HOLIDAY DONATION DRIVE - SUPPORT MSW - DO YOUR PART TO KEEP THIS GREAT FORUM GOING! (Only 51 donations so far out of 49,000 members - C'mon guys!)
×


Mirabell61
-
Posts
7,407 -
Joined
-
Last visited
Content Type
Profiles
Forums
Gallery
Events
Everything posted by Mirabell61
-
 Many thanks for your kind words Antony and Bob, Antony, like always with these scratch builds there are many details where I have to find solutions for, but I like doing that, especially when I`m building things not included in the given plan... I unfortunately have no actual plans for the under deck fitting out... Bob, the interior wall will in generel remain visible, at least when viewing later from the open port side, but to increase the angle, because due to the strong deck curvature it pulls down quite a bit..., I will leave a portion stripe of the main deck port side unplanked, the part where the canons are standing (they will stand on rails instead). Hope that will be of benefit for better viewing to the inside. Also thanks to all the "likes"... Nils
- 692 replies
-
- 4
-

-
- eagle of algier
- chebec
- (and 2 more)
-
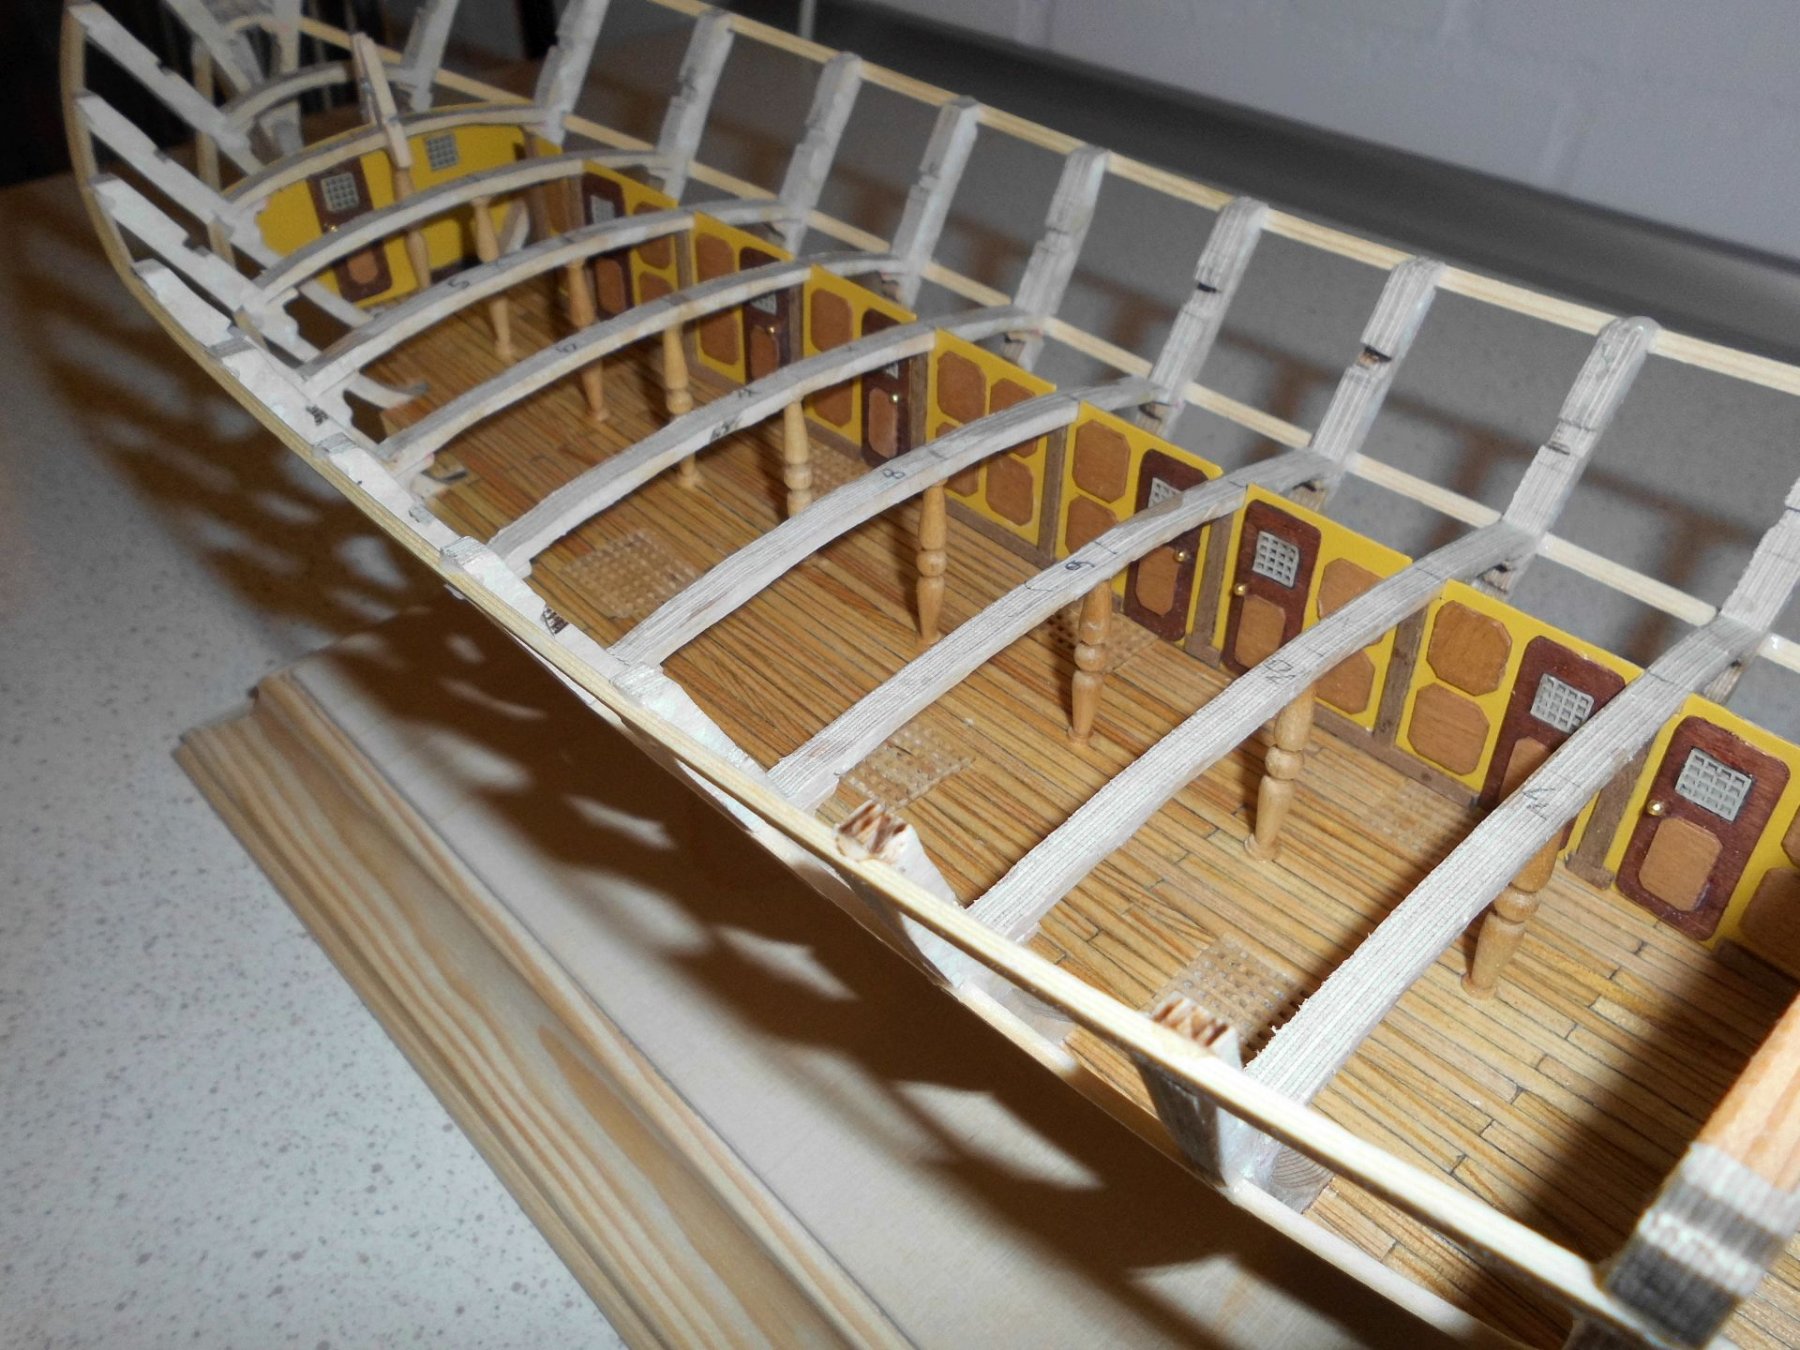
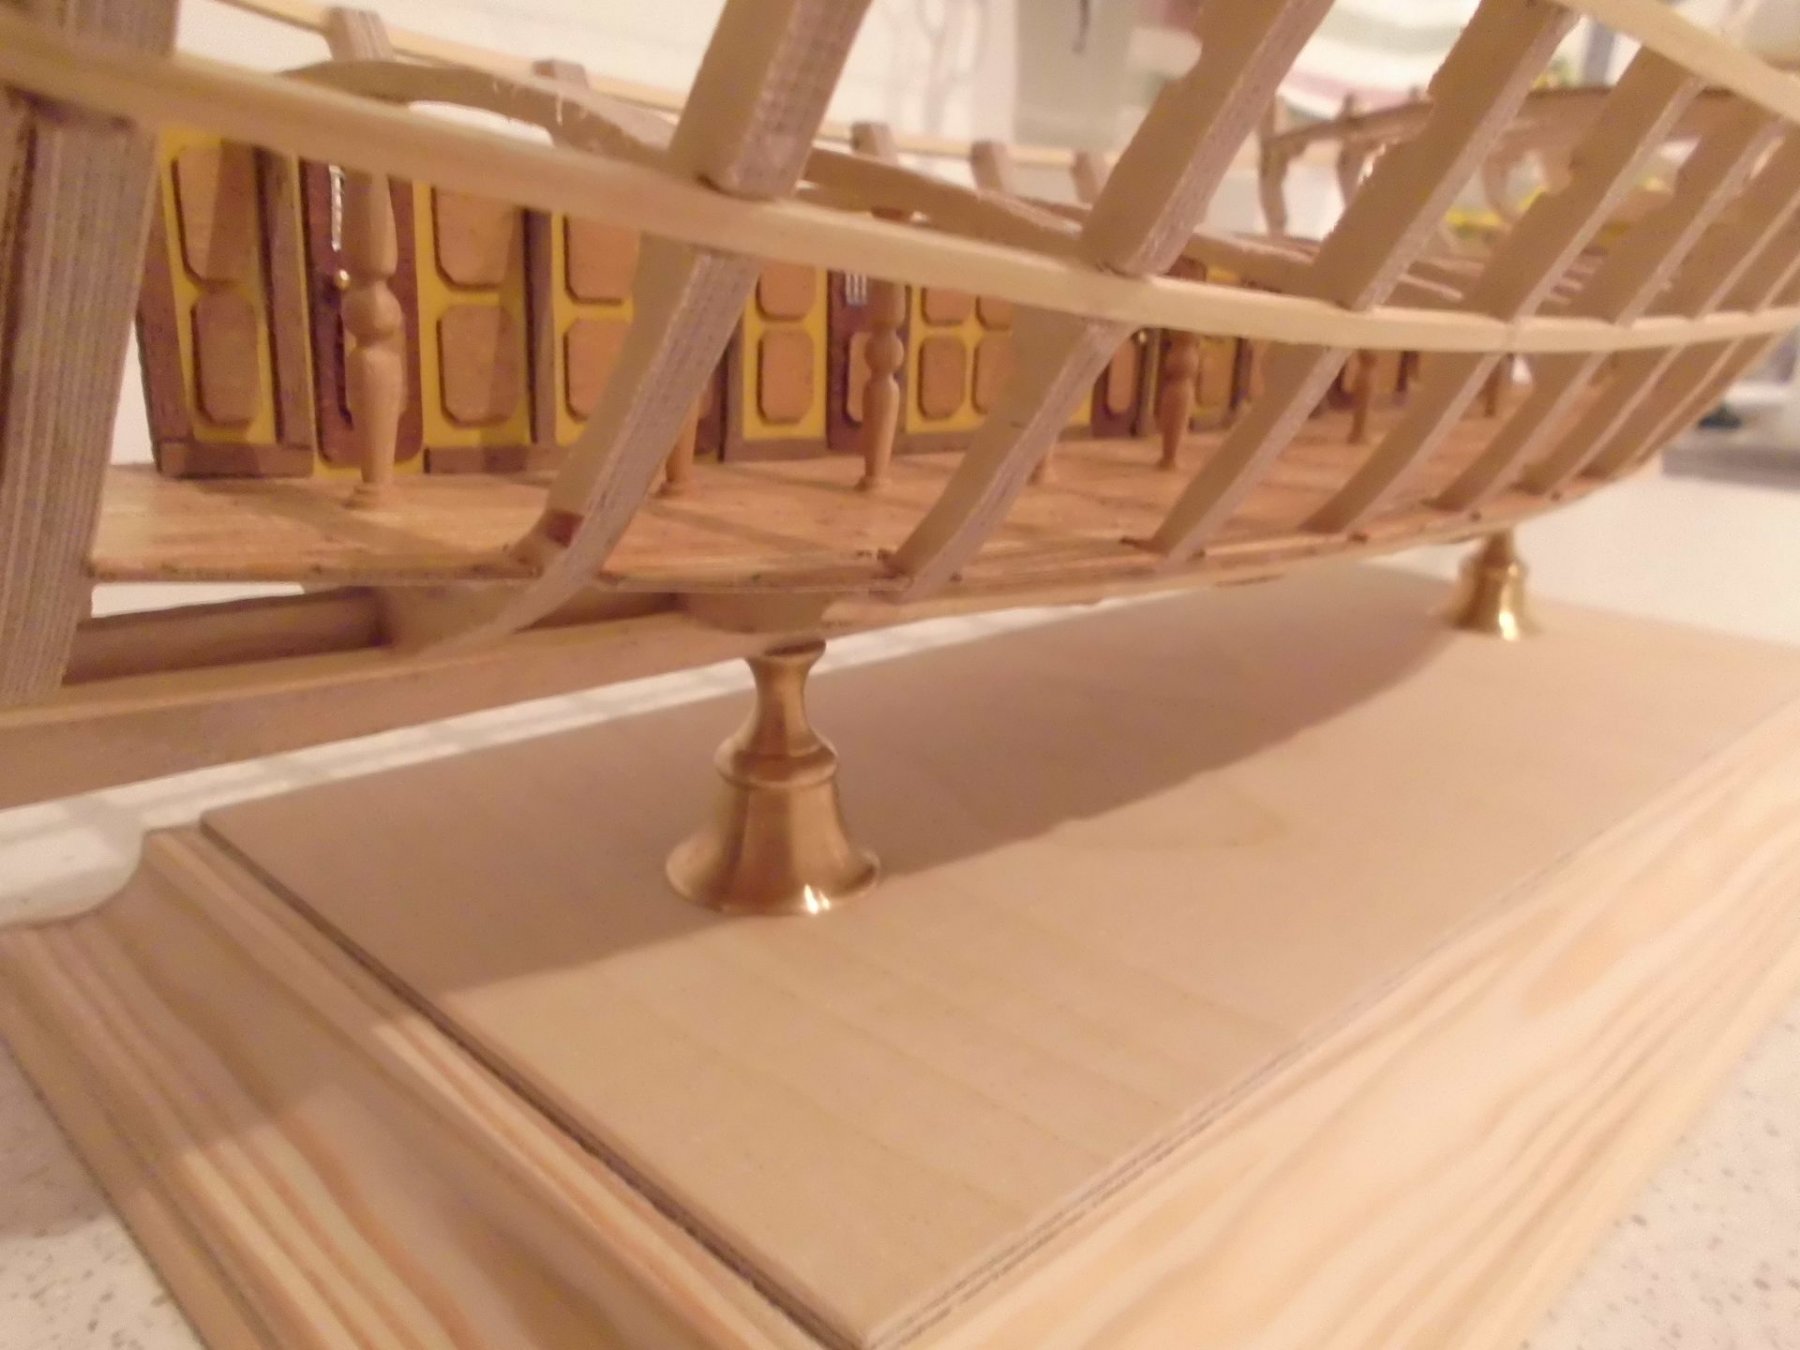
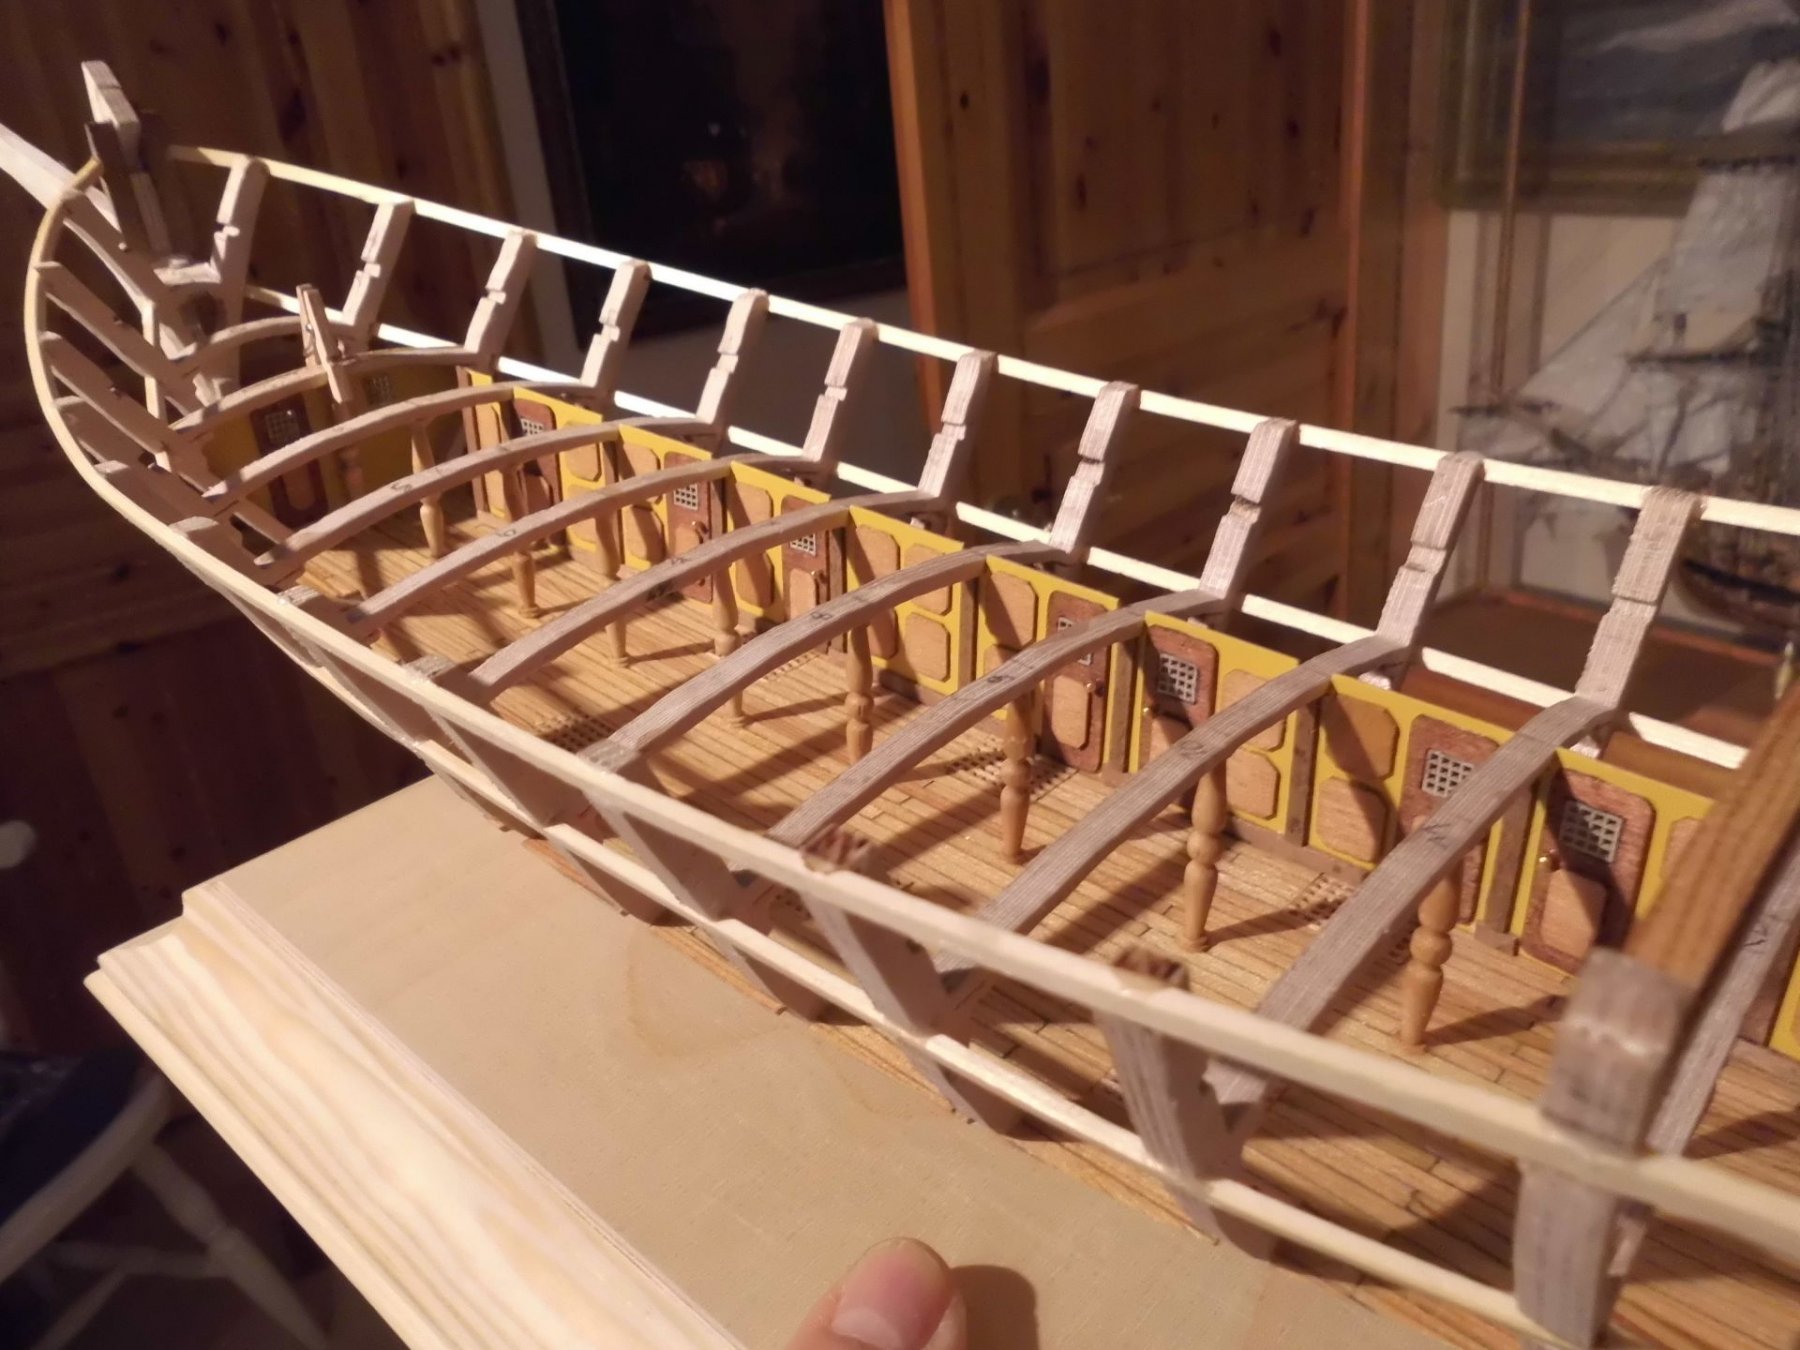
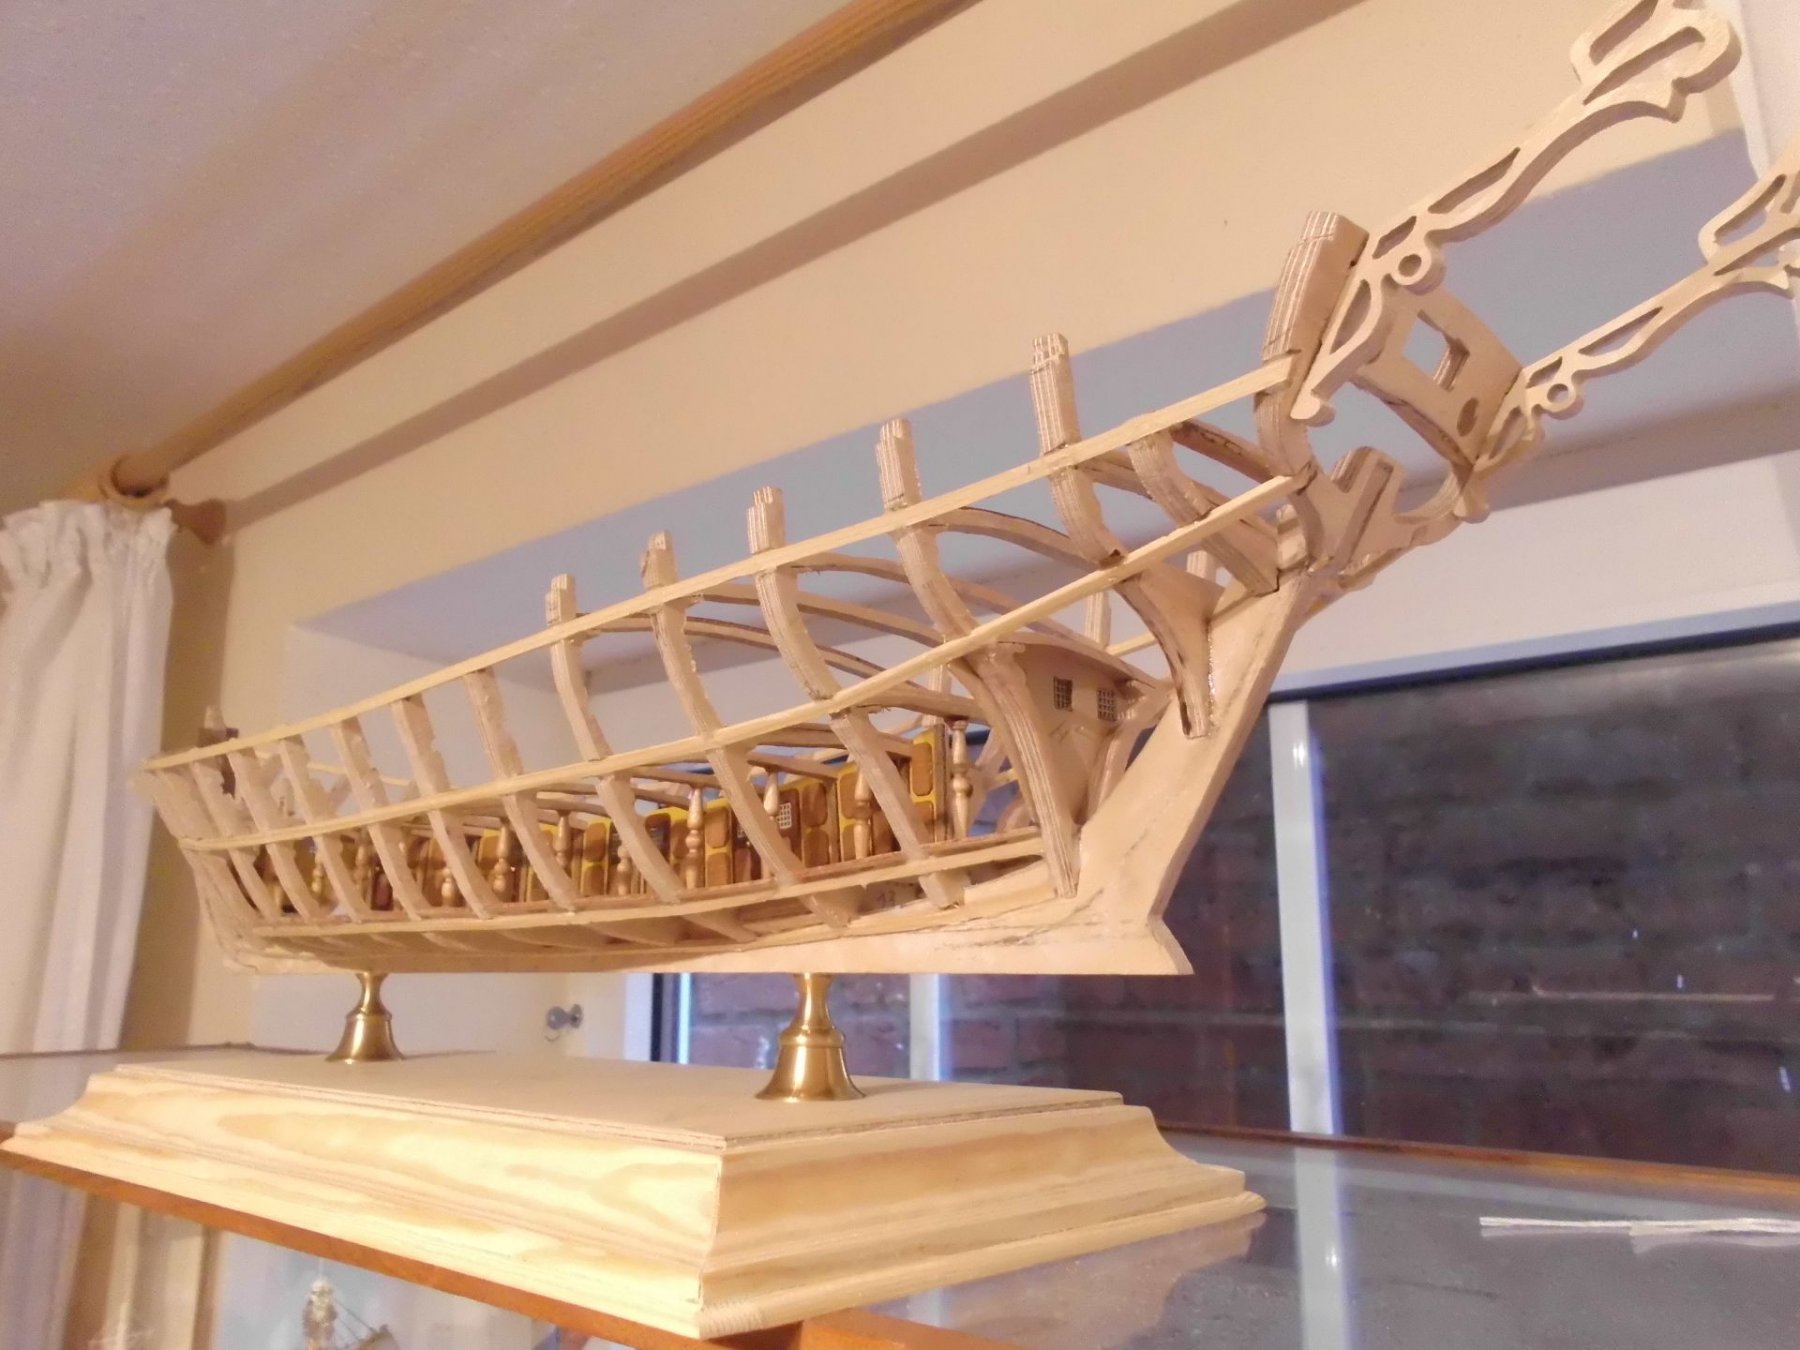
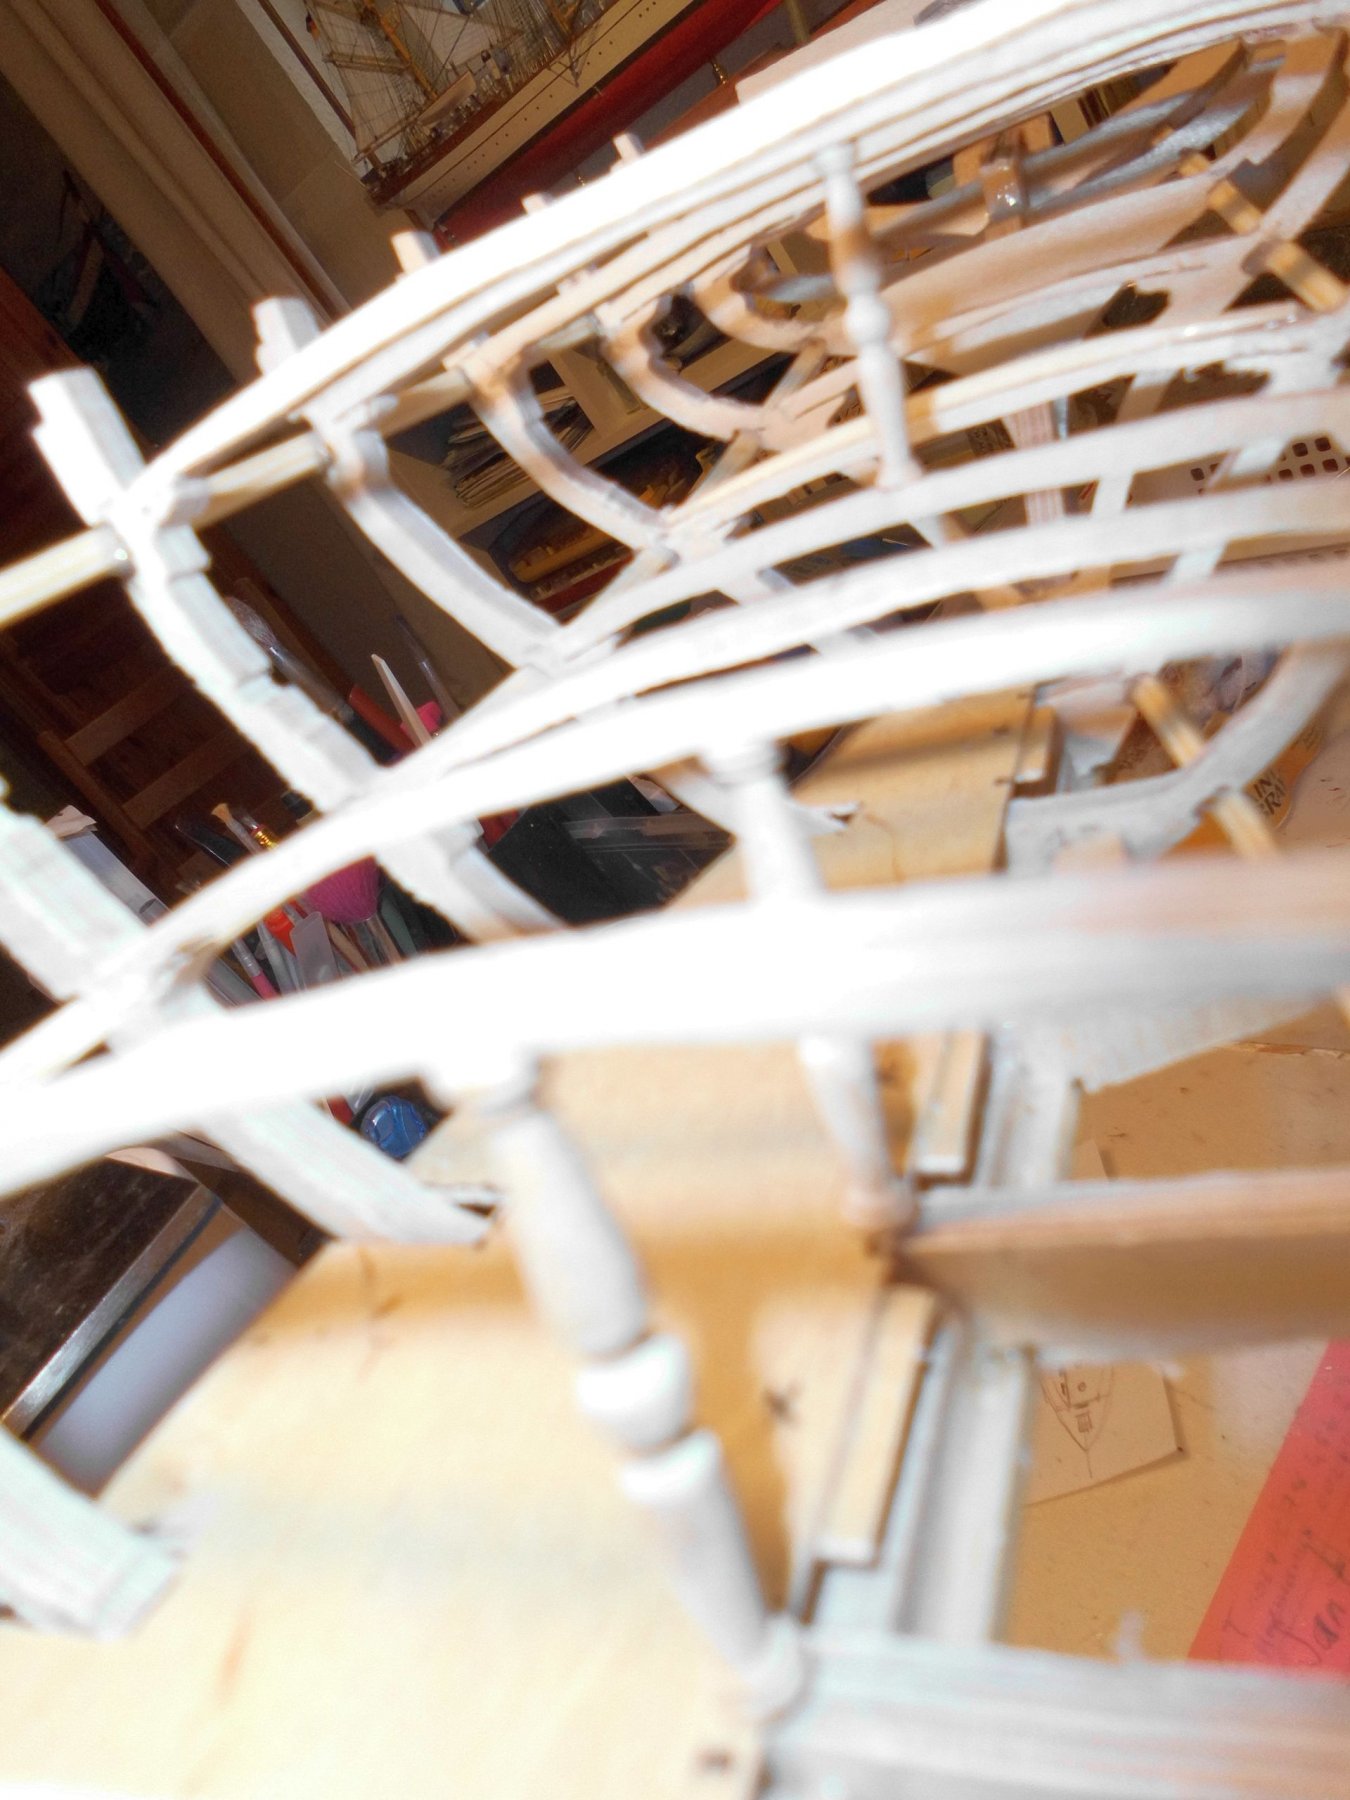
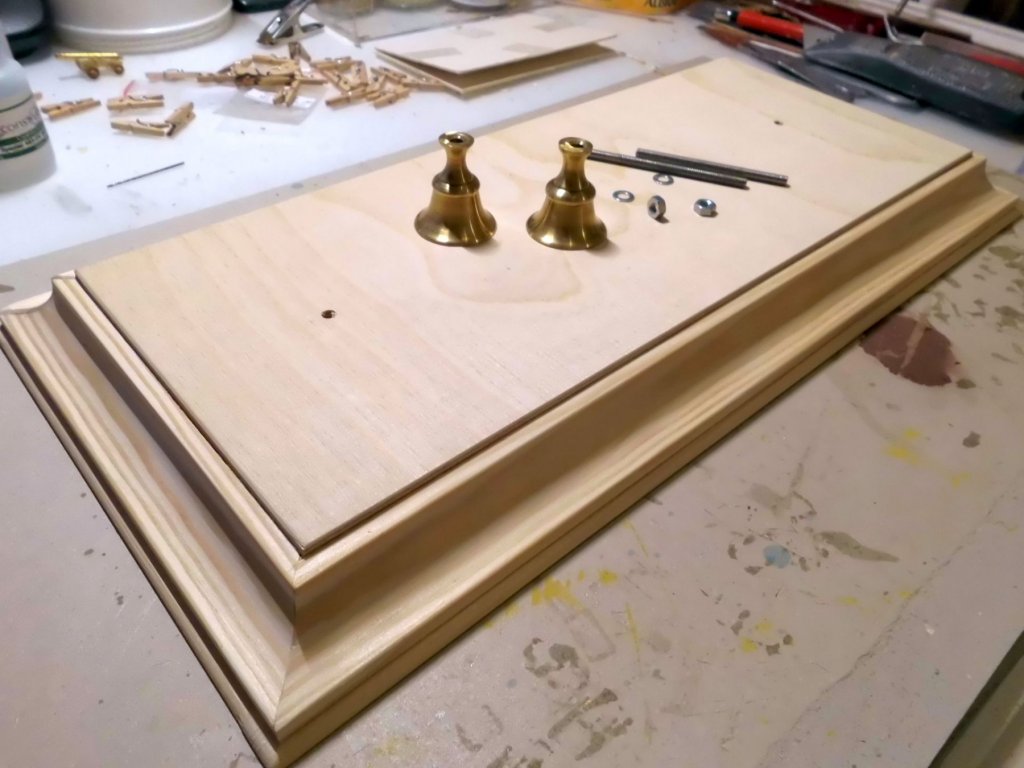
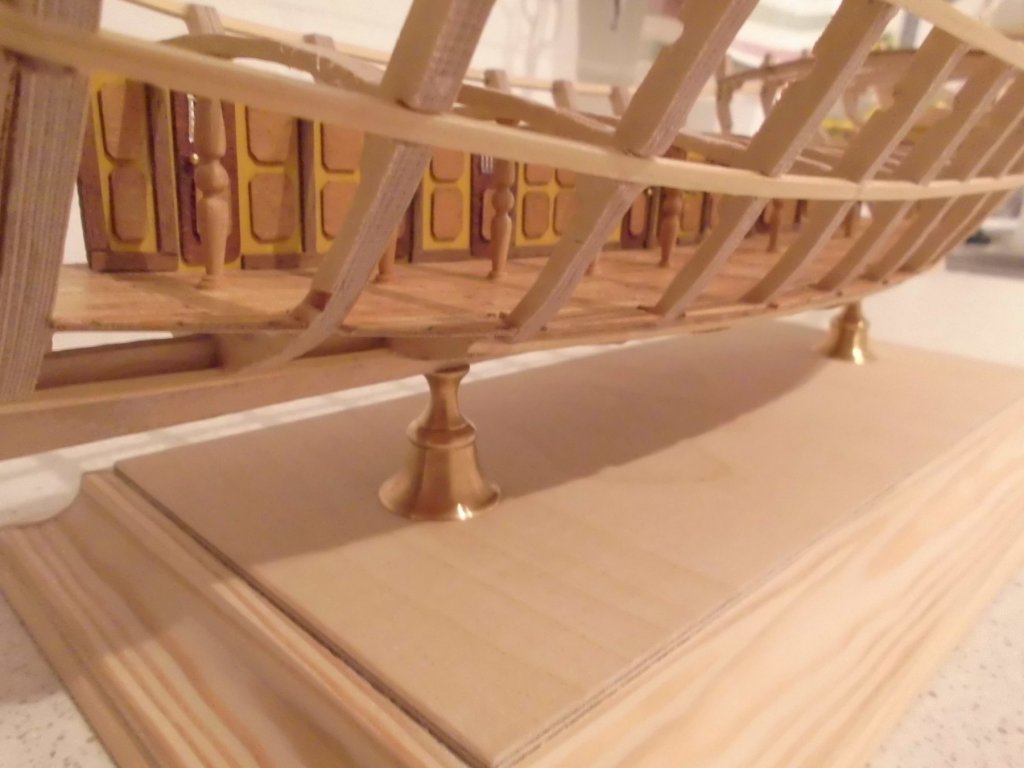
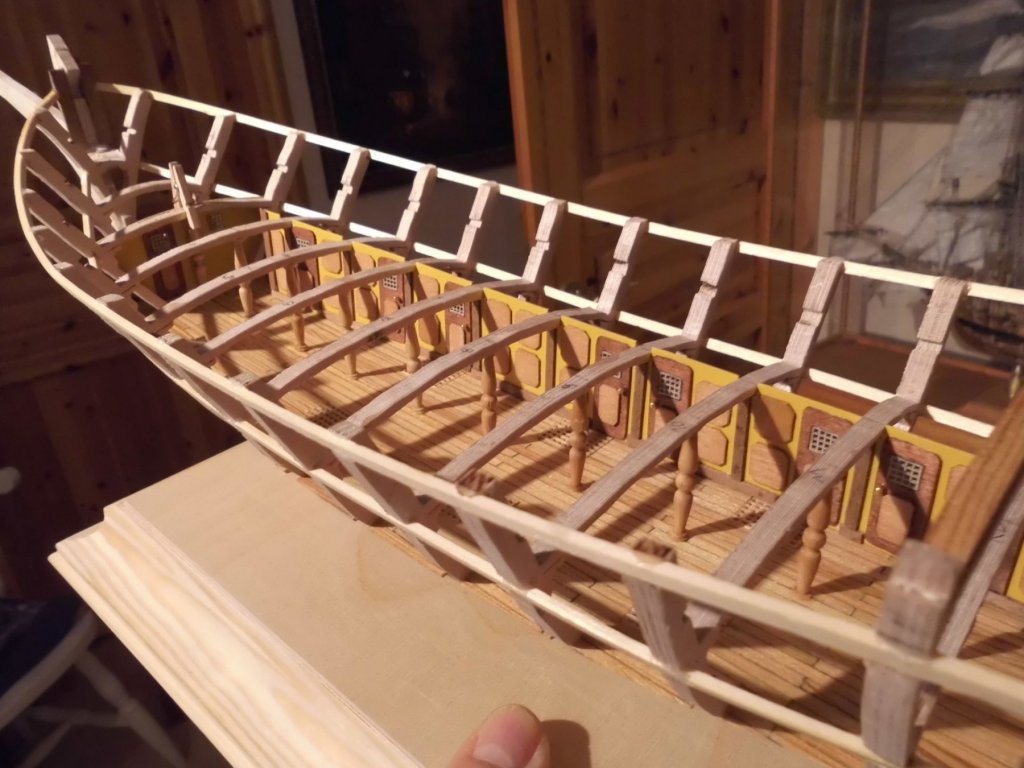
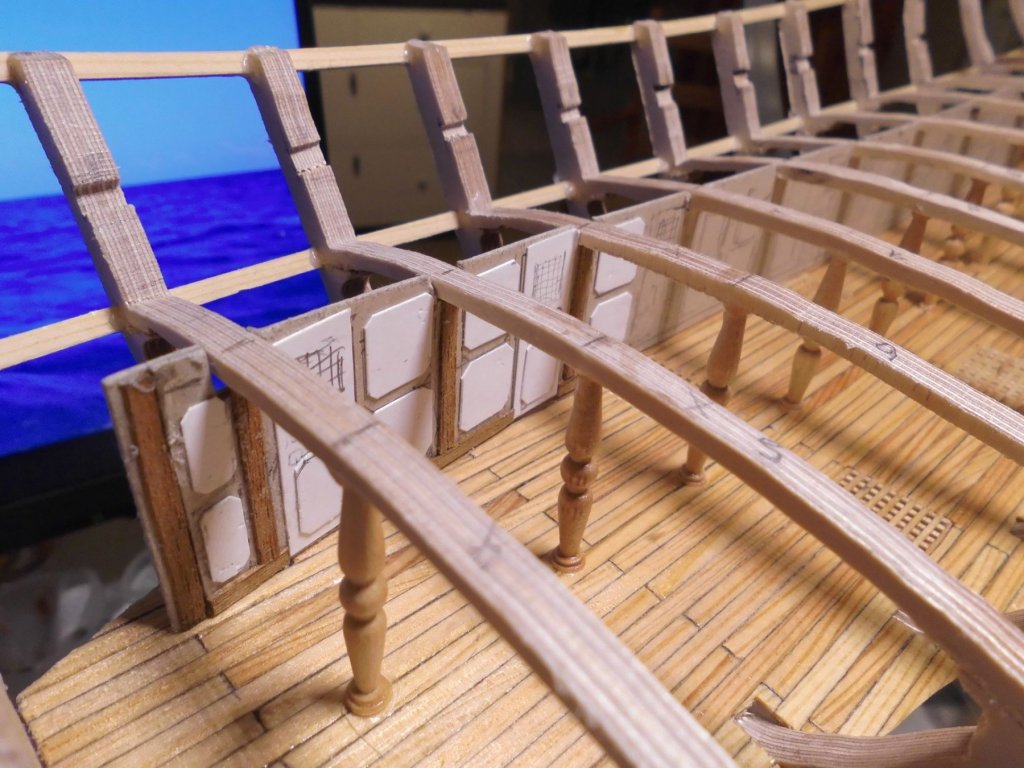
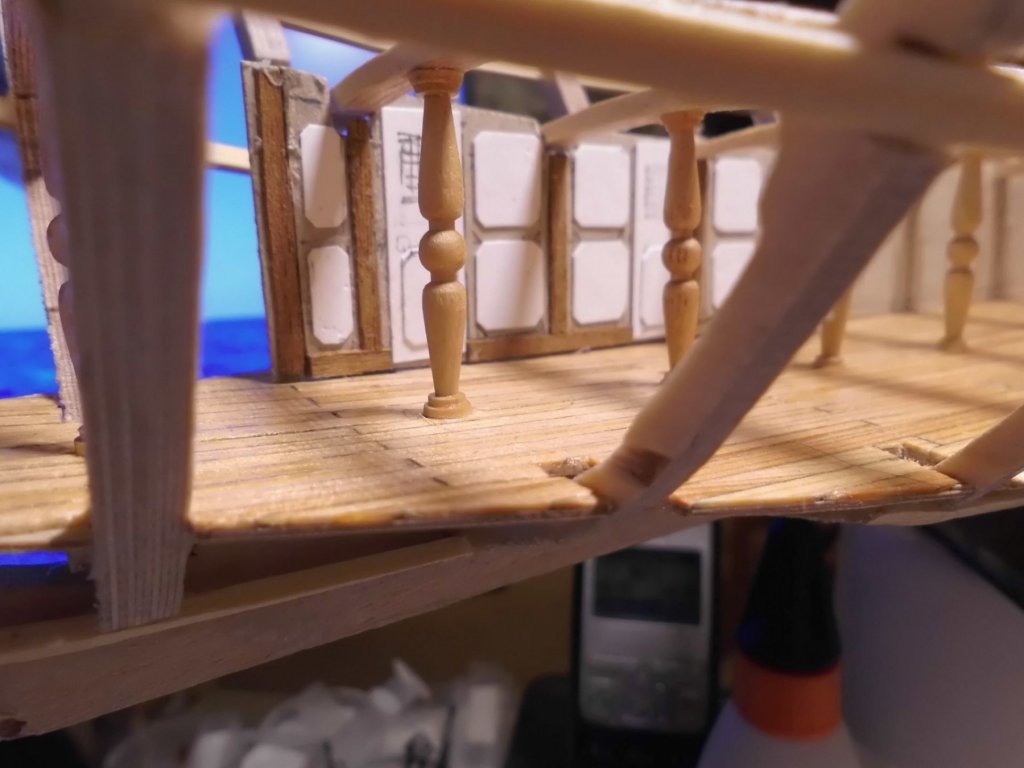
update... made the stand plate (not stained yet), and the starboard inner wall under deck, together with the closed bulkheads fore and aft... Nils still had some brass left over candle holder parts.... the spindles are from M4 thread stainless steel. There will be no more access to the bilge, when the hull planking is on basic wall is yellowish color, the doors are stained mahagony, window web is from card, door knobs brass, panels 0,8mm ply stained cherry color, frames mahagony... the ship is set very stablile on the stand..


- 692 replies
-
- 29
-
-
- eagle of algier
- chebec
- (and 2 more)
-
Very nice build Robin, your Greek Bireme looks wonderful.... Nils
- 473 replies
-
- 3
-
-
- greek bireme
- dusek
- (and 1 more)
-
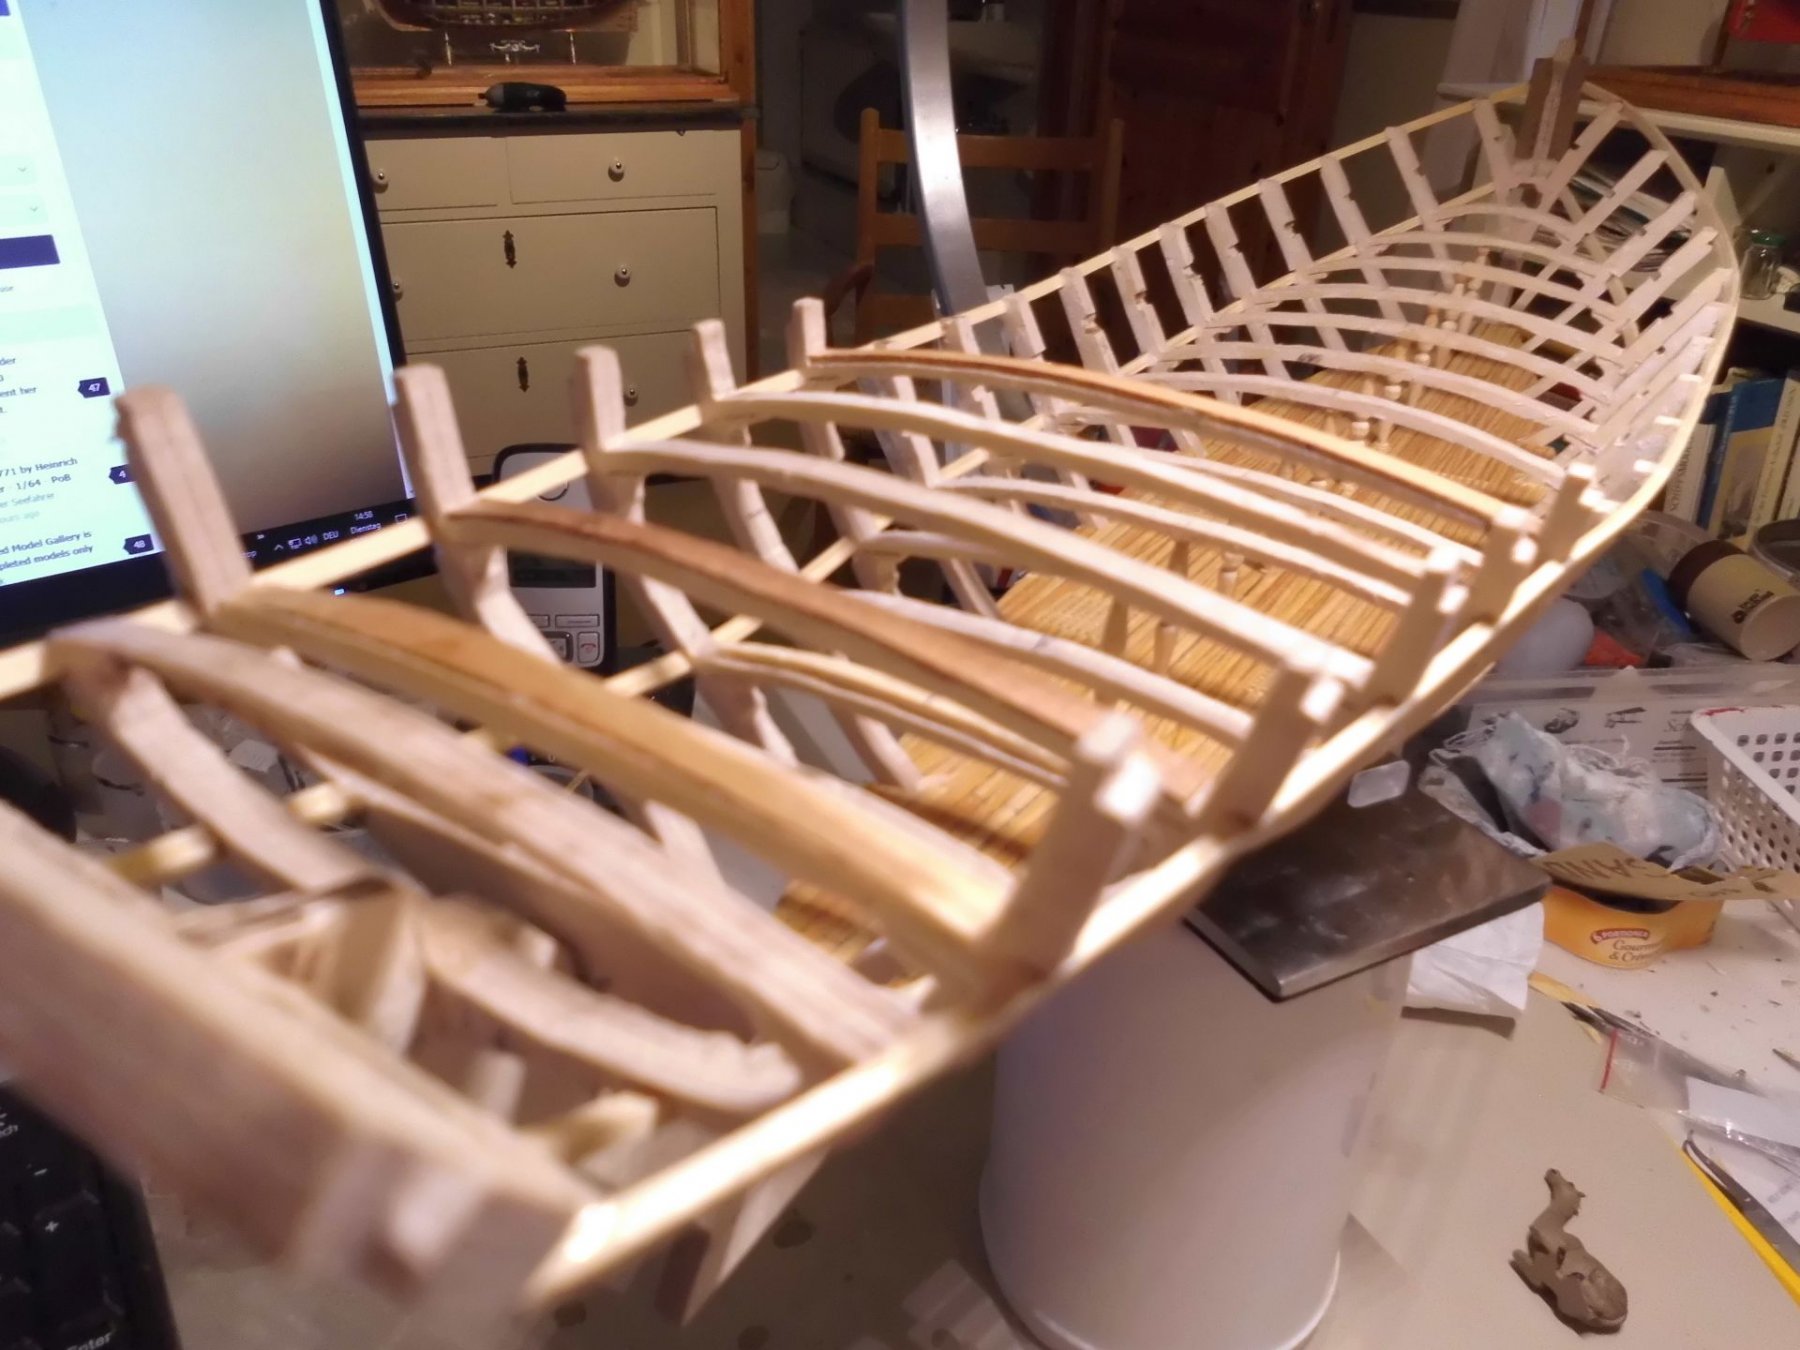
Hi Denis, thanks for your word... the lower deck was not really difficult...., first a template for each half, then cut out from ply and completely planked. Then slipped in, the (flexible) halves, through the deck beams fom above. Glue in place and then the gratings and the pillars. Am now working on the below deck cabins wall, here also first doing a card template, the final wall will bear the doors and the wall panels. This will be visable through the open port side and though the port side main deck outcut of the ship later on...Will need to think about the color giving tones there... Nils
- 692 replies
-
- 20
-
-
- eagle of algier
- chebec
- (and 2 more)
-
Hi Matiz, thats a beautiful model you are doing, I love those lines..... Nils
-
lovely work Rusty, well built, clean and crisp, a delight to look at... Nils
- 310 replies
-
- 2
-
-
- cheerful
- Syren Ship Model Company
- (and 1 more)
-
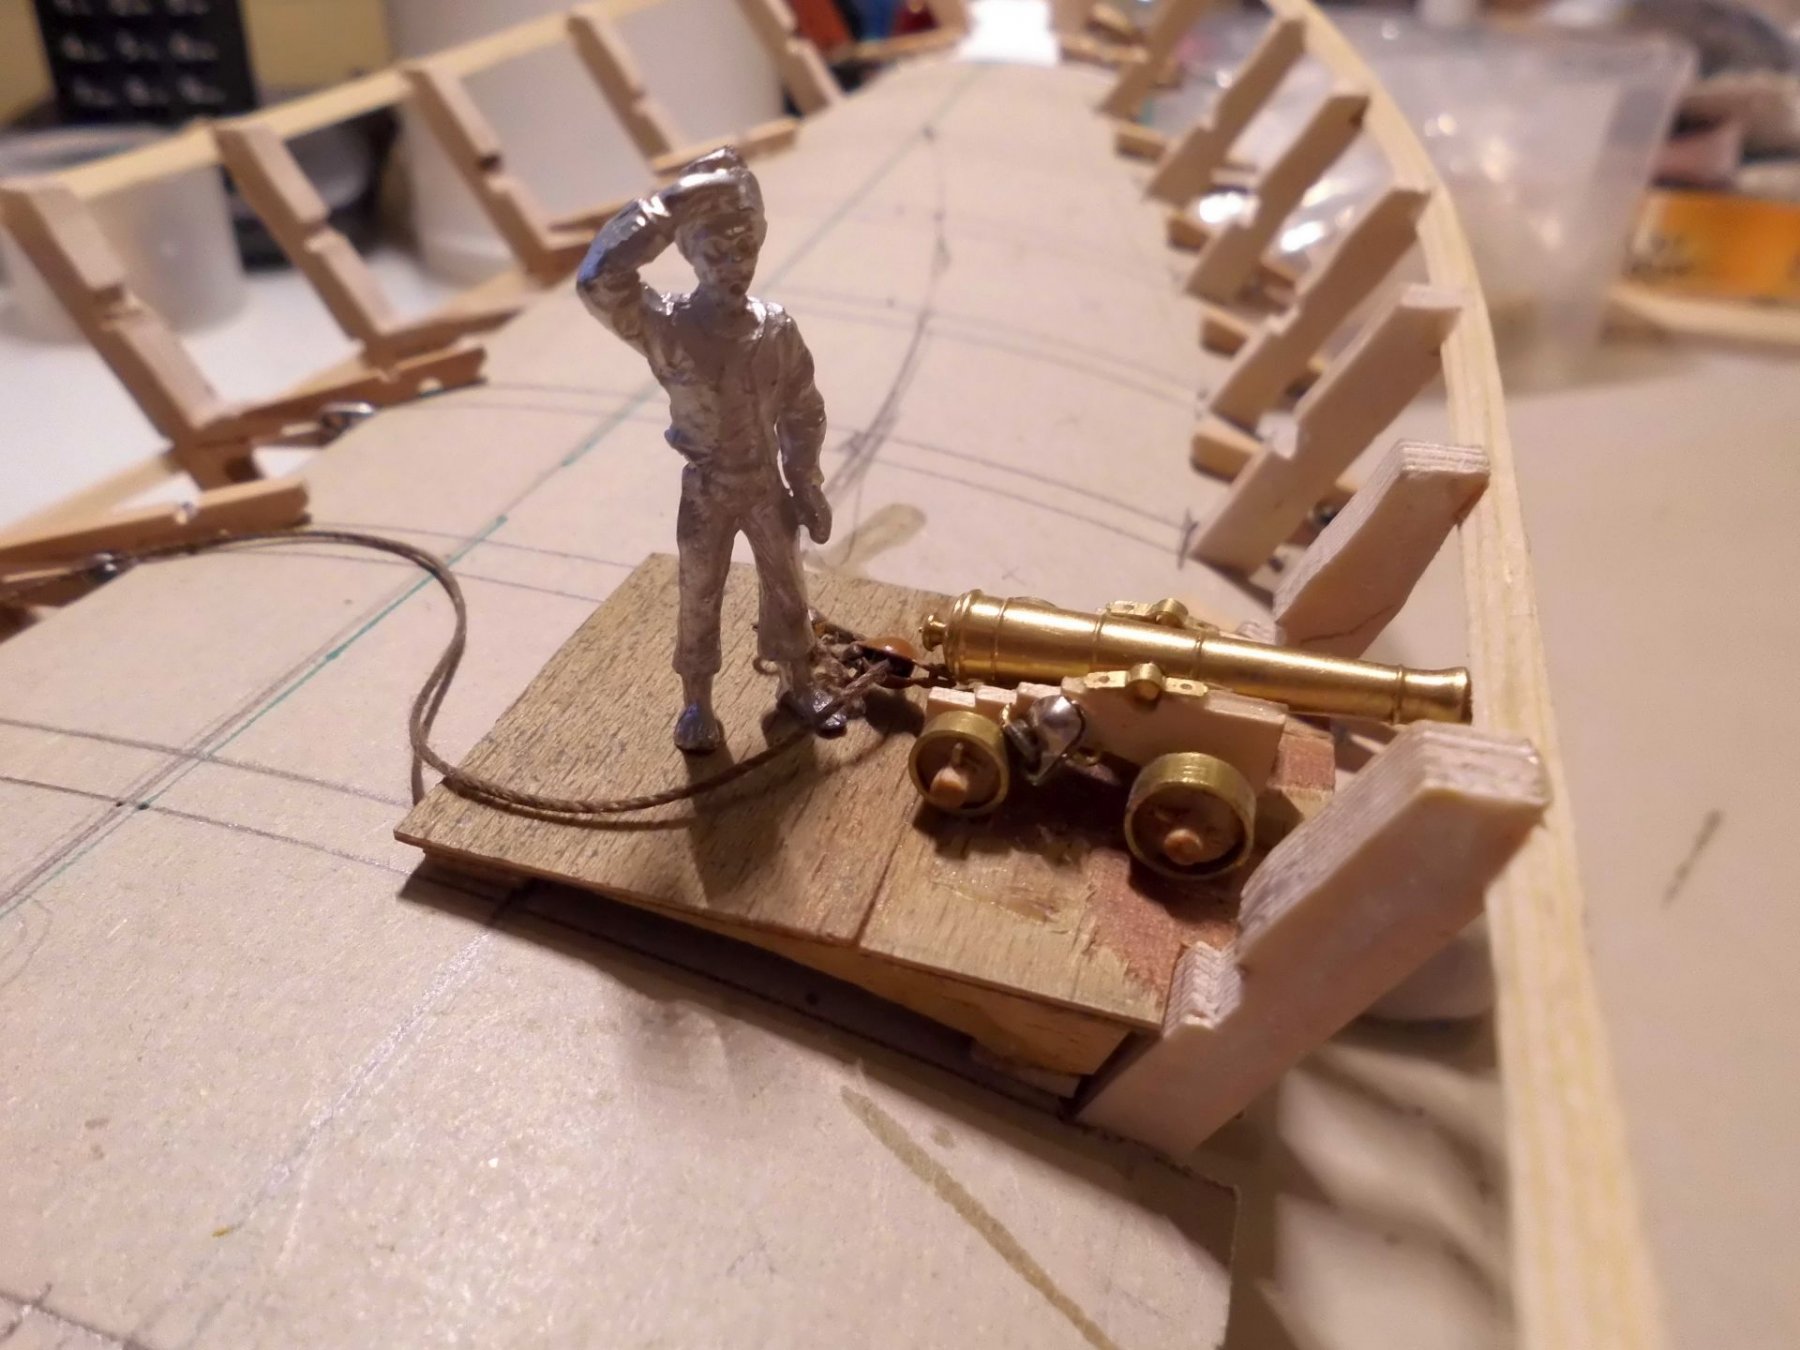
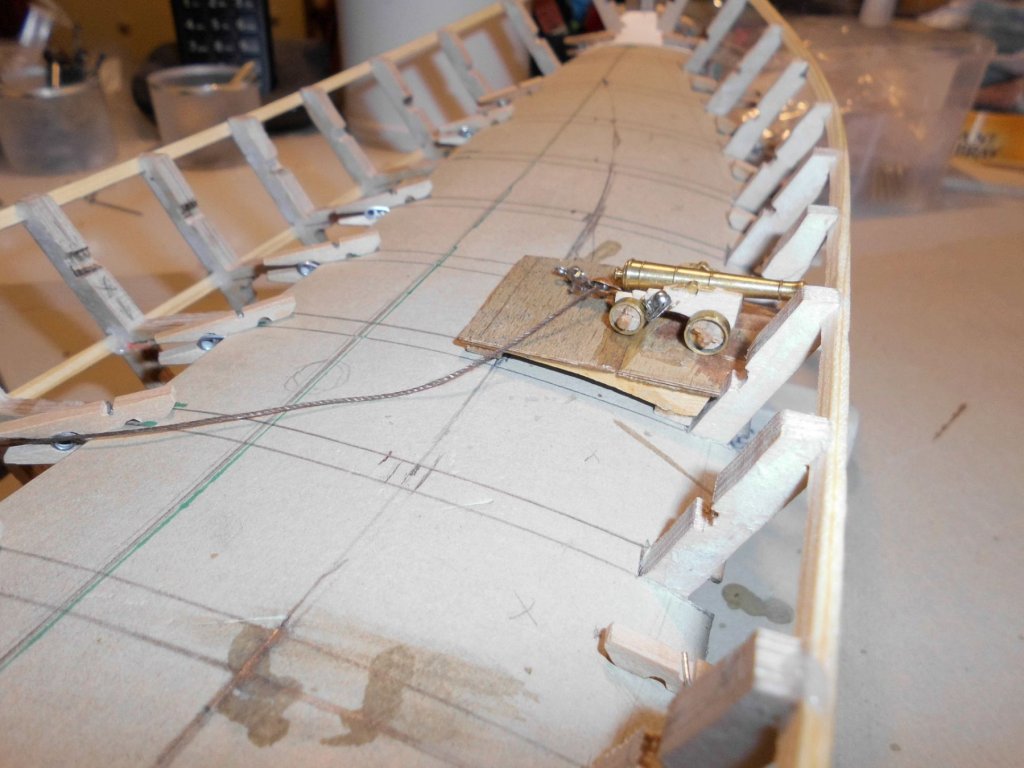
update: fitting a stb. side card template for the main deck (multi curvature), and a short dummy for the bevel degree (gun standing length, platform way). The gun was a leftover from an earlier model but in scale 1:64, now I will need a slightly longer barrel and a little bit larger carriage, that suits scale 1:48. Criteria is that the gunbarrel can point out horizontal resp. a bit upwards through the bulwark gunport. Nils


- 692 replies
-
- 21
-
-
- eagle of algier
- chebec
- (and 2 more)
-
Hi Clare, thanks for your kind compliment, its nice to have you on board, much appreciated. In the moment I`m planing where to position the "cutaways" at the port side of hull and partial deck, but to leave enough "flesh" for safe rigging and fastening of the fitting out items afterwards. Unfortunately I have no authentic plans of walls / Bulkhead arrangement / cabins, etc. of the fitting out under deck, so that might be subject to my imagination. Besides that it will also be the cargo hold to a certain degree. Trust it may look a little bit like my HMS Pegasus build, when viewing inside from the outer port hull side.... Nils
- 692 replies
-
- 5
-
-
- eagle of algier
- chebec
- (and 2 more)
-
Thank you very much Keith, I just had a look at the sail making you are doing for your schooner Altair,.... very good with the wire inserting ! Nils
- 692 replies
-
- 3
-
-
- eagle of algier
- chebec
- (and 2 more)
-
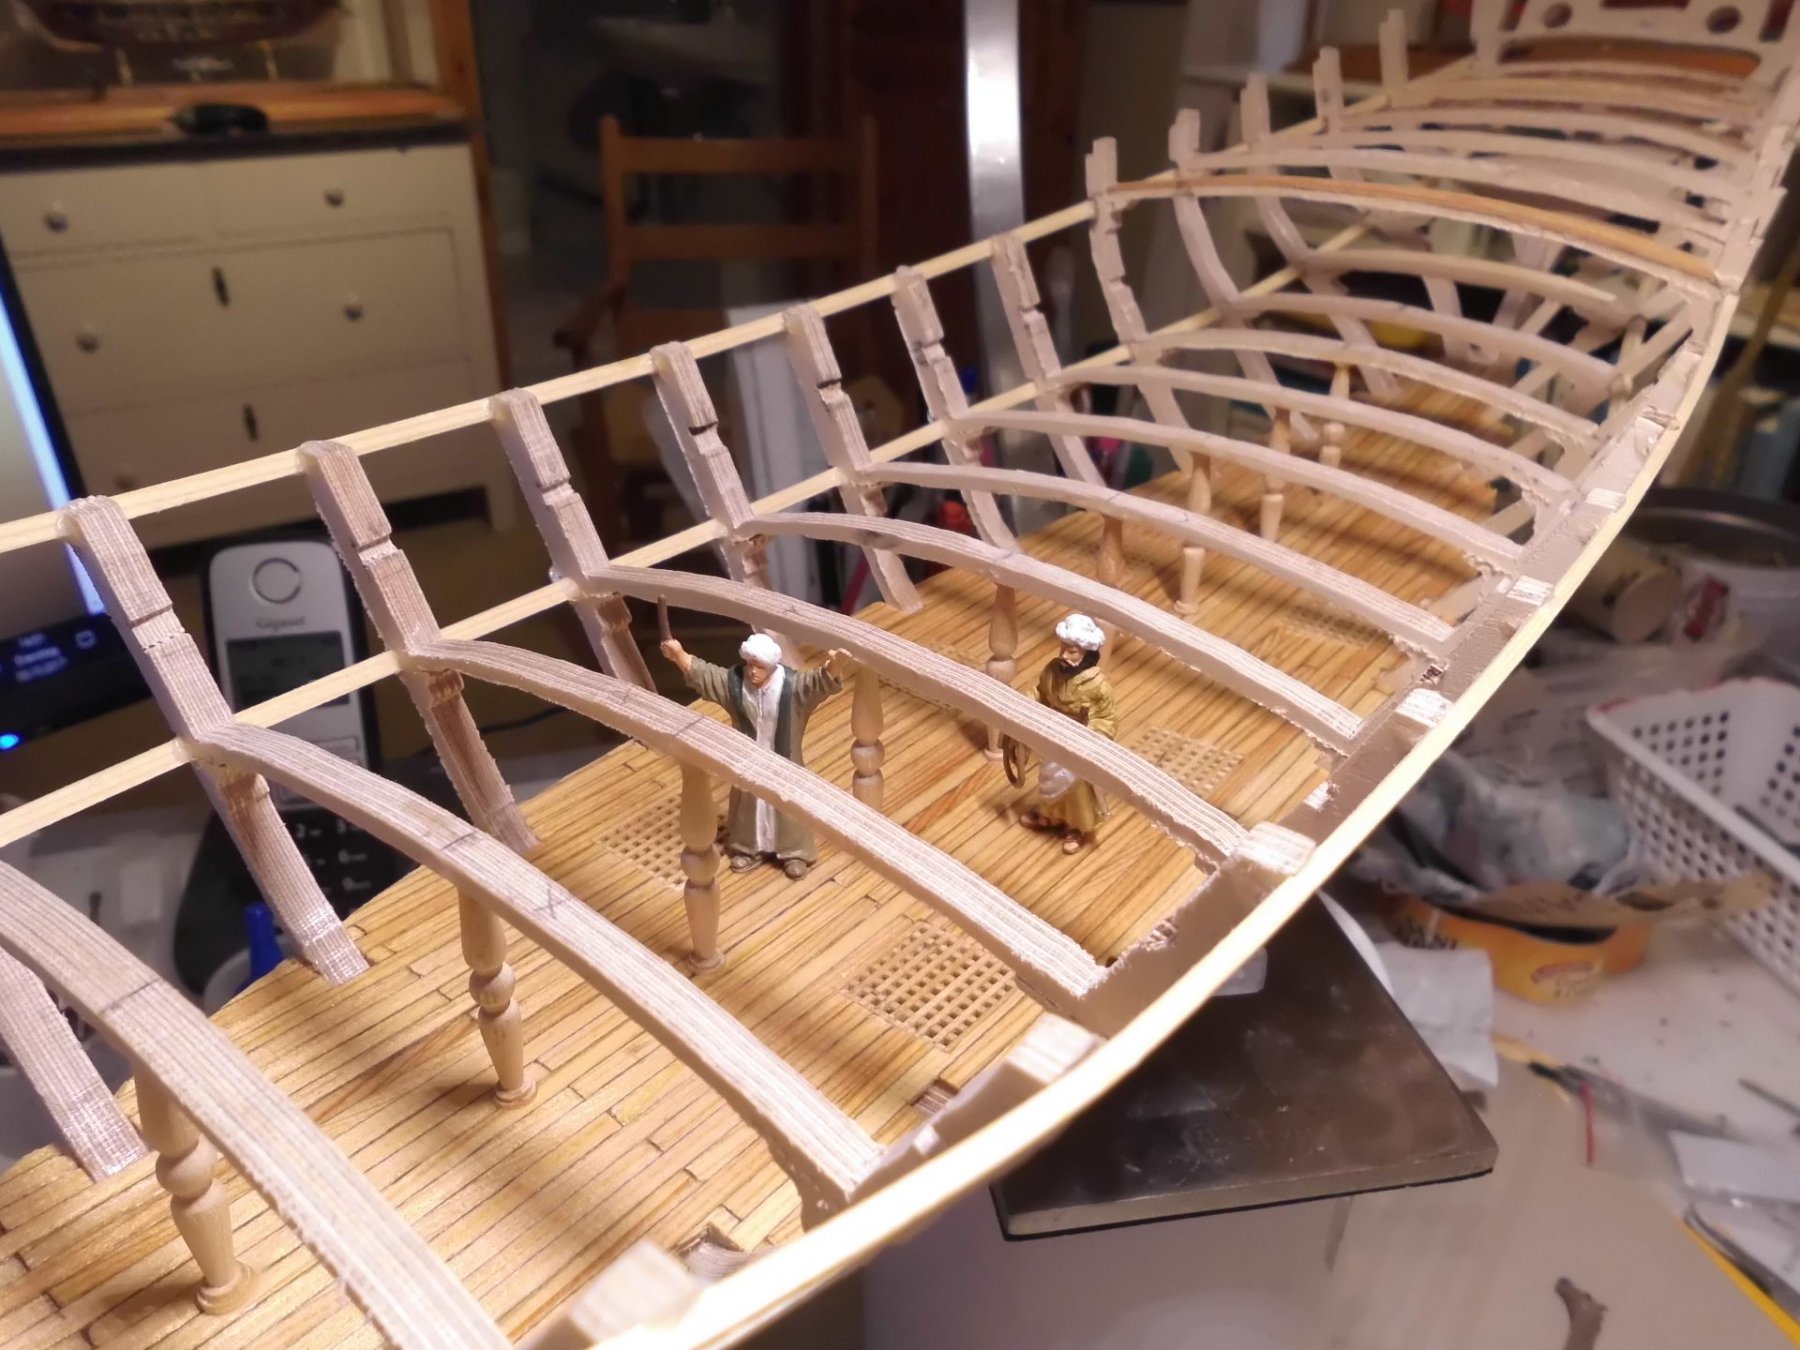
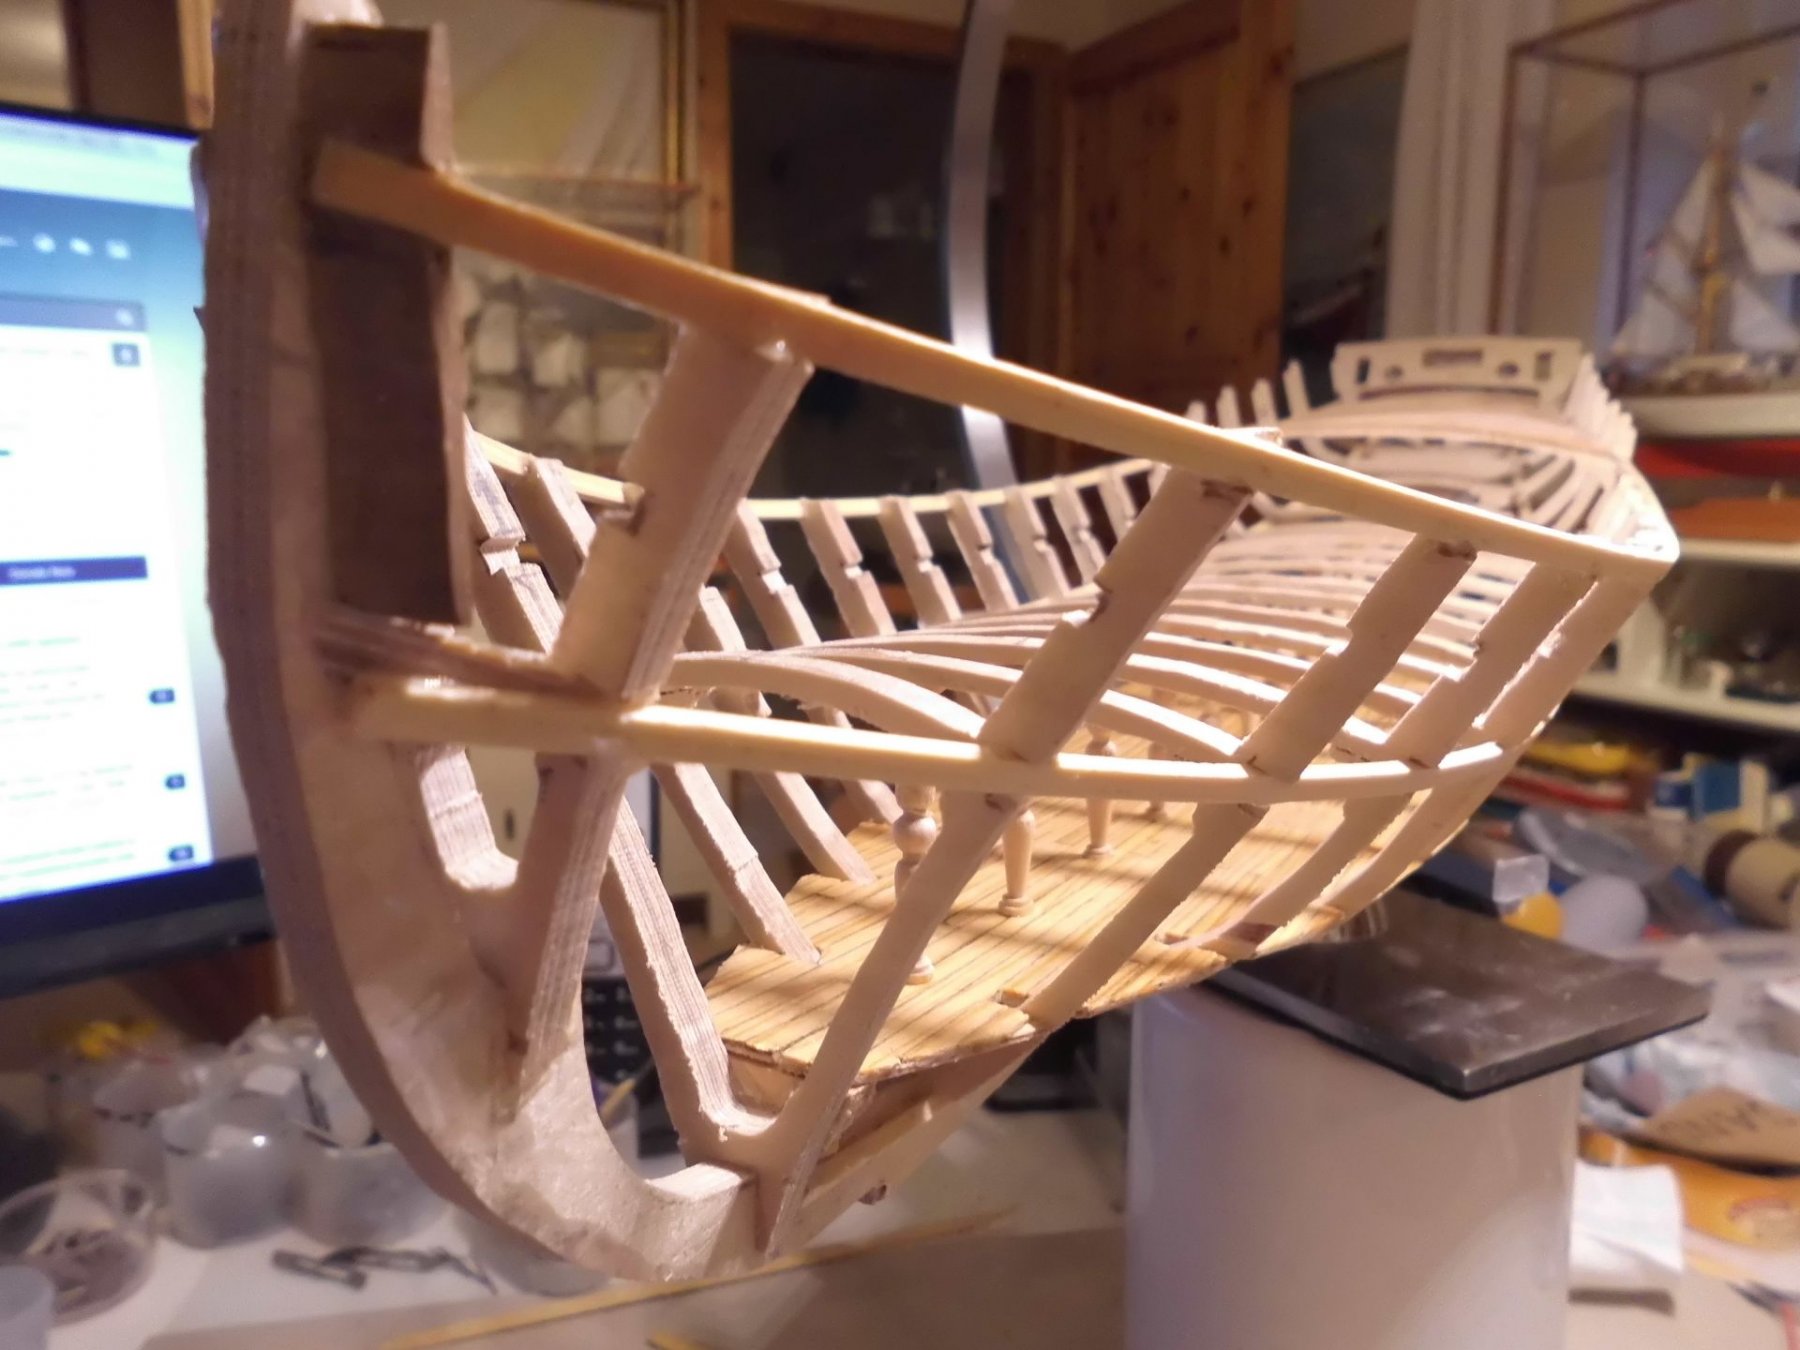
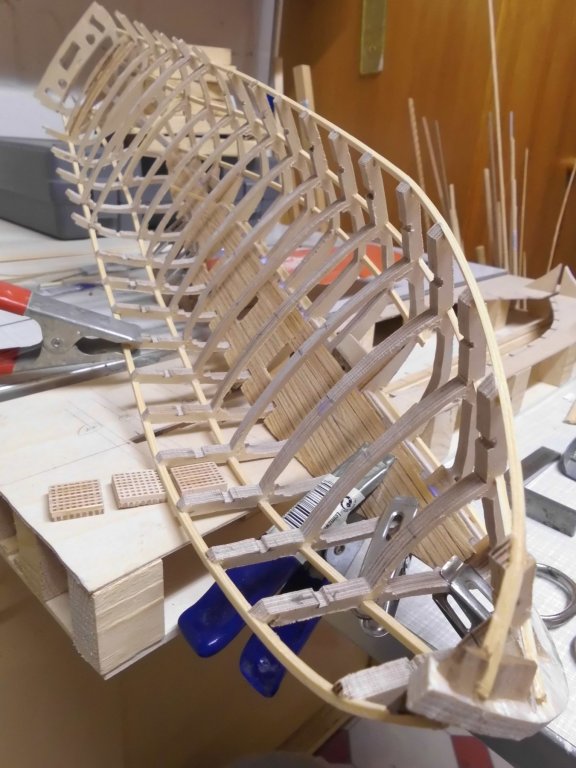
update : Floor planks and 10 deck supporting pillars mounted.... Nils


- 692 replies
-
- 27
-
-
- eagle of algier
- chebec
- (and 2 more)
-
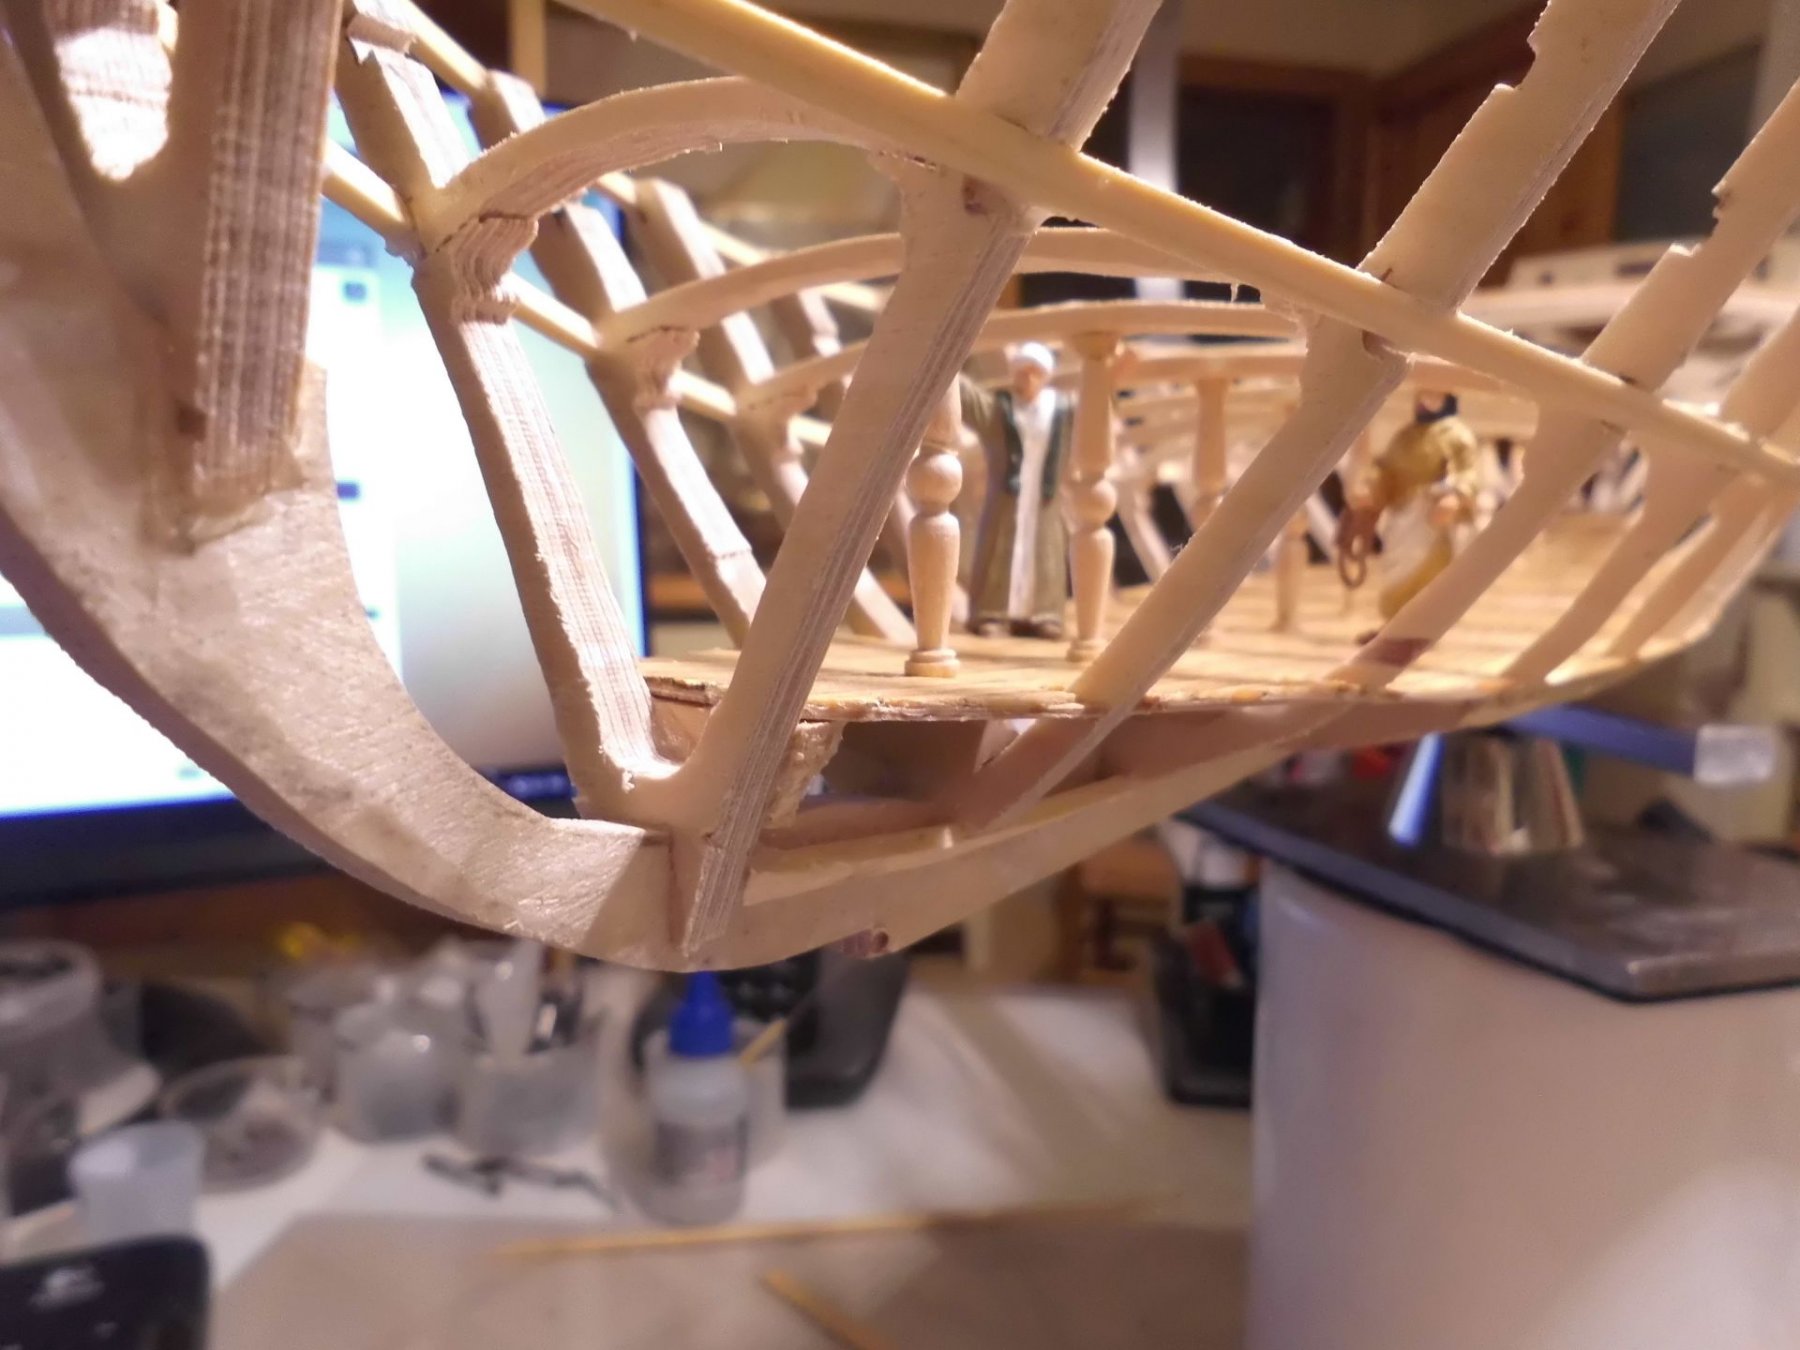
Hi Piet, many thanks for dropping in and for your words. Hope you and your family did`nt suffer too much under the hurricane`s damages.... For the chebec, also used for pirates, I started to gather some special and appropriate figurines in 1:48 for later on with the fitting out, but I must mention that I have no sympathie whatsoever with modern bazooka and machine gun and speed boat equipped pirates we often hear about. Nils
- 692 replies
-
- 3
-
-
- eagle of algier
- chebec
- (and 2 more)
-
Many thanks Patrick, I`m pleased the project is liked by you... also many thanks to all that expressed their "likes" recently... Nils
- 692 replies
-
- 3
-
-
- eagle of algier
- chebec
- (and 2 more)
-
Interesting methode of joining the hull sections Ken, aswell as closing the gap afterwards.... Nils
-
wonderful and beautiful work Patrick, thanks for sharing all the pics of your build sequences, a real treat that is..... Nils
-
Thanks for looking in Johann, you`re very welcome all time... Nils
- 692 replies
-
- 3
-
-
- eagle of algier
- chebec
- (and 2 more)
-
Many thanks Dan, correct with the three but joints (short planks, between the gratings), reason is that the deck was already planked when I cut the openings...., But your coment is much appreciated and good for the other deck plankings to be aware of ....... Nils
- 692 replies
-
- 4
-
-
- eagle of algier
- chebec
- (and 2 more)
-
Thank you Patrick, only small steps in the moment, but I`m quite pleased with the progress so far... Nils
- 692 replies
-
- 3
-
-
- eagle of algier
- chebec
- (and 2 more)
-
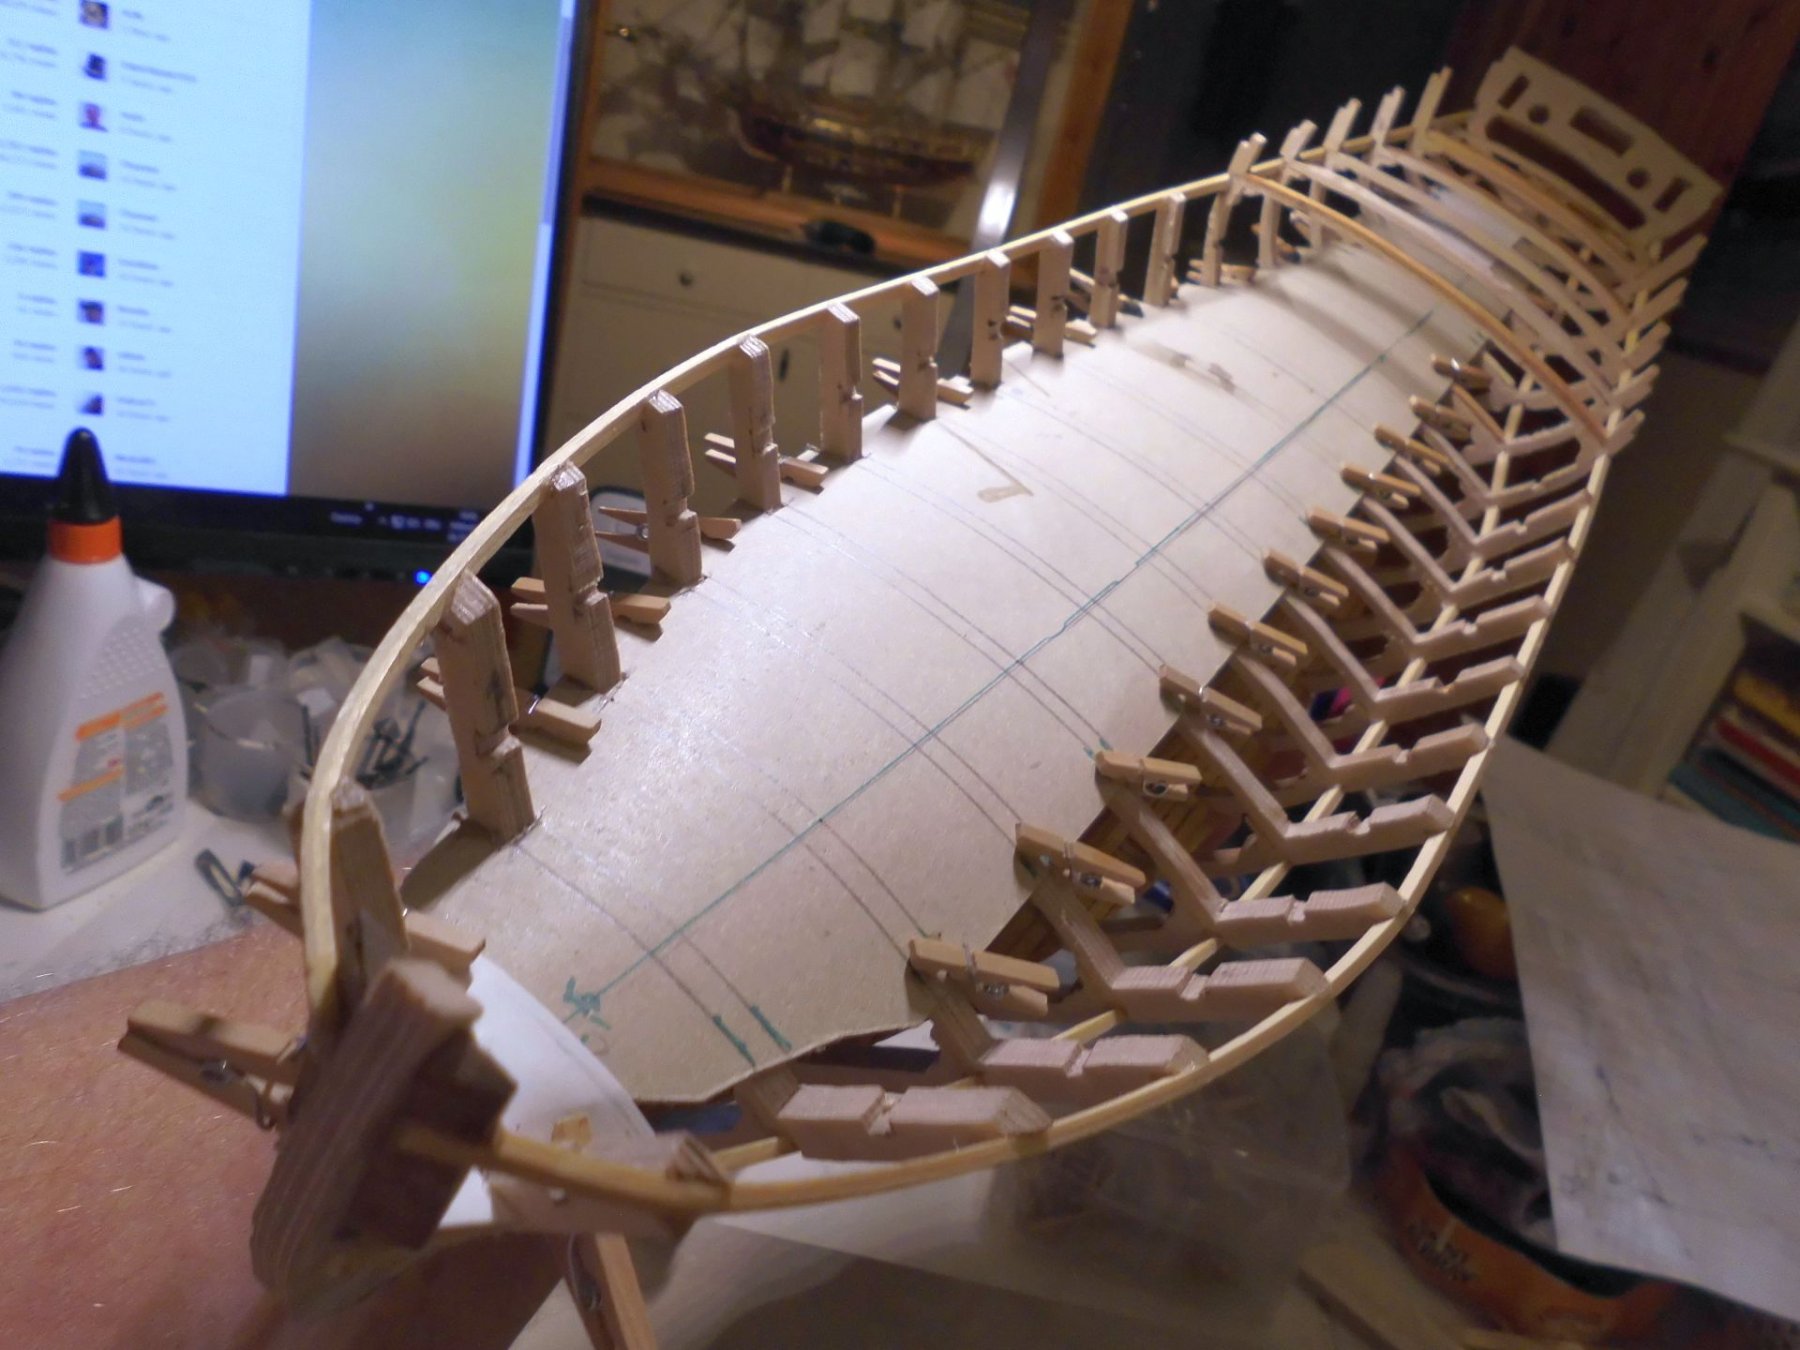
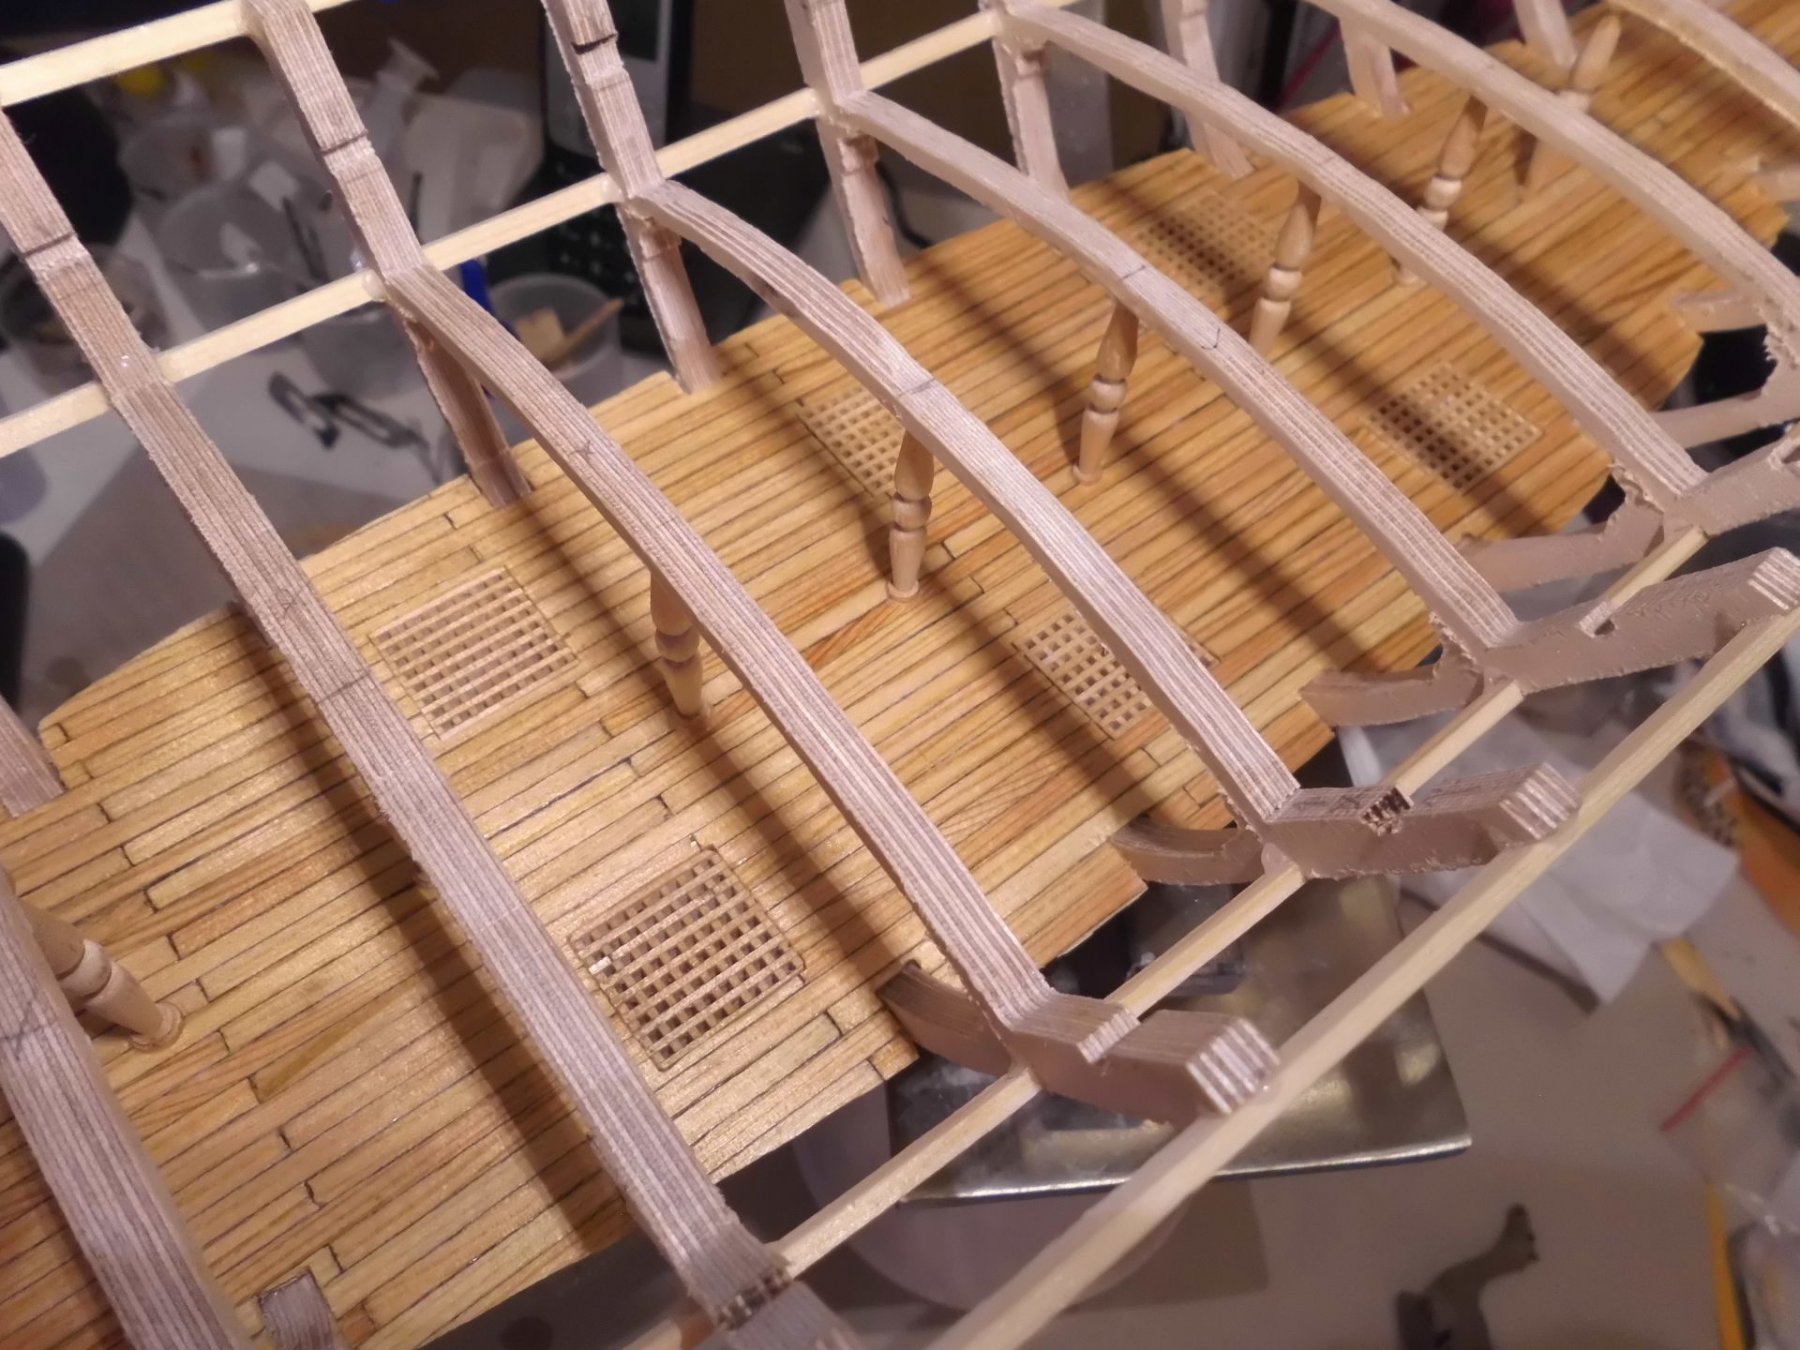
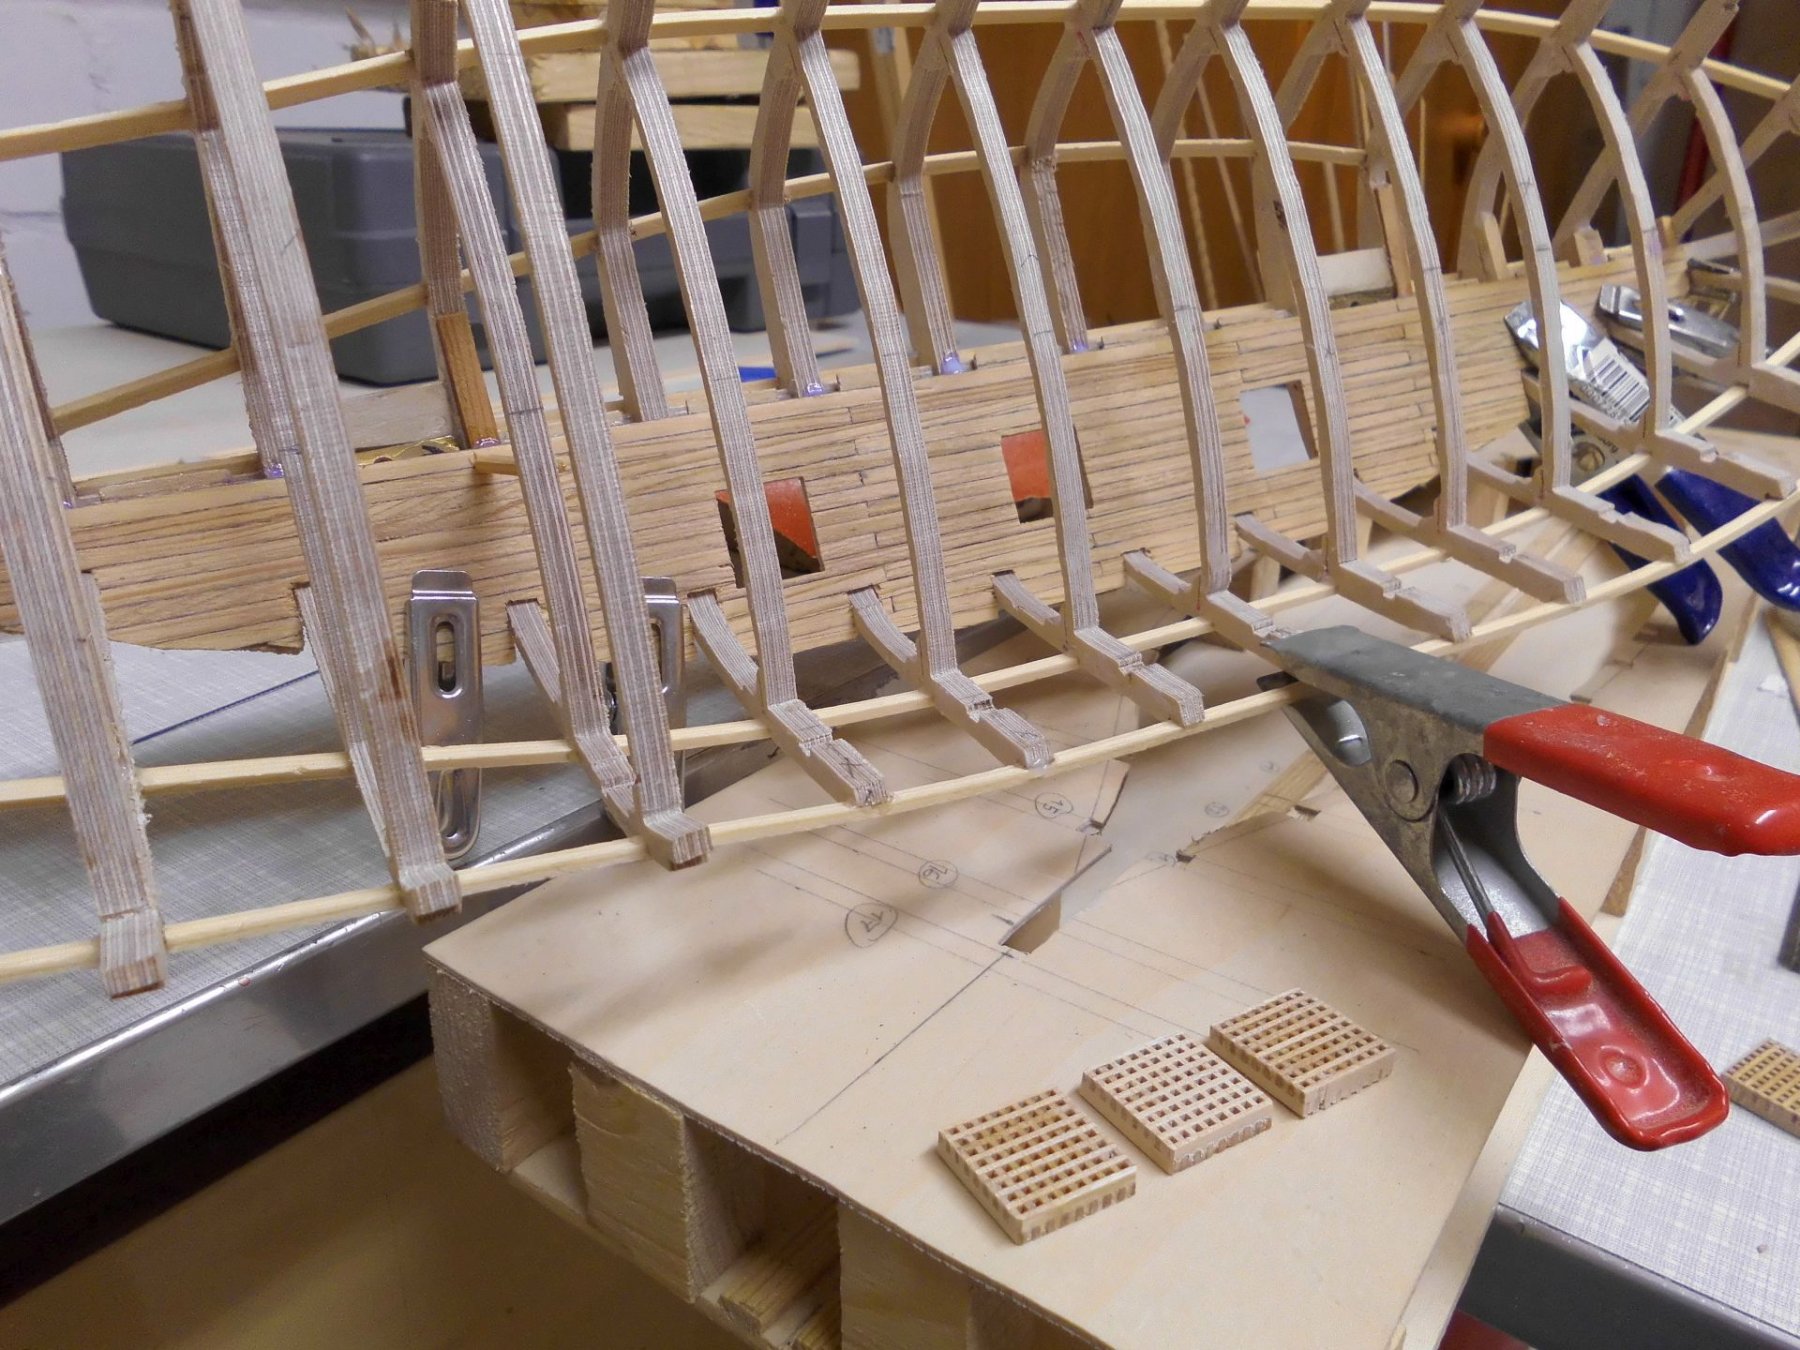
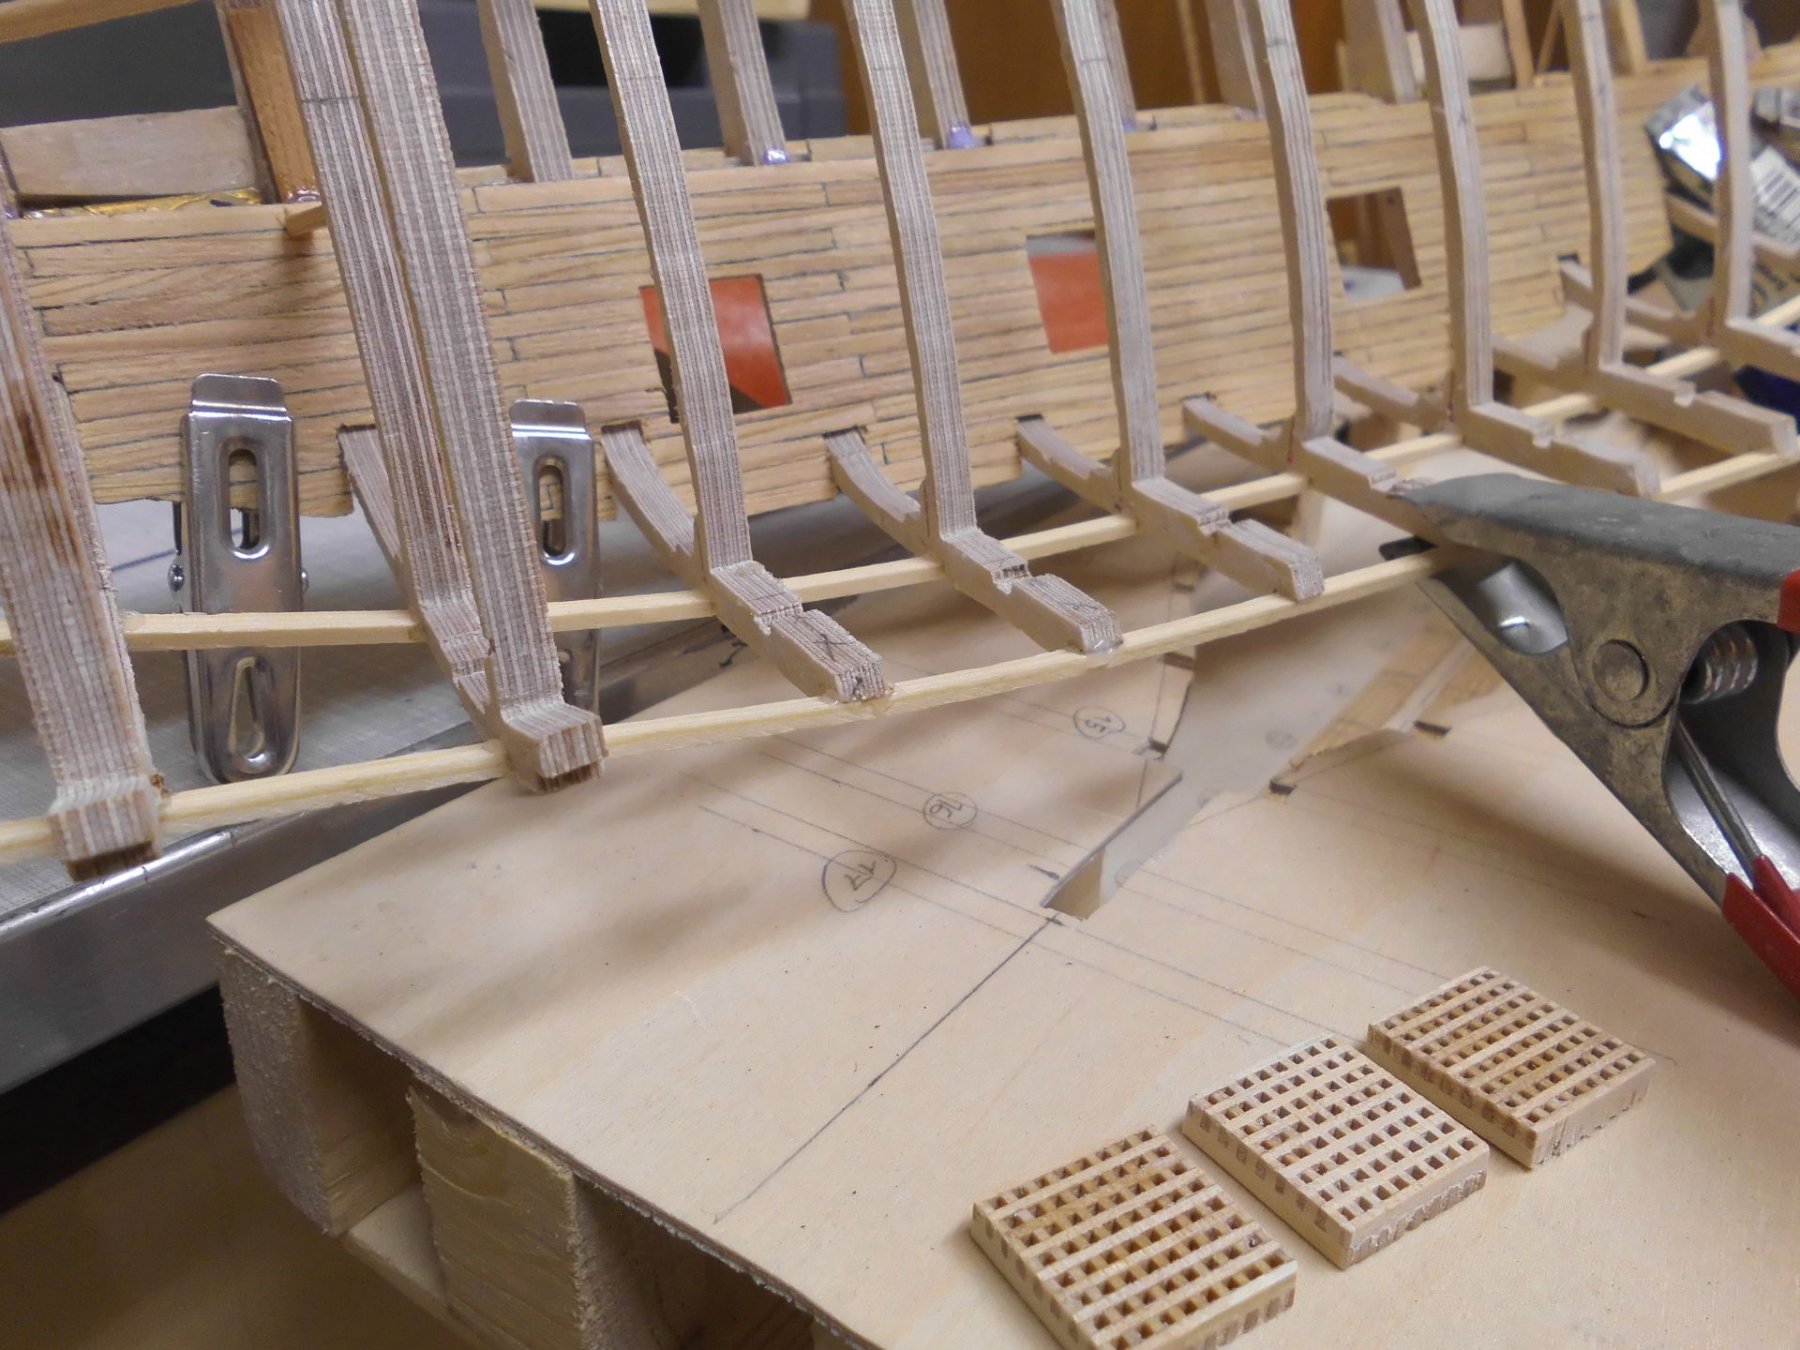
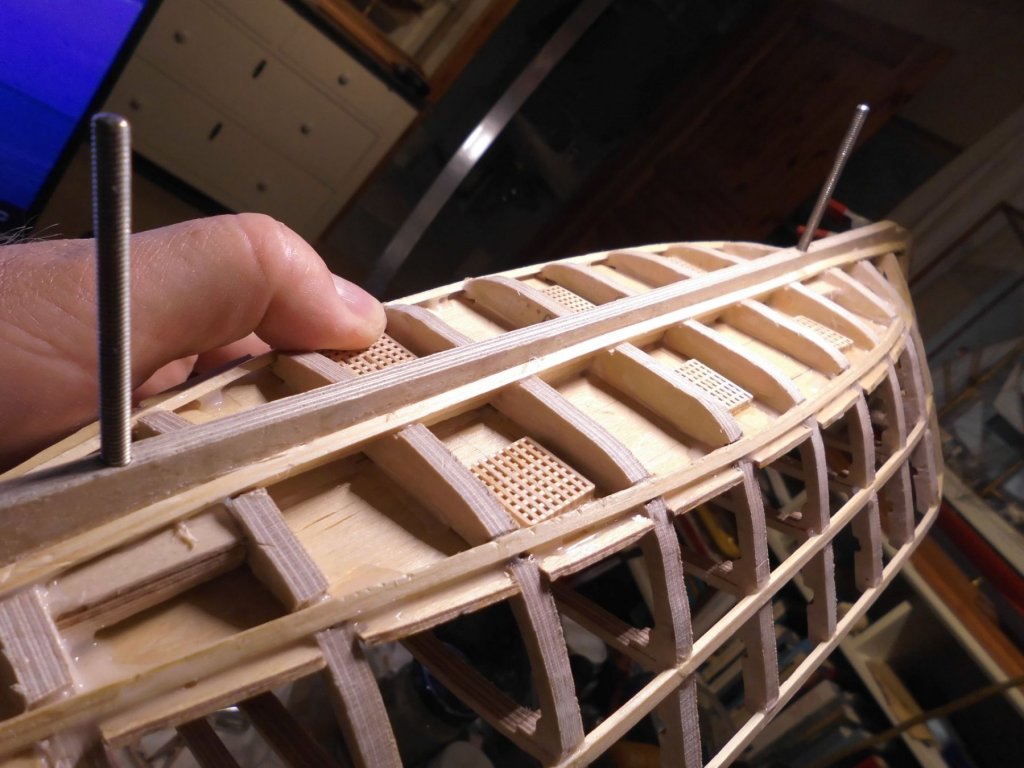
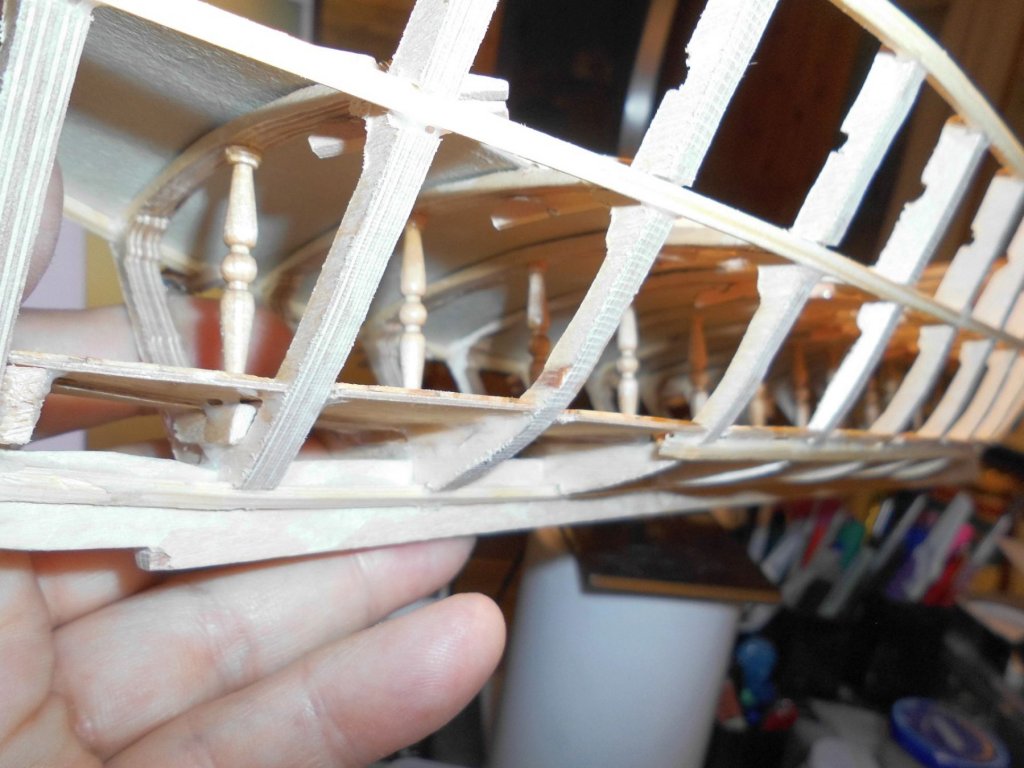
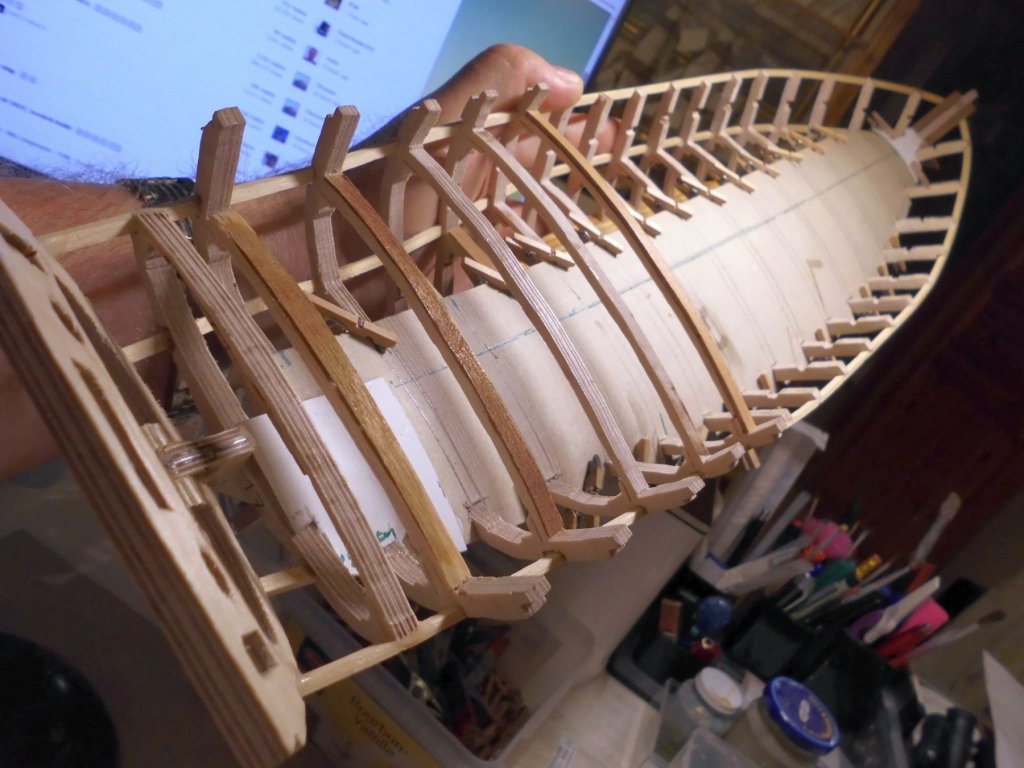
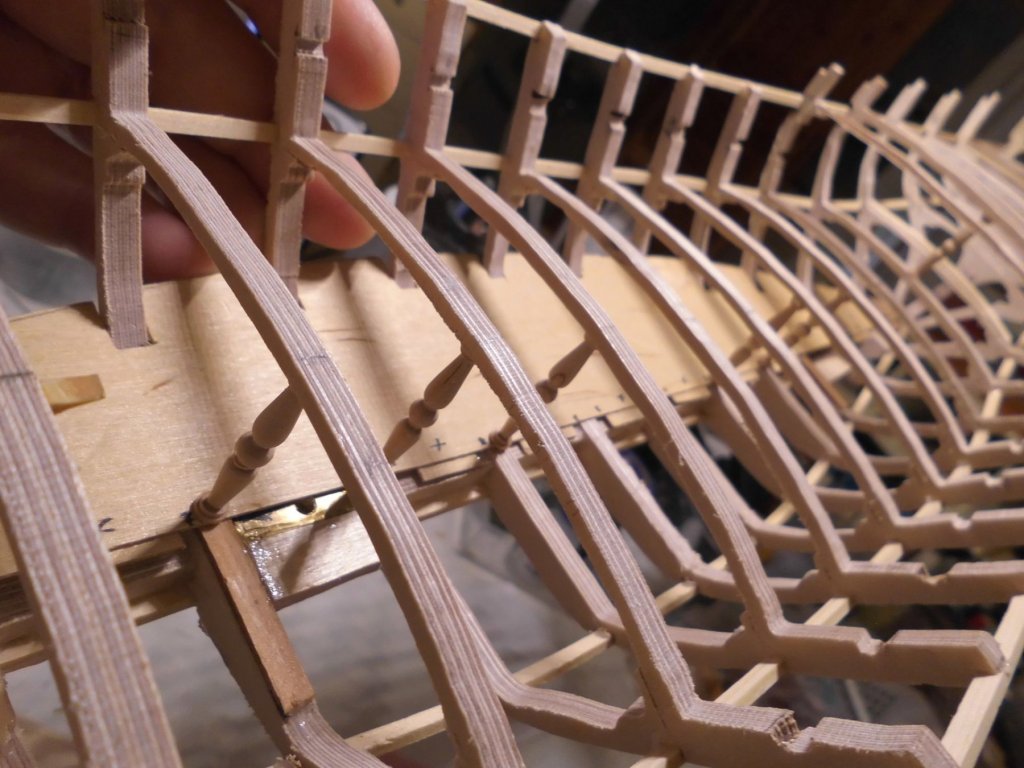
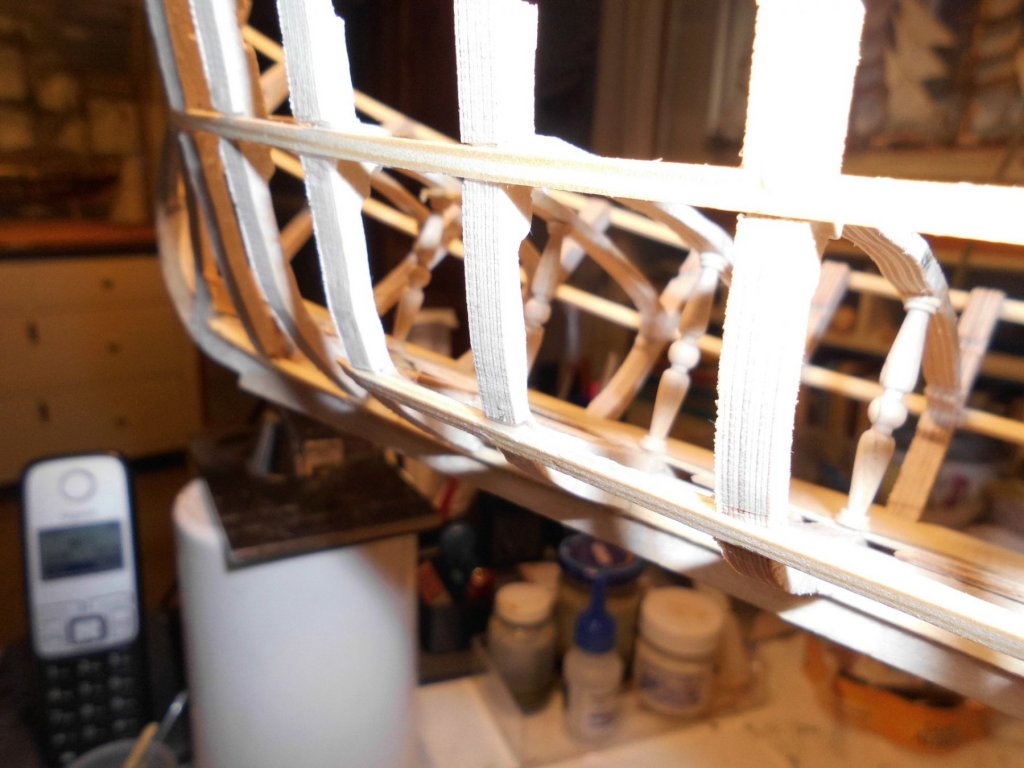
Thanks very much Keith, am pleased you like the spindle fastening points.... the stb. floor half is now permanently planked and mounted. The pine-planks are 3 x 100 mm long and 0,7 mm thick. The three square outcuts take up the gratings to the bilge. The overstanding outside edges of the floor will be trimmed off when the hull gets faired for planking... Nils the three gratings, per side, for access to the bilge the glue is applied from underneath, once the floor half is correctly positioned


- 692 replies
-
- 24
-
-
- eagle of algier
- chebec
- (and 2 more)
-
beautiful work Bob, and black and gold matches wonderful Nils
- 682 replies
-
- 4
-
-
- halifax
- lumberyard
- (and 1 more)
-
Lovely work Dave, a beautiful built ship !! Nils
-
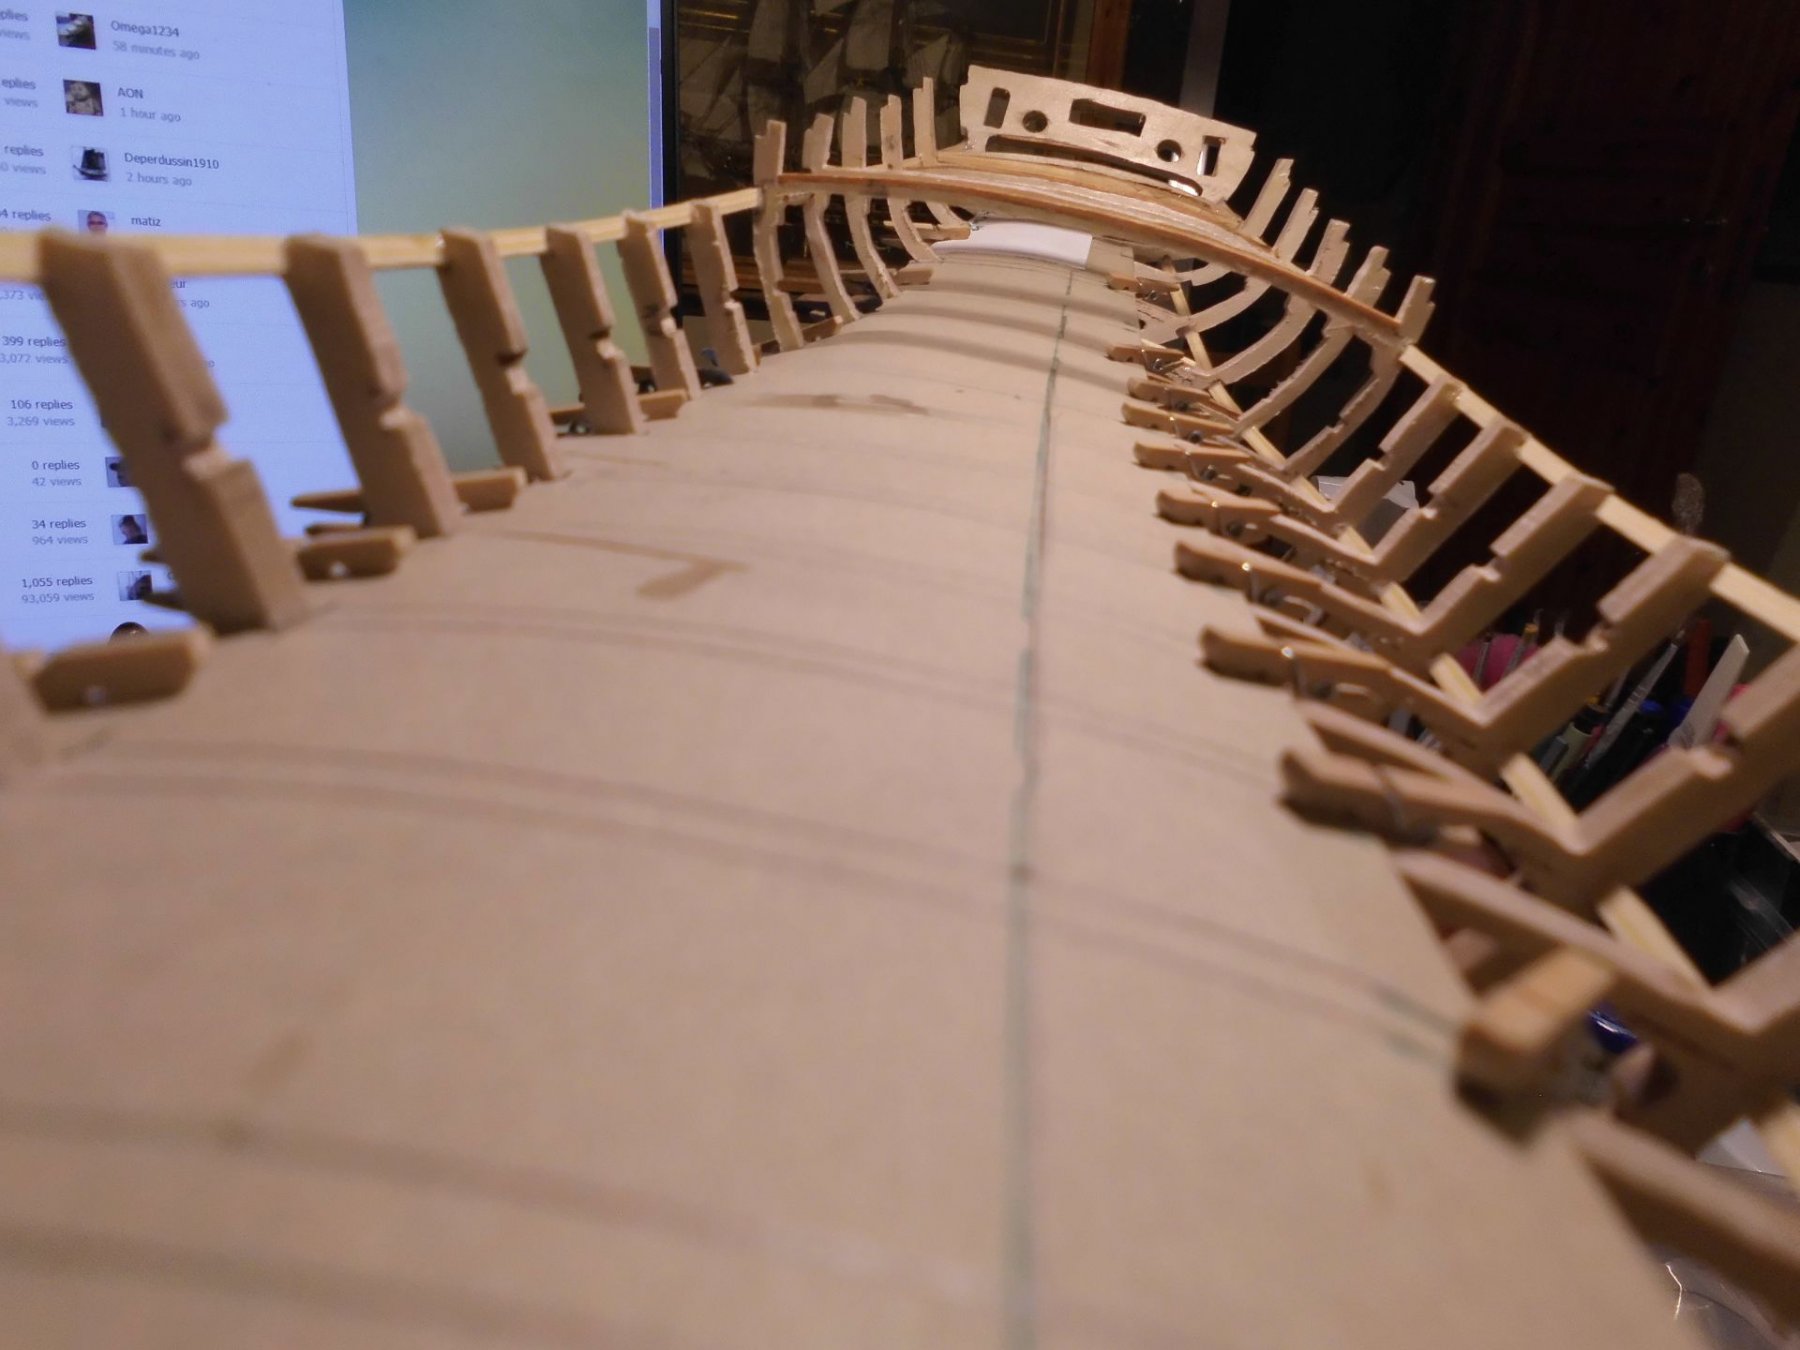
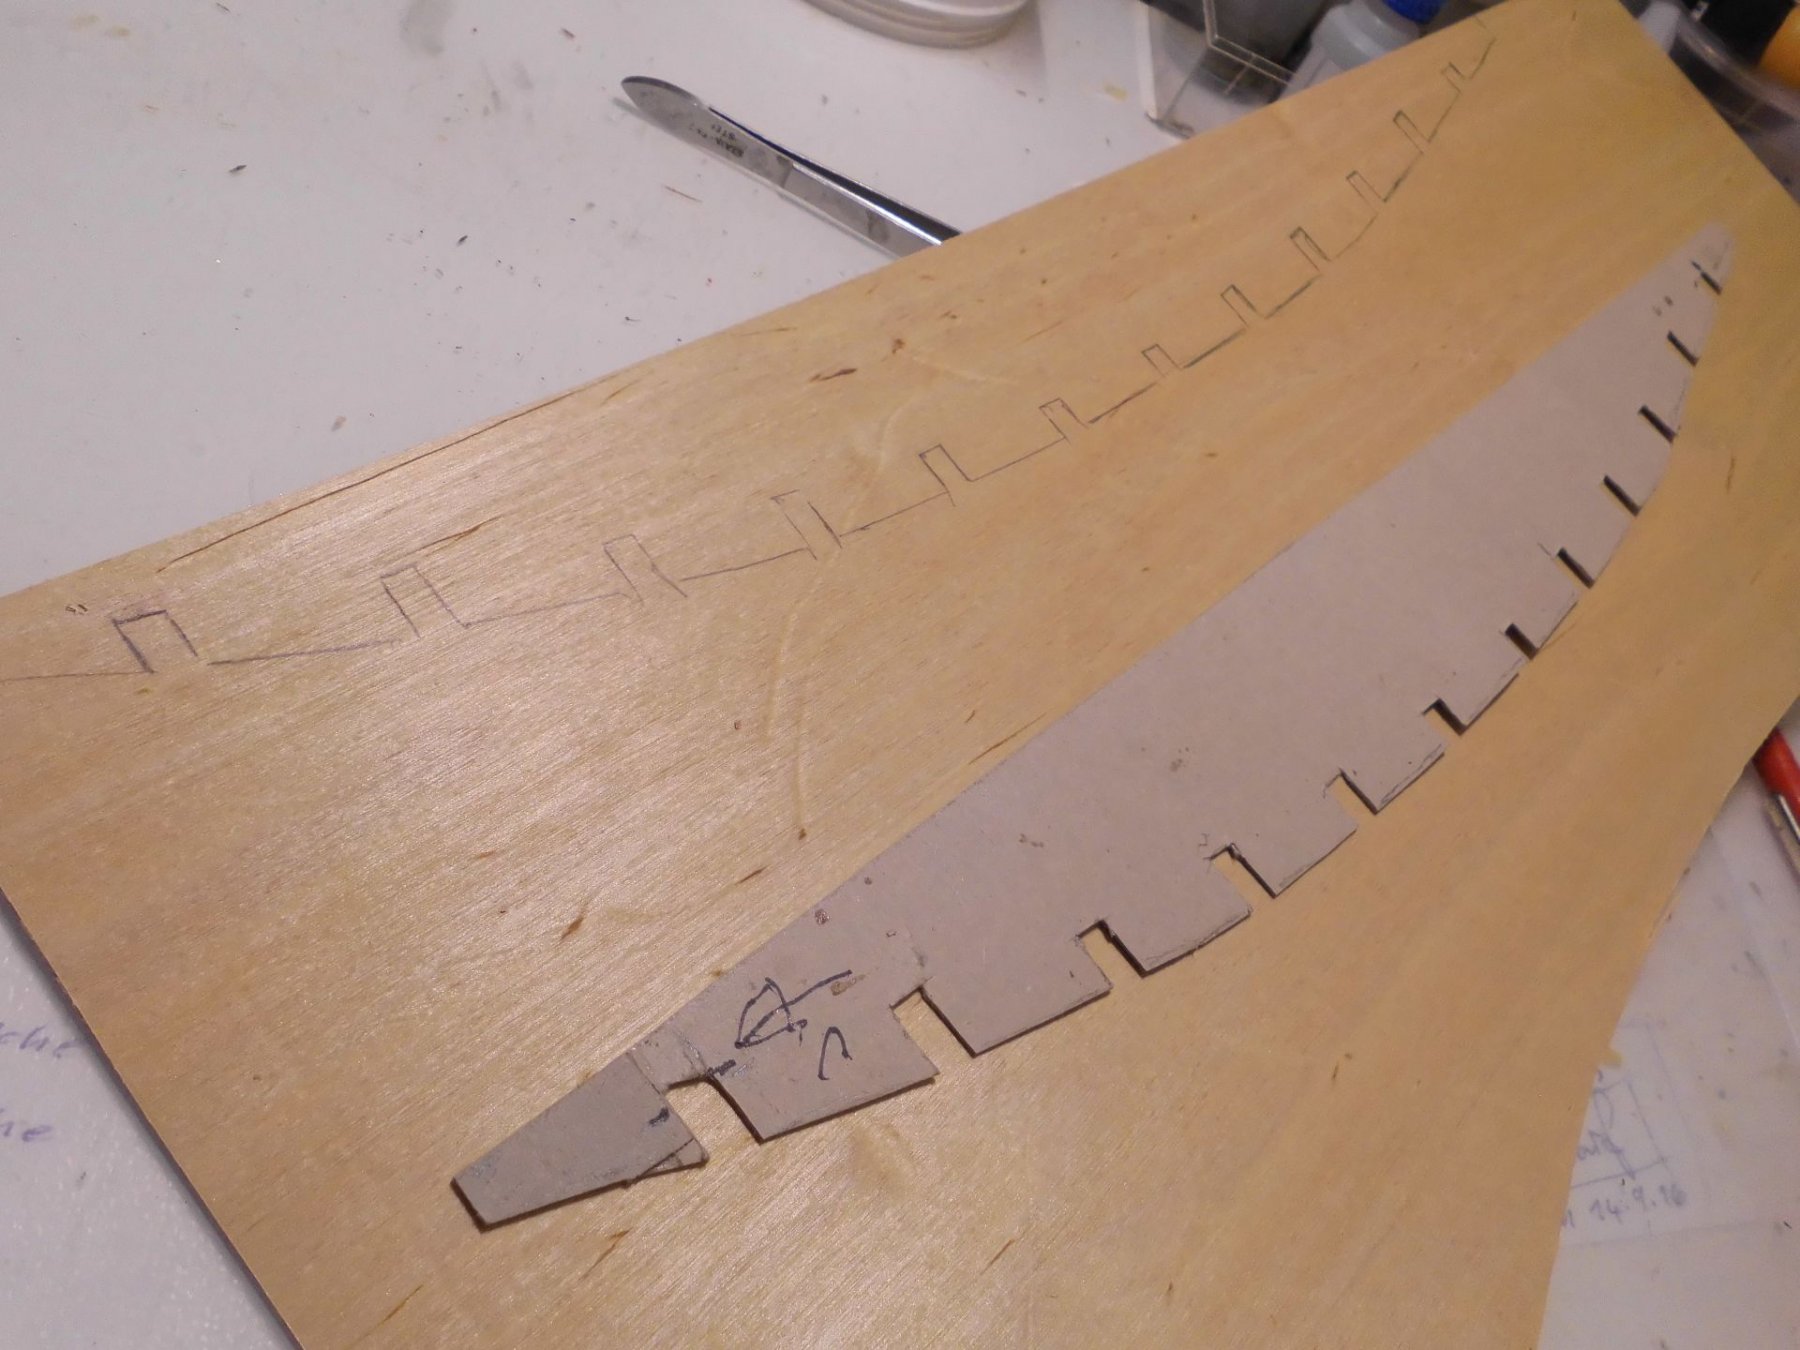
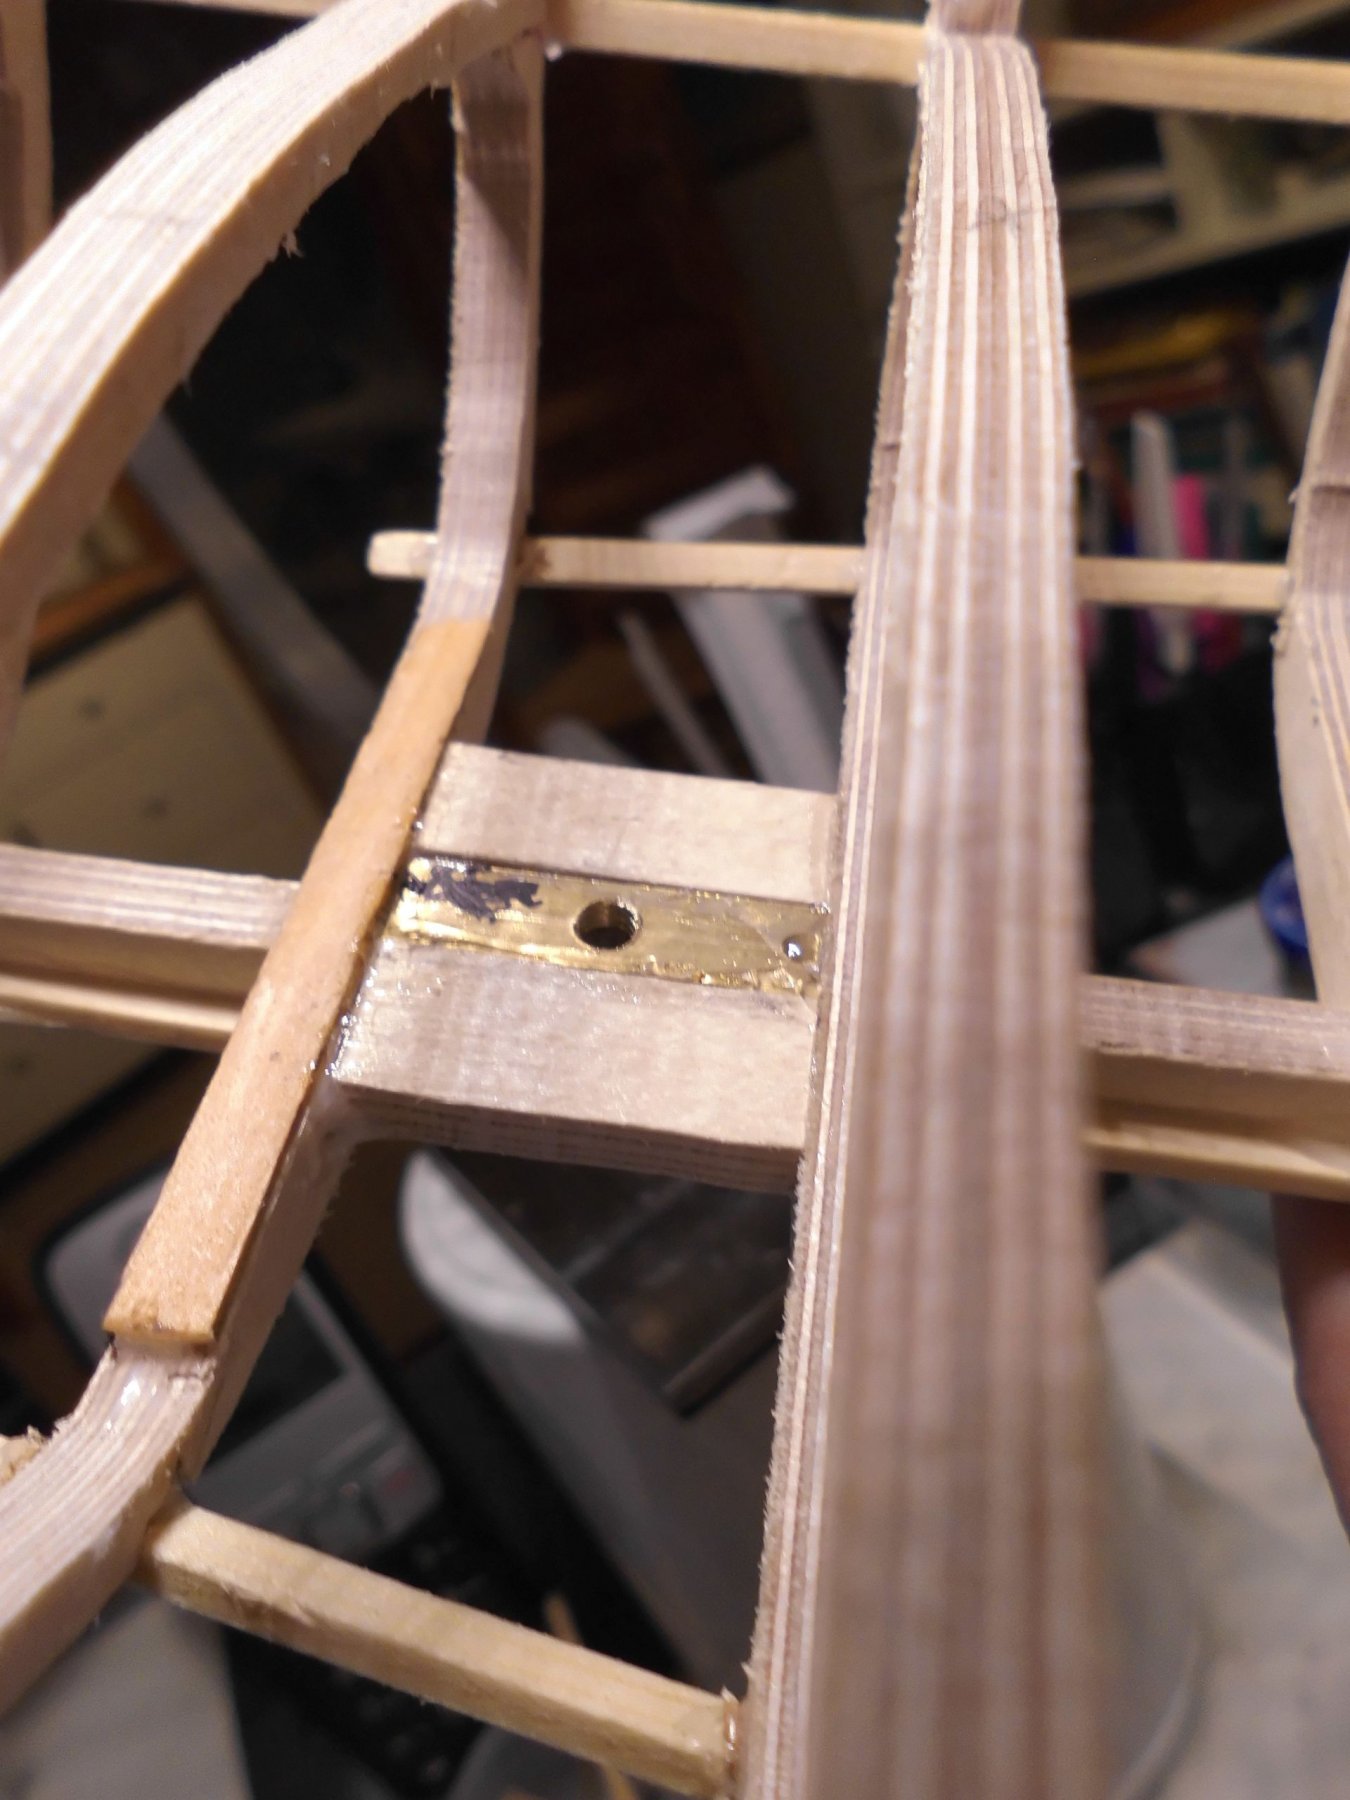
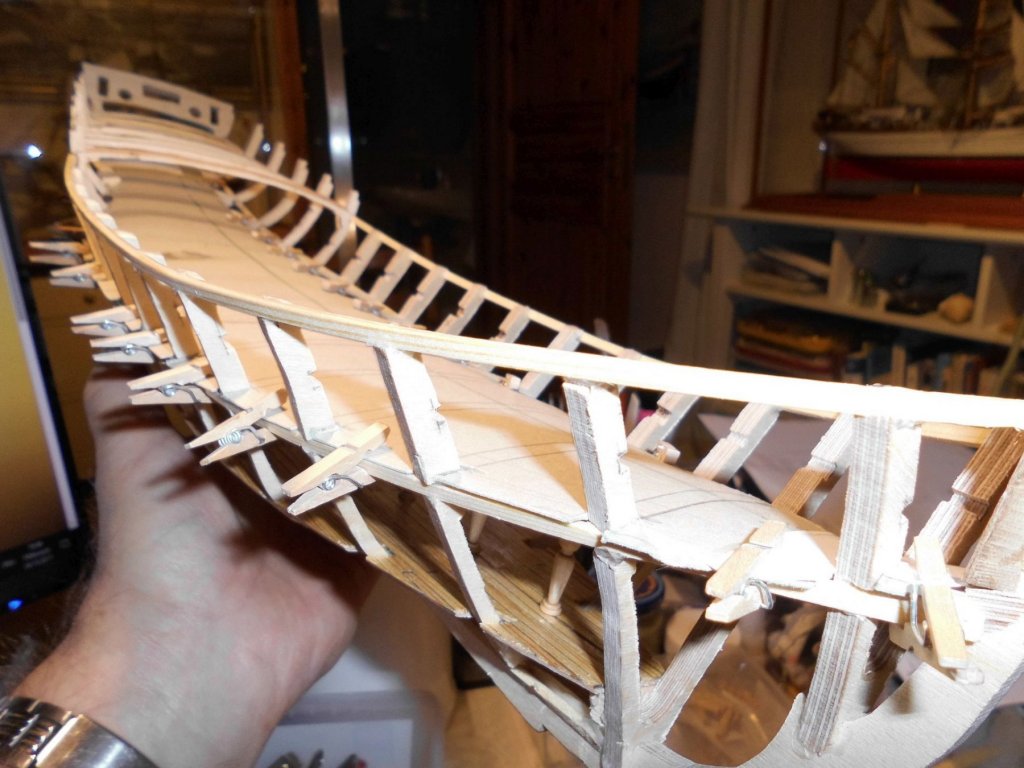
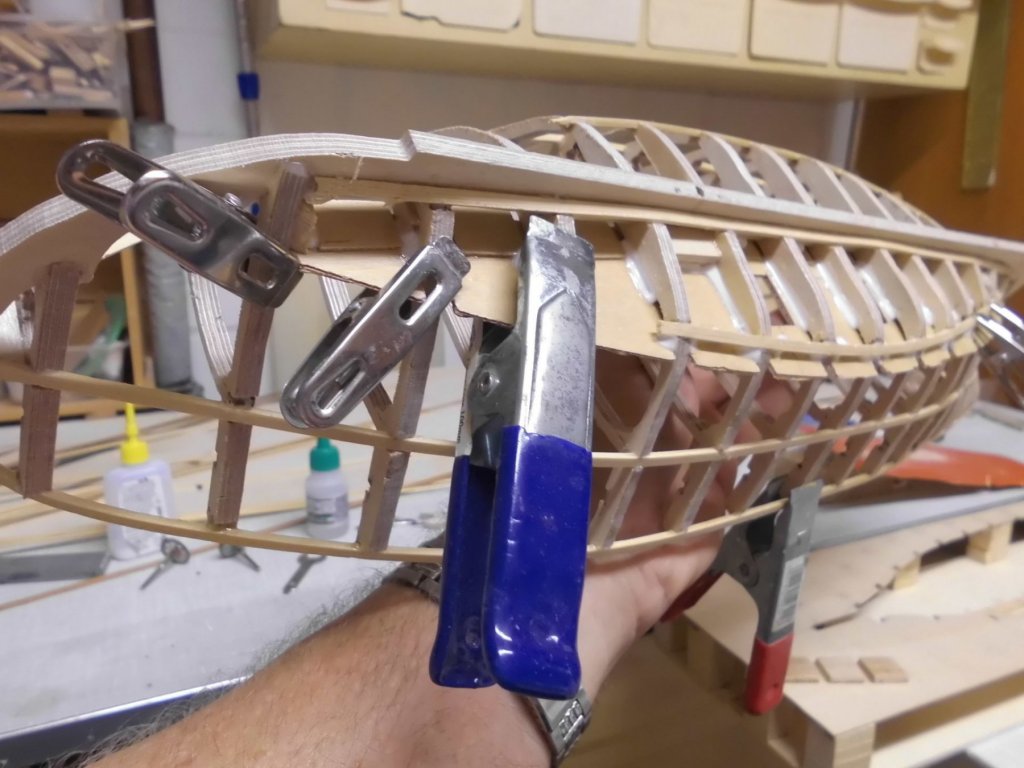
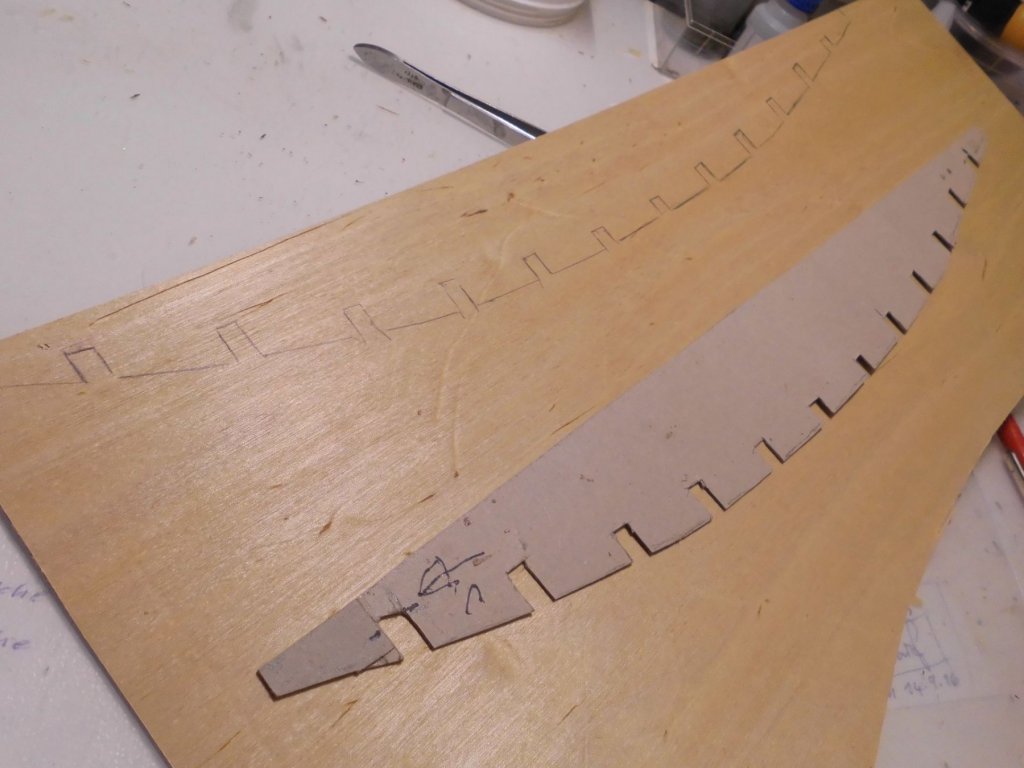
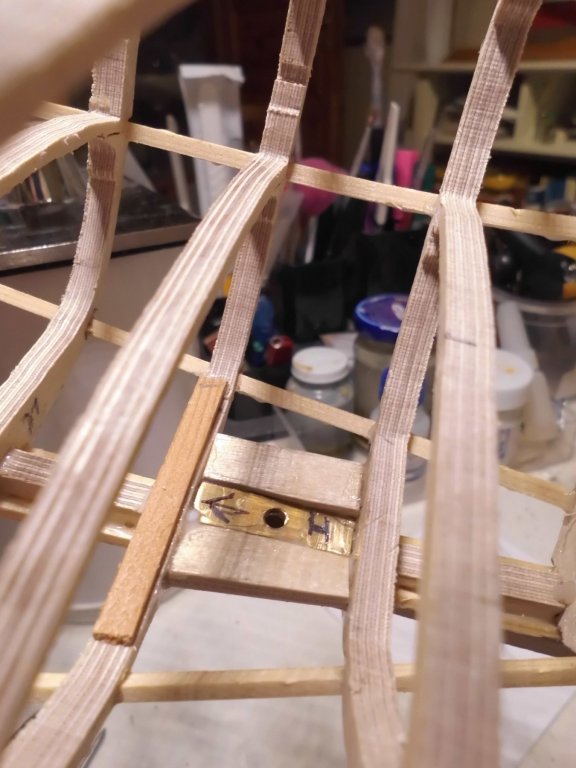
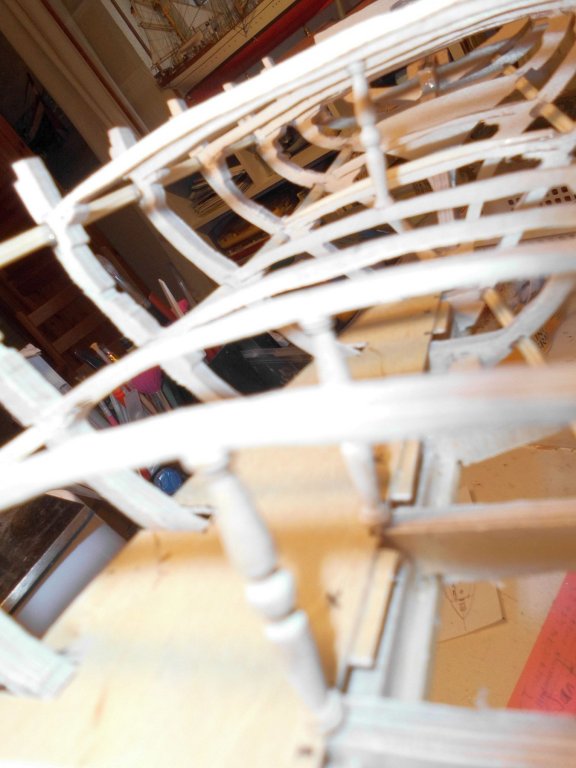
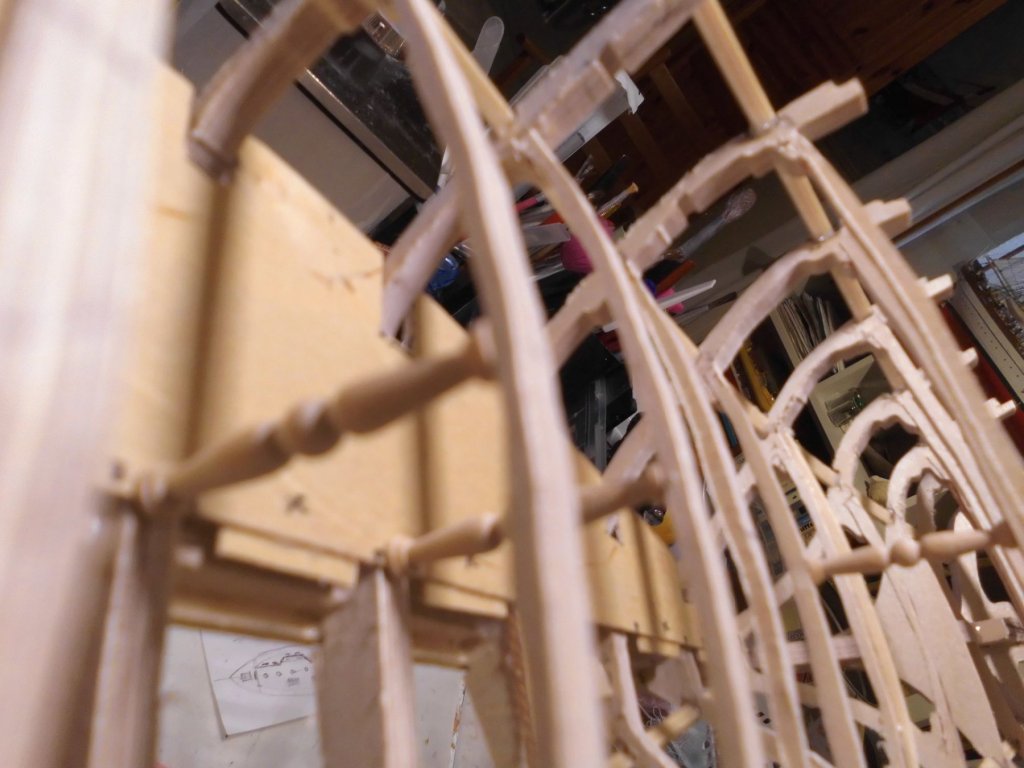
update... cutting out the floor halves from 0,8 mm ply for the cargo hold bottom (still to be planked...), and attatching the brass M4 thread-plates under the floor for the stand`s two spindles..., also checking out the deck-supporting pillars midships... Nils card template halves... will do... the threaded brass fastening plates are enbedded safely between supporting lugs... dry fit of pillars, the floor halves can be slipped in through the frame deck-beams... here one wooden floor half (with overlapping) braces in dry fit

- 692 replies
-
- 22
-
-
- eagle of algier
- chebec
- (and 2 more)
-
Very nice progress Dan, a delight to see how you do it at that small scale... Nils
- 287 replies
-
- 5
-
-
- michelangelo
- ocean liner
- (and 1 more)