Ras Ambrioso
-
Posts
662 -
Joined
-
Last visited
Content Type
Profiles
Forums
Gallery
Events
Everything posted by Ras Ambrioso
-
 Thanks Valeriy. I can use this information.
 -
Happy to hear from you and that you continue your fantastic micro work. If you don't mind, I will use your searchlight design on Amapá. I am also glad that, even though you are close to Mariupol, you are still okay.
-
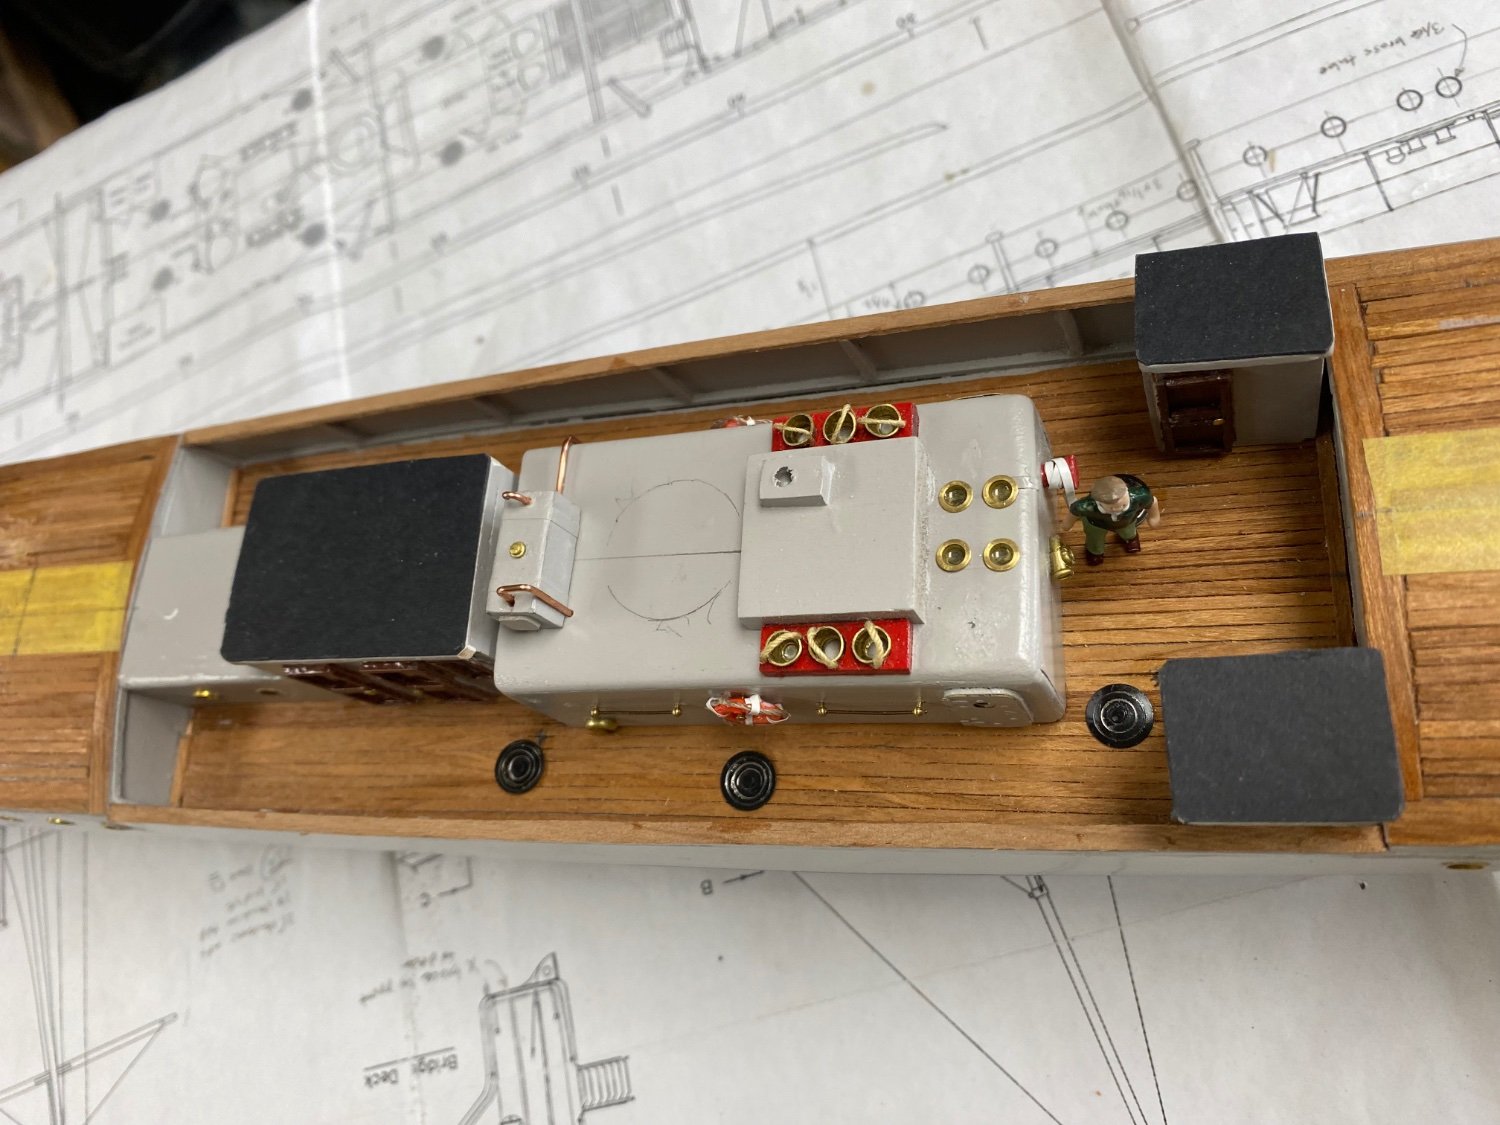
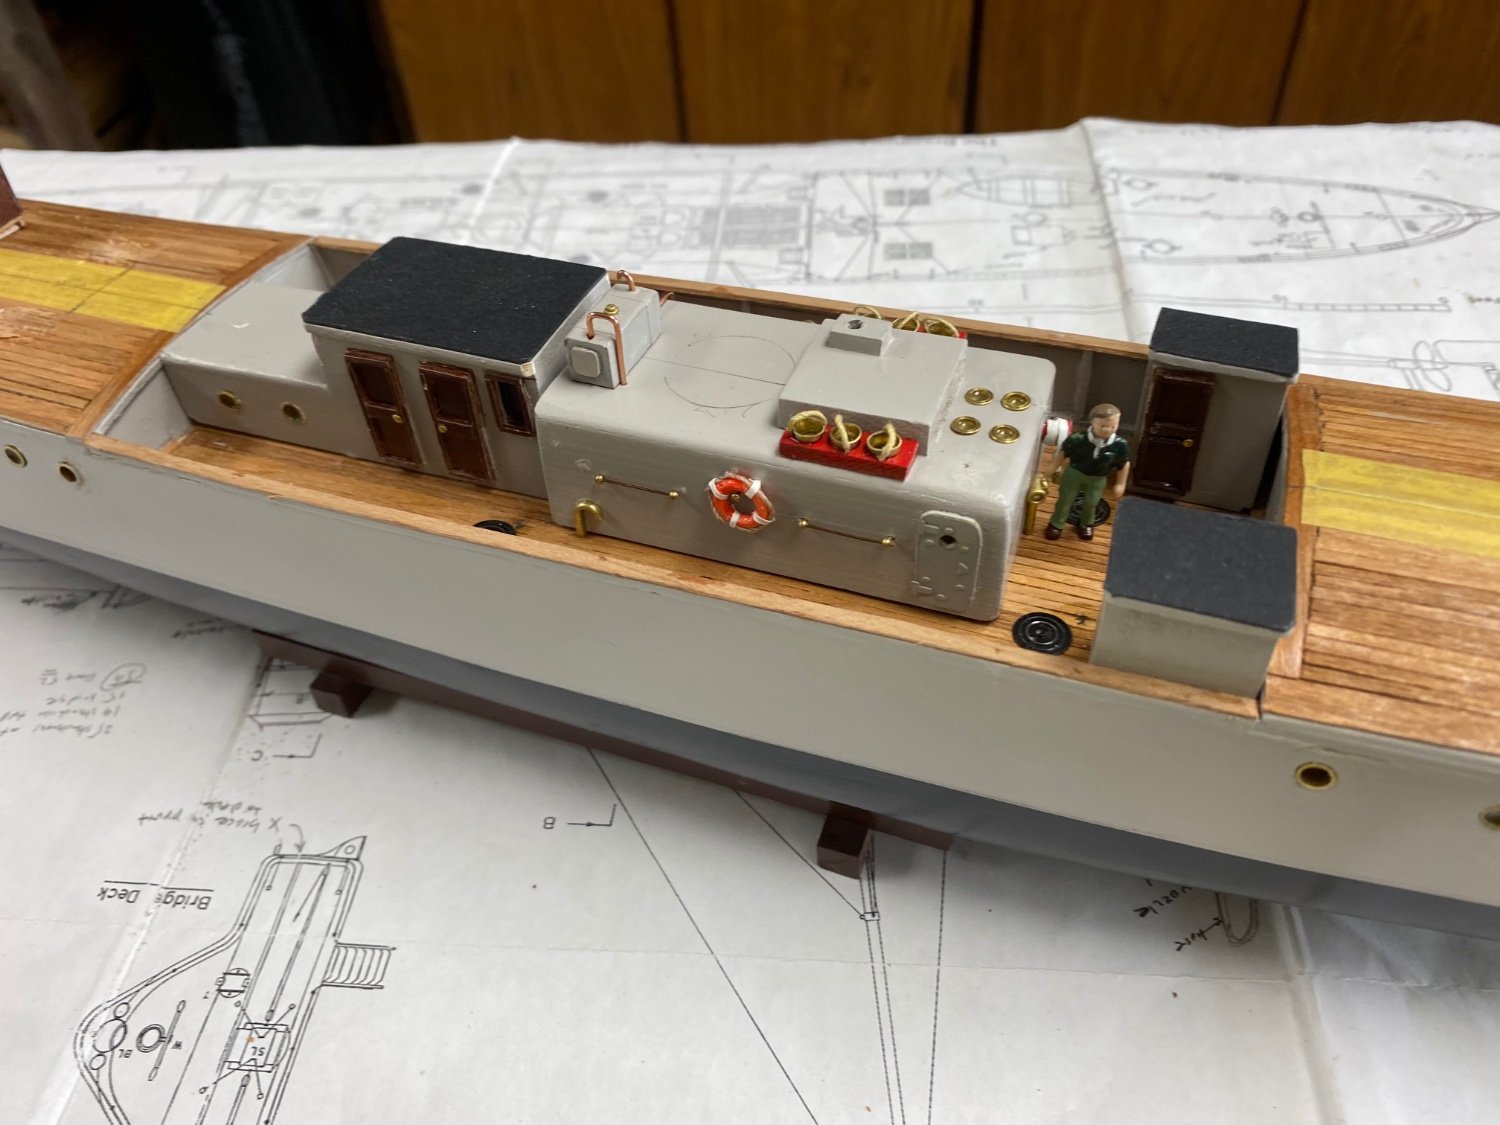
Well, the coal scuttles are in place midships. And Amapá looks good. And the fun continues.


-
Nice hearing from you Valeriy. Glad you are safe. And for you, Wefalck, thanks for the advise.
-
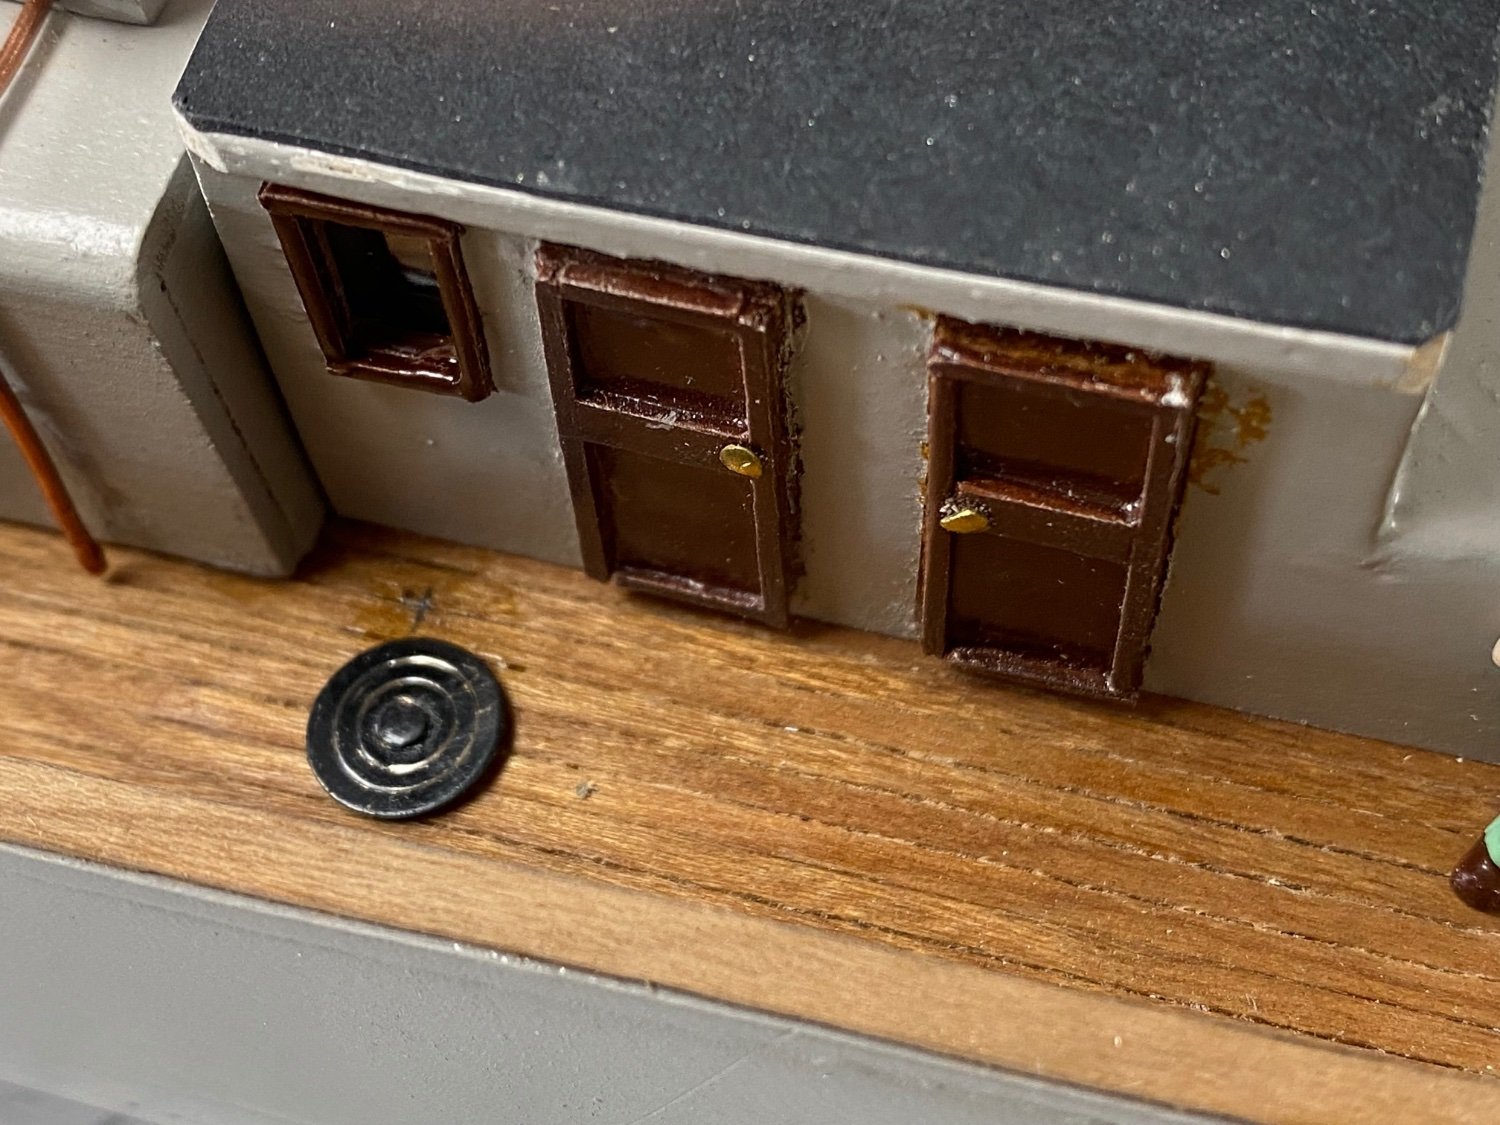
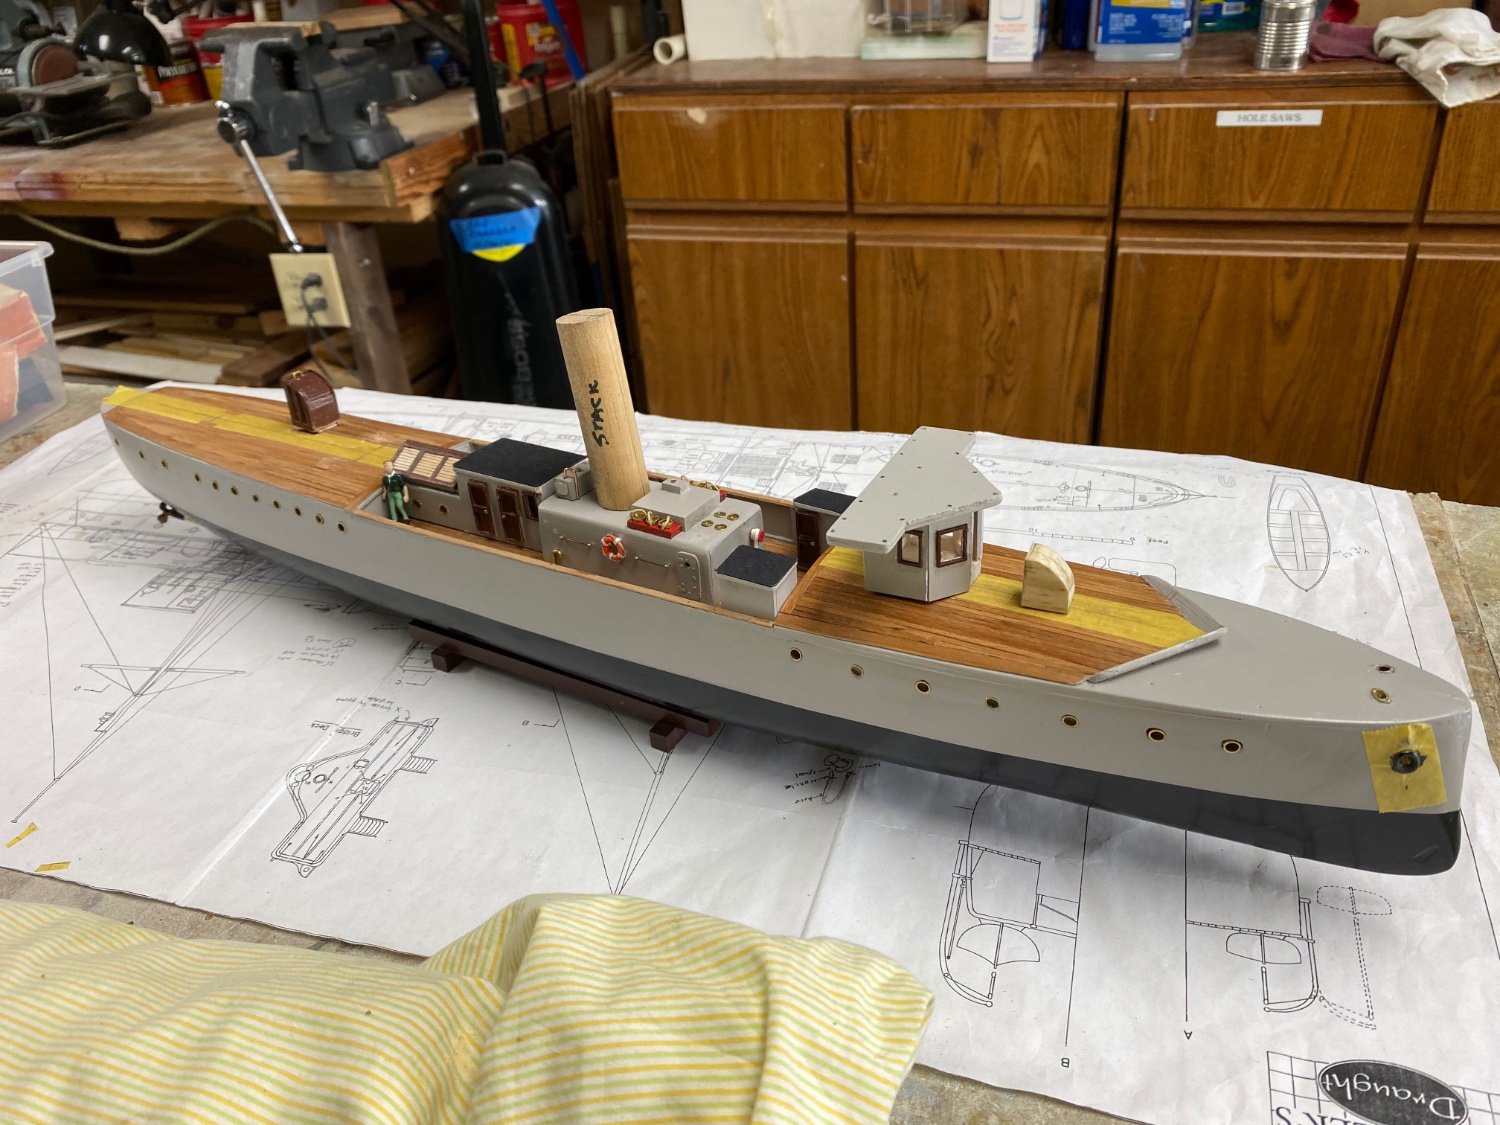
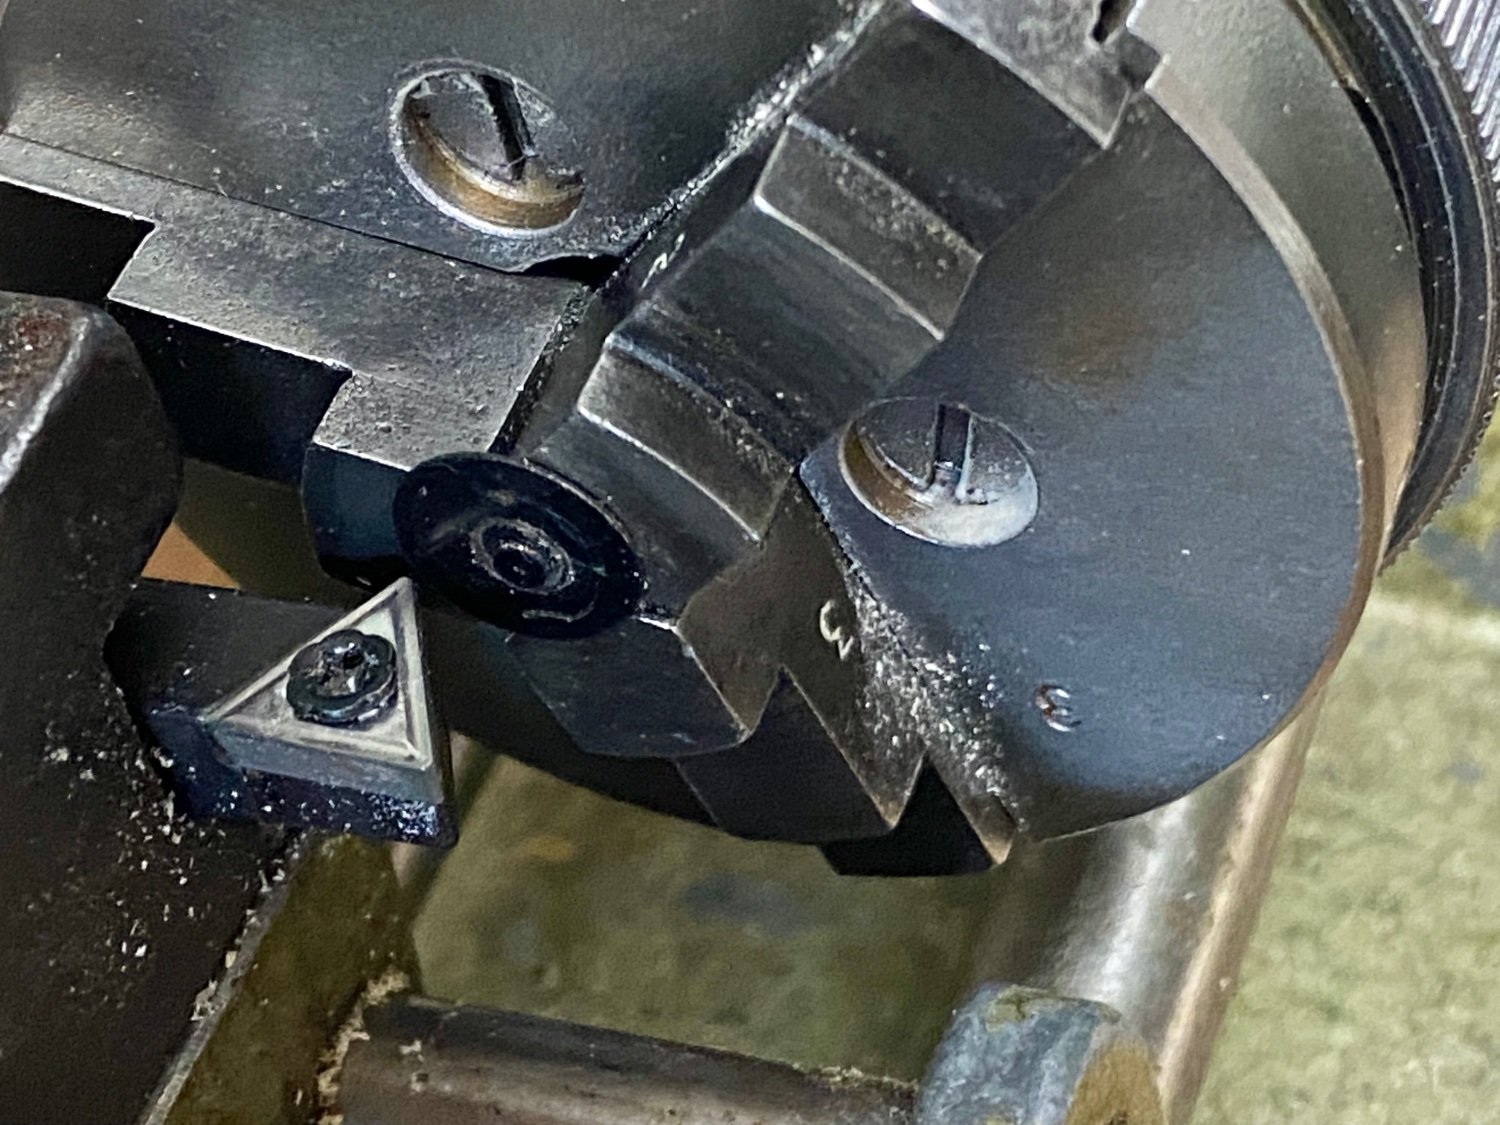
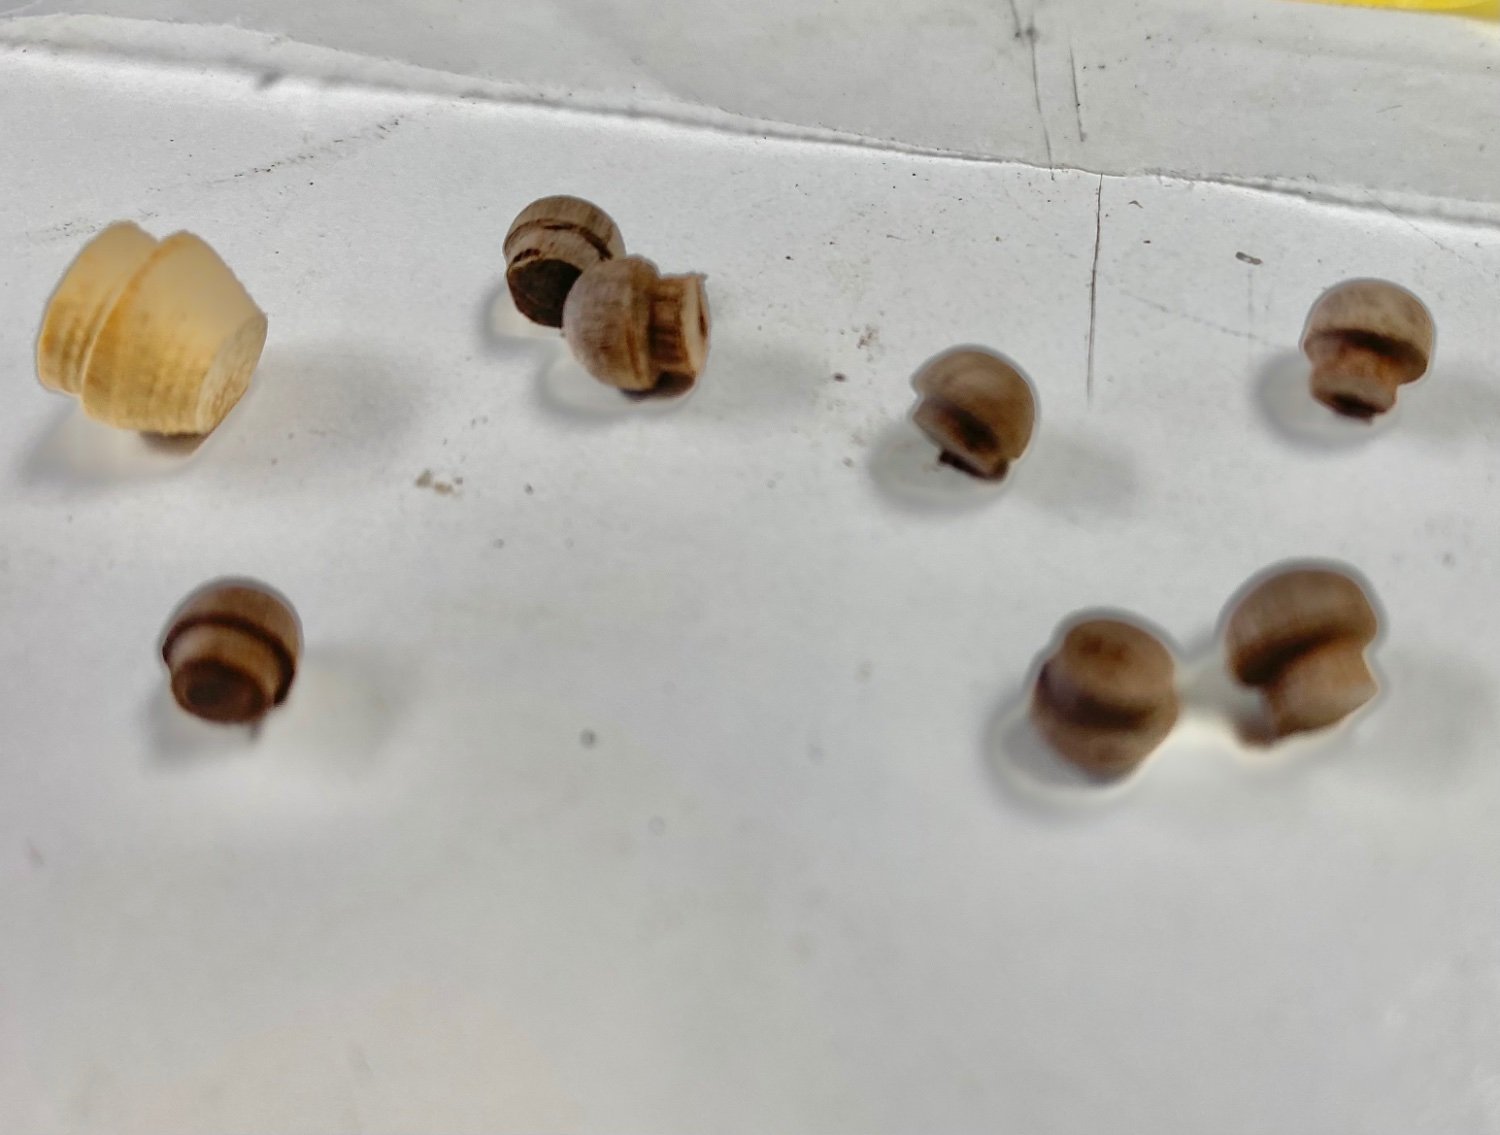
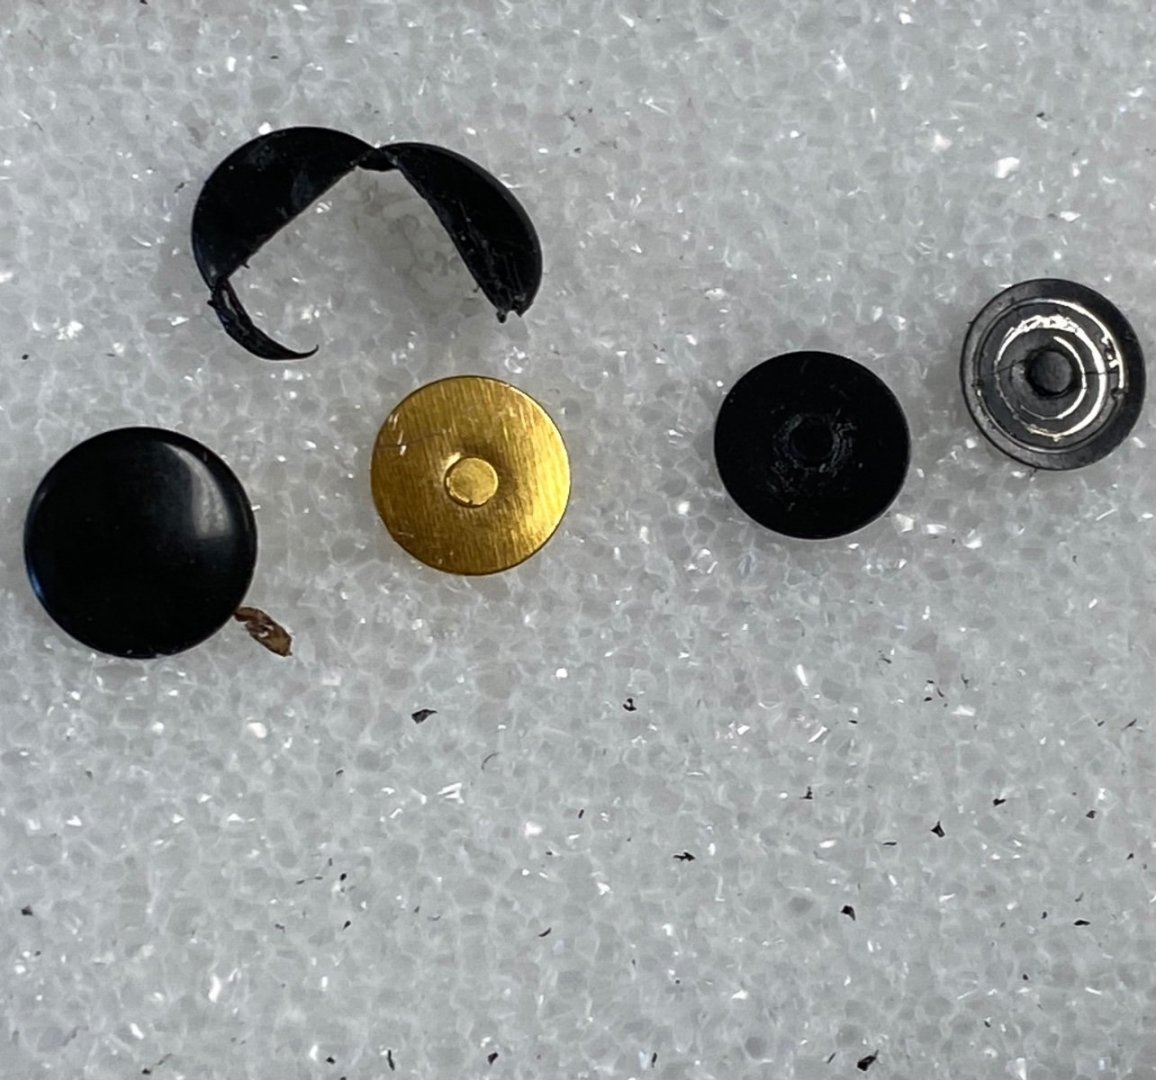
I have been struggling to get the coal scuttle covers to look right. Using the suggestions by Wefalck, I finally arrived at a satisfactory solution. I used commercial thumbtacks. First I removed the plastic color covers bringing up the brass tacks. Then I painted them gloss black, mounted in my lathe and proceeded to scratch the paint to represent the surface of the cast cover. The following picture shows the procedure: My lathe setup Please be aware that the whole operation was done by hand while the power was disconnected. And this is the final result. Success! And, while I had the lathe on the bench, I rebuild the numerous mushroom deck vents. My next challenge is the stack. I plan to use a dowel of the right diameter to serve as a mandrel for a card stock stack. Again, one my first adventures into paper modeling. I am also using this material to do the walls of the chart room. The adventure continues.


-
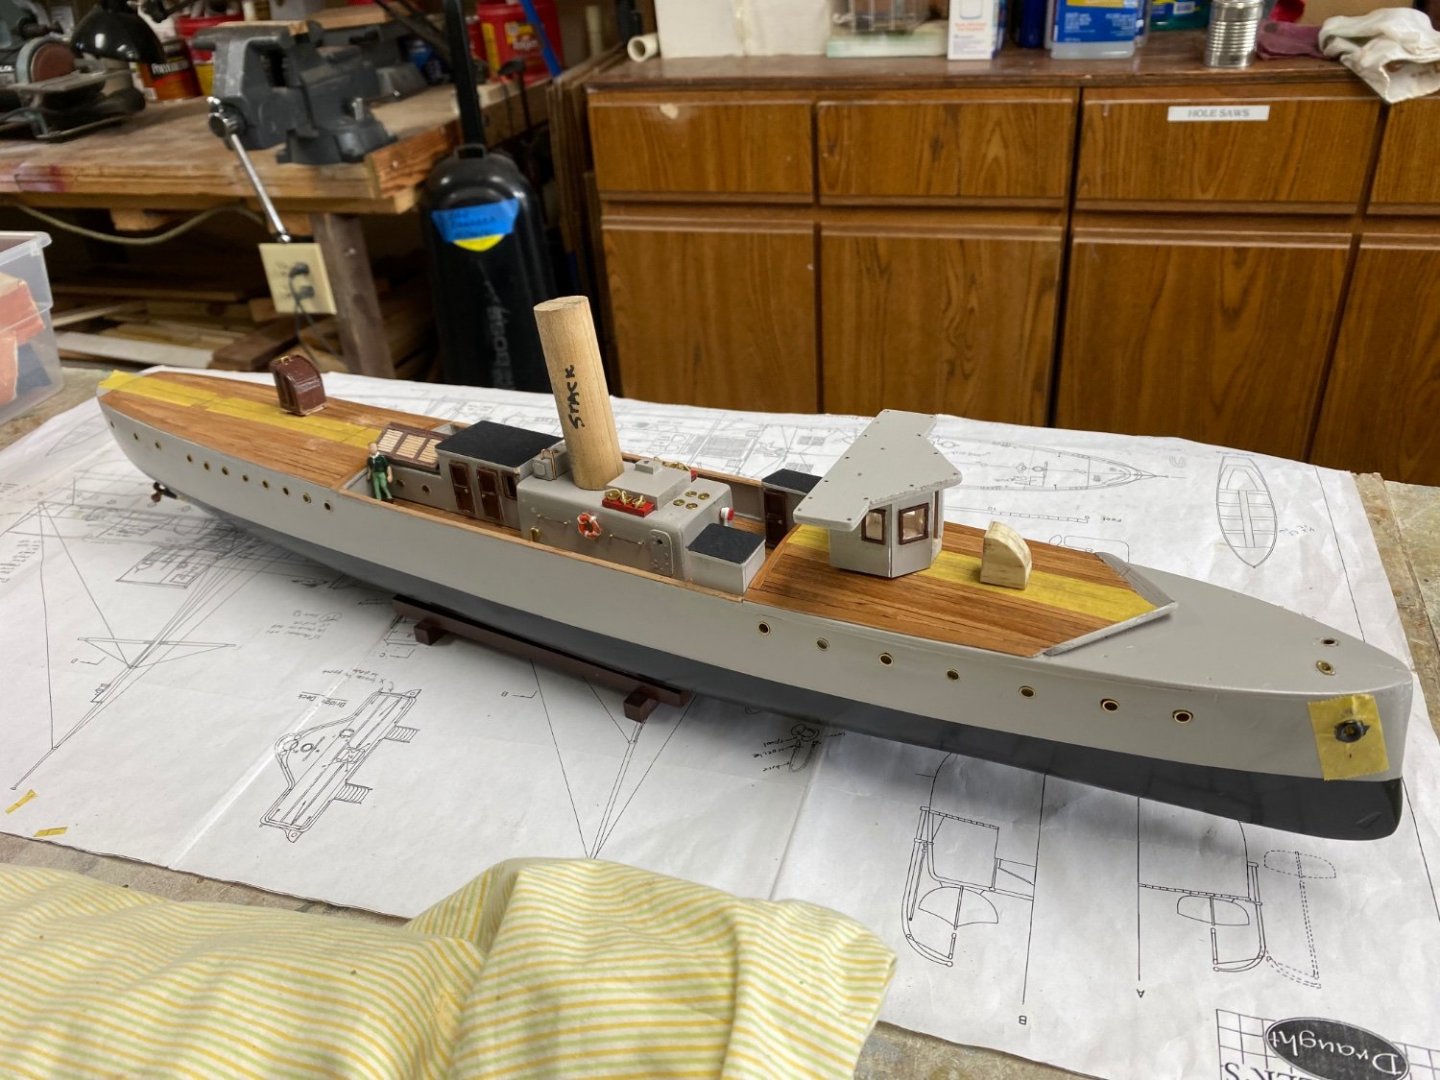
A little bit of progress today. The propellers and rudder are finally in place. Continued the fabrication of the forward companionway and the chart room. Installed the already fabricated items in the deck. Starting to look like a ship now. I expect to finish the decks this week and start the lathe work building the gun, searchlight, winches and pumps. This is the real challenge for me for it has been years since I have done lathe work. Photos will follow soon.
-
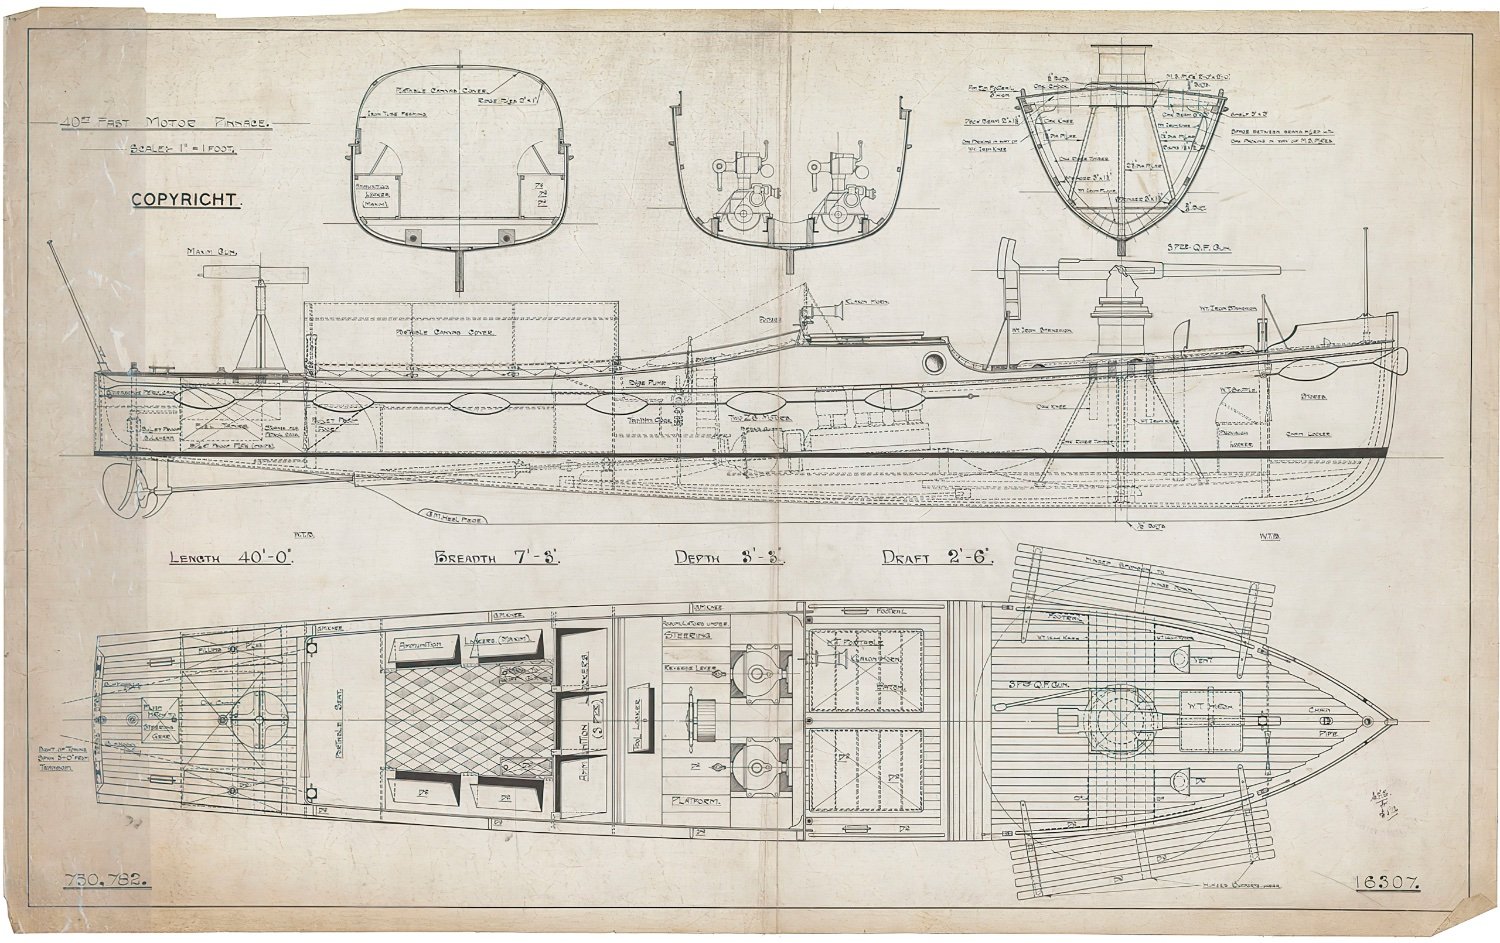
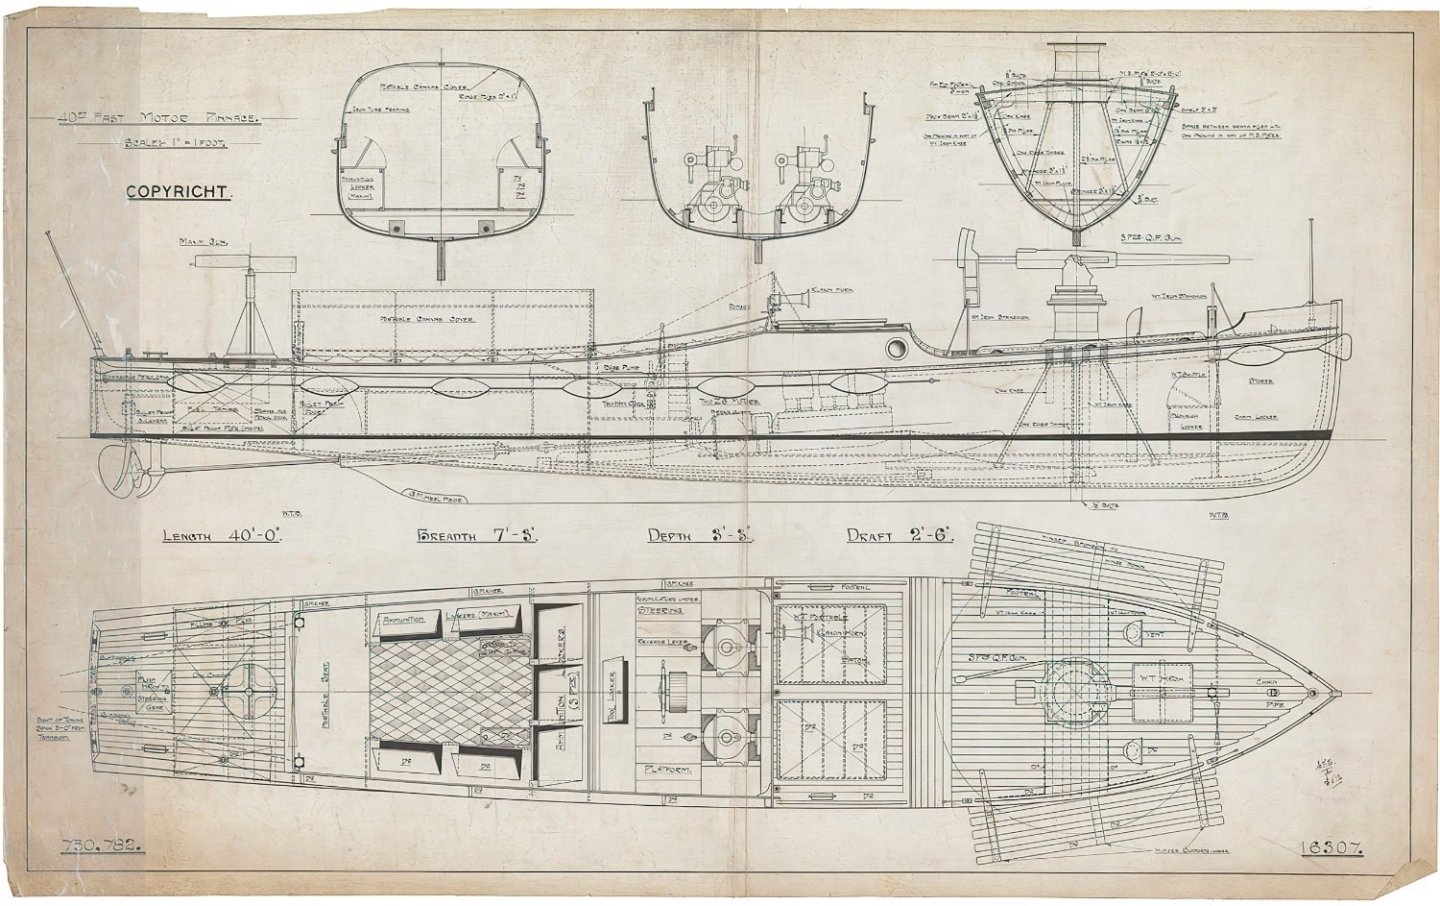
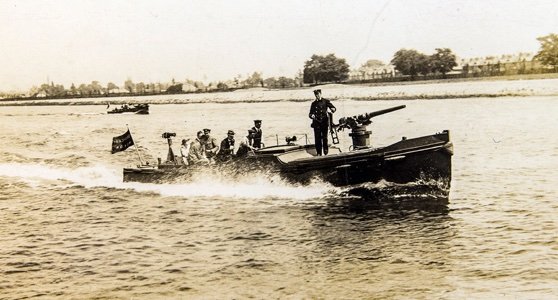
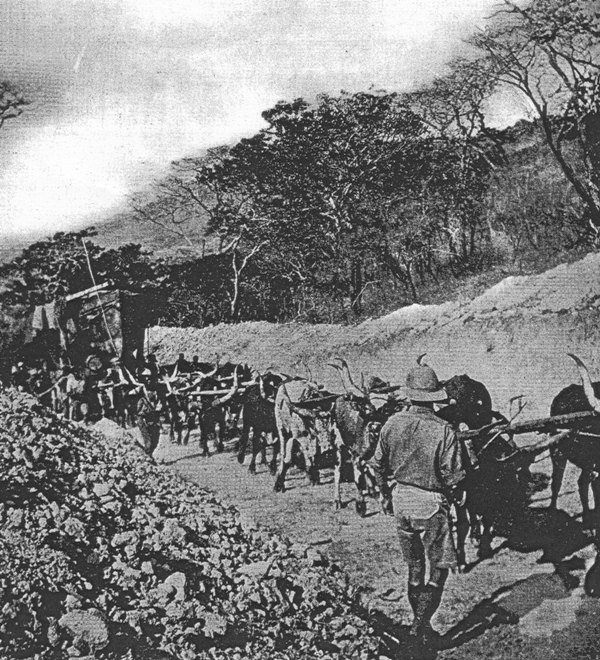
Introduction This will be my third model build log posted in this forum and my second scratch build. During the previous builds, I have become attracted to fabricate, to scale, the details of the model at hand. And doing this has directed my attention to look at the evolution of the engineering of these ships and their contribution to history. This research has been just as rewarding to me as the actual fabrication and assembling of the parts that make these ships so unique. In selecting a model to build, I have favored the period just before the end of the 19th century and after World War I. To me, these have been the times when major changes were made in both in ship building, warfare and in the methods of propulsion. Based on my current experience with Amapá, I decided that my models would be on scale that allowed me the best chance to obtain realistic scale details. I have selected a scale of 1/24. This scale produces a model less that 30” long that helps with my display areas. The model My next model is a “Fast Motor Launch” named Mimi. Built in 1915 by J. Thornycroft & Co. Ltd. Twickenham, England. During my research I managed to obtain a plan showing the general arrangement. Failing to obtain more information regarding the hull lines I ordered a copy of the plans for the British Admiralty pinnacle HMS Renown. These plans were drawn at a scale of 1:16 which I reduced to my chosen scale of 1:24. However, the Renown's length is 50ft and Mimi is only 40ft. Also, the pinnace is a single motor while Mimi has two engines. Following with my research, I found a kit from Deans Marine in the UK for this same boat in my chosen scale 1/24. Thus, I decided to order the kit and use the molded plastic hull and scratch build the superstructure, cabin, engines, and guns. I also will use some of the fittings in the kit when appropriate. I am doing this because I still have a lot to learn in the art of planking and I need to go through the NRG half hull model tutorial kit. But, I really wanted to build a larger scale brass and steel Hotchkiss quick firing gun at a larger scale that Amapá’s. The model also has a WW I Maxim machine gun. These by themselves will satisfy my desires to model these guns. Background history In the first year of World War One the German forces in the colony of East Africa quickly managed to achieve supremacy over the waters of Lake Tanganyika. At the start of the war there were only five vessels on the lake capable of being armed. The Germans owned two, Belgium and Great Britain the other three. The German steamer Hedwig von Wissmann was armed with four 37mm Hotchkiss Revolver Cannons. They also had a smaller armed launch named Kingani. With this armament she damaged the Belgian steamer, and sunk the two British steamers. In addition, the Germans had received reinforcements with the Graf von Goetzen, a 1200-ton steamer that had been built in 1913 in Germany, and then had been disassembled, packed into 5000 crates and shipped to Dar-es-Salam. She had then been carried overland through the bush to the lake and had been rebuilt. Her armament consisted of a 105mm gun taken from the sunken Cruiser SMS Konigsberg and a spare Hotchkiss Revolving Cannon taken from Hedwig von Wissmann. The Goetzen also carried an 88mm gun as well. This made her the best armed and largest ship on the lake. With this dominance of the lake the Germans were able to launch raids into allied controlled territories. The British Admiralty suggested that two motor launches be dispatched to the lake to beat the German vessels. Thornycroft was, at the time, building similar boats originally ordered as seaplane tenders for the Greek Air Force. However, the needs of the Admiralty came first and two 40ft launches, each armed with a 3-pounder gun and a machine gun, were ordered. The launches could reach a speed of 19 knots and were powered by a pair of 100 hp petrol engines. The large gun on the foredeck had one slight flaw, the massive recoil meant that they could only be fired more or less directly ahead. If fired to the side the ship's frame wouldn't be able to take the strain and disastrous results would follow. These two boats were named HMS Mimi and HMS Toutou. The following picture show these boats during their trials The normal practice at the time was to build the patrol boats, trial them, dismantle them and reassemble them at their destination, but as the Germans had unchallenged naval superiority on the lake, this could not be done without attracting attention from the German patrol boats. The way around this was figured out by the squadron commander, Lt-Cdr Geoffrey Spicer-Smith. Rather than breaking them down and reassembling them under fire, why not ship them whole and transport them overland? The launches underwent trials on 8 June 1915 and, by the middle of the month, were packed abord the SS Llanstephen Castle from London to Cape Town. At the beginning of July, they arrived in South Africa. Once they arrived, they would have to be carried over 3,000 mi inland, including the traversing of a 5,900 ft mountain range. This was accomplished using local train lines and, through the bush, by teams of oxen and steam tractors. Photos show the transportation mode. And to give you a view at the magnitude of this project, following is a map of the intended route. Arrived at Lake Tanganyika in late October. On the 22nd of December HMS Mimi and Toutou were launched. For the next six month these launches managed to decimate the German naval forces in the lake. They captured the small armed launch named Kingani and commissioned it into the British navy under the name HMS Fifi. The Hedwig von Wissmann was sunk and eventually, forced the Germans to scuttle the recently arrived Graf von Goetzen after removal of her cannons to be used in the shore defenses. I also found the following book that covers this fantastic adventure: “Mimi and Toutou’s Big Adventure" By Giles Foden. Just finished reading the book and, I can assure you that, any historian will enjoy its read. It is an amazing story combining the Joseph Conrad’s book: ”Heart of Darkness” with the Humphrey Bogart’s movie: “The African Queen” . I am now waiting to receive the kit from Deans marine in the UK to get started. Will keep you informed. By the way, I have not forgotten my other baby: the Amapá, that will be finished shortly .


-
Great job Popeye. And, yes, you should add some stuff to the tank deck. At 1/35 scale there are a million accessories you can add. Keep up the good work.
-
Wefalck, thanks for the advise. Will try it for sure. I am also glad you know the history of the battle fo Lake Tanganiyka. I am now reading a book called "Mimi and Toutou's Big Adventure". A fascinating story.
-
Chuck, I have a question for the administrators. I am starting the research on my next project and would like to start a build log with my research findings even a couple of months before I actually start the build. My research now consists of the historical findings and the generation of the plans for the model. Please advise. Thanks in advance
-
I got another one for you Wefalck. You are going to like my next project. It is the HMS Mimi that defeated the german forces in the battle of Lake Tanganyika in 1915. I'll keep you informed.
-
Holy Cow, Wefalck, you are the man. My problem with the turning them from scratch is that I am not sure I can make the thickness cuts for less than 0.5 mm and these covers will look over scale as regards to depth. I tried punching brass but my punching tools only produced extrusions and couldn't cut them clean enough. If my experiment with the thumbtacks fail I will experiment again to cut thin layers from a rod. This is part of the fun of building these model, right? Thanks a lot for your interest in my work.
-
I'm back. The Fifie is done, or at least on exhibit, lacking some more details I will be adding in the future. Finally, my tiny propellers arrived from Australia. To this date they have been installed and really look funny since that they are so small. This has teach me another lesson as to look forward when cutting corners early in the construction. I am now working on the chart room with the flying bridge above and the fabrication of the coal scuttle hatch covers. I have been experiment severals ways of accurately depict these covers. They are basically cast iron covers similar to to the one on street sewers but I have not been able to successfully cut printed paper discs. Latest idea is to use brass thumb tacks, from my early drafting days, and score the embossed concentric rings with my Unimat lathe. Photos to follow as soon as I complete the Admiral's assignments for the week. LOL!!
-
Great work Wefalck. I couldn't figure why they would done a radial planking in front of the gun, now I know.
-
Yves, thanks for comment but you have to know that the "distressed look" was due to my attempts to cover up my planking mistakes. But, like I said before, this boat belonged some some poor scotsman that must have had it for many years. LOL
-
Amazing piece of work. Those paddle wheels are incredible and your tutorial is very clear.
- 238 replies
-
- 3
-

-
- Robert E Lee
- steamboat
- (and 3 more)
-
In reply to Cathead. I finally figured out how to post the finished build in the gallery and it is now in place. Thanks
-
Thanks for the compliments. I could have not done it without you inspiration and advise.
-
Sorry about the videos. I was not able to delete them