HOLIDAY DONATION DRIVE - SUPPORT MSW - DO YOUR PART TO KEEP THIS GREAT FORUM GOING! (Only 13 donations so far - C'mon guys!)
×


Ras Ambrioso
-
Posts
661 -
Joined
-
Last visited
Content Type
Profiles
Forums
Gallery
Events
Everything posted by Ras Ambrioso
-
 Thanks a lot Roger and Flying Fish. Valeriy, Thanks for the information on the Suriya Monthon. It happens that another MSW member was looking for information on my Amapá. He is from Thailand and send me a note asking me for copies of my hull lines plans. We have been in communication since. He is building the Monthon who was a sister ship with Amapá. Your information will add to my files. It appears that these ship class was popular for coast guard duties overseas
 -
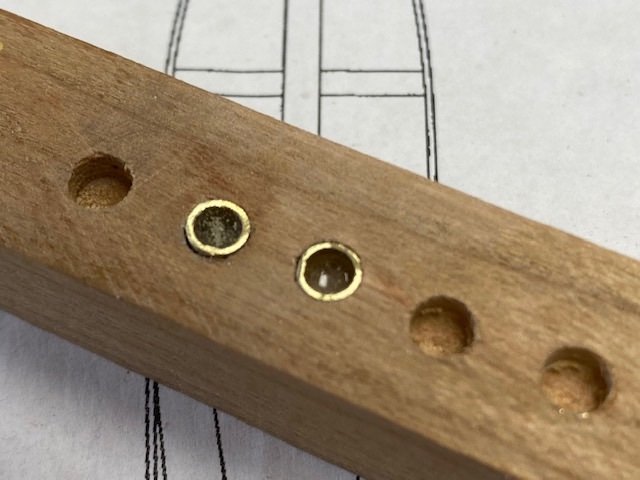
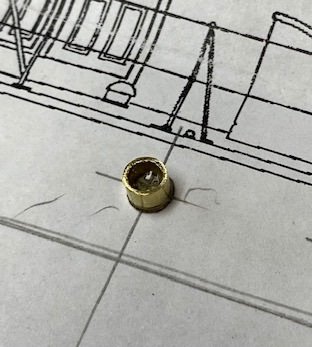
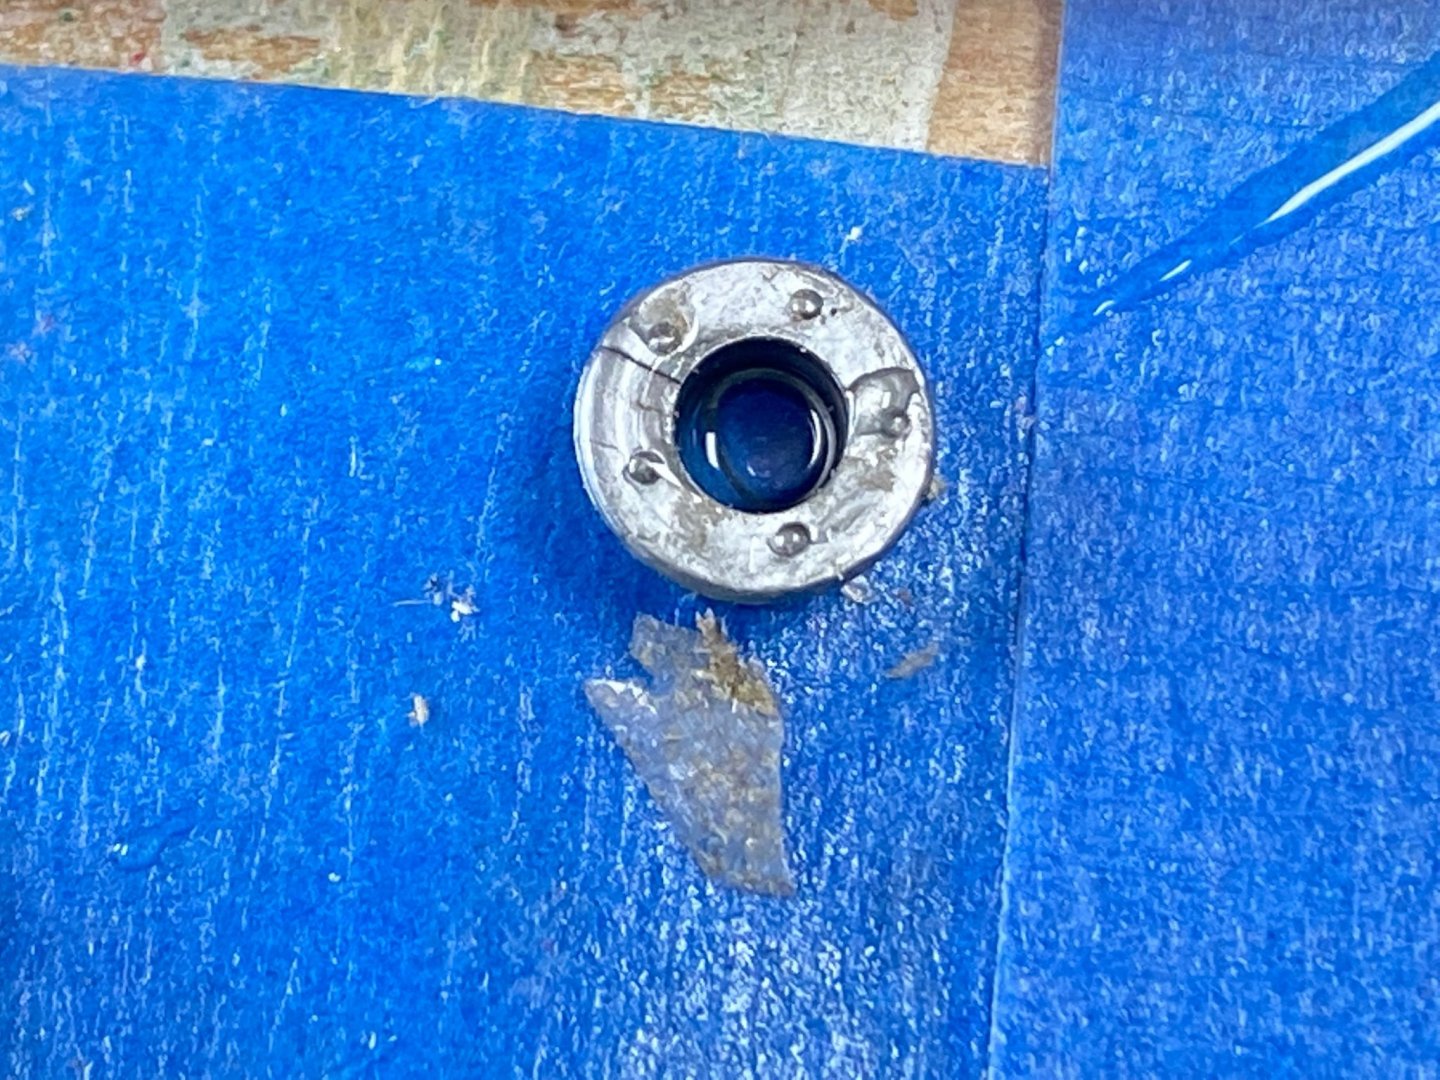
After I dry fitted some of my commercial scale portholes (See Post #52) I found them to look a little out of scale. The plans I have shown only a thin outline of a frame not a full flange. I used brass tubing and cut sections a little longer than the diameter to assist in getting through the hole in the hull in a straight way. This tip was taken from Wefalk's fantastic Wespe. I then made a jig to allow me to polish the edge of the tiny cylinder. Setting the rings on the sticky side of masking tape, I filled them with clear gorilla. The results were amazing as you can see in the jig and in the section of the plans.
-
Great work Sea Hoss.
-
Again my that goes down to you. I am learning a lot from you and admire your craftsmanship.
-
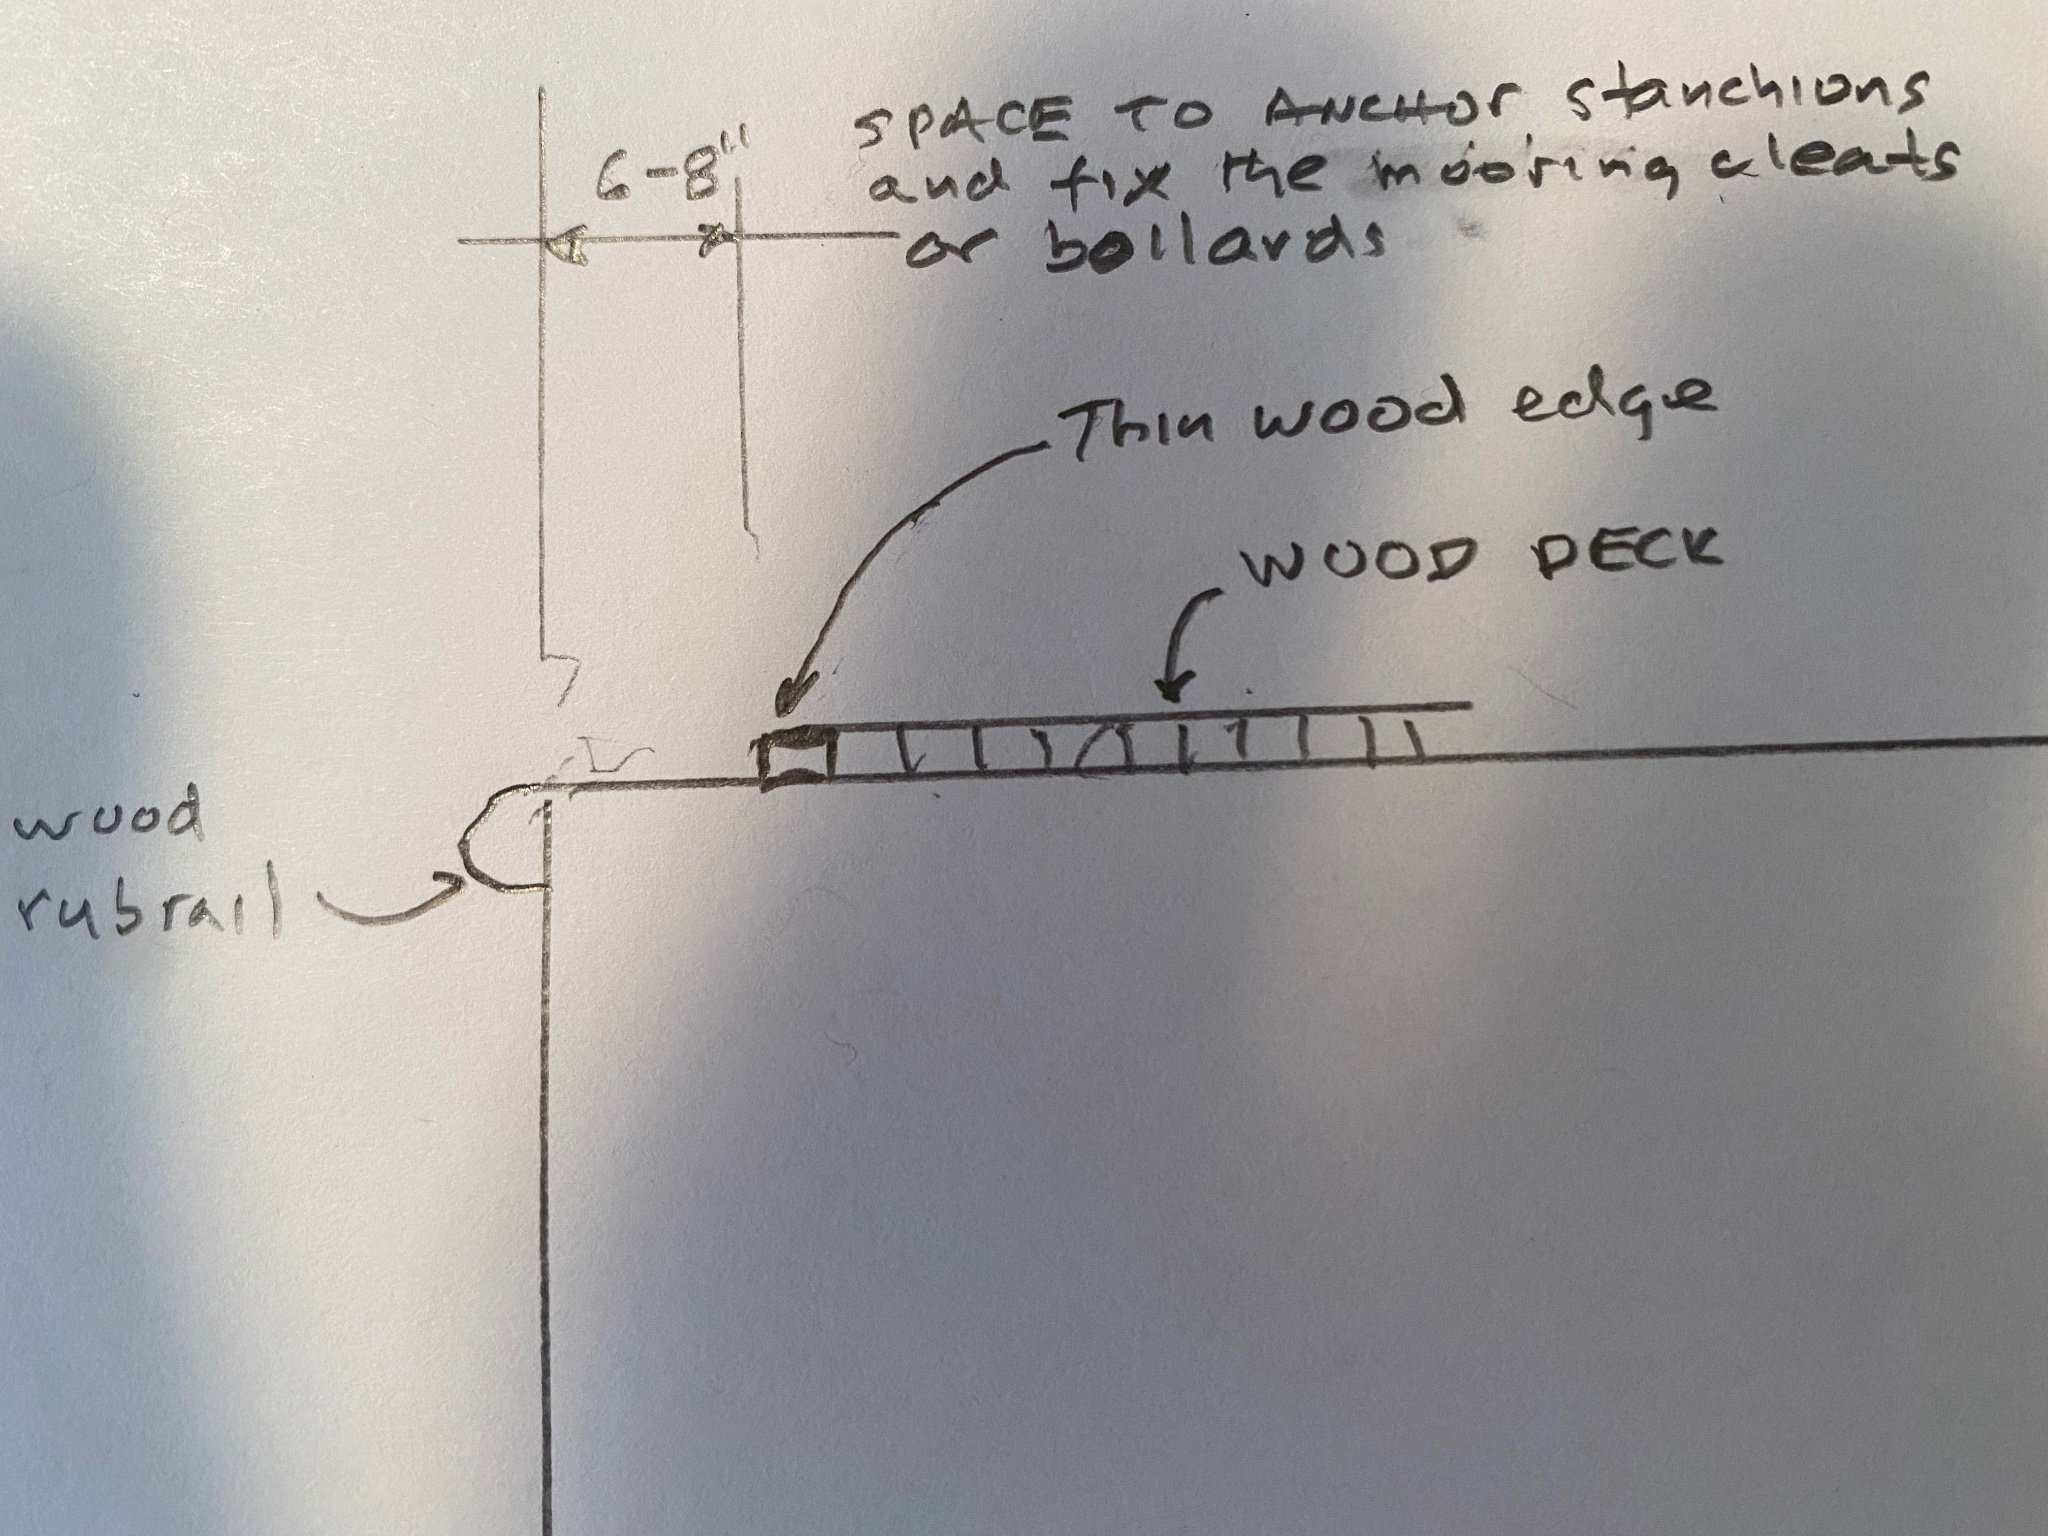
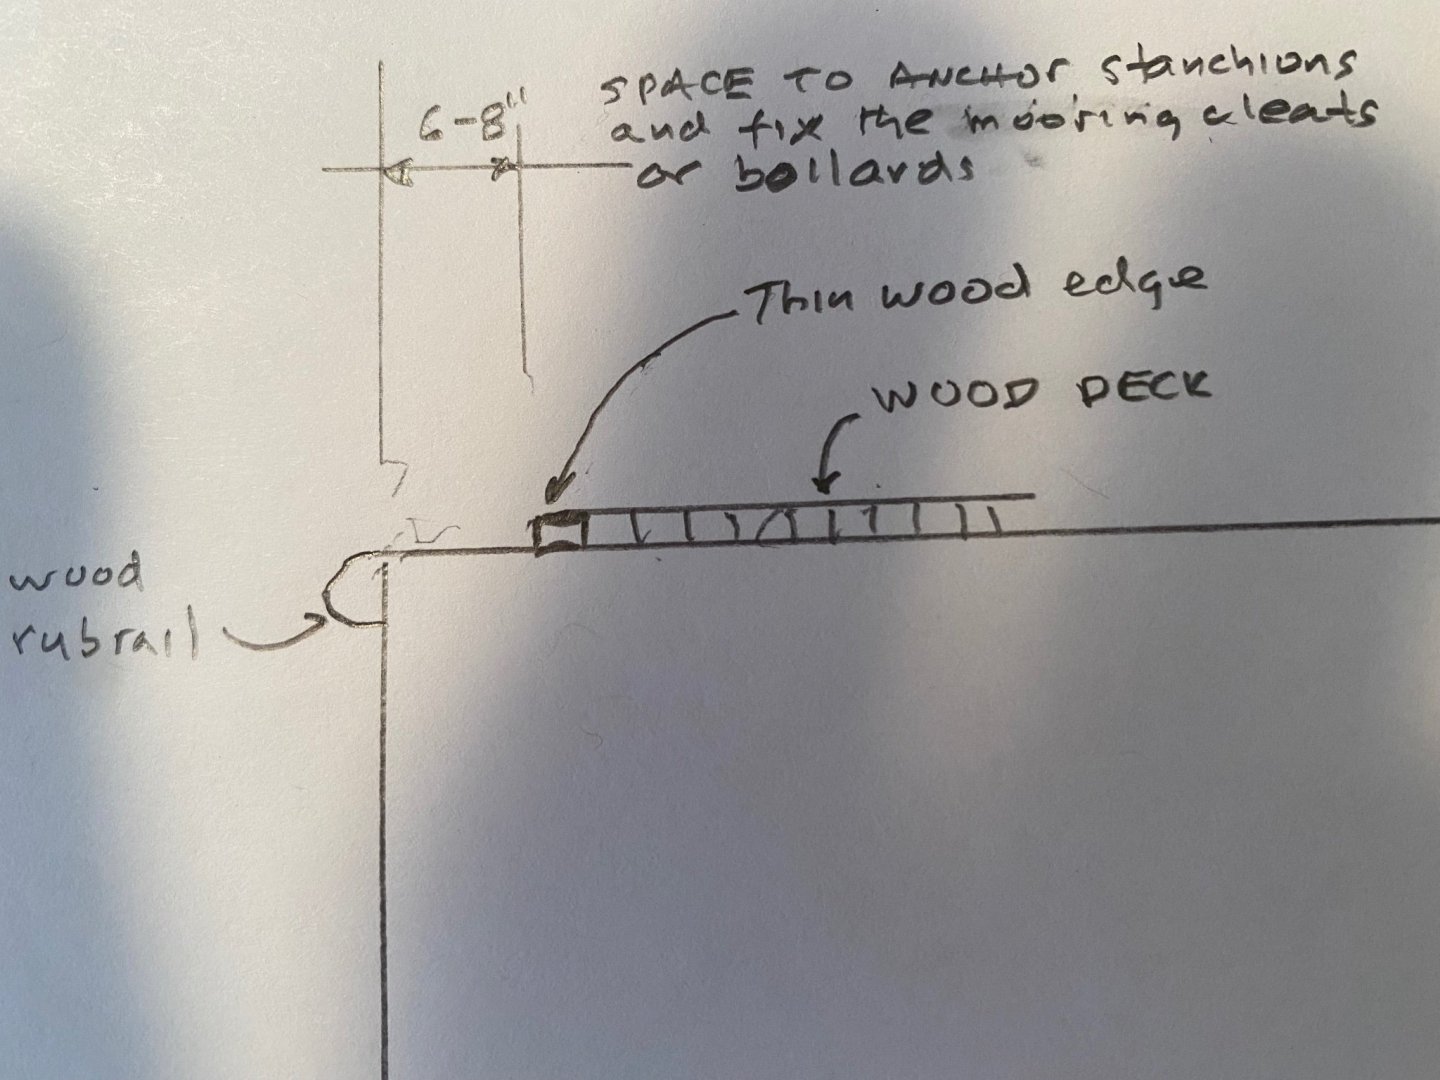
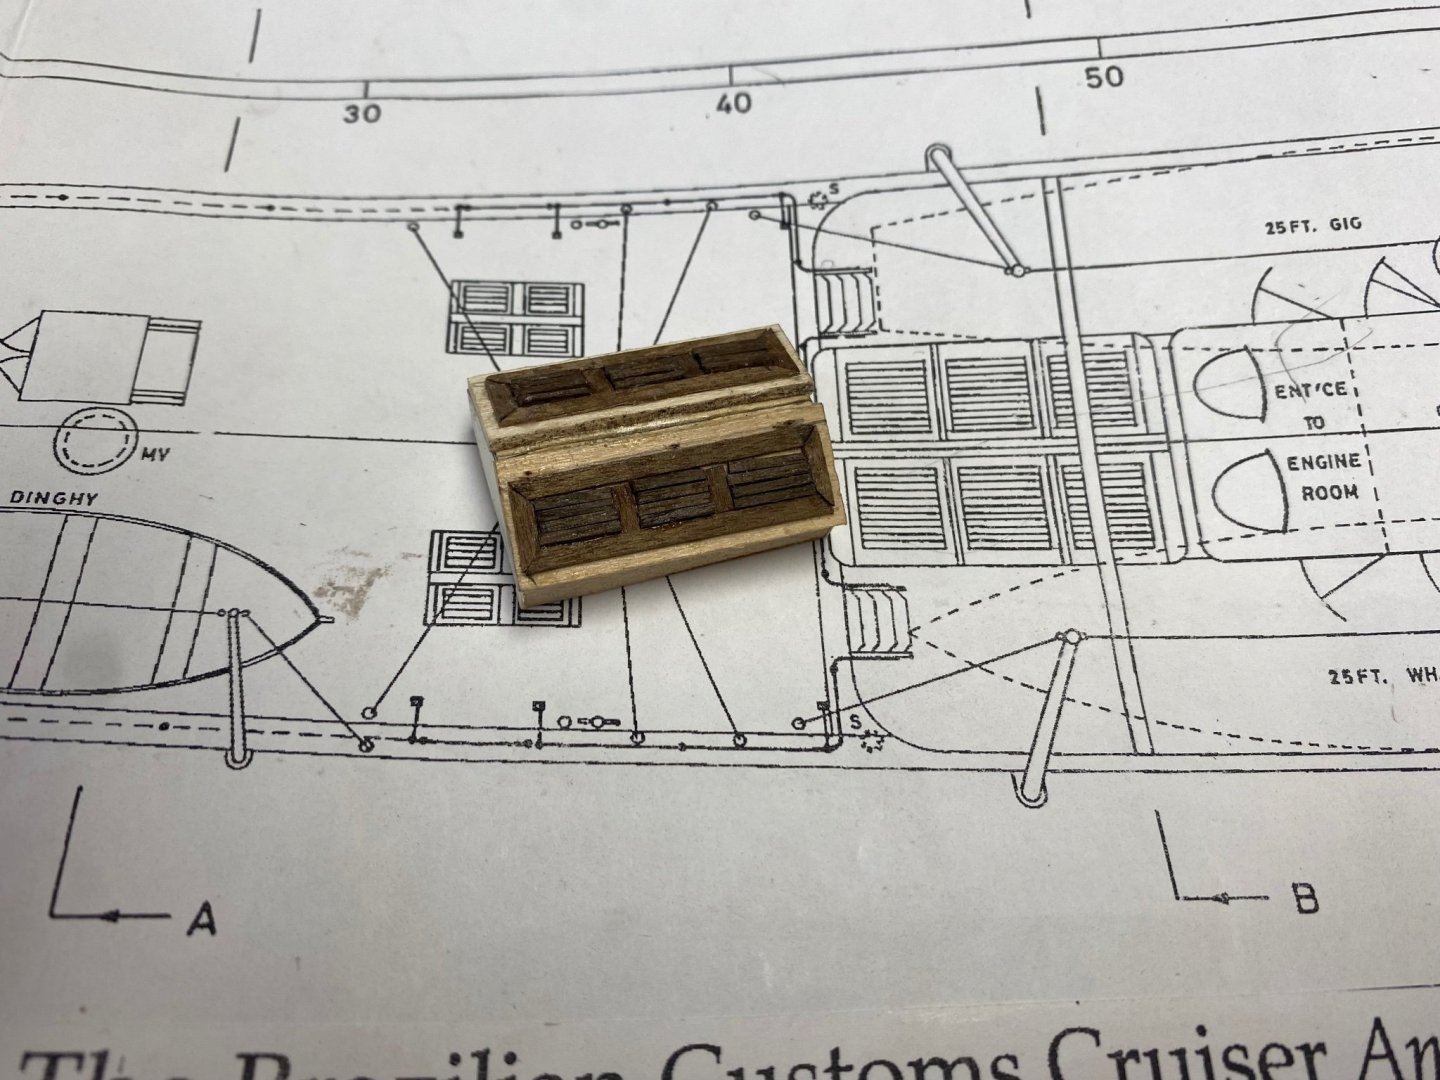
Wefalck thanks a lot for your reply to my inquiry regarding the wood decks on steel hulls. You knowledge is amazing and you are my "to go guy" for information. The following sketch shows what I decided to do. In the plans they show the mooring bollards and chokes at the edge of the deck and I figured that they will be more secure bolted to the steel deck rather that to the wood deck. Also at this scale I am using 3mm wide planks and will use a thin waterway to protect the edges of the planks. The sketch shows my plan. I plan to use an appropriate coaming around all the other structures on deck such as companionways so that they don't looks sitting directly on the wood deck. Also decided to paint the wetted surfaces in black. Could have been red but, with the grey hull, it looked kind of loud. Next I tried to replicate the skylights at the engine room roof. Now a look at the boiler casing the galley and engine room access installed in the lower deck midships. Lots of work still to complete but I am enjoying the journey.

-
I went back to your build to gather more information about the ships of this era. My Amapá is growing and I always learn something when looking at your outstanding micro scale workmanship. Still amazed and learning new things about this era of shipbuilding every minute.
-
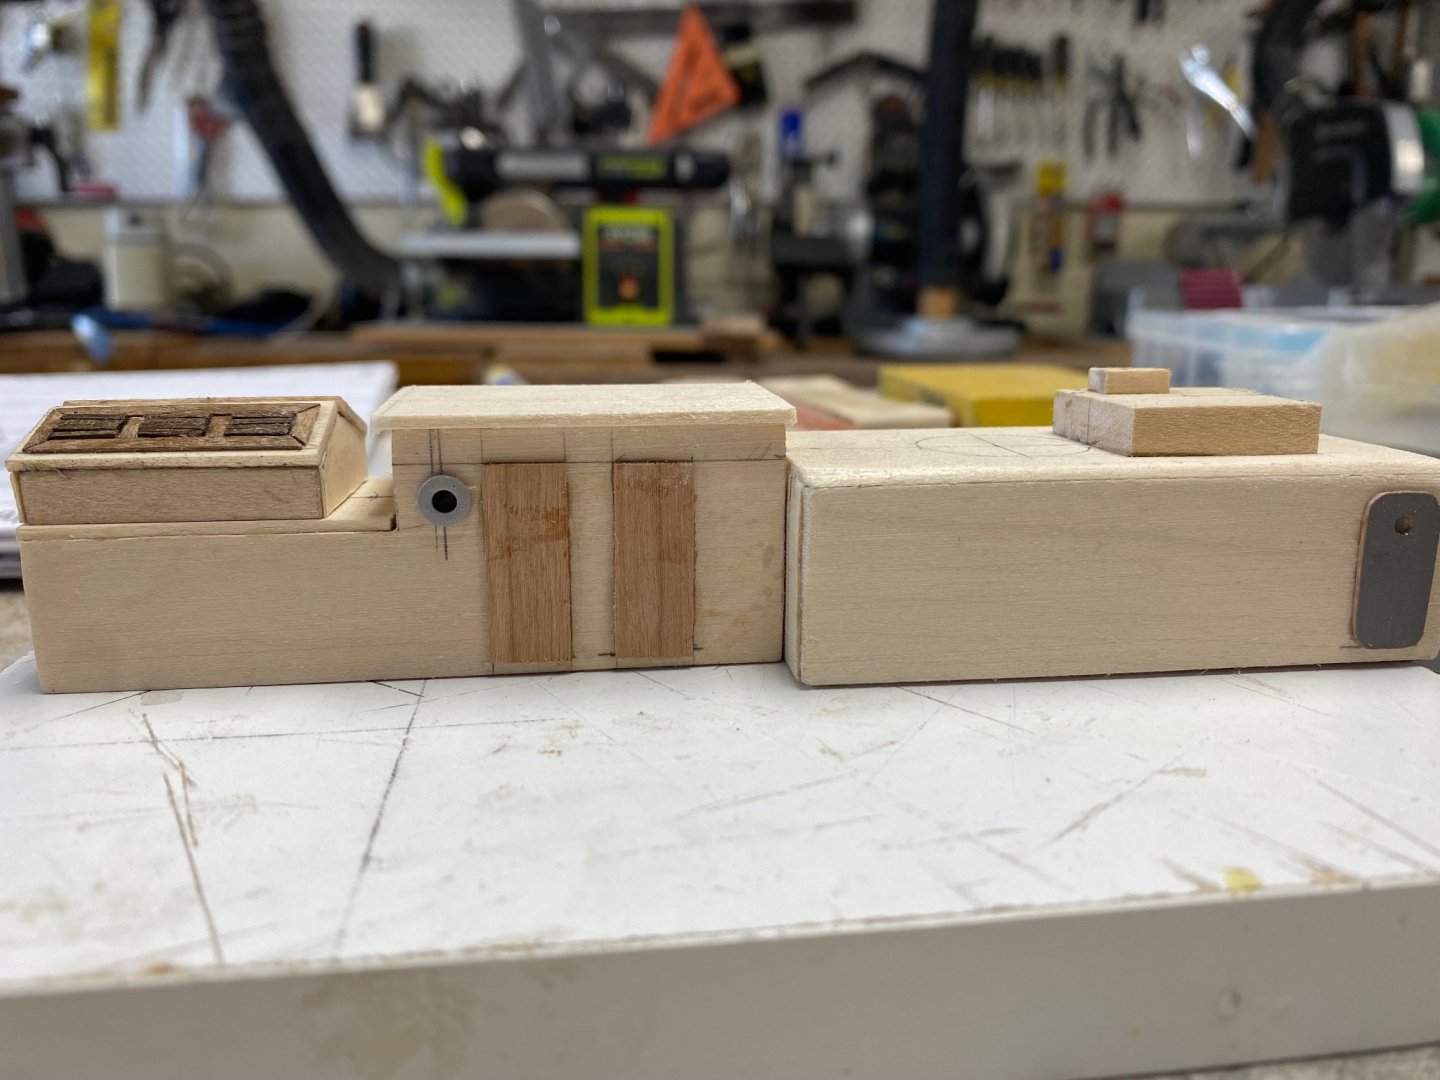
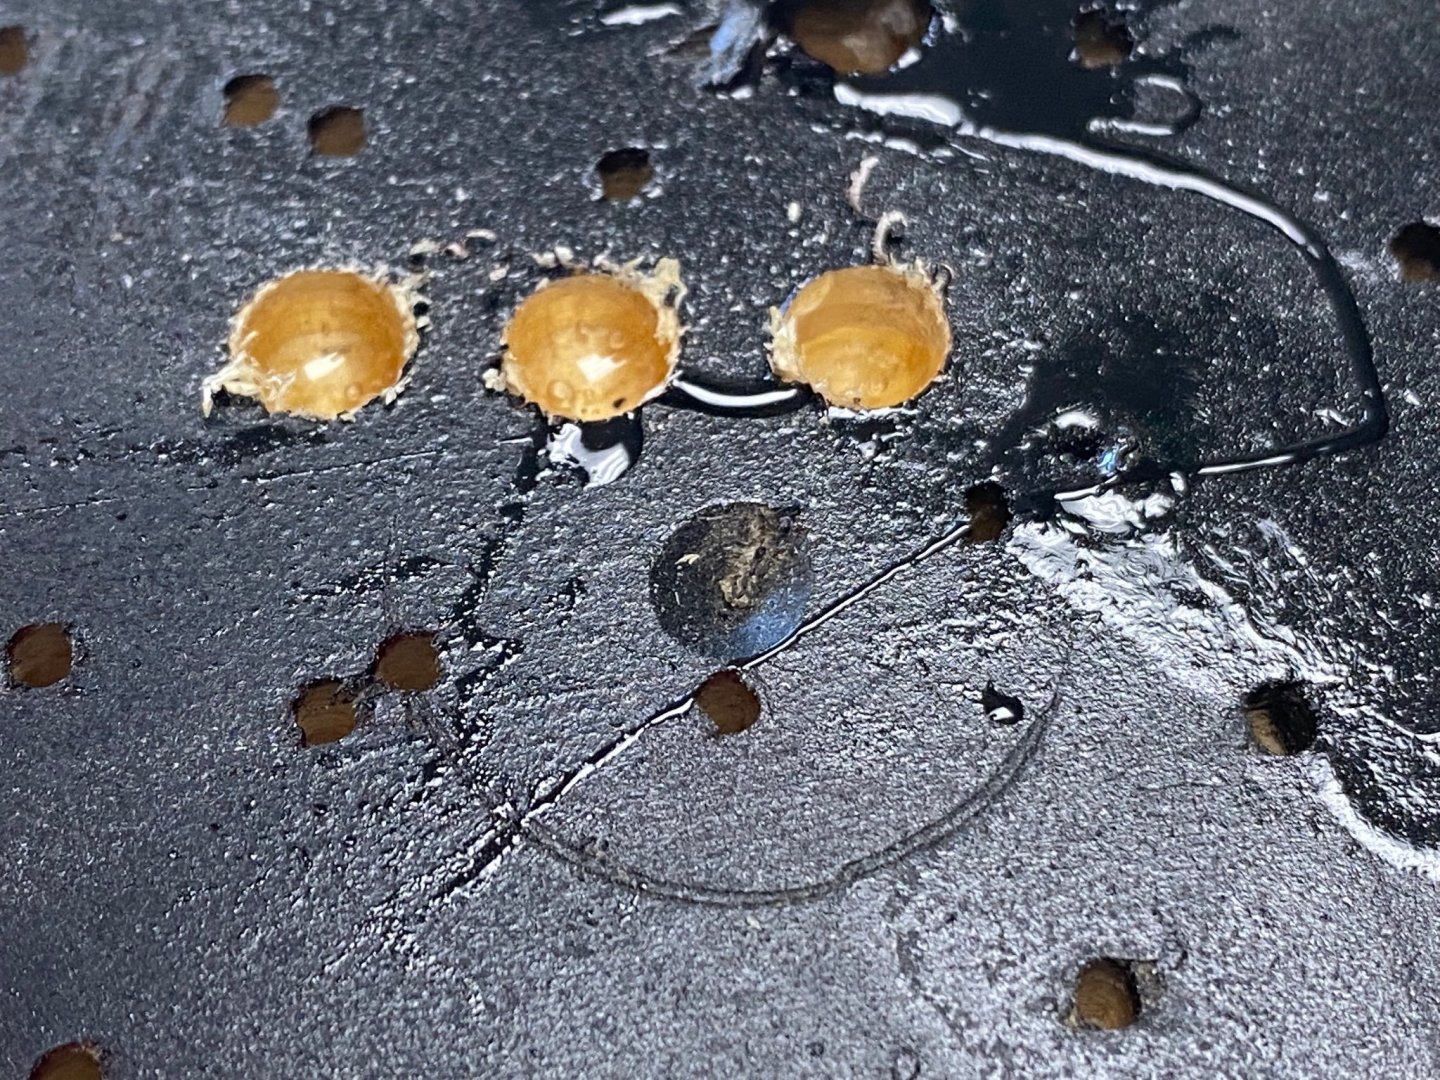
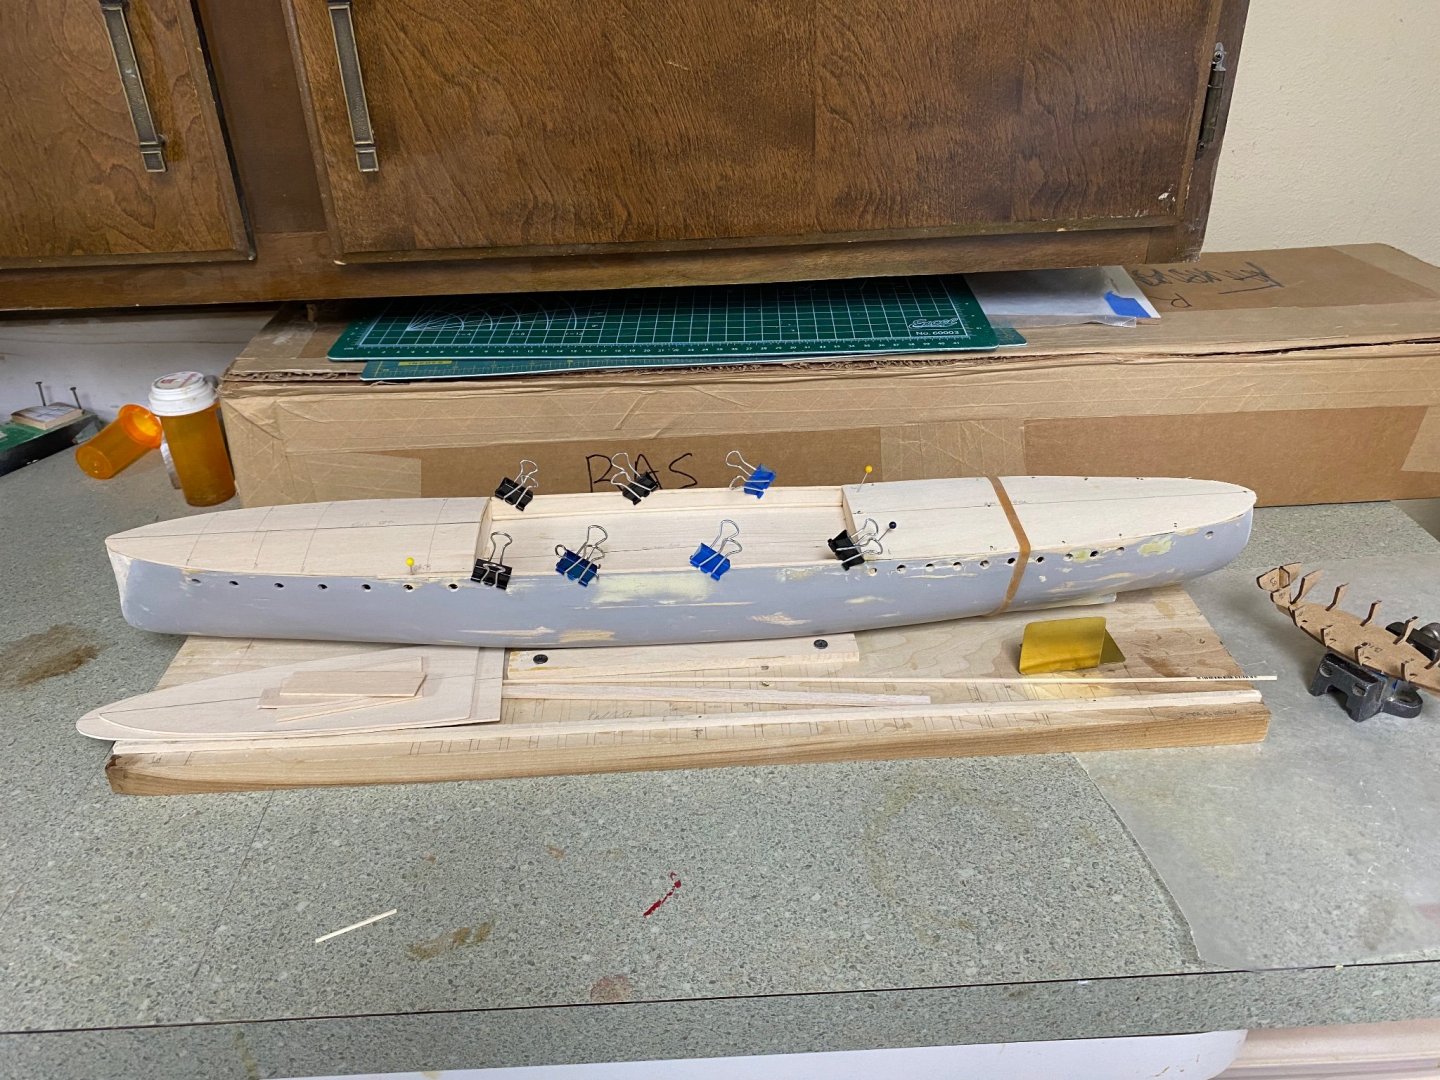
Success. The experiment with the Gorilla glue worked as you can see in the photo. I intend to use these scale portholes on the model. Slow progress on the hull. I think that I am being stubbornly obsessed with perfecting the hull surface. I am going to take it as it is now and proceed with the rest of the build. This is the beginning of the superstructure. I do have a question for the forum about the deck planking. This ship has a metal hull but specified wood planking on the three decks. My question is how close to the edge of the hull should I place the waterway? Do I need space to place fittings such as stanchions, bollards, etc. directly to the steel deck? And finally, how about things like the gun or the winch, should they be anchored directly to the steel deck and the wood decking be worked around these bases? Your comments will be appreciated.

-
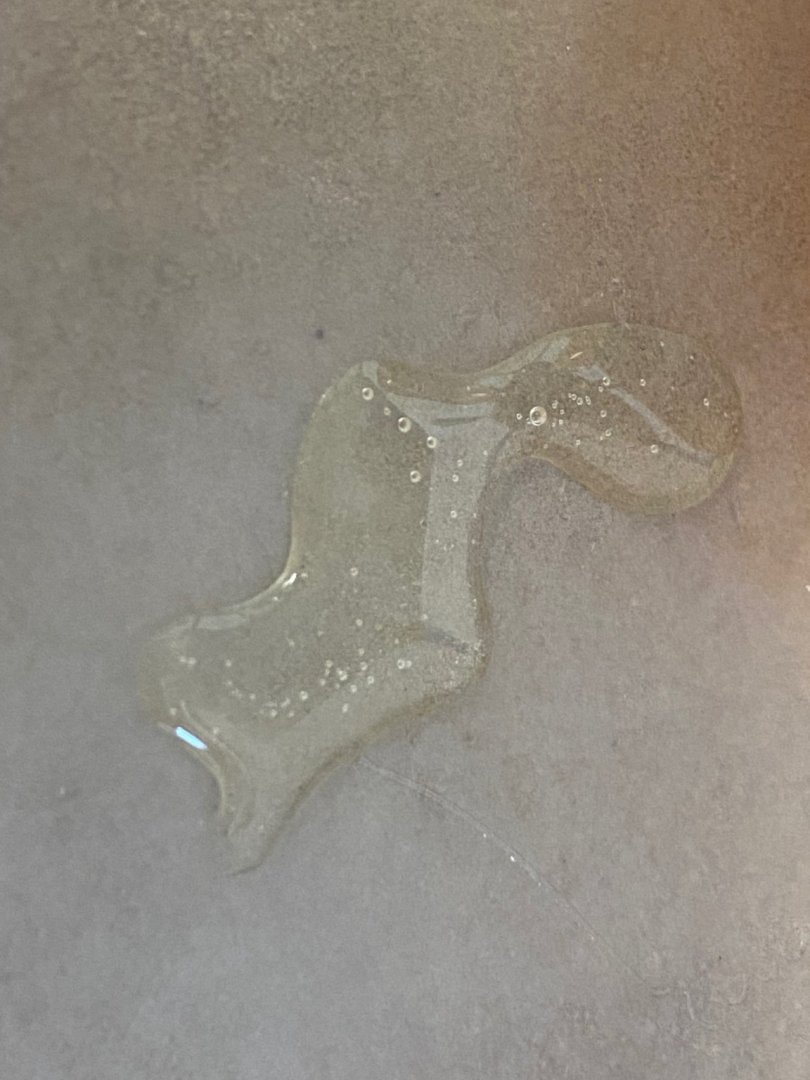
Thanks, Roger and Mark for your comments. I thought of using a hand drill but what I have are very small pin drills. The portholes are 1/8" diameter. Roger's idea of a cutter made from brass tubing looks promising and I will be trying it. Today I did an experiment for glassing up the portholes. I drilled 1/8" holes in a piece of wood and filled them with the Gorilla glue. It worked. It dried very clear and shinny. I also dropped some glue over wax paper in the result was a clear and very flexible blob. Next, I will try to fill a couple of portholes and see how they look. I continue the filling and sanding getting ready for the final paint coats. Thanks for following.
-
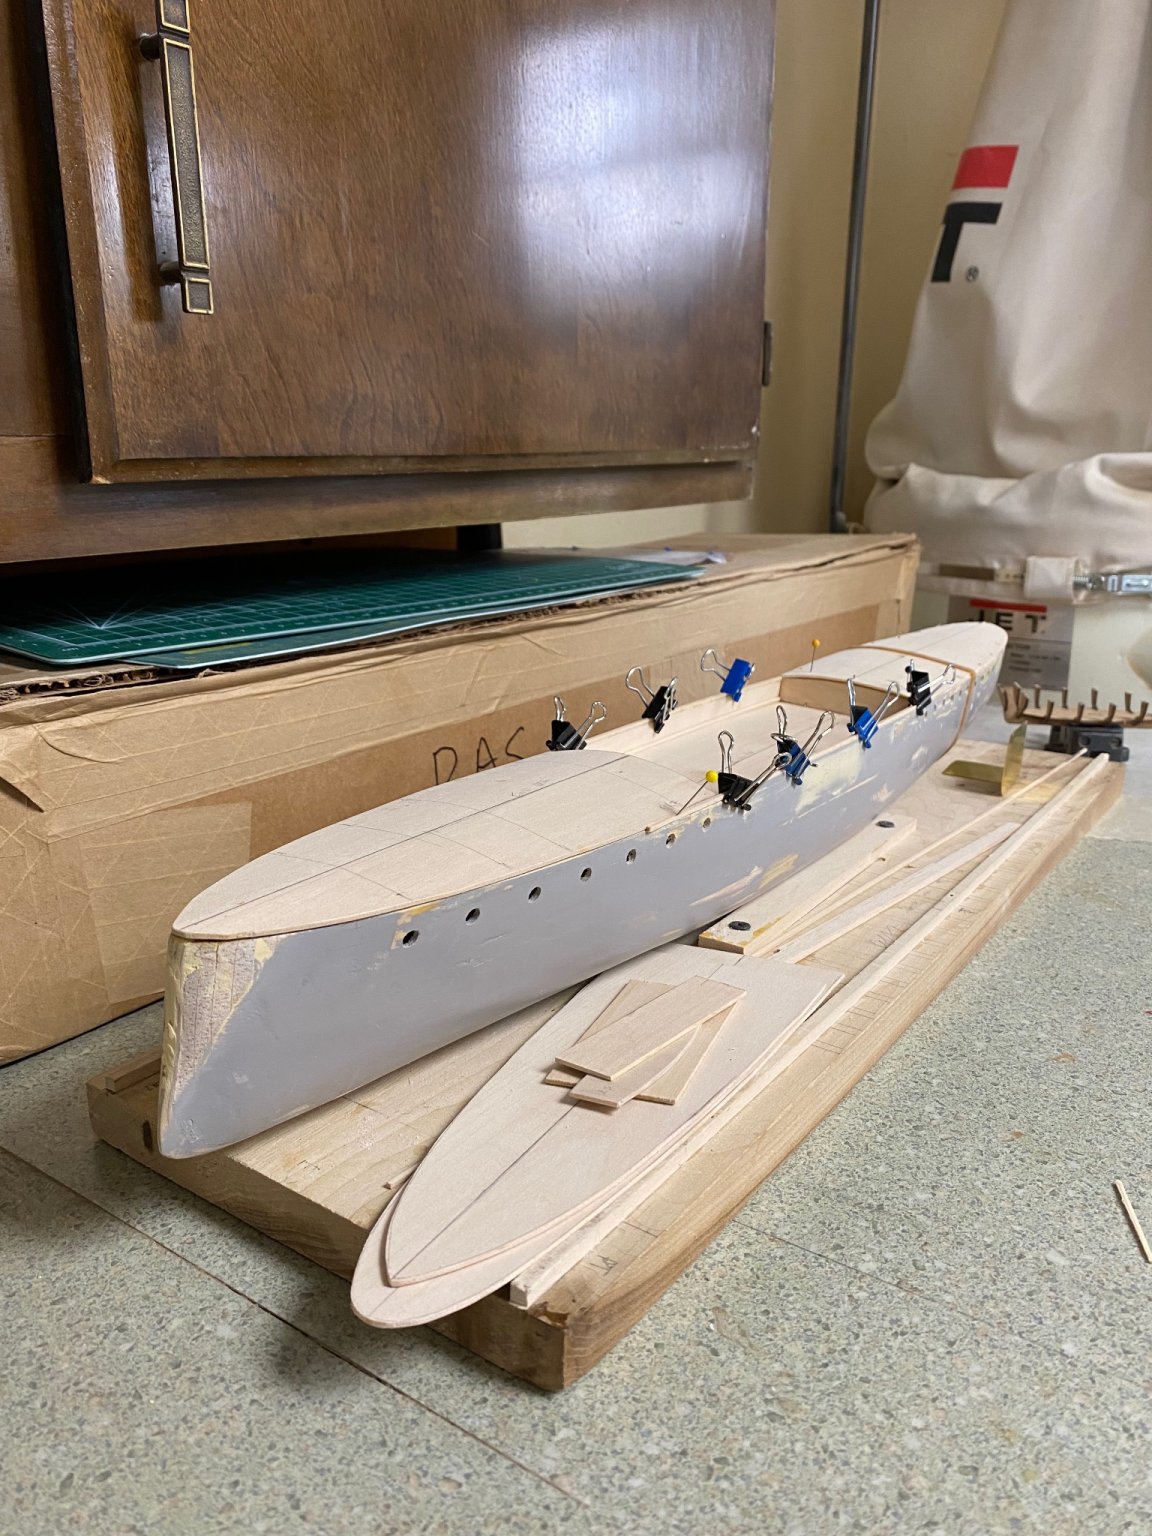
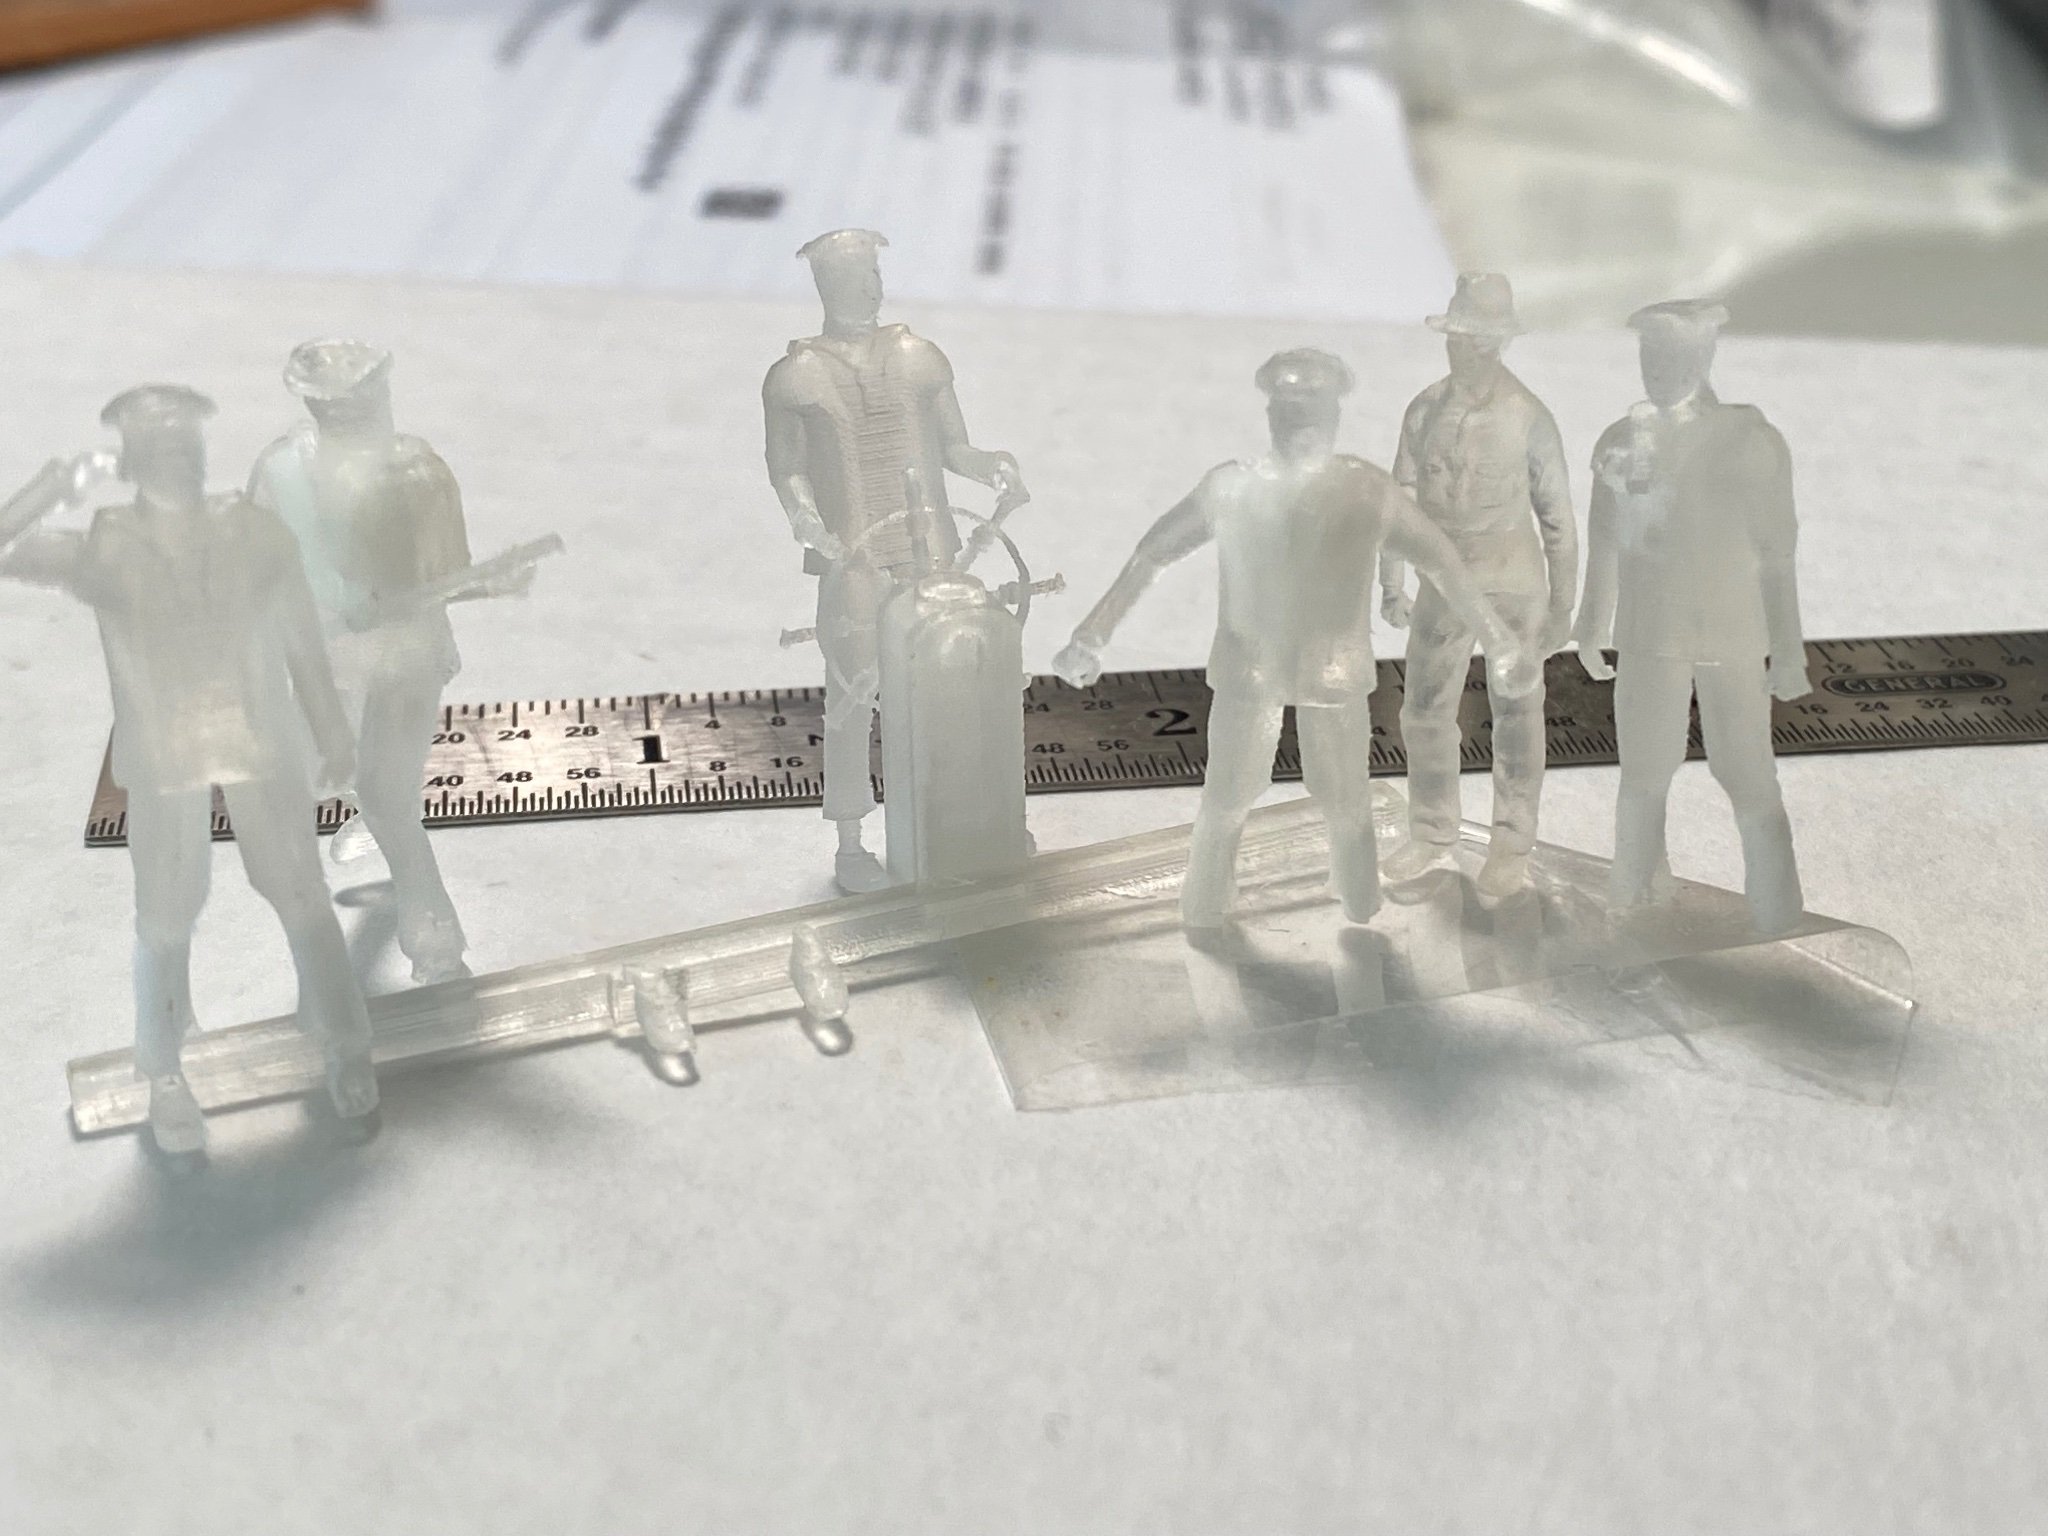
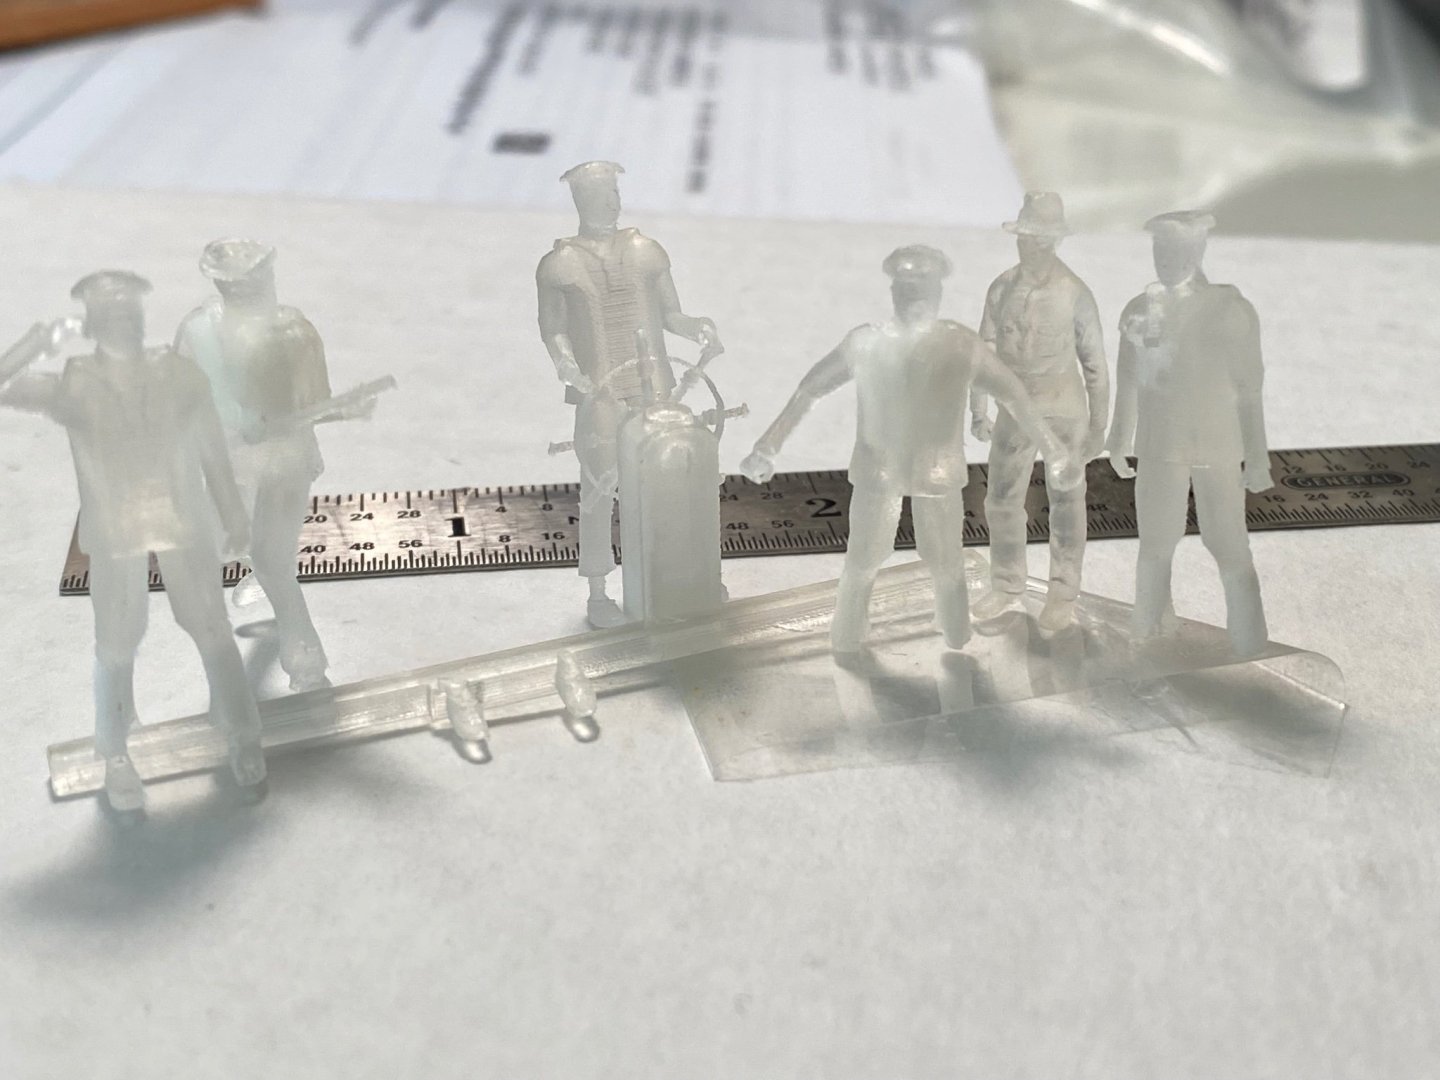
Attached the three decks to the hull and had to do more filling and sanding. While drilling the portholes I had several issues with the drill breaking the thin planking. Looking back (a good thing) I should have reinforced the backside of the planks. The drill was too fast. Today I am doing a little experiment to add glass to the portholes. The other day I noticed that the Clear Gorilla Glue does dry clear. I am thinking about placing a drop of the glue in the holes and, again on the after thought, I need to watch that the glue does not drip down. More thinking ahead. More sanding and filling ahead. Next I will install the bulwark stanchions in the well deck and finish the hull painting with more coats of light grey after which I will paint the wetted surfaces a rusty red. After this, I plan to fabricate the superstructures on the bench and install them after the wood decking is done. One of the reasons I chose to model this particular ship is the amount of detail on its deck which, I will try to reproduce either by fabrication or by using available accessories on-line. A few months ago a friend of mine retired from modeling (suffers from Parkinson's) and gave me his hand tools and boxes of fittings, most of them brass, that will be used on this model. I don't know if this will disqualify me from a "scratch" building experience as I see the original handiwork of most you guys. But I am a practical engineer and, a these small scales, I could not build every piece of the ship. But the gun will be scratch built, in brass, by me for sure. As a matter of fact I would like to make the same gun (a 3 pounder QF gun) at a larger scale with more detail And speaking of accessories, today I received my order from Shapeways for the crew of Amapá. These are incredible detailed 3D printed figures which will require a very little modifications to become my officers, gunners and seamen.


-
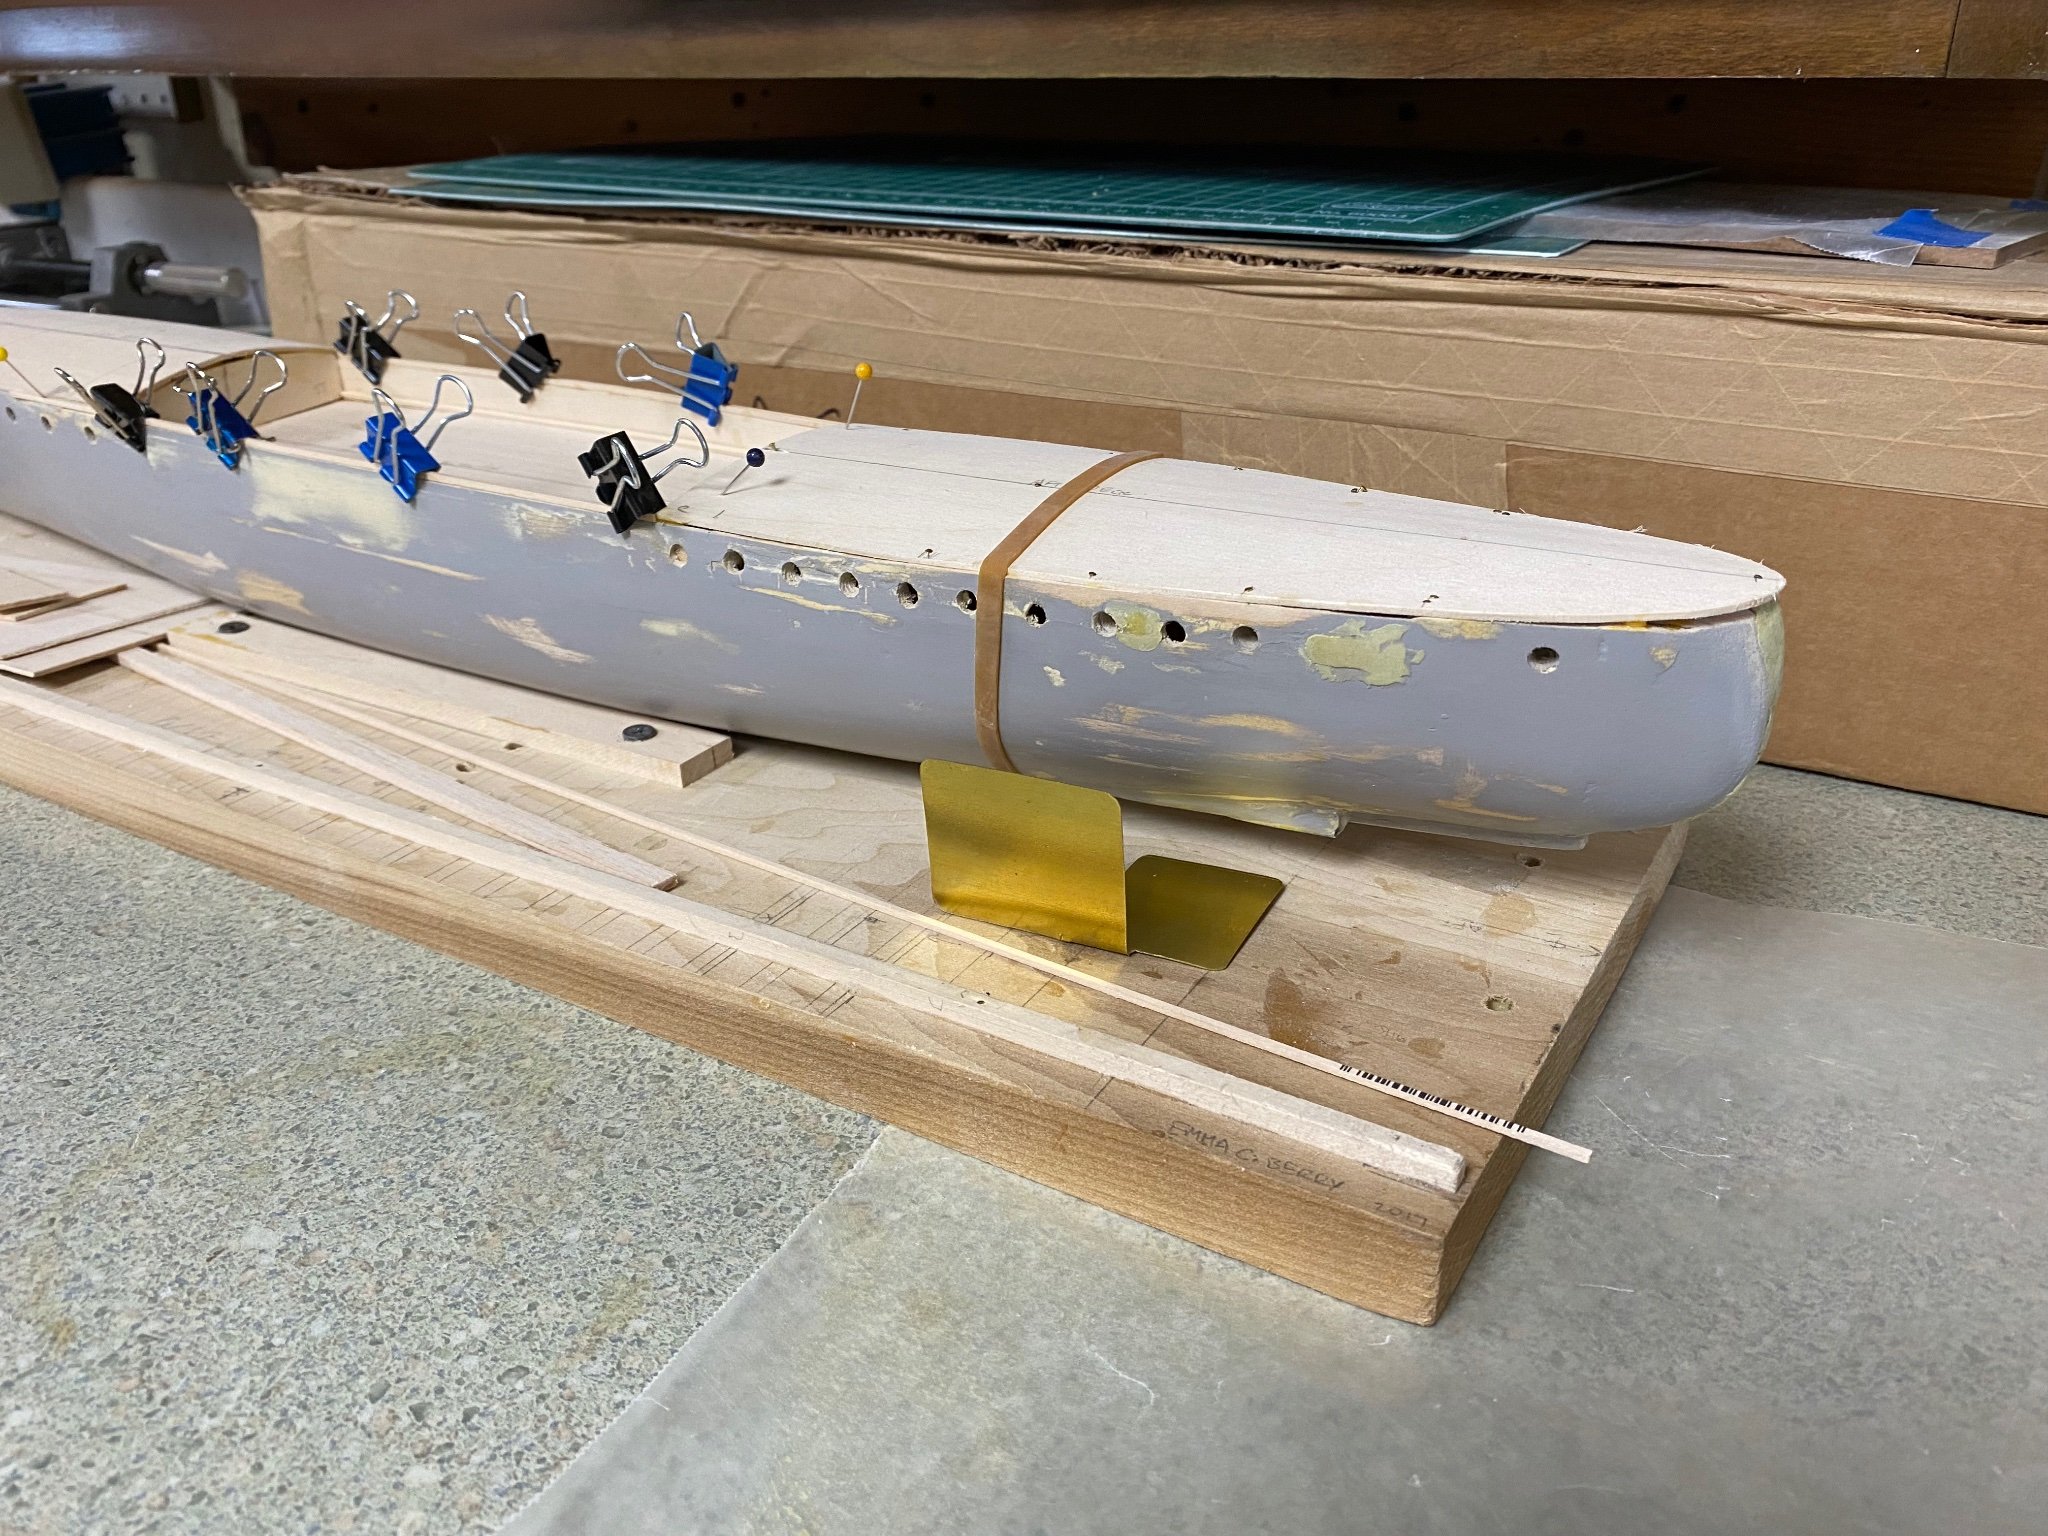
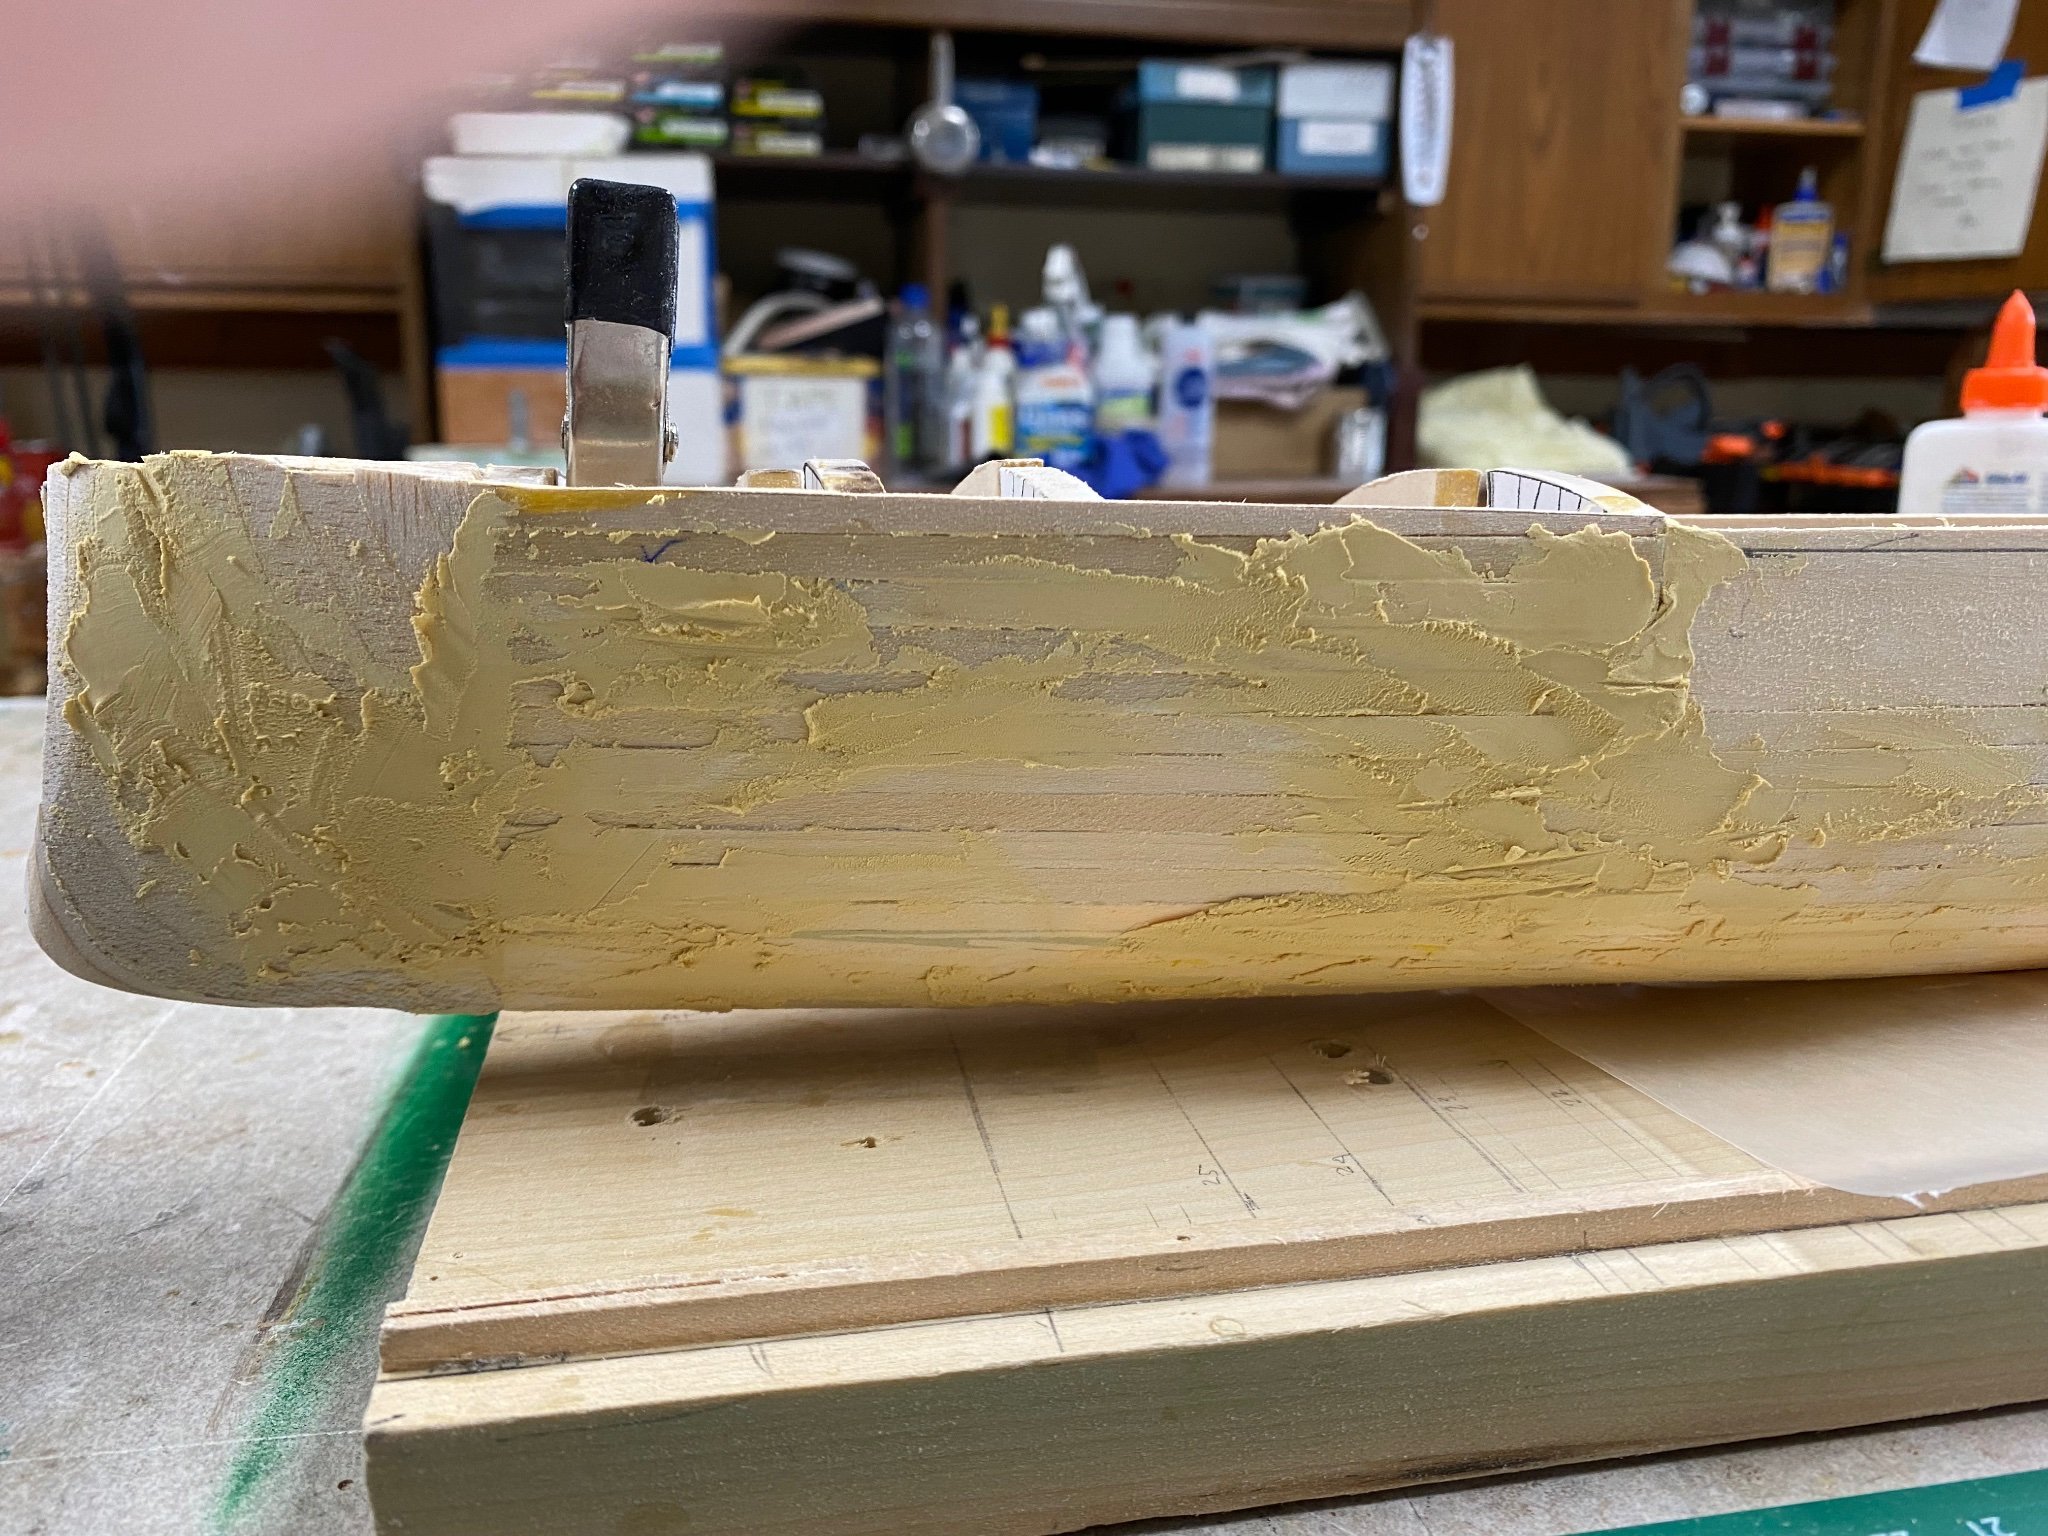
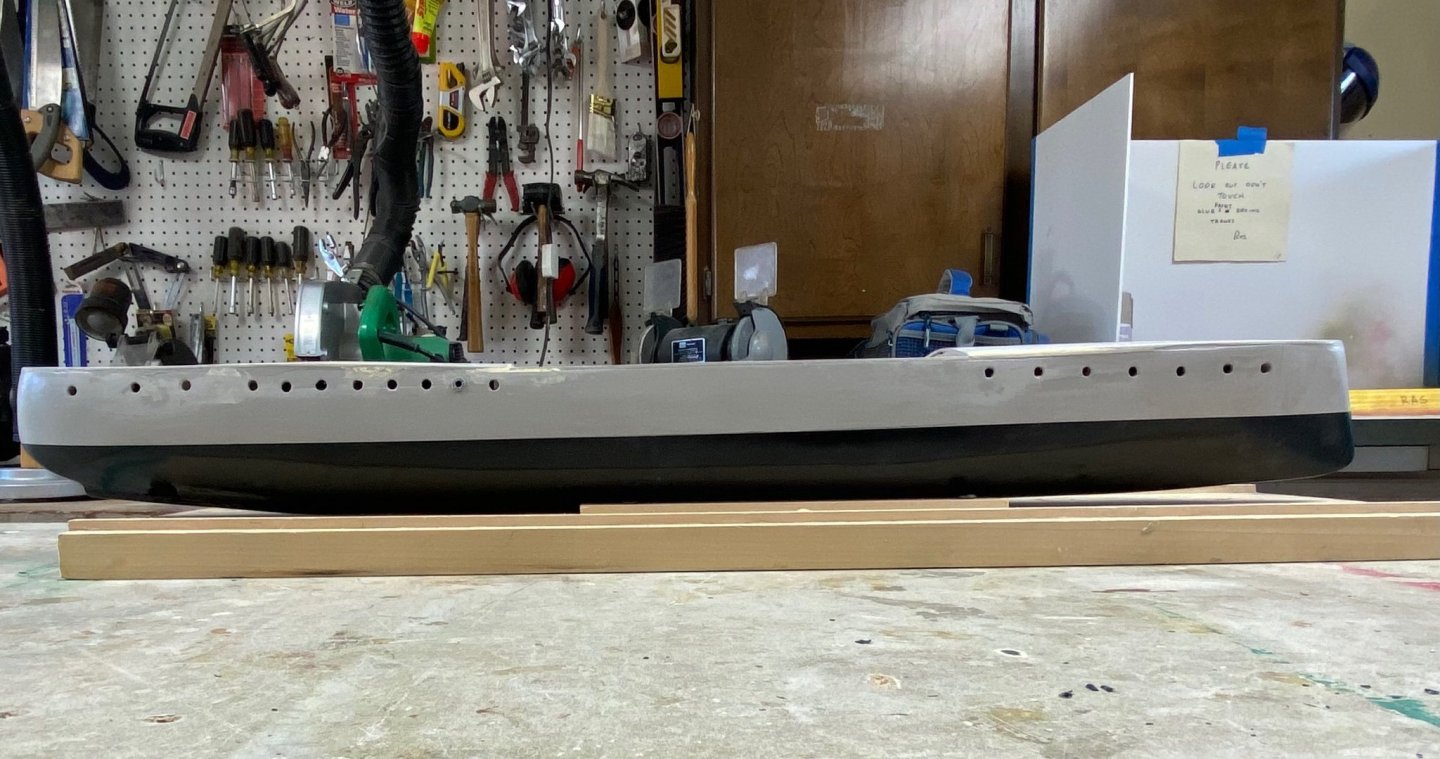
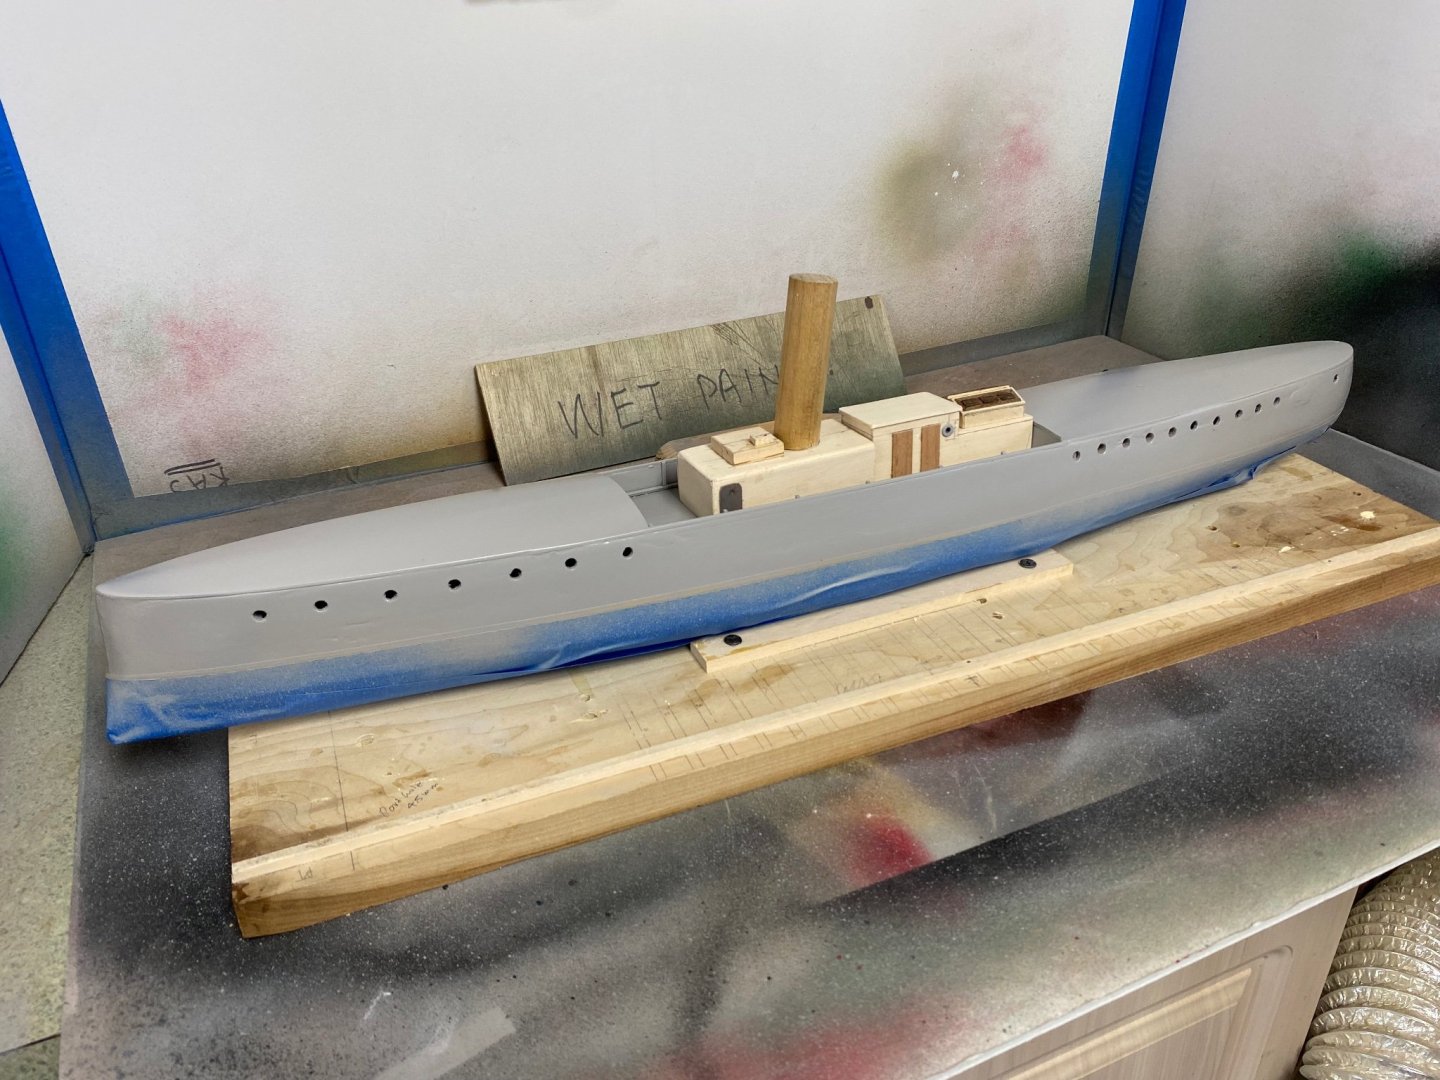
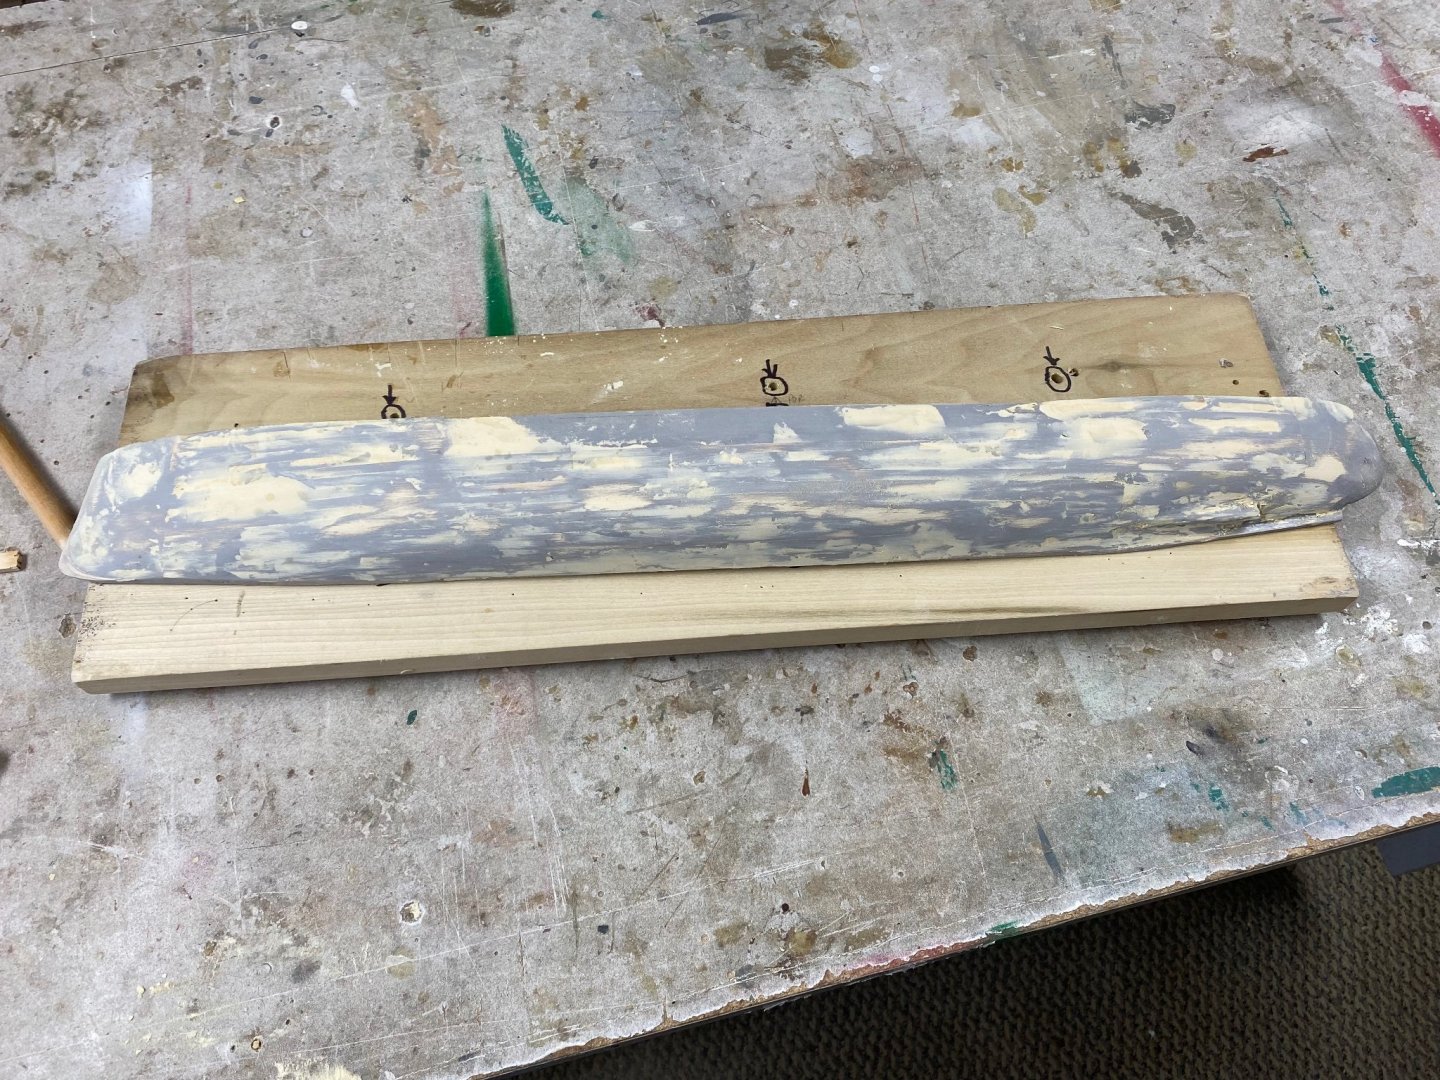
This has taken longer than I thought. My planking mistakes required a lot of sanding and filling. I wanted to obtain the smooth finish that this metal hull requires. Originally I was going to do a paper plating but my trials were not too successful and I went back to the fill and sand routine. This has required numerous layers of sanding, filling and priming. Finally I found that Elmers wood filler can be diluted with water into a paste with which to "paint" the hull. This is working fine but still presents small defects that will probably not be noticed when the whole ship is completed by but that I know they are there. The following photo shows one the filling/sanding stages. Today I finally achieved an acceptable finish and will be ready to join the half hulls. Pictures will be available next week after I finish with drilling the portholes.
-
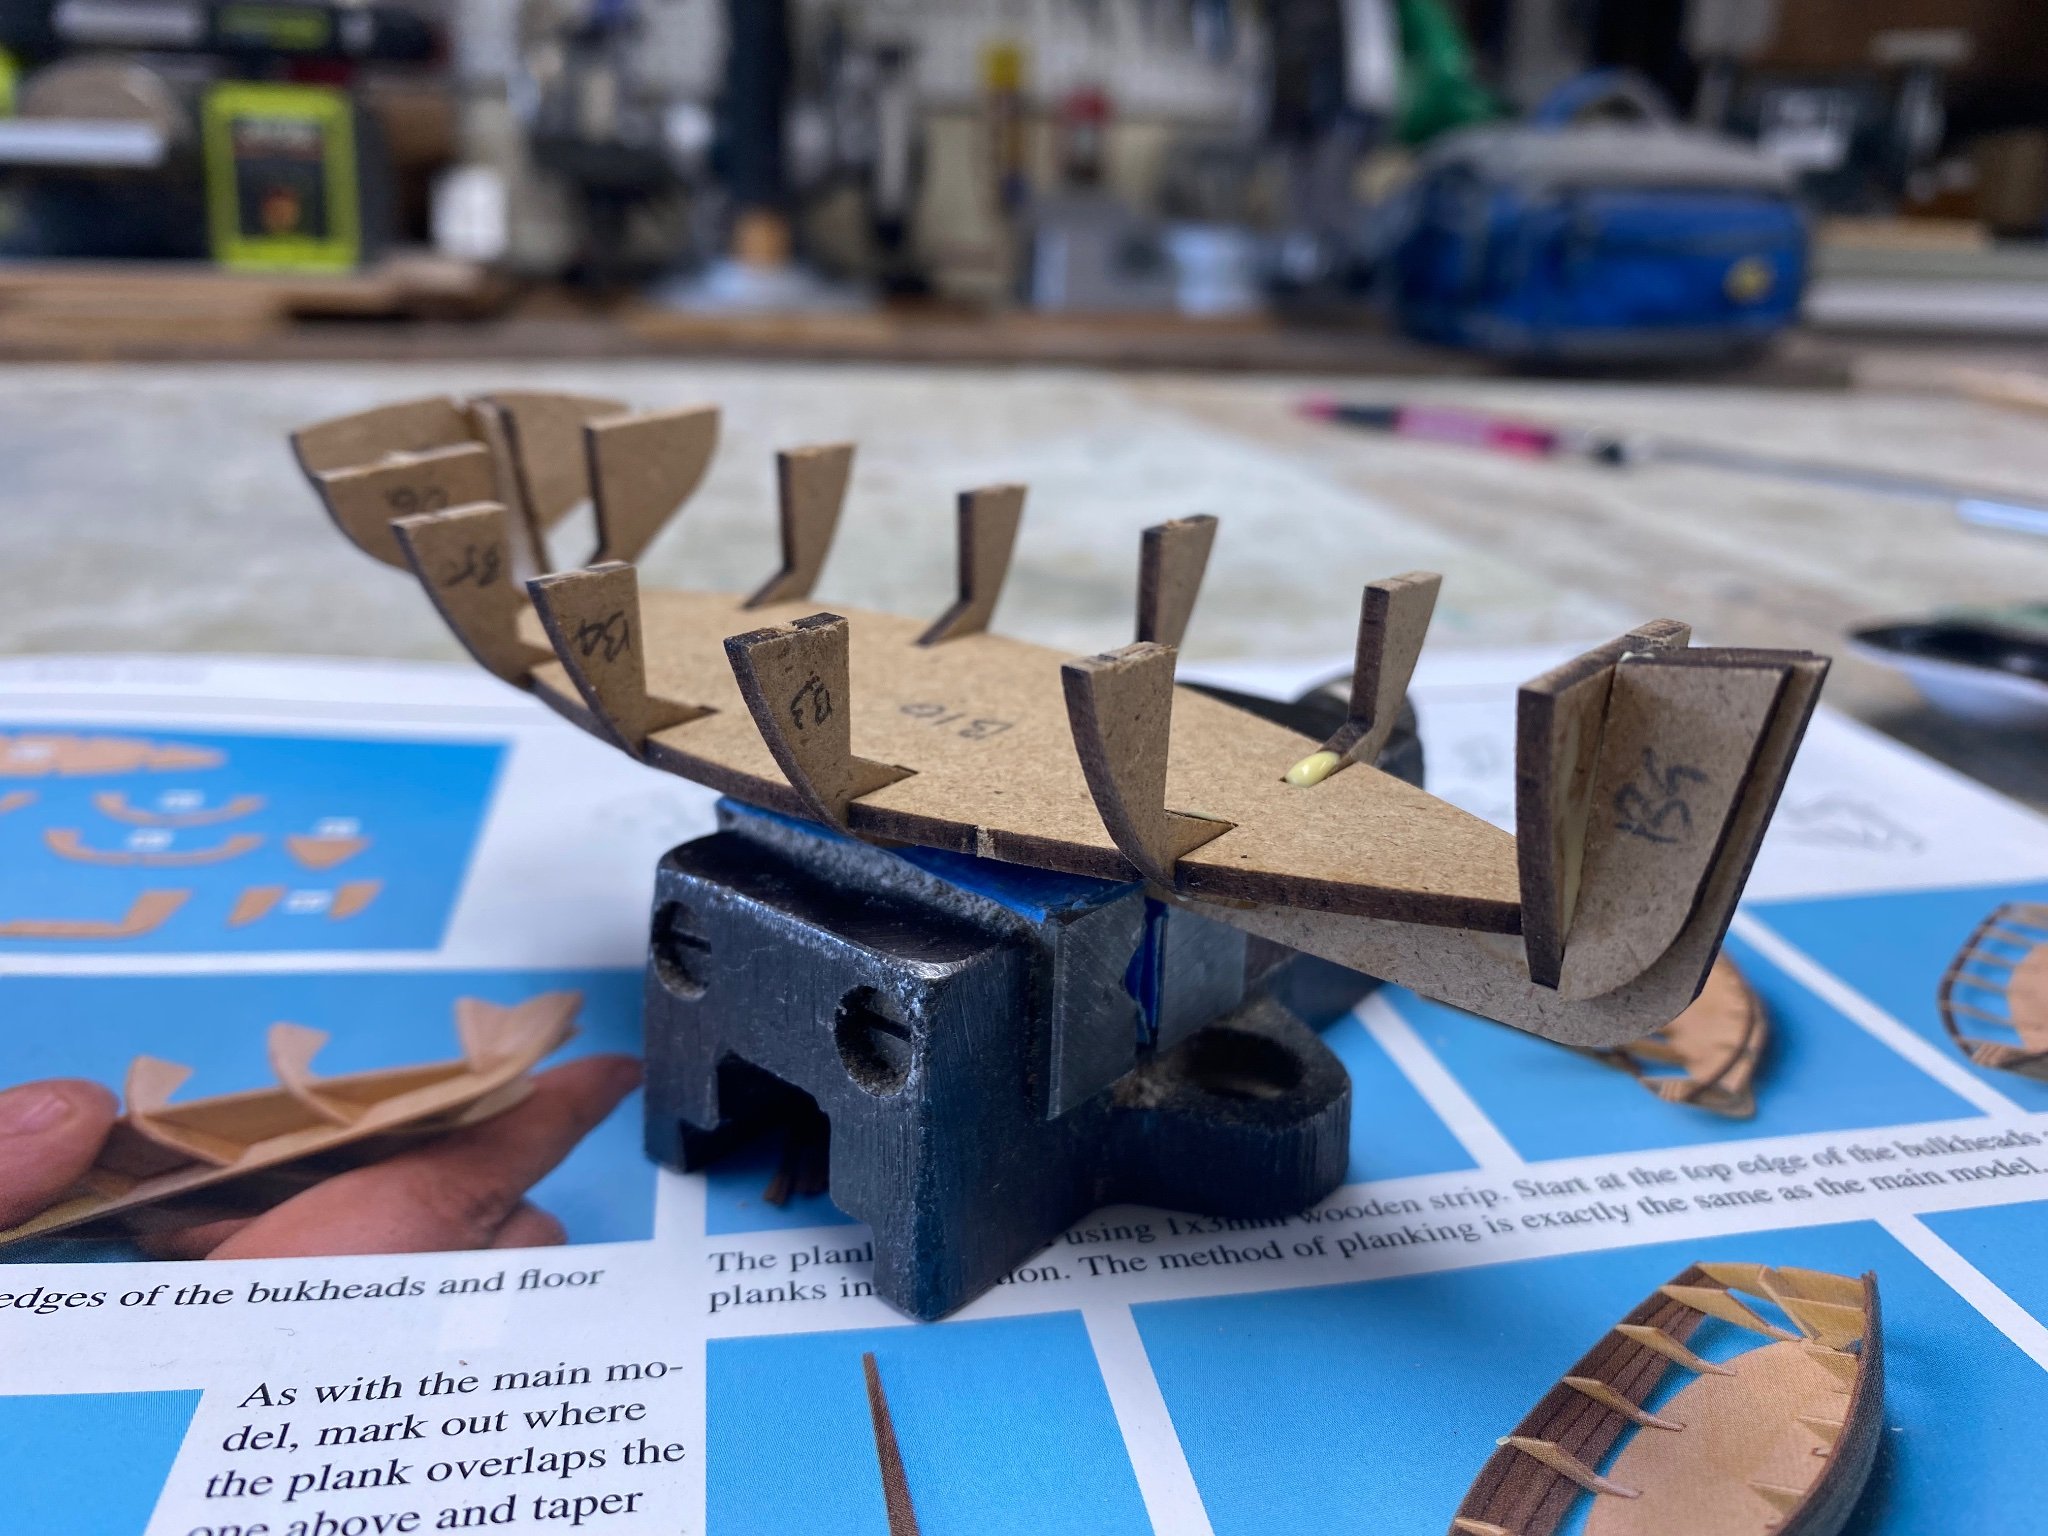
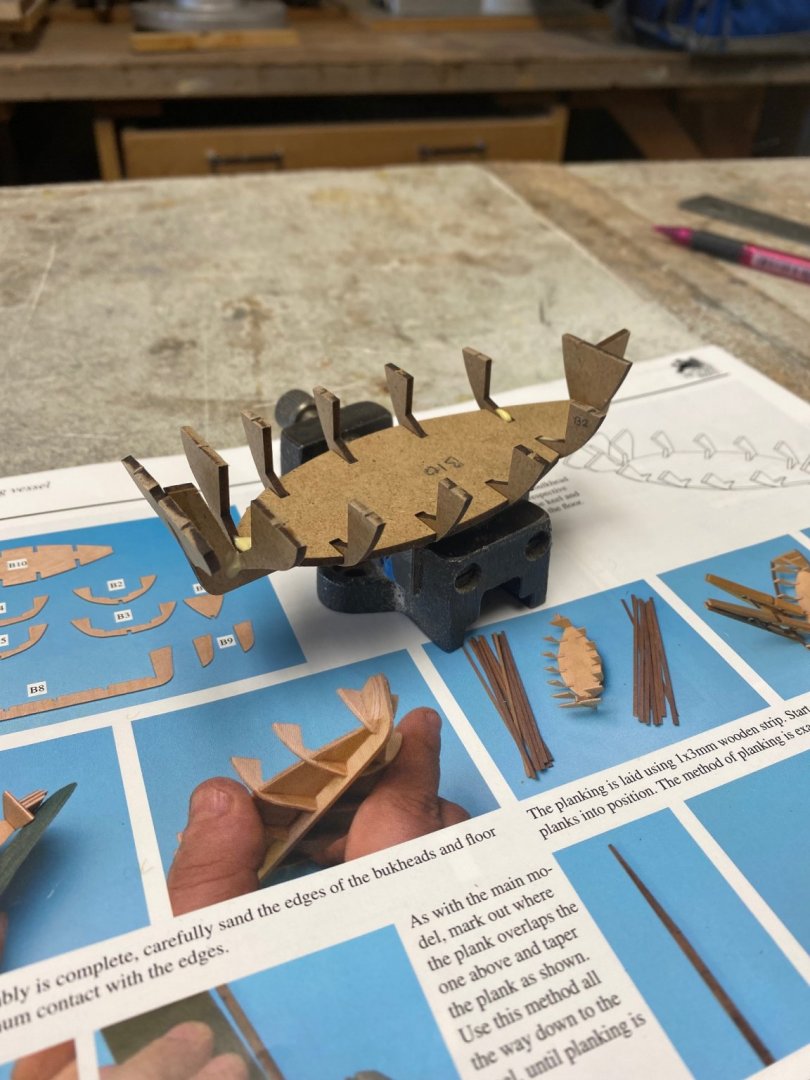
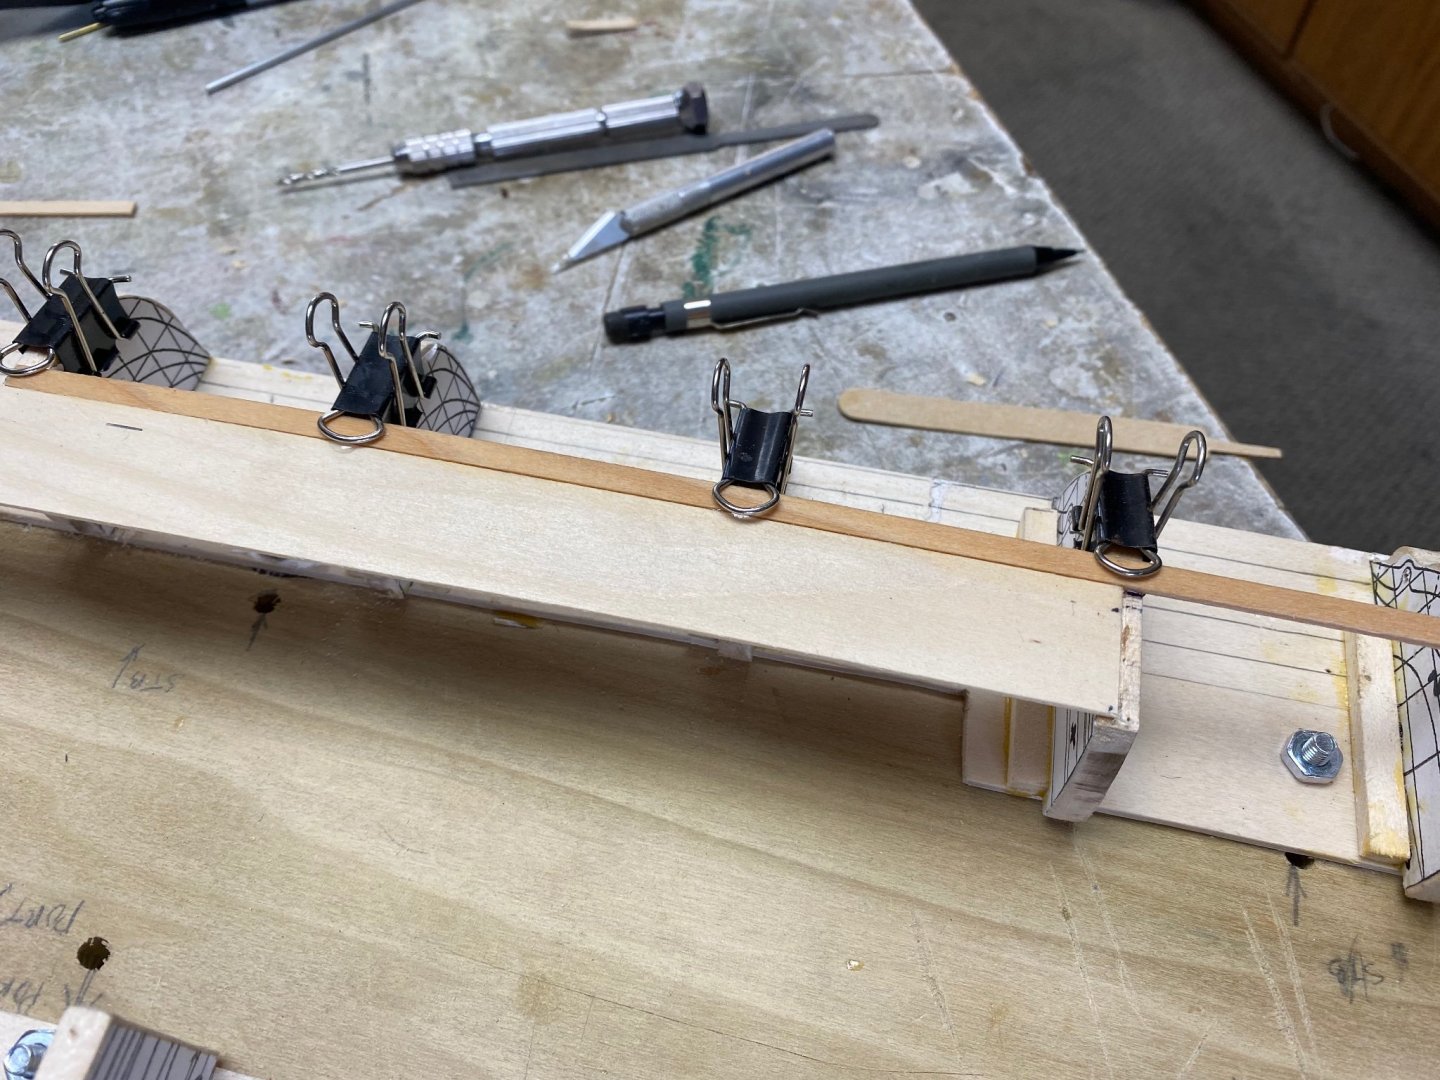
Ras is back. With an almost completed Fifie, I took a leave from this build to address my other project Amapá. I had decided to scratch build Amapá and that, with my now vast experience (???) in planking, it wouldn't take long. I thought that in a couple of weeks I could finish the new hull, take another break and come back to finish Fifie. Was I wrong! This week I finally decided (or rather my wife asked me when I was going to finish Fifie) to come back and tackle the numerous details that I want to add including fixing some damage to my rigging that occur when I moved Fifie from the shop to the apartment. Today I started to assemble the skiff and it looks so cute. I expect that the planking will be a cinch(??). Remember that this skiff is barely 6" long.

-
I agree with the idea of showing a glance at the ships interior. As mush as possible, I have been adding details to the inside of my Fifie such as leaving the companion ways open to show the ladders going below, having the inside of the hold with floor planking and doors in the bulkheads and having the pilot house inside details visible from the windows and the partially opened door. This is in addition to the lot of deck details which will include boxes and crans full of herring. Good job Roge.r
-
Excellent work Roger. Your research has been very informative. Carry on.
-
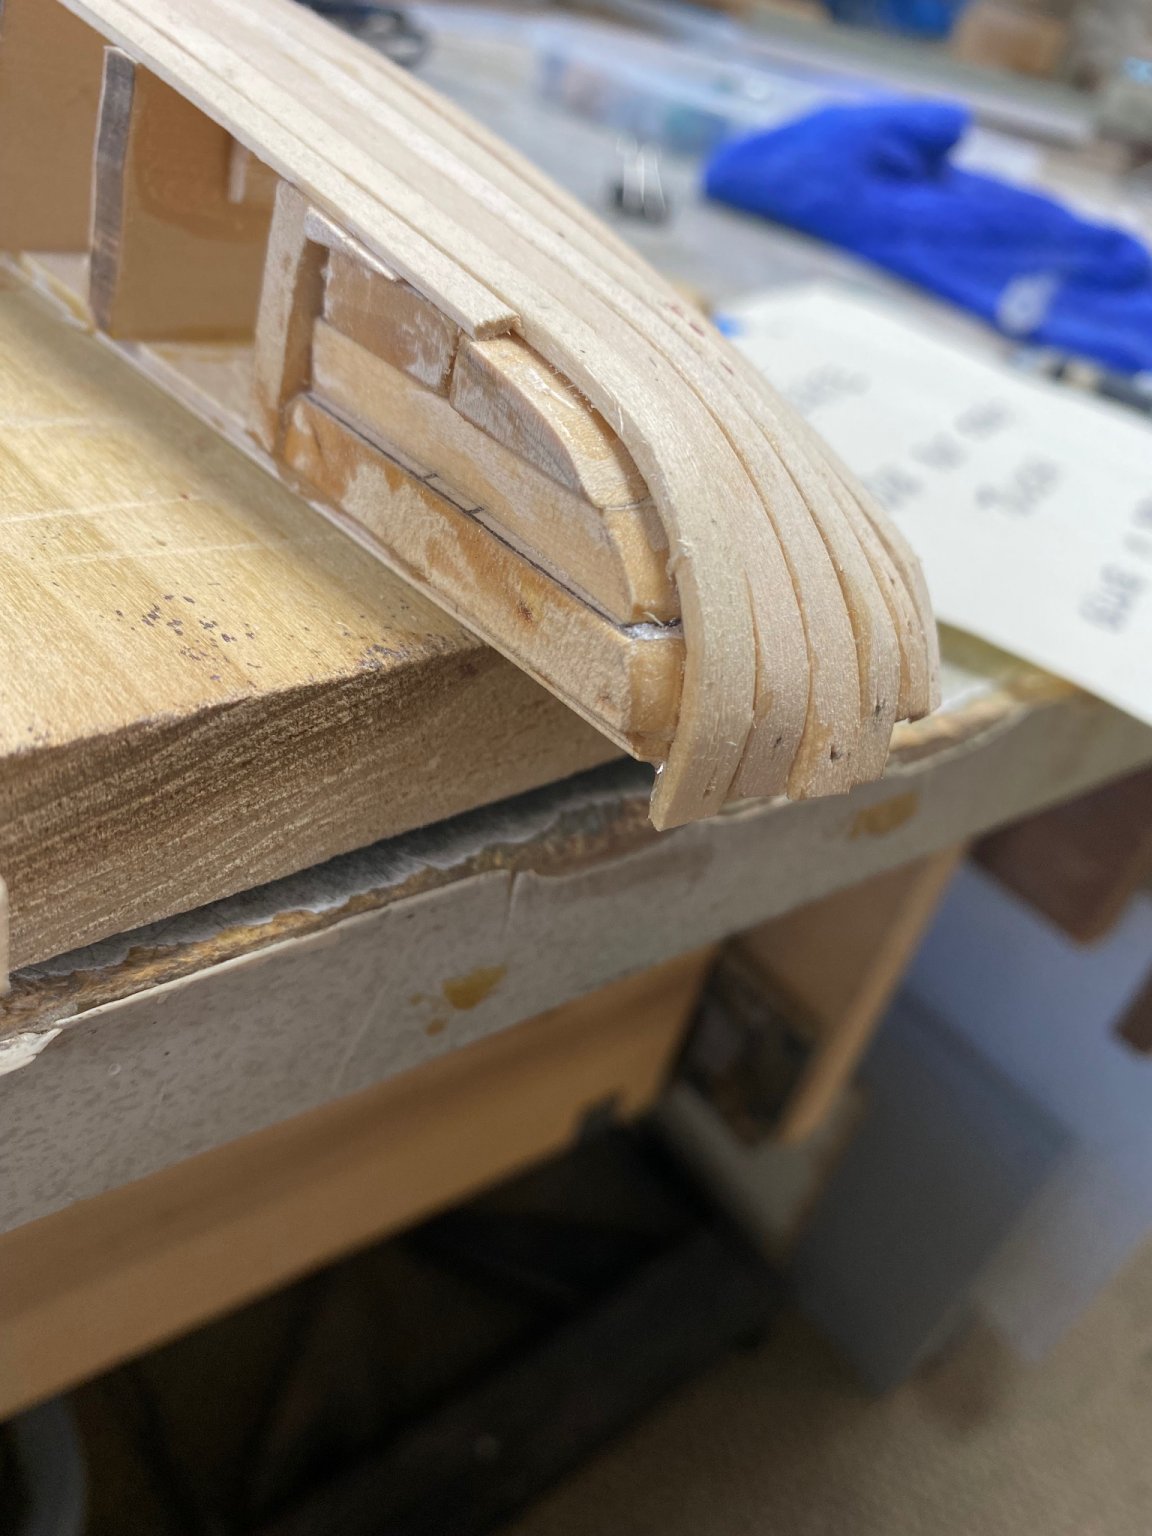
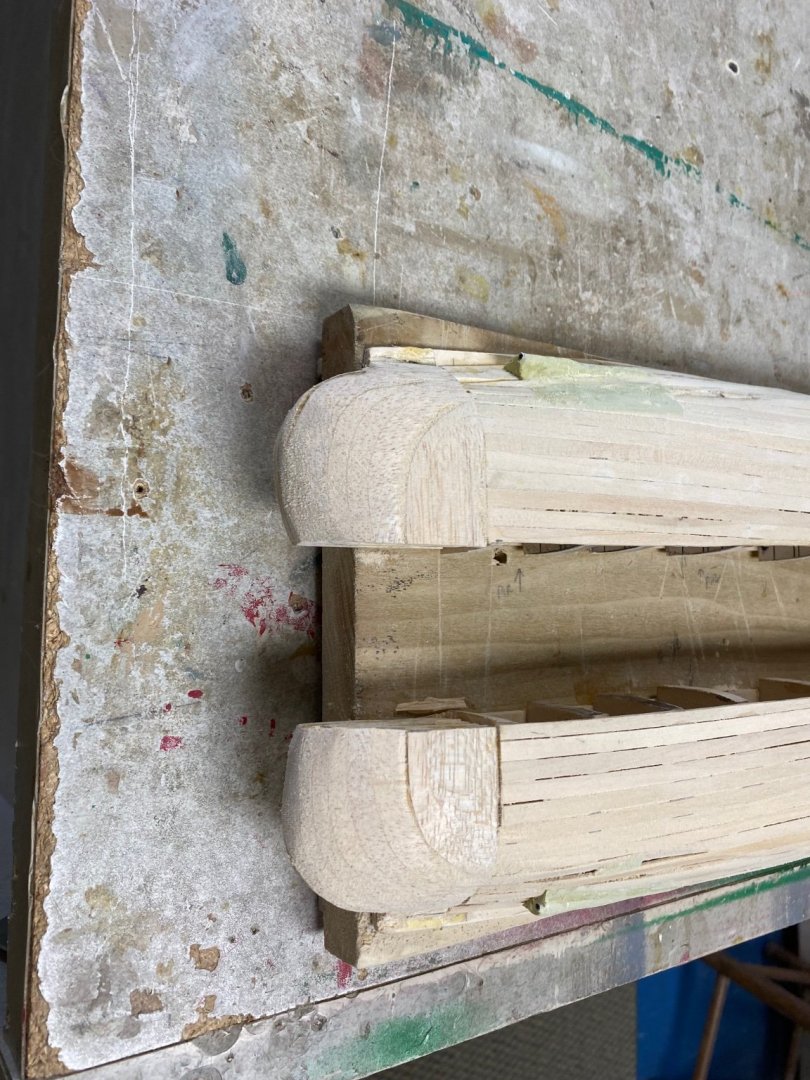
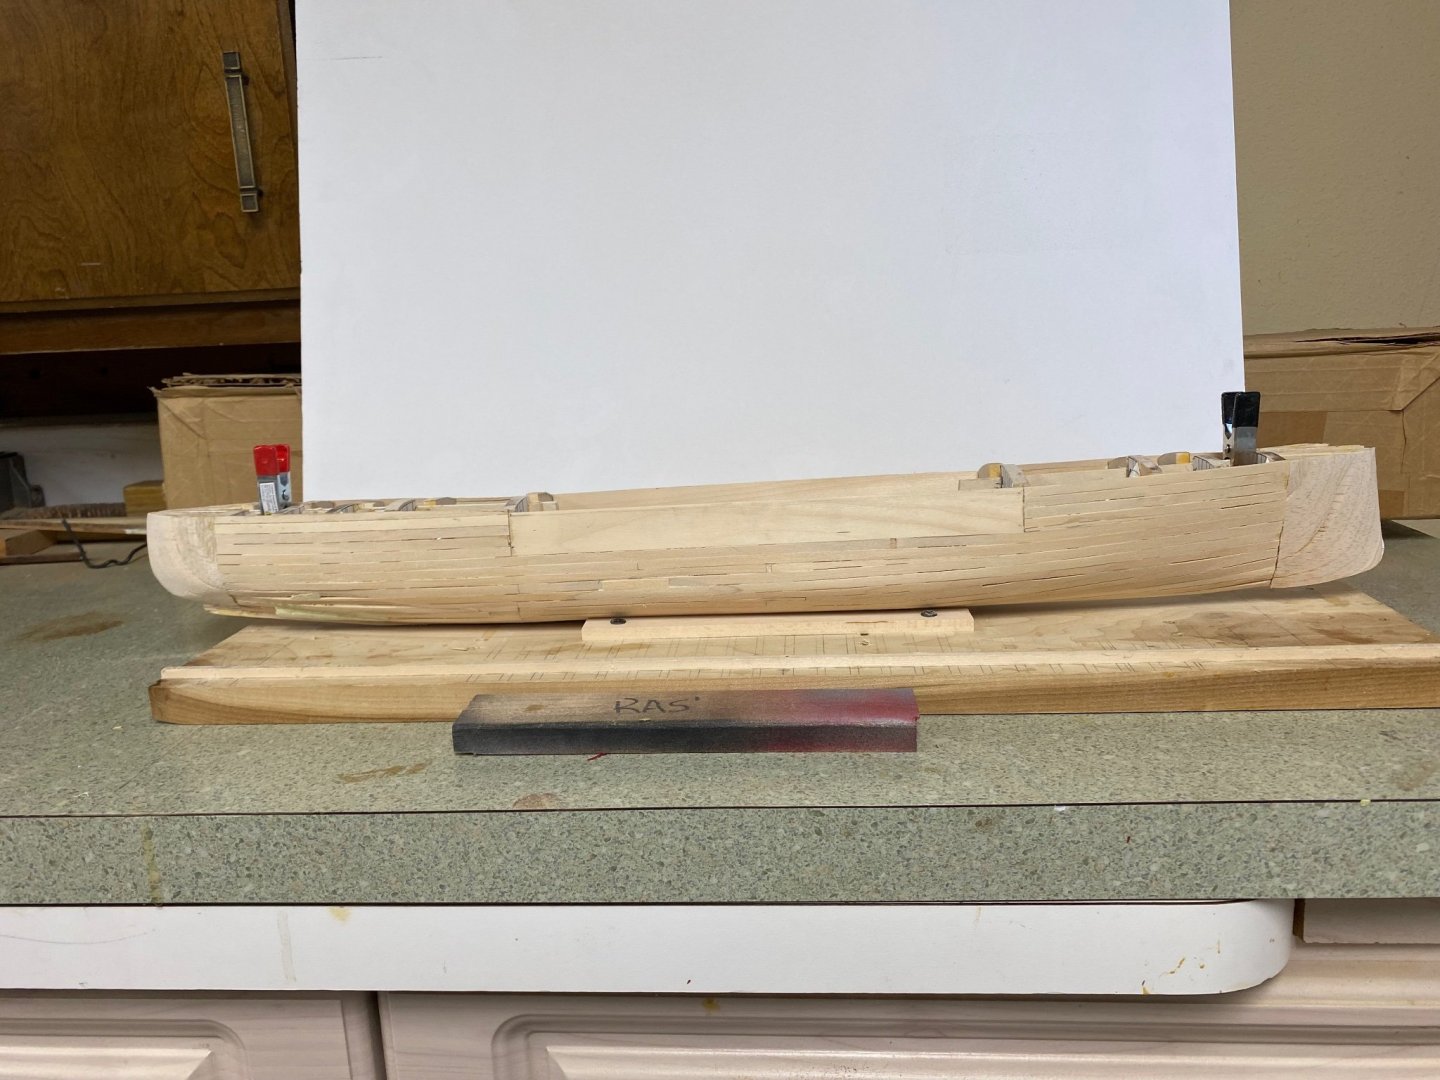
Following the Valerliy recommendations I filled the bow and stern sections. Then proceeded to shape both ends. I removed the half hulls from the mounting board and temporally connected them. It may no look as neat as Valerliy but, the planking is done. Then we started the filling with putty. And now my ship looks like my first wife while putting on makeup in the mornings. Ugh. Sanding comes next. I have had these plans since 1996 and thanks to the examples in this forum and your kind advise I can see my Amapá taking shape.


-
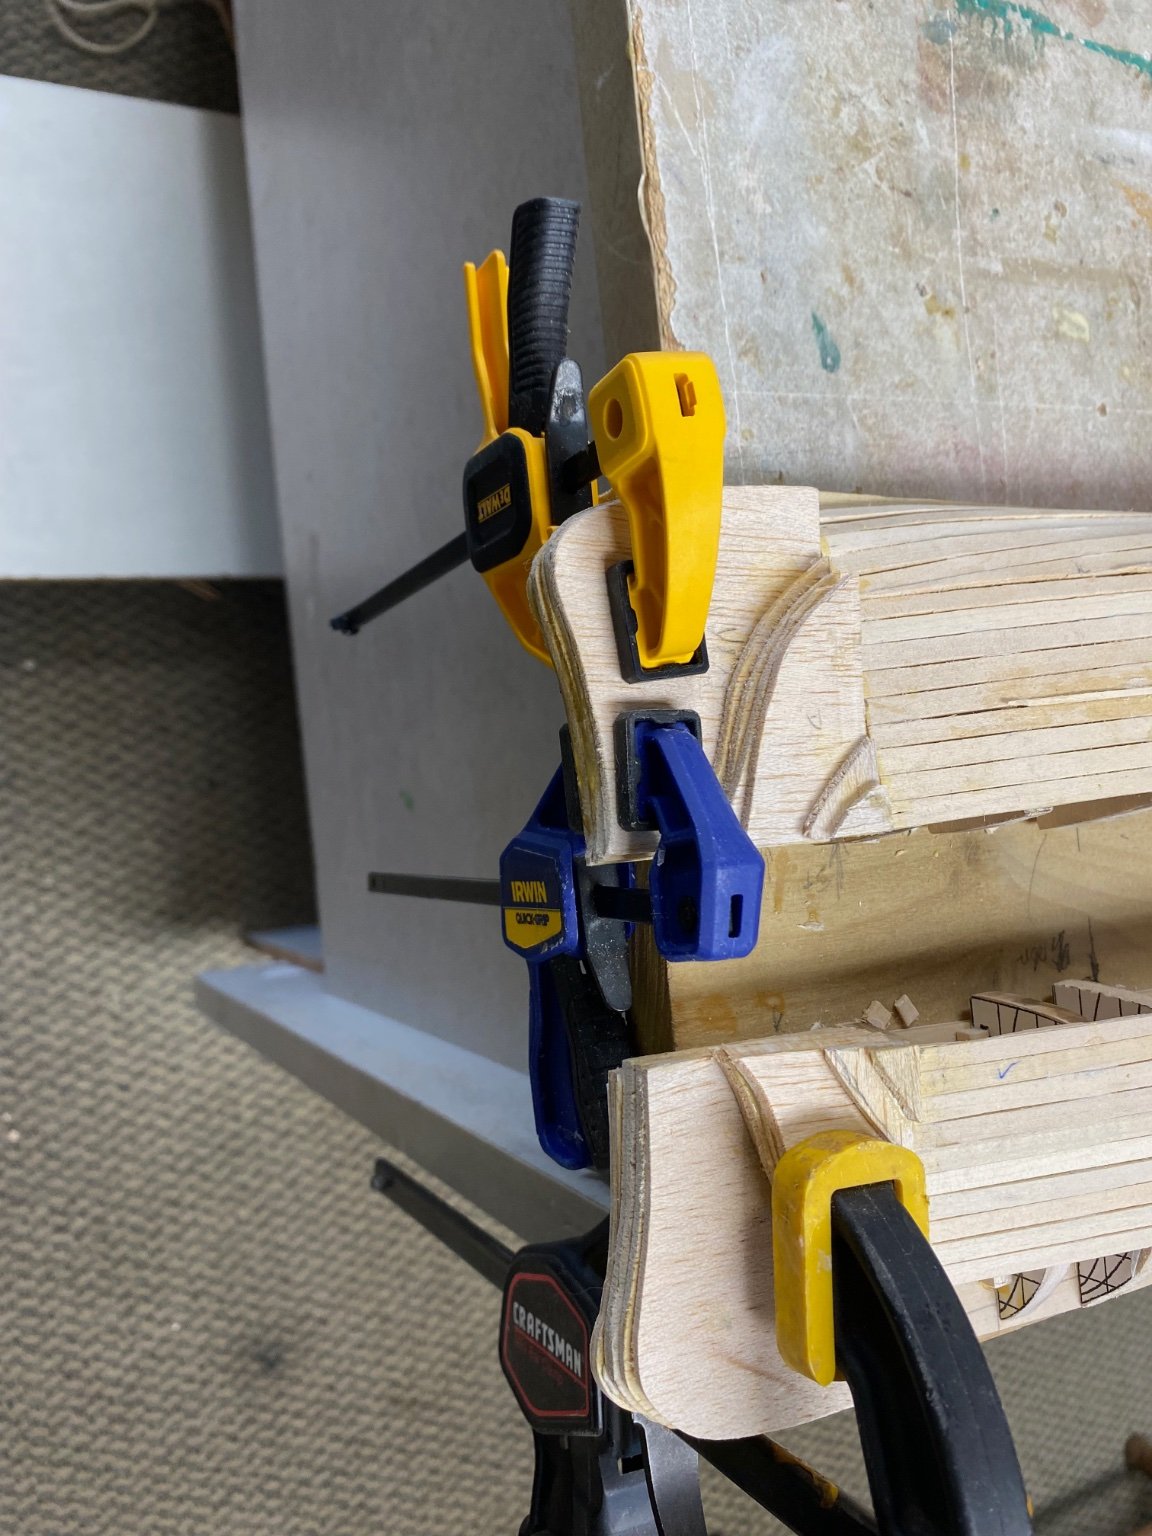
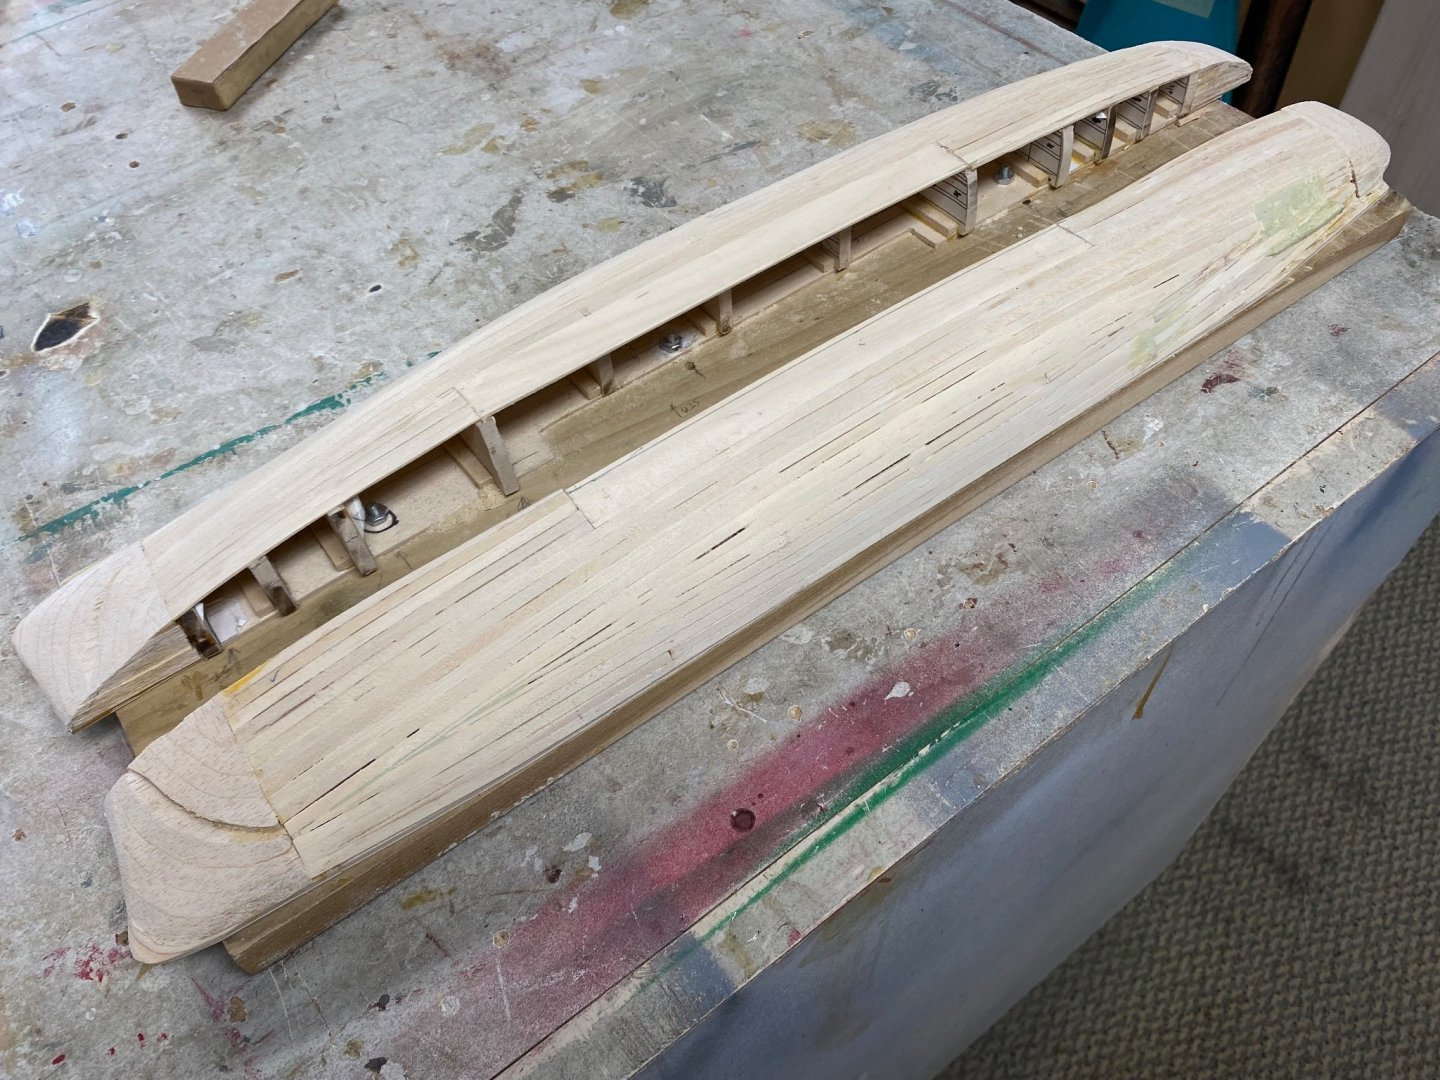
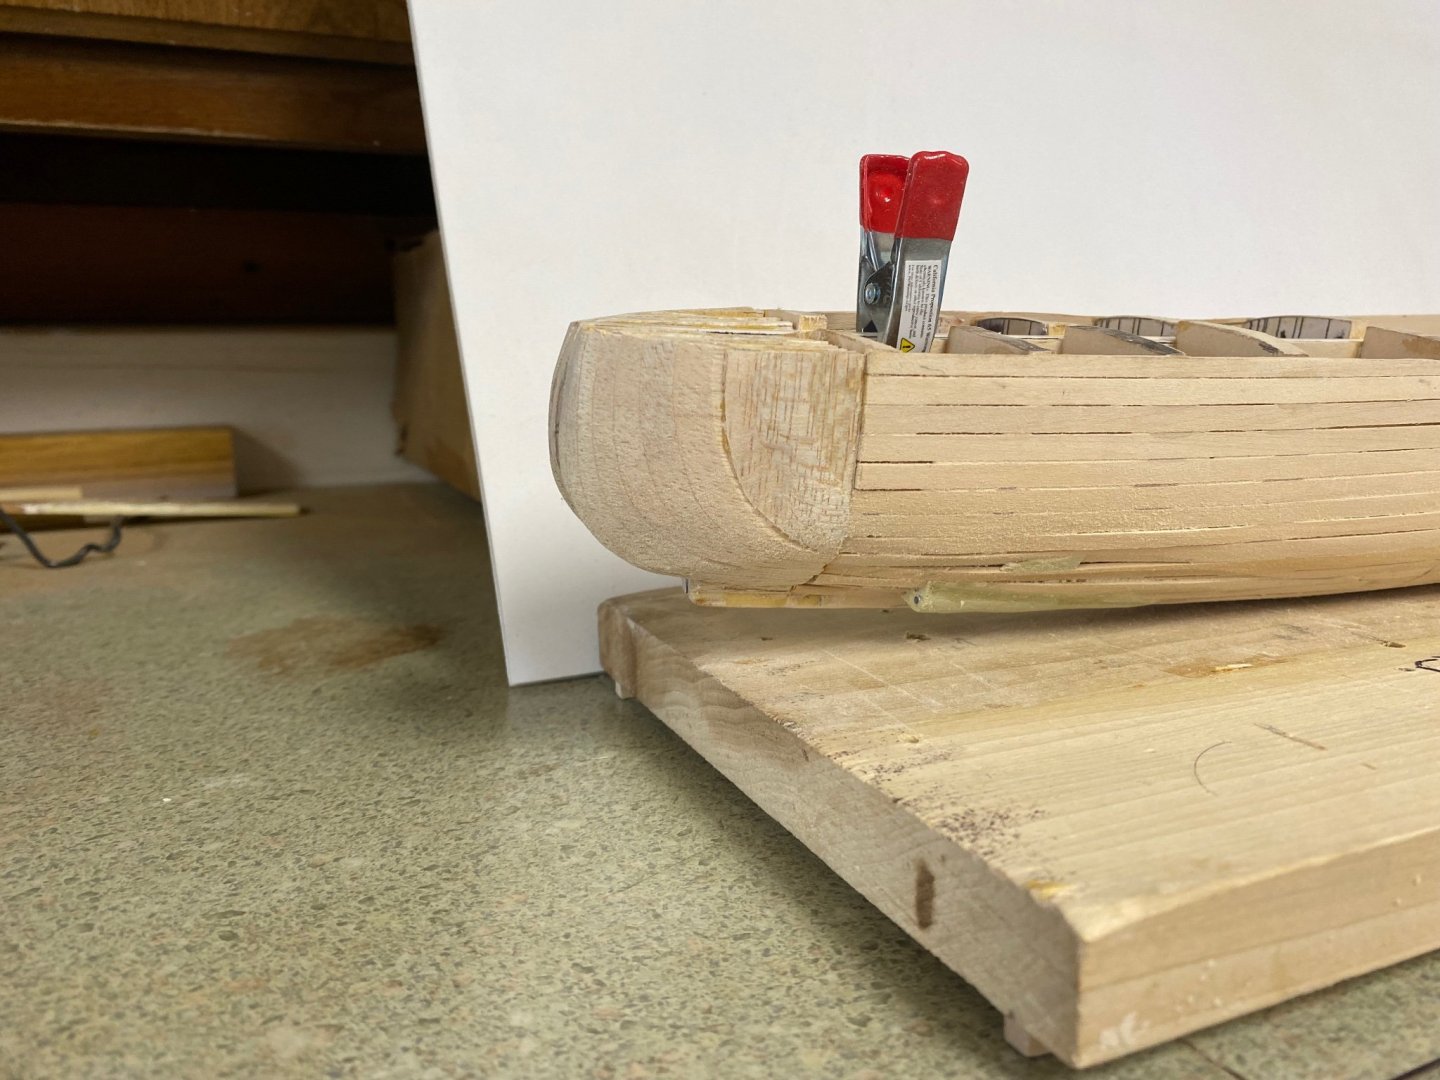
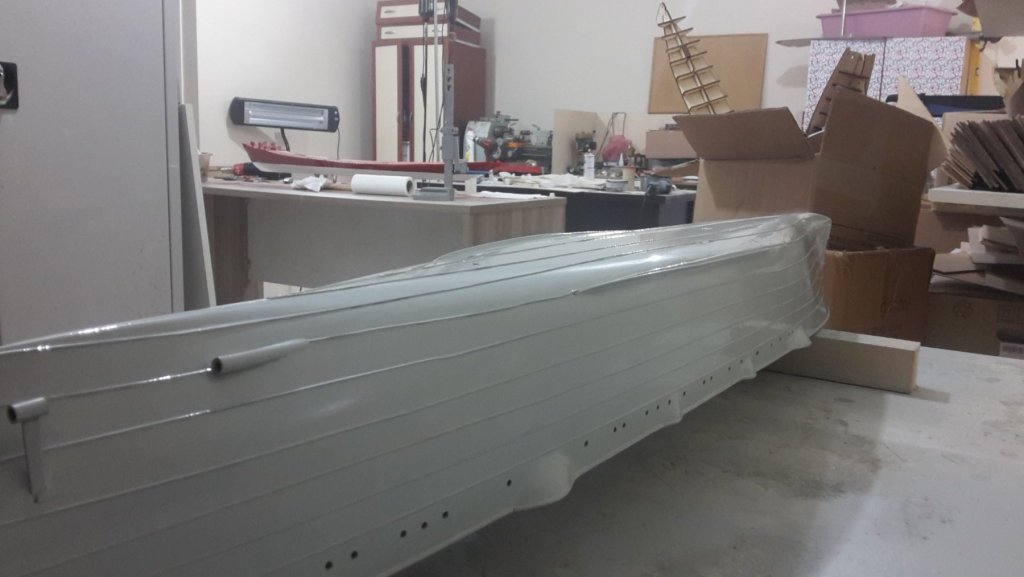
Well, now I made real progress. My grandfather used to tell me that if you are going to do something, do it right. In my career as a construction engineer I found that sometimes, to fix a problem, you will have to start over again. Valeriy suggested just to bring the planks to the last former and then add the filler for the bow and stern. So I followed his advise and dismantled my bow and stern and started again cutting out my newly finished round stern. This allowed me to finish the starboard planking. Not as perfect as it should be but it will be improved with a lot of sanding and filling. The biggest problem is with the propeller shaft tunnel. I hope I can match a hull finish like the one my friend from Turkey shown below This photo is from tozbeckler build: the Protected Cruiser Mecidiye. The result of this exercise is that I learned a lot about bending planks.


-
Banyan, welcome to my build. I went to your build and was fascinated by the historical references you made on your ship. And to do it at 1/72 scale is quite a challenge. Thanks for your comments.
-
HMCSS Victoria 1855 by BANYAN - 1:72
Ras Ambrioso replied to BANYAN's topic in - Build logs for subjects built 1851 - 1900
Another WOW model. I am going to follow you project. Will live to see your development of the carronade at 1/72 scale. thanks for your comments on my cruiser Amapá.- 1,002 replies
-
- 2
-

-
- gun dispatch vessel
- victoria
- (and 2 more)
-
Thank you Valeriy. In looking back, I should have done that but, by the time I thought about it I had already sanded down to meet frame forcing me to carry the planking to the end. Like I said before, this is a living experience learning while we build. Always the next model will be better. I probably have the to do the other stern the same way to keep the symmetry but I will definitely will do what you tell me in the bow area. Thanks again, you are not only a master craftsman but a great teacher.
-
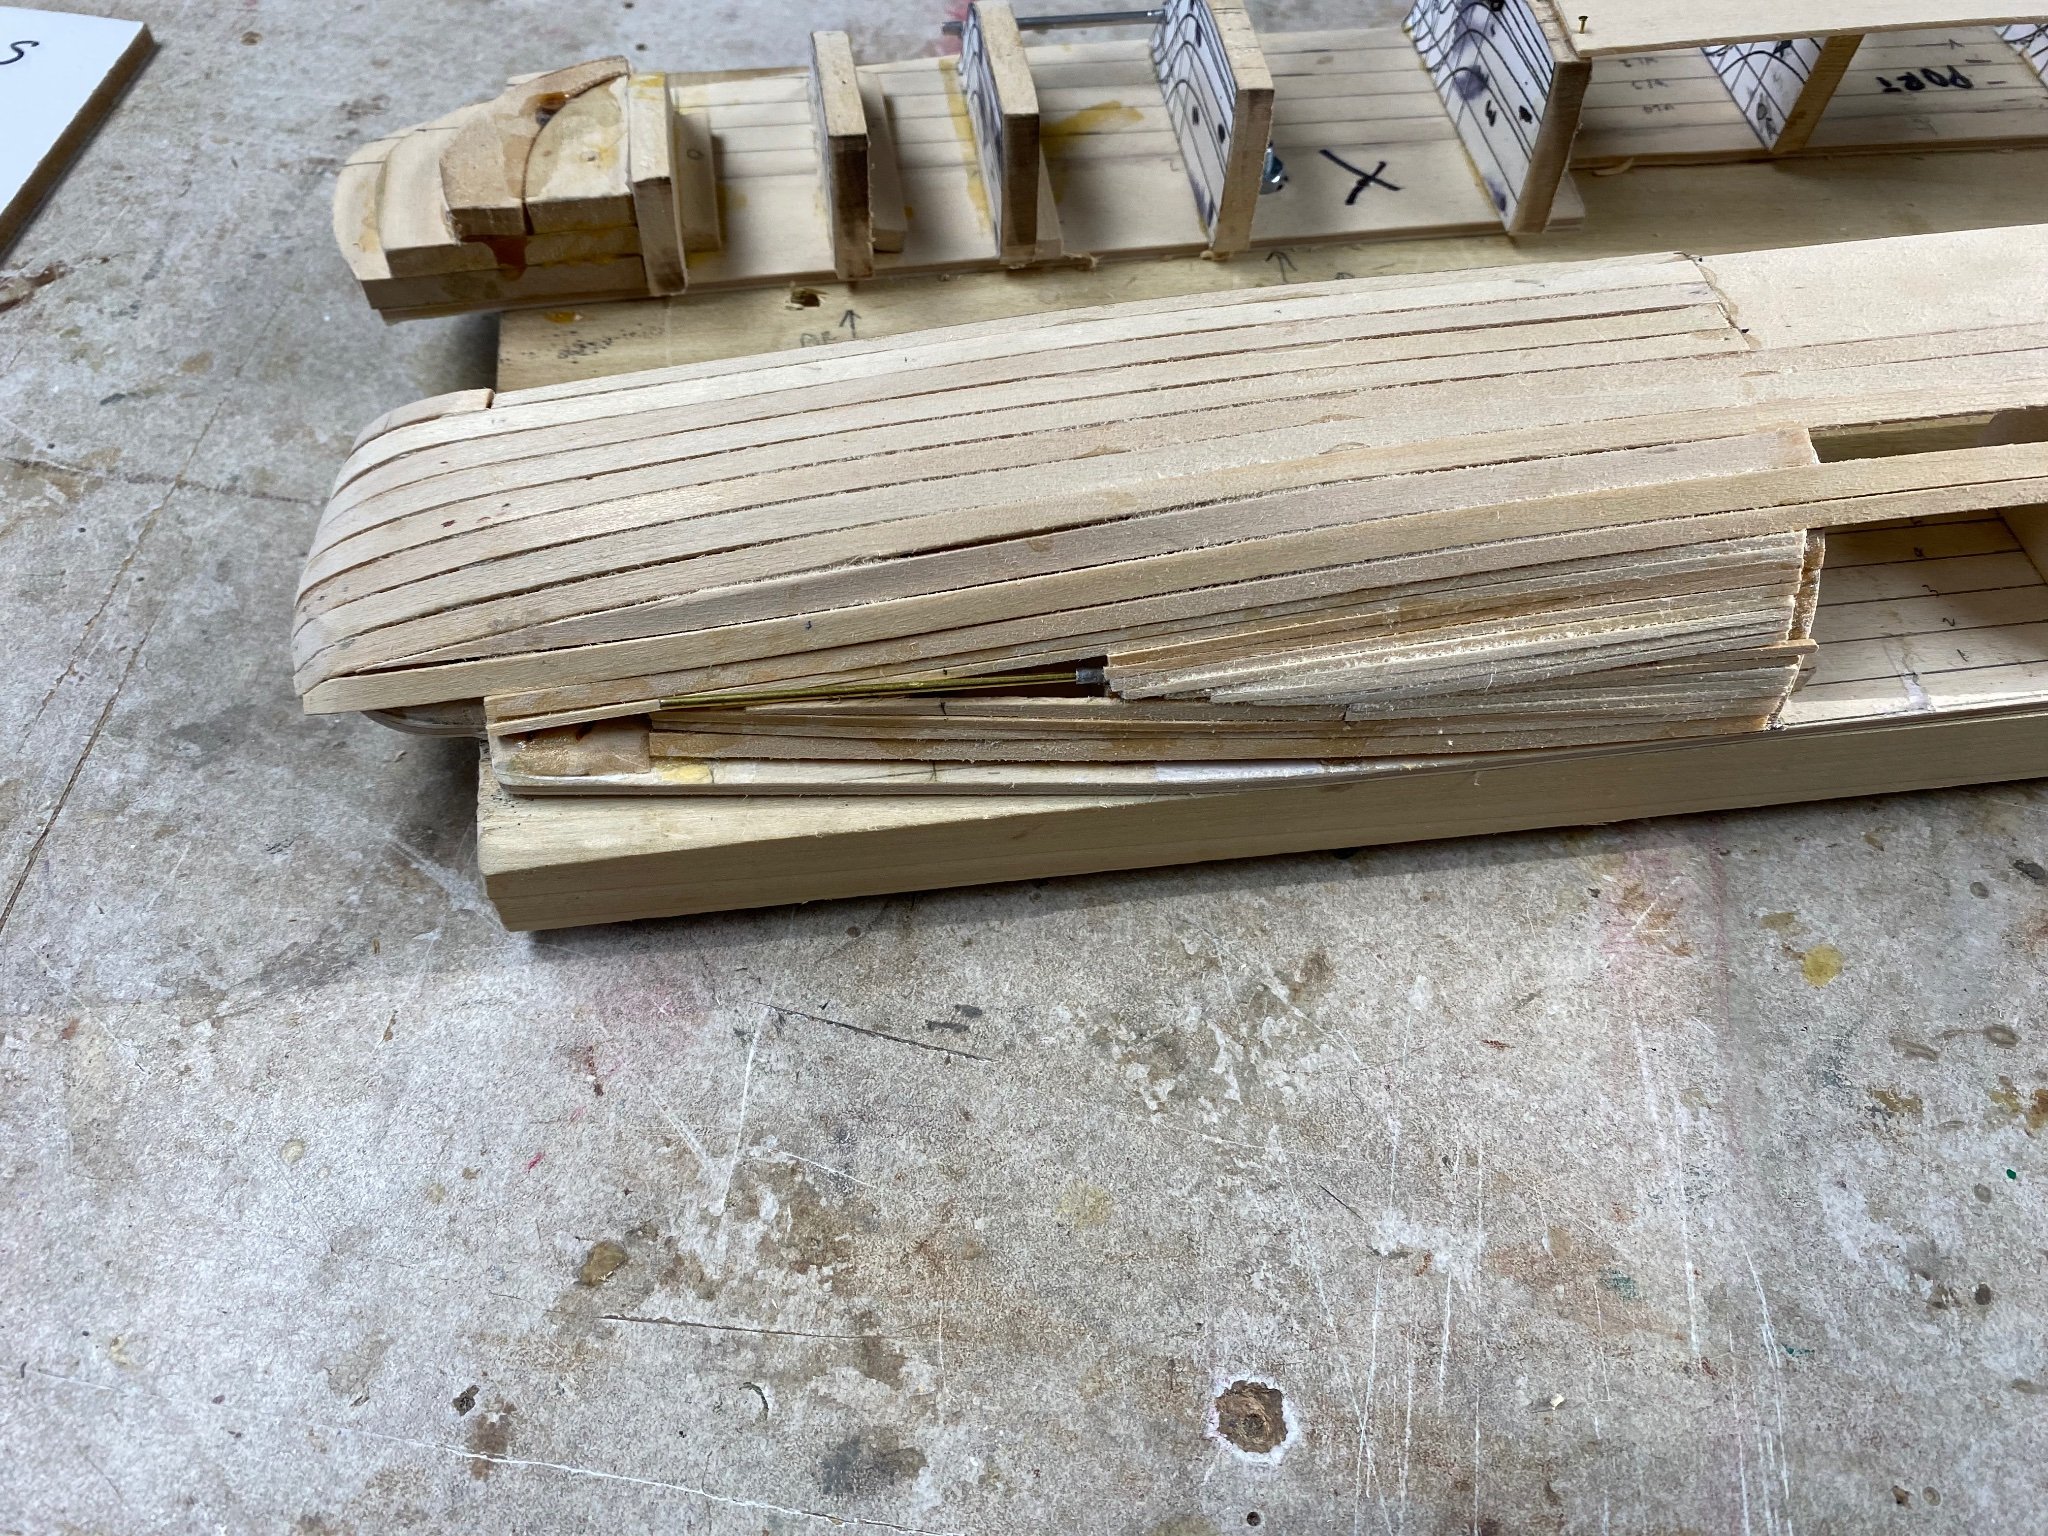
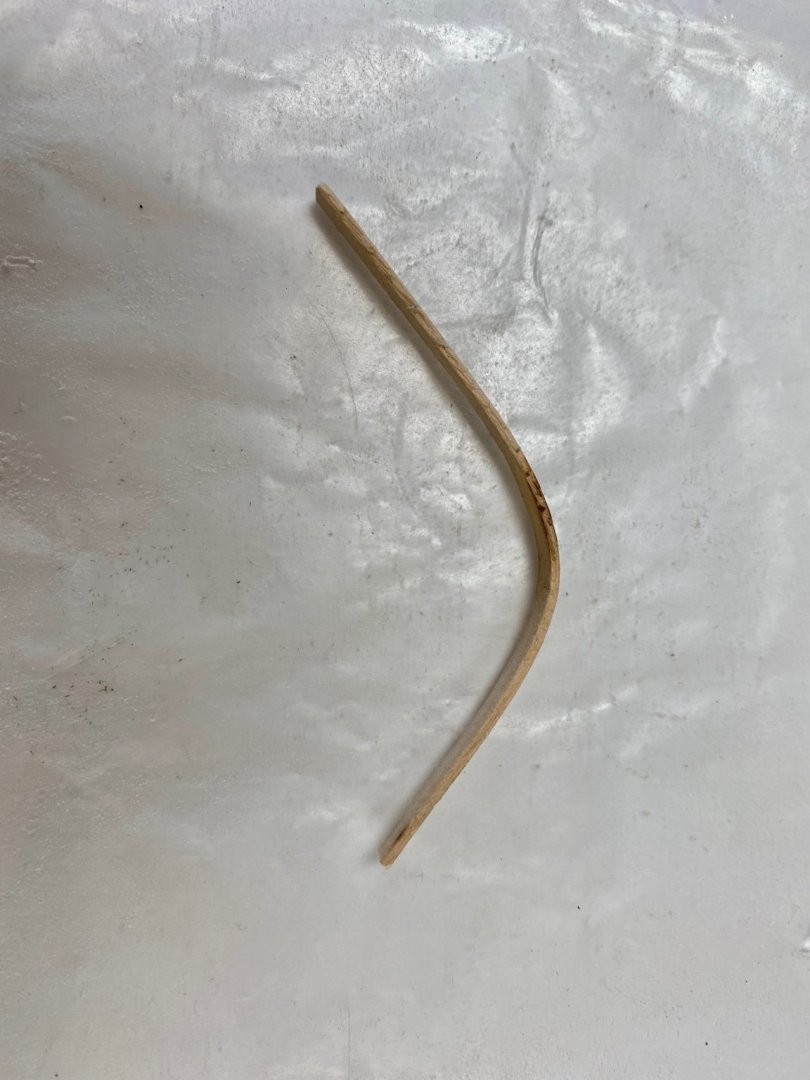
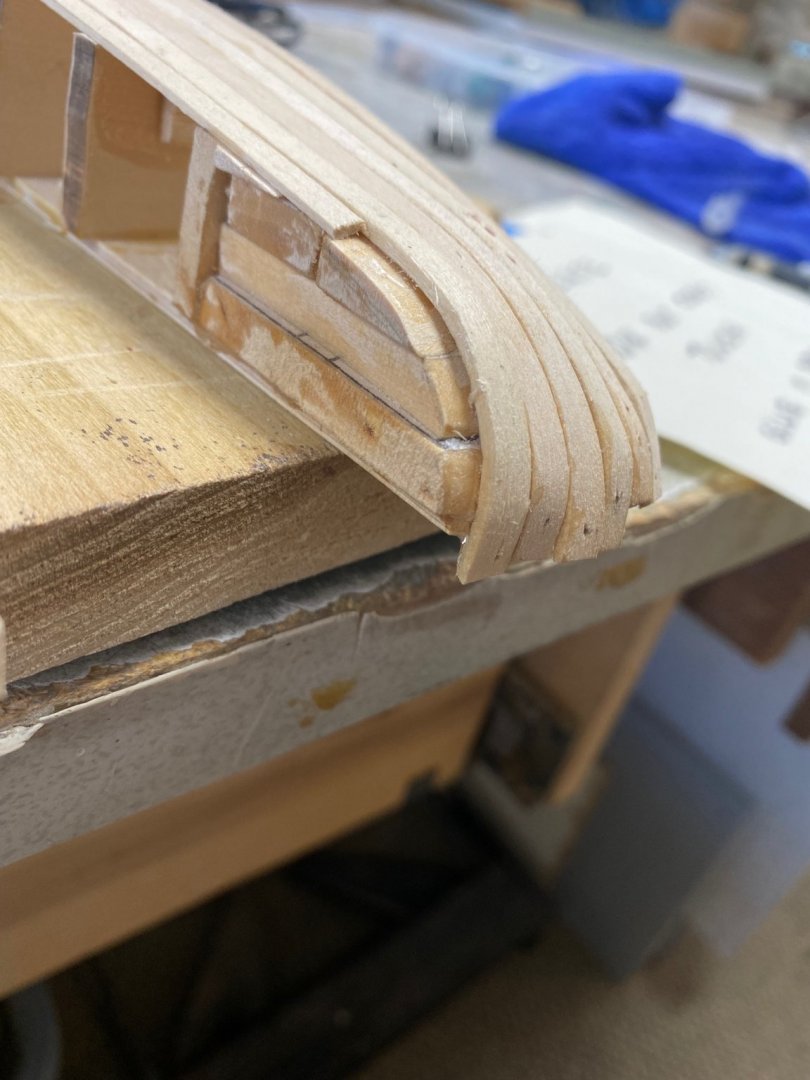
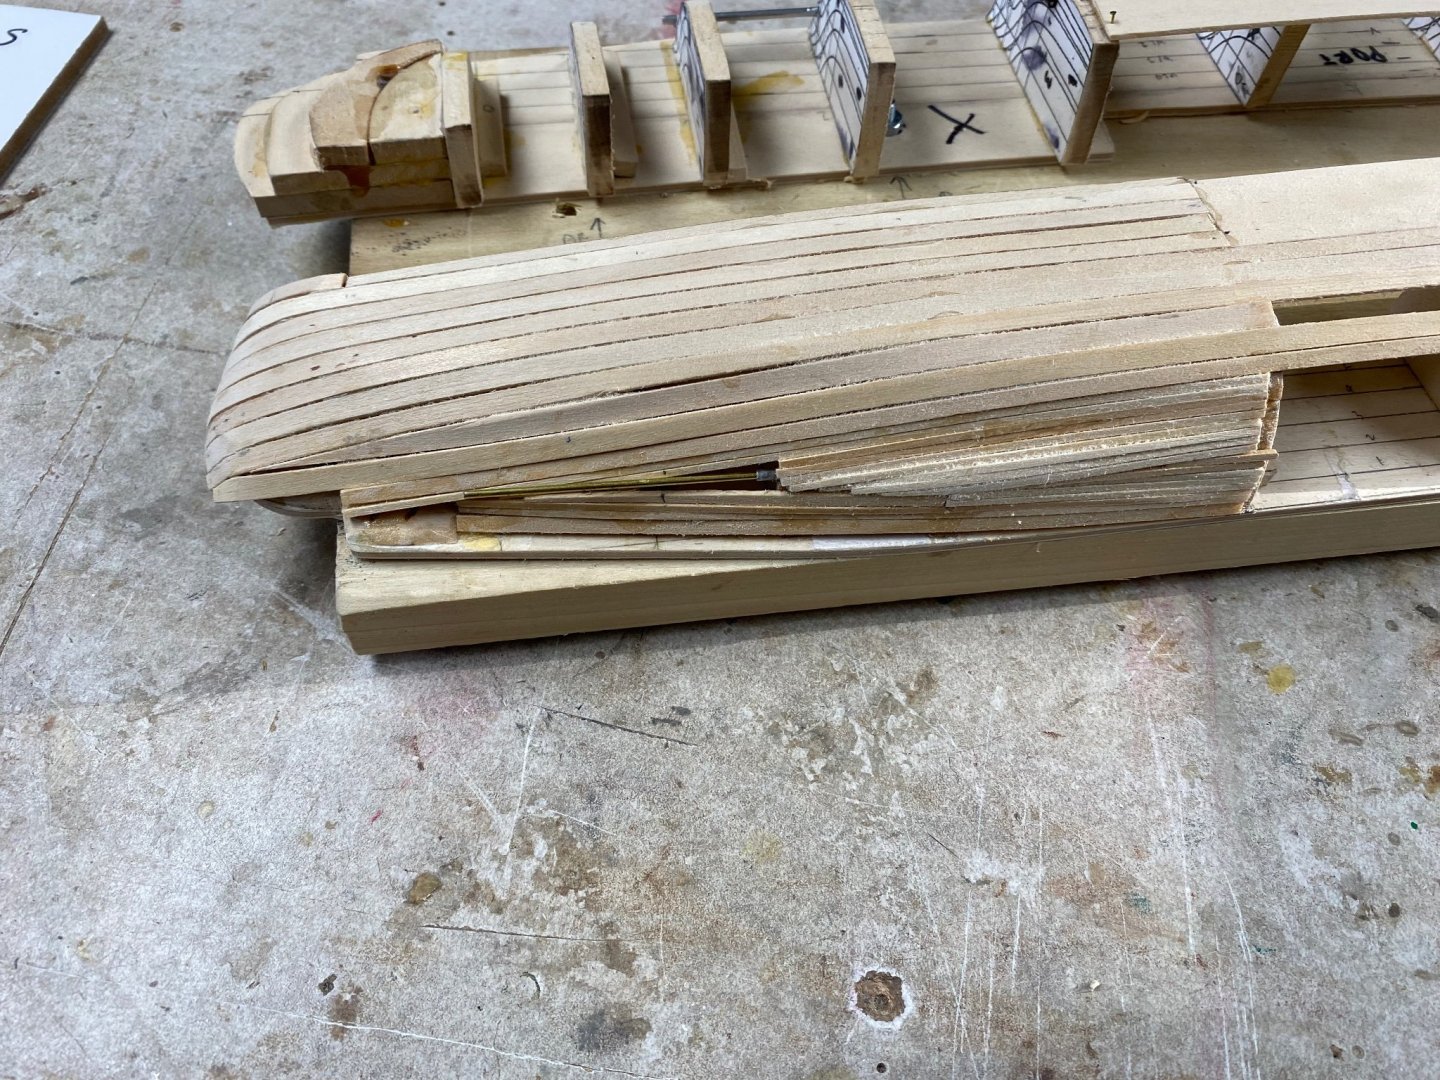
After much thought, I have reached the conclusion that scratch building is hard. God bless those guys like Chuck Passaro, that make the kits for us and foresee all the problems ahead. There is nothing like laser cut frames snapping into perfectly located slots into their proper place in the keel. In this model, my first scratch build, I have made several mistakes that have made the fairing and planking of the hull more difficult. I fabricated the frames using 1/8" basswood (first mistake: too thick) , cut them with a band saw and trimmed each in-pair (port and starboard) with a sander. So far so good. I had glued a paper copy of the ships profile to the keel piece and had both sides attached to the building board facing each other. Great! Then I used the wrong glue to stick the paper to the wood (second mistake)and then glued the frames to the paper that was glued to the keel piece (third mistake). The next day, after the glue dried, the whole thing came apart. Darn! Thanks to this forum comments, I finally arrived at the proper glue to use and did the fairing. After all these fiascos, started planking with mixed pluses and minuses. This ship has a split deck with a lower deck in between and I decided to use a full sheet to plank this section as can be seen in the photo below. Good! Started planking towards the keel using various techniques to bend the strakes. The most successful was the use of water soaked wood and hot air blower. But I could not bend all the way at the rounded stern without a snap. Then, I remember something out of these forums and made a mold of the curve. Success! More strakes on the stern And then fourth mistake shows up. When I cut the frames I didn't subtracted the plank thickness and the results will be a ship with wider beam. Oh well ! This, also interfered with the propeller shaft extending further back towards the propeller. I worked around the tunnel using smaller strakes working around the concave curves of propeller tunnel. Good! This quarter of the planking effort has been a real education and hope that most of these flaws will be corrected with miliput and wood filler. Did some experimentation with the idea of simulating the steel plated hull with shellacked paper and it seems like a possible alternative that may cover some of my indiscretions. So, again, thanks for the inspiration and advise given in this forum.


-
Congratulation VTHokiEE. Good job. Hope mine comes out as good. Thanks for the sharing your experience with us
-
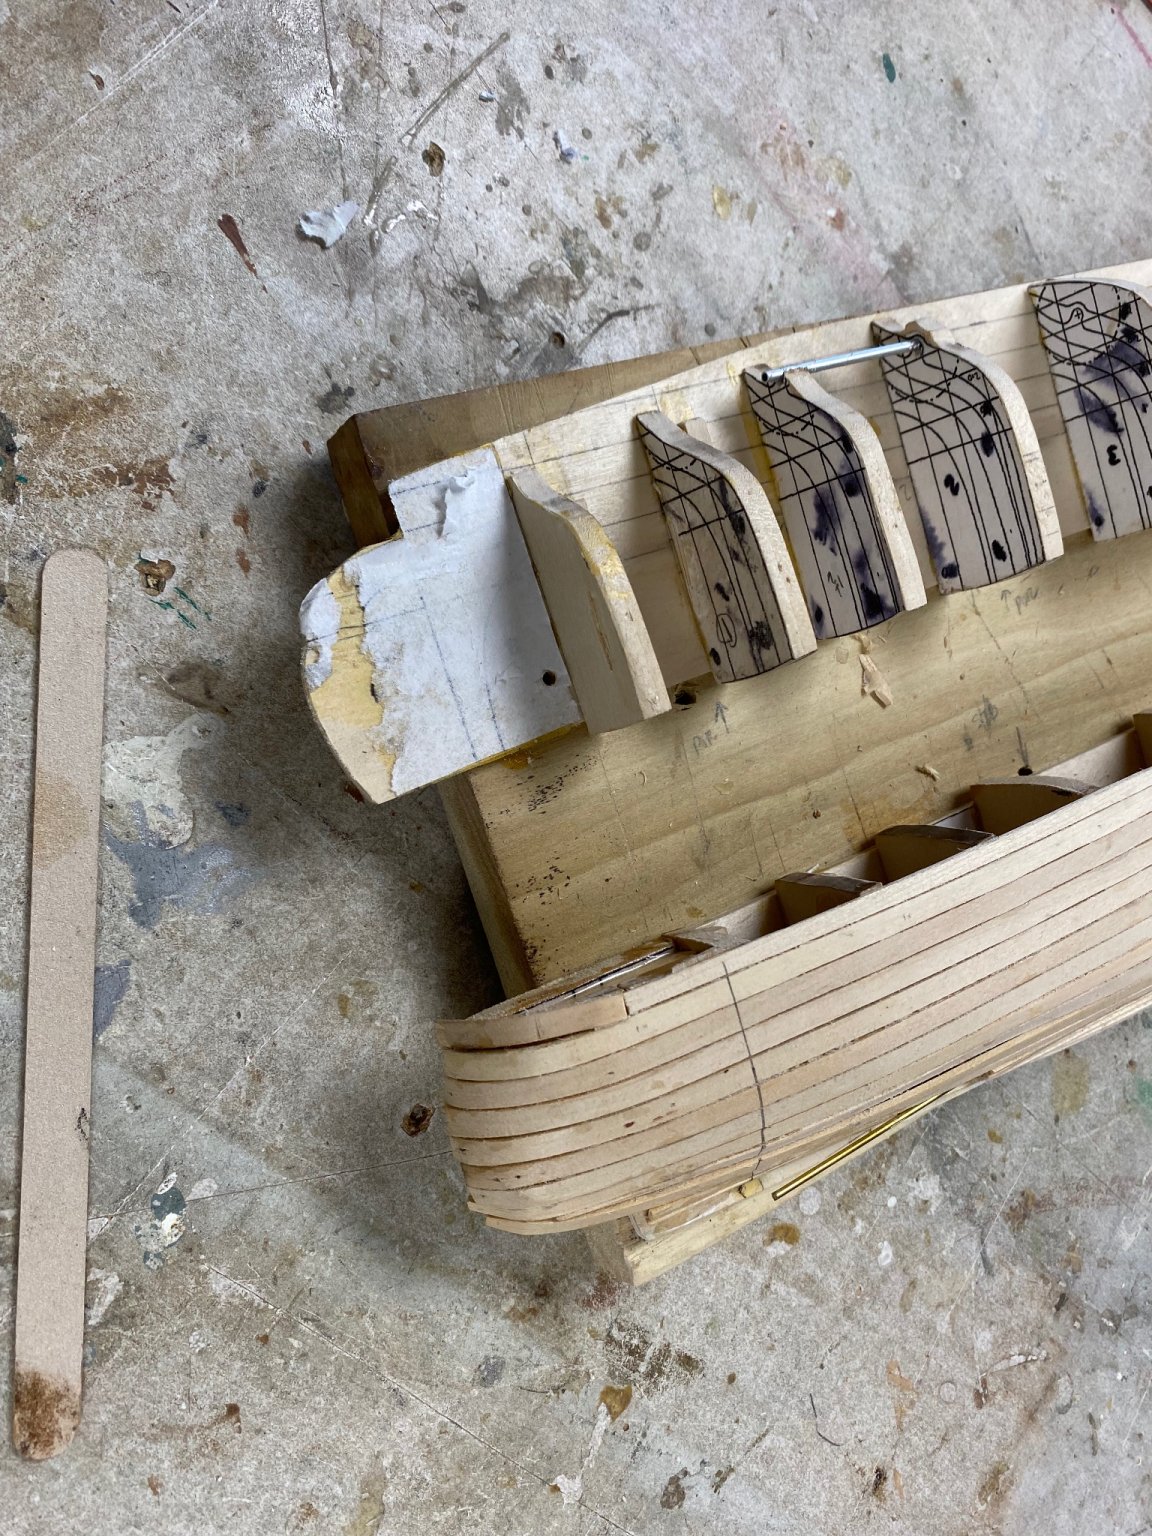
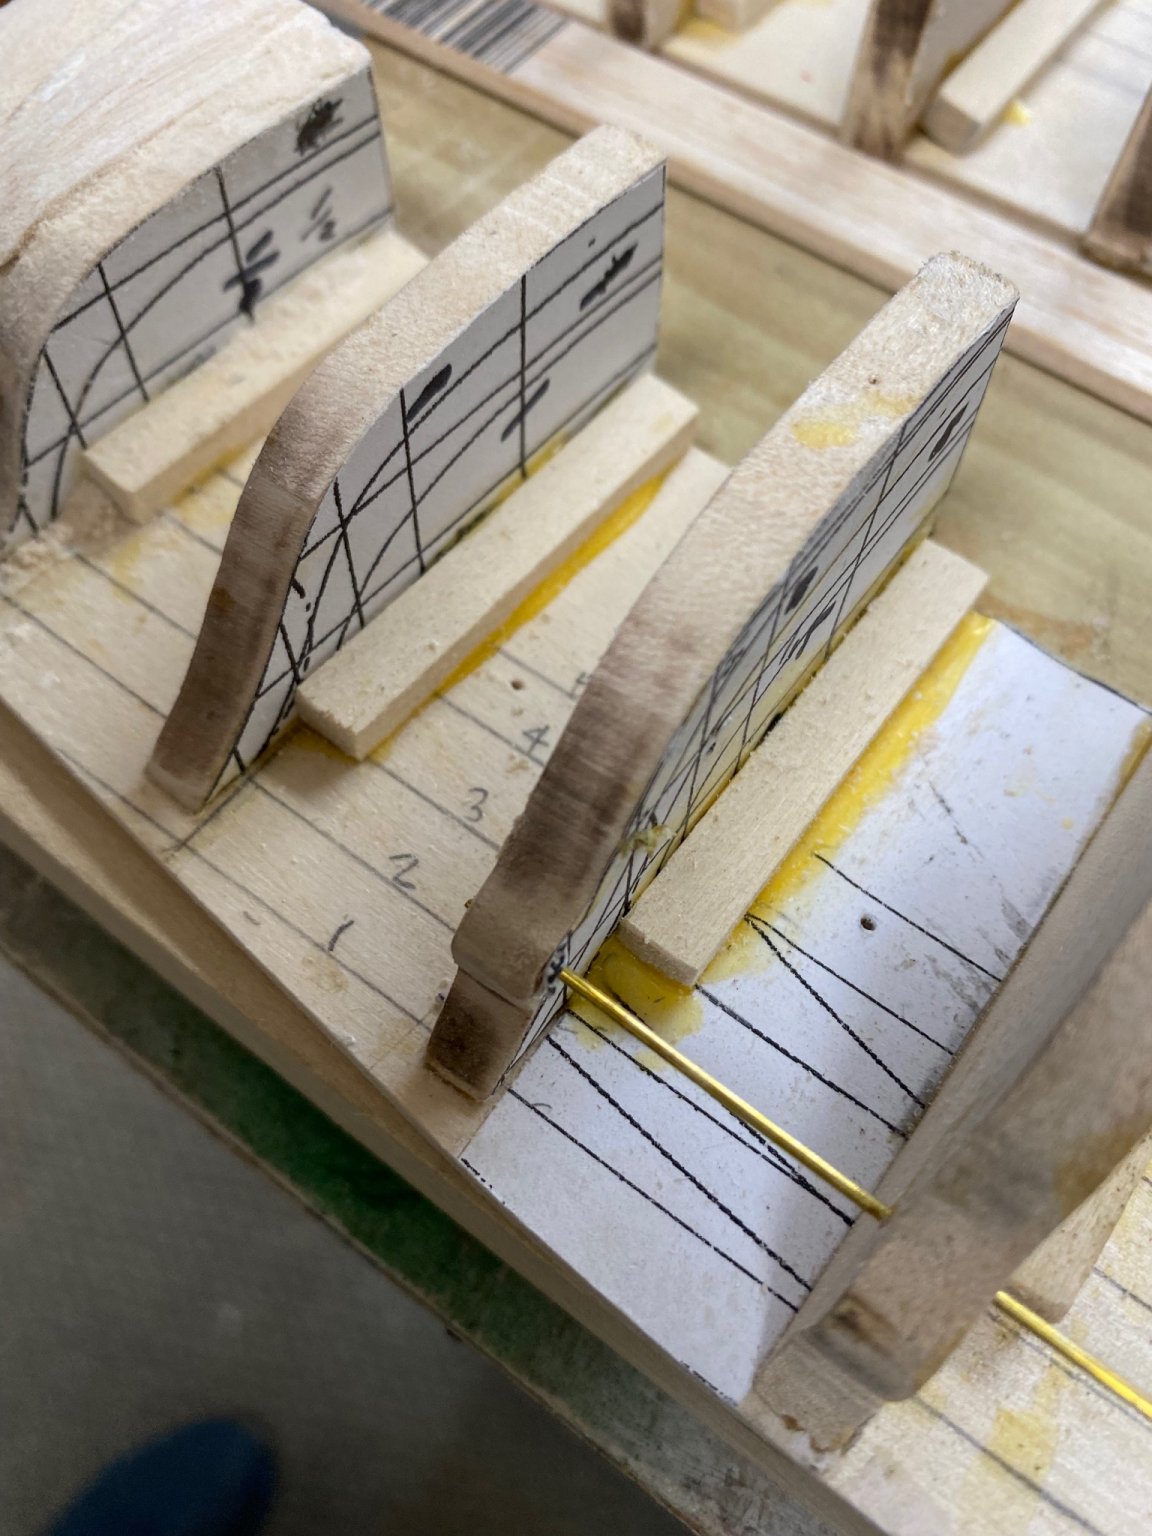
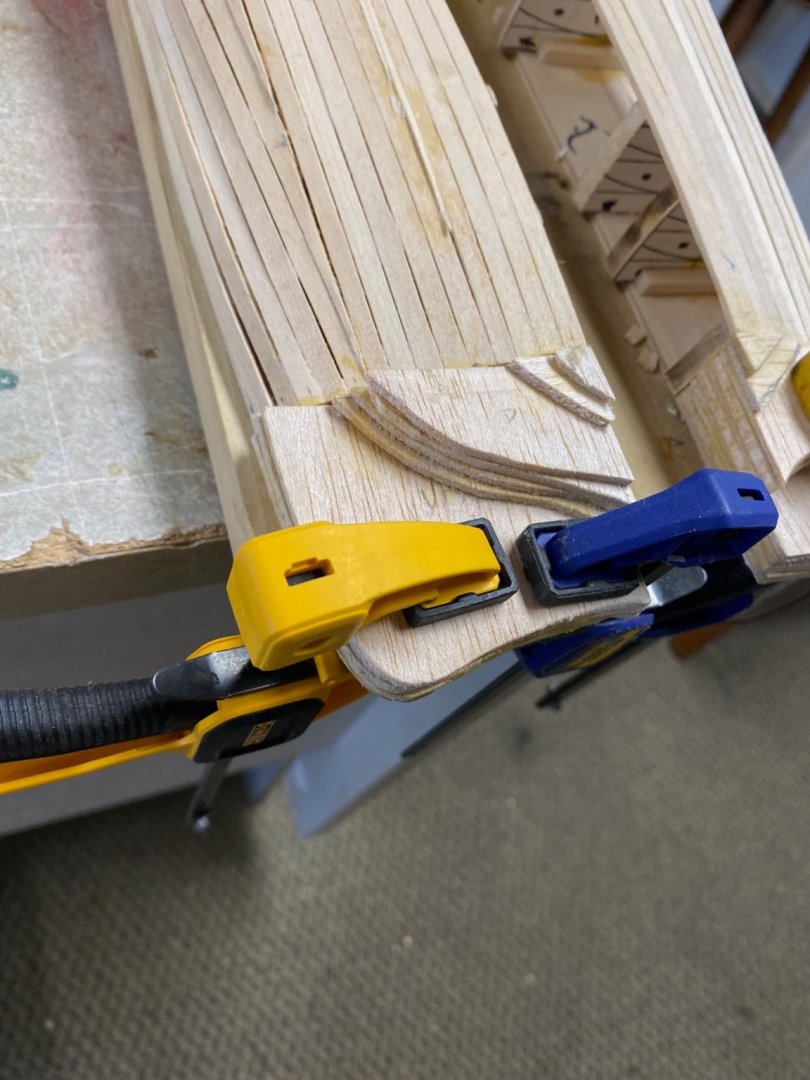
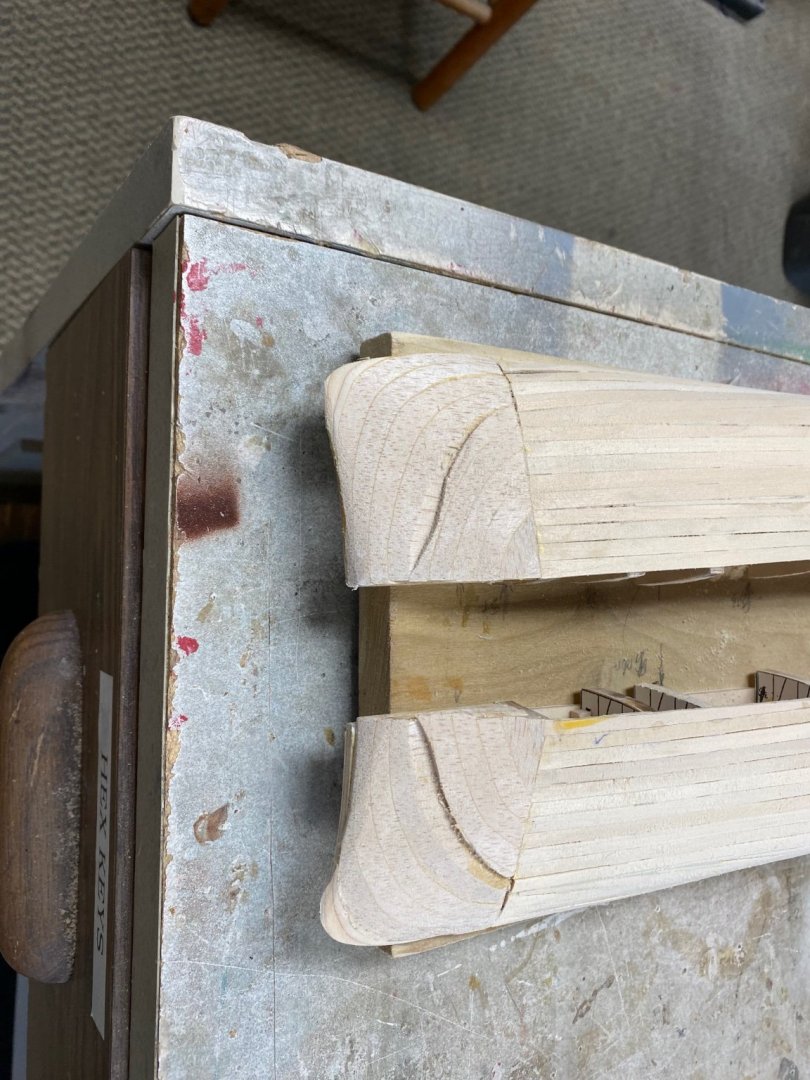
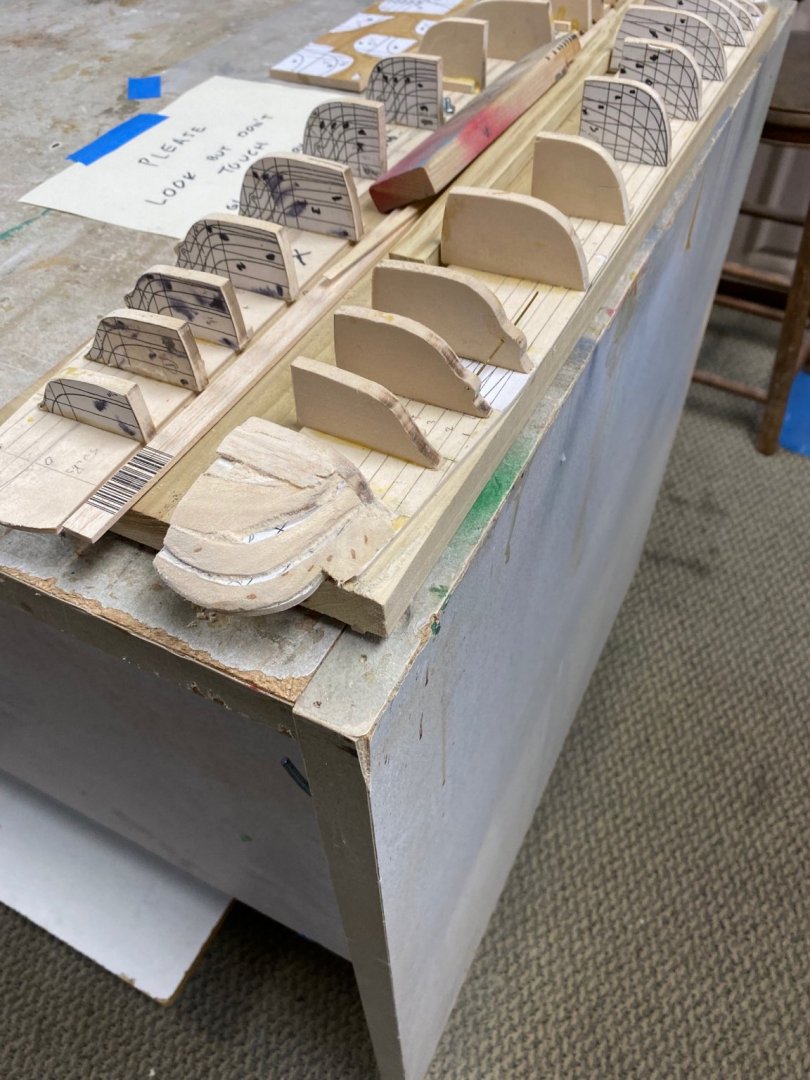
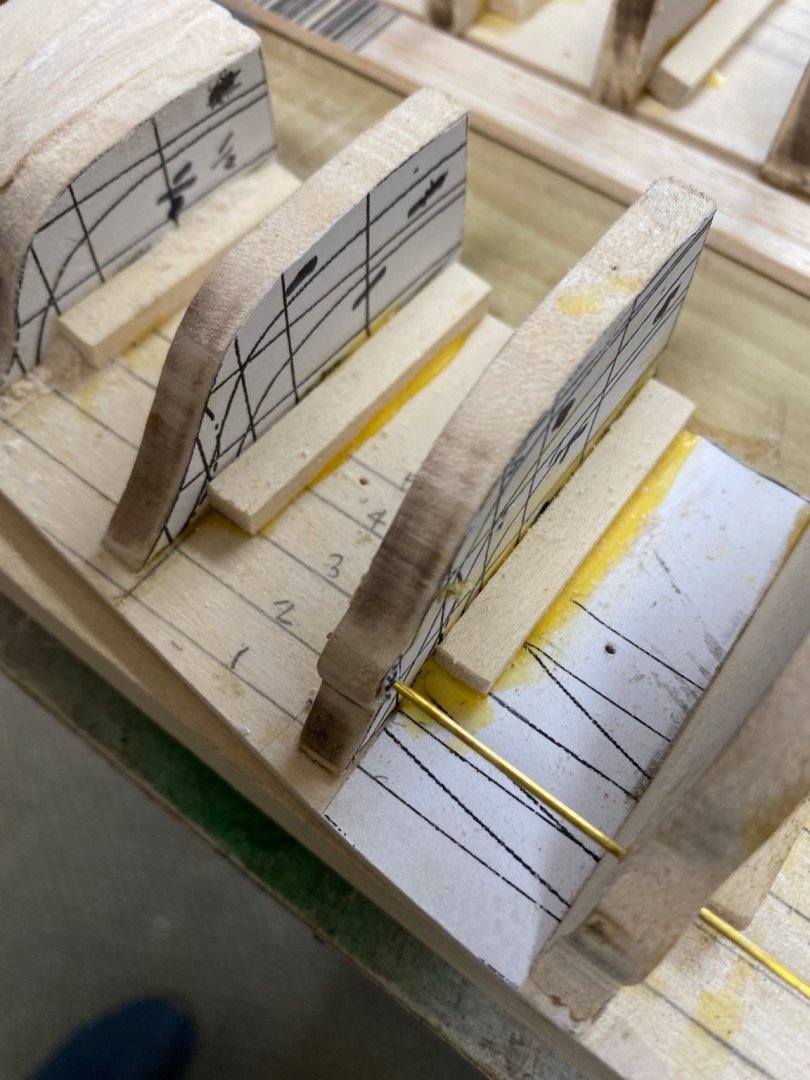
I have been a little under the weather these last few days and have been unable to work on my favorite project. However, I had some pictures of my progress after following Valeriy's advise about the Titebond. This shows the beginning of the filling of the bow and stern sections And here I added a vertical reinforcement to each frame just in case. I have received the material (cherry) to make the planking strakes and hope to get started next Monday. I had a lot of trouble gluing the paper to the wood. I used Loctite and a 3M sprays and they dried up in a couple of days. My last attempt was made with Elmer's contact cement and this seem to be holding up OK. I would like to hear you opinions and preferences for this work of permanently gluing paper to wood. I also want to welcome my new friend, Ton Kittichart from Thailand, who is planning to build Amapá's Thai cruiser the Suriya Monthon.
-
Looks pretty good to me already. For mine, I have bought the cherry in 3" wide sheets at Micromark. I will cut strakes as I spline them.
-
Very happy to see you back. I am still working on my other projects but I am definitely going to build this half hull and certainly appreciate your doing it ahead of me. Sorry I cannot help you with your counter but I am not very knowledgable in the 18th century modeling. Welcome back
-
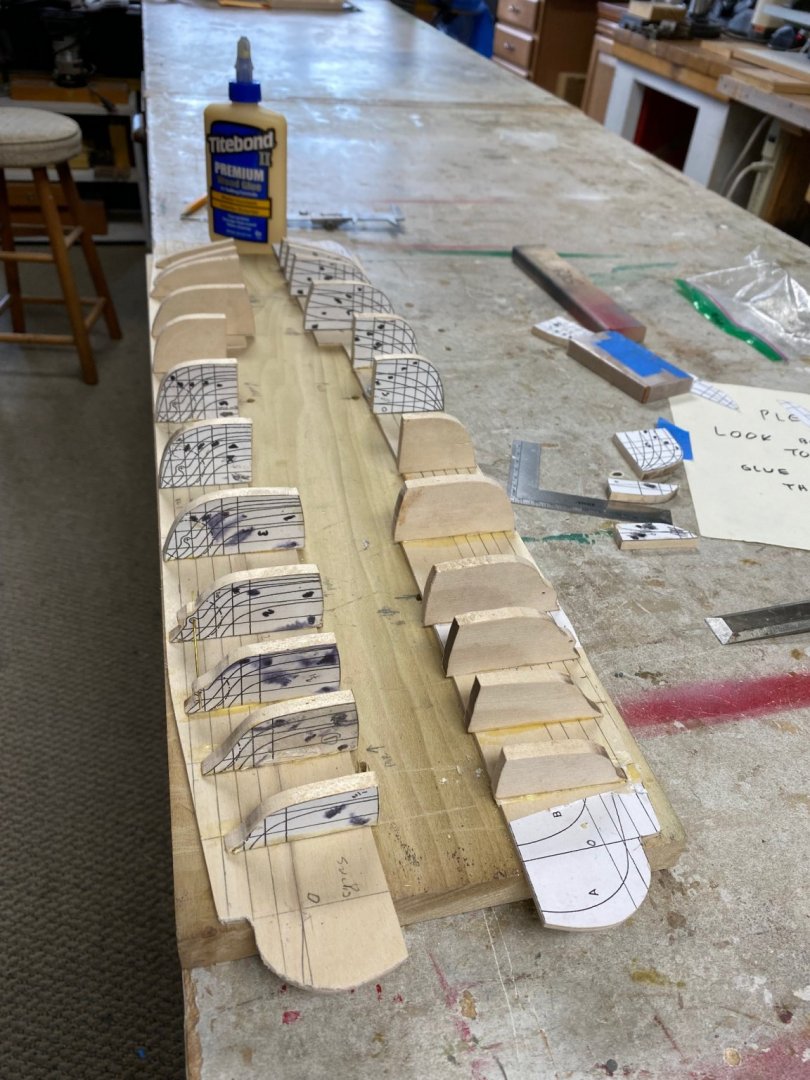
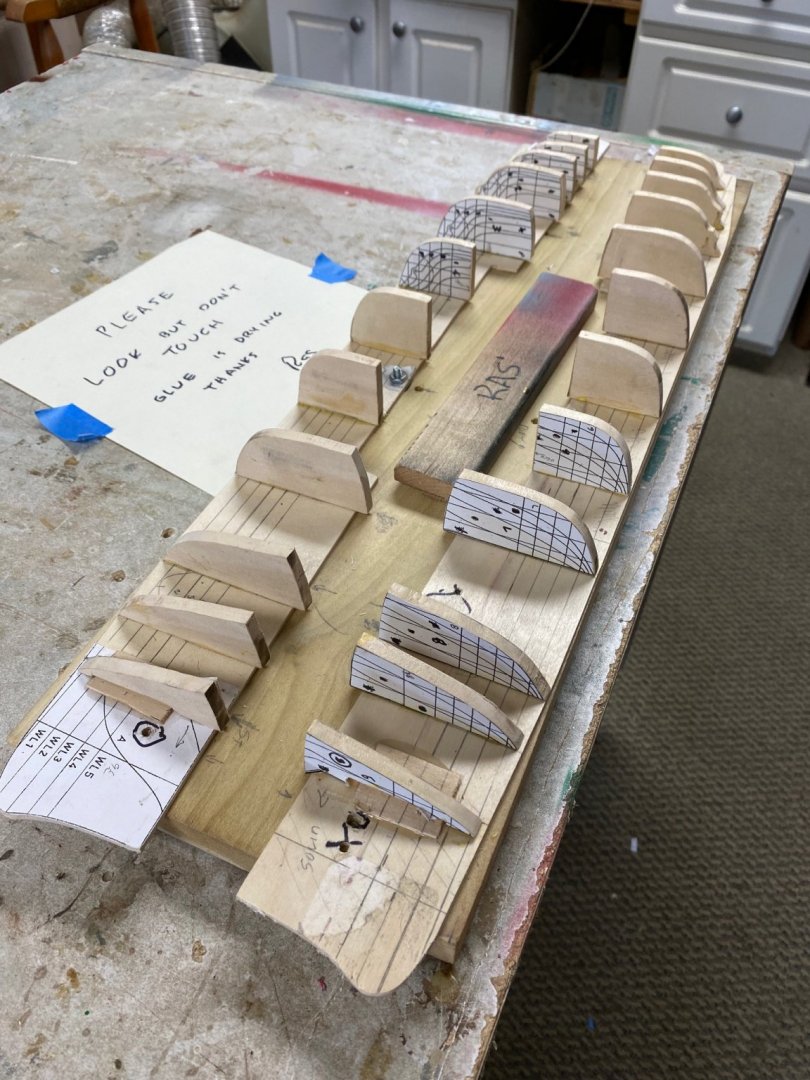
Well, success. I followed Valerliy advise and used the Titebond and managed to install all the frames without any drama. The glue sets quickly but with enough time to check the squareness. The frames were positioned using both the frame station line and the waterlines. I have ordered cherry planks and tomorrow will set battens to delineate the belts. My intentions are to finish the hull with some overlaid plating. I will be trying different methods as described by members of this forum. Thanks for the help and encouragement.