Egilman
-
Posts
4,382 -
Joined
-
Last visited
Content Type
Profiles
Forums
Gallery
Events
Everything posted by Egilman
-

F-86F-30 Sabre by Egilman - Kinetic - 1/32nd scale
Egilman replied to Egilman's topic in Non-ship/categorised builds
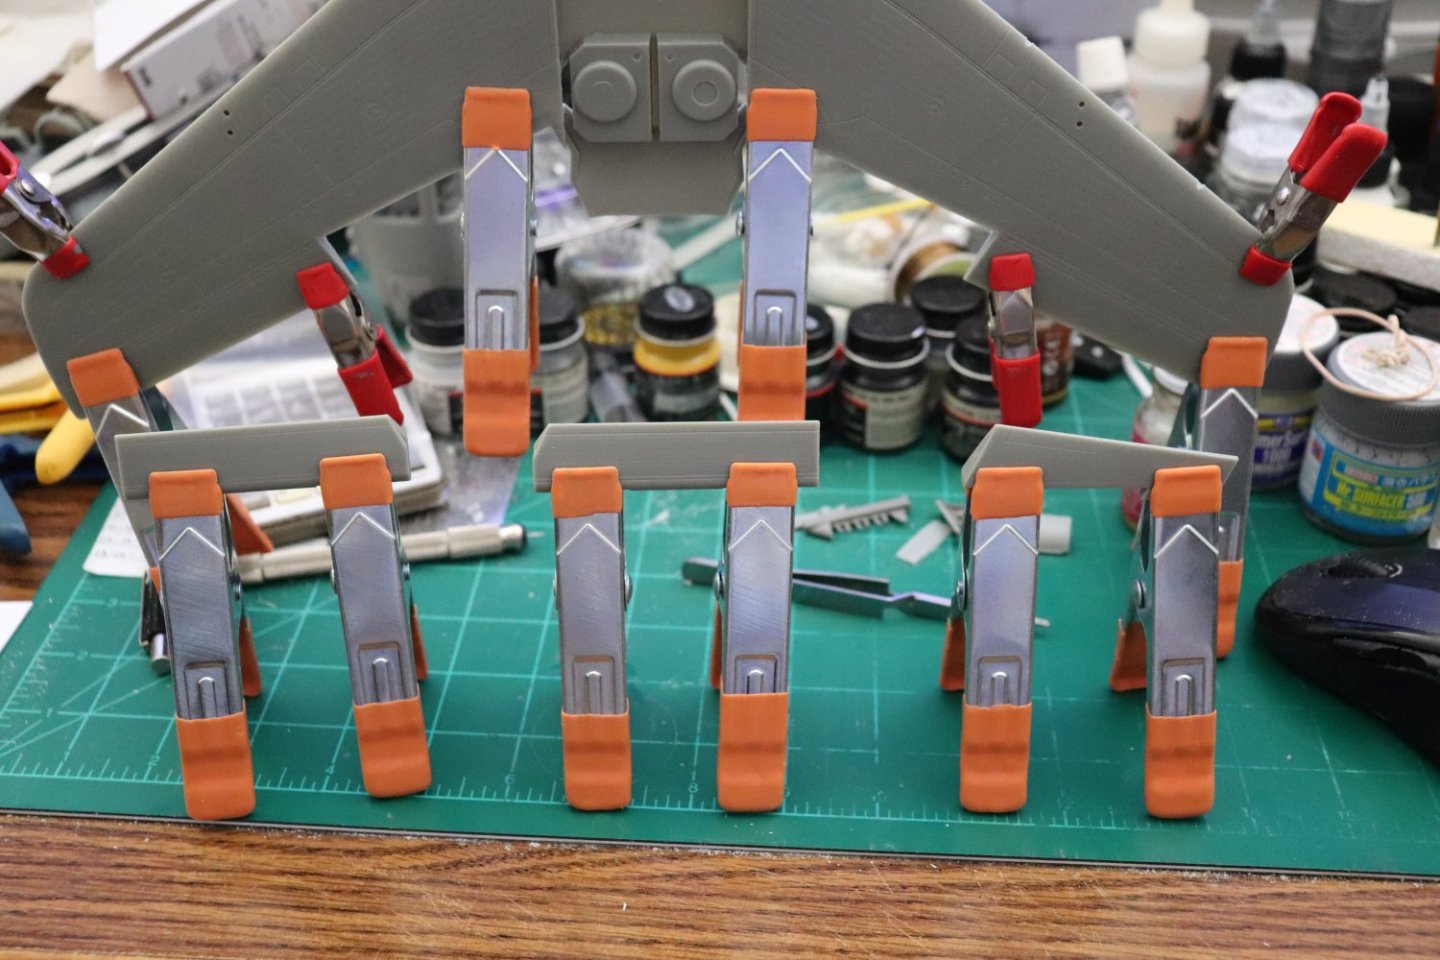
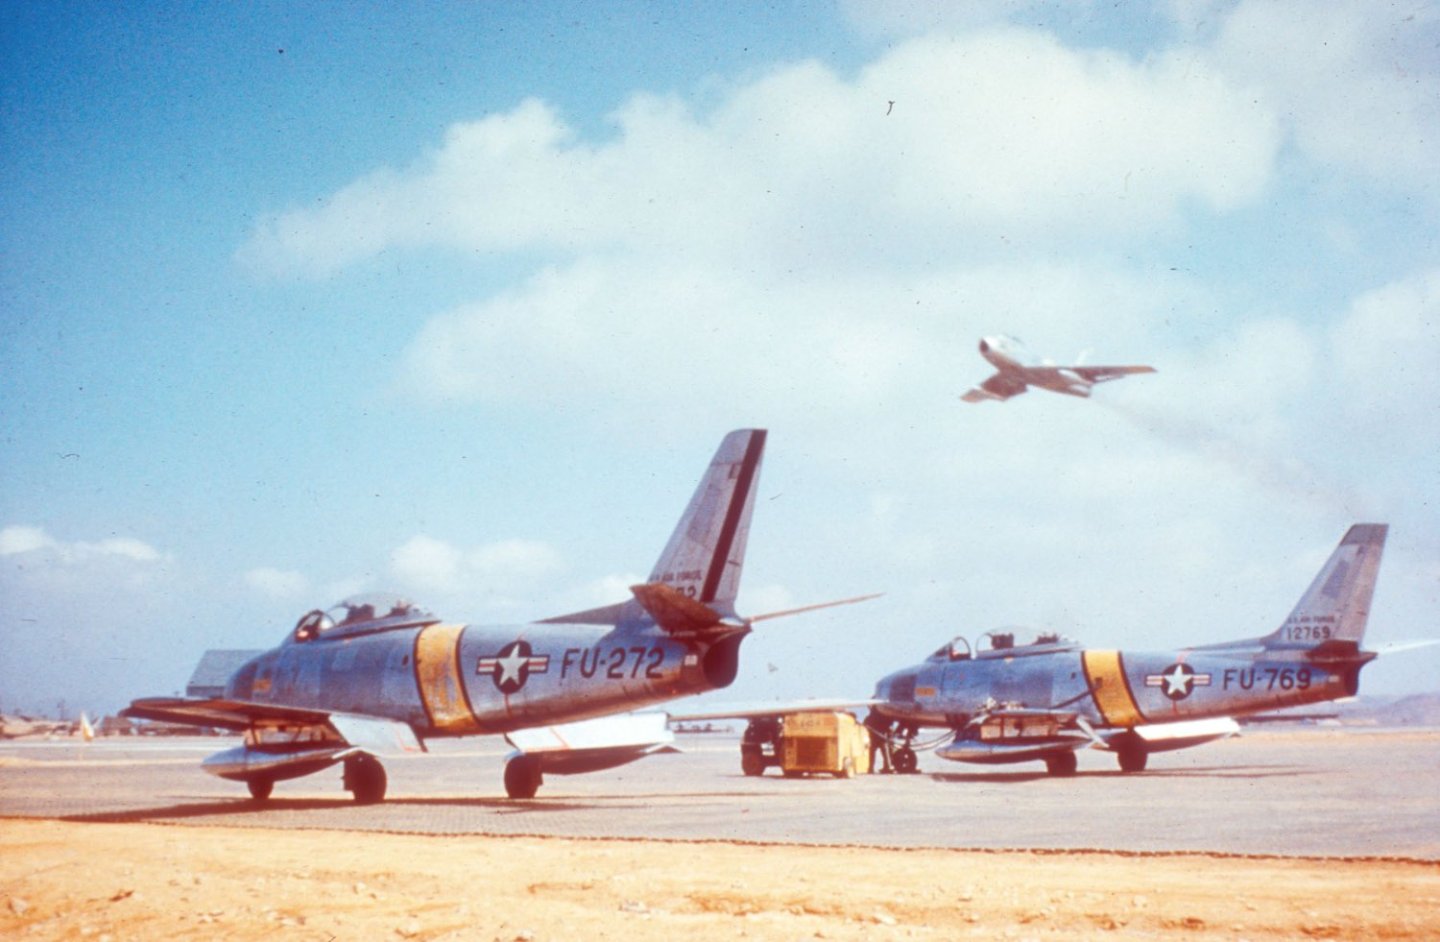
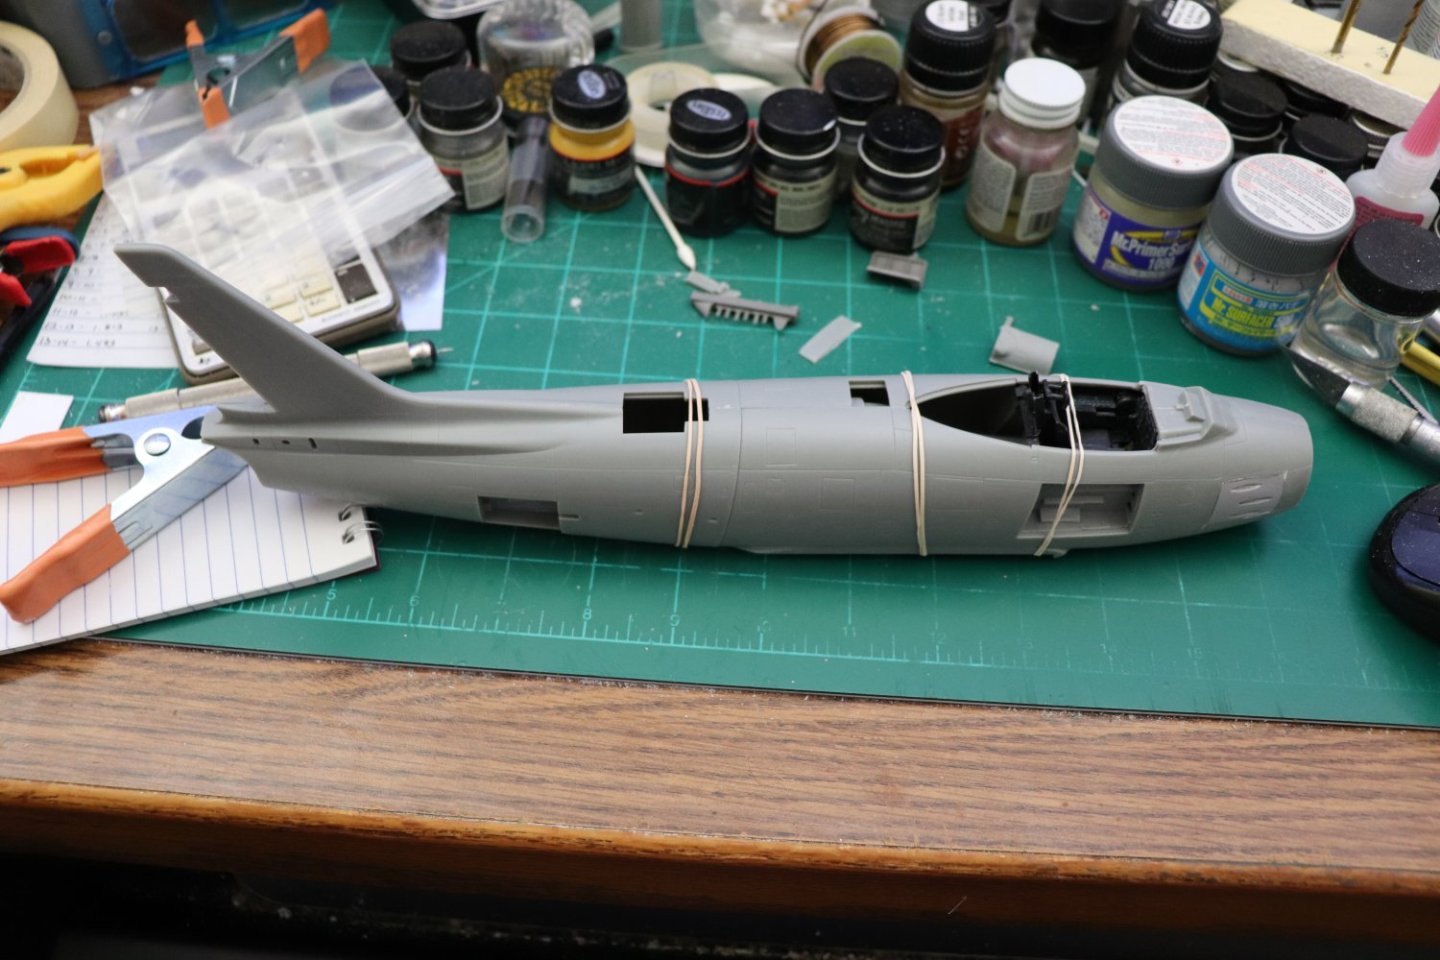
Thanks Dennis... Proceeding slowly, making sure I hopefully get it right... Main assembly of the fuselage is complete, awaiting it's final cure... Next was the control surfaces, Flaps and Rudder.... I went ahead and checked my source pics and came up with this one... late '52 or so Suwon, Korea.... Two F-86's sitting alert off the end of the runway... They are F-86E's instead of F-86F's but the period is correct... Notice the Flaps are down and the Speed Brakes closed.... So sitting in their revetment the flaps were closed but sitting alert could be open or closed for either control surface... Now I have a debate going on in my mind, which way I want to make it? Anyway, just finished gluing up the wing.... Once it is cured I'm going to have to heat bend the dihedral into the wing... 3.5 degrees, the kit molded them perfectly flat.... Making progress my friends... Thanks for the likes and following along... EG

- 585 replies
-
- 10
-

-
F-86F-30 Sabre by Egilman - Kinetic - 1/32nd scale
Egilman replied to Egilman's topic in Non-ship/categorised builds
I could see where that might work better, The Dental Repair powder is a water mix resin and cures indescribably hard.. But yet is still sandable and carveable... And it's wipeable smooth as long as it hasn't fully cured.... Well worth a try... -
F-86F-30 Sabre by Egilman - Kinetic - 1/32nd scale
Egilman replied to Egilman's topic in Non-ship/categorised builds
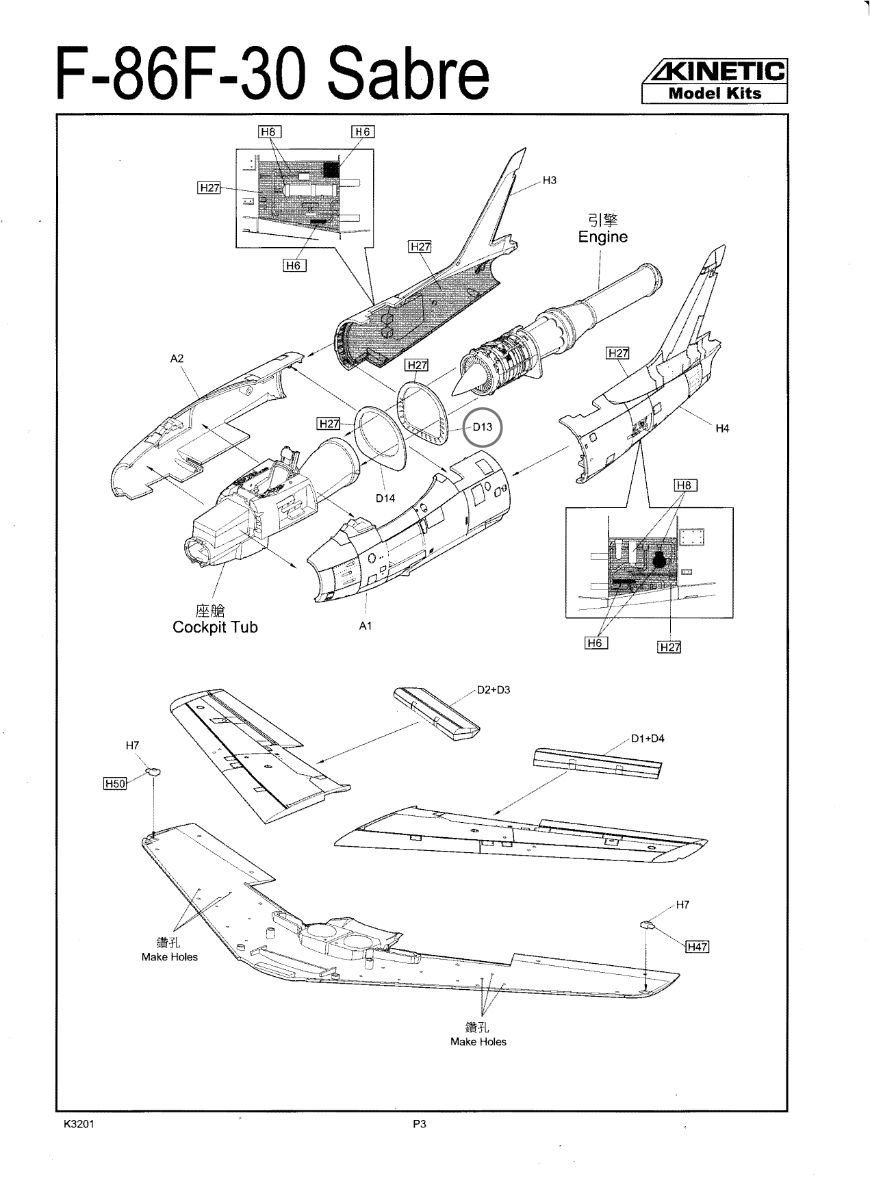
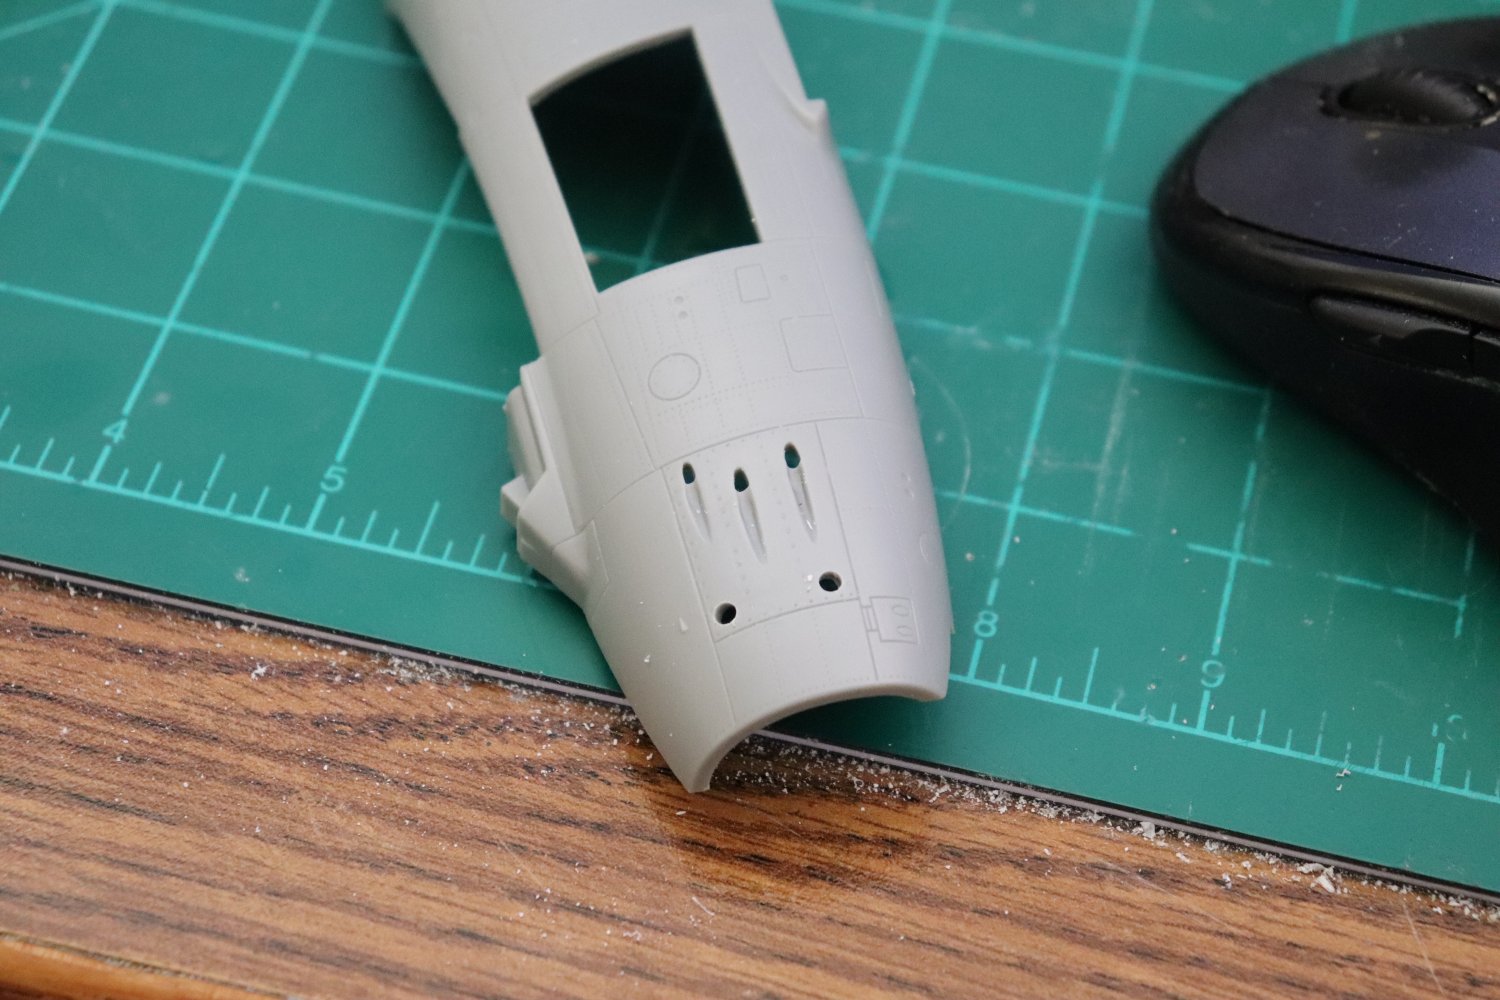
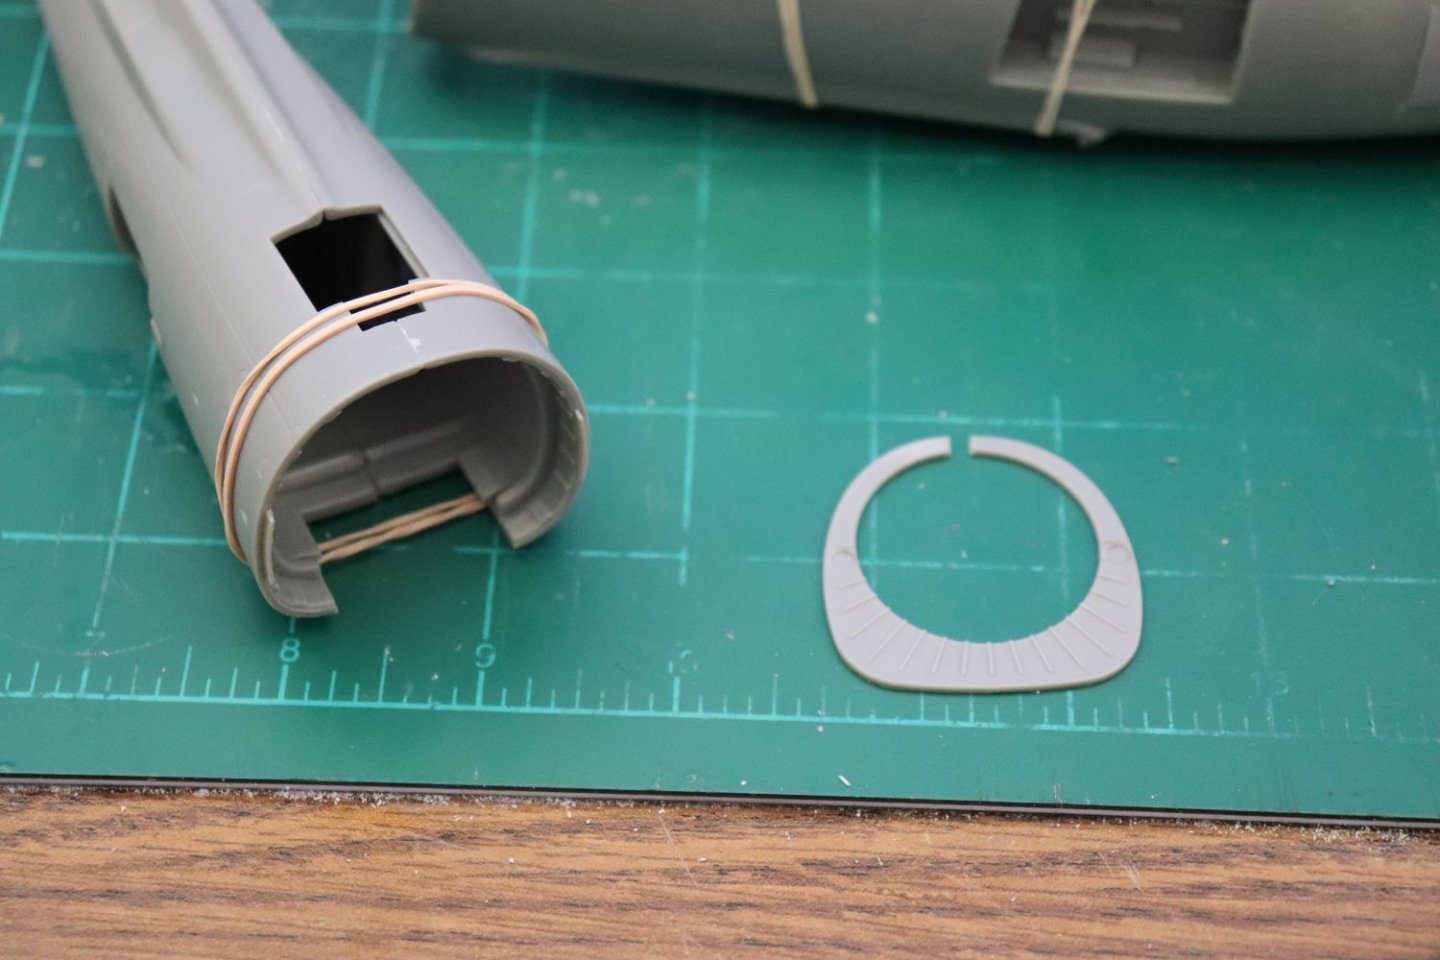
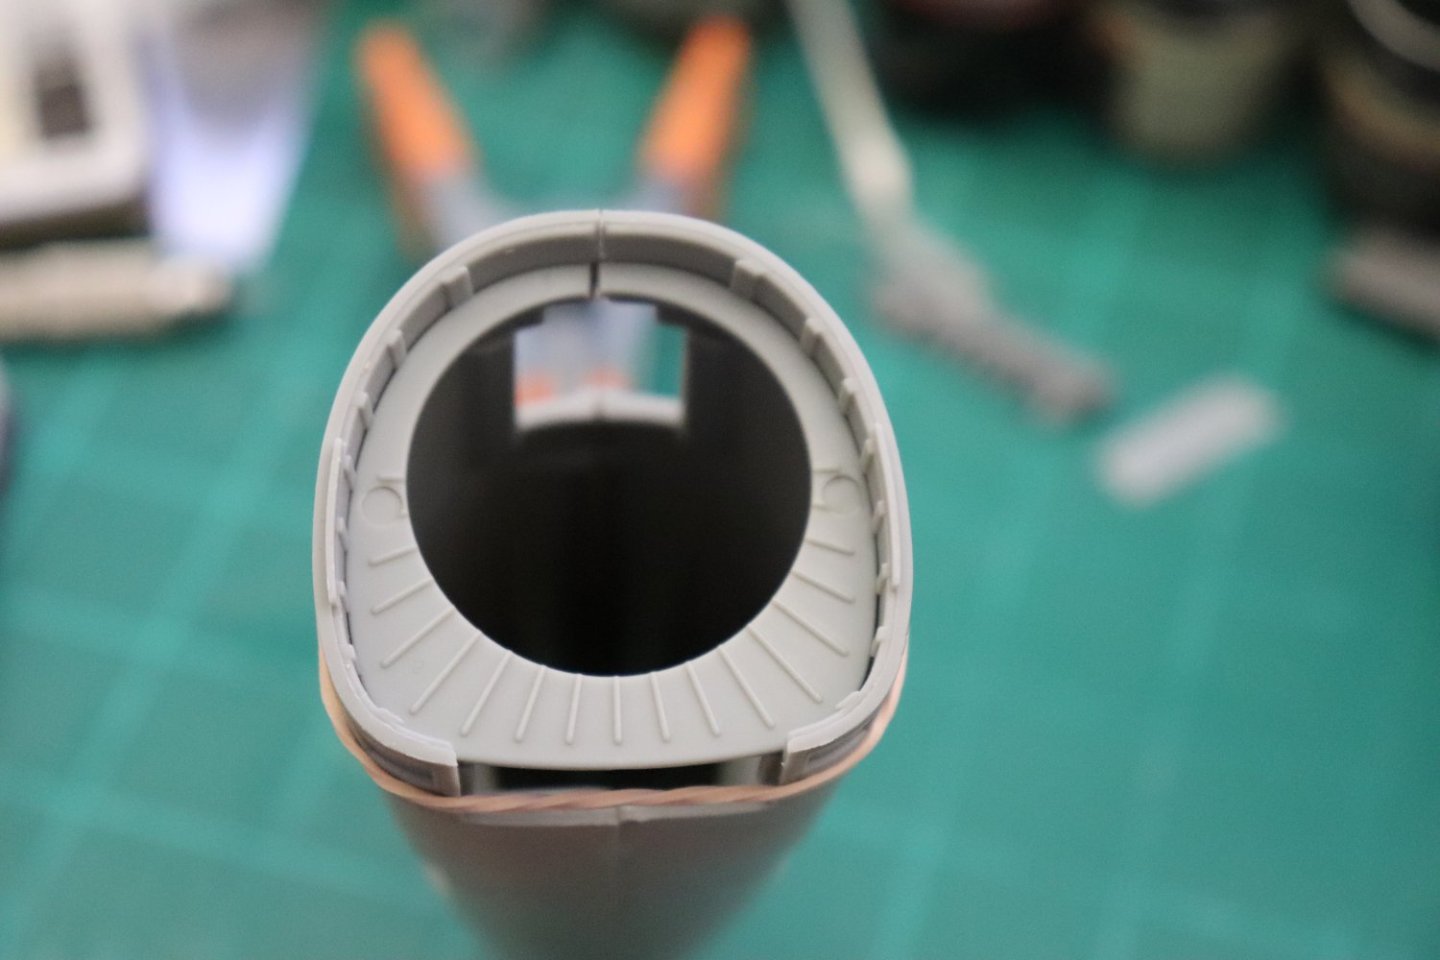
And another update... I've found that the plastic this kit is molded in is a bit soft, not really a big issue with building... But the plastic formulation does react a bit differently from regular polystyrene... Usually when I'm gluing plastic from most kits or Evergreen stock with Testors brand MEK glue, the joint is cured within ten minutes of application, the plastic this kit has been molded in takes about 4 hours to cure sufficiently to hold and overnight to completely cure... I found this out during the fuselage assembly portion... There is a part... D-13 on the drawing, (circled above) that is too big, 1/16th inch too big... When installed, it spreads the upper joint of the rear fuselage half wide open...... The fix is simple, cut the part down so it fits properly without spreading the joint... The initial installation exposed the glue/plastic problem by pushing the joint out... Thankfully there is an insert panel that creates a break in the joint and stops the spread before it ruins the entire upper joint... The fix is to cut a 1/16th inch section out of the part at the top to either side of the joint and snap it back in place so it doesn't put any pressure on the joint itself... When snapped into place it becomes a trapped part that doesn't require any glue at all... But I'm still going to glue it cause it will act to hold the fuselage separation joint together as a reinforcement maintaining it's shape.... As you can see below, makes for a much tighter and smoother joint.... This is a beautiful kit, but it does have some idiosyncrasies unique to it... Anyway, Onwards...
- 585 replies
-
- 12
-
-
F-86F-30 Sabre by Egilman - Kinetic - 1/32nd scale
Egilman replied to Egilman's topic in Non-ship/categorised builds
Thanks Dan... Yep I've tried it, but usually I let it harden too much before I'm finished sanding, it's an option I've used in the past but only for certain situations, usually for flat open seams... It does have the advantage of making very hard fills and joins but in my experience it's not so good with complex joints or sharp corners... The other issue is that it doesn't harden at the same speed, some CA's are faster than others, even from the same brand... And part of it is preference, simple Testors Putty (grey tube) dries slow enough that you can work it for a few minutes before it begins to harden and if you make a mistake you can easily remove it before it completely cures, the down side is it is an overnight cure.... 12-24hrs for a completely hard cure, but that is also a benefit, it gives you a natural pause in the build sequence... It's another tool in the box for those situations that would benefit from it... But not a general use tool.... -
F-86F-30 Sabre by Egilman - Kinetic - 1/32nd scale
Egilman replied to Egilman's topic in Non-ship/categorised builds
Thank you my friends, old school the only way I know how to do it... (I would be lost without my microsaw) It's now time to glue it all together into one fuselage, and then prime and final smooth the joints to finish it off... Then the wings get glued together as well. from here on it should be a fairly straightforward build... The only issue I've got to figure out is the wing join gaps, probably some filler strips, the angle is slightly less than 90 degrees in a sharp corner so the joint has to be tight... I also have to cut off the left wing gusset, when the ammo bay door was open the wing root leading edge was removed and usually hung off a cable but was occasionally placed on the wing upper surface... I still have to figure out where to cut it.... I'm going to present her in alert mode, sitting on the apron in rapid reaction state ready to fly, just pull the engine covers, fire up the engine and go... So the assembly will take her to an almost finished state as everything except the left side Ammo Bay Door and Speed Brakes will be closed up.... Even the Flaps will be at 0 degrees... (very rarely were they anything but when on the ground) And of course, everything gets silvered.... So this should move along fairly quickly until it's time for Rub-n-Buff & decaling/stenciling, (there are a million of them) Landing Gear & Canopy will be the last parts done.... At that point I will probably revisit the engine and see if I can't improve the cart... Again Thank You for the complements, it is sincerely appreciated.... -
You continually amaze me brother with your abilities to do figures that look real especially the modified figures... You have a real talent for this type of modeling... They are spectacular all by themselves....
-
Very Very nice, and a completed GPM kit to boot! I've watched a lot of people start one of these kits and eventually bin it over the years... (me included) Completing it is an accomplishment itself.... Beautiful job my friend, very impressive... Gonna try a Halinsky next? I heard the Thunderbolt was a particularly interesting build (the engine alone I believe has over 100 parts, it includes a lot of choice words in it's workflow as well) {chuckle} But they are a lot more accurate in their appearance... You are definately a card master....
- 150 replies
-
- 11
-
-
F-86F-30 Sabre by Egilman - Kinetic - 1/32nd scale
Egilman replied to Egilman's topic in Non-ship/categorised builds
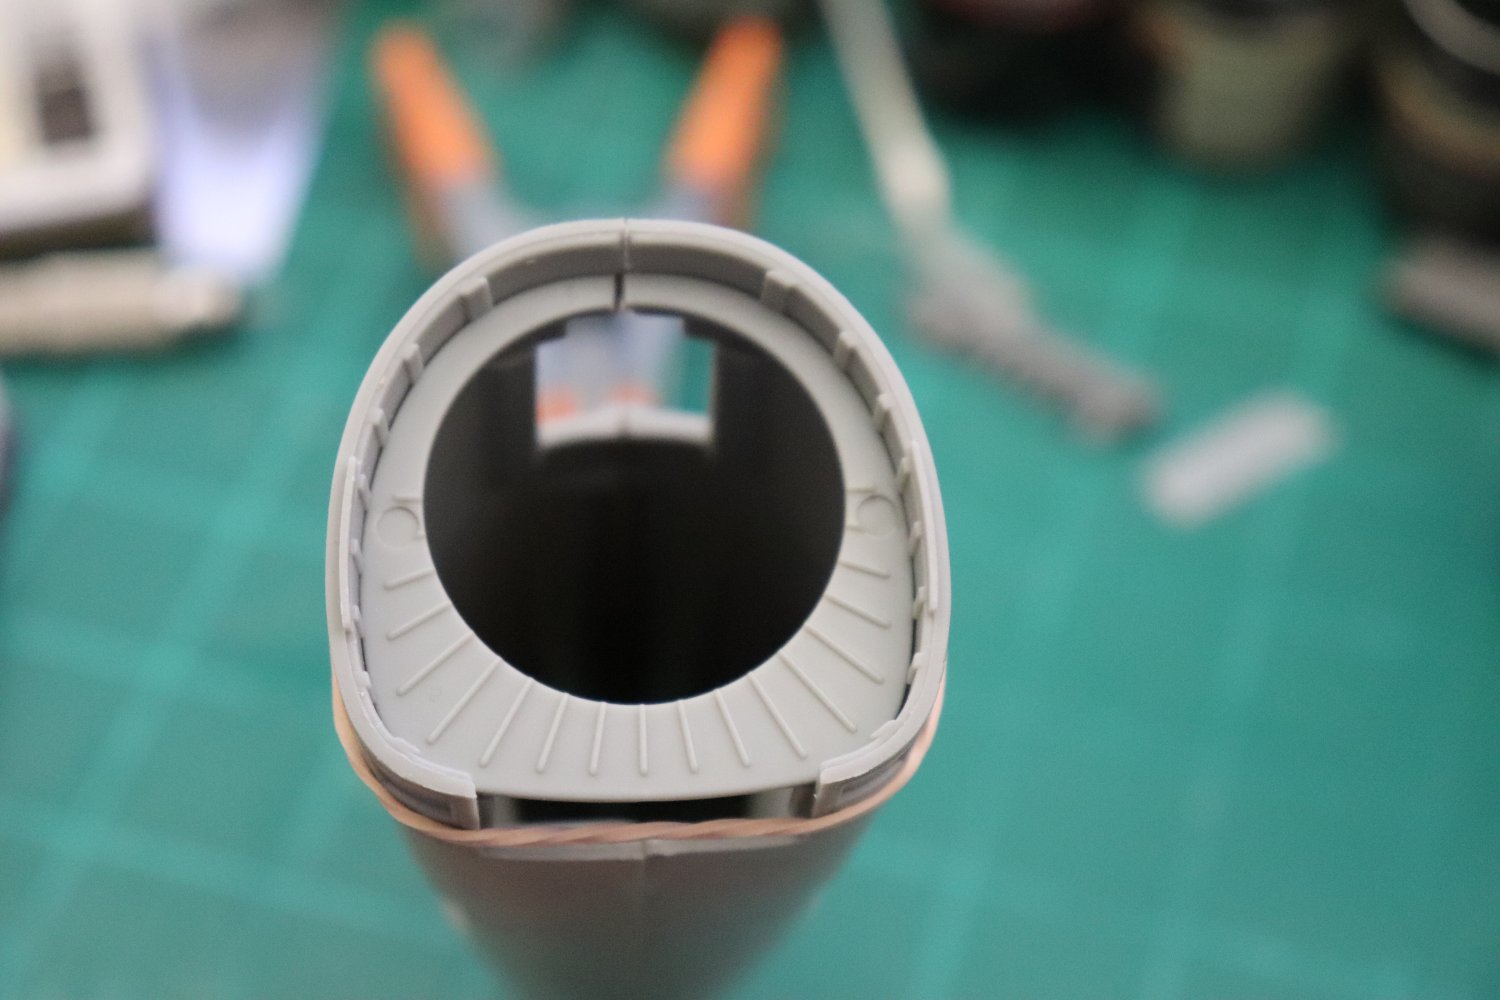
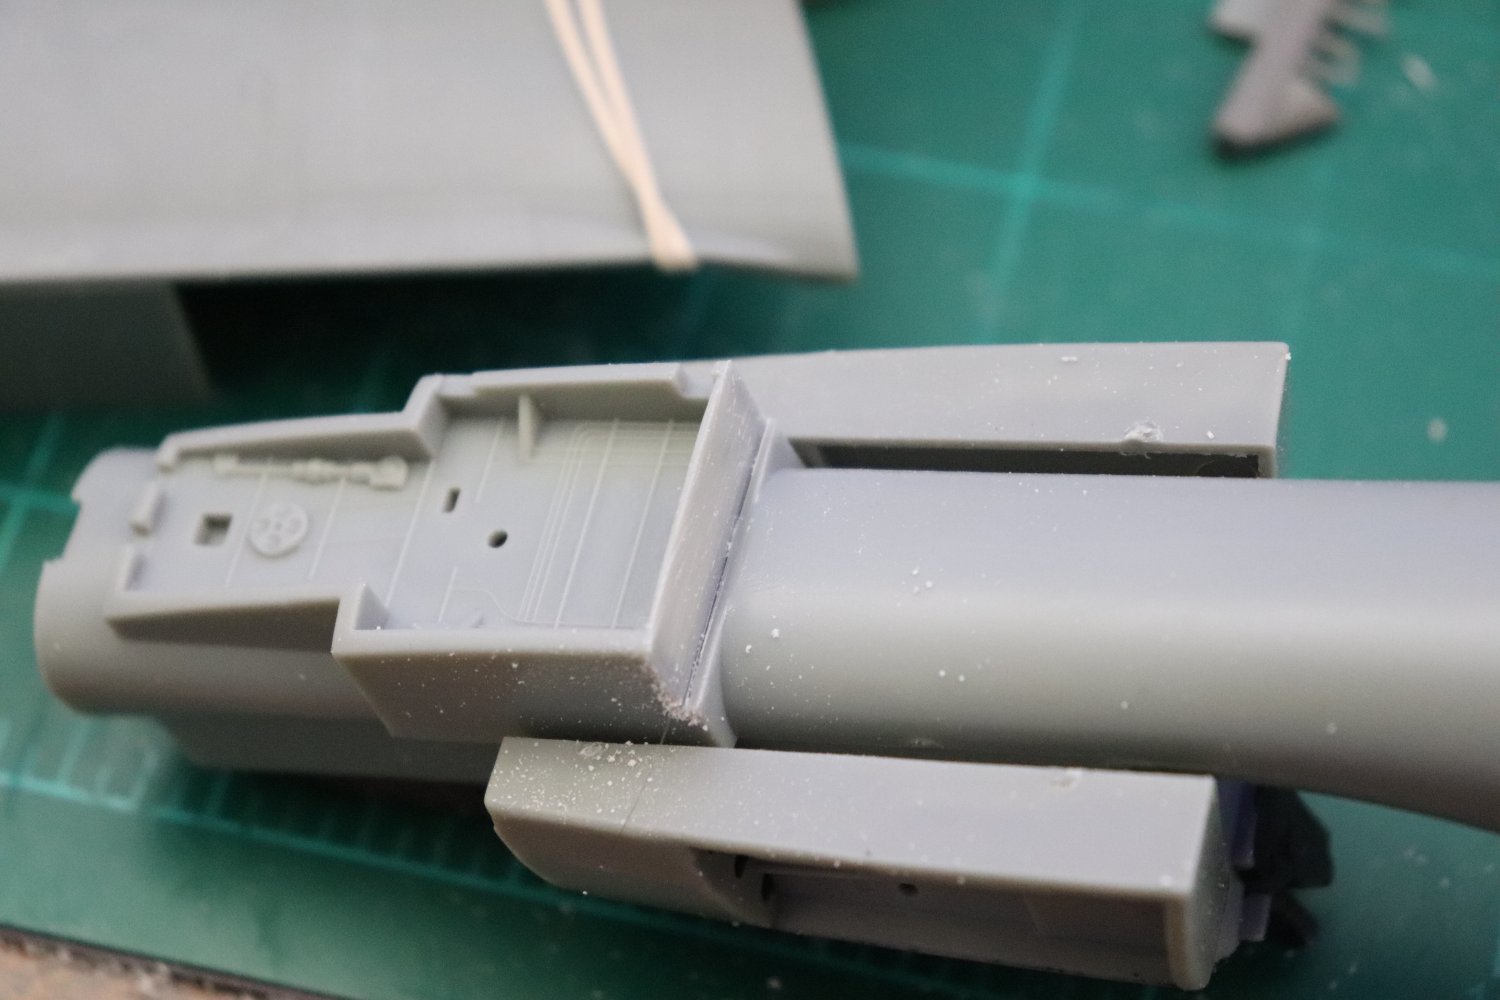
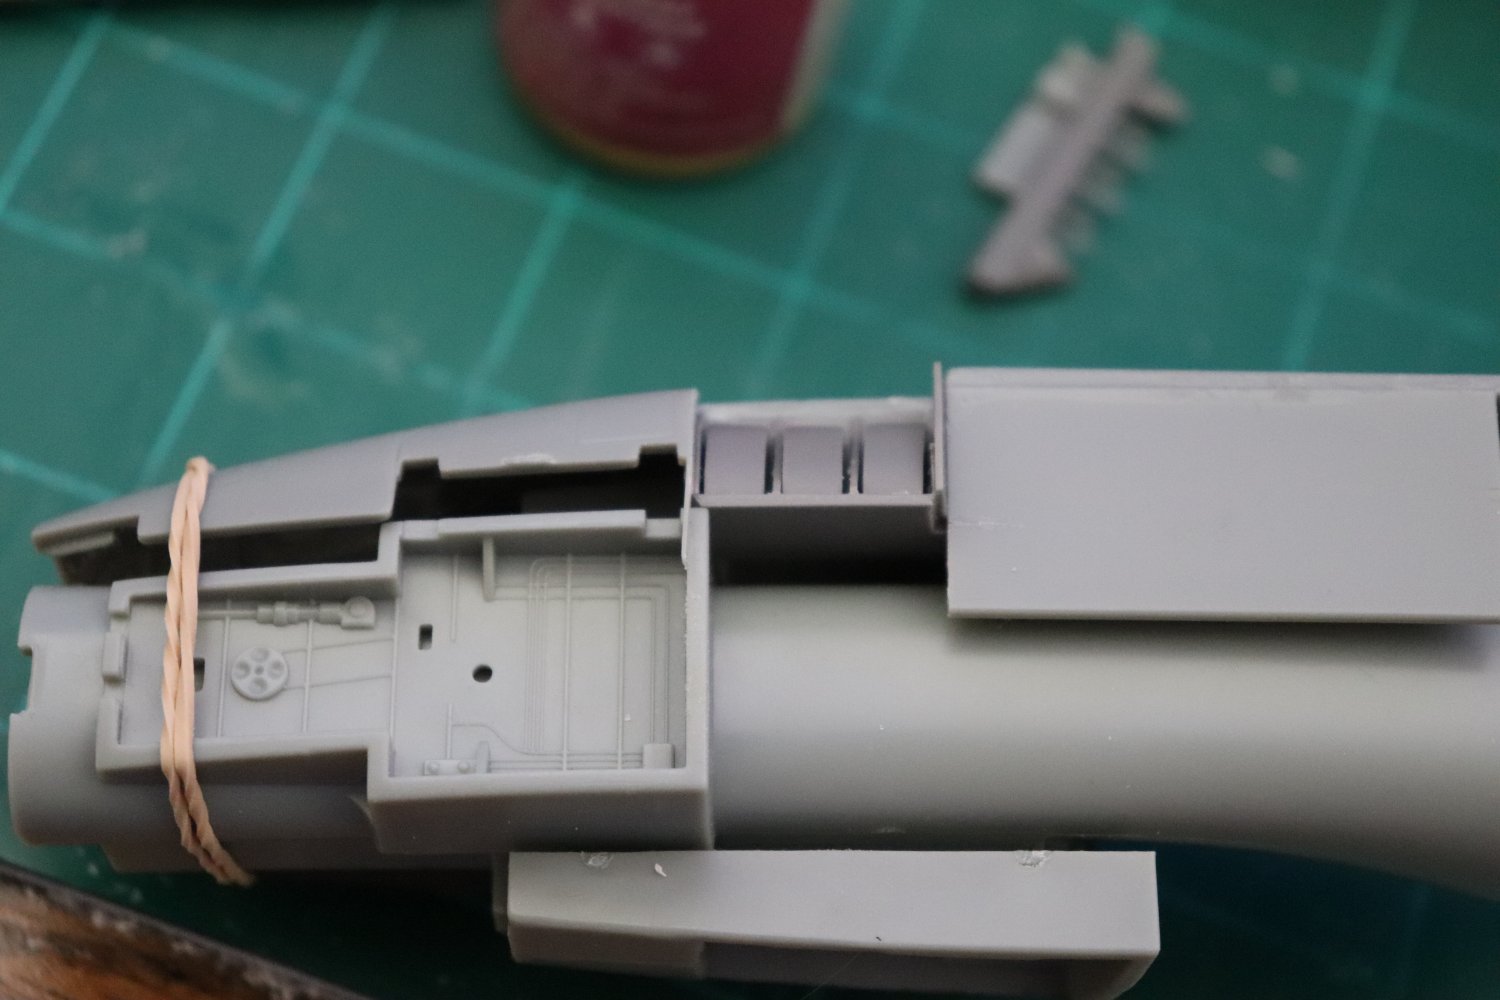
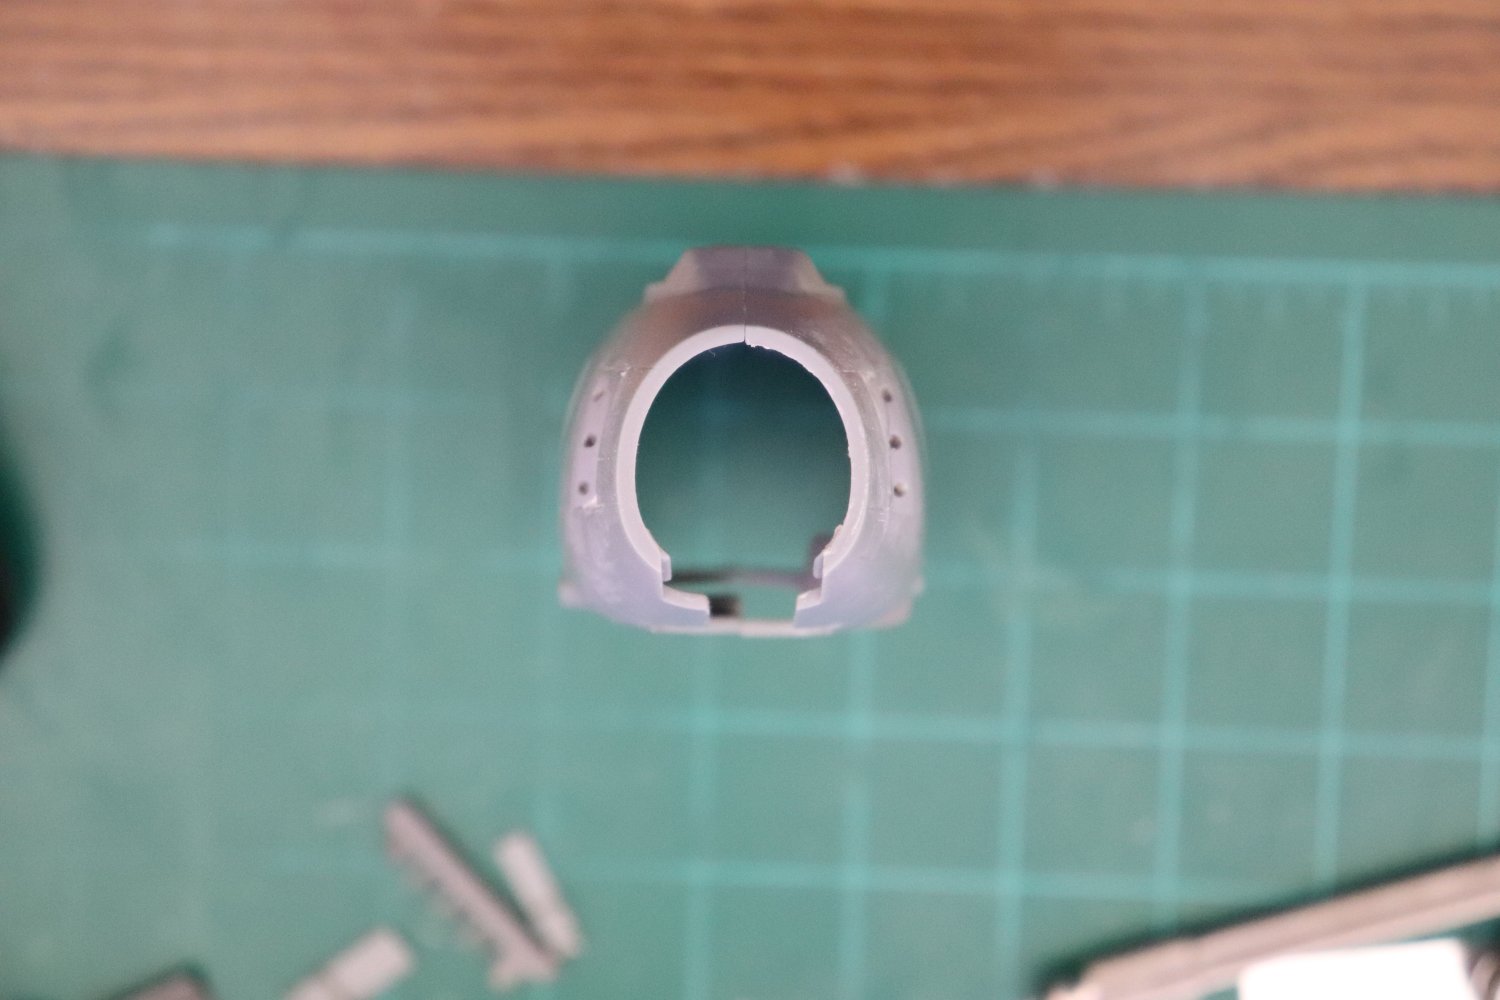
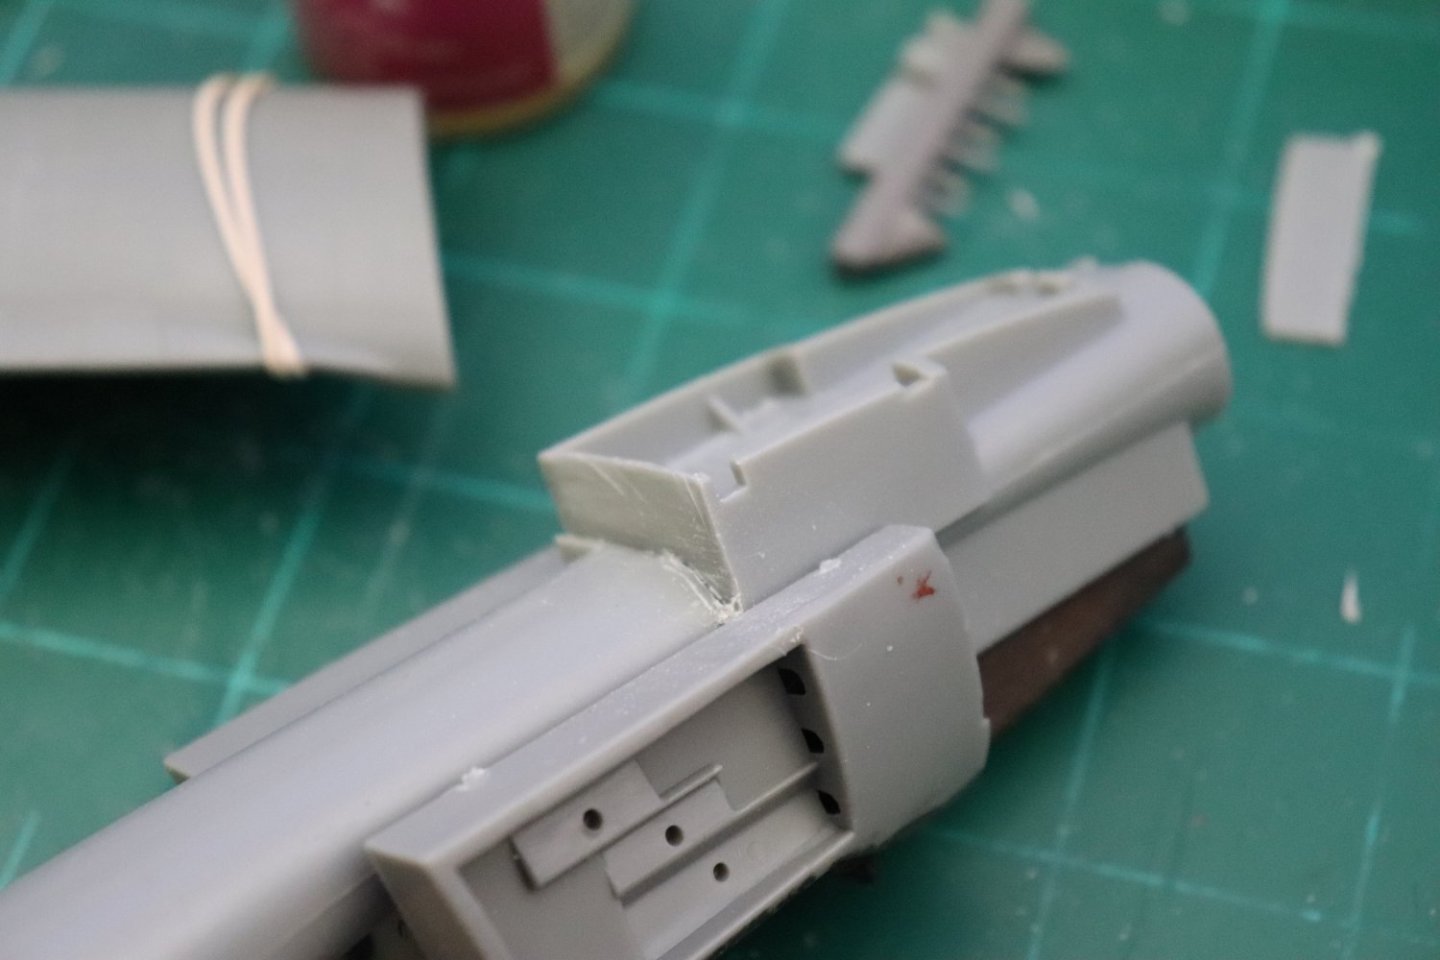
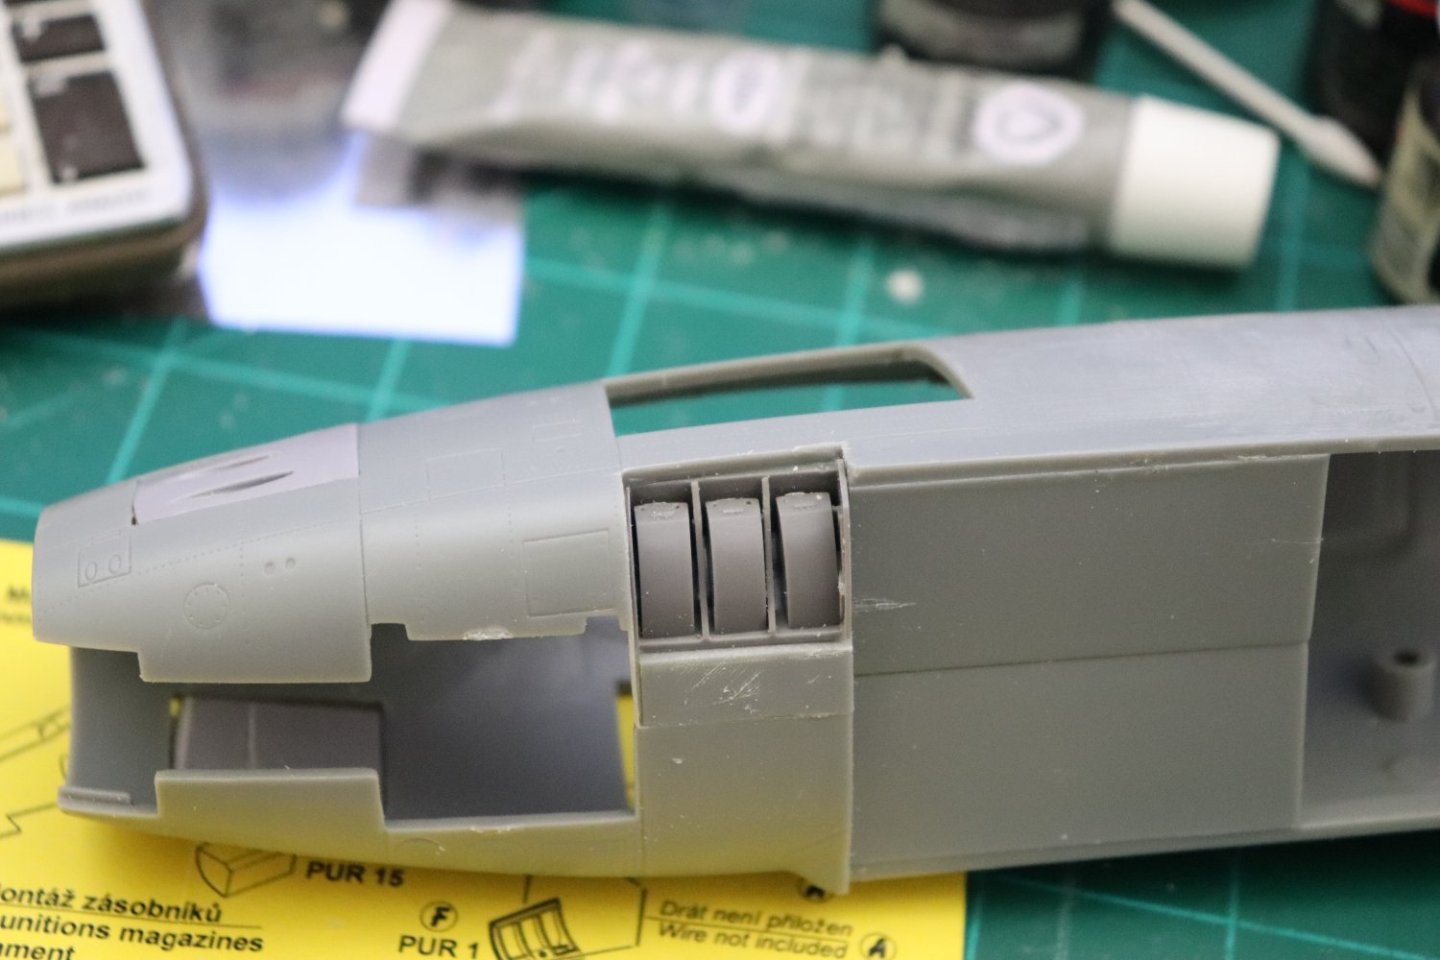
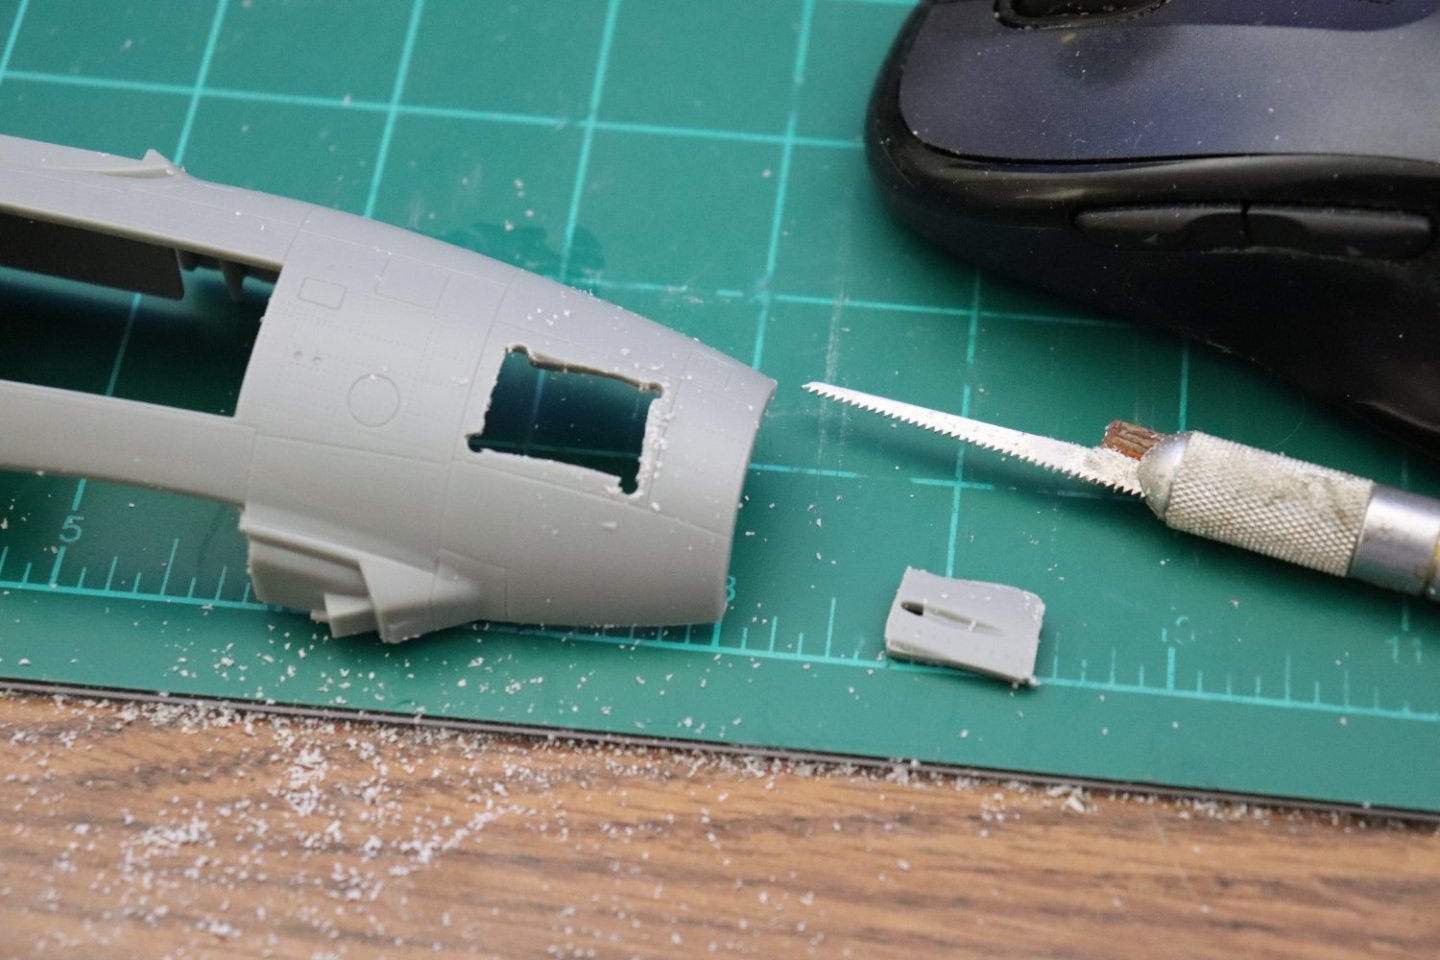
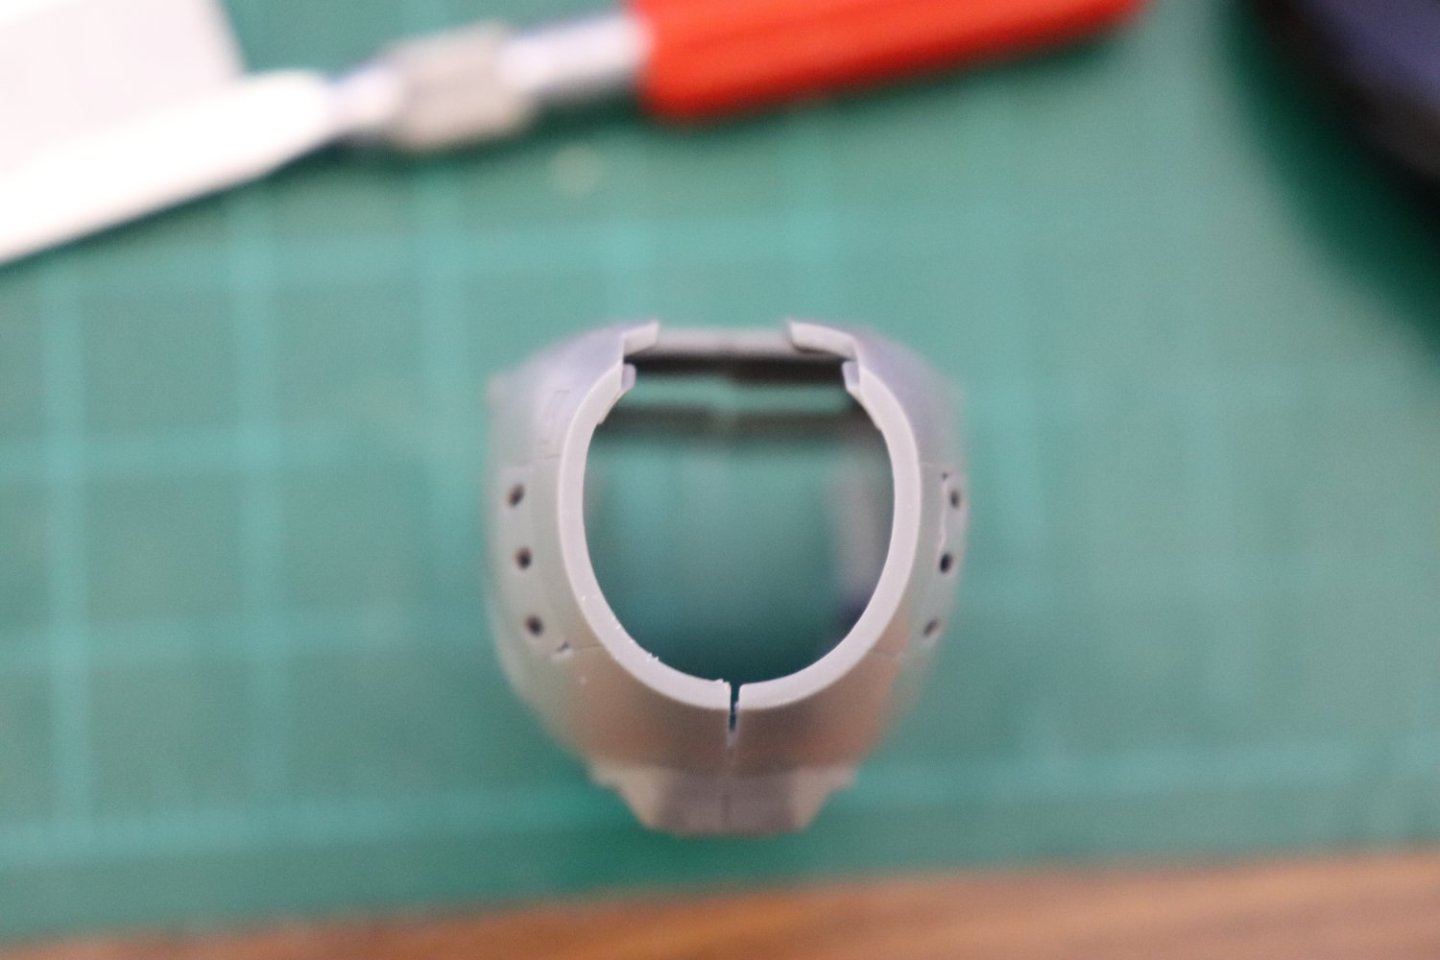
Another small update my friends... And another excursion with the micro saw.... The object here is to thin the back wall without breaking thru to the gear bay.... Far enough into the wall to clear the Ammo Bay insert.... Initial cut went like this.... That took off about 2/3rds of the thickness... Next is to remove the remaining corner from the intake planum.... Essentially a #2 straight blade run into the wall along the curve of the plenum, then a short straight cut along the machine gun bay... Once done, use a chisel blade to remove the triangular part along the plenum... And yes, that red splash on the side of the machine gun bay is my physical contribution to the build, courtesy of the #2 straight blade.... As the admiral would say, it is now officially mine.... {chuckle} Done... I will have to do a bit of filling along the joints when all is said and done... But it now ready for assembly..... More later.... EG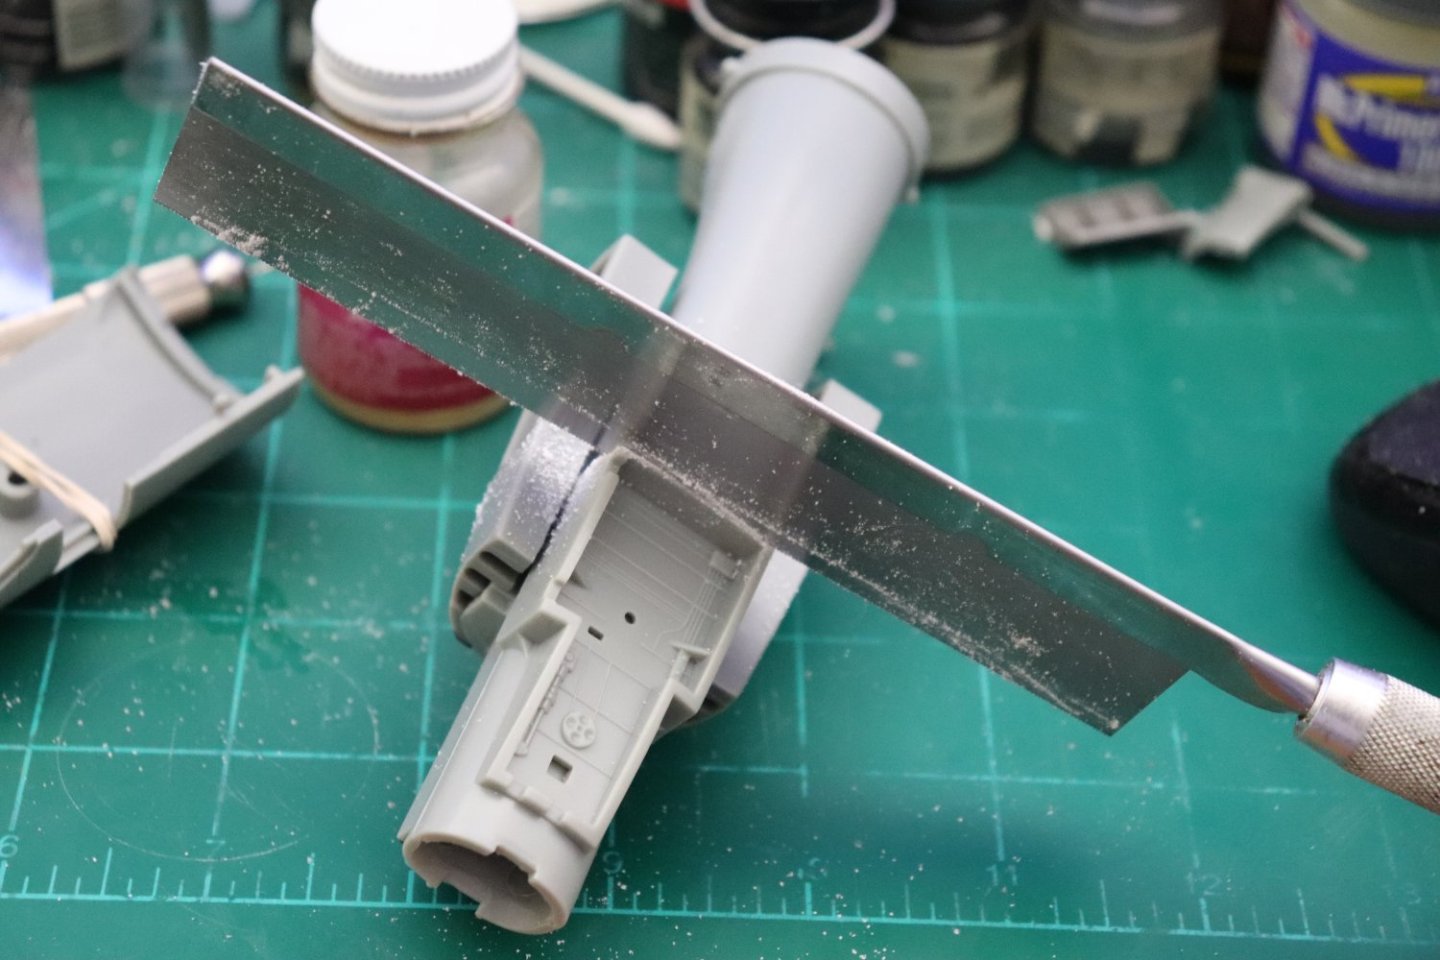
- 585 replies
-
- 11
-
-
F-86F-30 Sabre by Egilman - Kinetic - 1/32nd scale
Egilman replied to Egilman's topic in Non-ship/categorised builds
I've read that it is a wipe on wipe off type of stuff, only for filling gaps... Sandable smoothing fills take place after it is cured for at least a day... I don't know, others may have a better understanding of it, all I know is I haven't found an application yet where it works like we understand normal putties do... And it has come off everything I've ever put it on... -
As originally designed the Stuka had a bomb swing on the centerline so the bomb would clear the propeller arc when dropped... It is what made it a deadly accurate dive bomber much like the American SBD..... but as a tank buster, it was removed so no one would get the idea of loading it up with gun pods and a bomb, it wouldn't even get off the ground with both... Beautiful job on this brother... it was one of the favorite planes of my youth.... (especially the cox u-control version)
-
F-86F-30 Sabre by Egilman - Kinetic - 1/32nd scale
Egilman replied to Egilman's topic in Non-ship/categorised builds
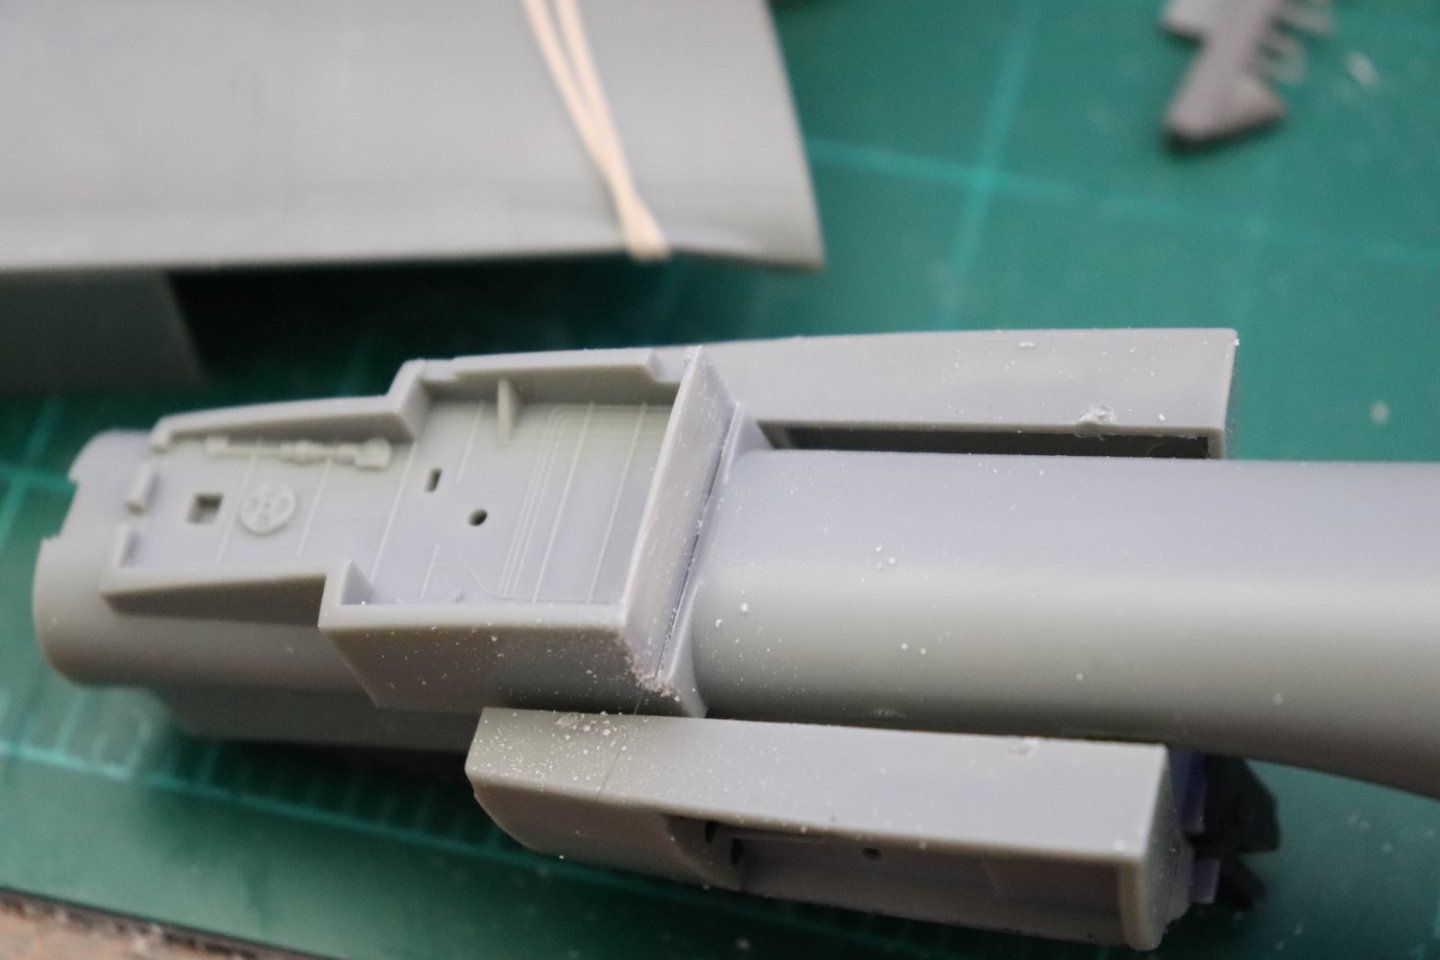
Short update brothers... I knew that installing the Ammo Bay was just went too easy... And I found out when I was trying to fit the forward fuselage halves together.... The back wall of the nose gear bay is way too thick and needs to be trimmed down on that side so it can slip into the space in front of the bay... I checked the two aftermarket landing gear setups for this kit and they have the same problem, I would have to thin them as well... Shouldn't be too much of a problem for the razor saw as long as I get the initial cut straight... Failing that replacing the entire back wall with some .010 sheet styrene should do it.... I just knew that the Ammo Bay went in way too easy... {chuckle}
-
F-86F-30 Sabre by Egilman - Kinetic - 1/32nd scale
Egilman replied to Egilman's topic in Non-ship/categorised builds
Thanks Craig! but I will say there are a few more plastic surgeons out there that make me look like an amature... Got a bit more to do to fit it properly, has more to do with the thickness of the parts as shot by Kinetic, some serious thinning needs to be done... (and aftermarket is no help) -
F-86F-30 Sabre by Egilman - Kinetic - 1/32nd scale
Egilman replied to Egilman's topic in Non-ship/categorised builds
Thanks Dennis, it's appreciated... Except there is always a fuss with this kind of stuff... Will be showing what's next cause it doesn't quite fit as well as it seems, more surgery is needed.... Pics in a bit... And hopefully the gods of no pain will smile on me for the next few weeks... (yeah right) -
F-86F-30 Sabre by Egilman - Kinetic - 1/32nd scale
Egilman replied to Egilman's topic in Non-ship/categorised builds
The real problem Brothers is that it doesn't adhere very well to the model plastic and tends to peel... And, like anything acrylic, once you get a corner lifted, it comes right off... -
F-86F-30 Sabre by Egilman - Kinetic - 1/32nd scale
Egilman replied to Egilman's topic in Non-ship/categorised builds
That's the issue brother, at least everytime I've tried it..... -
F-86F-30 Sabre by Egilman - Kinetic - 1/32nd scale
Egilman replied to Egilman's topic in Non-ship/categorised builds
Thanks Ken.... I think they came out well... They did line up nicely..... Still need to prime them to see how smooth they actually are but I have a good feeling... Thanks my friend...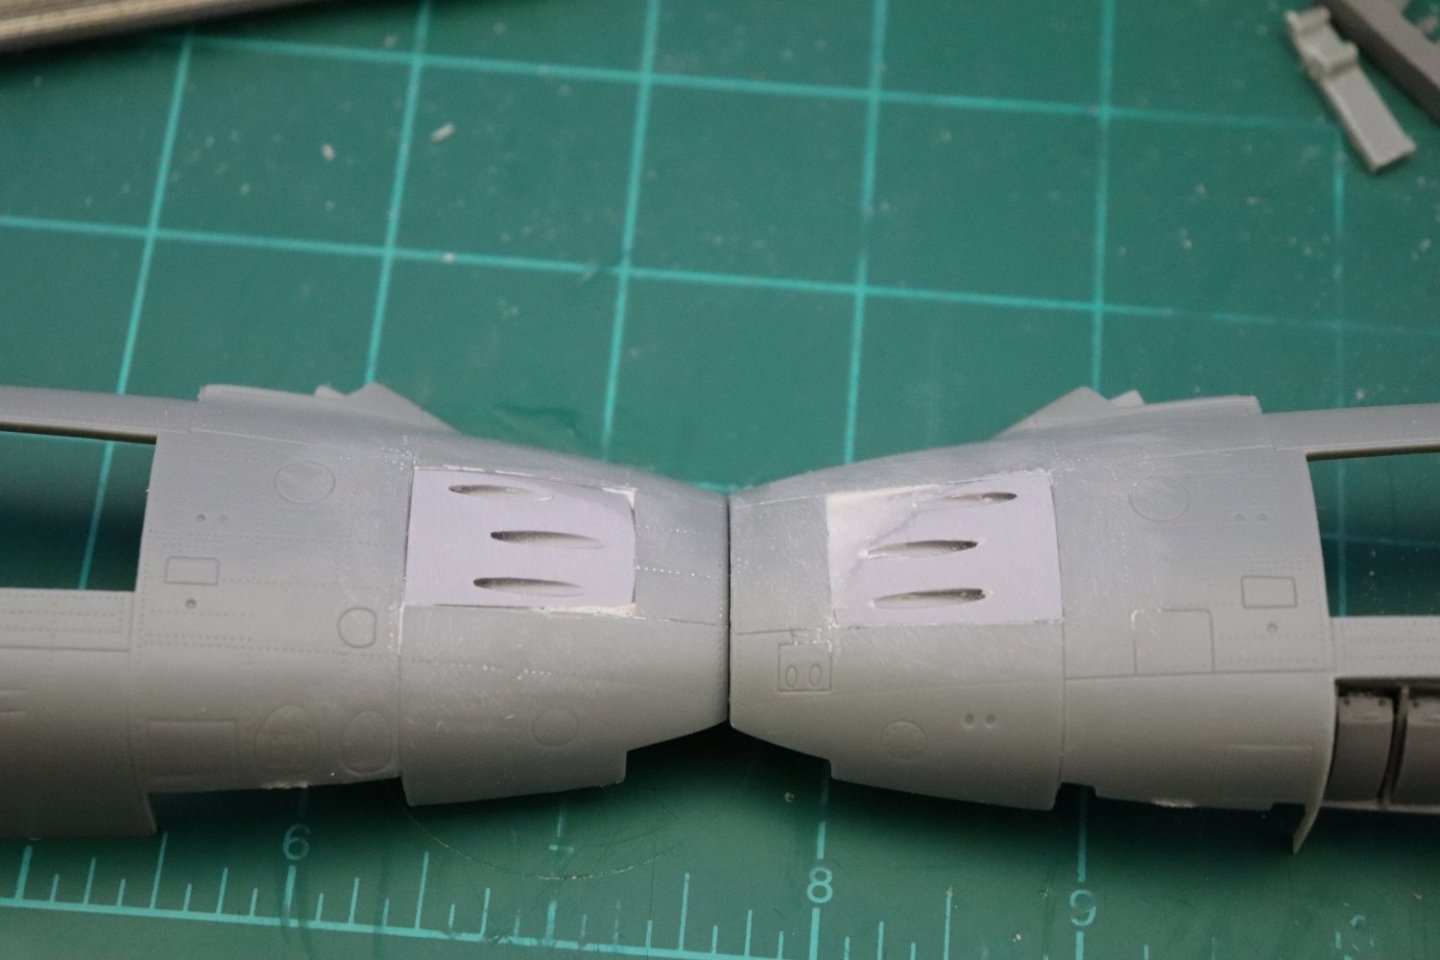

- 585 replies
-
- 11
-
-
F-86F-30 Sabre by Egilman - Kinetic - 1/32nd scale
Egilman replied to Egilman's topic in Non-ship/categorised builds
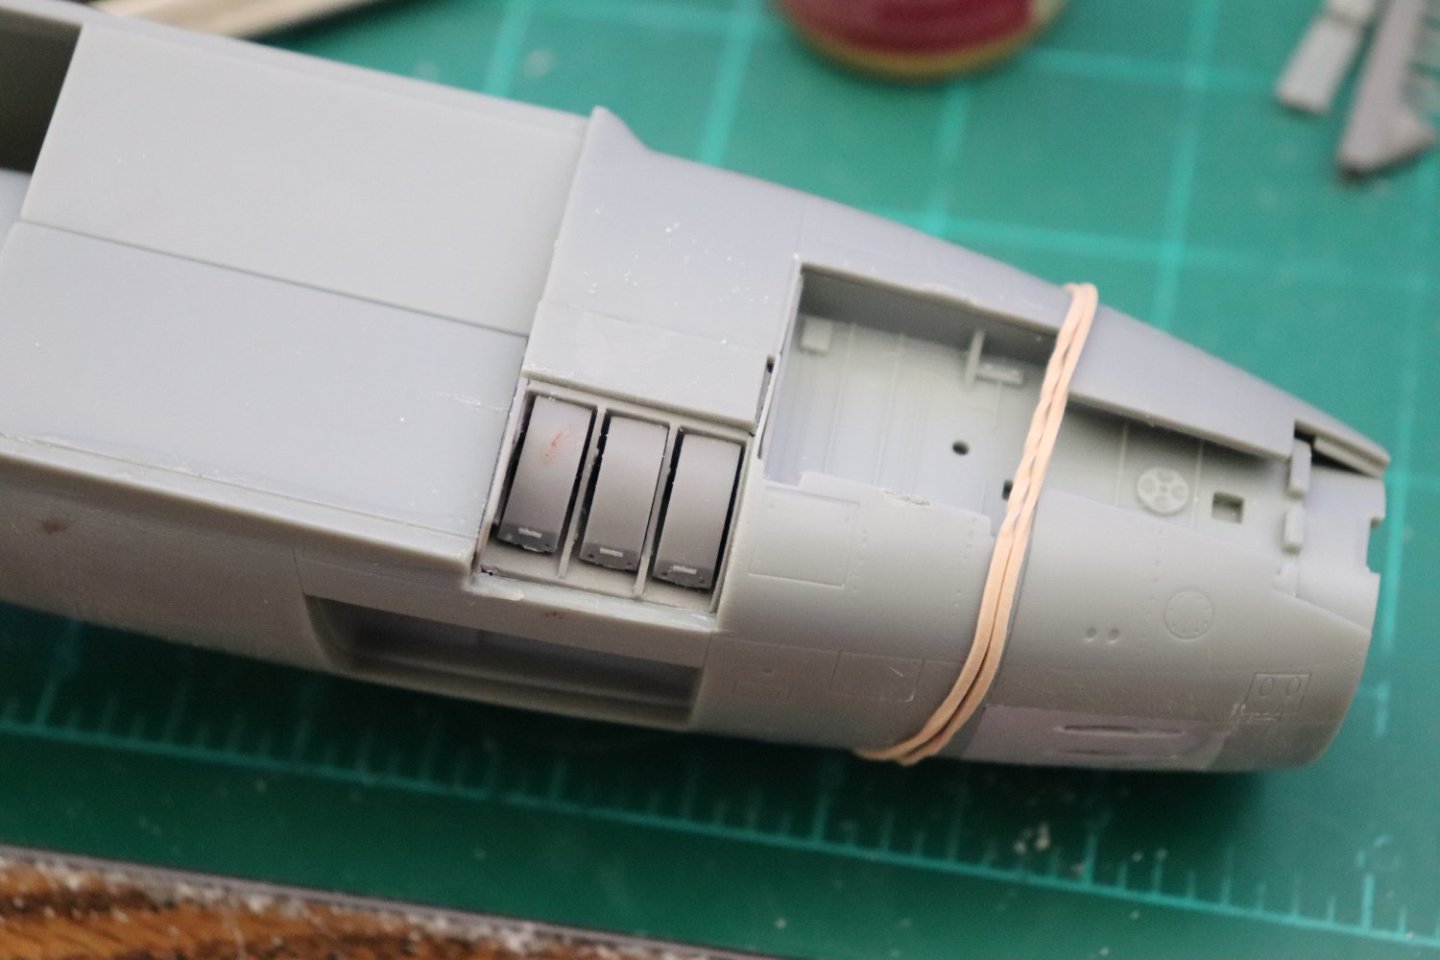
Ammo Bay installed.... Hole cut.. Installed.... Now the door doesn't fit perfectly, it's a few tenths of a mm off, but that was expected.... Besides it will be open functioning as the initial step into the aircraft and no one will see it... That went a lot easier than I though it was going to.... Almost ready to assemble the fuselage.... Onwards....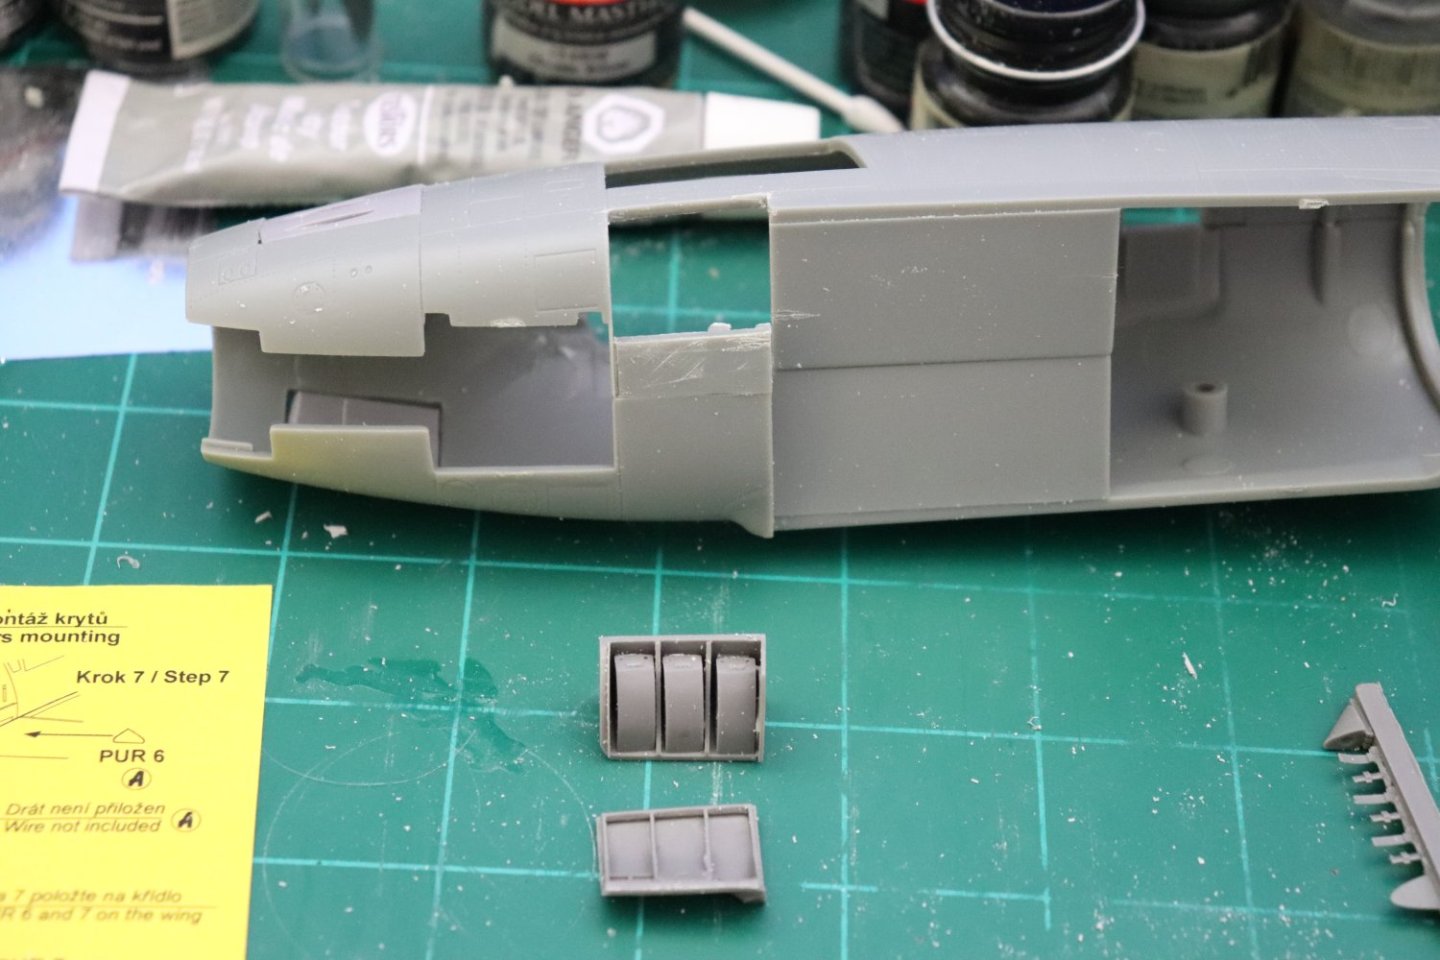
- 585 replies
-
- 13
-
-
F-86F-30 Sabre by Egilman - Kinetic - 1/32nd scale
Egilman replied to Egilman's topic in Non-ship/categorised builds
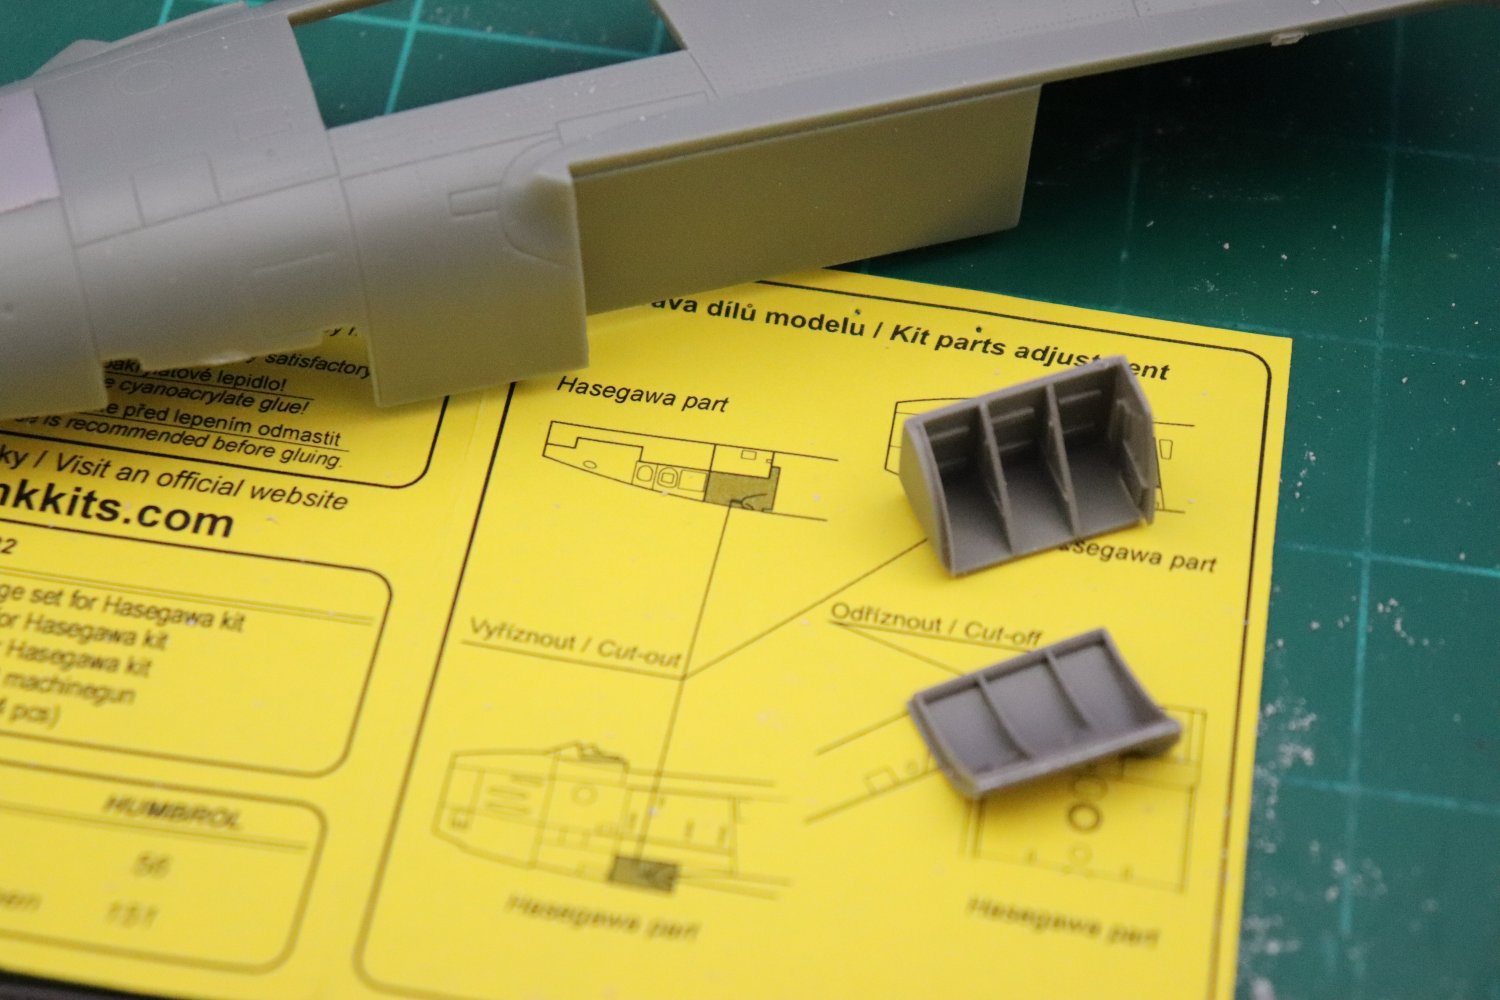
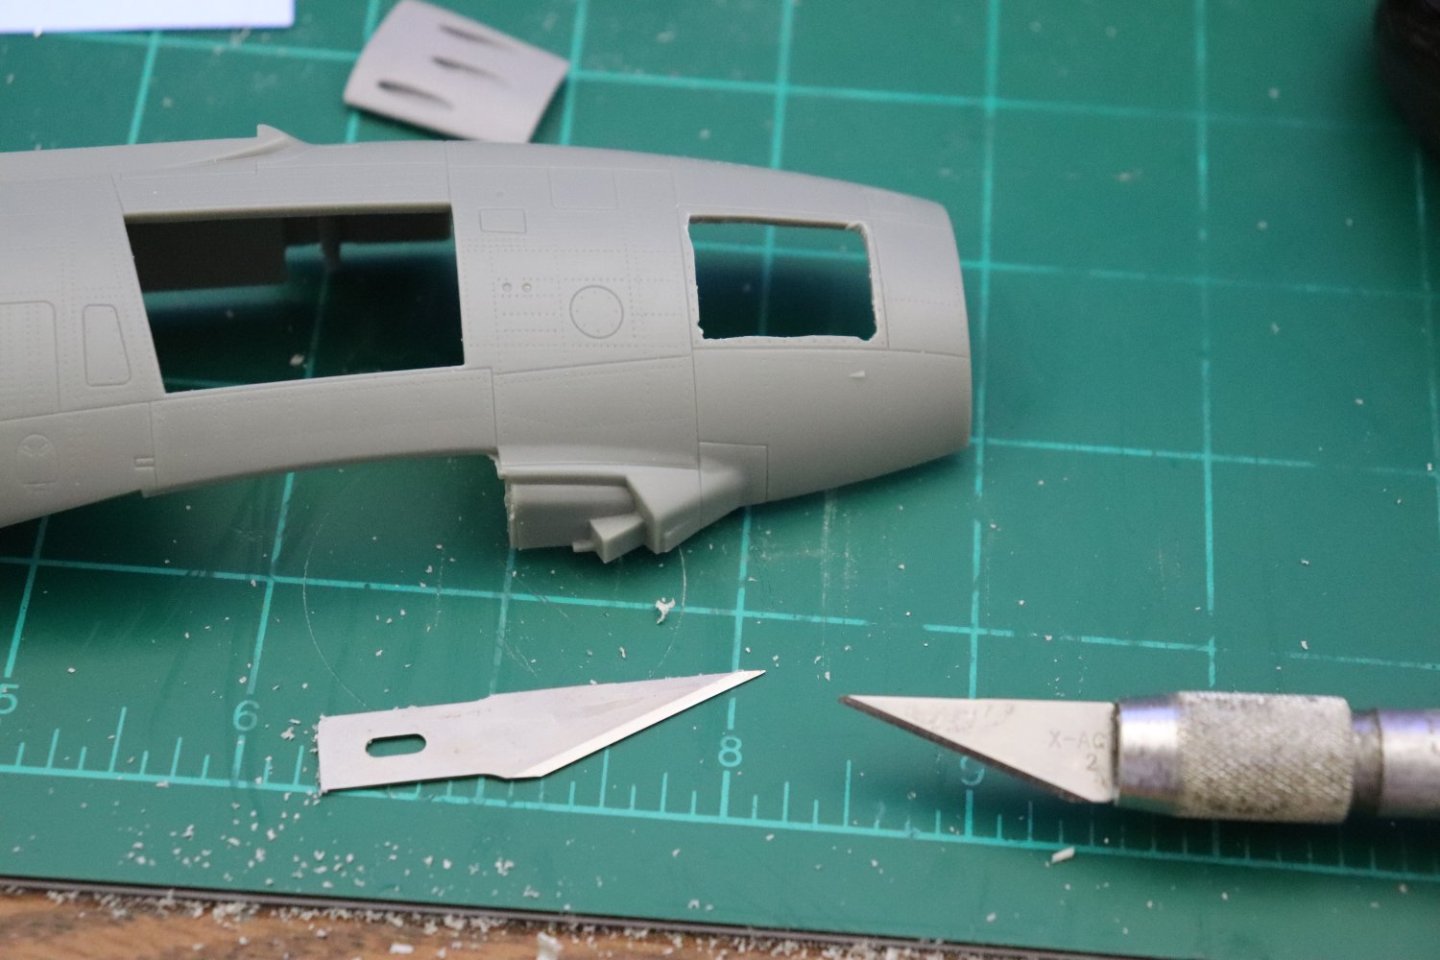
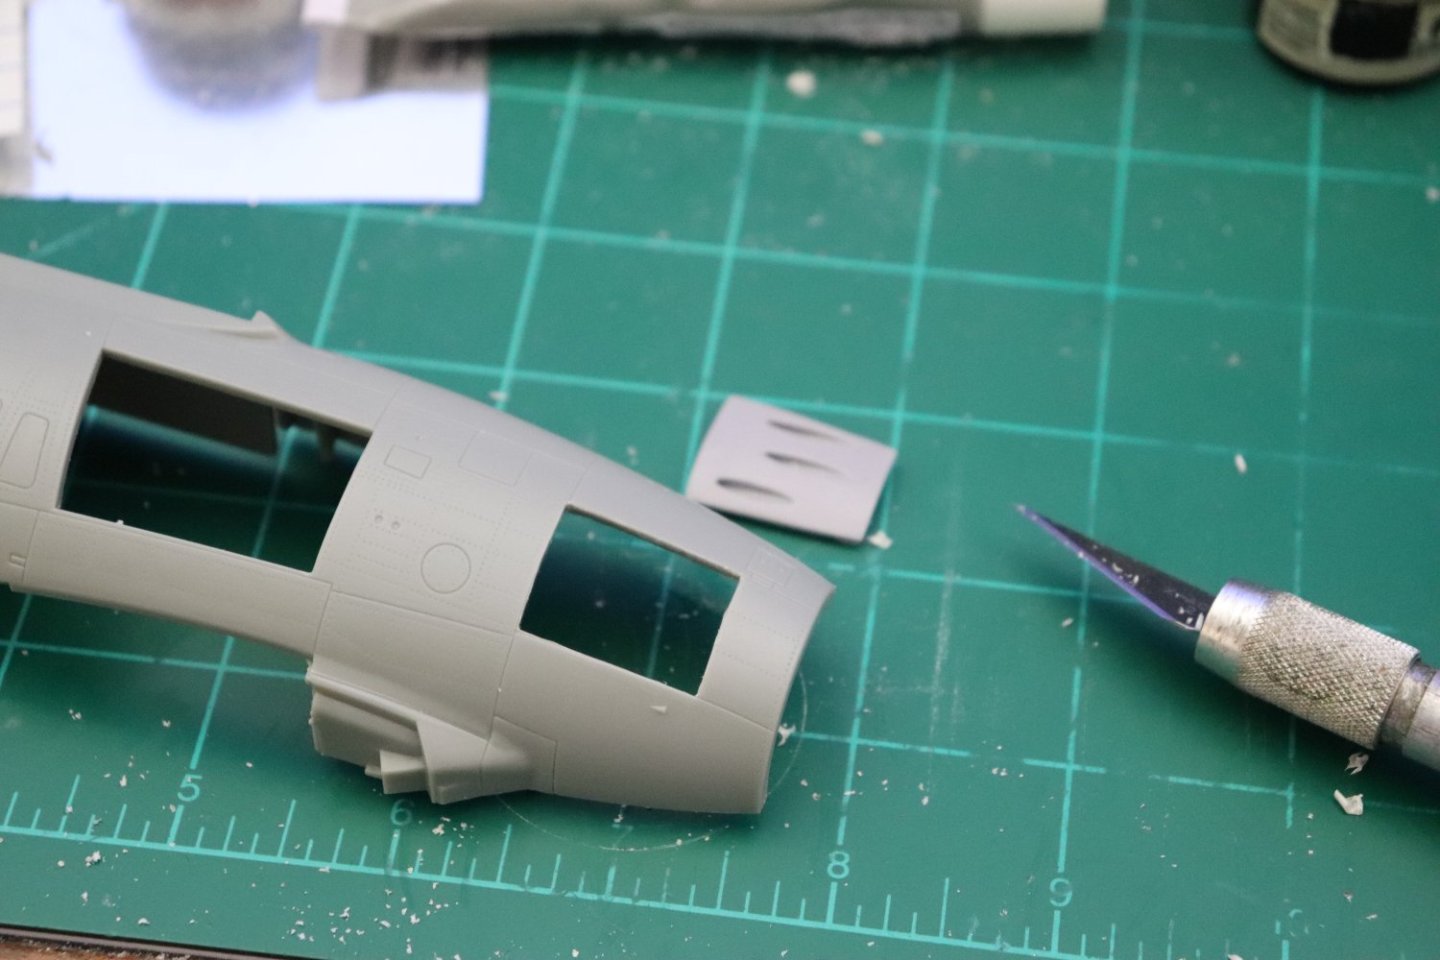
Ok, Short update; The left side is now cut and glued in... My process is simple, old school and goes like this... 1st step, drill 4 holes in the corners of the panel you want to remove about 1/8th inch from the finished edges... I used two of the existing holes... then you use a saw to join the holes taking out most of the material... Then using a large #2 blade you shave down the edges to the panel edge line... The last 1/32nd or so using a brand new sharp blade to get the cleanest cut you can.... Then it is just a matter of trimming the replacement panel until you get a snug push in fit, tight but not so tight to distort the pieces, you want it to just stay in place for gluing... I apply a few drops of CA to the back side and leave it sit until dry.... They will be close enough to make final adjustments to the shape with sanding sticks... Any gaps being filled from the inside with modeling putty... Here is how they look from the nose on position... The right locations and not too much sanding to get the fuselage shape correct.... But before I go to filling and sanding, I have to add the Ammo Bay on the left side as the door for it formed the first step for getting into the cockpit... A prominent feature that is always open when the aircraft is sitting on the ramp.... This part is also designed for the venerable Hasegawa Kit so it's going to take some figuring in how I want to cut it into the fuselage.... Anyways, Onwards.... Thanks for following...
-
F-86F-30 Sabre by Egilman - Kinetic - 1/32nd scale
Egilman replied to Egilman's topic in Non-ship/categorised builds
Me neither... {chuckle} -
F-86F-30 Sabre by Egilman - Kinetic - 1/32nd scale
Egilman replied to Egilman's topic in Non-ship/categorised builds
I'll be using Testors contour putty for this, easy application and sands easily... Sometimes the old standby's work best.... -
F-86F-30 Sabre by Egilman - Kinetic - 1/32nd scale
Egilman replied to Egilman's topic in Non-ship/categorised builds
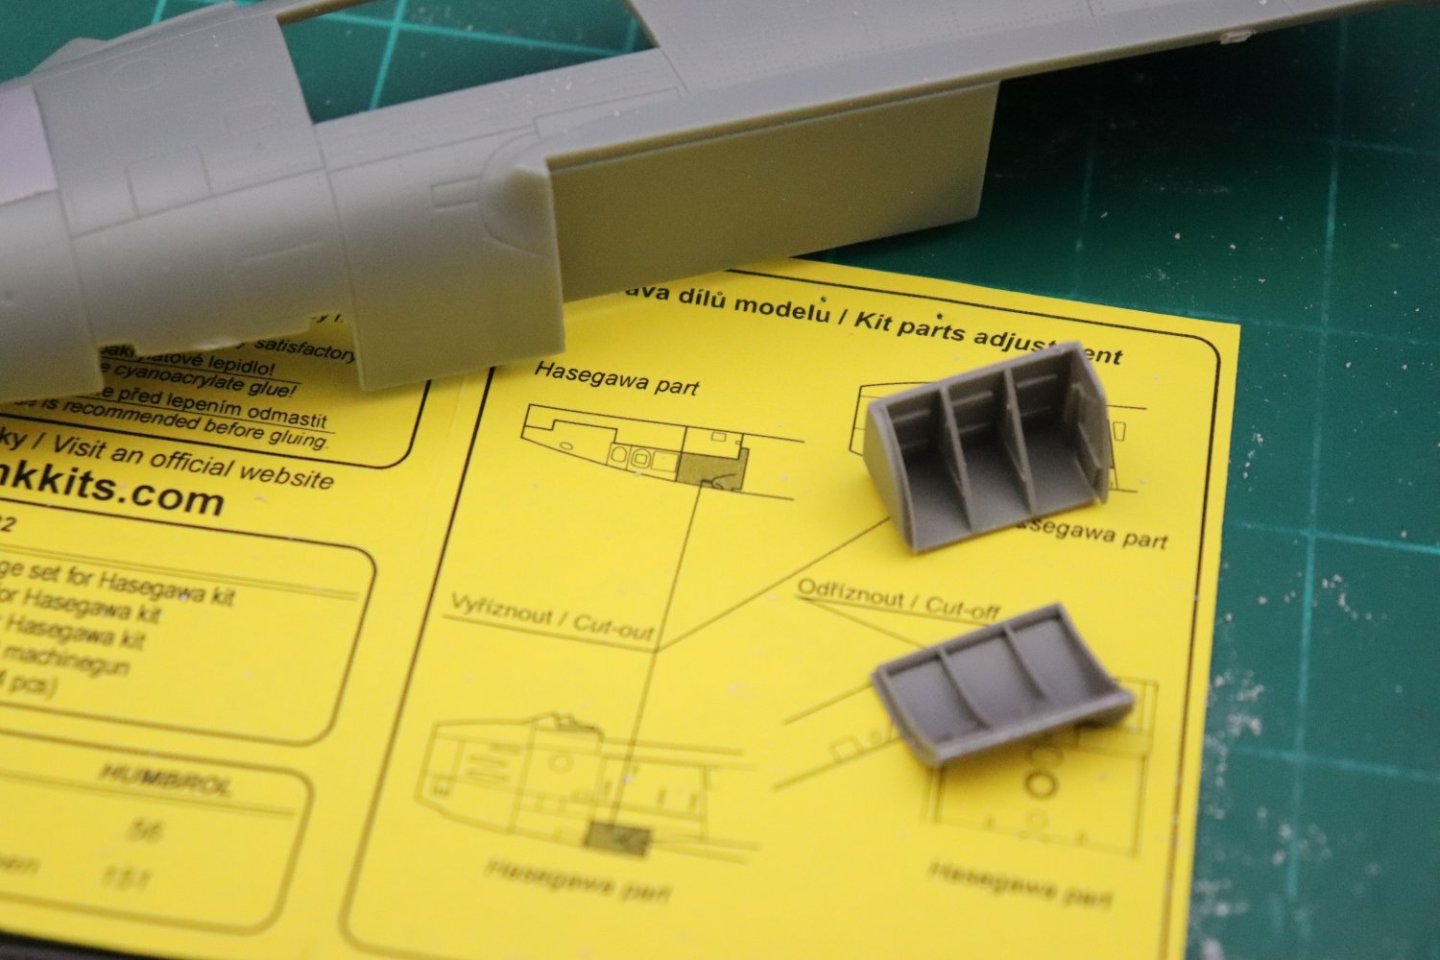
Ok Brothers, it's been a while since I've replaced panels... these are going to take a bit more work than the usual drop in application... The replacements are designed for the Hase F-86F-40 and of course they are a bit larger than the panels scribed into the Kinetic kit... So I had to not only open the panel but cut down the replacements to a push fit into the hole.. Thankfully the fuselage sides are thick enough to allow friction fit once you have worked them into shape... The problem is that you seldom get perfectly square joints sanding resin so some filling and shaping is required to finish them off... Here is what it looks like rough installed... The resin is very soft so shaping it to the fuselage side shouldn't bee too much of a problem and the Hasegawa replacement panels are tapered which making the fills and smoothing absolutely necessary... Starting on the left side rough install now... EG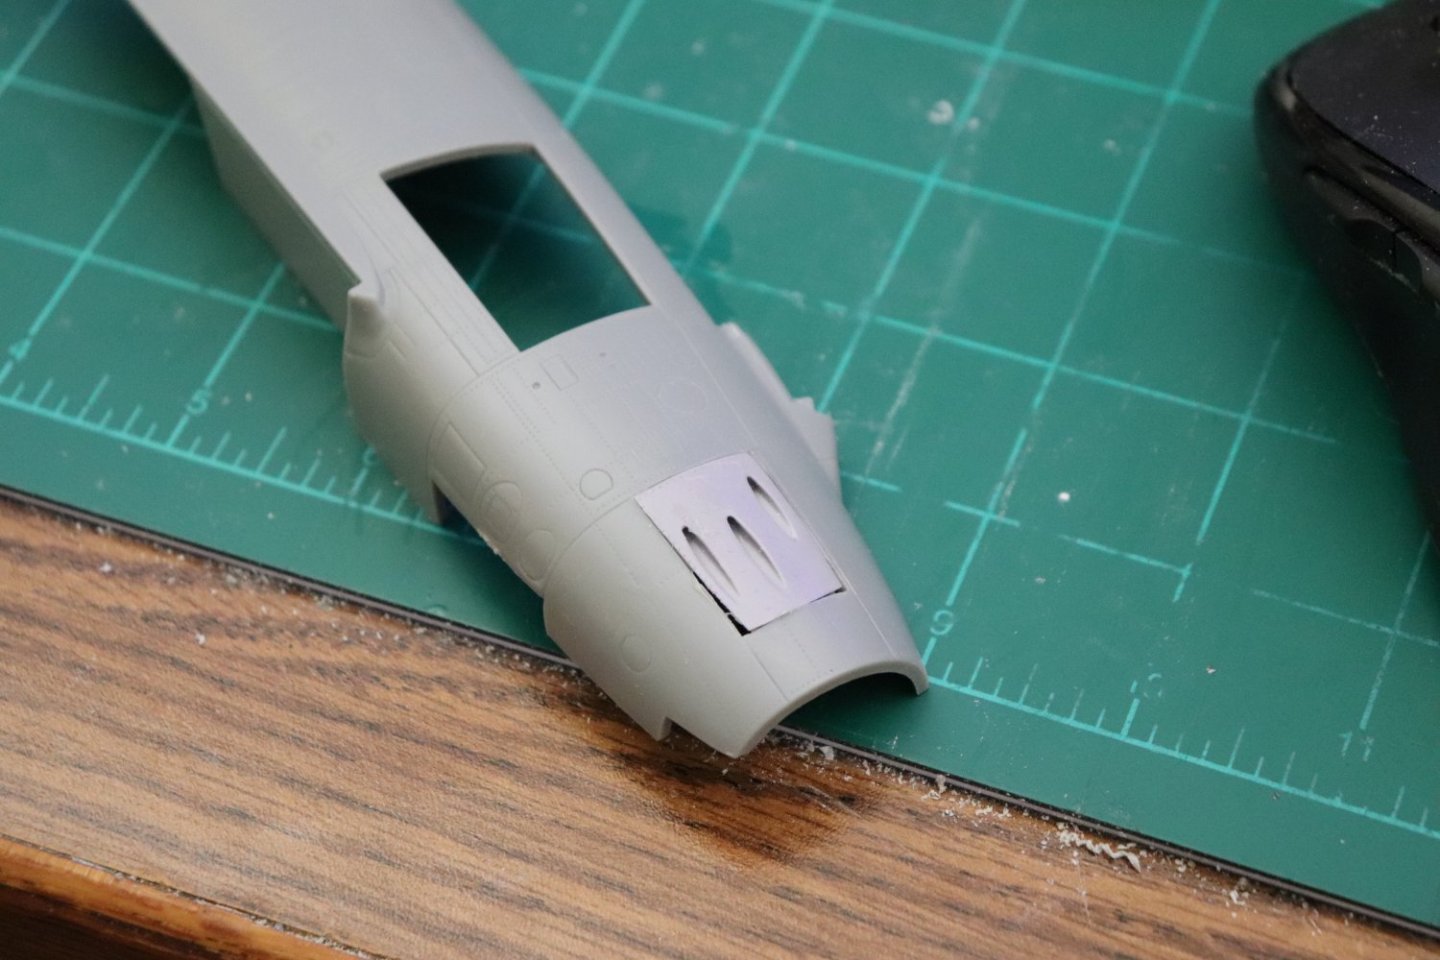
-
F-86F-30 Sabre by Egilman - Kinetic - 1/32nd scale
Egilman replied to Egilman's topic in Non-ship/categorised builds
Thanks Ken... Yeah they are noticeable right away, there are a number of ways of fixing them, replacing them with inserts I believe is the easiest.... The right side is rough installed, will post a pic in a few... EG -
F-86F-30 Sabre by Egilman - Kinetic - 1/32nd scale
Egilman replied to Egilman's topic in Non-ship/categorised builds
Thank Dan... Good to be back working on it again... RL was kicking my butt for a while there... The gun ports were made of forged steel so they will have a grey cast to them when compared to the bluish white of the aluminum... But, it depends on the light, in some photos they appear very dark grey in others they are almost indistinguishable from the aluminum.... When I do the finish I will be putting them in a pewter shade slightly darker than the aluminum finish... That's what I get from the pics I've looked at... I've got the right side rough installed right now starting on the left side... The inserts were designed for the Hasegawa F-86F so there are size differences to deal with... The Kinetic plates are a bit smaller than the Hasegawa ones so after cutting them out they have to be sized down a bit to fit the hole then contoured to match the curves of the fuselage side and fit the space... Thankfully the resin is softer that the usual resin used for AM parts so it shouldn't be an issue and I have some gaps to fill and smooth... Hopefully I can do it without sanding away too much fuselage detail... Will show pics in a bit... EG -
Russian T-62A Tank by CDW - Tamiya - 1/35 Scale FINISHED
Egilman replied to CDW's topic in Non-ship/categorised builds
Yes it is.. I have most of the mainline American machines from the FT-17, Mk-V and Mk 8 International to the latest M-1A2 Abrams... Planning on starting them as soon as I get done with these two airplanes... -
You did brother, you did....