


James G
-
Posts
234 -
Joined
-
Last visited
Content Type
Profiles
Forums
Gallery
Events
Posts posted by James G
-
-
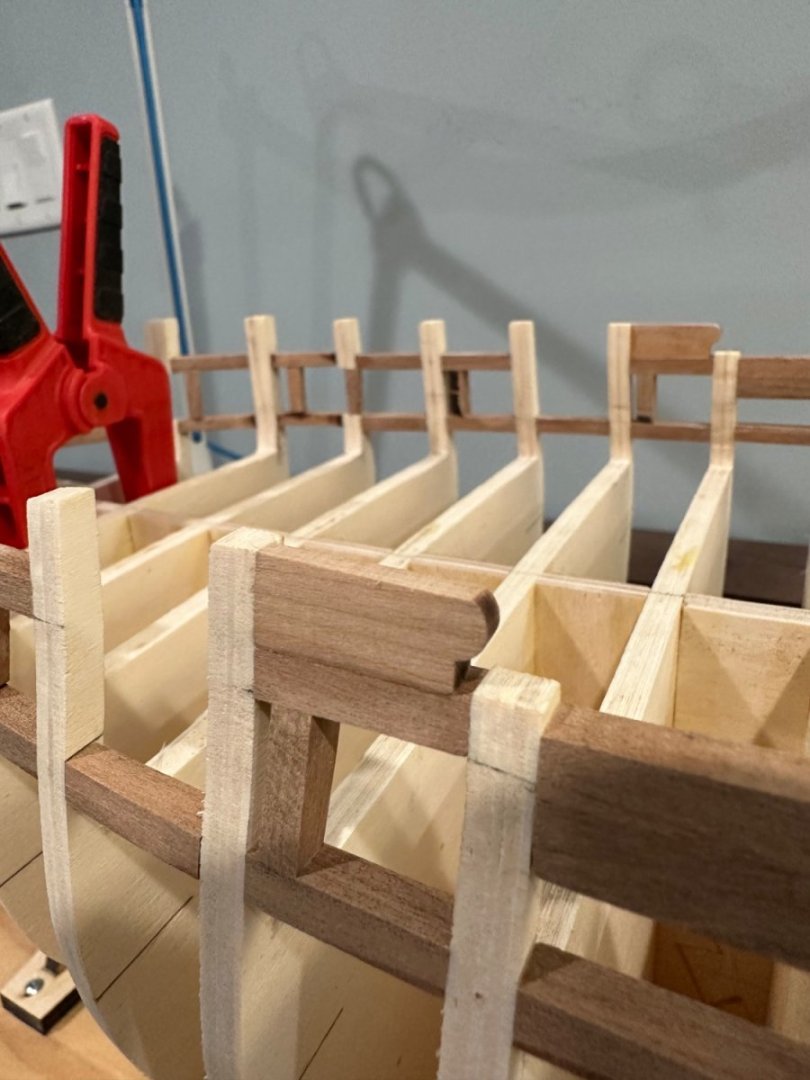
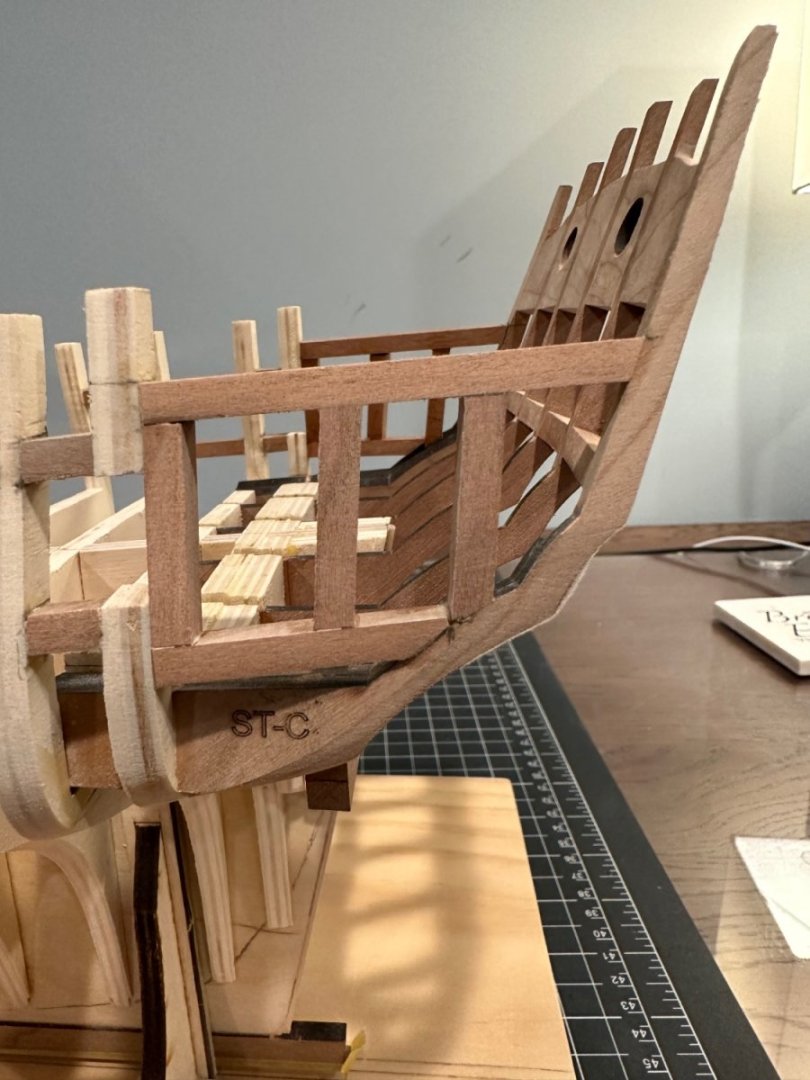
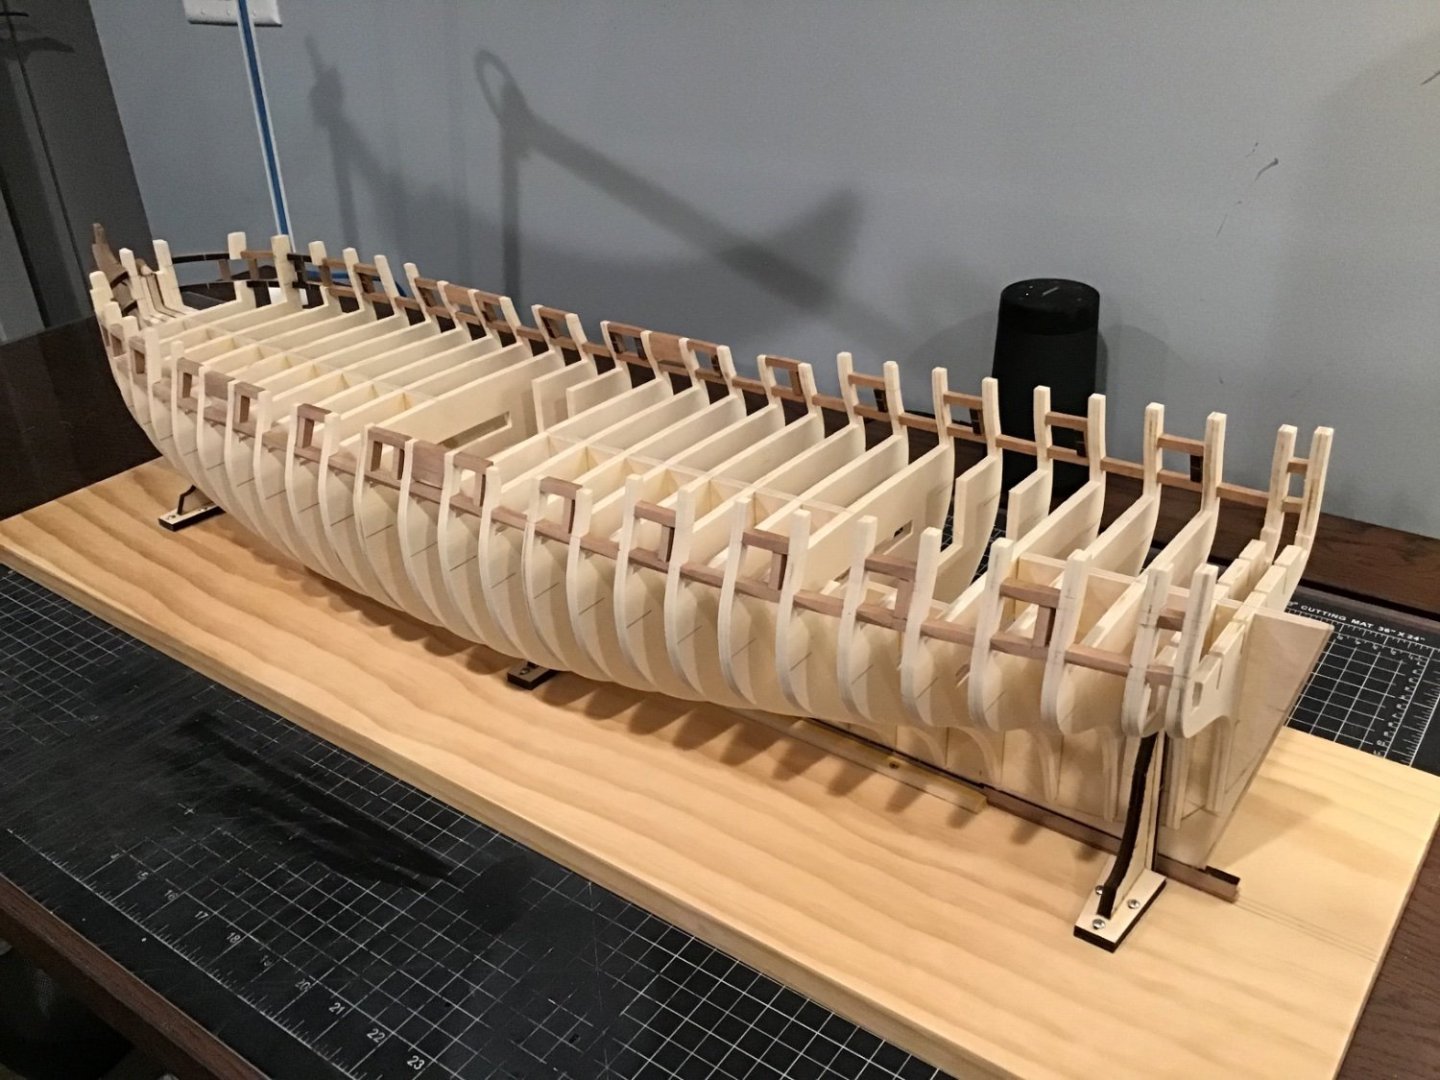
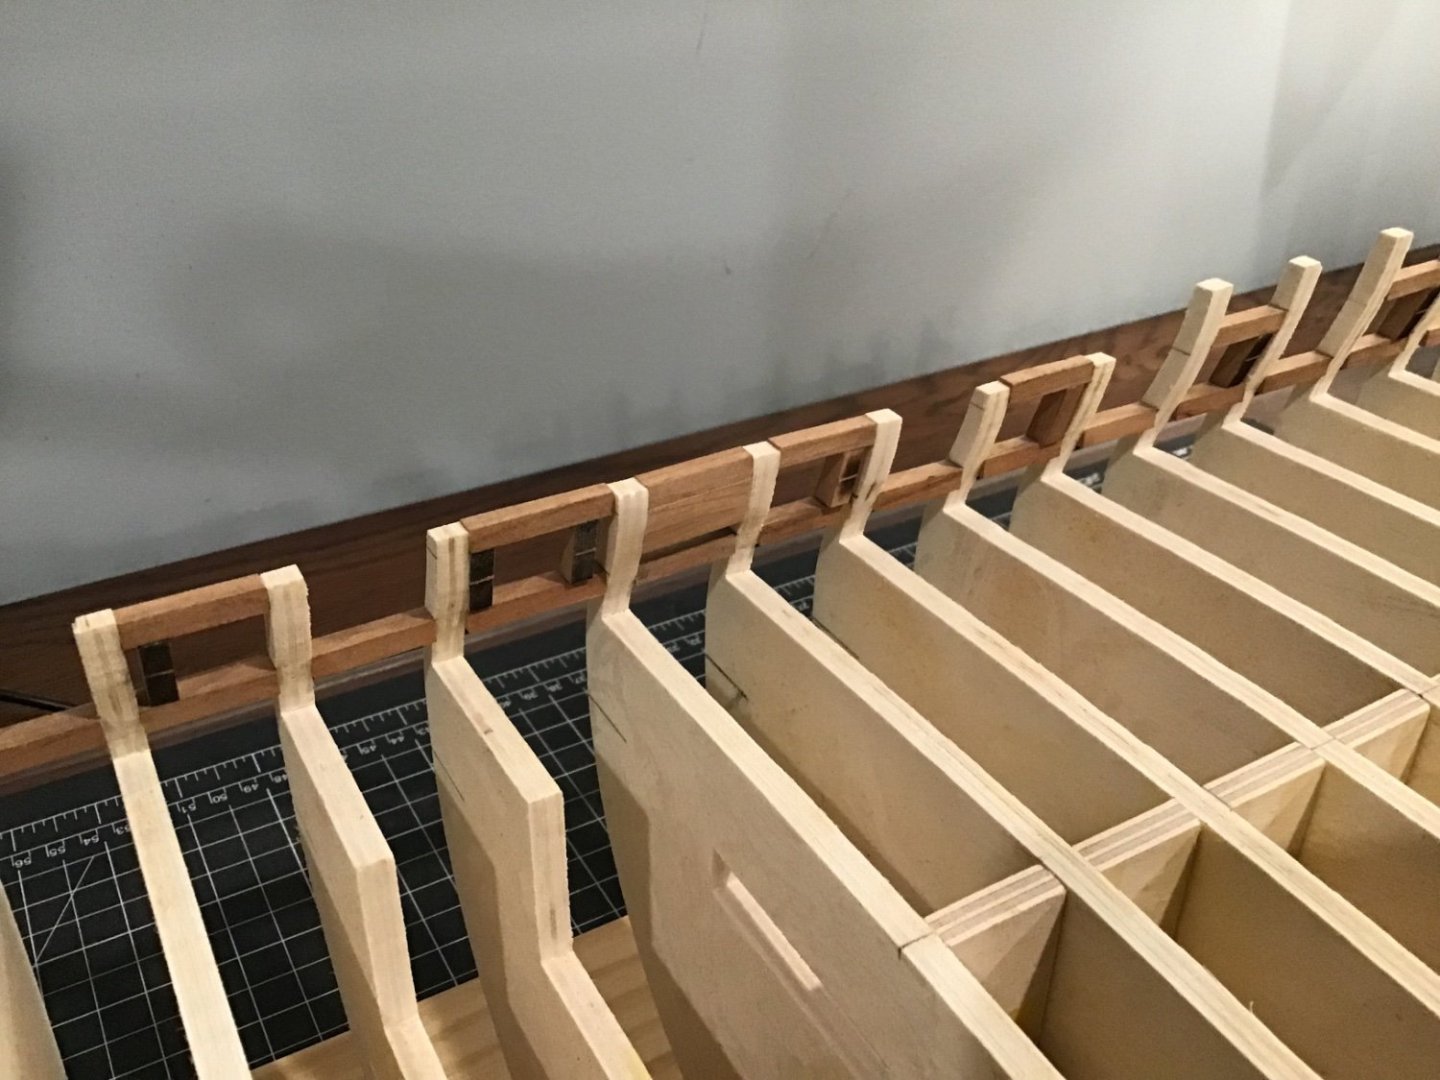
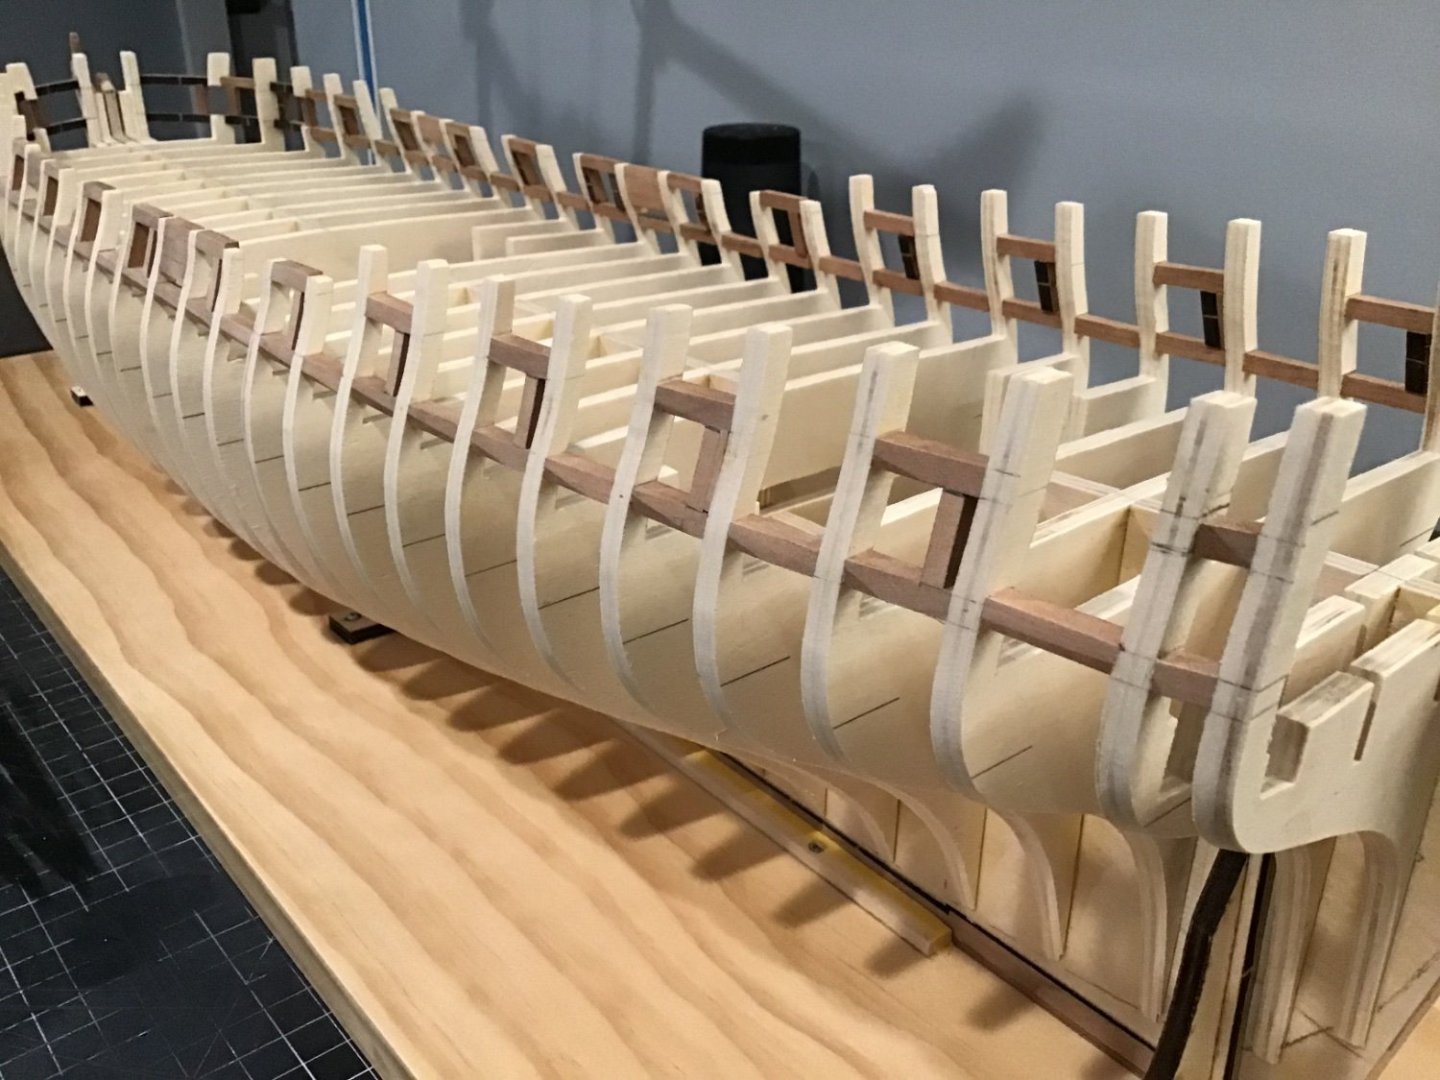
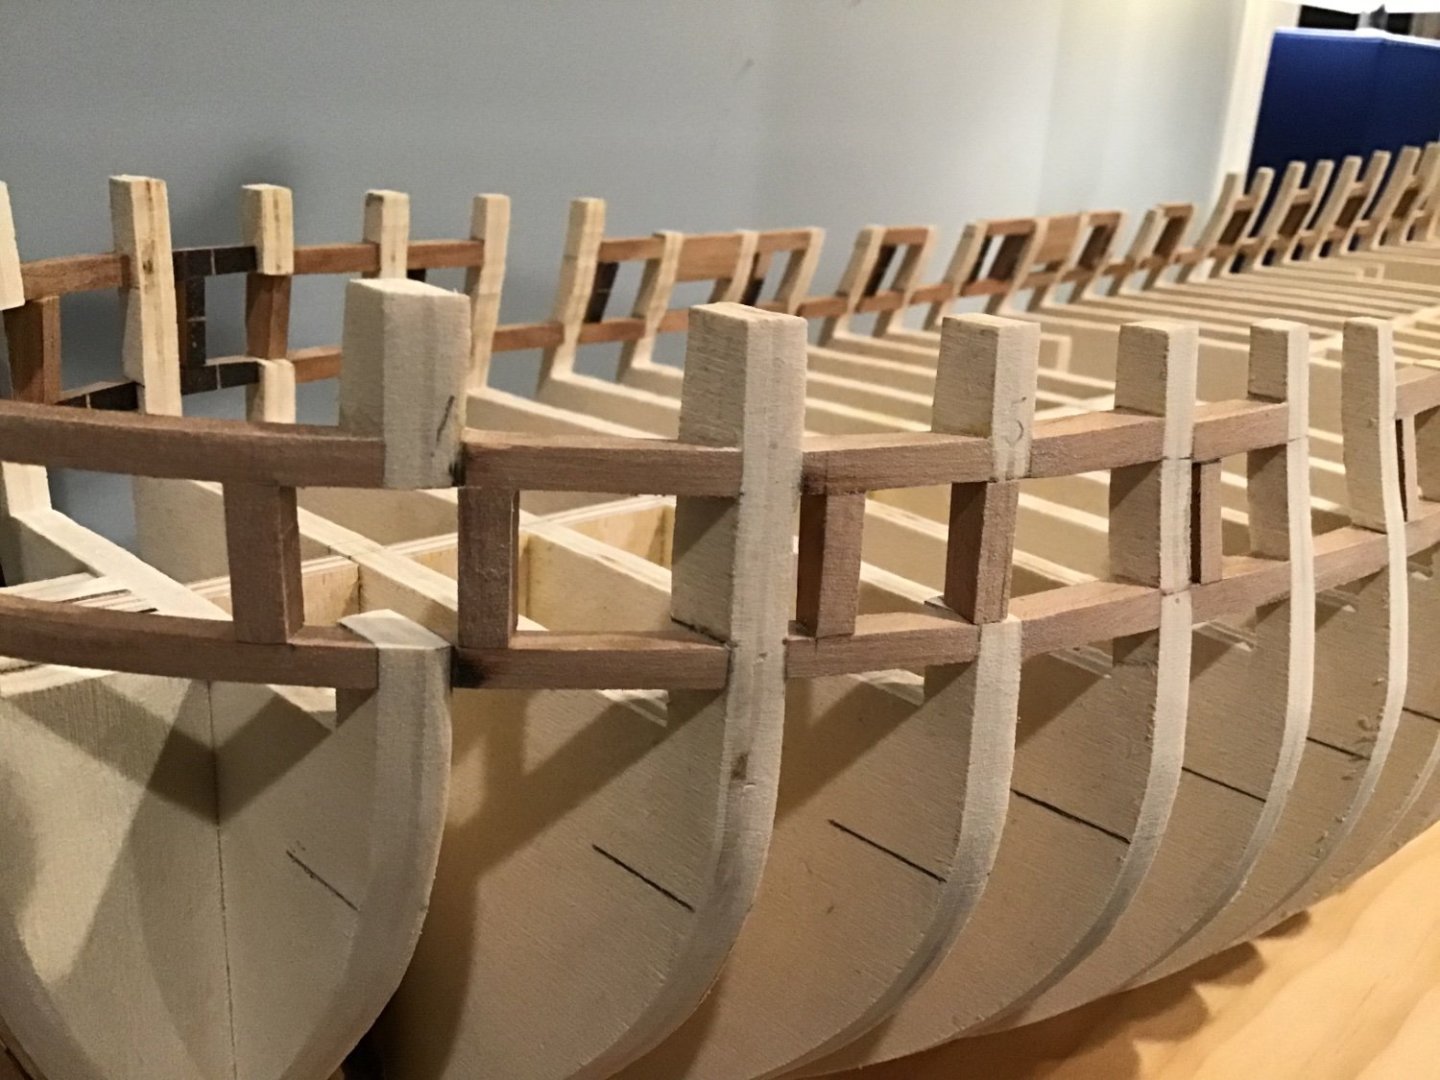
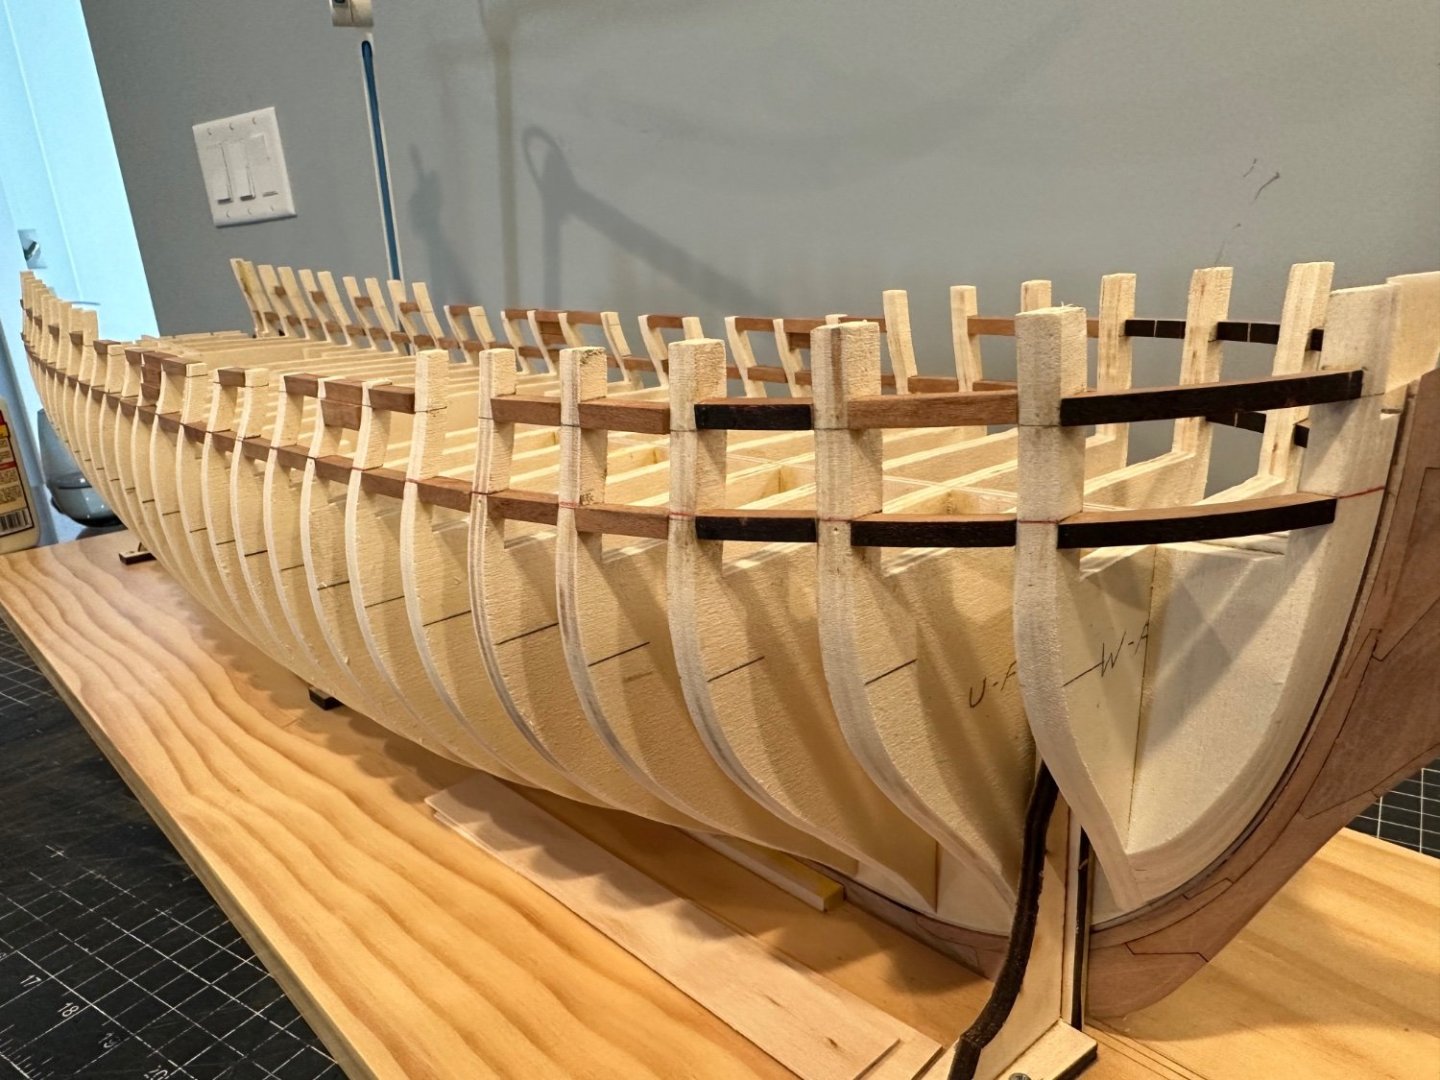
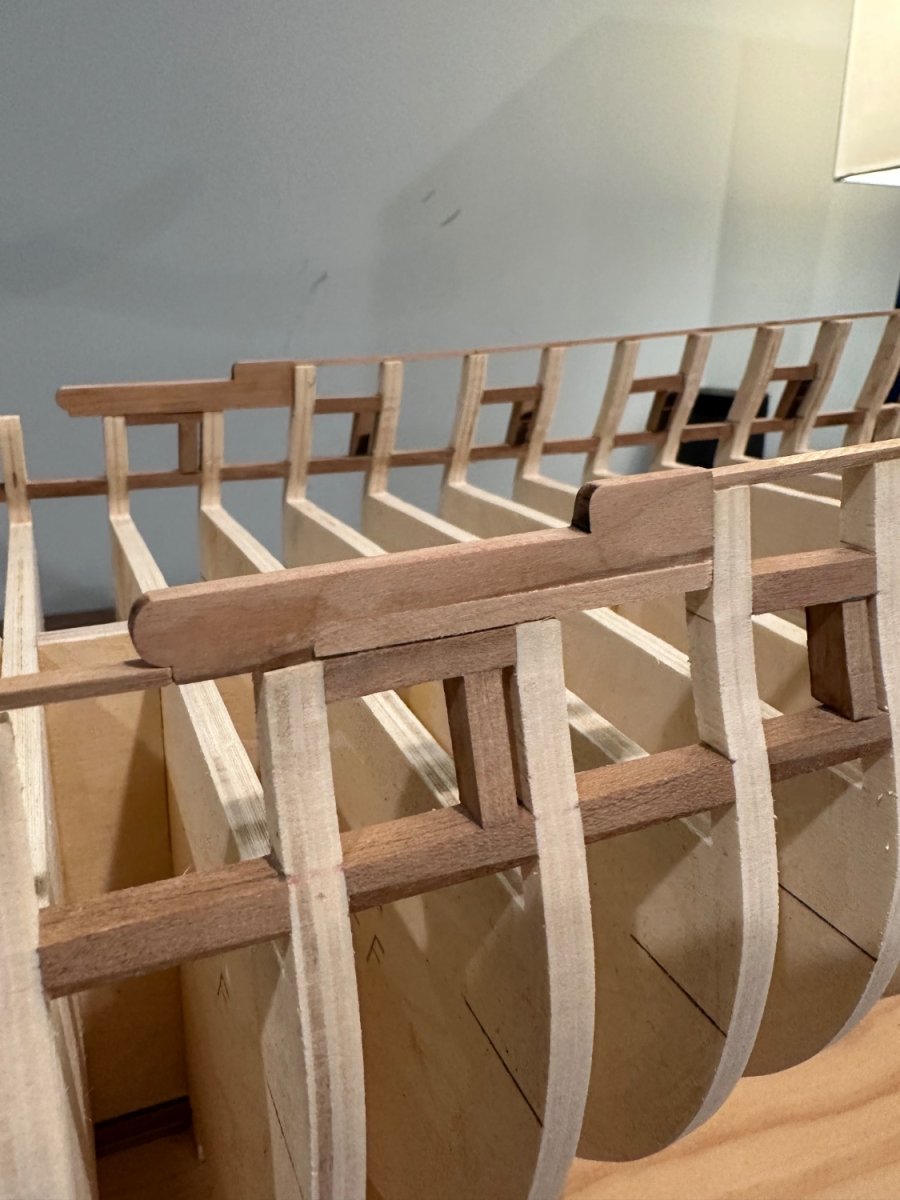
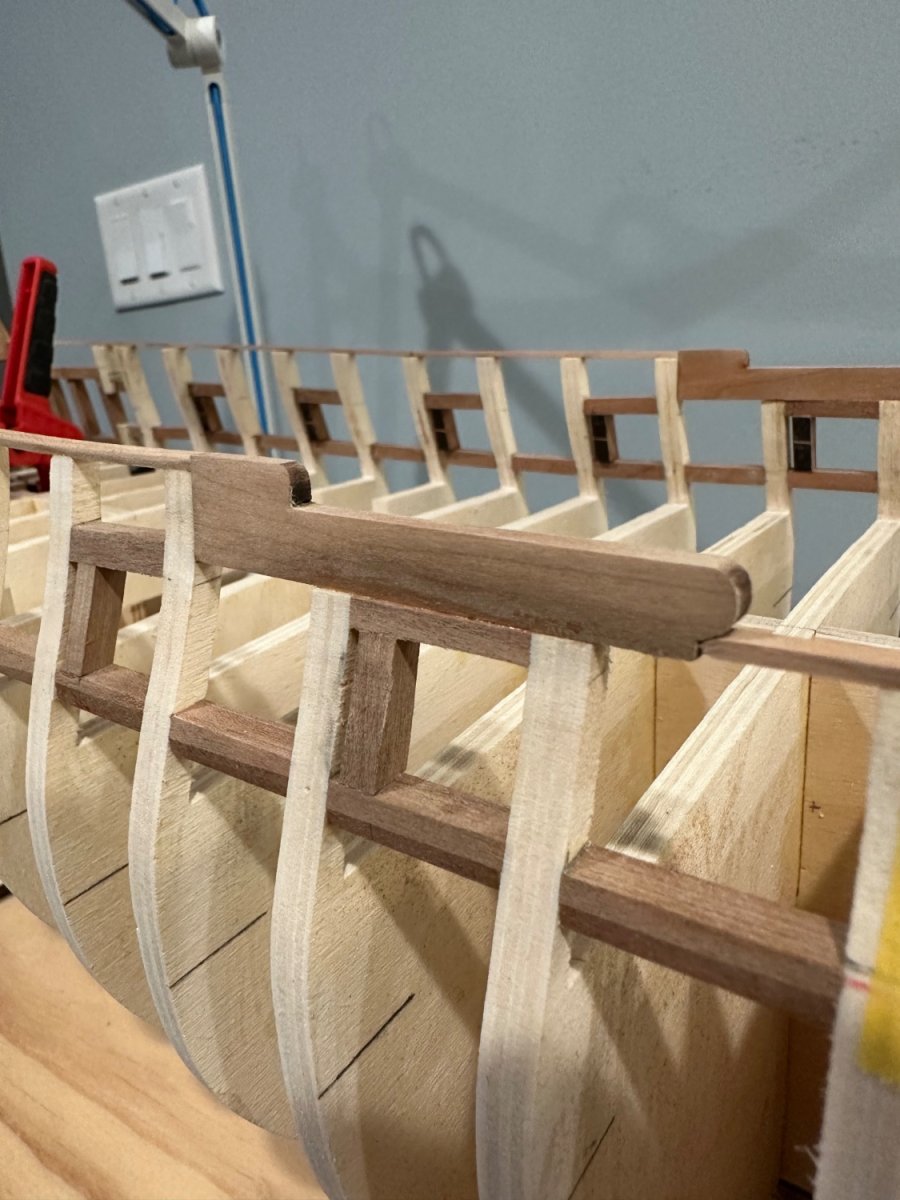
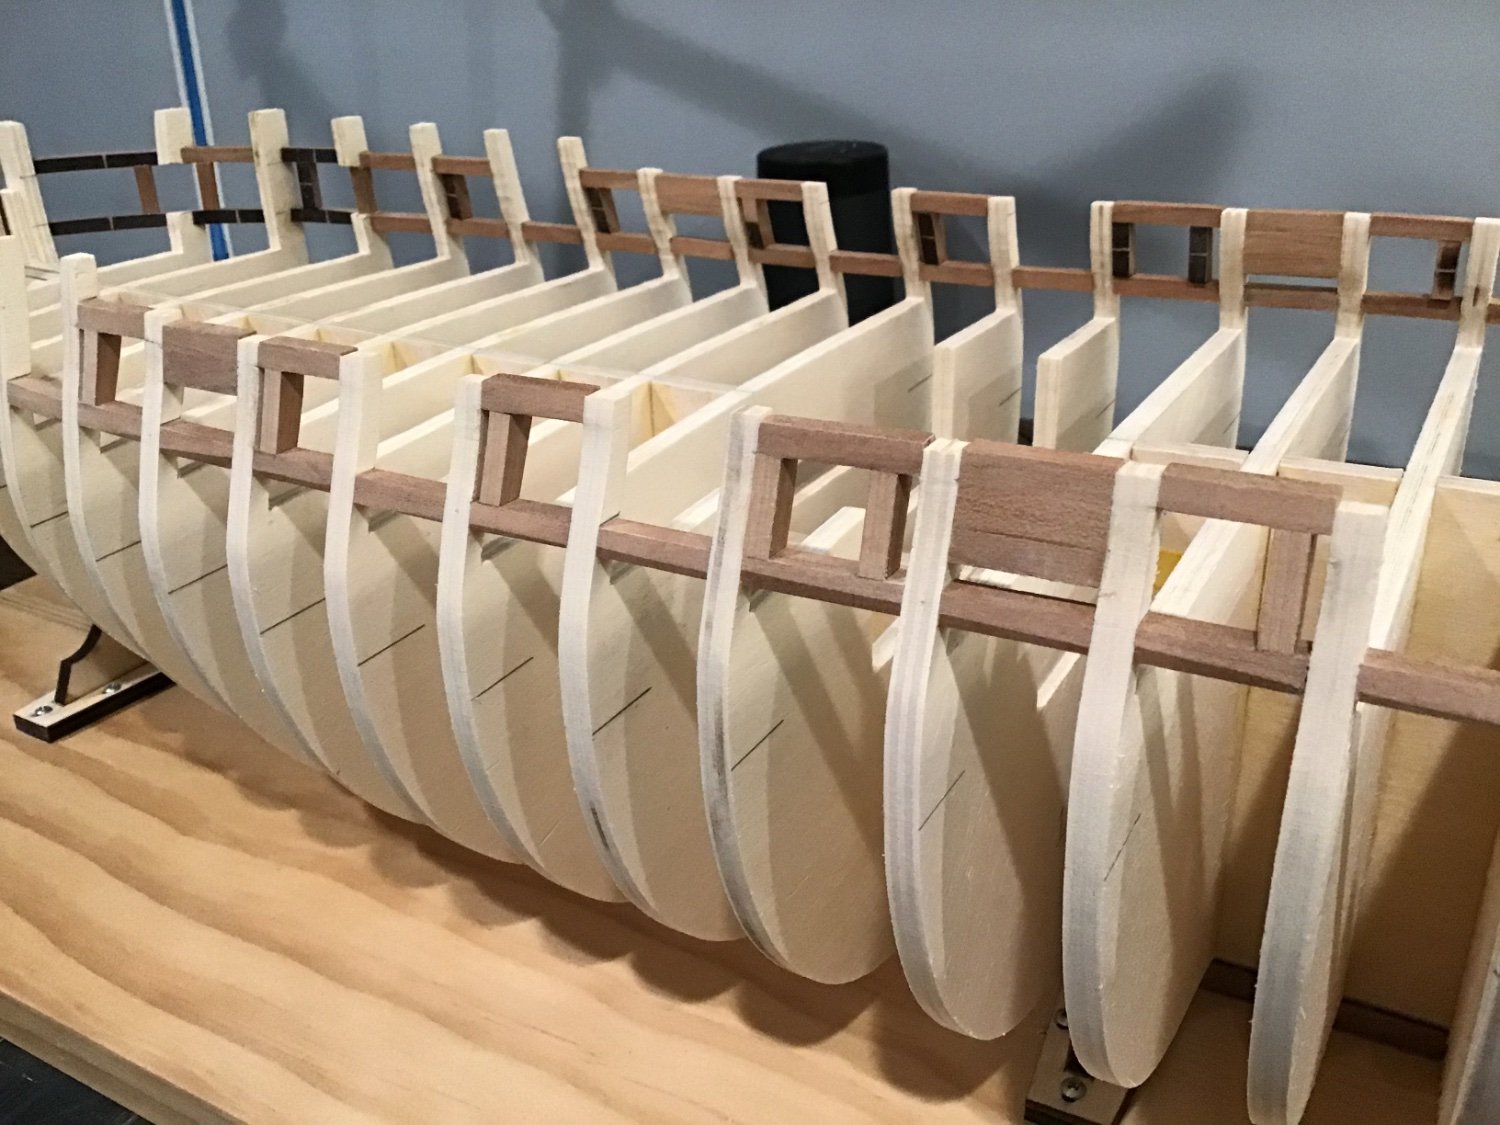
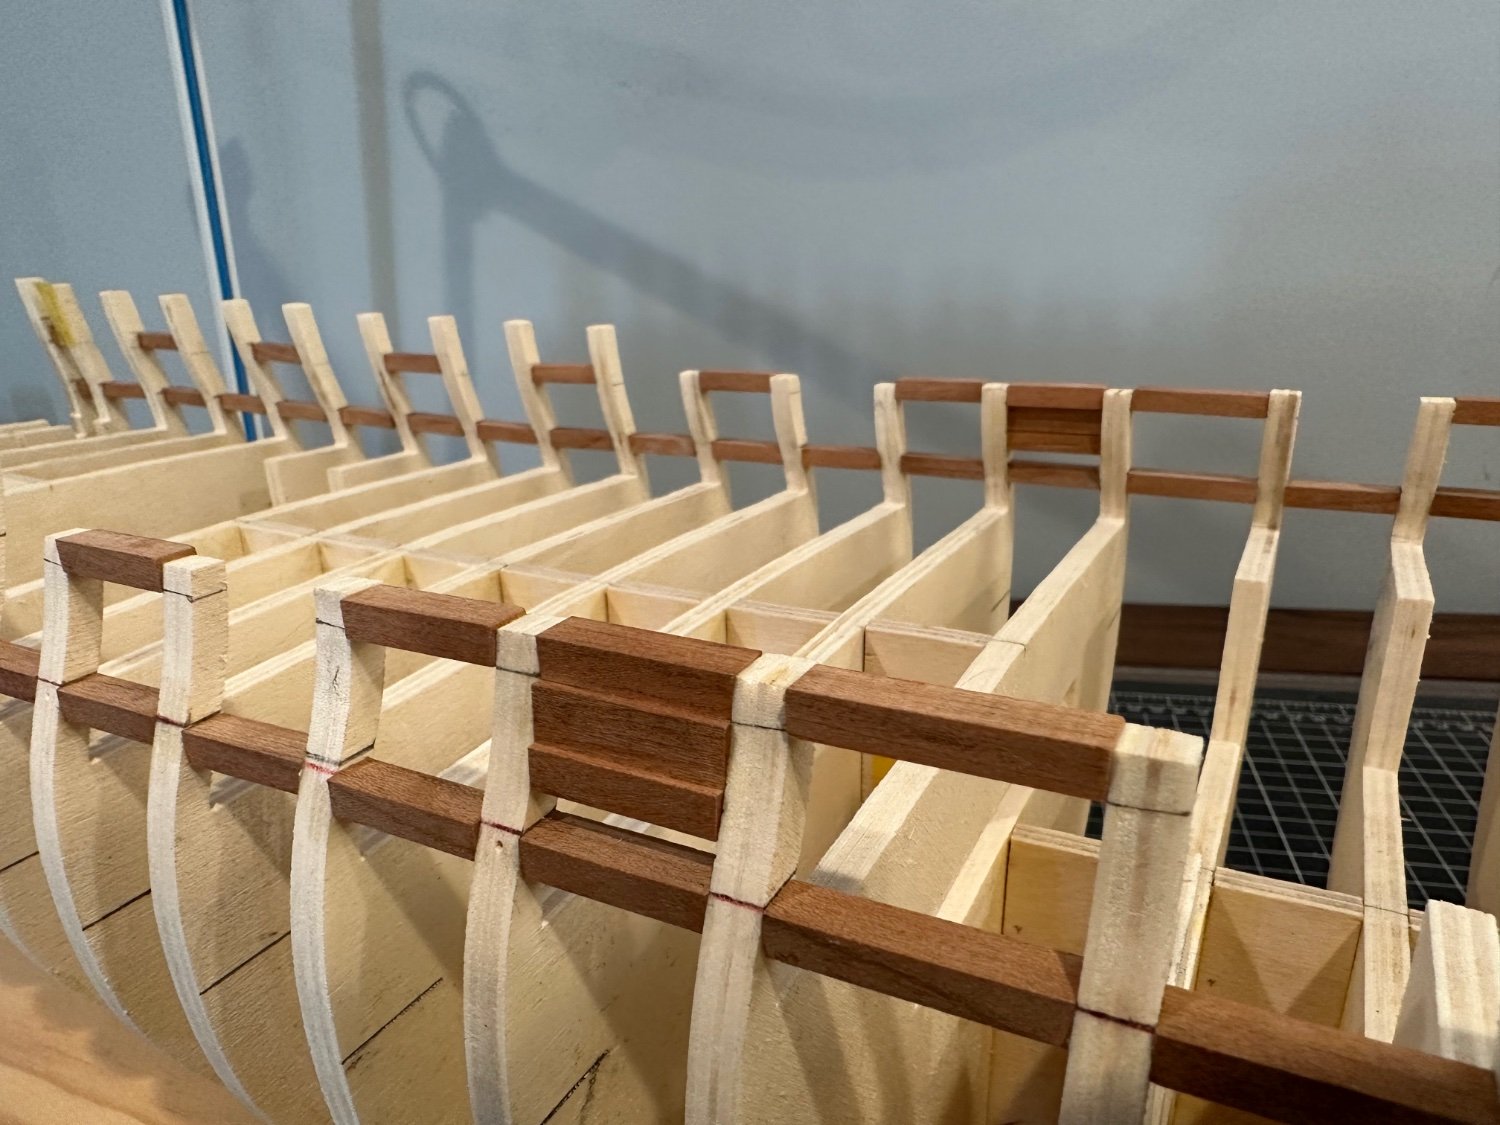
I spent the last few days adding spacers in the transom, the framing on top of the bulkheads as well as installing and fairing the hance pieces.
The spacers were based on Chuck’s and @Stuntflyer build logs. Hopefully, these will ensure a clean planking transition in the stern.

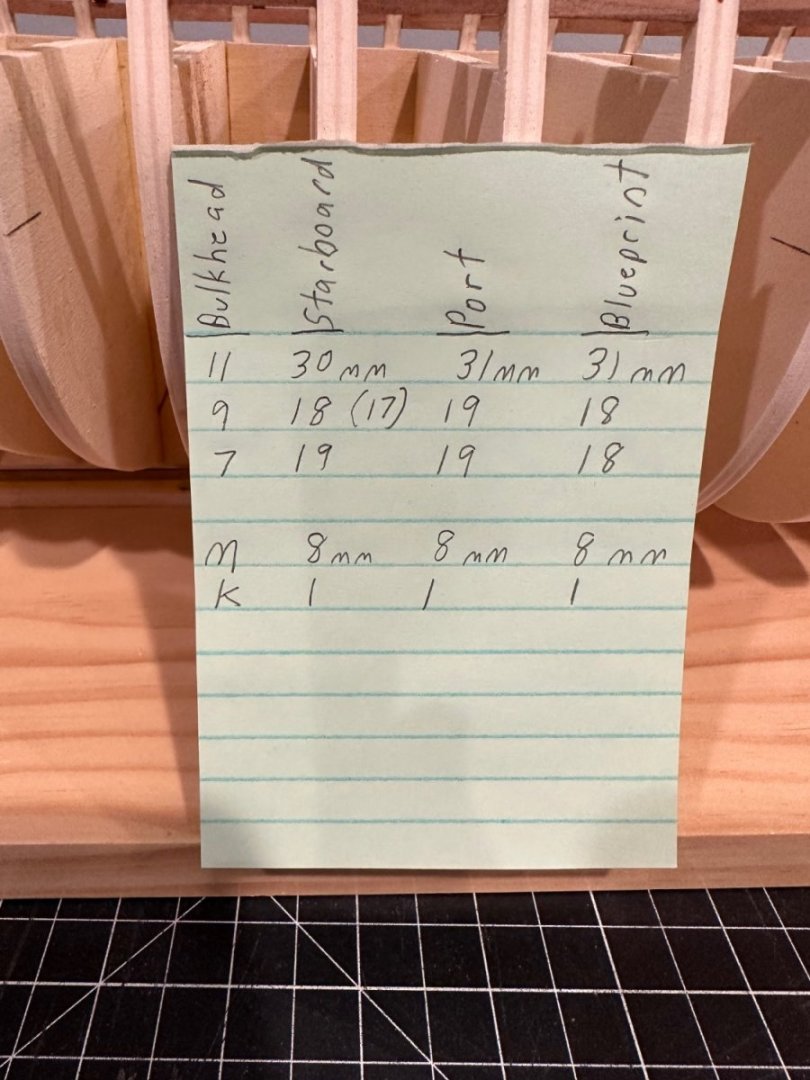
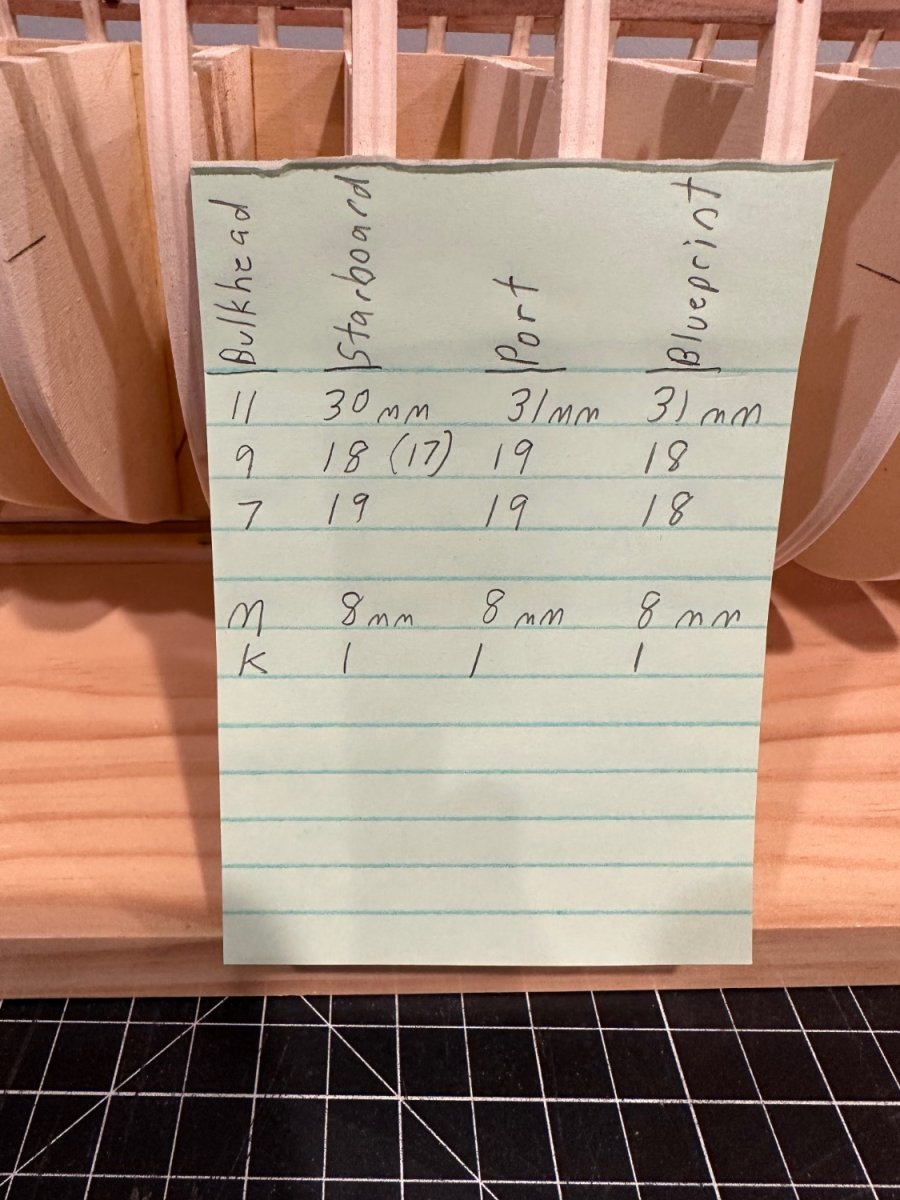
With the framing on top of the bulkheads I headed Chuck’s advice and took a lot of measurements. I used the blueprint to ensure that my bulkhead framing mirrored what was shown on the print. You can see the measurements I took on various bulkheads below. I really wanted to be sure both port and starboard sides mirrored each other. Got pretty close.
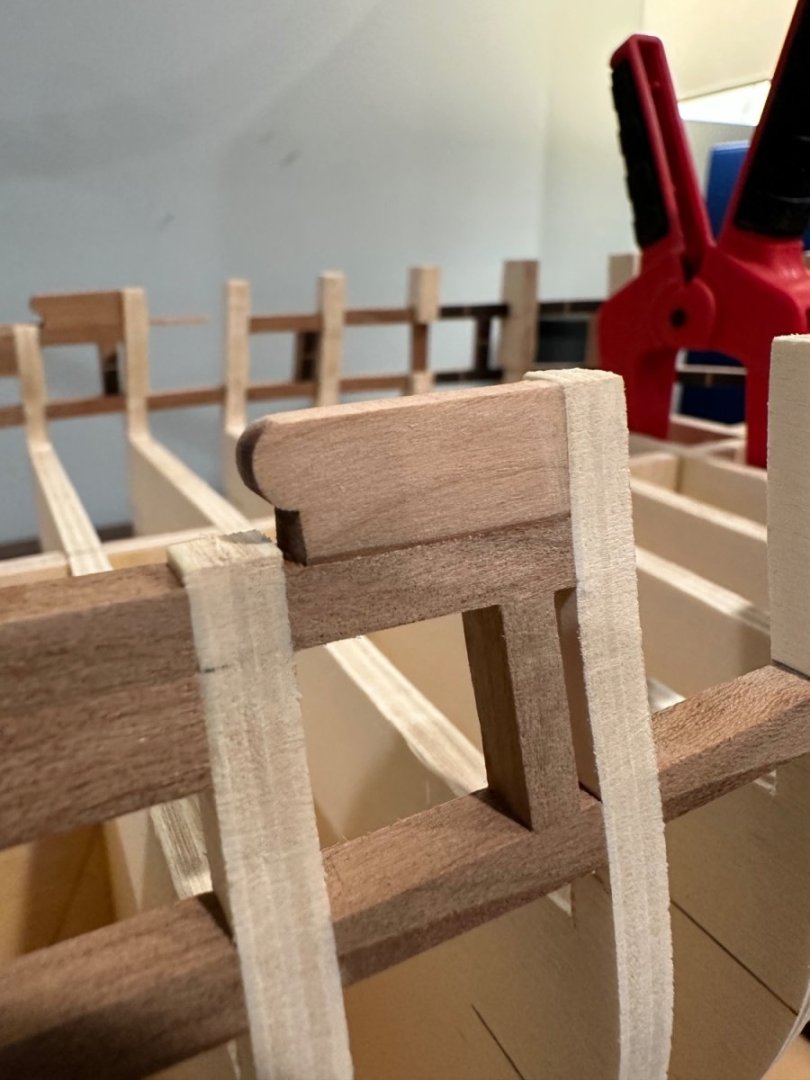
Finally, I added and faired the hance pieces. Three out of four went in pretty easily. However, I did run into a bit of an alignment issue with the rear hance on the port side. I ended up adding a filler piece and faired appropriately. Amazing the difference a millimeter or two can make in bulkhead alignment. 😆 I think I’ll be ok.


Thanks for stopping by to take a look and all the wonderful encouragement!
-
23 hours ago, FrankWouts said:
It’s the same with me Jim, the turtle feeling… Check my startdate…I spent over a full week practicing scraping the difcerent fancy molding strips and making the profile on redundant old hobby knives with the 0.15mm thick diamond cutter disks. But it’s like you say, quality over speed. And now I’ve got the hang of things I learned here like sideways bending, scraping, I can put them to work in future builds, hopefully with a little more speed…but with the same quality…at least…
Nice progress on your build, you’re going slow but steady, and that’s a good thing!
It will be longer in your living room and beyond perhaps in your family than the time you build it, so slow and steady isn’t a problem when contemplating like that.
Frank.
Frank, thank you for the words of encouragement. Given the beauty of your Winnie your approach seems to certainly be working! I plan to continue in a similar fashion. Nothing worse than staring at a model with a glaring error. It just screams at you. I don’t want that feeling with a model as well designed as the Winnie.
- scrubbyj427, FrankWouts and CiscoH
-
 3
3
-
21 hours ago, Chuck said:
Really nice work. Well done.
Thank you Chuck! I’m really enjoying the build. Your design and instructions are incredible. Since I’m new to ship modeling I work pretty slow. However, I’m more concerned with quality results rather than speed. I kind of feel like a turtle 🐢. Slow and steady should hopefully win the race.
21 hours ago, scrubbyj427 said:Looking good Jim. Time to start making some dust and then toss some wood on the sides!
Thanks JJ! I’m getting ready to place my order for the planking package from Chuck’s vendor. Excited to start chapter 2 and the planking journey!
- scrubbyj427, Chuck and FrankWouts
-
3
-
Couldn’t agree more Glenn. I noticed you used a cutout on your qdeck framing. Thought it was a great idea to borrow. Thanks for adding it into your log!
- glbarlow and FrankWouts
-
2
-
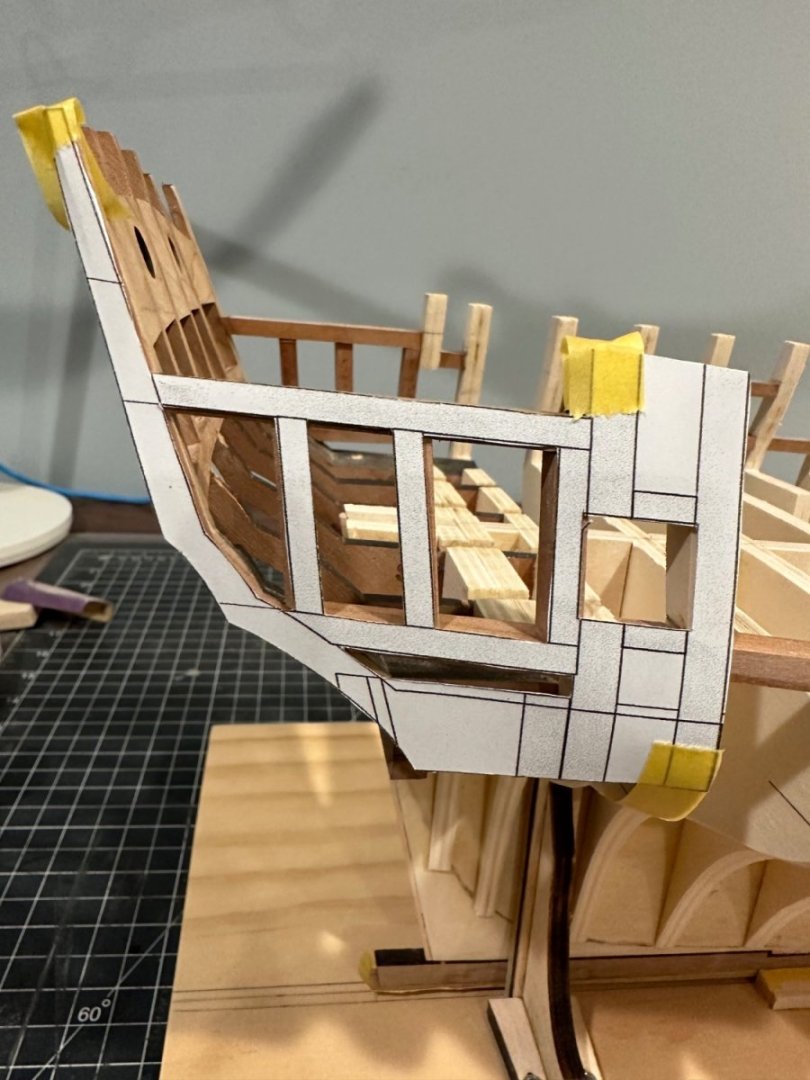
I spent the last couple of days framing the quarter gallery. As a birthday gift this year my better half gave me a Byrnes Disc Sander. She is the best! This was a tremendous aid in this step. The tilt table really made achieving the combination of angles easier to allow tight margins on the various framing contact points. As a self-check I used a cutout from the blueprint to ensure the framing was properly aligned. I’m relatively satisfied with how both port and starboard sides have turned out. Thanks for stopping by to take a look!
-
Stunning work Frank! Well done.
-
Thanks Frank! Extremely helpful. Your Winnie continues to be an inspiration for me. Appreciate your sharing.
-
20 hours ago, FrankWouts said:
Hi Jim,
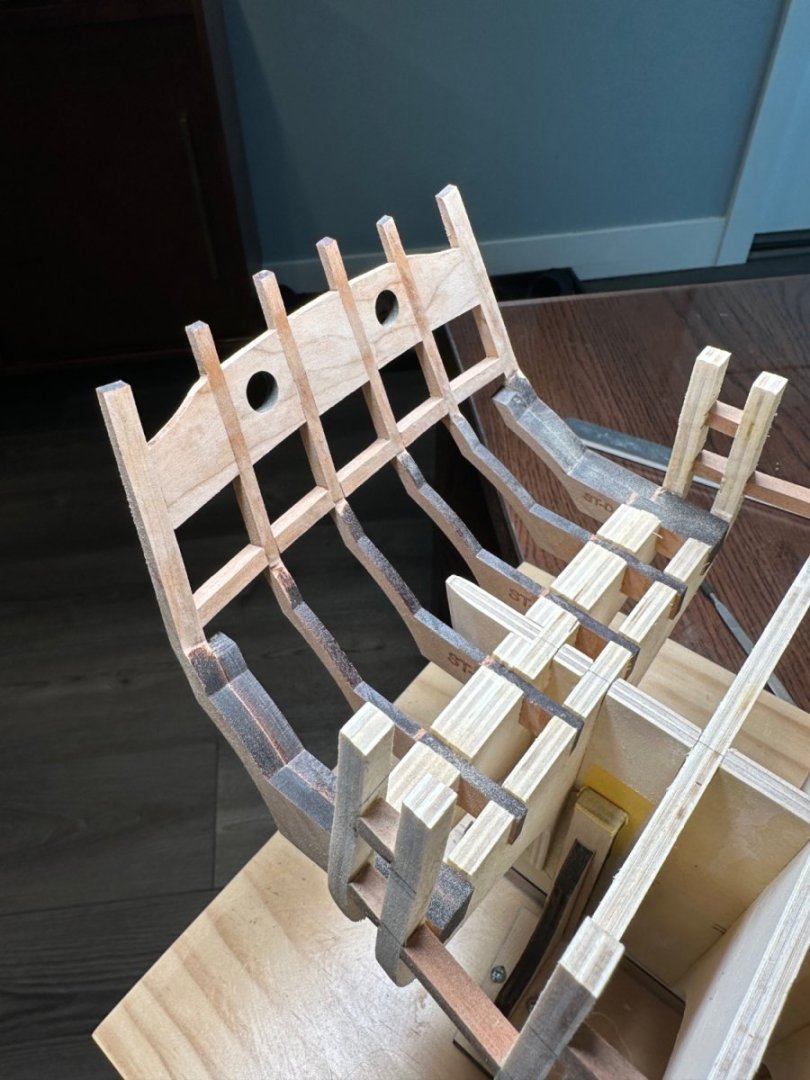
Very nice progress! Don’t forget to sand down the outer sides of the two outer stern frames until the dotted lines in the drawings…
Otherwise the two outer blinded toilet windows in the stern won’t fit.
Frank.
Thanks Frank! I did sand down the outer stern frames as you mentioned. However, I’ve not yet sanded down along the dotted lines all the way down to the stern frames yet. Should I follow these dotted lines completely all the way down? I don’t want to over sand by mistake! Thanks for any thoughts you can offer.
-
11 hours ago, glbarlow said:
Their placement and size comes into play when fitting the stern decorations, which are wonderful but a tight fit. If you don’t have them you may want to check against a cutout of the plans. A cutout of this framing of the quarter gallery also helps to confirm angles. A lot of what’s to come is made easier or harder based on the stern framing. Fun stuff.
Thanks Glenn! This was helpful. I did use the cutout and stern decorations to properly align and size the two holes. Worked great. I’m still making adjustments but I think I’m getting there.
- glbarlow, scrubbyj427 and FrankWouts
-
3
-
24 minutes ago, scrubbyj427 said:
Welcome back Jim, she’s lookin good. Did you place your stern window cut out against the frames and do a test fit?
Thanks JJ! Yes, I did. The windows line up well thanks to Chuck’s 1-5 window templates. However, the two circles in the upper sills are a bit off and will need some adjustment. Again, I see this as a symptom of how the stern frames were originally placed in my scratch-built bulkheads. Next time I’ll definitely purchase ones that have been laser cut. 😆
- Chuck and FrankWouts
-
2
-
Greetings! It’s been a while since my last update. I took the summer off from ship modeling to take advantage of the mild Michigan weather. The good weather season is short here so it’s wise to make the most of it. Good times catching up with family, friends, boating and lots of cycling 🚴♀️. Hope everyone reading this had a wonderful summer as well!
It’s turning colder so I jumped back into my Winnie project last week. I’ve been working on the stern frames. They’ve proven to be a bit of a challenge given my limited ship modeling experience.
They are not as perfectly symmetrical as I would like but I think they’ll end up being adequate. With lots of tweaking of course! I believe the slots in my home made bulkheads were the main culprit. I think Chuck’s laser is way more precise than my hand tools and questionable vision. I’ll forge ahead…great to be back at it. Thanks for taking a look!

- scrubbyj427, FrankWouts, Chuck and 1 other
-
4
-
Beautiful work Glenn! Sounds like you’ve certainly been busy with other priorities. I get that! Now that the summer season is here we’re outside constantly. My bench time is nonexistent. All good though…fall will be here before we know it! 😆
- Dave_E, FrankWouts and glbarlow
-
3
-
Congratulations Greg! She looks so good! A unique build that I’ve certainly enjoyed following. Thank you for sharing such a fine, detailed build and congratulations on your award. Looking forward to what you’ll take on next. Cheers 🍻!
- Keith Black, Greg Davis and mtaylor
-
2
-
 1
1
-
On 5/18/2023 at 6:06 PM, Saburo said:
Again Jim, you're build is motivational/inspiring. I really should start my own build here and overcome my bashfulness. thanks' to you, Glenn, Rusty, John, Chuck and so many others in this forum.
Bill
Yes, by all means join the club Bill! I would love to follow your build.
On 5/19/2023 at 9:42 AM, glbarlow said:How’s it coming Jim?
Hey Glenn! Thanks for checking in. All good, just on my normal pause that comes this time of year as the Michigan weather improves. I do a lot of cycling 🚴♀️ and sailing ⛵️ once the warm weather arrives and it’s here now. I’ll get back to the bench and when I do more Winnie updates will be coming. Loving the build, just have too many interests and not enough time. Hope you’re gearing up for a nice summer yourself!
- Saburo, scrubbyj427 and FrankWouts
-
3
-
Congratulations, Rusty! A stunning model! You should feel very proud. Thank you for sharing your journey.
-
Welcome, Bill! Looking forward to following your build. I started a few months ago myself. On a bit of a pause now that spring/summer weather is here. The Winnie builders are a helpful group that you’ll enjoy being part of. Good luck!
- FrankWouts and Saburo
-
2
-
Looks so great to me, JJ! If you hadn’t said a mistake had been made I’d certainly never have noticed. Safe travels.
- scrubbyj427 and FrankWouts
-
2
-
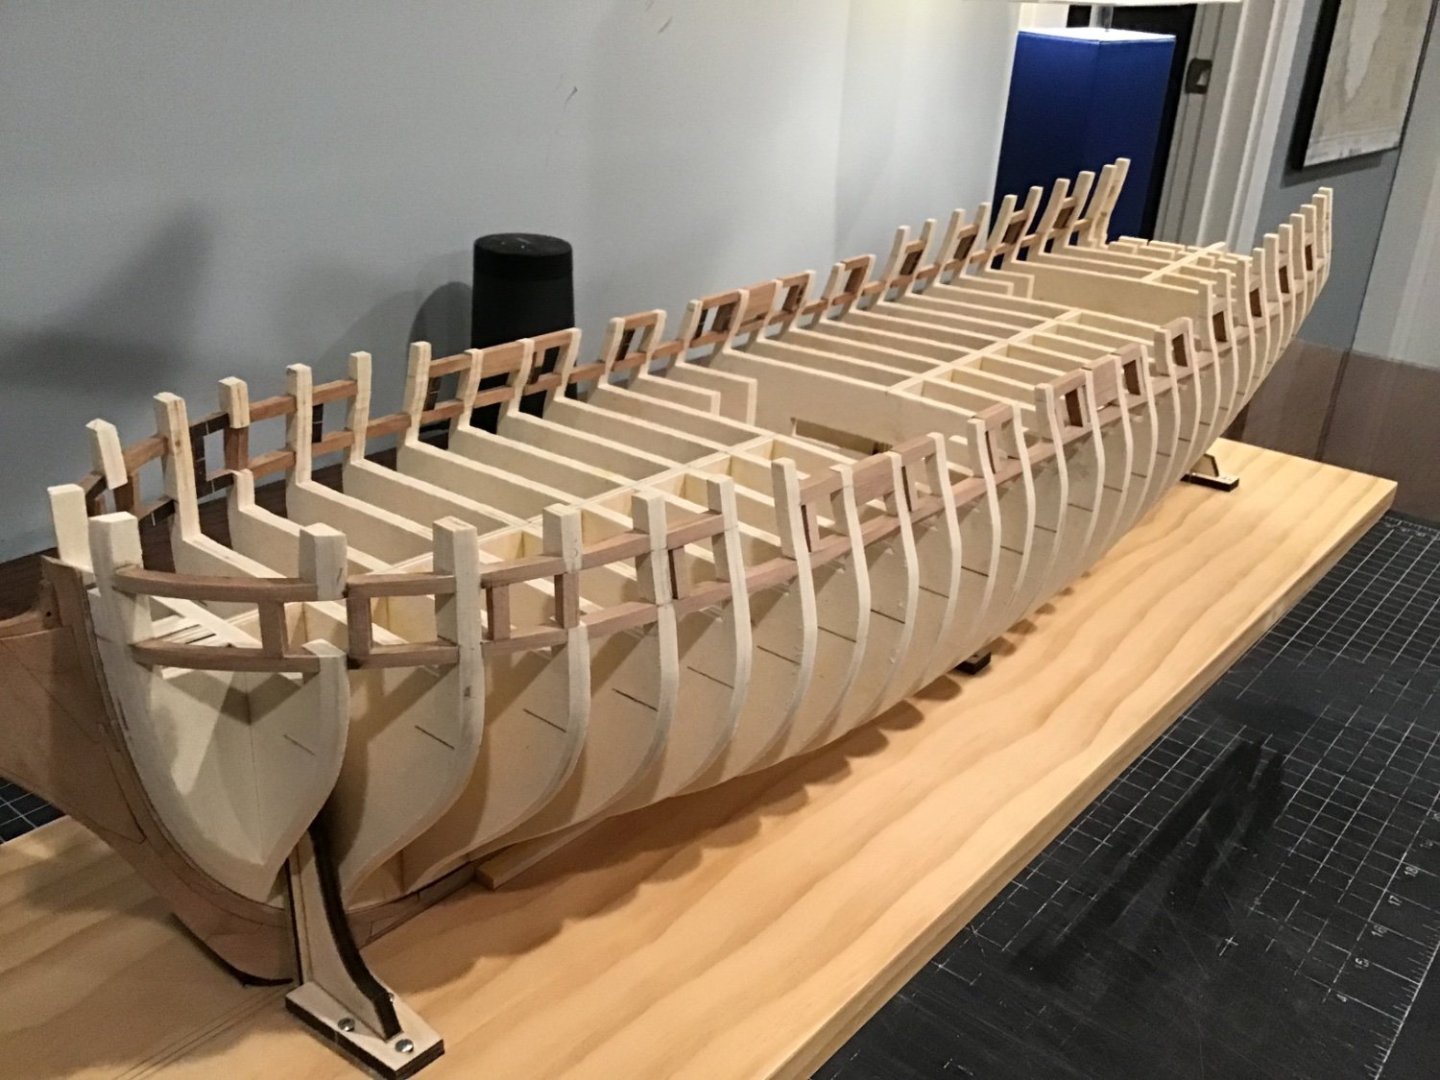
After a few weeks I’ve finally wrapped up installing and fairing all of the port framing. I kept asking myself along the way why this step seemed to be taking so much time. Finally, I counted up how many individual pieces are required to complete all of the framing. Works out to be a total of 136 separate parts for this step! Wow 😮…now I know why it took a bit of time. Below are a few pictures of the completed framing. I’m including some extras that may serve as additional reference for future Winnie builders. I am finding extra shots like these helpful myself as I’m moving forward and simply hope to add to what others have shared previously. Now, on to the Stern Frames! Thanks for stopping by and taking a look.
Best,
Jim

- Steve20, Edwardkenway, scrubbyj427 and 5 others
-
6
-
 2
2
-
Stellar job of planking Frank! I hope I can come close to your results when I get to this stage.
-
Beautiful Rusty! You are so close to completion of an amazing model.
-
Looks so good, Rusty! I have a lot of savoring ahead of me since I’m only on chapter 1 but I’m enjoying the journey thus far. With spring finally arriving in Michigan my build time will slow down as the outside projects take precedence. However, will get back to the bench whenever I can. Thanks for continuing to share your Winnie experiences…really enjoy your updates!
- Rustyj and FrankWouts
-
2
-
Looks great, Kevin! I have this kit on my shelf and to do list. My wife and I are heading out to Mystic Seaport in September to check her out along with the other treasures at the museum. Well done.
- billocrates and mtaylor
-
2
-
A quick update and question. The port lintels are all installed. A bit of debonding needed in a few instances but not too bad.
 Regarding this filler space pictured below. Does it also need to be filled inside the bulwarks before faring to create a flush surface between bulkheads K and I and 1 and 3 both inside and outside the ship? I’m assuming yes but just want to confirm. Thanks!

 Now on to the port sides. Thanks for stopping by.
Best,
Jim
-
Glenn, for precision addict’s your build log offers quite a fix! I do so appreciate your knowledge and documentation. You’re helping all of us build better Winnies.
- scrubbyj427, Dave_E, glbarlow and 1 other
-
4


HMS Winchelsea 1764 by glbarlow - FINISHED - 1:48
in Member Build logs for the HMS Winchelsea
Posted
Glenn, it looks so good!!! You really are your own harshest critic. However, I have a hunch it’s that perfectionism that’s helping you to create such a beautiful model. Thanks for continuing to offer such an inspirational example to all of us current Winnie builders.