


James G
-
Posts
234 -
Joined
-
Last visited
Content Type
Profiles
Forums
Gallery
Events
Posts posted by James G
-
-
Coming along nicely Gary! My wife and I took a trip through the Panama Canal in 2016. Amazing to see and hard to believe that is was basically built by hand. Quite the engineering feat! Hope you had a good time.
- cdrusn89 and FrankWouts
-
 2
2
-
Your wheels are looking amazing Greg! When you started this build and I saw the picture of the finished model I wondered how you were going to pull off building these. Well, question answered, you’re doing so successfully in the innovative fashion you often exhibit with your builds. Well done!
- mtaylor, Keith Black and druxey
-
3
-
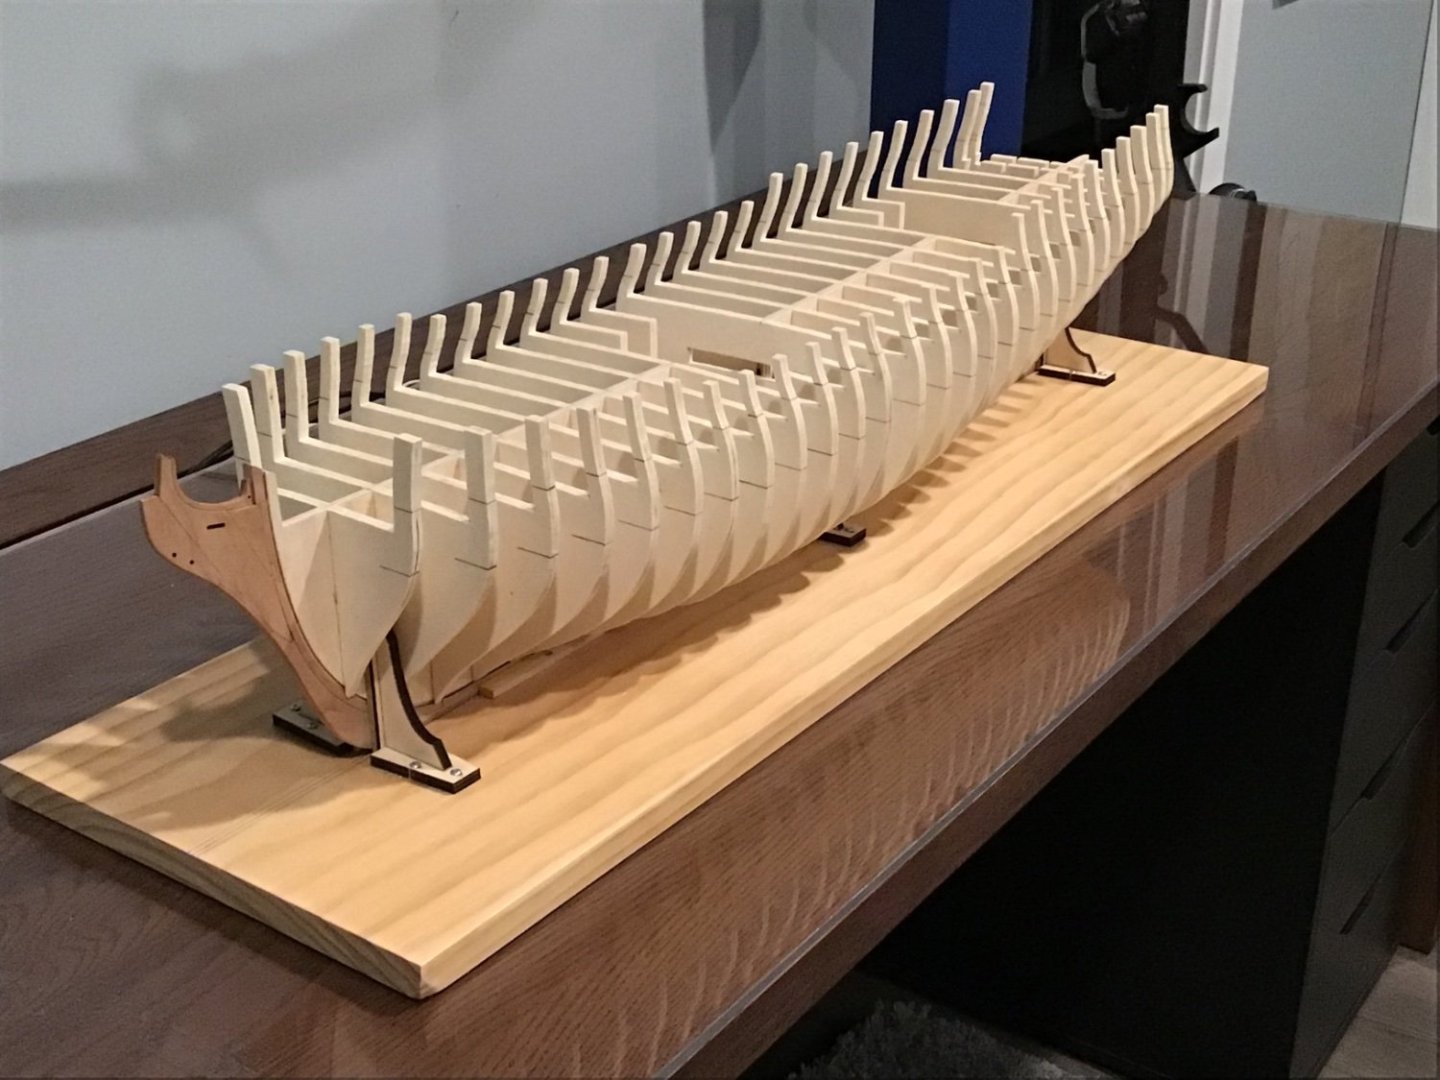
A quick update. After three days of gluing the bulkheads are in. @Chuck really wasn’t kidding about there being more bulkheads than normal! At times as I was placing it almost felt like a POF build. 😆I can see how with proper fairing the planking will lay down nicely. My bride offered some encouragement by saying it’s actually starting to look a bit like a ship. I’ll take that over the pile of plywood I’ve been sanding and shuffling around over the last few weeks. Thank you all for your views, likes and encouraging comments. They really do help! With a new bottle of Advil in the house let the fairing festivities begin. Take care all.
Best,
Jim

- dvm27, CaptnBirdseye, Saburo and 6 others
-
9
-
I agree with the others. If it’s going to gnaw at you I’d redo. There’s always imperfections but it’s hard to live with the ones that glare at you. Thus far it’s a beautiful build!
-
Looks amazing Steve! An example of the skilled ship modeler using right tool at the right time creating perfection.
-
Looks really good Matt! You’re representing Michigan ship modelers very well indeed!
- scrubbyj427, Matt D and FrankWouts
-
3
-
As everyone has already said JJ, it looks so beautiful! I just wanted to let you know that you’re going to love your Byrnes slitting blade.I purchased these a while ago and am amazed at how they cut. You’ll wonder how you ever got by before!
-
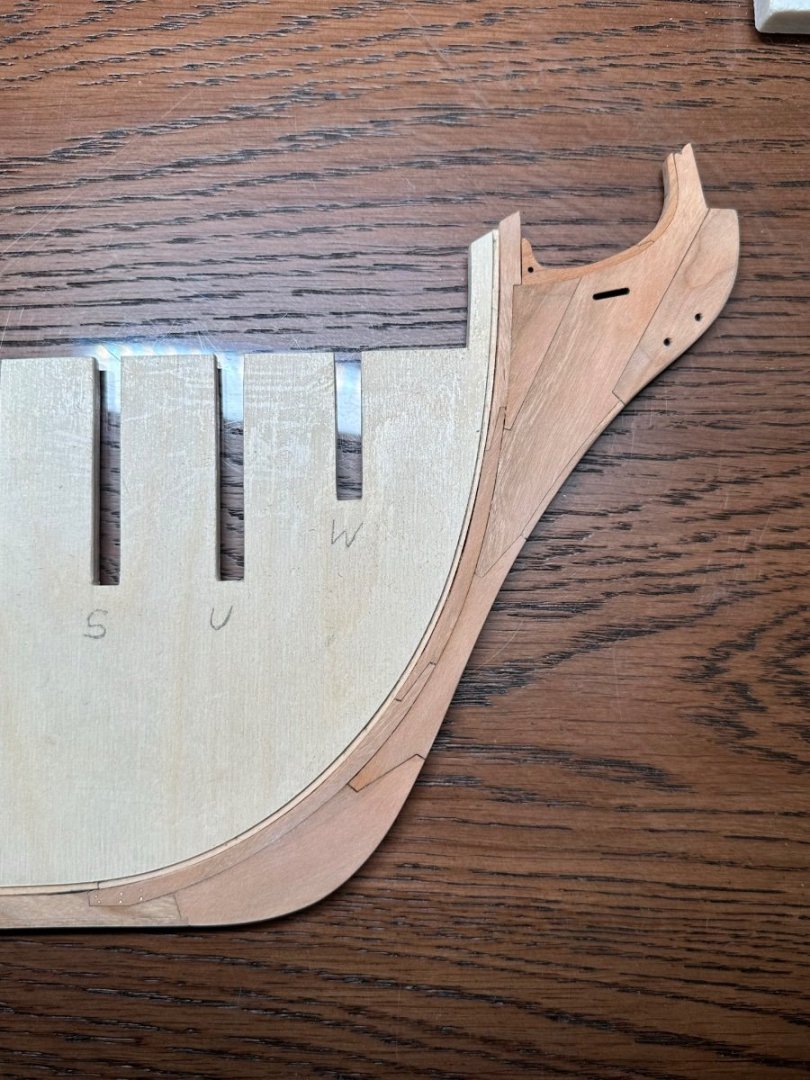
After some backtracking I’m now ready to begin installing the bulkheads. My second attempt cutting the bulkhead former now matches Chuck’s plan prints. I also wasn’t satisfied with my first attempt building the stem and knee. The margins just weren’t tight enough. So I debonded everything and started over. Many thanks to Greg @dvm27 for his tips on building on a lighted drawing board using 5x magnification. This really helped me to improve the appearance of the stem, knee and false keel. Below are shots of the copper treenails I installed in the false keel, version 2.0 of the stem and knee and finally the bulkhead former in my building board ready for bulkheads. I guess sometimes you have to take a few steps back to get a running start. Thank you for checking in on my progress…gradual as it may seem!
Best,
Jim

- FrankWouts, Matt D, glbarlow and 6 others
-
9
-
I bet that surgery was a bit nerve racking! Well done 👍.
- Keith Black and mtaylor
-
2
-
-
I’m holding off on adding a finish as long as I can. Still haven’t settled on if or what I ultimately want to apply. Since some areas require paint. I prefer to apply needed colors on unfinished wood. Certainly helps the paint to adhere better. Great work so far! I’m basically at the same point you are with my build.
Best,
Jim
-
@westwood, Dusan, thank you for sharing your experience and thoughts. I’ve been following your build log and the recent pictures of your planking are spectacular. The wop does gives your hull a rich appearance. I’m still weighing what direction I ultimately want to go. I do like the rich, dark finish of the linseed oil. My concern is it may be a bit too much on a model as large as the Winnie. Perhaps too much of a good thing! I’ll figure it out…fun to weigh options. At the end of the day I guess it boils down to personal preference. Thanks again!
Best,
Jim
- Saburo, scrubbyj427, FrankWouts and 1 other
-
4
-
Looking very nice, Mike!
-
Yes, @scrubbyj427. I’ve definitely gotten that message from you veterans on this build. Keeping everything tight along the way appears to make the journey much more enjoyable. Thank you for your feedback.
- FrankWouts and scrubbyj427
-
2
-
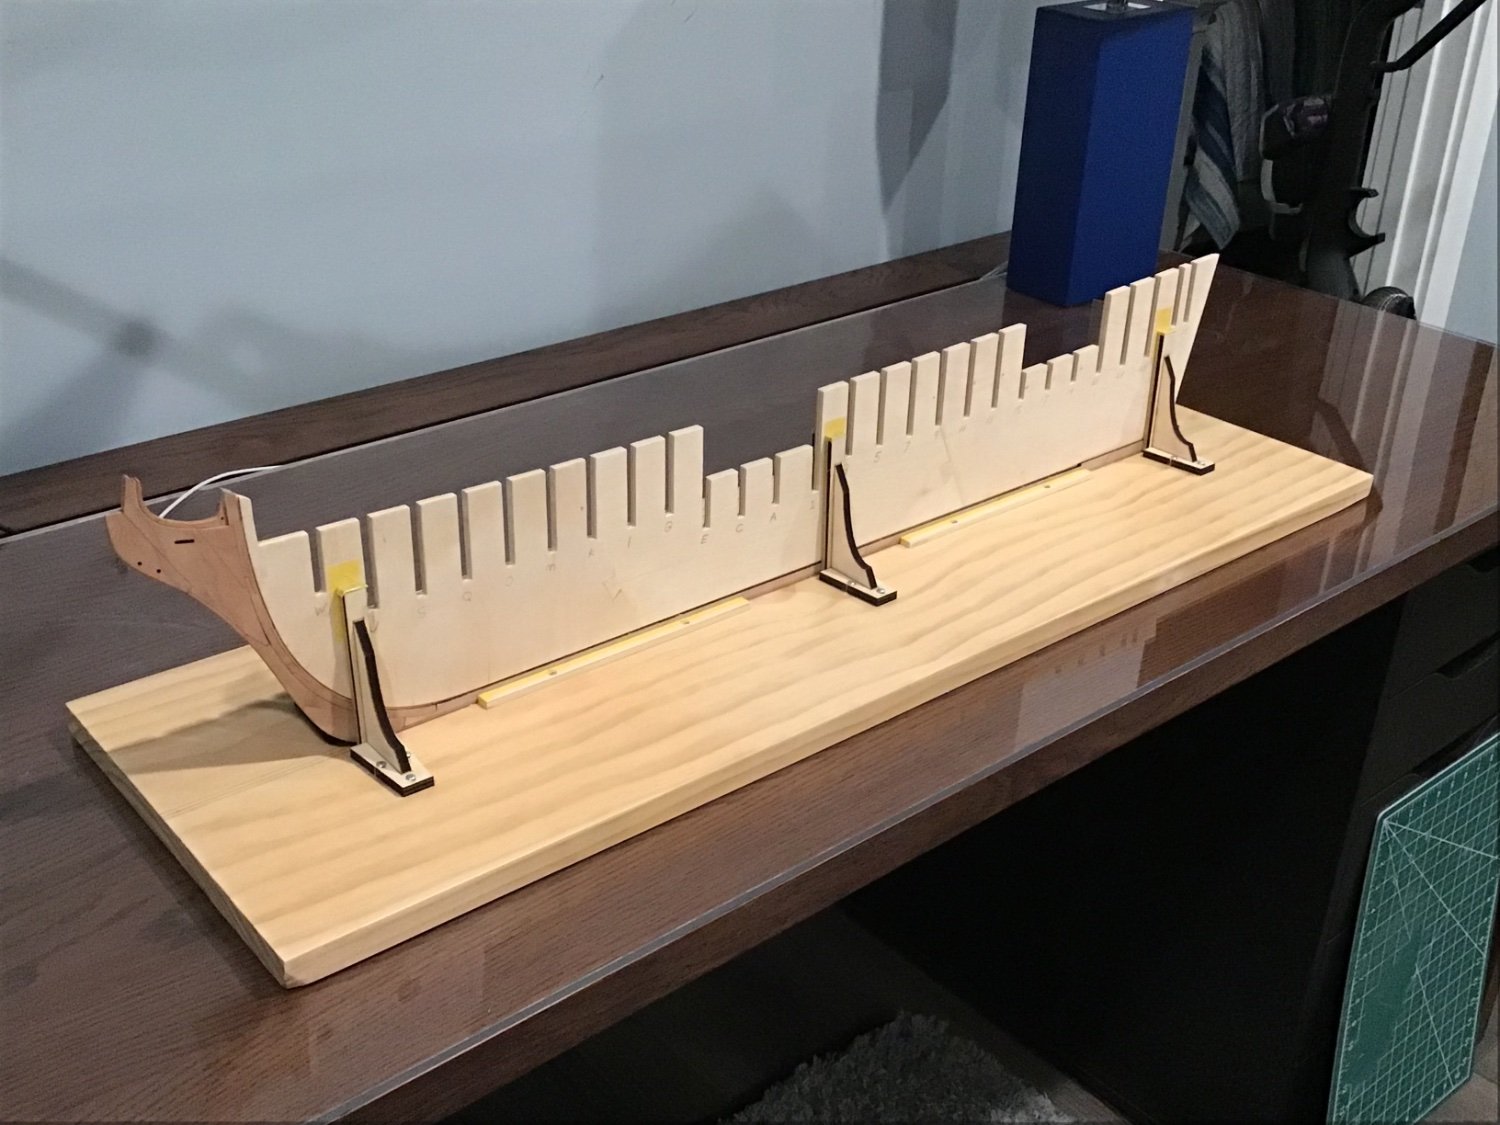
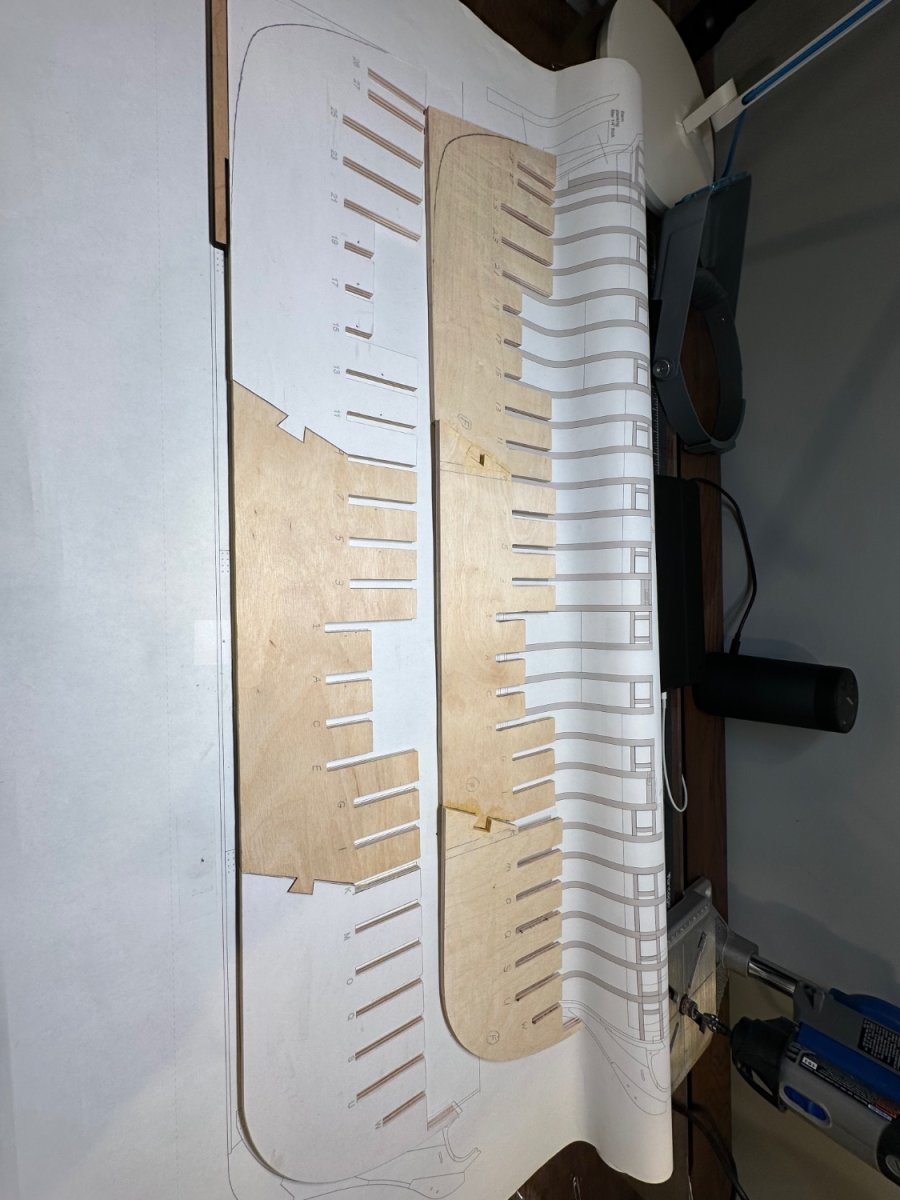
Greetings! An update on my progress. After cutting and shaping my bulkheads and bulkhead former I was getting ready to begin gluing in the bulkheads. However, when I put my bulkhead former on the blueprint after gluing the three sections together I noticed it was about 3/8” too long overall. Also, the positions of the slots that the bulkheads slide into were off by as much as 1/8” in many instances. It seems I had creeping sizing issues that became amplified when the three bulkhead former parts were joined. I’ve had this happen in the past and have tried compensate during subsequent steps and that just doesn’t work. I end up chasing the error the rest of the build which is miserable. So I cut out and shaped a second bulkhead former that exactly matches the blueprint. Version 2 is on the bottom in the attached picture. The one on top is version 1. The new one is spot on and will allow the bulkheads to be positioned correctly to Chuck’s plans. Thank you for looking, likes and comments!
Jim

- FrankWouts, scrubbyj427, Saburo and 4 others
-
7
-
Looks so good, Greg! I especially like your copper treenails.
- Keith Black, Greg Davis, Charter33 and 1 other
-
3
-
 1
1
-
-
-
Thanks for the update, Chuck! I’ll continue to follow your progress closely and understand that there are lots of logistics to figure out. No rush…my hands are plenty full with the Winnie. 😆😆😆 However, if a group build gets going on this model I want to start with the majority at the same time. I’ve joined the Winnie group pretty late.
Jim
-
Chuck, what an amazing model and building approach! Do you have a rough idea of when a kit form might be available for us model ship building mortals? Also are you and the other MSW administrators thinking about this build as perhaps being a group project like the Winchelsea? Just curious and a bit hopeful. Thanks!
Jim
-
Beautiful work, Frank. Wow!
- Matt D and FrankWouts
-
2
-
Whew! Well done, Edward. You have the hands of a surgeon! Glad the operation was a success.
- Jack12477, FrankWouts, Edwardkenway and 2 others
-
4
-
1
-
Congratulations Mike! It’s absolutely beautiful and I’ll be referring to your log frequently as I build my Winnie. I look forward to seeing your next project. Any chance you’ll go back and finish the Mayflower you had been building before the Winnie? Would love to see you complete that excellent build log if the subject still interests you. Thank you for sharing…I learn a lot from you.
Best,
Jim
-


HMS Winchelsea by James G (Jim) - 1:48
in Member Build logs for the HMS Winchelsea
Posted
As a new ship modeler I’ve been gradually building my tool arsenal. At this stage of skill development I’m trying to add tools that can truly enhance the precision of my builds. On previous ship models I’ve been frustrated by the lack of sharpness I’ve been able to achieve on curved edges. The old Dremel simply couldn’t deliver the crispness I was looking for. Thanks to a recommendation from @Greg Davis I purchased a Wen spindle sander (Model 6524) from Amazon. The price was fantastic and the results it delivers are exactly what I was hoping for. Below the sander is pictured along with a test curve I did with a machinist’s square demonstrating the edge precision. Highly recommend this product if you’re in the market. Many thanks to Greg for the recommendation!
Best,
Jim