James G
-
Posts
234 -
Joined
-
Last visited
Content Type
Profiles
Forums
Gallery
Events
Everything posted by James G
-
 Wow! You’re clicking them off just like Matt. Looks fantastic 😎.
 -
Agree with JJ. That black really makes everything pop!
-
Congratulations on finishing another chapter, Matt. You’re definitely getting there and it looks so good!
-
@glbarlow Glenn & @scrubbyj427 JJ, it does indeed take a village! That’s one of the many things I’m enjoying about building the Winnie. The camaraderie of kind model ship builders like you two and many others on MSW really adds to the fun. I appreciate the friendly support and experienced suggestions that both of you offer. Really helps!
-
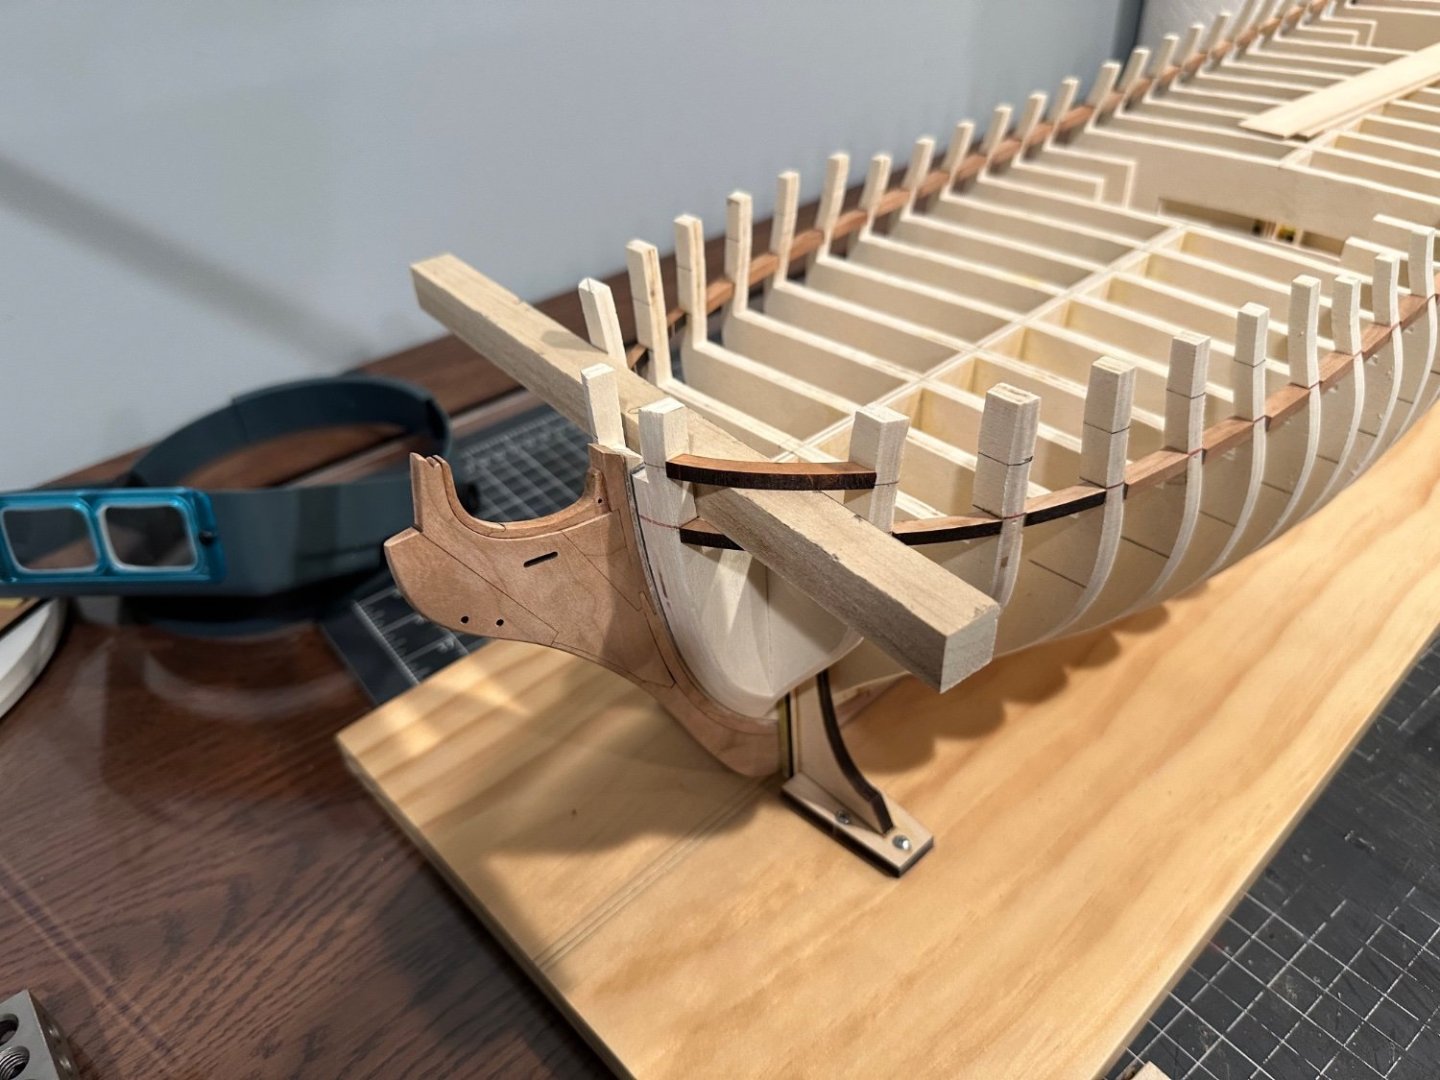
@scrubbyj427 JJ, I’m planning on using the port upright jigs that Chuck provides in his chapter 1 kit. I’m using the square dowels only to place the lintels at the correct height. Thanks for your input!
-
Thanks @glbarlow Glenn! That’s a great 👍 tip. I can see how important that is as I look at the model now. Moving forward I’ll use two spacers in the gun ports as I place the lintels to ensure they reflect the slope of the sheer. I appreciate you sparing me potential problems down the road. By the way, I’ve been referring to your log a lot as I’ve been installing the port sills. Your documentation of this important step was excellent and has been quite helpful.
-
@scrubbyj427 JJ, thank you for your kind words. Yes, I hear you on the need for a square dowel to act as a spacer on the gun ports. Made a trip to Home Depot today for just that purpose. The first lintel just went in. Finally, your Winnie is truly beautiful!
-
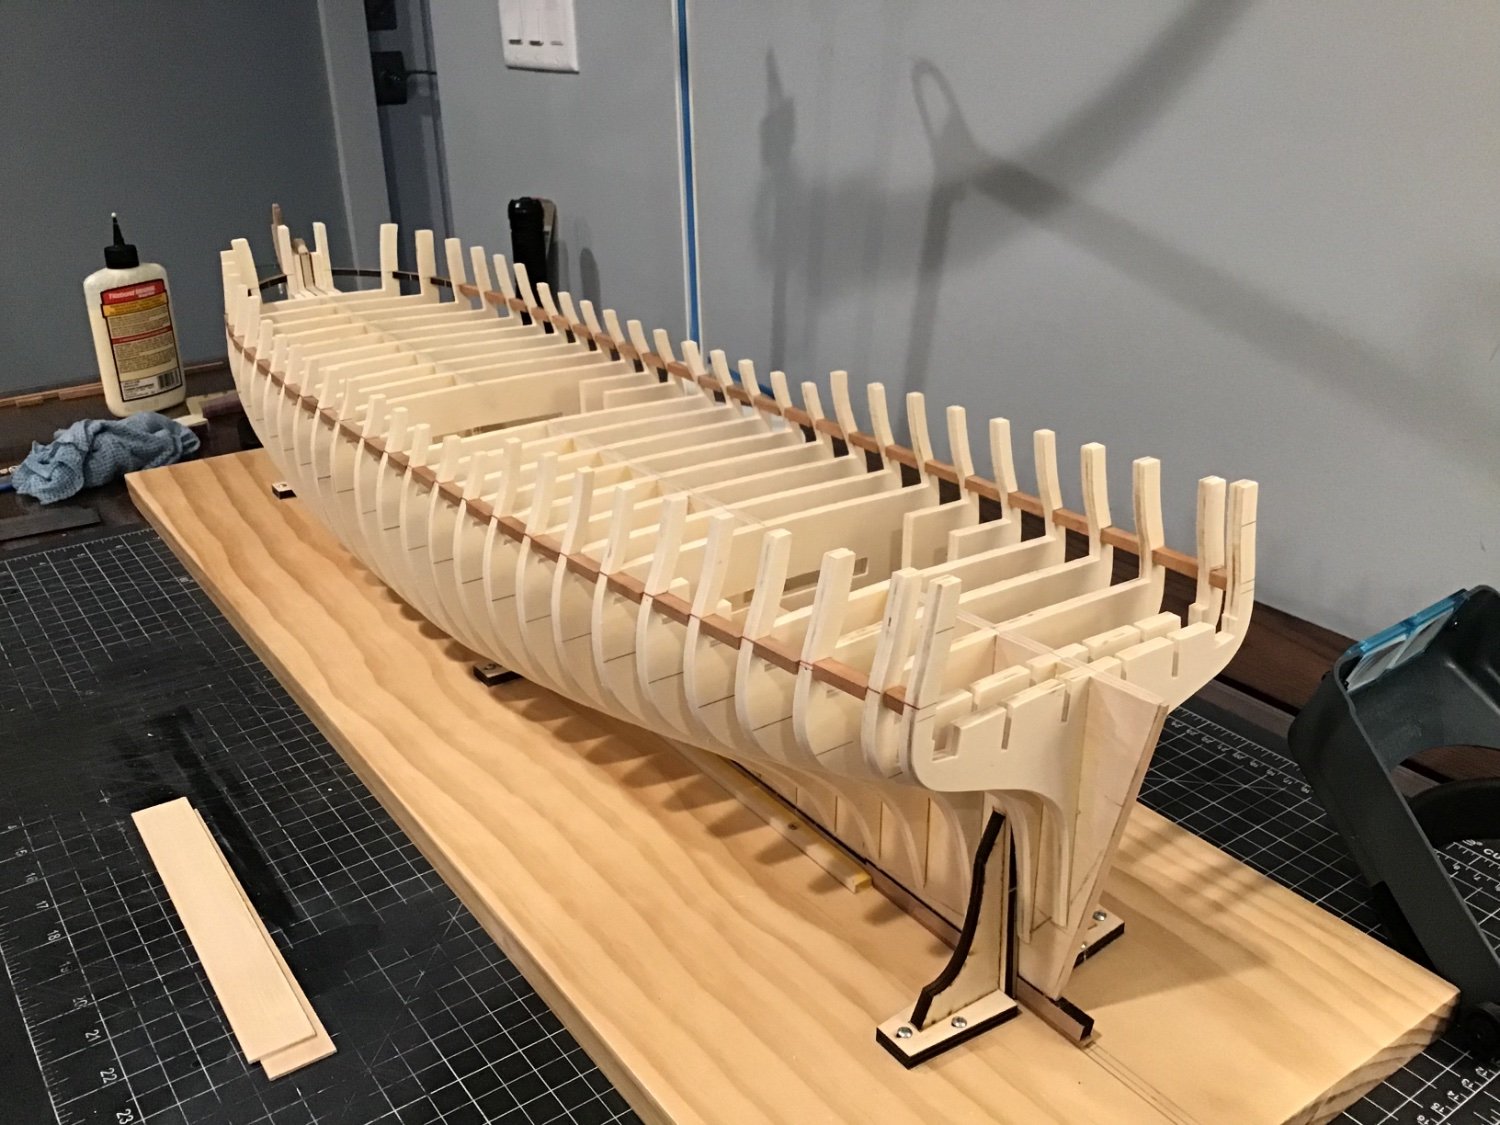
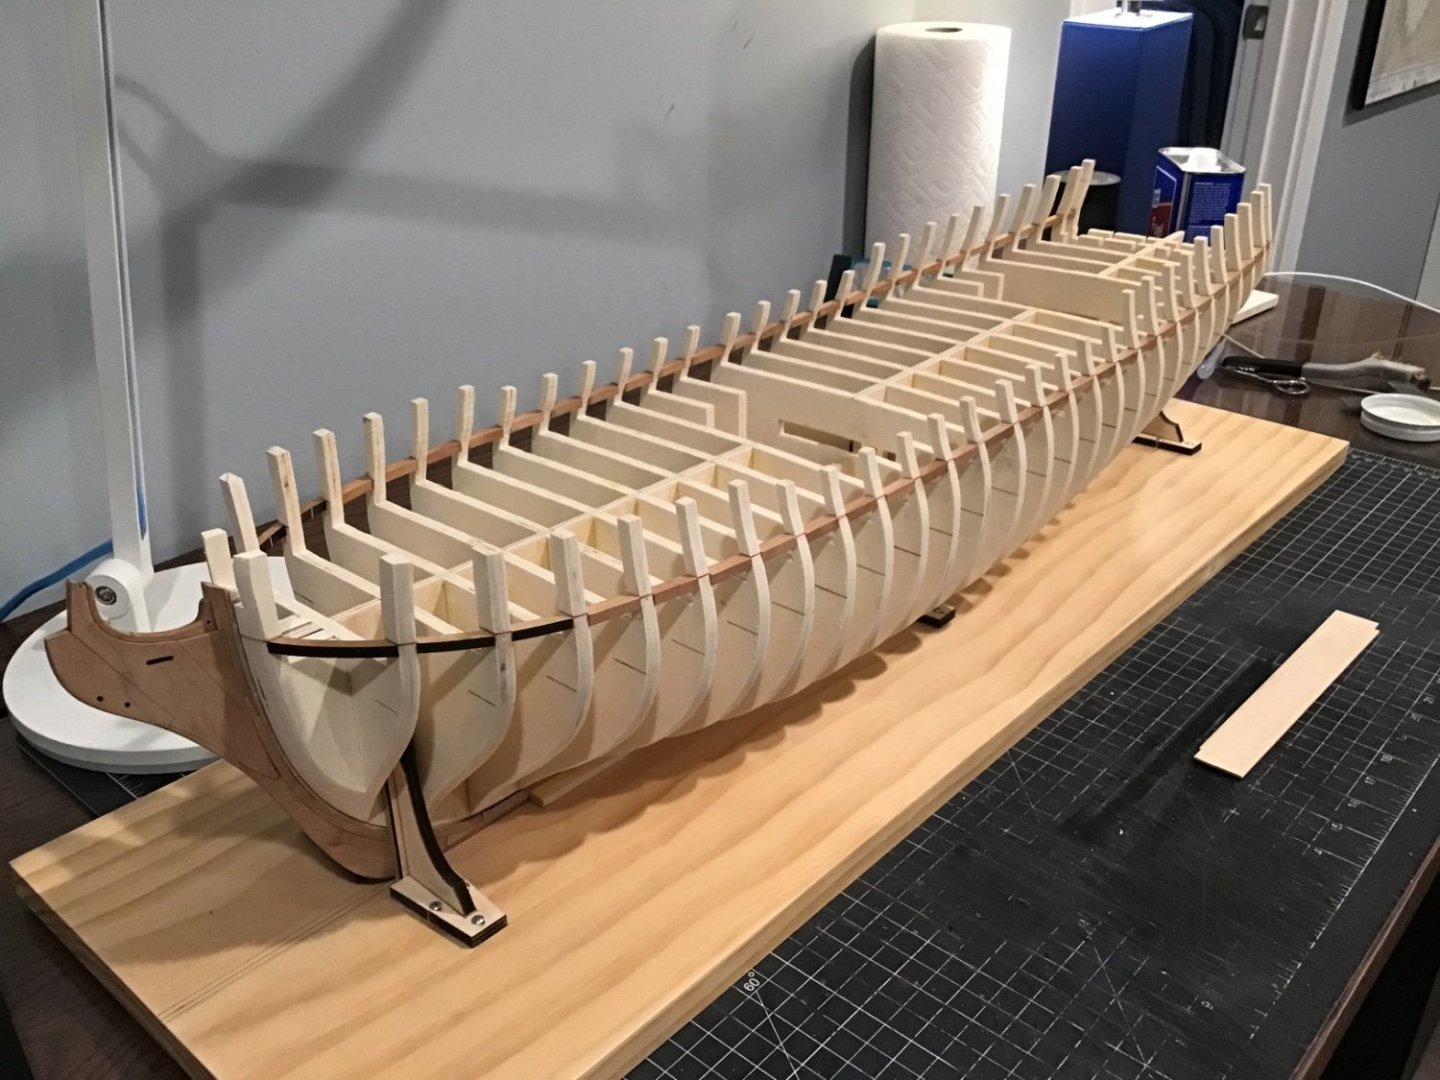
A bit of a tedious exercise but the lower port sills are installed. Adding all of these really added a lot of stability to the framework. It definitely was worthwhile to add them between every bulkhead. I also found it worthwhile to pull out the protractor and miter the sills between two additional bulkheads at the bow and one at the stern. After 54 of these I’m ready for something different! Now on to the lintels and port uprights. Amazed at how excited 😜 I am about this. Thanks for stopping by and your ongoing encouragement! Best, Jim

-
It looks so nice Rusty! Building the Winnie is a long journey. I was wondering, do you feel kind of sad that you’re coming to the end?
- 642 replies
-
- 1
-

-
- winchelsea
- Syren Ship Model Company
- (and 1 more)
-
Thanks, Greg for the feedback on your mill. I’m so glad you were ok after your mishap! It’s amazing how an accident can happen if we let down our guard for just a second. I try to be extra careful when I use tools like my Byrnes table saw. Call me paranoid. I’ve heard too many horror stories and don’t want to become a statistic myself. No doubt we have to respect many of the tools we use in our hobby. Your dredger continues to look beautiful. So fun to watch your progress!
-
Very nice fabrication strategy, Greg! The Byrnes table saw is the best for those angle cuts. What model of mill do you have? I’m currently doing a bit of window shopping for one.
-
They look very realistic!
-
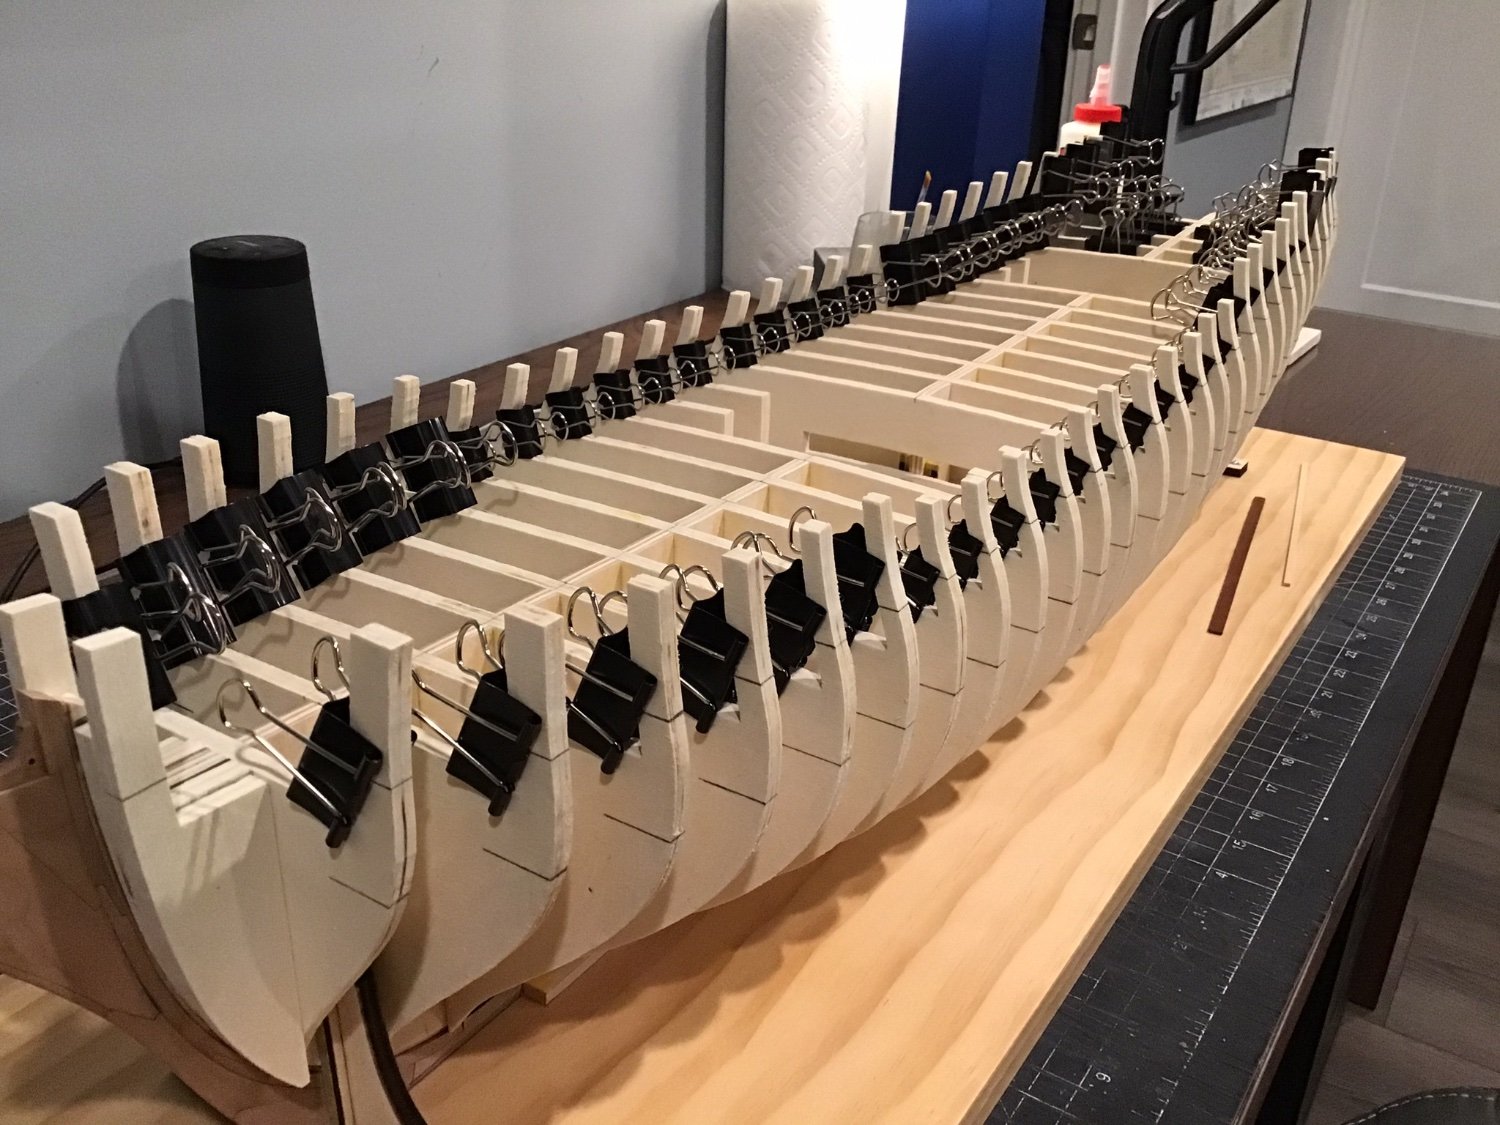
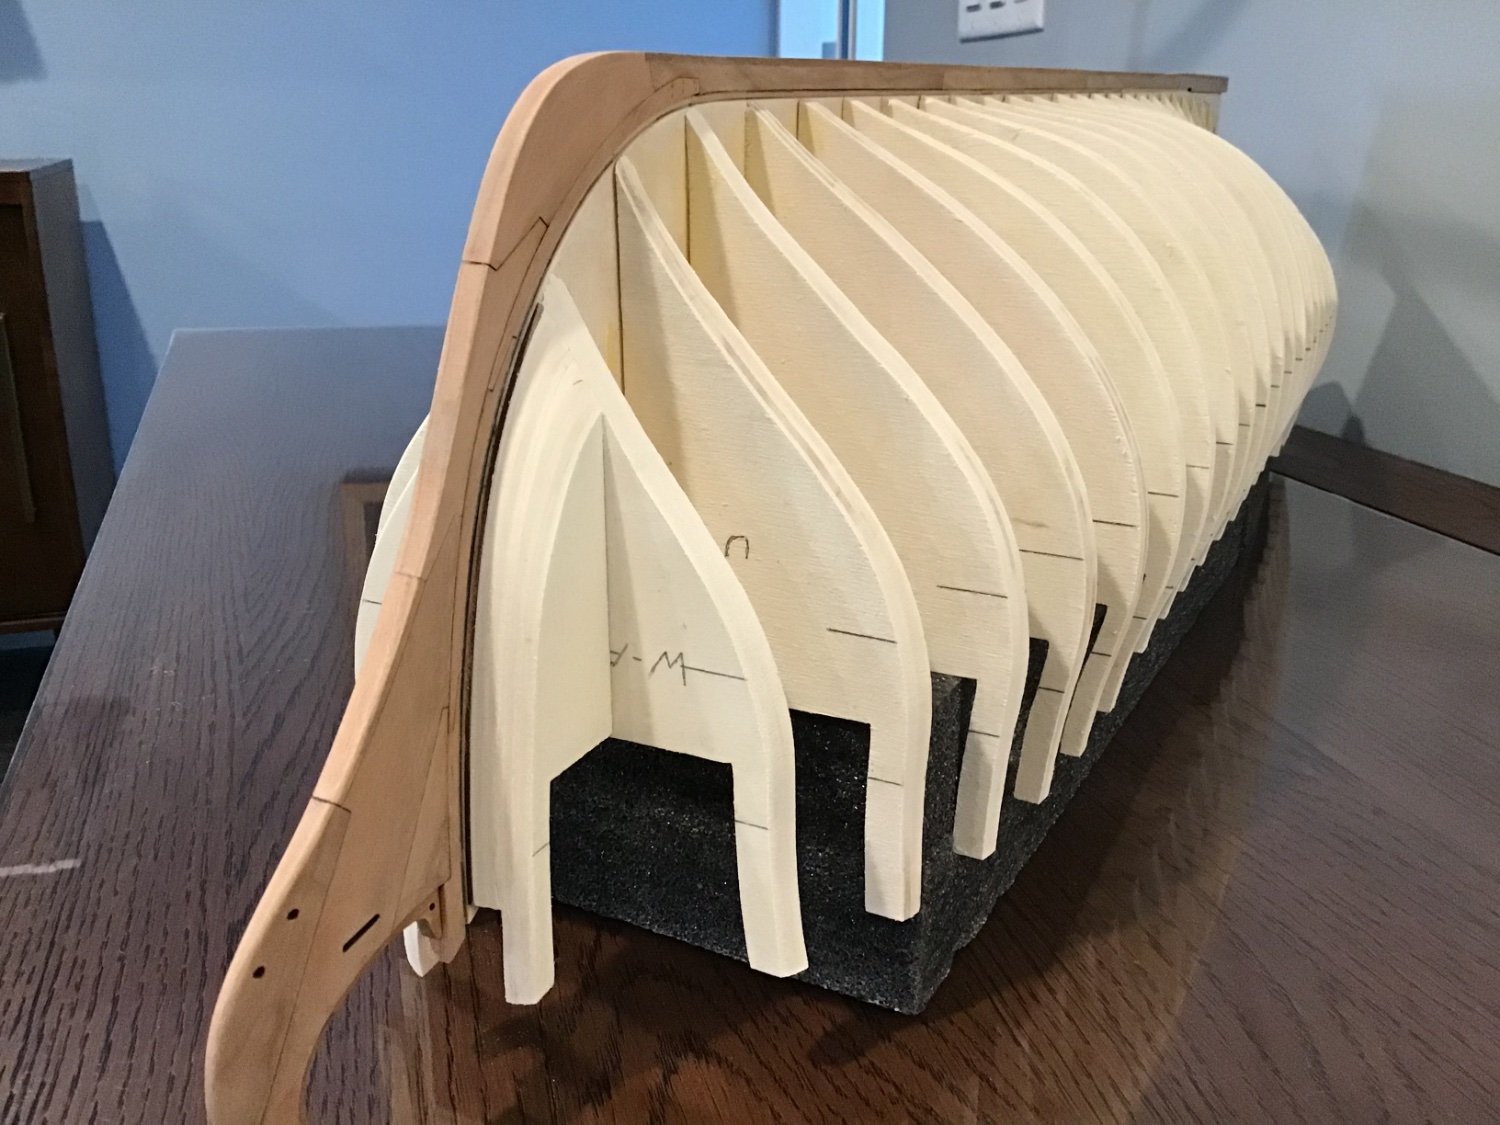
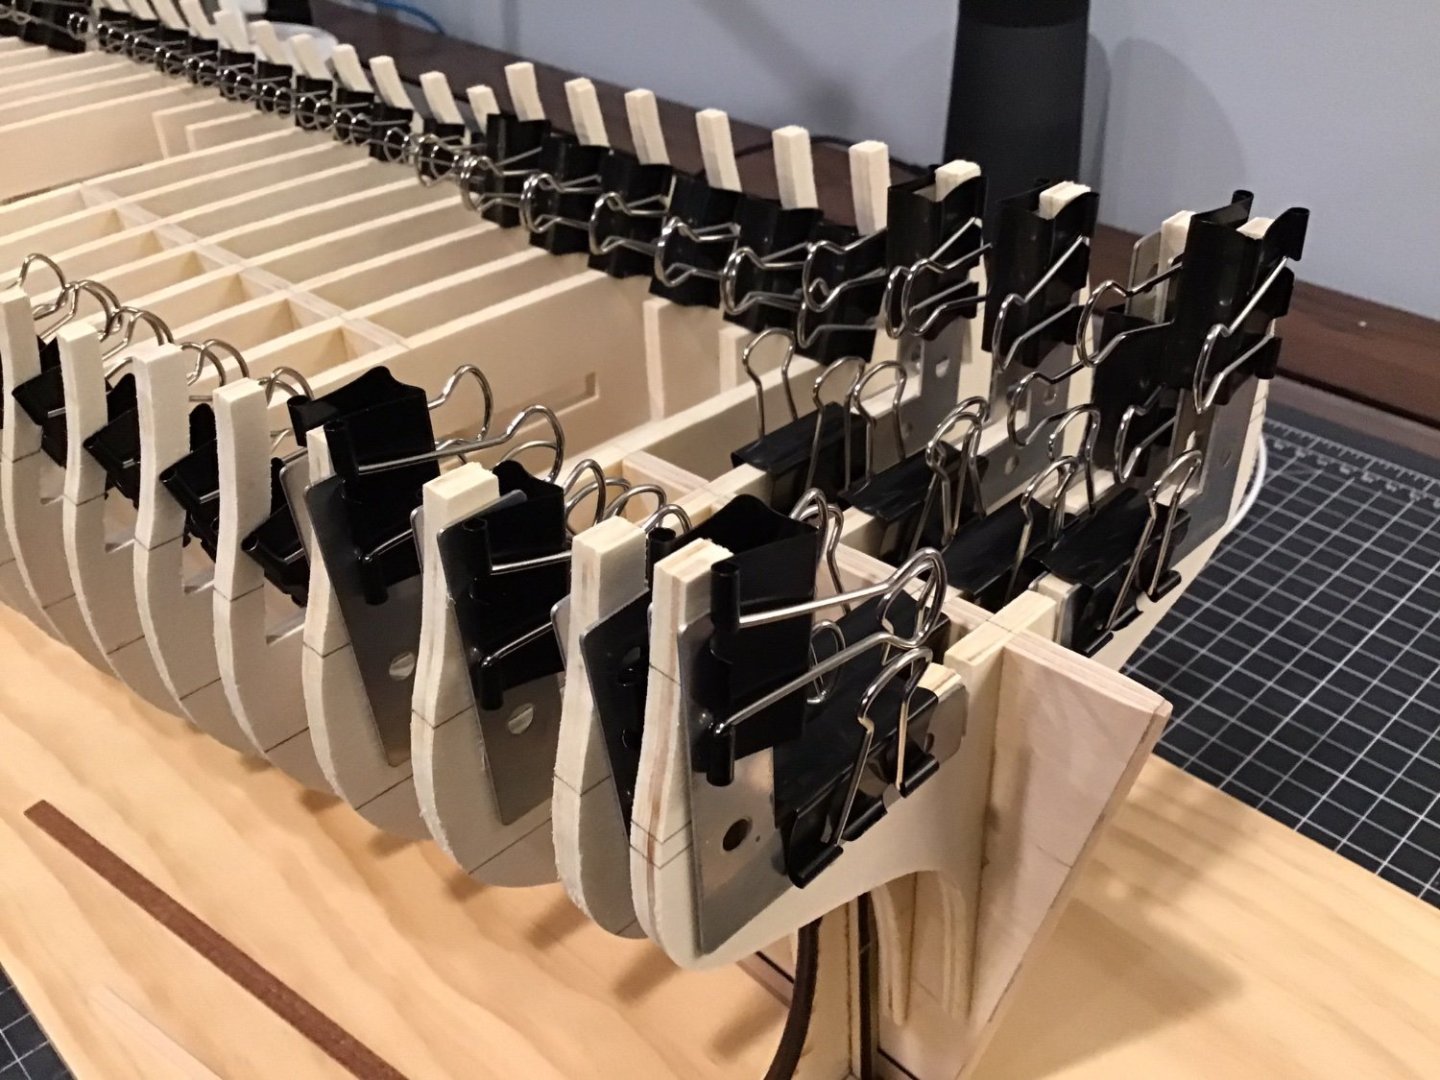
After a number of hours and days I’ve finished fairing the bulkheads. You Winnie veterans weren’t kidding! This is quite the elbow grease marathon! I found that when I grew bored with the sanding it was best to walk away for a while. I didn’t want to shortcut this step as I’ve learned the hard way that poor fairing can make planking a real nightmare that you just can’t wake up from. The bulkheads seem to be angled properly but I m sure some tweaking will be needed once I begin planking. Thank you to @Chuck for his binder clip and L bracket idea on the risers. The clips held firmly and no breakage occurred throughout the sanding process. Thanks also to @glbarlow Glen for his idea using polyethylene foam sheets to create a jig to lay the hull on for fairing the bottom. I purchased these through Amazon for $23 and am sure I’ll continue to use them throughout the build. I appreciate you all looking along with your likes and comments. I’m VERY happy to be moving on from this step and am excited to start adding the port sills. Take care all! Best, Jim


-
Nothing wrong with backing up to take a new running start!
-
Beautiful, Glenn. Actually the more accurate adjective is breathtaking! Thank you for sharing your steps taken.
- 840 replies
-
- 3
-
-
- winchelsea
- Syren Ship Model Company
- (and 1 more)
-
I’m with Glenn! I’m currently fairing the hull of my Winnie. About 2/3 done…all by hand. I have a Mouse too but have left it in the tool drawer. I’ve used it to sand fiberglass hulls on RC boats but don’t trust myself on this type of build. Way too easy for me to become over zealous. B.E. you are an example of self control. We’ll done.
- 648 replies
-
- 3
-
-
- Indefatigable
- Vanguard Models
- (and 1 more)
-
Looks very nice, Matt!
-
Very nice Glenn! I’ll use this when I get to this point on my build. Thank you for sharing the finer details. Quite helpful!
- 840 replies
-
- 3
-
-
- winchelsea
- Syren Ship Model Company
- (and 1 more)
-
Amazing JJ! Your Winnie is an inspiration.
-
Mike, what’s the name of your blog? Would be interested in checking it out.
-
The only thing missing is an adult beverage to hydrate with during all that pulling effort you’ll be putting forth.
-
Hope the Covid recovery ❤️🩹 is progressing comfortably. My wife and I had it last August and the worst part was our son and his wife were visiting from out of state when it hit us. We finished the rest of the visit outside and at a distance which seemed weird. However, they remained healthy and we recovered quickly. Your Winnie continues to look beautiful as you progress, Matt. Thanks for providing a great log, along with others, for us recent starters to follow!