


bigpetr
-
Posts
123 -
Joined
-
Last visited
Content Type
Profiles
Forums
Gallery
Events
Posts posted by bigpetr
-
-
-
-
Paper shields are good option. 80gsm paper (common office paper) is cca 0.1mm thick. Or you can layer tissue paper to desired thickness like Louie wrote. To prevent possible warping you can soak it with CA glue or varnish.
- Louie da fly and Binho
-
 2
2
-
Congratulations on the oarsmens. Huge task it was.
You will have the ship under the sails and with rowers rowing simultaneously? I thought it was one or the other. Can it be done simultaneously?
- Keith Black, Louie da fly and mtaylor
-
3
-
I think that there needs to be bevel on bottom and top plank at the end so that they still forms clinker.
On a real ship there was no clinker to carvel transition at the ends. Plank ends were not perfectly lined up but there were small steps.
On skuldelev 2 (the source for this ship) ends were carved to the stems to solve this problem
-
-
Louie I can manipulate background image for you, If you want or need.
- Louie da fly, druxey and mtaylor
-
3
-
-
I liike all the the variants with one white and one yellow.
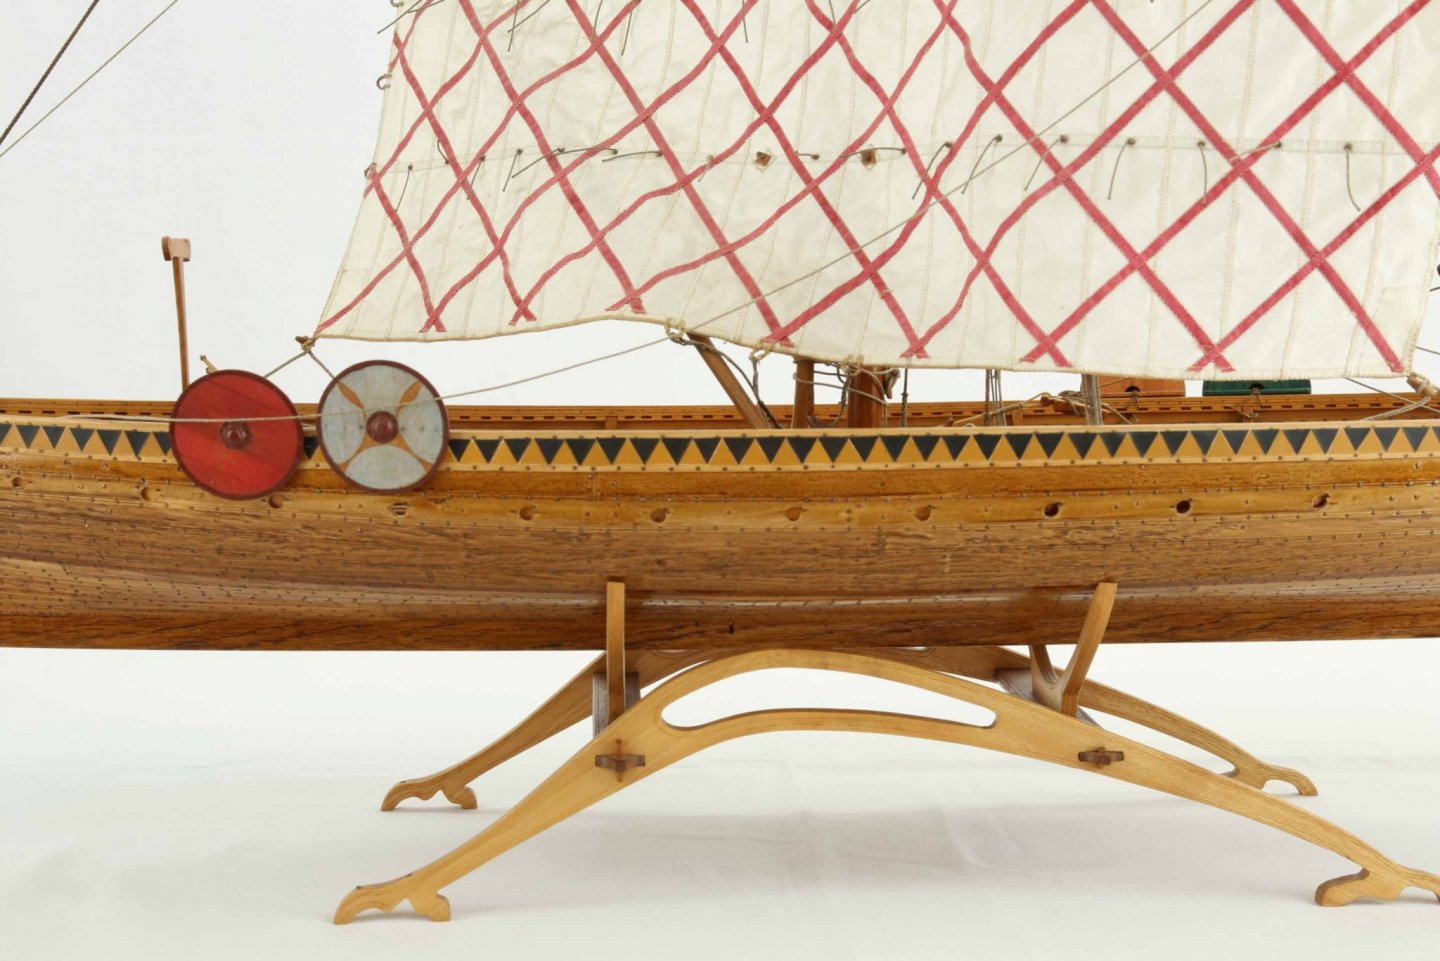
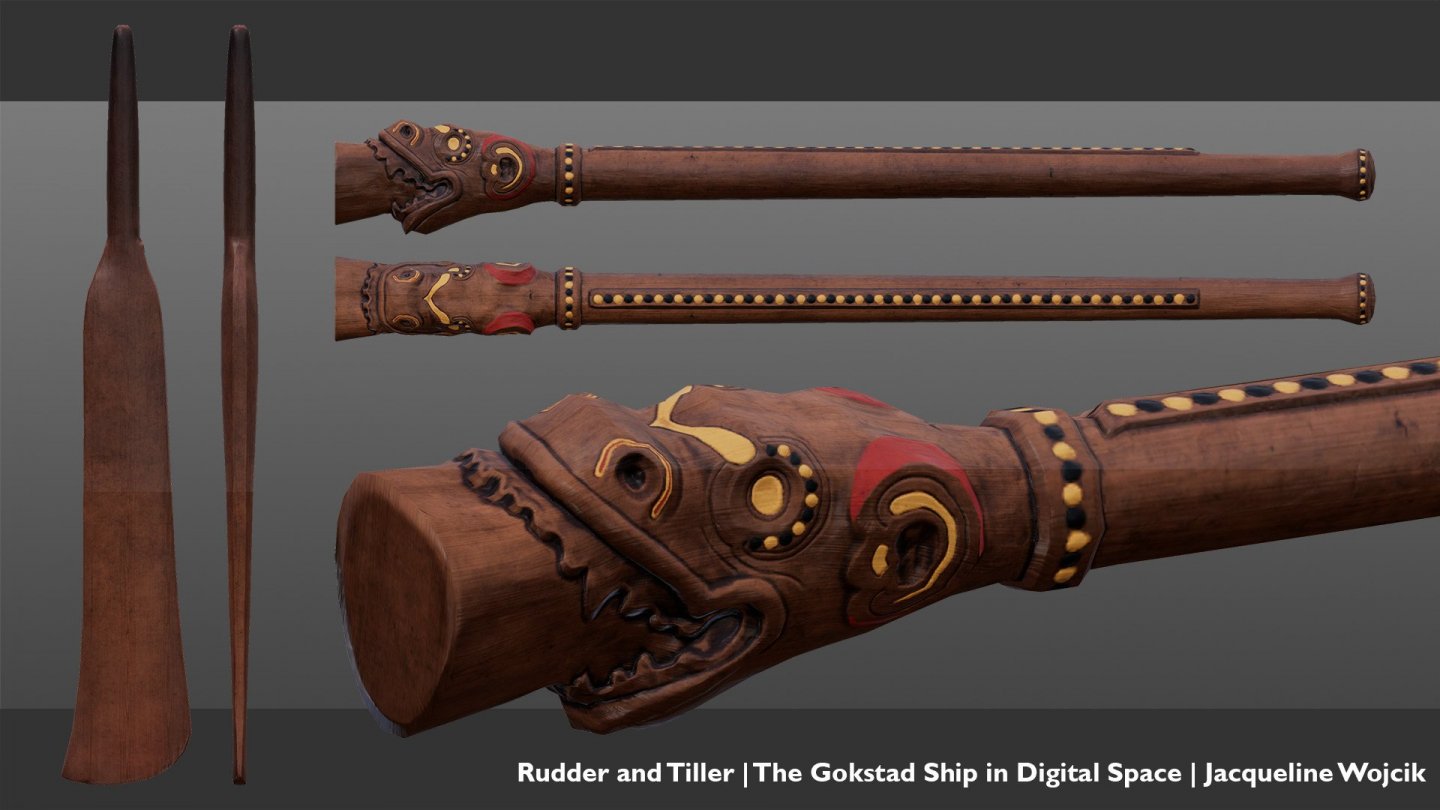
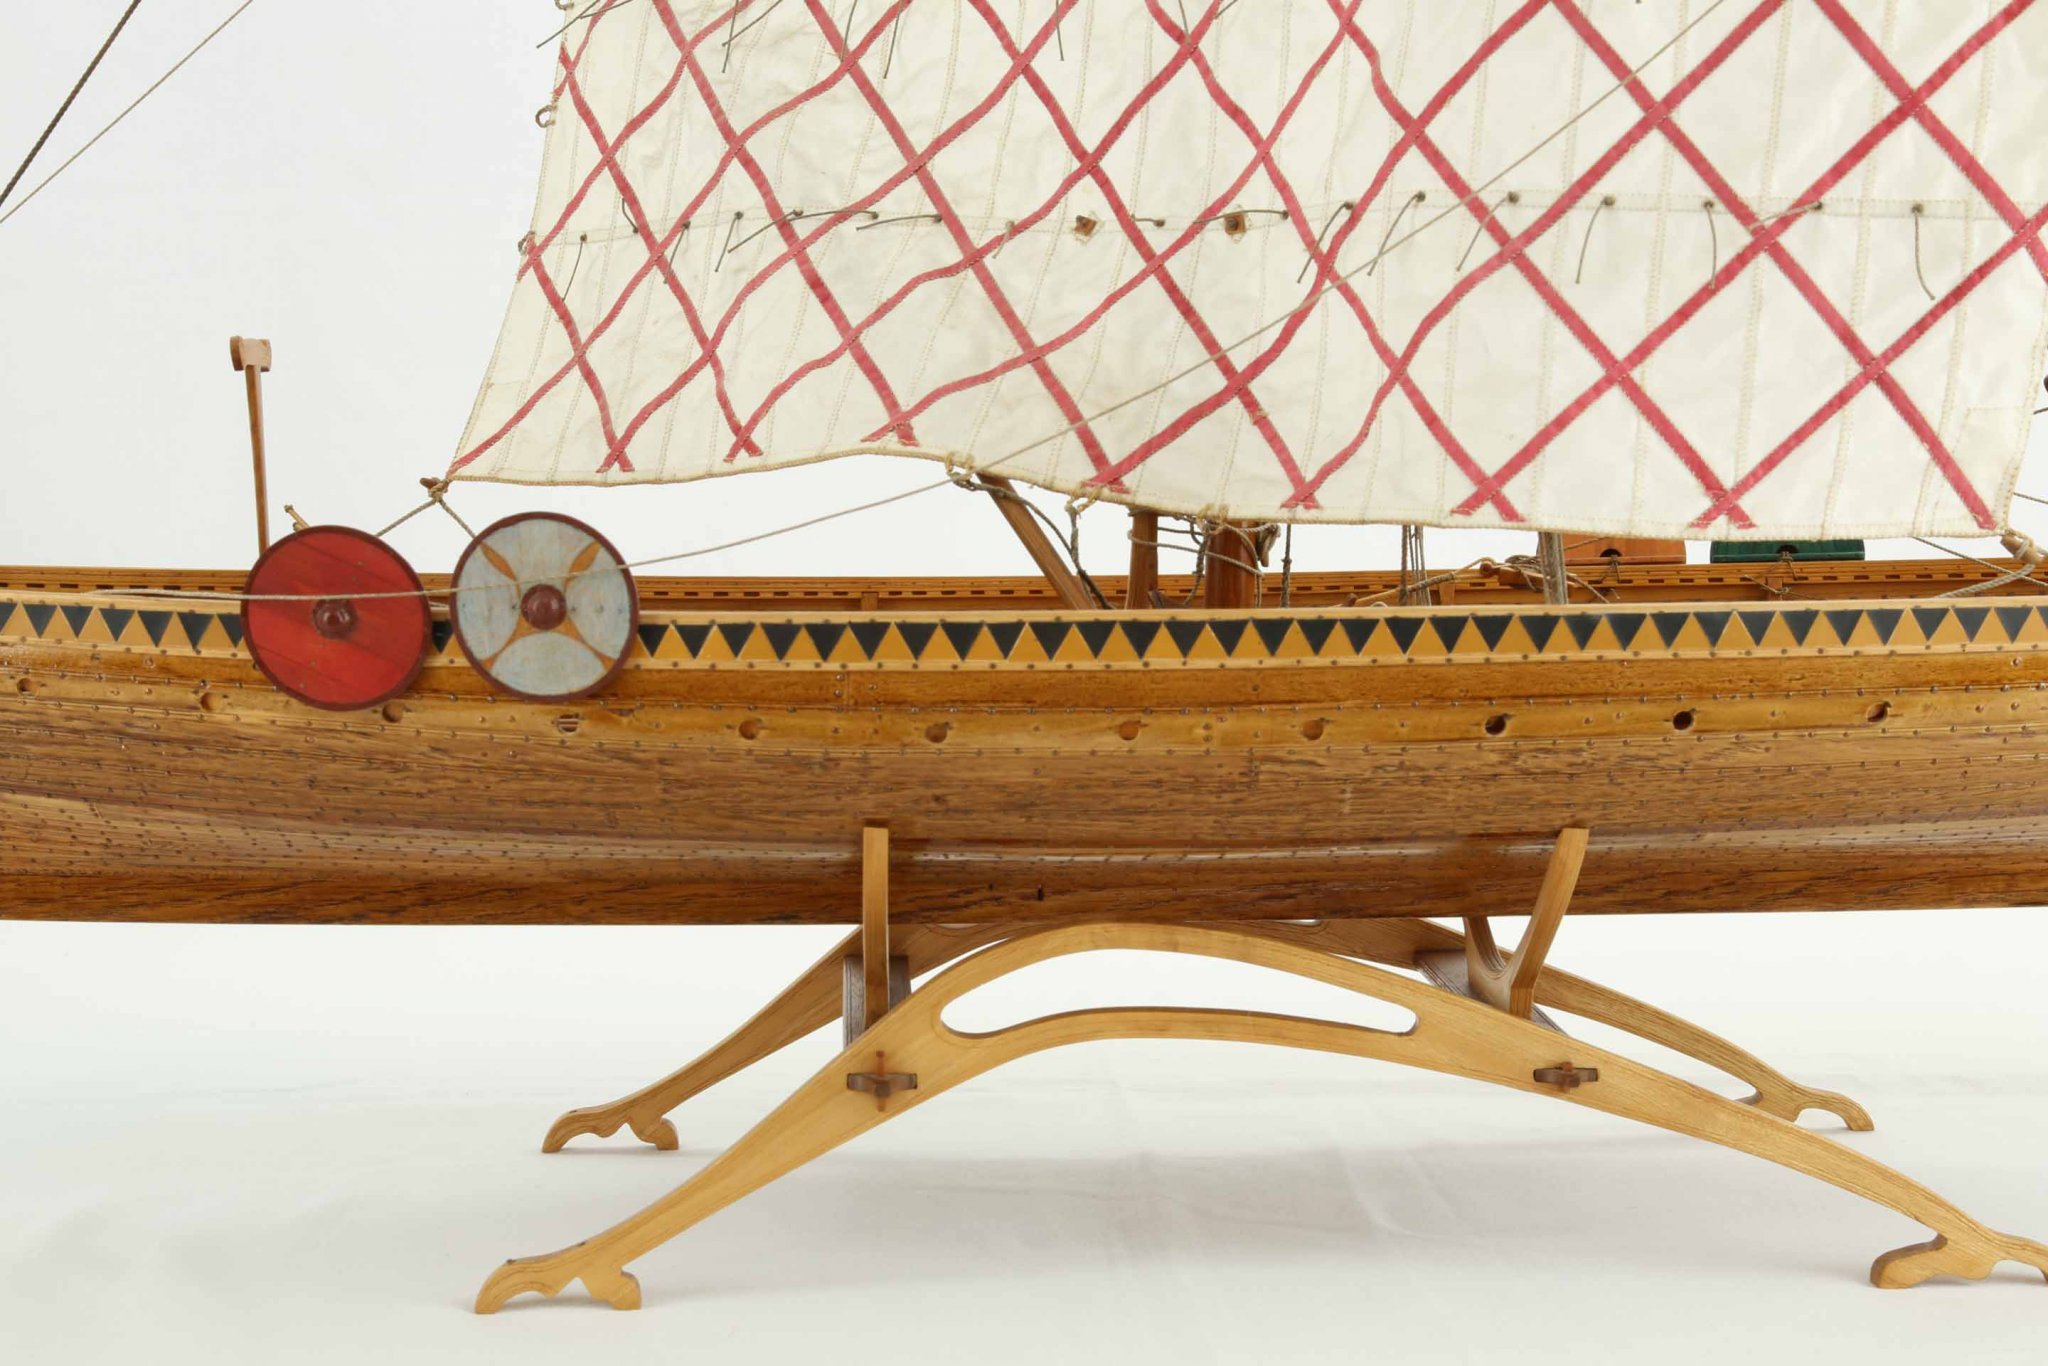
Museum replica of Gokstad steering oar tiller based on Nicolaysen drawings has yellow, red, black and brown colour. And although there are no traces of paint found on it, there are some interpretation that triangular shapes lightly carved on top strake was painted, somethig like that (colours used are just modelers preference):
- Binho, GrandpaPhil and J11
-
3
-
The cure is to do the model fast , while the initial spark still last🙂. Human needs to see outcome of his work quite fast, so when it lasts too long and building problems to solve acumulates he jumps to another subject unconsciously thinking it will go fast and easy🙂
-
It is beautifuly chuby 🙂. Great work
-
-
I am with Louie. I think vertical lean will affect structural strength, diagonals not so much on fullscale ship. I think diagonal lean was affected by shape of grown timber they ware able to get for the ribs. When they found something close, they just place it little diagonaly to fit to the shape of the hull. But this is just my theory. I think none of the lean (vertical or diagonal) will make difference in sailing behaviour of scale model where forces are different.
So (assuming all deck planks will be instaled on your model = inside of the ship not visible ) I would make ribs under floor level paralel in all axis and visible parts of beams and knees at angles as original have (or at least the vertical lean, because it will have more prominent visual impact then diagonals).
I am solving similar dilema with my Gokstad build, because all plans shows paralel ribs, but reconstructed original has some of them at angles.
- Larry Cowden, Louie da fly, mtaylor and 1 other
-
4
-
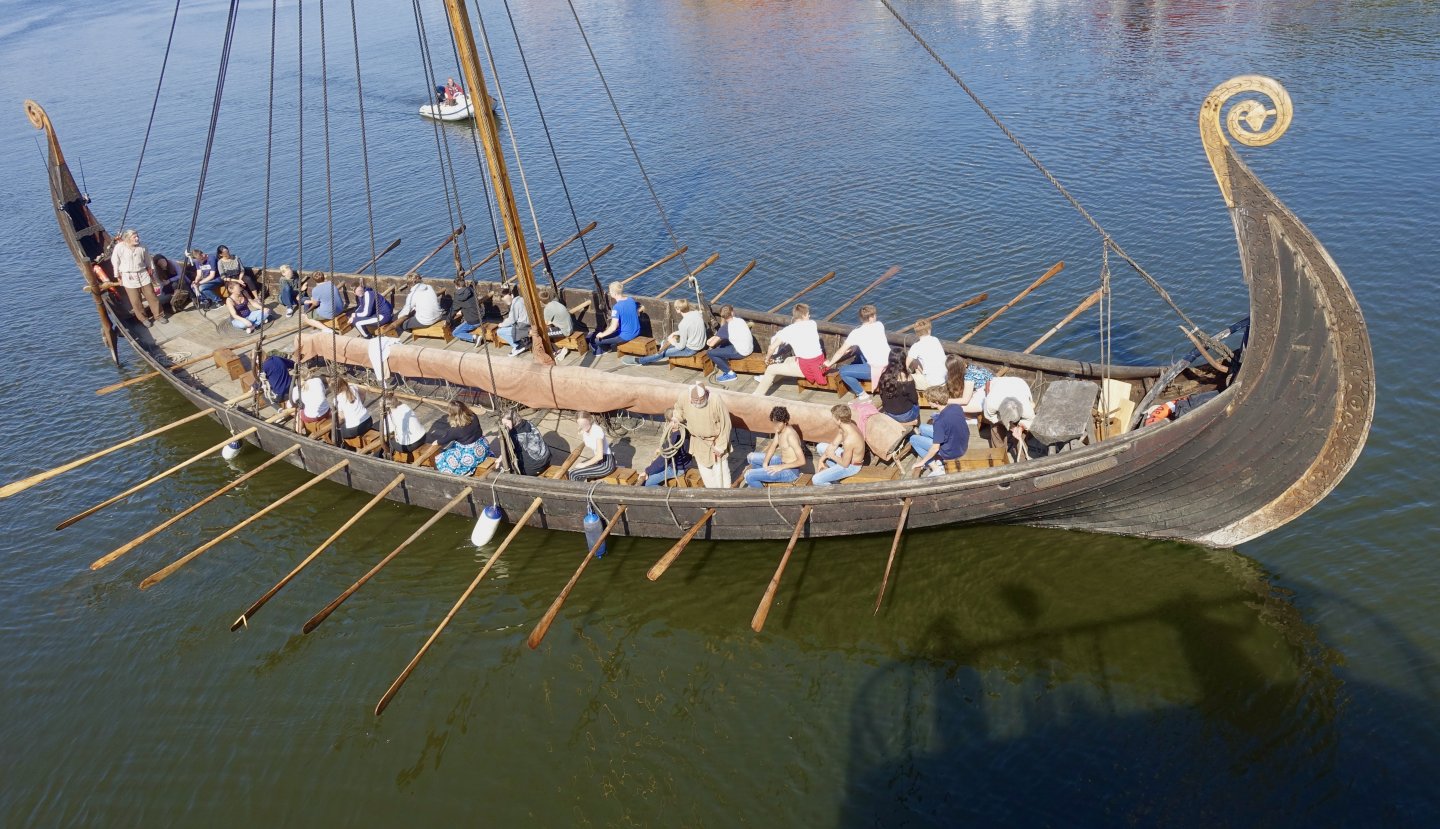
I do not know if this qualifies as sucesfull test of rowing on chests (it is bunch of a tourists 😀), but this is nice photo of Saga Oseberg replica with chests:
- KrisWood, Louie da fly and mtaylor
-
3
-
-
Maybe because they were sailors with practical minds, not historians and archeologist, who only works with what they find 😀. But I read somewhere that someone tested the chest variant and it works good, no problem to row - they say.
- Binho, Louie da fly and mtaylor
-
3
-
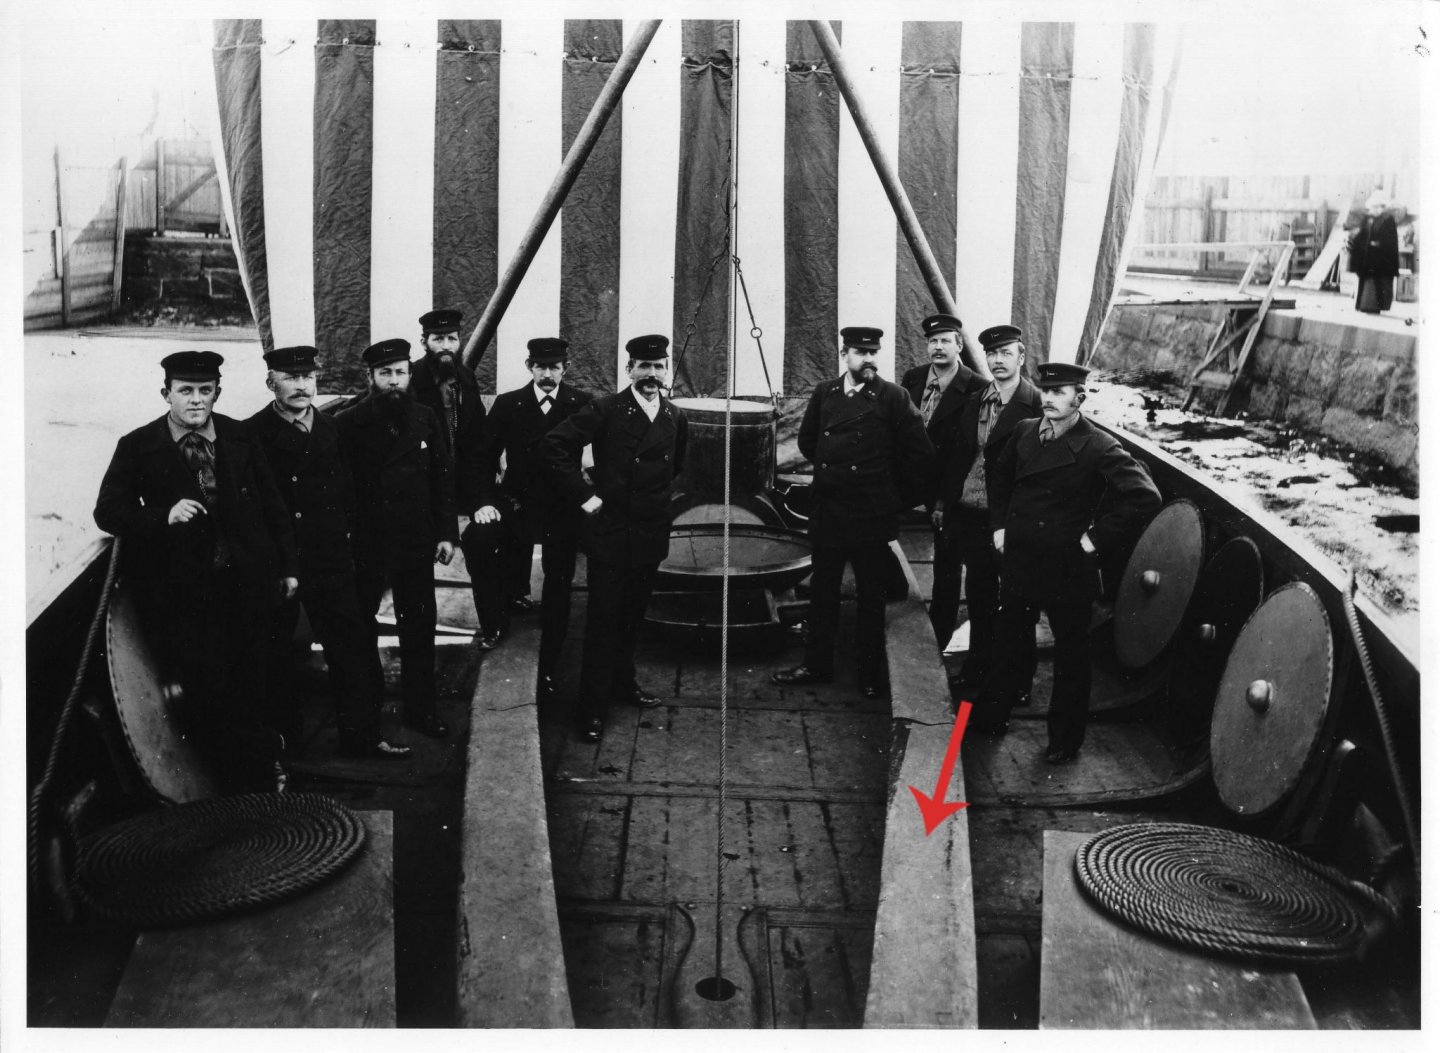
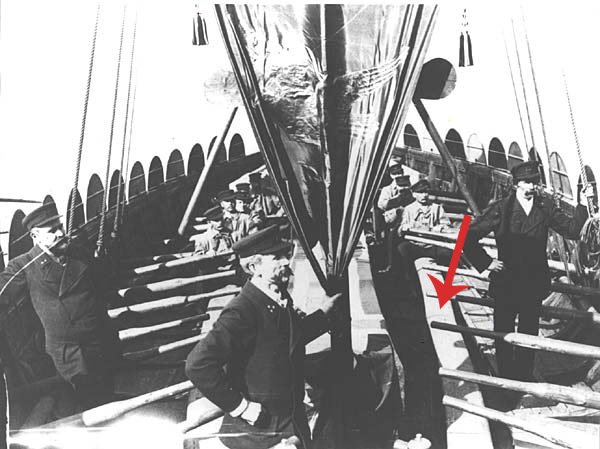
On Gokstad replica from 1893 they solved it like this - few long benches:
- KrisWood, Binho, Louie da fly and 1 other
-
4
-
-
Historical movie depiction is sad, but I stoped being upset about this long time ago and just take it what it is - entertainment. When characters are not flat and blacandwhite I am happy now. If I want historicaly accurate setting I get a book, historical novel. There the setting is as historicaly accurate as I can imagine it 😀
-
Hi Binho, closeups of tar from skuldelev replicas would be great. Thank you.
I paint paper with white acrylic colour so the next watercolour paint do not soak to the paper. Then I paint it with cheap watecolour paints. I start with brown and then adding black, white, red, yellow and green with small brush directly on the model, where it mixes together and create this tar effect. Nice thing is that you can wipe almost all the paint out with water if you are not satisfied or to make corections endlesly until you are satisfied because water dilute the paint. Also it is easy to make wear effect just by wiping the colour out with water. Finaly I seal with the varnish so the colour do not wipe out while handling with the model.
I did not experiment with it too much yet, but yout can aply another layers of paint after sealing with varnish. That way underlaying colour does not melt by water of next layer. It could be useful for some effects. Also I want to try to use light brown acrylic instead of white acrylic to give it some base colour and see how it looks
Great thing about watercolour paint is that it creates very thin layer so it do not fill concave edges and little details like carvings and rivets.
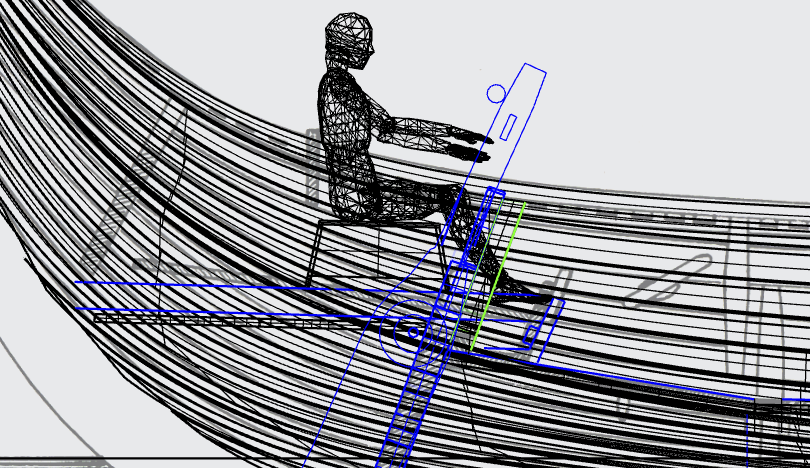
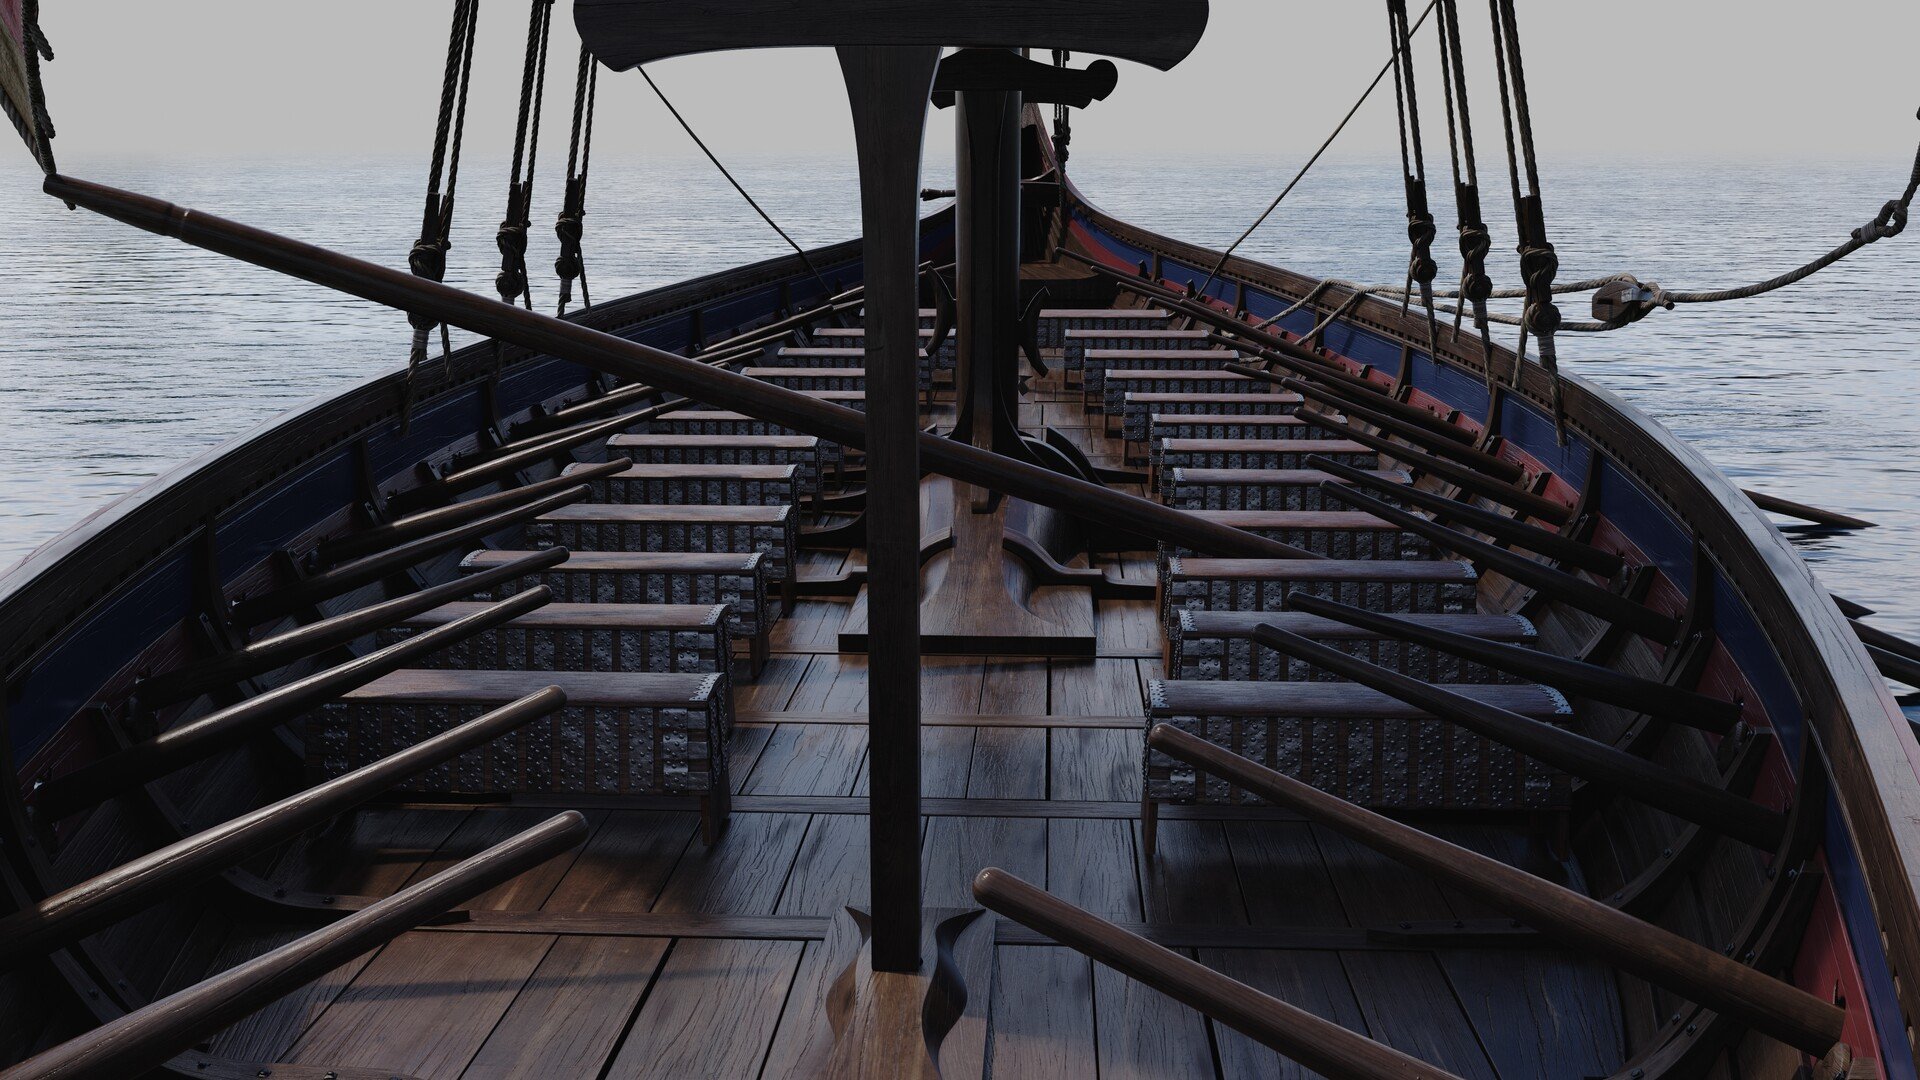
Yes, the thwarts thing is wierd. Who can tel how it realy was, they could be just burial ships. But I believe Gokstad (Oseberg I did not studied so detailed, but probably too) was real seaworthy allpurpose ship. I like the rowers siting on the frames better, because it seems more ergonomical to me. Even then they would need some sort of chests for their belongings, didnt they? Fully occupied ship is said to have 64 oarsmens (2 shifts that changes at the rows) so it means 64 chests? Is there a place for so much chests and shields? I need to test it in my 3d model.
-
Thank you Louie. I probably expres myself incorectly. By carvings I ment theese grooves on the planking and basicly near every edge on the ship.
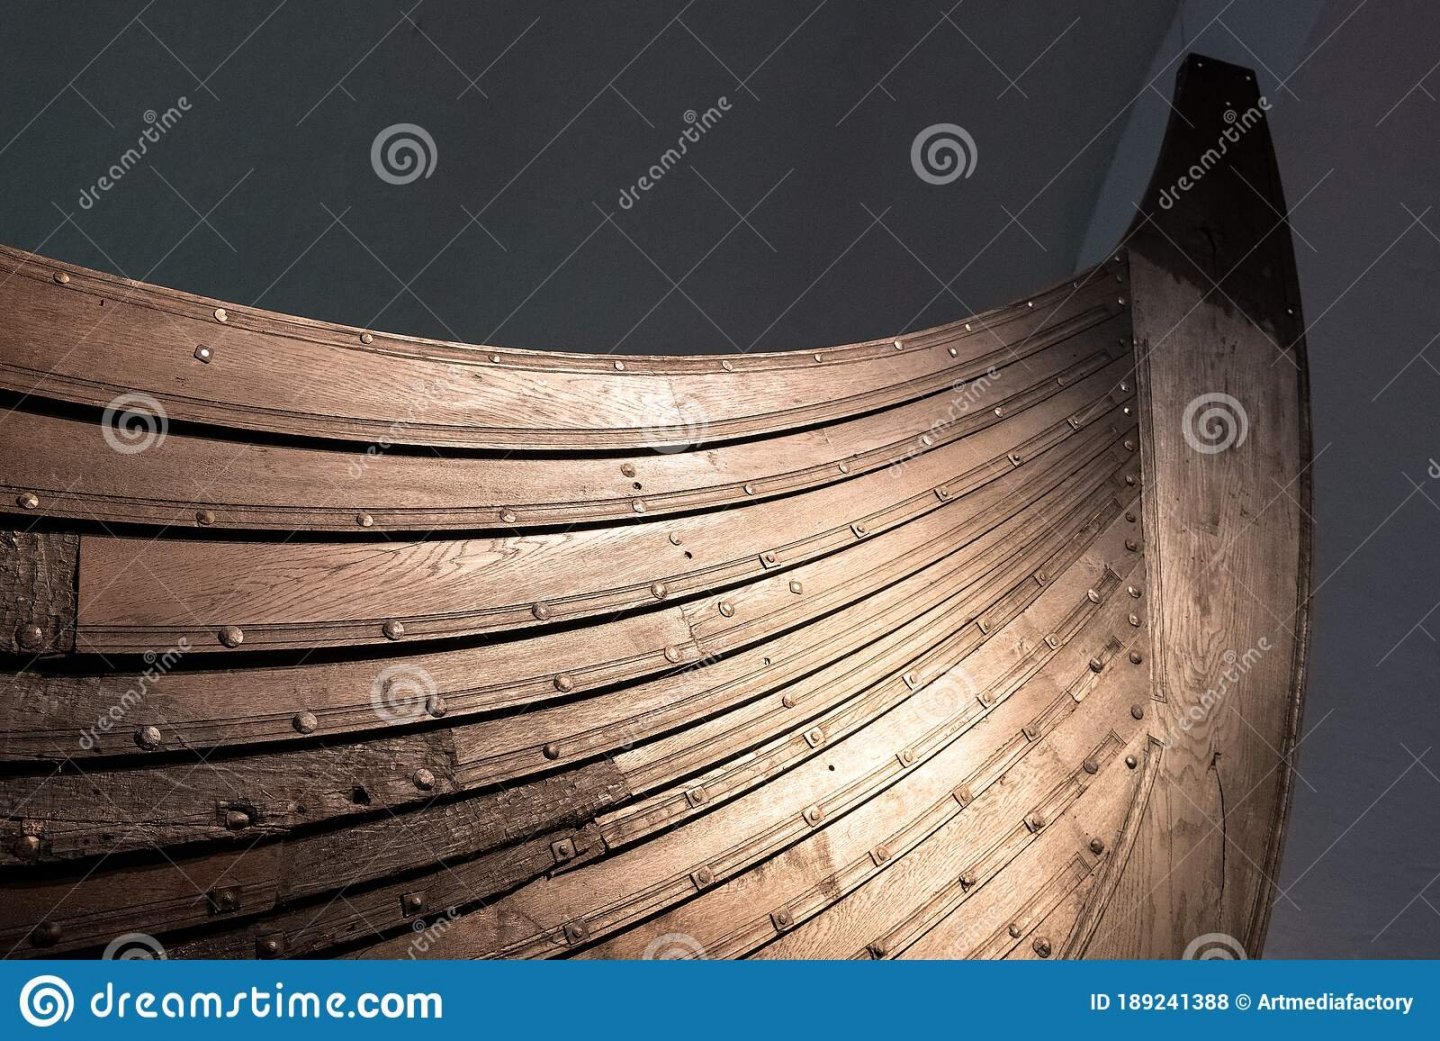
Gokstad had no other carvings beside this, circular patterns on the deck planks and sailor scriblings on the deck planks - game boards, traces of the foot. Oh and I almost forgot nicely carved handle of the rudder
- mtaylor, GrandpaPhil, popash42 and 2 others
-
5
-
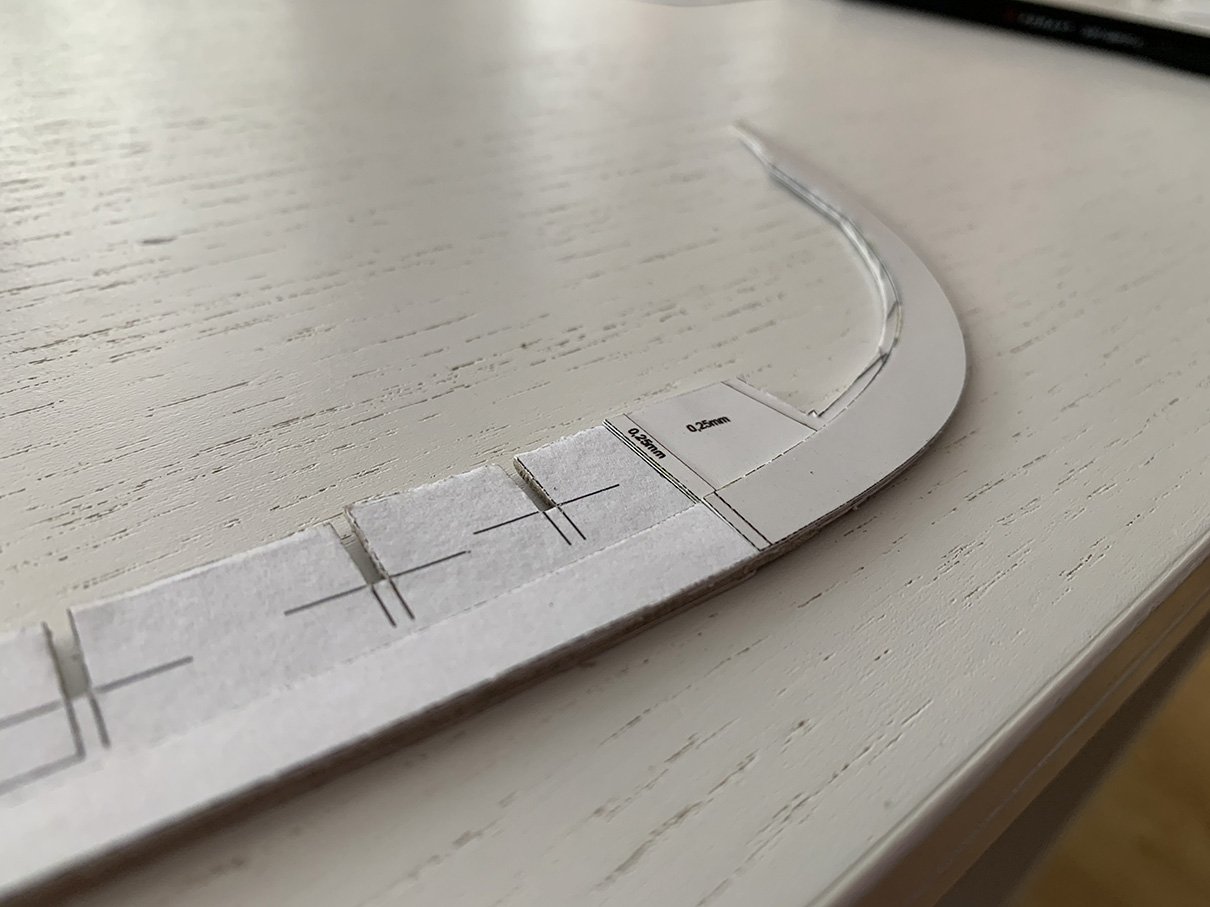
Keel sterm and stern are attached together. Everything fits as designed and matches with my blueprints.
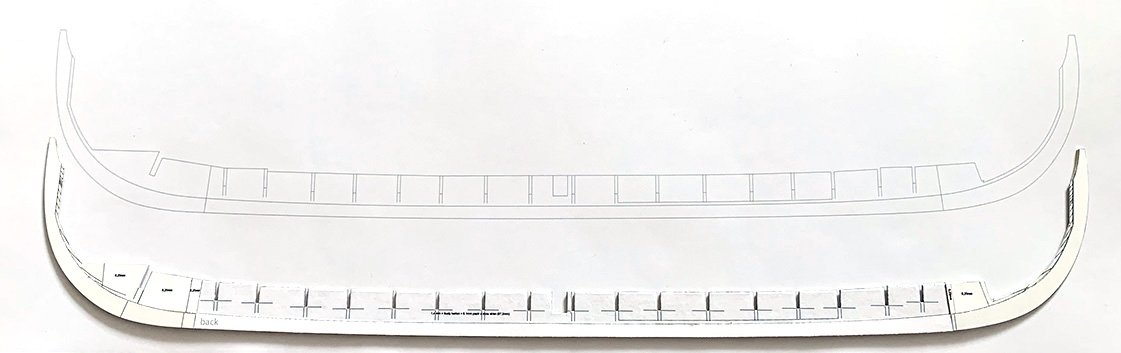
Here is detail of the transition from keel to stem, where you can see the switch from crosection of the keel to crossection of the stem liko on original ship.

Next step will be to make decorative carvings to the stem and stern before attaching the ribs and false deck.
-
-
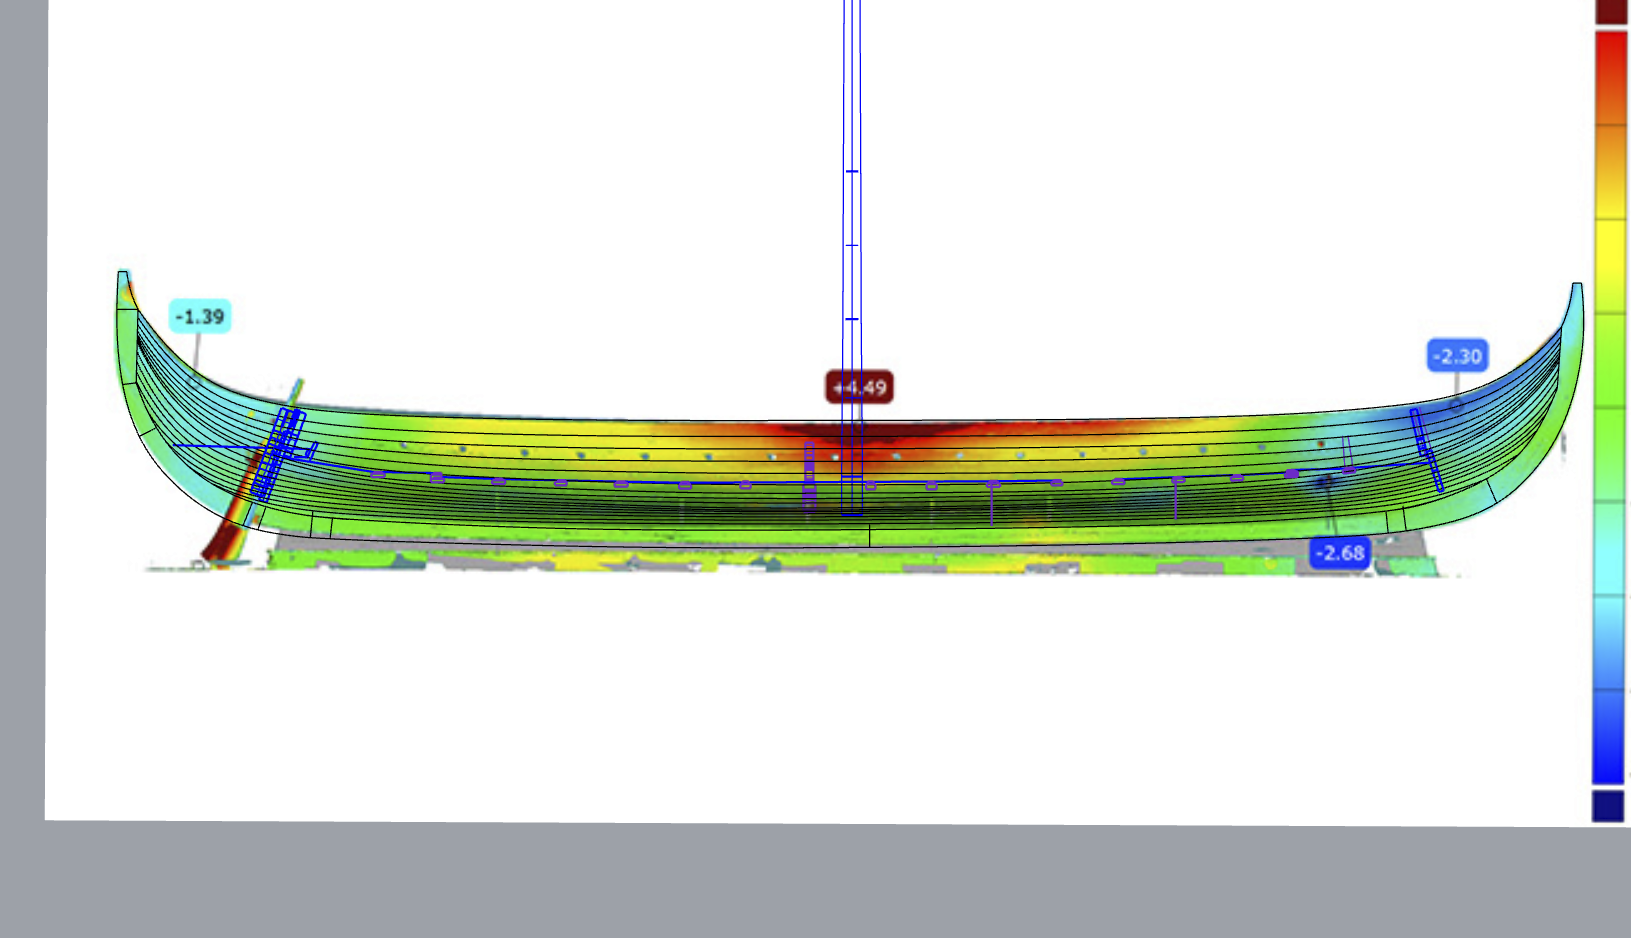
Here is comparison of my model with 3d scan of actual ship. Little off at the stern but curent reconstruction of original ship can not represent exactly like it looked like at its times from many reasons, so I will let it as is, because it could easily be as I have modeled it.

Here I completed stem inner structure:
It will be covered by skin layer after ataching to the keel. That way it will have right tapered shape to reflect actual stem crossections.
- Moab, GrandpaPhil, mtaylor and 2 others
-
5


Viking longship by Cathead - Dusek - 1:35 - FINISHED
in - Kit subjects built Up to and including 1500 AD
Posted
It is all realy wierd. I did not build this particular model, but Dusek makes good kits. Did you try to contact them? They are realy nice and helpful. They will send bad parts for free if it is their fault (speak from my own experience)