


bigpetr
-
Posts
123 -
Joined
-
Last visited
Content Type
Profiles
Forums
Gallery
Events
Posts posted by bigpetr
-
-
-
-
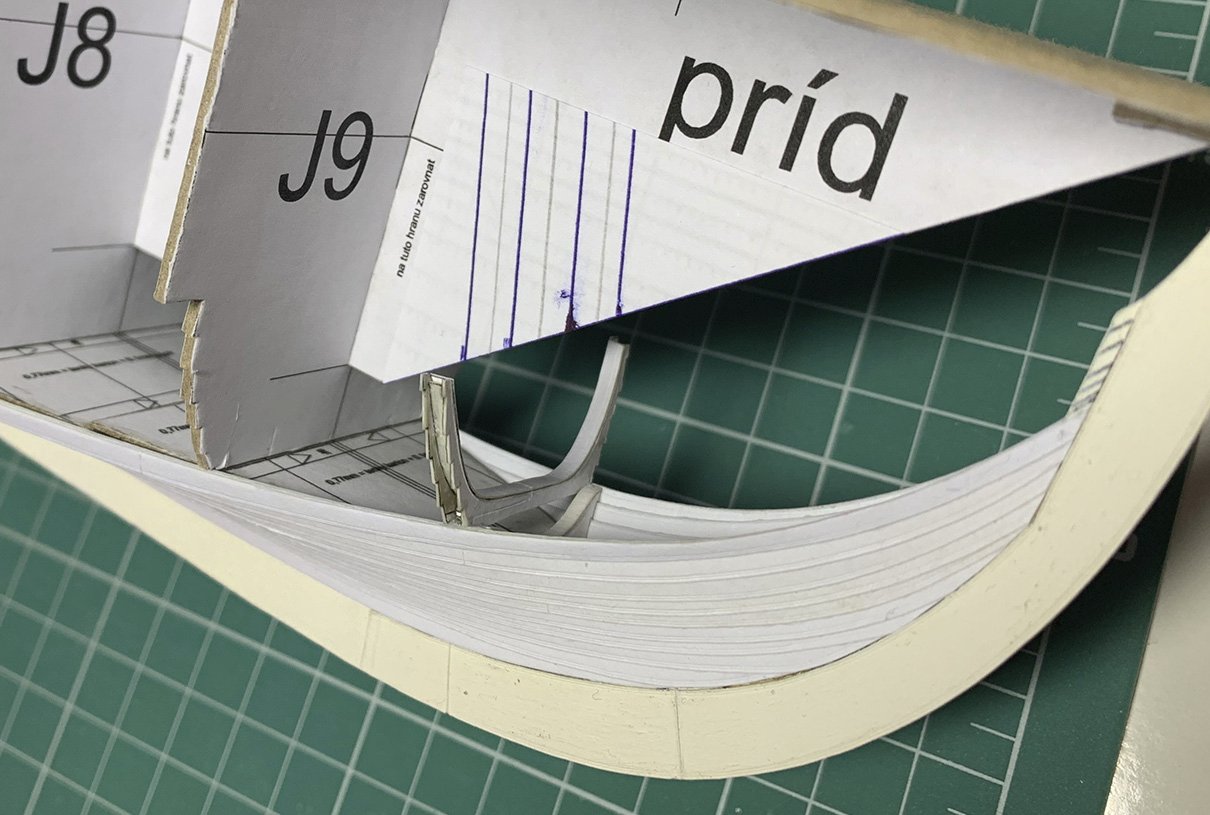
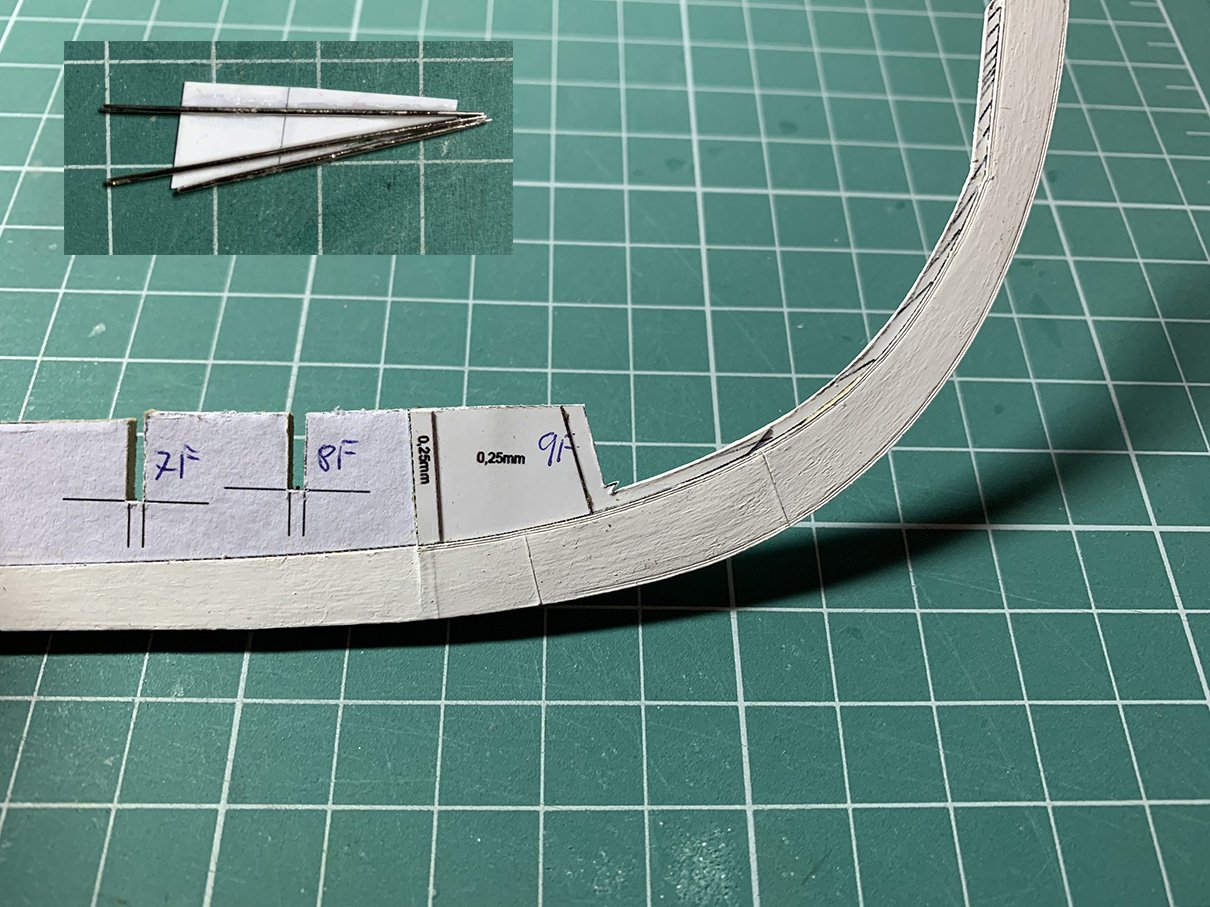
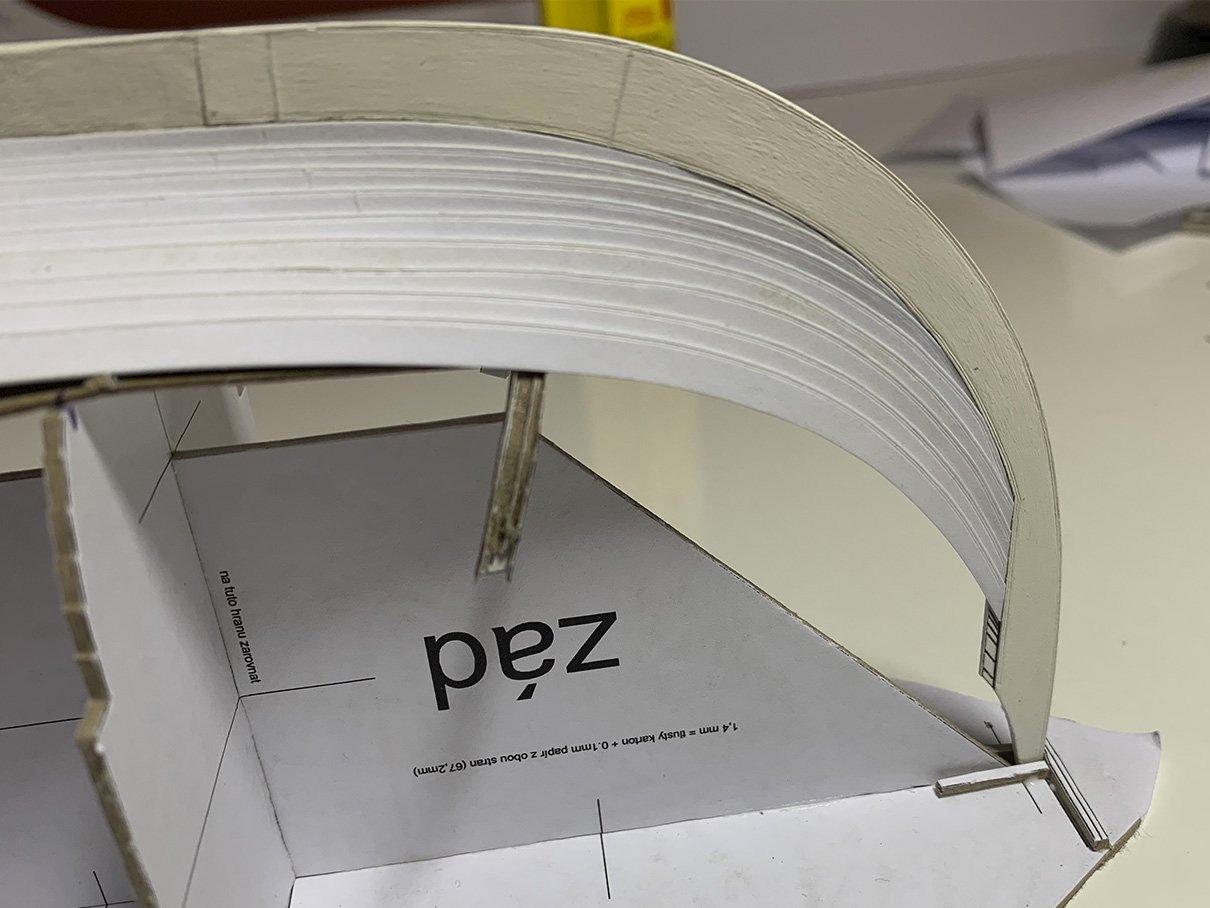
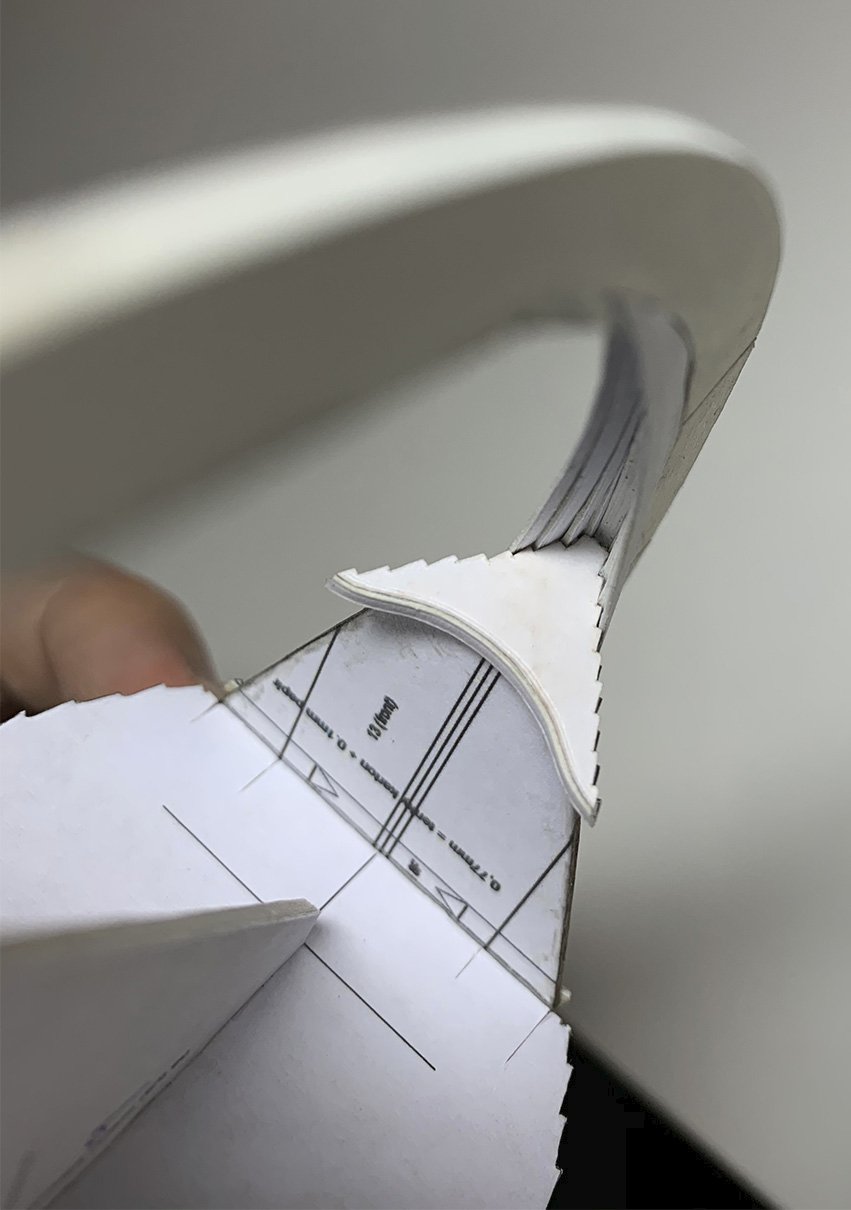
I have to attach another rib to guide the planks, because planking reach to the top of the small rib underneath it.
I have ploted decorative triangles to the top planks. They were probably painted. Are there some information on how the color on viking ships was done? Did they apply protective tar coat and then the colour, or just the colour layer? Or colour and then tar? Or do they mixed color pigment with tar? On museum replicas it looks like just colour layer.
-
-
-
-
What I wanted to say just sounded, Bravo and big thanks for so well documented and shared journey.
- Old Collingwood, cog, Louie da fly and 2 others
-
 5
5
-
Something about nitrocelulose varnish:
https://nitorlack.com/en/blog/nitrocellulose-varnishes-everything-you-need-to-know/
-
I did not try it myself yet, but some paper modelers soak the whole sheets of paper from the book (before cuting the parts) with nitrocelulose so it goes through the paper to the other side. So I think you do not have to worry about amount of the varnish. More the better in this case. Better to test it on some scraps as you wrote.
- thibaultron, mtaylor, catopower and 1 other
-
4
-
-
You have to harden the edges that you are sanding. You can soak the edge with CA glue or clear varnish and then you can sand just fine
- mtaylor, thibaultron and tkay11
-
3
-
-
Thank you very much for nice video.
- mtaylor and thibaultron
-
2
-
I am glad you like it, friends.
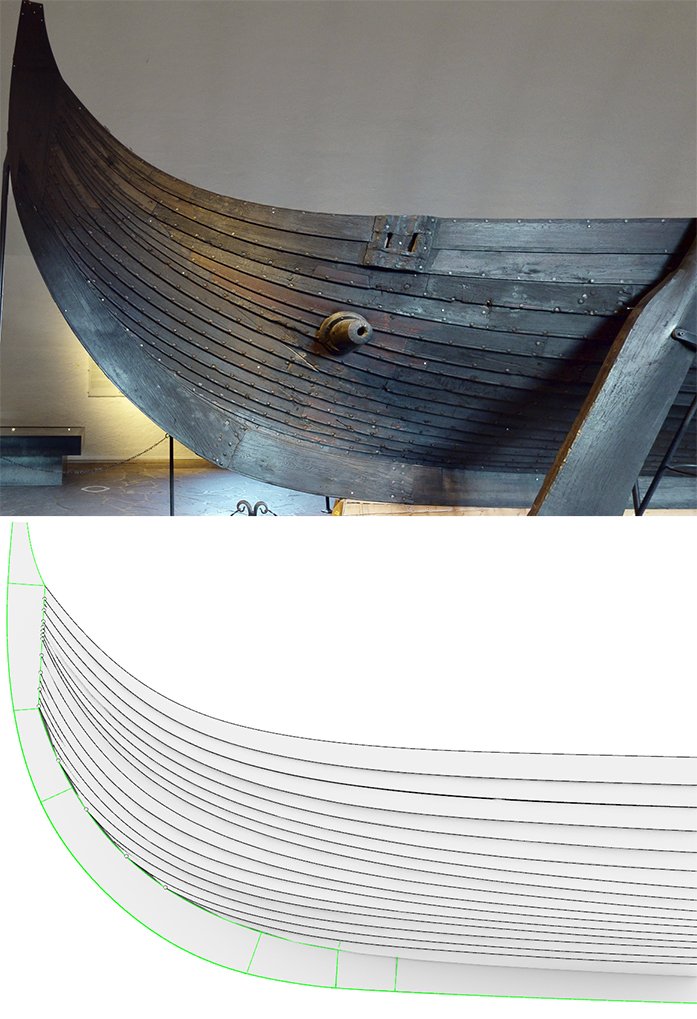
No, the shape of the plank is not same from stem to midship and from midship to stern. I 3d modeled planks to fit all actual ribs so they dictates the shape of the whole plank. Also stem and stern has different shapes so endings of the planks is different there also.
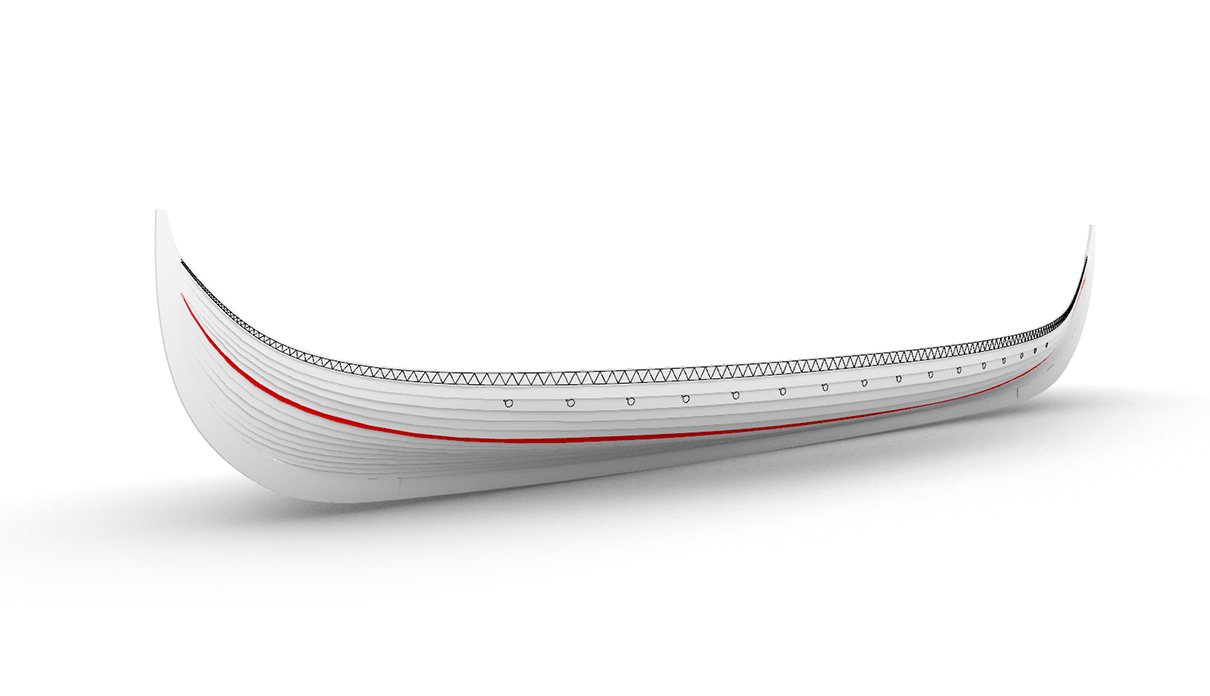
My planks represents the shape of the ship as displayed in musemum today, witch, as I learned receantly, probably do not represent the shape of the ship from its active years of duty due to 1000 year in the ground, wood shrinking and romantic ideas of archeologists from first half of 20th century who reconstructed the ship for display. Lets hope it will recieve the same treatment from nowdays archeologists as Oseberg ship and we will get the shape closer to the initial state of the ship.😀
-
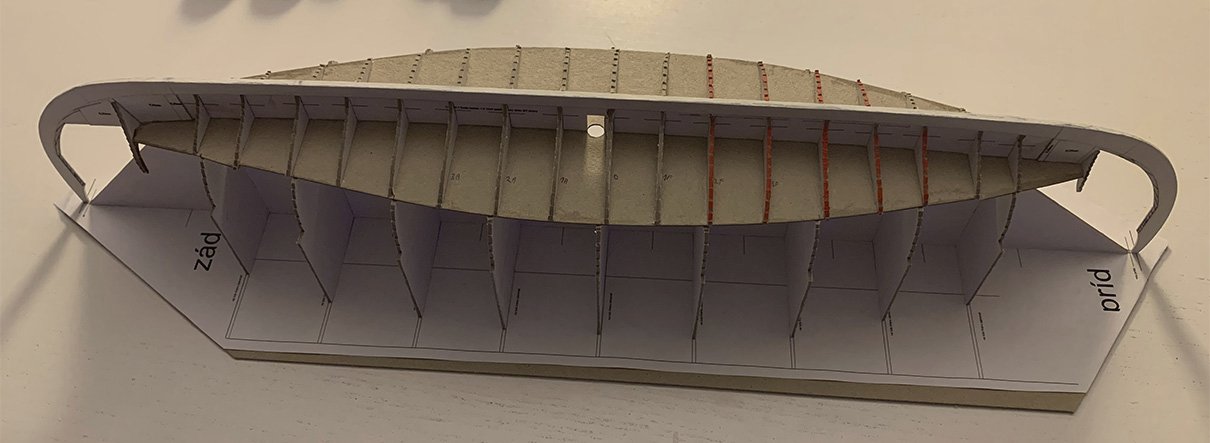
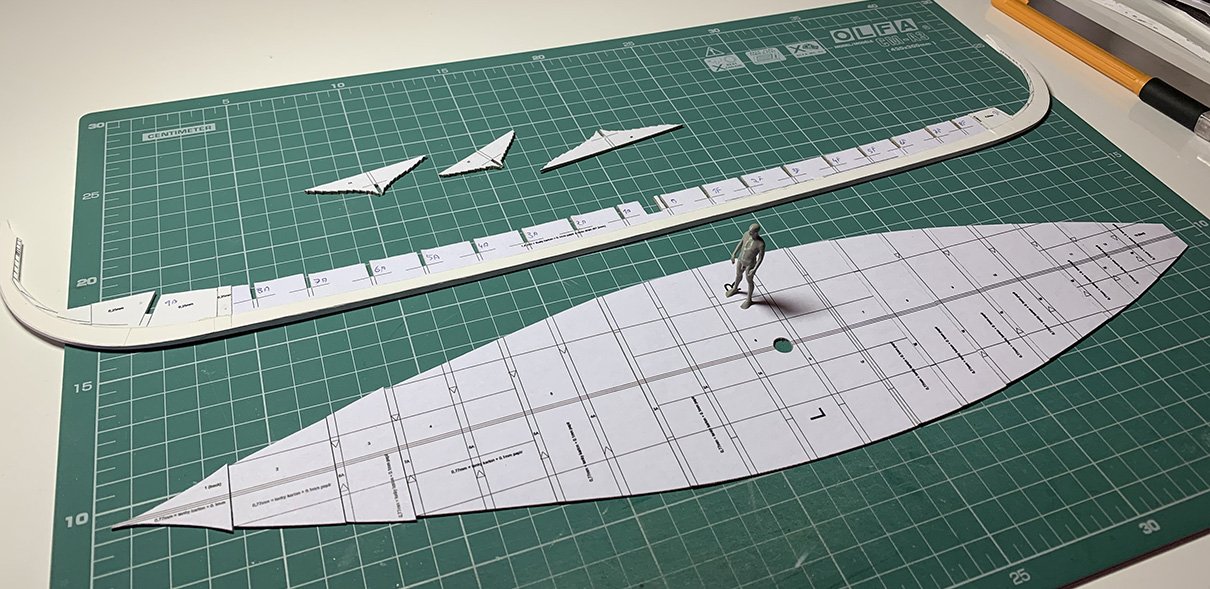
Planking journey has started, first plank in place, fits perfectly:
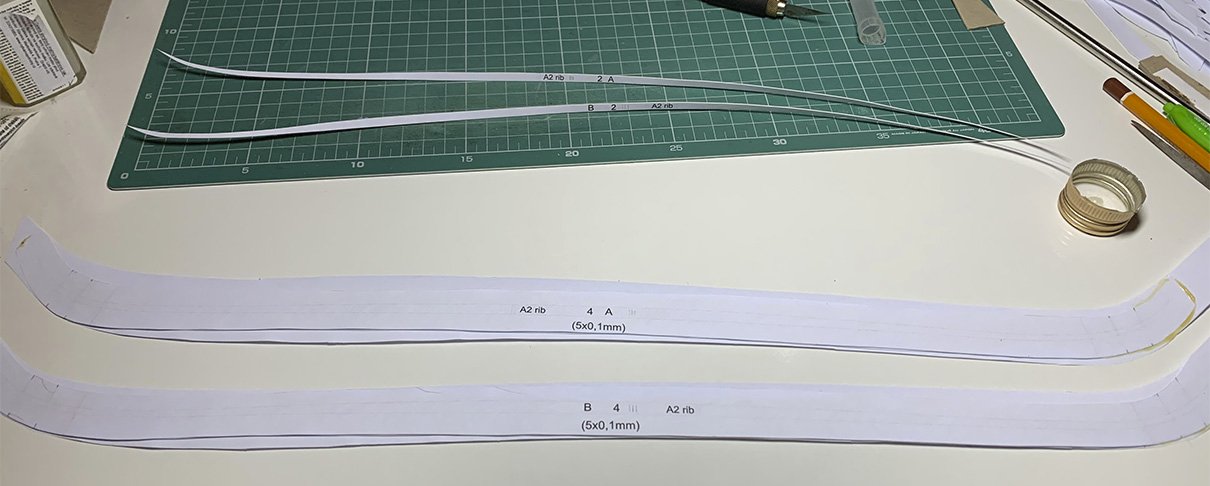
Here are planks in two stages of making proces. Laminated templates and cut out planks. Planks are laminated to desired thickness in a way that ends are roughly two times thinner than the middle part, same as the original planks. Also not every plank has the same thickness. In this scale differences are few tenths od millimeter, so I hope it will be at least felt if not seen.😀
- GrandpaPhil, Louie da fly, KrisWood and 3 others
-
6
-
-
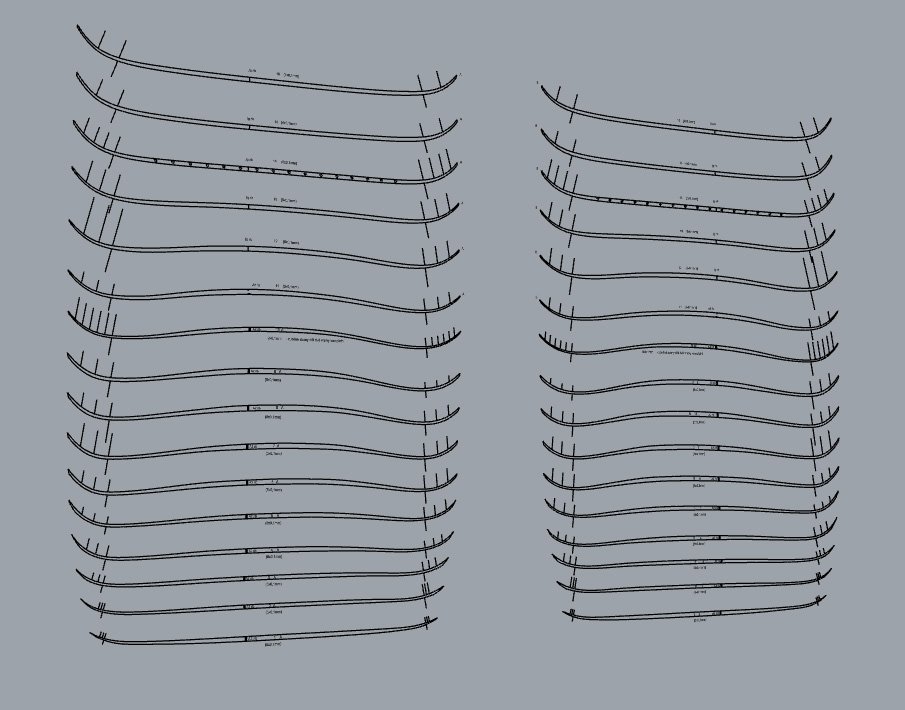
Template is a result of my CAD work as are (and will be) all other parts of the ship. CAD is realy useful for this, because you can solve all inconsistencies in blueprints and generate templates that fits together nicely.
- Brinkman, Louie da fly, KrisWood and 1 other
-
4
-
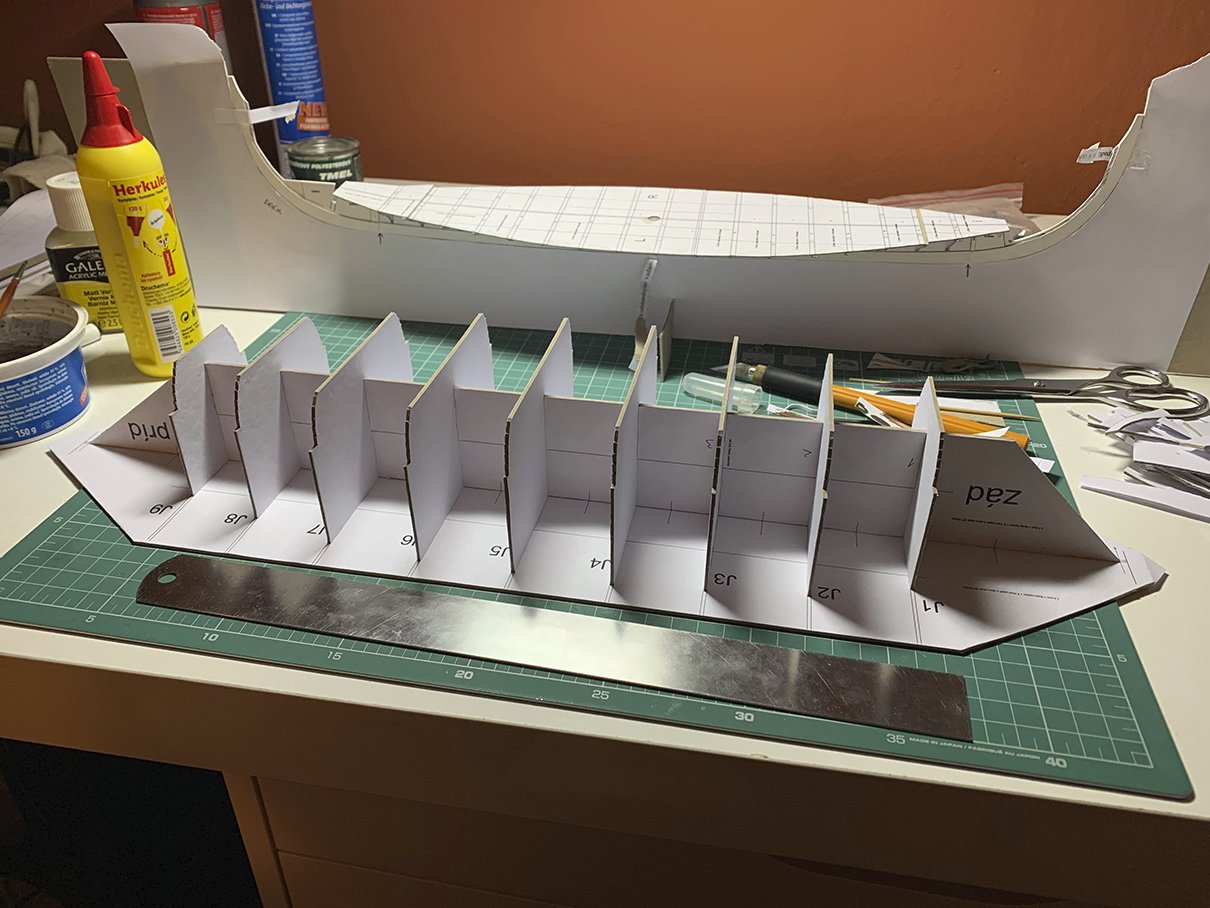
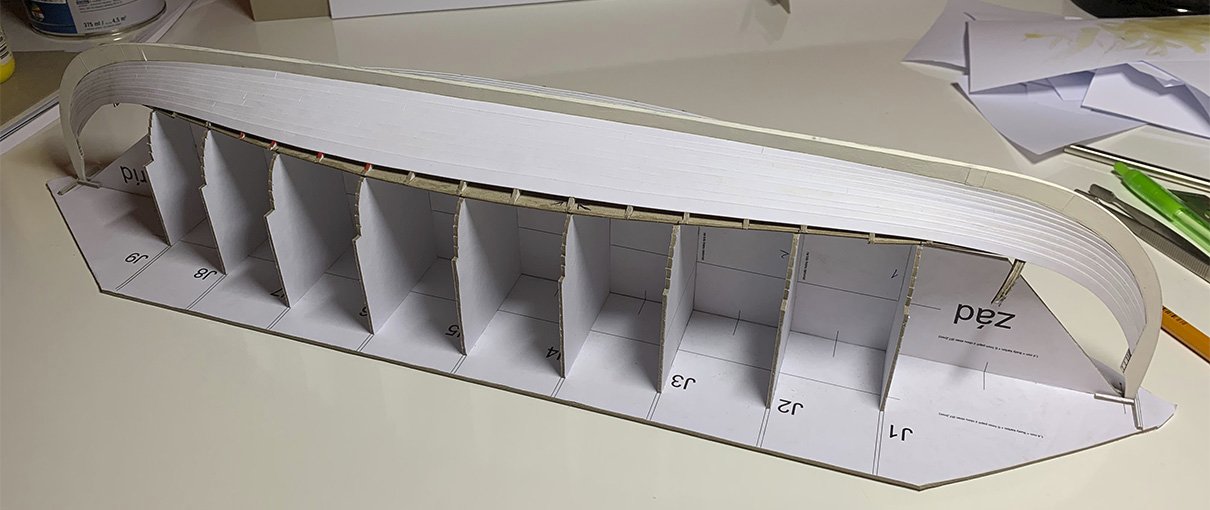
Ship attached to the jig
and planking template is prepared to be printed:
- GrandpaPhil, mtaylor, Brinkman and 2 others
-
5
-
Jig is ready to serve, I forgot to include few important guidelines to the jig, so I had to plot them by hand:
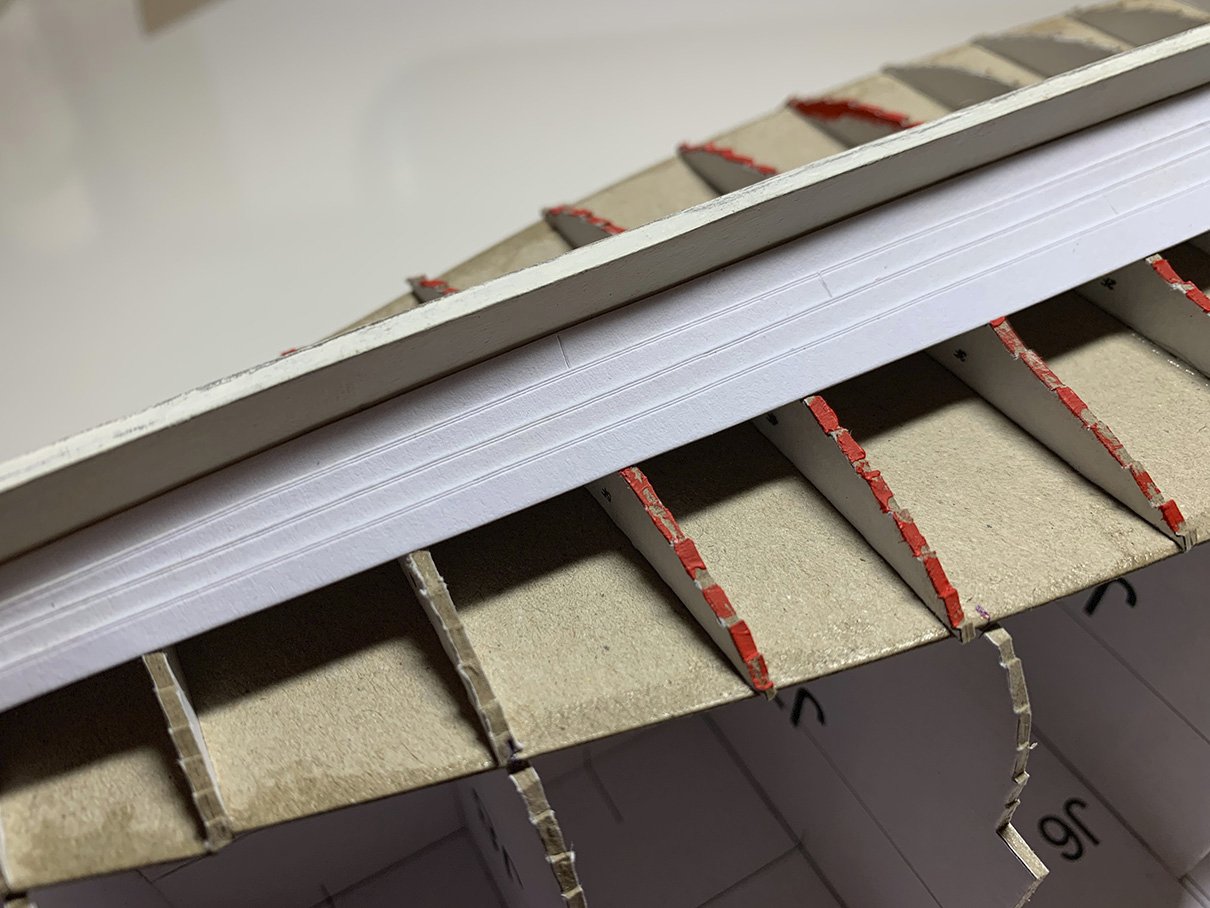
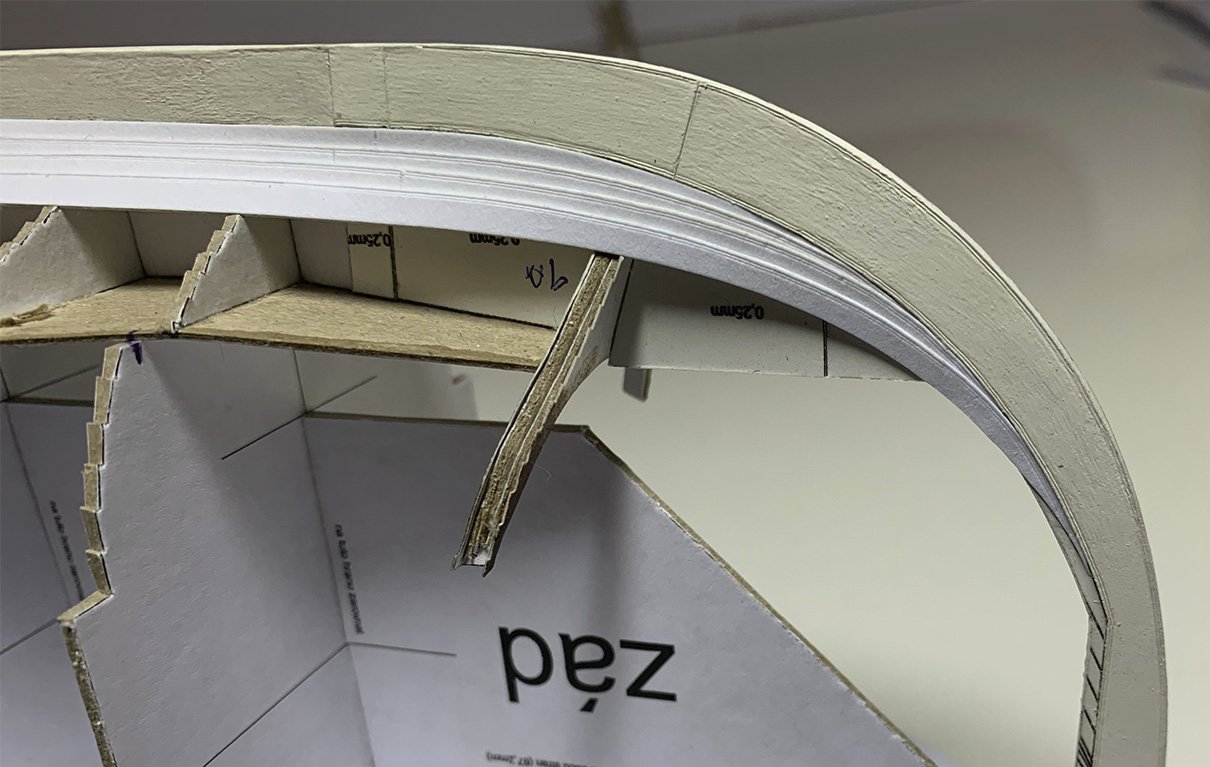
Then I assembled some visible ribs and aplied the grooves to the edges. Some test paint was used to see if the grooves will be visible when painted . They are, so I will continue to do them on the rest of the ship.

- mtaylor, AnobiumPunctatum, Brinkman and 2 others
-
5
-
It looks great. How did they steer with them? Just by rotating around their axis?
-
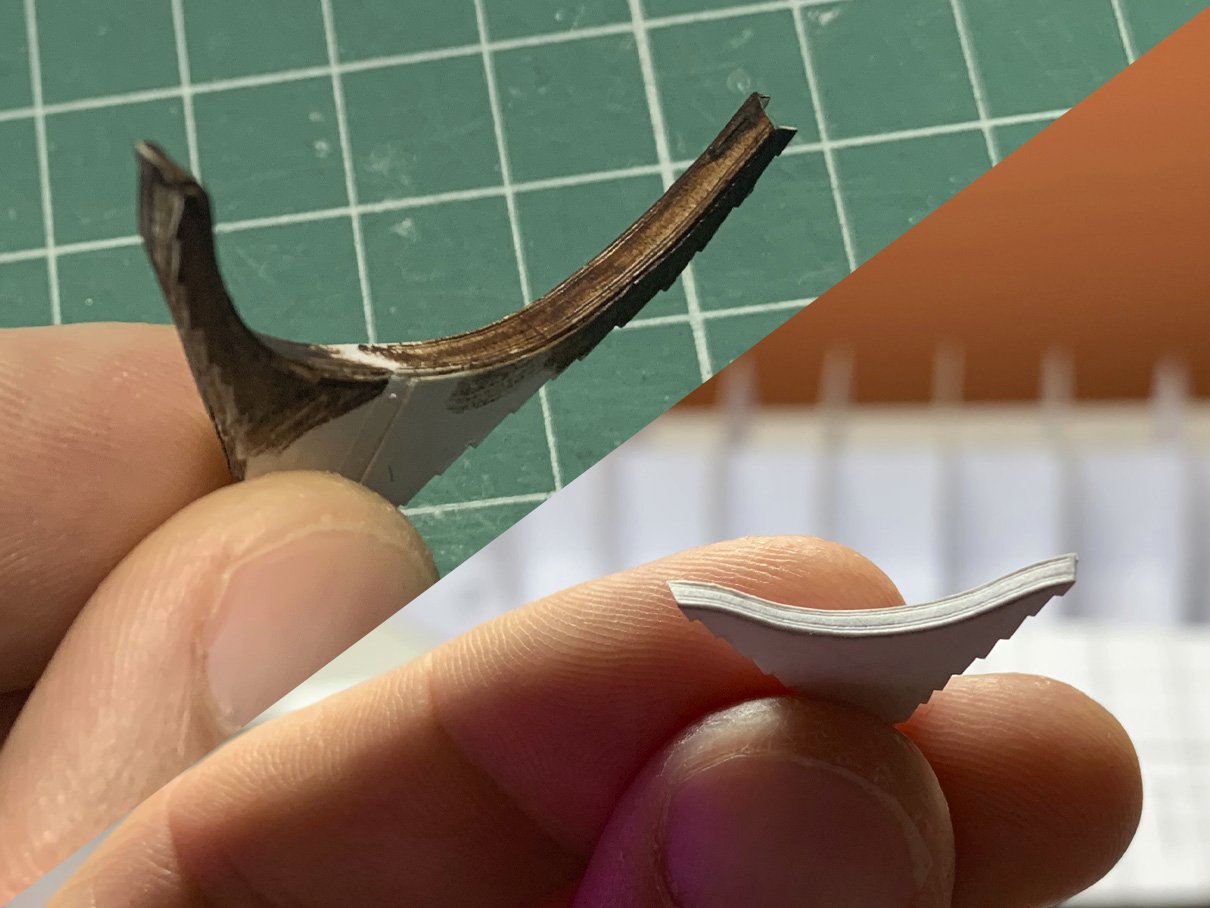
I made a tool from a needles to simulate carved grooves on the ship. Works great. Here it is applied to the stem edges:
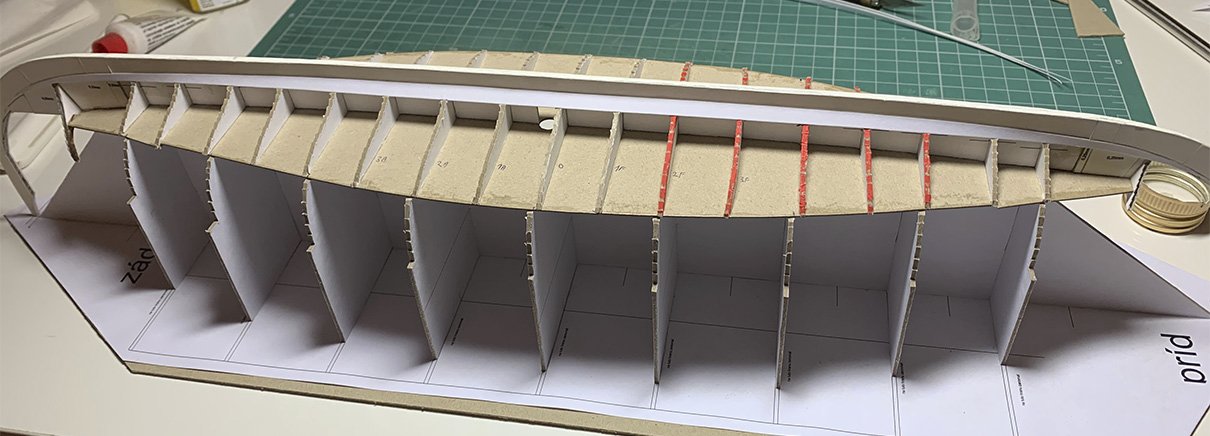
Then I could prepare the ribs and false deck (with 1:48 helmsman figure to be):
Ribs attached and made square with the help of false deck:
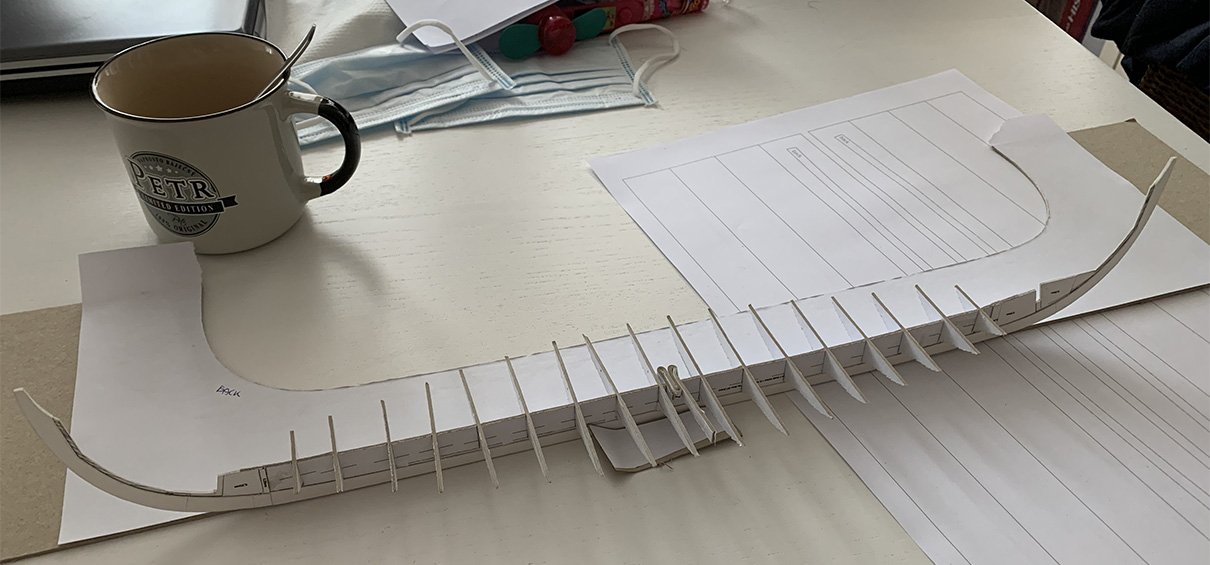
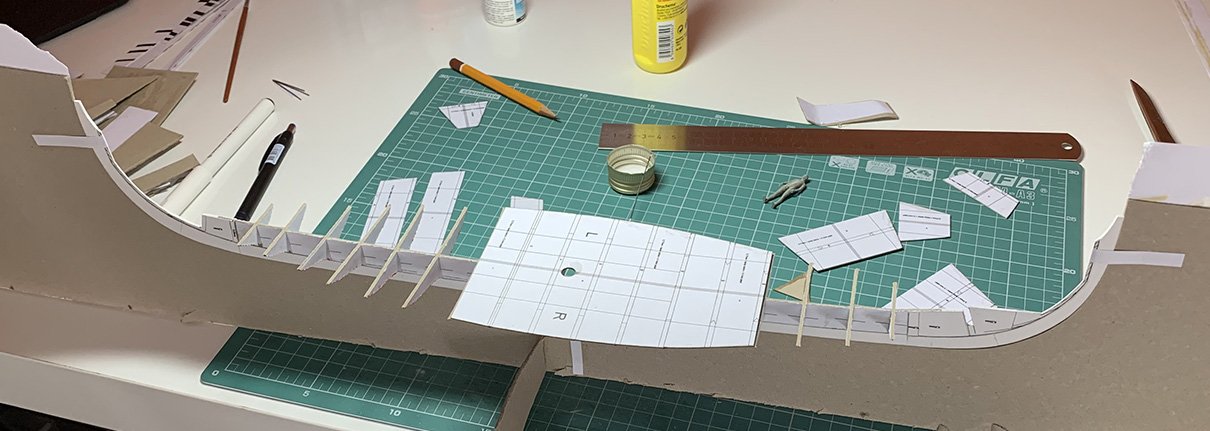
Next I will make proper jig to help with the planking.
- joep4567, Louie da fly, mtaylor and 1 other
-
4
-
Thank you for posting your findings Cathead, it will be invaluable for future builders.
Do not worry about differnt height of the strakes at the ends. It is perfectly normal to be so. This is how gokstad ship strakes ends, pretty irregular:

- FriedClams, mtaylor, Canute and 2 others
-
5
-
-
She is lovely. Great workmanship.
- Louie da fly, BobG and mtaylor
-
3

Oseberg Ship by KrisWood - 1:25 - Vibeke Bischoff Plans
in - Subjects built Up to and including 1500 AD
Posted
It is hard to say where the problem is. It can be printer or PDF exporter. PDF exporter acted wierdly in rhino. For example circles were not circular. So I export to other format (.ai format because i have Illustrator) and export to PDF from there. This way i have also no problem to print PDF with actual scale set up.
I did not checked it since so maybe rhino PDF exporter is fine now.
Also I print 15cm ruller on the edge of the page, so i can check if page is printed at 100% scale