MORE HANDBOOKS ARE ON THEIR WAY! We will let you know when they get here.
×

Geowolf
-
Posts
140 -
Joined
-
Last visited
Content Type
Profiles
Forums
Gallery
Events
Everything posted by Geowolf
-
HMS Terror by Broden - OcCre - 1:75
Geowolf replied to broden's topic in - Kit build logs for subjects built from 1801 - 1850
hi broden, good planking well done! the sanding are leaving it as smooth as needed... The second plank for me was a big problem, you know the planks are too thiin, i'm not very satisfied with it, but the black paint will cover all... Also i'm seeing your paint choice, i really like the brown one but maybe you'll see the wood filler under it.. and two layers of brown and one layer of black?? I'm using chalk paint, first of all i need to varnish all the hull and the chalk paint above it will leave their characteristic pattern; maybe it'll be good choice or an impressive error, i don't know at this moment hehehe. My progress is very low i expect to make the paint job in two weeks regards and take care! -
Whooohh very very nice finish, well done!! You're running quickly with your model 😃
-
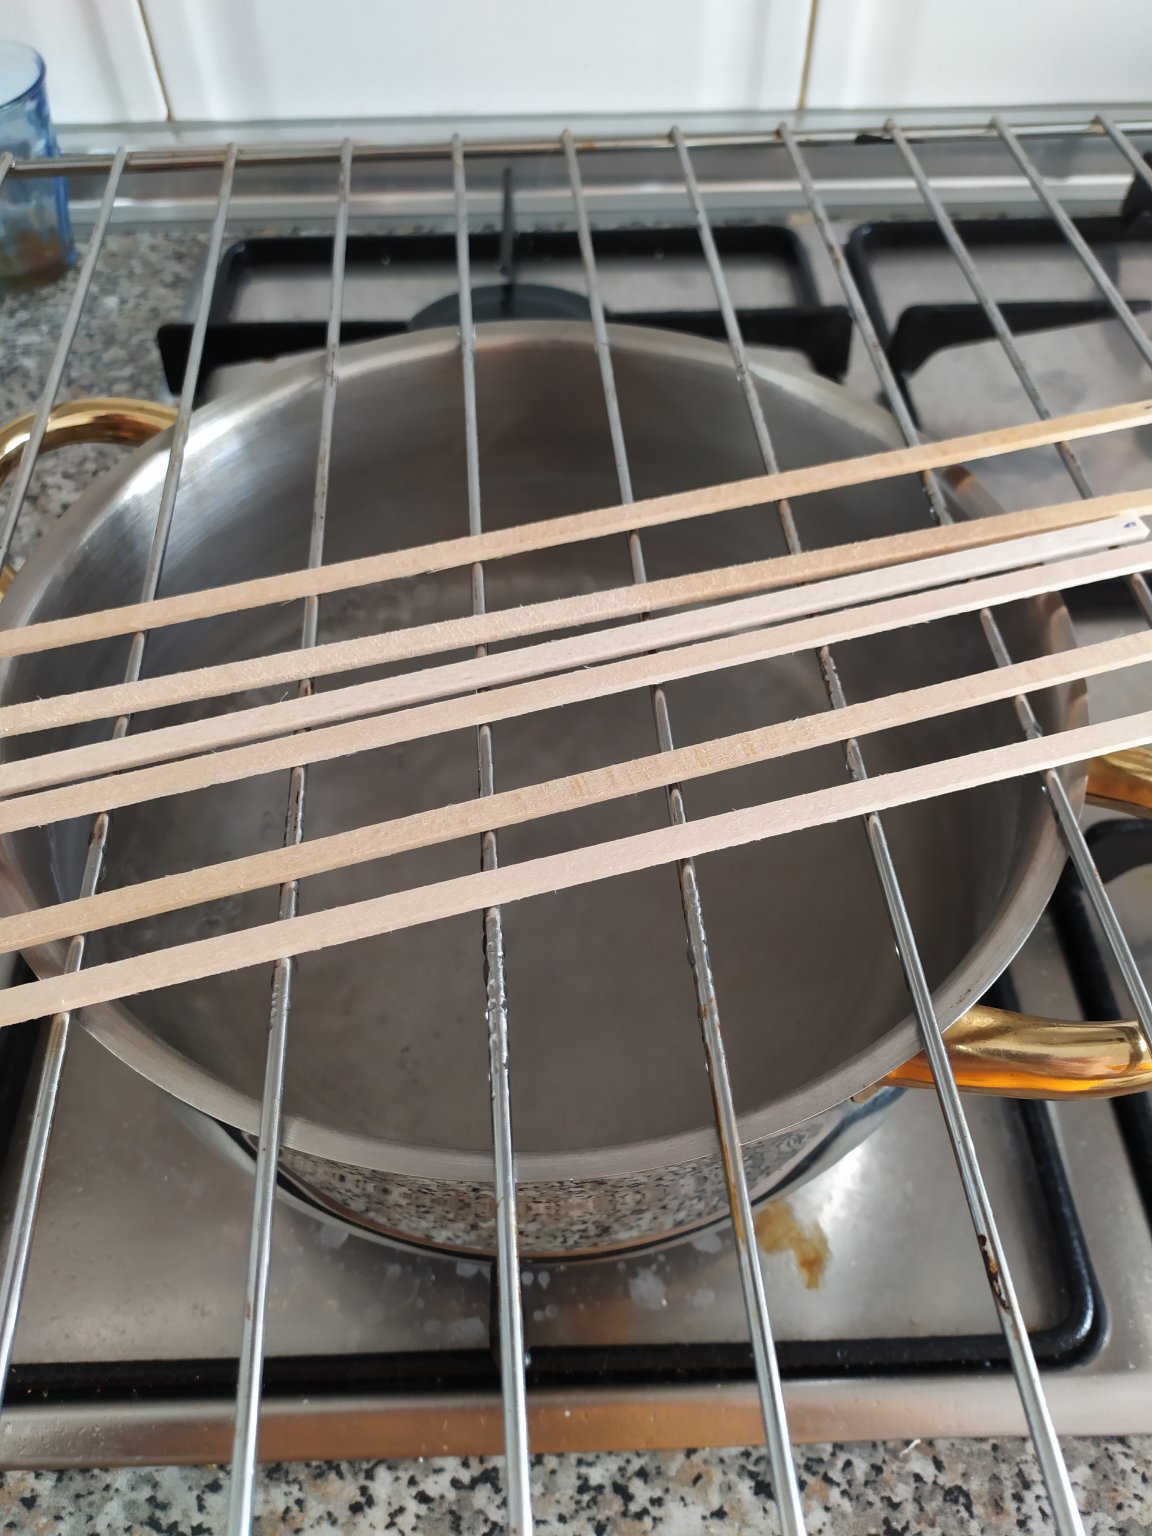
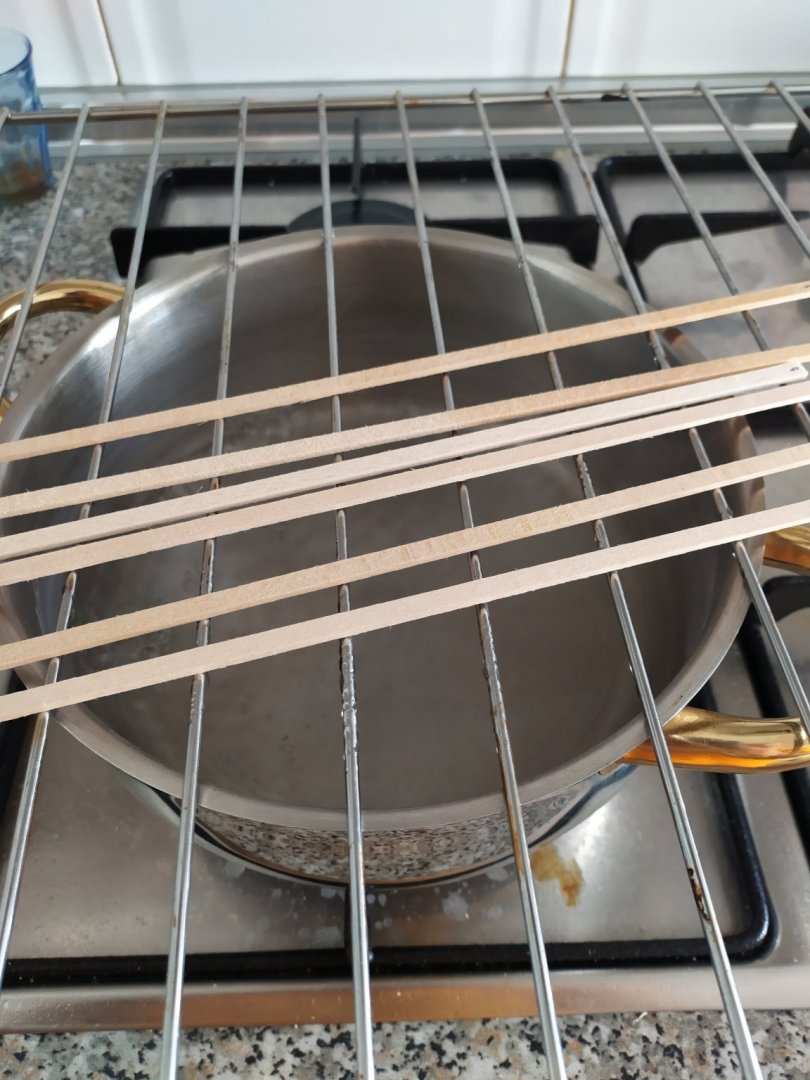
for me, the best way to curve the planks is put it above boling water 15-20 min, for this purpose the grill of the oven is perfect (i'm retired the cover for the photo) and later curve it with the electric solder
-
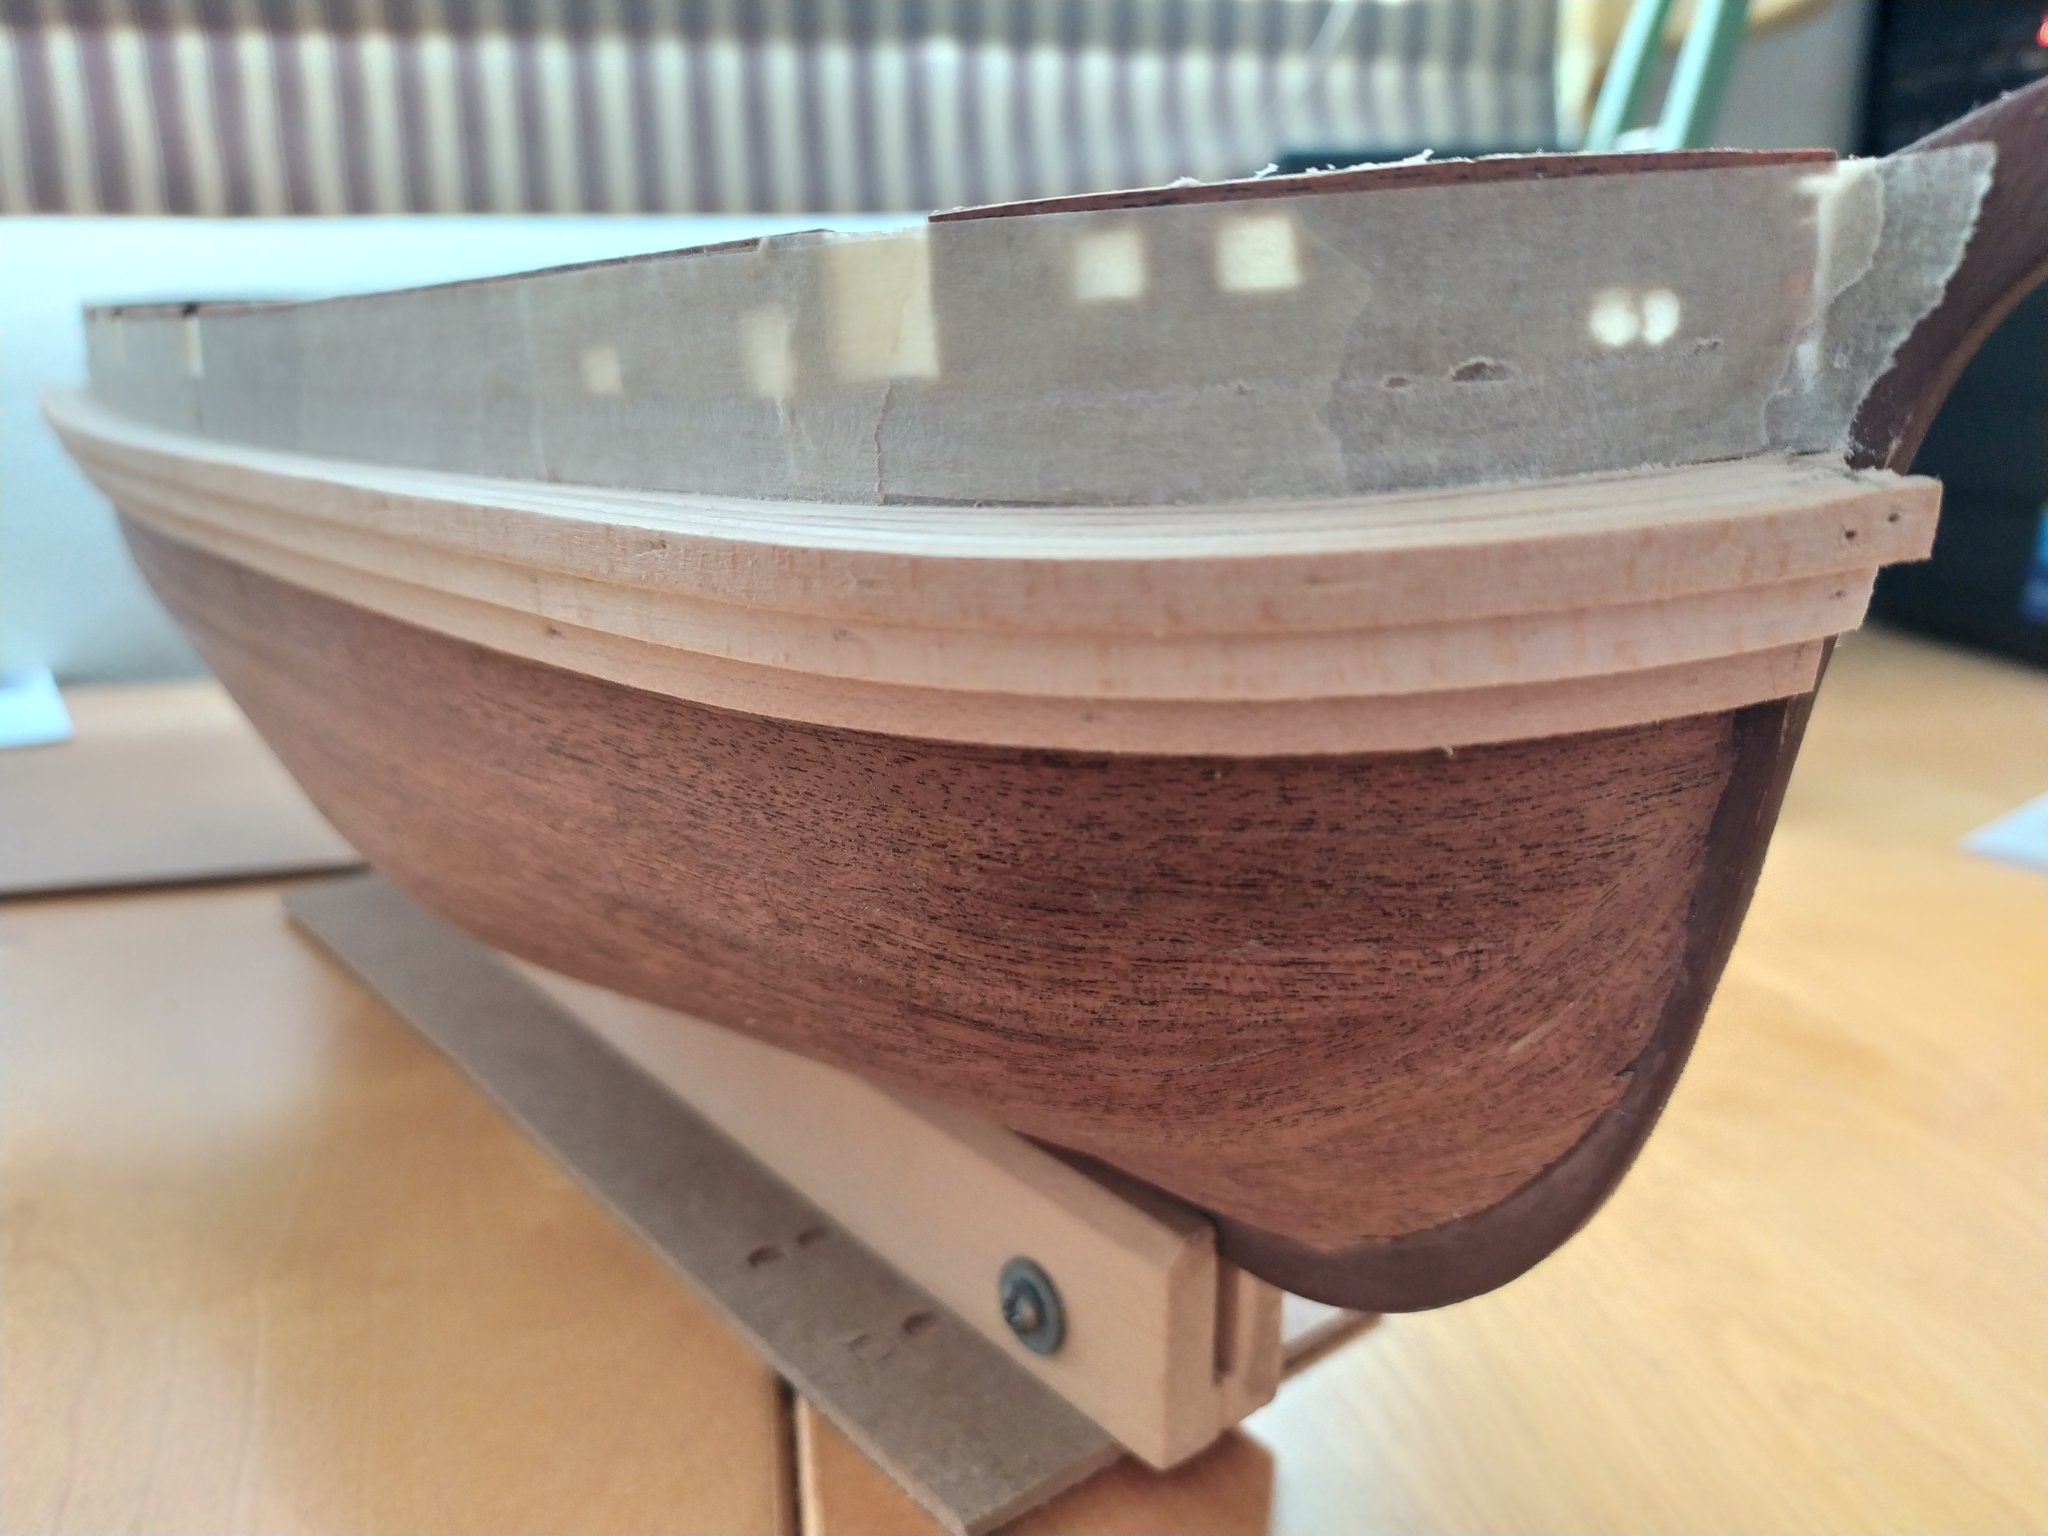
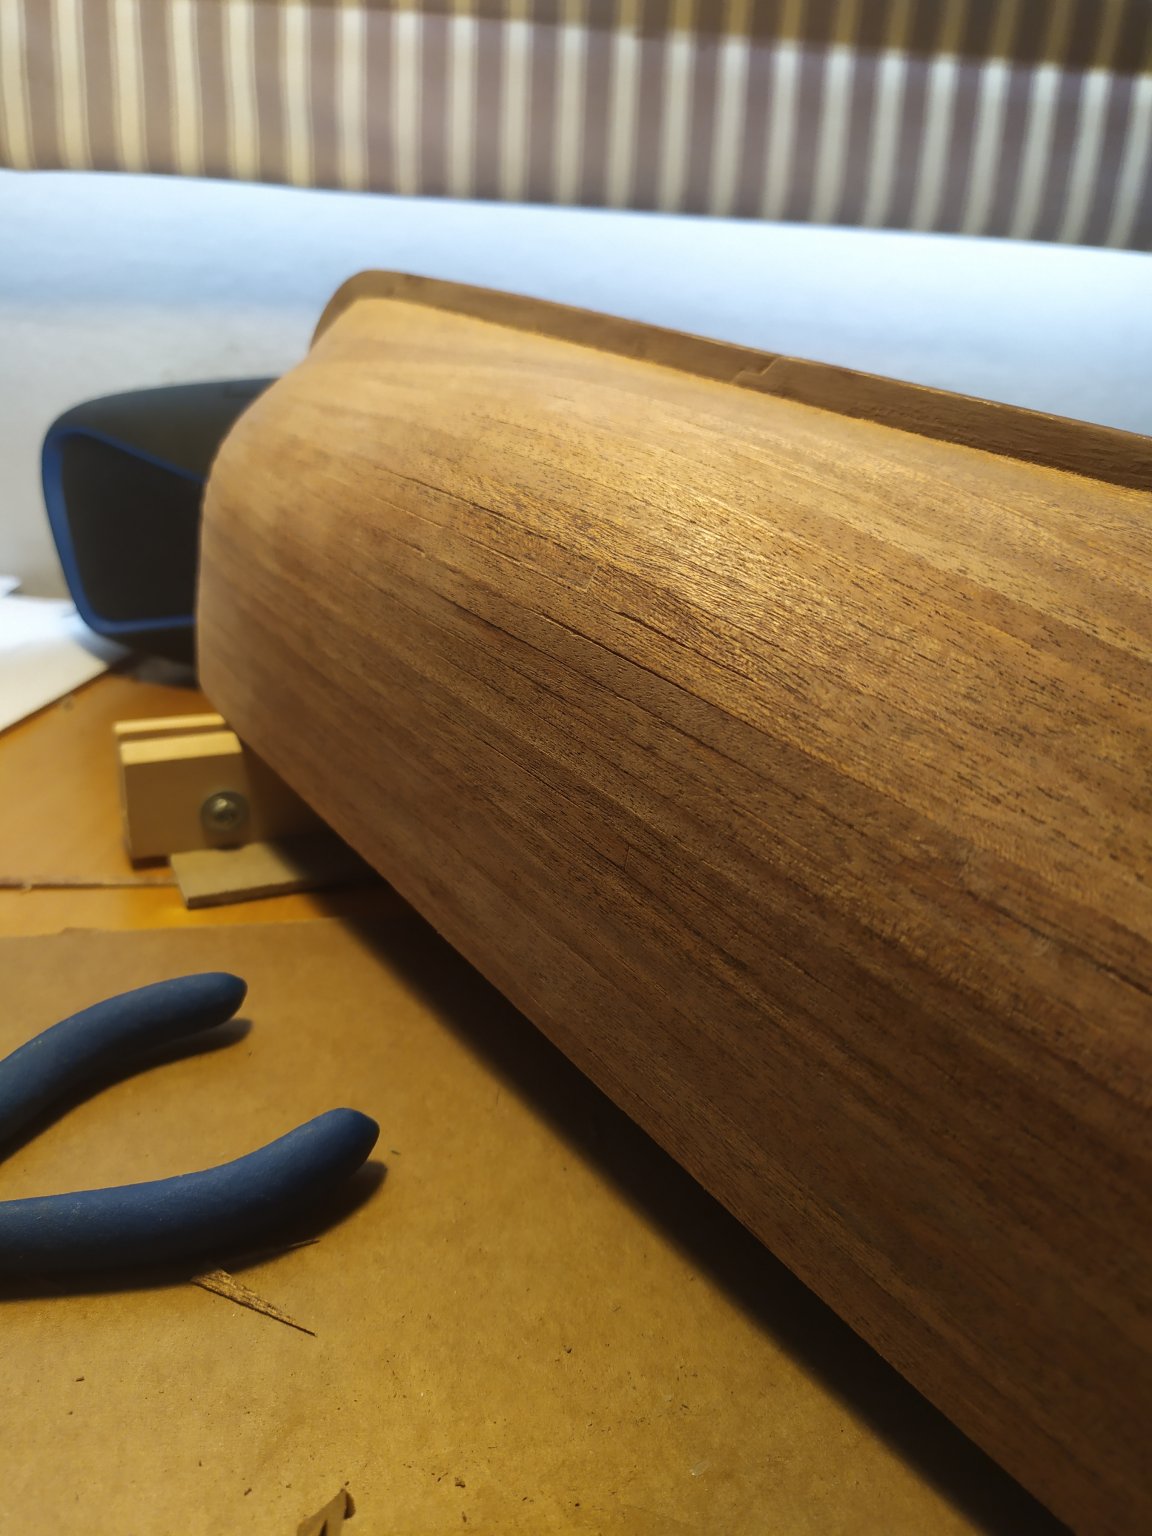
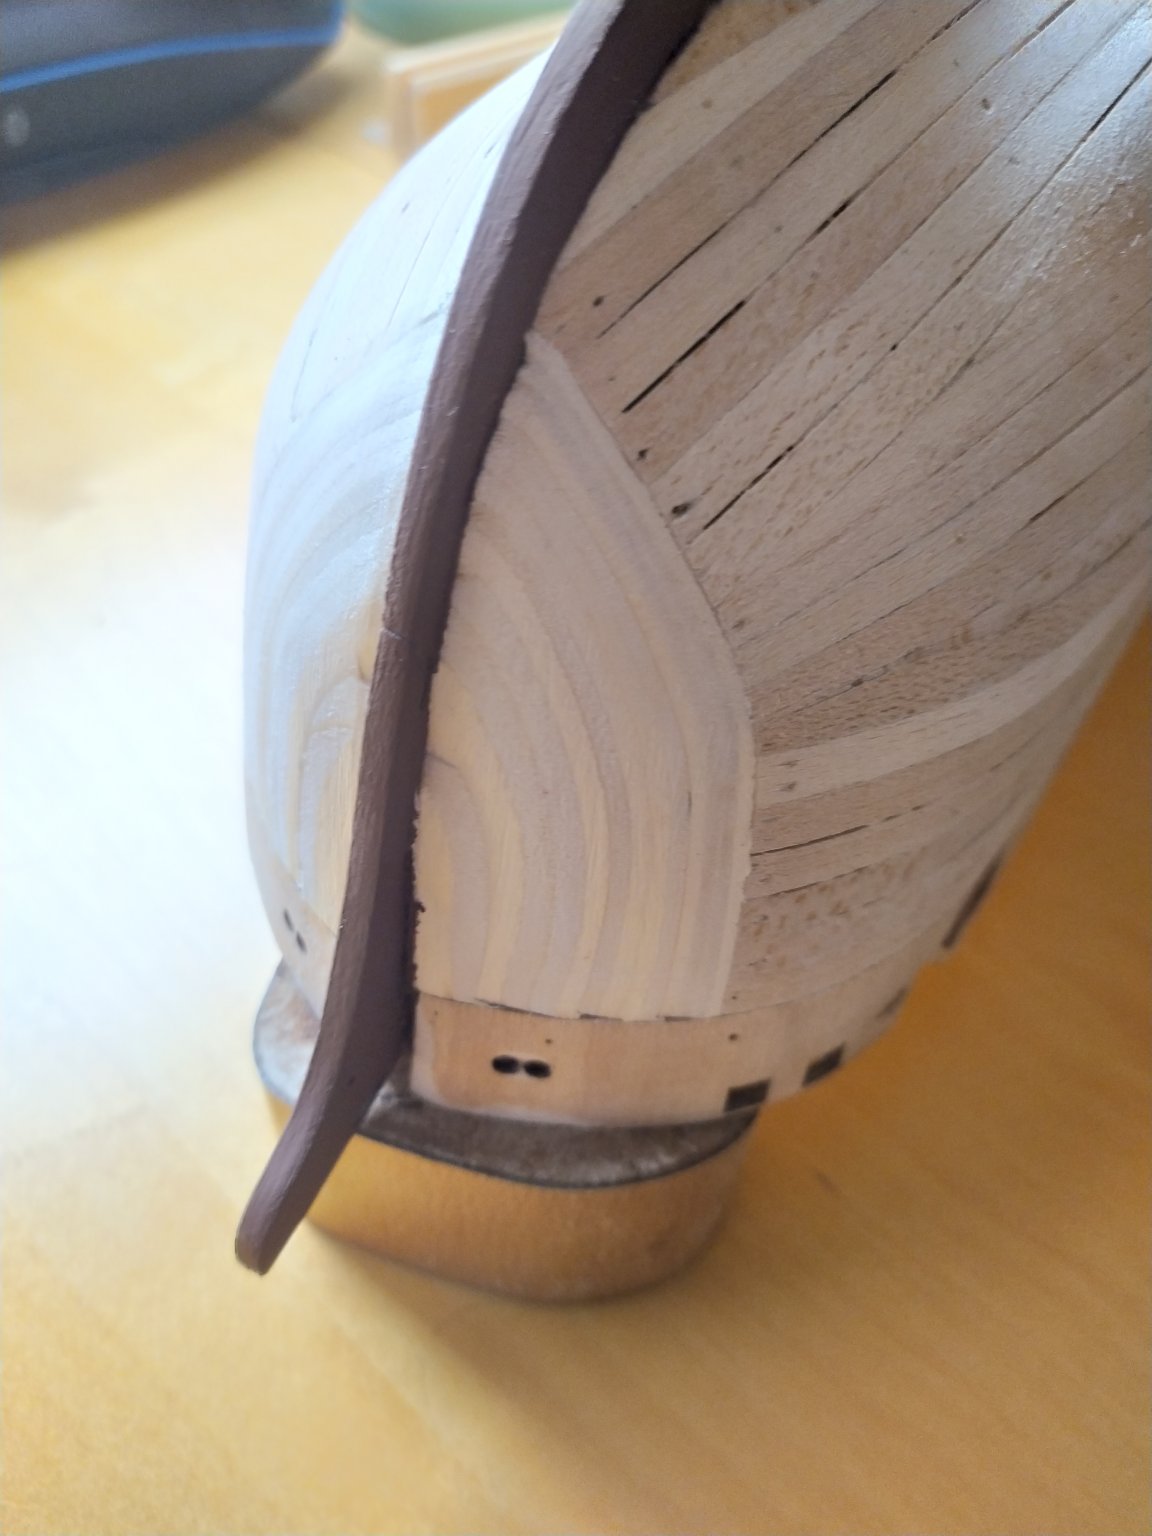
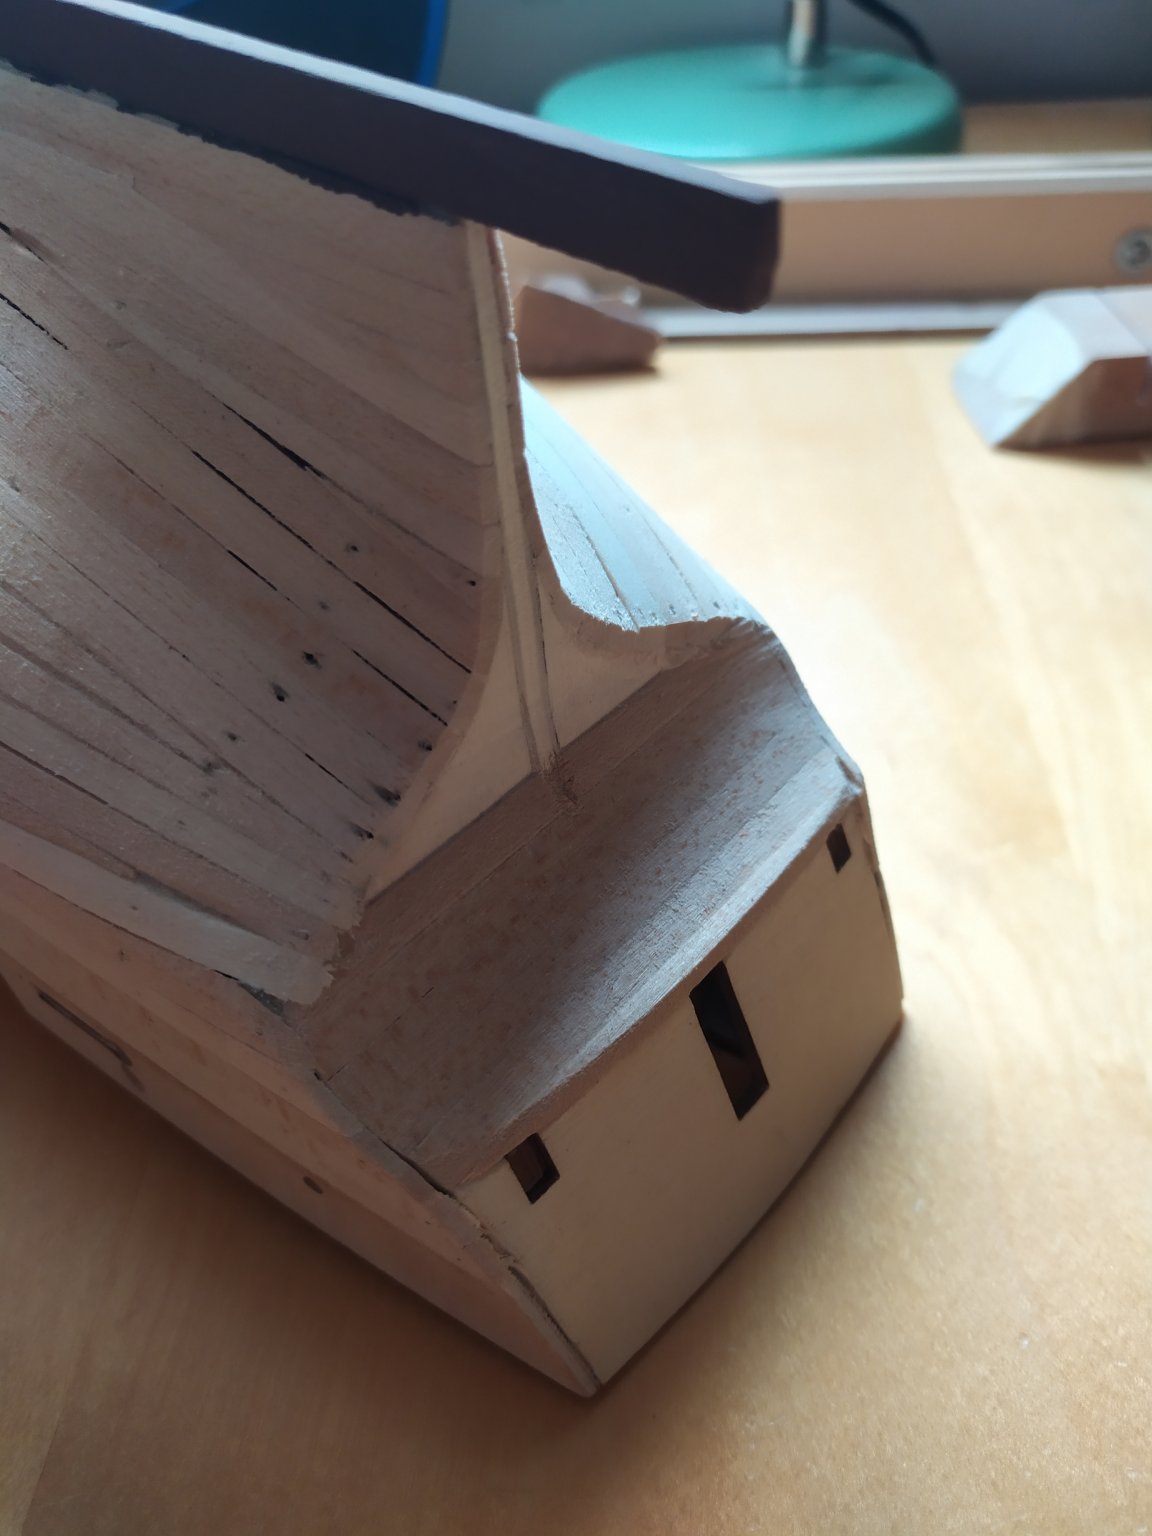
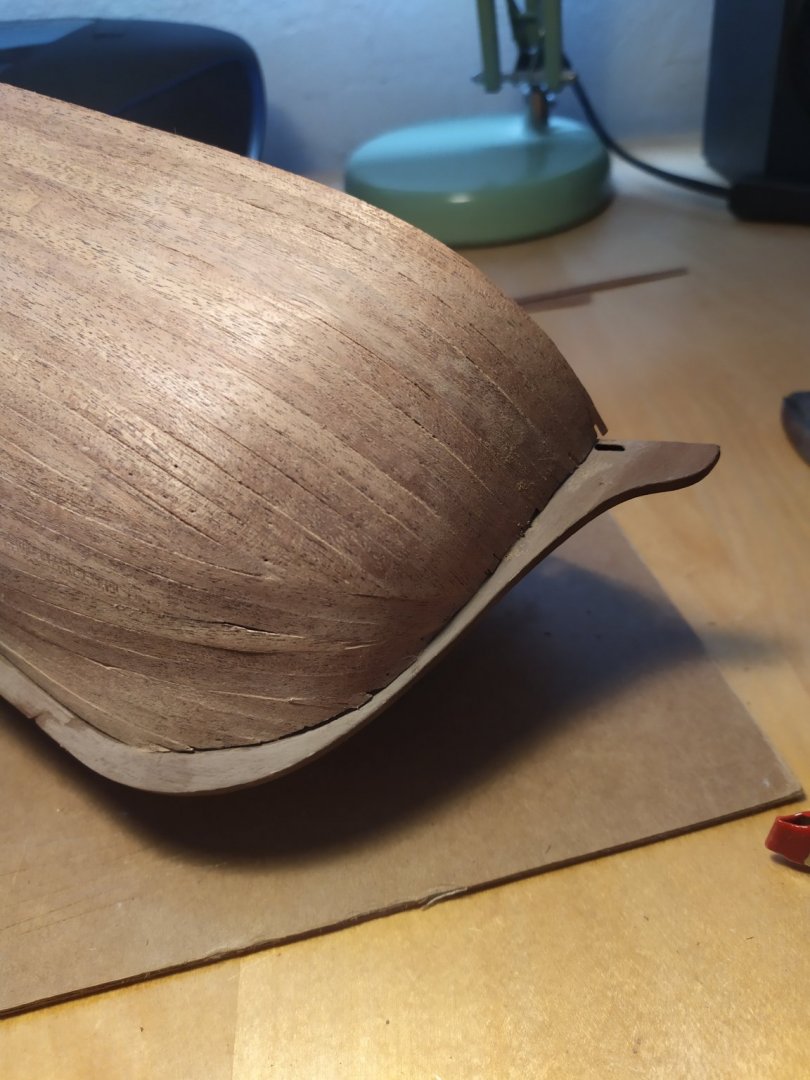
hi all and good morning! some photos of the ice protectors, i thought it would be difficult but this side has been easy. I'm understand the clearway comment about the large amount of wood need to be removed here 😅 thanks a lot for your comments and regards,

-
HMS Terror by Broden - OcCre - 1:75
Geowolf replied to broden's topic in - Kit build logs for subjects built from 1801 - 1850
hehehe i'm seeing the hand drawing of Keith S, with my first model my brain exploded trying to curve a simple straight piece of wood in a "three-dimensional figure" with three or four curves in all directions 🤣 -
HMS Terror by Broden - OcCre - 1:75
Geowolf replied to broden's topic in - Kit build logs for subjects built from 1801 - 1850
ahh ok it's true i don't remember it, i've seen your photos (i need to remember the two cms for the ice bumpers), take advantage of the summer! and your real vessel, nice model! sure in winter you'll have a lot of afternoons to retake the Terror. here in Barcelona we have good weather all time (the thermometer not fall under 0ºC), but the sunlight hours are fewer in winter, so i'm taking my ebike all time i can 😊 regards and take care, -
HMS Terror by Broden - OcCre - 1:75
Geowolf replied to broden's topic in - Kit build logs for subjects built from 1801 - 1850
oooh i love the Keith model!! and the bow is awesome, you've make the pins marks in the metal plates!! 😭 do you think about black painting the bow, or you will leave it as the picture? i'm thinking to paint the metal tiles but later use the sandpaper in the border of the tiles, or imitating the marks of ice,... -
HMS Terror by Broden - OcCre - 1:75
Geowolf replied to broden's topic in - Kit build logs for subjects built from 1801 - 1850
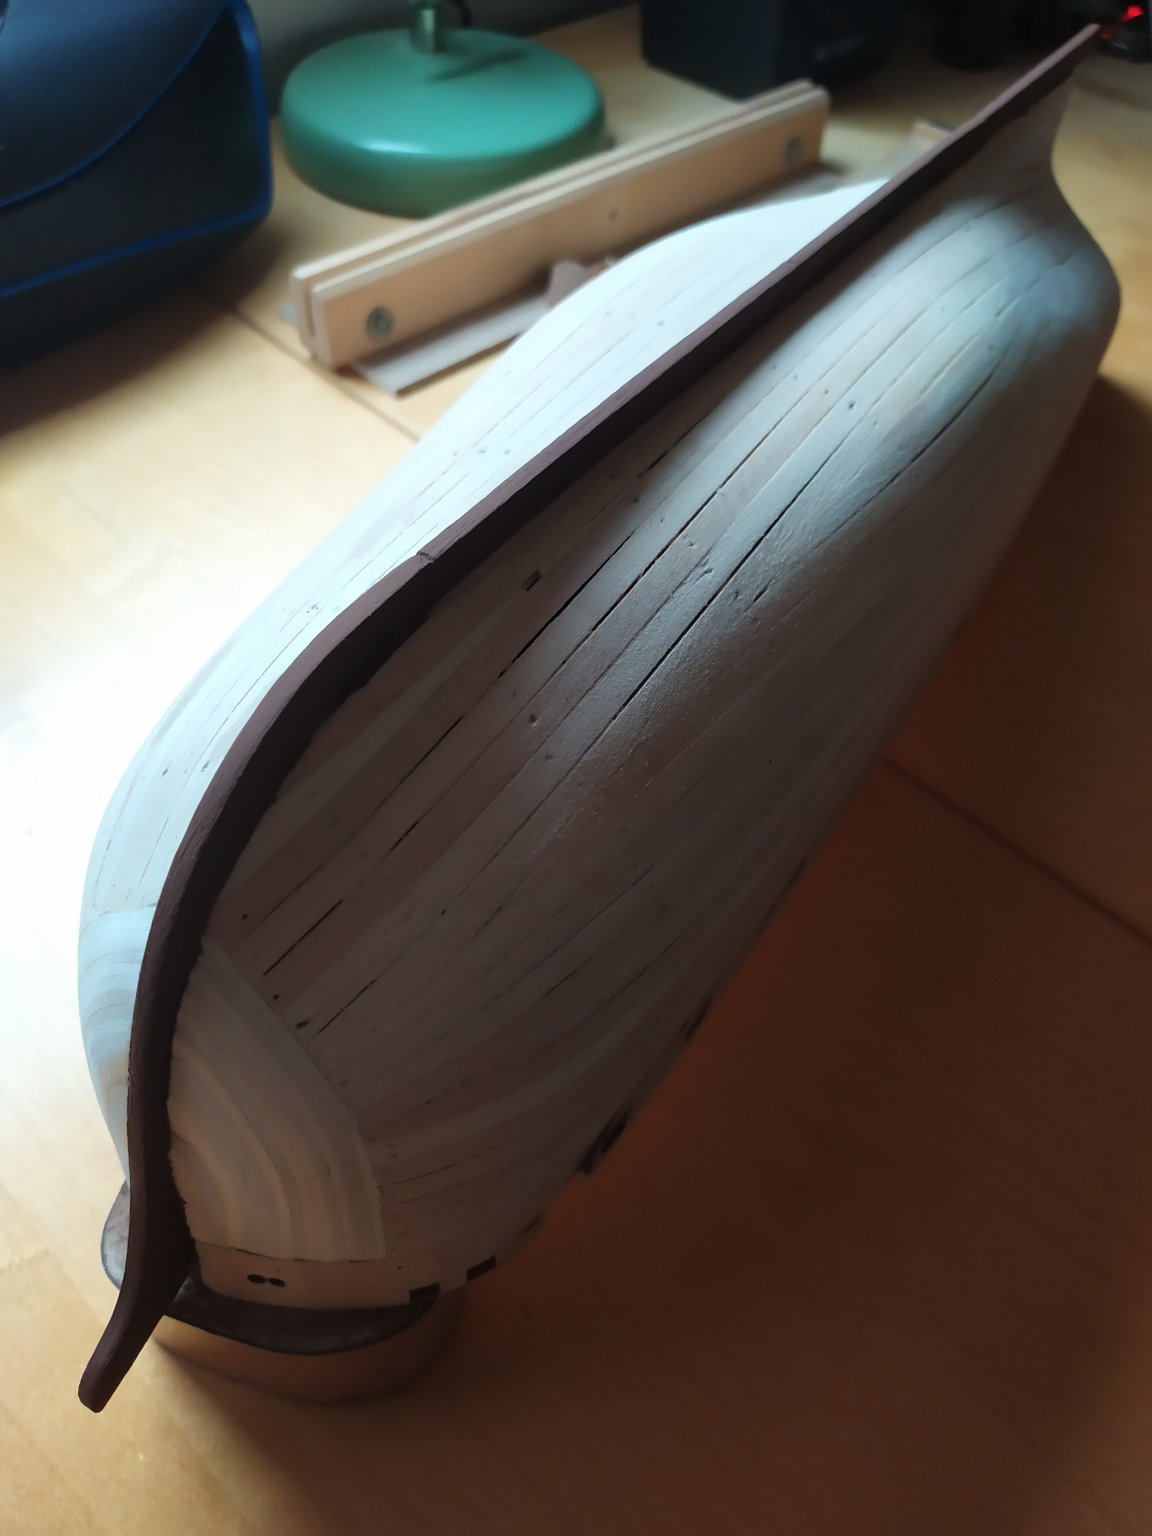
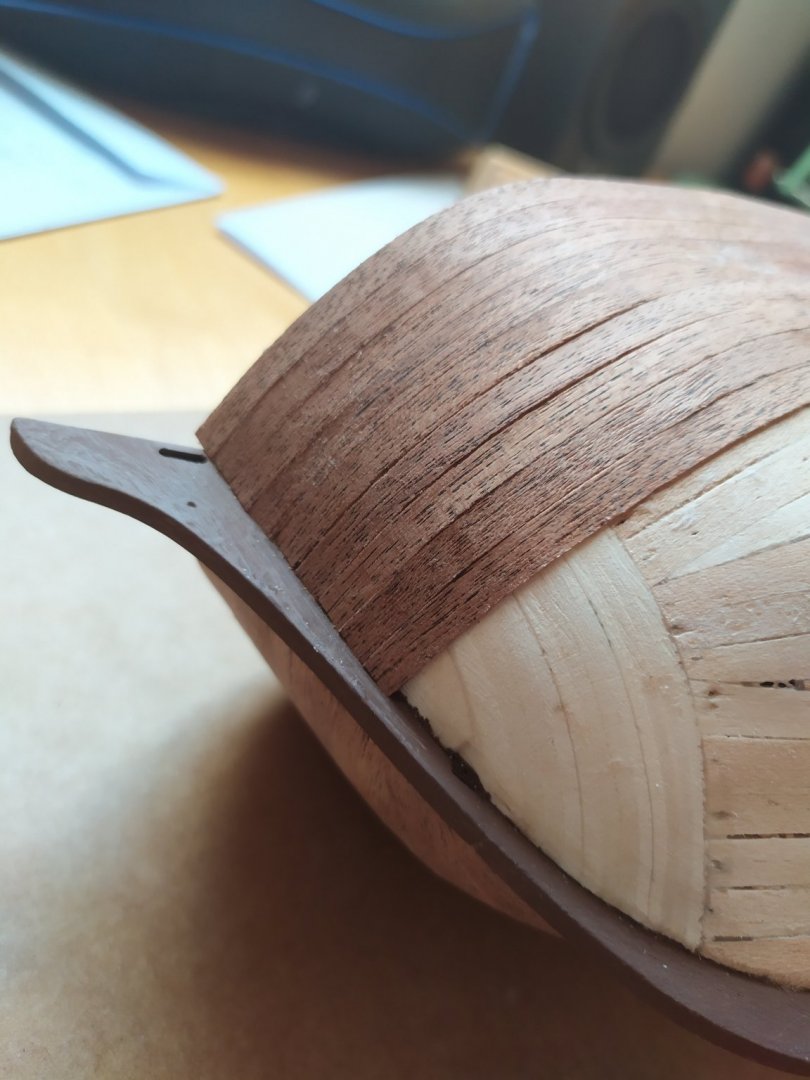
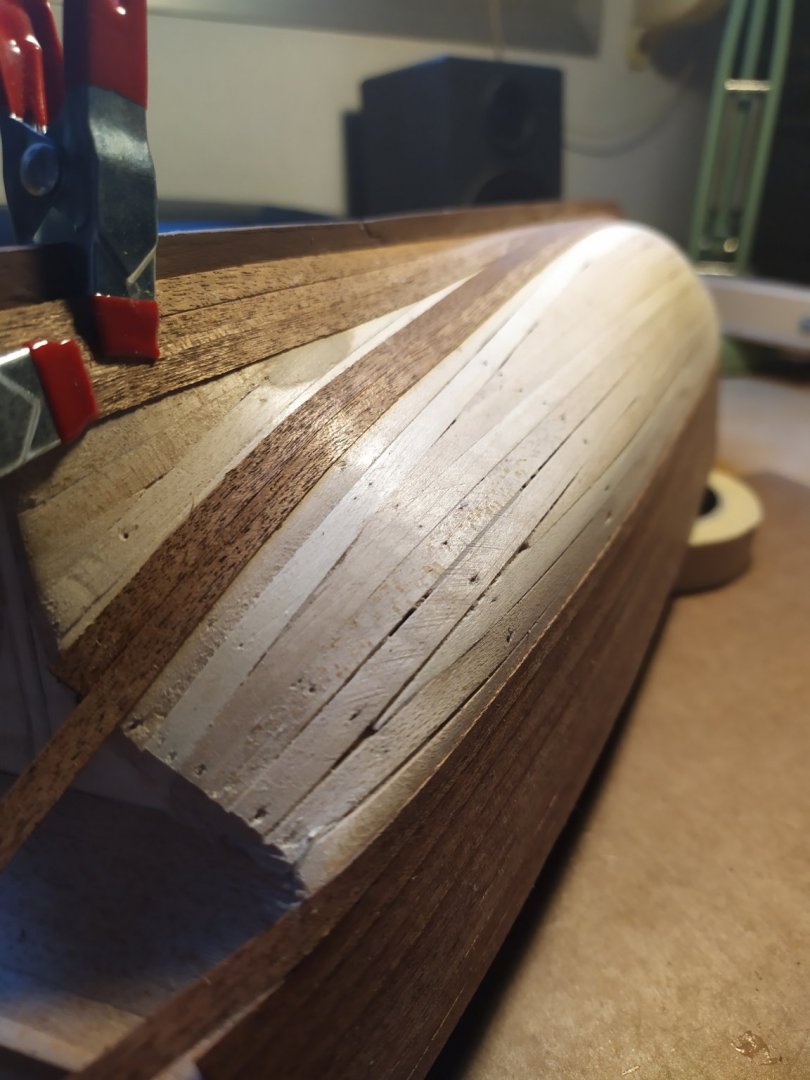
hi Broden, some tips about my own experience 😊 the first plank layer is a bit "heavy" when you are fixing and cutting the first planks, but with a few time you'll be confortable with it. Your objective is cover all the hull, try not leave gaps between the planks, and use the pins without care! the second layer will cover all pins marks, and the pins are the best way to fix in the correct place the plank. You can leave in water the planks but when dry, they will leave gaps; try instead an electric solder and move the dry planks with medium force above the solder. If the planks are "burned" no problem, you will sand all hull later (and the curves are for the internal side of the hull...). I didn't make planking drawing at the time because the second layer will cover anything. For me, the most important in the first layer is to keep smooth lines and not force the planks, they must to be located naturally on the ribs; if any plank is raised with the adjacent, you'll need to sanding it to the same level two planks, and if the difference if big, you can make a "depression" with later problems in second layer (as i experienced in my model). Think in this cases that maybe the position of the plank it's not good when you curve a plank and with the very large planks in the kit, you can curve at 5 or 10cm from one side (more easy than make the curve at the end of the plank) and cut the spare plank, because the wood is so large for cover all the model. You can retire the pins later (they destroy any sandpaper) so you need to use the glue to fix the planks. If you don't want to use glue with each plank each time or it's a bit dirty, fix with the pins two or three planks and later use glue inside the hull between the ribs and the planks (all planks at the same time), whitout care about glue (a lot of glue). Of course you can make it only for lower & upper planks, not at the center of the hull sorry for my "indian sioux" english and be happy with your model!! 😄 one shot of my hull almost finished today, be sure your model will be at least as this one 👍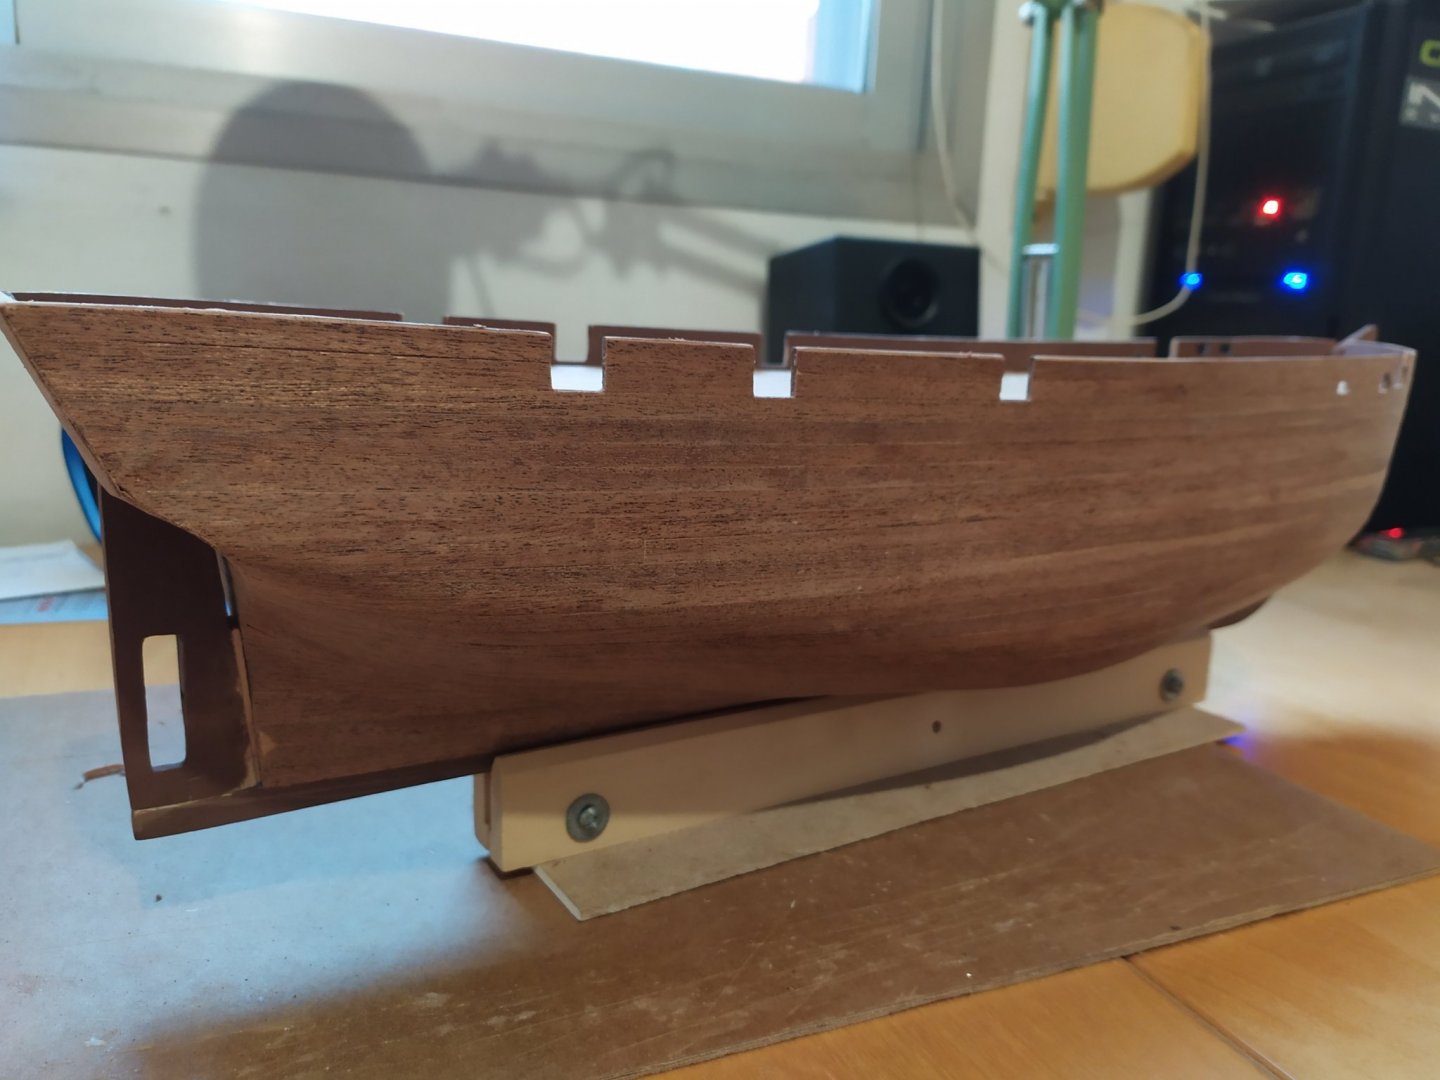
-
very nice and smooth lines, fluid without gaps! well done drumgerry!!! 👌 regards, F.
-
hi SIDEWAYS SAM, a very nice (and large!) model, congratulations for your choice! ufff i'm seeing the photos in Occre webpage, very complex for me hahaha. I can't wait to see all stages 😎 meanwhile only a few comments about the name of the model. The Virgin of the pillar (yes, Pilar means pillar - architectural component) is located in Zaragoza (Aragon), at the north of Spain. Zaragoza is located above Caesaraugusta, one of most important Roman cities in Iberica. The name of the ship follows the spanish tradition naming the ships with the name of significant saints or virgins, and reserving the "Holy Trinity" name for the biggest ship. more info and some photos: https://en.wikipedia.org/wiki/Cathedral-Basilica_of_Our_Lady_of_the_Pillar regards to all and keep safe,
-
Stunning hardware!! 😱😱 this is the sign of an experienced modeller, well done! regards Clearway,
-
thanks a lot for your comment, well at this moment i'm making the other side and the result is slightly better (at least i think i'm improving my skills hahaha), but still i've some planks "above or under" the adjacents. I think about two possible reasons: first, the first hull is smooth and clean but it has depressions or hills (maybe due for sanding or the adjustment between the solid bow and the hull planks); the second reason, i tried to force the planks of the second layer to make the way i wanted, and it's not correct, the plank must to follow his own natural way and it must be fit naturally without elevations above the first layer... well, in any case i think this week i'll finish with the planks, some photos with the other side! thanks for your comments and regards, stay safe!

-
wow, the two last photos are wonderful! the wood job is perfect, well done clearway! 🤩🤩
-
hi all, thanks a lot for your kind words!! i think i'll try the Keith S solution, if the plank is too thin or damaged, i'll replace it as clearway says. I had a problem with the planks in my first model Albatros (single plank, no way to mistakes), and i left it, abandoned, one year more or less.... but with this model no! thanks for your words, they're pushing me to continue! this weekend i'll continue with the other side, meanwhile i make advances in the model, i show you my ebike (picture taken this summer in Barbastro - Huesca), for me it's a good way to disconnect from all 😊 regards and take care!

-
yep, i'm thinking about cut some planks and replace it, but i used sandpaper in all and the rest of planks are very thiiiin like a cigarette paper, ufff i like thickness planks it's easy to fix something! I'm not made for these delicate things! hahaha i've the hull in my office table near to the PC, i'm seeing all the time, i think i must to go biking and take it out from my mind thanks a lot for your comments clearway 🤗 F.
-
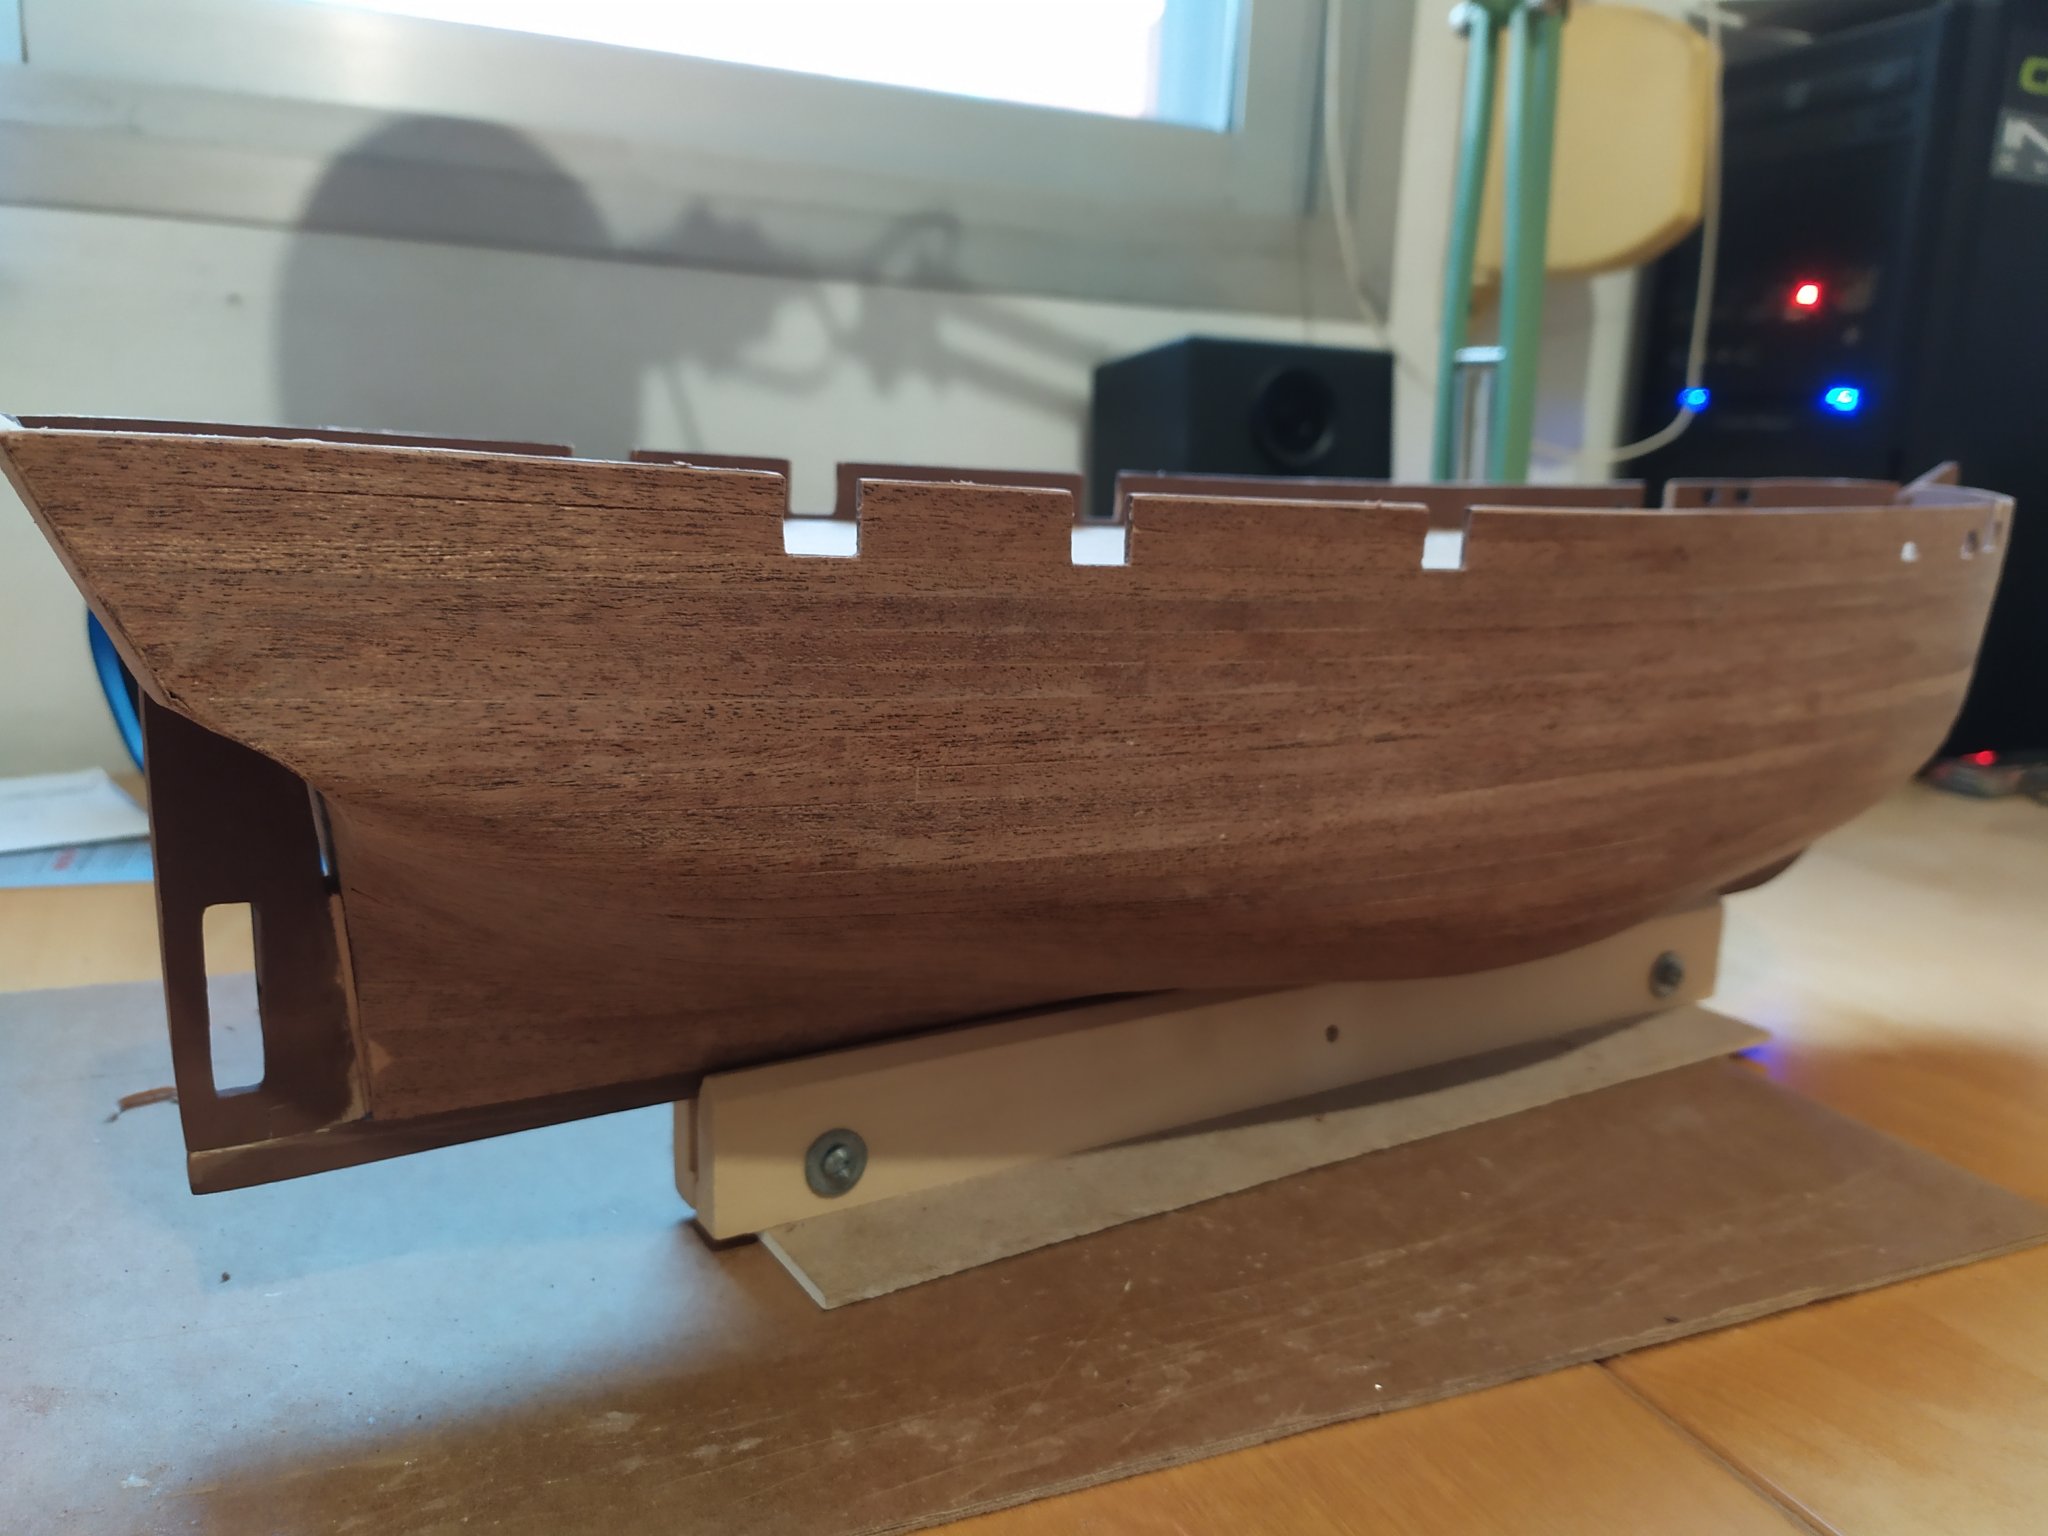
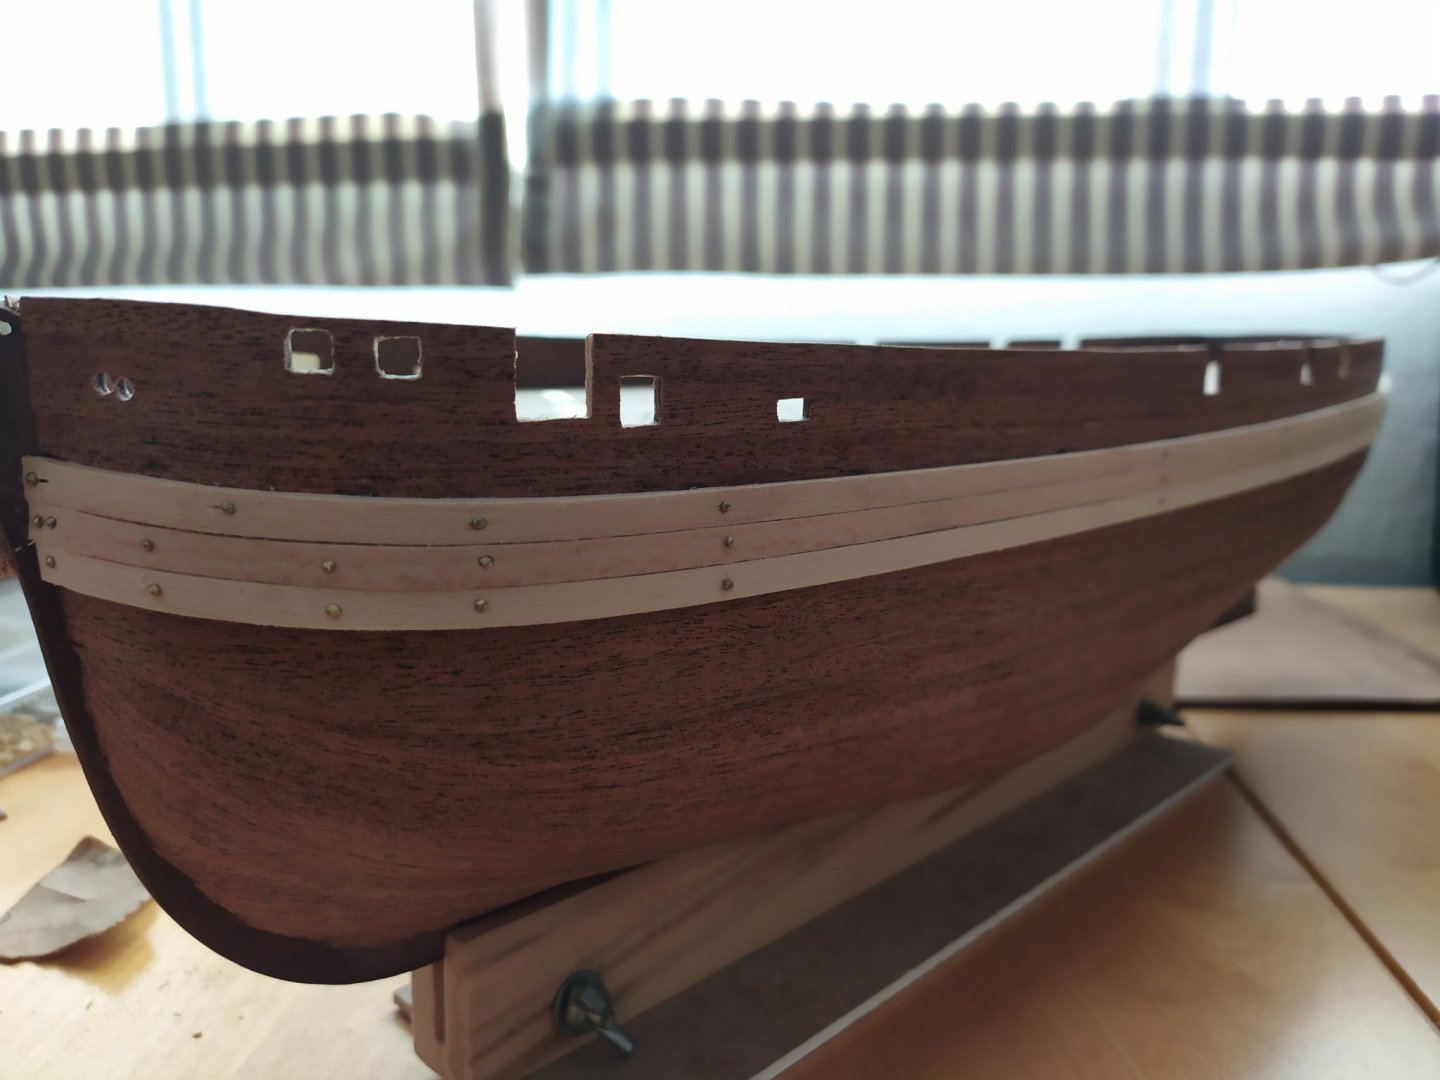
hi all good afternoon, finally one side of my second plank, if you see the pictures in detail you'll find my mistakes, i'm not happy 😔😔 maybe the other side will be better. I think the stern can be well finished i need to cut the remain planks and clean all, but the bow,... i think it can't be repaired. At least each day i'm learning a bit more 😌 regards!

-
well done drumgerry, sure you'll finish it as you imagine! the ship is very nice, with a lot of job with the guns. Many of us have some problems and issues but the most important is try to resolve it (you can read my problems with the second plank, my god) and keep pushing, and finish the model! regards, F.
-
hi ObviousNewbie, very nice deck planking, i also think is better make it cutting the planks as you say, well done! such size of ship, i think it'll be more difficult rather Terror, but you're prepared, you must to change your nick, newbie it's not correct! 😄😄 stay safe and good summer, F.
-
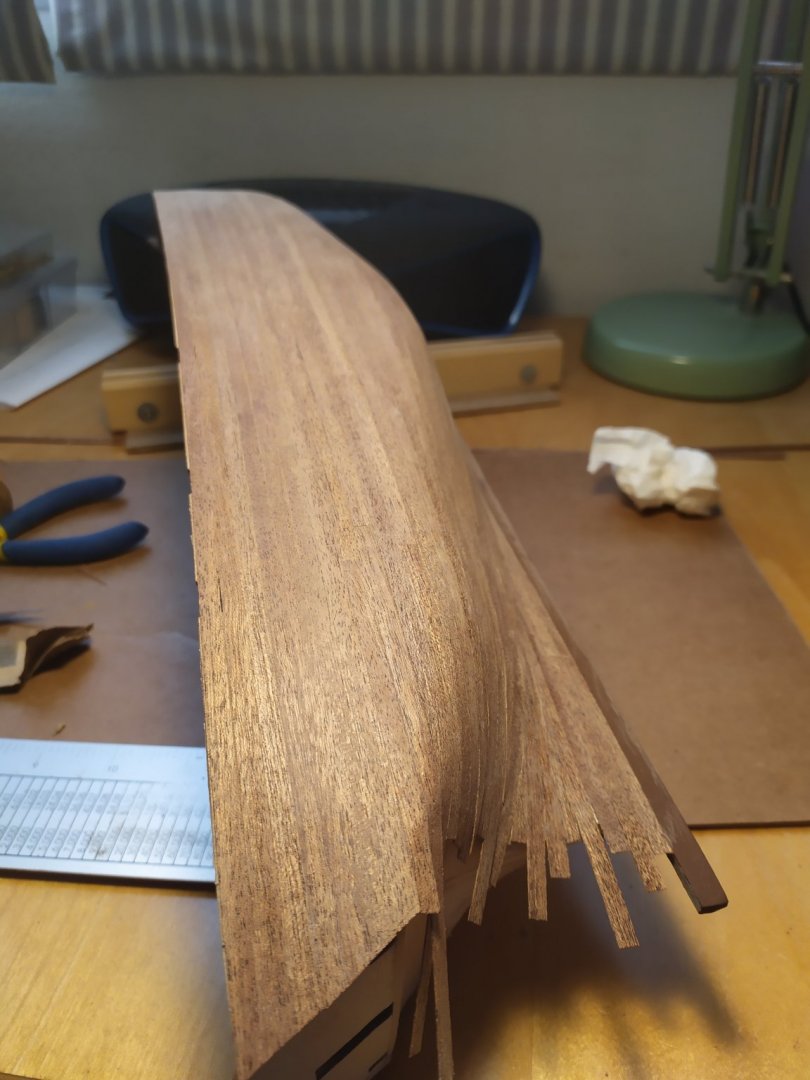
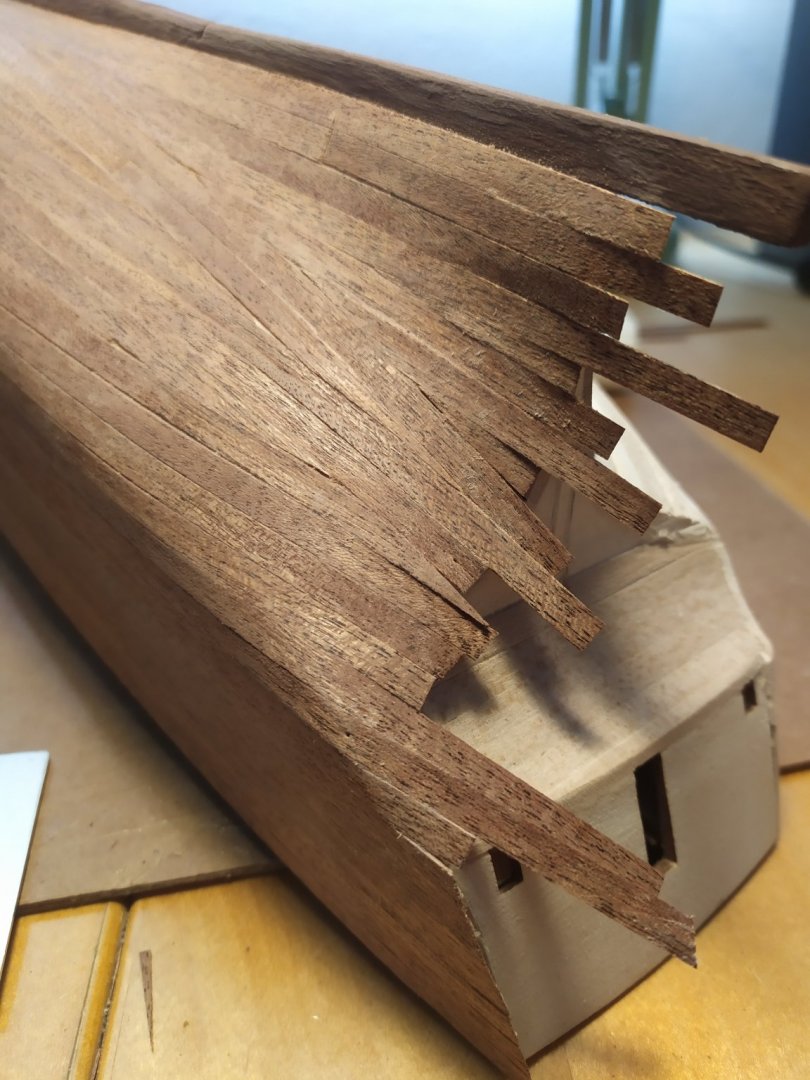
hi all and good morning, i've just start the second planking, i'm not confortable about it, i don't like this planks sooo thin! maybe the result will not be as good as i wanted, but you know we're learning each day 😅 I'll relate my own "terror" film: i've prepared a large surface with all the thin planks attached, to vernish it as i've seen in the Occre webpage videos. Baaaaad idea!! the planks has been attached when the vernish dried to the support (an old carton box), impossible to take the planks! i've lost more than 30 planks "glued" to the box by the vernish, bad starting. Second mistake (the sequel of my terror film hahah), i've buyed contact glue thinking it's more easy to use because the plank is fixed very quickly; well, i've started with three / four first planks but the contact glue is drying very quickly, the spare glue is added to the planks and the final result was bad, with the four planks spotted with contact glue (well fixed at least). I've finished the plank with my well know wood glue, it need more time to dry. some photos with final sanding, i'm thinking the first planking is better than the second one 😒, this afternoon i'll try to upload some photos of second plank, good summer!!


-
wwhoooo new modeeeeel!!!! 🤗🤗🤗 sure it'll be so beatiful as last one!! taking place to see your progress 🍿🍿🕵️♂️
-
one of the best planking i've seen, well done!! 😱😄😄
- 778 replies
-
- 2
-

-
- cheerful
- Syren Ship Model Company
- (and 1 more)
-
it's a joke you know hahaha... in fact i've a good relationship with my manager, and today it's not very easy to say... 🤪 about my comments don't worry; speaking about me, i've learned by "test/error" method and when i see something different to the usual way or different to the manual, i enter in panic mode! 😁. For me, the most important is to have an escape valve making the model so (for me) the final result it's not very important. You know, if an expert see my models, he'll find a lot of mistakes; and if a non-expert see it only will say "it's awesome", so then no problem, i'll only show the models to my friends and family hahahaha nice weekend and regards! F.
-
Ok if the final result is smooth it'll be good, be careful with the different high of the planks at the stern... I usually works on the model at the afternoon after muy job, i only need to think in my boss and the pins enters in the wood eaaaasy eaaaasy hahaha Regards and keep pushing!!! F.
-
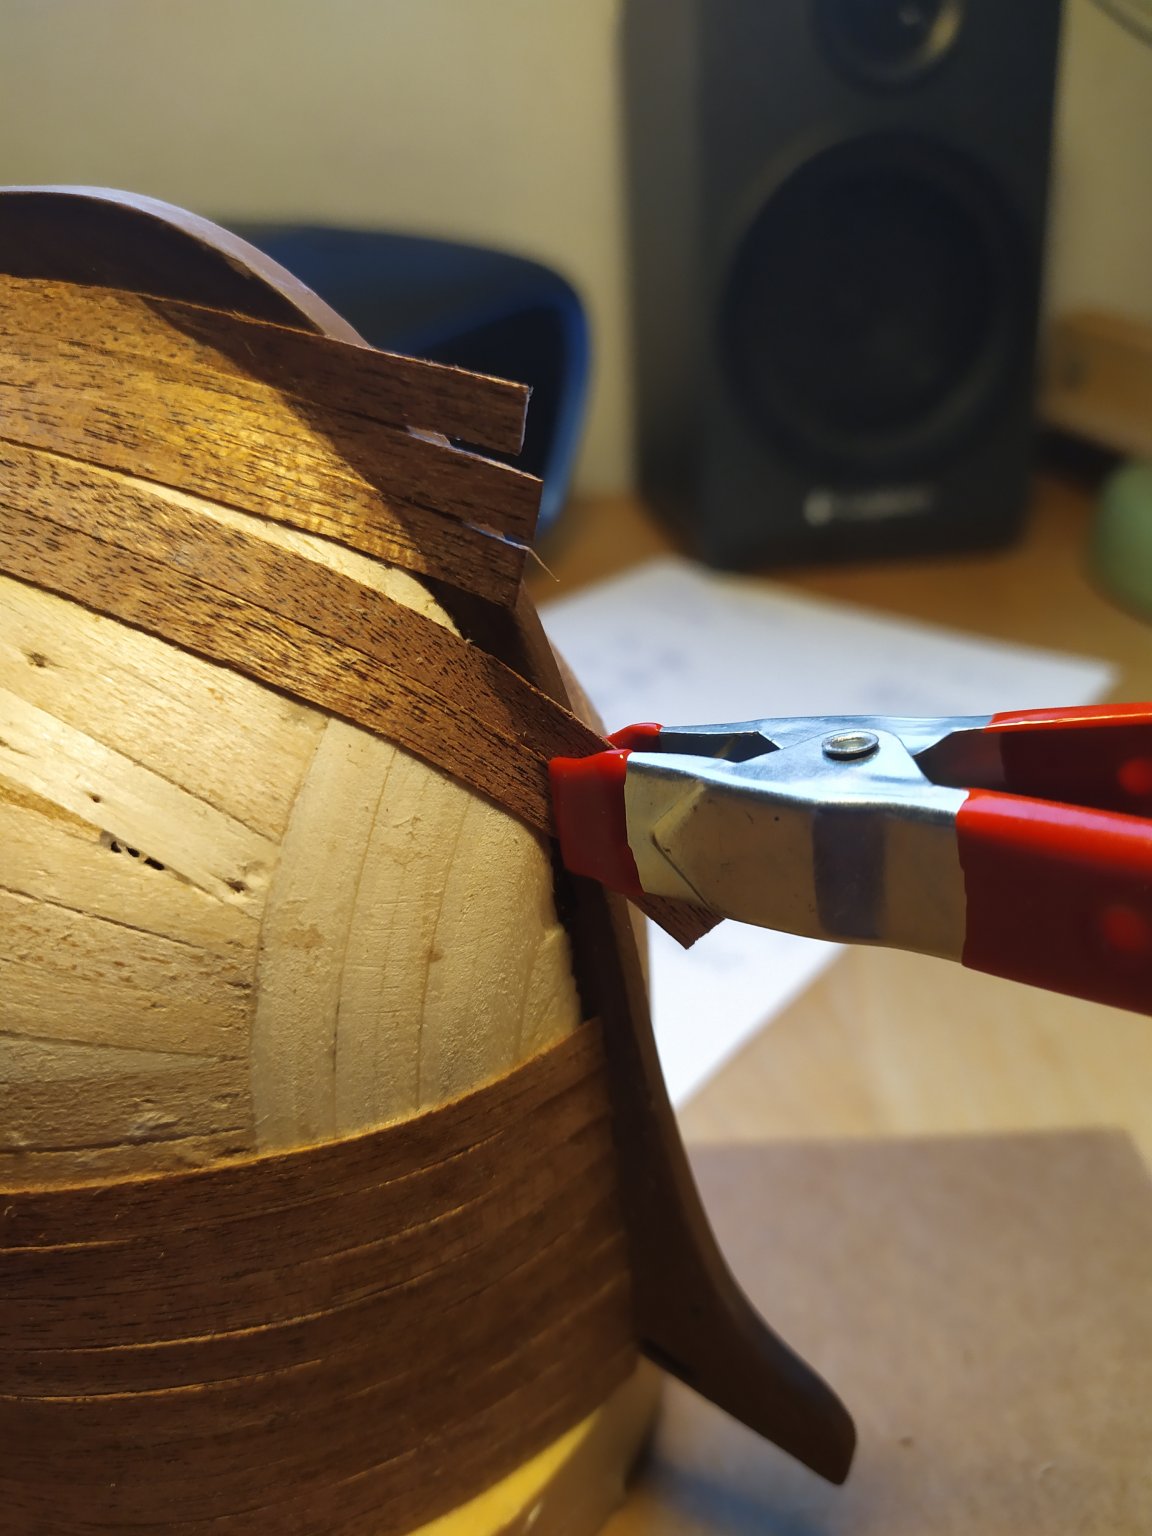
hi drumgerry, remember you can use the spikes to fix the planks, they must to have smooth transition between them otherwise you'll need to fill it later. Use the fingers across the hull in all directions, if you note some "hills" or "valleys" you'll need to repair later; the hills are easy with the sandpaper (be carefull because a high hill can need more sanding and leave your plank too slim). For me it's easy to use the spikes; i fix the plank to the hull at the middle of the plank more or less with a spike, tight to the adjacent plank, and later i fix the both sides left/right with glue and spikes. In each "rib" i fix the plank with a nail, so i'm sure the plank is following the correct curvature, because the plank even will try to follow his own curve and maybe it's not correct. Take a look to my hull, i'm finishing it these days. i've not the tool to fix the spikes, but with a small pliers i can fix it with not much difficult Buff sorry my english is terrible hahahaha 😓 well done and have fun!!!! 😄😄😄 F.
-
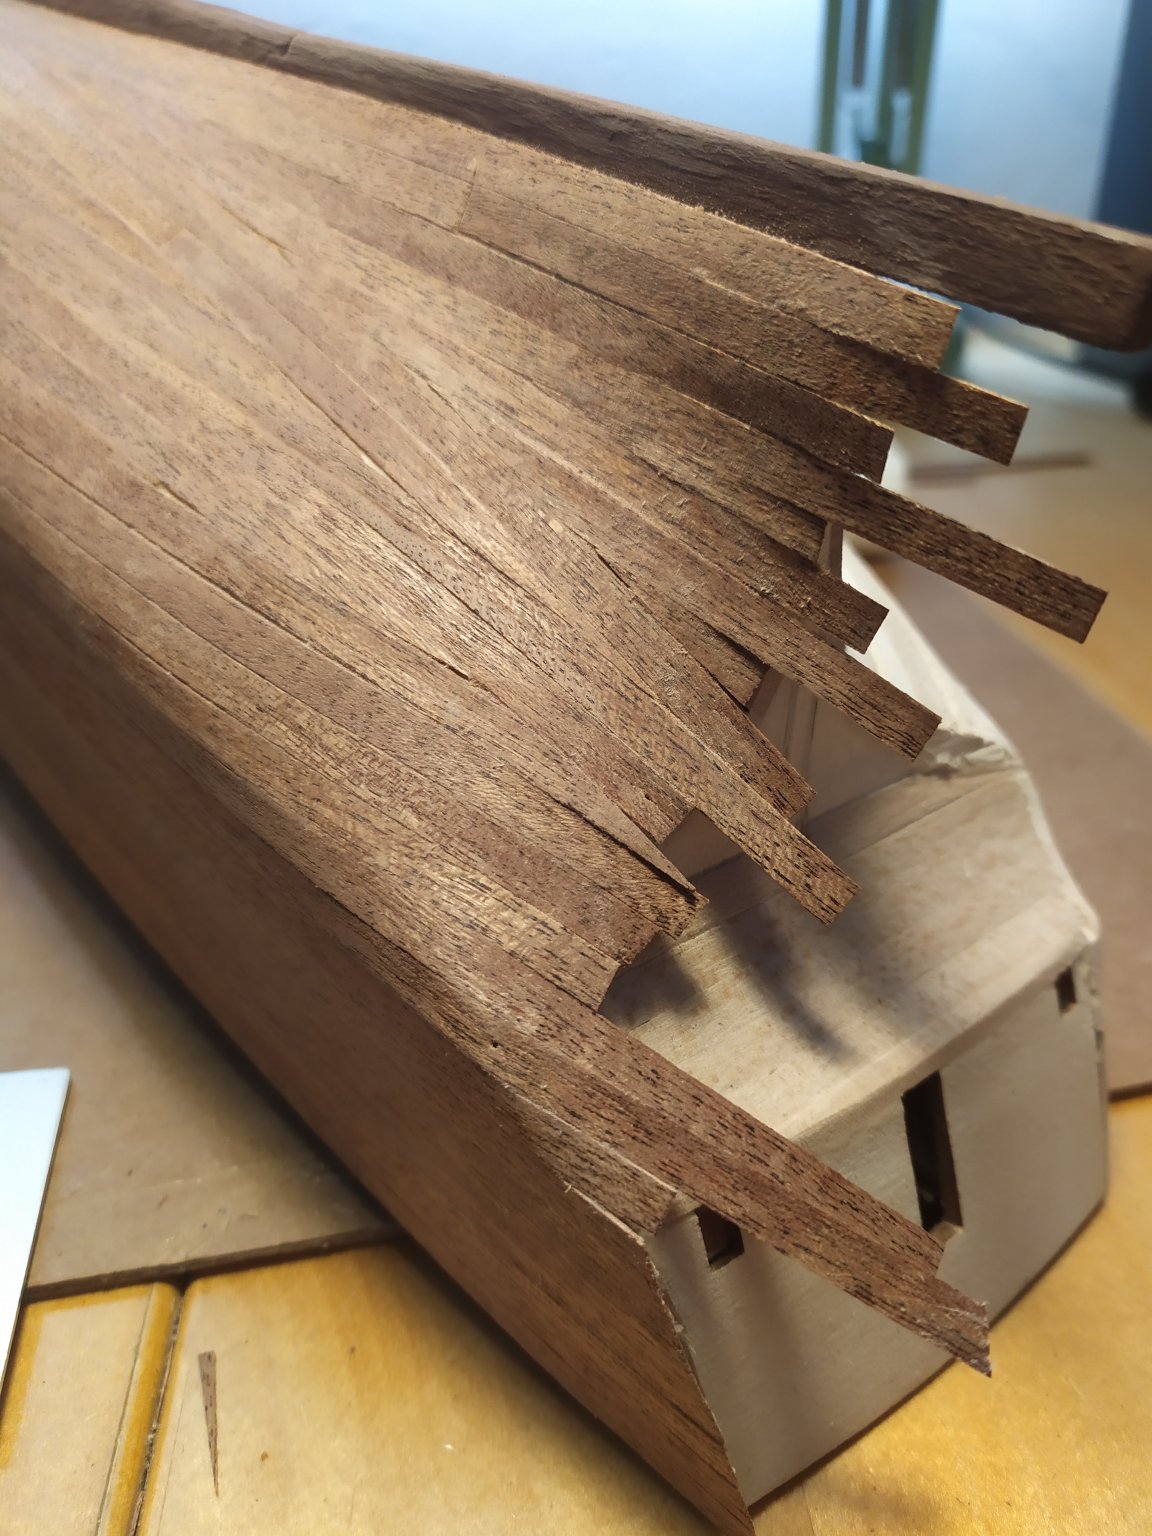
ufff i know, another amount of wood hahahaha. I'll need more beer!!! 😱 I actually use a small wood for modelist supplied with my first model Albatros, and for large surfaces i use a cork Wolcraft block, very useful because i can cut the cork to fit the curves of the model. This afternoon i'll try again with the dremel, my objective is to retire the large amount of unnecesary wood and later use the cork block i've seen your mast in your ship, well done Keith! regards, F.