HOLIDAY DONATION DRIVE - SUPPORT MSW - DO YOUR PART TO KEEP THIS GREAT FORUM GOING!
×


Bill97
-
Posts
2,704 -
Joined
-
Last visited
Content Type
Profiles
Forums
Gallery
Events
Everything posted by Bill97
-
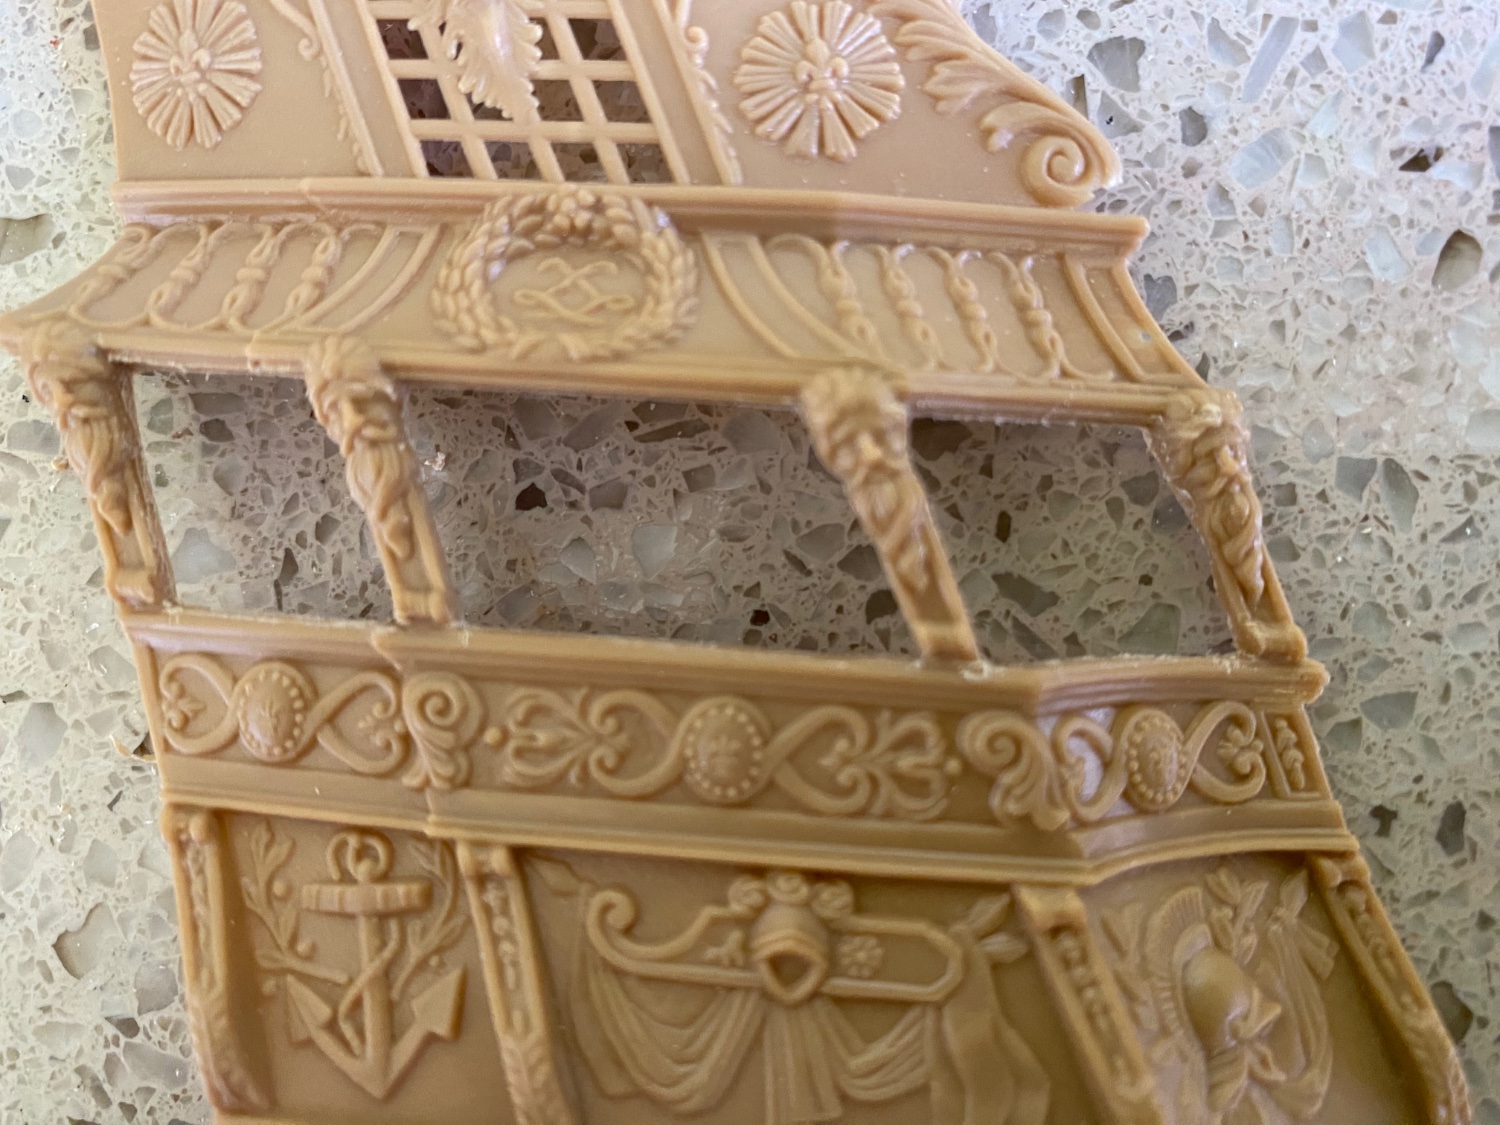
Marc I really like the molded rigols you have above each of the UB cannon hatches. That is an addition I want to try molding for my SR. Did you carve the the shape to cast the mold from or did you find the shape somewhere to make the mold? That is very precise.
- 1,508 replies
-
- 1
-

-
- Le Soleil Royal
- Heller
- (and 1 more)
-
Thanks John. I appreciate your response and information. Hope all is well with your family member. I discovered the same thing you did n the 2mm blocks availability. I went ahead and ordered 2.5mm and will try to make them look OK. I may eliminate the hooks and just tie the blocks to the deck eyebolts. That should give a bit more space. And as Ian said no one without a magnifying glass will know.
-
It was not to difficult. I used an exacto knife with a new sharp point blade. The he plastic is real thick so it does not take long to cut through it. You have to be extra careful around the molded figures.

- 1,508 replies
-
- 3
-

-
- Le Soleil Royal
- Heller
- (and 1 more)
-
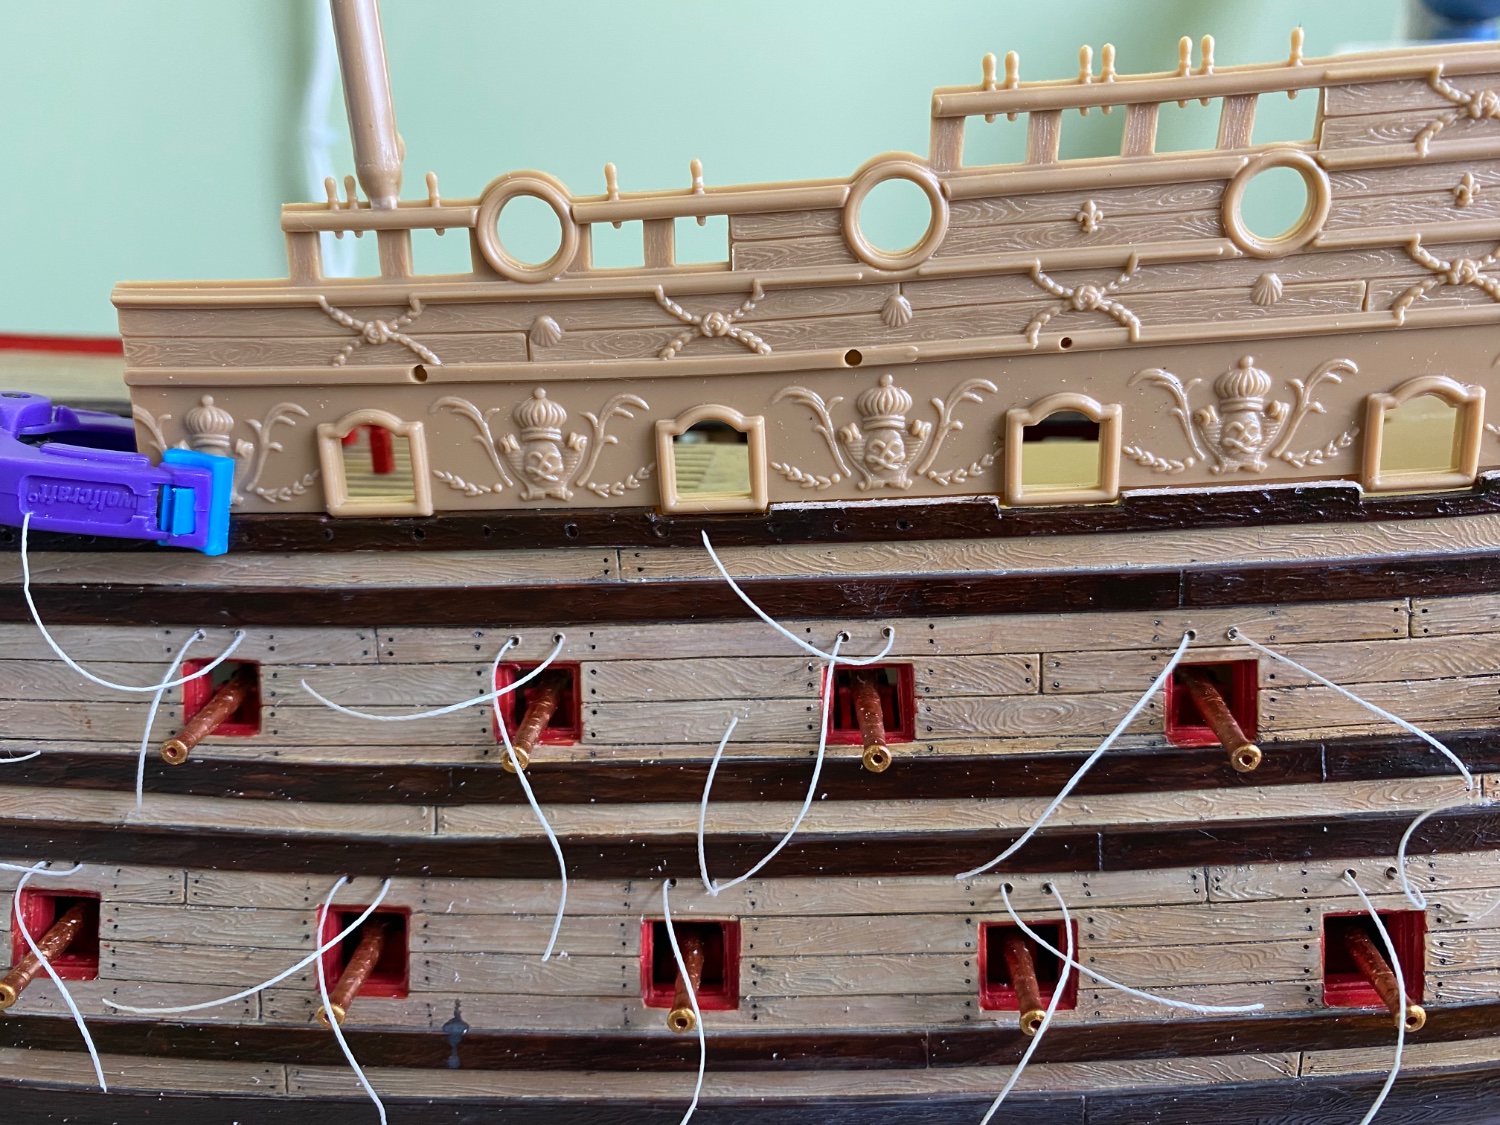
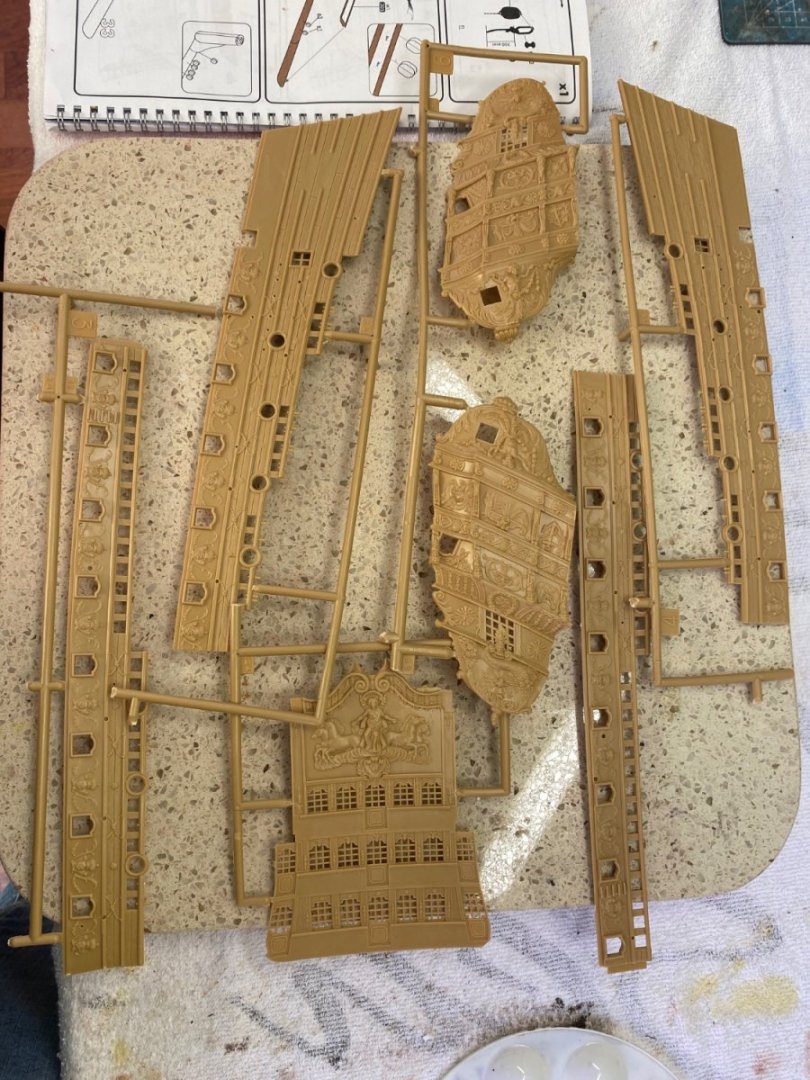
Thanks Marc. I found the product Kevin used to mold his additional ornaments. Order the mold making product and the resin product to use in the mold. Looking forward to experimenting with this new idea. I removed all the plastic belay pins on the 4 upper bulwarks (quite a few were broken off already), and drilled holes for new steel pins. I test inserted all the pins. I will remove them before I start painting and then glue them in adjusting their length to be uniform. This will be great when I start the rigging. Marc I got .030 Evergreen to widen the rails. I have also cut out the 3 upper openings on the side galleries. I saved the cut outs to possibly use on the upper bulwarks.


- 1,508 replies
-
- 3
-
-
- Le Soleil Royal
- Heller
- (and 1 more)
-
Anxious to see some of the photos. I read through this blog over and over. I see where you used Easy Mold years ago to make ornamentation. Trying to understand how it works. I looked it up online. I understand using the substance to press onto what you wanted to mold to get the design, but then what do you put into the mold to get the final product? Does Easy Mold come with an additional product you put into the hardened mold to get your finished ornament?
-
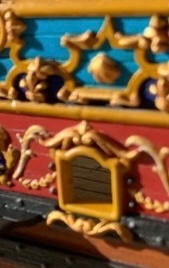
Marc this picture you added makes it much clearer now. I see exactly what you are explaining, especially how you framed the rail balusters (don’t know the nautical term). That must be really small Evergreen. There is so much in that photo I really like. There is so much in that photo that is causing me to take a pause on my painting and gold leafing plan. I see where you and Henry of molded ornamentation for addition to the model. What product do you use for that. I am really interested in that.
-
Oh no Marc, you are definitely not being a pain in the xxxx. I hope I am not being a pain in the xxxx with all my questions. This is the exact information I am looking for. Especially the size of the Evergreen to use. I think the piece I have in the photo is .8. Definitely too big. The skids are an excellent idea as well. Loving this build! 😊 Bill
-
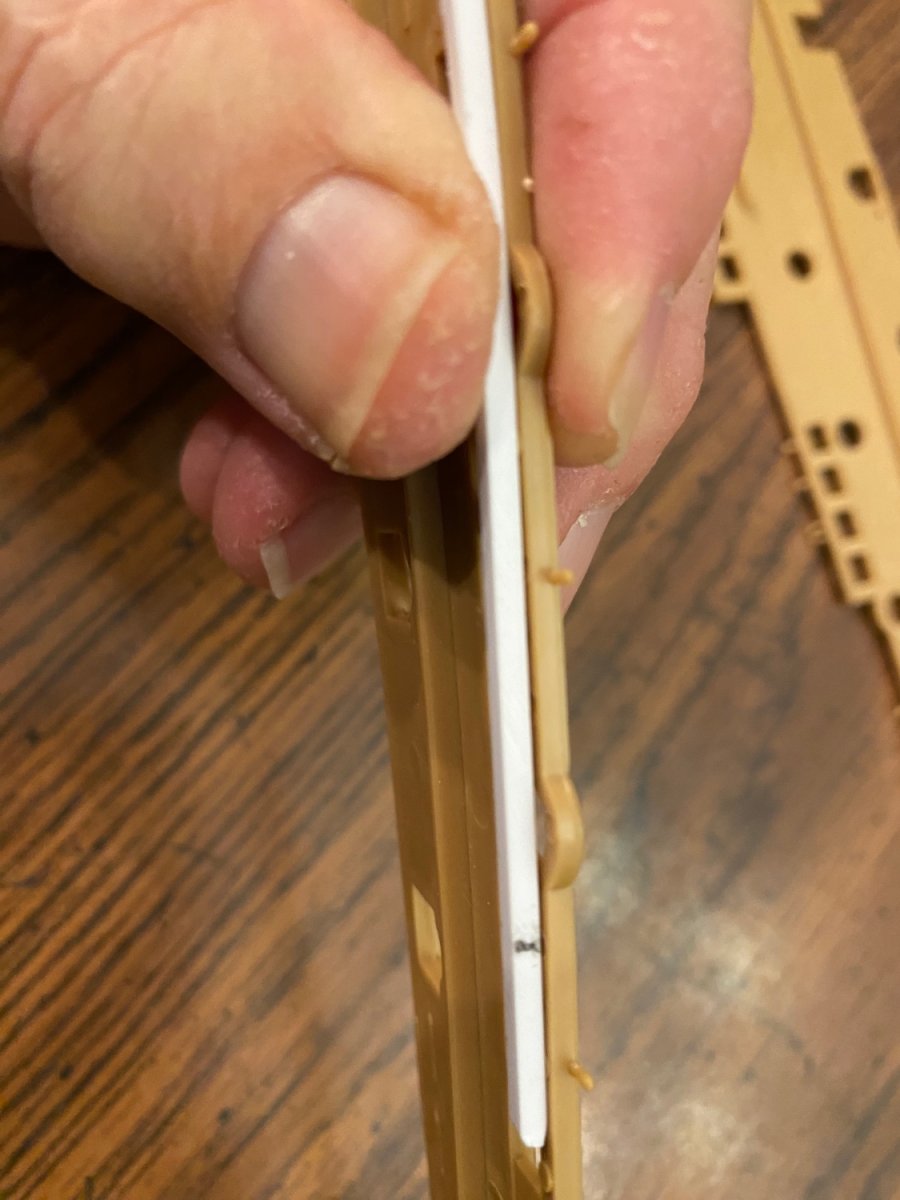
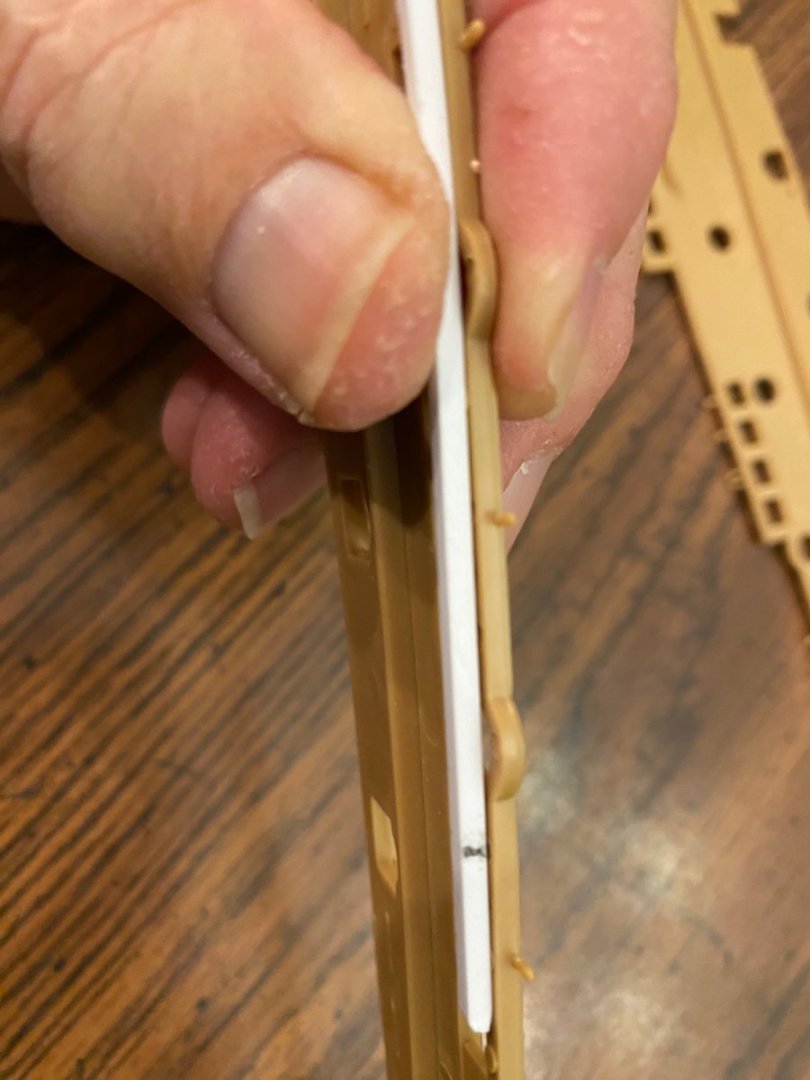
Ok Marc I am looking at my bulwarks and the pictures of your’s. In the photo I attached I am holding a piece of Evergreen up to the edge of the rail. This Evergreen is the same dimension of the molded rail so it basically doubles the rail thickness. I know I need to fashion it around the circular ports but just to get an idea of Evergreen size. You say not to widen the waist rail. Check. Got that. In your photo it appears you also put smaller dimension Evergreen on each side of the rail baluster? And framed on the front side? Is that correct? I see the thin white stripe on each side and at the top. Also in your pictures on the front side of the bulwark I see vertical white stripes next to the hatches in the waist area and a couple horizontal white stripes as well. What am I seeing? This is where I thoroughly enjoy the assistance you guys give me. I obviously want to get all the bashing done on the bulwarks before I touch a drop of paint. Thanks Bill
-
So you guys ran Evergreen almost the full length along the tops of the bulwarks? Mine has a narrow section as I showed in the picture and thicker either side of that section. I was thinking I only needed to do that section to make it uniform. Wonder if yours is molded the same way. Does it make the rail really thick?

-
Thanks Marc and Kevin. This is the kind of advice I need.
-
All advice is appreciated Ian. I will work with all the different options.
-
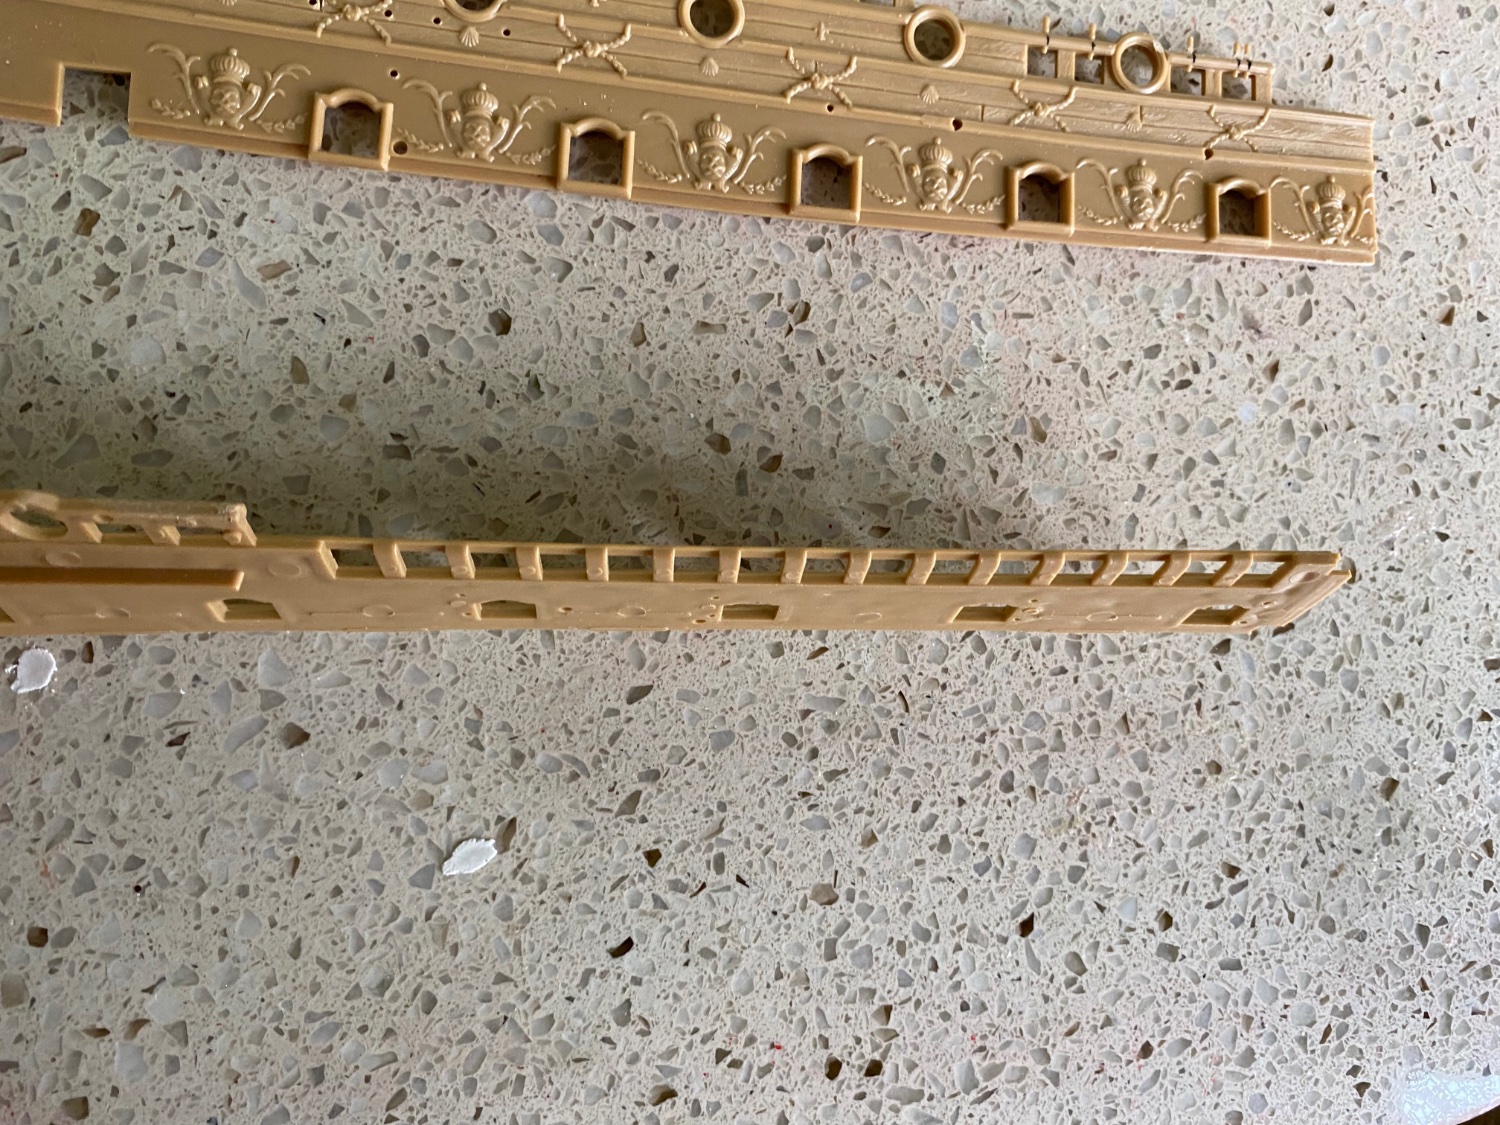
Marc I checked my instructions and it has me put the beakhead, then the bulwark pairs, then the stern plate. You recommend the beakhead then the stern plate and then the bulkhead pairs. Is the area of the top on the forward bulwark shown in the photo where it is recommended I fill in with Evergreen to make a solid rail?

-
Marc what is your opinion about once I am happy with the four bulwark pieces I go ahead and glue the halves together and fix the seam joint where they meet before starting the painting? Otherwise once I have them painted and mounted I will need to repair the joint which I think will not be as good. Also I plan to replace the 21 belay pins along the rails with steel pins. Many of mine are already broke off.
-
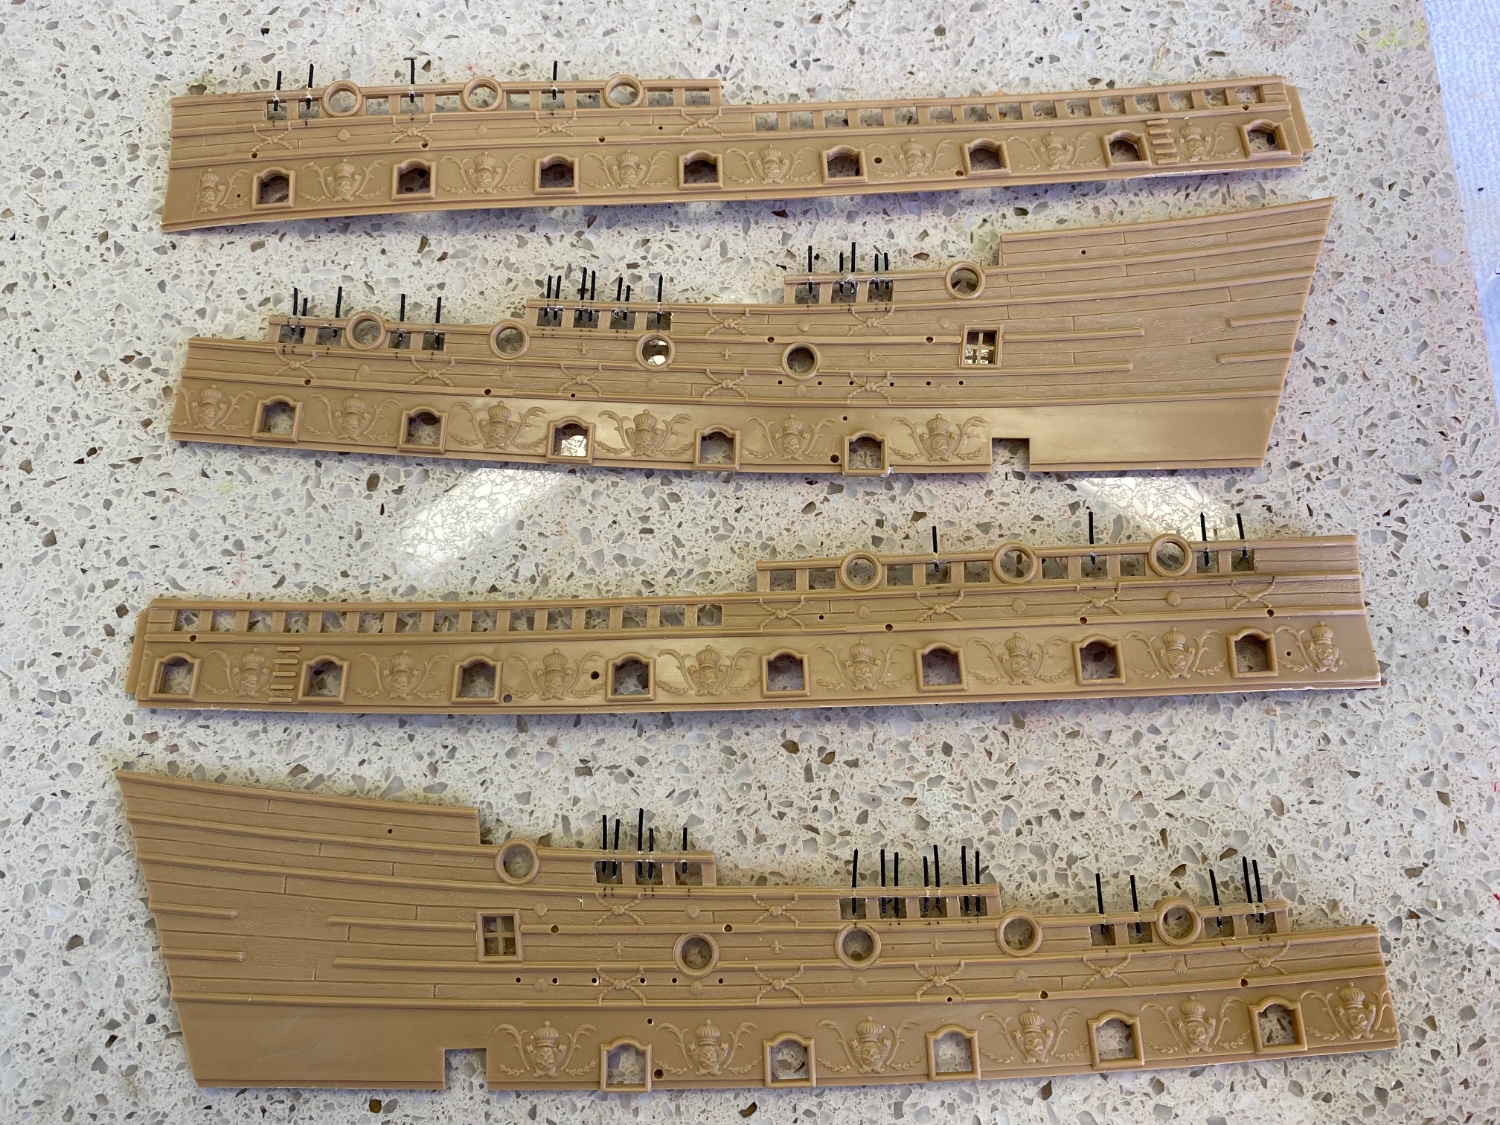
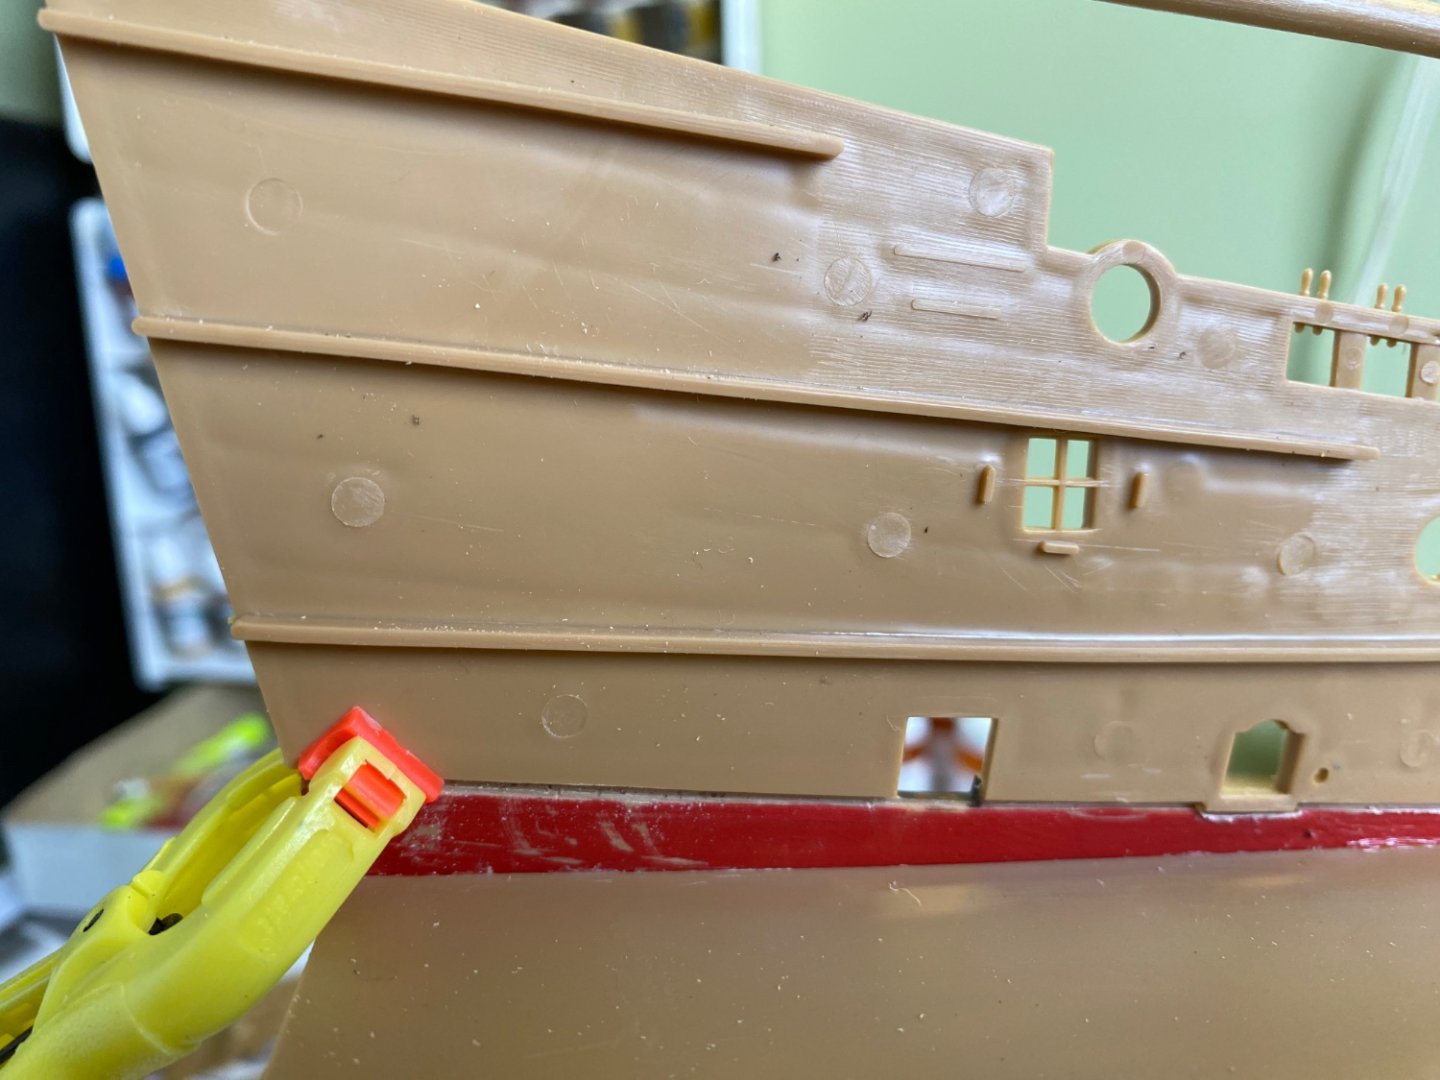
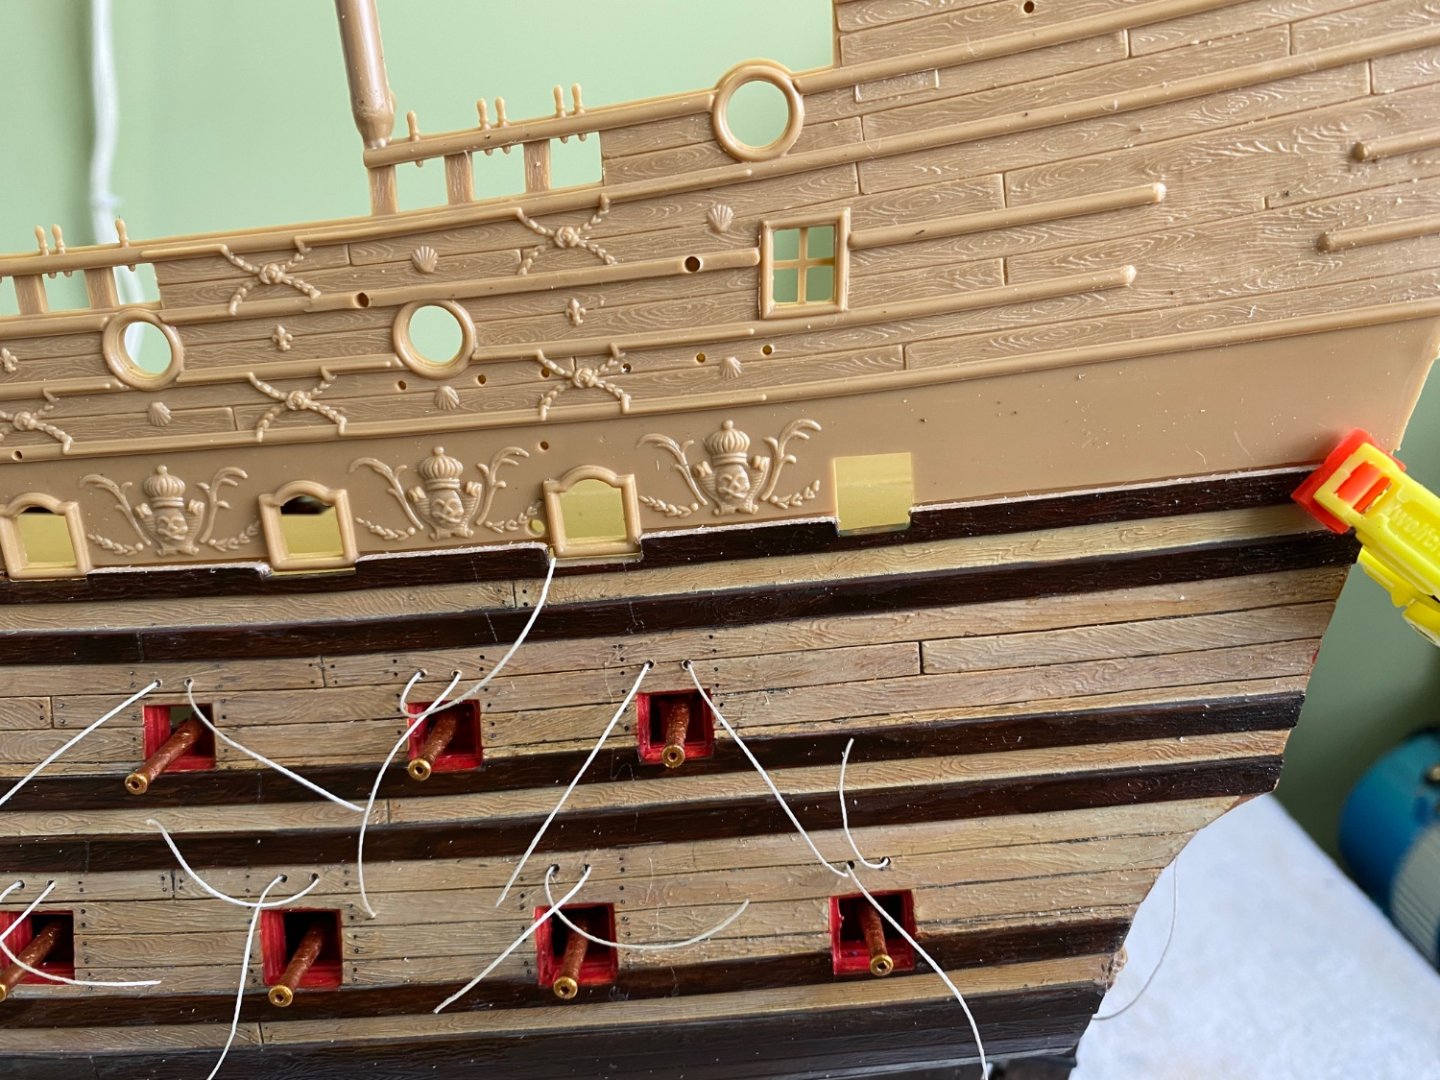
Is this one of the fit you guys are talking about? This is the port rear UB. It is not perfect but not as bad as I was expecting. Will need little bit of putty and sanding under three of three of the hatches for the exterior view and and a little along the seam on the interior back to the second window after which it goes under the next deck. Will see how the next 3 pieces look.


-
Thanks Marc and Ian. I am definitely forewarned. Based on your comment my goal before a drop of paint goes on the UBs is to get a fit as nearly perfect as possible. Is there much issue in the joint between the rear UBs and the stern piece? I will try to confirm that fit as well before any painting. I remember one of you, I need to look back to see who it was, mentioned adding Evergreen to the top of the UBs. What again was the recommendation? Need to do that as well before painting. Please try to think of any additional recommendations as I am attacking this critical part of my build. Marc I am still studying how best I want to open the side galleries before painting as well. Reading through both of your builds and Henry’s I know with the completion of the hull and installation of the 3 decks I am past the part of the build where I just follow along with the Heller instructions. Other than adding reinforcements to the deck support and Evergreen pieces around the cannon hatches, there was not much more bashing. Artistically I had the pleasure of painting the hull the way I liked it, but that did not involve bashing. Marc I know you reconfigured the entire shape of your hull but I did not go there 😳. From this point forward this is going to get fun, frustrating I am sure, and exciting. I learned so incredibly much from you guys during my Victory build. When I compare what I knew before I started it and finished it is like elementary school and college. There is still so much I need to learn. I know I could take what I know so far and the Heller instructions and probably complete an attractive model. I could even use Longridge’s book and rig it exactly like the Victory. Who would know, or care, except me. Now it is time to work on my PhD. The only problem is I don’t know what I don’t know. Only by reading through a number of blogs before each and every step do I see “oh wow, I could or should have done that step that way”! I know I have said it before, but I do thank you guys for all your help and recommendations. Please keep them coming. Bill
-
No problem Marc on the length. I will find it. I am going to set the hull aside for a while now and concentrate on painting and ornamenting the upper sections for a while then take them back to the hull. Working on those side galleries will be a big part of that.
- 1,508 replies
-
- 2
-
-
- Le Soleil Royal
- Heller
- (and 1 more)
-
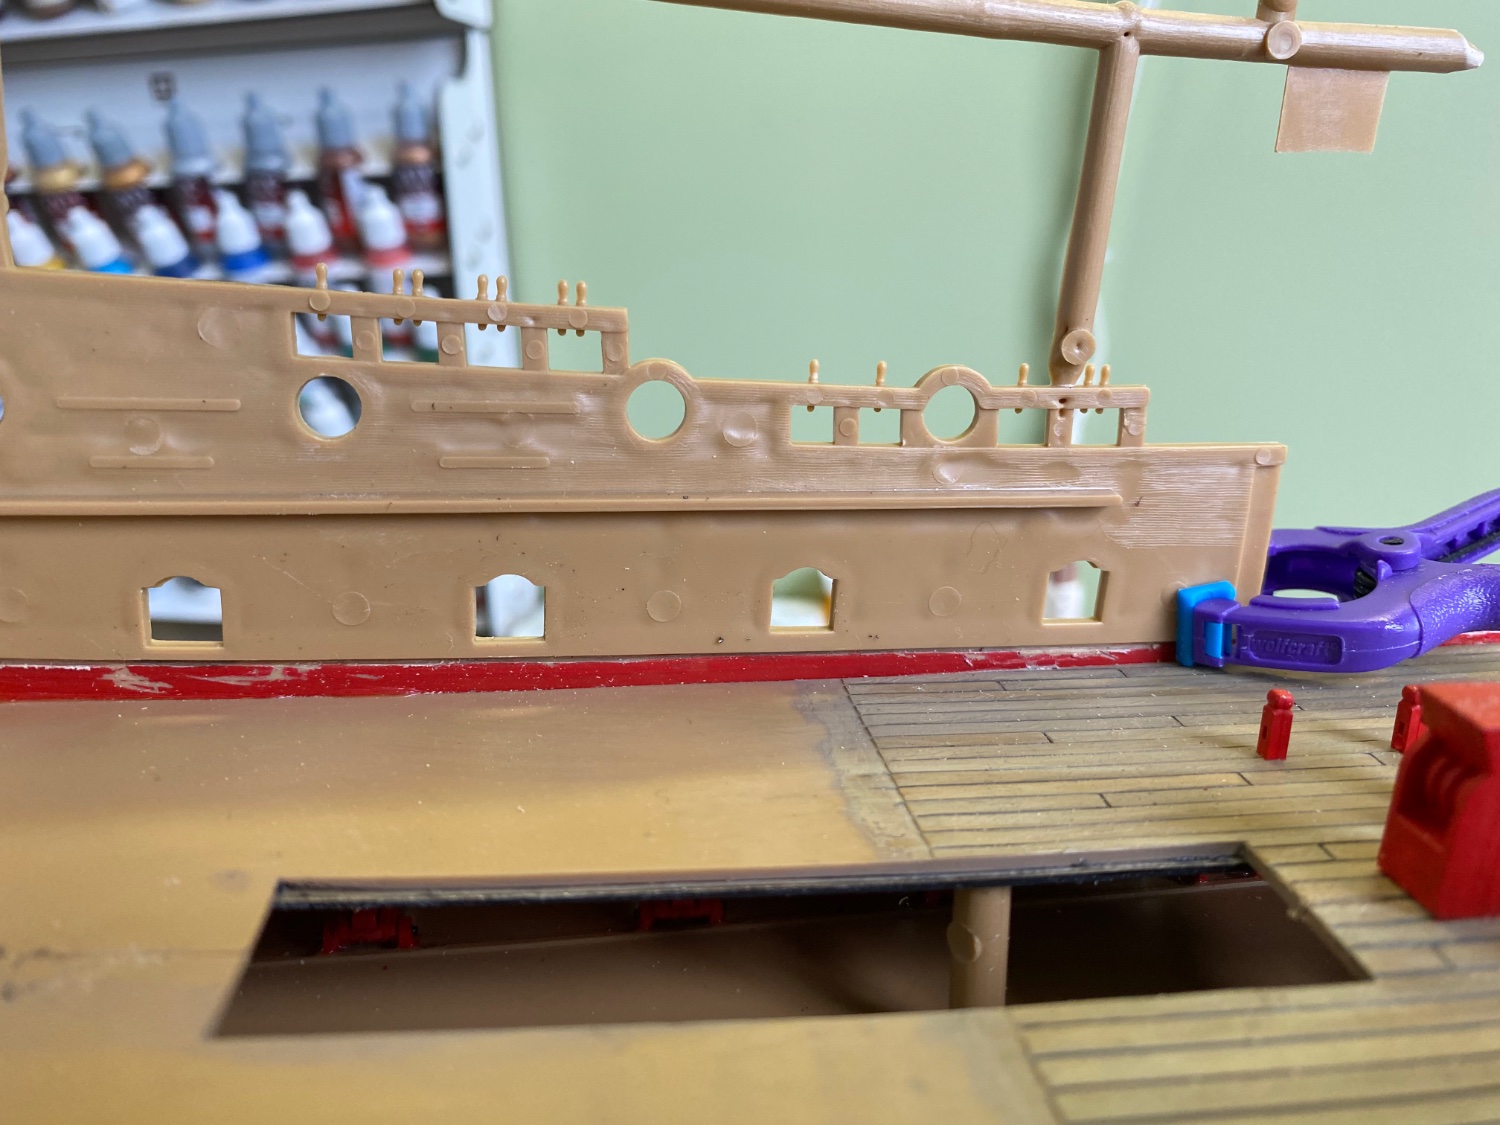
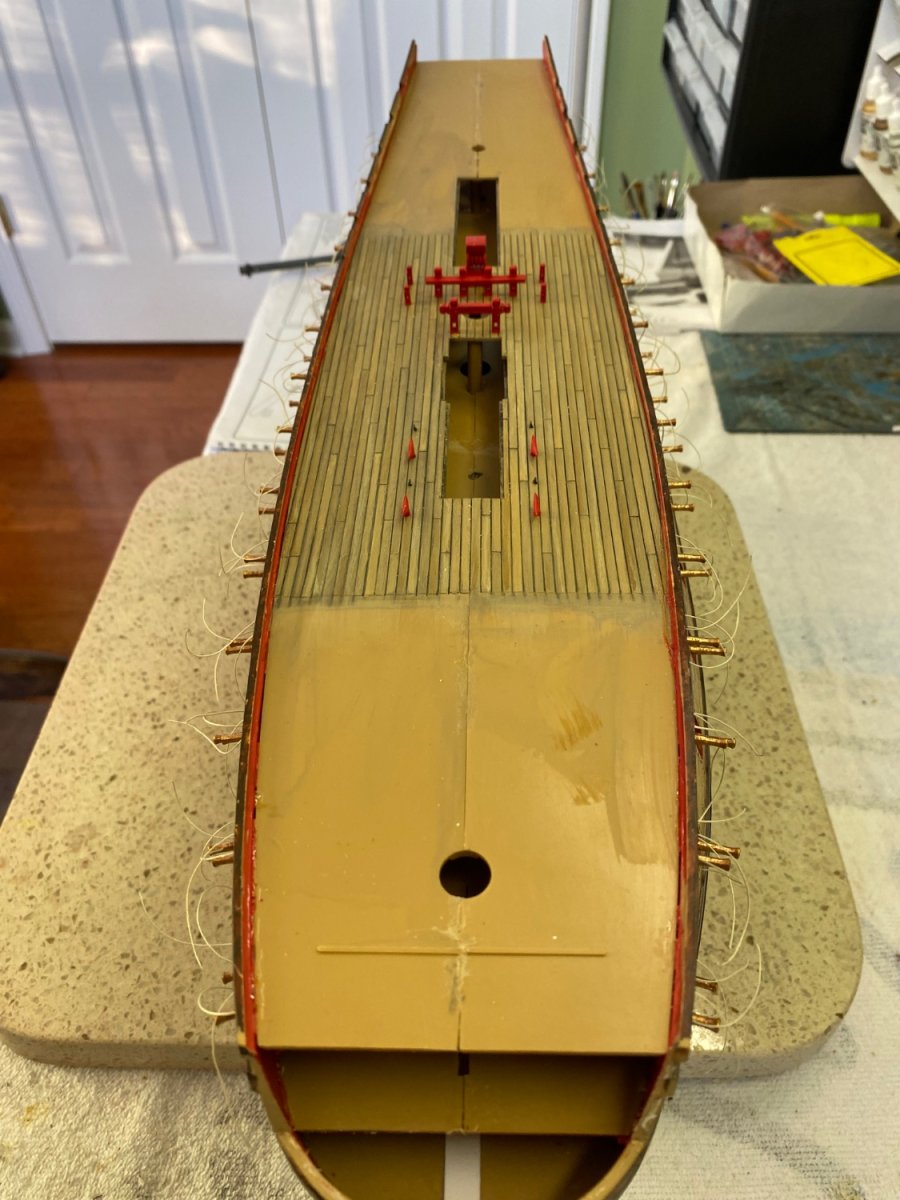
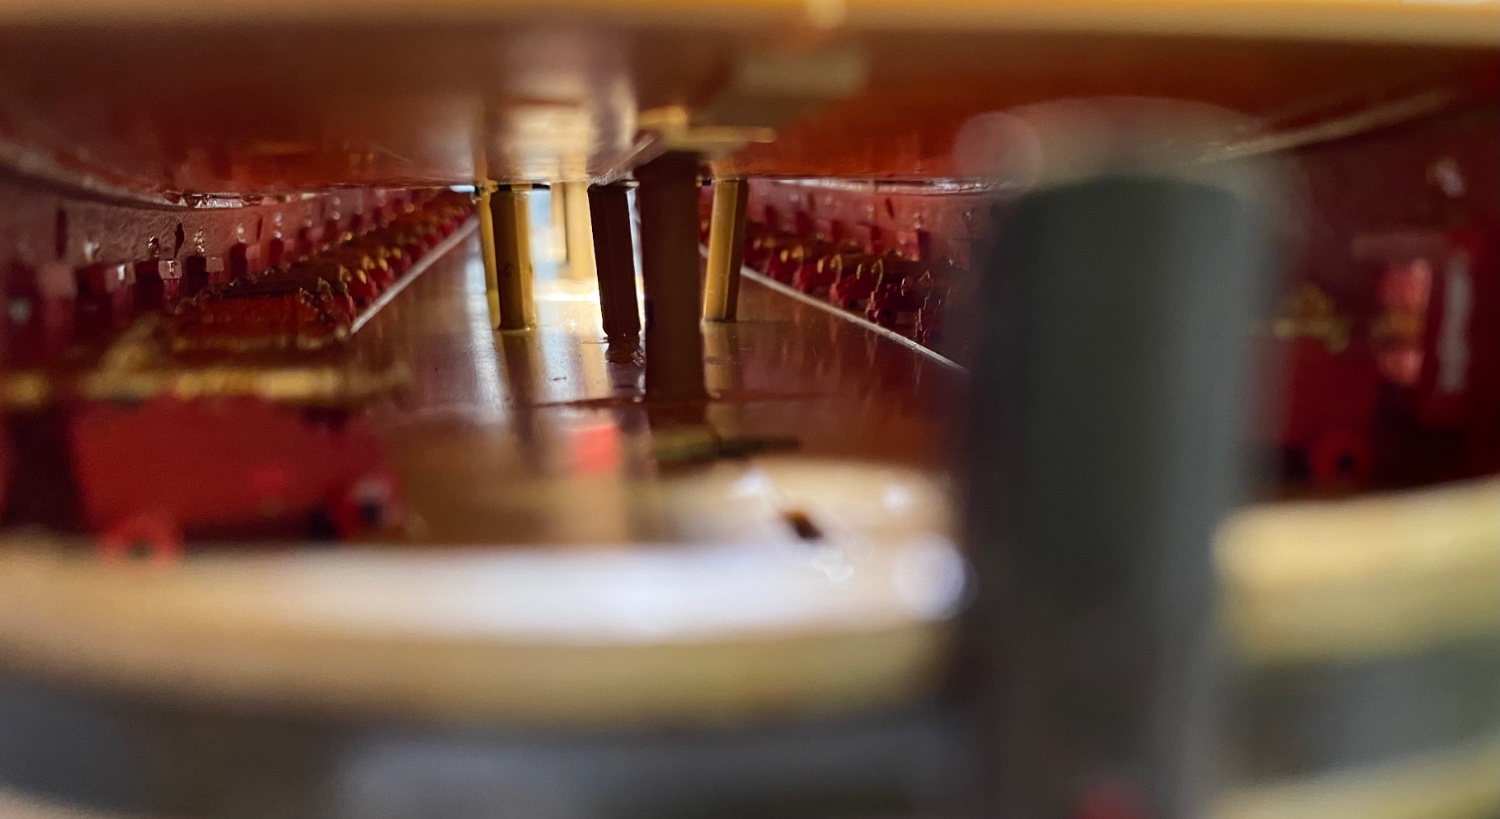
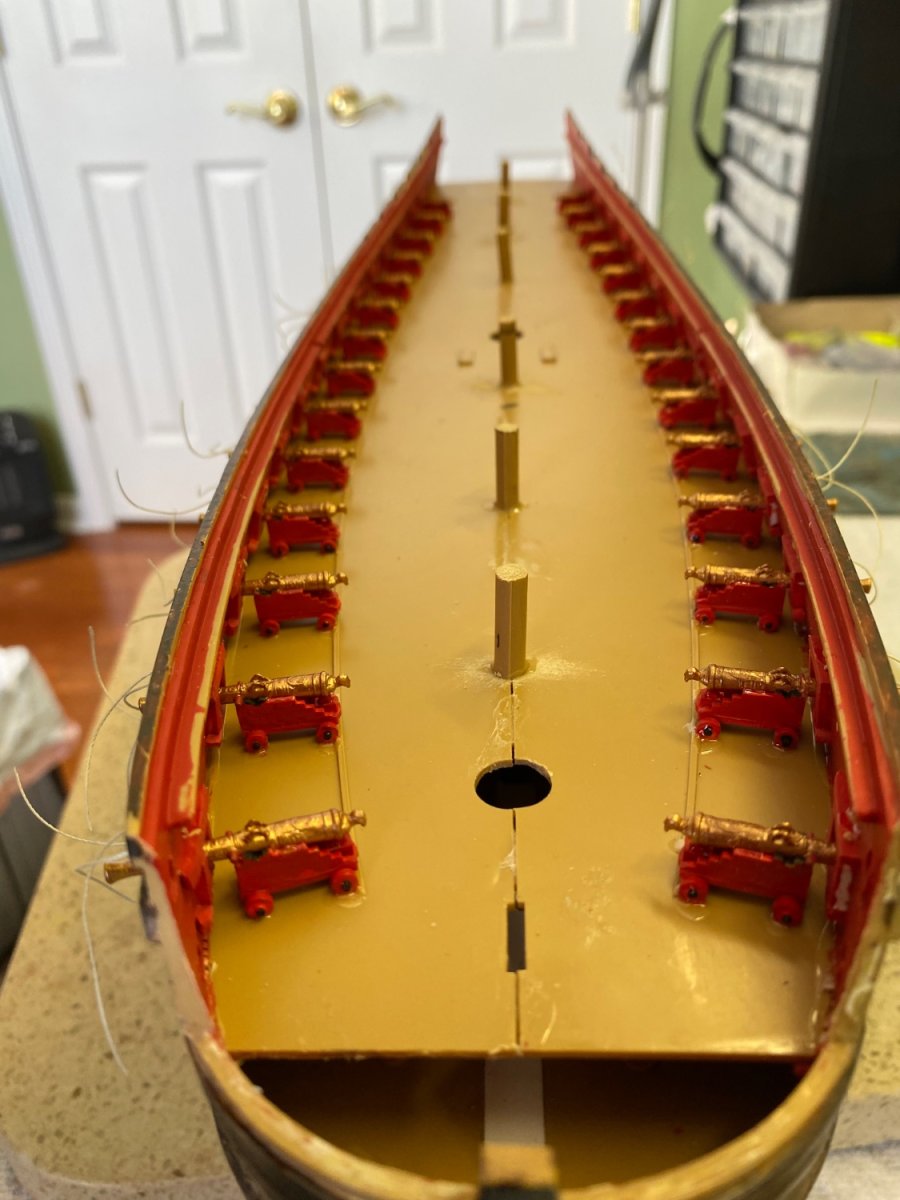
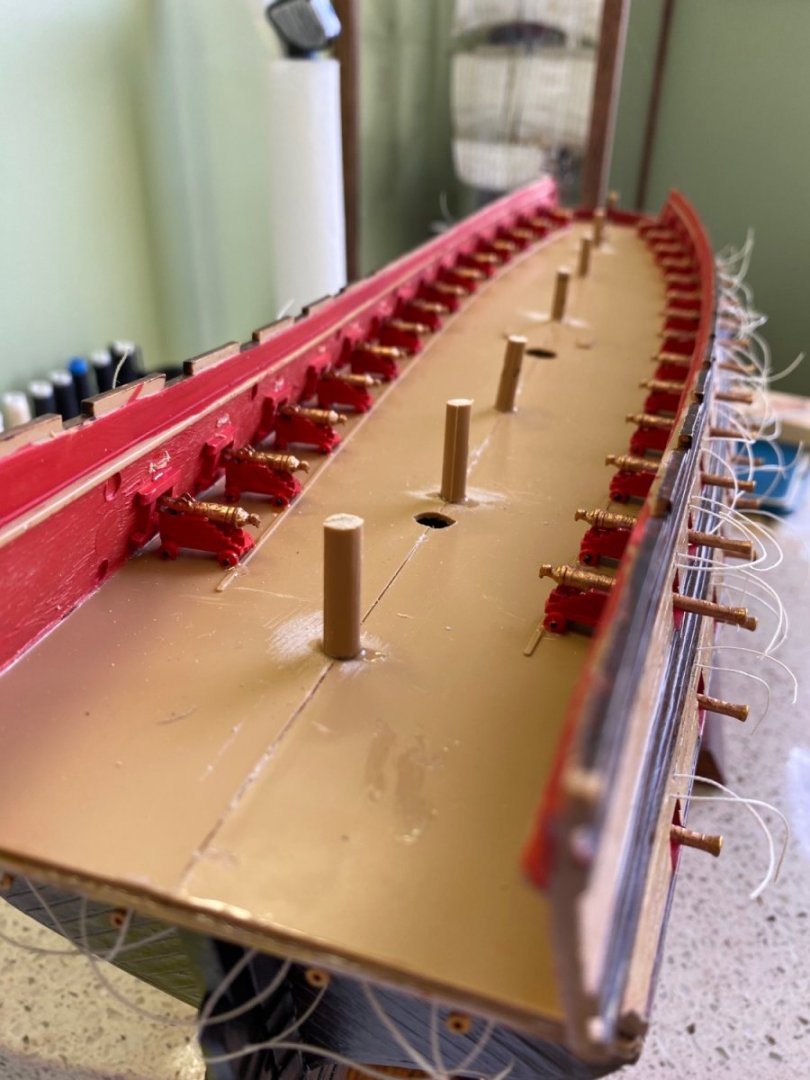
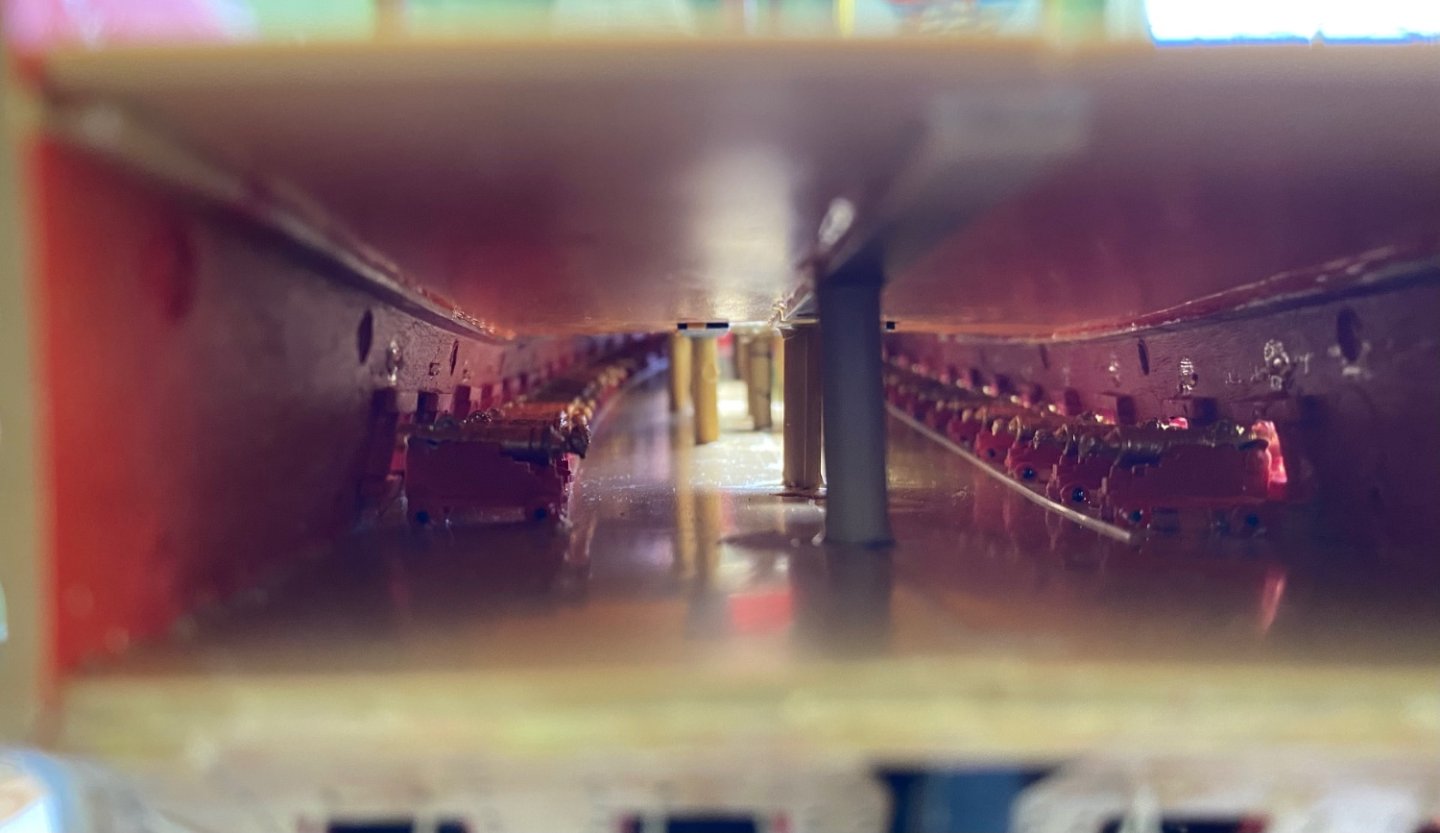
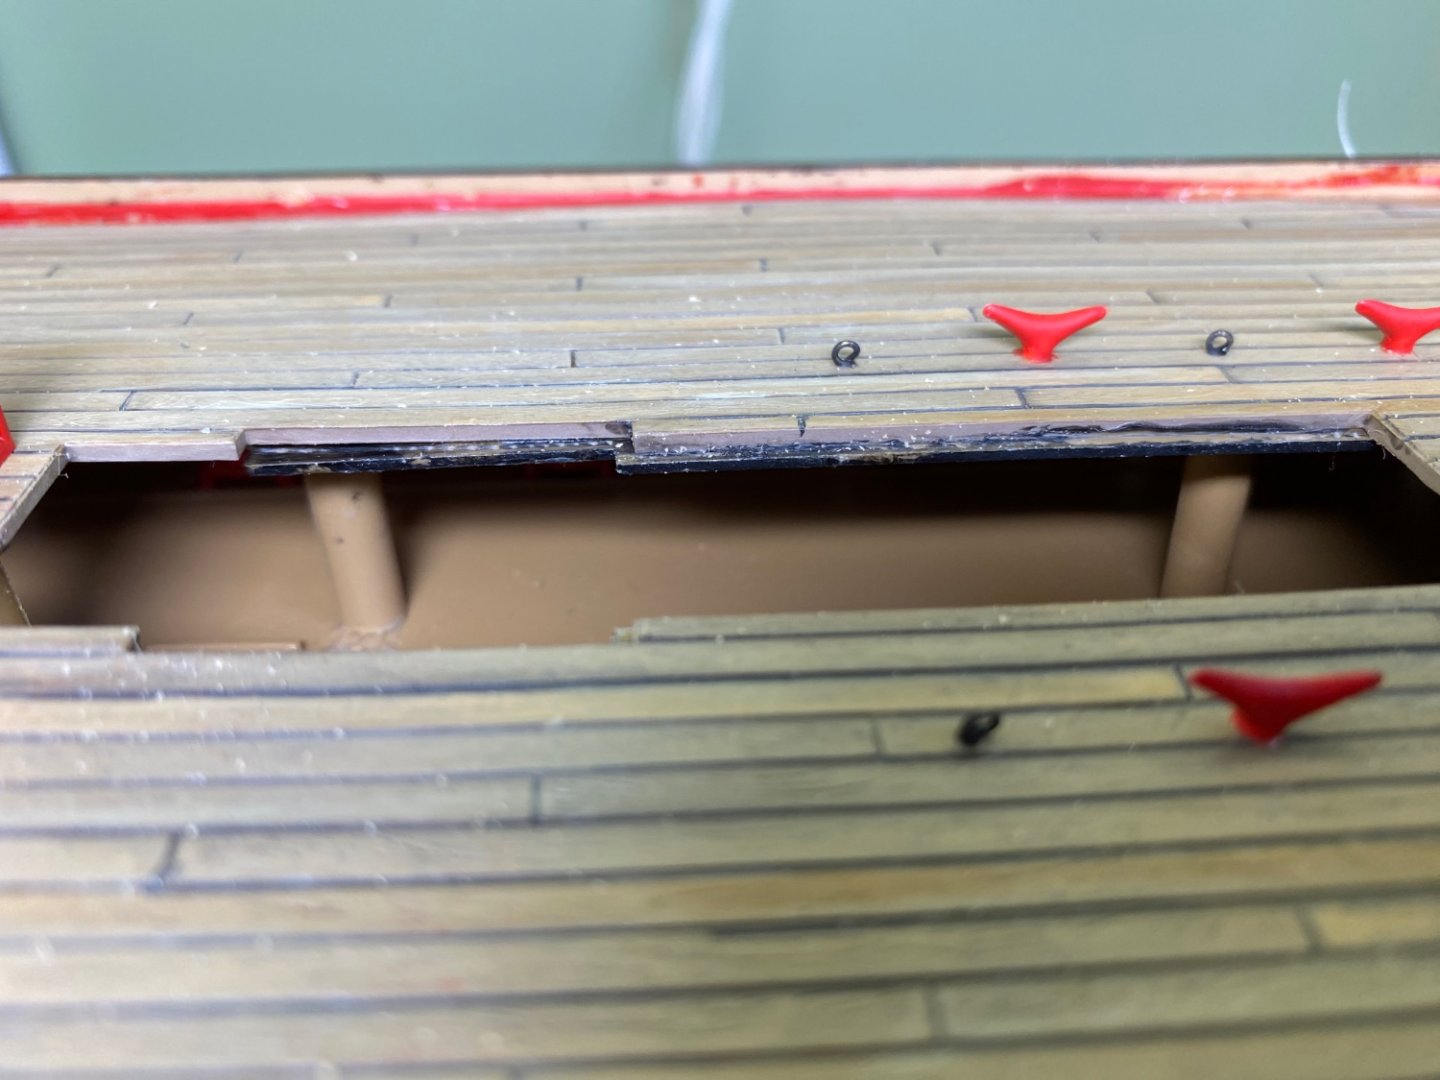
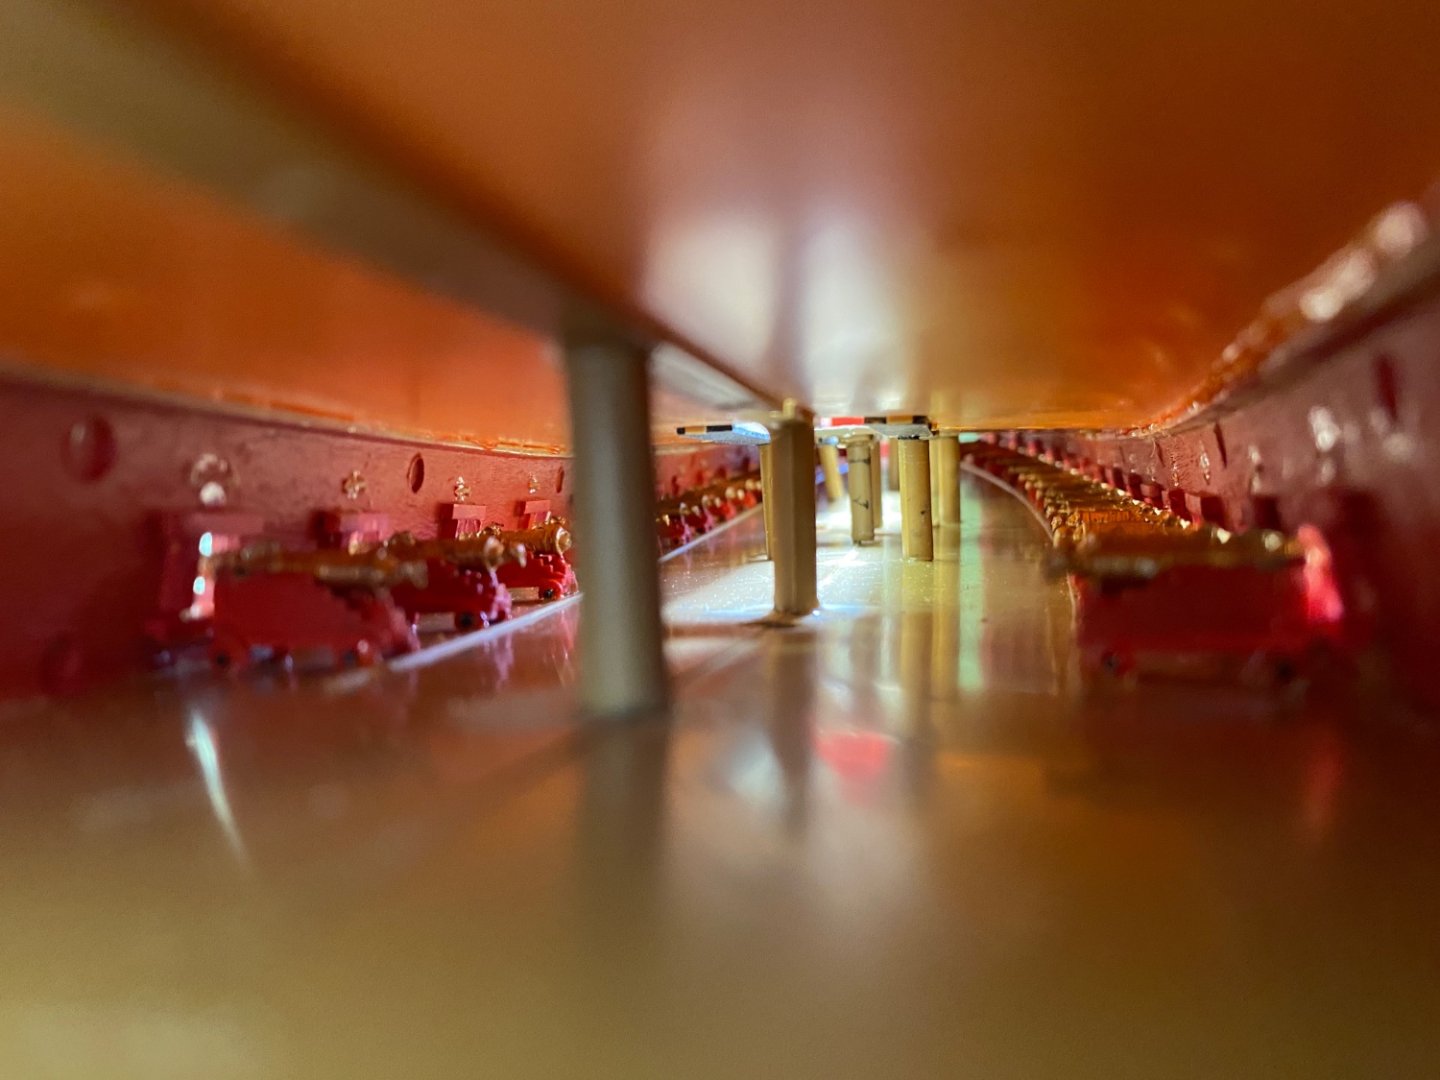
Top deck installed! Prior to installing the deck I added lanyards for the second gun deck cannon hatches to be used later. I read on a number of build blogs that since Heller did not provide stanchions to reinforce this deck it had a good bit of flex to it once installed. This would be obvious in places where strong rigging is attached to the deck. I decided to use scrap spruel to fashion stanchions similar to the ones between the bottom two decks. Once I installed the top deck I was still not satisfied with the amount of flex around the two large openings in the deck where I could not place stanchions for support. I then decided I would further the reinforcement by adding additional stanchions to the areas around the two openings. I carefully measured the needed height of each stanchion, applied glue to each end and positioned it under the deck at the openings. I did this working with a tweezer through the hatch. Looking from the stern end under the deck it looks like support posts holding up a roof, or deck. I am now venturing into the part I have looked so forward to since I saw the SR. That is painting and gold leafing the bulwarks, galleries, and stern! This will be a very slow labor of love!


- 1,508 replies
-
- 1
-
-
- Le Soleil Royal
- Heller
- (and 1 more)
-
So Marc did you cut the quarter gallery in half horizontally and reconfigure the bottom half to stand out further for the balcony and the top half close to the bulwark?
-
Which is the quarter galleries closed. Right?
-
Thanks Marc. That seems to make the most since. Looking at your build, along with Henry’s, and a few others I know I am going to be doing a lot of bashing around the bow area to include filling in the area between the two cheeks and making head rail timbers. I think I will just leave the two forward hatches closed. On a side note Marc, what is your position on the side galleries being opened up? After reading several build logs that was my plan. Since then I have read others, including one my Daniel (Dafi) that argues the side galleries were fully enclosed as Heller has molded them. I am reading through you extensive blog but have yet to come across what you did. I like the look of them opened up and additional flooring added, but I just wonder what is most accurate.
-
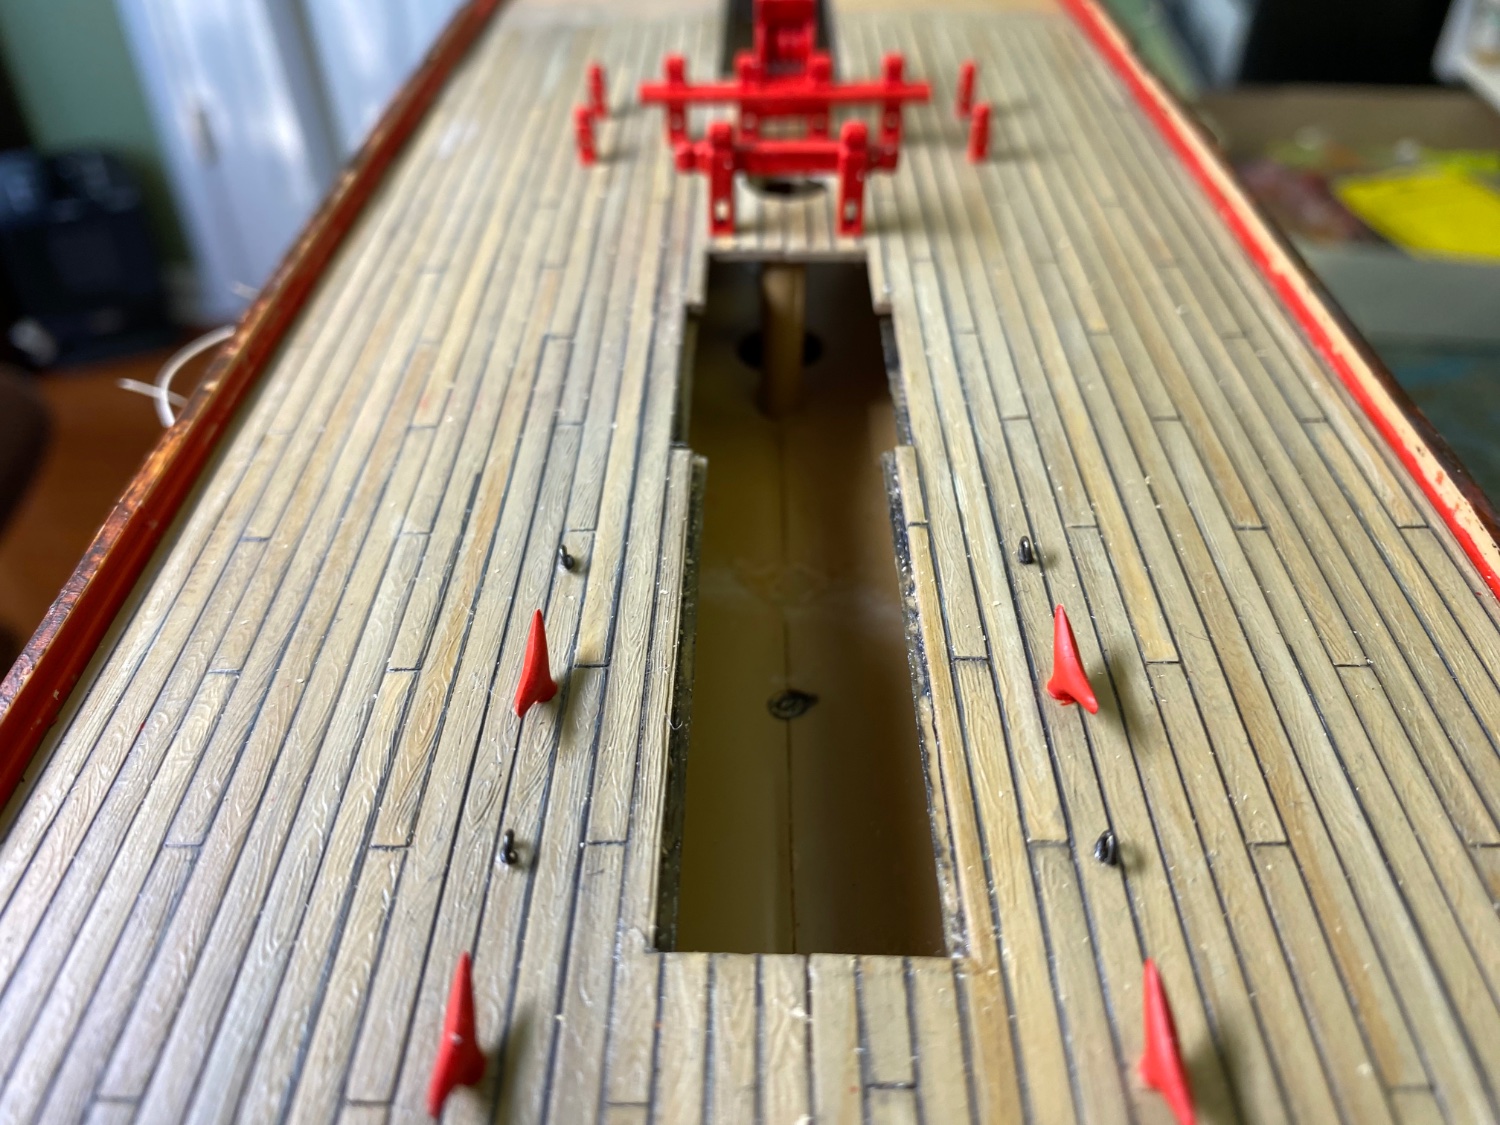
Marc what is he preferred practice to n modeling? Maybe just close these two hatches? Seems like if I put them in now before adding the next deck they are surly going to get knocked loose! Maybe I should just make fake carriages there that I could later just insert the barrel into the hatch.
-
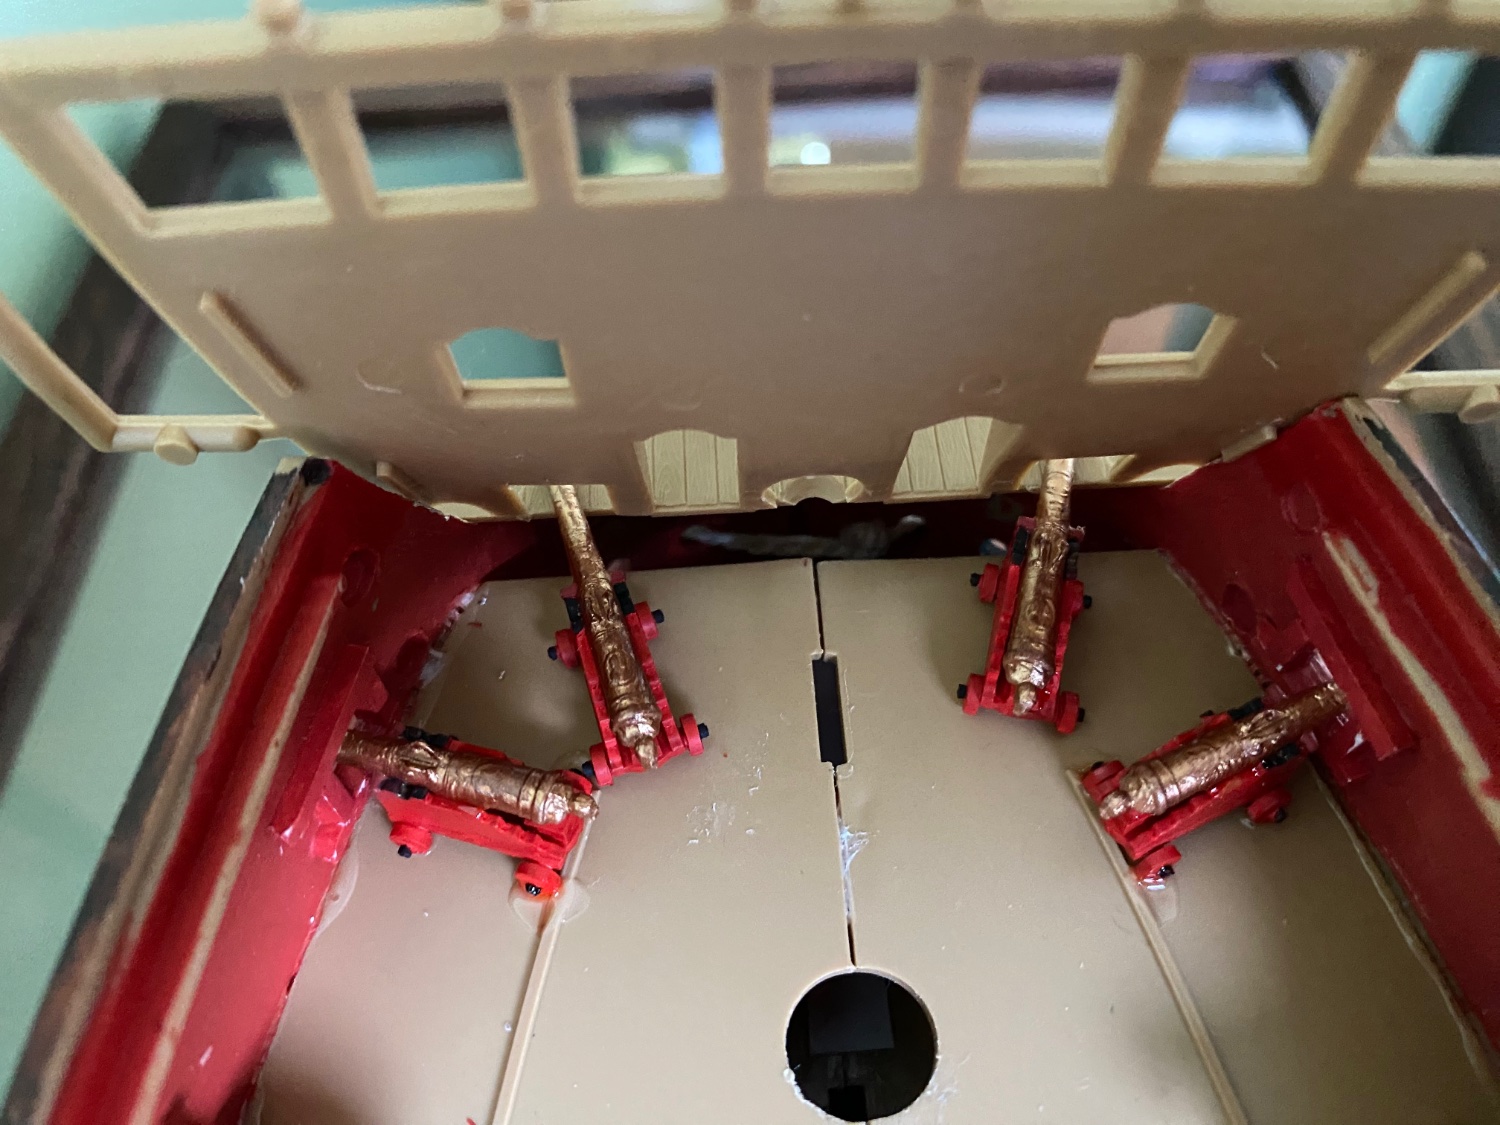
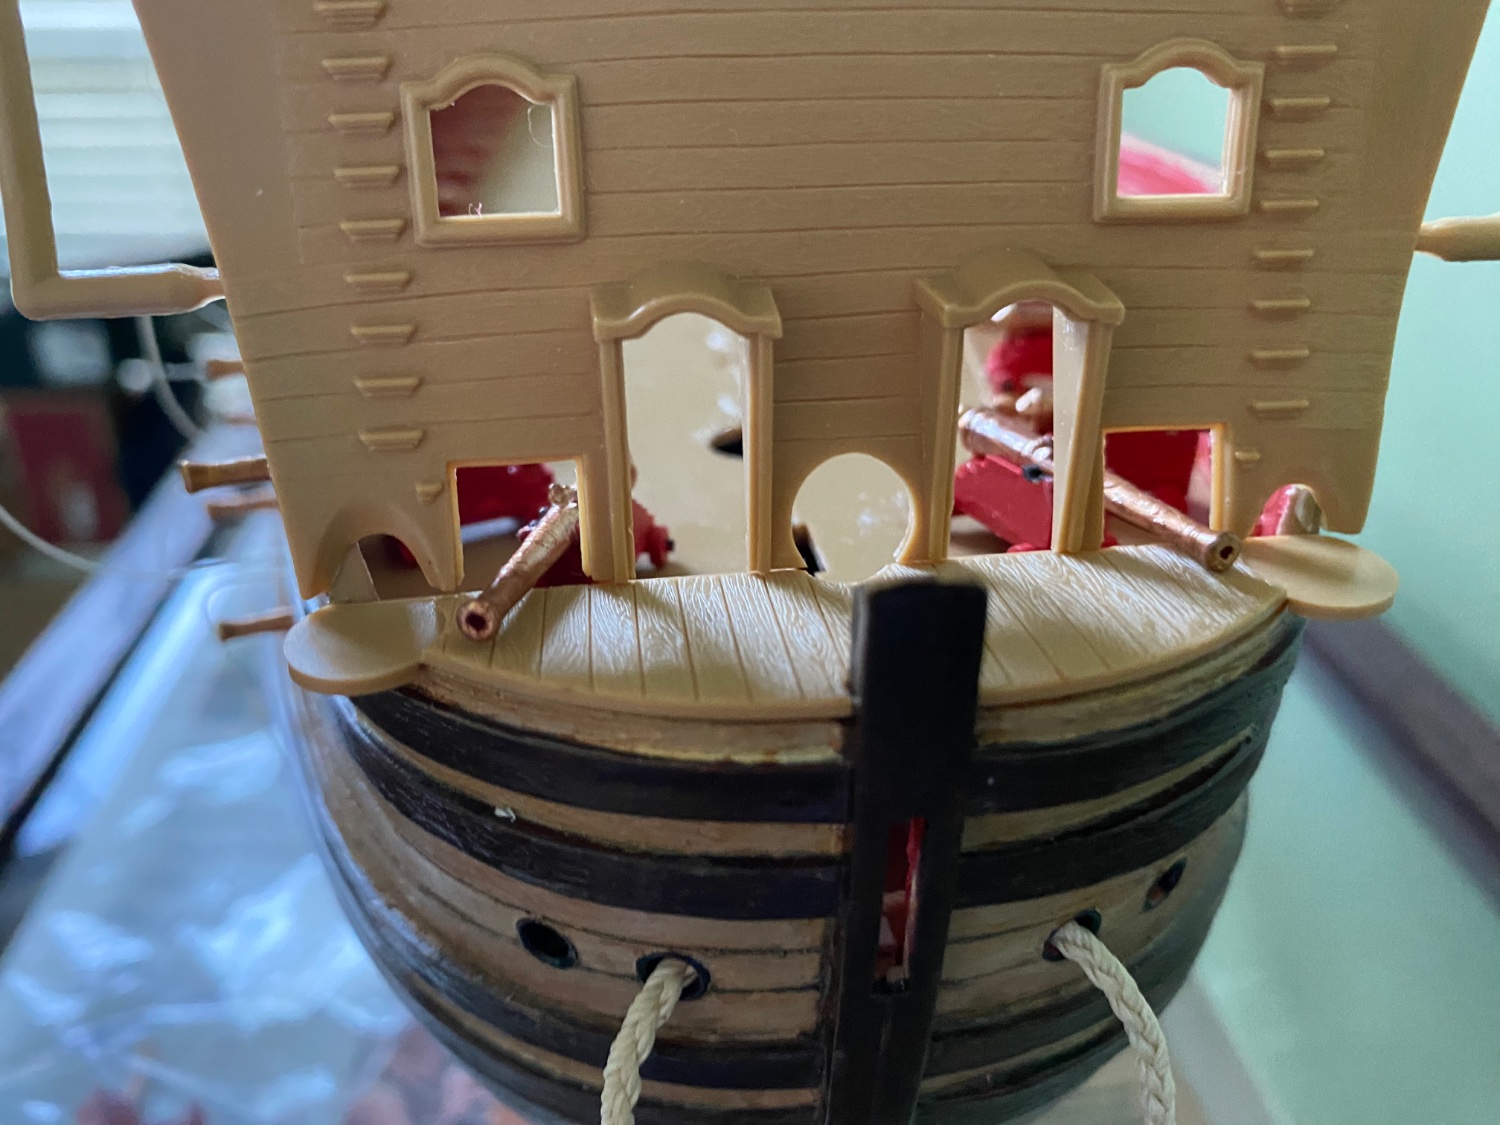
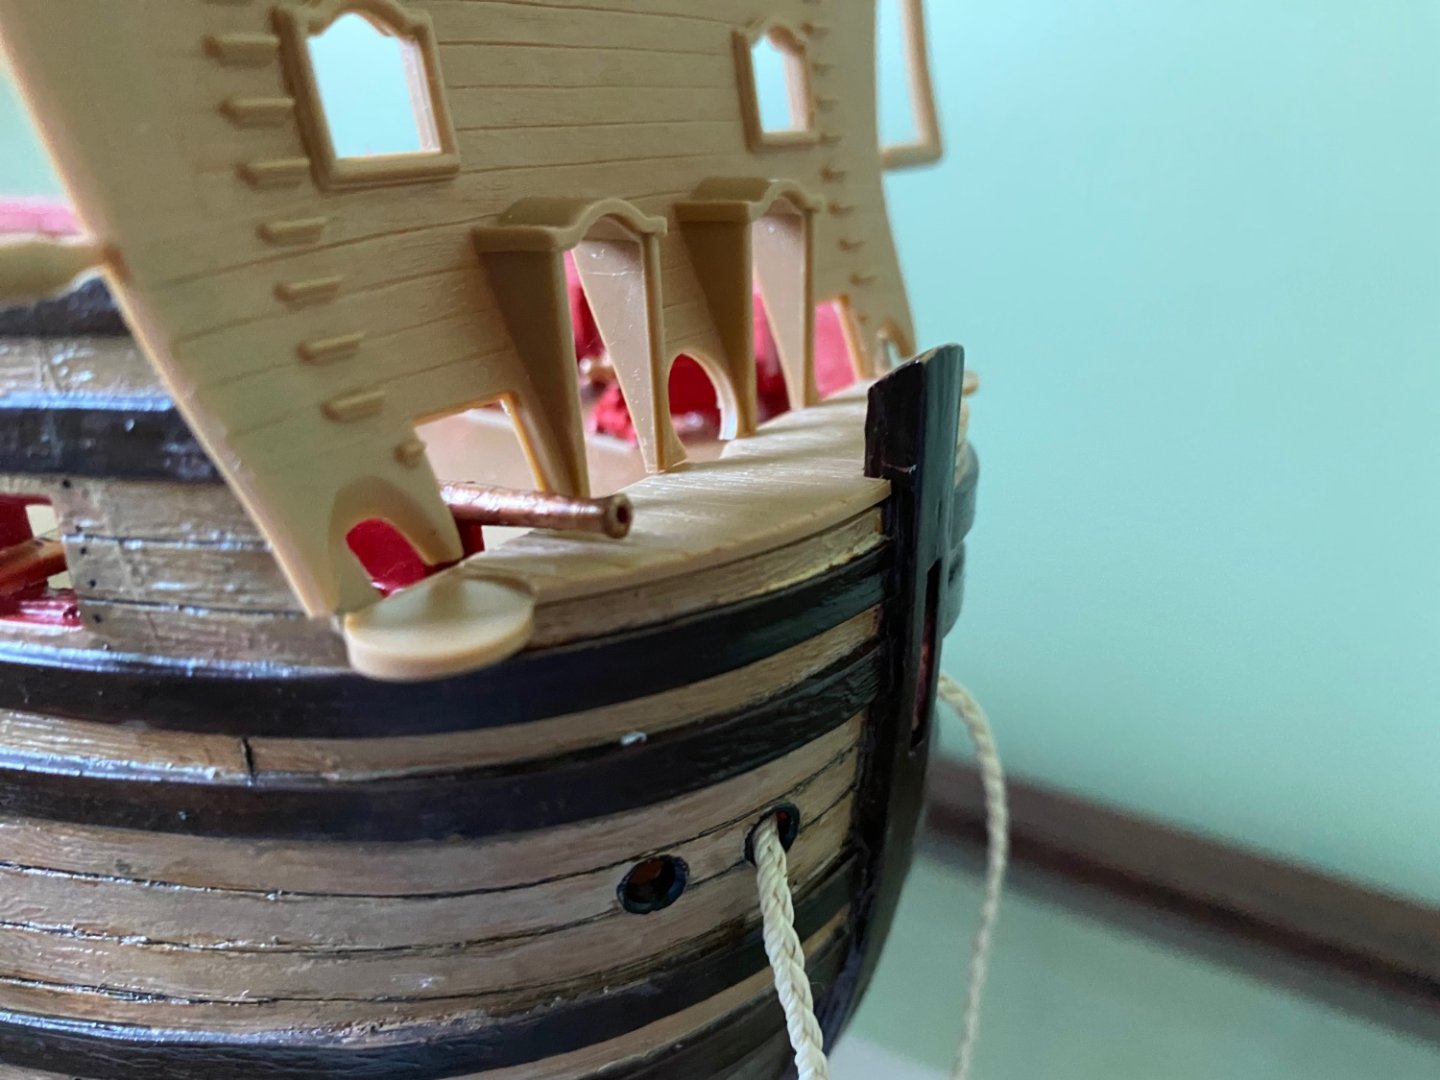
Ok so I found the beakhead bulkhead and just set it in place so I could position the he two forward cannons. Is this how it is supposed to look? I am not sure it is. The barrel almost lays on the deck outside the hatch and seems as if when fired would tear up all kinds of forward construction and rigging. Also seems that the recoil inside the gun deck would be dangerously close to the most forward side cannon.


-
Thanks Gentlemen. I will check that out. Will need to did through the parts to find the beakhead bulkhead to help position the two cannons.
-
Ian there may be. If there was would it be on this deck or higher?