HOLIDAY DONATION DRIVE - SUPPORT MSW - DO YOUR PART TO KEEP THIS GREAT FORUM GOING!
×


Bill97
-
Posts
2,704 -
Joined
-
Last visited
Content Type
Profiles
Forums
Gallery
Events
Everything posted by Bill97
-
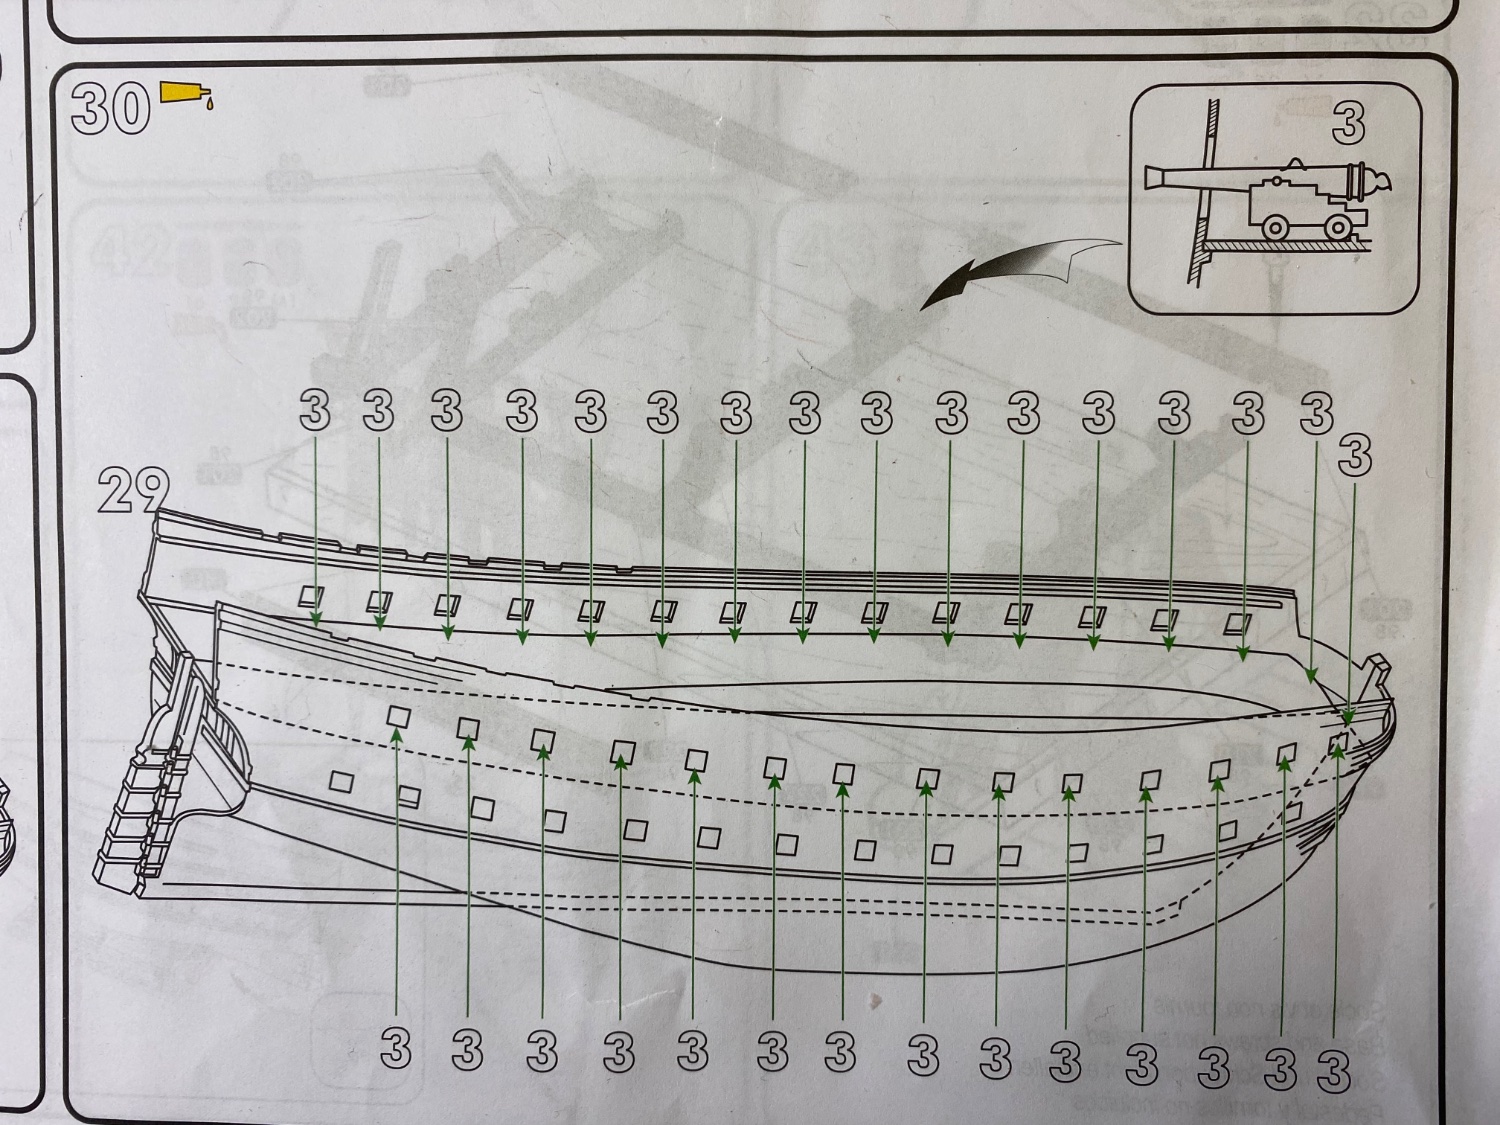
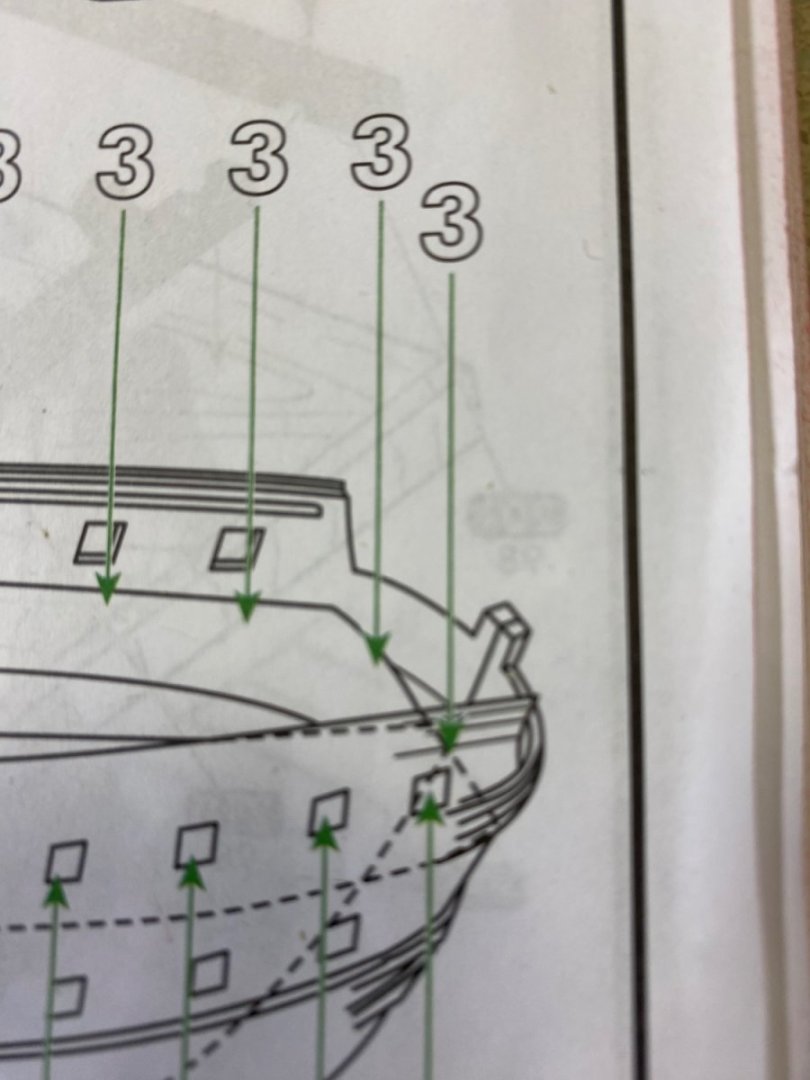
One question about the second gun deck. The instructions show two #3 guns at the bow where no hatches exist. Is this showing two #3 guns that will be in that position on the main deck or do I glue them on the second gun deck? Head scratcher.

-
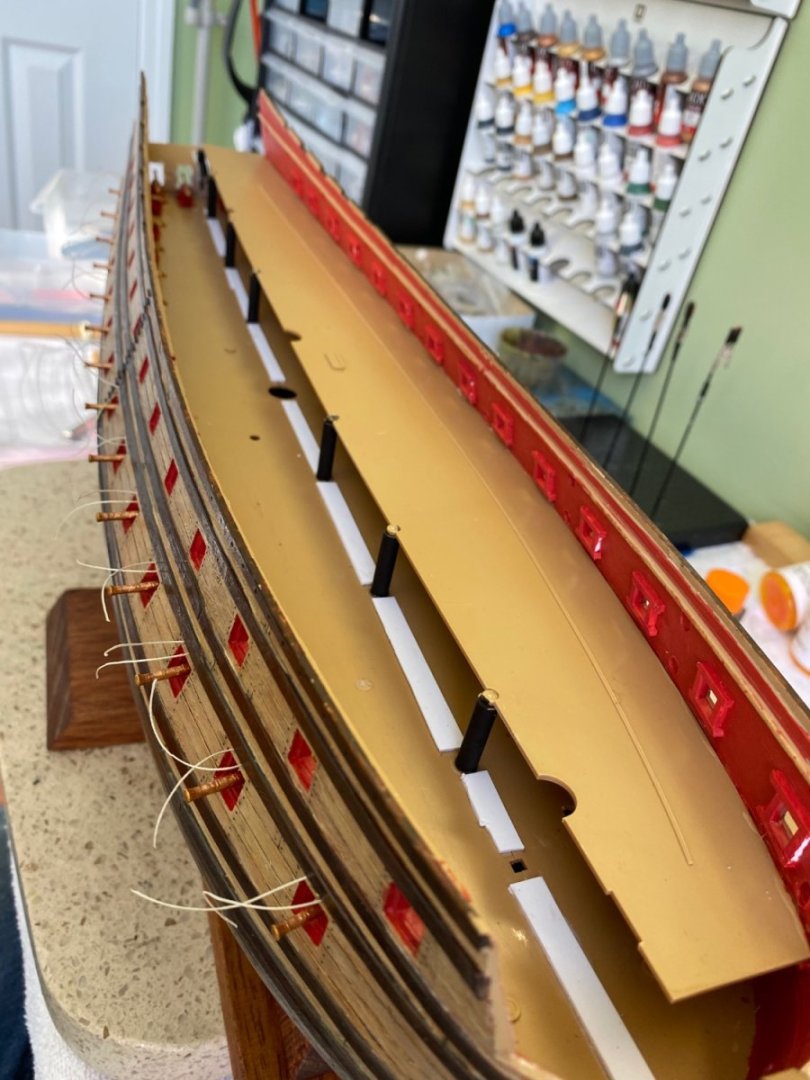
And then the second gun deck. After I drill the holes and add the thread for the hatch lanyards I will have completed the foundation of this beautiful ship. From here on will be the more artistic bashing and artistic interpretation.


- 1,508 replies
-
- 2
-

-
- Le Soleil Royal
- Heller
- (and 1 more)
-
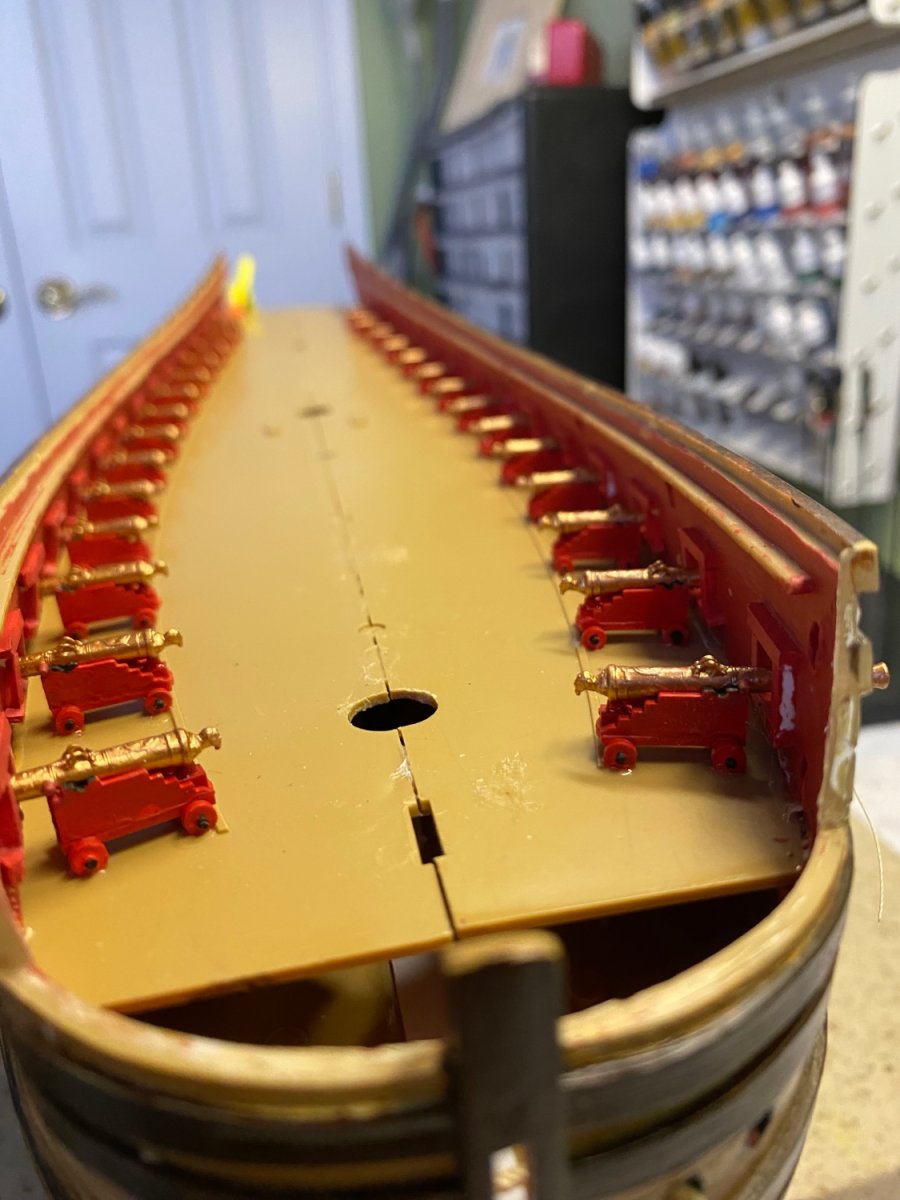
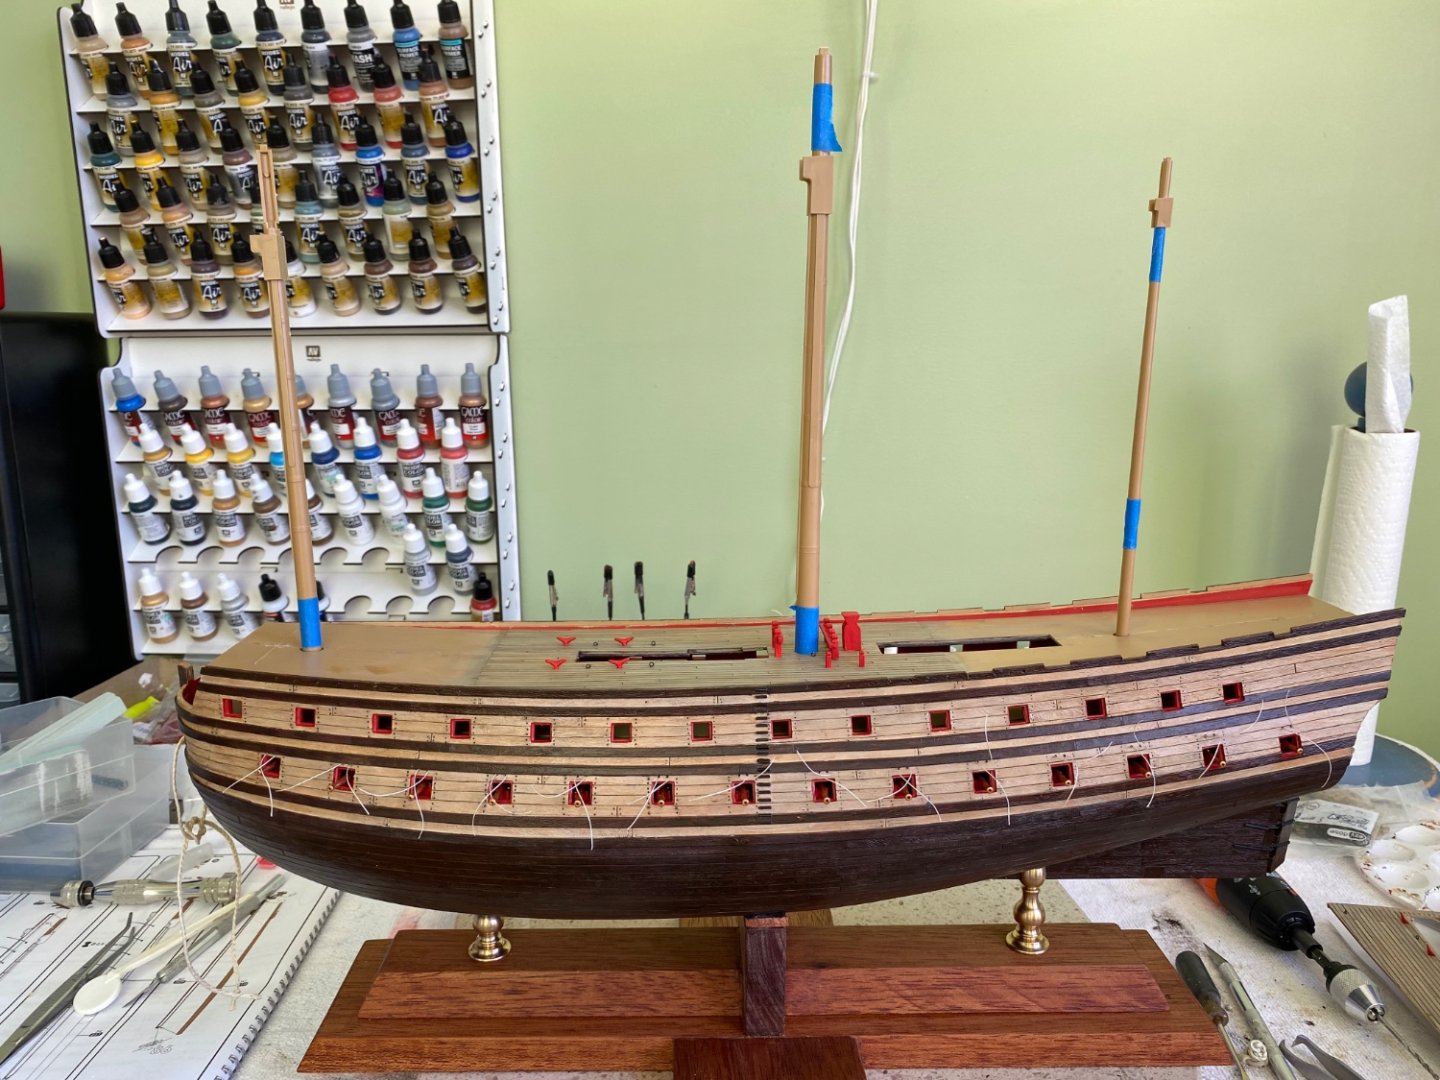
Put in the second gun deck today. To make sure the three decks lined up for the future installation of the mast I taped the lower mast sections together and used them to test the alignment of the second deck I just installed and I also laid the top deck in place to further check the alignment. All seems OK. I assumed me the mizzenmast will have a bit of a rake toward the stern, just as the Victory has. One little oh “darn” I ran into when I was dry fitting the mast. A little bit back I added Evergreen to the seam in the bottom deck to strengthen it as you guys recommended. When I dried fitted the fore and mizzenmast after gluing in the next deck I determined the evergreen was just a bit too close to the square hole the bottom of the mast sets in. The Evergreen slightly obstructed a solid seat of the mast bottom. I had to use some ingenuity to trim off a little of the Evergreen while only being able to access the space through the mast hole in the deck above. But I eventually got it, and it he mast bottom seat perfectly.
- 1,508 replies
-
- 1
-
-
- Le Soleil Royal
- Heller
- (and 1 more)
-
Henry please let me know how the model show goes. Do you know if pictures, or anything else, will be available on line?
-
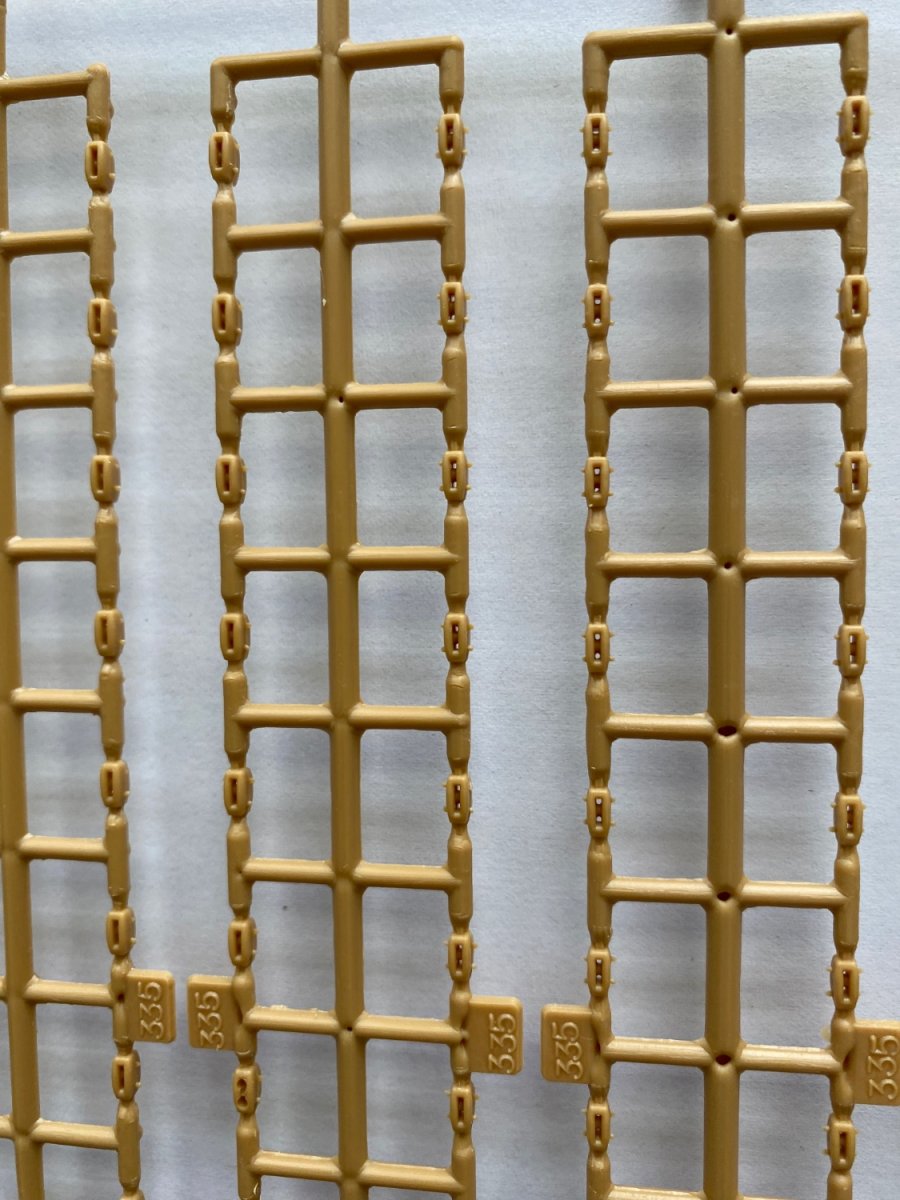
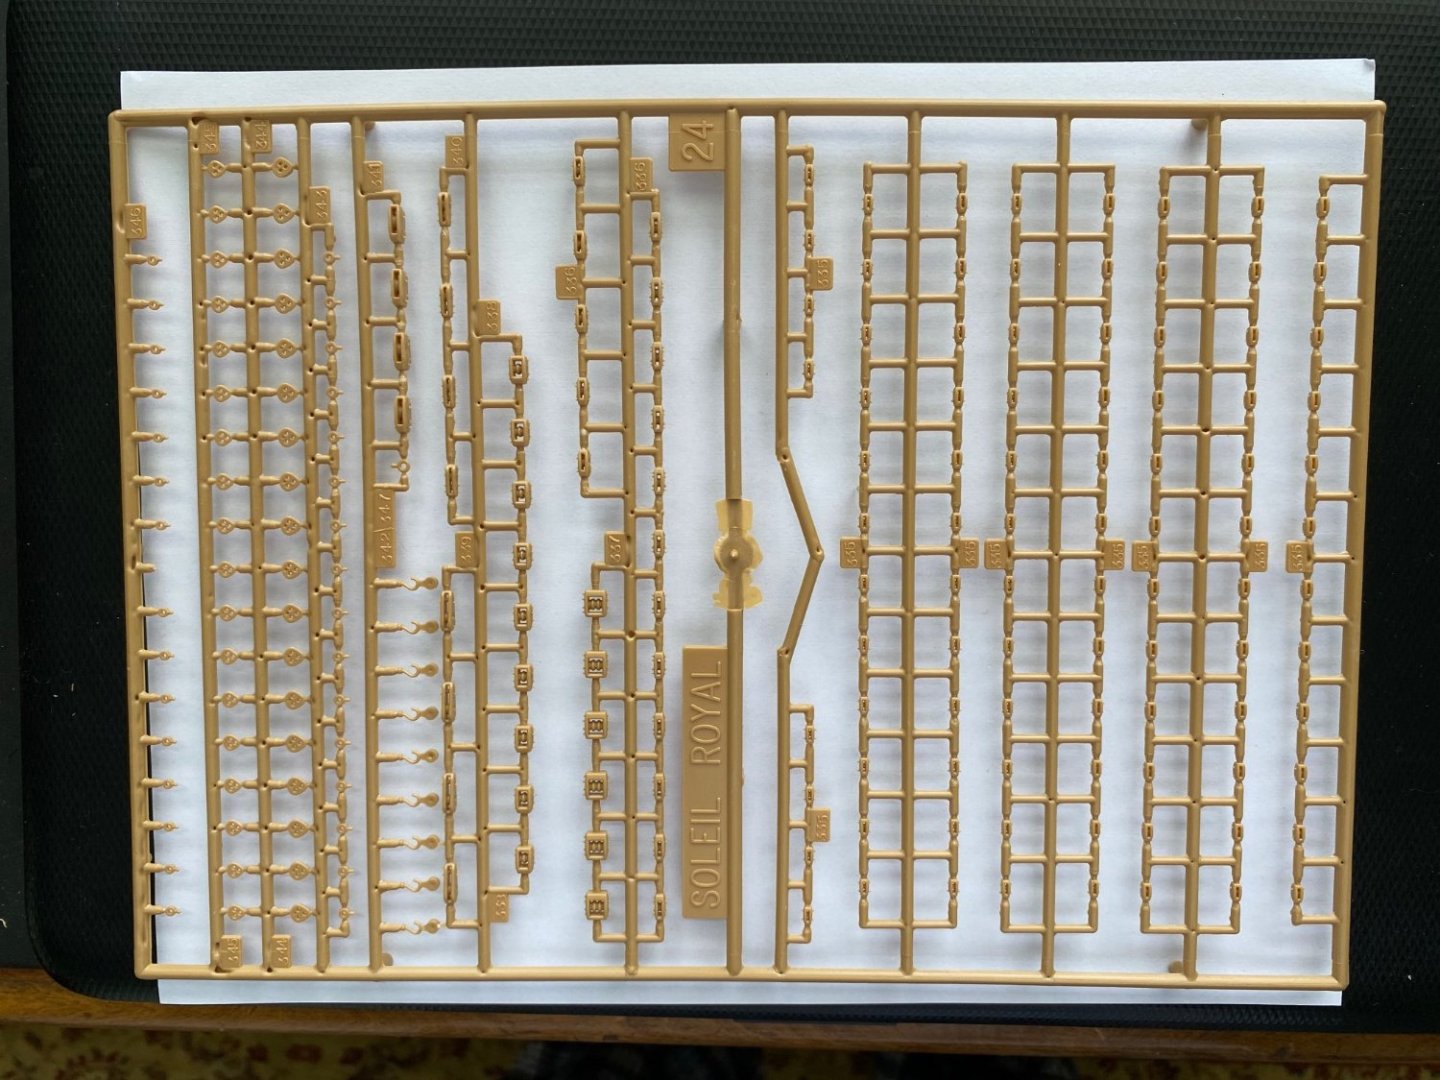
That is an interesting thought about the nubbies. For the Heller blocks I used on the Victory I did clip them off and file a groove. Thankfully I got some blocks from Kevin that he had 3D printed with a groove. The other issue with the Heller blocks is painting them to look authentic! Even if painted while still mounted in the spruel the job is tedious. You can airbrush a base color but still have to hit a couple weathering colors on each by tiny brush. I have ordered all new wood blocks and deadeyes for my future use. Will use my supply of resin blocks for backup if I run short on a particular size. Not sure what to do with these 4 spruels of blocks in the Heller kit. Hate to toss them in the trash.
-
Henry I am really finding your blog so helpful in my build. I read through parts of it often and find you out ideas clear and easy to understand. So very helpful. Great job my friend.
-
Thanks my friend. I will consider it. I really enjoy when we all seem to be on MSW at the same time. Kind of cool.
-
Ian I am reading through your Heller Preussen build now.
- 1,508 replies
-
- 1
-
-
- Le Soleil Royal
- Heller
- (and 1 more)
-
What’s that Ian? Heller Preussen? Is that a kit I need to look at for maybe starting in 2025? 😀
- 1,508 replies
-
- 1
-
-
- Le Soleil Royal
- Heller
- (and 1 more)
-
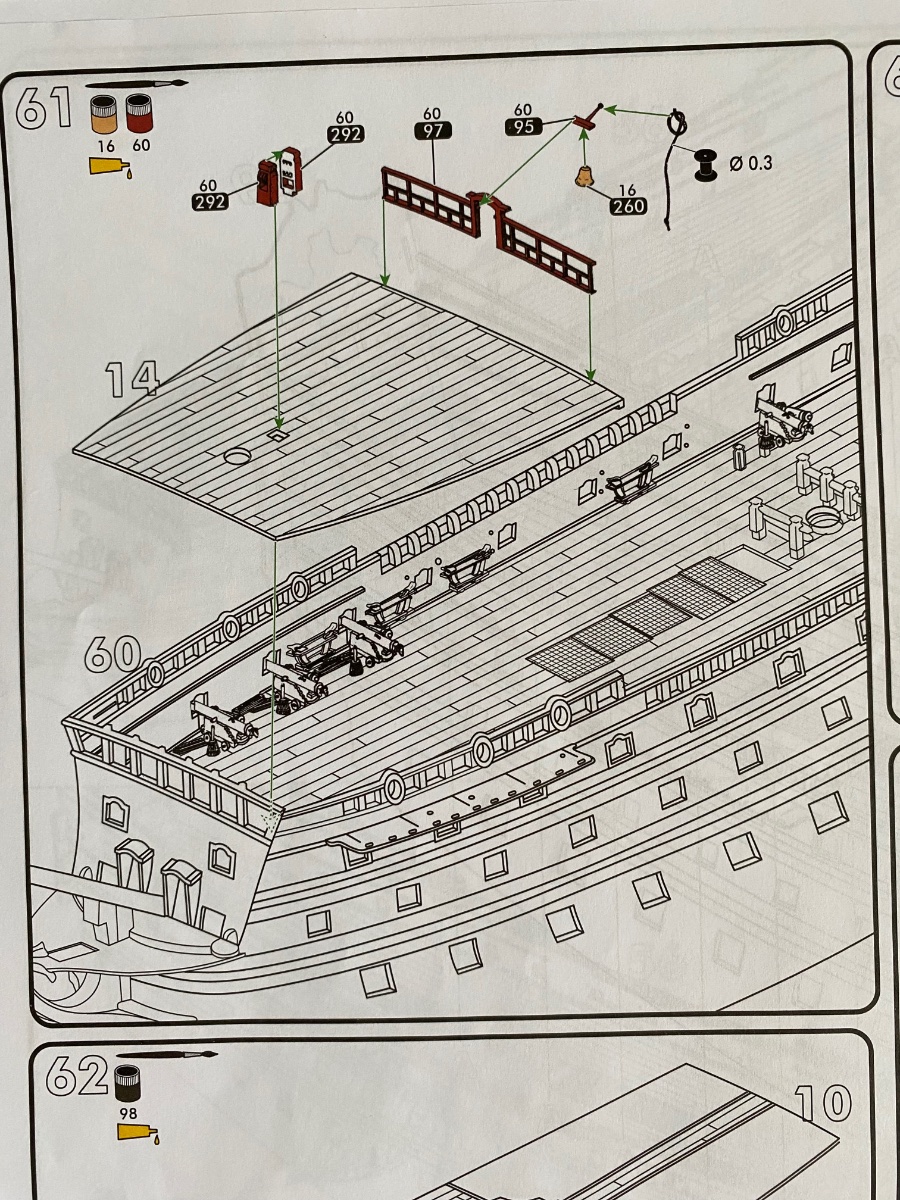
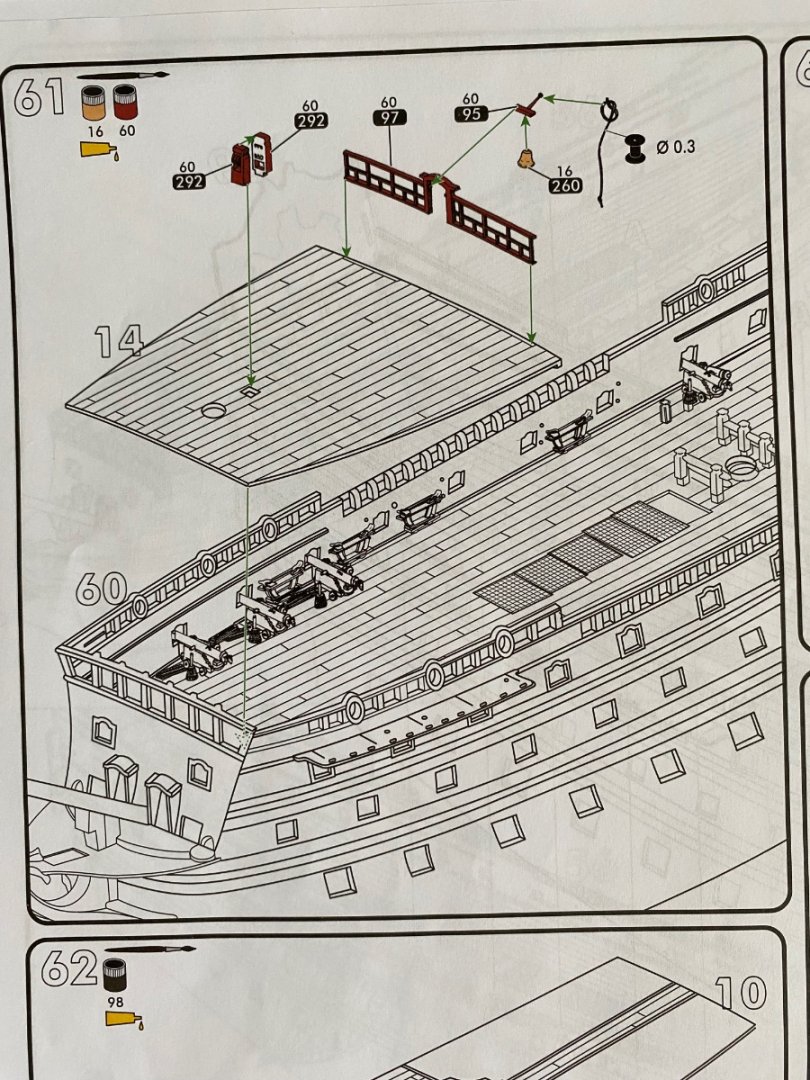
Whew! Thank you for stopping me before I screwed up. It does not appear I have even installed that yet. That comes long time from now at step #61.
- 1,508 replies
-
- 1
-
-
- Le Soleil Royal
- Heller
- (and 1 more)
-
Thanks Kevin. I really appreciate that. Gotta study this bash Henry recommends. I got that part in solid and looking great with the paint on and around it. It is the big knight head that is pinched between the two deck halves. Yuck!!!
-
Oh that’s right Henry. I remember reading about that in your build. Will look back at it. I already have it glued in place but maybe I can move it with out to much damage I can’t fix.
- 1,508 replies
-
- 1
-
-
- Le Soleil Royal
- Heller
- (and 1 more)
-
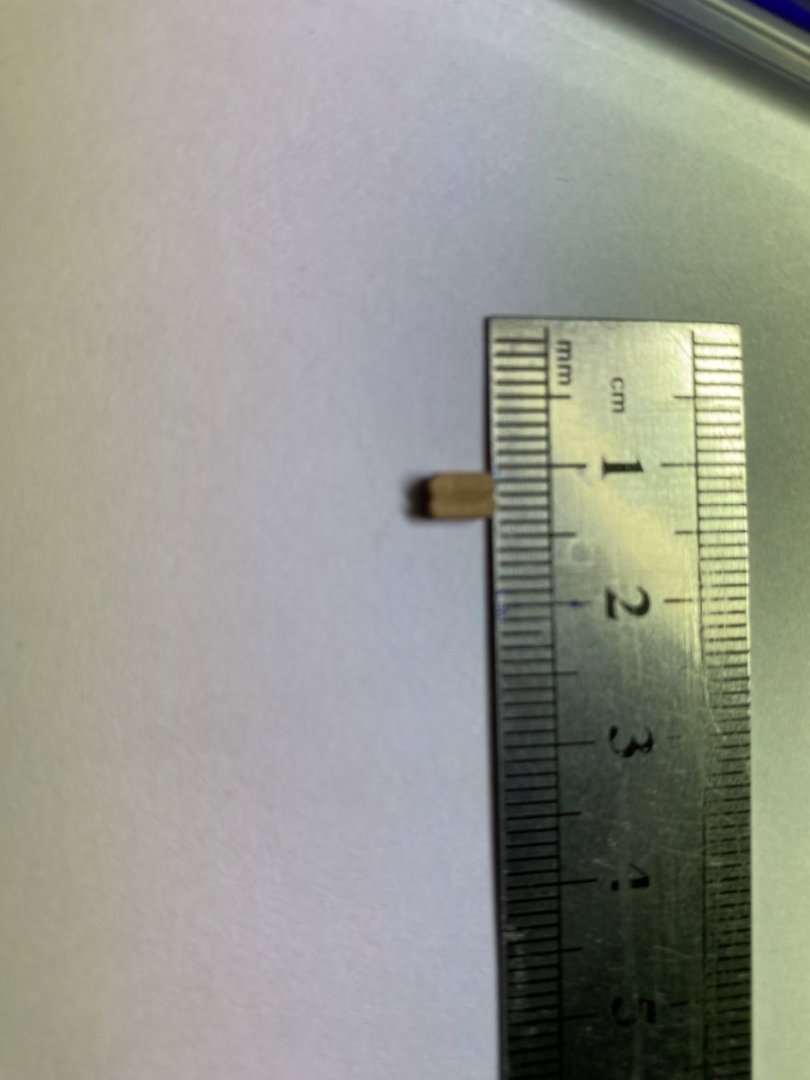
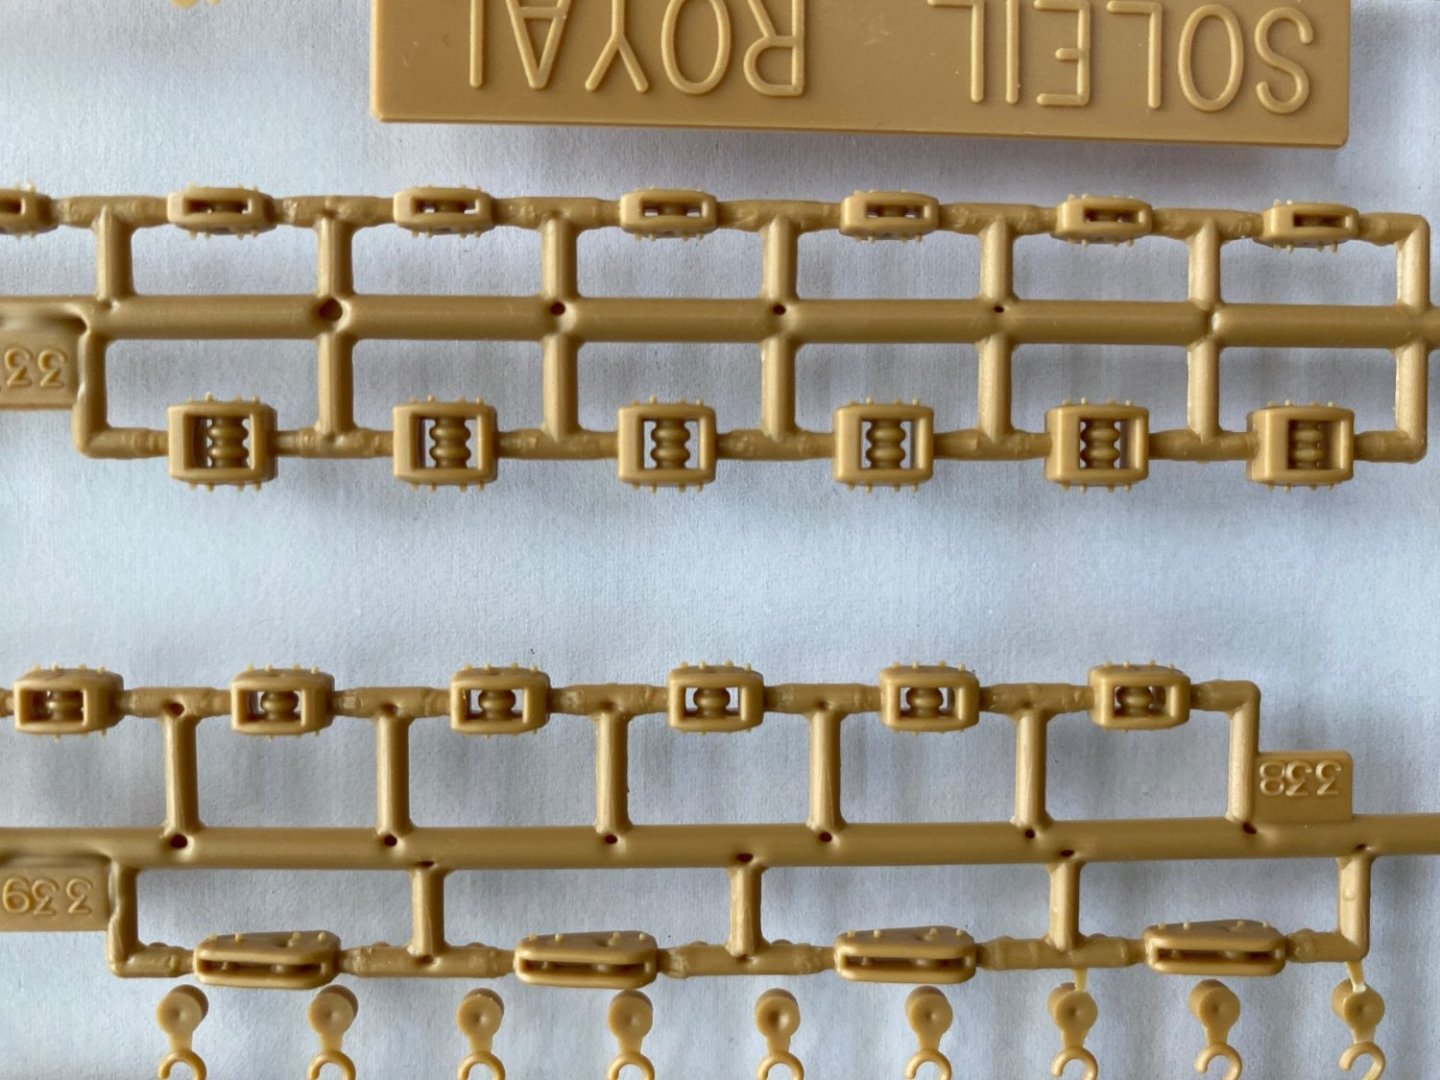
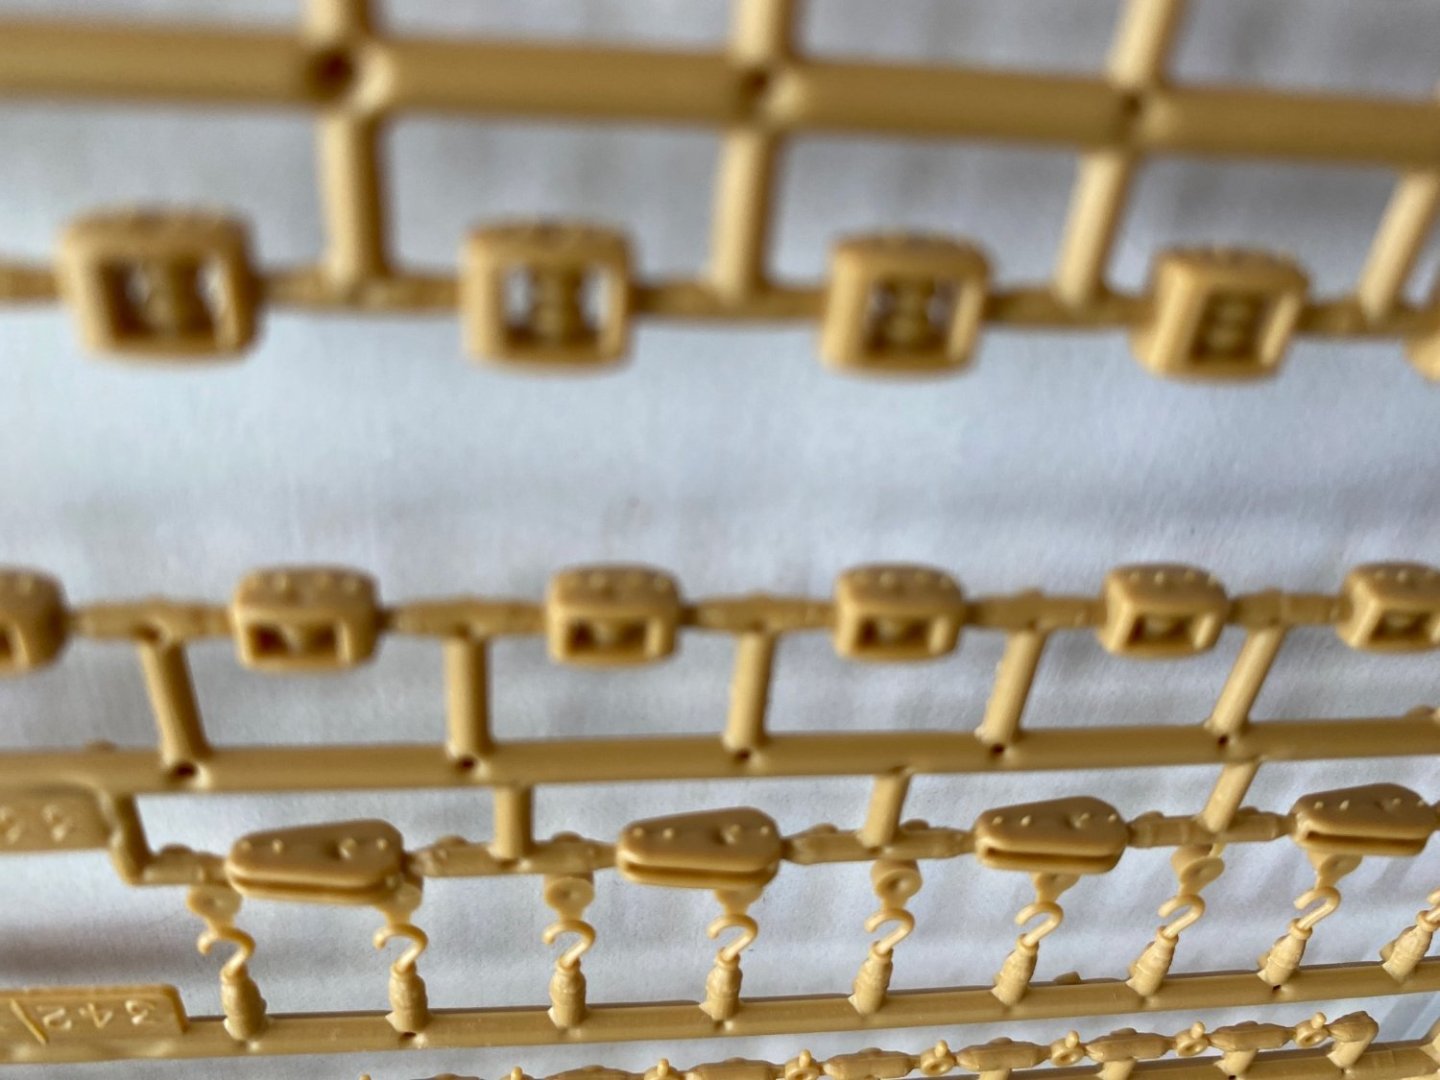
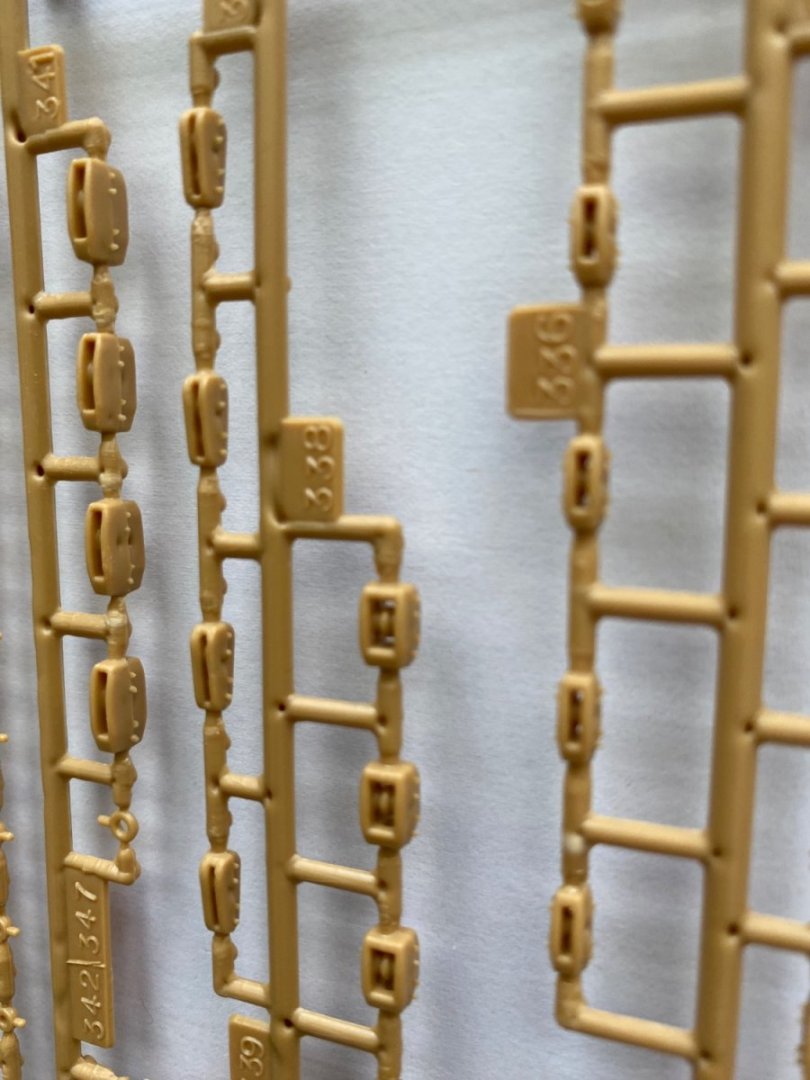
I am making out my Christmas list for the family. This year it will include my future needed wooden blocks and deadeyes for the SR. It will be a long time before I need them but might as well get them in my stash as a gift. Mikael says 5, 4, 3.5, and 2.5mm deadeyes will cover what I will need. I am attempting to measure and match the size, count, and types (sheave count) of the molded Heller blocks to see what to put on my list. What I think I am measuring is 3mm single sheave, 5mm single, double, and triple sheave, 7mm single sheave, and 8mm and 6mm pear shape blocks. 3mm single sheave is the vast majority at almost 400.
- 1,508 replies
-
- 1
-
-
- Le Soleil Royal
- Heller
- (and 1 more)
-
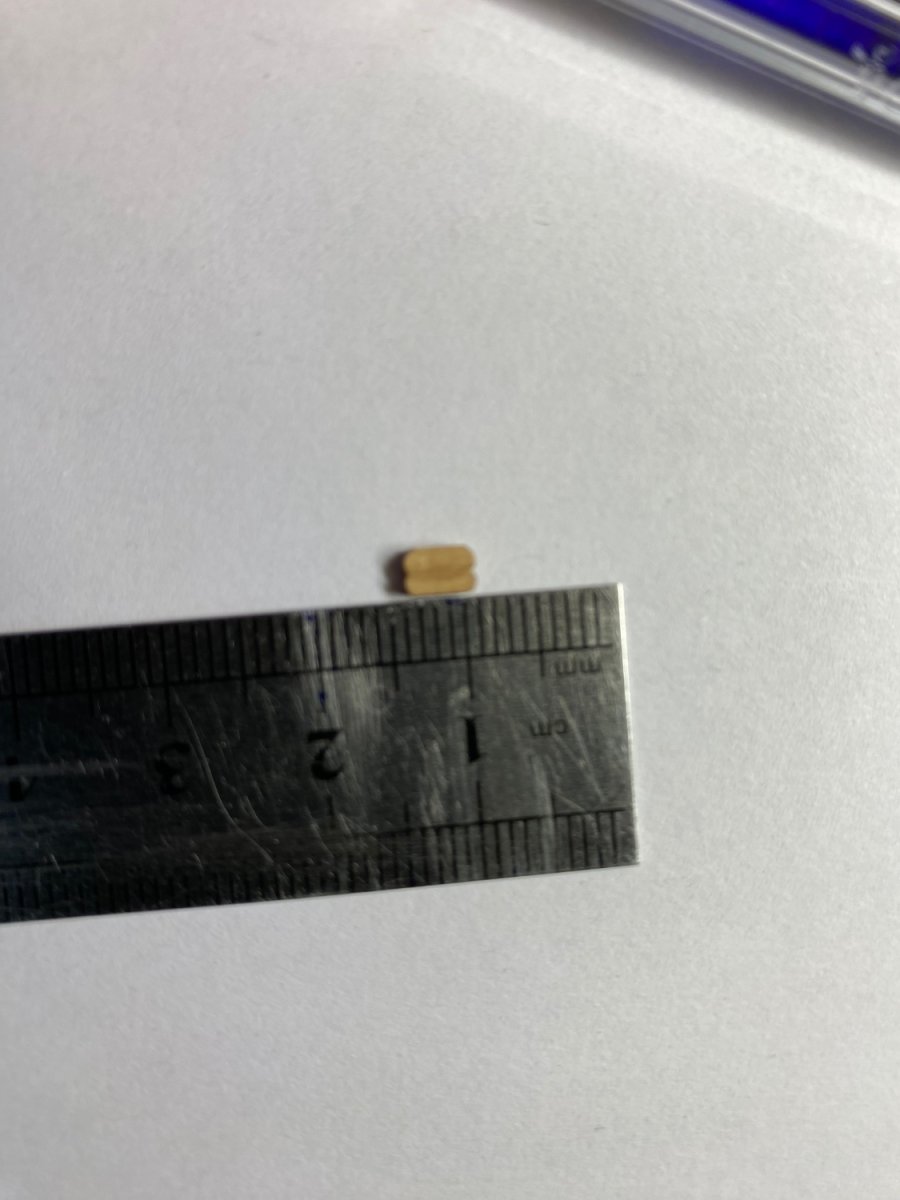
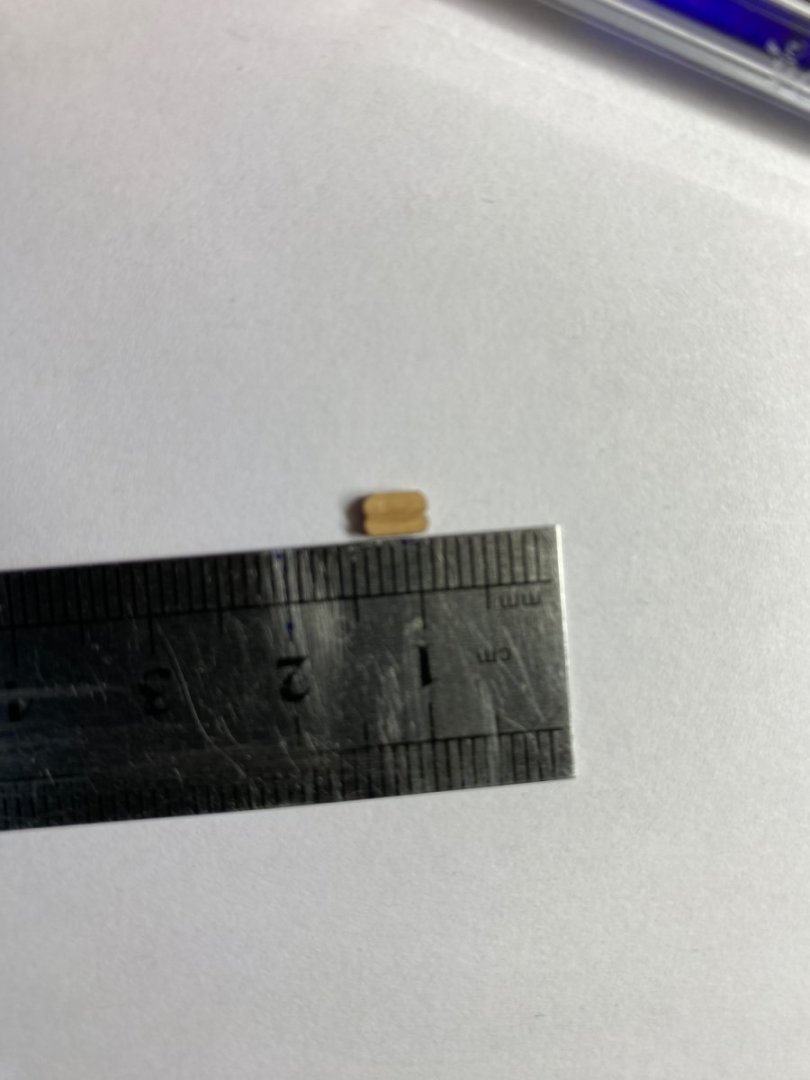
Yeah that is the same with me. When I used them particularly on my he Victory I had to use my knife to cut a groove on each side. Let me ask you this Marc. Blocks are usually oval shape. When it says a block is 3mm, 4mm, or whatever, is that the length or width of the oval? What would this block be considered? A 4mm block?
-
Do these look like the same block you guys got with your kits?

- 1,508 replies
-
- 1
-
-
- Le Soleil Royal
- Heller
- (and 1 more)
-
Oh I agree Marc. Very food conversation I was even thinking about just last night. It did seem to me that this was going much faster than my Victory, which did concern me. Like you I do very much enjoy the journey and do not want this to come to completion to quickly. On one hand I do not want to limit the amount of time I allow myself to work on it because I do enjoy it so much and on the other I am accomplishing a lot maybe too quickly. I looked back at my Victory blog to see where I was in the similar amount of time. Of course on the Victory there was much more time spent on the detail of the hull with the painting of the stripes and the incredible stern, and adding Daniel’s etched pieces over each of the cannon hatches. I am further along on my SR at the same amount of time. Part of that is due to what I learned from my Victory. I knew I was going to add the Evergreen around the hatches so I had that on hand and just did it. Where as on the Victory I had to learn about it, find it, and study how to do it. I expect the knowledge I gained on building the Victory will speed my process at various times along the way on my SR. Other than adding the Evergreen to the hatches and the detail I tried to add to the paint job (nail heads, weathering, etc) there was not much other bashing I could do. That is when I decided to ask you guys for advice as to things you recommend I do before moving to the next big step. The upper bulwarks will be very time consuming. I will be doing gold leaf against a blue background on all the ornamentation. I expect this will take days and days. I also expect rigging of the visible cannons will be time consuming and tedious. Which reminds me I need to get some 2 or 2.5 mm blocks before that time comes. Looking ahead in the instructions it appears I will soon be getting to the bowsprit which will need various blocks attached to it. On my Victory I used a combination of wood and plastic blocks. On the SR I am aiming to go all wood blocks and deadeyes if I can find the sizes I need. I do have a great supply of plastic blocks I got from Kevin and the Heller blocks that came with the kit surprisingly do not look to bad. The deadeyes not so much! I don’t know if Heller improved their blocks mold. Will have to send photo. So there are some decisions I need to make soon and shipping times to be accepted. That can all take place while I work on the he upper bulwarks on the side. On top of all that it does seem to me that at least 3/4 of my Victory build time was once I started adding the mast and rigging. I constantly read through other builds looking for any “oh I should do that”s.
- 1,508 replies
-
- 1
-
-
- Le Soleil Royal
- Heller
- (and 1 more)
-
Getting close to next deck being added. Any thoughts or recommendations before I do?
- 1,508 replies
-
- 1
-
-
- Le Soleil Royal
- Heller
- (and 1 more)
-
That’s ok Henry. From what you say I am guessing later in the instructions I will add the #162 around the mizzenmast.

- 1,508 replies
-
- 3
-
-
- Le Soleil Royal
- Heller
- (and 1 more)
-
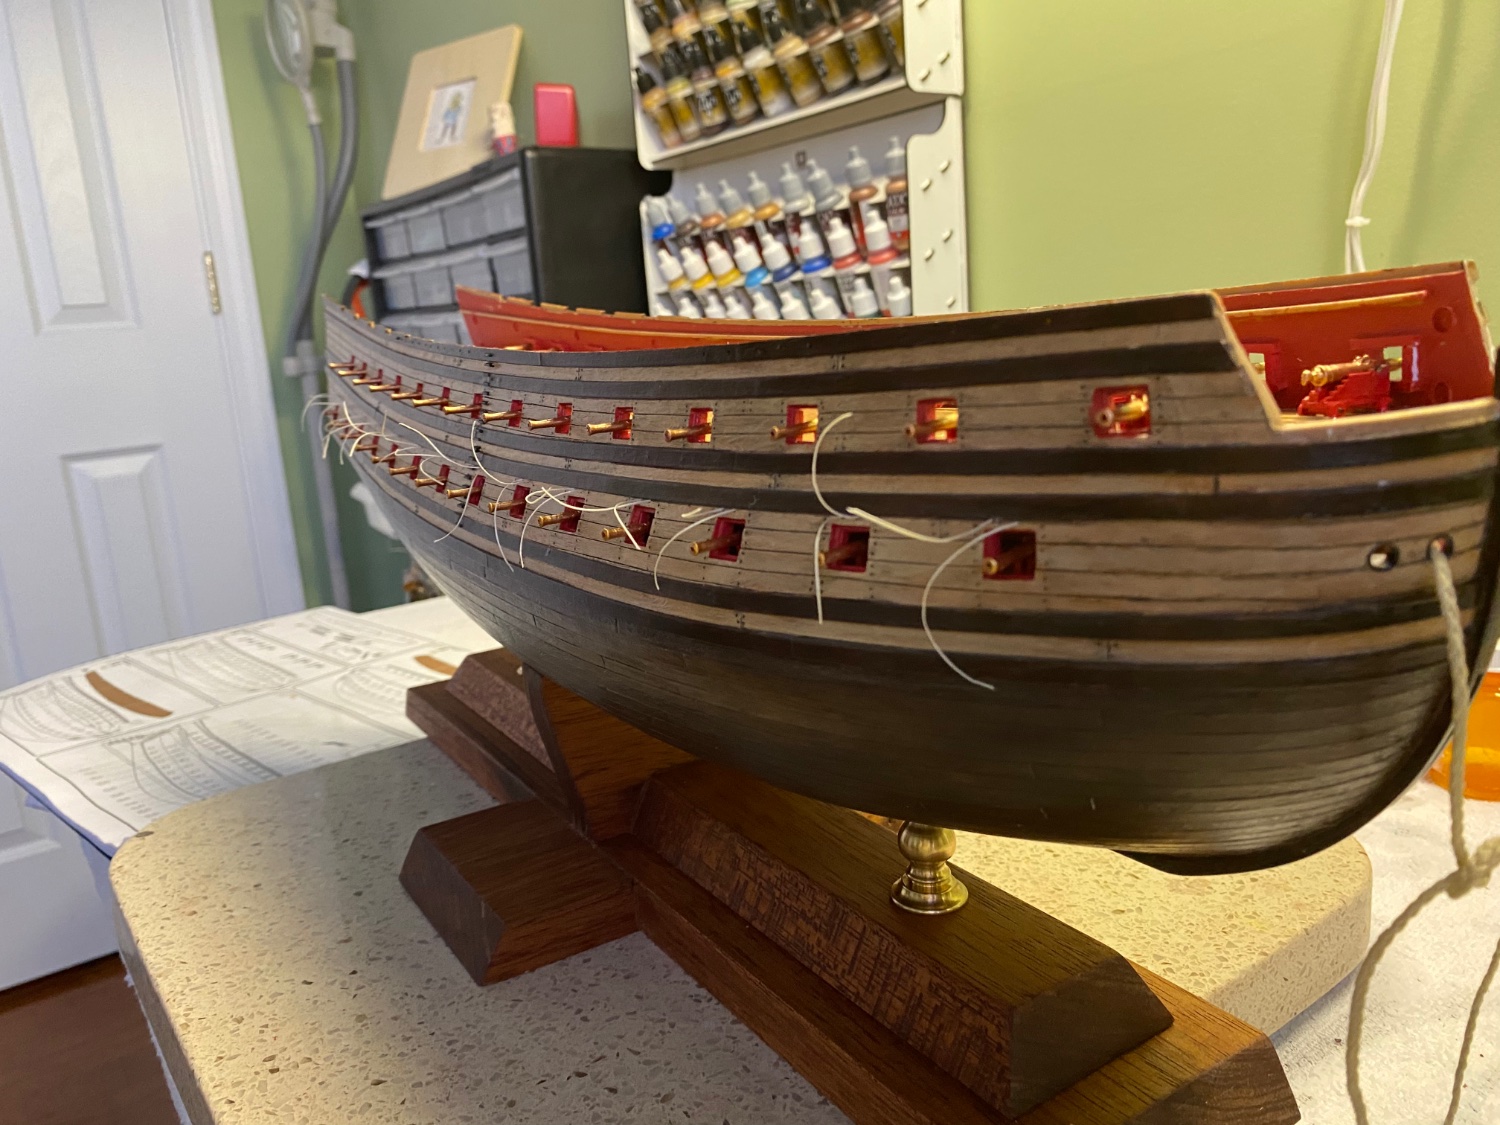
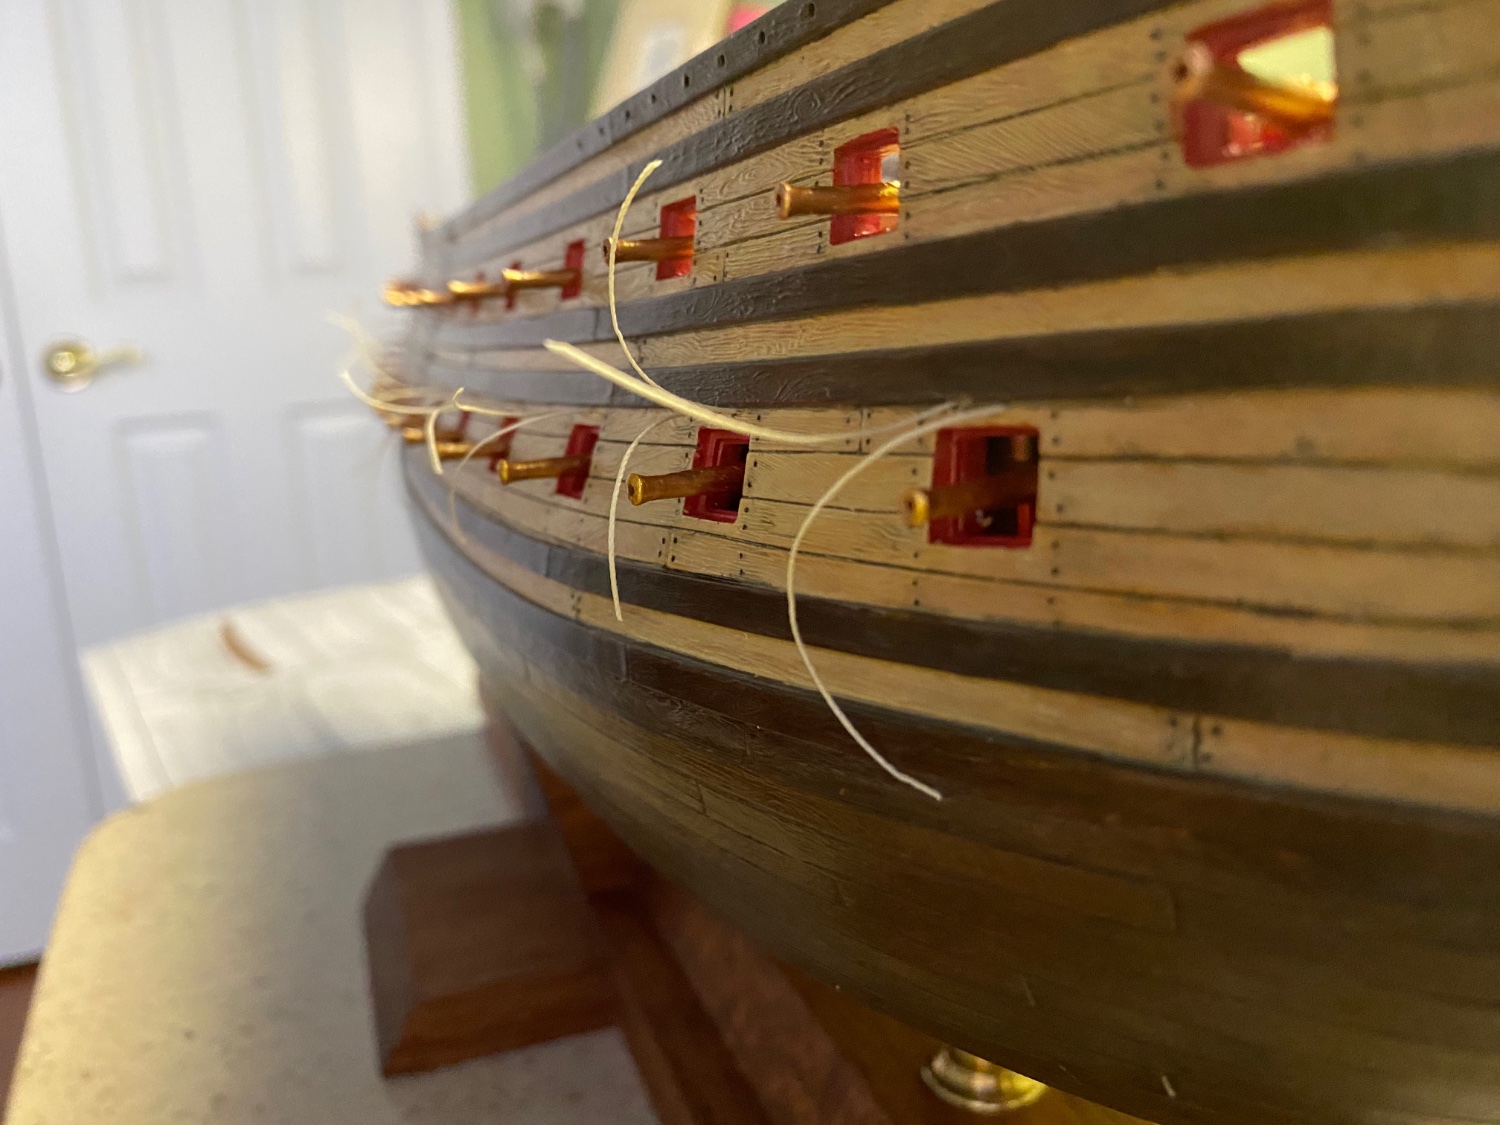
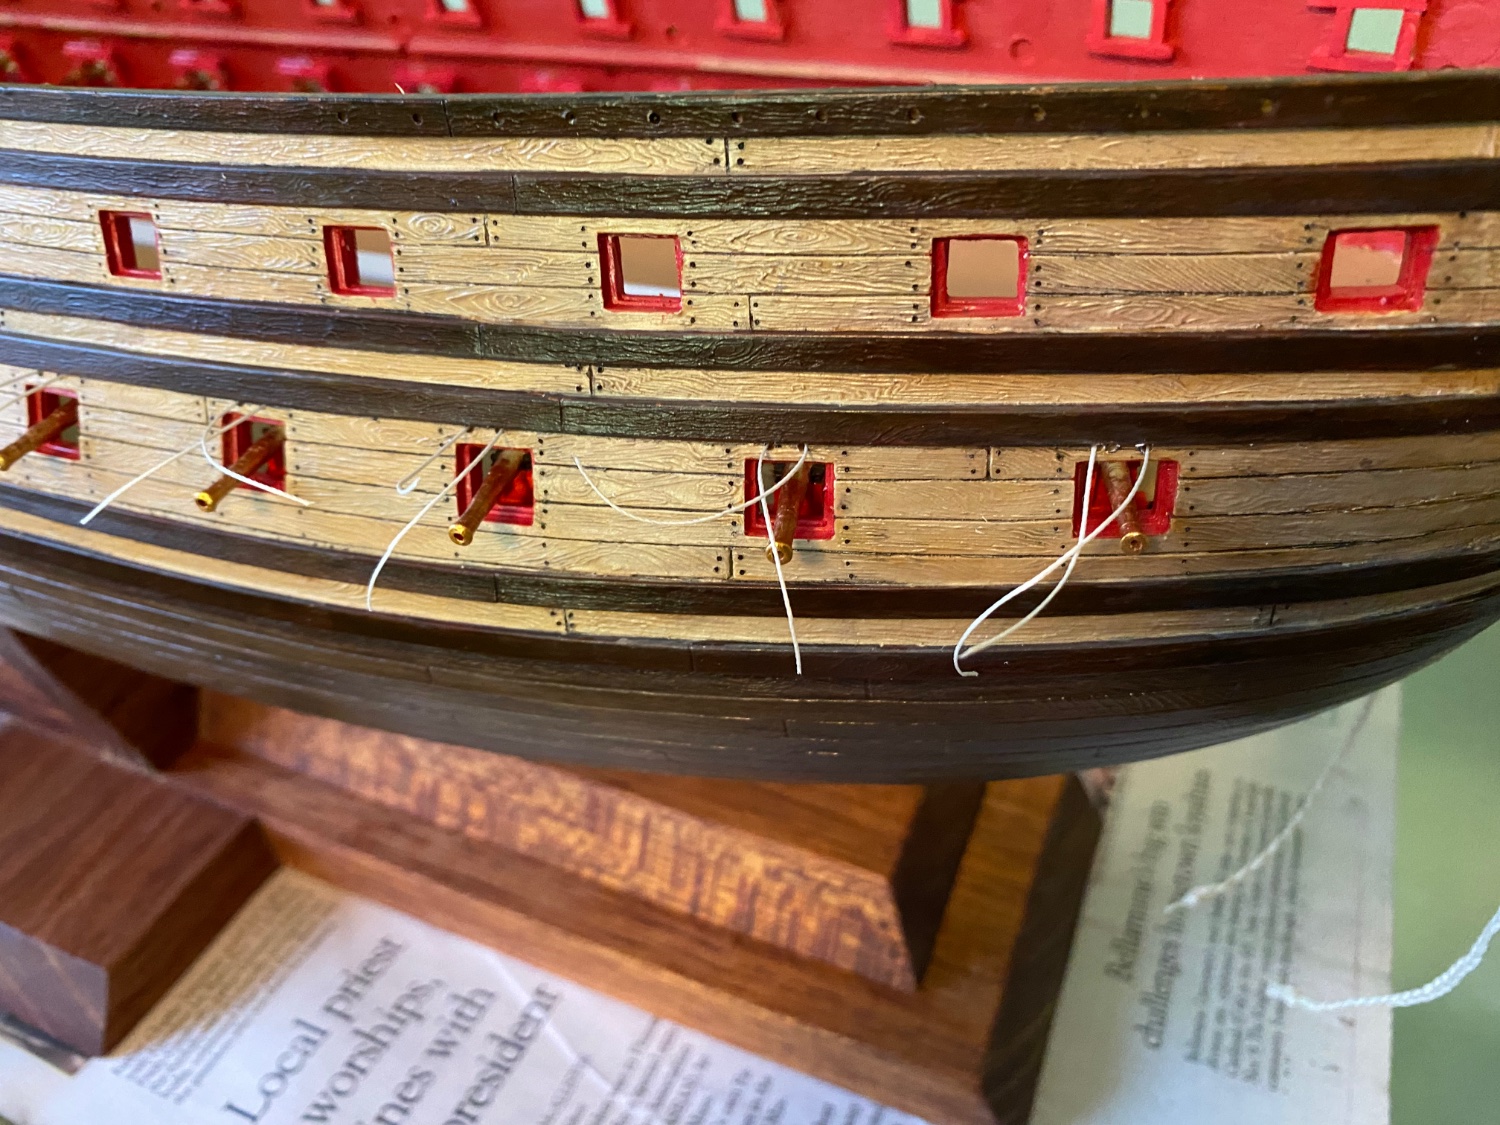
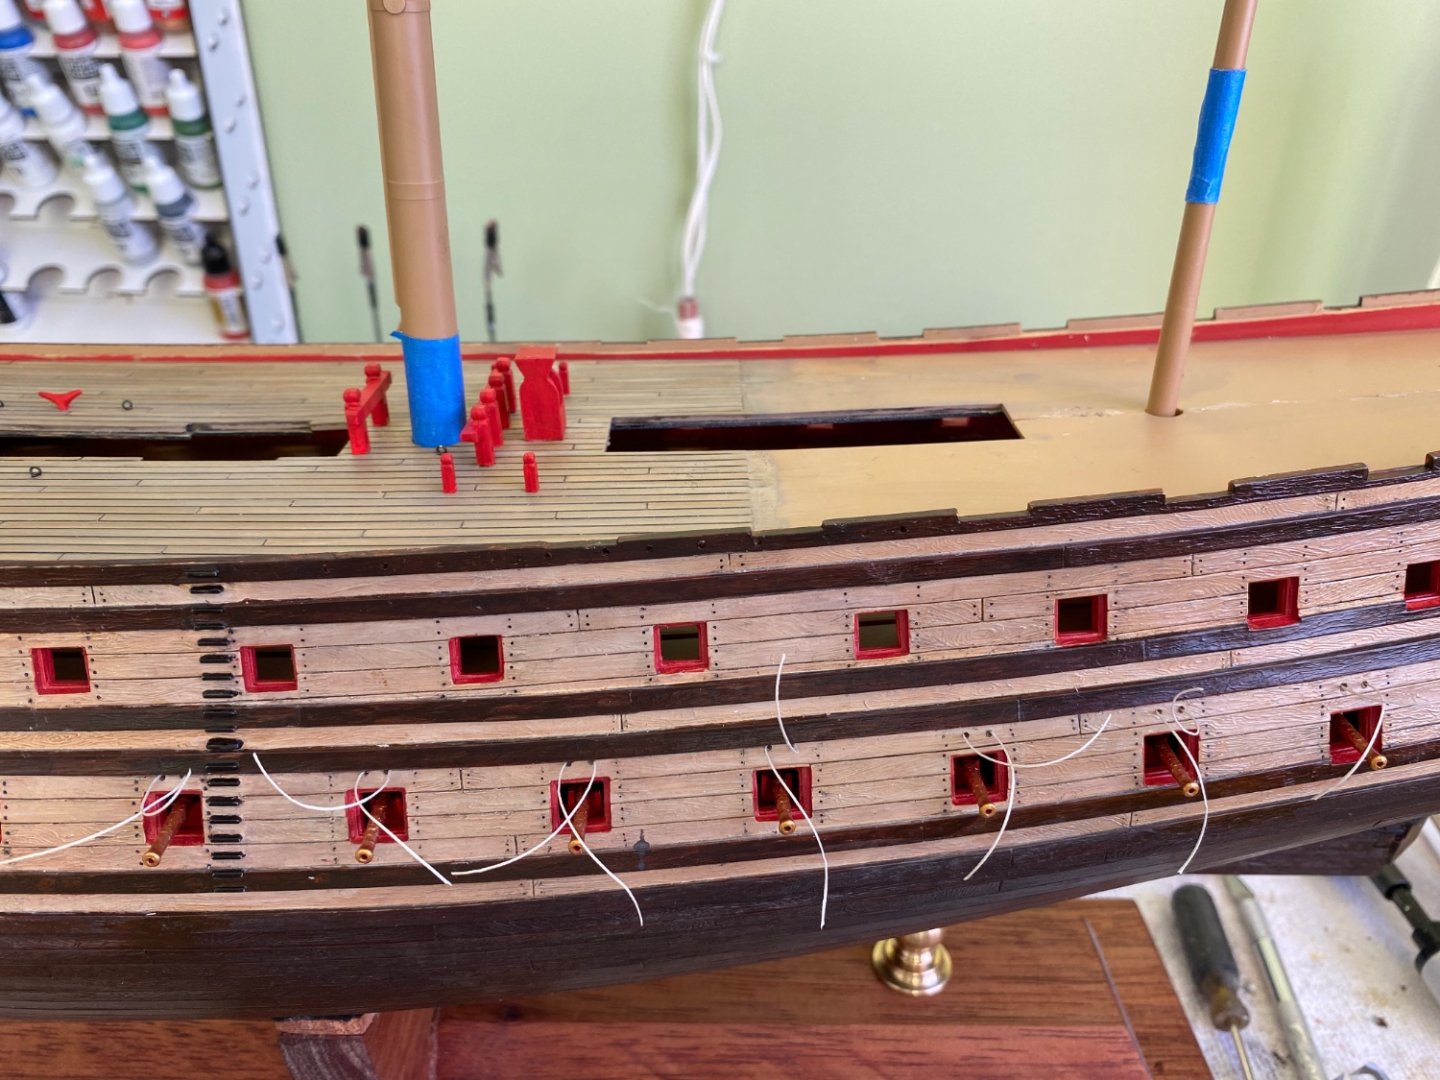
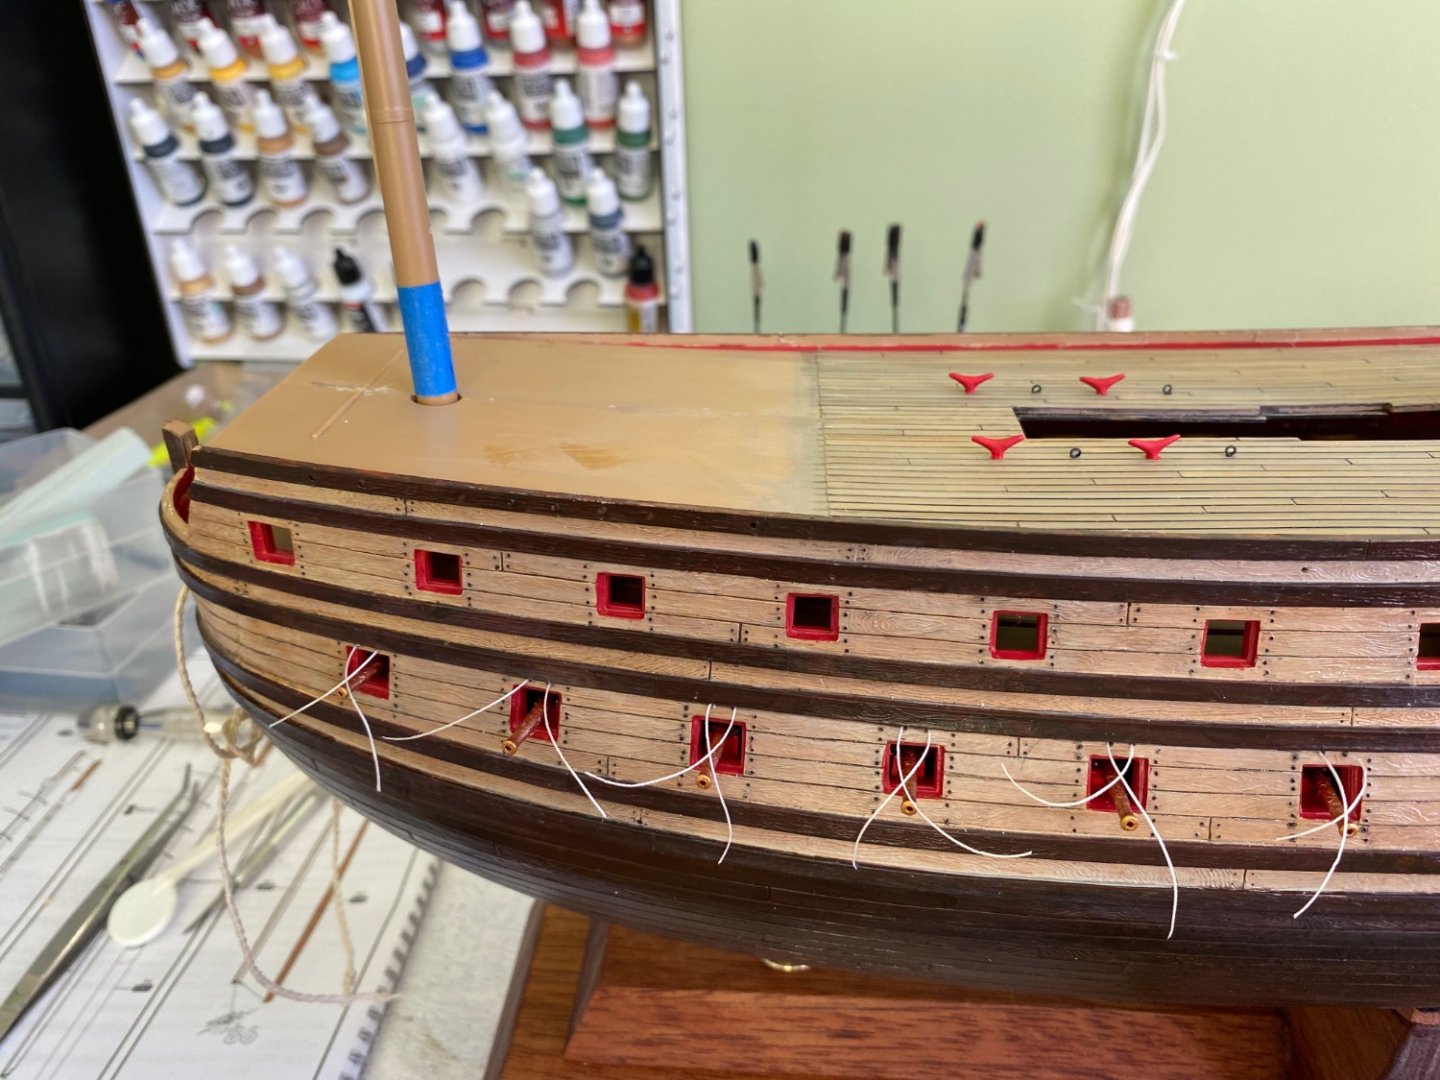
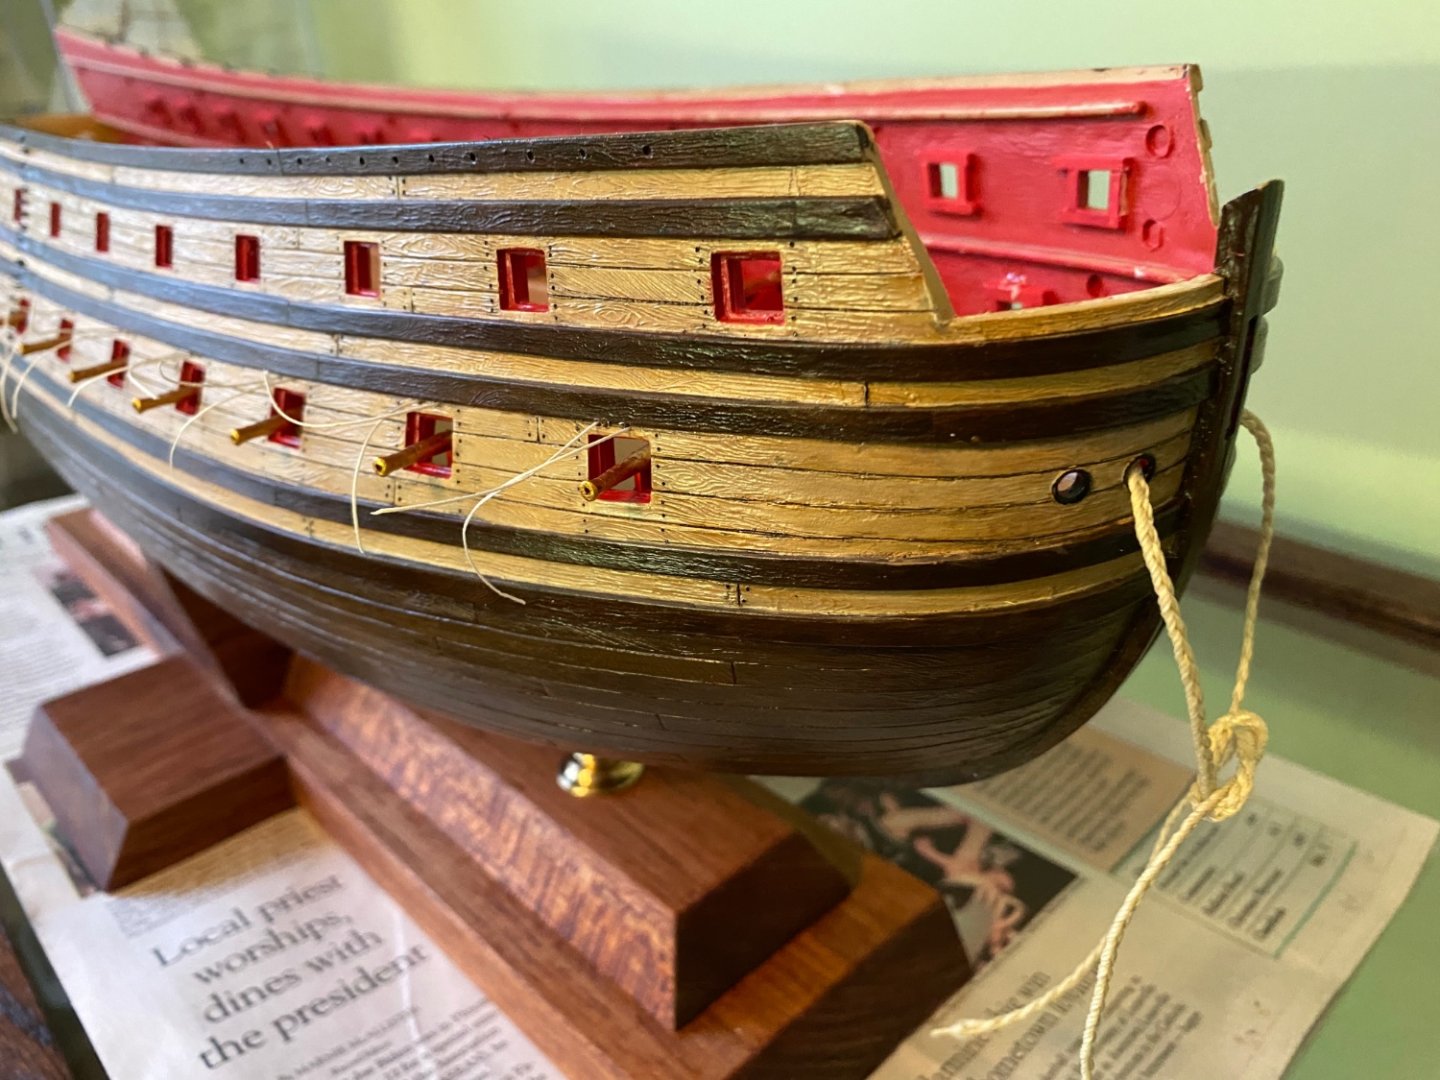
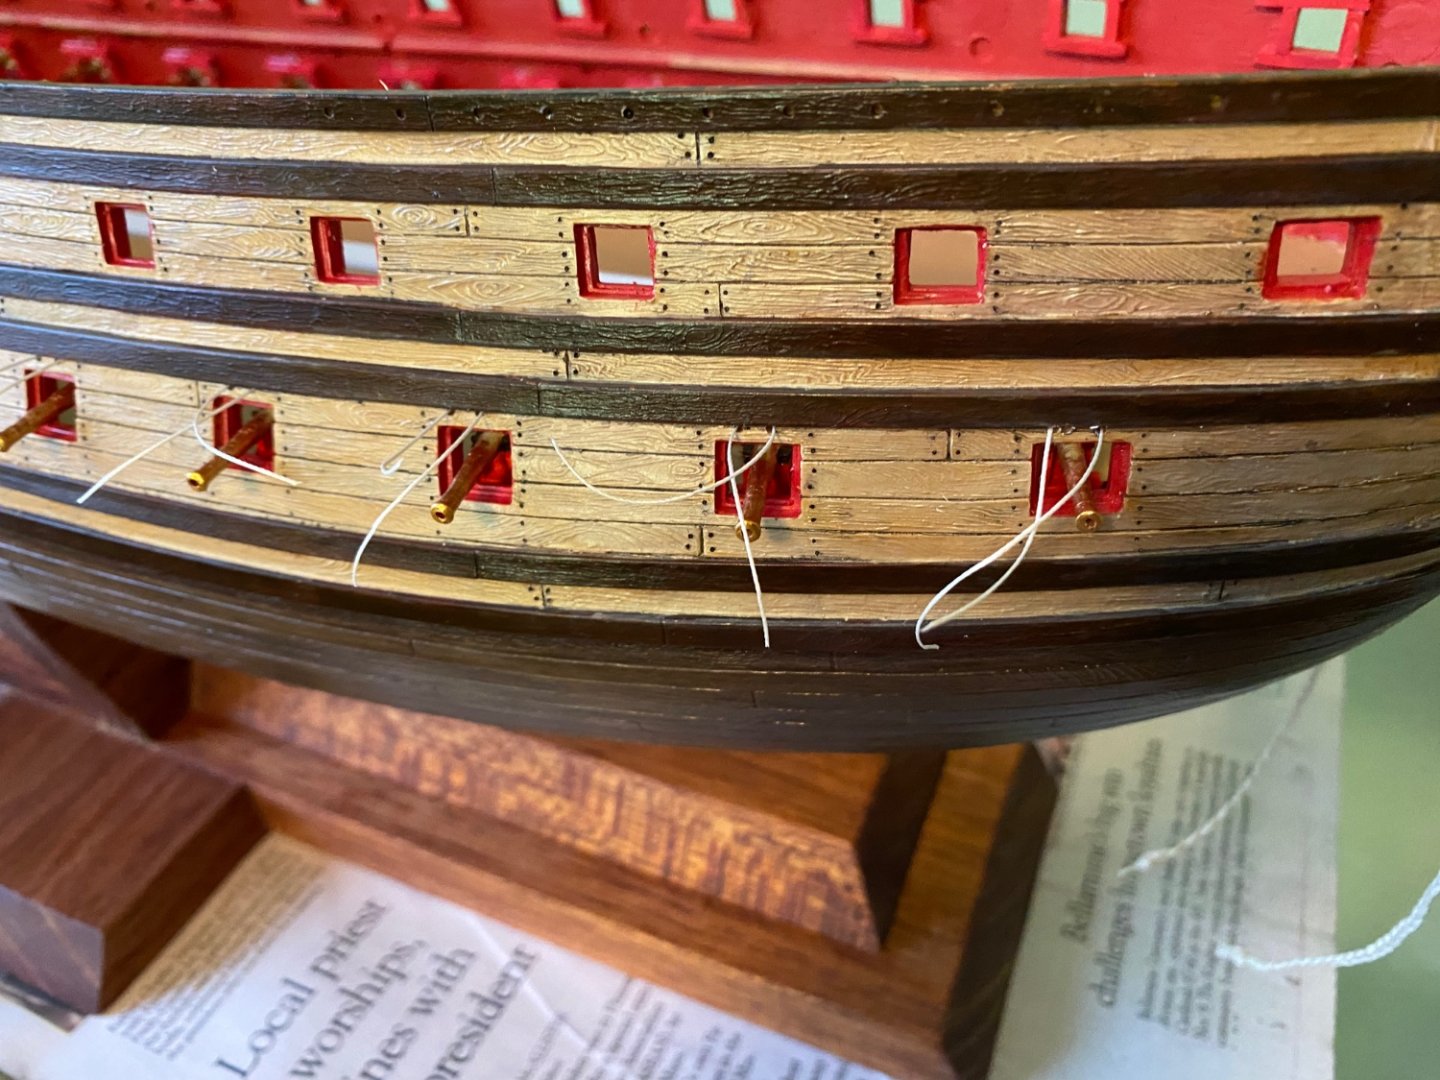
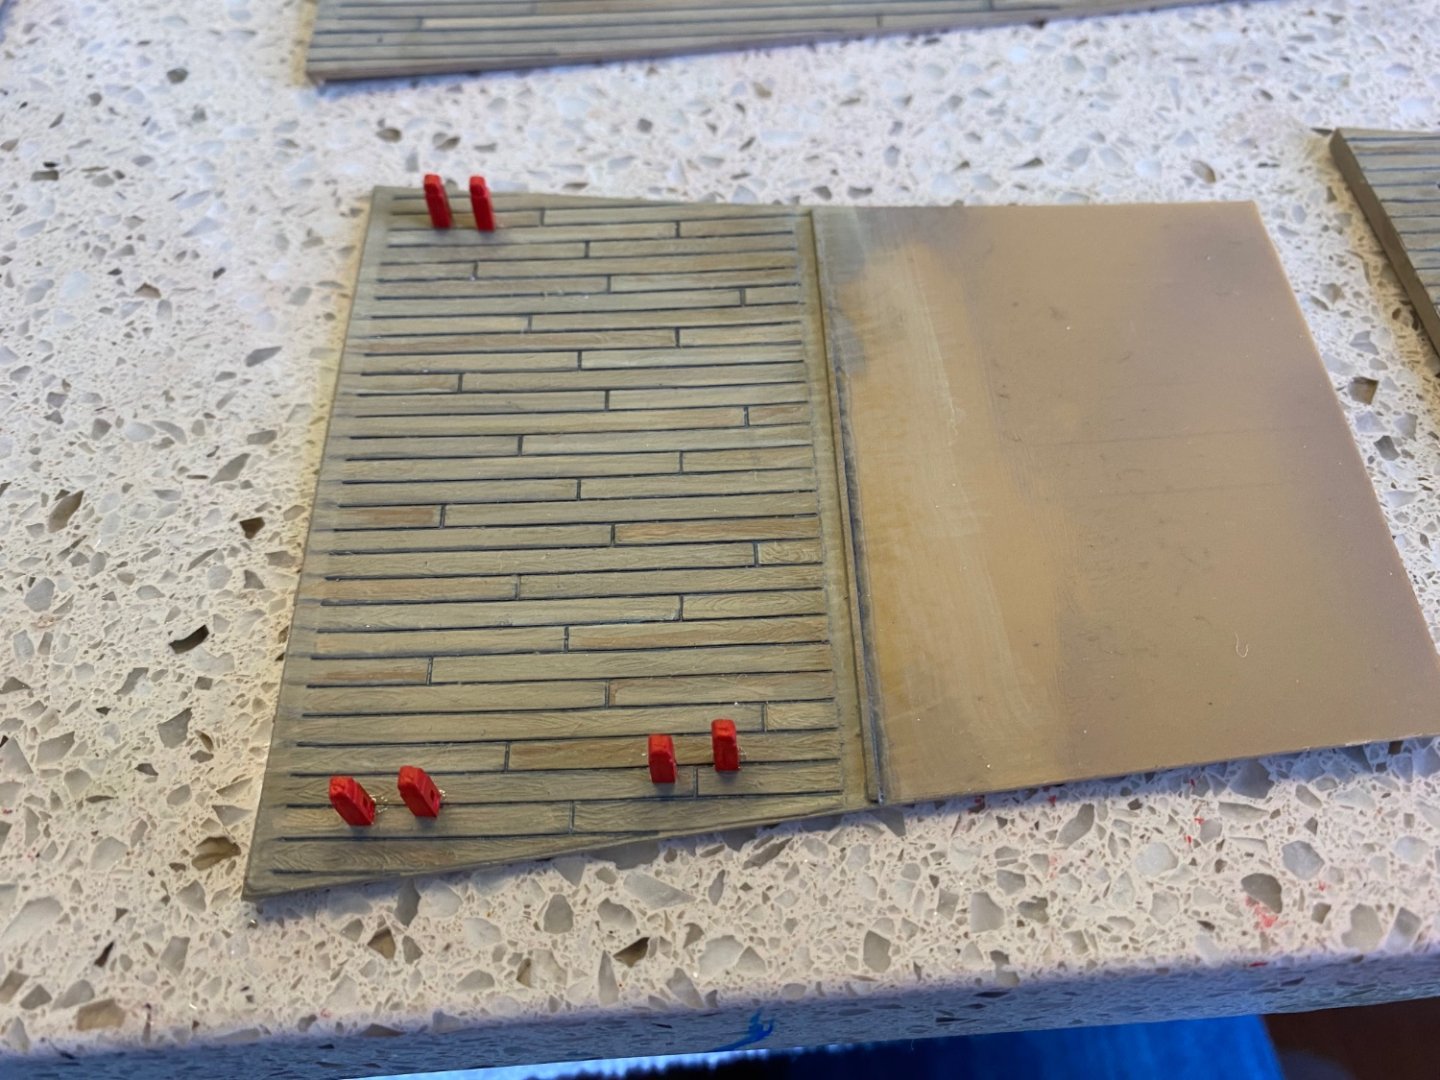
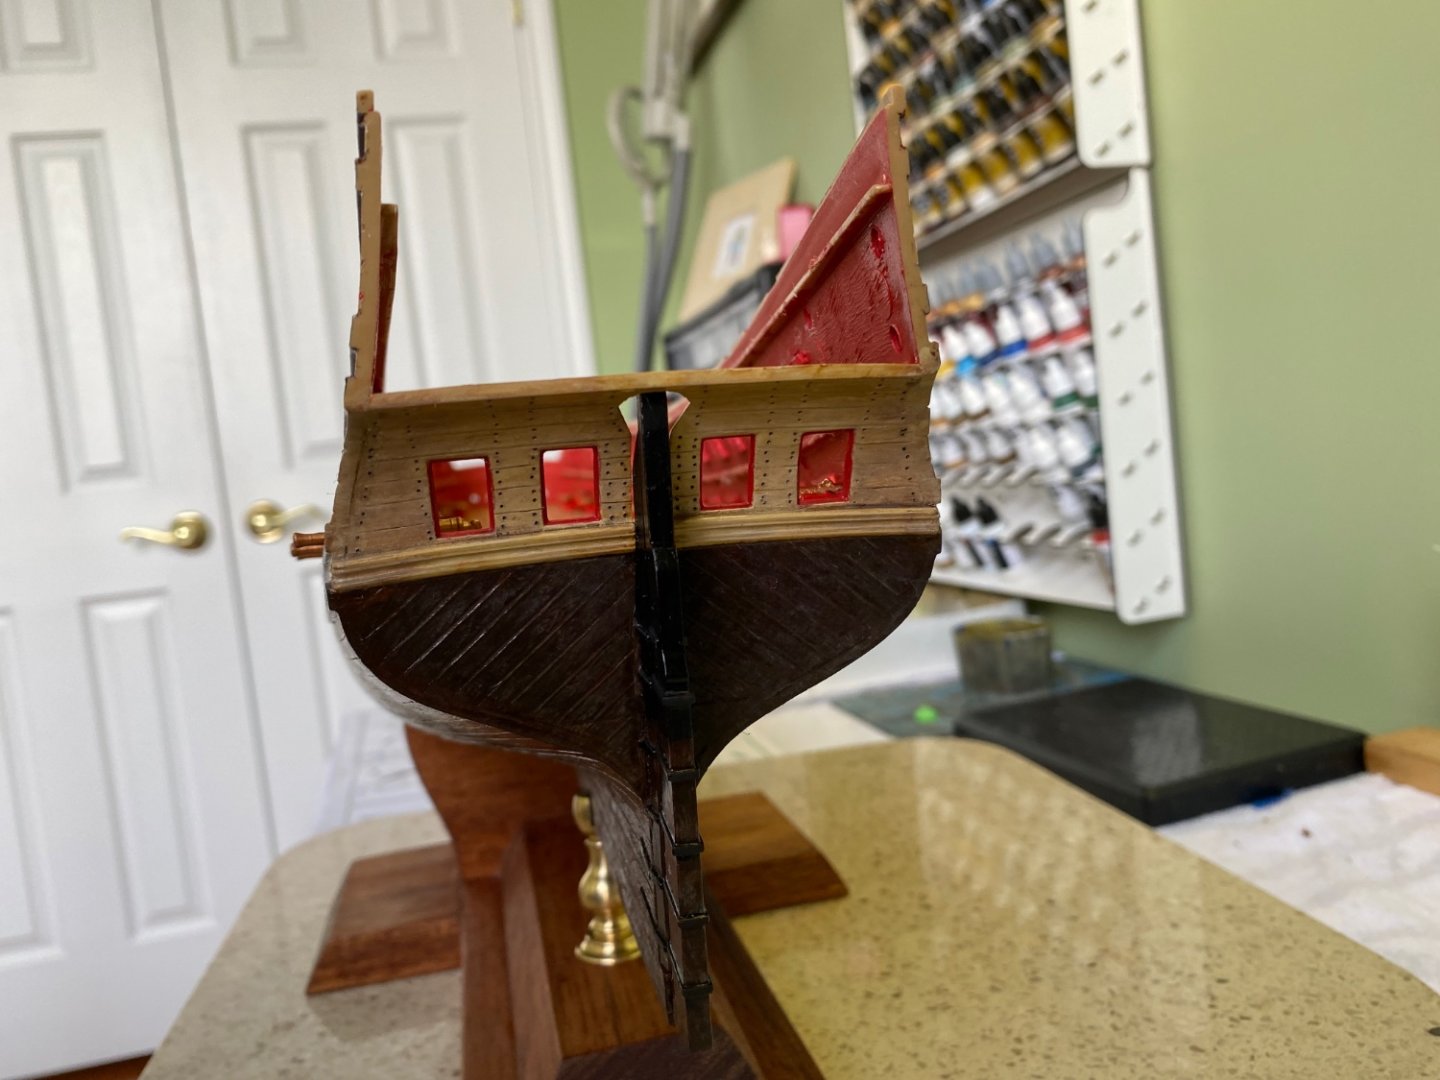
Decided to go ahead and drill a pair of holes above each hatch for the cover halyards. I spaced them the same distance apart as the molded eyebolts on the hatch covers which is where later I will add actual eyebolts. I ean appropriate size thread through one hole an out the other and then added a spot of glue on the inside of the hull over it he thread which I hope will prevent me from accidentally pulling it out before I need them. Once I put the next deck in my hey will no longer be accessible. Also added the anchor rope through the hawser hole.
- 1,508 replies
-
- 4
-
-
- Le Soleil Royal
- Heller
- (and 1 more)
-
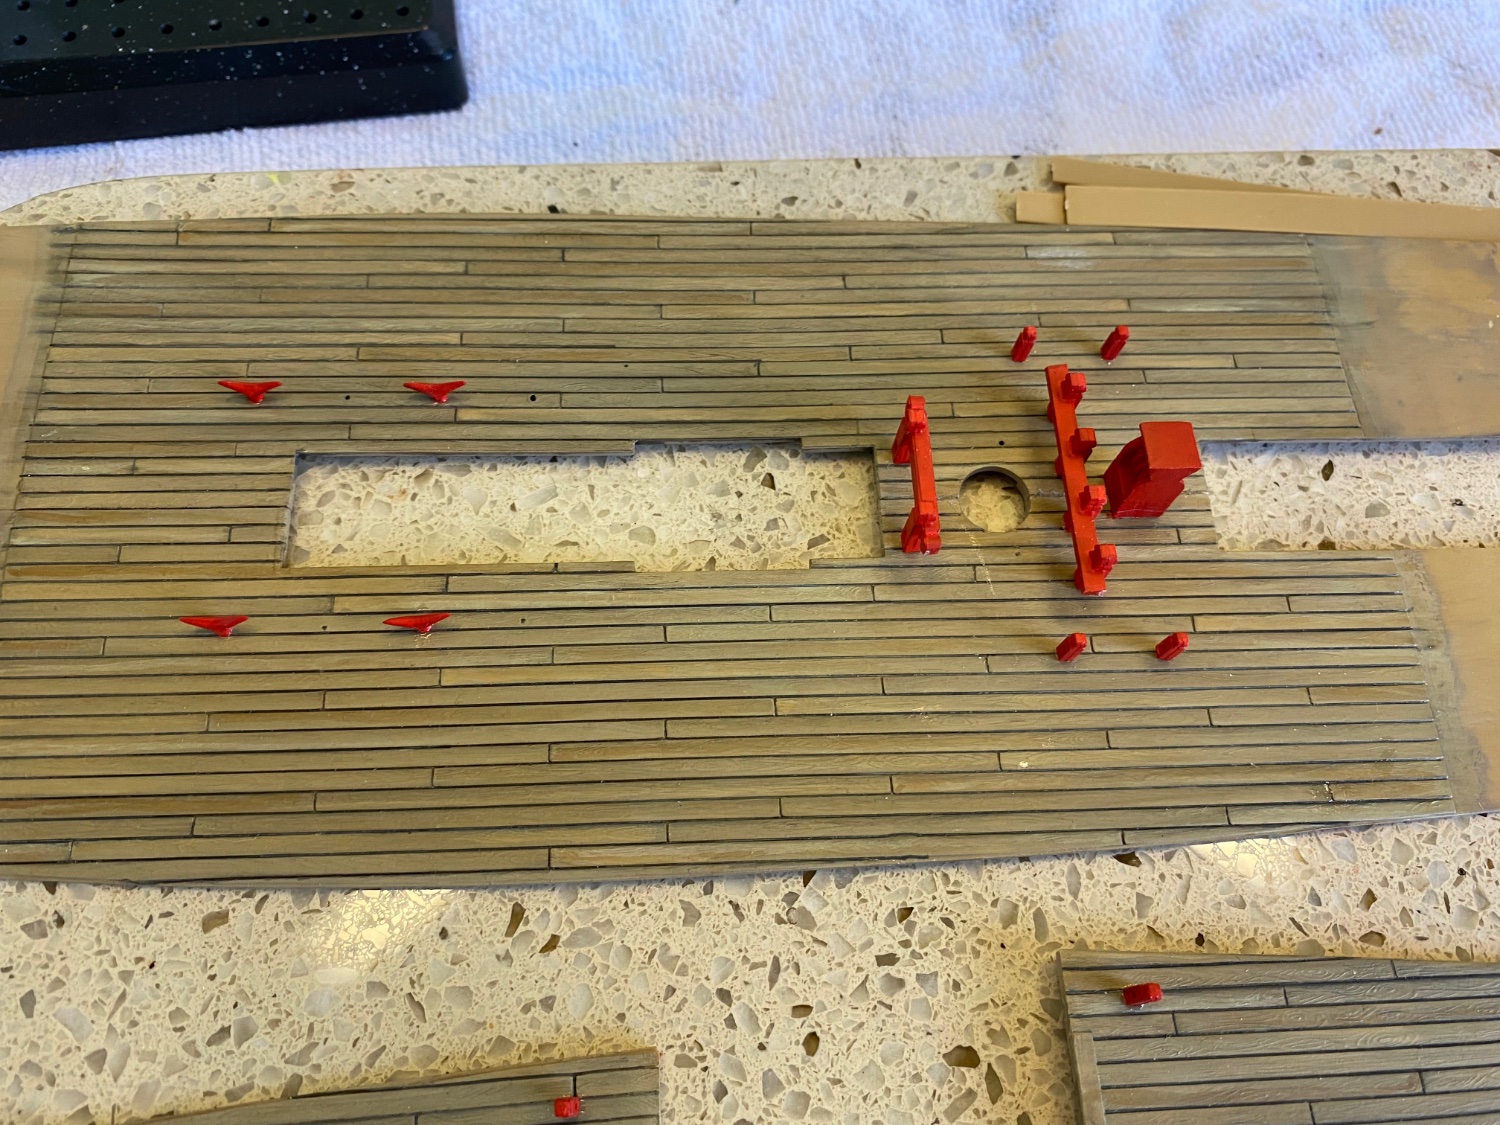
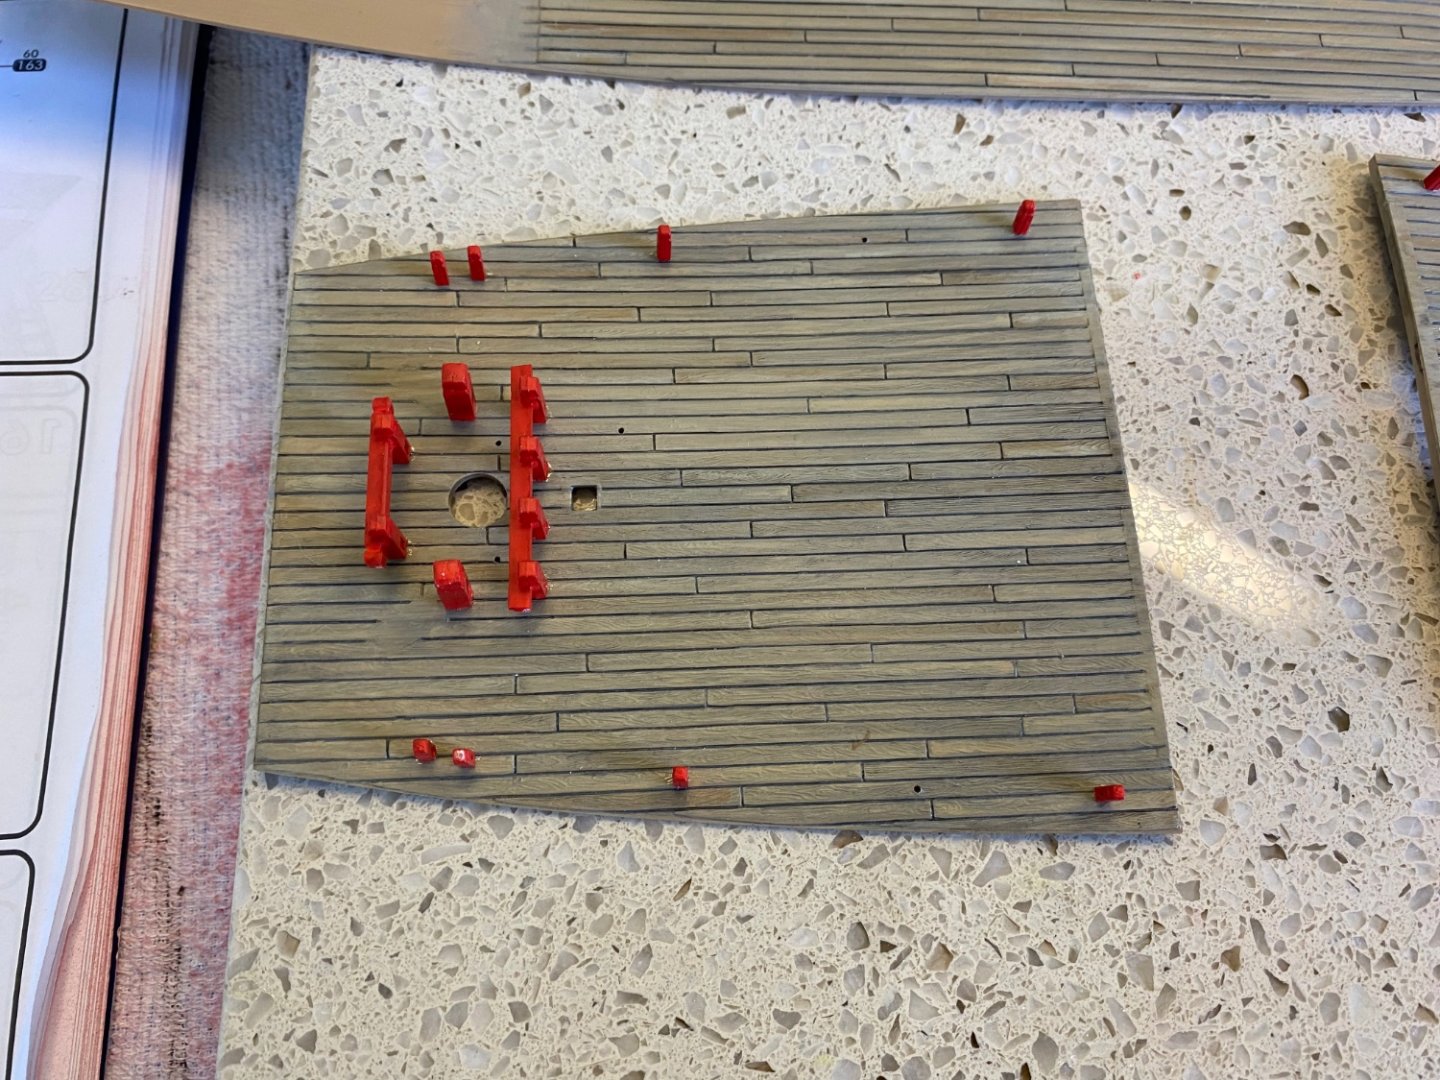
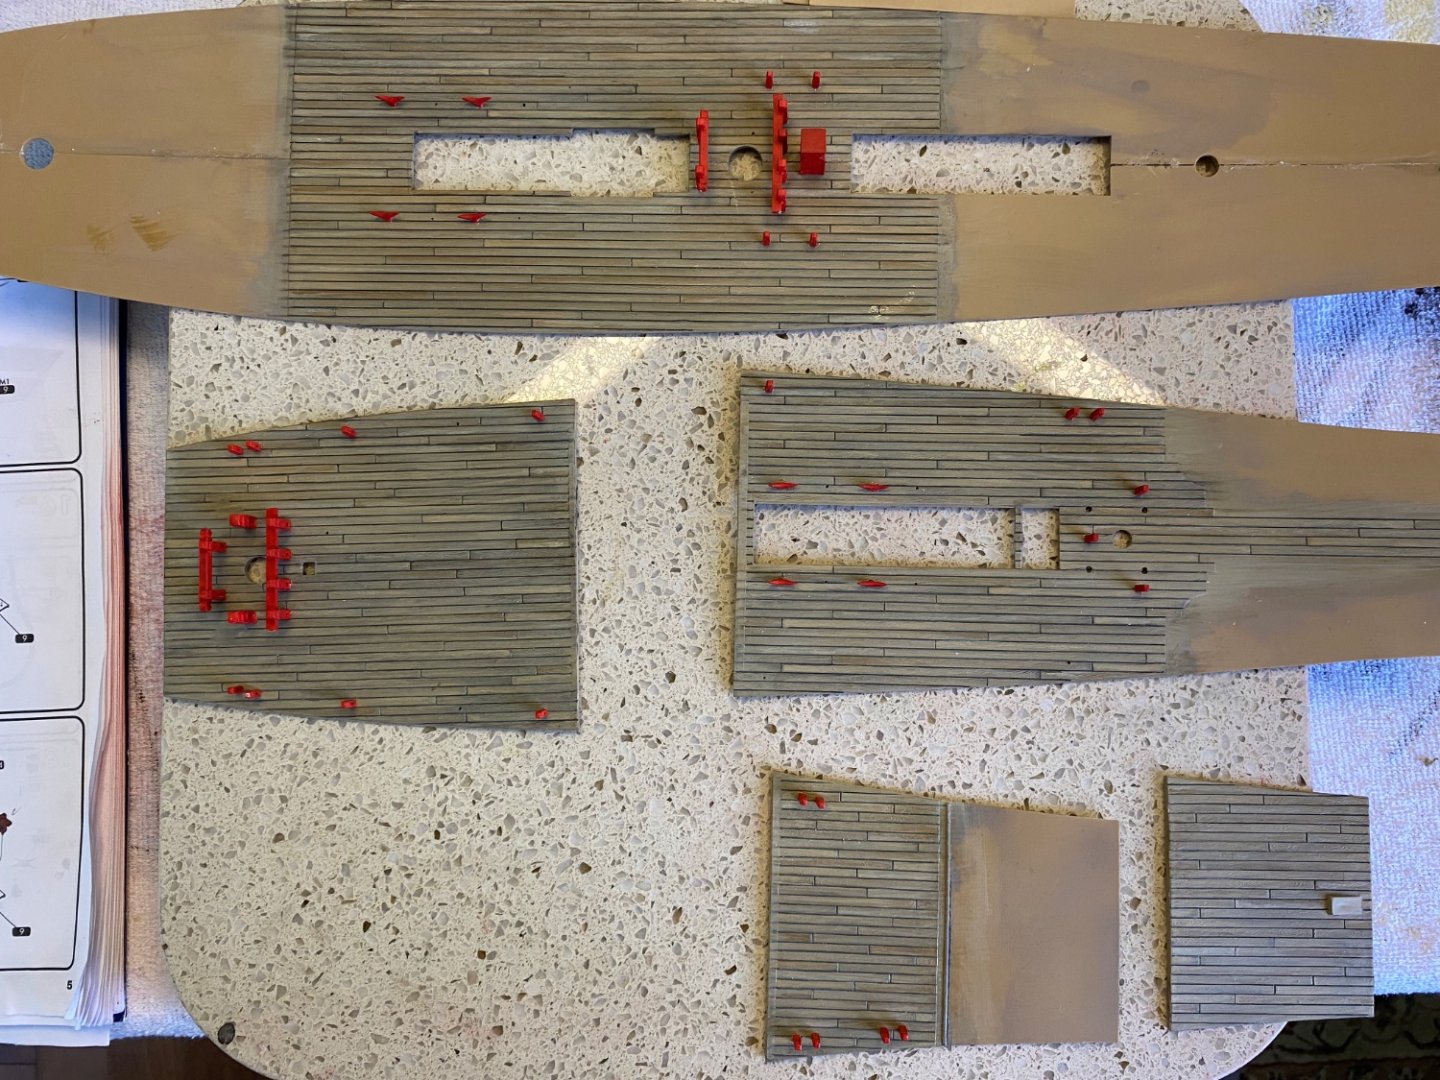
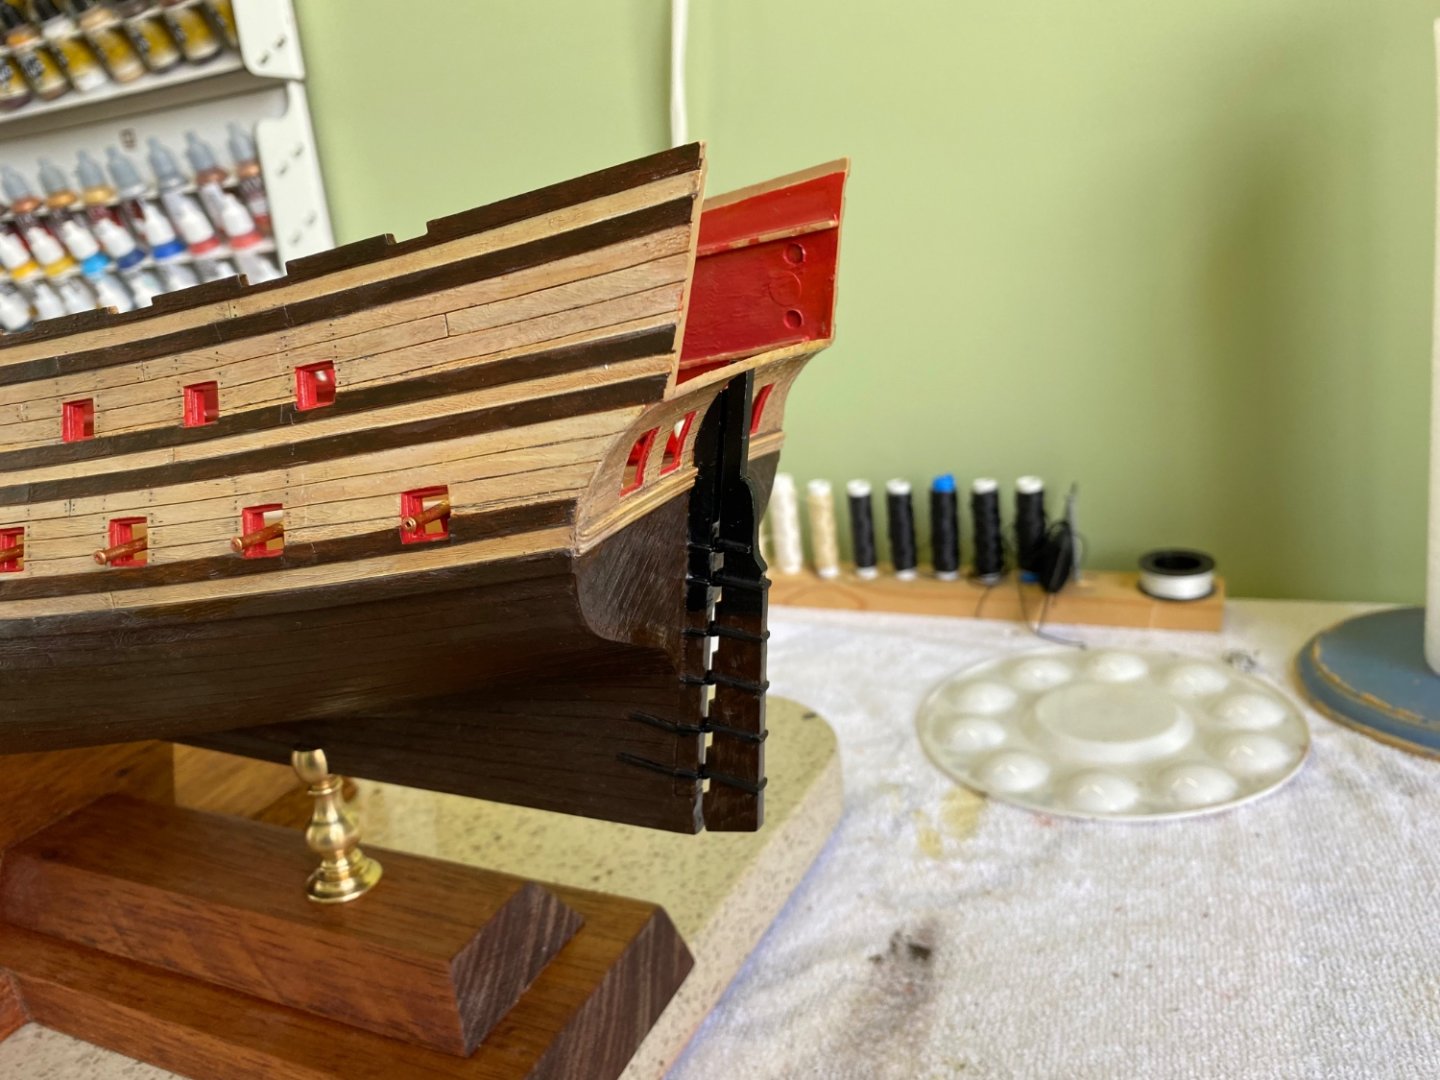
Ok Ian and Marc. Here is what I have matching the instructions, I think. Yes Ian I was guilty of forgetting to trap parts 258-259 between the deck halves. Luckily I noticed it while the glue was still wet and I was able to pry the halves apart in the center to get the part in then close it back up. I still need to add all the eyebolts, part # 343. I am making them from brass wire and blackening. Oddly enough the next page in the instructions has me put in the bottom deck, stern , and rudder which you seen in photos that I have accomplished. Then the next page has me preparing for the next deck coming up but includes step #26 which is gluing parts to the bottom of the main deck that I worked on in steps 6-14. It is almost like someone writing the instructions forgot a step and then when they remembered just stuck in it.


- 1,508 replies
-
- 3
-
-
- Le Soleil Royal
- Heller
- (and 1 more)
-
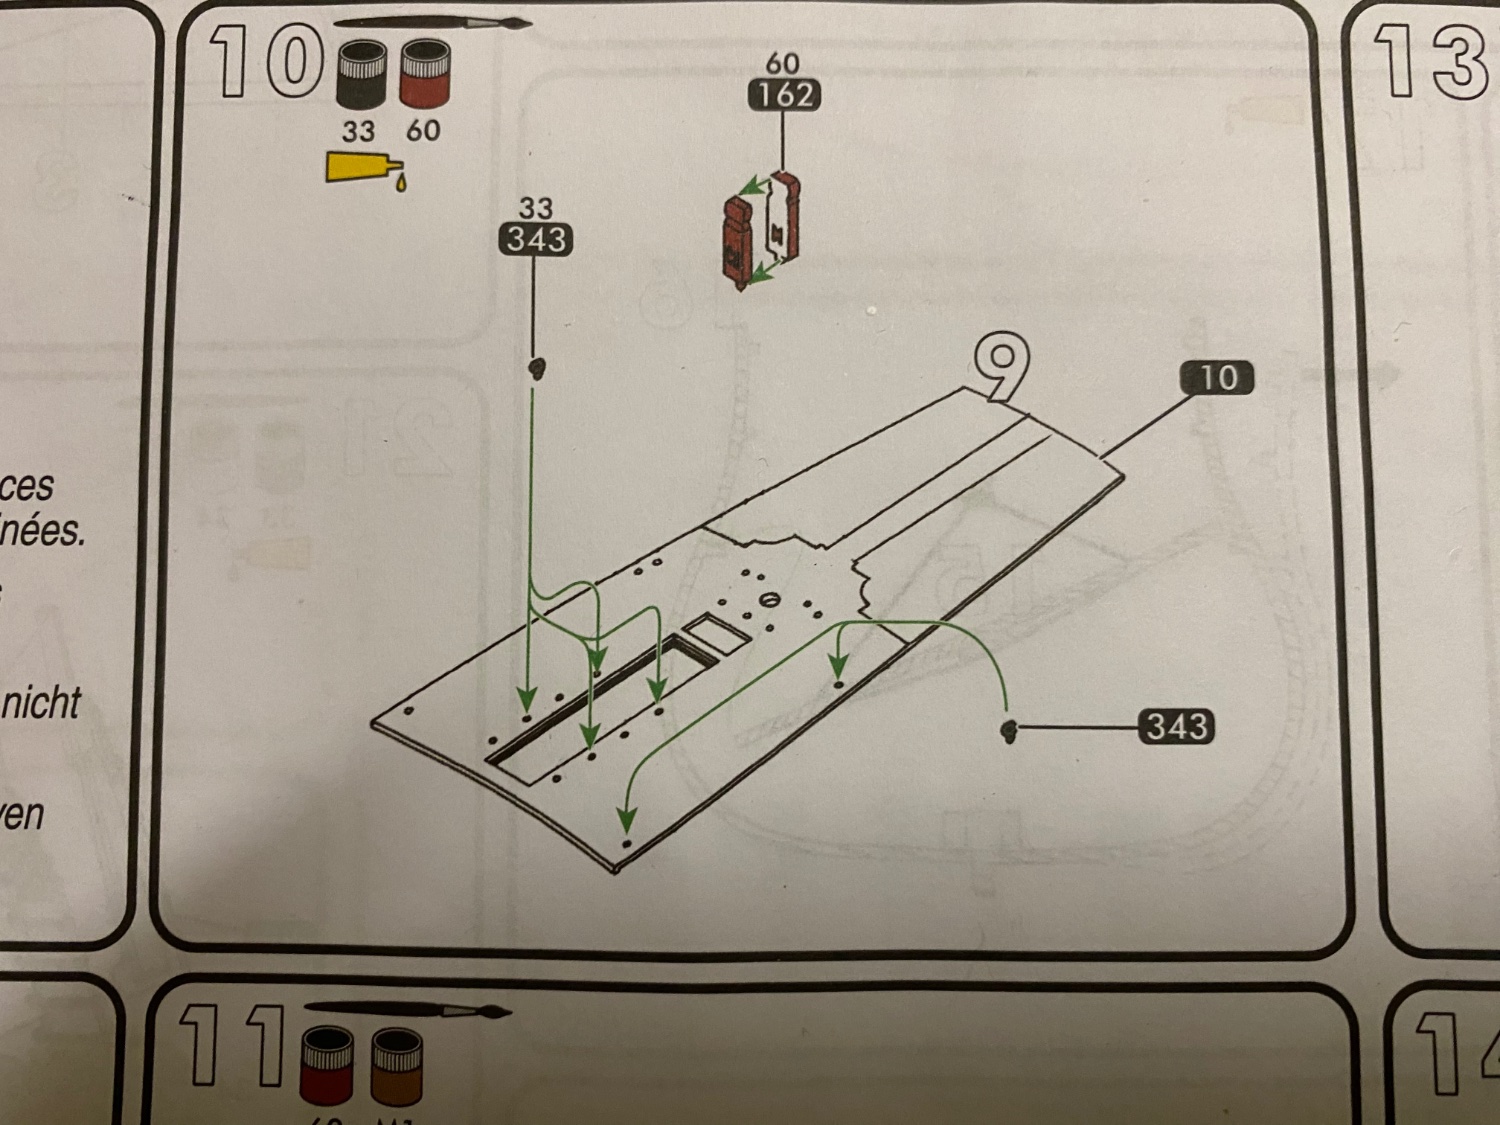
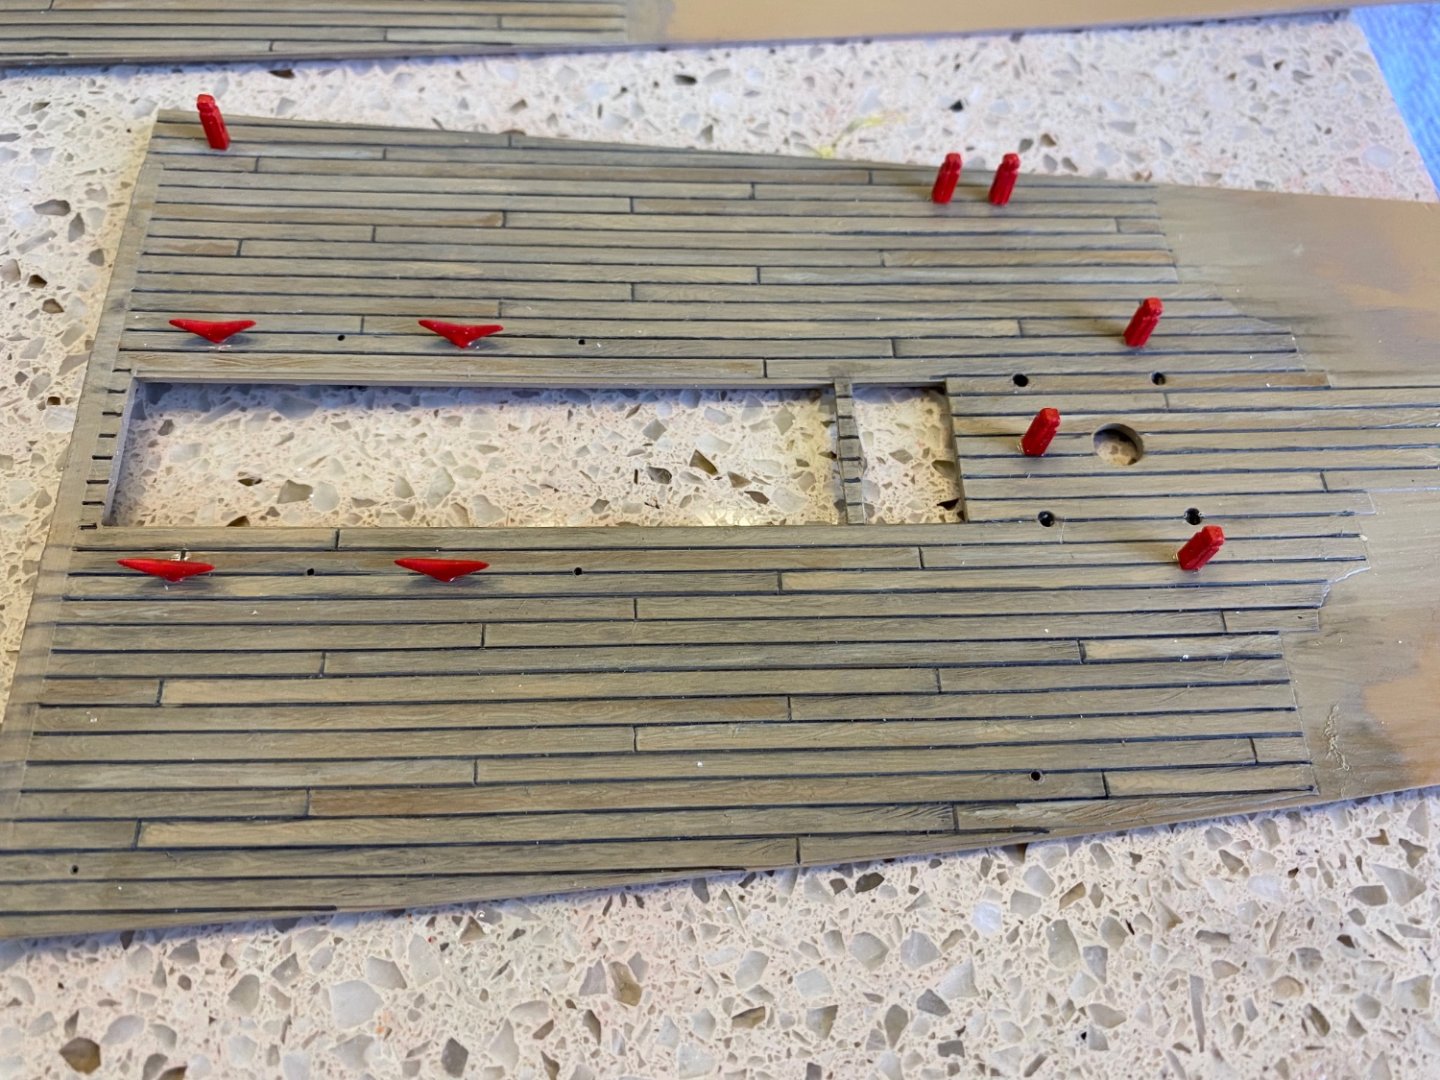
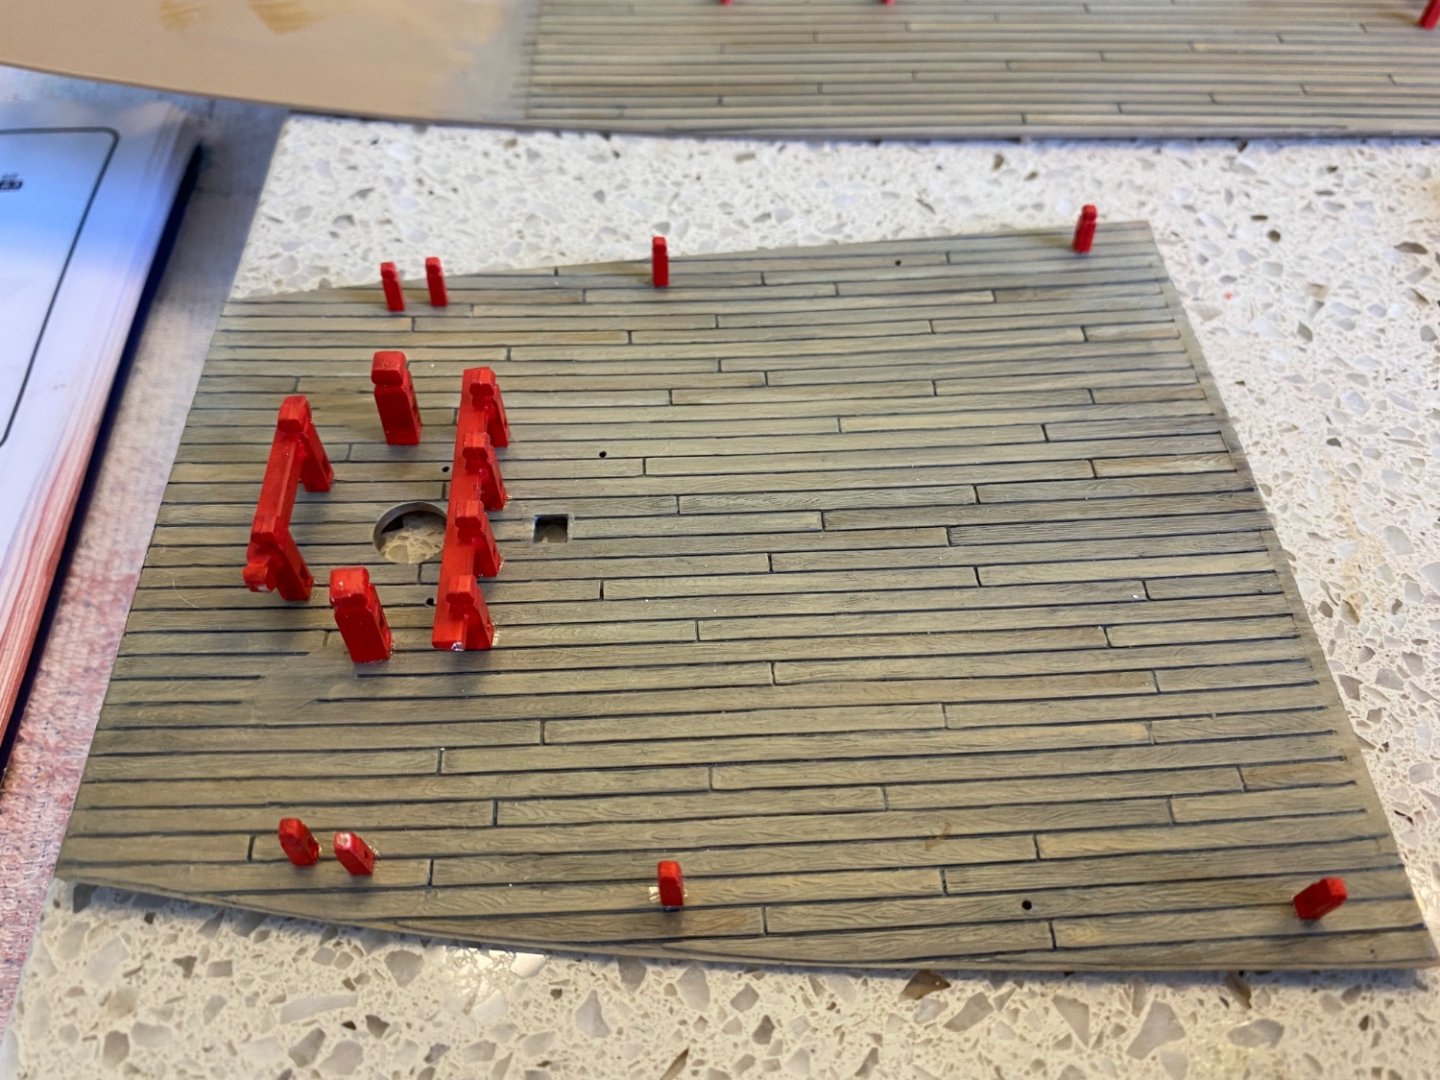
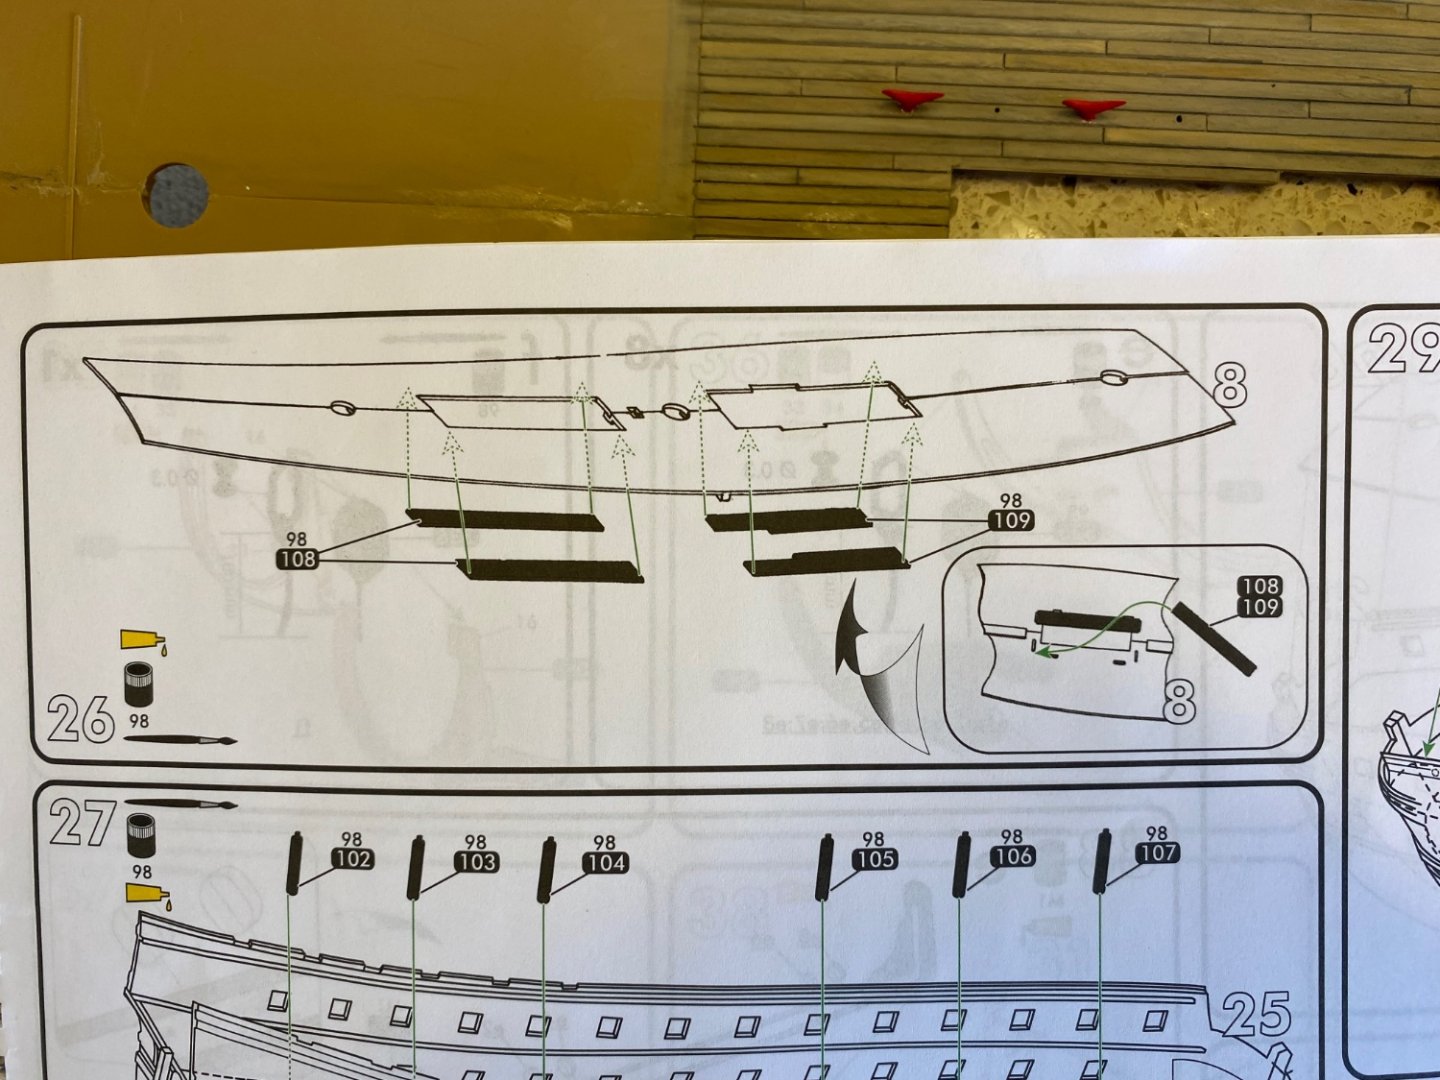
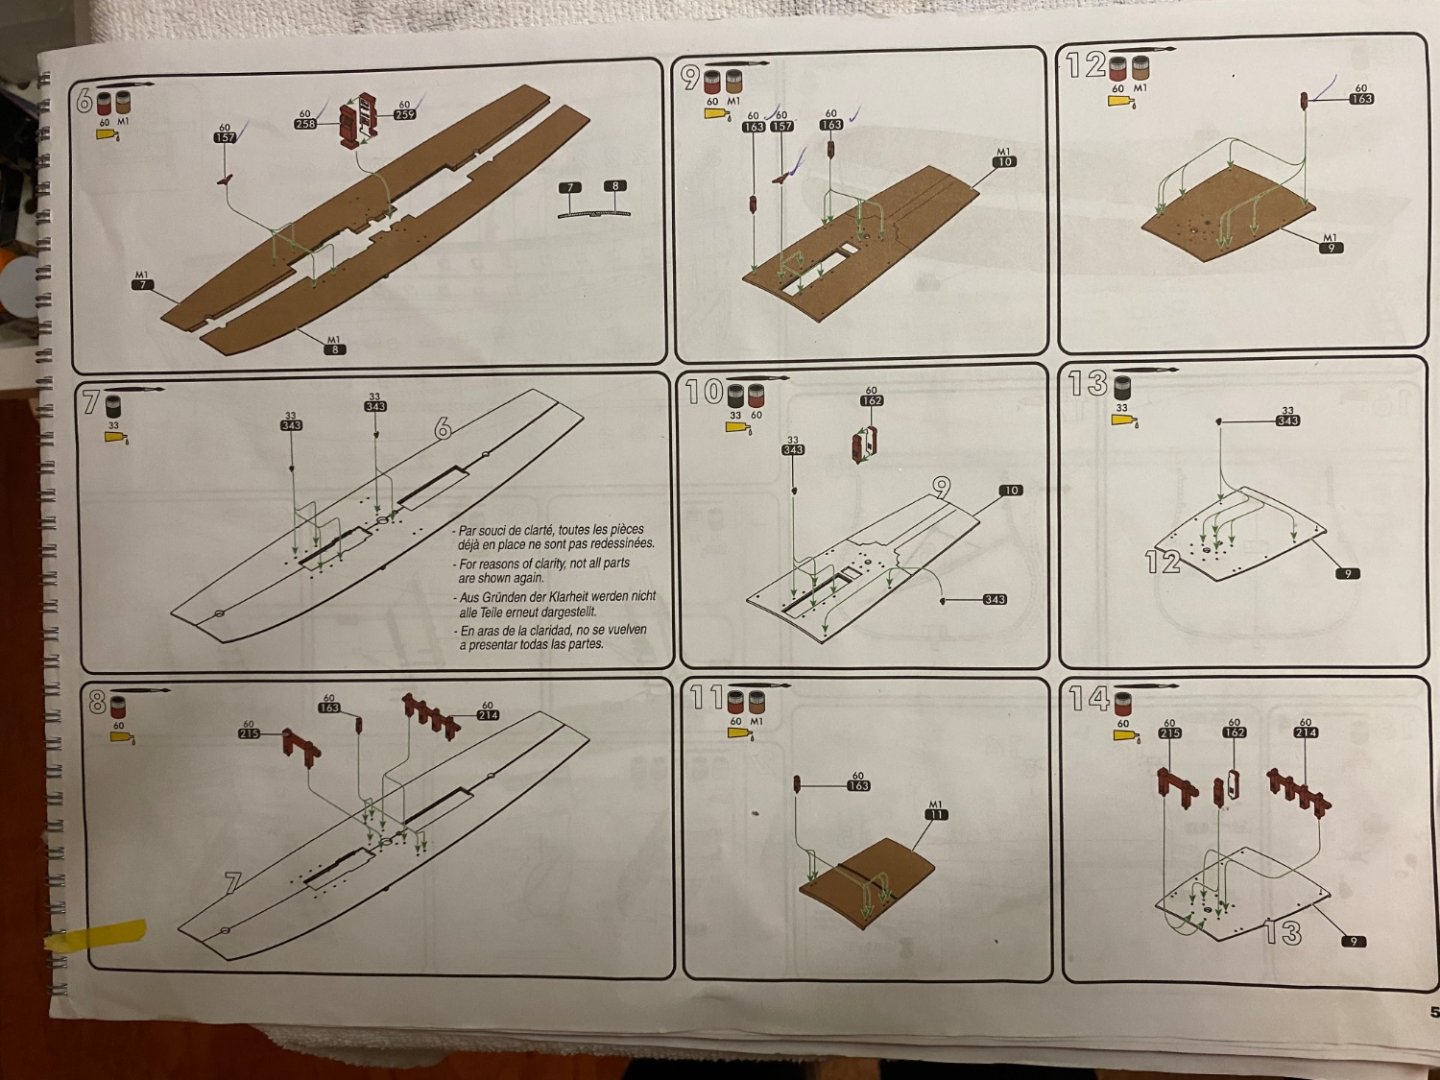
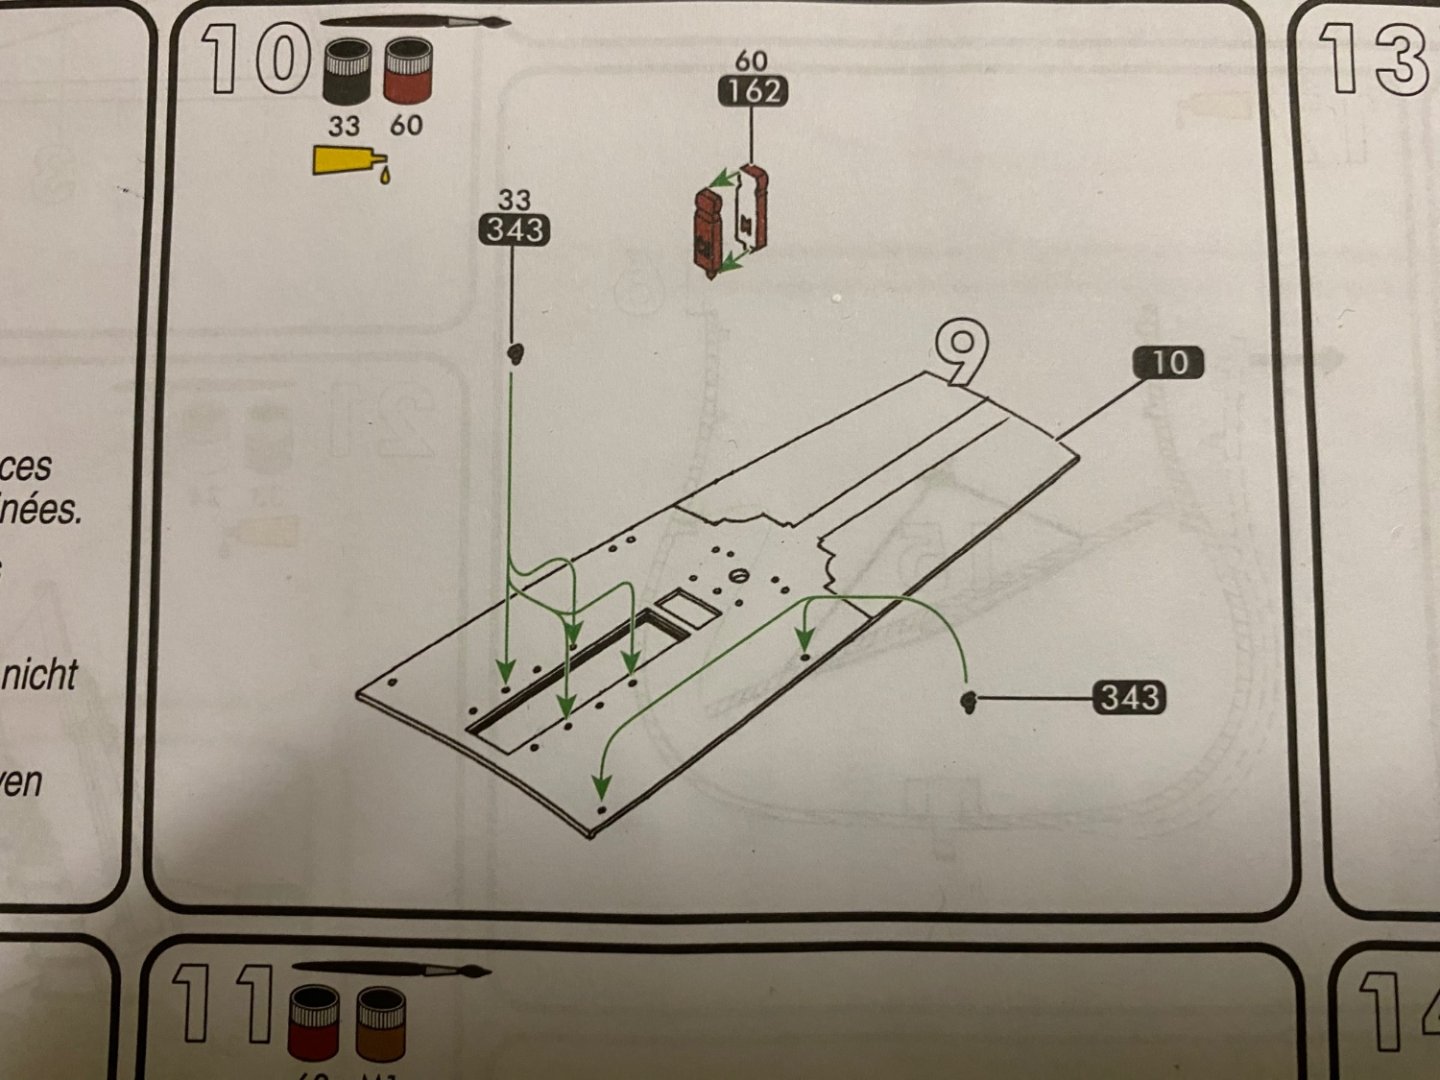
The instructions interesting recommend doing particular task in an odd order, but oh well. Right away it has me building the top deck which will be installed obviously later. The majority is pretty straight forward. I have a question I wonder if someone could help me with. I have attached two pictures. The first is the full page. The second is the step I need help with. Step 10 shows a part #162. In all the other steps on the page an arrow shows where the part goes. In step #10 there is not an arrow showing where part #162 is to be glued. Can anyone help?
-
Yes Henry, I looked at them after our conversation and saw the two molded rings. There are also two on the reverse side I assume to represent the pull down. When the time comes to work on the lids (a year or two from now 😀) I will make my final decision. And if I use your idea I adding the rope later I don’t need to bother with that now.
-
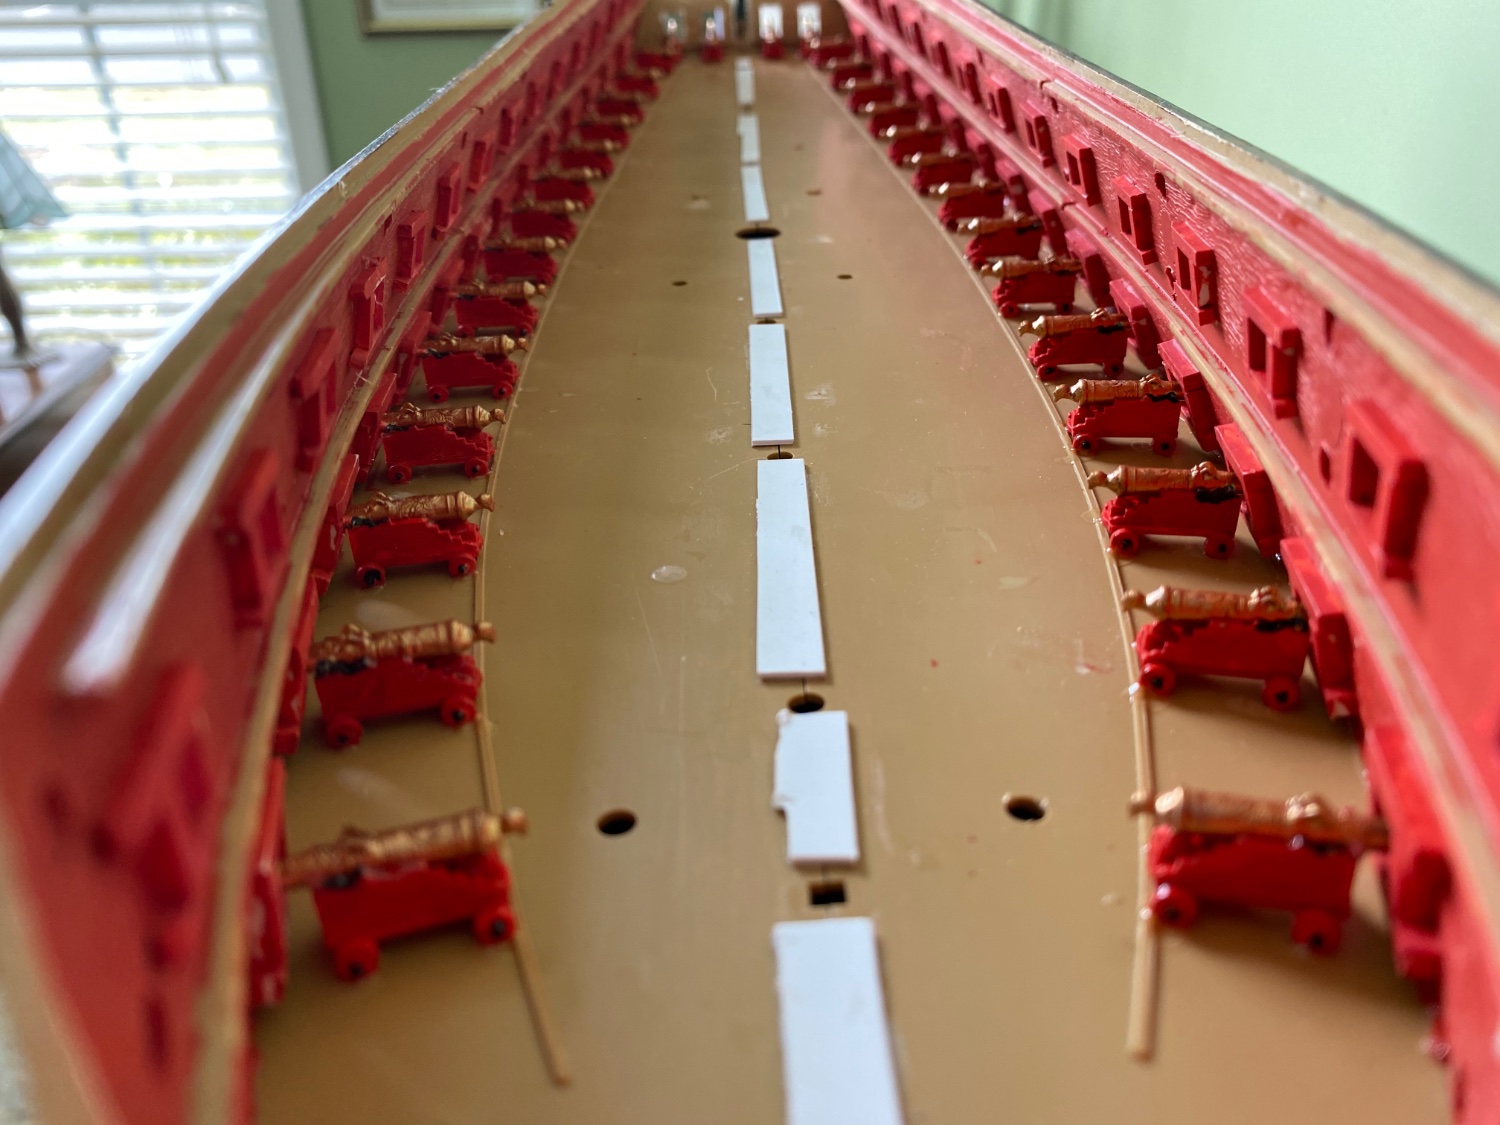
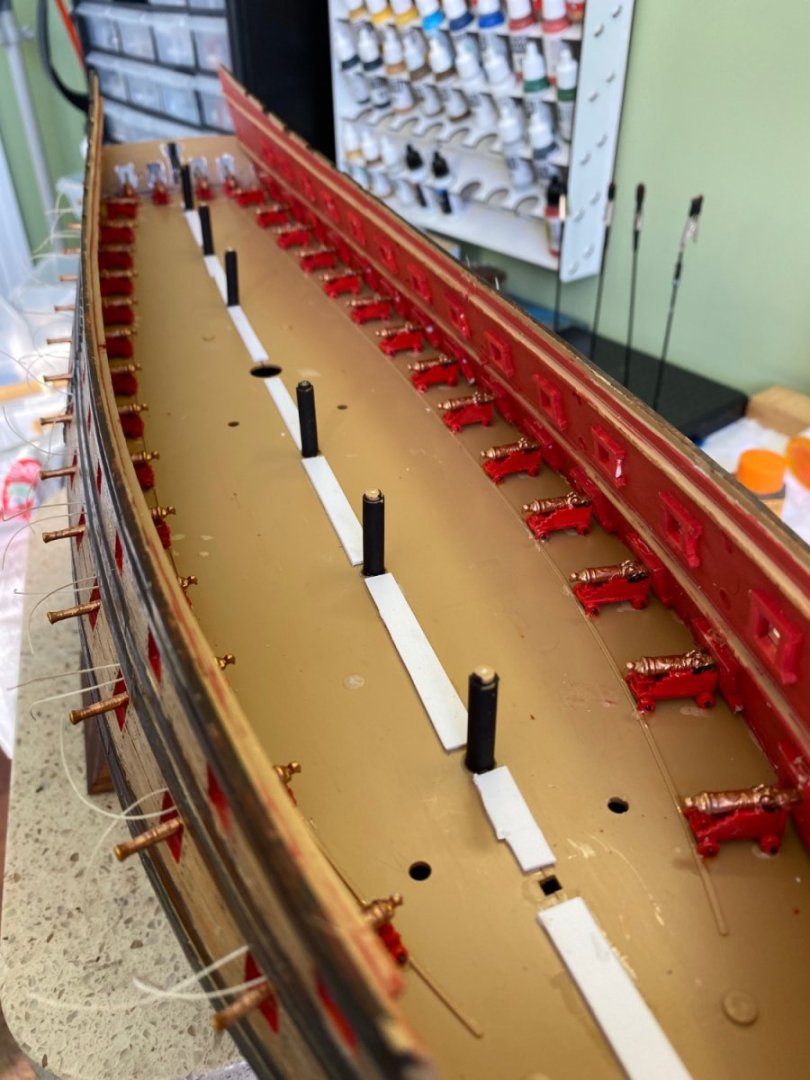
Oh ok I understand. Those are a lot of unseen carriages!

- 1,508 replies
-
- 1
-
-
- Le Soleil Royal
- Heller
- (and 1 more)
-
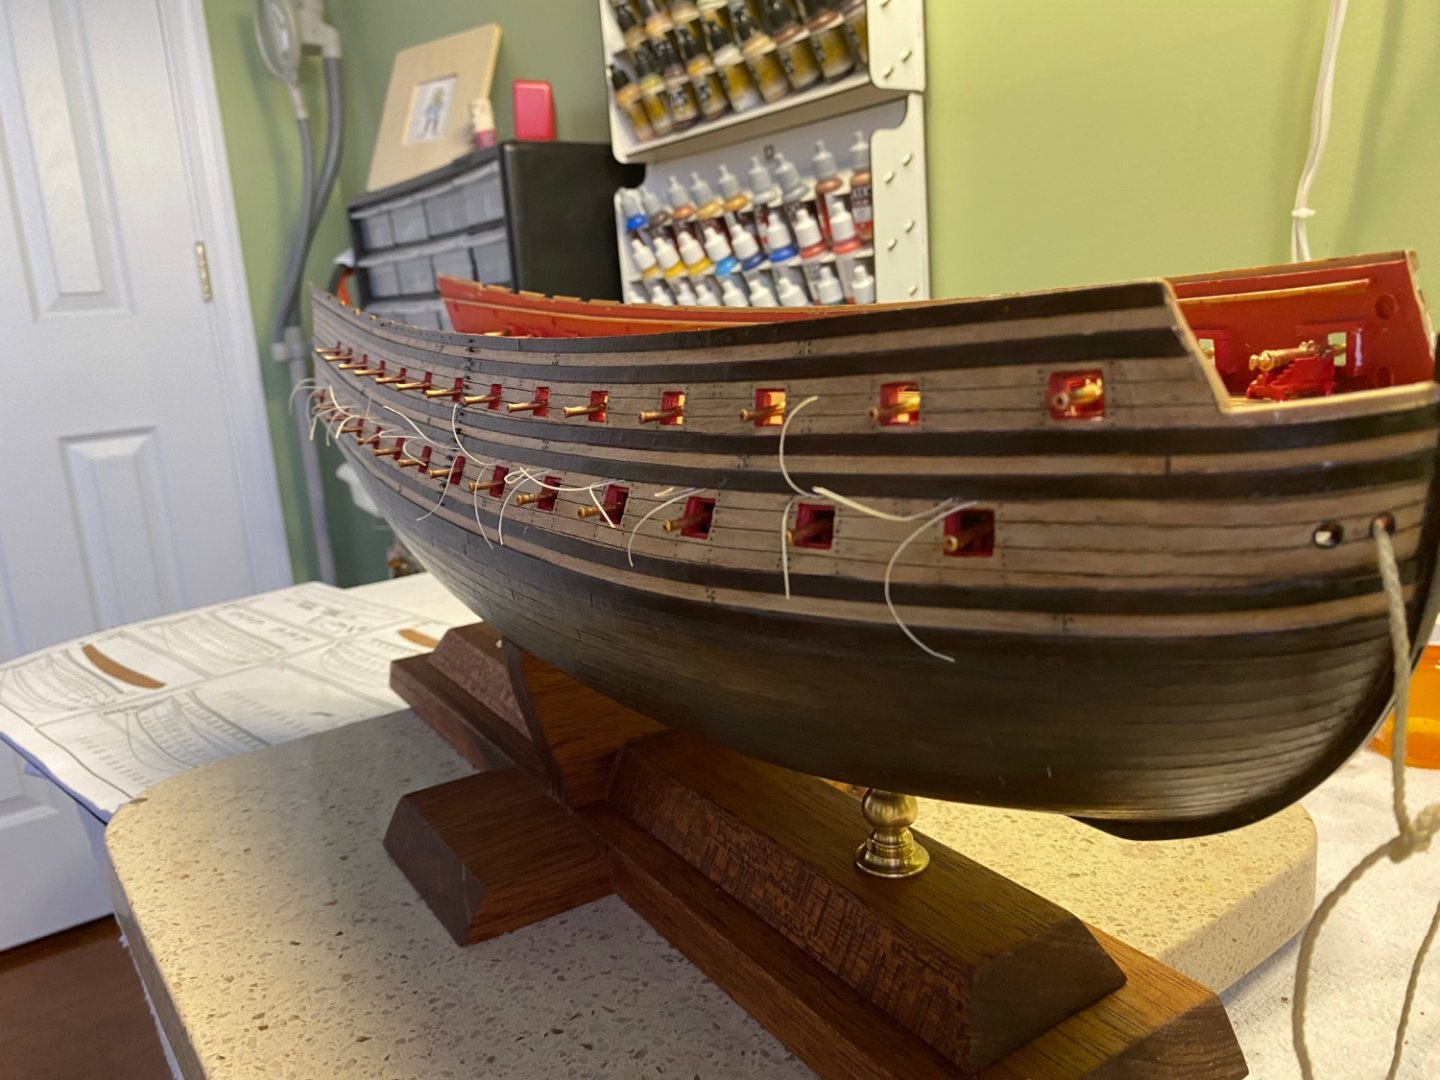
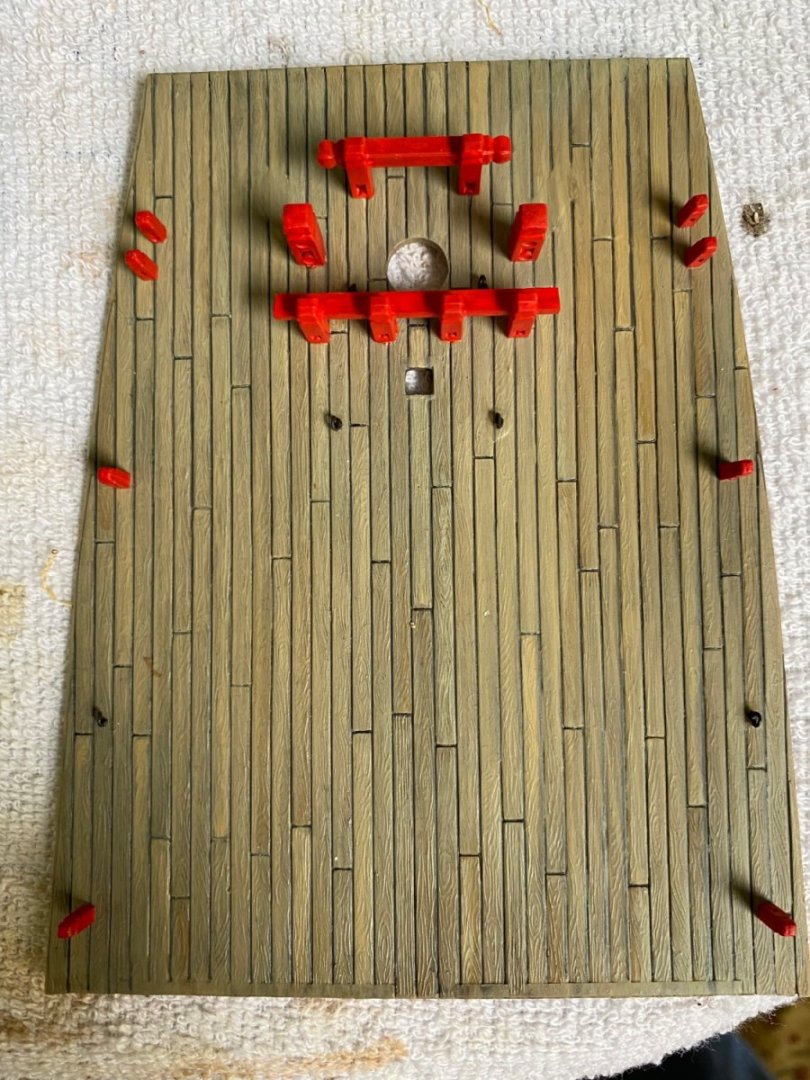
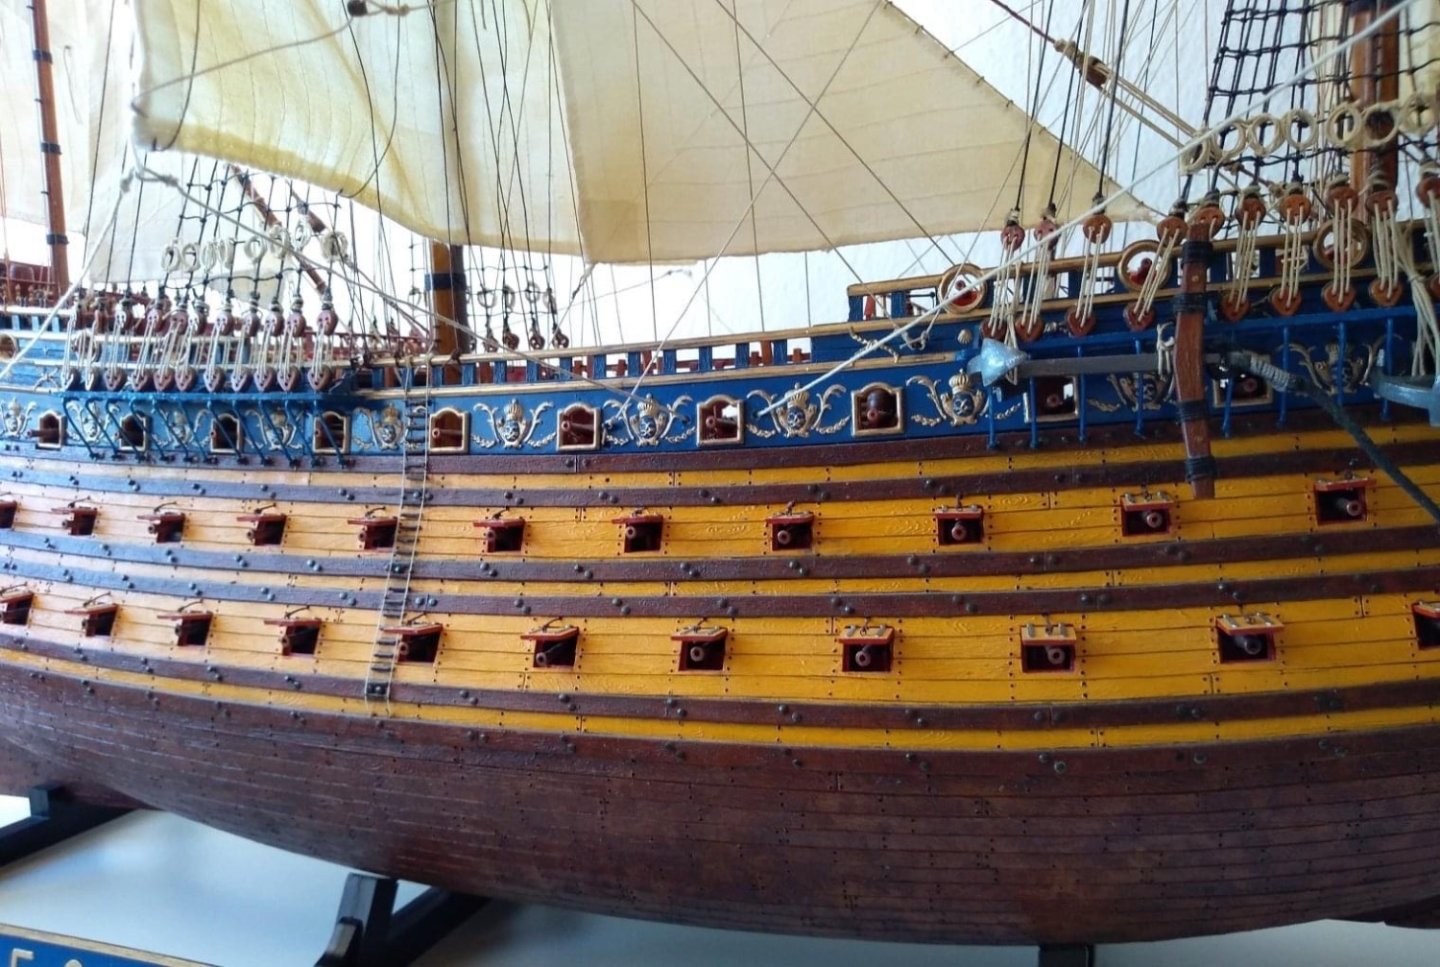
Marc tell me about the carriage blocks you have over each gun. It also looks as if you have made a means to fortify the bottom of your fore and mizzenmast? I completed installation of the stern section and rudder today. Required a little bit of putty and sanding of the seam but surprisingly fit pretty good. A little paint touch and it is good.

- 1,508 replies
-
- 4
-
-
- Le Soleil Royal
- Heller
- (and 1 more)
-
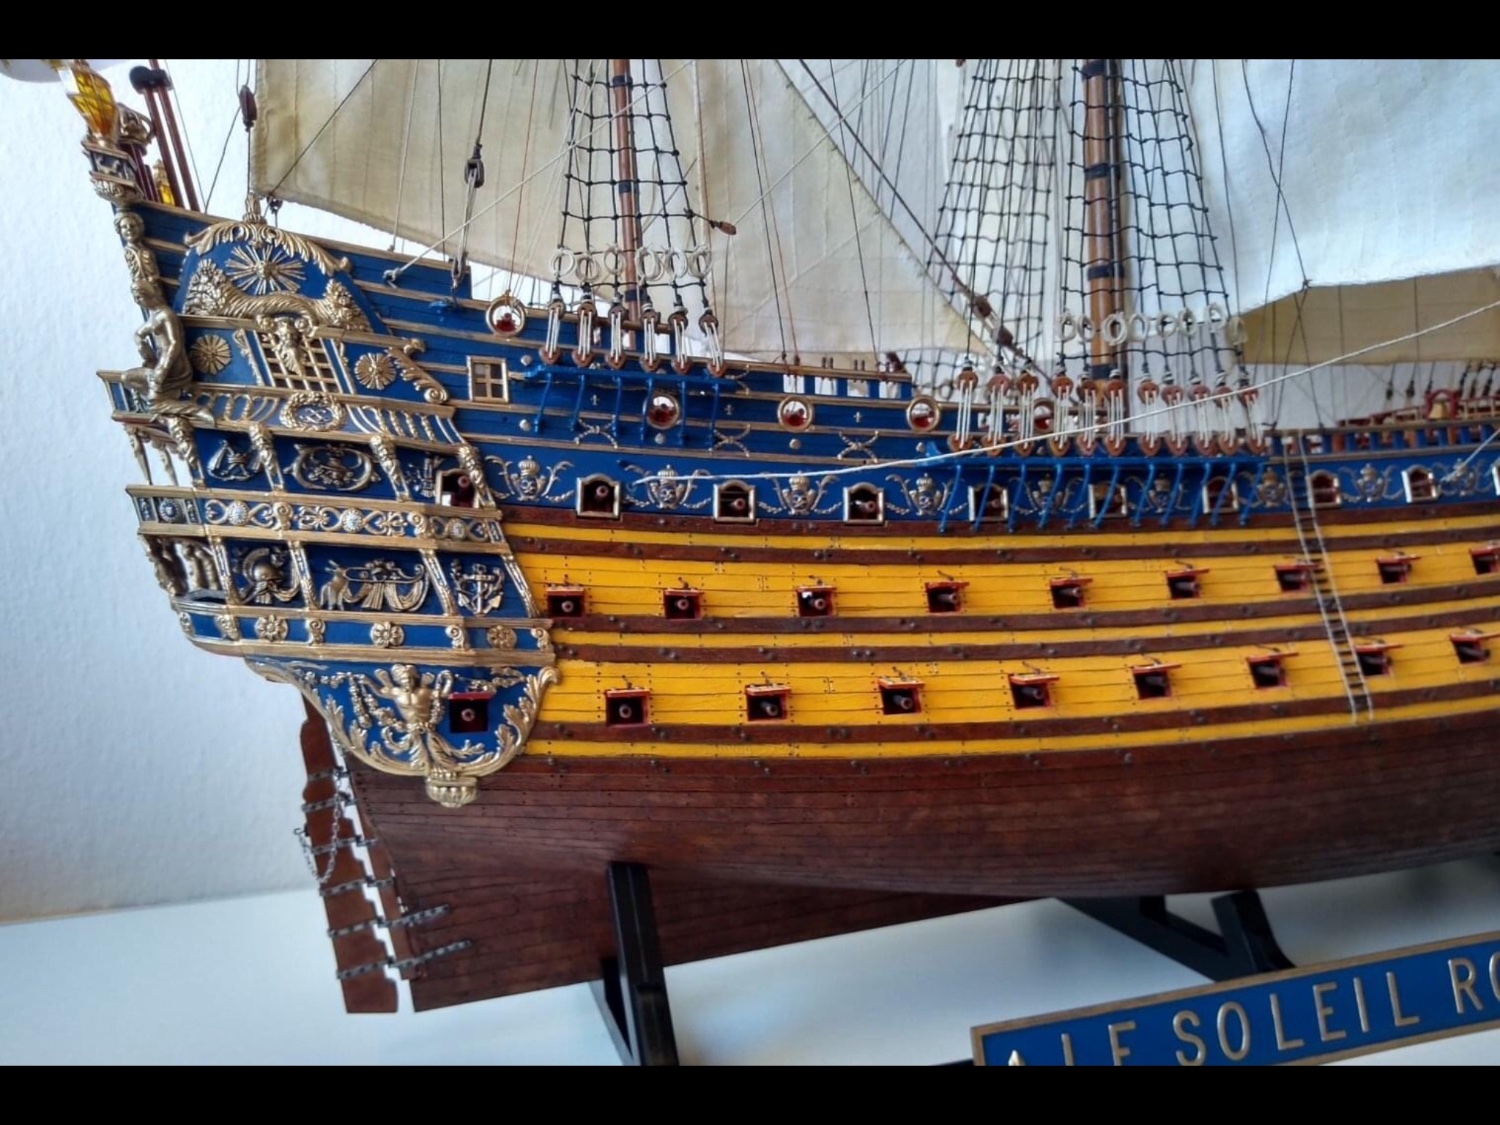
Happy Thanksgiving to all my MSW friends who celebrate it. I am definitely thankful for all your help and support this past year. I noticed in the photos of the design I am somewhat following this builder went with one lanyard. This does not look bad or completely inaccurate. Marc do I understand you plan to display the lids fully open with the outside flush to the hull and one single haul-down lanyard mounted in the center? Do you just place the end of the lanyard into the open hatch out of the way of a he barrel?

- 1,508 replies
-
- 2
-
-
- Le Soleil Royal
- Heller
- (and 1 more)