Balclutha75
-
Posts
179 -
Joined
-
Last visited
Content Type
Profiles
Forums
Gallery
Events
Everything posted by Balclutha75
-
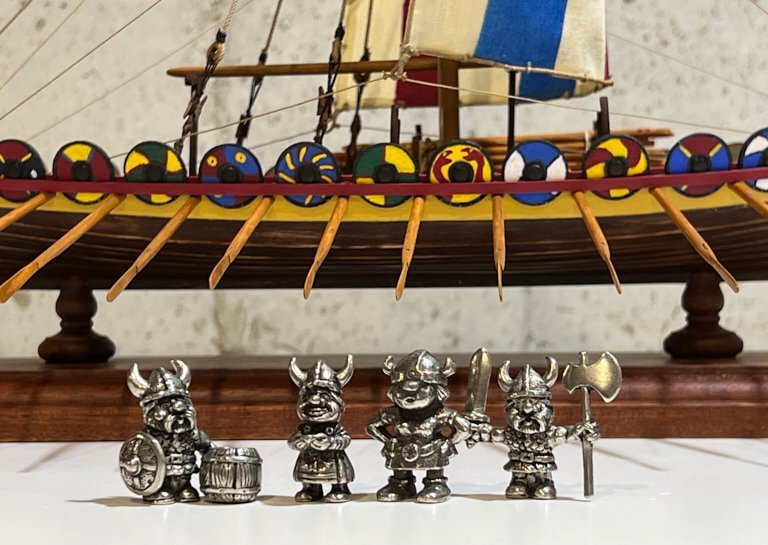
 He is their mythological inspiration. But the guy on the left is their Captain Aegir, who is "associated with brewing ale" in old Norse records, according to Wikipedia. Thanks Chuck and Steven for your guidance on the wood. I will take it to heart and look at MSW sponsors and see what I can come up with, and now plan to place a small order. I see at least a couple there. I'll dive into that tomorrow. And for the tip about scarphing. I would have omitted that, but now will do. I've seen pictures of that astounding Academician head in reading about the Oseberg ship. It is a thing of complex beauty. In looking online, and here at MSW build logs, I read about Viking styles, such as Ringerike and Jelling. To be honest it was hard for me to pin down differences. I chose the head I did because the shape resonated, and I thought there is a remote possibility that I could carve it. Thanks again.
 -
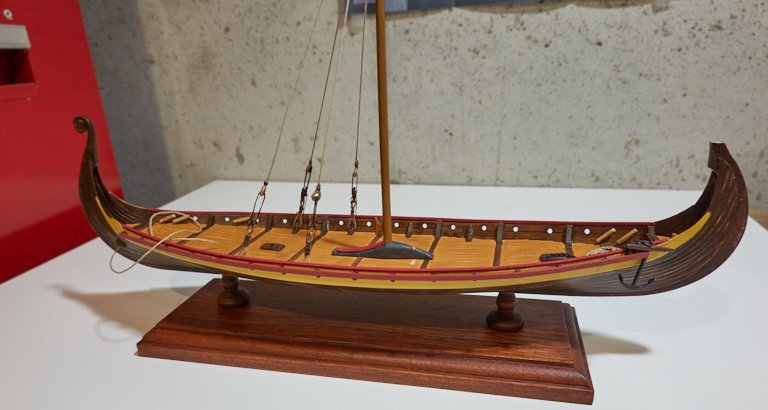
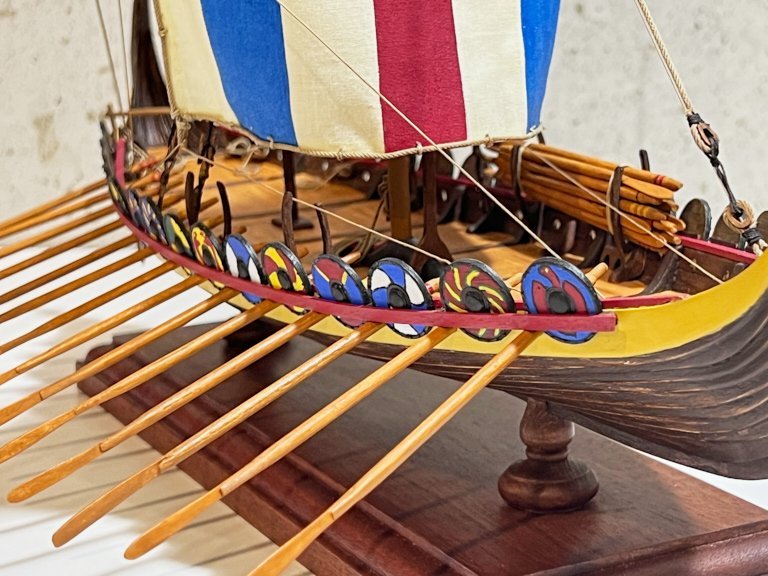
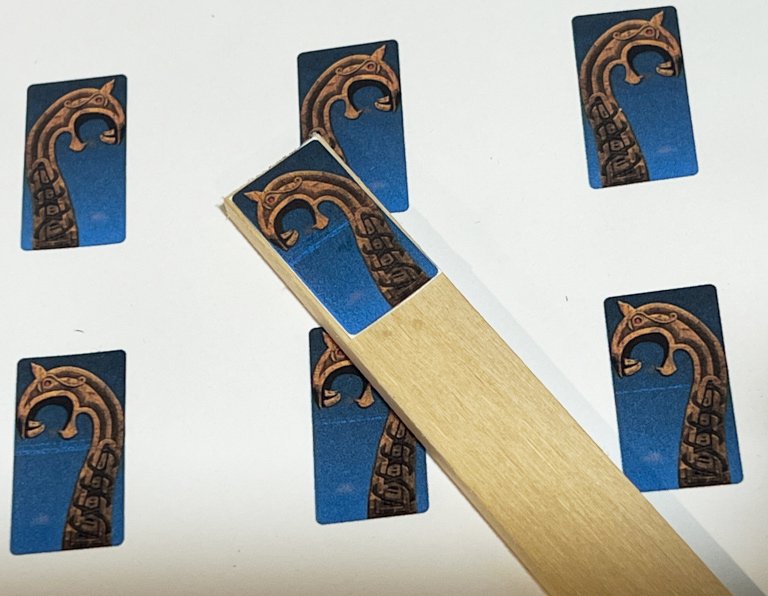
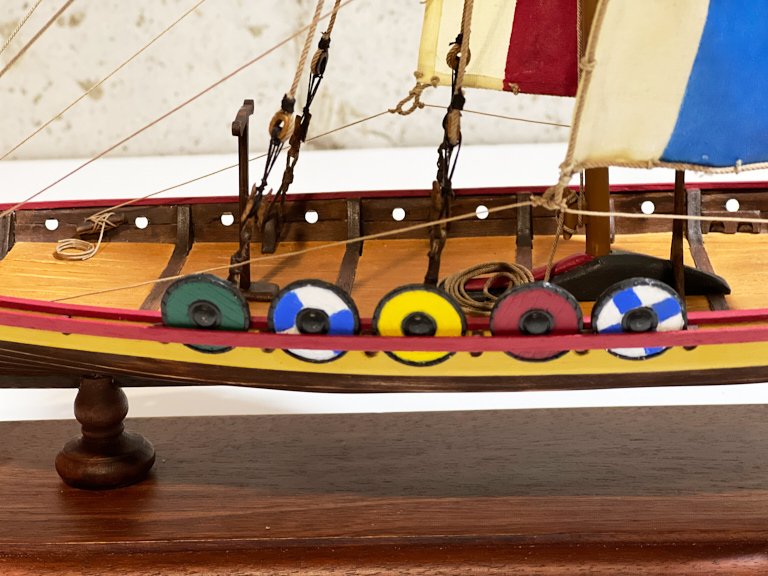
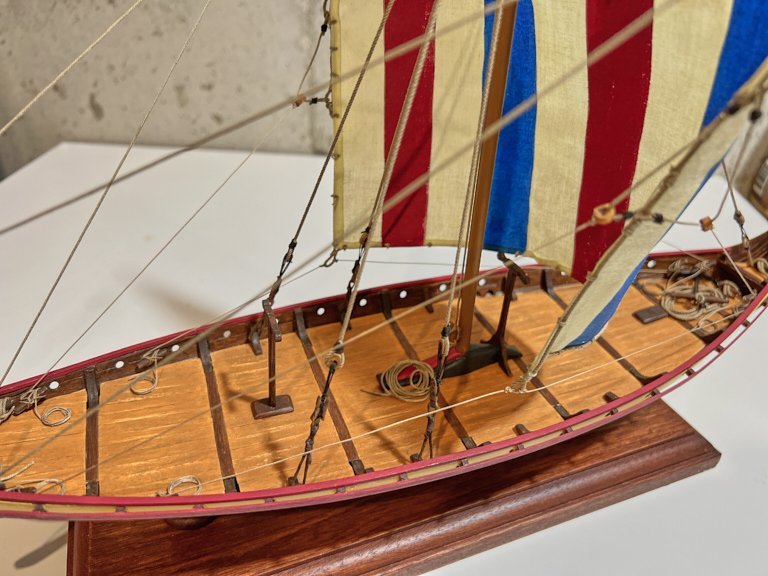
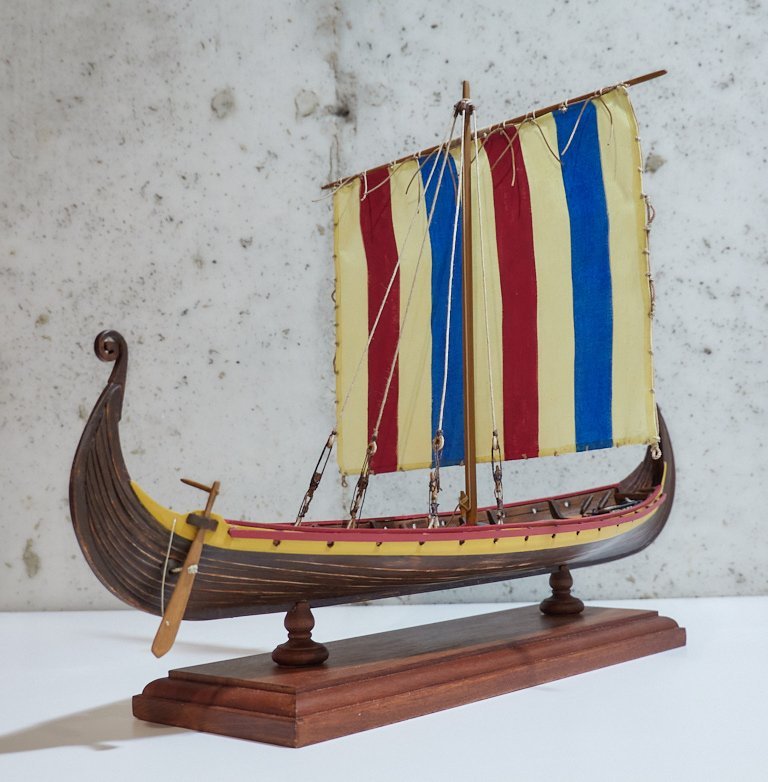
Greetings all, I have been quite inactive for some time, for a variety of reasons, but have started to make some more progress in the last week or so. I am calling the shields complete and have mounted them along the gunwale The oars on the starboard side are also glued in place. My intent has always been to have the oars extended on one side and in their racks on the other. This is dictated by the size of the shelf where the ship will be displayed, not wide enough to have the oars in use on both sides, but I wanted to show them . Next I'll move on to the dragon figurehead, and have this in mind now. The wood is cut from a basswood block I bought at the local Michael's hobby store. I will start chipping away (pun intended) and hopefully it turns out as intended. We shall see. The crew is now getting excited as they see some progress at last! Thanks for having a look.
-
Thanks man. Really appreciate it. I'm pleased with them too. Happy New Year!
-
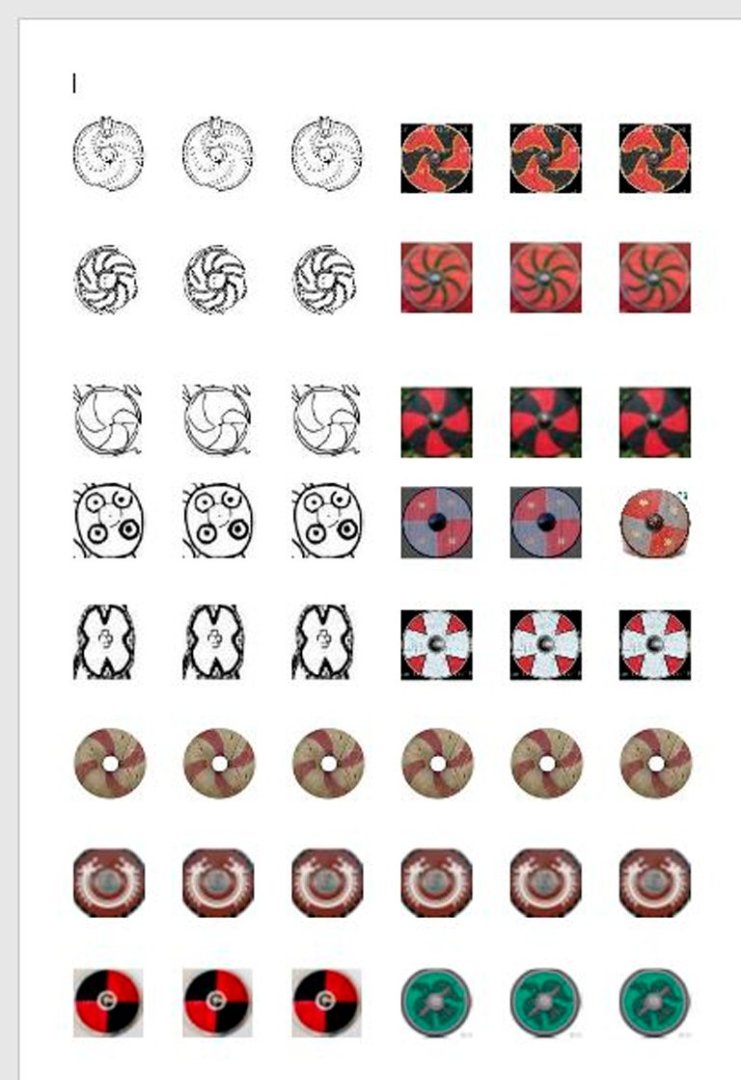
Slowly (as ever) moving forward on the shields. I posted a question in the tips forum, and followed a suggestion there to use graphite paper to transfer the patterns from a printed template to the shields. Here are the printed patterns, scaled to 18mm diameter size. These were gleamed from various online sources including Steven's shield side posted above: http://members.ozemail.com.au/~chrisandpeter/shield/shield.html I cut one of these out, poked a hole using a center punch, stuck a piece of graphite paper under it, then tried to transfer the pattern to the shield. It kind of works! You can get an idea here. Work in progress: Since the ship will be displayed with the starboard side facing the viewer, I can choose the nicer looking ones to face outward and regulate the flops to the port side facing the wall. 😆 The chance exists that I can put the coveted "finished" label on this log later this winter, we shall see. No rush in any case, but I do have another kit in the sitting wings for quite some time now (Master Korabel St. Gabriel). Thanks for having a look.


-
Thanks much Keith, nice job on your ship and the dragon head. I like your display. I confess I had to look up "dry brush" and now have learned something. I may wind up doing something similar with the kit dragon, but I think I'll try my hand at carving at least once more. Thanks for the encouragement Steven. I can also report the second attempt was a disaster, though not as bad. A passable angry duck, at least. I have see that shield page you linked to in the past, but thanks for pointing it out again. I'll try to incorporate some of the patterns in figures 11 & 12 into my shields. I have a question about all this that I think I'll post in the paint forum later today. I actually had thought of making my own shields by carefully using a mitre box to cut slivers off a dowel as a start. But then what would I do for the boss, the rim and boards?? I quickly realized I don't have the required combination of skill/tools/patience to make that effort a success. As you say, no one in my audience will know the difference!
-
Thanks much Knocklouder. It's a great thought to think this log can be useful to someone someday. Much appreciated.
-
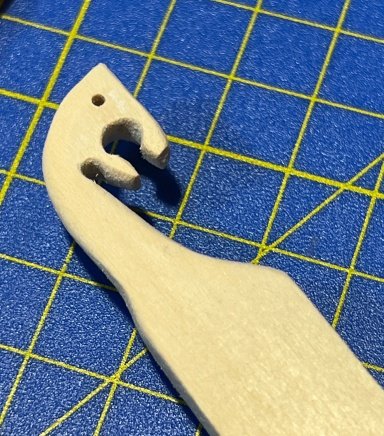
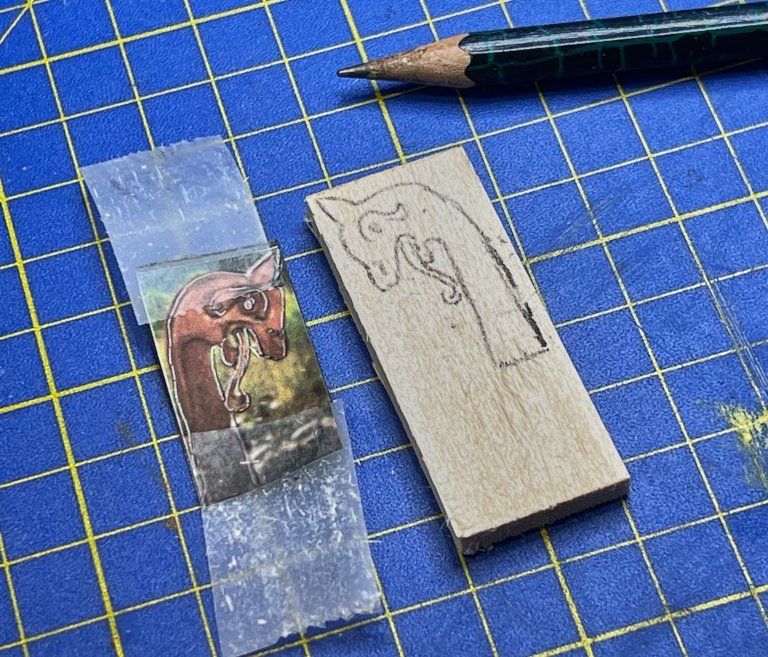
On another front I've been pondering what to do about the dragon figurehead. The kit comes with a cast metal dragon head. I'm not really crazy about that, so I decided to try my hand at carving something out of plank of wood. I glued an image found online to a 5/8" plank. I worked at it with a dremel, drill bit, files and sandpaper. The result looks more akin to an angry duck than a dragon. You'll have to take my word on that. So it will be back to the carving board, but painting the kit figure remains a possibility.

-
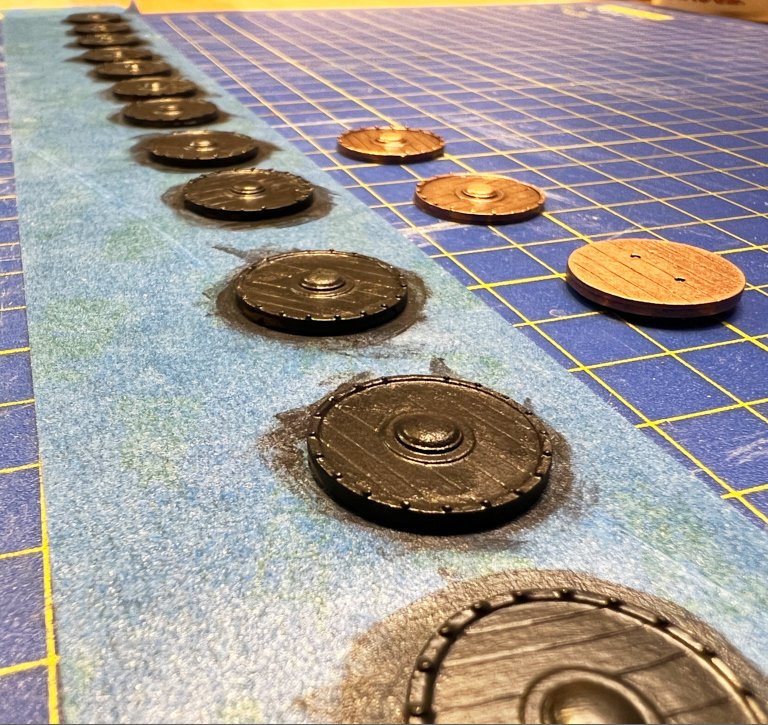
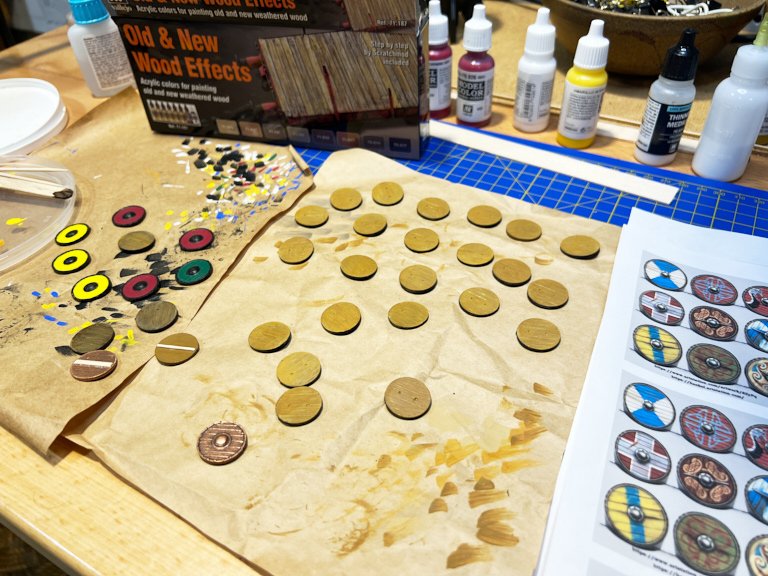
Greetings! It's been a while. I have taken most of the summer off from modeling, but now am back. I've been slowly painting the shields. The ones that come with the kit look like stamped copper, and don't take to paint all that easily. But here is the idea I'm working towards. These are not done yet but just positioned to see where I might be headed. To get here I first painted the face of the shields black, planning to keep the boss and rim black as if they were iron. Then I painted the wooden planks with various colors. Here is the black paint assembly line, with some of the unpainted copper ones for reference. The rear of the shields I'm attempting to make look like weathered wood, with marginal success. Here is work the in progress. In the above picture you can see one unpainted shield in the foreground. The bunch above that are in the early stages of adding weathering layer. To the left there are two farther along in the weathering process, just in front of the painted shields. These are acceptable to me, though I may do some more work. Also, in front of these are two experiments with possibly gluing a thin strip of wood to simulate handle. Of course I'd paint the wood beforehand if I actually decided to do it, brown to simulate leather. On the right are some printouts found online of possible patterns I could try to paint. Although there is no way I can do the detail work, perhaps I can give an impression of what it might be. The jury is still on that. Thanks for looking.
-
Thanks much GrandpaPhil. I found the intro to carving group posts, I will look into it for sure, appreciate the heads up. https://modelshipworld.com/forum/84-build-logs-for-the-carving-group-project/ I found some food for thought here: https://ucrazy.ru/interesting/1569258277-drakkary-i-dreki-vikingov-istoricheskie-fakty.html
-
Snug Harbor, thanks much for your comment really appreciate it! Everything you say about the Syren rope is true. I tried a few brands of rope out of curiosity, they all had fuzzies. I tried applying beeswax, which I read about, but that didn’t work. Also, I appreciated that they are in small coils instead of wound tightly, so they don’t kink like the kit rope. I do plan to attempt at least a few chests and perhaps some other assorted flotsam and jetsam, maybe bales, buckets. I’ll try to strike a balance between having some stuff on deck, but not overly cluttered. We’ll see how it goes! Thanks again.
-
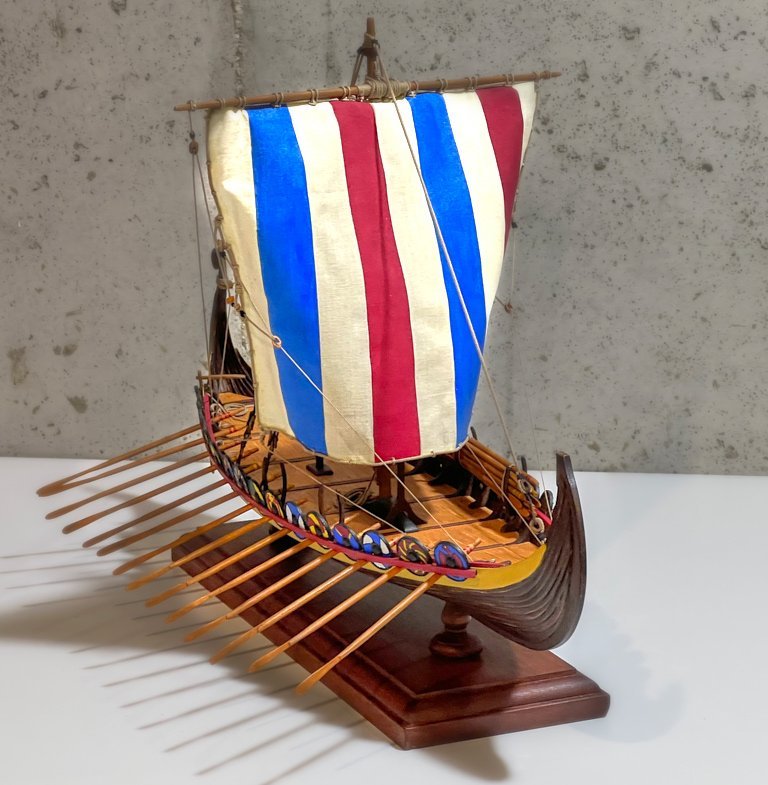
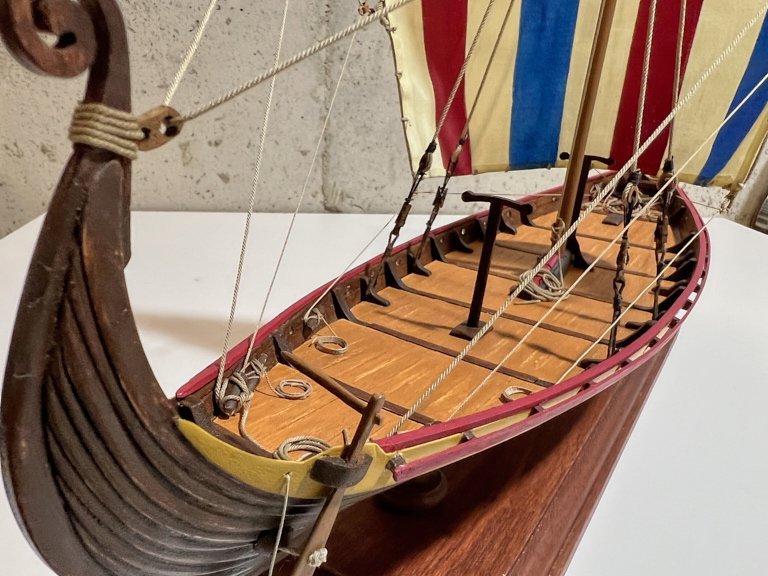
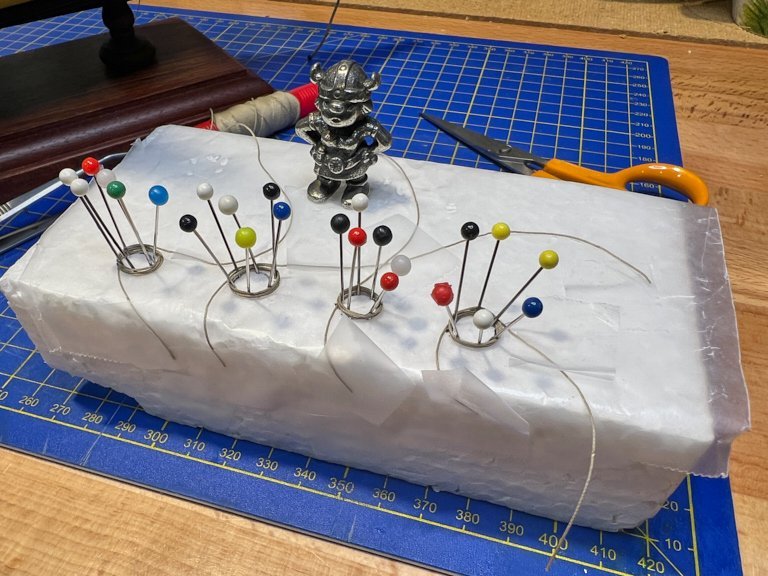
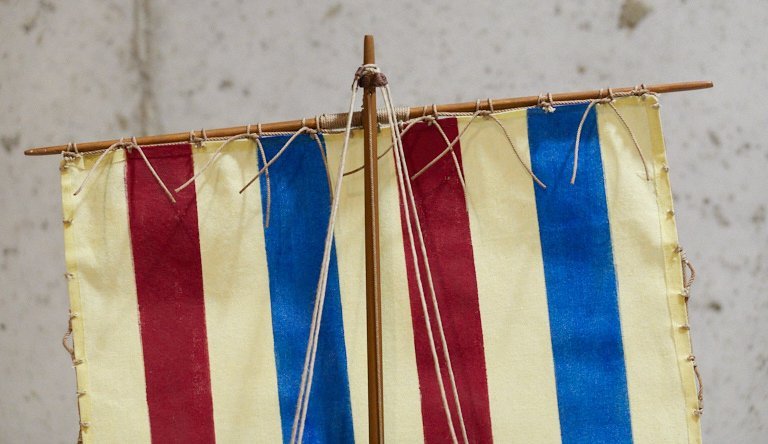
Hello and greetings from the shipyard! It's been some time since I posted. We were out of town for over a month and now I have been s.l.o.w.l.y back at it. It's good to be here. The yard and sail are now rigged. In fact they were rigged twice. First I used the Amati rope. Then after I ordered more Syren rope I decided to tear it all apart and redo with much nicer Syren. The workmanship didn't improve, but the end result was better looking. The rope hangs more naturally for one thing, and of course the strands look so much nicer. I added wind to the sail by hanging it horizontally from my Quad Hands tool, sprayed it with dilute white glue and put a plastic bag filled with baking flour on the sail. When it dried it had a nice looking curve. (This trick learned here on MSW, but I can't find the log now. Thanks, whoever you are!) Sorry, I didn't take a photo of this step. The rope coils were made using a piece of Styrofoam with parchment paper taped to it. I could then make circles with pins, wrap the coils around the pins dab them with glue. Admiral Helga keeping any eye on the procedure. When the glue dries the pins are removed and the coils can be glued to the deck. I think that trick, or something similar, was from a Tom Lauria video, but I'm not sure. Overall, I'm pretty pleased with how it's turning out. Next up will be the shields. I'm not sure what I'll do with them. Should I try to do various patterns, designs, curves, or just stick with solid colors? Some experimentation will answer that. Here are some shield links for thought, the first one, at least, from Steven: http://members.ozemail.com.au/~chrisandpeter/shield/shield.html http://www.vikingage.org/wiki/index.php?title=Round_Shield_Designs#/media/File:Shields Also thinking about the dragon head. I'm not happy with the cast metal one that comes with the kit, so I'm thinking of trying to carve something simple. But I've never carved anything before. I guess this will be a good time to start! Thanks for having a look.

-
Sorry about the circumstances, but nice to see you posting.
-
An exciting event: the sail is attached to the yard and temporarily raised on the mast! I'm pretty satisfied with it. I'm going to lower it because I purchased some fabric stiffener at the local Joann's, and will attempt to add some wind to the sail with it. I experimented with adding reef lines, but finally decided against it. For one thing, I tried to glue on some reinforcement strips, as cathead shows here, but since my sail has been soaked in dilute PVA and painted, these strips just didn't want to stick. Finally I decided that my various trial runs on scrap pieces were just not looking, and I'd likely ruin the sail if I persisted. However, my wife came down to see what I was up to, and suggested why not leave the lines at the yard hanging down? These can be used when the sail is furled. I'm thinking I'll do that. I will try to get them to hang straight once the sail is stiffened. If any justification for doing this is needed, beyond modeler's choice, I found two items. First this seal, which I think is from 1297. This was posted in woodrat's log of a hulc. (I found this via a link Steven posted in another viking log.) One can imagine lines like this hanging from the yard... maybe? Also, this beautiful model of a 1st century B.C. Roman ship has them: https://www.modelships.de/Roman-trade-ship/Roman-trade-ship.htm Unless there is a compelling reason not to do this, I think I'll leave them. We will be leaving town next week for a road trip to Arizona and I probably won't have be back at it until April. Thanks for having a look!

01.png.f55b4511894a1c879eda96615d4d2380.png.265fe219a7ded6864a0a536089c63d3d.png)
-
Thanks Toolman, hope to see a log from you. There is a lot of great information on Viking boats here on MSW. Good luck on your build.
-
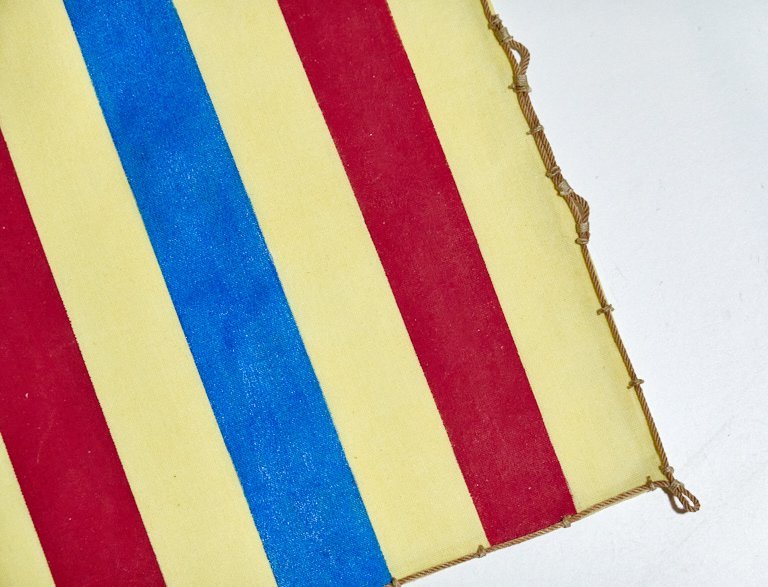
The bolt rope finally is on the sail: In a previous post I had stated, with some confidence, that I wouldn't be able to sew the bolt rope, and was planning to glue it. That turned out to be prematurely un-optimistic . I did sew it, but instead of using a continuous stitch I simply poked holes in the hem with a dental tool, then sewed a couple of turns with the 0.5 mm kit rope. I knotted that with a half-hitch and dabbed on some diluted white glue. In case you are wondering why the bolt rope itself looks so nice, it's because I ordered some from Syren Ship Model. Wow, is that nice stuff! Too nice for this model in fact, but now I know what all the buzz is about. Looking forward to using this in the future. Next I have to decide on the reef points - if, what kind, how many - and attach the yard. I also have a plan to try to put some wind into the sail. Wish me luck! As an aside, we are planning our semi-regular trip to warmer weather in Tucson, Arizona and in the course of planning I stumbled on this museum exhibit, "Sentinels of the Sea: Miniature Merchant Clipper Ship Figureheads by Lloyd McCaffery" at the Tucson Mini Time Machine Museum of Miniatures. https://theminitimemachine.org/exhibitions/sentinels-of-the-sea/ Looks like it will be worth checking out. They also have one ship model and cannon on display: https://theminitimemachine.org/exhibitions/hamersen-miniature-ship/ Maybe this is of general interest, so I also posted it in the museum news forum. Thanks for having a look.


-
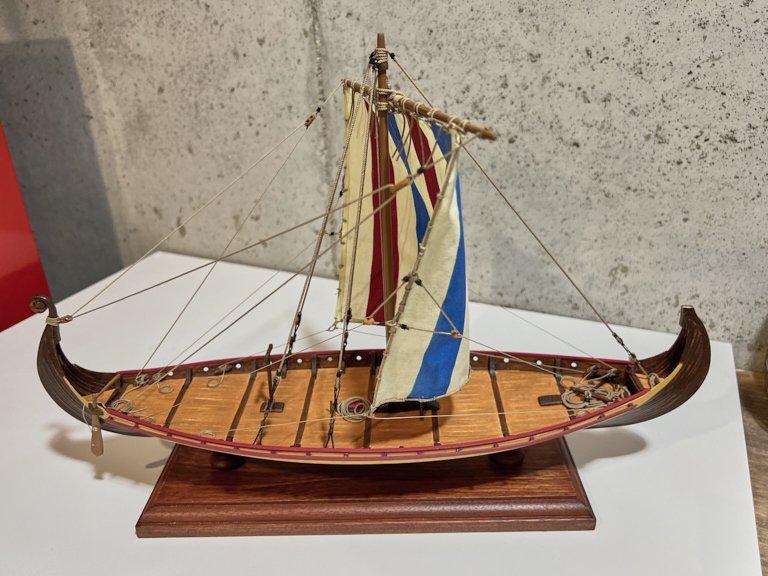
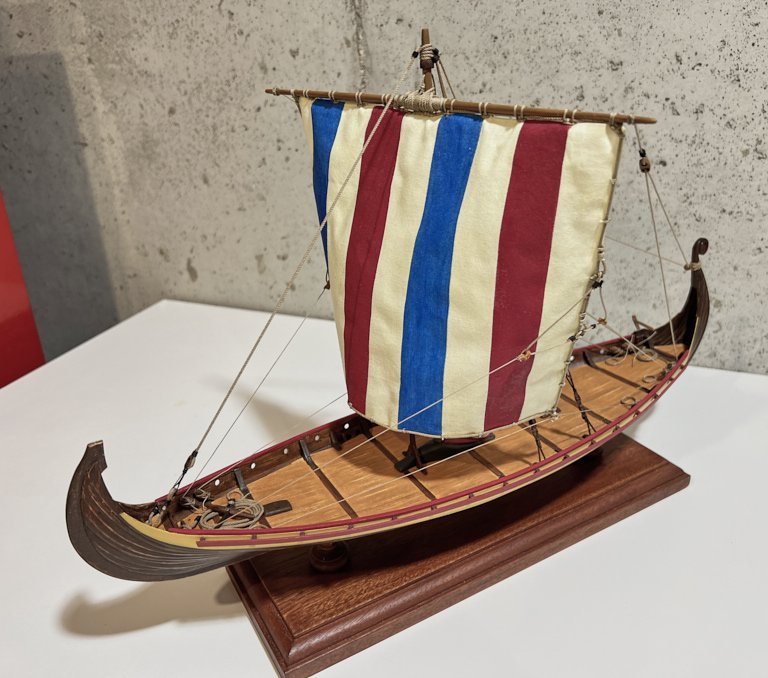
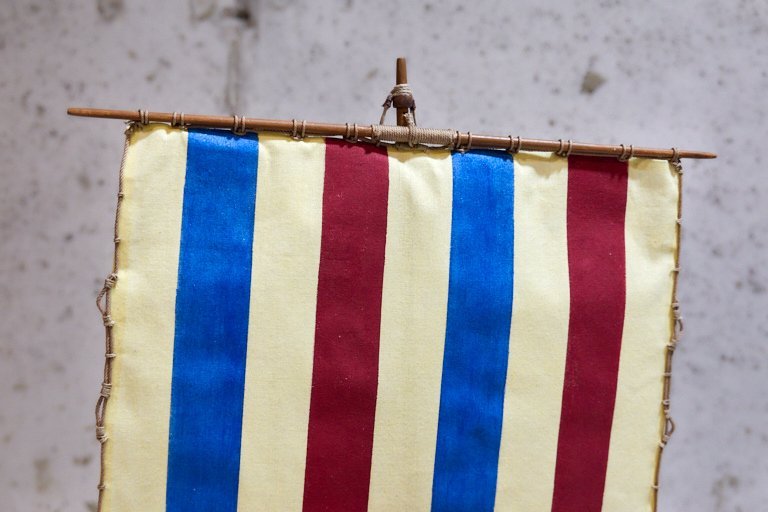
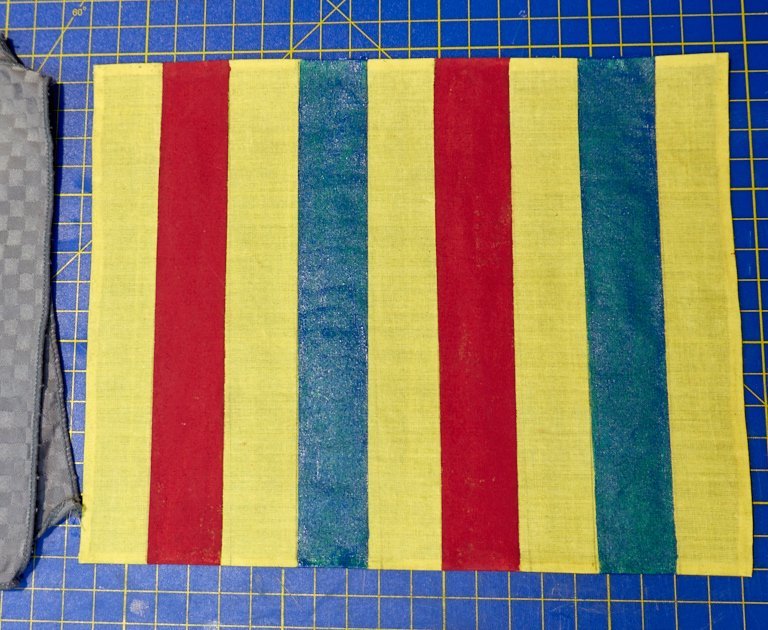
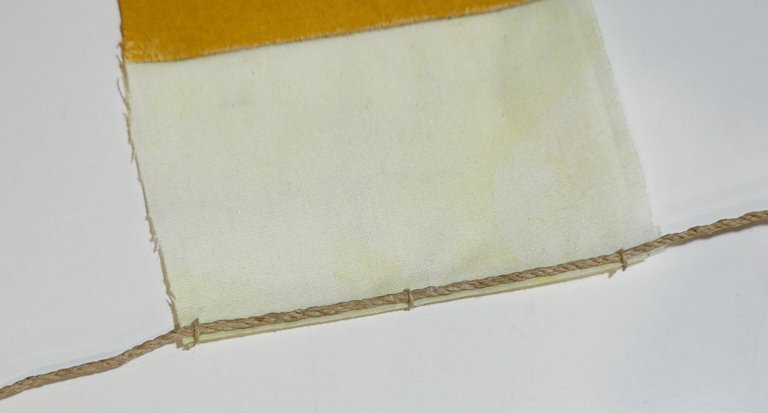
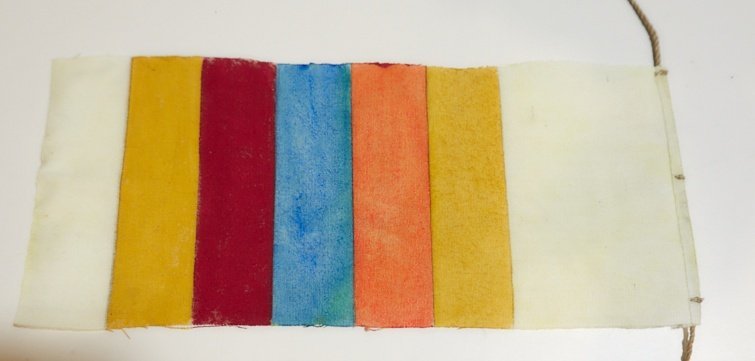
I made an attempt at painting the actual sail, and here it is. Unfortunately I had a little, shall we say, accident on the reverse side and will have to redo. But this will be a useful experimental piece. The sail is stained with Numi Three Roots turmeric tea (with ginger, licorice & rose). This stuff will stain anything that it comes in contact with, and in fact may stain anything nearby in the room. And you can drink it. The red is Vallejo number 926 red, and the blue is Slick Dimensional Fabric Paint, royal blue. That is an 18% grey cloth on the left, so the white balance in the photo should be OK. I've been playing with red, yellow and blue patterns for a while but settled on the above largely due to the winter issue of Nautical Research Journal. I joined NRG a couple months ago because it seems like a good organization and I'm enjoying the hobby, regardless of my skill level. An article in the journal is of a fabulous medieval hulc by Bill Wardle. A similar color pattern is used in the sail. Thank you, Mr. Wardle.
-
This will be a fairly uninteresting post to most folks, but I guess it's part of the journey. I've been experimenting with painting stripes on sail material, and much to my surprise, it is actually possibly without bleeding the edges. I used 5mm Tamiya masking tape for the edges and the result is here on this scrap piece that is about 6x2 inches on size. (~70x170 cm). I'm experimenting with colors, still deciding on what pattern and how many colors to use. The jury is also out about adding the diagonal strips as shown in the kit instructions. On the right the 2mm hem was folded over, ironed down and glued with Fabric Fusion glue. On another piece of scrap I experimented with sewing on a bolt rope. I decided that there was no way on earth, or anywhere else for that matter, that I'd succeed in making that look good. Instead I glued the bolt rope in place with white PVA, then sewed on some periodic individual thread like this. I believe I can make this work. The good news from this is a week ago I had no idea how to construct a sail, now it feels like there is a workable path forward. Onward!
-
Really superb work and a excellent and informative log! She's a beauty.
-
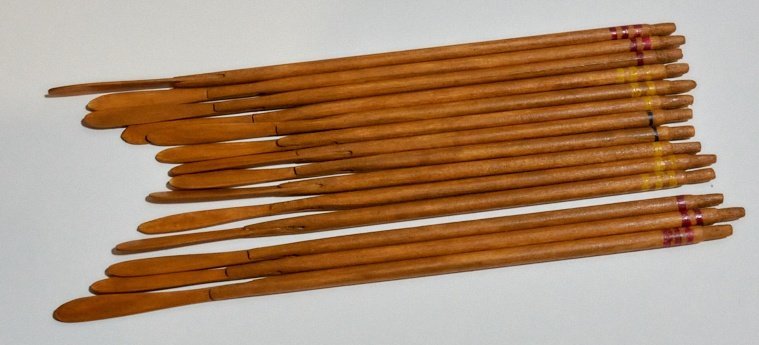
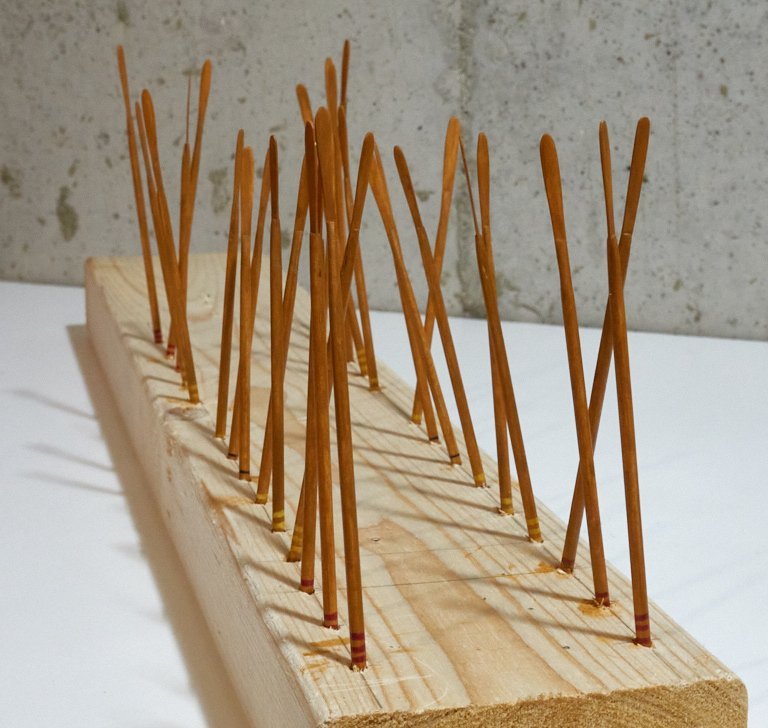
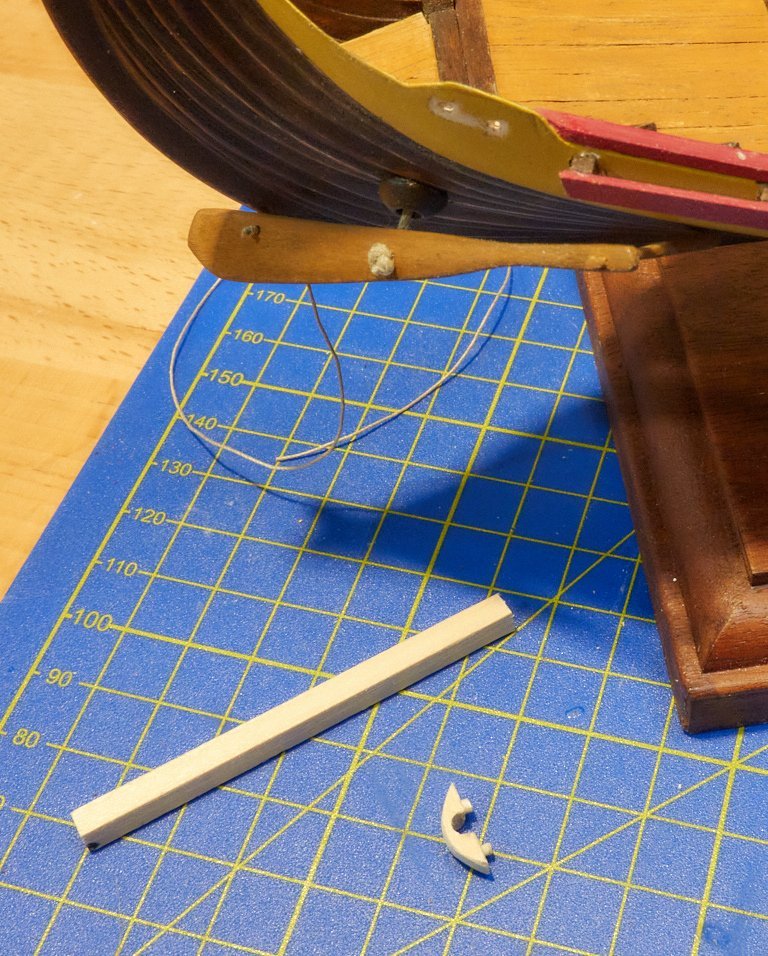
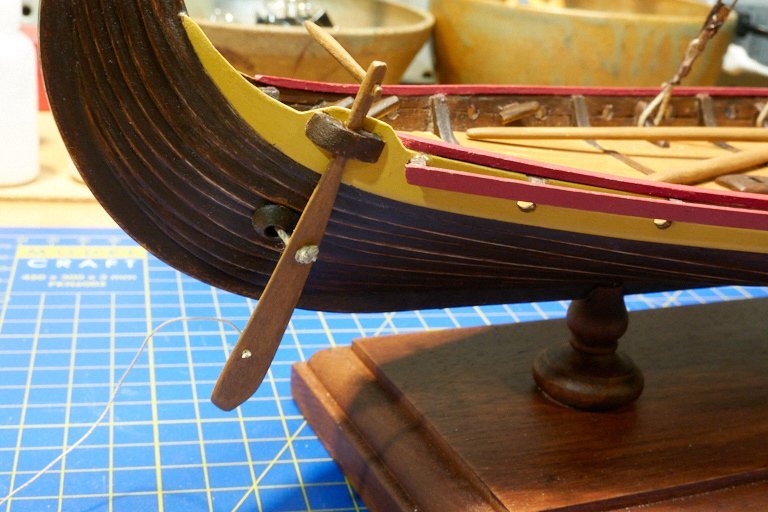
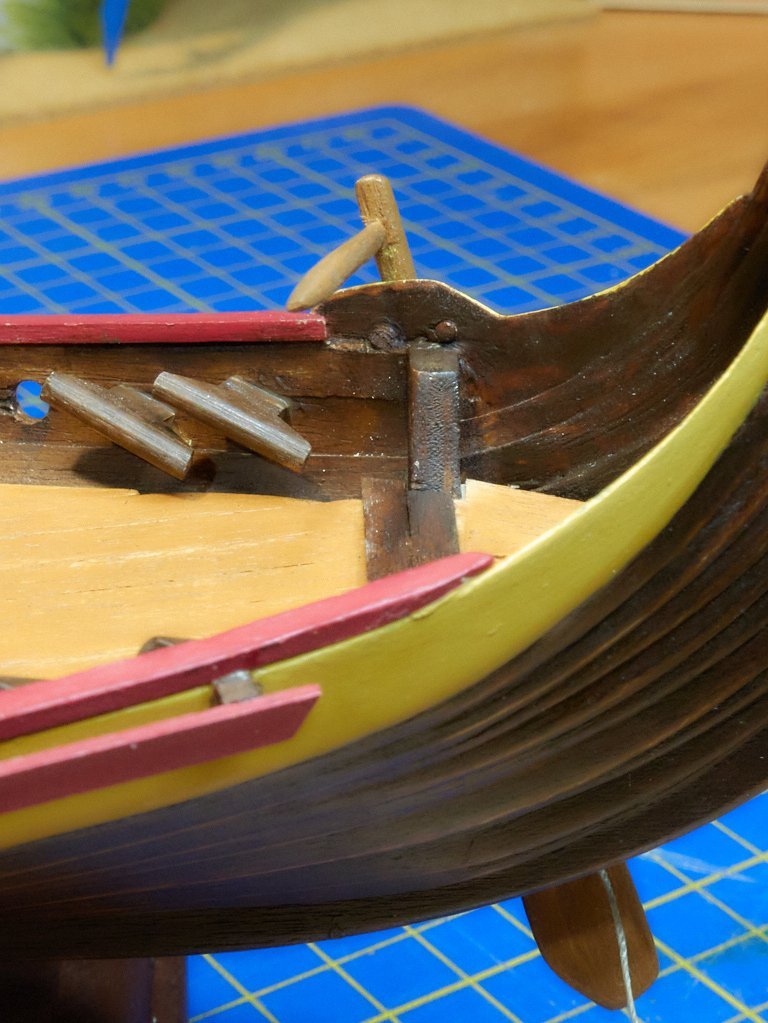
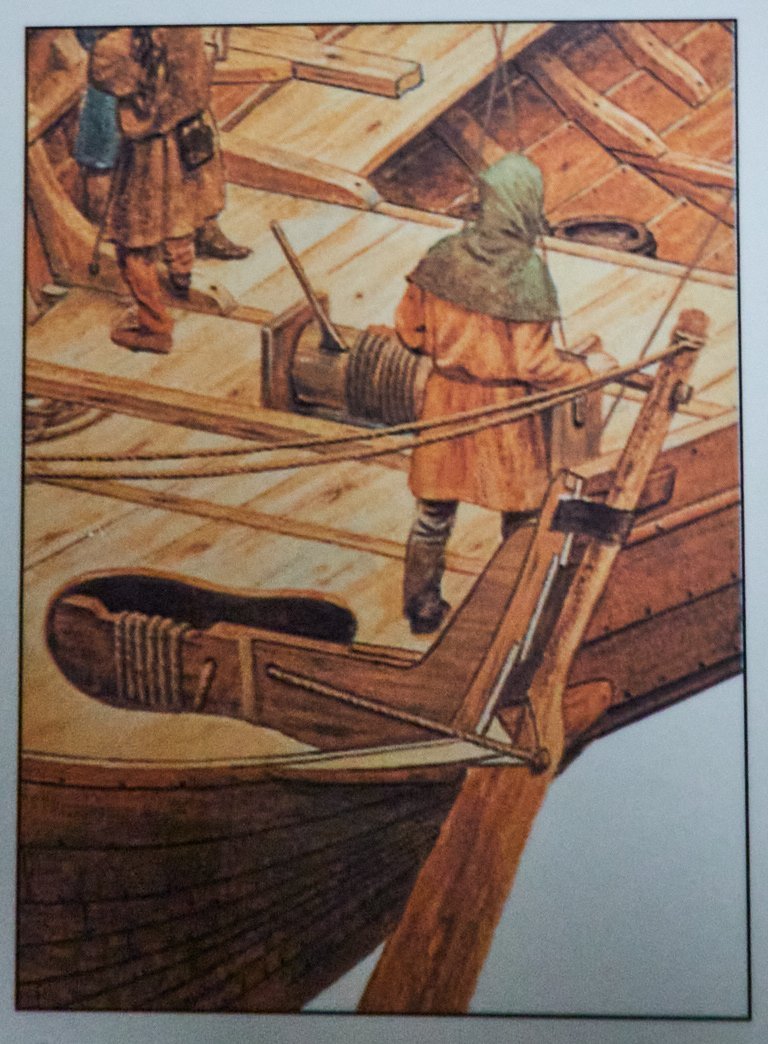
When we left our hero, an autumn and summer past, he was contemplating oars and sails. Now he's back in the shipyard and the oars have been completed. There are seven different oar length, four each. I thought they should be coded somehow for quick removal when stored and stacked in cradles. I settled on a simple stripe pattern that needed only two colors plus black, easy to learn and remember. Next, mounting the rudder. The Amati instructions show a somewhat vague method of lashing the rudder to the top strake. I drilled a couple holes in the strake, played around with lashing and knots for a while, but was unhappy with the results. I decided to make a simple wooden strap with a couple of plugs to fill in the holes. Not sure where I got this idea, perhaps cathead’s log here. I also saw similar concepts in modern reproductions and in this drawing from the Osprey book that I have, although it looks like a leather strap here. Mine is clunky and not elegant in comparison, consistent with the rest of my boat’s style. But I am pleased with it. Next up, the sail fabric is sitting on the workbench, staring at me. As an aside a book I read this summer, carried on a hiking trip, was A Voyage for Madman by Peter Nichols. It’s about the 1968 Golden Globe race to circumnavigate the earth non-stop. Although I knew much of the story, I found the book to be a real page turner, perfect for passing time around camp in the evening. Recommended.
-
Thank you for sharing this build with us. It happily coincided with my introduction to this hobby, and is a build I'll return to time and time again. Hope to see it in the calendar next year, all the best to you.
-
Thanks for the vote of confidence guys, much appreciated. Even if things are moving slow now I'm still having fun with it, and it's nice to see it sitting out on my workbench. And your logs have been inspirational!
-
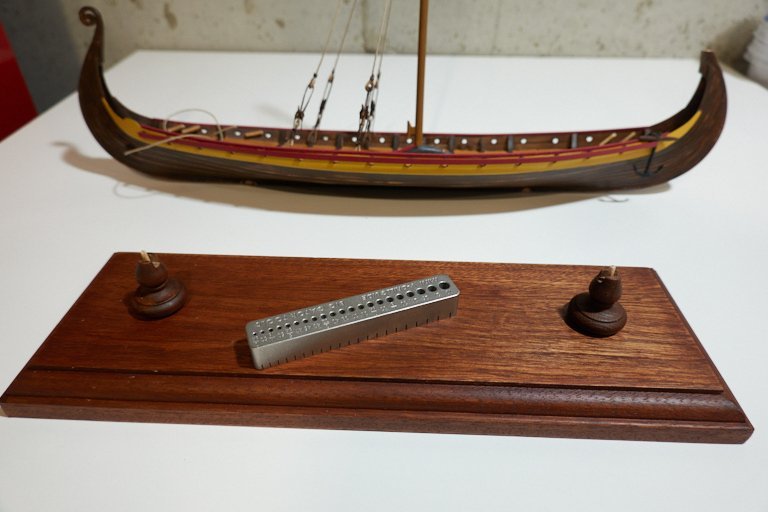
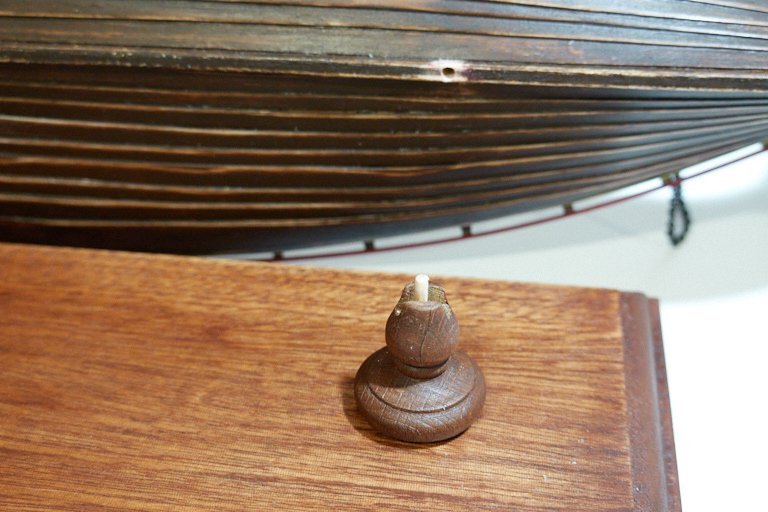
With summer activities in full swing, at least for the time being, work on the model has slowed down dramatically. My wife's garden was in a native plant tour, and that took a bit of work to prepare. But the tour is over and was successful. I did purchase an Amati wood base and mounting columns. These were stained with some cherry stain I had at home. I don't have a drill press so in order to drill a straight hole through the base for the mounting columns screws I bought a Big Gator Mini Drill Guide that I found on amazon after doing some online research. I think it worked great, and I could have used it on various other home projects. Here it is sitting on the base. By hand with a pin vise I drilled holes in the top of the two columns and at corresponding locations in the keel for toothpick insertion. It's not glued yet, but it will look something like this. The oars are all carved and just waiting for me to stain them, and I've also been experimenting with painting cloth for the sails, but none of that is picture worthy. Now there is some local travel on the horizon, including a big hiking trip to prepare for. I'll continue to slowly plug away here, but no need to rush for me. By the way, I'm currently reading Sea of Glory by Nathaniel Philbrick, which has absolutely nothing to do with Vikings, but is an excellent book about sailors and the sea. Thanks for having a look.