-
Posts
559 -
Joined
-
Last visited
Content Type
Profiles
Forums
Gallery
Events
Everything posted by ScottRC
-
Robbyn, Your coil and rope work is looking amazing on this build. Great job Scott
- 234 replies
-
- 18th century longboat
- model shipways
-
(and 1 more)
Tagged with:
-
Hi Kimberly, Tying shrouds can be like herding cats. Tighten one and the other loosens third down on the opposite side. After a while some are tight and some are all loose and goosey. I have found that it is easier to keep them all a little loose and secured with a single hitch and then start to taught each one little by little, from side to side, until they are all equally taunt and the mast is strait. Then I tie my knot and seal it. Agree that the kit thread is probably poo, so go the craft store and pick out some thread that I would say "feels right". I mean find something that feels easy to handle and tie. I used thick "coat and button" thread when I was learning because is behaved well in my novice hands, didn't fray when cut, and was cheap. Also pick up some Beeswax, usually at the craft store in the candle section. We run our line through it so that is keeps the line manageable when laying out the line and it seems to act as a lubricant with passing the line through blocks, holes ,and when tying hitches and knots. Keep up the great work.
- 94 replies
-
- santa maria
- revell
-
(and 1 more)
Tagged with:
-

Help with question regarding HMS Victory at Trafalgar
ScottRC replied to AllanP's topic in Nautical/Naval History
Yes, thanks Pete for the visit and instructions. -
You work has so much character and emotion in it.
- 7 replies
-
- patric obrian
- jack aubrey
-
(and 2 more)
Tagged with:
-
If you cannot get the Microset or Microsol, then put a few tablespoon of white vinegar in your water and use distilled water if possible. The chlorine and sulfates in tap water can cause a reaction with the decals surface binder making it hard or causing it to delaminate. Testor's makes a Decal set solution but the two that Andy suggested work much better and I have used these with tap water. I regards to the big red crosses, you may find them, as I found, easier to paint them than fiddle with the decals. In fact I think I used a red marker if I remember, been a long time. It would be much more realistic and was more fun, since the outlines are molded into the sail it was easy to stay in the lines. But paint the sails first
- 94 replies
-
- santa maria
- revell
-
(and 1 more)
Tagged with:
-
Hi Kimberly, Just checking in and saw your latest picture and all I can say is "WOW!"
- 94 replies
-
- santa maria
- revell
-
(and 1 more)
Tagged with:
-
Jan, I just came across your build and I am just impressed with your talent and style. Also, I REALLY got to try one of these models, it just looks like its a lot of fun. Look forward to seeing more! Scott
-
What is filler? This is a putty that we use to fill in dents, small seams, and cracks. You spread it over the area that needs filled in thin layers, then when it is dry, sand it so the blemish is blended away. There are several kinds and brands. Testor's white filler is common in hobby stores. Its is kinda thick and chunky and I never cared for it. There is also Squadron Green and White putty, green is thin and the white thicker. Some hobby stores carry it and its also obtained from Squadron.com. Then there is my favorite, I use good old Glaze Spot Putty by Bondo that you get at the auto parts store. I like it because it comes out thin, but will thicken if you let it stand for a few minutes, and its easily available. To apply it, I must caution and advise you get disposable gloves, because its not good for your skin and the best way to apply it is with your finger. There is a book I like to suggest that is available through Amazon that explains just about everything you are asking. How to Build Plastic Model Ships by Les Wilken
- 94 replies
-
- santa maria
- revell
-
(and 1 more)
Tagged with:
-
Now waiting for the cost of the materials to come down. 3D printing is still pretty pricey per square inch.
-
Woo Hoo, looks great any pirate would be proud to sail on her. So, you disregarded the instructions to put the sails on and you have parts left over? Well, I must say you have past into the category of now seasoned ship modeler. Just wait, soon you will be measuring spars and masts with calipers and making your own because the one in the kit is too tall, too short, or you just want to do it for the fun of it. Don't worry about the mizzen topmast being on backwards, I mounted all three masts on backwards on a Constitution, and this was after building this kit at least several times before. Its such a bad problem for me that I now turn the ship about when placing masts. Again, thanks for posting and have fun with the Santa Maria. Scott
- 118 replies
-
- jolly roger
- lindberg
-
(and 2 more)
Tagged with:
-

Panthere 1744 in 3D
ScottRC replied to malachy's topic in CAD and 3D Modelling/Drafting Plans with Software
Hi Bava, nice work. I just started using Blender. So far not to bad. Do you import anything or is everything built in Blender. I ask because I am importing stl files out of Solid Edge and Solid Works. Scott -
Ditto on the acrylic. I use pretty much all water base now on my plastic models oils or stains on wood. Easy to clean, they seem to last forever if sealed, and no smell. One drawback is that some types, such as the arts and crafts brands, require a primer in order to adhere to the plastic. Humbrol is a great line of paint as J.Pett indicated, for brush painting. You are lucky you have a store nearby that stocks it. Tamiya and Gungze Sangyo are two other brands of acrylic that are high quality specific for plastic models. One drawback I do have with acrylics is that I cannot get the effect I want with washes. Ulisis's Santa Maria is an excellent example of doing thin layers of color to shade over a base coat producing a deep, rich, 3 dimensional effect. This is where I do a base coat with an acrylic, spray it with a lacquer clear coat, then will paint washes using oilpaint thinned with turpentine. I like what you said about remembering terms. I still get yard, spar, stay, brace, and shroud all confused. I started sailing lessons a few years ago and drove my instructor nuts. I remember the Jolly Roger instructions well, insomuch that I put the main tops'l yards on the fore mast. This is the point where you model by sight, rule of thumb, and gut instinct. Makes it more fun. Life is full of rules and instructions, here is your chance to get a away from it all.
- 118 replies
-
- jolly roger
- lindberg
-
(and 2 more)
Tagged with:
-
Much like Revell with their line of plastic ships ie: Bounty/Beagle, Thermopylae/Pedro Nunes/Cutty Sark, Constitution/United States etc... Anyway, I am still interested in this kit.
-
Forgot to add that that was the only picture I have of the Jolly Roger, it met its demise from the full broadside of a cat a few years ago.
- 118 replies
-
- jolly roger
- lindberg
-
(and 2 more)
Tagged with:
-
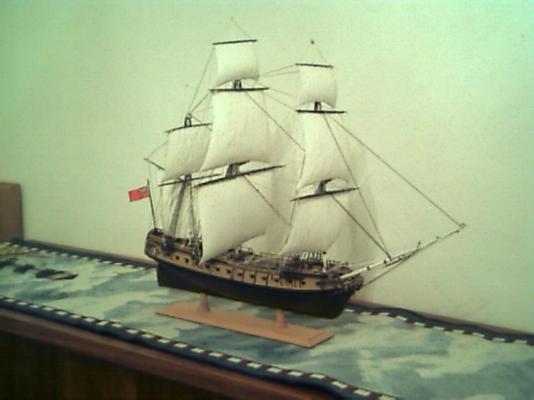
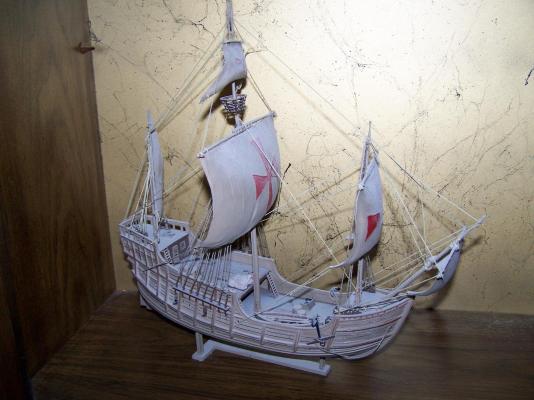
A little word on cements. Be careful with the Testors, for it will attack or craze the plastic if put on too thick. Tamiya is a better cement but can still craze the plastic if put on too thick. Plastic Strut, WeldX, or Weld On are brush on liquid cements that do not harm the plastic. I think Micheals and Hobby Lobby carry it. I also prefer to use Lock Tite Gel superglue for applications that require a semifast and strong bond. For knots, I use "Head Cement" that is used to secure thread for Fly tying. It is easy to use, dries clear and thin, and is indestructable. I attached pictures of both my Jolly Roger and Revell Santa Maria. The Santa Maria was built in my dorm while working up in Glacier Park using tempra paint, a red marker, and a pencile for coloring and detail.
- 118 replies
-
- jolly roger
- lindberg
-
(and 2 more)
Tagged with:
-
Ulises, Did you do a base coat then several "washes" of differnent shades of browns and black? Kimberly, this style of painting is a lot of fun.
- 118 replies
-
- jolly roger
- lindberg
-
(and 2 more)
Tagged with:
-
your SF is at a great place to stop and take a break. Finsihed enough to look like a ship and very presentable.
- 773 replies
-
- san francisco ii
- artesania latina
-
(and 1 more)
Tagged with:
-
Been catching up with your project and you by far have risen the bar in making this model a masterpiece. Great work, keep it up! Scott
- 446 replies
-
- Revell
- Constitution
-
(and 1 more)
Tagged with:
-
Woo Hoo, like the build. I'm about the same place you are on the Connie and you are giving me ideas. Scott
- 732 replies
-
- constitution
- model shipways
-
(and 1 more)
Tagged with:
About us
Modelshipworld - Advancing Ship Modeling through Research
SSL Secured
Your security is important for us so this Website is SSL-Secured
NRG Mailing Address
Nautical Research Guild
237 South Lincoln Street
Westmont IL, 60559-1917
Model Ship World ® and the MSW logo are Registered Trademarks, and belong to the Nautical Research Guild (United States Patent and Trademark Office: No. 6,929,264 & No. 6,929,274, registered Dec. 20, 2022)
Helpful Links
About the NRG
If you enjoy building ship models that are historically accurate as well as beautiful, then The Nautical Research Guild (NRG) is just right for you.
The Guild is a non-profit educational organization whose mission is to “Advance Ship Modeling Through Research”. We provide support to our members in their efforts to raise the quality of their model ships.
The Nautical Research Guild has published our world-renowned quarterly magazine, The Nautical Research Journal, since 1955. The pages of the Journal are full of articles by accomplished ship modelers who show you how they create those exquisite details on their models, and by maritime historians who show you the correct details to build. The Journal is available in both print and digital editions. Go to the NRG web site (www.thenrg.org) to download a complimentary digital copy of the Journal. The NRG also publishes plan sets, books and compilations of back issues of the Journal and the former Ships in Scale and Model Ship Builder magazines.


