HOLIDAY DONATION DRIVE - SUPPORT MSW - DO YOUR PART TO KEEP THIS GREAT FORUM GOING! (89 donations so far out of 49,000 members - C'mon guys!)
×


Micklen32
-
Posts
619 -
Joined
-
Last visited
Content Type
Profiles
Forums
Gallery
Events
Everything posted by Micklen32
-
 Great to hear from you Adriaan I hope you are improving at a fast rate I am certainly not rushing on this one These small parts particularly are taking a lot of time with the problems with my fingers I hope you get back to normal soon though Adriaan, you are missed Keep it up Mick
 -
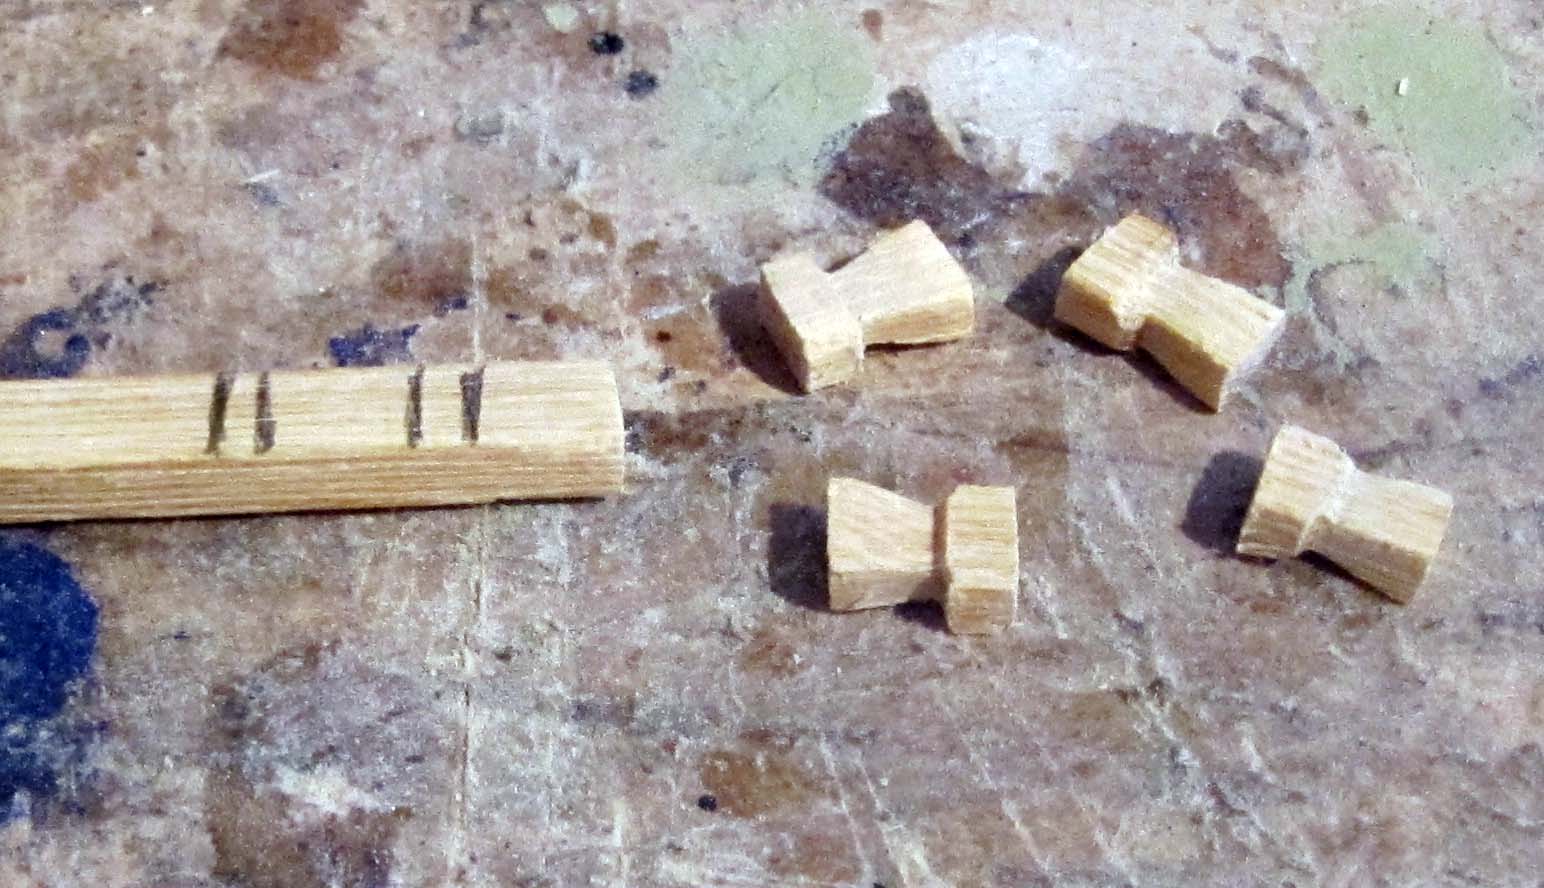
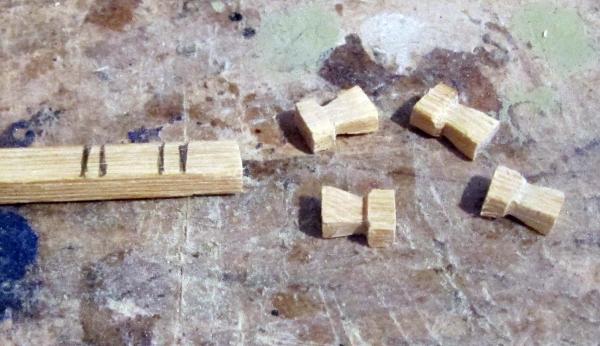
Hi Sjors I use a normal flat file on the Samson posts because the shape is square according to the OcCre instructions Have you an idea they should be a rounder shape ???? As you can see in my photo they are a sort of inverted pyramid shape on the square Anyway get well soon Sjors Mick
-
Thank you Anja Making these small pieces by hand puts a lot of stress on the fingers so I do very few before resting for a bit I am getting there with the samson posts and columns I made a skylight to have a bit of a rest and I also carved the breakwater from a piece of basswood, so I am not being lazy There are other bits of deck furniture I can build to give me a break from the small stuff I will do some photos tomorrow so you can see how I am getting on One thing I did find very difficult was the transom surround which in this kit is done with strip layers of a very thin lime veneer It was difficult because the veneer was so thin the glue was actually coming through it I think I have it sorted now though and it just needs cutting back and sanding In the instructions it shows it stained, but personally I think it will look better painted blue, as the transom is So as you can see I am keeping it up Mick
-
Hi Adriaan I hope you are getting somewhere towards fit You are really missed on here You aren't addicted to jigsaws I hope I have a small 1000 piece one I can retire to if my fingers need a long rest Not that I think doing a jigsaw would give my fingers much rest I mean, sorting through and picking up all those little pieces Get well soon though Adriaan And keep it up Mick
- 1,038 replies
-
- 1
-

-
- King of the Mississippi
- Artesania Latina
- (and 1 more)
-
Looks really good Steve Tell me, does your kit actually come with instructions about the roping, masts, spars etc I say that as I am a little worried about getting to that point with mine as there are no instructions, just plans Full size plans maybe but I have never done anything this complicated and a few pointers would have been good No doubt when I get there there will be helpers about though I just hope that I will be able to get mine looking as good as yours Steve Keep it up Mick
-
Slog, those chains are brilliant The OcCre way is to bend brass wire around the deadeyes and then run a single wire down to the hull I was thinking it may look better if I had the deadeye in the centre of the length of wire and had the two wires coming down slightly apart I will have to do one and put it up see what people think That is if my fingers ever recover from making these samson posts and columns Keep up the great work Slog Mick
-
Tell me about it Sjors Working on these small parts as I am now puts so much pressure on the fingers The Samson posts are the worst as they are so small and using a miniature file so accurately is very painful I do a couple and I have to rest The normal columns are a little easier as they are a simple sanding to a thinner point at the top but even they get to me after doing a few Problem is this isn't going to go away and I have to learn to live with the limitations What I am waiting for is to see physiotherapists to see if they can give me exercises to hopefully free up my fingers and the rest of my joints a bit So let us look forward to the future You getting over your illness and me getting a bit of relief in my joints Get well soon Sjors and Keep it up Mick
- 1,873 replies
-
- 2
-
-
- occre
- san ildefonso
- (and 1 more)
-
Thank you all for your comments Slog. Unfortunately once the rudder is it it is in However looking at the plans I think it can be left much later than OcCre say Alistair. Yes I see what you mean Looking at all the photos I have seen of the finished model there seems to be nothing putting strain on anything on the gallant rail All the ropes etc seem to go to cleats or rings I am not a fan of epoxy and only tend to use them in connection with fishing rods I don't think contact adhesive is suitable so I may try fast acting wood glue as that will give a solid finish without the brittleness Anyway at the moment I have my head down I have 34 of these to make, then lots more posts and other parts I also want to carve the breakwater as the one in the kit is not great and it's a quite important part I have a nice piece of bass wood and the Dremel so I should be ok Keeping it up Mick
-
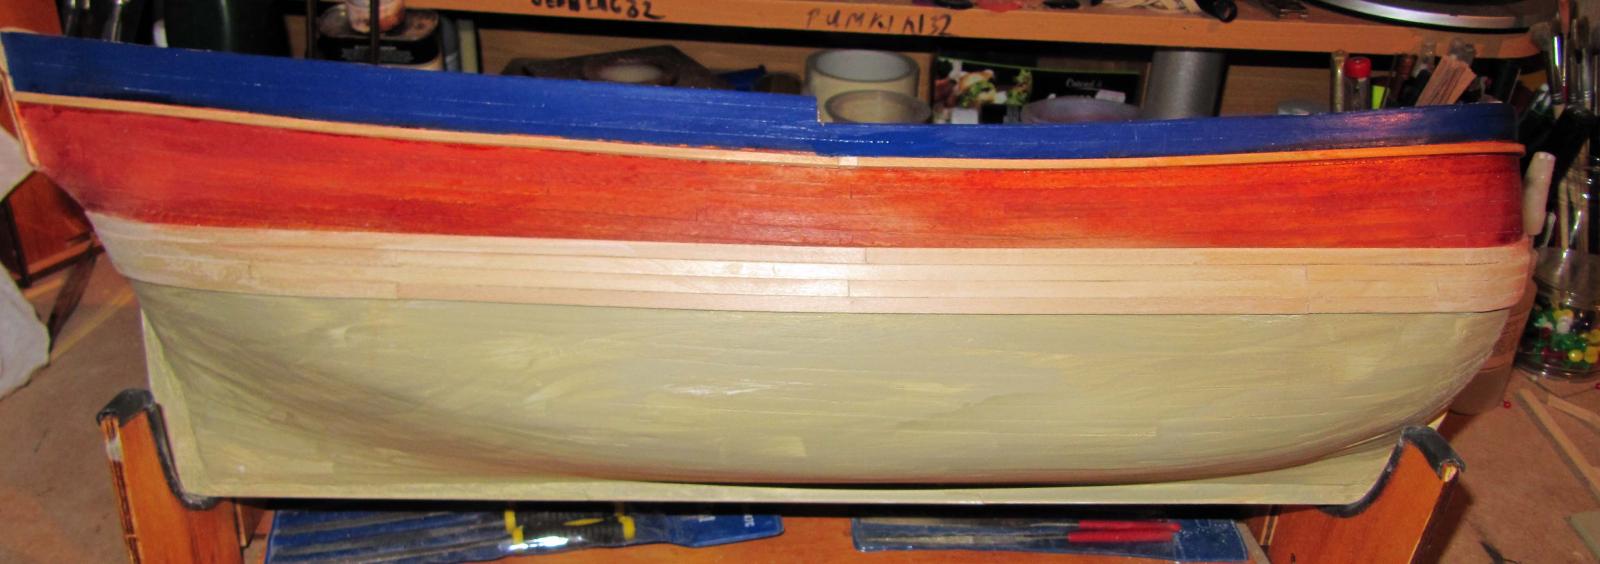
Right Been a busy boy today as my hands and fingers were good Have a look how she looks now I have decided not to paint the white and black until I have to As you can see the next major job is for me to make the samson posts, pillars etc to go on the gallant rails Now I do have a question for you all Should I reinforce these parts with a small pin into a hole in the gallant rail or is that overdoing things and just making sure there is maximum surface for gluing and a spot of CA glue enough ?????? All the items to go on the gallant rail, and there are 74 ish of them are scratch made so that will keep me bust for a day or two so there is plenty of time to get plenty of answers to my question Keeping it up Mick
-
Yes Slog I have to agree with you I have done some undercoat to see how it looked and I see one or two points that need a bit of work Once that is done and I have put another bit of undercoat on I will leave the painting until it is necessary i am wondering if I can fit the rudder before painting The hinges are quite small and would be difficult to paint round easily so I will probably put off fitting the rudder until I have to and use that as my starting line for the white Keeping it up Mick
-
Hi Sjors Thank you It will be a bit darker as it will have a coat or two more and that will darken, but the blue should stay pretty much the same The tape didn't arrive today so I have to wait a little longer May get the gallant rails cut and stained I will see how I feel The arthritis is having a bit of a field day or three in my fingers recently Keeping it up Mick
-
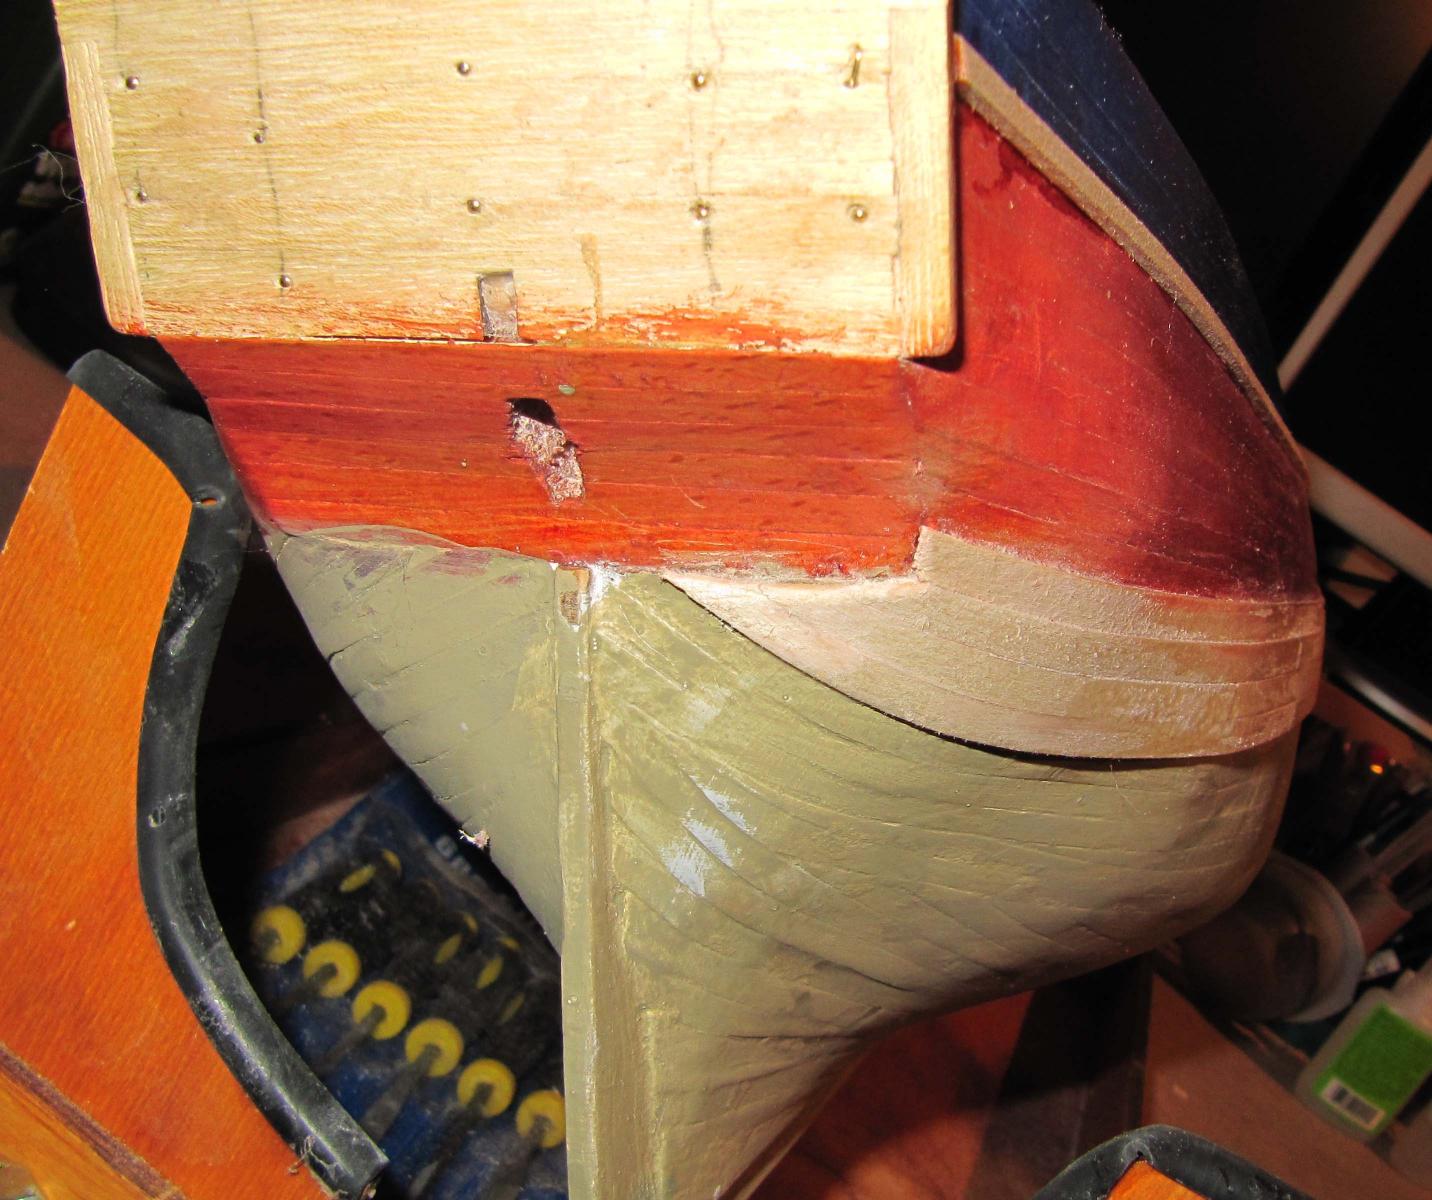
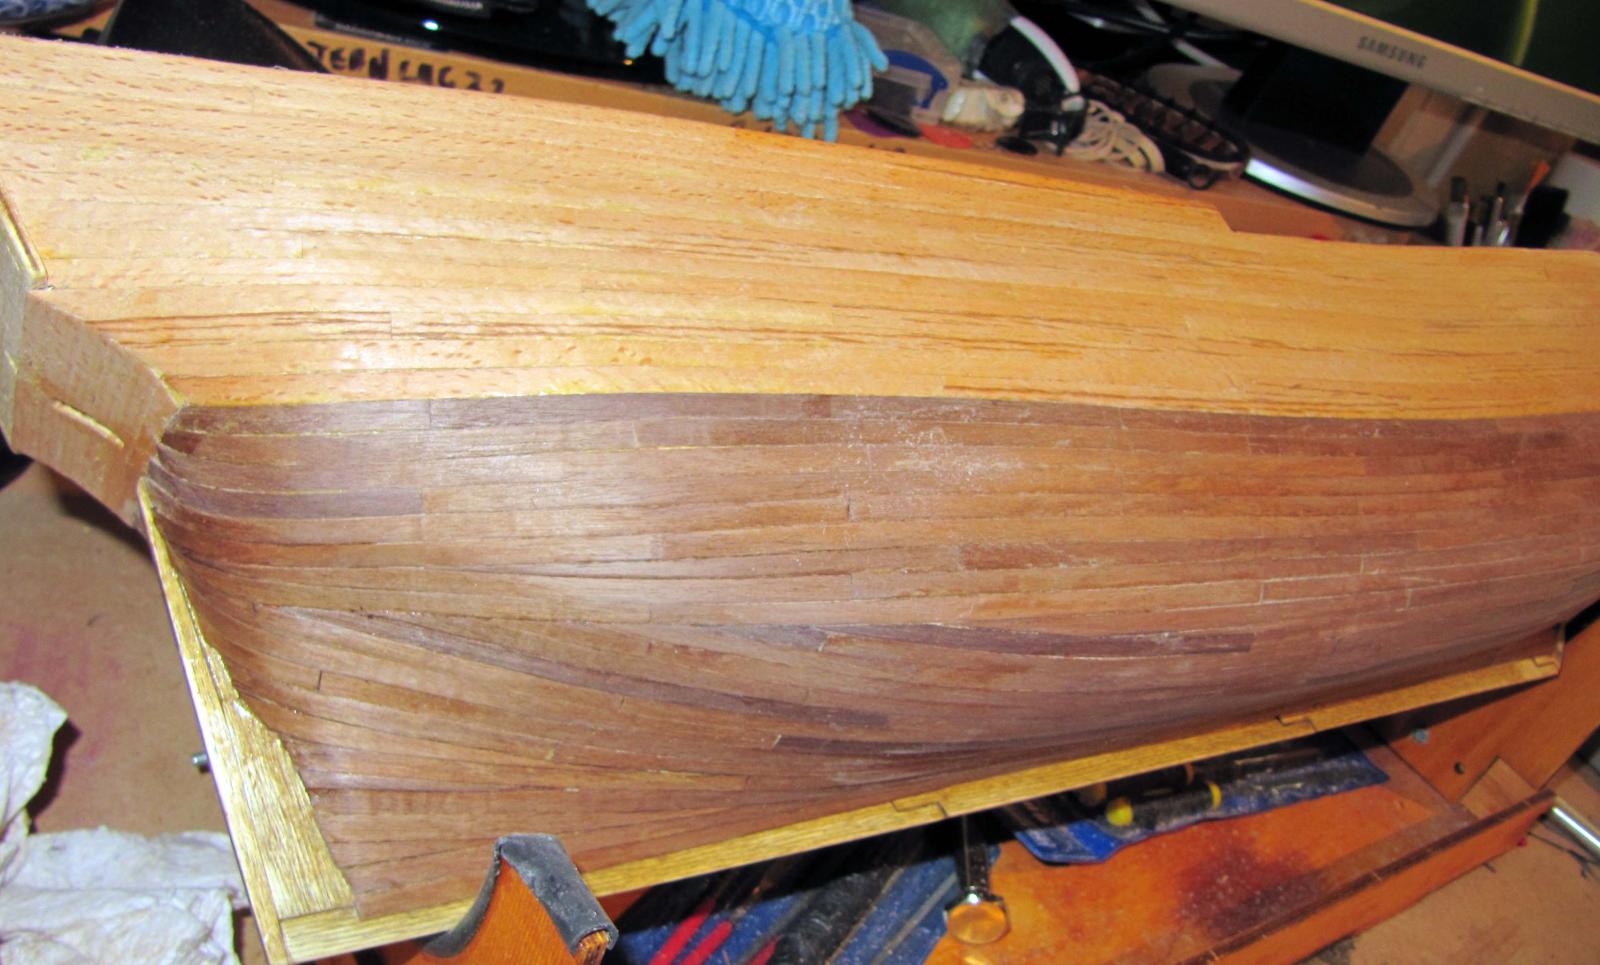
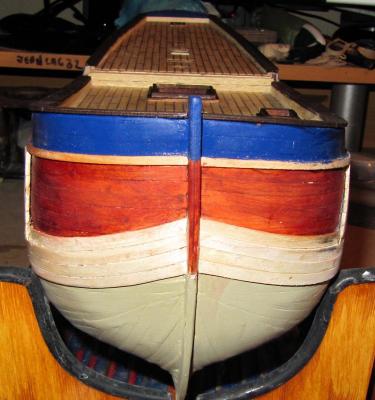
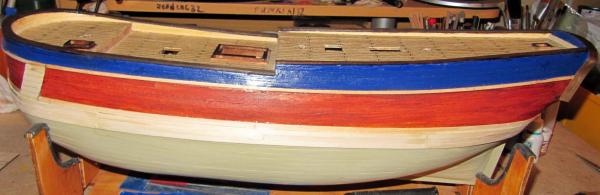
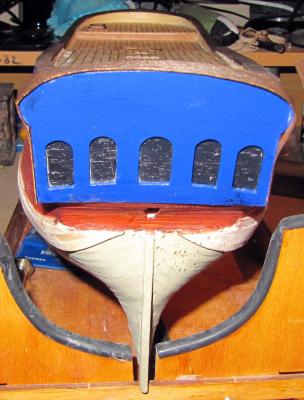
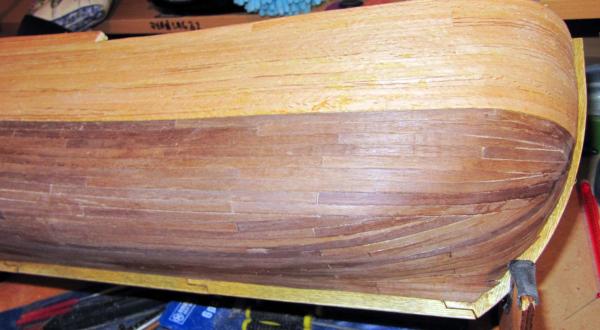
Been hard at work today Been undercoating the hull and fitting the rubbing strakes one side Well pleased with how it looks and over the moon that I have it perfect as the illustrations show me If you look at the stern shot you will see the 3 thicker strakes fitting underneath that curved bit and the thinner one on the side just as the illustrations show so I am well chuffed Still waiting for the tape to finish the painting off properly hoping I have enough white as it doesn't seem to want to go very far Tomorrow I will fit the other side strakes and maybe give the blue it's second coat then stain and fit the gallant rails if I have the time That or give the few humps and bumps on the hull a sand We shall see Keeping it up Mick
-
Hi Theo The new blocks do look really good What I would say now is should you use a thinner recoil rope as now it seems to overpower things a bit Just my thought Mick
-
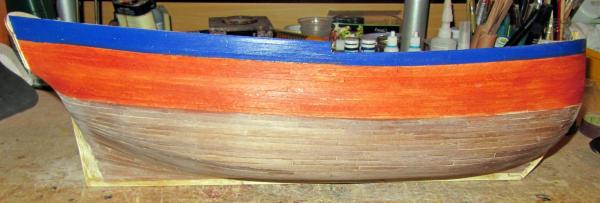
Never been known to hold back Gave the hull a very good rub down And tried the blue paint and the stain The blue looks great The stain is a little darker than I expected but I think it will be good I used Frog tape which is supposedly totally bleed free It did bleed a little though but that is not so bad as I need to bring the blue about 5mm lower I did that just in case it did bleed a little I have Tamiya tape on the way The walnut still needs a little more sanding but my hand and arm was dropping off I am pleased with the way it looks and when the black strakes are on there it should look real good Keeping it up Mick
-
Thanks Alistair That looks perfectly logical looking at your photos and others It's just working out when to do it If I followed the instructions it is done next prior to fitting all the strakes, then the gallant boards followed by the transome and rudder I do get a little nervous going away from the instructions because I worry about missing something until it's too late to put it in satisfactorily I have done that twice before on other models and I don't want to make a third Looking at the Eaglemoss Endeavour build videos as they do it exactly the same I have looked at that as we presume it is the same model http://www.build-endeavour.com/en/guide.htmlhttp://www.build-endeavour.com/en/guide.html It also looks as if on your build it is not too much different so I think that is the way I will go on Thanks a lot for the pointers Alistair It will all come good in the end Keep it up Mick P.S. To put your AVS link in to your signature just do the same as I have using cut and paste for the addy
-
I totally hear you Alistair My problem is I do tend to follow the instructions in the book as it were What I could do is just the blue paint for now as that will be needed before fitting the gallant rails and then do the strakes and painting when it gets close to starting the bits that go on the hull I do have a question for you all while I am on What should the finish of the keel be Natural wood or black paint or what????? Thanks a lot Mick
-
Really nice job Theo Lovely lines You sure you got enough cannon ports though Keep up the great work Mick
-
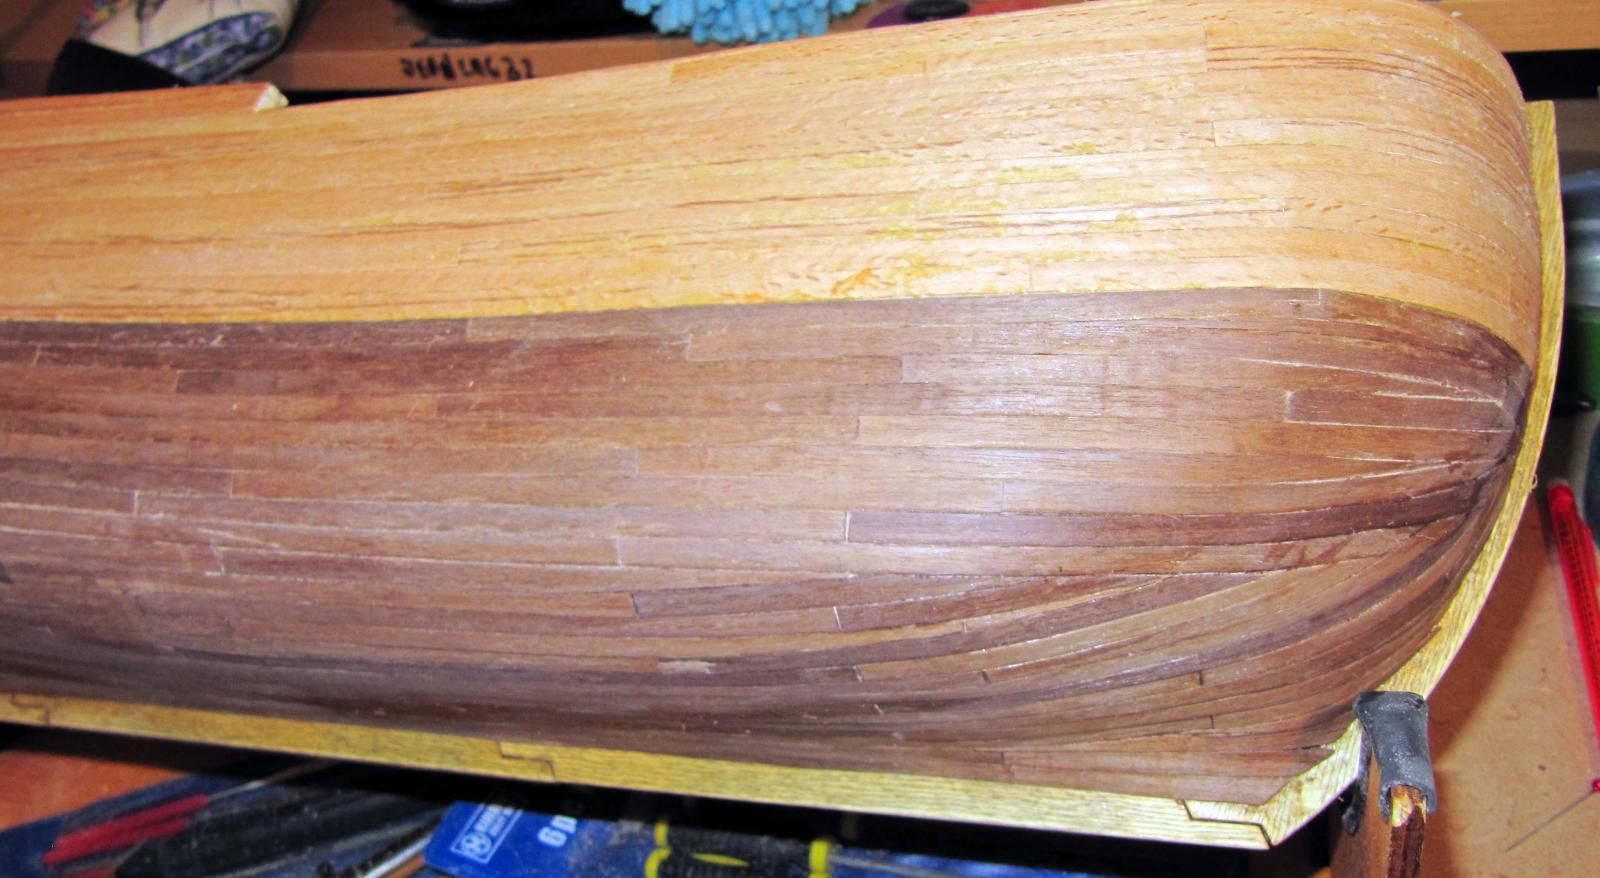
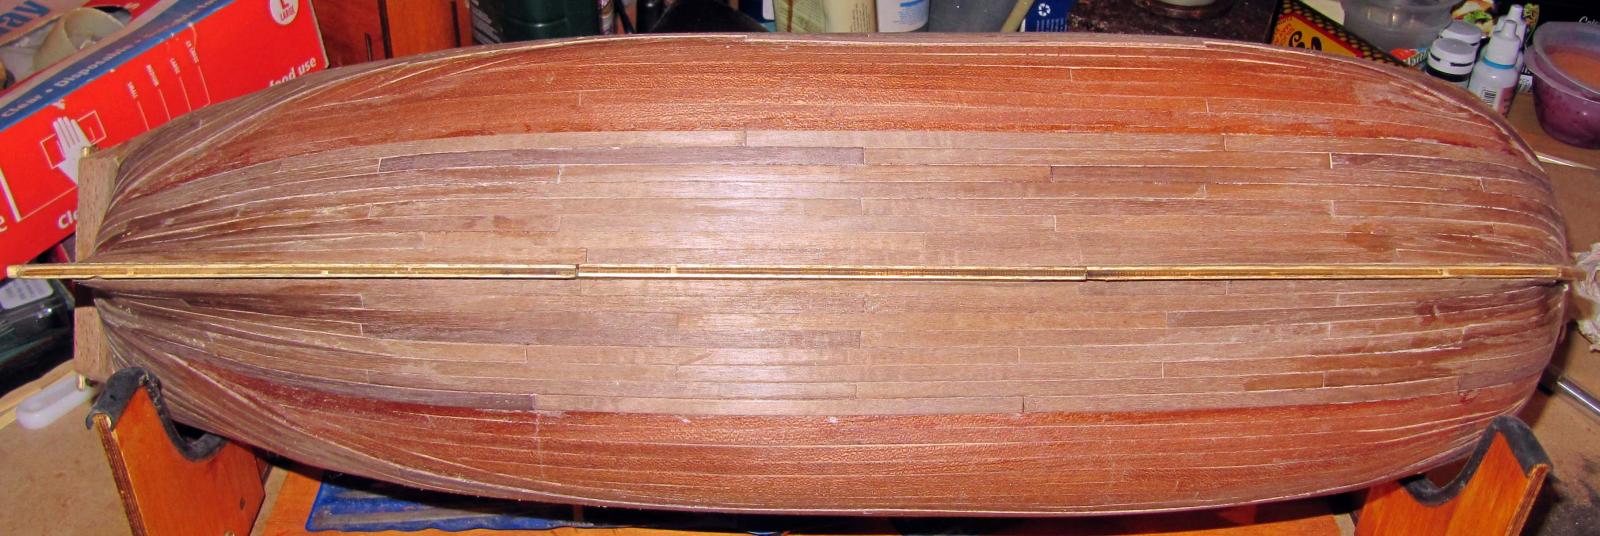
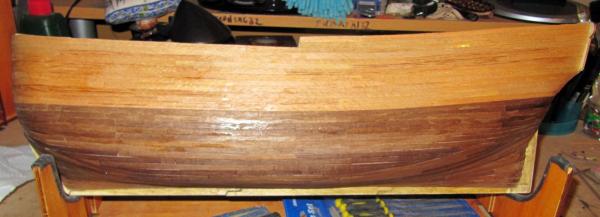
Right the planking is done I am hoping the paint will come tomorrow but I do have a lot of sanding to do first I am very pleased at how the sides look but the bow and stern do let it down a little Still after a lot of sanding it should be nice and smooth and after an undercoat it should take the white very well I see in the instructions that a lot of the parts are scratch built so I will really need to take my time there There is the hull to paint next then the first part of the build are the rubbing strakes closely followed by the gallant rails I am looking forward to starting building the furniture but my arthritic fingers could do with a day or twos rest I think Still tomorrow Sanding Keeping it up Mick
-
Yeah I see that Sjors The judicious use of a scalpel with a new blade I got that all in hand Going to finish the other side tomorrow after having a few x-rays taken of my arthritis so the physios can see what it's like inside Not had any of the joints for a long while and they want a fresh look Keeping it up Mick
-
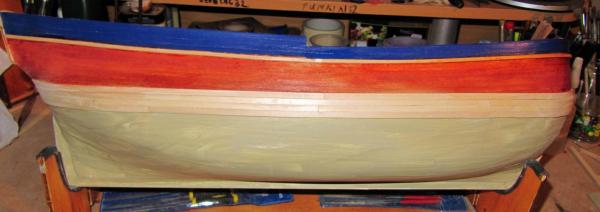
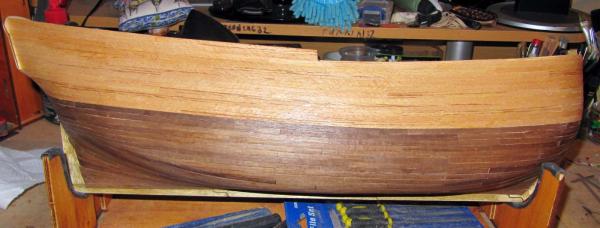
Yes Sjors I was deliberating a bit and it is good to come to a firm decision I have sent off for the paint and have a lot of sanding blocks ready This is how the finished side looks BTW Keeping it up Mick

-
Right I have come to a decision I have decided to paint I will do it the Caldercraft matt white I am fairly happy with the planking but it is far from authentic with it's points etc so I think it will be better and more realistic to have the white paint finish as a lot of the Endeavours have including the replica I will get the hull finished and then do the base painting, the Blue, middle staining and the white hull, then I will add the strakes and do the black I think that will work well Right off we go, it's good I have come to a decision Keeping it up Mick
-
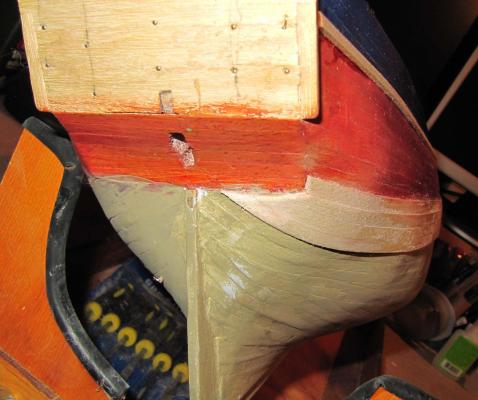
Ok I had a good look round and made a decision The gap is now closing I think some of the problems I was having was caused by using slightly tacky contact adhesive and it wasn't spreading properly Also the top half was becoming difficult to do So I am using CA glue and working from the bottom half and 'Touch Wood' it is coming together I will now be glad to get it done BUT I am not rushing it Keeping it up Mick

-
http://www.youtube.com/watch?v=jl122Nd6J_w Hi Shawn The link above will give you a much better idea of plating It will also probably put you off it for life Keep it up Mick
-
Hi Shawn At any good ship modelling shop you can buy sheets of copper 'Tiles'to plate your hull It's quite a long job but does look good when finished Good luck Keep it up Mick http://www.youtube.com/watch?v=9JWlSFzJ8uA This will help
-
Only just read your edited post Richard Thanks a lot for those links I will take a look and see if I can line things up I am about out of contact adhesive anyway and I may not be able to get any tomorrow so I may have to take a break :mellow: Thanks again Keep it up[ Mick