HOLIDAY DONATION DRIVE - SUPPORT MSW - DO YOUR PART TO KEEP THIS GREAT FORUM GOING! (89 donations so far out of 49,000 members - C'mon guys!)
×


Micklen32
-
Posts
619 -
Joined
-
Last visited
Content Type
Profiles
Forums
Gallery
Events
Everything posted by Micklen32
-
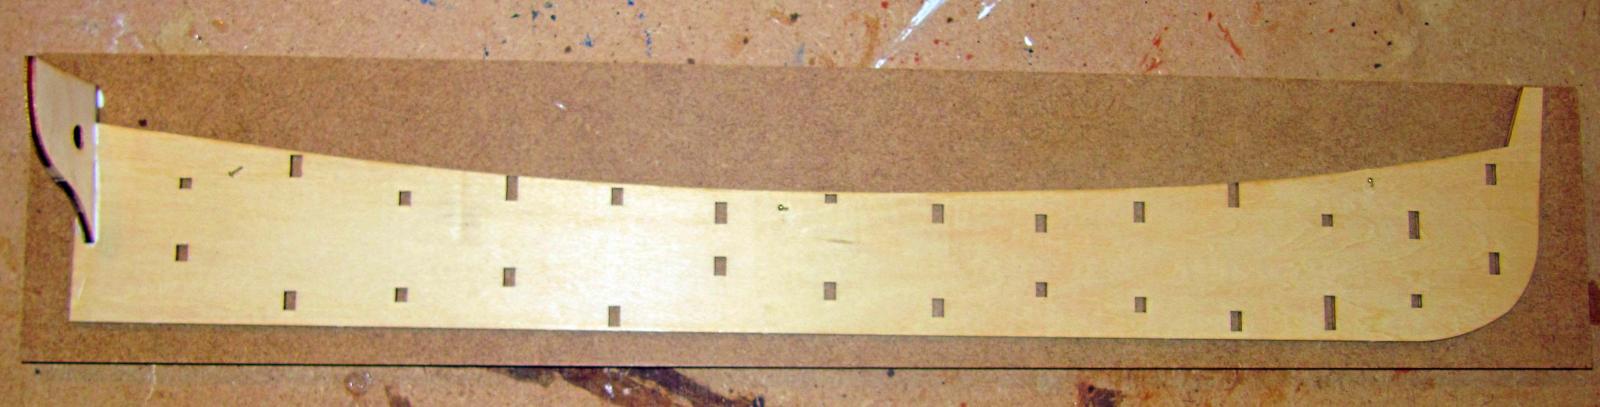
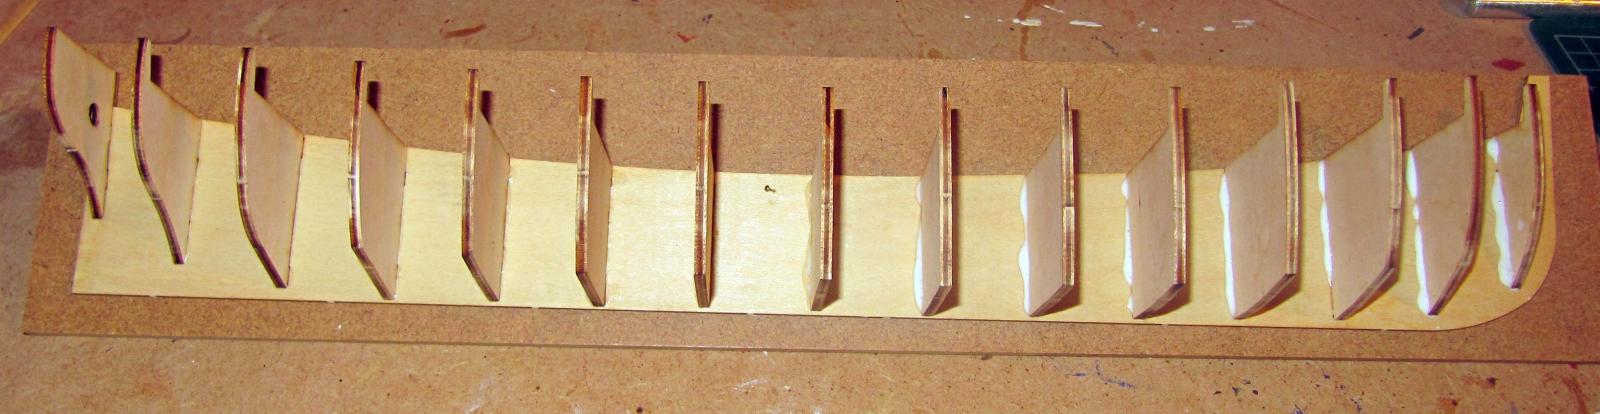
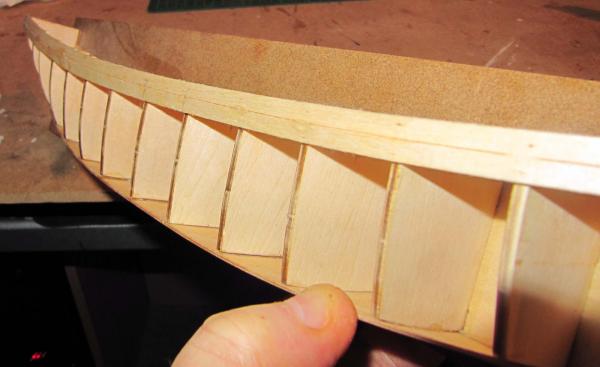
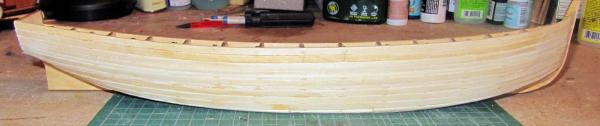
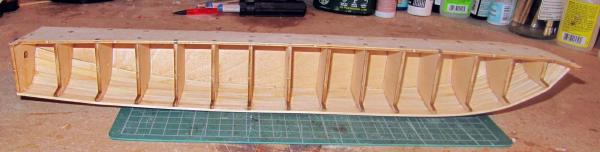
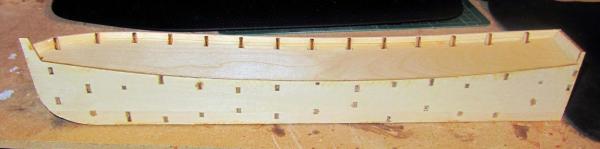
 Thanks Tom I am one who likes having various things to so I don't get stuck on something I know it's still ship building, but the ship is so different it will be like doing something different Ah hi there Sjors Great to have you on board Now you know me Hard at work always Working mebbe a shade too fast So here's how I am going Here the one piece lower part of the hull is fitted and the first plank is pinned into place Here is a view to show the line of the planks Quite a curve to bend to similar to the Endeavour In fact that curve made the use of the white glue impossible for me so I made use of thick CA and here she is planked out and with a quick sand A lot more sanding to do obviously Another view showing the inner hull before it get covered up And finally the almost finished hull The fit of the deck was not perfect and I had to open some of the slots up slightly and as the middle part of the deck is left bare I may use some veneer strips to make it look perfect It does seem wierd that it was out as I treble checked all the frames for vertical When I do the other half I will make use of the deck to get them fitted to it I may sand the hull down a bit tomorrow, but I will also do some work on the Endeavour
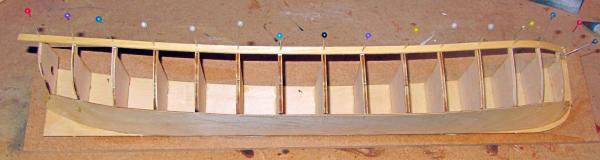
- 170 replies
-
- 2
-

-
- thames barge
- billing boats
- (and 1 more)
-
Thank you very much Richard and Wayne Whoops, and Alistair who slipped in while I was writing this Work is progressing quite well As I have said, the instructions aren't being a great deal of help I would have though that as a supposed beginners kit the instructions would have been good The planking is quite tricky as you have to follow the gunwales, or whatever you call that bit on a 'modern' ship I am making use of a profusion of pins Also as it has to represent a metal hull it needs to be as good if not better that if it was a wooden finish It's going to be a very interesting build I think as it is so different from anything I have done I think I must have been drawn to it because I always thought that Thames barges were a very interesting ship to see them travelling by sail up the river Also you can see from the information provided on it that it was well used during the war and once peppered with Focke Wulf cannon shells Yup. a very interesting build and thank you all for your interest in it And don't worry Alistair, the ships will be built concurrently
- 170 replies
-
- 1
-
-
- thames barge
- billing boats
- (and 1 more)
-
Just popped round the back to have a look and this seems a very interesting build It's a shame you mislaid some of the photos It would have been interesting to have seen the full build She looks a real fine ship and you are doing a great job with her Well done Richard I will take a seat and keep an eye on this build
-
Lovely lovely job Sjors I think she looks really great Certainly a slightly different style of ship That bowspritty thing at the front is very unusual to me Certainly very well put together Congratulations Anyway, come on Sjors The front seat at the Will Everard will soon be full and we need the popcorn and beer
-
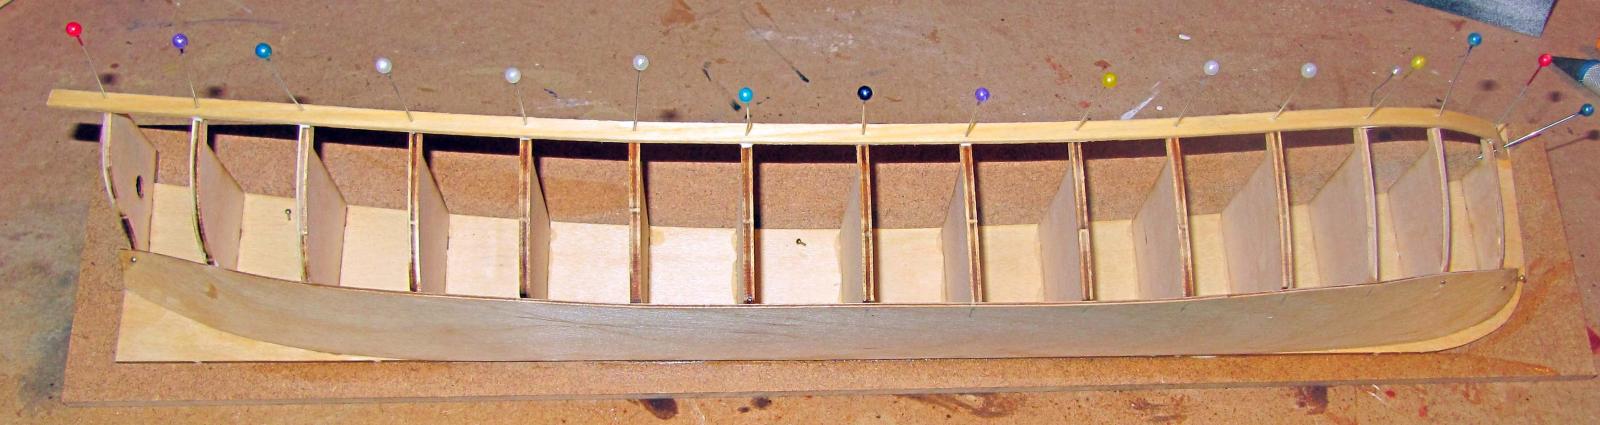
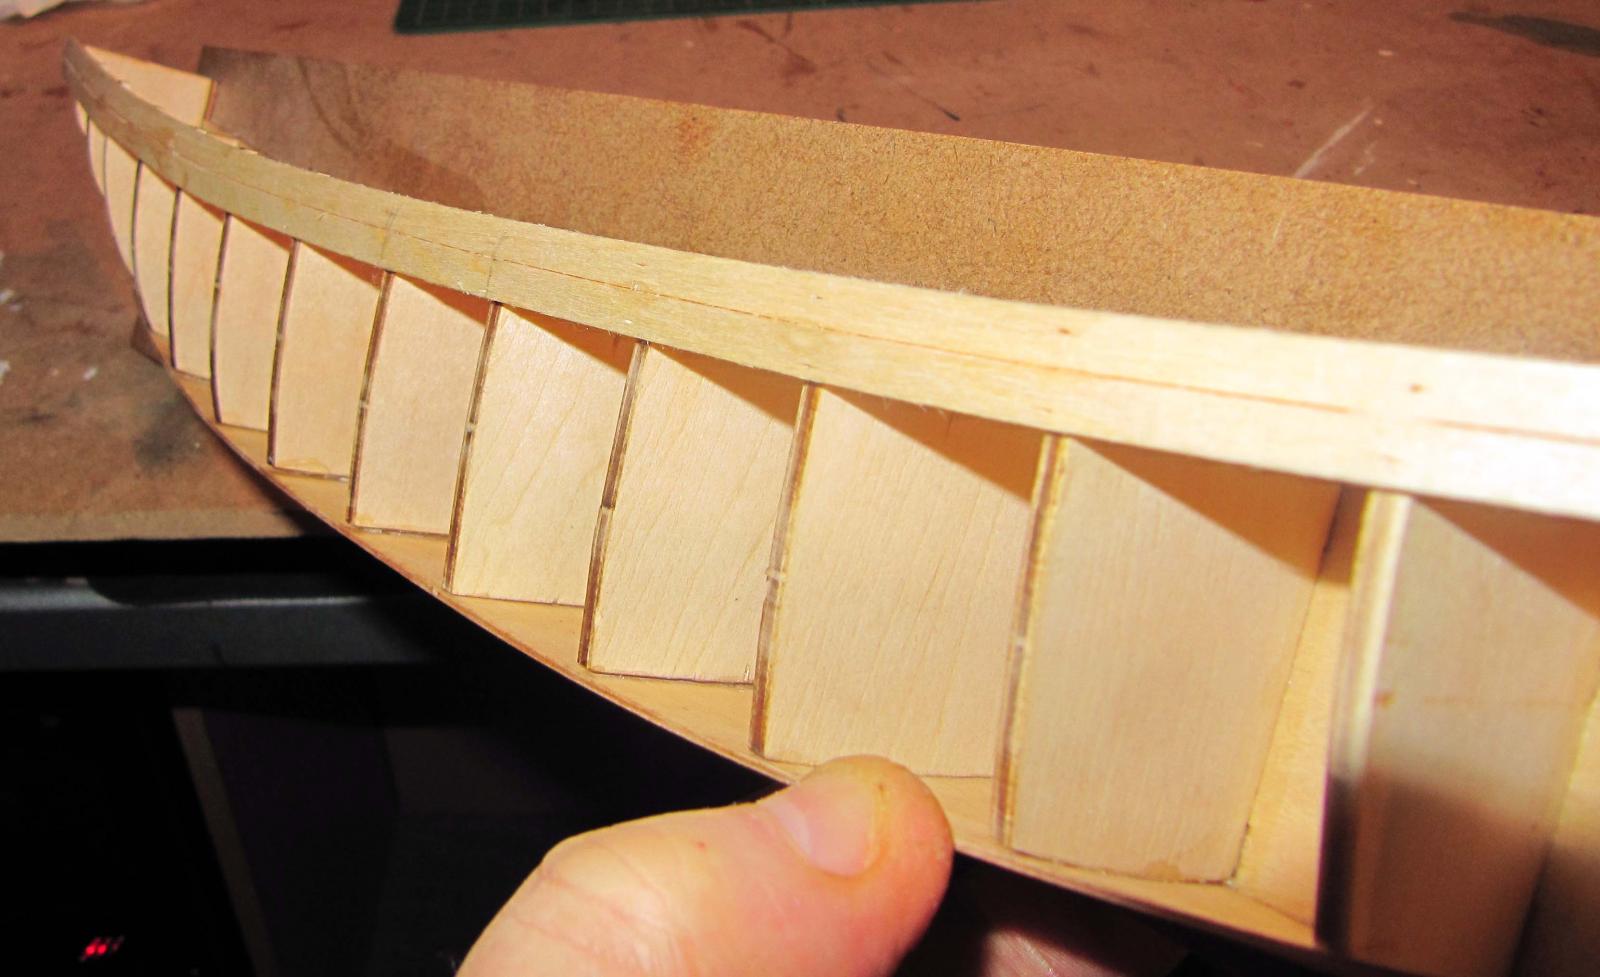
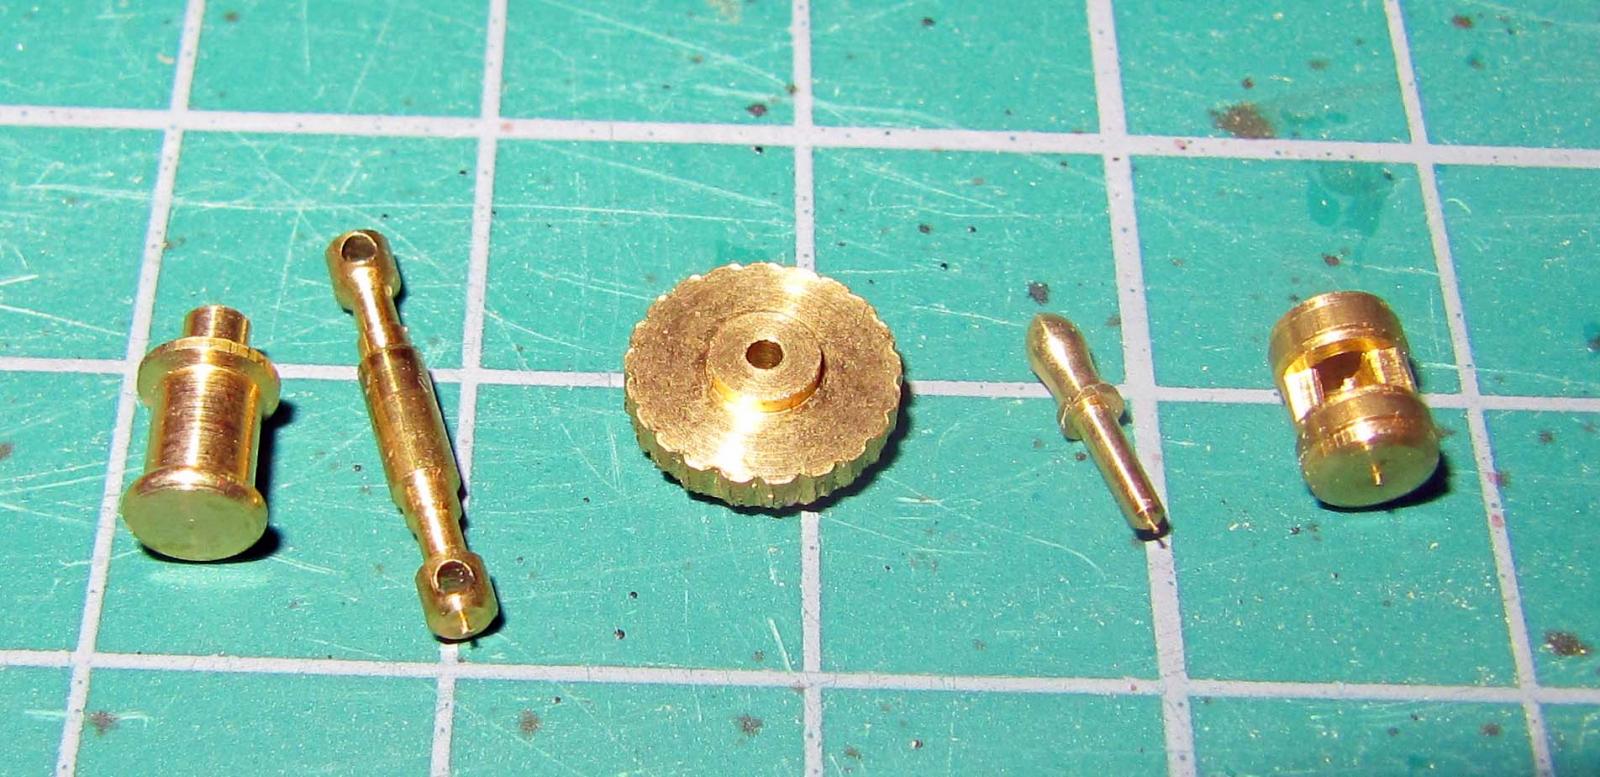
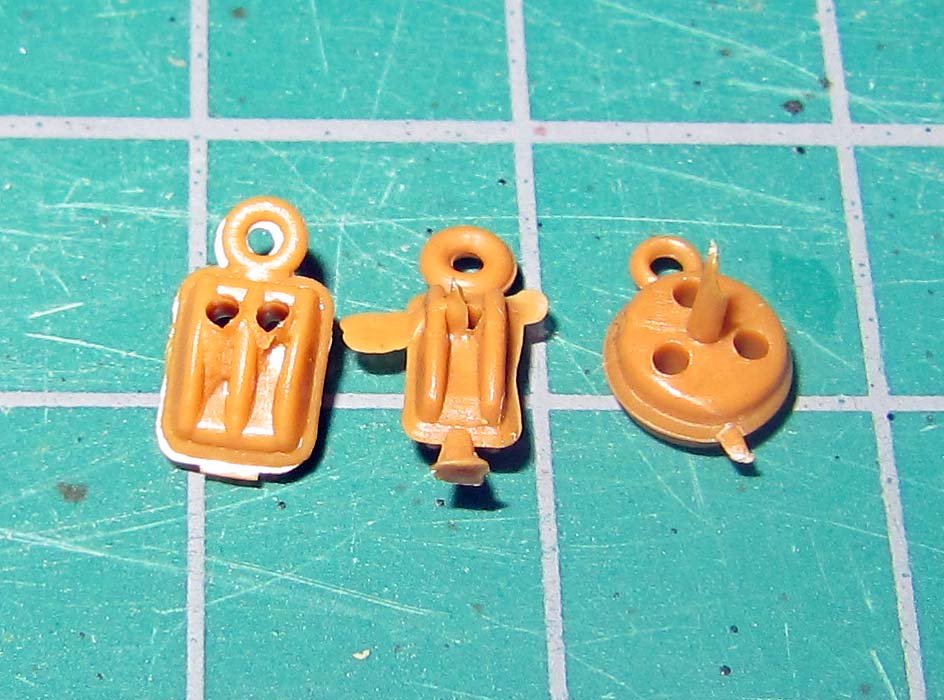
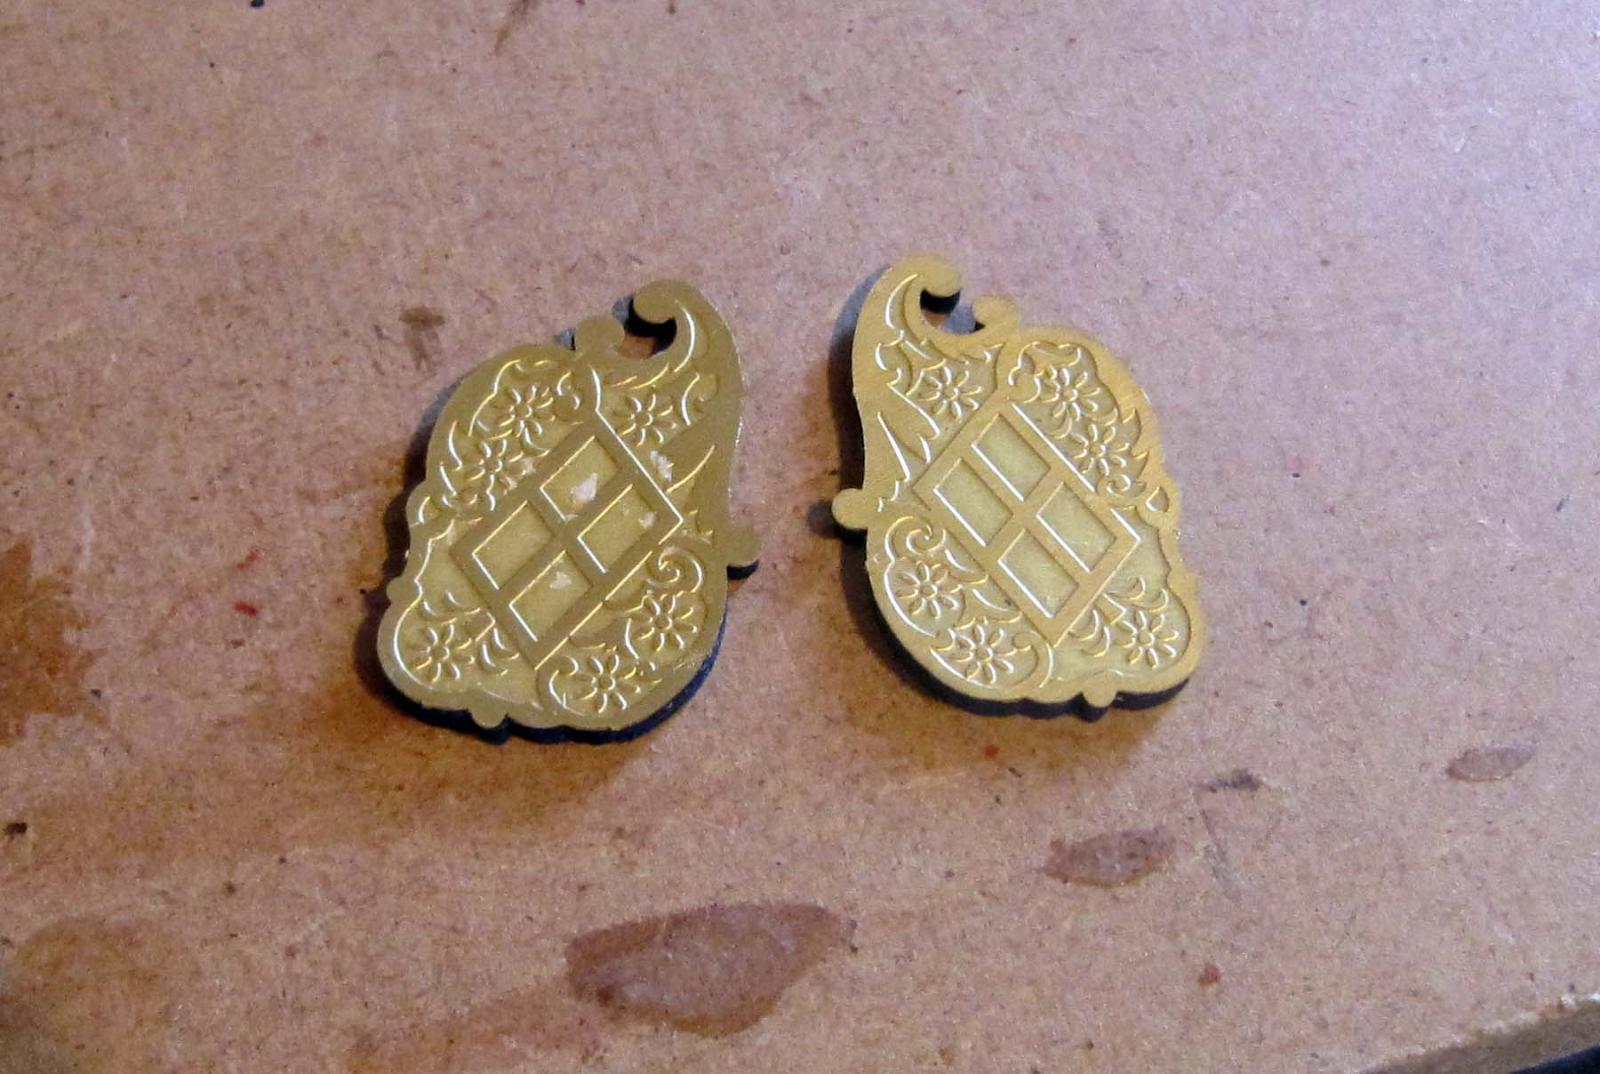
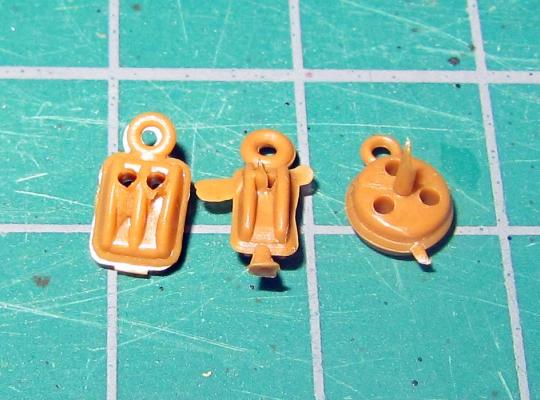
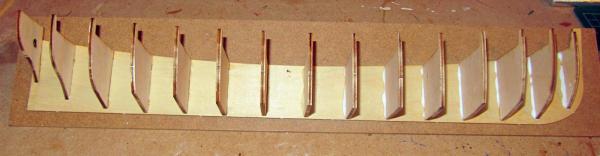
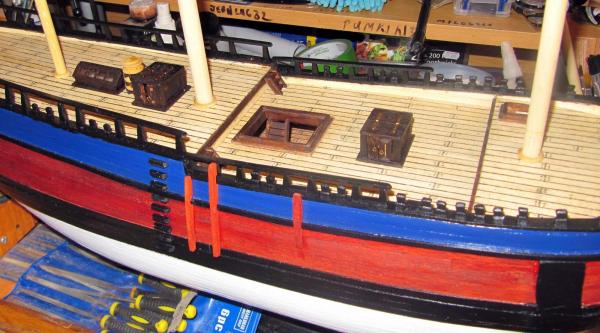
Spot on Edward The hull is built in two halves, planked and decked, then fitted together Anyway I have made a bit of a start I checked the parts and was a little perplexed at the difference in quality Mostly the parts were very high quality, even most of the plastic ones As can be seen from these very good turned brass parts However, the deadeyes and blocks Ok some were better than that, but that's not the point I don't think any of them should have been like that And doing them in placcy anyway :mellow: :mellow: :mellow: They will be replaced So, I secured the keel to the nice bit of MDF they supplied I then got busy with the PVA and the square Had my dinner Then got busy again Although this is supposed to be a beginners model, according to Billing, a lot of information has to be taken from plans and drawings, not the instructions, which just say things like "Mount the decks" "Assemble the masts individually and mount on the deck" So be warned if you want a nice simple "Put it together" kit to start your modelling life, this might not be the one Anyway that's it Time to put my feet up What luxury now A choice of what to do


- 170 replies
-
- 1
-
-
- thames barge
- billing boats
- (and 1 more)
-
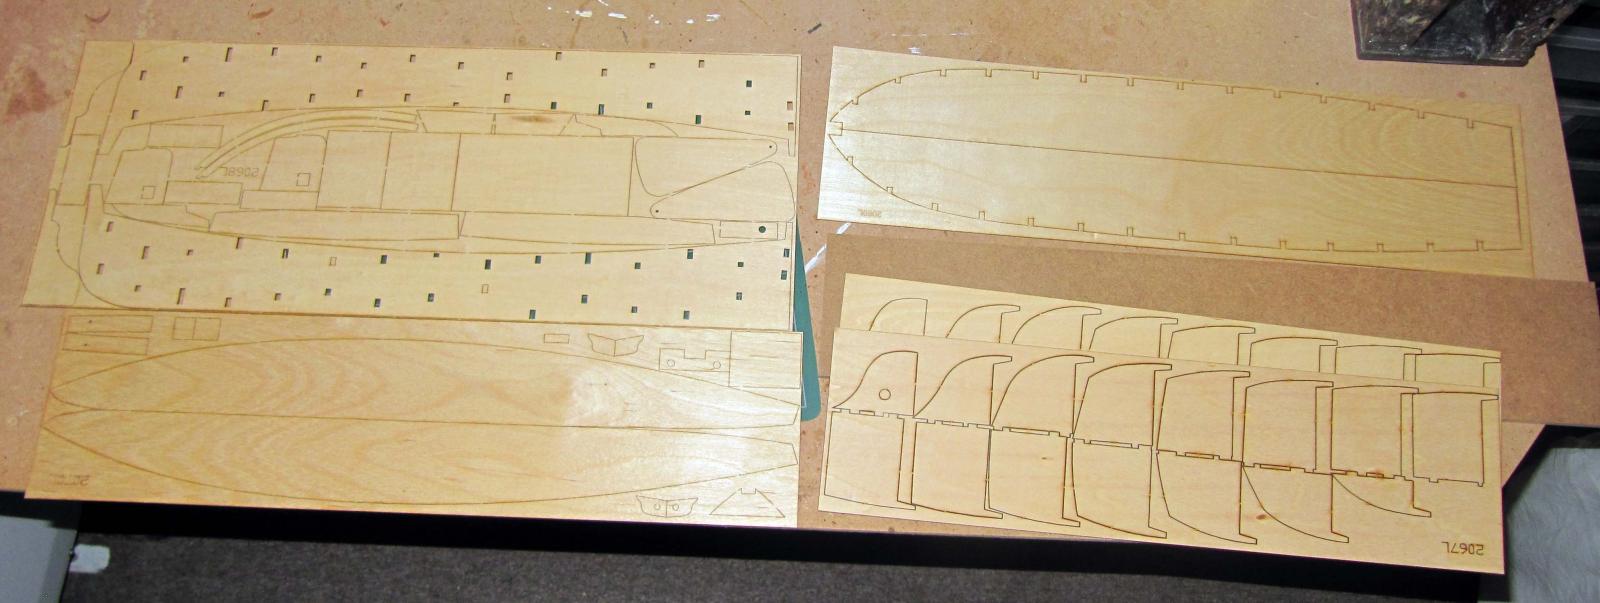
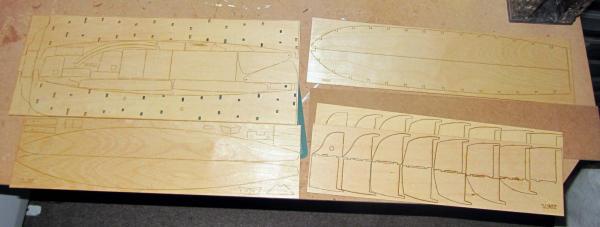
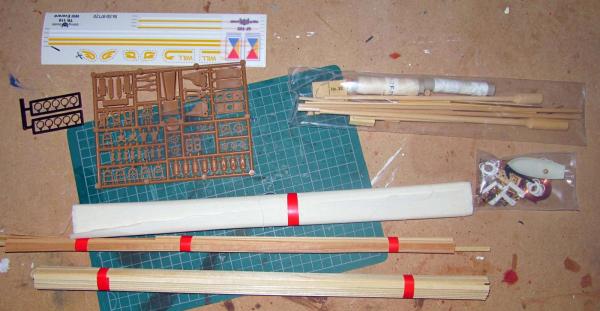
Thanks a lot Tom You get the front seat Let's hope Sjors hurries up with the popcorn and beer Ok let's make a start and open the box I have never built a Billing before so it will be interesting The lasercut sheets look pretty good They even provide a thick board to fix the keel to for fitting the frames Billing are a bit different as a lot of their small stuff is plastic and not wood or metal Very interesting The instructions are very basic and although they say this is a beginners kit I would not want to be doing it without quite a bit of experience or some much more precise instructions Well that's the box opened I am now told to count everything so that the next job :mellow: CU in a bit

-
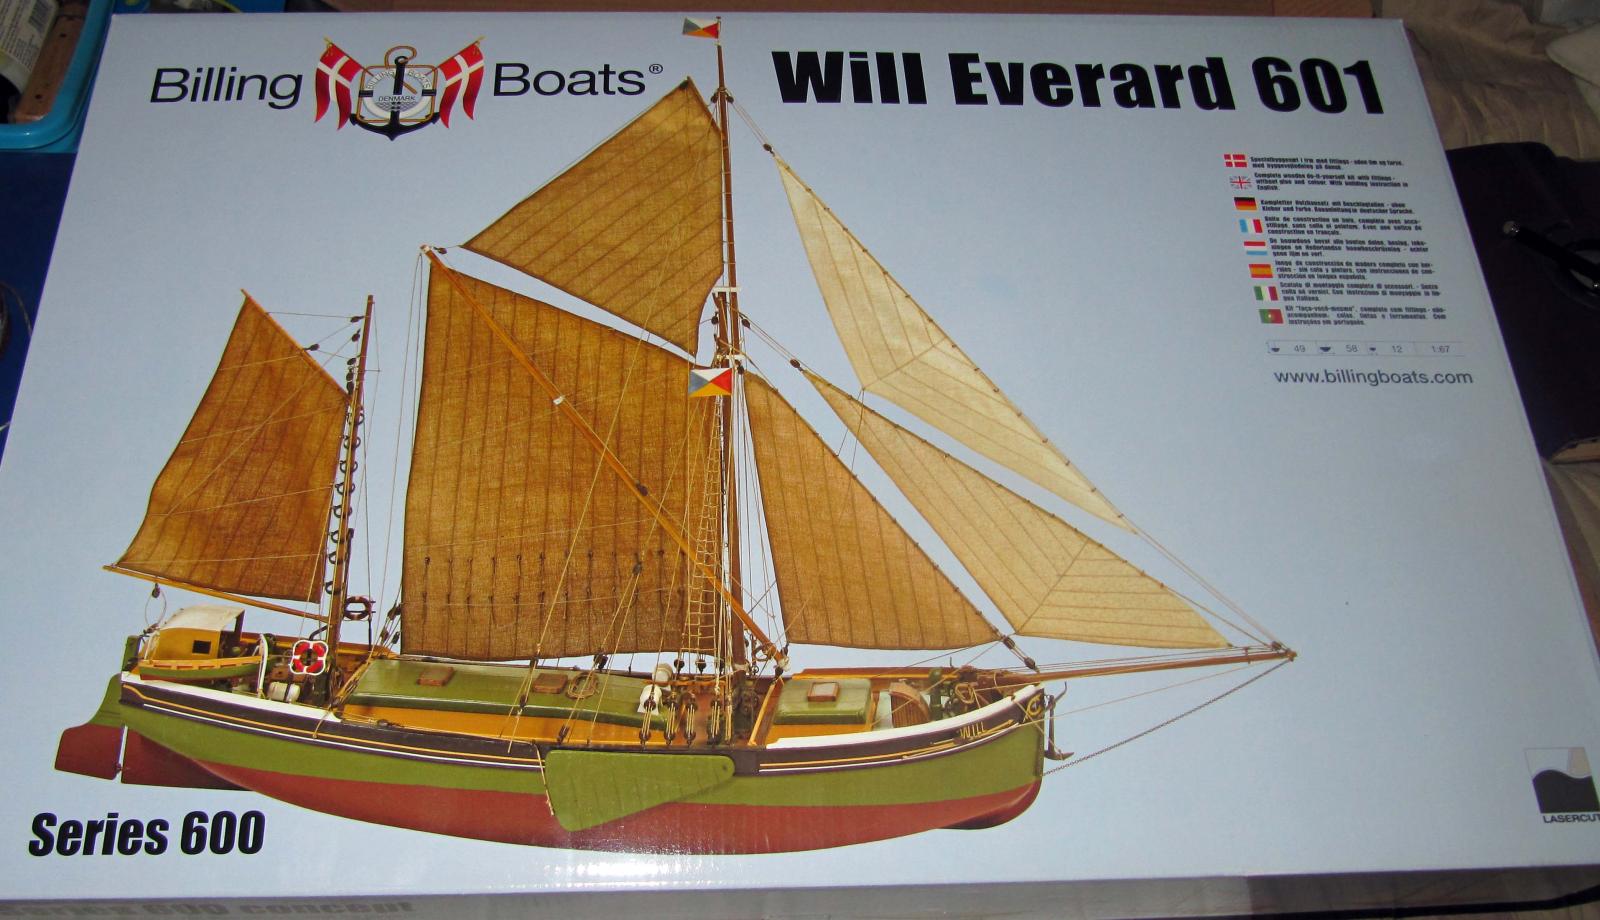
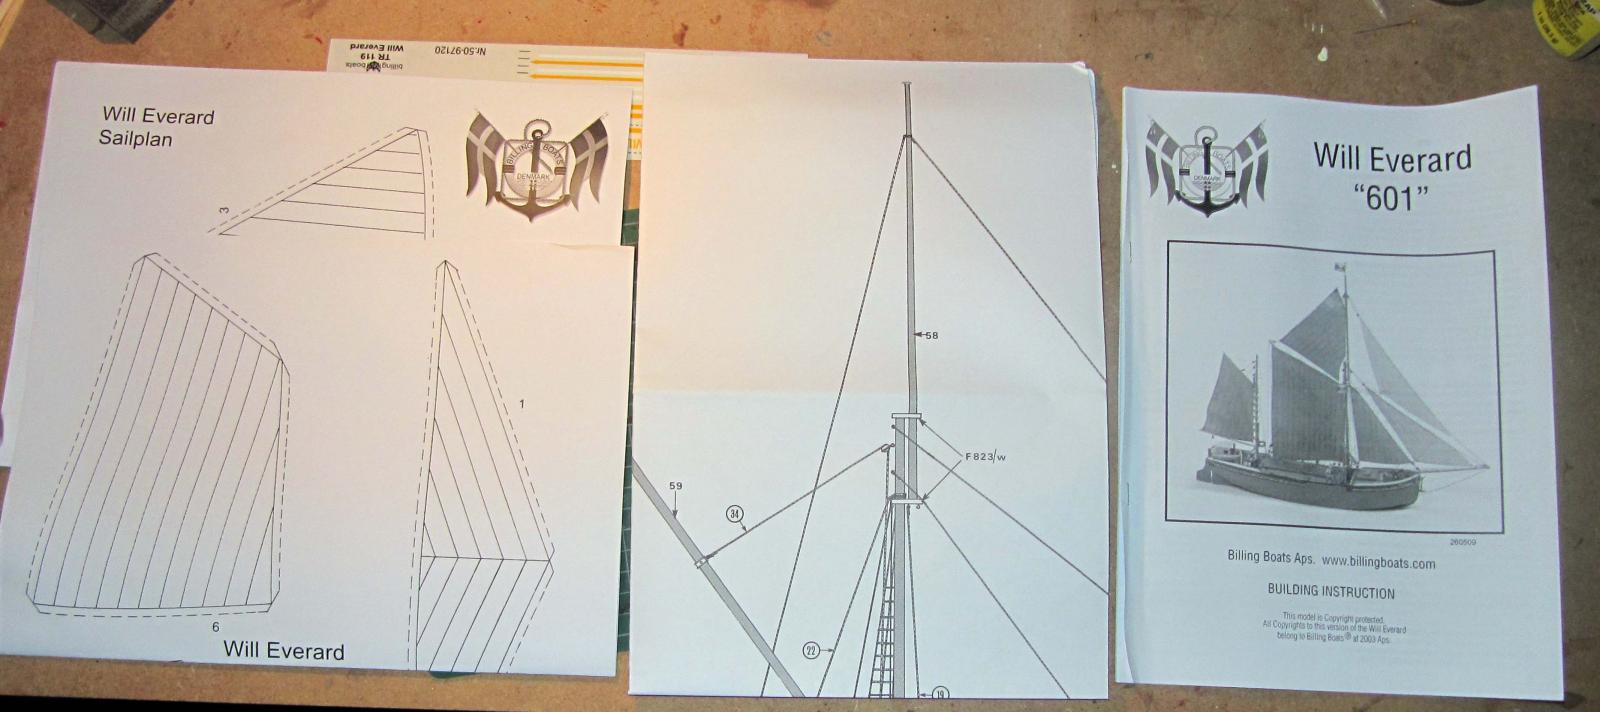
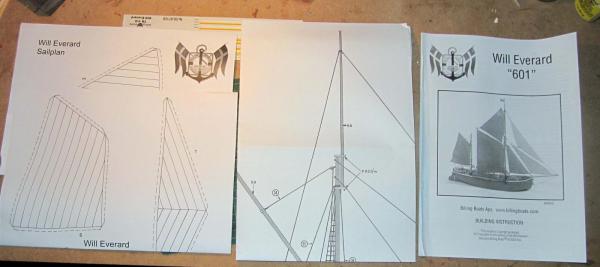
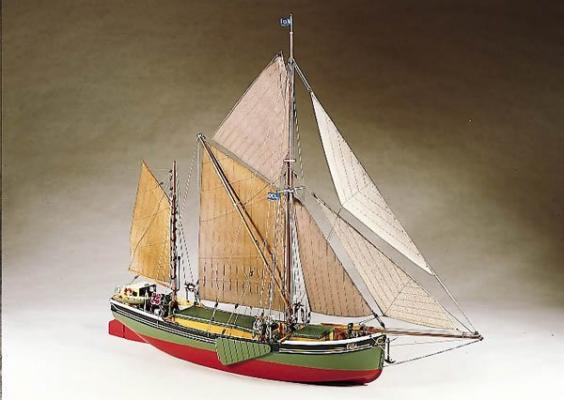
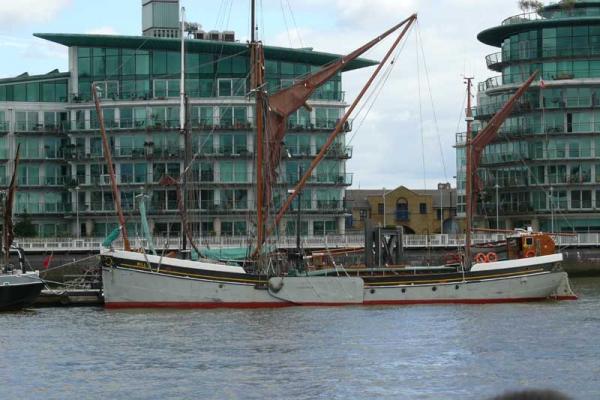
Bought totally out of the blue at our local model shop the Admiral and I both fell in love with this model for some unfathomable reason Here is the Historic ship register entry http://www.nationalhistoricships.org.uk/register/234/Will Here is more personal information on the barge (ex Will Everard). Official No. 148677. 150 tons, built of steel originally as "Will Everard" in 1925 for F.T. Everard & Co. Ltd., by Fellowes of Great Yarmouth. She was one of four built between 1925 and 1926 and all named after parters in the family firm- Alf Everard, Ethel Everard, Will Everard and Fred Everard. They cost about £500 each, and were built to the same dimensions - 97.6 x 23.1 x 9.6 feet, but two of them were registered as carrying more cargo and were therefore charged more for towing dues. They were claimed to carry the greatest set of sails of the sailing barges as they measured 112 feet from truck to keel and had sprits 65 feet in length. This allowed them to set 5,600 square feet of canvas, not including balloon canvas. They carried a crew of three - skipper, mate and third hand. They were built when Everards secured the contract to supply gas coal to the Margate Gas works, and the Will did a lot of this work, fetching coal to Margate from Keadby on the Humber. In trade they had a grey hull with a pink bottom, black rails and gold sheer line. The Will Everard traded by sail alone until 1950 and was by then the last one of the four to have an engine fitted (Ethel Everard having been lost earlier at Dunkirk). From 1932 until a little while after she had her engine fitted, her Master was Captain Jim Uglow MBE - the only barge captain known to receive this decoration for gallantry, devotion to duty and meritorious service on board the Will Everard during the war. He tells his story in the book "Sailorman - A Barge Master's Story" - about half of which includes his time as master of the Will Everard. Hugh O'Donell, started as third hand on her in 1946, and became master of her in the 50's for Everards. The Will Everard was finally sold out of trade in 1966 for £750 to Vernon S. Harvey under the condition that she did not retain the same name. She was renamed Will. She was used as a store for this time, until bought by John R. Hobbins who rerigged her and used her as a private yacht, until he sold her to Overseas Containers Ltd (part of the P&O group) in 1976. She has changed ownership within the P&O group, in her role as hospitality/P.R./corporate entertainment ship. The photograph above shows her in 1988, anchored off Heybridge Basin on the River Blackwater, with a green hull when owned by OCL. More recently she has been sporting a blue hull under P&O colours. Master was Sue Harrison who eventually bought her in partnership with Malcom Fisher. 2004 - now owned by Topsail Events and Charters and available for charter There is now a link between Will and the Falmouth Lifeboat of the RNLI. John Hobbins and his wife set up the Will Charitable Trust which gave money to fund the purchase of a new Severn Class lifeboat which is stationed at Falmouth, Cornwall. In commemoration of this, the life boat has been named "The Will" after the barge they once owned. I am going to build it concurrently to the Endeavour and hope to finish it well before to get some practice in the ways and wherefores of sails Well here we go I wish myself good luck
- 170 replies
-
- 1
-
-
- thames barge
- billing boats
- (and 1 more)
-
Just been up town Happened to go by, no sorry, in to the model shop Both the Admiral and I fell in love with a model It's a beginners model and the ship is still in use for hire I was looking at Viking style boats for something totally different Then we saw this No idea why we both liked it but we got it It's Billing Boats Will Everard I am going to build it concurrently with the Endeavour to hopefully get some practice fitting sails I will start a log for it now where I can put all the information on the ship It is certainly a very different build than the Endeavour so I should really enjoy it
-
That answers everything Tom Two totally different types of launch with different rowing systems I have great fun building mine with a sanding block I do wish I had your tools But in a bedroom...................................
-
Nice work Tom I was going to make the oars for the launch on the Endeavour like that However I found that the shape was probably totally different when someone sent me this link https://sites.google.com/site/shipwrightsfaq/smf-qoars As my launch was fitted with Tholes to hold the oars they have to be that shape A lot more difficult to make as you would see in pages 2 and 3 of my build I cannot see how your oars will be held as there wasn't even any idea on that drawing What you have made look really good I wish I had equipment like that
-
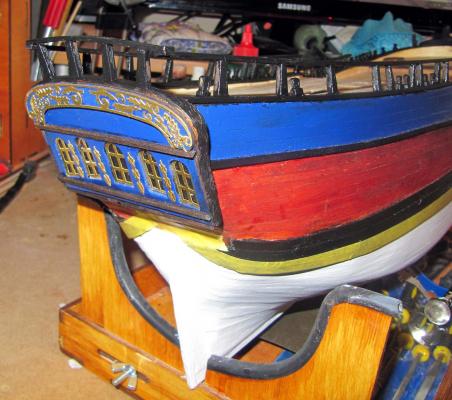
Been working hard with the glue pot today Still a ton of stuff to stick on but I have made a start Just stuck the masts in to line up the wood rings that tidy up the holes in the deck Now, regarding these things I am thinking of blackening them then rubbing most of it off and painting the windows black I was also thinking or blackening the decorations either side of the transom and brushing most of the black off How does that sound????
-
What I mean is Sjors :-That your crows nests look like holiday homes compared to mine And mine isn't a warlike vessel, it's a survey vessel with a few guns stuck on as an afterthought Yours has more guns in the captains cabin than mine has all over And my crows nests are a network of logs up there to hold the ratlines and any idiot seaman that wants to take his life in his hand There will be lines of people waiting to go up to yours The bosun will be there beating them back with a CoNT
-
Thank you all FINALLY got round to fitting the steering gear (Rudder) I have to admit I was dreading it a bit, but with the help of a little contact adhesive it went quite well It has dirtied the white there up a bit but with the blackened hinges I expected that a bit I have pushed in what full nails I could with the help of the nail pusher Just ther cut heads to be glued in now Now the serious deck furniture build can be started as the actual steering gear (That long bit of wood coming from the top of the rudder) is an important part to have fitted Right I will go and get my head in the book and see exactly where things go

-
Hi David As you gave your time to visit me I thought I would have a look to see where you lived So I came over, found the back door open and wandered in I got a seat at the back as the place looks pretty full If I could just get Adriaan and Sjors to pass some popcorn and beer back to me I will settle in I have read through your log, agonised over your problems and cheered your successes As you can see I have built a few OcCre models Often I have looked at the instructions and thought "Do that NOW!!!!" or "Surely I should do that first" A particular point with the Endeavour was indeed the keel I was told to stick it on when all the planking was done I thought "But there's not a lot there to plank to, how am I going to get a nice finish" So I stuck it on after the first planking so I had something to plank squarely to Also just to add to the debate about glue, I use PVA wherever possible and only revert to CA medium or thick when absolutely necessary Thing is with PVA it reacts much less with stain or paint whereas CA just seems to react with everything and does not take kindly to gluing prestained wood Ok that's my bit for now I will just sit here at the back and keep an eye on things, although it does look as if you have gotten over your probs and are now doing very well Keep it up Mick
-
Much much better Sjors Coming along leaps and bounds now It's a very posh looking ship, a little unlike what you think an out and out warship should look like Especially the parts of the masts I think of as crows nests I am not sure what the correct name is Keep it up Mick
-
A lot of us have had illnesses or problems recently Bankie so I guess you are just joining the club I hope you get over it soon so you can get back to your quality work in the Endeavour Keep it up Mick
-
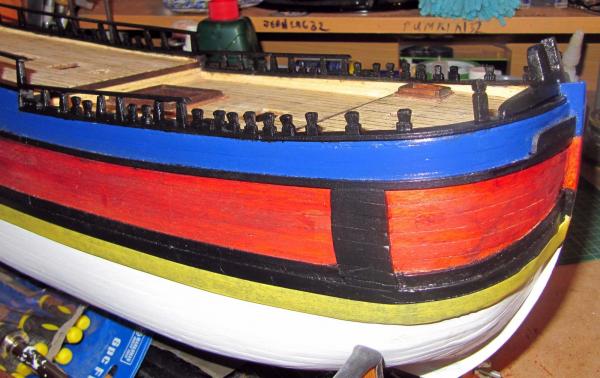
Just given the Gallant rails etc their last coat and this is how they look I definitely prefer the black finish Next job is to mask the rest of the ship and dig out my compressor and spray gun to give the hull a coat or two of white Other than touching up that should finish the painting Keeping it up Mick
-
Spot on Sjors I have just adjusted my cupboard on Adriaan's advice It's no good if you can't look at other peoples ideas and make changes if necessary Keep it up Mick
-
I had a think about that and I agreed with you Adriaan.................So I think that looks a lot better Thanks for that Adriaan Right, better see what I got to do next Keeping it up Mick

-
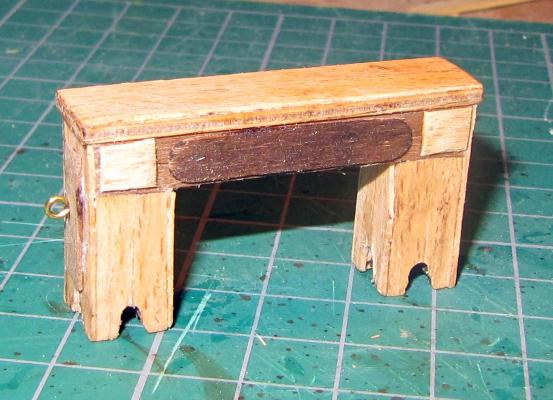
Well the bottom half is a bit obscured by the skylight but not the top But as I say earlier it does look as if it is a simple cupboard I just WISH I didn't keep taking macro photos MANY time life size :mellow: OMG it looks awful It's a good job it doesn't actually look like that sitting here That took a minute or two to make as well as the base shape is covered by planking Making something like this always puts me in awe of the scratch builders and the ones that totally bash their kits and get them looking museum quality They are like Gods to me Believe it or not there are THIRTY FOUR.......34 separate pieces in that Trying to keep it up Mick
-
Looks fine Adriaan As Sjors says the railings particularly stand out I still can't get over those herring bone style planks either Lovely work Adriaan Keep it up Mick
- 1,038 replies
-
- 1
-
-
- King of the Mississippi
- Artesania Latina
- (and 1 more)
-
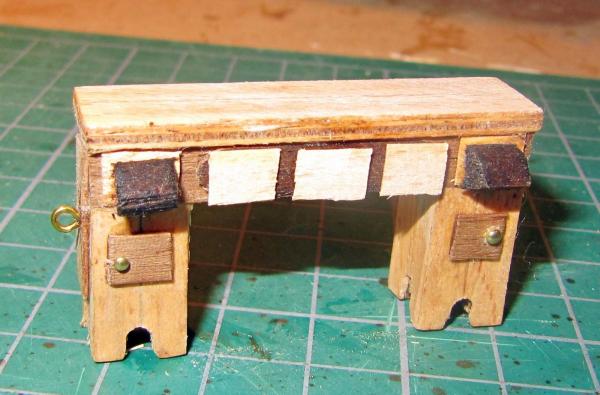
The instructions just tell you to glue the bits on Adriaan Looking at the number of parts there are only 3 x 195 which is the decoration to the front and two sides so I have to assume the back stops at 171 which is as plain as can be Also looking at others and a magnifying glass on the photos it looks just like a cupboard with a plain back so that is how I will go Keep it up Mick
-
Looking good Sjors That is some rope there though Is that a back up tow rope ?? Keep it up Mick
-
Hi there Thank you all Another quick question Found somethings bigger to build I want to start the Binnacle cupboard as it's called Now the problem is I have very little info on the other side of it The instructions tell me to make only two sticky out bits they call drawers Does that mean the side away from the wheel is plain??? And if so, how plain????do I stop the far side at photo 171 or 172??? Thank a lot Keeping it up Mick