HOLIDAY DONATION DRIVE - SUPPORT MSW - DO YOUR PART TO KEEP THIS GREAT FORUM GOING!
×


Micklen32
-
Posts
619 -
Joined
-
Last visited
Content Type
Profiles
Forums
Gallery
Events
Everything posted by Micklen32
-
 Basically what I am doing Grant is following the instructions Thing is with the planks only being 65mm it would be tricky to lay them any differently Plus I have always done it as I am now and it is habit So it actually never even crossed my mind although I have read about it I am afraid as well that I have started the middle deck the same way :mellow: Maybe the next ship If I can afford one Keep it up Mick
 -
Really nice work Slog You are well advanced compared to me and my OcCre version The kit does look slightly different but no doubt I will be able to pick up hints from the other builds I have yet to decide how to finish the hull off I think the white hull may be later versions, I am not sure I know the replica is white but I am leaning more toward leaving it natural or using a stain It just seems a bit of a waste to me to spend hours on the planking to them cover it up again I would maybe like a copper finish like on the Victory as that is art in itself but the Endeavour did not have copper I am sure So I will keep popping in and out to yours and the other Endeavour builds to see what tips I can find Really nice work here Keep it up Mick
-
Yes I think that has to be the way Theo Nothing more satisfying than working a bit of wax in to build up a lovely finish Thank you all for your nice comments Remember the reason I may seem speedy to some of you is that I spend around 8 hours a day on the build I don't suppose there are many that can say that Anyway I need a few more planks cut to finish the second half of the lower deck so back to work Keep it up Mick
-
Really nice work Theo Tell me, what paint did you use on the cannon??? It really makes them look authentic You have done a really good job there Theo I think you even have Sjors outweighed with cannon here Keep it up Mick
-
Hi smarinid I did the Sergal version of Thermopylae a few years ago The scale was 1:124 I cannot really remember sizes as everything was supplied but I know the blocks etc Well Everything Was tiny I did do a site about the build apart from the very end of it You will see a link in my signature I am not sure if it will help at all Keep it up Mick
-
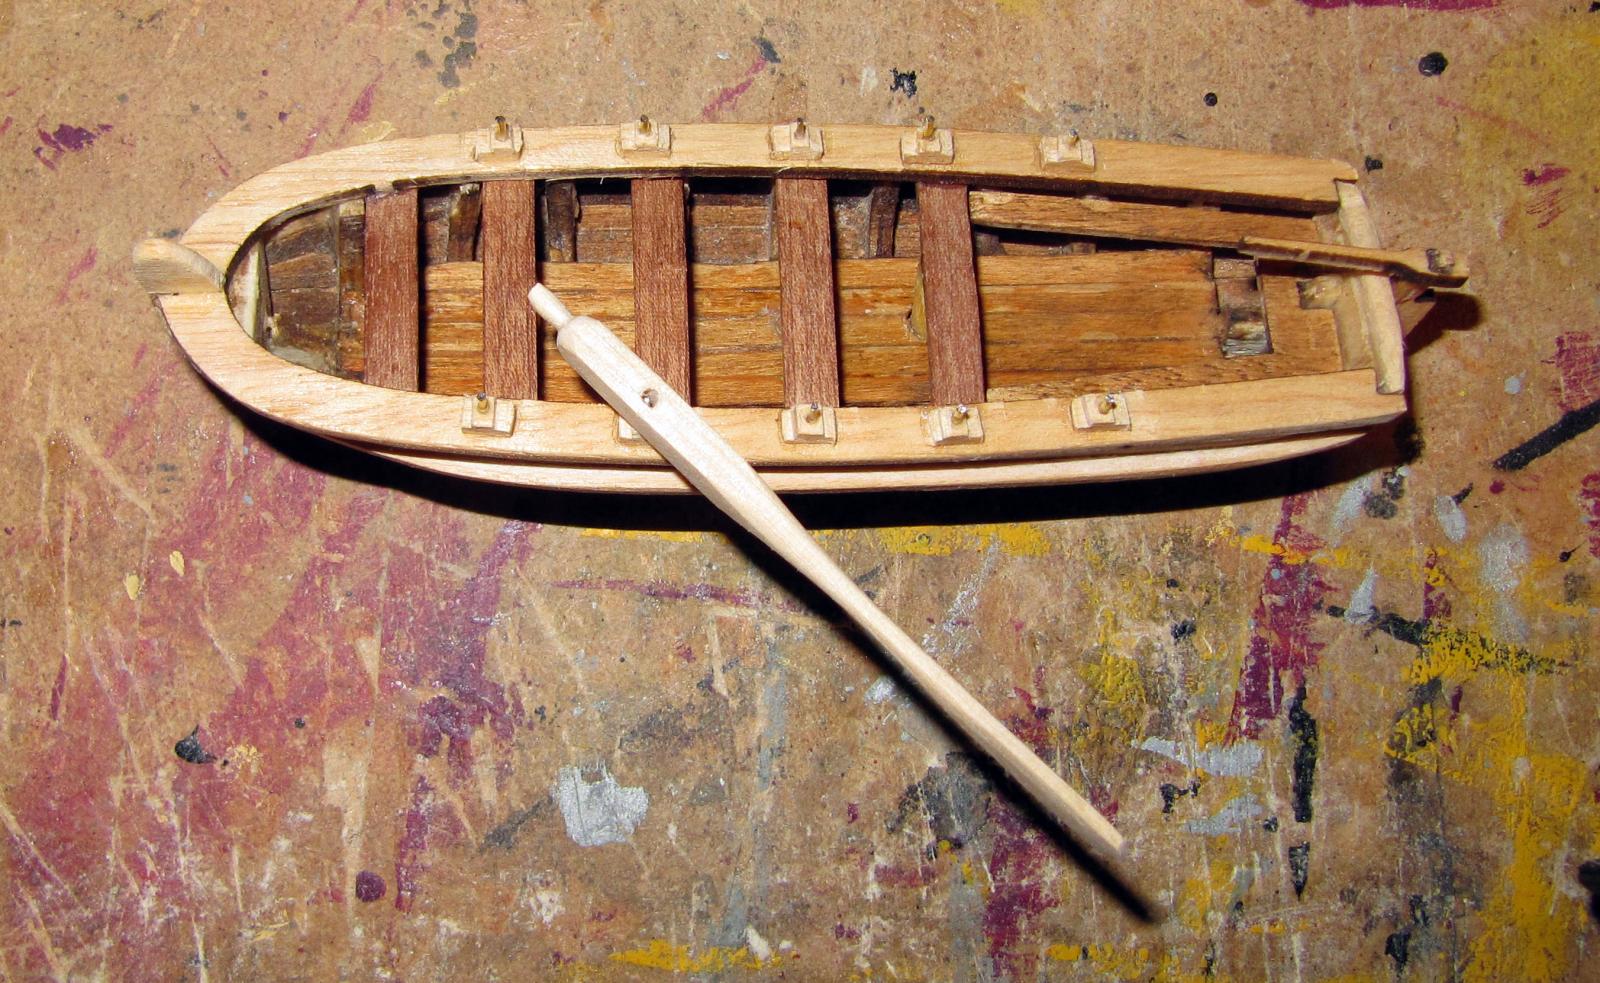
Thank you Anja Here is the half deck finished I have done my best to even the caulking up but as I have said most of this deck is hidden in one way or the other I have finished 6 oars and the rest can wait until my fingers have recovered from the cuts As you can see the 'Hand' made ones are a lot better but they take forever and I think the others are good enough as they will be heaped in the boat I should finish the other half deck tomorrow so it can be fitted in the hull Then it's the more important decks that will be seen more Right better go and change the dressings on my hands Keep it up Mick P.S. Oh yes. Question of the day. Do you think the decks look better polished or just varnished??????????????


-
Hi Bankie OcCre are famed for having good instructions and also supposedly the most realistic models The also now seem to be doing most or all their instructions in English Anyway to keep you all abreast with what is happening there is so much on the TV today what with the Test, the Scottish Open golf and most importantly FISH-O-MANIA But what am I doing I am making oars And do you know what else :mellow: I have the DREMEL out I won't say it's any easier, it's probably more difficult Slip with a sander you make a bit of a mark Slip with the Dremel and you have a tooth pick But I am a whiz with it and it is so much quicker So production line oars for a bit, then I may do a bit of planking I can plank while i watch the TV Keep it up Mick
-
Hi Bankie I am building the OcCre version of the Endeavour and after just a quick look it seems quite a bit different that the AL one The main ones so far seems to be the frames look a lot different to mine and the planking instructions are to plank at 65mm which is a lot different I am known as a quick builder as I can spend upwards of 8+ hours a day on the build but this one is going to be taken very slowly and carefully as mistakes are so easily made especially a major one like I have just made with my Taxi build We don't seem too far apart You are ahead on the planking as I was needing thread to make the caulking as that is a method I have used before and find for me works well I have virtually built the lifeboat though although I am making work for myself as the kit did not come with oars so I am making 10 from scratch Good luck with your build It will be interesting seeing the different builds come together Keep it up Mick
-
Hi Edwin Please accept my condolences I did try to message you but was told you couldn't receive any more messages Take care Mick
-
Ah yes Theo, I must have seen your post at some point when I was searching caulking through here I did think about it but thread had done such a good job for me before It is just a question of getting the right thread Mick
-
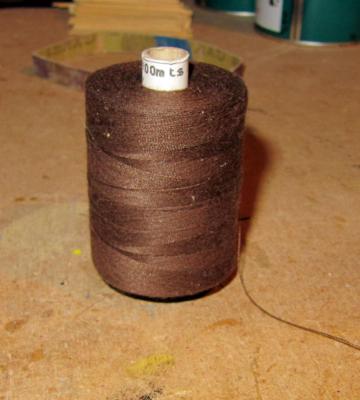
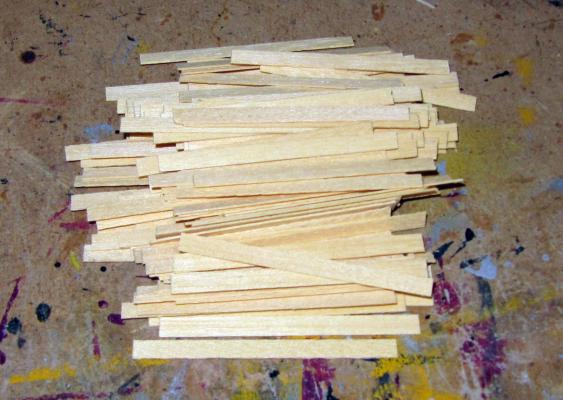
The problem is if the thread is not secure and also strong it will pull out or shred when you sand it Anja I was going to send off for some 1mm bracelet thread as that would be great I thought I consulted the wife to see what she though of the idea and she said 'hang on a minute' She brought in some embroidery thread and this is how it looks As you can see the last two are the ones with embroidery thread and it looks real good So that may be the way to go I would say if you had nothing that 1mm Shamballa bracelet thread should work well and is quite cheap It's important to fill the gap as solid as you can I remember reading a thread somewhere where a chap cut 1mm or less shims of wood and used those That would be hard work though without specialist kit I would think

-
Looking good Sjors Cannon are really looking mean Decks fitted out beautifully Great work Keep it up Mick
-
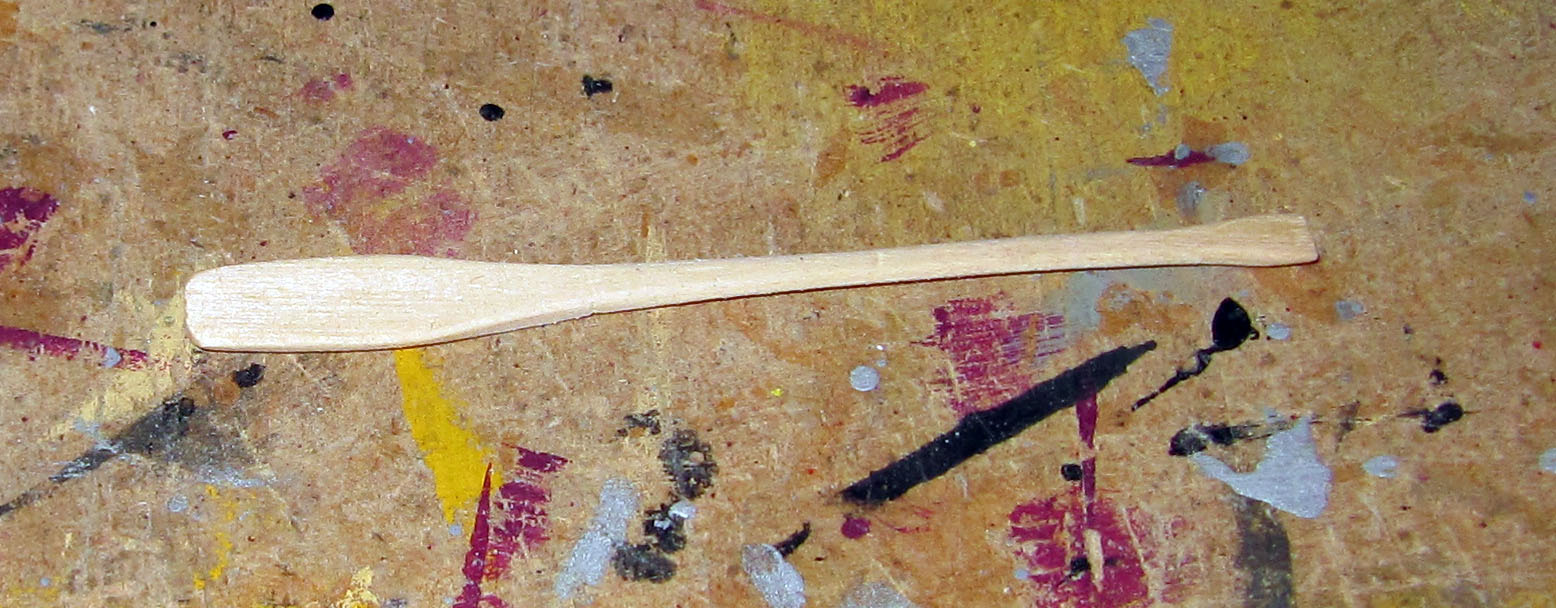
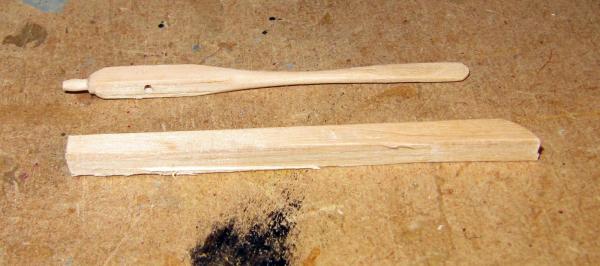
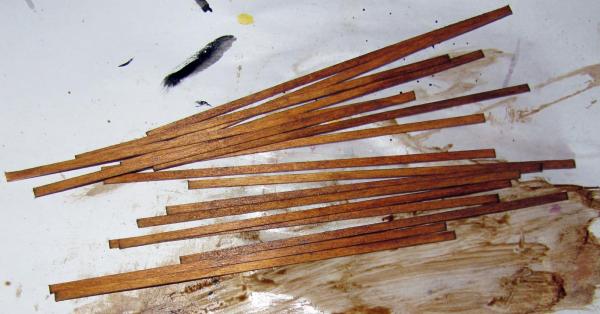
To virtually finish the lifeboat other than painting or whatever I fitted the throles I shaped them slightly as they had in the picture instructions Then I made another oar in the shape I thought was right but when I looked at it I realised it needed to be made from a square section to get the shape needed so I glued 3 tongue depressors together and cut them into 3 This now gave me the shape I wanted I feel that looks so much better in shape and size It is only fractionally shorter than the original Looking at diagrams they seem to be the same size all the way up virtually, apart from the thickness of the blade and a section of round just above the blade The thread has also arrived I am a little disappointed as it is not as thick as I remember the thread I used for the Thermopylae I will give it a try this afternoon and if it is no good I will have to see if I can find some actual carpet thread Well this is how it is turning out As you can see it is improving as I go The thread really isn't thick enough and carpet thread would do the job much better but I had great difficulty finding any so I went for the upholstery thread What I did to make it work was to twist it double with a tiny bit of glue Carpet thread would be perfect though and I will try and get some for the upper decks Not much of this deck is seen Keep it up Mick

-
Cheers Kevin Let me be the catalyst to get you going on your build again Keep it up Mick
-
DAWN!!!!!!!!!!!!!!!!!!!!!!!!!!!!!!!!!!!!!!!!!!!!!!!!!!!!!!!!!!!!!!!!!!!!!!!!!!!!!!!!!!!!!!!!!!!!!!! Could that be just after 9.00 please Mick
-
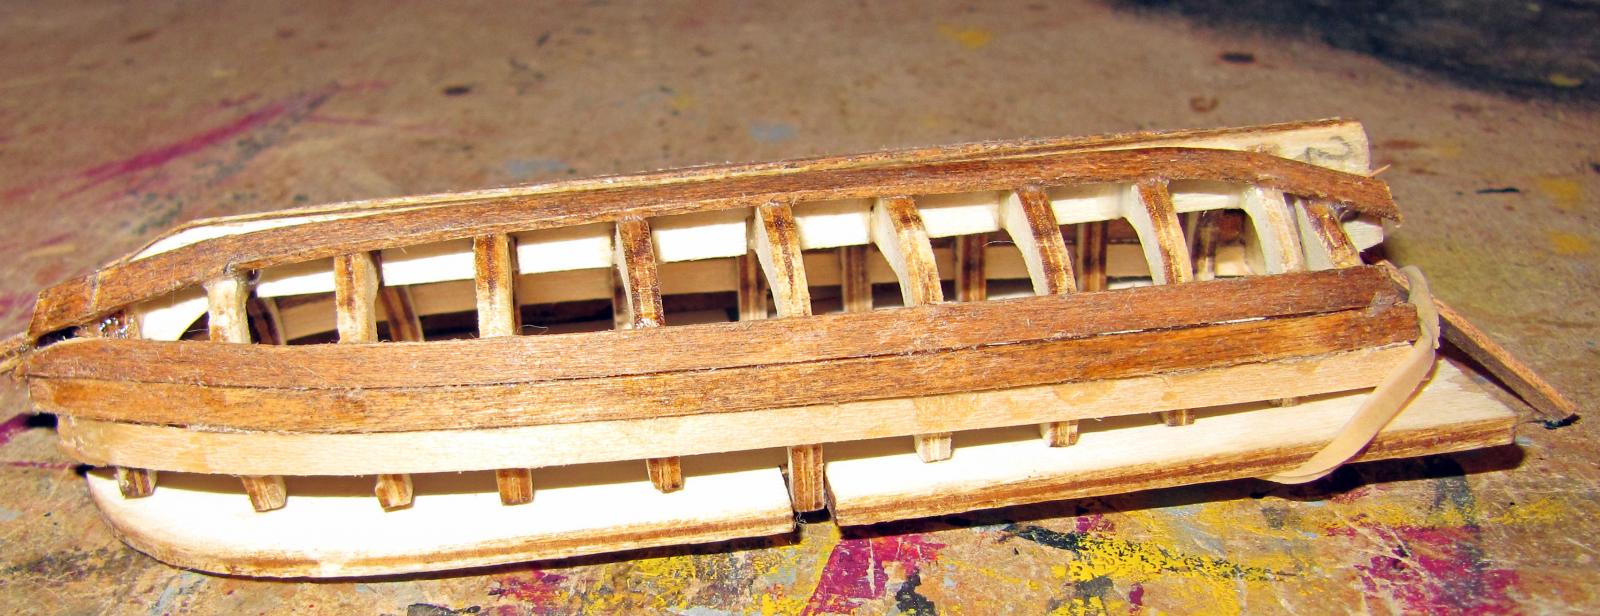
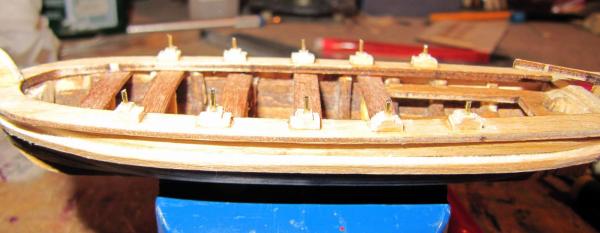
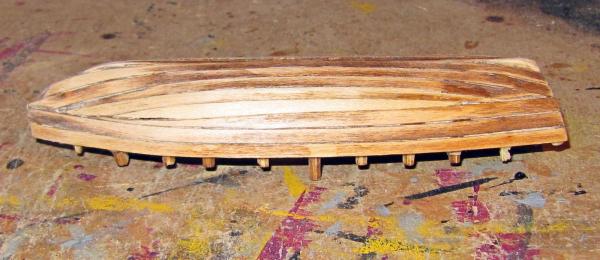
Here we are with more work on the lifeboat I sometimes wish we weren't working with laser cut parts as the edges are of course heavily burnt and it is almost impossible to get them clean without causing damage I am of course talking about the much smaller parts that the boat is made up of I think that problem is going to make me paint it Whether I am too heavy handed or whether it is almost impossible to remove the burning........................................ Anyway I had a fairly good day The first job was to add the rubbing strakes Then fit the floor of the boat and the rear seat Then I fitted the seat poles and the seats themselves I have to confess the line of poles are maybe not as straight as I would have liked The seats had to be fitted in two actions as they have a slight bow in them The pic shows the peg holding the end down to create the bow The last thing today was to fit the gallant rails, keel, rudder and a bit at the front There is still a fair bit to do as there are 10 tholes to fit but that will give me something to do tomorrow The thread should come tomorrow but then I also have 10 oars to make Can we have a double grog ration tomorrow please And no water in it Keep it up MIck


-
Morning all Thank you for your thoughts and information If I am reading the information David sent right it's not the length that's the problem so much as the shape The boats real length would be around 21' and on boats of that size the oars could be up to 14' long which is over 4m So the length of my oars are not far out but the shape seems to be right off On the boat I will be fitting what they call 'Tholes' which are pins that fit into a hole in the oars and for that purpose the oars are quite wide for what appears most of their length I was quite surprised reading the information as it seems that oars went up to the enormous length of 25' that is over 7.5m I presume they were manageable because they sat on these pins rather than just loosely in rollocks So I will make the oars taking this picture as a pattern I will finish the boat and then make a pattern for the oars and start knocking them out as there needs to be 10 I am making them out of tongue depressors that I used to use to stir stuff and they should be perfect Anyway back to sanding and building the boat Keep it up Mick P.S. Oh yes Sjors, I was thinking of getting a few slaves and a big drum to get the Endeavour through any calms

-
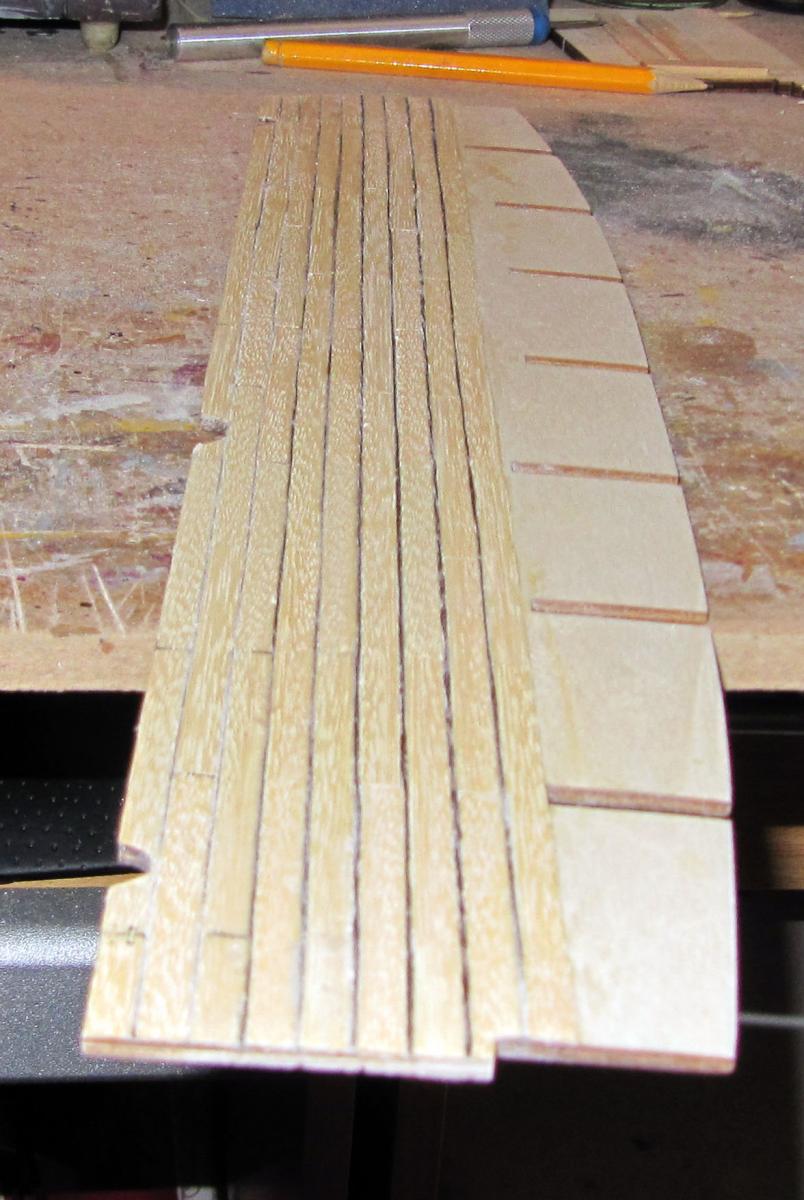
Where are you all?????? I don't want to do any more oars until I get an idea if they are about right Luckily I still had something to do Yes the lickle boat I had to stain some of the 1 x 3mm strip to plank the boat The instructions said to stain it first but I suppose half of it will be sanded off It was a little more difficult than I expected and I certainly admire Grant a lot more with his scratch built boat There is still a bit of sanding to do then start to fit the boat up That is for tomorrow Let me know about the oars by then please Keep it up Mick


-
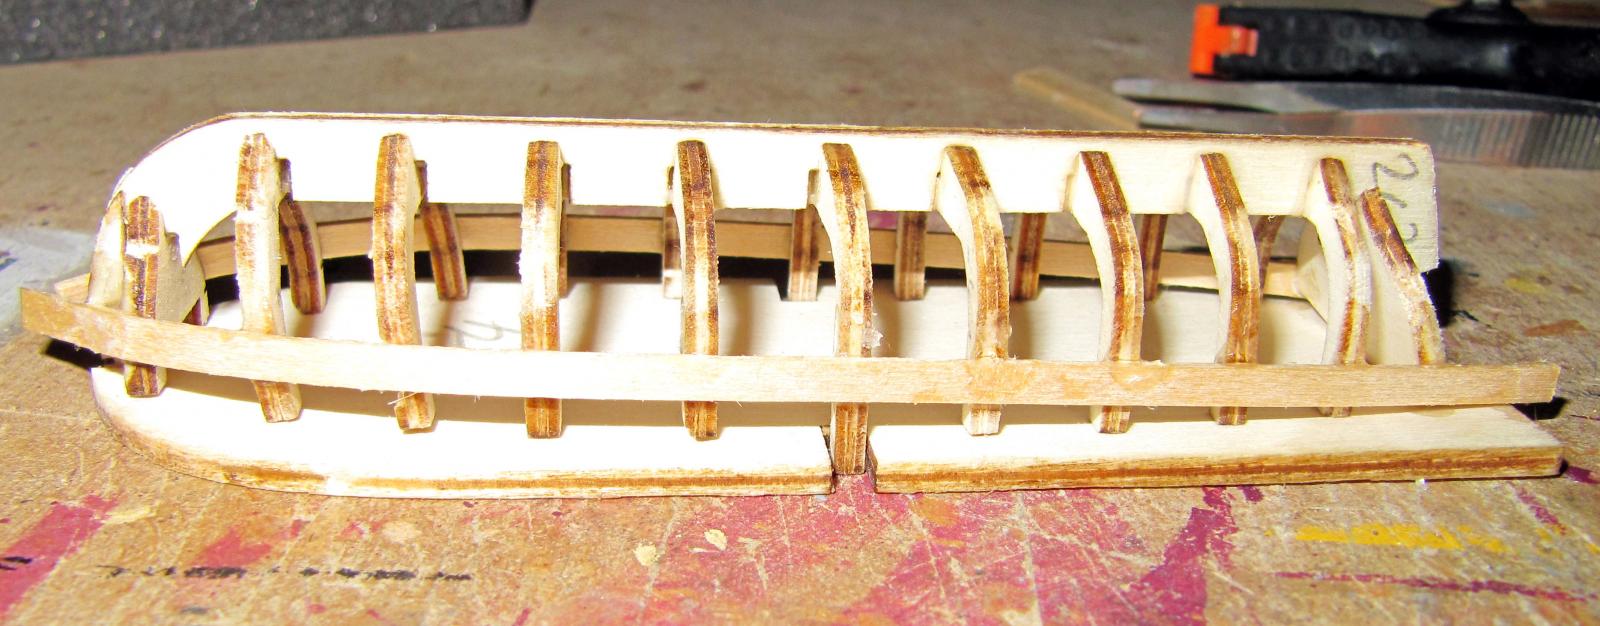
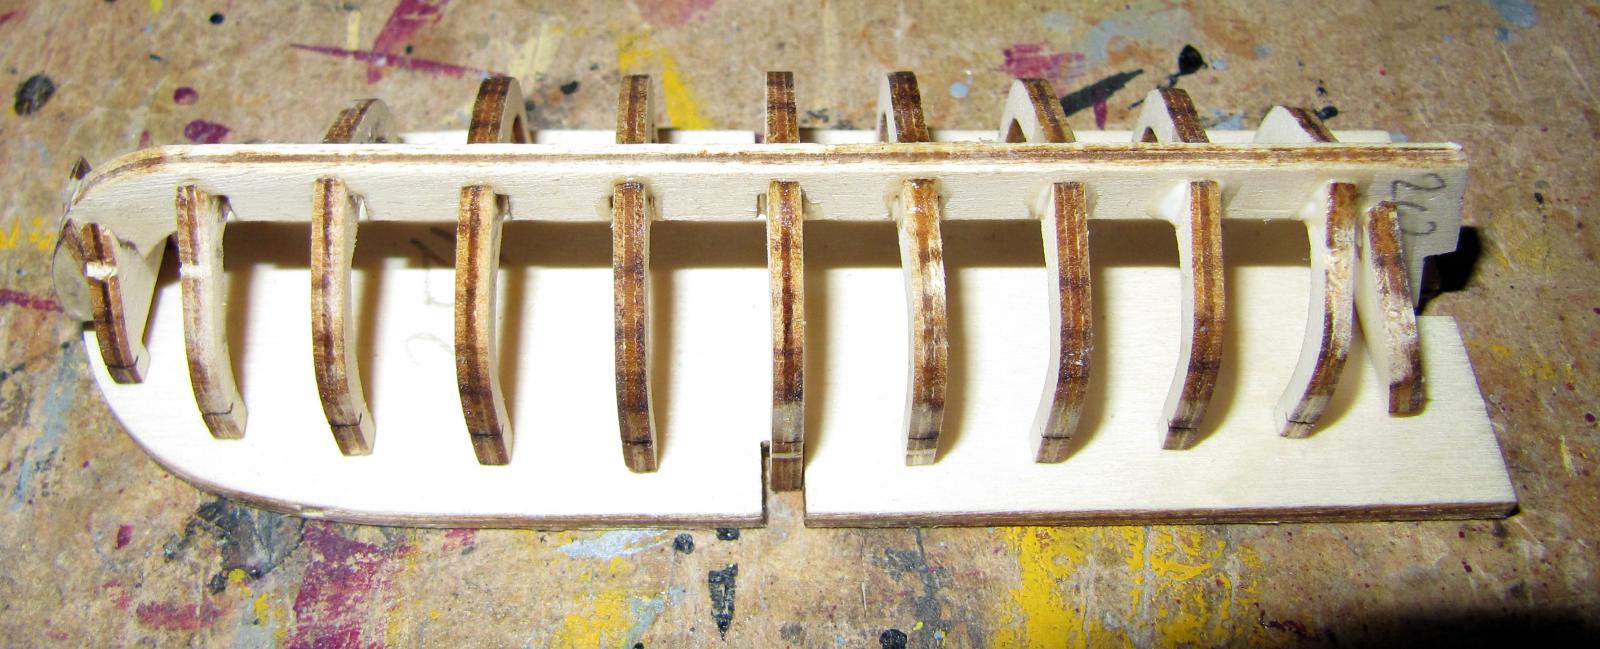
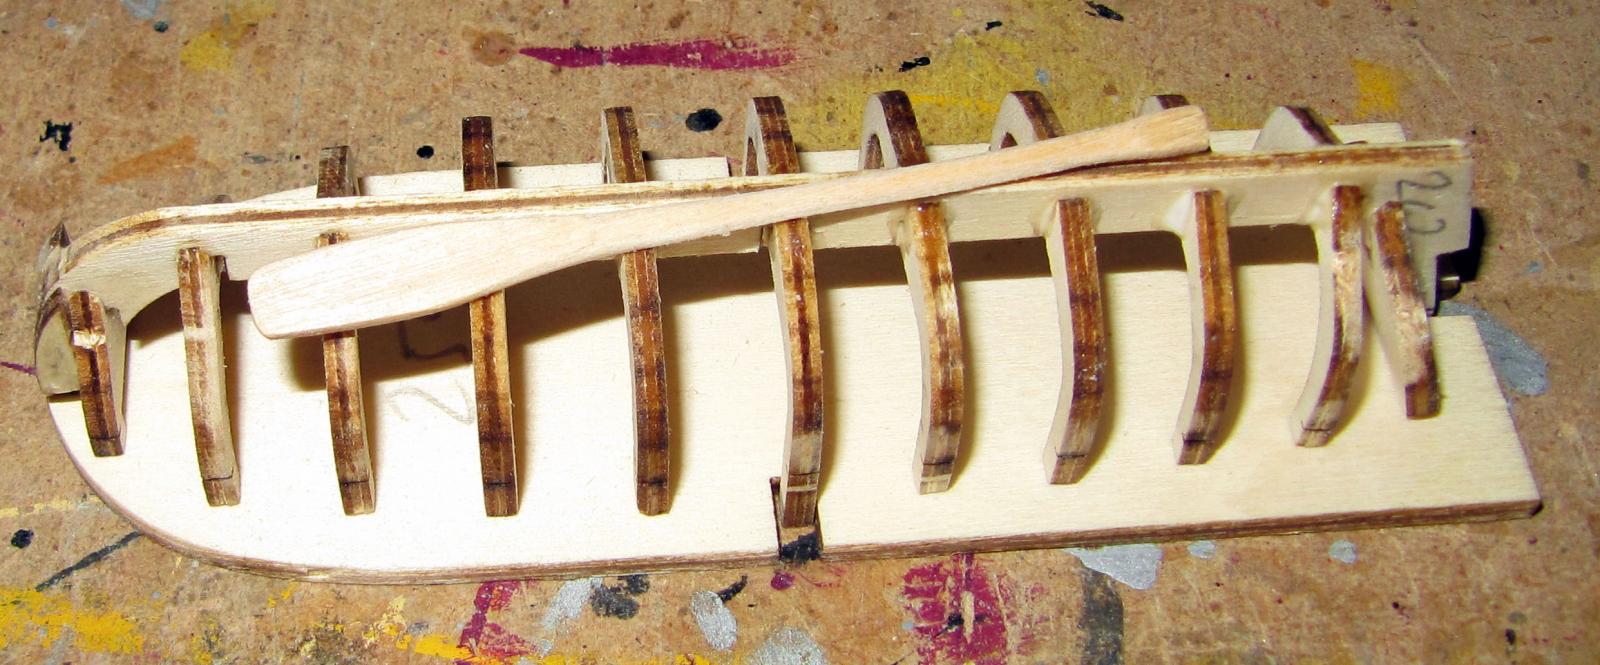
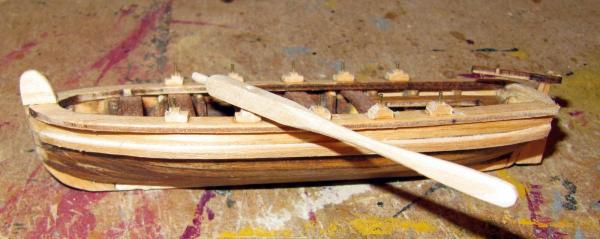
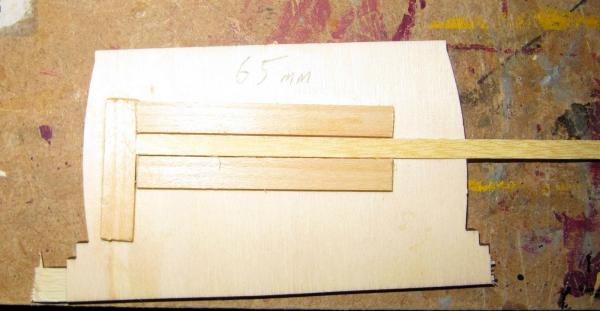
Great Sjors Now we can really get to work Without the thread can't carry on with the main build........................BUT!!!!!!!!!!!!!!!!!!!! There's a boat on board isn't there so I can start that Well there is the frame on it's support That obviously comes away later but is there to make life easier until you have finished the planking etc Now this model does not come with oars but I feel it needs them for authenticity I couldn't find a lot of detail so I am asking you lot if this looks good The oar is 70mm long making it 3.8m or 12' 6" full size I need VERY critical advice on the shape and size It still needs very minor shaping but I wasn't going to spend an hour on it if you think it's the wrong shape PLEASE give me your advice on this one Also should the boat be carrying a mast do you think????????? There is nowhere to fix a mast so it could be purely oars What do you think?? Keep it up Mick


-
Following you David I was always going to do the Bounty but I found the story behind the Endeavour very interesting I will enjoy following you though as it should prove a good build to follow Gratz for winning the longboat, I bet that will be a good one to build and in fact a good one to do at the same time Not that I am trying to push you or anything Course not Keep it up Mick
-
Thank you Anja I will be using a dark brown upholstery thread as it is thicker and a lot stronger than normal thread I did try normal thread but it doesn't show up so much and if sanded it just disintegrates Keep it up Mick
-
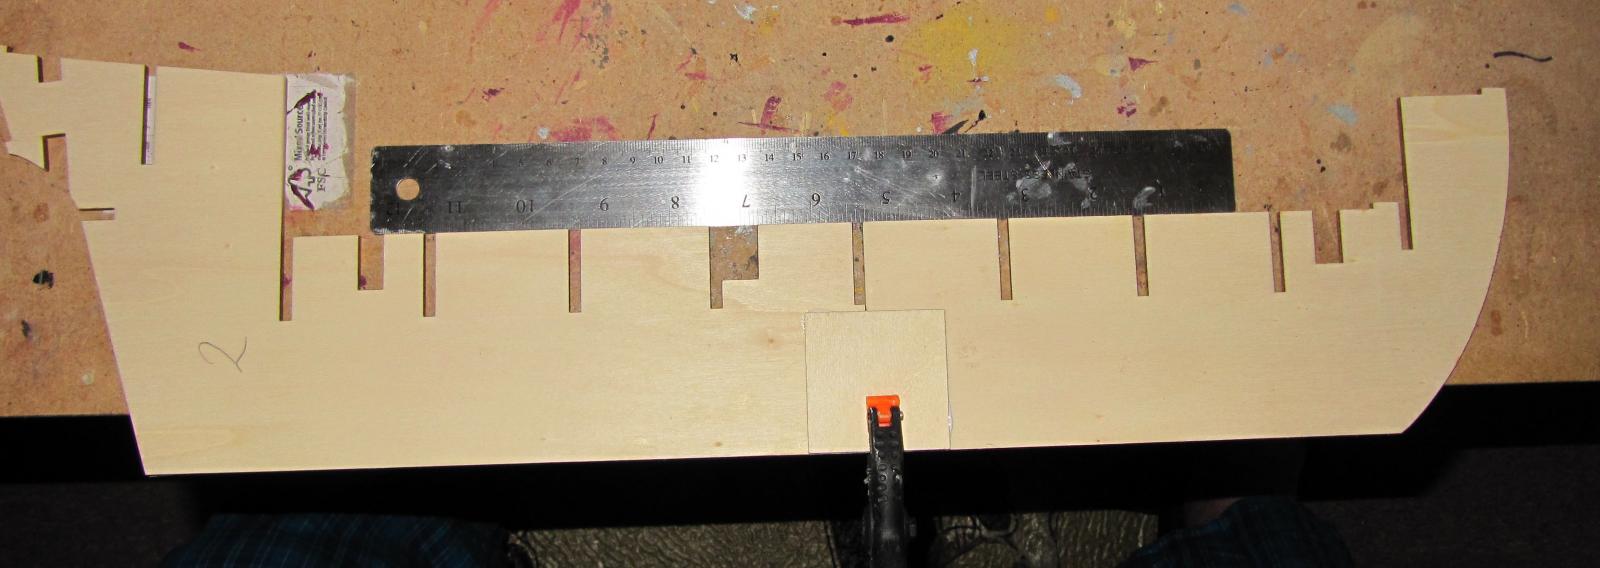
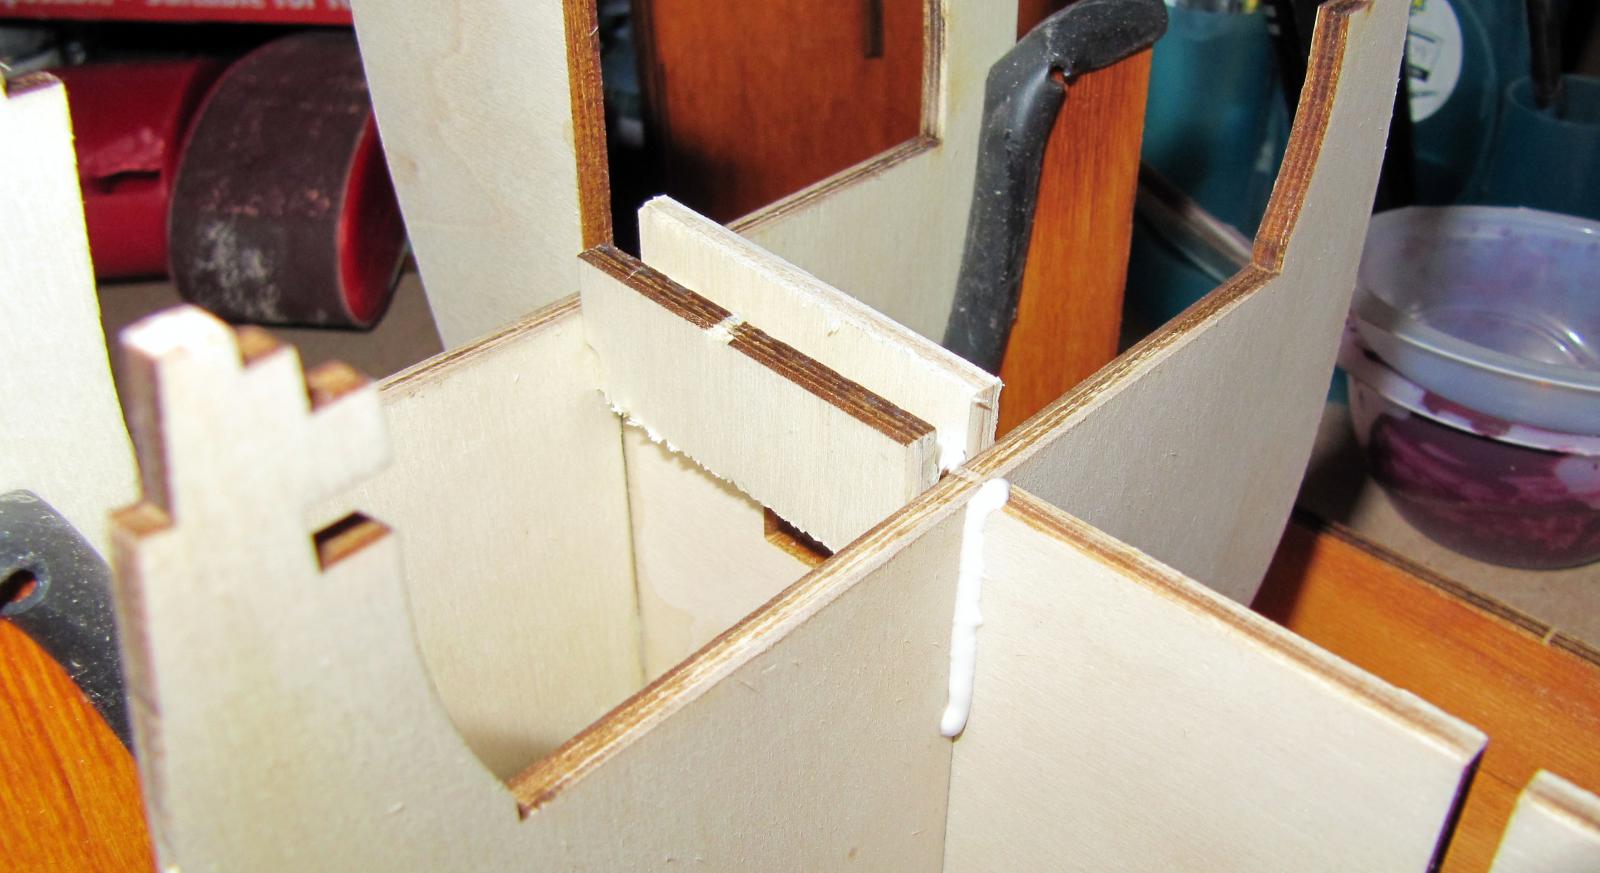
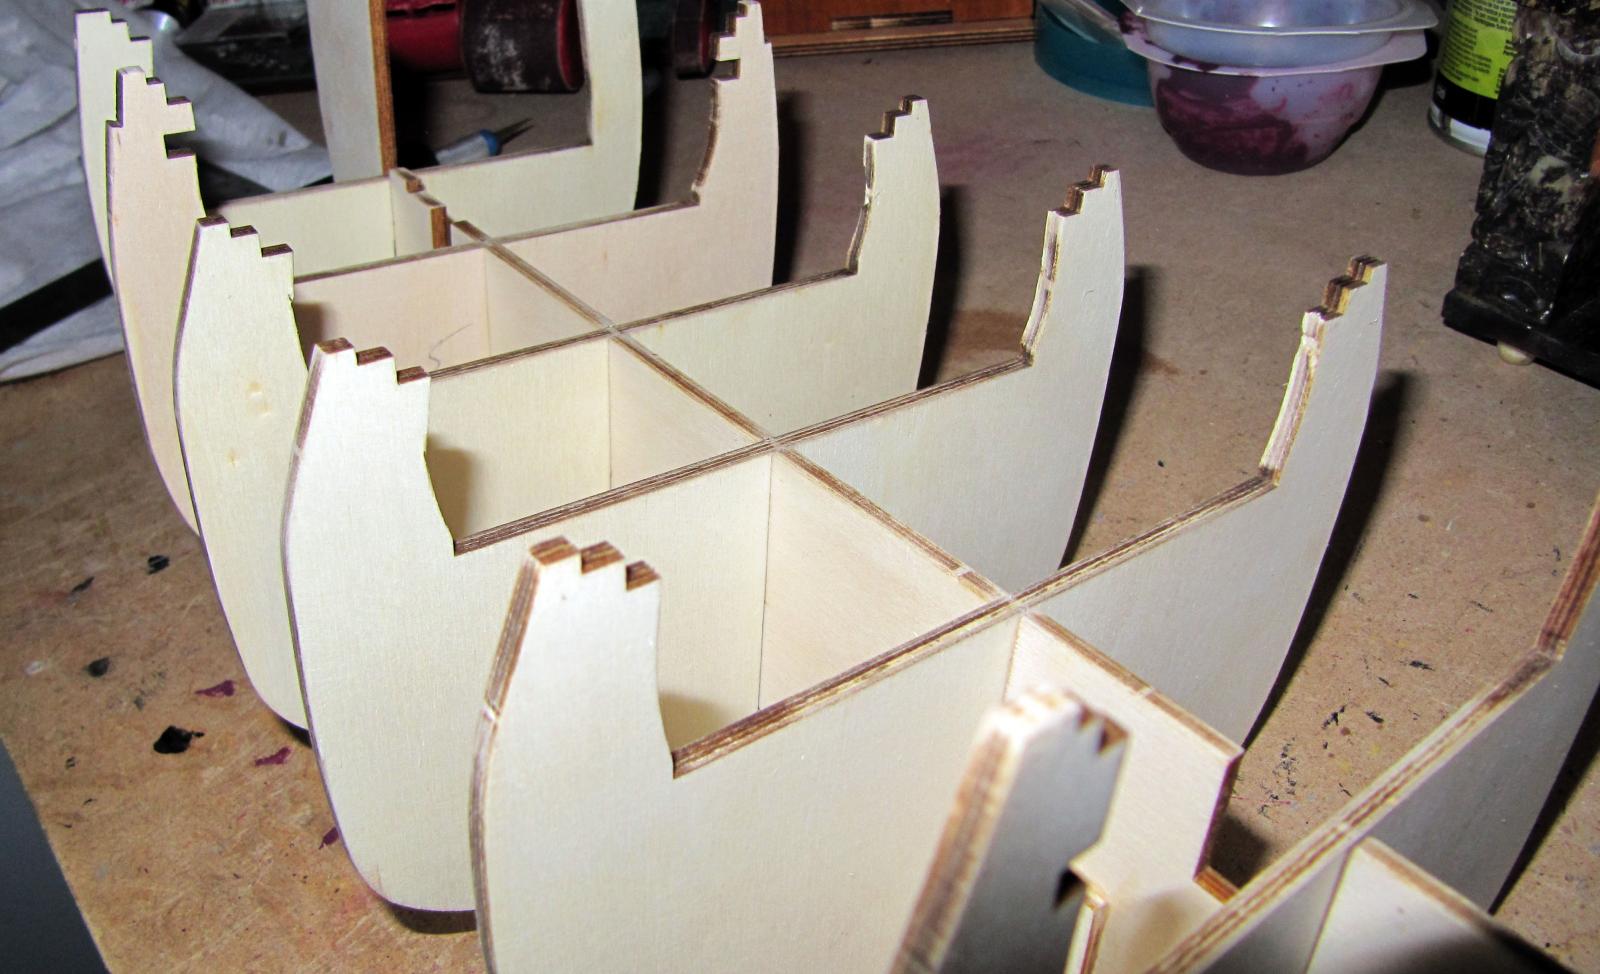
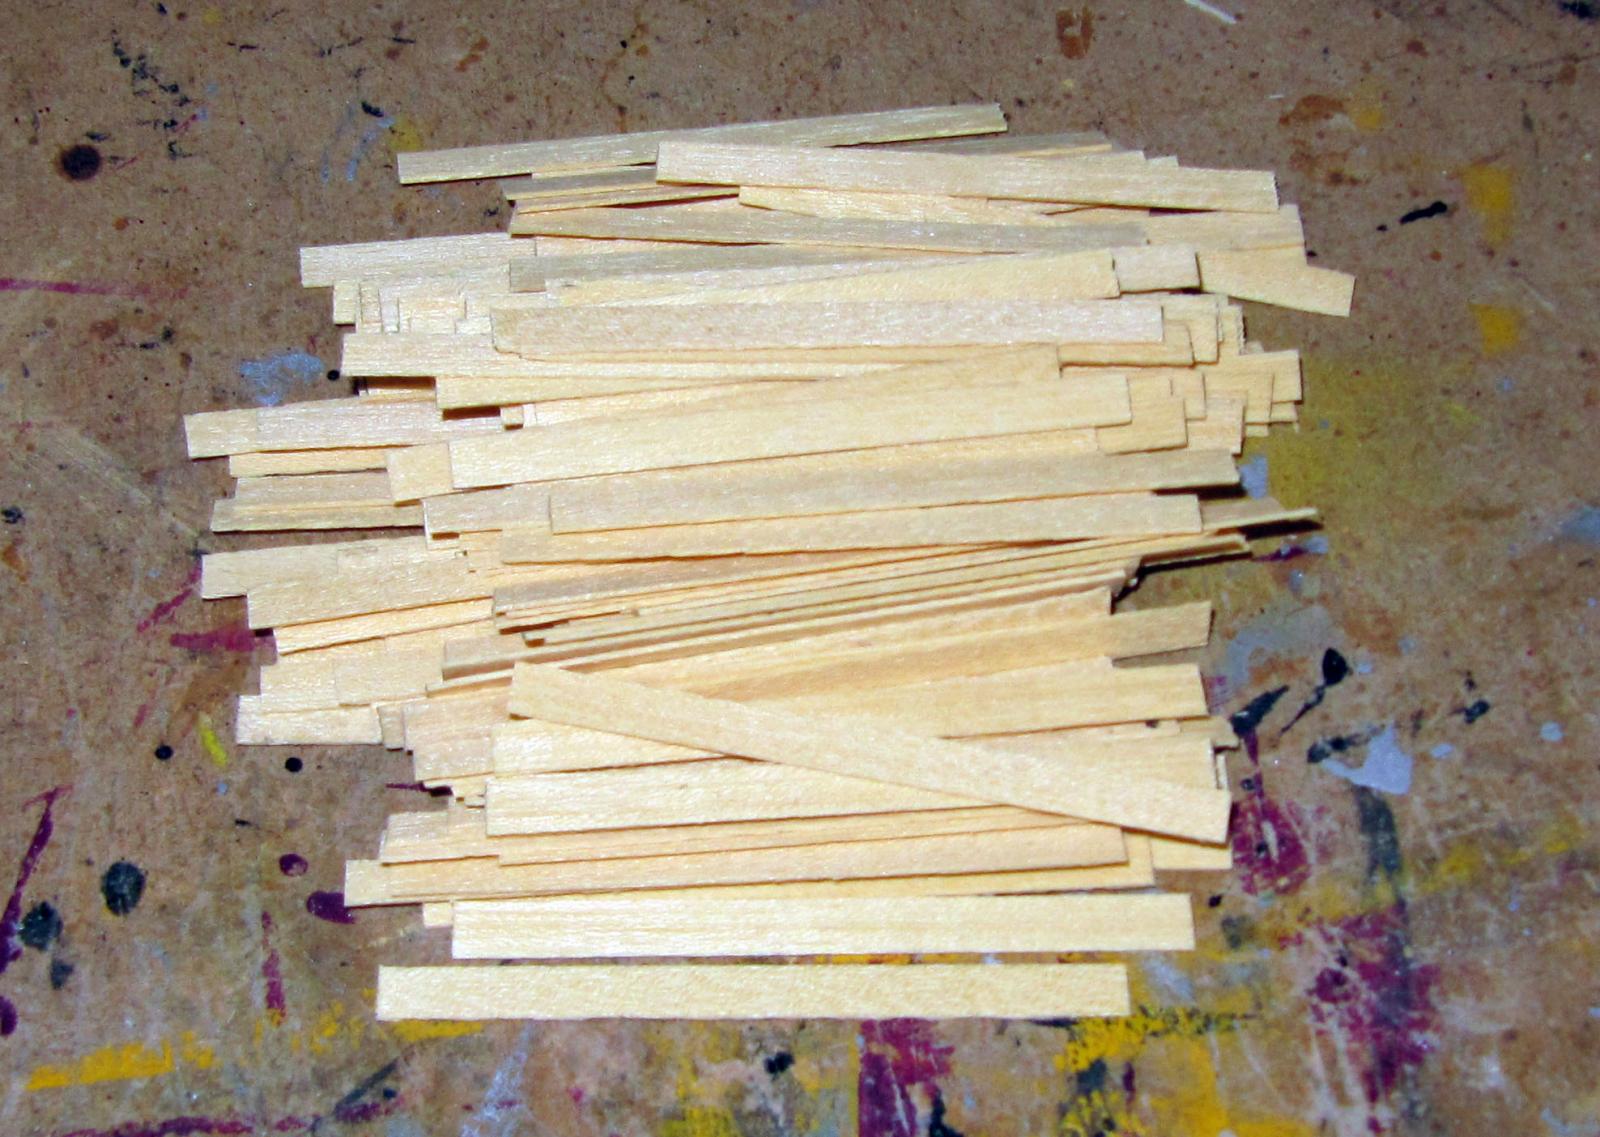
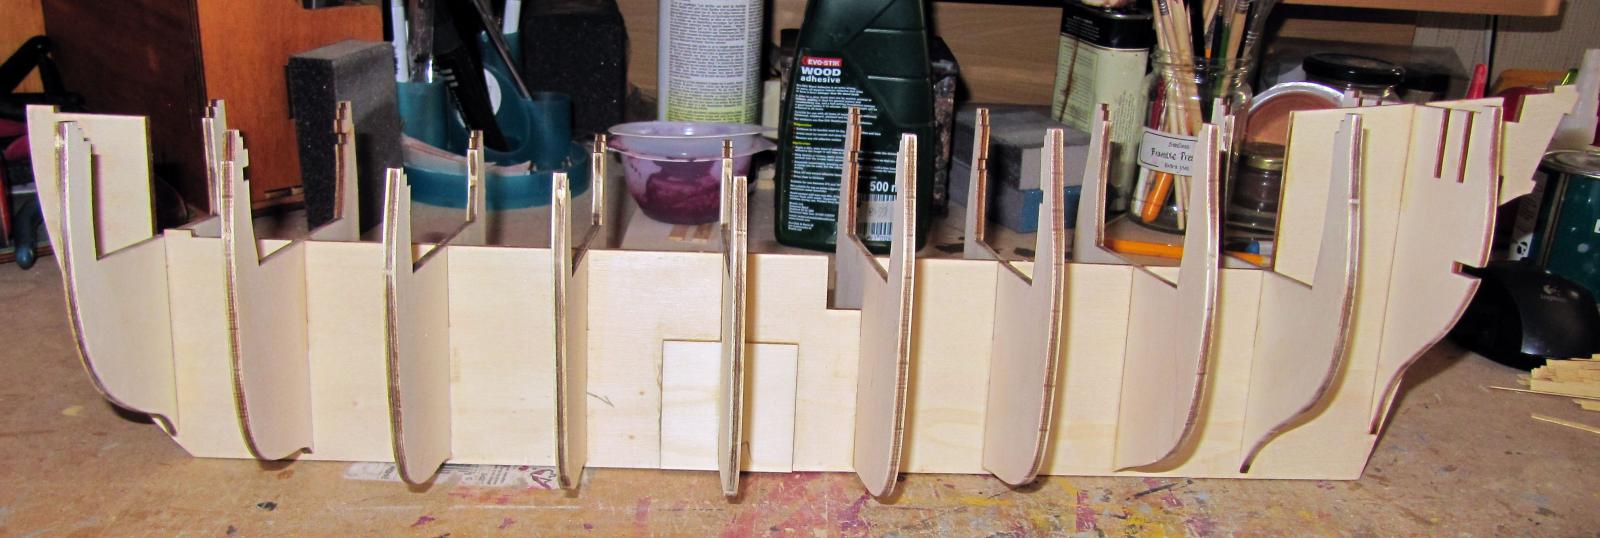
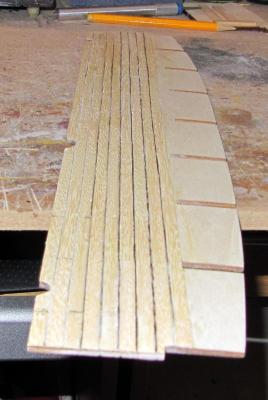
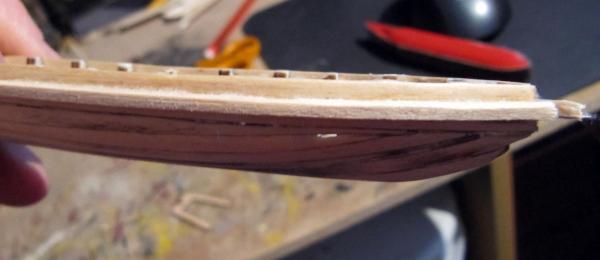
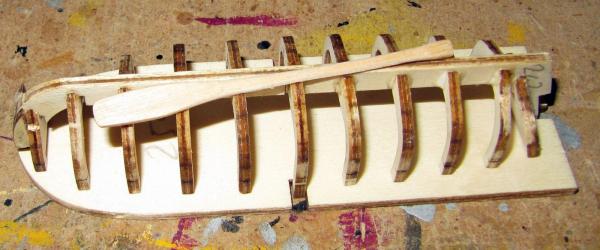
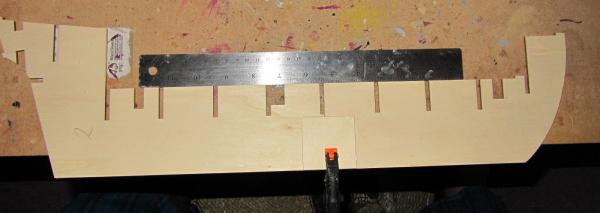
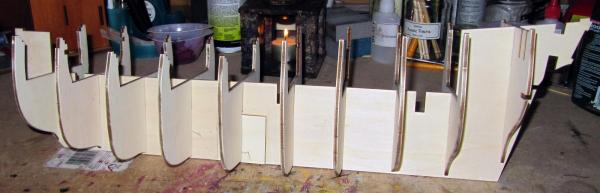
Here we go then I can't do too much of it because 1. I am waiting for the parts for the Taxi as I really want to finish that before I really get going on this 2. I need some superstrong upholstery thread for the caulking This is how I fared today though :- The false keel went together well with the reinforcing pieces either side. This soon gives you an idea of the hull size of the ship I dry fitted the frames to see if everything was good and as you can see from the second photo the fit was as near perfect as it could be so I went ahead and started gluing I cut myself some spacers to ensure the frames were at perfect right angles I let each frame dry a bit before adding the next and while I was waiting I made a jig and cut some planks The instructions say to use full length strips and show cross joints by drawing lines but I prefer doing it right. I am still not 100% sure how to show the wood nails or whatever you call them. I may just dot with a pencil or a fibre tip unless anyone has a better idea Well that is the framing done. As the next job is planking the decks I won't be able to do that until the cotton arrives but hopefully that won't take long I like using the cotton, it worked really well on the Thermopylae and following the instructions with the Spirit and using pencil, I did not enjoy that and I didn't think it looked as good I realised what I was doing wrong with the photos here. I was using add picture rather than add file and that works so much easier There should be more here in a day or three. May have the bar fitted up by then too Keep it up Mick


-
Thank you everyone I think at this rate there will be people in the hall as the bedroom is full Brian, I will try the other system again as I did have some people mention it on the Spirit build The problem I had was I could only get a couple of photos on one page before the page seemed to just end I will have a go though The kit is very complete My only worry is the instructions do not seem to include anything at all about fitting the sails The diagrams do seem comprehensive though and the the build videos in 'Build the Endeavour' at least give me an idea Sjors, I do have a popcorn maker but it is nowhere near so big as yours Regarding refreshments, has anyone a large fridge they can bring as ours is now totally full An ice maker would be useful as well Right that's enough chatting I am about to put the false keel together and I am going to really take my time to get it right as I will the whole build EVERYONE ENJOY!!!!!!!!! Mick
-
Hi Adriaan You should be able to get a good photo if you have the camera on a little tripod or something solid to get the right shot Then turn off the flash, use it on auto and also use the shutter delay so you are not close when it goes off That should do the job nicely Started the log for the Endeavour BTW Keep it up Mick