FlyingFish
-
Posts
566 -
Joined
-
Last visited
Content Type
Profiles
Forums
Gallery
Events
Everything posted by FlyingFish
-
 Great progress, despite the eye patch. Your Grandson looks a spendid chap. Though from your third photo I think you should increase the milk ration now.
 -
I could lock it in a safe and it would still get me!
- 174 replies
-
- 4
-

-

-
- Vigilance
- Sailing Trawler
- (and 1 more)
-
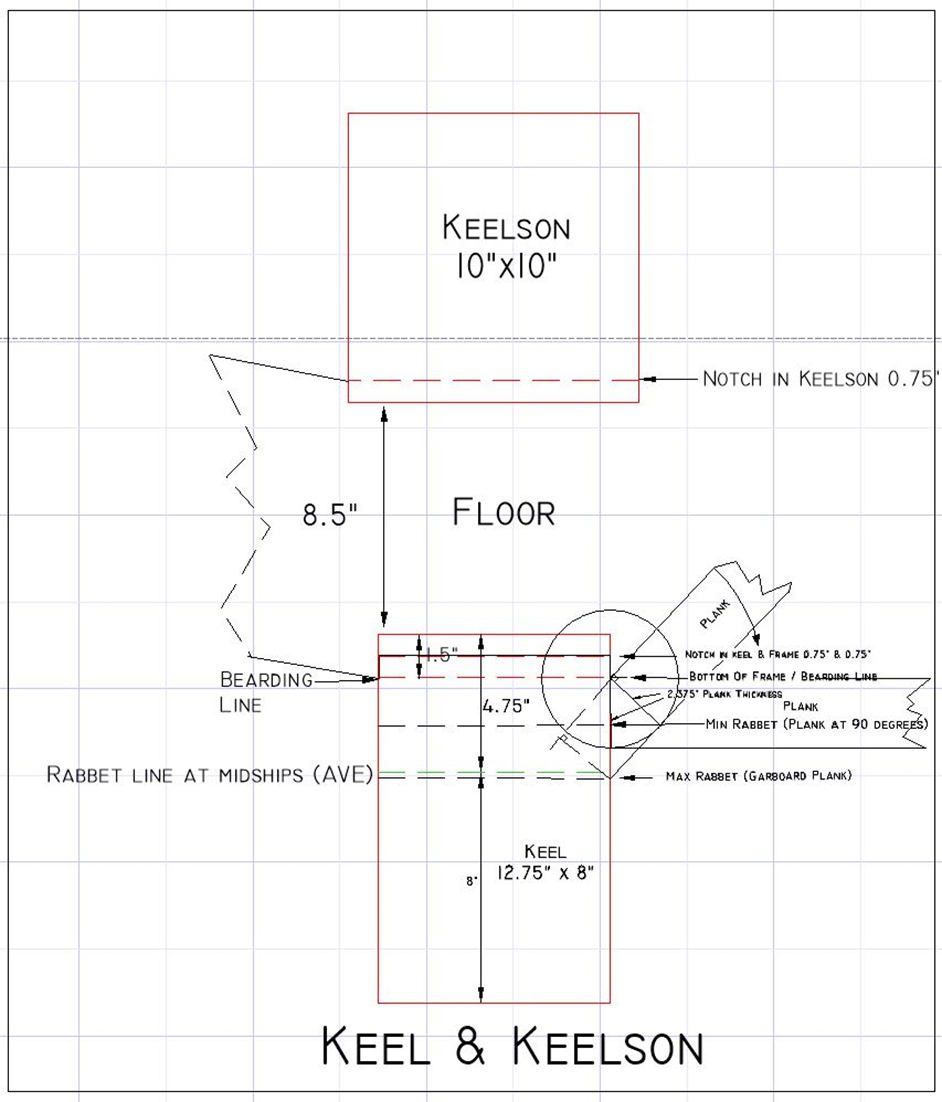
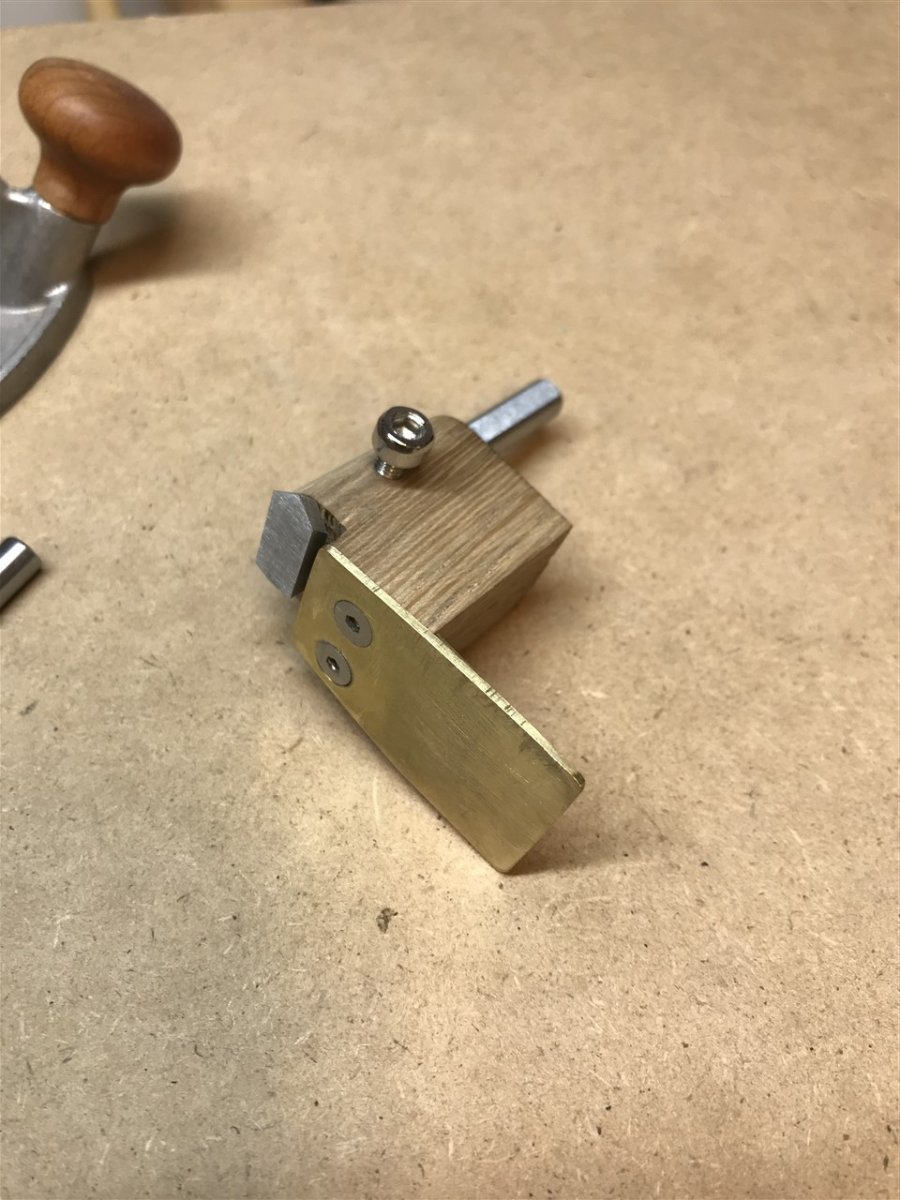
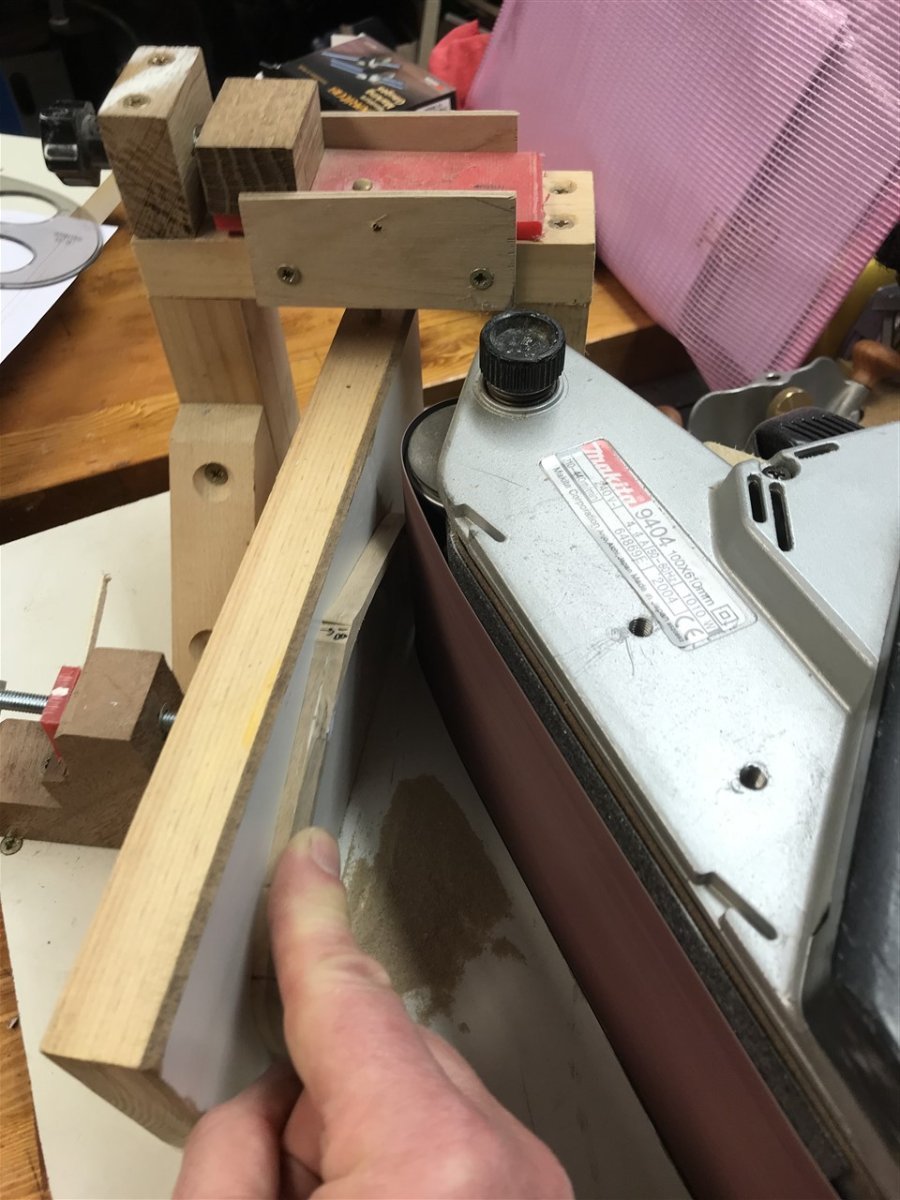
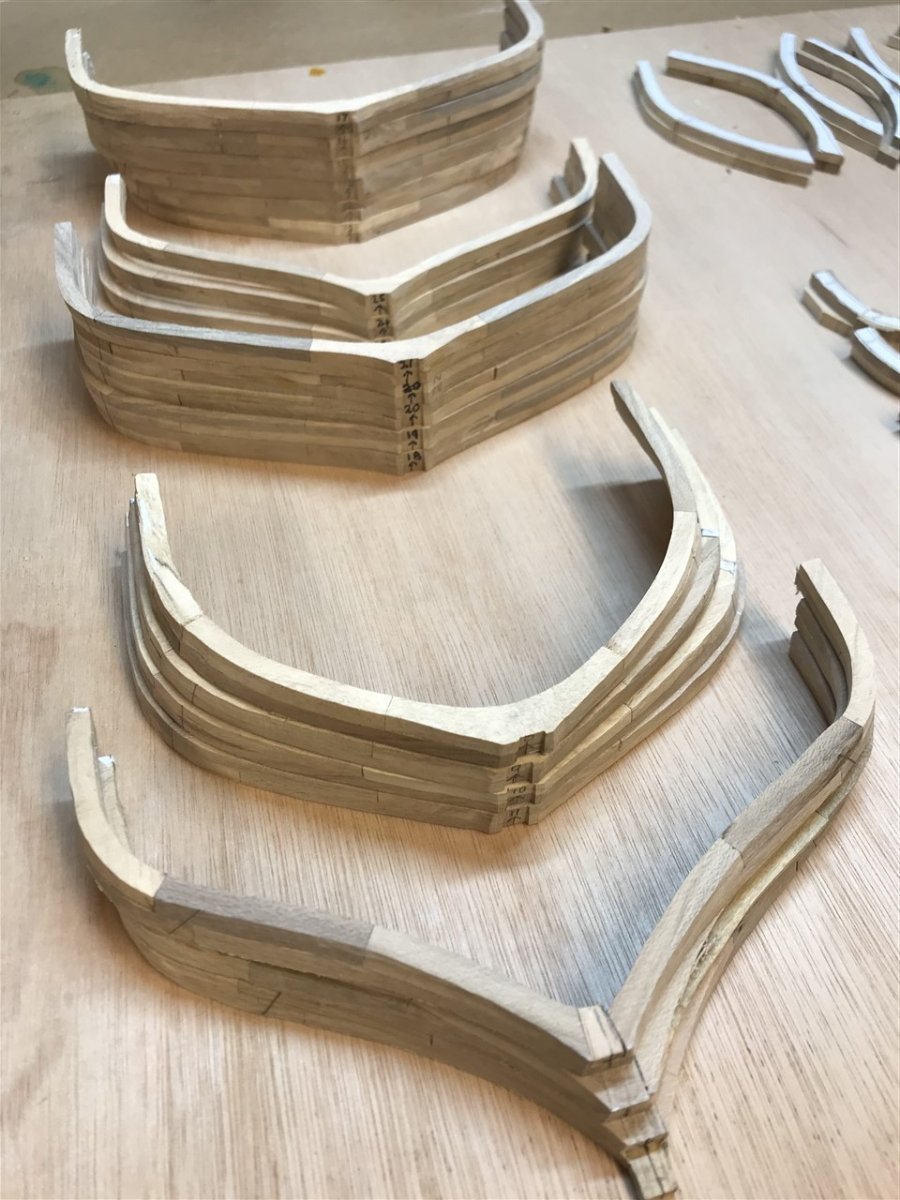
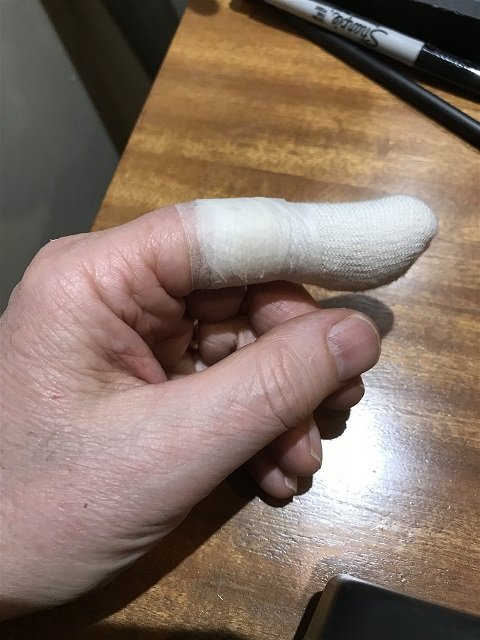
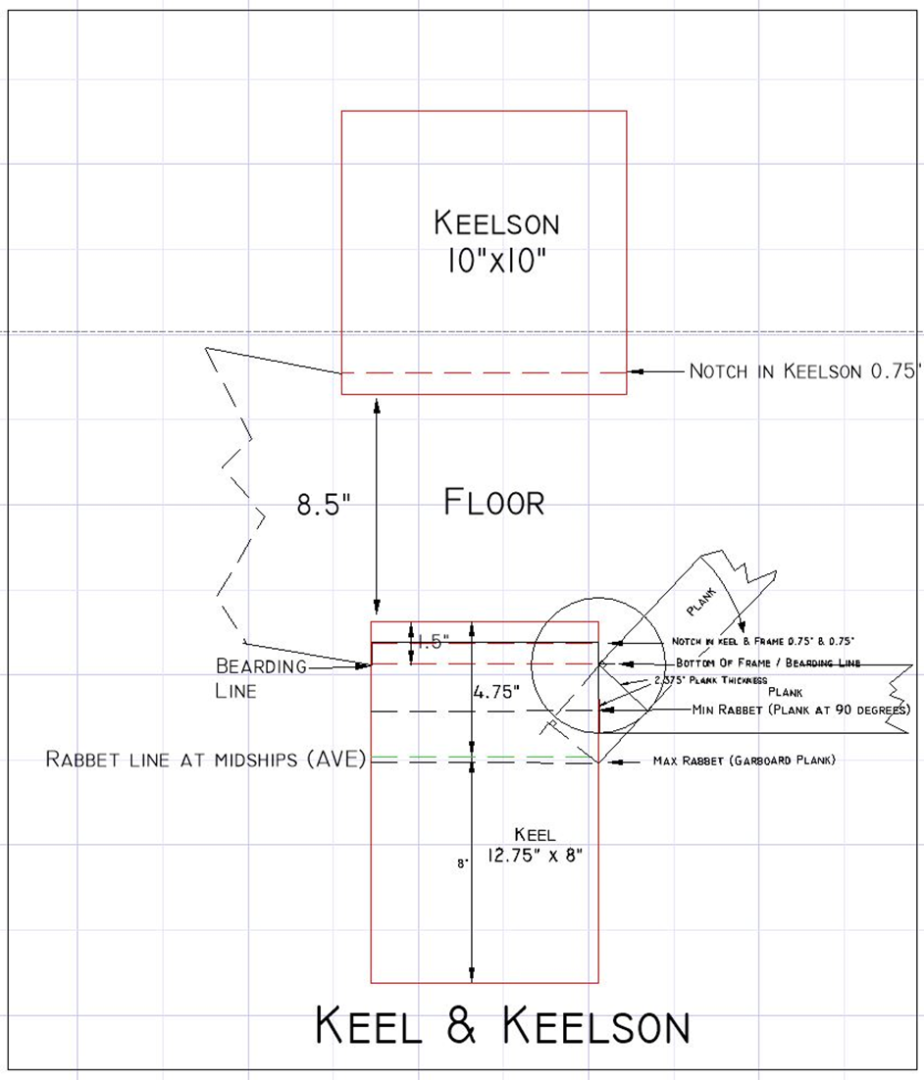
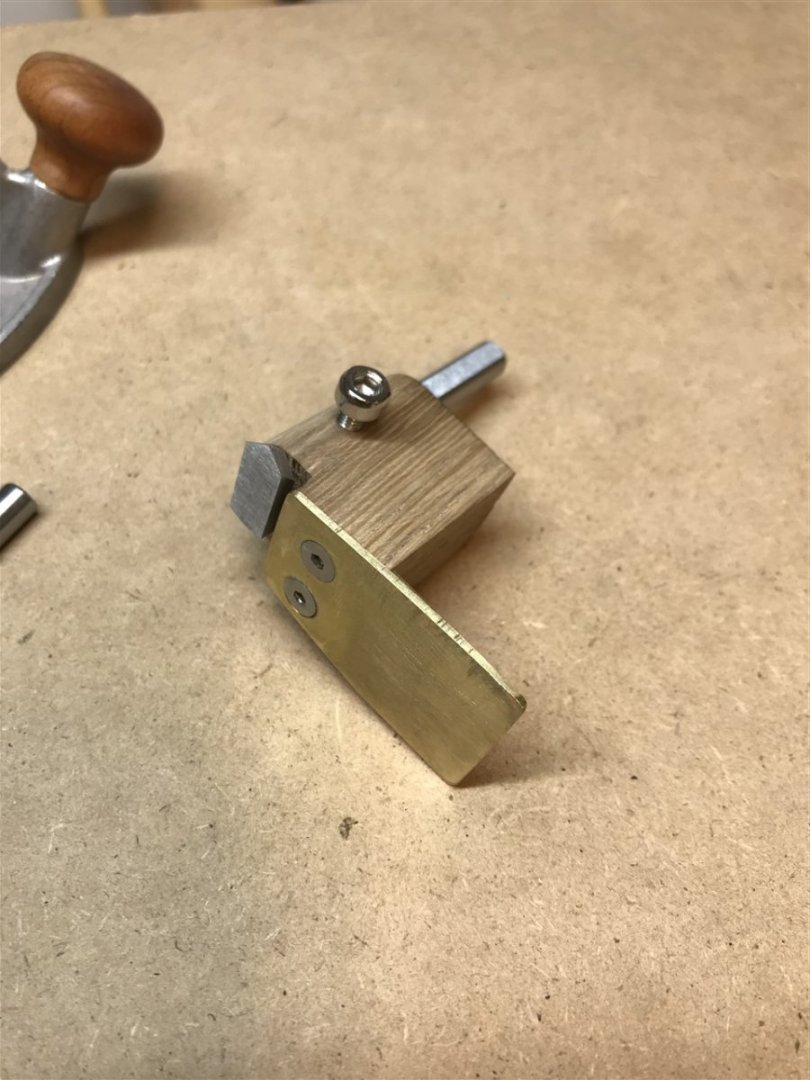
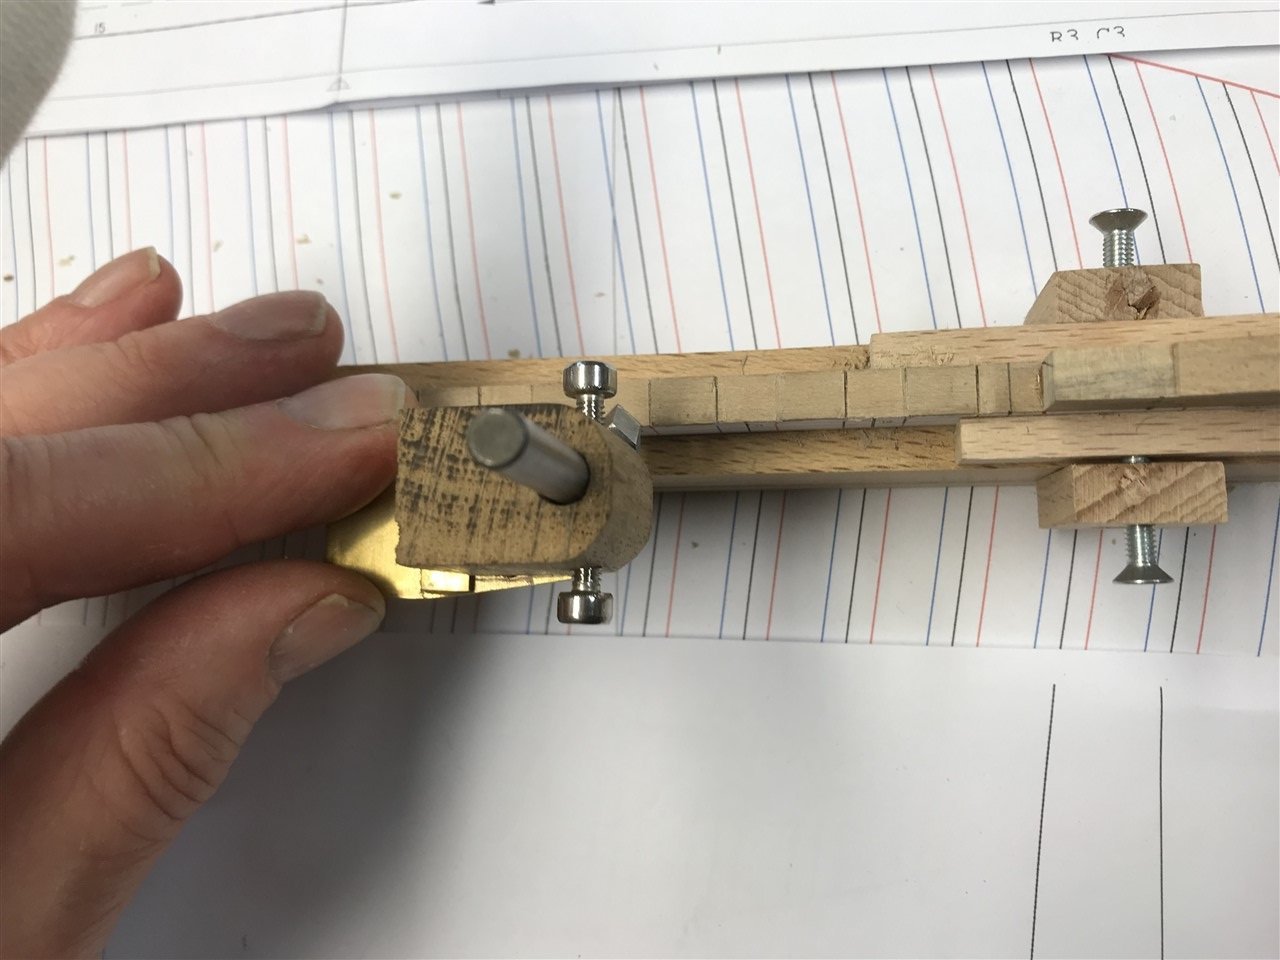
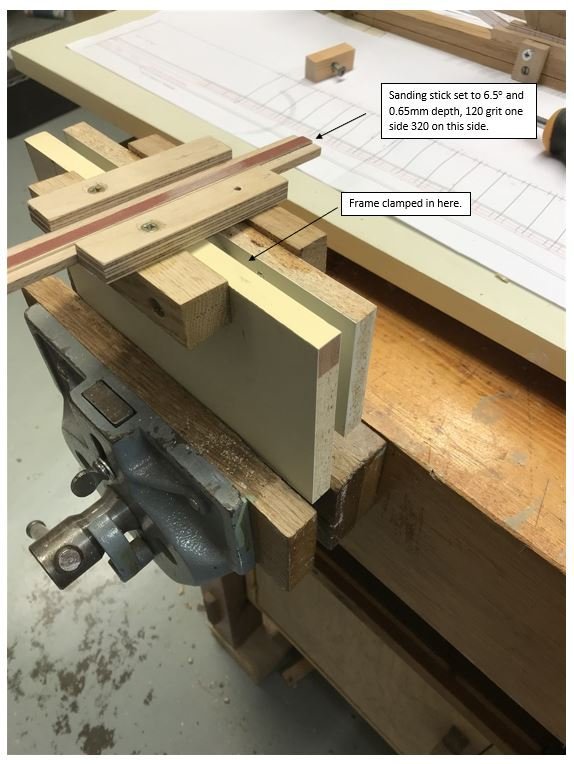
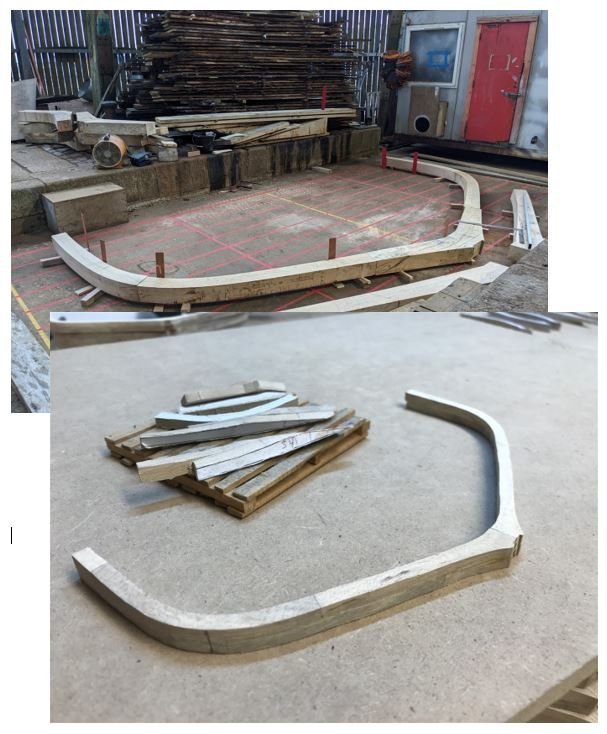
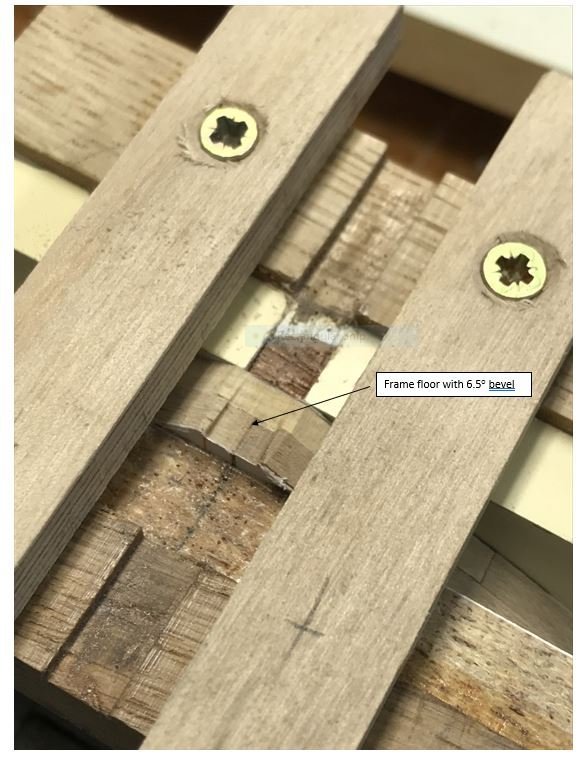
Well, a but of a delay in progressing..... caused by self-inflicted sillyiness with the No. 11. Is it just me but this always happens just after I think 'now don't put your finger there....'! Anyway, back to work - and next is: Keel Preparation for Framing. Rebates for floor location: The keel and the base of the floor are both notched ¾” making a 1/12” housing. At scale this is 1.2mm, or 0.6mm each. I could ignore this if the frame was perpendicular to the keel, but as the rake needs setting I’ll have to create a means of doing this without driving me potty. The above diagram shows the relationship of keel to keelson. The rabbet is at 8” above the base of the keel (6.35mm at scale) from stem to skeg, and the dimensions are based on a plank thickness of 2 5/8” (1.88mm at scale). The bearding line is 1.5”(1.2mm at scale) from the top of the keel at the centerline, but varies as the garboard angle changes. I’ve knocked up a crude little router plane for the keel notch, using a blade 6mm wide (pinched from my Quangsheng Plane) and set at the correct depth. Its reversible left and right to get into the ends of the keel, as I didn’t think ahead to do this before assembling the centerline. For the 6.5° angle on the base of the frame floor a simple little jig for running a sanding strip in the centre of the frame heel makes quick work of them. The dimensions are so small it only takes seconds. Then a run through the thicknesser ro remove the paper template and set final size to scale: ...and finally finished frames ready for assembly. A comparison shot for fun! I am pleased with the way the wood matches the oak at scale, Next post (finally) will be cutting rabbets and setting up the frames on the keel. All for now! The Friends of Vigilance facebook site has a great week by week chronology of photographs and commentry here which currently shows the planking - they are well ahead of me!


- 174 replies
-
- 12
-
-
- Vigilance
- Sailing Trawler
- (and 1 more)
-
Very nicely recovered!
-
Pleased to hear the news that Maggie is doing well and coming home. It will be an enormous relief to you both, and a spur to further progress.
-
At least you are seeing in stereo now.
-
How the saw repair going Keith?
-
Great subject for a build - M. S-D seems to have been a remarkable chap. Bonkers even. An interesting project!
- 288 replies
-
- 3
-
-

-
- Santos Dumont No. 18
- hydroplane
- (and 1 more)
-
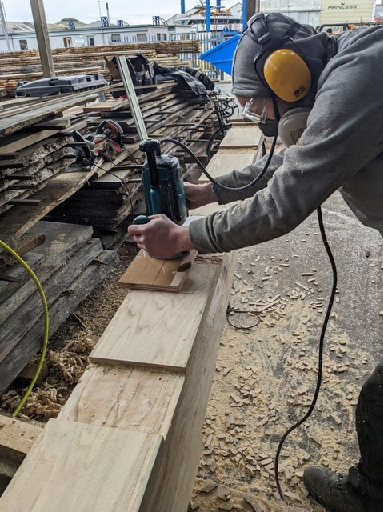
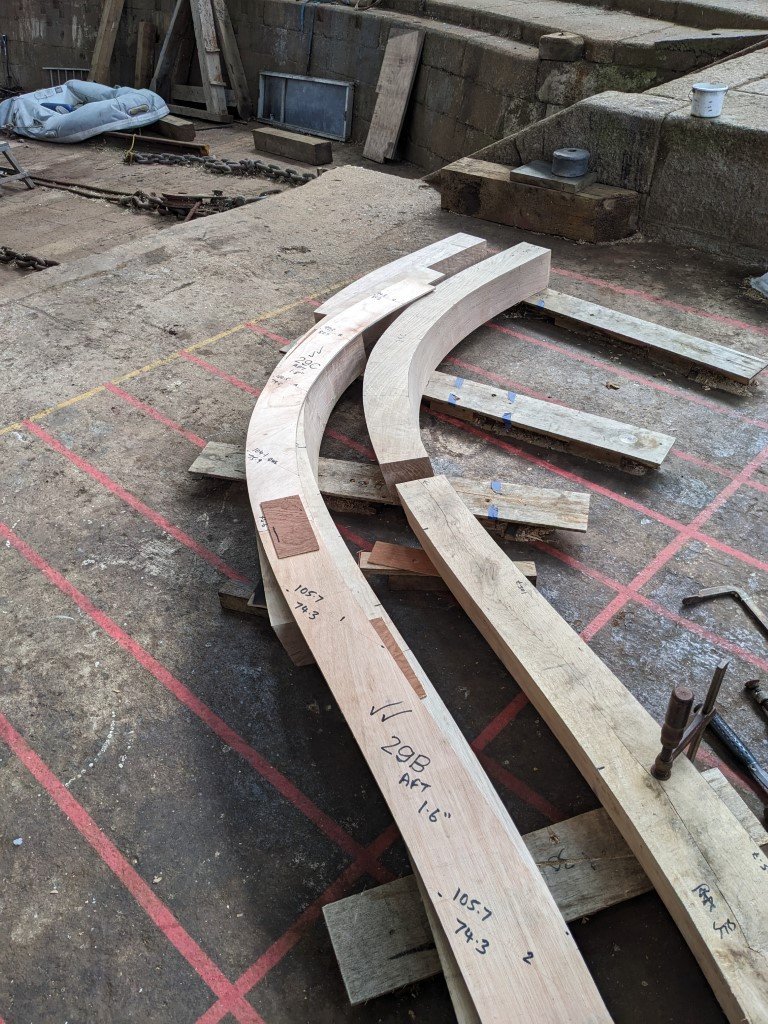
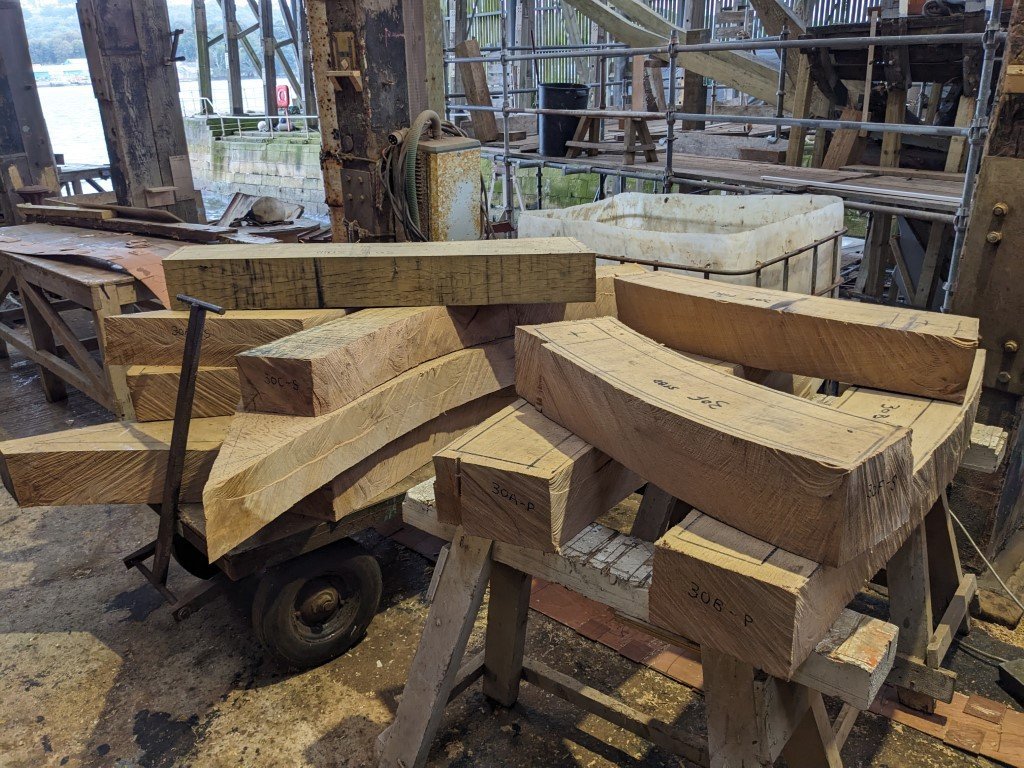
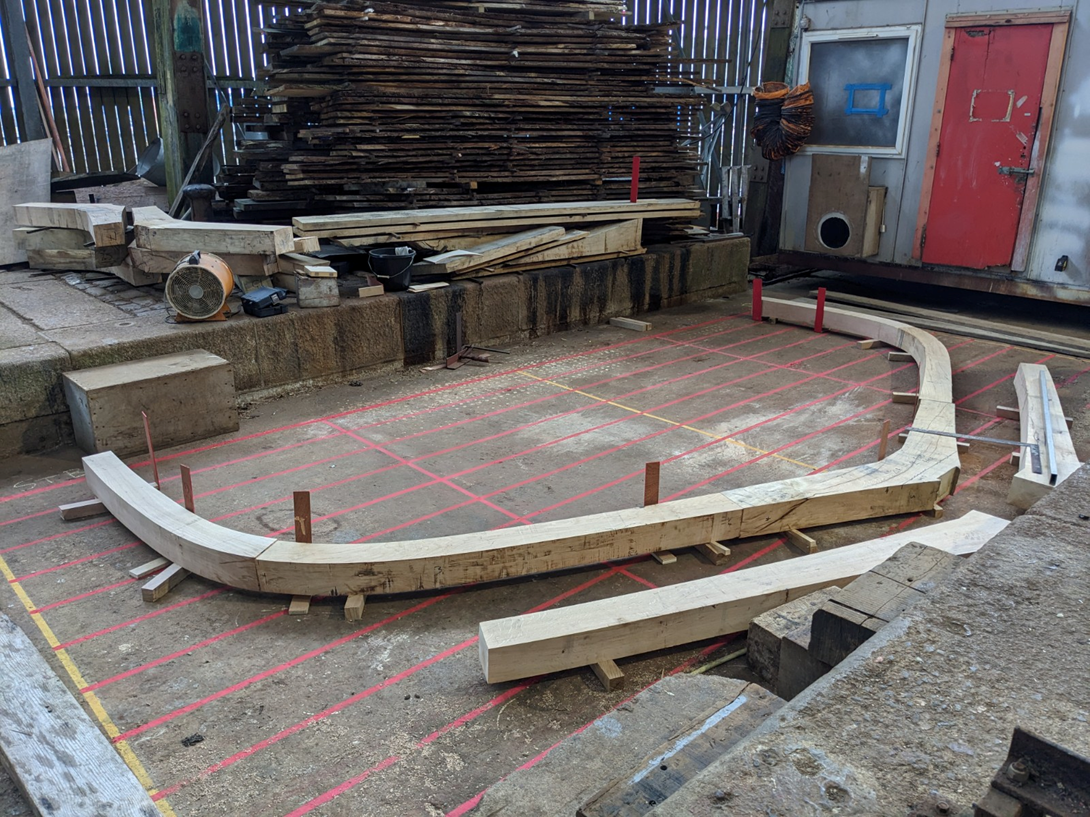
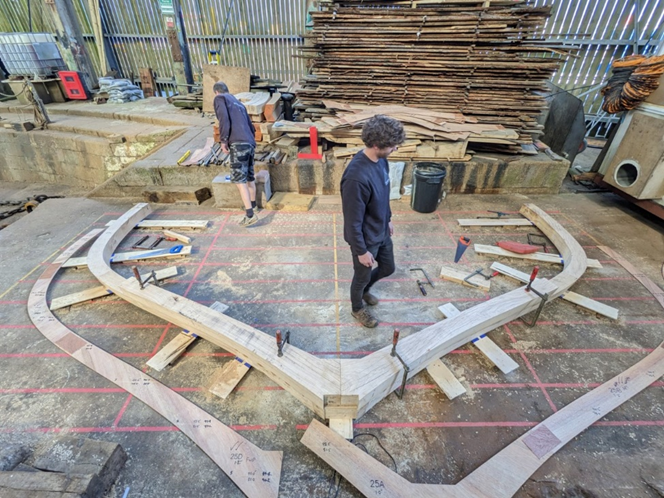
Yes Roger it's an unusual opportunity to learn from the actual rebuild- from what I've seen, you are correct in that the red tapes mark waterlines and buttocks although these do not correspond to the waterlines from the original surveyed linesplan. the architect appears to have reoriginated these when abandoning the stations to draw in the frames. The stock was marked directly from the templates, and cut out on the ship saw. The templates were supplied from the naval architect with all waterlines marked, including the DWL allowing each floor and futtock to be laid onto the grid accurately, and thanks to the powers of CAD grouped in 8' by 4' ply sheet format for best use of materials. Because I did not have these waterlines on my plans I had to re-originate my frames using my own waterlines which took a great deal of time. The compound curves caused by the 6 degree offset required the frames to be chocked on the assembly floor, this also allowing access for the clamps. The bevel allowance was presumably marked by putting the fore and aft templates on top of one another and the resulting difference written on the template, as shown below where frame 29 port aft and fore sections are being assembled. The Friends of Vigilance facebook site has a great week by week chronology of photogtaphs and commentry which shows all this in more detail here.
- 174 replies
-
- 8
-
-
- Vigilance
- Sailing Trawler
- (and 1 more)
-
Very clean precise work Hakan; the lines are poetic!
-
Very interesting subject Nils - clearly you have found a corner of your house without a glass case in it!
- 313 replies
-
- 8
-
-
-
- lightship
- Feuerschiff Elbe 1
- (and 1 more)
-
So sorry to hear of Maggie's stroke; my thought are with you both. As you say the medical folk are so skilled and it sounds as if you too did a great job getting her speedy help when it happened. best wishes for a speedy recovery.
-
Thanks Keith, Gary, Welfalk Druxey and Rik and all for the likes. It feels more like stupidity sometimes! The reason for framing this way will become clear later inthe build; normally I'd have gone for sectional framing in ply. With your level of skill it would be child's play! Indeed, and watching the local shipwrights putting Vigilance together is very educational. The scale of the timbers even on this relatively small vessel are impressive. I tack the butt ends of the frames with CA and use kicker for speed, as I have over 350 frame parts to assemble, then use Titebond PVA to glue the two frames together as a pair.
- 174 replies
-
- 5
-
-
- Vigilance
- Sailing Trawler
- (and 1 more)
-
Belatedly catching up - grea job with the 'thatching' I was going to suggest natural raffia, but your solution looks authentic. Enjoying the build.
-
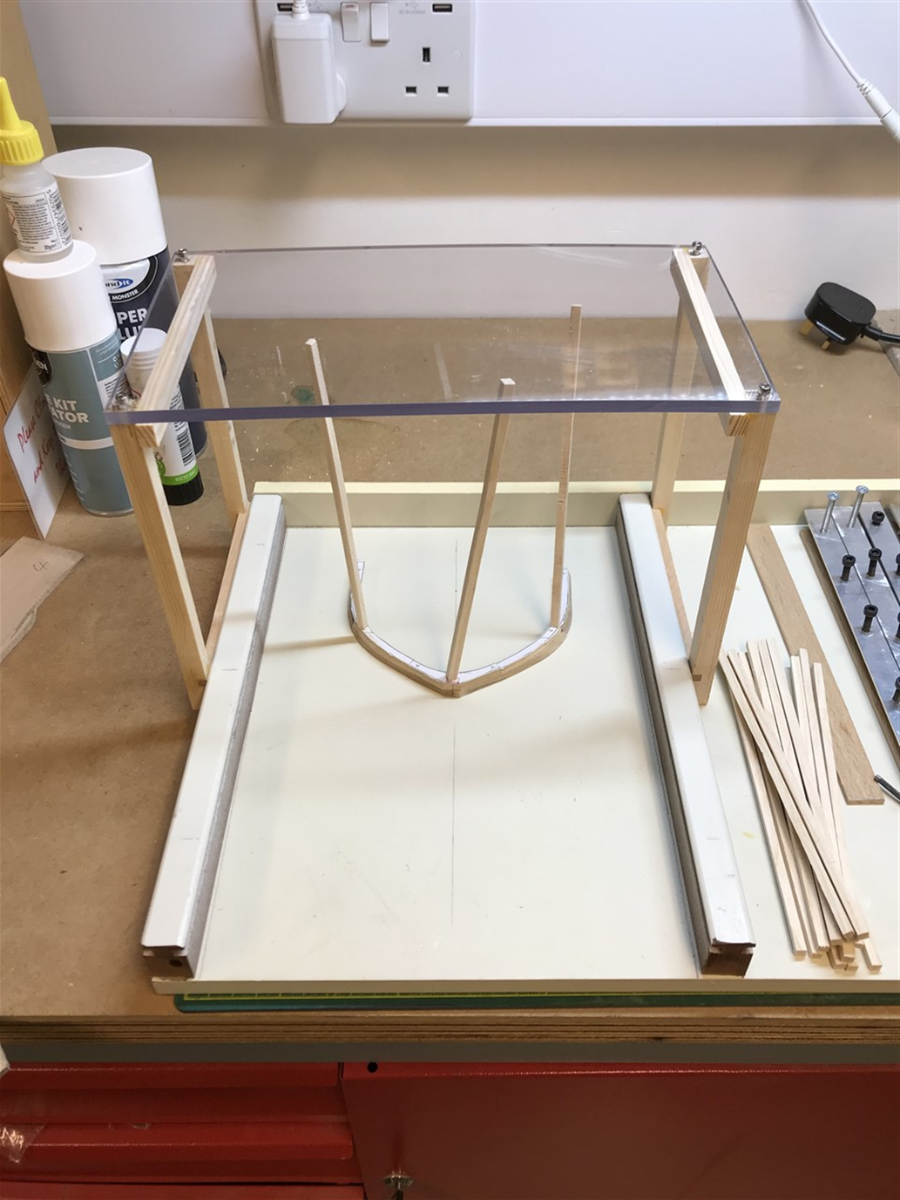
If you mean to go-bar press, here's a proper one in action. My son and I are making a guitar episodically when he visits. the ash bars are flexible and hold down the struts on the inside of the concave surface guitar body whilst the glue sets.

- 174 replies
-
- 8
-
-
- Vigilance
- Sailing Trawler
- (and 1 more)
-
Very precise work Valeriy. It would be wonderful if, some day when you have time, you would write a tutorial on soldering and fabrication in metal. I'm sure it would be a best seller!
-
That's a blow. Good luck with the repair. I'd get a trilby if I were you.
-
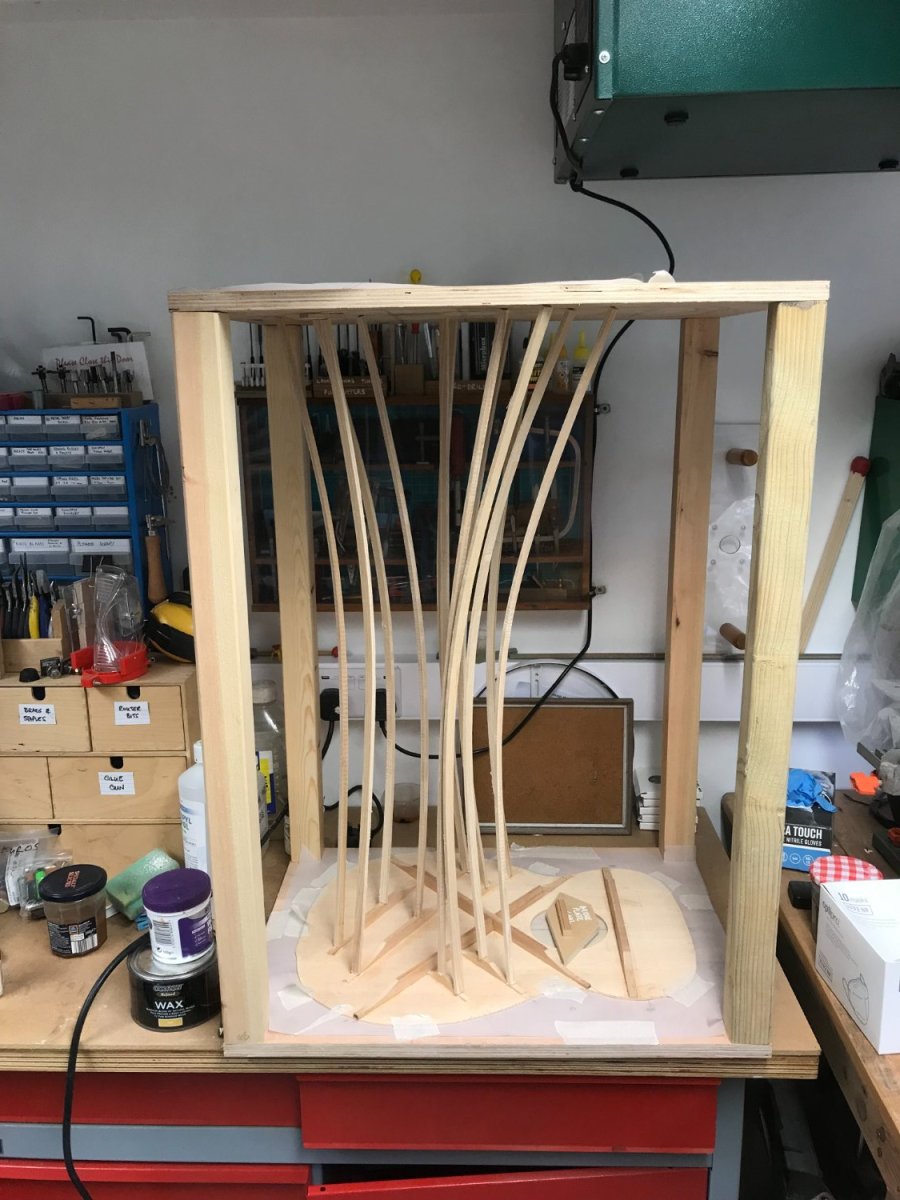
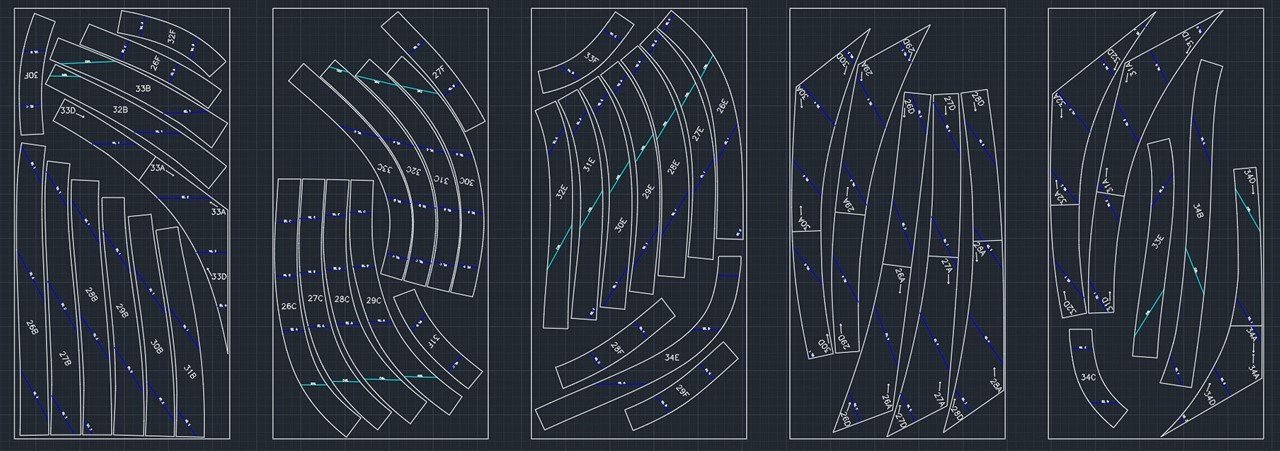
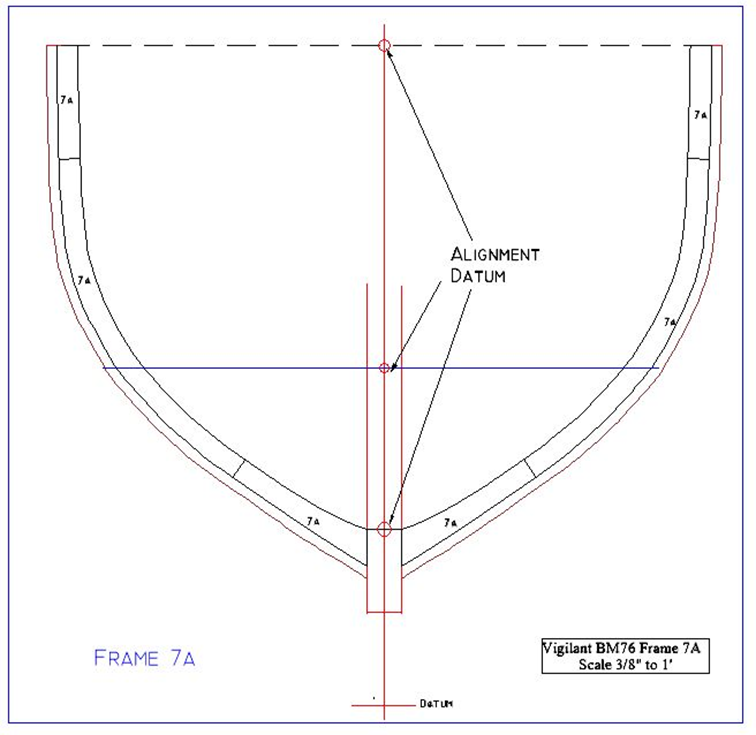
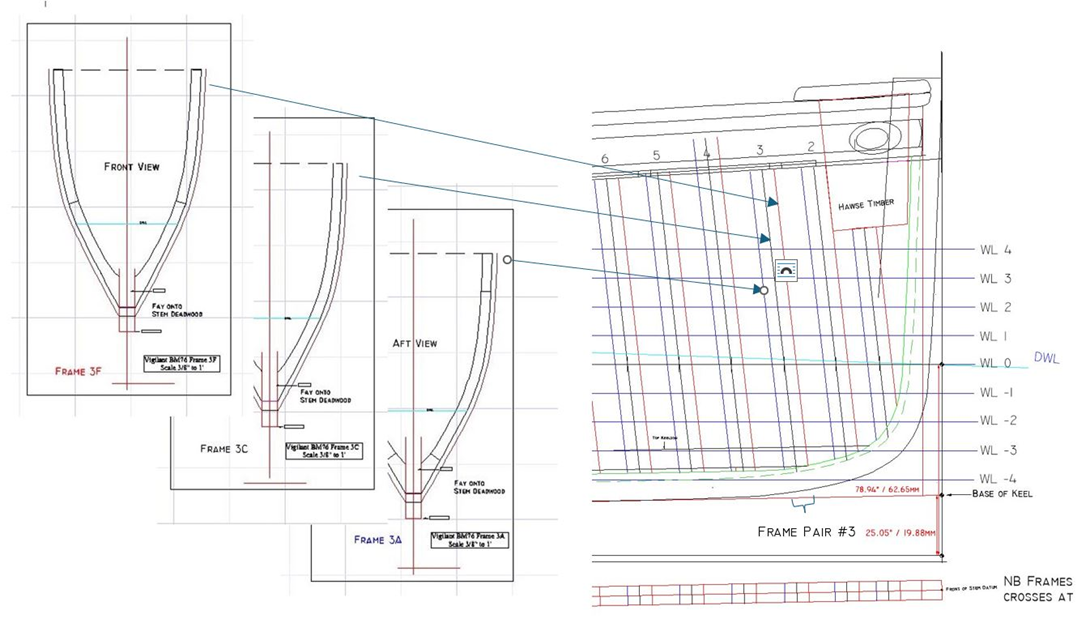
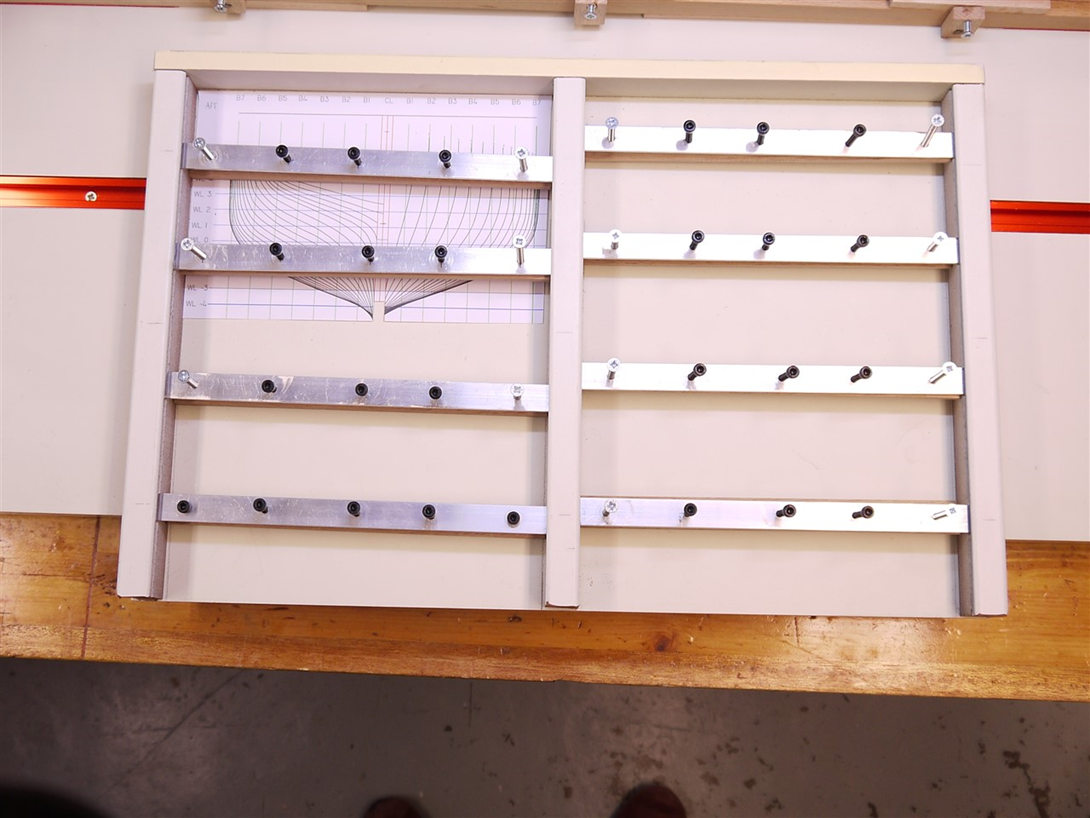
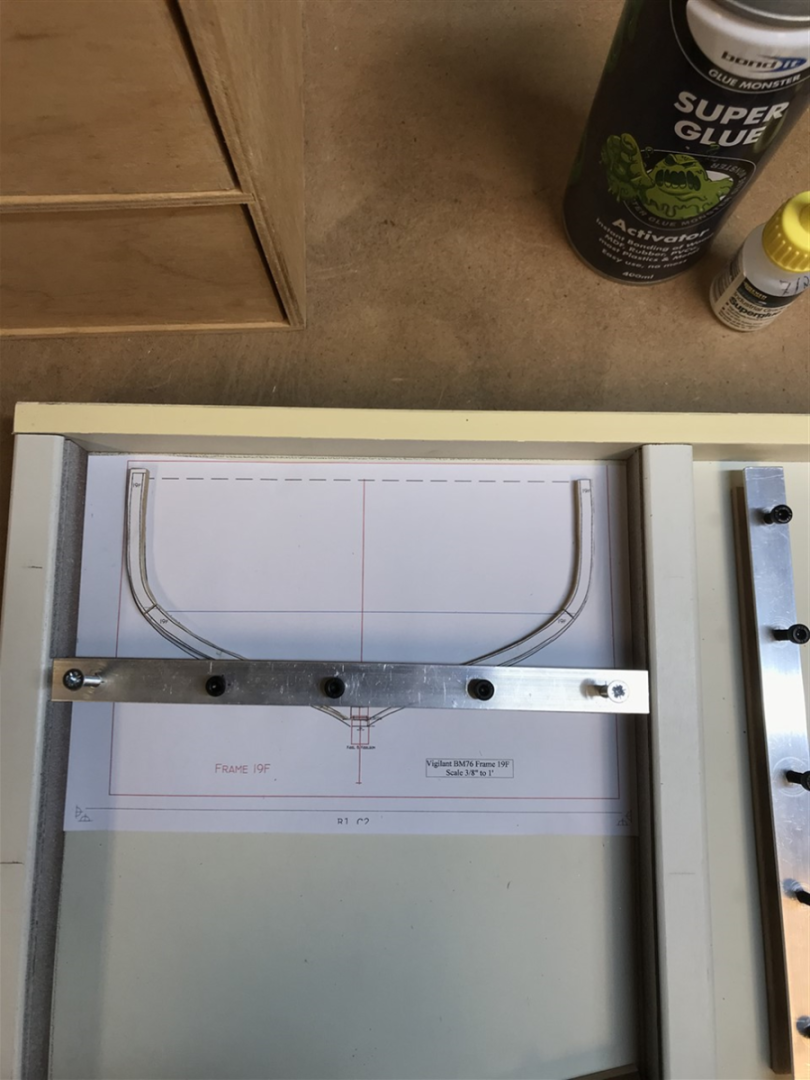
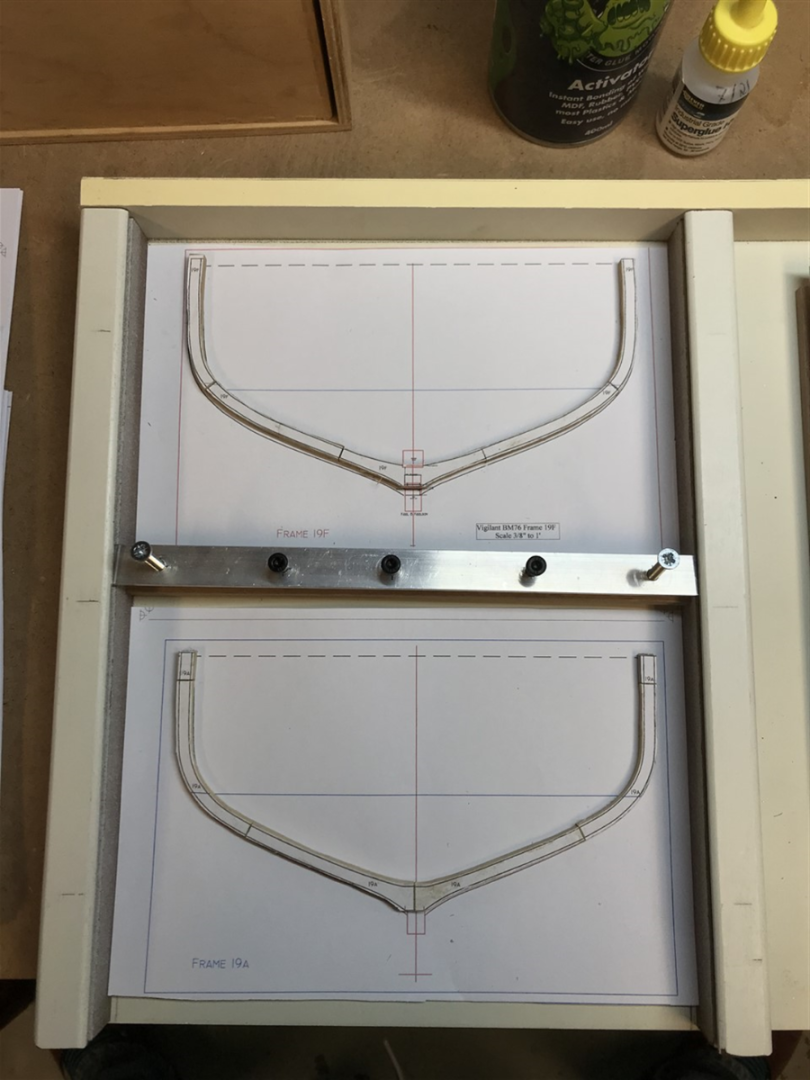
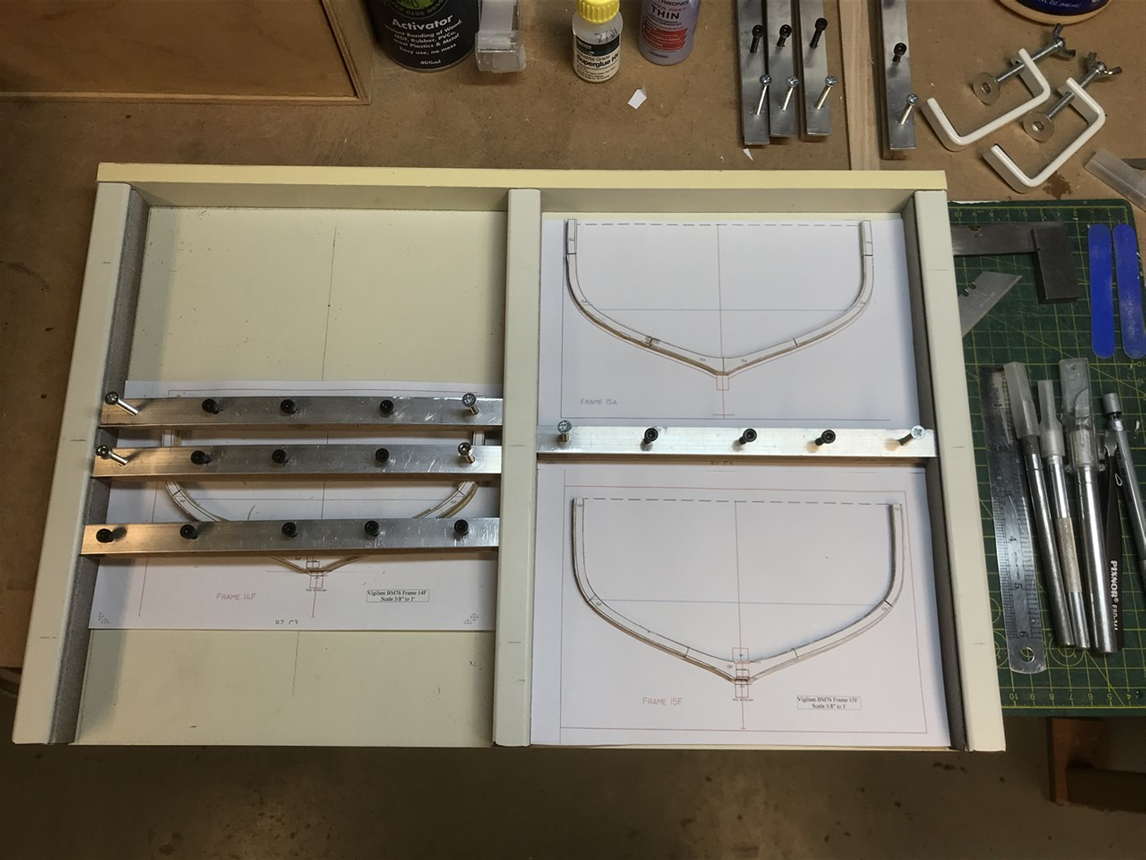
Framing – assembly. Vigilance has 10” paired frames from # 1 – 34. Each consists of two 5” frames, with a 21” ‘room’ between pairs. Five further 6” single perpendicular frames #35 to #39 before the cant counter timbers in the stern. There is no datum shared by all frames. Because of the rake, Waterline #0; top of the frame foot and the sheer/centerline datum for this frame is about 0.6” different fore to aft, at 1:32nd scale which is less than 0.5mm and is lost in the final sanding to attach the keel, keelson and covering board, so can be ignored. I just lean them a tad aft to get that tiny offset required. In the centre of the boat the differences are minimal, so this only really becomes obvious at each end where the bevel is much more pronounced. I have found that in practice you just need to eye it carefully to make sure the two halves look aligned. It’s a bit hit and miss to be honest. Frame pair #3 templates, Framing Jig (After Ed Tosti) As you can see the Yard are laying out frames on a lofting floor using plywood templates. Note the bevels and the shape made more complex by that 6.5 degree rake. The frame is fore-face up, the floor timber being aft. It’s very skilled work, although they make it look easy! I’m using the Ed Tosti-style jig. The only adaptation is the addition of a removeable mini go-bar press (familiar to luthiers) which is useful to hold down any parts of the frames that need keeping still. The futtocks have previously been roughly sanded to the line for bevelling thus: from stem to centreline, the fore frames outer edge is sanded, and aft frames inner edge. The opposite from centerline to stern, if that makes sense. Wider of the two frames in the pair (aft in this example) is assembled first, by laying onto its template in the framing jig. This keeps everything aligned. The joints between futtocks are wiped with superglue set with kicker. The second frame in the pair (fore) is assembled in the same way. When dry the paper backing is removed. I thought of then gluing it onto the centre template and rough sanding to the line, but its really not necessary other than for the very offset pairs near the stem. The frames are carefully aligned one on top of each other, using fresh aft template as a guide, matching the waterline, sheer and keel line together. When all is lined up the frames are glued with titebond and held down using the clamps. The next pair are prepared on the right, and some sort of flow established. So far I can produce three or four frames in a session. The frames are then carefully bevelled by hand. Holly and field maple being very hard timbers produce superfine dust which simply floats about the shop, so I sand into an extractor funnel which seems to help, and run the extractor throughout. Body plans for fore and aft frames printed on transparencies and laminated serve as a quality check to ensure the sheers match, and the beam is correct. These will be used for erecting the frames later. Frames will later be pinned in scale bolts (5/8th = 0.5mm), and the wood was chosen to give a variation in colour, and grain to help see the separate parts. I'm grateful to the Friends of Vigilance CIO for continued access to the boat, plans and information. A great collection of photographs of their restoration can be found here.

- 174 replies
-
- 13
-
-
- Vigilance
- Sailing Trawler
- (and 1 more)
-
Its a good point, Wefalck. We shall probably never know for sure. Too right, Gary; it's taking a long time. finished cutting out the last of the components today, and making steady progress on assembly.
- 174 replies
-
- 5
-
-
- Vigilance
- Sailing Trawler
- (and 1 more)
-
Try Boulevard Online, based in Worcester UK - listed on a well known online marketplace!
-
Hey Gary - great to see the shipyard doors back open! Congratuations on the Underwood - they are very fortunate to have such a handsome craft in ther collection. Pelican's planking looks great - and some very helpful tips and tricks as well! I agree with John - flush, otherwise exposing plank end grain would result, as well as increasing friction; neither desireable I'd have thought.
-
I'm looking forward to the tutorial on turning square coamings! Presumably you use a dovetail bit and clamp the timber in the tool holder. We've been missing a trick here Haken! However from the photos, I;d say you are doing well without.
-
Ha! You are a tease Keith. My mind went all floppy for a bit! Why the black marker on the edge - is this for a white tick strip?