


Jerry Berenson
-
Posts
70 -
Joined
-
Last visited
Content Type
Profiles
Forums
Gallery
Events
Posts posted by Jerry Berenson
-
-
Hi Avi, I have not been on this site for many months. I wanted to see how your Constitution was going. You are doing a great job…it will be a museum quality build when finished. I also had trouble with the rudder on my Constitution. I am going to rebuild the rudder to get it closer after I finish my current model of the whaleship Essex. I needed some time away from rigging so I built the Nantucket lightship but am now back to rigging again. My wife and I were on a cruise this summer and I was fortunate to go aboard the HMS Victory at the Royal dockyards in Portsmouth England. I was amazed at the size of the ship as well as the fact that it seems that all the ships of the line including the Constitution are built so similar. Enjoy the last day of Chanukah and have a happy , safe and healthy new year…Shalom, Jerry Berenson


-
Any recommendation about what type of glue to use when planking a hull. I have used cyanoacrylate in the past but wind up with glue on my fingertips. Is contact cement any better or any other suggestion? My objection to contact cement is the need for ventilation. Thanks, Jerry
- Scottish Guy and robert952
-
 2
2
-
-
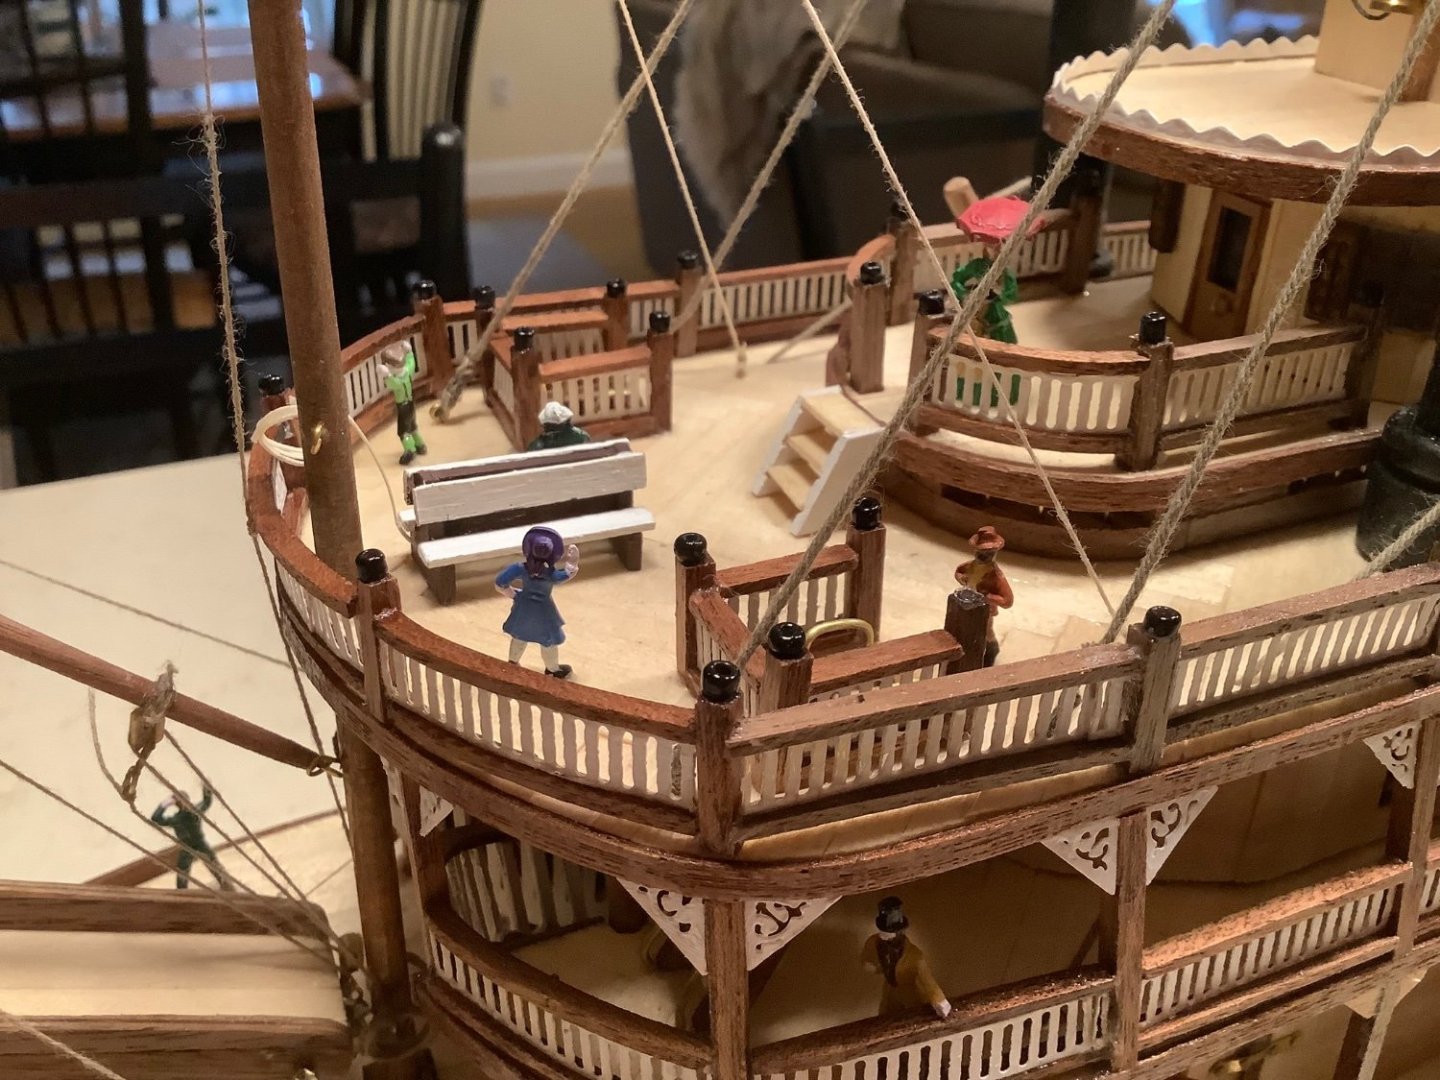
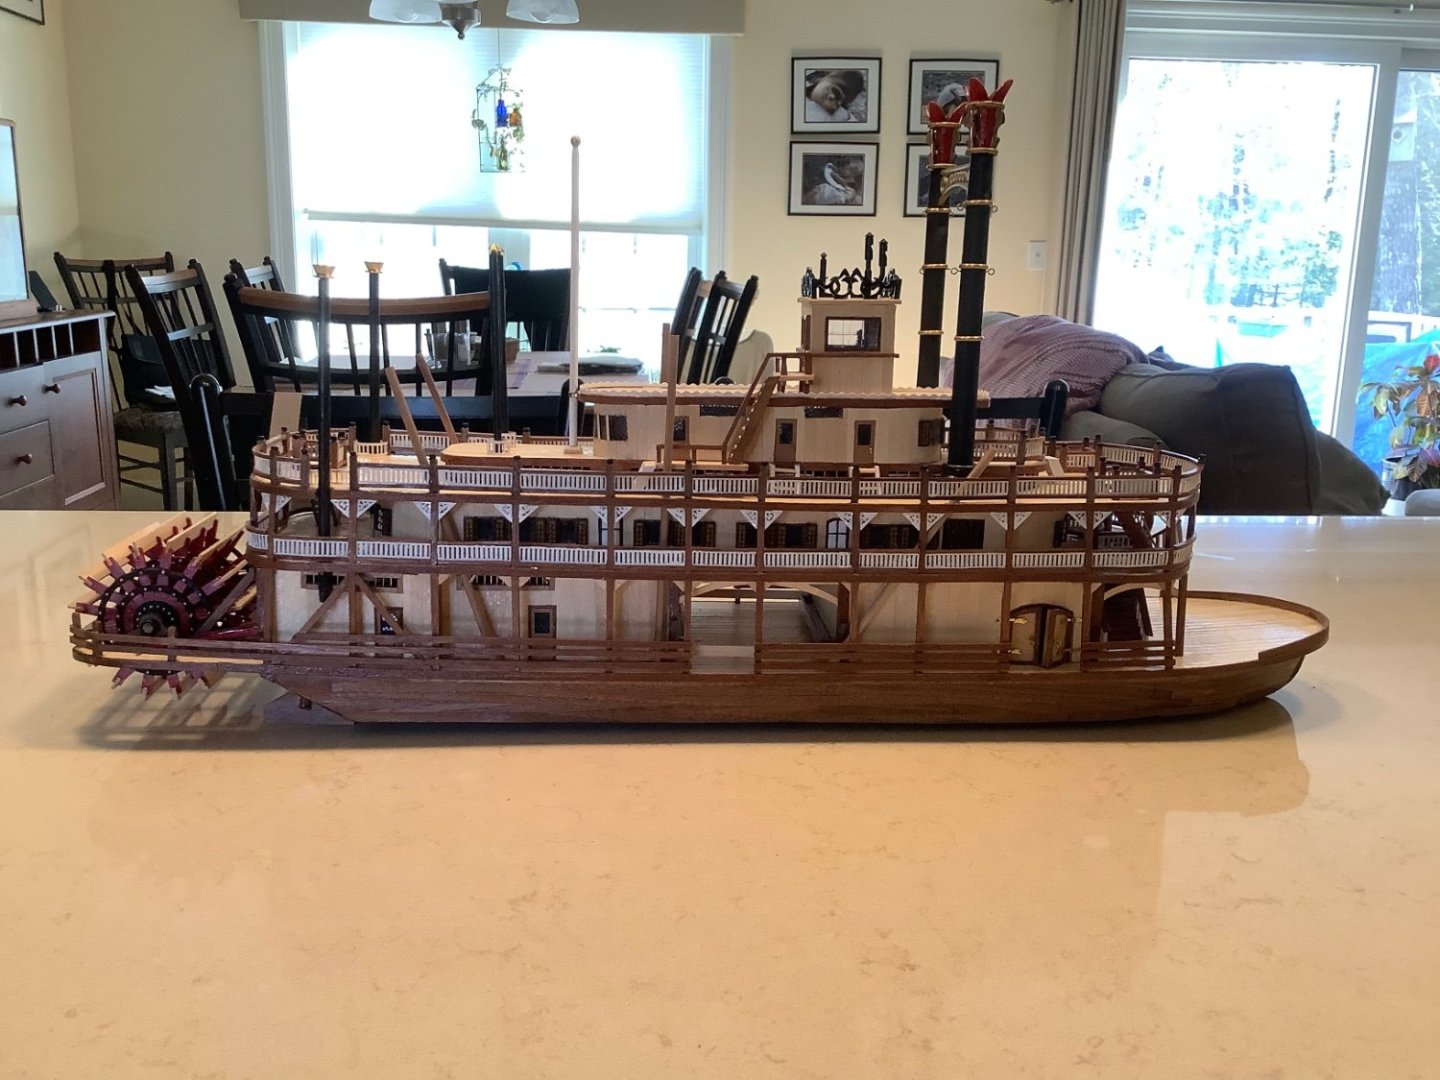
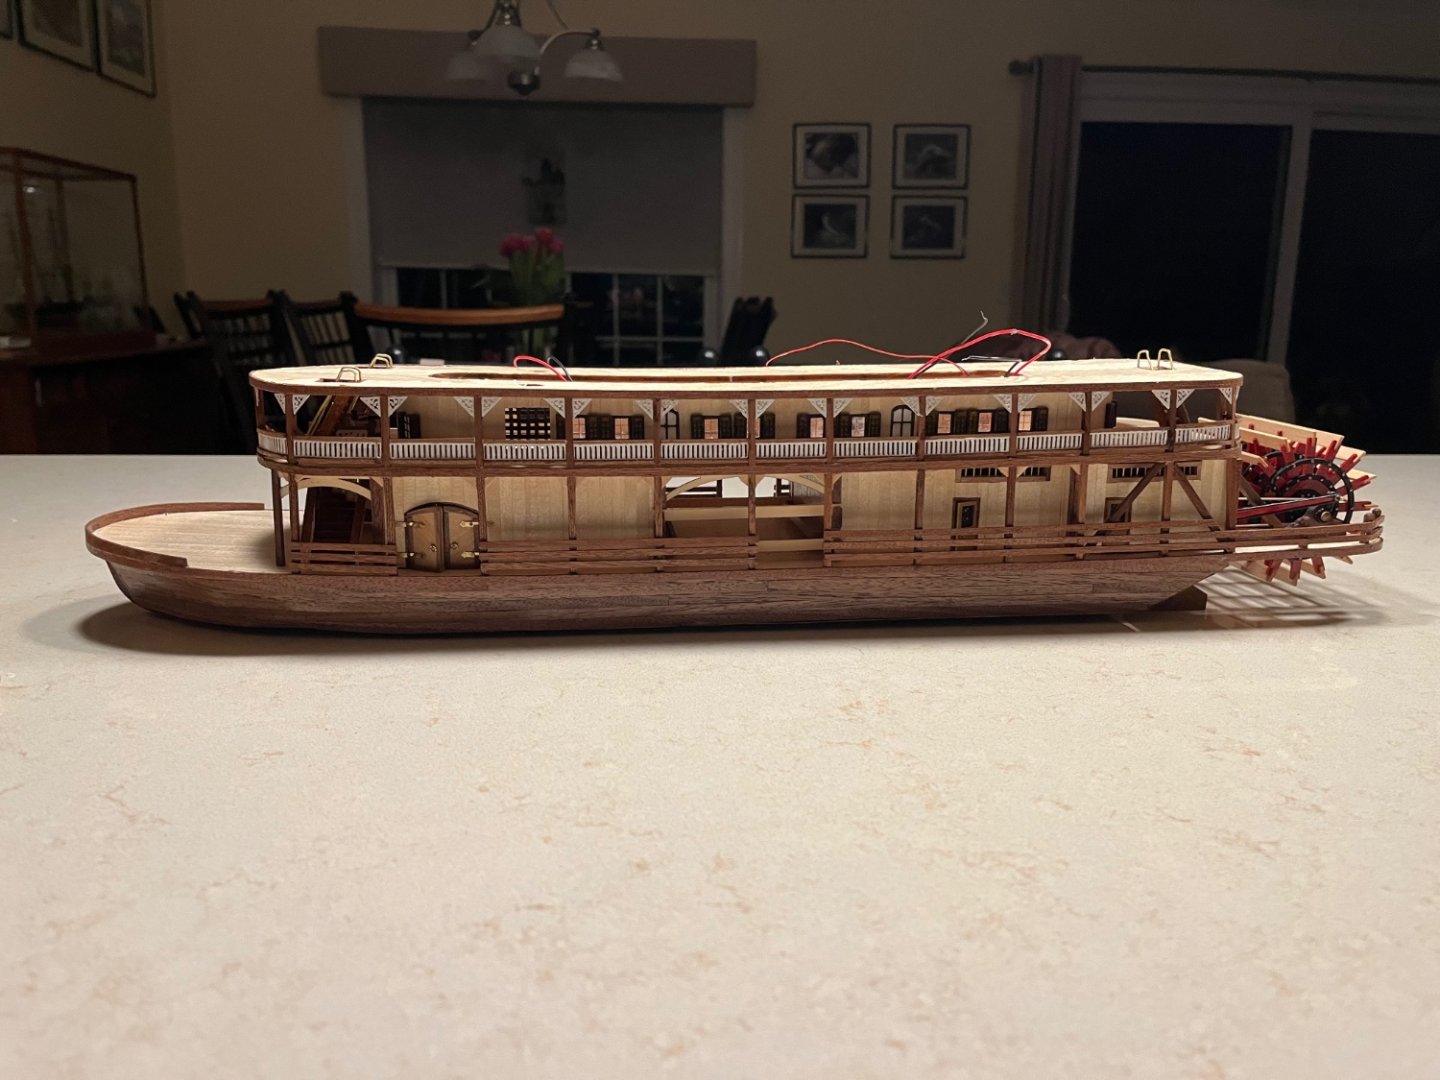
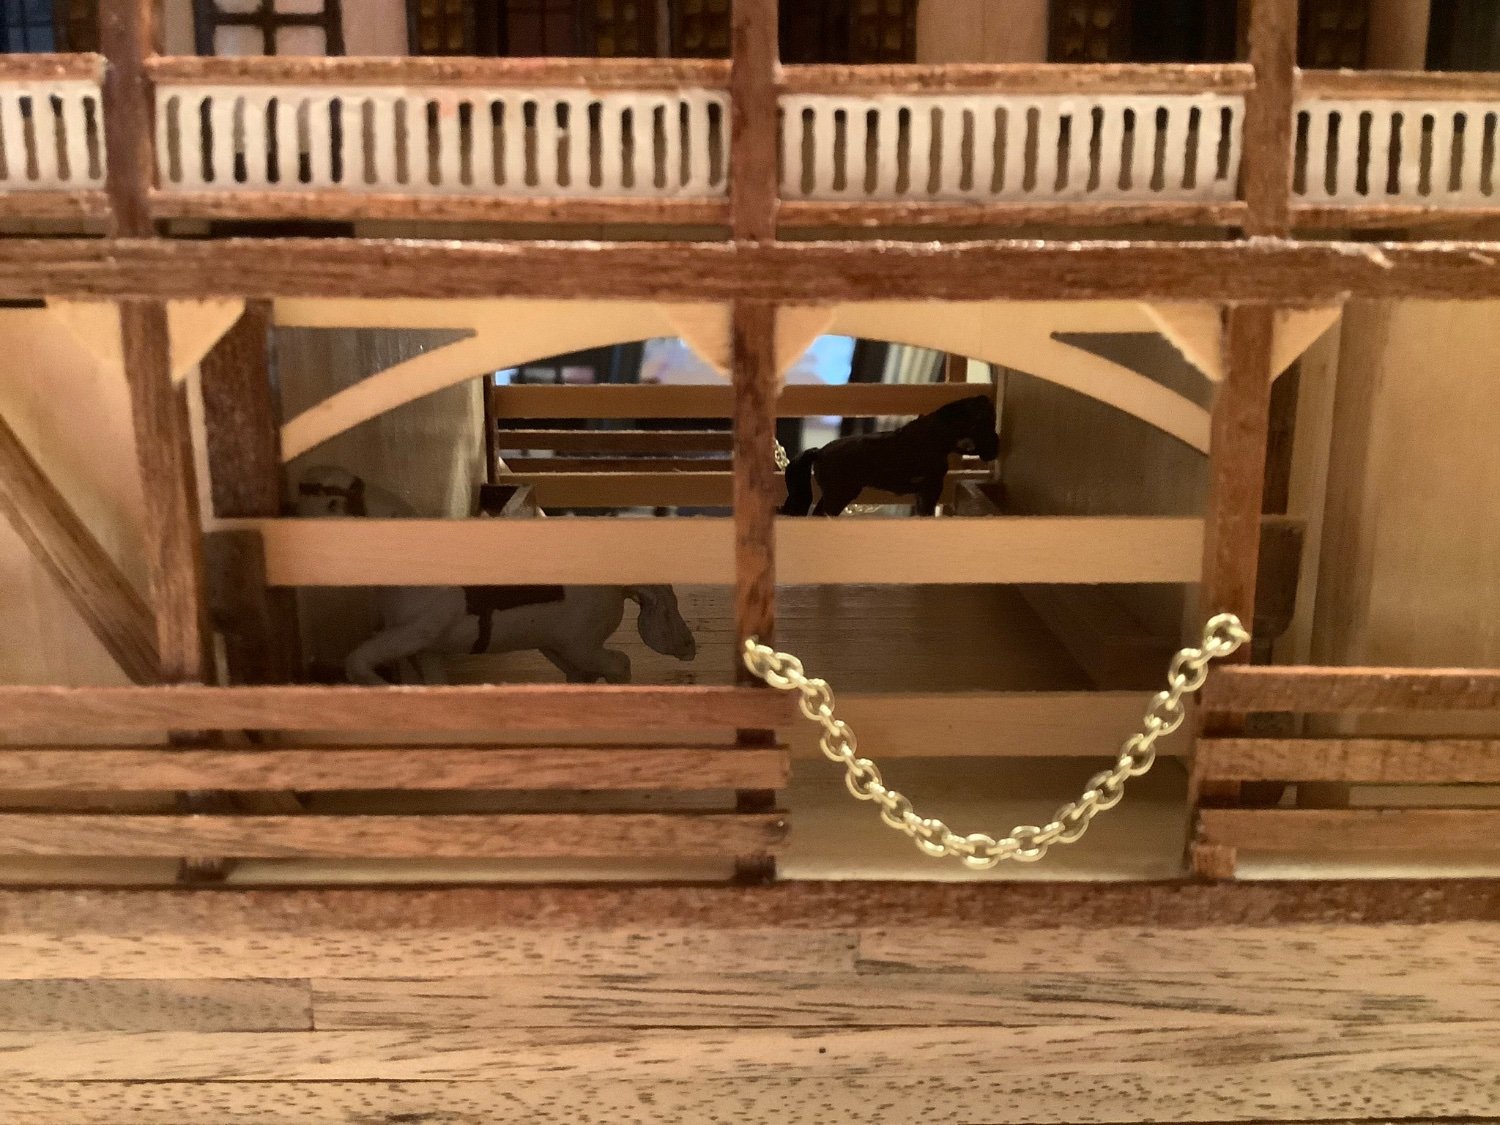
All done! Note the little people as well as the 2 horses in their
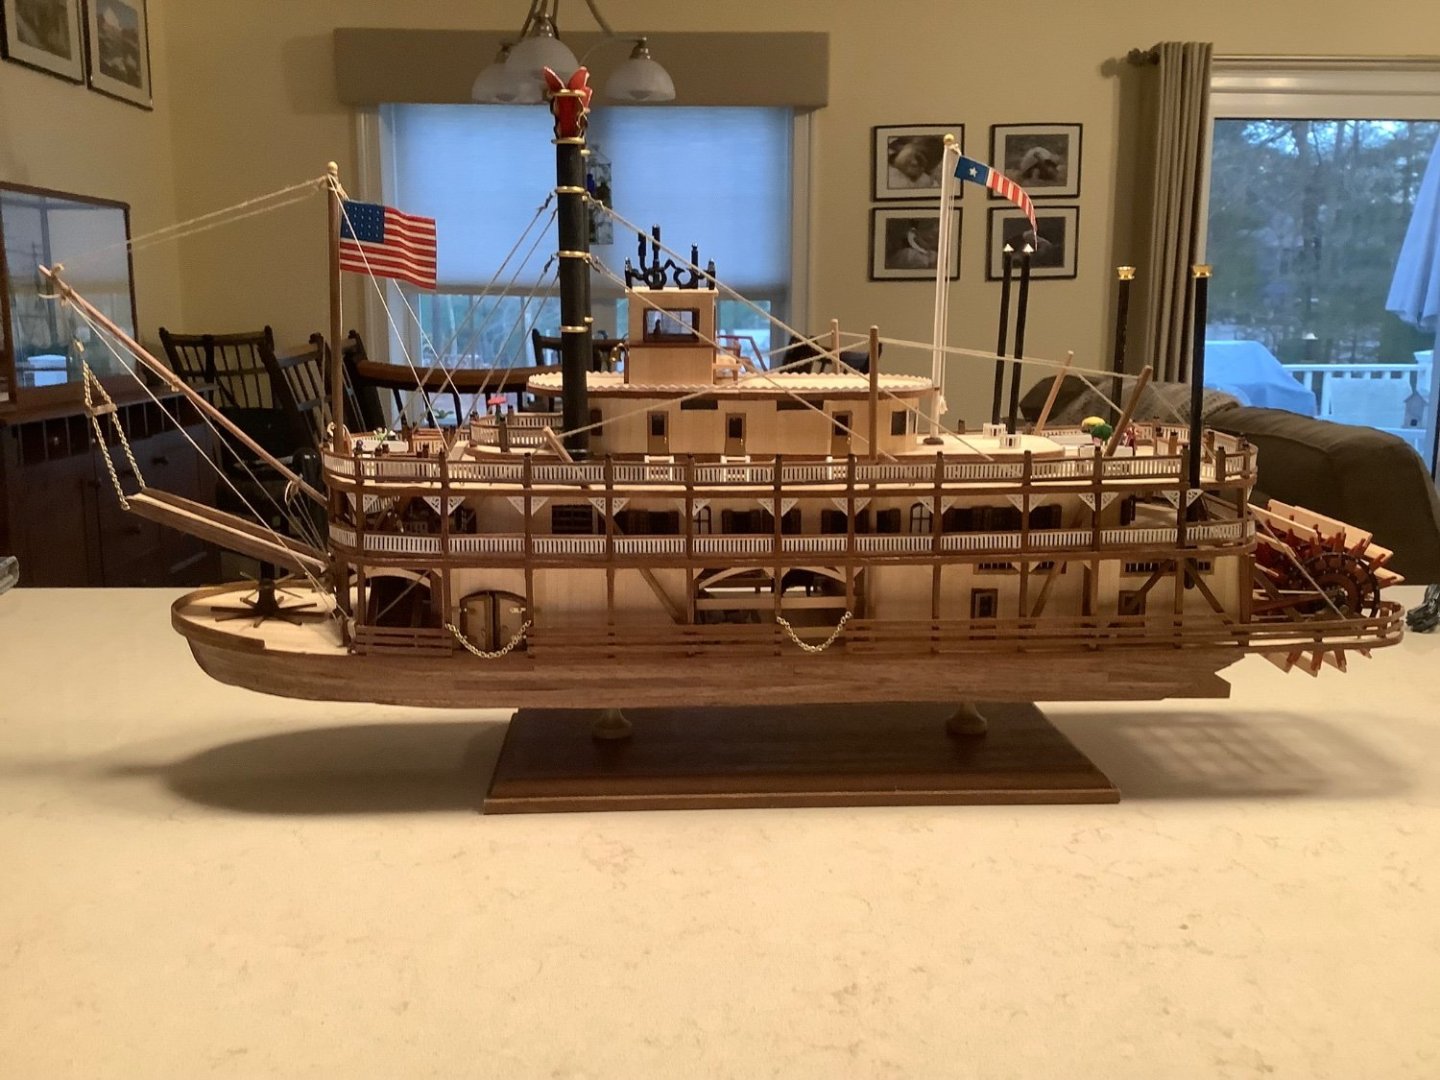


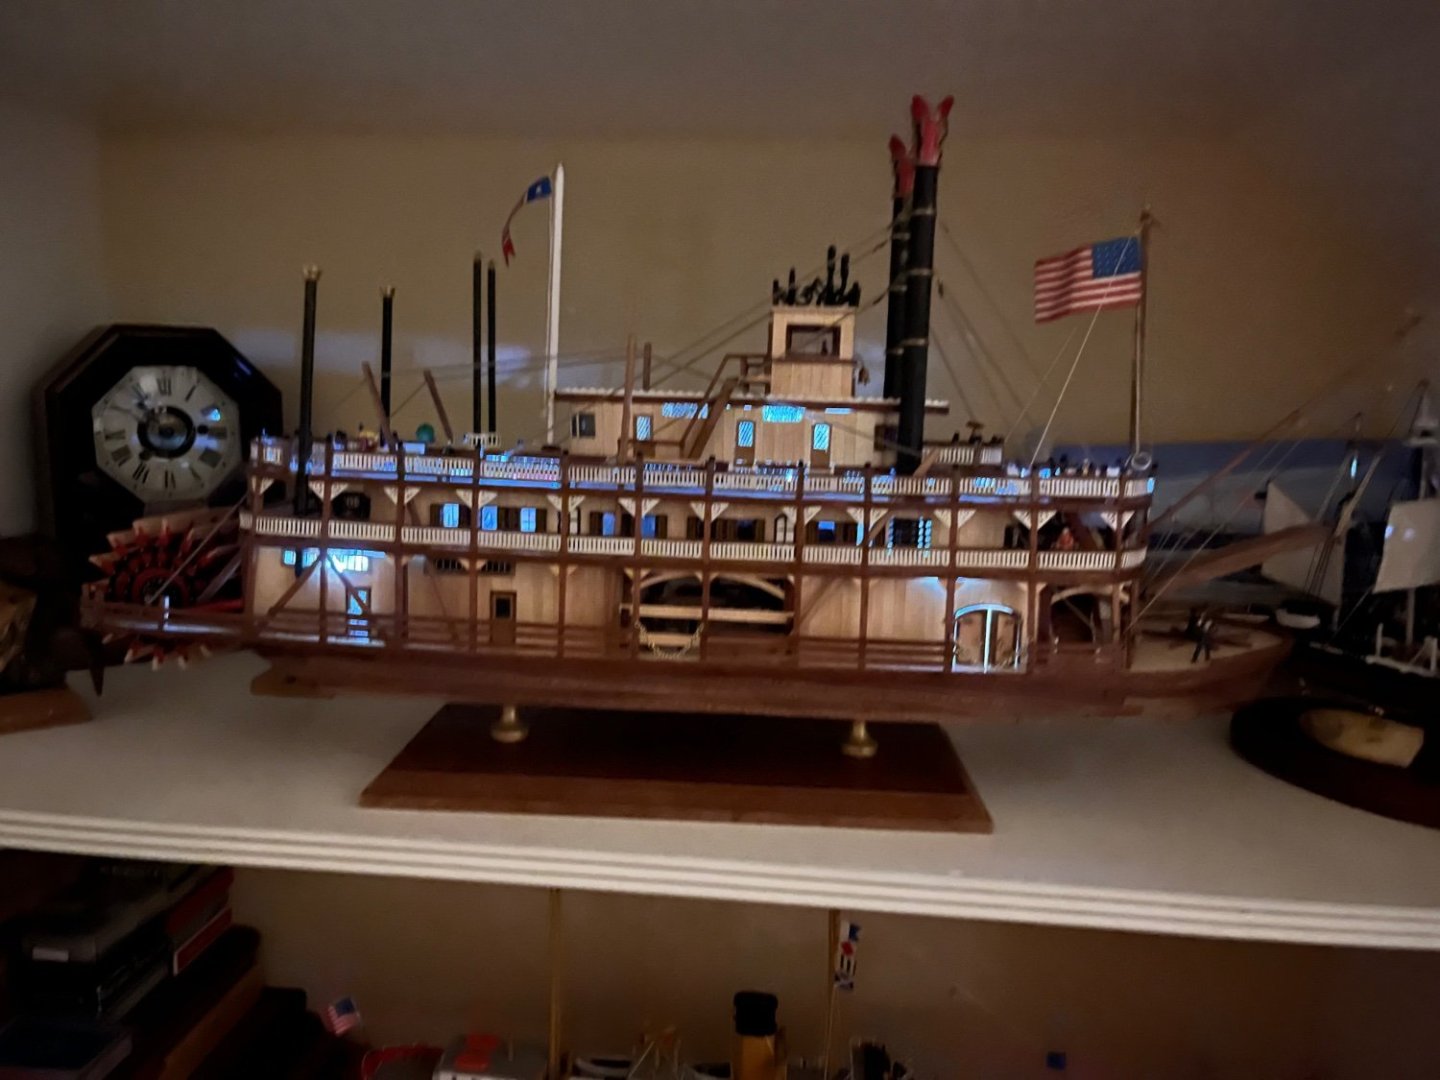
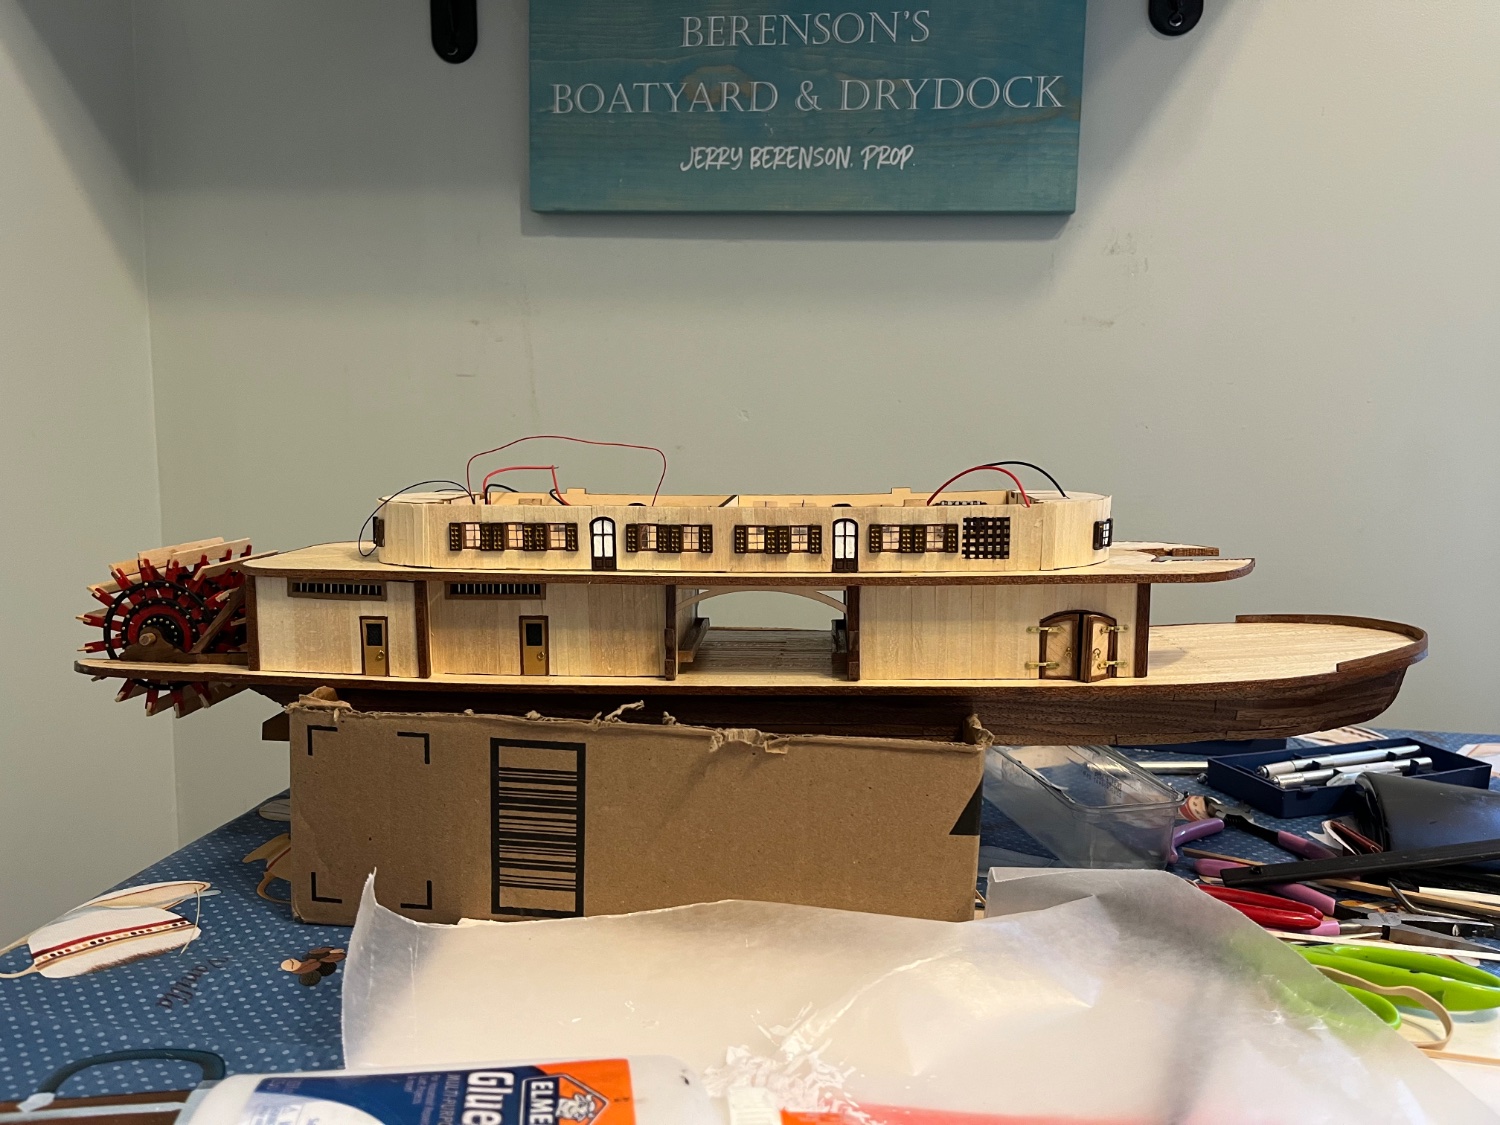
stable. I electrified the boat as can be seen by the LEDs as well as the paddle wheel. (Still a little bit of slippage but “good enough “ for displaying.) I am not going to use it in the bathtub 😀. It was a fun build. I used the enclosed directions as well as modifying the online plans since my model was an older model. Nothing else in the pipeline but we will see when Fall and winter arrives. Thanks for following my build. Jerry
- Cathead, Auger, Bob Fraser and 1 other
-
4
-
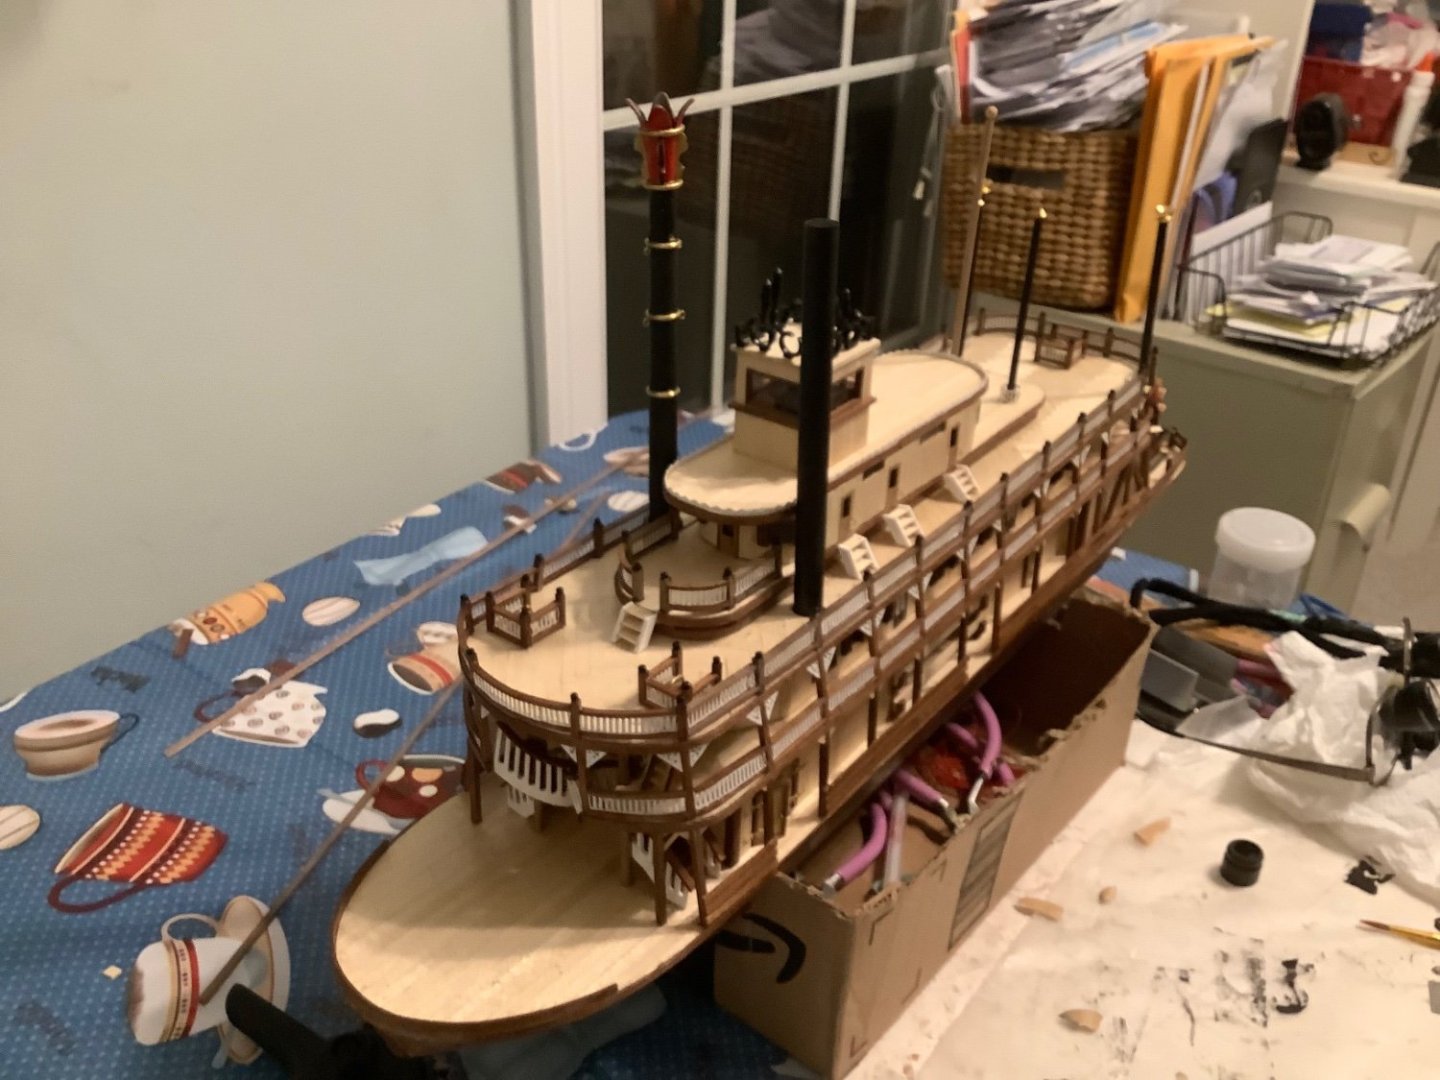
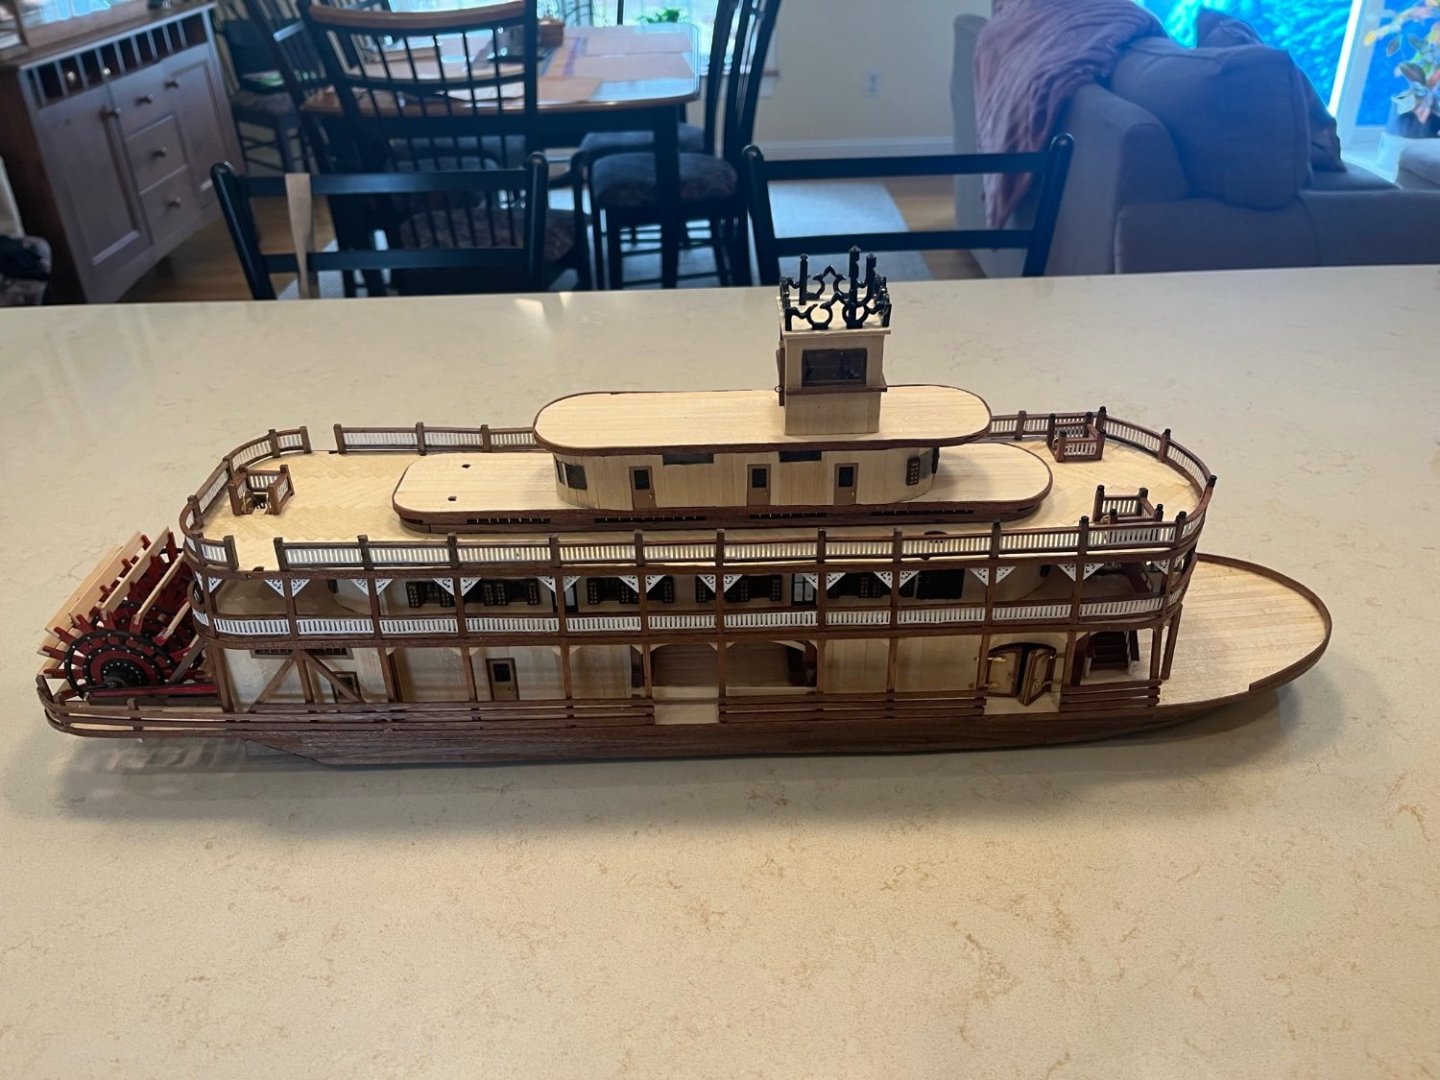
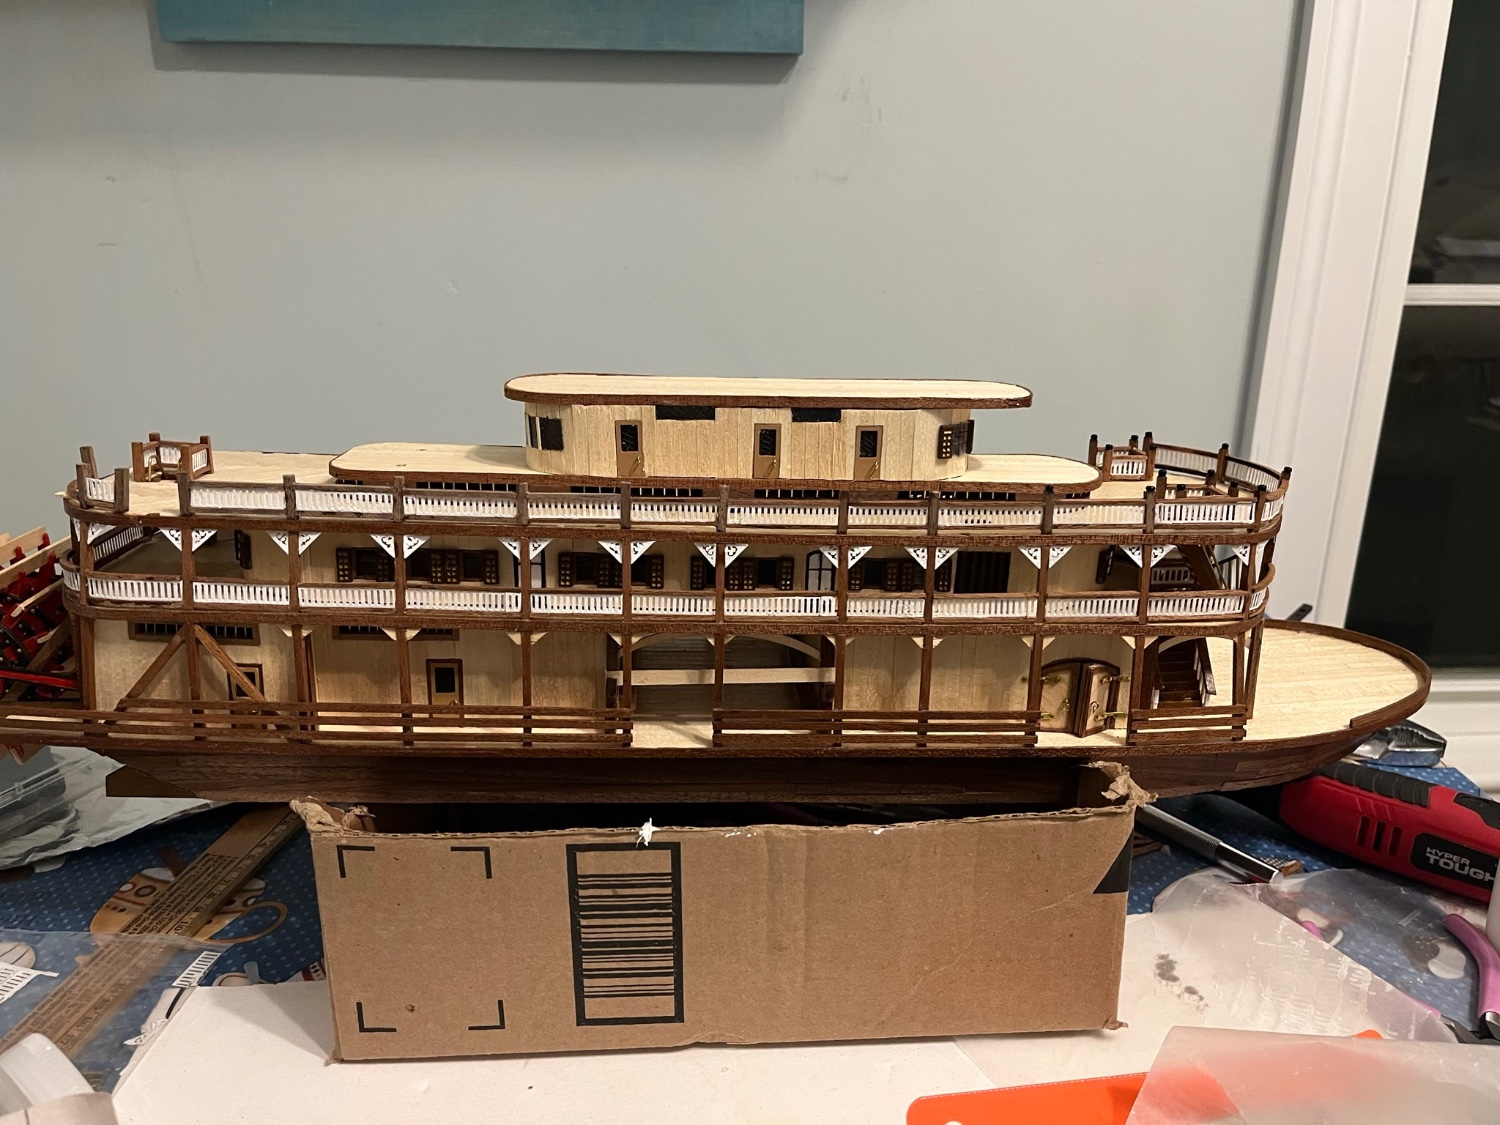
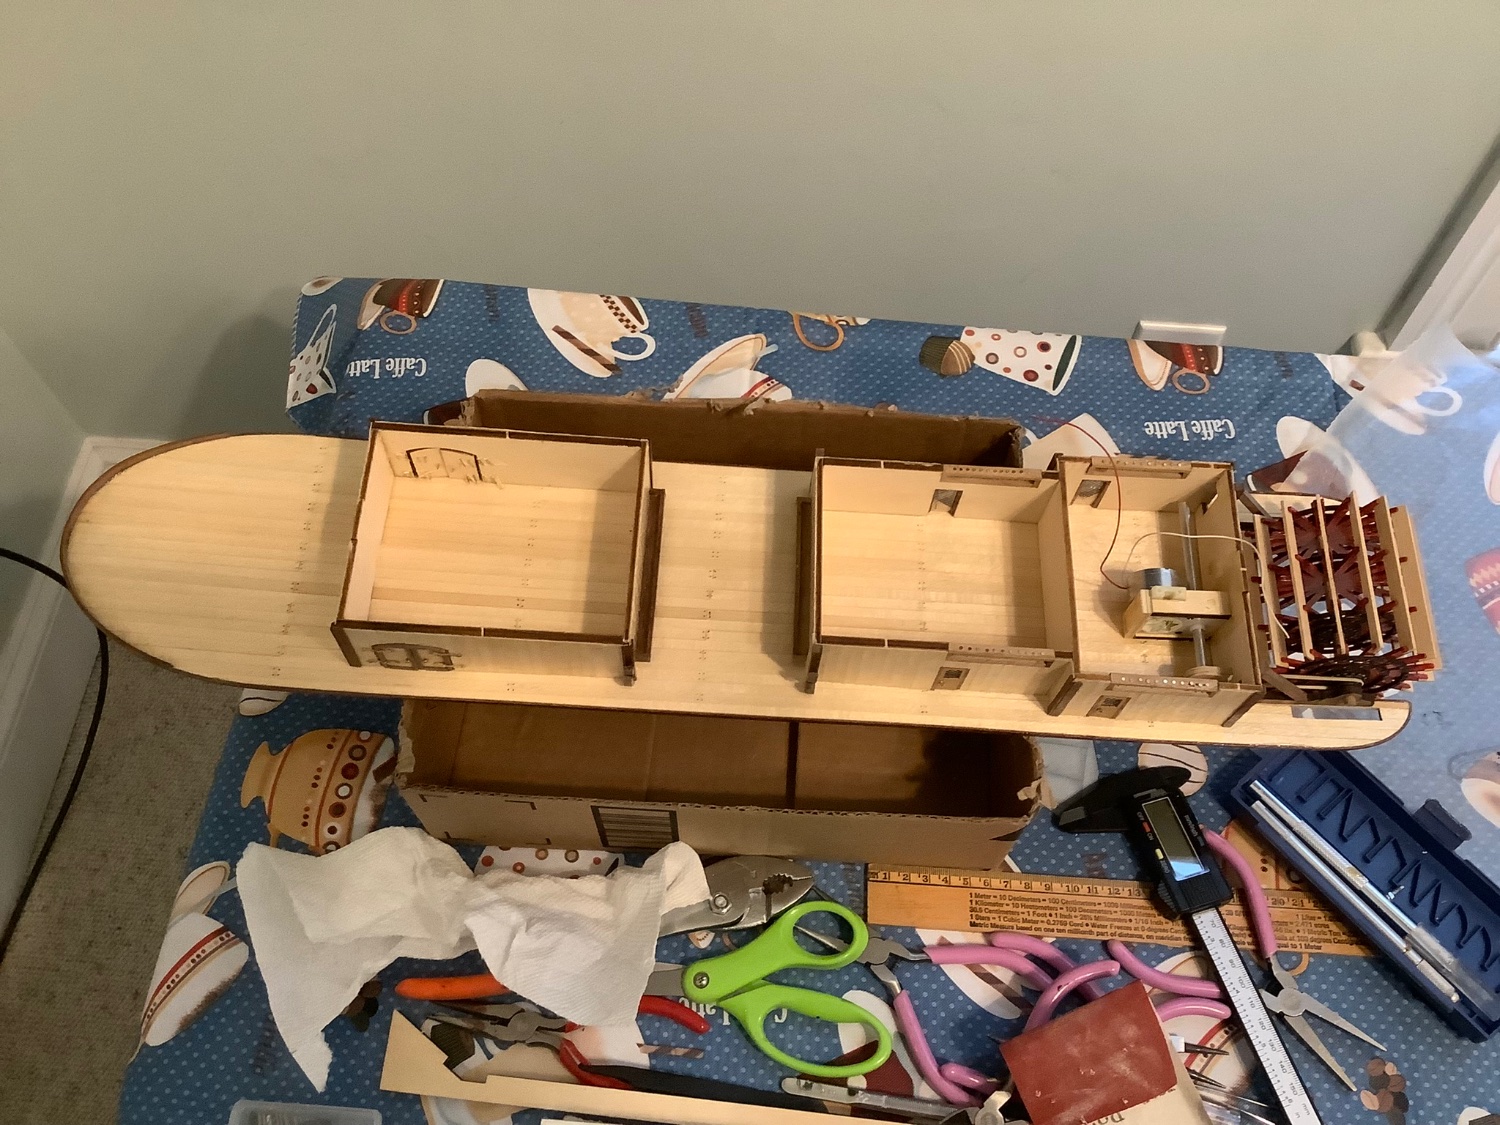
Bobandlucy and Bob Fraser…..thank you for your nice comments.Here are pictures of where I am presently on this build. Since the daffodils are coming out and model building is my winter project, I am looking to completing this model in the near future. Still a way to go but getting there. Bob, I determined that the reason the paddle wheel was slipping was that my homemade wooden gear that I fitted onto the motor shaft was slipping on the shaft. A bit of super glue helped.


- Bryan Woods, Knocklouder, Cathead and 4 others
-
7
-
-
Bob, Maine was a part of Massachusetts at that time. Capt. Mitchell of the HMS Nimrod attacked our town of Falmouth on Cape Cod in the War of 1812. A cannonball which penetrated the side of a pub in town remained in the wall of the men’s room until about 5 yrs ago when the pub was demolished. Fun fact!😀
-
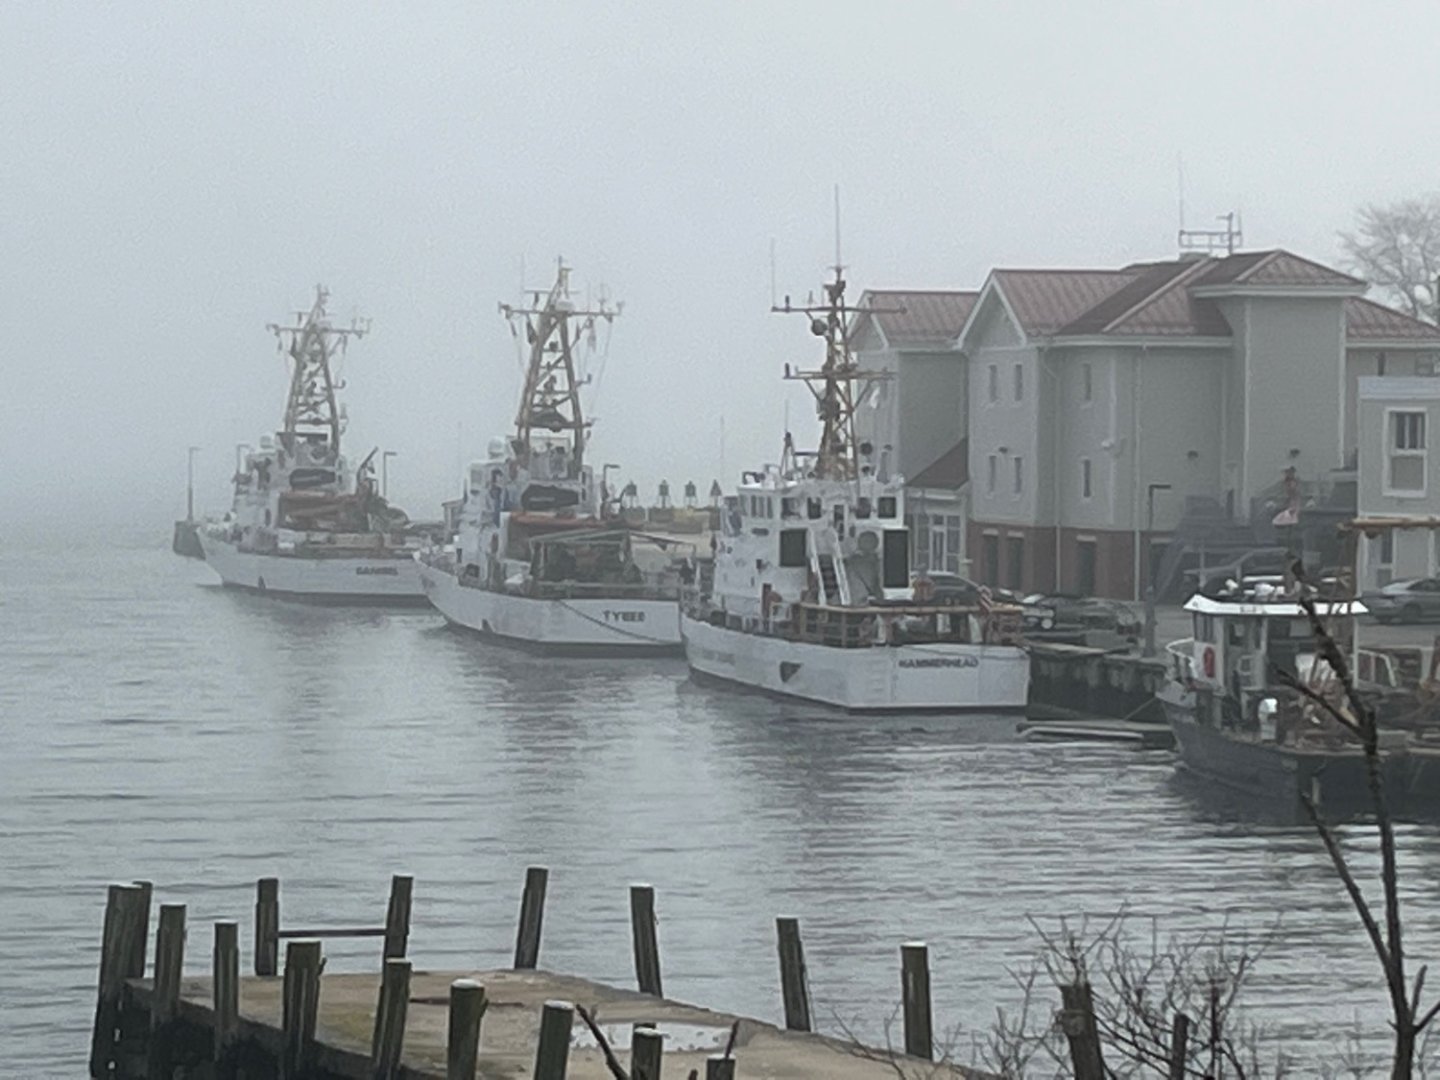
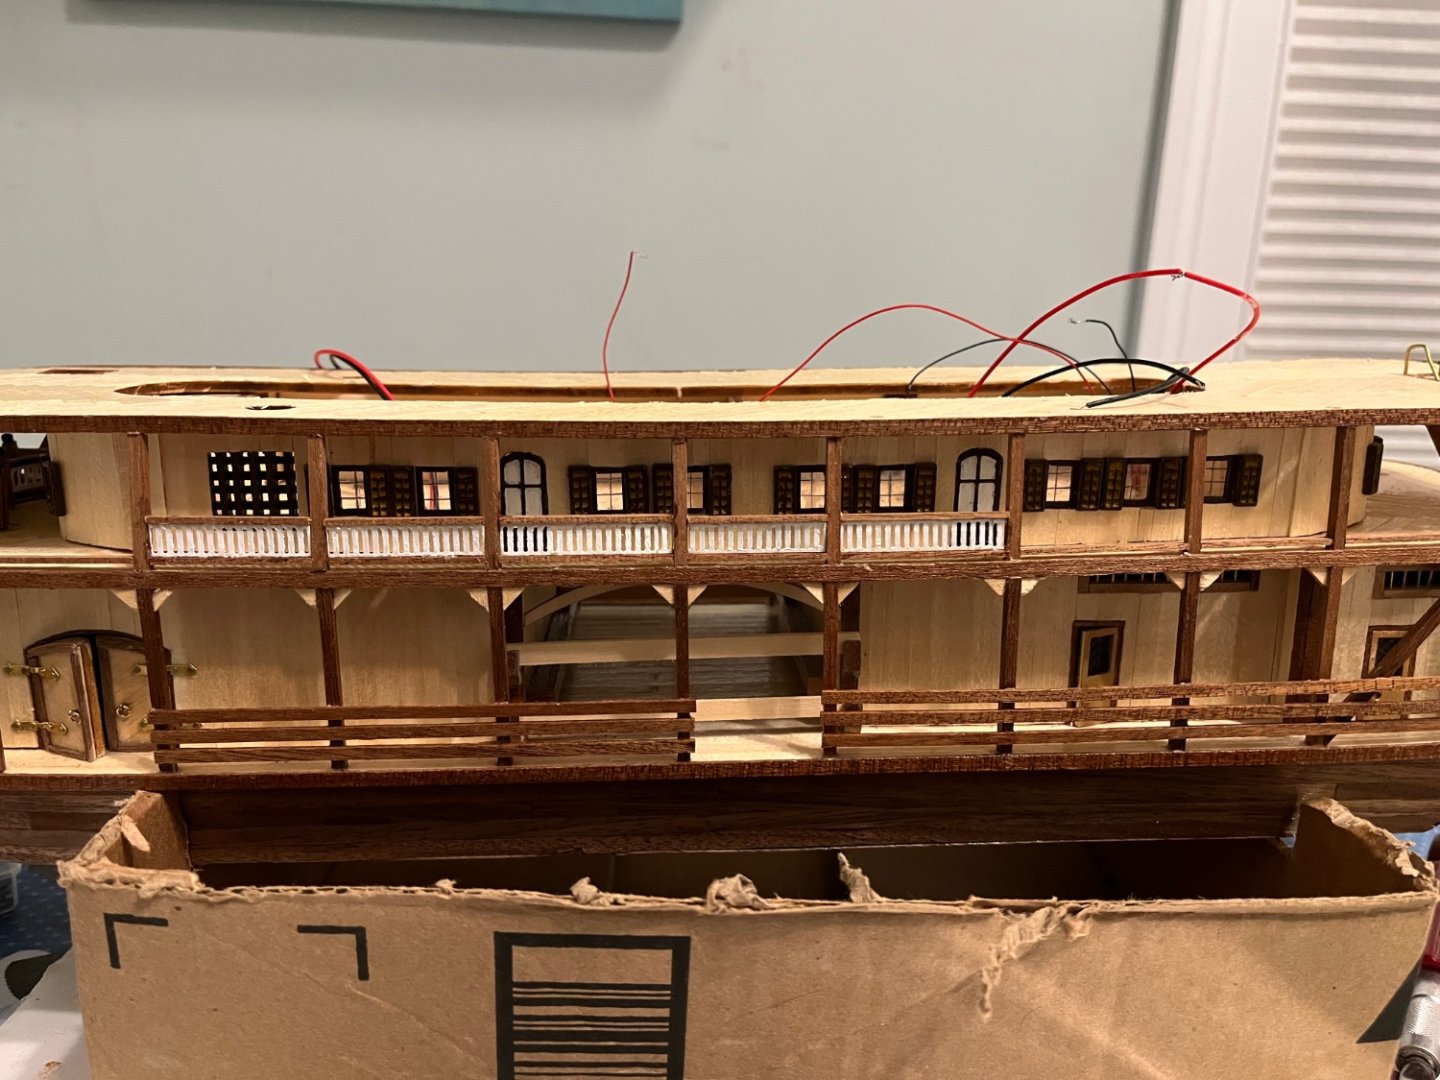
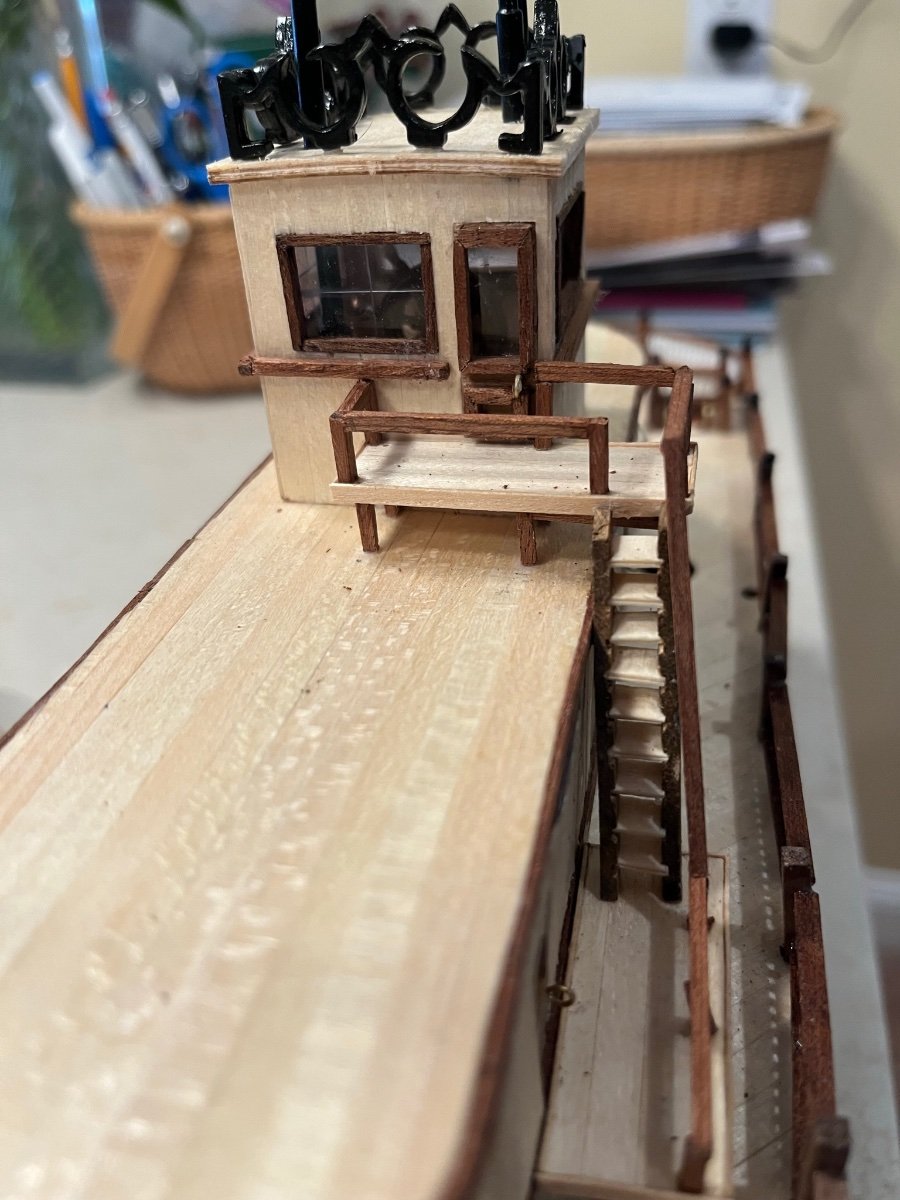
Here are some additional pictures of where I am on the build. I placed railings around the stairways and have completed one side of the railings around the perimeter of the deck. I wired up the motor for the paddle wheel to see if it works. It does rotate but needs some refinement. I constructed the superstructure on the third deck and paneled it.Bob Fraser, you called it ! I had to order some additional wood for the railings. On an additional subject I have enclosed a picture I took last week of 3 Coast Guard ships ( in the fog) at their births in Woods Hole , Massachusetts near my home . My good friend served on the middle ship the “Tybee”. While there in our local coffee shop,I also met and spoke with Dr. Robert Ballard ,who located the Titanic as well as the Bismarck . Woods Hole is the home of the Alvin submersible as well as Woods Hole Oceanographic and the Marine Biological Lab. It is a world renowned center for ocean research.


- Bob Fraser, Bryan Woods, bobandlucy and 3 others
-
6
-
Jerry Berenson ( not Berensen)
-
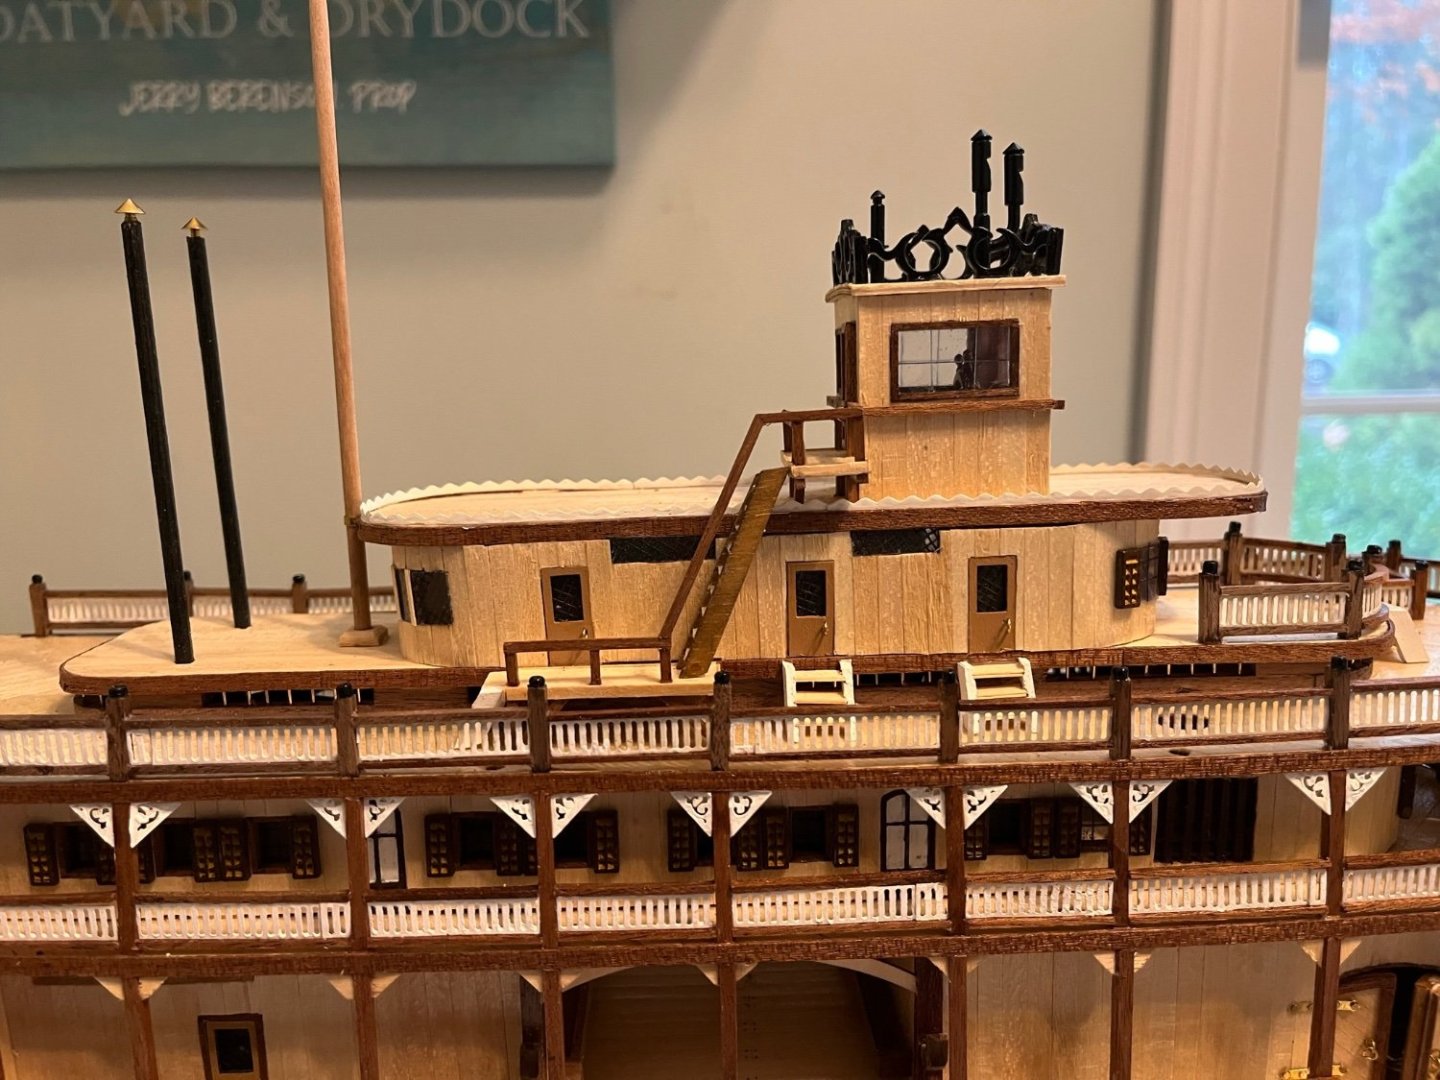
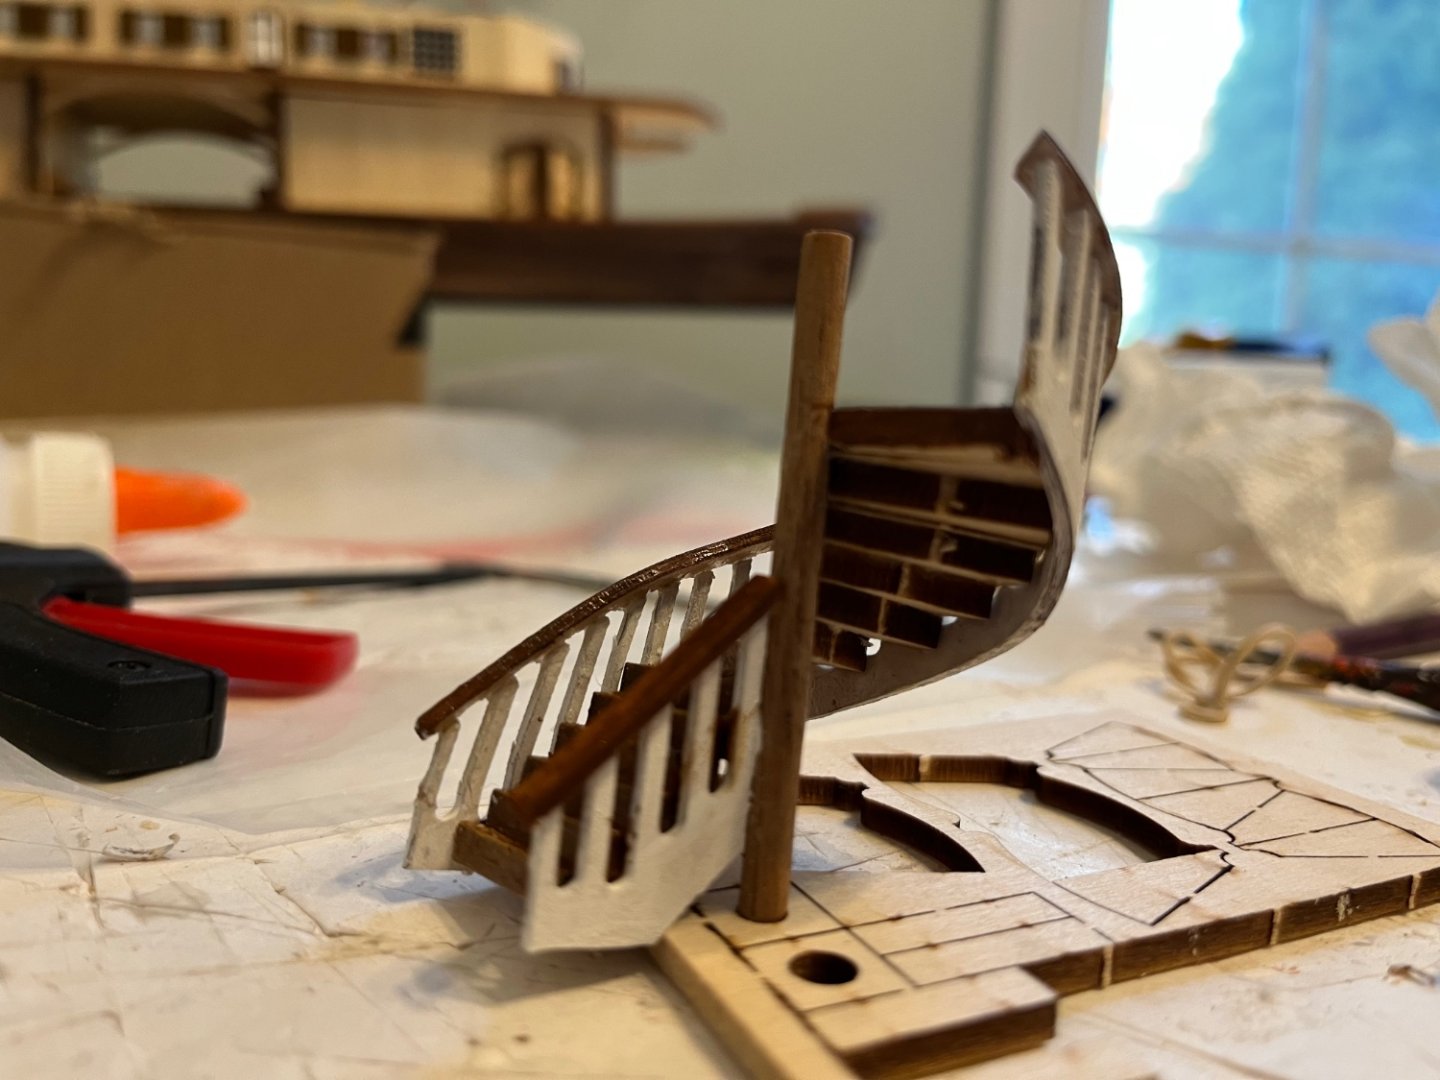
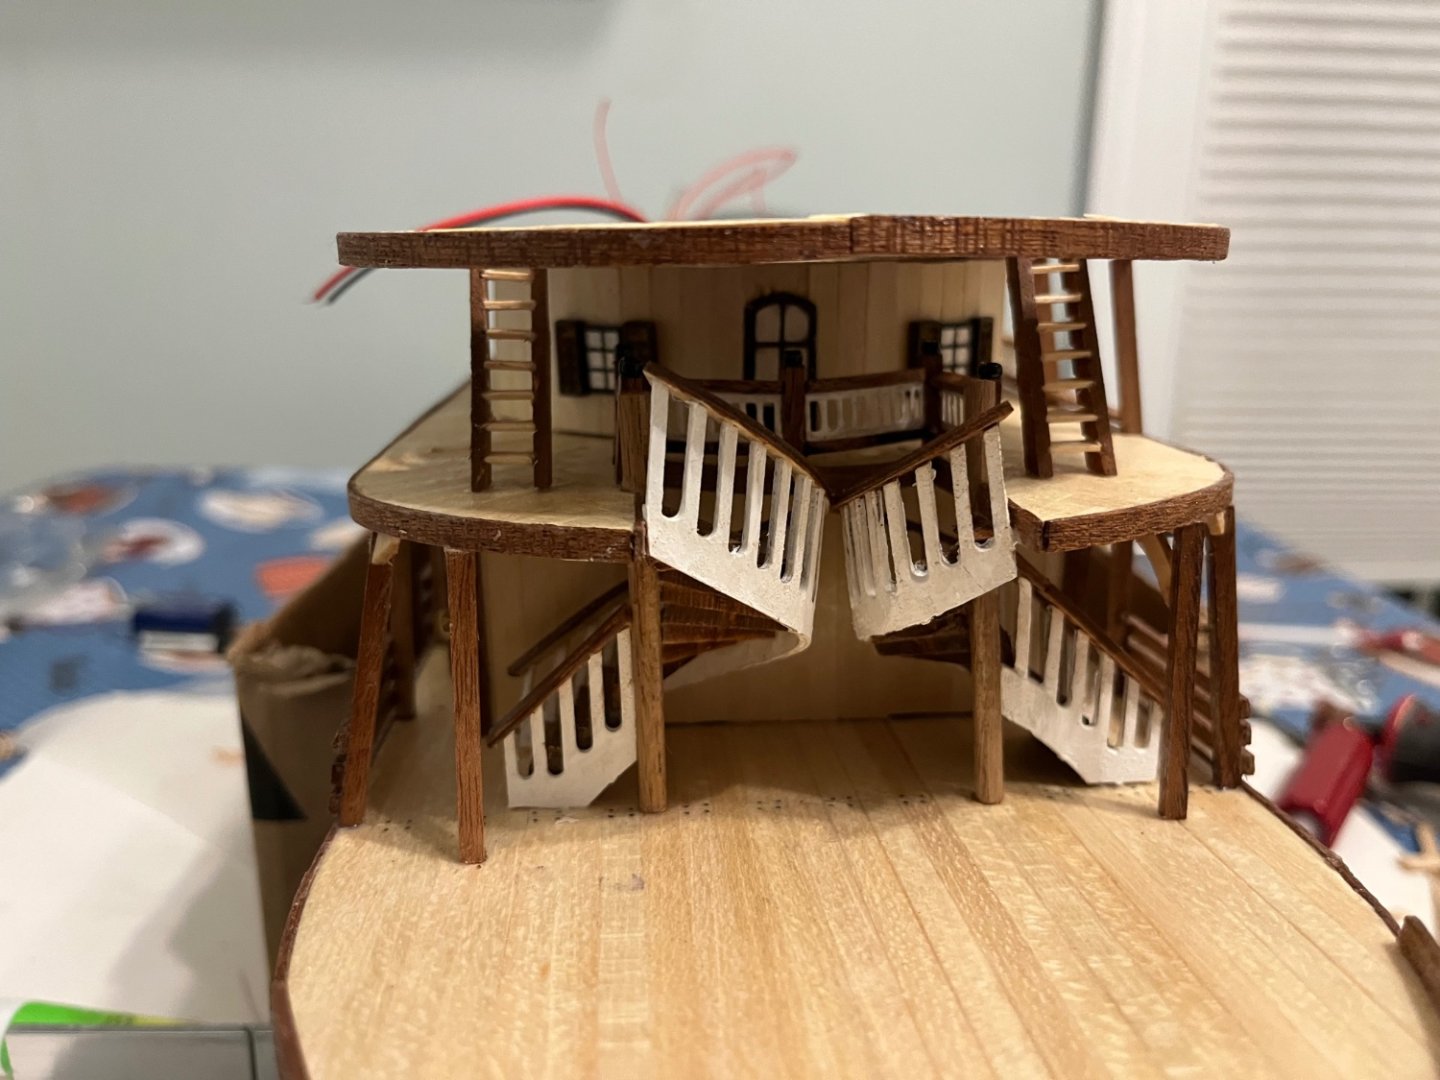
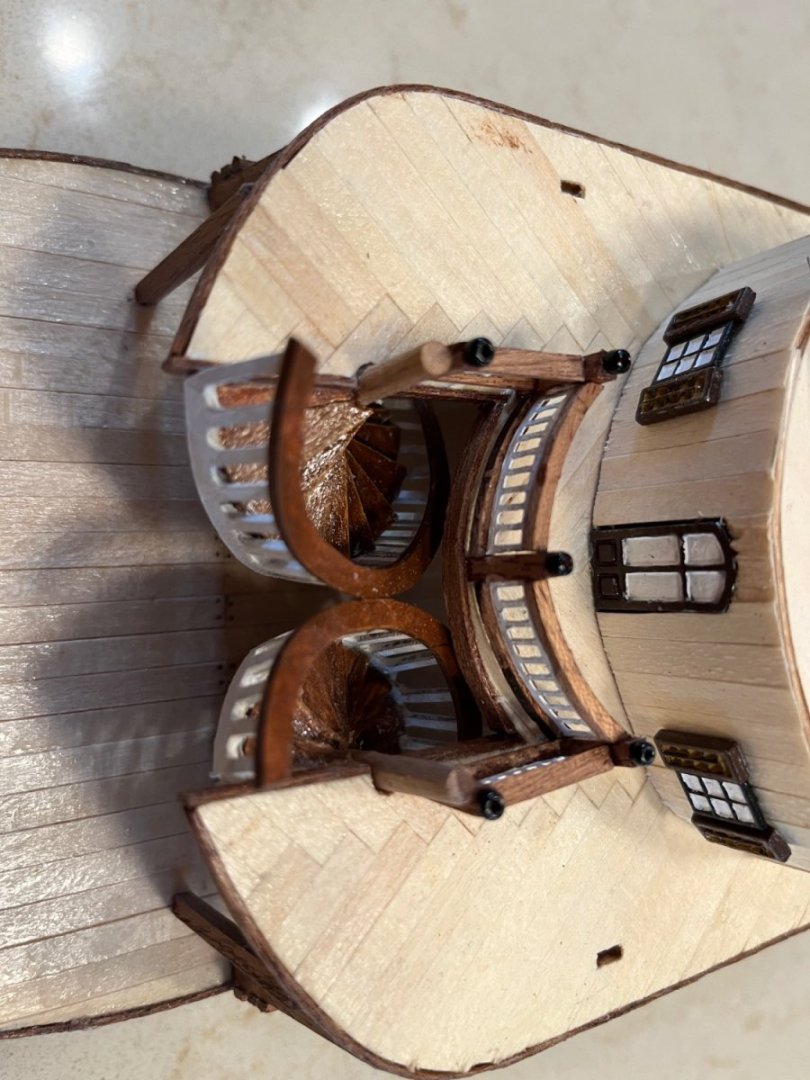
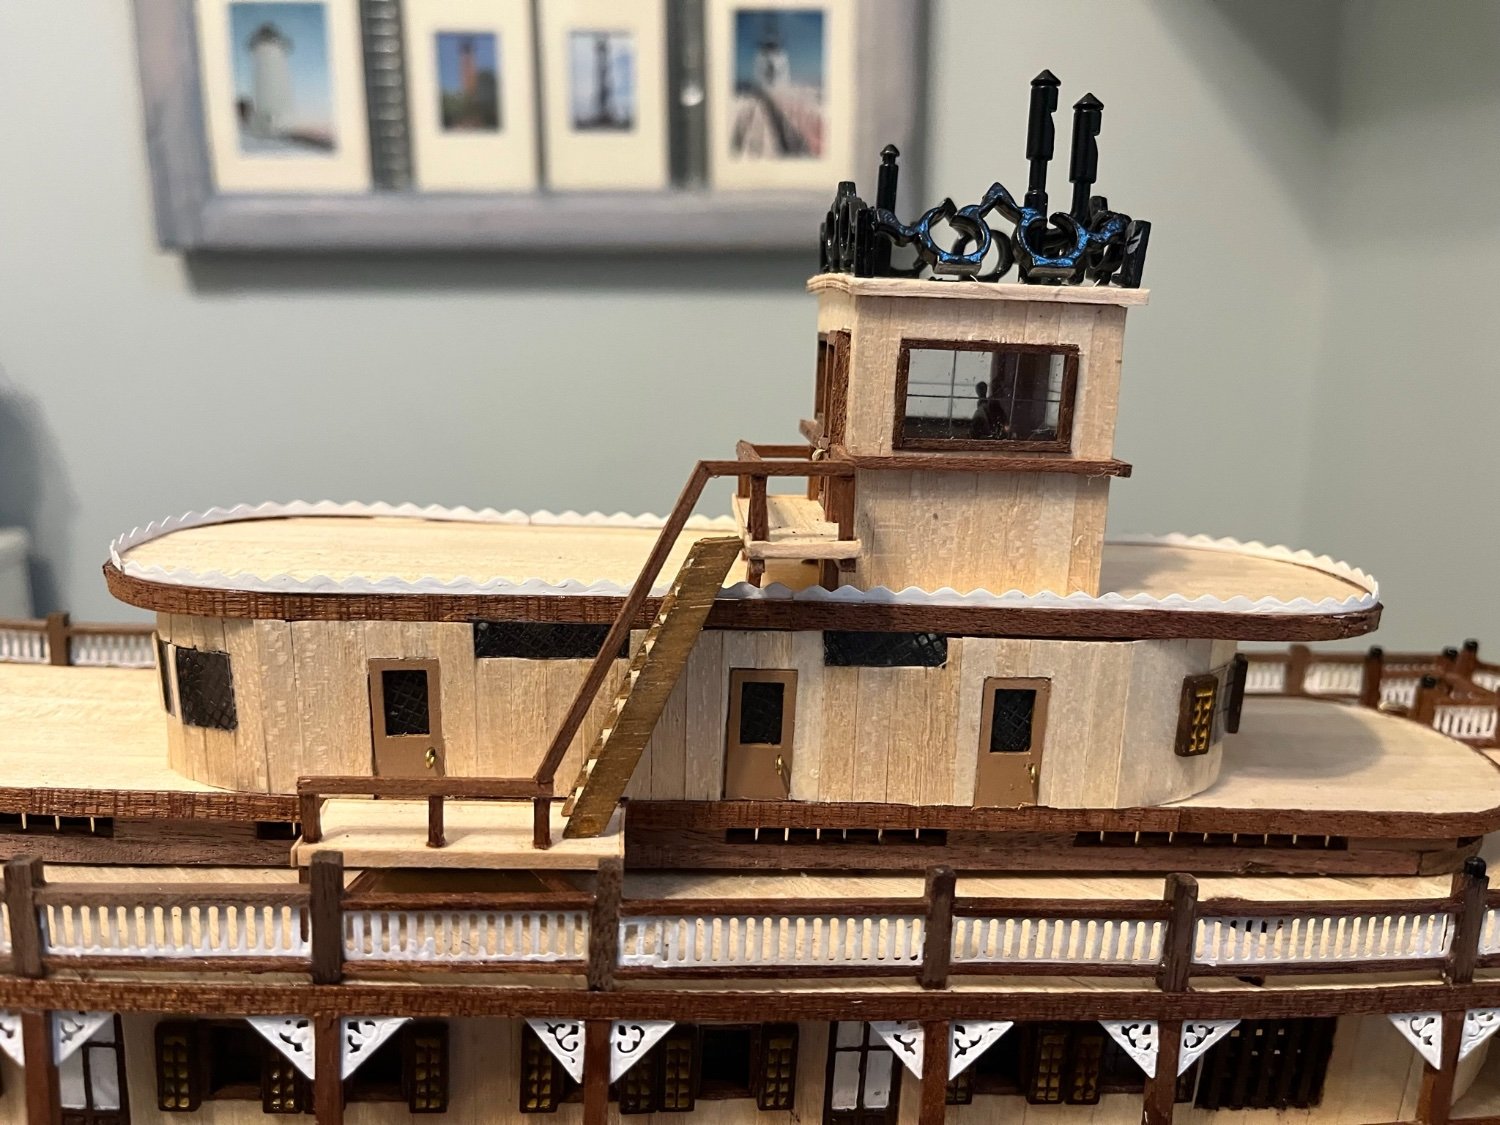
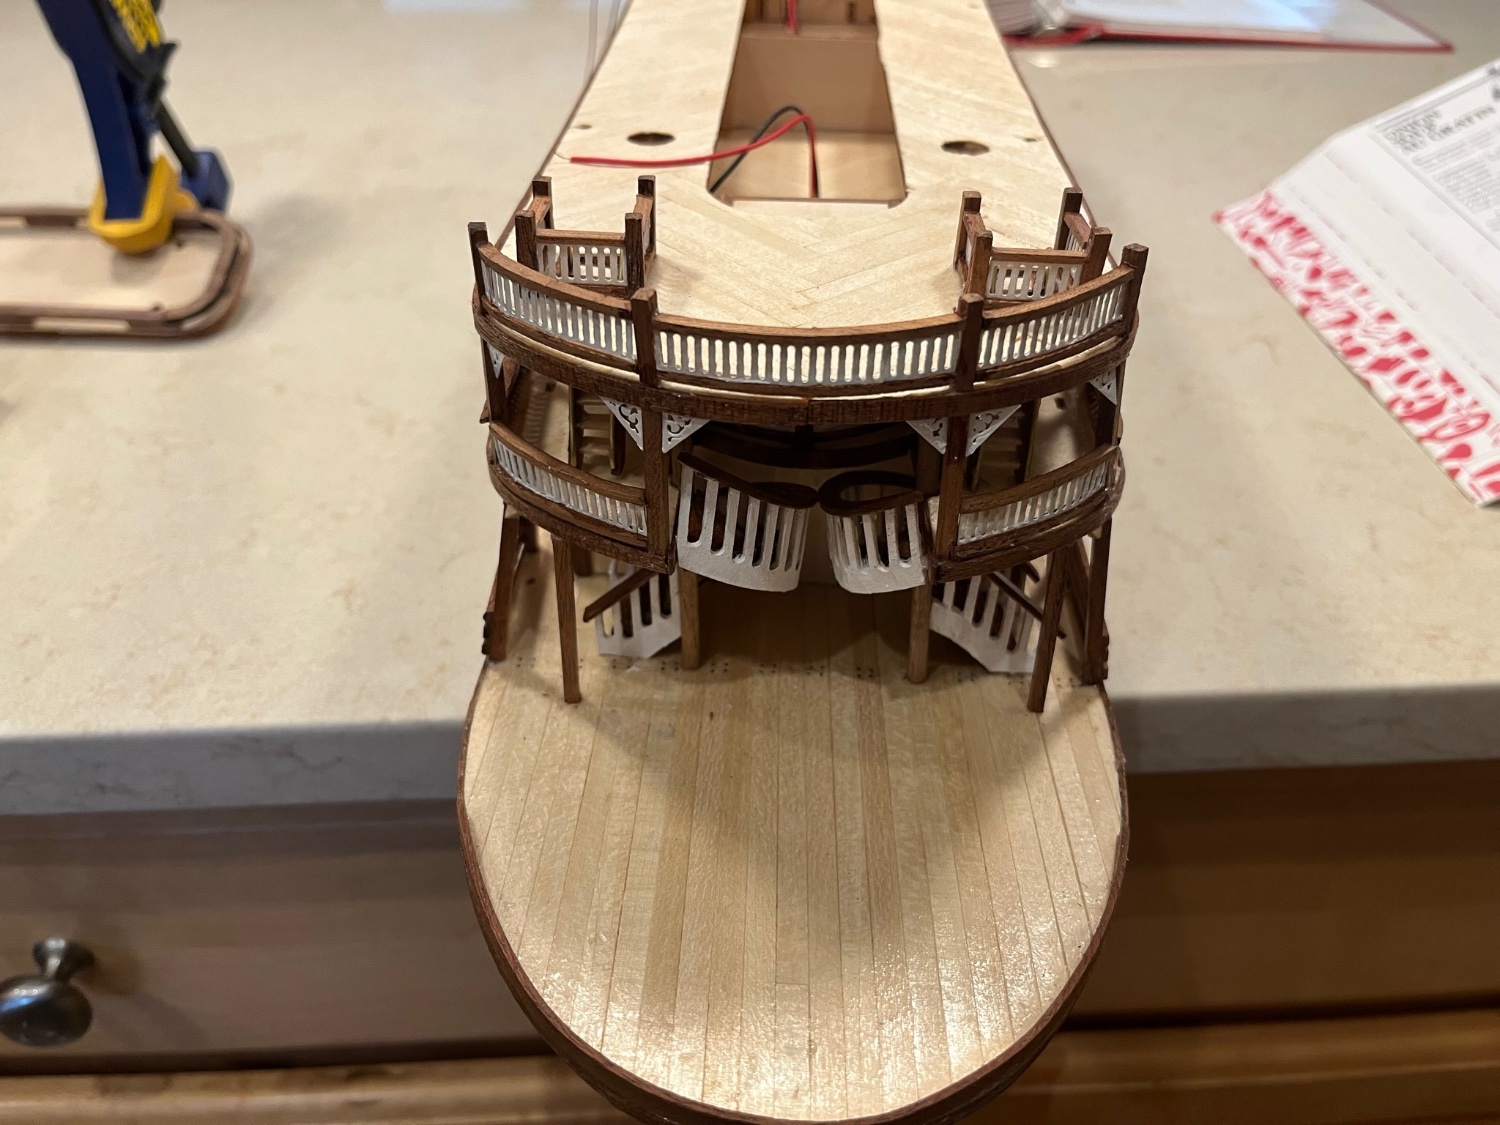
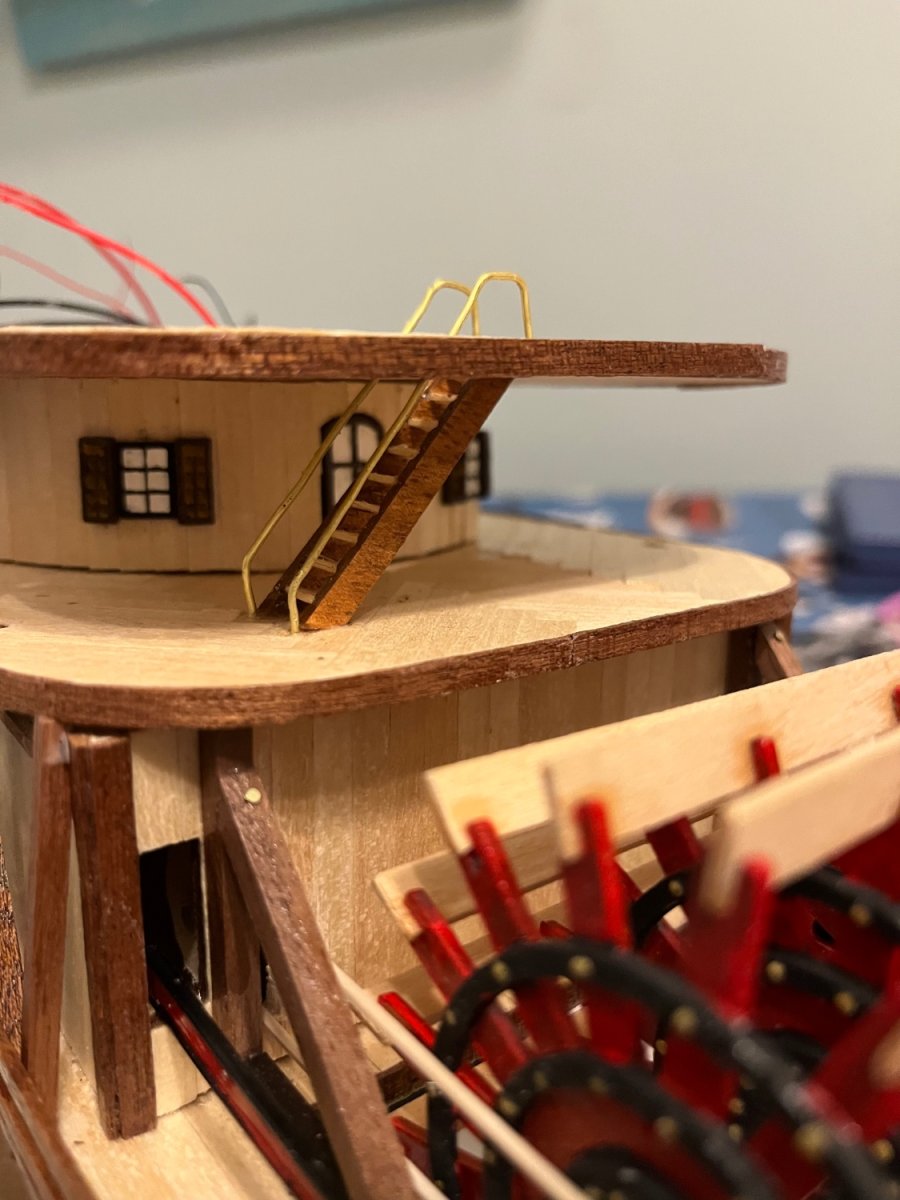
Building the main staircases was a challenge. They came out slightly off center “c’est la vie “ ! I stained them with teakwood stain. I then built the stairs and railings for the 2nd deck . The supports were cut and glued all around the boat. I painted the rails and placed them inside the railings between the posts along with making and glueing triangular supports on the lower deck as well as painting and installing the premade metal ornamental supports on the second deck. That is where I am presently and will post more as I get further along.


- GrandpaPhil, Cathead, Bob Fraser and 4 others
-
7
-
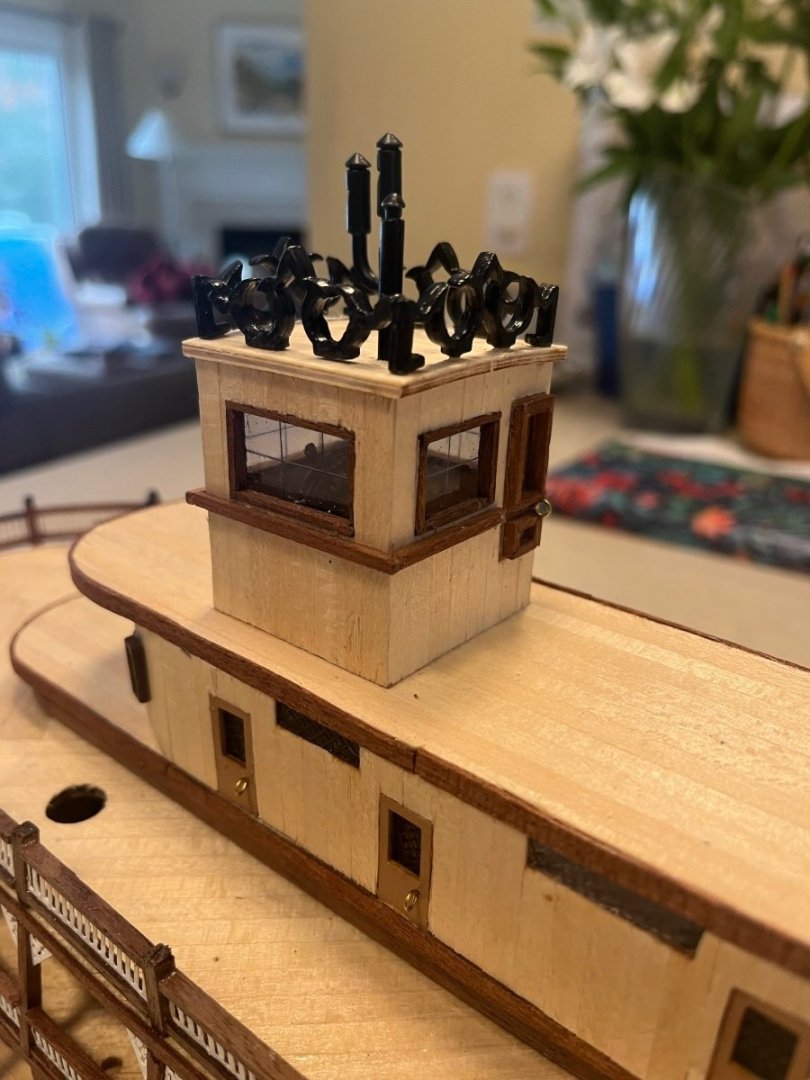
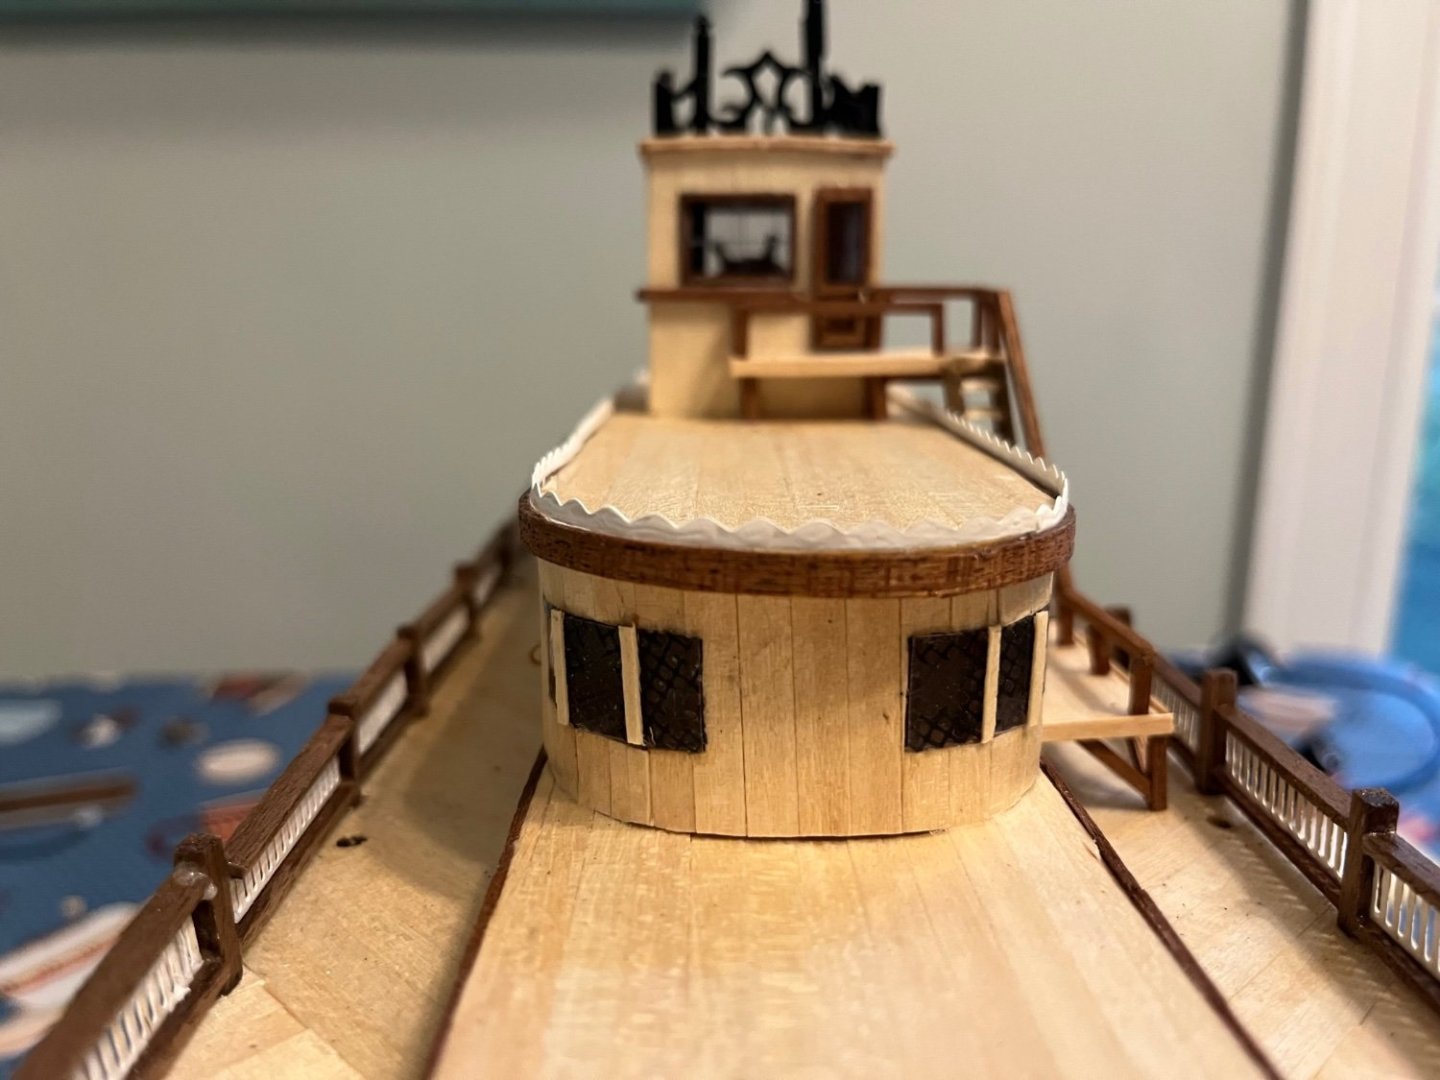
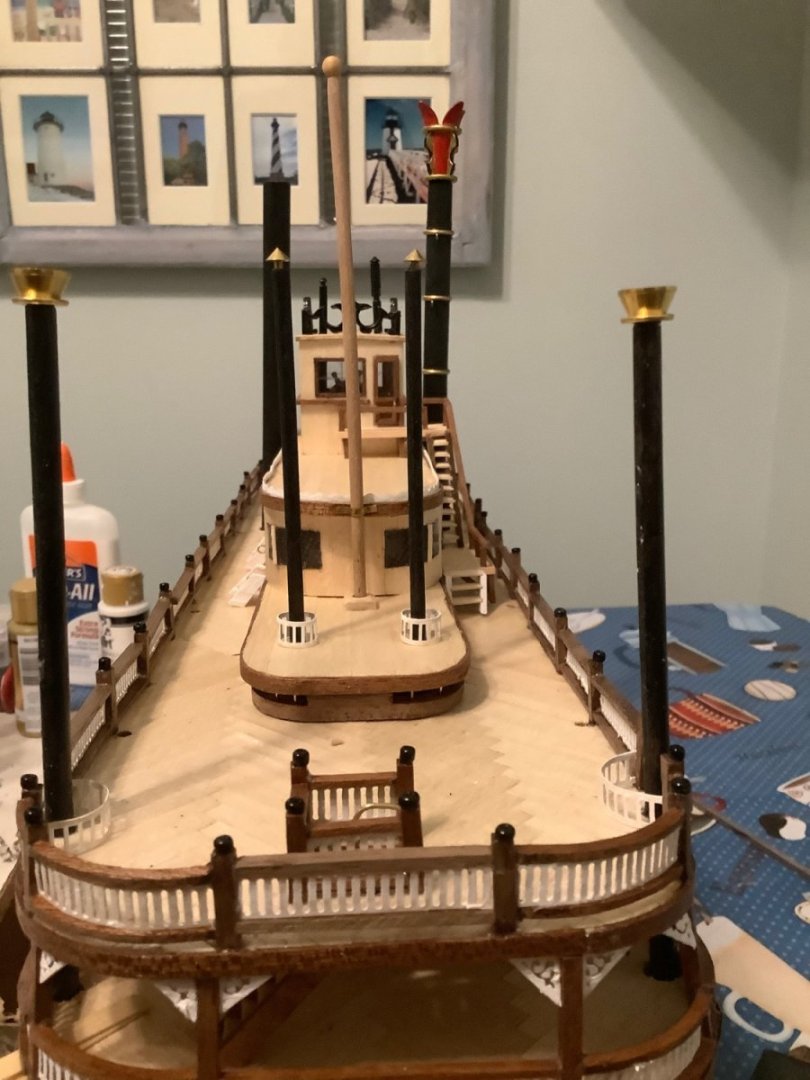
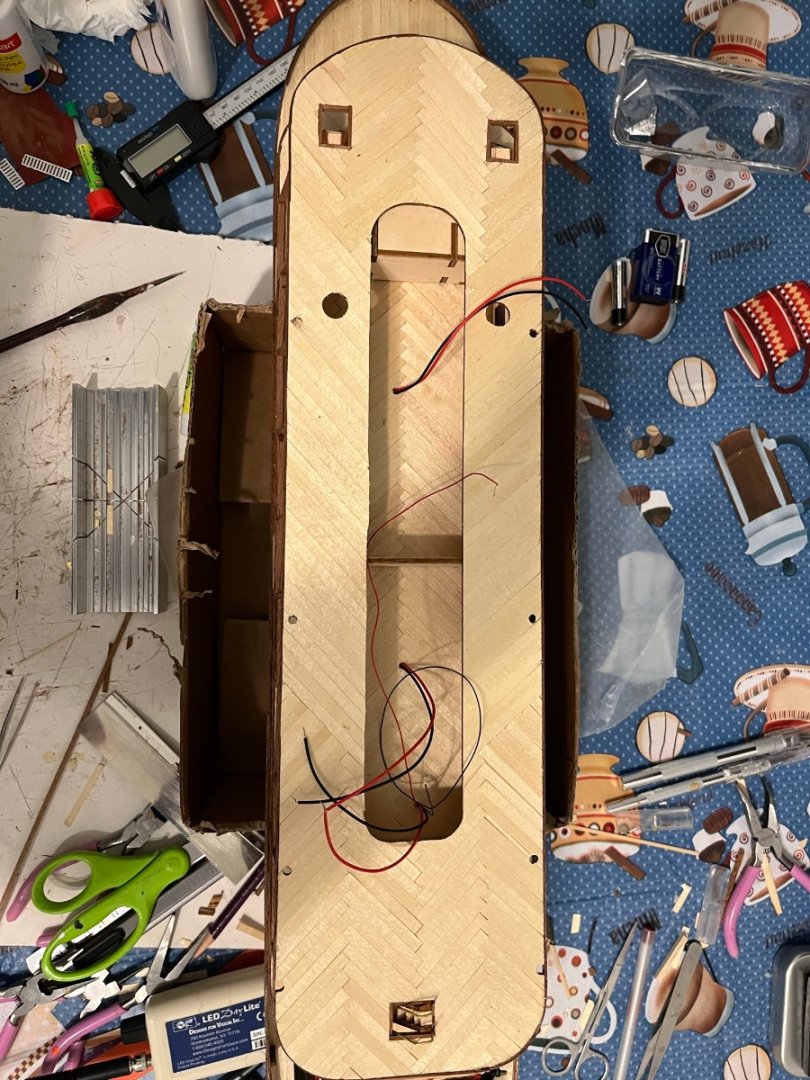
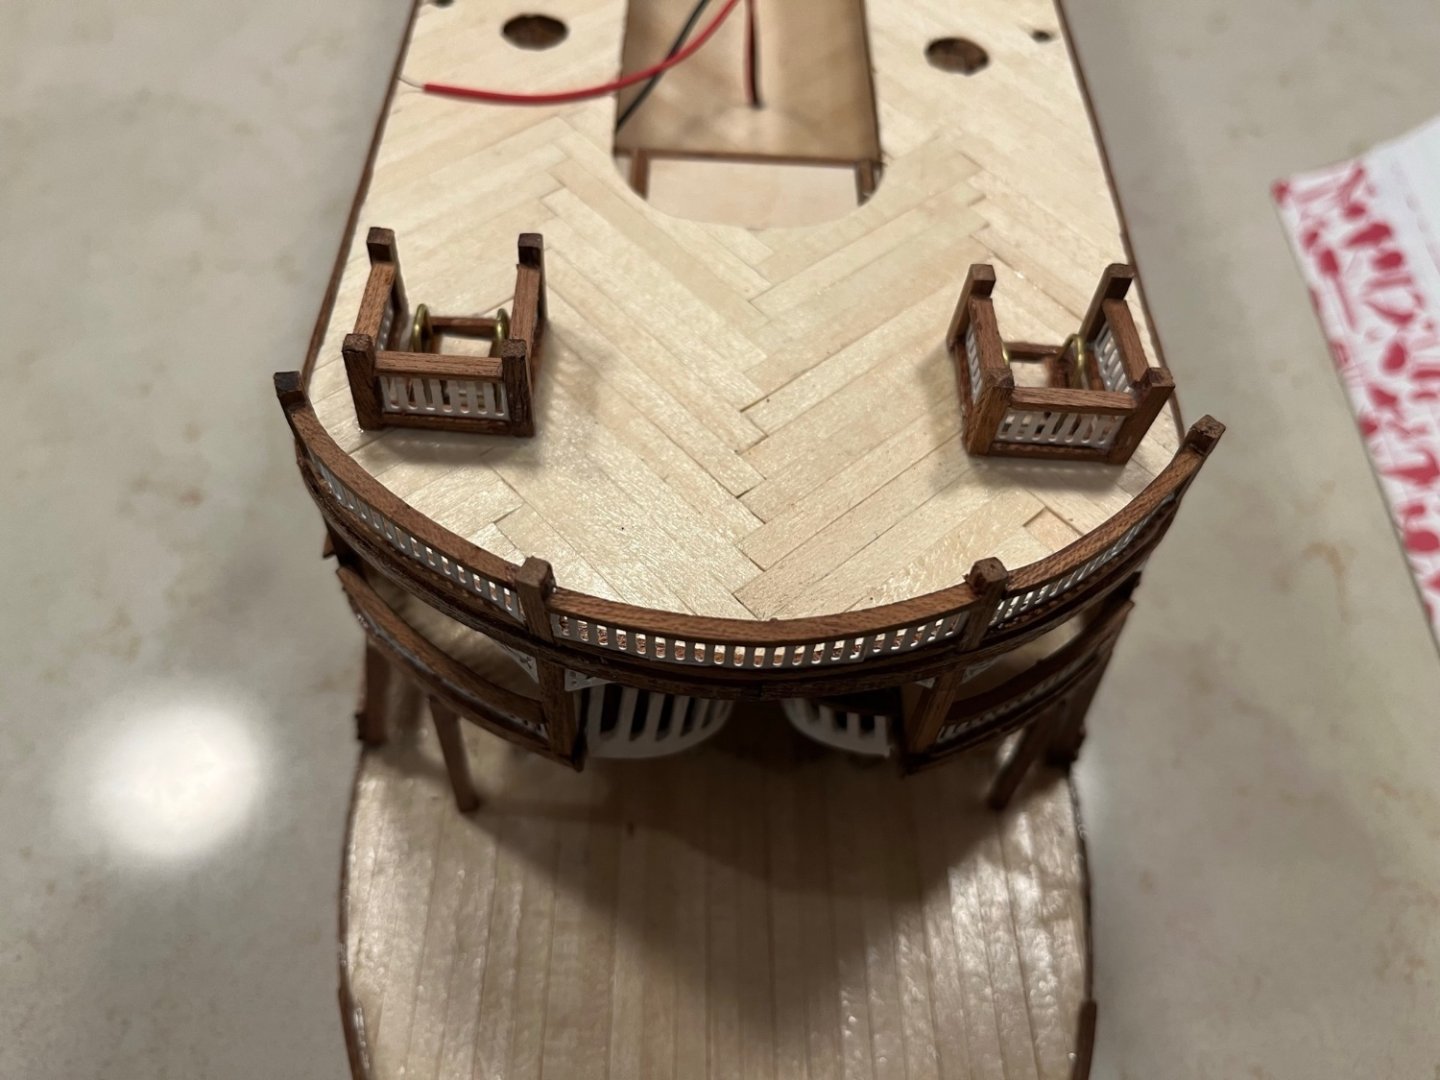
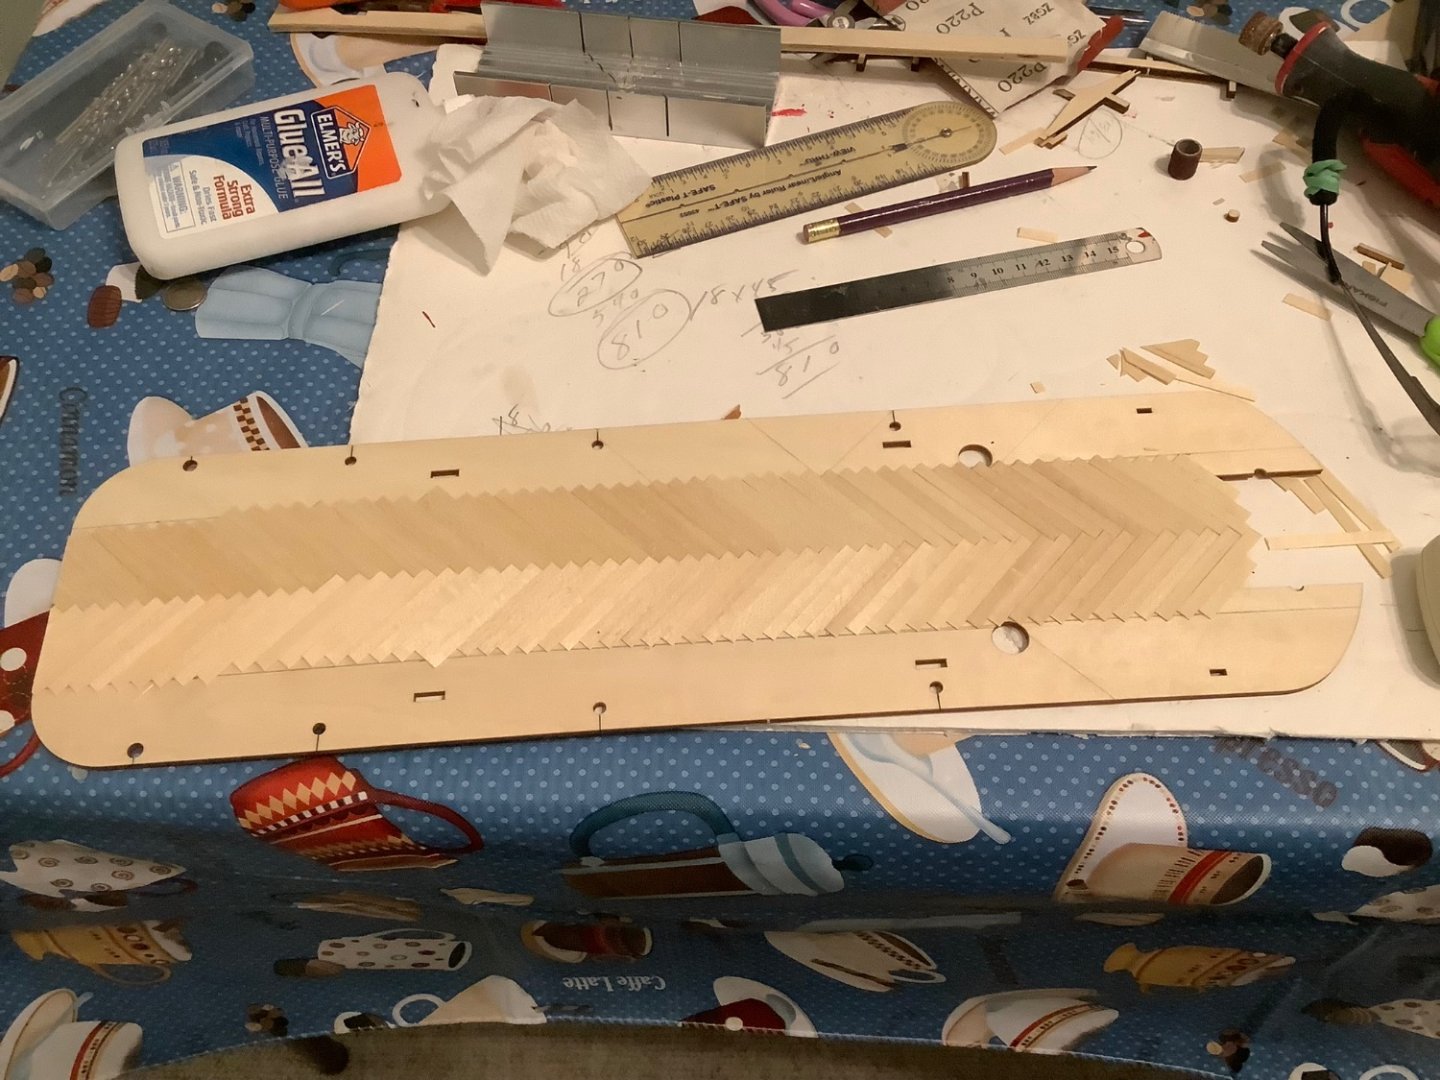
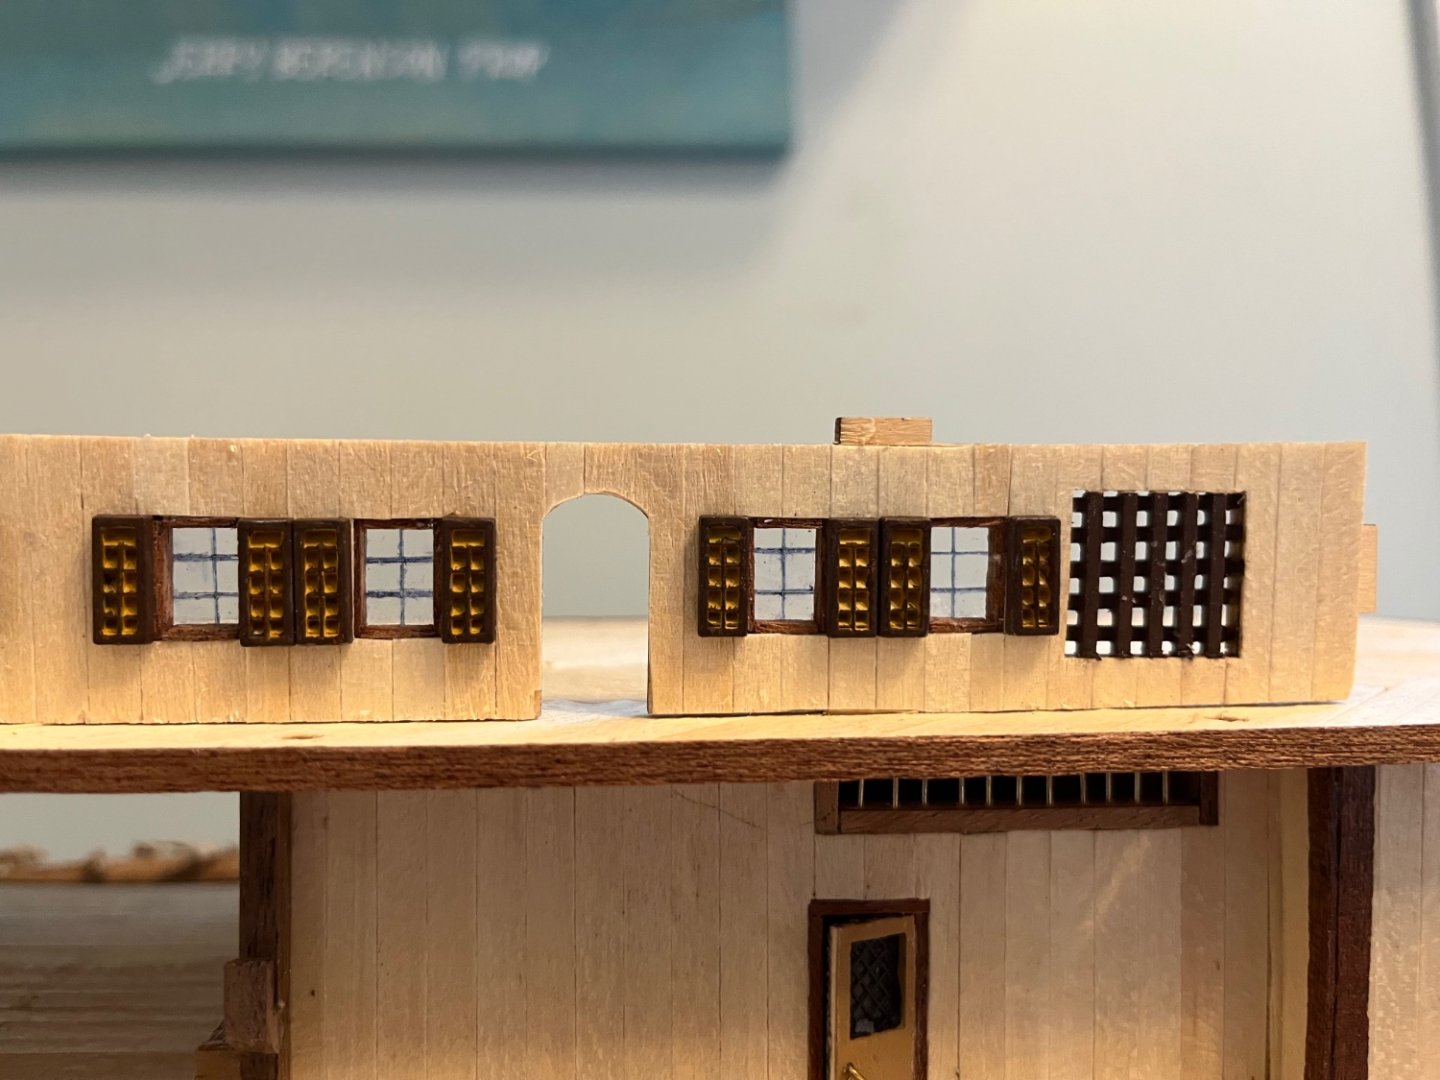
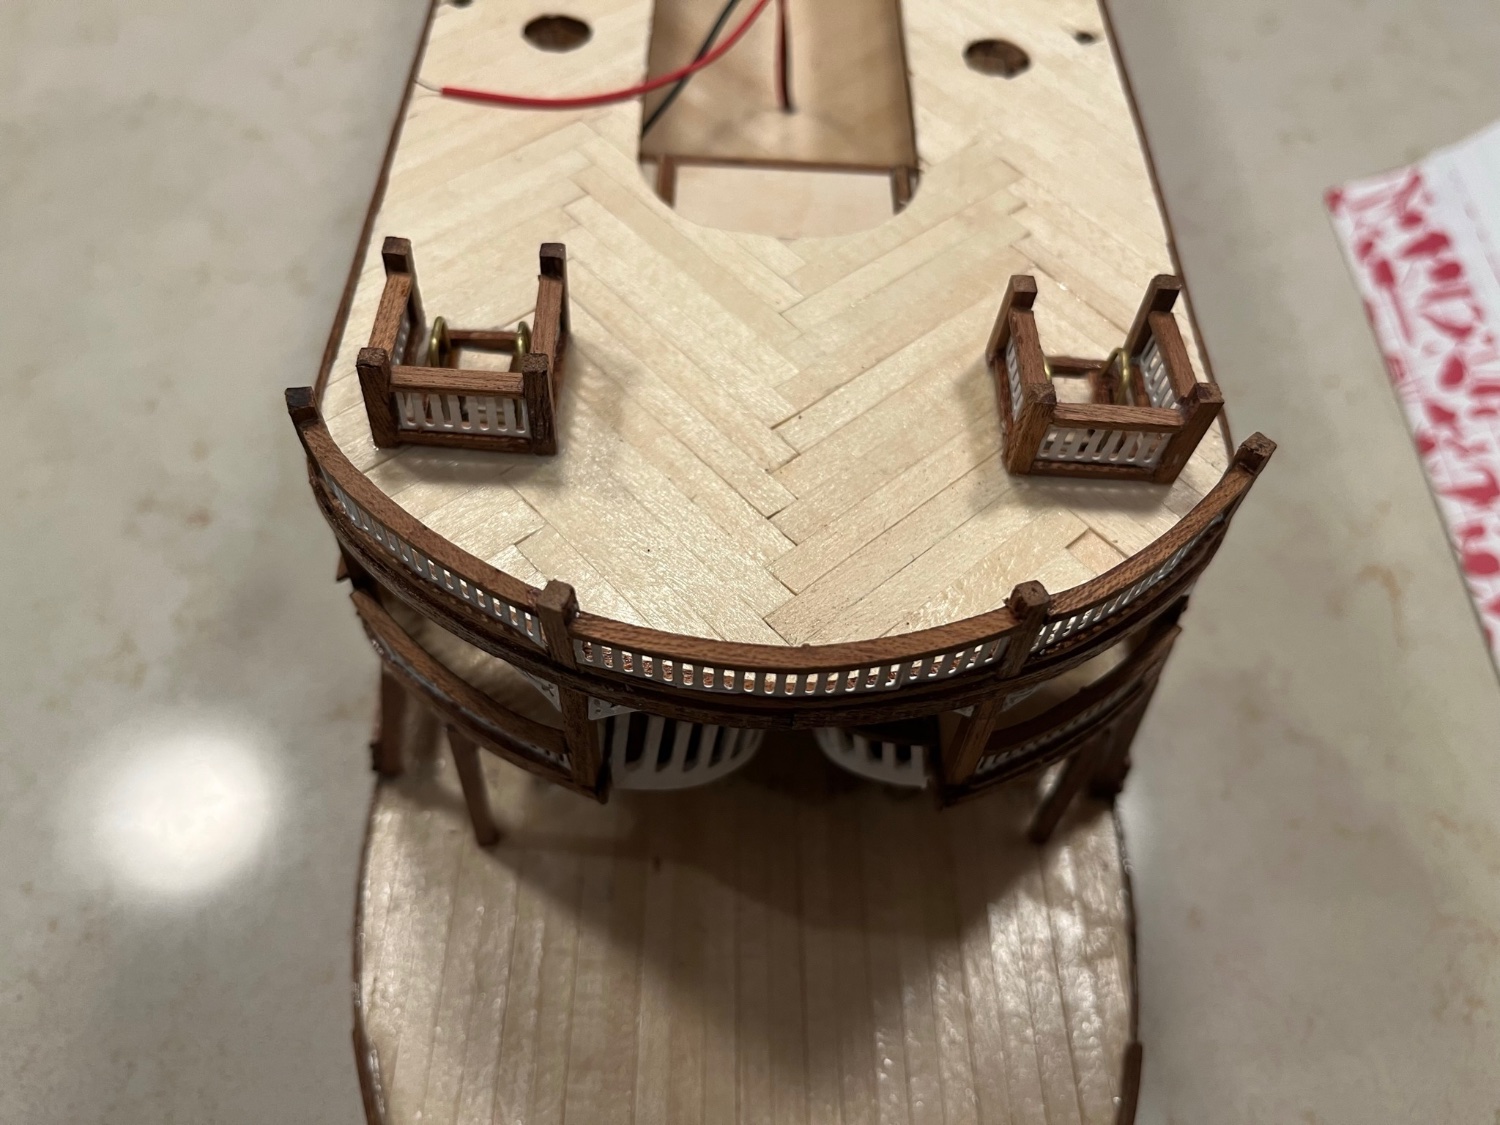
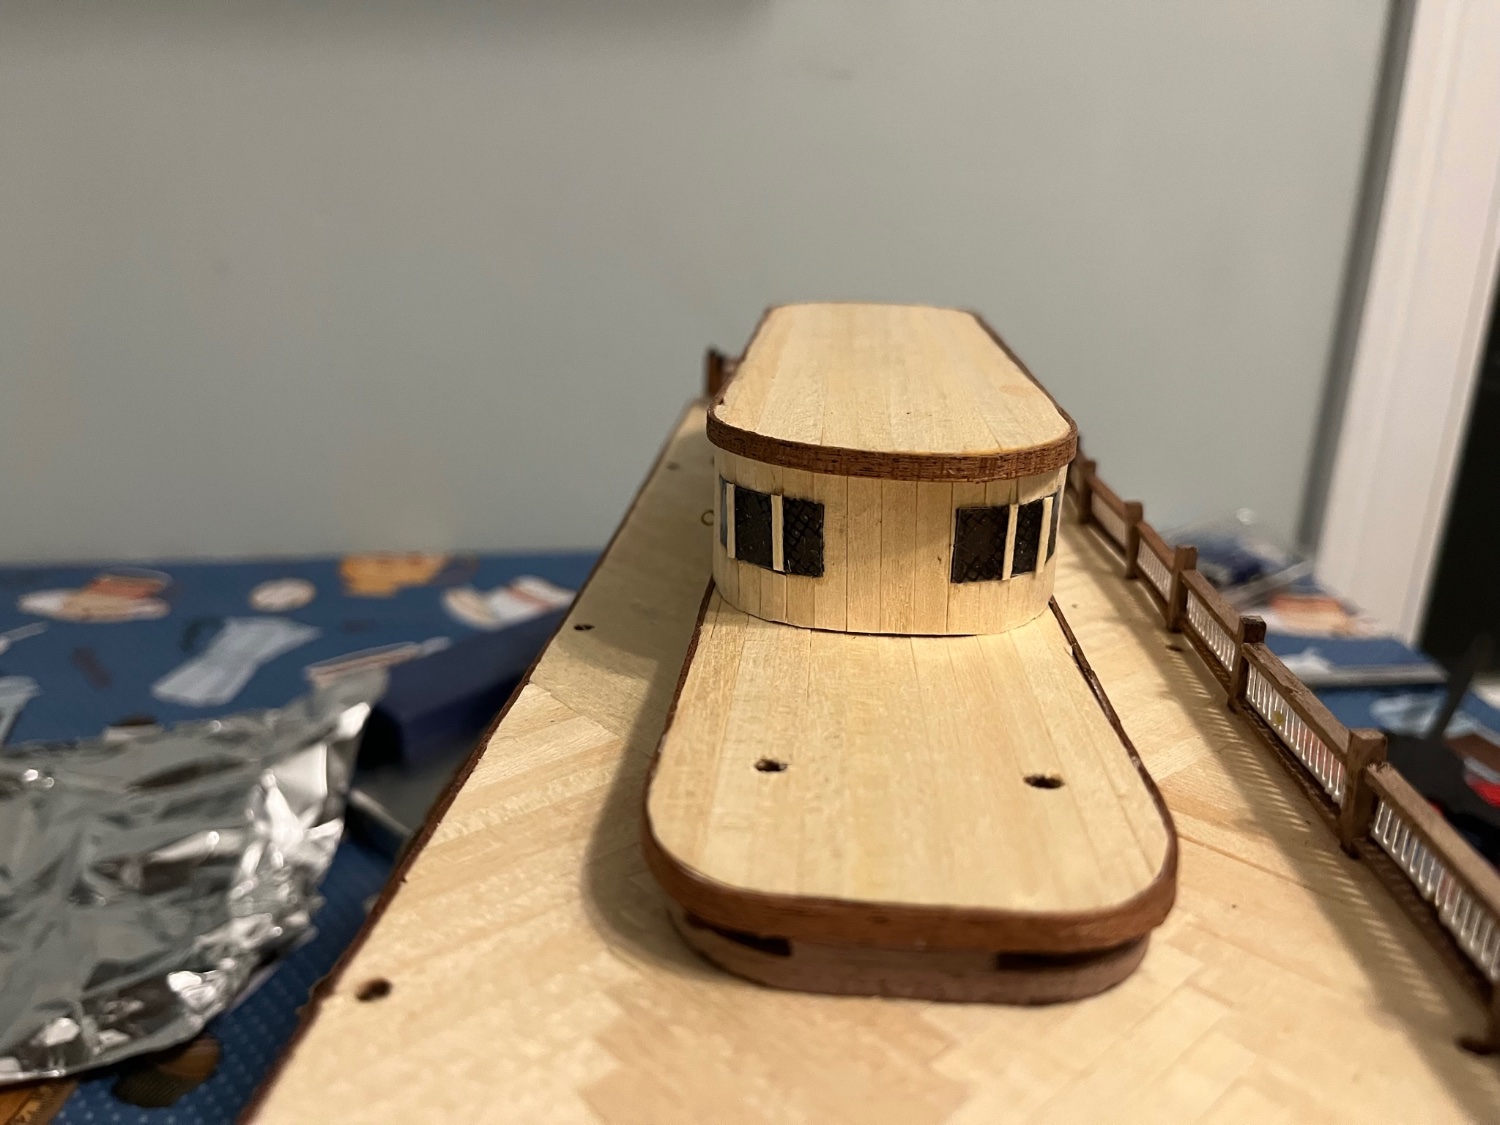
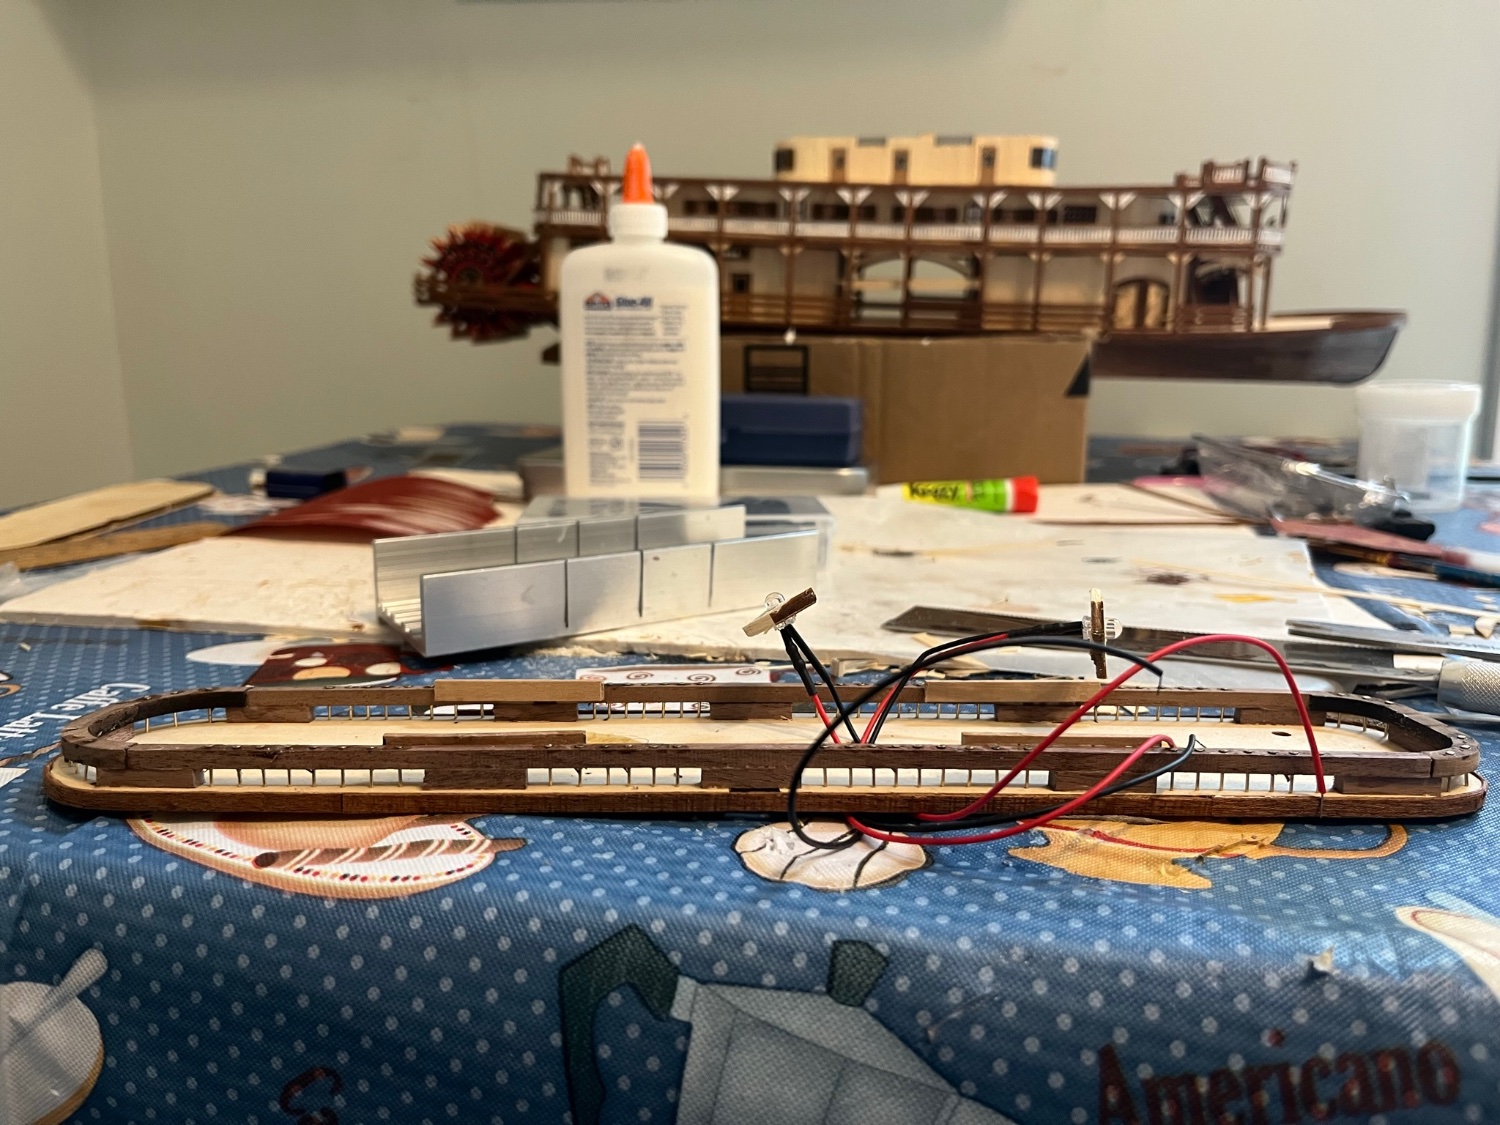
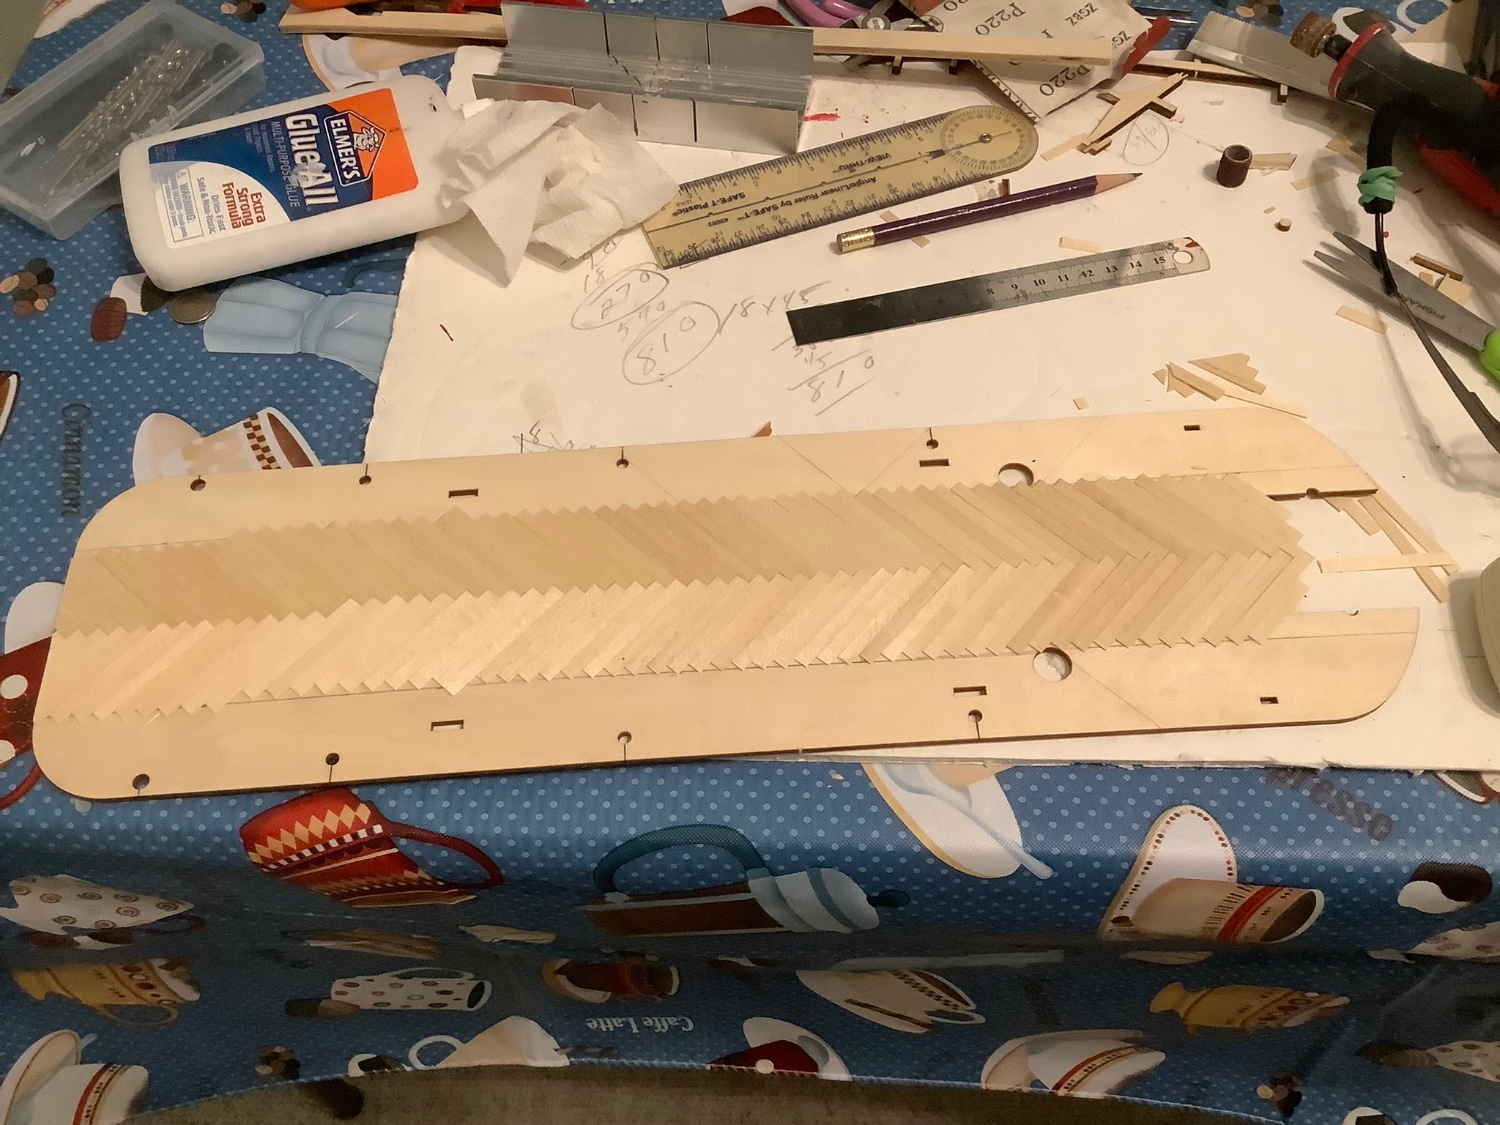
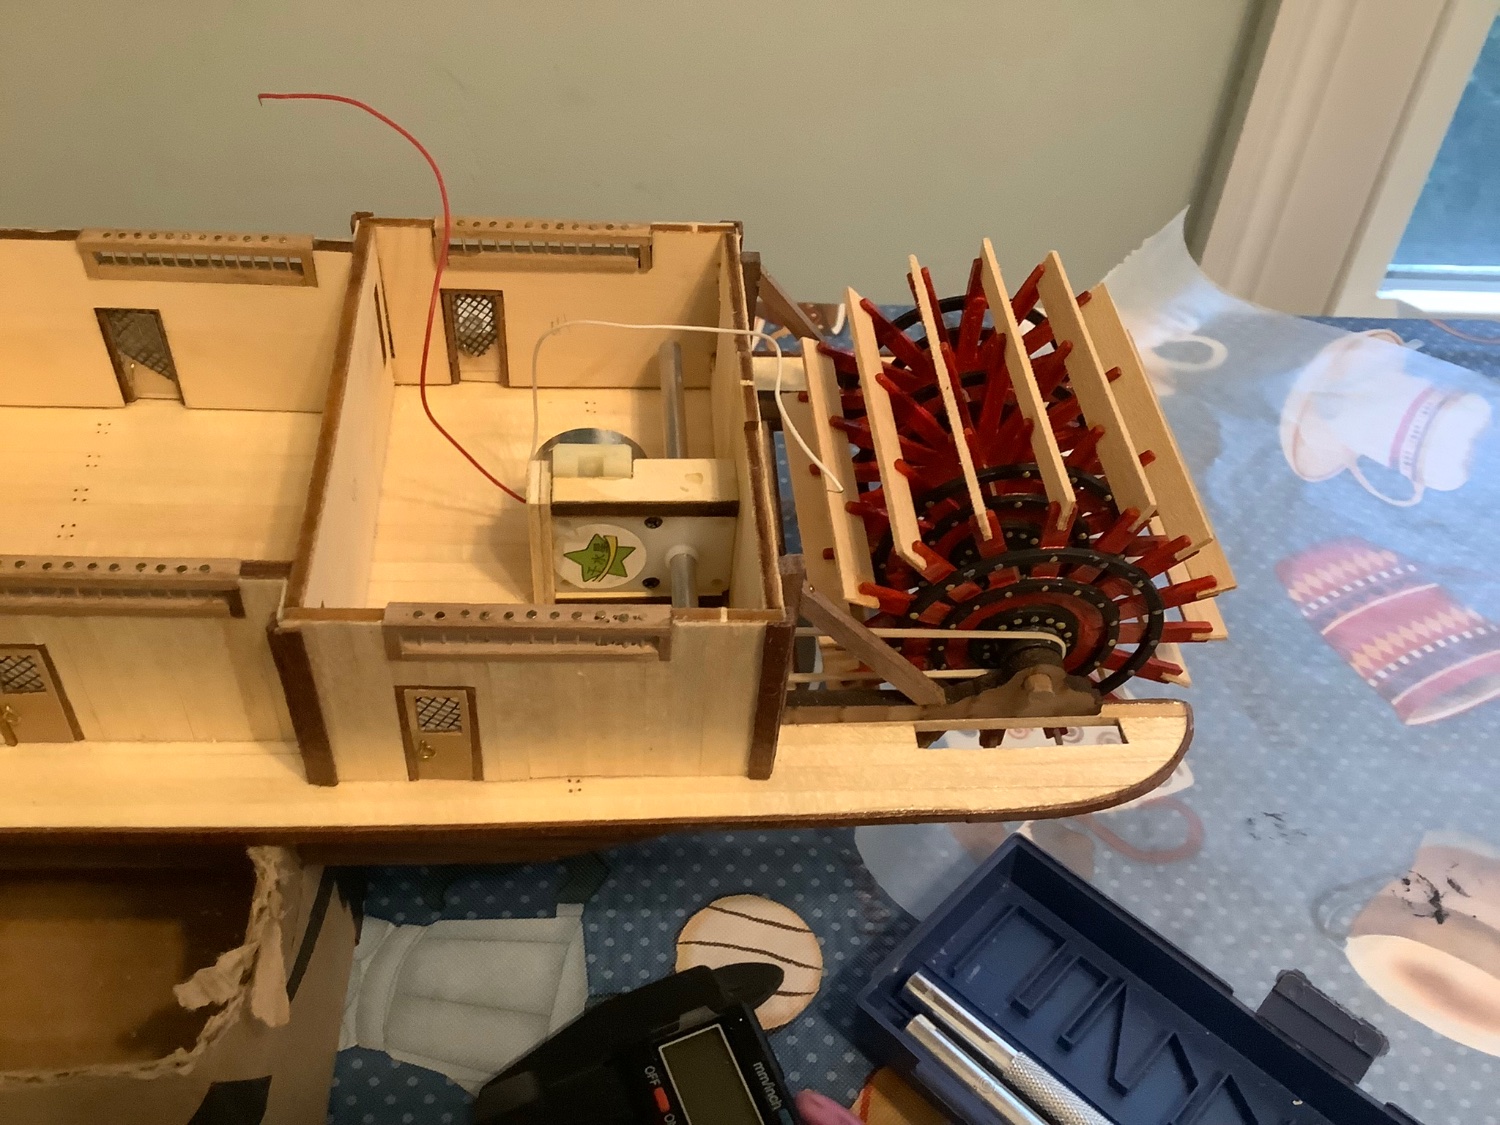
I bought a low speed motor on eBay and mounted it in order to turn the paddle wheel. I fabricated a wooden grooved wheel for the motor as well as one for the paddle wheel and glued them on to each. I am not skilled enough to make connecting rods so I will be using a rubber band . The windows on the 2nd deck were solid metal. I decided to use LEDs to light that deck so I discarded the metal ones and made my own from clear plastic which I scored and then inked in to make them look like separate panes. The superstructure was planked similar to the main deck structures. I made the vents, stained them and fit them in their respective openings. The paddle wheel took several coats of red and black paint along with brass for the rivets. I planked the deck in a herringbone pattern.


- Bryan Woods, Cathead, GrandpaPhil and 2 others
-
5
-
Thanks Bob, yes I try to be frugal with the wood
-

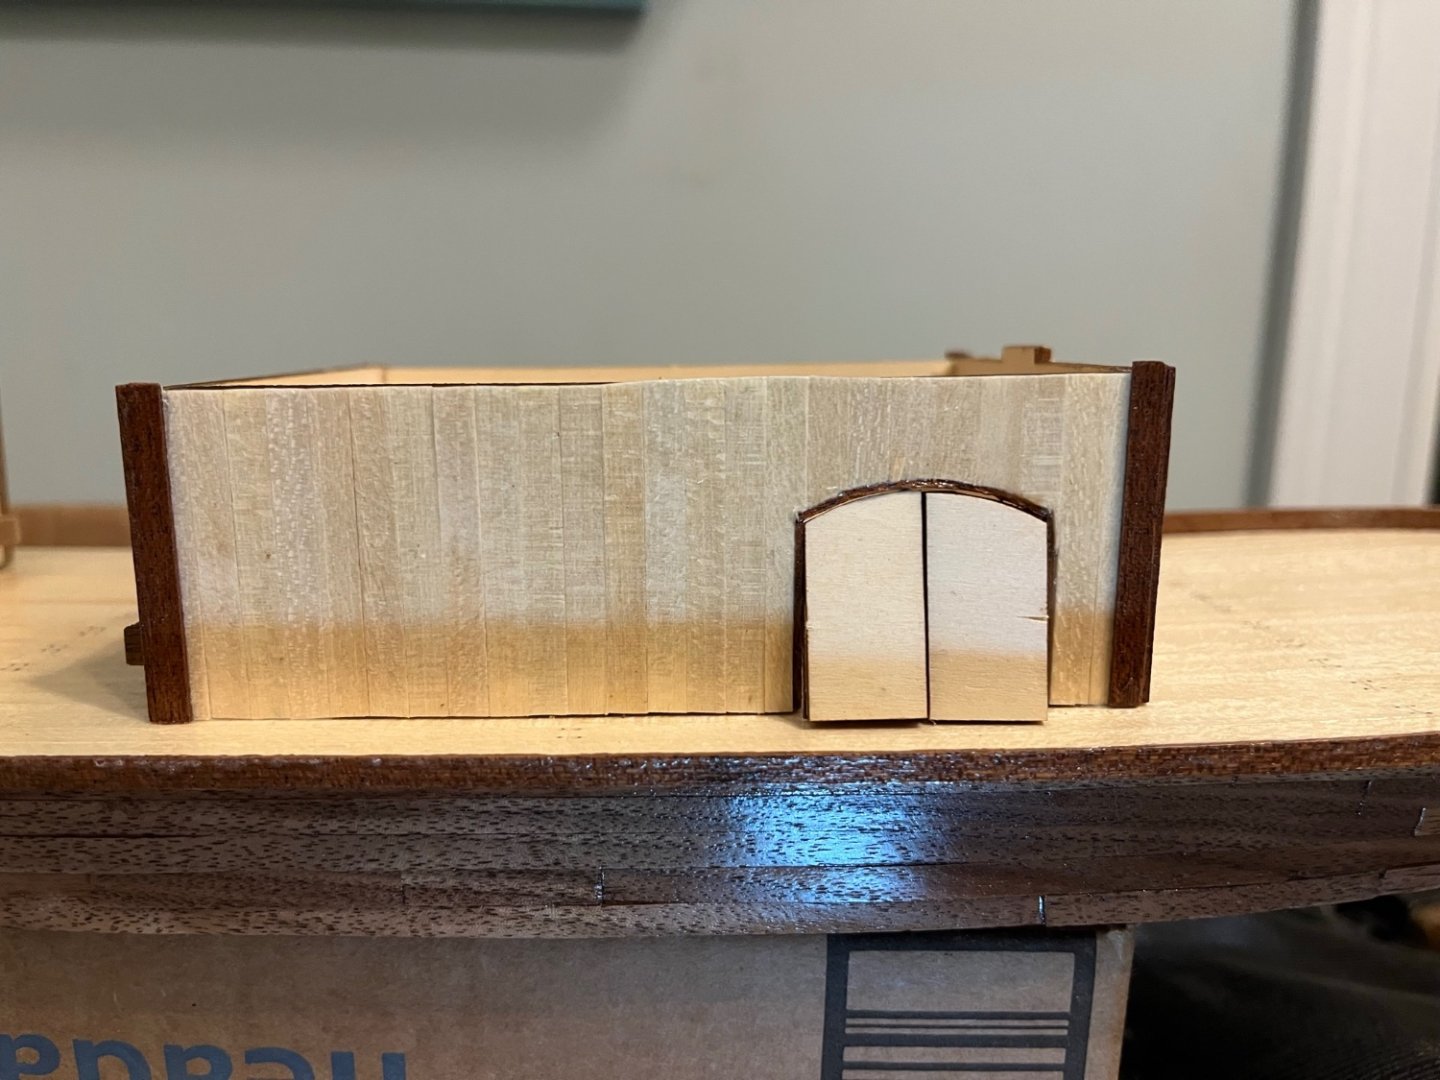
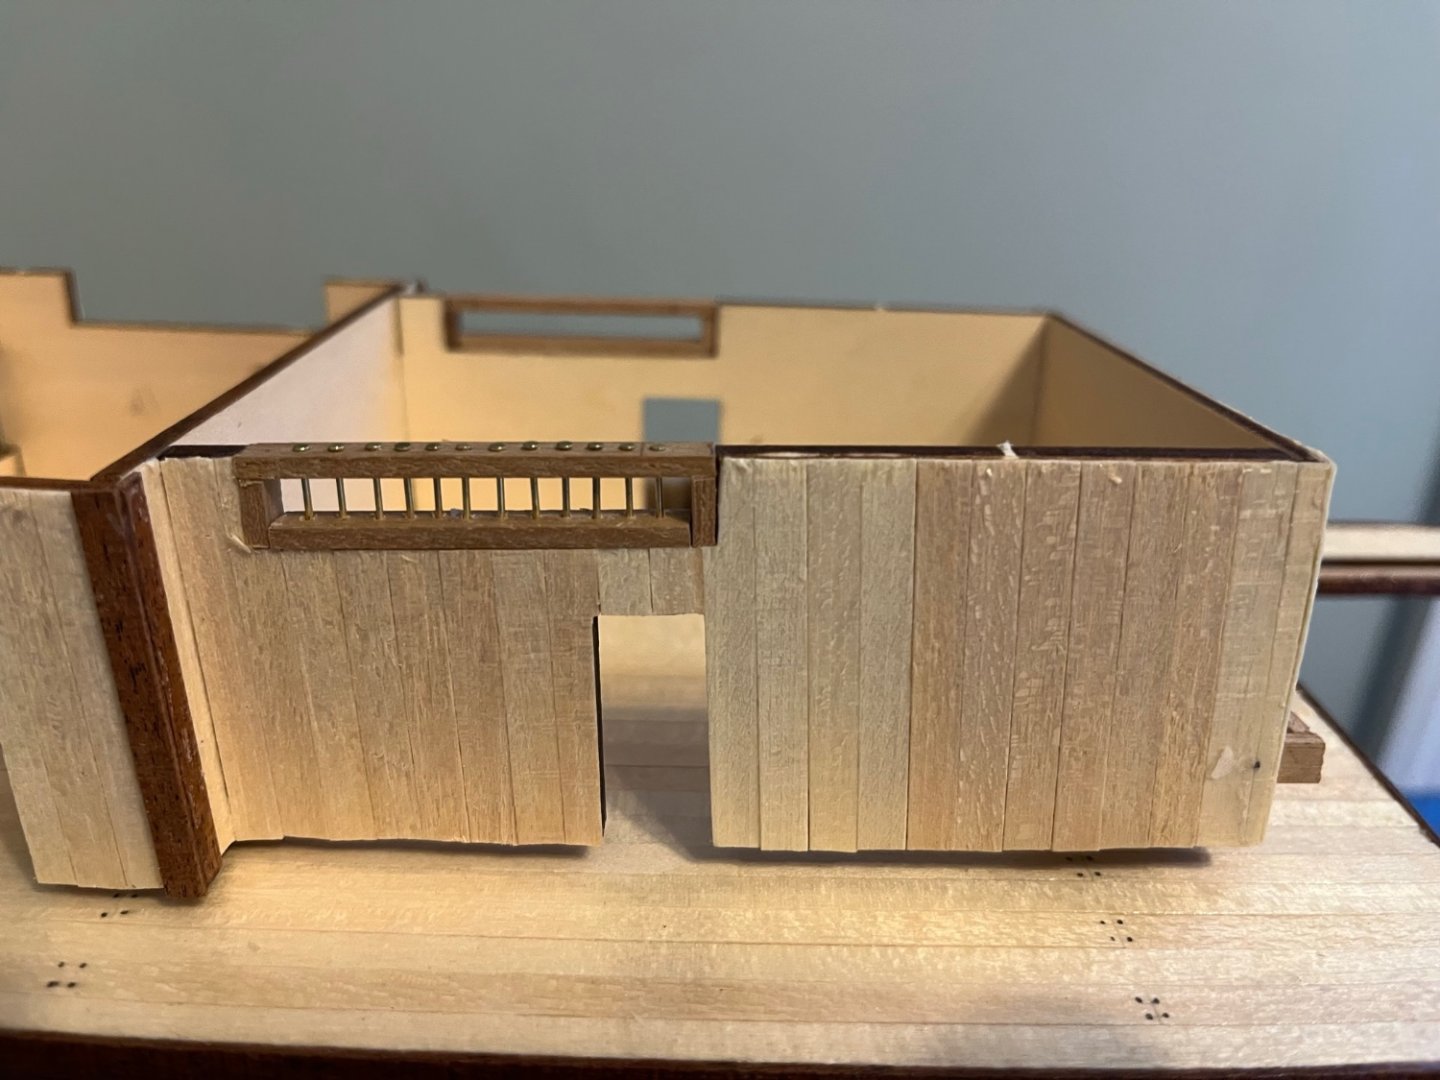
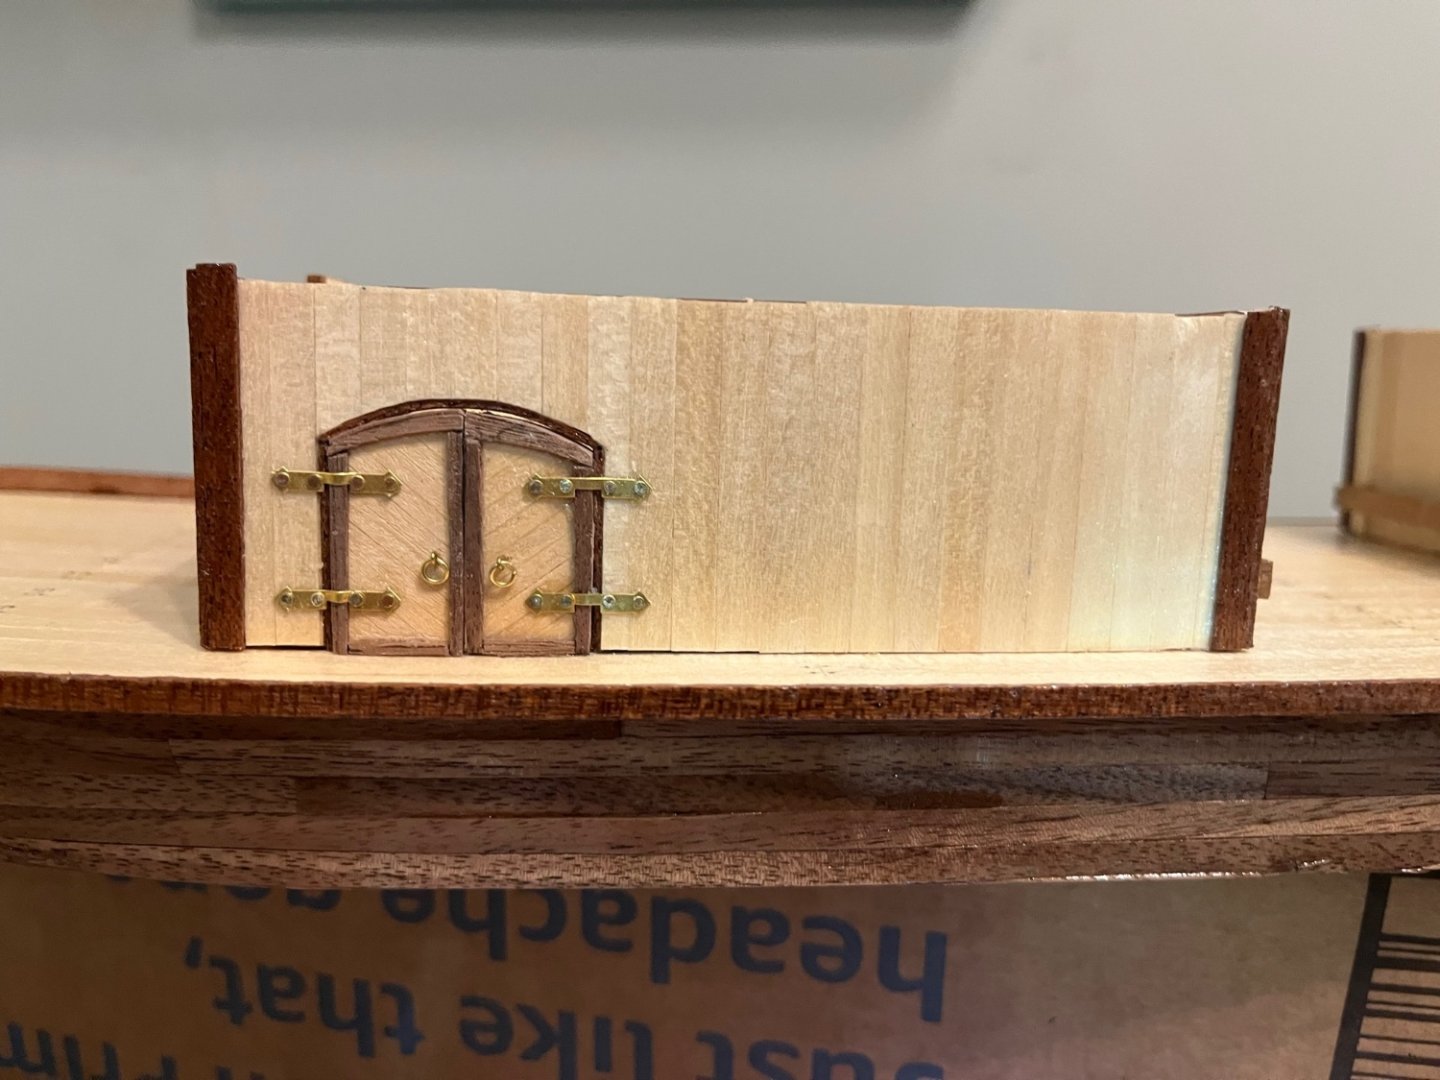
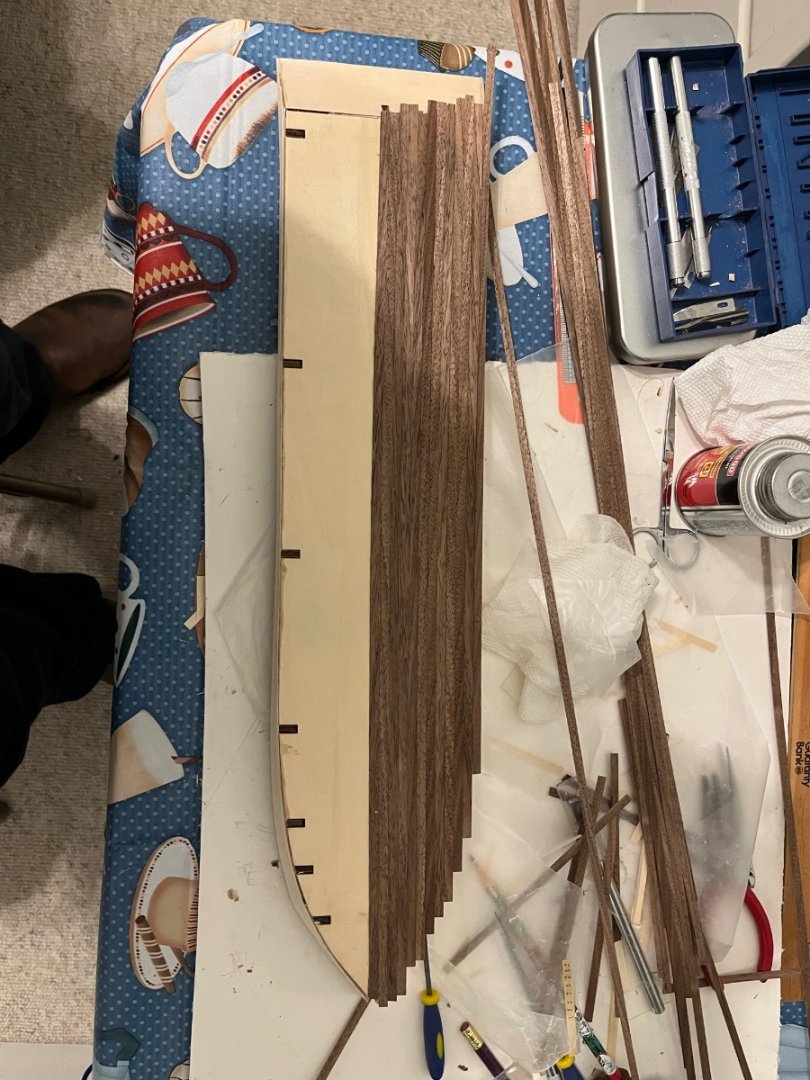
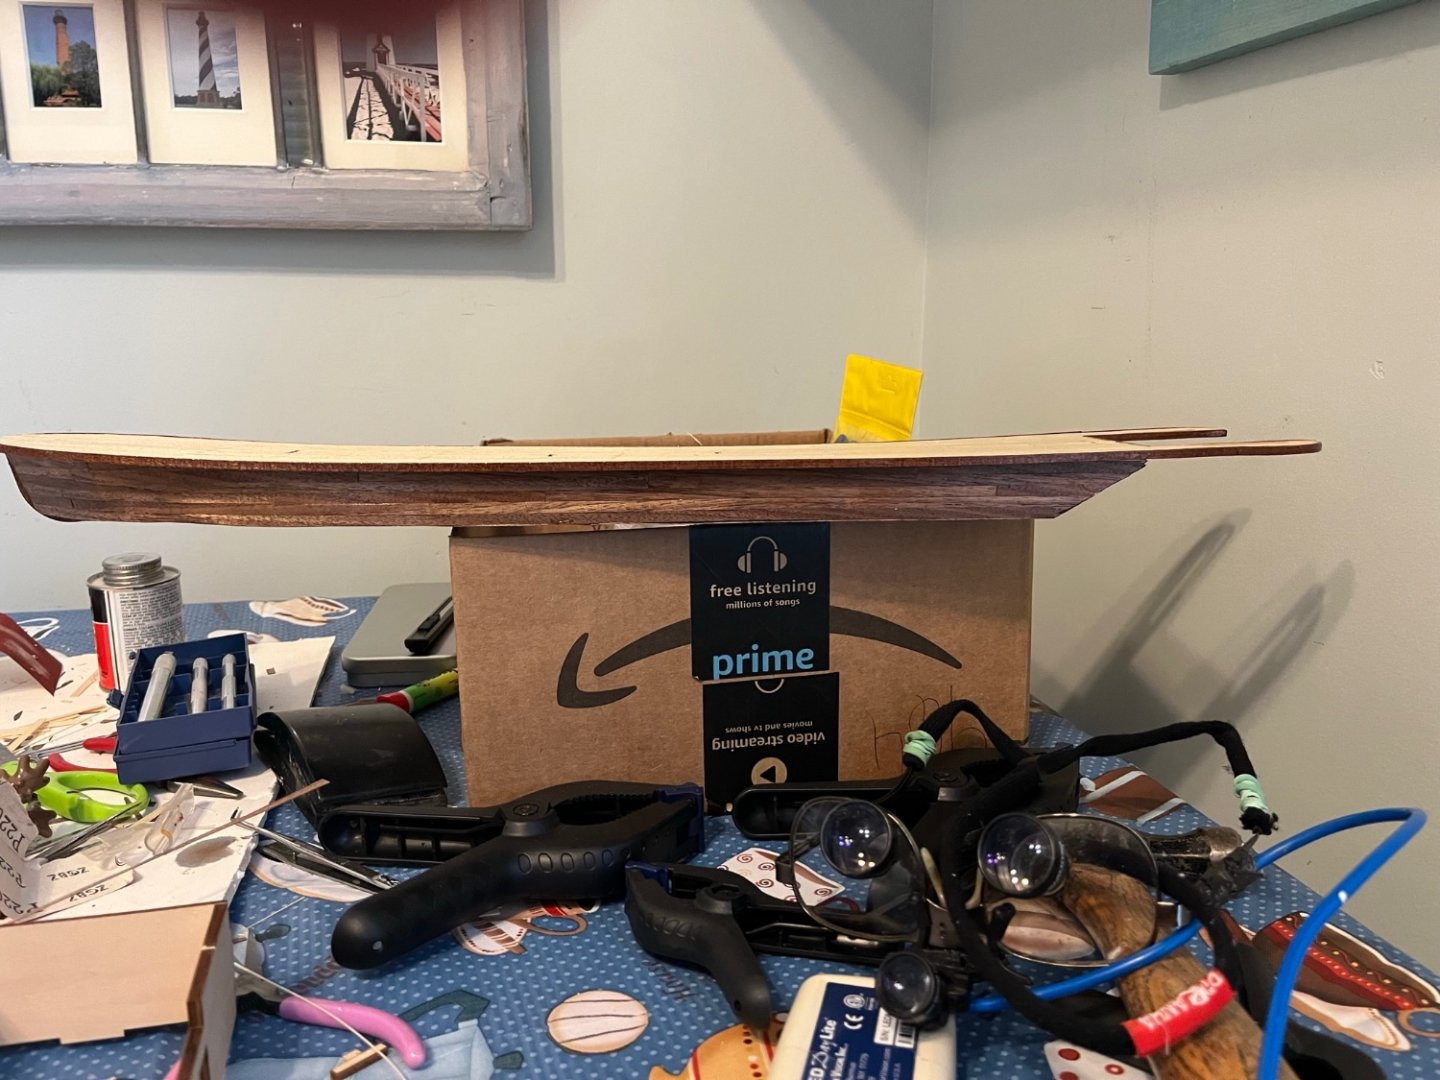
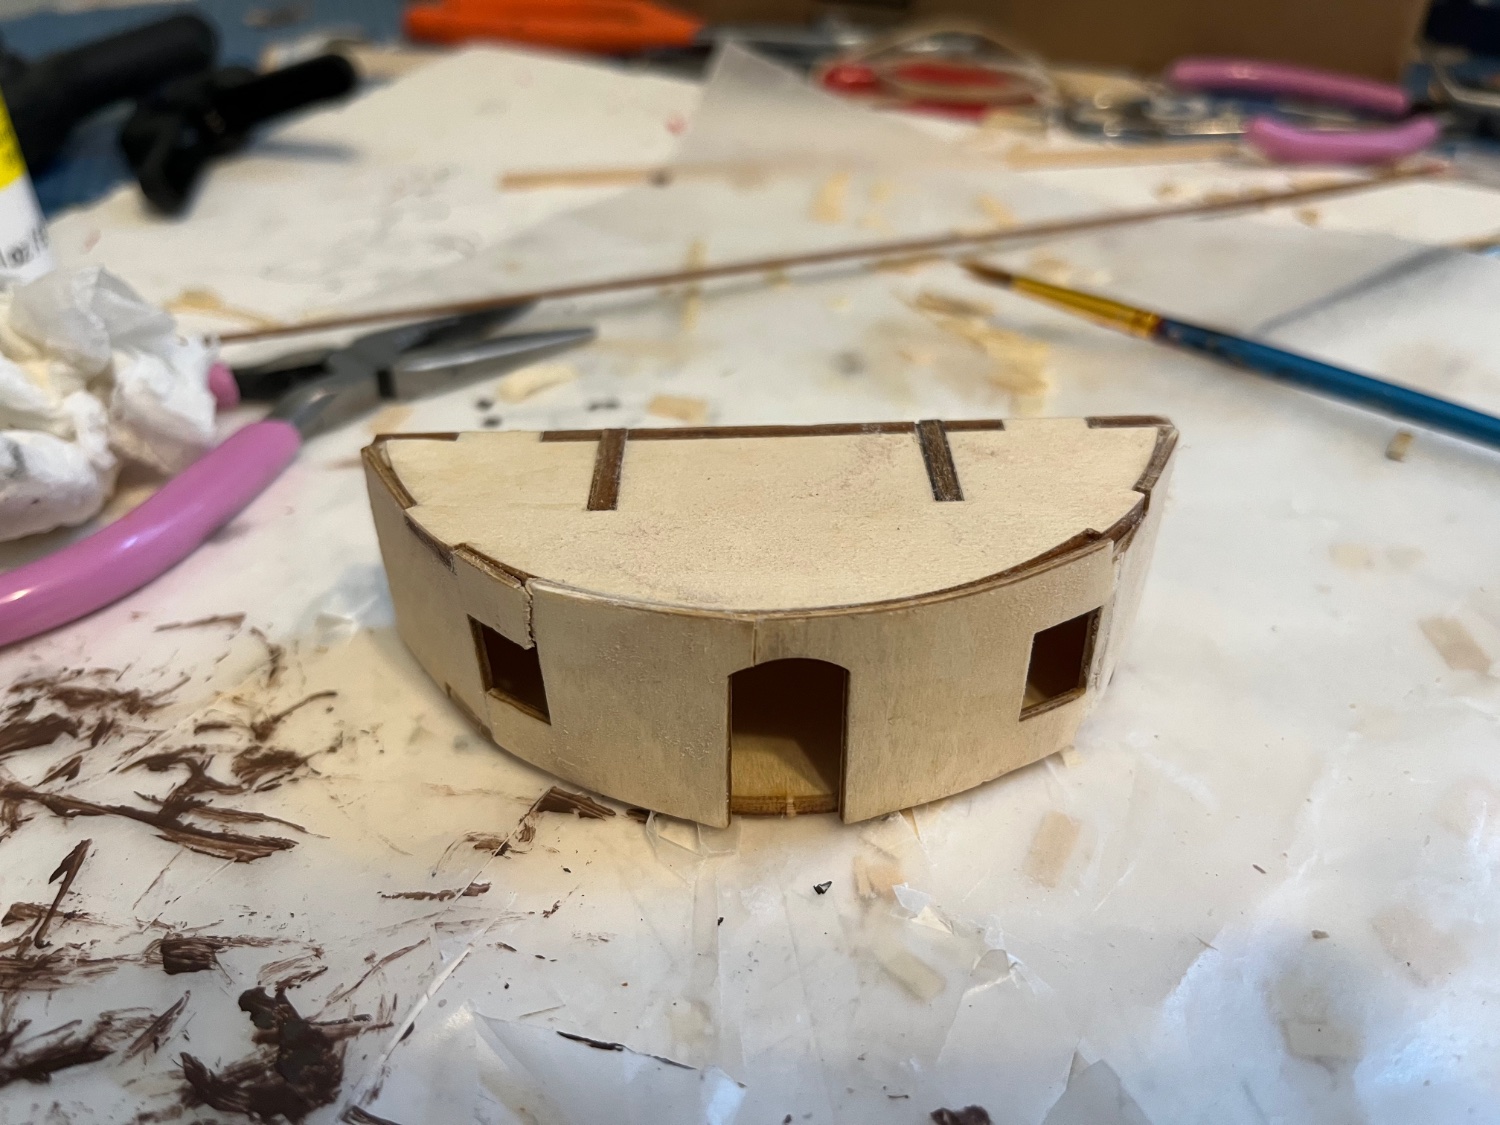
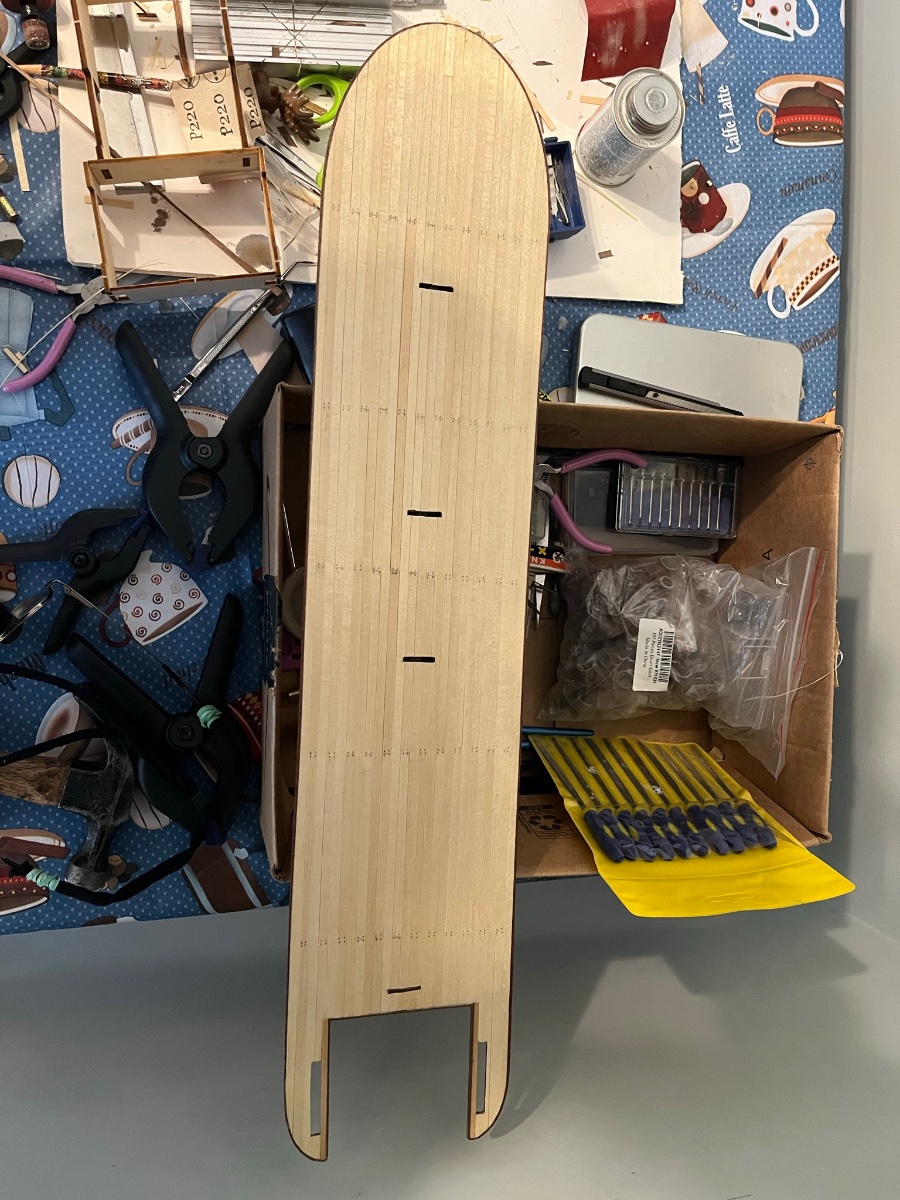
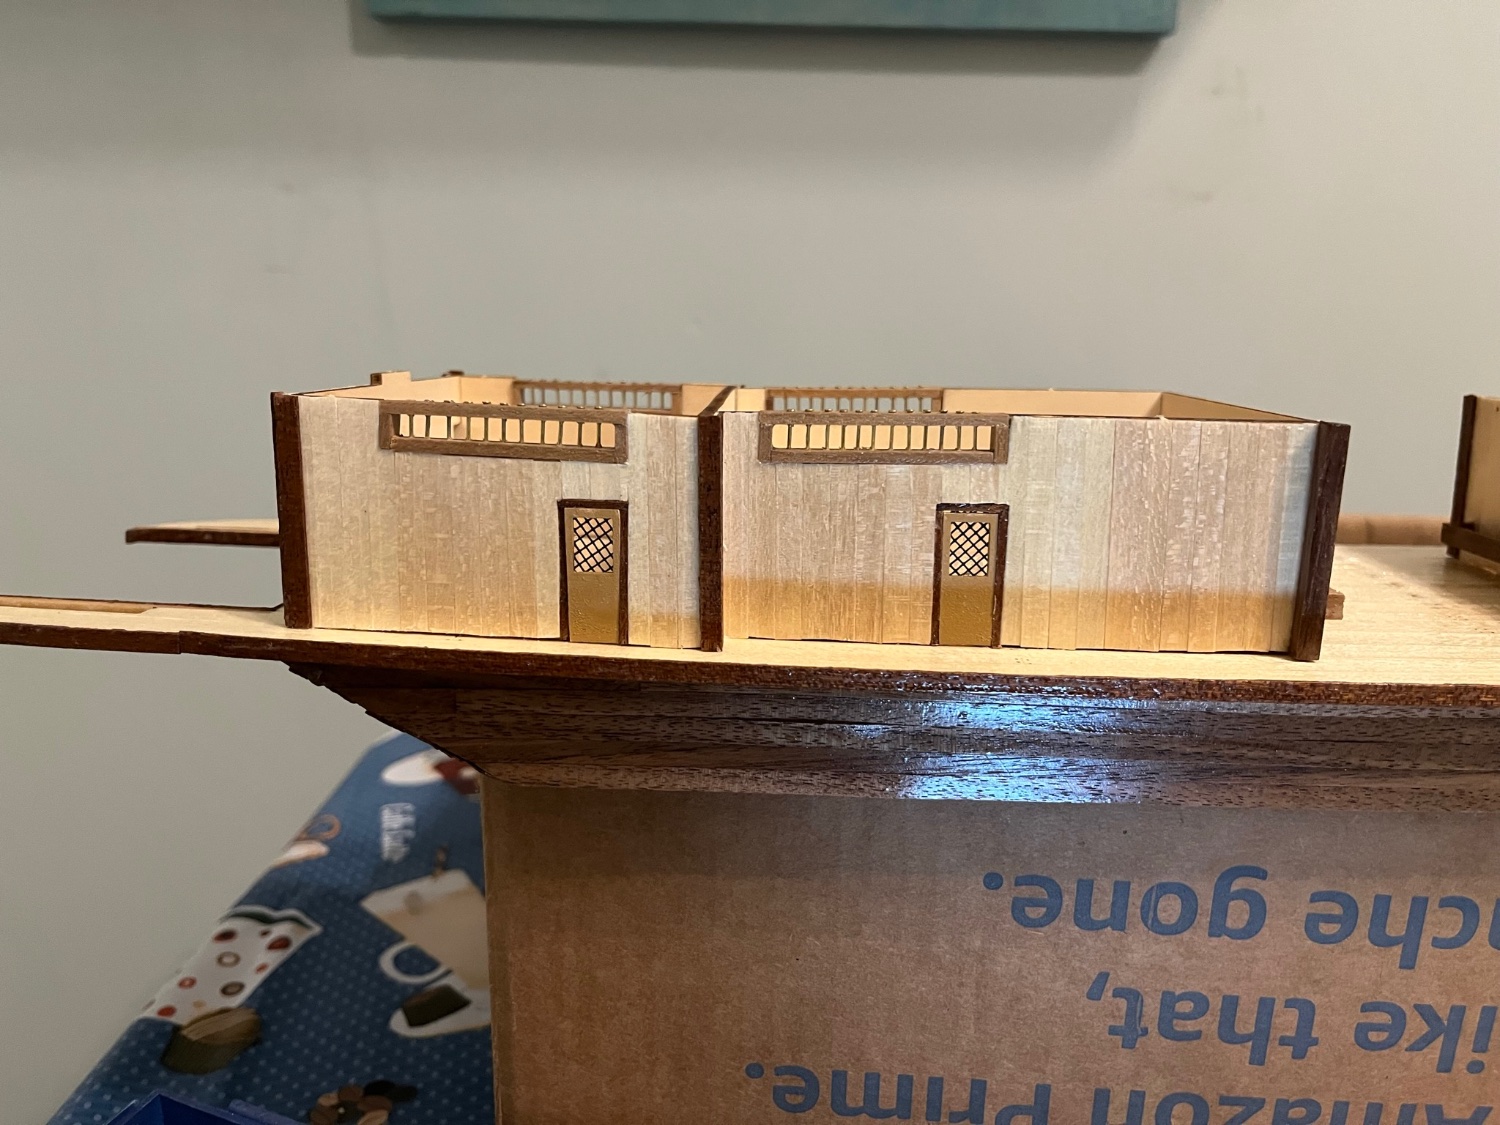
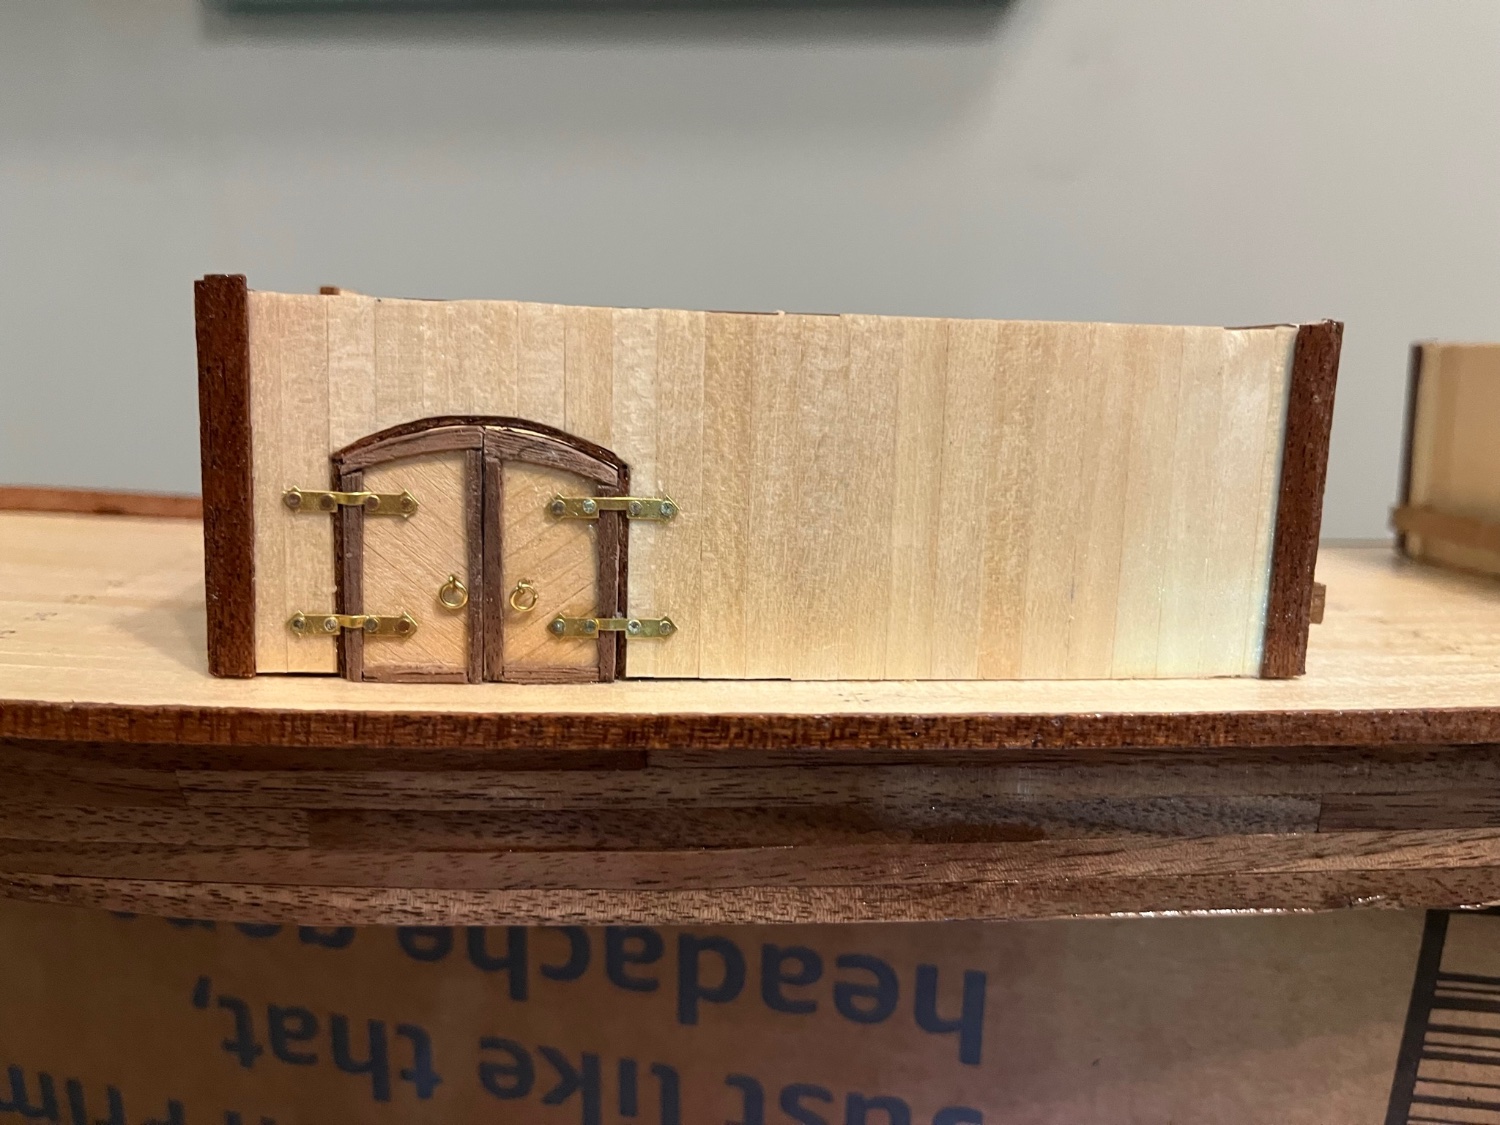
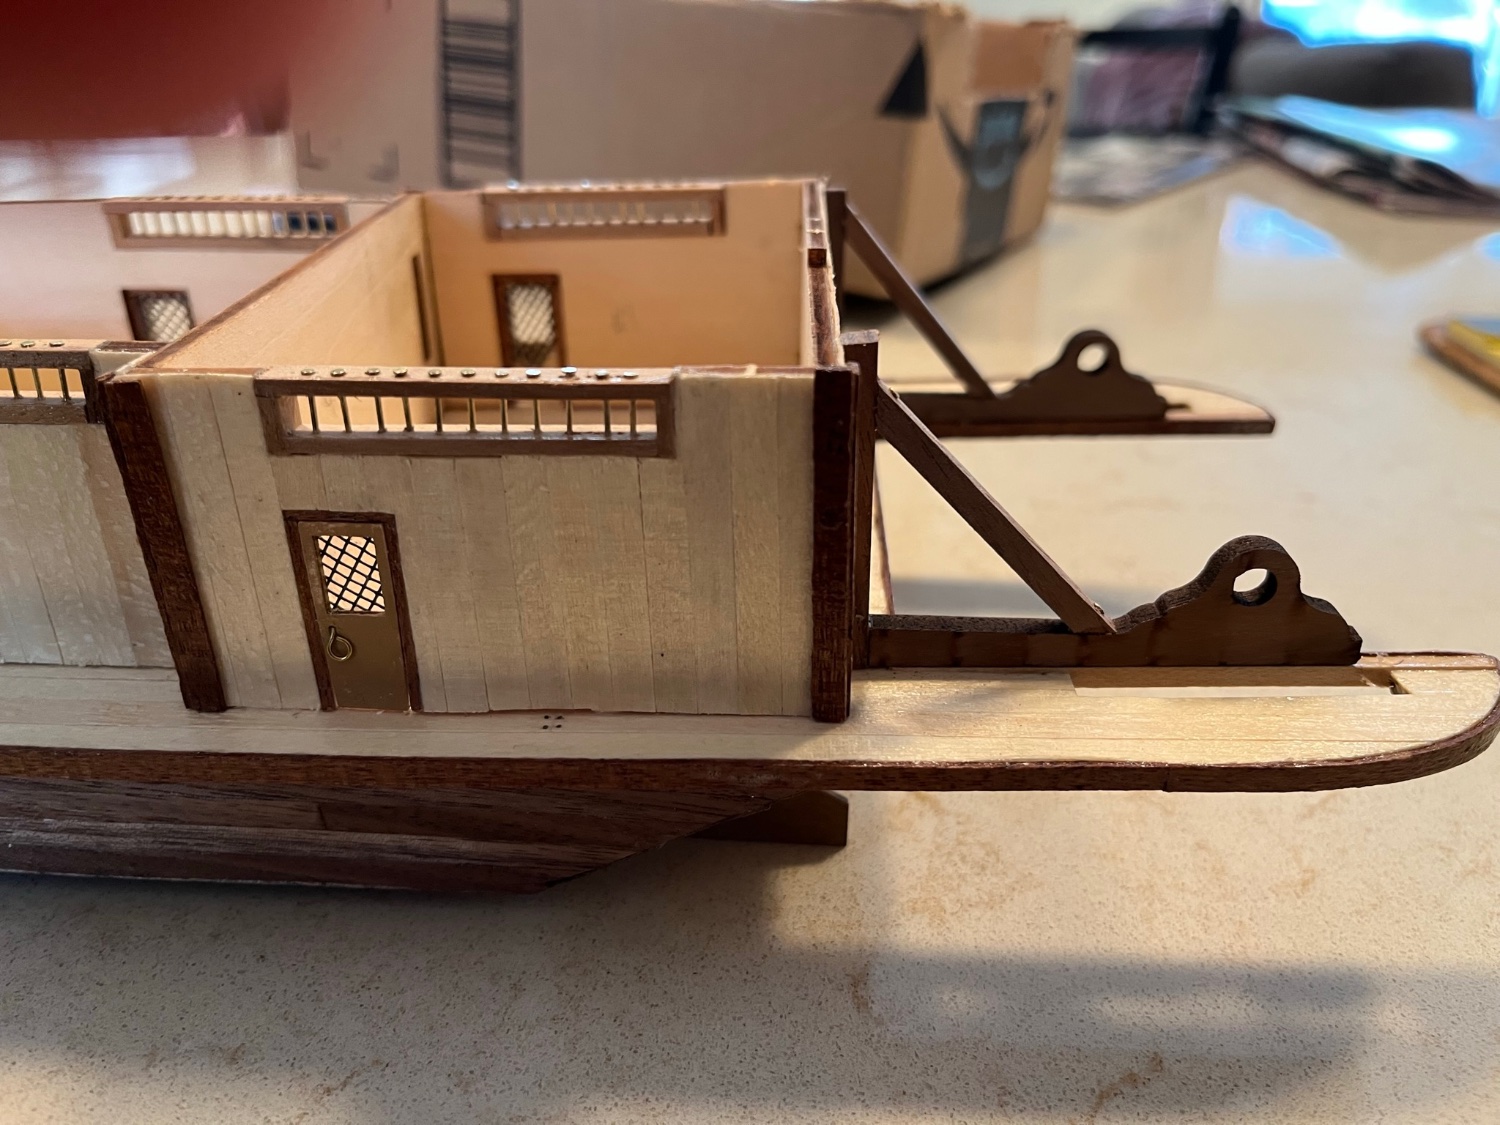
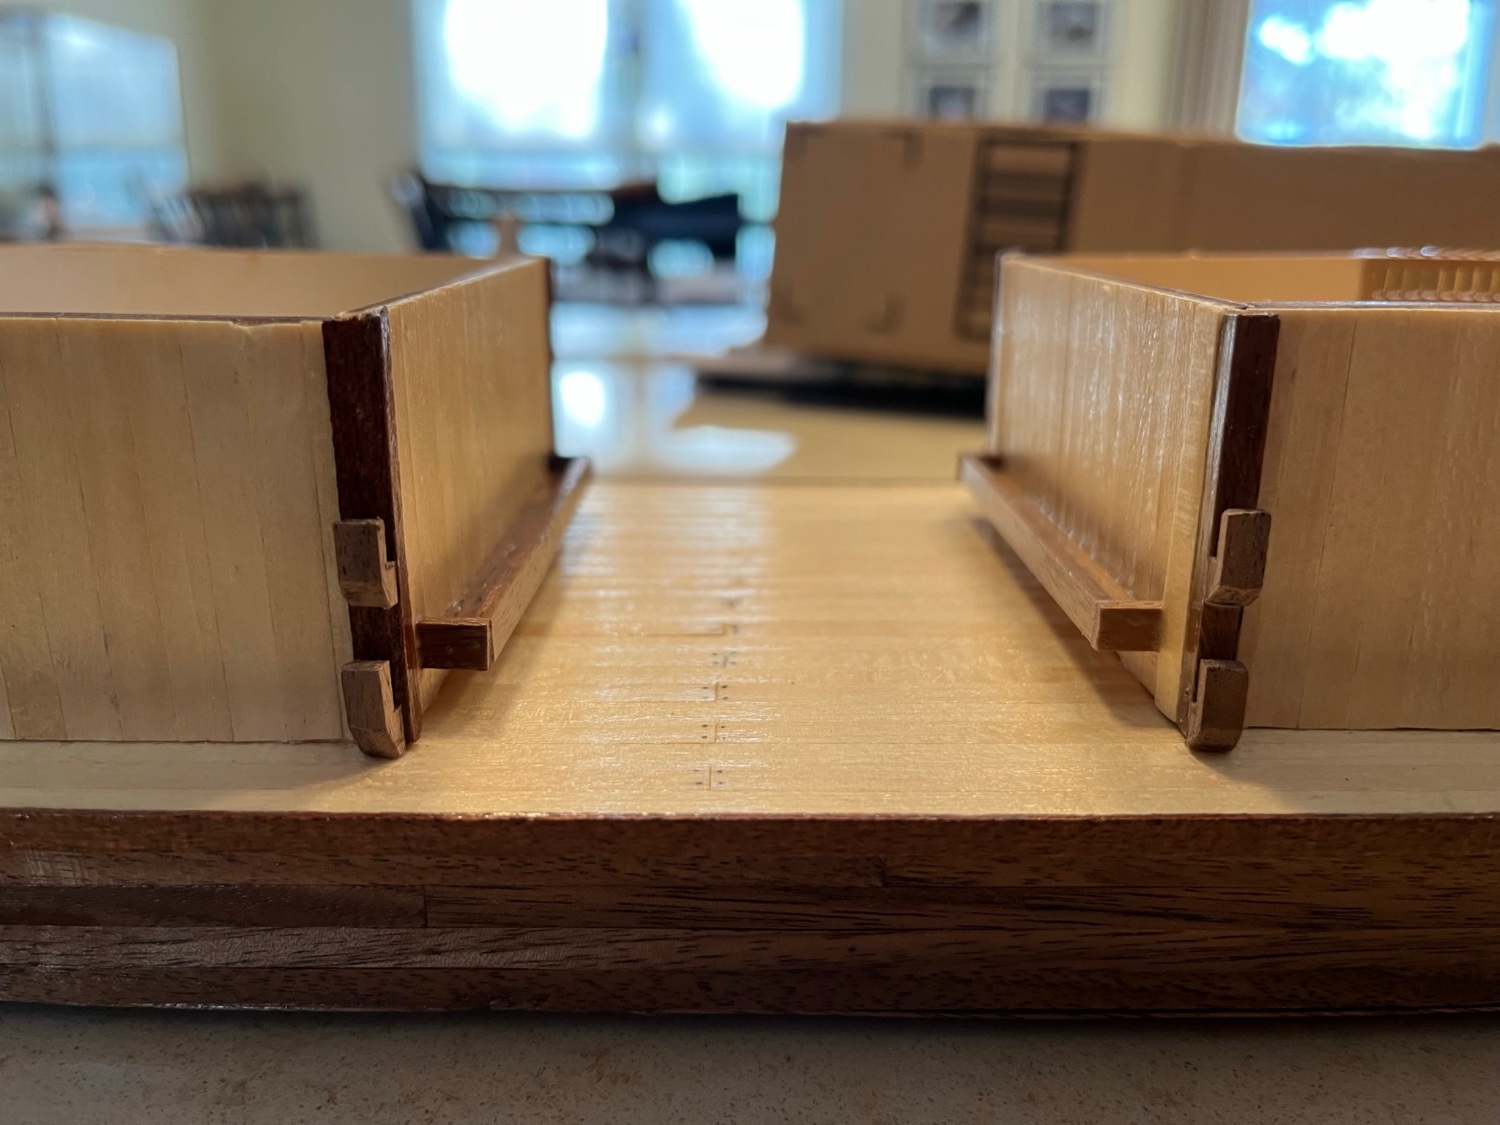
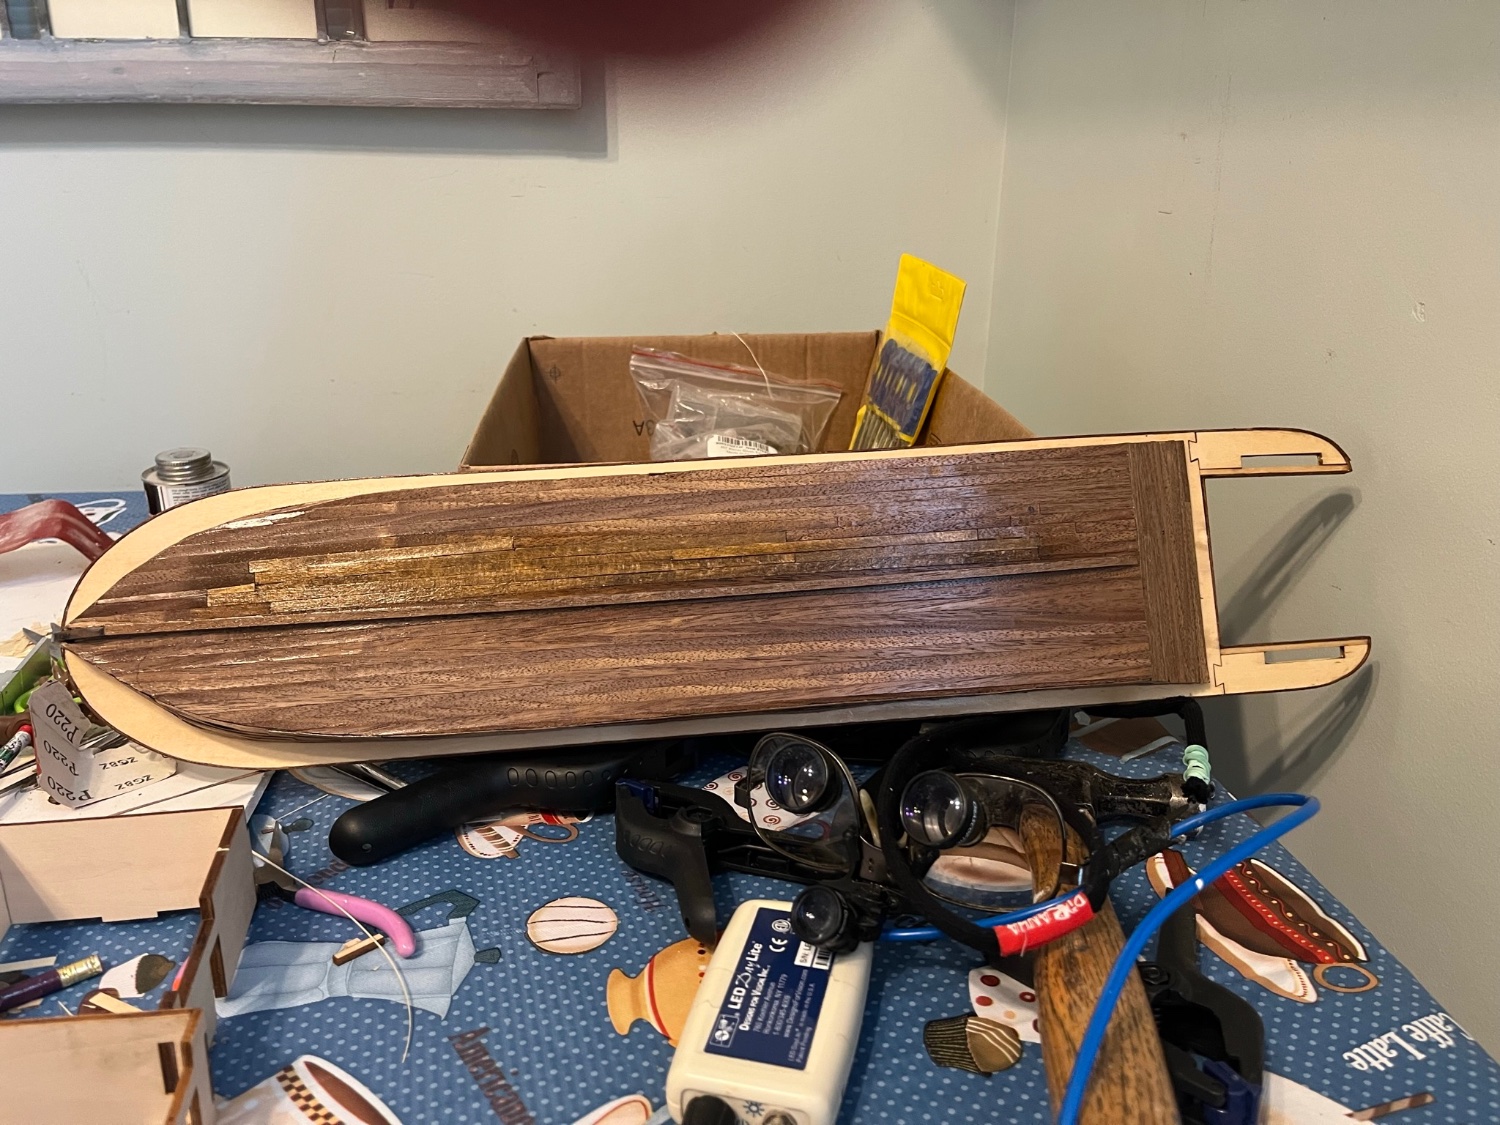
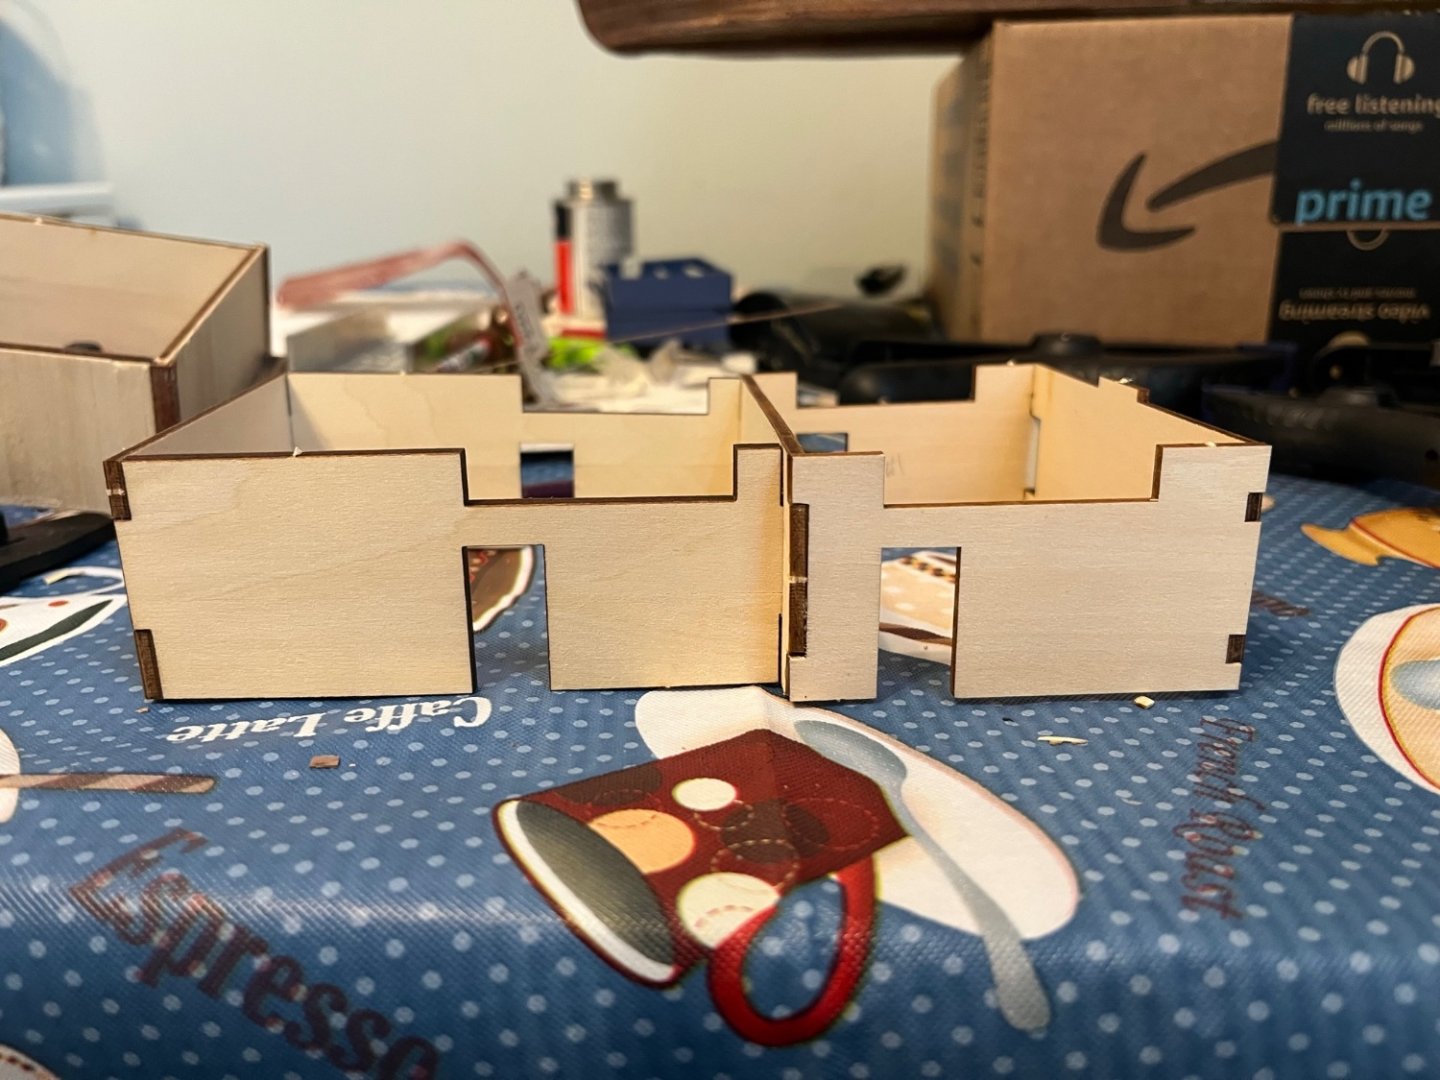 I planked the hull and then planked the deck. Next was the building and “shingling”of the superstructure.I framed the doorways and made the vents for the stables. Pins were nailed vertically inside the vents and the doors were mounted. Throughs for the animals were made as well as hangers for the retaining bars. The paddle wheel brackets were mounted.
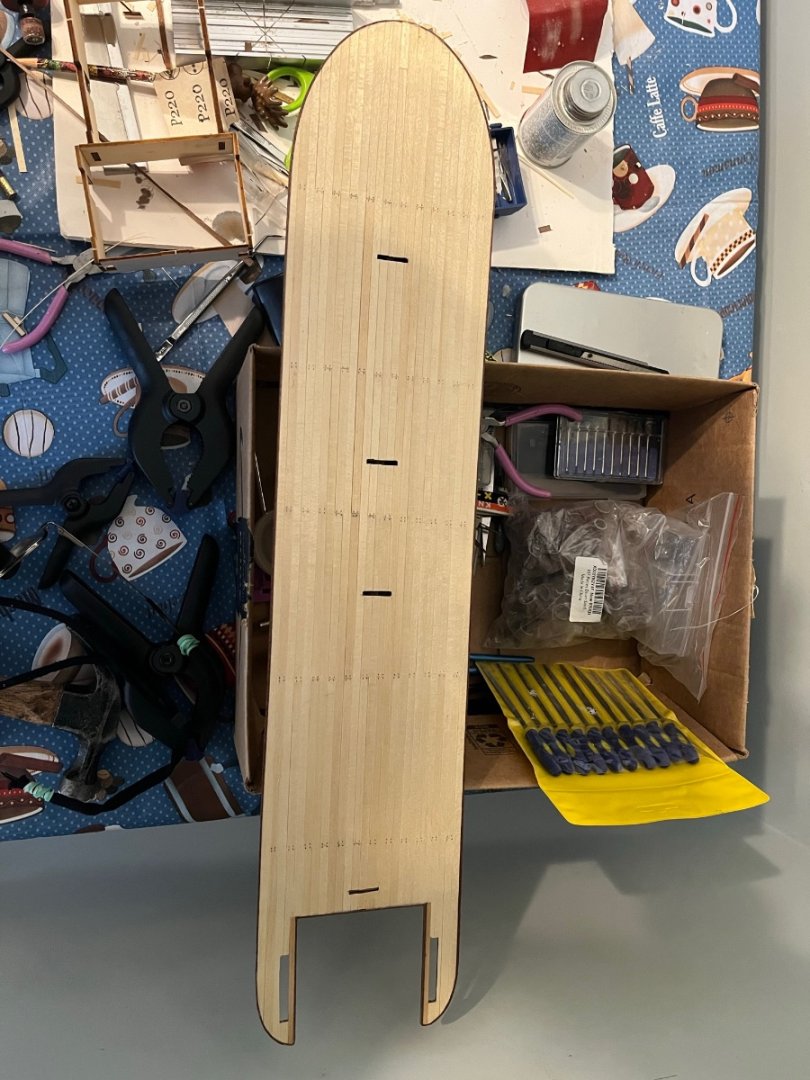


- ccoyle, Cathead, GrandpaPhil and 3 others
-
6
-

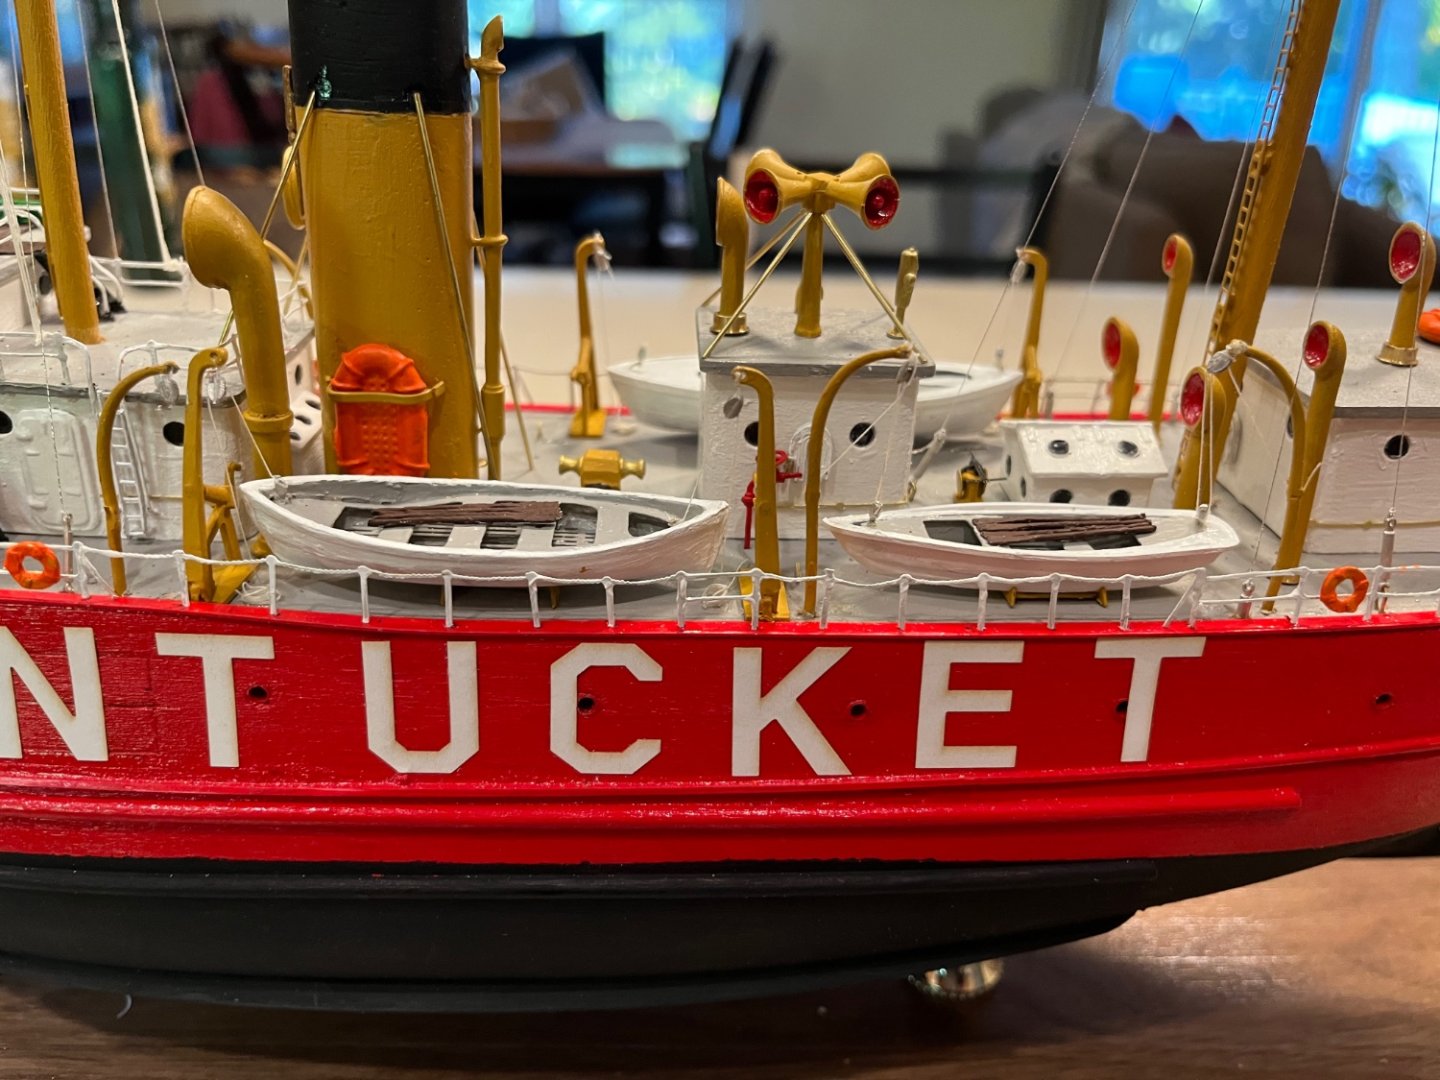
 I am posting a blog documenting my build of the Mississippi riverboat “King of the Mississippi “. I bought a kit of the older version of the boat and decided to motorize and electrify it. I modified the kit using plans I found on the internet for Artesania Latina’s new version of the riverboat which allows for a motor and LED wiring. I have previously posted and built 2 Bluejacket kits, USS Constitution and the Nantucket Lightship. I hope you find my blog interesting. Jerry
- GrandpaPhil, ccoyle, Knocklouder and 3 others
-
6
-
Thank you both for your ideas and help. Jerry
-
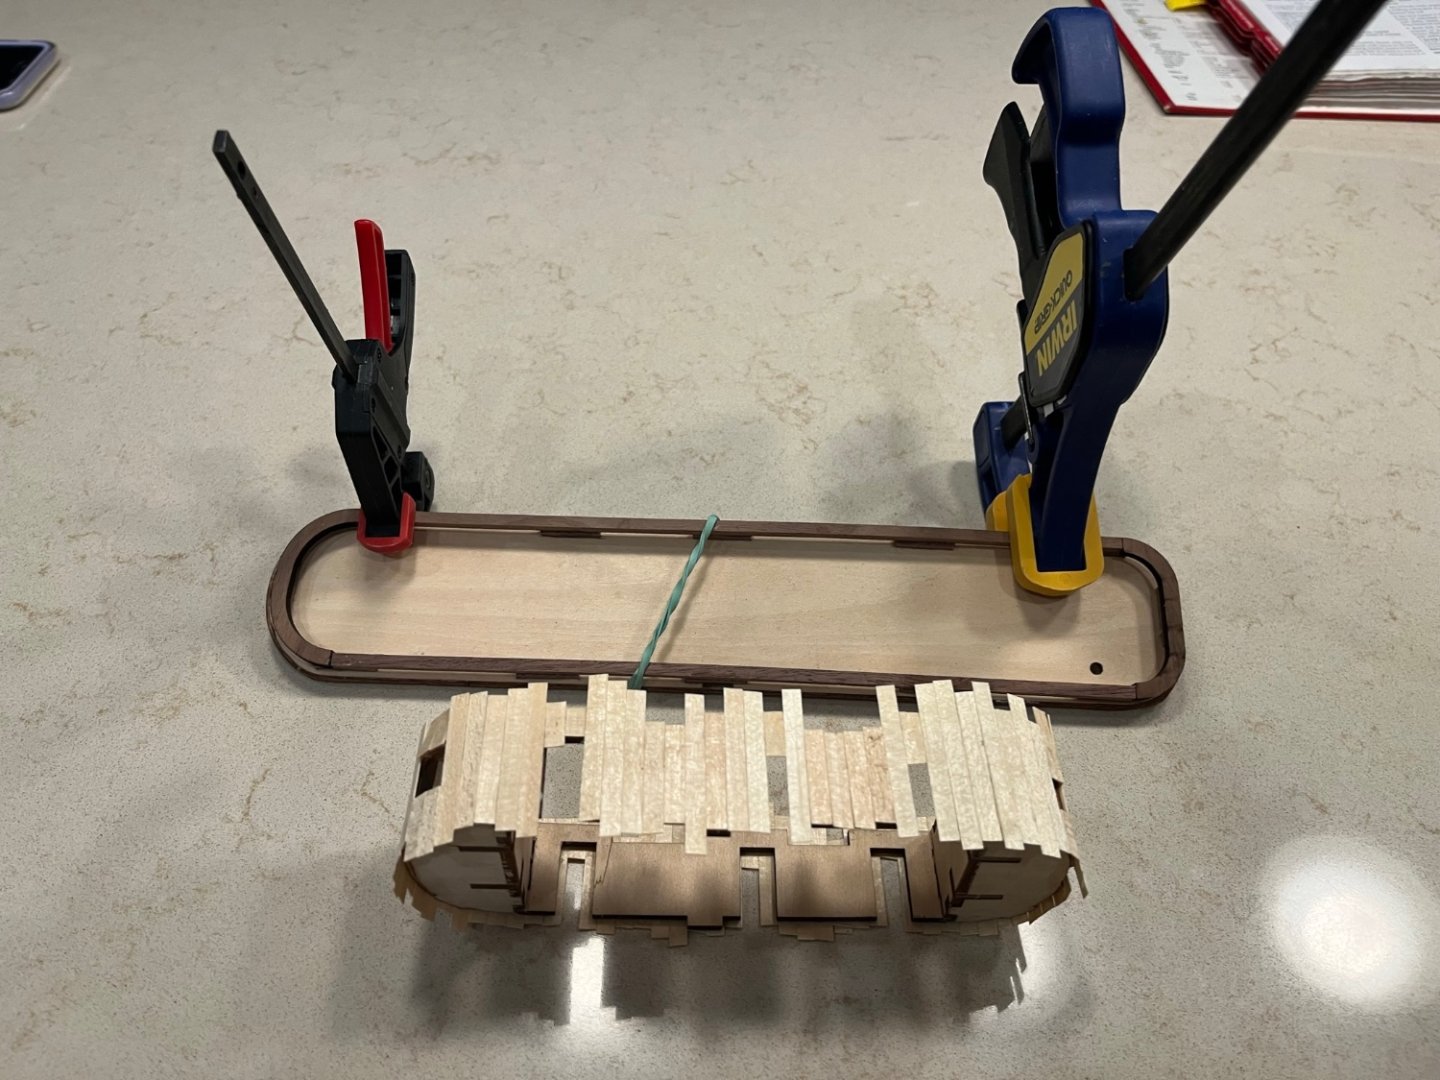
Bob I am currently building the King of the Mississippi…..how did you bend the railings around the stern onto the head posts at the paddle wheel . The 1.5 x 3 mm sapelli continues to snap. Did you soak them in hot water and if so how long? Thanks for any help. Jerry
-
-
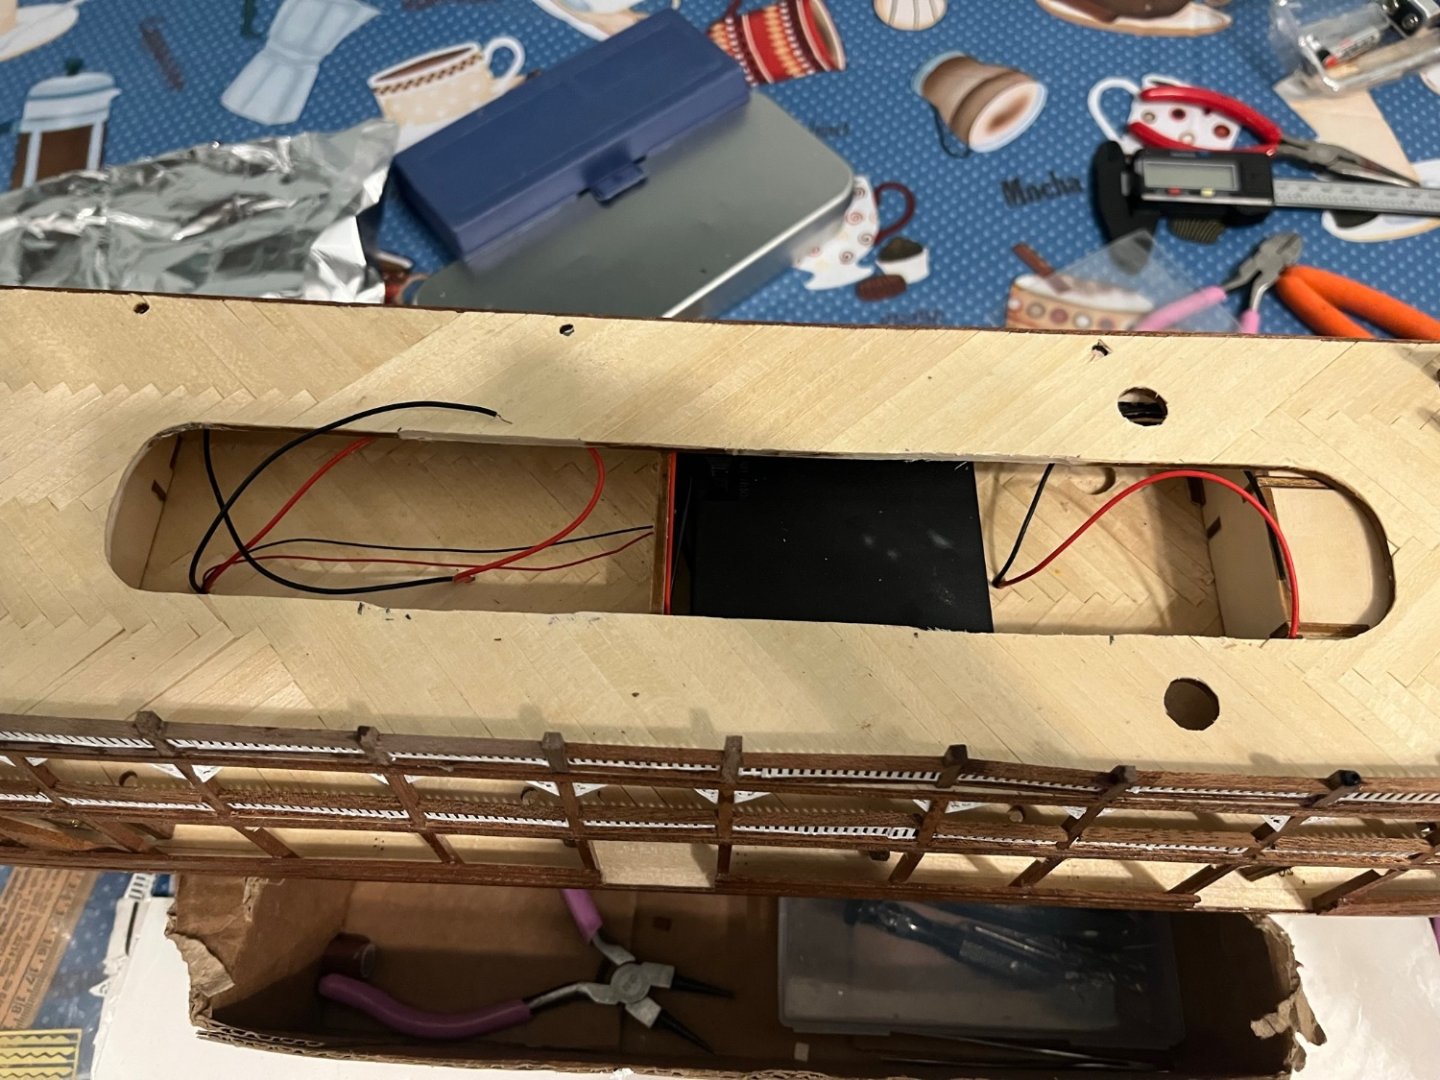
Hi Cleat, I am also building an older version of your model. Yours is looking great ! I am in the process of planking the second deck. I have also had similar problems like yours along the way. I am using the plans with the model as well as plans on the internet for the new version of the model as I have motorized the paddle wheel and will also light up the ship. The kit has solid metal windows so I am planning to make my own with clear acrylic. My problem is I cannot find where to place the batteries and on/off switch. The new plans show the
-
-
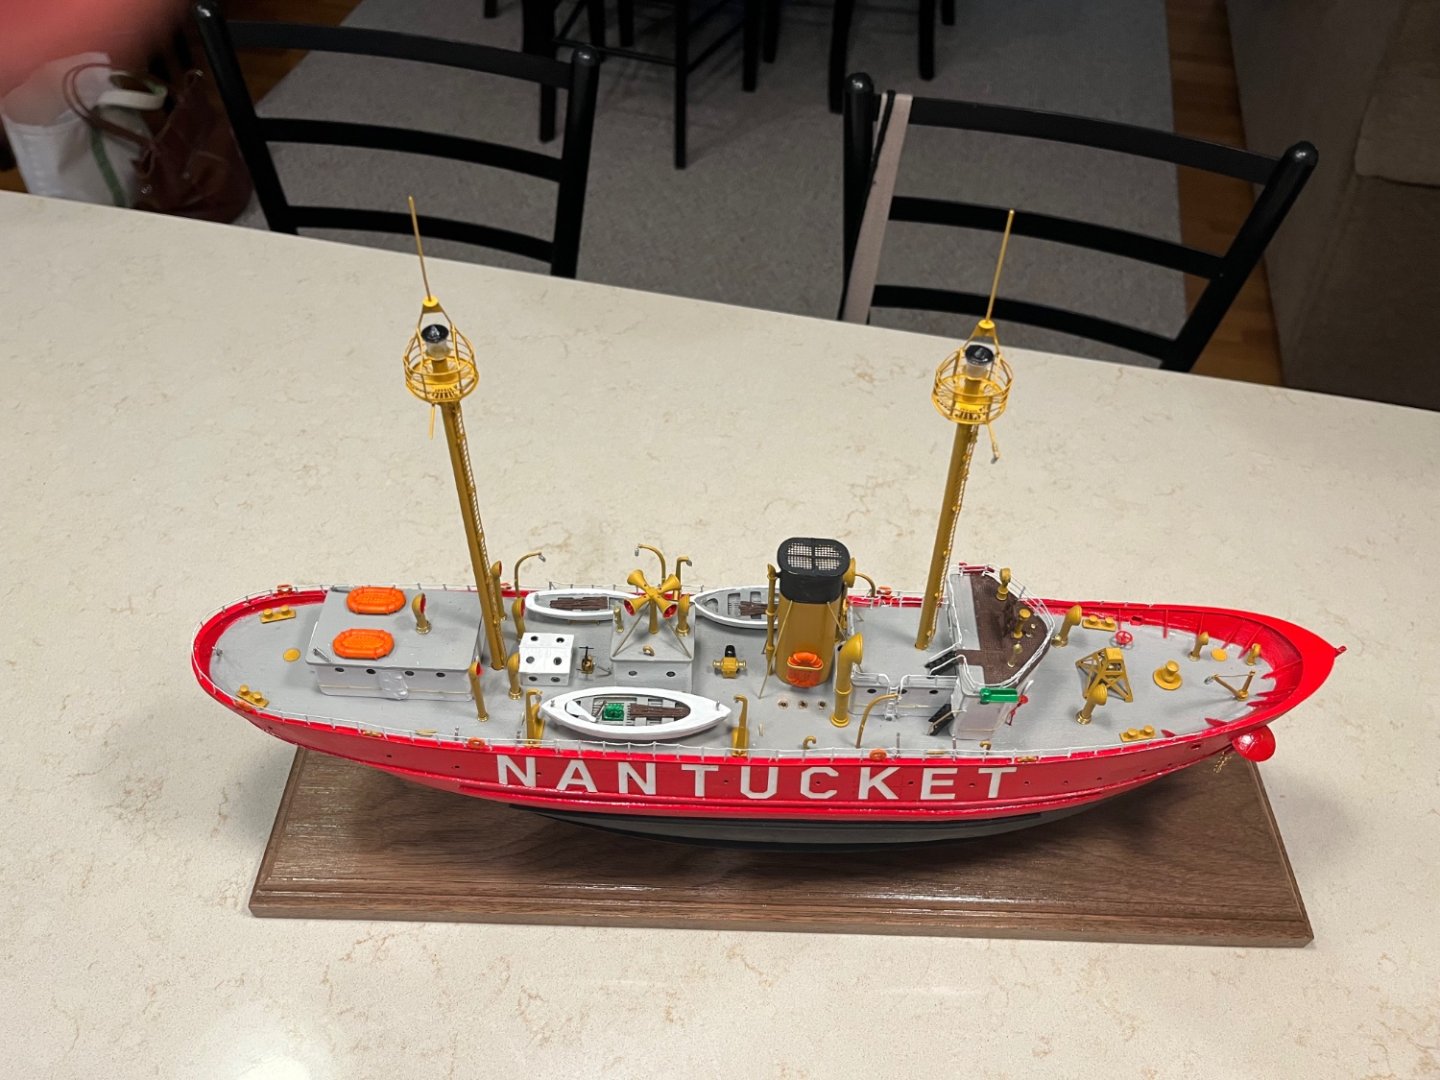
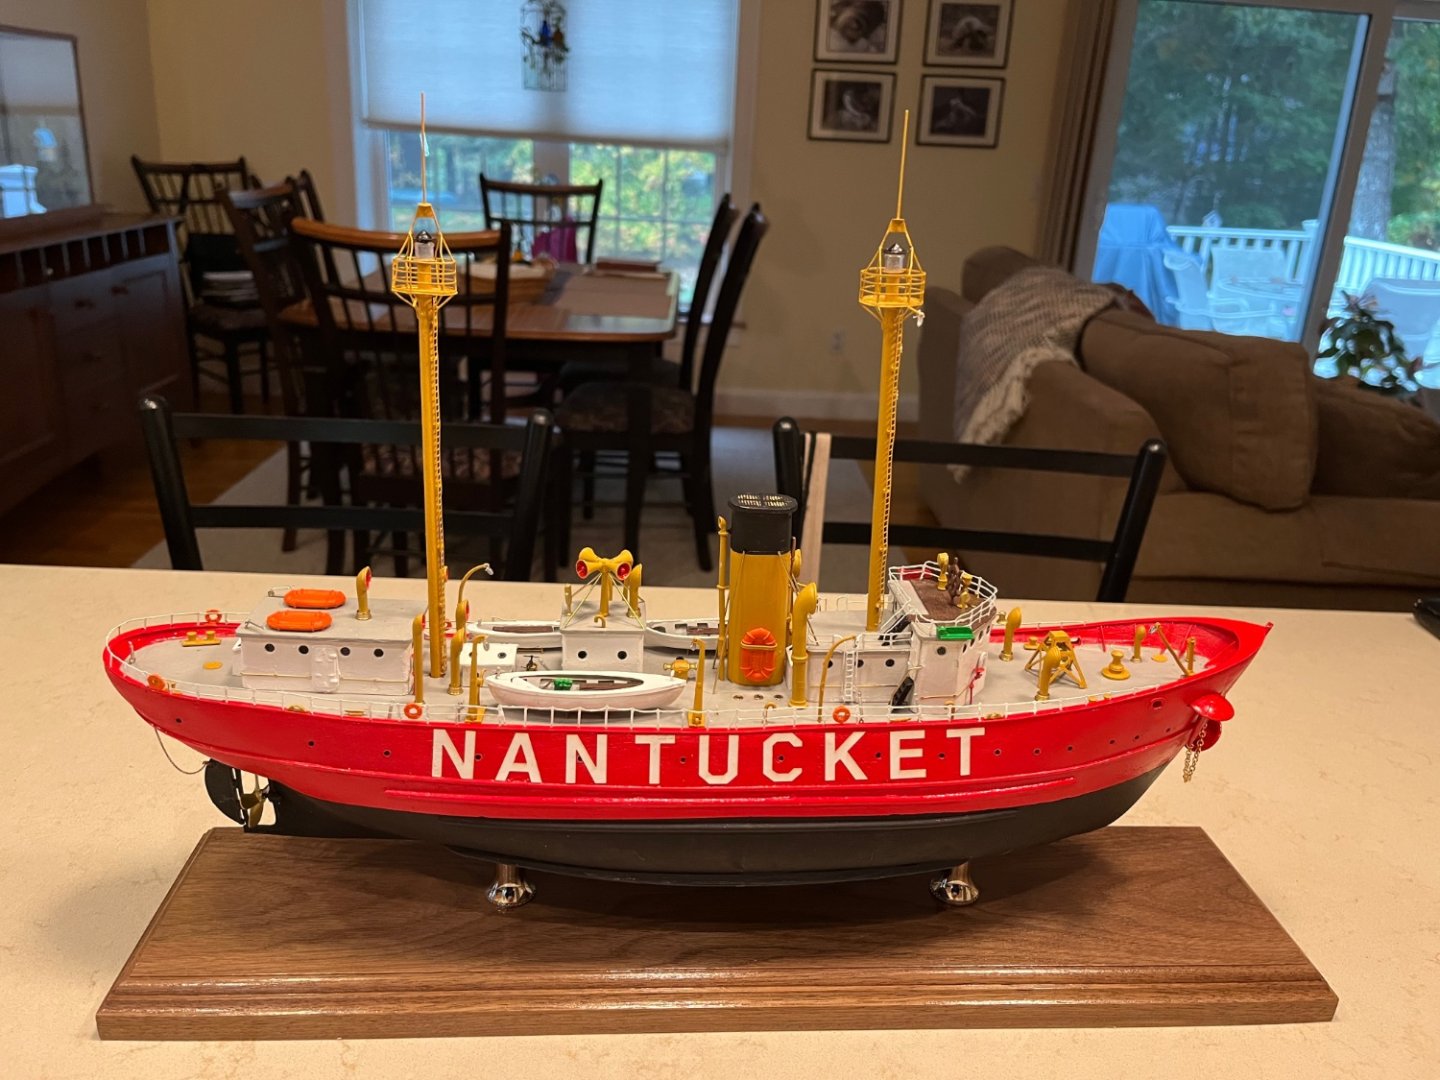
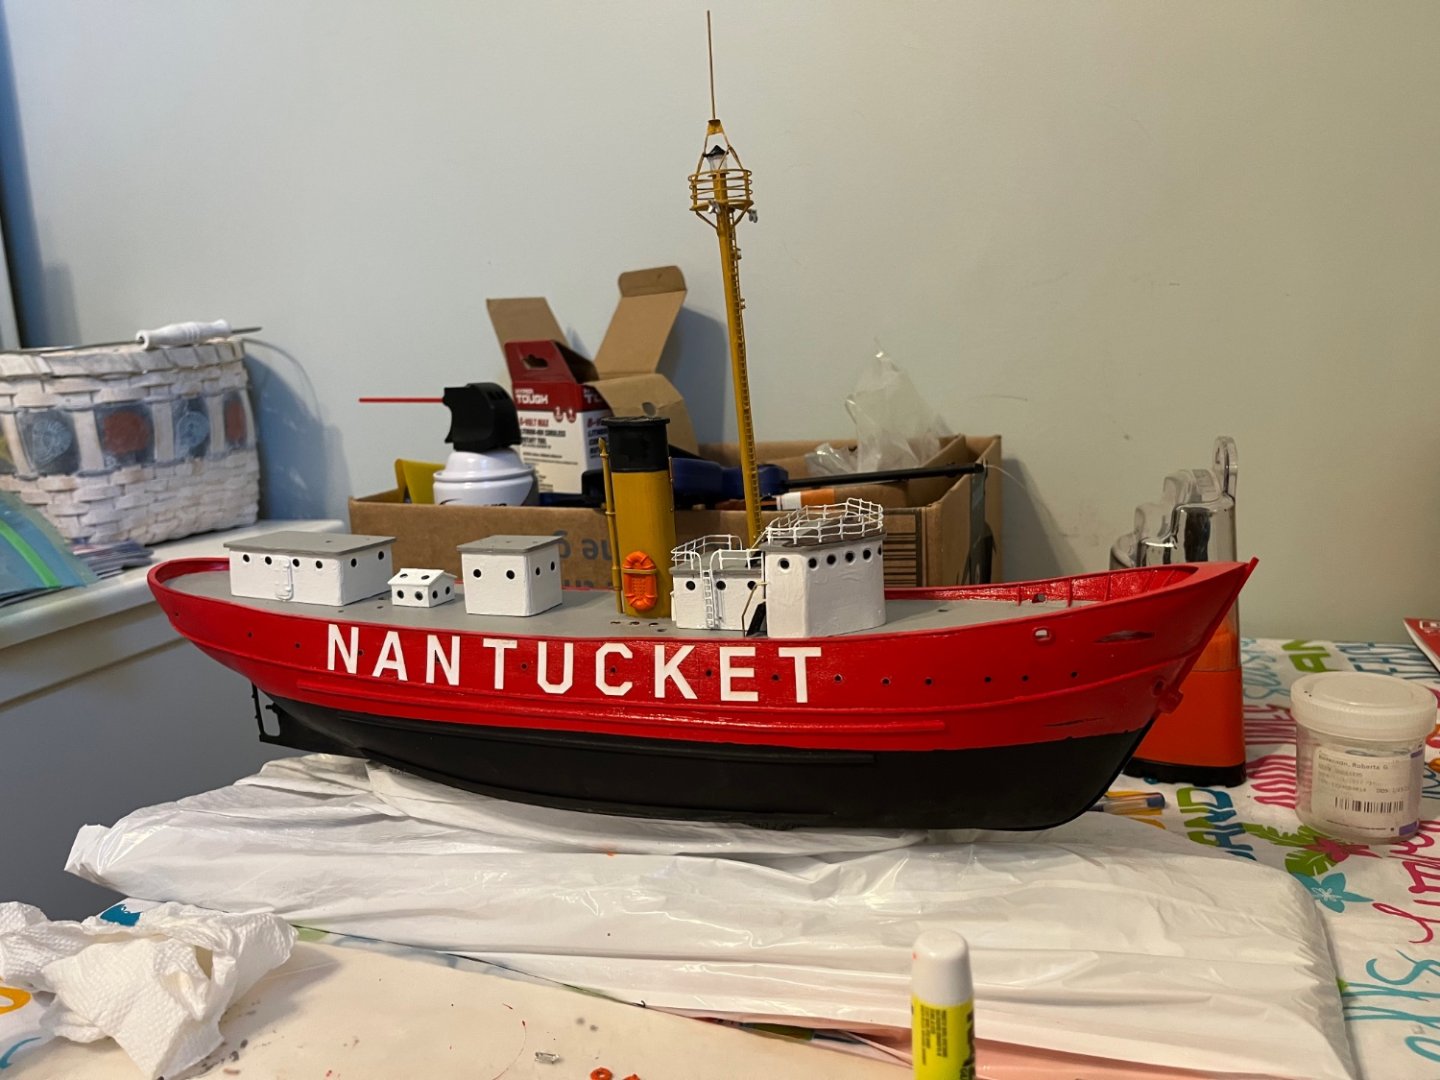
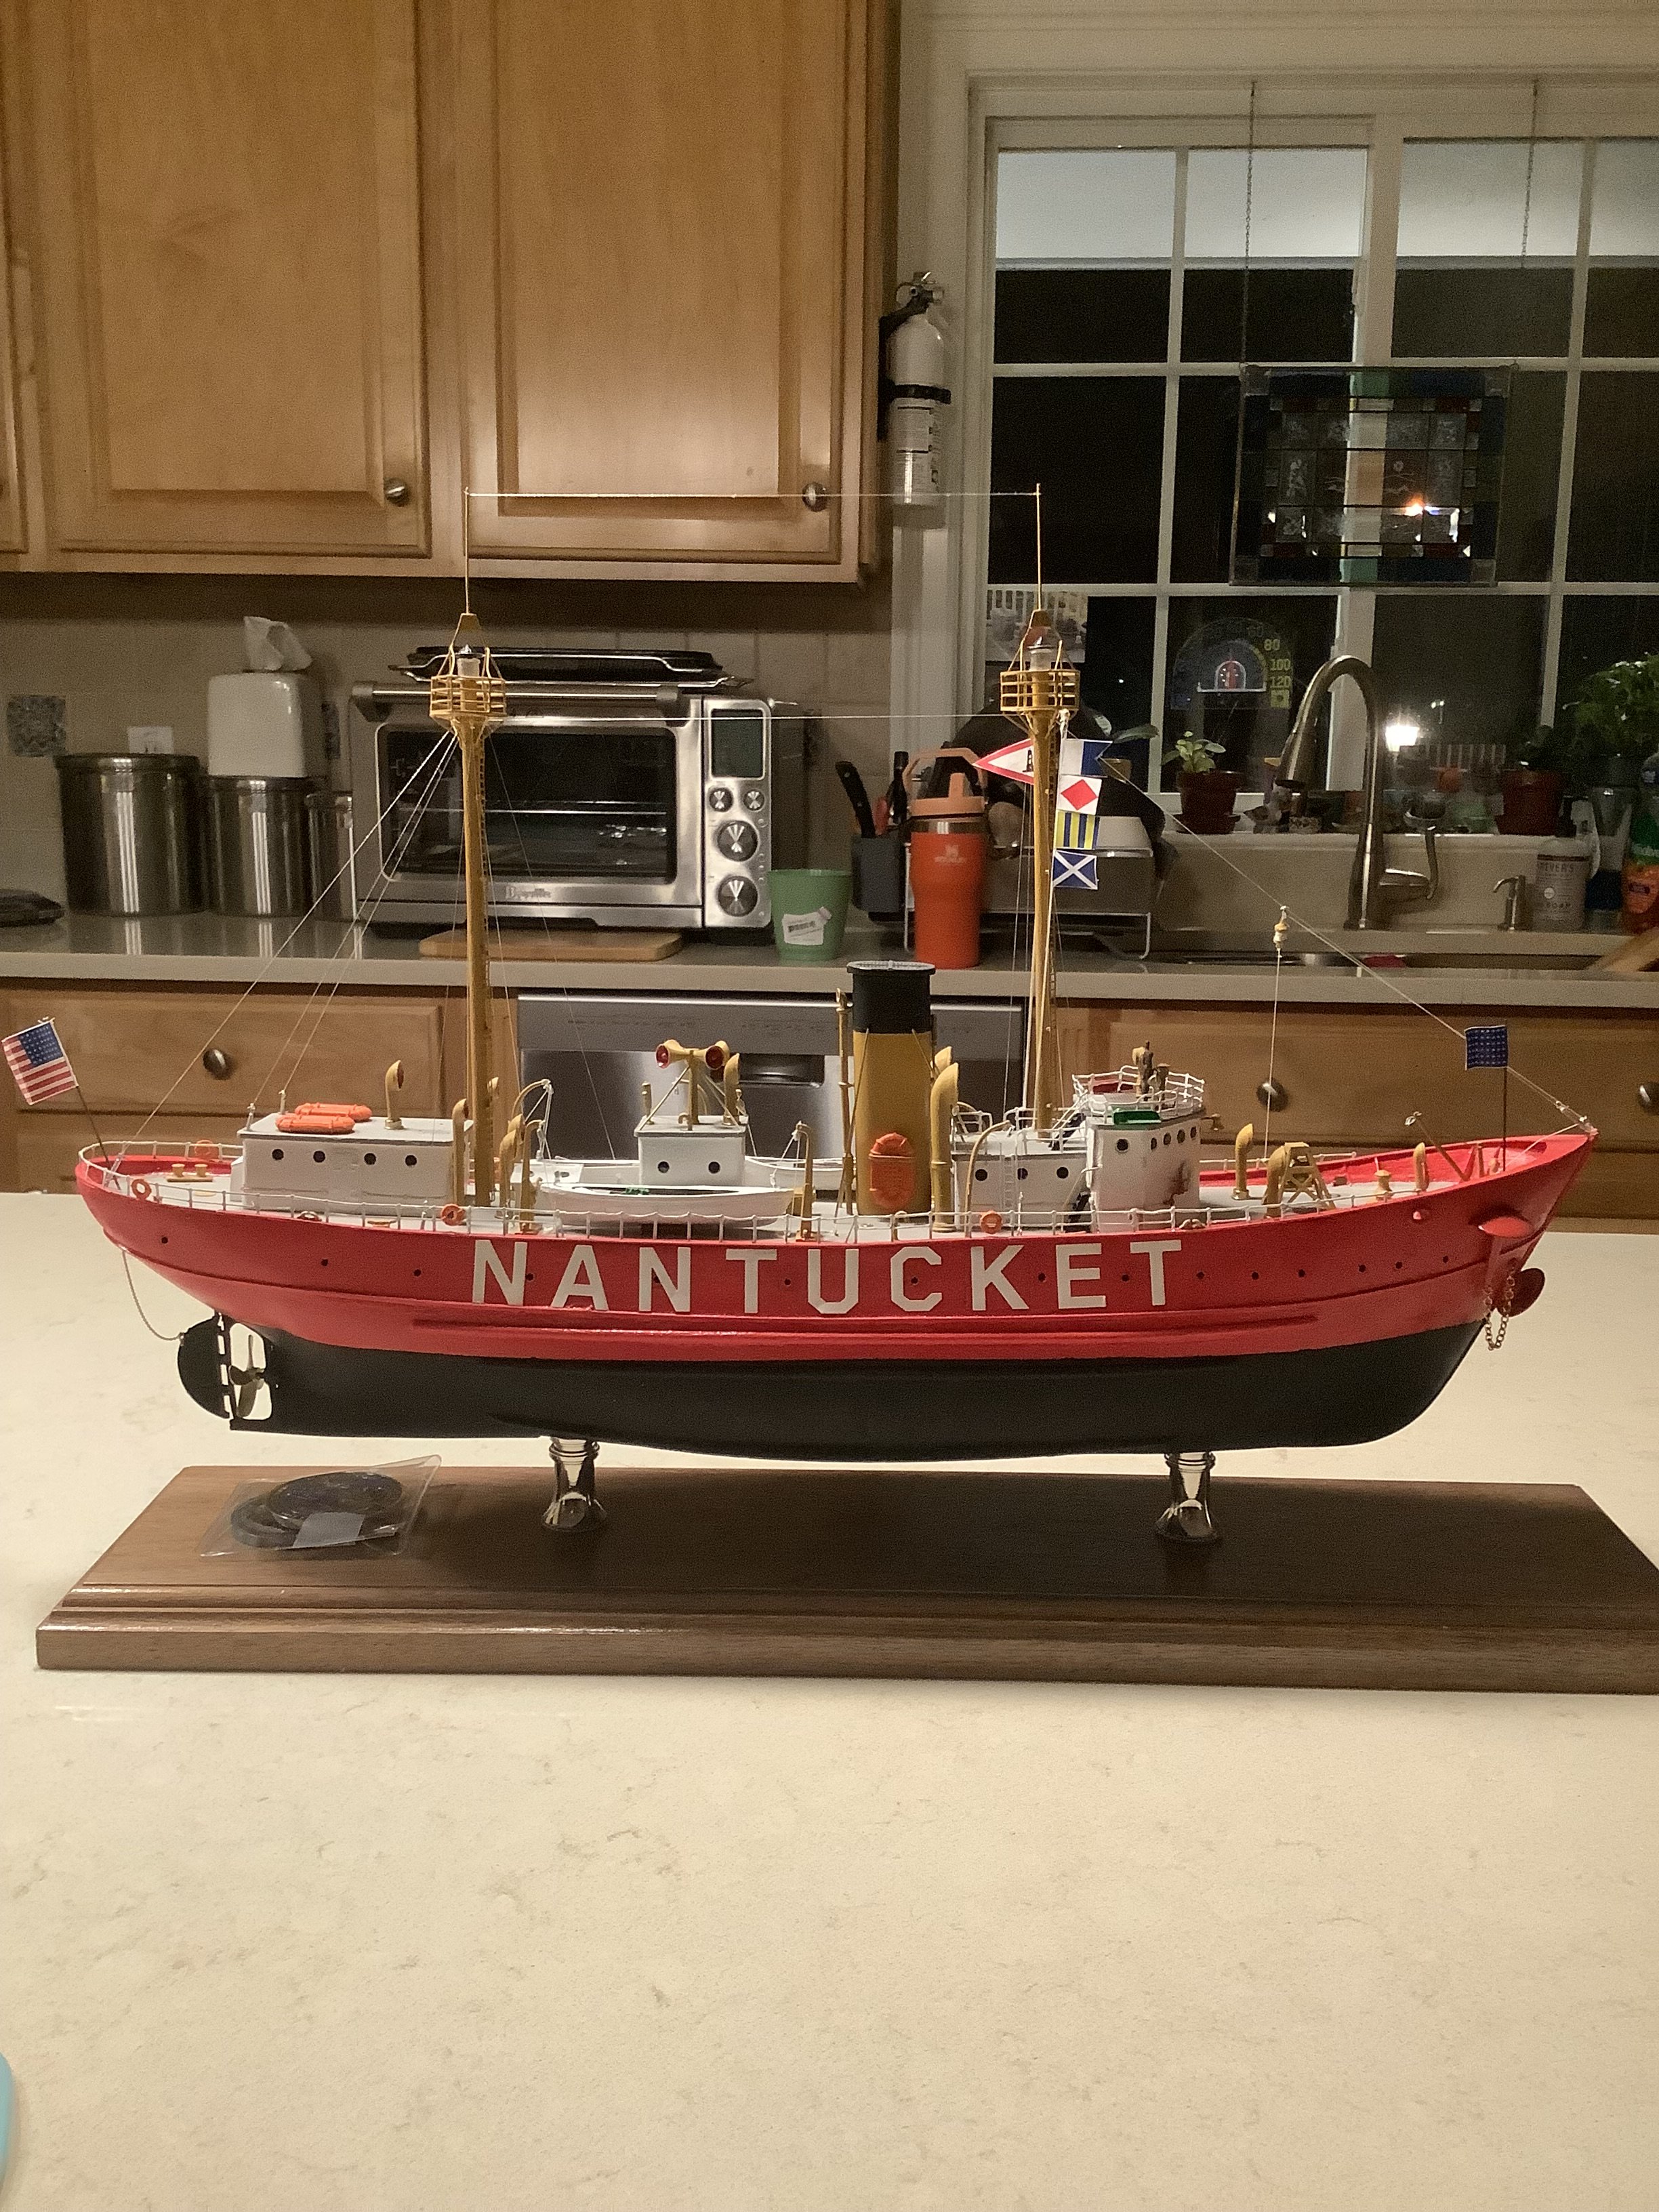
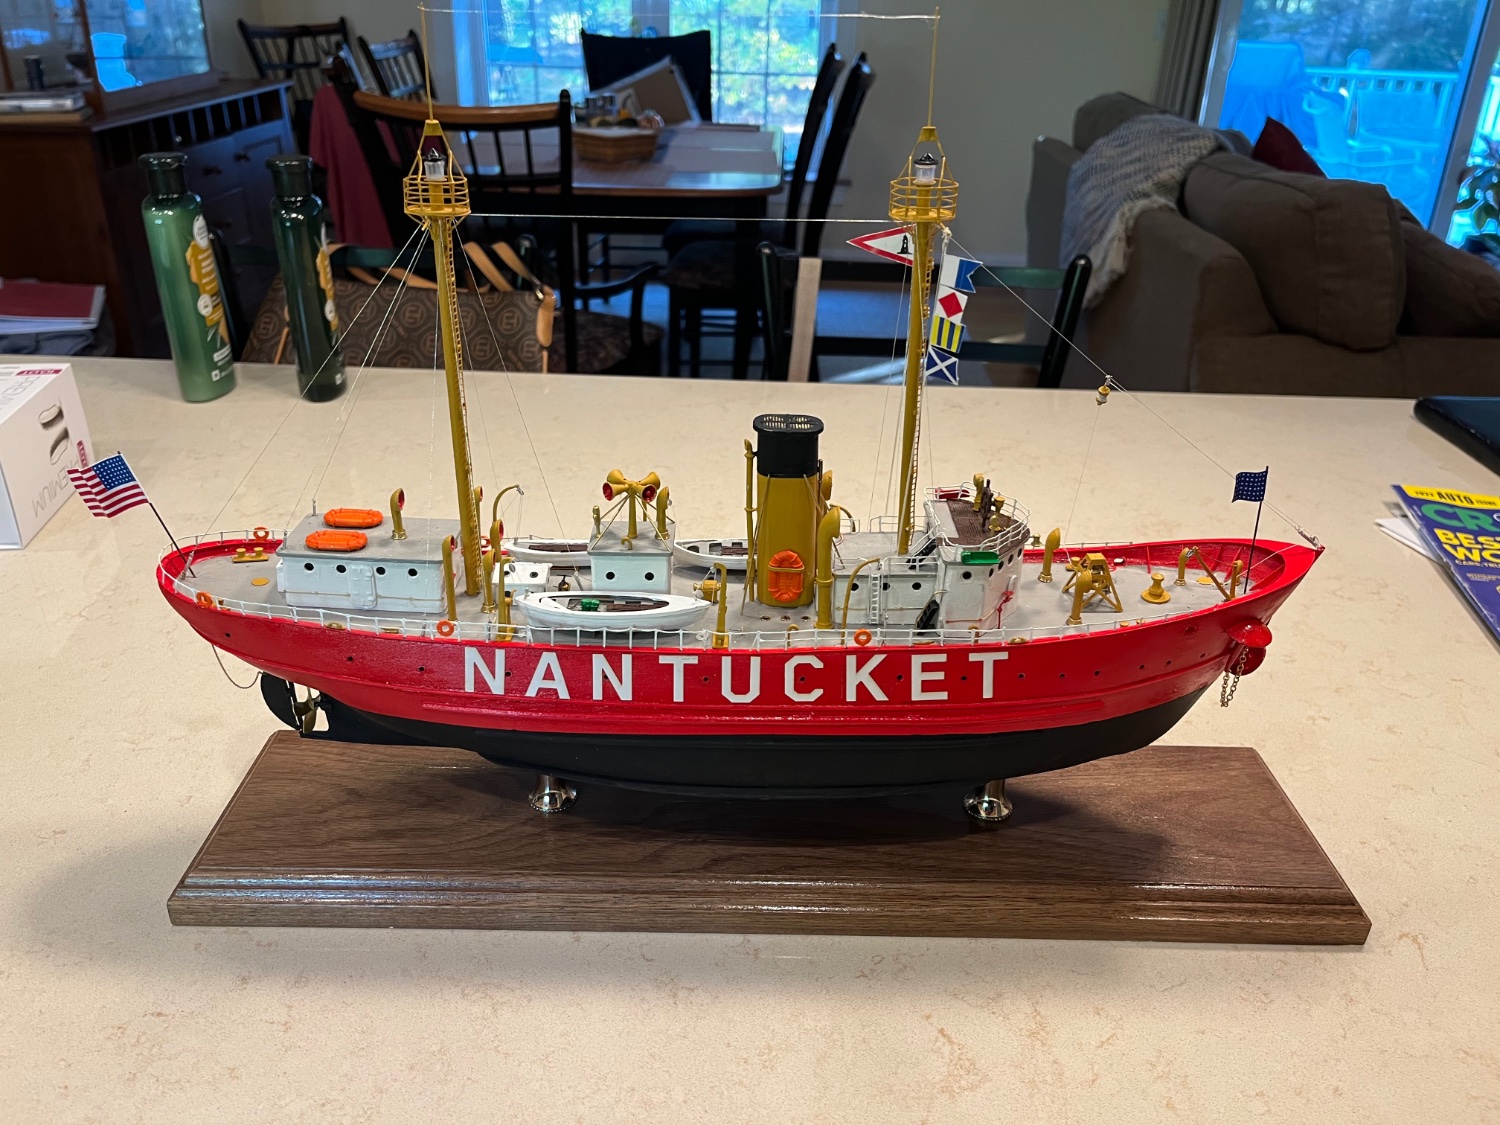
All done!! Finished the model today. Rigging all done and the flags placed on the halliards. I rigged the 3 boats to their corresponding davits. One disclaimer…. Somehow I could not find the 2 remaining open chocks to place on the bow! I searched my working area on hands and knees to no avail. I will either give Bluejacket a call and have them send me a couple of them or wait until next summer when we go up to Maine for our annual vacation. Thanks everyone for following my build as well as your constructive comments. Laxian Key, looking forward to see how your model is going!

-
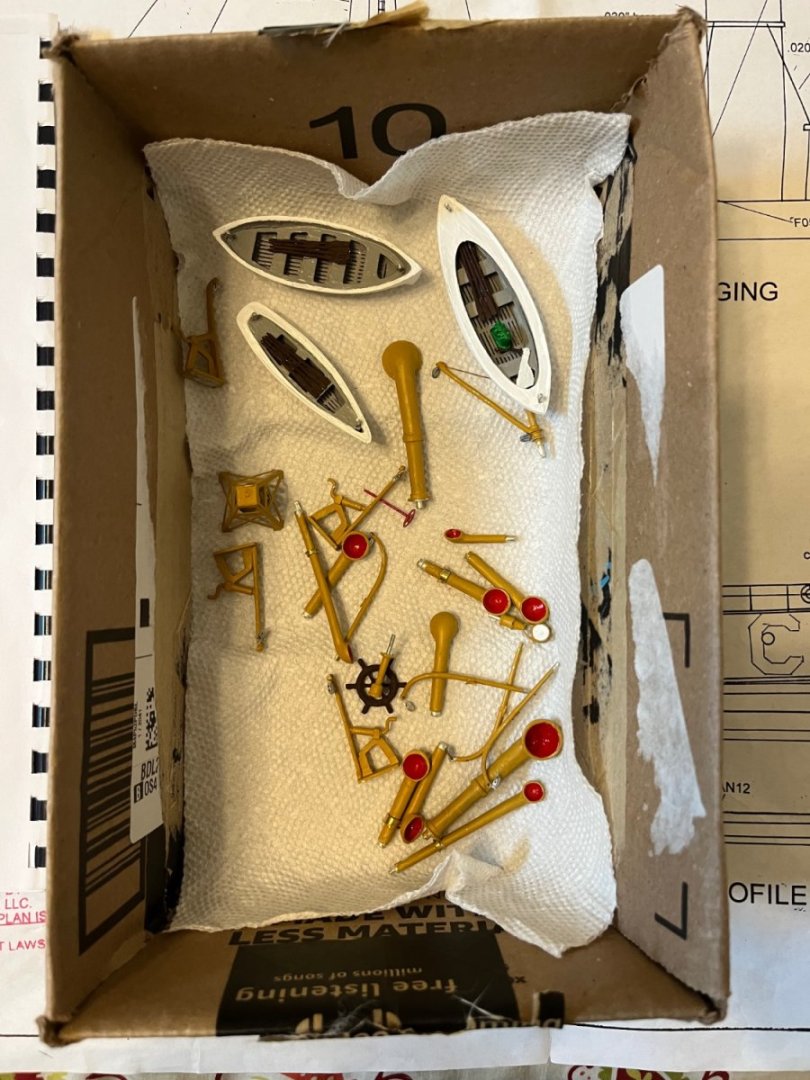
All accessories painted and mounted on the ship. I still have to do the rigging , flags, and poles. After using all the pieces from the brass sheet per the manual, I noticed that the safety railings remained. No where in the manual were the railings mentioned. It is an obvious oversight when the kit was recently updated. The railings are on the plans so I placed them on the houses where indicated on the plans. Also be very careful with the cast Britannia turnbuckles! I fractured one end of 2-3 of them when trying to open up the holes which attach them to the deck with a very small hand drill . I wound up cementing them directly to the deck.
- ccoyle, Mike Collier, hof00 and 8 others
-
11
-
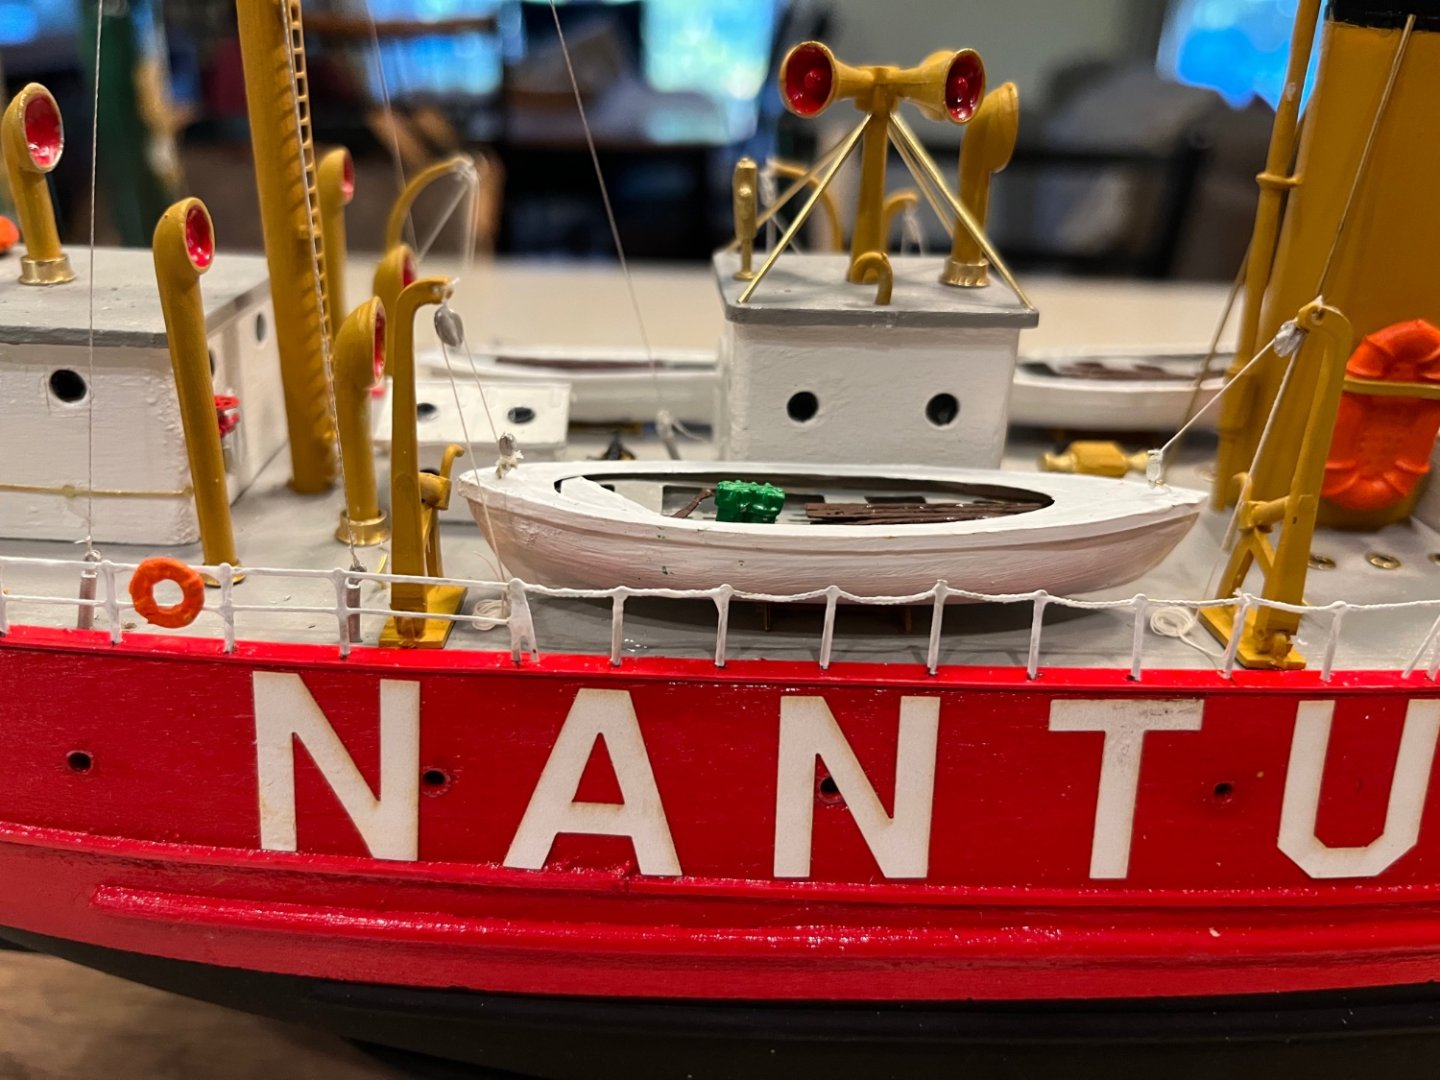
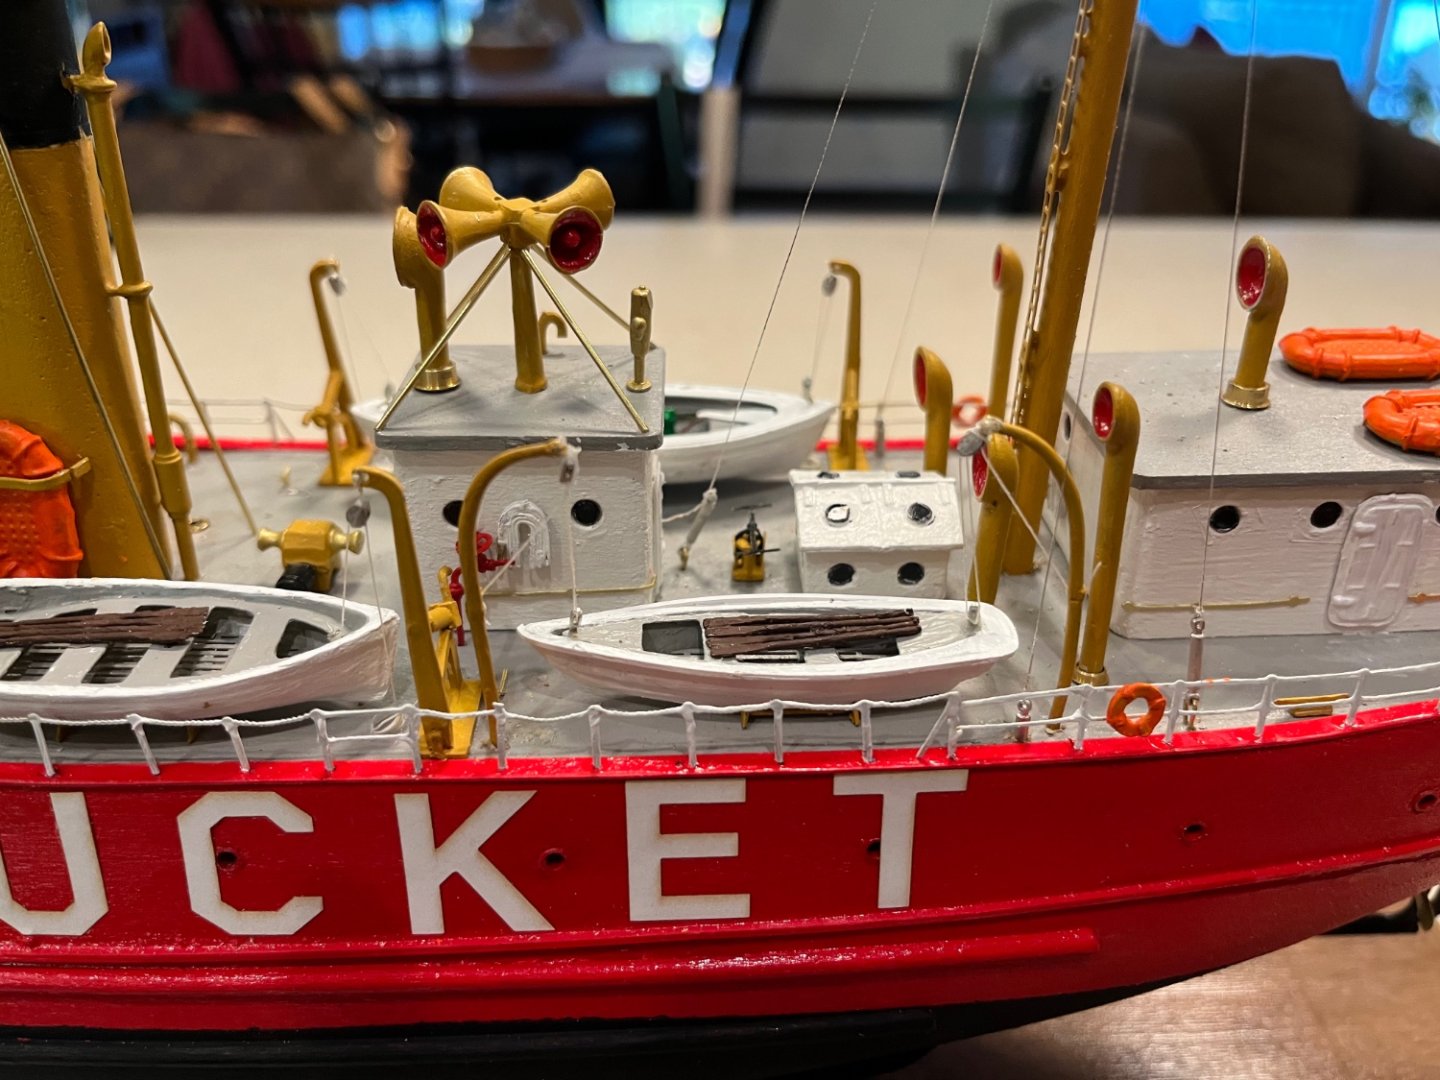
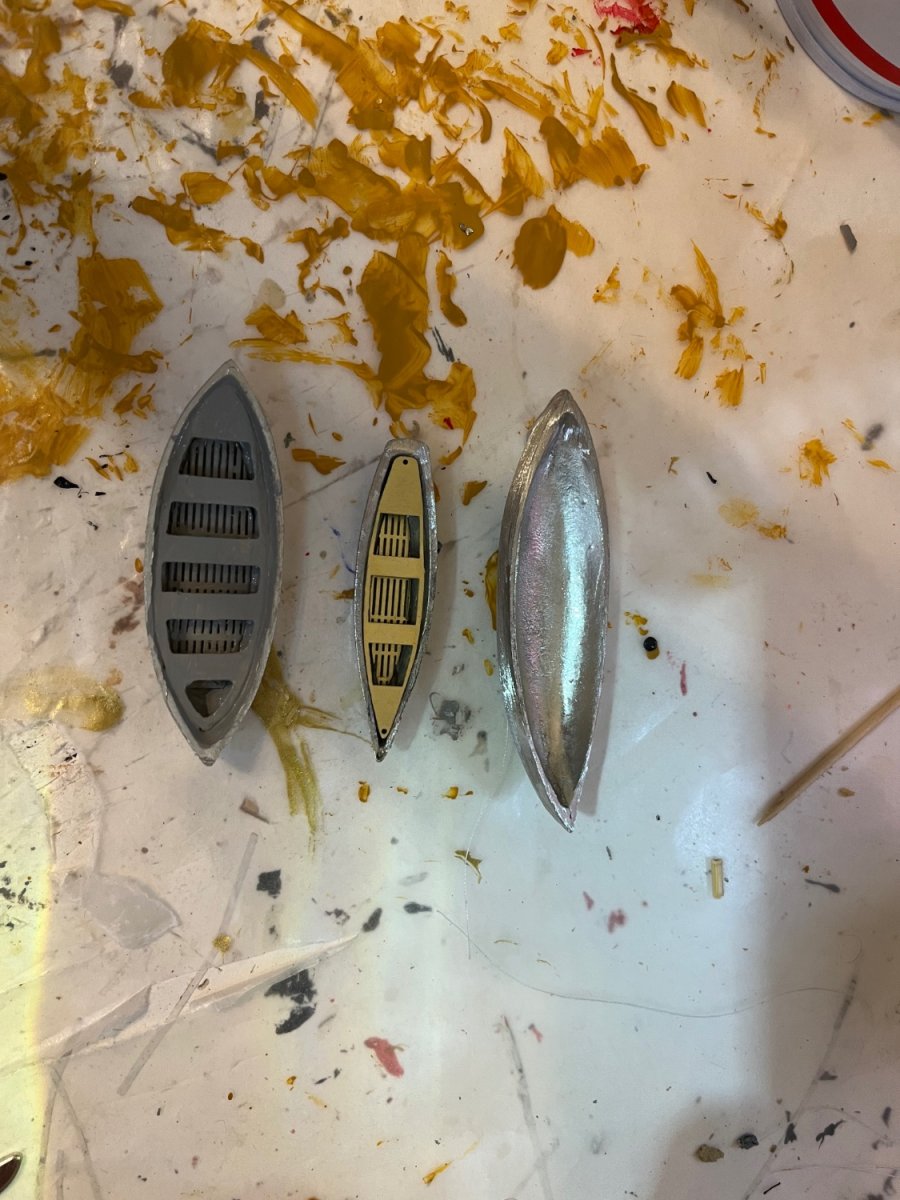
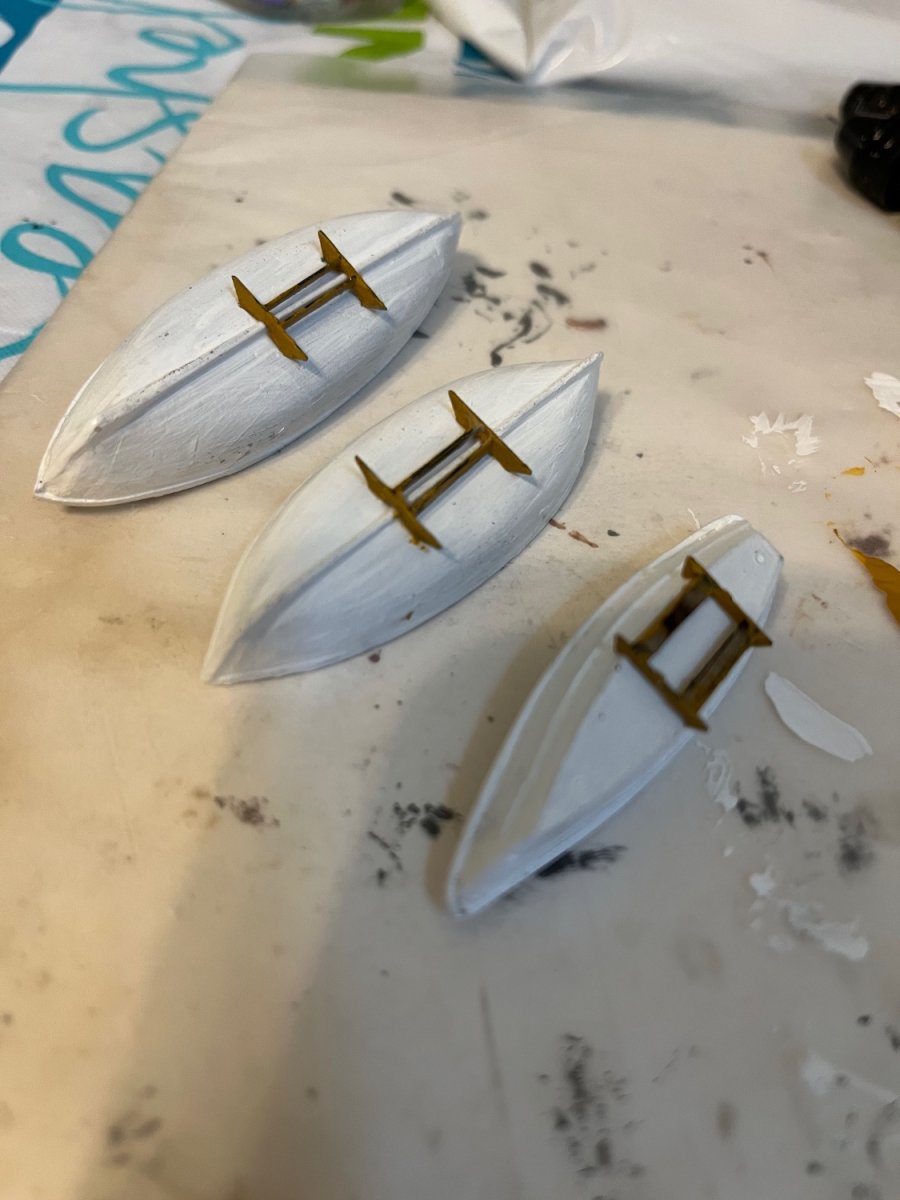
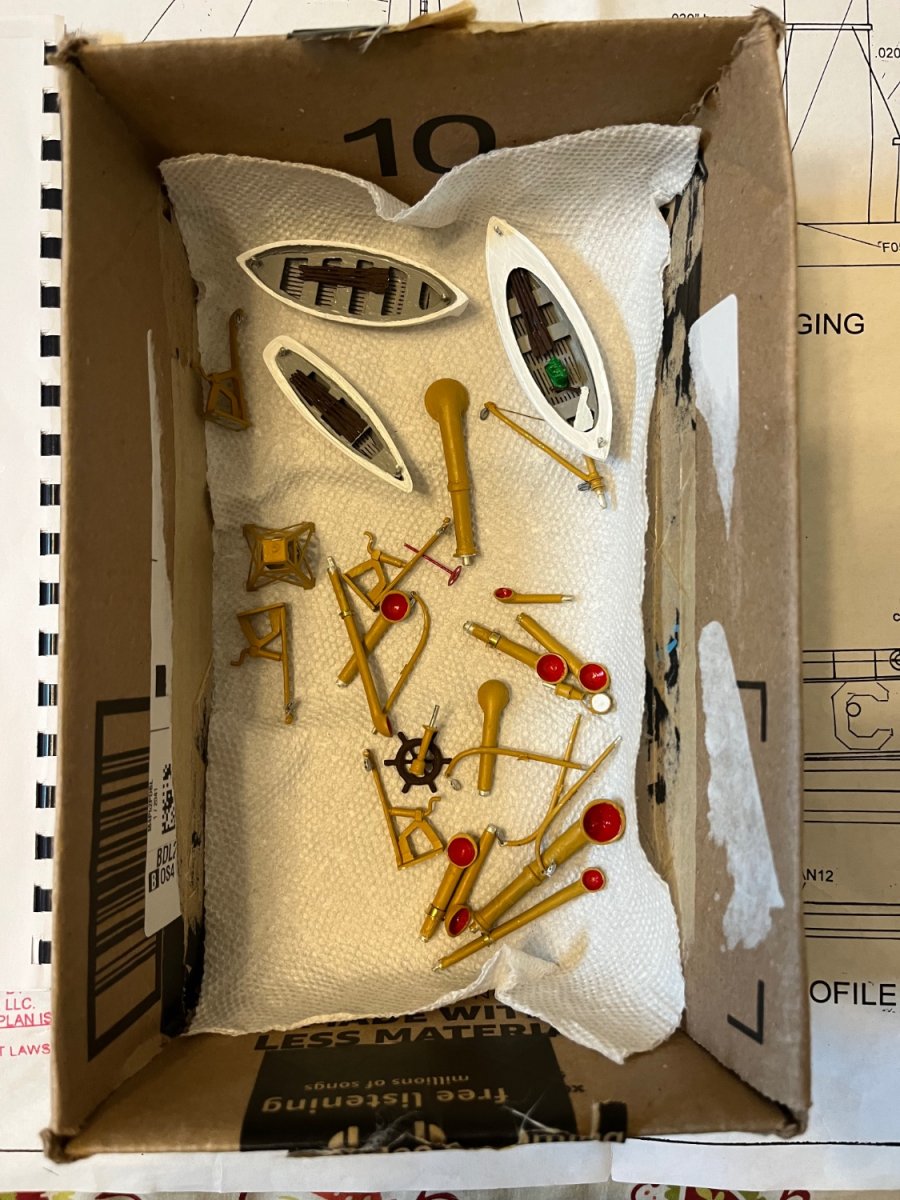
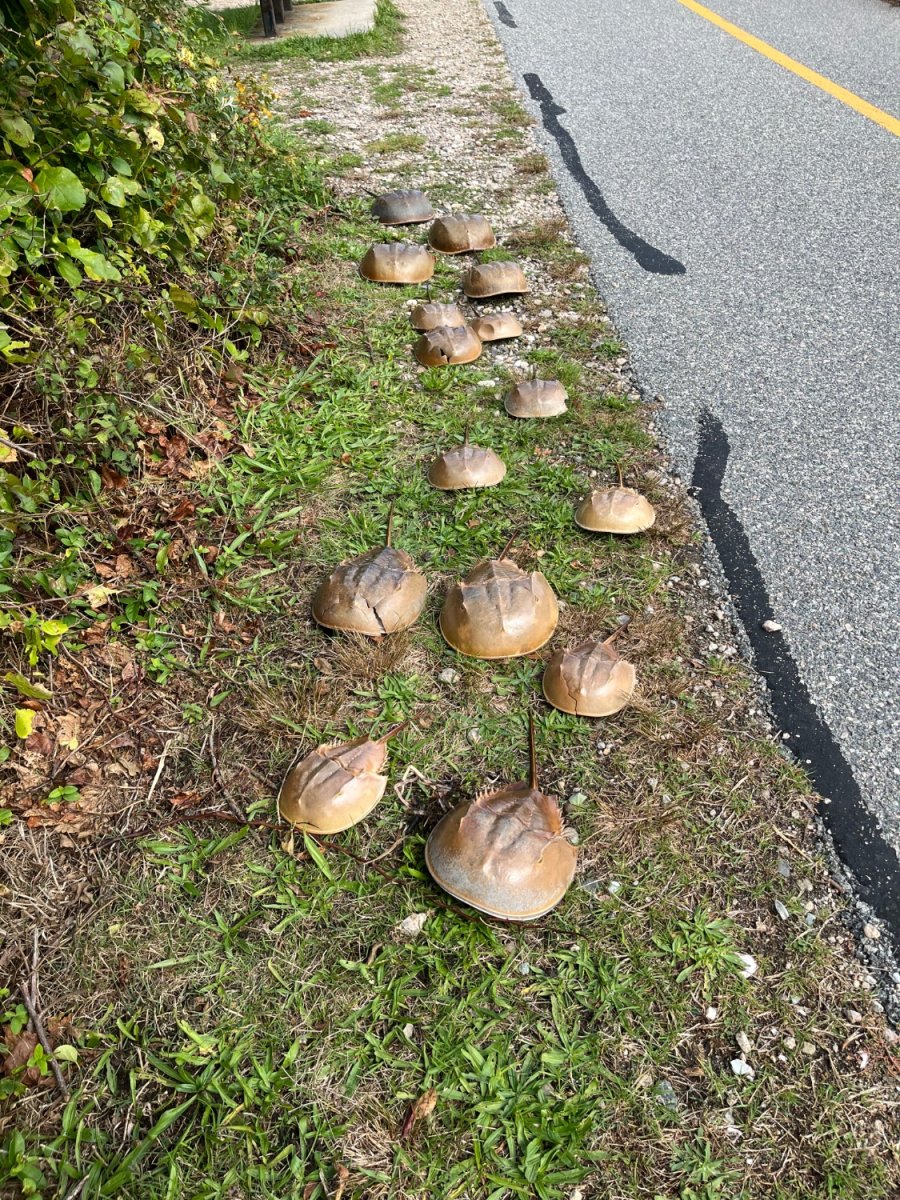
Just completed the 3 boats , cradles as well as the pilot house and forward house railings and ladders. The railings were quite tricky to place and needed a lot of patience. Luckily they are very flexible and not delicate since I accidentally dropped the longer one and stepped on it while looking for it. I thought I would have to order a new one but although mangled it did not break when I reshaped it back to normal. I had to refine the castings of the boats with my dremel . There was a lot of extra material from the castings and I had to smooth down and reshape the hulls to fit the thwarts and especially the deck of the motorized whale boat. The cradles were also tricky since they are so small. Hint…. Micro drills, a digital caliper , tweezers and very fine paint brushes are a necessity for this model. I also highly recommend magnifying lighted glasses. I have enclosed some pictures as well as a picture of many horseshoe crabs on the side of the bike trail I was on last week down here on the Cape.


- Canute, Jack12477, king derelict and 7 others
-
10
-
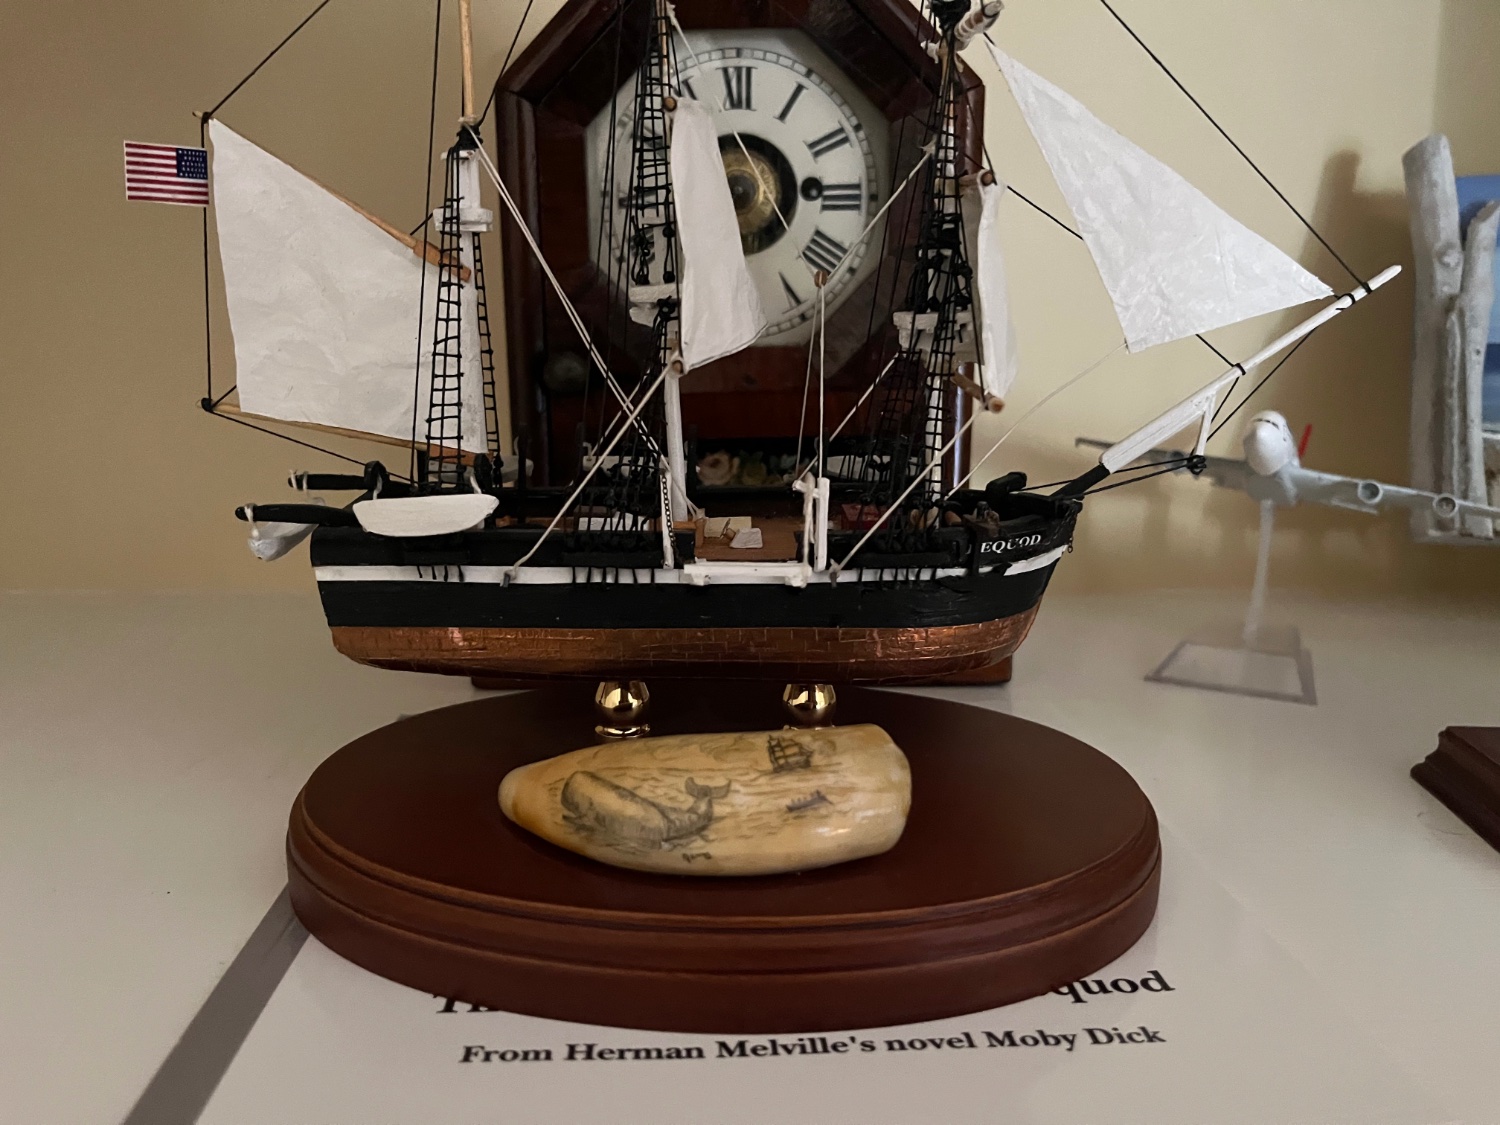
Dan, my name is Jerry Berenson and I am now building a Nantucket lightship after completing Bluejacket’s model of the Constitution. I noticed your blog. I am enclosing pictures of a small model I built ,while recuperating from heart surgery 2 yrs ago , of the fictional Pequod.It is modeled after typical whaling ships of that period. It was a very old kit I had hanging around the cellar. I took some liberties with it. I also mounted it on a baseboard with an old whale’s tooth which I “scrimshawed” many moons ago. Note Queeques’s coffin. BTW I am a member of the New Bedford Whaling Museum since I live about 45 minutes away on Cape Cod. It is a national treasure and a must see. They have a 1/2 scale of an old whale ship to board. If you desire, check out my blog of the Nantucket Lightship I am building. Regards, Jerry


- catopower, mtaylor and Dan DSilva
-
3
-
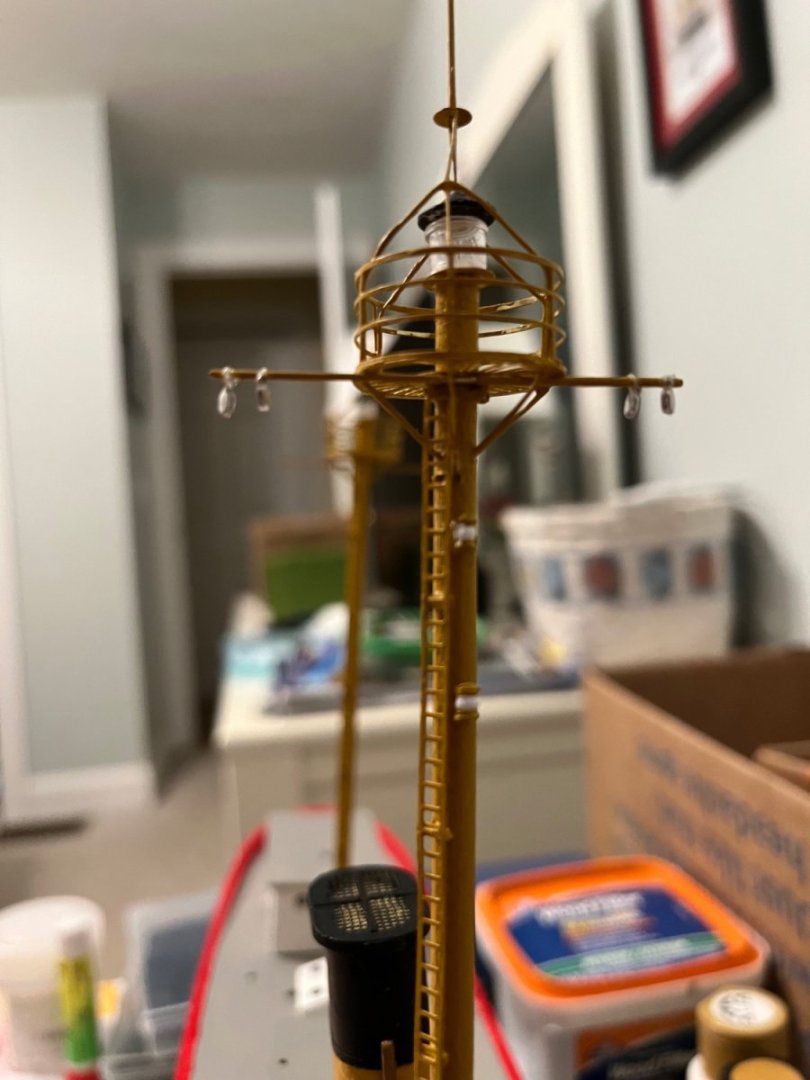
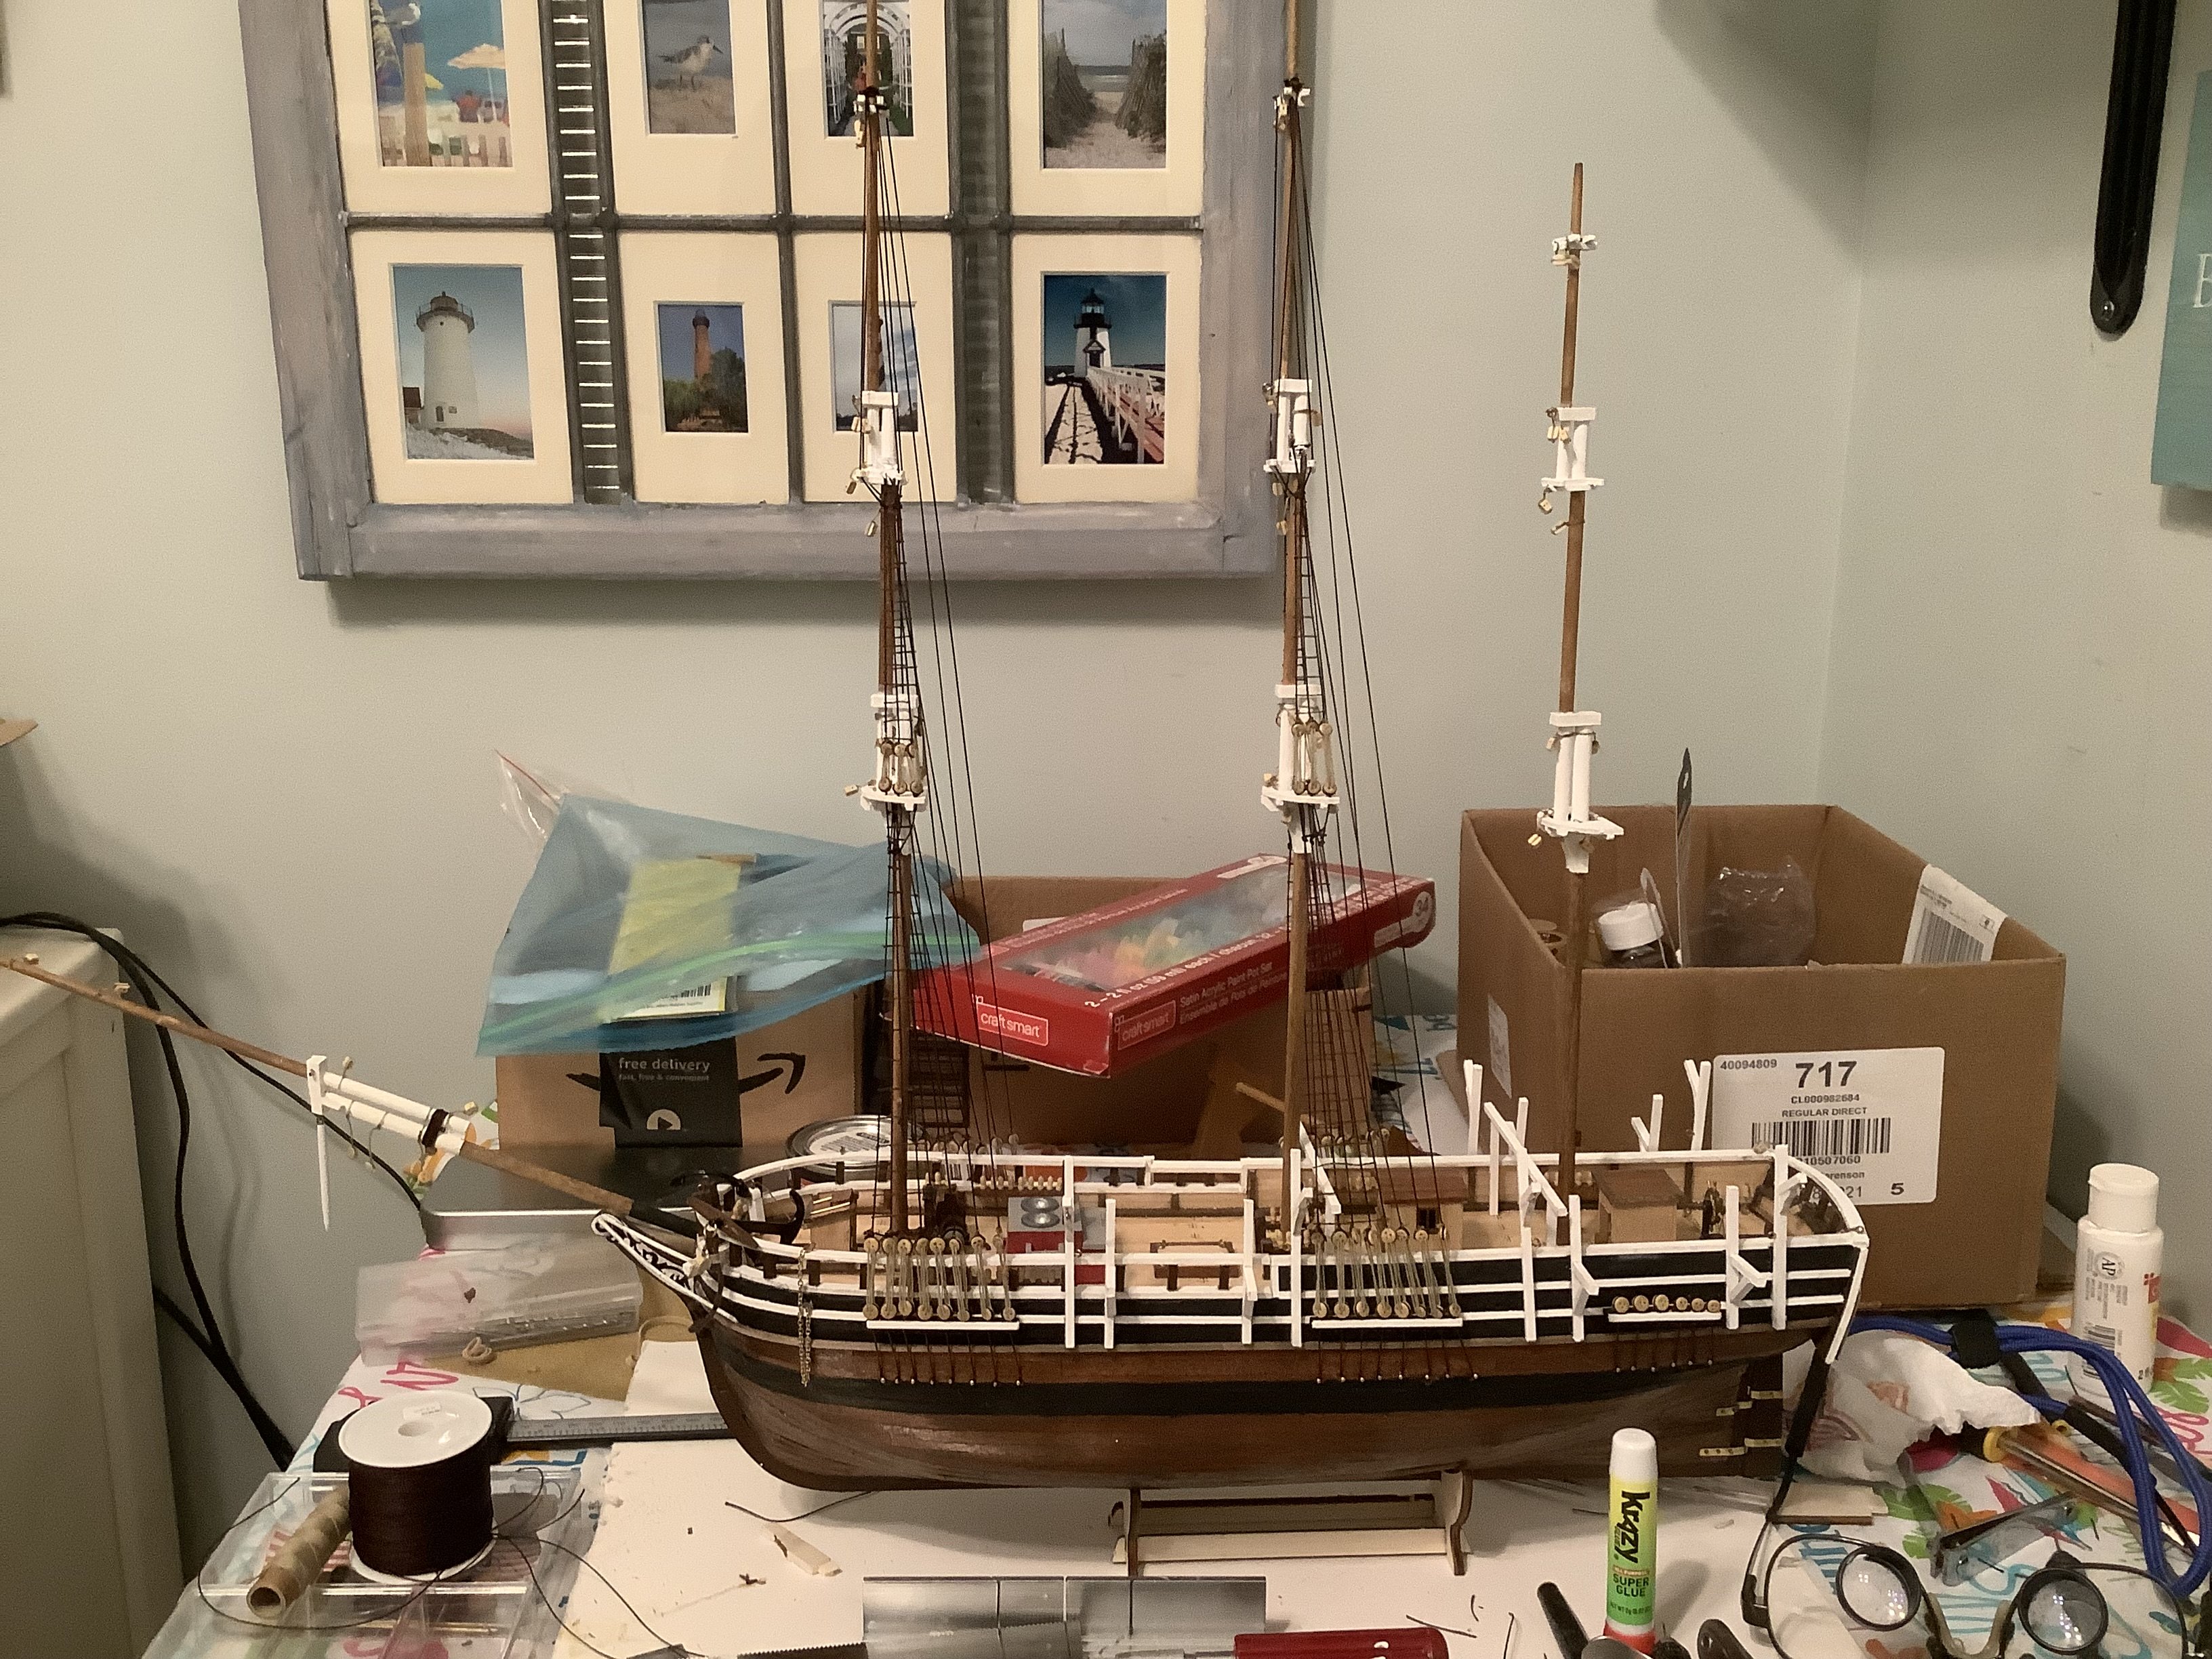
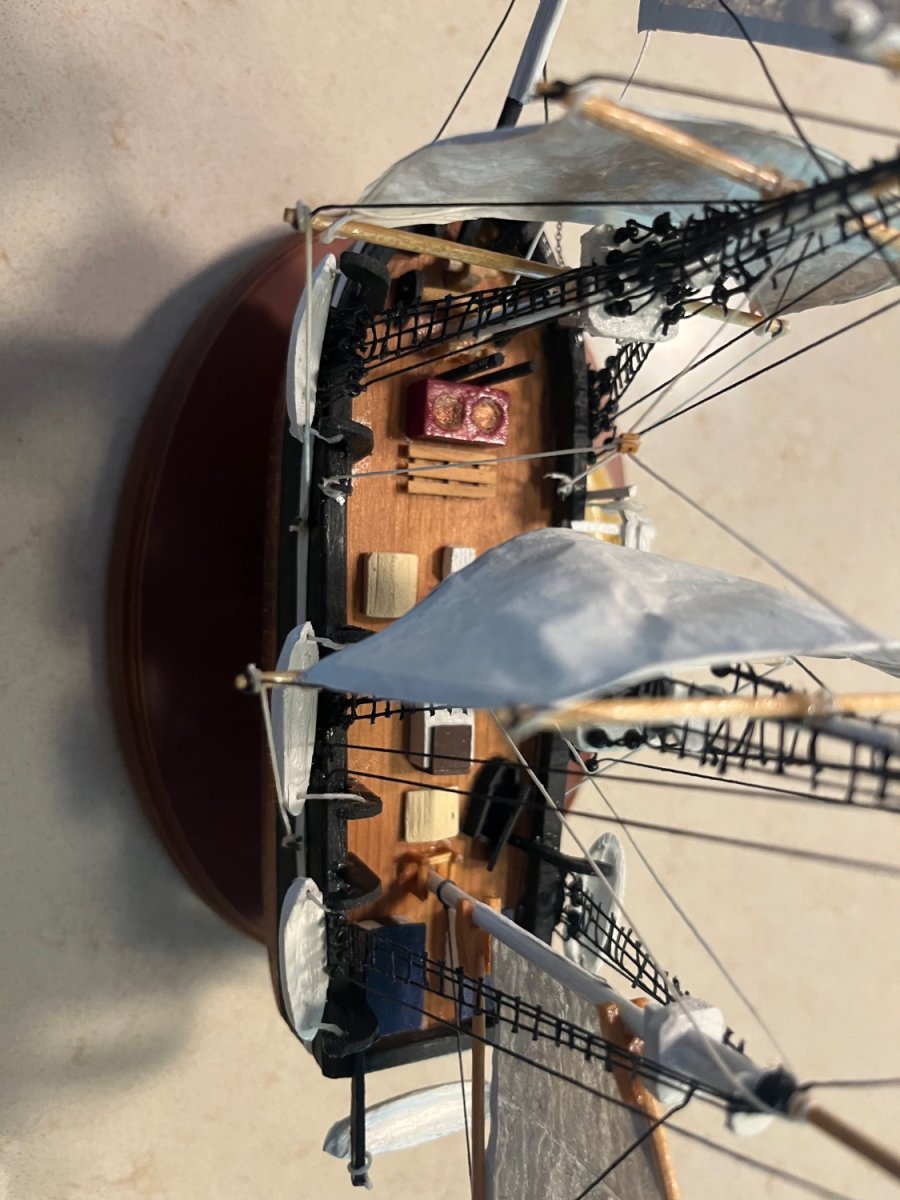
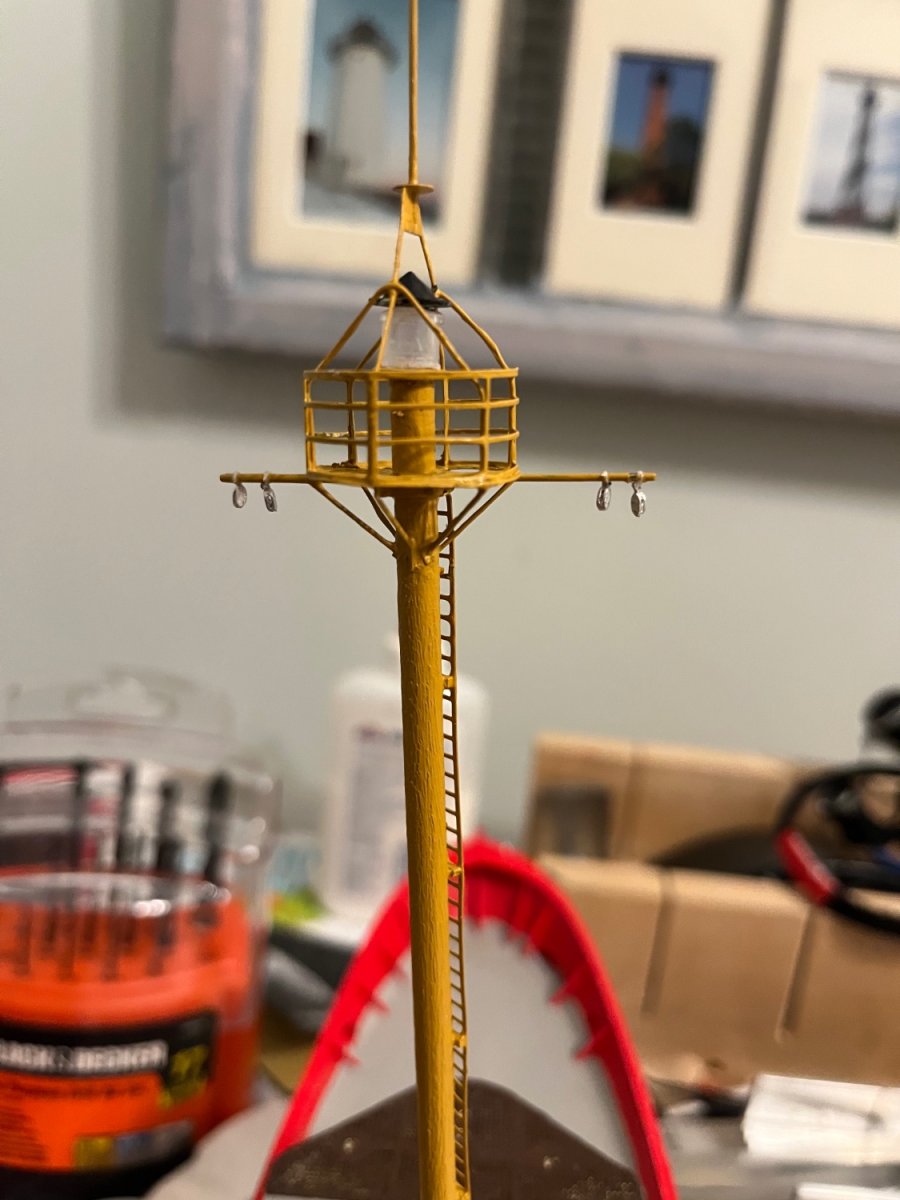
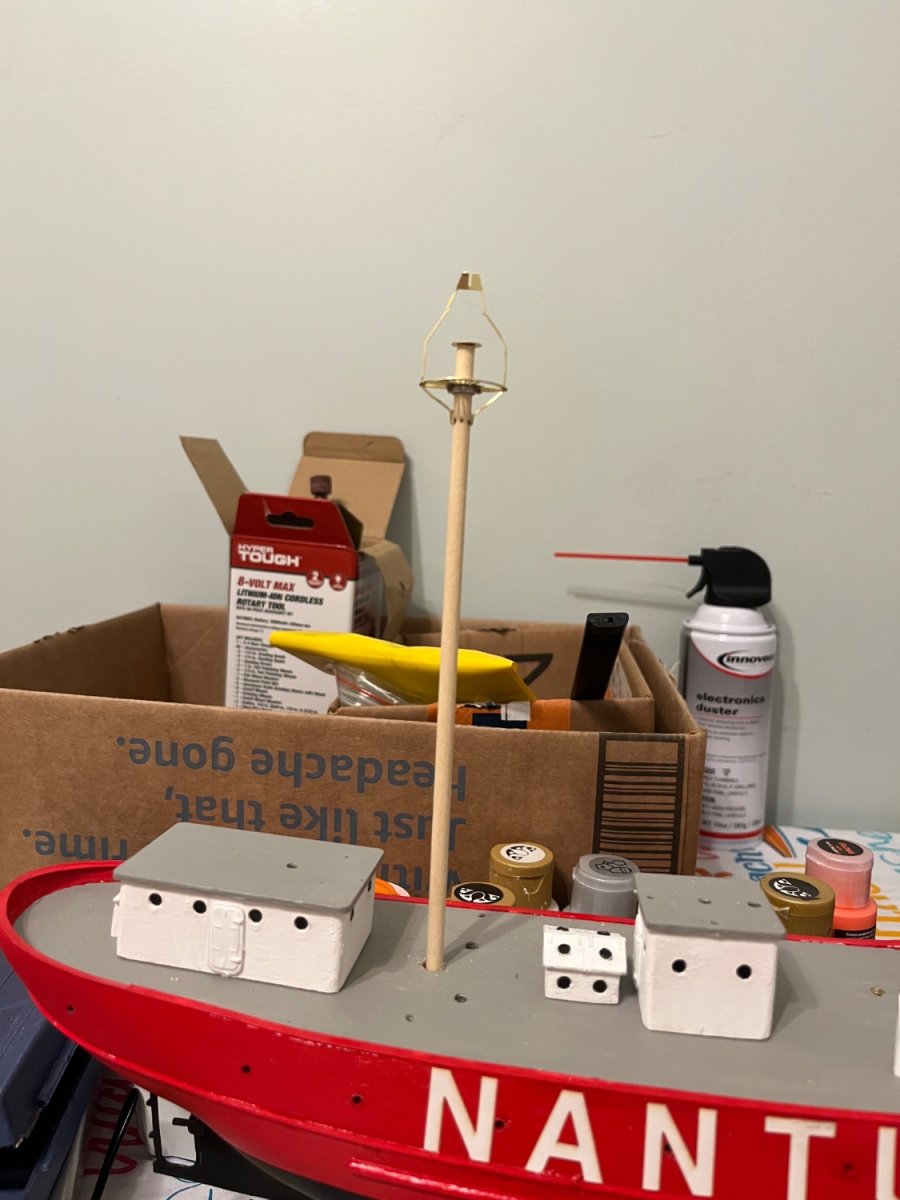
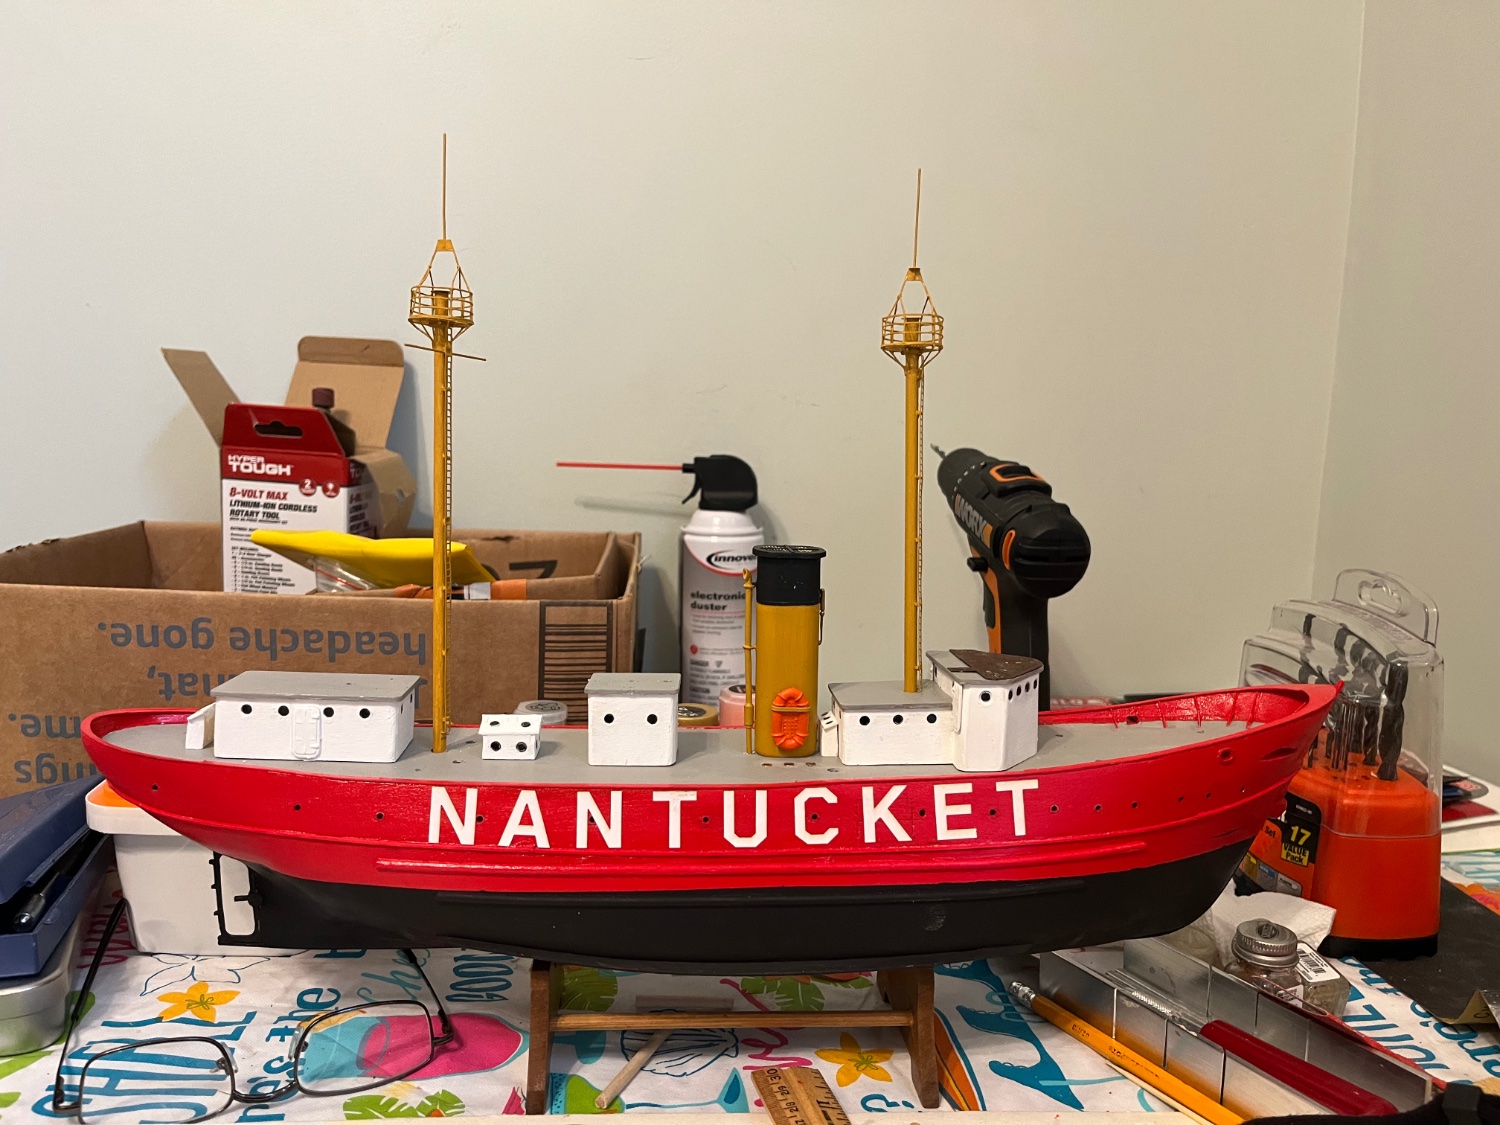
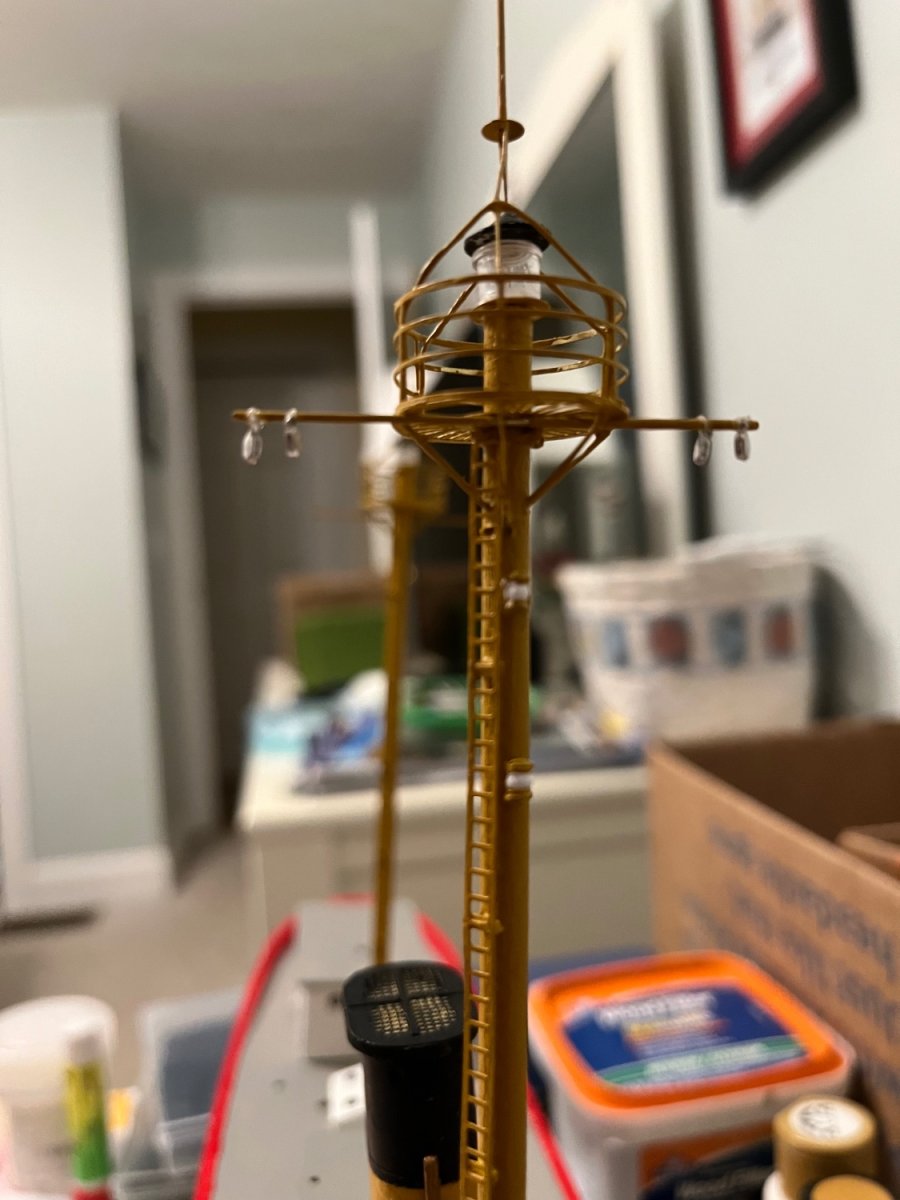
Fully constructed forward and stern masts. (I have not fully seated the stern mast so it is about a 1/2 “ higher). I sanded the masts and painted them an ocre color which is extremely close to the actual color. I also cut and cemented the forward and stern yards. Note the 4 blocks on the forward yard. You need a very small hand drill to open the eye on them to attach them to the yard with some thread and cement. I use a headlight with magnifying loupes which allows me a better view of them. I respect the modelers who constructed their creations prior to the invention of cyanoacrylate (super glue) cement. I cut and attached the ladders to each mast placing spacers every 10 rungs. I finally attached the running lights on the forward mast. I have enclosed several pictures as well as one of the concert I went to last weekend with my son to see Willy Nelson . Not bad for 89 years old!


Whaleship Essex by Jerry Berenson - FINISHED - OcCre - 1:60
in - Kit build logs for subjects built from 1751 - 1800
Posted
I just completed the build of the Whaleship Essex of 1820 which was sunk by a whale and inspired the Melville novel “Moby Dick. It is the first model I completed with fully rigged sails. I added a whimsical touch to the model by hand carving a spermwhale and a stoved in whaleboat.