HOLIDAY DONATION DRIVE - SUPPORT MSW - DO YOUR PART TO KEEP THIS GREAT FORUM GOING! (Only 36 donations so far out of 49,000 members - C'mon guys!)
×


rfolsom
-
Posts
881 -
Joined
-
Last visited
Content Type
Profiles
Forums
Gallery
Events
Everything posted by rfolsom
-
 Awesome job; I can't wait to see how the paint looks on her hull; Niagara is my third wood ship model to be planked... First one was A.L.s' swift which was double planked... Second was Billing Boats' Cutty Sark, which was coppered below the waterline... The Niagara will be my first attempt to "properly" plank the hull, as I hid all the butchered planking beneath the double planked, and coppered, surfaces on these previous builds. BTW, neither of these other ships are finished; both hulls are planked; the Swift is ready for her masts, and the Cutty is ready for her deckhouses and fittings. I like to bounce back and forth builds in order to learn and compare ideas between very different ships, and ship model companies.. Keep up the great work!! .
 -
Rich- When I installed the mast supports, I did try to fabricate them to the specified octaganal shape. I then attempted to duplicate this shape on one of the mast dowels provided with the kit, in order to test fit and determine the correct mast angles, (with respect to the deck and waterlines). I agree with Patrick and the others that shaping a square dowel (wait, SQUARE dowels??) would be much easier than shaping a round dowel. Square stock, and a jig, will be in my future... On the plus side, my butchered octagonal dowel fits snugly into the holes, and the angles with respect to the deck seem to be correct. (I did panic for a moment when I noticed that the masts were not parallel to each other; upon consulting the plans, the two masts have different angles with respect to the horizontal...Whew!)
-
Thanks, Patrick; I'll have to check out the Tamiya color; the yellow ochre in Model Shipway's paint set is a little too dark for me. I do have a build log for the Cutty Sark on this site, I started it when I started the Niagaras'; but have been working on the CS for about 15 mos. longer, so had to play catch-up with the photos.
-
Rich; Thanks for the advice. So, you'd recommend completion and finishing of all the planking (hull and deck) and installation of all fittings before installing the cap rail? This sounds like a good plan. At the rate I'm going with planking the inner bulwarks, I probably won't need to make the decision for another couple of months. I definitely agree with feeling both old and young at the same time; My attitude and mindset still feels 22, but sometimes (many times?) my body seems to disagree! Went hiking up Green Mountain today, and came within five feet of treading on a rattlesnake; (this after convincing my girlfriend there would be no snakes as this park is within the Denver metro area, and human traffic would scare them away... wrong!!) So yes, I'll certainly enjoy my weekend now that one of us is not airlifted to the hospital...
-
Thanks for the B-day wishes, I've only turned 22 twice in my life....
-
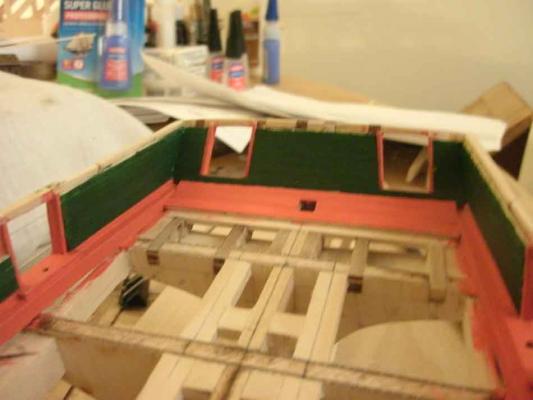
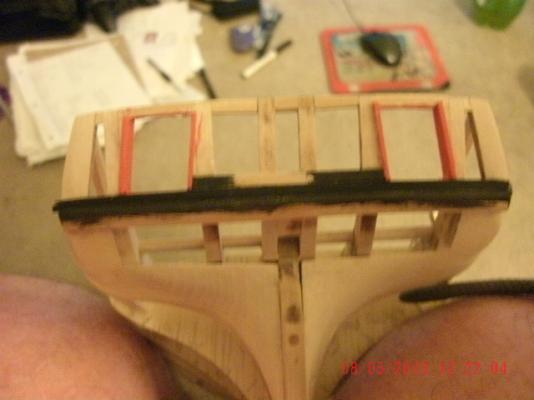
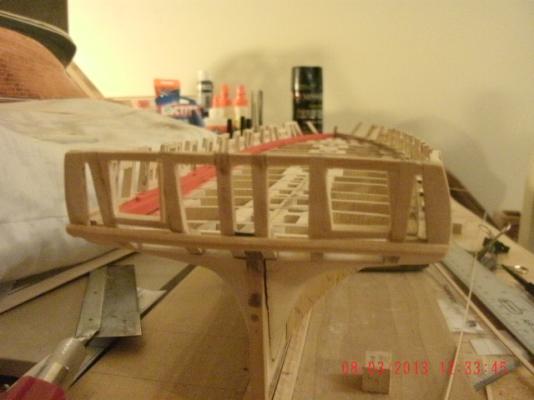
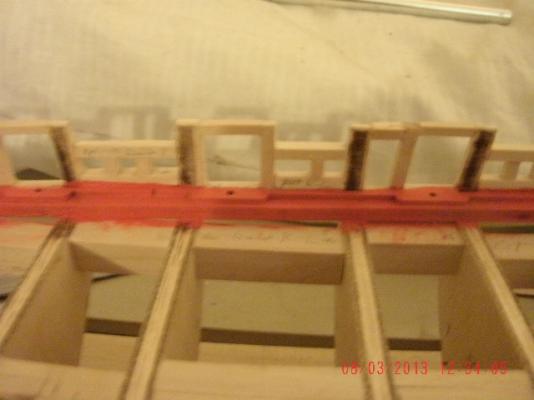
I decided to ceil the inner bulwarks before doing the upper planking on the outside. I am proceeding from stern to bow, alternating between starboard and port, and pre-painting the planking from one gun/sweep port to the next, bottom to top. This is very tedious, but I am trying to avoid masking the fiddly 1/32" square strips, and also squaring the gun/sweep ports to the best of my ability, one at a time. After the inner bulwarks are completely ceiled, and the outer bulwarks also finished planking, I will then install the topmost planks, inner and outer. After that, I plan on installing the top rail.


-
Rich; Incredible build, and great progress! What's your plans on shaping the masts (and other spars)? I skipped ahead in order to step the masts into the mast slots, but I've found planing these spars into the correct octagonal shape very tedious. Any thoughts? -Bob
-
Marc and Brian; Thank you so much for your compliments; Right now I have been working on the US brig Niagara for awhile; mainly to develop my skills with armament, rigging, and the spar construction before I tackle the Cuttys'. Niagara is a two masted brig, a beautiful ship, and intermediate skill level according to model shipways. I will shape her spars and do her rigging before I finish the Cutty's. And I thank the powers that be that I don't have to copper this one!! Best Wishes and happy modeling, ~Bob
-
Sorry for my broken English; I'm from Nebraska (Ha Ha...)
-
Rich; Just want to say "Thank you" for your posts; I hope you find a job soon. Have you thought of Cisco or Microsoft certifications as a booster in your down time? Companies seem not know RF but these certs. seem to rule.
-
Rich, and anyone out there that can help me; where would the actual beams be located on the Niagara?; I like accuracy and and know they don't always follow the models' bulkheads. I would like to produce the plank staggering as accurately as possible. Thanks for any help!
-
Very cool, Rich; Do you have a pic of your jig?
-
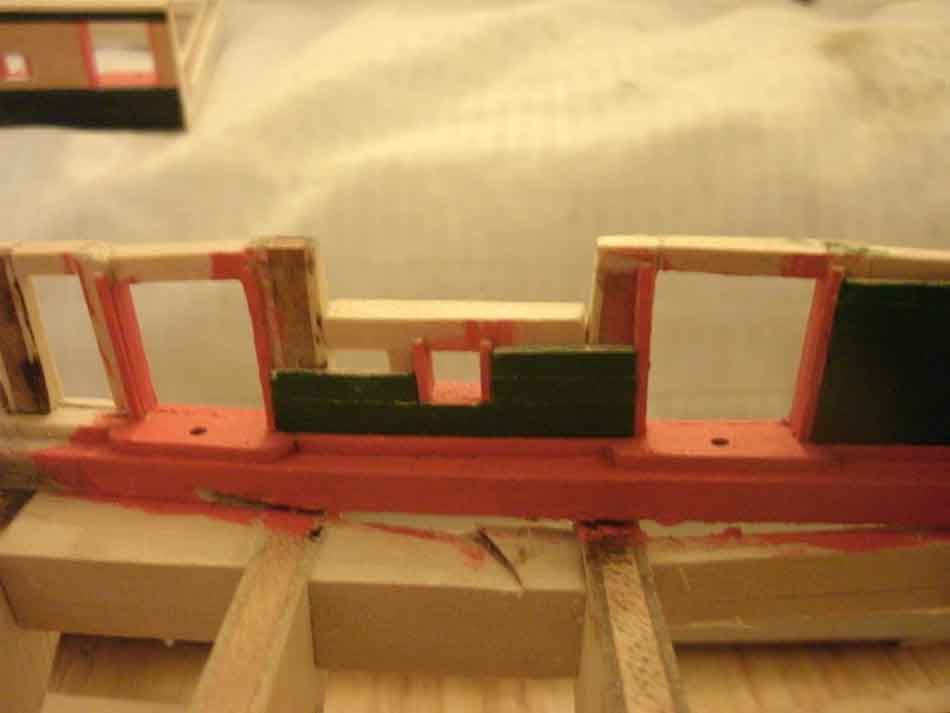
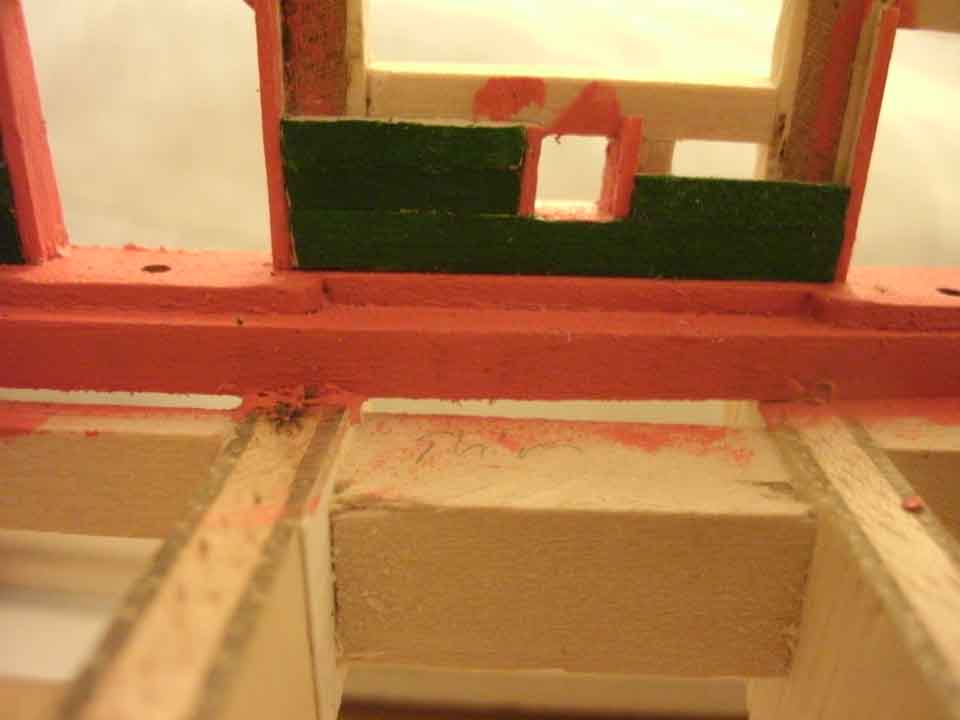
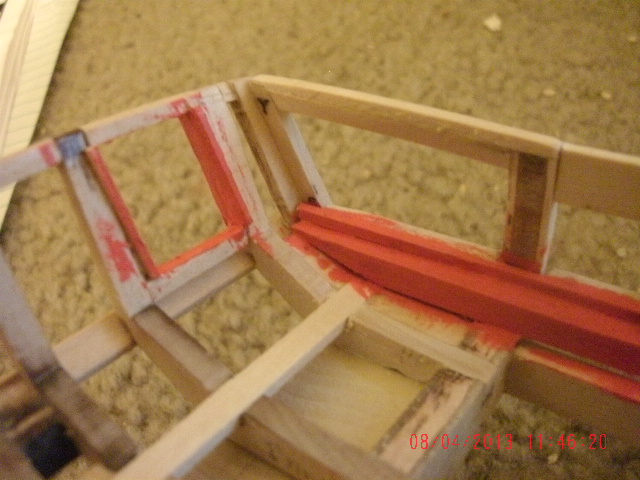
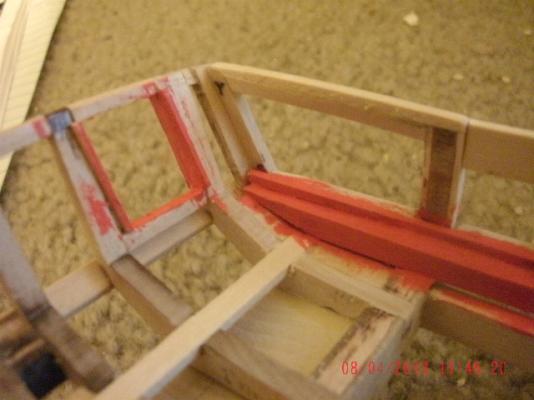
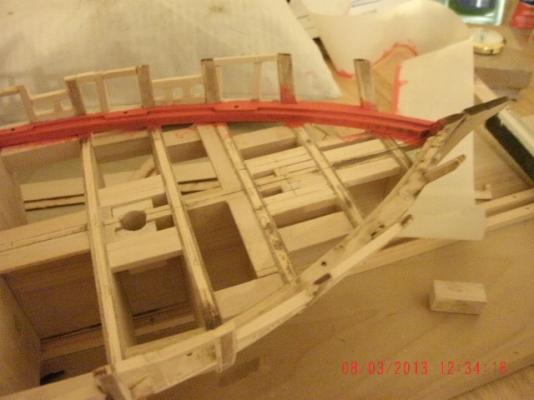
I cut the planks between the stern gunports, aligned them, and painted their edges to avoid masking next to the red gunport sill trim. There's a slight deviation from the plans (ports seem about 1/64" - 1/32" too tall) but I will wait until the edges are planked; and possibly even when the side bulwarks are planked to make a judgement call...


-
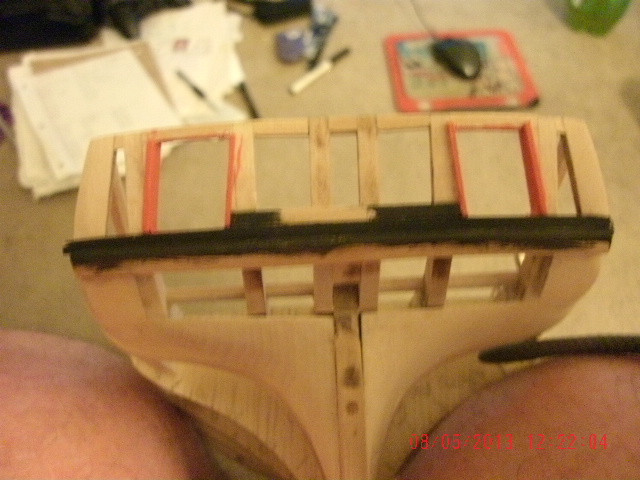
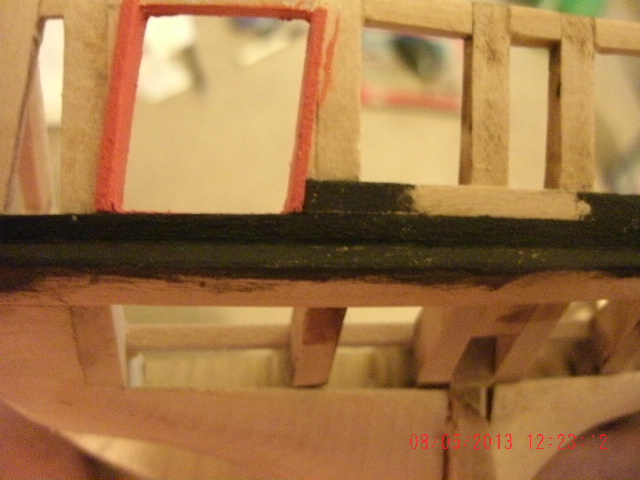
Started with the stern gunports and added the 1/32" square strips, and started the red painting. Also have a green ceiling transom plank, and an external black transom plank painted and shaped.

-
Yes, indeed; our beloved animal friends can wreak havoc at times. I had my parakeet cage on my workbench, and didn't notice the stern of my Cutty Sark was close enough to their cage that they did some interesting re-sculpting of the stern filler blocks. (Who would have thought they could reach?!) I definitely could not pursue this hobby if I had a cat (I love cats) or a puppy, and indeed I will have to be careful when letting the birds out after rigging commences. Just remember, wood is very forgiving, and you can always scratch build a part if necessary.. Good luck with your build! Bob
-
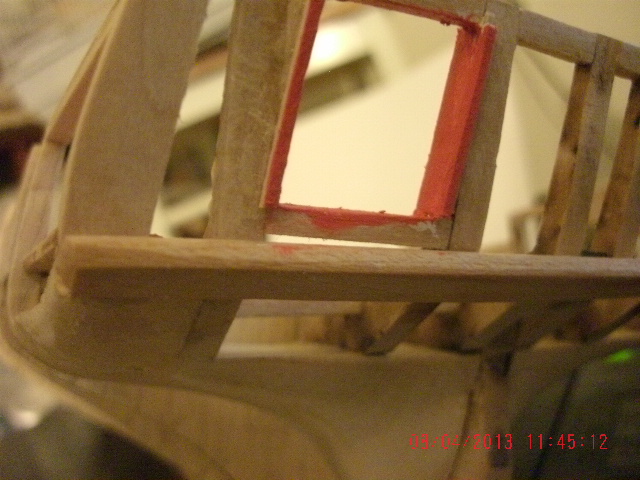
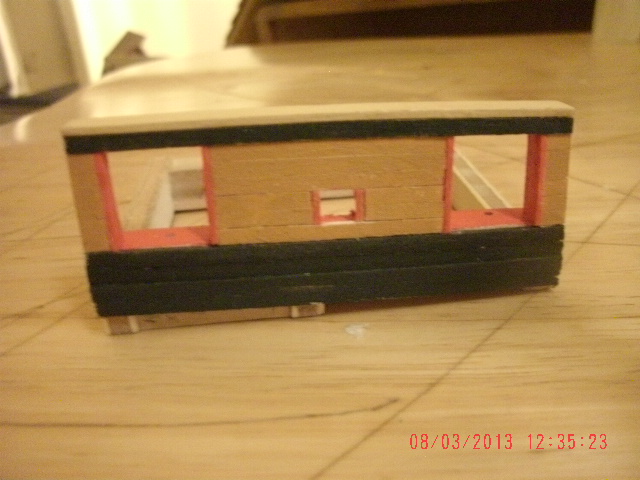
Hi guys, (and gals); I finished planking and painting the outside of my "test section", and found out a few things on how to proceed: 1) Did not like the look of the yellow ochre supplied in model expo's Niagara paint set. 2) Made the mistake of using a 3/32" wide plank at the bottom of the sweep ports. (1/8" makes it even with the plans) 3) Decided to go with the red 1/32" square plank end frame coverings lining the ports. I've now finished all of the gun/sweep port framings, finished most of the sanding, and started painting the waterway/planksheers. Next I need to add the bow timberheads and knightheads, and then add all those tedious little 1/32" strips lining the vertical sides of the ports. I found out I had to add a 1/32" shim to the tops of most of the timberheads in order to make their height consistent with the run of the planksheer, and also had to shim a few, and sand a few, of the timberhead sides in order to have the carronade pin holes be properly centered within the gunports. I also needed to pull out the dremel and undercut the waterway in two places where I neglected to properly fair the run of the deck, and then man-handle the waterway into a smoother position. Hopefully when bulwark planking commences, I will have few unpleasant suprises. (Not likely, but one can only hope...)

-
Looking good! Your build is just a bit further than mine, so I'll be watching! Bob
-
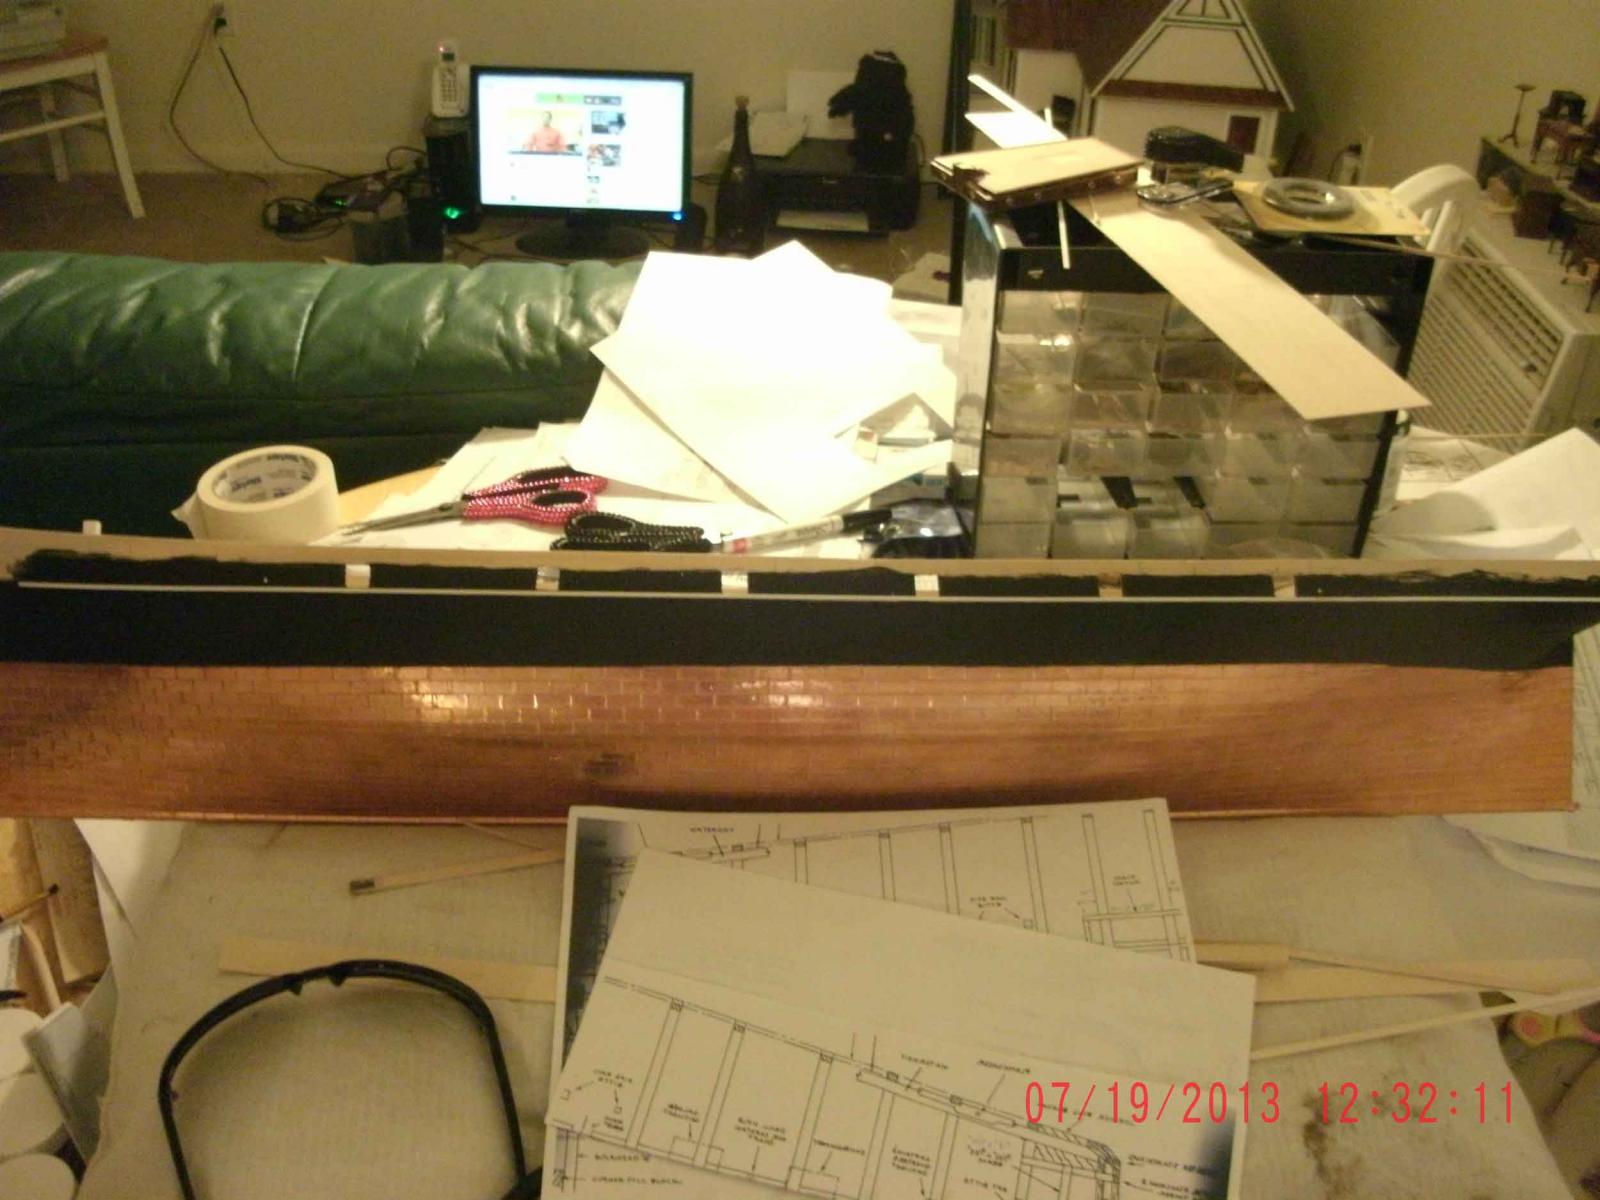
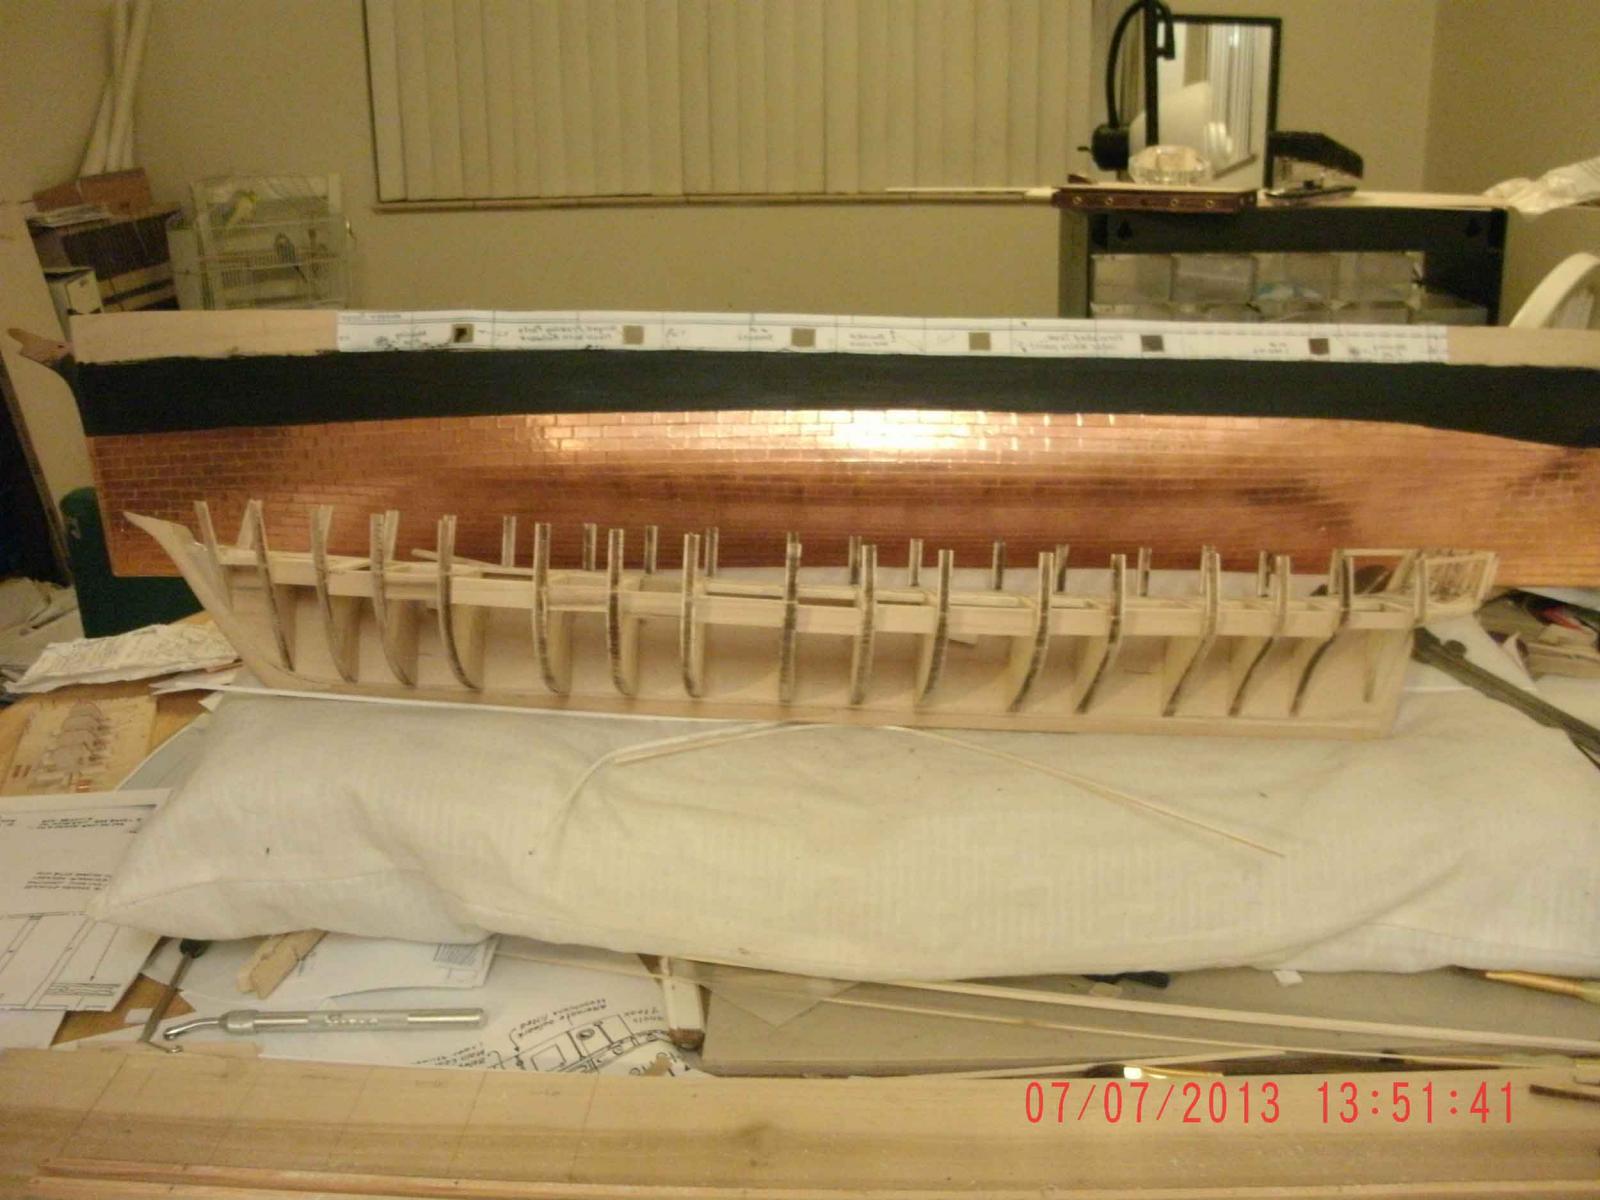
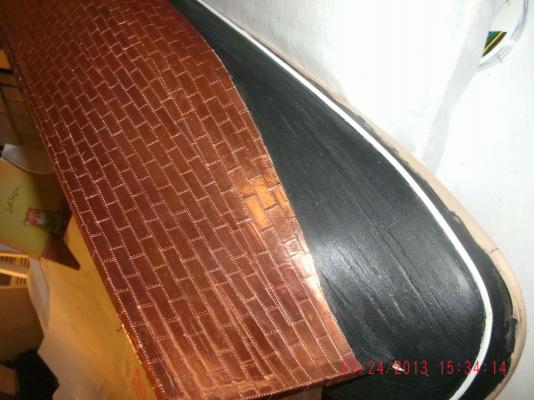
Thank you Popeye, for the nice comments. It is indeed my first attempt at coppering, and I chose copper tape bought from model expo, along with their ponce wheel to emulate nail dimples. Fairly cheap, yet a rewarding method for a newbie. As far as the trestle, that was a gift from my best friend, and former college roomate, who likes to see me put things together. Pretty much just a toy from Hobby Lobby's clearance section, but a fun distraction from the tedium (and I do Love the tedium!) of this hobby, and it holds my scrap and partial lumber for the ship modeling. Regards, Bob
-
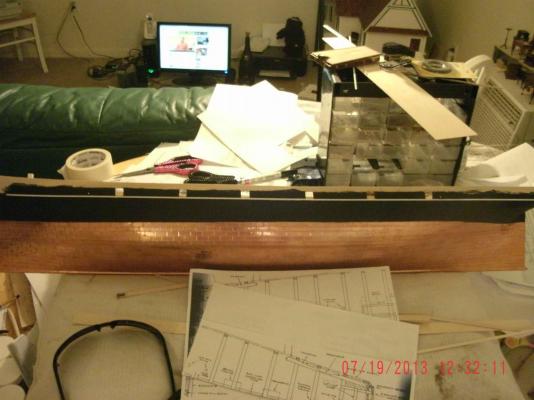
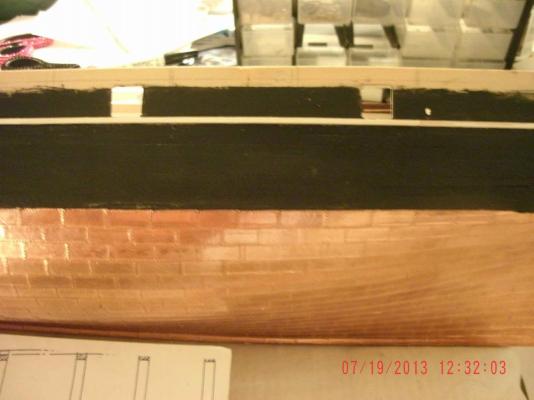
Now I'm finally caught up to real time; these are the latest pics taken of the CS. I'm currently painting the upper hull, cutting out the freeing ports, and adding the railing along the sides. There's also a shot of Model Shipways' Niagara that I'm currently working on as well.

-
Marc- My thoughts go out to you and your loved ones; hope to see new posts when you're ready. Bob
-
Cutty Sark by NenadM
rfolsom replied to NenadM's topic in - Build logs for subjects built 1851 - 1900
I am also a big fan of G. Campbell's Cutty Sark plans. with risk of copyright infringement, I could send you some copies,( but I didn't say or type that in my right mind.) t -
Cutty Sark by NenadM
rfolsom replied to NenadM's topic in - Build logs for subjects built 1851 - 1900
Hello, Nenad, I have found that the curvature in the stern area is a very hard area to deal with. There are three different curves: First; the natural curvature of your planking that leads to the counter; Then, the curve of the iron bulwarks as they wrap around the stern. ( I did this with 1/32" basswood). Finally, the last 1/4" that I steam bent into place; these lie vertically.- 4,152 replies
-
- 1
-

-
- cutty sark
- tehnodidakta
- (and 1 more)
-
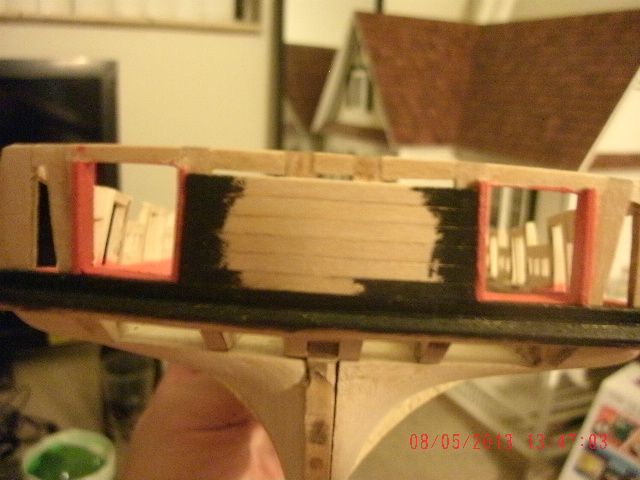
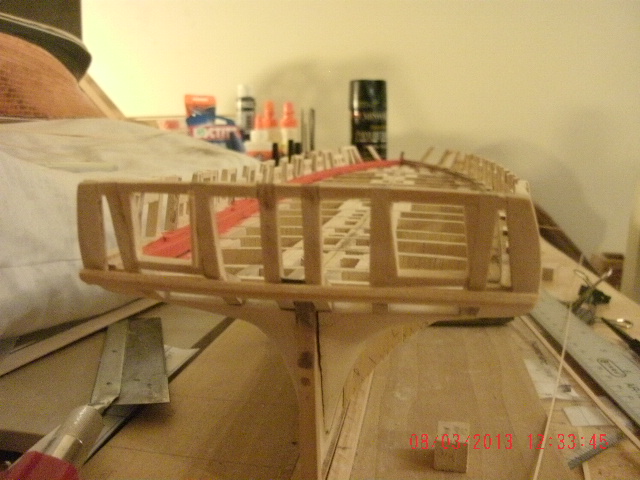
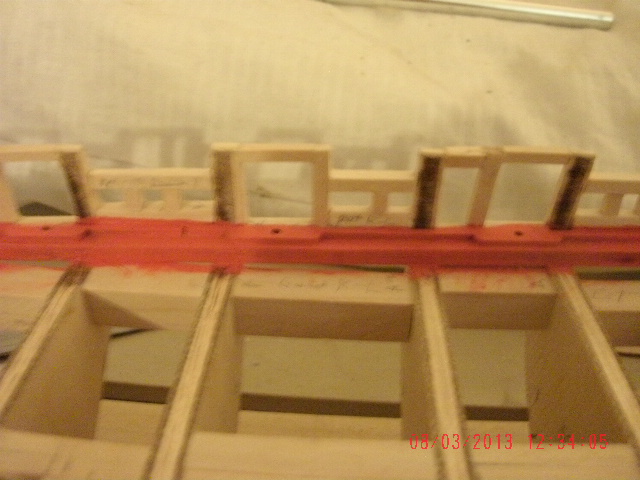
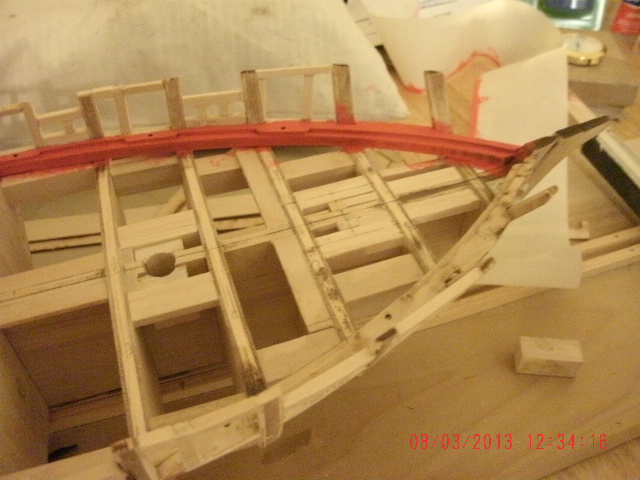
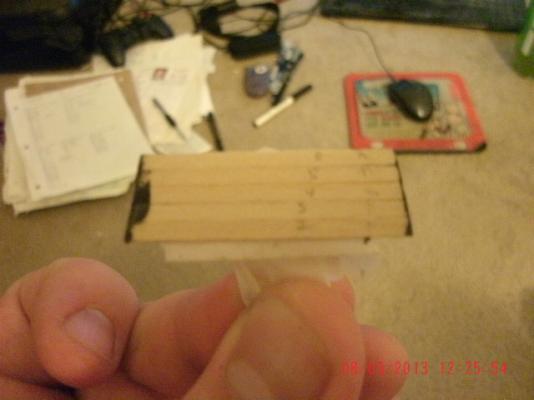
Hello, Larry; Very nice build! I wish I was closer to where you are; as a relative newbie, I decided to replicate a small portion of the ship (bulwarks G, H, and I) down to the reference line, and build a mini-model that I could plank, test the painting and carronade mounting, eyebolt positions, deck caulking, etc. It's actually working out better than I thought, and I will probably end up with a 3 x 3 inch little display I can give as a gift


-
Marc; Awesome build! I too struggle with the actual colors of the ships' deckhouses. If you compare a ship with a personal home, you know that through the years you have to allow for many changes: for example, a house built in 1950 is not going to have the same painting scheme, wallpaper, flooring, roofing, and furniture, and is highly unlikely to have escaped any major structural modifications, as compared to the same house in 2013. This is in 63 years. If you extrapolate the date the Cutty turned 63, that would have been 1932. I see that you have a copy of G. Campbell's plans, and that is what I always bounce back to when I have a dilemma concerning minor details. I know my model is not representative of the CS at any one point in time, but serves my personal preference as to how she looks the best, while trying to keep things as historically accurate as possible. Keep up the excellent work, and don't sweat the details ~Bob
- 525 replies
-
- 1
-
-
- cutty sark
- mantua
- (and 2 more)
-
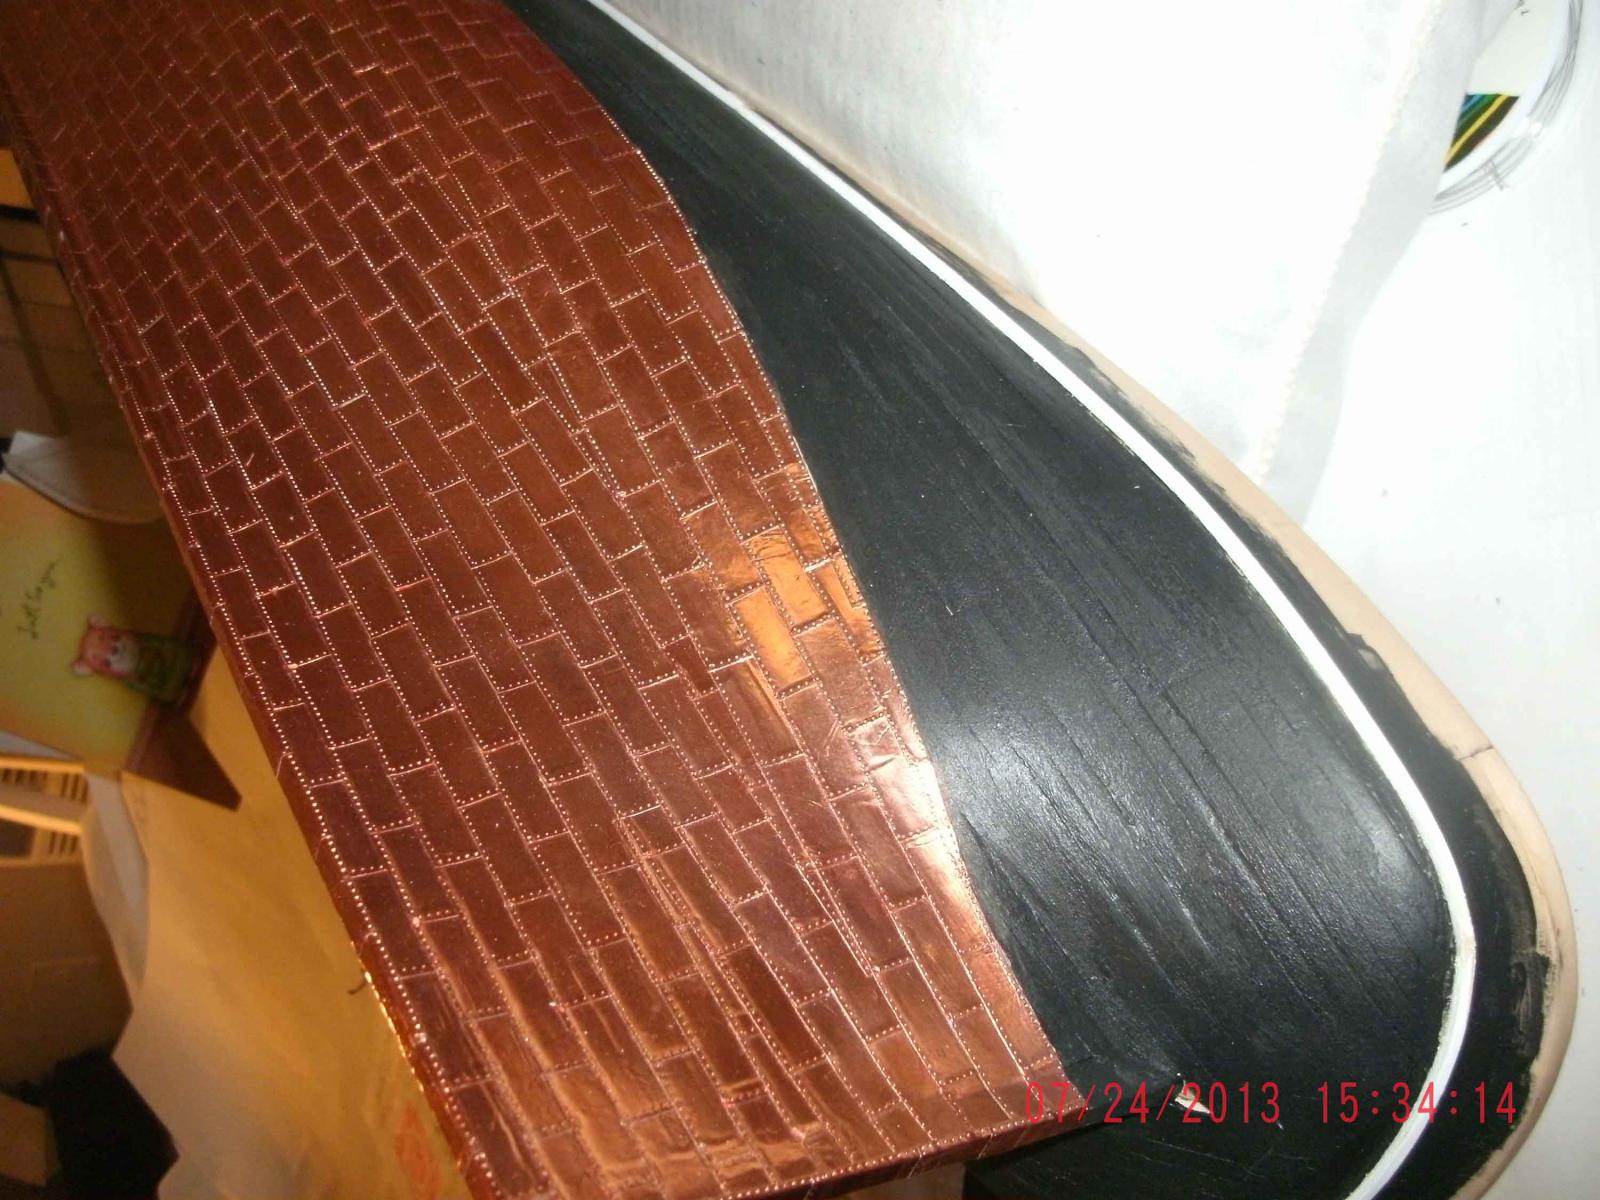
Neenad, if you're still watching, notice how different lighting shows different colors of the same plating! (I did not notice this until I posted these photos)