rfolsom
-
Posts
881 -
Joined
-
Last visited
Content Type
Profiles
Forums
Gallery
Events
Everything posted by rfolsom
-
 AJ: Welcome to the Niagara Club! Your bulkheads are coming along nicely... (Very colorful clamps, btw..) Bob
 -
Cutty Sark by NenadM
rfolsom replied to NenadM's topic in - Build logs for subjects built 1851 - 1900
Ah, yes; I do feel for you, sir. When I had completed planking my false deck (outside the main hull) I awoke the next morning to find out my birds had somehow splashed their water all over the completely planked deck, warping it badly. (I have since moved their cage off my work table). I was so discouraged I told the Admiral that I'm boxing this ship up, and ordering the USS Constitution kit from Model Expo. However, After a few choice words, I took a deep breath and placed the deck in the bathroom with the shower running full force as hot as it would go; to steam the deck; then placed it on tile with 10-12 encyclopedia volumes on top for a day. This worked out well enough that I was able to salvage my work and go on. I encourage you to take a deep breath, weigh your options, and proceed.. This is a hobby, and at times can be discouraging, but there is no timeline for completion involved, nor will any lives be lost because of mistakes As James Lawrence commanded in 1813 (while dying): "Don't give up the ship!" And also thank you for the advice on the deadeyes; this is how I'll proceed.- 4,152 replies
-
- 1
-

-
- cutty sark
- tehnodidakta
- (and 1 more)
-
Thanks for the nice comments, guys... I should be finishing up the ceiling of the inner bulwarks in the next couple of days, and will post some pictures soon... Then it's on to the outer bulwark planking.
-
Awesome news, Rich!! Congrats and good luck on the move! Bob
-
Hello; You can see how my birds (they were in their cage, which once sat upon my workbench) reworked the port stern filler block... Luckily the deck and stern planking covered this !

-
Cutty Sark by NenadM
rfolsom replied to NenadM's topic in - Build logs for subjects built 1851 - 1900
Wonderful progress on your build! It makes me want to do the next step on mine as well... Kids will always be kids; If he paid for the bike himself; let him lose (or break) it himself, and learn the lesson the hard way. However, motorcycles can be very dangerous without proper care; Watch this carefully.... Are you going to keep the kitties?- 4,152 replies
-
- 1
-
-
- cutty sark
- tehnodidakta
- (and 1 more)
-
Rob- I think it's great that you're modeling this ship as it was at a certain point in her career; People seem to ignore the fact that many of these famous vessels had more than one "life"; Indeed, many of us humans share the same fate. Keep up the good work, and never be discouraged... ~Bob
- 44 replies
-
- 1
-
-
- cutty sark
- revell
- (and 1 more)
-
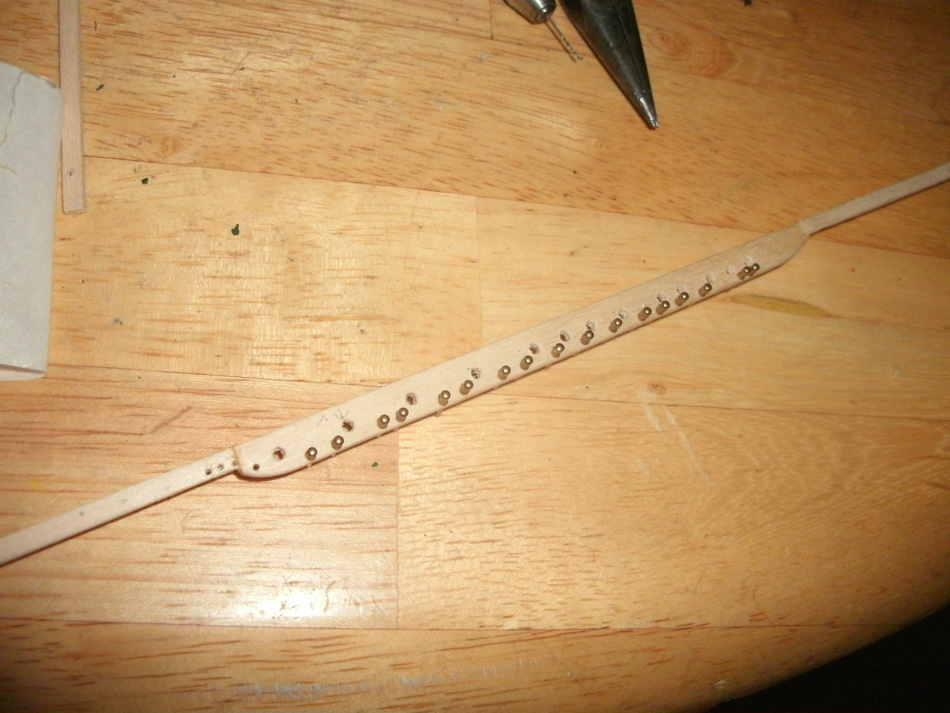
During this dilemma, I have cut out the freeing ports, and I've also started to mark where to drill into the waterway for the stanchions' placement. On my next day off, I will be testing Popeye's plan (Thank you, Sir...) and hopefully (substantial) progress will resume!
-
Popeye; Excellent idea on the half-cap for the stanchions! I should have mentioned something sooner. This may definitely be my solution for that dilemma... I've been holding off for several months now... As far as removing the upper rub rails, they were never installed (yet); I was contemplating pinning the pinrails into place, through the bulwarks, first, and then hiding the pin-heads underneath the rub rail. (The paint is spotchy because I was hesitant to cover my reference lines in that area). I have 1/16" square by 24" basswood stock formed and ready to install (after staining).
-
Slowly working on the inside bulwarks; painting each plank as I go....

-
Hello, everyone; I haven't posted in a while; right now I am trying to figure out the best way to fabricate/mount the side pinrails, and at the same time trying to figure out the best way to fabricate/install the bulwark stanchions. I do believe this is one of those "moments" to just plow ahead instead of ponder...


-
Spencer; Get yourself a set of G. Campbell's plans; they are indispensable for this ship, whether kit or scratch built. Also, the book "China Tea Clippers" by the same author (George Campbell) would help in any clipper ship build. The book is out of print, but I had no problem whatsoever finding a pristine copy on ebay for $15. I believe you can get the plans from the Cutty Sark's website. I was fortunate enough to receive them in my 40 year old Billings Boats kit. (Which is now mostly scratch built). Happy modeling... Bob
-
I agree with Sam.. By nature engineers are designers, it goes hand in hand. And especially RF is the cream of the crop in electrical engineering... We used to call the RF dudes "Witch doctors" in school; A 43% , with the curve, in electromagnetic field theory earned one an A at the university I attended. Software can be a big pain in the a** for hardware guys; I had a boss ask me if I had experience with C programming; upon saying "no" he plopped down a textbook on my desk and said "Well, now you will" and I learned it in 8 hours for a project the next day....
-
Digikey, Mouser, and Newark are my go-to's when I need a part. I usually do a sample request... But yes, a $30 coffee maker is not worth the time and the effort (unless it's fun)! (Kinda like ship building!?) Keep up the good spirit; my best friend just went through the process of finding a job (after a layoff from a 13 year career) and I did so in 2010. I really hope you get this job; what's the market looking like for embedded system design?
-
Rich, You're an engineer. Did you think about fixing the coffee maker?
-
Cutty Sark by NenadM
rfolsom replied to NenadM's topic in - Build logs for subjects built 1851 - 1900
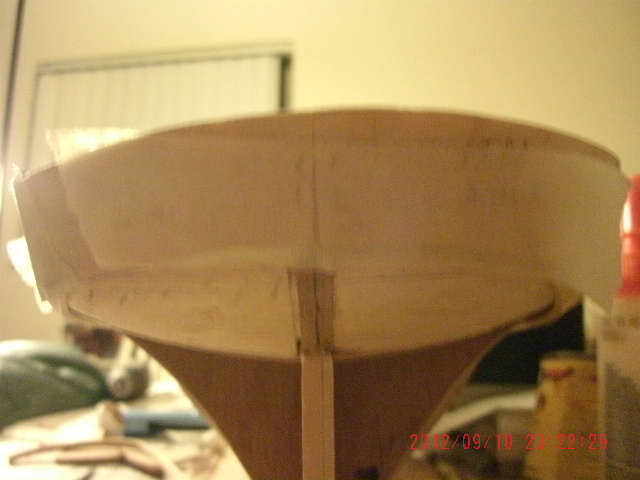
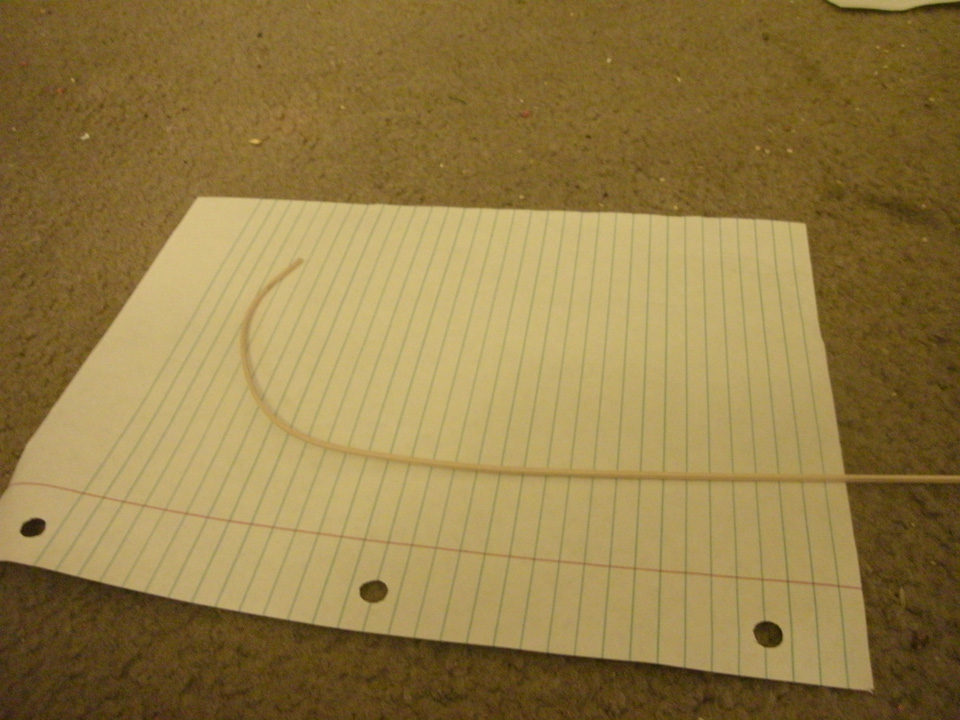
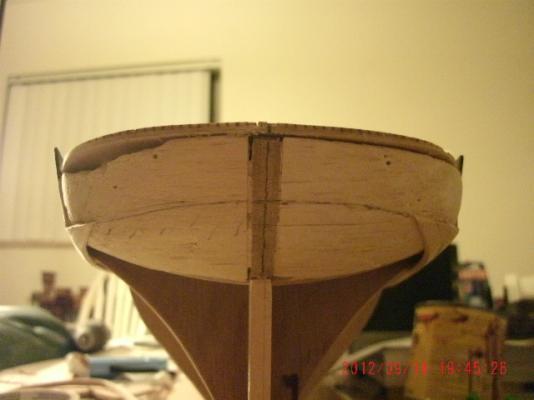
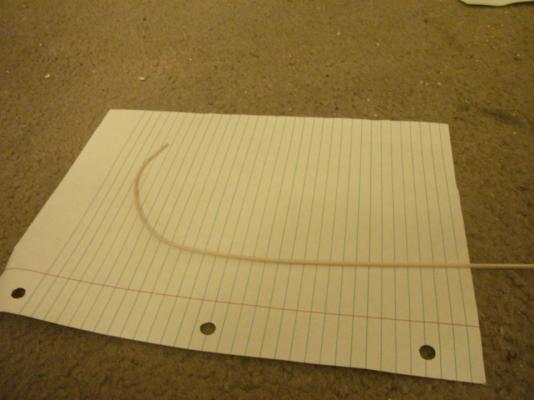
Nenad; I took a piece of 1/32" by3/16" basswood; soaked it in plain water over night, and formed it over a soda bottle, to let it dry. It formed the stern bulwarks perfectly.- 4,152 replies
-
- 1
-
-
- cutty sark
- tehnodidakta
- (and 1 more)
-
Cutty Sark by NenadM
rfolsom replied to NenadM's topic in - Build logs for subjects built 1851 - 1900
Well, yes, you can go on and on... I have many mistakes that I can live with, and indeed, if I ever finish my build, I'll be able to show my friends these mistakes that only I will know about. When coppering the hull, I had a few nights of drinking beer and listening to music, happily coppering along; and the next morning waking up to badly aligned tiles; having to remove 3 hours worth of work only to start again! However, sometimes I left them as they are. It all depends how much "work" you want to do. The waterways on my build are badly misaligned toward the bow, but I sure won't remake the deck just to fix it. Also, my deck has ripples that are not noticable when looking down upon it, but at a level view is very apparent. I can live with this.- 4,152 replies
-
- 2
-
-
- cutty sark
- tehnodidakta
- (and 1 more)
-
Cutty Sark by NenadM
rfolsom replied to NenadM's topic in - Build logs for subjects built 1851 - 1900
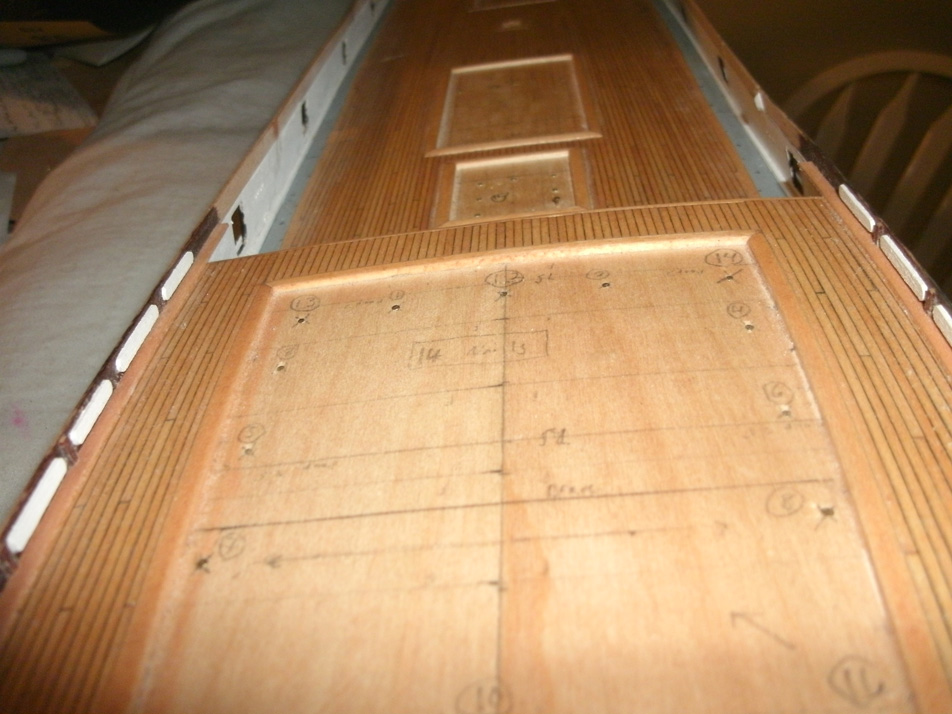
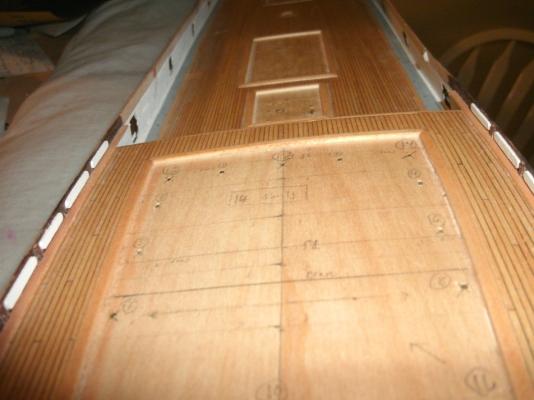
Nenad, As you know, I use Campell's plans exclusively in my build, as I feel they are the most accurate available for this ship. Now that you have a copy, you can proceed with confidence. My suggestions would be as follows: establish known reference points on your build, such as distances between centerlines of masts, and scale Campell's plans to match in photoshop. Next, make allowances where you can where you find discrepancies. (You can adjust the waterways at the stern to compensate somewhat for the different curvatures.) I've found it extremely helpful to mark the section lines from Campbell directly onto the build (deck and hull). Nothing ever completely lines up (for me, at least), but it's a great joy when they do! You just need to find the average overall that will balance out the entire model. That being said, please remember that the real ship was built in 1869, with 1869 technology, and things would not have lined up 100% with their plans then; and our frustrations with our models probably accurately mirror the original builders' frustrations as well. Your build is progressing marvelously, and your ideals you posted are very wise; I would add two more: 1) This is my hobby, and It's fun and relaxing. 2) Don't sweat the small stuff. Happy modeling, it's the journey, not the destination!- 4,152 replies
-
- 5
-
-
- cutty sark
- tehnodidakta
- (and 1 more)
-
Cutty Sark by NenadM
rfolsom replied to NenadM's topic in - Build logs for subjects built 1851 - 1900
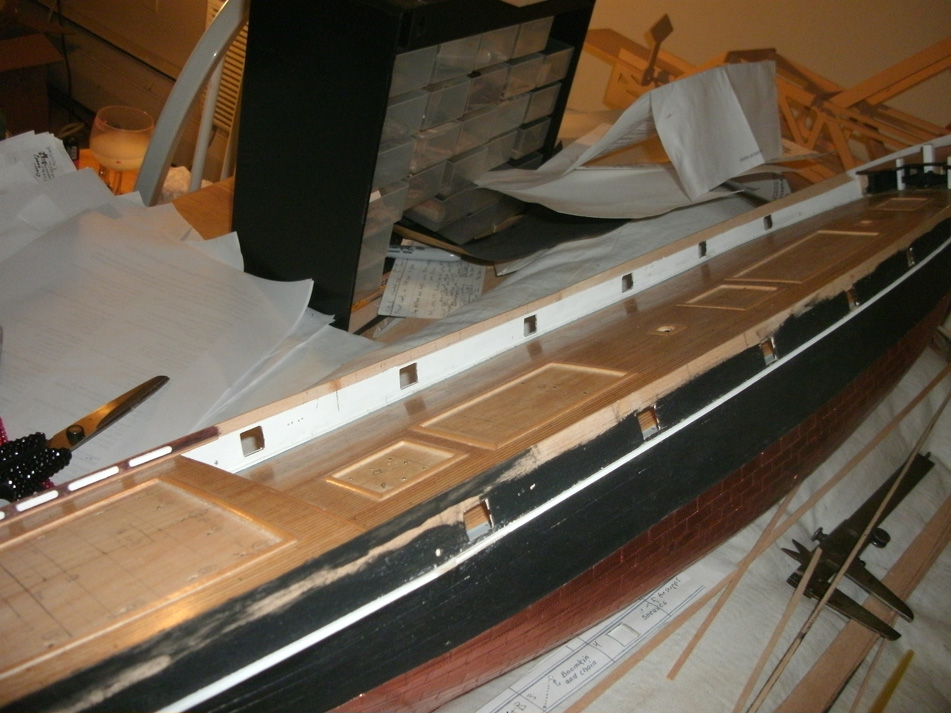
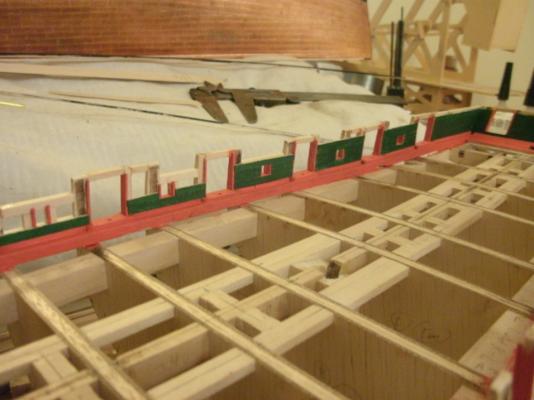
Hello, Nenad; In my build I decided to make these panels the opposite way of what they're supposed to be; I.e. standing out instead of recessed. Your way is definitely the accurate way, and I may indeed regret my decision. I have only done the sternmost four of these details (photo is of the stbd. side with the bow facing left; poop deckhouse removed for clarity). Working from Mr. Campbell's plans, I noticed there is a different spacing between the uprights; and hence the different lengths of white panels in this photo. I did these first test panels some time ago~ 6-9 months, I think, and not sure of their spatial accuracy. Let me know what you think; I may have to rethink this process.. Happy modeling, Bob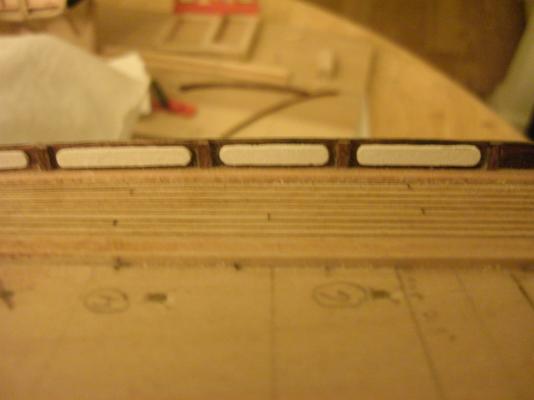
-
I suppose most of my CS is scratch built; as I only used the prefabricated bulkheads from the kit. I downloaded the instruction manual from Billings, but I was not satisfied with them. I do all my modeling from the Cambell plans now.
-
Cutty Sark by NenadM
rfolsom replied to NenadM's topic in - Build logs for subjects built 1851 - 1900
I too share the same dilemma; I pre-painted my lines and installed them after painting the hull underneath, in order to avoid a lot of tedious masking. I'm not sure that was a wise idea, because they are coming loose in places, requiring me to use ca glue, which discolors the paint, which leads to sanding and repainting.... (on and on...) I have had many run-ins with fate or bad luck, (or drunken nights )with this ship, but I repair my many mistakes as best I can and keep plugging along. I agree that the time invested is not worth restarting the build. I try to view the mistakes I make as inevitable "battle scars" and will be proud of the ship, no matter what the "critics" may think!- 4,152 replies
-
- 5
-
-
- cutty sark
- tehnodidakta
- (and 1 more)
-
Cutty Sark by NenadM
rfolsom replied to NenadM's topic in - Build logs for subjects built 1851 - 1900
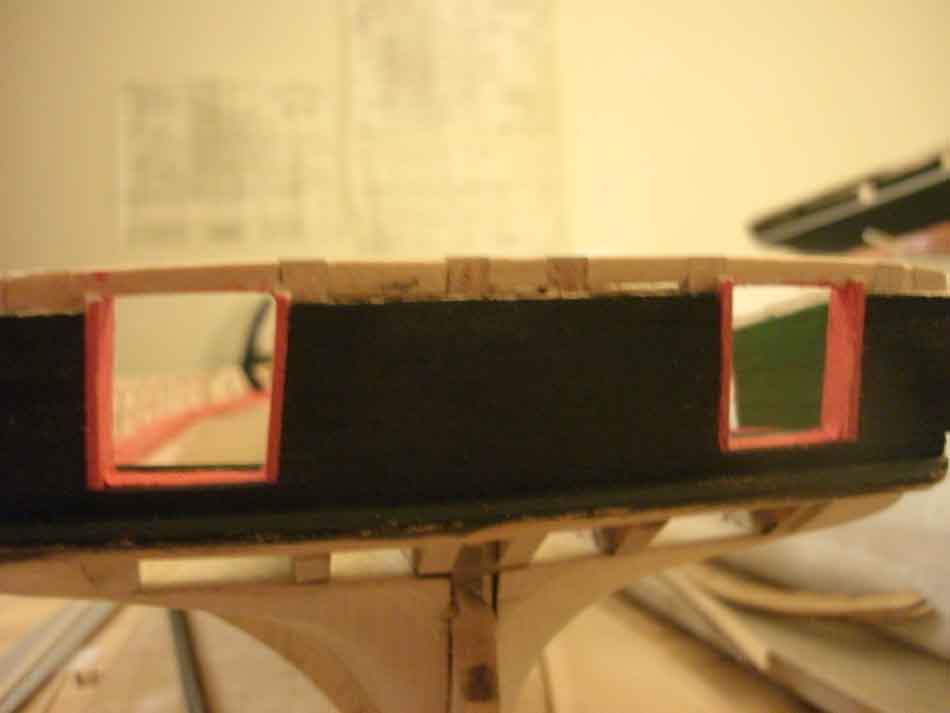
Hello, Nenad; Not sure if I was hiccuping the night you mentioned; I was brought up the same way only that an itchy nose was the sign someone was talking about you As far as the ship's areas you mention, the first three lines are accurate. I assume that the previous restorations added the fourth line to cover up unsightly copper erosion at the top, and who knows the purpose for the fifth line? (Probably someone who thought it would make the ship more presentable?) They wouldn't have been installed on the original ship. There were no wooden planks above deck level; the bulwarks of this ship were made of iron plates. This is very deceiving on most kits' instructions (including mine) who would have you plank right up to the rail. I made my simulated iron bulwarks out of 1/32" sheet basswood, and thought about duplicating rivets and plate lines, but decided against it. I am attaching a pic of the cross-sectional area of the bulwarks, but I'm not sure if it's uploading correctly. Hope this helps, and remember the "hmmmm-hmmm" is like the "mm-mmm" of eating a fine meal! Crosssection.bmp- 4,152 replies
-
- 1
-
-
- cutty sark
- tehnodidakta
- (and 1 more)
-
Cutty Sark by NenadM
rfolsom replied to NenadM's topic in - Build logs for subjects built 1851 - 1900
Your sanding and lines look great! Now is the time when you sit and look at the ship from every direction and say to yourself; "hmmmmm.... this is really cool!- 4,152 replies
-
- 1
-
-
- cutty sark
- tehnodidakta
- (and 1 more)
-
Rich; Happy belated birthday, and great job on the deck structures; it's so good to hear you have promising news in the job arena; I have been keeping my fingers crossed for you since I joined this log, and I have no doubt at all you will come out in a better position than before... Patience always prevails over frustration, and rewards will be the end product! Best to you, and Yours, Bob
-
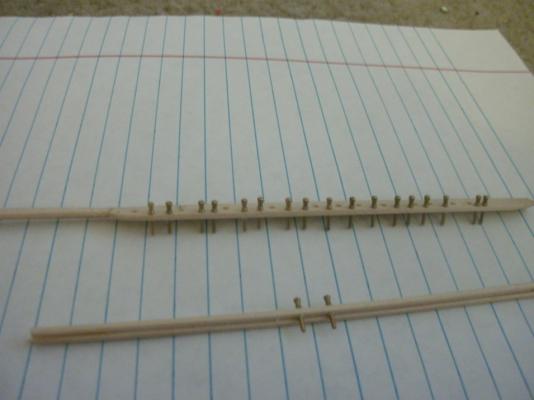
Rich- Your build is going great! I noticed you've started the fife rails, a long way off in my build; however... In my kit, I was supplied with 12 mm pins, which disagree with the 9/32" pins called for on the plans (sheet 3). After emailing Model Expo informing them that they supplied the wrong sized pins, they responded by saying the 12mm pins were the right part. I have some 5/16" pins from my other build that match the plans very closely, but I don't have enough to do both builds. I guess after all this rambling, my question to you, and to the other Niagara club members, were you supplied with the 12mm pins, or the 5/16" (8mm) pins? Bob