HOLIDAY DONATION DRIVE - SUPPORT MSW - DO YOUR PART TO KEEP THIS GREAT FORUM GOING! (Only 36 donations so far out of 49,000 members - C'mon guys!)
×


rfolsom
-
Posts
881 -
Joined
-
Last visited
Content Type
Profiles
Forums
Gallery
Events
Everything posted by rfolsom
-

Cutty Sark by NenadM
rfolsom replied to NenadM's topic in - Build logs for subjects built 1851 - 1900
I'm very sorry to hear about your losses; please take care and know that my thoughts are with you, my friend. ~Bob- 4,152 replies
-
- 1
-

-
- cutty sark
- tehnodidakta
- (and 1 more)
-
Cutty Sark by NenadM
rfolsom replied to NenadM's topic in - Build logs for subjects built 1851 - 1900
Congrats to Princess; and belated congrats to everyone in your family for their education! You must be proud, and well deserved! ~Bob -
Always trying to plan ahead; the best I can do... I have no idea how to represent the scrollwork, other than photo etching. 15 years ago I worked for a circuit board manufacturer and everything I would need was at my fingertips; now, 800 miles away, I'll have to do it on my own. Photo etch is not my first choice, but I know the limits of my artistic skills, (nonexistent)... Anyway, much more paint, stain, and cut up aluminum cans to go before photo etch,..
-
Keith; I hope you're just kidding, Your build is looking wonderful! ~Bob
- 151 replies
-
- 1
-
-
- cutty sark
- billing boats
- (and 1 more)
-
Thanks for the kind words, Keith and Nenad; I'm glad I took the time to tear up the topgallent rail and sand things down. I'm not nearly as courageous as you, Nenad, but sometimes you just have to take the plunge...
-
You own the key to success, Omar; the whole idea is to have fun; and if you can make the Admiral happy in the process, it's quite the bonus! Cheers! ~Bob
-
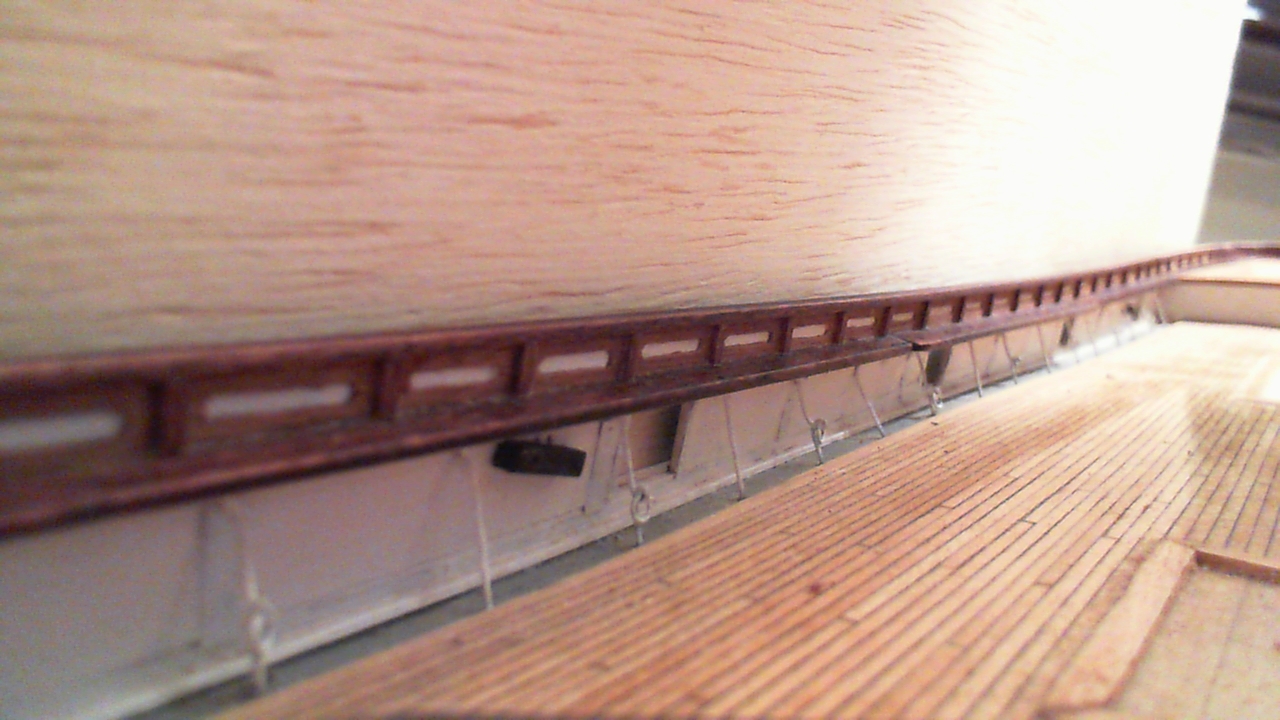
Inside bulwarks modified; see my post 586 for comparison

-
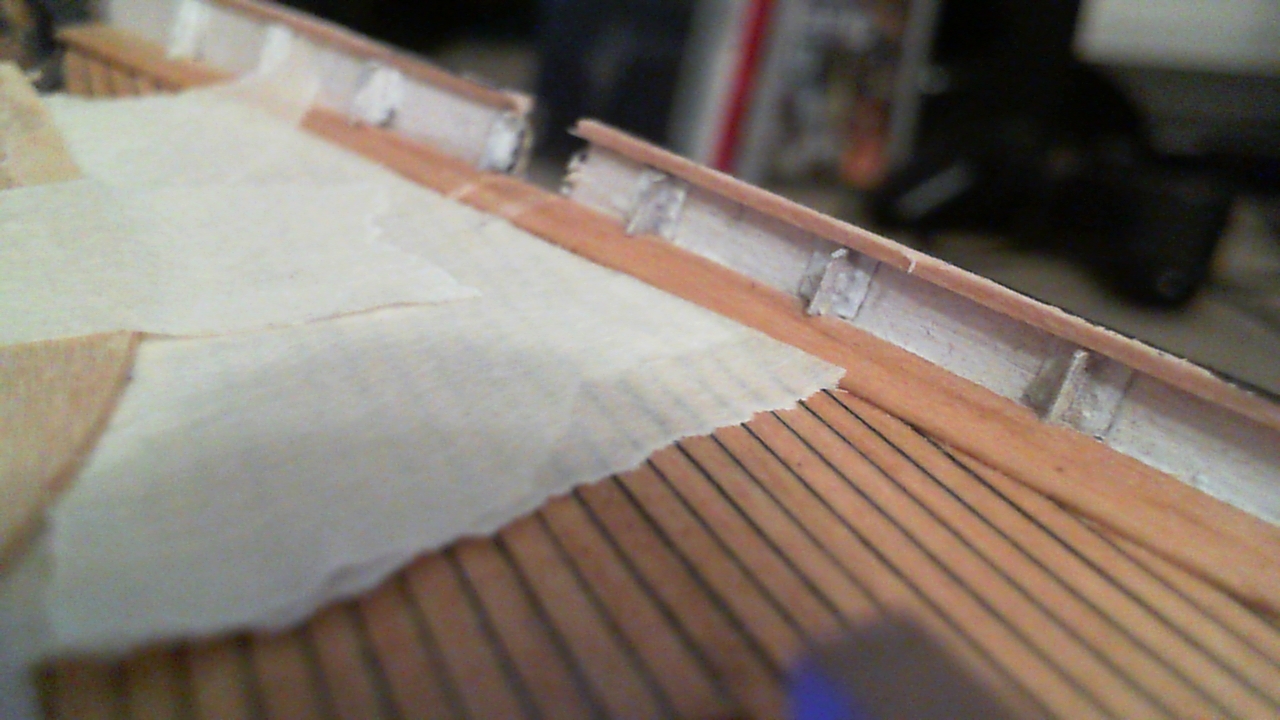
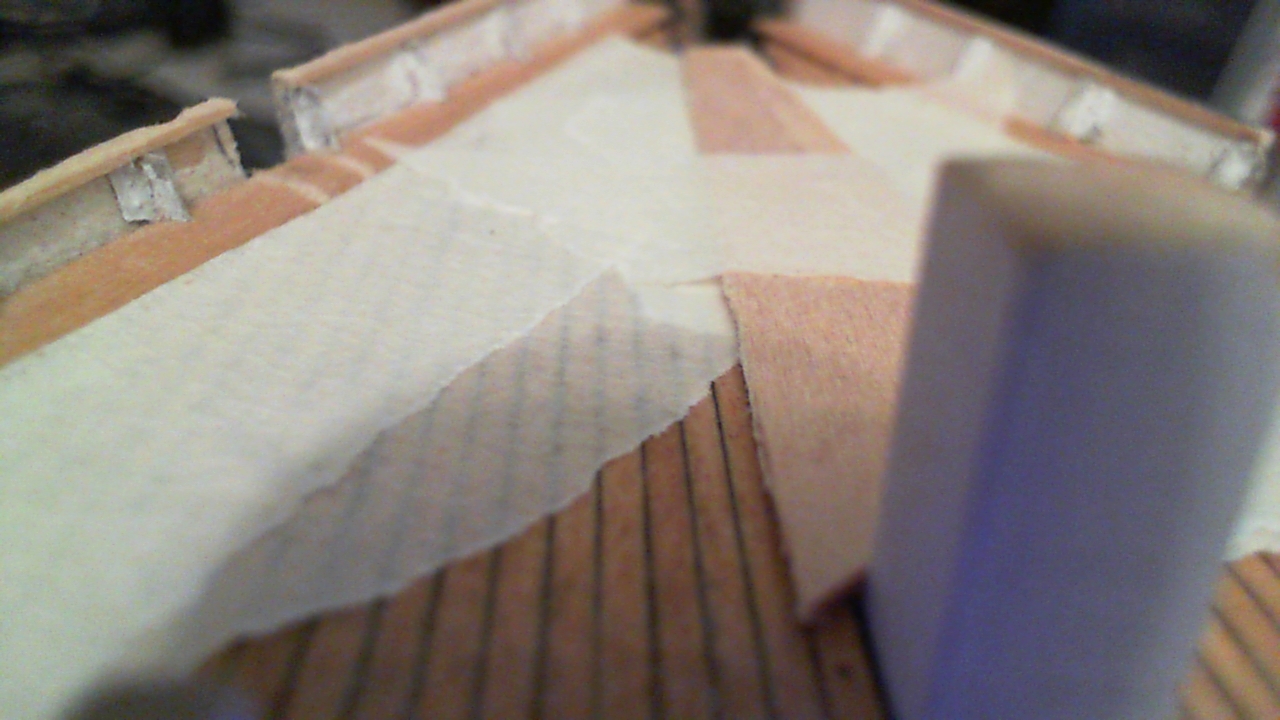
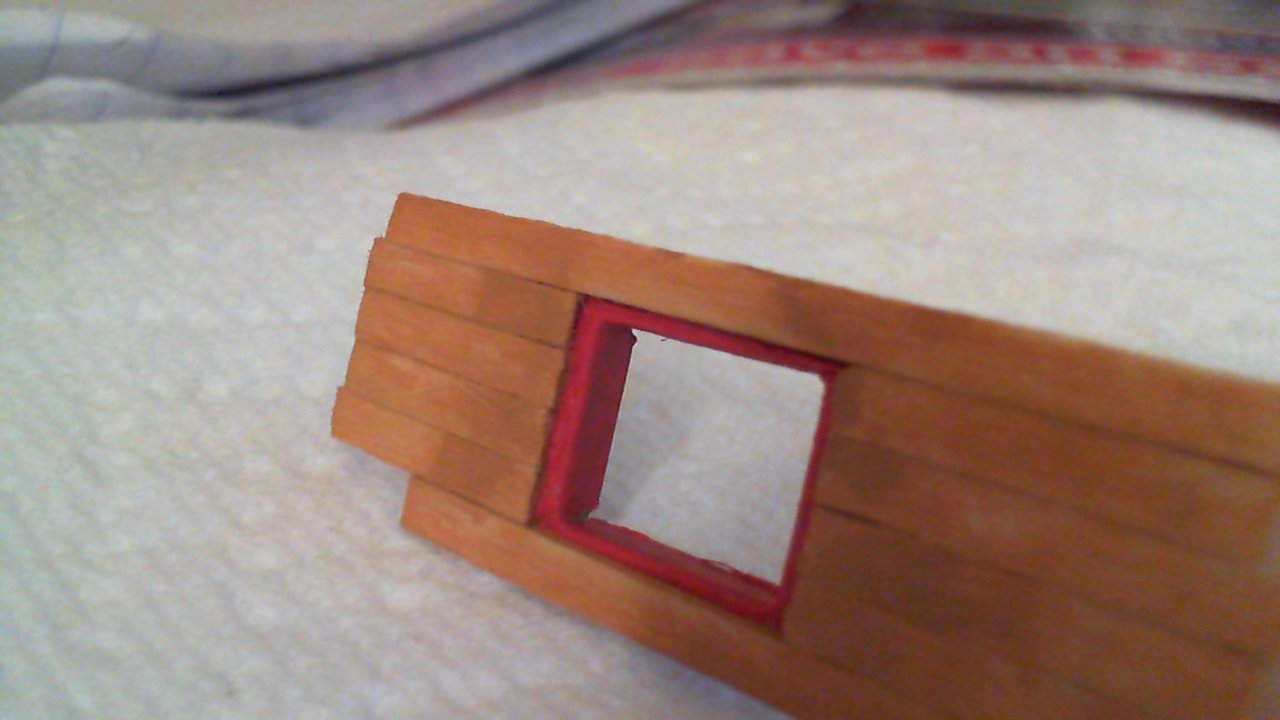
Progression with cathead fabrication cannot continue until I make the step to cut out the bulwarks where they fit on the ship. I affixed a template to the deck and used a razor saw to cut out the bulwarks. As I thought, the thin basswood broke on one side, but was an easy fix. These holes will have to be cleaned up before the catheads are installed. also, the masking tape and scrap wood shows where I protected the deck from my saw cuts. (Margin plank will be notched in this area.) Final photo shows my progress with the tumbler release handle for the cats... ~Bob


-
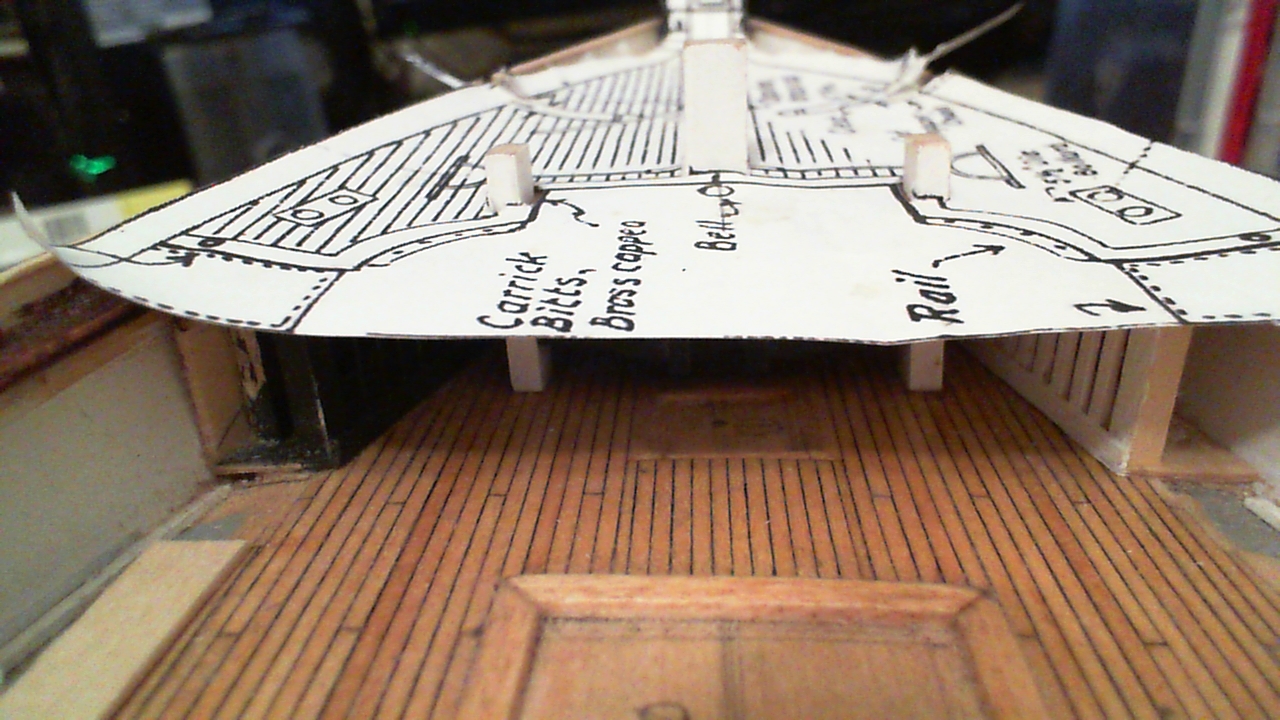
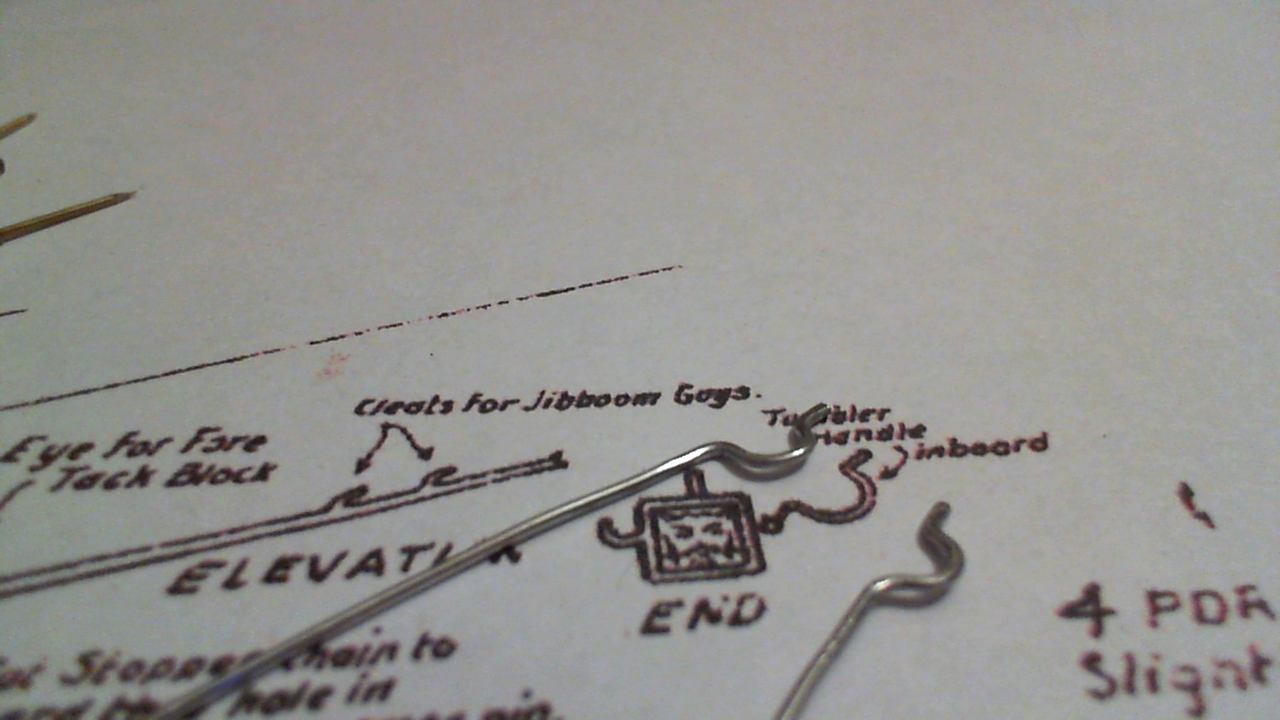
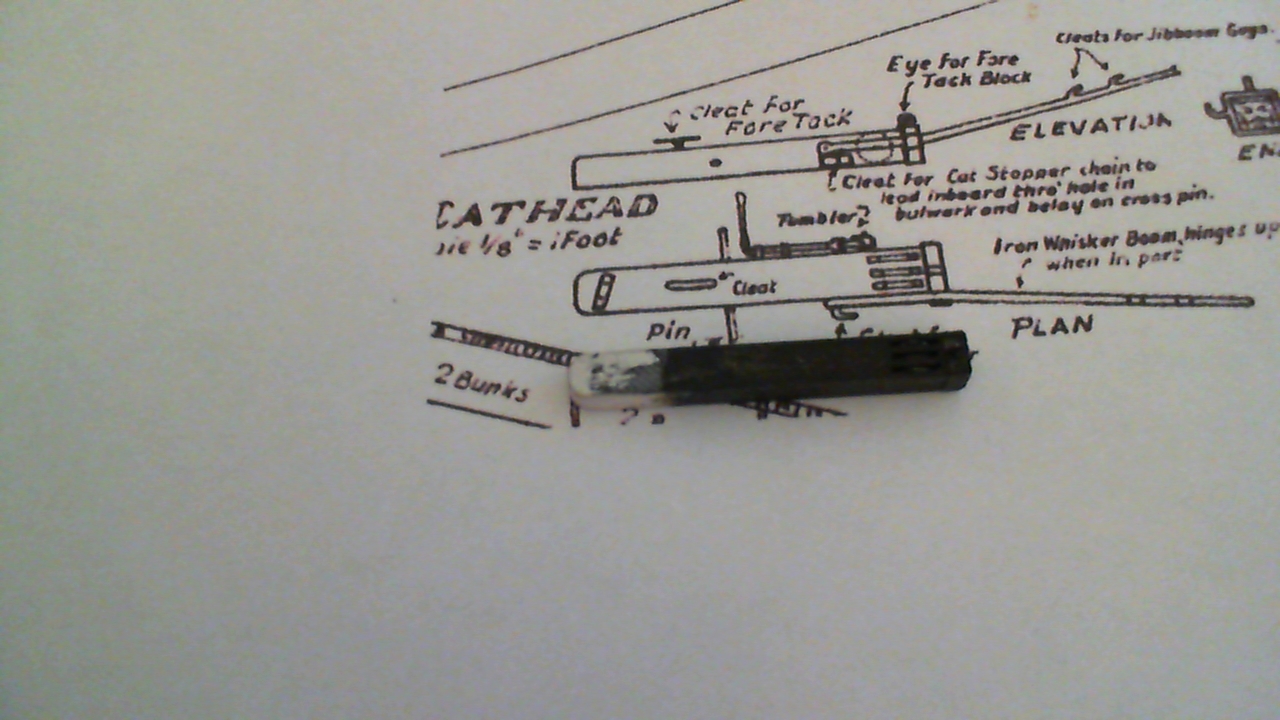
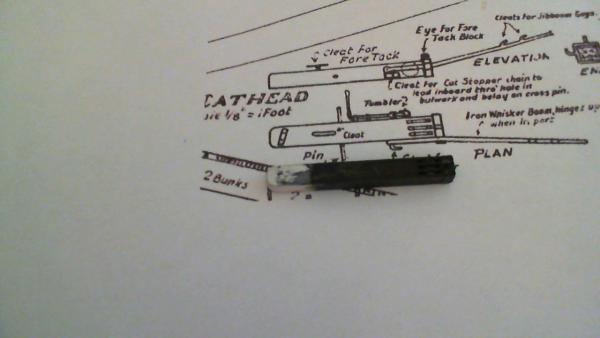
Thanks, Nenad; Campbell's plans are semi consistent with the actual ship... This goes for the cathead detail only... the 1/8":1' detail shows the cleats inboard of the pins; as in reality. His deck plans show the opposite; and indeed if you match the scale (from the same plan sheet!) nothing lines up. (Too much scotch for Mr. Campell that night, perhaps?..) Anyway, I'm done with diddling with this, so I'll be using the 1/8":1' plans; and adapting them as I see fit to the pictures of the actual ship.. Moving along...
-
Compare these to Lou's CS090 picture...(which I can't reproduce here).
-
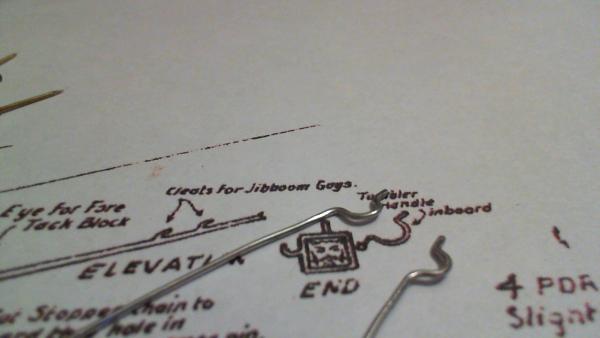
Alright, CS Fleet; this is probably the #1 problem I can't get my head around... I'm working on the catheads, and I'm not getting any consistency between Campbell and the actual ship. Right now, I'm limiting my cathead attention inboards... There is a "pin" and a cleat that show up in radically different positions in regard with my two references (Campbell, and actual photos (courtesy of Lou). Also the taper of the cathead is not shown on the C. plans, but is evident with the pictures... This is the easy part... I still have to do the cat stopper tumbler and the whisker booms yet... SOS.. Which would be correct?
-
Thanks, Popeye; hope to show the "new and improved" inner bulwarks soon... and more detail on the cats before installation...
-
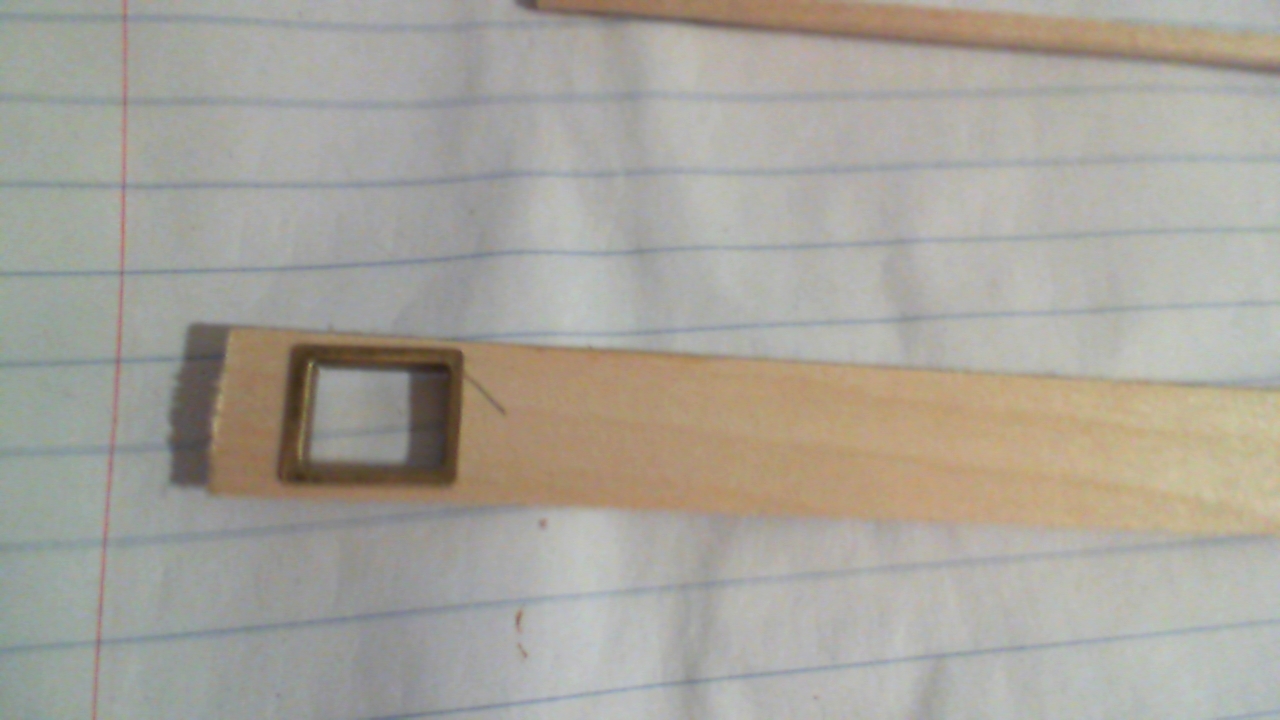
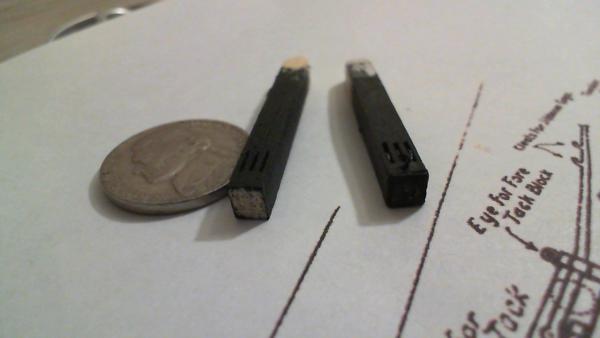
Cathead proto to the right, with sheaves, end iron, and eyebolt, (hard to see) and the wood only twin on the left...
-
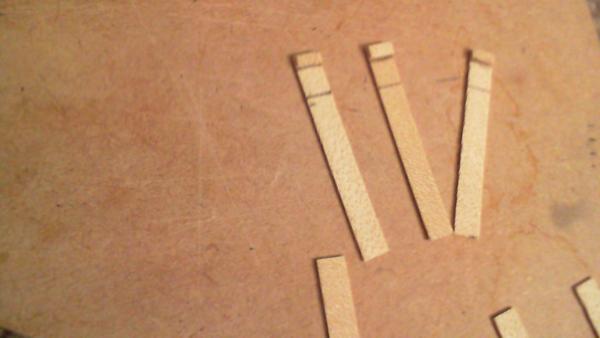
I wear a very convincing wig.. No railing pictures yet, but I made a small measuring stick based on Campell and went from panel to panel, sanding along the length of the bulwarks in order to get the proper height. Why I didn't do this before? I have no idea... (forest and tree scenario, most likely..) After this frustration, and while the new rails' stain is drying, I revisited my cathead prototype, decided it was o.k., and started another... These are the laminar pieces to replicate the sheave slots, that I have posted before..
-
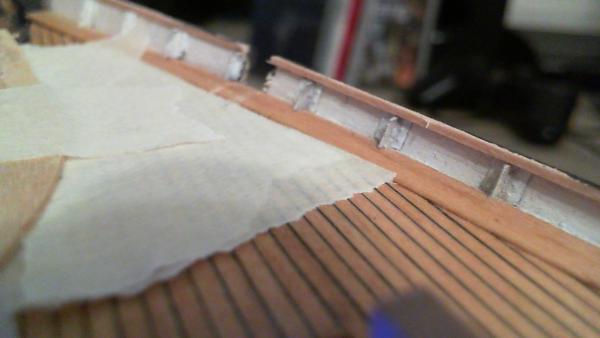
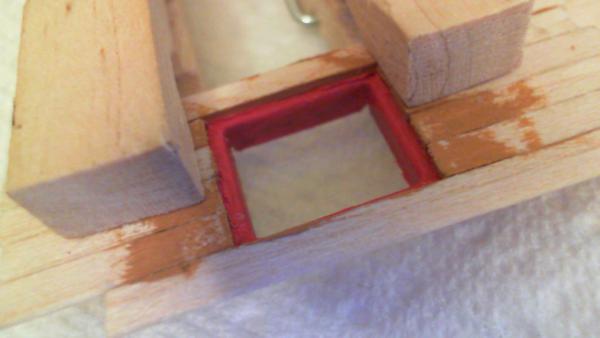
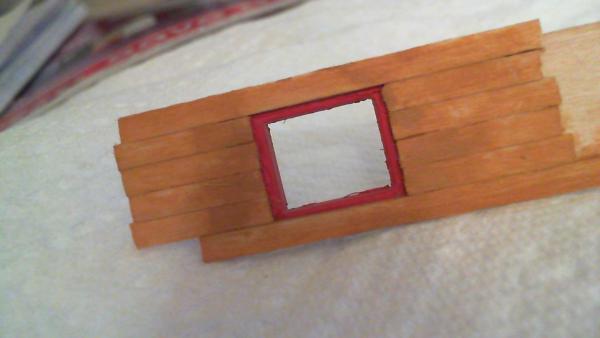
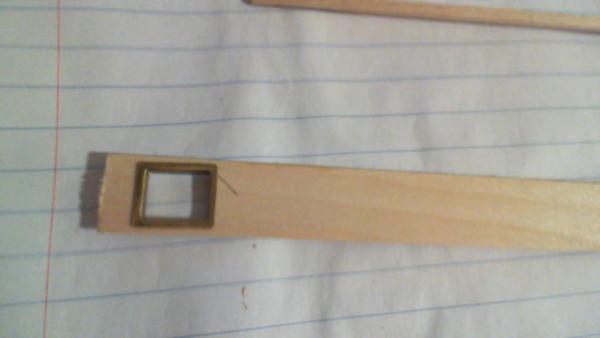
Final stages of the test port. Note no primer was used on the brass or wood, nor were many accurate paint coats, as this was only a test to see the contrasts and if the brass fittings would serve as an accurate liner substitute. (Hence all the dark splotches.) I'll keep this test assembly together to also test framing and inside bulwark planking when the time comes, then break it apart to retrive the brass frame...

-
Brass port lining painted Model Shipway's red; test planks' edges painted MS Yellow ochre.
-
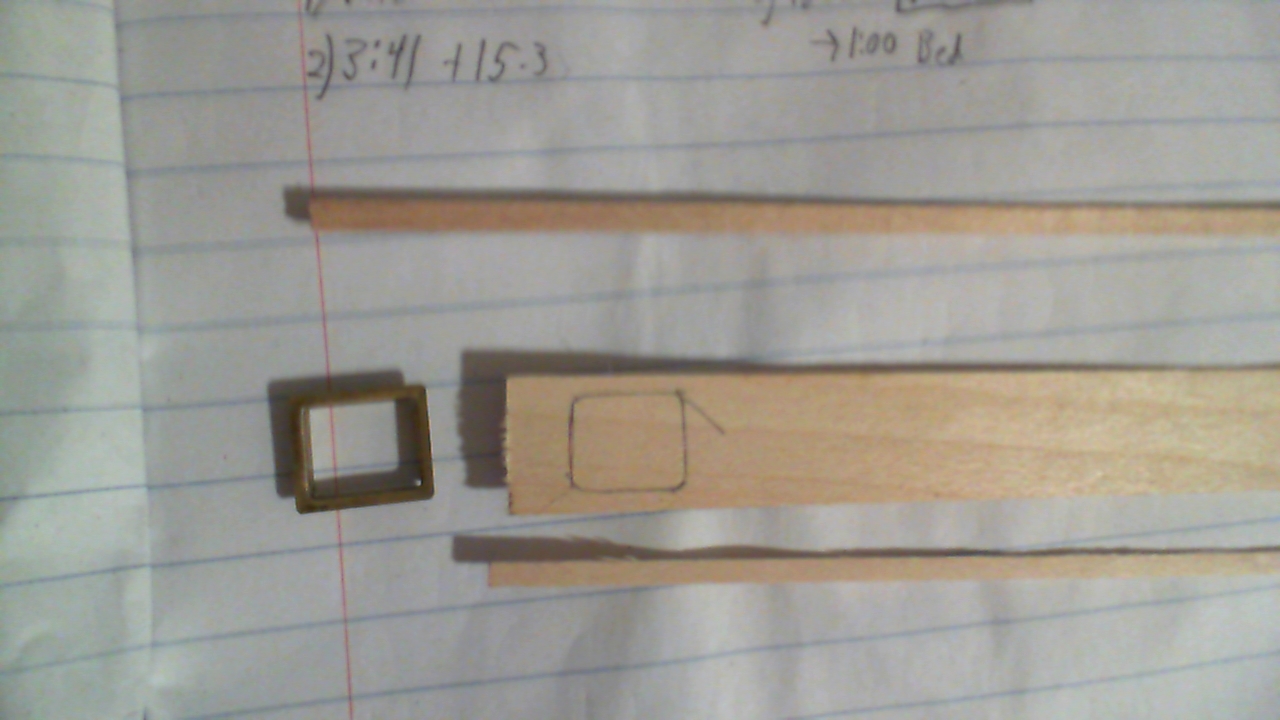
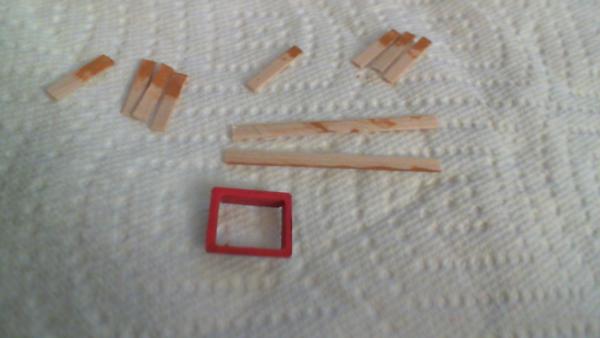
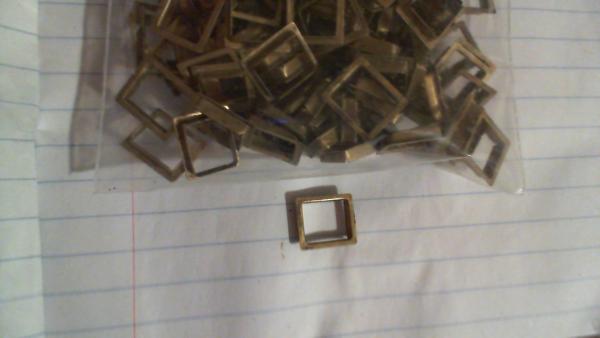
Fitting these into the "test strip" sure beats squaring the wood by hand...
-
1/32" test strip marked, with 1/8" x 1/32" planks ready to go..

-
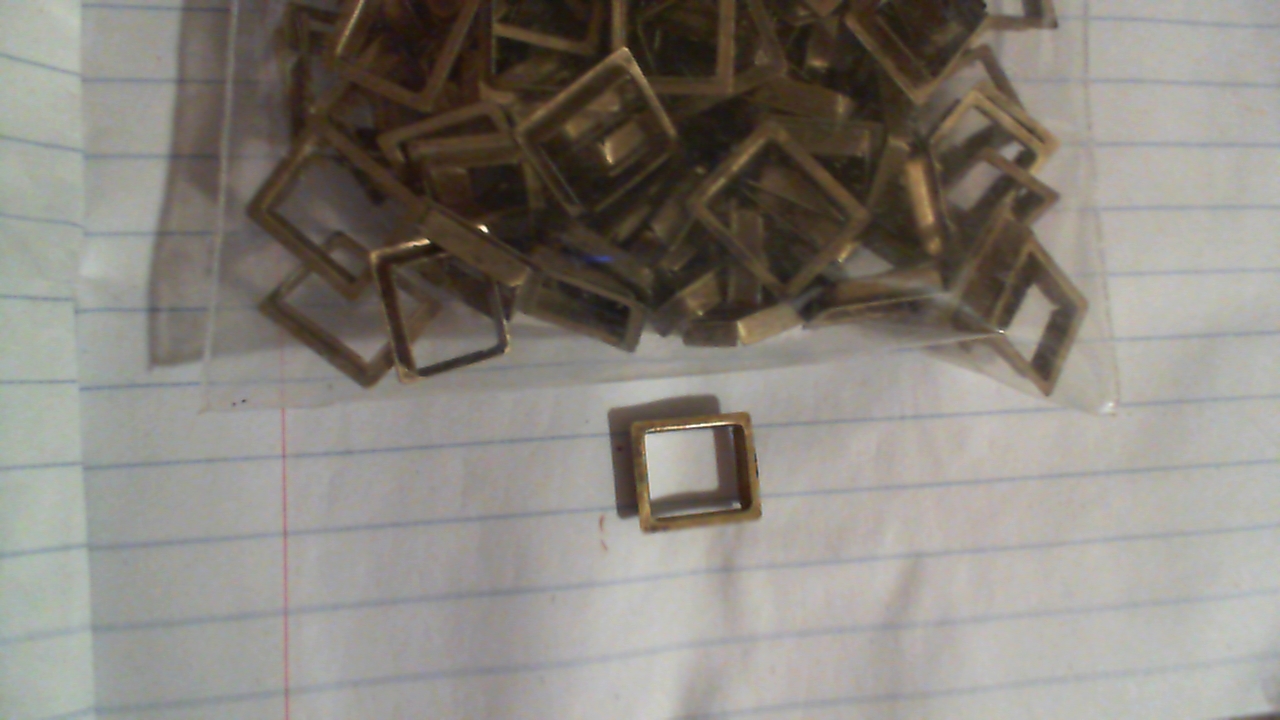
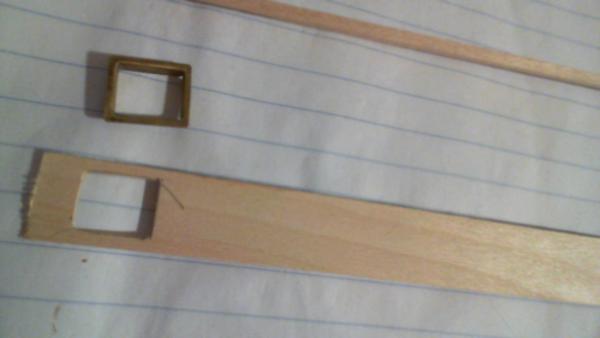
Taking a break from fiddling with the bulkheads, I decided to dig into the 40+ year old fittings box. I'd pulled out these stamped brass gunport frames before; and thought to myself "what a shame I can't use them, they are the right dimensions." After revisiting, (Maybe this was the kits' intention all along) I thought about sandwiching them in between the bulwark strips and outside planking (bulwark strips don't exist yet; they'll be scratched from 1/32" sheet basswood, using Caldercraft scaled and modified to fit AOS). So a test had to be conducted... 106 of these stamped brass frames...
-
No fittings kit with my Billings' ; I bought all my (walnut) deadeyes.
-
After 40, plenty of hair comes out of all sorts of weird places...
-
Well, ... Internet provider was down for about a day and a half; at almost $80 per month I was very unhappy with that situation... So I took it out on the C. Sark.... I ripped off the t. gallant rails.. They came off very cleanly, actually.. now I can fix the scaling problem with the white panels. It's always a good idea, when you're away from a build for awhile, to stare at the plans for a good minute or two (or hour) to re acclimate yourself to the ship and plan your next move; or else you'll be tearing pieces (or your hair) out. ~Bob
-
What you do to one side, do to the other, in small increments, and remember each plank is a project unto itself... ( You can't torque the lower bolts of a Chevy head and then tighten the upper ones, right?.. warped head... Same principle with these models....
-
I'm not as experienced with this as many; but one thing I know, is "do one side, then turn it around, and do the other"; I do this with with deck planking, hull planking, coppering... It's a hell of an SOB to spend two months planking and coppering one side of the ship happily, and turn it around to find your work pulled the keel out of whack...
-
Good to see you again, Omar; looking forward to new posts! ~Bob