Gregory
-
Posts
3,170 -
Joined
-
Last visited
Content Type
Profiles
Forums
Gallery
Events
Everything posted by Gregory
-
 You may have already realized this, but the only points you have to cut are the 'tabs'. These keep the laser cut parts from falling out of the sheet during cutting. It's standard practice for laser cut parts. I've found they can usually be cut with a hobby knife, but going from both sides makes it easier.
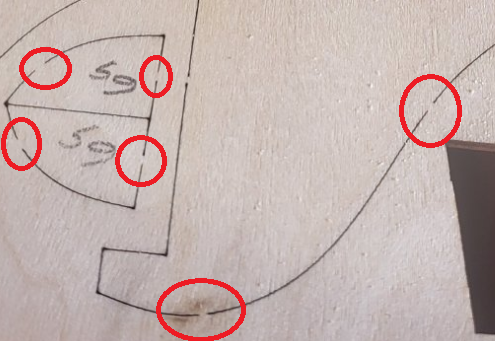
-
I'm glad I was able to help. I really like your refinements. I think this method could be adapted for tapering spars and masts. I must confess, I use a laser cutter for most of my tapering.
-
A common tool for squaring bulkheads to false keel are small leggo blocks. Clamp them in place till the glue sets. Here is an example from another members build. Your model might require a different arrangement, but the principle would be the same.
-
Wipe On Poly Techniques
Gregory replied to Freebird's topic in Painting, finishing and weathering products and techniques
Wipe on Poly works best for me by brushing then wiping with soft cloth after a few minutes. I may make any number of coats till I get the finnish I want . FWIW, Wipe on Poly is just Poly varnish that has been thinned with mineral spirits. Maybe 75/25 varnish/thinner. I make my own, about 50/50. -
Overlapping the seams sounds like clinker planking, and is actual practice on some ships and boats.
-
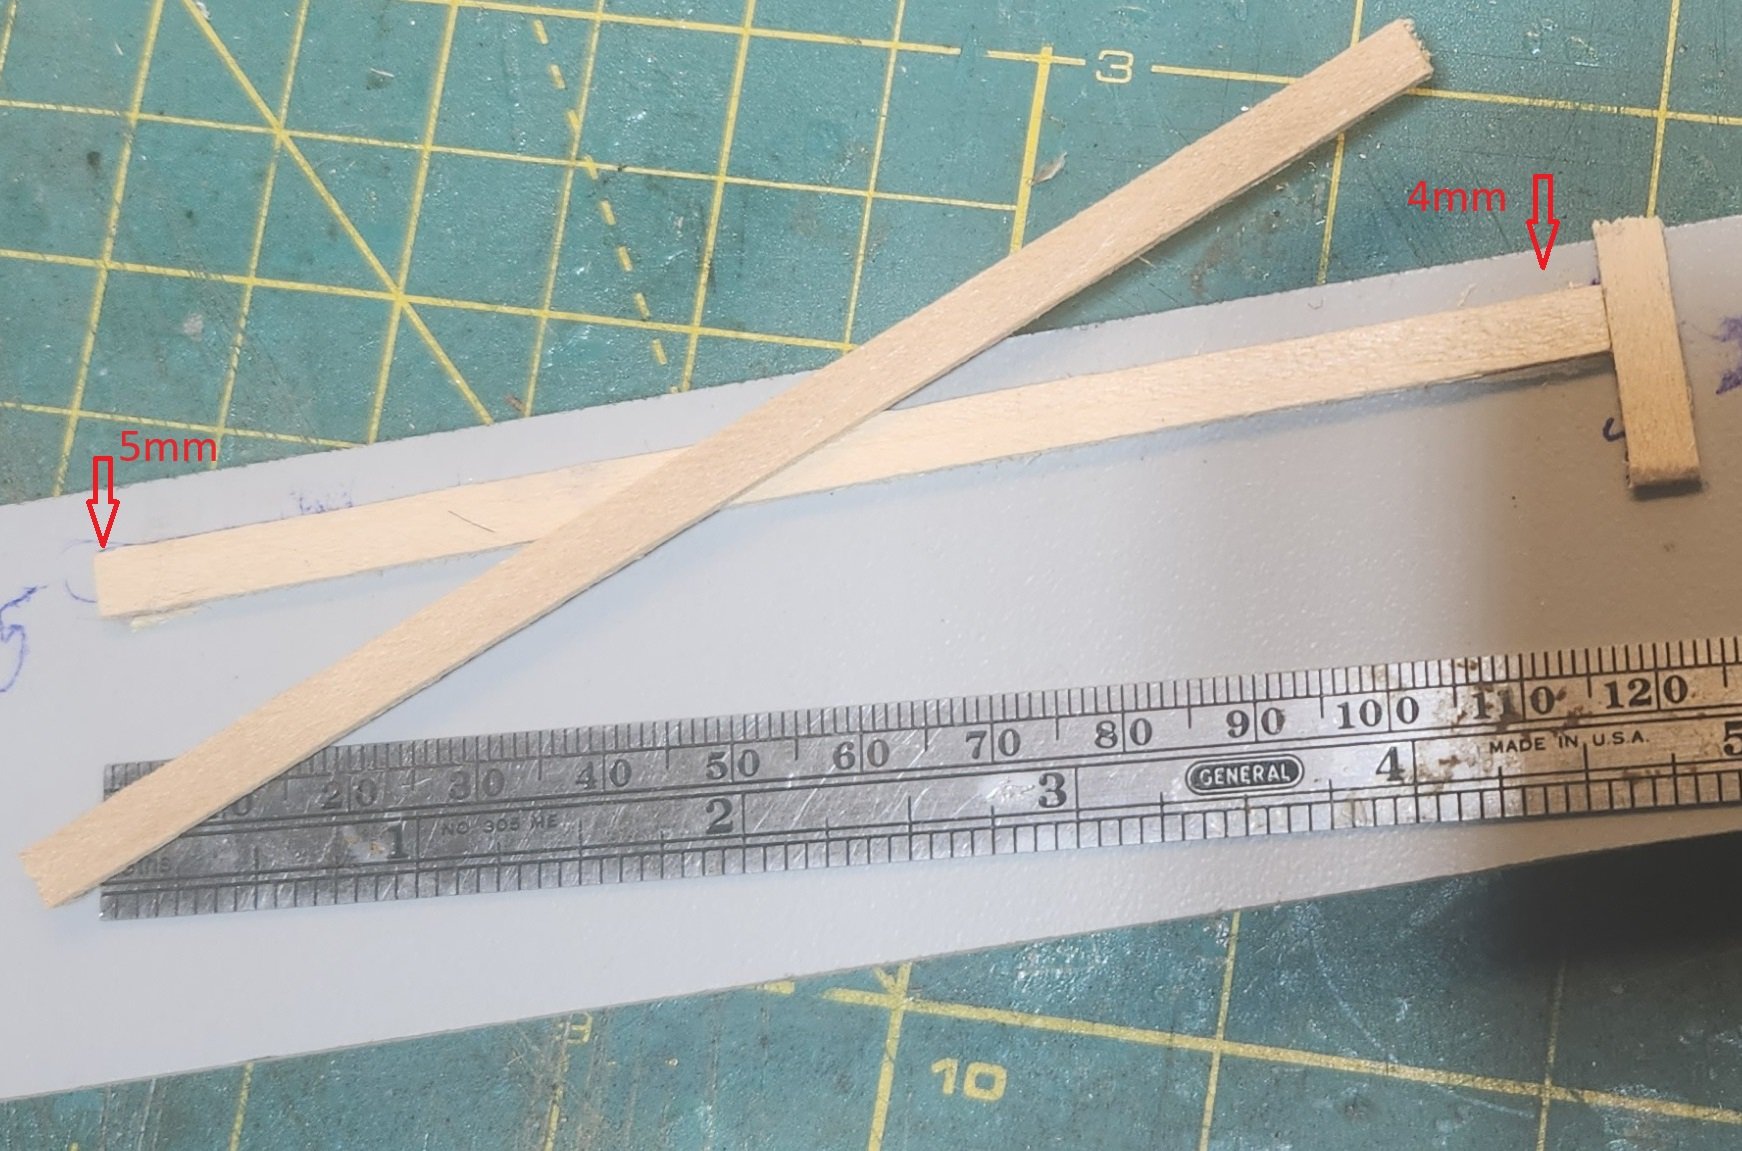
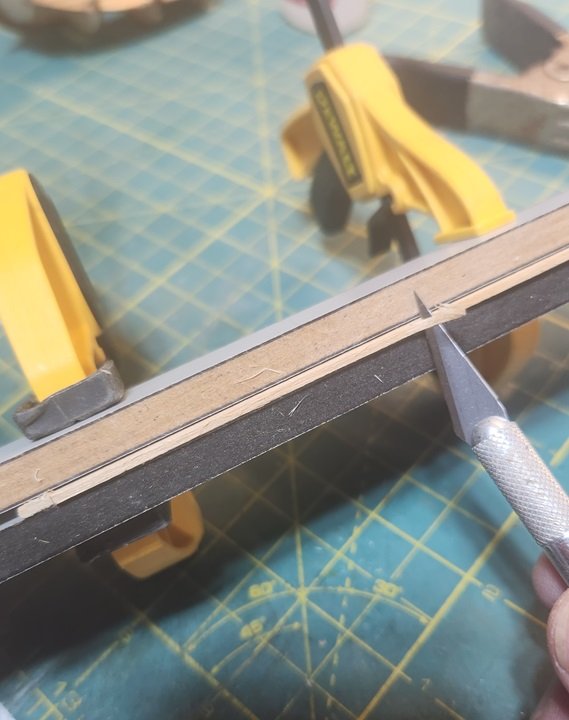
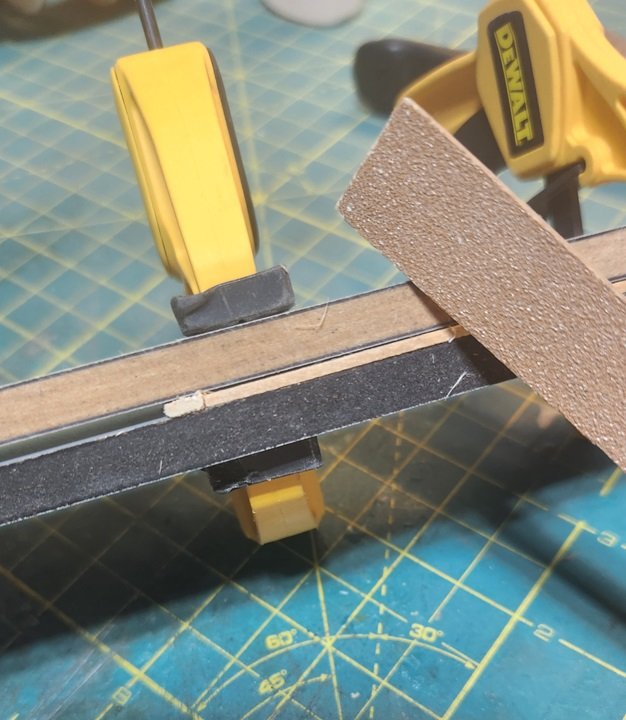
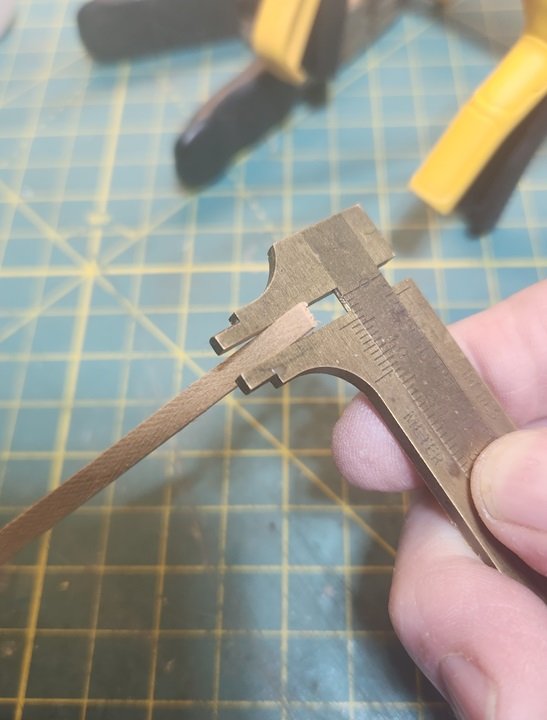
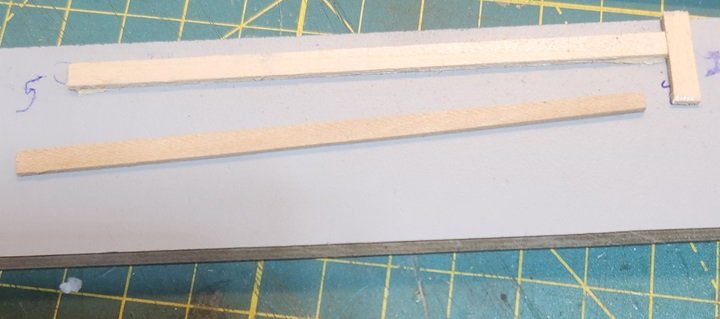
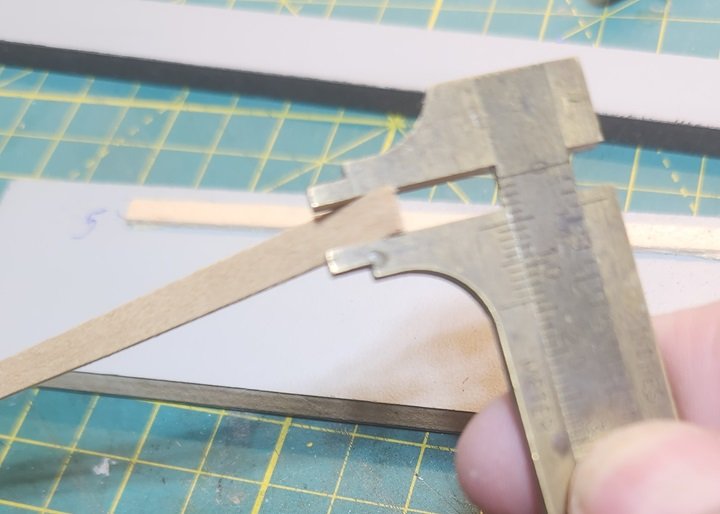
This is something I put together quickly to demonstrate, so it could be refined somewhat. I have this real hard melame/mdf stuff, but I'm thinking aluminum might be better. I glued ( just tacked at each end with CA, so it could be easily removed later ) a strip the same thickness and length as my target, to the MDF. The little vertical piece acts as a stopper. Note one end is 5mm from the edge of the MDF. The other end is 4mm. At this point you could probably just lay your strip to be tapered against the template above and trim with Xacto blade or scalpel and follow with a little sanding . I took another option and clamped the smaller piece of MDF onto the template and trimmed from there. The target still has a tendency to move around, so you have to make sure it stays flat against the jig. Make sure the business side of the two MDF pieces are flush. I also thought I might screw the jig together for a tighter fit. After the blade, I did a little sanding. 4mm On one end. 5 On the other. Let me know if I can explain any better.

-
Don't do all your tapering in the next few hours. I want to show you a jig that might help with consistency.
-
I don’t have an illustration handy, but consider clamping (really tight) between a couple of pieces of wood or aluminum, exposing the area to be trimmed, and trim away.
-
I meant to add that you should taper the squaring, and yes, a little 'tapping' with hammer might be necessary.
-
Easy. Take an appropriate size nail. Square off the end with file/sander. Push it into a pilot hole.
-
There was no point in having gun port lids on a weather deck. In heavy seas, they would have hindered the clearing of water from the deck.
-
Very nice. What sizes will you be offering?
-
Interesting subject. The sails on the museum model look really good.
-
And... The results are?😁 FWIW, Here's my version.
-
If y If you had a choice between mahogany or walnut, which is what michael101 asked about, which would you choose?
-
My experience is that mahogany tends to be less brittle than walnut.
-
We have a forum where members have discussed their CAD, 3D printing and similar endeavors. CAD and 3D Modelling/Drafting Plans with Software - Model Ship World™ There are a lot of resources out there for getting custom work done. Just Google " 3d printing services " and " photo etching services " . There are probably other online groups dedicated to those endeavors also. It may not be too late. Check out Fusion 360 .. It's free for hobbyist. This guy has some really great tutorials for beginners. Product Design Online If you use a 3rd party 3D printing service you can probably save a lot by having 3D drawings ready to go. For photo etching, 2D should be all you need.
-
That is as good as any planking job I have ever seen.. Better than most. It would serve as a great tutorial for Sphinx and any number of other kits.
-
I knew what was being said. Is there something wrong with me?
-
Working with blackend brass.
Gregory replied to SiriusVoyager's topic in Metal Work, Soldering and Metal Fittings
What is your method for annealing the brass? If you are heating it with a torch, you might consider treating it with Birchwood Casey Plum Brown. It gives a nice dark finish that doesn't come off easily. -
Good point. This can be distracting on an otherwise excellent model when the knots scale to something about tennis ball size or bigger. Ratlines on Victory. Lees says ratlines are 1.75" circumference. About .5" diameter. This scales to .01" at 1:48. At 1:64 its close to .008" The smallest rope at Ropes of Scale is .009, so this would be a good match at 1:48. Syren has .008 and .012. At smaller scales you are looking at single strand thread to get a reasonable scale match. This is a good option. One might also consider just glueing the ratline to the shroud. A little blob of glue will look like a knot.

-
Help with tapering
Gregory replied to N1ckel's topic in Building, Framing, Planking and plating a ships hull and deck
I believe the 1/2 rule has a basis in actual practice. However, if you follow the procedures we have discussed, it probably will never be an issue. -
They show up on rigs from the 17th century to present. It is my understanding they do the same work as a double, but their shape is better suited for some applications. They are often used in the vangs for gaff rigs. Here is one in a back stay for Cheerful.
-
Help with tapering
Gregory replied to N1ckel's topic in Building, Framing, Planking and plating a ships hull and deck
Good answers from Johnny and Dziadeczek. Just to clarify, here is a contemporary ' expansion drawing. This is Podargus (1808) This shows the actual shape of the planks laid out flat. This illustrates why Chuck's bending method results in the planks laying flat against the bulkheads -
Help with tapering
Gregory replied to N1ckel's topic in Building, Framing, Planking and plating a ships hull and deck
Measure the green line with a piece of string.