HOLIDAY DONATION DRIVE - SUPPORT MSW - DO YOUR PART TO KEEP THIS GREAT FORUM GOING! (89 donations so far out of 49,000 members - C'mon guys!)
×


Dan Vadas
-
Posts
3,261 -
Joined
-
Last visited
Content Type
Profiles
Forums
Gallery
Events
Everything posted by Dan Vadas
-
Thank you Greg and welcome to my Build Log. Thanks also for "Liking" just about all my posts . Yep, I've got one. However my power bills are high enough without using it all the time . Pat, see the above comment. If I was at all worried about it then I'd do something to improve things, whether the line or the environment. It only means I need to stop rigging work at about 10:30am - by then I've had just about enough anyway . Ed - thanks for your input, very well thought out. As mentioned before I don't really have too many concerns about it - the line goes back to almost "guitar string" tightness as soon as it all cools down. I'll try the diluted beeswax trick to see if it makes any difference. Thanks Gaetan. I believe Chuck's rigging line is a blend of cotton and polyester. As far as the tension on the ropewalk goes - I have no idea. It's really nice stuff to use and looks superb on the model - other than the temporary sagging issue I'm more than happy with it. BTW - I tried stretching one piece early on (for about 1/2 a day using a 2kg weight) and it made no discernible difference to the amount of sagging. Yep, exactly what happens to mine. I might take some pics myself . When I take Vulture to the next model shows it will be in the middle of winter, so I'm not going to have an issue . Thanks Michael, yep just like that. I use the Part Off tool on the lathe to do all the work of shaping the outer groove - it's less than 1mm thick and does the job nicely. Thank you too Christian. Danny
-
Thanks John and Pat. I LOVE rigging . So far my only problem has been with humidity - Chuck's line is a bit susceptible to it. I have to stop around 10:00am as the high humidity we have been experiencing lately up here causes the line to sag alarmingly. It's all fine again the next morning though . Anyone have any thoughts or solutions on this? Danny
-
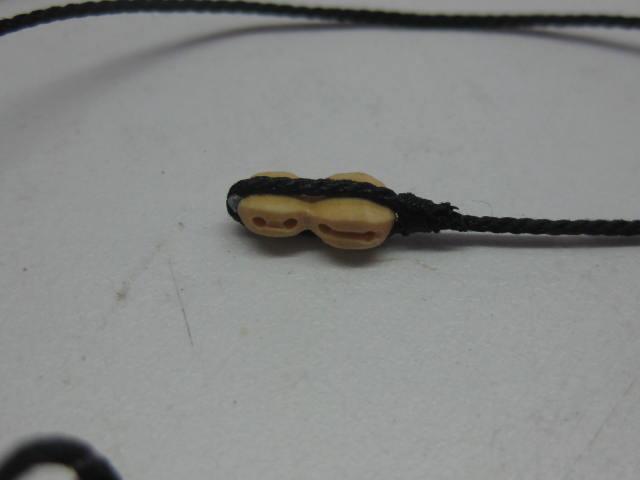
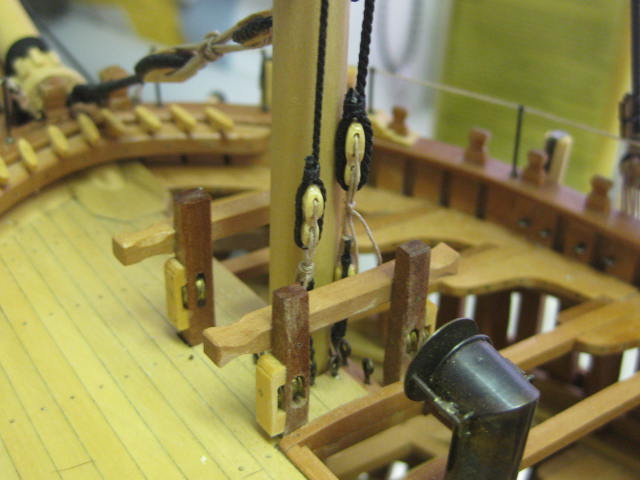
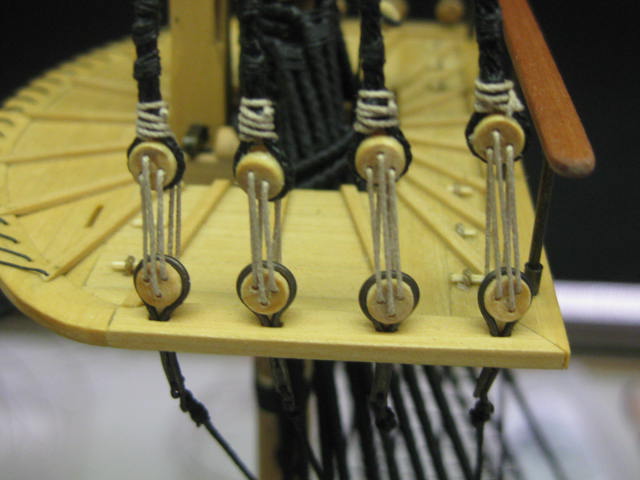
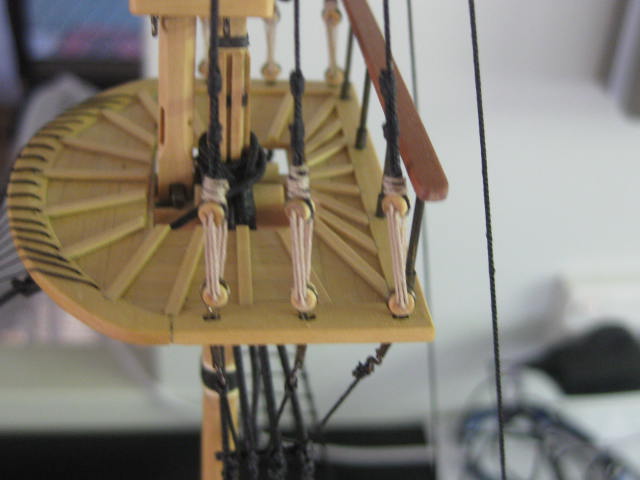
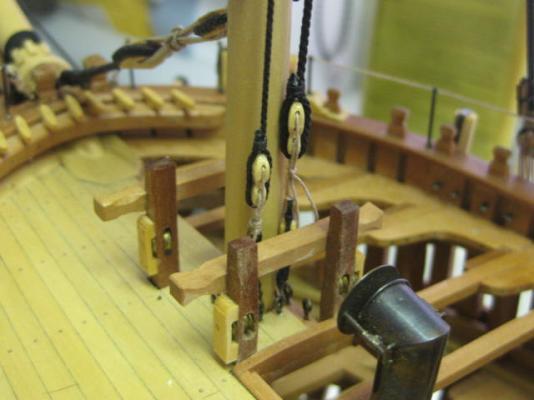
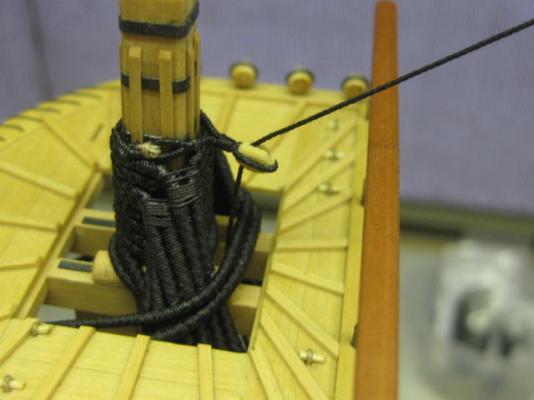
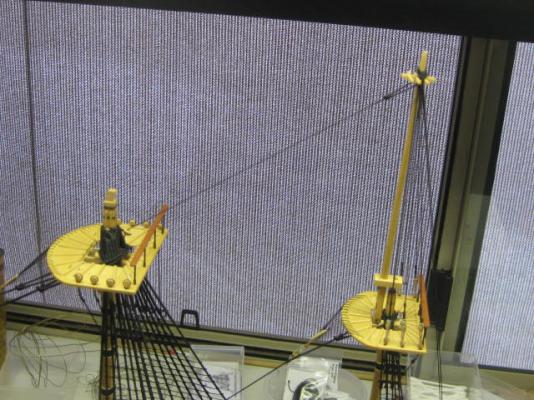
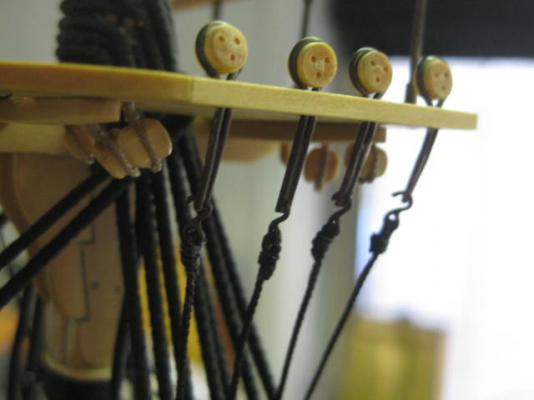
Main Topmast Stays There is a preventer stay as well as a main stay for the topmast. These were made in similar fashion to the mizzen topmast stay. There is a Violin block attached to the lower end. I made these from one piece of stock the same way I make the Sister blocks : The stays are served where they go around the mast head and for a few scale feet below the mouse. A Collar is used to hold a lead block to the mast. The preventer stay block is fitted just below the foremast hounds. This would have been considerably easier to fit on the bench before I'd fitted the mast top : Here are a few pics of the main topmast stay ready for fitting : And some more of both stays fitted. The preventer stay goes on first : The lead block for the main topmast stay has a collar which could be slipped over the fore mast head. This pic was taken well after I'd fitted the stay - the fore topmast and shrouds had been fitted when I took the pic : The sister blocks and their tackle at the foot of the fore mast. Hooks are used to attach the lower blocks to the eyebolts in the deck : Danny


-
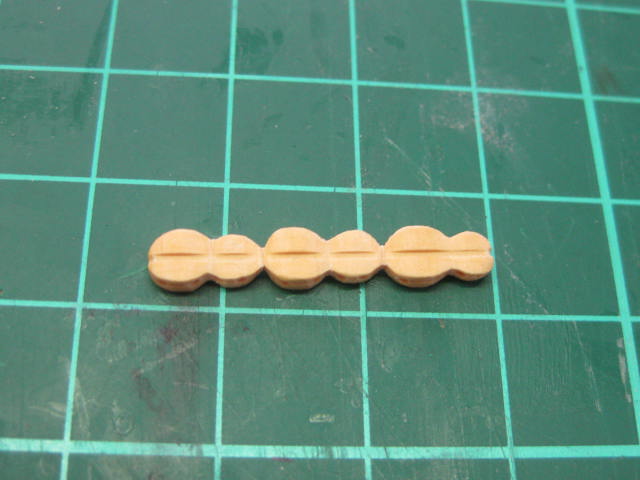
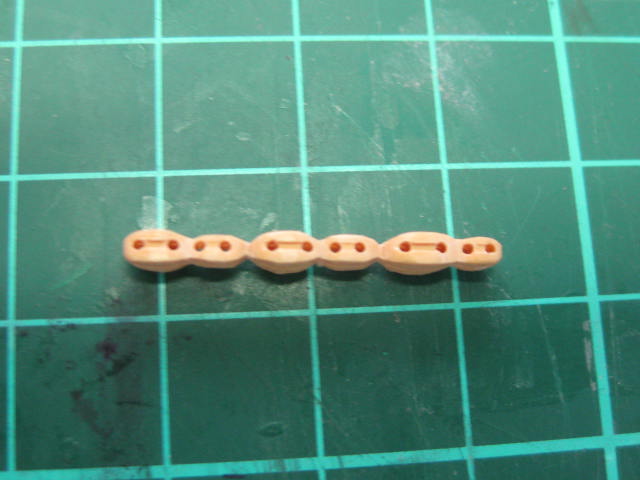
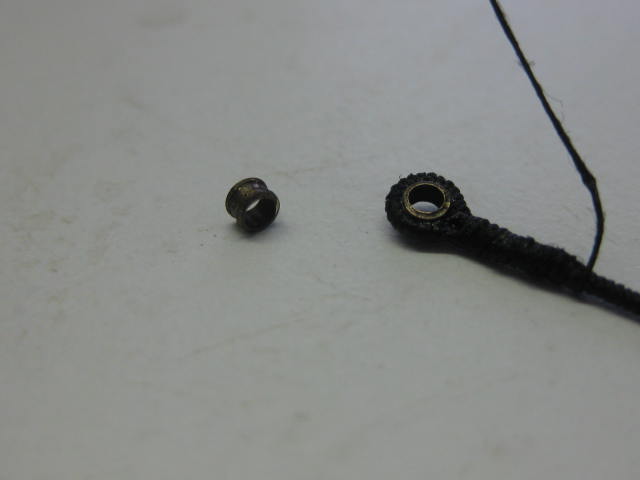
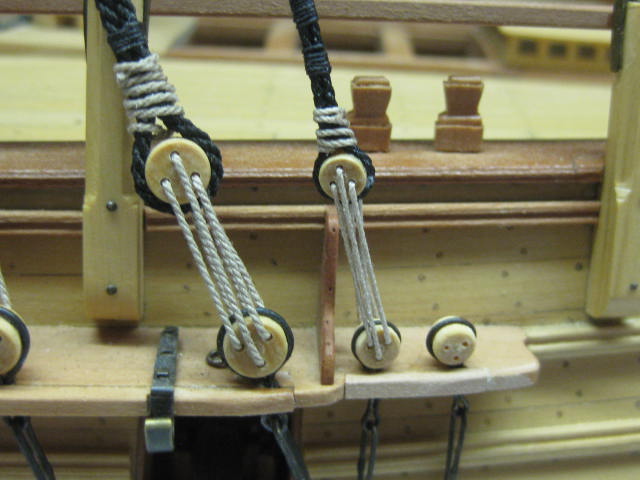
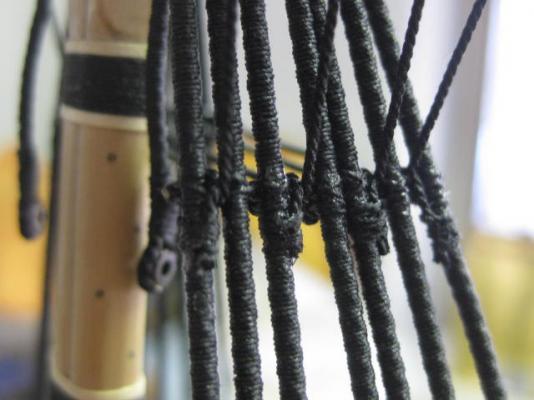
Thanks for the comments John, Shaun, Juergen and Ray . Main Topmast Shrouds Before fitting any of the shrouds the topmast Burton Pendants needed to be made and fitted. These are served all over I turned the thimbles on the lathe : The four sets of shrouds were made up and fitted the same as the mizzen topmast shrouds. Once again the foremost ones are served for their entire length and the others for the uppermost parts : The Backstay is separate from the shrouds and terminates on the aft section of the channel : A Sister Block is lashed between the two foremost shrouds. I made these from a single piece of stock in the same way I make "normal" blocks. After first cutting the basic shape on the table saw most of the finish shaping work was done with an Xacto knife : Danny


-
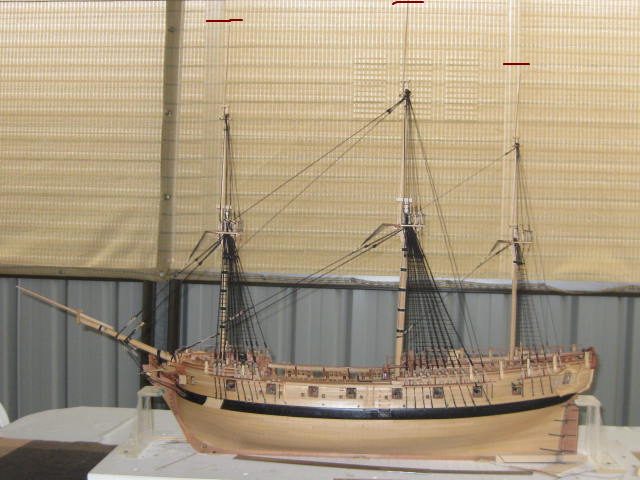
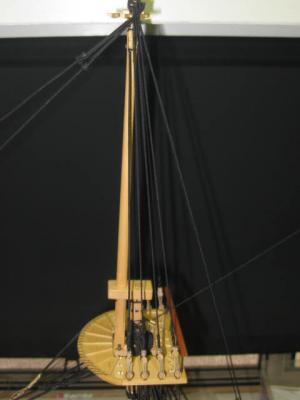
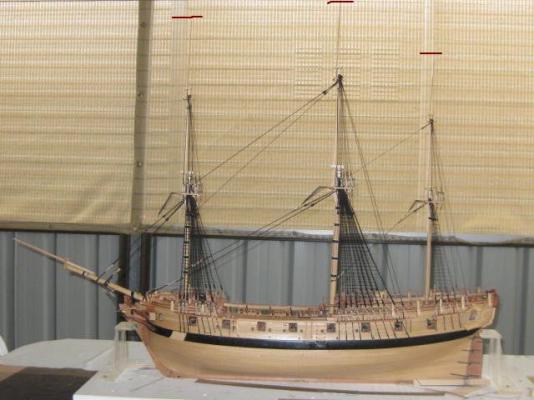
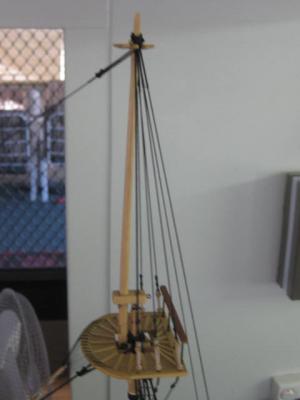
Hi Pat, I agree with your concerns regarding the length of the Topmasts - they look too long in proportion to the lower masts. I'm at almost exactly the same stage on my Vulture (I have the fore topmast shrouds and main topmast stays fitted). Here's a pic for comparison. I've drawn some red lines so the tops of the topgallants are easier to see against the background : Be aware that Vulture is a warship and not a "discovery" ship, so the overall length of the masts will be a bit more than Endeavour. Greg Pegleg - I've found that it's far better to first construct all the masts on the bench, but don't permanently fit the topmasts to the lower masts or the topgallants to the topmasts. That way you can slip the pairs of shrouds and the stays over the mast heads as per the "real thing". I permantley fit the next mast after doing all the standing rigging for the lower one. Take a look at THIS POST in my Vulture build log. It shows the shrouds and stays fitted to the mizzen mast, but the principle is the same for the other masts. The main topmast stay and fore stay are two entirely different pieces of rigging and don't in fact line up with each other. They are also of different sizes of rope. Danny
- 517 replies
-
- 1
-

-
- Endeavour
- Artesania Latina
- (and 1 more)
-
Thanks again Pat, David, Allan and Shaun. David, it's been done before . I'm using the rigging plans from TFFM and backed up by Lees. Shaun - my spacer is basically the same as yours except I push it through the two centre holes in the deadeyes. Danny
-
Try clamping the dowel in a small vise and use an awl to make a centre mark. Danny
-
Easier to replace when they get damaged? Danny
-
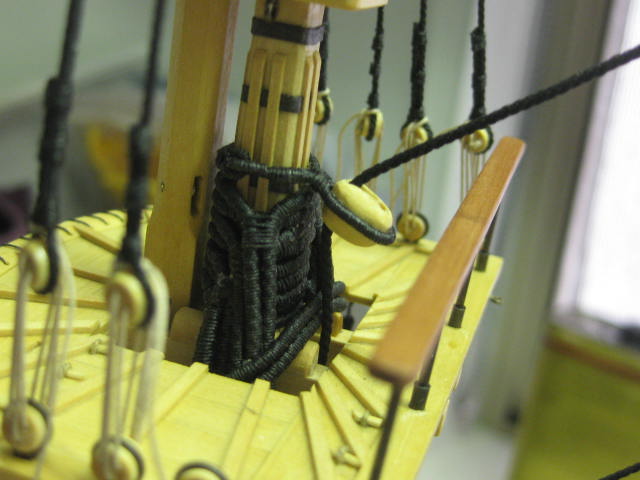
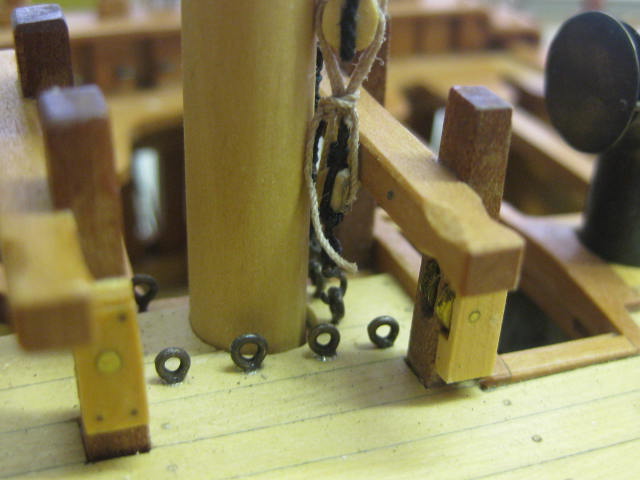
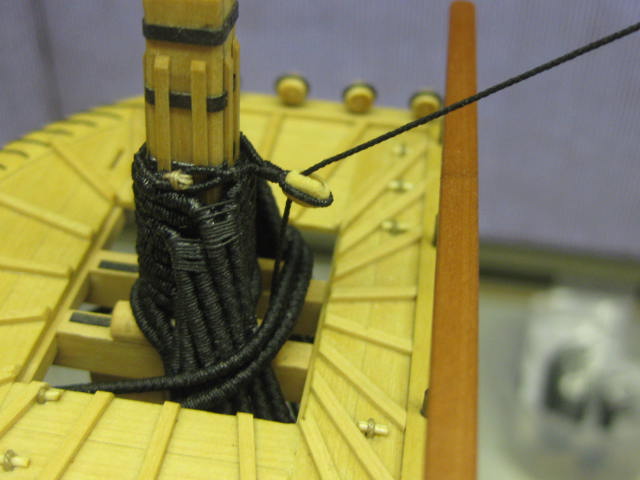
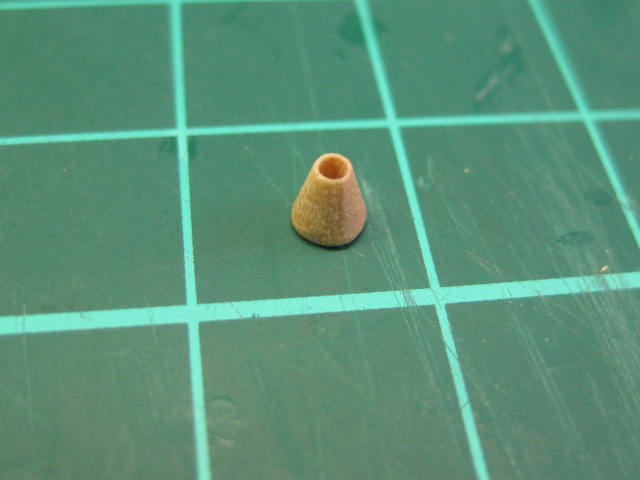
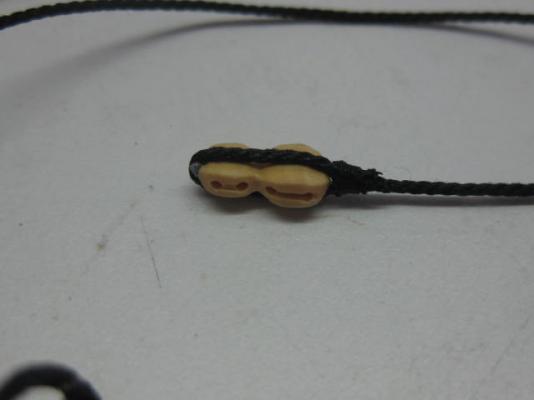
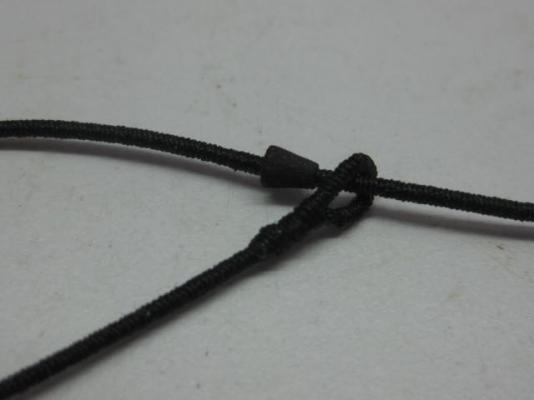
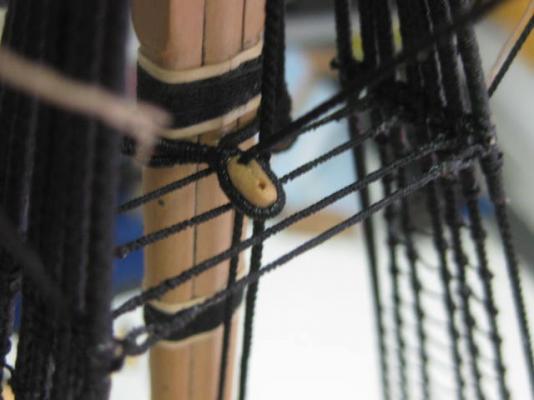
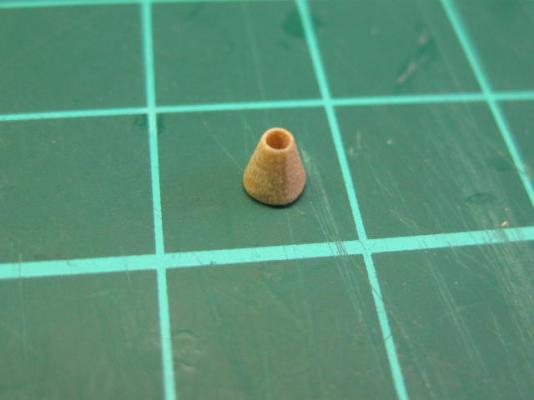
Mizzen Topmast Stay First thing to make for the stay was the mouse. I turned it on my lathe the same as the previous ones for the lower stays : The stay fits around the mizzen topmast in a similar fashion to the lower stay : A lead block is served and stropped to the main mast head : The lower end of the stay has a block seized to it. Another block is attached to an eyebolt adjacent to the foot of the mast via a pendant. A lanyard joins the two blocks : Danny


-
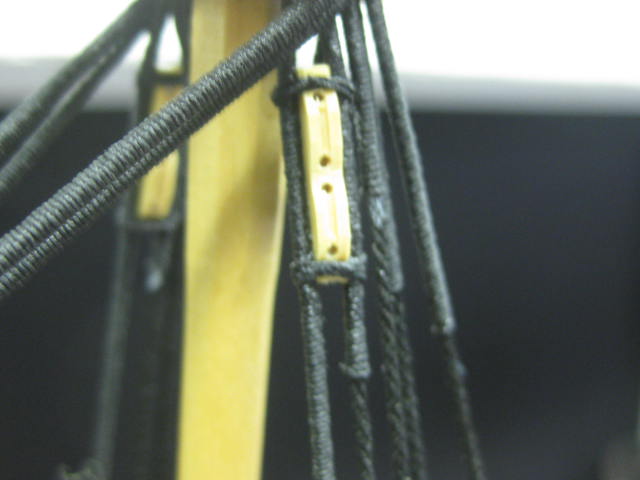
Mizzen Topmast Shrouds There are three pairs of shrouds on the mizzen topmast and one backstay which is the 2nd "leg" of the aftmost pair of shrouds. These are fitted around the mast top in similar fashion to the lower shrouds : The backstay is fitted to a small stool aft of the mizzen channel : Danny

-
Thank you again George, Caroline and Nils. There wasn't any need to tumble the cleats Nils, they turned out very good after I rounded the edges a bit with a file. Here's a pic of them fitted to the foremast shrouds : I see that I've bent one of the rail stanchions a bit - I'll straigten them all when the model is complete as they get a bit of a knock every now and then. Danny

-
Lory, the deadeyes on the "real thing" would have had some kind of chainplate or they simply wouldn't have worked - they'd have torn loose the first time any load was put on them ! Here's a link to bhermann's Bluenose which shows another type, probably later than Winnie. Click HERE. The Billings kit probably doesn't go into this kind of detail (surprise surprise ). Danny
-
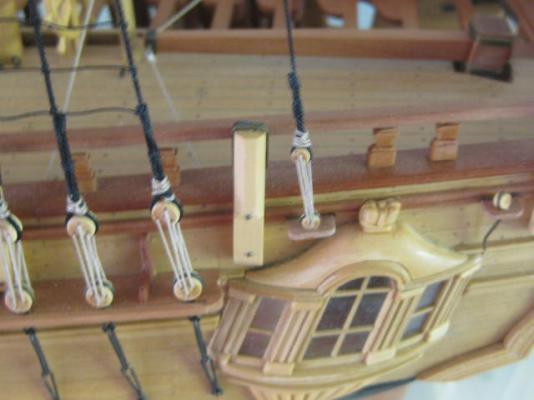
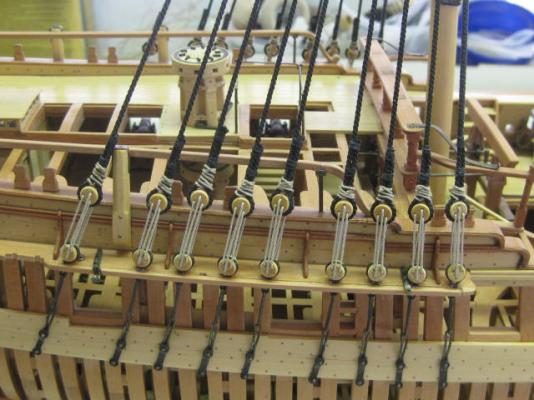
I disagree with Foxy - get them as tight as you can or the ratlines will be very difficult to tie (assuming the model HAS ratlines??). Going back to your question on the previous page, and Mark's answer which you may have missed, there are usually Chainplates which attach the deadeyes to the channels and are bolted to the hull underneath the channels. These do the work of carrying the tension of the shrouds. The channels merely hold the deadeyes outboard from the hull, and the tension on them is toward the hull, not upward, so you don't need to worry about the shrouds pulling them upwards. The pic below shows the Channels, Chainplates and Shrouds on my Vulture - the chainplates on your ship will be different as they are much more "modern" but you can see the basic principles involved : Danny
-
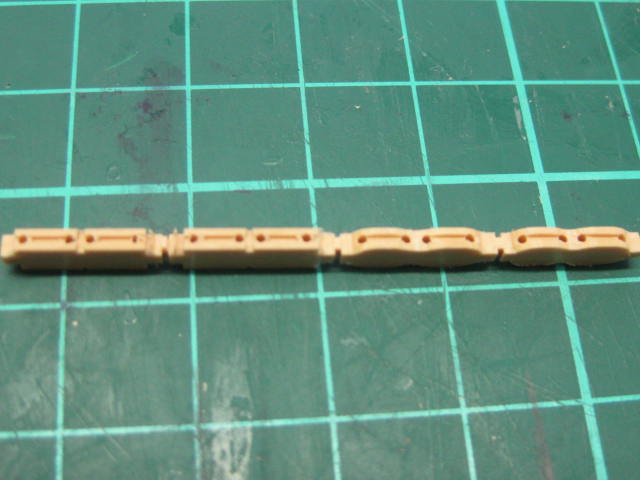
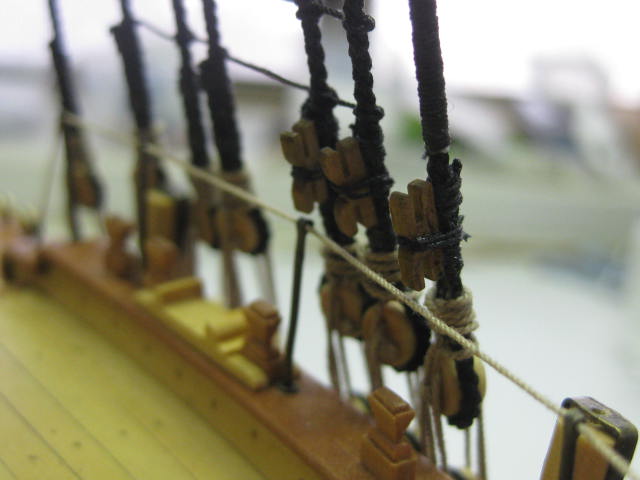
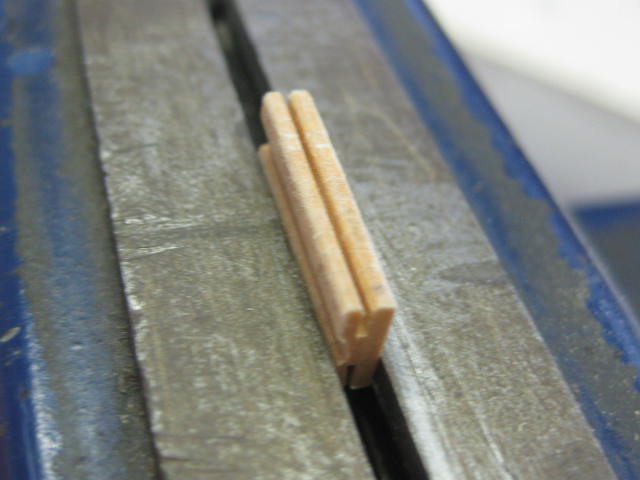
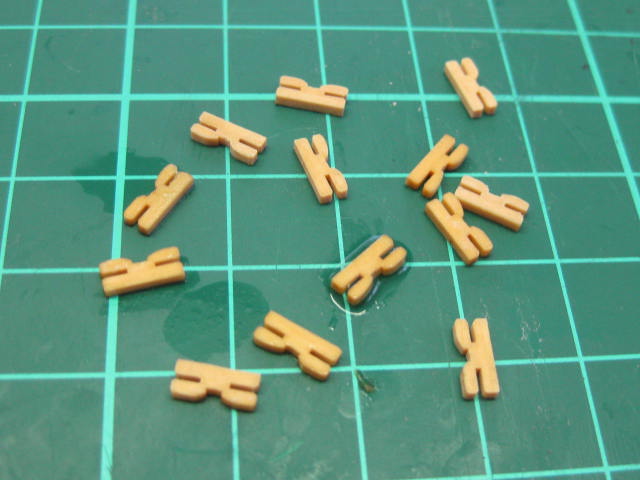
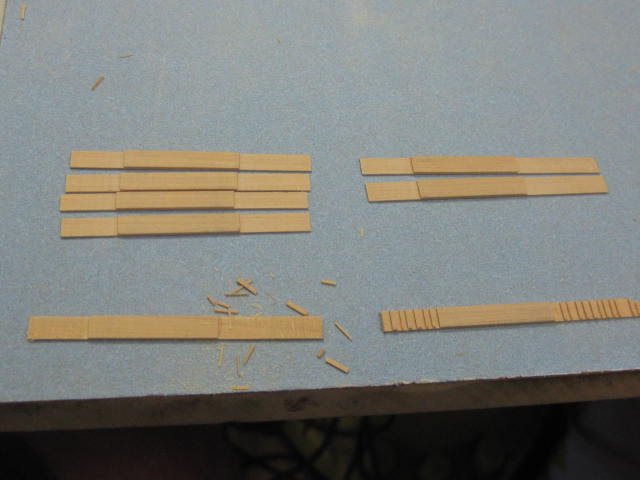
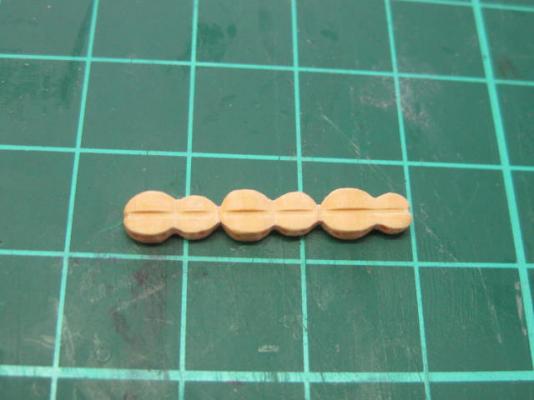
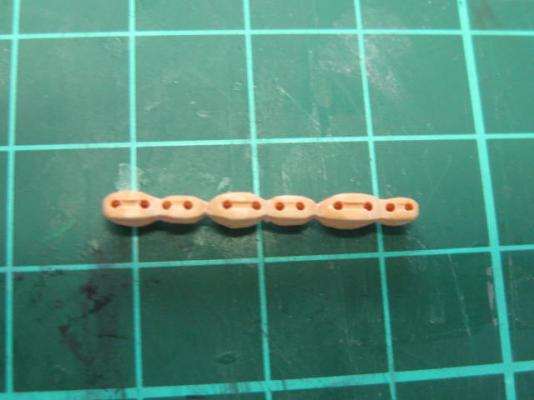
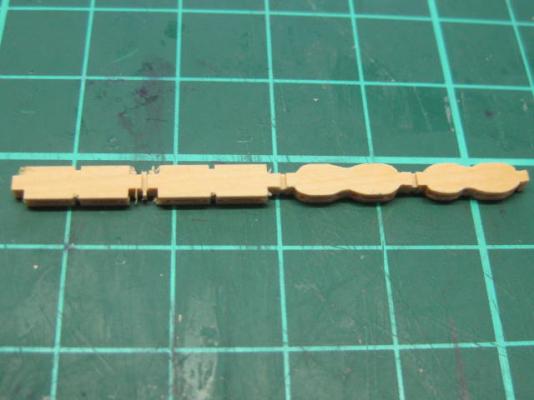
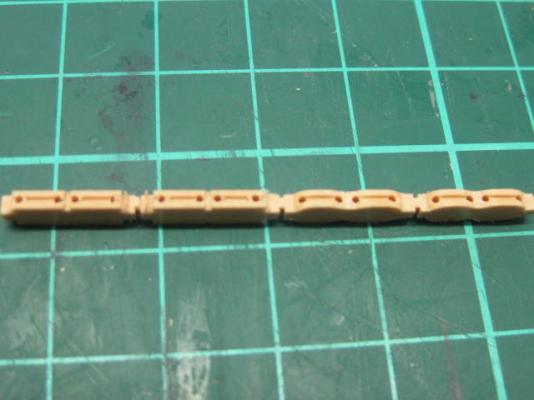
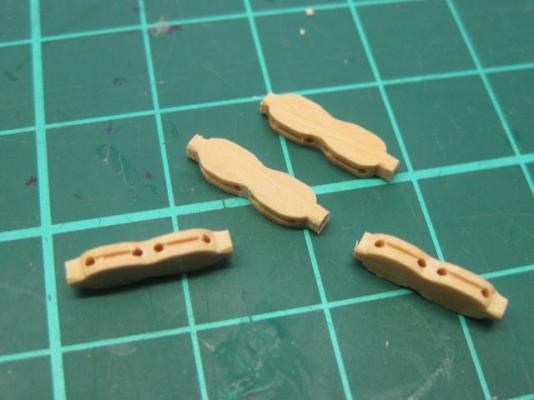
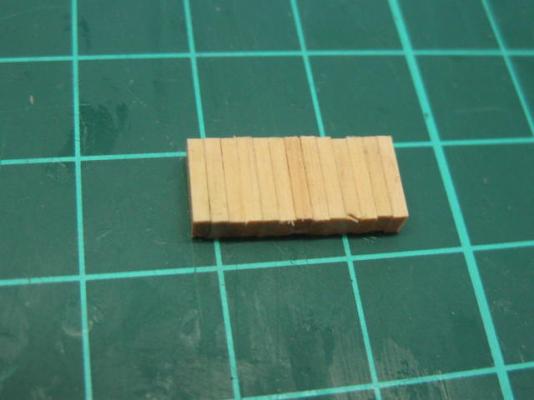
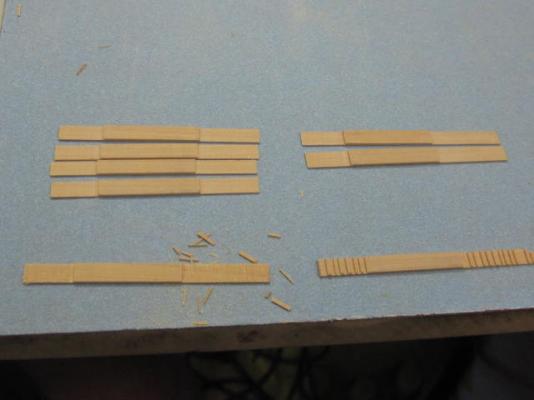
Thanks very much John, Aldo and Richard. Good to see you back on the site Aldo . Shroud Cleats There are about two dozen Shroud Cleats needed as far as I can tell, so I've made them as a bit of a break from tying ratlines. Instead of making them one at a time I've used the method learned from others to mass produce them. First I cut 26 pieces (a couple of spares) from 2.8 x 1.32mm stock at 7mm lengths. These were then glued together with PVA and allowed to dry. A bit of disc sanding got them evened up after this pic was taken : Next I cut a slot in each long end, and a shallower one for the centre lashing on the table saw : Then I clamped the whole section in my vise and did some final shaping with a needle file : Finally the section was dropped into a jar of Isopropyl Alcohol to dissolve the PVA. A little bit of rounding up will be done, and I'll stain the cleats a darker brown so they don't "jump" at you : Danny


-
how to work with teeny blocks???
Dan Vadas replied to achuck49's topic in Masting, rigging and sails
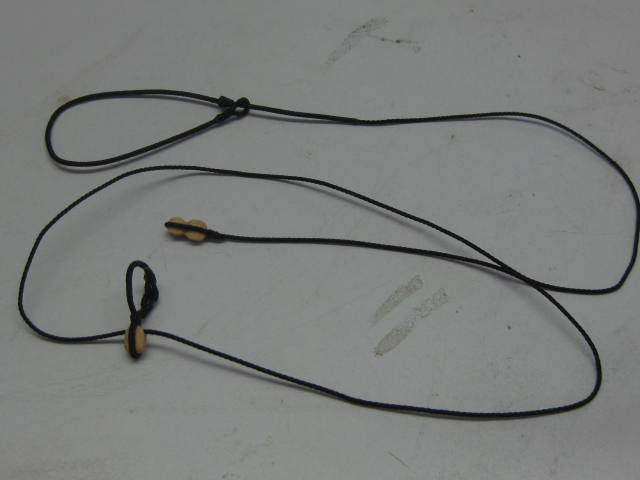
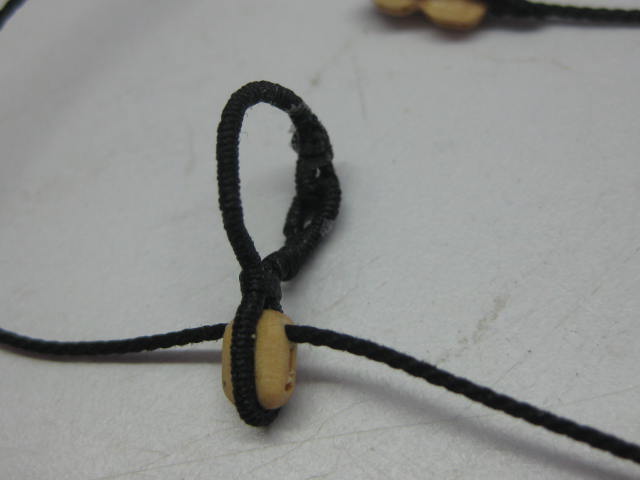
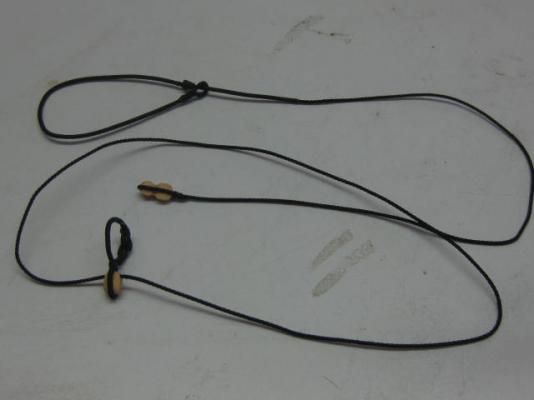
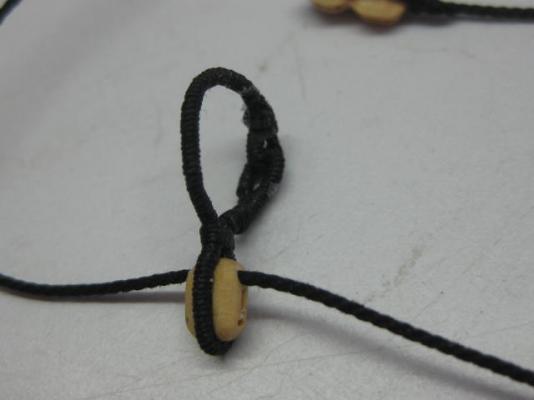
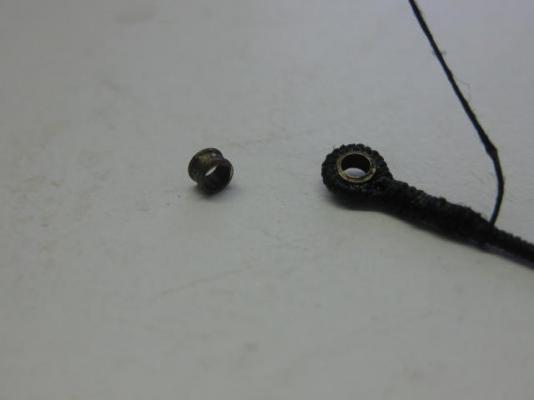
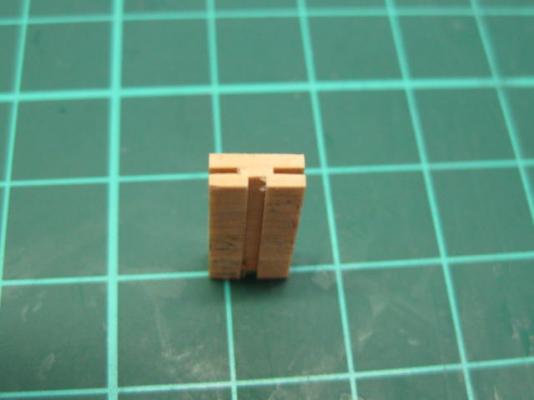
First I clamp the block in my vise. I use tweezers to hold the block while I tighten the clamp. Then I brush a liberal amount of diluted PVA around the groove and also dampen the line with it - this helps hold the line in place. Then I loop the line around the block and tie an overhand knot in the line, brush on a bit more PVA if needed, and pull it tight and adjust it so it hangs realistically. Then I clean up any excess glue with a Q-tip. Finally I snip the tail off after the glue has dried. Danny -
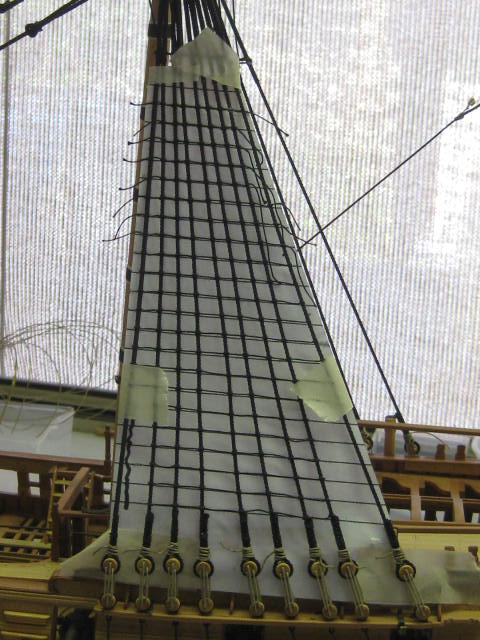
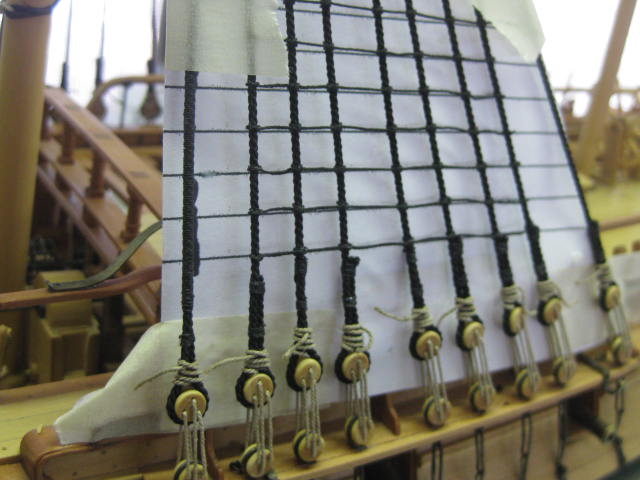
Thanks for dropping in again, and your kind comments John, Nils, Allan, Richard, Maury and Frank. Richard, I'm not using a "professional" setup. I use a pencil torch from Bernzomatic, which uses butane. The solder paste is a medium melting point from Fusion. Maury, I cut the plates to length after soldering and before drilling the holes. Ratlines Time for the "fun" job of tying the lower ratlines. I printed out a spacing template using AutoCAD and taped it behind the shrouds : The lowest 6 and uppermost 6 ratlines don't tie off to the outer shrouds. There is some minor adjusting to be done which I'll do when they are all completed. Danny


-
Hi Remco, I made my lowest one 36mm long and the second from the top one 19mm. The middle ones are in a straight line on the forward ends between them. Danny
- 1,215 replies
-
- 1
-
-
- sloop
- kingfisher
- (and 1 more)
-
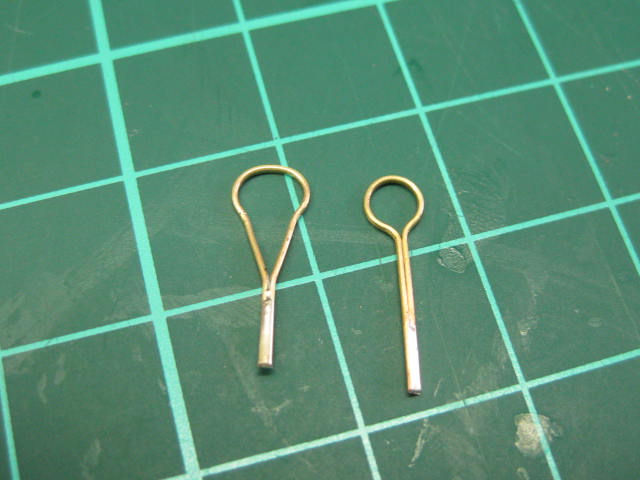
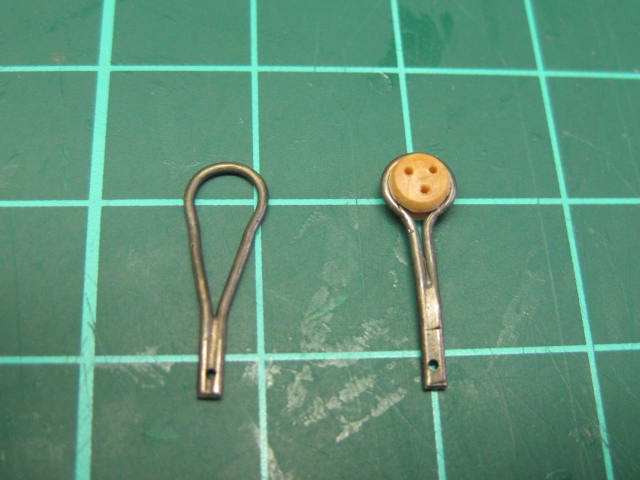
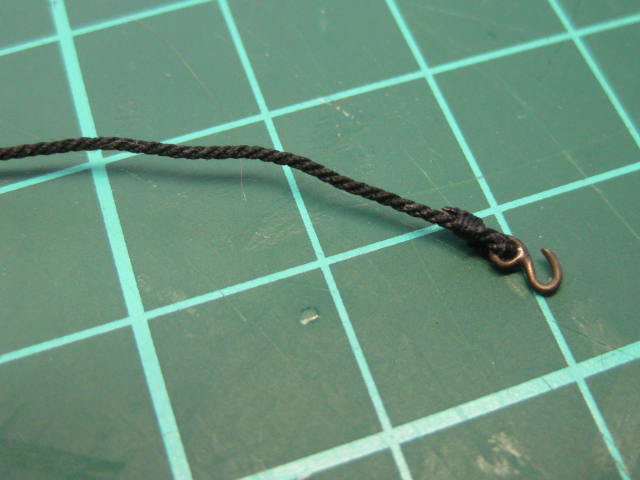
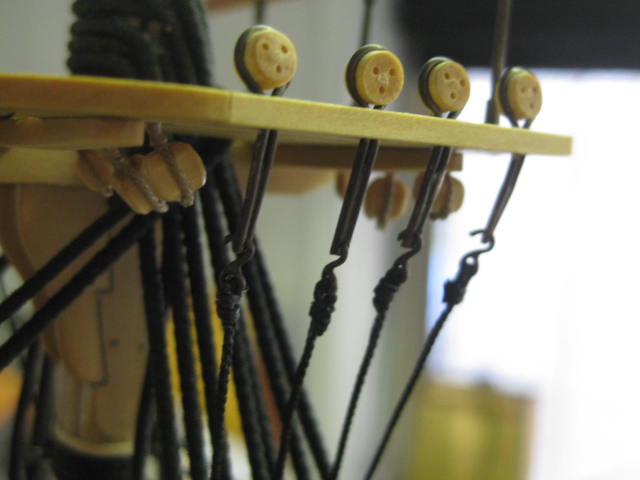
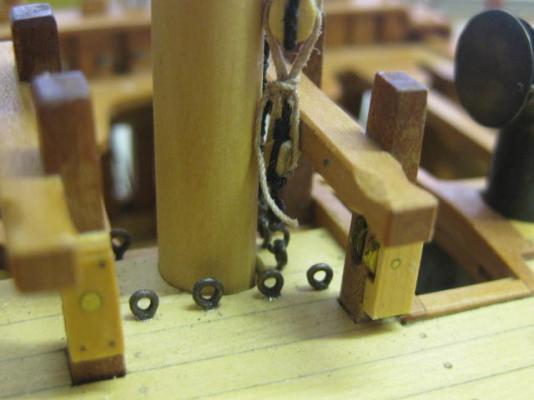
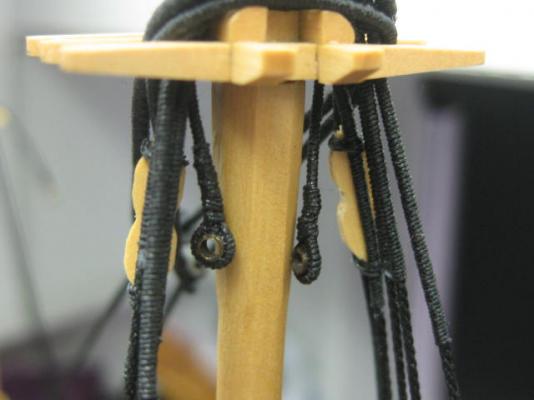
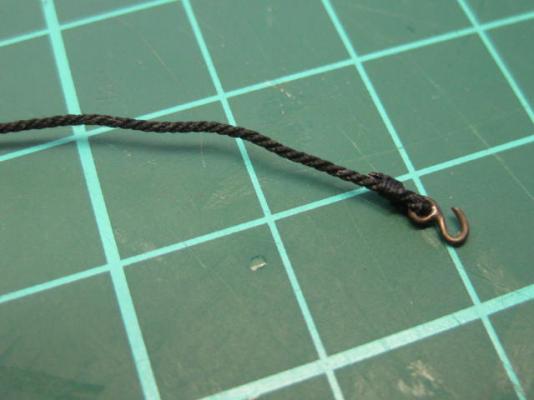
Thanks for looking in Michael and Jan . Futtock Shrouds Preparations for installing the Futtock Shrouds begins with making the Futtock Plates which hold the deadeyes. I made these from 0.7mm brass wire rolled around a 3.3mm drill bit, clamped up with needle nose pliers, and silver soldered at the bottom end. A 0.7mm hole was drilled into the lower end and the upper end was stretched back out so the deadeye could be inserted : After blackening the plate was closed up around the deadeye : 4mm hooks were bent from 0.5mm wire, silver soldered and blackened. The futtock shroud was then seized to it : The futtock plates go through the oval holes in the mast top and the shrouds are hooked to them : The lower end of the shroud wraps around the futtock stave and is seized to the lower shroud : Danny


-
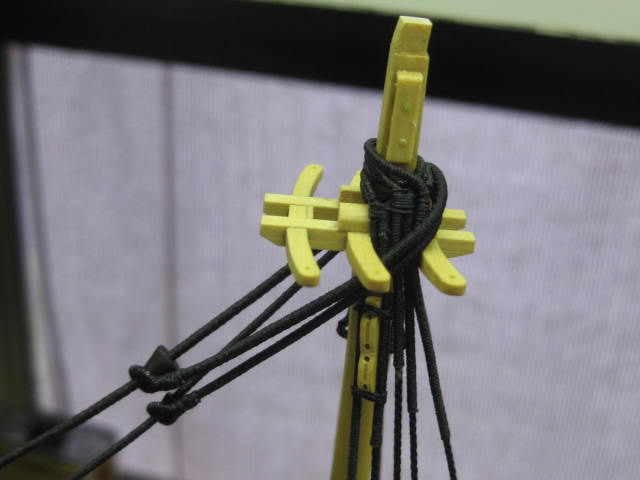
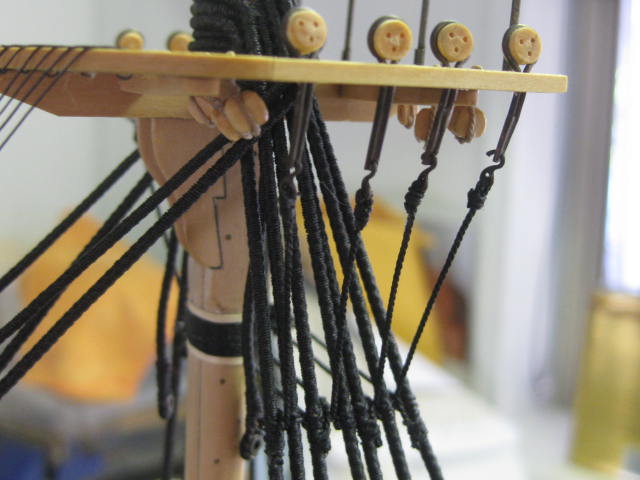
That's what I DID use originally. I couldn't find another color of Quilting Cotton that was closer to Chuck's tan rigging line. I'm pretty happy with the black - I've redone all three crowsfeet. Danny
-
Can i live without a BYRNES TABLE SAW
Dan Vadas replied to shihawk's topic in Modeling tools and Workshop Equipment
Hi Mike, Carefully . I used a Push Stick to hold the piece down on the table. Danny -
Can i live without a BYRNES TABLE SAW
Dan Vadas replied to shihawk's topic in Modeling tools and Workshop Equipment
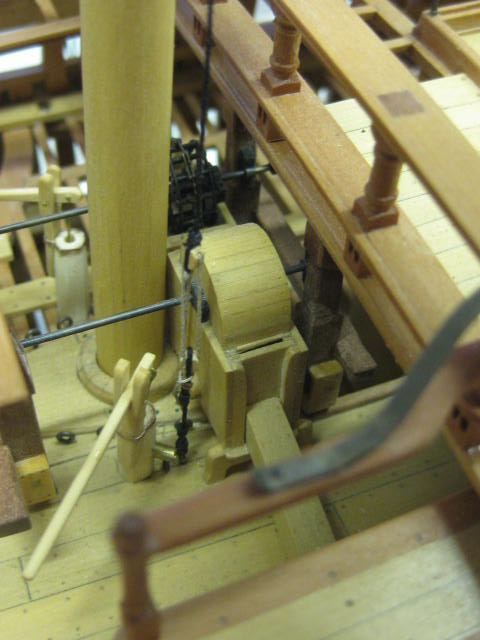
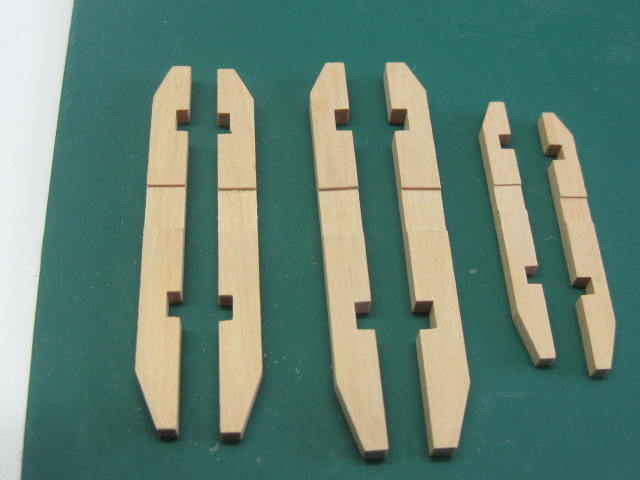
I have all of the above except for the Planer. The tool most used out of them all is the Byrnes Table Saw . Apart from the obvious uses you can't beat it for making very exact rebates, for example in Mast Tops : Or for cutting planks to half thickness for the Top Floors : Danny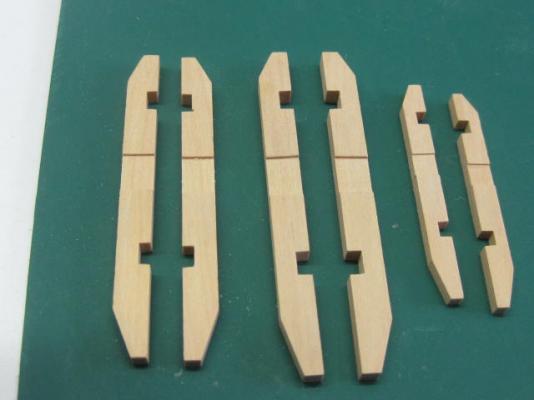
-
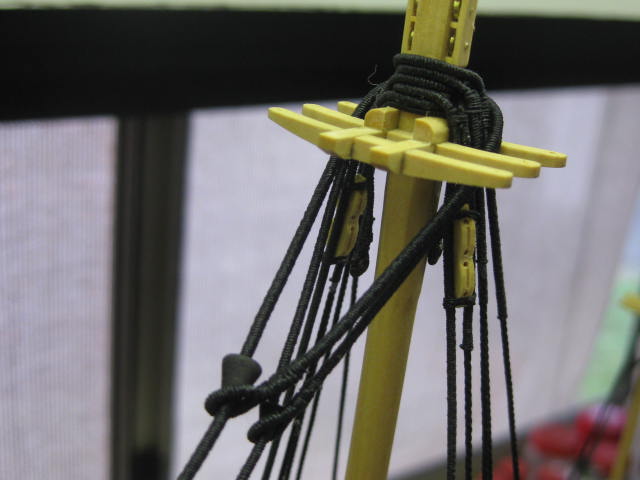
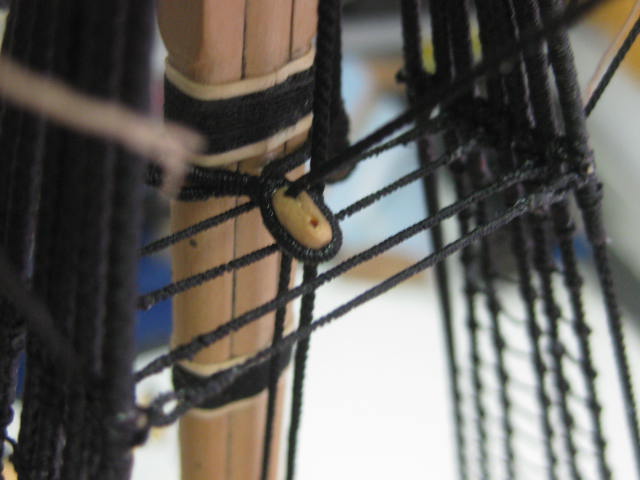
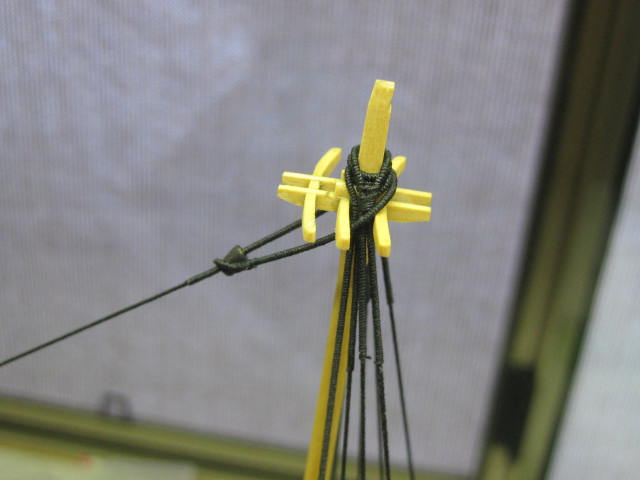
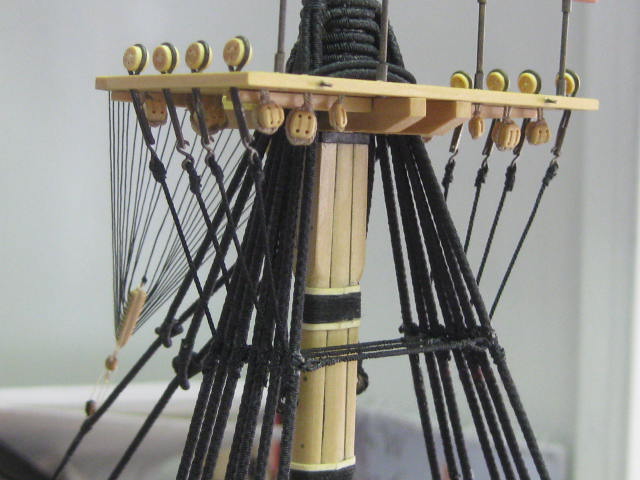
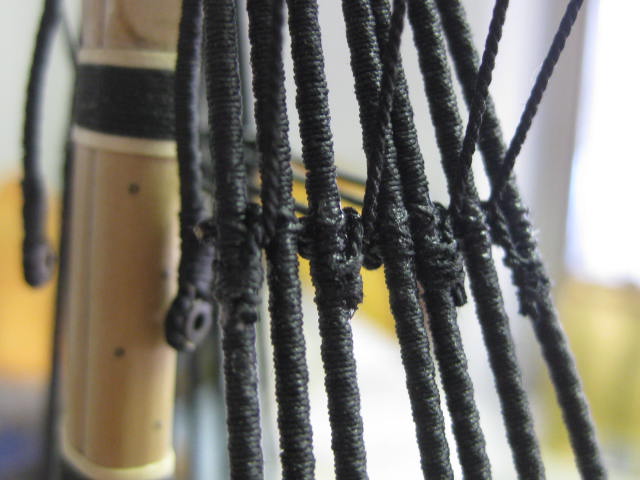
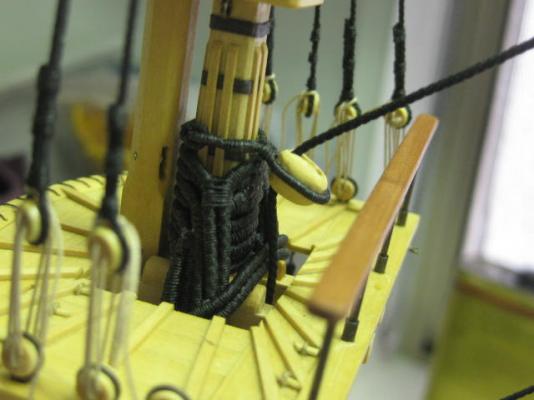
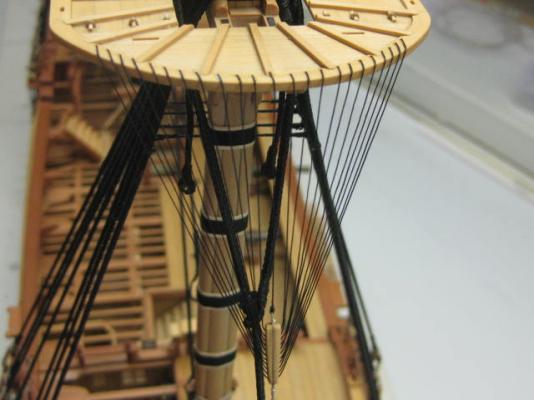
I was unhappy about the thread color and the stark contrast for the crowsfeet, so I'm re-doing them with black line : This is not entirely accurate, as to the best of my knowledge they weren't tarred, but the visual aspect is far better. Danny
-
Thanks Robin, Popeye, George, Adam, Michael and Carl . Popeye, Robin summed it up pretty well. According to Lees (pages 44 and 45) Crowsfeet were introduced in the middle of the 17th century. The tackle using blocks was replaced with thimbles around 1800 until crowsfeet were done away with some time in the early 19th century. Danny