Dan Vadas
-
Posts
3,261 -
Joined
-
Last visited
Content Type
Profiles
Forums
Gallery
Events
Everything posted by Dan Vadas
-
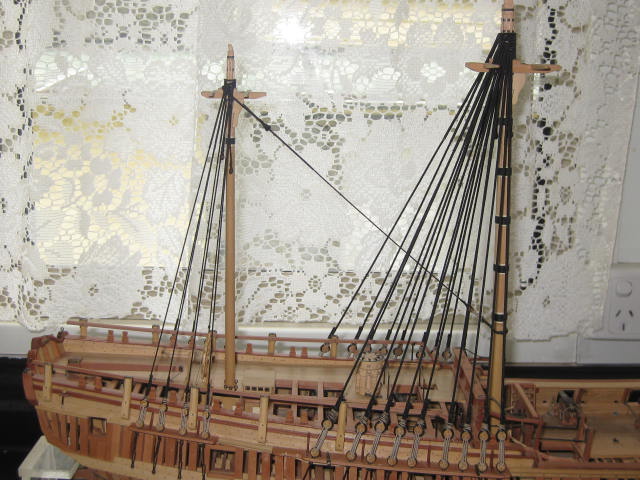
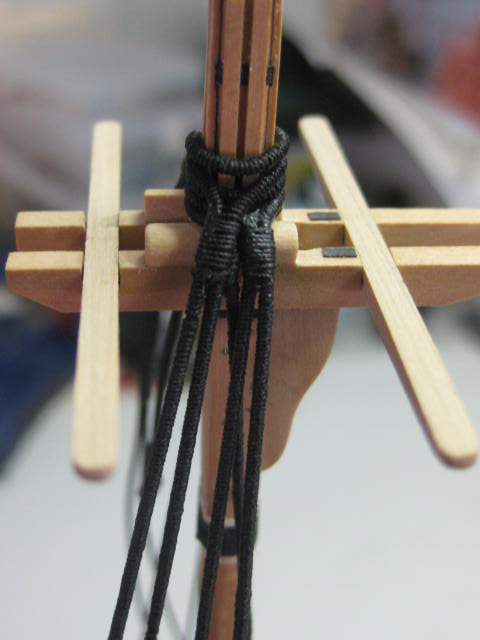
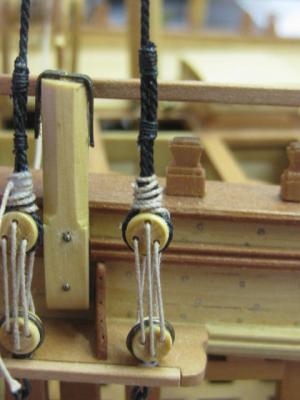
You're welcome Robin . Main Lower Shrouds and Burton Pendants I've fitted all the Main Lower Shrouds. The foremost one is served all over, and the others are served for the uppermost quarter. The Burton Pendants are slipped over the mast head before fitting any of the Shrouds. These are used for heavy lifting of any cargo, in conjunction with other rigging on the yards. They have a Thimble spliced into their lower ends, and are made up as a pair with a Cut Splice around the mast : The foremost shroud is a single and also uses a cut splice to connect the port and starboard shrouds : The rest of the shrouds are paired on each side as were the mizzen shrouds. This pic shows all the shrouds fitted around the mast head : The deadeyes and lanyards : An overall pic of the rigging so far : Danny


-
Thank you Greg, Robin and Alex. Greg, some overall pics will be coming shortly. I've finished the lower shrouds on the mizzen mast, and I'm just about to fit the last two pairs on the main mast so there will be some progress for you to look at. Robin - David Antscherl details the forecastle railings in TFFM based on a contemporary model of Amazon 1773, 32 guns in the NMM. Danny
-
Hi Toni, Don't take the Planking Expansion in TFFM as gospel, especially around this stage of the external planking. David himself admits that there will be variations, as this Expansion was done using a CAD program. Any slight deviation in measurement over a couple of planks, or more significantly a variation in Fairing the frames WILL result in an error somewhere down the track. I found I was quite a way off the TFFM expansion by now, and had to "Become My Own Shipwright" to get them to fit. From the explanations in your last post it looks like you're on the right track . Danny
-
I think that the bottle is to be used AFTER you've finished the serving Geoff. Unfortunately, NO directions for how to empty it, it's left up to your discretion . Danny
-
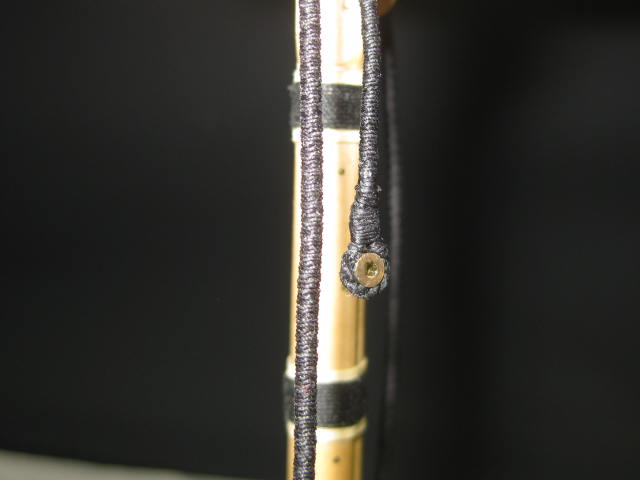
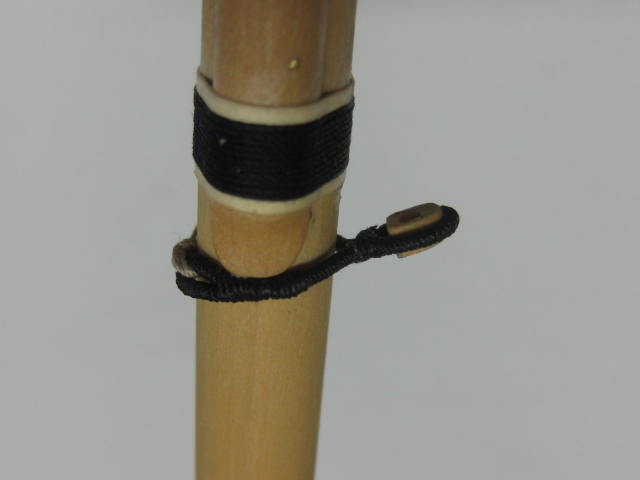
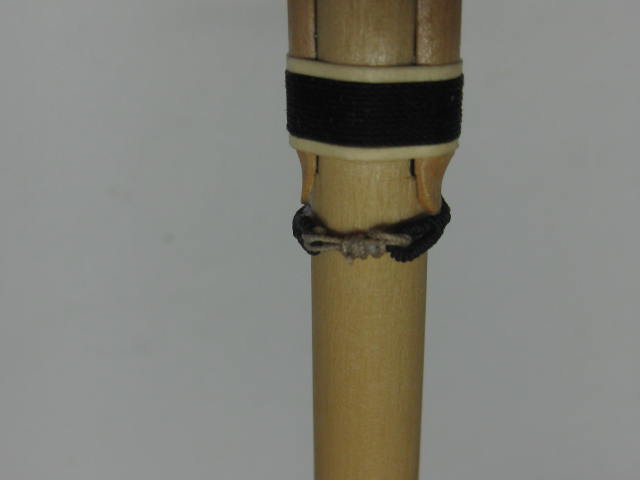
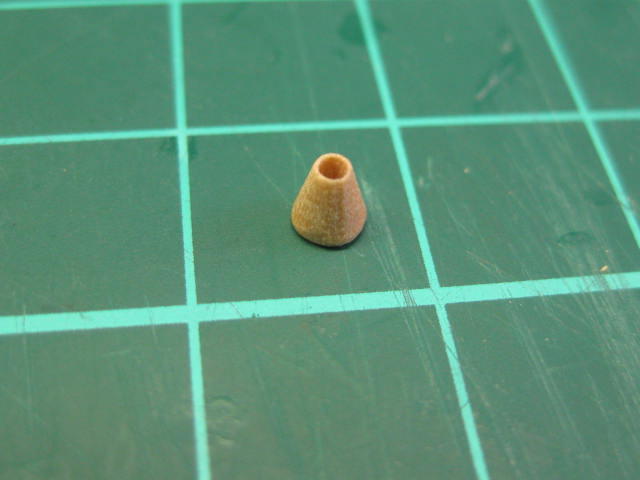
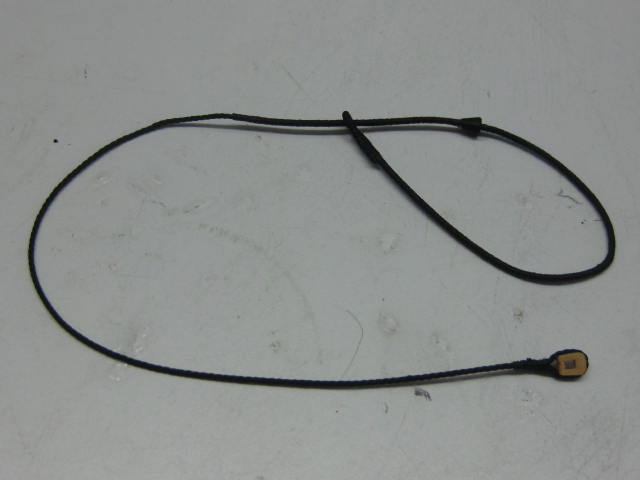
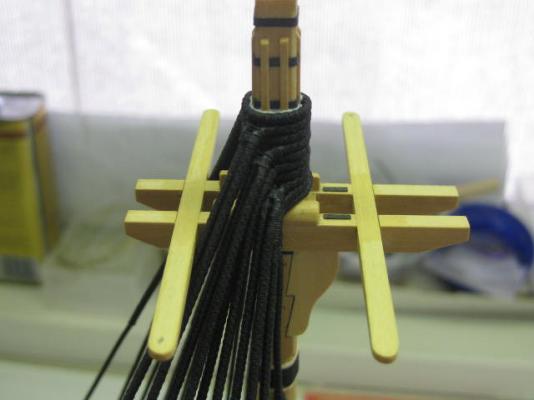
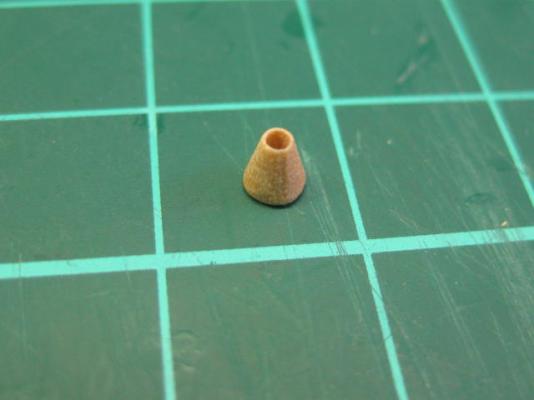
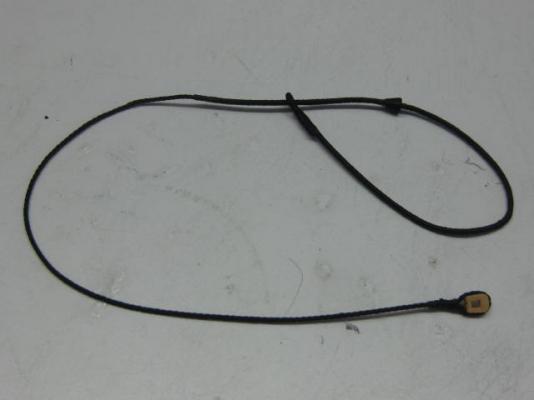
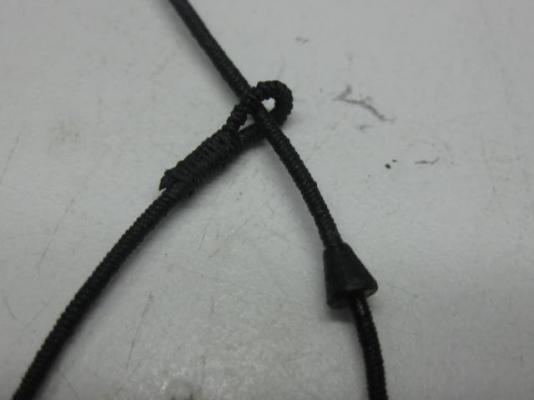
Mizzen Mast Forestay and Collar The Mizzen Mast Collar was made up in similar fashion to those on the Bowsprit. It's fully served and has a Heart incorporated : I turned the Mouse on the lathe after first drilling a 1.2mm hole up the centre. This gives a good fit over the served stay : The Forestay with mouse fitted : Lashed to the masts : Danny


-
Thank you to Brian, Remco, Joe, Nils, Steve, David, George and John. Remco, the Serving Machine is not Homemade. Check this LINK for the Domanov machine. David, I'm using Quilting Cotton. It behaves like pure cotton when tying knots etc, but has a Polyester coating which removes all (or most of) the "fuzzies" . It's only drawback is that it's a bit thicker than pure cotton. Another "plus" for it - it's a LOT stronger than cotton - virtually unbreakable. Danny
-
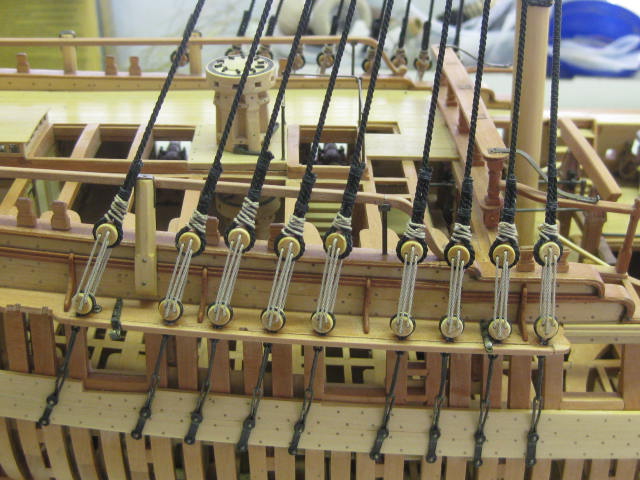
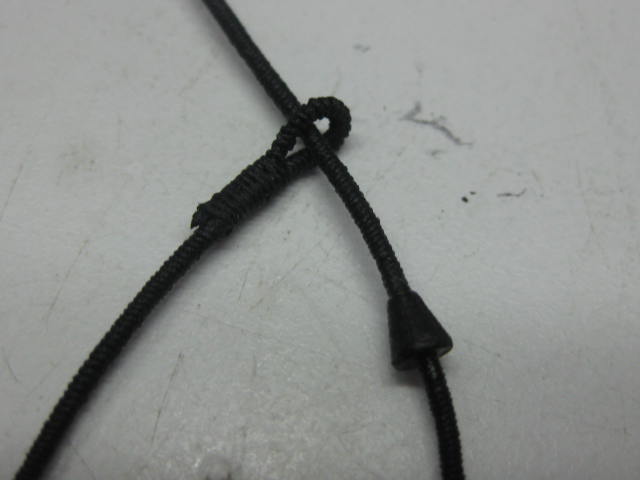
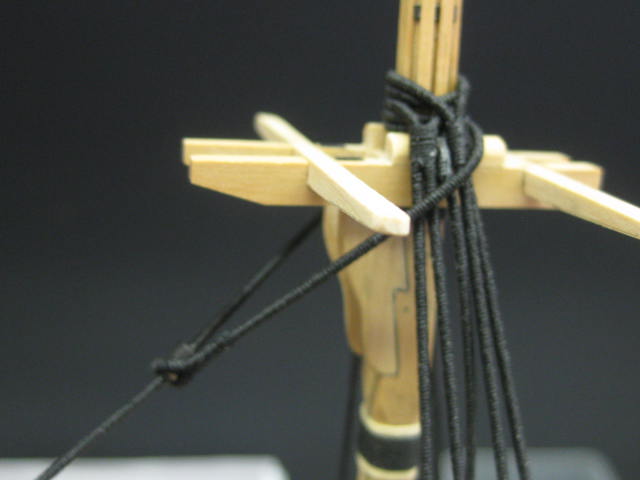
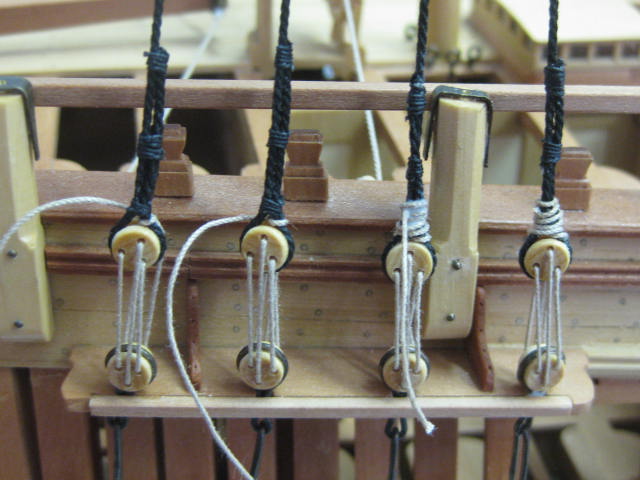
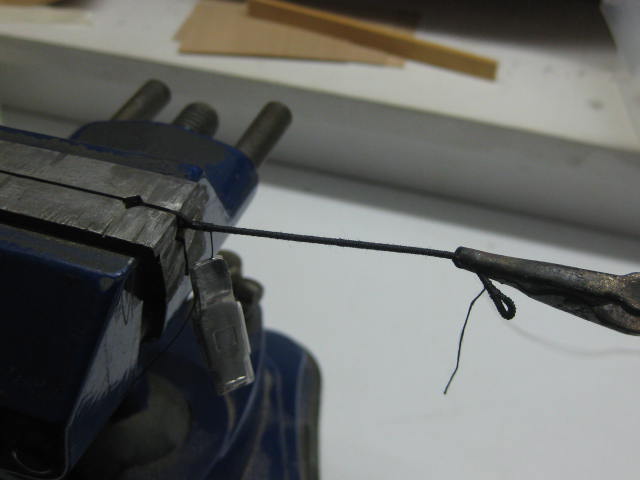
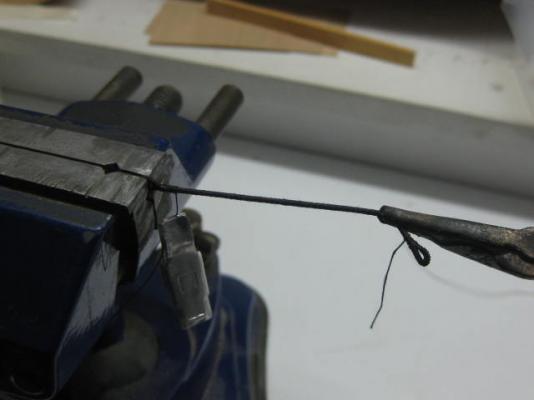
Thank you Dave. Mizzen Mast Shrouds The Standing Rigging for the Bowsprit is now complete, so I'm turning my attention to the Mizzen Mast rigging. The reason I'm starting back-to-front to real practice is one of access - once the mainmast shrouds are fitted it will make rigging the mizzen forestay a little more difficult. All the mizzen shrouds are served for about 6 feet below the mast top - unlike the other two masts the foremost shrouds aren't served for their full length as there is no Mizzen Course which could chafe them. I left them overlength for now, and lashed the pairs together around the mast : Using a wire spacer between deadeyes I measured each shroud, starting with the foremost starboard pair, which are the first to be fitted. Then I removed the pair from the mast and turned in the deadeyes on the bench using a vise and a set of Third Hands - much easier than attempting to do them on the ship. When all four pairs were done I fitted the Laniards : Danny

-
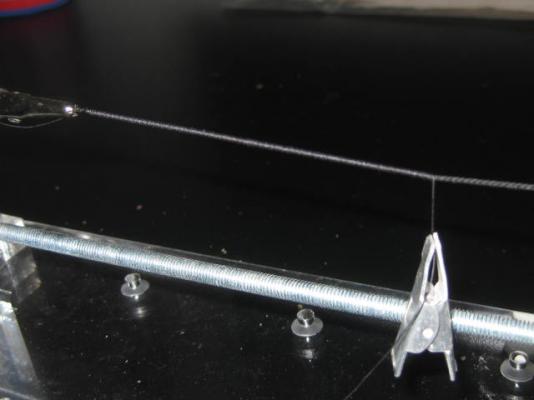
Thanks Brian, Steve, Nils, Grant, Ed, George and Mark - much appreciated . Main Stay Collar This is the largest Collar on the ship. Again, it is served all over. After measuring and serving the line I "spliced" an eye into one end. Next I lashed the Heart to it. Then came the fun part - attempting to pass the line through the hole in the knee of the head. To assist me with this I tied a length of thin cotton to the free end and led that through the starboard headworks, through the hole, and then back up through the port headworks. All went very well . Once the line was all in position I passed the free end through the first eye and seized the end back on itself : Danny


-
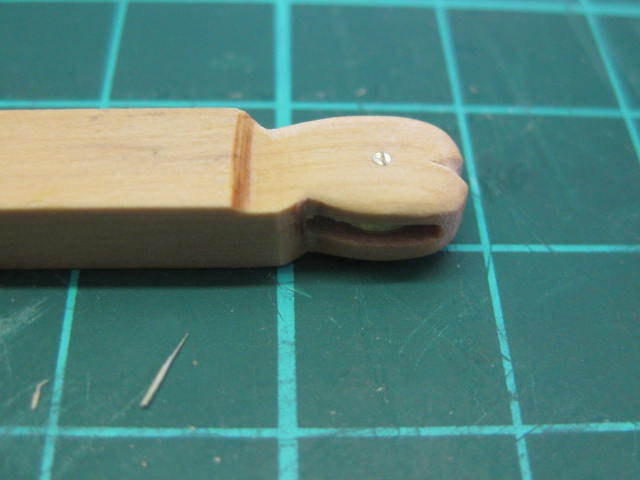
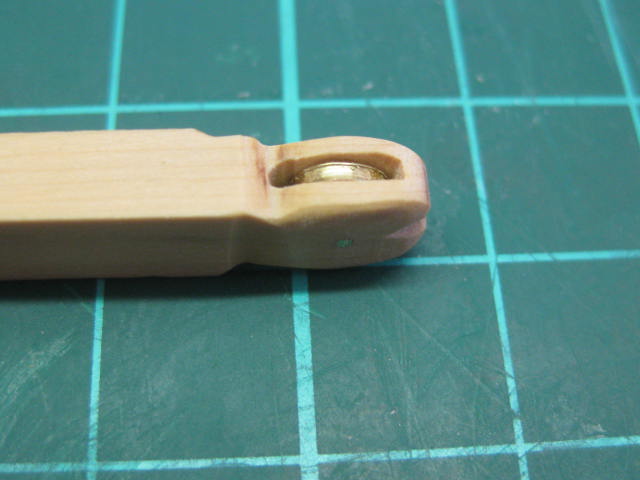
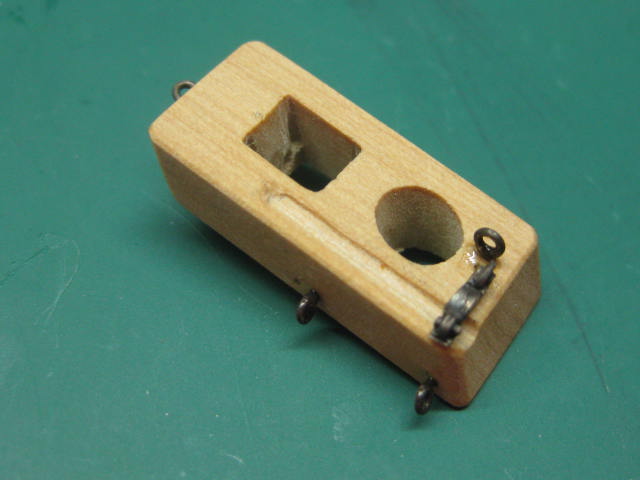
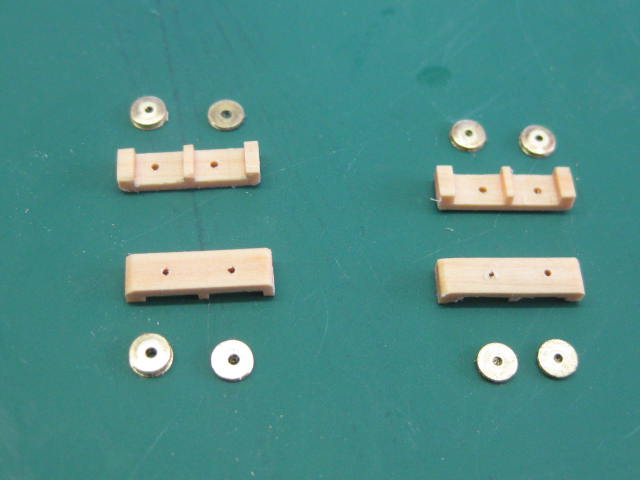
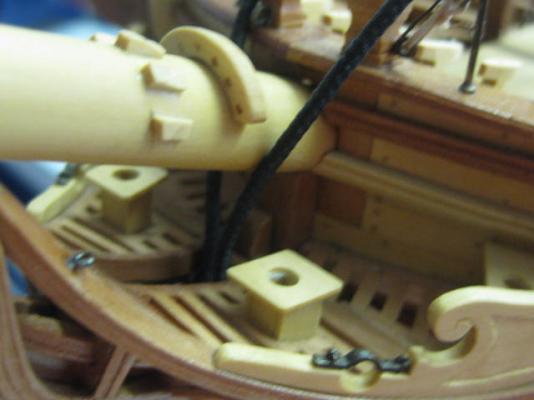
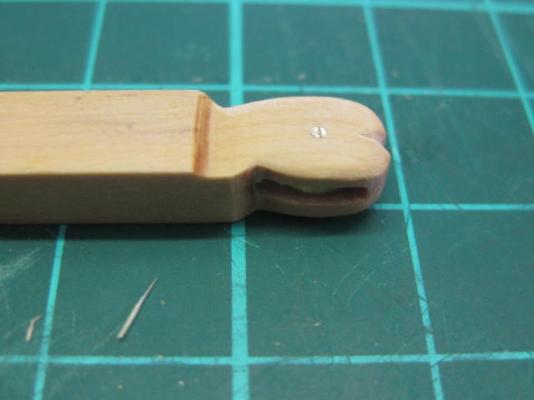
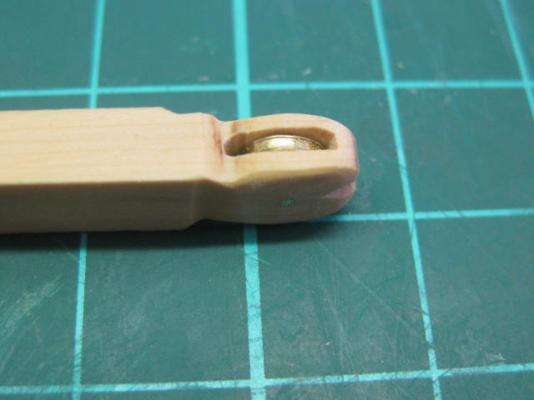
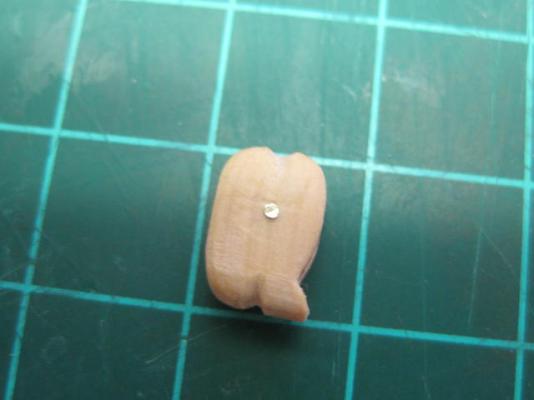
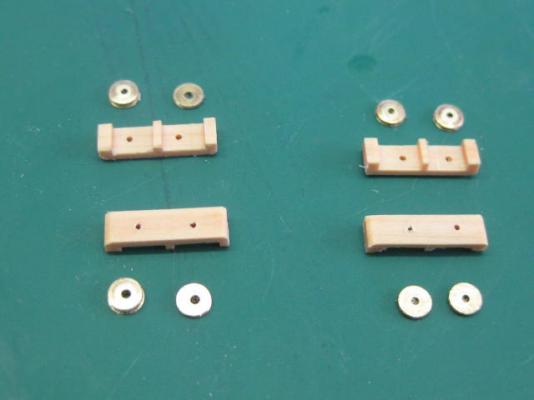
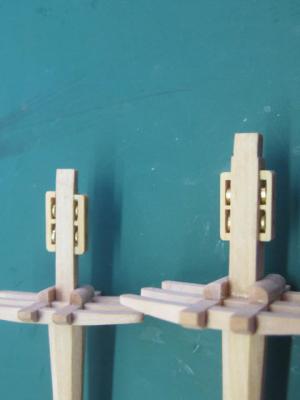
Fore Tack Step Blocks These are relatively large Blocks which attach to the Boomkins - 14" in real life. I made them from English Box, the pics tell the story : Their Strops are served : Danny

-
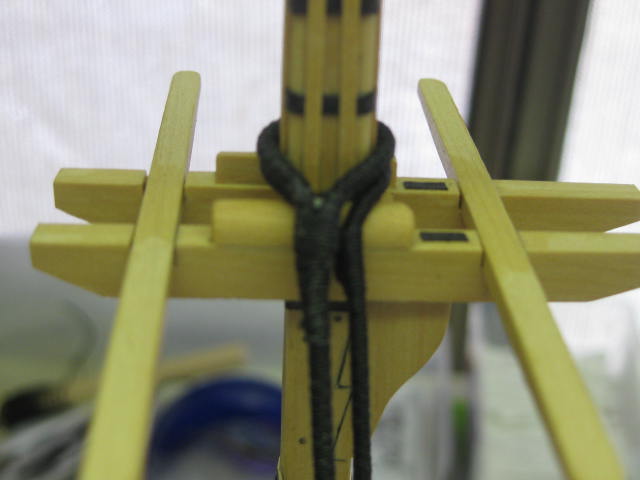
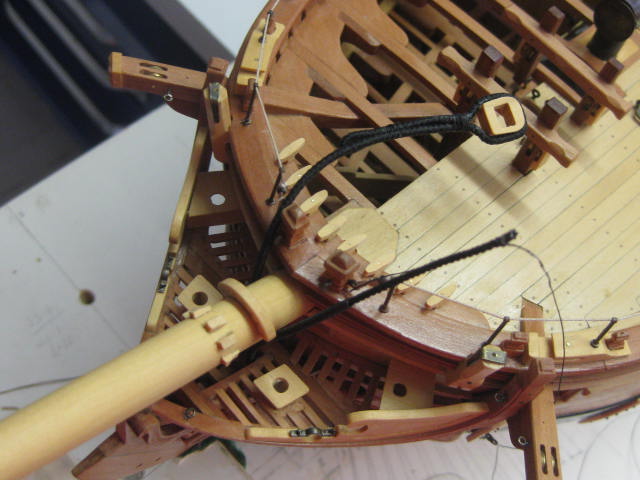
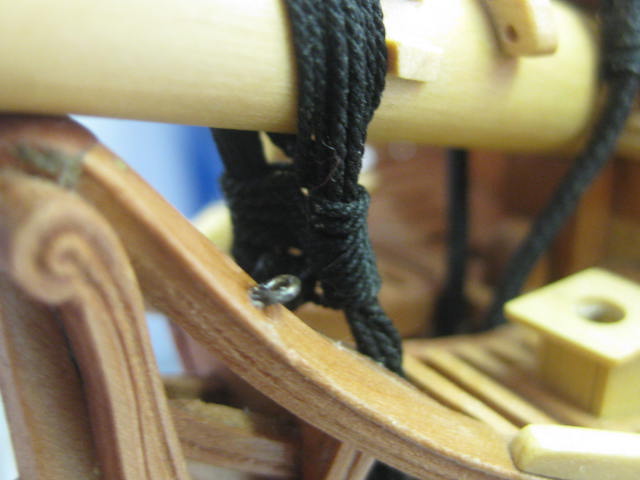
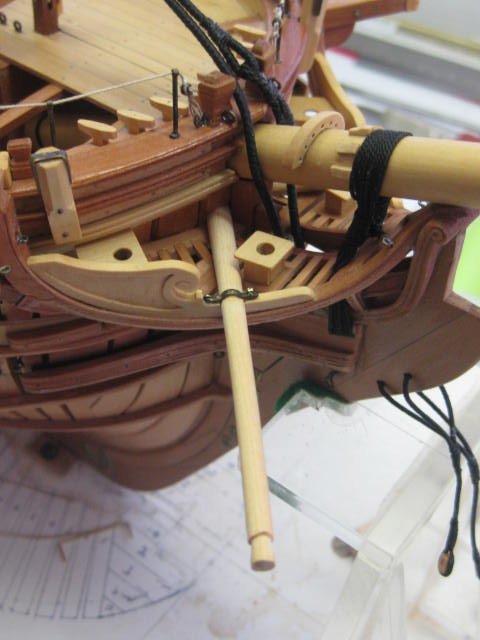
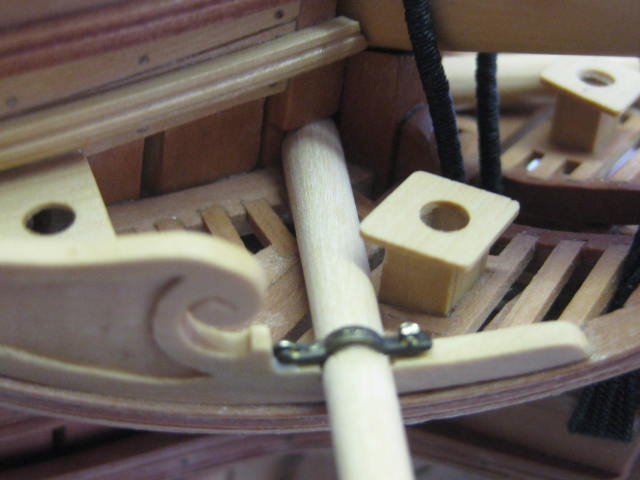
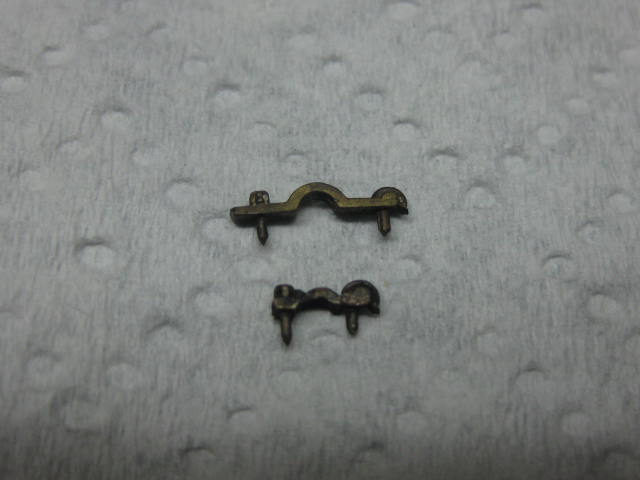
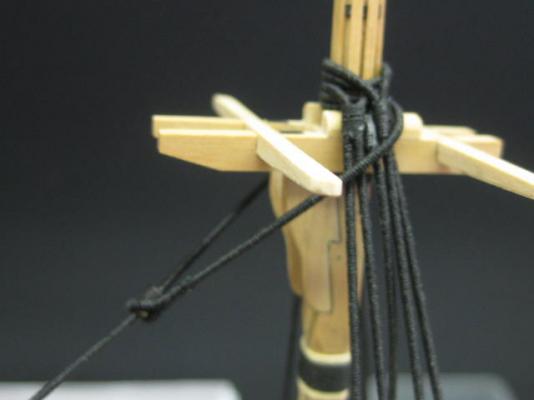
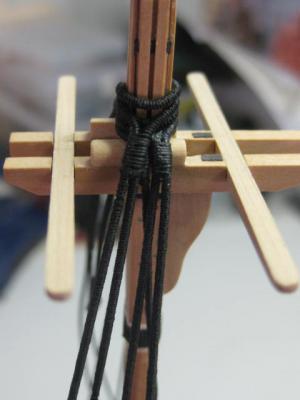
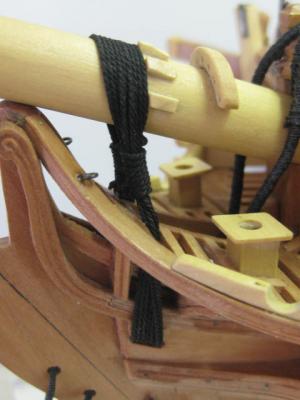
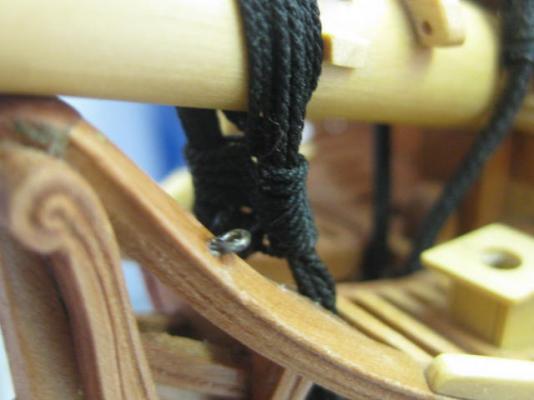
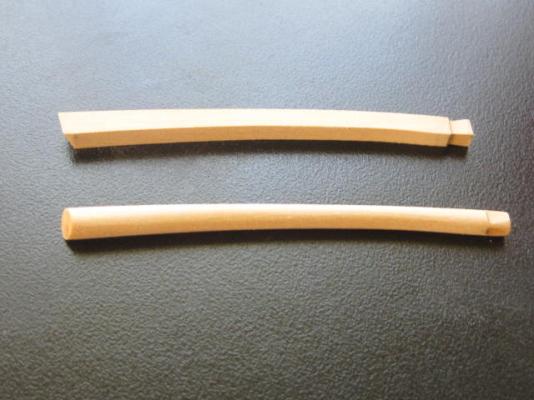
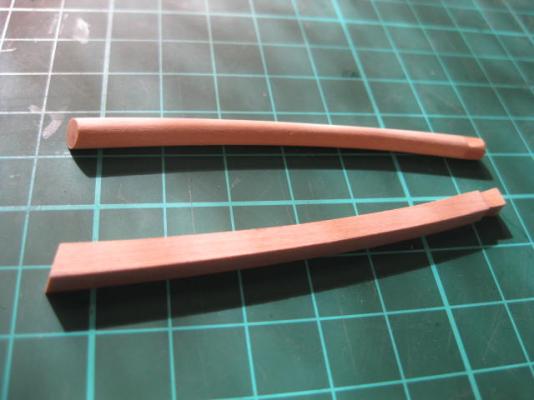
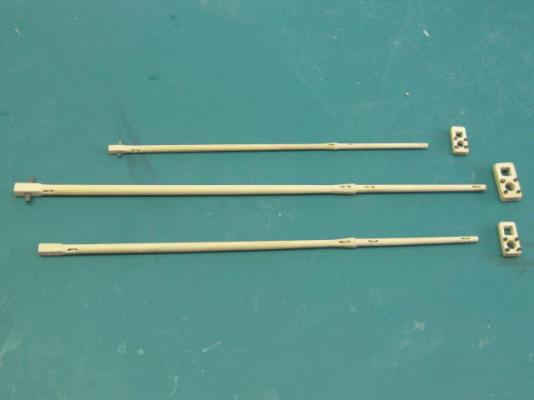
Gammoning The Gammoning consists of 9 turns crossing over each other vertically, followed by the same number horizontally to pull it all tight. A couple of half-hitches complete it : Boomkins The Boomkins were made in similar fashion to the other masts/yards, with the exception that they are curved. I cut them from rectangular stock and "octagonelled" them before sanding them round. They have a step at their outboard ends for the shrouds and Fore Tack Block : A Capsquare fastens them to the head : Danny


-
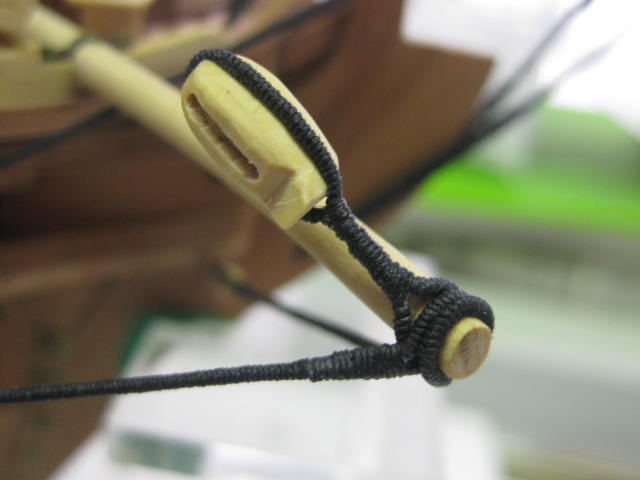
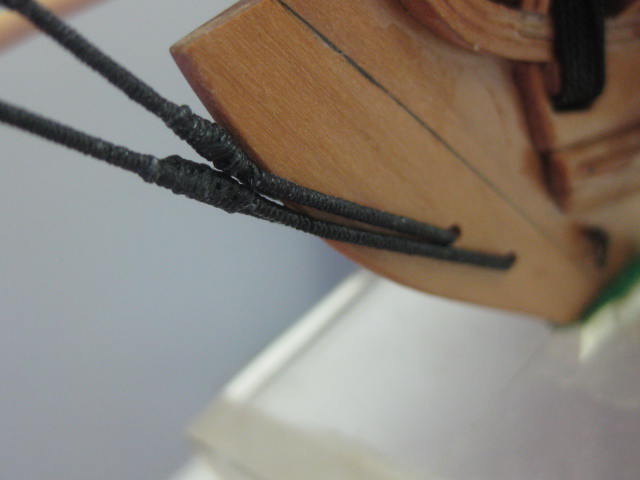
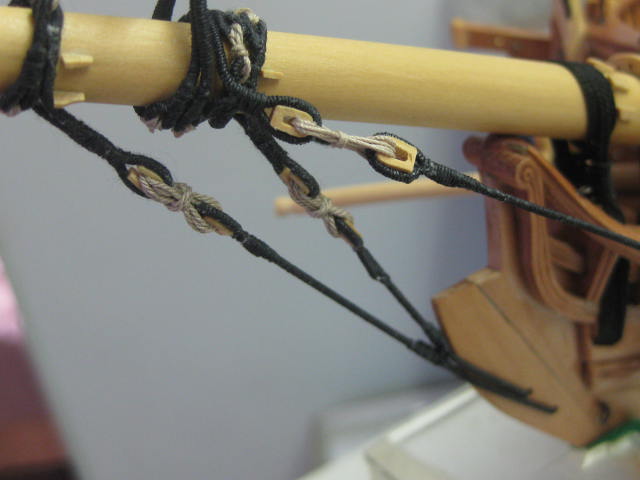
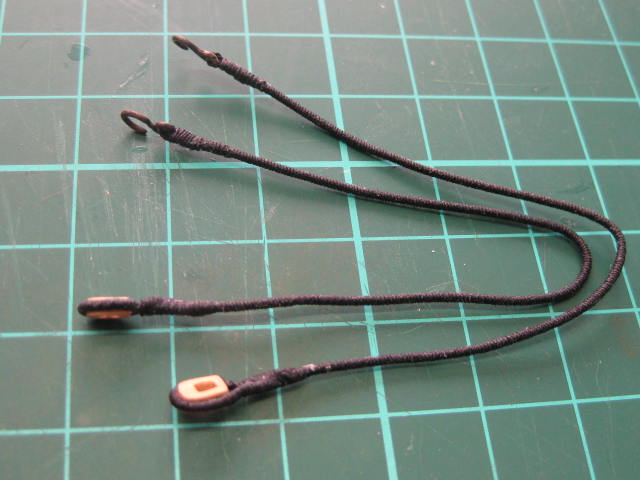
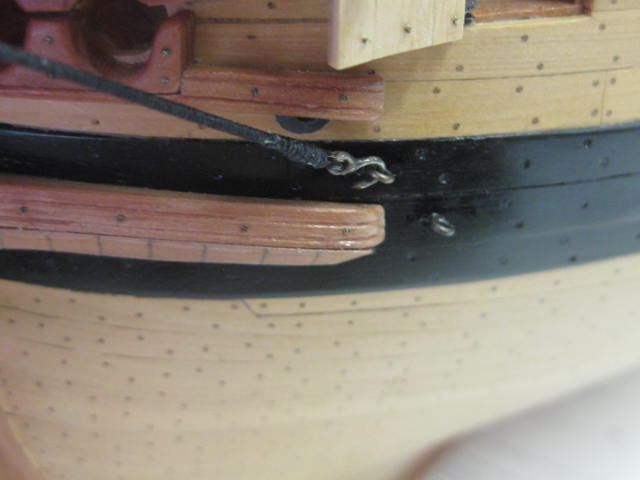
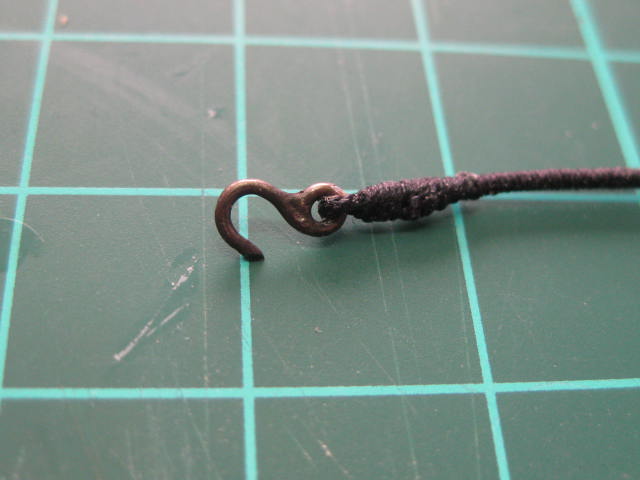
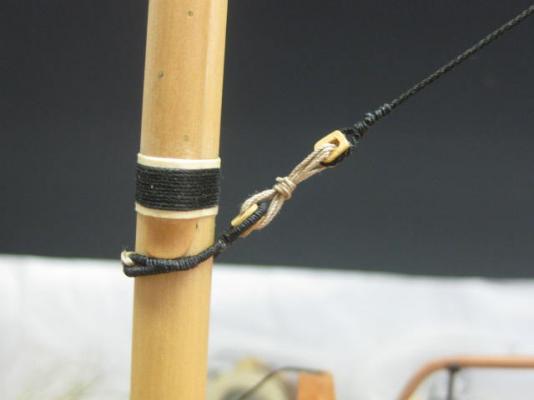
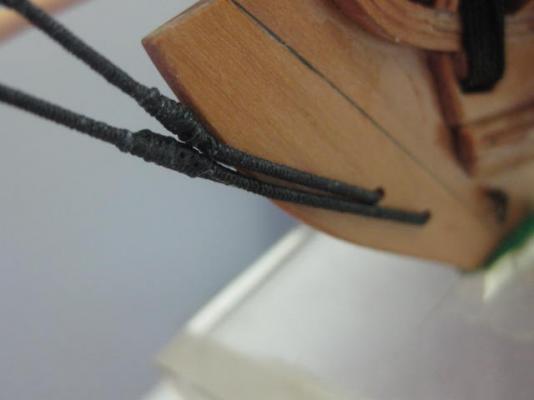
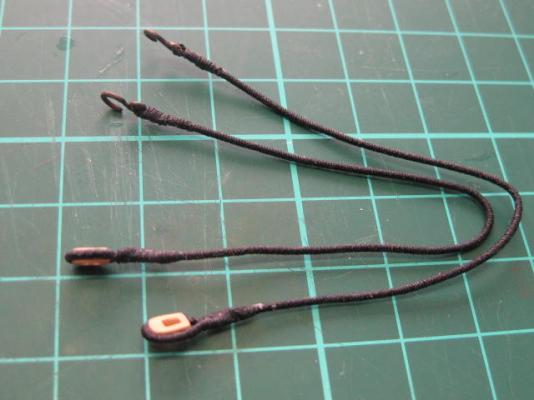
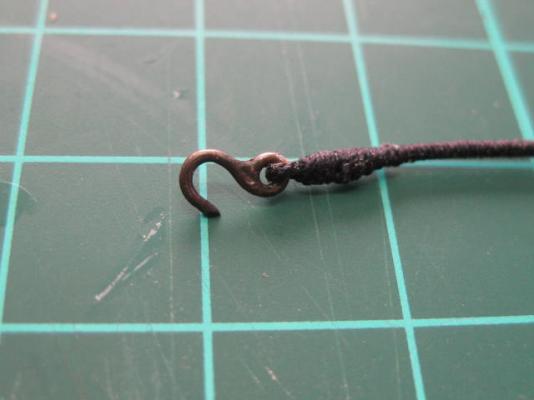
Thanks very much for looking in again Brian, Allan, Arch, Nils, Grant, and a welcome to George . Work has been continuing on the Bowsprit Rigging. Bobstays These are the equivalent of the Forestays on the other masts. Like all the Bowsprit rigging they are served all over. The inboard ends pass through the foremost holes in the Knee of the Head, and are spliced together : Bowsprit Shrouds The equivalent of the Shrouds on the other masts. These are hooked through eyebolts at their inner ends : The outer ends of both the Bobstays and Shrouds finish in a heart block, and are lashed to their respective Collars : Danny


-
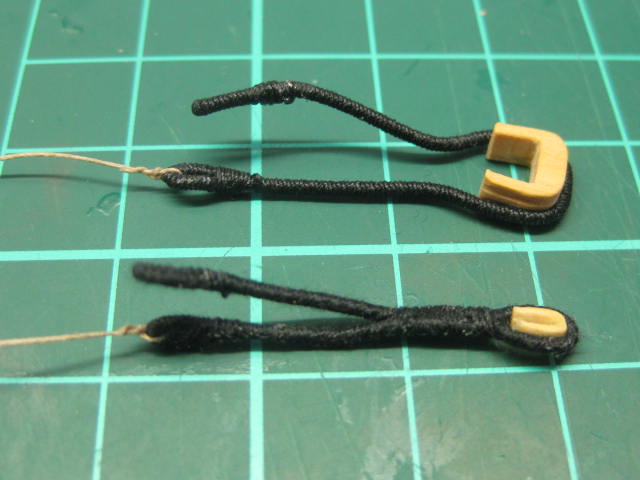
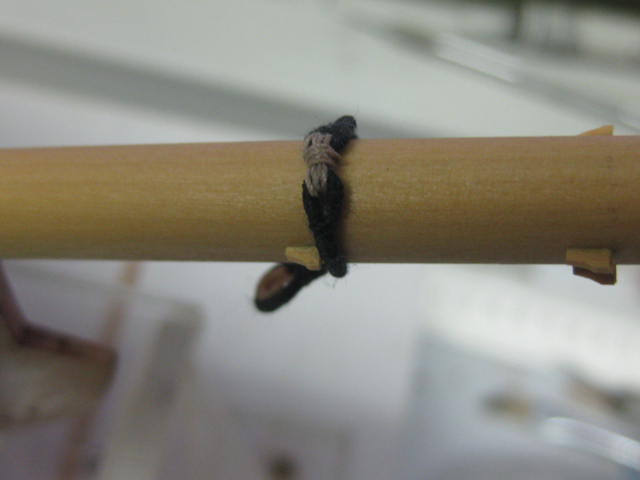
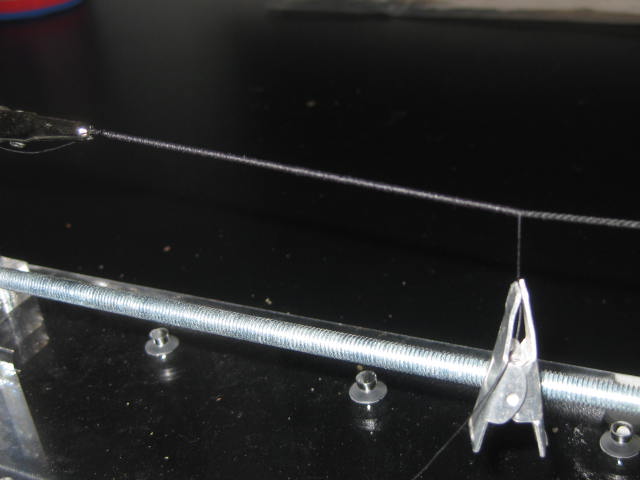
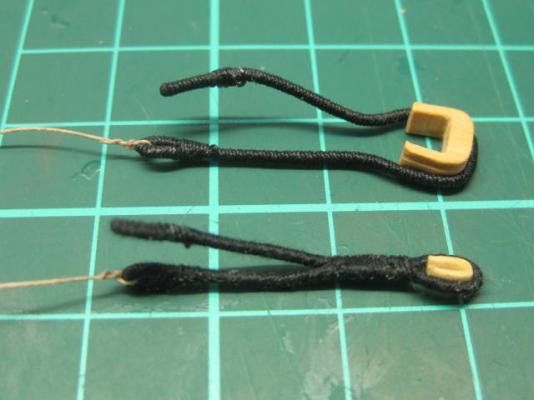
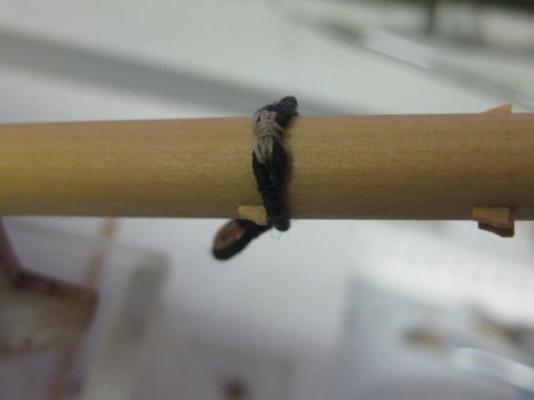
..... continued. I've finally come to making the actual rigging . Collars First step was to make the Collars for the hearts. These are Served for their entire length, so my new Domanov Serving Machine got it's first run : For the serving line I used Quilting Thread, which is made from cotton with a polyester coating. It has no fuzzies at all, and is quite easy to work with. It also has no "rope definition", but at this scale that's not noticeable. I used my vise to hold the eye and turned the excess serving line around the main line to make a very neat fake splice : A couple of hearts with their strops. The larger is for the Forestay and has a double strop (one still to fit). The smaller is for one of the Bobstays : A bobstay collar lashed to the bowsprit : Danny

-
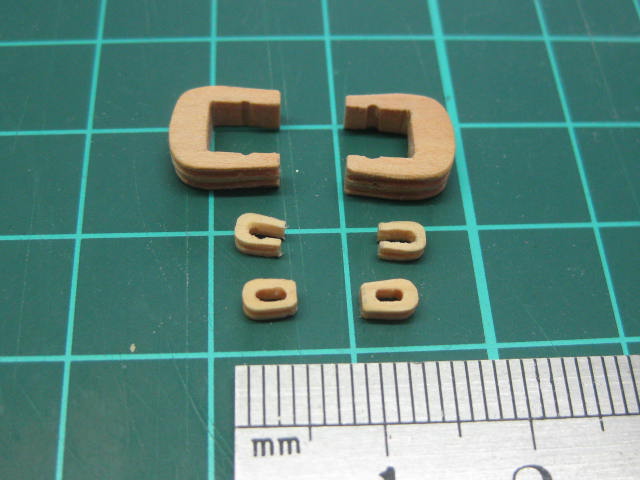
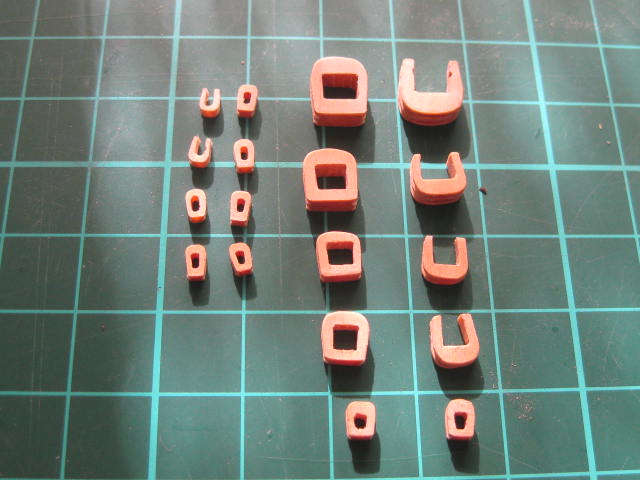
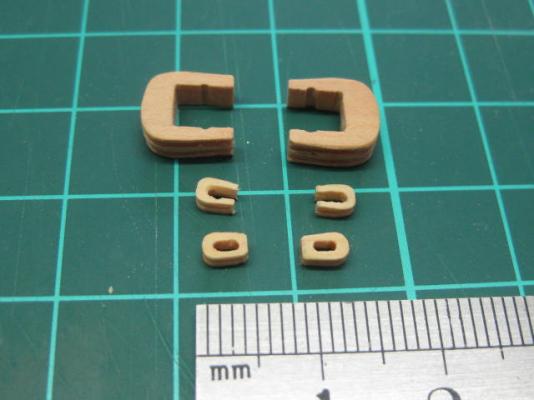
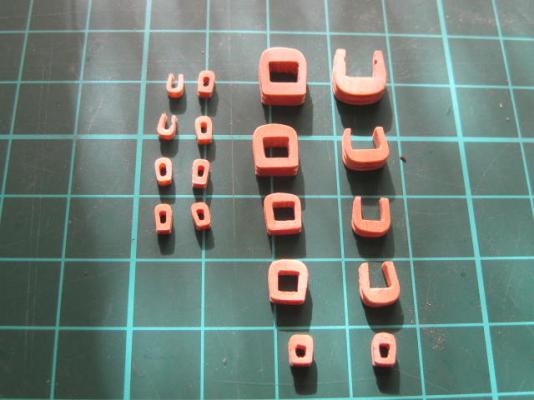
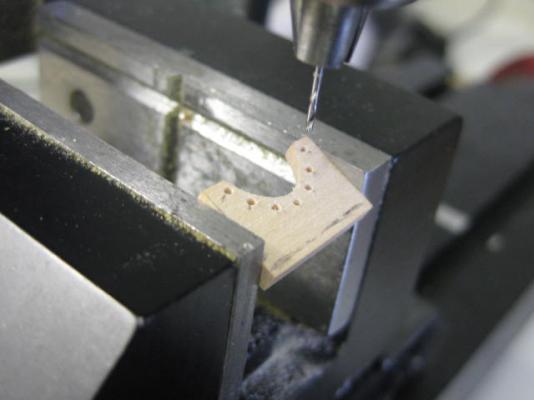
Thanks Brian and Pat. Hearts The standing rigging for the bowsprit requires a number of Hearts, both open and closed. I made these from English Box in the following manner. First cut the groove for the strop using the table saw on both sides. Next I filed the groove on the end with a very thin needle file. I put the stock in my vise and tapered both sides, and used a 0.8mm "chisel" to recut the groove. Next step was to drill the centre hole using the mill - I drilled a number of holes and trimmed the excess with an Xacto blade. Finally I cut the heart from the stock on the table saw : Continued next post ......

-
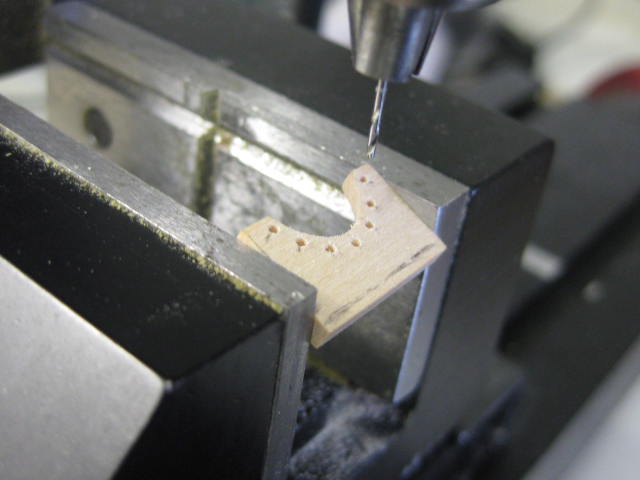
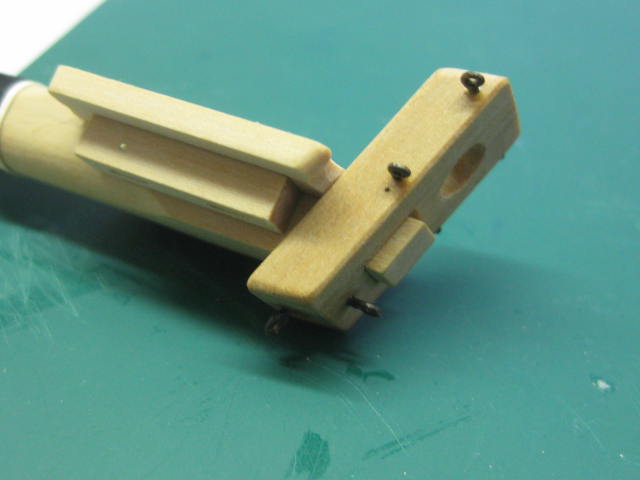
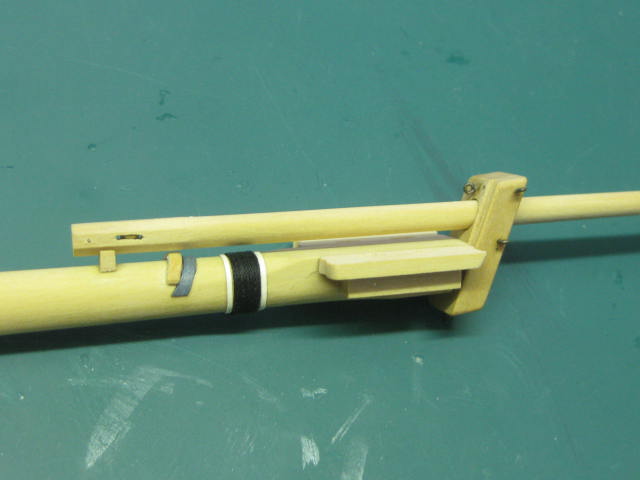
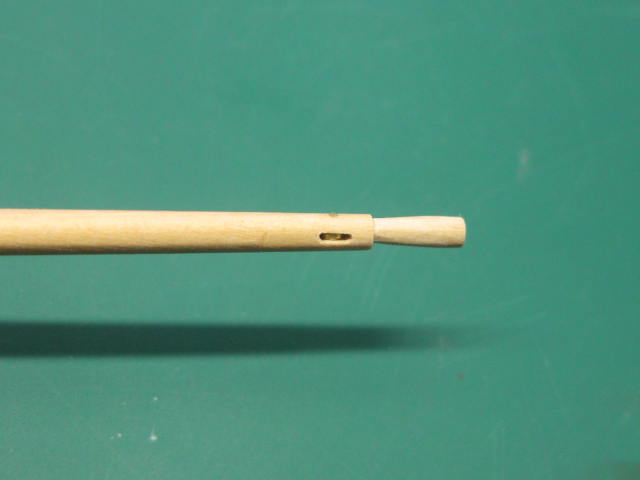
..... continued. To drill the holes at an angle in the Saddle I set it up in my mill vise : The Saddle and Gammoning Cleats fitted : The inboard end gets a "iron" band made from thin card : The outboard end of the Jibboom has a shoulder cut into it and a tiny sheave : Some views of the bowsprit assembled. As with the other masts nothing has been glued yet (apart from the fittings) : Danny


-
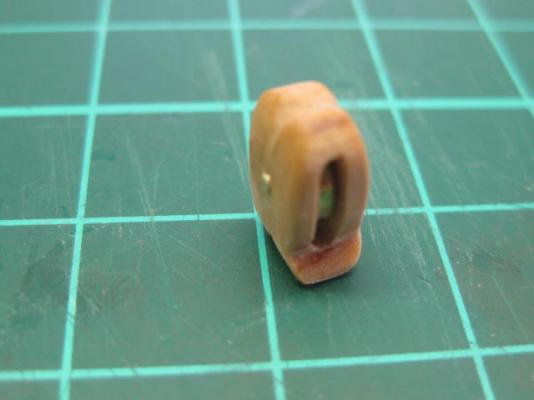
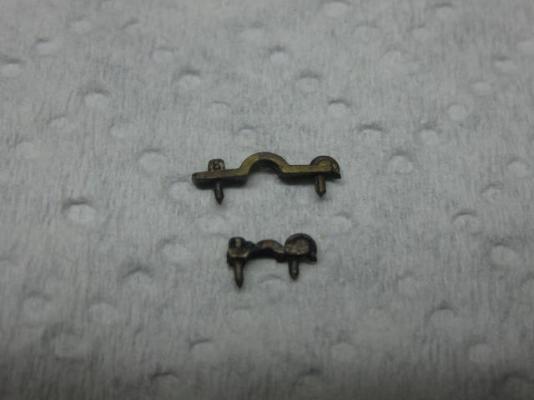
And thank you Piet . Continuing on with the Bowsprit. The Cap has been made - this one is considerably more difficult to make than the mast caps, due to the angle of each cut. The groove in one side is the seat for the Jackstaff : I cut down and soldered one of my spare trunnion caps for the jackstaff capsquare : Also made were the Bees and Bee Blocks, the Spritsail Yard Sling Cleat complete with "lead" liner, the Jibboom Saddle and a Woolding : Continued next post ......
-
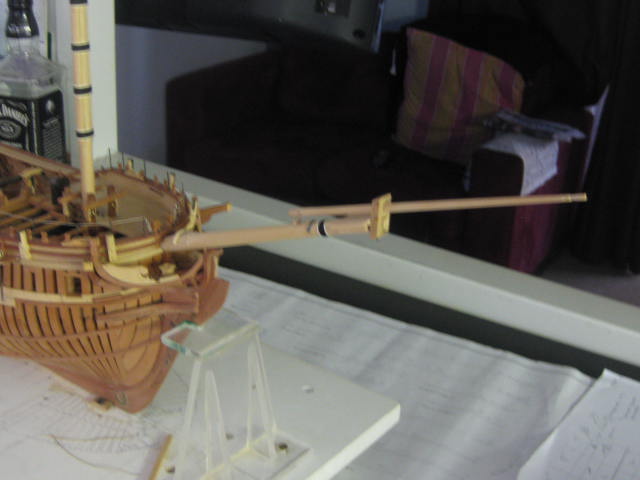
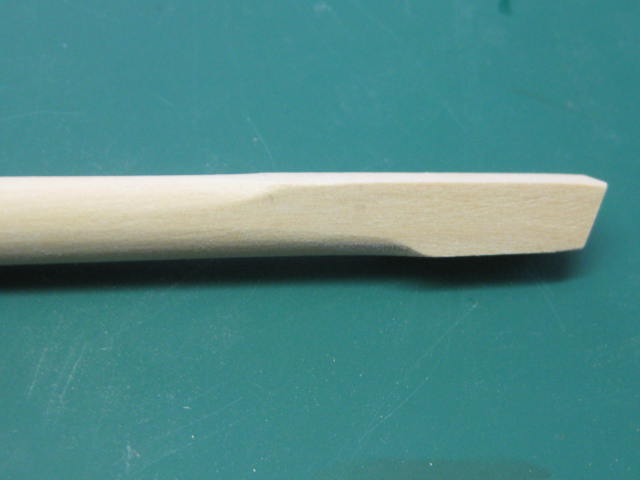
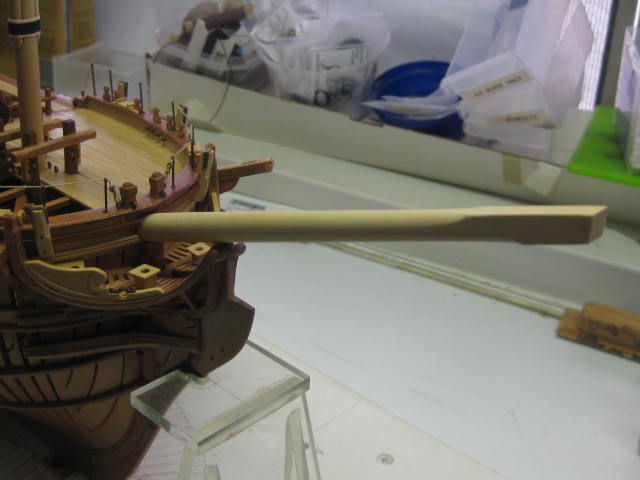
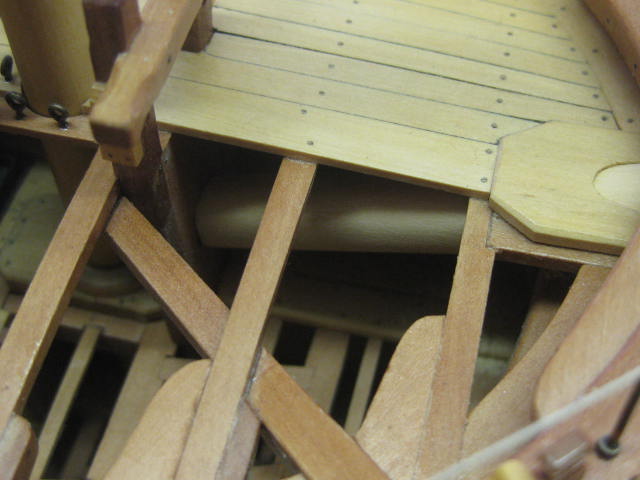
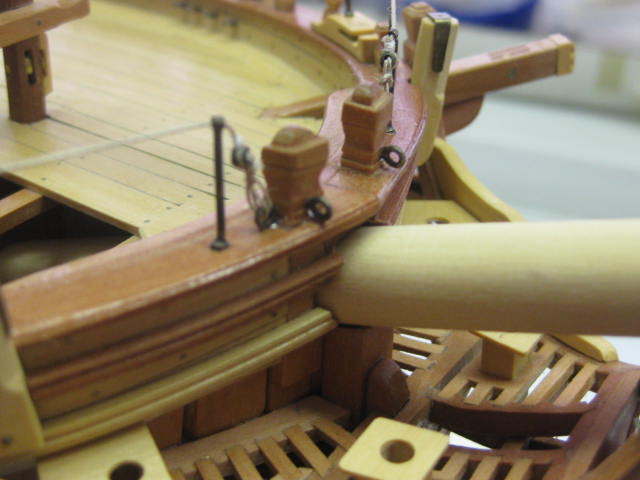
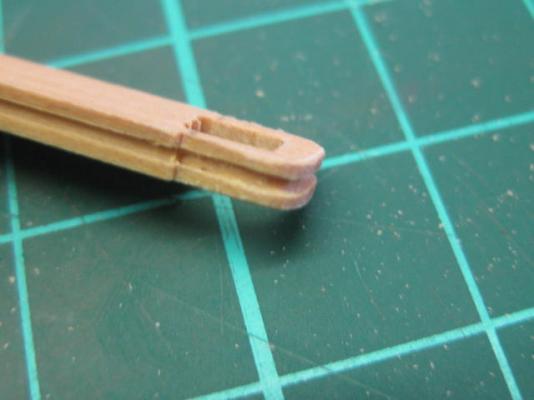
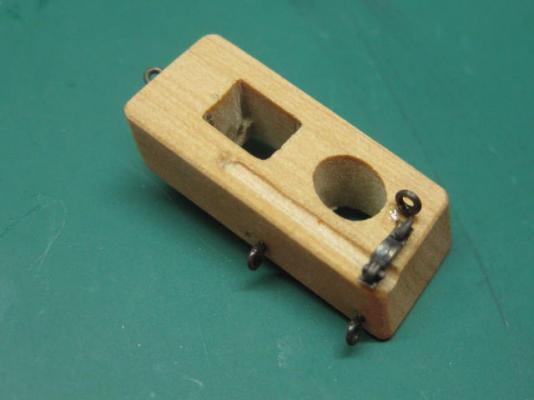
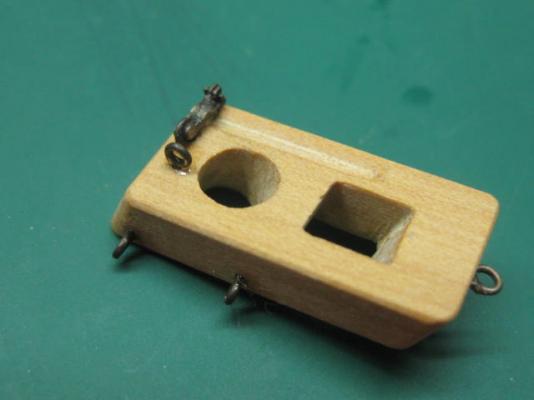
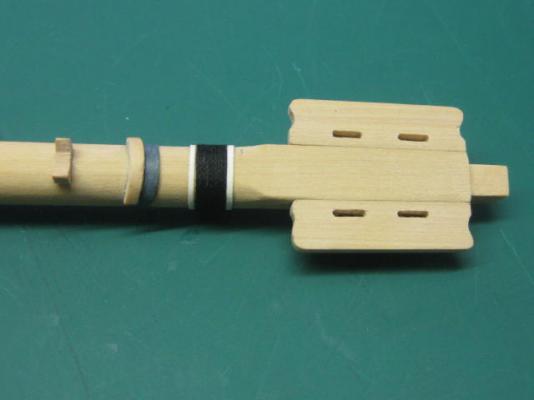
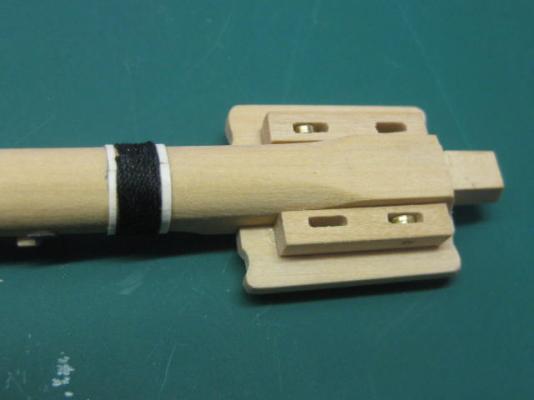
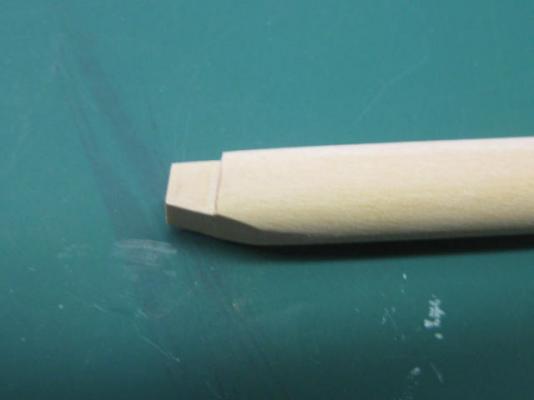
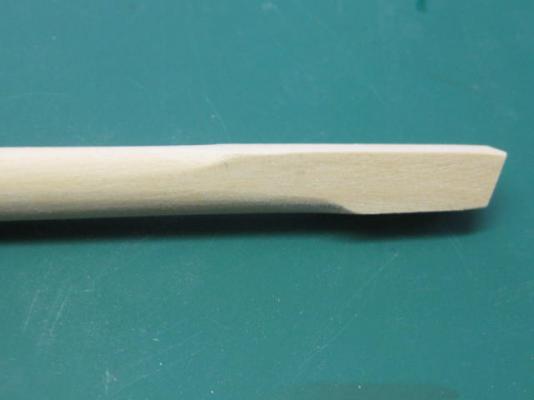
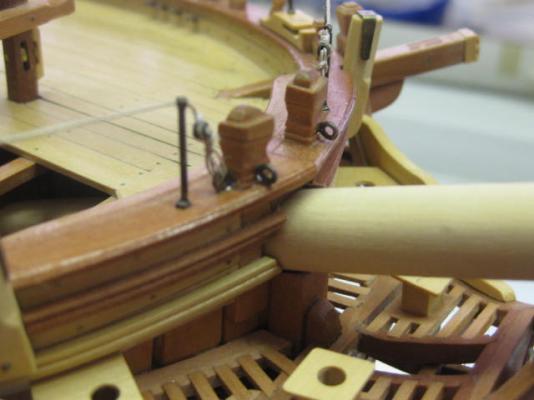
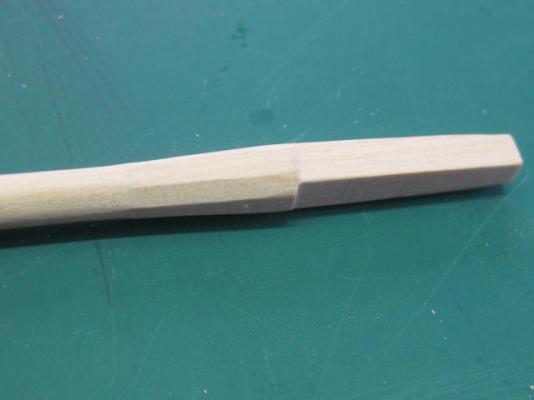
Thank you Mark, Michael and Kevin . Bowsprit The Bowsprit is tapered like the lower masts, that is it narrows inboard from the Knightheads. It has a tapered tenon which fits into the step in the support in the forecastle : The forward end has two flat sections for the Bees. These sections are offset from each other : Some views showing the bowsprit fitted into the step : Danny


-
Thank you Mark, Geoff, John, Allan, Nils, Grant and Ed - much appreciated. Geoff, the idea was to give other builders another option for very small sheaves . Thank you Ed. You were one of those responsible for me "lifting my game" . Cheek Blocks The Fore and Main masts have a pair of double cheek blocks in the Topmast Head. I cut these on the table saw from English Box. They are fitted with 0.6mm thick by 2.4mm diameter sheaves : Danny
-
Very nicely done Toni, and congratulations on the "milestone". See you in a couple of months . Danny
-
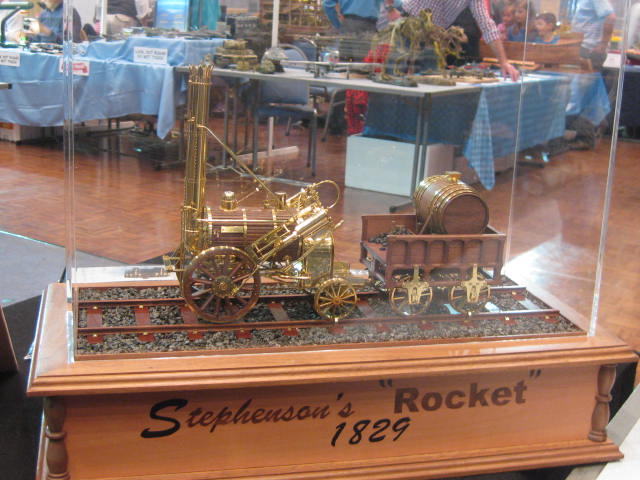
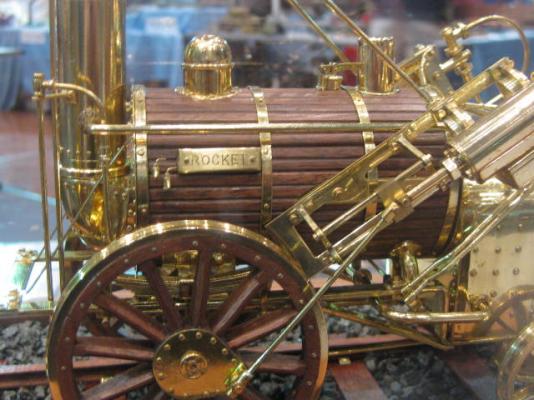
Great job Grant, she's a LOT better than my Victory which I built straight out of the box. The boats are something else again ... superb. You have made a great start to your scratchbuilding career . I don't know if you saw this on another of my posts, but here's a "Rocket" scratchbuilt by Kevin Hudson from Port Macquarie - just to give you a taste of what's to come : I wish you well on your future projects. Danny

-
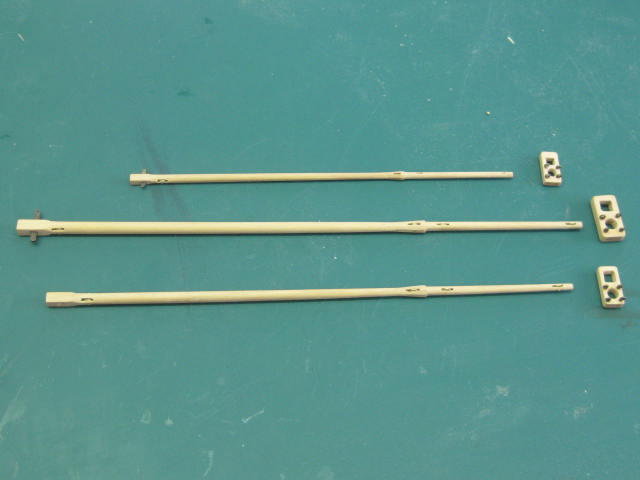
Topgallant Masts The Topgallant Masts are rather on the thin side, but still needed the same amount of detailing as the lower masts. The Hounds are similar to those on the Topmasts. There are 4 sheaves in each mast, although I cheated a bit on the 3 upper Mizzen mast ones - the two middle ones just have a sheave pin, and the uppermost one is a fake made by drilling two holes and filing a dummy sheave into it. The 1.0mm diameter sheaves which I made for the upper fore and main topgallants are about the limit in size that I can make, these needed 0.75mm which I put in the "too hard" basket : Danny

-
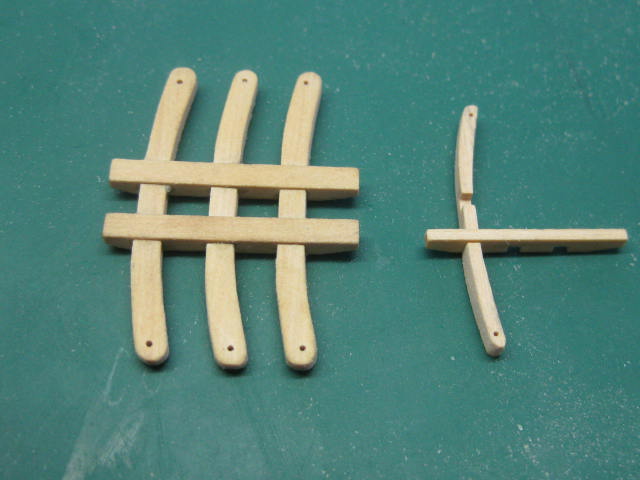
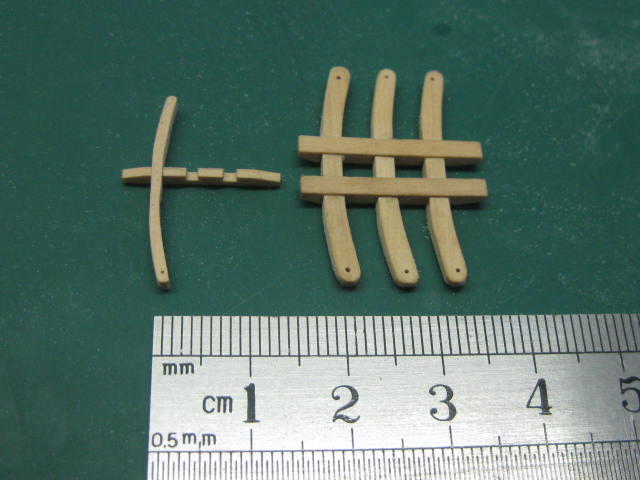
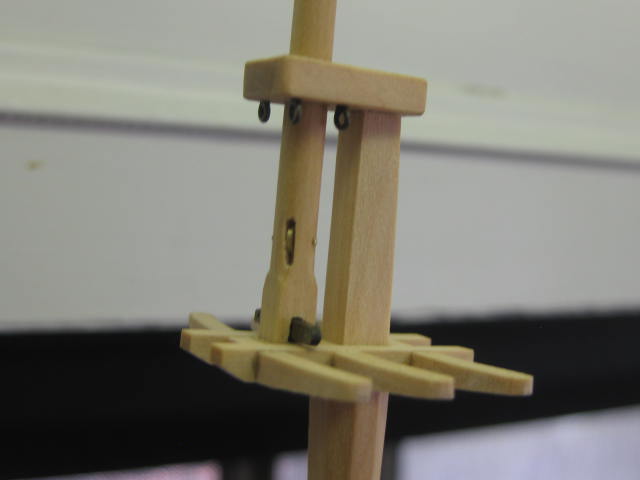
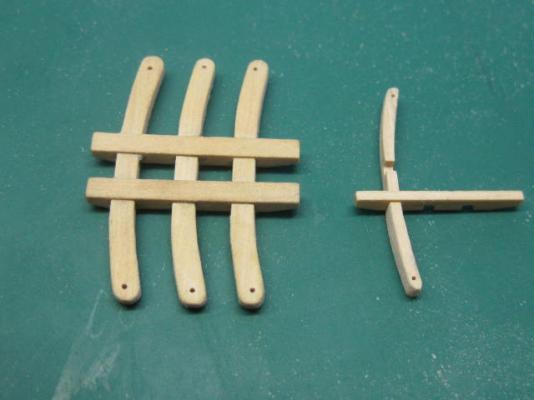
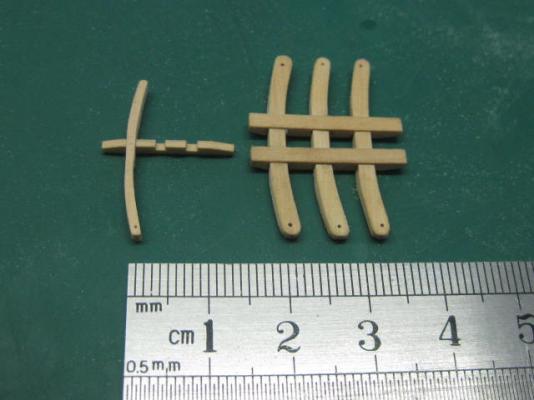
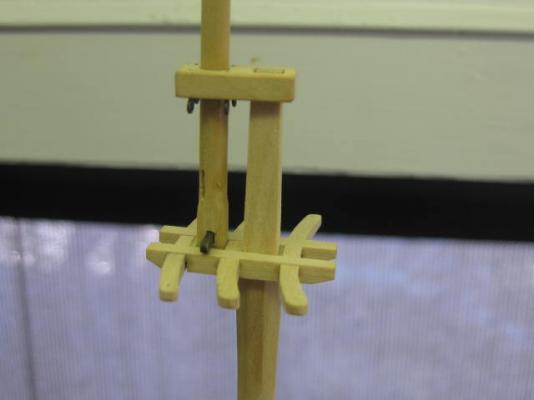
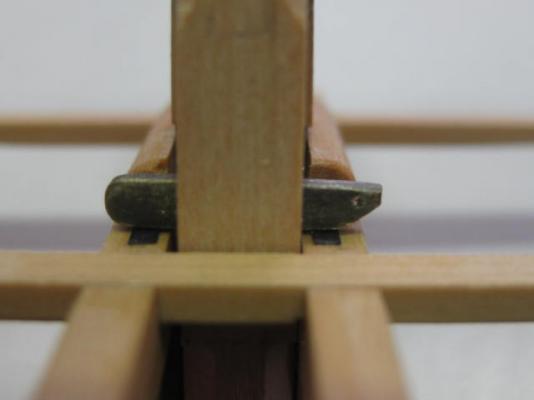
Thanks Grant, Pat, Remco and Cog. Grant, first I drilled the hole, then I used a left-handed cutting tool set to cut at an angle of 45 degrees both ways for the groove. The sheaves were removed from the stock with a cut-off tool. I had to make them one at a time - drilling a 0.5mm hole any further than the thickness of the sheave plus the thickness of the cutoff tool (plus 0.3mm for good measure, a total of 1.8mm) risked a snapped drill. Topmast Trestles and Crosstrees These were a whole lot of fun to make. The Mizzen crosstrees in particular are very tiny - a mere 1.4mm wide by 2.8mm thick (don't try THIS with anything but the BEST timber ). The crosstrees have an aftward curve, and are rebated to the trestle trees in the same way as the lower ones. I found that the best way to make them was by first cutting the rebates into the stock, then cutting in the outside curve. Next I used a compass to draw a parallel line the width of the crosstree, marked and drilled the holes for the shrouds using my mill, and cut the inner curve on the scroll saw. Finishing off was done with a sanding stick. Here are a couple of pics of the Main and Mizzen ones : The Fids for the topmasts were of three sizes, the Mizzen fid being 6.5mm long by 1.0mm wide by 0.5mm thick. I made them the same way as the lower ones : A couple of pics of the topmast tops in place : Danny

-
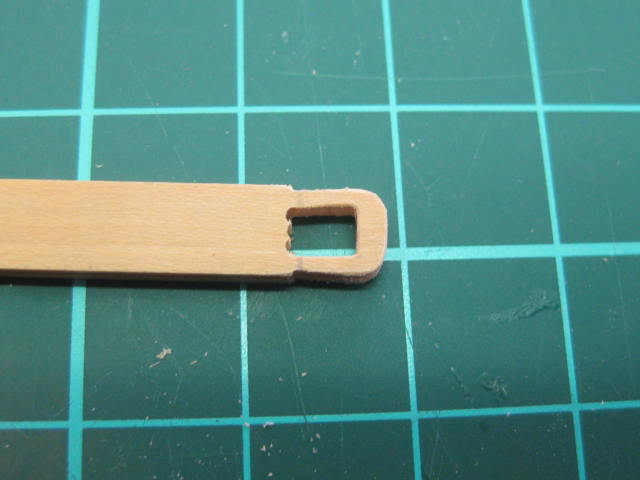
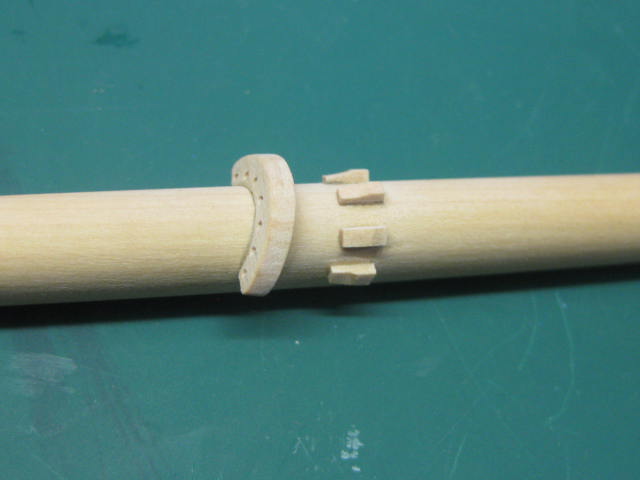
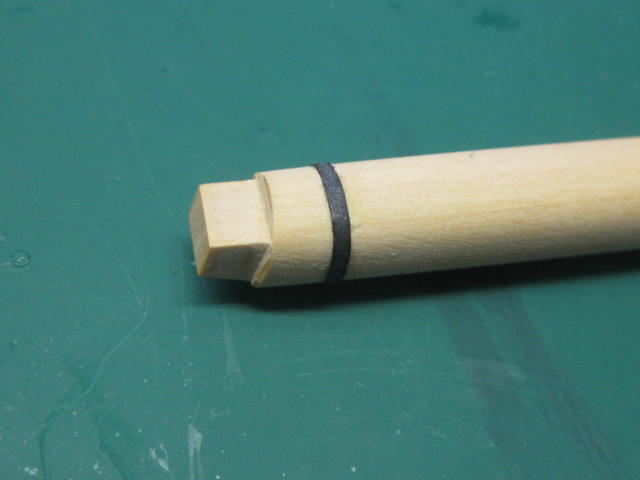
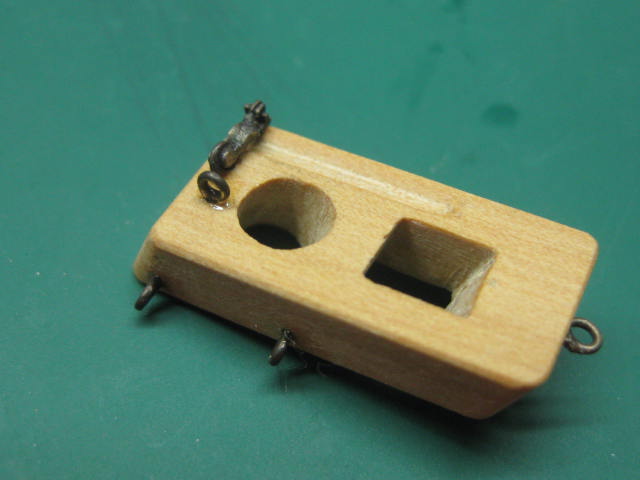
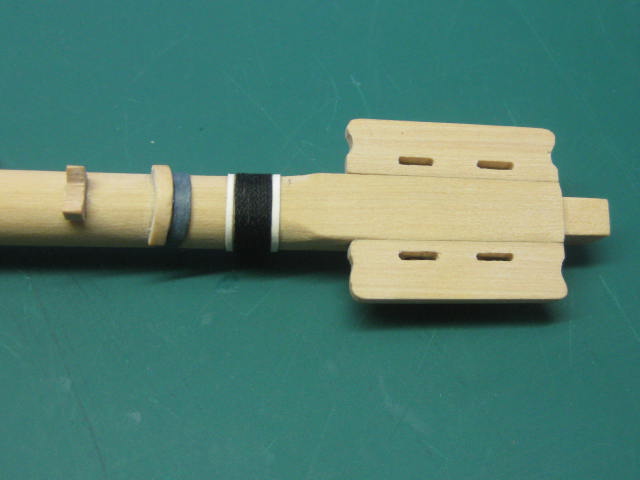
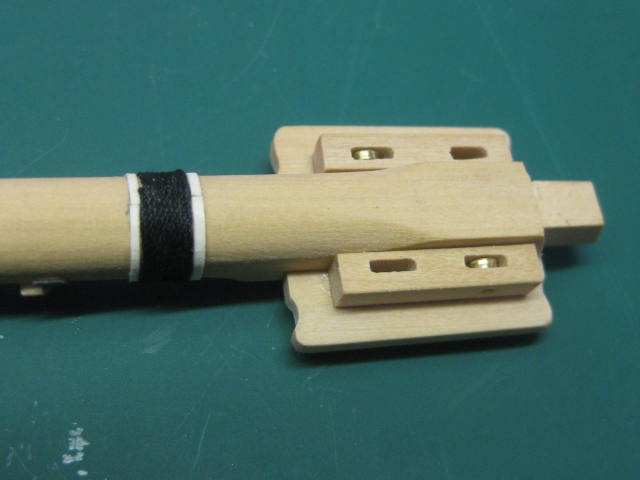
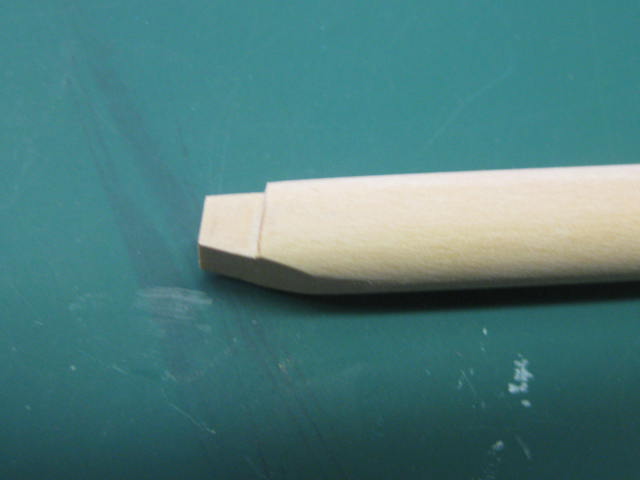
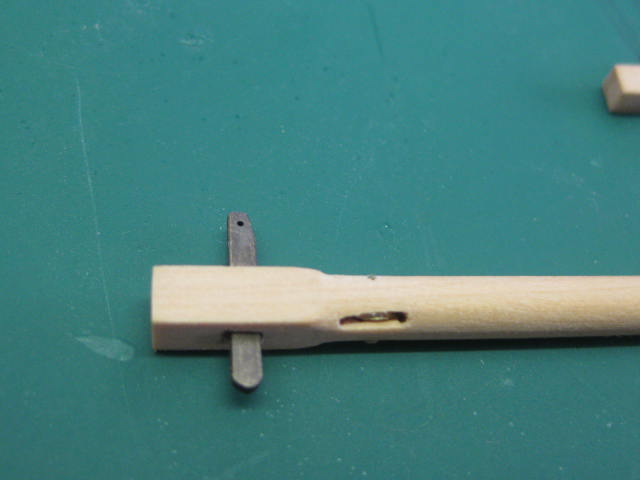
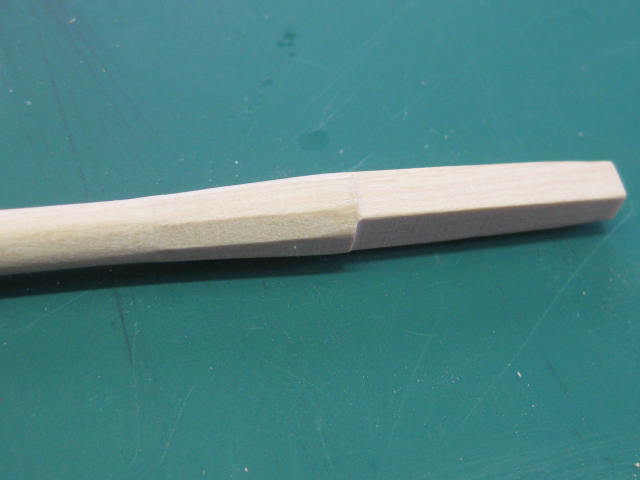
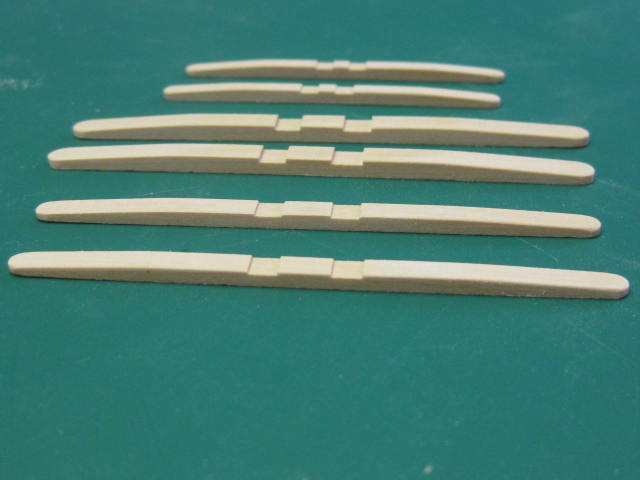
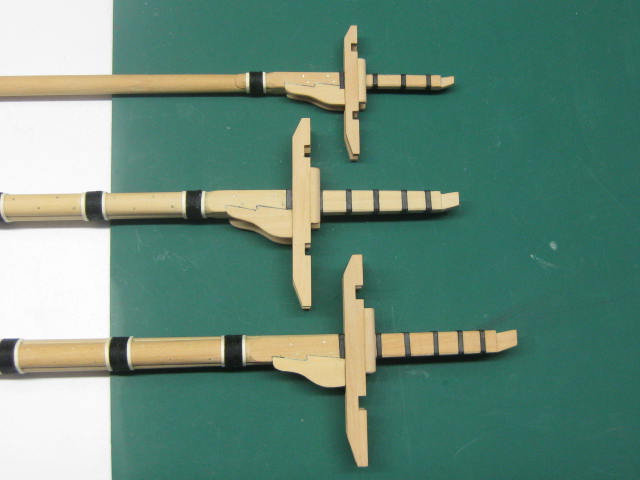
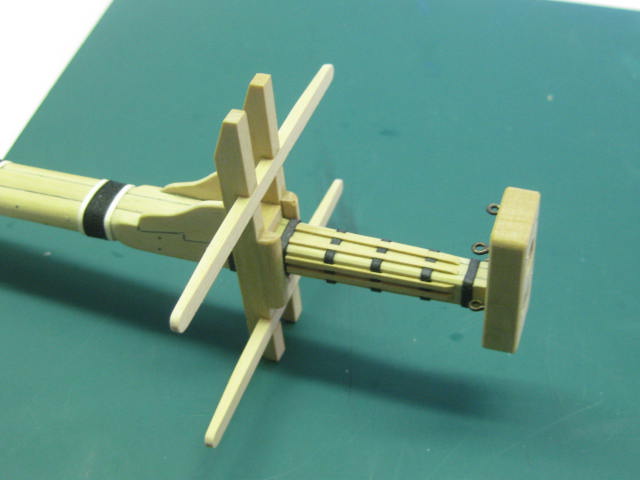
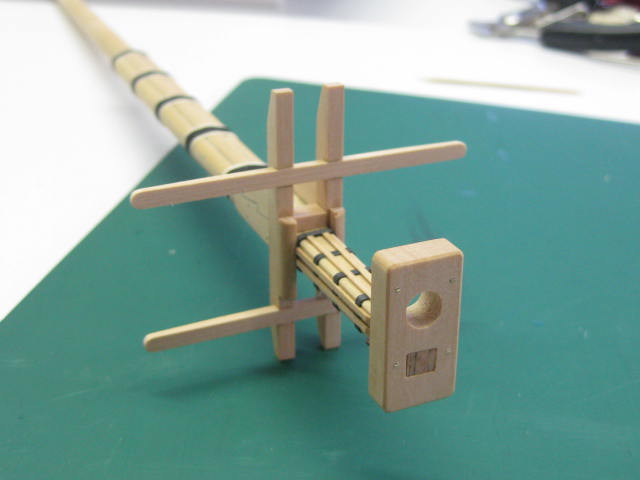
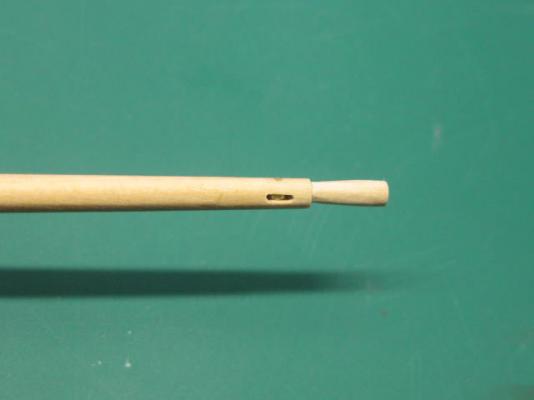
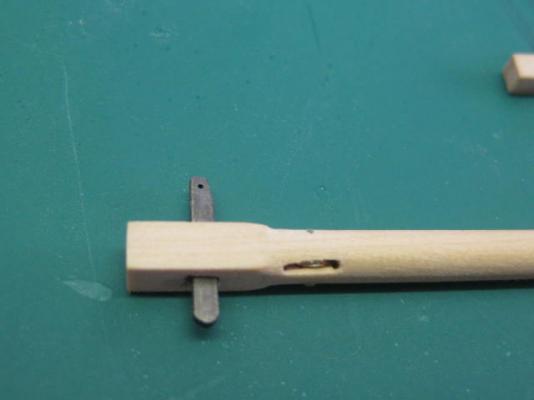
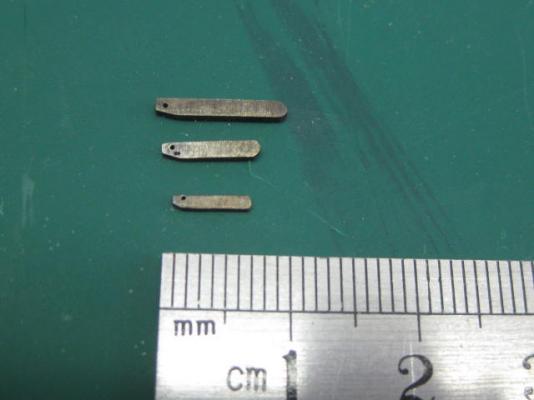
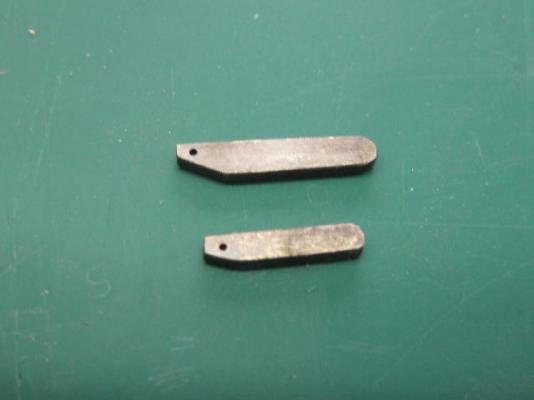
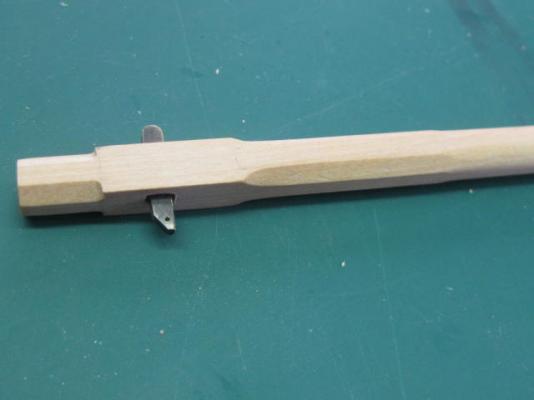
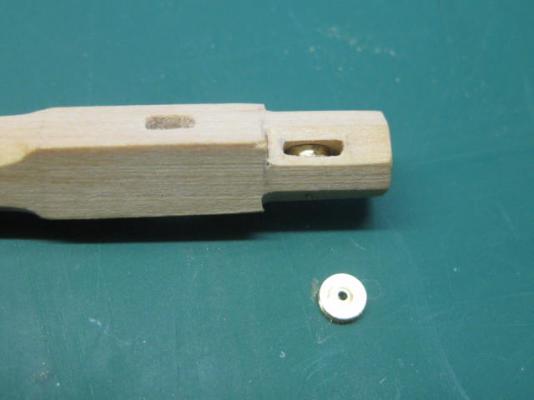
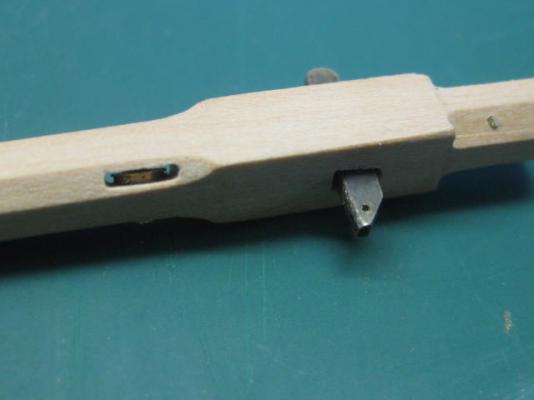
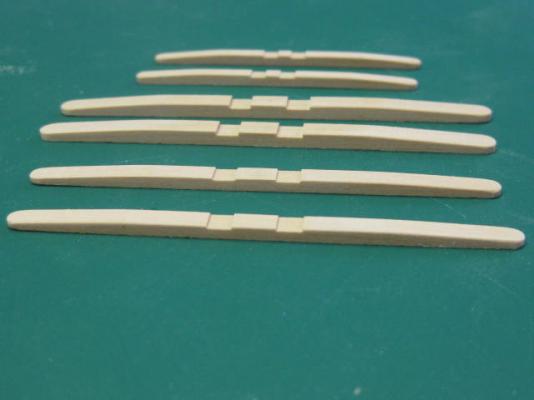
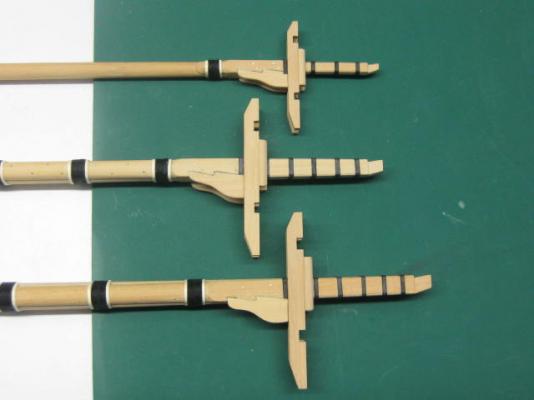
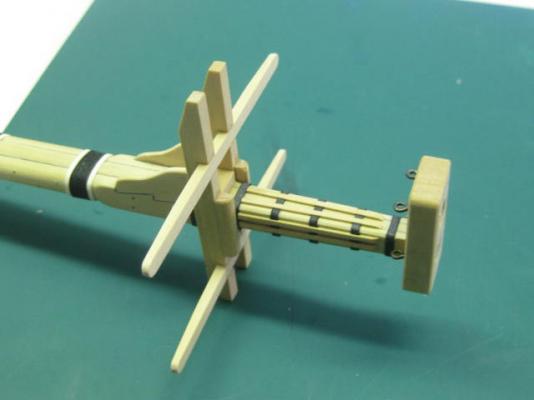
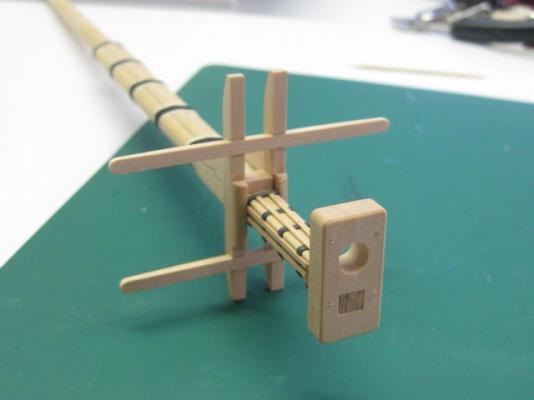
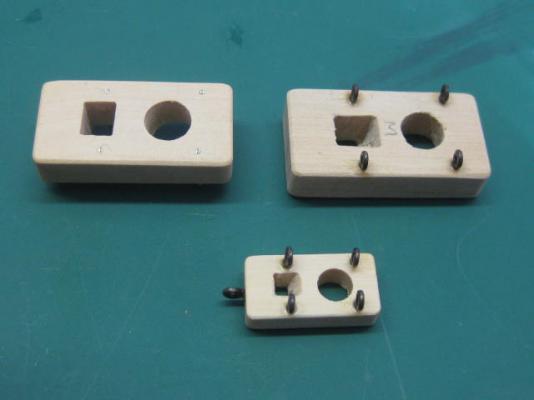
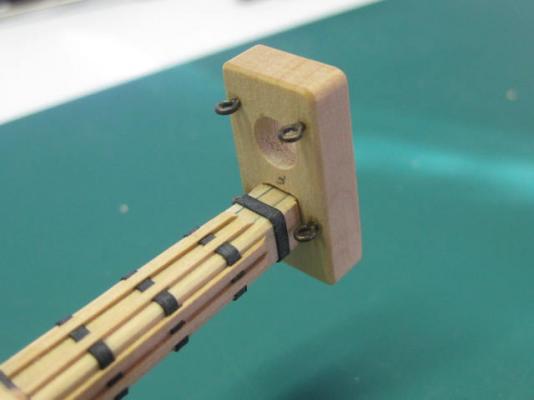
Thanks once again for all the kind comments Geoff, Grant, Greg, Nils, John, Joe, David, Steve, Christian, Carl, Janos, Johann, E&T and Padeen, and also for all those who "Liked" my last post . I somehow made a measurement error on the Mizzen Crosstrees, and subsequently had to remove all the pieces of the top (apart from the Battens), make new crosstrees and refit the lot. I'm very happy with the results now .... that kind of thing would have caused all sorts of problems later on. Topmasts The Topmasts are a bit trickier to shape than the lower masts. Starting from the bottom they have an octagonal shape, then a square, another octagon, a tapered round for most of it's section, a tapered octagon and a tapered square topped by the tenon for the topmast cap. It all sounds very difficult, but it was surprisingly easy (although time consuming). As with the lower masts most of the work was done with a chisel, rounding the middle section with sandpaper. I made the Fids from brass strip. The rectangular holes were cut with a very narrow chisel after first drilling two small holes : Two slots were cut for the Top Rope sheaves, which were turned from brass : Danny

-
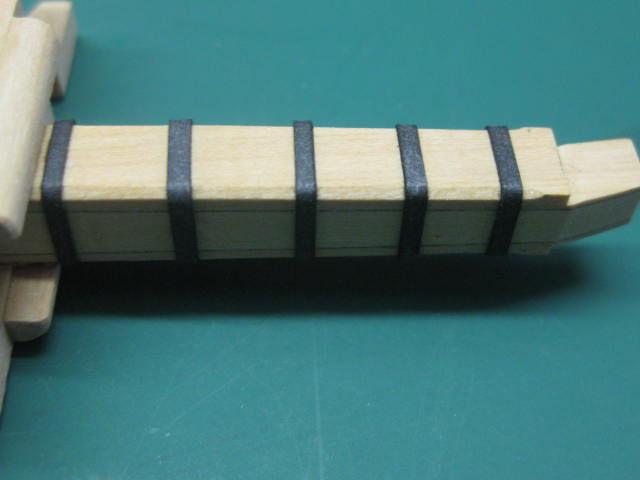
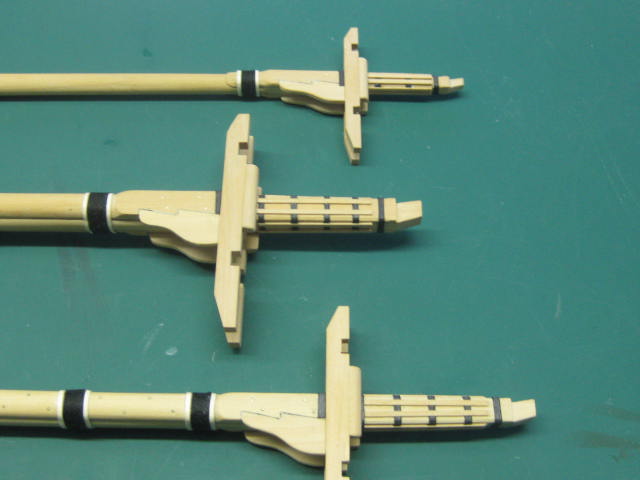
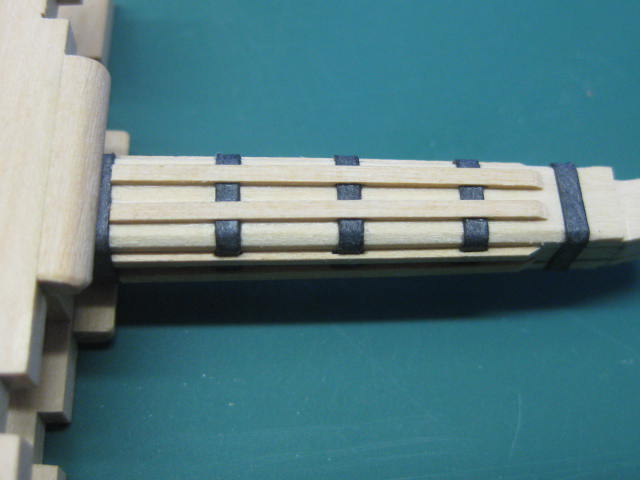
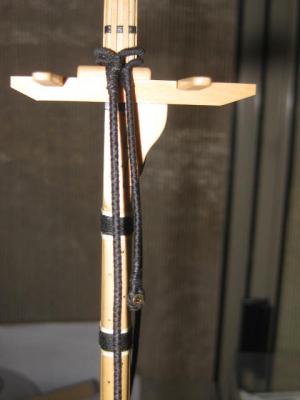
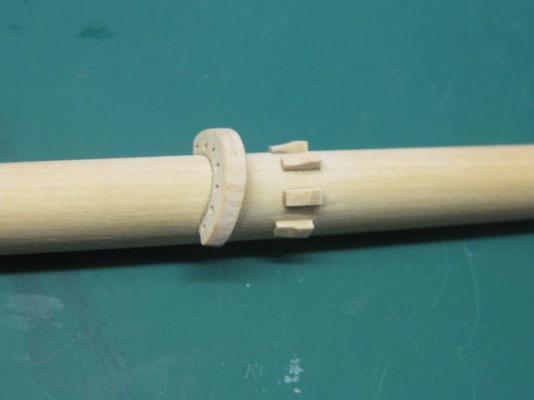
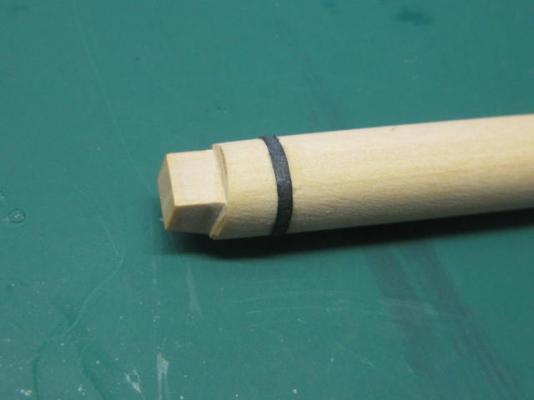
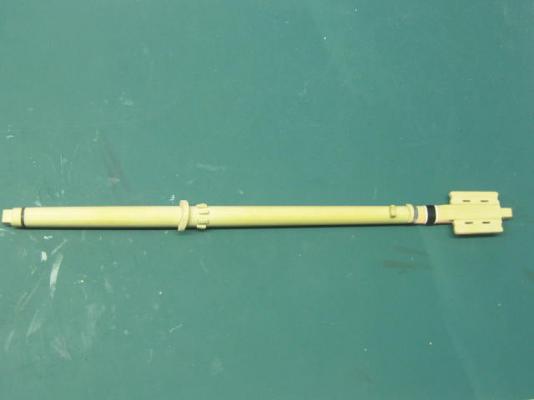
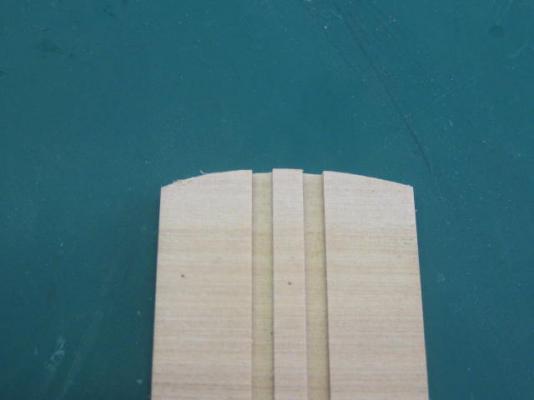
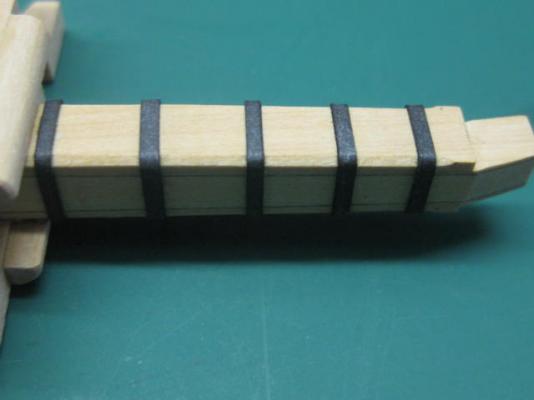
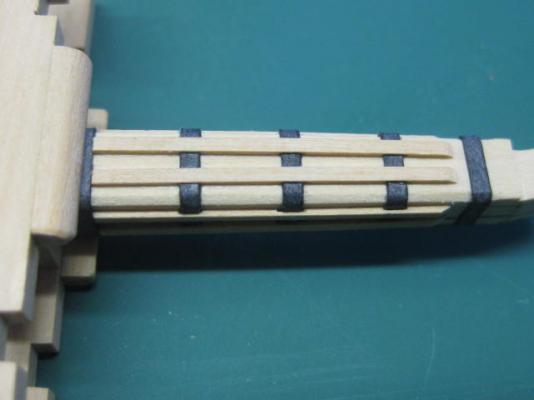
Thanks very much Vivian, John and Pat - no Blacksmiths in my family as far as I know . Mast Heads Back to the Masts, I'd made the Crosstrees earlier. They are notched halfway through to match the notches in the Trestle Trees : Before fitting them I fitted the Bands around the heads. I made these from thin card which I'd stained black - the finish has a slight metallic "sheen" at this stage, probably caused by diffraction of light, which may disappear when I apply Minwax - I hope not, as they really look like iron at the moment : I also cut and fitted the Battens - they are 1.2mm wide by 0.6mm thick. These run 3/5 of the way up the mast head, and needed to be notched to fit over the bands : Next I fitted the Crosstrees - a rather straightforward operation : Finally, I made the Caps. These took a bit of careful marking out and cutting. Their eyebolts have also been fitted : Danny


-
Hi Toni, What Greg said - I also believe the glue rehardens when the alcohol evaporates, as I've done the same many times. Getting those gunport sills to line up was quite an exercise in frustration for me too. I had some issues with a few of them, but as Greg said the problems eventually "blended" in and are no longer as visible as they were at the time. Well done . Danny