Dan Vadas
-
Posts
3,261 -
Joined
-
Last visited
Content Type
Profiles
Forums
Gallery
Events
Everything posted by Dan Vadas
-
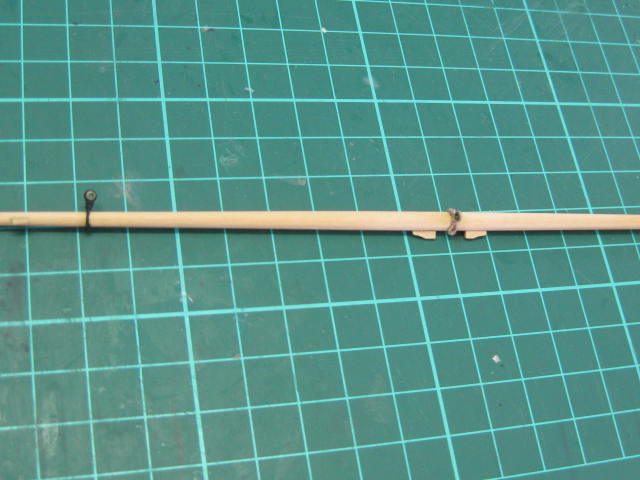
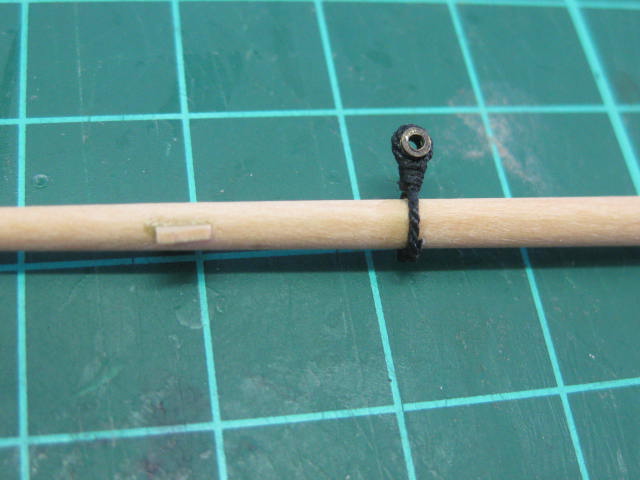
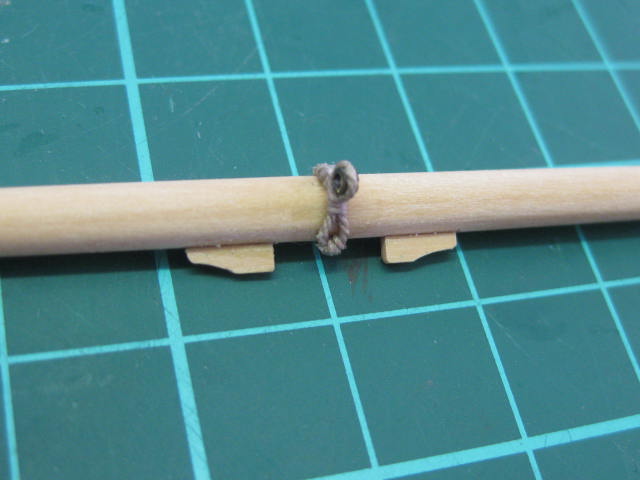
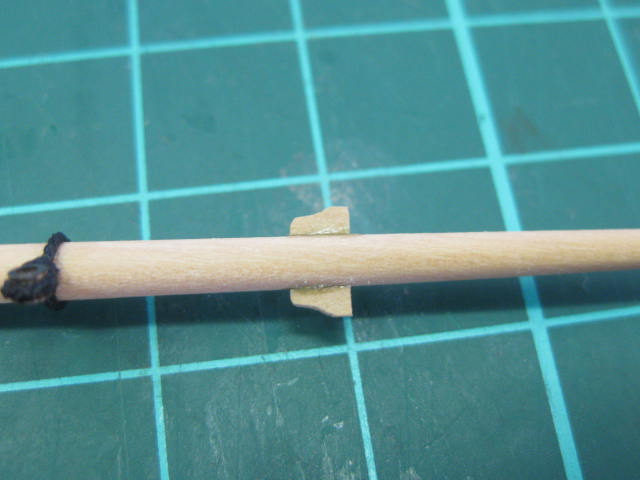
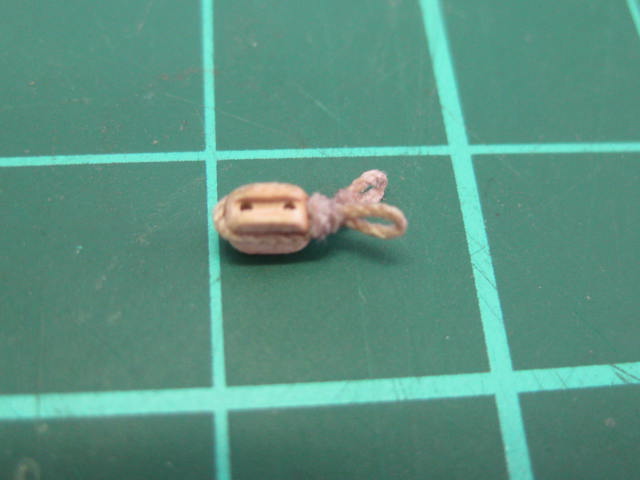
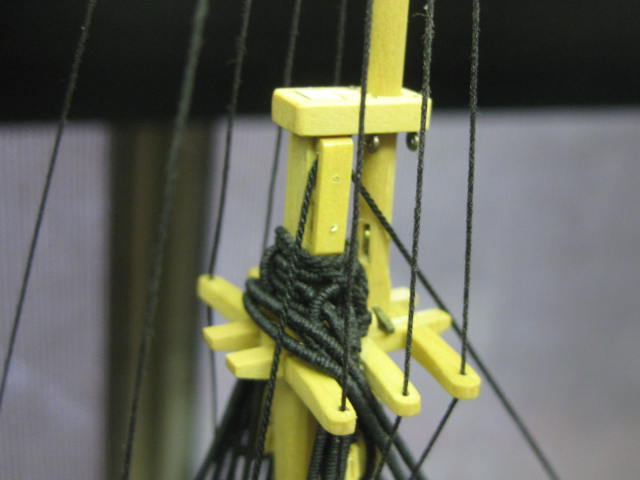
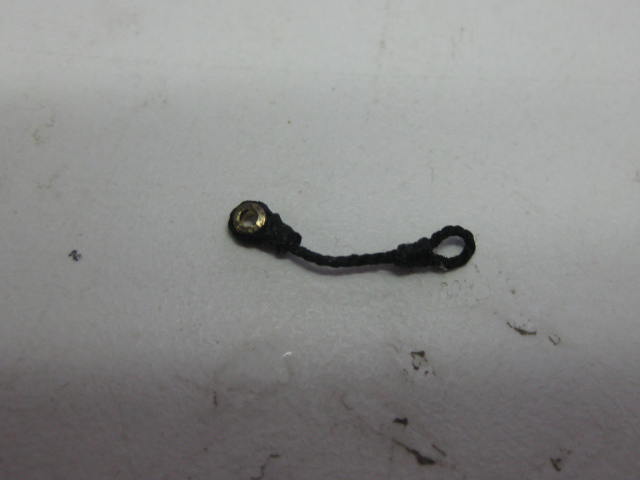
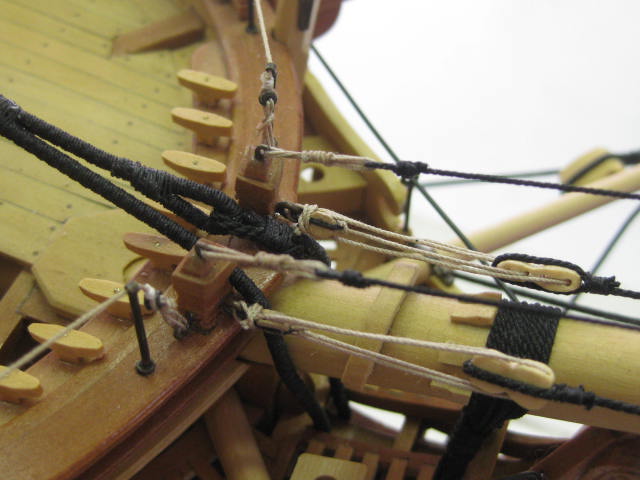
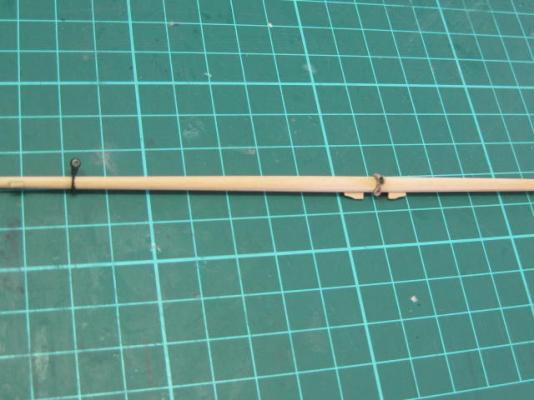
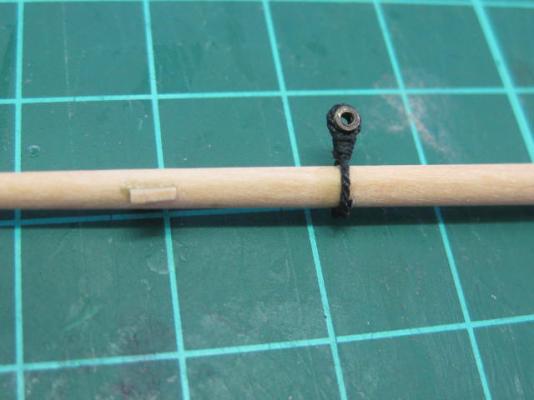
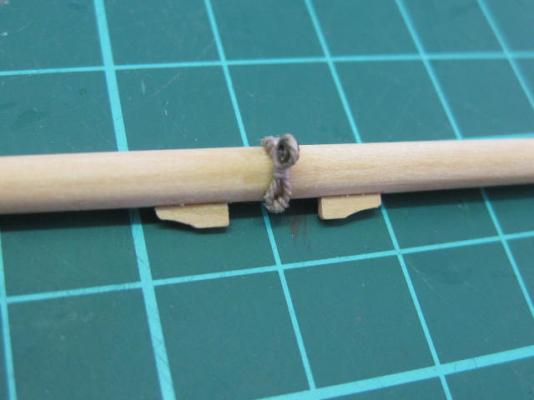
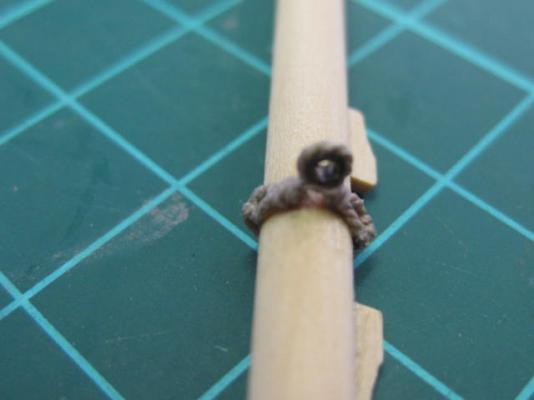
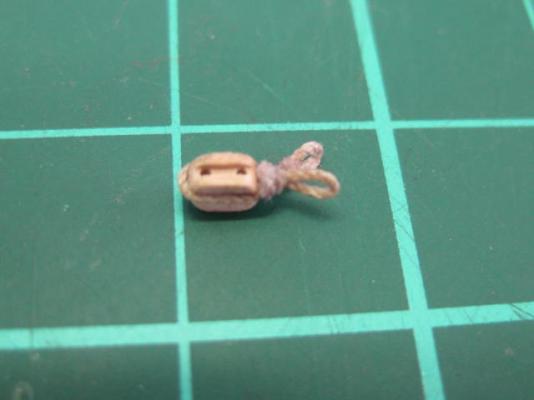
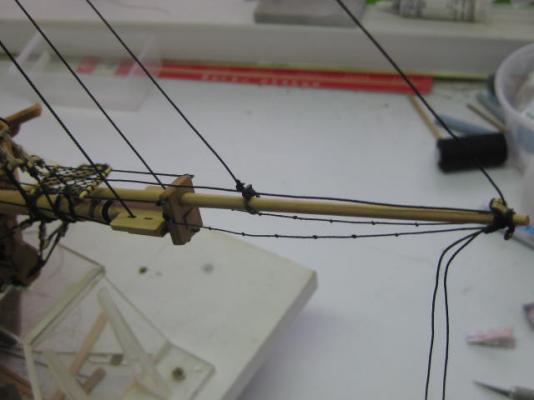
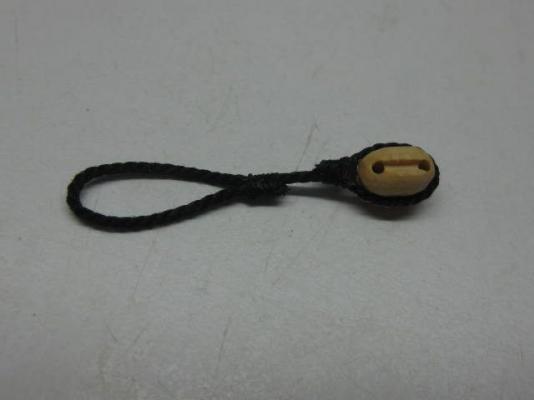
All the blocks and fittings are much easier to fit BEFORE the yard is fitted to the mast. I didn't do these in the right sequence for this yard, but I learned my lesson . First things to make and fit are the Sling Cleats. These were made from English Box. I also made the Spritsail Halyard Strop. This has an eye in each end, with a thimble seized into it's "centre" - it's actually a bit off centre with a long and short leg. A lanyard fixes the two eyes around the yard : Next I made and fitted the Stop Cleats near the ends of the yard. This was the mistake I mentioned earlier - they should have gone on AFTER the other blocks had been fitted as I couldn't slip the block strops over them. It would have been a lot easier if I'd left them until later in the piece. A strop with a thimble seized into it is fitted at the 3rd quarter of each end of the yard for the Jib Guys : An overall view of the yard to this stage : The Clueline blocks are fitted 3 feet from the slings : Danny

-
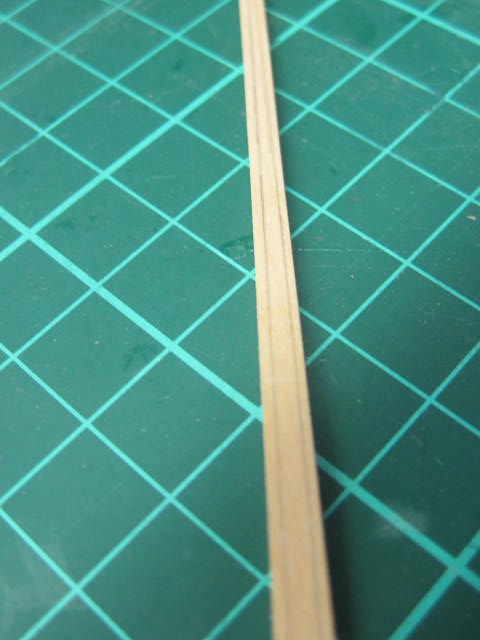
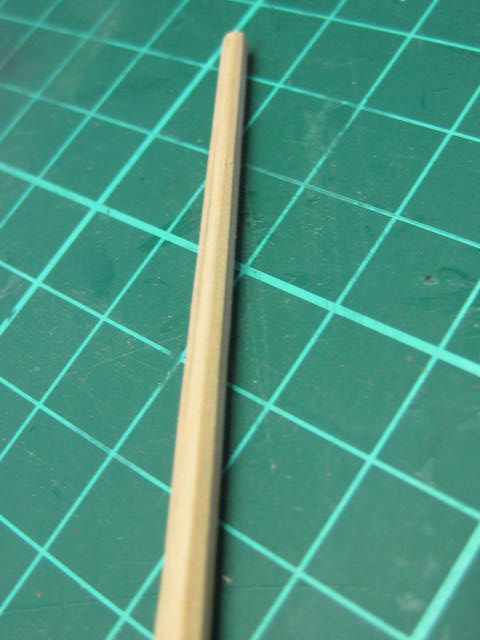
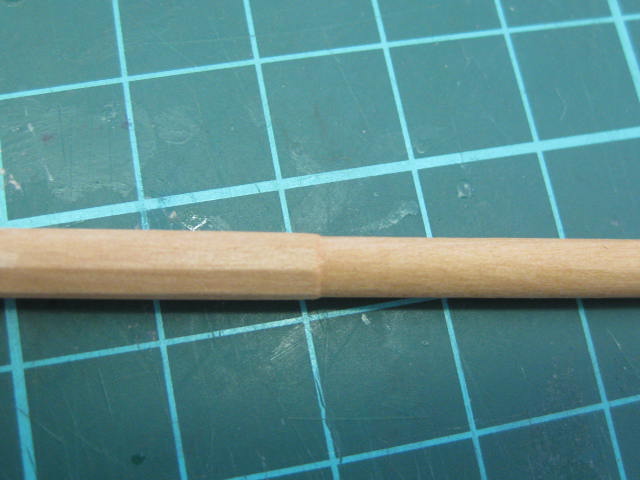
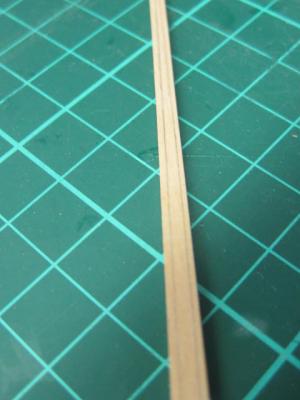
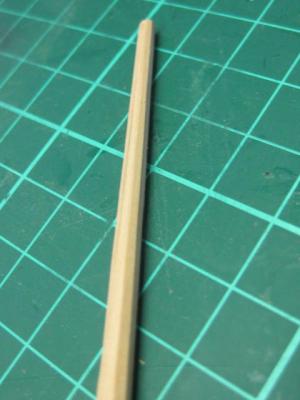
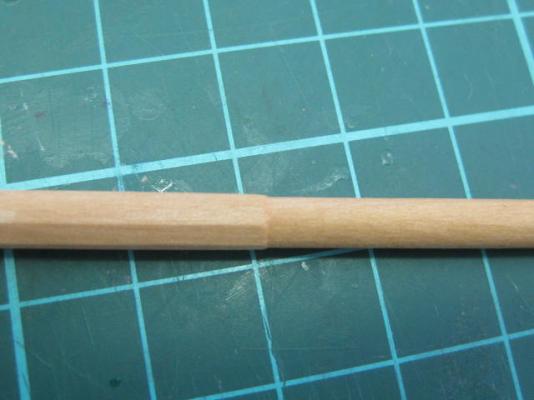
Thank you very much Dave and Bryan. I don't mind at all Dave . I look forward to seeing the start of Pegasus. Spritsail Yard I've started making the Yards. The basic method of making them is pretty much the same for all of them, so I won't detail each step for all of them. Where there are differences in the construction I'll show those details. Construction starts by marking out the tapers using the 7-10-7 method. Two opposing tapers are sanded into each end using the disc sander - this is easier than it may seem with a bit of practice. Then the other two tapers are done in similar fashion. Next I marked out the octagons : and cut them in with a very sharp chisel using my "V" block rest : The central portion of some of the yards are octagonal in shape with only the outer parts rounded off. The rounded sections were done with a sanding block. I used the lathe to cut a sharp neat transition on each end of the octagon before sanding the round sections. Danny
-
38mm seems to work OK on mine Remco. Check HERE. Danny

- 1,215 replies
-
- 9
-

-
- sloop
- kingfisher
- (and 1 more)
-
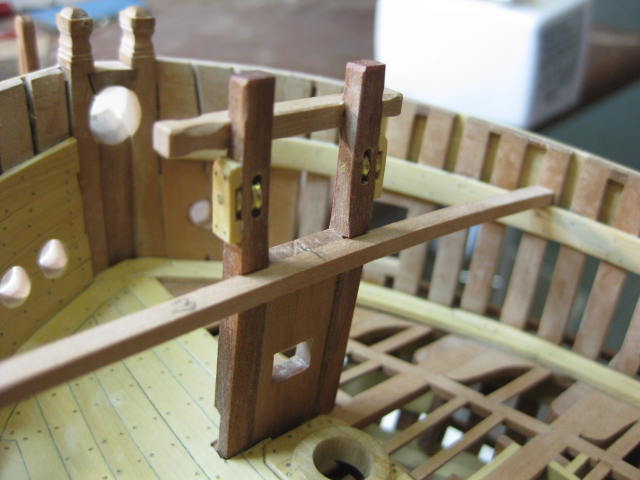
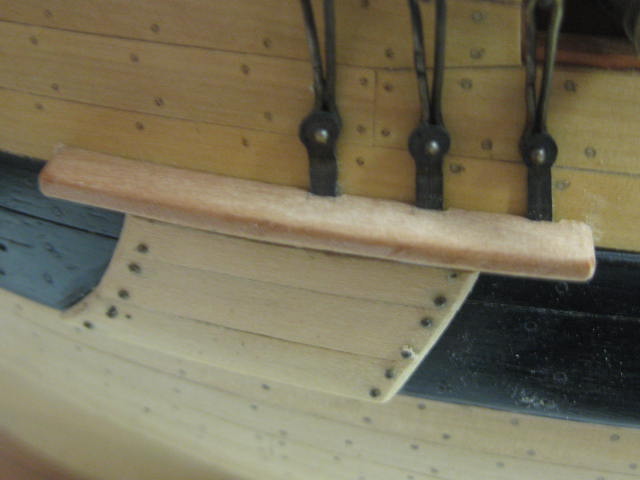
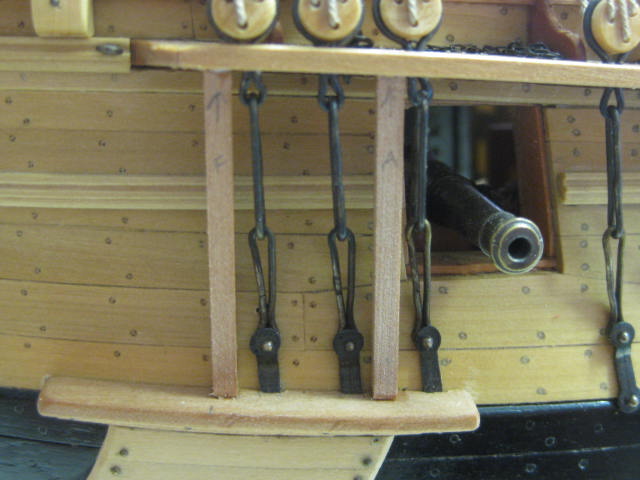
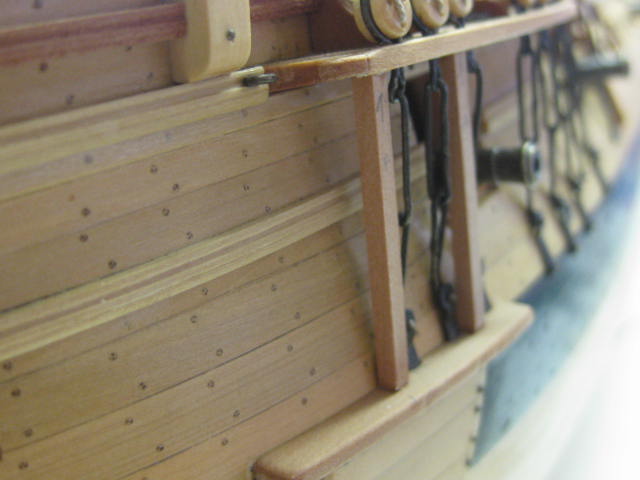
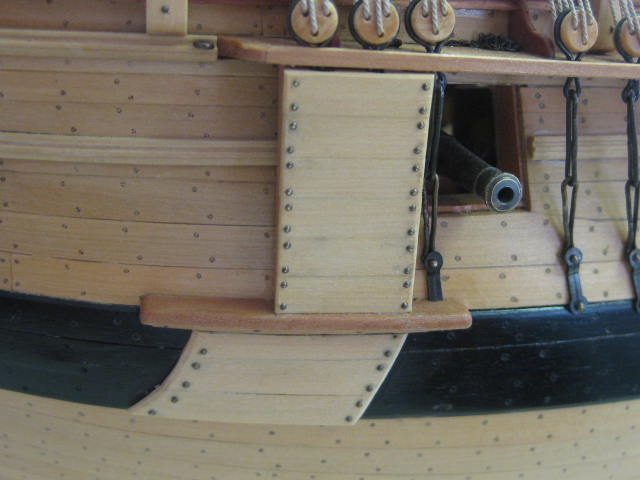
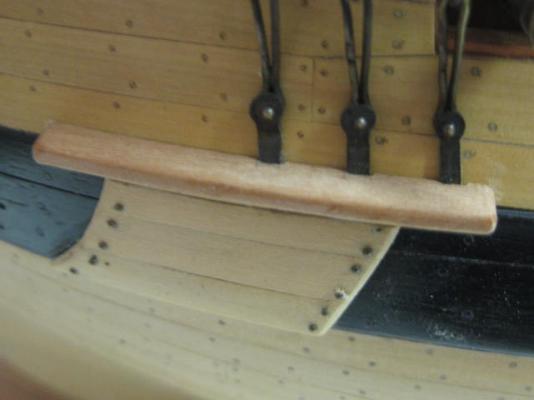
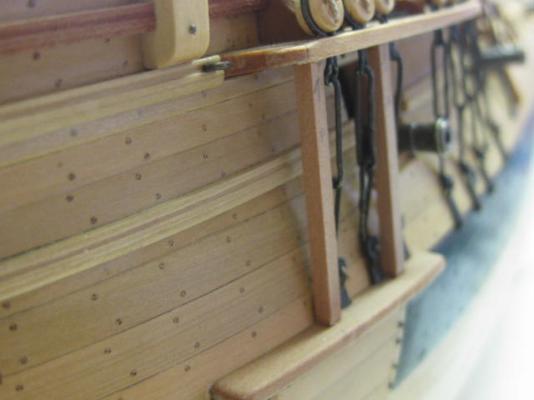
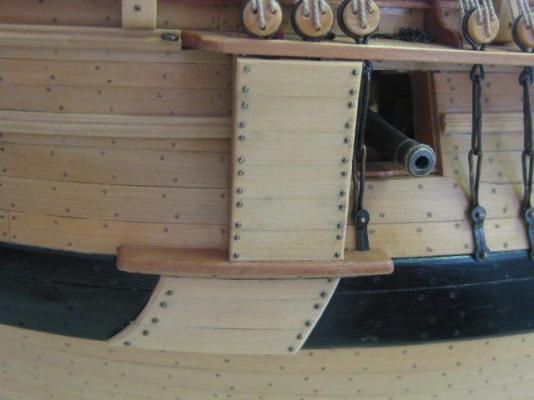
Billboard With the standing rigging completed I can now finish off the Billboard. As you can see from the pics below it covers the first three chains on the foremast. The billboard protects these from damage when the anchor is stowed. The first thing to fit is the previously made Bolster : Next come two stanchions to which are bolted the planks : Finally the planks are fitted and "bolted" with 0.7mm headed round head rivets : Danny

-
Thanks for the comments John, George, Greg, Popeye, Steve, David, Mark, Grant, Carl, Toni, John, David and Greg. As always they are much appreciated . We have a small dog which behaves itself very well in the workshop, but we are also getting a kitten tomorrow to keep him company. THIS could be a problem . I'm doing that as we speak Mark . Oh dear, I hope I haven't created a monster Toni . I'm about to start making the Yards Greg, which will be followed by complete running rigging. I'm still very undecided about adding sails - I don't want to hide too many of the details of the masts and hull. And don't worry about this log ending - once I'm finished with Vulture I'll start something else . Danny
-
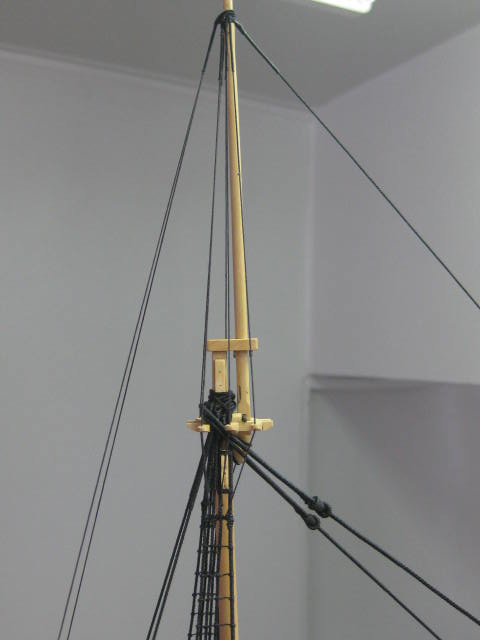
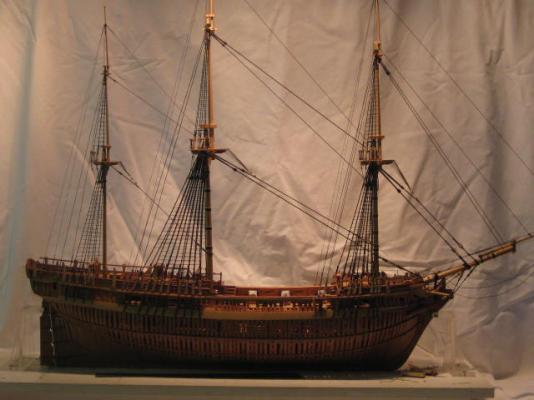
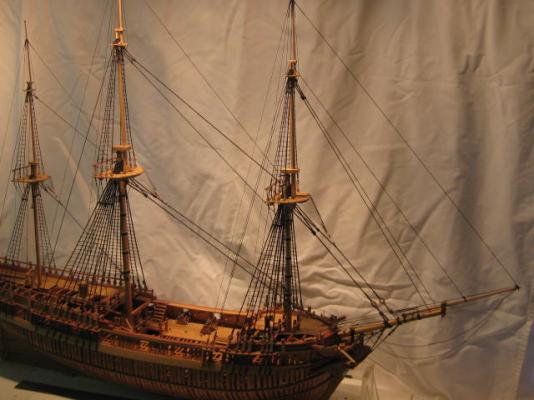
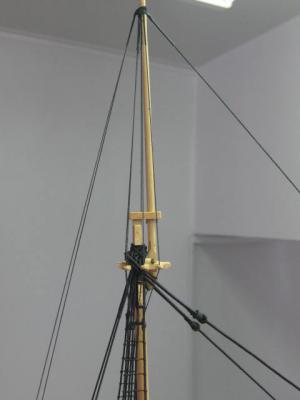
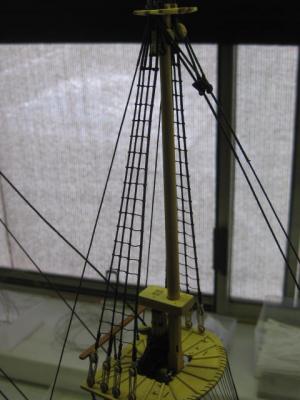
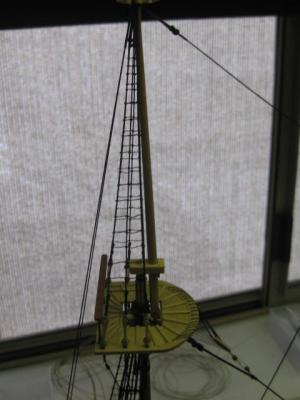
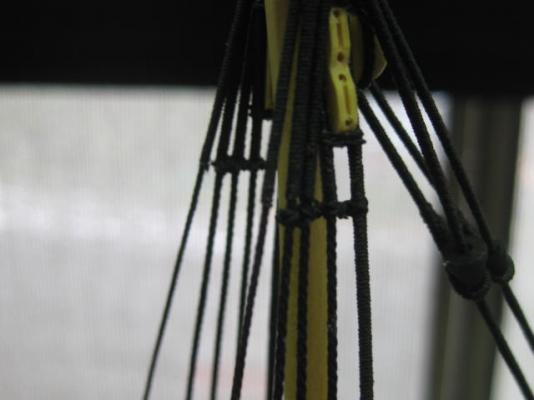
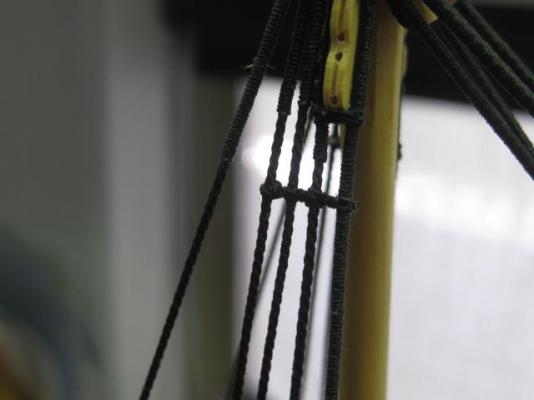
I've also fitted the fore topgallant shrouds and backstays. These were done in similar fashion to those on the main mast. This concludes all the standing rigging apart from the Guy Pendants Falls. These have been partially rigged and will be finished off when the Spritsail Yard is fitted. Here are a couple of pics of the completed standing rigging : Danny
-
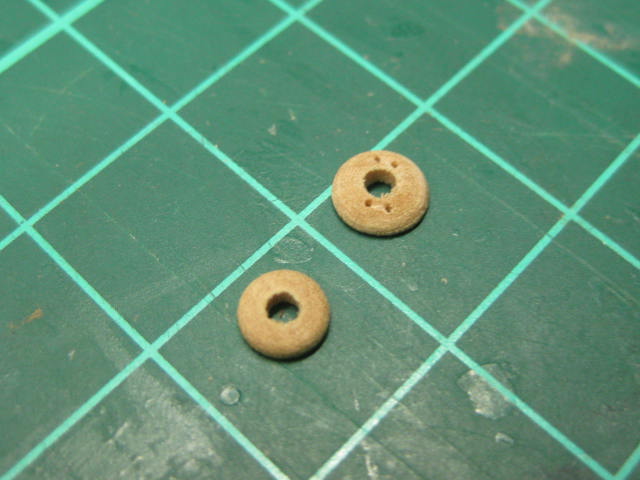
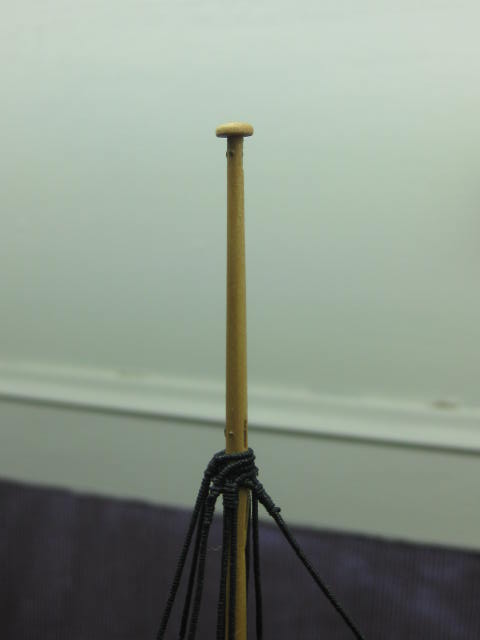
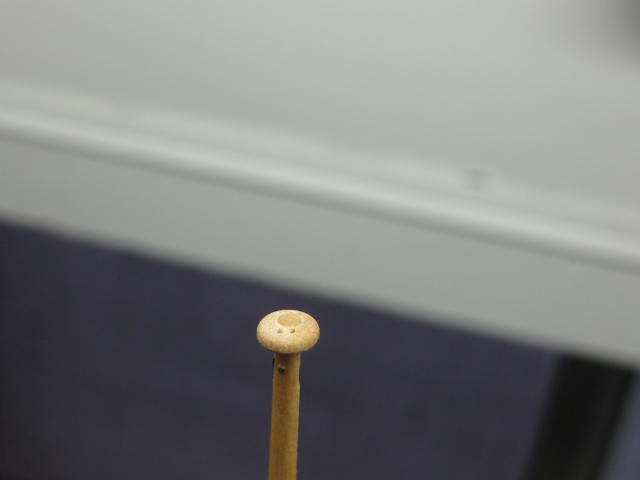
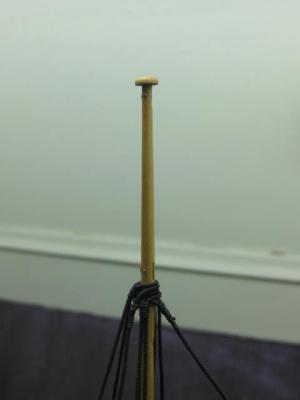
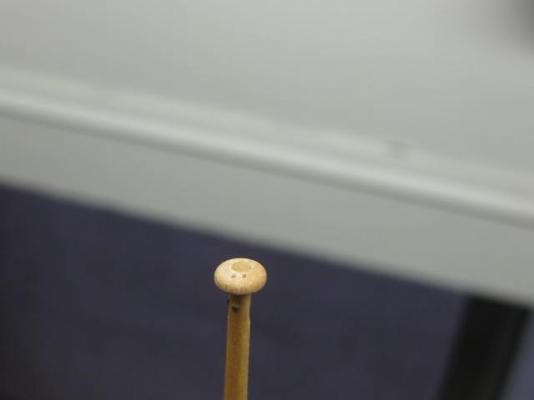
Mast Trucks I'd previously turned the mast trucks, now I've drilled four 0.3mm holes in each to simulate the sheaves for the flag halliards : A couple of pics of the trucks fitted : Danny

-
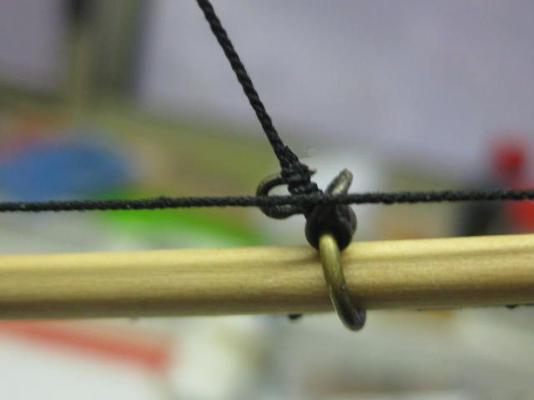
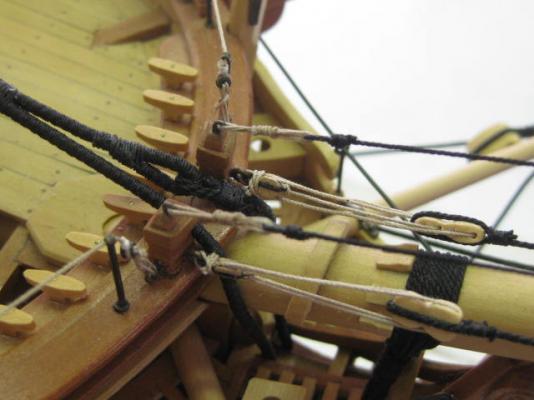
Jib Stay The jib stay starts on the Traveller. It's seized to the ring between the starboard side of the shackle and the hook : Then it passes through the upper sheave on the starboard side cheek block on the topmast head : It finishes by being tied to the starboard topmast backstay above the deadeye : Danny

-
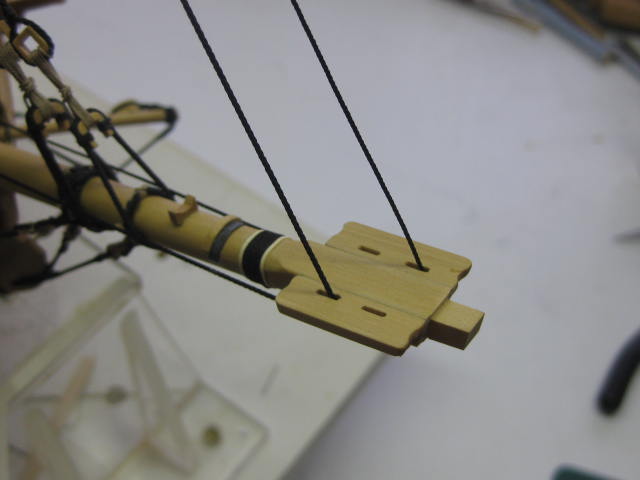
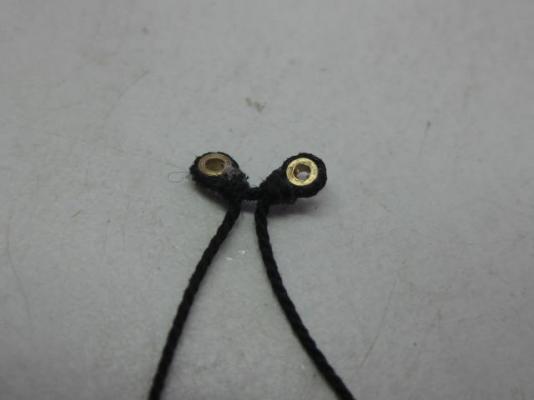
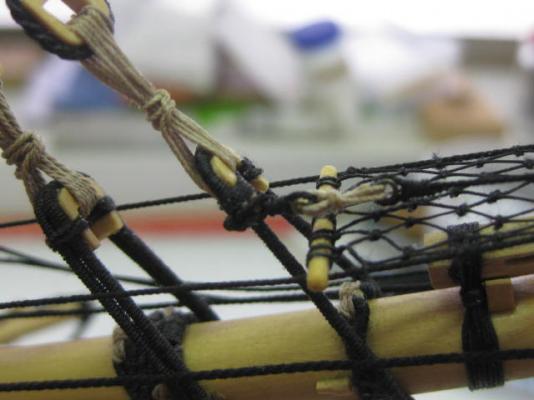
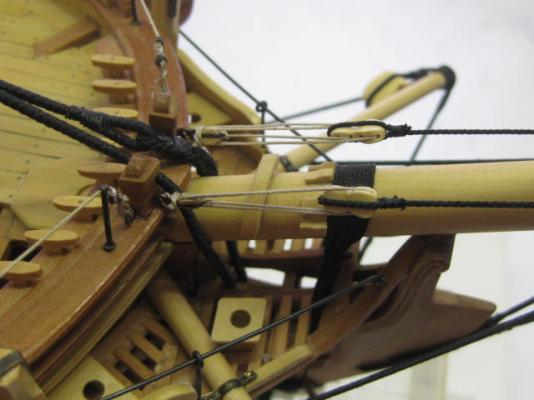
Thank you again for the very kind comments Nils, Greg, David, Christian, Allan, Russell, Carl, John and Robin. They are all appreciated . Russell, I get my rigging line from Syren Ship Models. John, when I bought the rigging line Chuck hadn't started making right-handed line (I believe he does now). Besides, small ships such as Vulture were sometimes rigged left-handed so I took a bit of licence here . Fore Topgallant Stay Before the fore topgallant stay can be fitted the treble block for the stay and the topgallant Bowlines needs to be slipped over the end of the jibboom. I've used a treble block rather than a triple thimble collar, first because this setup was used on some ships of the period and second because it's easier . I did however make a two thimble collar for the spritsail yard lifts : The topgallant stay is fitted to the topgallant mast in similar fashion to those on the main and mizzen masts. It passes through the middle hole in the treble block at the end of the jibboom and finishes with a thimble which is lashed to the starboard side of the fore preventer stay heart block using a collar : Danny

-
Blackening brass problem
Dan Vadas replied to Maury S's topic in Metal Work, Soldering and Metal Fittings
Geoff, I use Birchwood Casey Brass Black - not Blacken-it. The B/C only needs about 30 to 45 seconds to do the job. Danny -
Blackening brass problem
Dan Vadas replied to Maury S's topic in Metal Work, Soldering and Metal Fittings
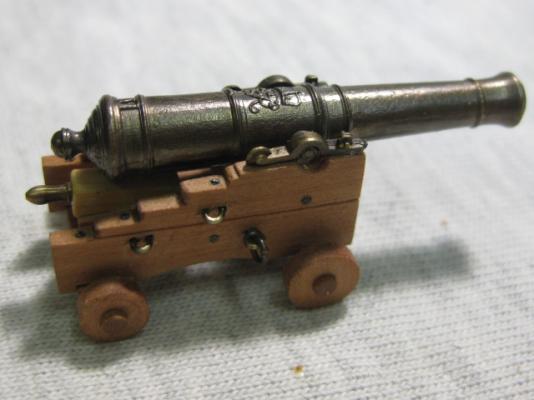
To demonstrate hornet's post above, you can't get this kind of effect with paint (unless you're a VERY good painter) : Danny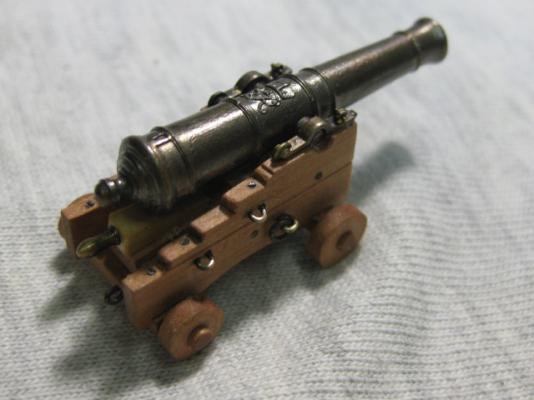
-
Blackening brass problem
Dan Vadas replied to Maury S's topic in Metal Work, Soldering and Metal Fittings
That's what I use. You only need to soak the piece for a minute or two depending on how "black" you want it. Danny -
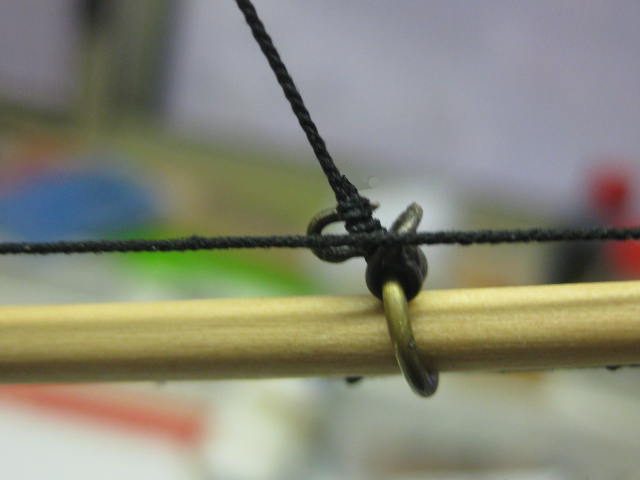
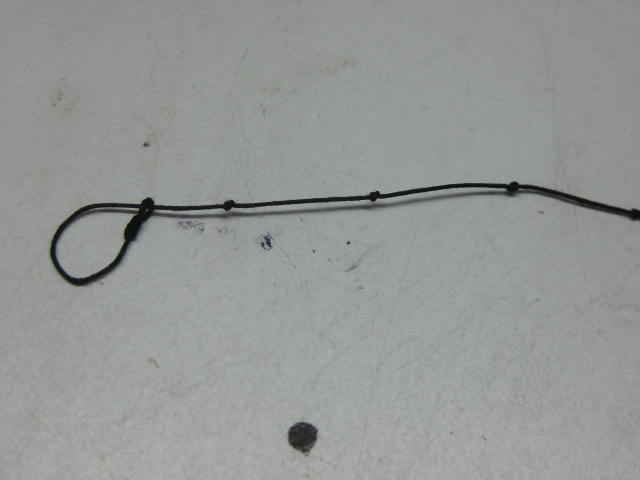
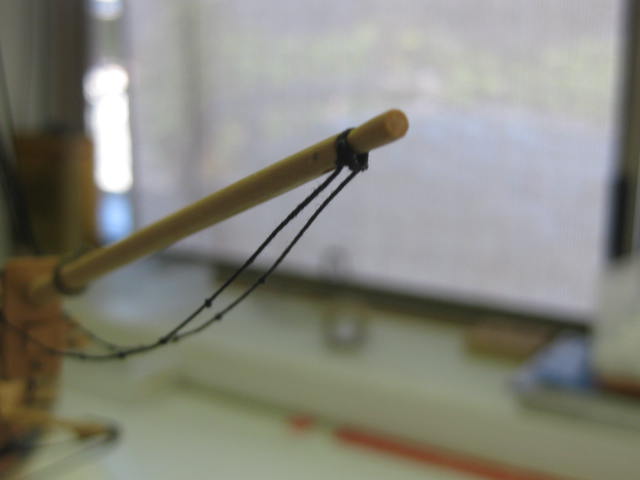
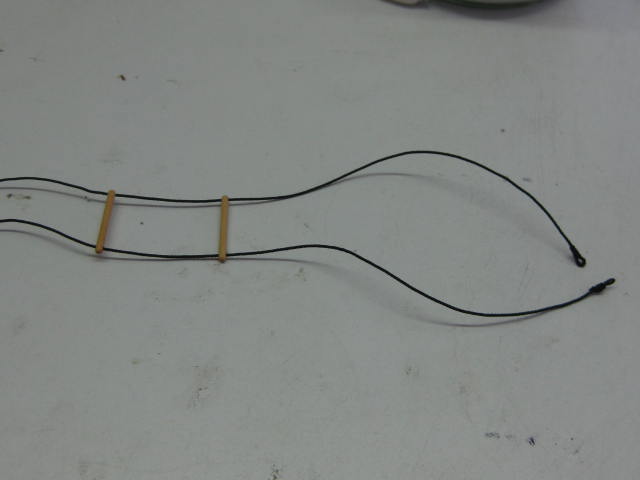
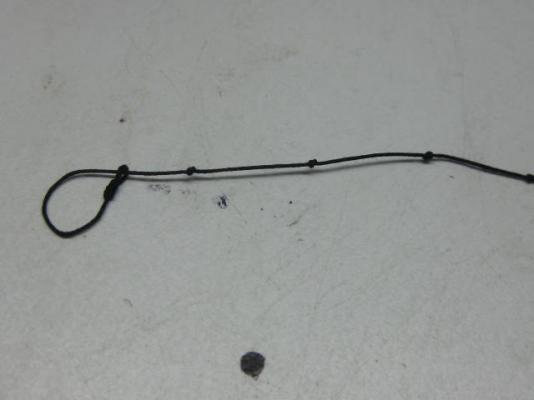
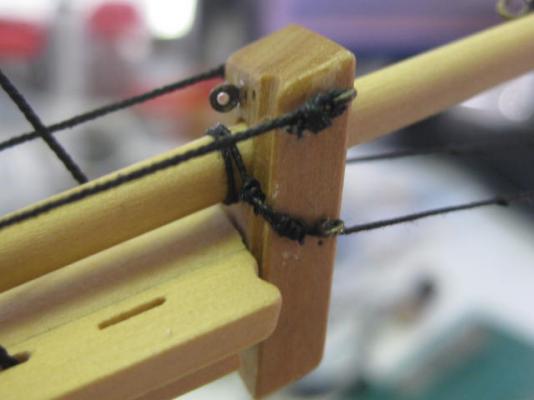
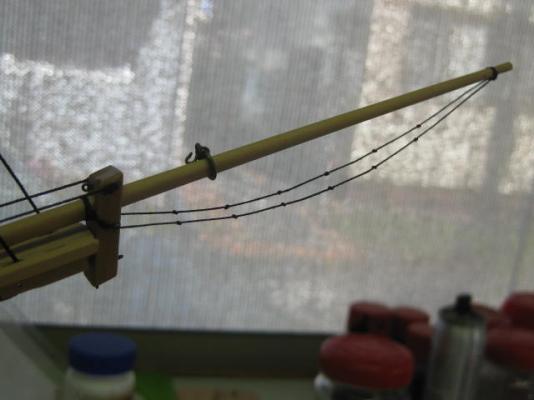
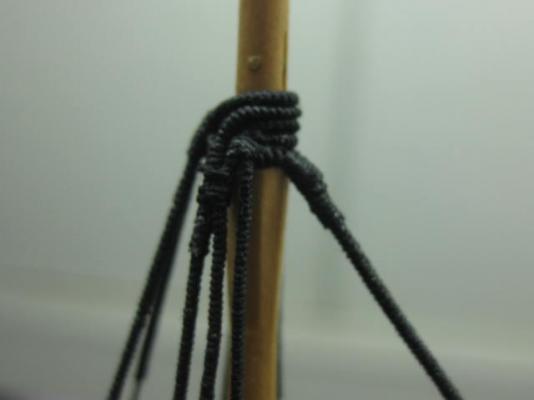
Thank you again John, Nenad, George, Druxey and Eamonn. Eamonn, I hope you're kidding . Jibboom Horses The jibboom horses are the equivalent to the Footropes on the other yards. They are knotted every 2 scale feet, which takes a bit of careful doing to get them spaced evenly. There is a small eye in the forward end which loops back on itself and then around the forward end of the boom : The aft ends are passed around the boom aft of the cap and have two seizings to fix them : To get the horses to hang naturally I dampened them and attached a couple of clamps about 1/3 of the way in from each end until they dried: Danny

-
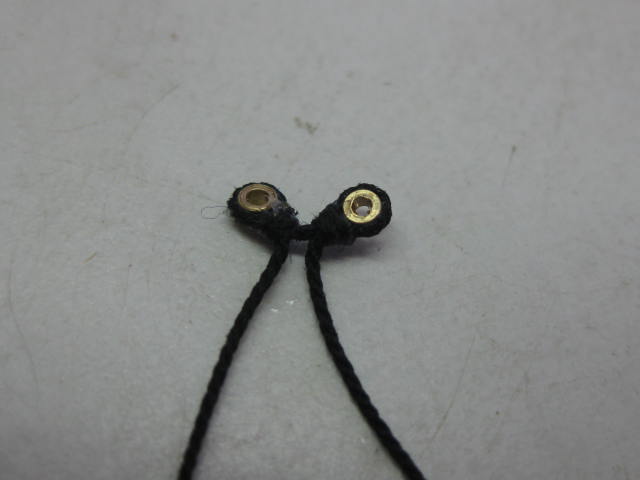
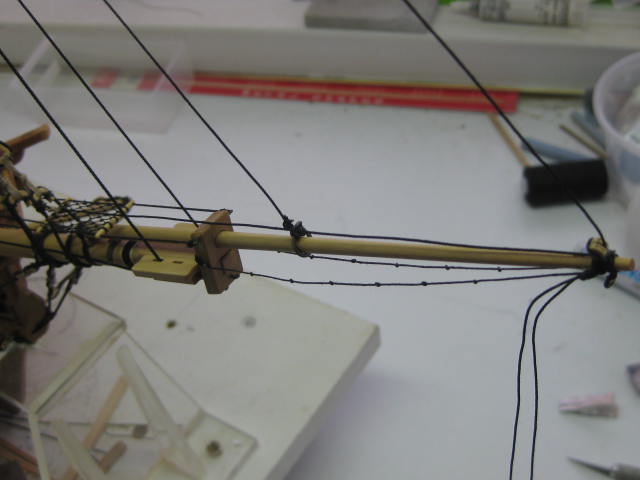
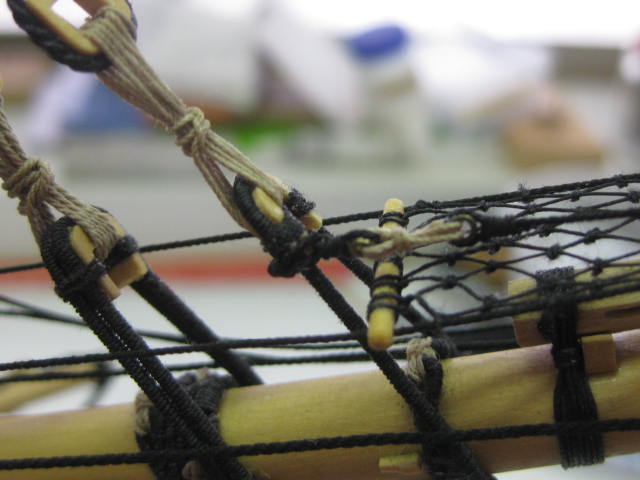
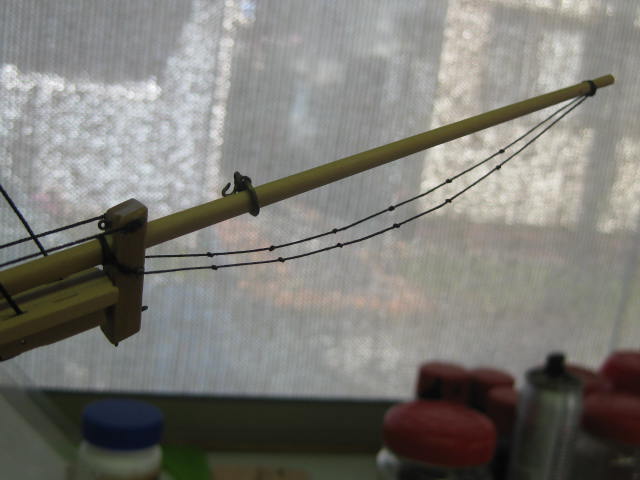
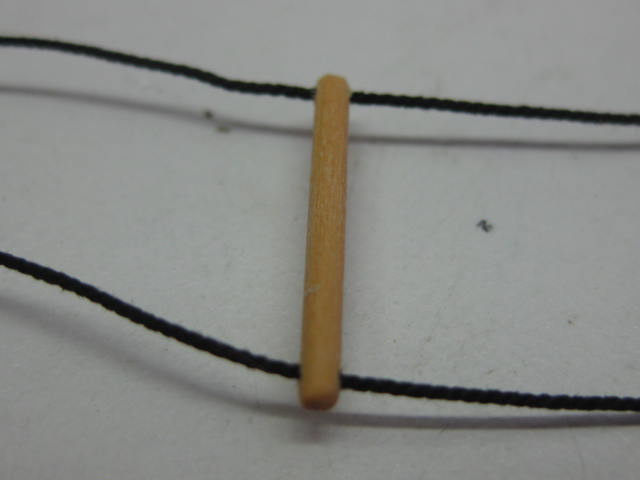
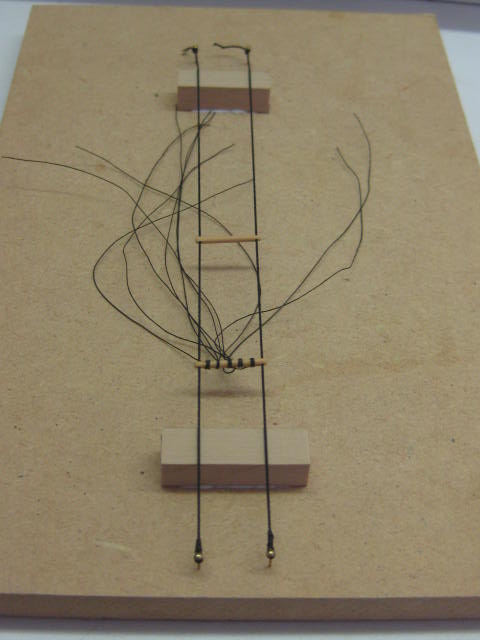
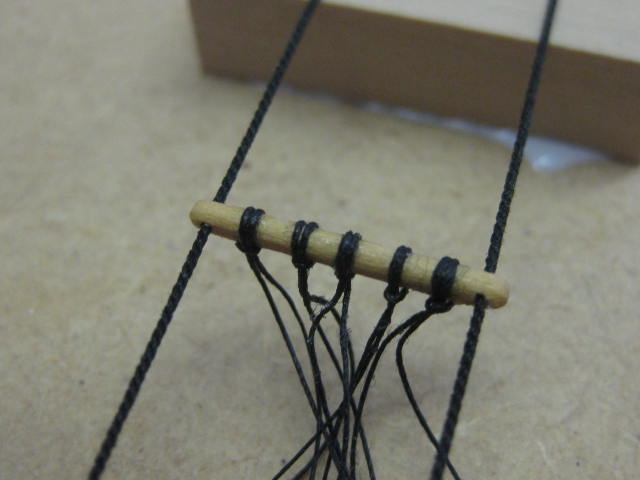
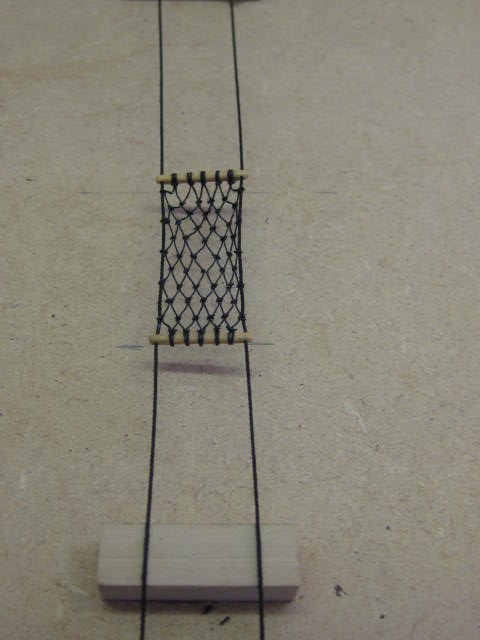
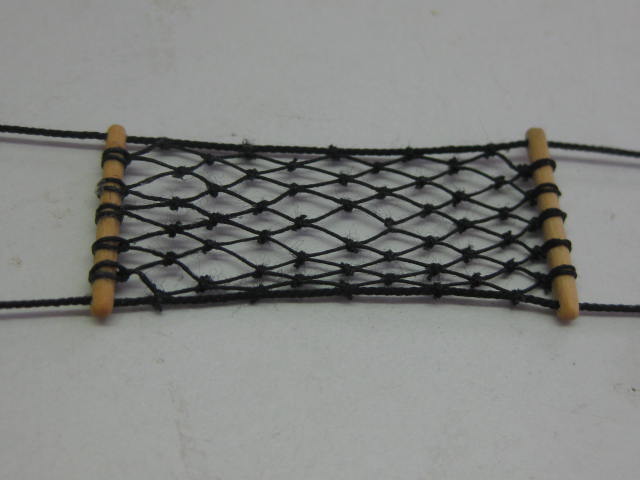
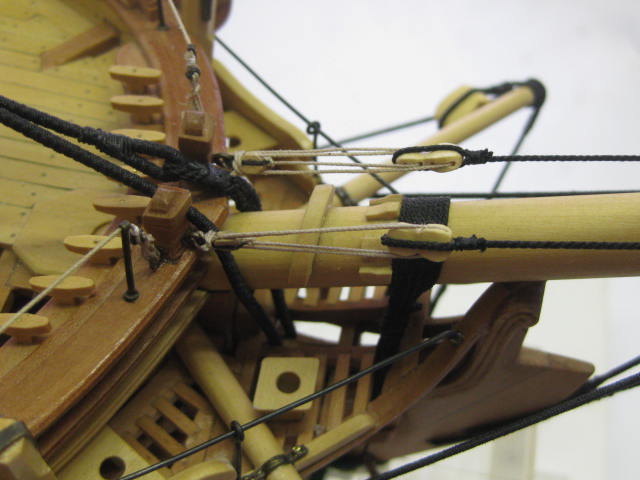
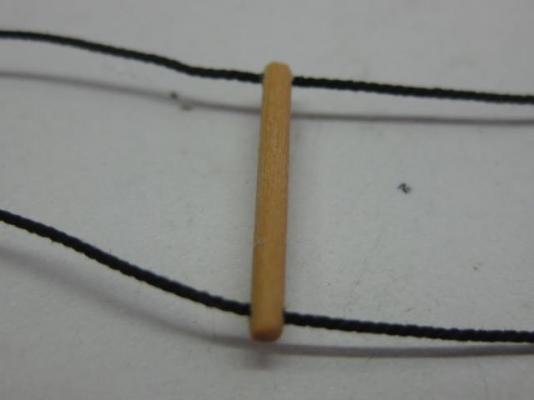
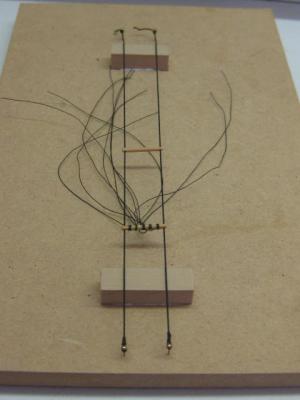
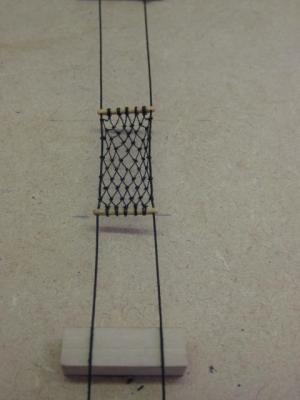
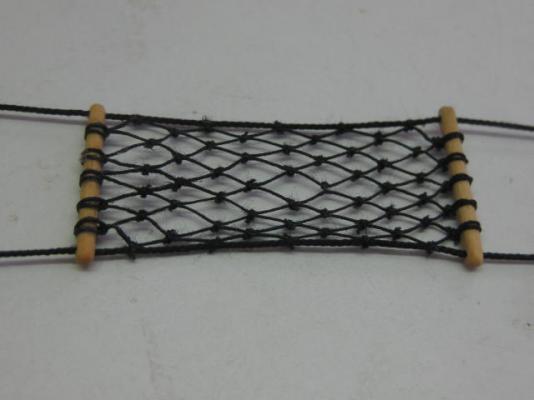
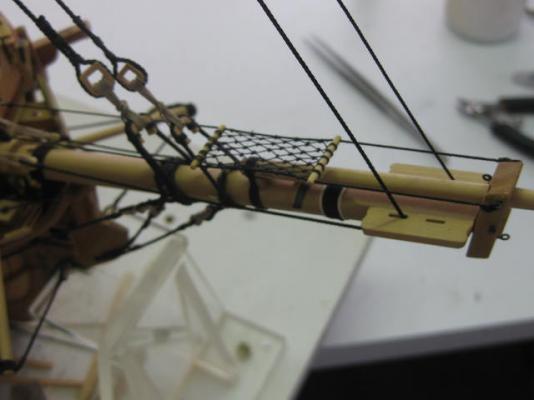
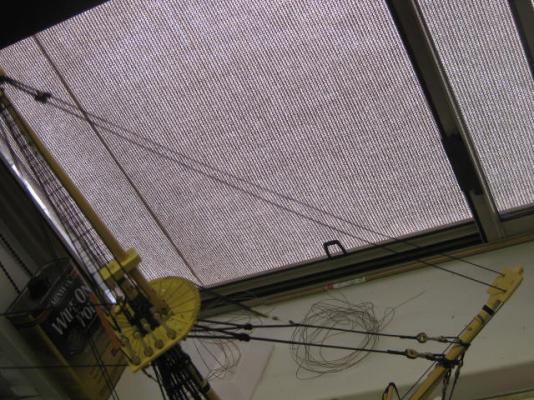
Thanks for the comments Christian, Carl, Ed, Maury, Alex, Mike and Greg. Much appreciated as always. Christian - 1050 long (from tip of Bowsprit to tip of Driver Boom) x 740 high x 355 wide. Jib Net This is one of the fiddliest parts to make on the whole ship. It took me 2 1/2 days. It starts by making the two spreaders from English Box. Then the two Horses were threaded through the holes in each end of the spreaders and an eye seized into the inboard end of each horse : To tie the netting together I constructed a simple Jig : Five double lengths of the netting were hitched around one spreader : Then the tedious work of tying together every 2nd pair of the longitudinal netting began. The first couple of rows didn't turn out too well under magnification, but look OK to the eye : Two days later (I had to wait for the glue to dry on the seizings before continuing on the next row) the second spreader was hitched to the free end : The net fitted to the bowsprit. The forward ends of the horses attach to the eyebolts in the sides of the cap : The aft ends of the horses are attached via lanyards to an eyebolt in each knighthead : Danny


-
Thank you John and Druxey. Hmm .... it's not the first time I've found a mistake in Lees. I wonder what his specific source for changing the Order of Dressing for the Topgallant masts was? BTW - I'm not about to change them now . Danny
-
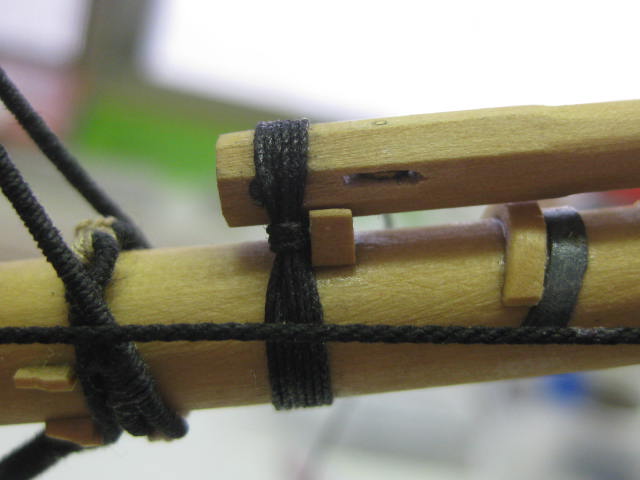
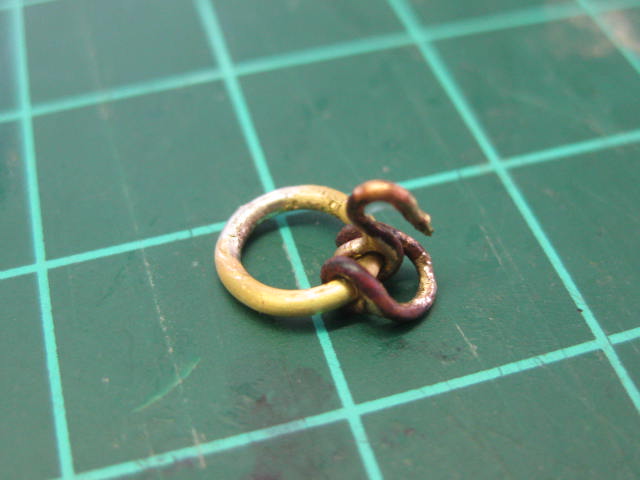
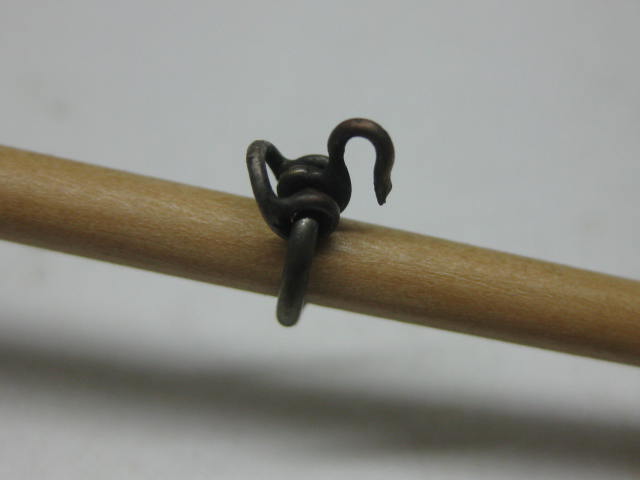
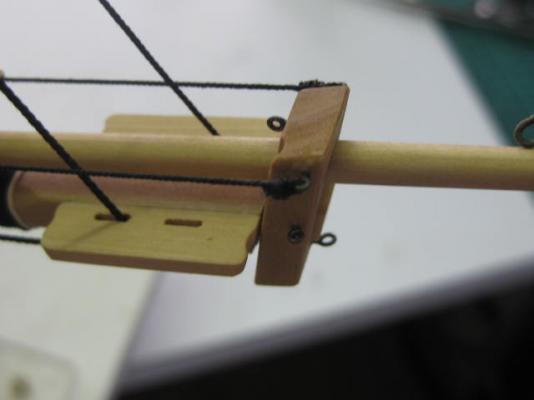
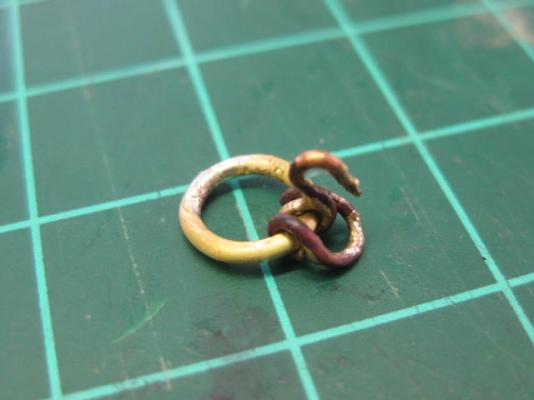
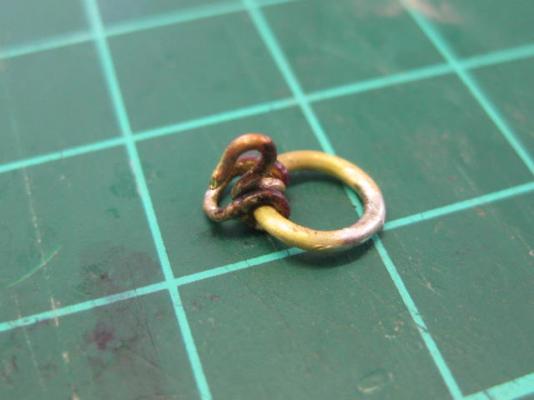
Thank you Pat. Jibboom Crupper The aft end of the Jibboom is held fast by the Crupper, a similar arrangement to the Gammoning on the Bowsprit : Jib Traveller This is a tricky piece of "iron" work. The Traveller holds the Jib Outhaul and the running end of the Jib Stay. It's purpose is to allow the Jib sail to be adjusted or moved along the jibboom. It consists of a ring which encircles the boom, a shackle to which will be attached the outhaul and the stay, and a hook which holds the tack of the jib (the forward corner). I made the shackle and hook first, silver soldering the eyes. Then I bent the ring and slipped the shackle and hook through it, closed up the ring and finally silver soldered it closed. These pics show the assembly before cleaning up and blackening : And the traveller on the jibboom : Danny


-
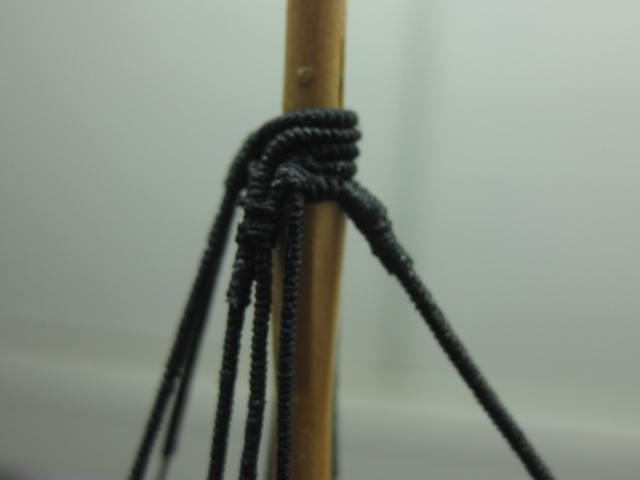
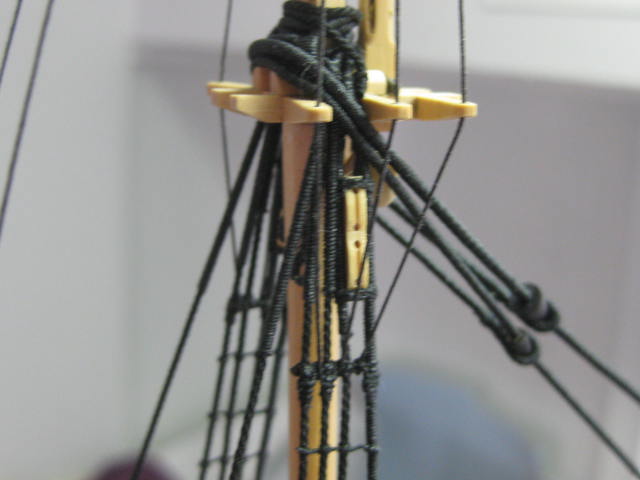
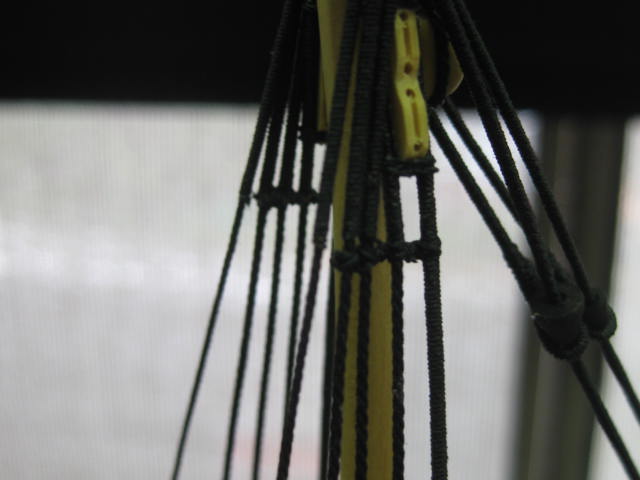
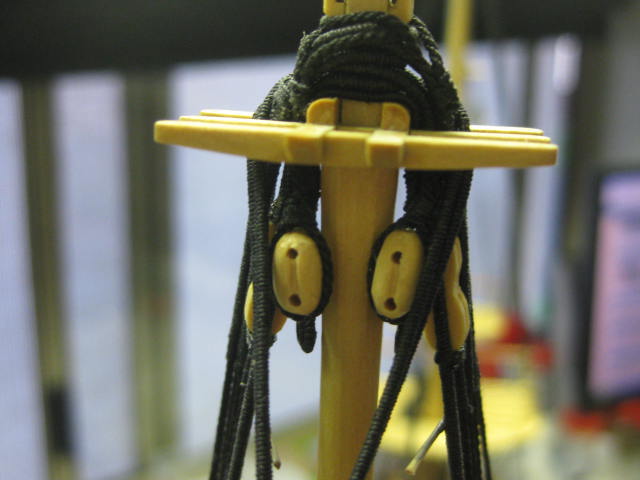
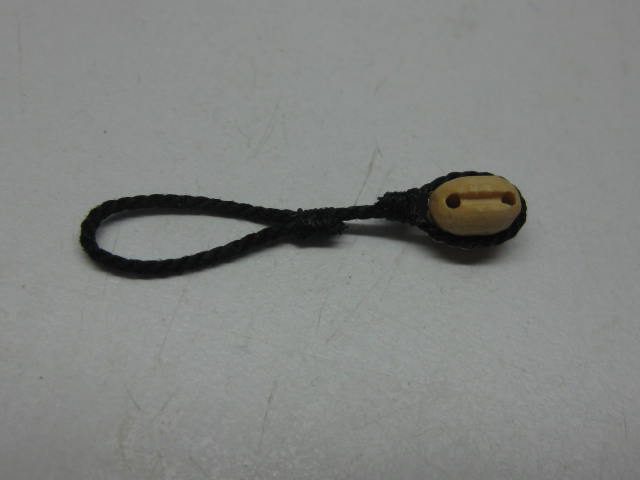
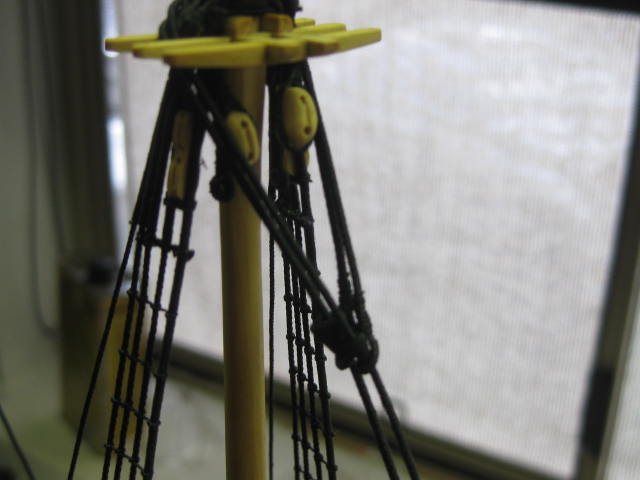
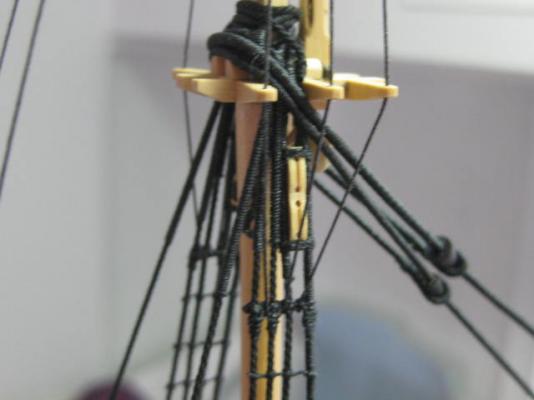
Thanks for looking in again John, Grant, Greg and David . Topgallant Shrouds and Stays The Topgallant Stays are the first lines fitted, unlike on the lower masts where the shrouds and backstays are fitted first. I decided on this arrangement after reading Lees who quotes Steel on the "Order of Dressing". TFFM has the stays fitted as per the lower masts. EDIT - see a few posts below. This could be wrong . The Stays and Shrouds are all served around the mast and for a few feet below. The forward stay may have been served for it's full length, but at this size of shroud (0.2mm) the serving would have looked too large so I've omitted that. The running end of the backstays end in deadeyes fitted to the aft end of the channels on the Main mast, and on the aft deadeyes on the stools for the Mizzen and Fore masts : The running end of the Stays on the Main and Mizzen masts lead through a block stropped around the lower mast heads and are tied to the strop of the topmast lead blocks : An overall view of the Main Topgallant Stays and Shrouds : The Topgallant Futtock Shrouds are fitted in similar fashion to the topmast futtocks : Danny

-
Has anyone got or used headband magnifiers?
Dan Vadas replied to vossy's topic in Modeling tools and Workshop Equipment
I slip my Optivisor on as soon as I sit down at my workbench - I'm hopeless without it. I have two of them, one with the LED lights which have been totally removed as they didn't make much difference with the good lighting I have, and they got far too heavy after a while even with the batteries removed. Also, as Toni mentioned above, if it looks good under 4x magnification it looks excellent to the naked eye . Danny -
Hi Toni, I echo everyone else's comments about the display cases and the eggs - wonderful . I used to go down a similar path with my pickling, but I've found that dropping the pieces in a jar of simple white vinegar does just as good a job. I leave the pieces in the vinegar for about an hour and then rinse off with water. As you are doing, I pickle both before and after soldering and I haven't had any problems at all. Danny
-
Yeah, how many times have you seen a model with full sails and the flags are flying toward the stern? They should be flying toward the bow if the wind is coming from behind. All bets are off if the model is shown at anchor - the wind could be coming from any direction. Danny
-
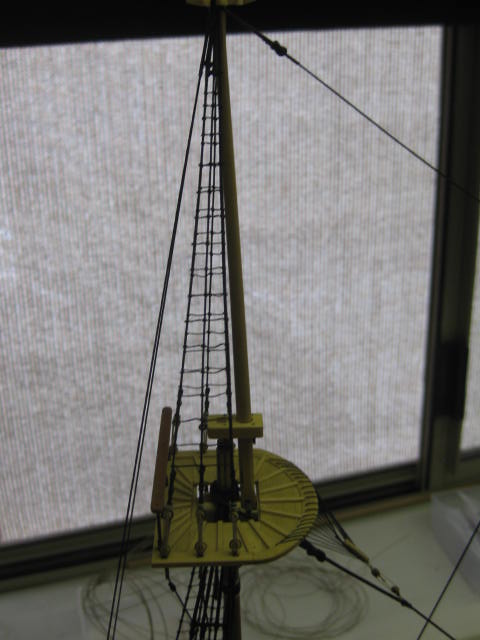
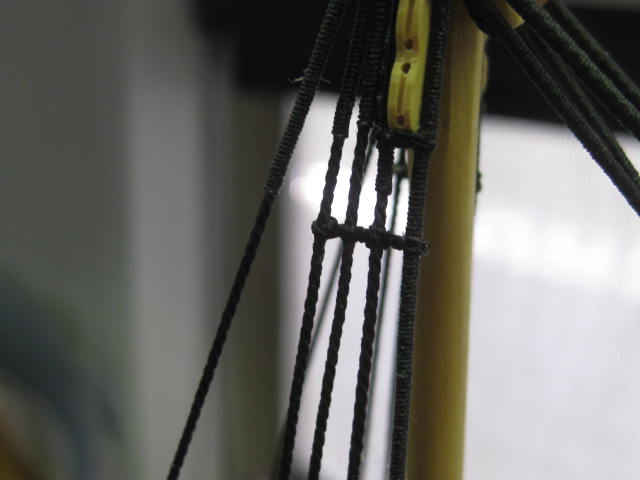
Topmast Ratlines Nothing real different here, just more ratlines. At this stage I only have most of the ratlines on the main topmast left to do. Here are the foremast ones : And the mizzen topmast : Danny
-
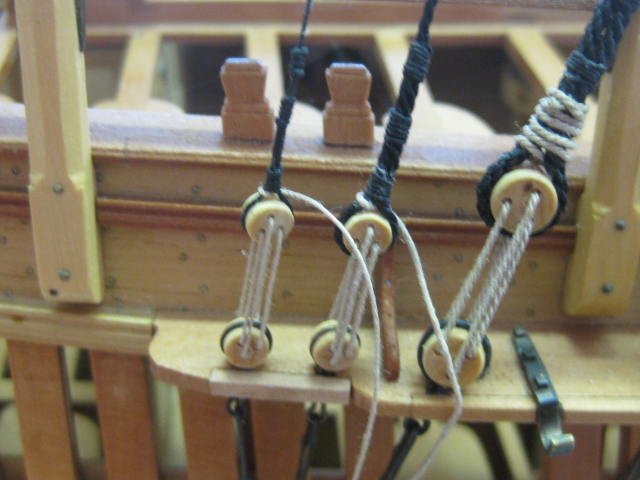
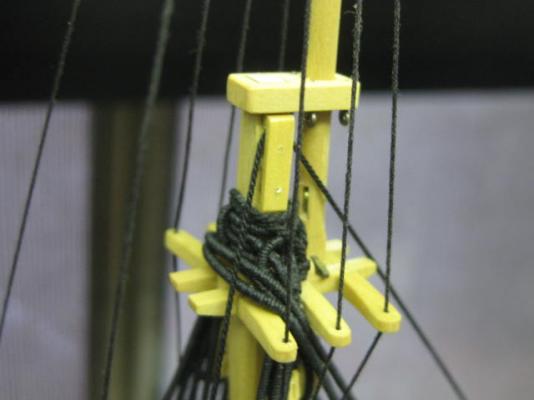
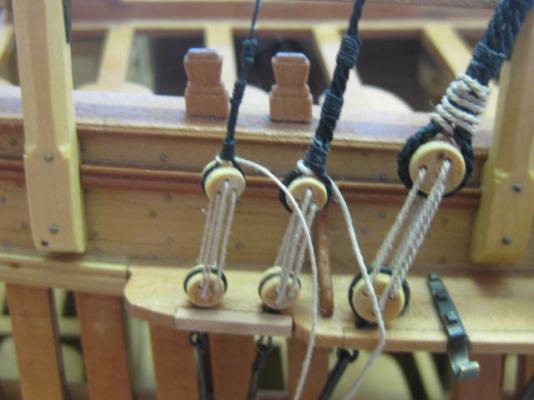
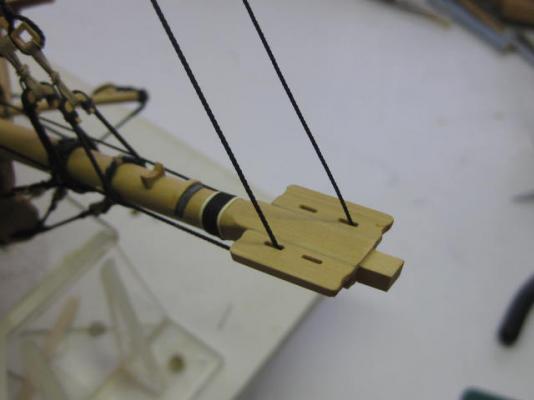
Thank you Aldo, and thank you too Greg . Yeah, I noticed ...... every morning there were at least 30 "Greg the Pegleg Sailor liked a post in HMS Vulture" notifications. I'm glad you like her . Just for you (oh, OK the rest of you too ) here's an update. Sorry it's been so long coming but my computer's been playing up again. Today it's having a rare "good" day. Topmast Futtock Staves The topmast shrouds have futtock staves that are similar to the lower mast ones : Fore Stay and Preventer Stay Both stays are attached to the topmast head in similar fashion to the main topmast stays, with the exception that the preventer stay is above the stay : The running ends of the stays are fed through the sheaves in the bee blocks, with the preventer stay going through the port side forward sheave and the stay going through the aft starboard sheave : The ends of the stays have violin blocks fitted. Two 7" single blocks are stropped to the eyebolts in the knightheads, and are connected to the violin blocks by lanyards : Topsail Yard Tyes TFFM suggests that now is a good time to fit the Topsail Yard Tye blocks. This would be very difficult to do after the topgallant masts are fitted. I made the two pairs of 14" blocks for the main and fore masts (only) from English Box in a similar fashion to all the other blocks I made previously. They seem to be getting better as I go . The two blocks are stropped with enough length to allow them to hang about a block length below the trestle trees : Danny


-
That's a relief Pat . Danny
-
Umm .... Pat ..... unless Endeavour is a lot different to other English ships of the period the HEXagonal sections would have been OCTagonal . Sorry about that mate (unless I'm wrong). Danny
-
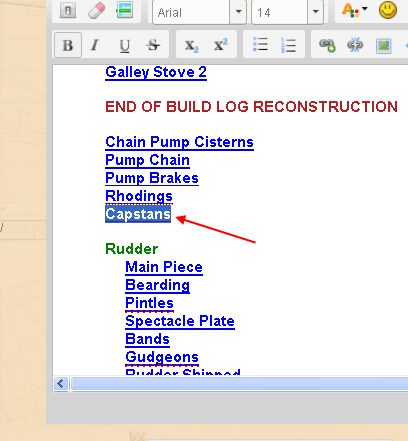
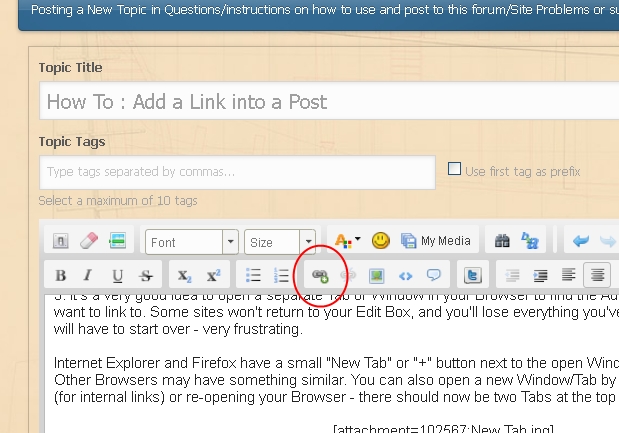
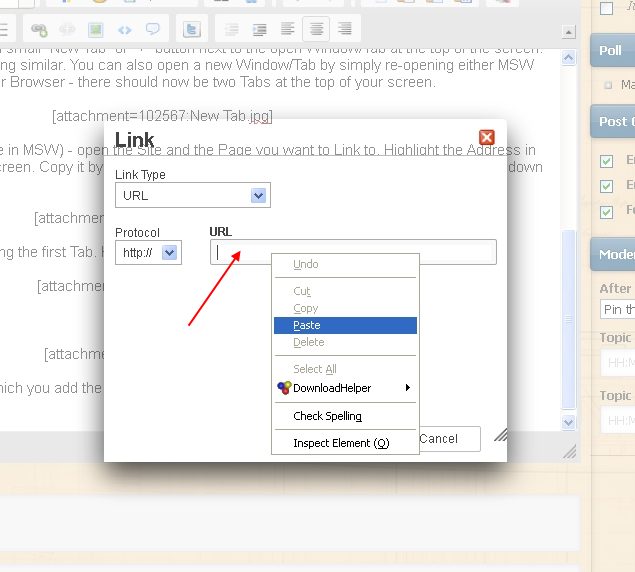
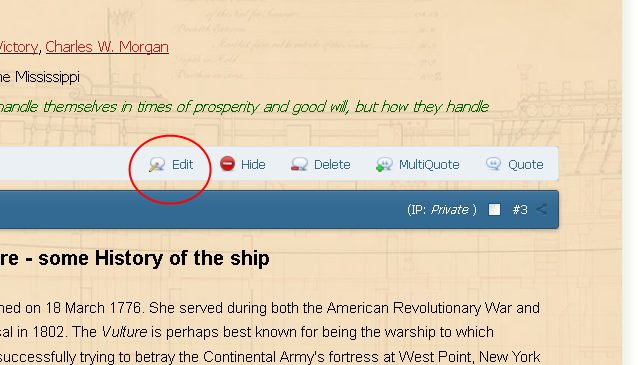
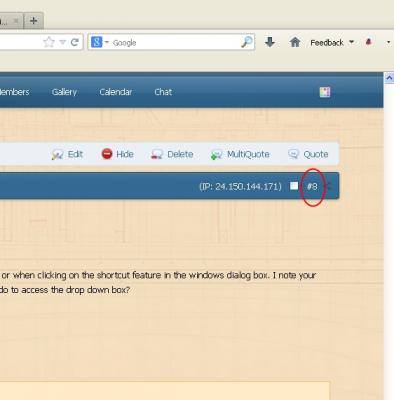
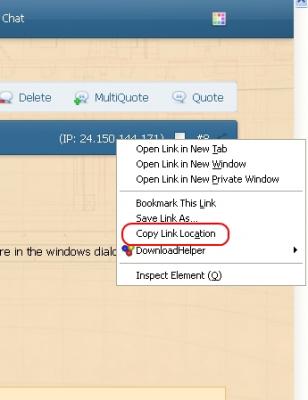
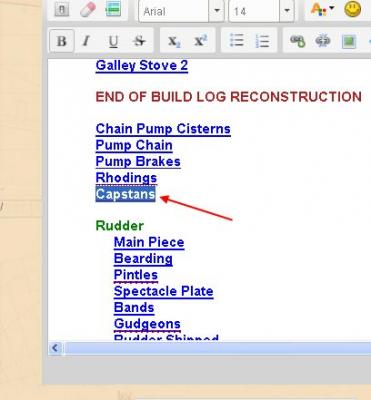
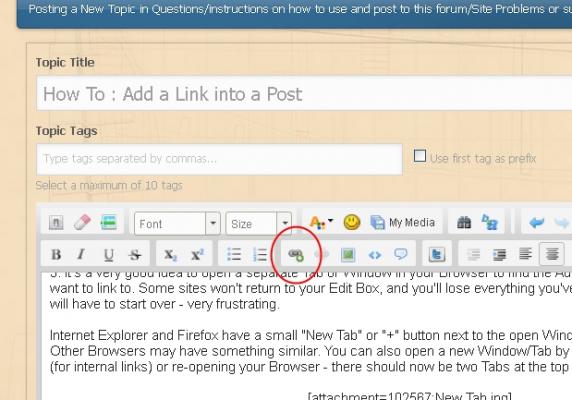
Several members have added Indexes to "Points of Interest" to their Build Logs. This helps both themselves and others to quickly find the page or post to certain items during the course of construction - e.g. selecting "Capstan" will take you directly to the first post dealing with it's construction. Here's how you do it : The Index is merely a collection of Links. For those of you familiar with the method of creating a Link you can skip this next bit. How to create a Link : Find the Post you want to create a Link to, preferably by opening MSW in a separate Window. RIGHT Click on the Post Number : This will bring up a Menu. Click on "Copy Link Location" : Click on the "Edit" button in the post you want to create a Link : Select the word (or words) that you want to turn into a Link by dragging your mouse across it while holding down the left button or using Shift + Arrow on the keyboard : Click on the "Add Link" Button in the menu bar : This brings up a small Menu. RIGHT Click in the "URL" bar. Make sure the cursor is inside the bar. Click "Paste" in the menu : The Link is now attached to your selected word/s. Example of an Index It's helpful to place the Index in the first post of your Build Log, but if you can't do that for whatever reason you could create a Link to the Index page in the first post of the Log. You can Format the text in the usual way (font, size color etc)


- 10 replies
-
- 22
-
-