


Mike Hunt
-
Posts
61 -
Joined
-
Last visited
Content Type
Profiles
Forums
Gallery
Events
Posts posted by Mike Hunt
-
-
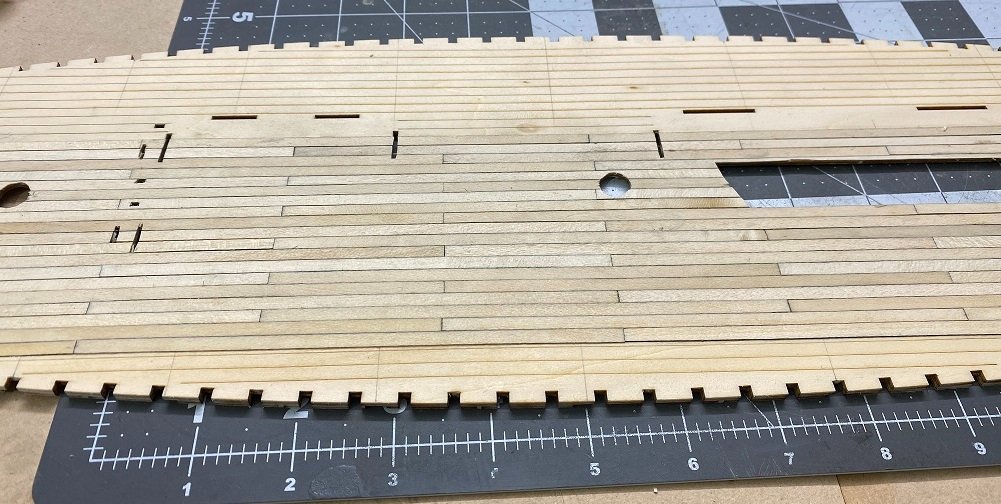
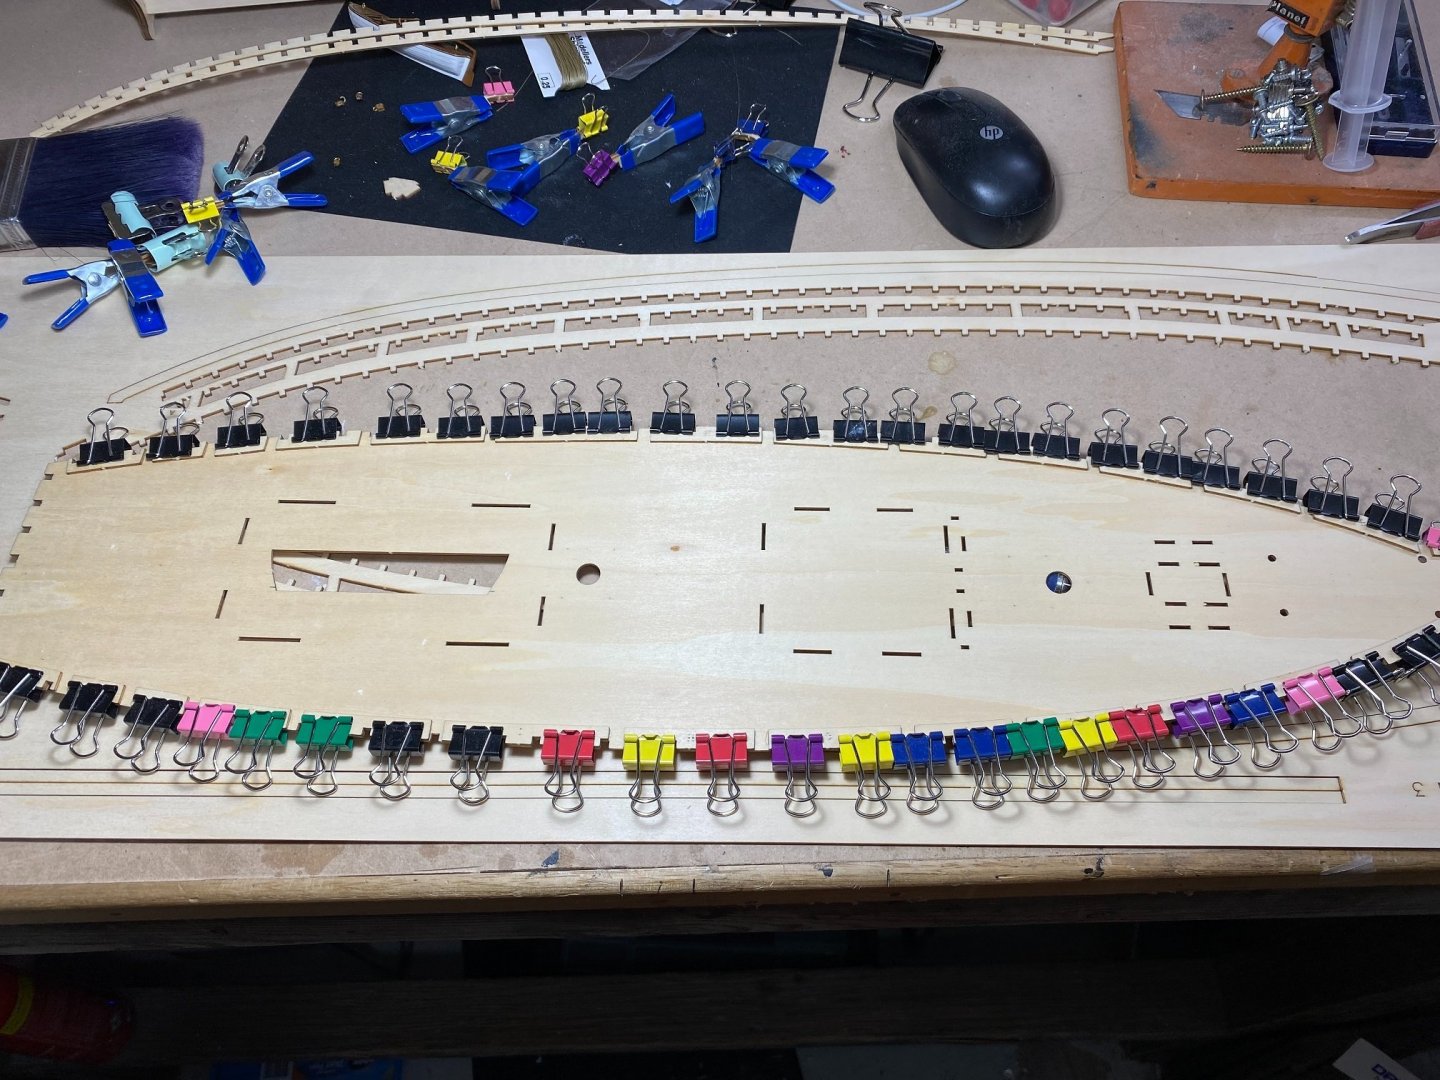
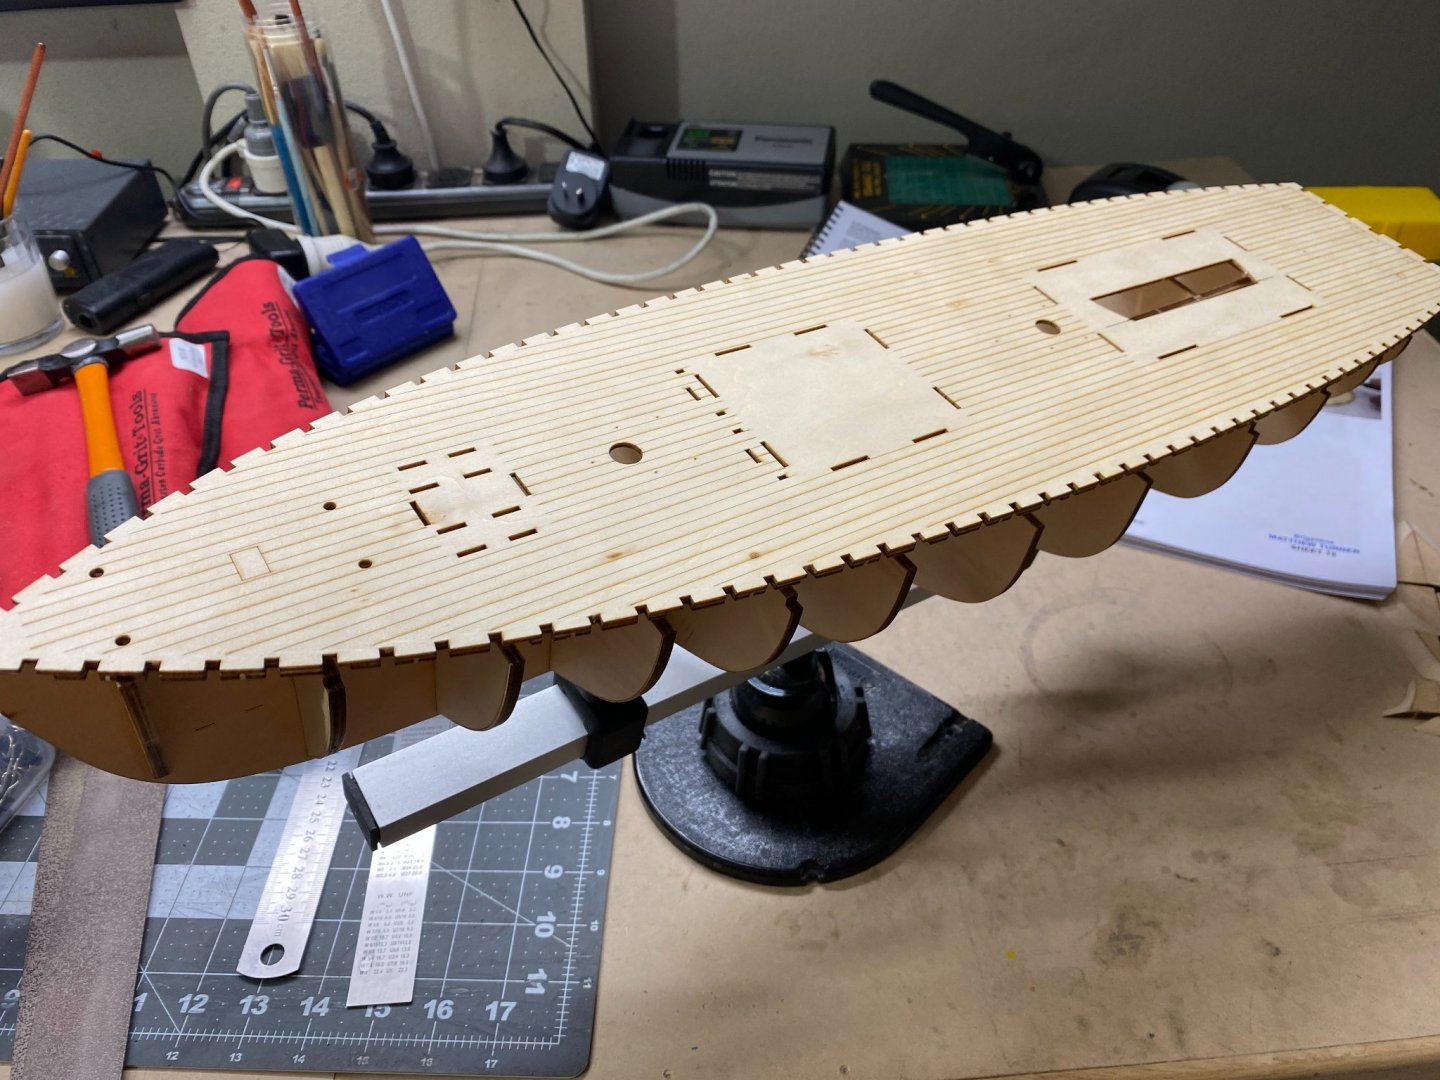
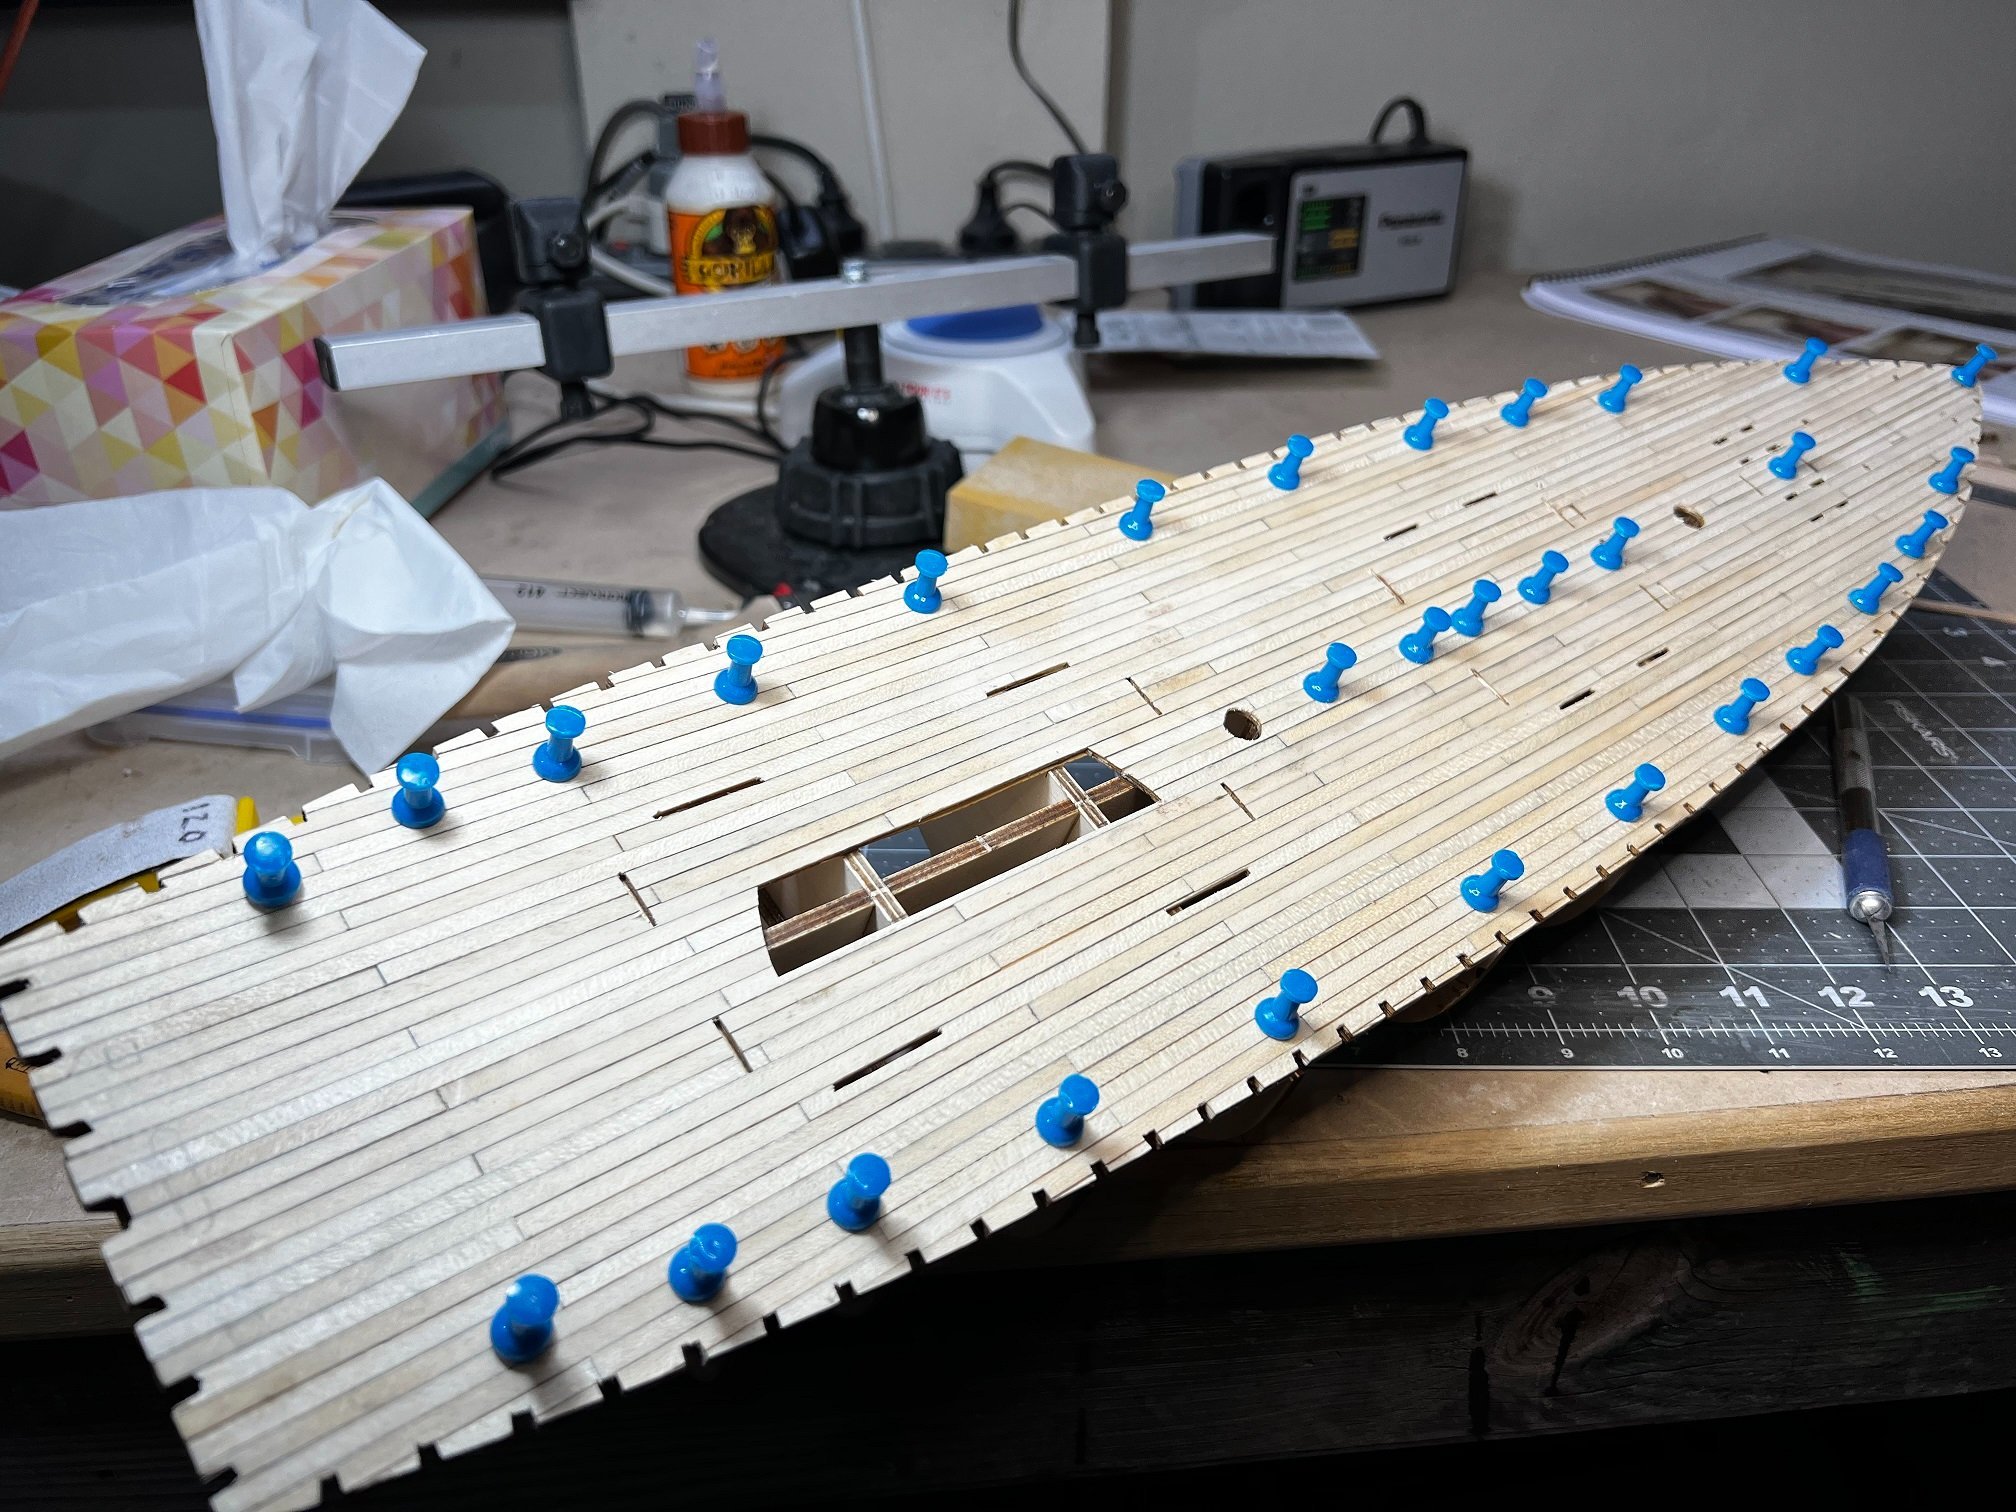
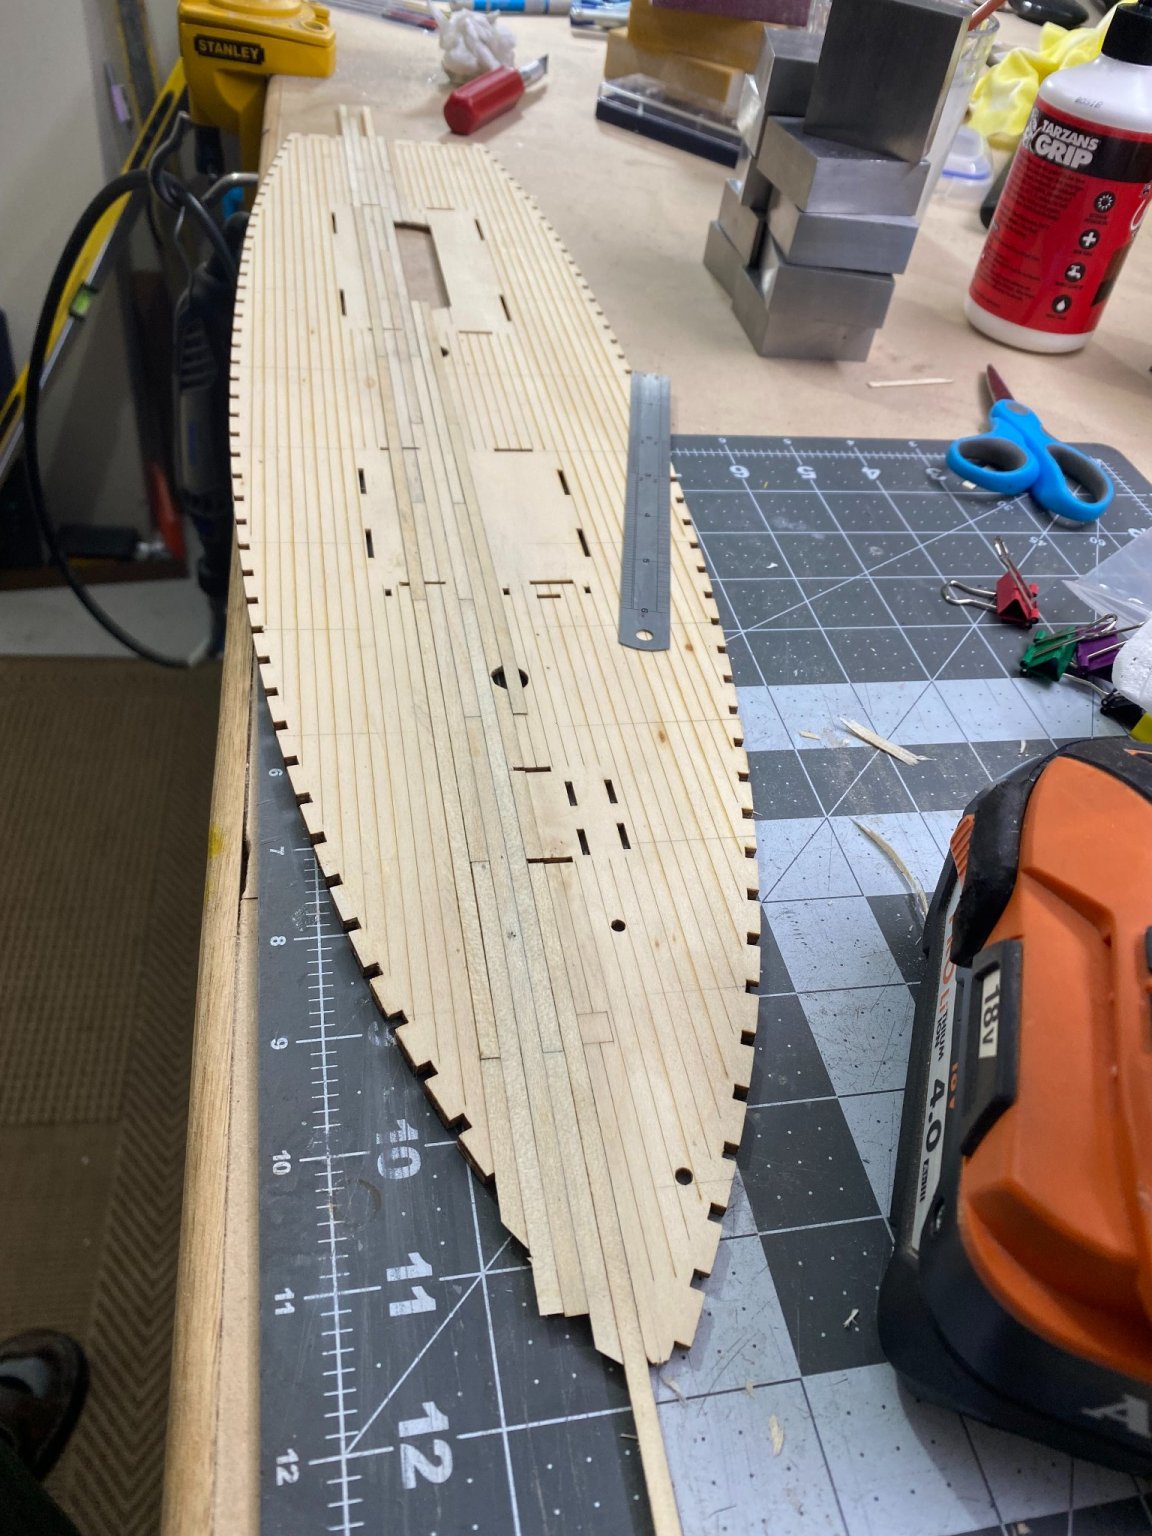
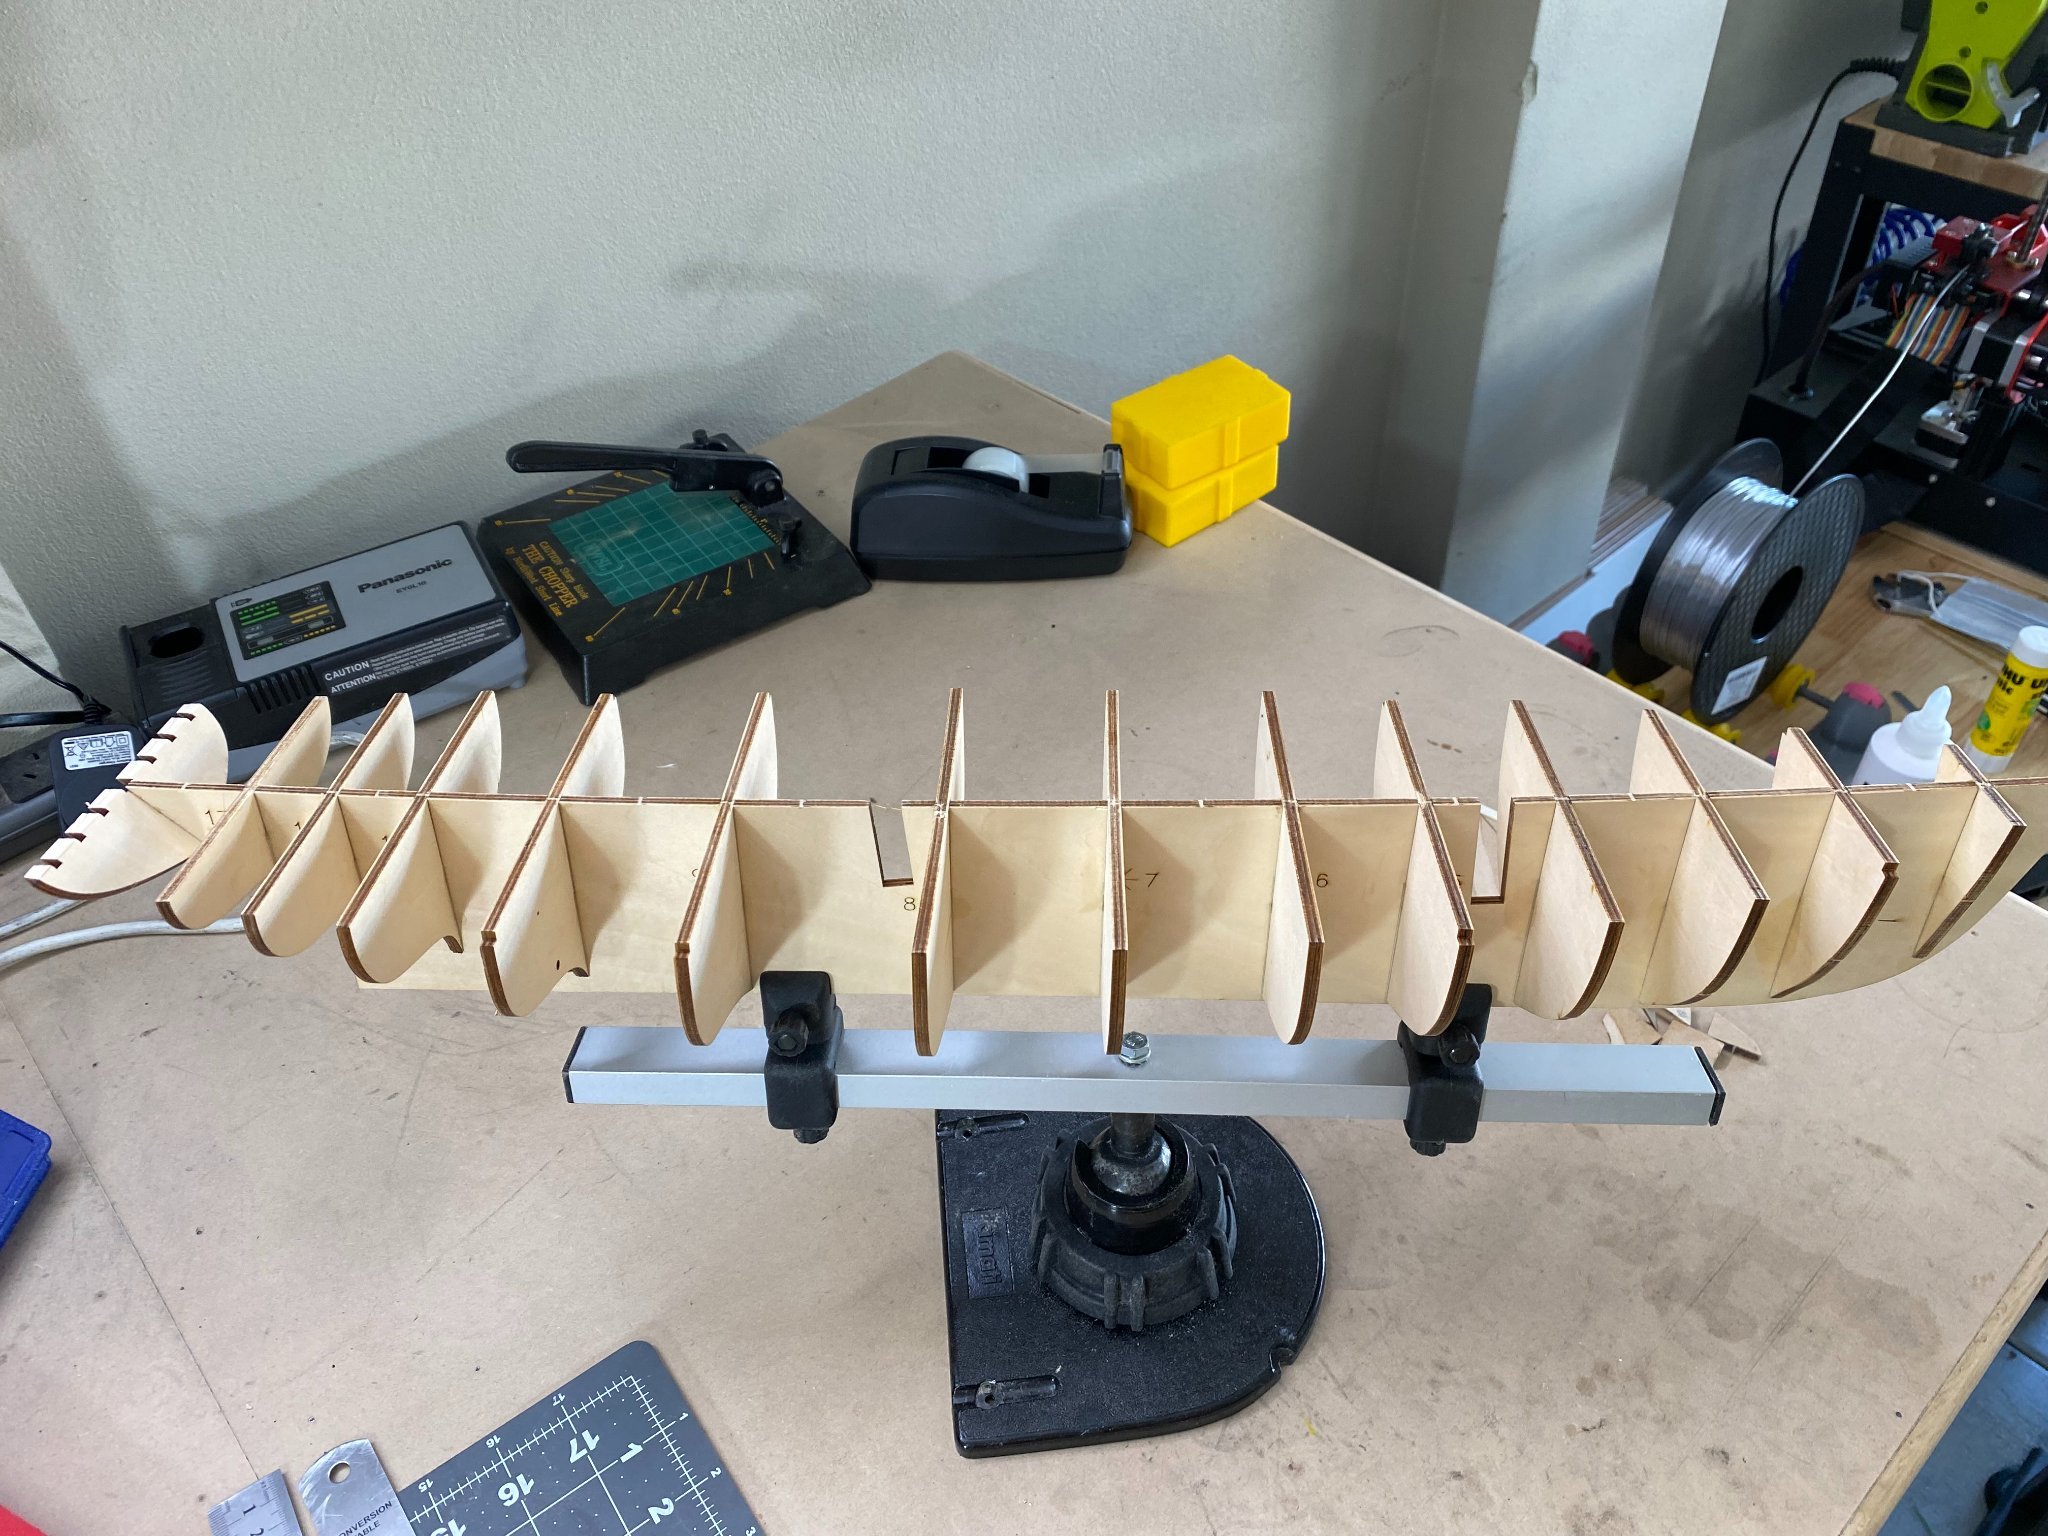
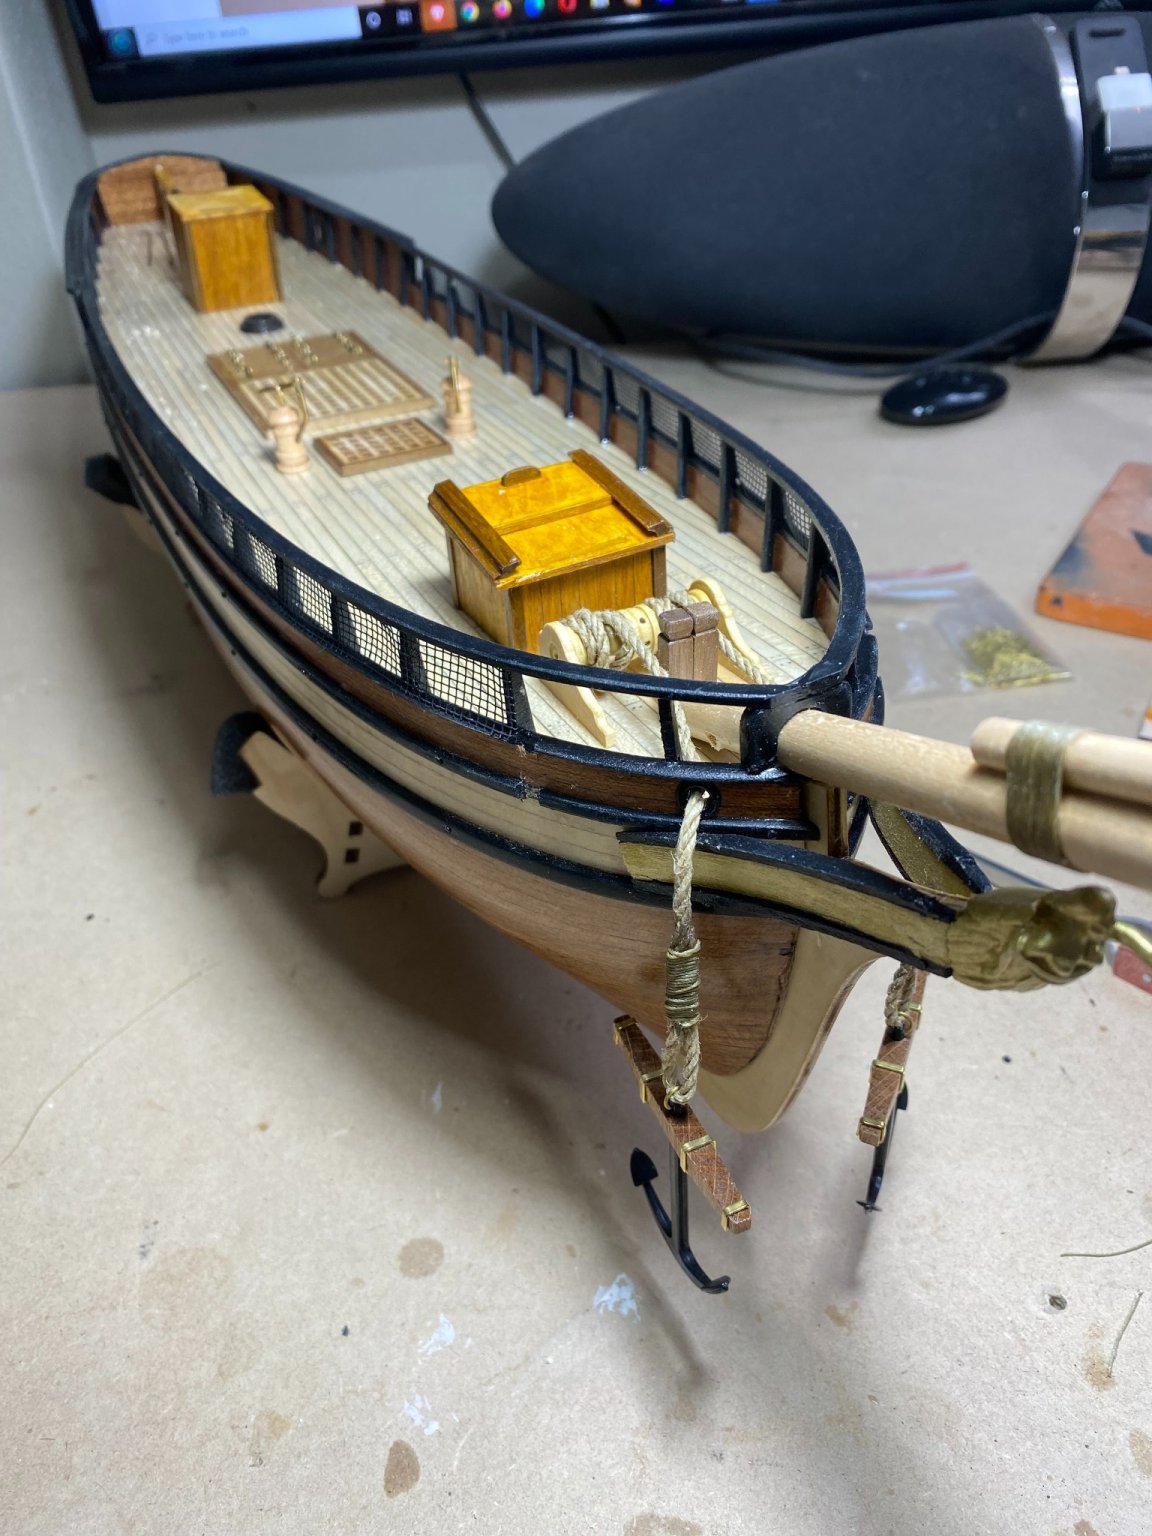
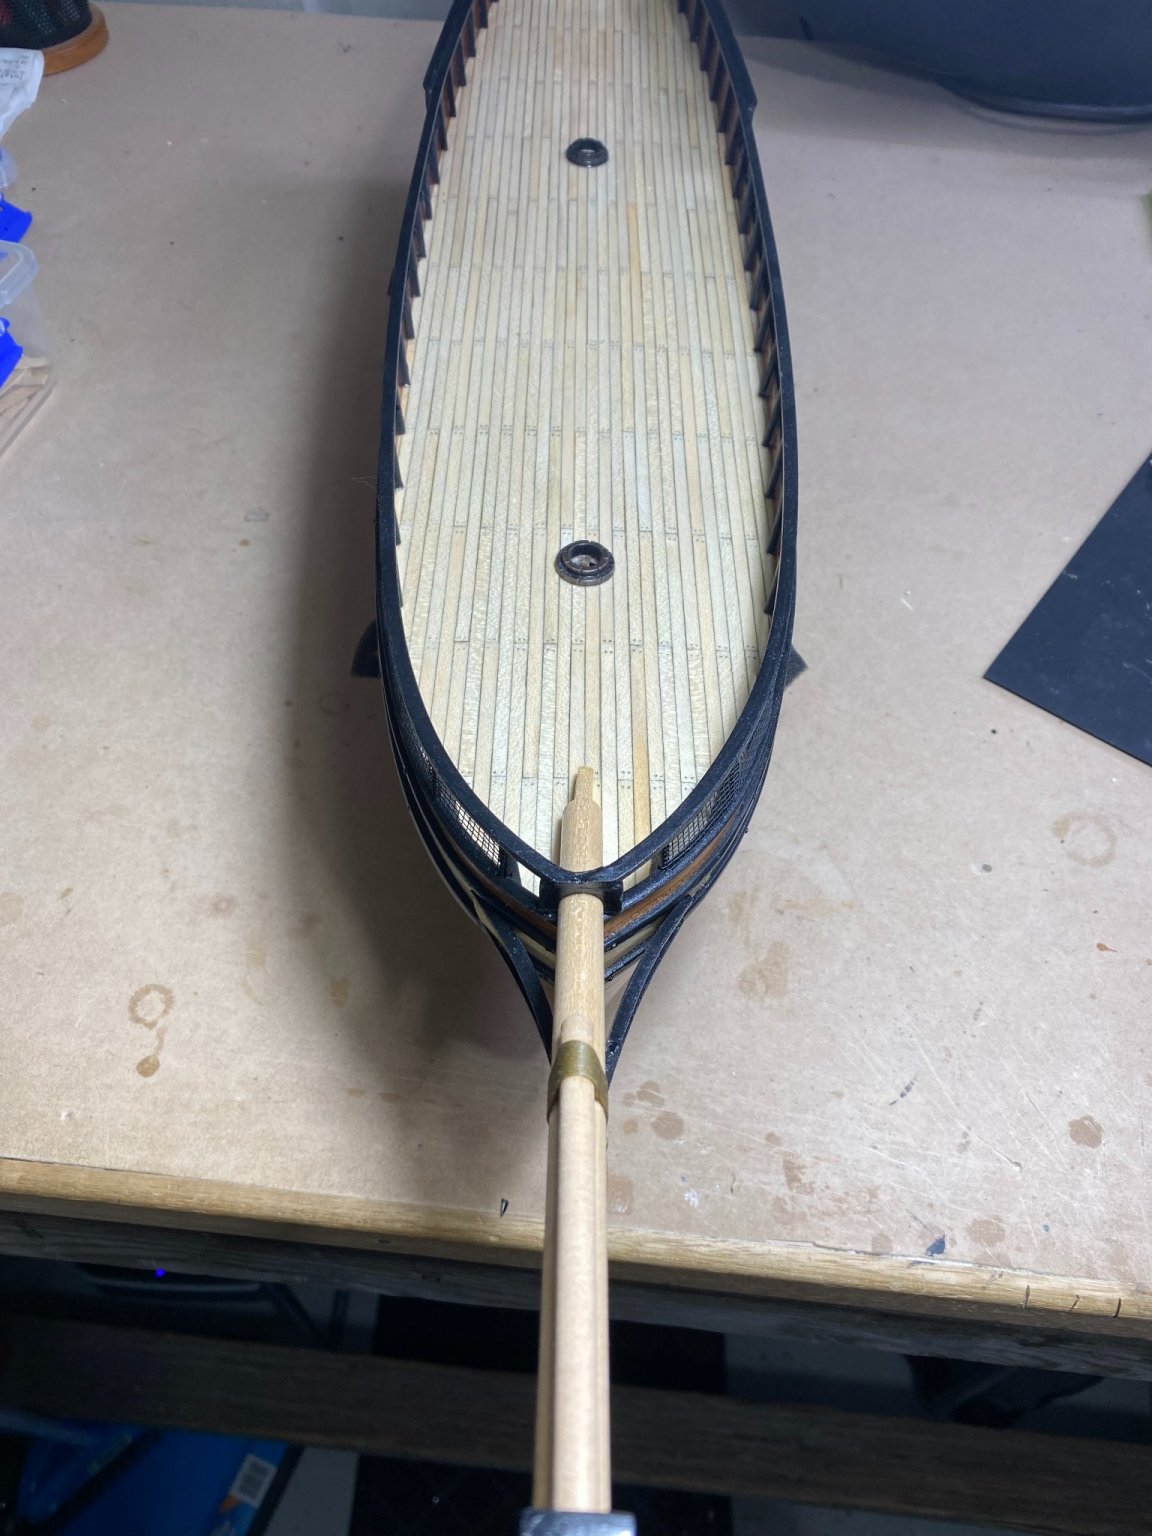
01/09/21 - 02/10/21 Continued deck planking
06/10/21 Glued deck in place
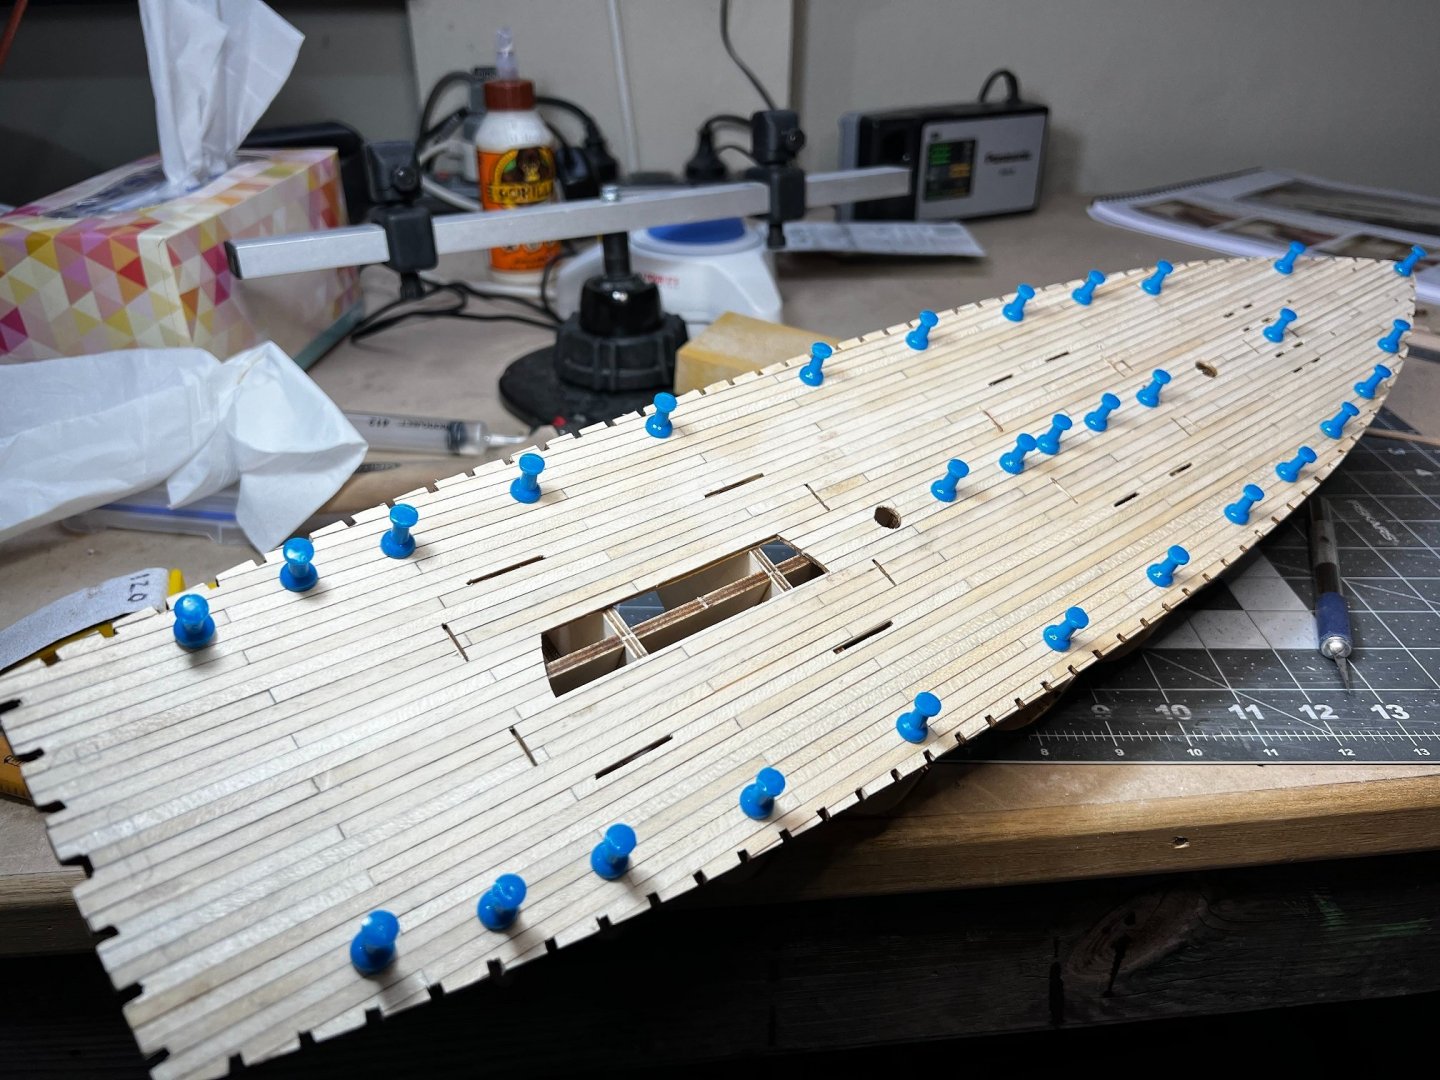
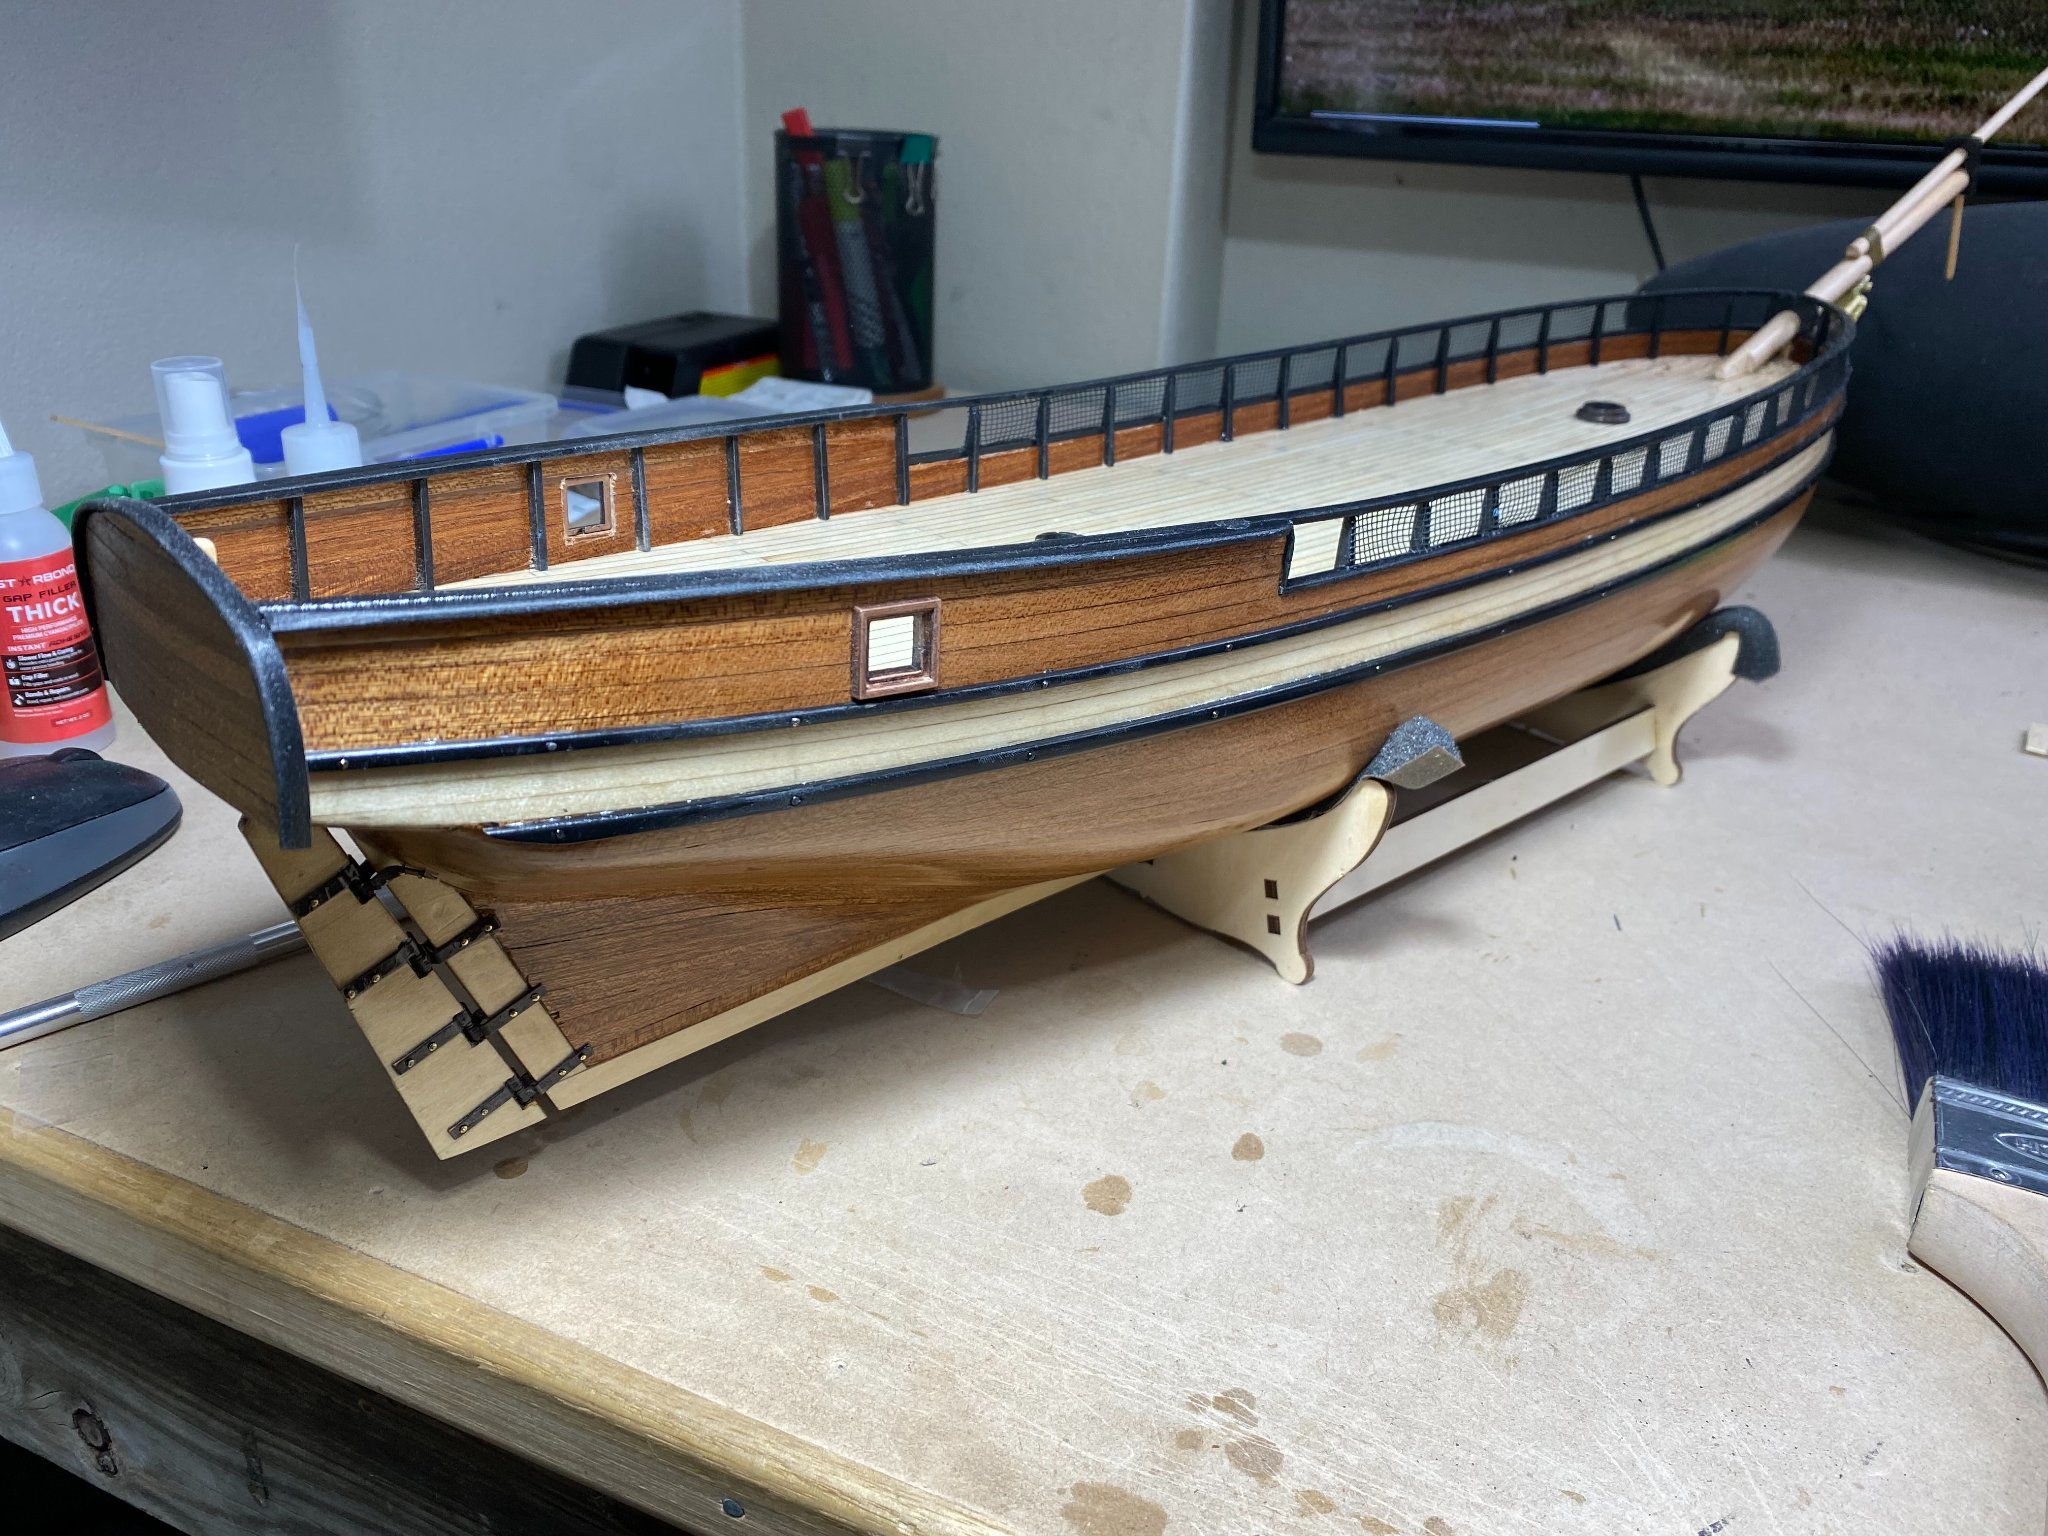
07/10/21 Faired the hull
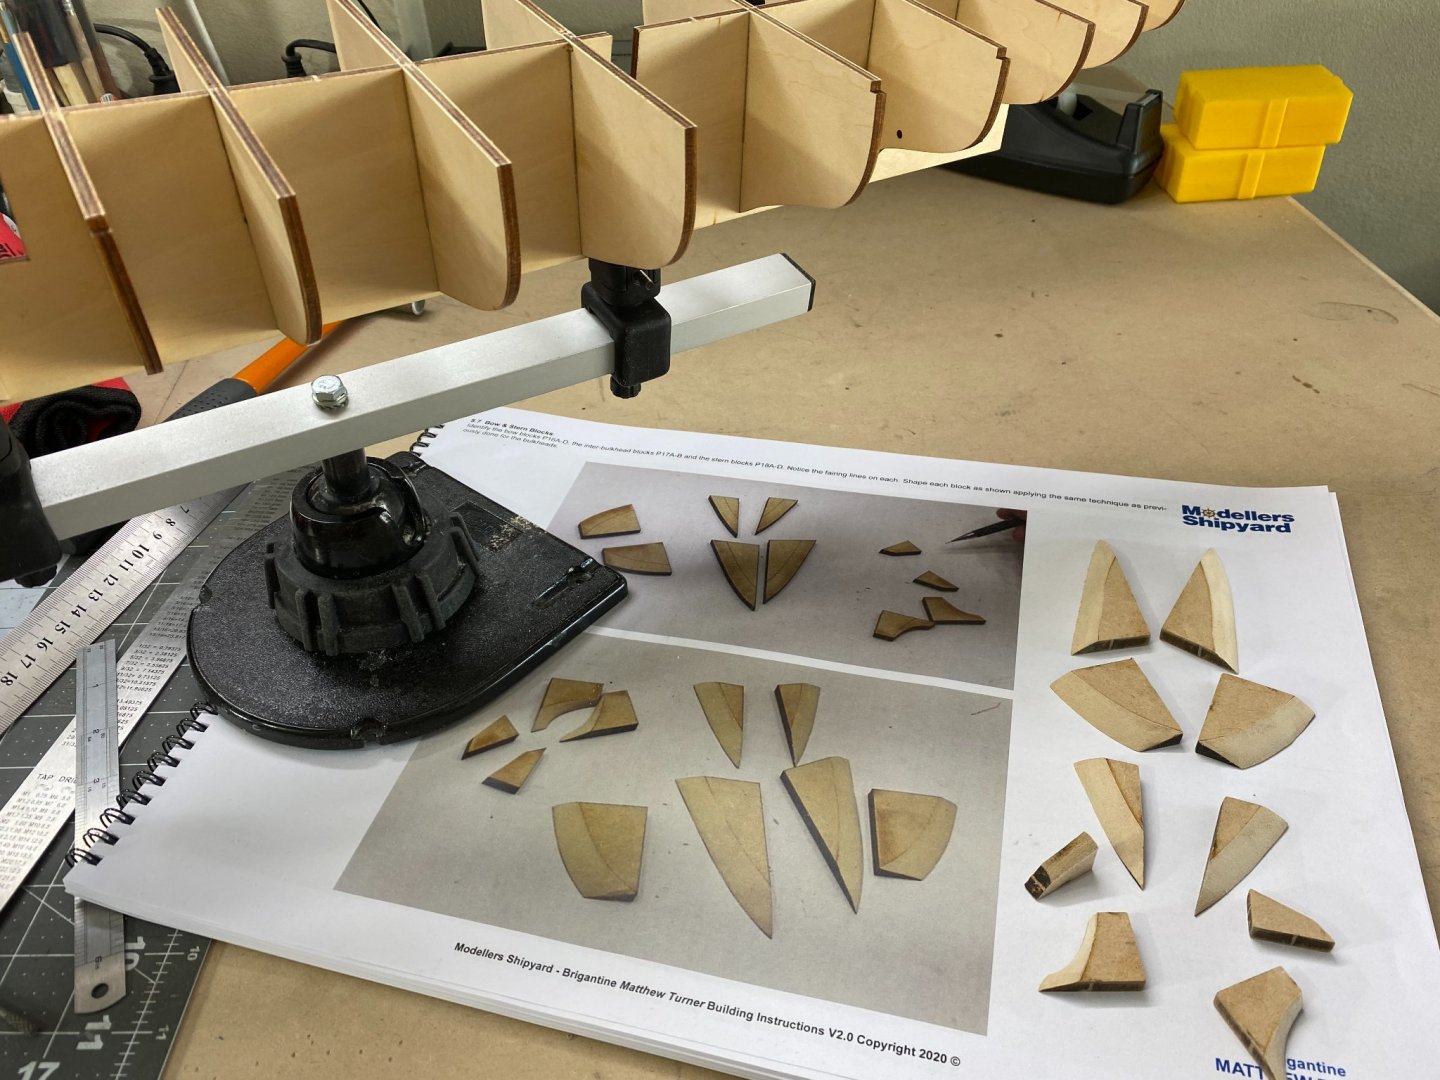
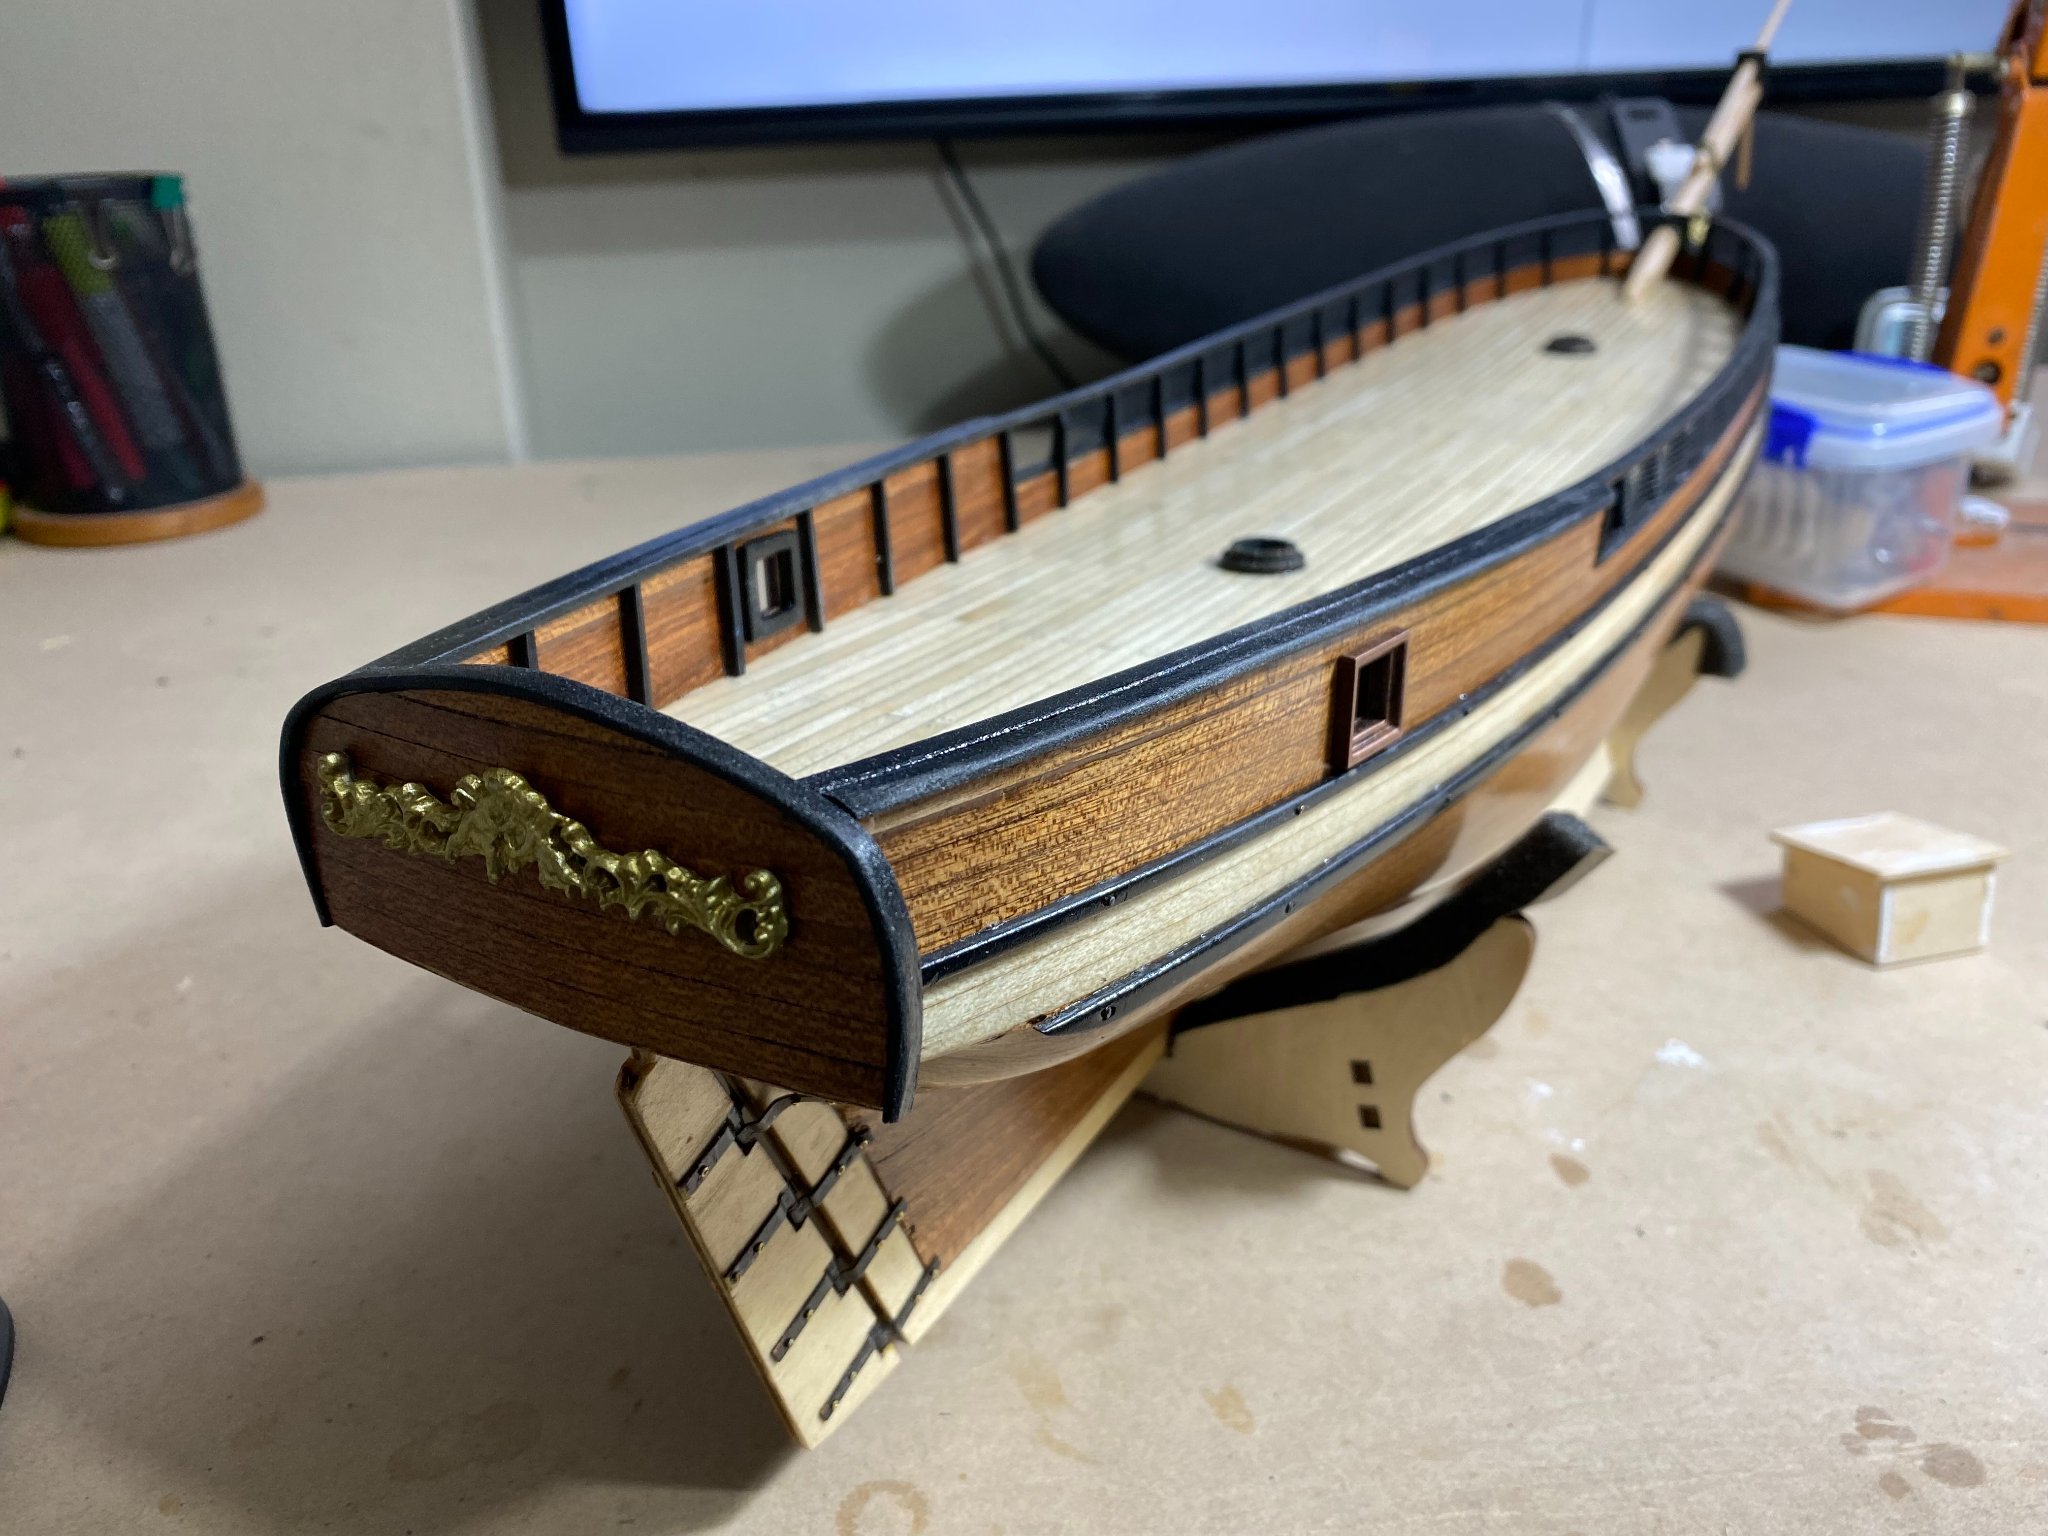
08/10/21 Glued bow and stern blocks in place
09/10/21 Continued sanding and shaping bow and stern blocks. Shaped transom and transom strengthener and glued together.
10/10/21 Glued transom in place, sanded deck and applied first coat of varnish
11/10/21 - 13/10/21 More sanding and varnishing
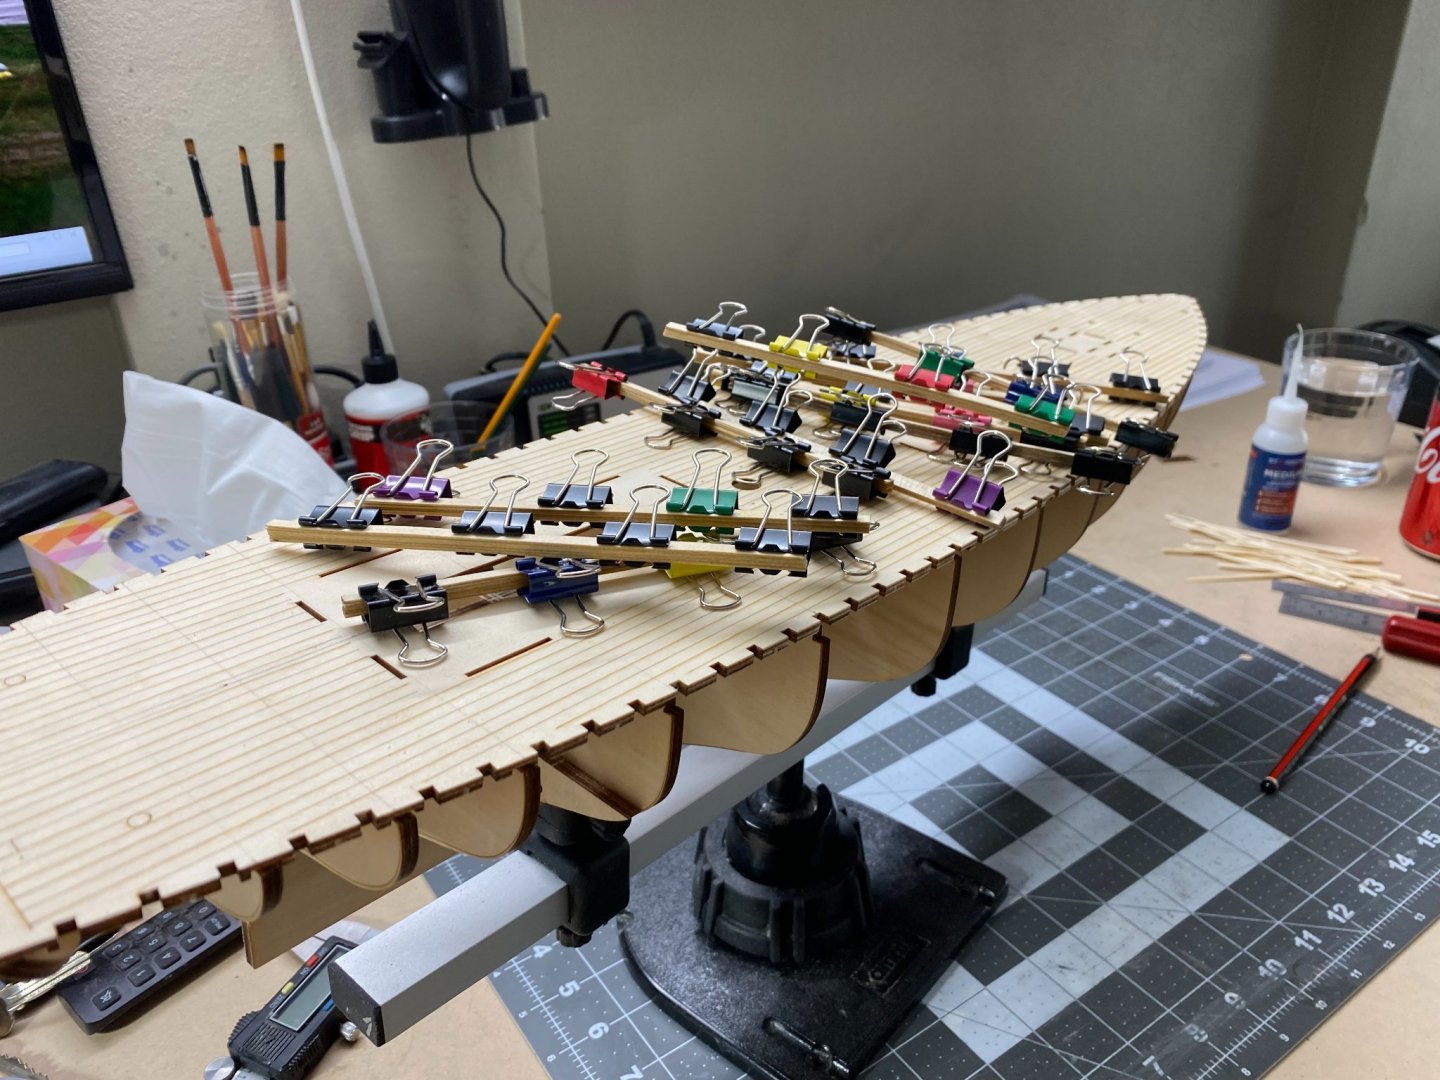
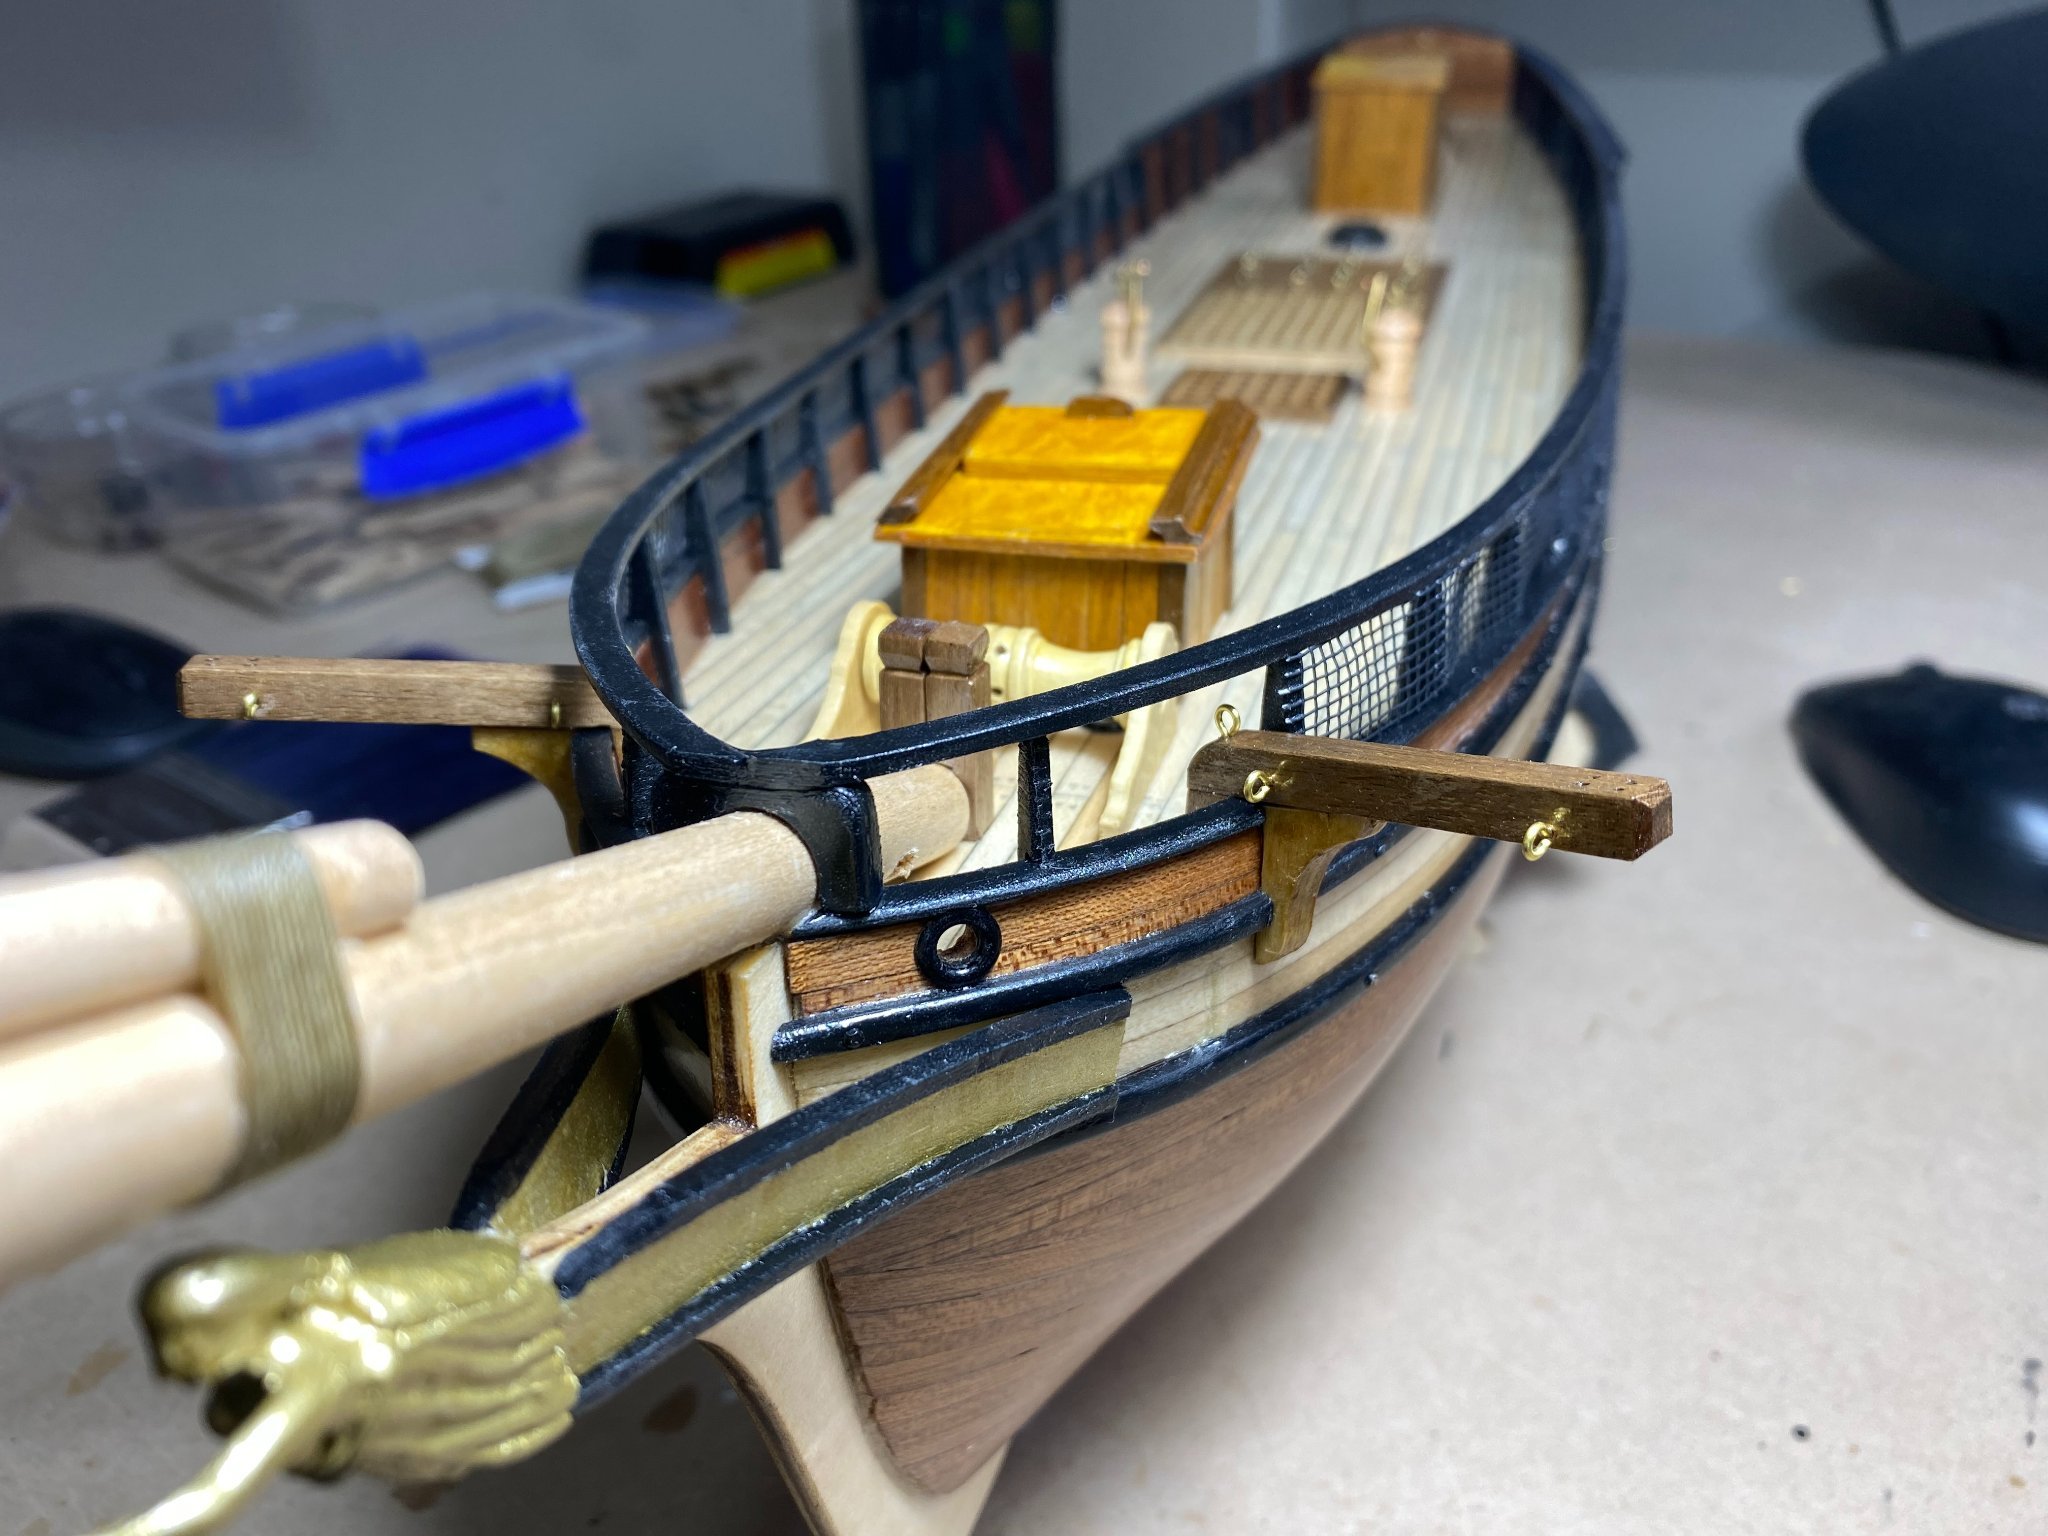
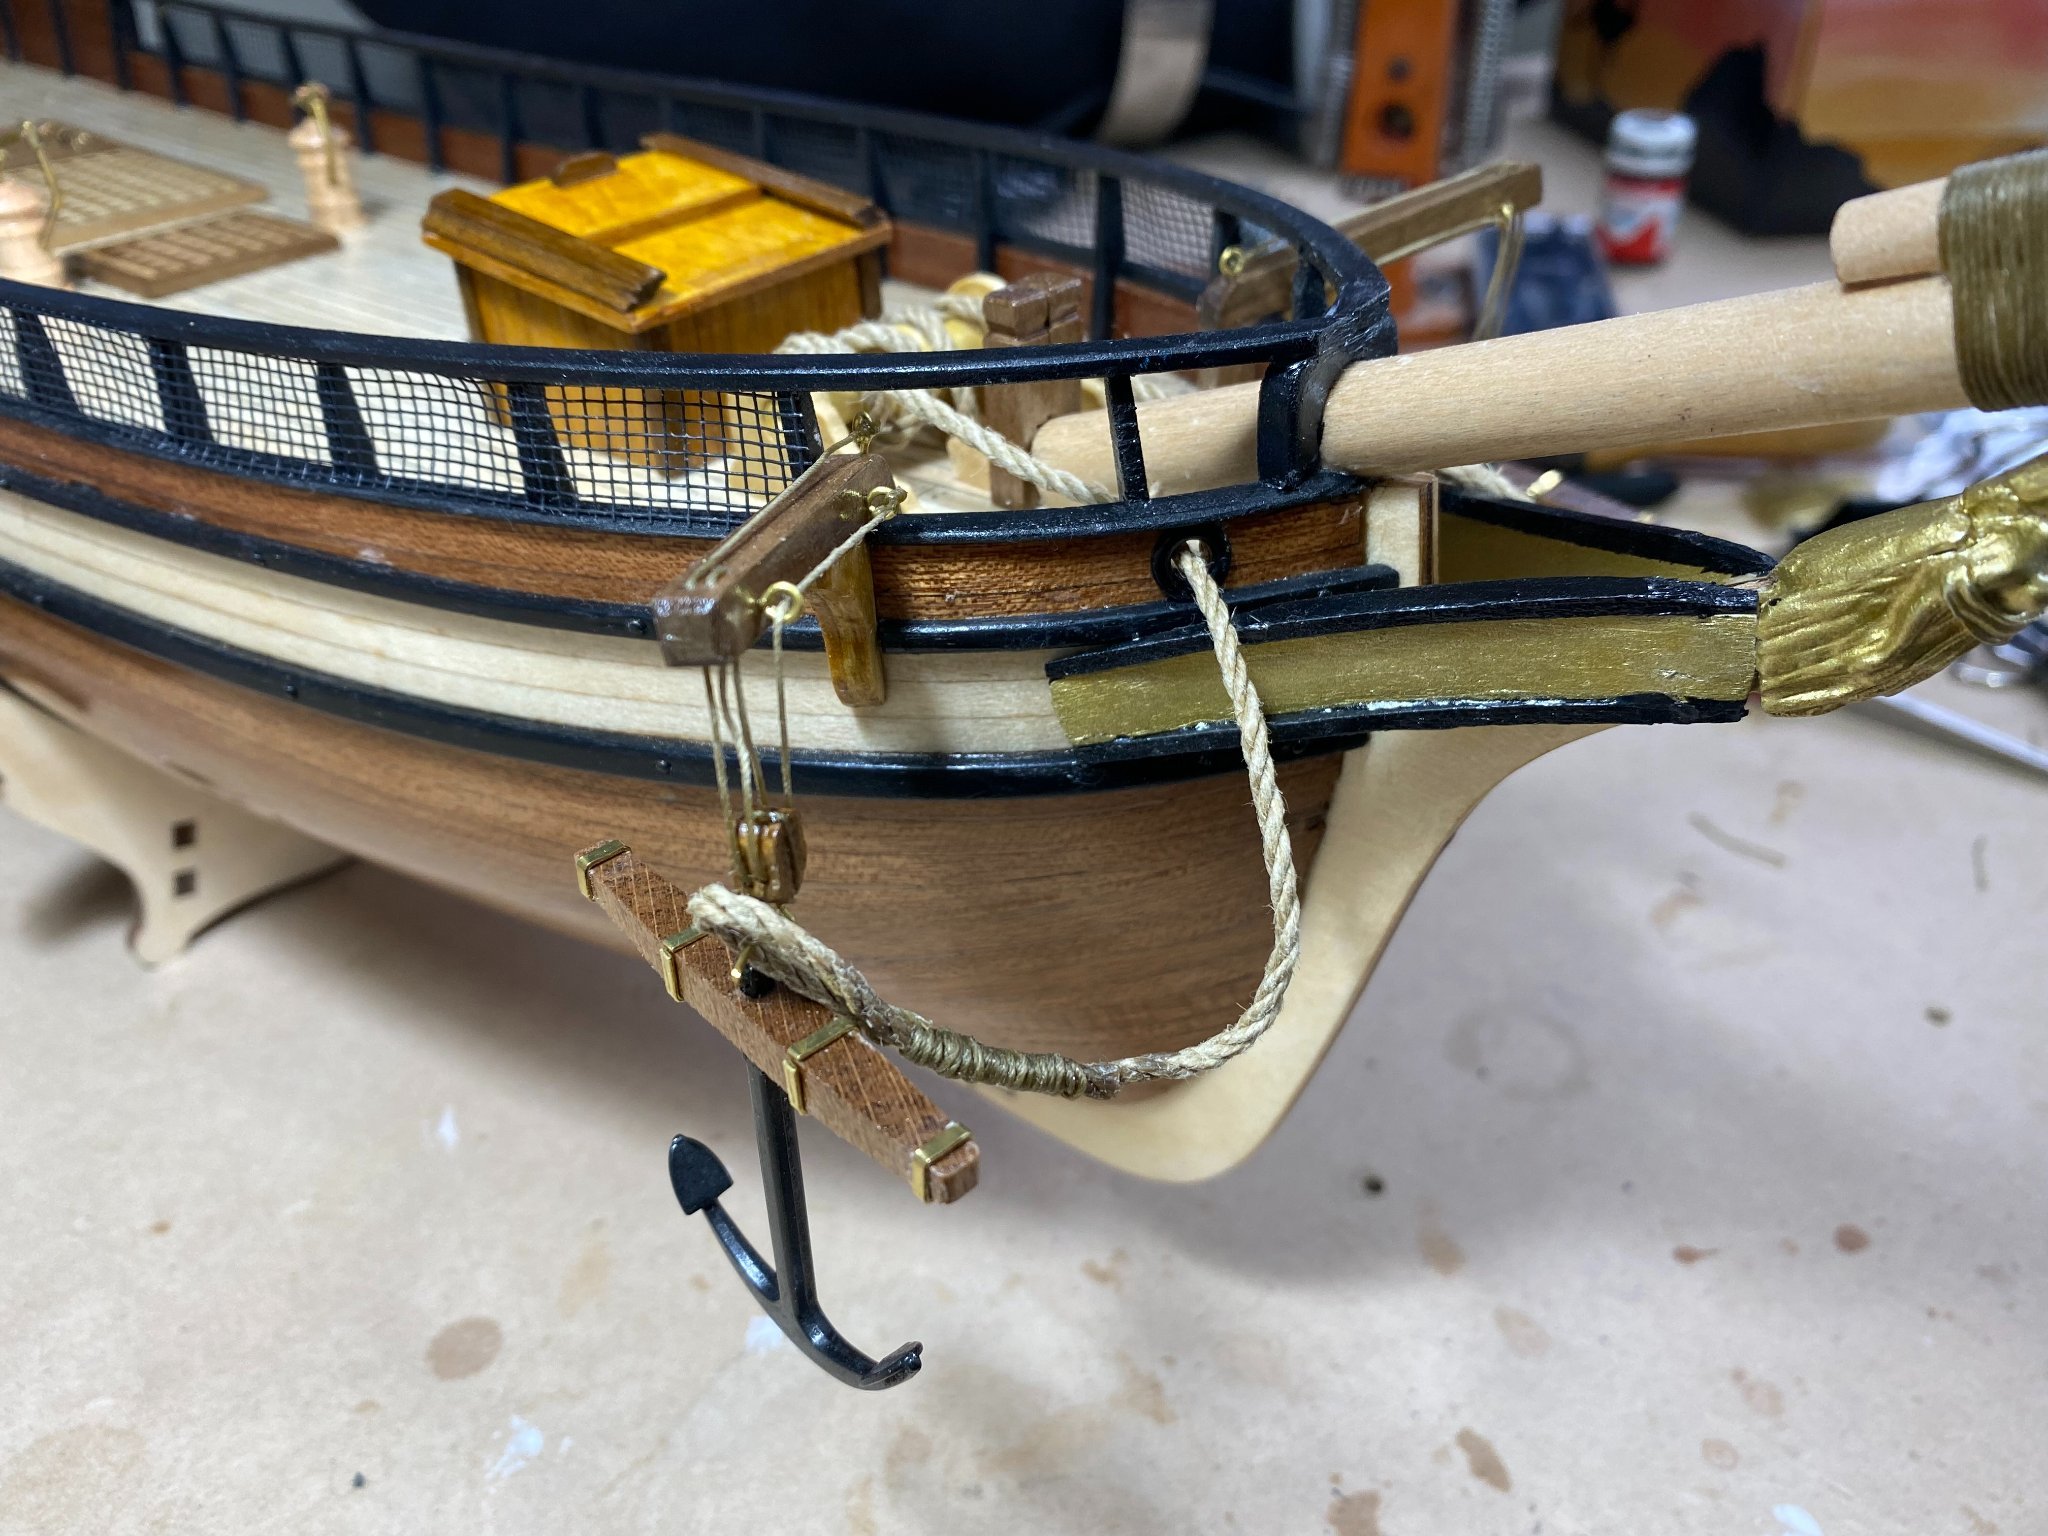
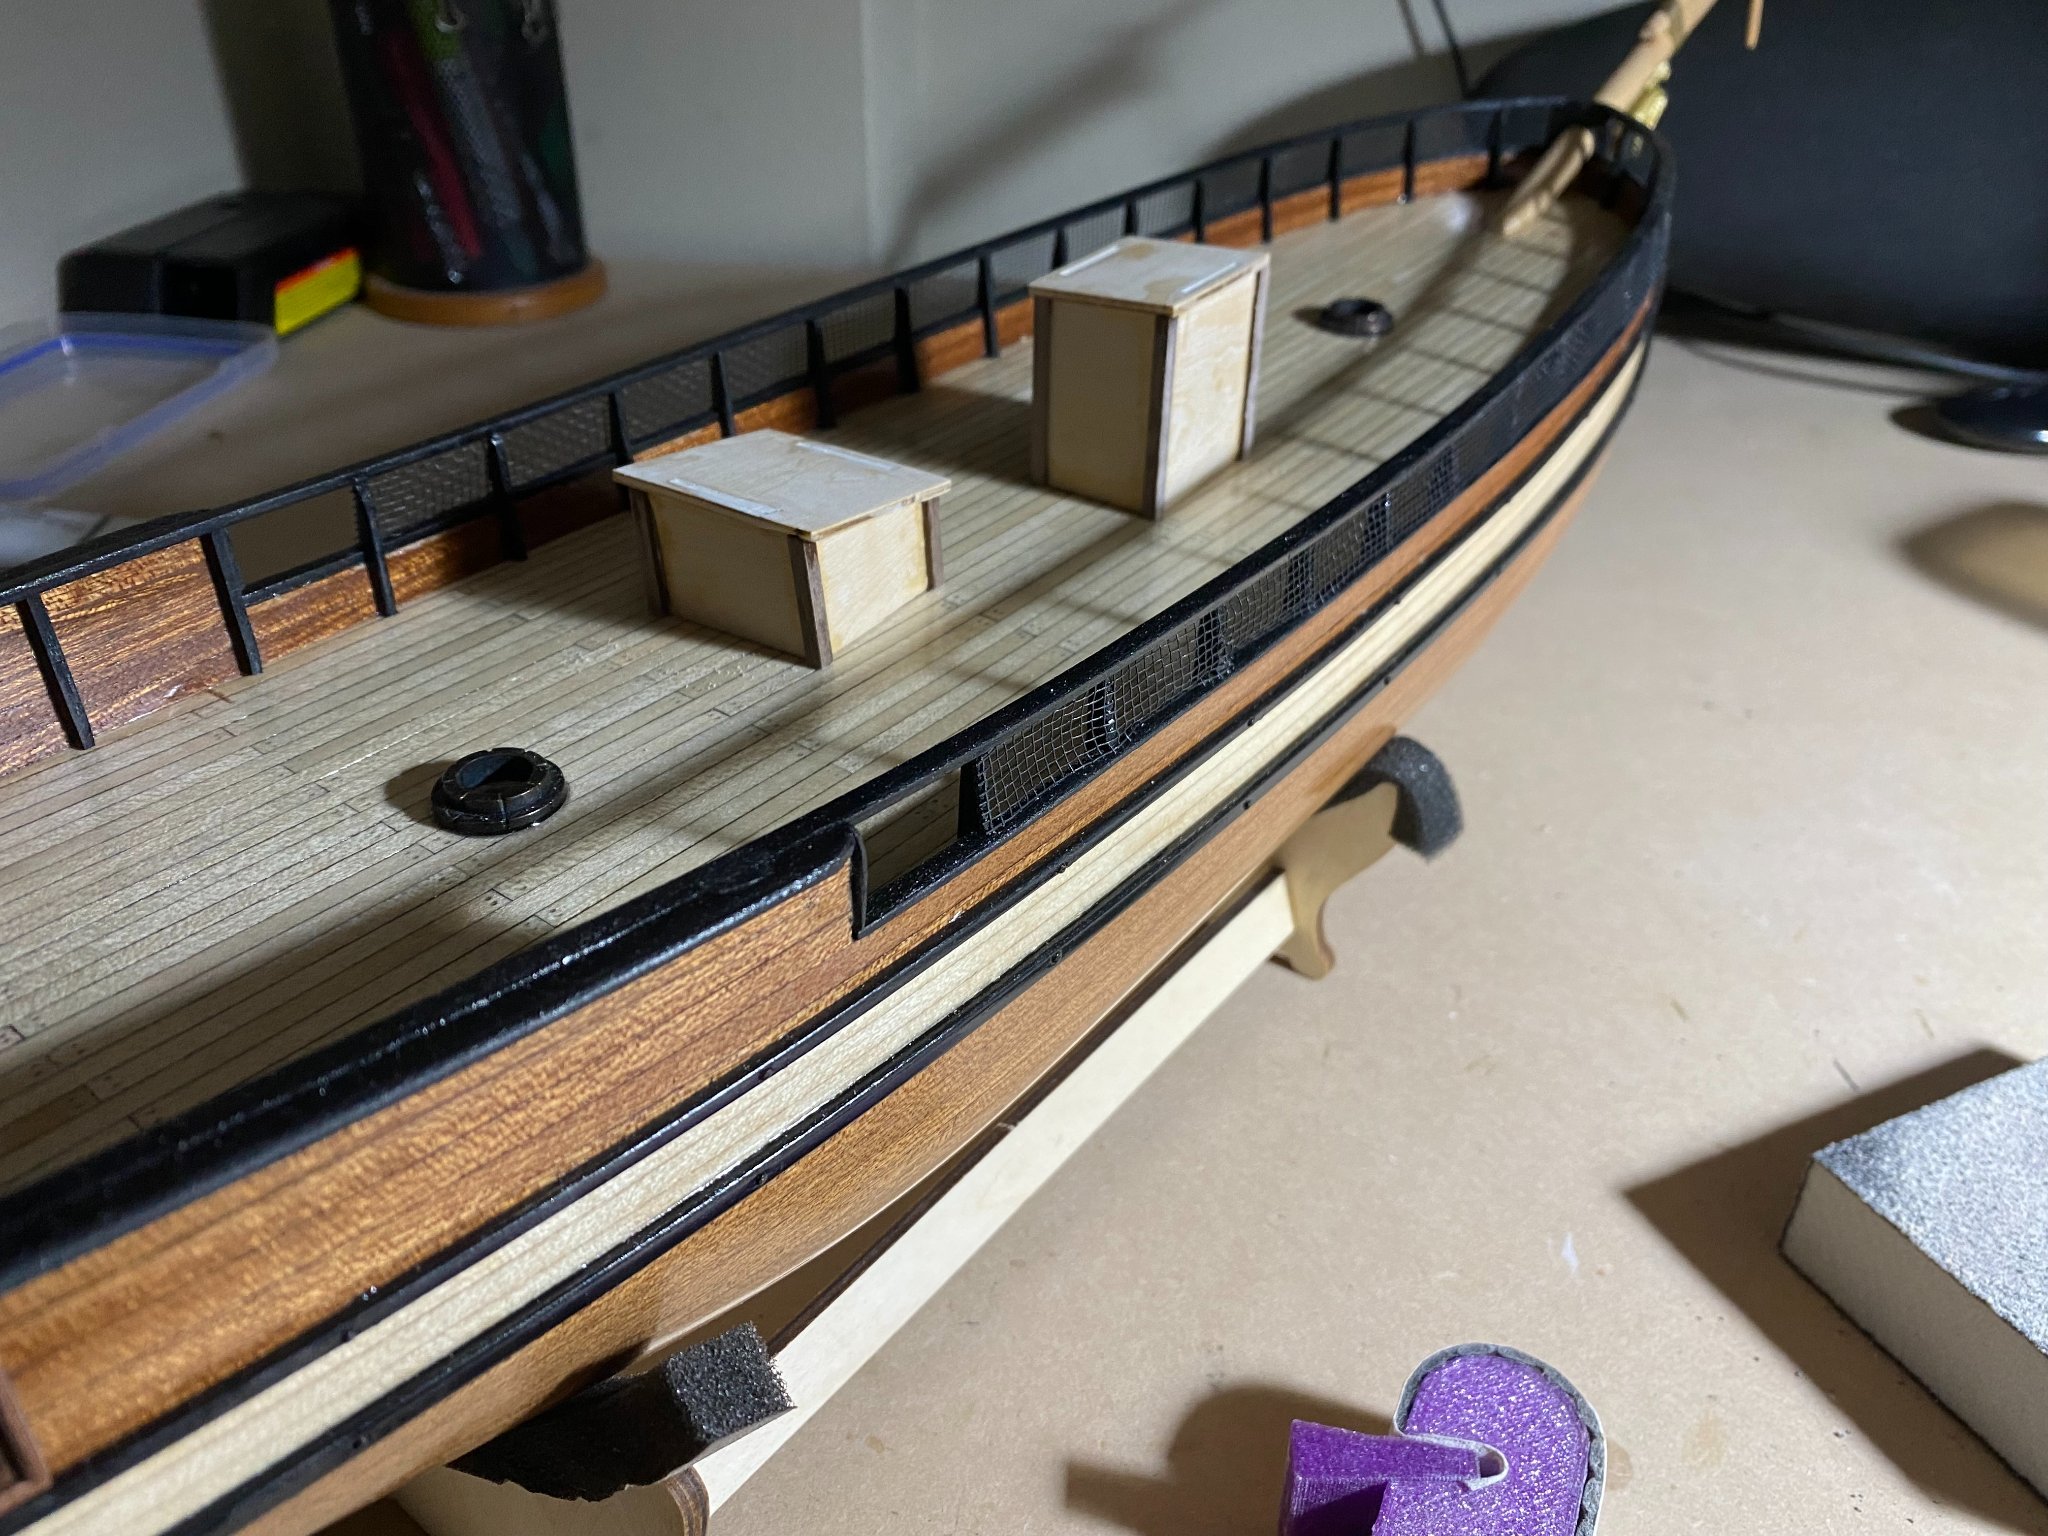
16/10/21 Fitted top temporary planks on P & S and glued 3 planks below temp plank on both sides.
17/10/21 Fitted 3 spacers midship and another temp plank below spacers to define planking section on P & S
21/10/21 Sanded back deck and applied faux nails in deck planking and gave a fresh coat of varnish
22/10/21 Another light sanding of deck and another coat of varnish.
23/10/21 Final varnish
HTD: 30
Deck planking continues
Planking complete and glued in place
Fairing the hull
Bow blocks faired
First temporary planks in place
First plank glued in place with the help of planking clamps

First three planks glued in place along with three temporary spacers and a temporary plank to define that planking section.
Some exciting progress on this build for me. For some reason I really enjoy and relish the challenge of planking.
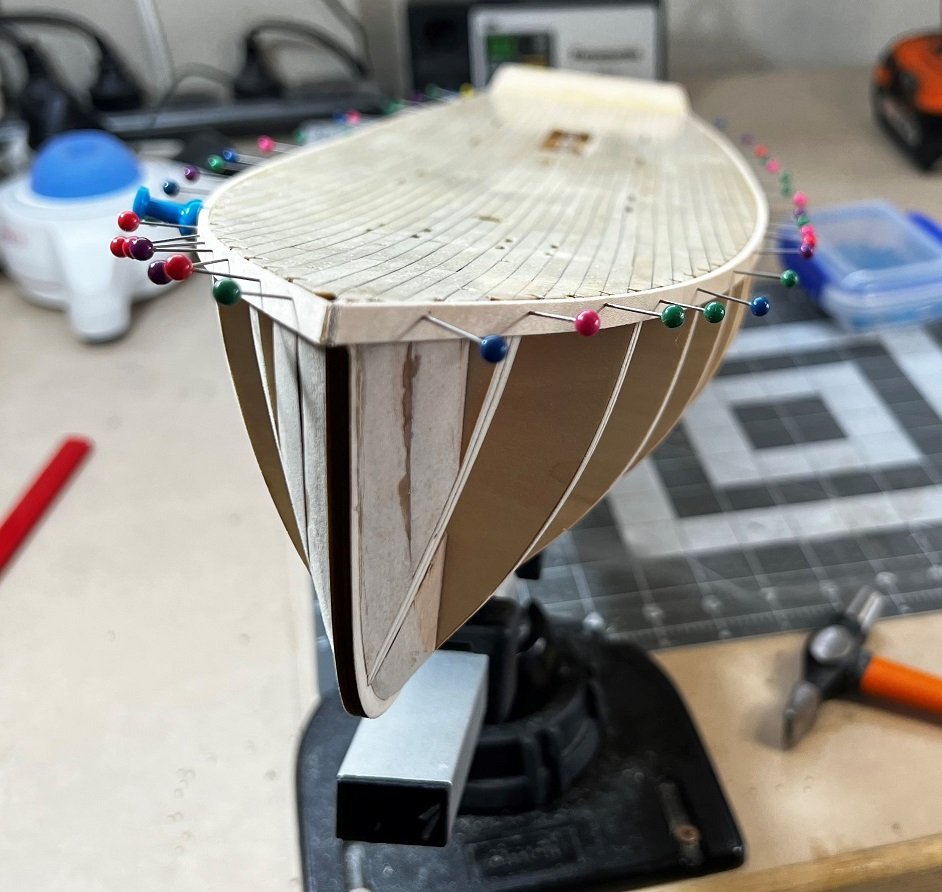
So as mentioned earlier this kit was supplied with planks etched into the deck, I don't know why they couldn't have etched in butt joints and nail points. To be honest, even if they did I would have still preferred to plank it as I would any other deck. Anyway, the planking went without hitch and the only mistake I made was not gluing the deck onto the hull before commencing the planking. You see I wasn't able to get the deck to hold firm with clamps and weights alone and I had to use pins which of course leave pin holes. Mixed some sanding dust with PVA and filled same. With lots of sanding and several coats of varnish I think I might just have gotten away with it.
With the deck finished I started to fair thje hull. Now these bulkheads came with laser etched fairing lines and it was suggested in the manual to fair these prior to installation but I chose to install first and fair later. I found it very easy to fair and I still found the fairing lines helpful as a guide. Overall the procedure was relatively easy for me.
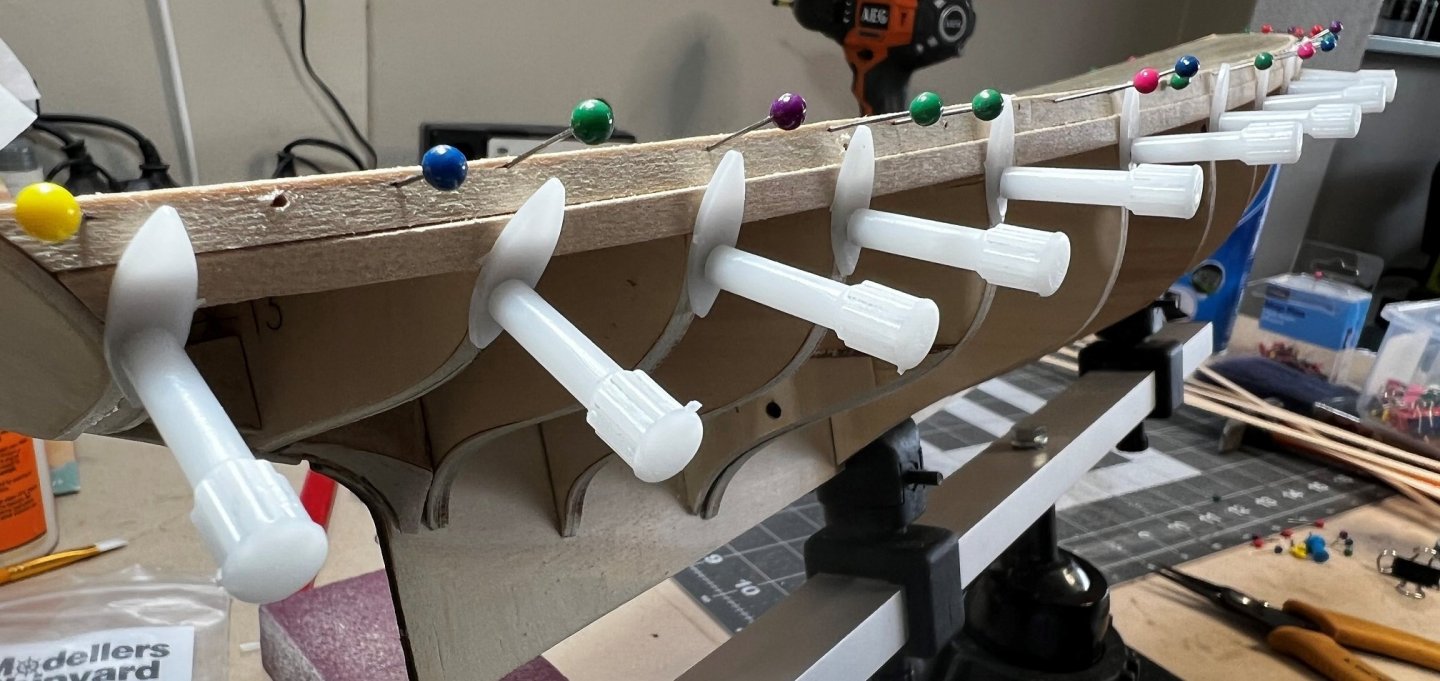
On to the planking and the first temporary plank was a doddle to install as one might expect. The next plank down I decided to try out the new planking clamps I got from Modelers Shipyard. Well the concept is great I think but in their current iteration, useless. Too fiddley and because the thumbscrew is nylon coated it shreds your fingers to bits, absolutely not worth the pain. If the thumb screw was bigger and had a more finger friendly surface then they might be the ducks nuts.
So the spacers and temp plank are installed to define the next planking section which will see me take three planks down to two in that space. Only used wedges and fillers on the Perseverance so looking forward to this new challenge which I should be starting in the coming week/s
-
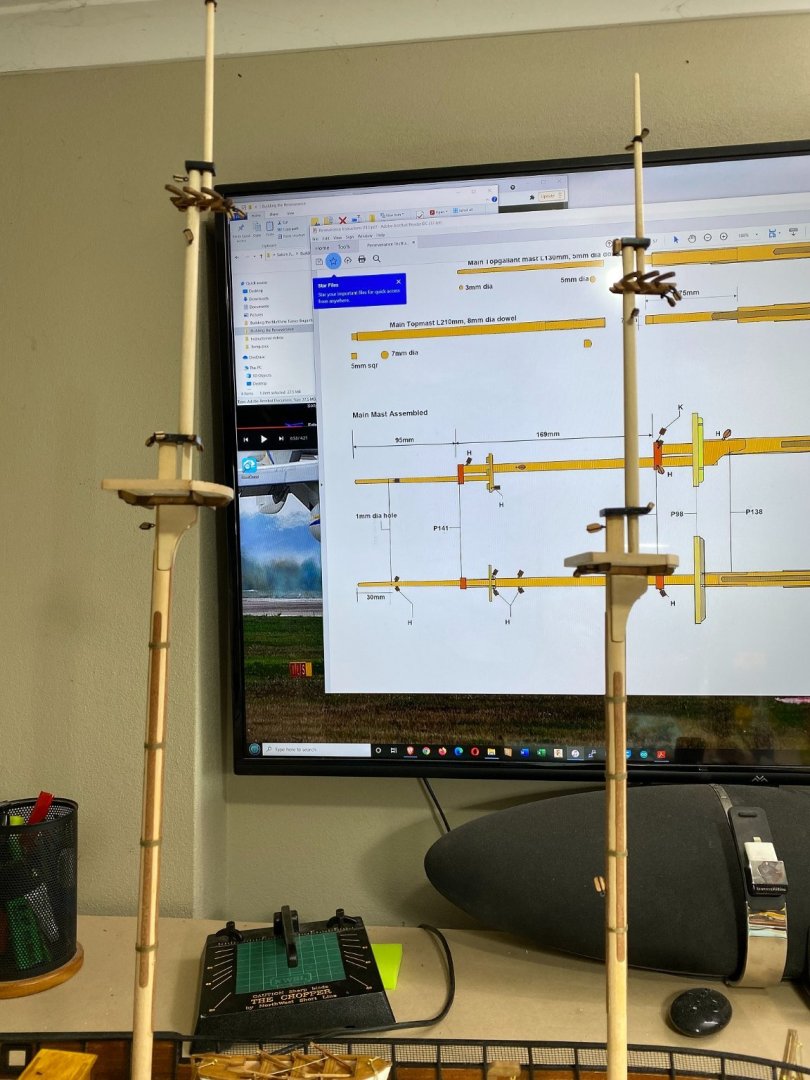
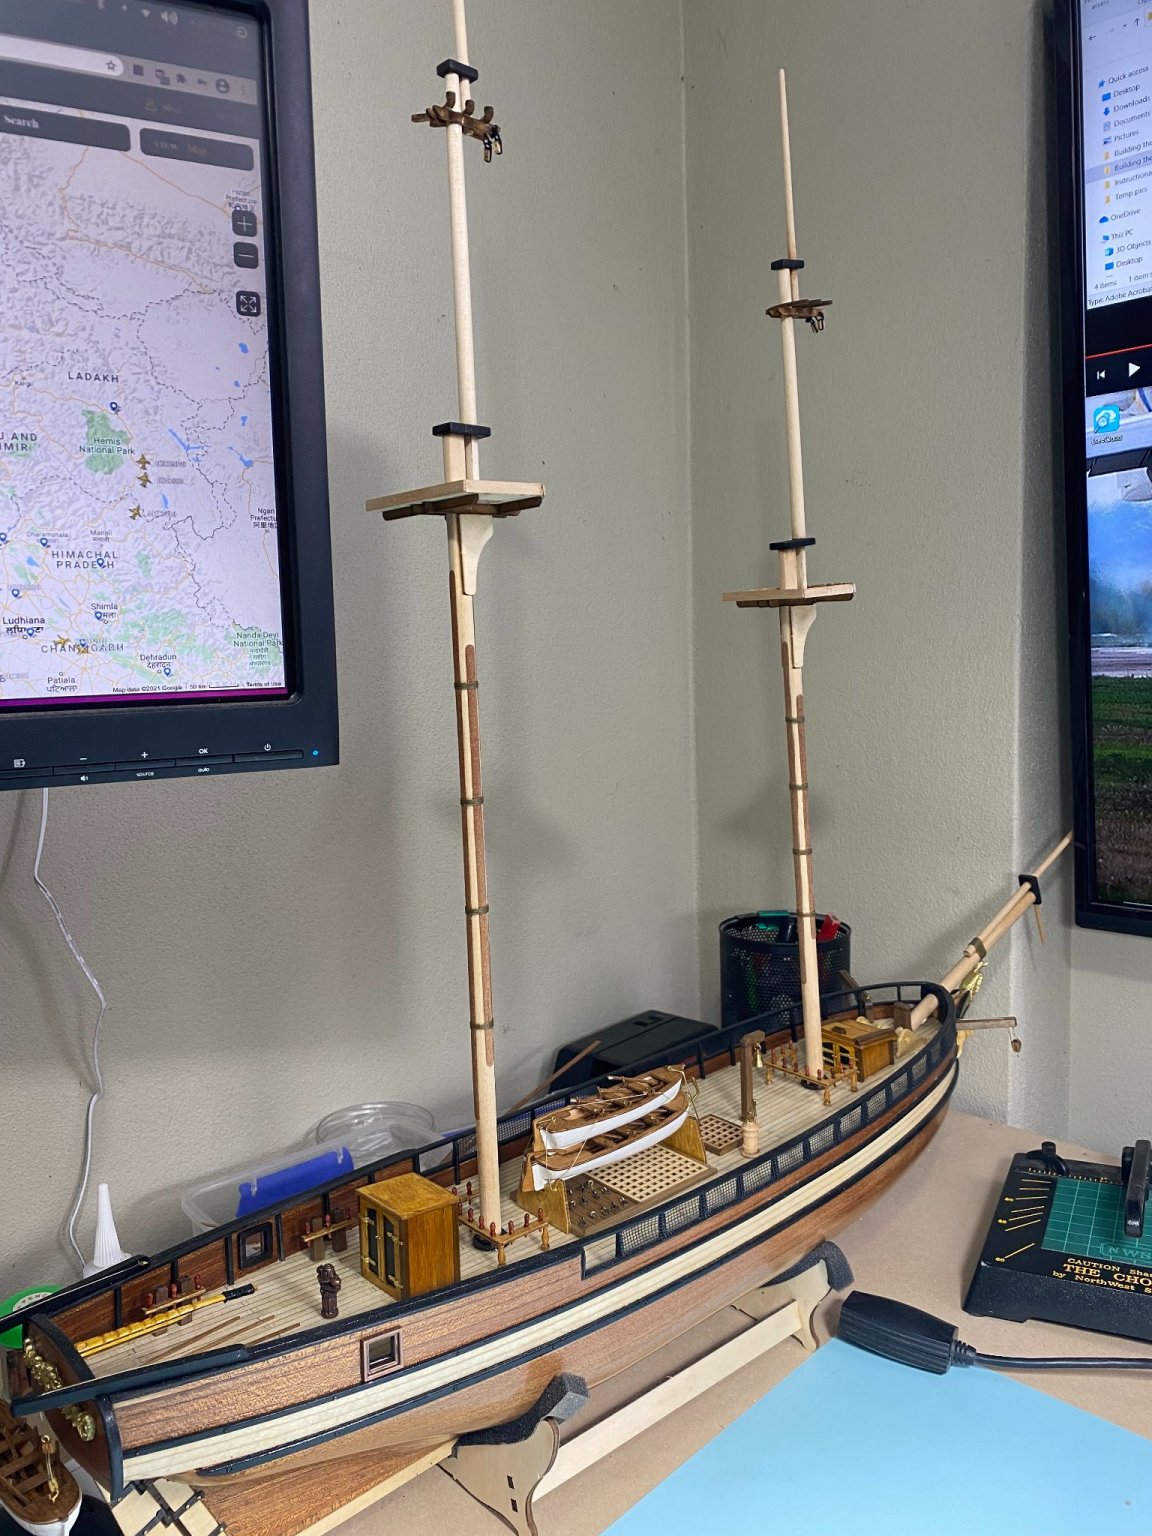
06/09/21 Painted mast top caps again
08/09/21 Varnished masts
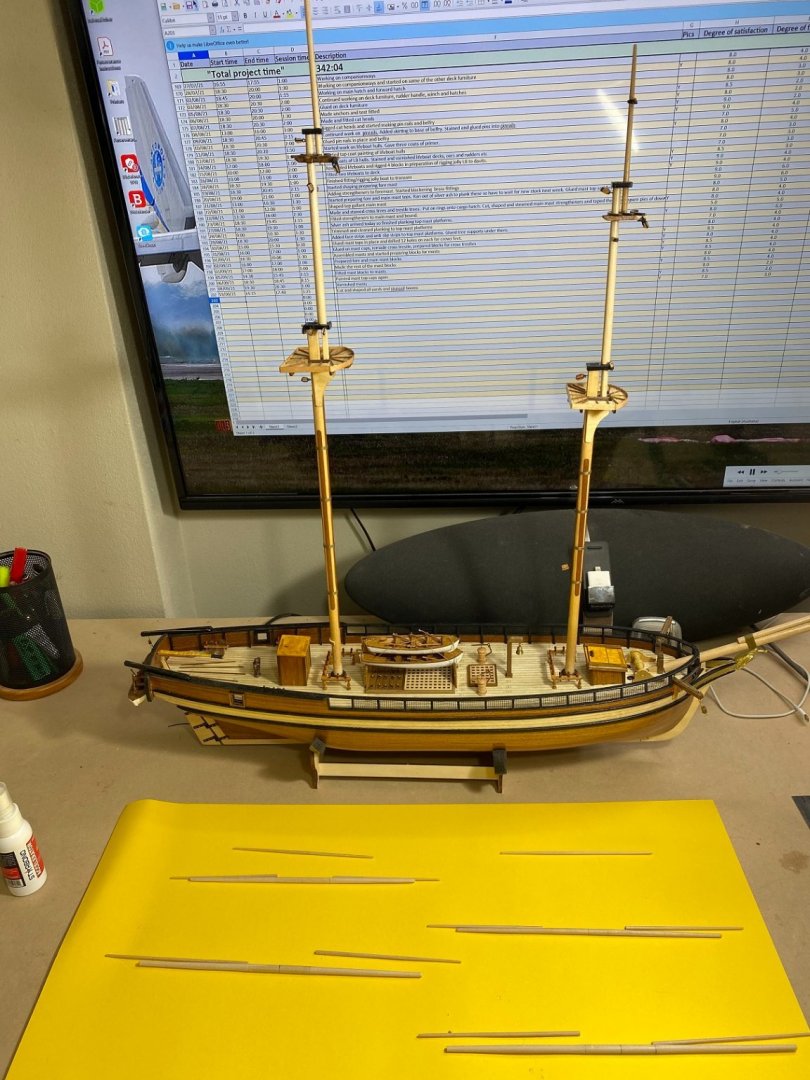
19/09/21 Cut and shaped all yards and stunsail booms
02/10/21 Painted yards
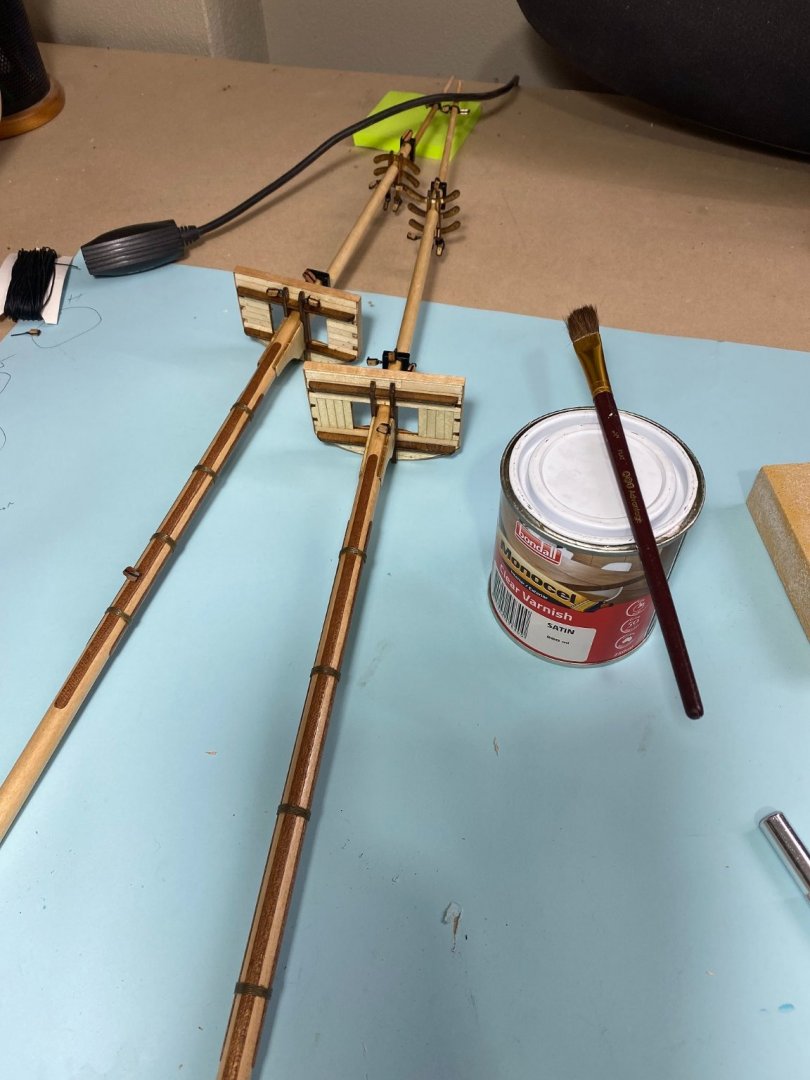
08/10/21 Assembled main yard and glued on strengtheners in middle of yard.
09/10/21 Sanded main yard strengtheners, glued stunsails in place, bound and varnished entire yard assembly.
17/10/21 Finished assembling three remaining yards
22/10/21 Started rigging yards and completed Fore Top Yard.
23/10/21 Completed rigging fore top and main yards
HTD: 351

Varnished the masts
Yards cut and shaped
Yards painted
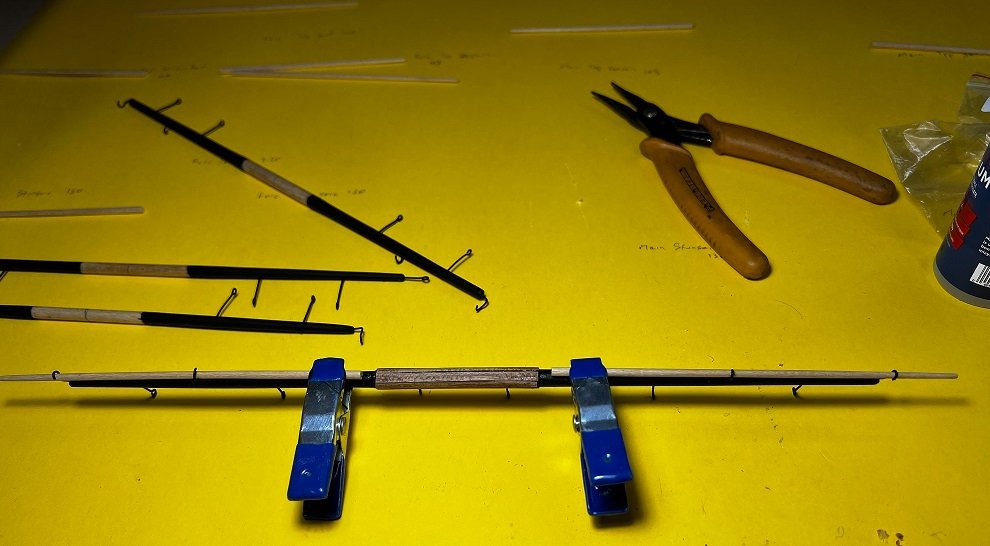
Main yard assembled with center strengtheners and stunsails added
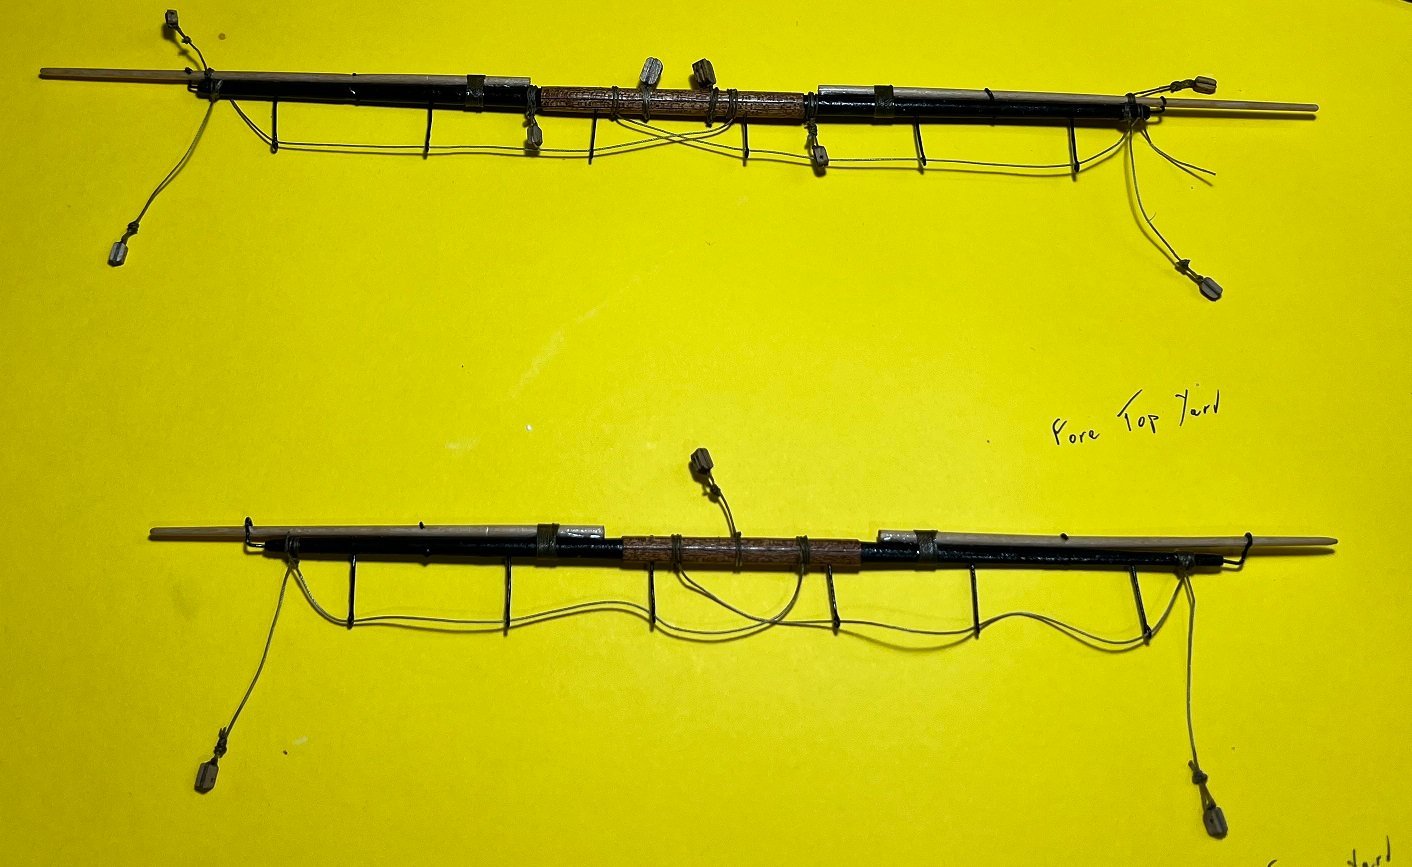
Fore top and main yards complete
So there has been a lengthy spell since my last installment partly due to spending equal amounts of time on my other two builds and a small measure of couldn't be stuffed.
So no real challenges in this last progression. Watching lots of videos to help with techniques for rigging and the like. Despite having a mini lathe it was still tricky getting those yards shaped nicely. I did find it a struggle to get the stunsails nice and straight and square to the yards. You see pictures of them everywhere and I think, that doesn't look to difficult but alas..........
I'm hoping to finish the two remaining yards for the main mast next week and then the installing of the masts and mast rigging commences. I am really looking forward to rigging the mast as it somehow seems like a milestone of sorts. I suspect however that reality will soon wipe the air of excitement from me.
Other confusing contradictions between manual and instructional video had me a little flustered, such as, video states that all pendants should be 75mm but the manual states 45mm, I settled for 55mm as I couldn't see that it was going to make too much difference other than to "historical accuracy".
-
06/09/21 Painted mast caps again
08/09/21 Varnished masts
19/09/21 Cut and shaped all yards and stunsail booms
HTD: 342
Masts varnished
Yards cut and shaped
Not a lot of progress since my last installment as I took a week off to travel north to visit WA's wildflowers. Tis the season to be sure and I thought I would beat those pesky kids on skewell holidays in a week or so.
Anyway, finally finished the masts and varnished them with a satin varnish that I favour. Masts just sitting loosely in their respective locations. Overall I am not happy with them in terms of symmetry but keep reminding myself this is a steep learning curve. That excuse is starting to sound like a cop out.
I cut all the yards to length as well as the stunsail booms and shaped them all using my little Proxon mini lathe. I didn't use the chisels just various grades of sand paper so truth be told I could just as easily used a power drill.
Next week should see me start assembling the yards and fitting the blocks and rigging to same.
- No Idea, Fernando E and GrandpaPhil
-
 3
3
-
14 hours ago, BobG said:
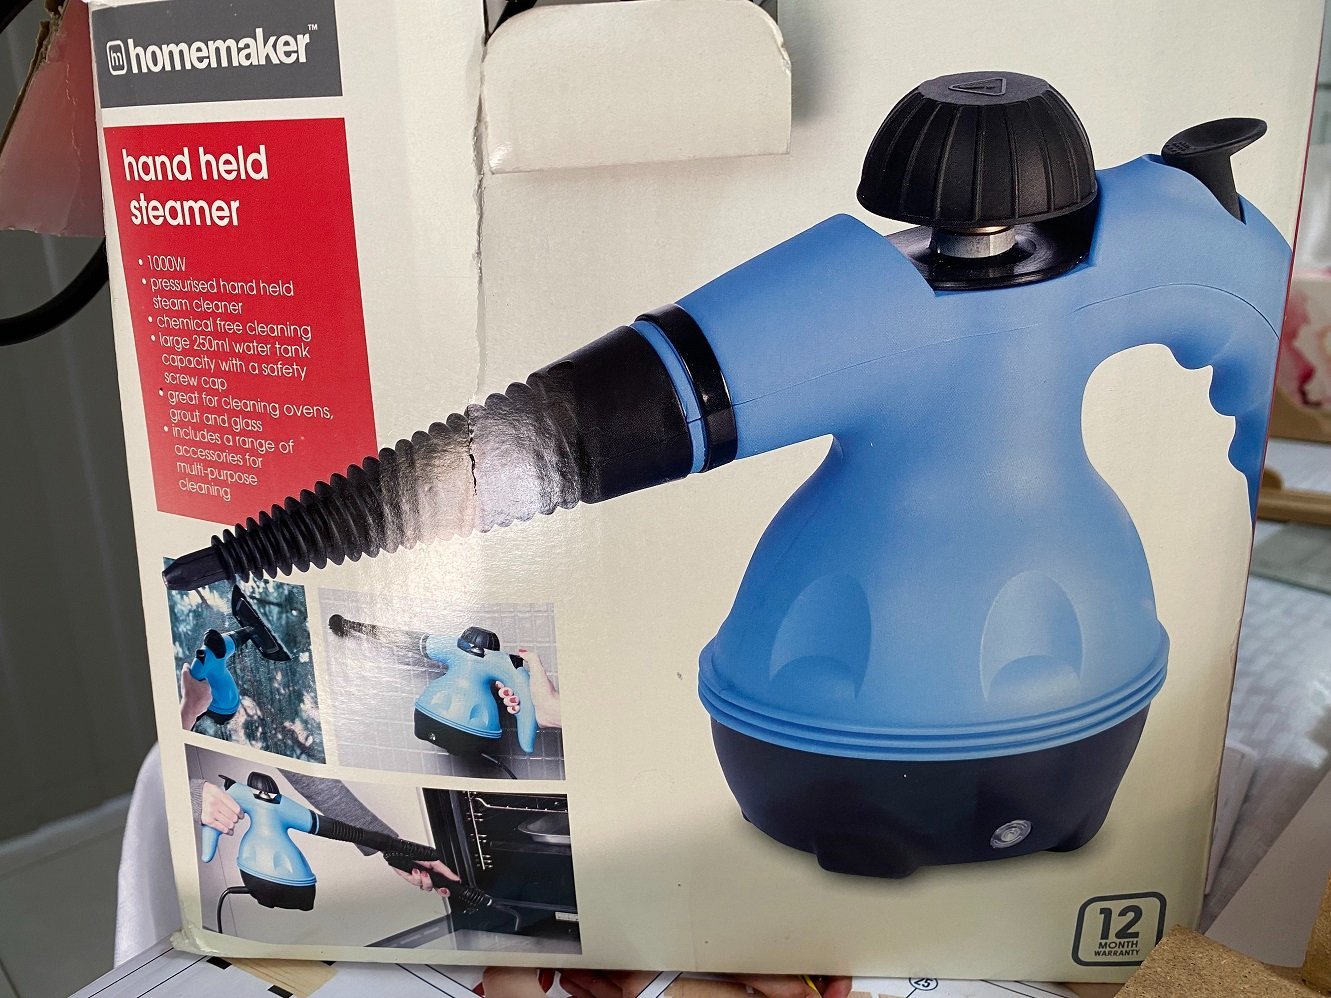
I never seen one of these steaming machines before. What things have you found it useful for?
Hi Bob, well I bought it years ago from KMart or Target or one of those, the equivalent to WallMart in your neck of the woods I guess. Just a cheap domestic appliance that appeared on one of those infomercials and in a moment of weakness, well................. It only cost $30 or $40 AU and it is virtually a steam iron in Darth Vader clothing. I purchased it to try and remove mould/mildew from hard to reach areas and it has sat in its box since then. But your comment made me think about it and I might try using it when it comes time to persuade some planks to bend.
-
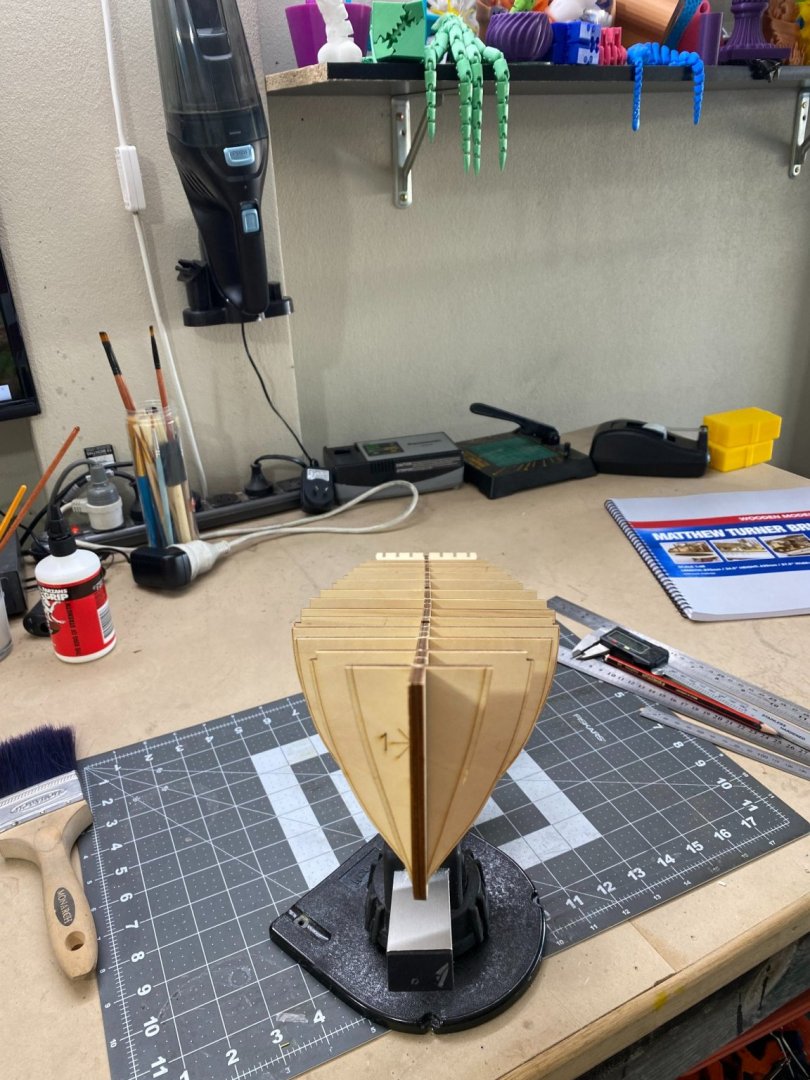
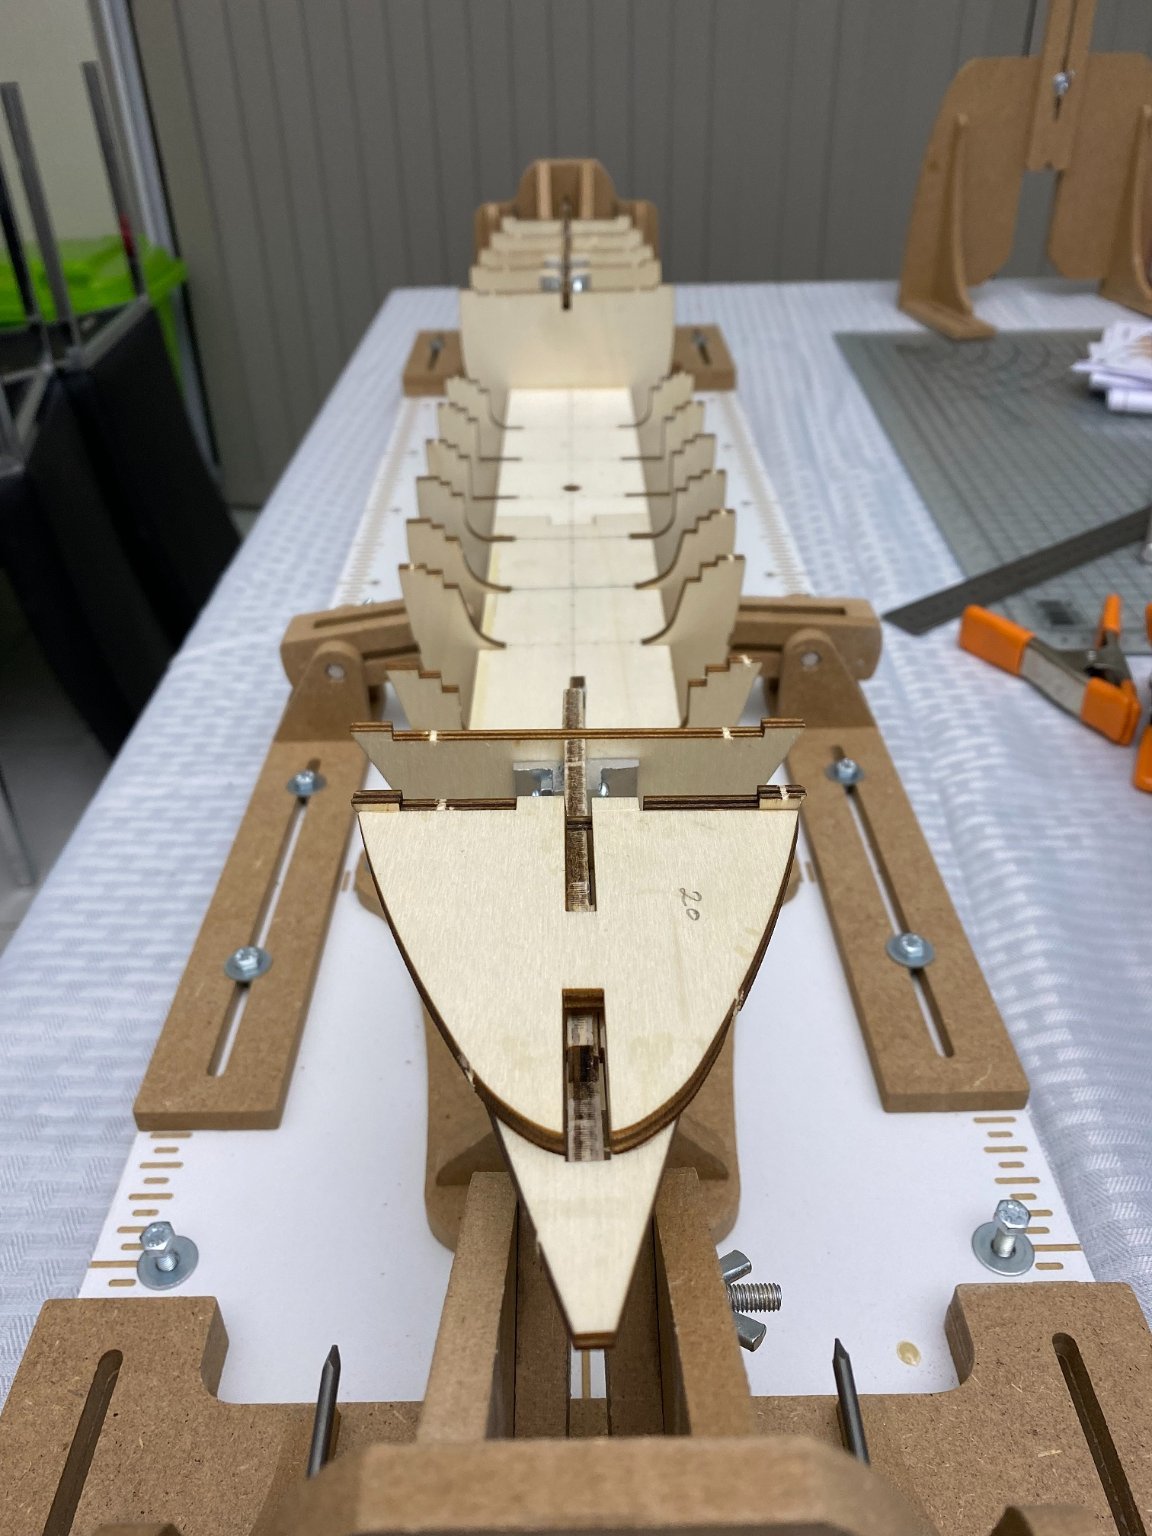
25/08/21 Installed first bulkhead BH 14
28/08/21 Removed BH 14 and proceeded to straighten false keel.
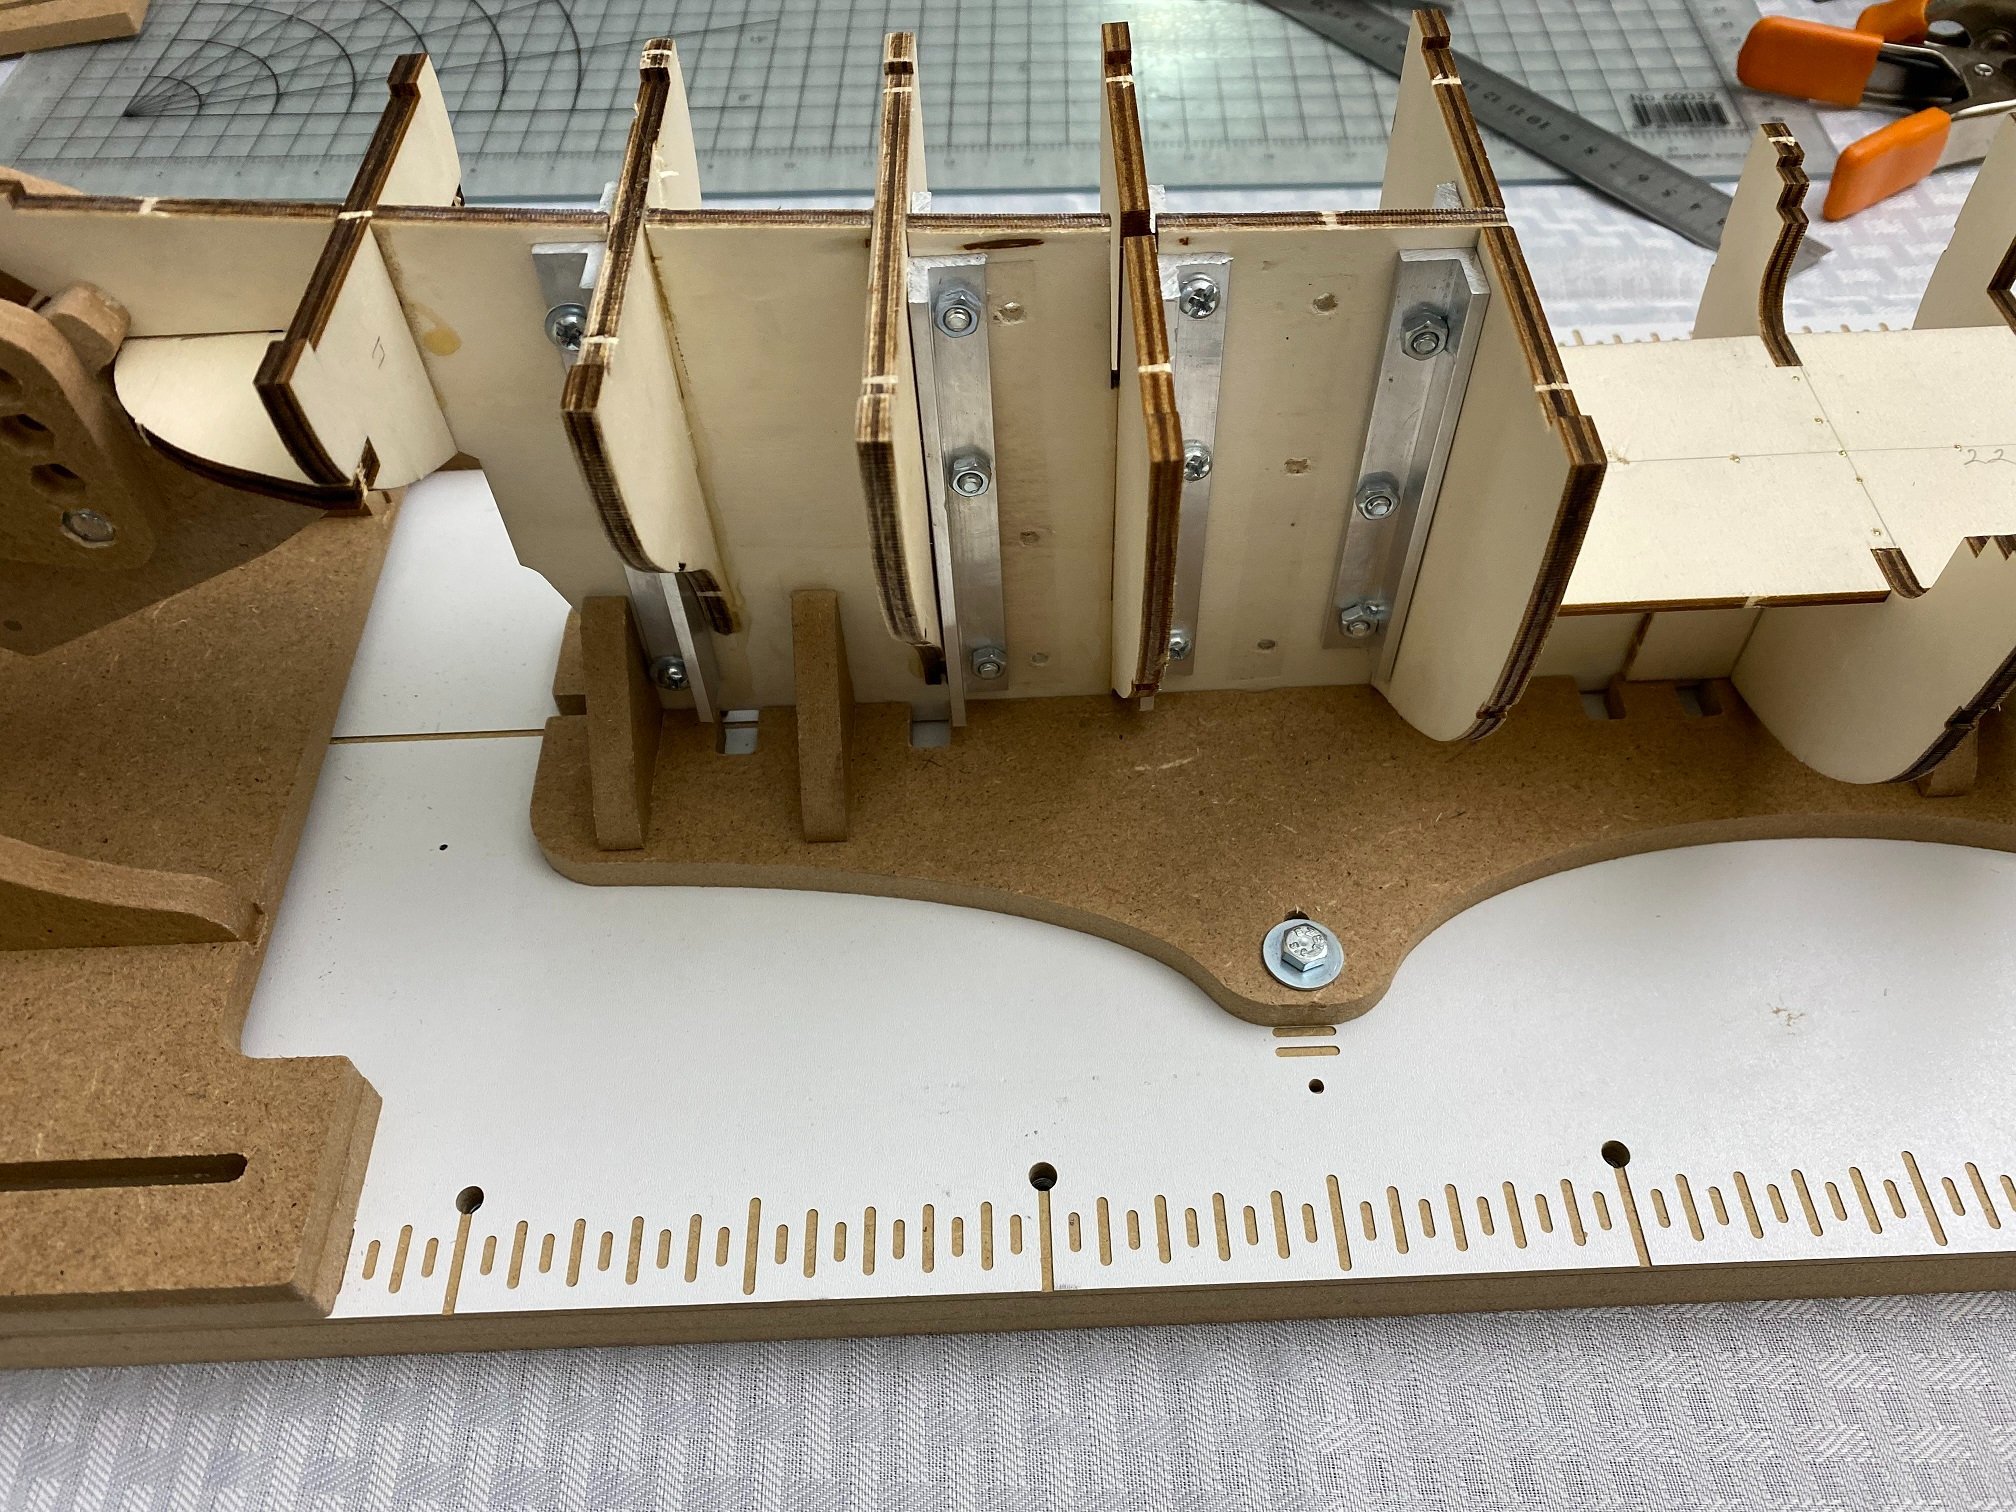
30/08/21 Installed BH 16 Added aluminium angle to help straighten false keel
31/08/21 Installed BH 15
01/09/21 Installed BH 14
02/09/21 Installed BH 13
03/09/21 Installed BH 12 & 11
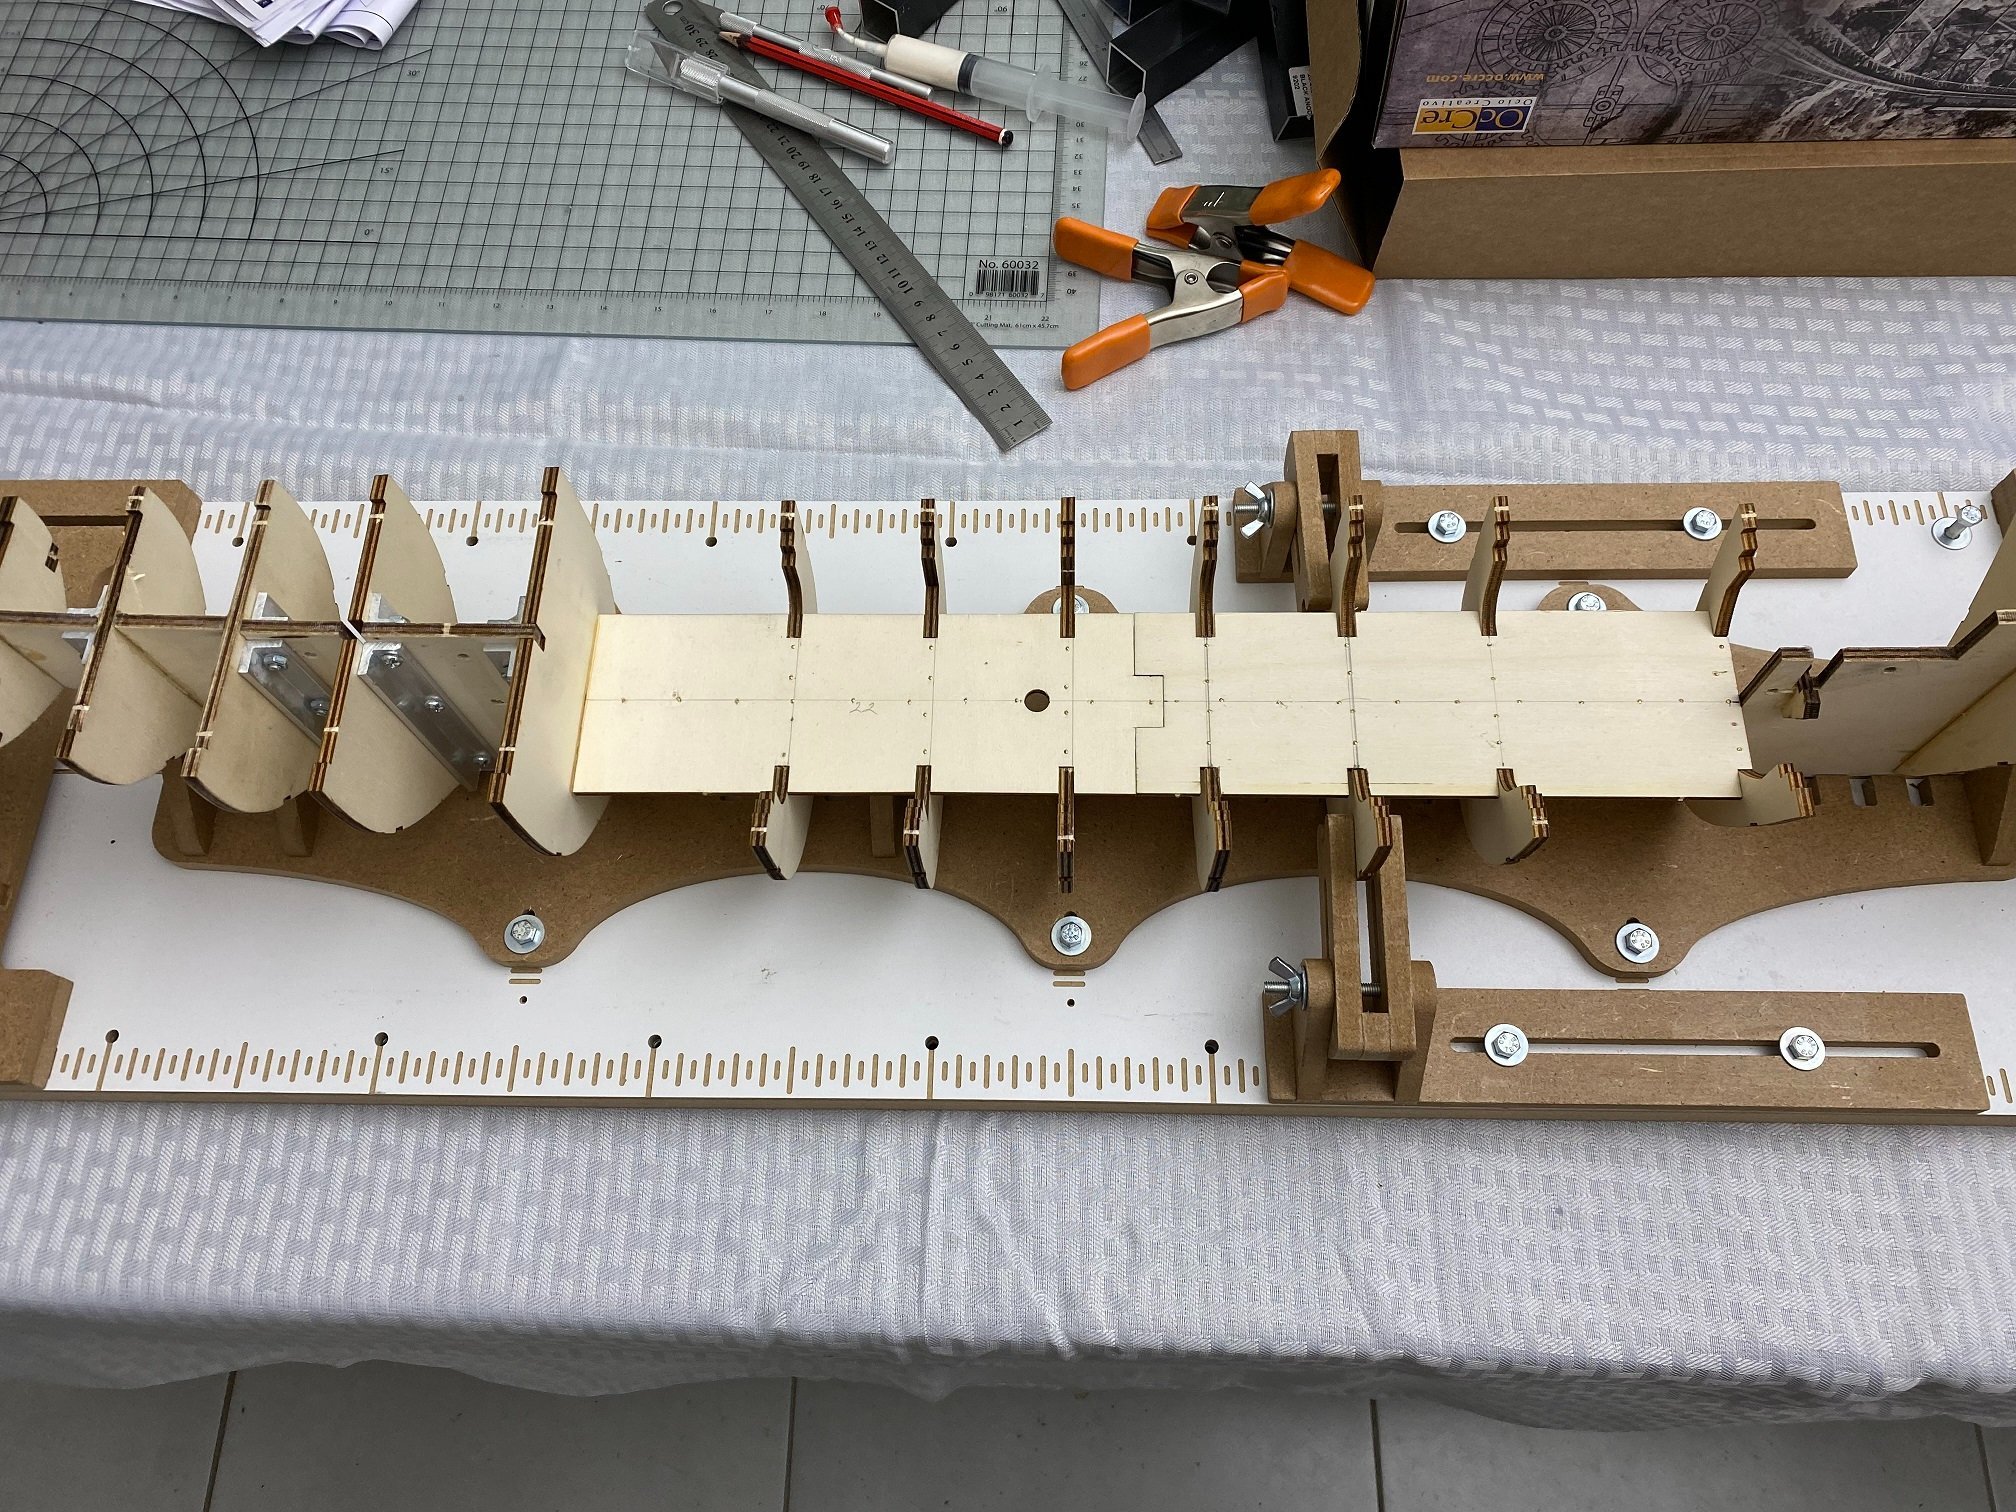
04/09/21 Installed BH 10 - 6
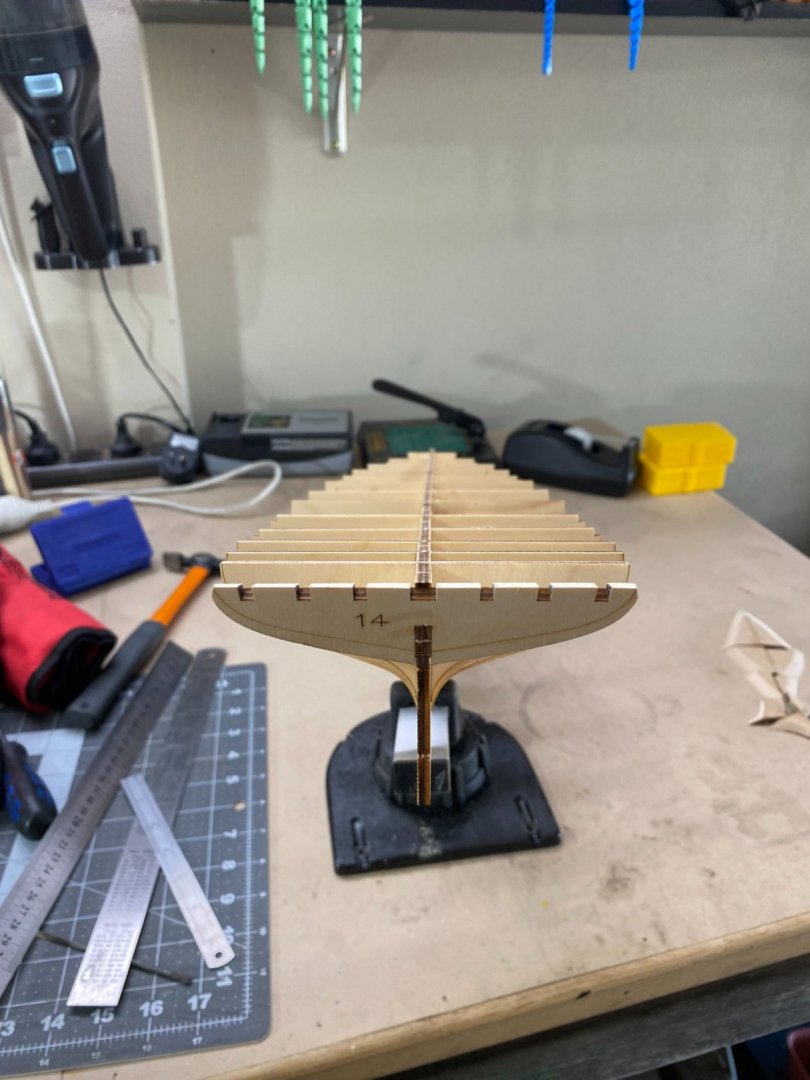
05/09/21 Installed BH 5 & 4. Also installed stern frames 17 & 18 and bowsprit deck 19 & 20 as well as lower deck.
HTD: 19

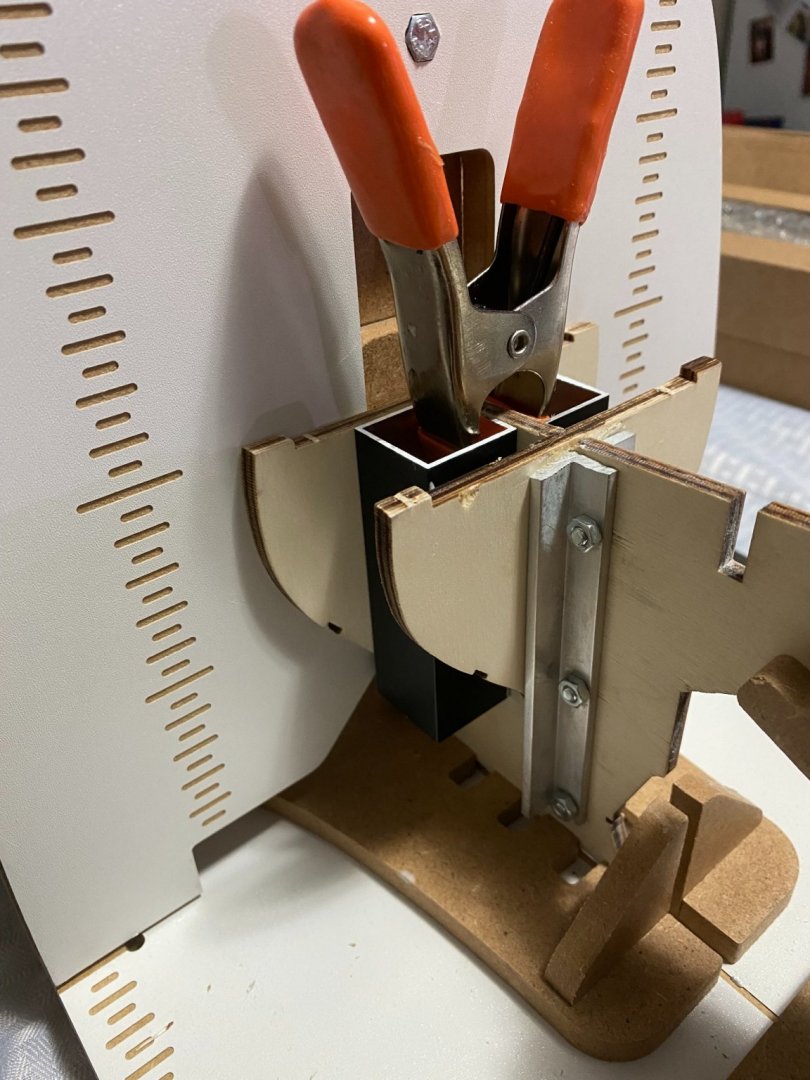
Vertical curvature in false keel fore and aft
I countered the curvature by fitting some aluminium angle braces
Using my little steaming machine I steamed those areas around the braces that were badly curved.
First couple of BH's fitted
Movin' on down the line


All BH's in place as well as bowsprit deck

Straighteners

Showing lower deck fitted.
Well! Where do I start? I thought I had mentioned earlier that when I first did a stock take I had noticed after cutting out the false keel that it had a significant warp. I put the two pieces in a shallow bath of hot water and allowed to dry under the weight of a few dozen floor tiles for a couple of weeks. When I removed the tiles I saw that the warp was far less pronounced than at first and I wondered if it would straighten as I proceeded to insert the bulkheads.
Anyway a week or so passed and I glued the two sections together along with the strengtheners at the join points. A few days later as I was preparing to fit the false keel in the building slip I noticed that a significant curve had developed vertically on both the fore and aft sections (see above pics). I thought or hoped that fitting the bulkheads would straighten it out so I proceed to fit and glue the first BH14 and waited a day or so to find that it mad no difference.
I cut BH14 out and got some aluminium angle and bolted the pieces through the false keel which worked a treat. I fitted several of these pieces of aluminium to the worst affected areas (see pics above). Obviously some of them will get in the way when it comes to planking etc but I will adjust or remove them as needed otherwise I will just leave them there. I also tried to place these angle pieces against the BH's so as to give further strength to those joints.
And so, in terms of the quality of the material and laser cutting, I am less than impressed. A lot of the laser cutting is not square as I think is illustrated in a previous post and I was not happy with the way the keel curved and warped.
Anyway, all the bulkheads are in place along with the lower deck and when removed from the build slip everything is straight as a die and all BH's are square. The only other area of concern I have is there seems to be a little inconsistency with the checkouts for the beams on the mid section BH's. These inconsistency's were more apparent when a straight edge was held atop them. Anyway, I will have a closer look next week as I believe that is one of the next steps.
-
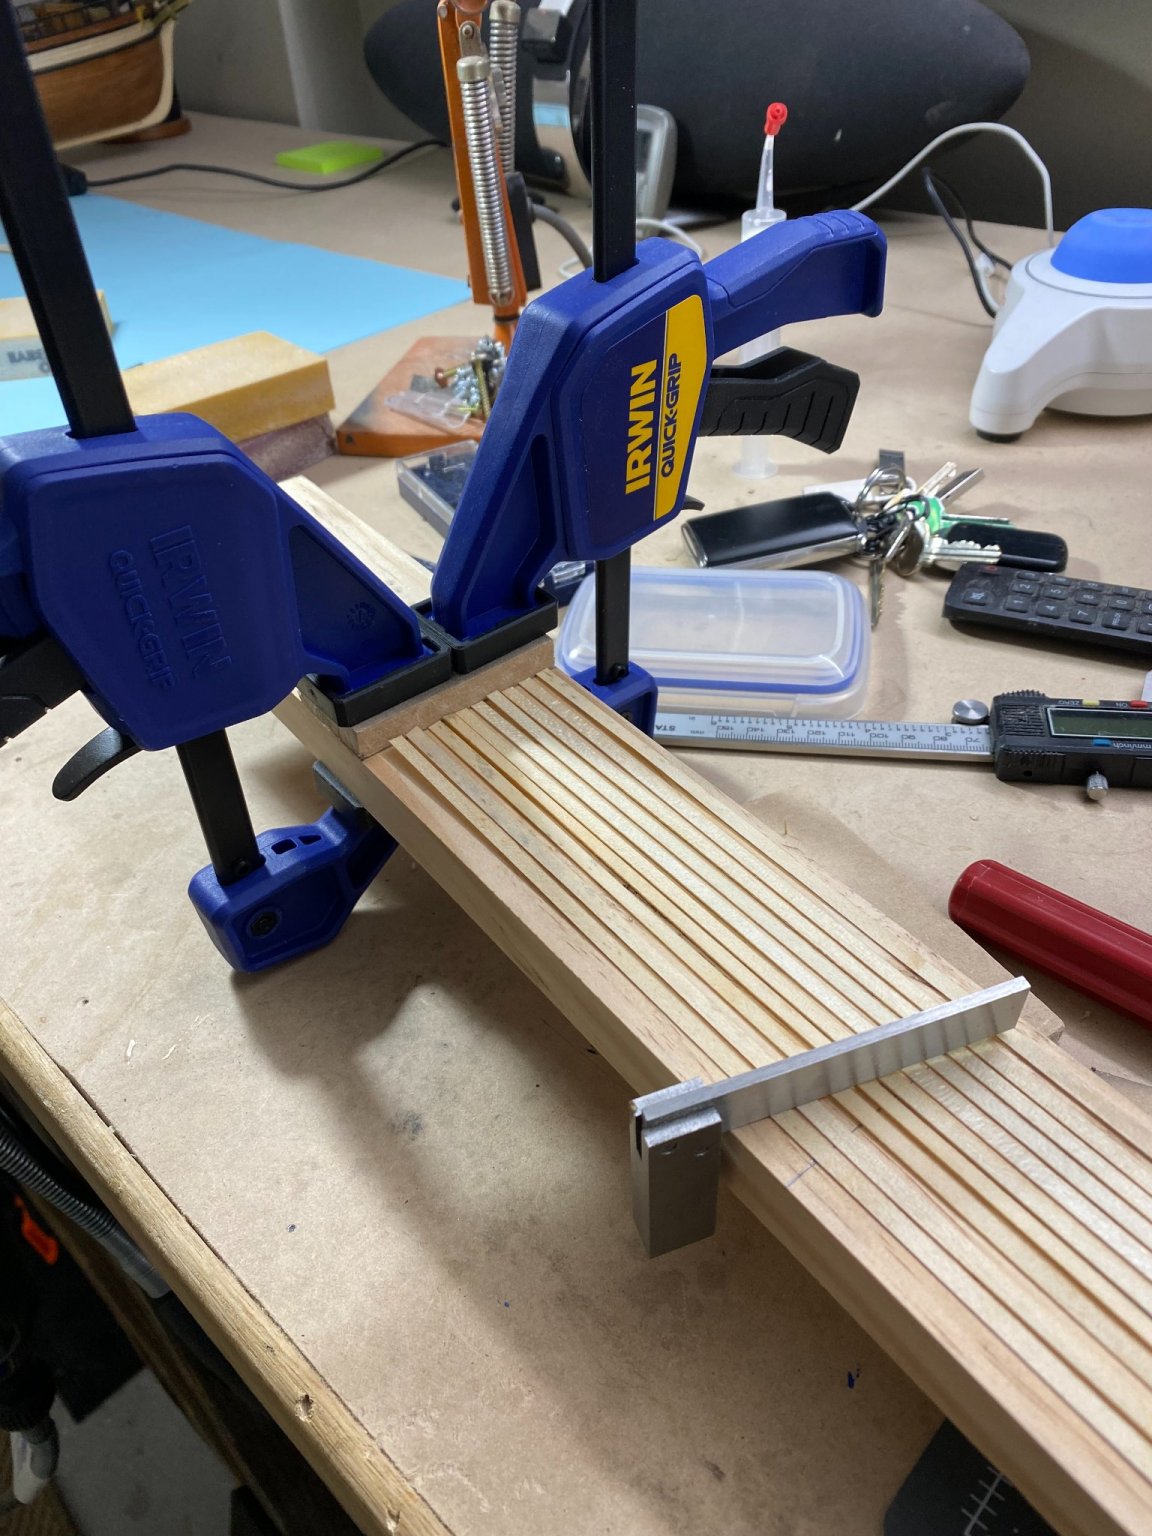
30/08/21 Silver Ash arrived so started cutting planks
31/08/21 - 02/09/21 Deck planking
HTD: 15

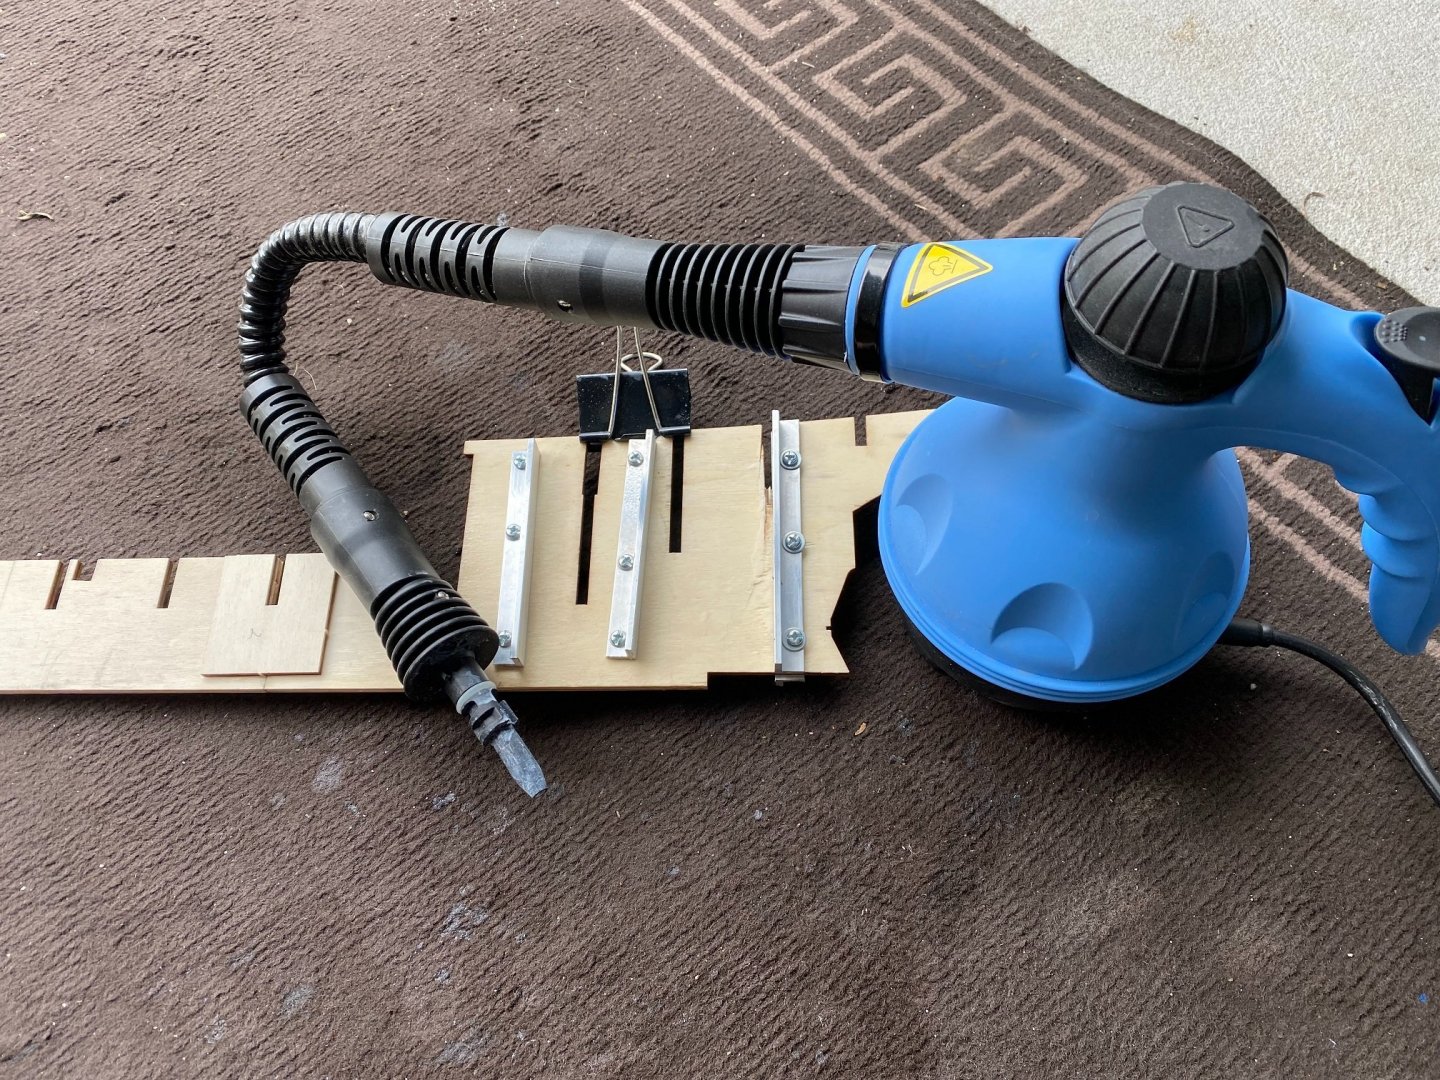
Jig for cutting planks
Planks ready to go
Deck planking commences

Planking continues
OK, so not a lot of progress here since last installment. As I think I mentioned in an earlier post this kit comes with a deck that has laser etched planking which did not appeal to me. Perhaps a way to keep costs down. So I ordered some Silver Ash to plank it myself. As there were no instructions on deck planking I decided to cut them to 150mm lengths and stagger them at 50mm intervals. On my other build I used 100mm lengths also staggered at 50mm. I think it will look ok and not out of scale, as they are both similar size it will be interesting to see the difference side by side.
On the Perseverance I used contact cement for the deck planking which can be unforgiving if one is not precise when laying the planks but the end result is close to perfect in my opinion. The contact cement method, for me anyway was much slower and laborious as I only prepared one plank at a time where the experts prepare six or more at a time. And so this time about I decided to use PVA.
Much much easier to work with BUT!!! when wiping excess glue with a damp cloth you also smear the graphite from the edges which does not look particularly attractive. I am hoping that on completion I will scrape down the deck instead of sanding and that this will reduce the contaminated graphite.
Looking forward to completing the decking and then onto the fairing process I think
-
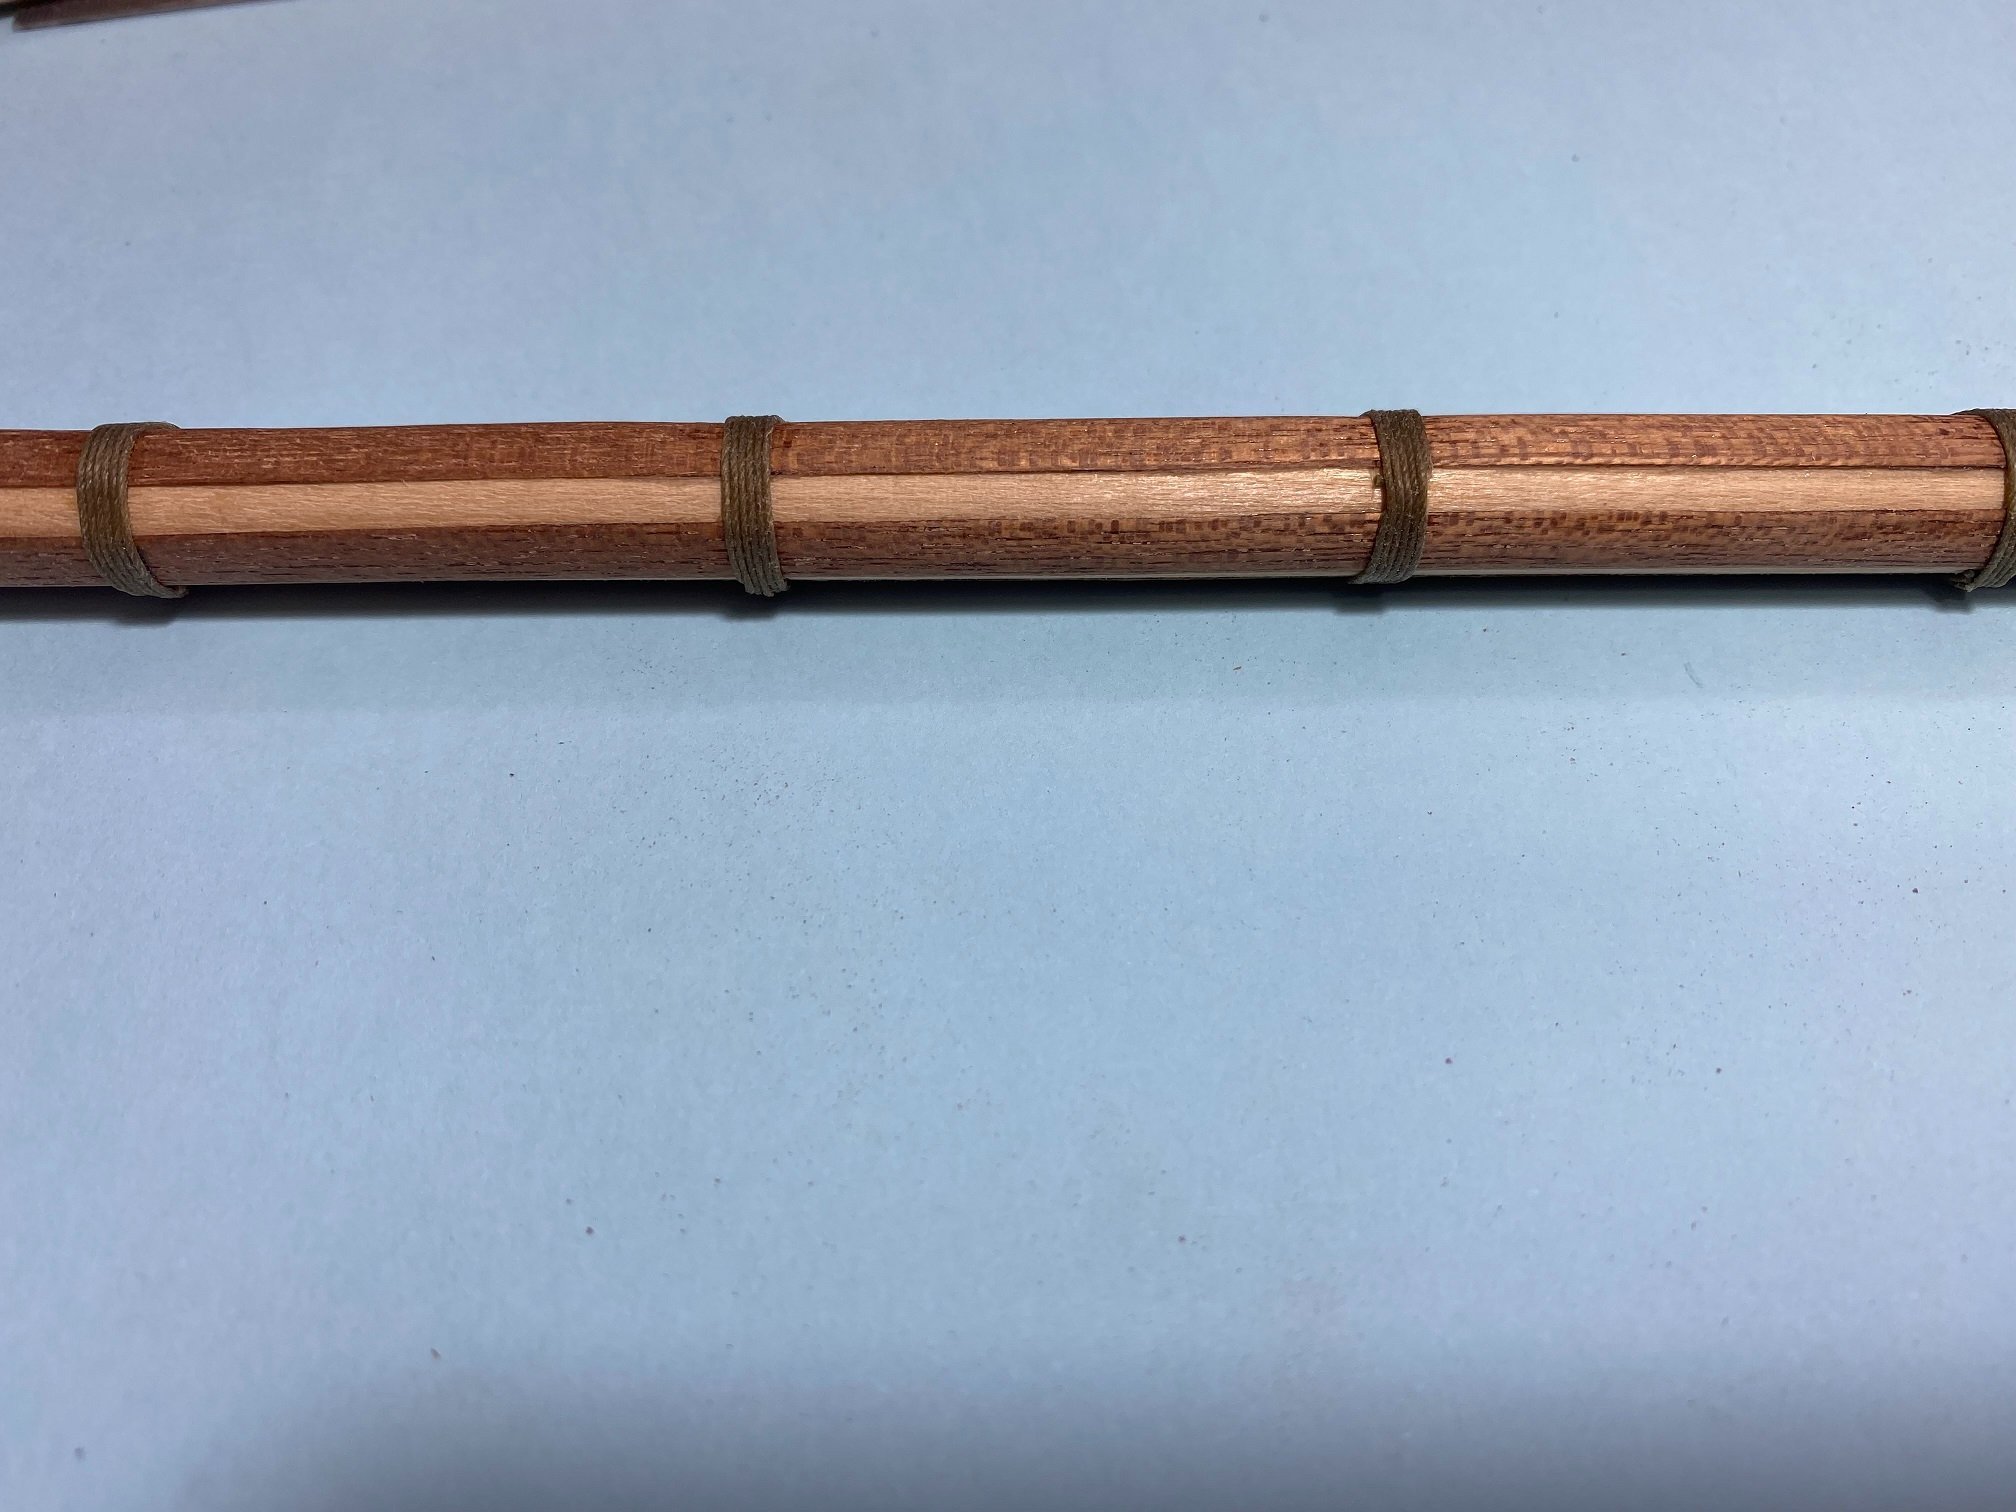
20/08/21 Added strengtheners to foremast
21/08/21 Started preparing fore and main mast tops
22/08/21 Shaped top gallant for main mast. Made and stained cross trees and trestle trees. Put on rings onto cargo hatch. Cut, shaped and steamed main mast strengtheners and taped them to a spare piece of dowel
23/08/21 Fitted steamed mast strengtheners to main mast
27/08/21 Silver Ash arrived so continued planking top masts fore and main
28/08/21 Trimmed and cleaned planking to top mast platforms
29/08/21 Added face strips and anti-slip strips to top mast platforms. Glued tree supports under them.
30/08/21 Glued mast tops in place and drilled 12 holes on each for crows feet.
31/08/21 Glued on mast caps, remade cross trestle, prepared blocks for cross trestles
01/09/21 Assembled masts and started preparing blocks for masts
02/09/21 Prepared fore and main mast blocks
03/09/21 Made the rest of the mast blocks
05/09/21 Fitted mast blocks to masts.
HTD: 337

Masts underway

Black rings added to cargo hatch's
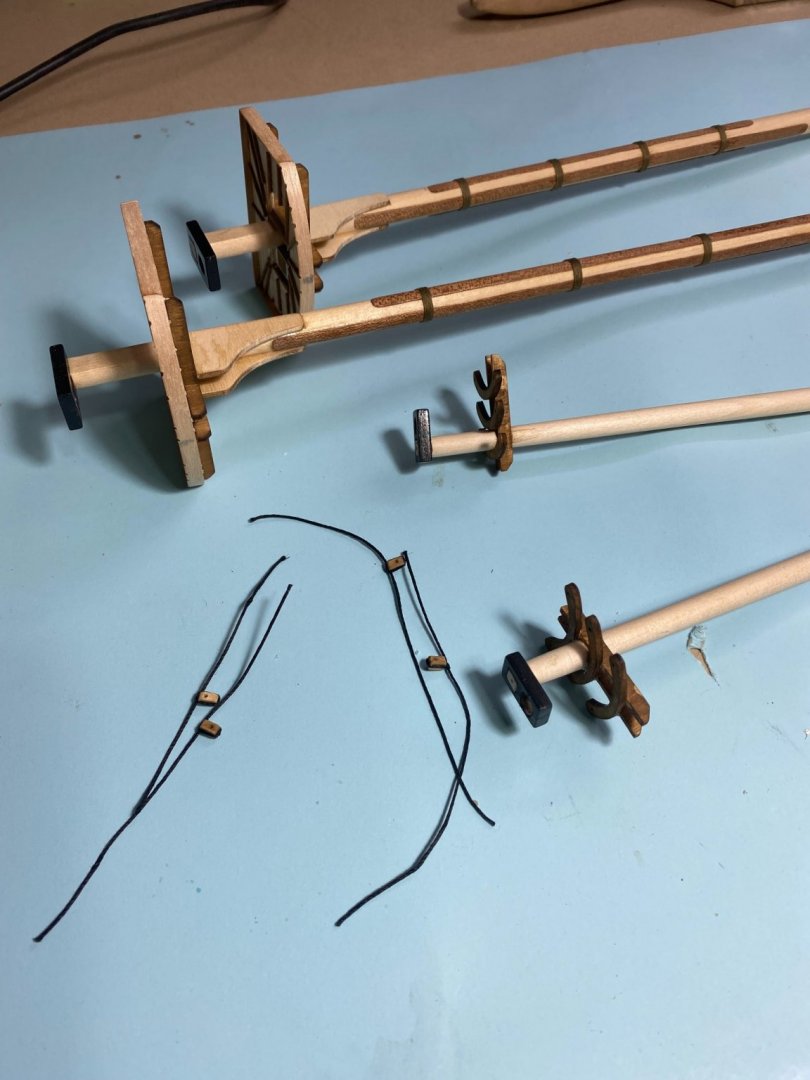
Masts with some of the blocks in readiness

Blocks ready for attachment

Masts assembled but not glued to deck yet.
Blocks attached
Well a busy two weeks found me learning lots more lessons. Some of these lessons will stick others I may have to relearn.
The Silver Ash arrived which allowed me to continue finishing the top mast planking and also got started deck planking on one of my other builds. I also finished the trim on these top masts as well as the cross trees and trestles.
Wasn't very happy with the cargo hatch rings blackening process using "black it". Seems I skipped a very crucial step because I thought the brass rings were clean enough. Turns out, oxidation and other contaminants can hinder the blackening process. So with the eye pins I washed them thoroughly with Isopropyl first and the end result was perfect. Another lesson learned.
Getting platforms, cross trees and trestles square, straight and level on round masts was not something that came easily to me and I suspect it is something that only experience and practice will improve on. It's amazing how a different day, different light can show up the imperfections in these fixtures.
Overall I was happy with my progress since last installment, I will varnish the masts tomorrow before moving on to the yards and booms.
-
-
13 hours ago, No Idea said:
Just read your whole build - fantastic job on this ship it looks really nice and clean 👍 I'm looking forward to your updates - BTW - best forum name ever 🤣
In the words of Monsieur Heisenberg, "Say my name!". It would appear I stayed up much later than you trying to come up with a name

Thanks for the warm smoke

- mtaylor, coxswain and Nautical 1
-
2
-
 1
1
-
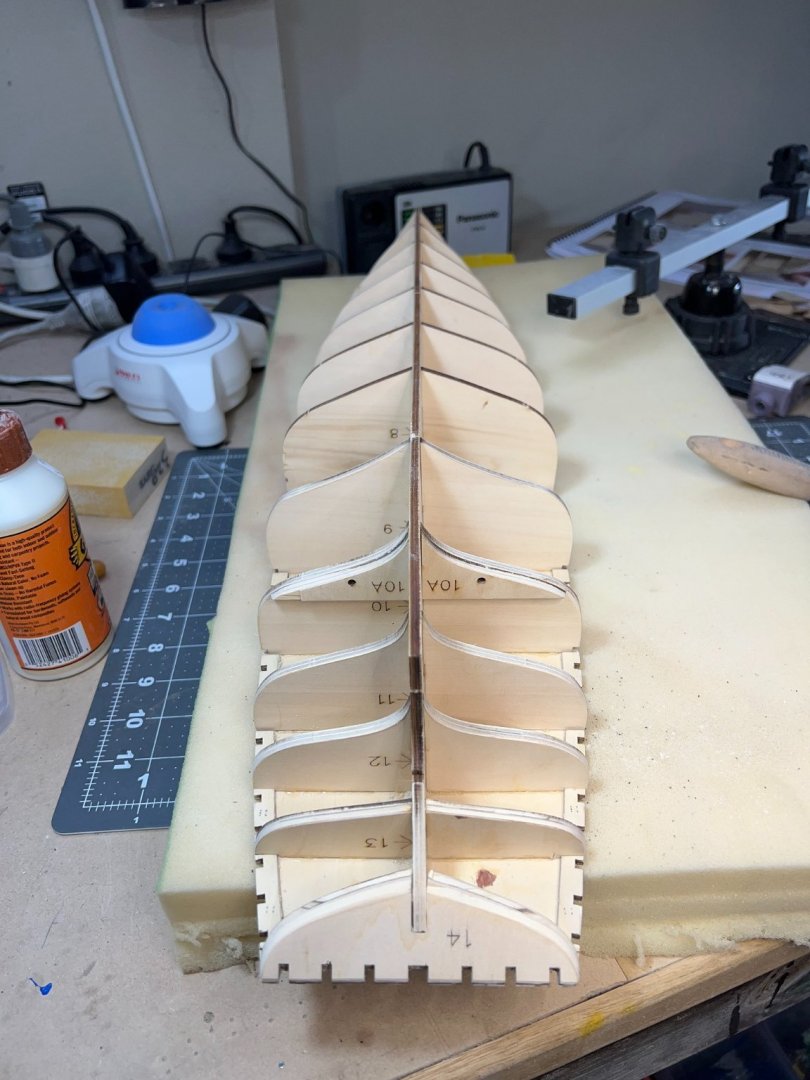
14/08/21 Removed all bulkheads and false keel and sanded clean
15/08/21 Dry fitted all bulkheads to false keel also glued BH's 1 - 5
16/08/21 Glued BH's 6 - 11
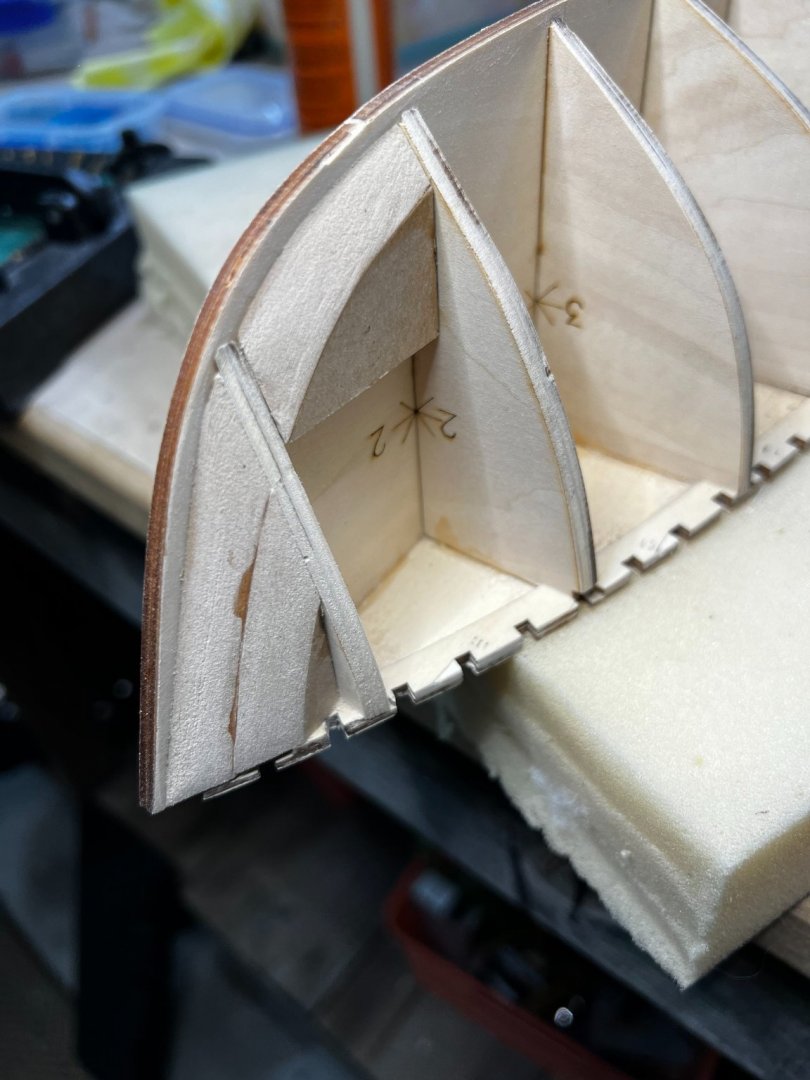
17/08/21 Finished gluing bulkheads. Shaped bow and stern blocks. Glued on under-deck supports.
18/08/21 sanded and cleaned deck edges
HTD: 10
Off and running.

A few more in place
All in

All BH's nice and square
Bow and stern blocks shaped and ready to be glued in place
Under deck frame supports in place
Just a dry fit of the deck.
Well what a hugely exciting start, for me, on this beautiful boat.
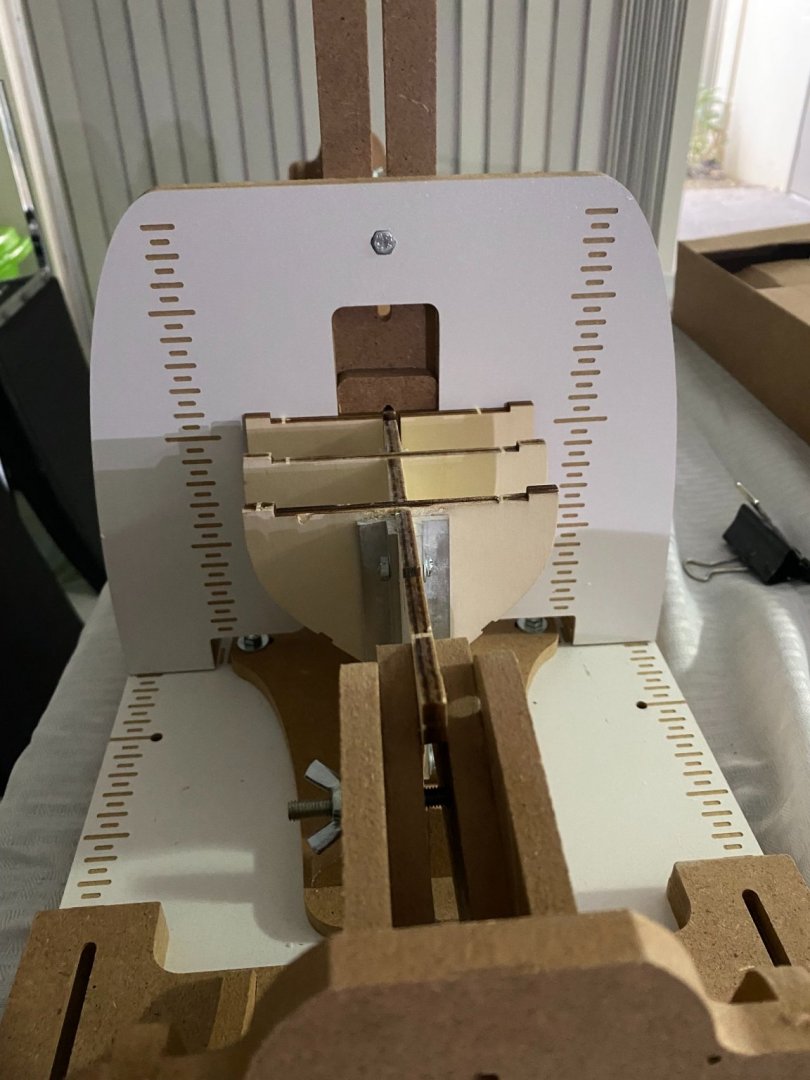
I was blown away with the quality of the bulkheads and false keel compared to my other build, the Perseverance, which was from the same manufacturer. With this kit every single bulkhead was a perfect fit and none required reducing or building up. The lines seemed to be very true indeed. The BH's were such a perfect fit that the were all square requiring no assistance. None the less I still used a couple of pieces of square aluminium box section and clamped each BH in turn. Very very happy with end result. It's all the more interesting having the other build from the same manufacturer for comparison.
You may notice that there is a very slight curve in the false keel which I believe will disappear after the deck is attached. I did a trial fit of the deck and it fitted beautifully. Those under deck supports have gaps in them helping the alignment to the bulkheads to be more accurate.
I decided not to use my new HZ building slip as I am keeping it for the Gorch Fock build not to mention the fact that it is rather large and unwieldly. I will start throwing BH's into that model shortly.
You will notice in the photos above that the forward and aft BH's have score lines to help with fairing. The manual suggests that these BH's are faired before being glued in place. Well this just didn't feel right to me, despite my lack of experience I opted to glue them in place first and I will still use those helpful lines as a reference when I start fairing. I hope I haven't jinxed myself going out on my own like that so early on.
The other "going-it-alone" decision I have made is to plank the deck. As clever and helpful as the plank etching might be, I simply just don't like it and have ordered forty odd strips of .6mm x 4mm Silver ash which has a beautiful grain and awesome finish when varnished, see some of the pics in my Perseverance build. Anyway, I am not expecting their arrival for another few days so build on hold till then. I am hoping that this extra .6mm isn't going to be detrimental to the rest of the build.
-
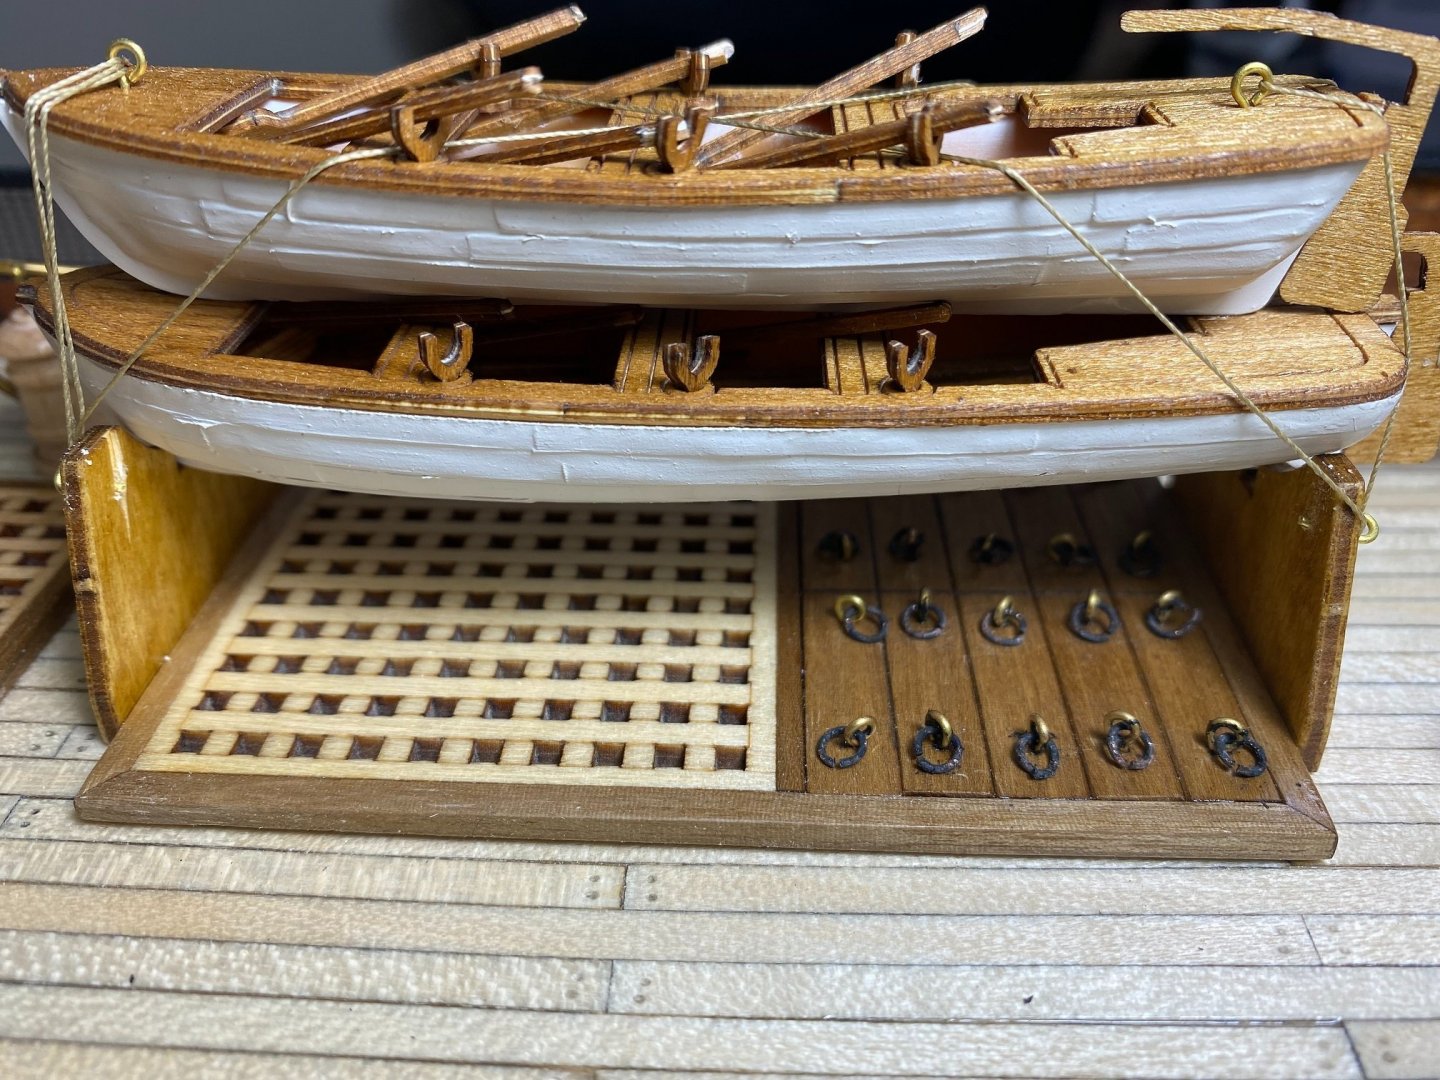
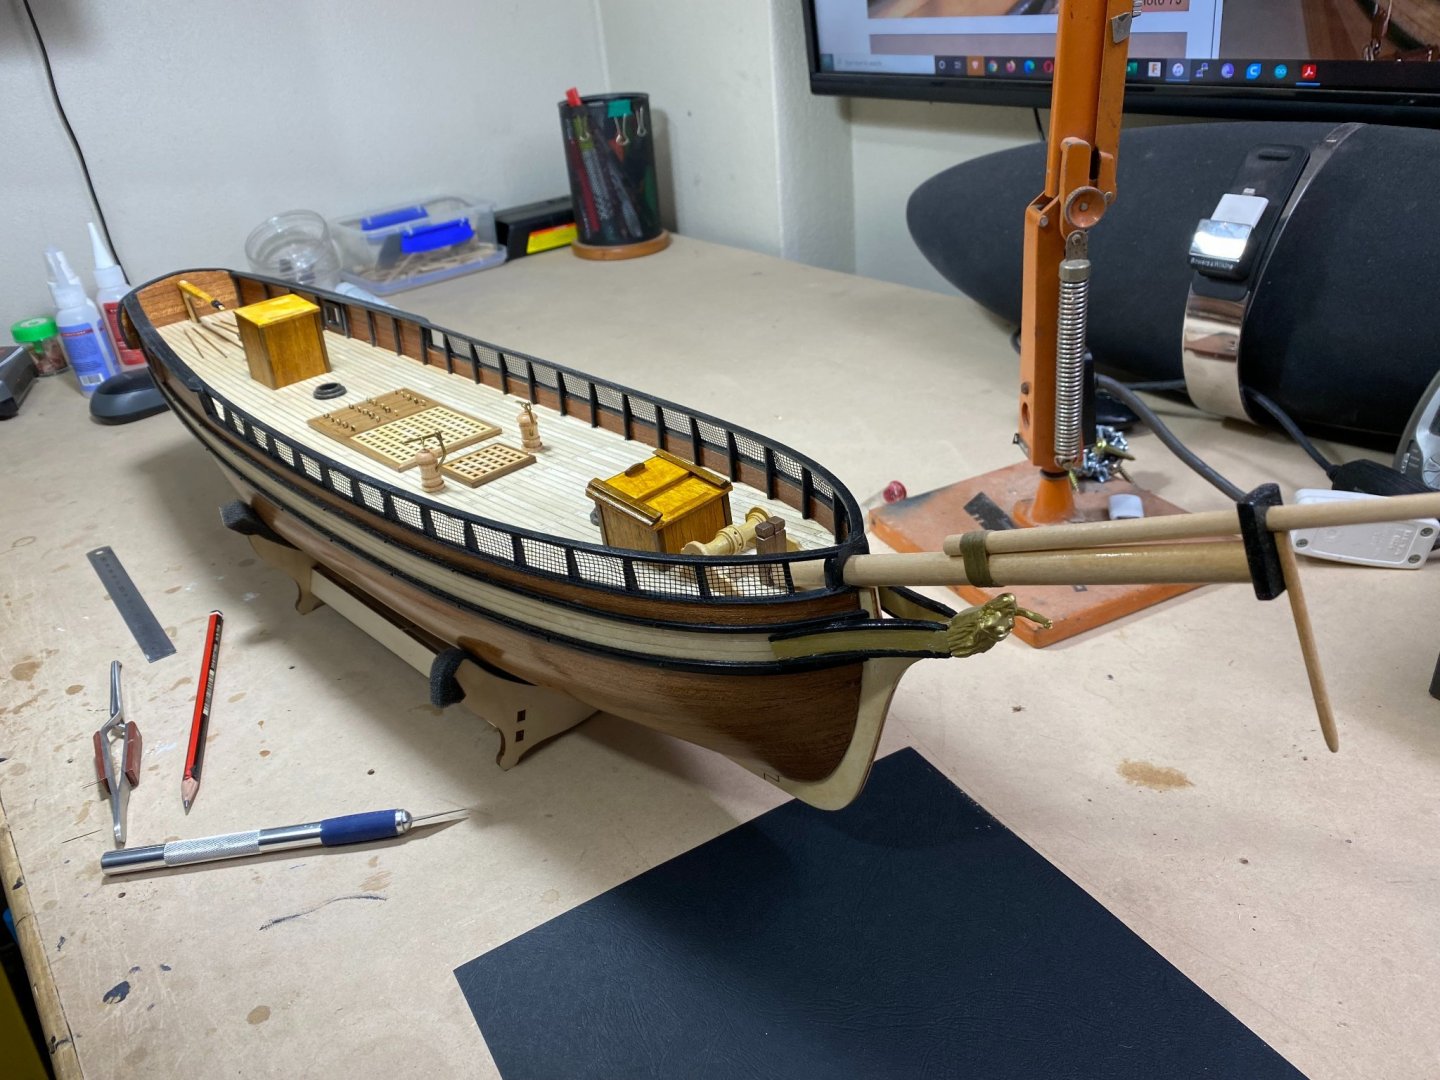
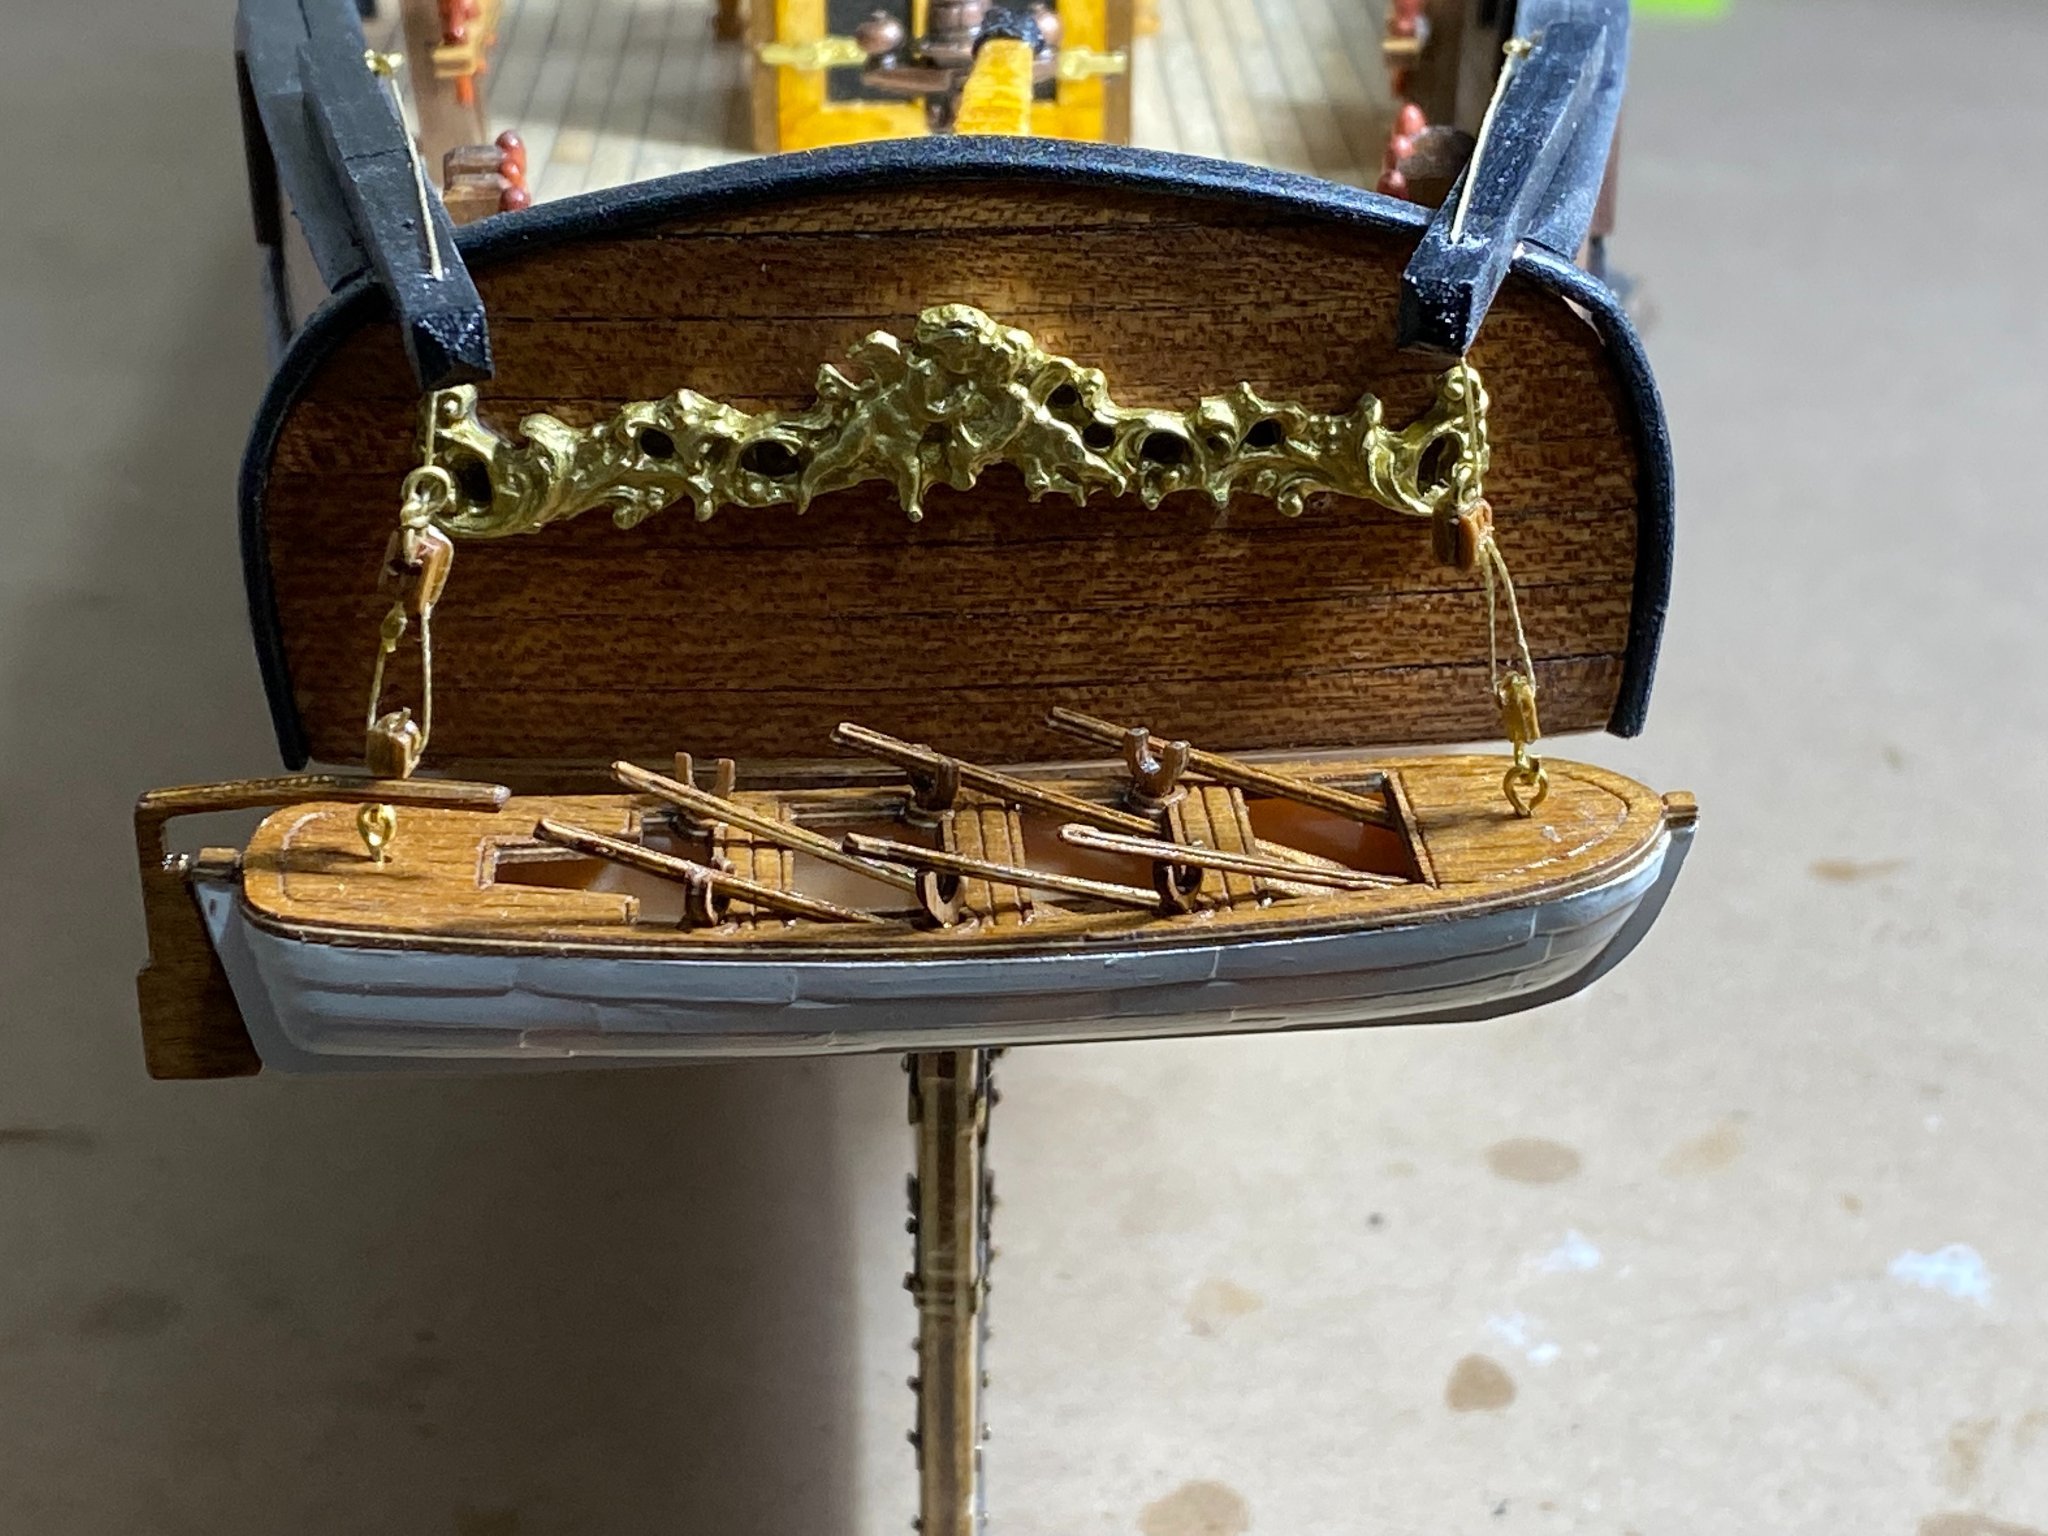
16/08/21 Fitted and rigged lifeboats to deck
18/08/21 Fitted and rigged jollyboat to transom
19/08/21 - 22/08/21 Started work on fore and main masts
HTD: 325
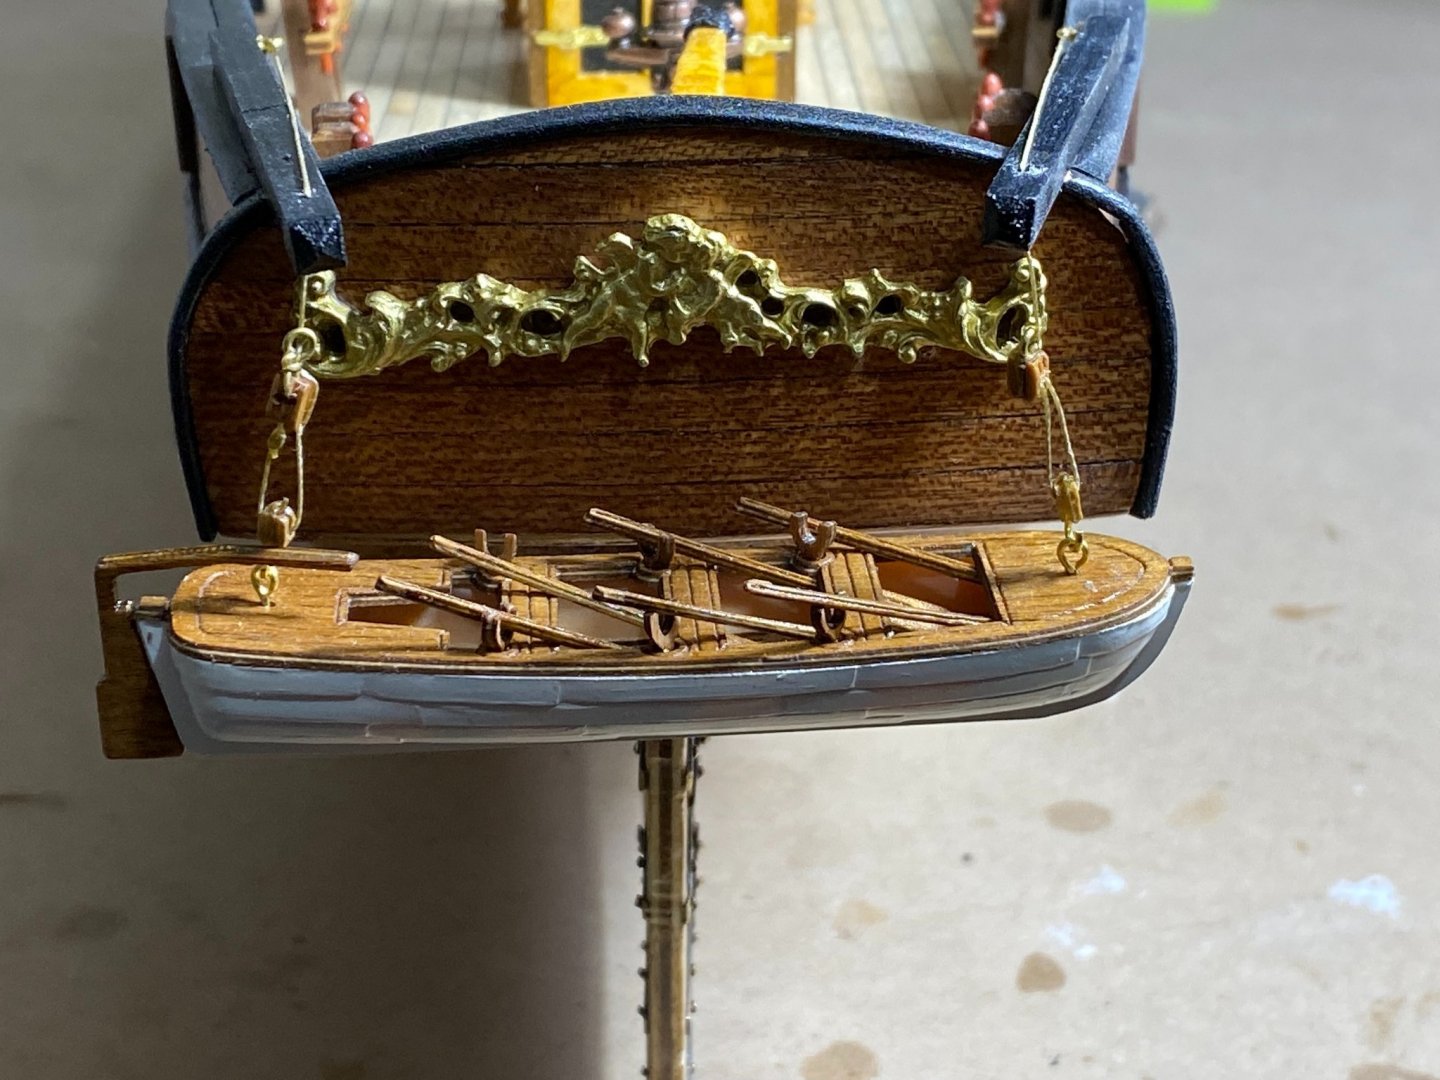
Lifeboats rigged and ready
Black rings added to hatch covers
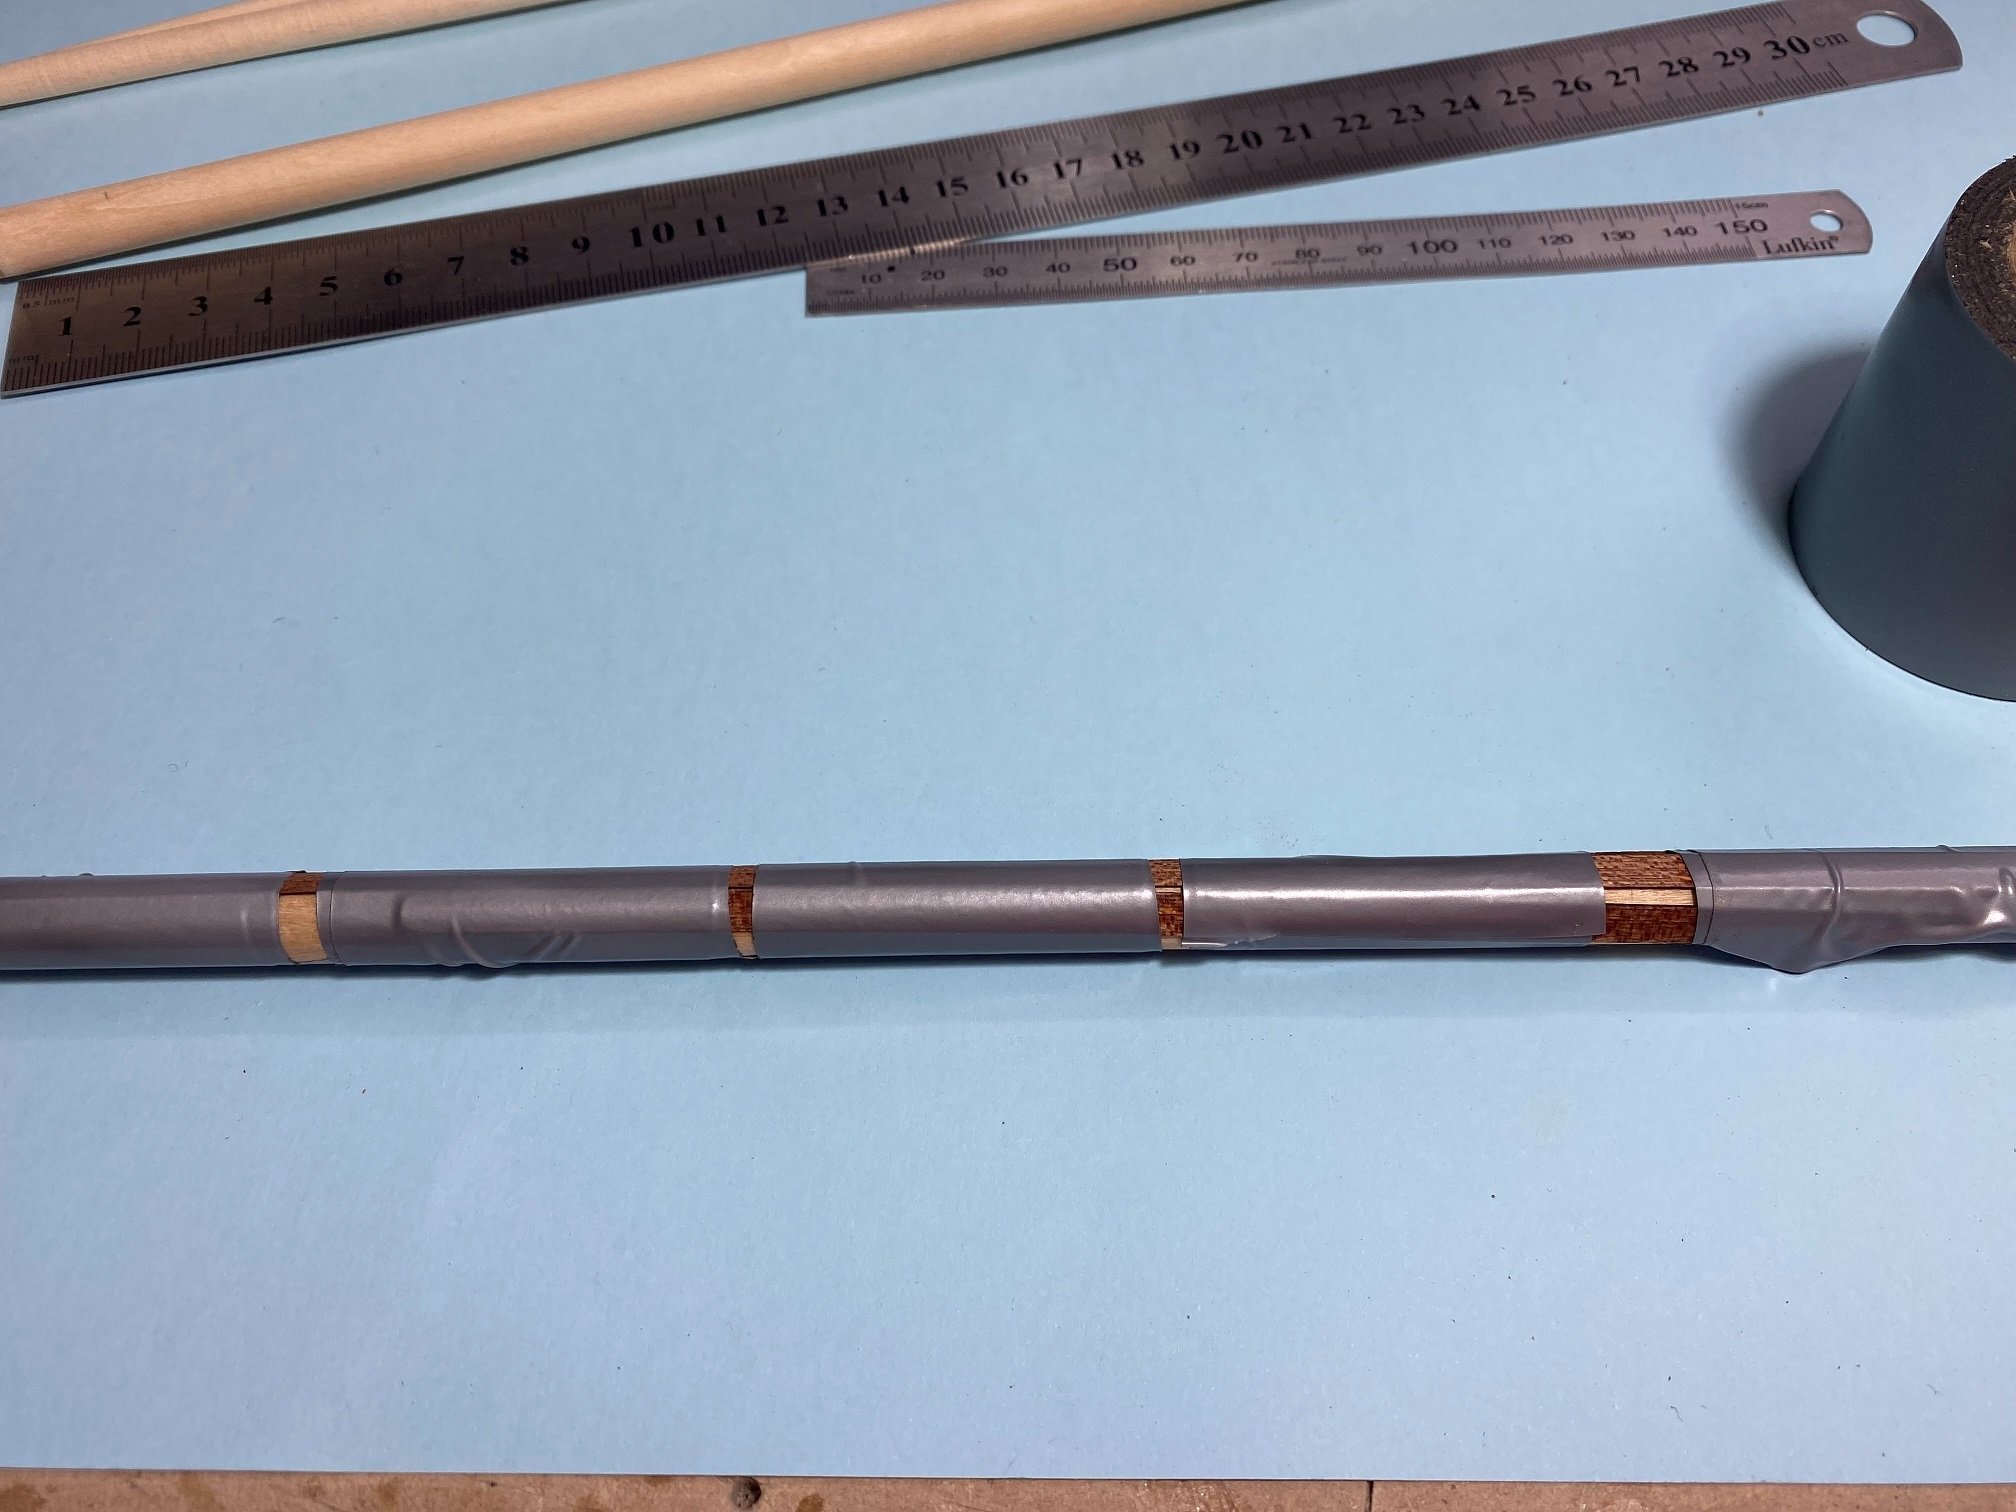
Mast strengtheners attached and bound to fore mast
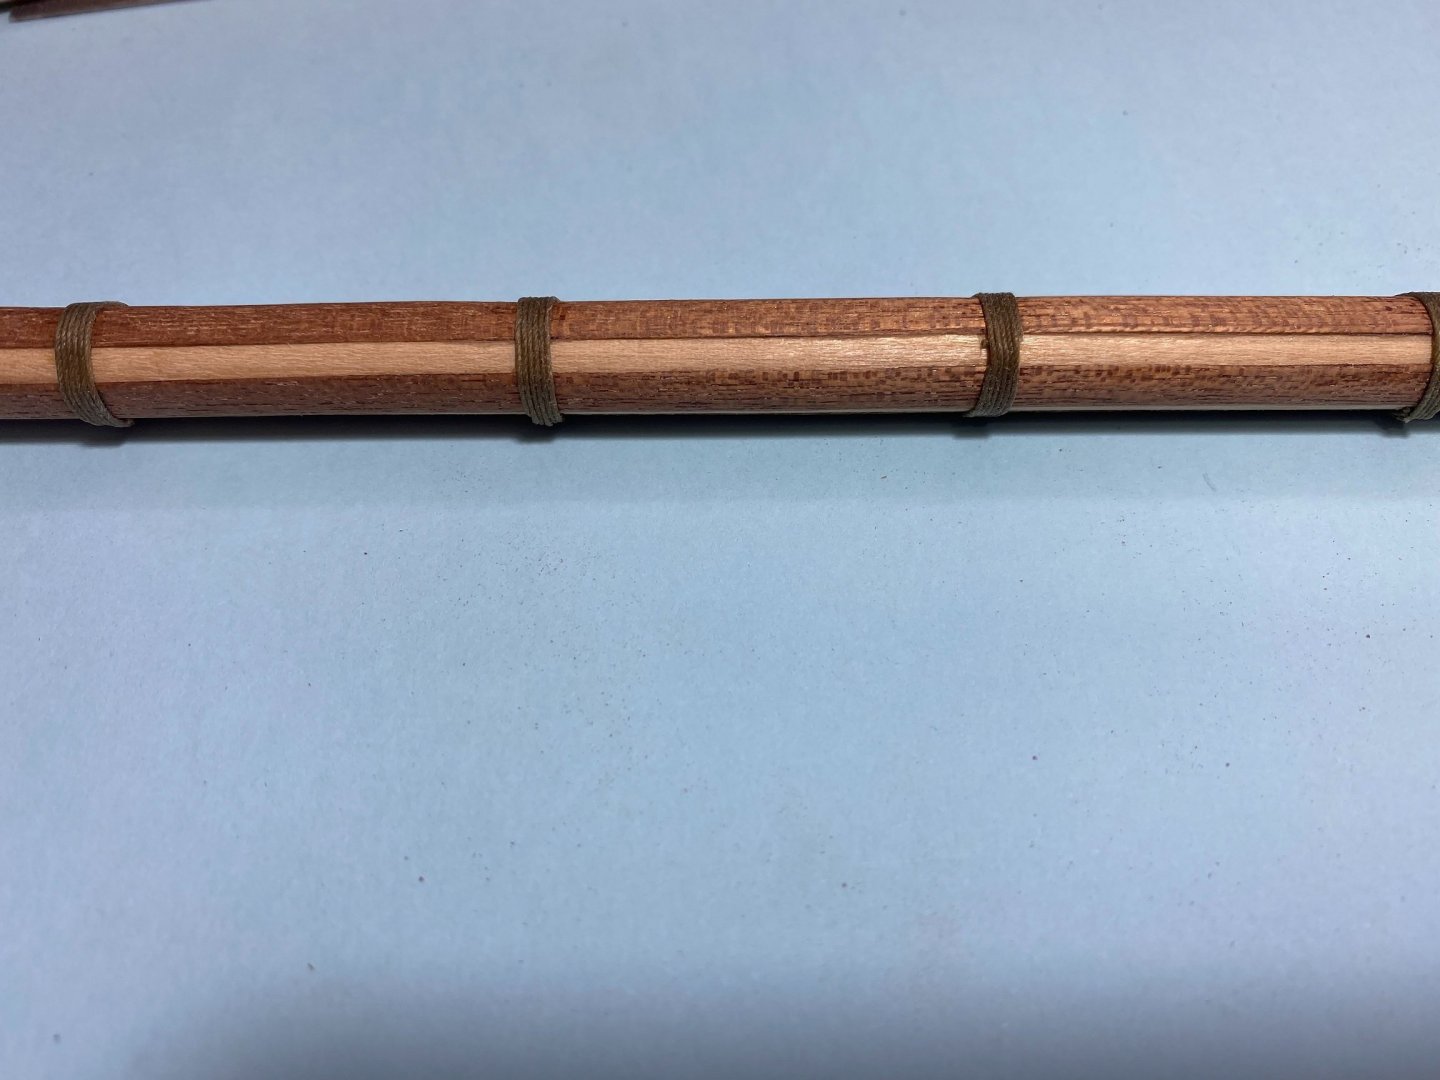
Mast strengtheners, after steaming, being prepared for main mast. Temporarily taped to a spare piece of dowel.

Mast production in full swing, nothing glued yet, final positioning a way off yet
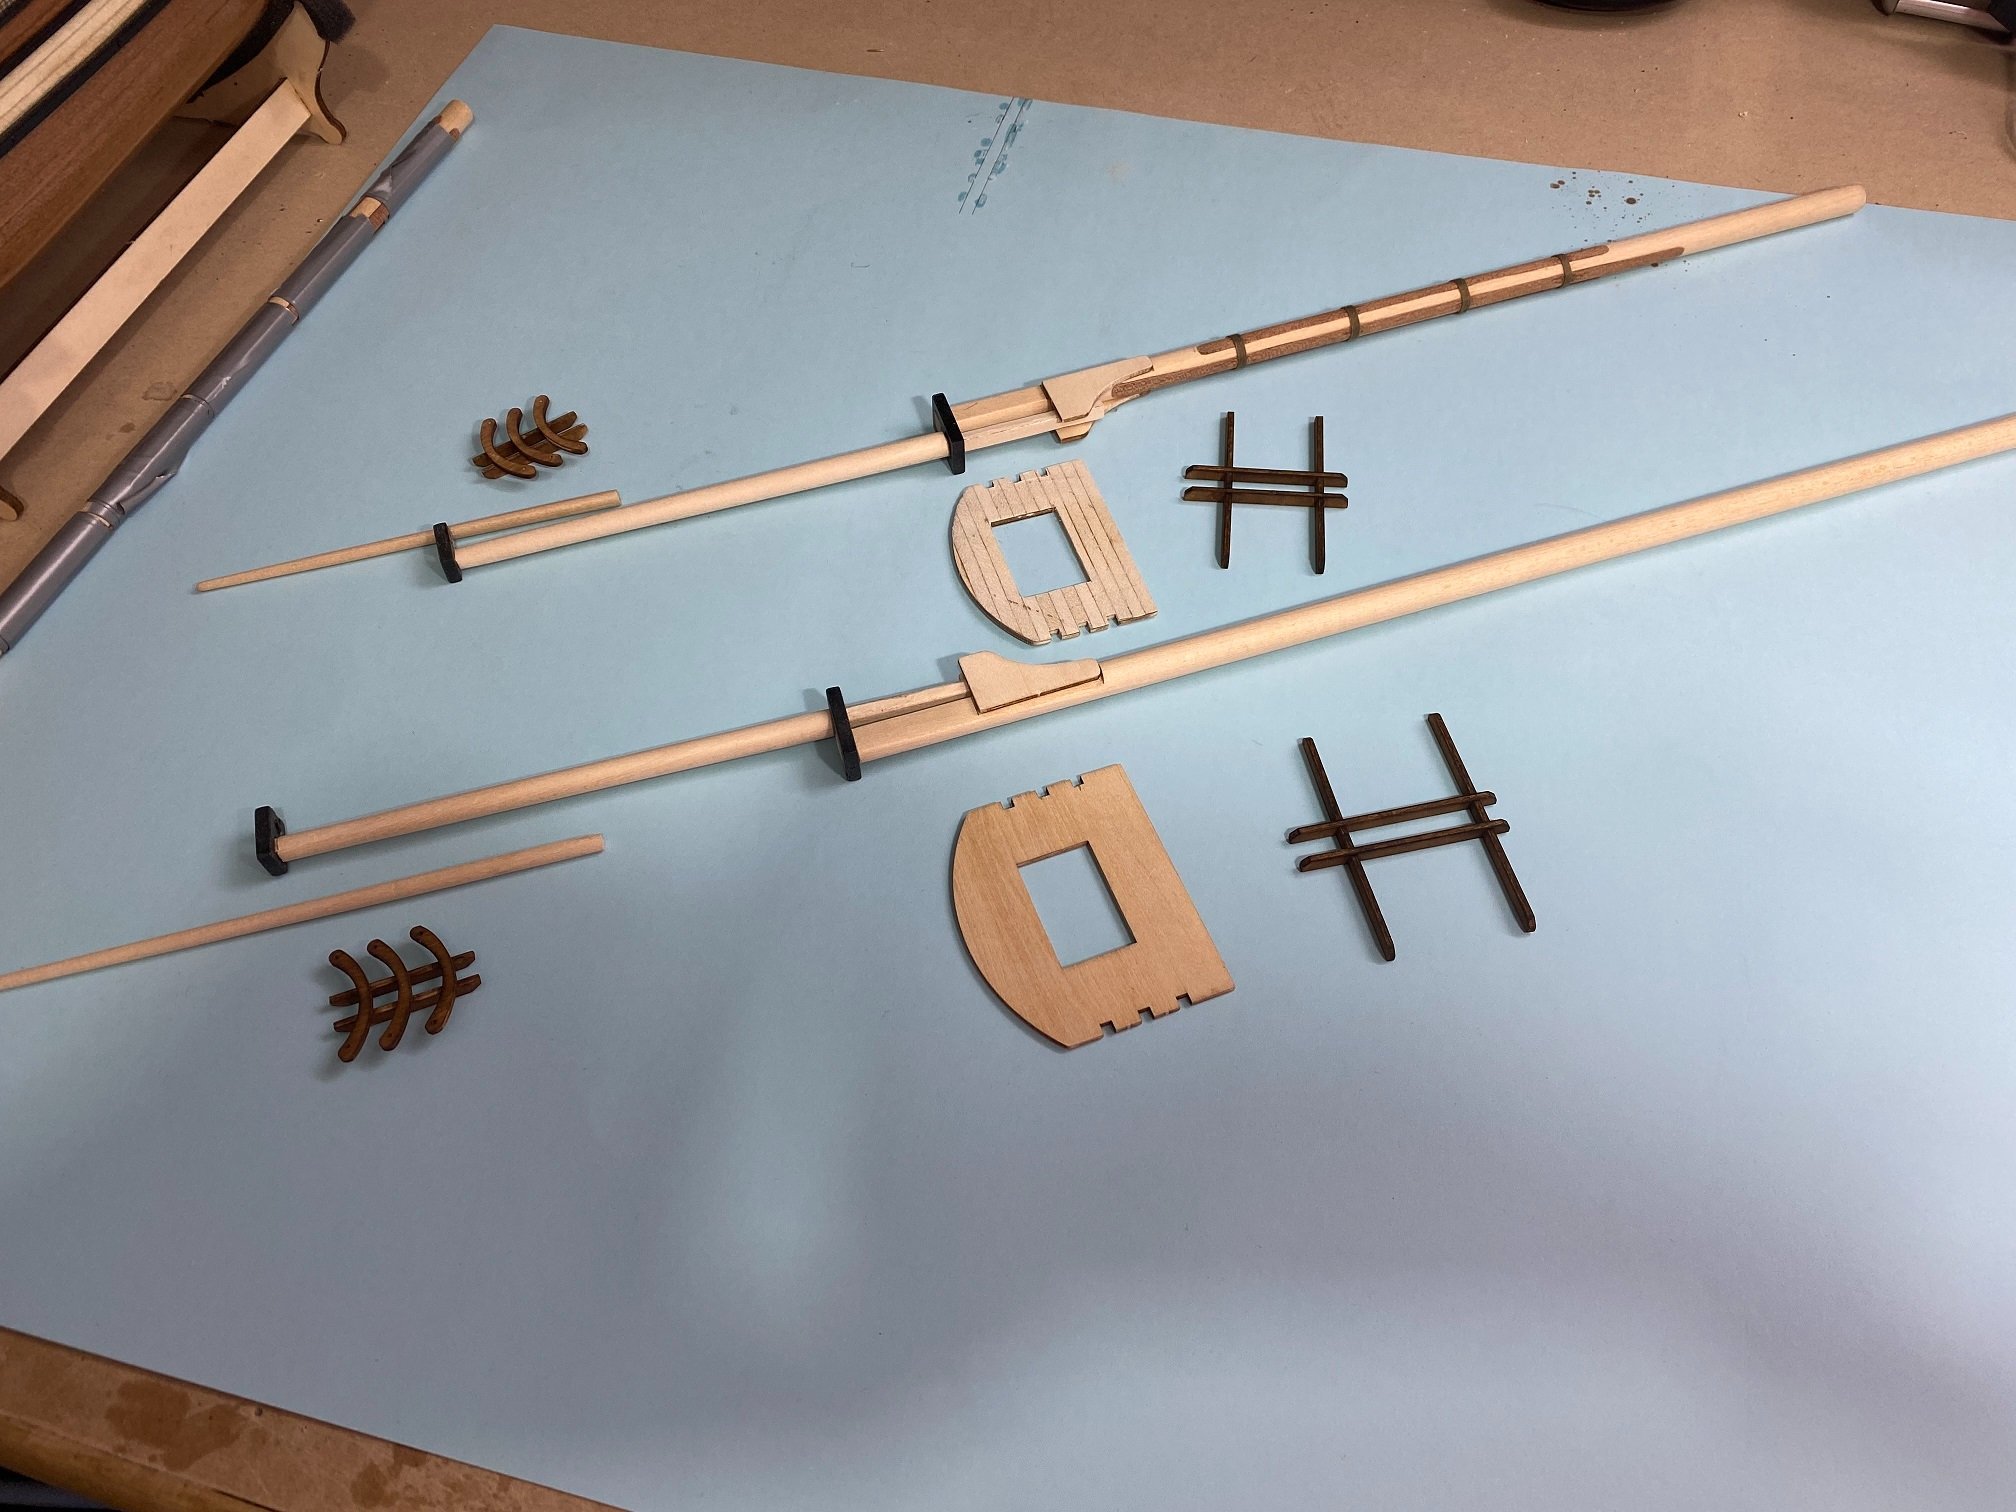
So this week saw me make a start, finally on to the masts. Again, much easier watching the experts doing it than doing it myself. I found it a challenge, and will need more practice with cutting/checking rectangular and square, lets call them tenons, and keeping them true to each end.
Even something as deceptively simple as gluing the mast strengtheners to the mast was challenging. I used PVA but found that the .5 x 5mm didn't want to bend around the dowel. So using a series of bulldog clamps down each side saw the laminate split down the middle. I poured thin CA down the crack and sanded back which completely hid the crack. I also noticed that the strips tended to wave about the place and didn't present a true line. I think perhaps CA might have been a better choice of glue for this task. I found the binding of the strips to the mast to be a very easy task
I have steamed and taped the next set of strips around a spare piece of dowel (see pic above). I am hoping this will offer easier placing on the main mast in conjunction with the use of CA instead of PVA.
The topmast platforms call for planking top and bottom and unfortunately I have run out of Silver Ash which is what was used on the main deck. Expecting it to arrive any day now. I have stained the cross trees and trestle trees that lay beneath the platforms, oak, to offer a little contrast to the paler timbers and also to try and help mask the ply edges.
Hopefully next week I will see this planking finished and the platforms and masts finished with blocks attached etc all ready for some sealing and satin varnishing.
- BobG, coxswain and GrandpaPhil
-
3
-
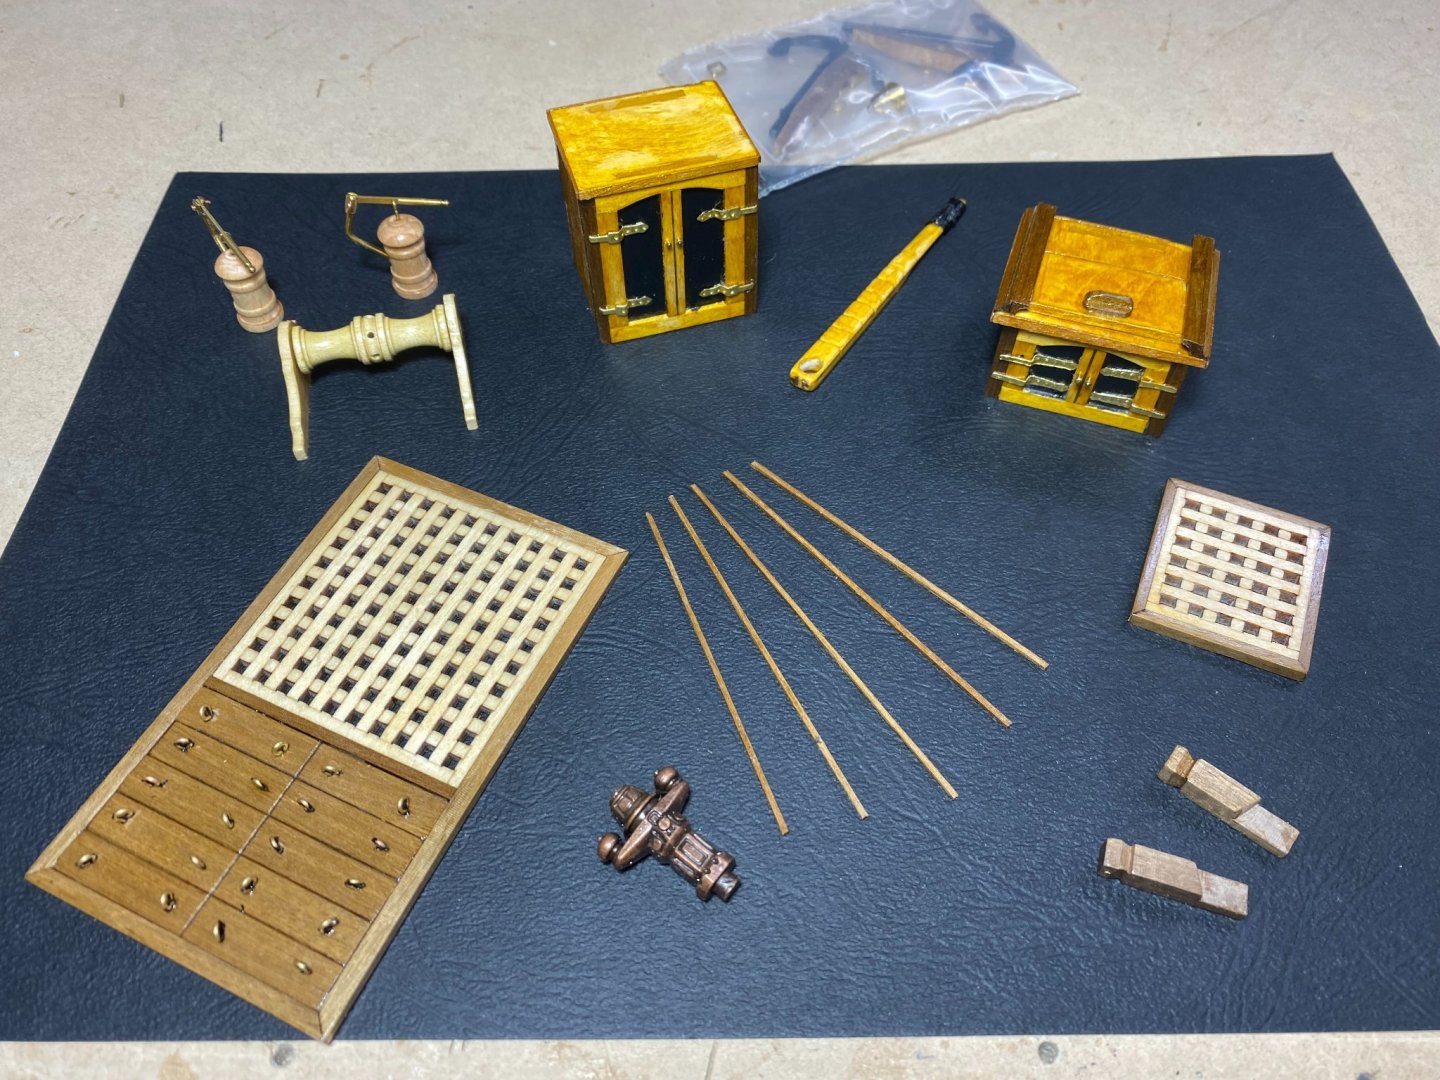
09/08/21 Working on pin rails. Stained and varnished pins and glued into pin rails
10/08/21 Glued all pin rails in place as well as the belfry
11/08/21 Started work on lifeboat hulls
12/08/21 Painting of lifeboat hulls
14/08/21 Lifeboat topcoats also stained varnished lifeboat decks and accessories
15/08/21 Assembled lifeboats and rigged 4 blocks in preparation of rigging jolly LB to davits.
HTD: 312
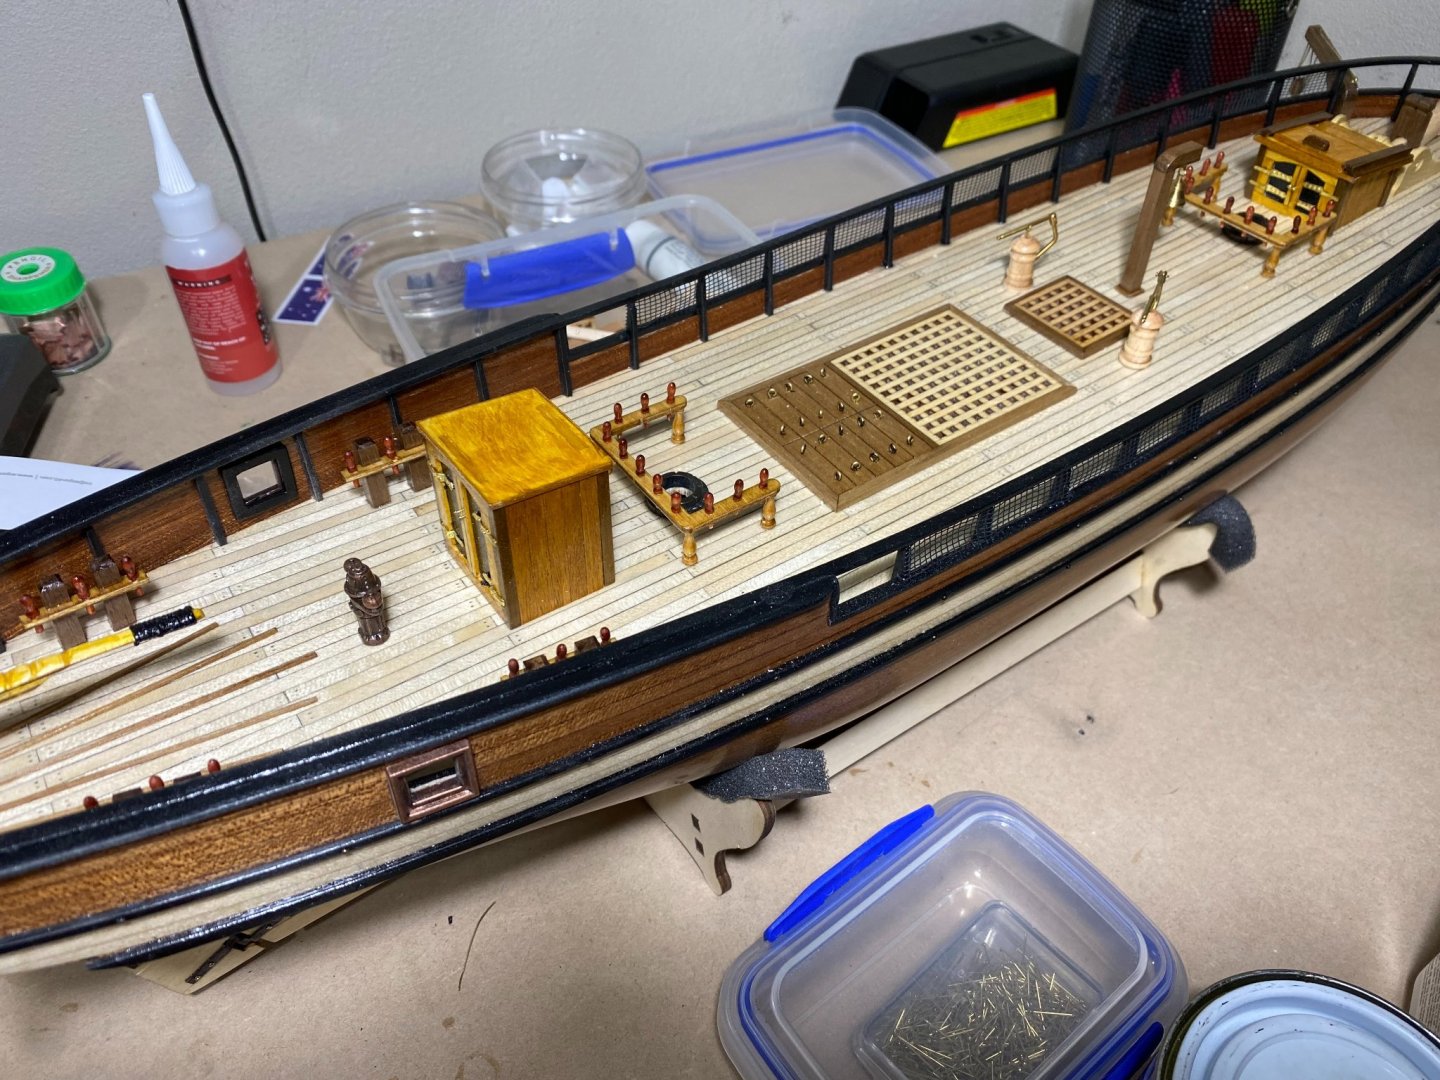
Pin rails glued in place along with the belfry
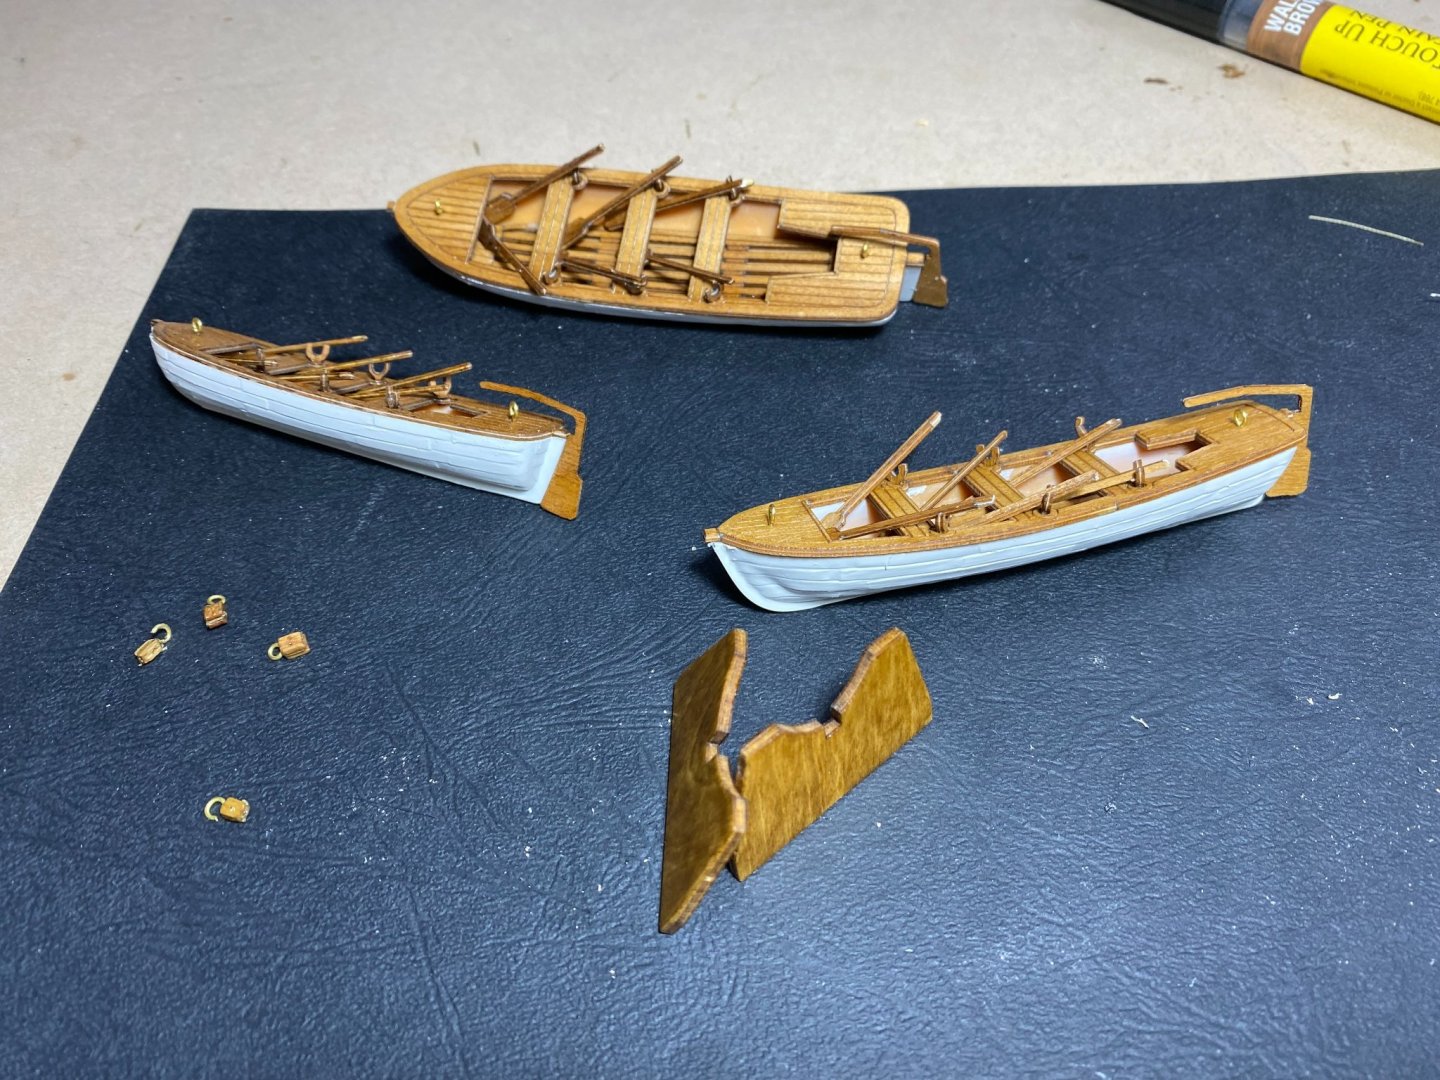
Lifeboats ready to be fitted. Blocks are for rear LB suspended from davits.
Fairly easy week. lifeboats were not much of a challenge. I airbrushed the plastic hulls with primer and top coat. Stained and varnished the decks, rudders and oars. Also tried to give oars a rounded finish instead of the square laser-cut finish. All ready to be installed next week.
While the pin rails were relatively easy to assemble it has to be said I don't like working with 2mm ply. The pre cut pieces had the holes drilled for the pins but these were not big enough so I had to drill them bigger. This procedure tore out bits of the ply and left unsightly gaps to me. I think in future I will manufacture my own parts from solid wood instead of the thin ply.
Looking forward to finishing the lifeboats and starting on masts and yards.
- Fernando E, coxswain and BobG
-
3
-
16 minutes ago, ccoyle said:
Very nice! We have a member here whose grandfather was aboard Galilee during her magnetic surveying days (link here). Being a native of Northern California, I have a soft spot for West Coast merchant sail, especially those vessels involved in the lumbering trade.
Yes indeed, I have already been all over that build and when I grow up I want to be a scratch builder just like CDR
-
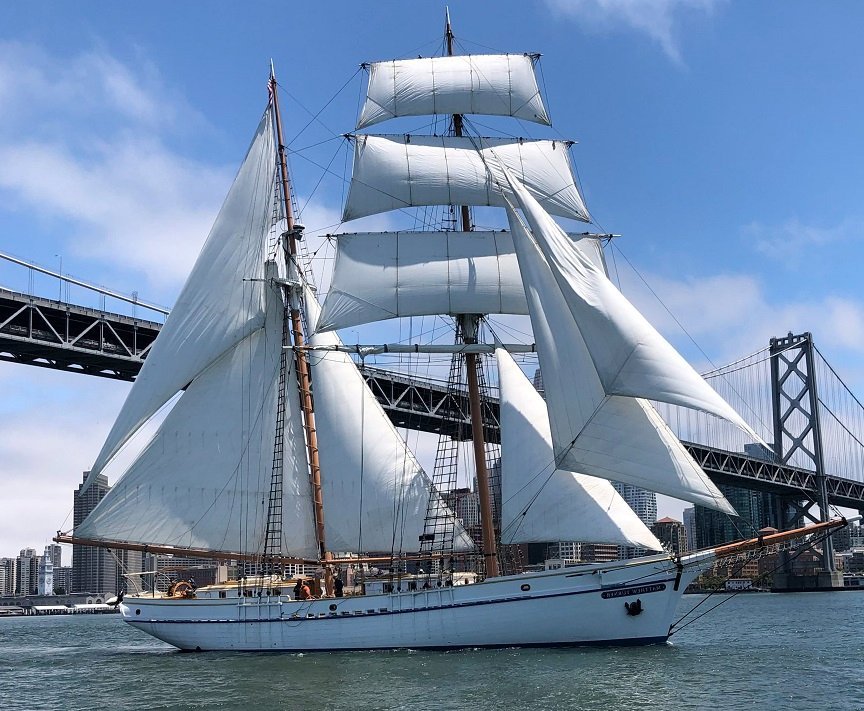
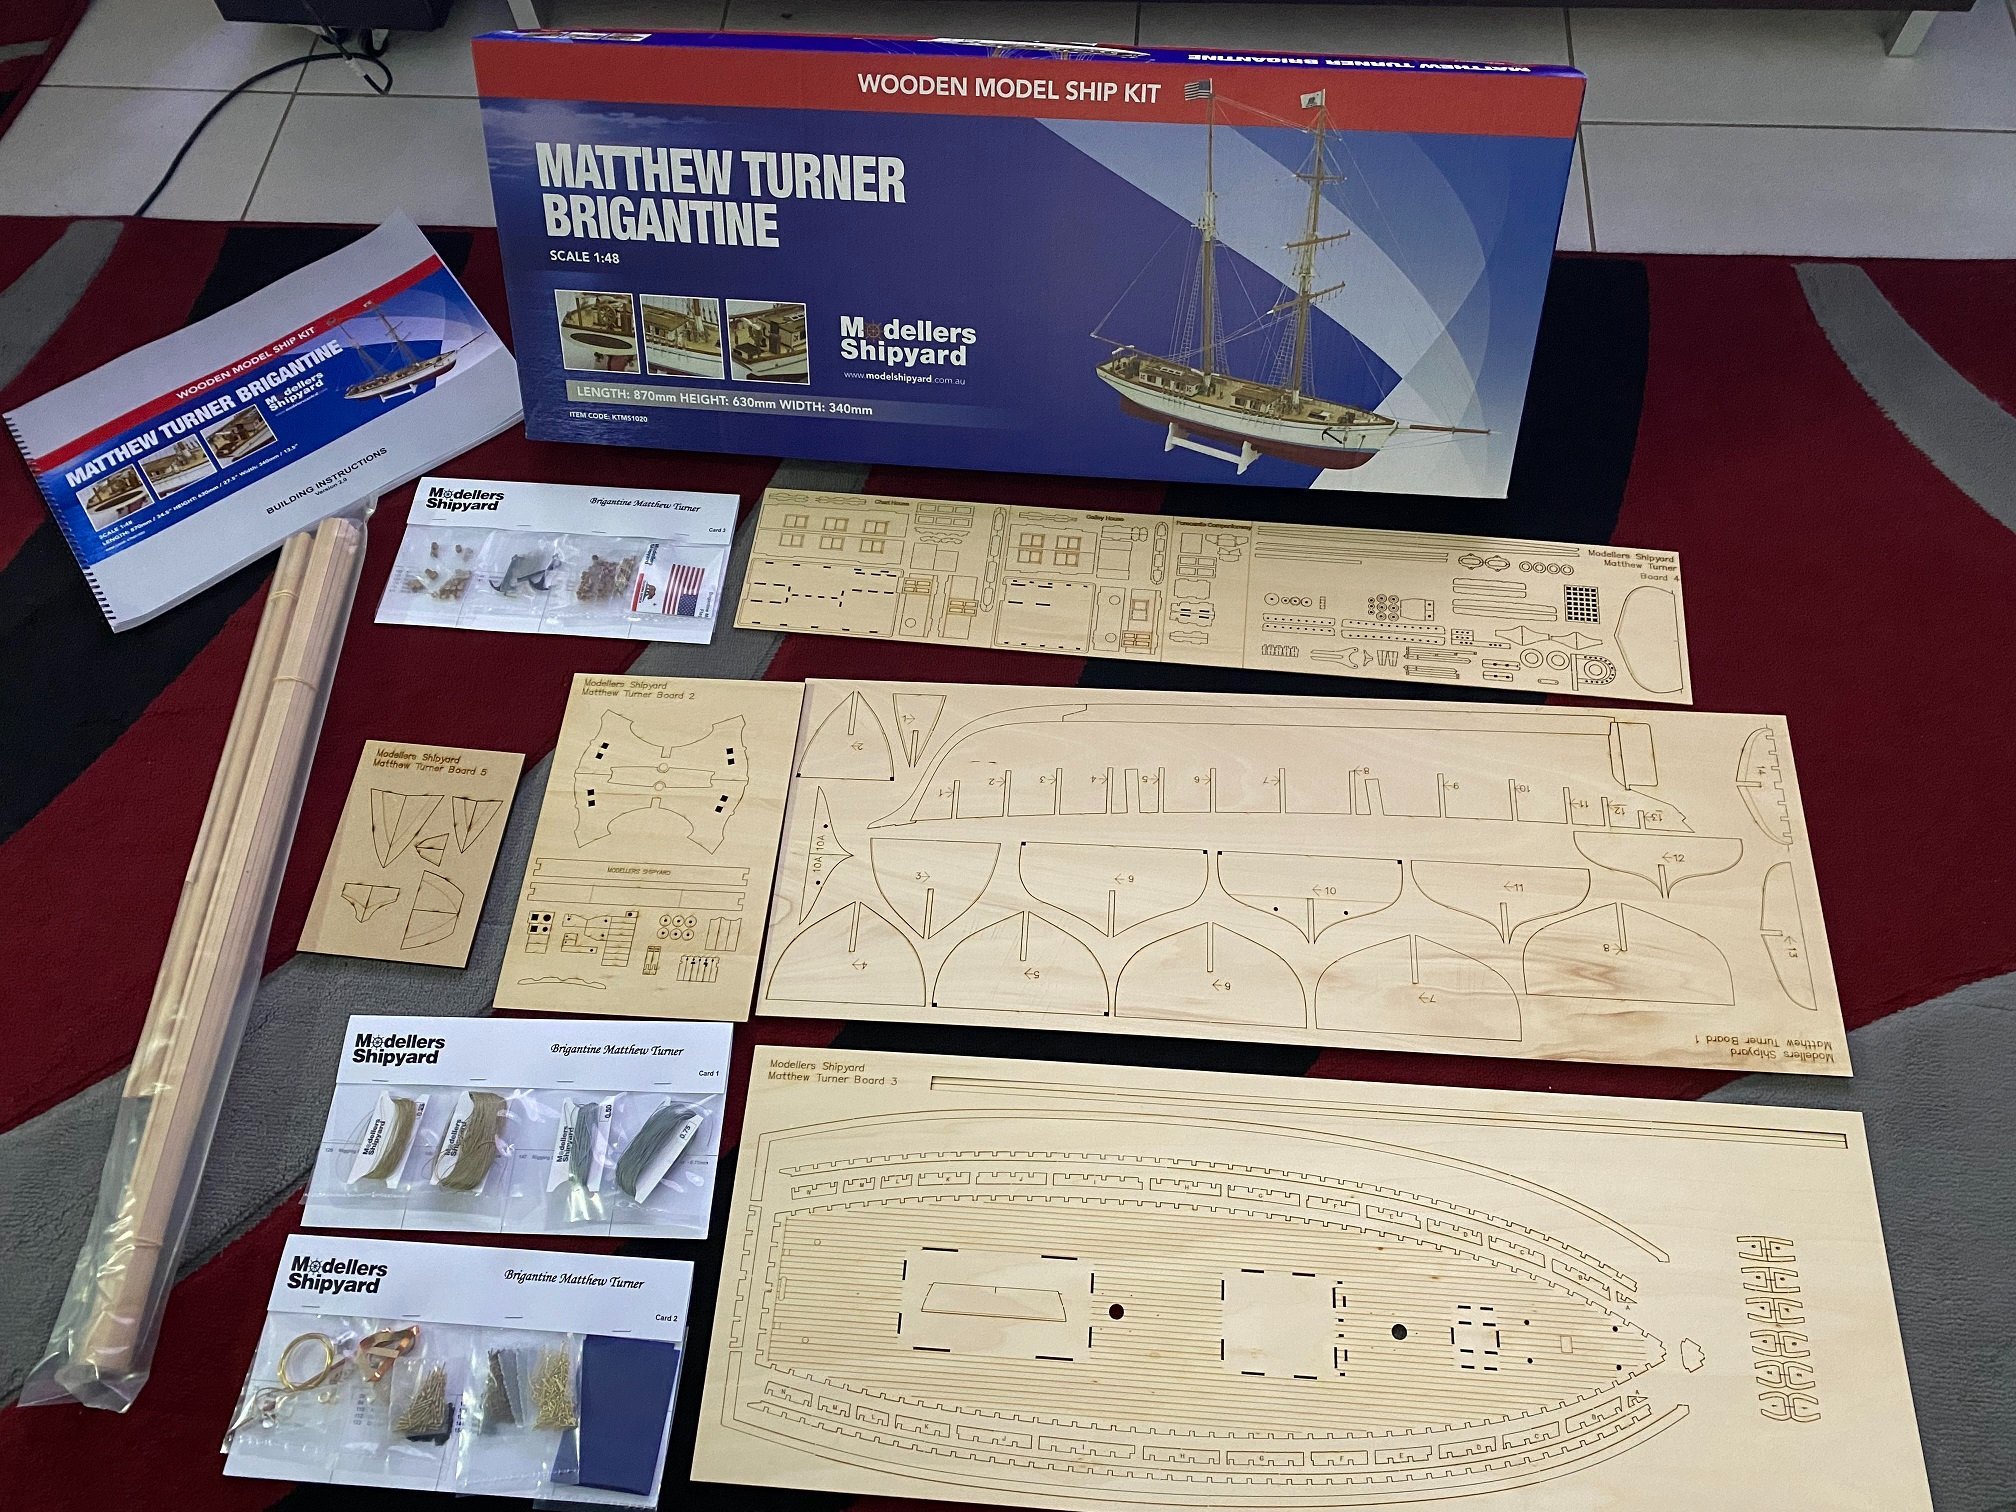
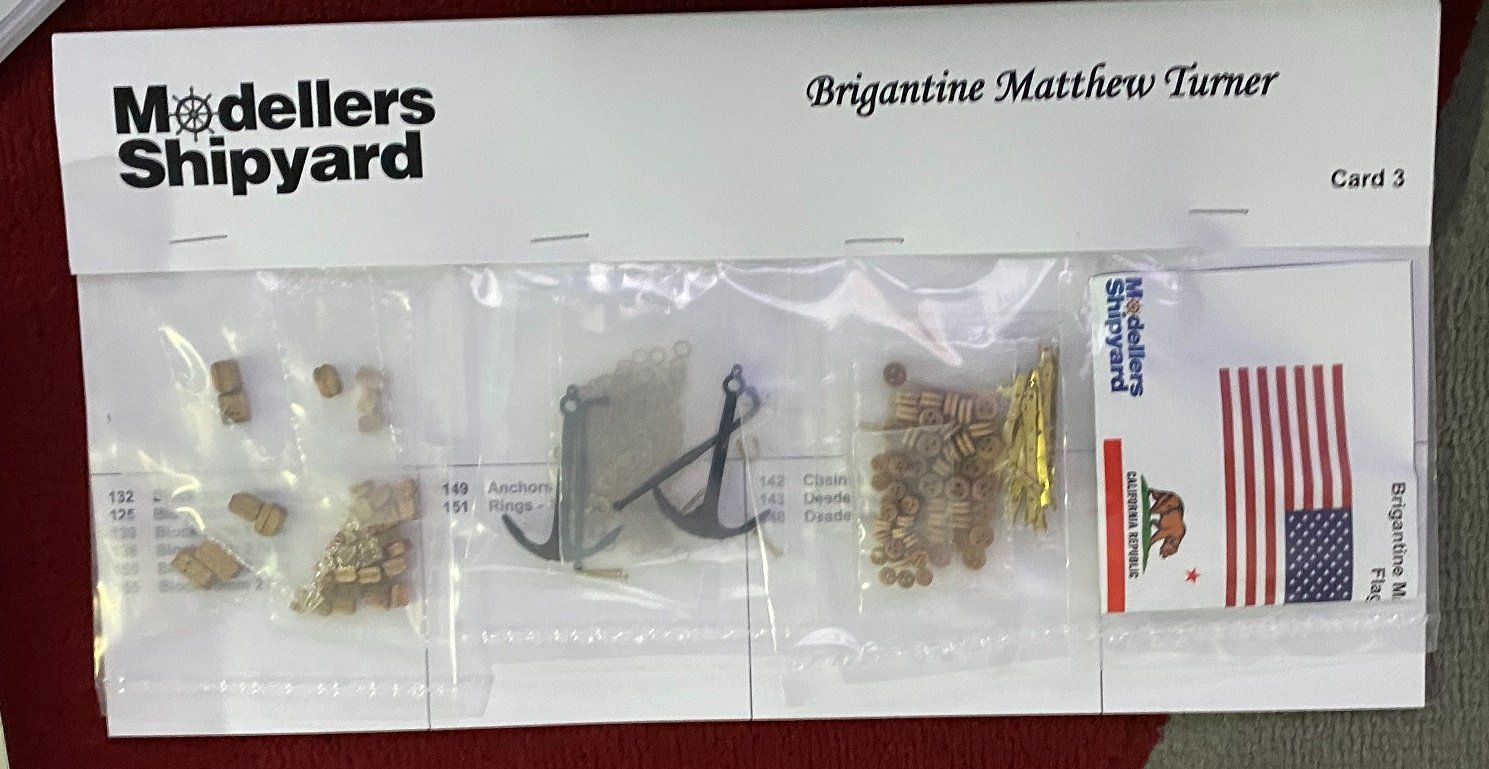
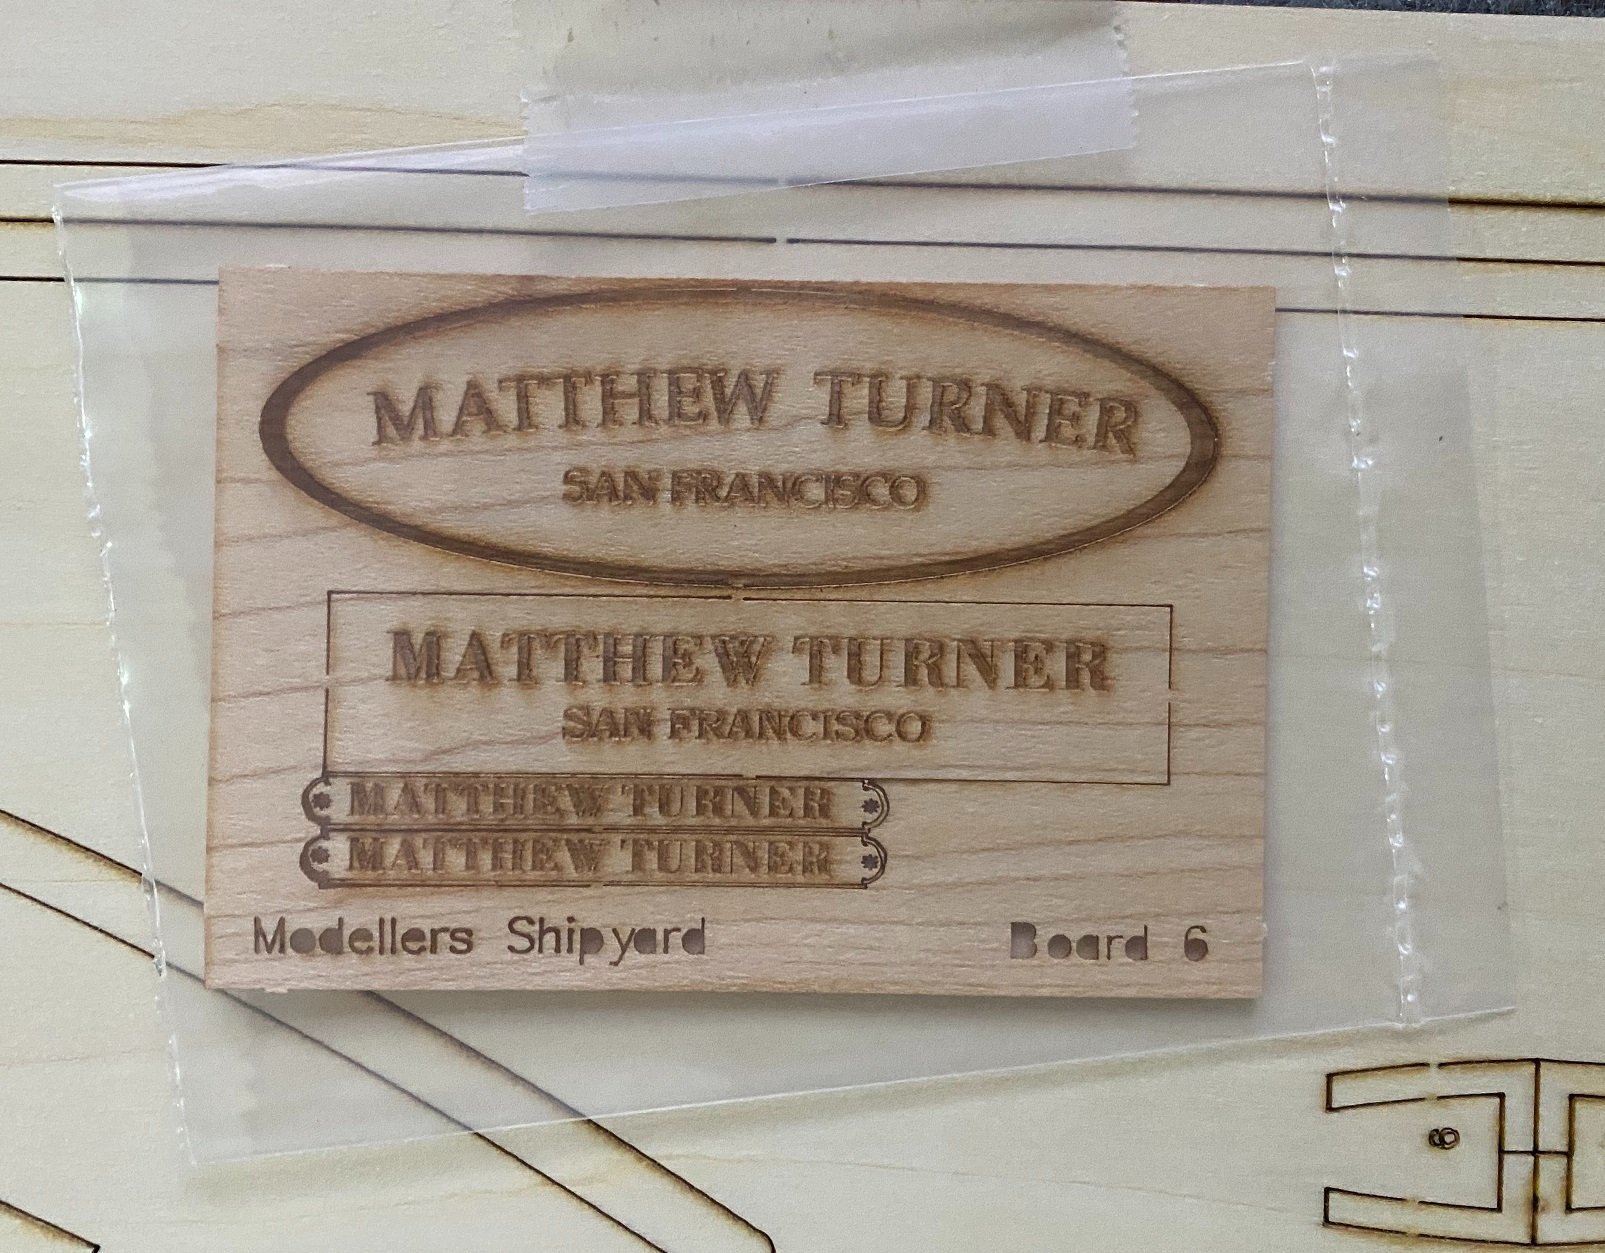
Hi and welcome to my second build, the brigantine “Matthew Turner” from Modellers Shipyard.

I have not yet completed my first build but wanted some variety and experience building a next-level-up model, as it were.
A little history about the Matthew Turner: (Taken from Modellers Shipyard website)
Launched at Sausalito, California in April 2017 the brigantine Matthew Turner is the largest wooden sailing ship to be built in the San Francisco Bay area in more than 100 years. Built of Douglas Fir and Oregon white oak. The Matthew Turner has a length of 132 feet (40m), a beam of 25feet (7.6m) and a displacement of 175 tons (160 tones)
The ship pays homage to the ships namesake, Matthew Turner (June 17, 1825 - February 10, 1909) was an American sea captain, shipbuilder and designer. He constructed 228 vessels, of which 154 were built in the Matthew Turner shipyard in Benicia, California. He built more sailing vessels than any other single shipbuilder in America and can be considered the "grandaddy" of big time wooden shipbuilding in the US Pacific coast.
The main inspiration behind building the Matthew Turner was the Turner designed brigantine Galilee, launched in 1891. Galilee spent much of her career as a packet, making swift passages back and forth between San Francisco and South Sea ports. She ended her days on the Sausalito mudflats - Galilee Harbour is named for her - but her stern is preserved at Fort Mason and her stem at Benicia.
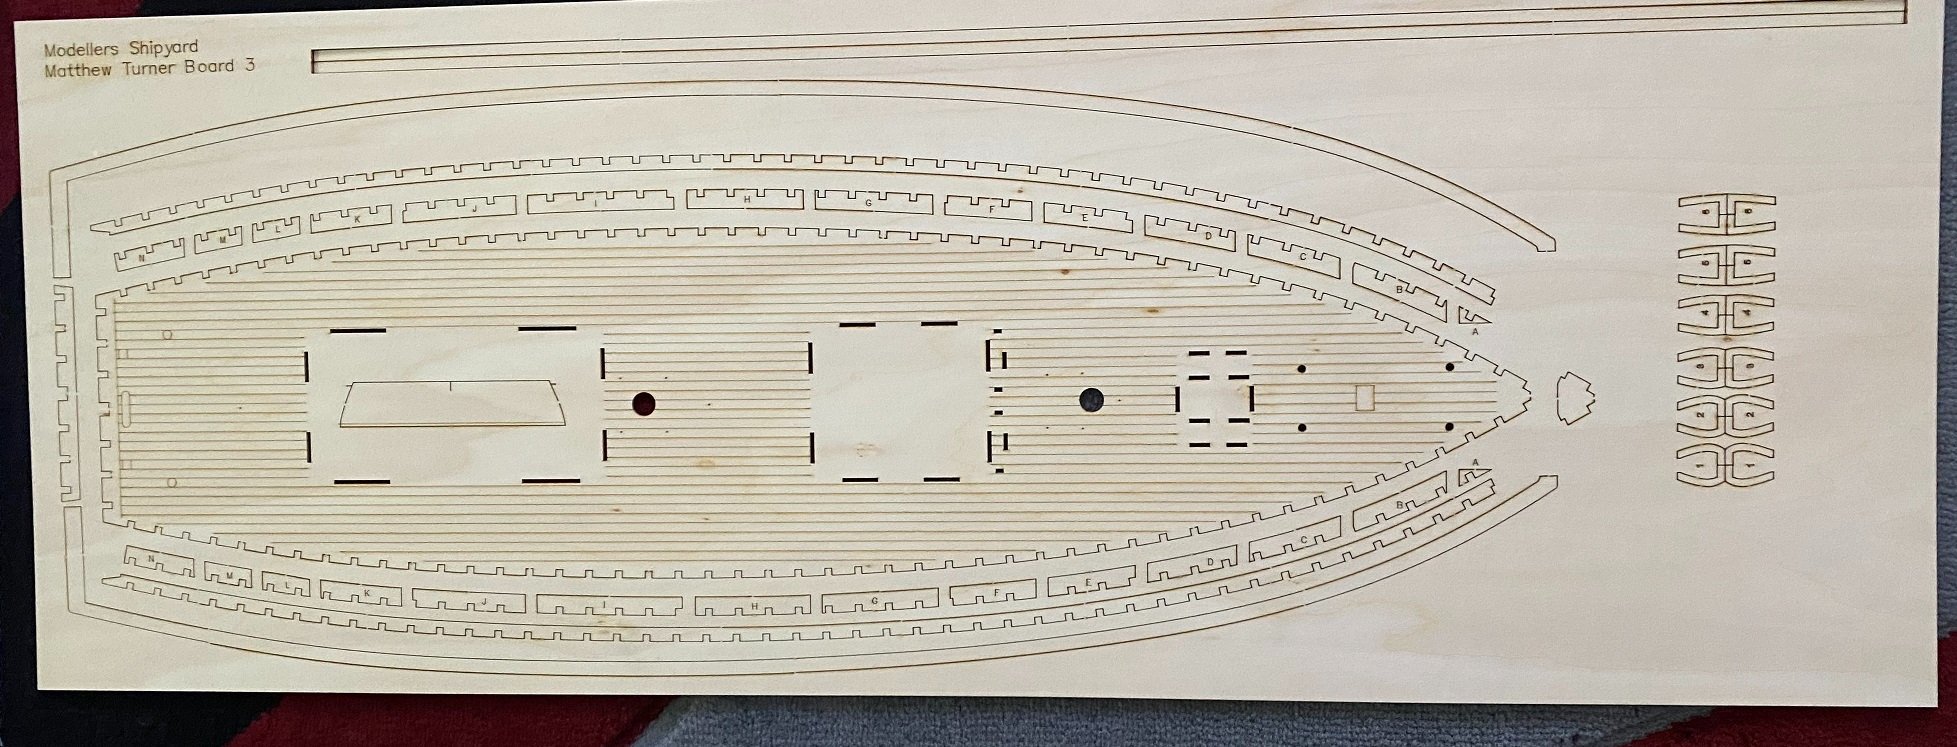
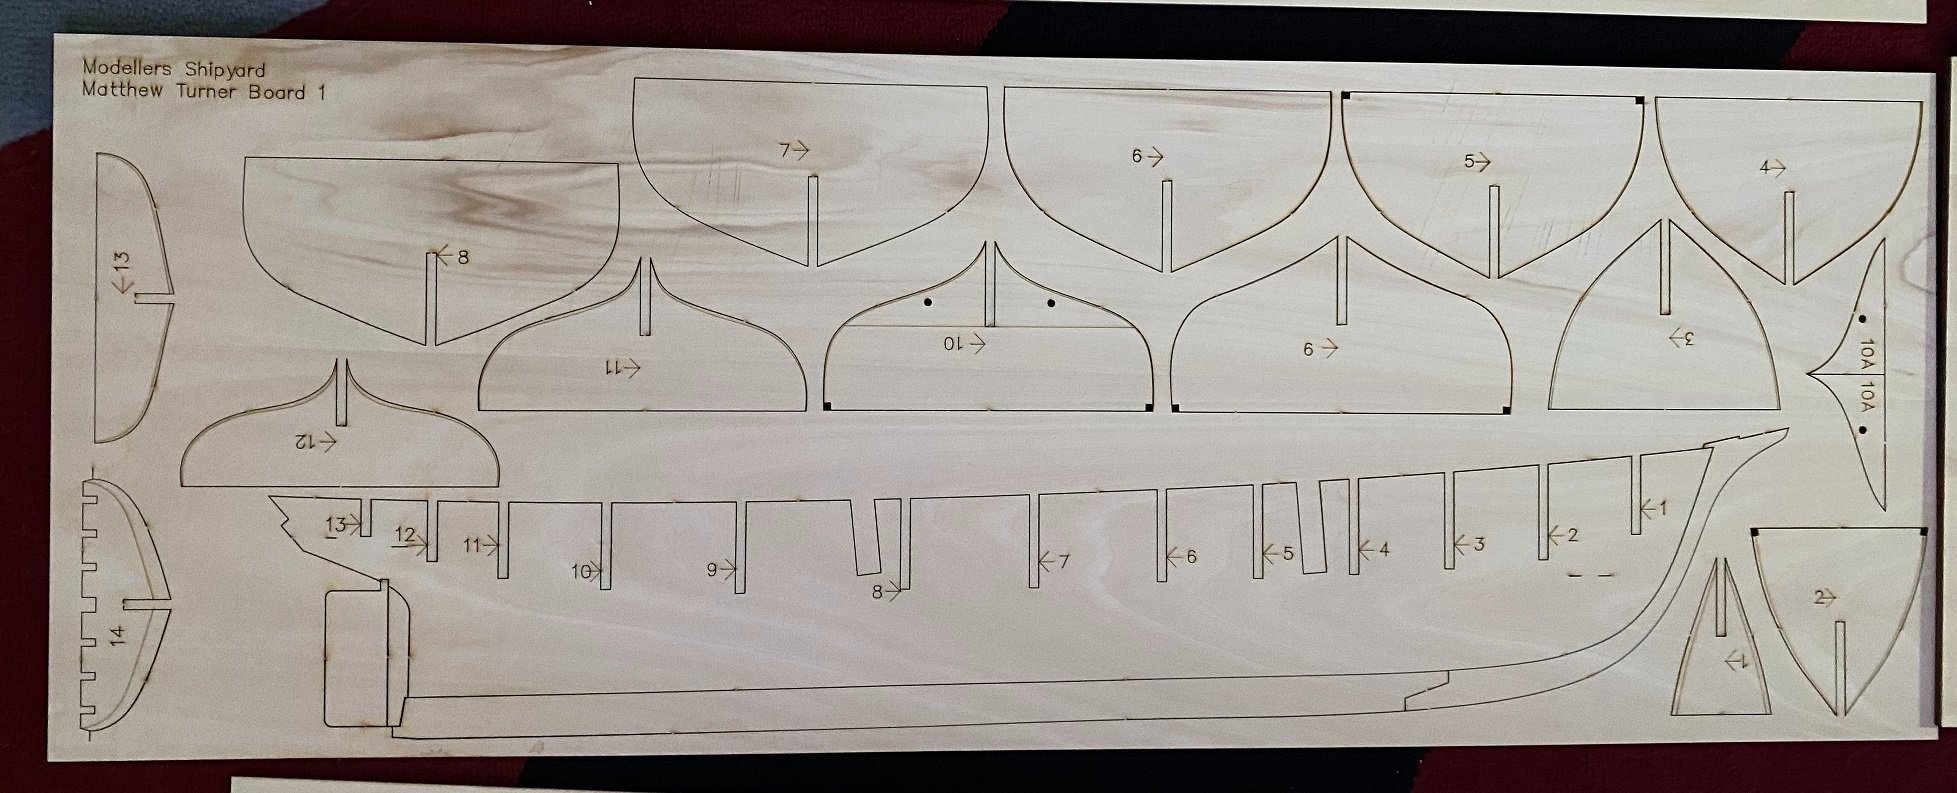
This model of Matthew Turner is expertly designed with a keel and bulkhead construction. A unique feature of this kit is that it has fairing laser score lines on the bulkheads to make the fairing accurate and symmetrical. All laser cutting is clean and crisp and all parts and fittings are of the highest quality. The English building instructions provide highly detailed step-by-step descriptions supported by colour photos of the model being built. The model is single layer planked.
Why did I choose this model? Several reasons:
It's a very handsome ship
I have a penchant for sail training ships
It was from the same manufacturer as the brig Perseverance which I am currently building and I am very happy with the quality of that model.
It is a next-level-up (Lv3) which I felt I needed to undertake before immersing myself in the Gorch Fock (Lv4).
The support from Modellers Shipyard was/is excellent on my current build.
The availability of the 4 DVD set of instructional videos is a huge bonus for this novice builder
Because this ship is so new, there is an endless supply of photos, videos and all sorts of reference material available all over the NET
It was on sale, yesssssssss 🙂

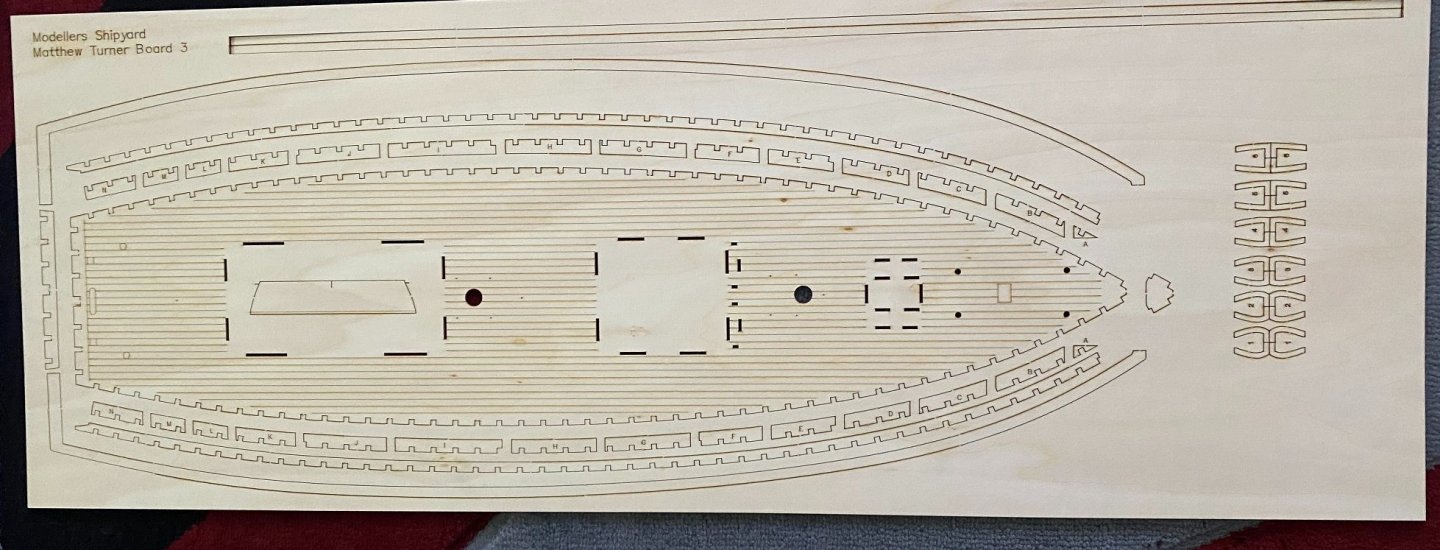
Cant say I like the laser etched deck planking, I rather enjoyed doing my own planking.

Notice the fairing lines laser cut into some of the bulkheads. I don't know that it is a particularly unique feature as I seem to recall having read about them previously.
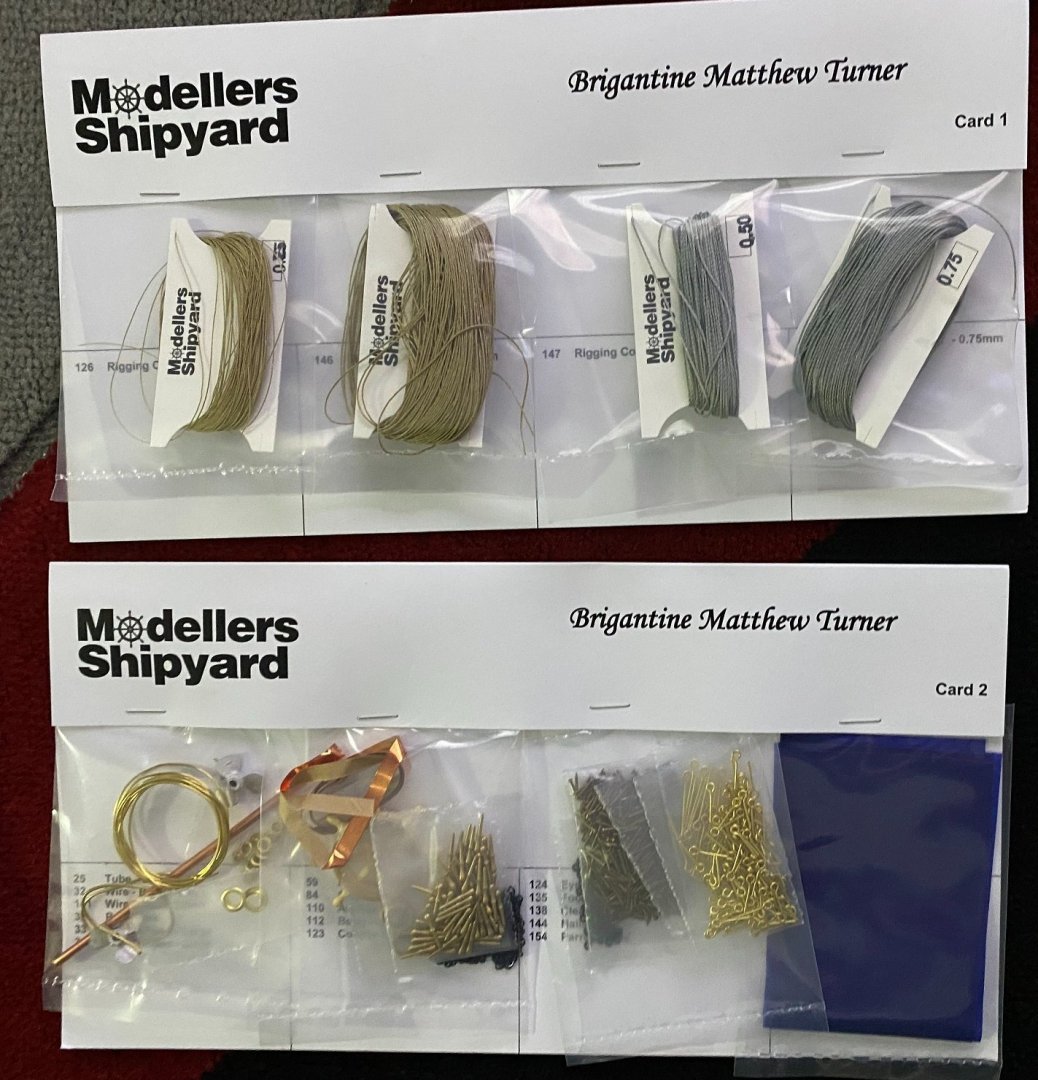

I have noticed that some of the smaller parts like blocks, pulleys and deadeyes are of a much higher quality than say those supplied with the OcCre Gorch Fock.
So that's the kit and I hope to be setting sail with it in the coming week

For anyone interested in the real deal, here is an excellent starting point from Call of the Sea
- yvesvidal, JpR62, chris watton and 2 others
-
5
-
On 8/9/2021 at 11:22 PM, Eurus said:
True, the instructions are easy to follow. However, the main problem I see is twofold: process and authenticity. I cite two examples.
I am subscribed to a YouTube channel model ship builder from Greece who almost exclusively builds OcCre models and he is constantly highlighting examples not dissimilar to your own observations of errors, inconsistencies and sometimes things that are quite simply wrong. Unfortunately, not having a nautical background whatsoever, I will be eagerly glued to your build progress. Mind you, I did complete two years as an apprentice shipwright nearly fifty years ago, interrupted by a stronger desire to learn more about the fairer sex. But it was perhaps from these early days of boat building that I developed an appreciation of sailing vessels.
-
On 8/10/2021 at 6:43 PM, Chook said:
Looking good Mike. You certainly are a hookerinerer. It would have taken me more than a year to get to the same stage.
Well it's better than sitting in front of the idiot box watching countless videos on model ship building. I spend a couple of hours a day out in the shed and find the building process most relaxing and therapeutic, I guess I am trying to catch up with those whom have been doing it for years.
-
On 8/10/2021 at 12:11 AM, BobG said:
I just came across your build log, Mike, and your work is excellent especially considering this is your first build. The finish on your hull is beautiful. What varnish did you use on it?
I also see that you have started building the Gorch Frock. I look forward to following that build as well. I've always thought that she is a beautiful ship.
Good luck!
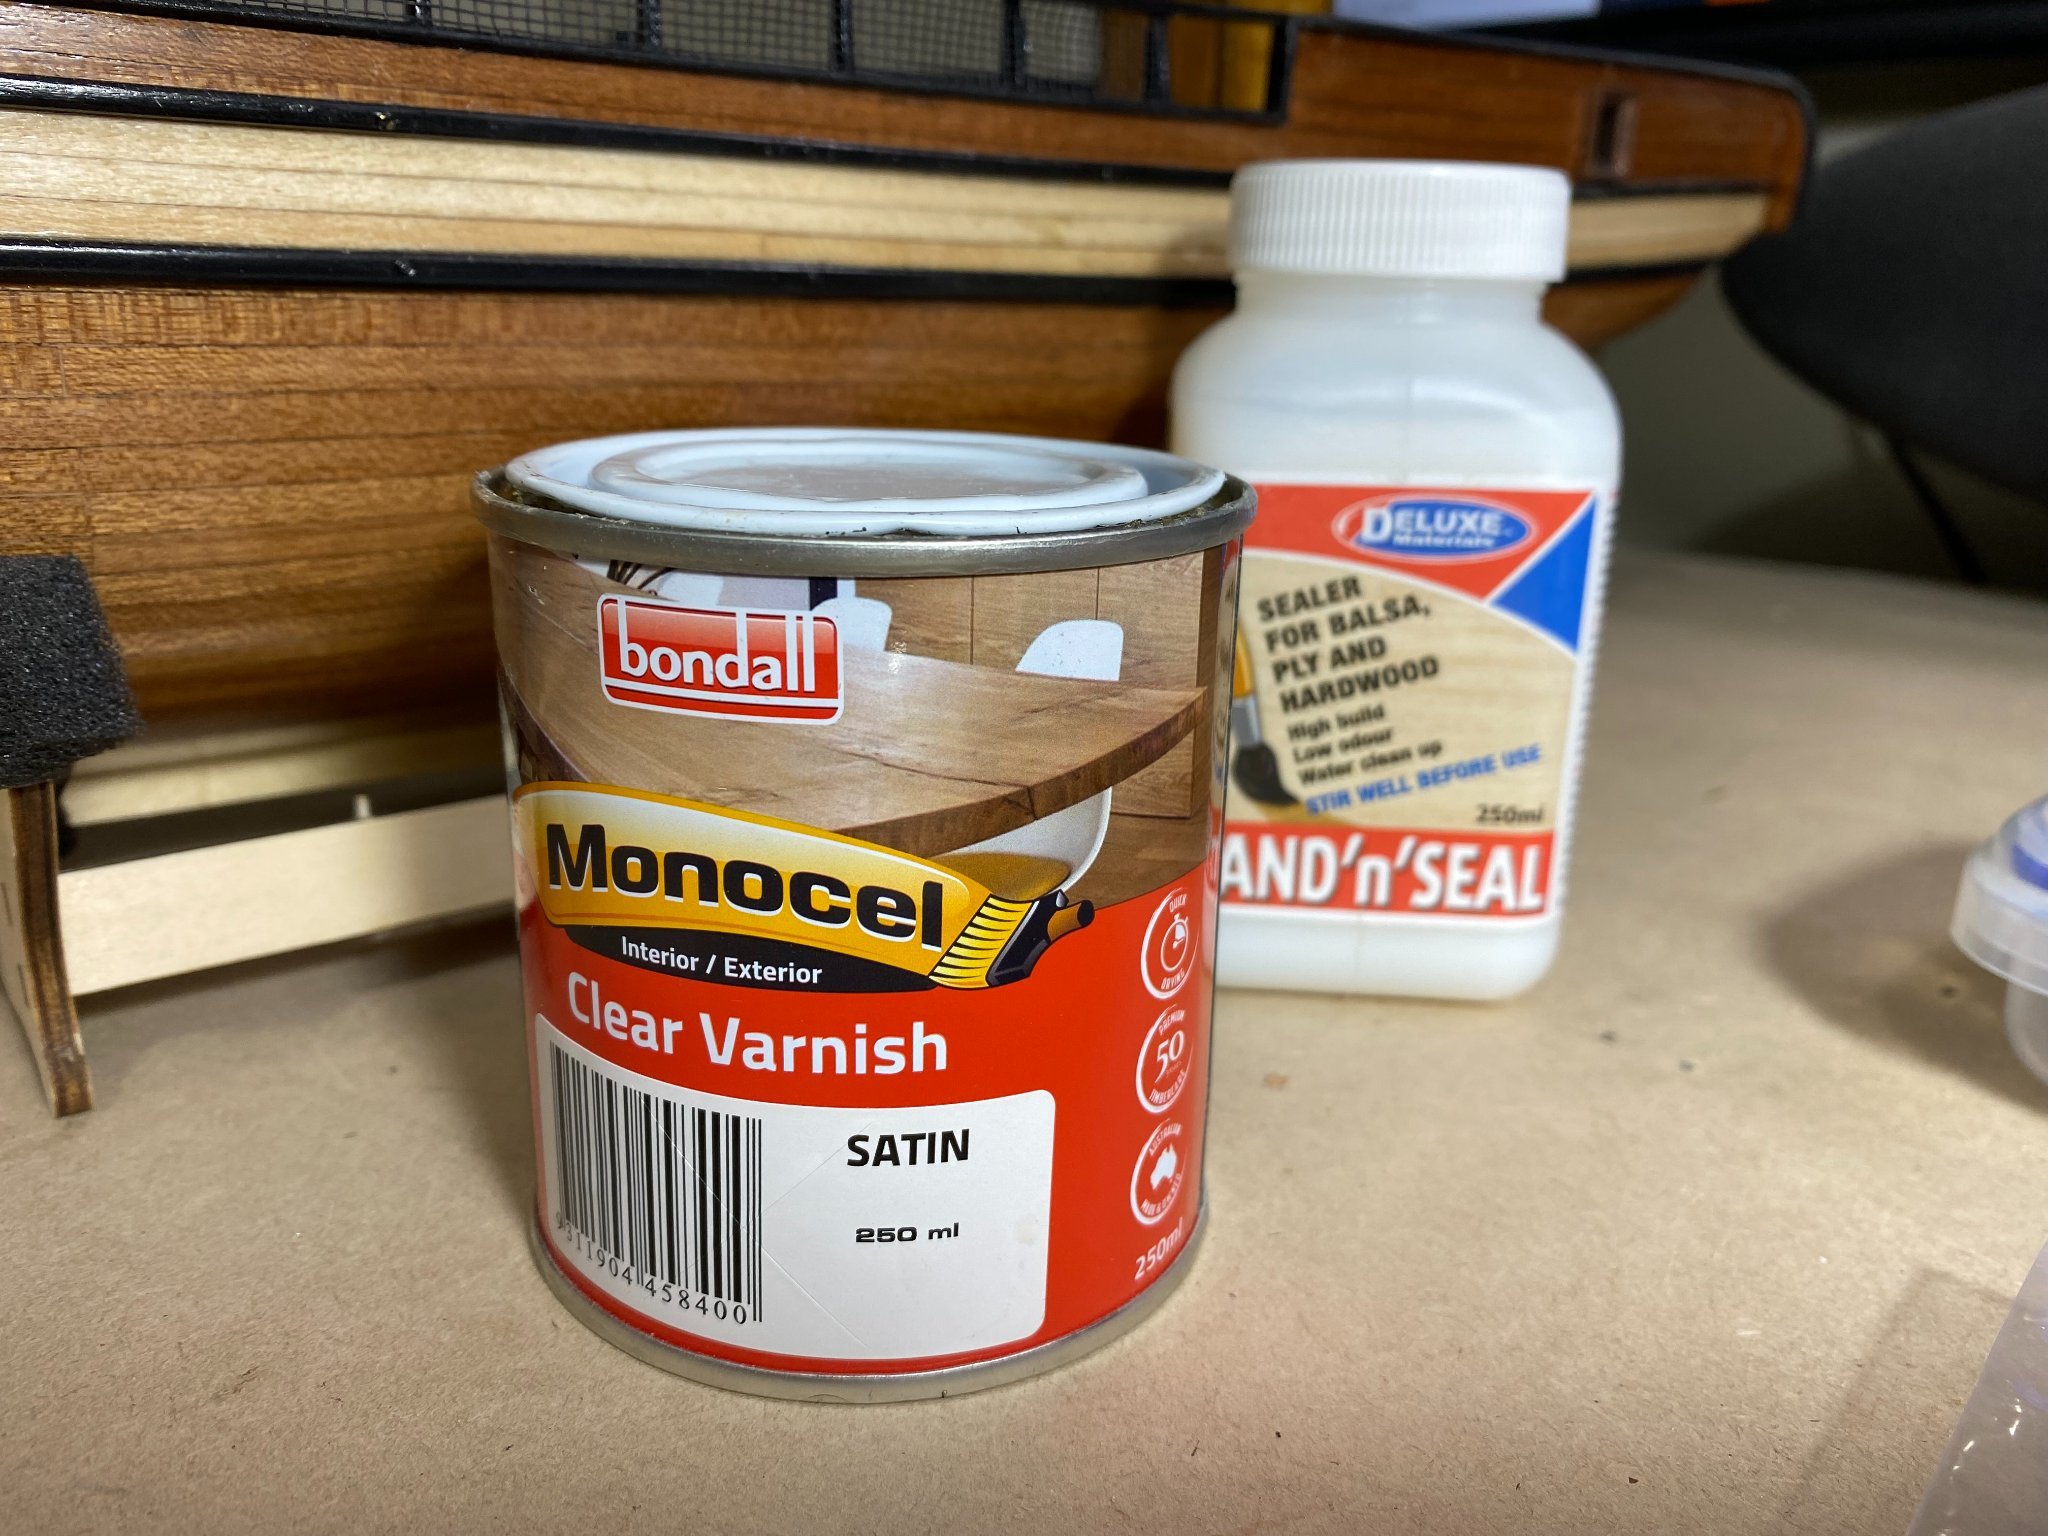
Well thank you indeed for your kind words. So no expert on varnishes or finishes I told the little old lady at Bunnings what I wanted it for and she suggested this one. I knew I definitely did not want gloss and flat was a tad bland. I like the satin finish, for me it's just right. So I gave the hull and deck three coats of sand n seal and three coats of the satin varnish with a very light sand between coats and I was quite pleased with the results.
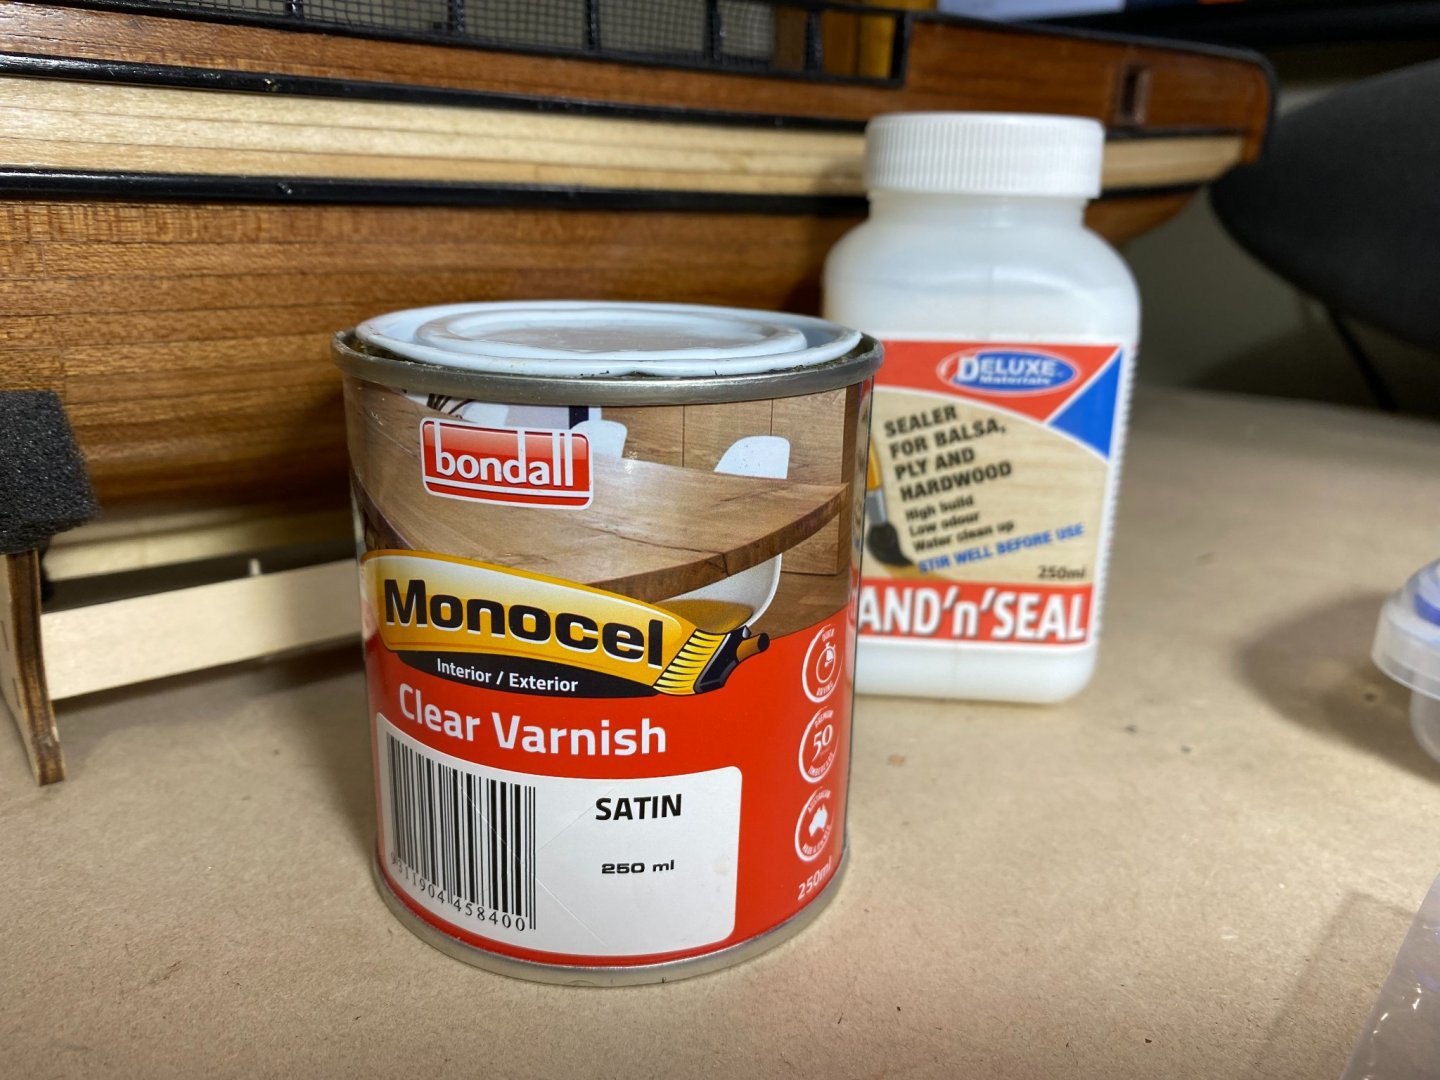
The Bondall varnish, as it turns out, is manufactured here in Perth WA so bonus there as I like to buy local wherever possible.
I just love the Gorch Fock, a very handsome ship indeed but that build will be put on the back burner while I shortly commence my next build. The current model is rated as a level 2 where as the Gorch Fock is level 4. Having found some aspects of my current build more challenging than expected I have decided to embark on a level 3 build first. That build is also a training ship called the Matthew Turner named after the famous American ship builder of the same name. I will start a build log on that one shortly.
- Fernando E, coxswain, BobG and 1 other
-
4
-
22 hours ago, Eurus said:
Hello Mike. I am currently building Gorch Foch's cousin, the ARM Cuauhtémoc. Both are based on the same design and blueprints, real vessels and OcCre models. We could probably benefit from each other's experience.
I have done a lot of research for my build, which includes the Gorch Foch as well.
Be advised, the materials are good, but the instructions severely lacking and sometimes outright wrong. If you are going for authenticity and realism, there will be a lot to do.
Well isn't it interesting to see differences in perception. I felt the instructions were easy enough for me to follow, whether they are correct or not is a different matter and I am not qualified nor experienced enough to say. The quality on the other hand I felt was questionable, and I can only compare to one other kit that I started first from "Molders Shipyard", the Brig Perseverance. My observations of small items like the little blocks were of a far better quality and more defined from the MS kit. With this OcCre kit I was disappointed with the false keel, laser cut out of square and significantly warped at either end. That said, the rest of the timber in the kit appears to be of good quality.
In any event, I am going to follow your build and learn with interest.

-
50 minutes ago, Fernando E said:
No more floggings but after nearly 7 weeks here am starting to look like a Tasmanian..(..am growing an extra toe!!) 😄😄
So long as you don't sound like one you'll be safe and welcomed back, I say this of course with my tongue firmly embedded in my cheek
")
- Fernando E and mtaylor
-
2
-
10 hours ago, Fernando E said:
PS. I'm still in Tasmania and not keen to head back to Sydney while the lockdown is still on and Covid numbers are still on the rise. The only downside is that under lockdown I would have more time on important things like working on my Perseverance!!! 🤕
Ahhhh Tasmania, do they still carry out public floggings down there or have they moved on? Ahh the good old days.............

- Fernando E and mtaylor
-
2
-
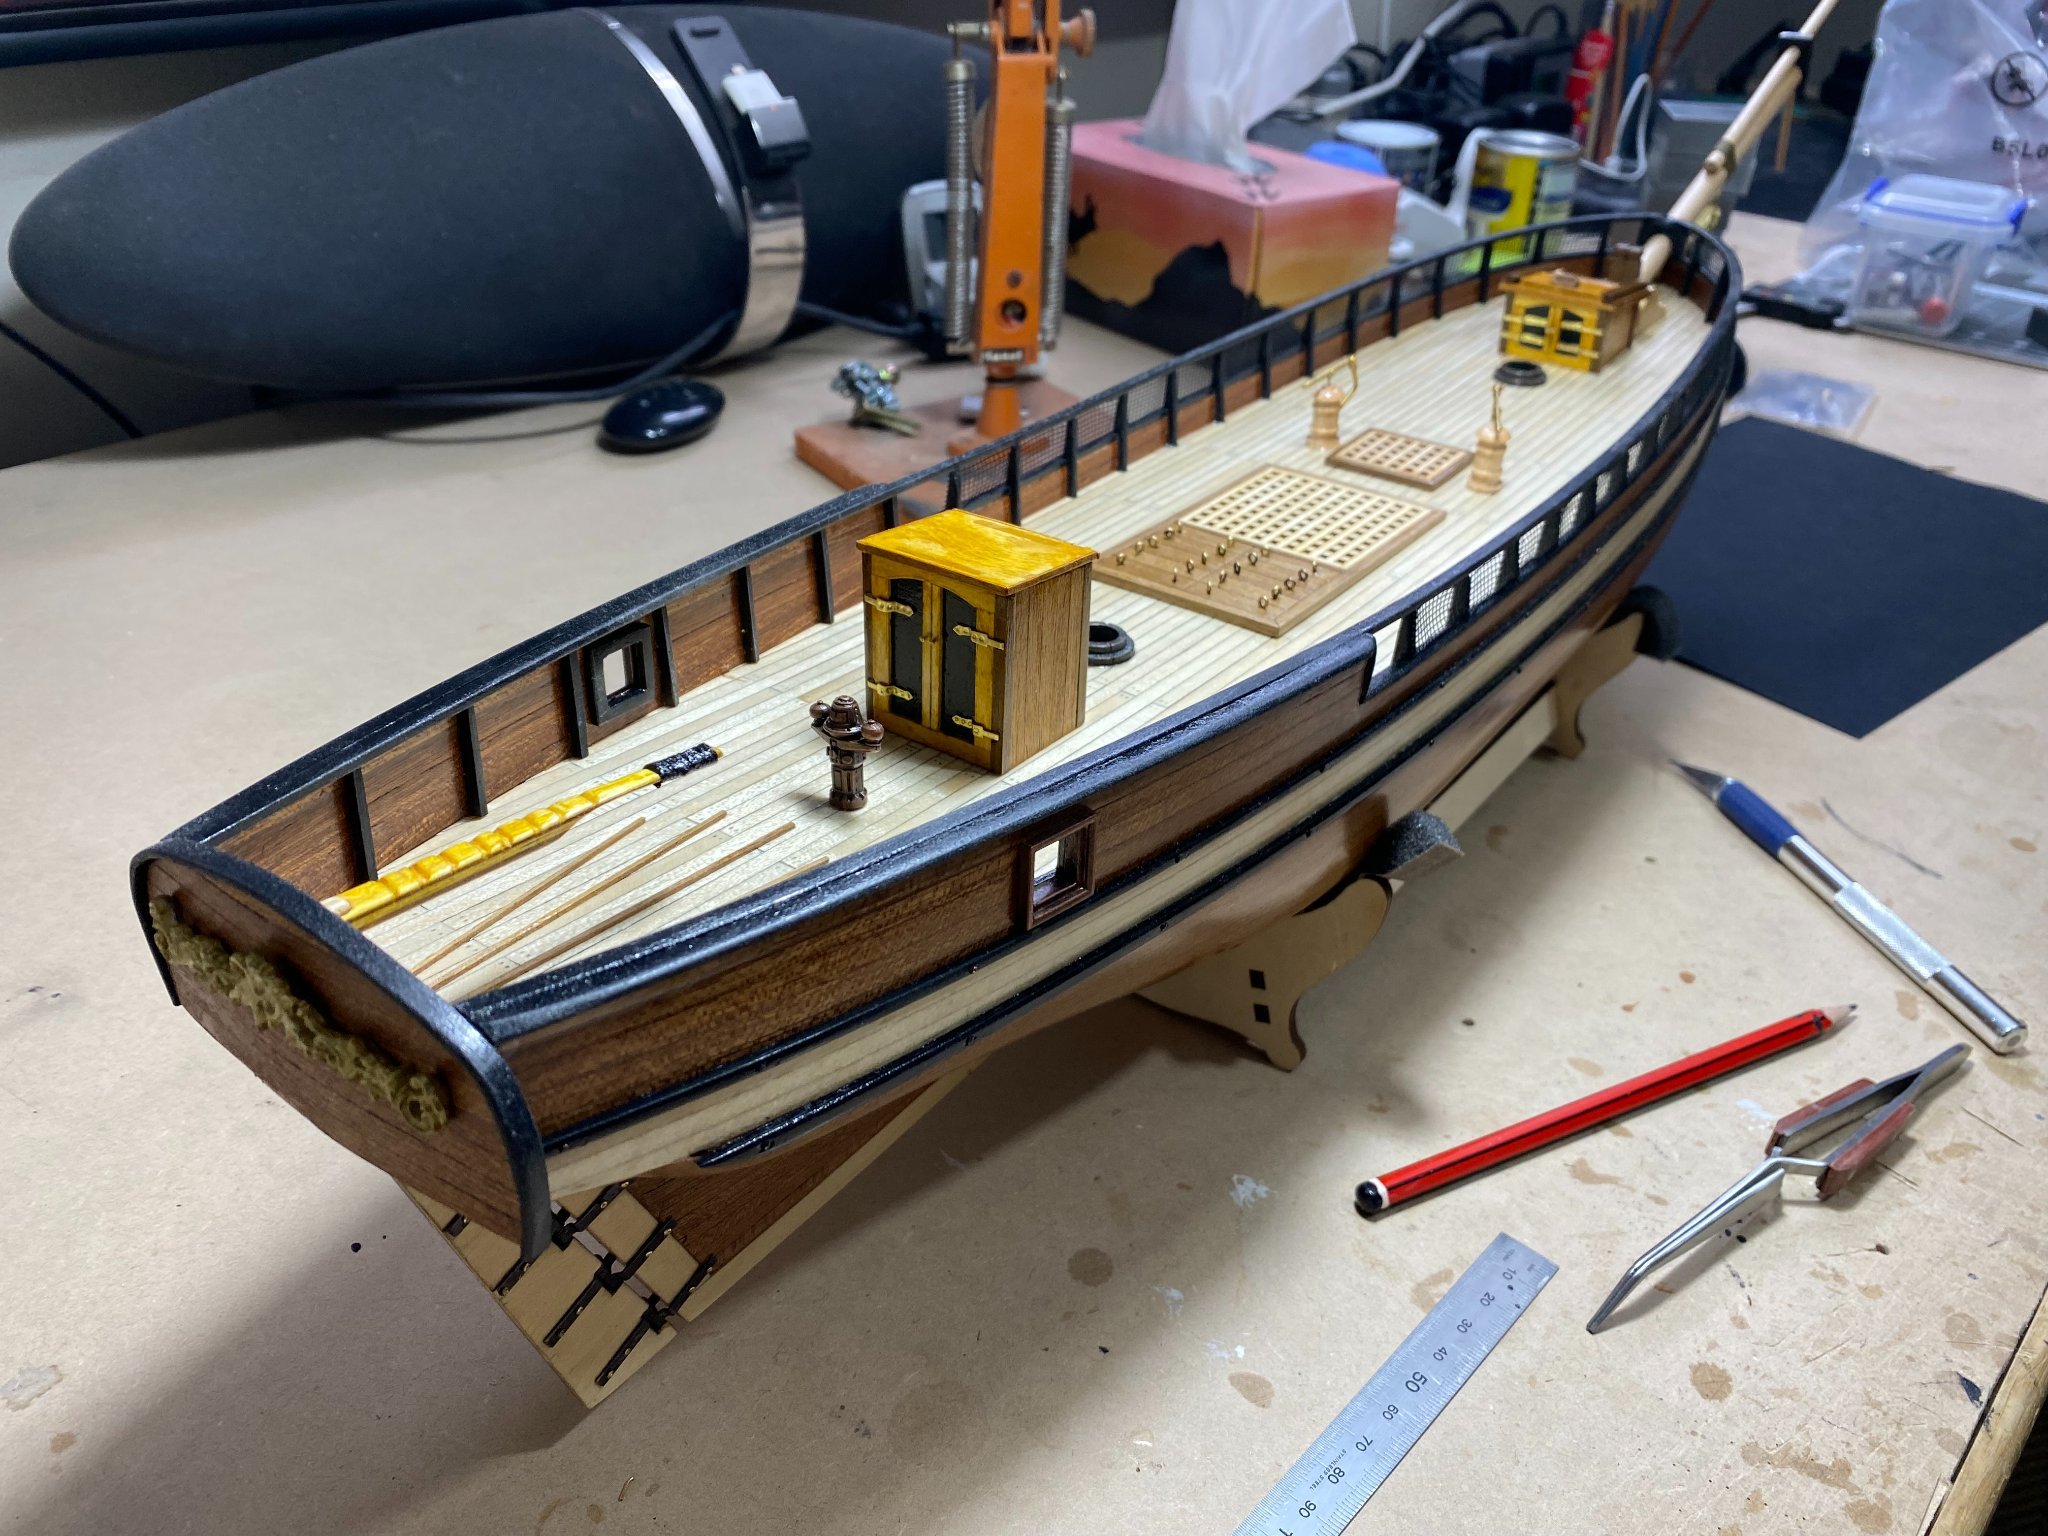
26/07/21 Working on companionways
27/07/21 Working on companionways
28/07/21 Working on companionways and started work on other deck accessories
02/08/21 Working on main hatch and forward hatch
03/08/21 Continued working on deck furniture, rudder tiller, winch, hatches and anchors
06/08/21 Big day, glued in place all the deck furniture I made
07/08/21 Made and fitted cat heads and knight heads
08/08/21 Rigged cat heads and started making pin rails and belfry
HTD: 302
.
Some of the assembled deck furniture ready to go on
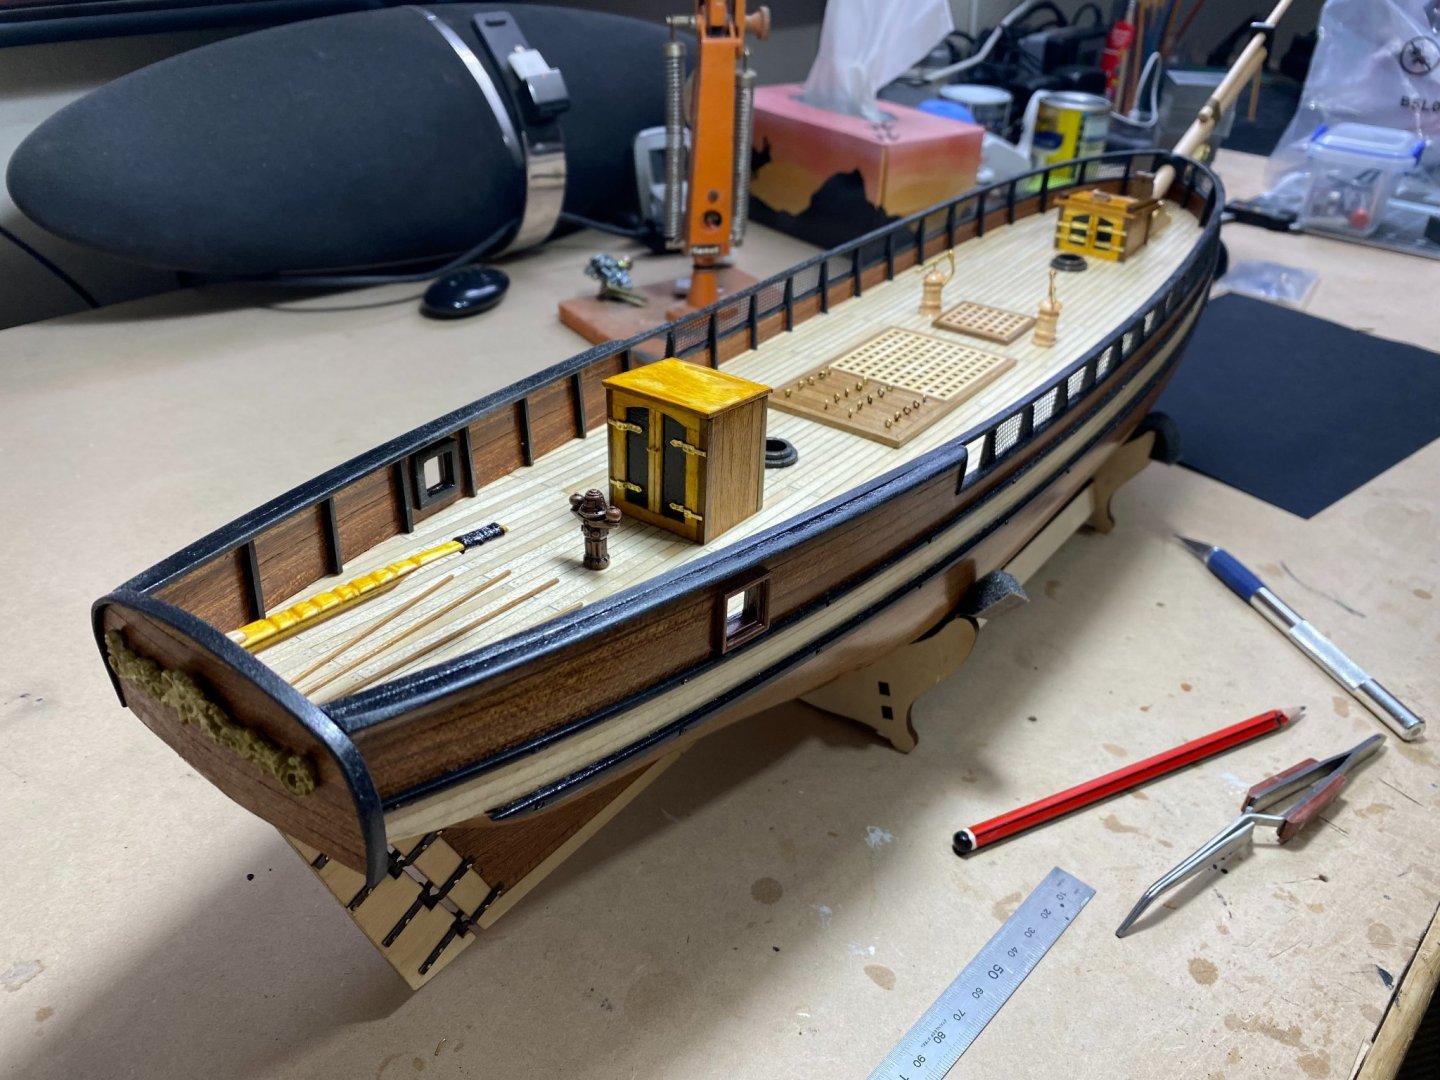

Deck furniture in place

Anchors temporarily in place
Catheads in place
Cat heads rigged with anchors temporarily in place
Next week sees a start on the lifeboats
So a lot of fiddley things this last couple of weeks.
Attempted staining the roofs of the companionways but clearly lack experience and expertise. I was just trying to get away from the plain and unattractive ply finish. None the less, to the casual observer I will be perceived as a genius and no one but myself will be any the wiser. Once again I find something that should be a doddle to put together deceptively tricky, some well learned mistakes for next time. The learning curve will steepen further before it wanes I suspect.
I wanted to blacken the eyelets on the hatch covers but wasn't prepared to part with $30 or so for a few drops (100Ml's) of Black-It. I tried the vinegar and salt suggestion for a few days but that just took the shine off and it was no blacker. I then gave them a lovely coat of black primer and and a couple of top coats but this just came off on handling. So I have given in and ordered me some Black-It.
I really enjoyed rigging the cat heads as it was my first foray into rigging and am looking forward to getting stuck into some real rigging in the coming months.
I stuffed up a bit with the knight heads in that when I checked out the base of the bowsprit I checked out too much. There was no measurement given and so I just went by eye. There is only about a 1mm gap between the two heads instead of about 4 or 5 as I see it. Another lesson learned.
So in terms of deck furniture I just have to finish some pin rails and start on the three lifeboats before getting stuck into the masts and yards.
- Fernando E, GrandpaPhil, Eurus and 1 other
-
4
-
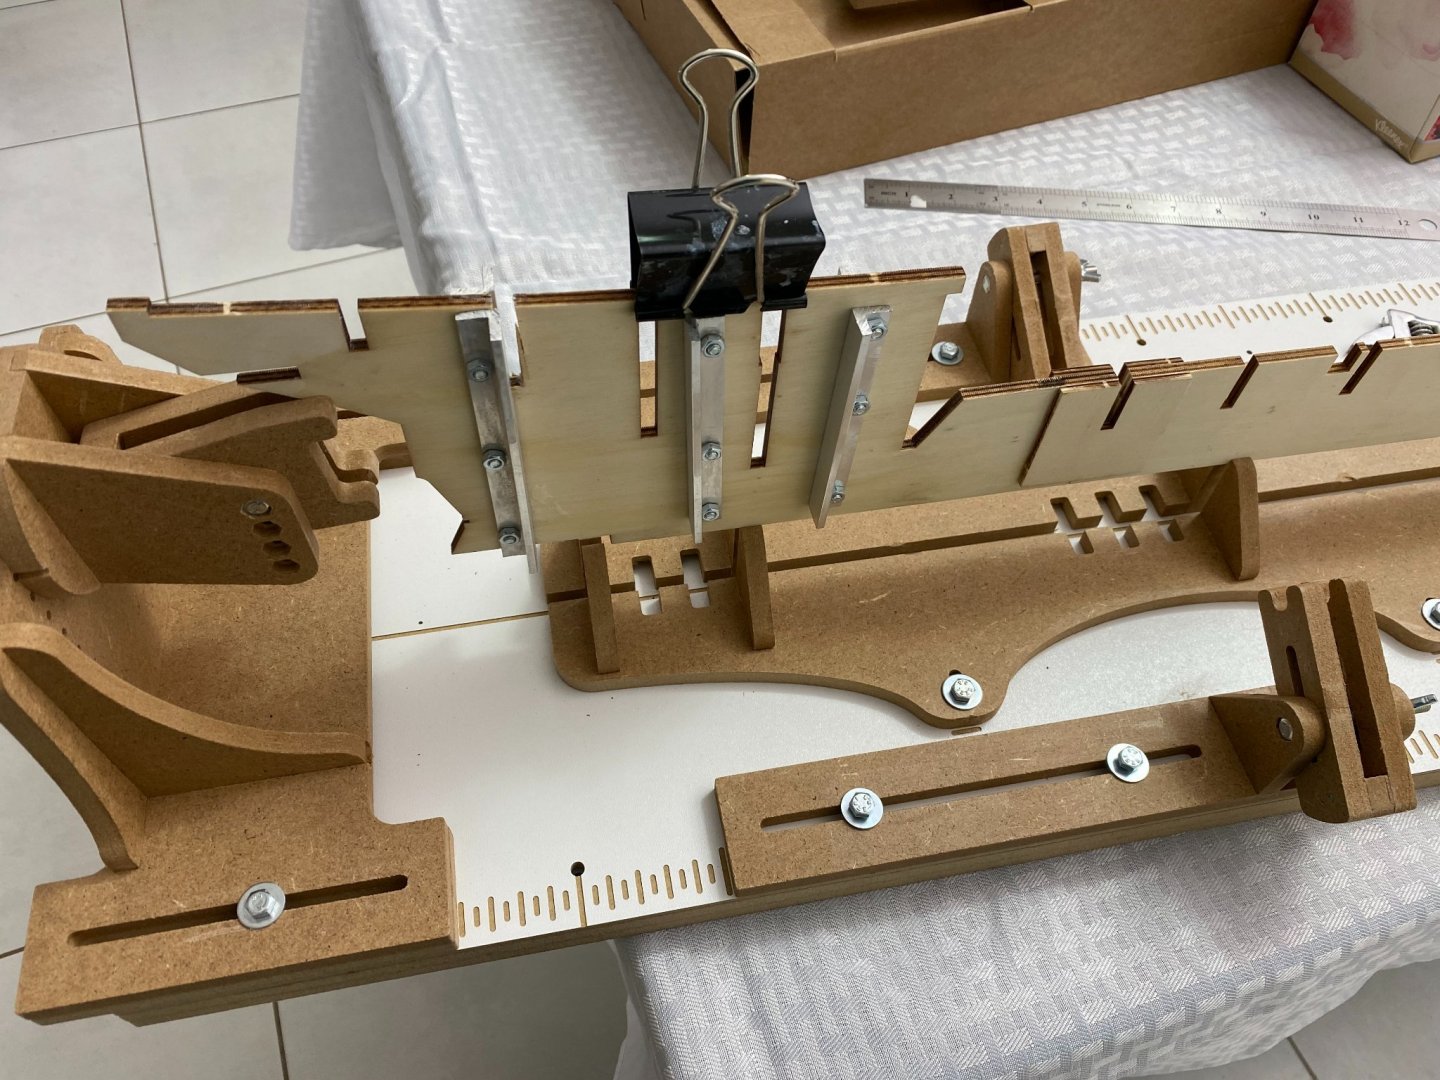
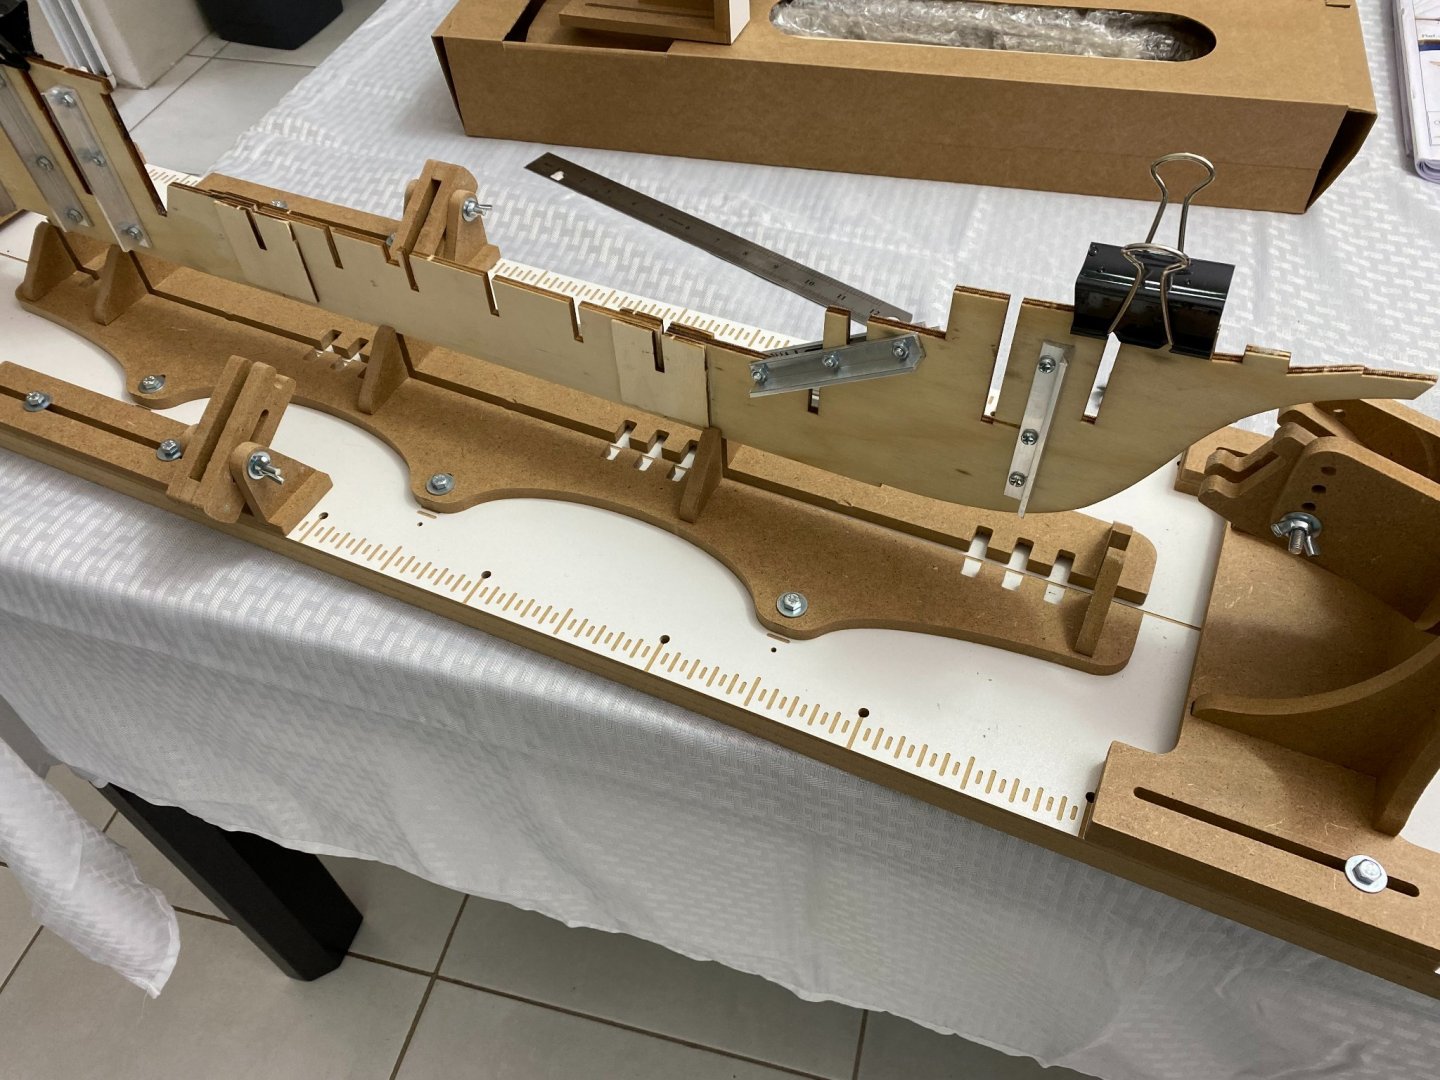
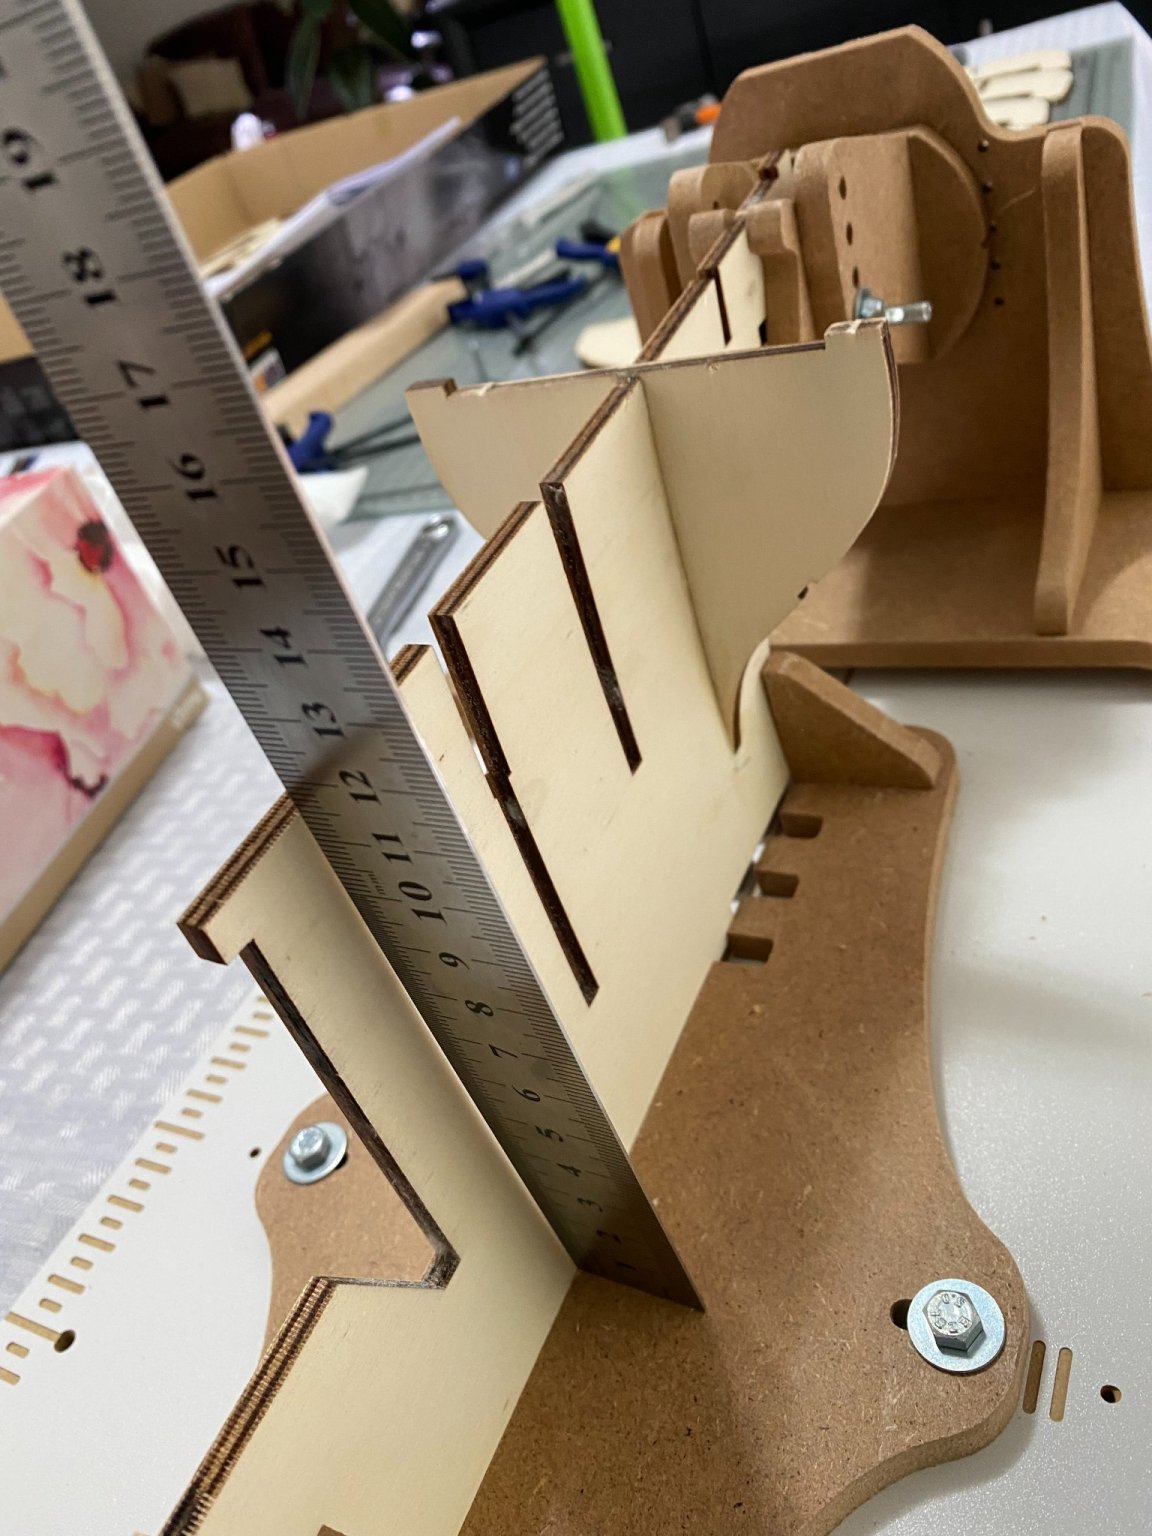
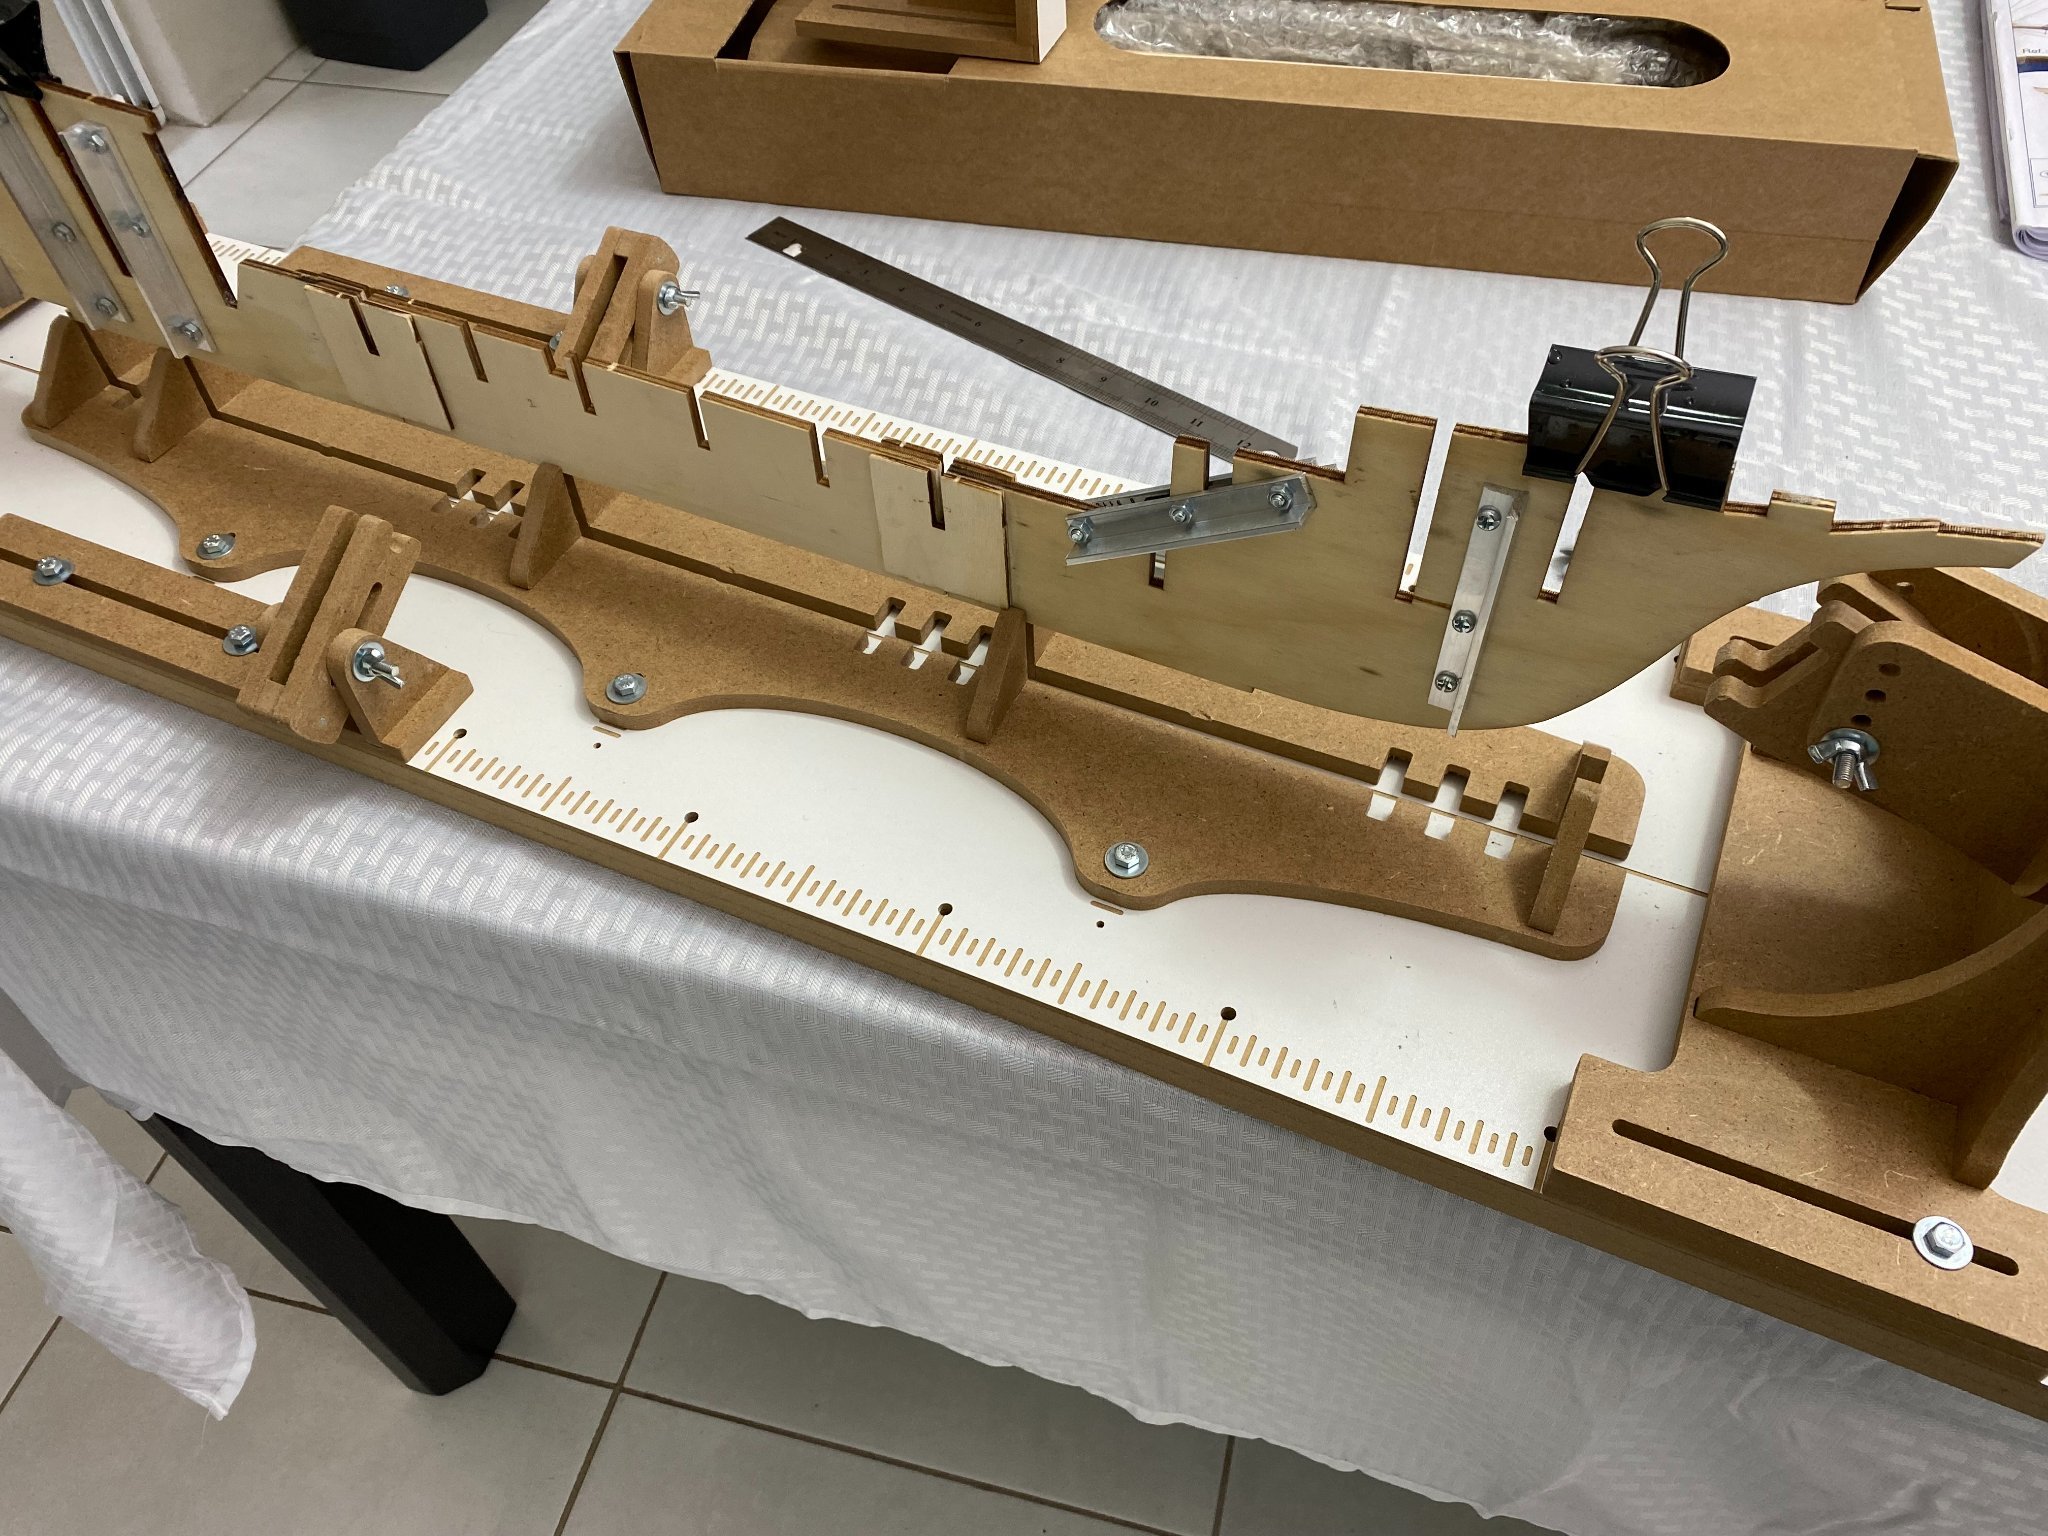
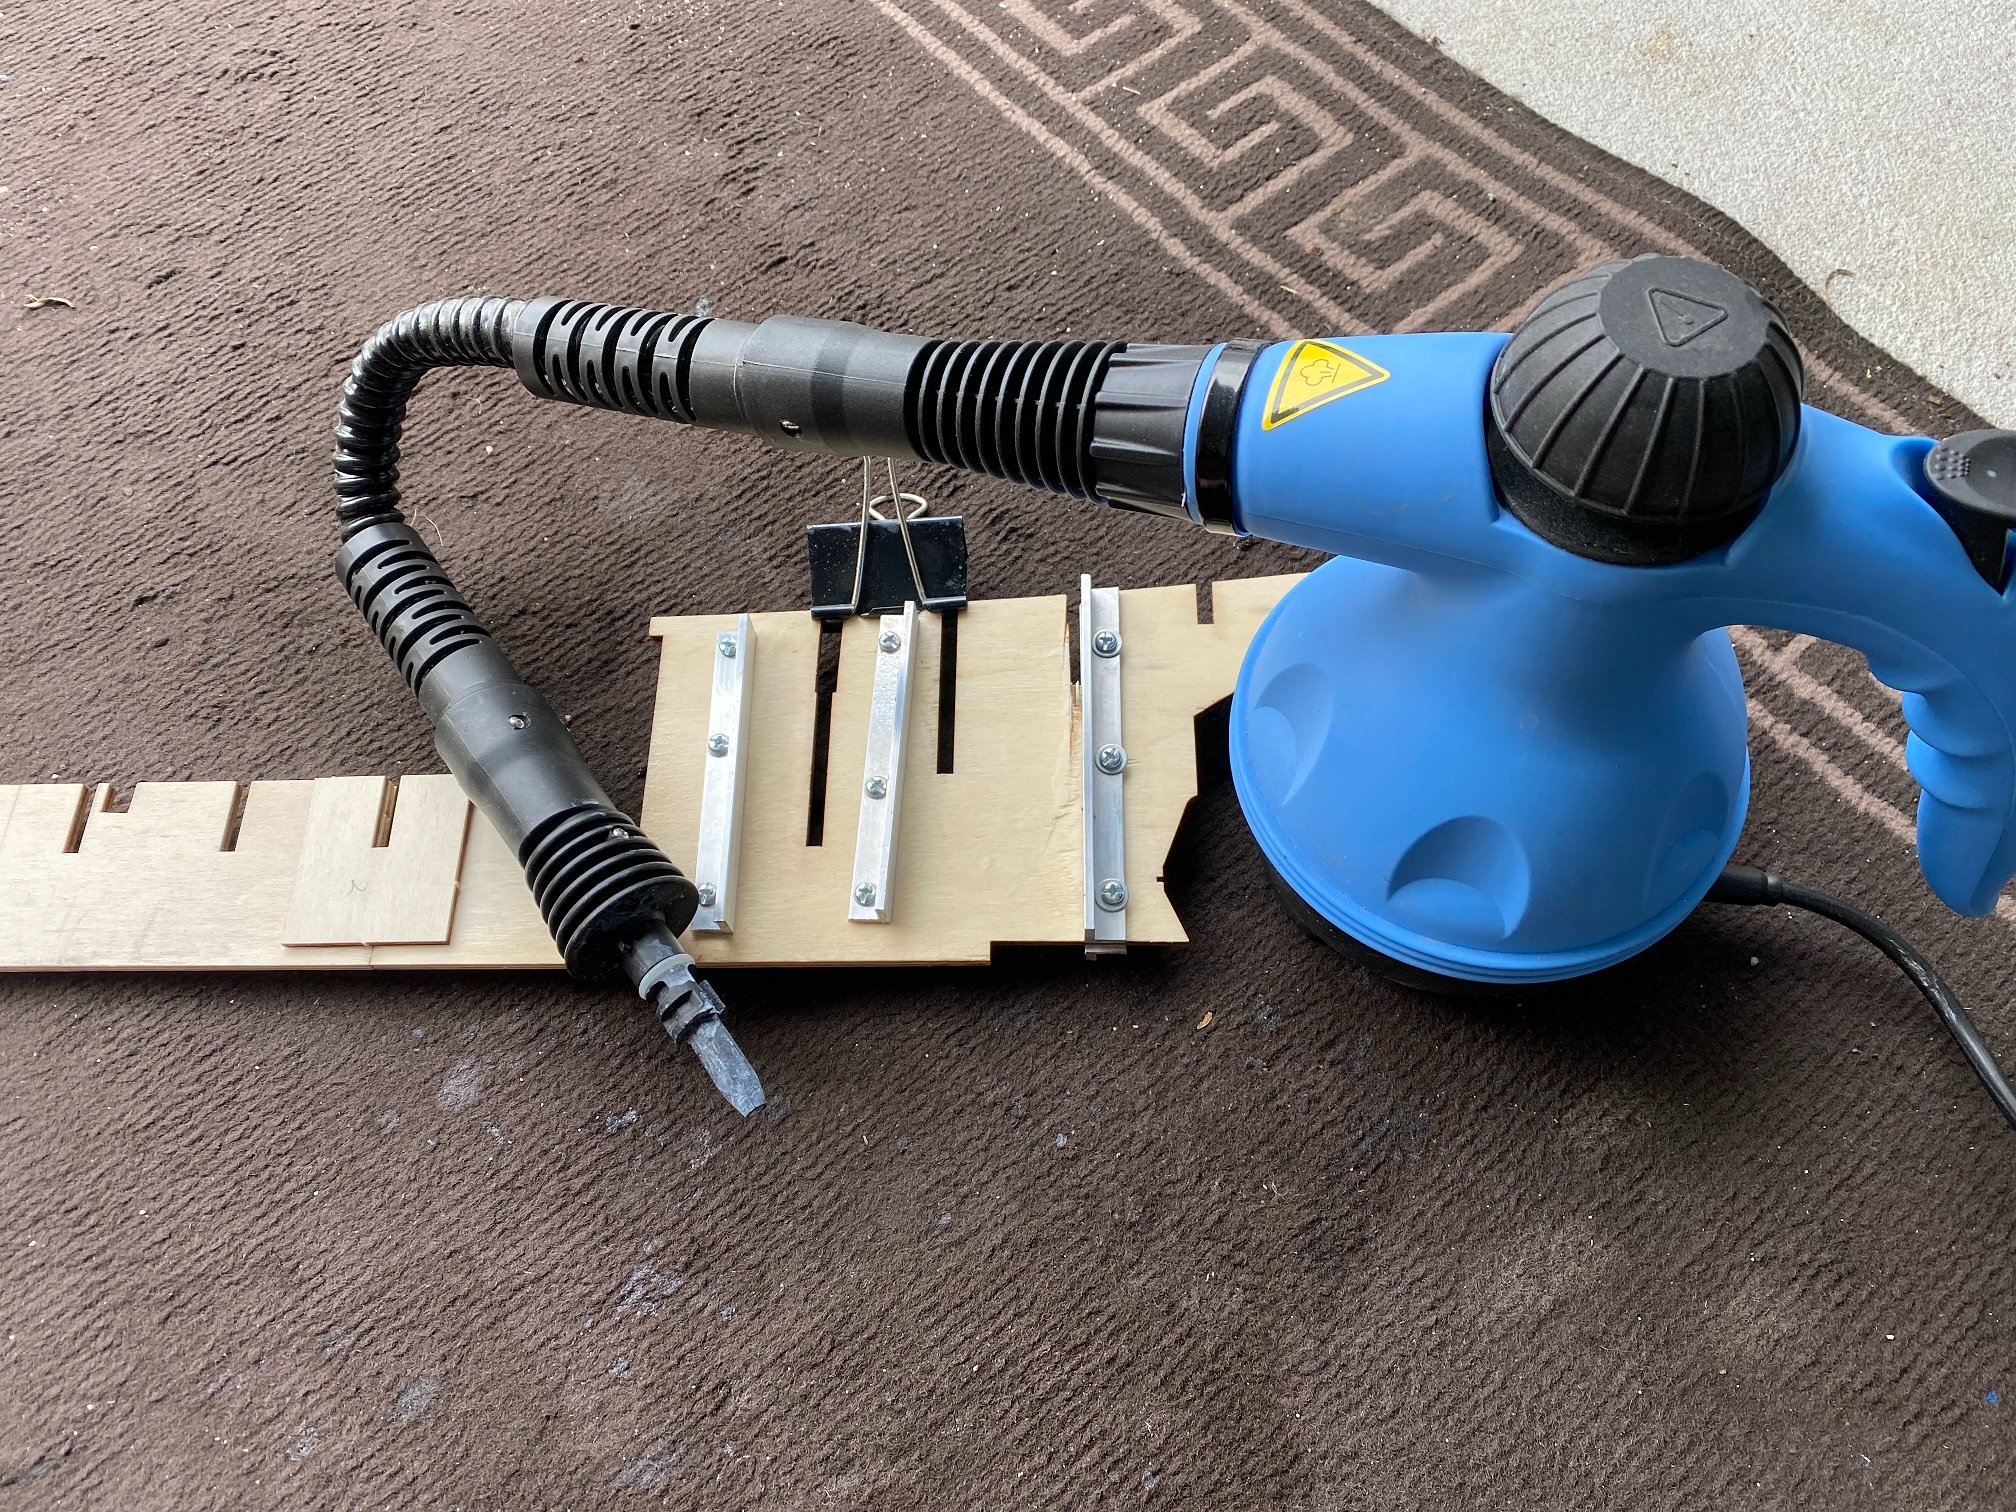
05/08/21 Assembling my Hobby Zone building slip and setting the keel in it ready for framing.
HTD: 6.4

Built the slip.
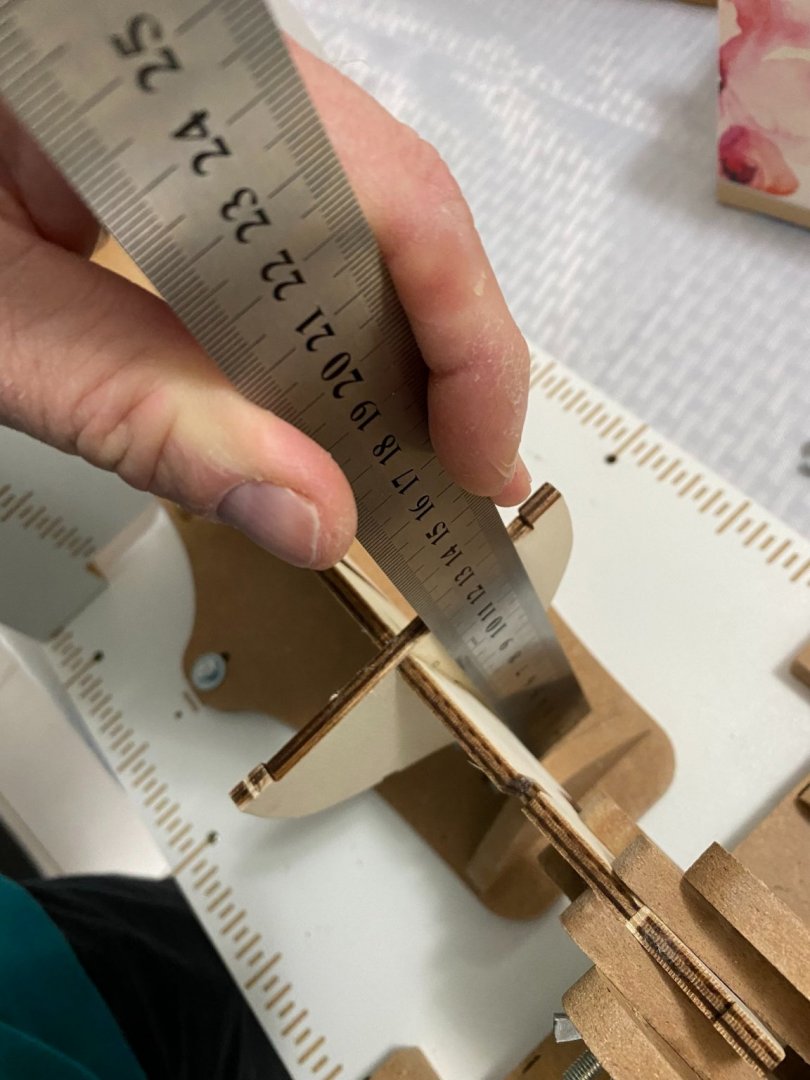
After a seven or eight week wait the big heavy box arrived and no wonder it was sent sea freight. Being of MDF construction I sealed all parts with a sealer so that it doesn't swell up when I spill my coffee on it. I also replace many of the nuts with wing nuts for quicker access to make adjustments. I think this slip is an ingenious design and I'm looking forward to exploring its full potential.
This build will continue very slowly as I am half way through my current "Perseverance" build and for the benefit of building experience will start my next build "Matthew Turner" shortly. I think two at a time is enough to be going on with but will slip a few bulkheads onto this one occasionally.
-
16/07/21 - 22/07/21 Remaking head rails.
23/07/21 Glued on new head rails and cut out cargo ports in bulwarks.
24/07/21 Fitted cargo ports and made frame for same on the inside. Fitted transom decoration.
25/07/21 started to make companionways.
HTD: 284
New head rails in place, less curve this time and the right way around i.e. concave not convex, oh the embarrassment.

Cargo ports fitted

Top view of top rails, symmetry not great :-(

Cargo port with internal frame and check out my handsome transom :-)

Starting to make the companionways.
So this week, for the most part, was spent recreating the headrails and as I have mentioned before it is so surprising how something so deceptively simple was so challenging and to be honest I am not much happier with the new ones. I suspect a seasoned modeler would have stripped them off again and again if need be to get them just right.
Cutting out the cargo ports was not as easy as I thought it would be, much less 70 odd canon ports on the Trinidad or similar, a labour of love for sure. Anyway, got them cut out but to me, not perfect as the gaps, as seen from the inside, were all over the place, as seen in one of the pics above. The manual didn't call for an internal frame for the cargo ports but as I said, just too messy naked, as it were. None of the stains I had came close to the finish of the bulwarks so I just painted them black which disappointed me because you now can't see the mitre joints employed in the making of them that I prided myself on.
Today I started making the two companionways. I started out thinking this will be so easy and fun. WRONG!! Rushing too much I put things on back to front yada yada. Anyway, have rectified the mistakes and will slow down with the completion of them.
- Chook, coxswain, Duanelaker and 2 others
-
5
-
2 hours ago, James H said:
Beautiful stuff 🥰
Love the heavy metal to hold stuff down and all those clamp forceps! 😝
Well would you believe that the "heavy metal" came all the way from England. I bought them very cheaply on eBay for a different purpose but glad I was able to find another use for them. They were listed as Jewellers anvils if I remember correctly.


Gorch Fock by Mike Hunt - OcCre - 1:95
in - Kit build logs for subjects built from 1901 - Present Day
Posted
06/09/21 Installed beams on BH’s that support mid deck also installed 2 sections of mid deck.
07/09/21 Installed last section of lower deck
02/10/21 Cut and prepared planks for lower deck
07/10/21 - 19/10/21 Continued on and off planking this lower deck.
20/10/21 Completed planking, trimmed edges and started sanding. Applied sand n seal and sanded some more. Applied faux nail holes to planks. Applied first coat of varnish
21/10/21 Sanding and varnishing of lower deck
22/10/21 More sanding and varnishing of lower deck
23/10/21 Started work on deck houses. Sanded and gave first coat of primer.
HTD: 33
Bit of a gap where BH meets deck
Final section of lower deck about to be installed
Lower deck complete.
Getting planks ready for lower deck
Lower deck planking complete
Started to prepare the deck houses
So making a bit of progress here. Looking forward to getting the deck houses finished so I can complete the two upper decks as they protrude out over the deck houses. I didn't come across any issues or hassles in this last bit of progress other than where the deck did not come out to be flush with a bulkhead so I built up the deck edge with some scrap planking wood and bobs your uncle, or aunt, as may be the case in this crazy world of gender misappropriation and confusion lol.