Dave_E
-
Posts
1,282 -
Joined
-
Last visited
Content Type
Profiles
Forums
Gallery
Events
Everything posted by Dave_E
-

Brass Blackening Building Time Survey
Dave_E replied to Dave_E's topic in Metal Work, Soldering and Metal Fittings
I’m totally down with that Allan! After spending a few hours this week, just starting the process, was just curious about the time it takes for a larger model. -
Ok, I know the following photo has nothing to do with my build log, but it came today. 😁

- 362 replies
-
- 9
-

-
- Amati
- Lady Nelson
- (and 2 more)
-
Brass Blackening Building Time Survey
Dave_E replied to Dave_E's topic in Metal Work, Soldering and Metal Fittings
Hey Pat, The process is all good, I’ve got that down. My question is on a full kits worth of brass to blacken, how much time are you spending on just that process. 10 hours, 2 days? -
Hey Peanut, I just went through the same decision with my Rattlesnake. I agree with you, at this time in our building life, things like kit completeness, quality of material in the kit and instructions are way important! I received good answers from many folks that had their reasons for picking the kits they did. My .02 for you is research each kit to the best of your ability, and look at ALL the build logs and see what builders had to say about the kit they built. I had the same questions about size of the scale you brought up. I personally would be looking at the 2 larger scales. 👍
-
Hi All, This is not another “how do you blacken brass” question, but a question for you who do the brass blackening process. I’m building the Lady Nelson, a small single mast, beginner type ship and after all my experimentation, I think I’m leaning toward brass blackening for my ships. When the parts are in the solution and right after coming out, boy are they black. After rinsing , still black. However when you wipe them down (If you don’t, you’ll have black all over your fingers and then all over your ship), the parts are not black, they are “gun metal”. So here’s the question: What kind of average time do you spend on the blackening process for a 2 or 3 masted larger ship?
-
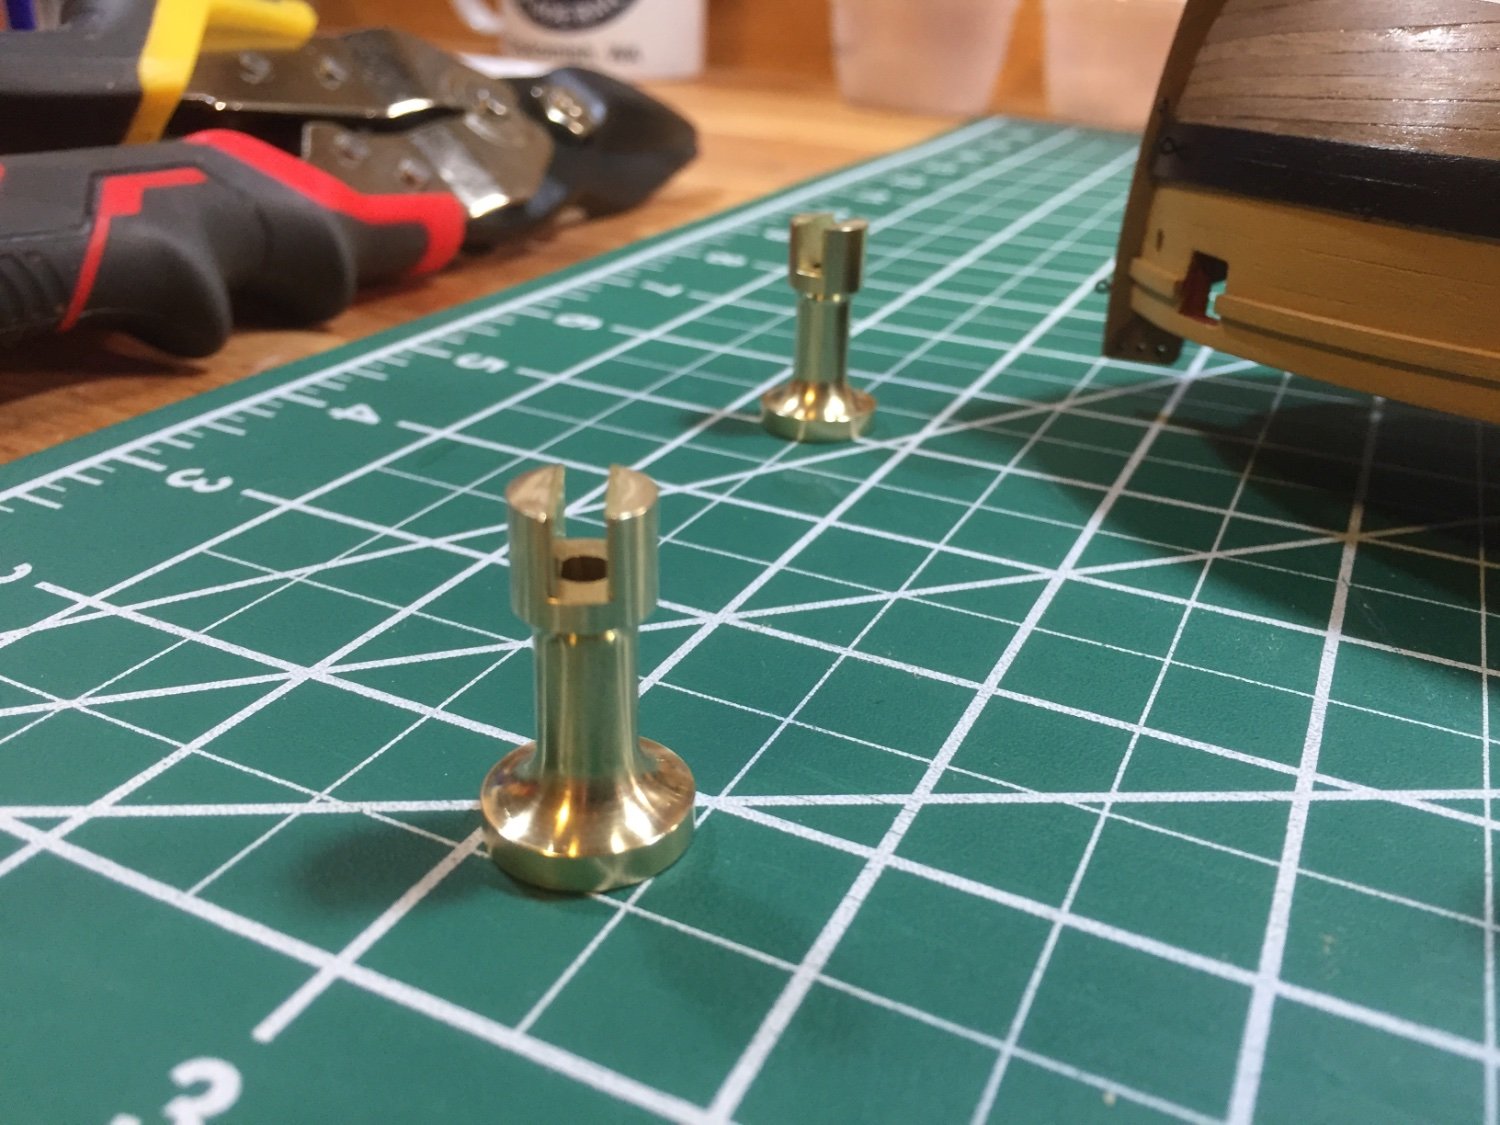
Got the mounting figured out. I did the math and purchased some brass sheet, cut little pieces and glued them in the pedestals. As you can see in photo where the pedestals will go, they took off the paint. I drilled 1mm holes and will epoxy brass rod into the keel and the pedestals after they are mounted to the display board.


- 362 replies
-
- 10
-
-
- Amati
- Lady Nelson
- (and 2 more)
-
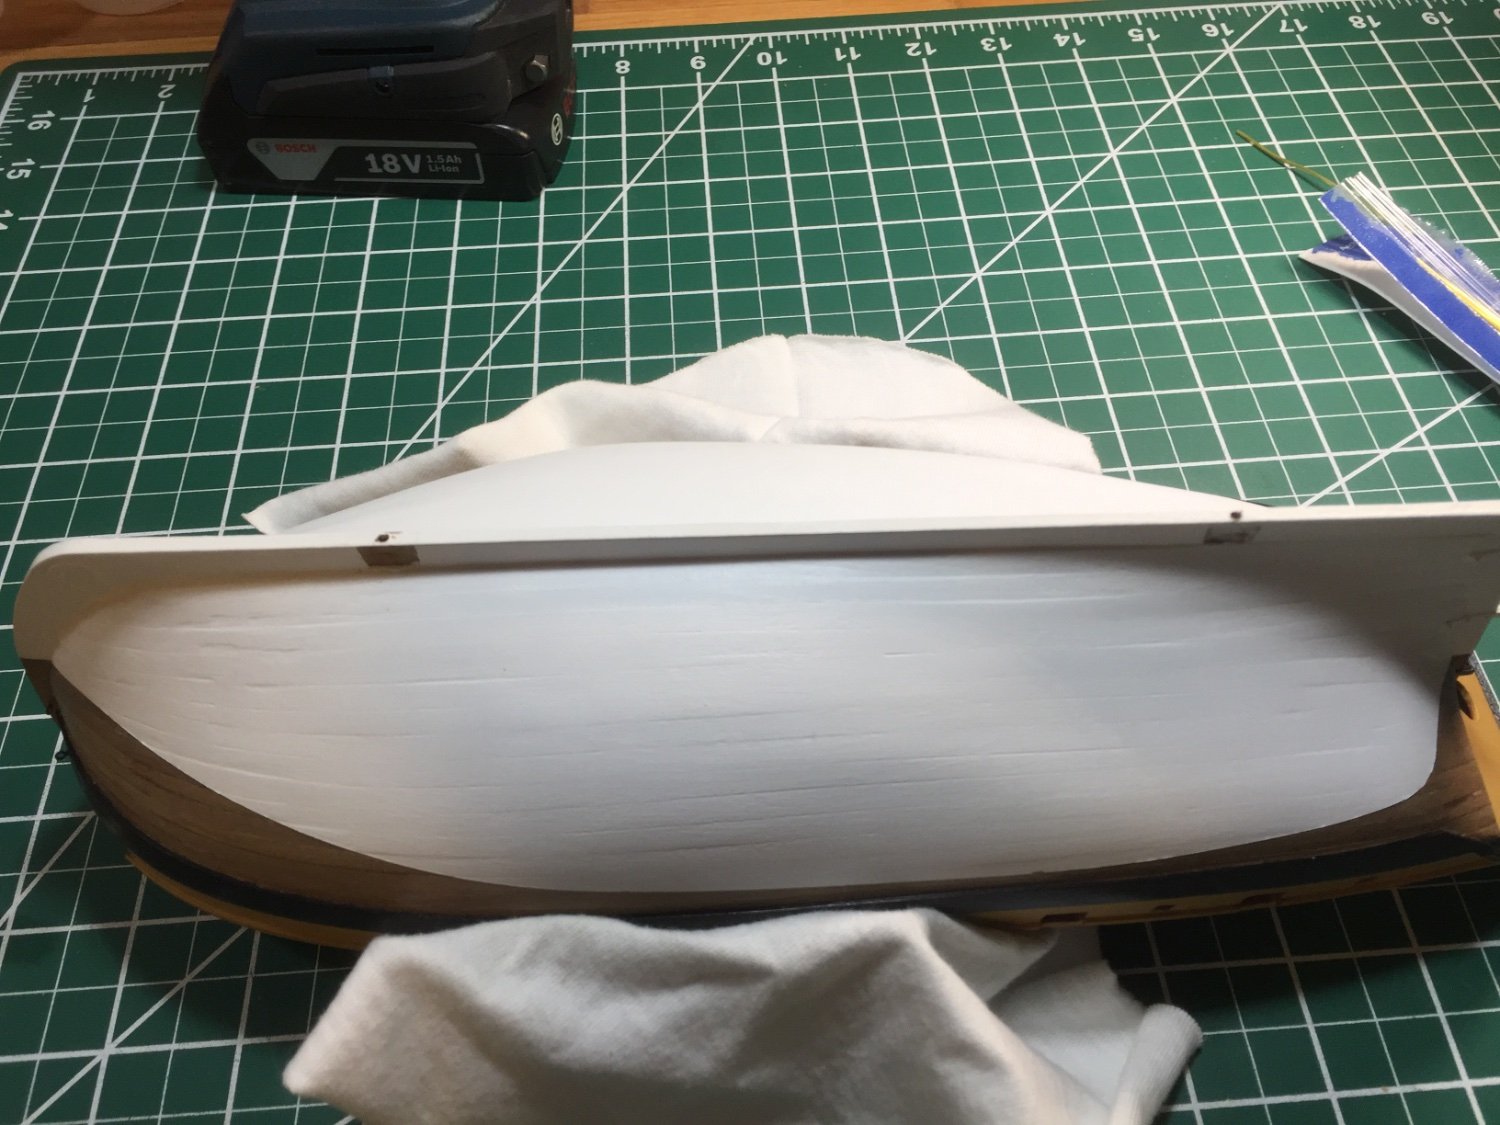
Painted waterline too thick
Dave_E replied to Dave_E's topic in Painting, finishing and weathering products and techniques
Thanks Guys, My mistake for sure... left the tape on for 2 days. 😯 I put on a coat and then let it dry, added another, etc. This went on for 2 days as I tried to find the correct thinning of the white so it would brush on smooth and not set up too quick, but also not be like water. So on the next one... continue to add coats as the previous coat tacked off? I certainly cannot see retaping with every coat. Am I incorrect assuming that? -
Hi All, I went to Syren and purchased some .2mm.
-
Welcome Michele! What all these guys just said + 1. 😀
-
It's has begun... 😳 Not as easy as it looks. I just ordered some decent .50 mm bits. Wasted 4 eyelets getting the hang of it. Hope Amati gave me a couple spares. 😁E

- 362 replies
-
- 6
-
-
- Amati
- Lady Nelson
- (and 2 more)
-
Showed this to my Admiral. She thinks we are all nuts. 😆
- 419 replies
-
- 4
-
-

-
- Victory Models
- Pegasus
- (and 2 more)
-
Hi Ferrus - Welcome to the forum.
-
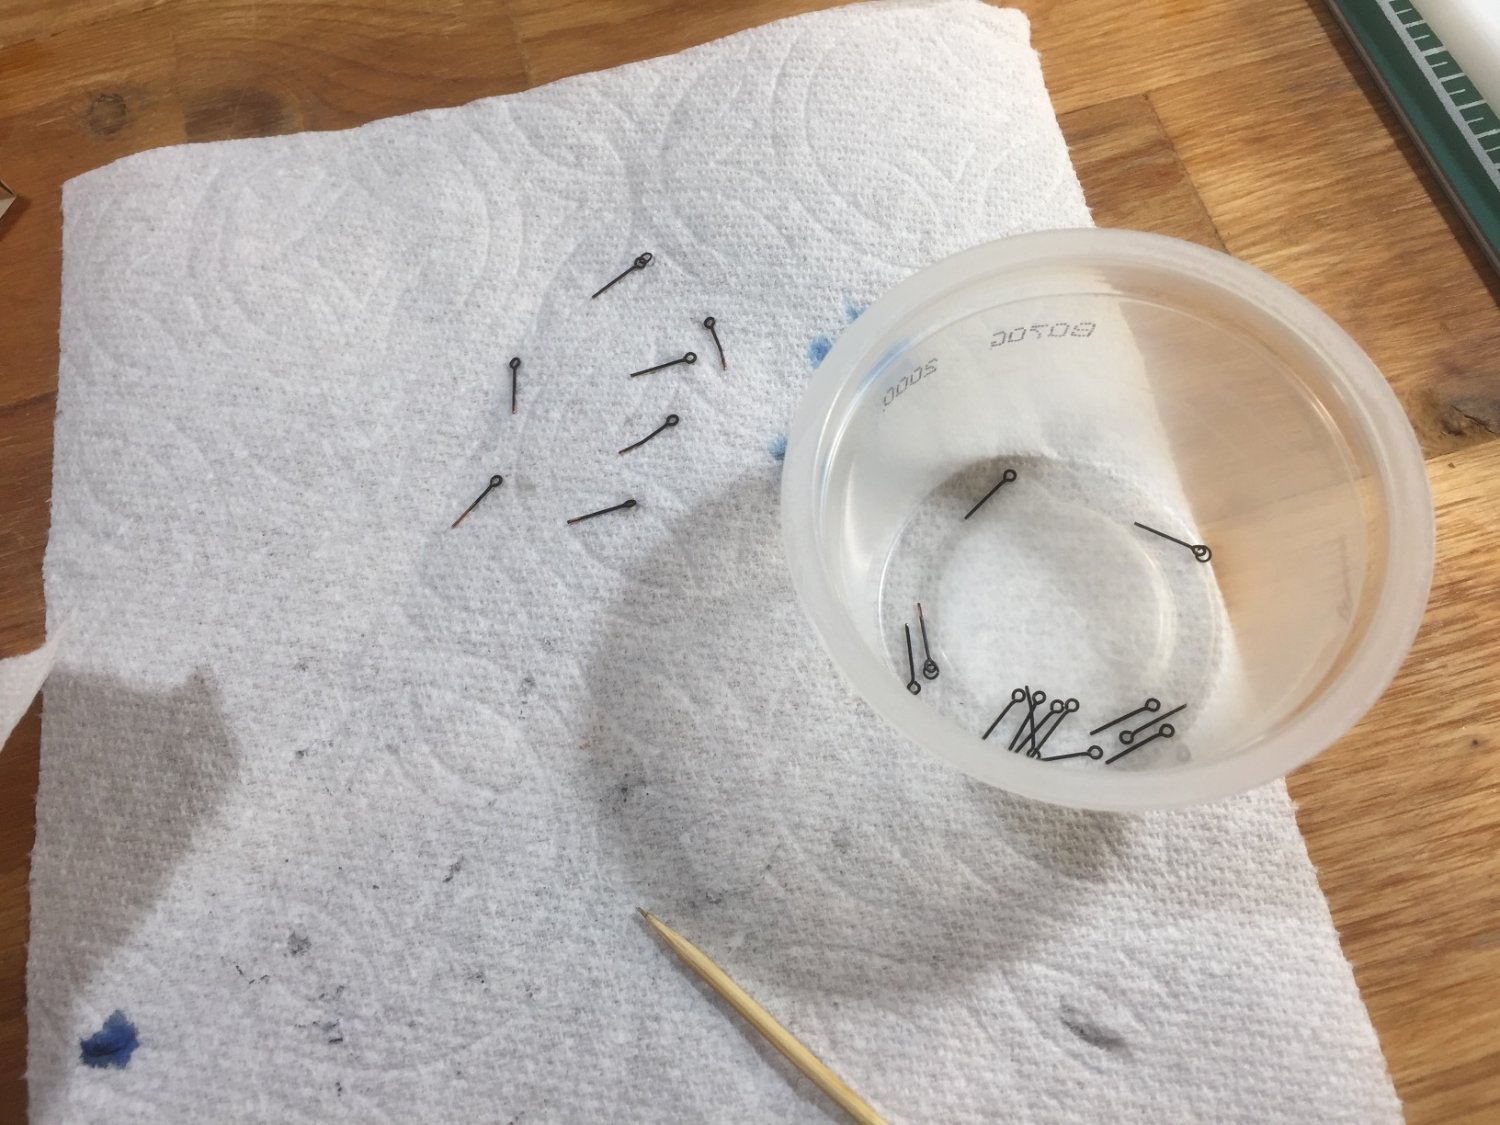
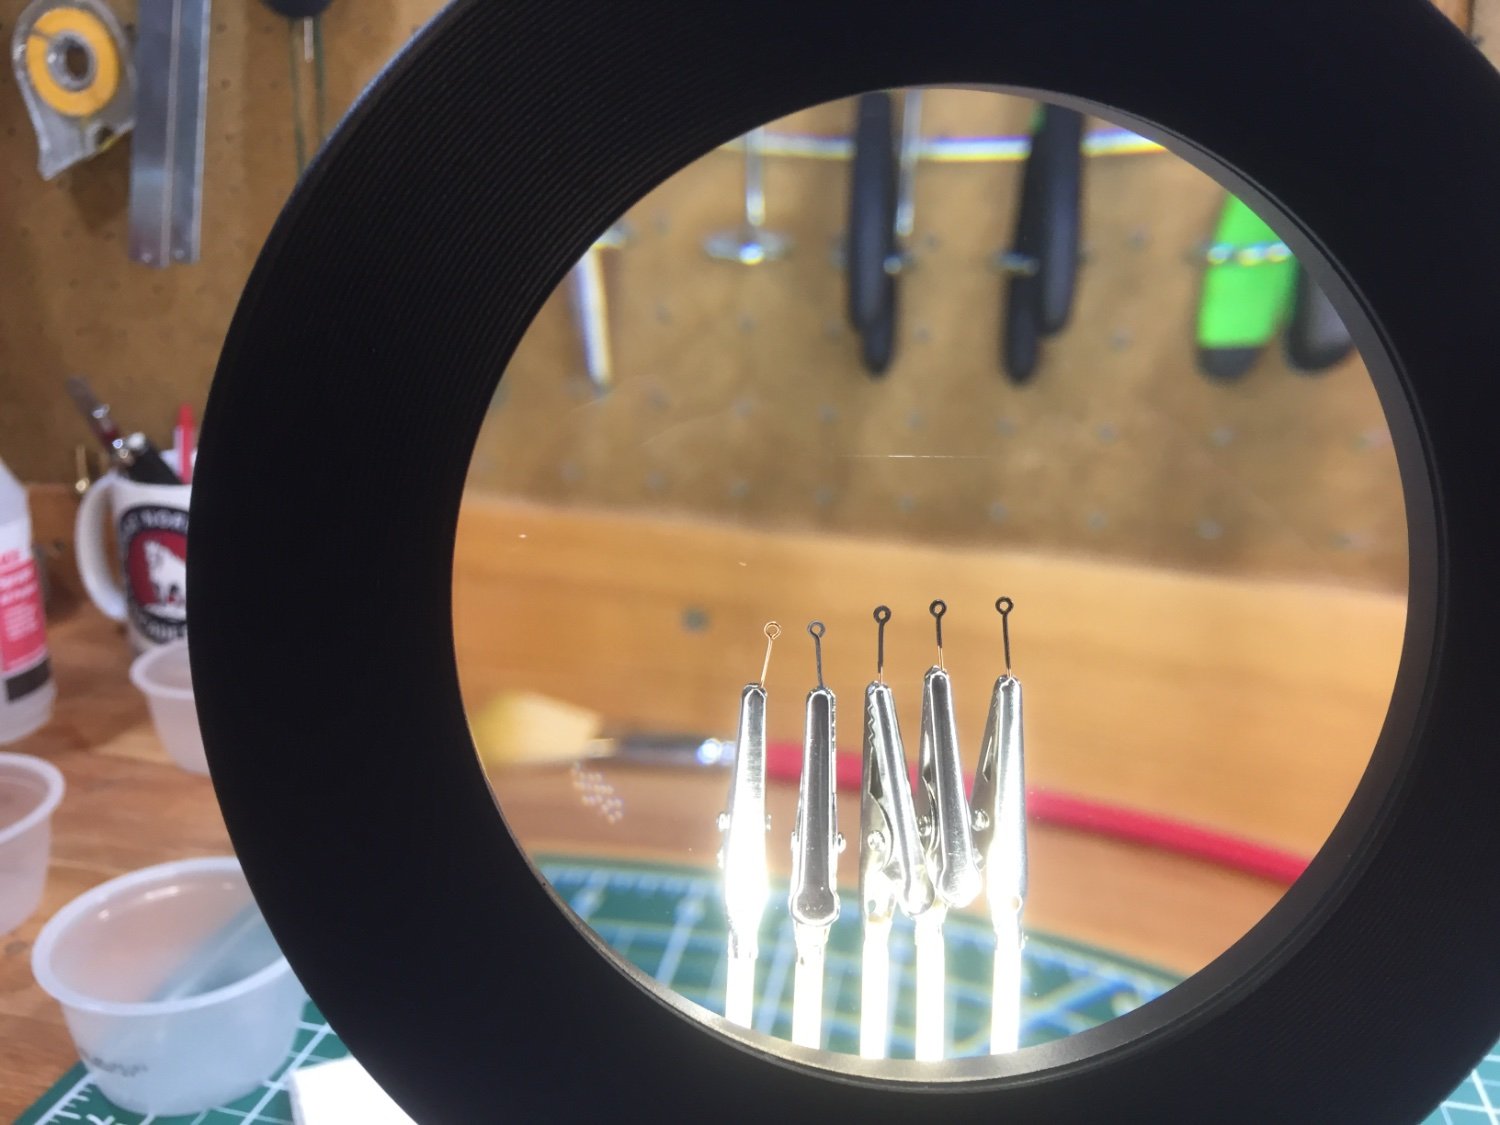
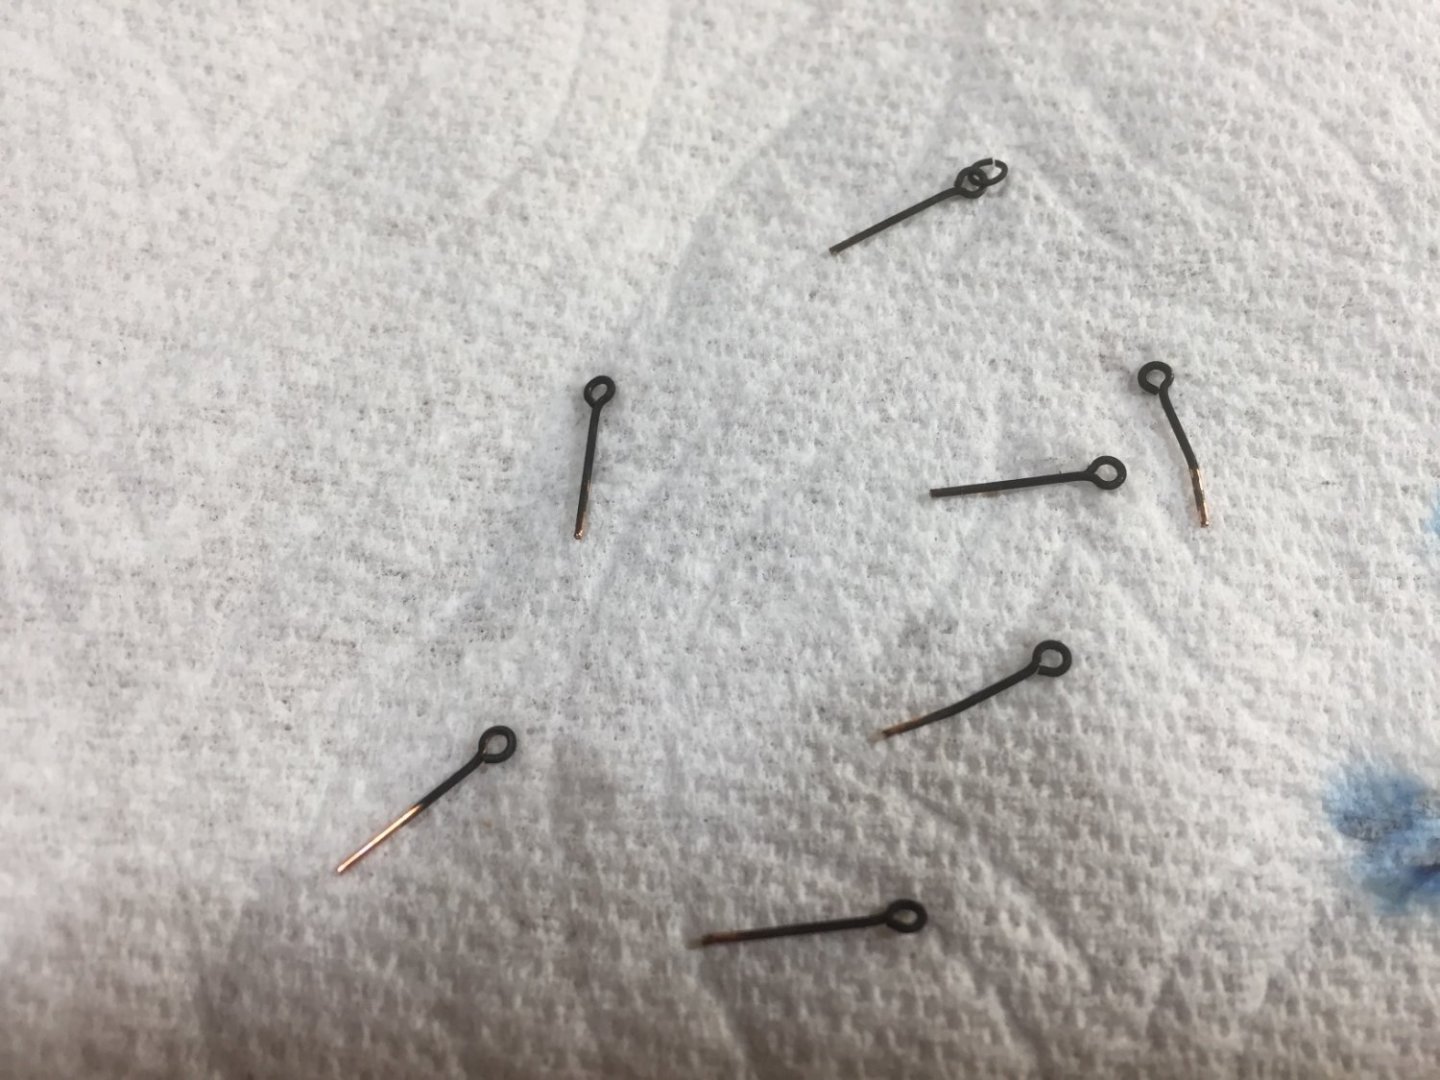
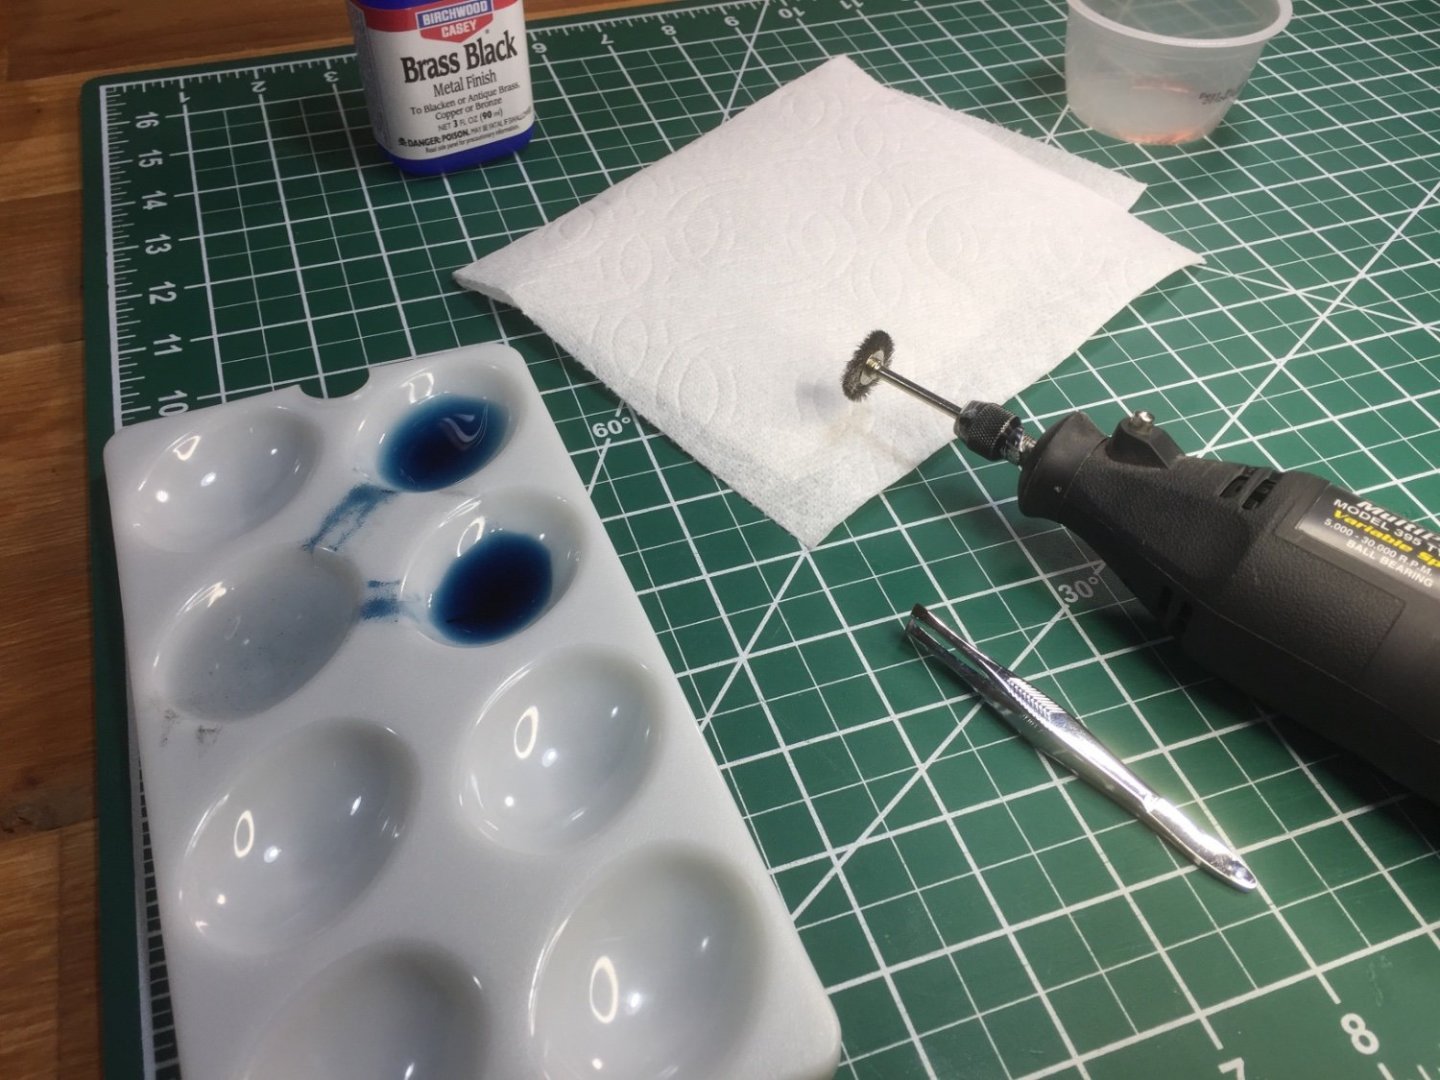
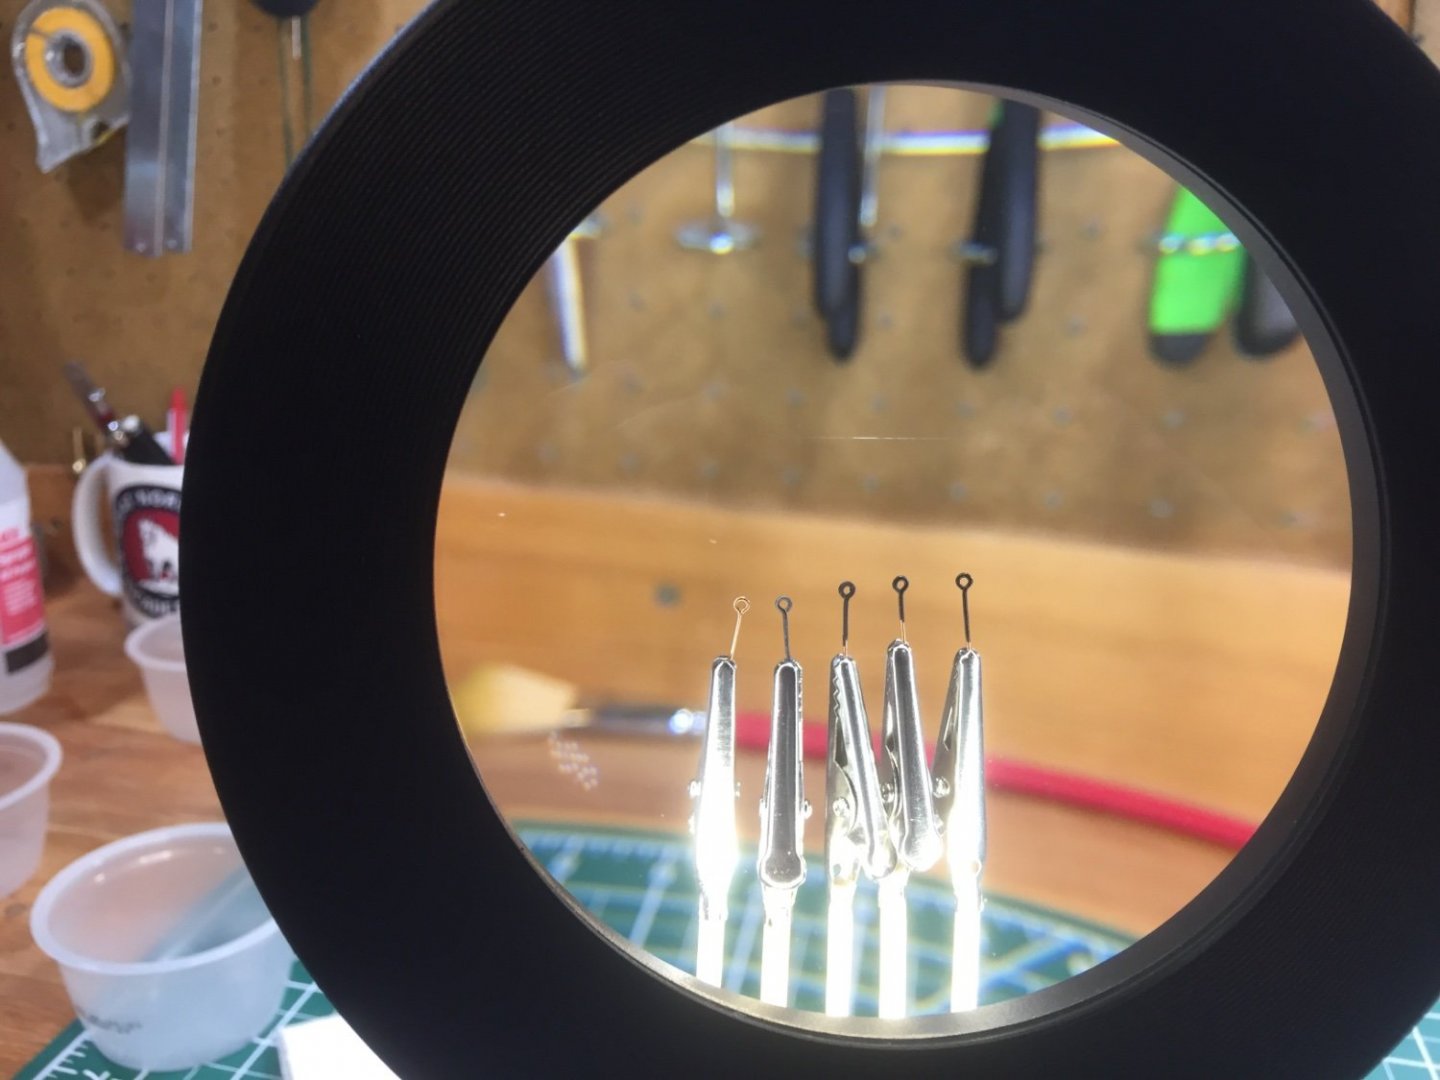
Good Evening Everyone, I thought I’d keep the blackening discussion here… for my build, didn’t want to reopen something from a year or two ago. I gave the eyelets an honest go with the Birchwood Casey. I tried soaking in acetone, rinsing, then soaking. They did turn black, rinsed and dried. Then after dried, the black wiped right off and back to shiny brass. Discovered the brass was coated. Ok, got out the dremil and with a brush and gave each one of these little hummers a work over that removed the finish (it was visible to the naked eye). Gave those the business and boy they blackened in a hurry. Rinsed them off and they passed the rub check. Black did rub off but the underlying brass stayed a dull grey… not black. Then I painted 3 samples, one with flat black enamel, one with acrylic dull black and one with acrylic ironwork black. The next picture shows from left to right: out of the box, Birchwood Casey, enamel flat black, acrylic ironwork black, acrylic dull black. So… the time spent on 22 eyelets (with only 13 passing Dave’s quality inspection) was an hour and a half. 😳 I can see going through an arduous procedure for the brass implements but then it may not match any painting I do. I noticed the flat black enamel went on but dried so fast the finish was not very good. The acrylics went on ok, but I had to really load the brush otherwise it went on too thin and brass showed through. I have read most every post on blackening on the forum and am not inclined to go get heat pots and chemicals etc.. For those of you who paint… what kind of paint and application is what I want to pick your brains for.

- 362 replies
-
- 4
-
-
- Amati
- Lady Nelson
- (and 2 more)
-
Hi All, Building the Lady Nelson and as mentioned on the forum, the swivel cannons provided by Amati might probably be out of scale (too big). That being said, every cutter built (real ones) had swivel cannons (1/2 pounders perhaps?) I’ve searched with no luck… does anyone know where I can score 1:64 scale swivel cannons?
-
I know I’m way late on this build (I wasn’t a member yet, and Keith and I have corresponded much since I came aboard). Really glad I posted some rigging comments lately on my Lady Nelson. Because of your comments on rigging, I came to your build and while looking for your wire stropping, I find this. This is one of the really cool things about build logs and a forum like this. I never thought about making the tackle look “more real (correct)” until I read this section on how you did all this work to make the tackle look so realistic. This is so cool! 😎 Think I’m going to try your process. 👍
-
Thanks David, Excellent advice and technique with the thought and write up for an individual rig. I’m going to do that! 👍
-
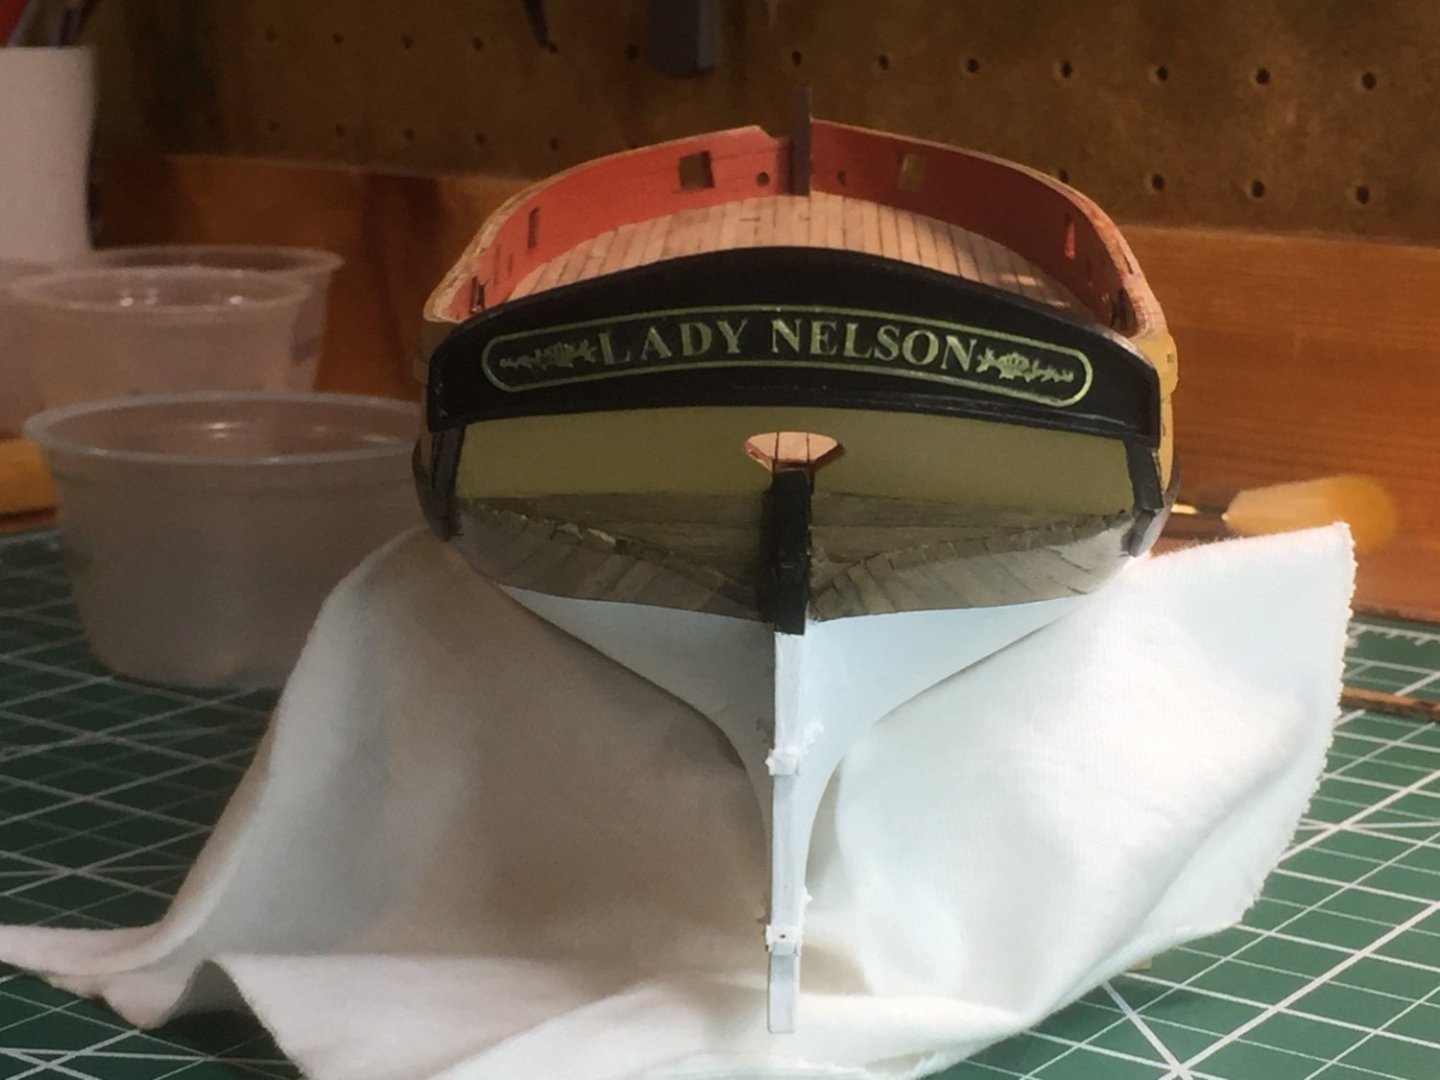
I thought this turned out OK. As I mentioned before, I messed something up way back during framing and the asymmetry was never per drawing. I had to drop the decorative swirly at the top and center the nameplate to make it look acceptable.
- 362 replies
-
- 9
-
-
- Amati
- Lady Nelson
- (and 2 more)
-
Hey Keith, You bet I will ask questions. Between the 3 books I have and the plans with the kit, I’m pretty sure I know what will go where. Aside from bigger sailing ships, I’m a lifetime sailor and know the basics of what’s what. It’s learning the knots and the how this block gets attached to that thing-um-abob, etc.. 😆 I concur… rigging might be what separates the…. Ship modelers. 😊
- 362 replies
-
- 2
-
-
- Amati
- Lady Nelson
- (and 2 more)
-
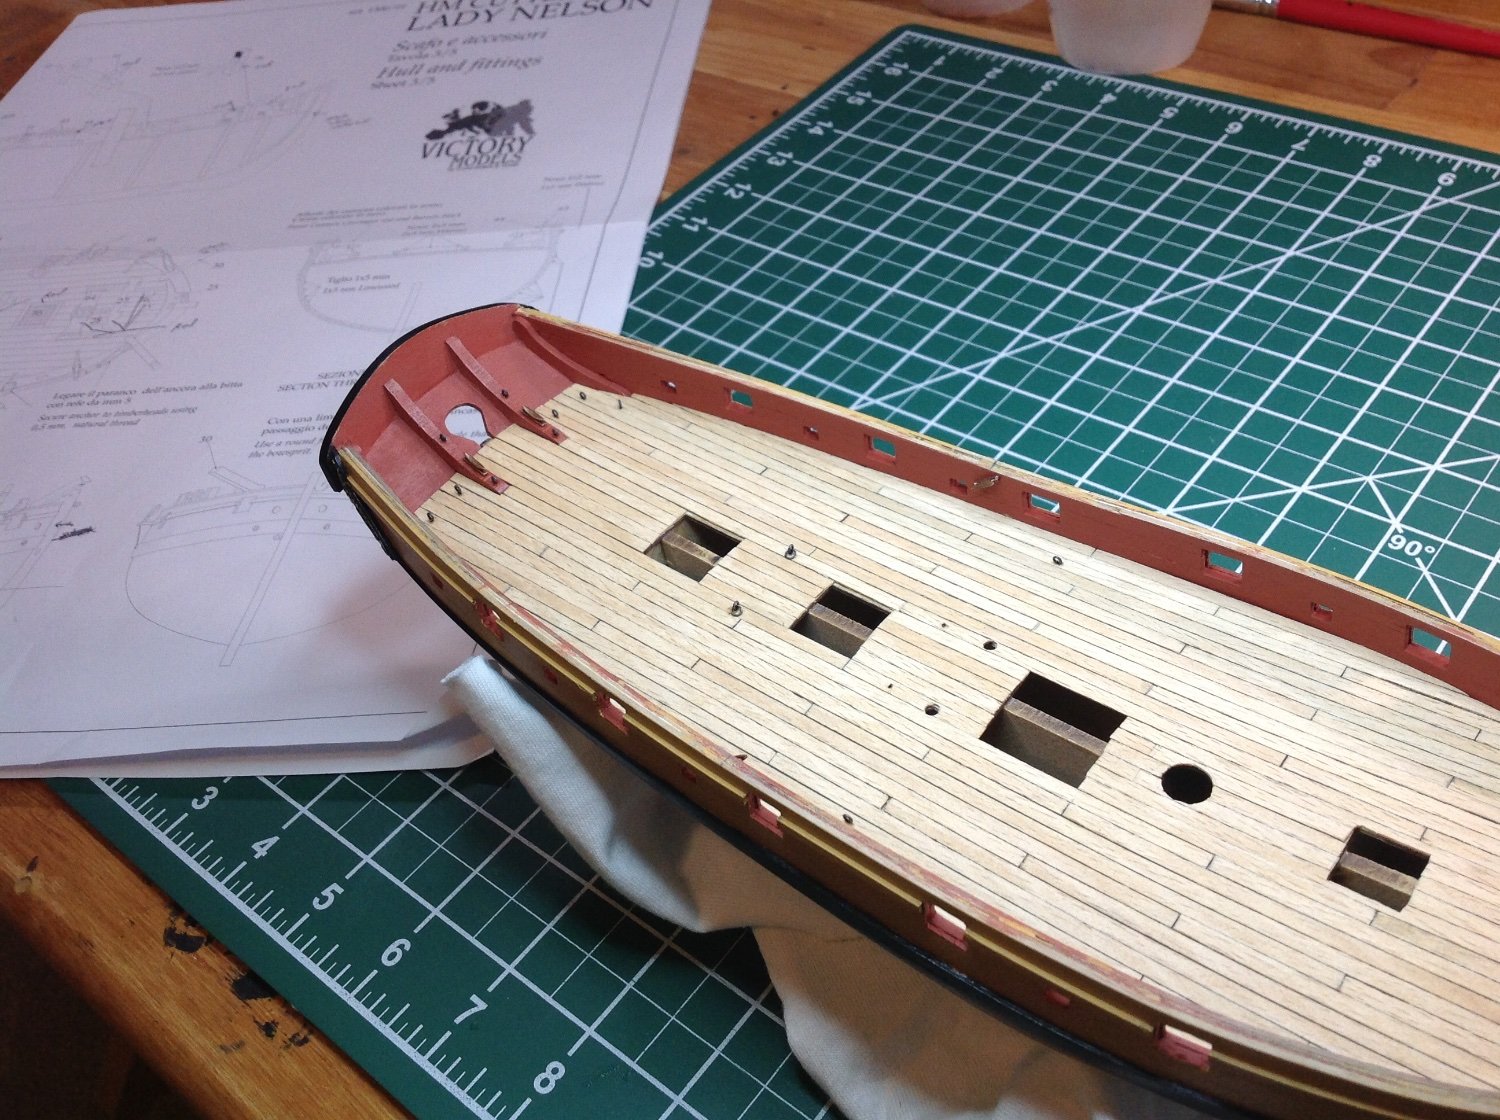
Hi Everyone, This afternoon I thought I'd look into all the eyelets and cleats and thought this would be a good time to get all those in all around the deck and bulwarks. The Amati kit has a bag full of shiny (brass?) eyelets. Birchwood Casey Brass Black has NO effect on them. I see most every model ship on the planet has all eyelets, rings and cleats that are black. Those of of you with Amati kit experience, how did you get the eyelets black? I also started studying the plans for the rigging a bit. Yikes... a whole new world coming my way. I'll have the grates done in short order and it will be about time to start a new side of the build. Anyone have any super-newb advice for learning the rigging? Easy practices you may have learned with? I know, I have 2 subjects going here. 😳
- 362 replies
-
- 1
-
-
- Amati
- Lady Nelson
- (and 2 more)
-
I looked at the Amati .1mm “natural” rigging thread. It is actually twisted. I haven’t been able to find back .1 mm rope anywhere. I know I’m asking a question that I haven’t researched yet, but what is the scale size for rat lines of a typical 1:64 ship? I’m guessing everyone isn’t using .1mm twisted rope dyed black from Amati.
-
I’m not finding any. 😕
-
Words to live by in this hobby for sure! Thank you for the reminder. Beautiful boat! 👍😀
- 25 replies
-
- 1
-
-
- Mantua
- Trotamares
- (and 1 more)
-
My other thought remains. Is .1mm black thread available? If so, why go through the hassle of inking?
-
Hi Kevin, I like your idea best. I would be soooooooo crazy upset if I slopped India ink on the deck and see trying to mask as a real pain. May I inquire as your technique please?