Dave_E
-
Posts
1,282 -
Joined
-
Last visited
Content Type
Profiles
Forums
Gallery
Events
Everything posted by Dave_E
-
Thanks Guys - ordering today. 👍😀 I’ll practice with some sewing thread. I’m a real sailor and have whipped and seized many a line in real life. Doing it on a 1:64 scale rope… that could be something entirely different. 😆
-
Just found a “thread” (excuse the pun) from David Lester. The good Admiral is going to show me her sewing thread collection and I’ll confiscate a role for each color rope I have in the Amati kit. 😁
-
 You know Keith, I think so. Familiarity of the tools and having the correct tools plus the "how to" help from the forum has defintey helped with the confidence and technique. I am fortunate to be freshly retired and can sit and build as much as I want and I think the deep emersion into the hobby has helped tremendously. And that includes hours of research and chat time here on MSW! 😀
- 362 replies
-
- 4
-

-
- Amati
- Lady Nelson
- (and 2 more)
-
Hi All, Into a new phase of building (even if it is for the cannons). Amati supplied the Lady Nelson with 1mm, .75mm, .5mm, .10mm and .25mm ropes. As I look at the drawings, these are all for different rigging on the ship. The drawings show seizing and whipping but do not address how it got there. So here is the dumb question for the day: what size of thread do I use for all the whipping etc. on a 1:64 scale ship? What are your recommendations?
-
Thanks Theodosis and Kirby, glad to have experience watching. 😀
- 362 replies
-
- 2
-
-
- Amati
- Lady Nelson
- (and 2 more)
-
Jacek, what happened to the build?
-
Ok, it’s time to break open some scale rope and get 10 cannons in place, then move to the anchors, then get her in the permanent base.

- 362 replies
-
- 10
-
-
- Amati
- Lady Nelson
- (and 2 more)
-
I’m glad I’m not the only builder who has fellow builders on speed dial for learning and inspiration! 😁 Now you have someone watching you. 😀
- 112 replies
-
- 1
-
-
- Cheerful
- Syren Ship Model Company
- (and 1 more)
-
When you get them… watch one and tell us if the picture quality is what you would expect. On you tube it’s a mix of poor to “ok”. ROKU has the whole series on right now and the quality is no better than YouTube. 😕
-
Excellent work Sir. Your rigging photos are most helpful and I will refer to them in the future! Thank you. 👍😀
-
You are definitely a “Plank Master”. Outstanding work! 👍😀
- 840 replies
-
- 3
-
-
- winchelsea
- Syren Ship Model Company
- (and 1 more)
-
I’ll follow. Used to chase these things around the Mediterranean in my P-3.
-
Your photography is outstanding! I’ve got you build on “speed dial” because your documentation and photography for the rigging is so crazy beautiful and will help me as I attempt my first rigging. Thank you! 👍😀
-
REALLY NICE Lyle. Truly building excellence for new builders to strive for (me 😁).
-
Good Morning Everyone, Last night while working the lower deadeyes, I went to nail in the 1st chain plate and found the nails supplied with the kit were too big for the hole. 😠 My bad for not checking prior to all the blackening and the fitting for the installation. So… had to drill up all the holes, luckily I had a drill motor that would take a small 1mm bit (so I didn’t have to wear out my fingers with the pin drill). Did I just experience one of the anomalies of “kit building”? From all my reading on the forum, there are quality differences between companies. My lesson learned… fit every piece before finishing and assembly and think ahead when planning a part of the build, especially for kits that have virtually no step by step directions. However, I’m pretty sure I’ll complete the Lady and the learning curve I’m experiencing building a kit without a step by step instruction book, can’t help but make my future endeavors much better. 👍😀 I’m a good listener and have the skills, the knowledge factor for building a kit like the Lady absolutely came from this forum! Thank you all for your contributions!!! (We’re not done yet 😁).
- 362 replies
-
- 2
-
-
- Amati
- Lady Nelson
- (and 2 more)
-
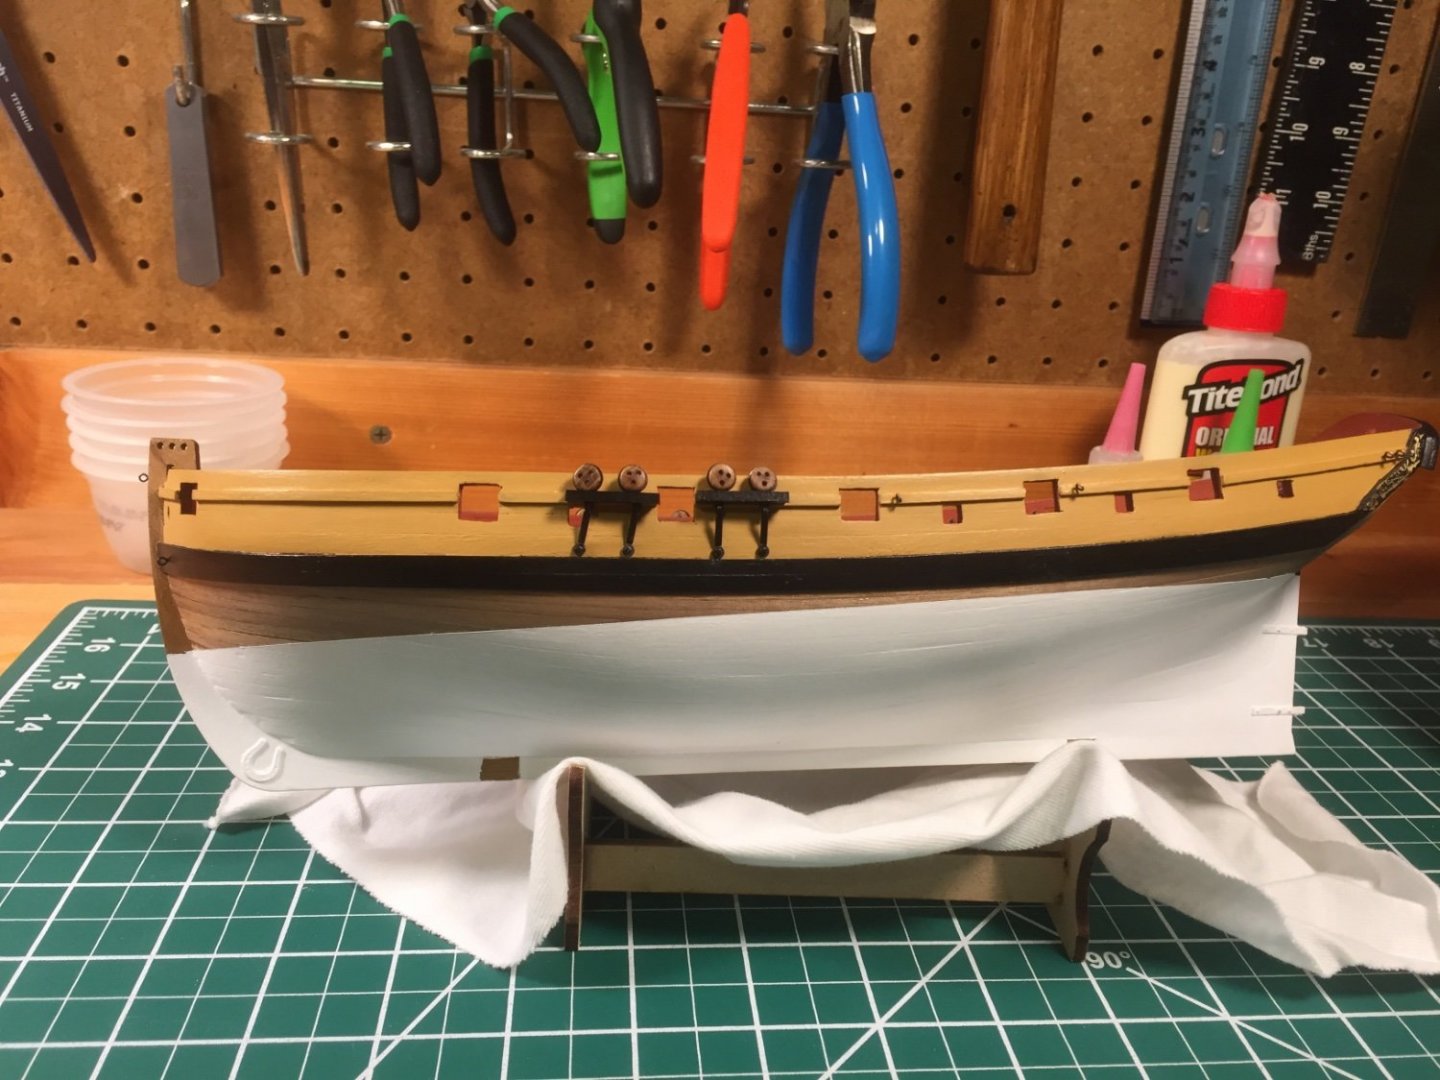
Good evening everyone. I got started on the deadeyes and chain plates and after I got the process down, couldn’t stop. 😁 Thanks for the all the help with the strops and deadeyes. Thanks to Derek aka DelF in the UK, for showing me his “special tool” for opening up the strops. I used this, worked like a charm. I ended up painting the parts ironworks black and no paint came off with all the handling and bending. I’m fairly pleased with the results for this part of the build. The needle nose and the round needle nose made everything go smoothly. (Learned all about the round ones from you guys). 👍
- 362 replies
-
- 9
-
-

-
- Amati
- Lady Nelson
- (and 2 more)
-
Hi Brian, thanks. You’ll like it here! 👍😀
-
Welcome Sir! What name do we call you? 2nd on that start a build log. 🙂
-
Thanks Dave! Did you blacken before installing? My blackening wiped right off while handling. I’m going to guess the parts needed to be mechanically cleaned before the blackening process (which I did not do 😕).
- 362 replies
-
- 1
-
-
- Amati
- Lady Nelson
- (and 2 more)
-
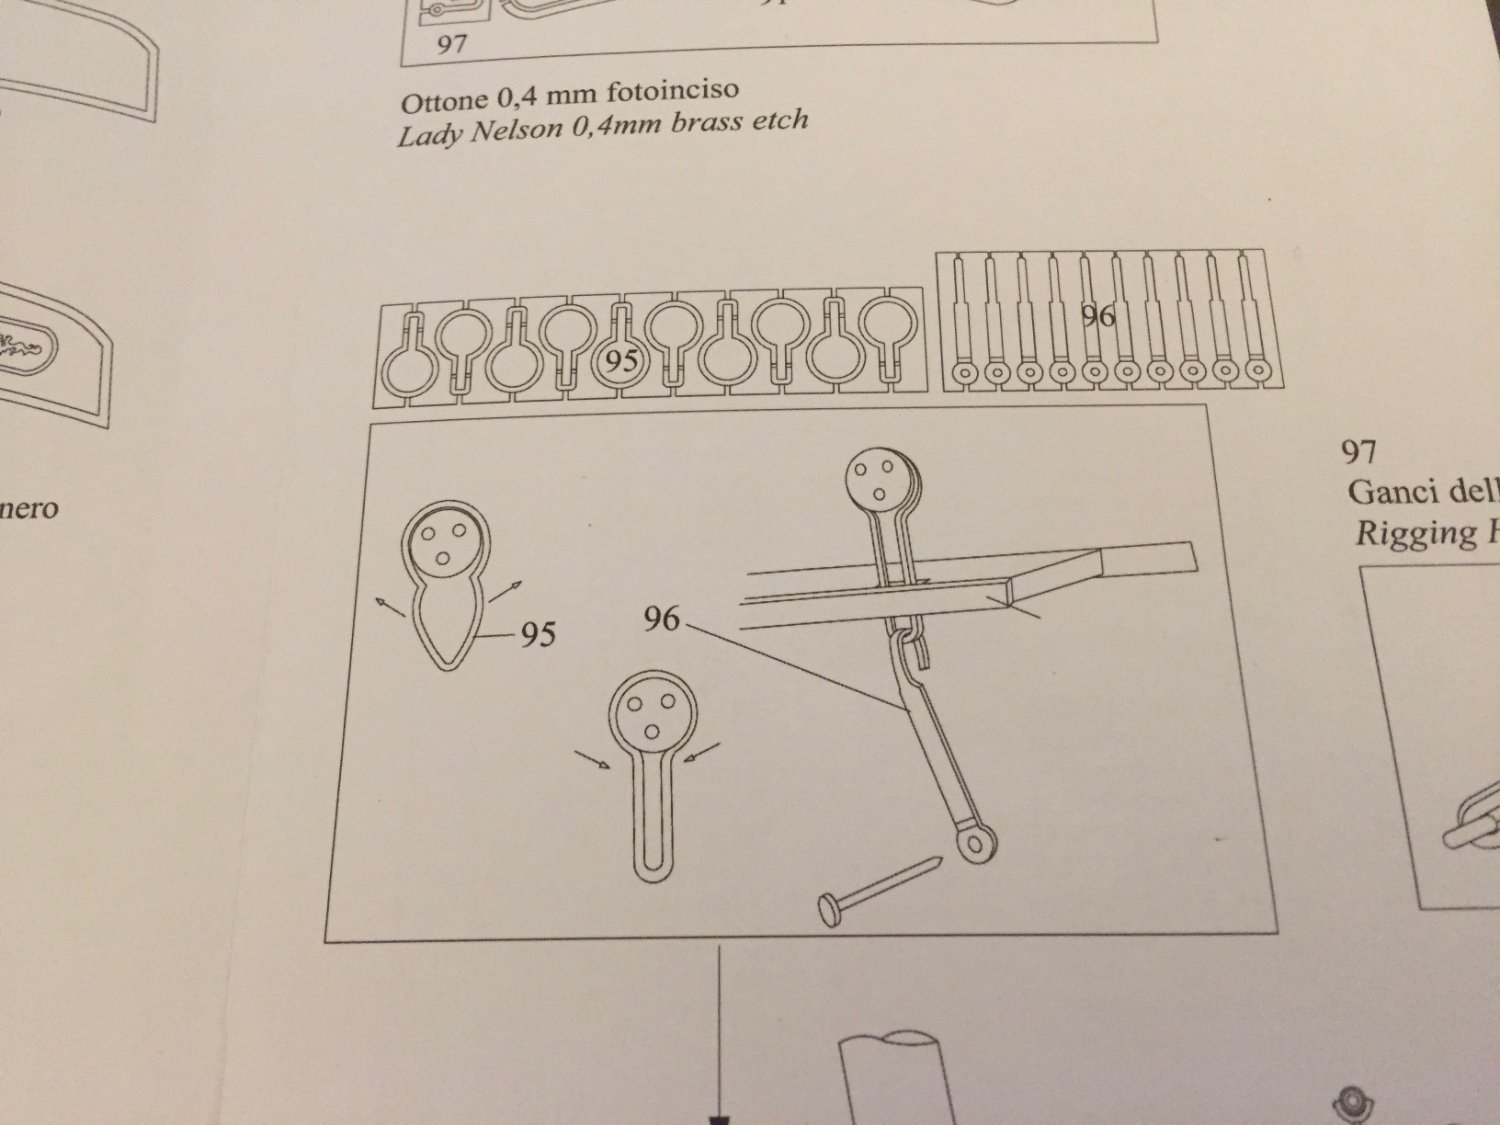
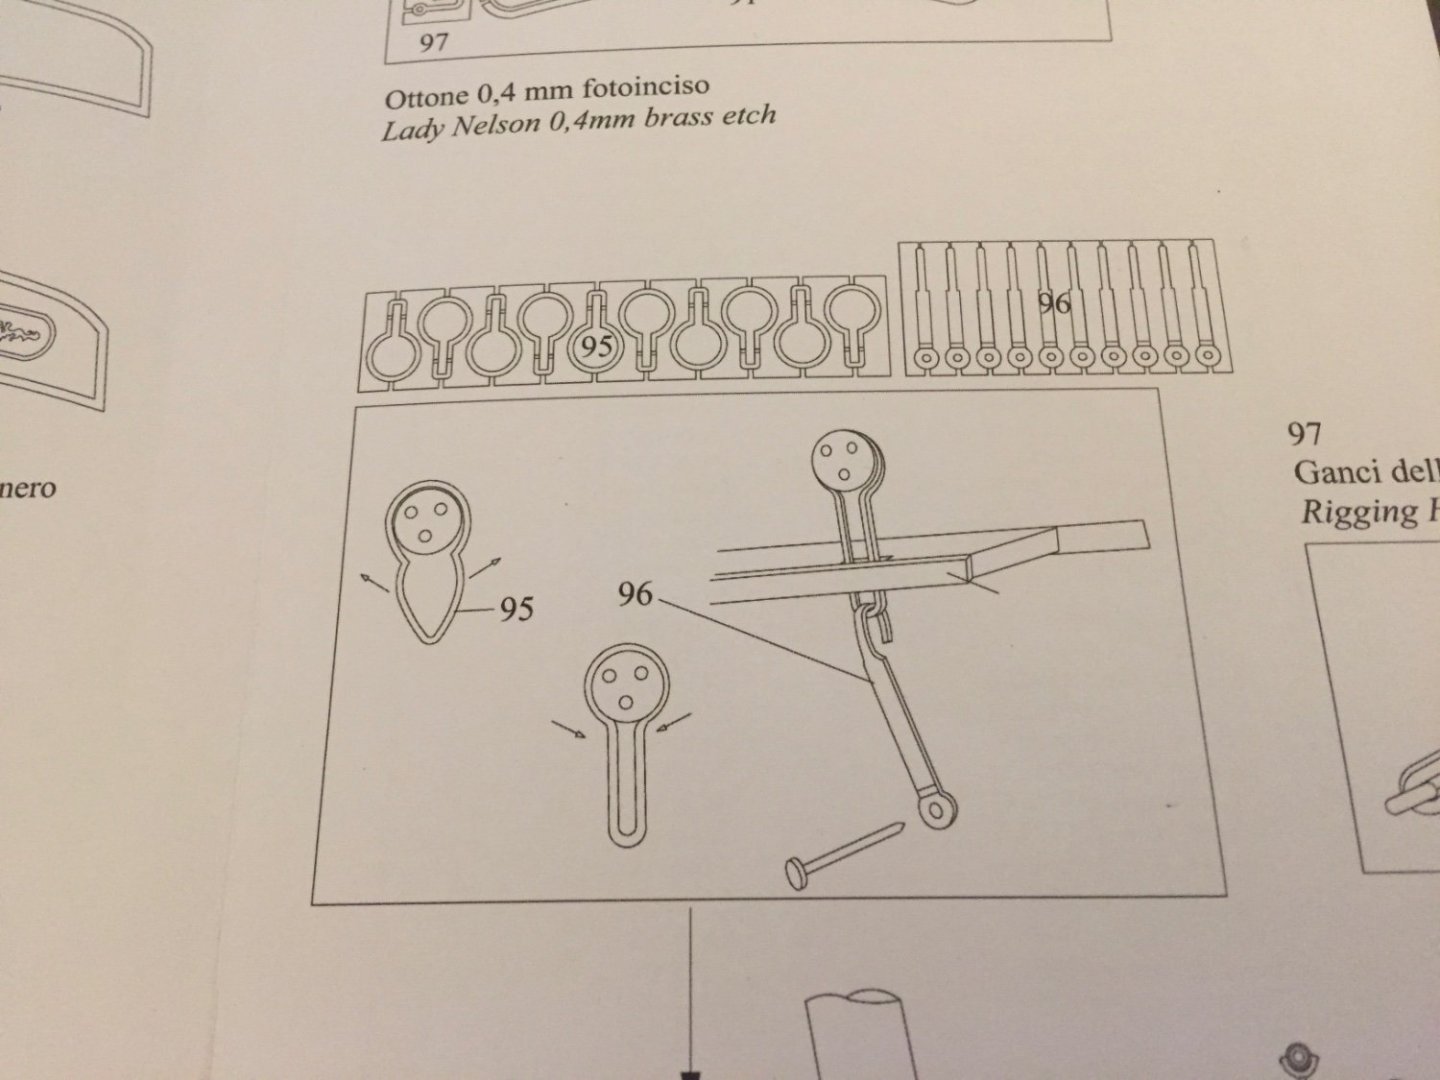
I am having no luck finding out how to attach the kit supplied strops to the deadeyes (on YouTube or here on the forum)… but I see them everywhere in build logs. 🧐 I have found several articles and videos on “stropping deadeyes” with wire. I’m leaning toward trying that.
- 362 replies
-
- 1
-
-
- Amati
- Lady Nelson
- (and 2 more)
-
Outstanding Dave! I’m not far away from starting the rigging. How did you get those lower deadeyes into the chain plates? Is there a trick? I broke one of the rings and don’t have a clew how to open it up to put the deadeye in and then get it closed and looking good.
-
The Amati kit only has 10 of these things and I just horribly wasted 1 trying to get it opened up and then closed back around the deadeye. I found some YouTube videos, but they are all how to use steel wire, no one made a video on how to use these gizmos from Amati. You guys that have completed the Lady or any Amati model... how do these things work??? 😳
- 362 replies
-
- 1
-

-
- Amati
- Lady Nelson
- (and 2 more)