


Glomar
-
Posts
52 -
Joined
-
Last visited
Content Type
Profiles
Forums
Gallery
Events
Posts posted by Glomar
-
-
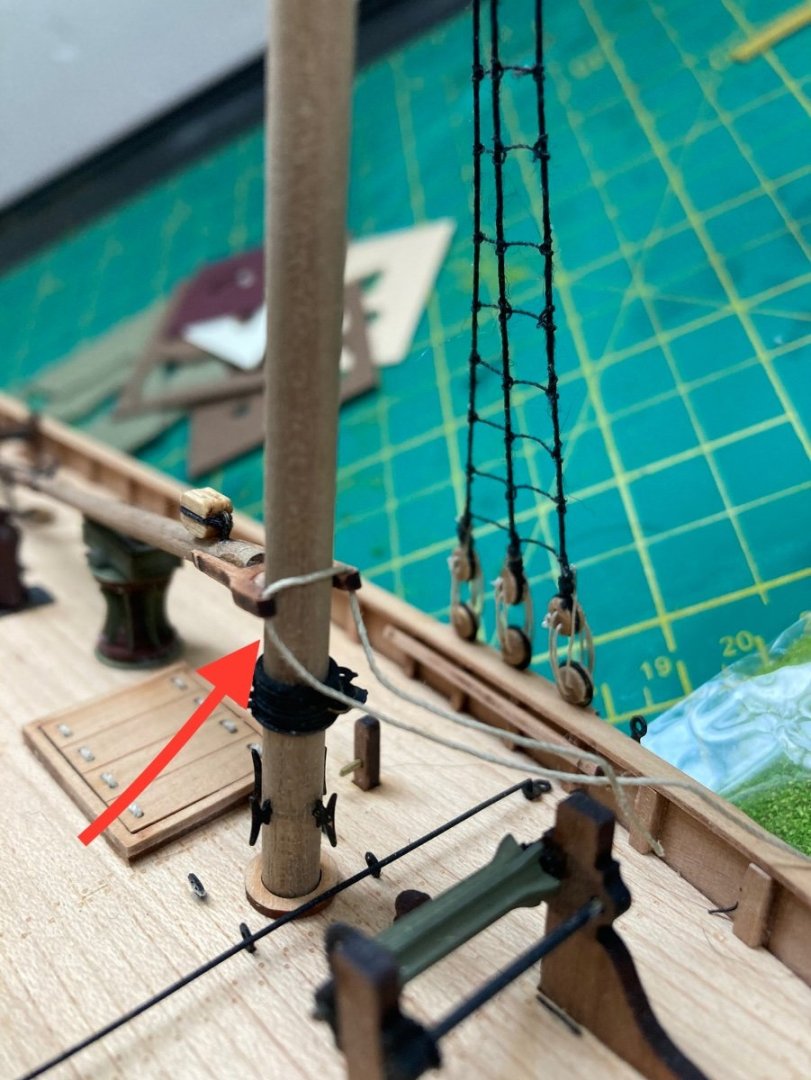
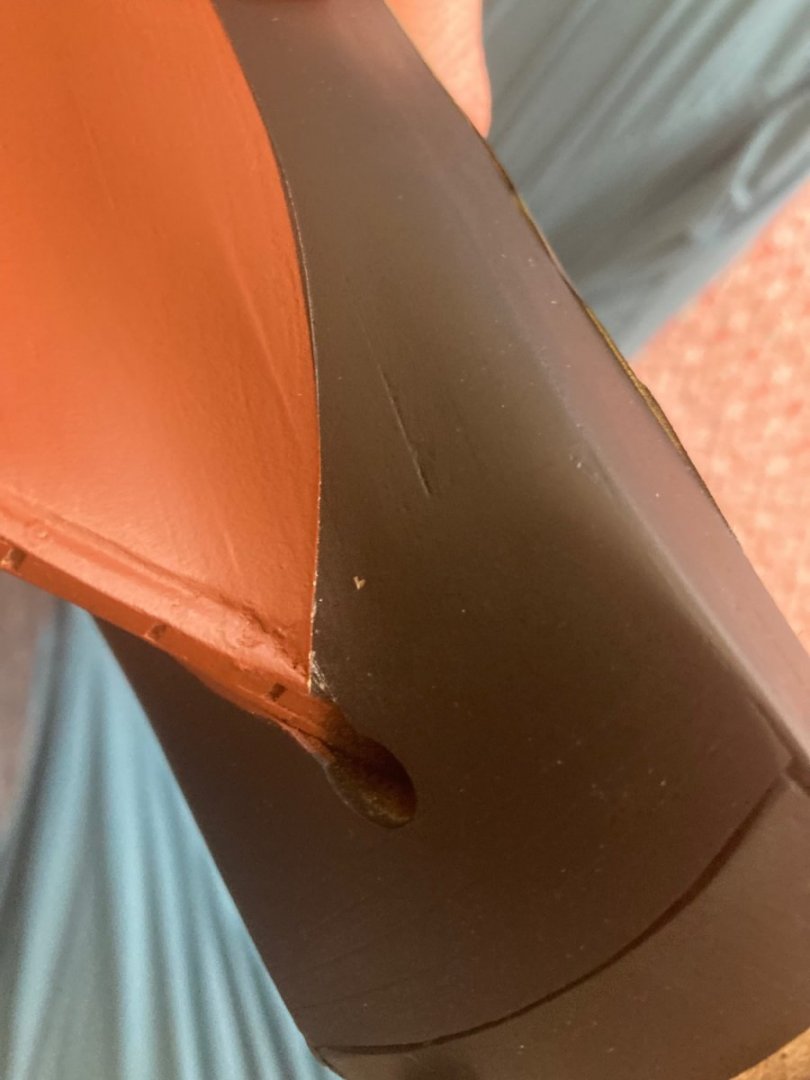
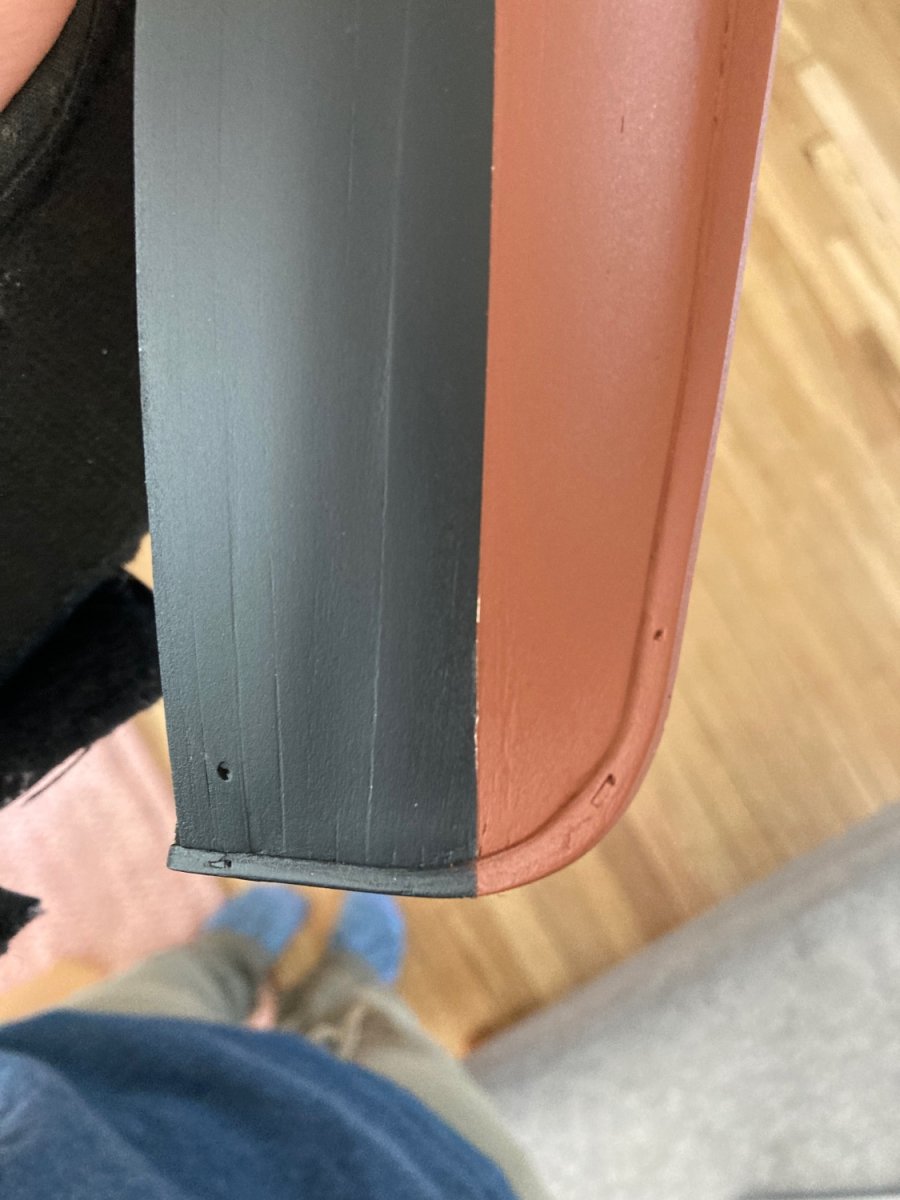
@Craigie65 how did you tie the gaff to the mast?
-
This is incredibly helpful as always! Sorry for the confusion, I did mean with how the line runs.
For whatever reason, it did not occur to me that the belaying points were correlated with the (clearly) marked number on the plan. For the line connecting the mast to the gaff- is it just a single thread from the eyelet on the mast to the belaying point?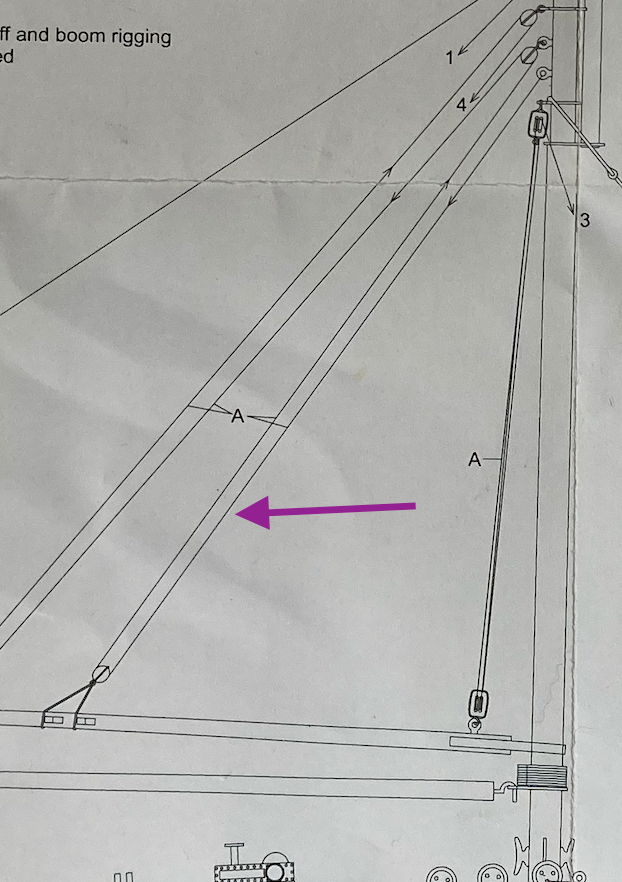
-
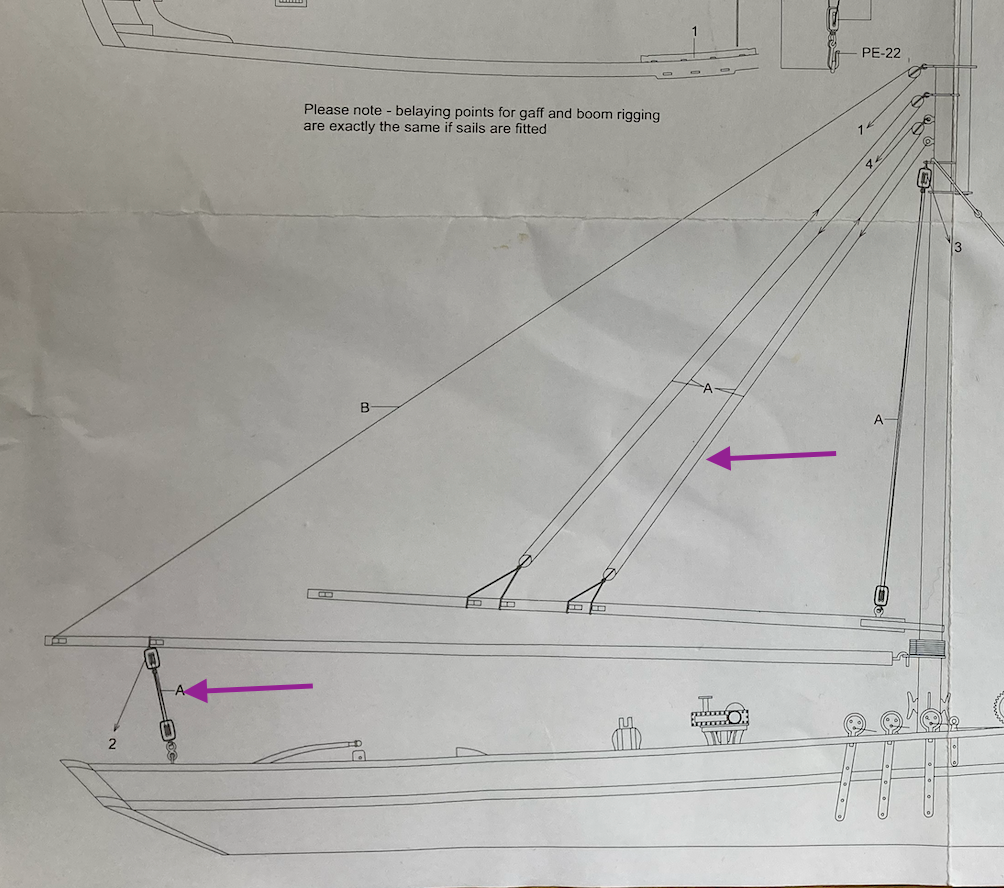
Thanks Craig! I have been able to manage the rigging blocks ok, the trouble I am having is with figuring out how to do the rigging between the the mast and the gaff/boom. I am not sure of the exact terminology but the treading connecting the rigging blocks from the mast to the rigging blocks on the gaff
-
-
-
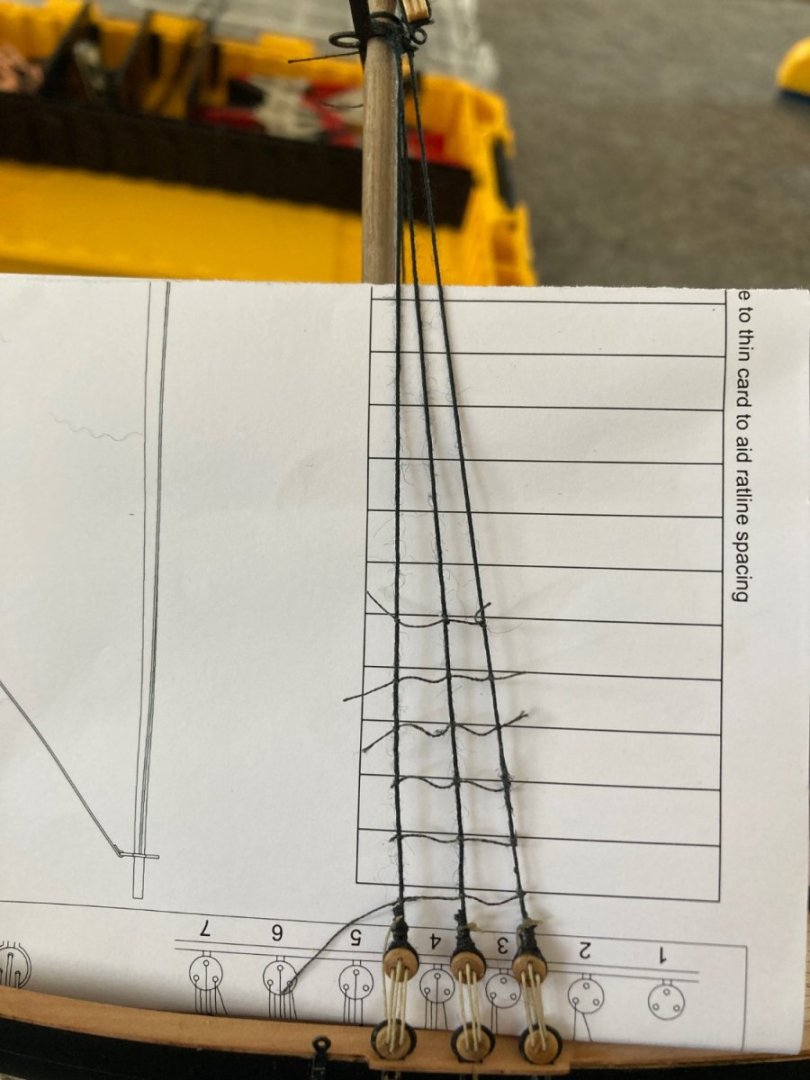
I am working to finish the rigging on my first masted ship but I am running into problems trying to get the ratlines right. I am using clove hitch knots but the ratlines are super loose. I am using bees wax if that is having any impact. I appreciate any help in trying to clean these up!
- Ryland Craze, mtaylor and Dave_E
-
 3
3
-
I was actually able to find a 3mm stencil on Amazon last night, so going to try spraying it on that way but failing that will try some of the decal methods raised. I appreciate everyones insight!
- thibaultron, von_bednar and mtaylor
-
3
-
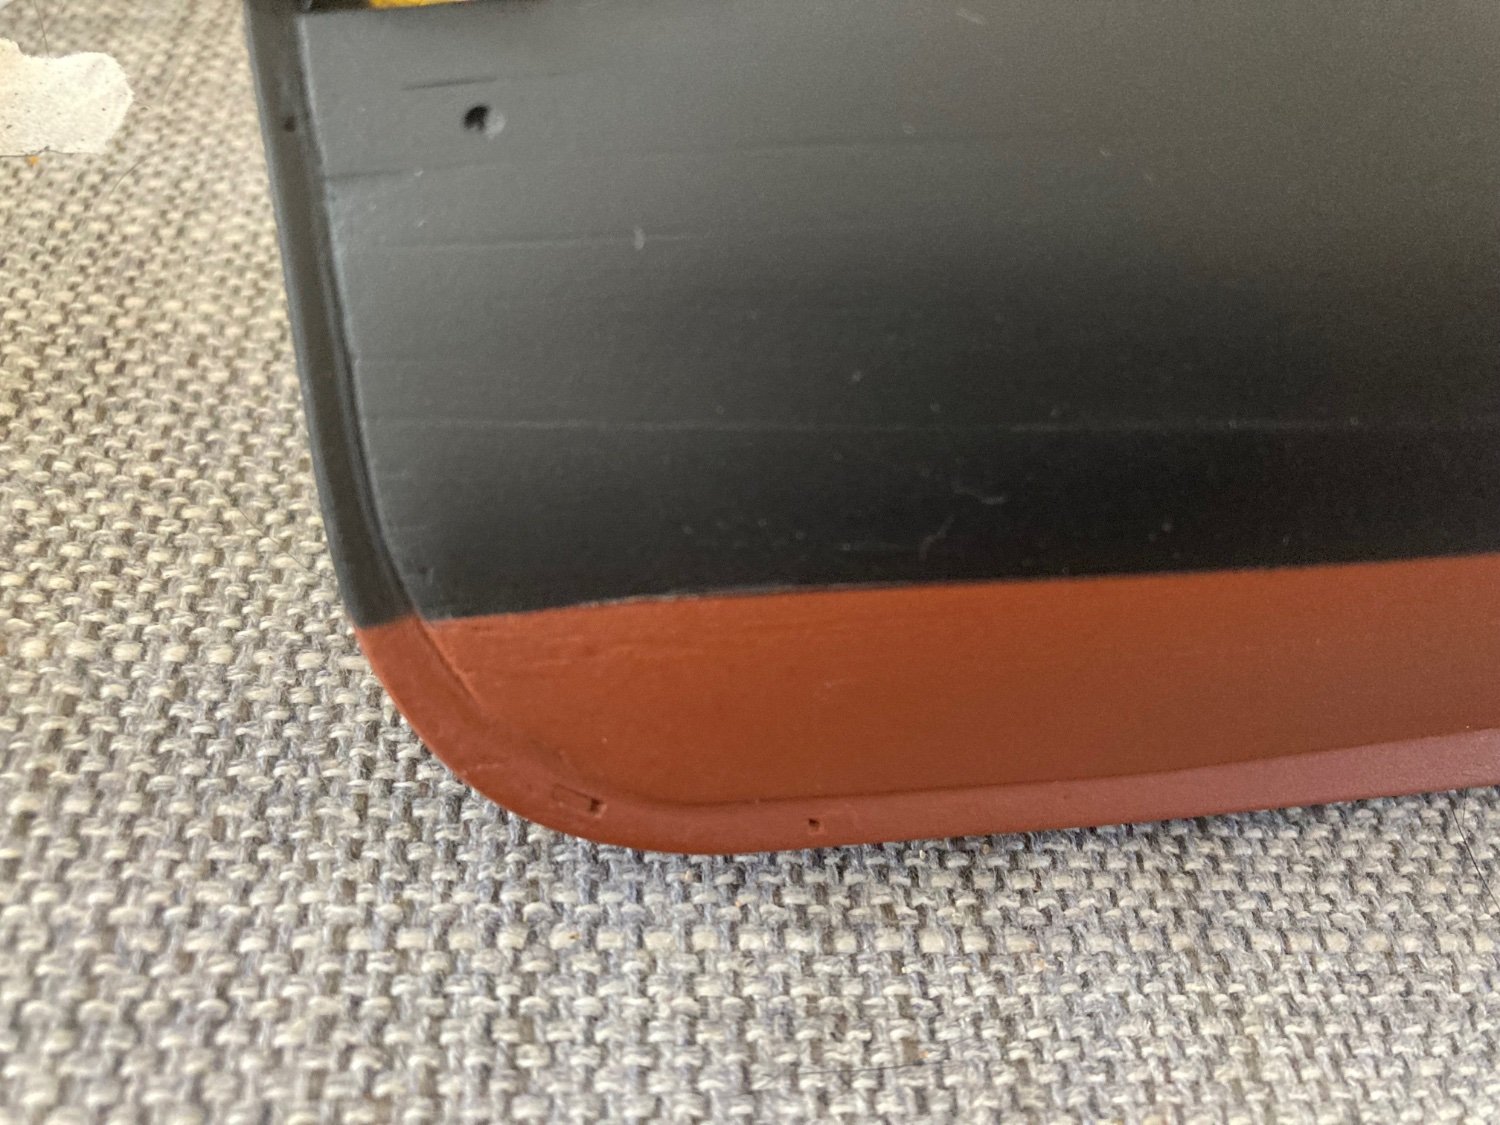
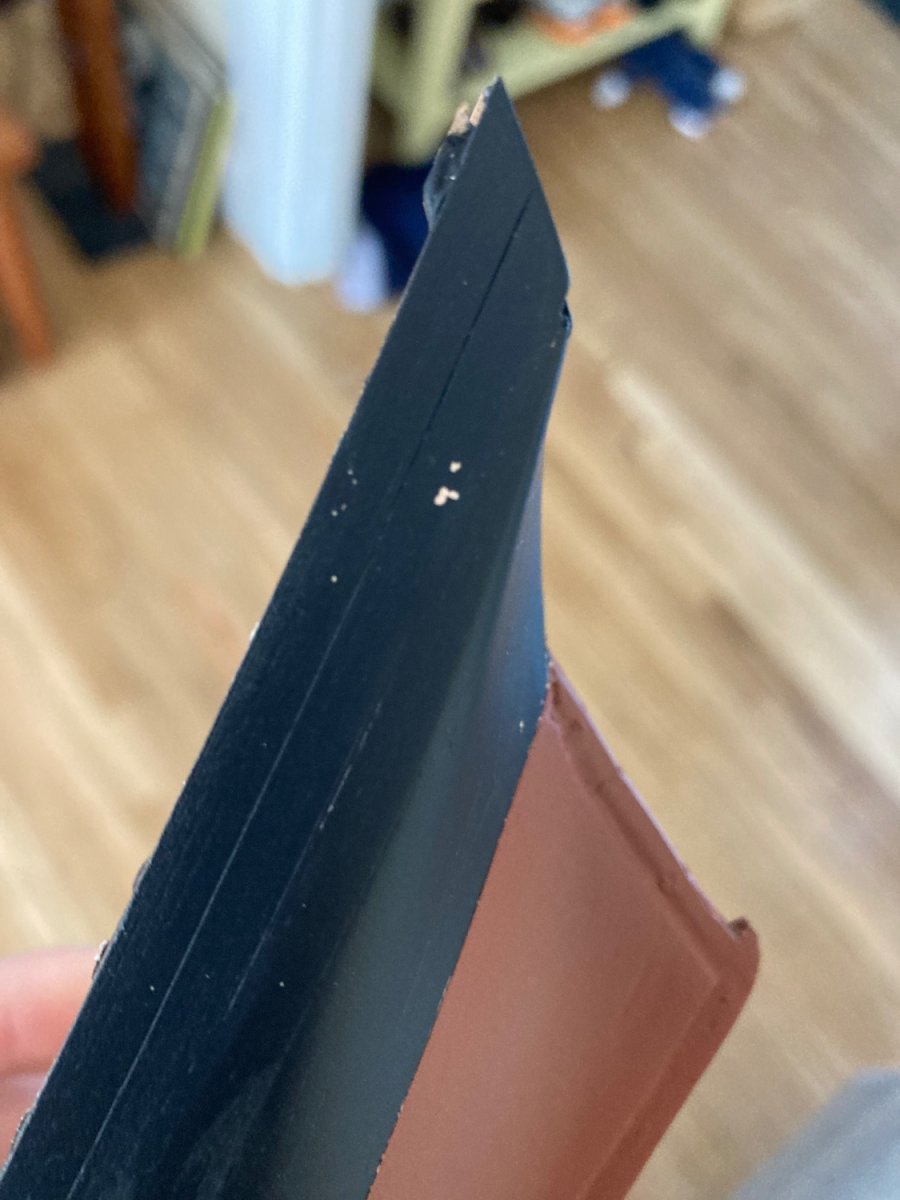
Thanks all for the painting advice and motivating me not to be lazy! I resprayed both sides, and while it is not perfect, I think it came out pretty well. I did some how miss one little section in the stern which naturally I didn't notice until the tape was off!


I like the really like the colors, but after I use up the rattle cans, I think I am going to be more proactive in finding paints and just use my airbrush. The Chaos Black goes on really easy but seems to chip just as easily and I don't know what good forsaken liquid that initially came out of the Plastikote but I am pretty sure the box I was spraying it in is a superfund site now.
Lessons Learned
1) Don't be too eager to rip off the tape
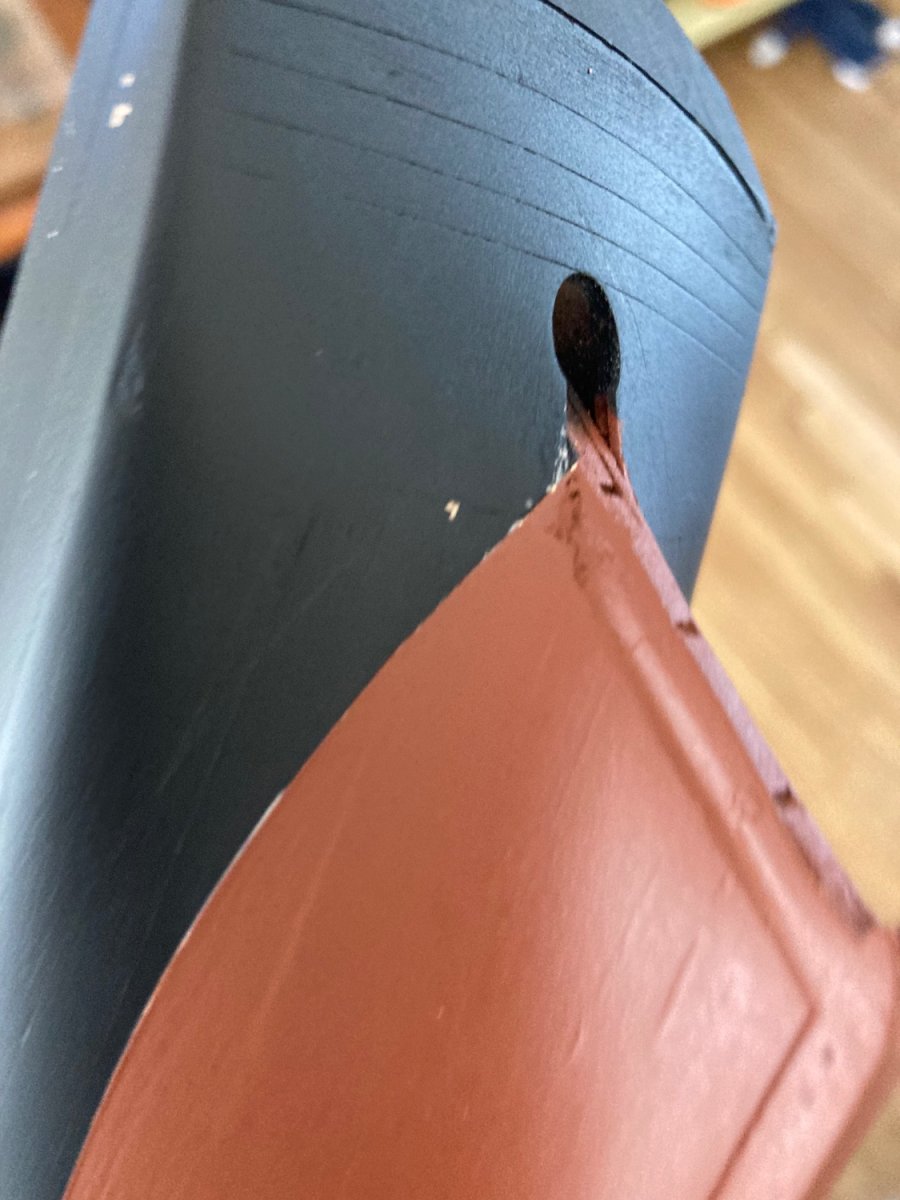
2) Cover any holes in the bulwarks (there is a little tiny black spot on the inside bulwark where paint came through the hole for the anchor chain)3) Don't remove all the tiny photo-etched parts before painting them
3) Get a positive pressure hazmat suite when using Plastikote for painting or chemical warfare.
Questions:
1) Is there any surface coat that I can use to prevent the black from further chipping.
2) Any advice on trying to either touch up or mask off the area around the chip to respray?
Moving forward, I sprayed the last of the the photo etched parts so going to be moving on to assembling the deck pieces and then onto the mast. I was able to find a 3mm stencil so going to try out that for the stern lettering I am a bit nervous to start rigging as I can barely tie my shoelaces never mind a hitch knot, but just need to endeavor to persevere. Would not be against any sage wisdom though!
-
1 hour ago, Craigie65 said:
Hi Glomar,
Really good to see you are still progressing. I like the paint scheme. I have never used Plastcote - although I have seen a few rants about it!
I think it is just the black that needs touched up, the bit at the waterline looks to be in the black section. If you hand brush you will see there is a difference.
My instinct would be to re tape and spray the black , but it is your call.
Don’t forget the bowsprit hole😉
looking forward to seeing the next pics.
That what I was thinking but was just trying to be lazy! Do you think I should just spray a whole other coat on both sides or just the side that is affected?
Any reason you think the chipping might have occurred?
2 hours ago, wool132 said:Can’t help much with your first three questions but for the custom decal I’m intrigued by this post by Dr PR. I’m thinking of using his technique instead of plastering on the kit supplied decals.
Jonathan
This is a really clever idea so thanks for flagging!
-
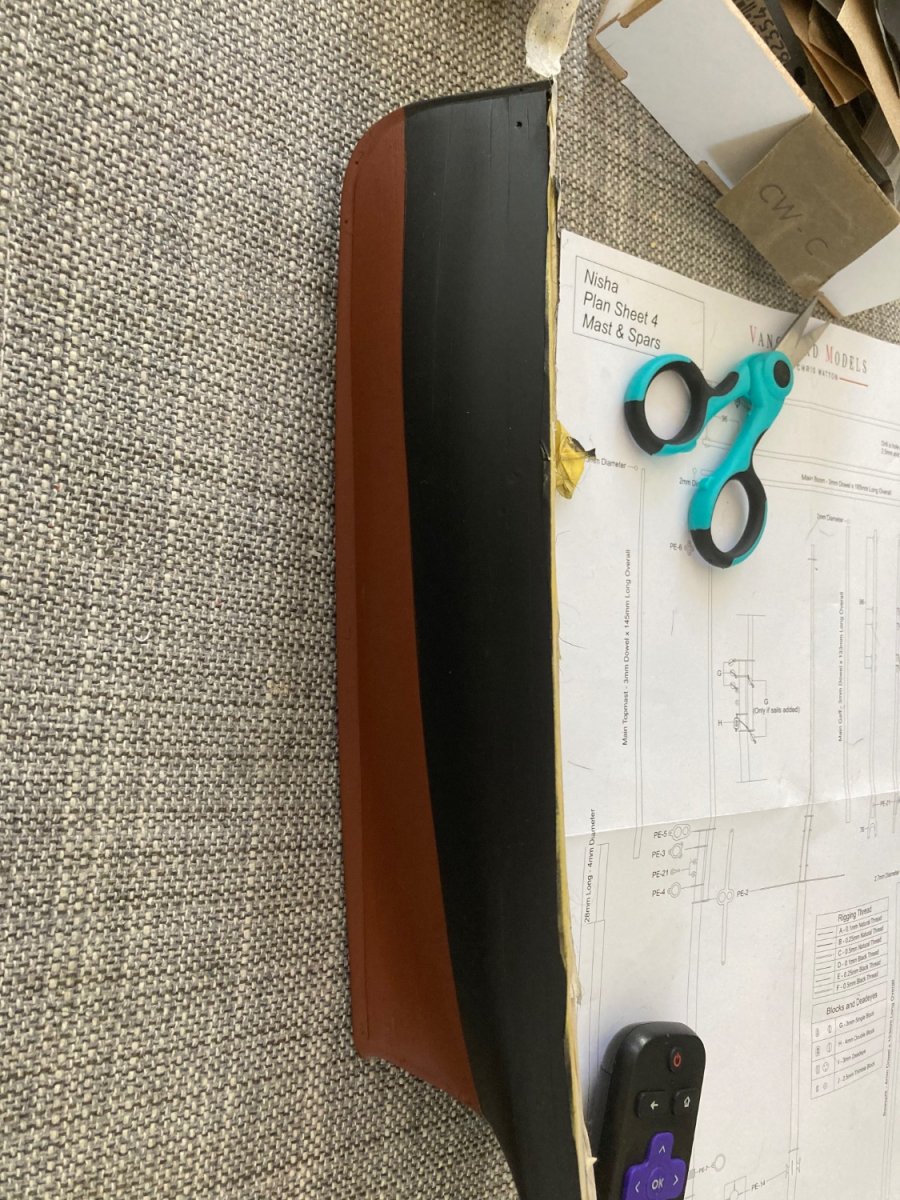
Hi All! I am making the Vanguard's Nisha for my Dad and I thought it would be a nice touch to use the family name on the stern of the ship. The decal that comes with the model is 3mm high. I was not able to find any stencil with the right font hight that small so I was looking to try and create a custom stencil. Any advice on how to do it would be greatly appreciated!

- mtaylor and thibaultron
-
2
-
It has been a little time so my last post but it is nice to be able to provide all you fine folks with an update. This next part is going to be a bit of a rant, but finding paint turned out to be a JOURNEY! For whatever reason ALOT of basic colors for airbrushing (red, white black) where out of stock or only in stock with ridiculous shipping fees but I was able to find spray cans. After the cans arrived problems compounded when the Plastikote can arrived rusty. The nozzle was stuck because it was full of this green gunk(oxidation?) After I was able to clear it shot a clear gunky substance initially but then seemed to work.
Now for the real stuff:
Going off James H excellent recommendation the colors I used where:
Tayima Grey PrimerBadger Anti-Fouling Red Oxide
Citadel Colors Chaos Black
This recommendation came after I bought the plastikote, but for those with an airbrush Wool 132 had the excellent recommendation of Badger Anti-Fouling Red Oxide which I think came out really well.
The results for my model I think came out pretty well given that I am complete rookie, but I noticed a little flacking on the Choas black. That could have been a user error problem as I only waited about 18 hours after spraying the final coat before I taped it up for the red oxide. I was using Tamiya Painter Tape but I might have been bit too eager pulling off the first strips. On the left side, I was a little short with the tape on the water line, so there is a bit of unpainted wood. I also airbrushed the photo etched brass with Tamiya XF 1 Black but I do not think that I did a enough prep and alot of those parts end up chipping so I stripped the paint of and sanded them and have the first coat of primer.
Final Thoughts1) I didn't think finding paint would be so hard for me, so I would recommend buying your colors before the planking process
2) Make sure you cover the hole of the bowsprit!!! I got lucky as some of my tap incidentally covered it but it wasn't something I thought about until I saw the paint on the tape.
3) Primer on the photo etched pieces is probably your friend.
Questions:
1) Is there a good way to fix the chips on the chaos black without respraying with a rattle can?2) Is there a good way to fix the waterline with out respraying?
3) Is it necessary to apply a pro acrylic finish?
4) Is there a good way to make a custom stencil or decal for the name of the ship? I am build this for my Dad so I thought it would be cool to put on the family name/


-
Thanks for the amazing advice everyone! @Bob Cleek you pretty much wrote a dissertation on painting right there so might be getting on my to mastery soon!
@Oldsalt1950 I am actually going to be using a rattlecan to paint the antifouling as thats what Bob and James use for their Vanguard series (specifically plastikote red oxide.) I do have a little airgun set up but I could not find the right shade of red oxide available (paint stocks are LOW right now) so just decided to try a rattle can.In regards to cleaning, what is the best way to ensure the surface is prepped- is it enough to wipe it down with a tack cloth or do I need to be more aggressive?
Do you all typically sand between coats?
I really appreciate all the insight! I had very little modeling/woodworking experience but thanks to this community I am REALLY getting close to finishing the Nisha. I am building the model for my Dad so trying to make it as close to perfect as possible. -
This is a VERY basic question, but I have never used spray paint before so I am hoping to benefit from all your collective knowledge. Any tips, advice, cautions that you have for a rookie? I have been looking on youtube, and there is a lot of great vids regarding plastic models, but I was curious if there are any considerations for working with wood (ie: clear nail polish under tape to prevent bleeding) Probably being a little neurotic but I am pretty far along in my first substantive build and really cautious about messing something up. Appreciate the help as always!
- Canute, mtaylor and East Ender
-
3
-
On 6/4/2022 at 7:27 PM, wool132 said:
The results are in with the Badger Anti-Fouling Red Oxide paint. I sprayed it on undiluted using my Paasche H Airbrush. I have minimal experience in airbrushing. Here 'tis:
The picture was taken with a Nikon D3400 set for f/25 (to increase the depth of field) with a 10-20 mm zoom lens in shaded evening light. It's a pretty good reproduction of the color. Initially I was lazy and used my iPhone 12 but the built-in AutoColorCorrectifierForDummies turned it into a rather garish red - gee, thanks guys. 😕
Jonathan
That turned out really great @wool132! Thanks for sharing!!!
-
Sorry all for the super specific question but I have been going to down a bit of a rabbit hole trying to find the shade of red for the waterline of Vanguard Models Nisha. Chris Watton uses Plastikote Red Oxide primer in his build but I have not been able to find a supplier in my area so I have been looking for equivalent shades. Ideally I would like to airbrush it on using acrylics.
I am looking to paint the hull black with a red waterline like Ajohnson and Niwotwill excellent builds. Ajohnson uses Colour Coats Enamel "anti-fouling" and NiWotWill uses Mission Model "Standard Rust." Since I am painting in my apartment, I am trying to stay away from enamels and as I am completely new to airbrushing (and painting in general) I am a little worried about Mission Models as they have a reputation of being difficult for newbies. I couldn't really find any easy conversion charts but as a beginner, I am not sure of the standard methods, so recommendations on matching paints would actually be incredible as well. I really appreciate this communities patience and advice throughout this build!- Canute, thibaultron and mtaylor
-
3
-
On 10/30/2020 at 9:43 AM, EKE said:
While I finish up the planking, I need to make some decisions about painting the hull, and I’m hoping to solicit some advice.
My plan is to fill and sand the hull surface, mark the waterline, and to paint up to the waterline with a matte red oxide spray to simulate the bottom paint. All good there. But I want to paint the hull above the waterline black, in conformance with nearly all of the photos I’ve seen of Zulus. My first thought was to simply use a matte black acrylic paint like the Vallejo acrylics I have. But looking at vintage photos, it looks to me that the topsides paint on the Zulus was most often glossy, or at least a satin finish. I’m having trouble locating a good satin black paint to use. Can anyone recommend one? I suppose another option would be to use the Vallejo black, and then topcoat it with a satin sealer of some kind, to give it a bit of sheen. I’d love to hear any advice you all may have on how to proceed. My plan is to do the bottom and topsides as described, and then to paint the white boot stripe last.
Another question, this one for James... in your build log, you mentioned after painting that you coated the entire hull with a matte clear varnish. Do you recommend putting the varnish over the painted surfaces, including the red bottom paint, or just the bare wood surfaces?
Thanks to all for any advice!
-E
Absolutely love your building log for this @EKE, and this has been super helpful for my building of the Nisha, so thank you for the excellent job explaining your build! What paint brand did you end up using for the red oxide paint?
-
I am looking at portable airbrush painting booths such as this one and I was wondering if it would be good to collect dust from sanding. I live in a relatively small apartment so I am looking for ways to cut down on dust from sanding and was wonder if this could do double duty. I appreciate any insight!
- mtaylor and thibaultron
-
2
-
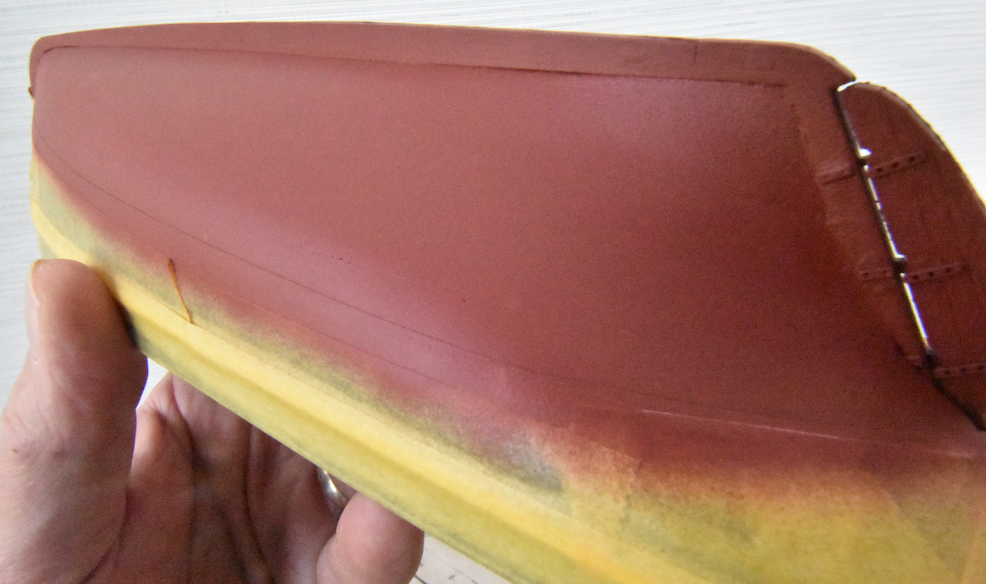
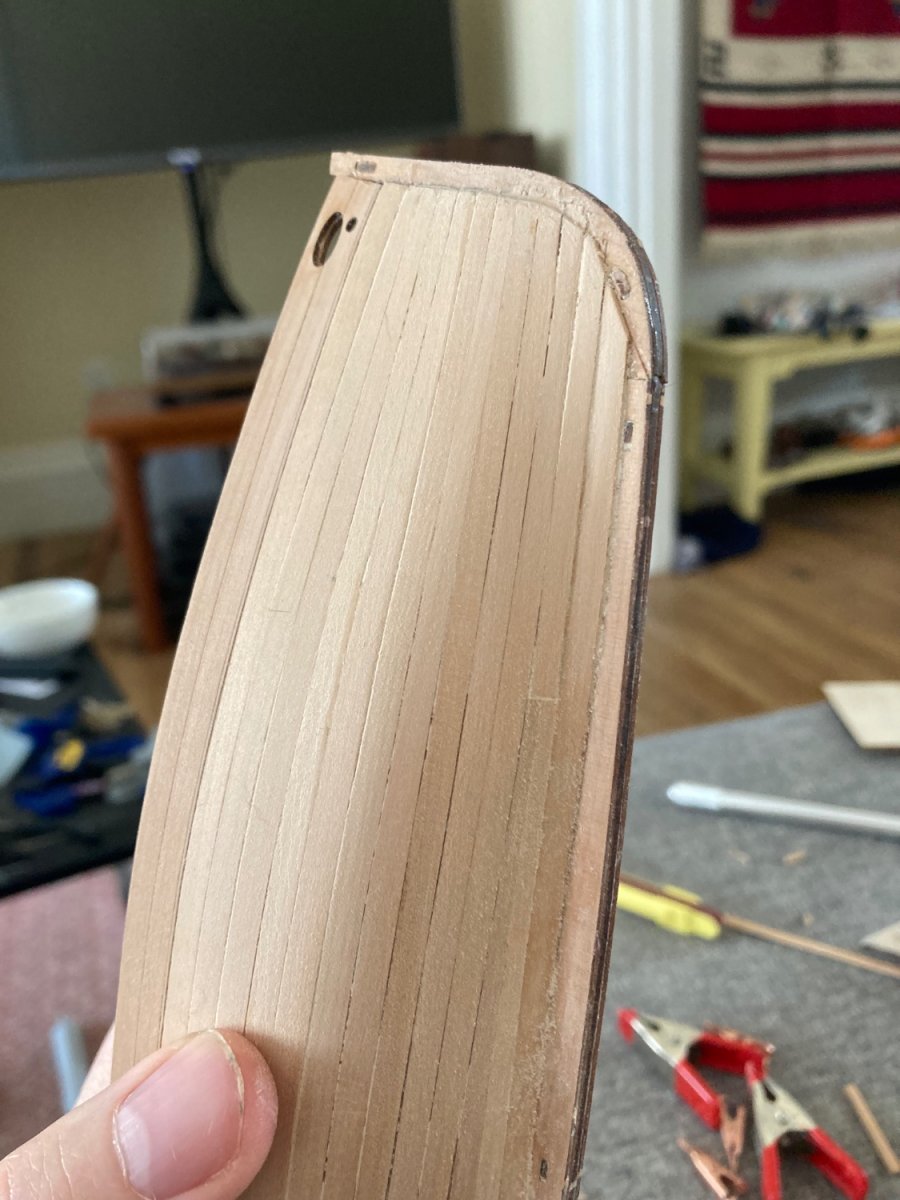
Busy week but starting to get back at it! Continuing on a long line of "learning experiences" (mistakes) I realized the follies of sanding too aggressively and put some fairly good gouges in my planks for I have been spending a fair amount of time going back with filler to try and fill them in.
Getting ready to start painting but wondering if there are any good guides on how to use a waterline marker. I got the one from model expo but there were no instructions on use.
1) Do I want the pencil to be level with the ship
2) Any standards for determining height or is it just eying it?
3) Any other advice or mistakes to be aware of?
-
Hi All!
All of my sanding is done by hand for model wooden ships, so there is no big shavings, but I am worried about fine dust particles especially since I do most of my work in my living room. I use a mask and try to sand with the windows open, but I live in a small apartment in a city so there is no real opportunities to work outside. Do I need to concerned about lingering dust particles from sanding and if so does anyone have any solutions or ideas? Most of what I am finding online is related to sanding with power tools and I have not been able to find too many solutions related to smaller projects like this hobby.
I appreciate any advice/input!- thibaultron and mtaylor
-
2
-
@Craigie65 As always, thank you for the amazing overview!
For your Nisha, what brand/colors did you use?
I see ALOT of tips about airbrushing on plastic models but not some many for wood models. Is spraying pretty similar or are there different considerations?
If I am not being to much of a pain, would you mind sharing the steps you used for painting (primer/thinning/spraying/top coat etc?) Do you spray on the matt varnish?
Finally this is probably bordering on stupid question territory but do wood filler and wood sealers accomplish the same thing? I have been using elmers wood filler, but it seems to be pretty flaky when sanding so I am not sure if there is a better way to do it.
-
On 5/14/2022 at 7:17 PM, Peanut6 said:
Glomar, you may want to consider saving some sawdust from your hull sanding. I've read that mixing sawdust (of the same wood) with a diluted PVA solution and working it into the gaps works for many builders. I tried it on my planking, in a test prior to deconstruction, and I wasn't too pleased with the results. I wasn't going to paint my hull and there was just enough PVA exposed that things looked blotchy when applied stain. I can't see how this method works better than wood filler especially if it will be painted, but to each their own. I just read a build log where the shipwright took a lightly different approach using the same materials. He very carefully and sparingly filled the gaps with PVA and then pushed/worked sawdust into the gap until he had (what I'll call) a sawdust ant hill. He then came back after it had dried and carefully sanded it down. His results were very impressive and sure seemed to work for him. He wasn't going to paint his hull either and I can see how this method could work better because, in theory, you would have a layer of of like wood sawdust that could take a stain rather than a combination of PVA and sawdust. Again, to each their own and I'm just sharing some information that I've come across.
@Peanut6 Thanks for for flagging this! Do you know which build log you saw this on? I did a similar thing trying to combine diluted PVA with sawdust but also got less than desirable results. Would be interested in trying this again though!
-
@Craigie65 looking into airbrushes and would love to get your thoughts!
do you have any recommendations for airbrush that you like?Did you find there was a steep learning curve at all?
Is clean-up or maintenance intensive at all?
Do you use a spray both?
With the stain, did you stain all the planks or just the ones that you left unpainted?
My last couple paint jobs with a brush did not have the best results so I am starting to look into airbrushing but am not sure if it is the easy solution that I might be thinking it is.
-
Thanks @James H and @Craigie65! This has very much turned into a group build with all the help you all are providing so I am glad to say we are getting there!
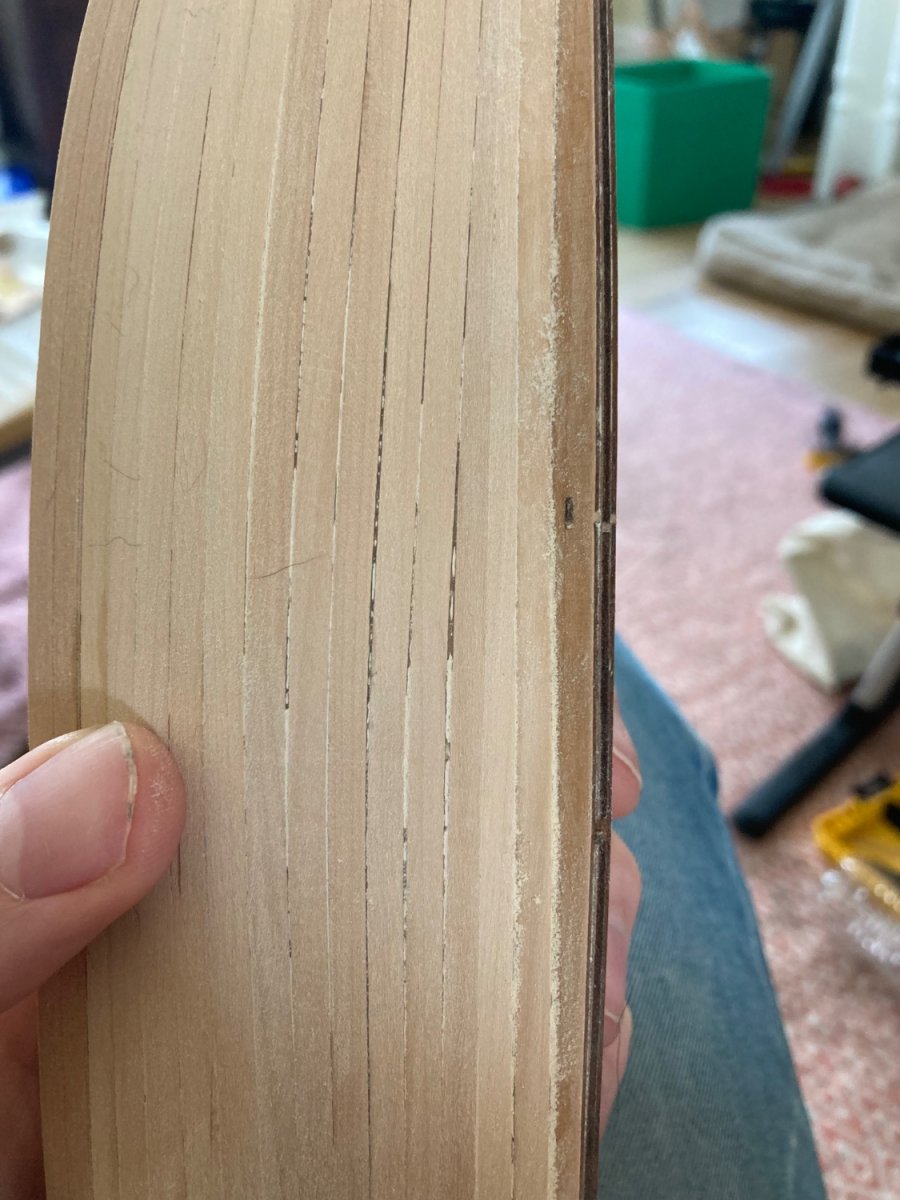
Whats weird is that the blackish parts that look like gaps are what I think are dried wood glue.
1) Should I try and dig it out a little bit to get some filler in it?2) Just because I am neurotic- is it possible to over sand? At what point do you all stop? I notice on the first layer or planks and now on this one, it is that gaps start appearing/becoming more noticeable when sanding. Is that normal or am I being too aggressive?
3) For that chip, would you carve it out and replace it with another piece or is it best to just fill it.
Also kind of random, but how do you feel about the garboards? I am not sure if I am getting them right and they seem a little janky to me but I am not the best judge.
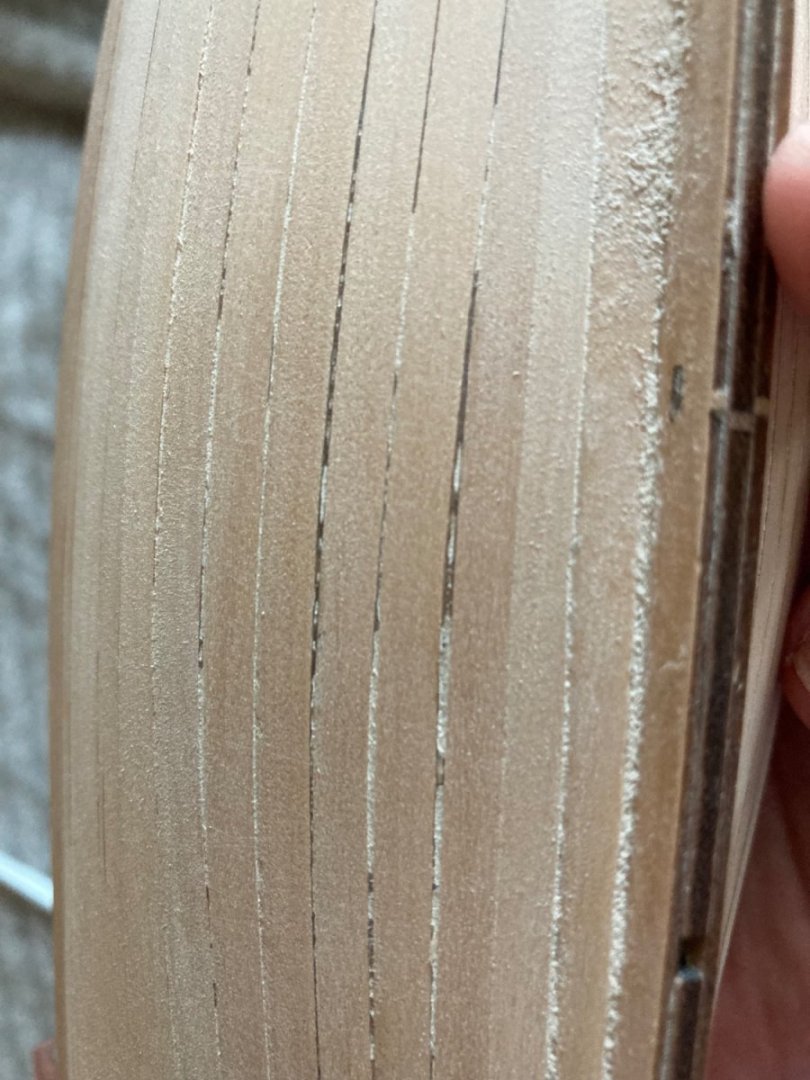
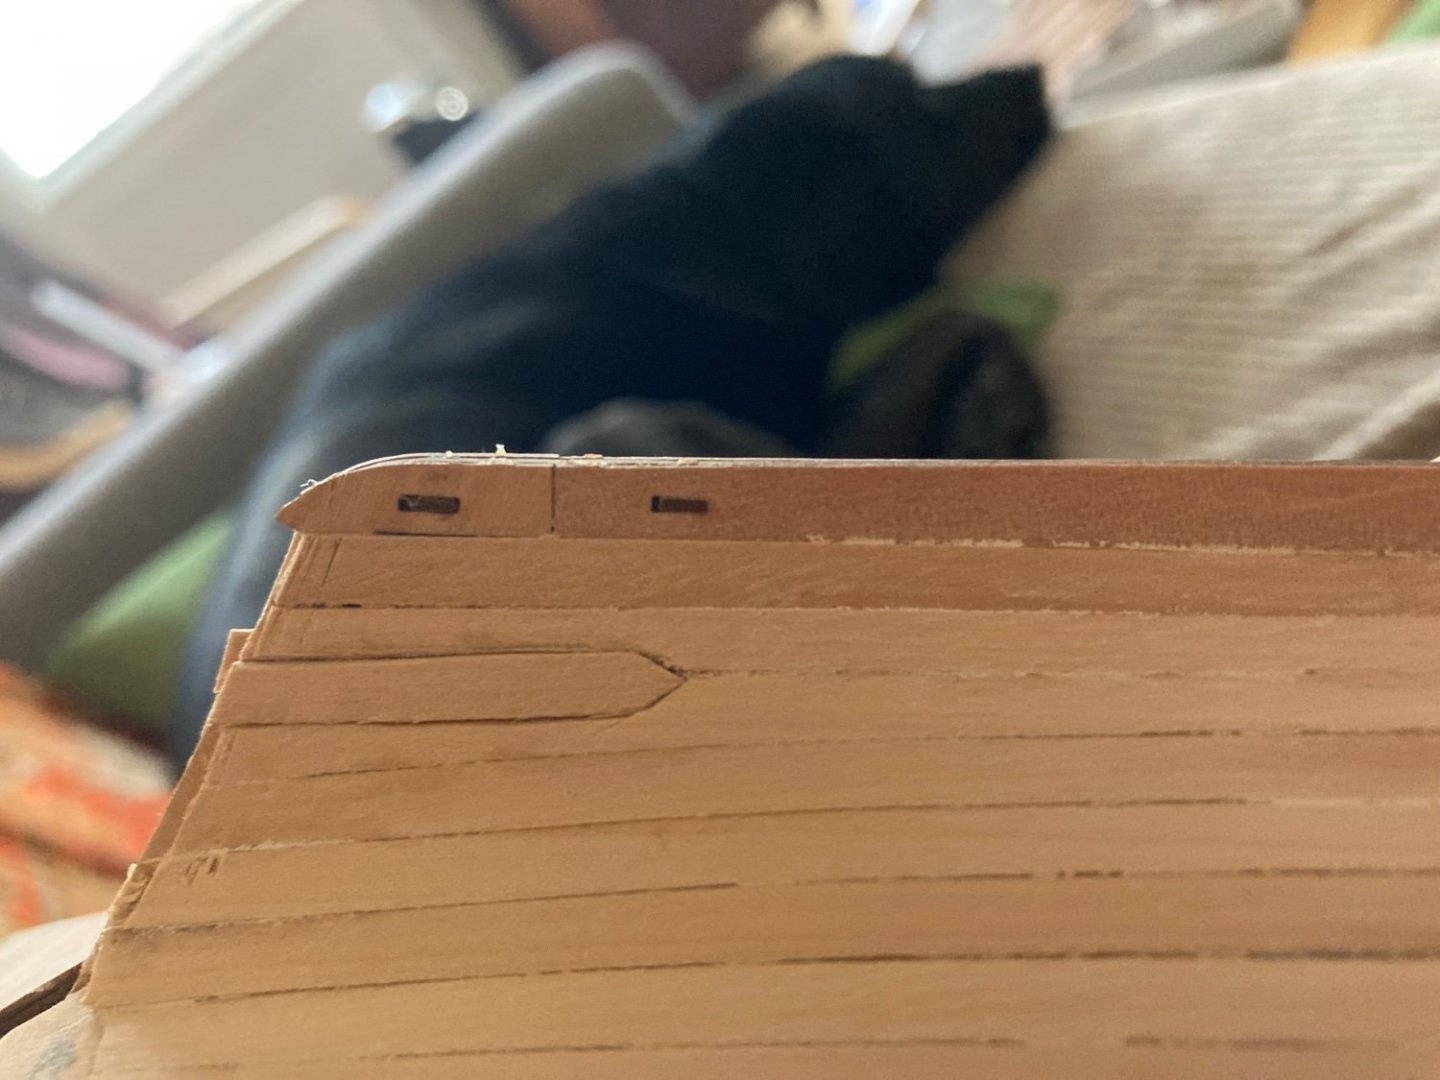
One thing I did play around with this morning is adding stealers in the stern. It is a little crude and needs to be sanded but I had fun with it
- Peanut6, Craigie65 and chris watton
-
3
-
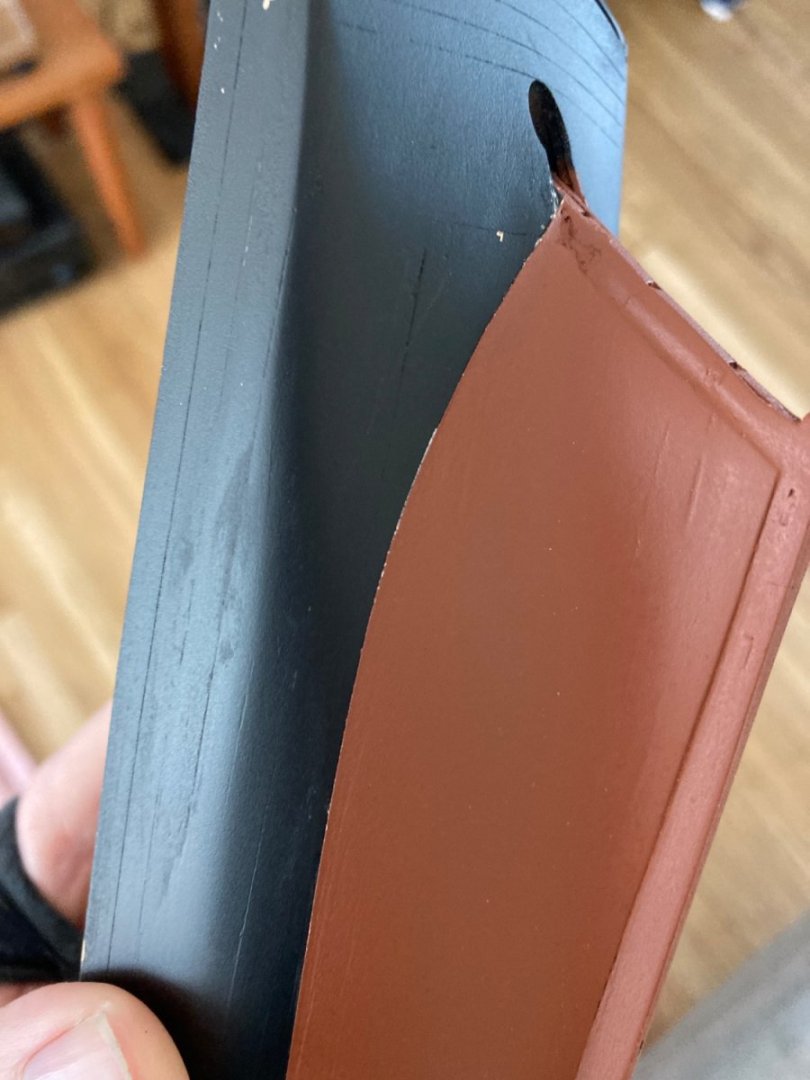
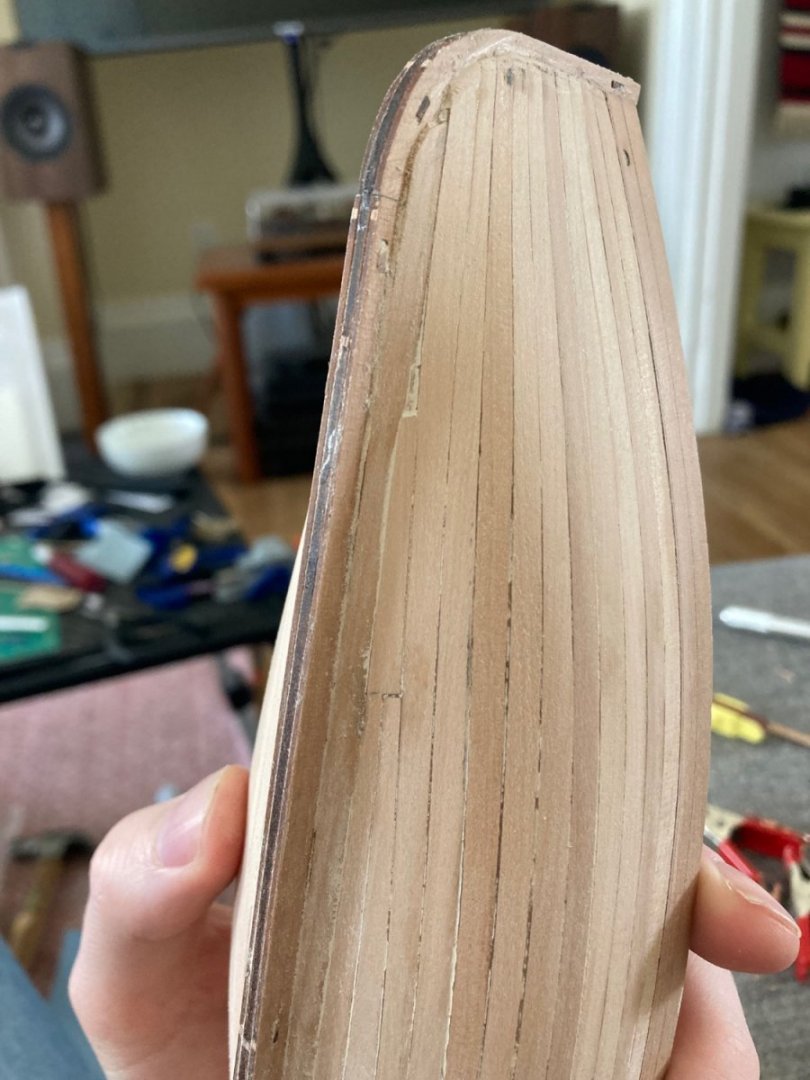
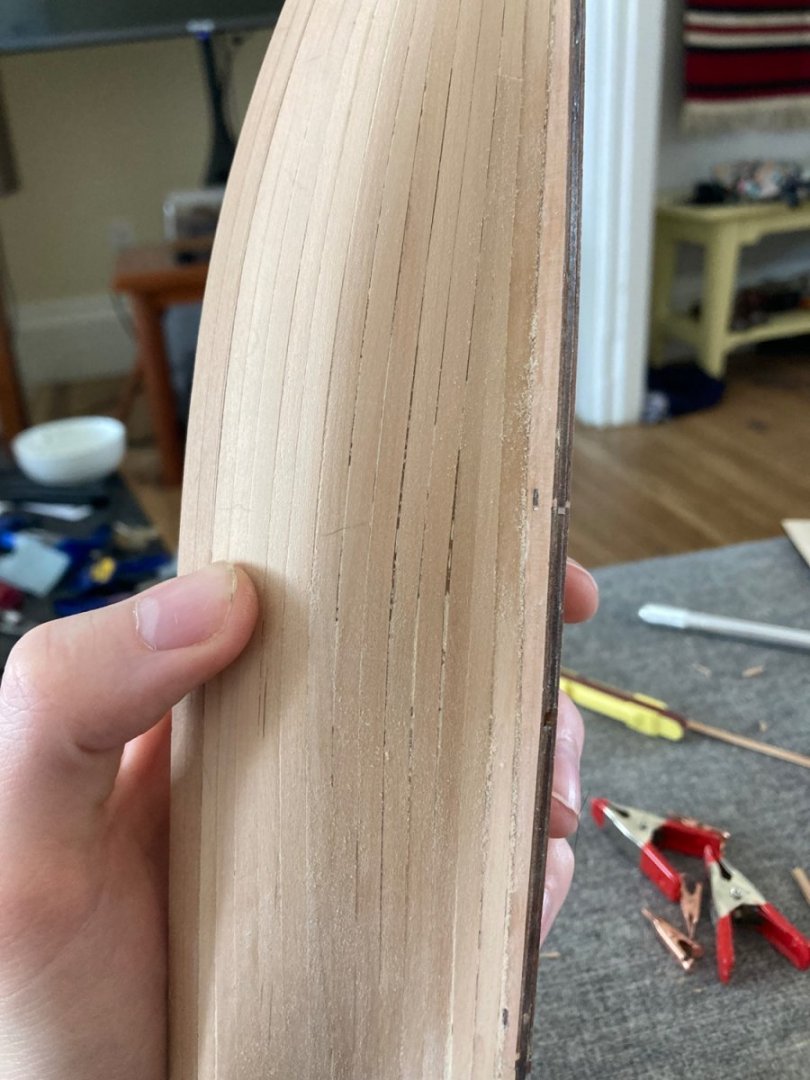
I got the second layer of planking done but with mixed results
I tried to get clever on the bottom half by using drop planks; one side came out pretty well, the other not so much. There is a little chip that I need to figure out how to remedy. More glaring though are these dark lines between the bottom half of the planks that I am not entirely sure they are from
@AJohnson @Craigie65 Any recommendations on how to clean it up a bit?


- Craigie65, Peanut6 and chris watton
-
3


Nisha by Glomar - Vanguard Models - 1:64 - Brixham 'Mumble-Bee'
in - Kit build logs for subjects built from 1901 - Present Day
Posted
So after a very long hiatus, I am back to finally finish this project. Honestly I had everything besides the rigging down last year but because of life as well as just avoiding to learn knots the project got delayed. But no more!
I don't have a good log entry since my last update, but for the sake of continuity here are some questions that were very generously answered by you all (shout out to Cragie65!) (Help Rigging Main Boom and Gaff for Nisha (Vanguard Models) (Best Way to Tighten Loose Ratlines)
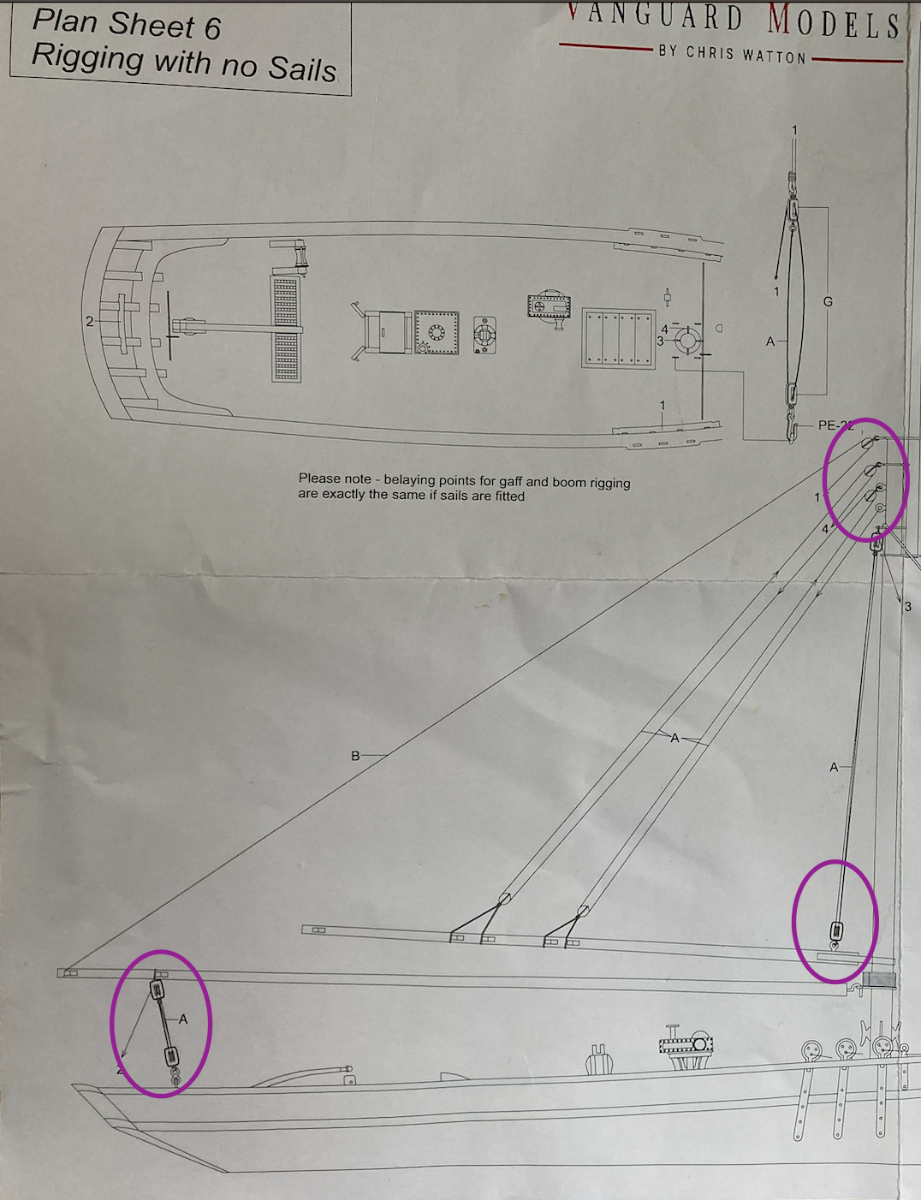
Currently trying to figure out how to rig the Nisha for no sails. I have the gaff up but I think it looks weird because there is no weight on the gaff to cause tension on the rigging.
Next Steps
Trying to configure the Nisha for no sails in a way that would look presentable. My plan was to configure the gaff and boom as if it had sails (but sans sails) but not sure if that is the best path forward. As always any comments or advice is greatly appreciated!