HOLIDAY DONATION DRIVE - SUPPORT MSW - DO YOUR PART TO KEEP THIS GREAT FORUM GOING! (Only 13 donations so far - C'mon guys!)
×


Oldsalt1950
-
Posts
496 -
Joined
-
Last visited
Content Type
Profiles
Forums
Gallery
Events
Everything posted by Oldsalt1950
-
 Time to pull up a chair and watch the building evolution. Looks good.
 -
A clove hitch would be in order to keep the line on the rod.
-
I'm still fighting with the gunports. I'm going to try a different approach from what I have been doing hopefully it will work. I have plenty of time and want them to look right. Found out I still need to take some material off the blocks in the bow. A sanding we will go. Two steps forward, three steps back. 😅
-
She's looking real good John. You are way ahead of me now. I should be ready for planking by around November at the rate I'm working. I'm making more progress in reverse than forward. I need to remove the forecastle coverboard so I can fair the inside bulkheads. Good thing I only use a dot of glue to hold things together. I see you are going with red for the bulwarks, I'm bucking tradition and going with grey. Privateers were a thrifty lot so mixing black and white paint together rather than purchasing addition red paint just seems to make more sense.
-
There is definitely some tricky work to getting the fairing right. I think I have the external okay, will see when I proceed to planking. I settled on a 4-pane window myself, took the frame and design from the plan set for the rigging but without the heavy top bar across the frame. Measurements are 10x10mm at 82 degrees of rake, frame with of 1mm for frame and stiles. Will make it 1/16 thick so it is barely proud of the planking. Will do it sandwich style by using some 1/32 sheet material. The knightheads took some work, lots of filing to get them through that tiny hole.
-
While trying to work out the stern quarter windows, I looked at the gun ports again and didn't like what I saw. Tore out the ones already installed and started over. Now all the lower sills flow nicely along the deck line like they should. Once I have the gun ports completed will post pictures. Also finally managed to break one of the upper deck braces, knew it would happen eventually. Repair was a piece of cake as it broke off very clean. Have a Happy Easter everyone. Jim
-
It looks like masts, spars and rigging are about all you have left Dave. Sanding is a messy business but just clean as you go. Saw dust gets everywhere, it can't be helped. Jim
- 362 replies
-
- 2
-

-
- Amati
- Lady Nelson
- (and 2 more)
-
Dusan, looks great. Planking is spot on. I am looking forward to watching the rest of your build. Happy Easter Jim
-
Very nice Dave. Go with the walnut, it will mellow with age. Jim
- 362 replies
-
- 2
-
-
- Amati
- Lady Nelson
- (and 2 more)
-
I see you have cleaned the old girl up a lot from her previous condition. You have a good foundation to start building on. Looking forward to seeing your progress. Remember to take your time. Jim
-
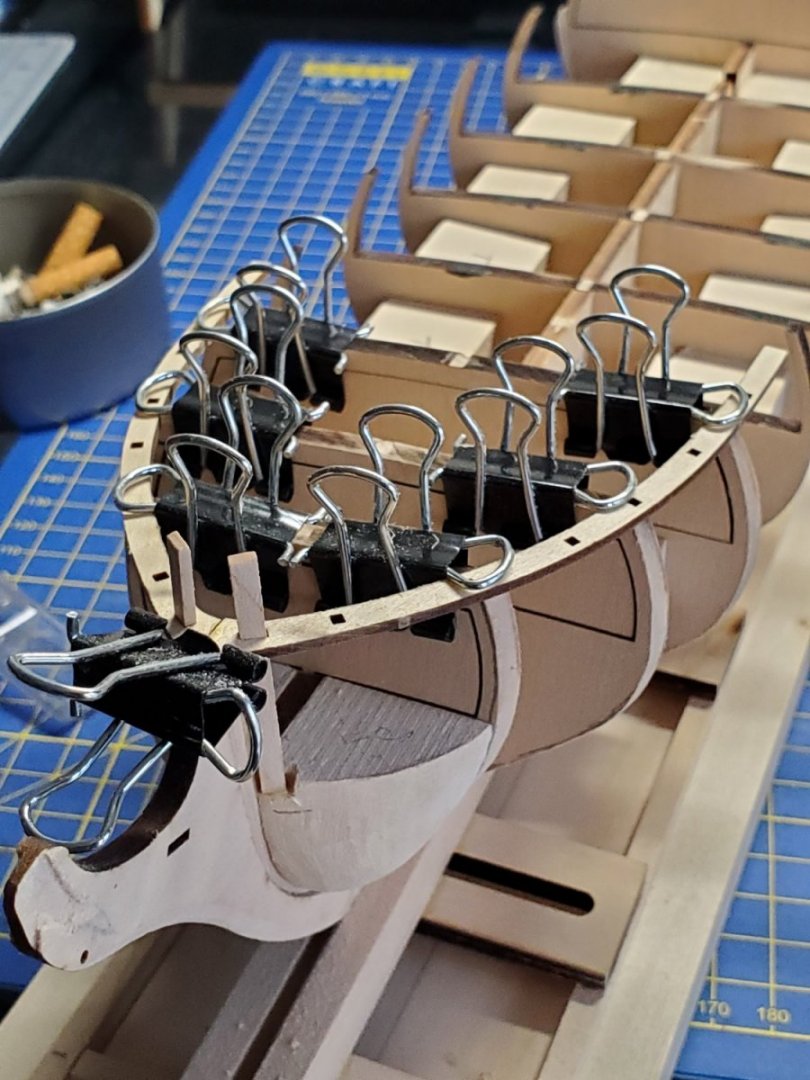
They are bulldog clips that have been modified. You need 3 bulldog clips to make 2 of the modified clips. Take the wings off one clip and fit one into each of what will become the modified clips . You can also modify wooden clothes pins to do the same thing by filing a notch into the end of the clips.
-
I'm right there with you Dave. Cannot see investing in a lathe. I did purchase the book " The Masting and Rigging of English Ships of War " by James Lee, from Discover Books. It gives very good detail on masts and rigging for ships from 1625 to 1860. There is also a good article on making masks from square stock here under the NRG articles. Combine the two and you should be good to go. Jim
-
John, the only issue I have concerning the stern quarter window is the frame size. I'm thinking keeping it thin like the stern gallery. Also have to decide how many panes of glass. At this point I'm leaning towards 4. Will have to make up a sample window and see. Will also check the Cormorant drawings.
-
Greetings from Colorful Colorado
Oldsalt1950 replied to Prowler901's topic in New member Introductions
Welcome aboard Todd. You'll fit right in with the rest of us. Jim -
To borrow a tried-and-true Navy term "BOHICA", and I have the T-shirt to prove it.
-
I had to laugh at myself for the going the wrong side of the bulkhead mark and doing the portside backwards episode. Like the Amish say "The hurrier I go, the behinder I get." Lesson learned, slow down and pay attention to detail. Jim
-
Spent part of yesterday and today making and remaking the gun ports. Still haven't finished and need to decide how I will handle the oar ports. The process itself is not all that complicated. Measure the space between bulkheads for the horizontal members and cut and sand to fit. Measure the vertical members and cut and sand to fit. Measure and mark height of lower sill on all bulkheads. Install gunports. Easy enough. I on the other hand installed the sills the wrong side of the bulkhead mark. Tear them out and redo. Okay now the sill is at the right height time to install the vertical members, carefully set them in place making sure they are not leaning in one direction or the other. I'm taking my measurements off the drawing so what can possibly go wrong? I'm working on the port side and forget that everything is reversed as the drawing is of the starboard side. Once again tear things apart. So now I've wasted over half a day and have half the gunports assembled. Halted construction for today. I'm now trying to determine how to best handle the stern quarter window as the kit casting looks terrible. Also have to determine how to best do the 4 sheaves that are mounted in the bulkhead. Once all of that is done it is on the planking the hull.
-
Looking good Jared. You'll be back to sanding soon enough. Seems there is always something that needs sanding. Will follow your build with interest. Jim
-
Glomar the scribe line is the line imprinted on the bulkhead. Jim
-
Dave, not enough difference in gauge to bother about. As for making rings, not to hard to do. Find a dowel or other circular object the size you need wrap the wire around it and then clip off the wire and close the loop with some needle nose pliers. You can either solder or glue the ends of the ring together. Jim
-
Glomar. nice start. When fairing use the longest plank you can. You should be checking as many bulkheads as possible, gentle curves included. Stop your hull fairing at the end of part 24. The rest is the transom area and is handled differently. Leave your hull planks at the stern long. the transom area planking will butt up with it. When I fair my bulkheads, I taper/bevel them from the scribe line to the back of the bulkhead when moving aft. When going from the stern forward the bevel goes the other way, so it is from the scribe line to the forward edge.Take your time , don't rush. When you start planking small issues can be sanded out or shimmed to make corrections. Jim
-
Arthur before you put yourself in A rough spot click on Articles Database at the top of the page, then scroll down to Framing and Planking. Everything you need to know short of how to fair the framing bulkheads is there to complete the hull. Swift is a great kit to start with, you'll learn all the basics and can have some fun along the way. Jim
- 8 replies
-
- 2
-
-
- first build
- Artesania Latina
- (and 1 more)
-
Really starting to take shape now. Will you be adding sails?
- 111 replies
-
- 1
-
-
- Swift
- Artesania Latina
- (and 3 more)
-
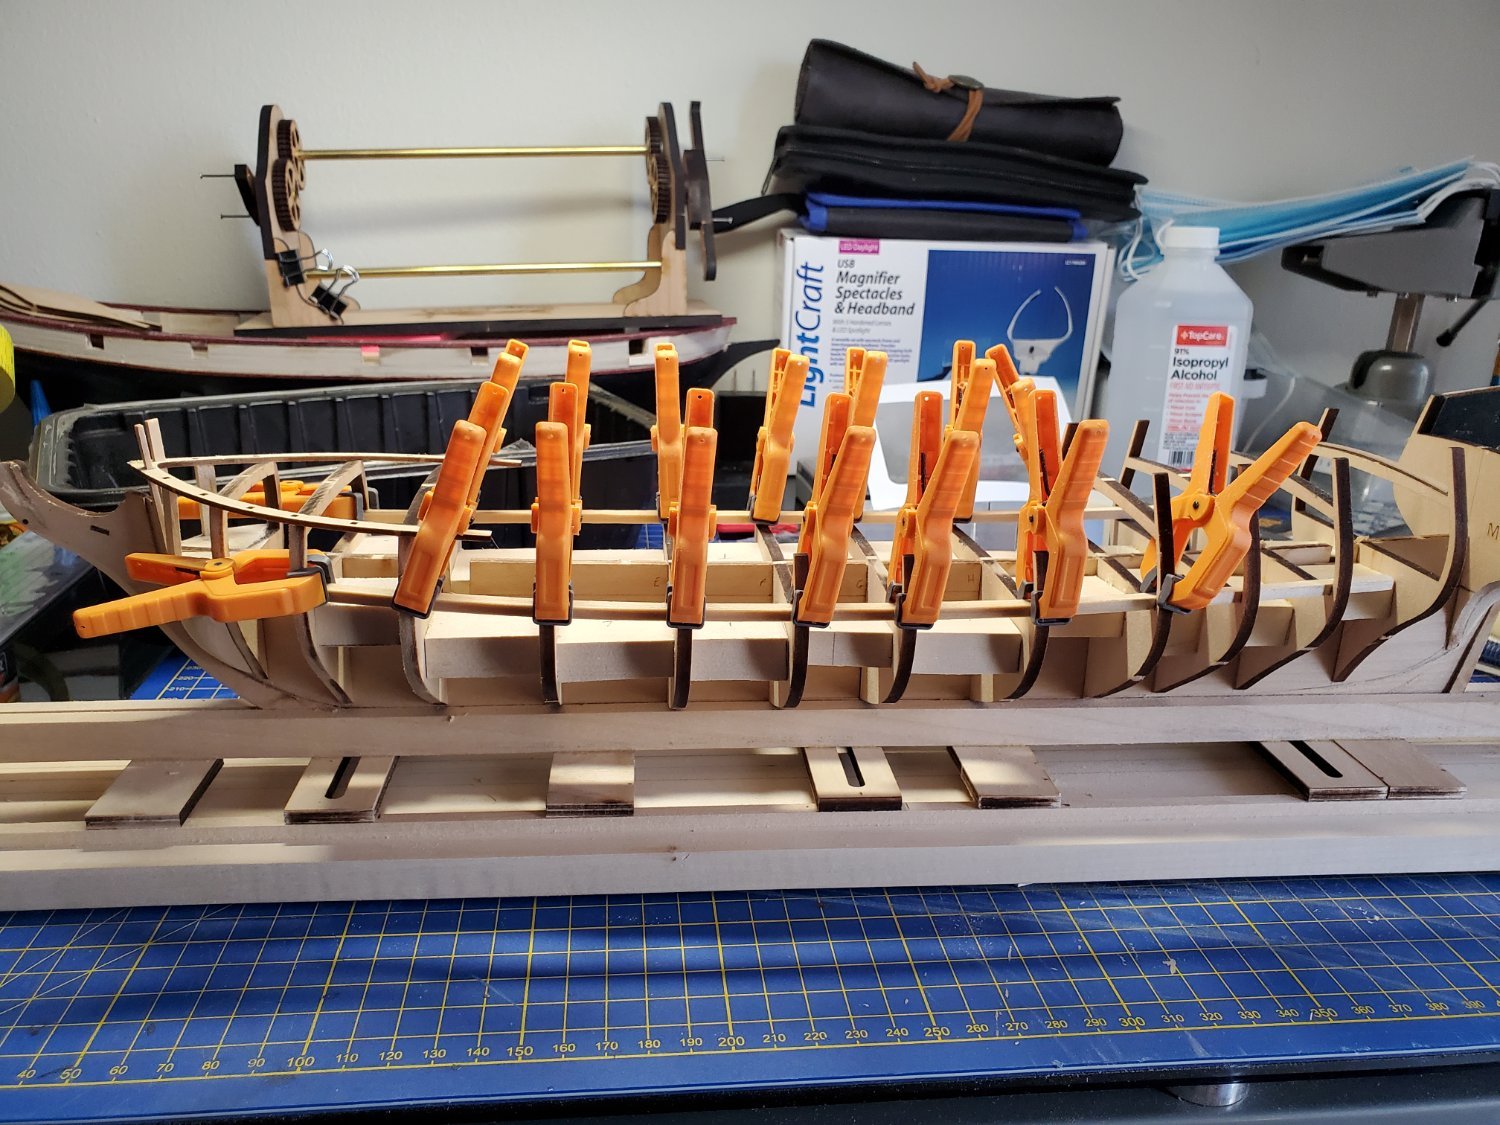
Today's progress was better than expected. Knightshead and Timberhead installed along with Forecastle Coverboard. Placed steamed Waterway timber in place to bend B to I . Will have to make a series of cuts to bend Waterway timber from bulkhead B to stem post. Also have to construct Hauser scupper before doing upper planking. It is not mentioned in the building instructions but shows on plans. Today is in the books.