HOLIDAY DONATION DRIVE - SUPPORT MSW - DO YOUR PART TO KEEP THIS GREAT FORUM GOING! (Only 13 donations so far - C'mon guys!)
×


Oldsalt1950
-
Posts
496 -
Joined
-
Last visited
Content Type
Profiles
Forums
Gallery
Events
Everything posted by Oldsalt1950
-
 One more : Manning the Helm
-
Here are a couple of ideas:
-
Welcome aboard. I grew up in Mt. Sinai, had a house out in Ridge. use to laugh when I heard people tell me they saw strange lights over the Island out near Riverhead, Damn E-2 Tracker dish reflections do strange things. Jim
-
I'd use the cannon frames (trucks) as is just paint them first , and then assemble the entire thing. It isn't that hard to place the cannon barrel in the assembly. Do one side to the base and let it cure then place the cannon barrel and glue the other side to the base. Jim
-
I'm pulling up a chair and following along. Jim
-
Log to PDF Tool
Oldsalt1950 replied to VTHokiEE's topic in Using the MSW forum - **NO MODELING CONTENT IN THIS SUB-FORUM**
It runs and can be installed using Microsoft "Edge" too. I am currently running it in the AVG Secure Browser . Doesn't take long at all to create the pdf. Jim -
Silly me, getting my ships mixed up. Jim
-
Looks really nice Chris. I assume once this is done you'll be moving on to Sophie. With that said, you know people are going to be clamoring for a Jack Aubury figure to captain her. Jim
-
Value-for-Money Airbrush
Oldsalt1950 replied to BANYAN's topic in Painting, finishing and weathering products and techniques
Kurt, you may be absolutely correct in your determination that the black airbrush is a direct copy of the Badger 350. I will also concede that all 3 brushes could be knock offs of other designs. There is no way of knowing for sure outside of comparing them to the blueprints of the originals they may have been copied from and taking measurements. There are not many differences between airbrushes cosmetically on the outside. The internals however are another matter. Fit, finish and choice of materials along with placement of O-rings, springs, etc. make the design. Chances are, that if you have anything on your workbench that is "made in China" it is pirated. It is also possible it could be a legitimate copy as some companies outsource items under direct license. Jim -
Cpt Striker You can use the knock out piece from the bulkhead to construct the poop deck bulkhead wall. to make the hatches and gratings you will have a few decisions to make concerning how you want to make them look. Will the corners be mitered ( cut at an angle) or will you notch them? Then you must decide if you will lay the grating pieces flat or will you assemble them fitting the notches together. You will also have to provide some sort of lip inside the hatch coming (Frame) for the grating pieces to rest on. No matter which way you choose to build the hatch frame the frame should be constructed such that it is twice the height of the grating. The pieces of the frame that go athwart ship , that is across the frame from side to side should be contour to match the curvature of the deck on the bottom. I'm not sure what parts you are talking about in the plastic tube as all my parts came in bags a picture would help. Jim
-
Very nice work Dave. Those cannon look sharp. Jim
-
Value-for-Money Airbrush
Oldsalt1950 replied to BANYAN's topic in Painting, finishing and weathering products and techniques
If you are just starting out, this combo can't be beat: Airbrush Kit -
You are off to a great start. Think I'll pull up a chair and watch your progress. Jim
-
The rail placement is correct, and your bow fillers need to go on a diet. For the knights head and timber heads, fit them using the 1/32 x 3/32. You can always reenforce them once the rail is fitted. If you look at the mast and rigging diagrams, lay the bow sprit over its corresponding drawing and cut to length, make it a bit long and sand it back to its correct length and angle. Jim
-
That is really bad. Jim (Stg1sw, USN ret)
-
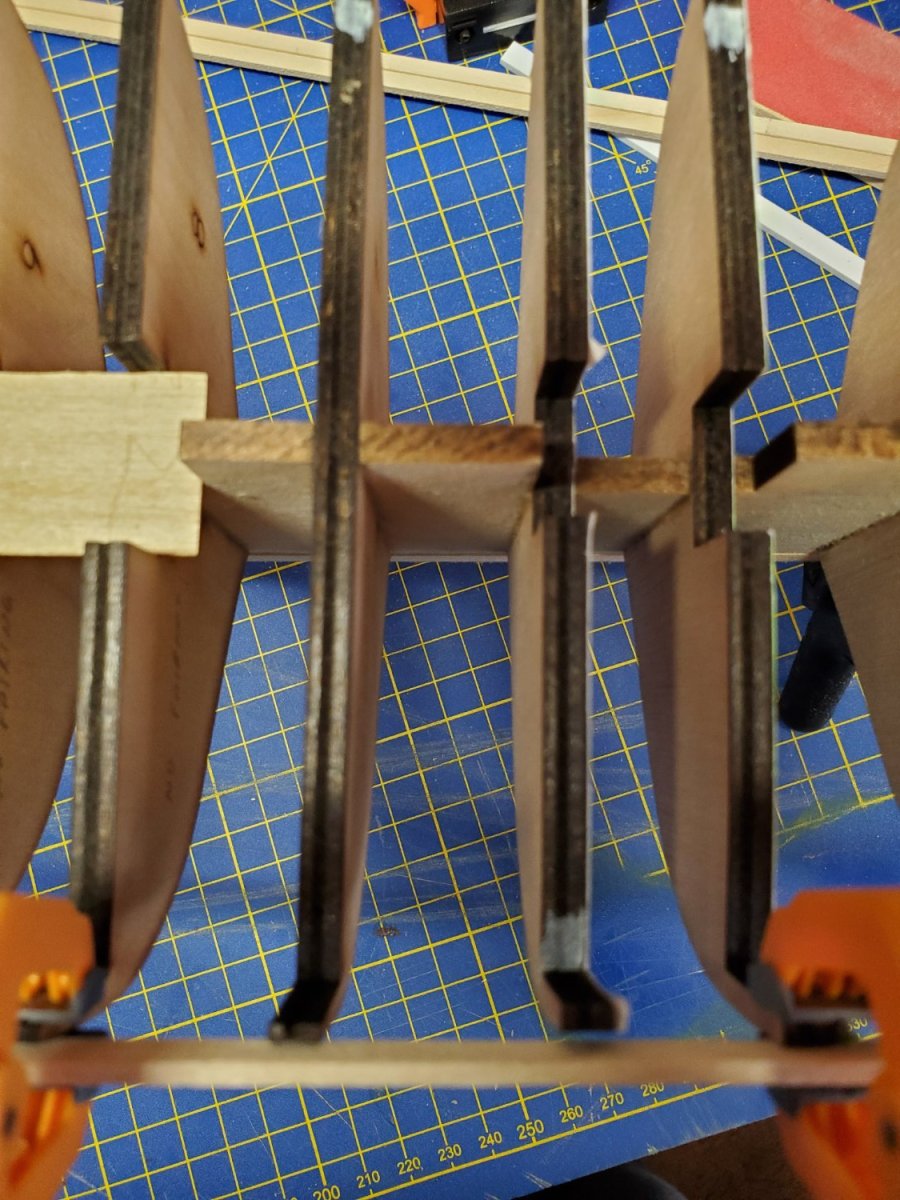
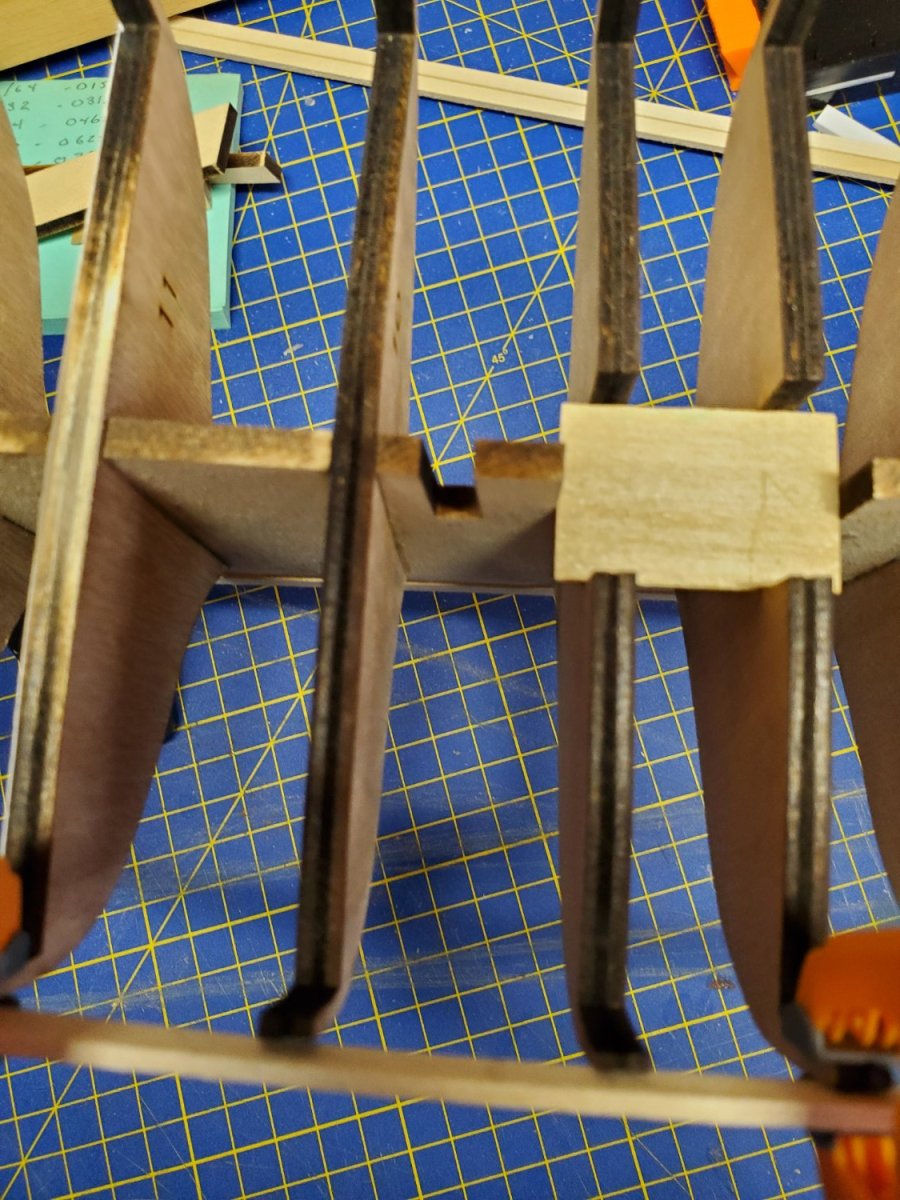
Have been working on the waterways, well to be more precise experimenting. The kit supplied stock is (2) pieces of 5/32 x 1/8 timber which is in no way east to try and bend to fit the curve of the edge of the deck without kinking or breaking. The obvious solution would be to make a laminate or make the waterway in pieces to make the curve. So off I went seeing what could be done. To make a laminated waterway took about 4 hours total and I haven't established the edge profile yet. I did however also manage to actually bend that 5/32 x 1/8 timber without kinking or cracking it, time invested 14 hours. Lots of hot water and clamps involved. it too needs an edge profile. Thick timbers can be bent to fairly tight curves if you take your time and are very careful and lucky. Jim
-
While waiting for the shims I just glued in to set and cure. I am reevaluating whether to make the FA into a 14 gun ship or 16. At 14 guns similar to what Pete Jaquith did, there can be a great cabin, at 16 guns not so much so as the cabin would start at the next to last aft bulkhead frame. I leaning more towards 14 guns for aesthetic reasons as it would compliment the hull lines as is much more pleasing to the eye. I also have a few more changes I am mulling over one of which is a ship's name change to the "Wendy Kay" in memory of my deceased wife. Stay tuned to see what else i may change as I progress in the build. Jim
-
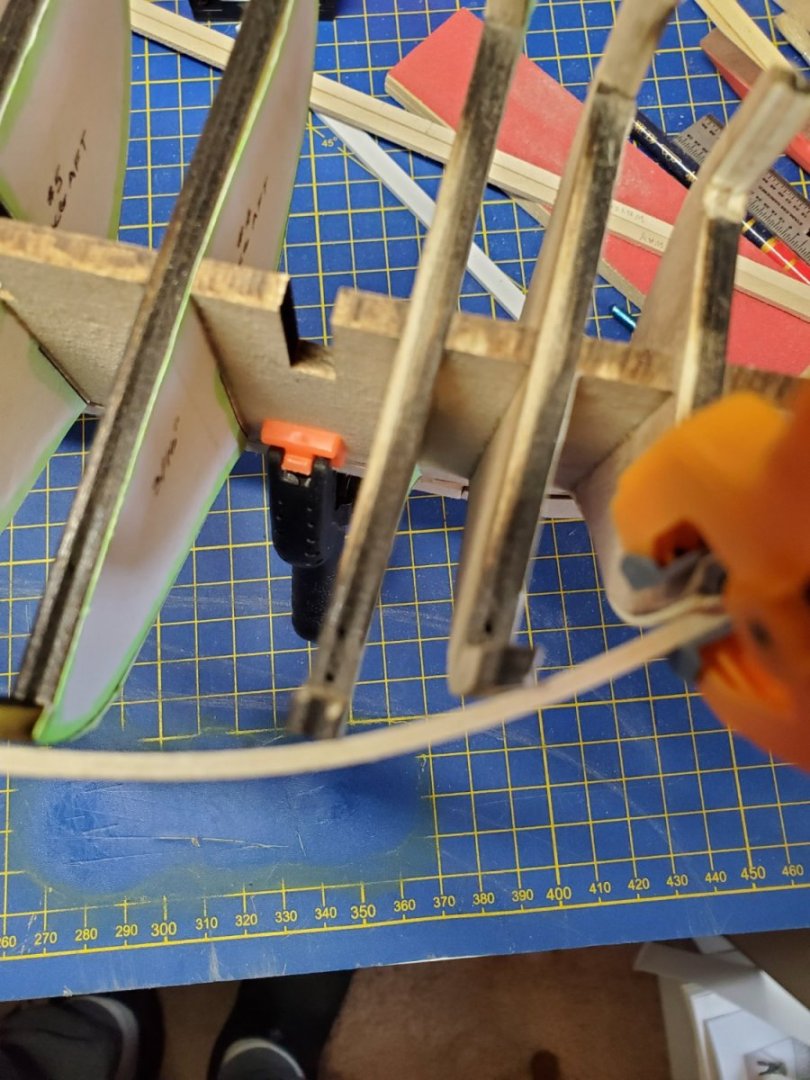
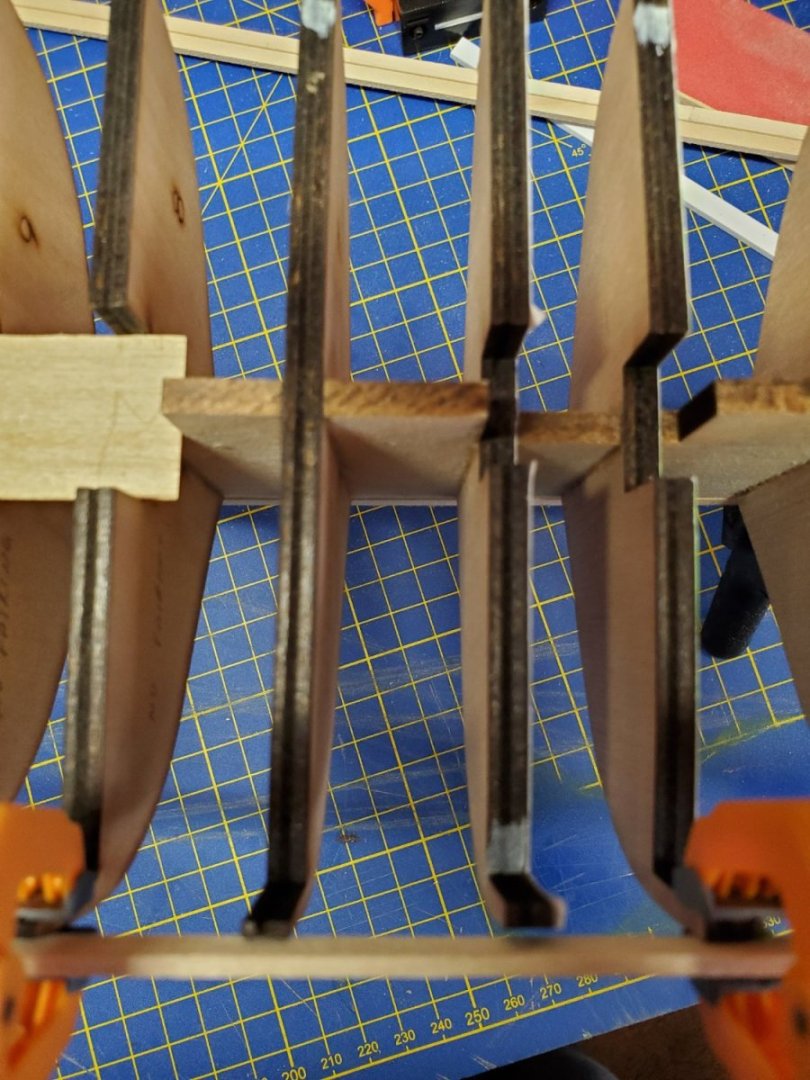
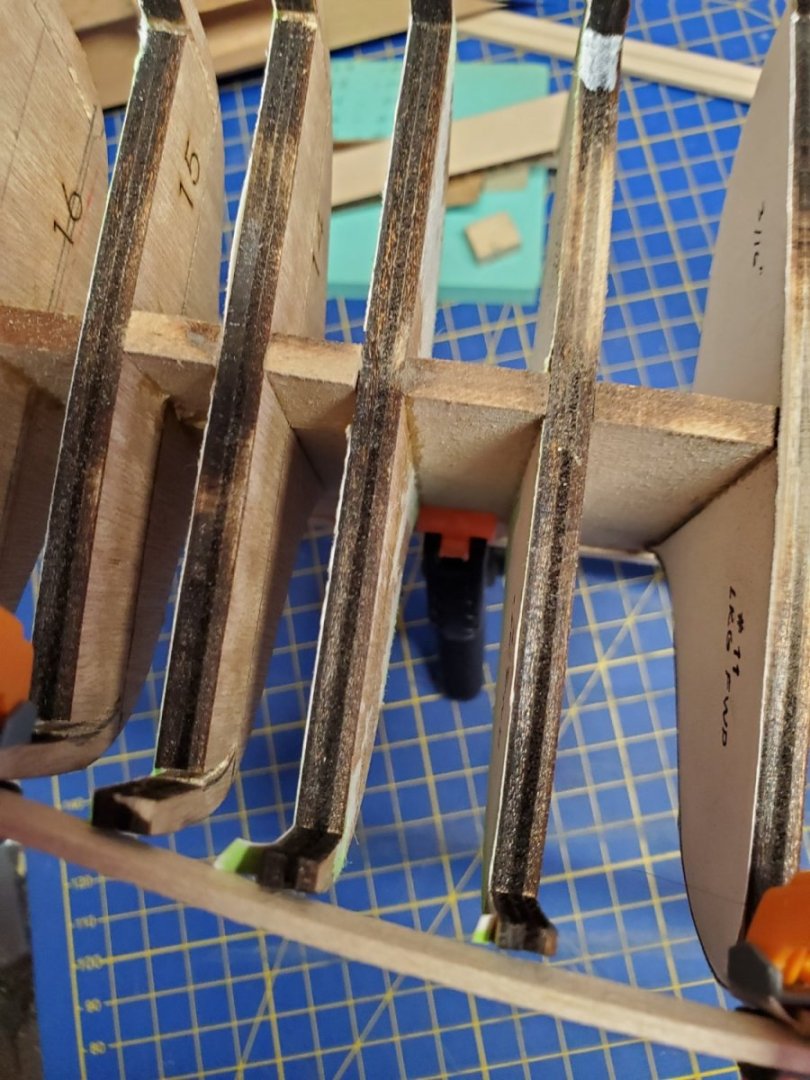
Fairing and final beveling process is about to begin. I have some shimming that needs to be done to ensure a smooth transition as can be seen from the photos below. These are all the starboard side,

-
Welcome aboard Tom. Take a look through the building logs for your ships and you'll find the answer to some of your questions concerning your Bounty and Cutty Sark. While you are at it you might want to start your own build log on them. People will chime in with plenty of advice and encouragement. Jim
-
Racks would have still been used, just mounted lower on the bulwark. Storage bins would have been out of the question for a variety of reasons, mostly because there really wasn't any real estate on the deck that was not being used for other ships evolutions besides gunnery. You can see what i mean if you look at the deck from overhead with all the ordinance fully rigged. There isn't much space to put a locker to hold the loading and elevating tools near the ships cannon that would work, add to this the room required to handle lines for the sails, ships boats, anchor , etc. and the bulwark rack makes the most sense. Remember that the guns were manner, loaded and run out long before the first shot was fired then things got real interesting real quick. Jim
-
Rope walk machine
Oldsalt1950 replied to Christership's topic in Modeling tools and Workshop Equipment
Syren Ship Model Company -
Bulkhead frame bevels are something that each of us approach a bit differently, as is the keel rabbet. I prefer doing mine by hand and at first did the beveling of the bulkheads frames when I did my fairing. The plans show you the approximate beveling lines and they can be transferred to the bulkheads before assembly a much easier way to do thinks. You have a number of options for how to do this; Transfer the measurements using a set of dividers, trace the lines, make a template. You will eventually find a method that works for you. I've found the best way to do the rabbet is to lightly sand the keel frame then use a piece of Planking of the appropriate thickness to mark the bottom of the keel frame, flip the frame over and mark it again. This is usually a piece of planking 1/16 thick then sand the rabbet bevel to the indicated lines. As far as where to start with your planking once the fairing is done, that too is different for all of us. I like to establish the wale line and start there. I will then fit the garboard plank making sure that the forward/stem end does not rise up above level with the keel. Then you can mark off your planking belts. Jim
-
Ed, it all depends on how you approach constructing it. It looks like you left a little space after the end of the waterways at the bulkhead frame which means you won't have to try and cut the very bottom corners to fit around the waterway. The part you really need to think about is the windows in the panels. Will you actually cut them out, or just paint them in. Jim
-
Nice work Ed. While thinking about the wale and bulkhead planking, also think about the cabin/quarterdeck bulkhead and how you are going to approach that. Jim