HOLIDAY DONATION DRIVE - SUPPORT MSW - DO YOUR PART TO KEEP THIS GREAT FORUM GOING!
×

DB789
-
Posts
427 -
Joined
-
Last visited
Content Type
Profiles
Forums
Gallery
Events
Everything posted by DB789
-
 Great to see another Adder build. I’m thoroughly enjoying building her too. I’ll be following along.
- 66 replies
-
- 2
-

-
- Adder
- Vanguard Models
- (and 1 more)
-
She looks wonderful! Great build, thanks for sharing!
- 152 replies
-
- 1
-
-
- Flirt
- Vanguard Models
- (and 1 more)
-
Chris, thanks so much for the advice. I will certainly follow that sequence. My deadeye lanyards are longer than the top of your range, but not hugely so. I’m happy with them albeit they’re not technically correct. I’ll make sure I get them shorter on my next build. I’m much more out of my comfort zone on the rigging so it takes me a lot more time than it really should. As I get to know the typical rigging layout on a square rigger it will get easier and I’m sure I’ll speed up. I much prefer building and fitting out the hull to the masts and rigging. Your plans couldn’t be clearer and I appreciate that Adder has a slightly simplified rigging plan compared to say Speedy which will really help me. Thanks again for another great kit.
- 146 replies
-
- 5
-
-
- Adder
- Vanguard Models
- (and 1 more)
-
Ron, thanks so much for the advice. I’ll certainly follow that sequence. I look forward to seeing your diorama.
-
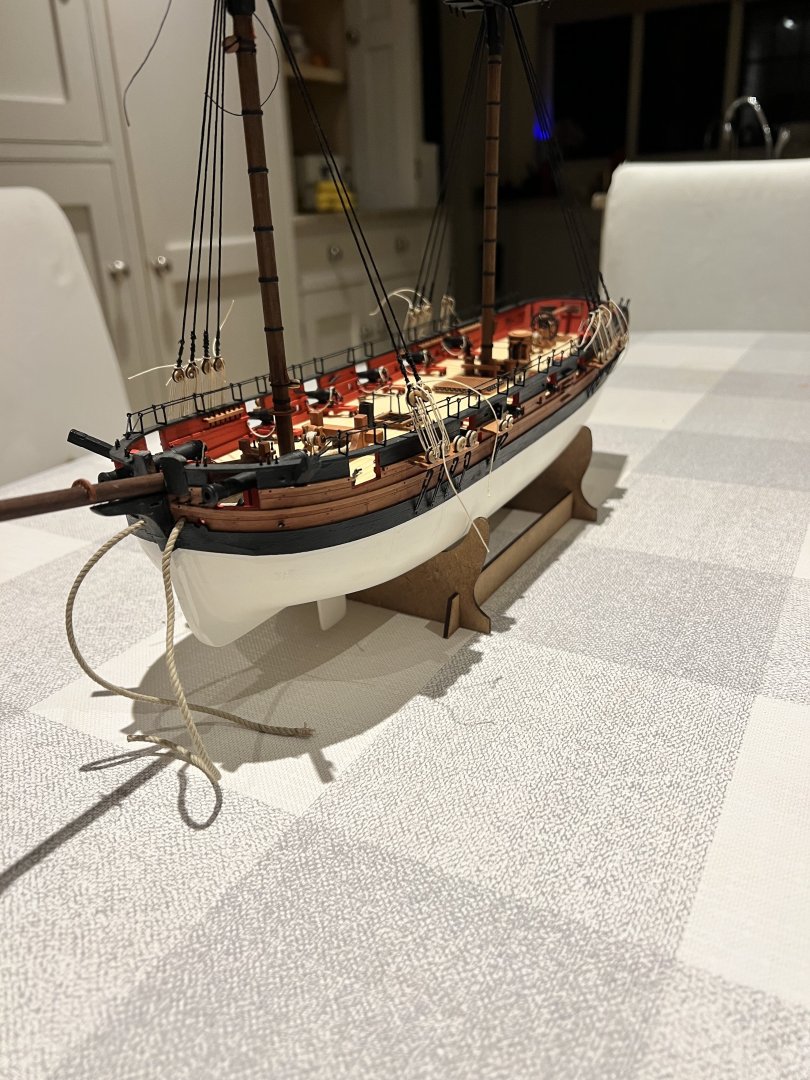
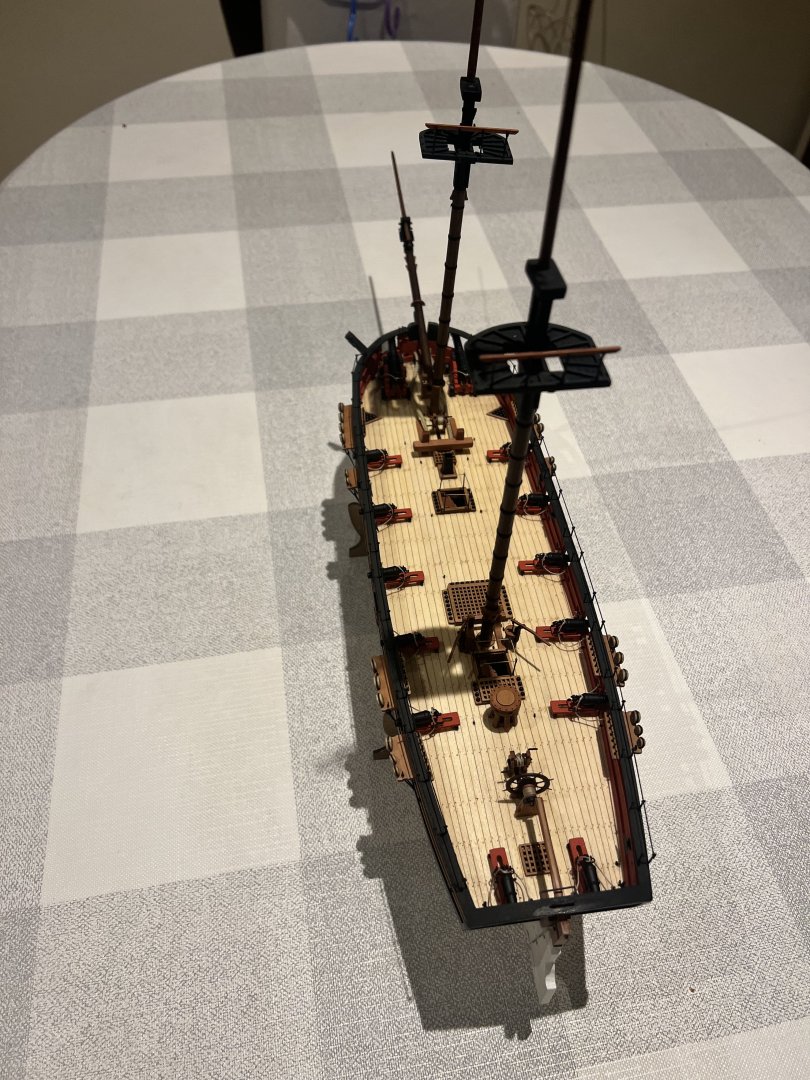
Thank you all for the excellent advice. Gratefully received and followed. I’ve removed and replaced the shrouds on the foremast. All the shroud lanyards are a little longer than on Chris’s prototype which I’m sure has the realistic scale length, but they’re all now the same length and I don’t have the odd looking high deadeyes starboard on the foremast. I’m happy with that, the lanyards are no longer than I have on my Grecian and Alert kits, they just look it as the height of the maintop/foretop is much lower on the square rigged Adder than the two fore and aft rigged vessels. Next either to add ratlines (and catharpins) to the lower shrouds or add the topmast shrouds. Not sure which I’ll do first - or should? Ron - I look forward to seeing your Adder, mine is very much an “out of the box build” following the instructions and colour scheme. They’re such great kits from Vanguard that’s enough for me, but I really liked your interpretation of Grecian.


- 146 replies
-
- 10
-
-
- Adder
- Vanguard Models
- (and 1 more)
-
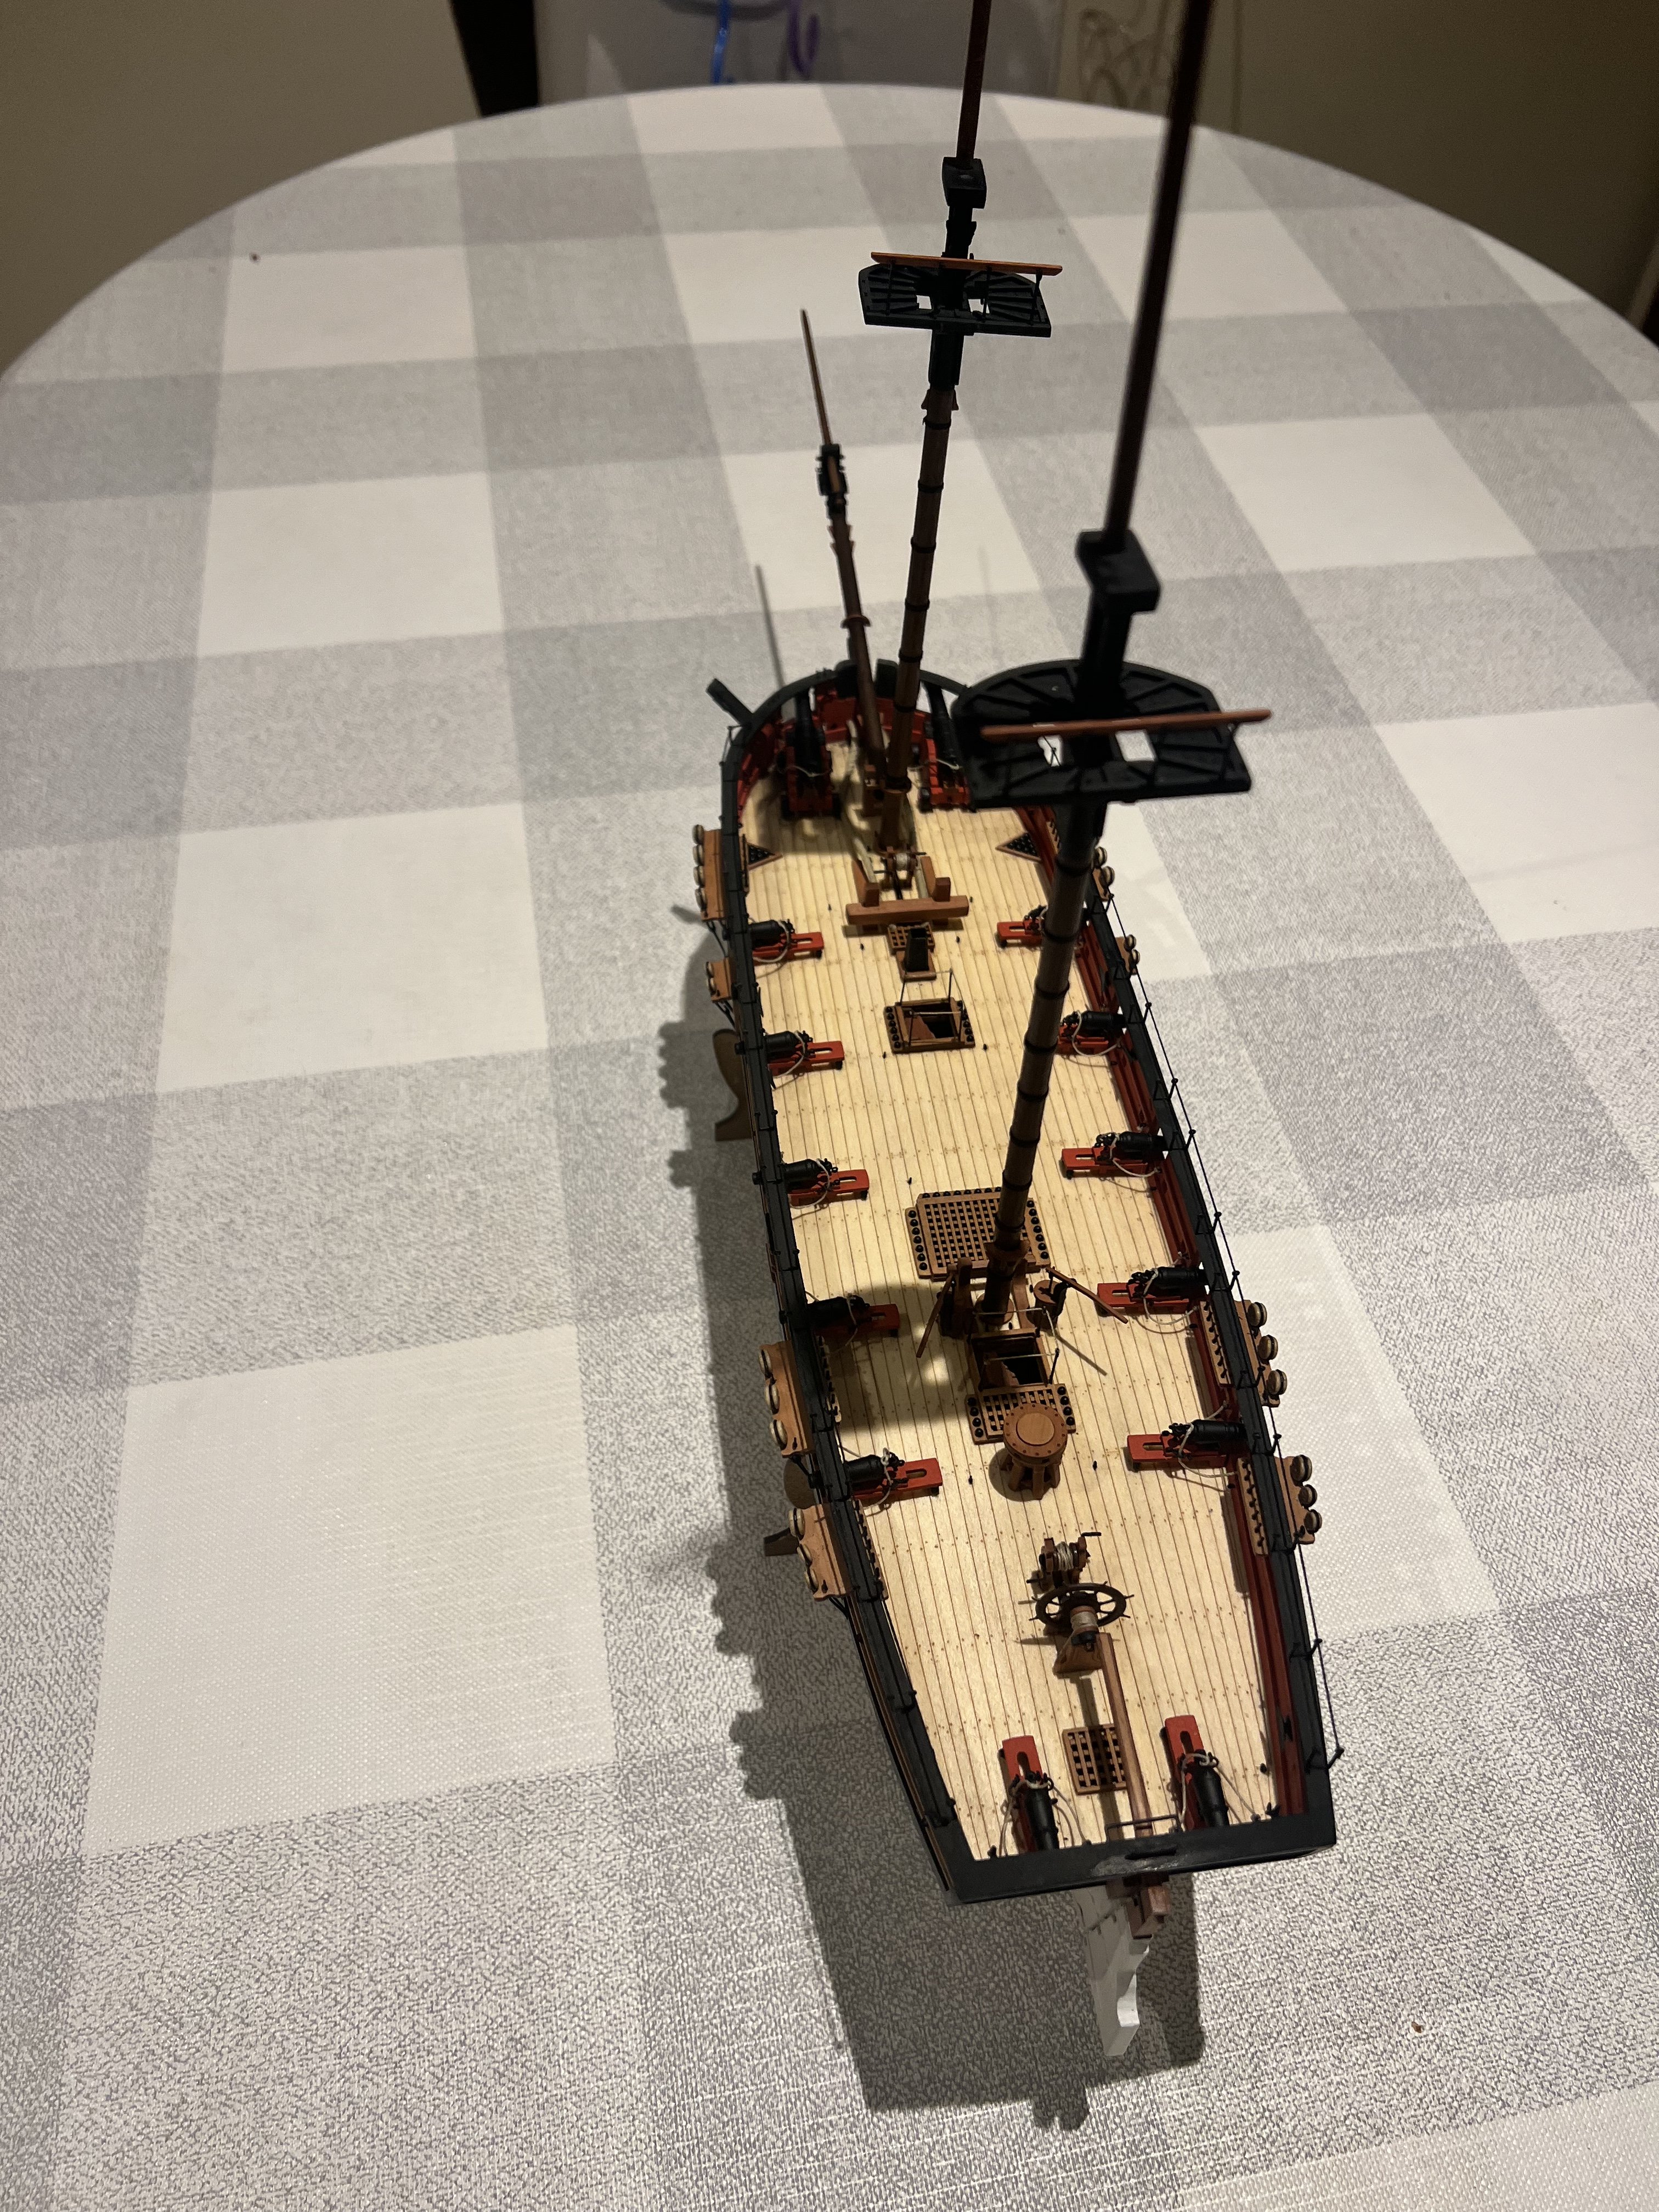
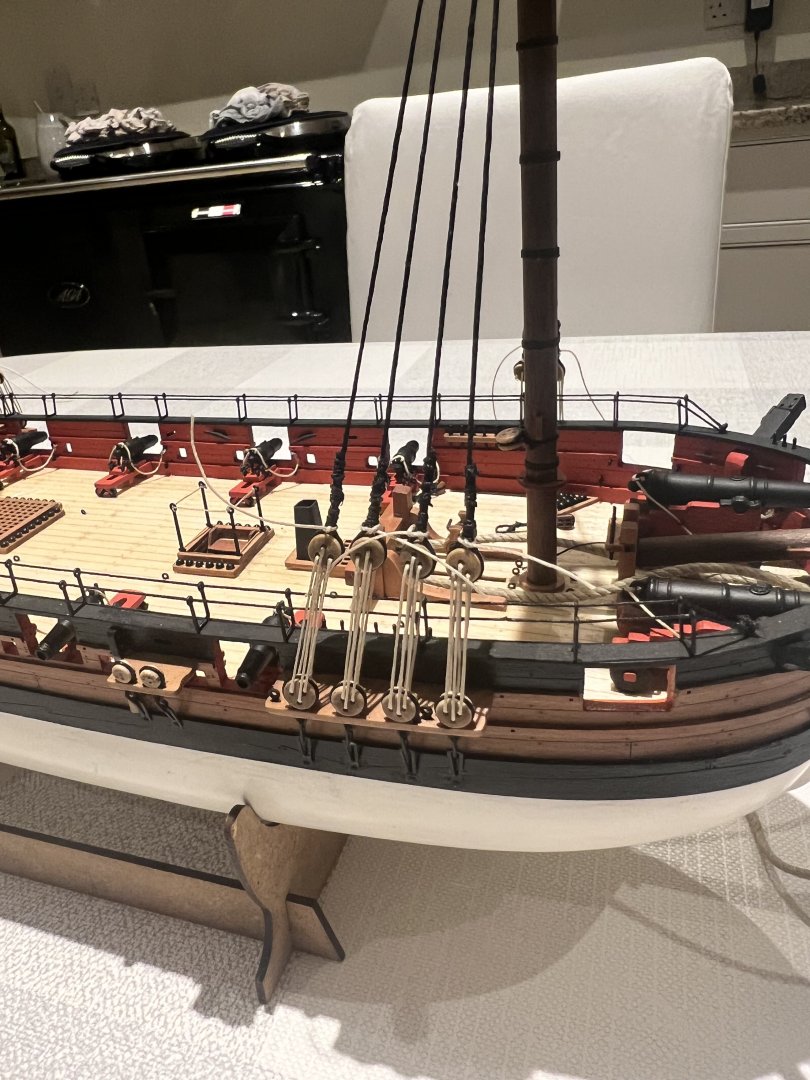
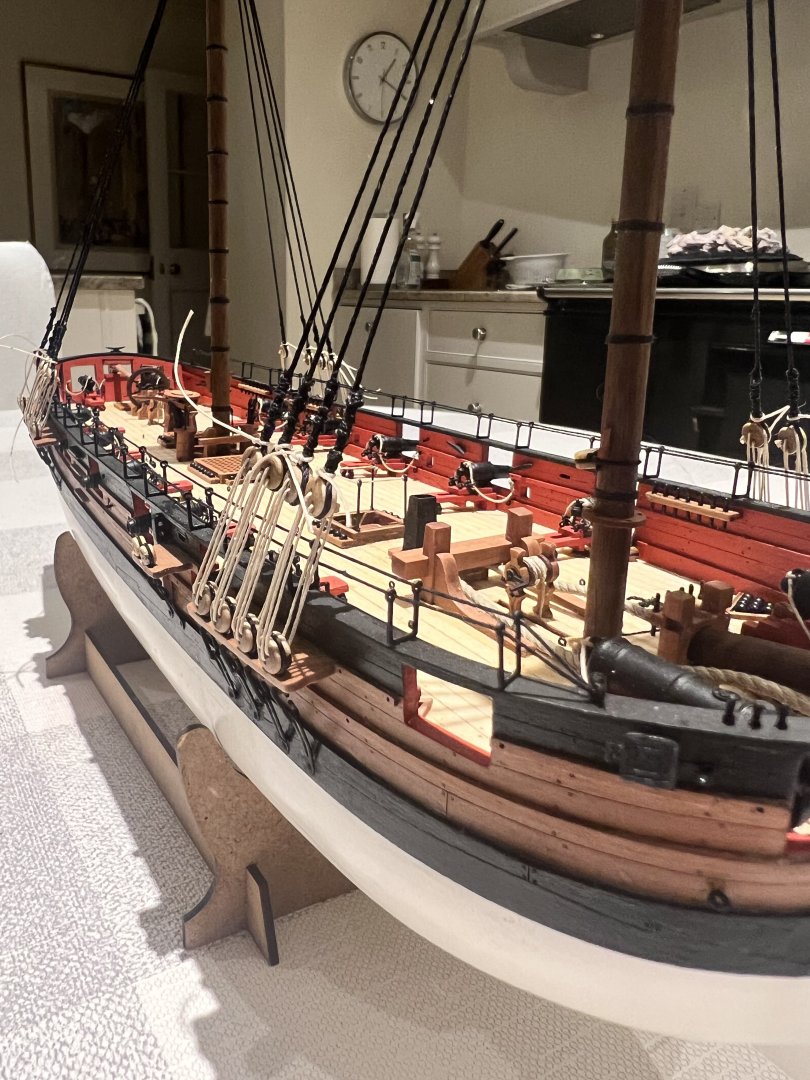
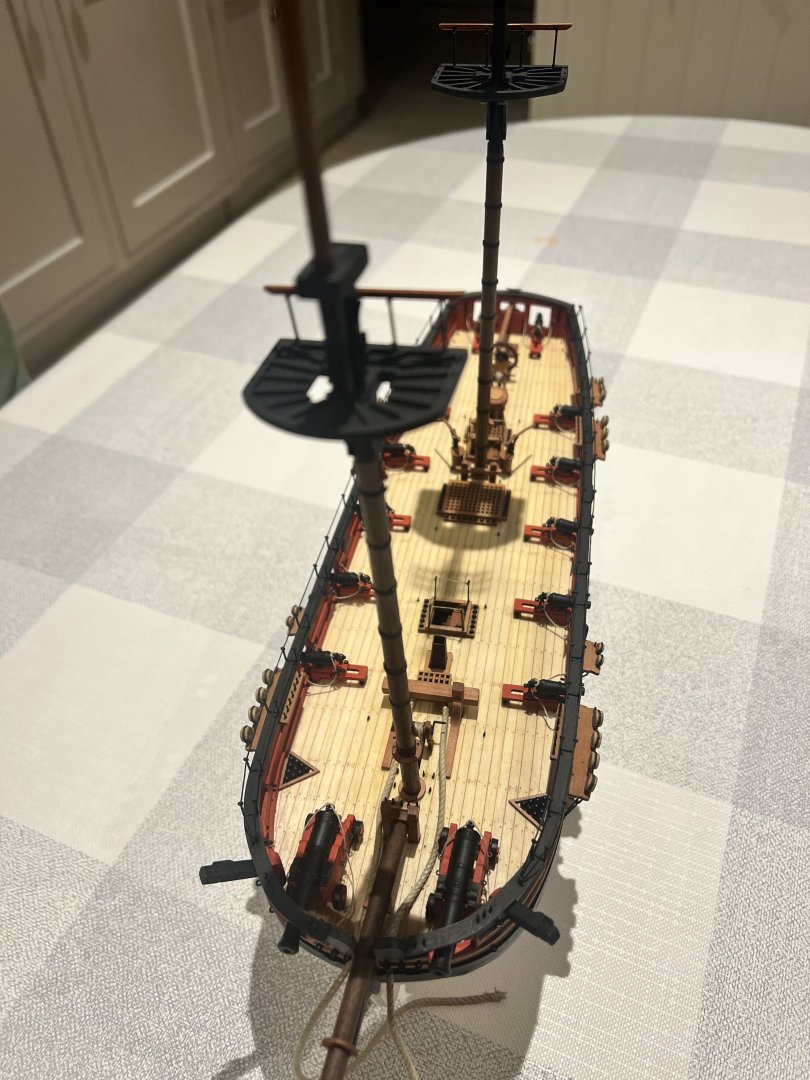
Thanks Uwe and Lee. Uwe I’ll certainly follow your advice, life has been busier than normal…. So I’ve stalled a bit as I find the rigging a little intimidating. Not a huge amount of progress. I’ve seated the masts, but not yet the bowsprit, and added shrouds. I’ve left the deadeye lanyards longer than I should have and certainly longer than Chris has in his prototype. I’m happy enough with them on the main mast but do they look silly this long on the fore mast? I’m loathe to change them as it means replacing the fore shrouds as they wouldn’t be long enough… The deadeyes are just above the hammock cranes at the main but higher still at the foremast and particularly noticeable on the starboard side of the foremast. Any thoughts and advice very welcome.
- 146 replies
-
- 8
-
-
- Adder
- Vanguard Models
- (and 1 more)
-
Stunning model and super photos. I hope to build her one day.
-
Apologies for the lack of progress, I’ve been very slowly adding blocks to the masts, but life and work have got in the way. I hope to be back on the case properly next week. Uwe - thank you. I think the rigging should be pretty straightforward for a modeller with some experience. It’ll be a challenge for me as I don’t yet know the rigging of a square rigger and have lots to learn. Lee and B.E. thanks for the encouragement!
- 146 replies
-
- 5
-
-
- Adder
- Vanguard Models
- (and 1 more)
-
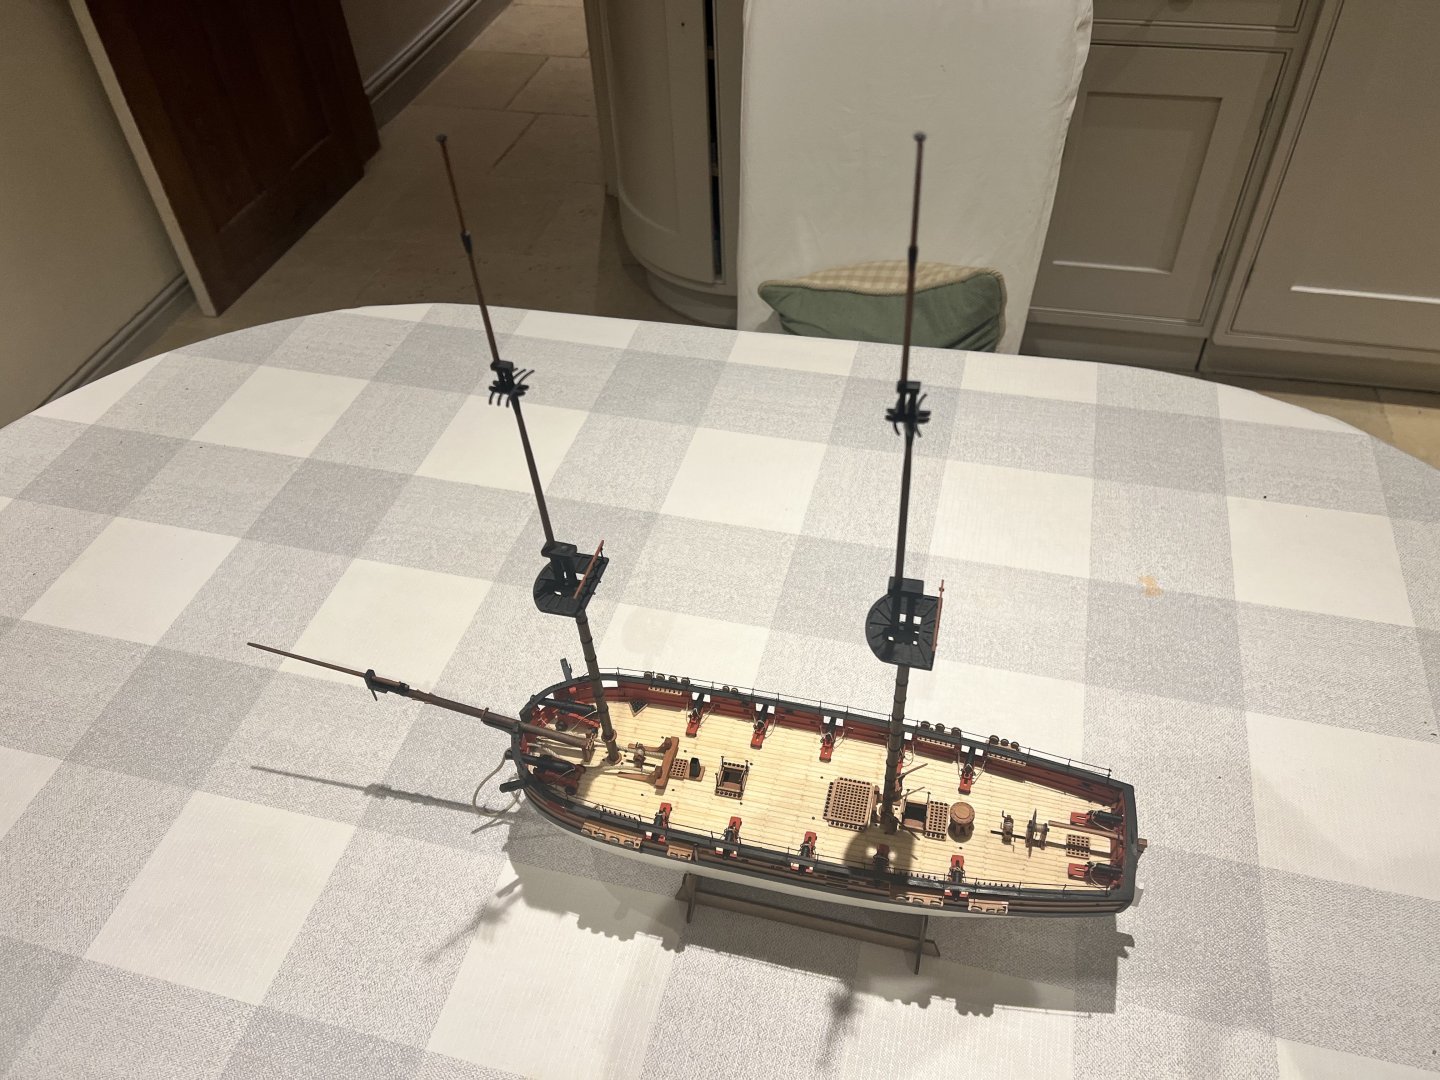
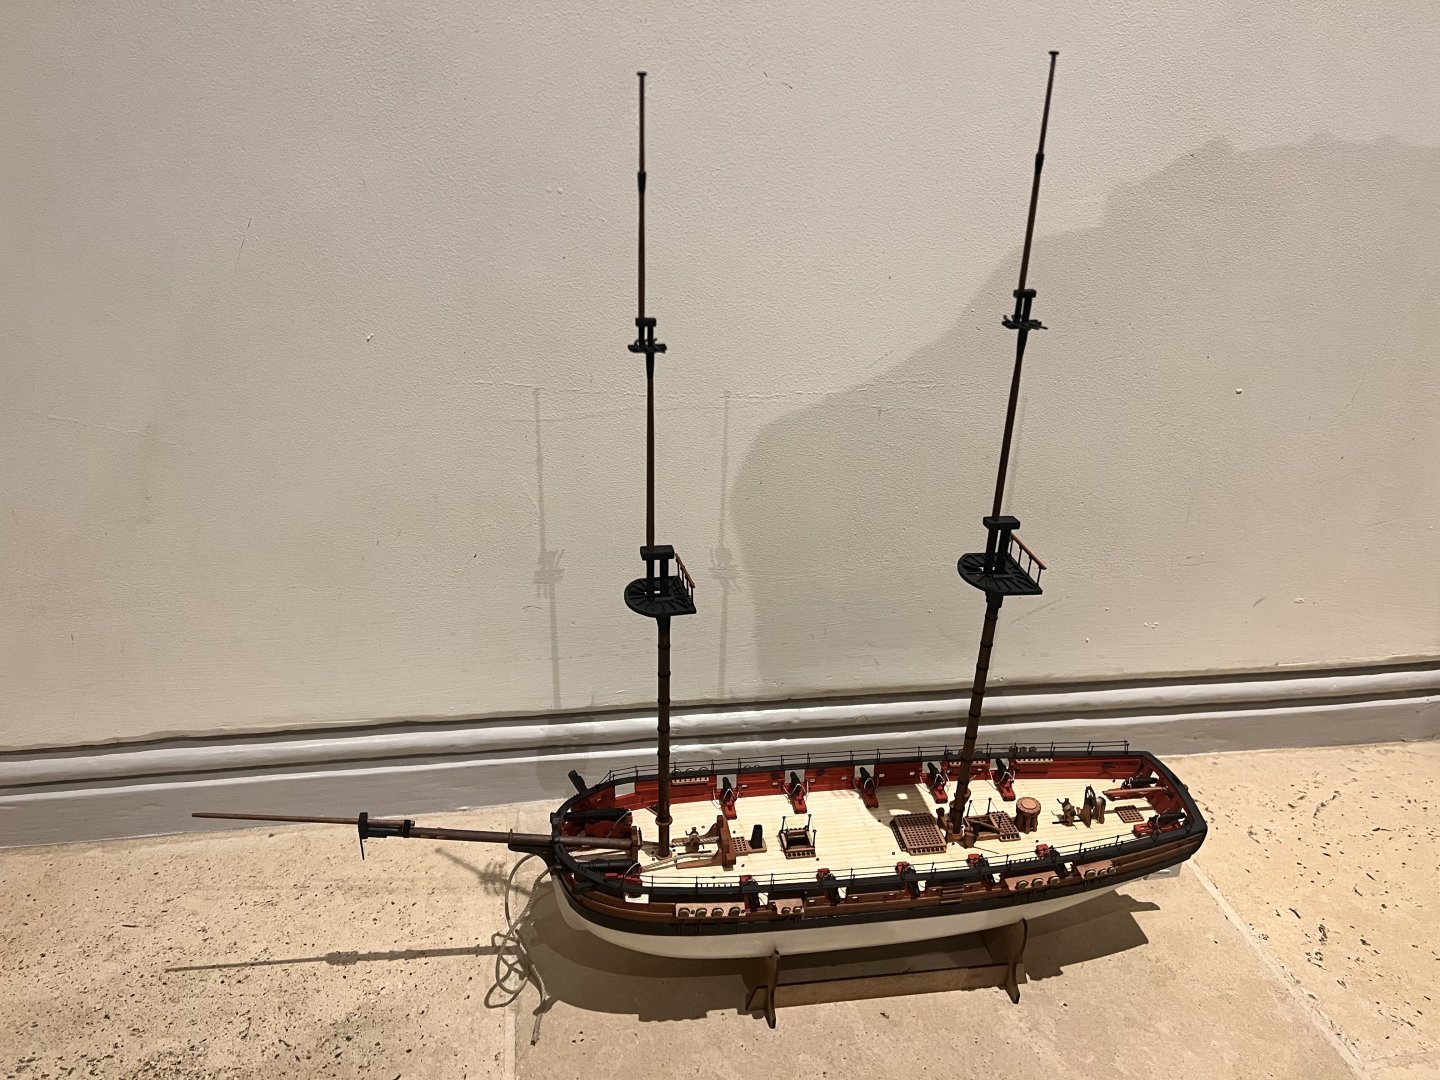
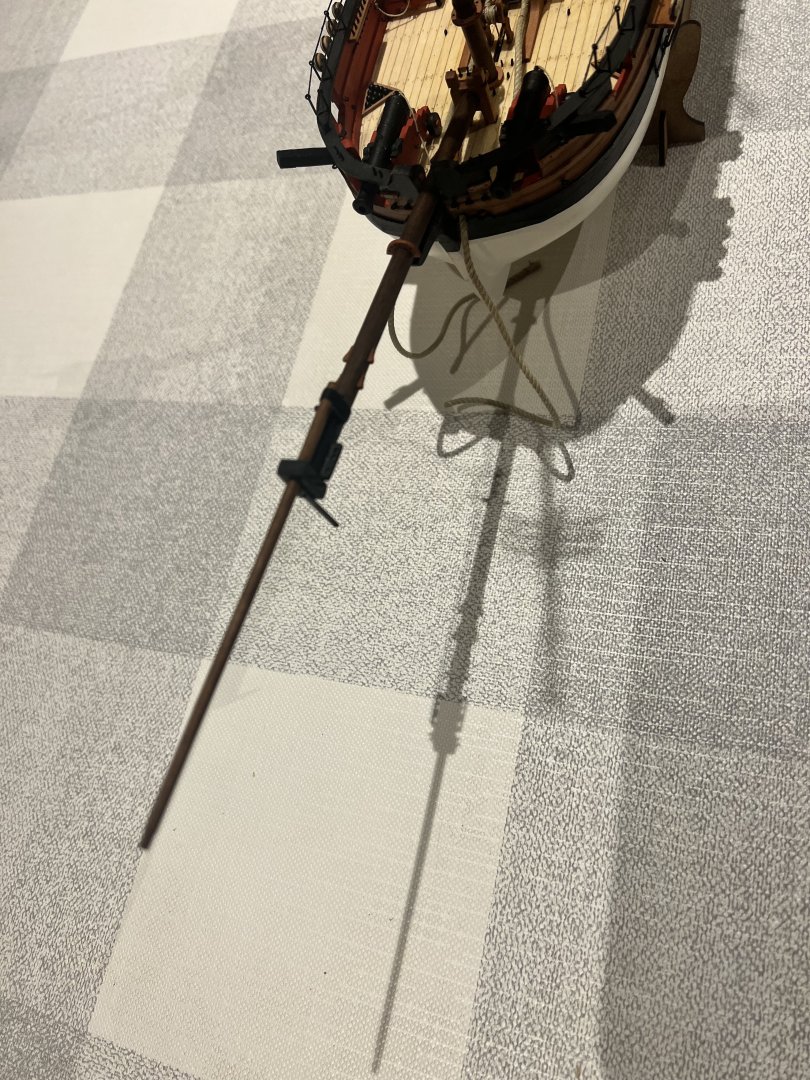
Sunny weather in the UK (until the last few days) has not been so conducive to boat building. I’ve made the masts and bowsprit, they’re not glued in position yet, so may not be properly aligned. Still to add any blocks or deadeyes to them, that’s the next job I find squaring off the dowel at the tops for the masts and topmasts quite difficult, I just use a vice, file and sandpaper, I’m not sure if there’s a better method? I’m also clumsy and keep snapping off the top of the topgallant masts - both now reaffixed with CA glue. There’s two types of PE eyebolts in the kit, larger PE-15 for the outside of the hull and smaller ones PE-14. I don’t think there’s quite enough of the larger eyebolts for the outside of the hull so I checked with Chris and he said fine to use the smaller PE-14 eyebolts there too. I ran out of eyebolts after completing the hull and before adding those needed to the masts and bowsprit. I’m not quite sure why, I’ve gone back and counted all the PE eyebolts required on the plans including the shortage of the larger eyebolts and by my reckoning I should have had enough between the two types. I must have lost more to the carpet monster than I thought! I contacted Chris and he very kindly sent me some more eyebolts. Such incredible customer service and hugely appreciated. Thanks again.
- 146 replies
-
- 13
-
-
- Adder
- Vanguard Models
- (and 1 more)
-
Absolutely stunning model! I’ve really enjoyed following your build - I’ve got Speedy to build soon…
- 95 replies
-
- 1
-

-
- flirt
- vanguard models
- (and 1 more)
-
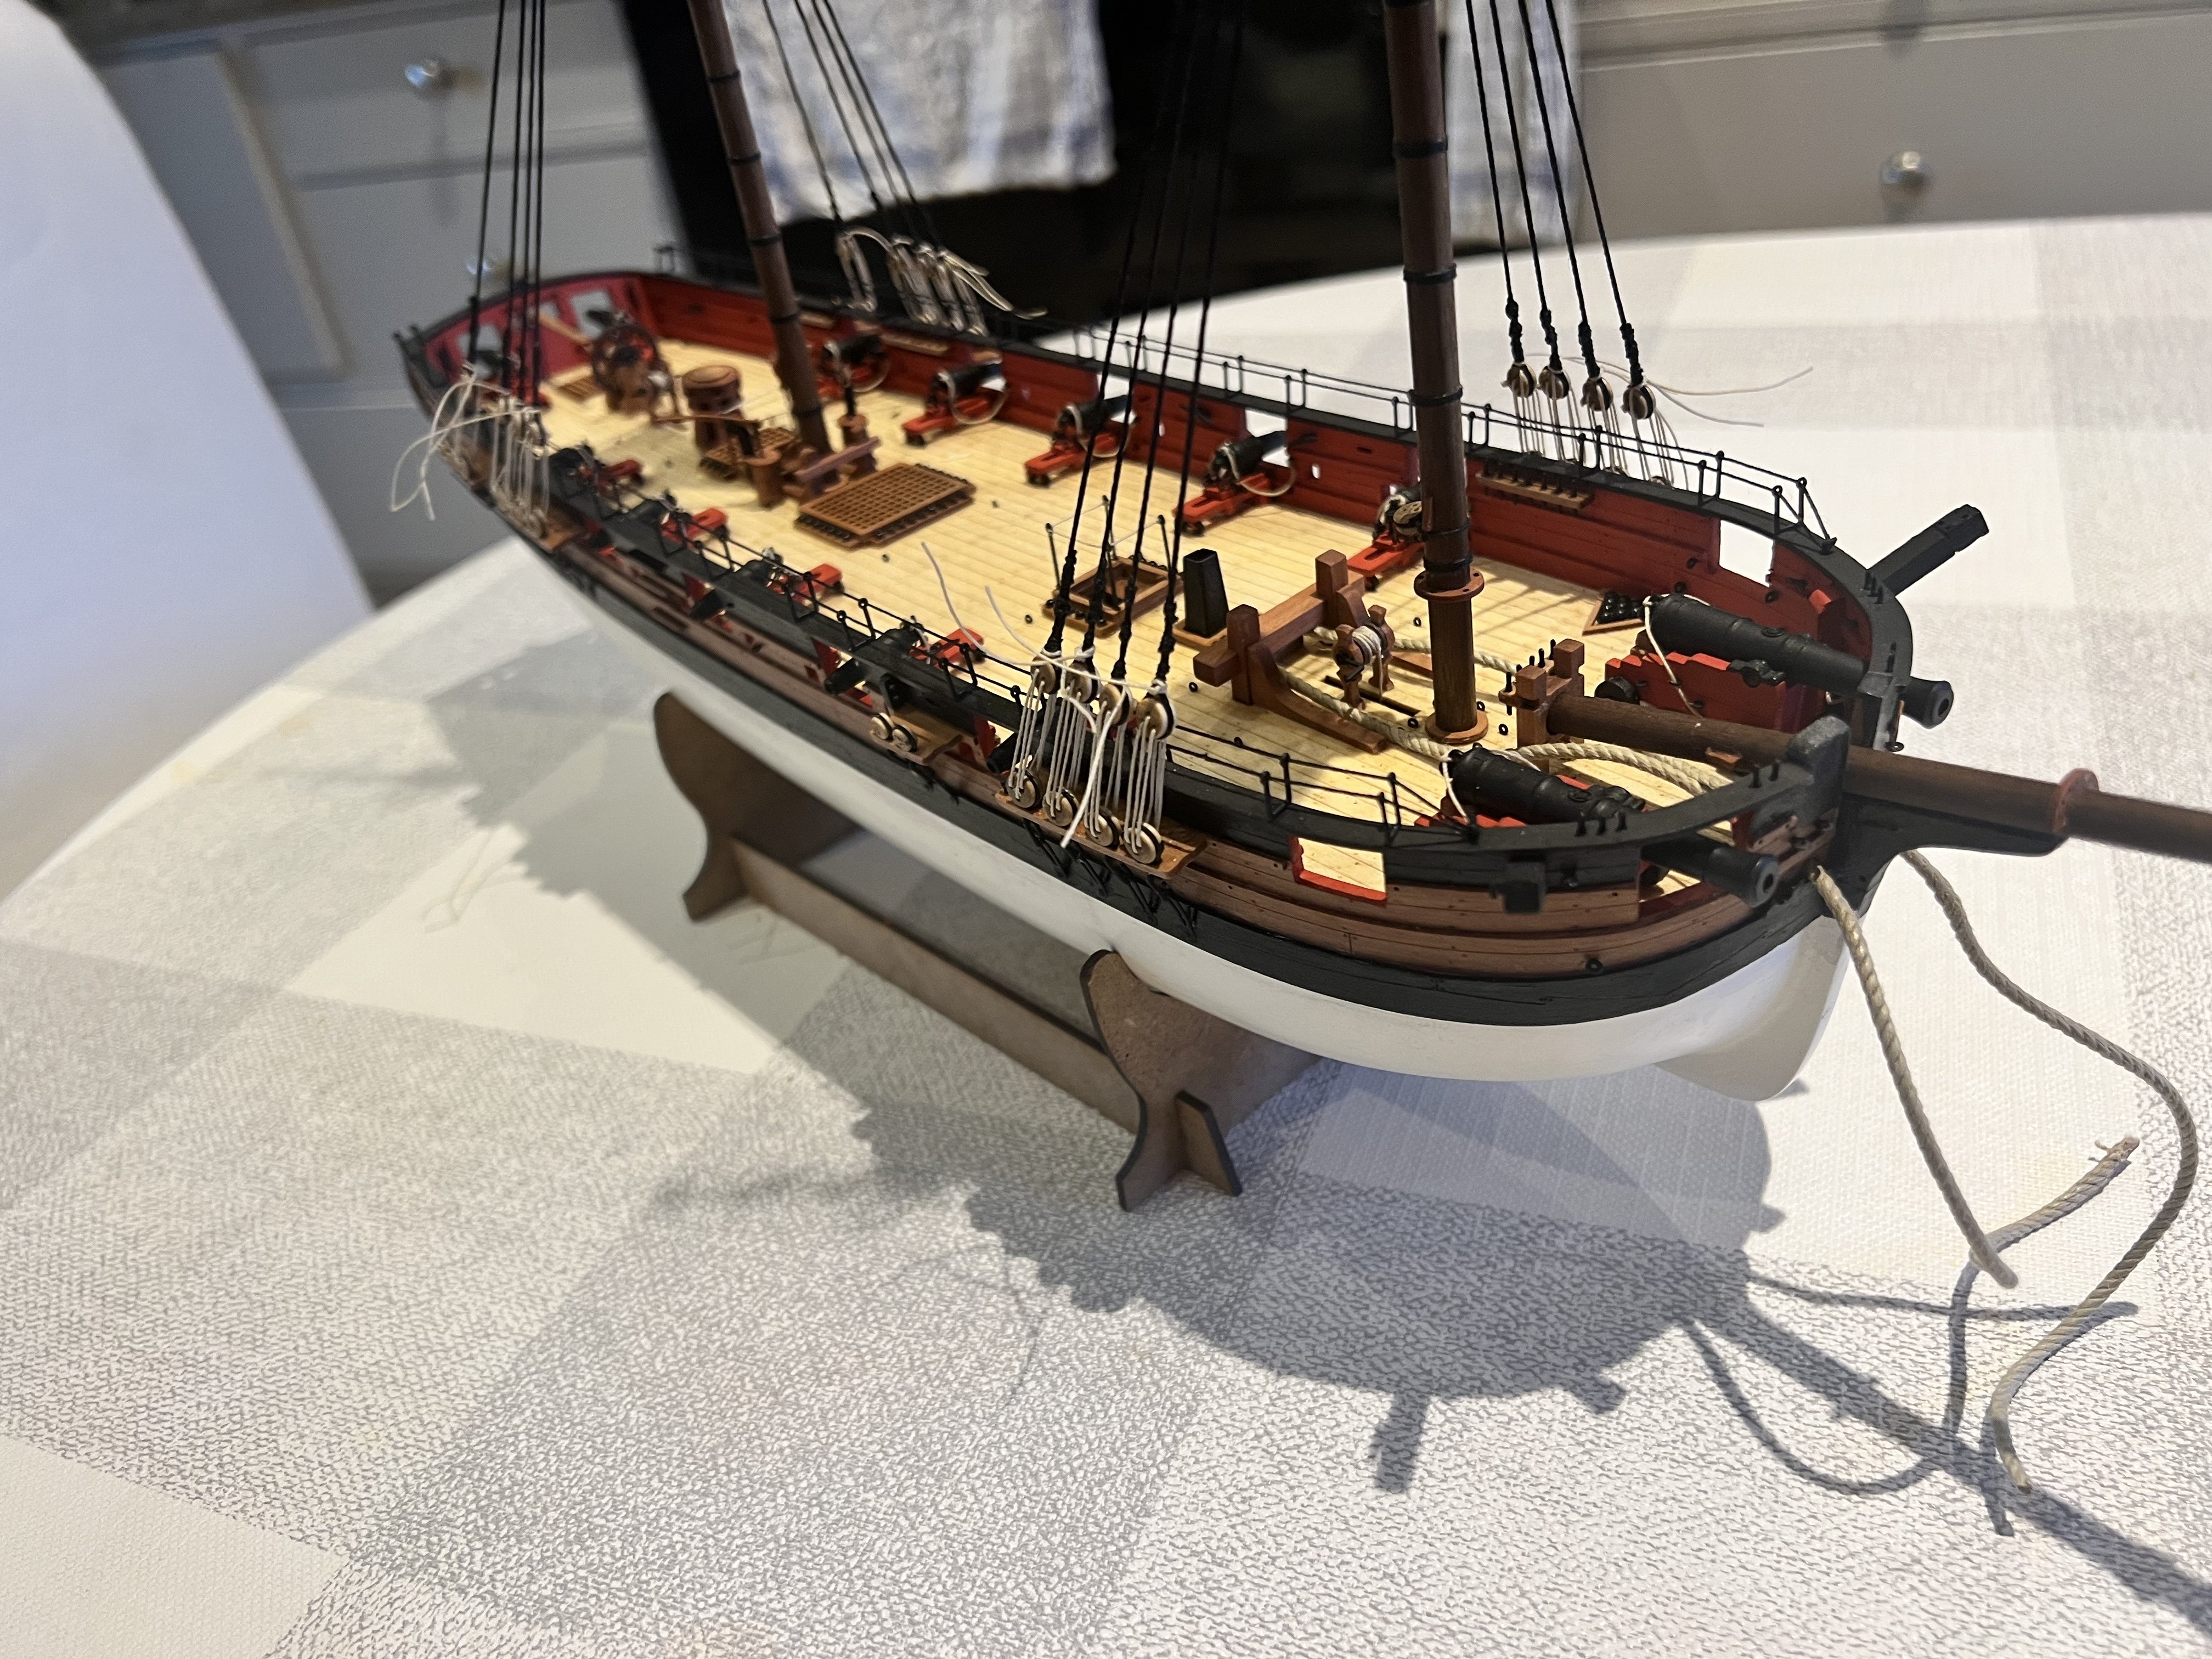
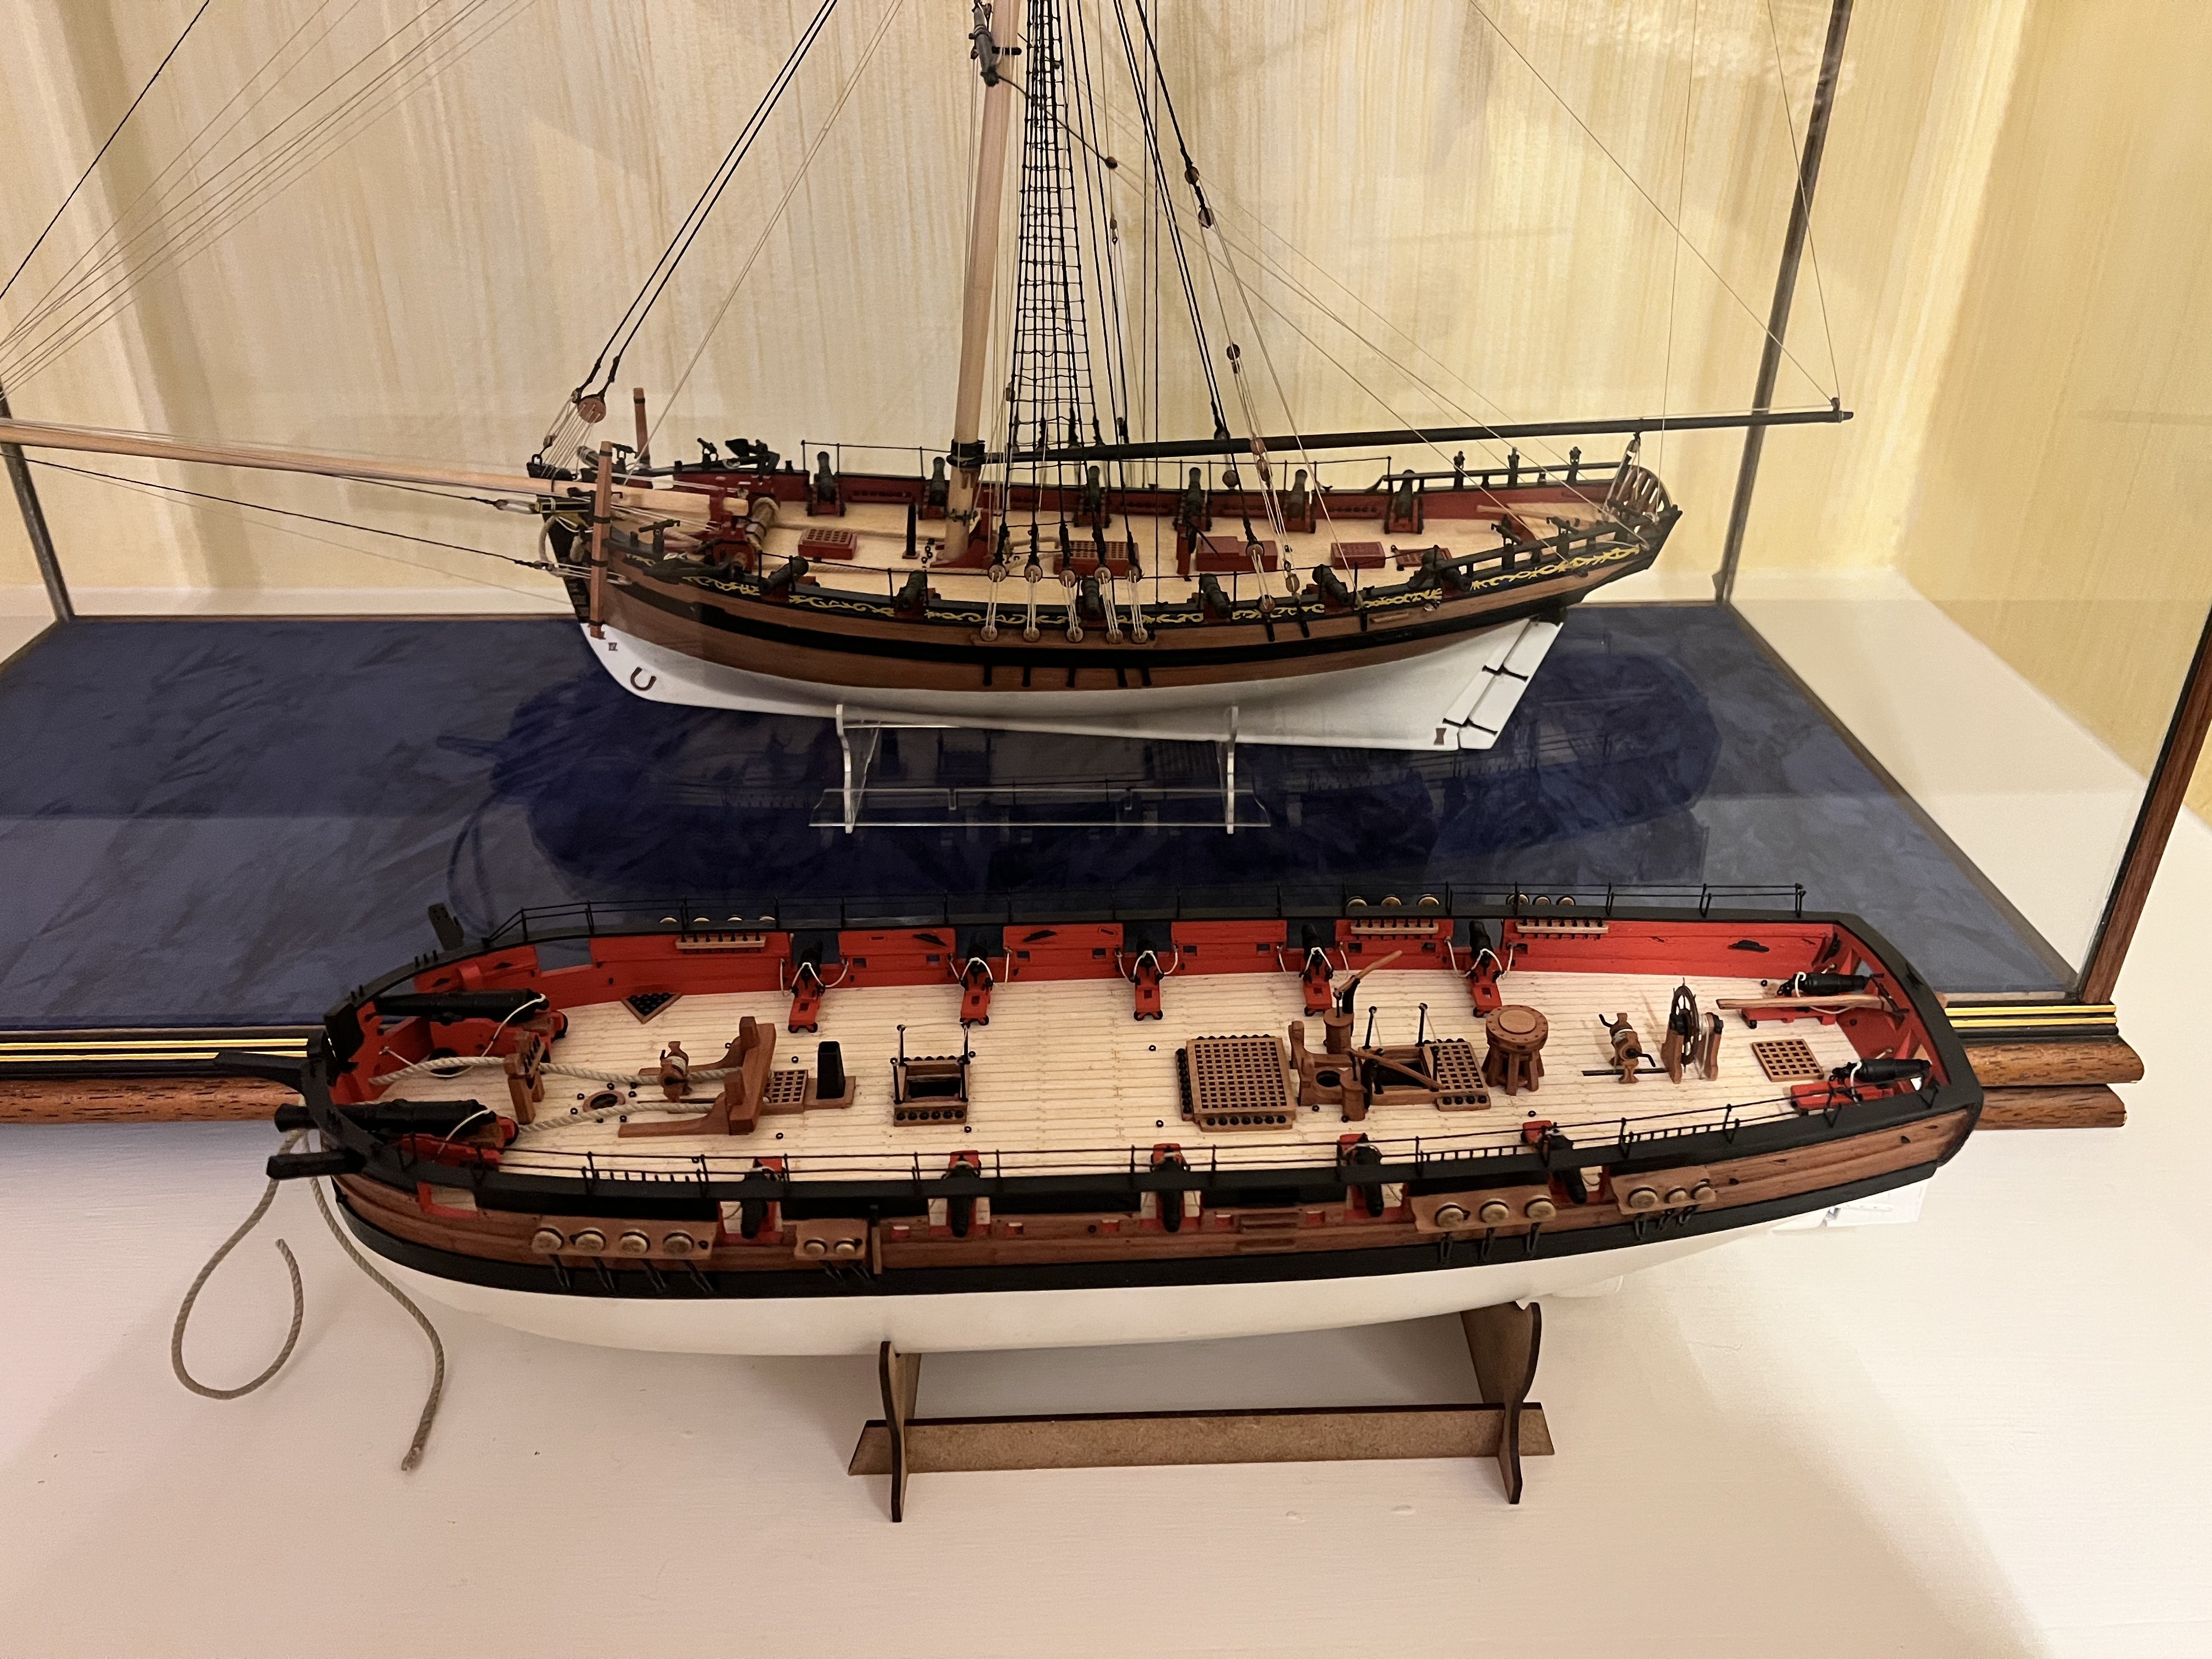
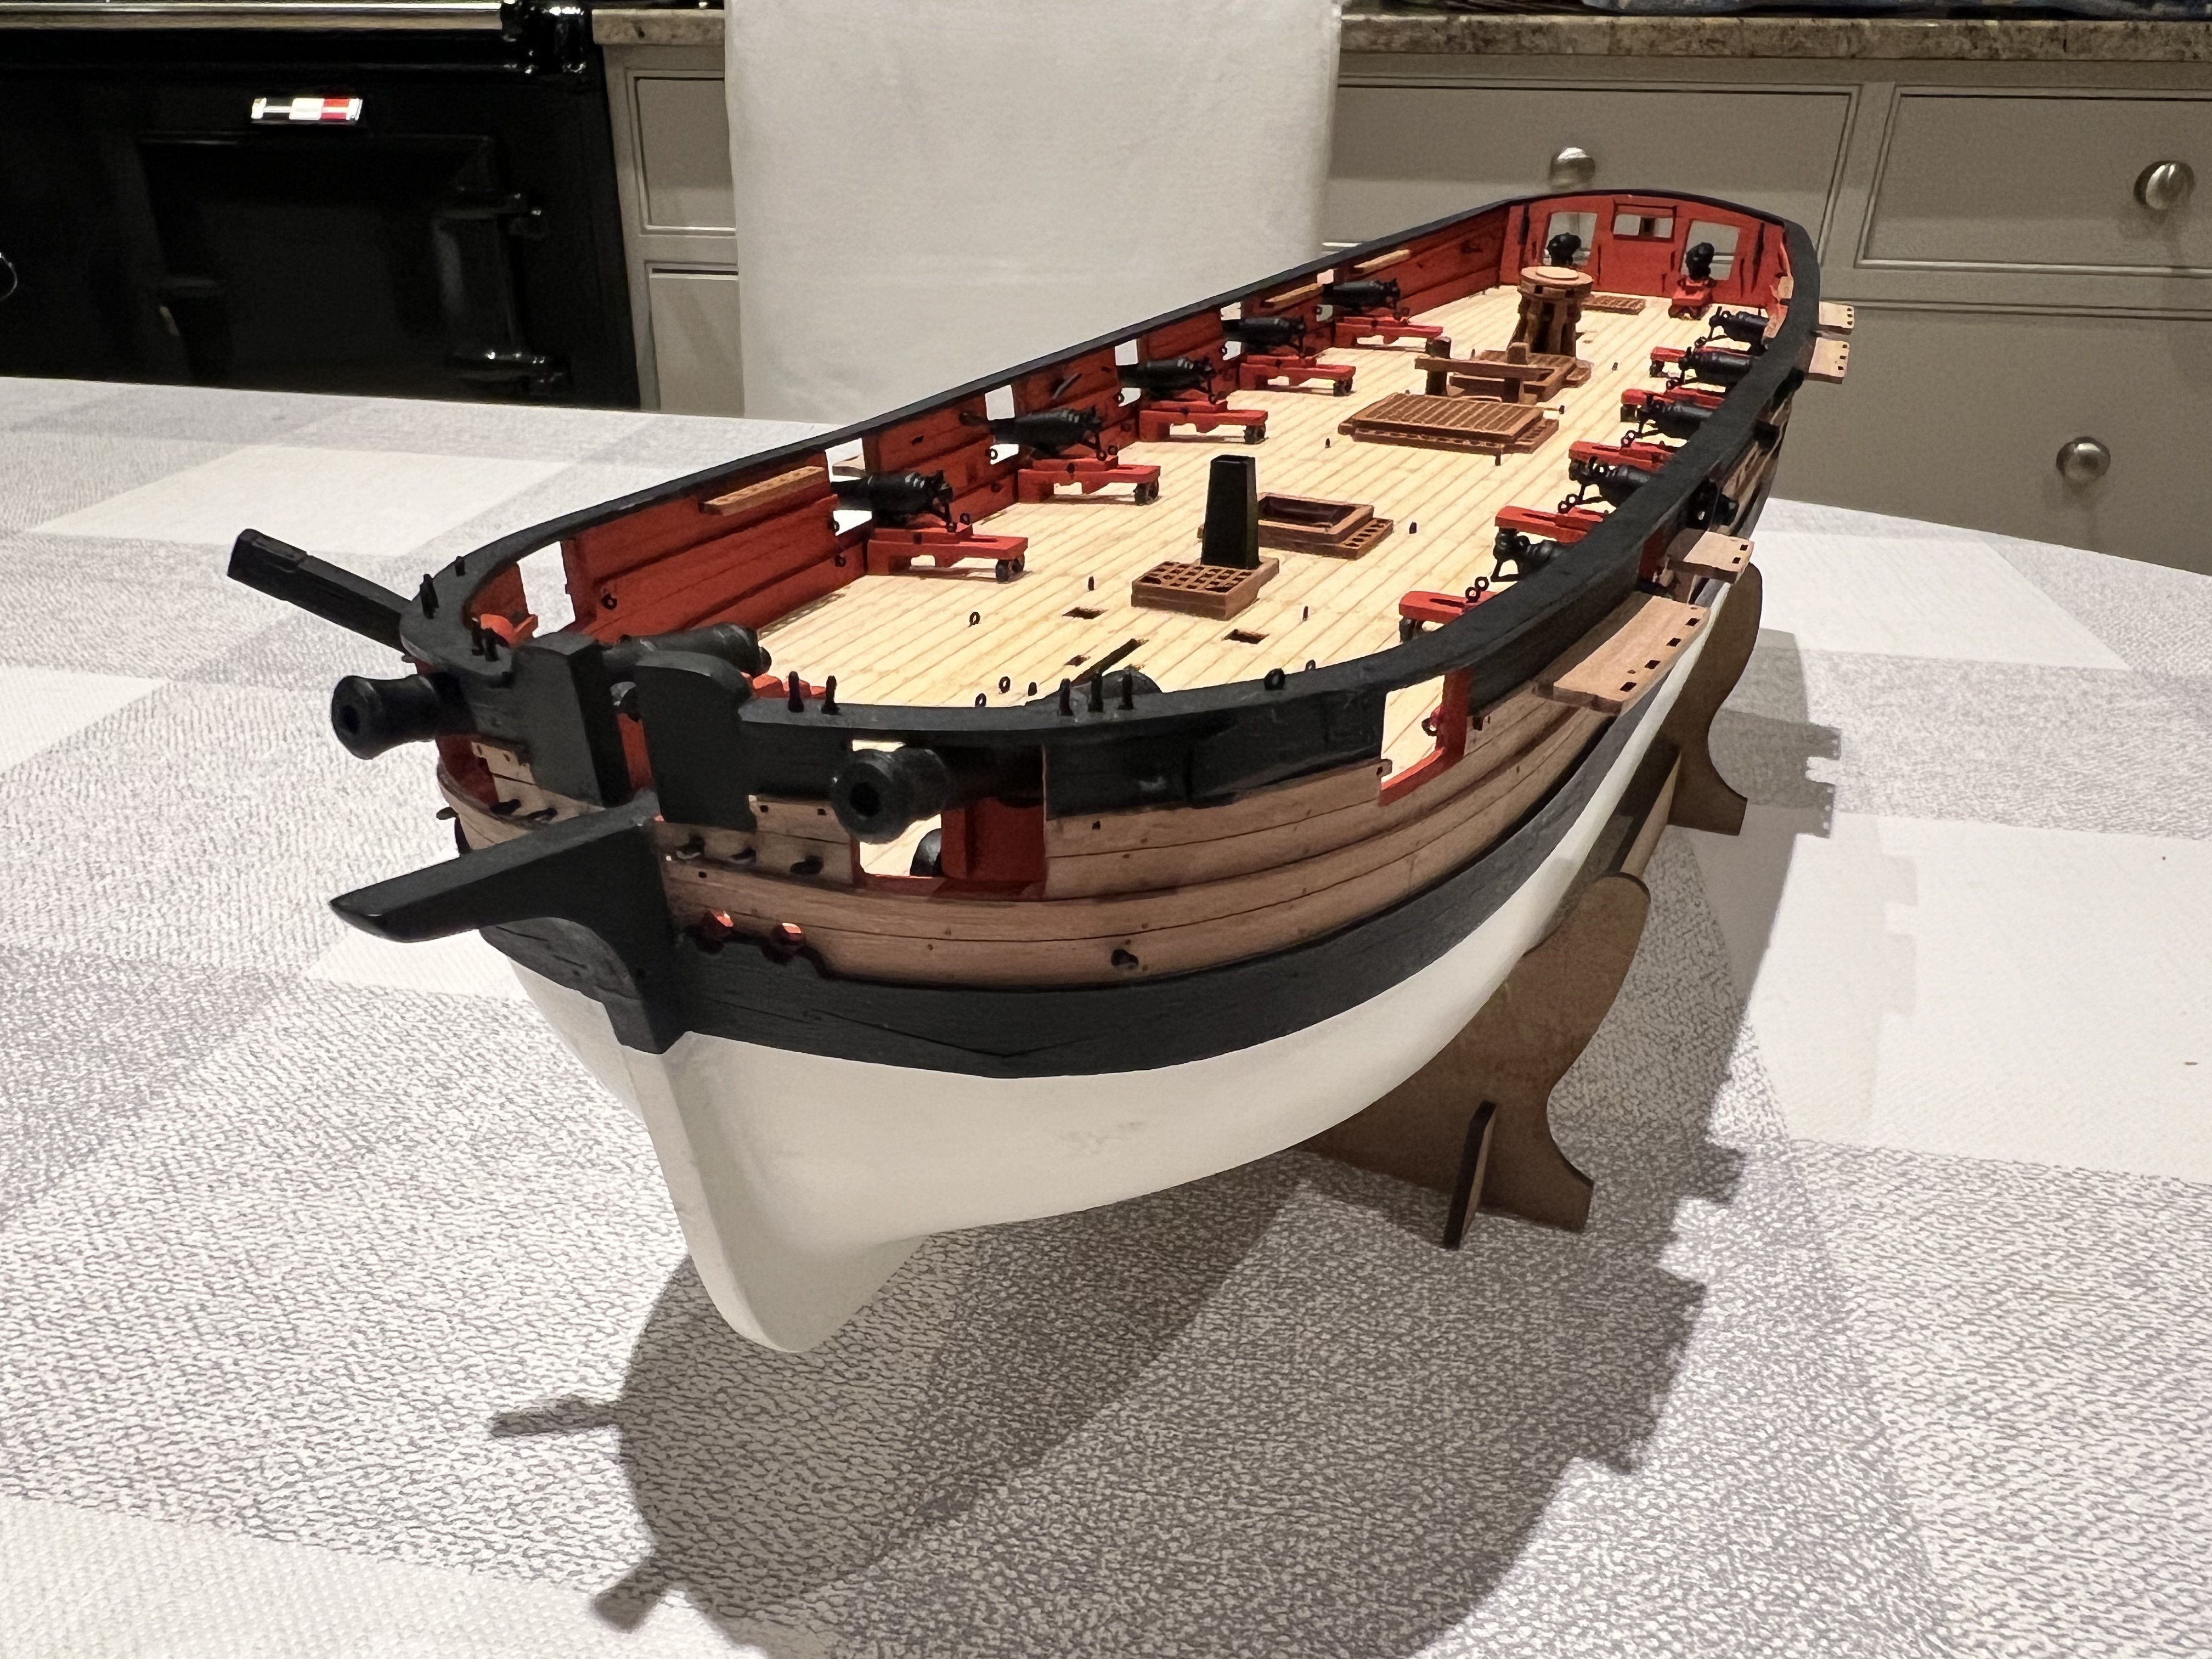
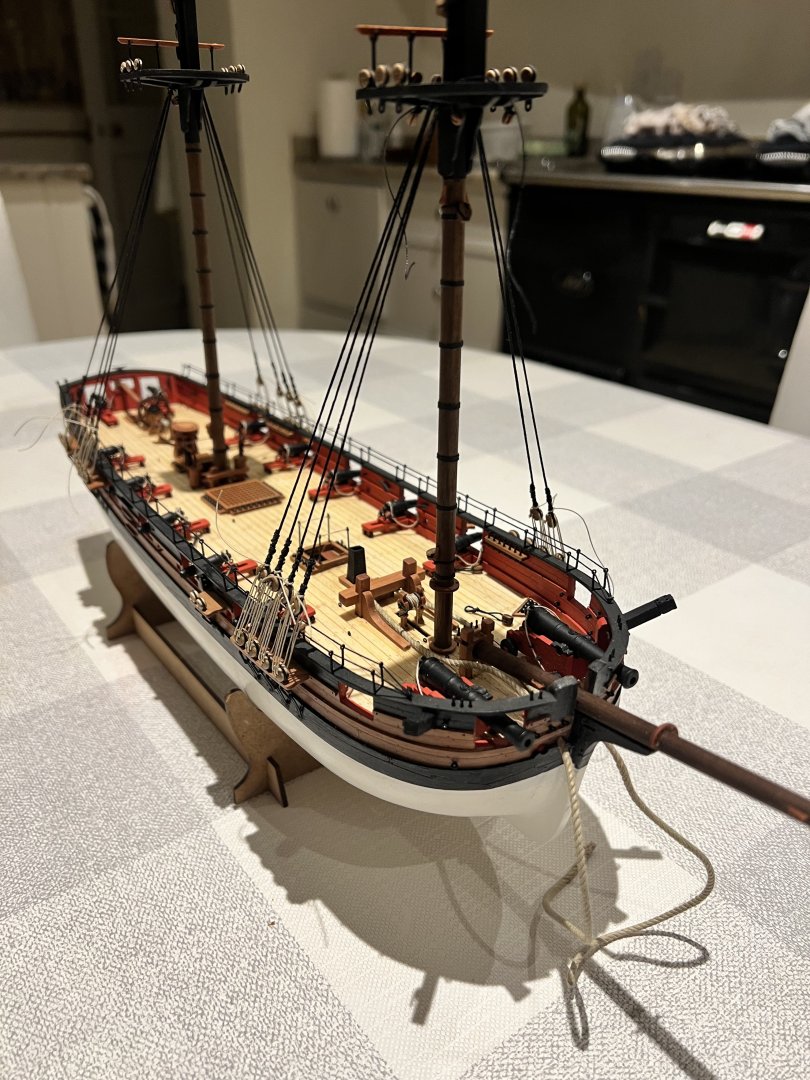
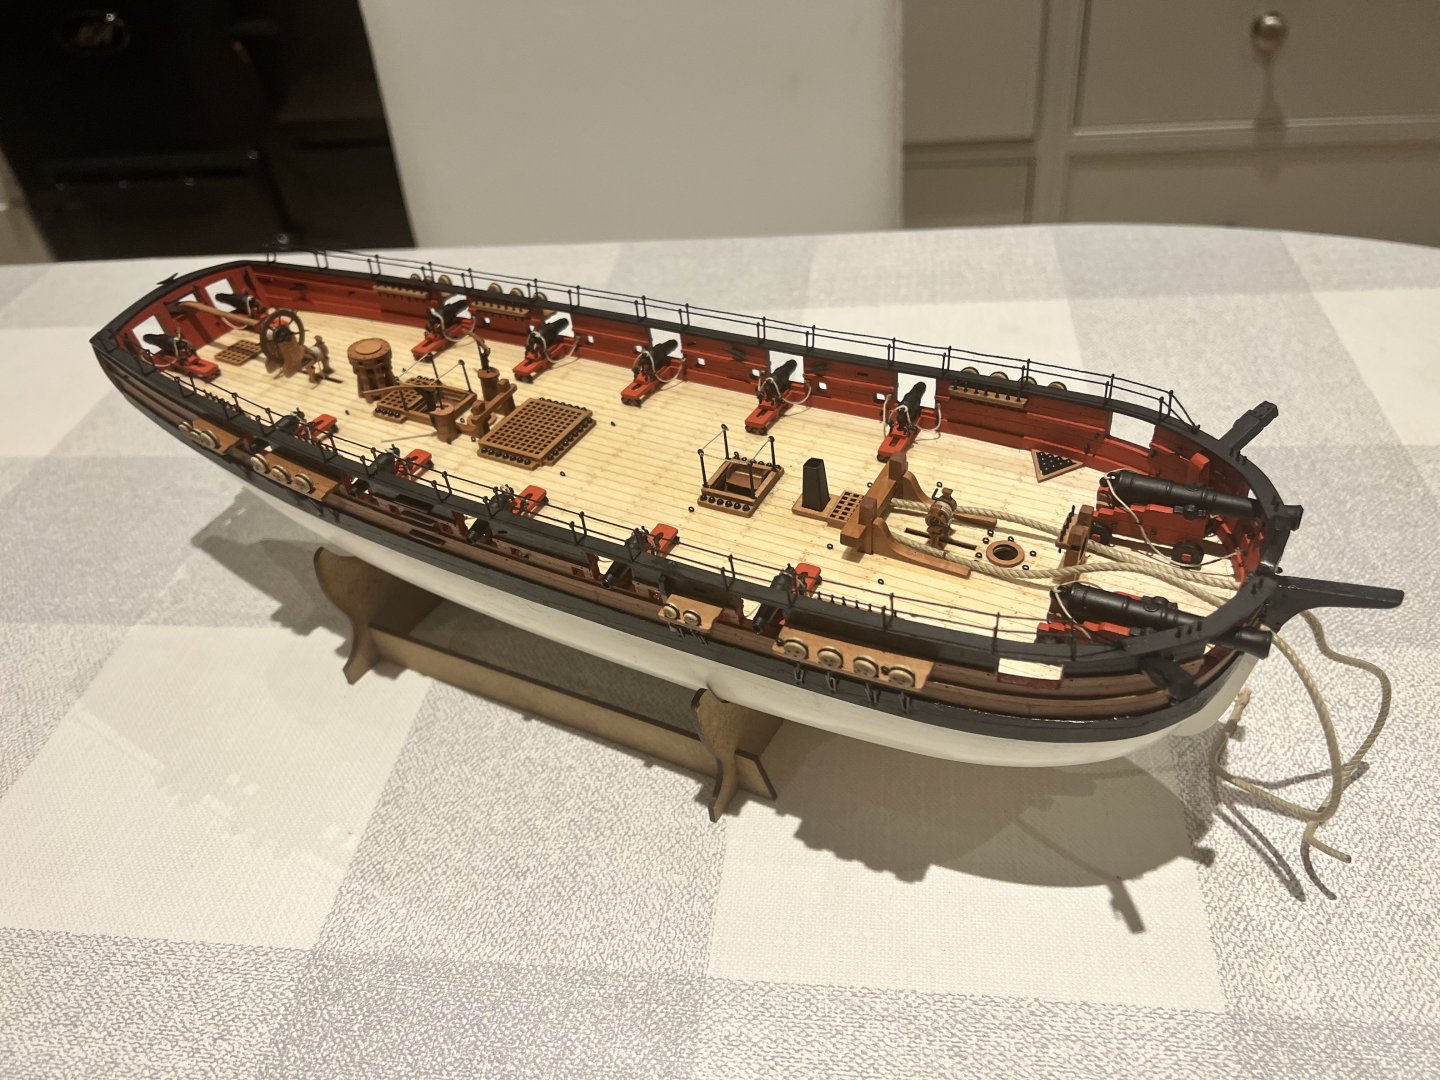
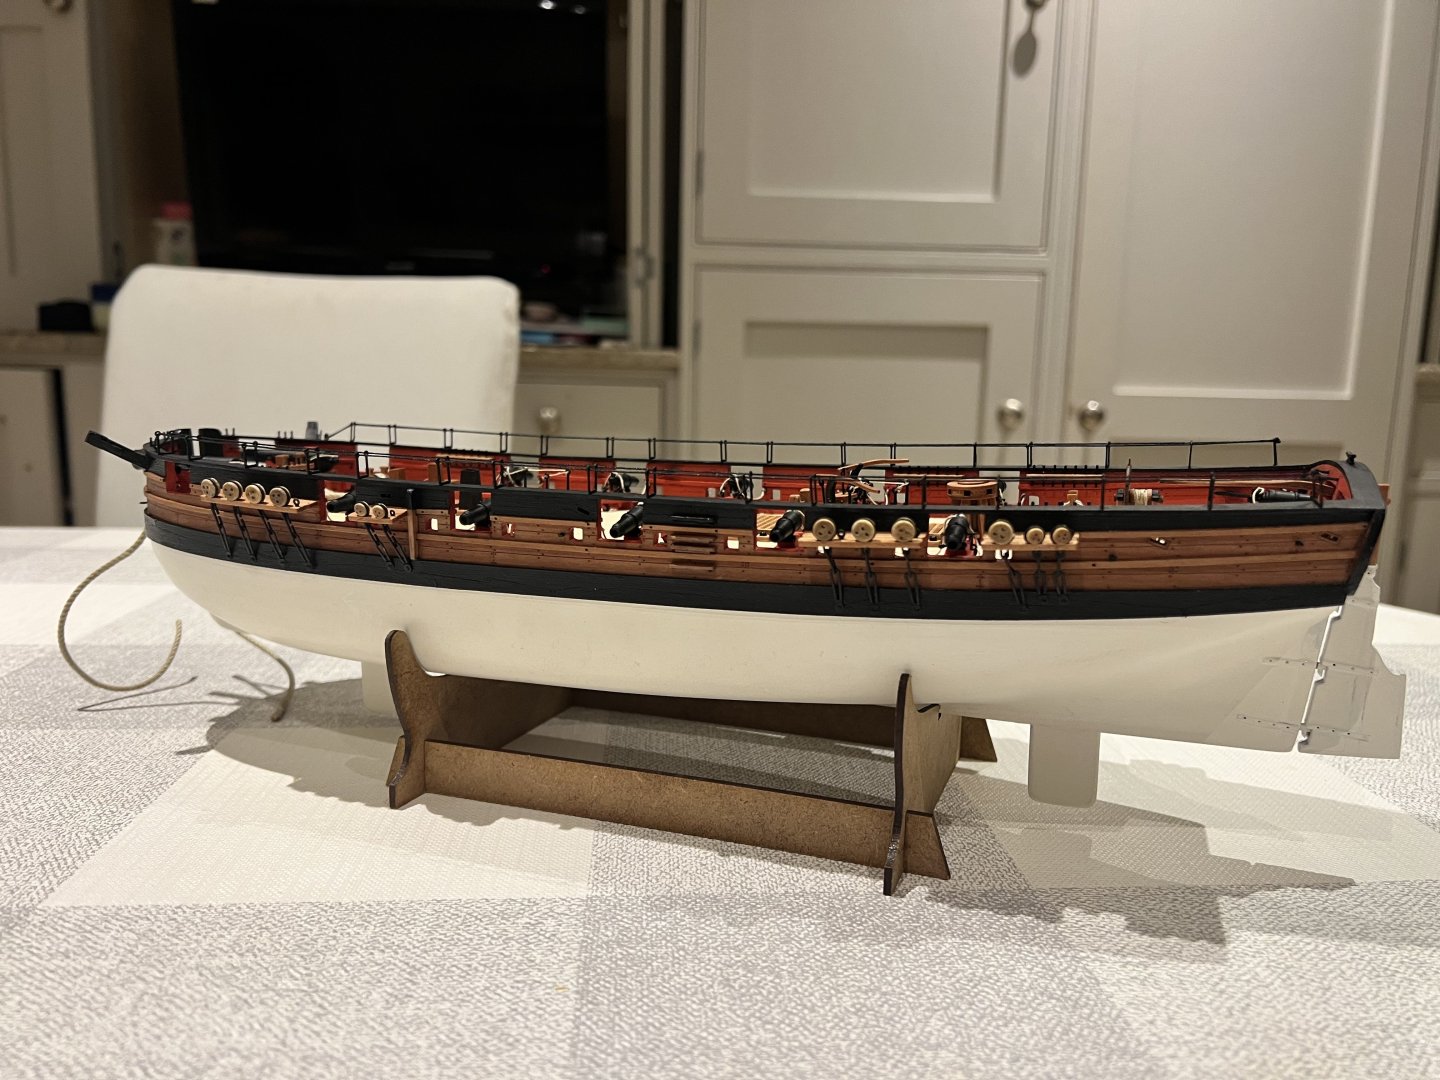
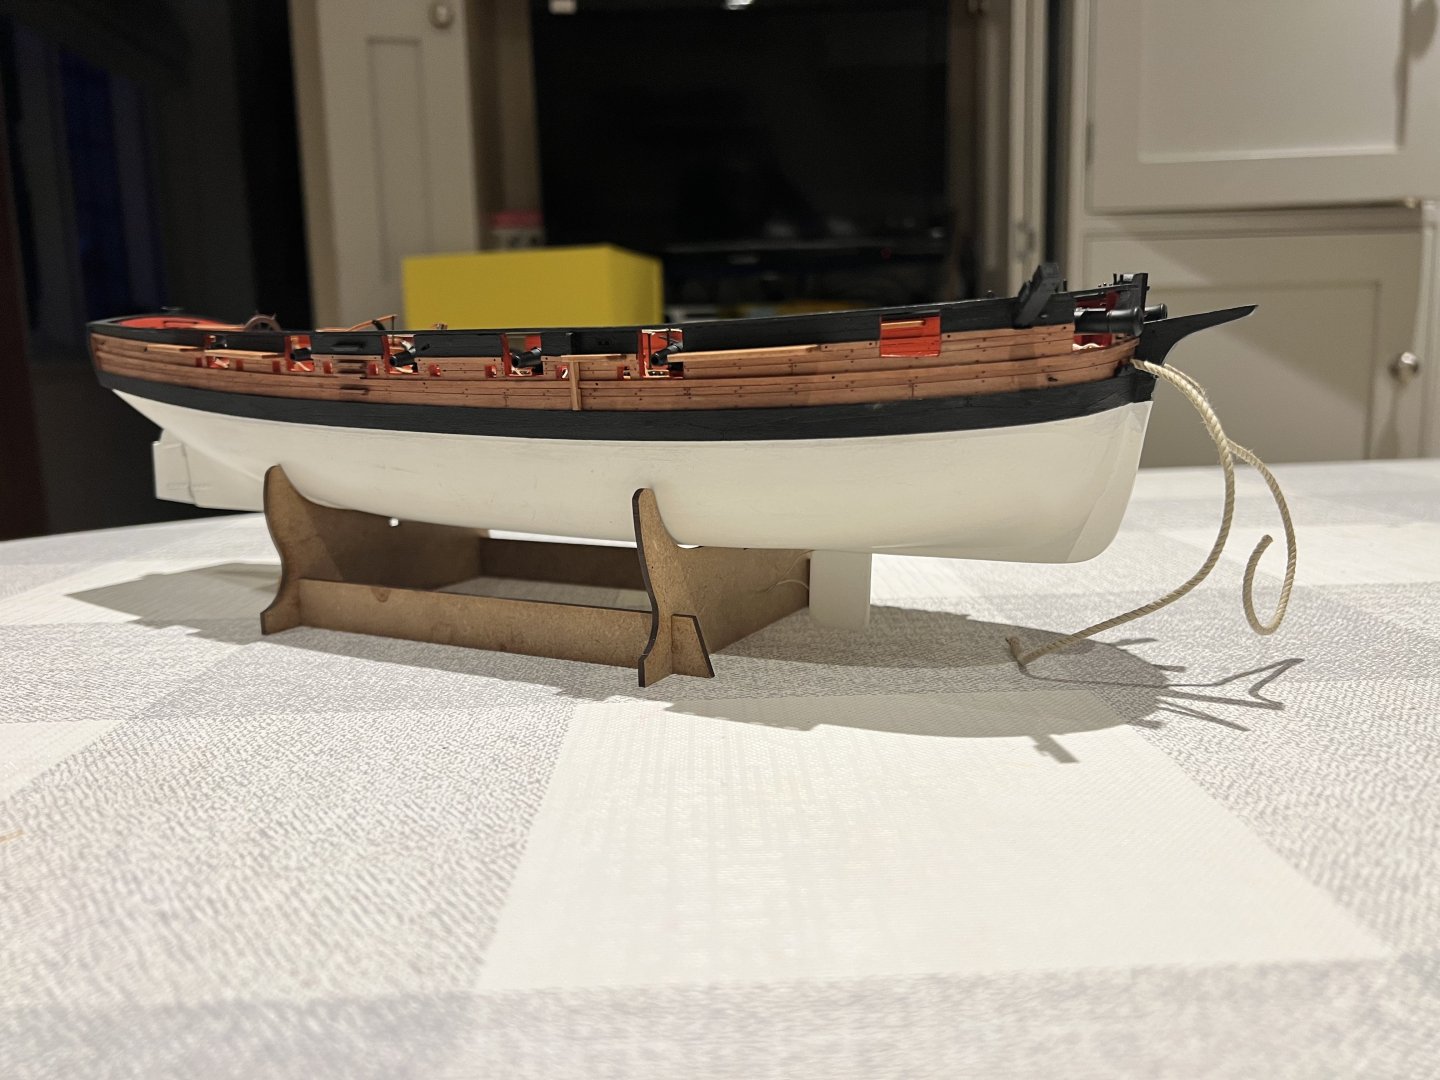
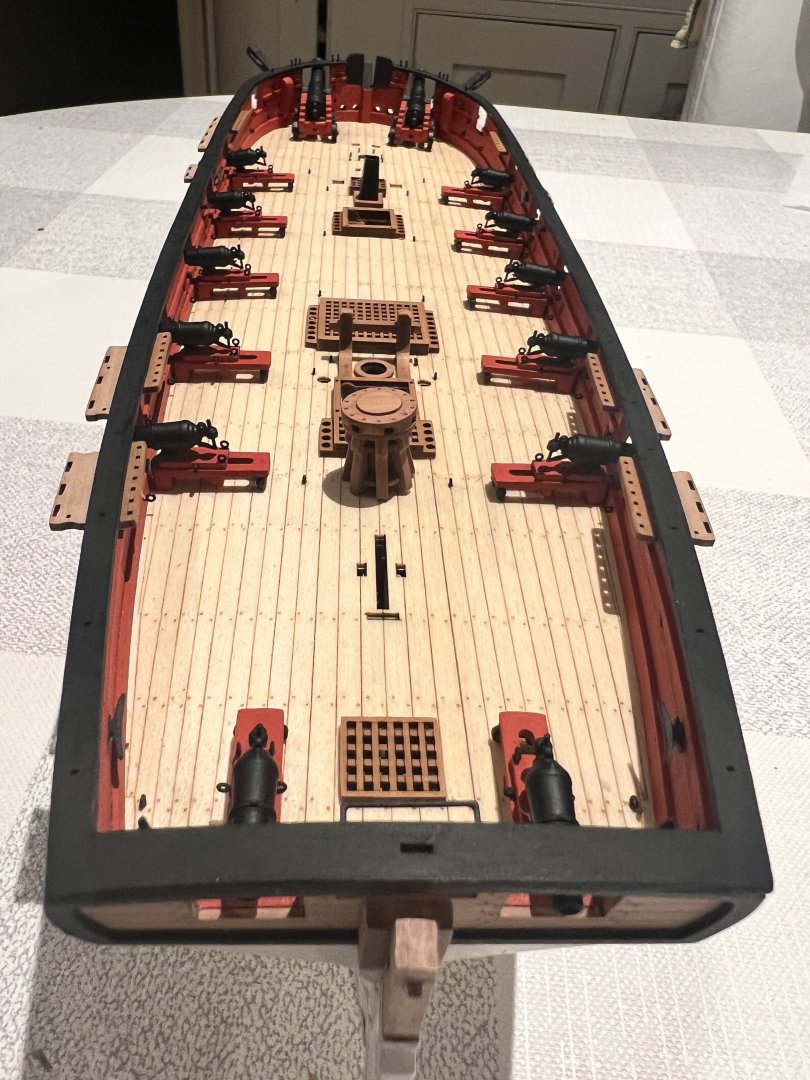
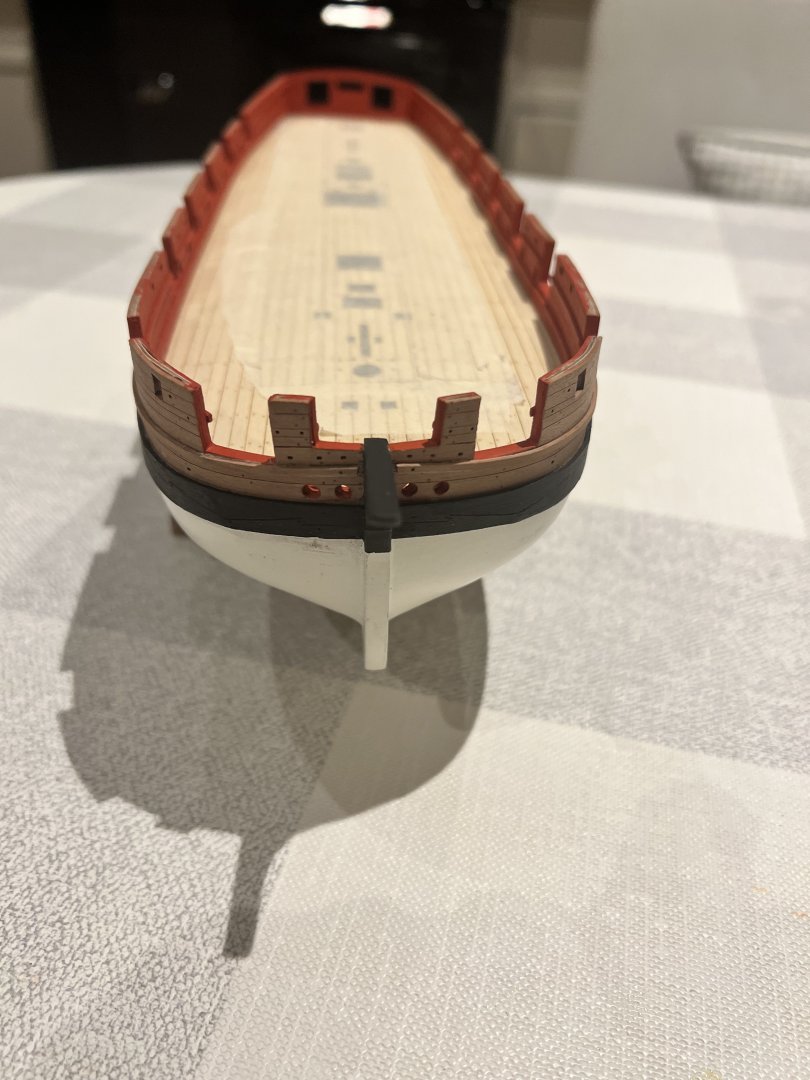
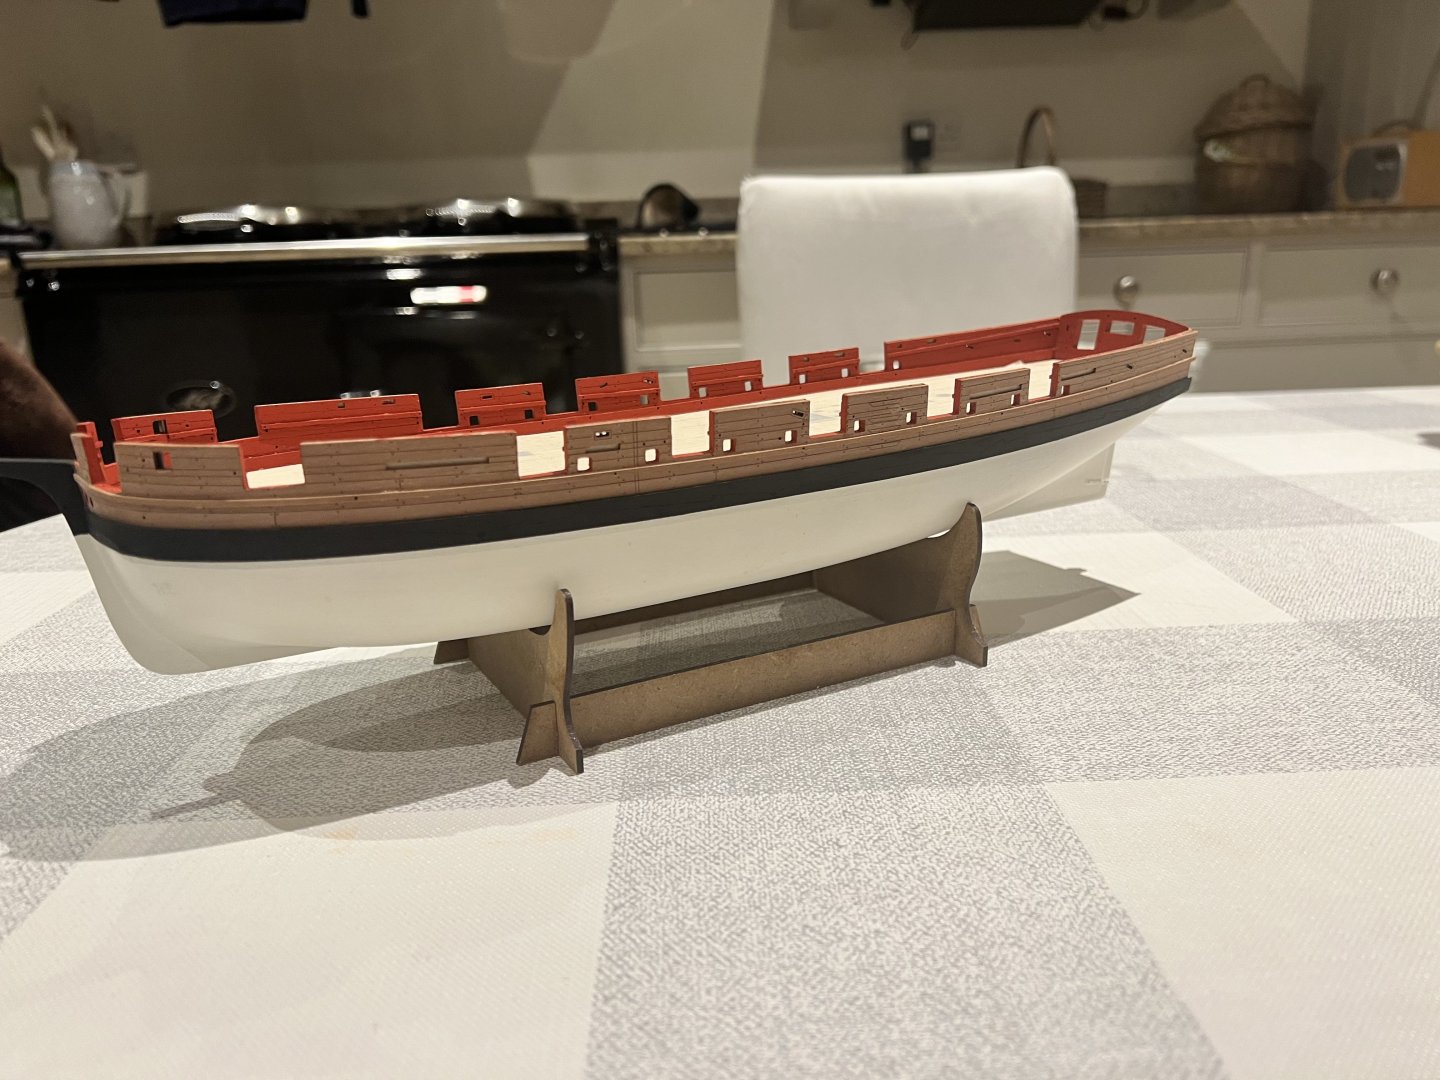
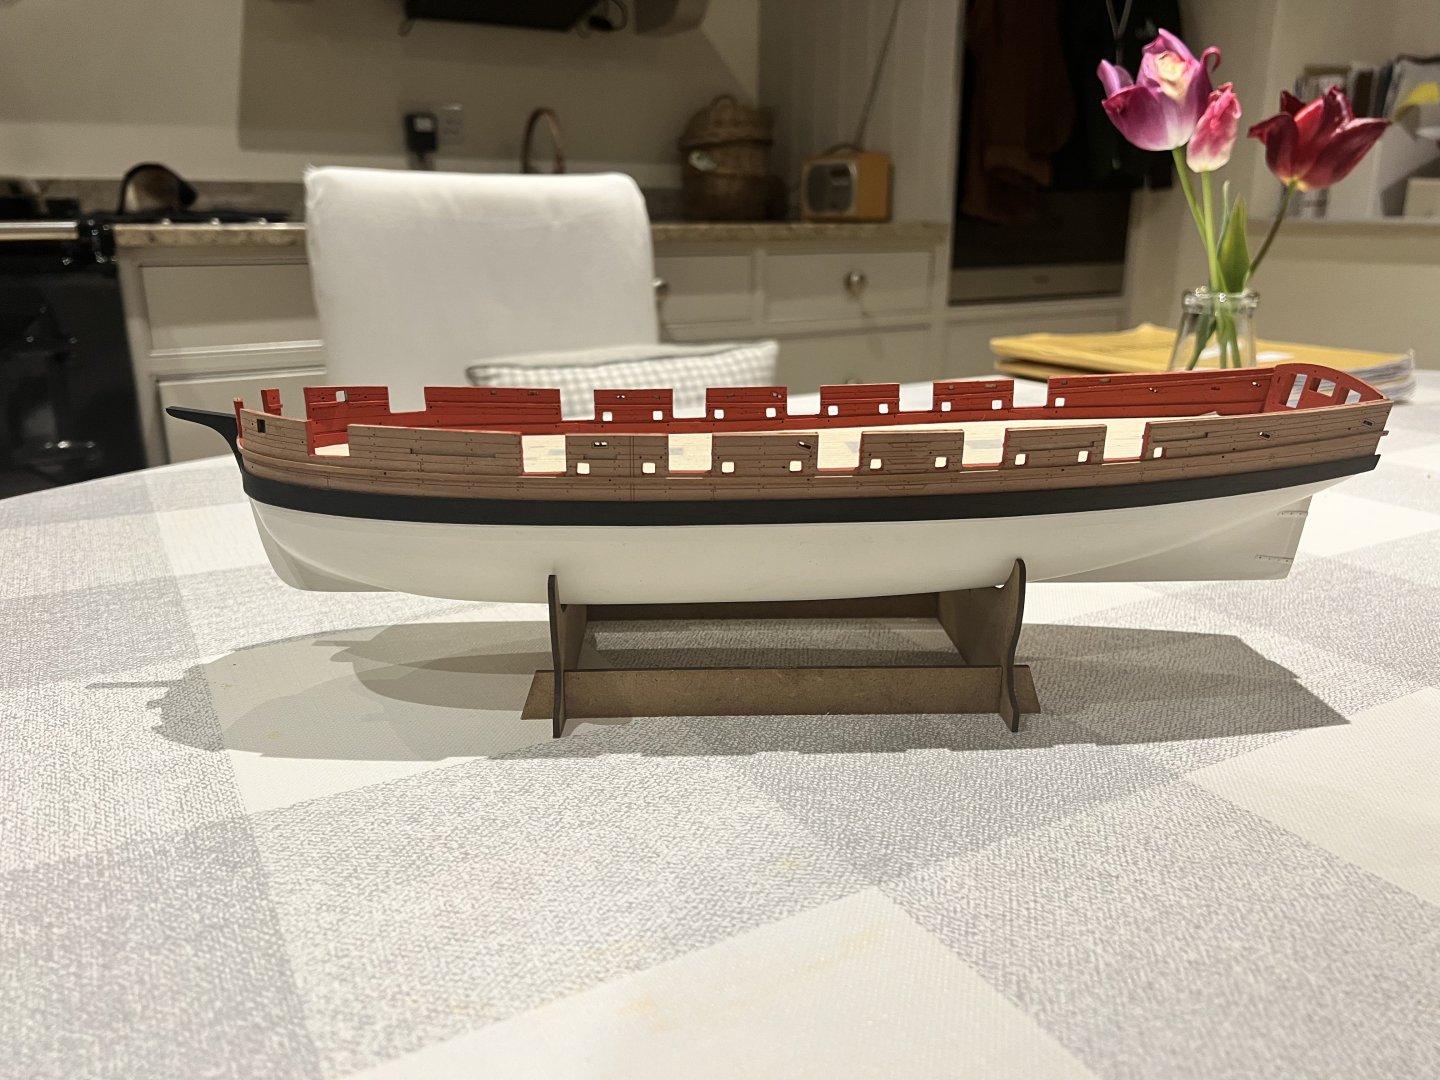
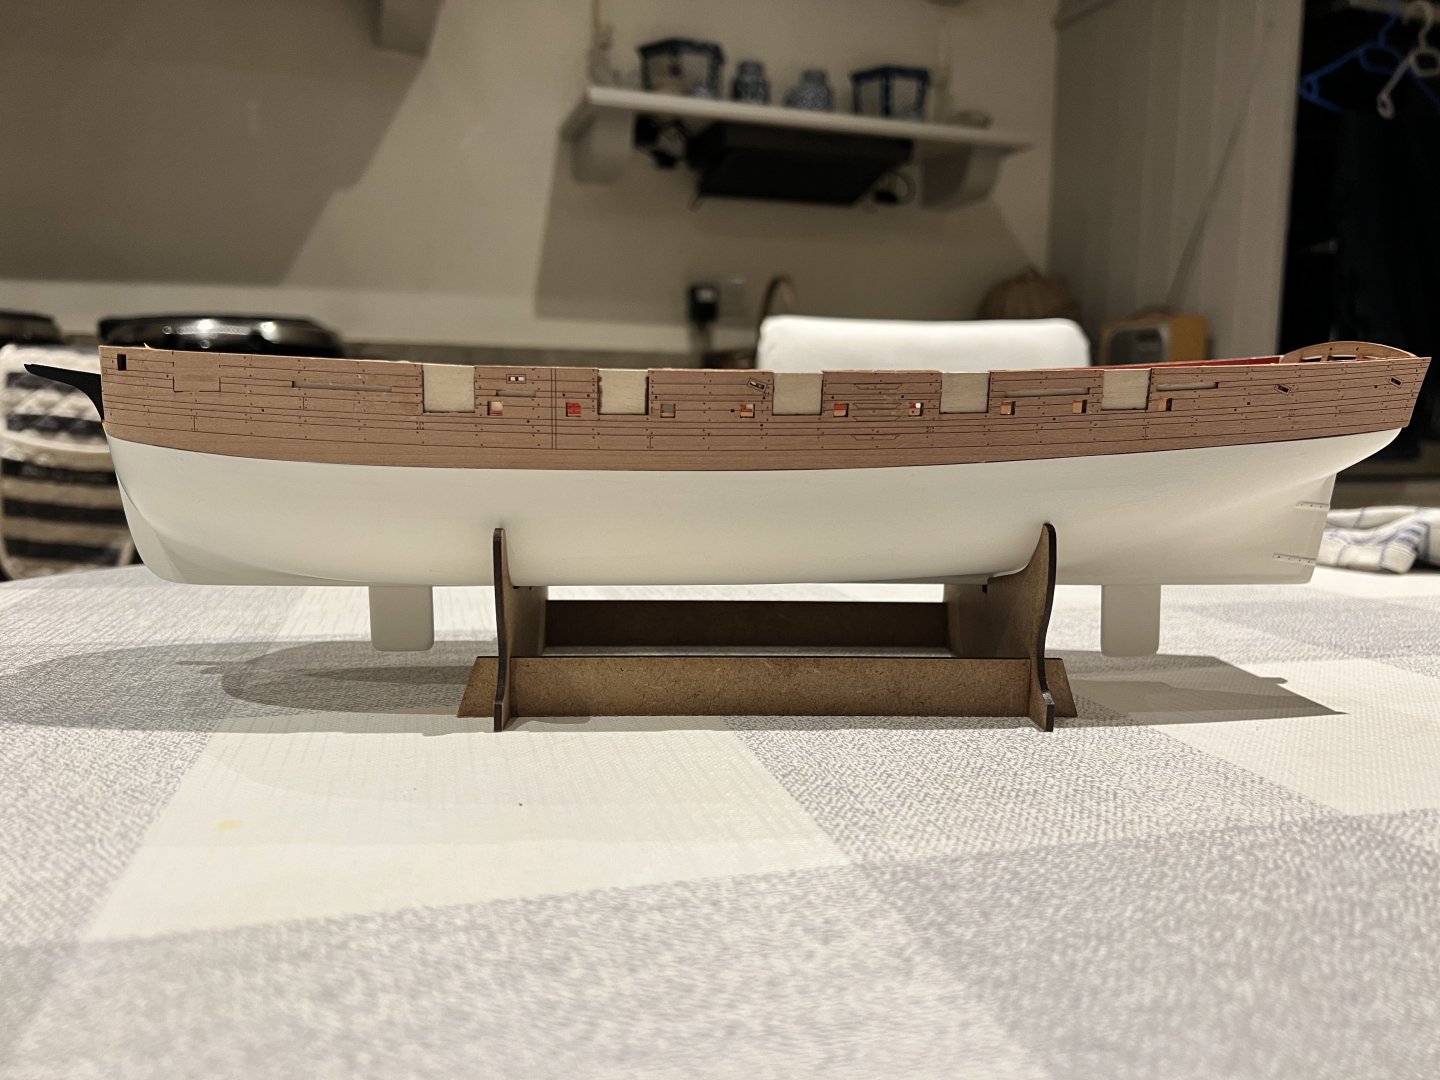
Thanks Thukydides - I was planning to follow your excellent advice. I installed the PE for the hammock cranes, then put a line through to check alignment, this proved surprisingly fiddly, so I fully rigged the hammock cranes as I’d probably find it difficult to do so once the shrouds were fitted. Adder’s hull is now complete except for the anchors so onto masts, yards and rigging… Photos of the finished hull below: With Alert. Perspective is deceptive, Alert and Adder’s hulls are almost identical in length.


- 146 replies
-
- 19
-
-
- Adder
- Vanguard Models
- (and 1 more)
-
Thanks Glenn, I’ll follow you advice and add the hammock cranes once the deadeyes and chainplates are fitted.
-
Looks great, I broke the top off the upper rear section on my Saucy Jack too.
-
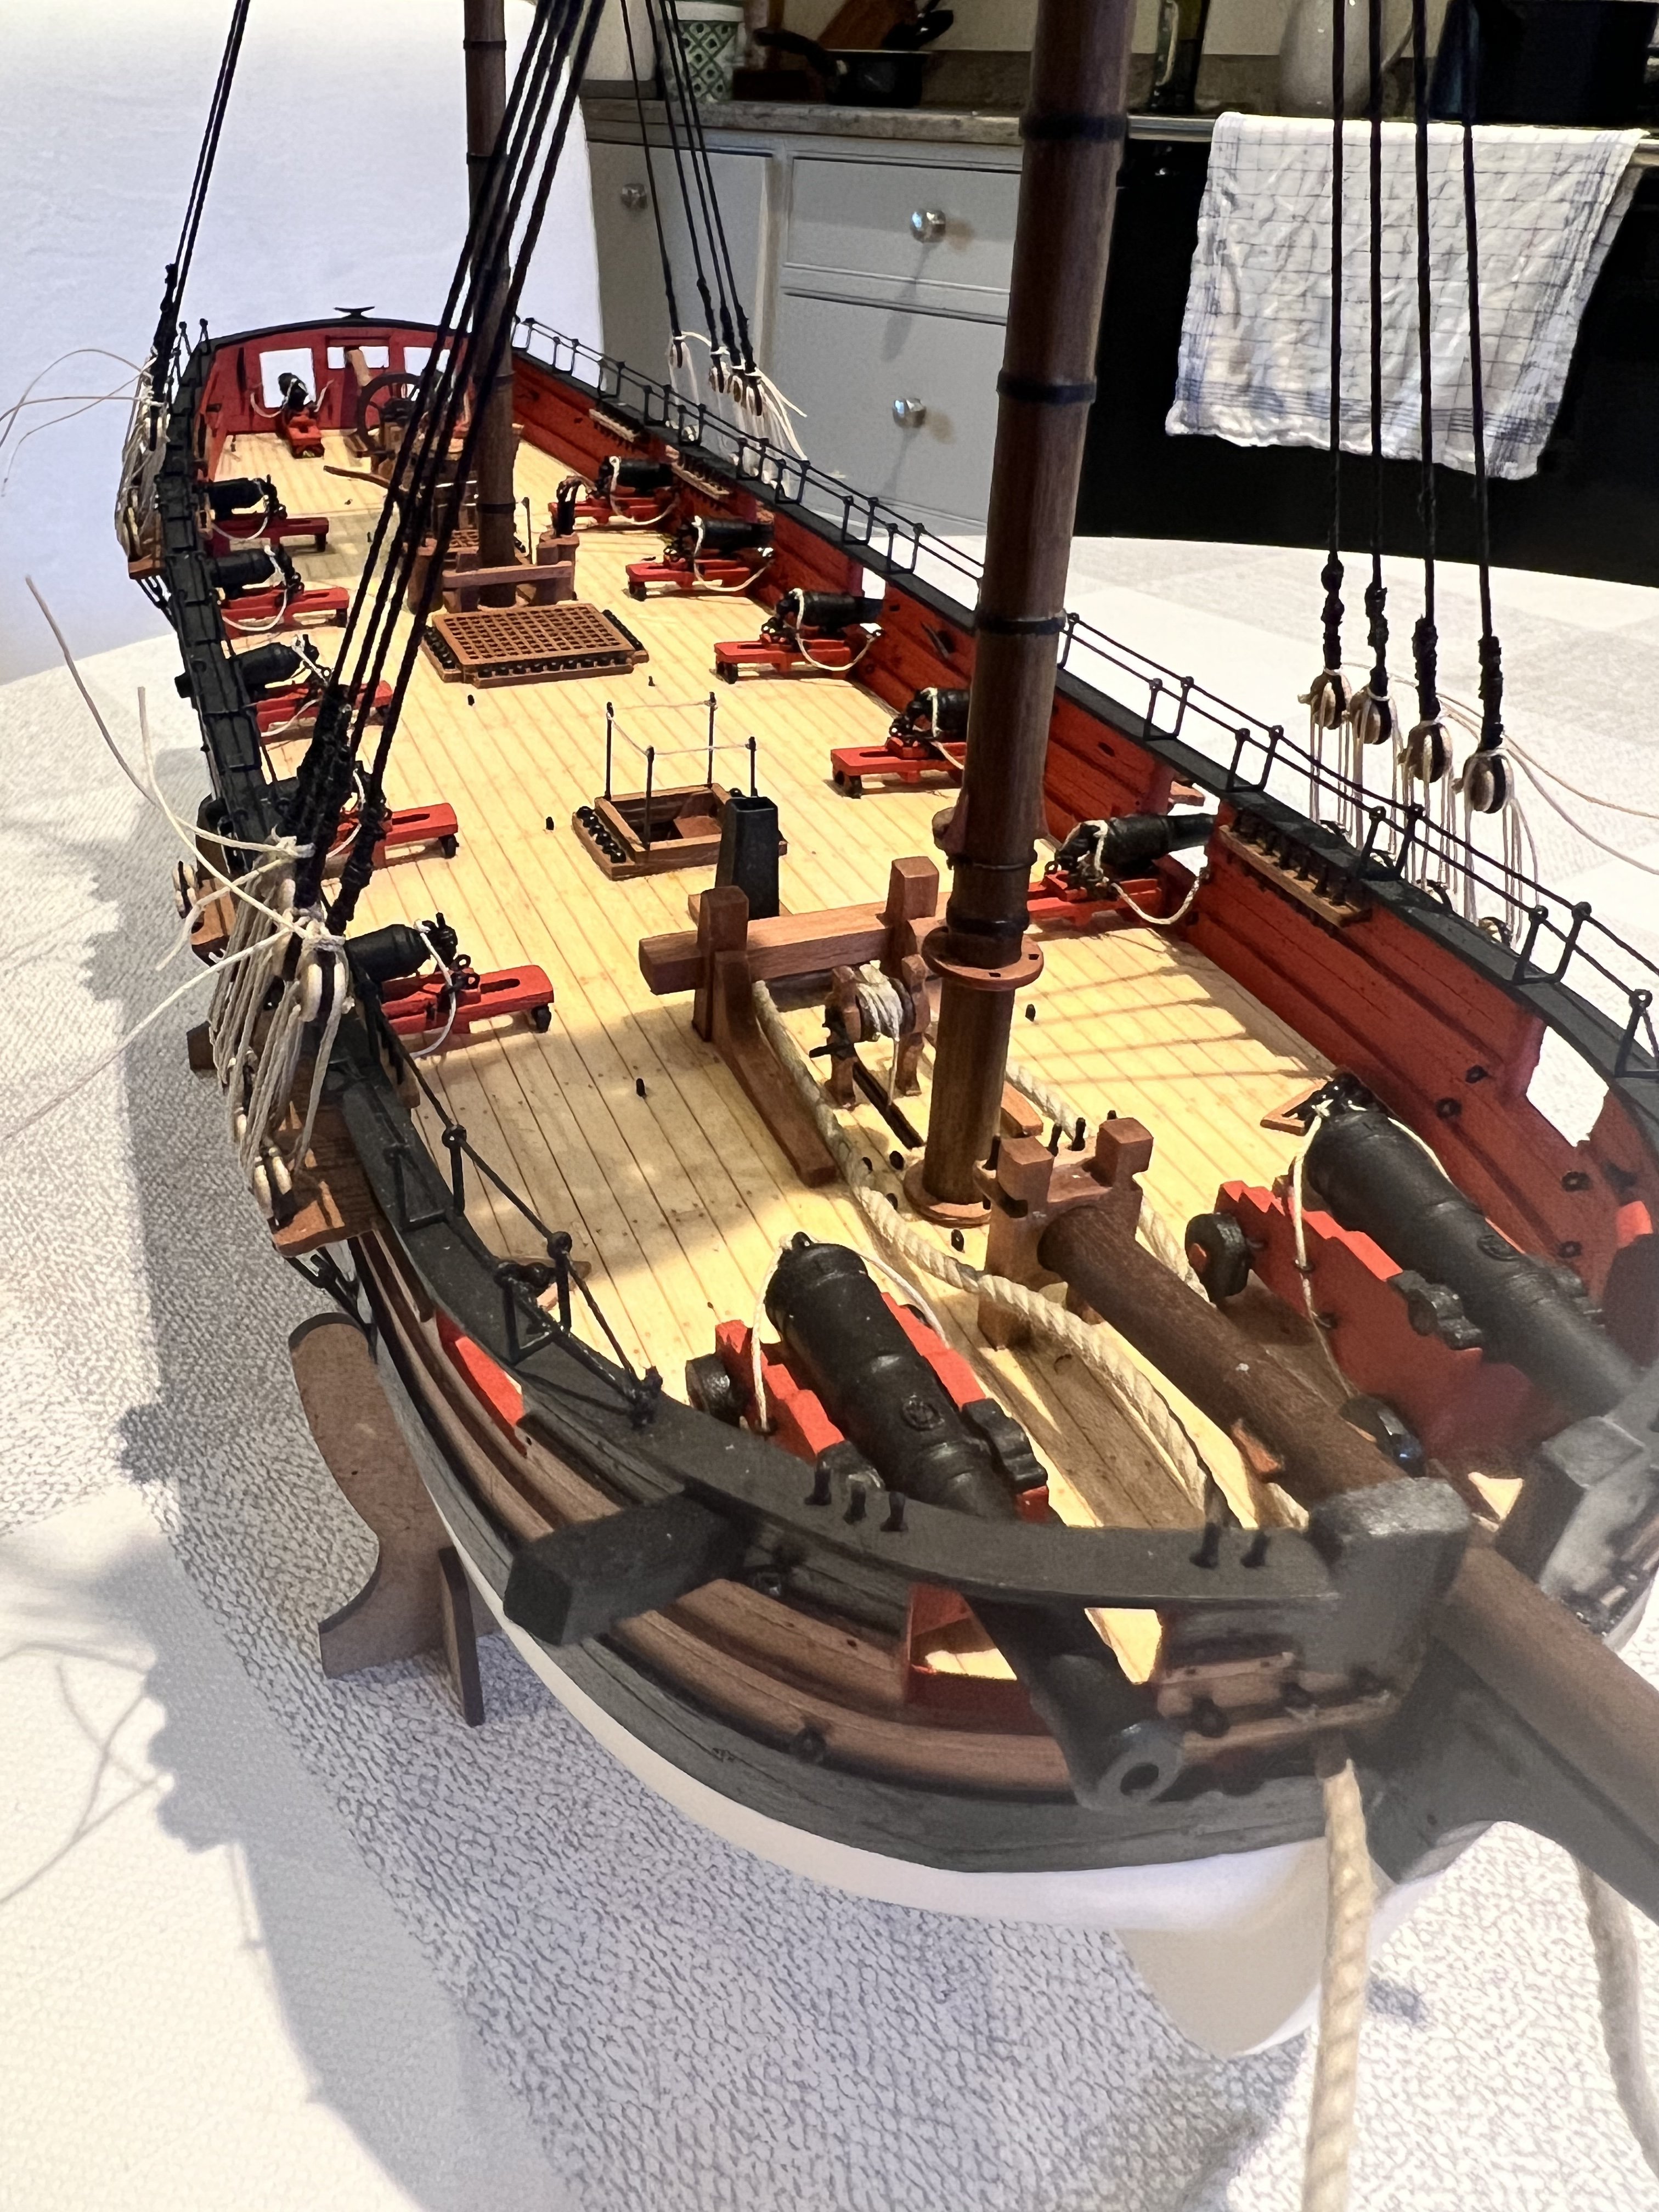
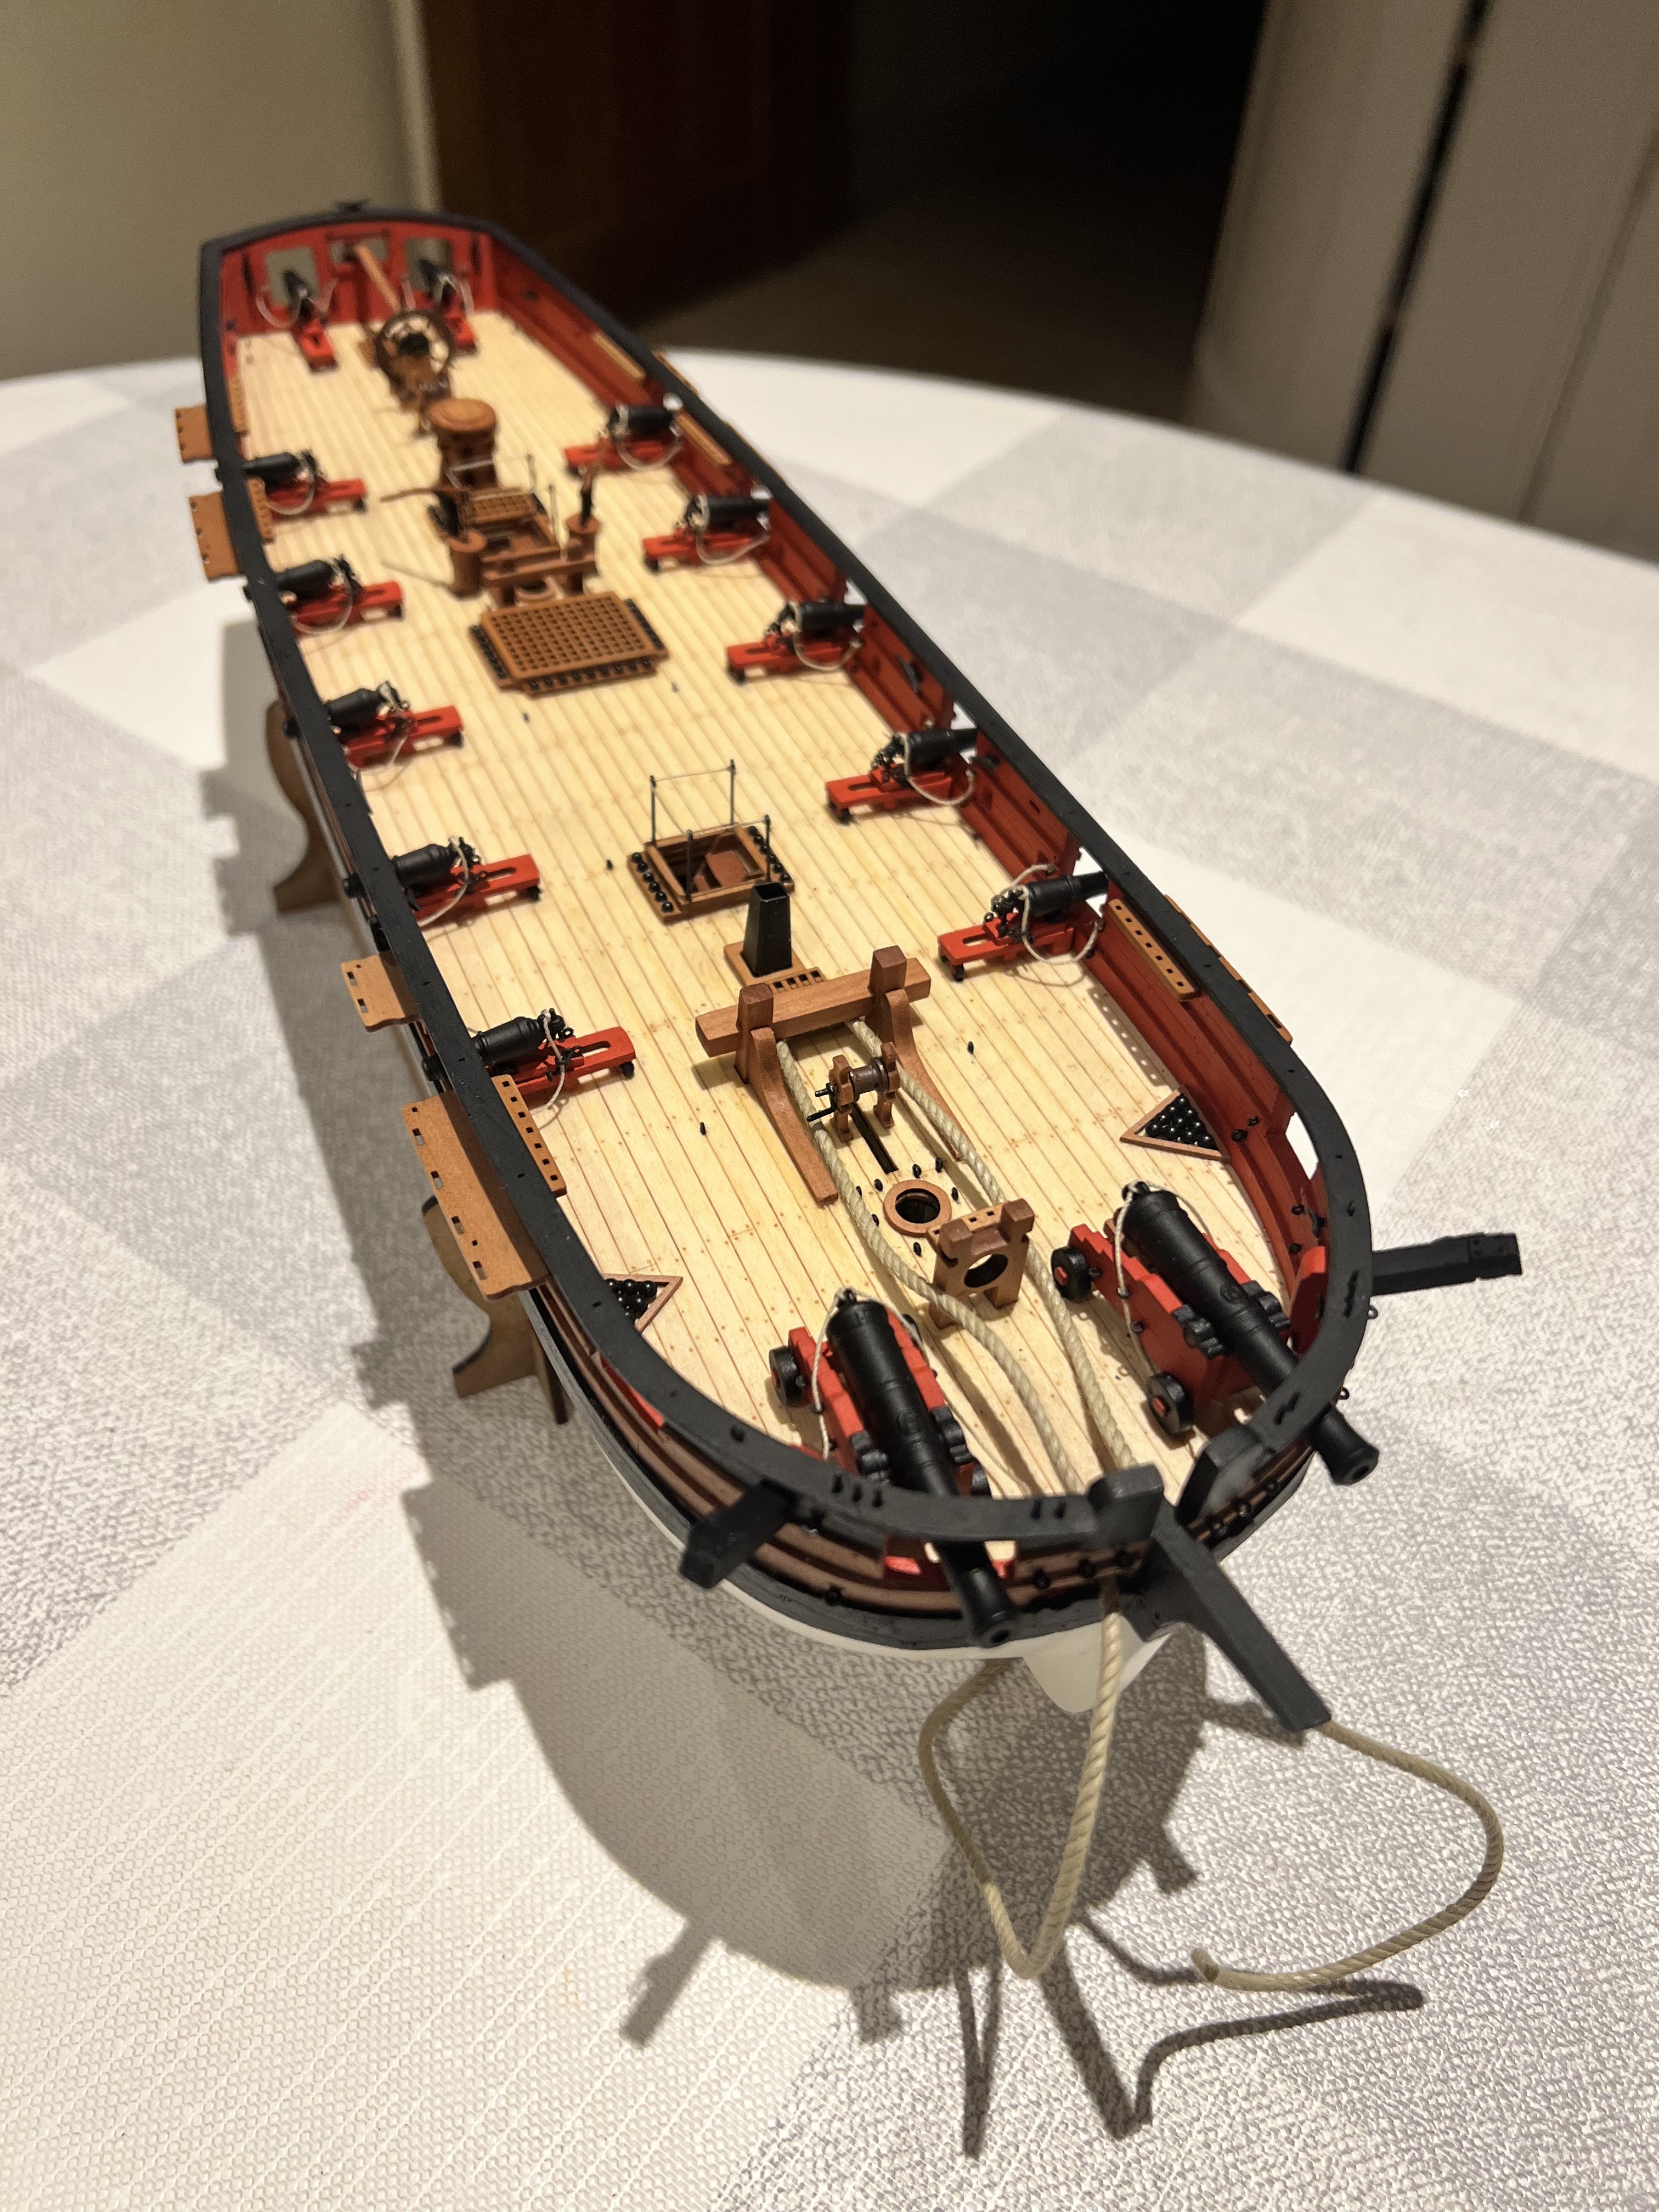
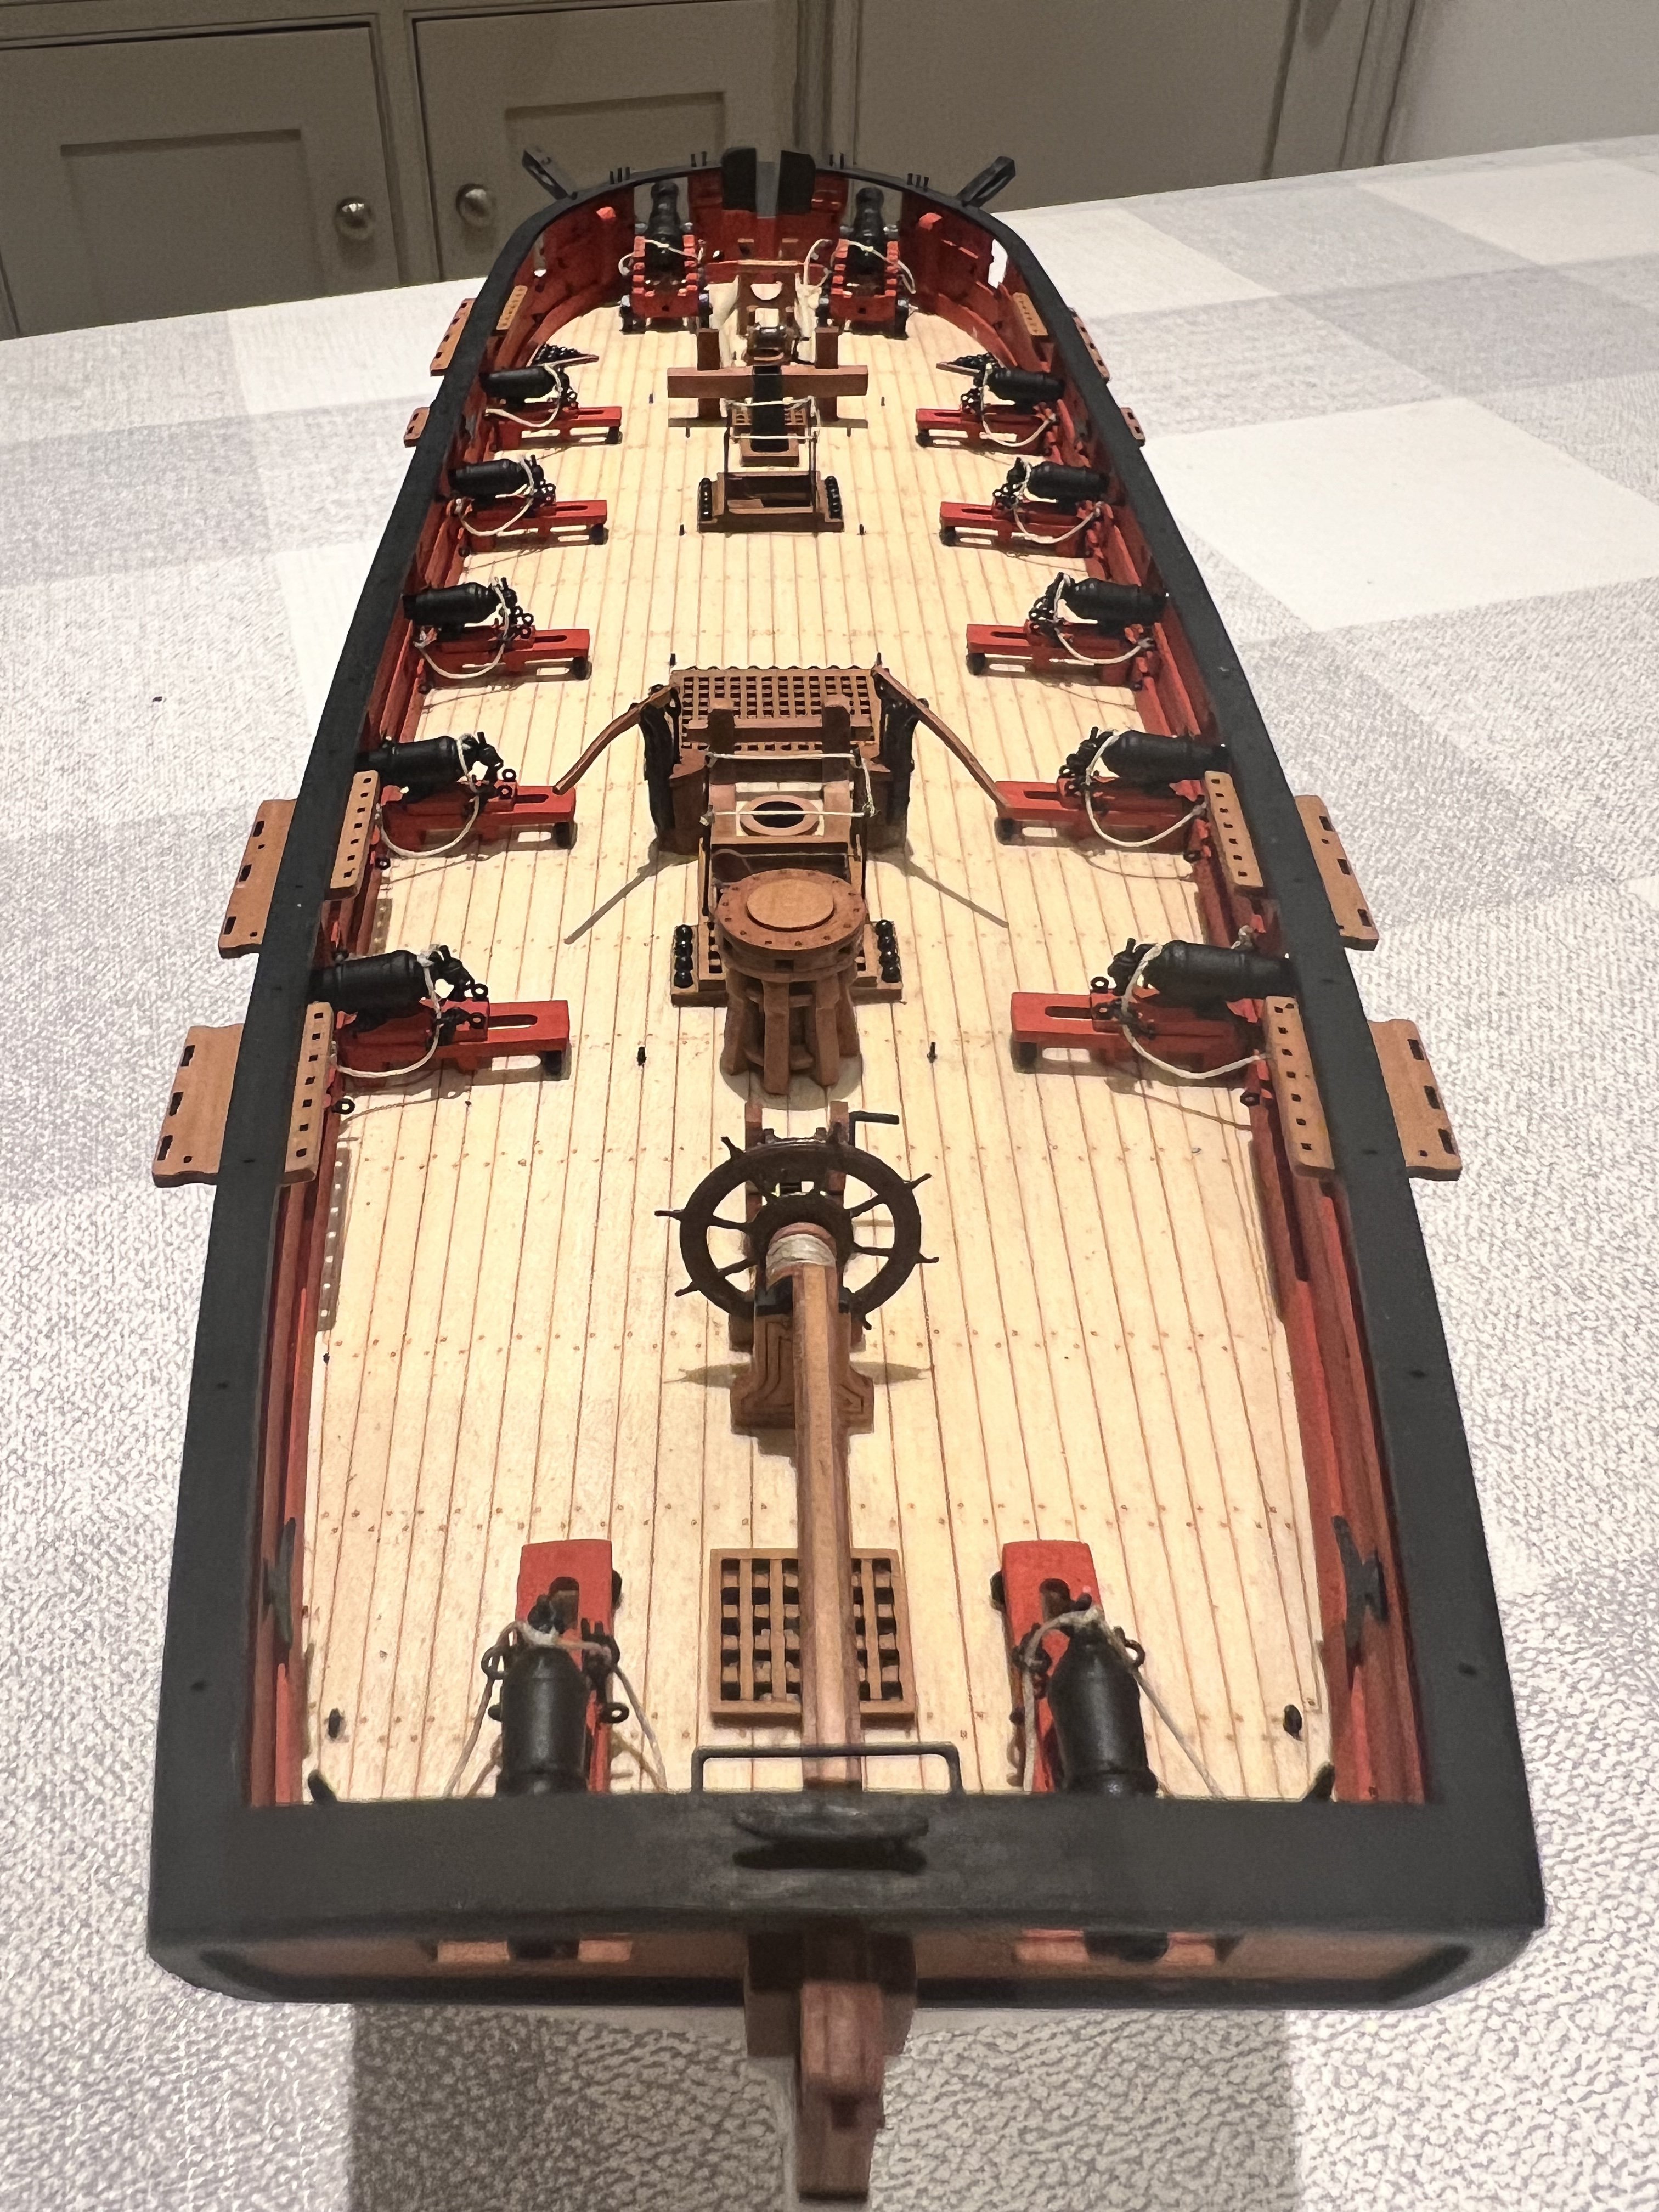
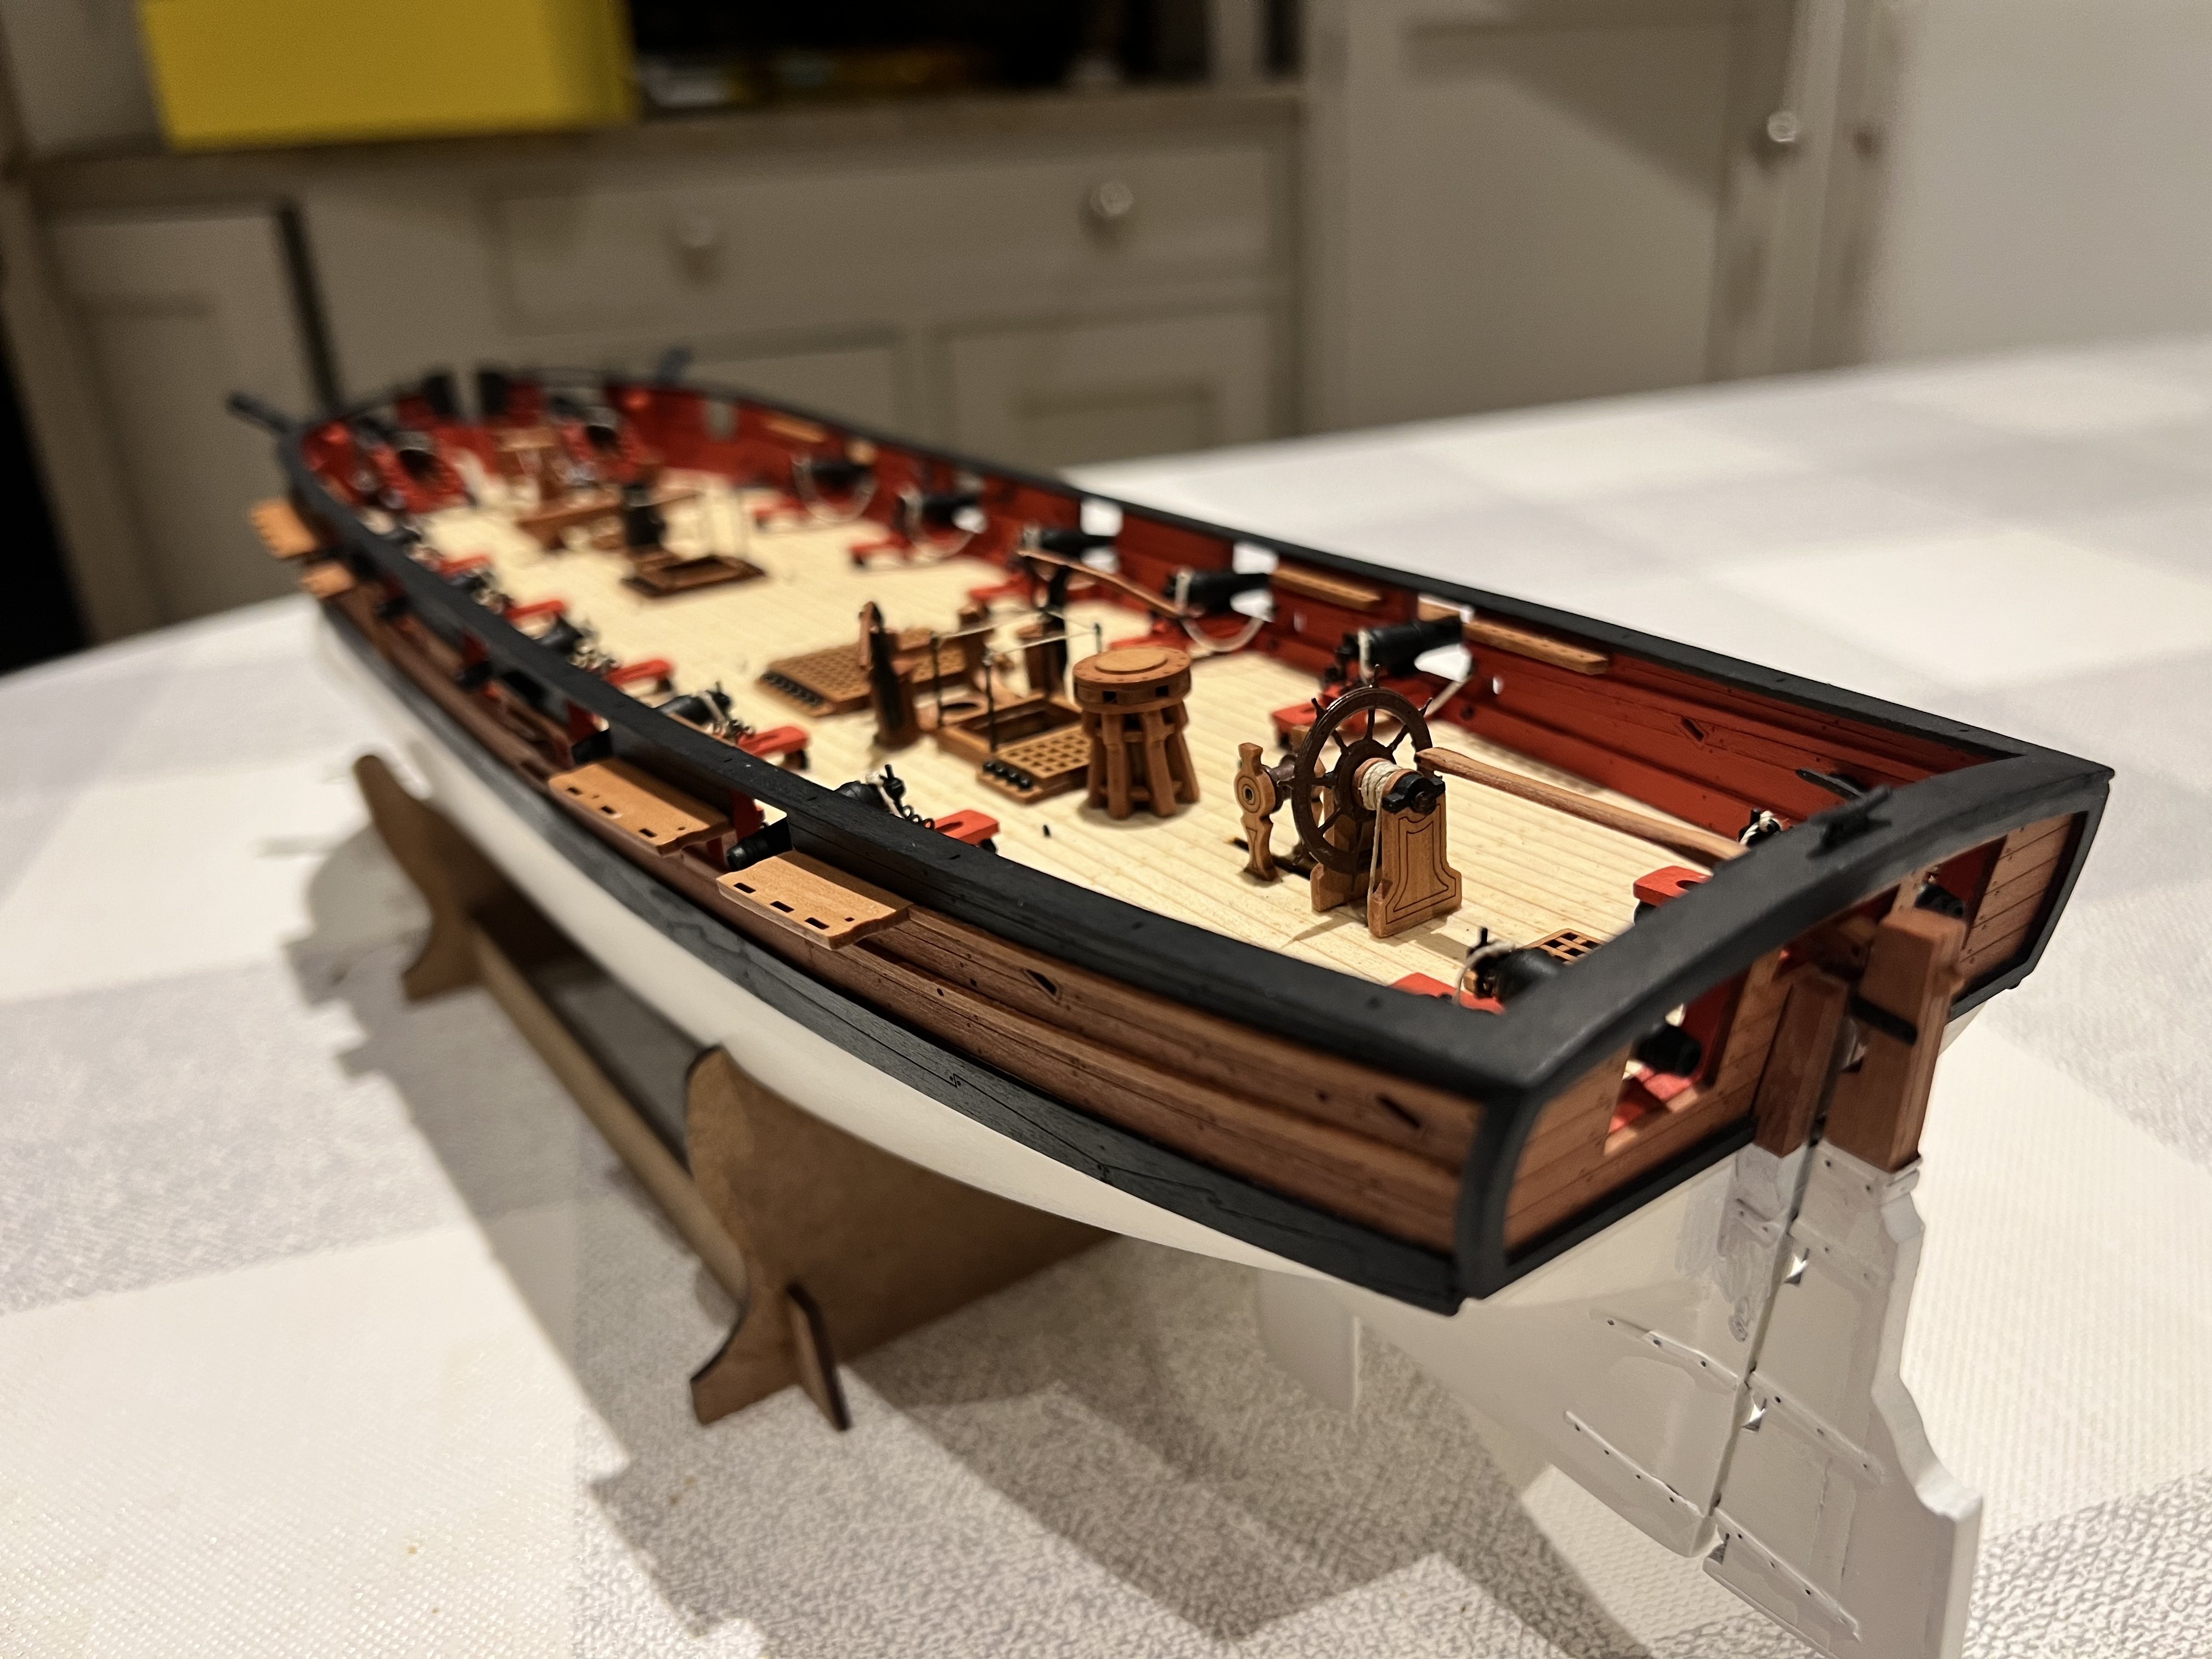
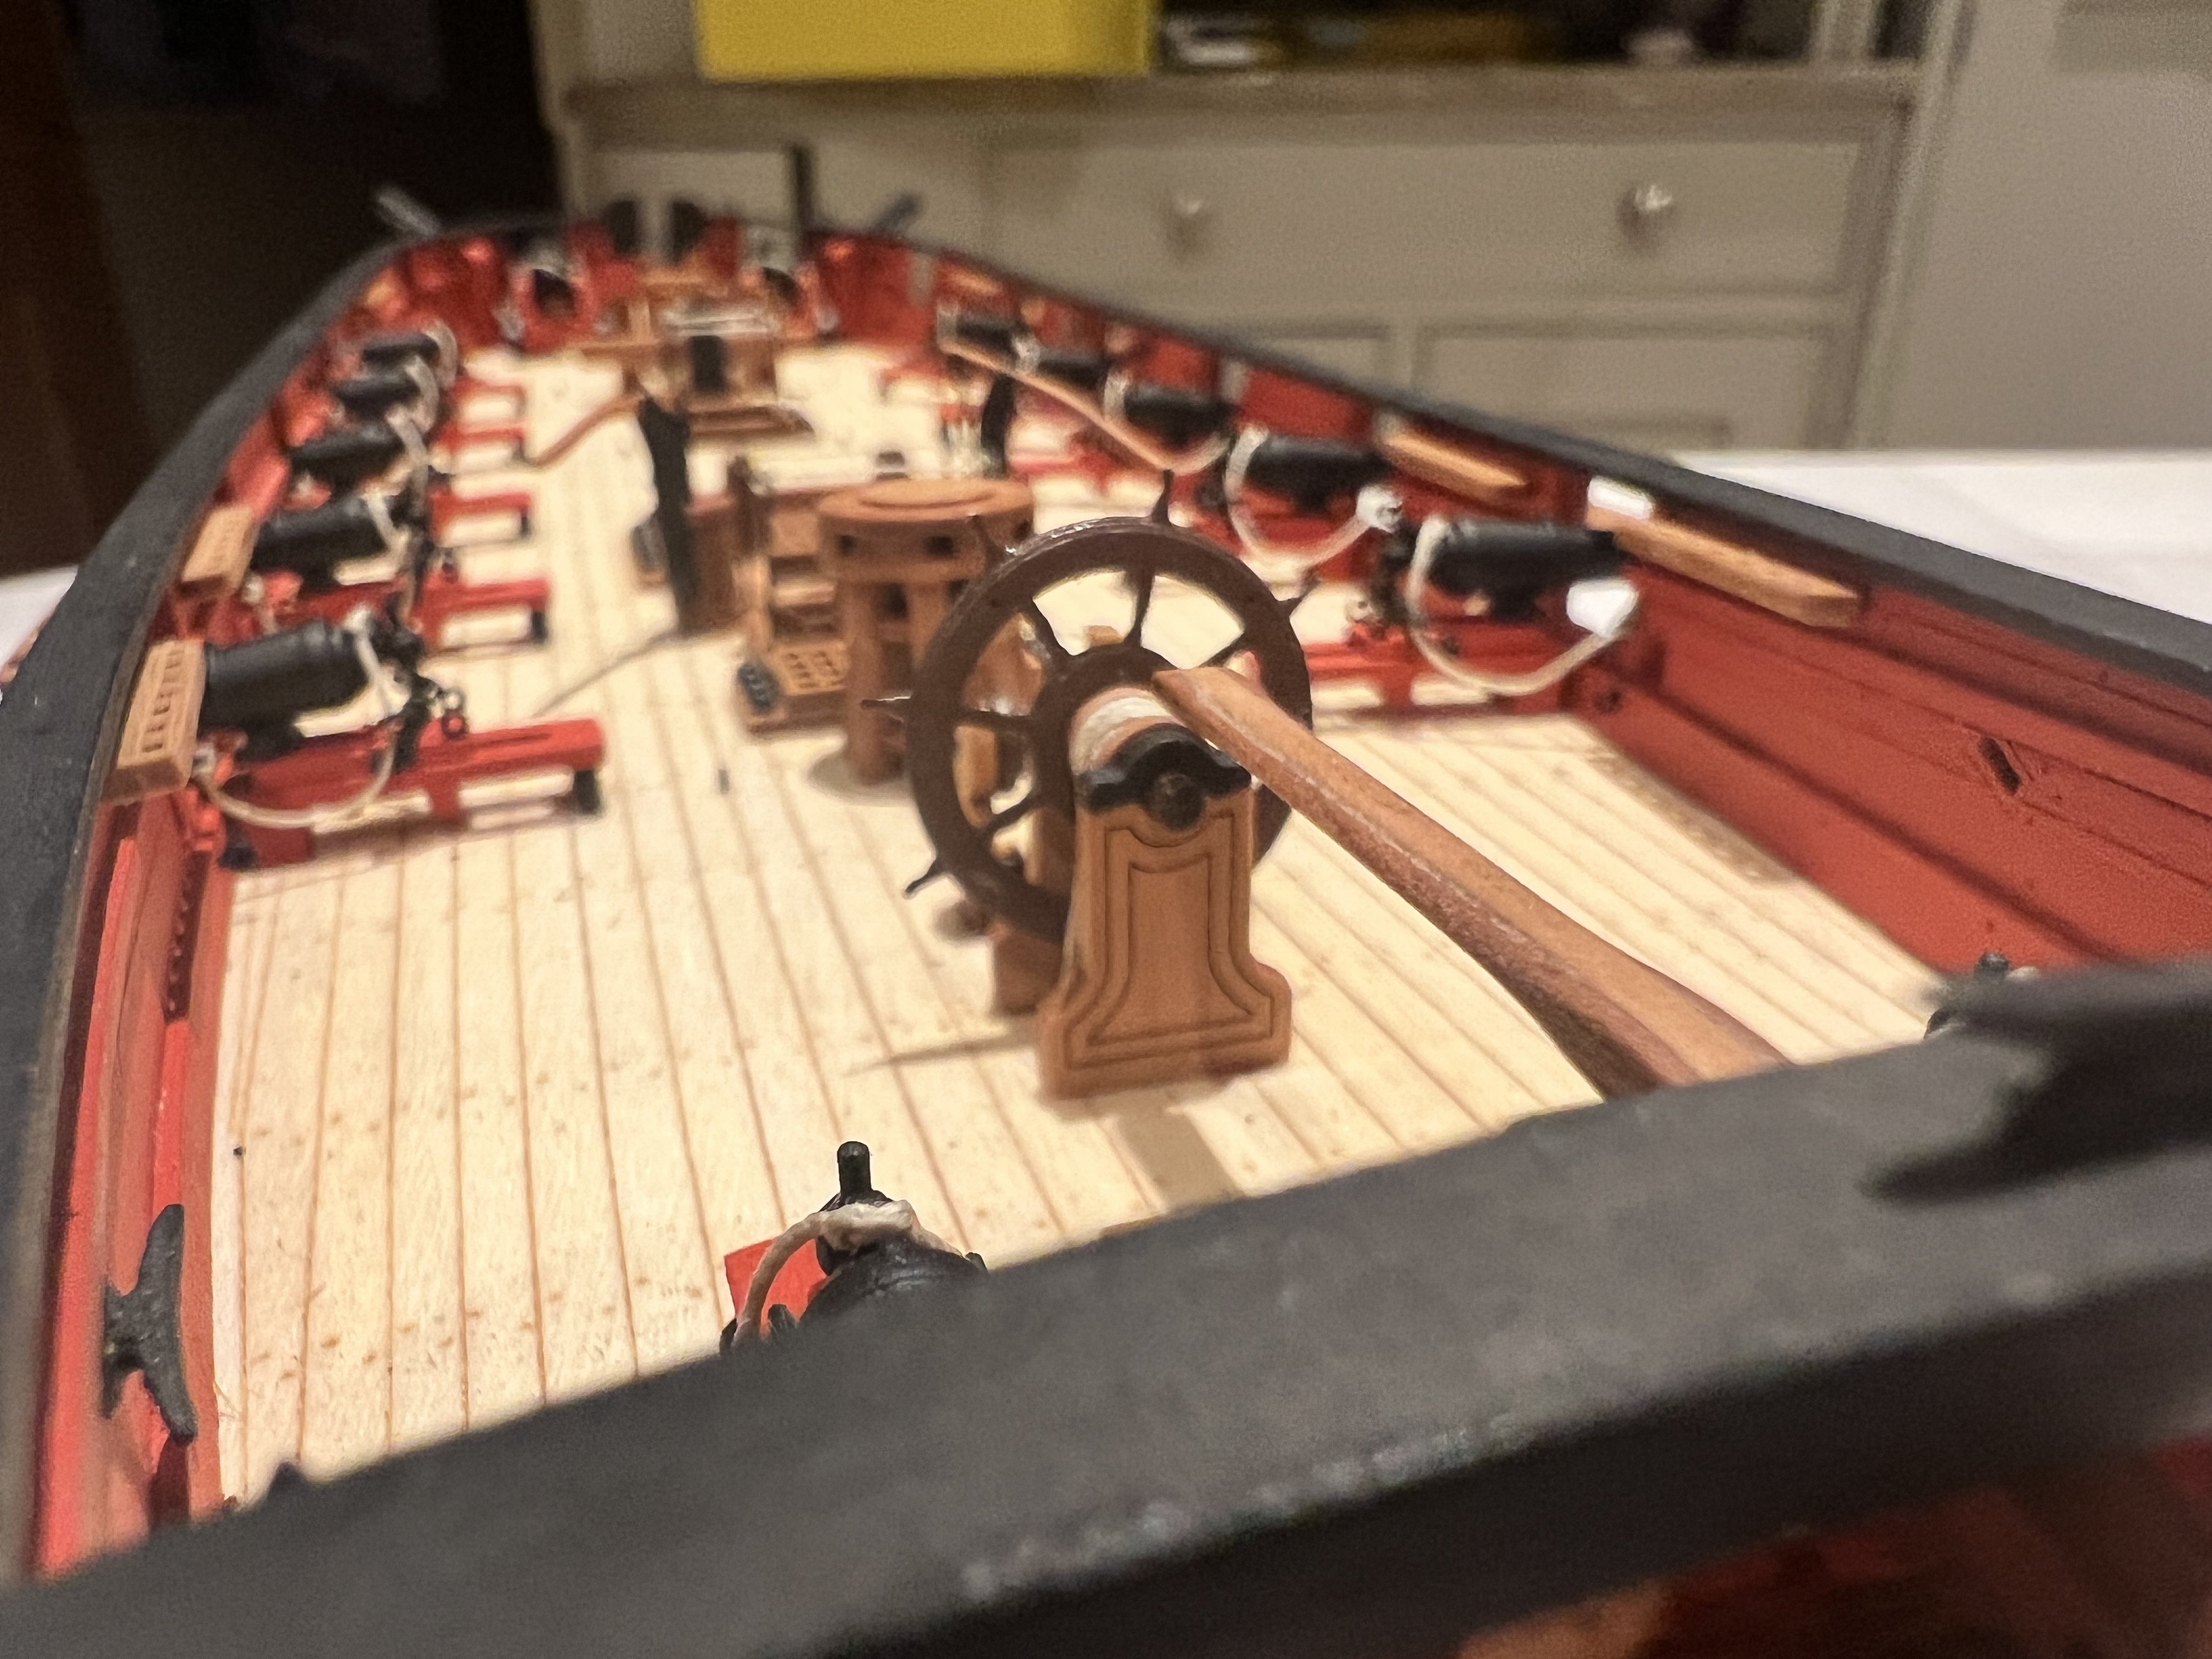
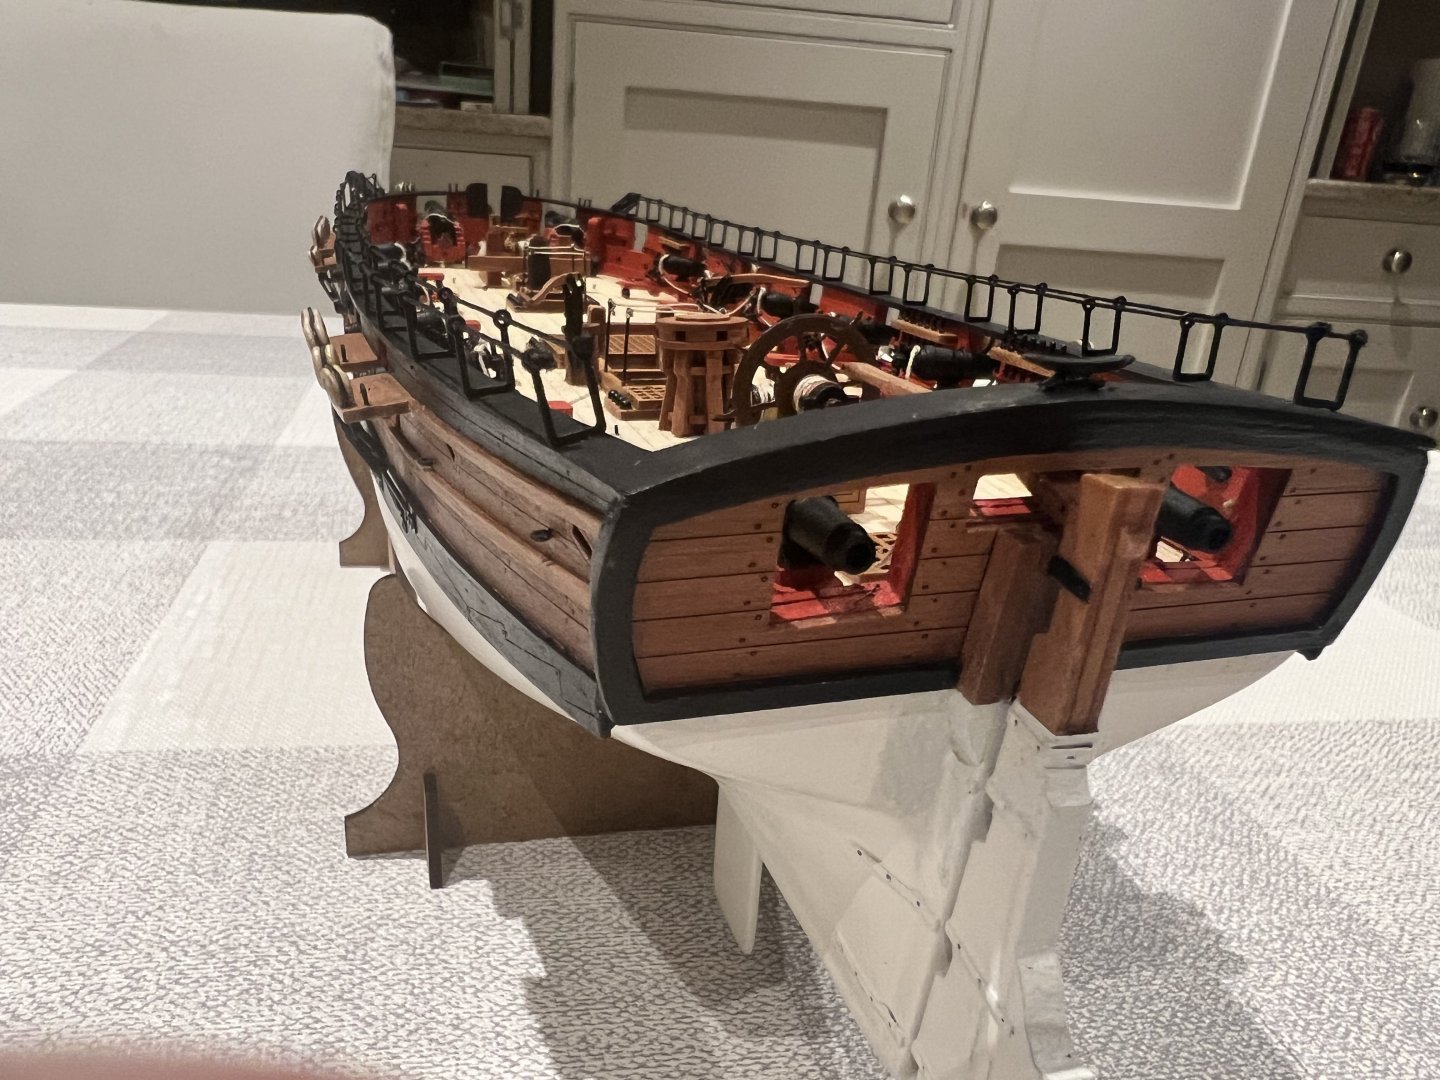
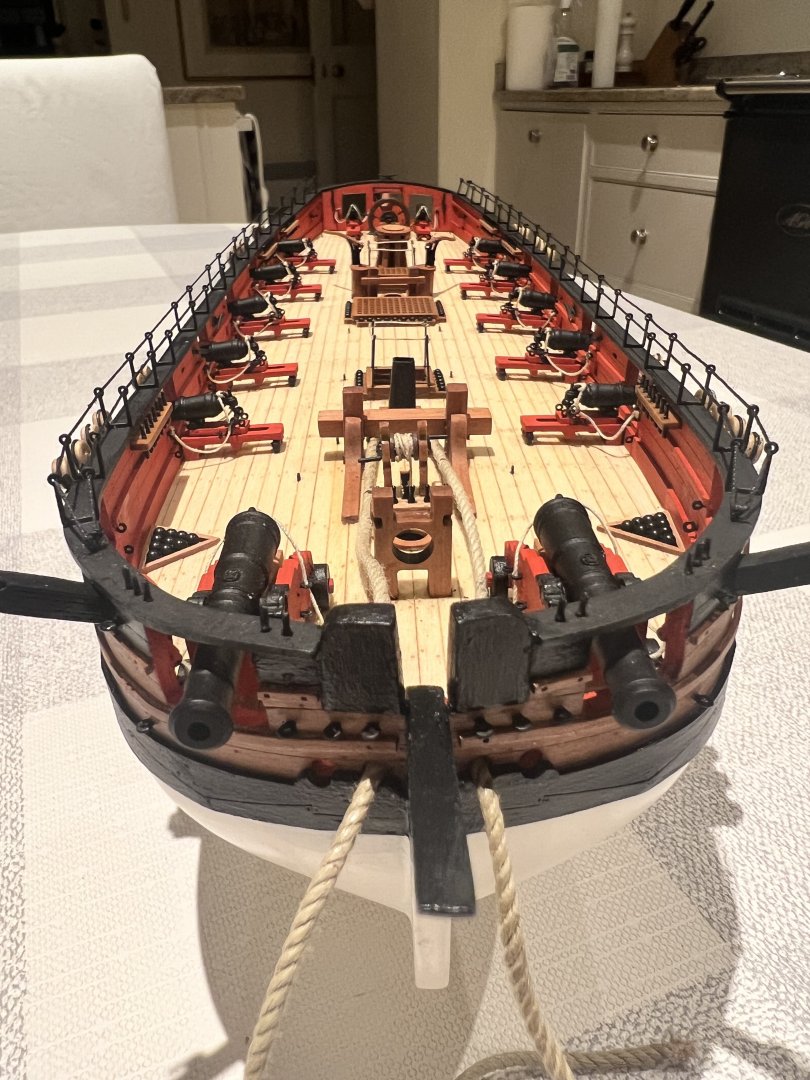
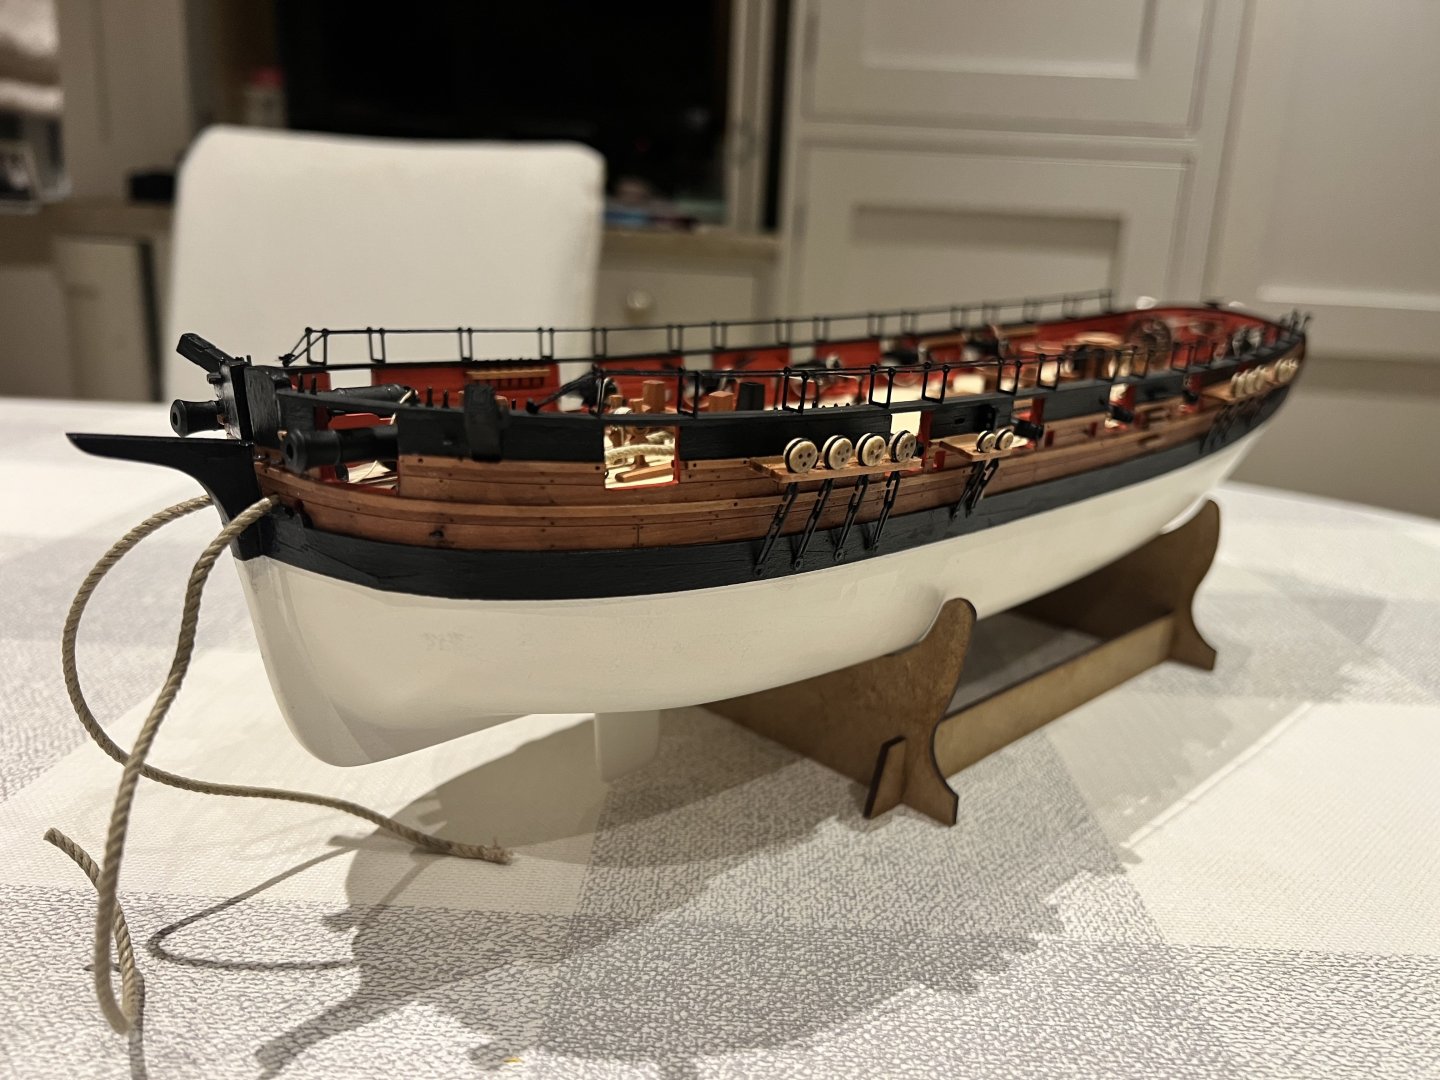
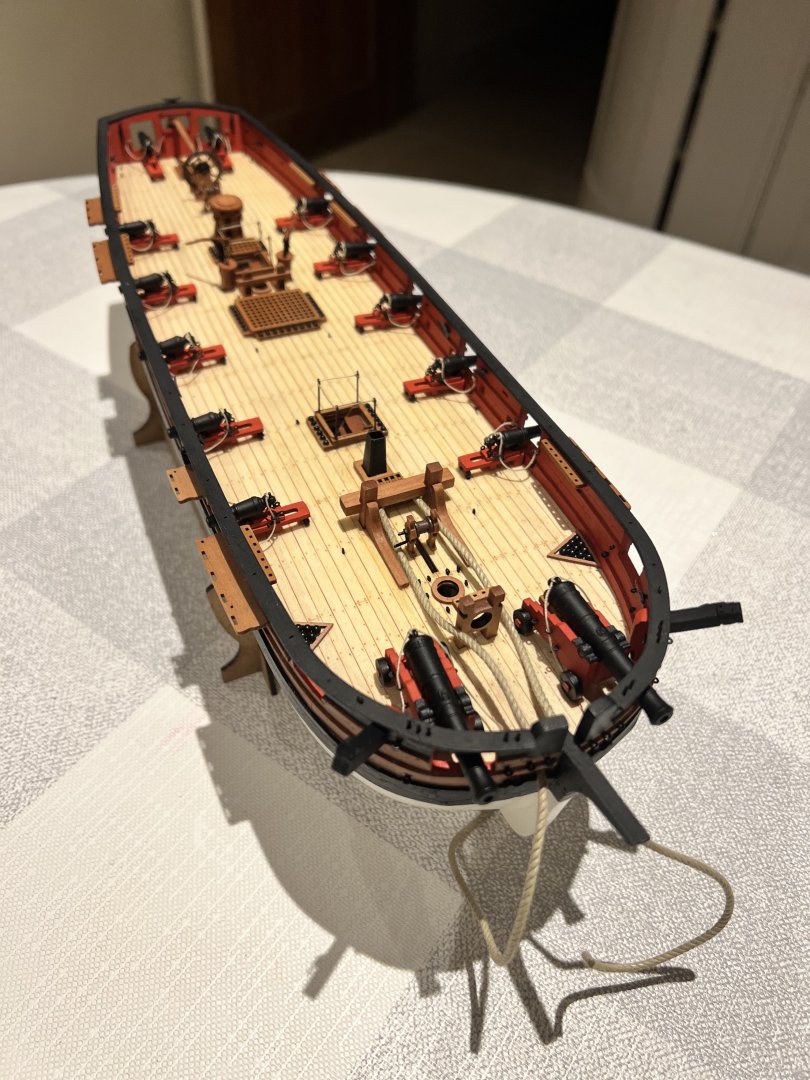
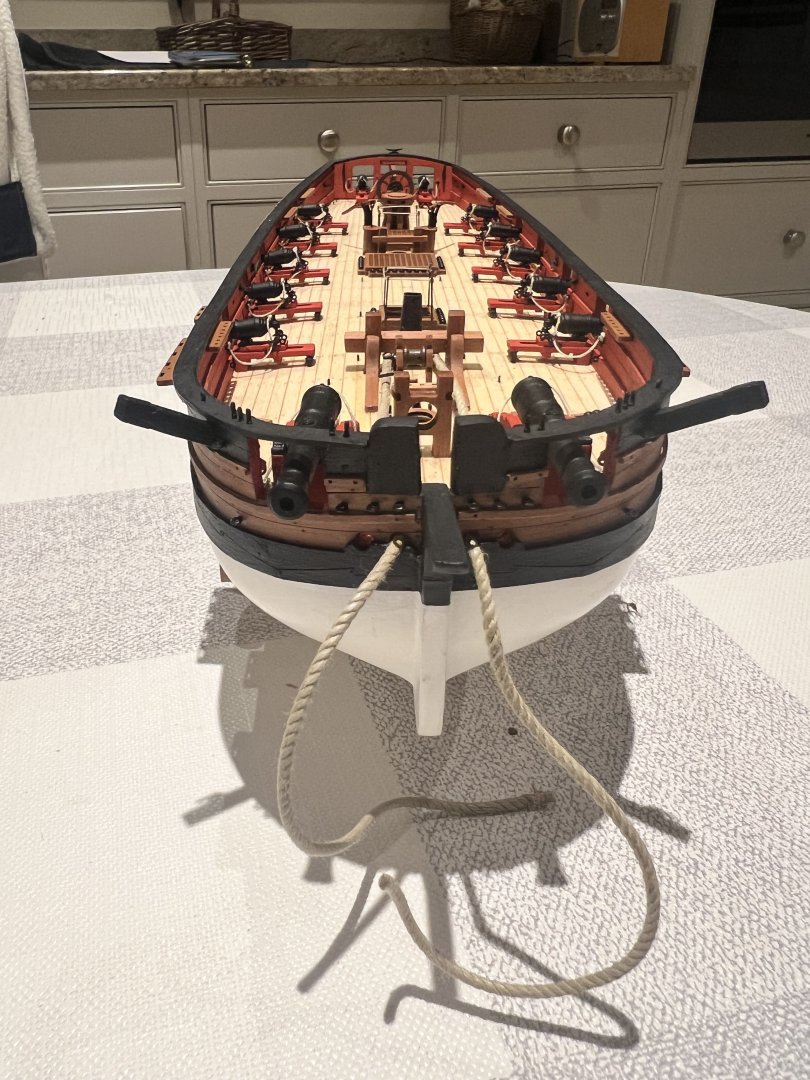
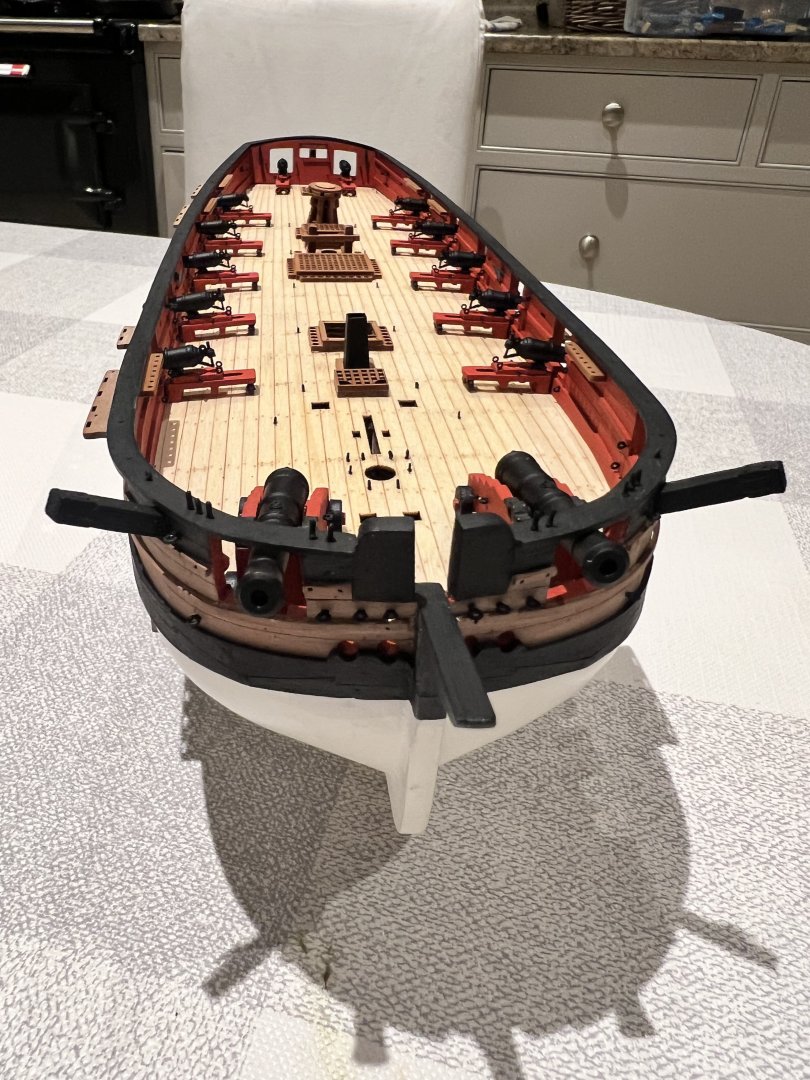
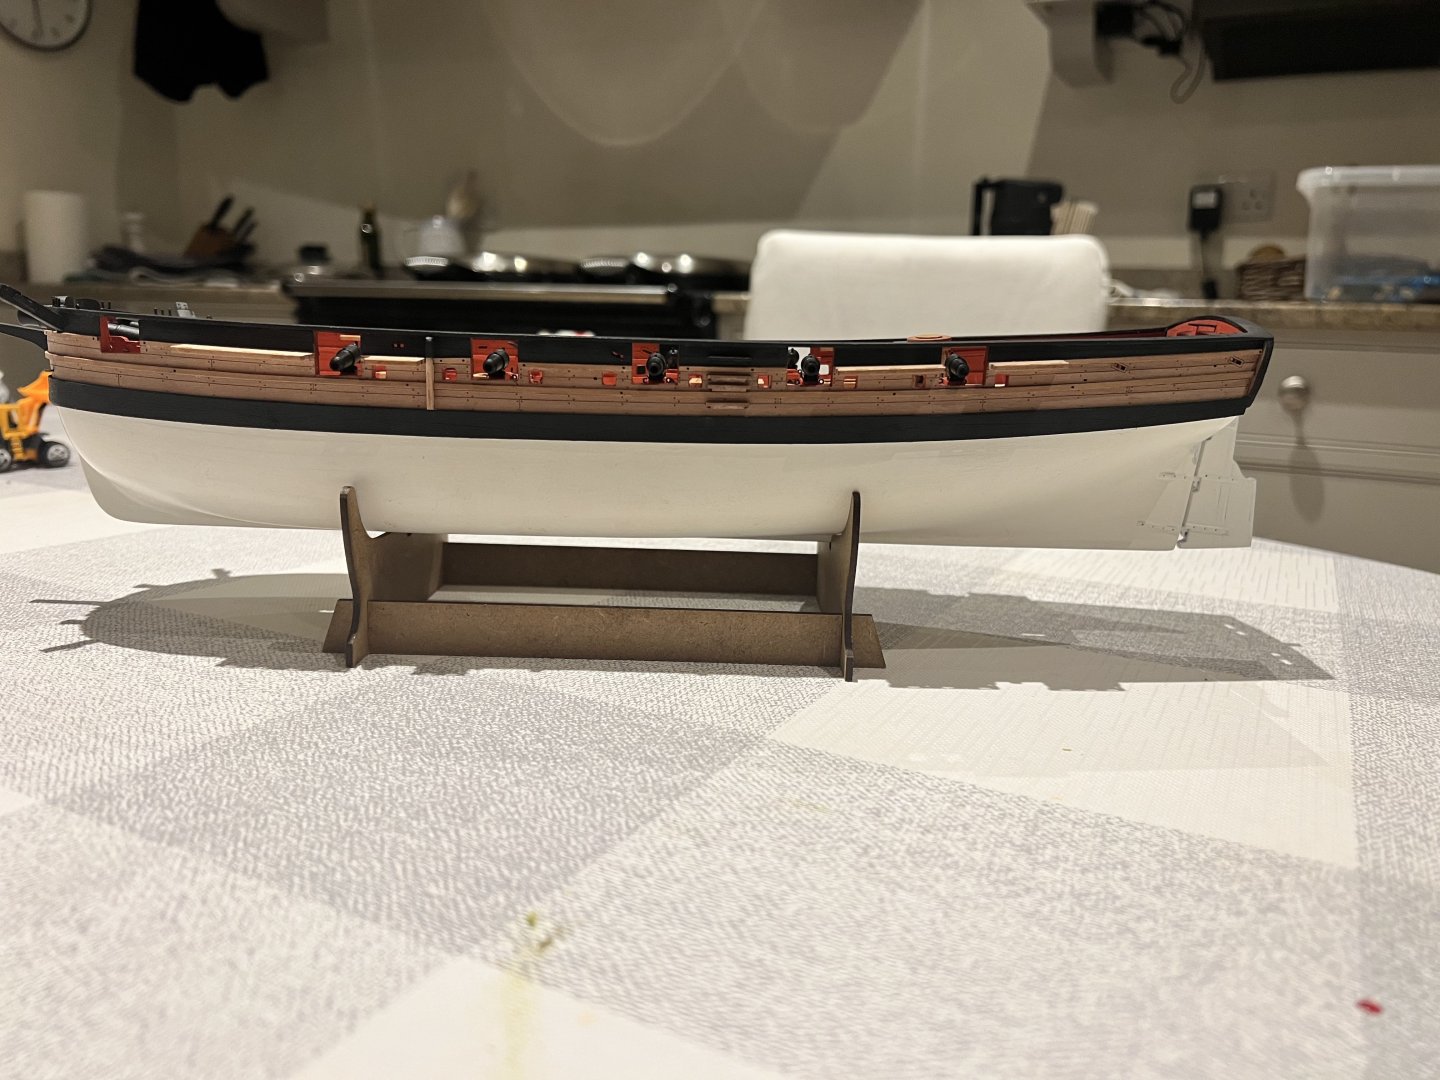
Thanks Chris, Chuck, mugje, really appreciated. Fitting out of Adder’s hull nearing completion. I decided to risk blotches and apply Danish oil to the outer bulwarks and it worked! The engraved pear looks amazing with Danish oil. I’ve done a somewhat amateurish job of fitting breech ropes to the cannons and carronades. The cannonballs were added using ultra matt poly varnish to hold them and take some of the shine off them. Fitting the parts is pretty straightforward. The fiddliest parts are the rope for the wheel and also for the drop keels. I have taken the drop keels off again whilst I manhandle the hull and fit deadeyes and chainplates. I’m leaving the anchors off until rigging is complete. I’m not sure when best to fit the hammock cranes and the cord between them as they’ll likely be in the way to for tying off rigging, then again I’ll need access to fit them which may be hard post-rigging. Still to add the deadeyes, chainplates and drop keels. Thanks for looking!


- 146 replies
-
- 14
-
-

-
- Adder
- Vanguard Models
- (and 1 more)
-
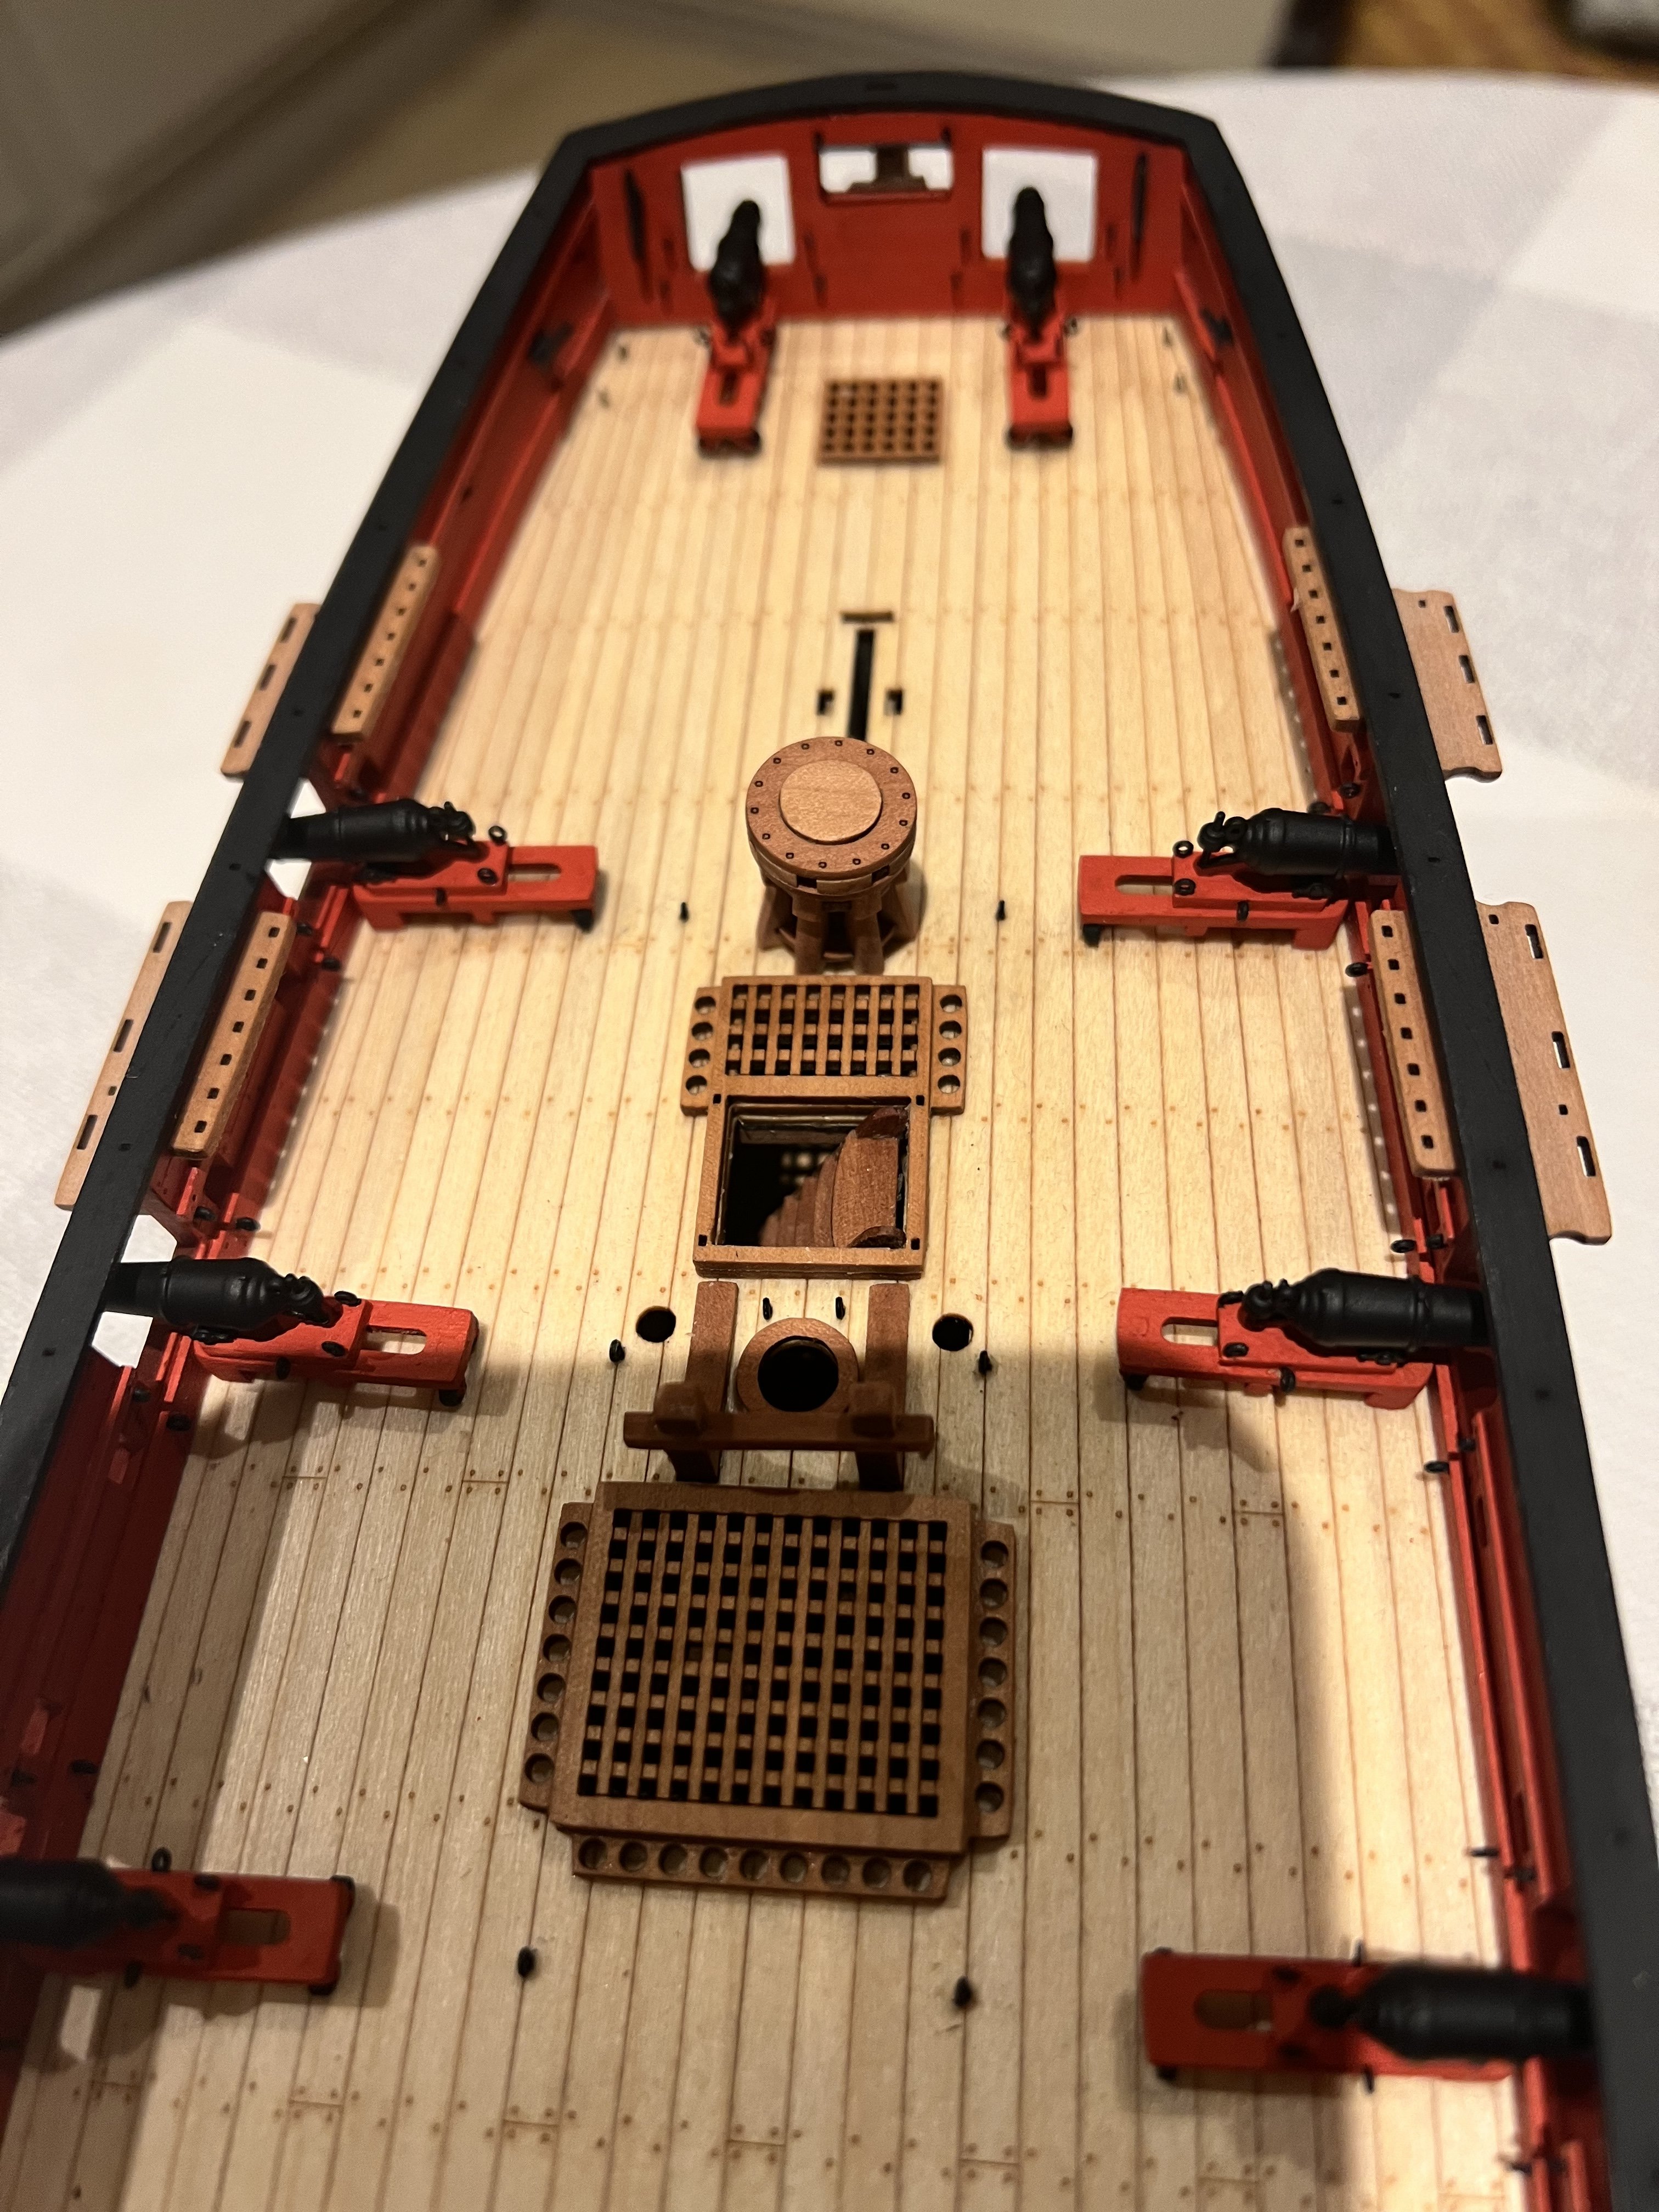
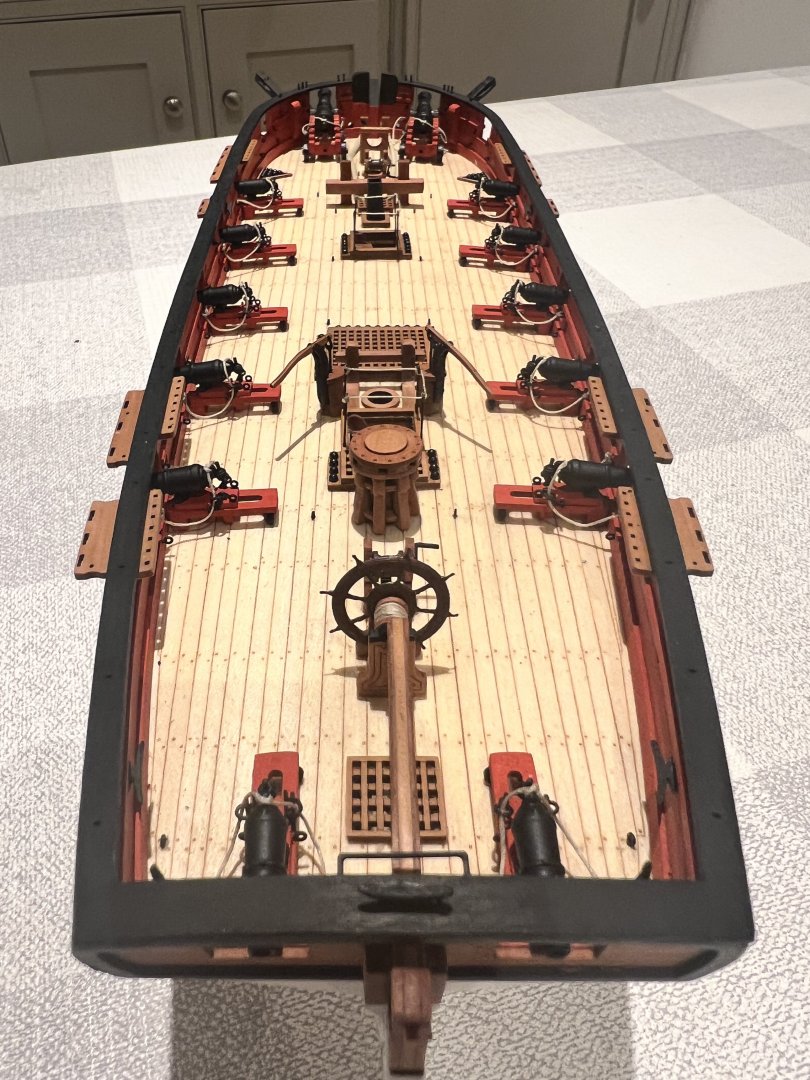
Started fitting Adder out. I’d already made some of the fittings. She has very nice lines for a gun brig. Parts 173 go below the hawseholes on each side and are not mentioned in the instructions but are clearly on the plans - easy to miss if you just work from the instructions. The carronades still need PE parts 17 and 18 added. I’ve also left the sprue to the lower elevating arm for each carronades in place for now and will remove this at the last moment as I broke a couple of these on Grecian and they proved nigh on impossible to glue back on. I’m not fully rigging the guns but will certainly add breach ropes to the 24 pounders. I may add breach ropes to the carronades but I struggled to make these lie naturally on Grecian. The plans show six side steps on each side with the lower two on the main wale. Chris’s prototype in the instructions photos omits the lower two. I suspect that the plans are more accurate as the bottom of the four steps would be quite a reach from a small boat, but I’ve copied the prototype as it’s more aesthetically pleasing. The parts are there for six steps each side if anyone wants to add them. The deck and inboard fittings were treated with Danish oil and they came up very nicely. I’m not sure what to do on the exposed wood on the outer bulwarks and stern. I’ve scraped PVA glue off the bulwarks in places and I know from experience that Danish oil won’t be absorbed where the glue has been and would give me a blotchy finish. I guess I’ll try some poly varnish or make another attempt at mixing some wipe-on poly. I’ll put Danish oil on the channels to be consistent with wood fittings inboard.


- 146 replies
-
- 14
-
-
-
- Adder
- Vanguard Models
- (and 1 more)
-
Very much looking forward to following you on this. I’ve also got the updated 2024 Speedy to build. Good luck with the build.
- 114 replies
-
- 1
-
-
- Vanguard Models
- Speedy
- (and 1 more)
-
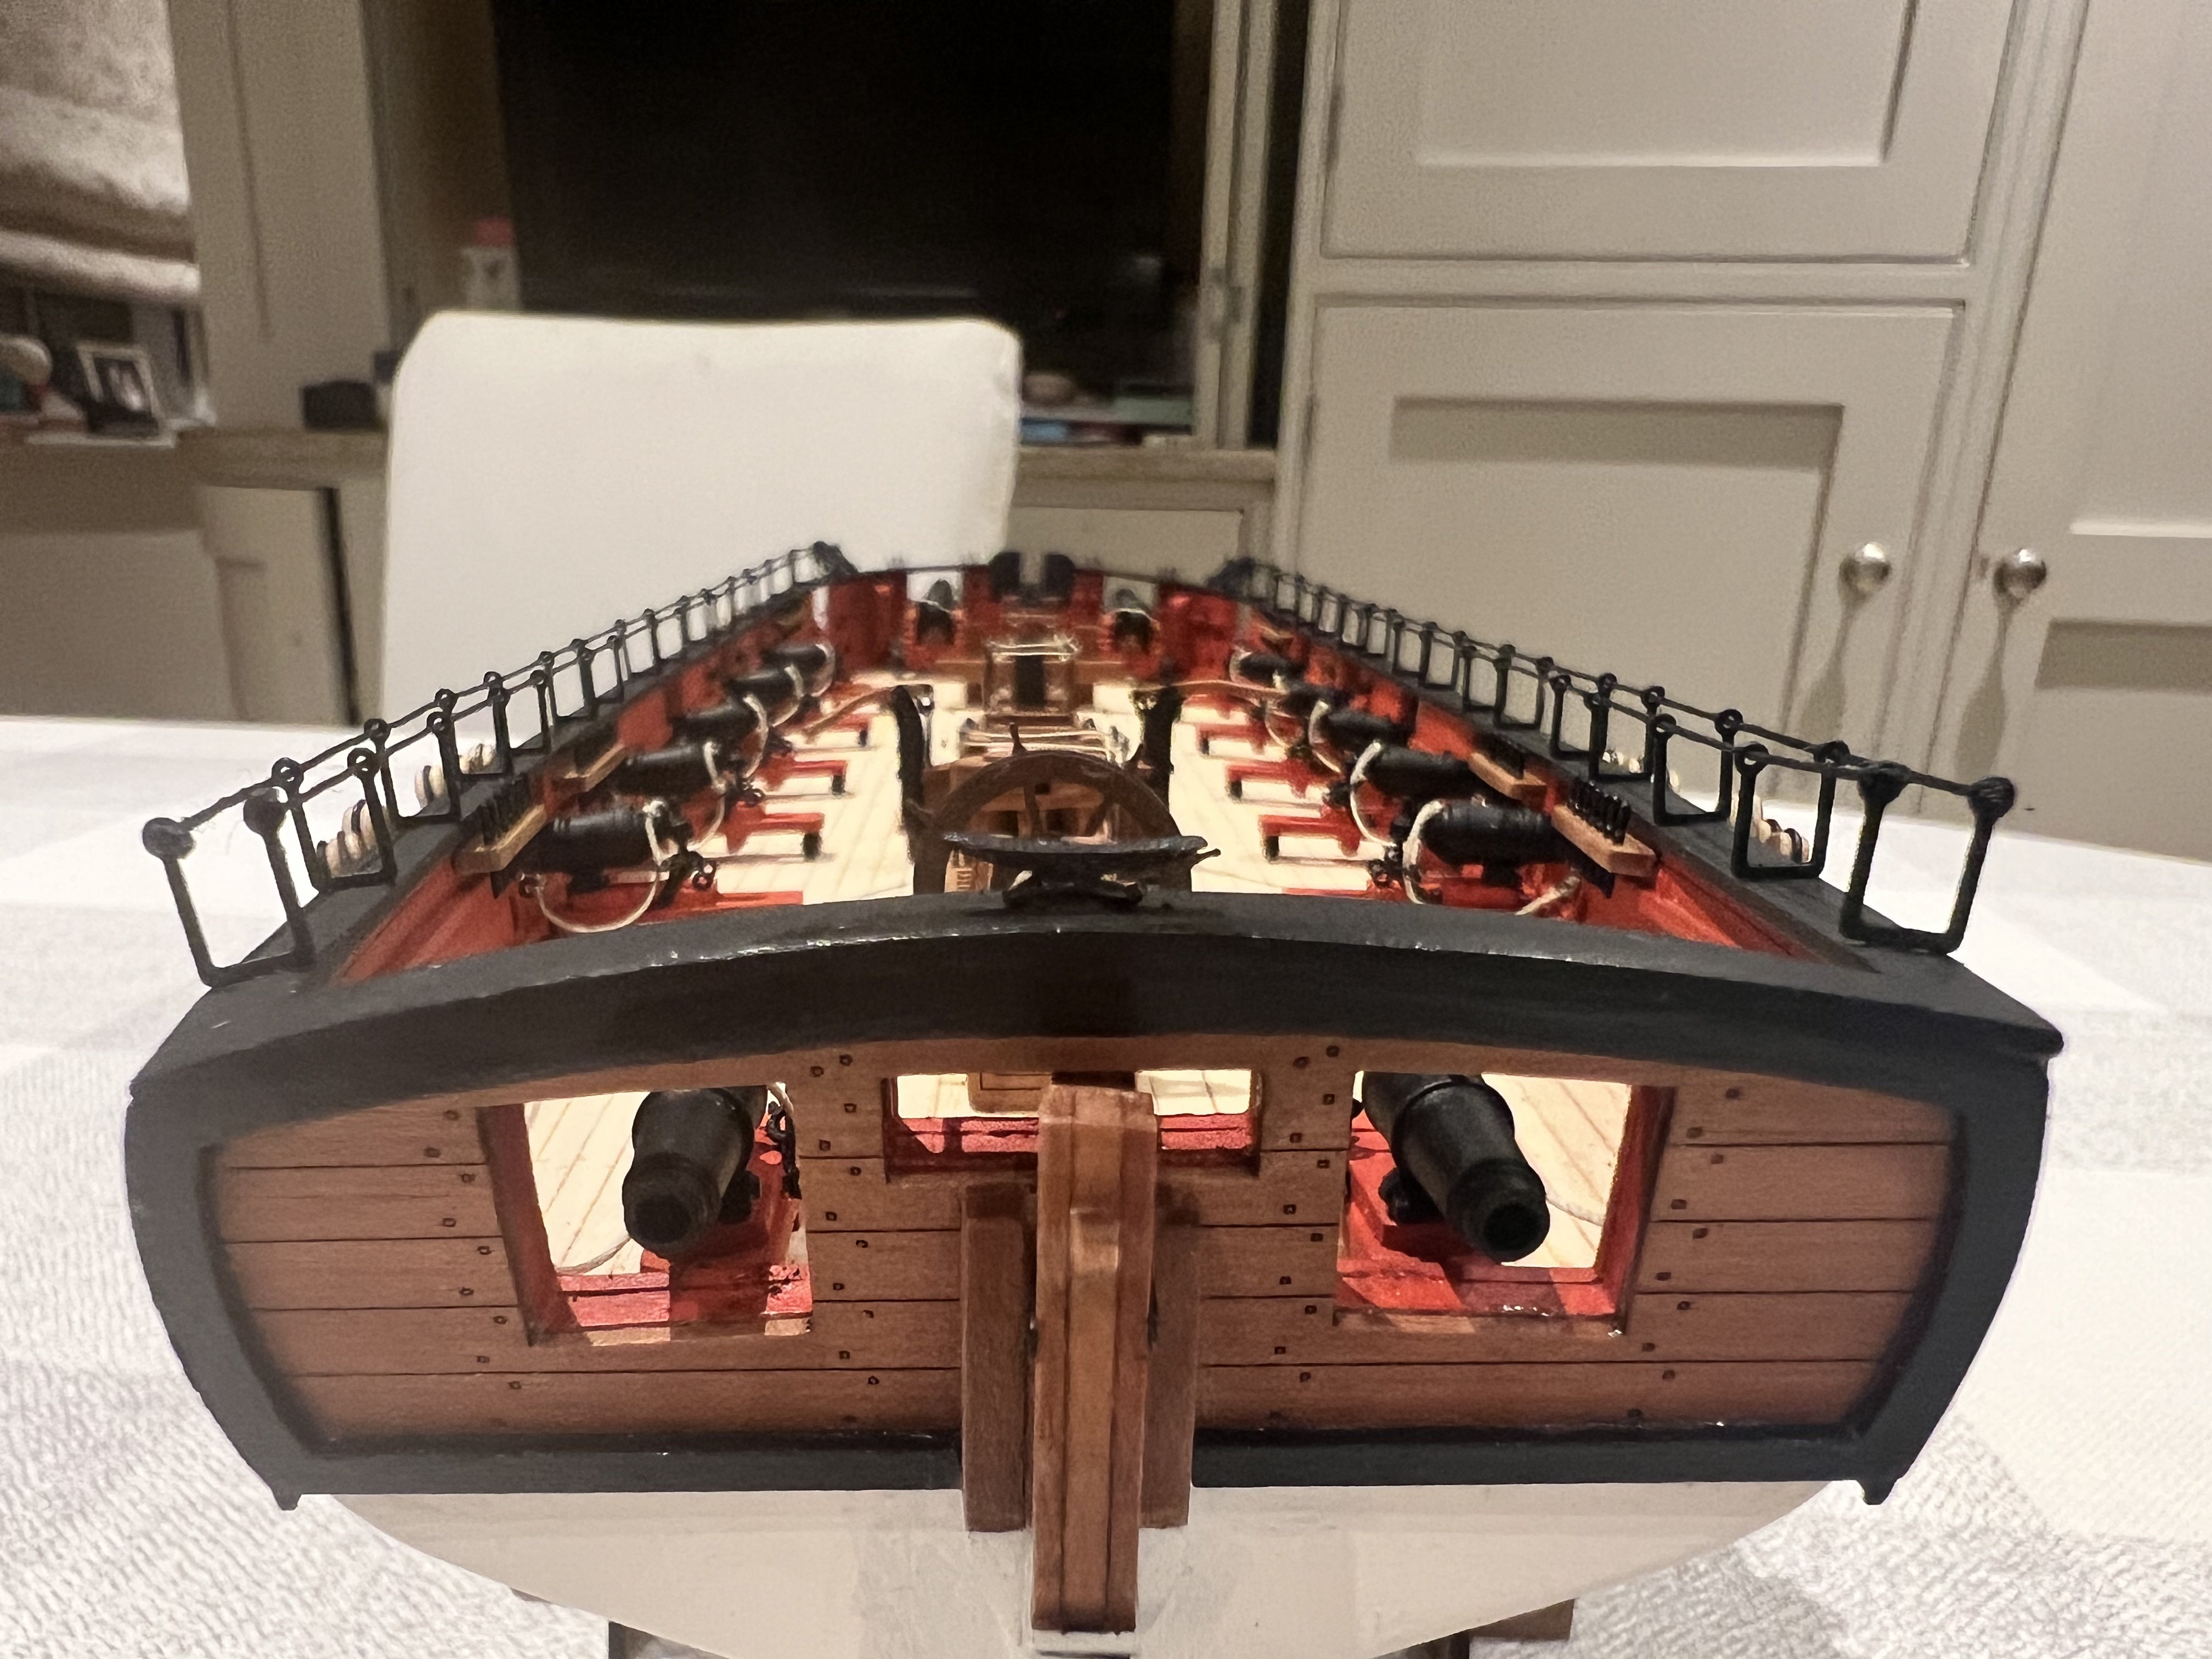
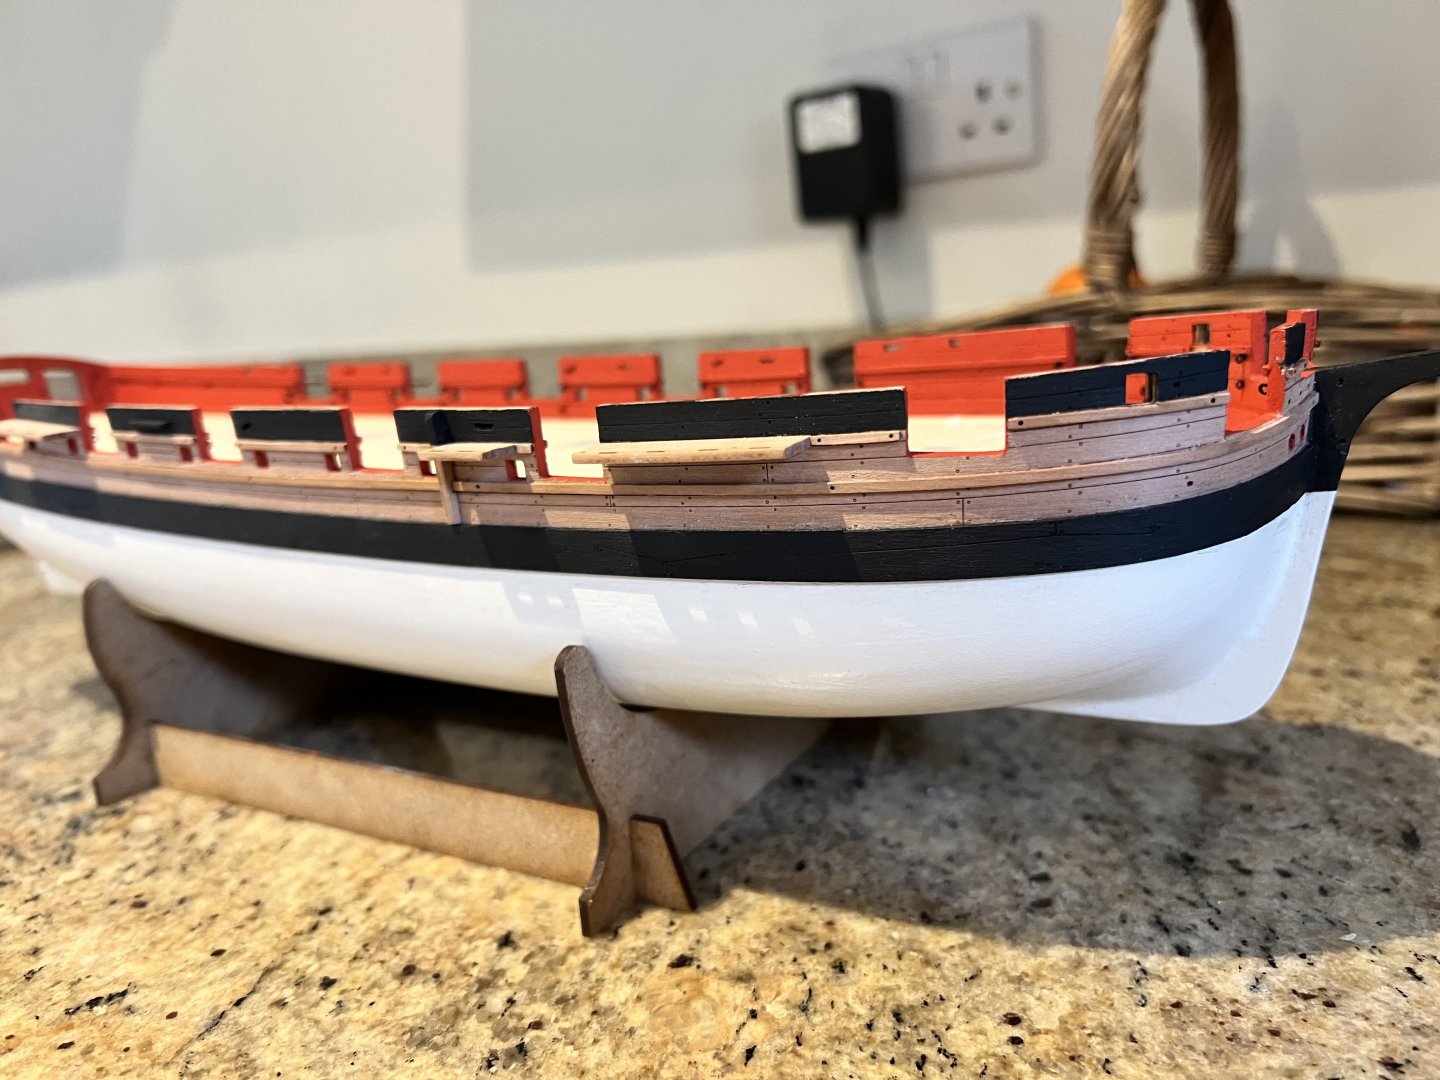
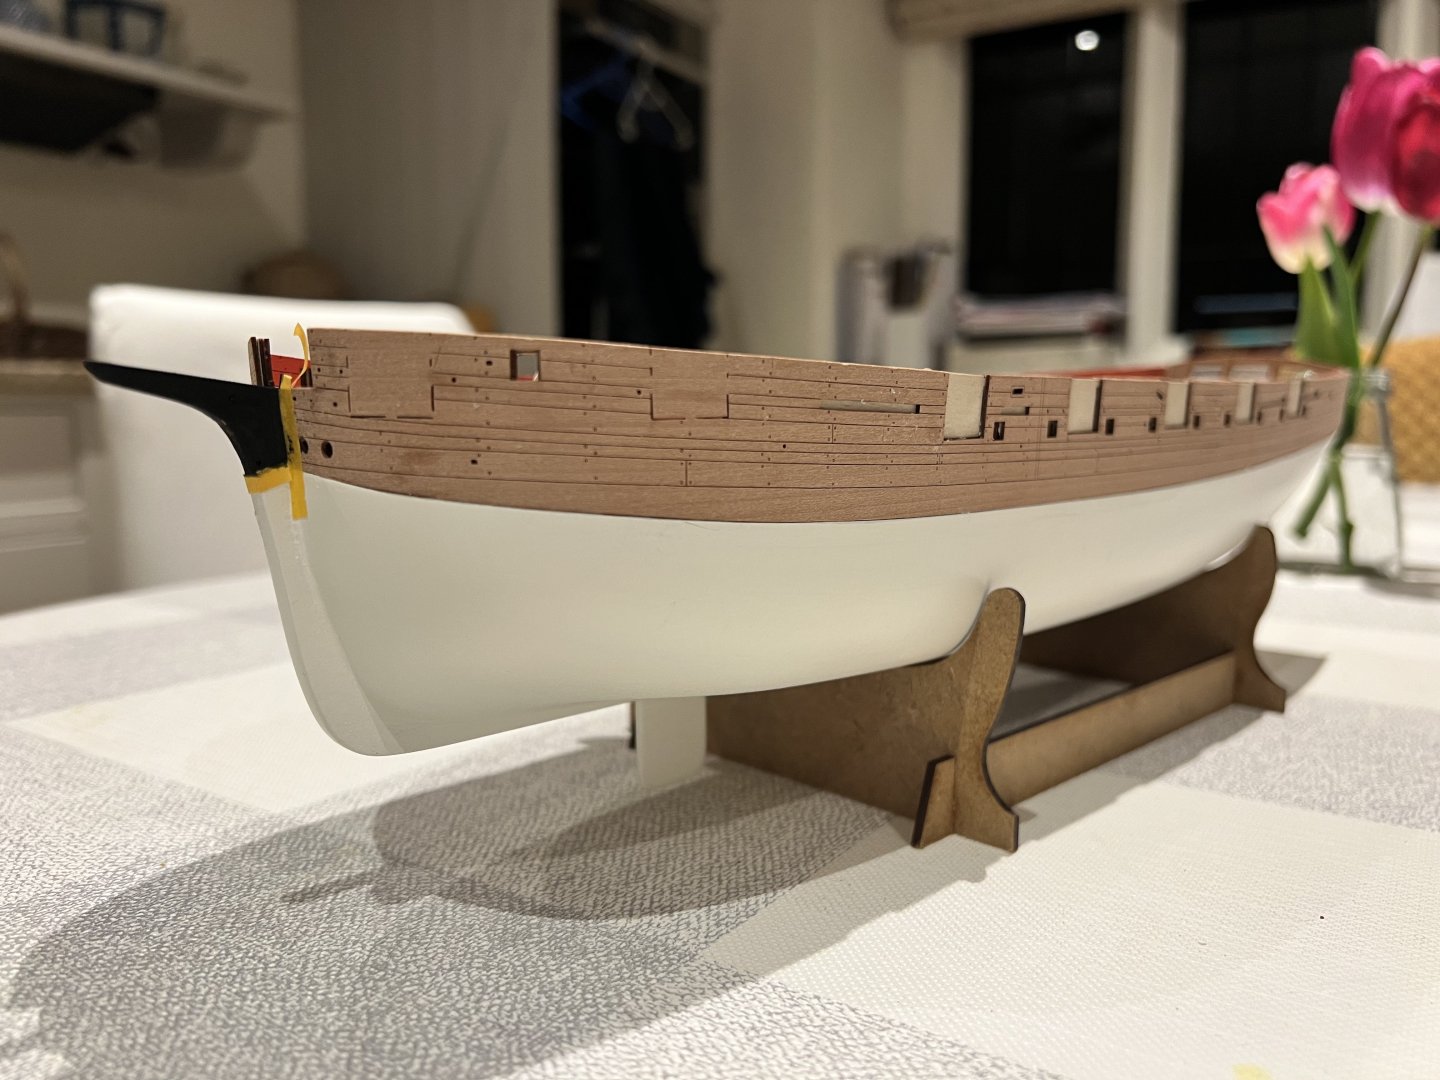
Top of the bulwarks painted black. Then channels and upper rails fitted. Gunwales painted black and glued. Eyebolts added to the inner bulwarks. The gunwale across the stern needed to pre-formed to get the correct curve. I soaked it and let it dry for 24 hours. On the stern the outer stern board was added followed by the rudder post cheeks. Then the aft gunwale and the black trim on the stern. I need to try a different white pain to touch up that matches the spray can white better.


- 146 replies
-
- 11
-
-
- Adder
- Vanguard Models
- (and 1 more)
-
Thanks Chris, it’s almost entirely Chris W’s amazing design. Certainly there’s some basic building skills to master, but so far on this boat it’s been hard to go far wrong due to the clever design, engraved locations for parts and highly detailed instructions and plans. Consequently, it’s actually a much easier hull to build than for example even Chris’s Alert where a little more is left to the builder to think through. There’s been very little ambiguity whilst building Adder so far which is a testament to how well thought out Chris’s models are now. The only exception to the ease of building has been Adder’s planking - mine wasn’t great but being fully painted doesn’t matter. Again, Chris’s design choice of the painted area being traditionally planked and the exposed bulwarks being engraved parts means you can be terrible at planking and still end up with a stunning model. I’ve not rigged a square rigged boat before, so have lots to learn and am intrigued to see to whether rigging will be equally clear and step-by-step.
- 146 replies
-
- 2
-
-
- Adder
- Vanguard Models
- (and 1 more)
-
Main wales painted black and glued in place. I used PVA with a clamp at the bow and pins. The instructions say to cut off and file away the excess on the pins, but I didn’t fancy my chances of getting a pin flush with the woodwork. Instead I pulled the pins out and used a touch of filler on the holes before repainting which worked too. I have also added the lower of the two upper rails. Still some tidying to do at the stern. I will likely need a tiny bit of CA to get the bottom of the wales to take the shape of the hull. All went smoothly except I slipped with the pin pushes and created a small divot in the white paint below which I’ve filled and will need to touch up the paint there.

- 146 replies
-
- 10
-
-
- Adder
- Vanguard Models
- (and 1 more)
-
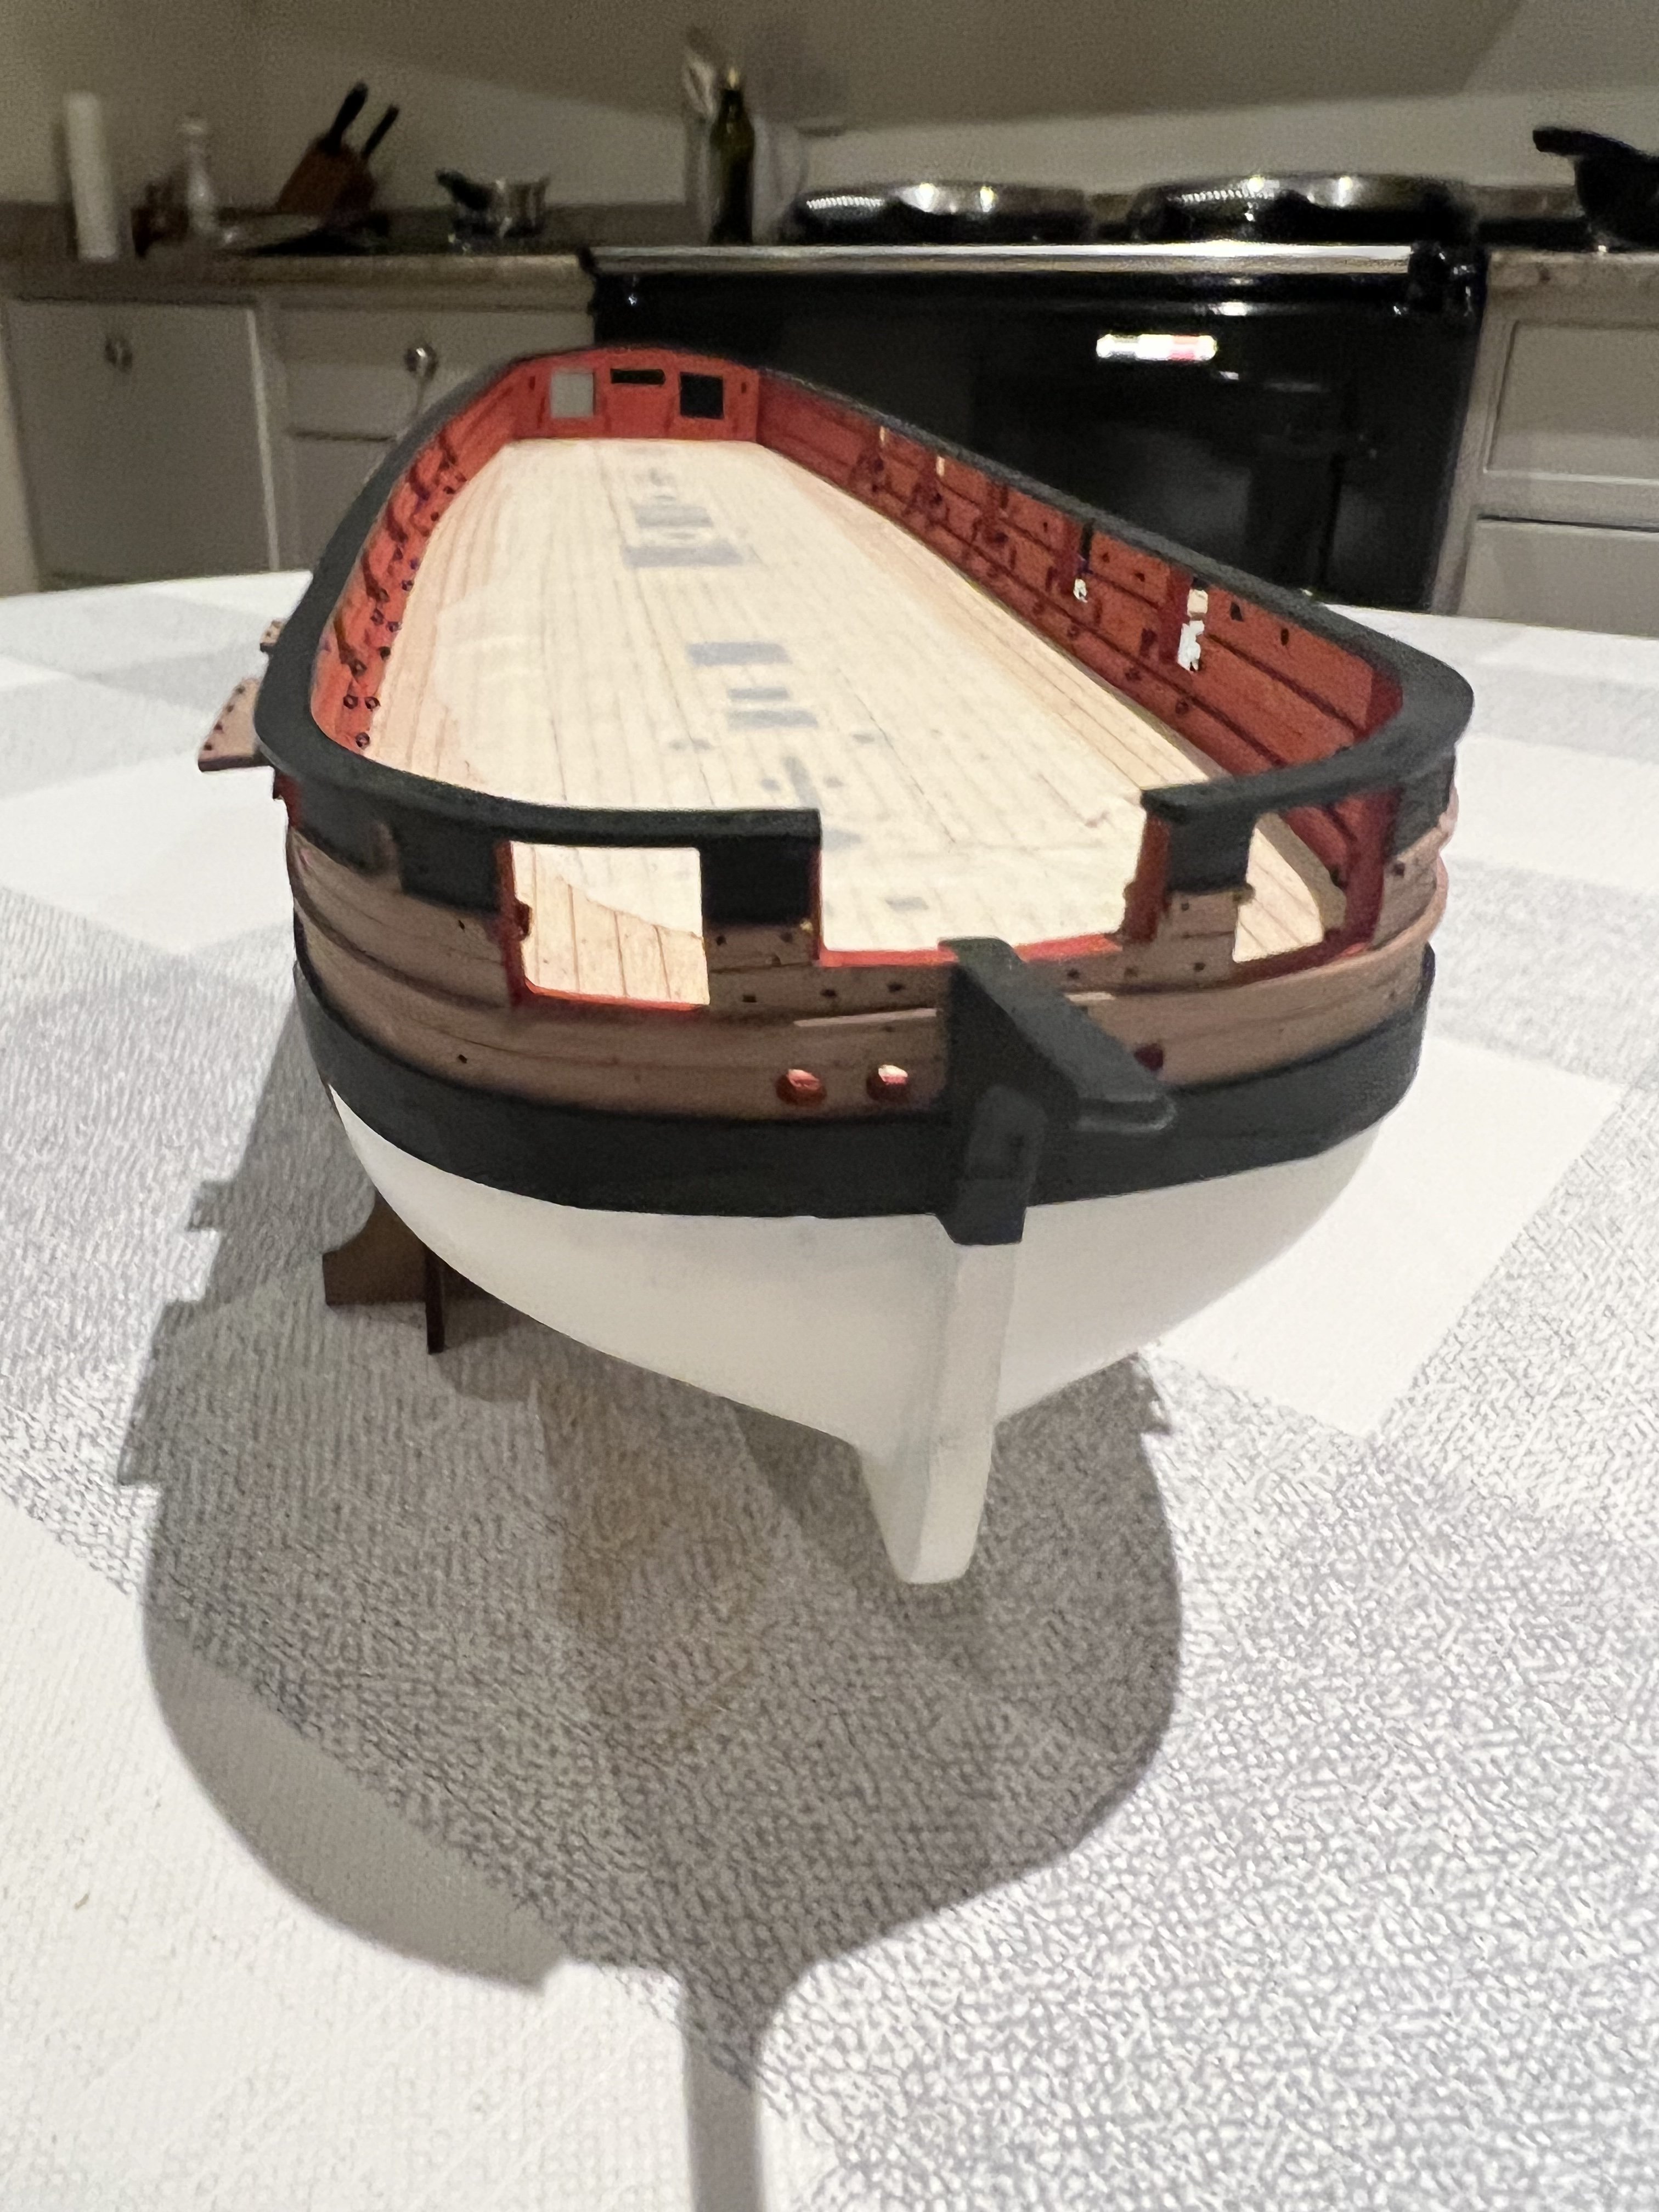
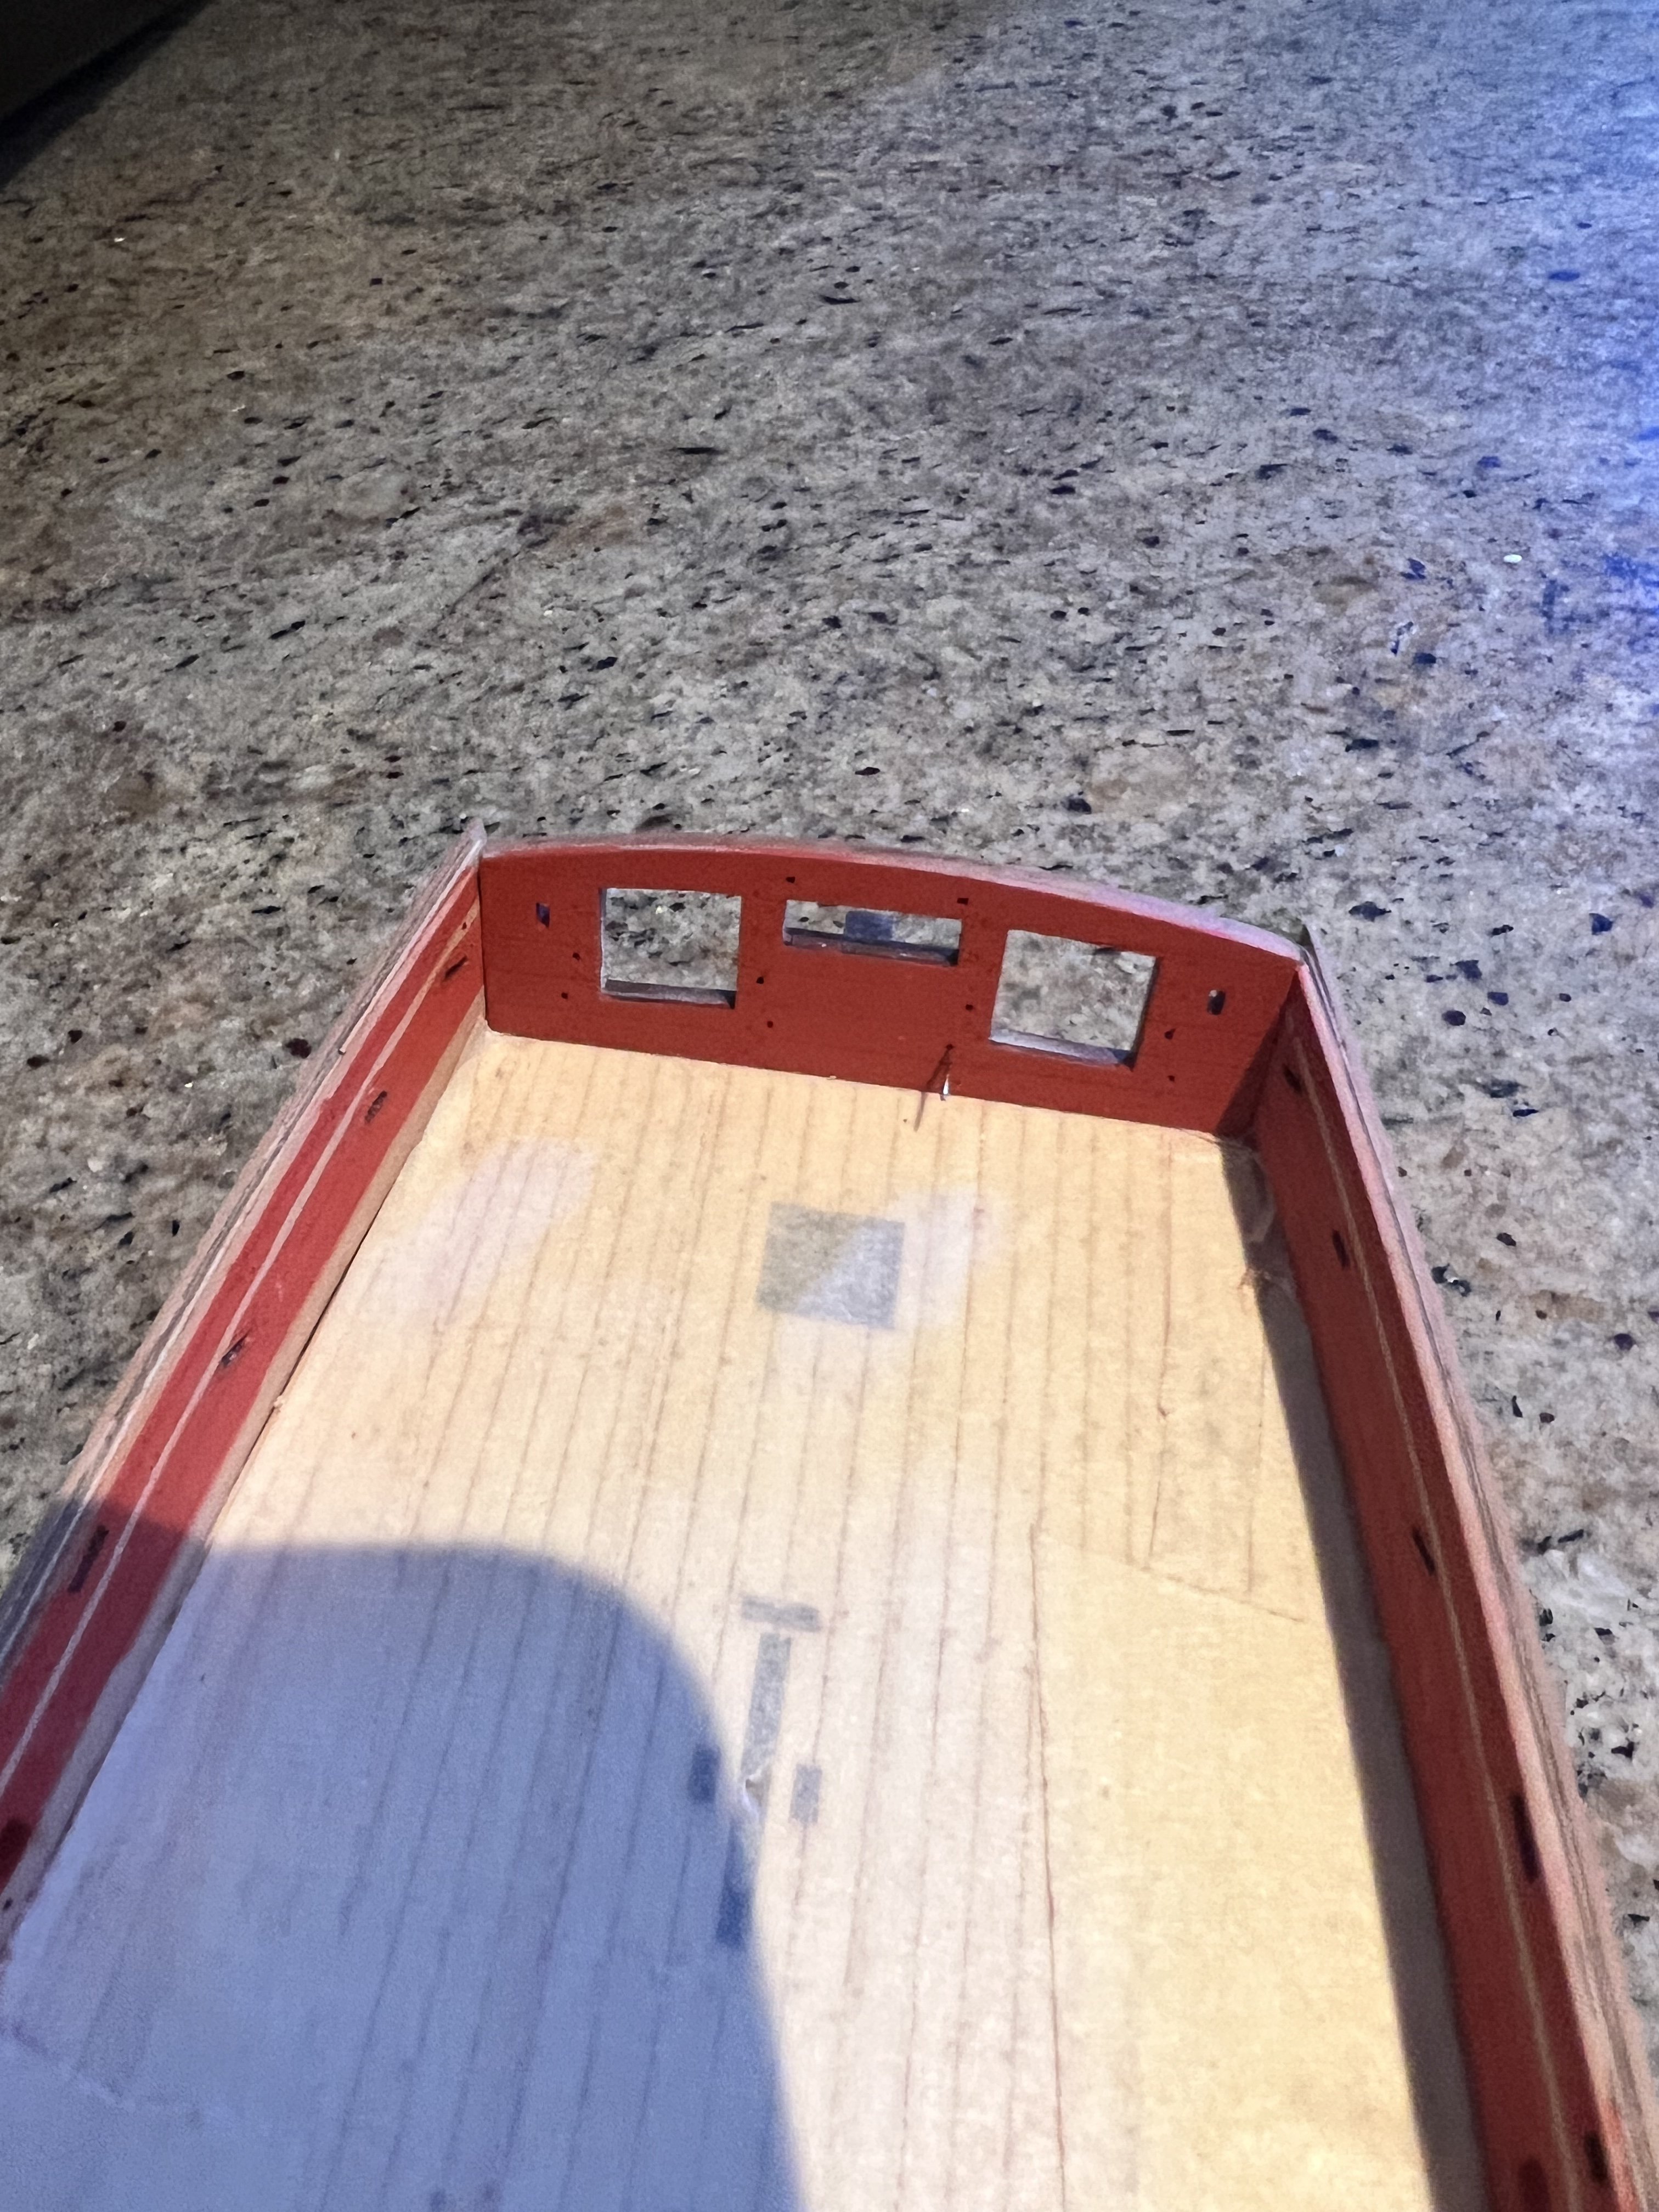
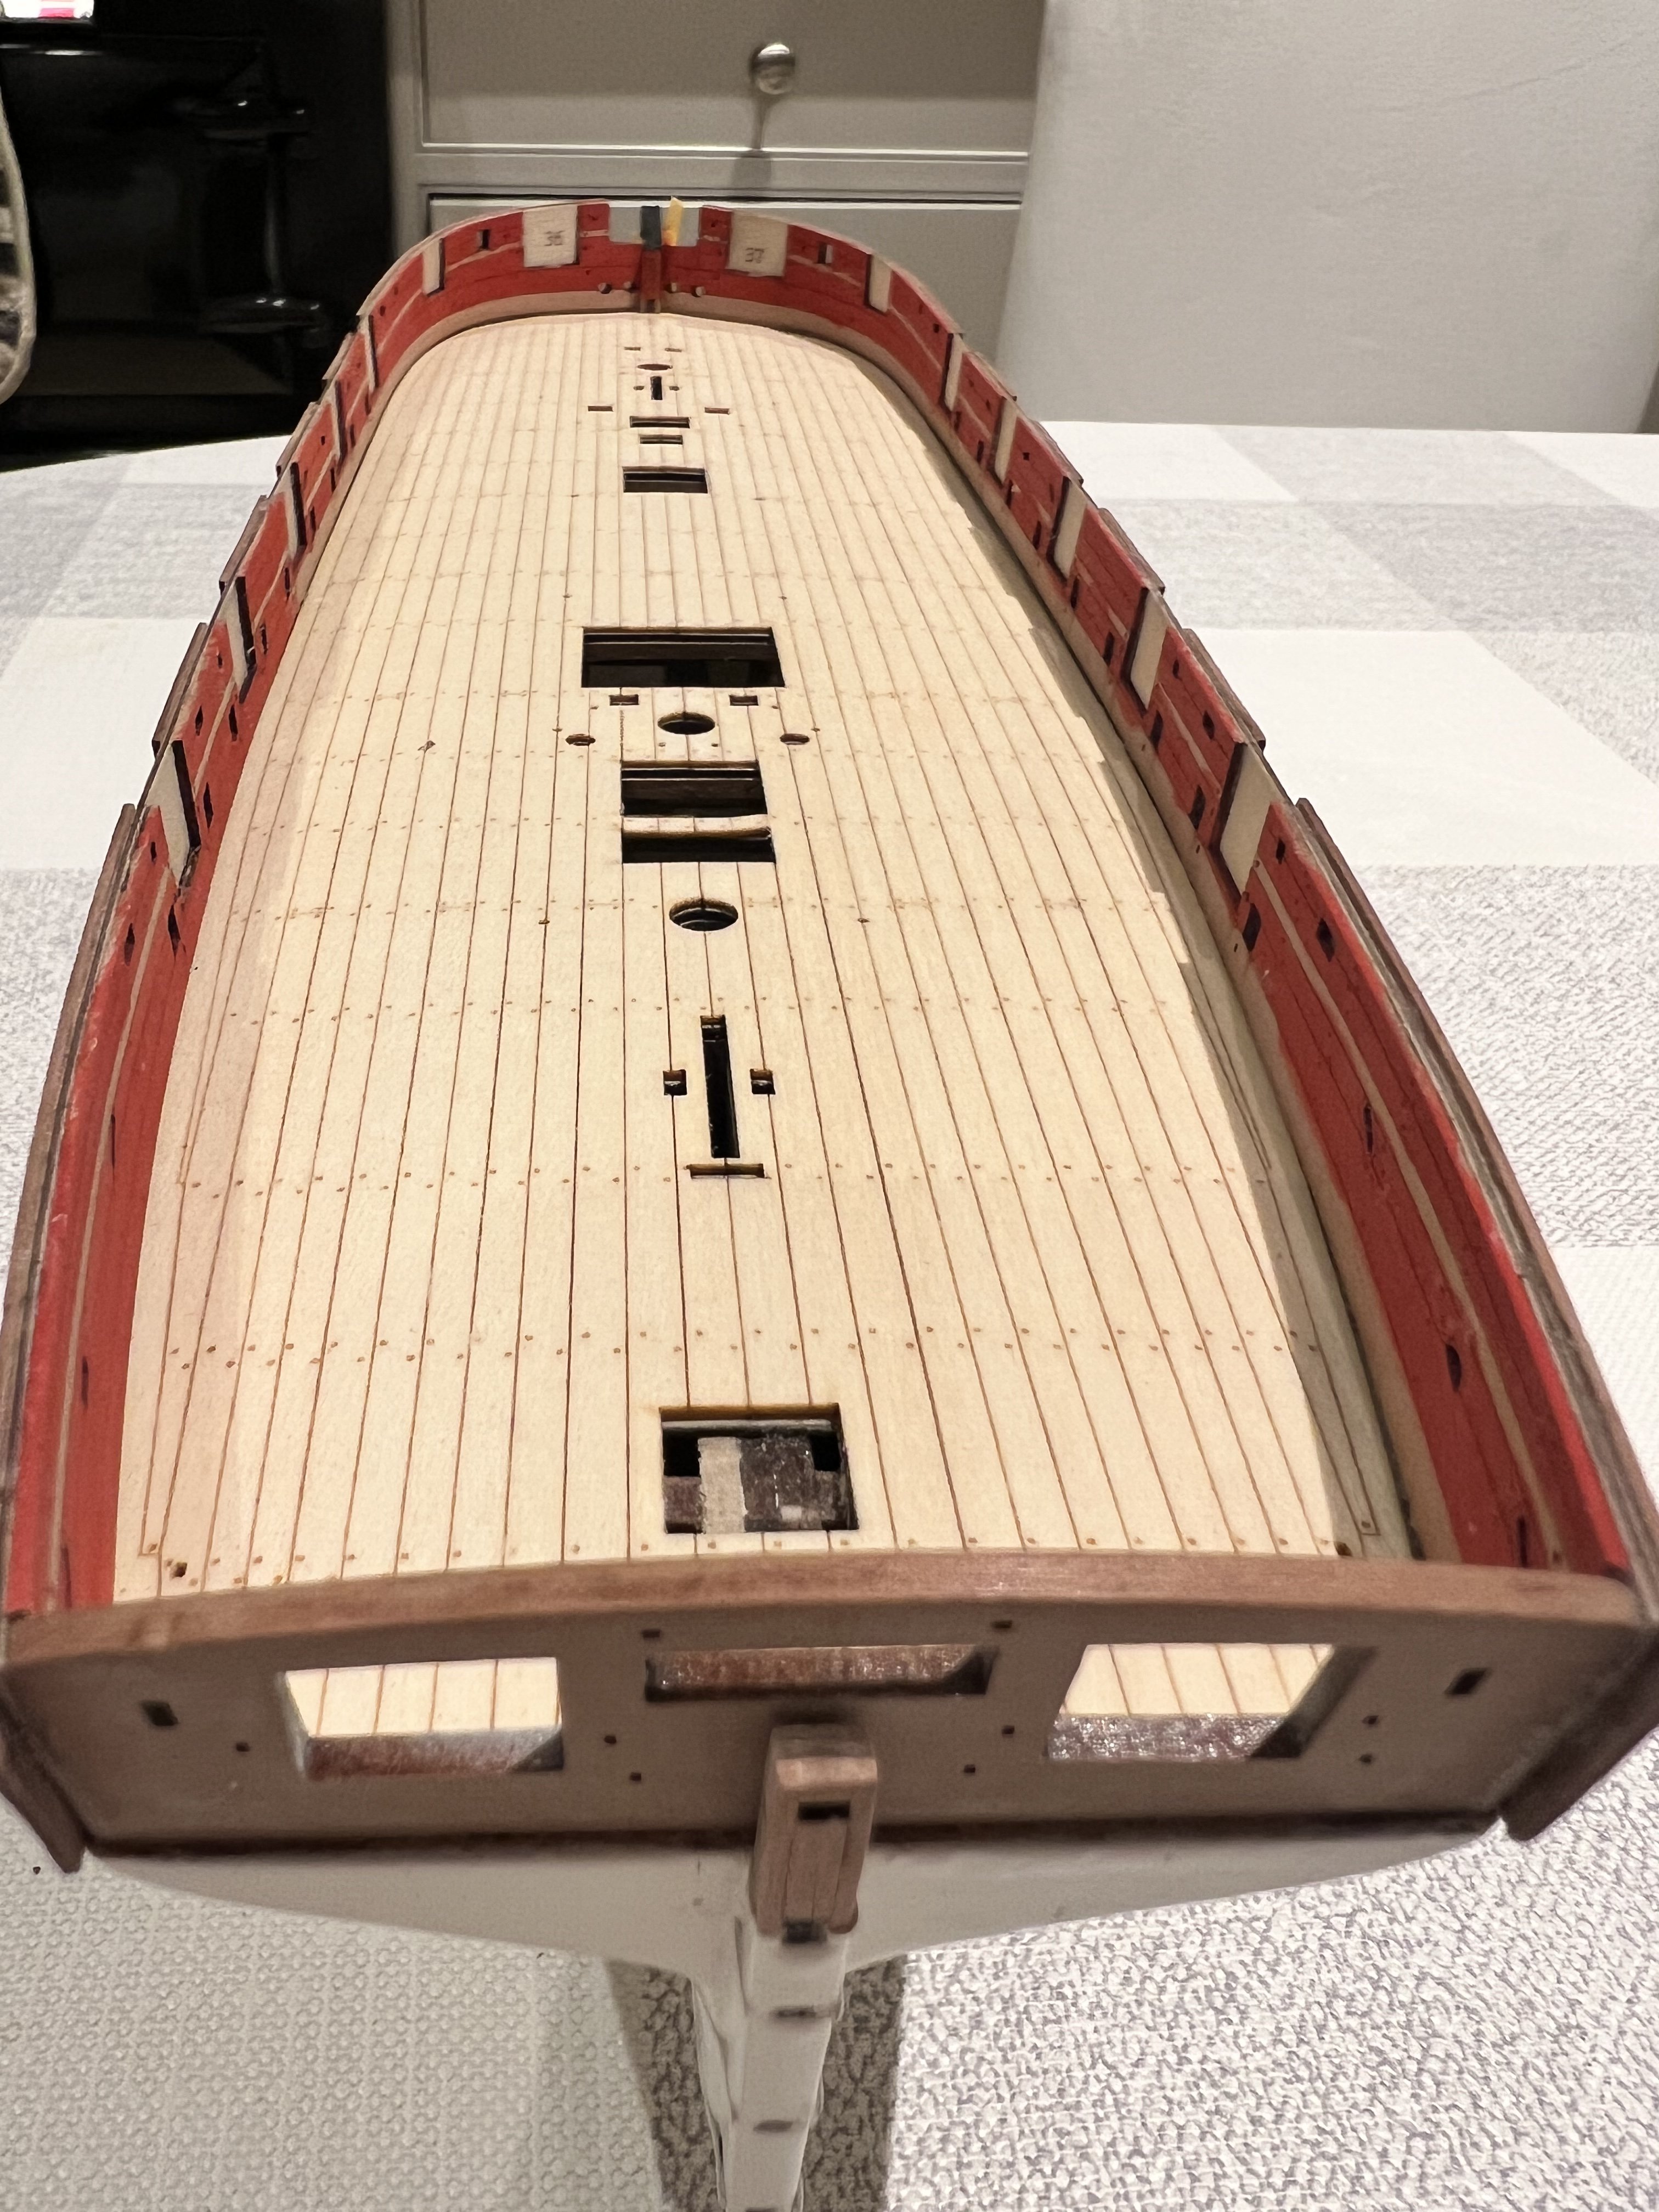
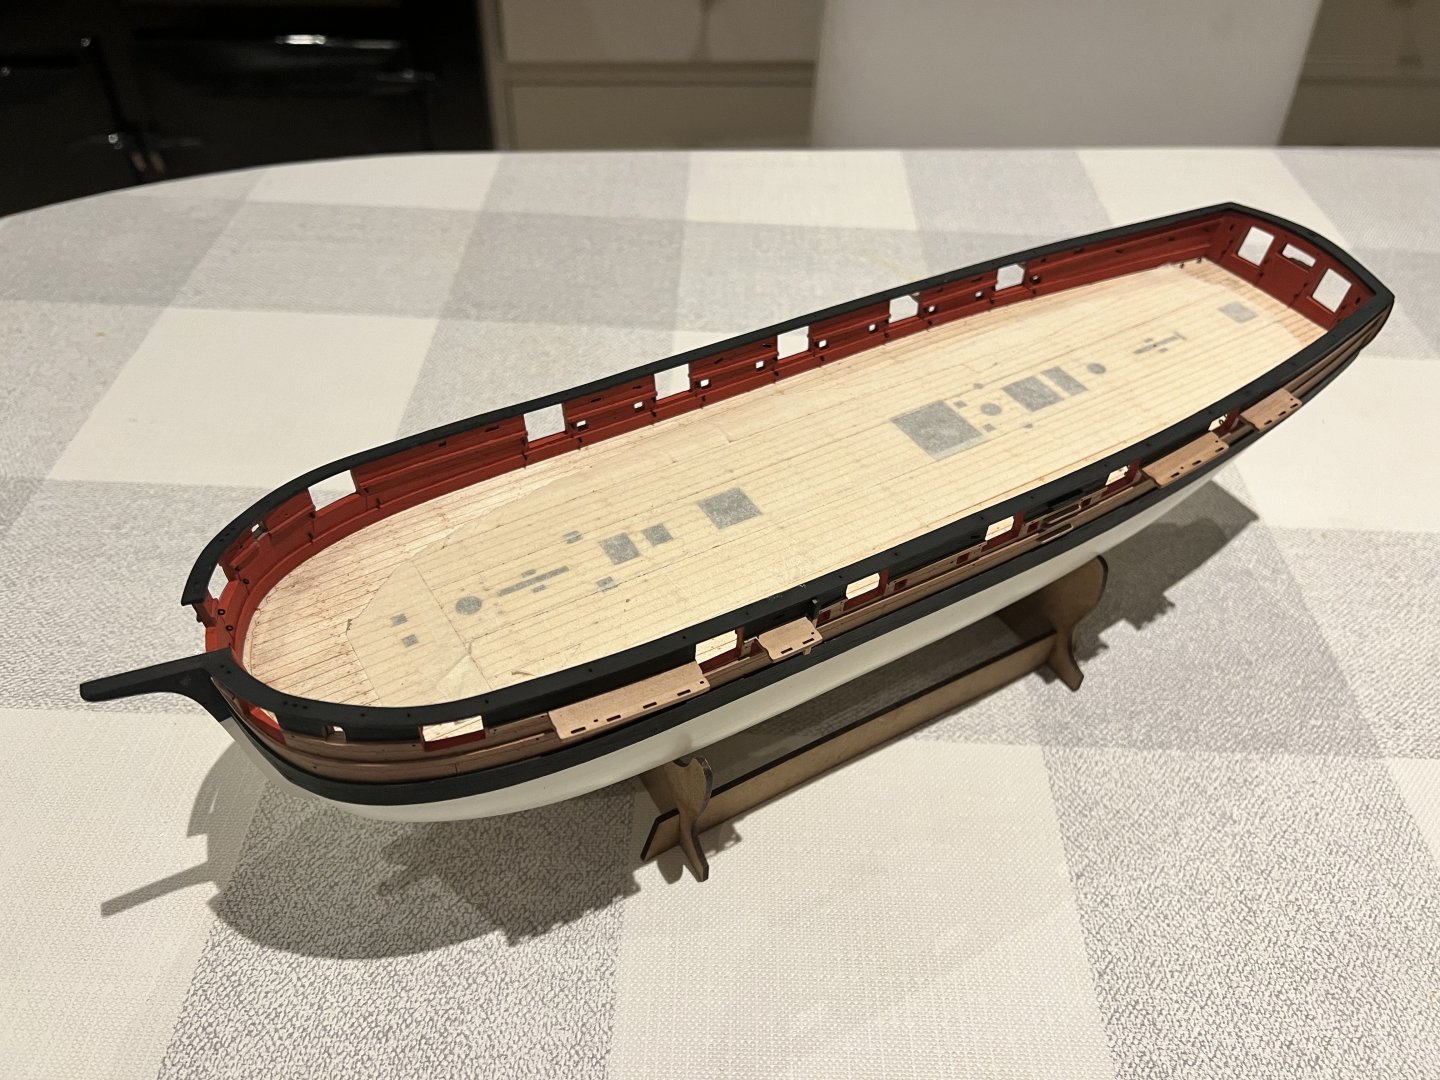
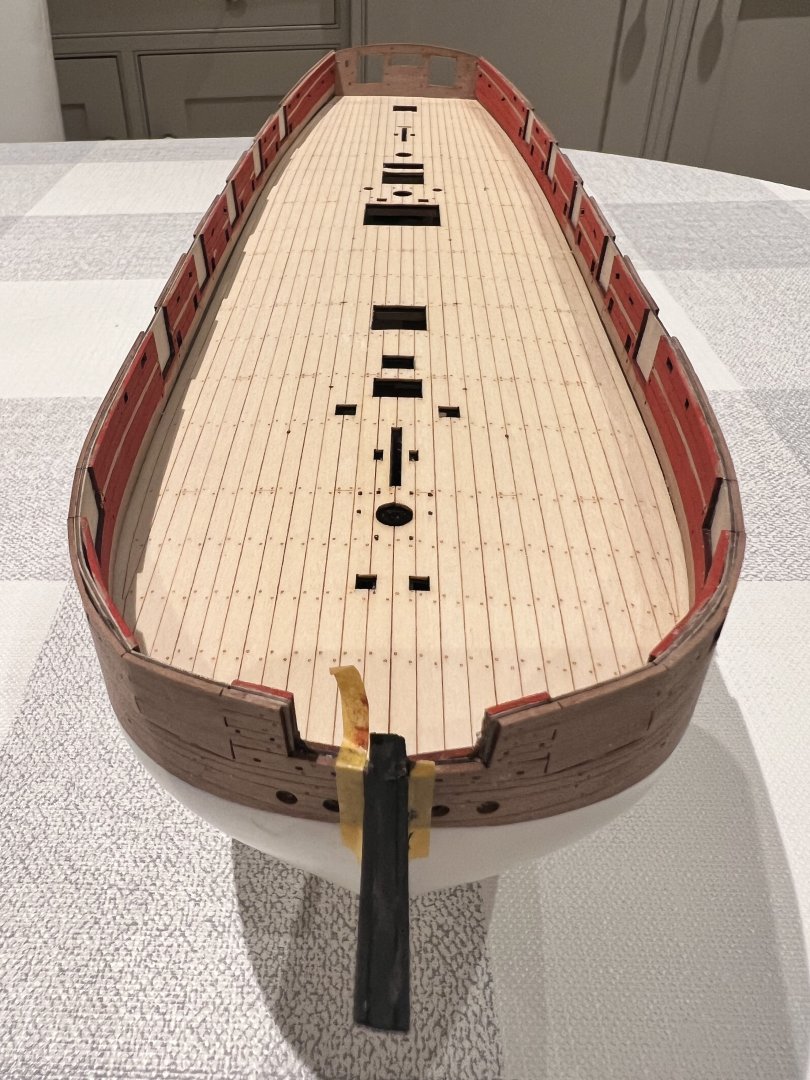
Cutting the gunports in the plywood with a razor saw was very straightforward. I may have very slightly notched the bottom edge in a couple of places, but it’s barely noticeable and will be covered by the rails later. Here she is with her teeth. I fully masked the desk to protect against my clumsiness with a paint brush or file. The gunports and oarport edges, whilst aligned needed some filing and a touch of filler to be smooth. The inner sternboard was added and is an excellent fit. As elsewhere, I used pins in some of the holes to aid with alignment. The inner rails were added and then the inner bulwarks painted. Even with masking tape along the outside of the hull I found I got some seepage of the paint onto the outer wood of the hull by some of the gunports and oarports. I scraped this off with a scalpel whilst still wet. Z Lastly for today the main wales were soaked in hot water and then clamped and pinned to the hull to dry for 24 hours, no glue at this stage.


- 146 replies
-
- 15
-
-
- Adder
- Vanguard Models
- (and 1 more)
-
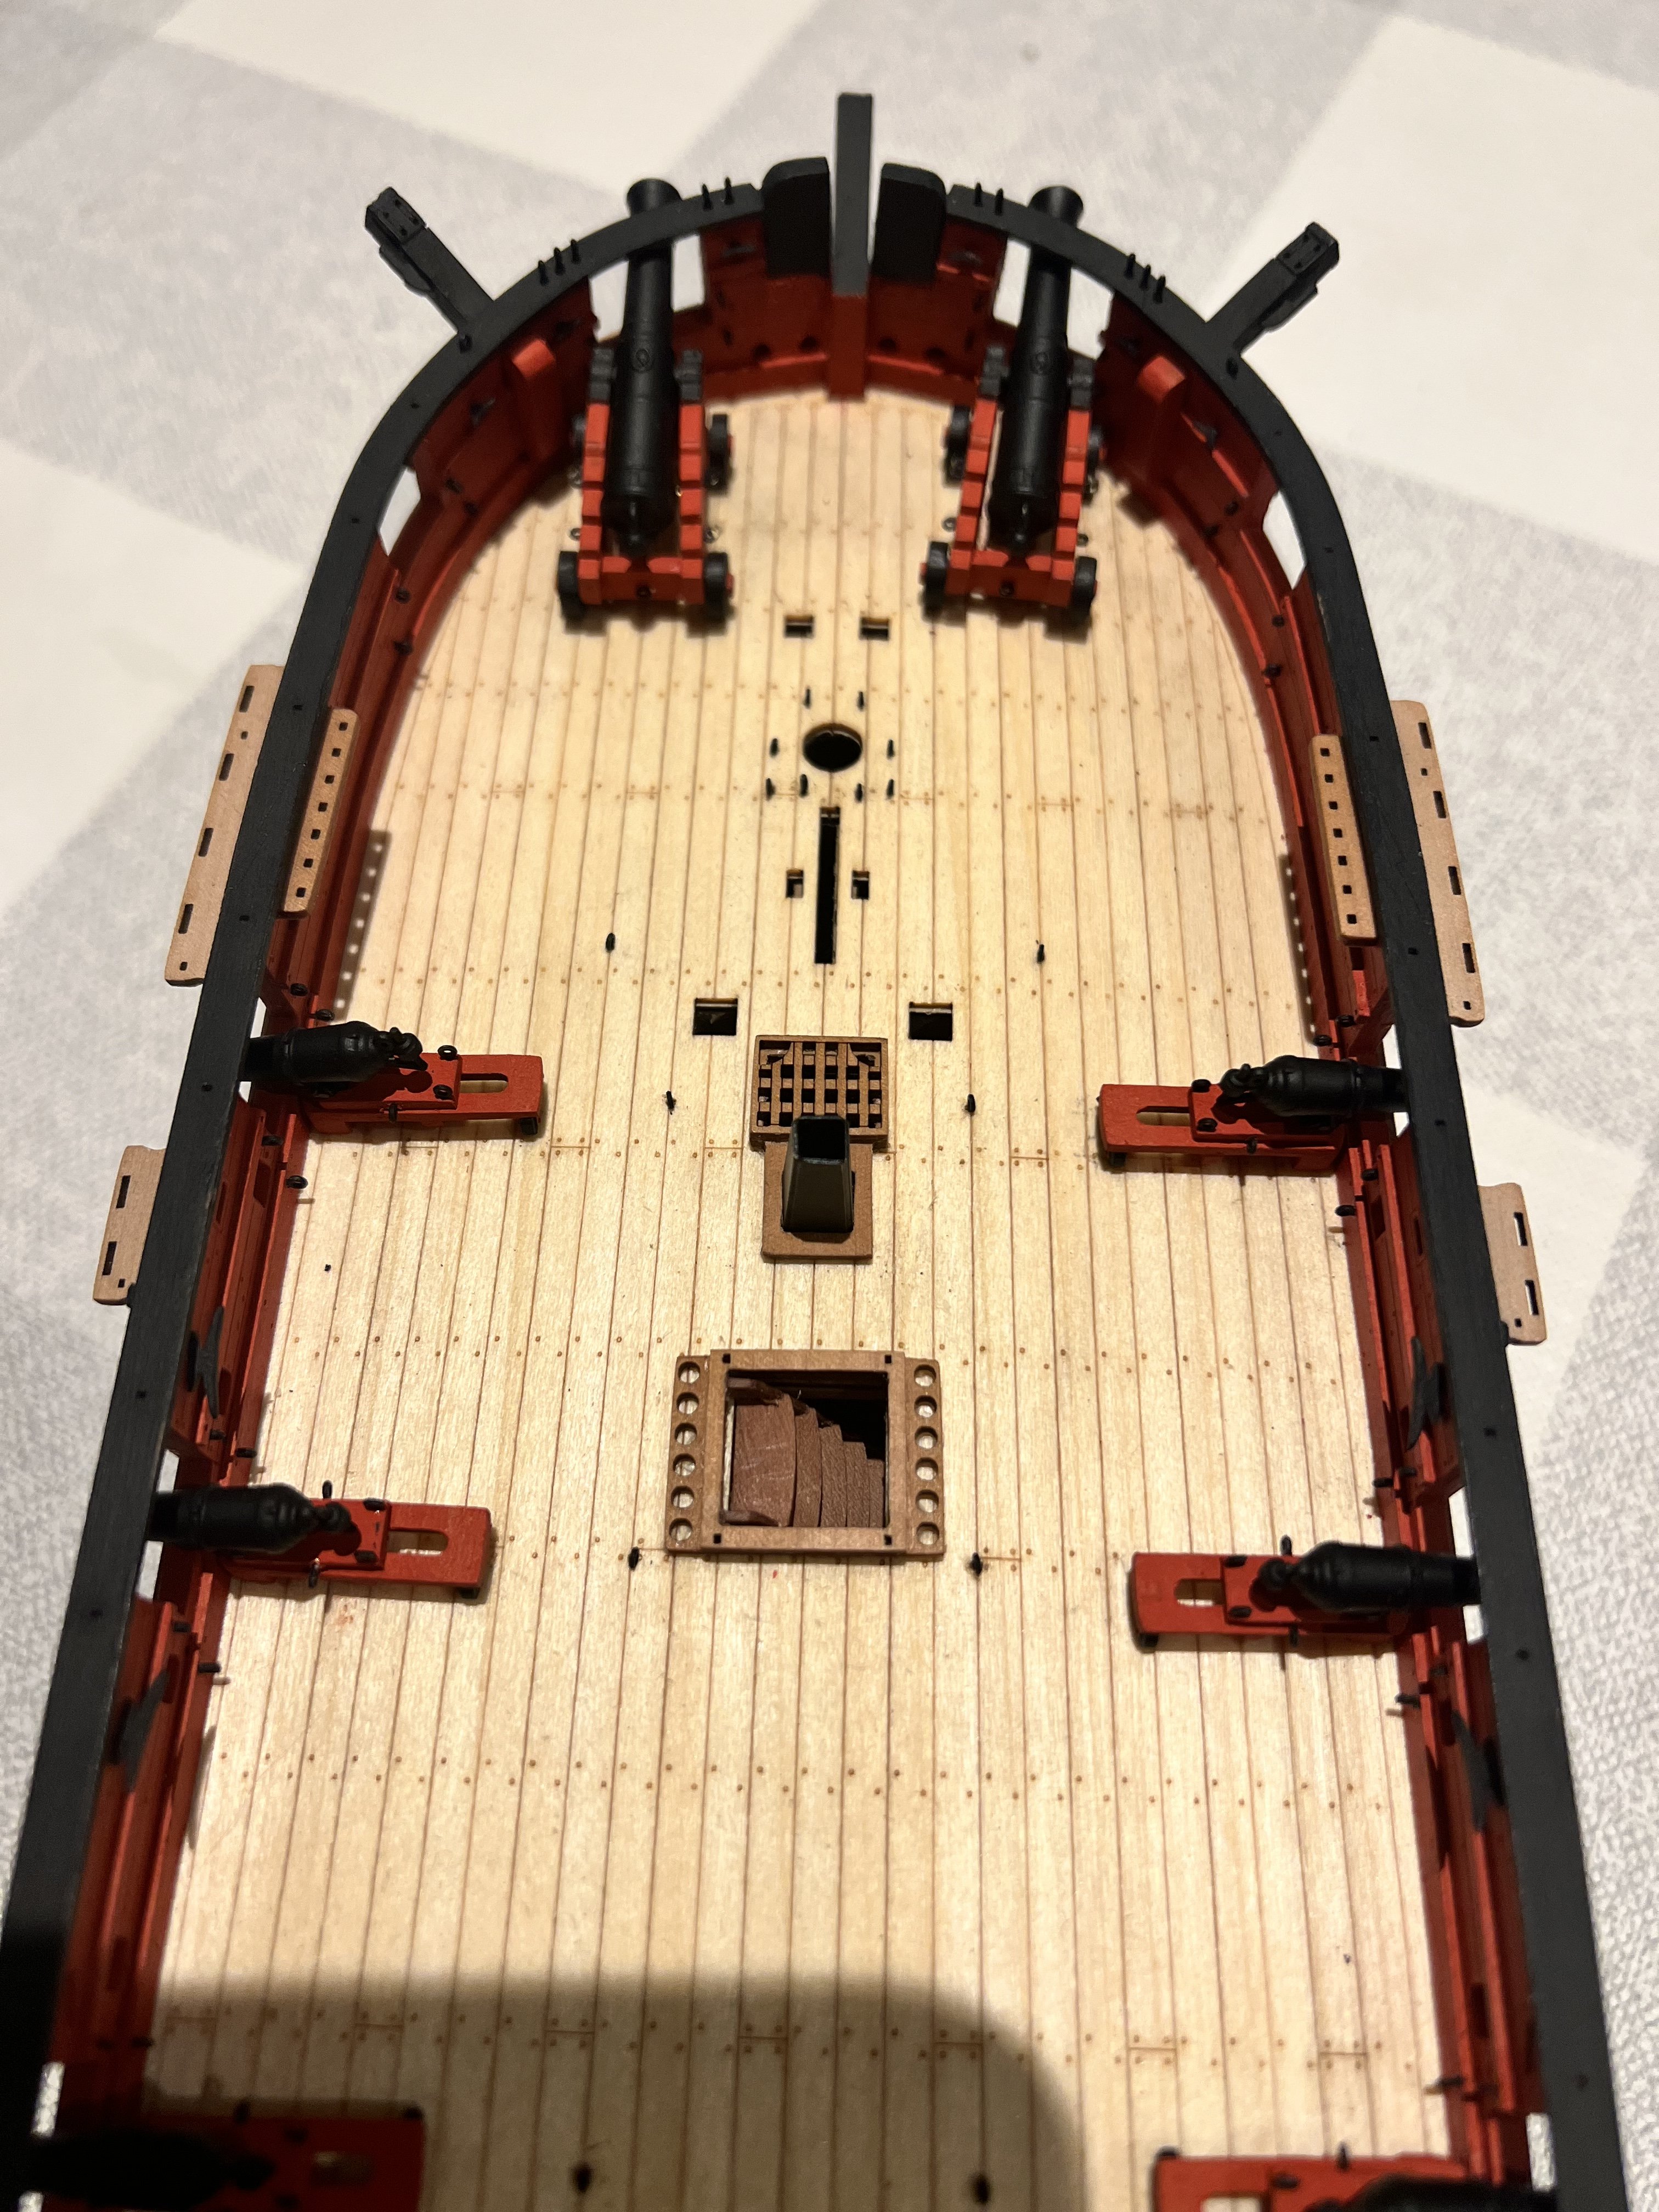
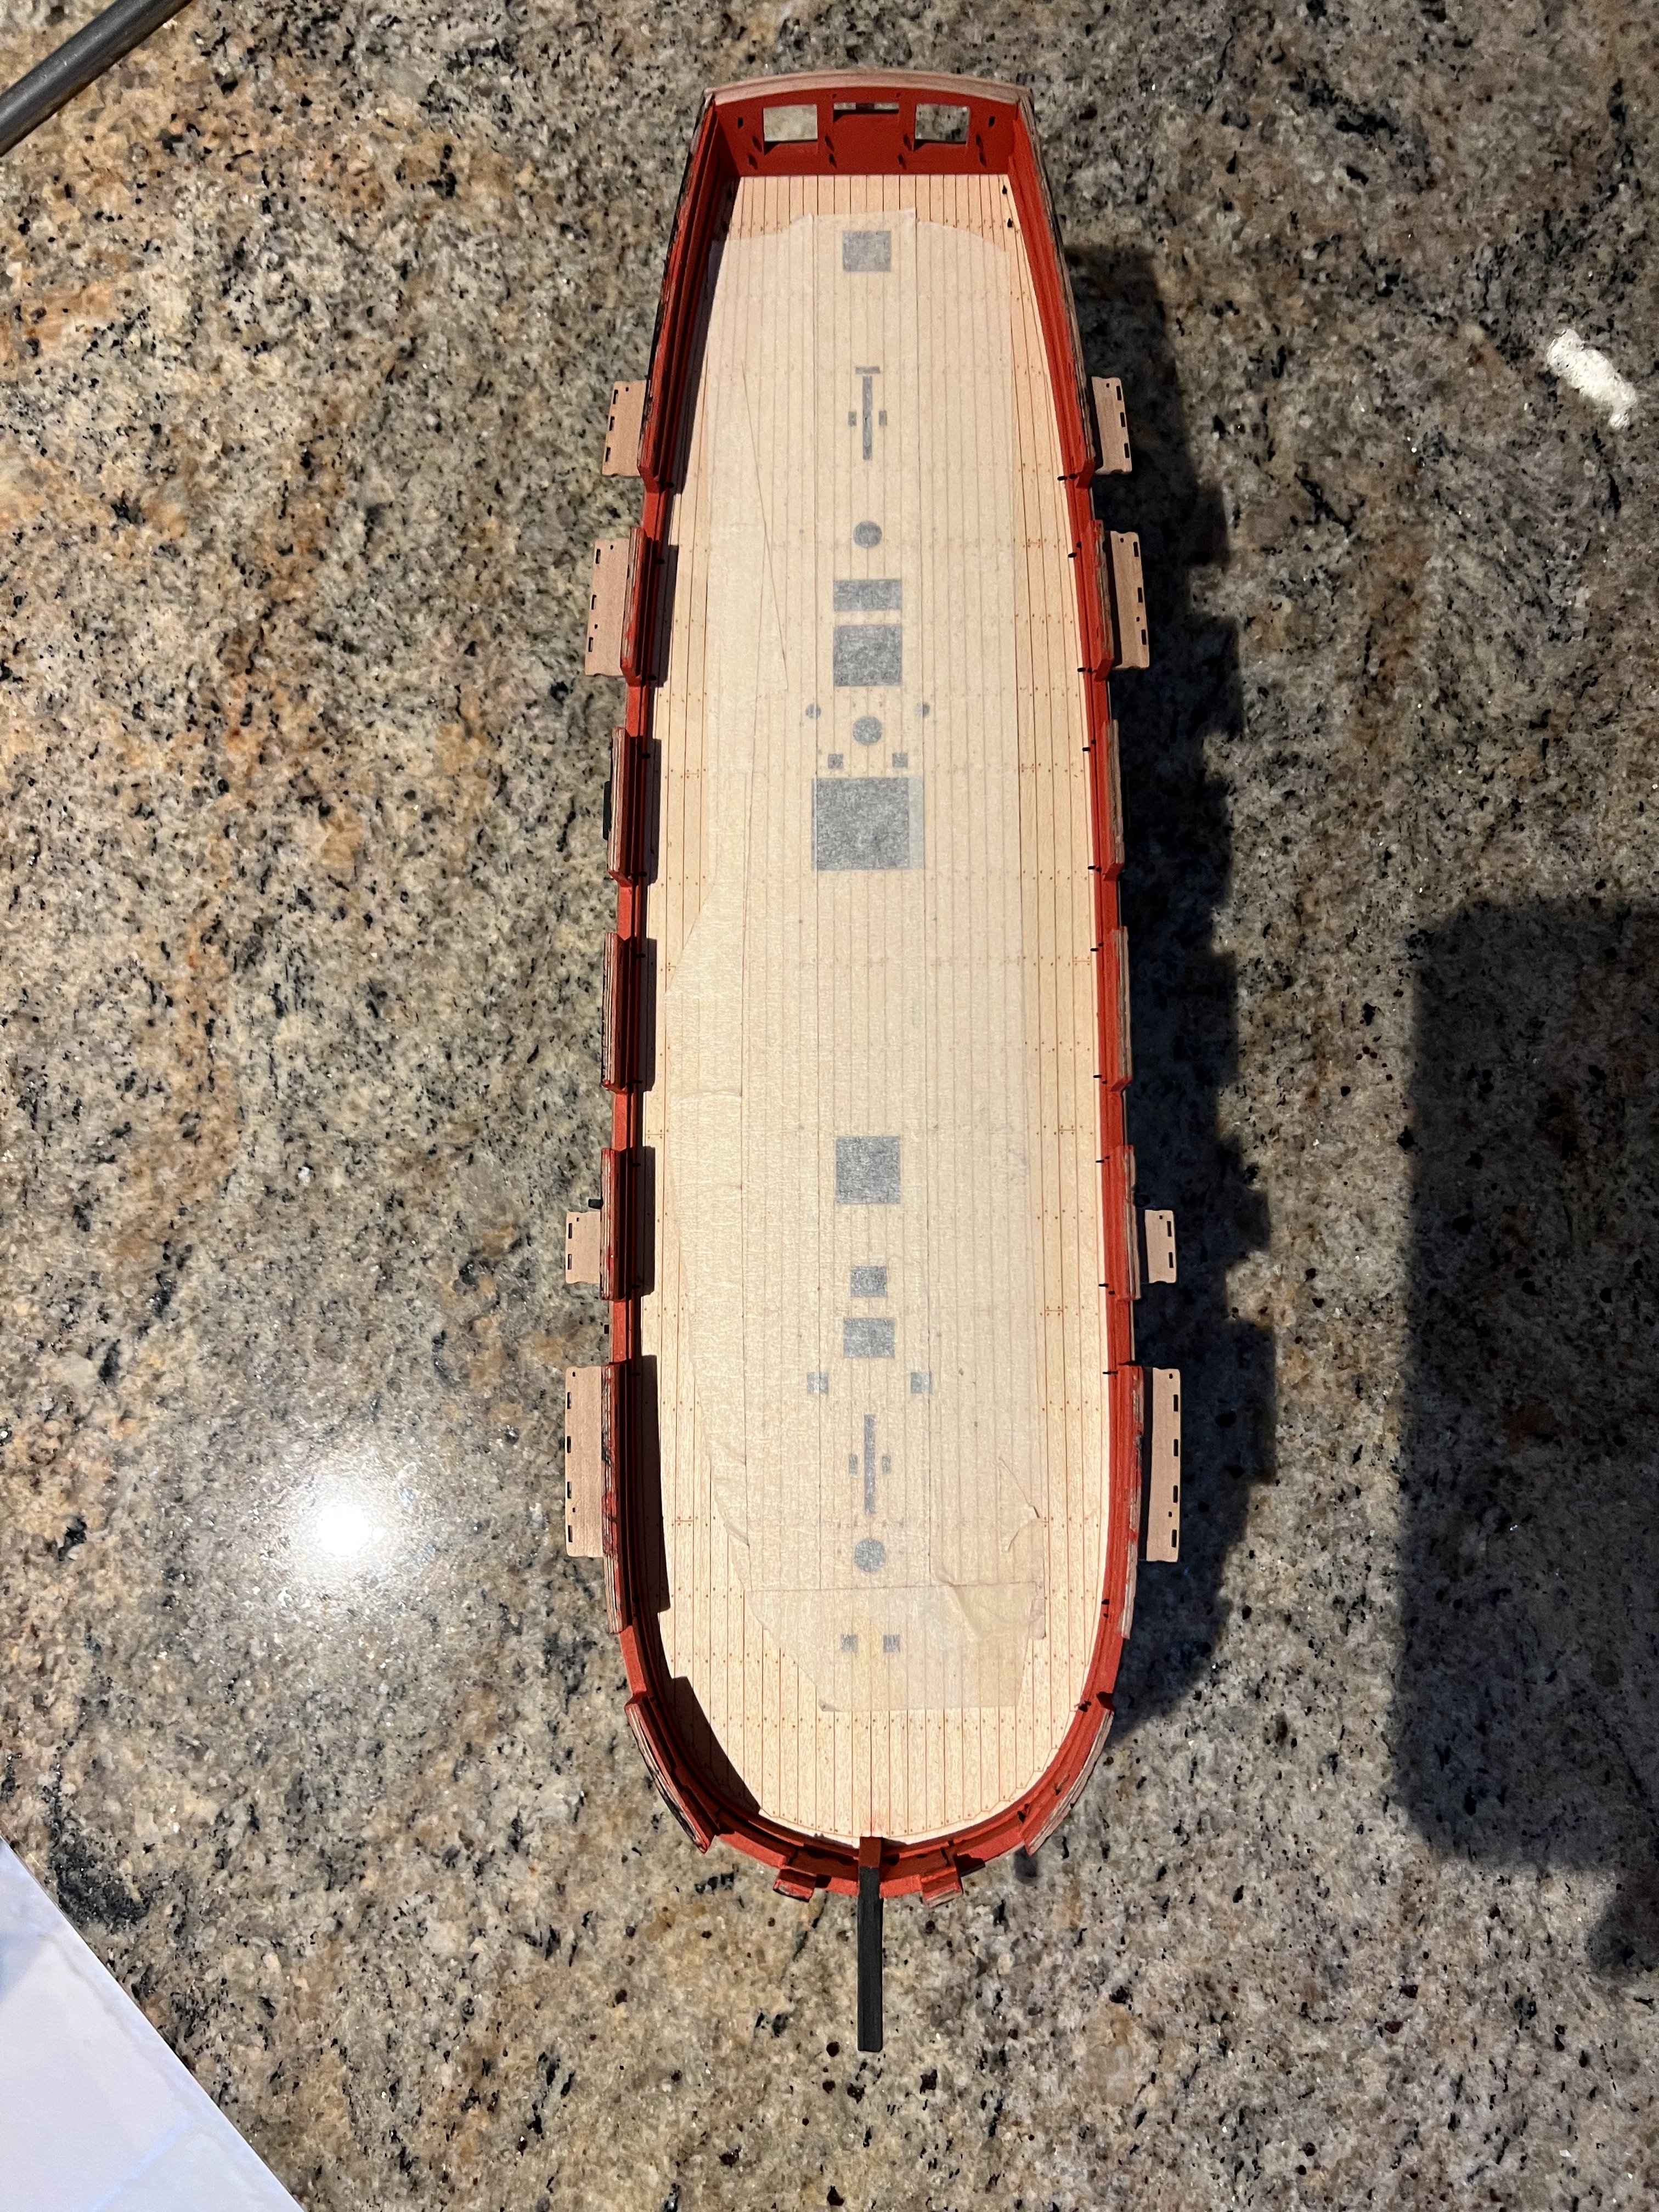
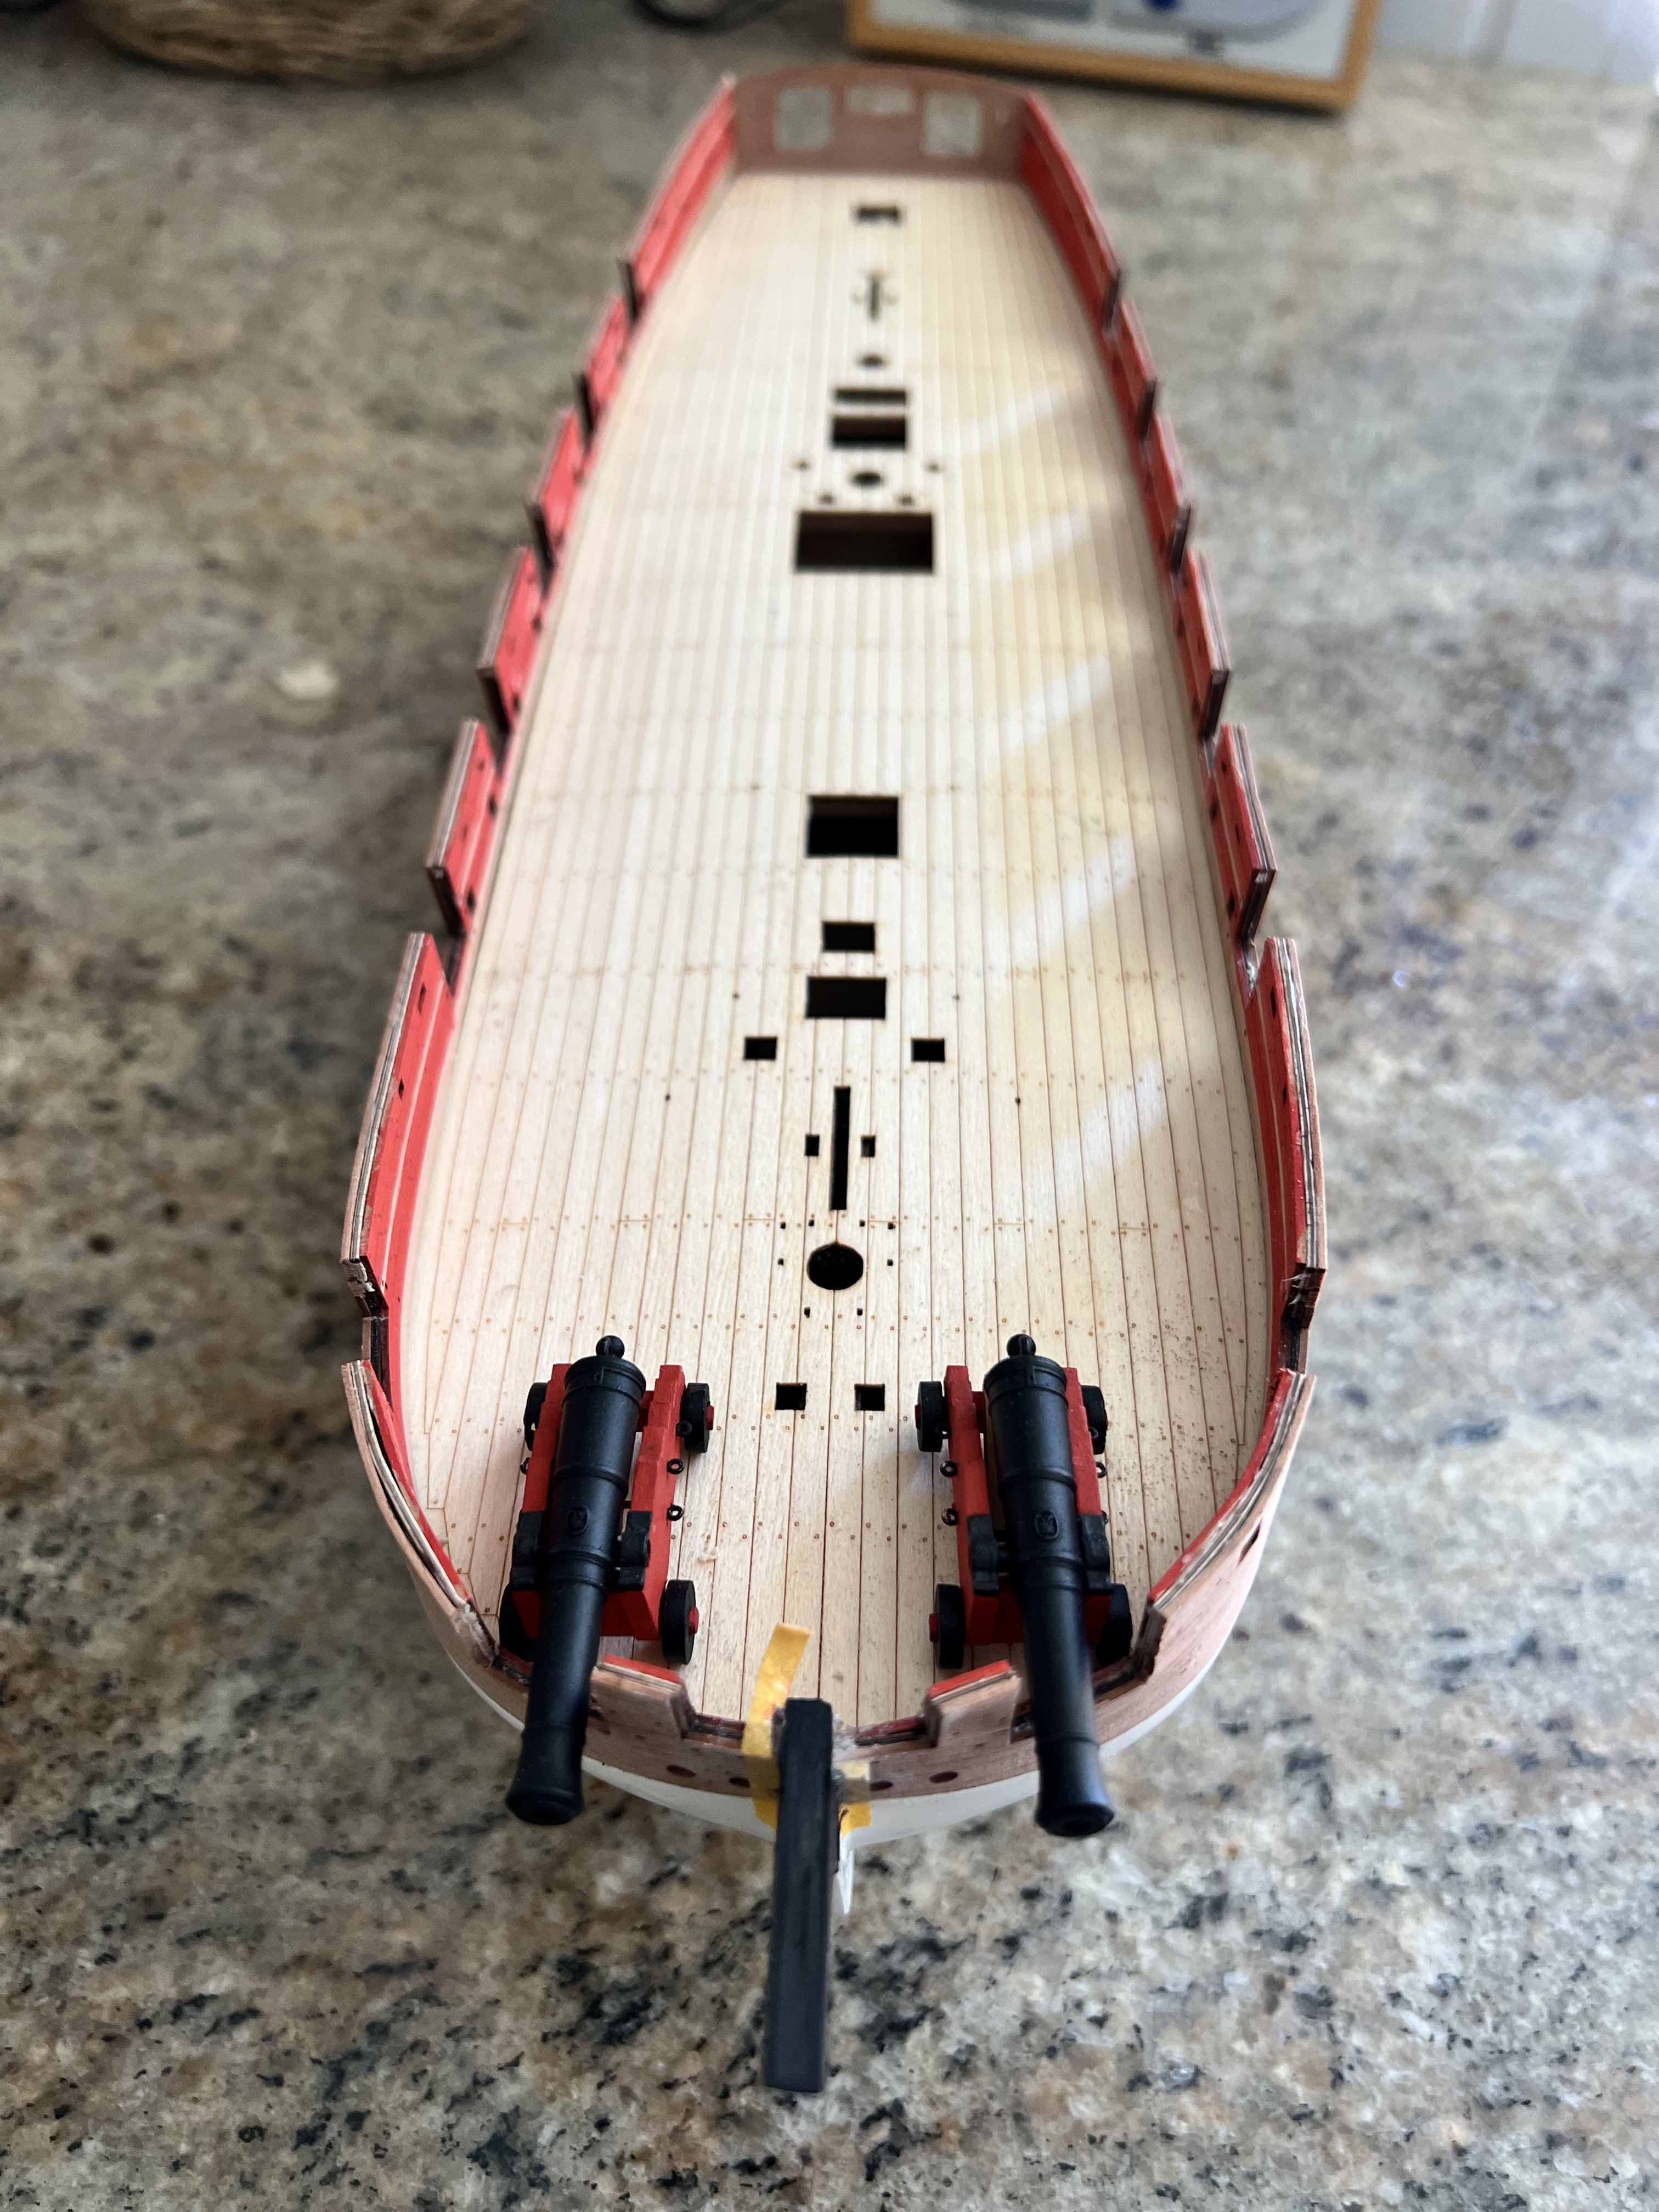
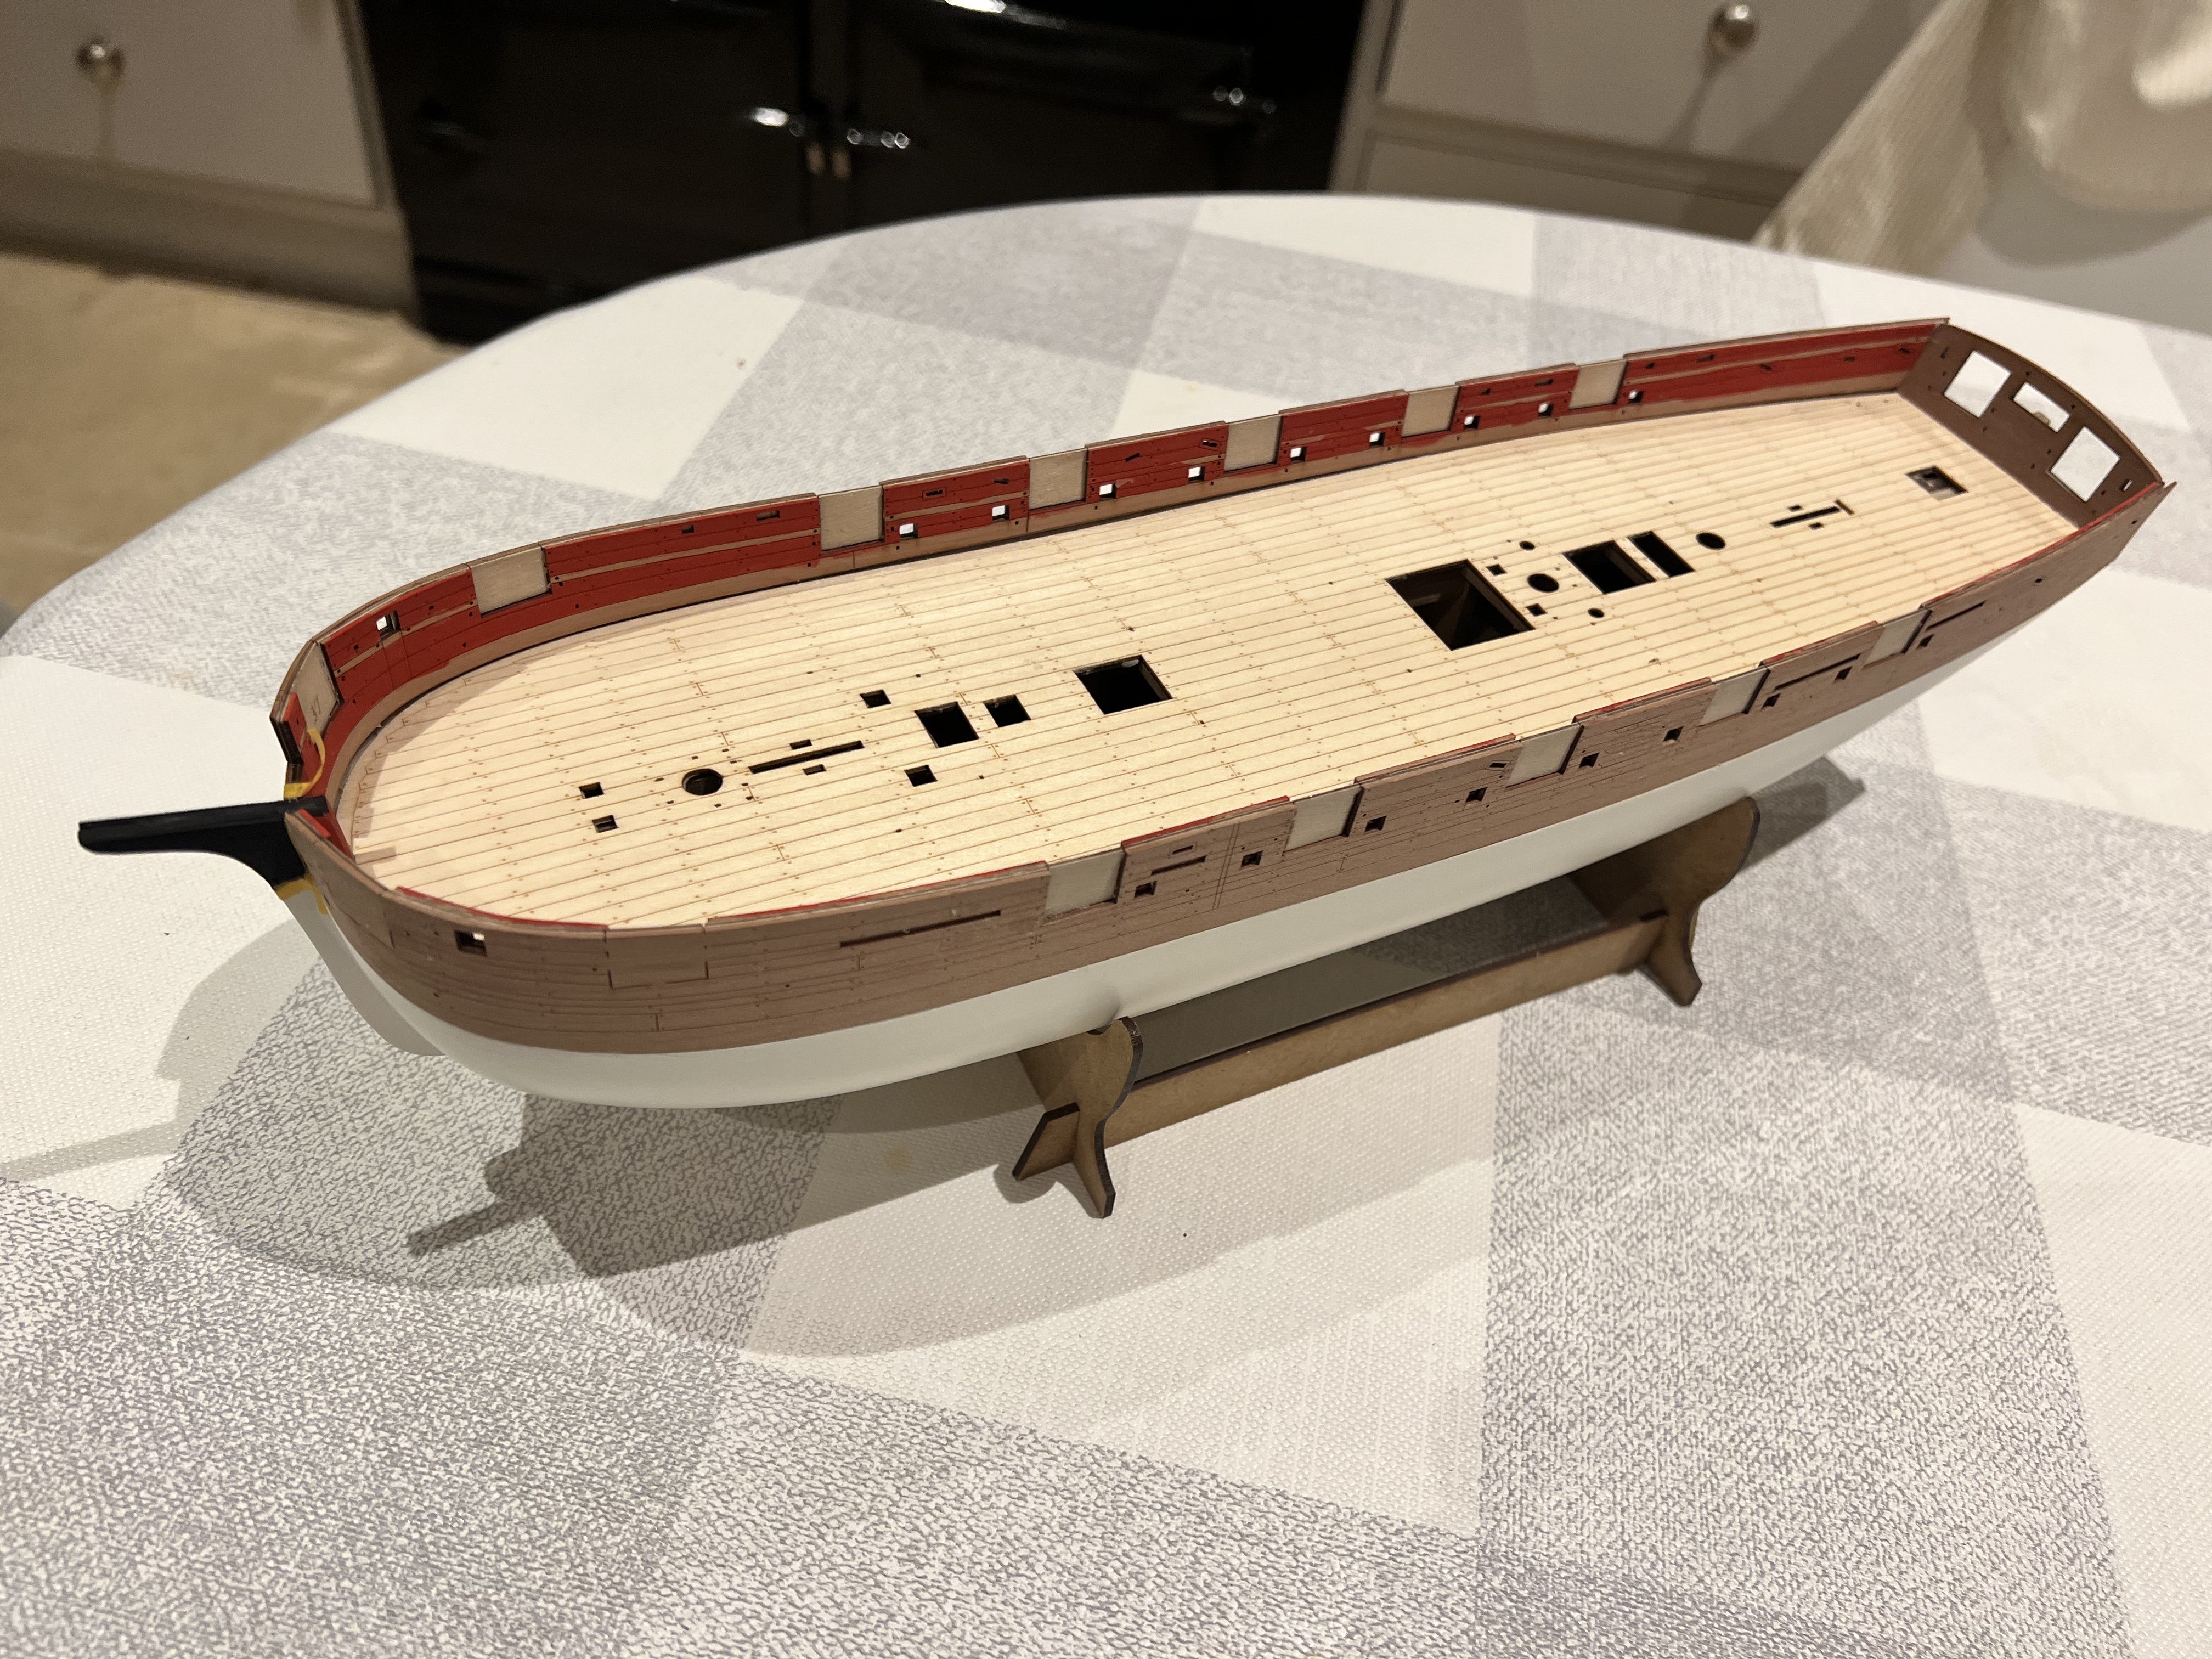
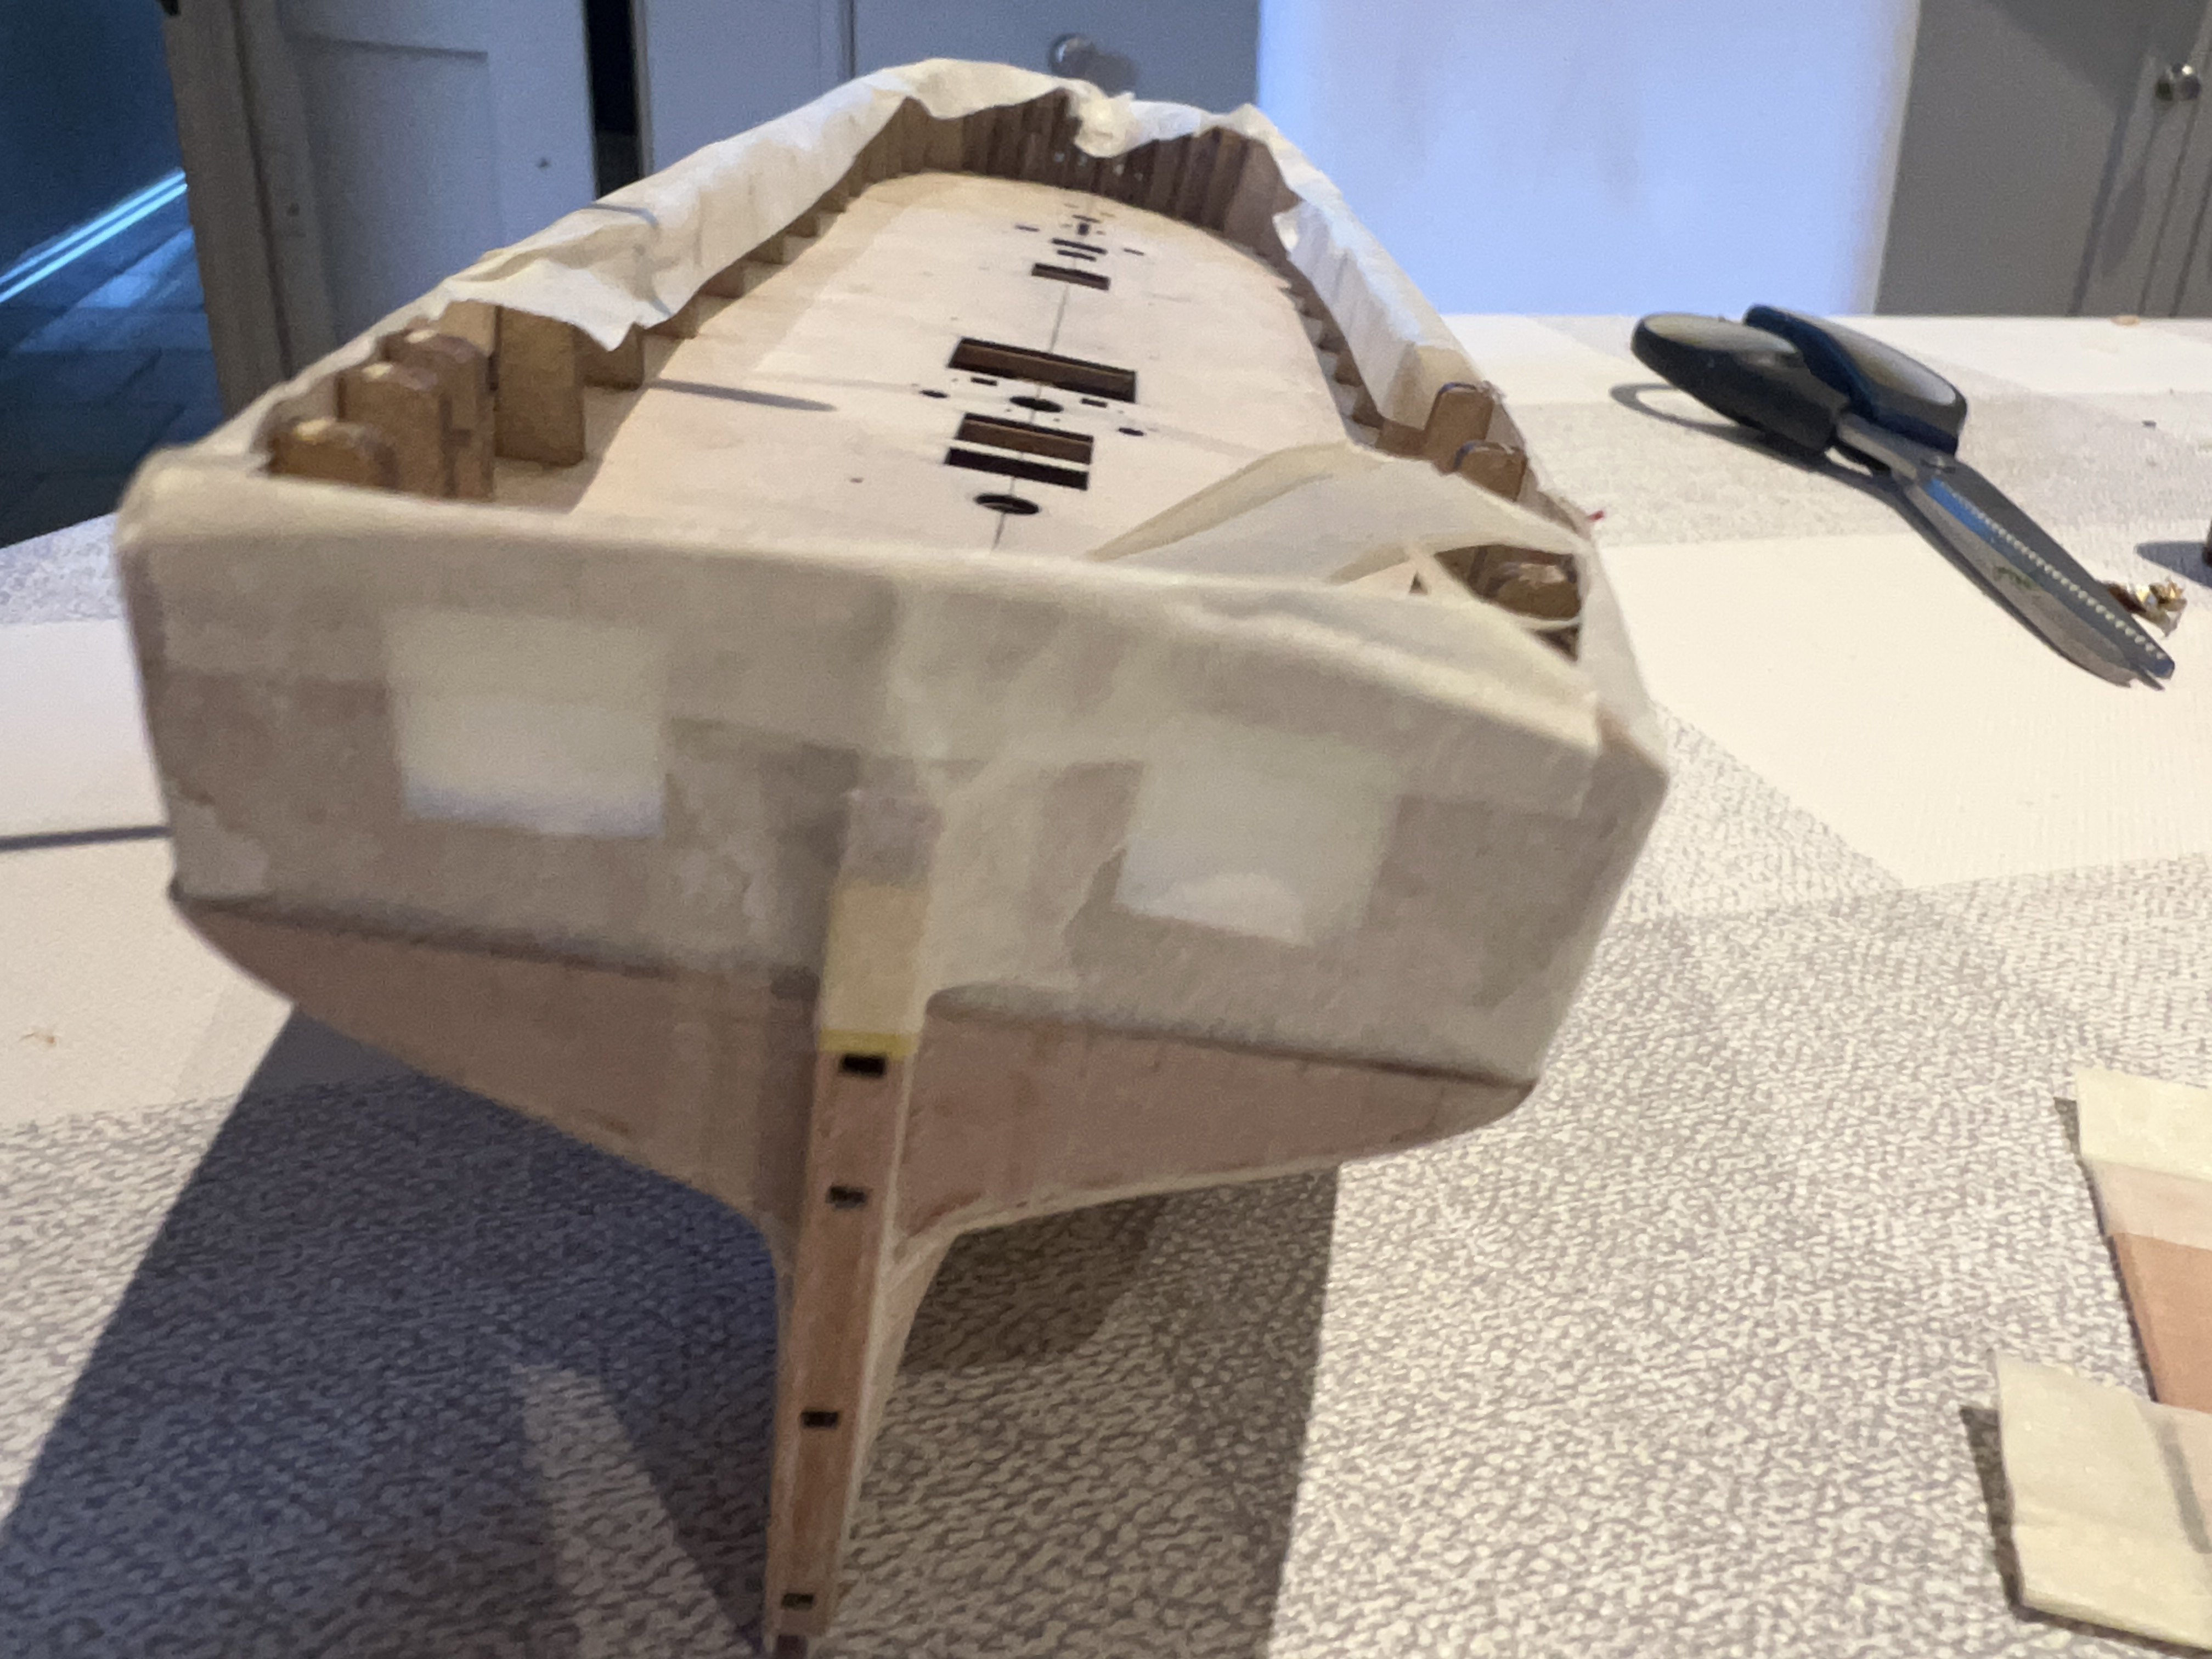
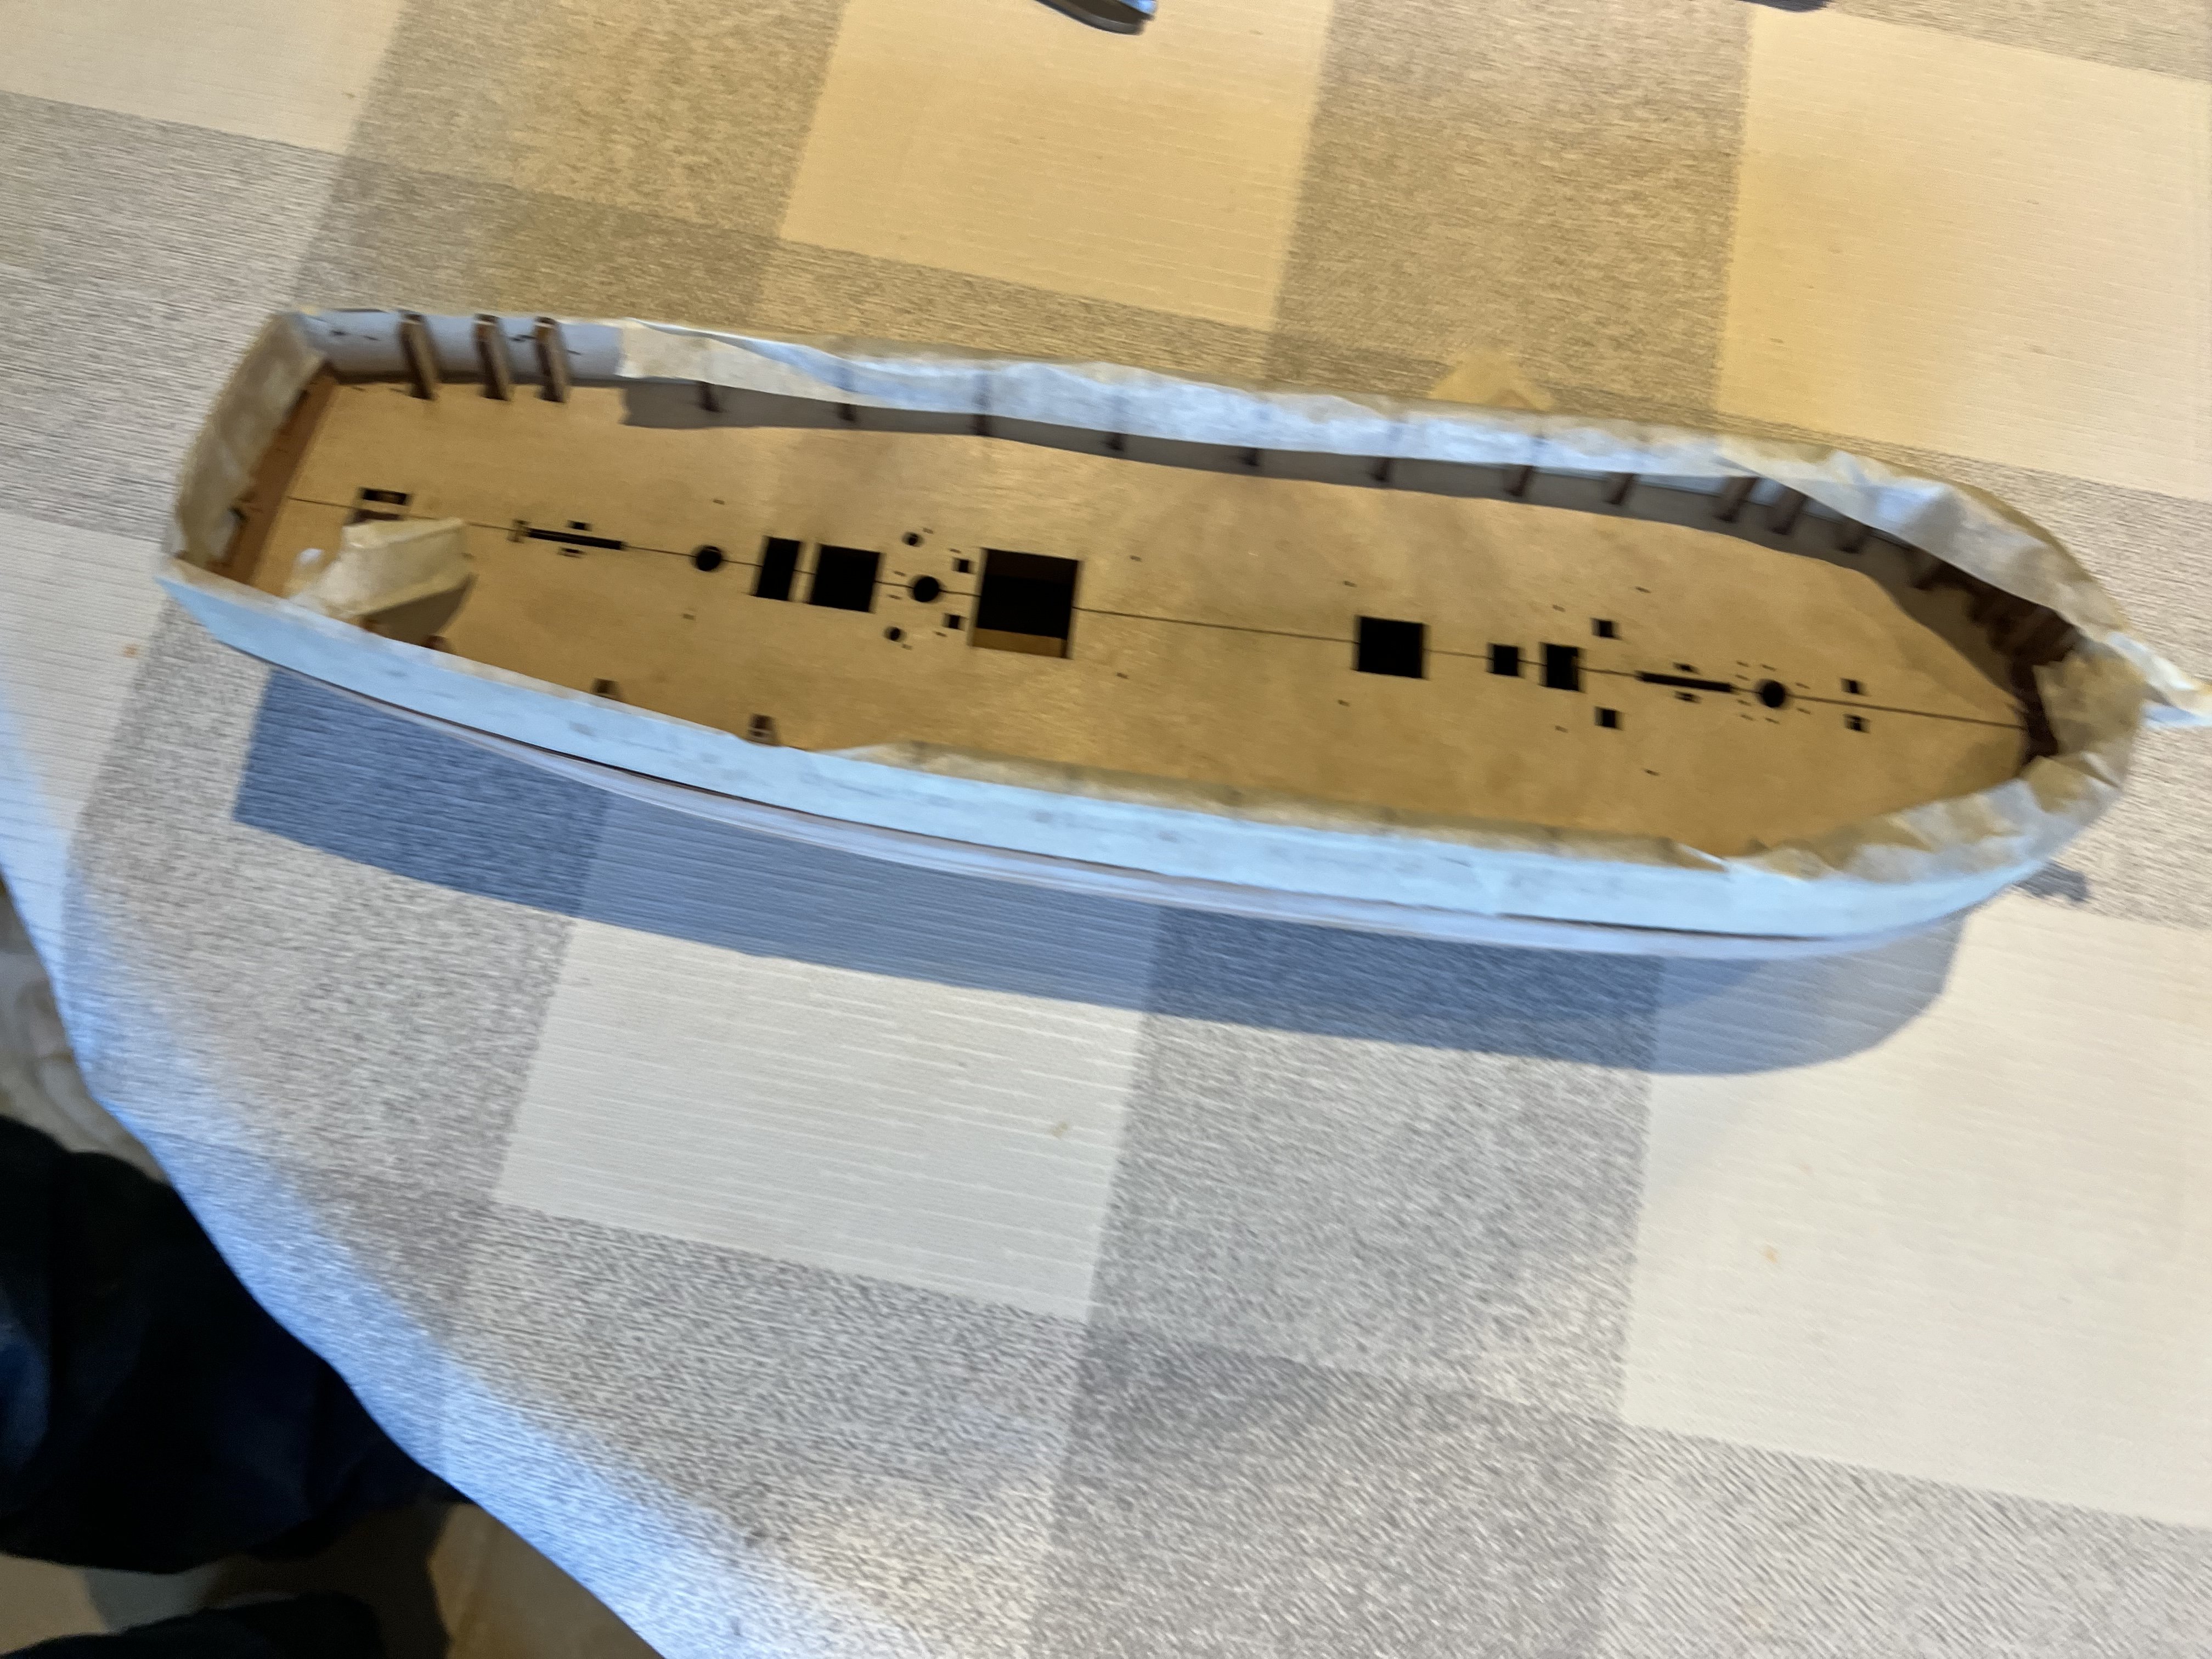
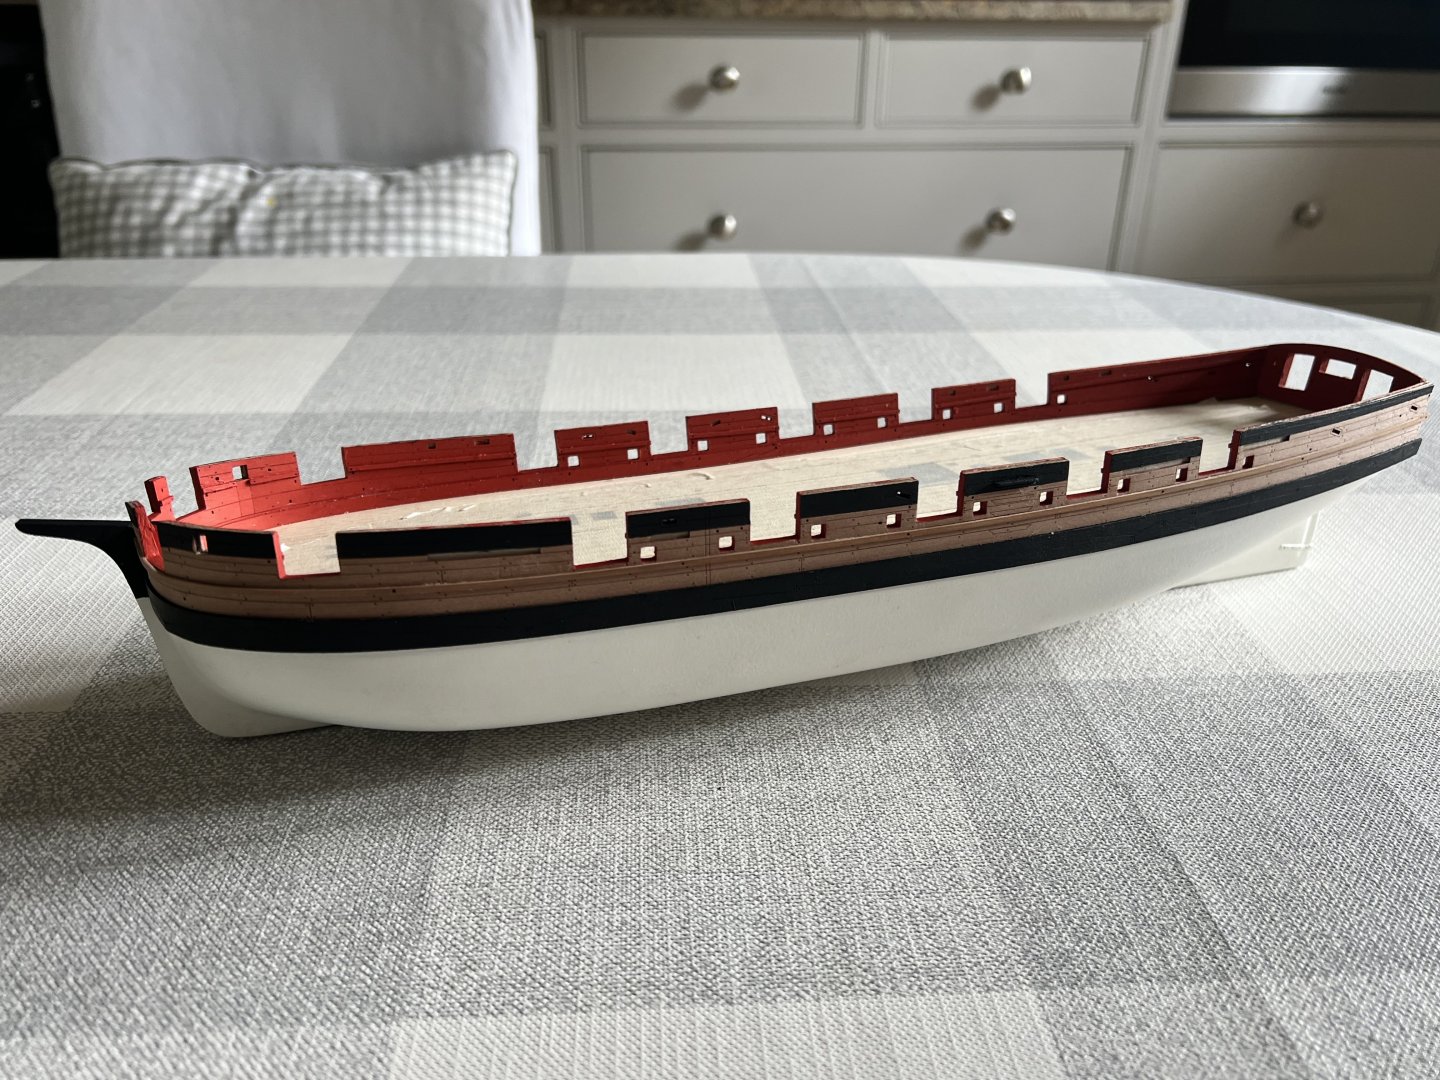
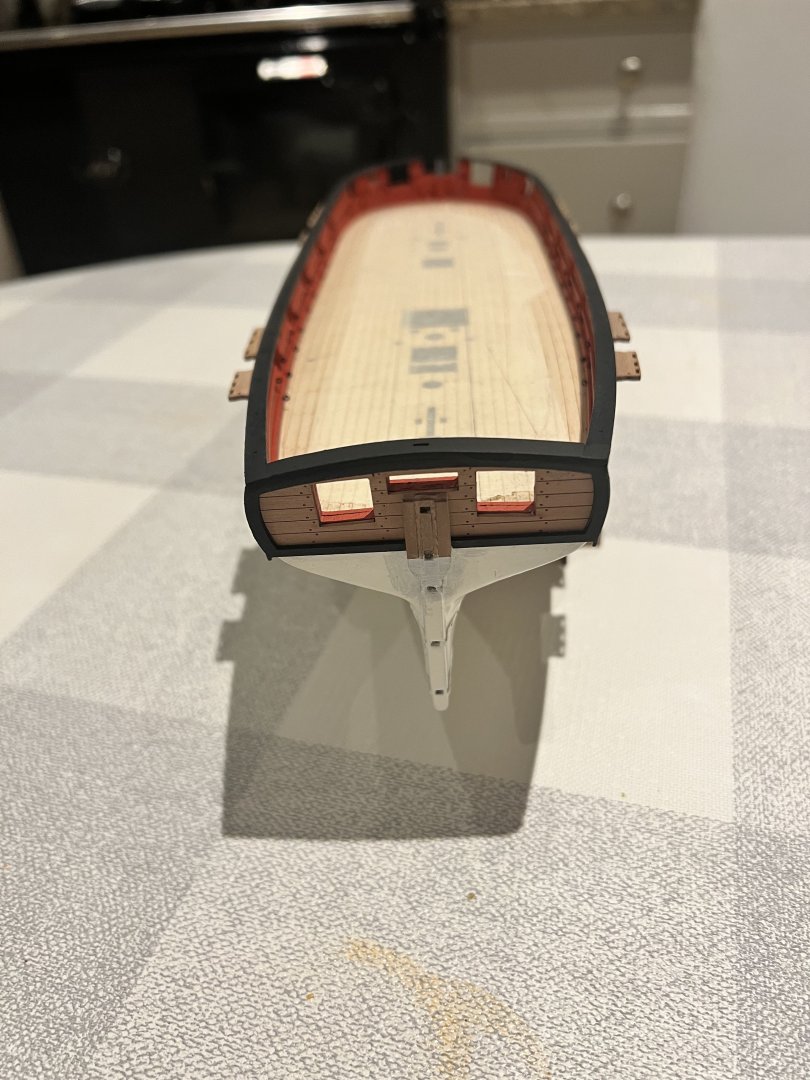
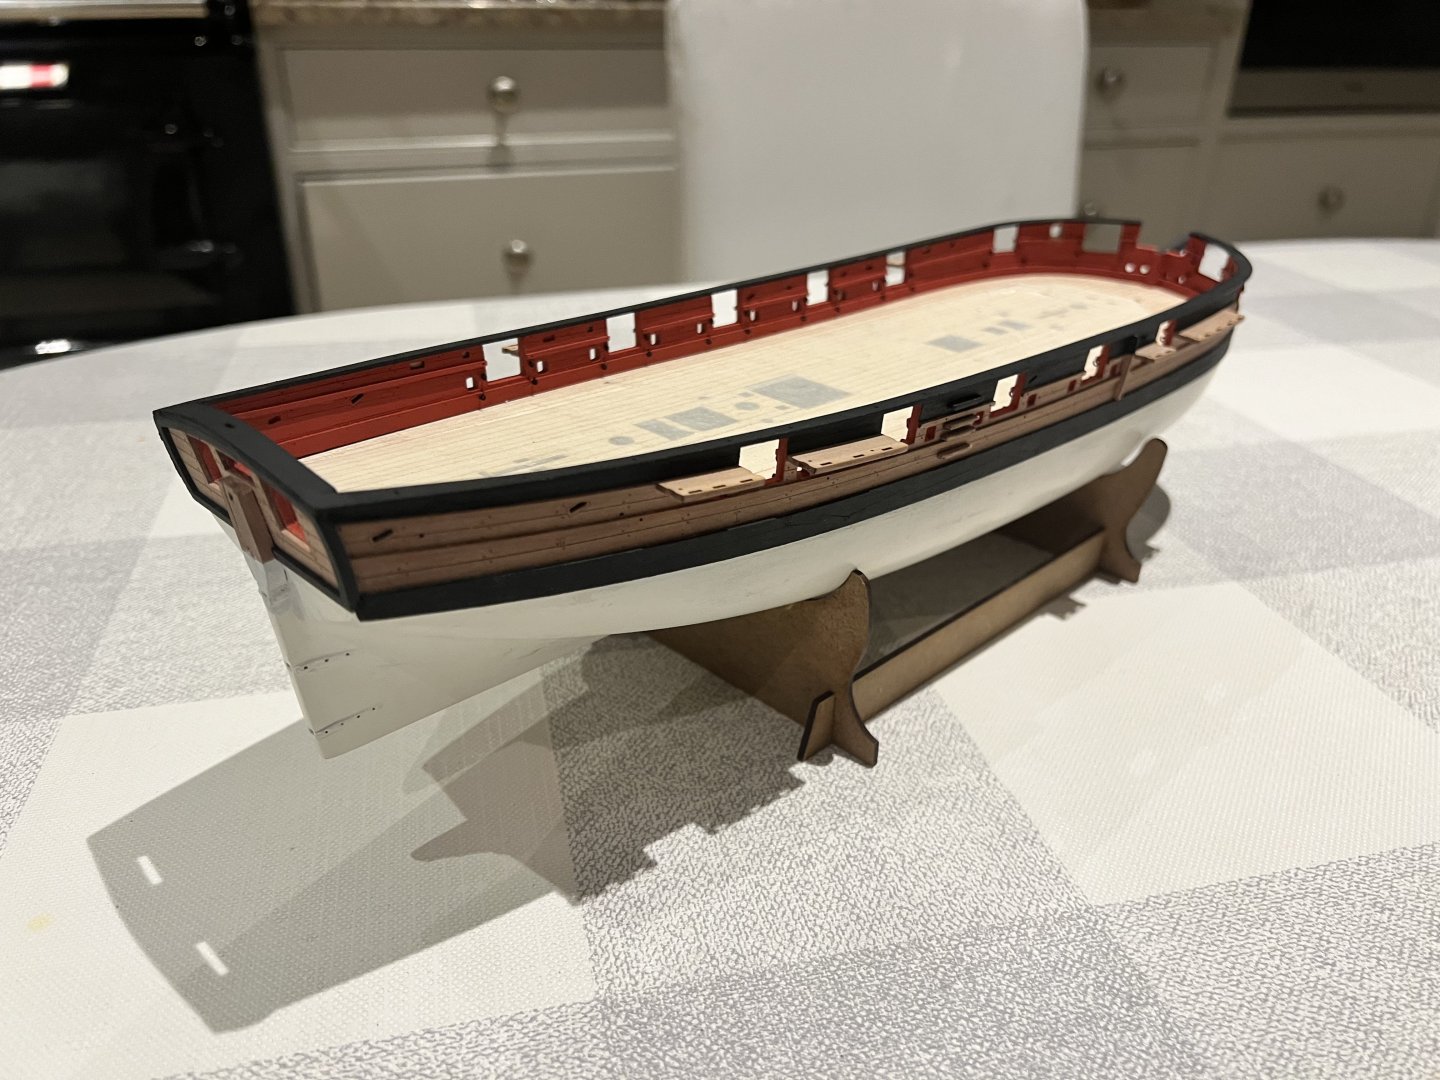
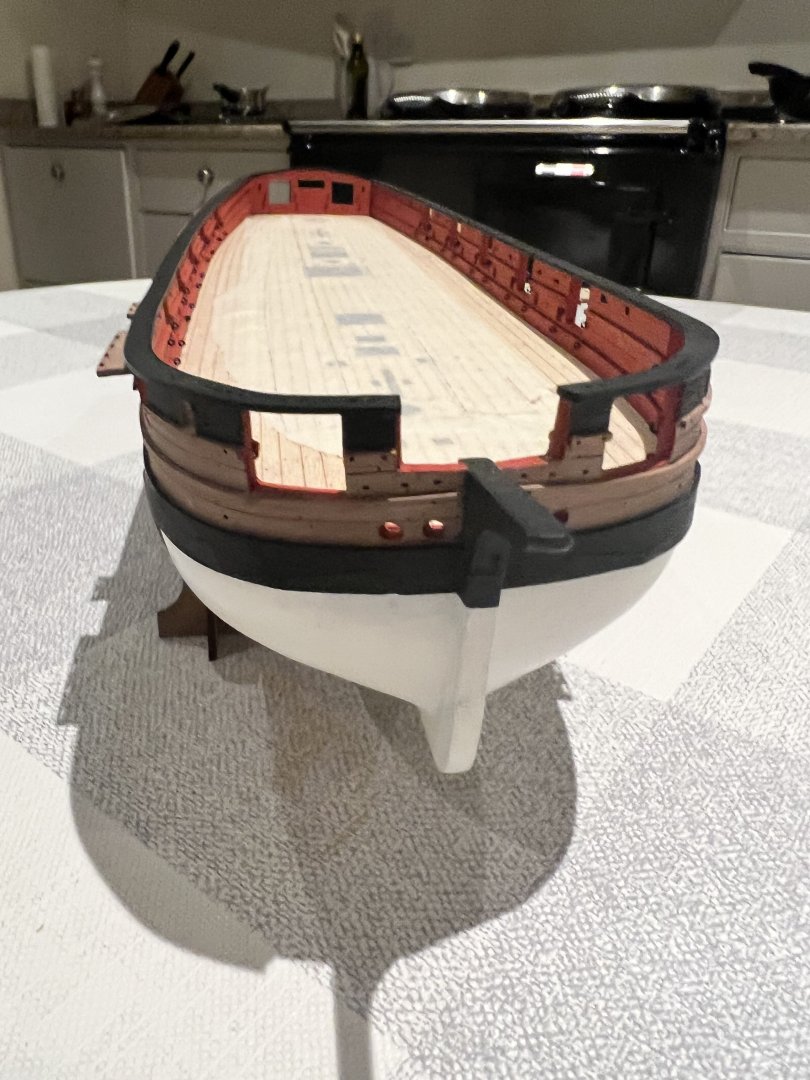
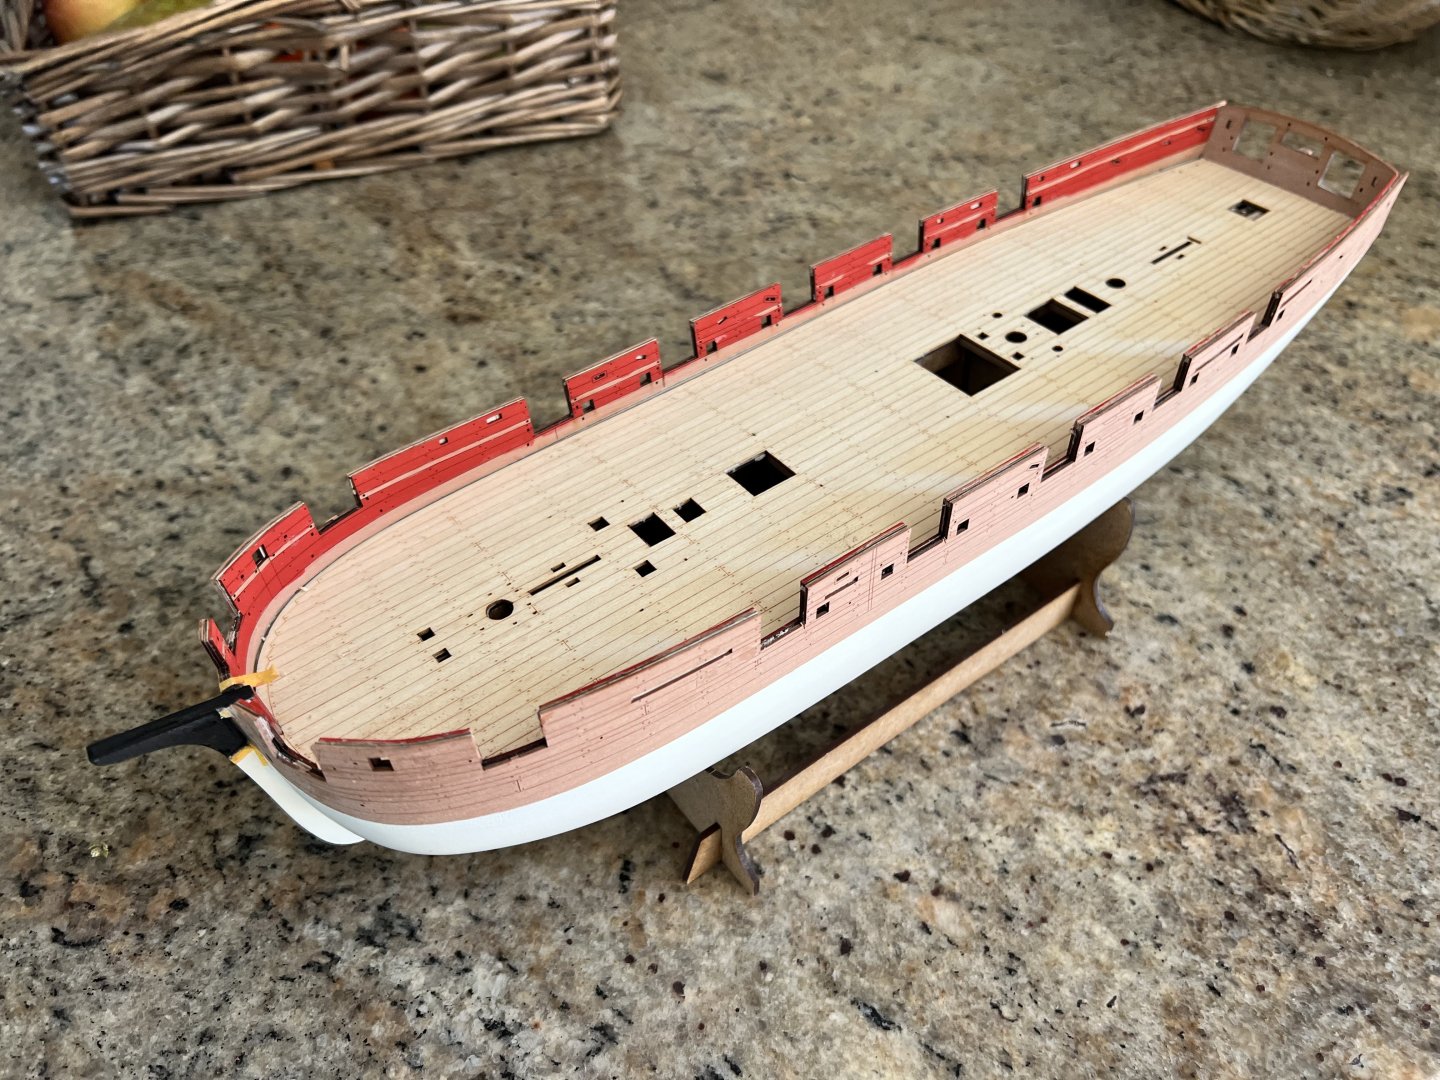
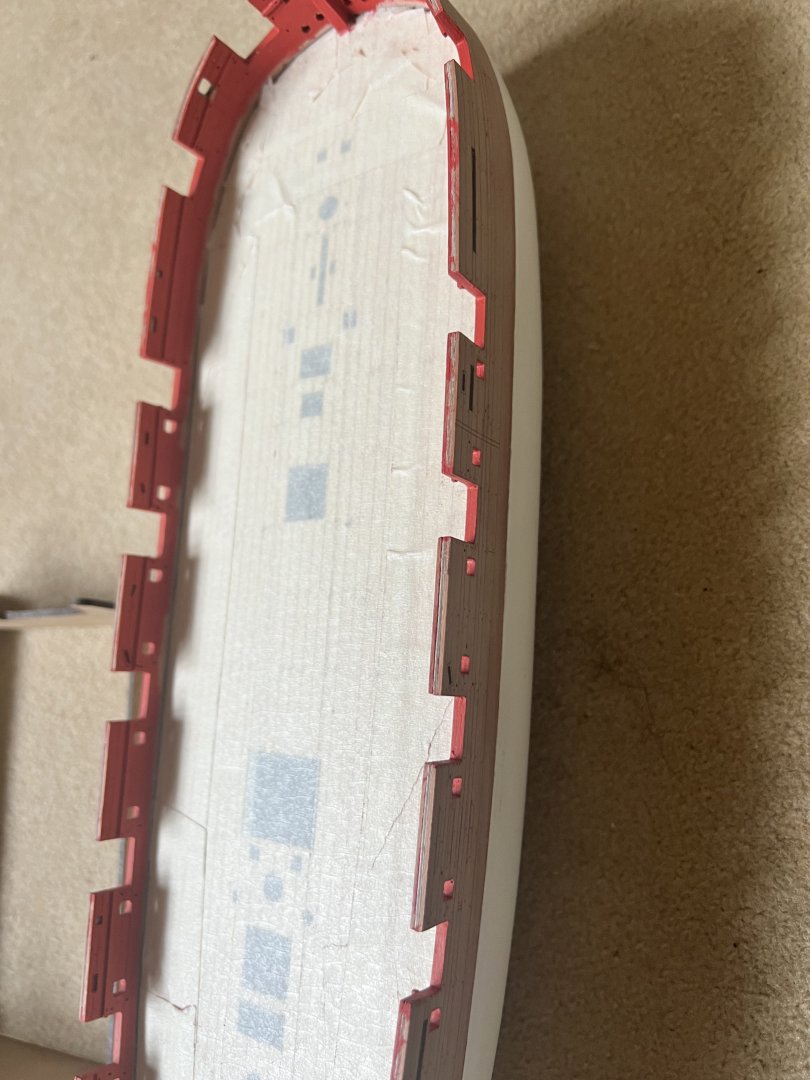
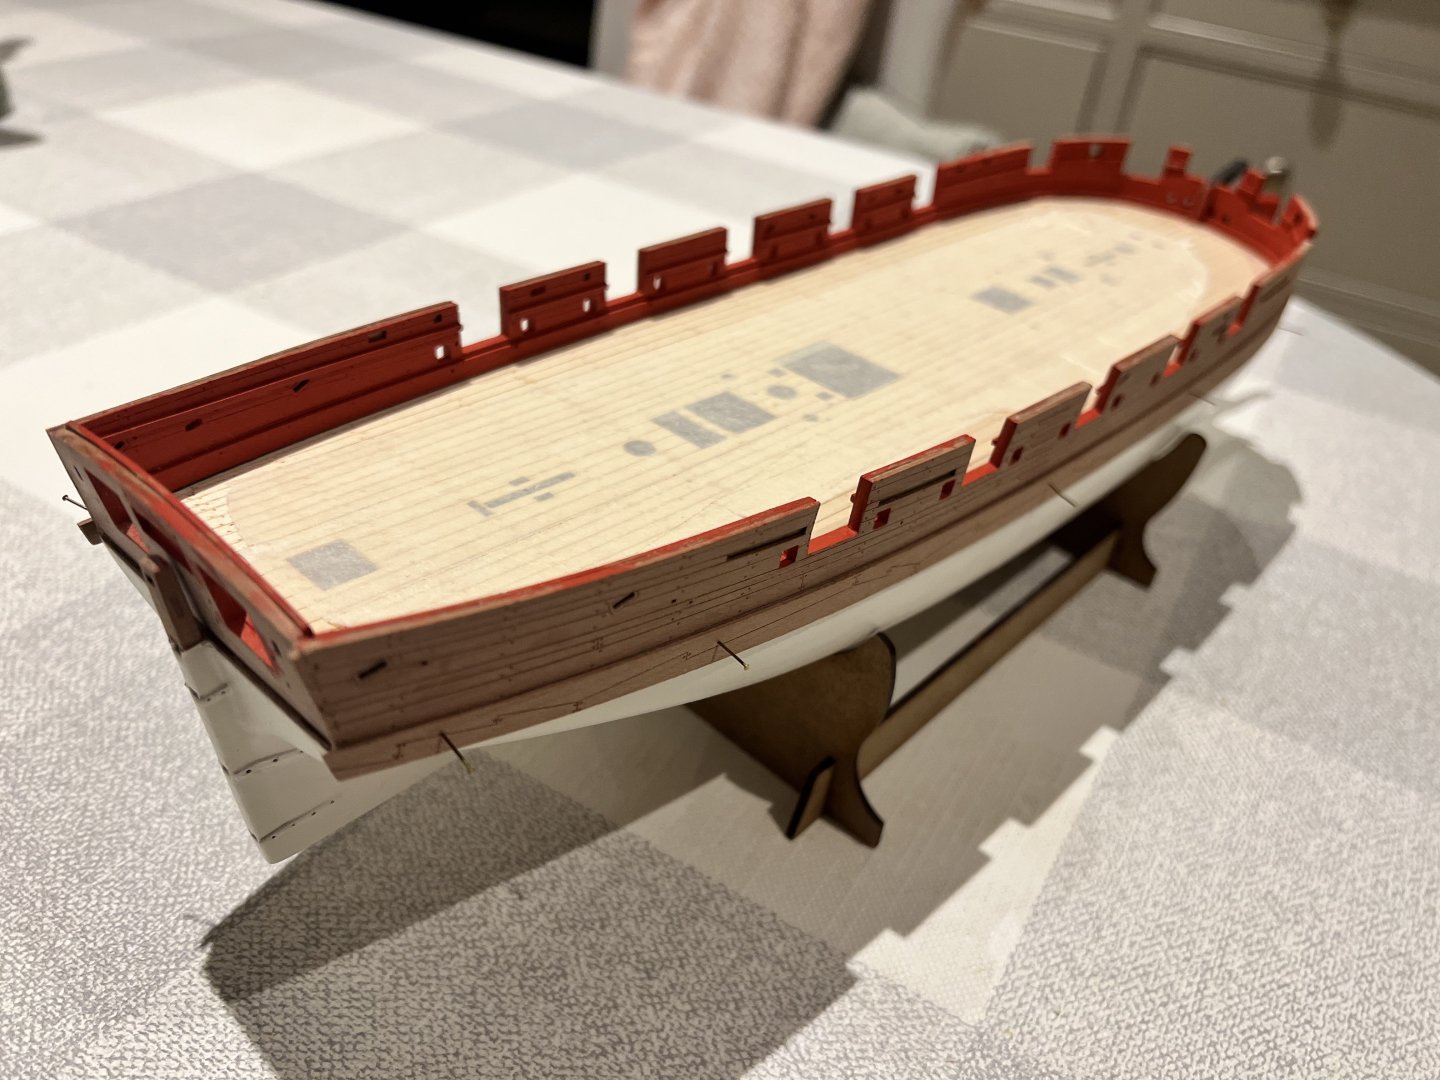
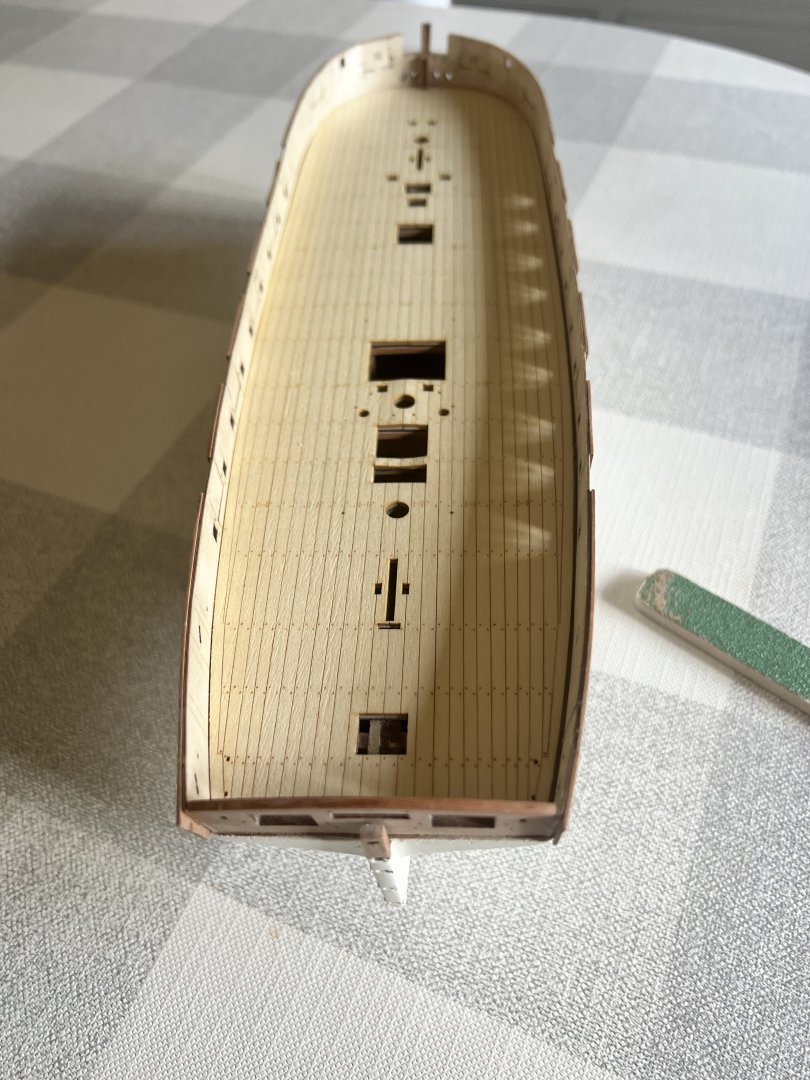
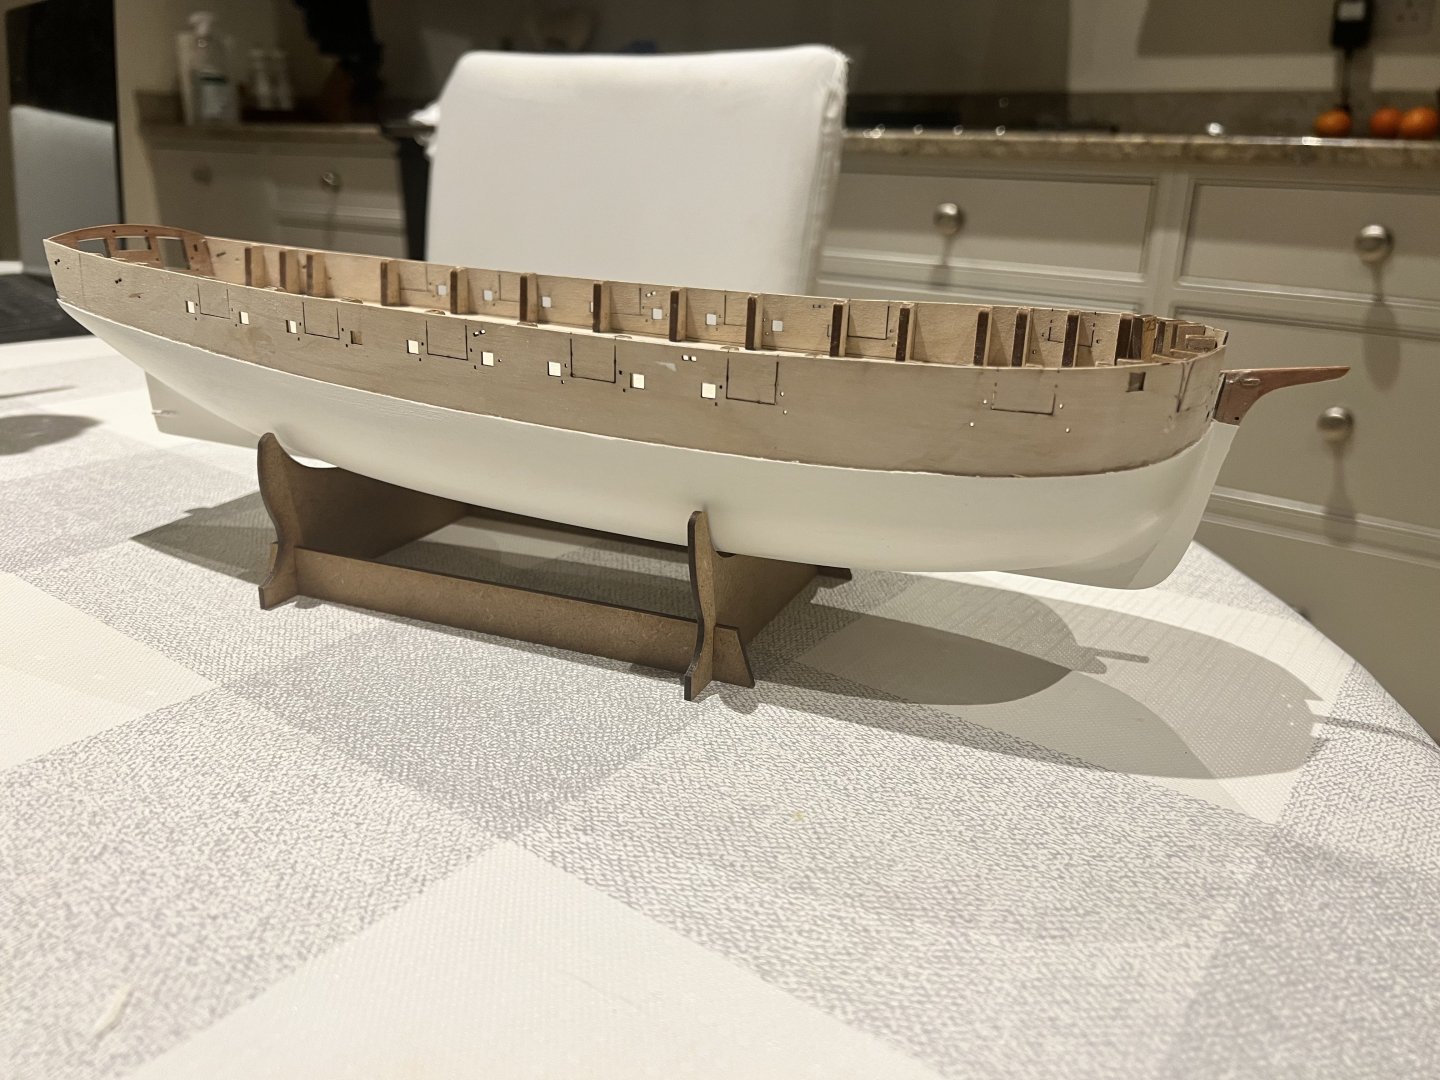
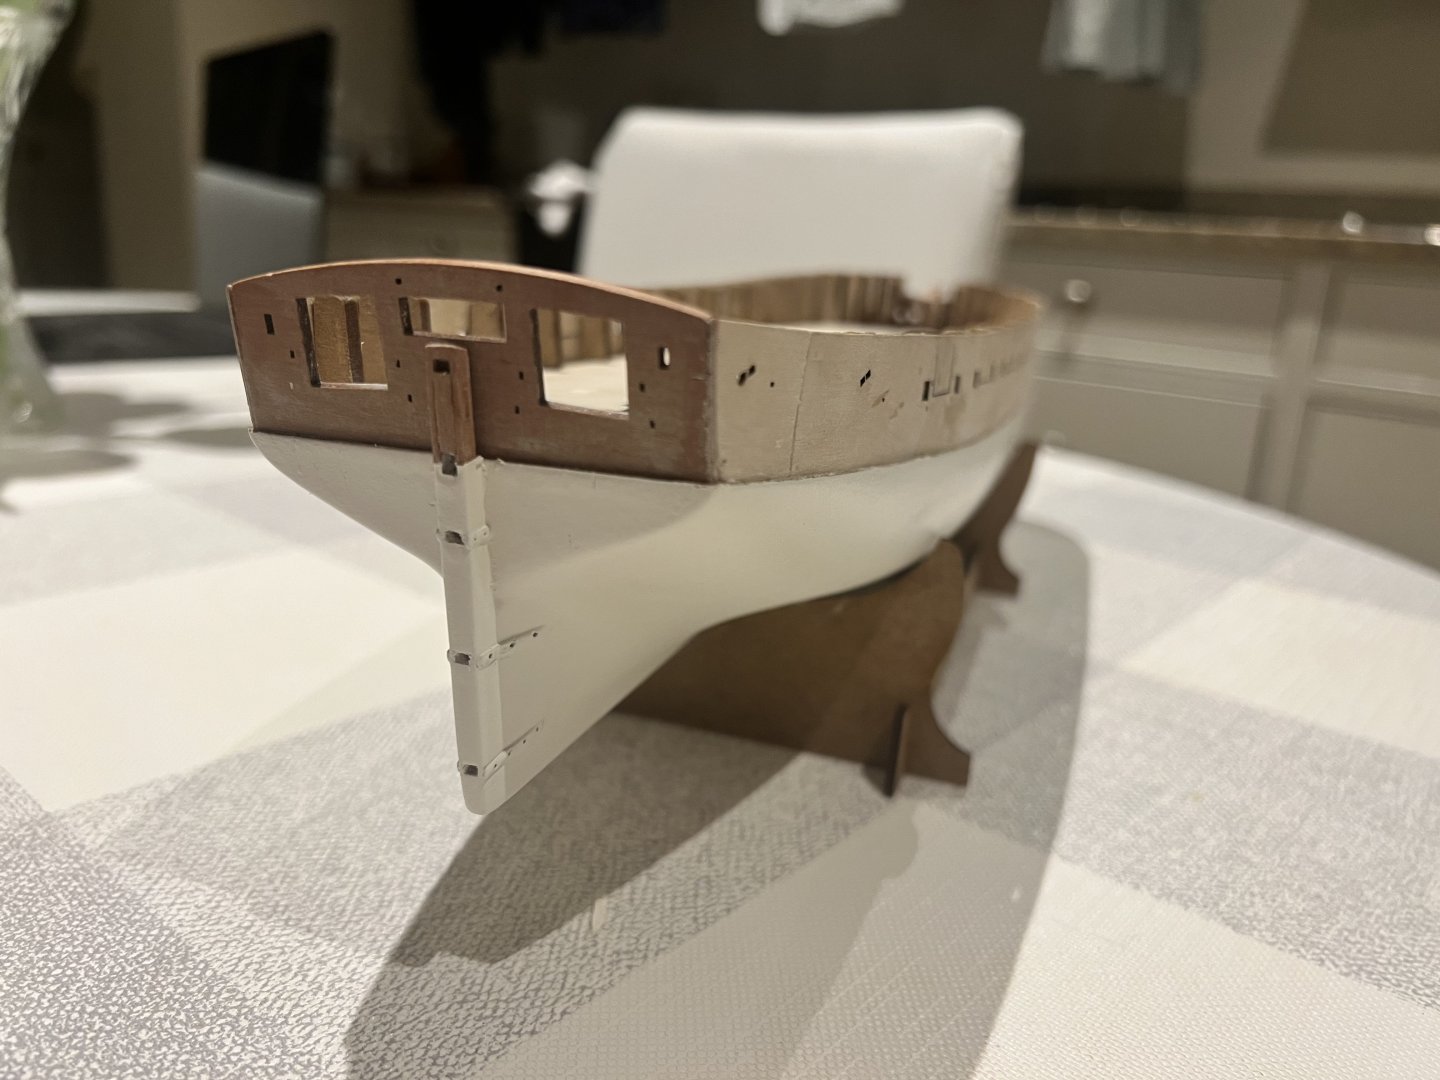
Thanks for all the likes! Outer bulwarks glued and clamped to dry. They aligned very well with the ply. I focused on lining up the oar ports exactly as a tiny gap at the bottom between the bulwarks and white paint will be hidden by the main wales. The bulwarks are a little long, which I think is intentional and will need sanding at the stern - the prototype’s bulwarks appear similar in the instructions. Once fitted the false bulkhead ears were twisted off and any stumps sanded level with the false deck. The engraved deck was then fitted. This needed no sanding at the edges and only a tiny bit off the stern edge to get it to lie flat. Then the inner bulwarks were fitted, glued and clamped. These lined up well too. Again I focused on lining up the oar ports which does leave a bit of a gap at the bottom as described in the instructions and which will be covered up later with spirketting. I started to paint the inner bulwarks red before fitting, but decided that I’d do the second and third coats on the model and would need to mask up the deck given my propensity for getting paint everywhere! I also painted the beak head (think that’s the right term) black. Will need a little filling and more coats of paint. Lastly, the daggerboards are ready and in position, but not glued. Next is cutting out the gunports.


- 146 replies
-
- 12
-
-
- Adder
- Vanguard Models
- (and 1 more)
-
Thanks Cisco, hides a not so nice planking job beneath!
- 146 replies
-
- 1
-
-
- Adder
- Vanguard Models
- (and 1 more)
-
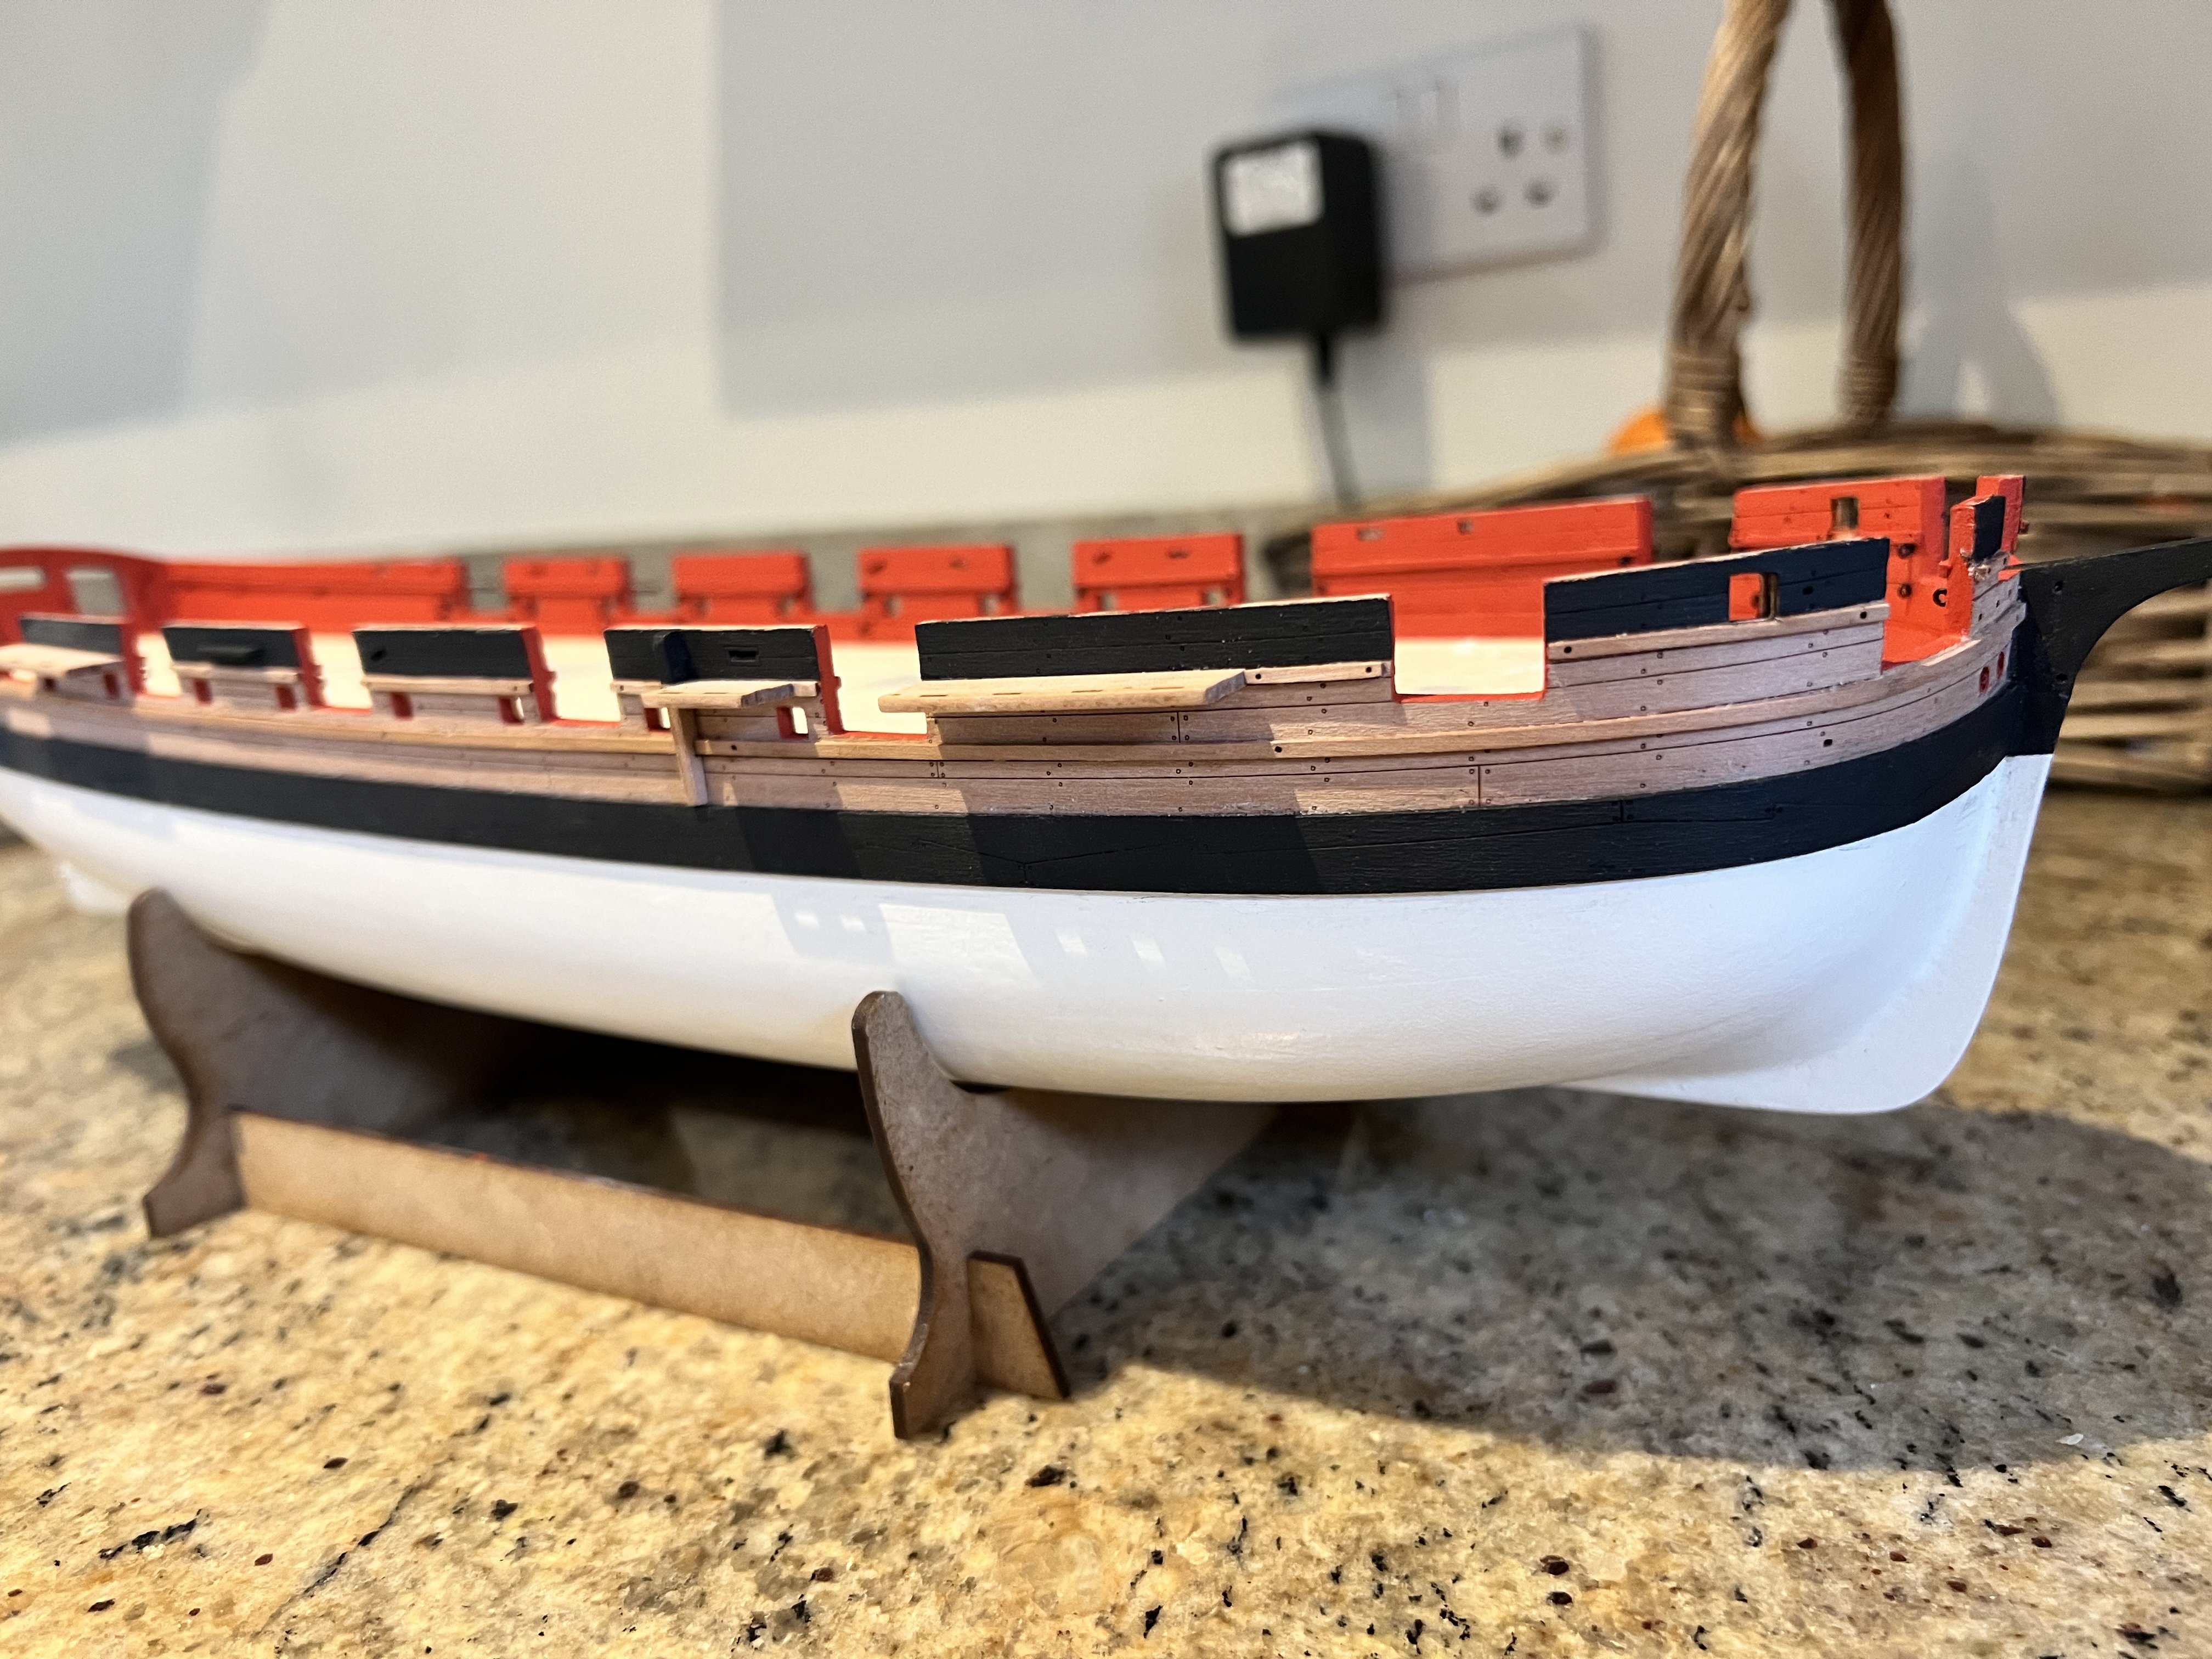
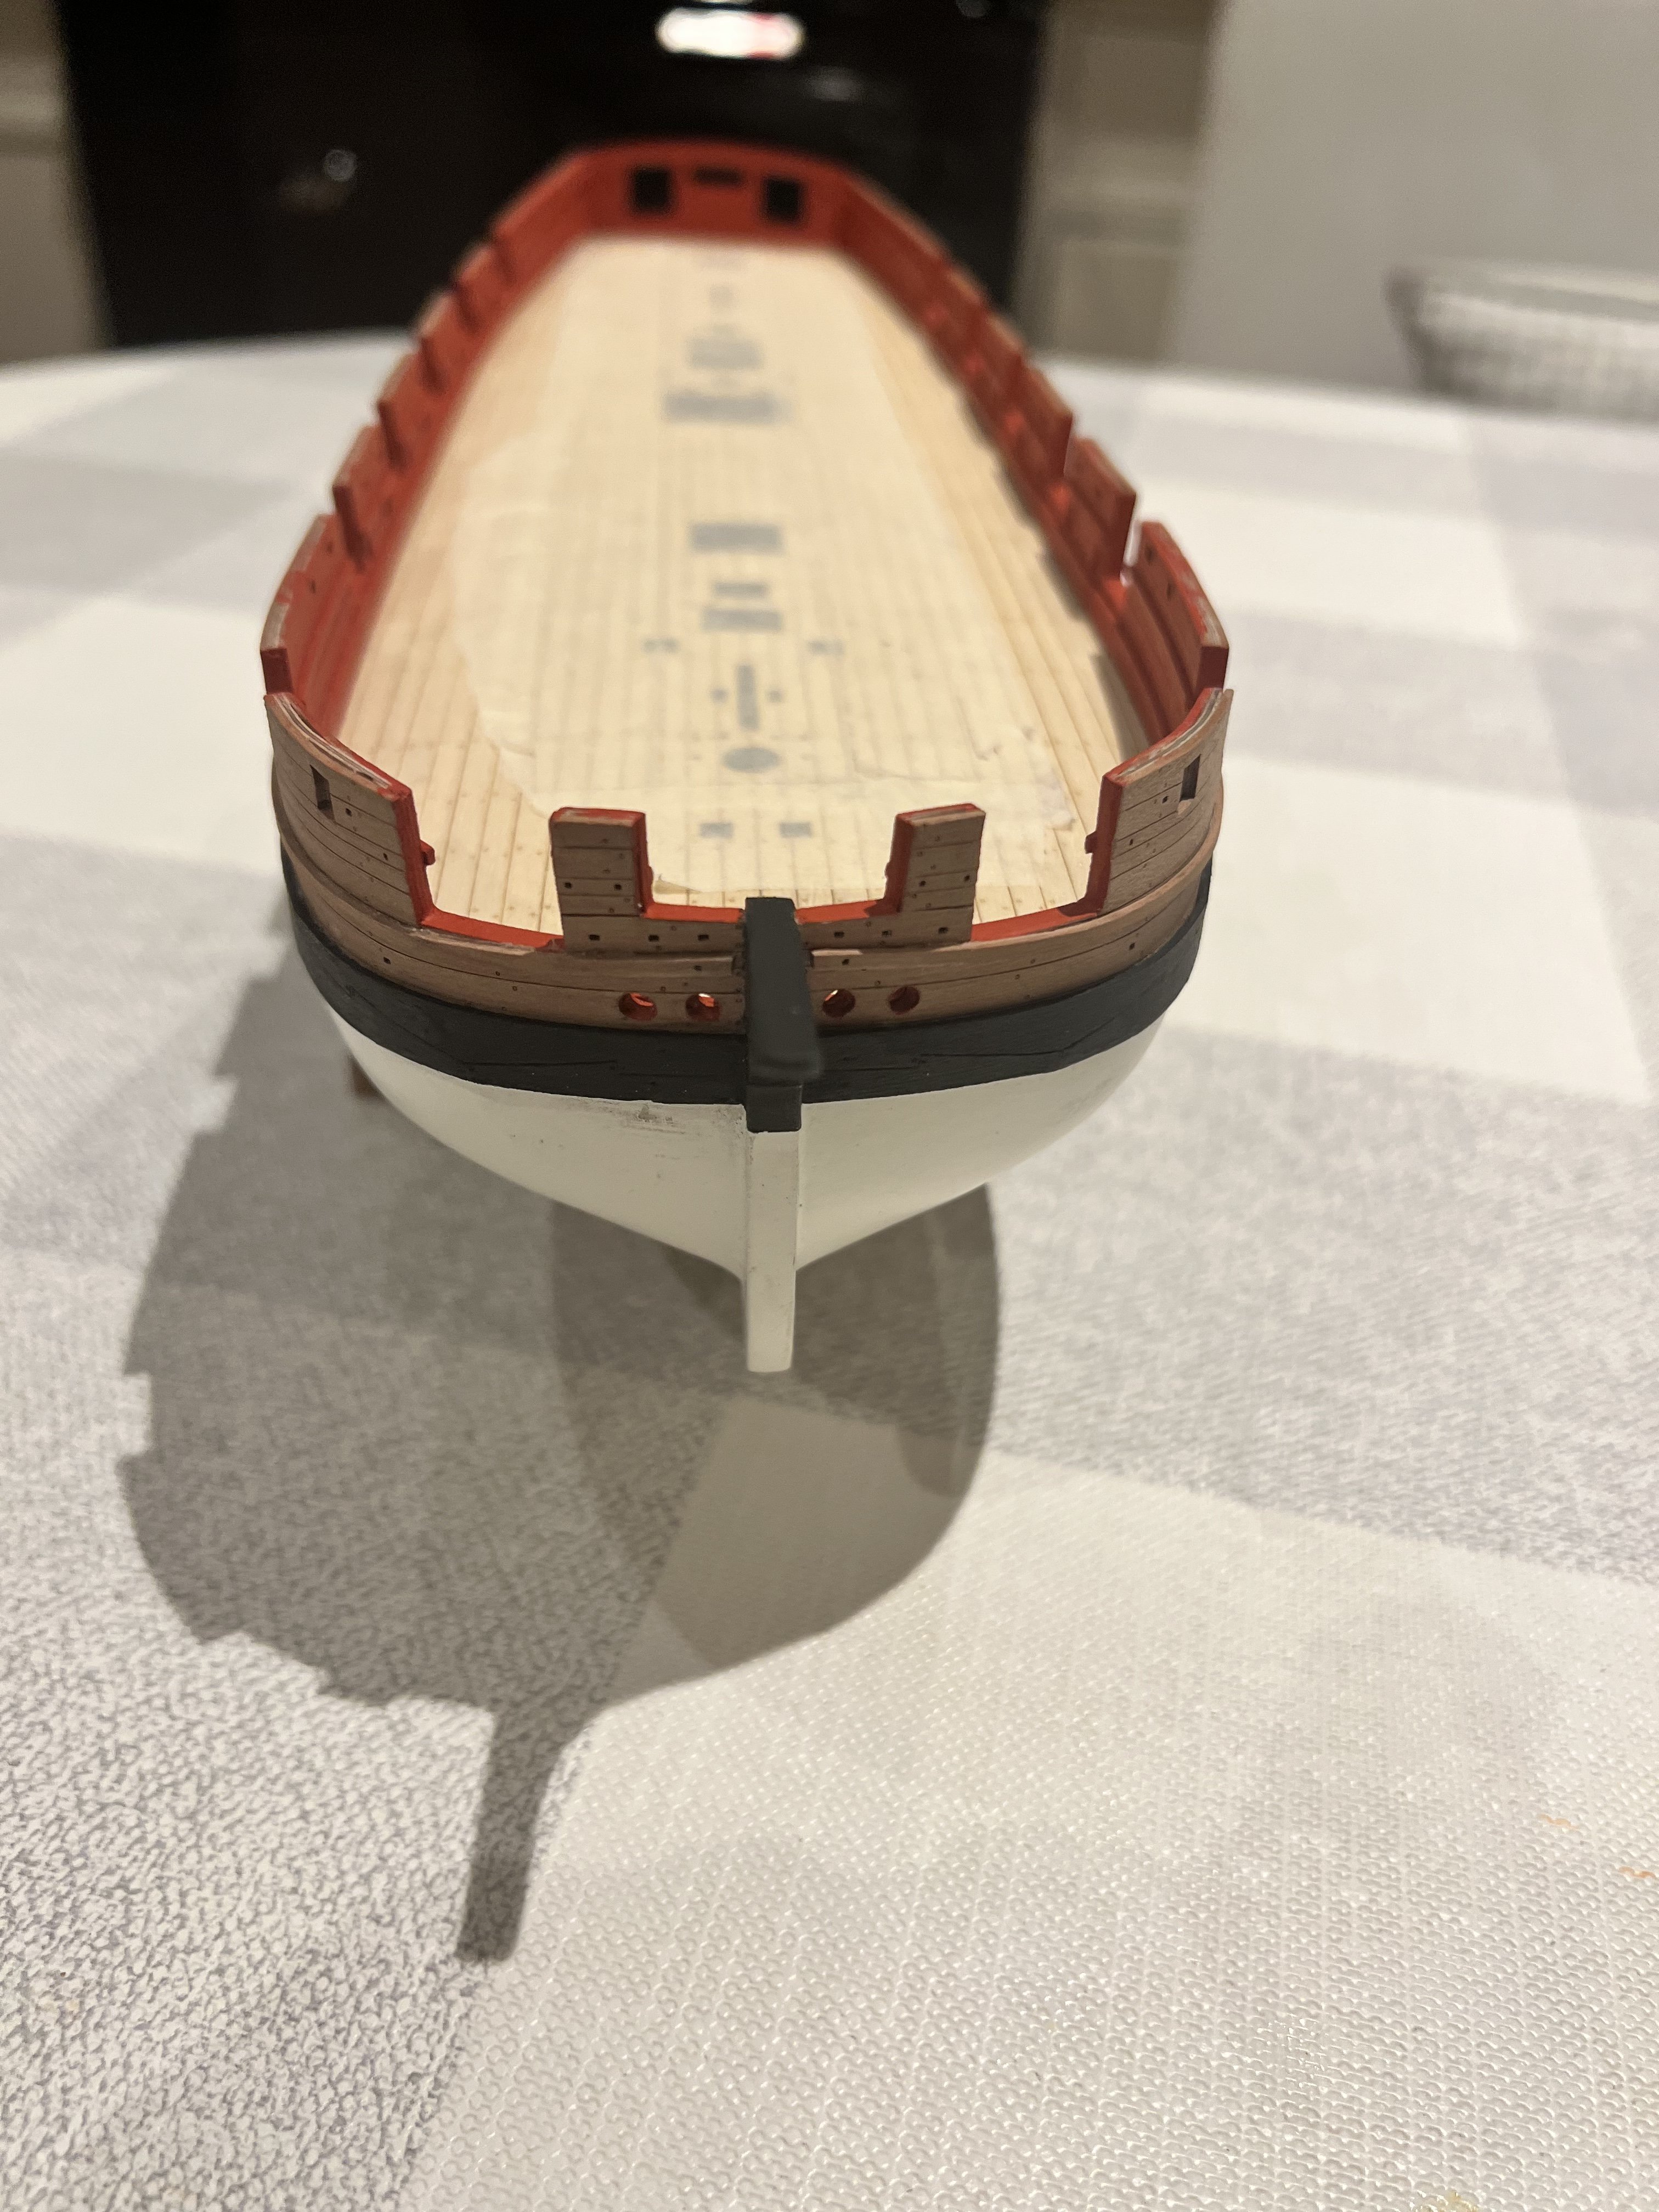
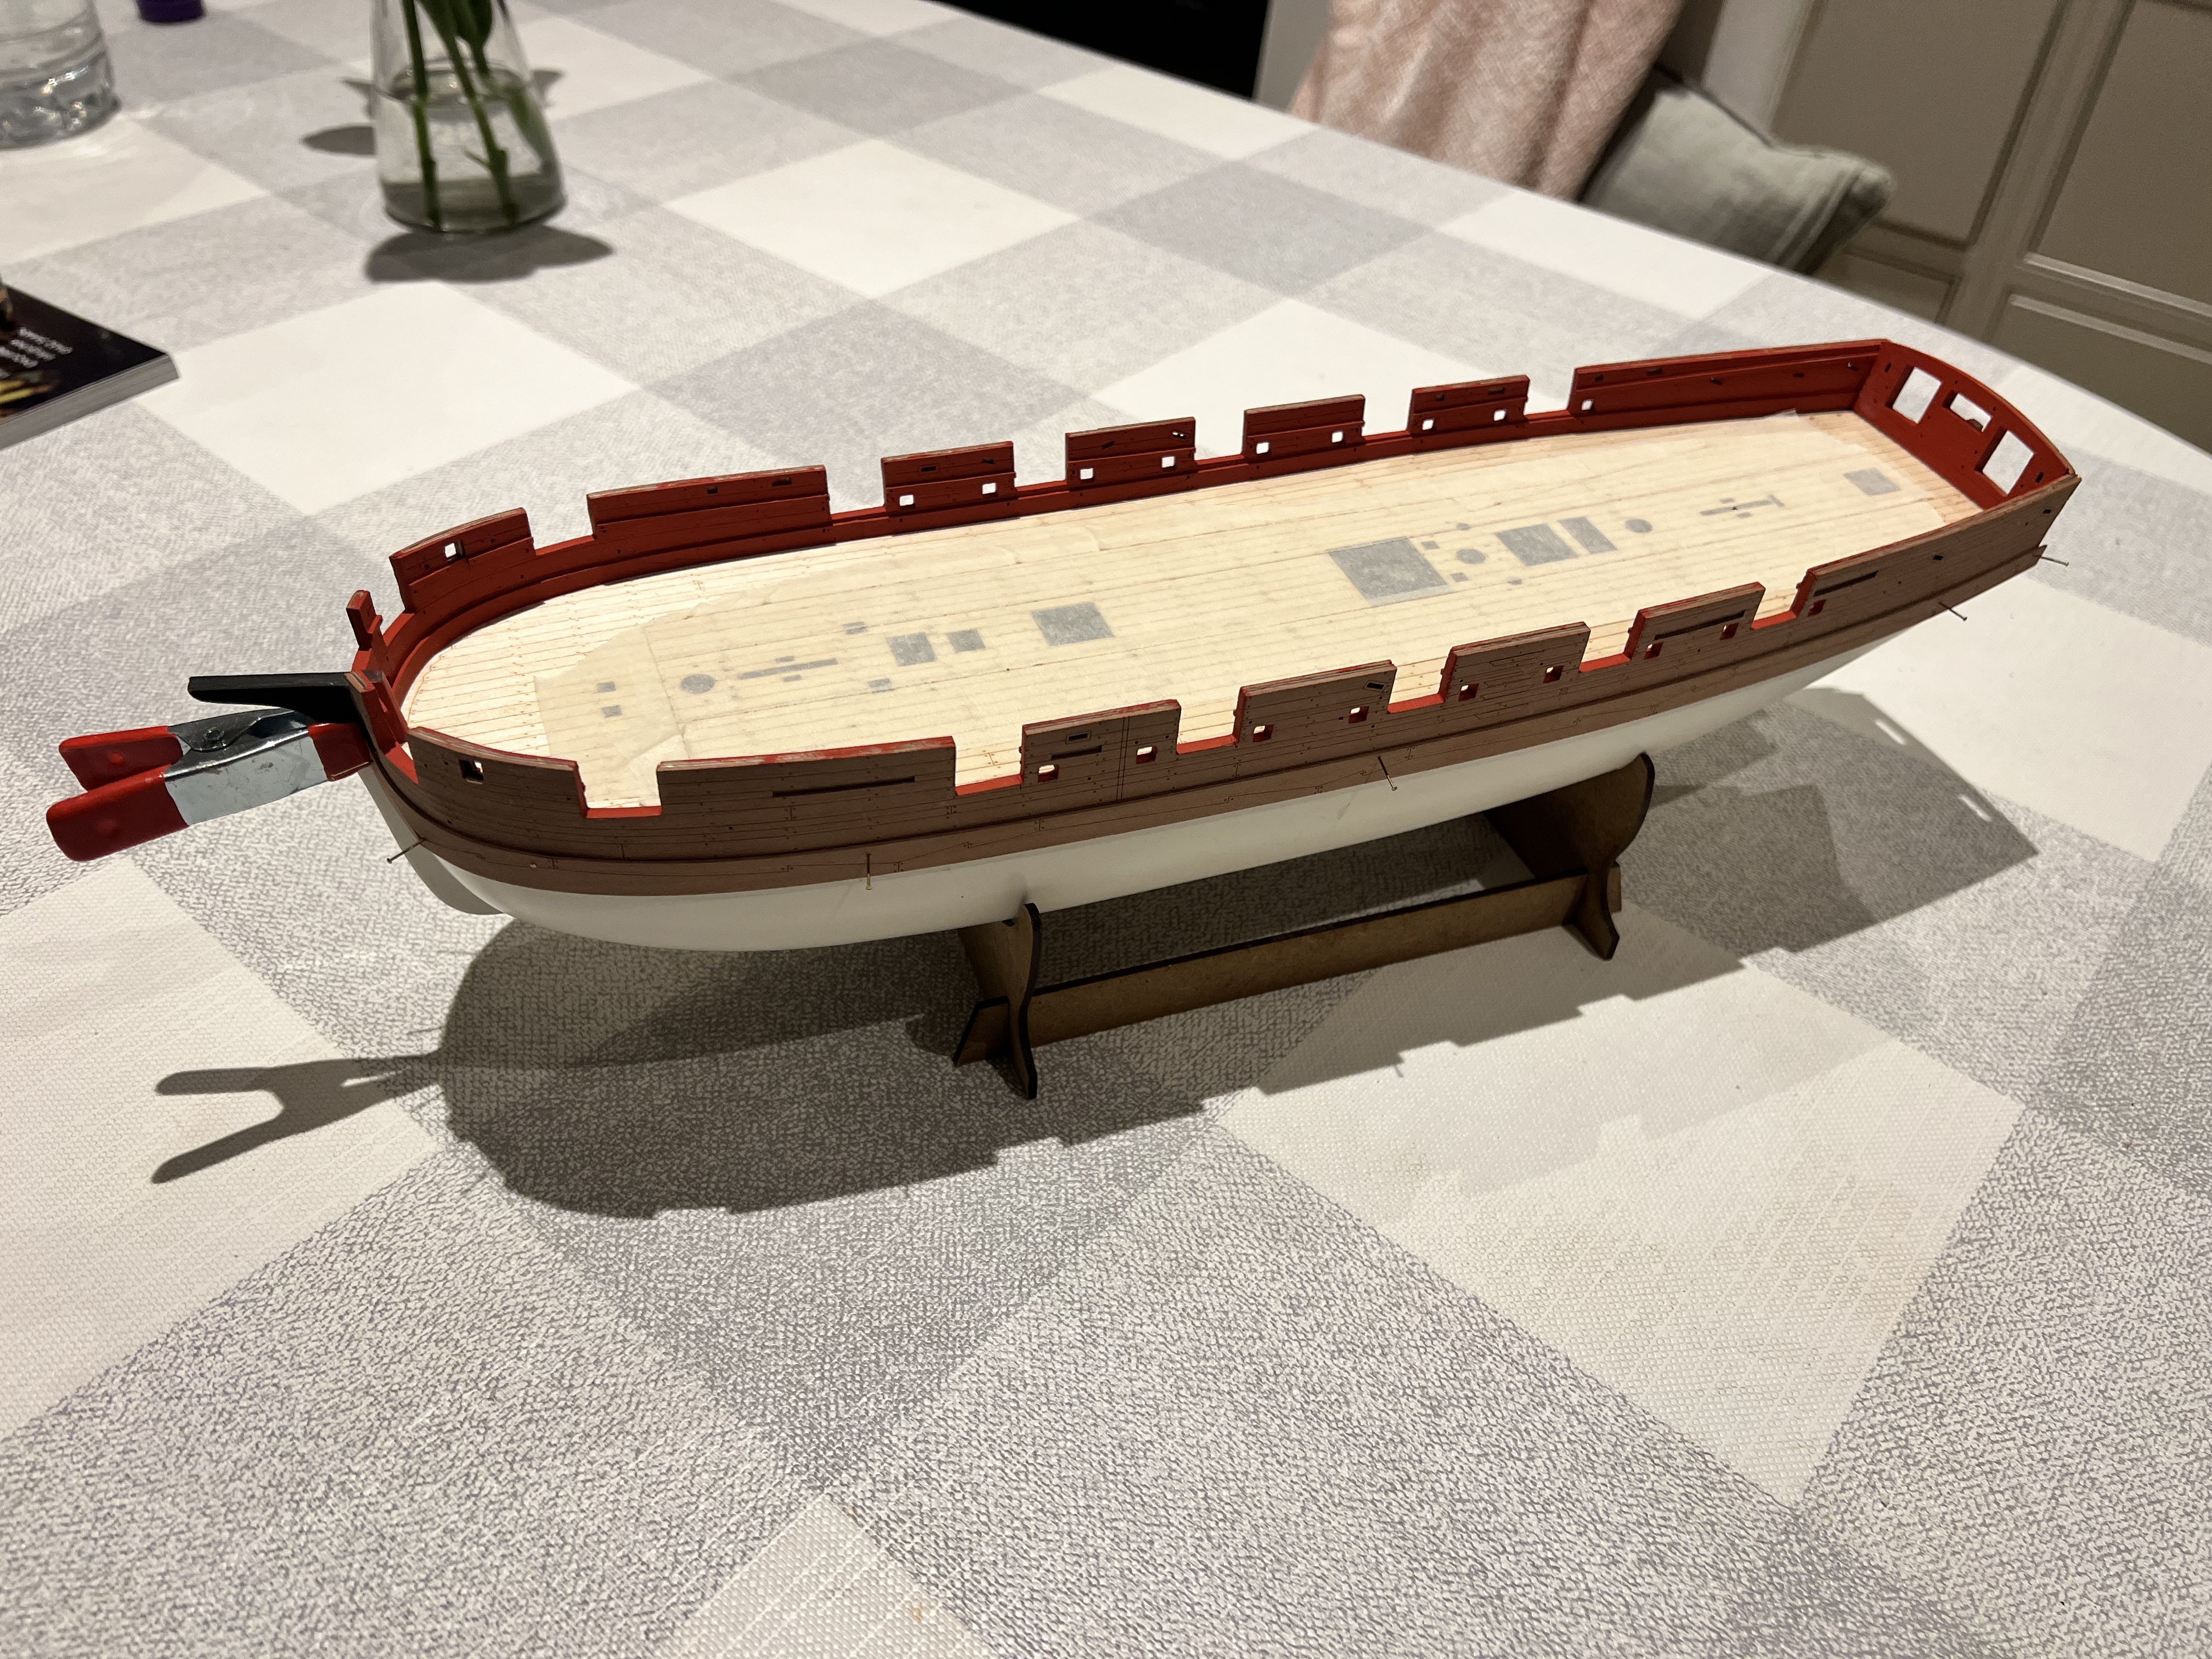
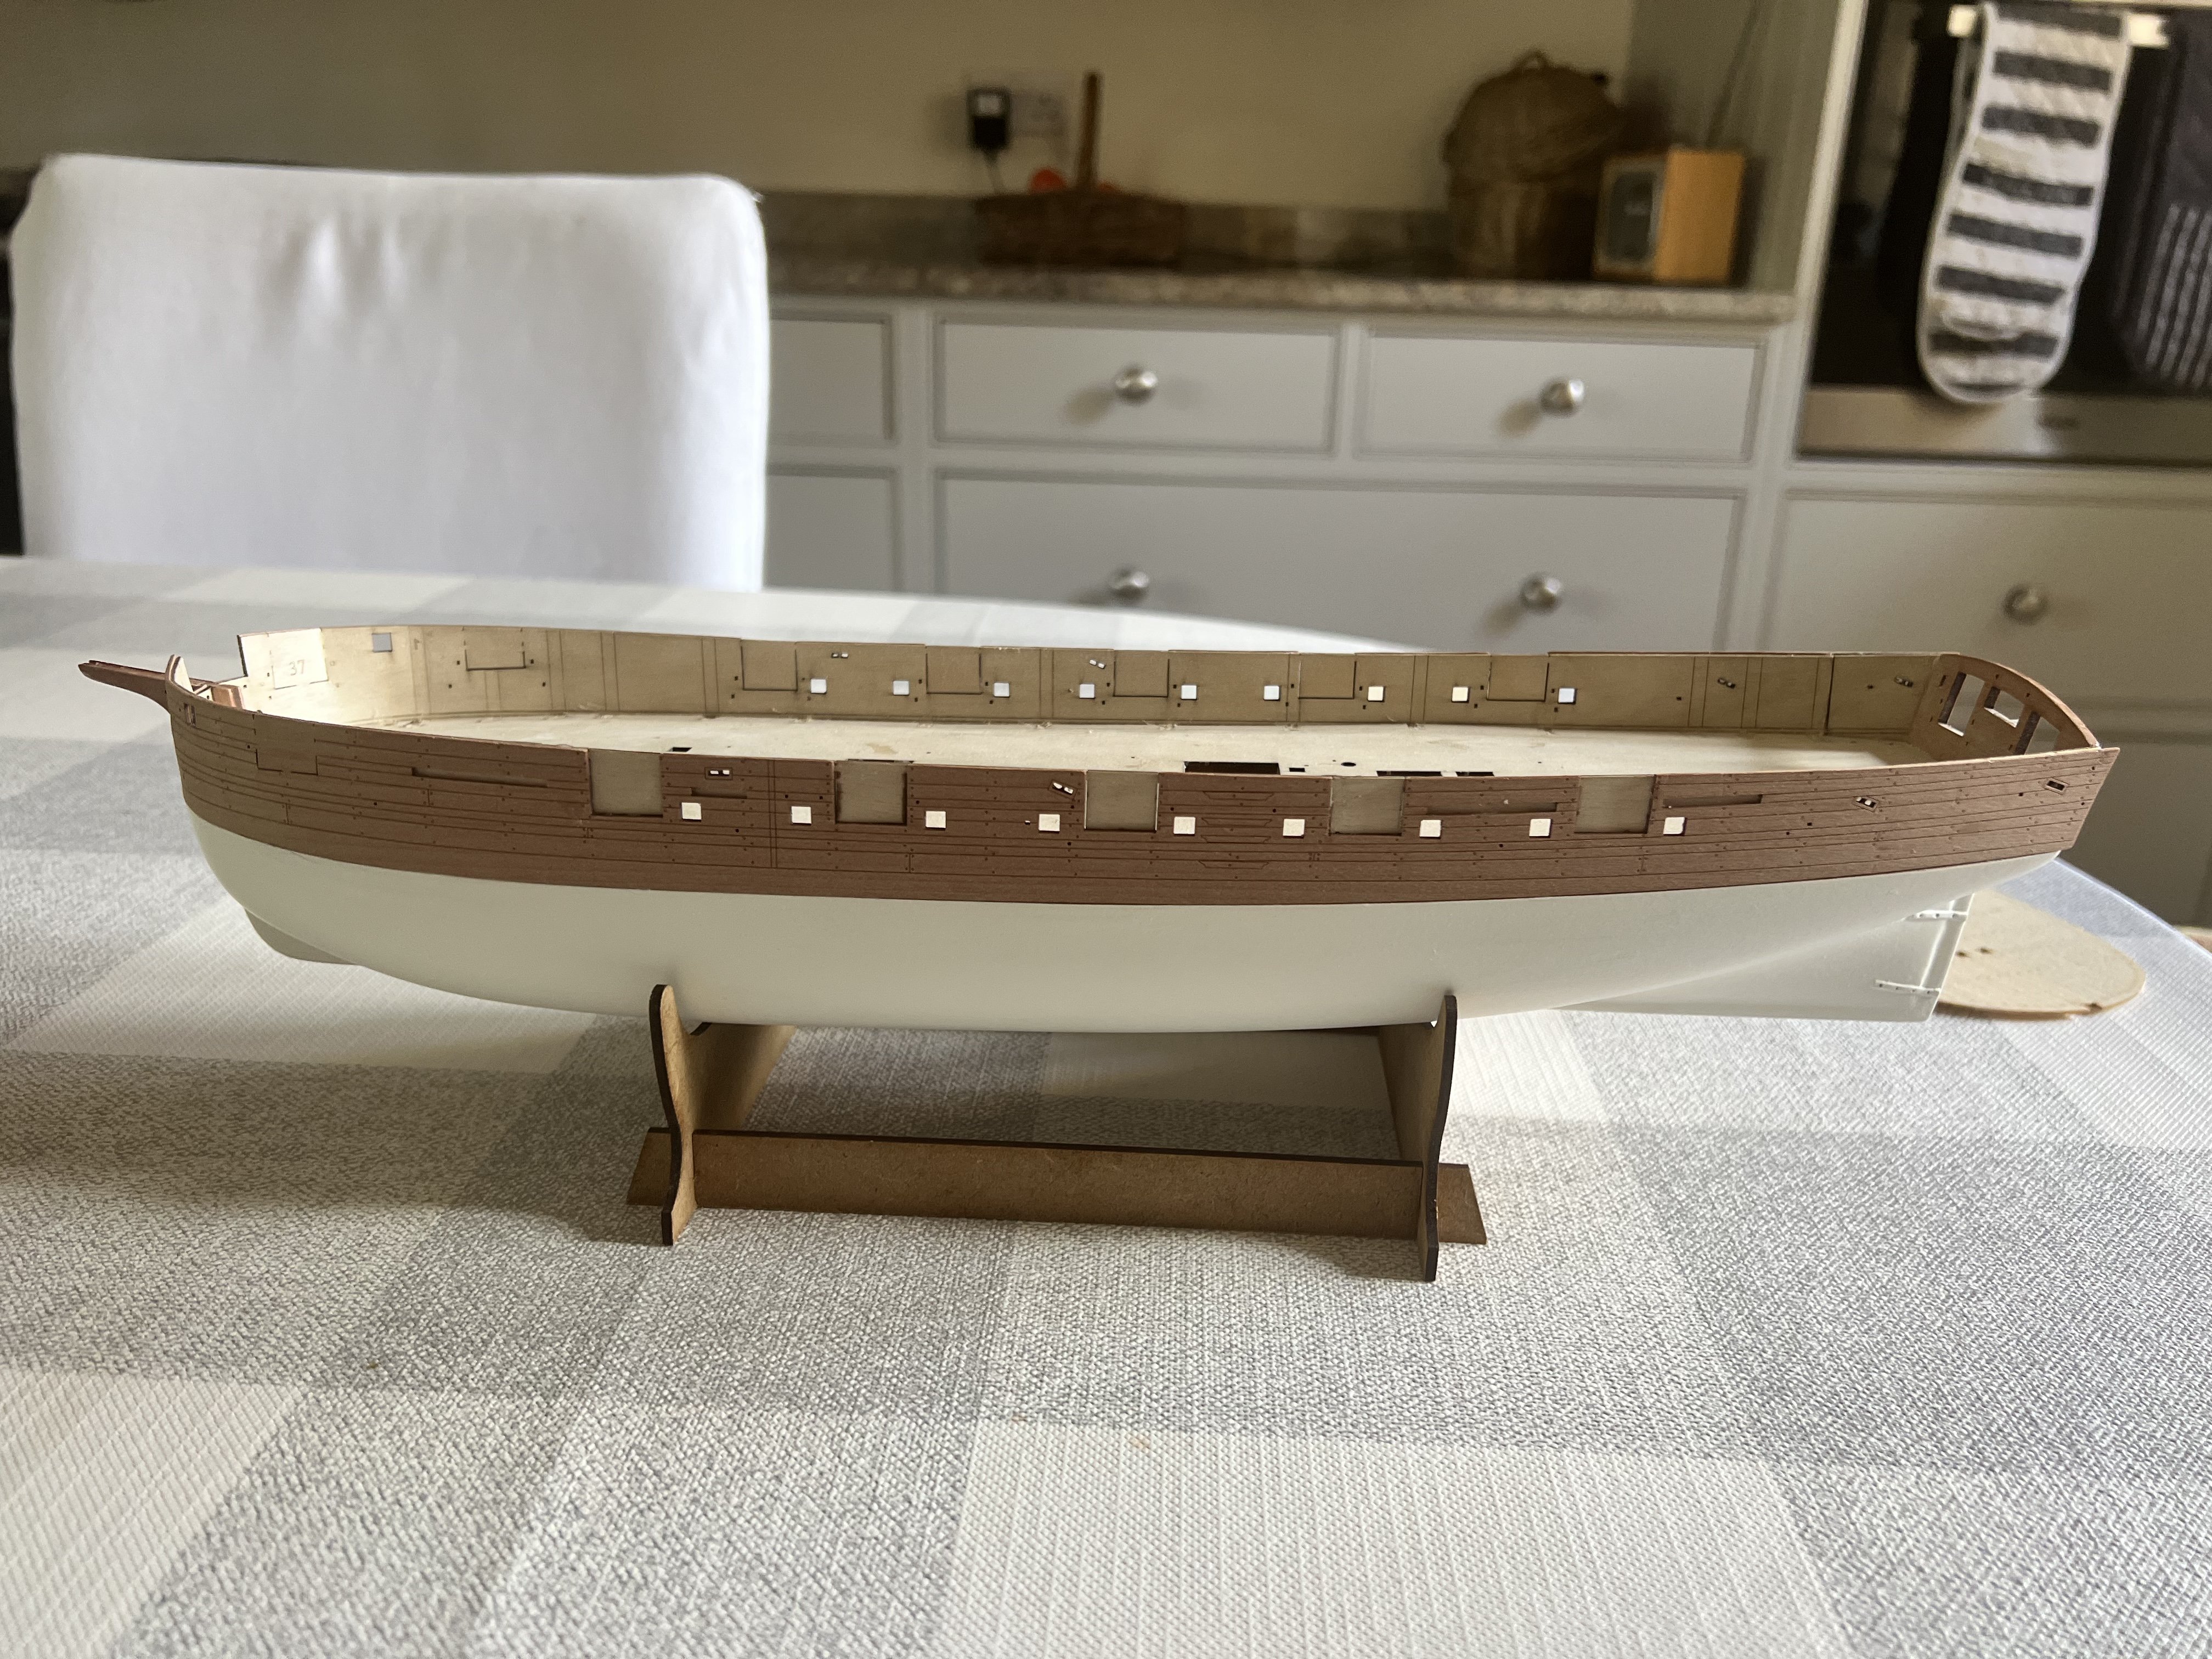
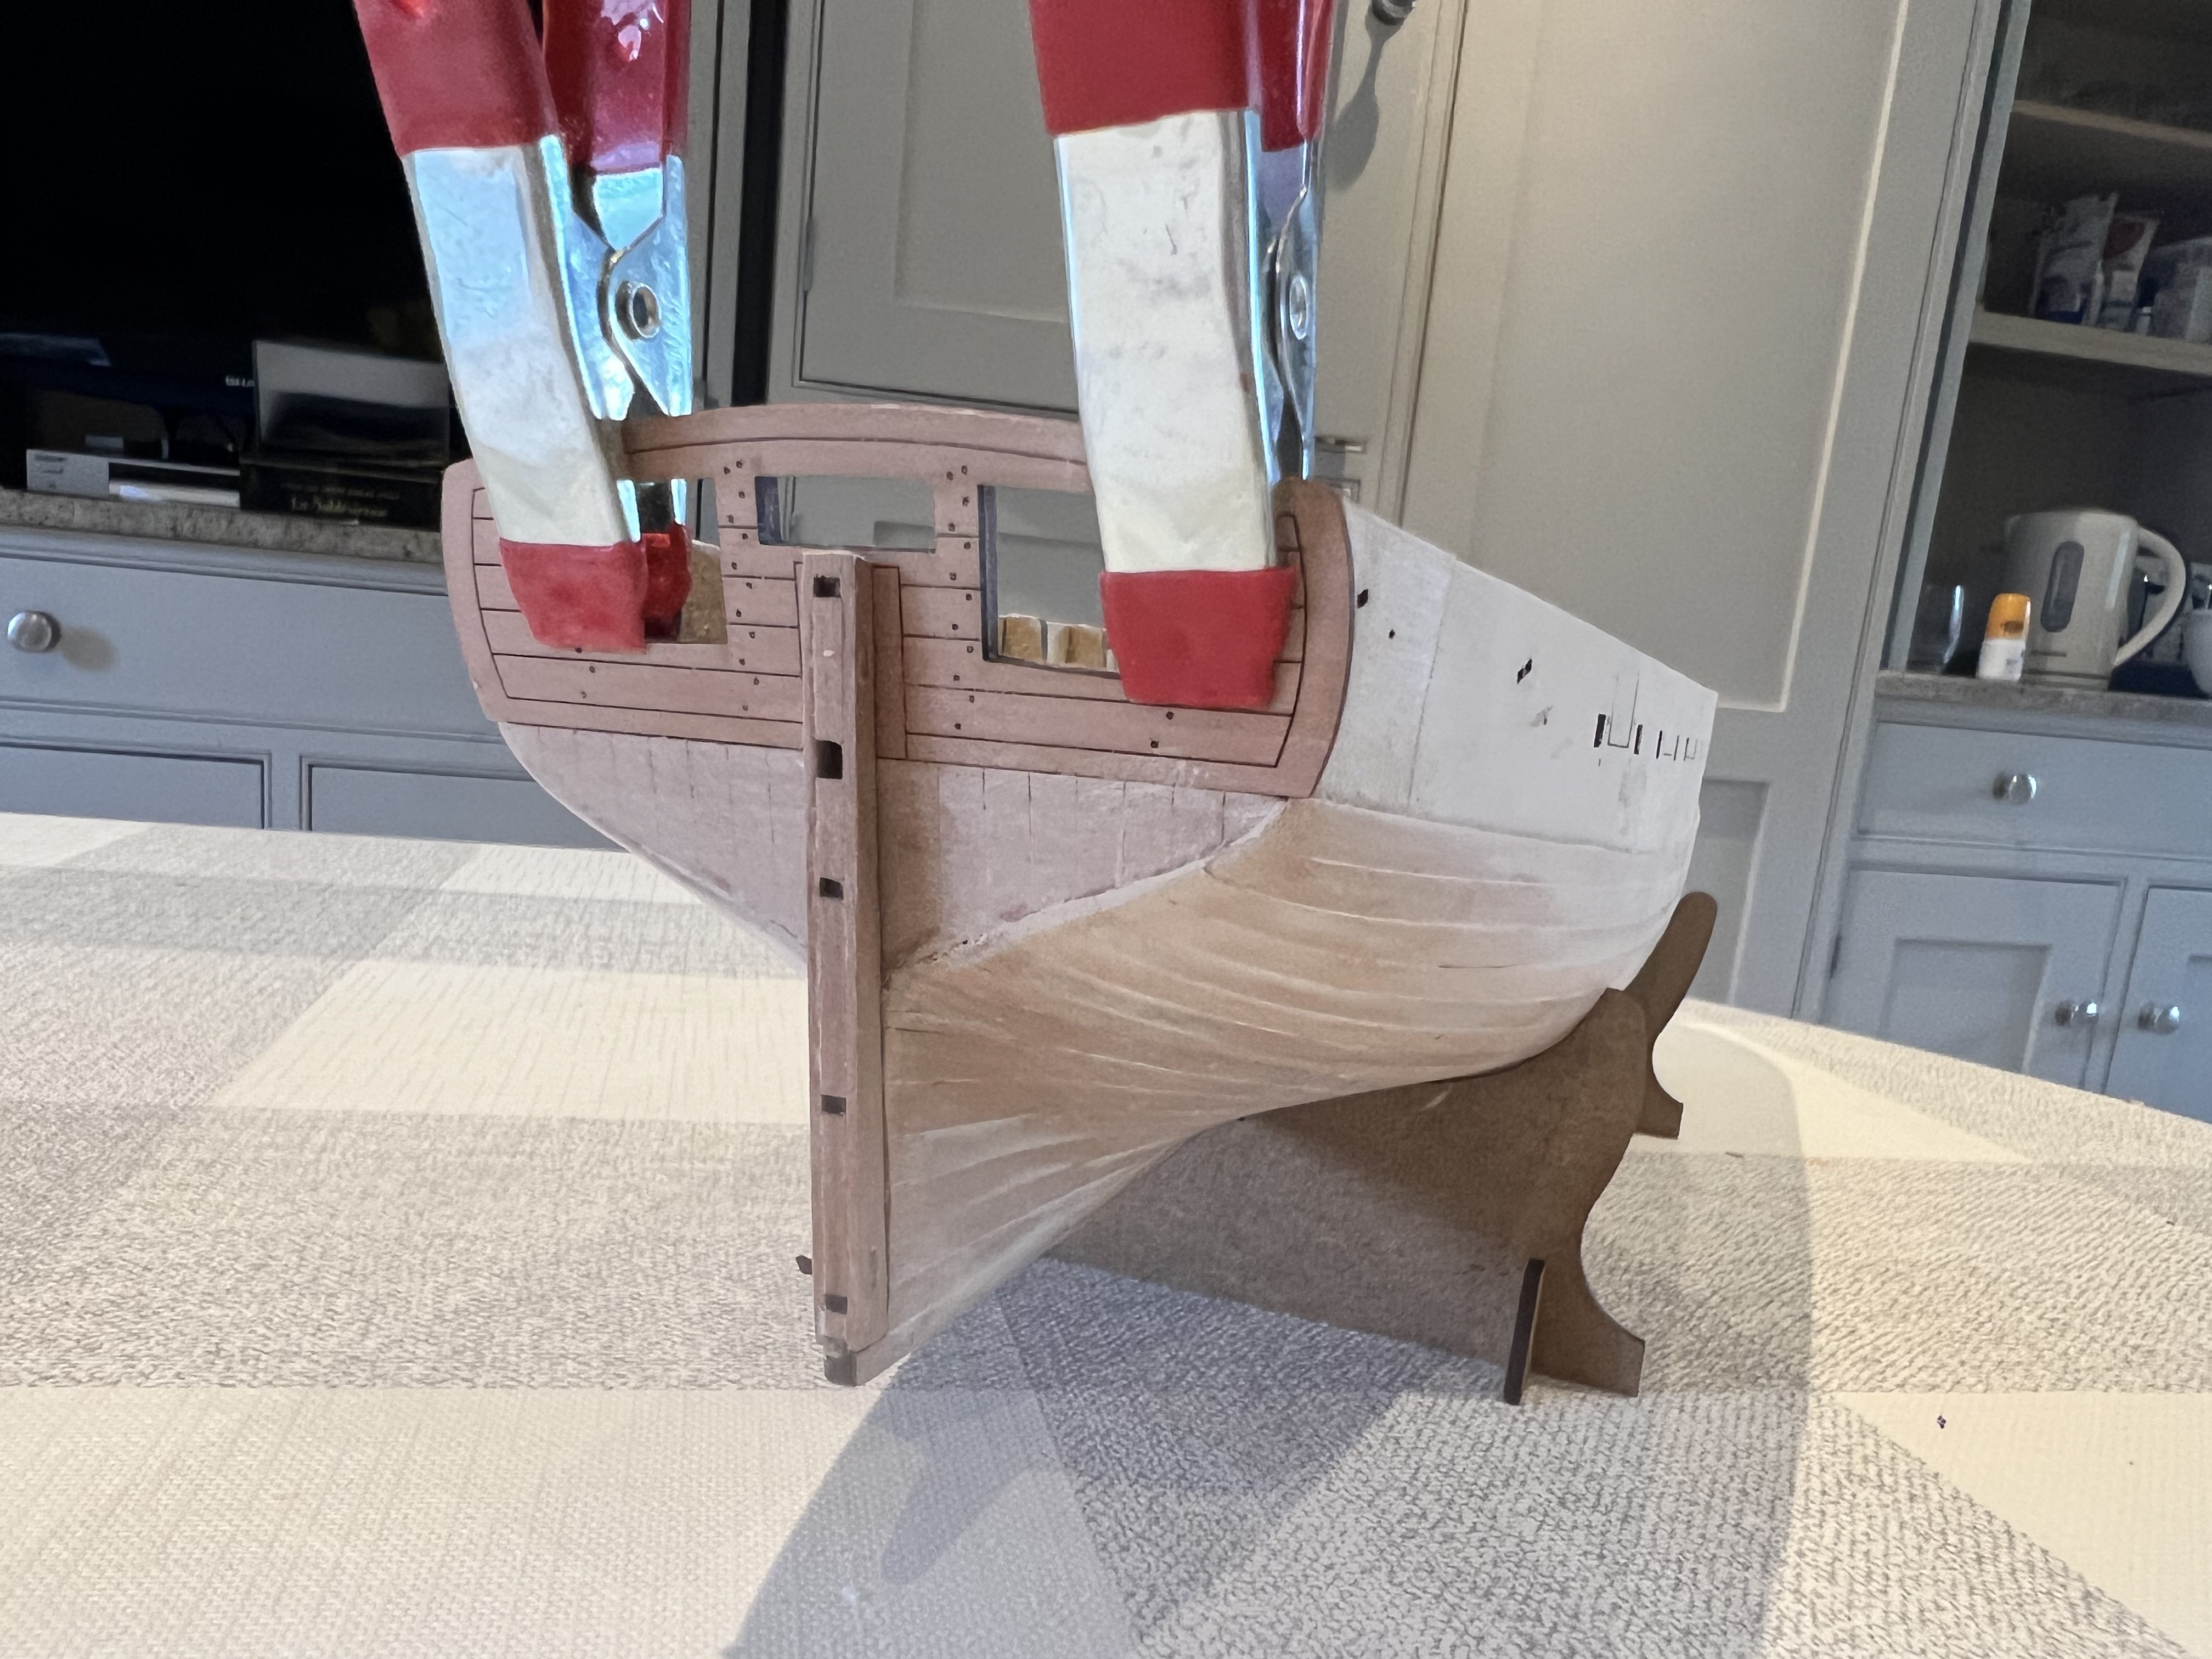
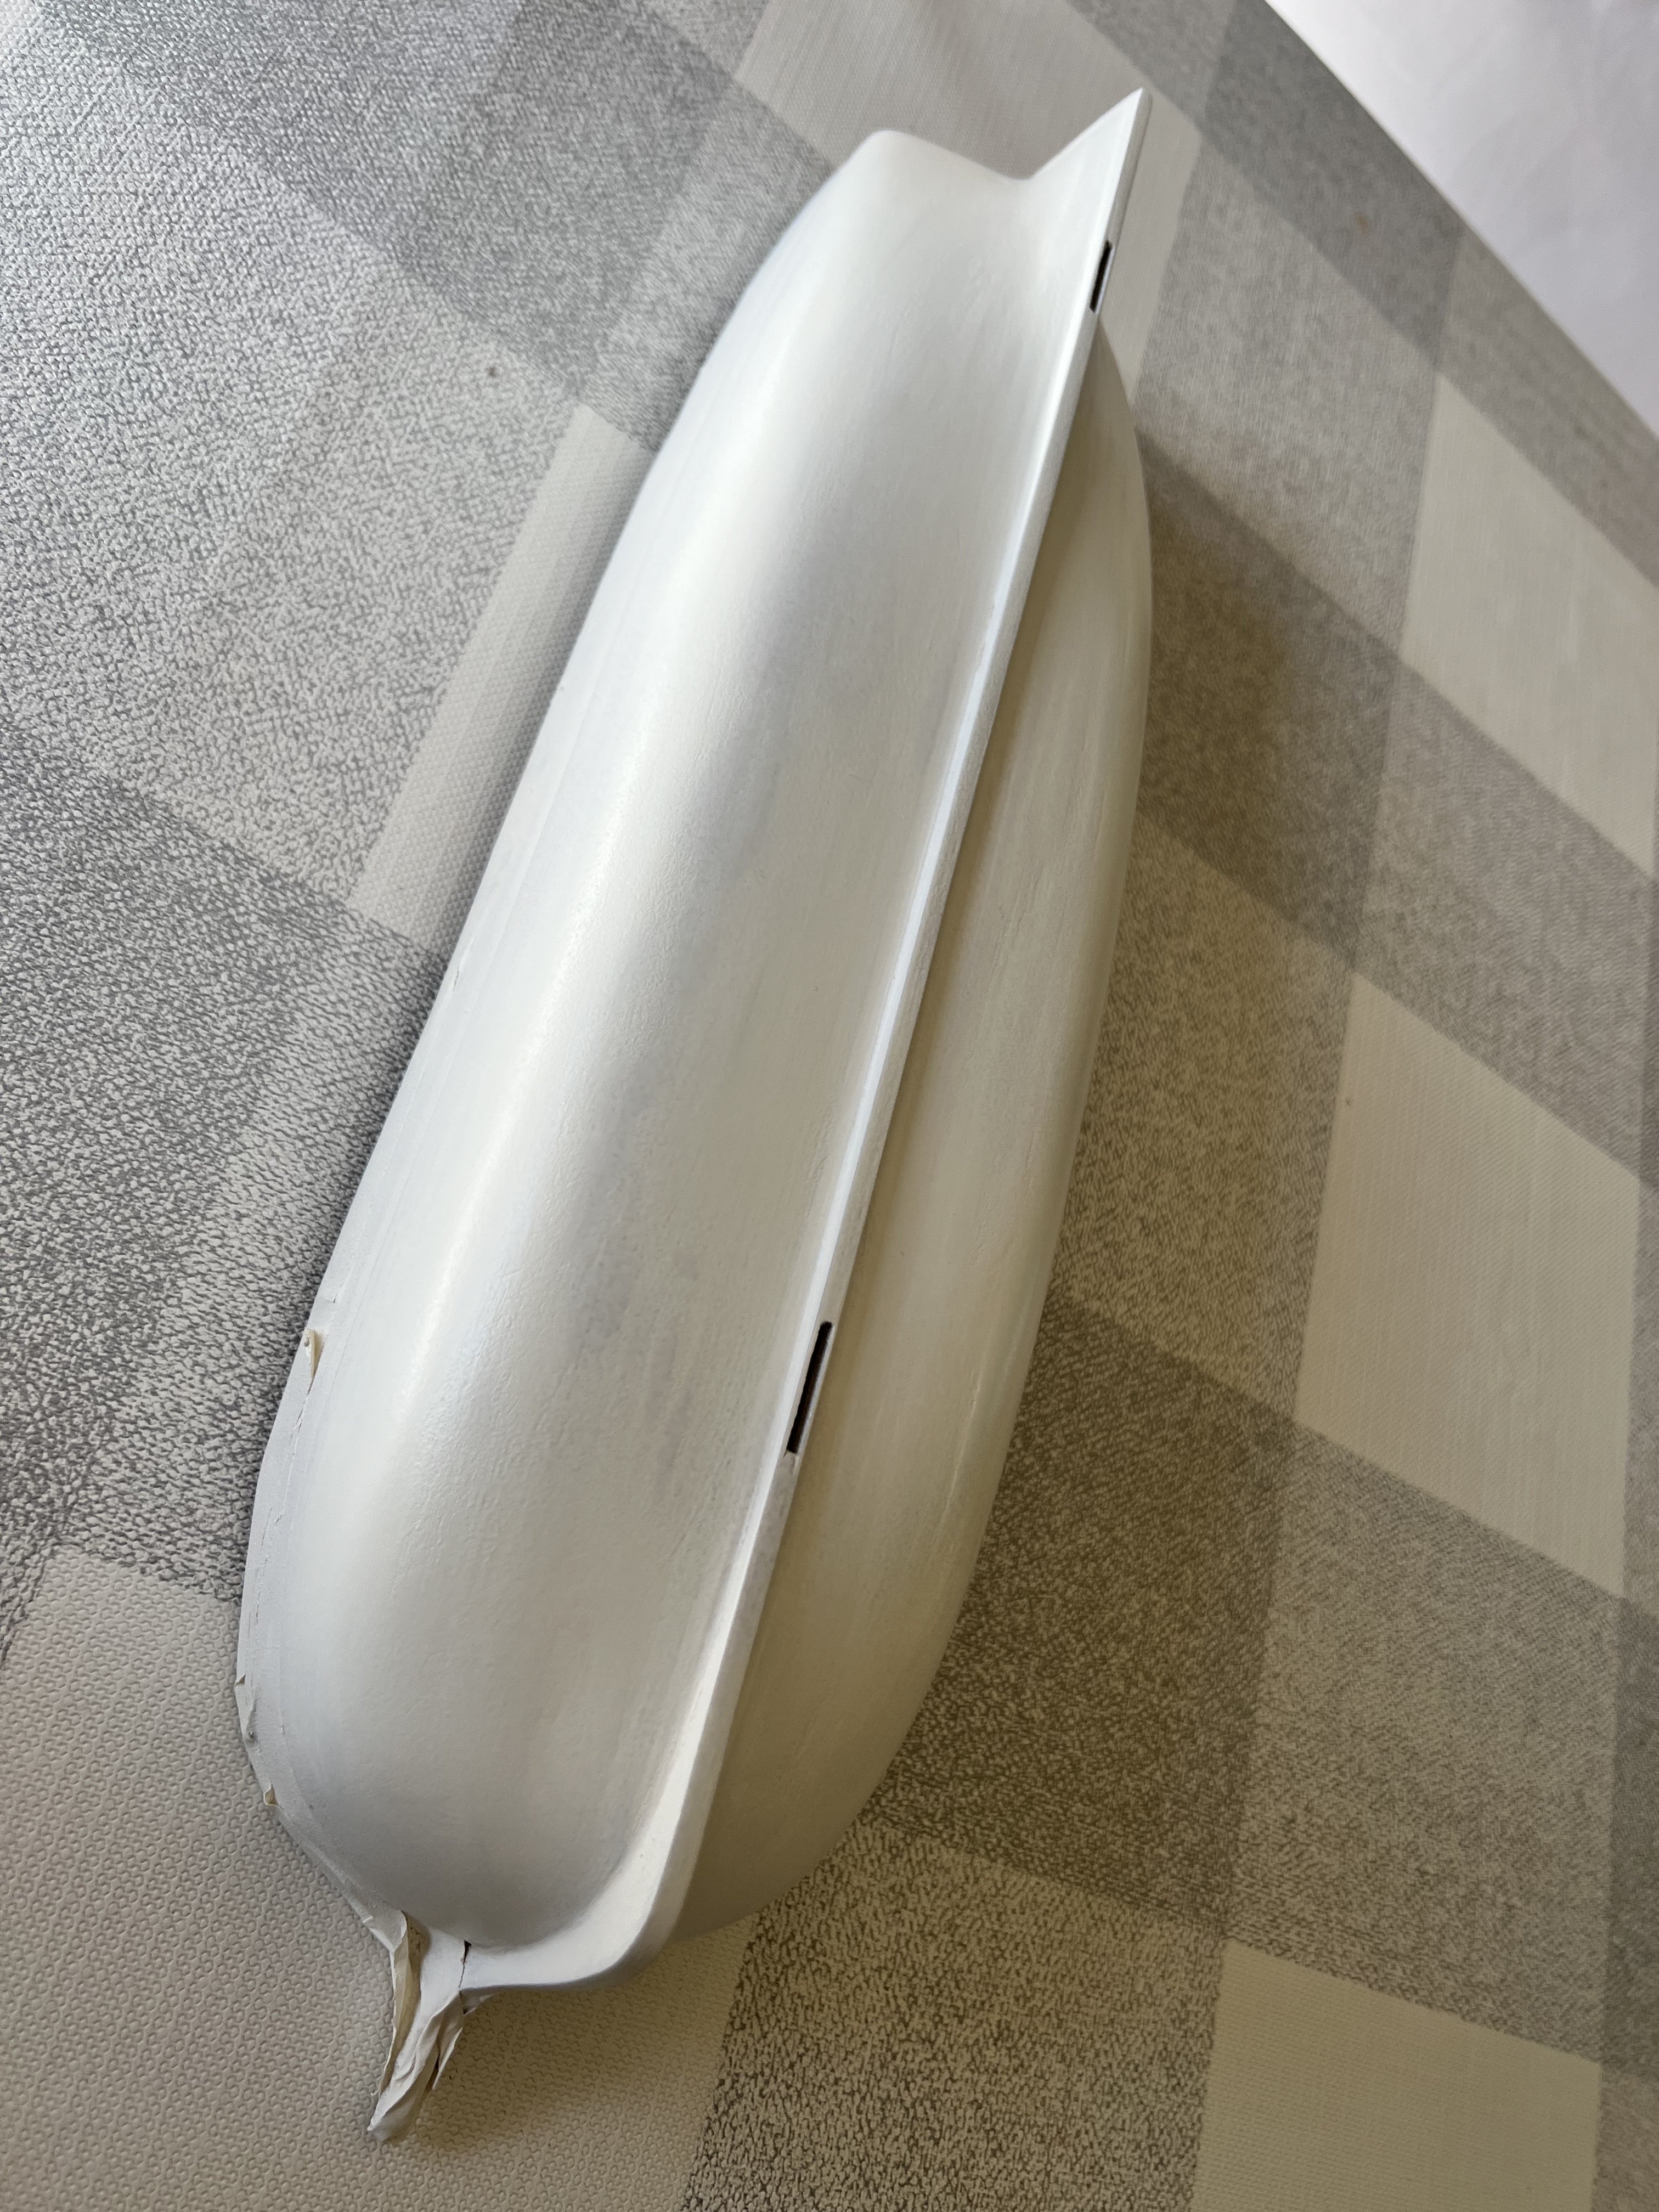
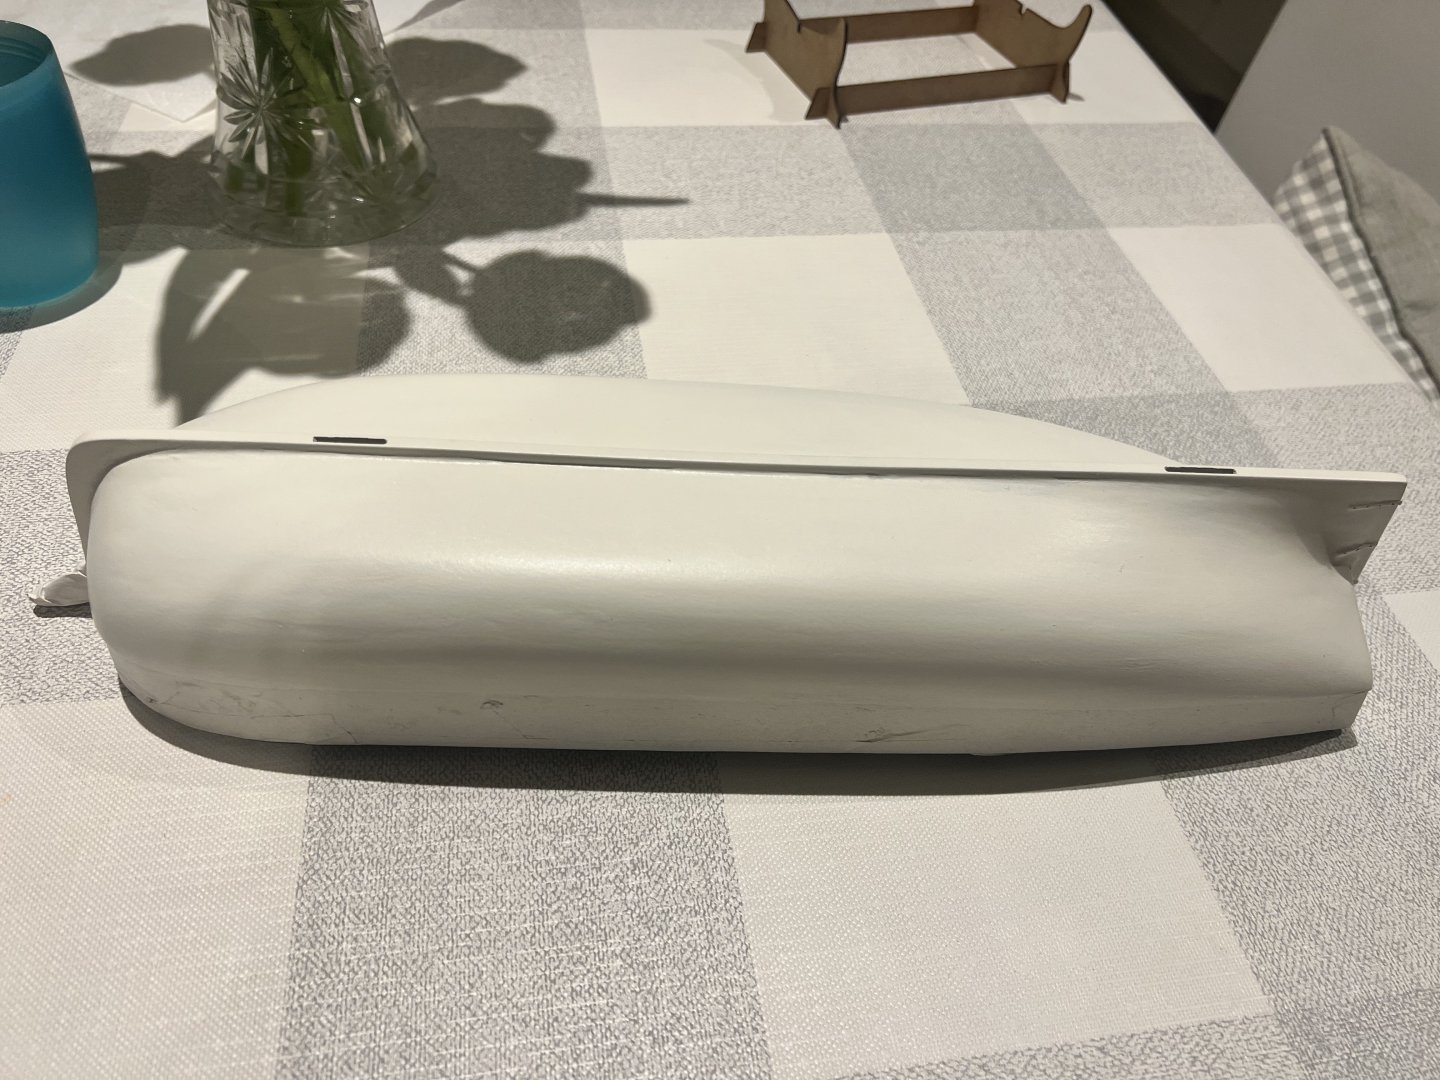
Many coats of paint, filler and sanding later… Added the rudder hinges on too. Smooth, except as always on my builds, I struggle to get the planks neat near the bottom of the rudder post where they do show a little. Masking tape removed. The brilliance of Chris’s design here is that the lower hull is fully painted without any risk of getting paint on any of the outer or inner wooden parts that will show. The line between the upper bulwarks and the white lower hull will be hidden behind black painted gunwales added later providing clear lines on the hull without the risk of paint bleeding under masking tape. Very clever and well thought out.


- 146 replies
-
- 9
-
-
- Adder
- Vanguard Models
- (and 1 more)
-
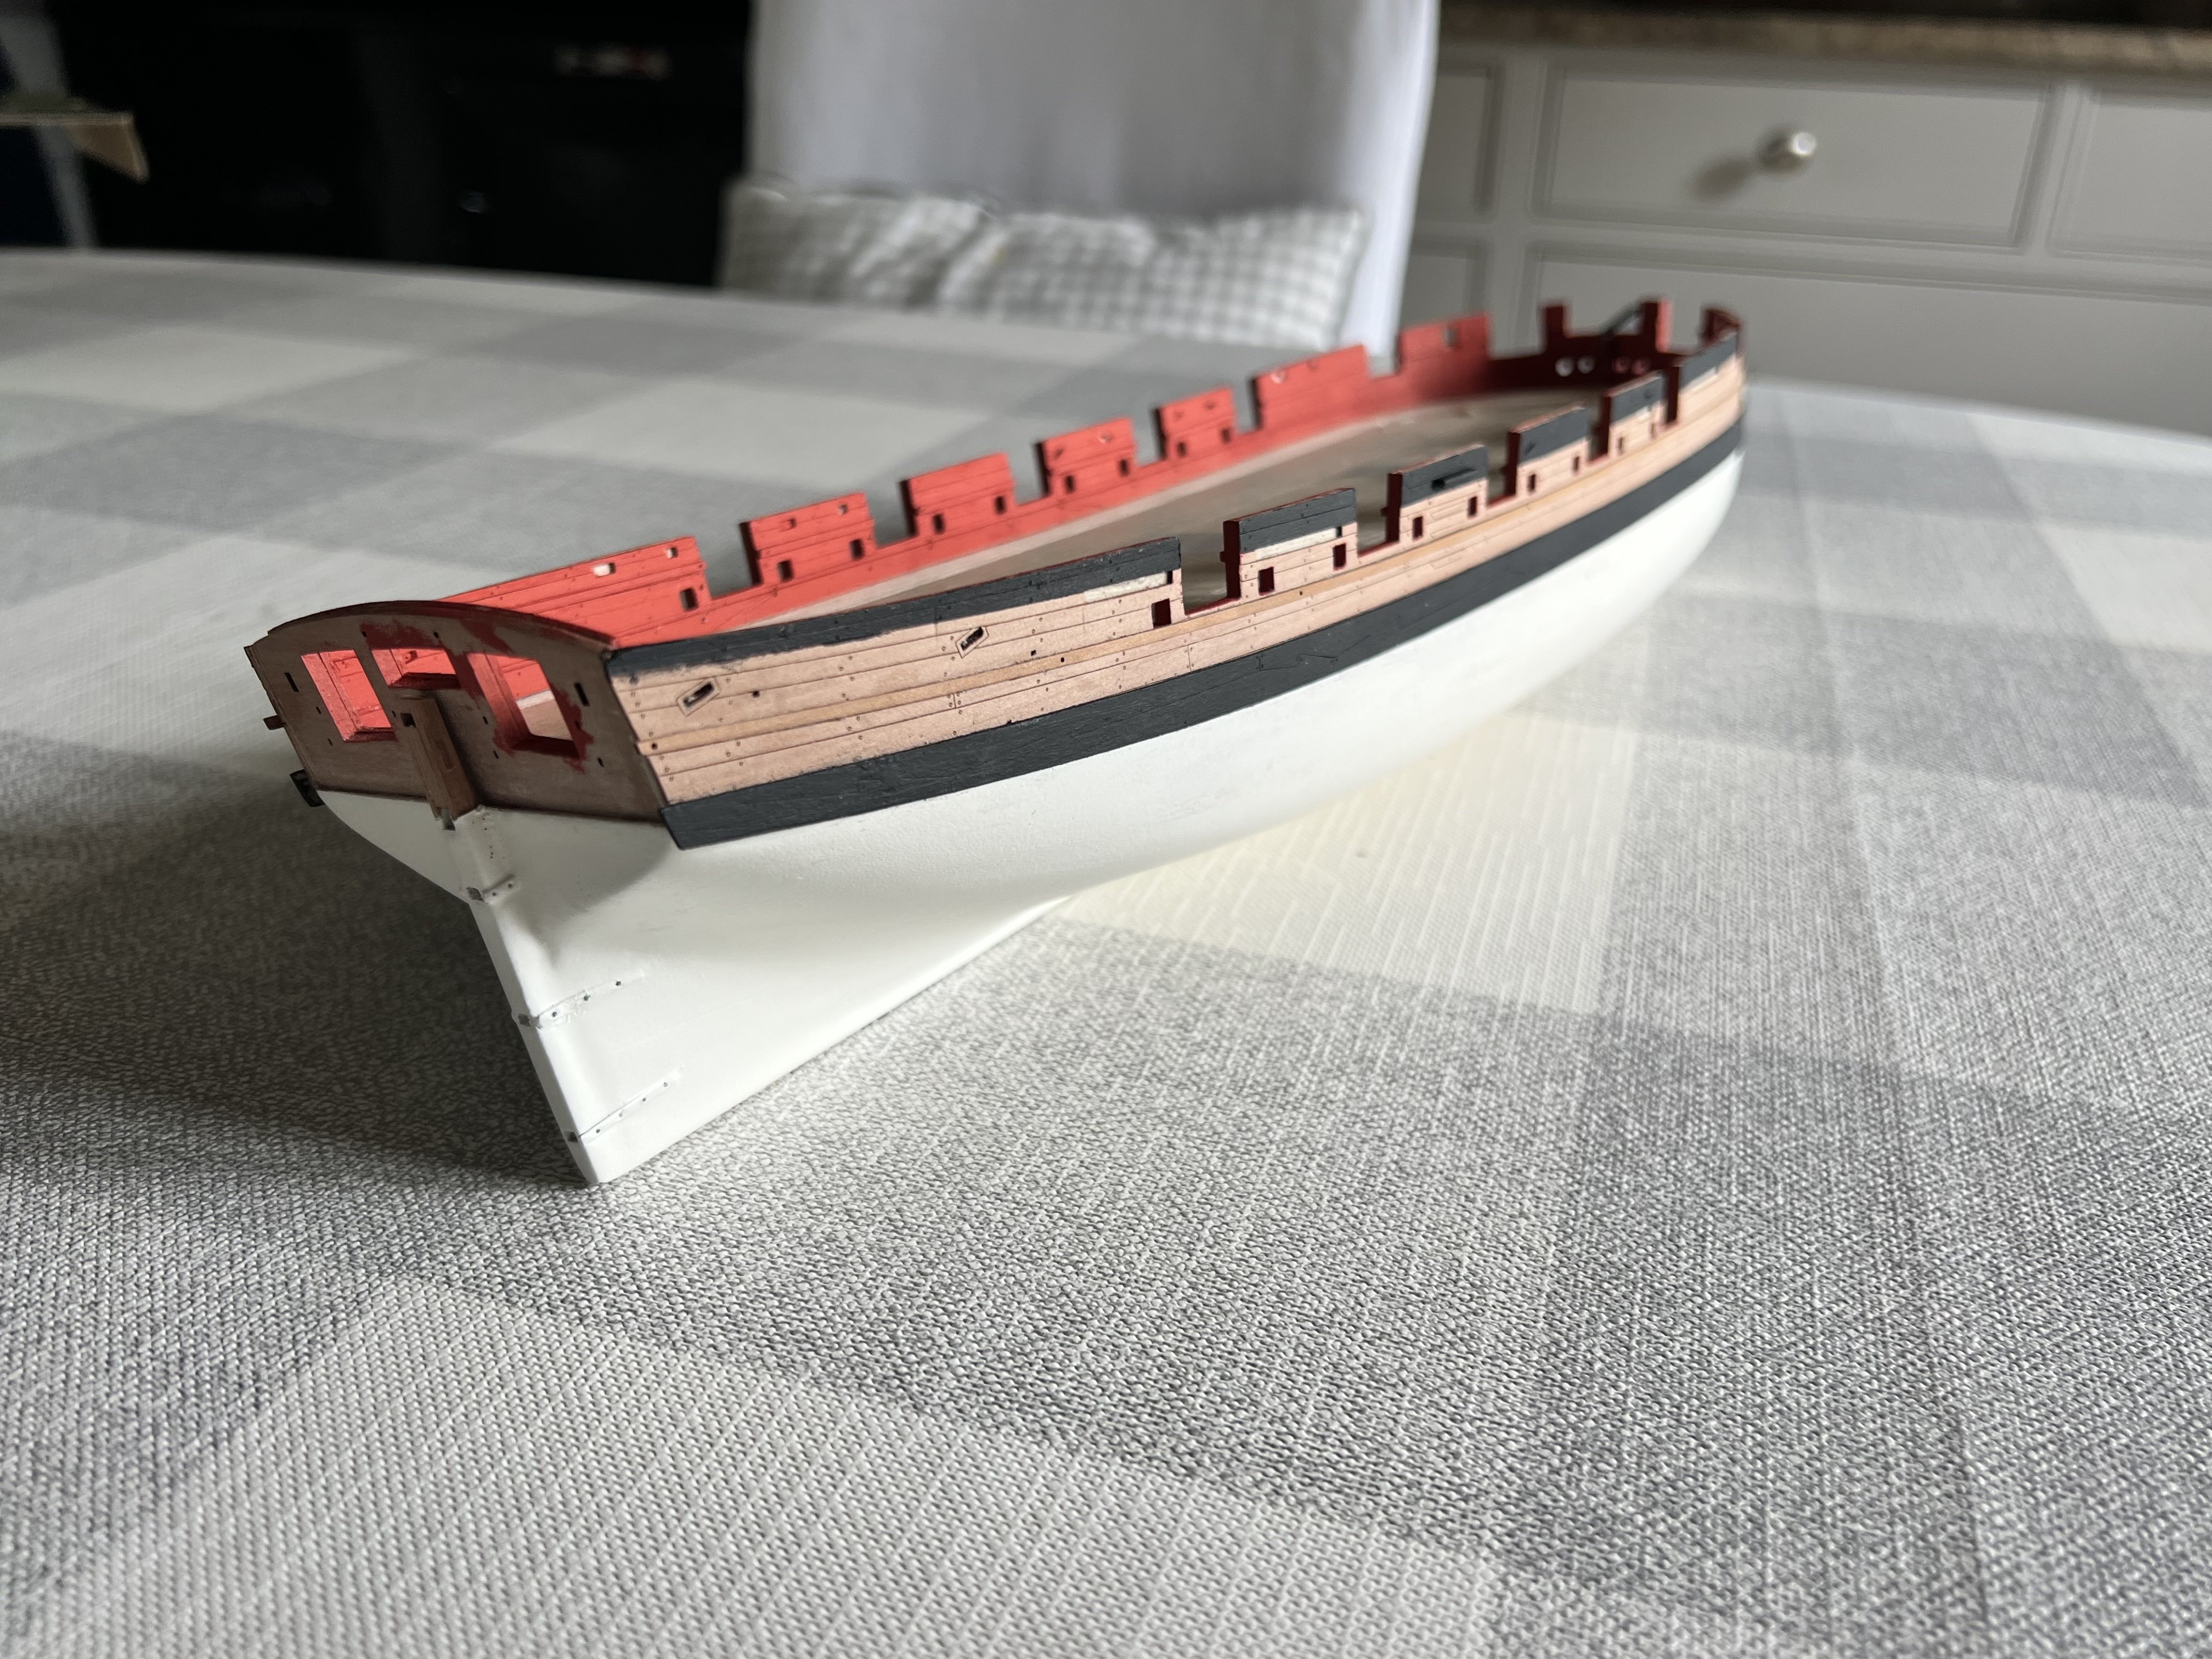
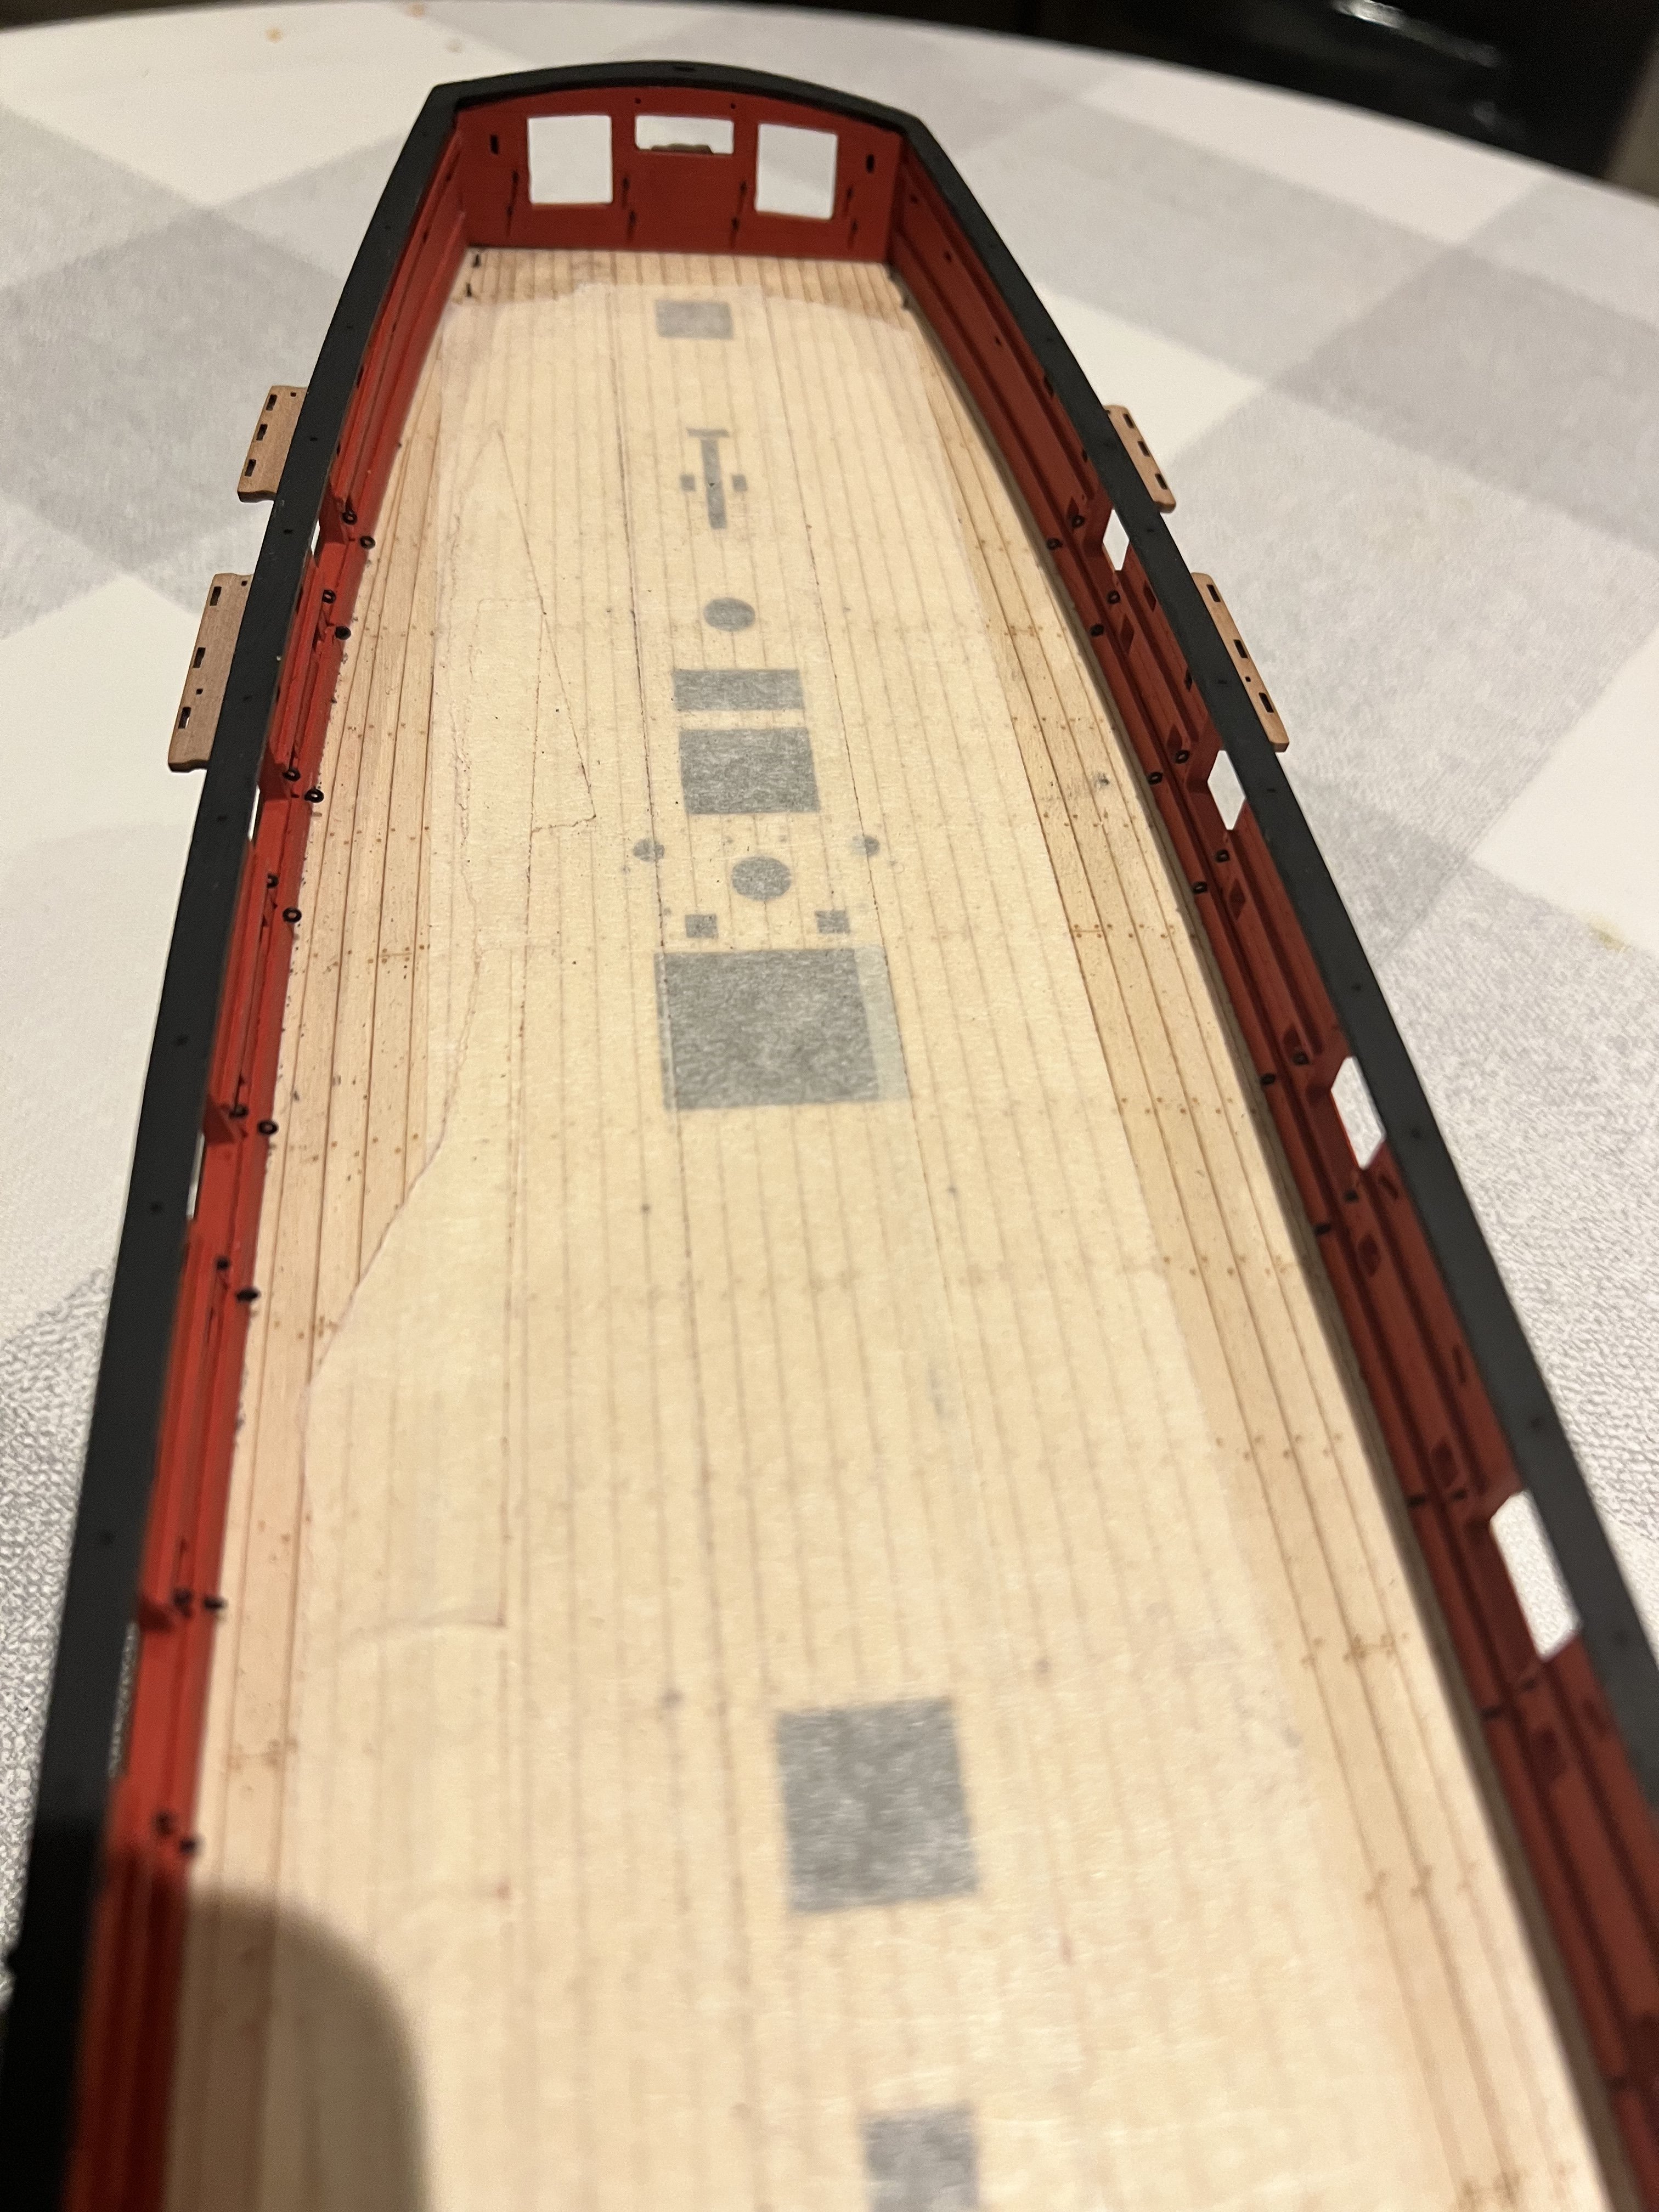
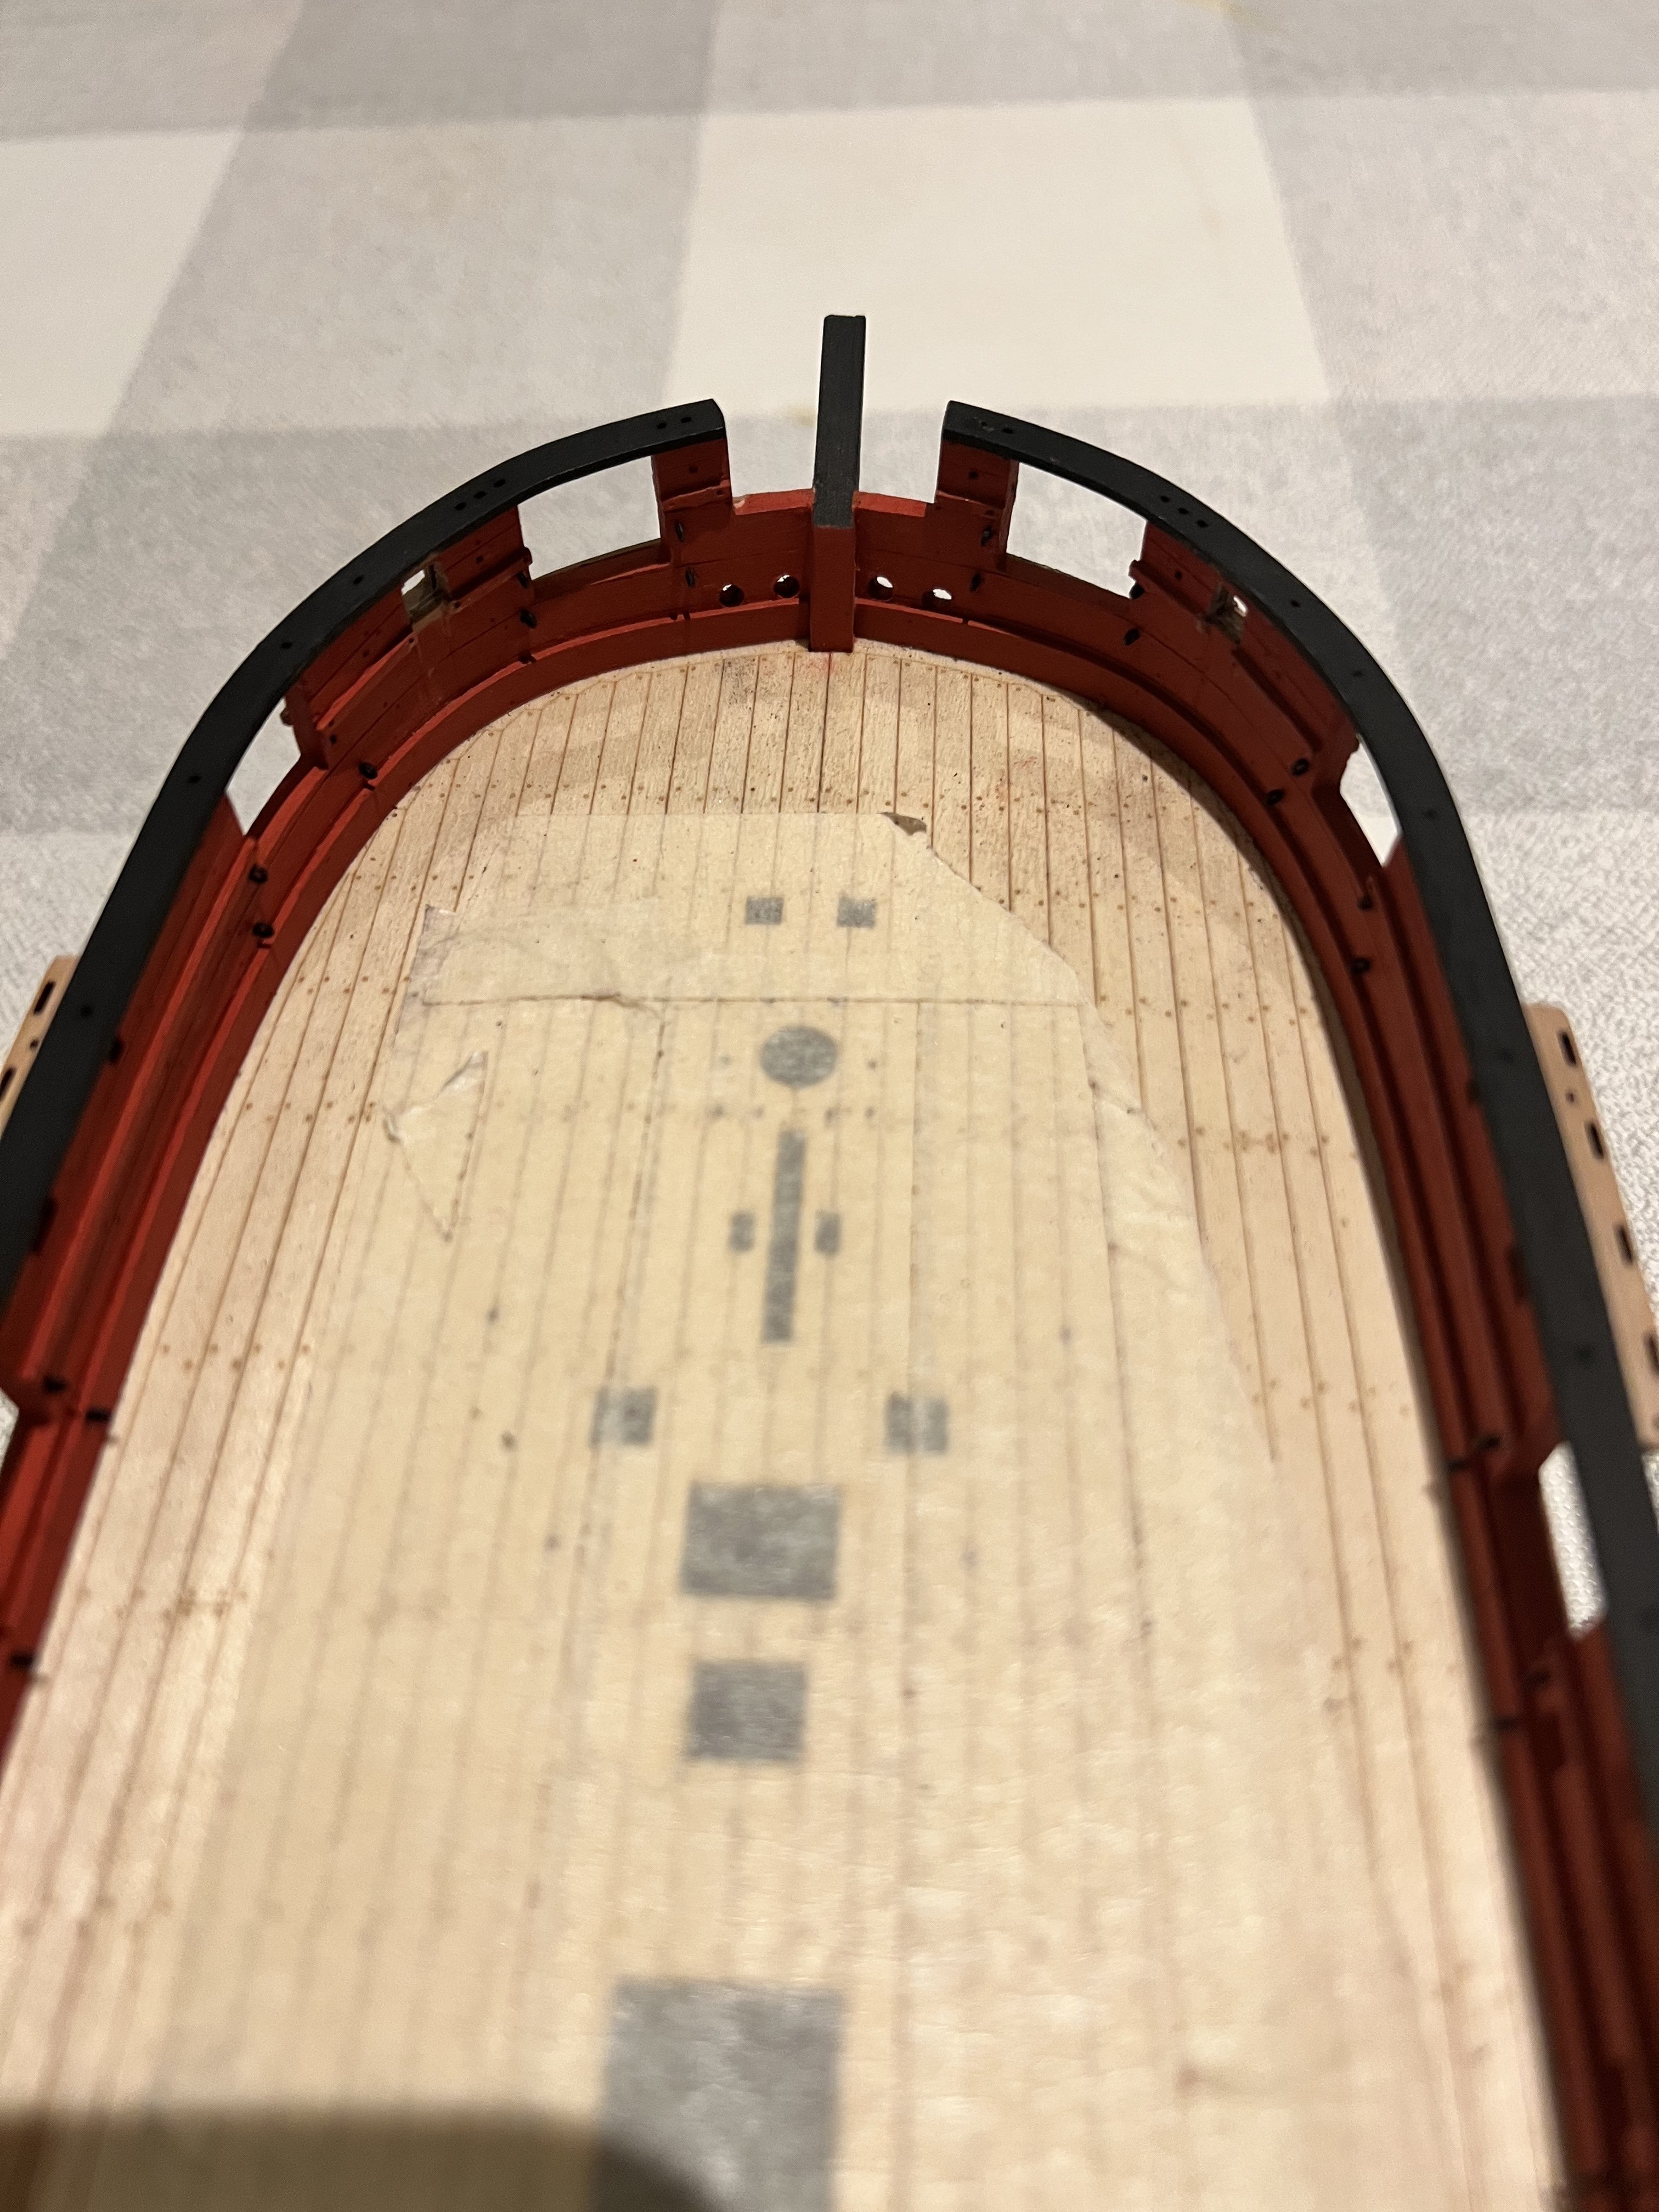
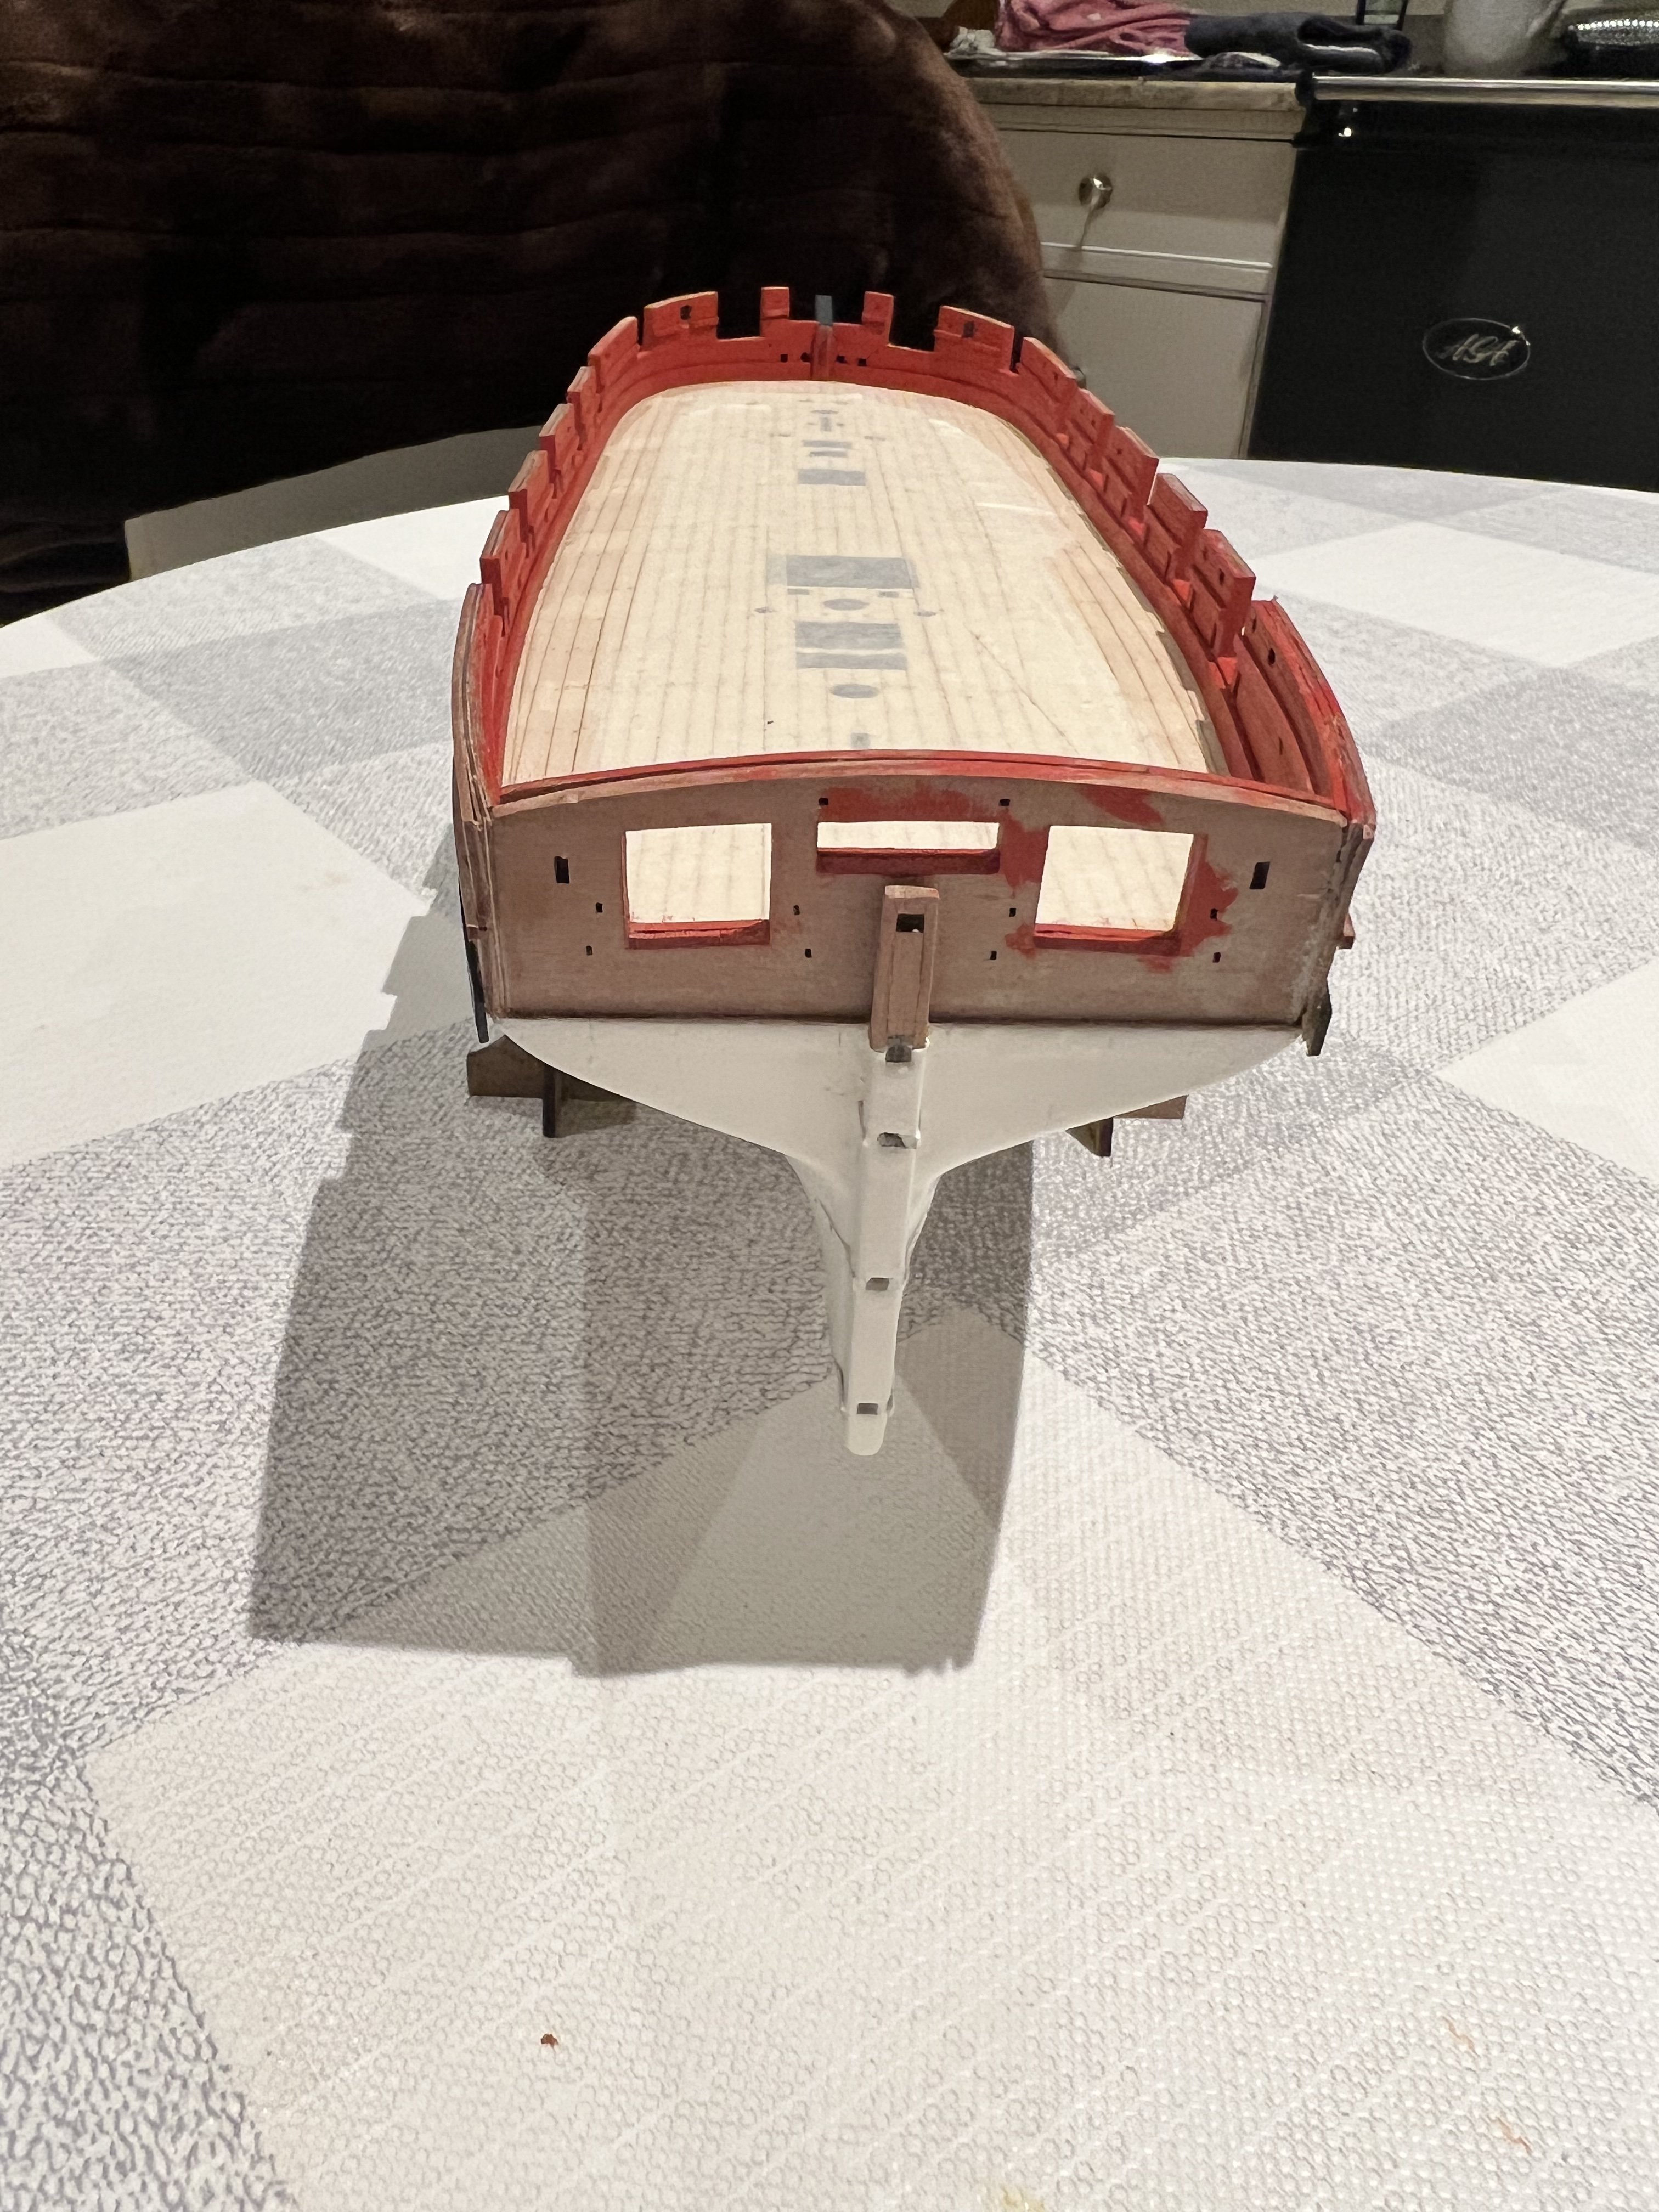
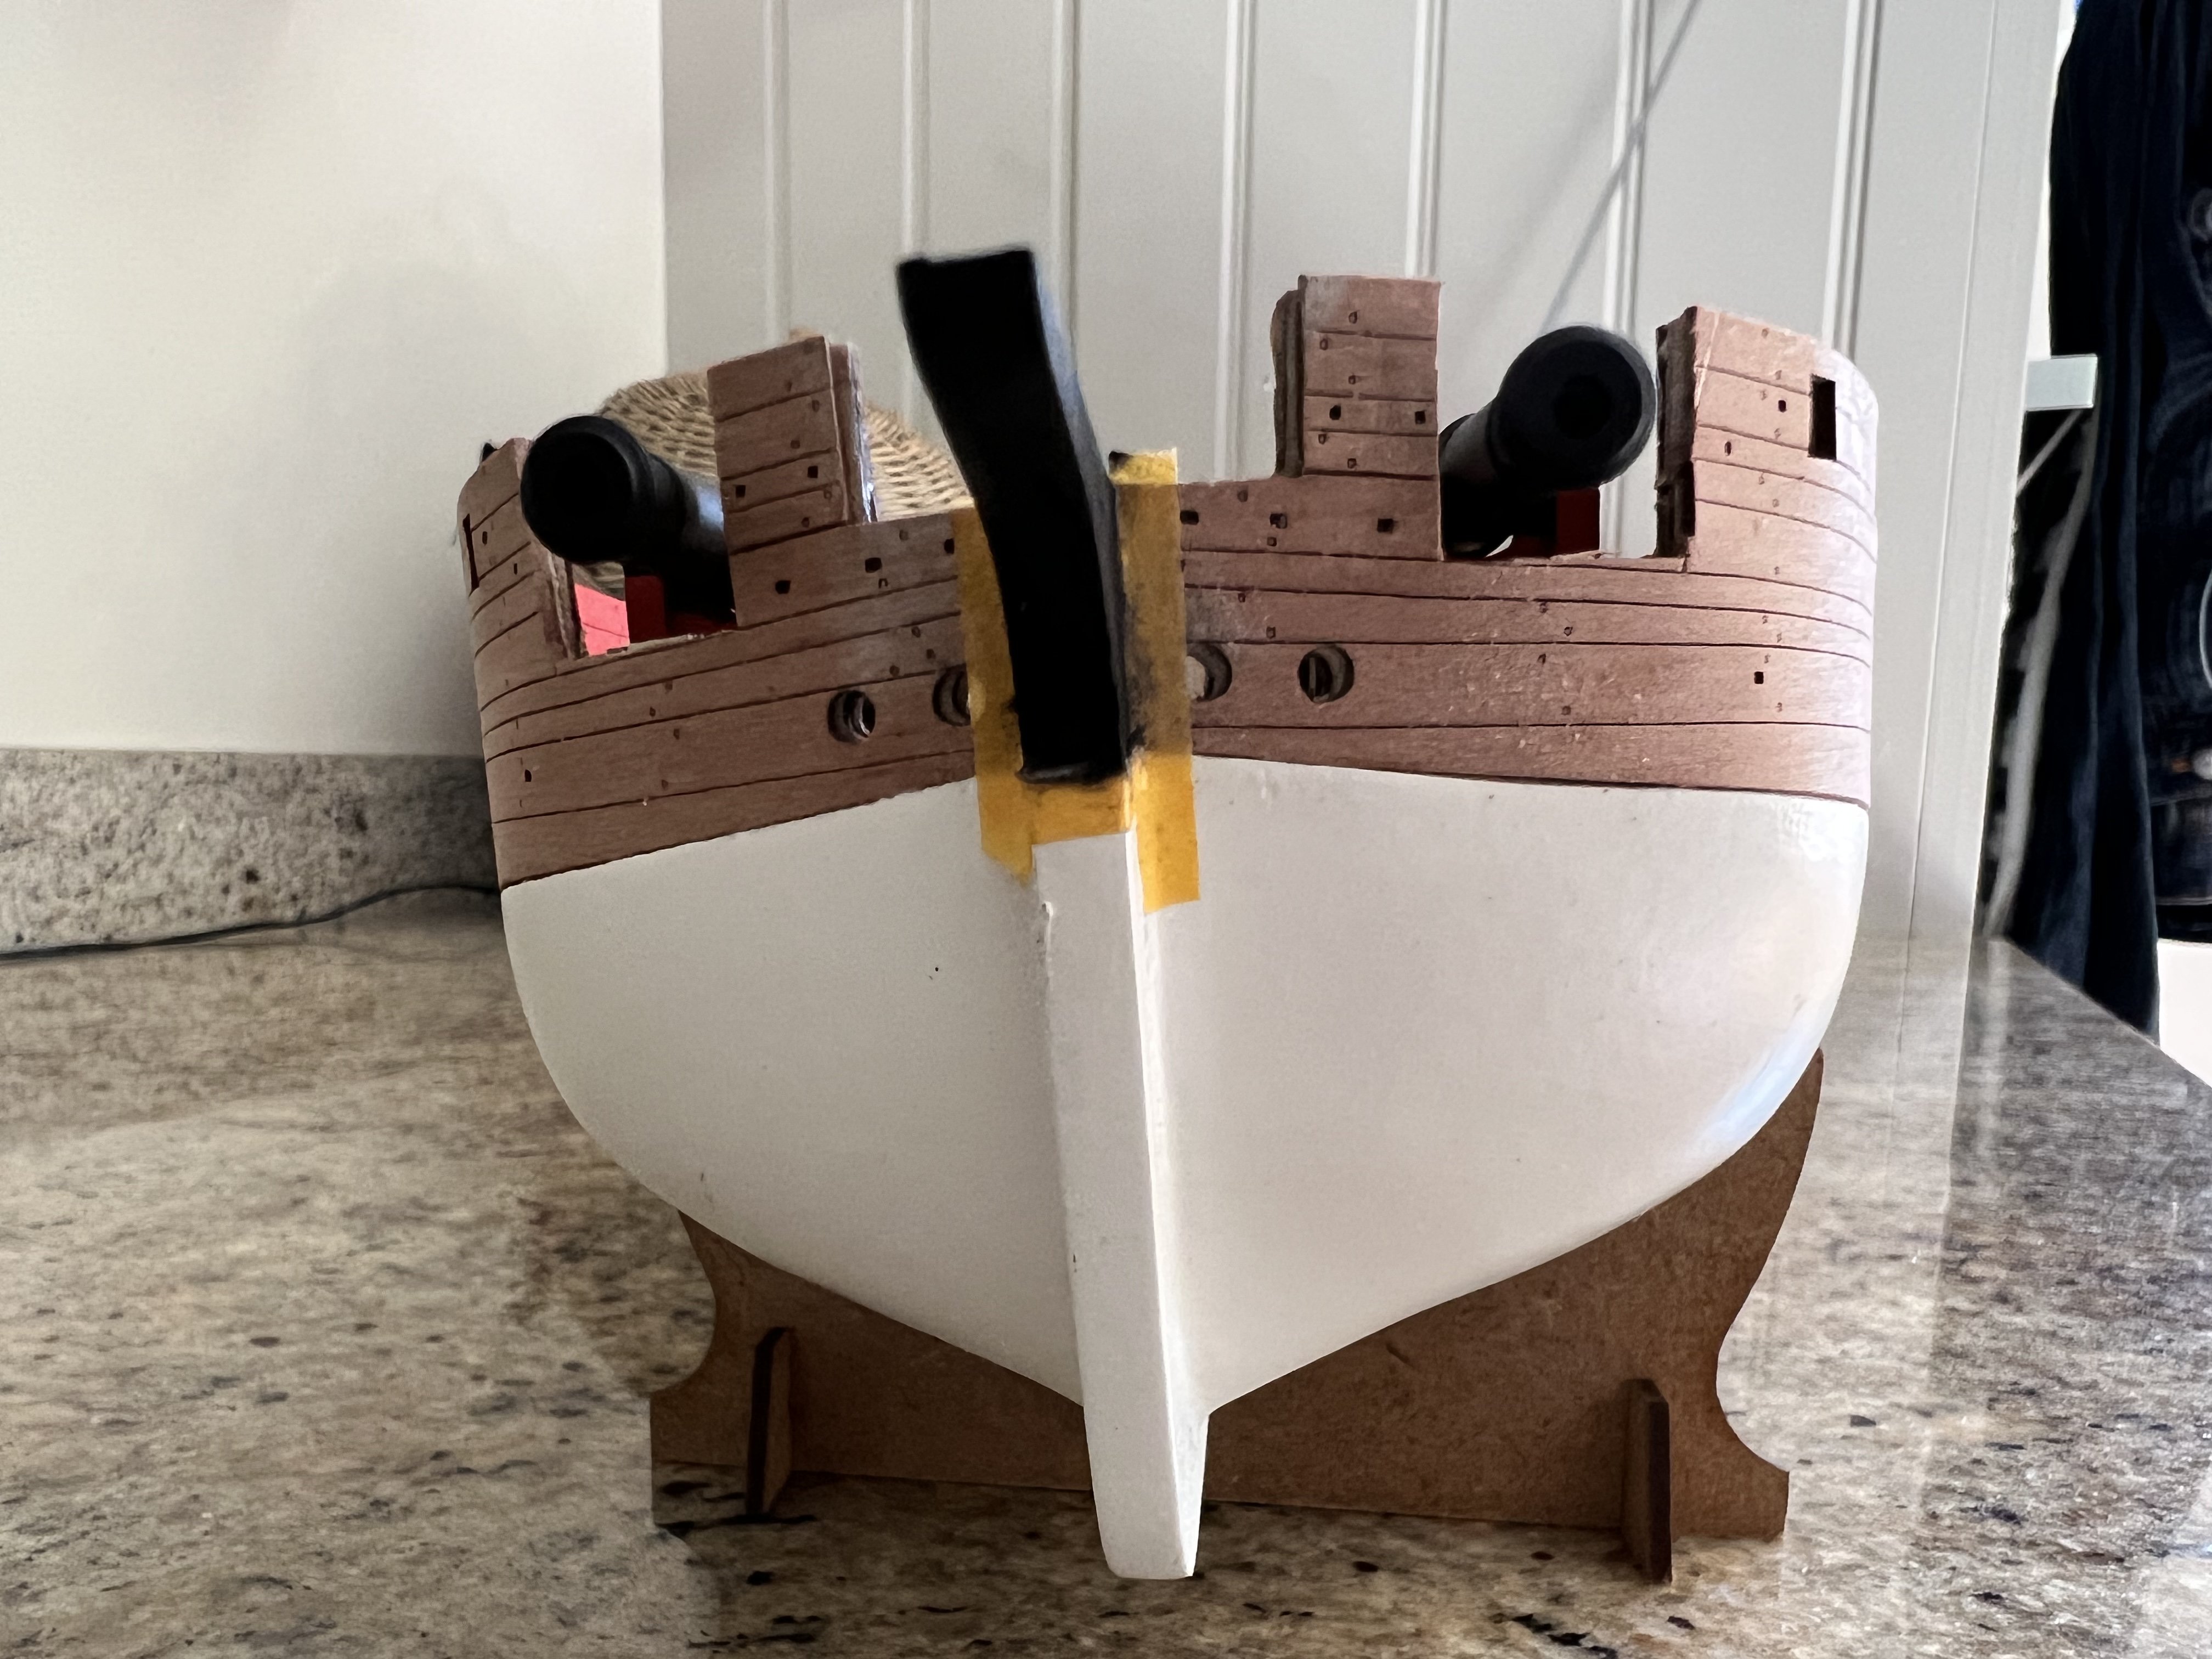
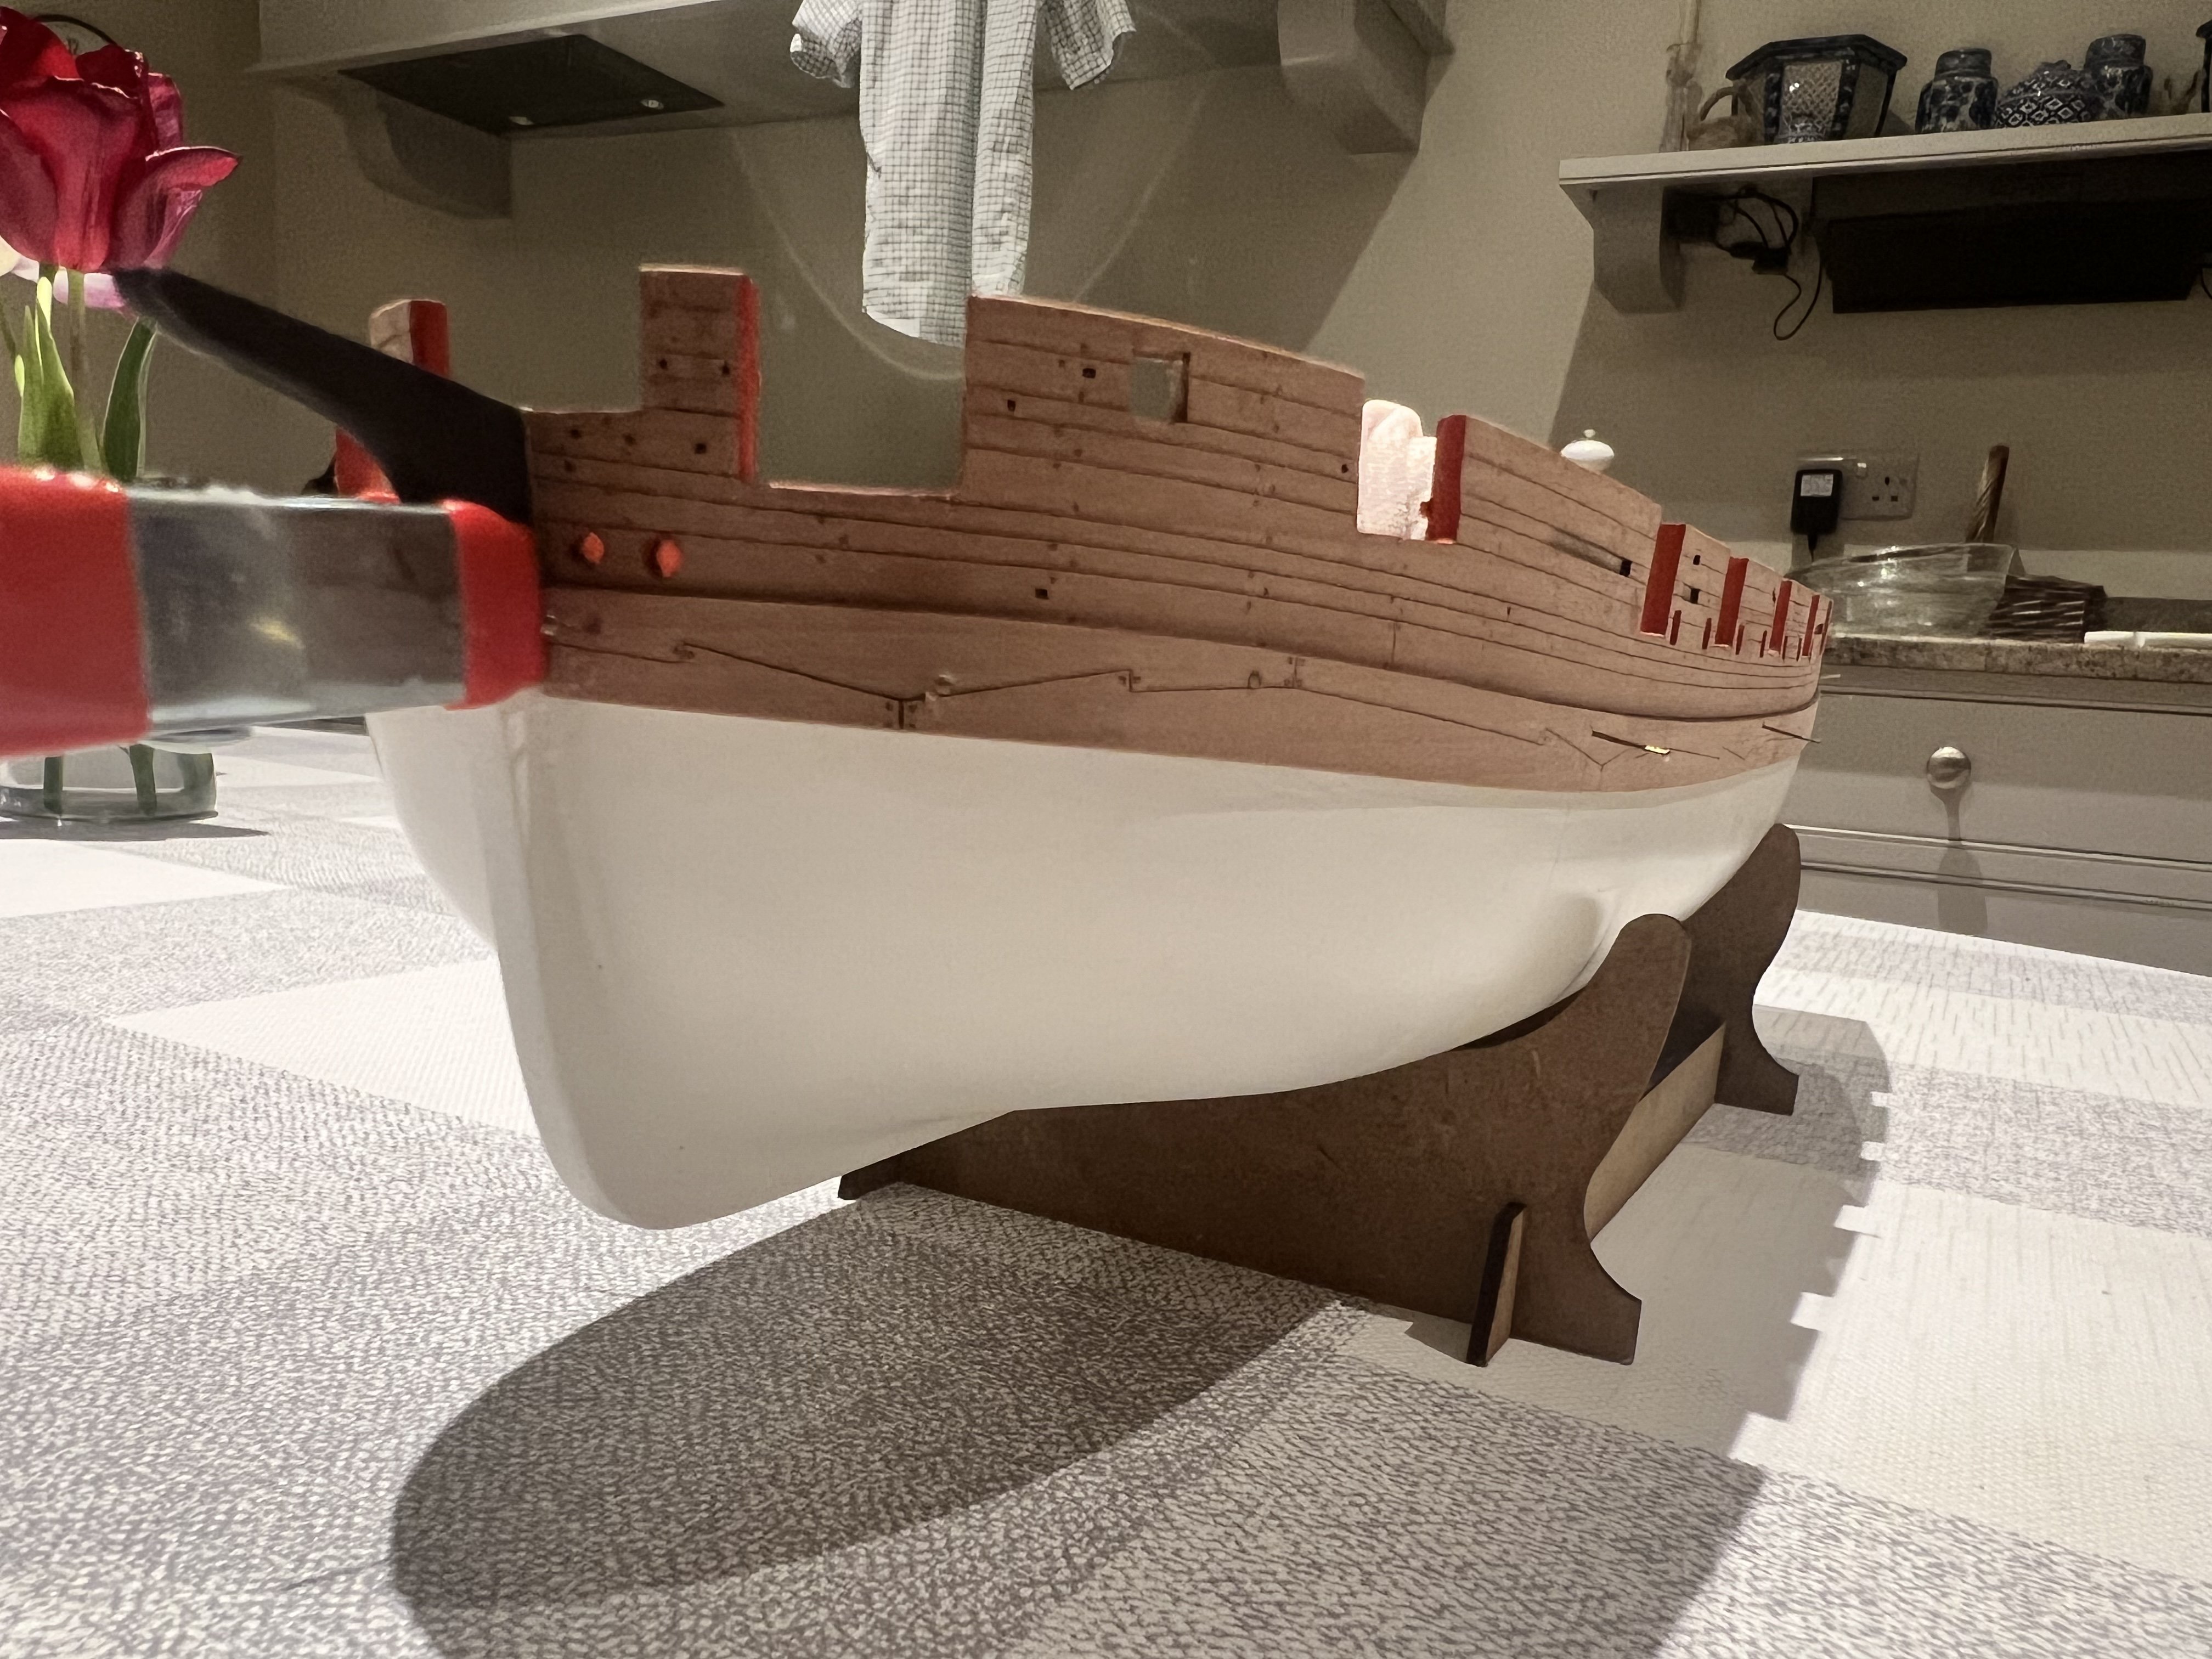
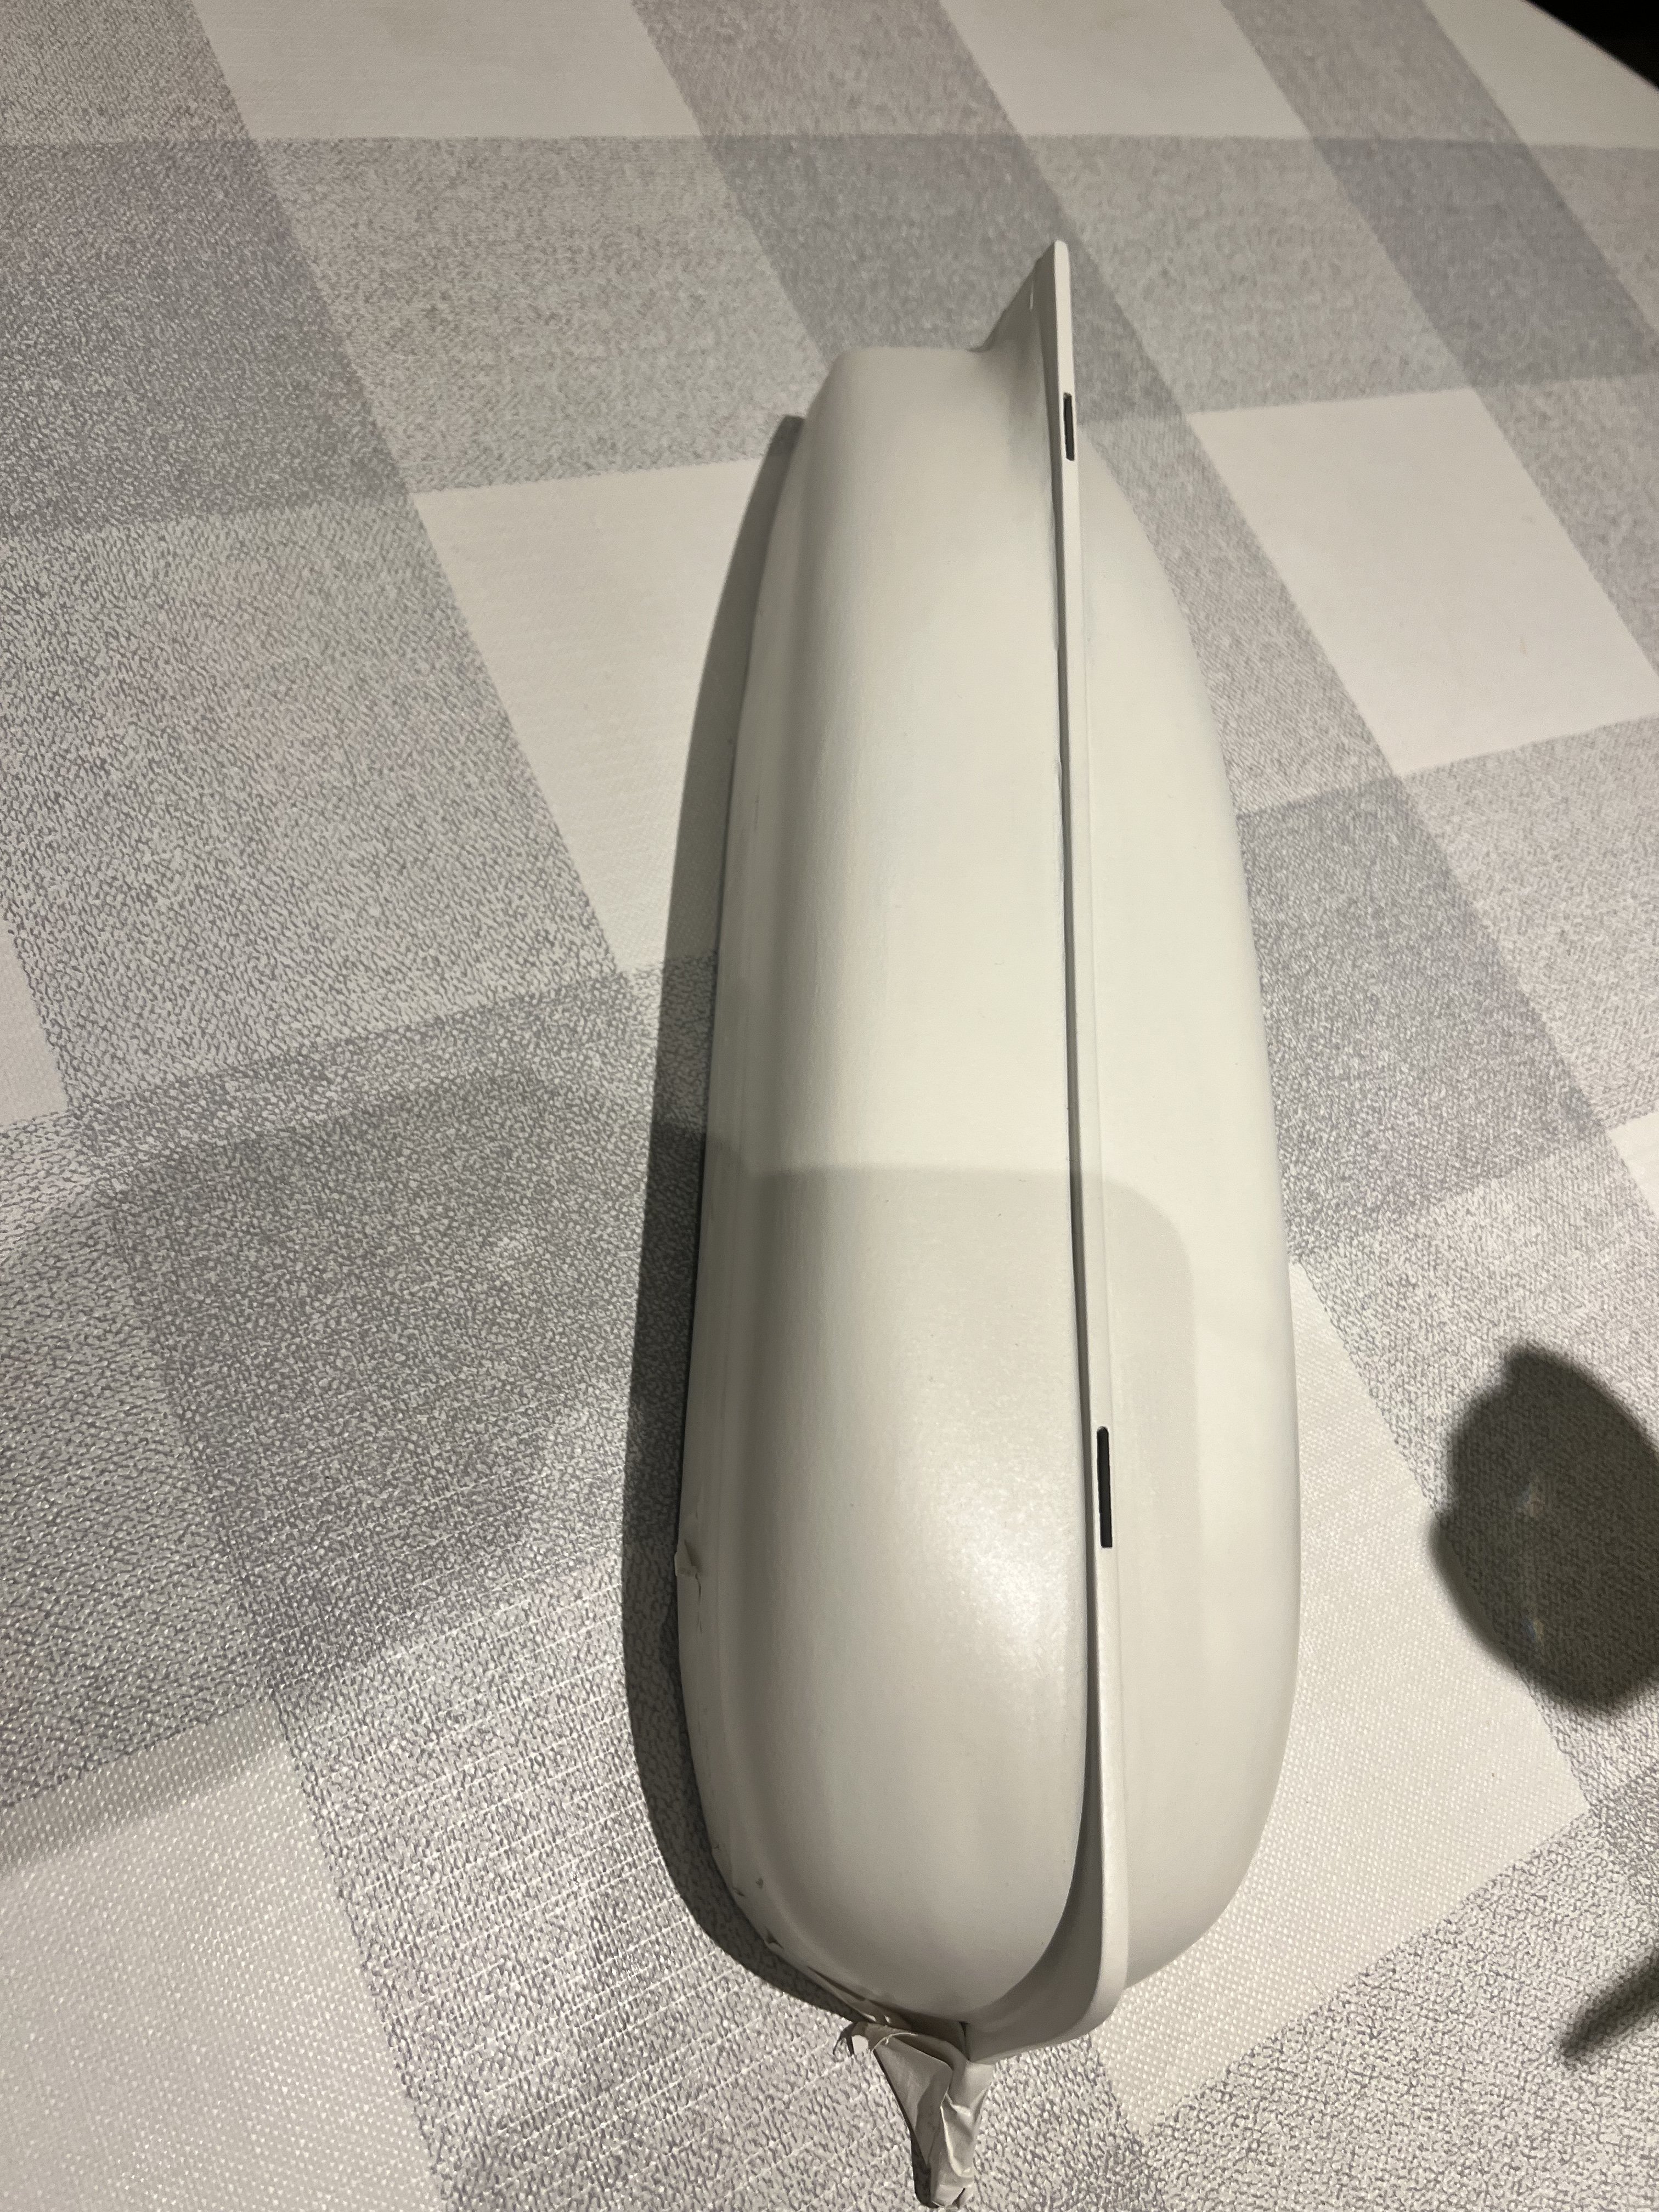
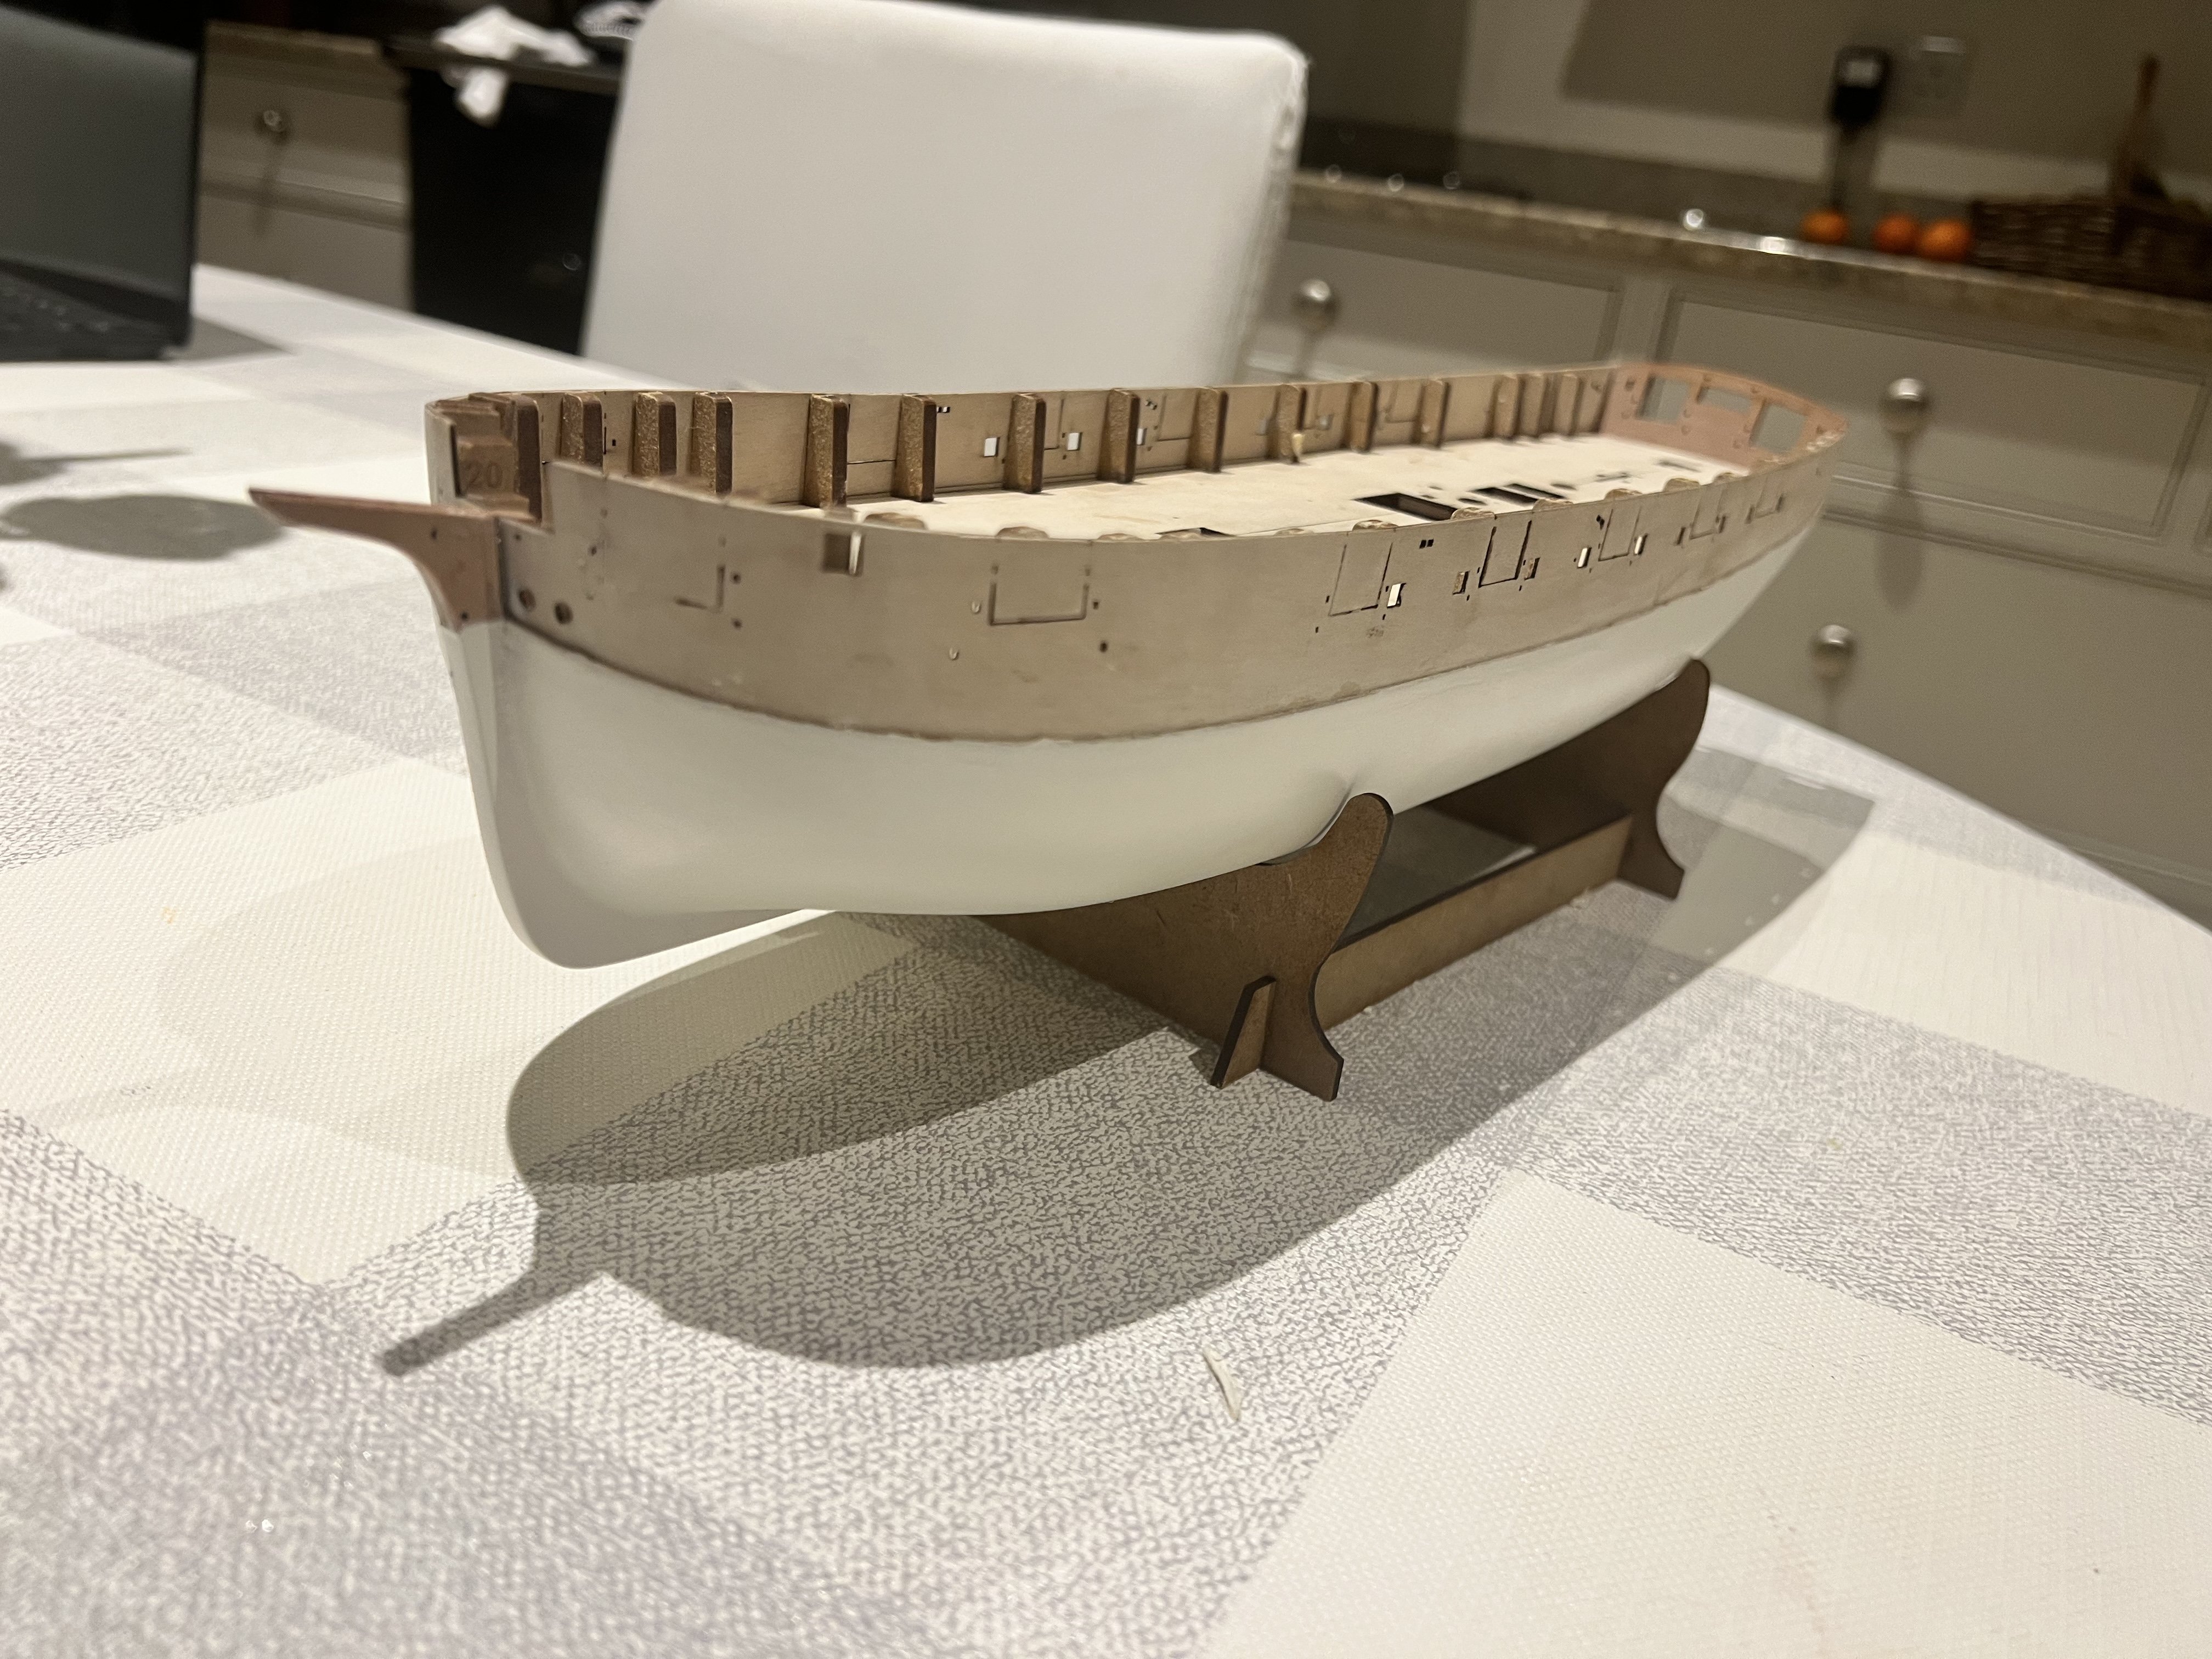
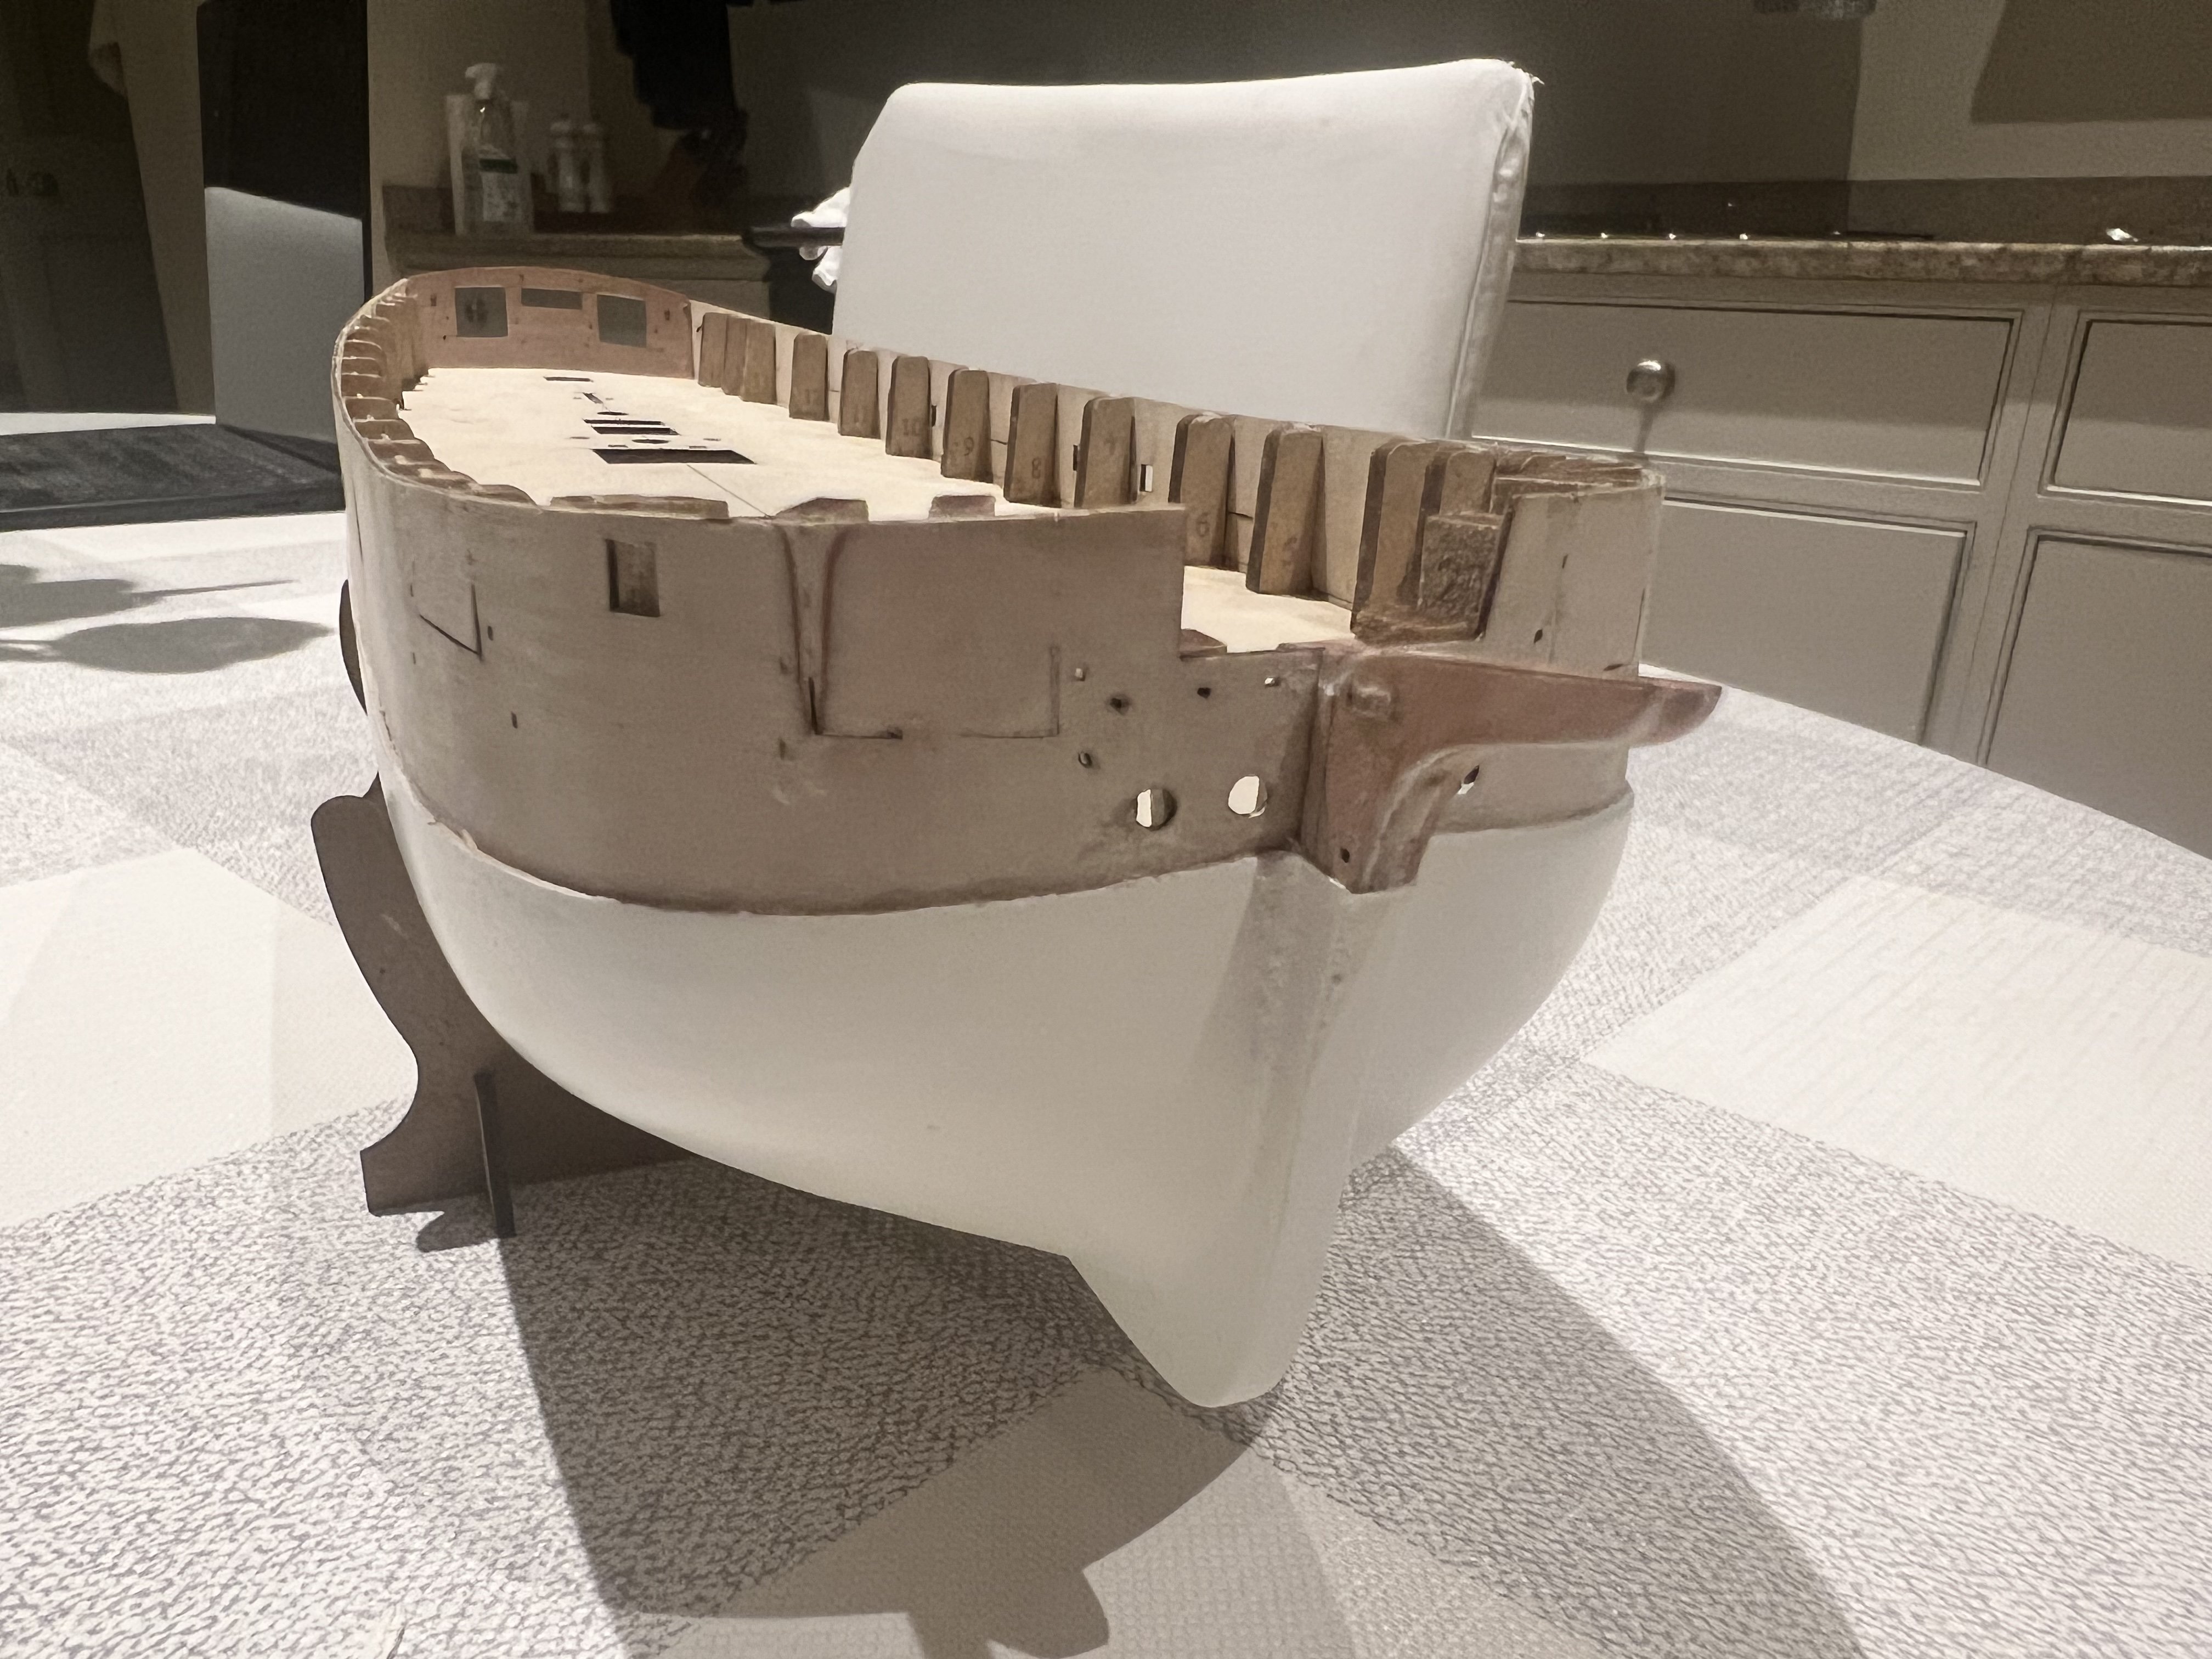
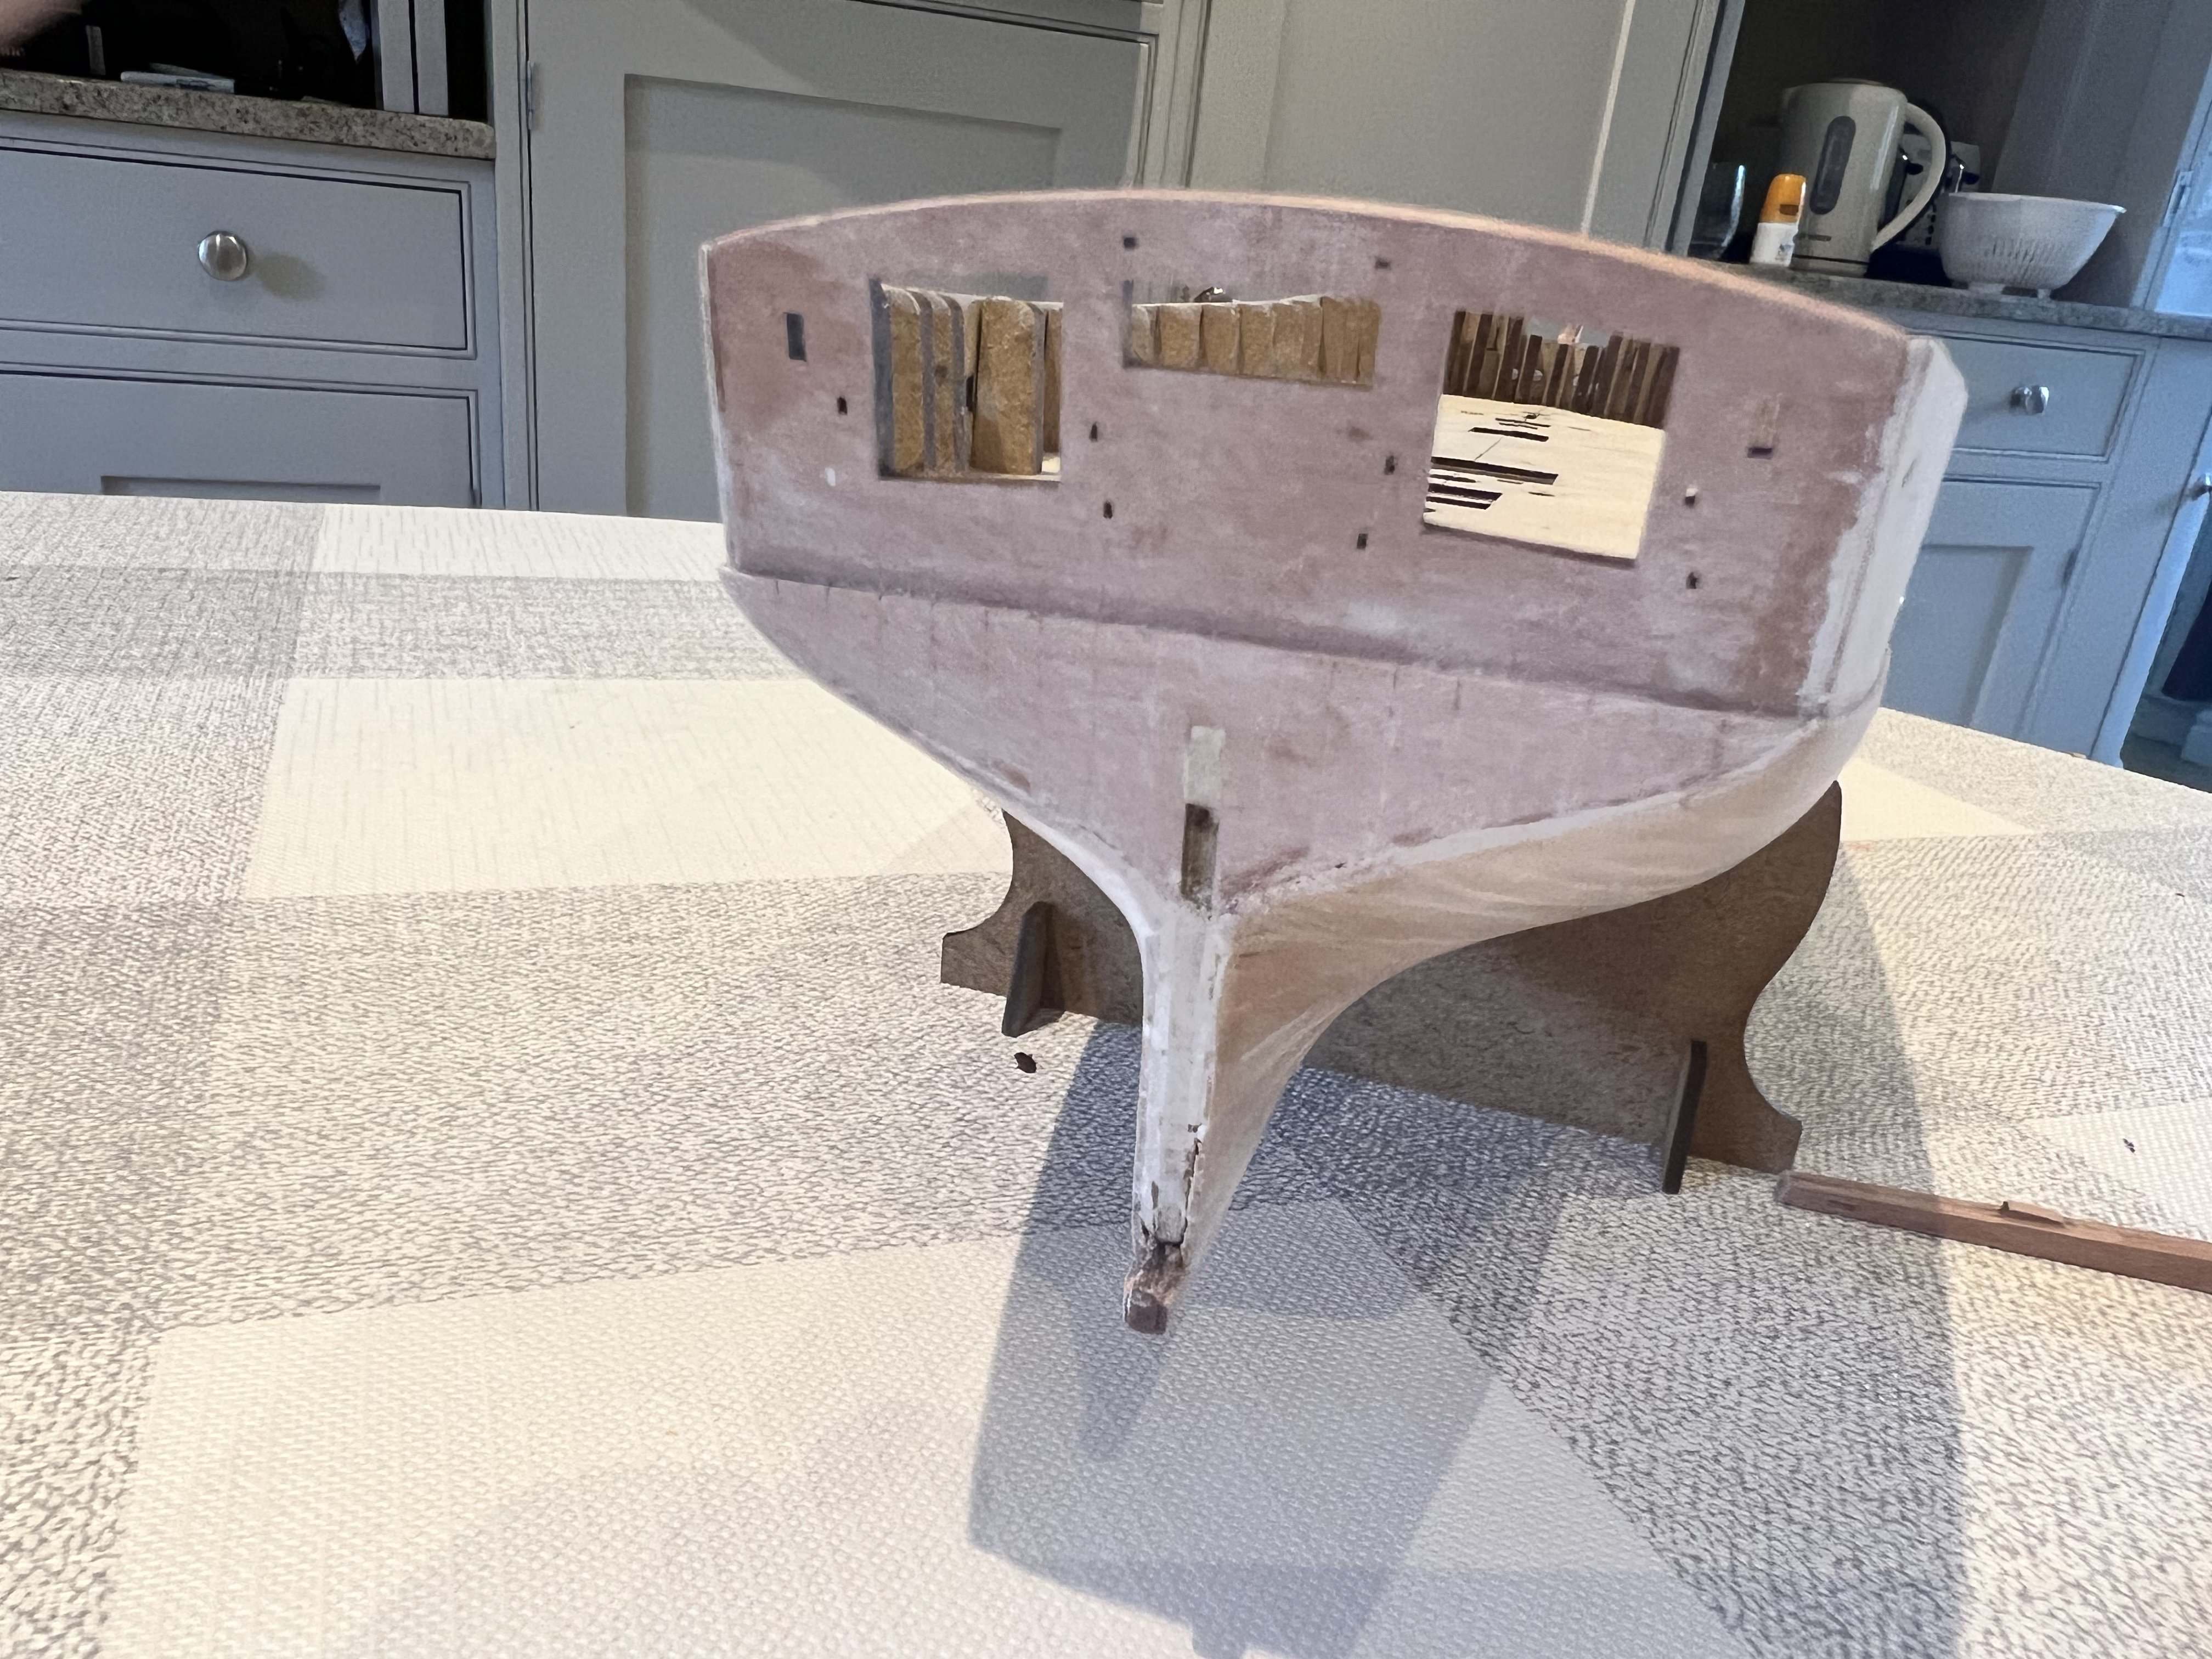
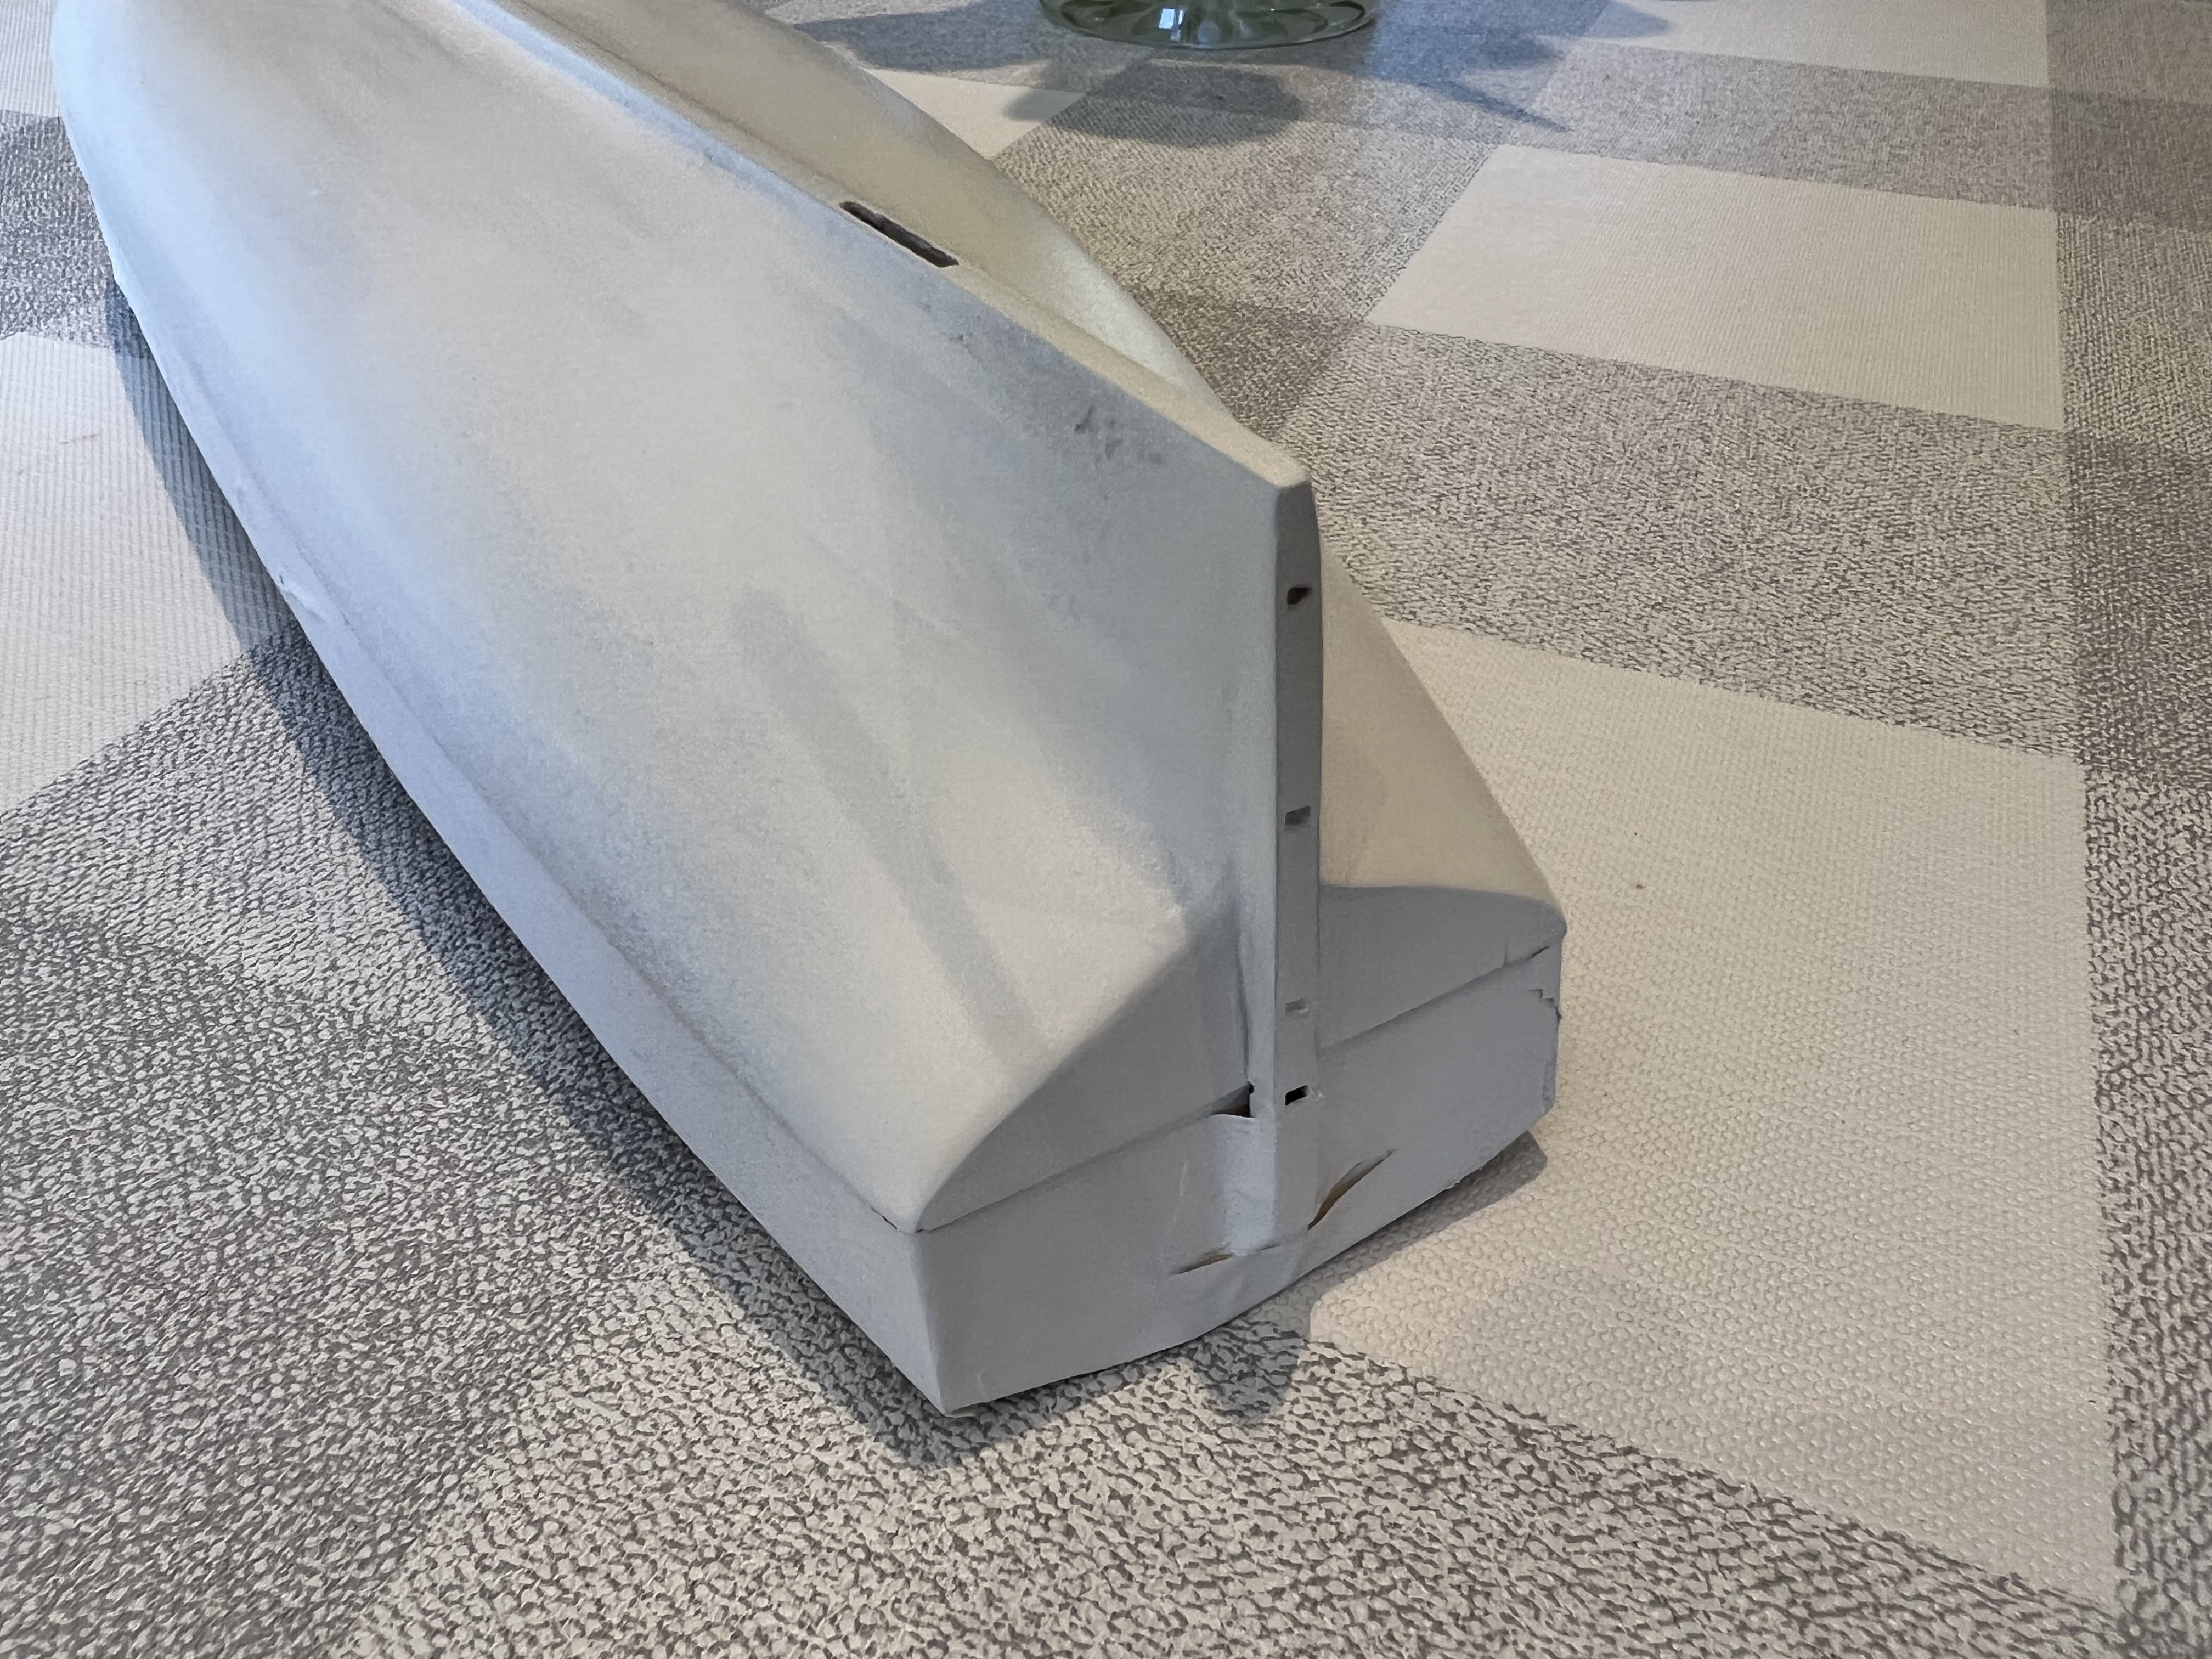
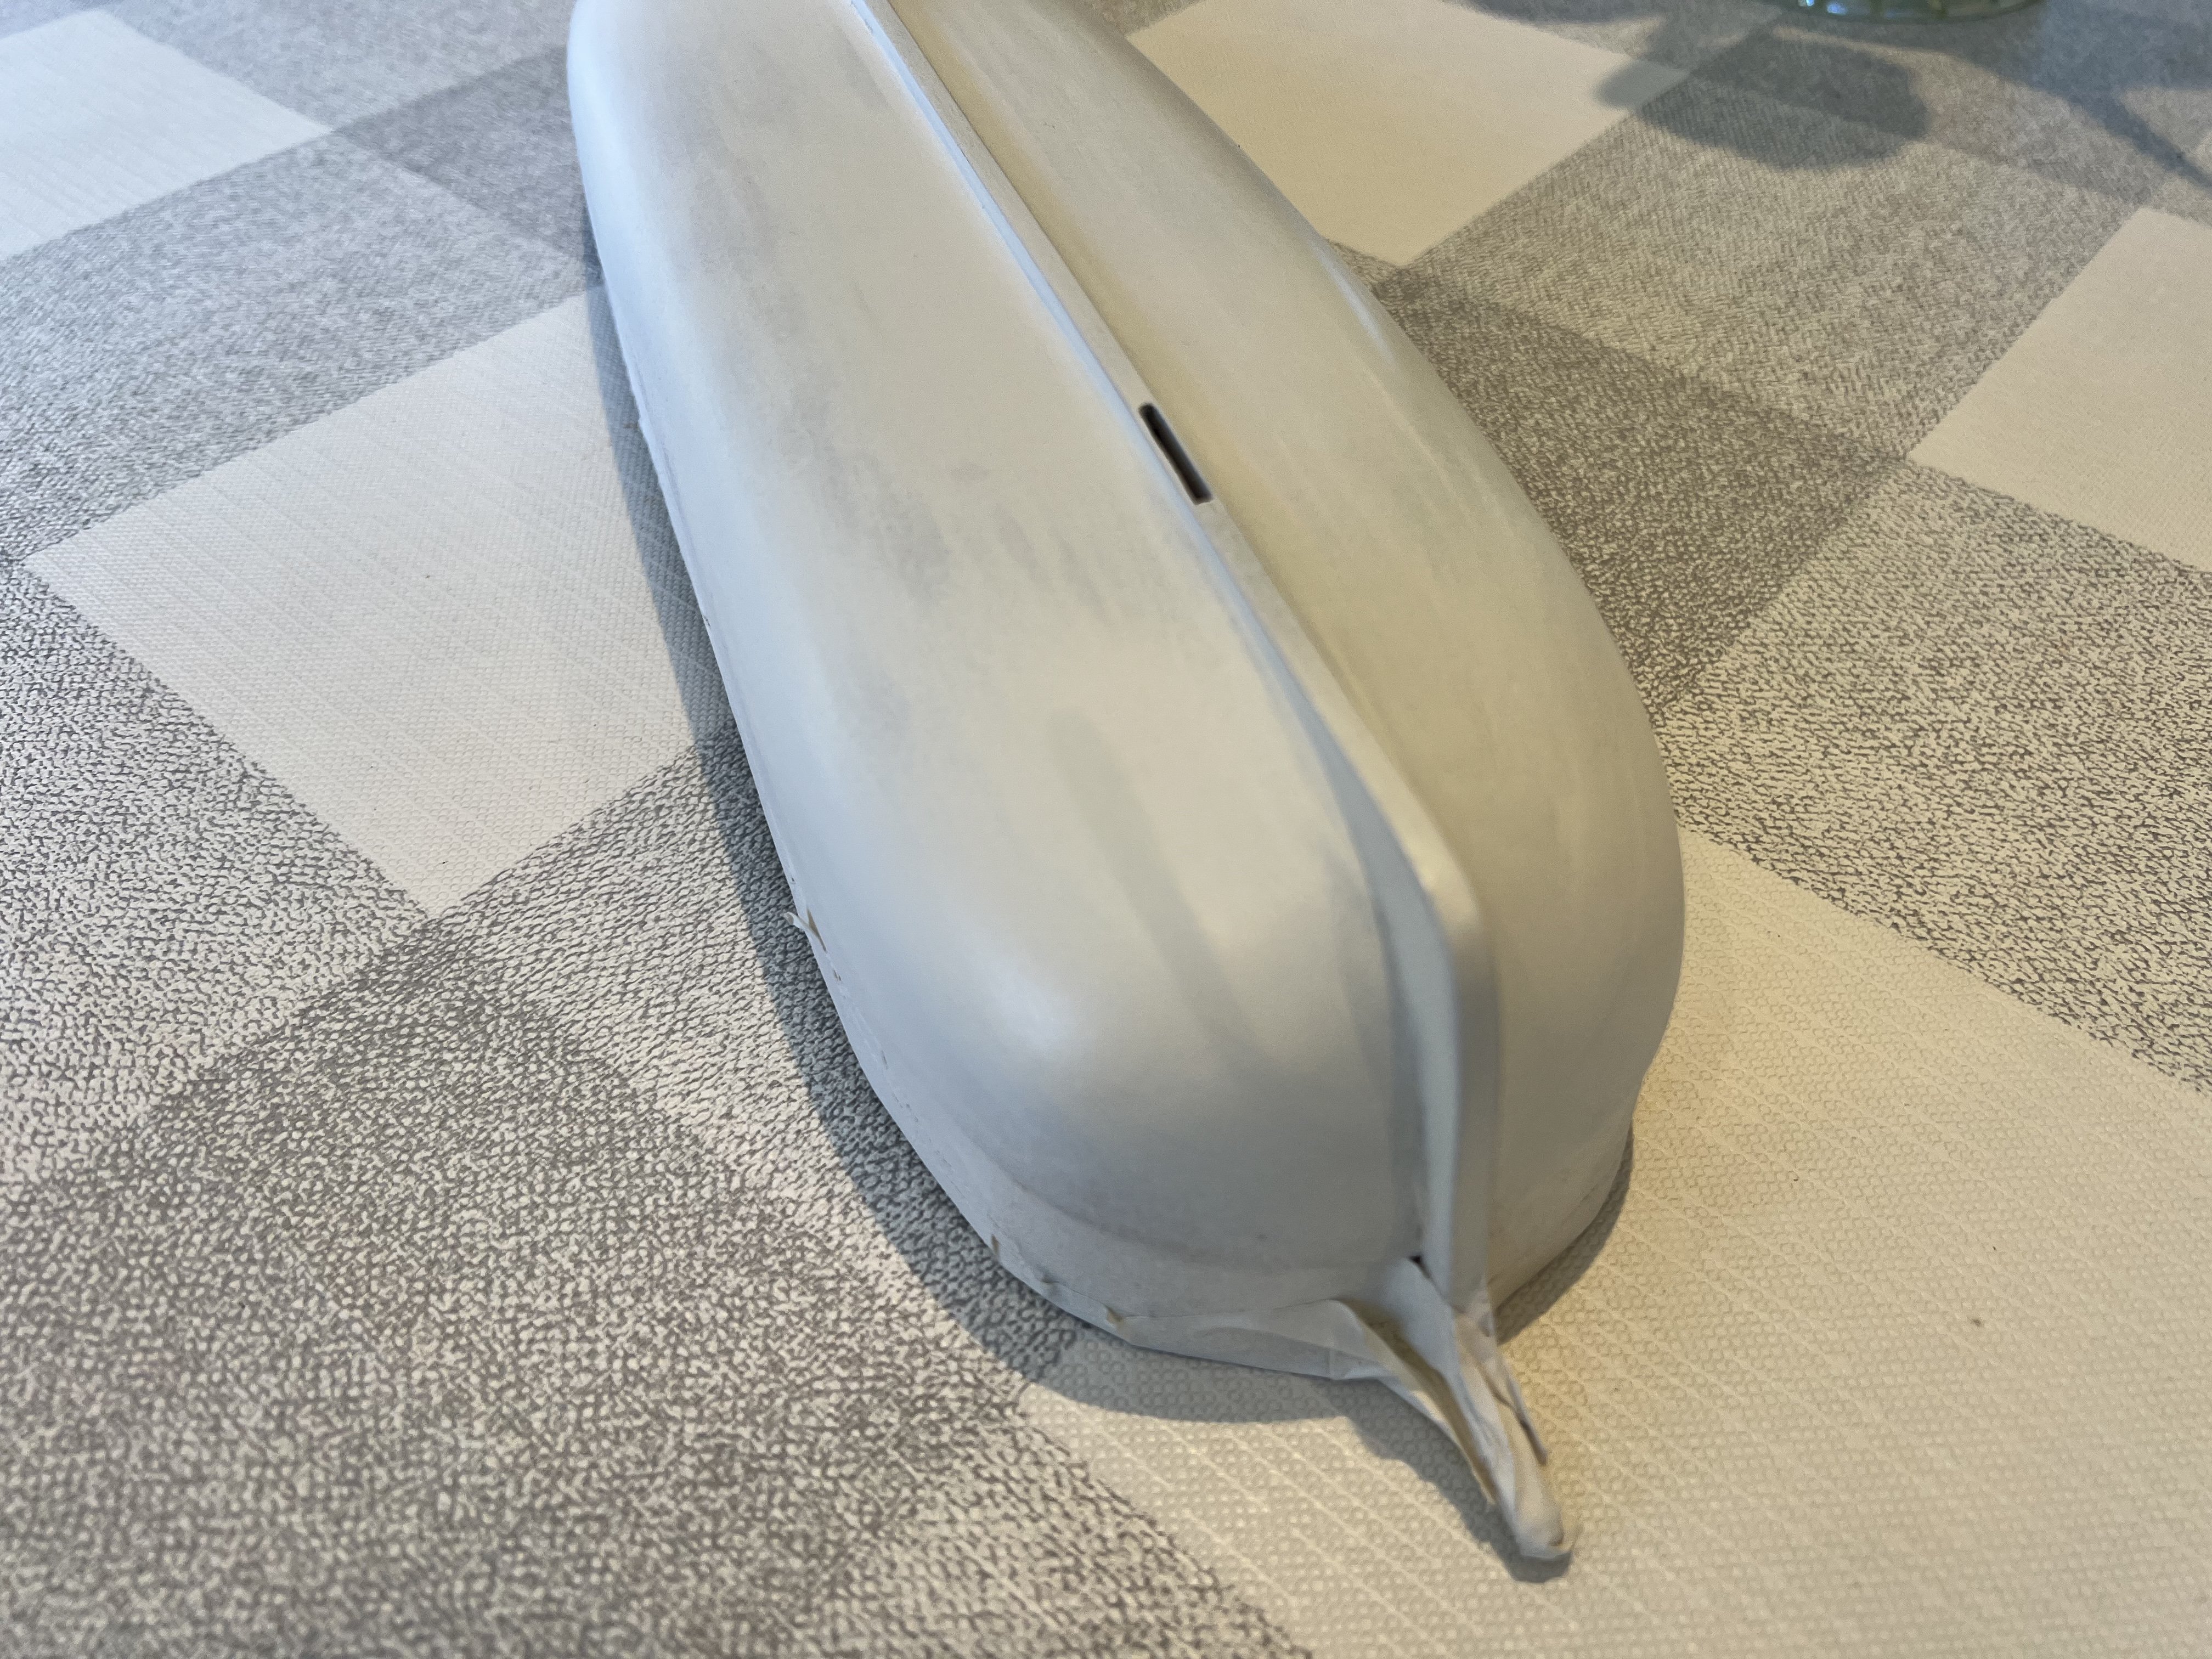
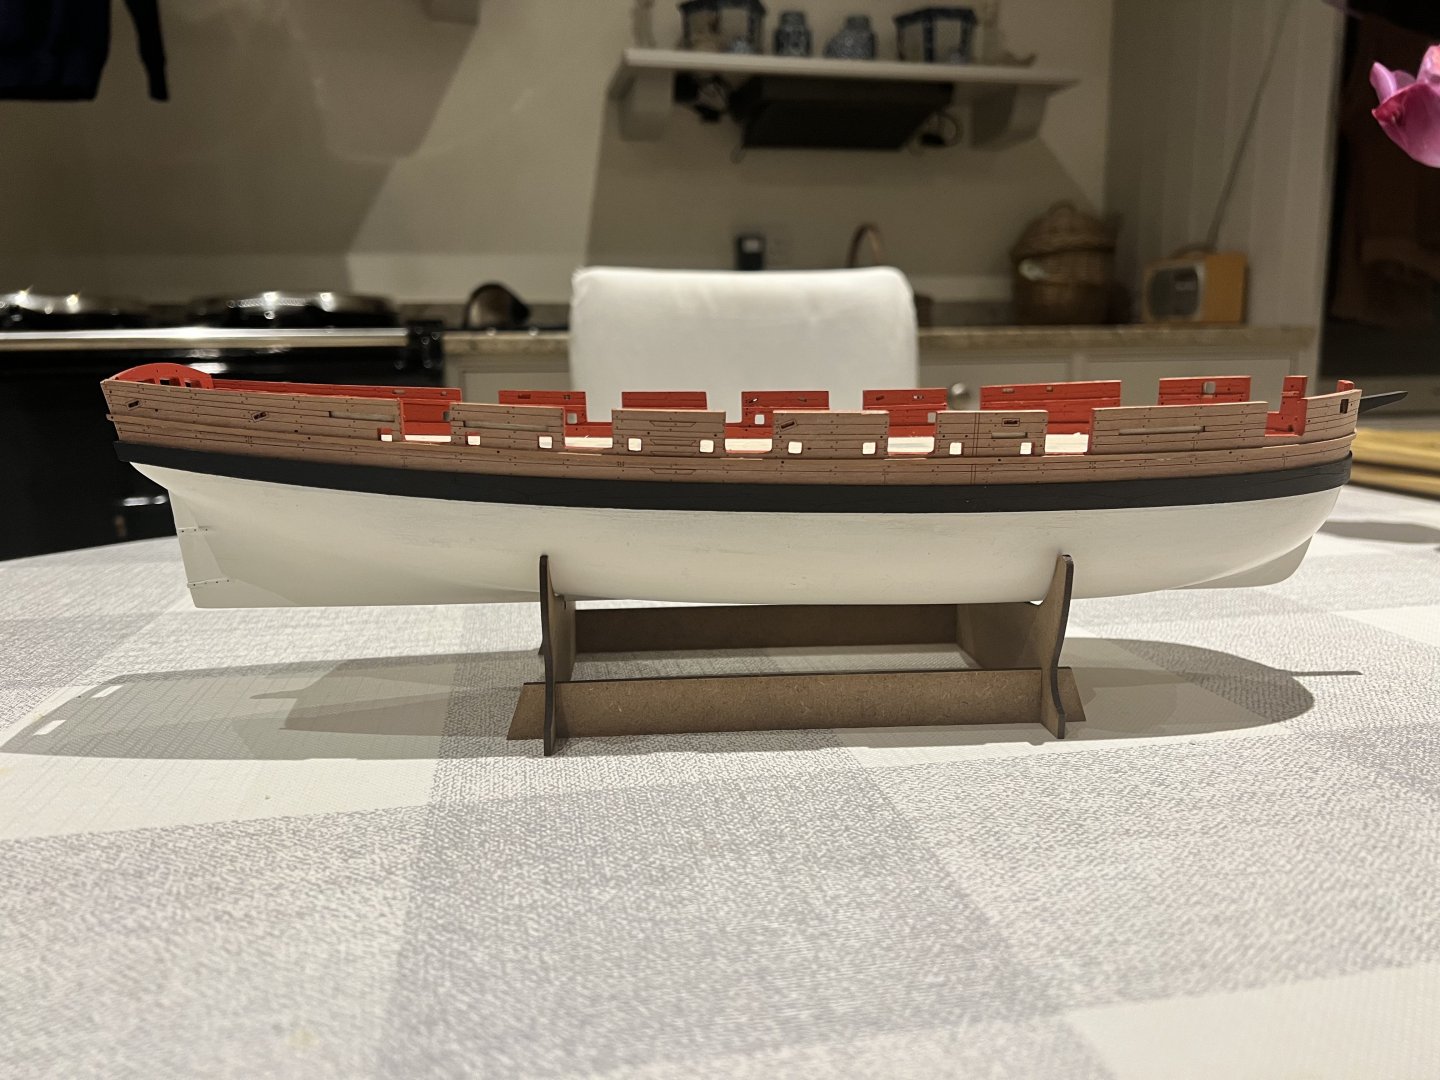
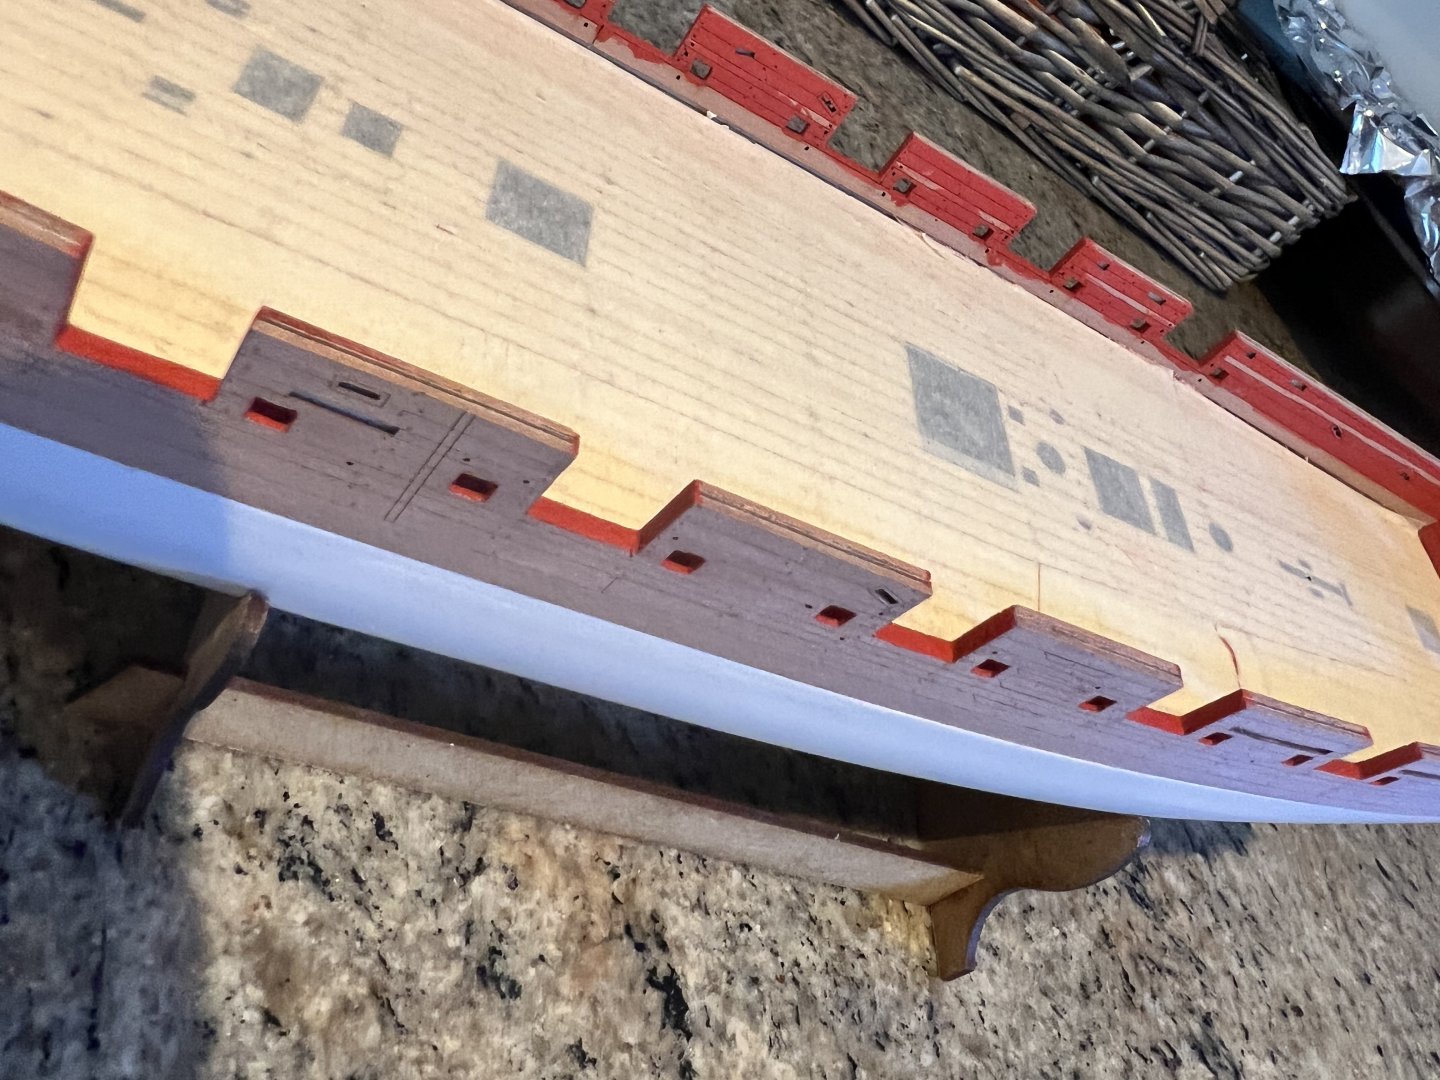
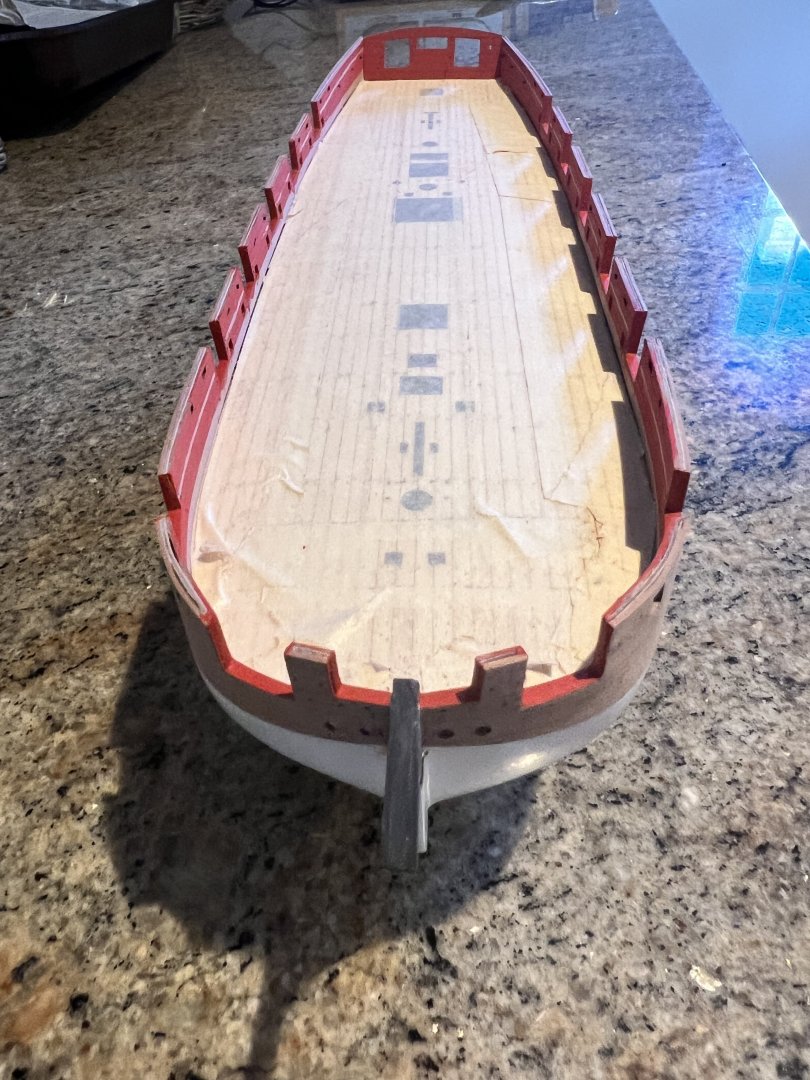
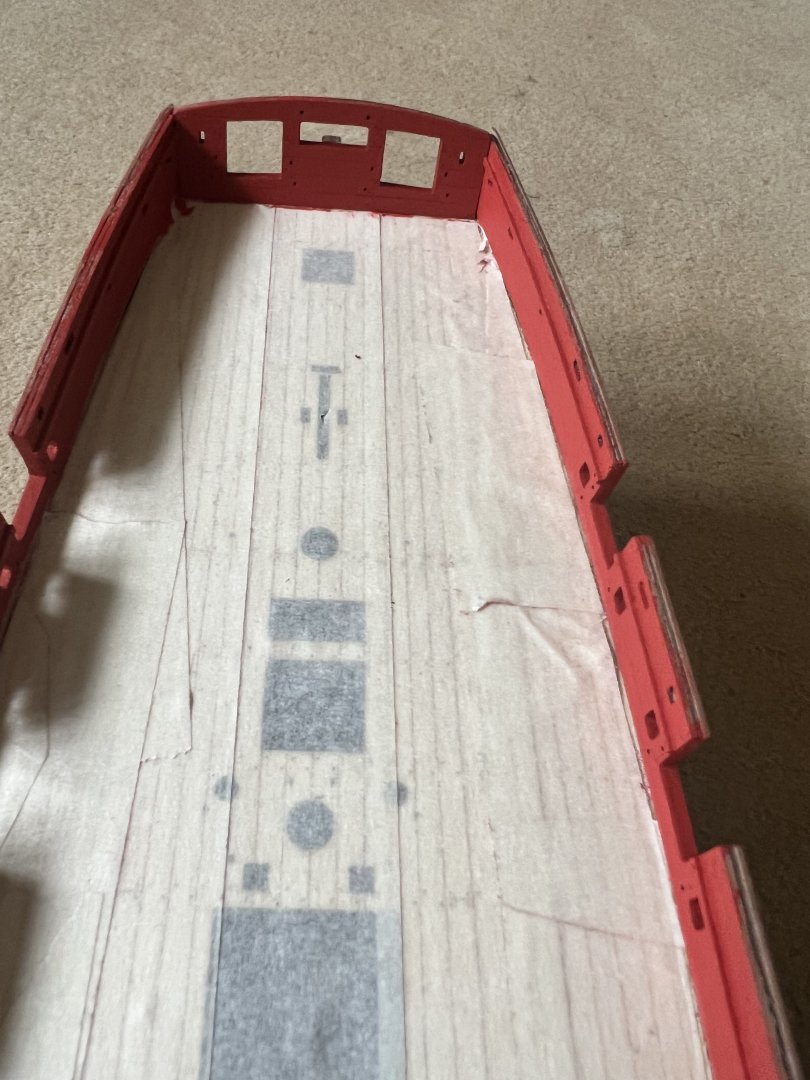
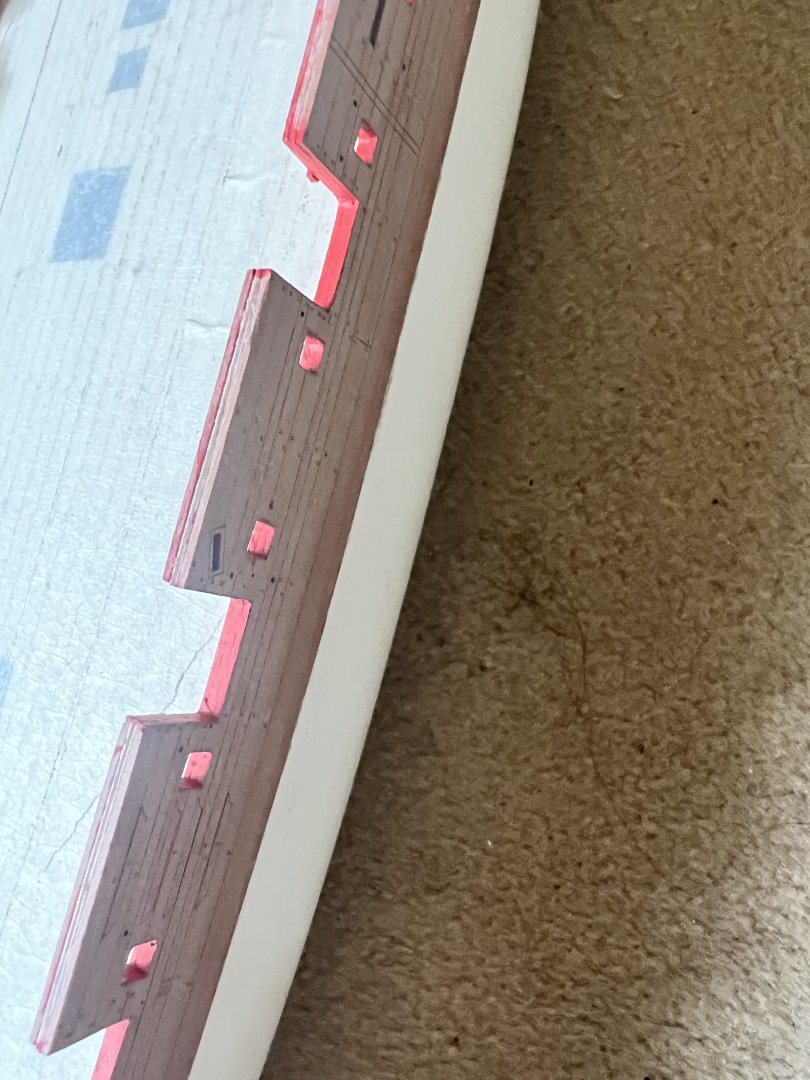
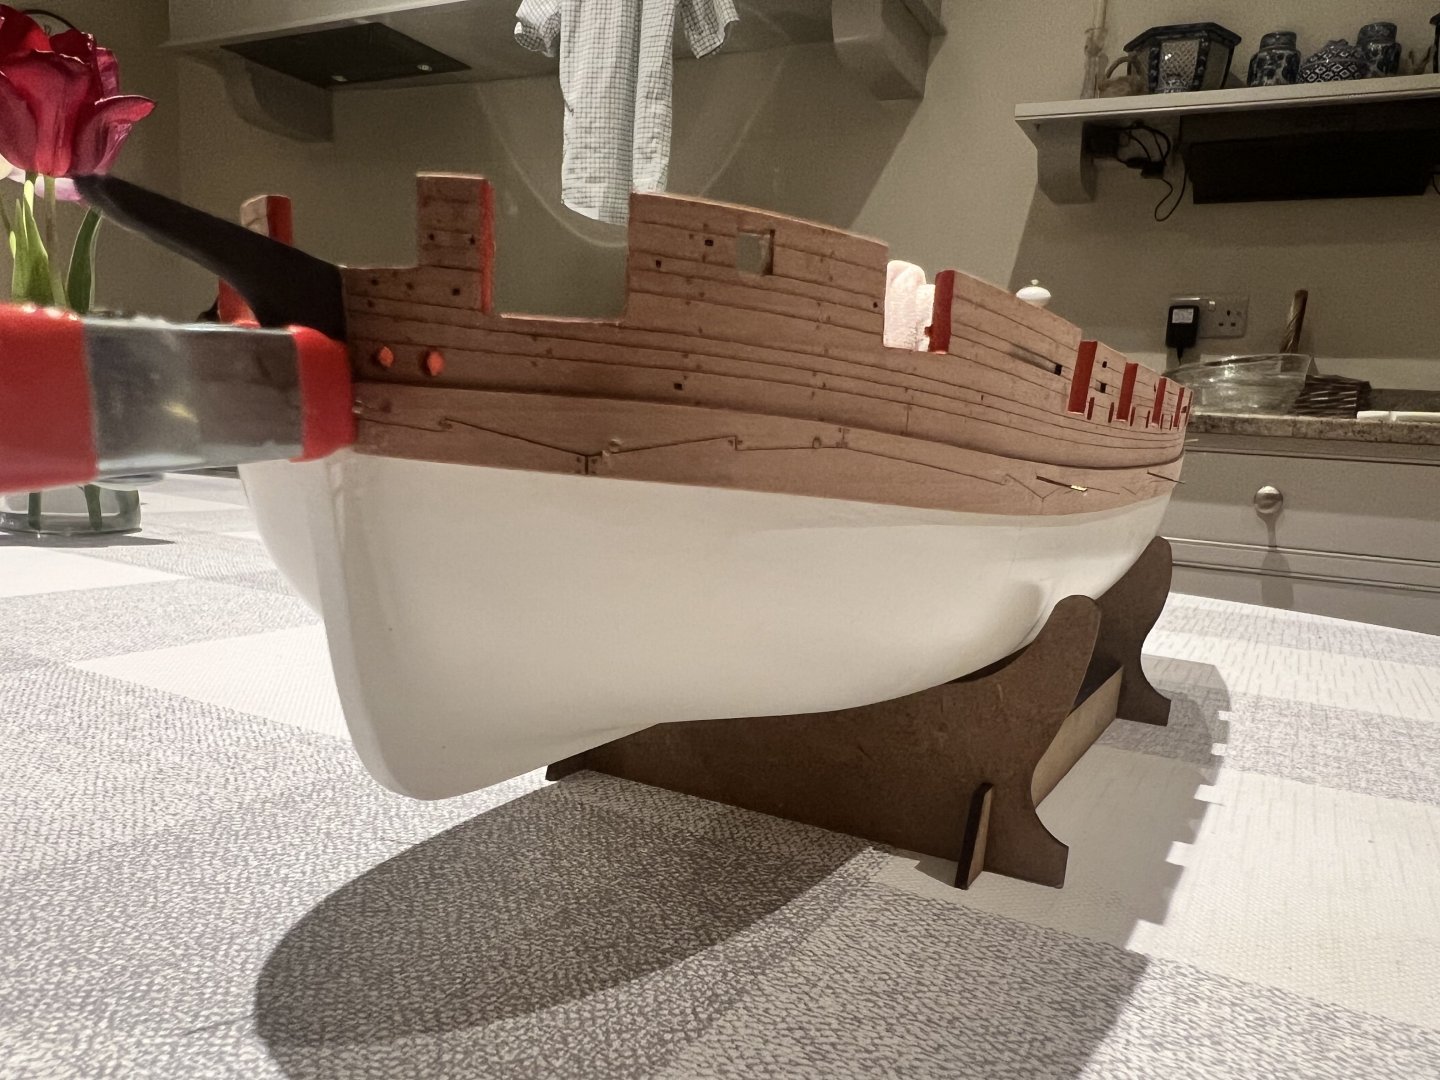
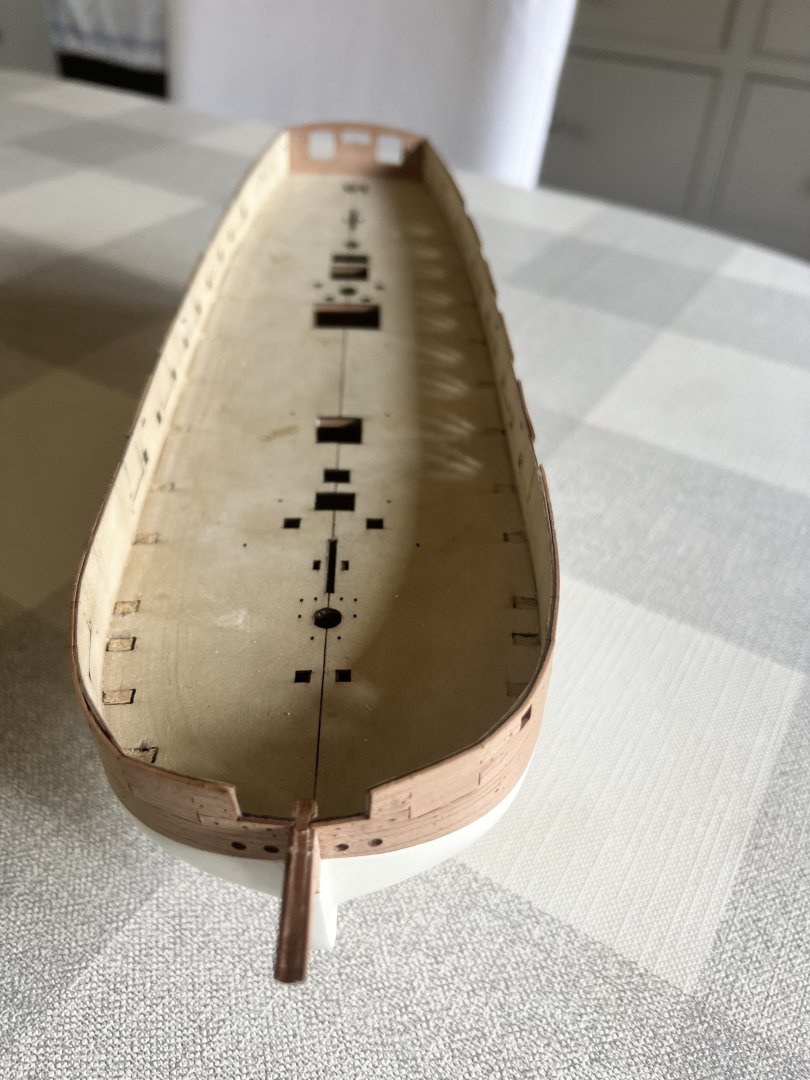
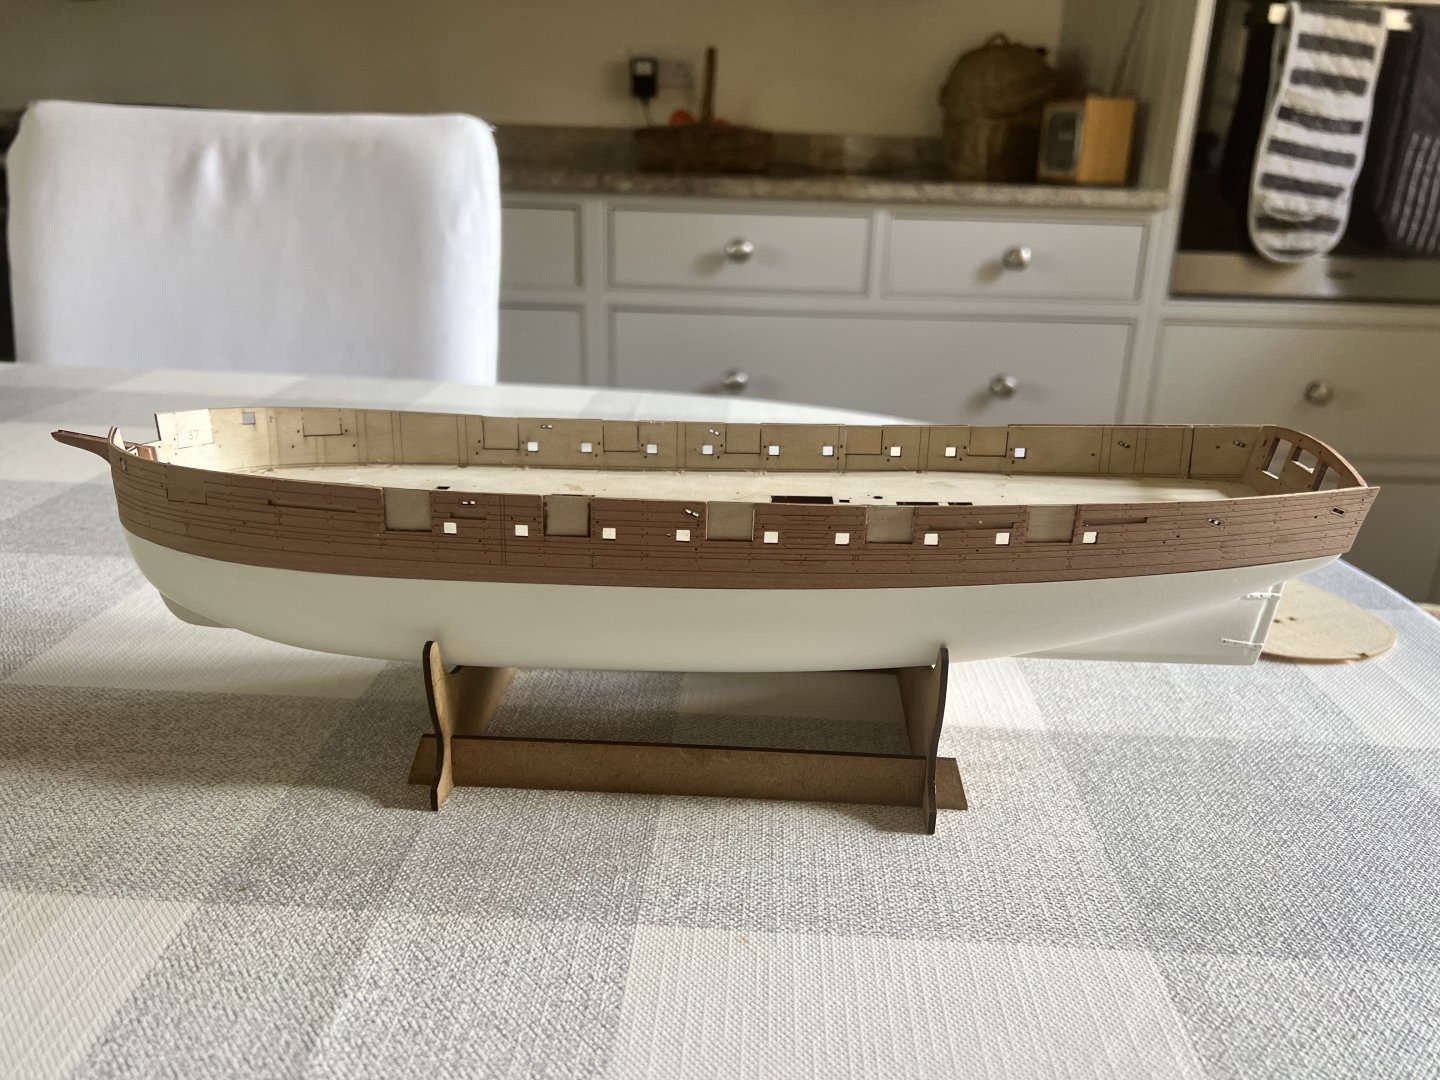
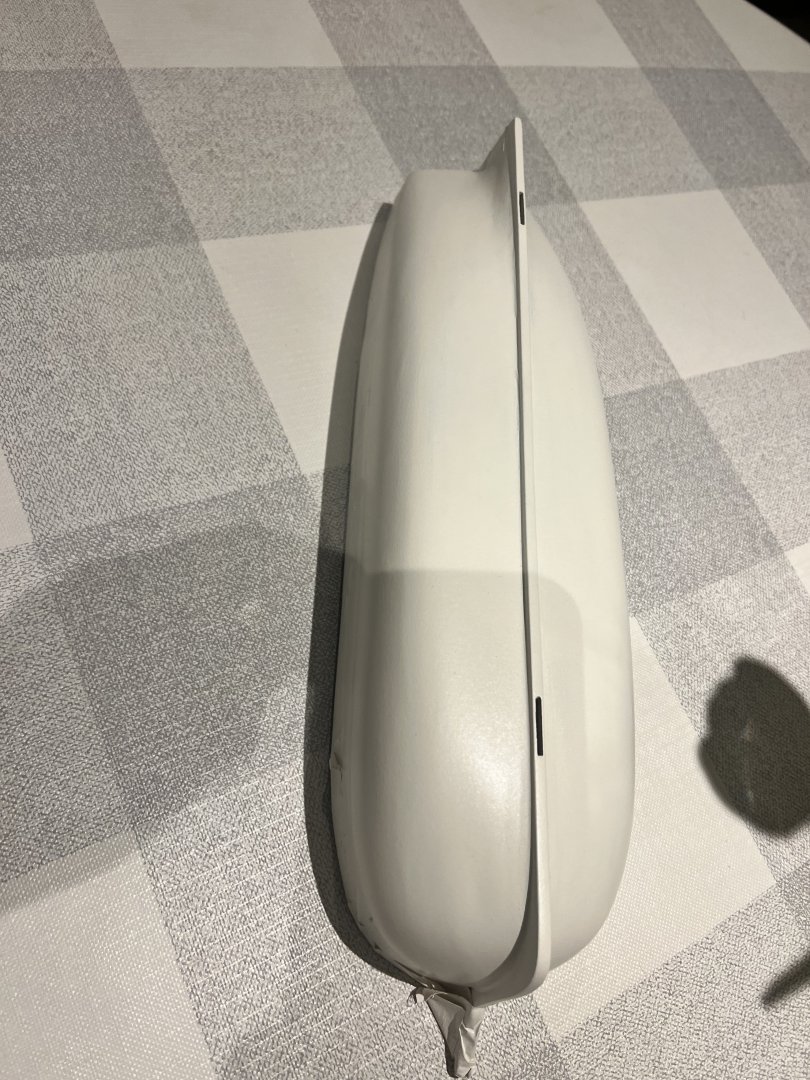
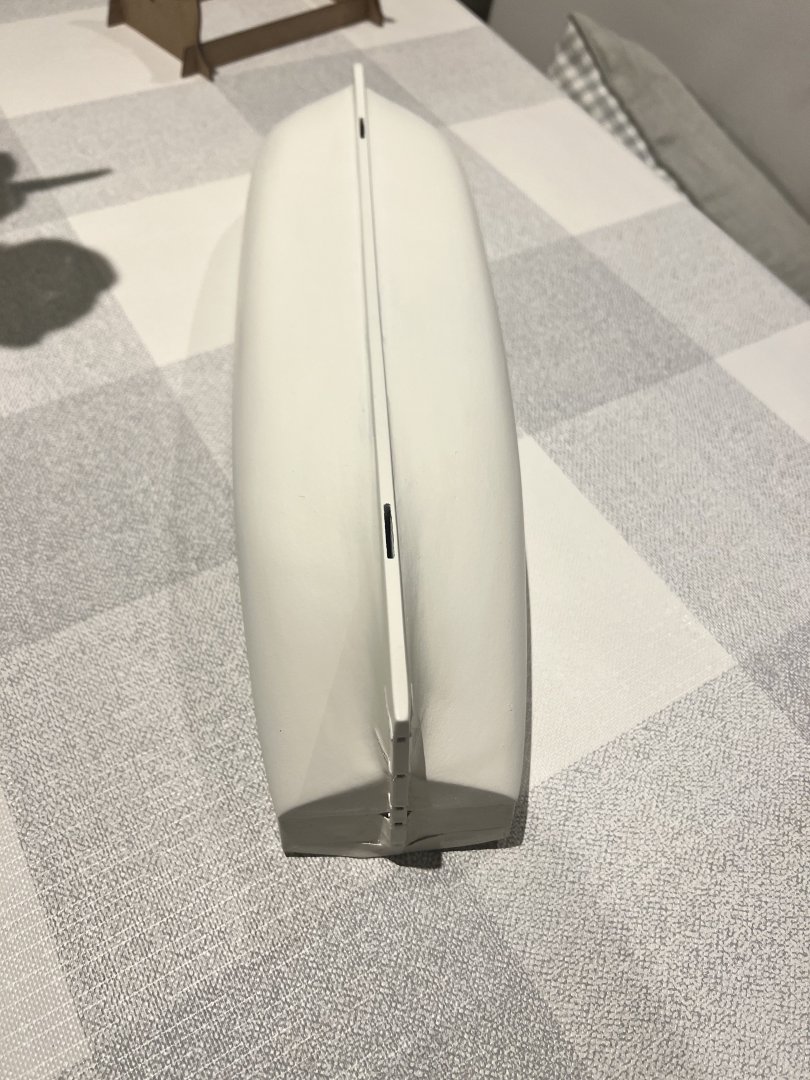
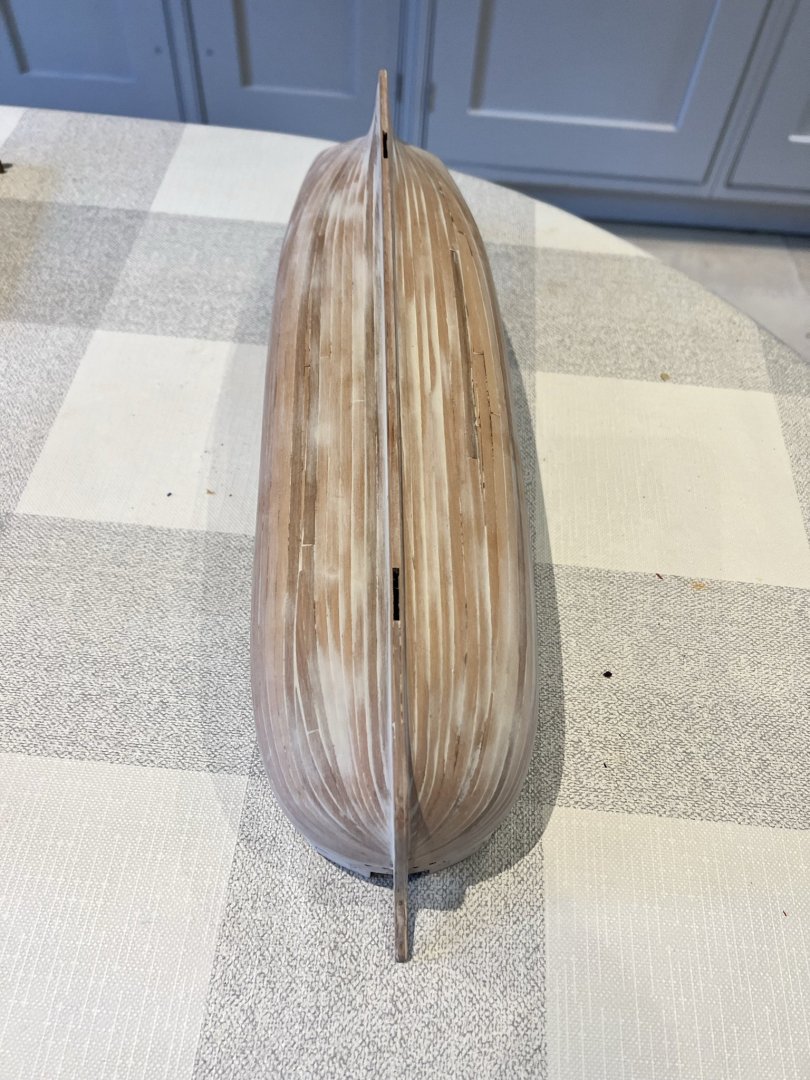
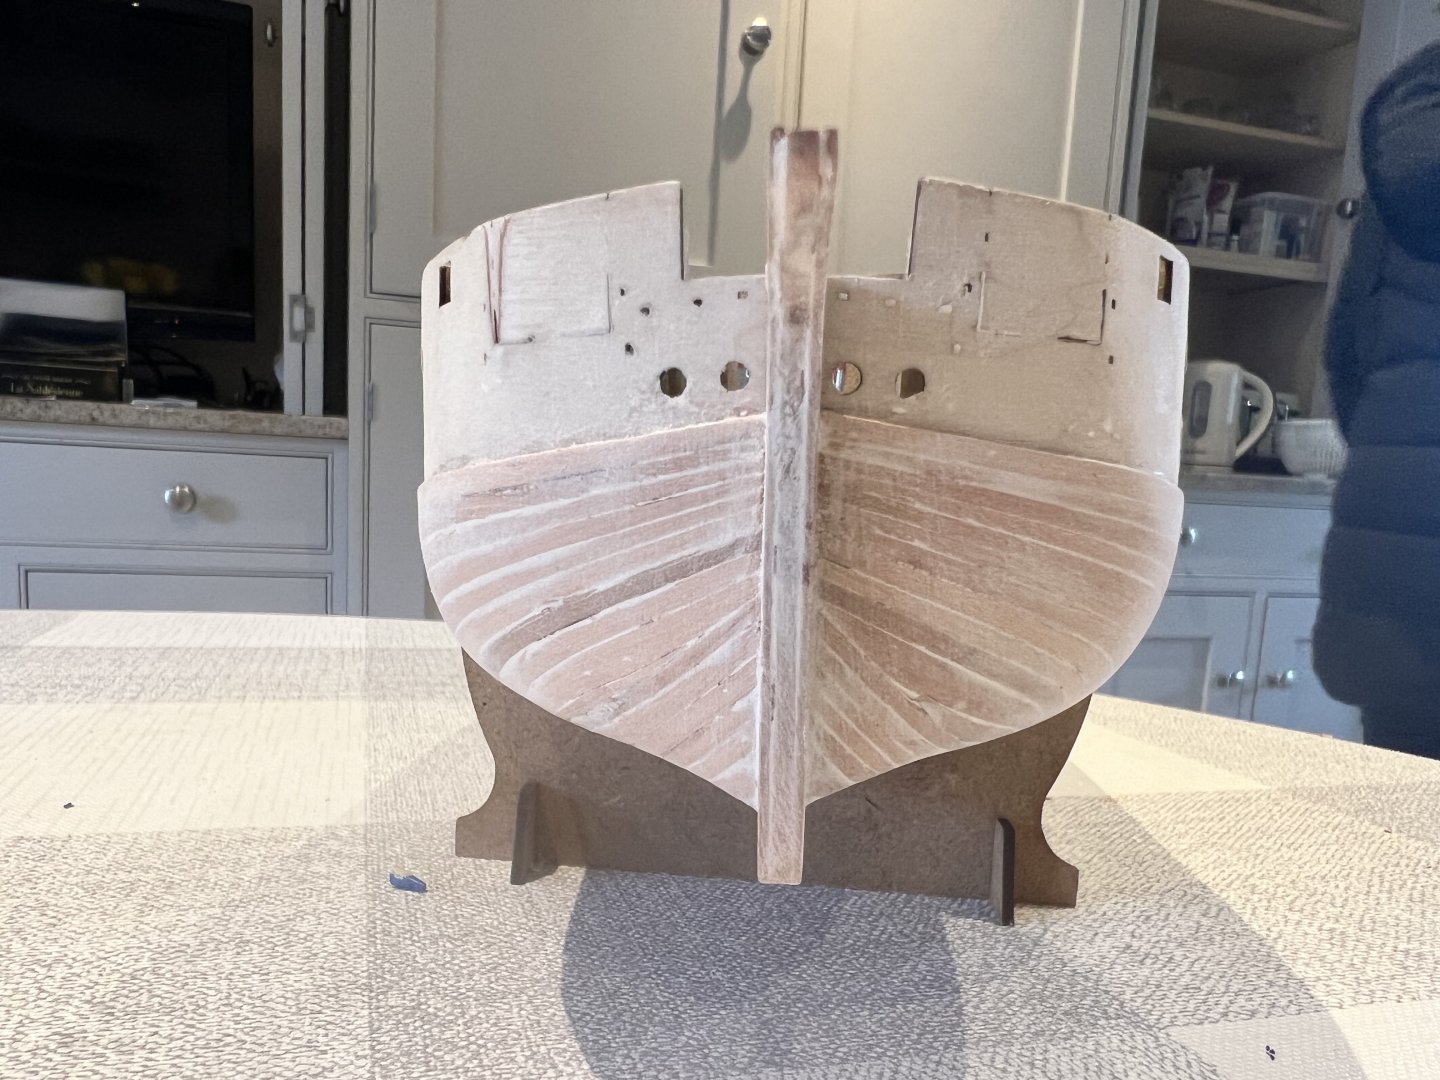
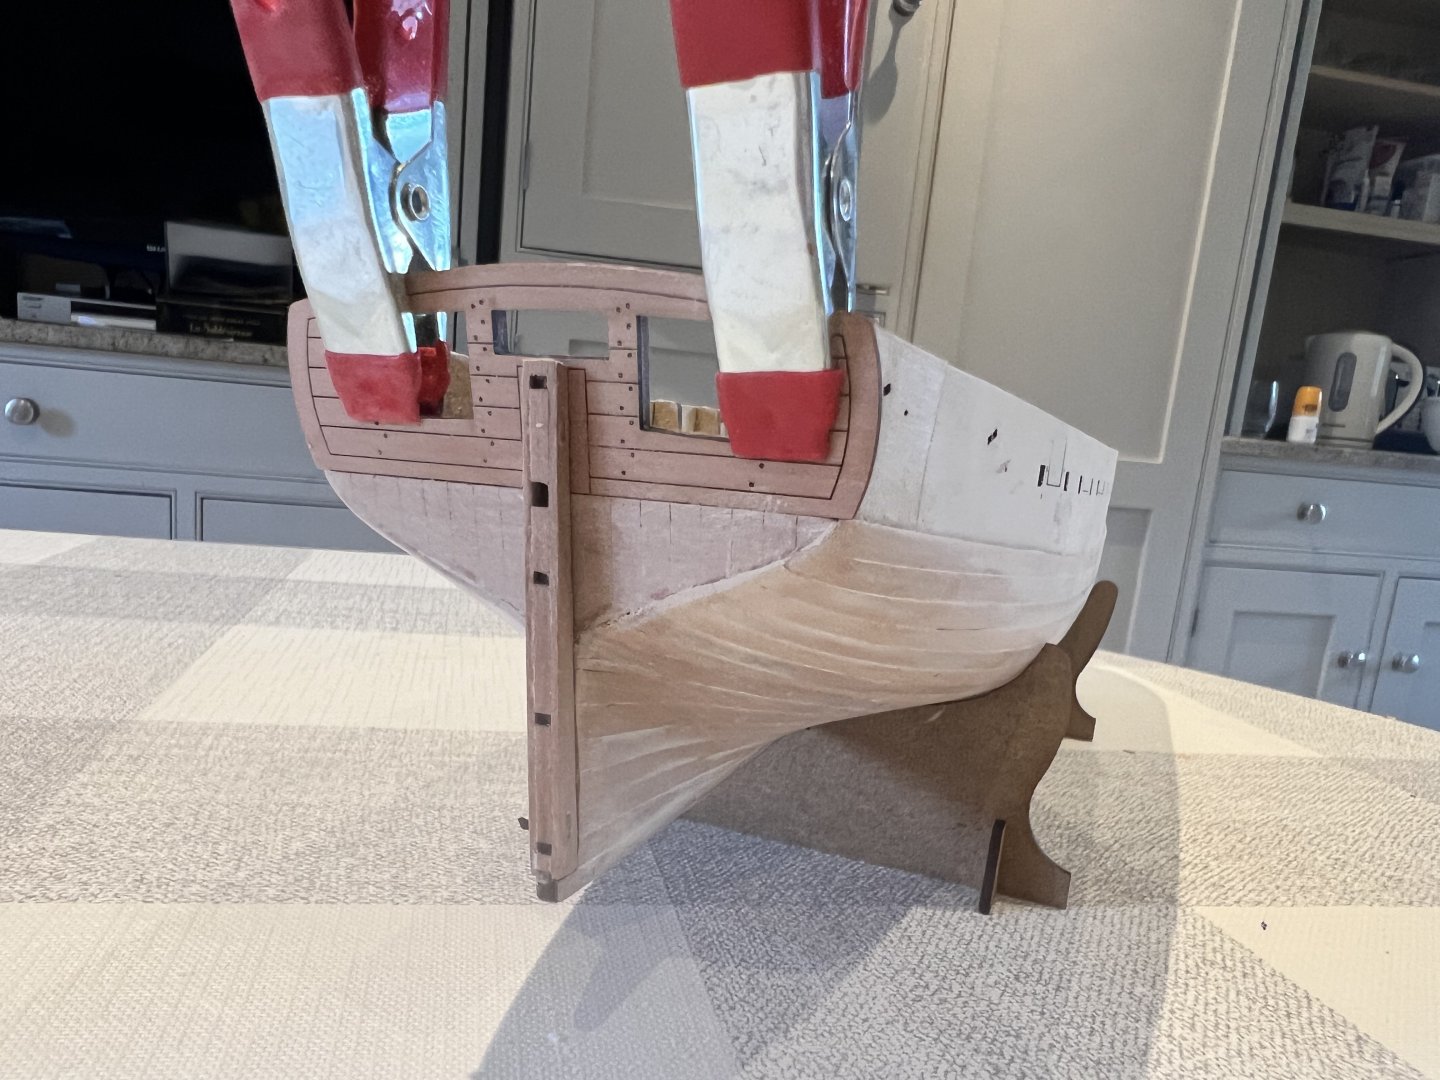
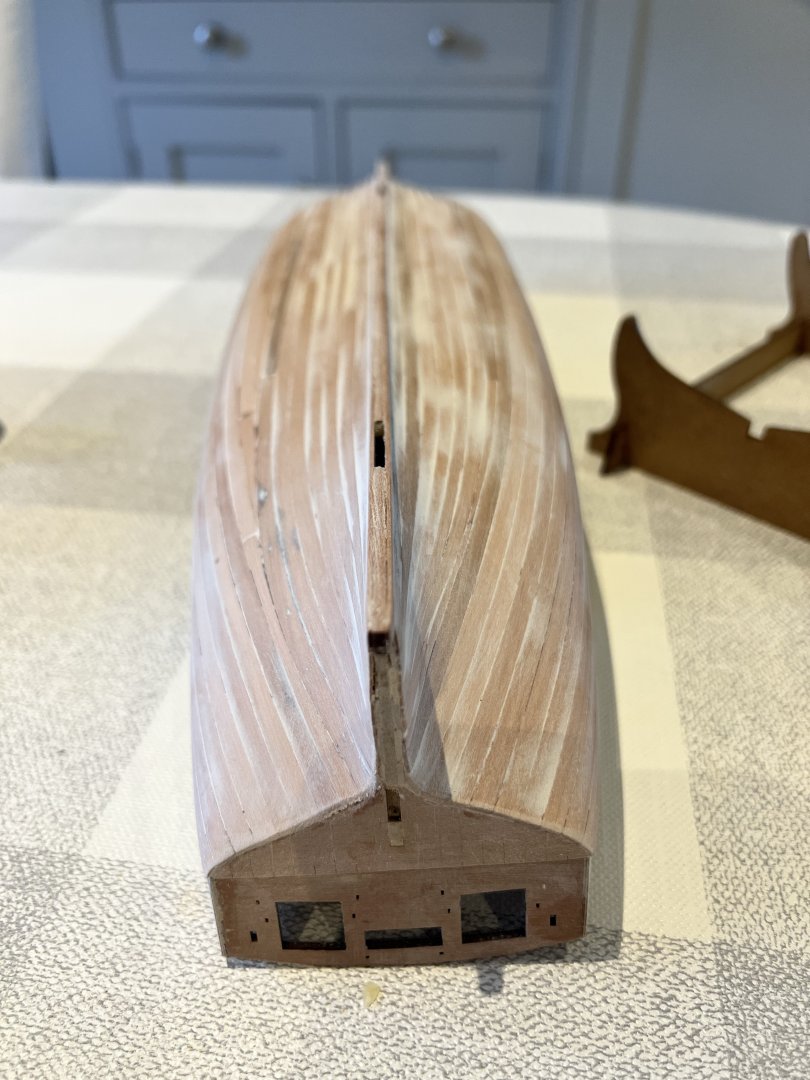
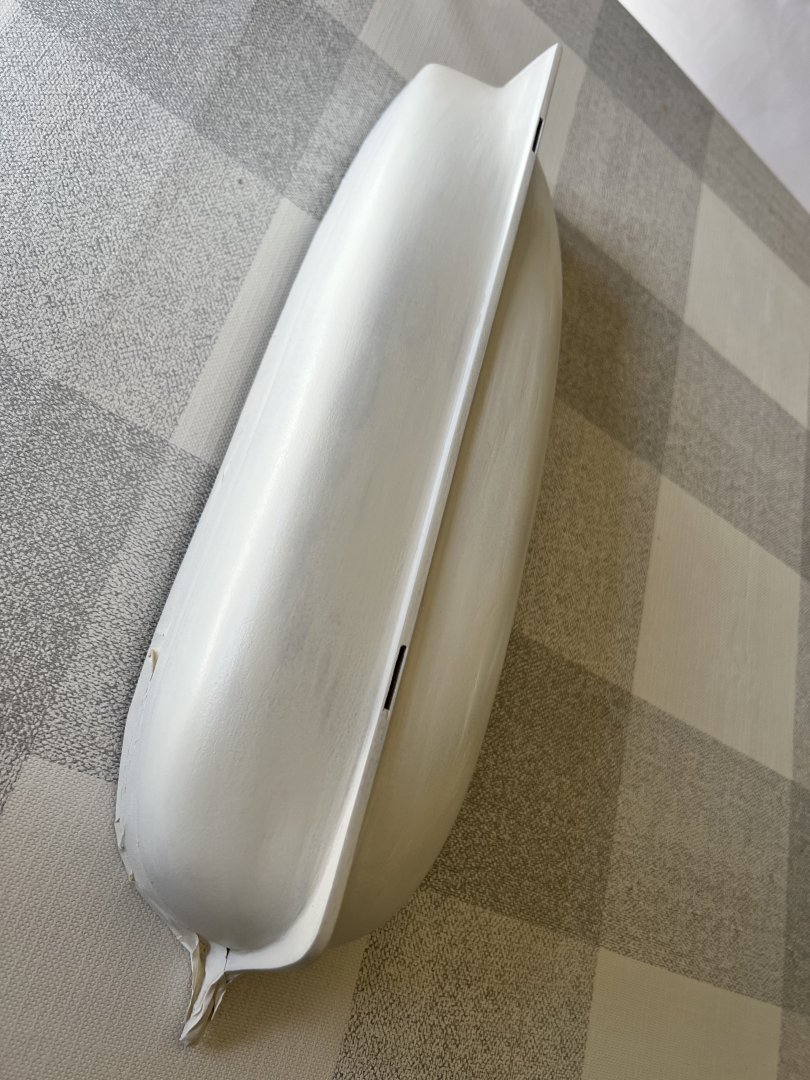
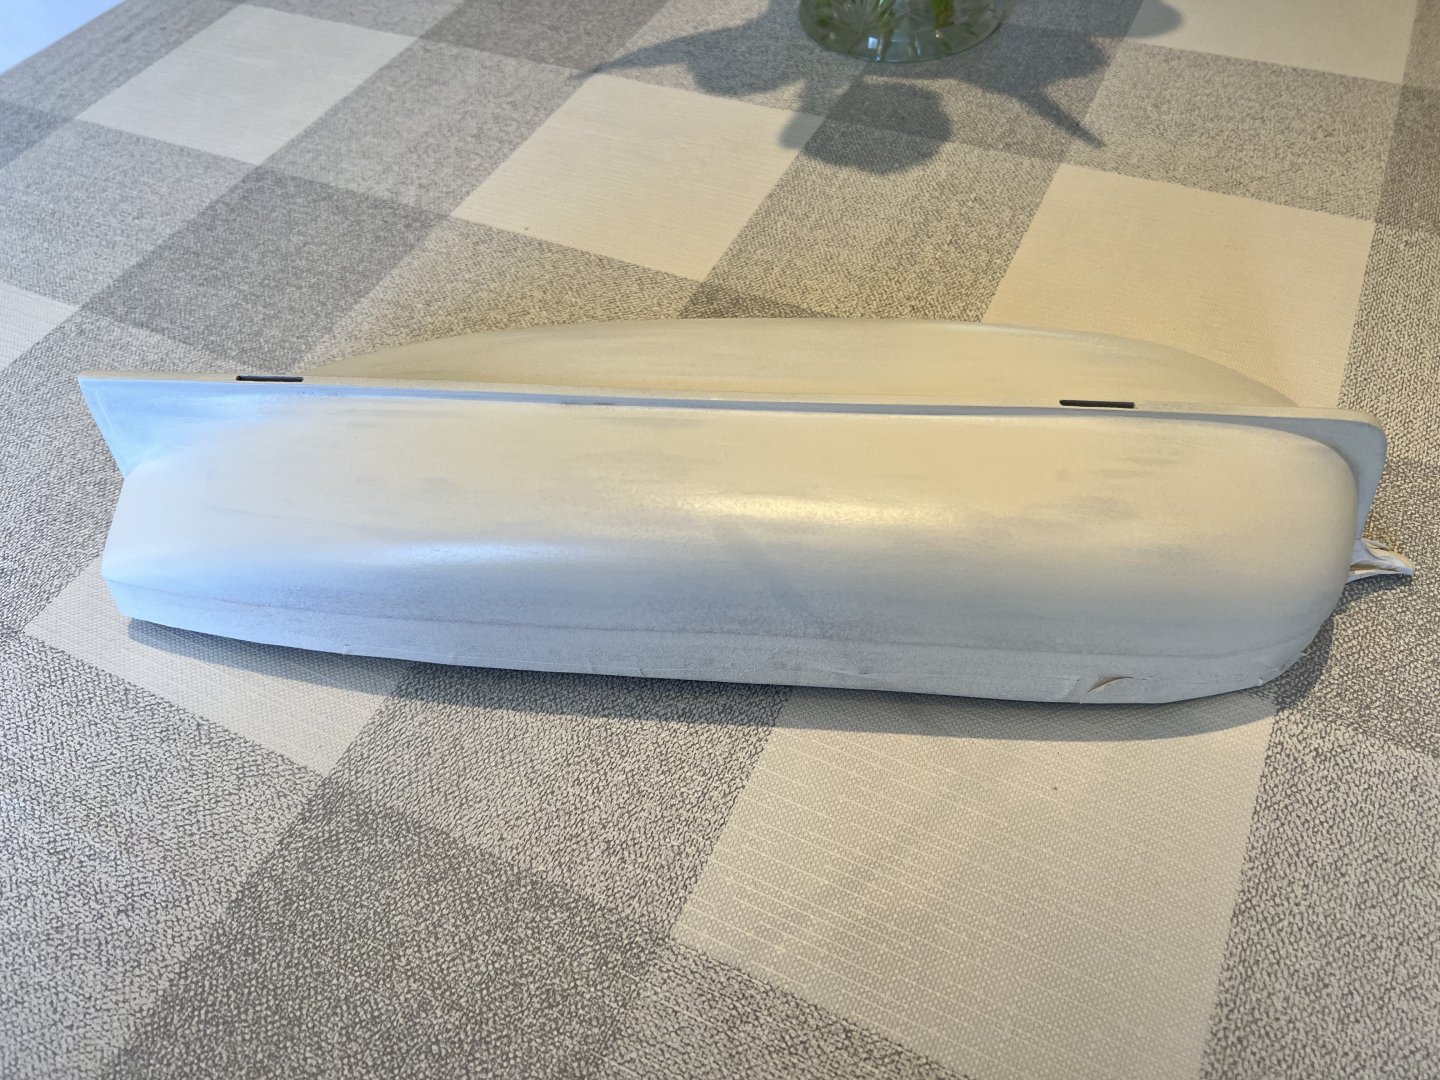
Second planking is now complete. Tapering more aggressively than in the first planking helped a great deal. Having not used tick marks to work out the extent of the tapering at each bulkhead I fell foul of tapering past bulkheads 1 & 2 whilst the planks needed to be wider here, so I needed to fill in the gaps. I haven’t detailed my planking journey here as technically it’s what not to do, and the end result is a little crazy paving in places, but with filler and sanding, smooth to the touch its close to what I’m aiming to achieve as the lower hull will be entirely painted. The outer sternboard was clamped on (not glued) and the sternpost glued in place. The outer sternboard has been removed again and the upper hull has been masked off for painting. First coat of paint has produced a surprisingly pleasing result without any noticeable cracks There are some areas where planks show through and the filler rougher than I’d like, but overall, this looks good to me for a painted hull and not too far off the end result I’m looking for. More filler, sanding and another coat of paint… and repeat…


- 146 replies
-
- 12
-
-
- Adder
- Vanguard Models
- (and 1 more)