HOLIDAY DONATION DRIVE - SUPPORT MSW - DO YOUR PART TO KEEP THIS GREAT FORUM GOING! (Only 13 donations so far - C'mon guys!)
×


rtropp
-
Posts
936 -
Joined
-
Last visited
Content Type
Profiles
Forums
Gallery
Events
Everything posted by rtropp
-
Very nice Sal, I am just starting those and being able to look ahead is really helpful. Richard
- 659 replies
-
- 2
-

-
- syren
- model shipways
- (and 1 more)
-
great job, It's a pleasure to watch your progress. Richard
- 593 replies
-
- 1
-
-
- royal william
- euromodels
- (and 1 more)
-
Danny, A real pleasure to follow along... and very instructive. Is it possible to see a shot of the cannon on the lathe perhaps part way through working it? Thanks, Richard
-
Proxxon EF vs. Dremel 7700
rtropp replied to rtropp's topic in Modeling tools and Workshop Equipment
Hi, Frank, I have used the Foredom and like it for some uses but I am trying to get away from the somewhat stiff shaft attachment. Mike, the 8050 seems a little big for my purpose. Do you know the weight of the tool itself? Jack, Do you know the weight of the WeCheer? I suppose what I would really like is the pencil like form factor of the Proxxon and cordless like the Dremels. Given the need for a battery, I thought that would not happen but I found out the dremel 7700 is only 12 oz so the difference between it the 8 oz proxxon does not seem too much? Richard -
I am told that CNC is a process and can mean many things and indicate many different tools. So I thought I should the item that led to my interest in this question. It seems it can not only cut the pieces per outline but also carve the piece as 3d carvings. Richard
-
I want to get a lightweight rotary tool to use when doing fine work. So far I have narrowed the choices down to the Proxxon EF at .506 lbs, and the Dremel 7700 at @ 12 oz. I have the Dremel flex shaft attachment but it feels a little cumbersome when trying to move around the build. I already have the transformer for the Proxxon so that is not a problem. I guess I am wavering between battery power and the lighter weight of the Proxxon. What do you all think? Richard
-
I am seeing Laser machines being mentioned more frequently on MSW in the build logs. Given some of their difficulties, I was wondering why I don't hear more about CNC. They seem to require similar learning curves for software but the CNC seems easier to set up. doesn't have the char and angled cuts and the prices seem on par with the laser machines. Just curious... Richard
-
Micro Drills, Revisited.
rtropp replied to Modeler12's topic in Modeling tools and Workshop Equipment
Hi all, I was following the conversation and thought I would add what I have been doing. I found a place called drill bit city online that sell re-sharpened bits. (at its sister site it has new ones plus mills and other bits.) The shafts are all a common size and the plastic ring gives an easy to read bit size and also serves as a stop when putting it in the drill. They are easy to handle and hold up well... unless I use them by hand or without a holder. Then, like others, they tend to break if I breathe too hard. For quick holes they can be used without a holder. best part is they are cheap. The set shown is about $10.00. You can also get sets of 5, 10, etc of the same size. I have sets of 10 in # 74,75,77, and 78. (No connection with them, just a customer.) they can be found at https://www.drillbitcity.com Richard
-
Pandora by marsalv - FINISHED - 1:52
rtropp replied to marsalv's topic in - Build logs for subjects built 1751 - 1800
Thanks for the drawing, Richard -
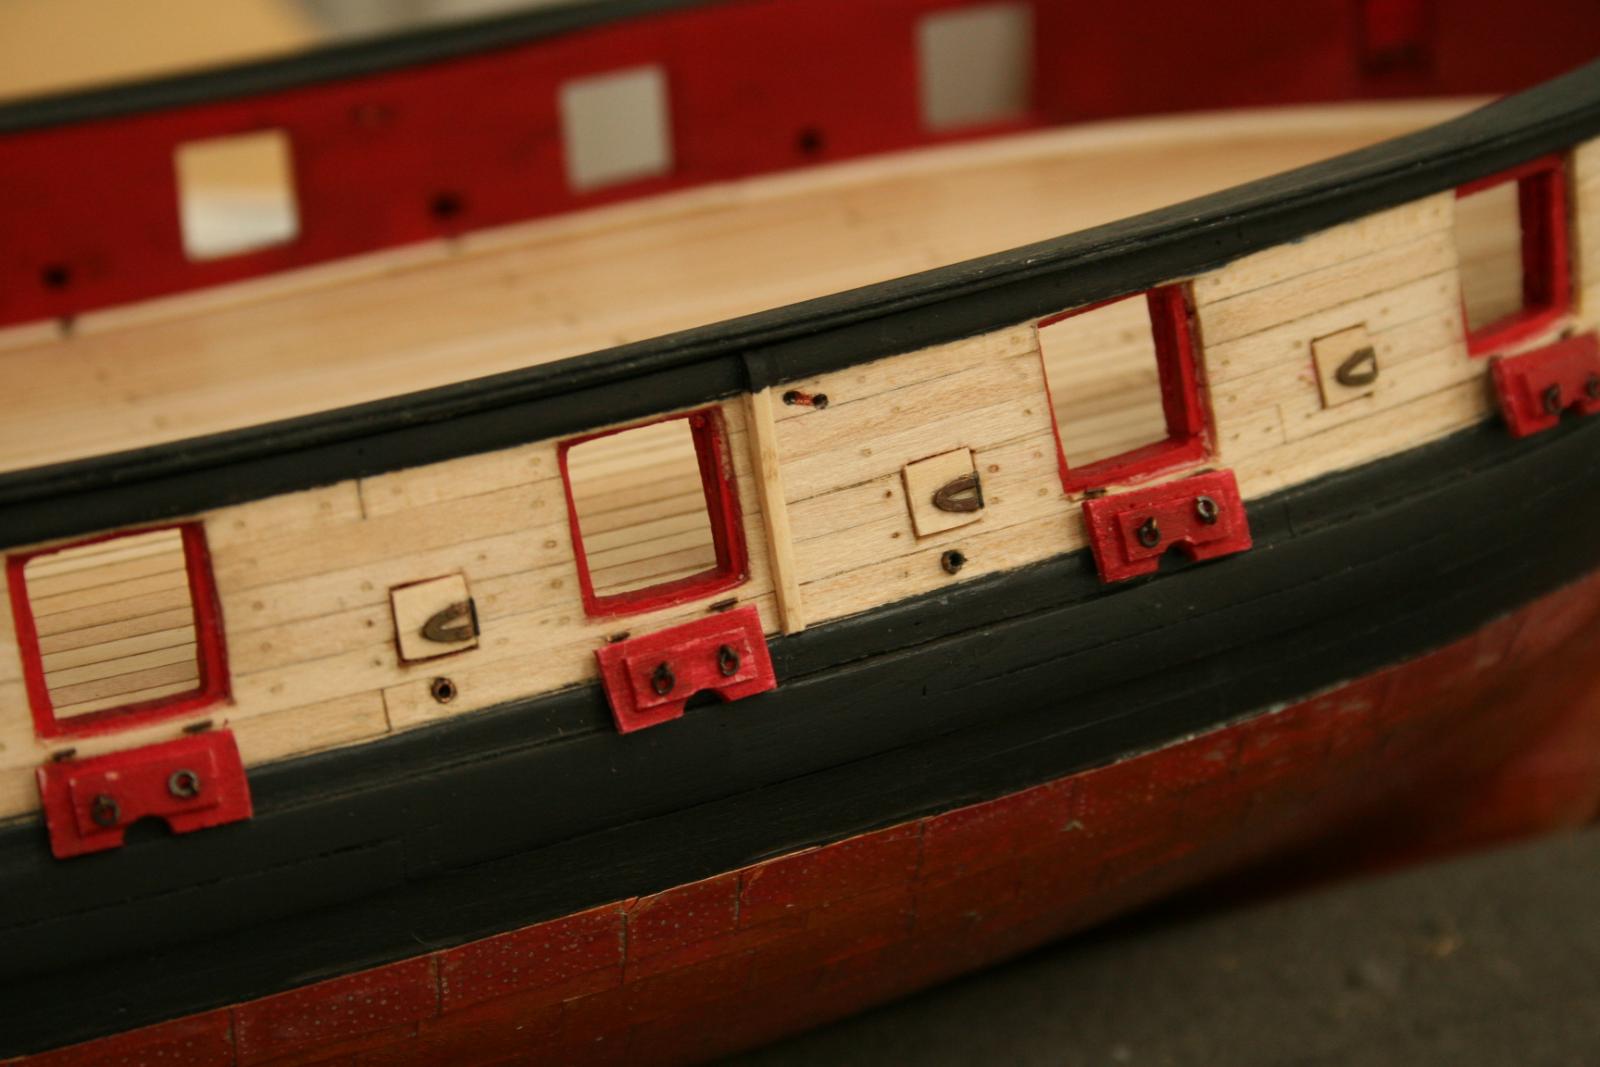
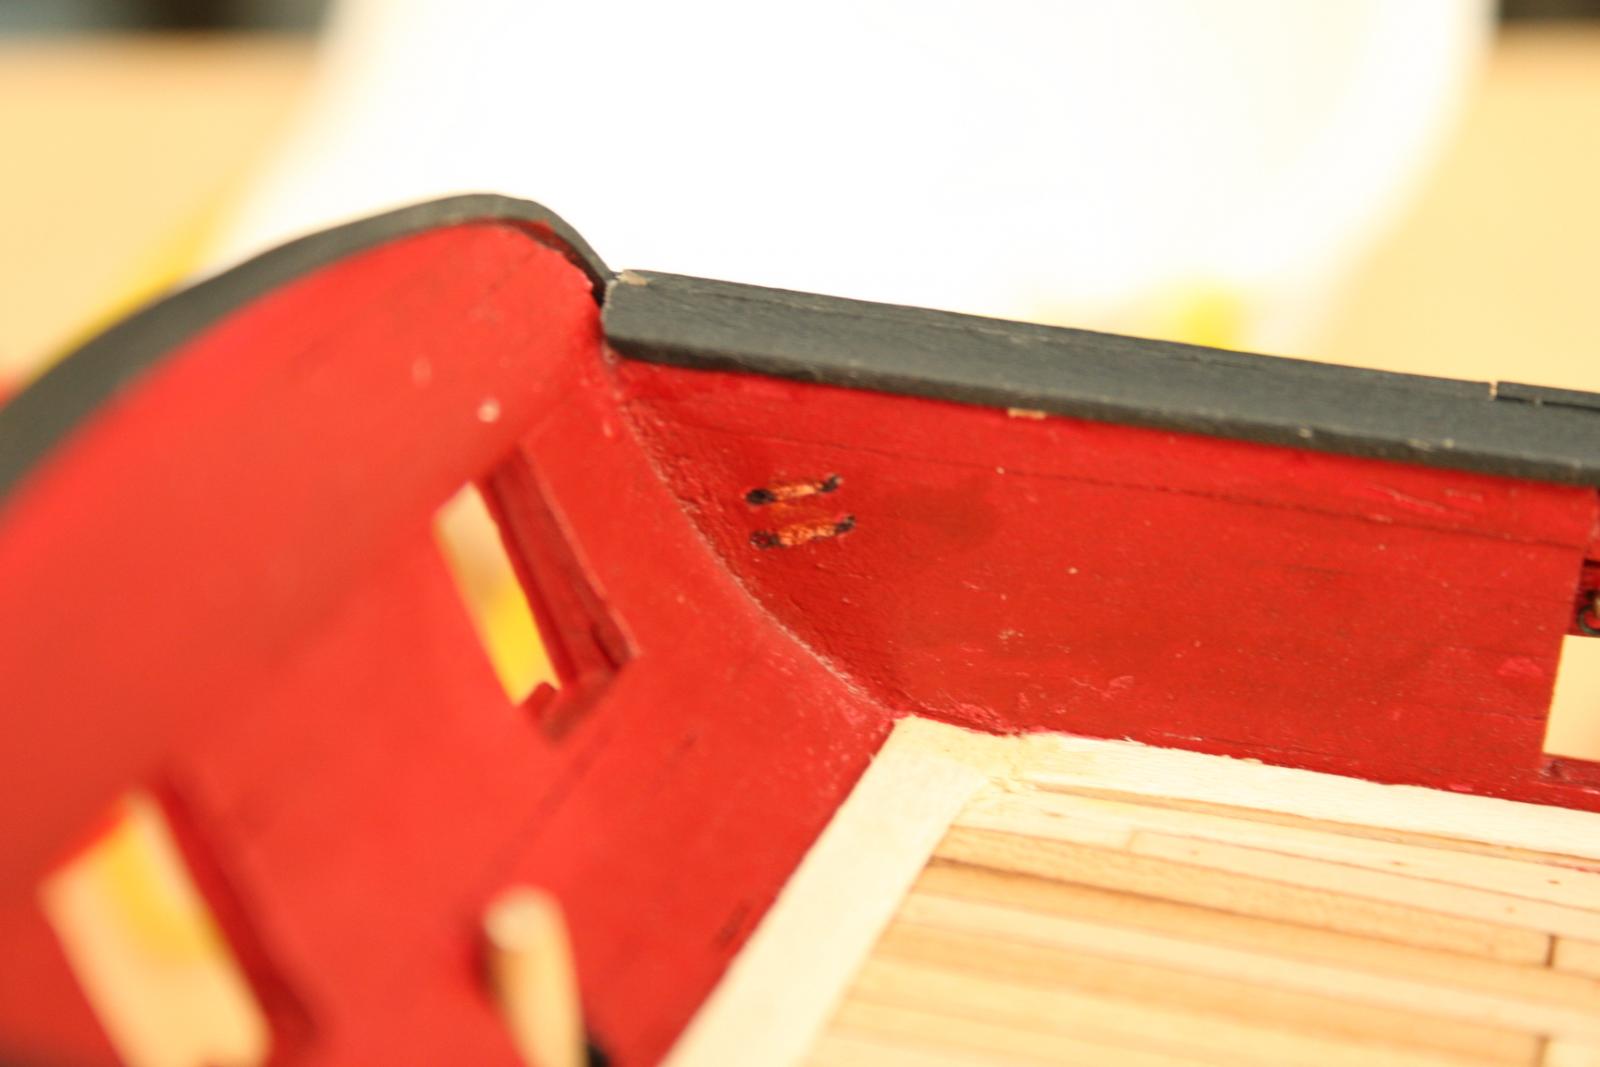
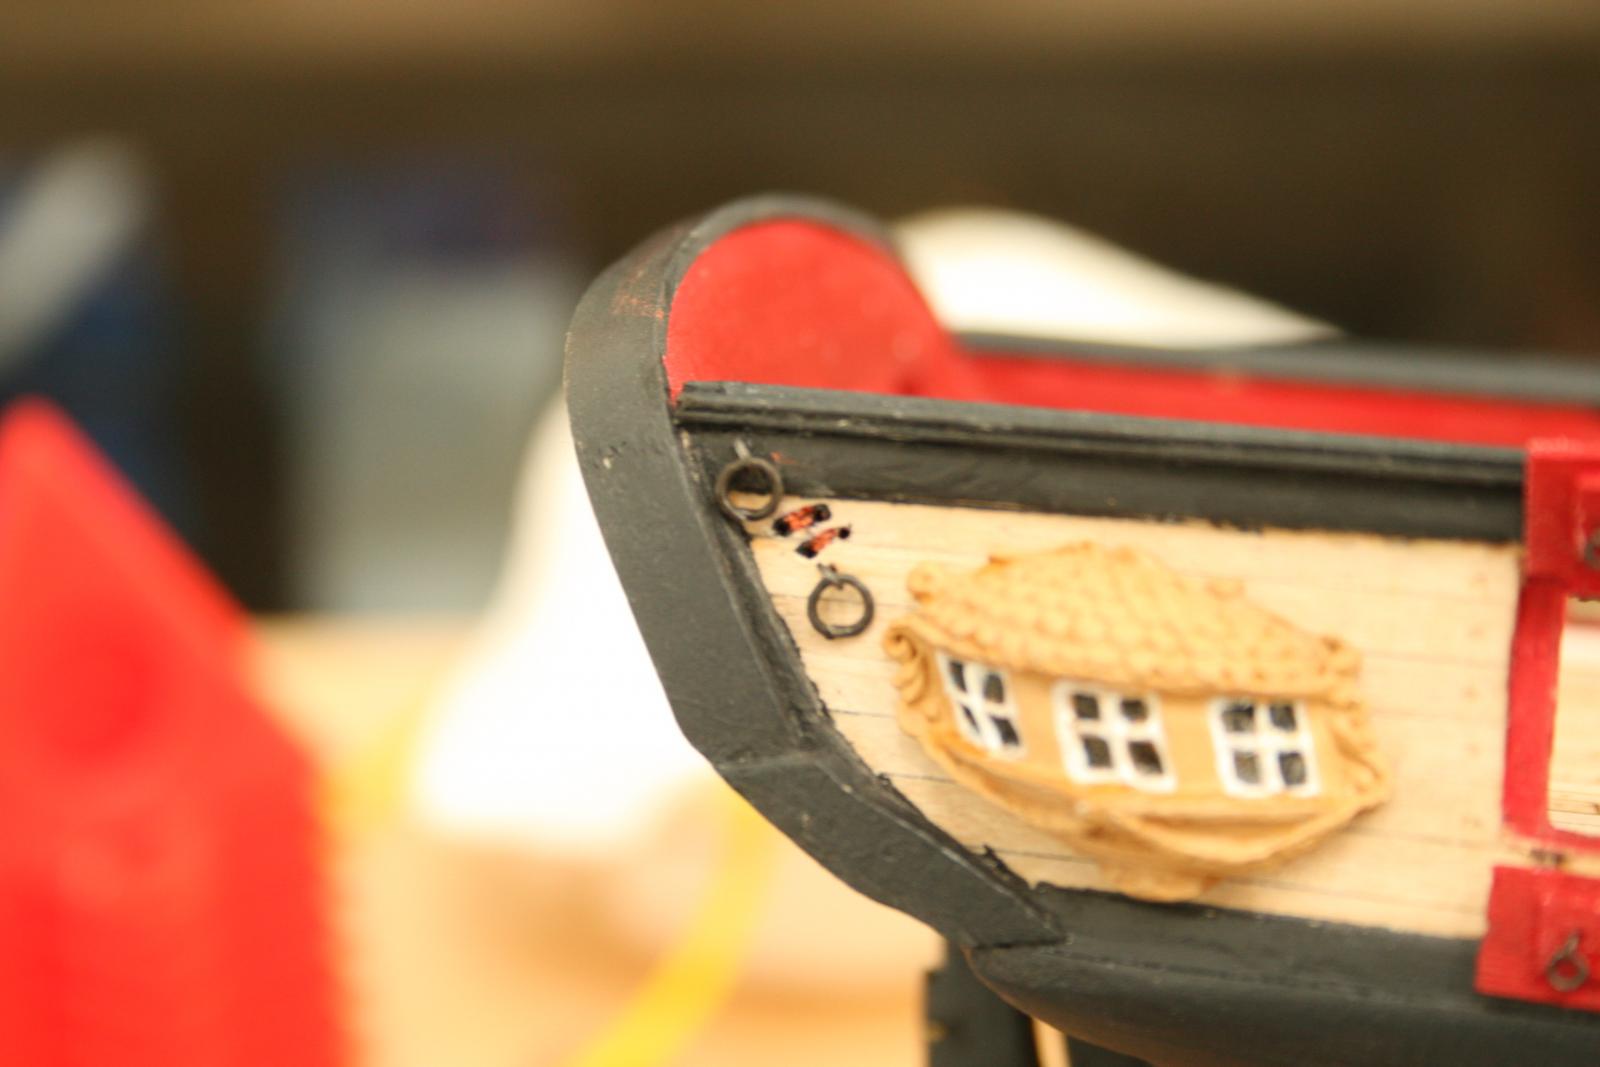
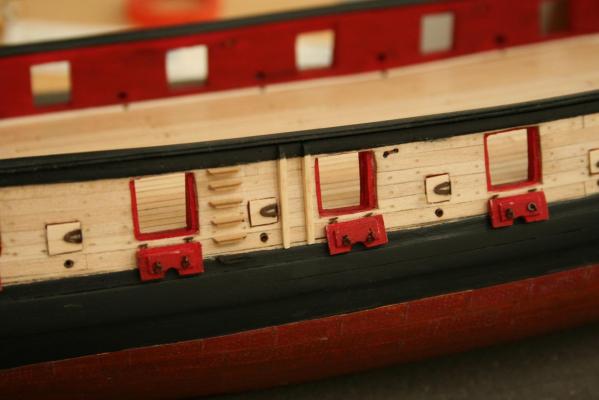
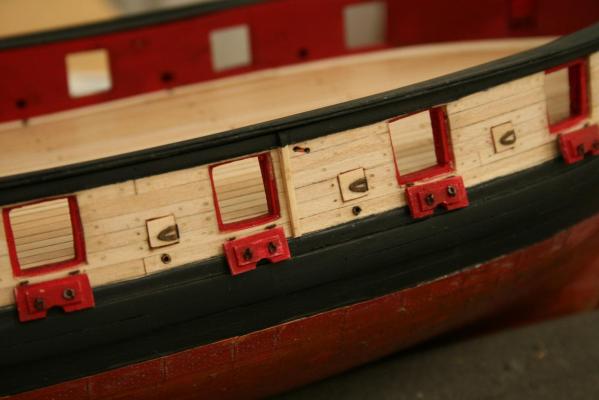
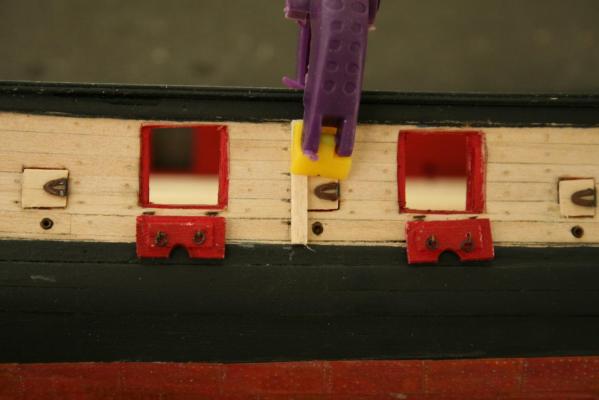
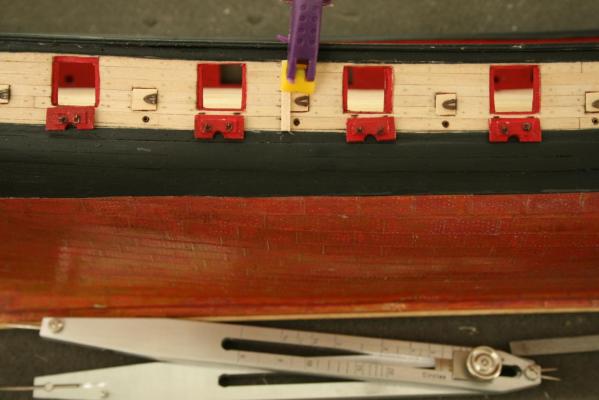
Hi all, I finished chapter 9 last night. First putting in the fenders and painting the bottom step of the ladder and the top of the fenders. Also took the opportunity to touch up dents and scratches. added the sheaves: I added the channels using pins for support: Then attached channels and them painted black I did not fully paint the edge with the cutouts wanting to leave bare wood for adding other components. Here is a shot of the sheaves near the stern. After seeing some of the other modular sheaves I wanted to try the same but I had not cut out places for them. I tried making a simulated sheave out of thinned wood but it did not seem right so I decided I had missed that opportunity early on. I had some brass paint from a hobby store and tried it as an accent to represent the brass... not sure if I will keep it or paint over it. The work done in chapter nine really showed the impact of inexperience during the initial parts, building the bulwarks, gun ports, etc. Luckily it does not seem to have hurt anything but I will not know for sure until further in the build. I am learning how the parts are all interconnected in some way and there can be a domino effect for earlier lack of skill / dexterity. I look forward to beginning chapter 10. Richard


-
Jaeger, DaveS, and all, Thanks for the detailed replies. They are very helpful. I am not sure if band sawing will be possible on the larger piece but should be doable for the smaller one. I will find out this week. The idea of the drying rig sounds simple and easy. A question: If I cannot get the larger piece cut down to billets, would the drying rig still help it. If the piece does develop cracks, can I just cut billets around the cracks and live with the waste? As for outside drying, I live in Georgia and not sure how the heat and humidity will affect it. I would appreciate your thoughts. I am enjoying this exercise... would be great to work a scratch build from raw wood. That really sounds like scratch building :-) Richard
-
Mark, It did not take any help to get confused, I am pretty good generating my own confusion. My interest in the real practices of plank bending began during my first attempt at the 18th Century Longboat . Some of the bends were so difficult that I could not do them correctly in a double size scale. I noticed that a number of builds required extreme plank bending and the number of different practices and devices for bending are huge. So I guess I just started wondering how did they do this in real practice. In researching I found a couple of mentions of steam boxes at the ship yards, but none really explained how the bends were accomplished after steaming. (My image of a huge plank bender 30 feet tall did not help;-). I do have a few books relating to full scale ship building but have found nothing that gives my a visualization of a plank actually being bent. I am still looking for something like that and if anyone has any sources for the full size plank bending process used in the 18th/19th century I would appreciate seeing it. Thanks all Richard
-
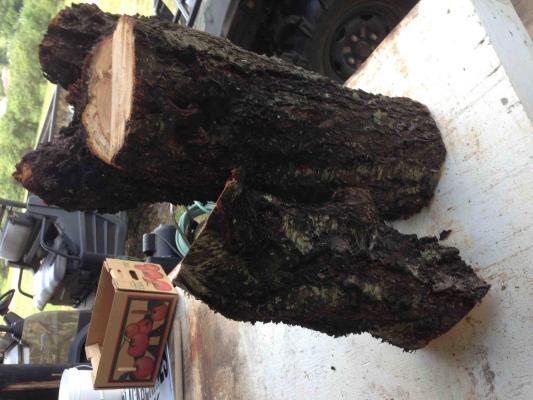
I just picked up the Peach wood. It was cut two days ago. I tried to get some anchor seal at the local home depot and lowes but they had no idea what I was looking for. Should I use a more commonly available substance (i.e., paint, sanding sealer, etc) or just let it go. I will be visiting a friend who owns a band saw and was thinking of cutting which ever piece he can fit on the saw to create smaller billets for faster drying. I am not really equiped to remove bark. Is it really necessary? If so, is there a simple way to do this does not required heavy tools? thanks, Richard
-
Pandora by marsalv - FINISHED - 1:52
rtropp replied to marsalv's topic in - Build logs for subjects built 1751 - 1800
OK, silly question: The treenails look like they are still attached at the bottom. How are you removing them from the wooden block. Richard. -
It seems that Blacken It will no longer be available. I was wondering what other members used and which they favor. Richard
-
I have seen a number of models that require fairly extreme plank bending as the hull planks approach the stern. I looked at a number of models including the Licorne by MTaylor as well as others, both scratch and kit built. Were these bends actually made on the full size ships? Thanks, Richard
-
Thanks all, Jaager, I think I'll get a few pieces and try both ways, one using the uncut log, the other with the logs cut into 1" and 2" billets. I appreciate all the advice. Richard
-
Brass Black
rtropp replied to sailor jim's topic in Discussion for a Ship's Deck Furniture, Guns, boats and other Fittings
Hi all, a quick note: I was trying to replace my stock of Blacken-It but found that most online retailers out of stock. Customer service at Model Expo told me that they were out of business. It took me awhile of online searching to find a retailer that had some in stock at a normal price. I don't have additional confirmation but decided to get a couple of bottles... just in case. Richard -
How would you improve your Byrnes tools?
rtropp replied to Keith_W's topic in Modeling tools and Workshop Equipment
Jack, Sounds like a great idea, I have even looked at his book on Amazon. Might be an interesting read. I had some thoughts on how to approach it and it would be helpful to run it by someone experienced. Grant, I was thinking something like: Use a blank insert then when cutting the blade opening reverse it to get a wider opening. Cut out the blade from stock that is thin enough to fit through the blade opening and bend the bottom to form an "L". Then silver solder in place. Copper would be easy to work and comes in enough different thicknesses to create multiple zero tolerance inserts to fit the various blades used. I might give this a shot when I get some time. Richard -
Thanks all, Mark great links, I will definitely get some from the orchid and season it. Does anyone know if anchor seal is as effective as other sealers such as paraffin? Do you just coat the ends or the whole thing? Can you cut the wood into billets then coat them or is it better to do the whole limb and season it before cutting? Thanks all for the help Richard
-
We have a local peach farm and I can get some pieces of green peach wood that would be about 24" long and 4" to 8" wide. I remember hearing that all fruit woods were good sources for modeling timbers. I was wondering what you all thought about this wood for modeling. Does anyone know if it has a fine grain and if it works well with hand tools. Figured I'd get some feedback before getting involved in obtaining it then sealing and aging. Thanks, Richard.
-
How would you improve your Byrnes tools?
rtropp replied to Keith_W's topic in Modeling tools and Workshop Equipment
Grant, What soldering supplies do you think would give a strong enough bond. Also, would you edge solder it to the top of the plate, or cut a slot and put it up from the bottom? Richard. -
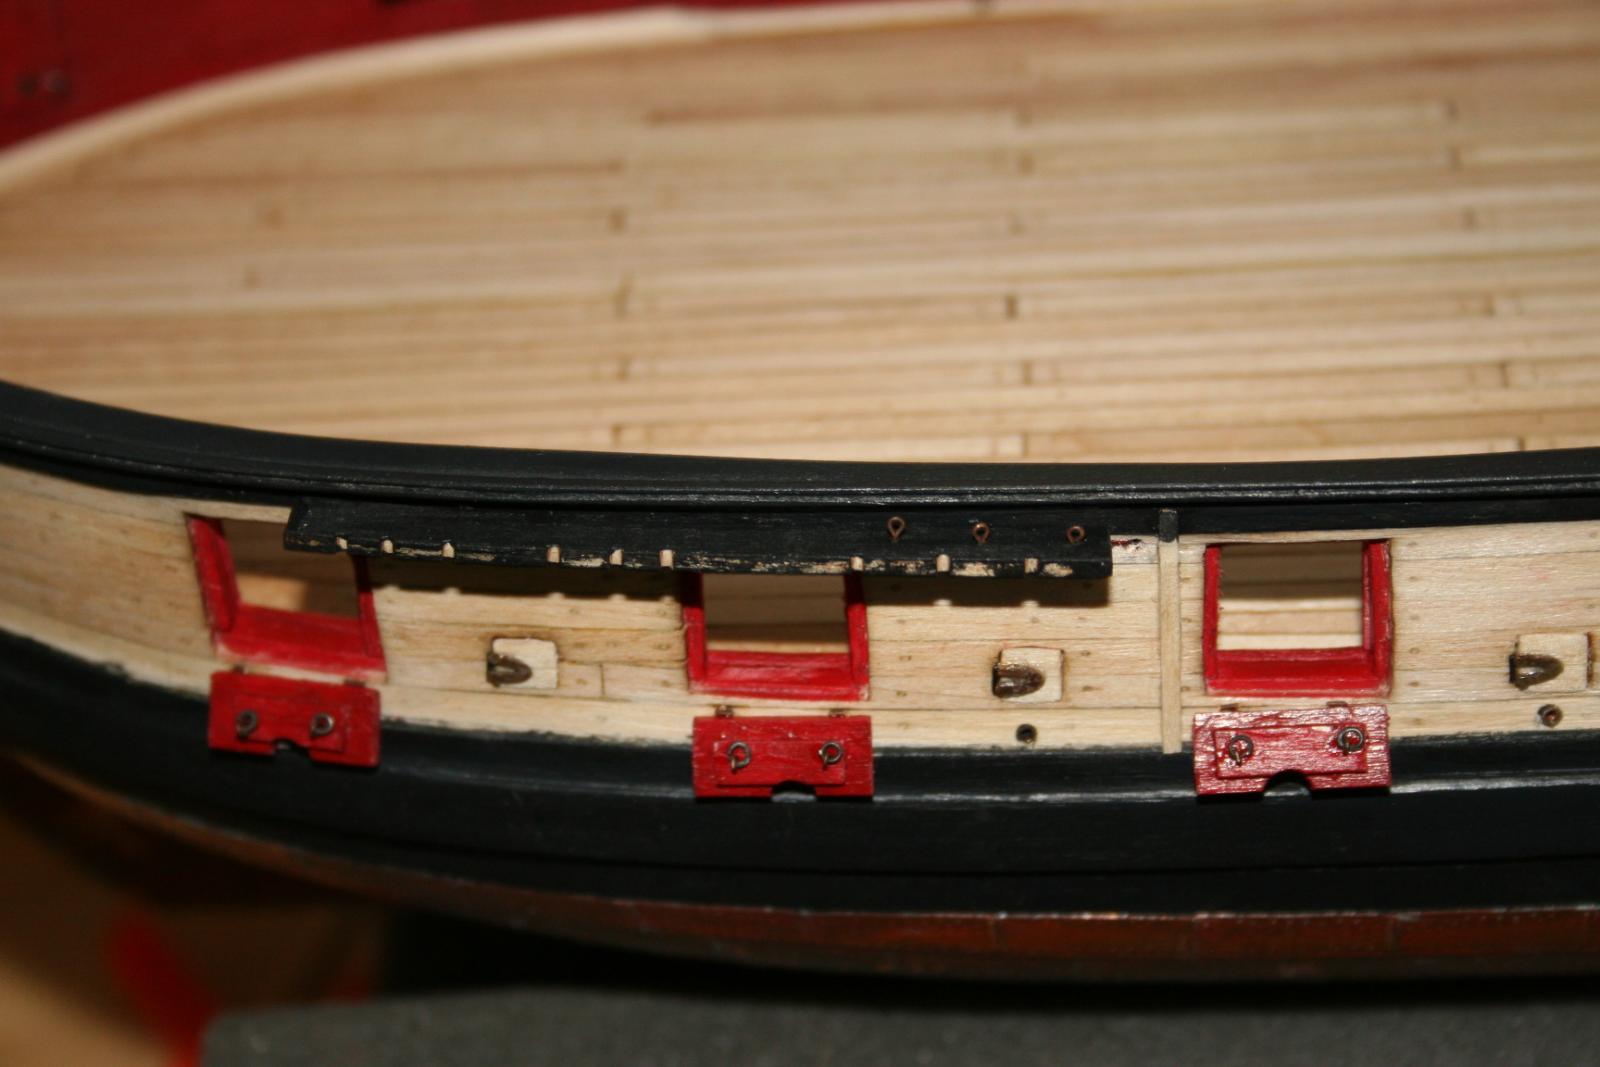
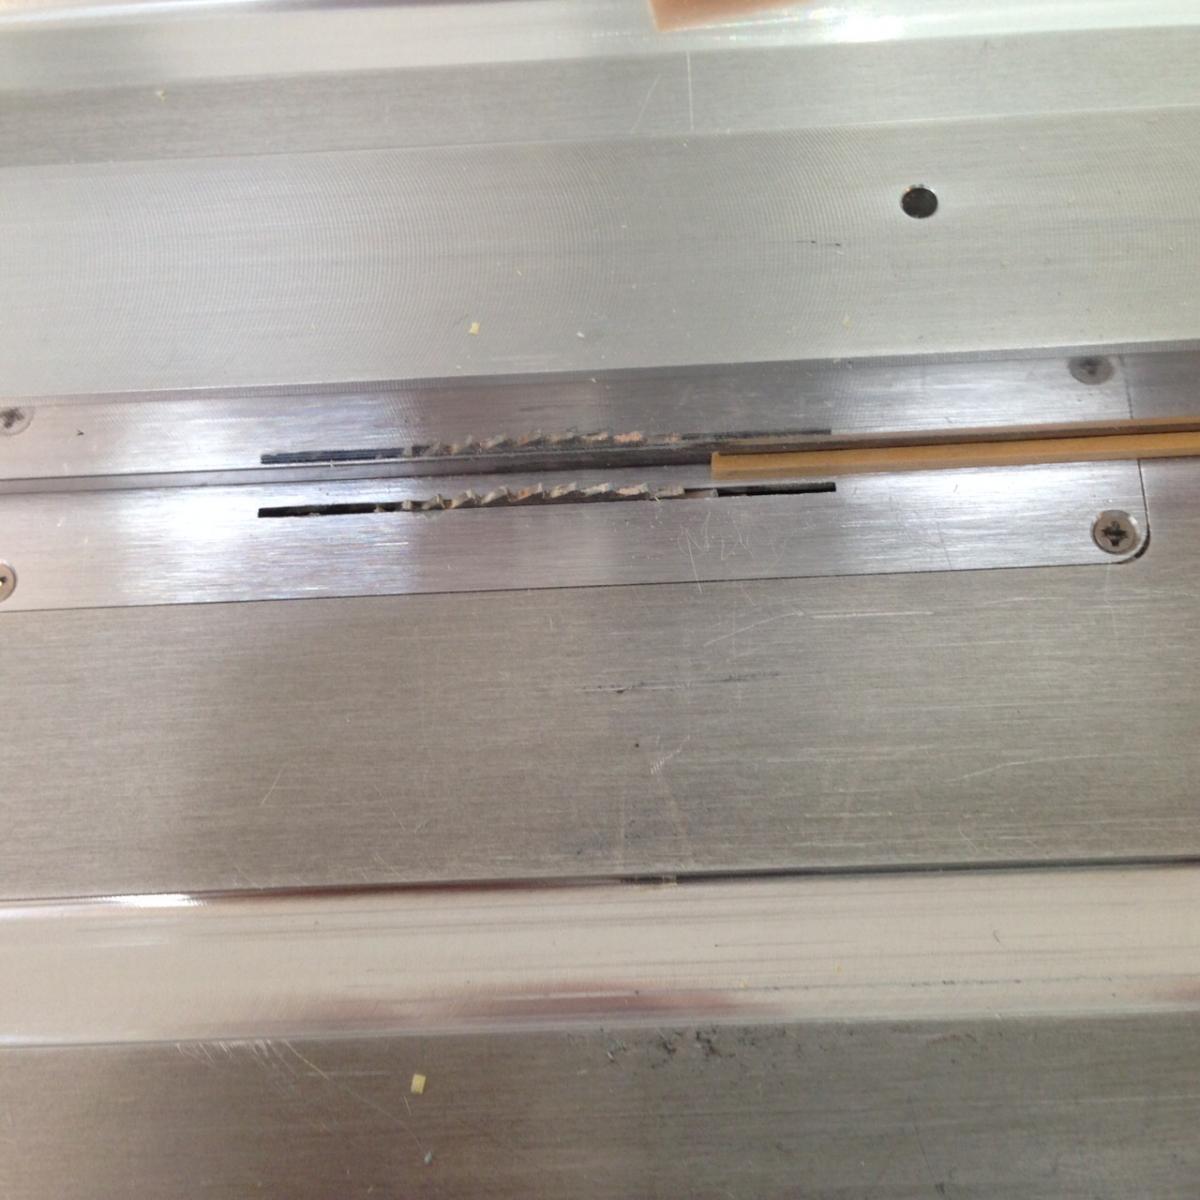
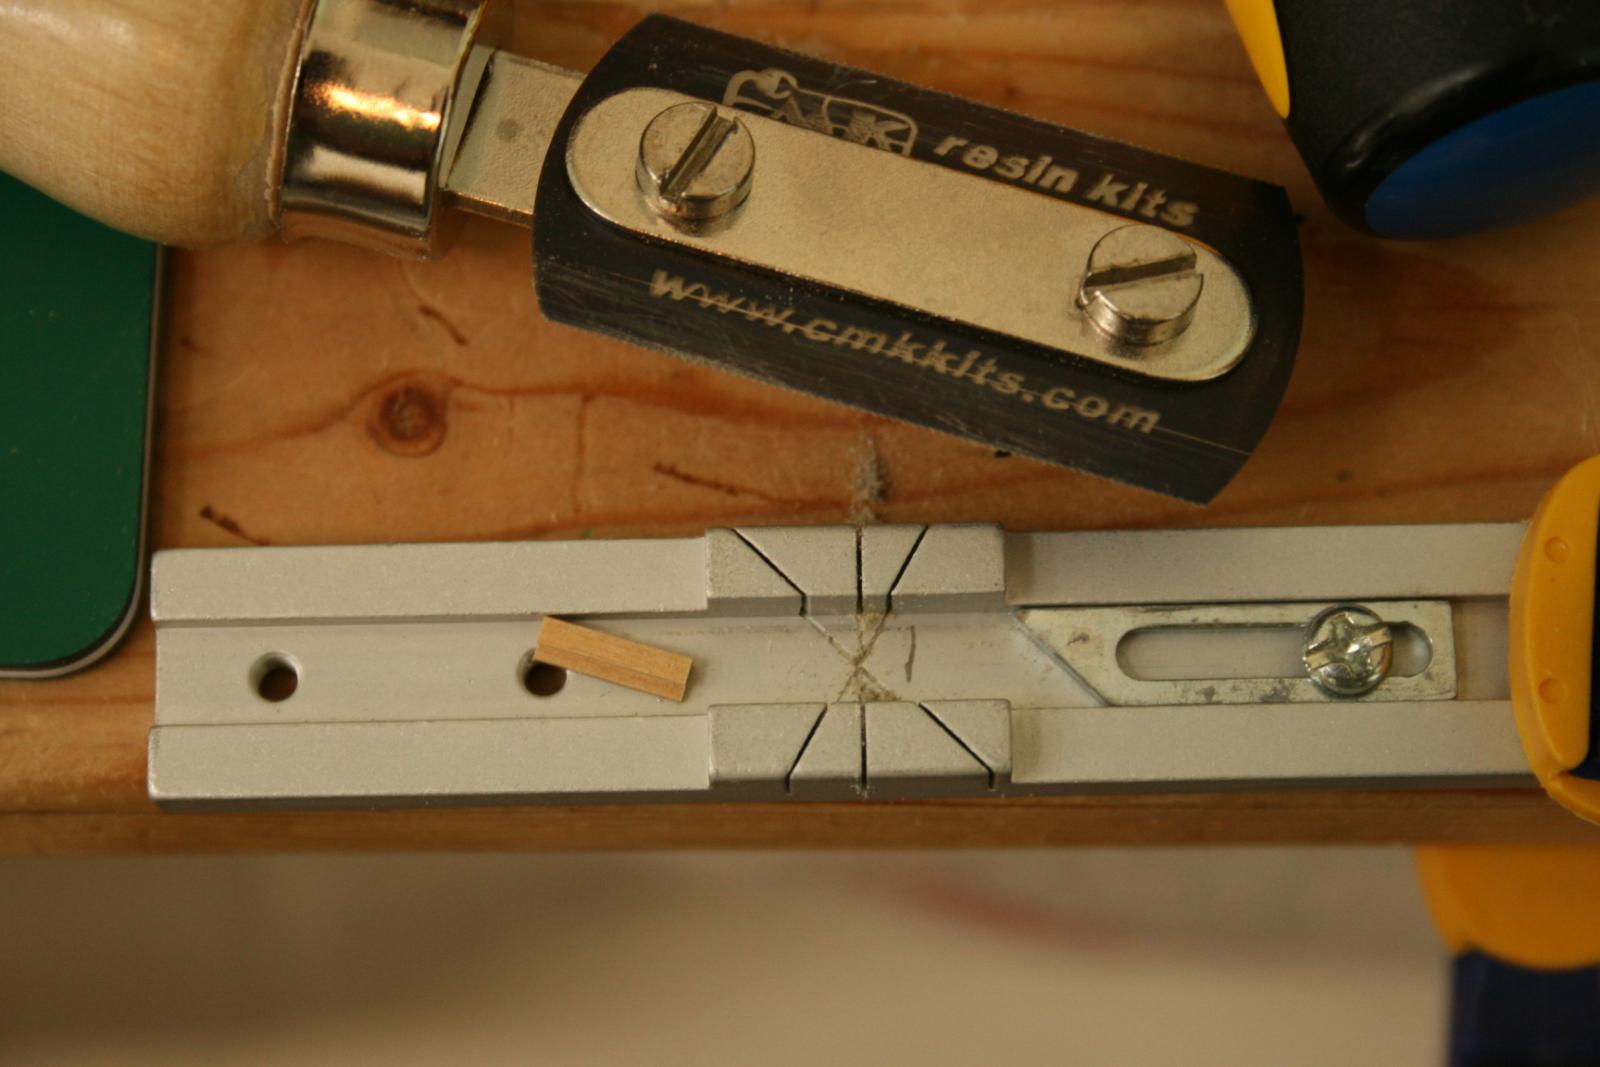
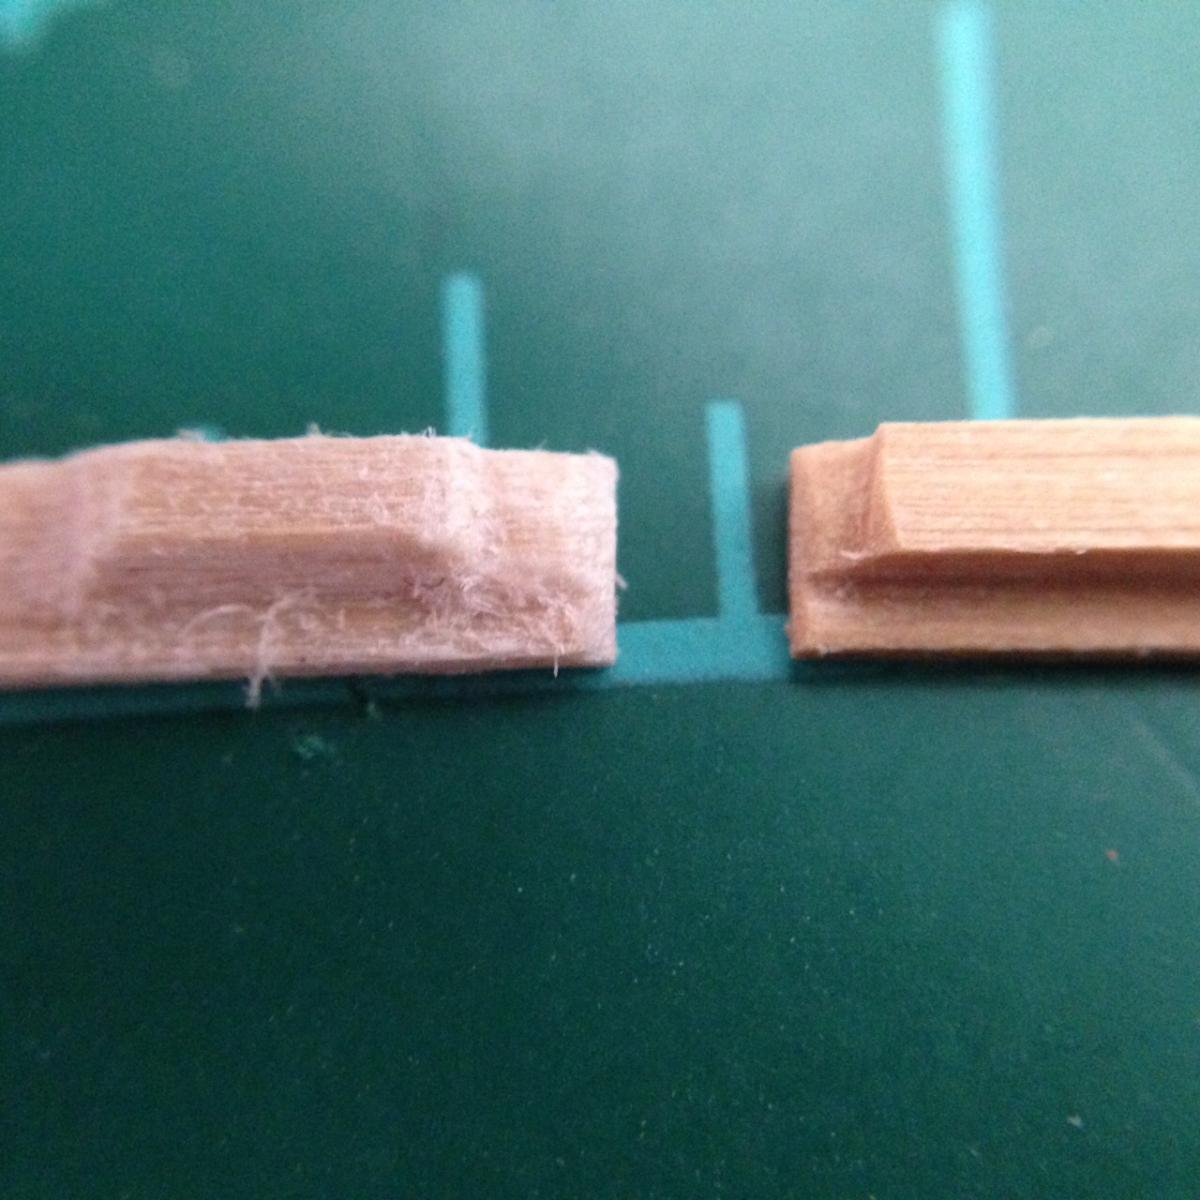
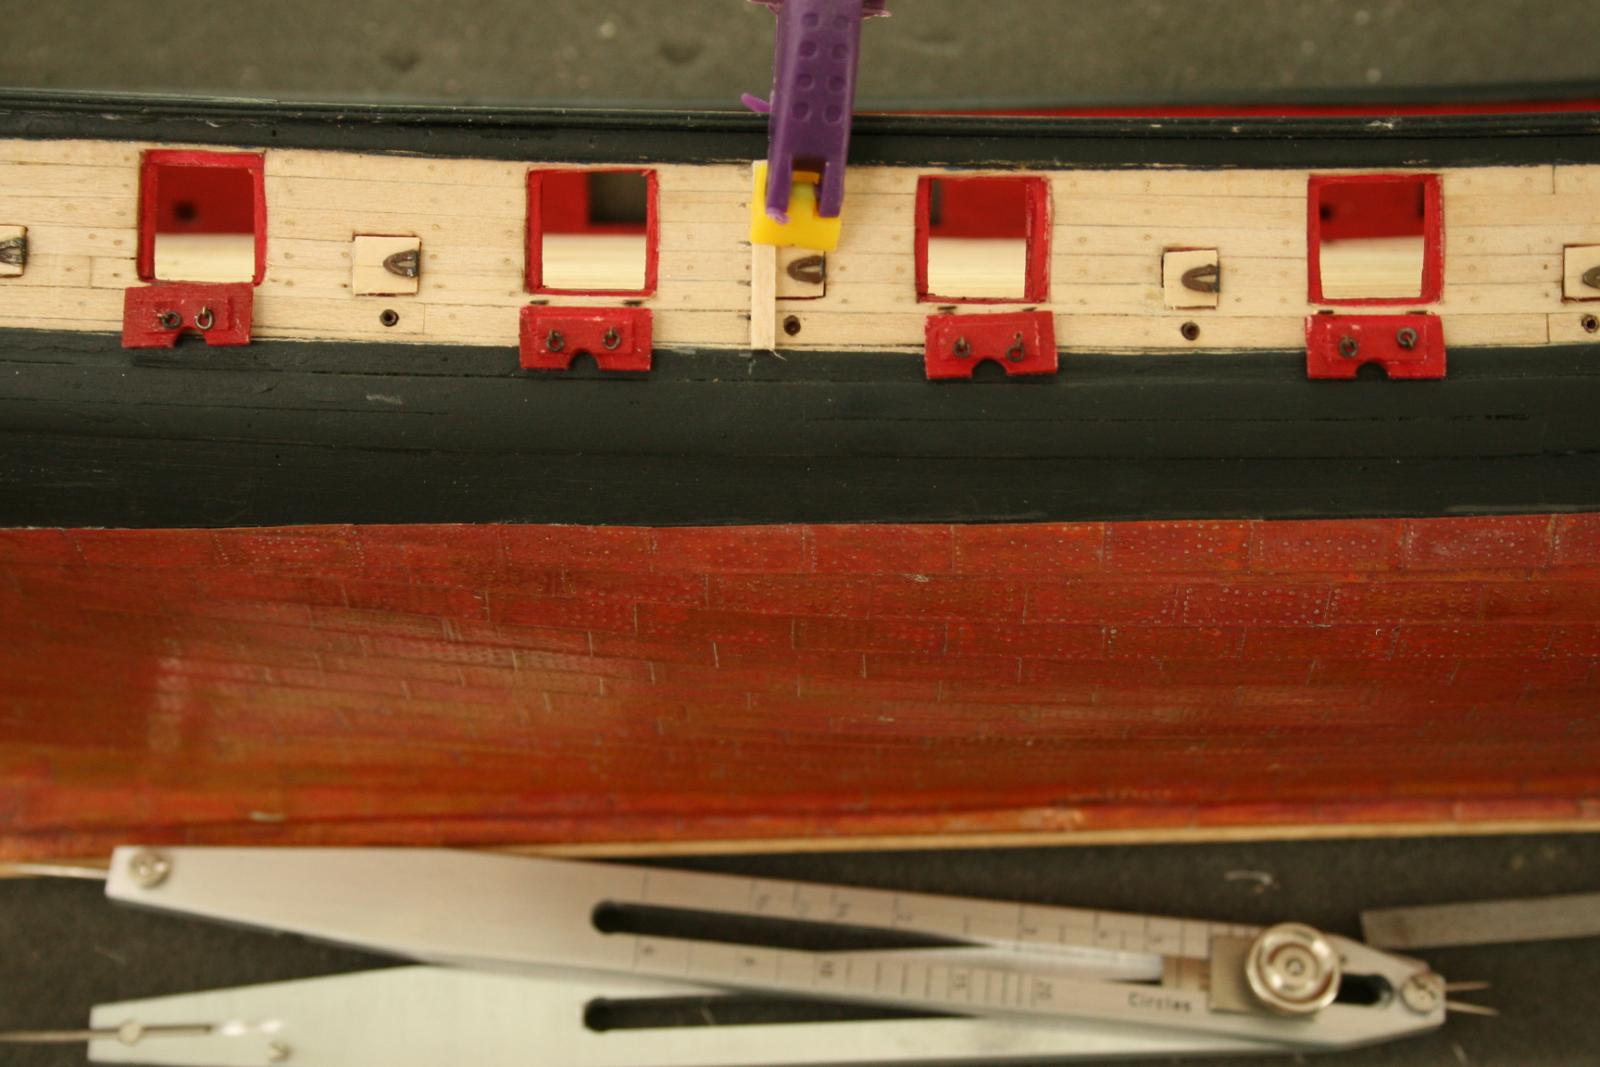
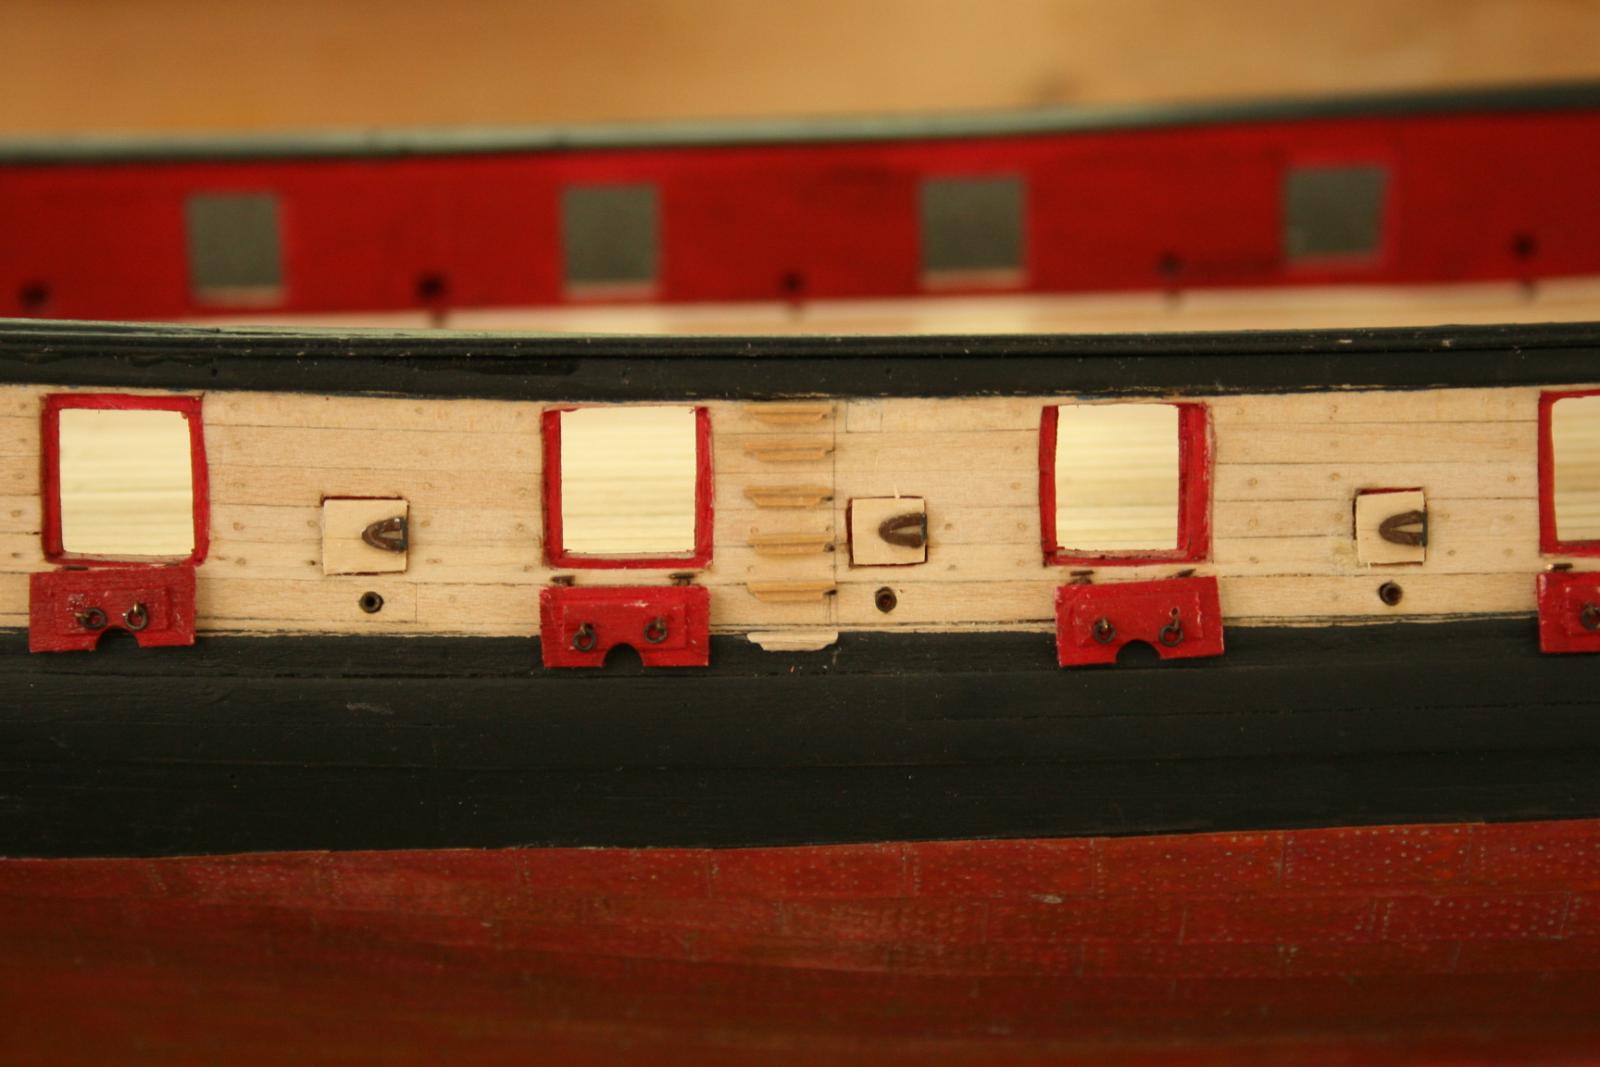
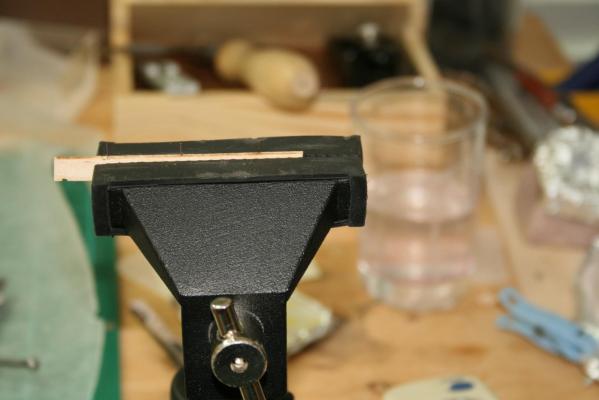
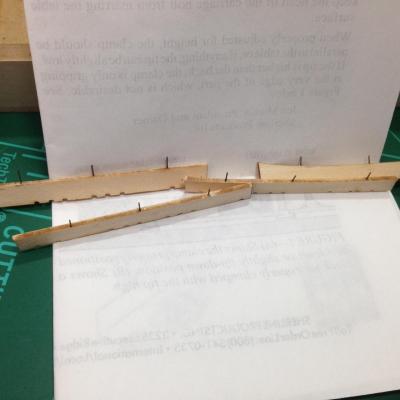
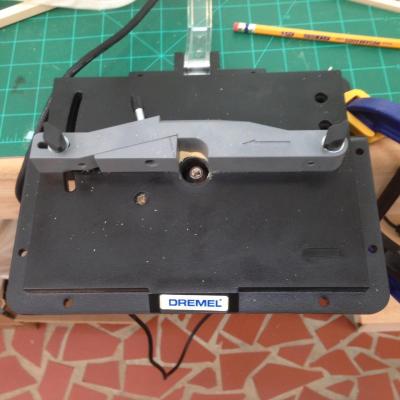
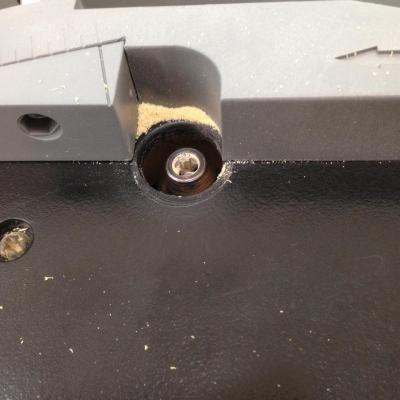
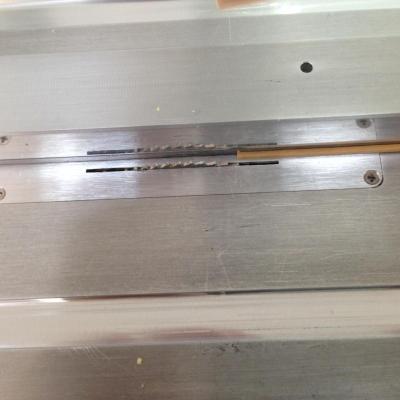
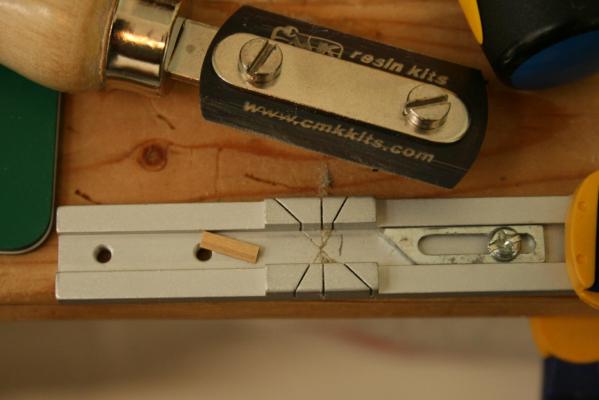
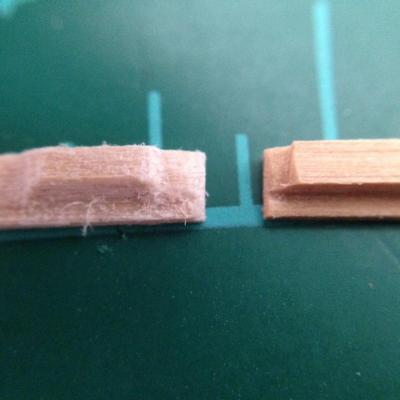
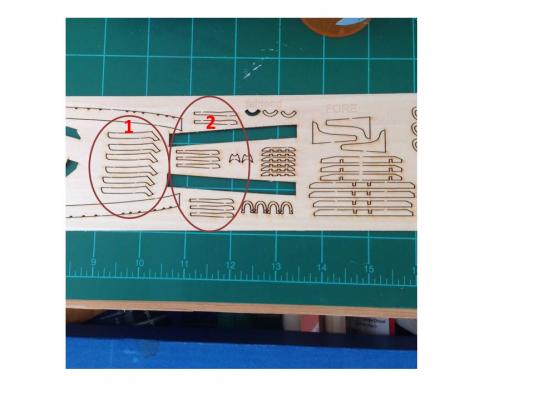
So, on to the boarding ladder steps. Using a Dremel shaper/router, I created the indented front cut along the entire length of the strip. I finally got to use the Dremel shaper/router... so it was not permanently assigned to the unused tool closet... :-). I used some scrap wood to set the depth and height of the cut. Then tried to route 1/16" by 3/32" basswood. Well, the wood strip was too thin and would not stay straight through the cut. So I took a wider piece of 1/16", ran it through the router. In the "What should Jim Byrnes create next" debate, I might vote for a really precise shaper/router. I can see using it for a lot for similar cuts as well as channels, etc. Then I cut a 3/32 strip with the routed edge from the sheet on the Byrnes Saw. I cut each piece to length after setting the stop on the saw. Finally, using files, I cut the indent on the sides of each and shaped them. I was not satisfied with the result. The basswood had the fuzzies as well as a "soft" look. I tried cleaning it up with sandpaper and files but it still did not look great, so I repeated the process, this time using boxwood. Here is a comparison of the two. I used a strip of wood to maintain an even edge down the ladder. I set a proportional divider to calculate the distances instead of copying from the plans. (I used the 6 to 1 scale with one side set to the distance between the bottom of the rail and wale.) When I first start the kit I had never done this and the early lack of knowledge and skill is now rearing its head. One impact is differences between the build and the plan, especially with fine measures. The final result was: Once I finish the fenders I will paint the bottom steps black. Will also put some brush on poly on the steps to finish them. I am now beginning the fenders and chesstrees. I wanted to double check that I am going to use the correct laser cut pieces. (I am not sure how many more mistakes the old girl can handle...) I believe that I should use parts #2, but would appreciate confirmation or correction. Thanks Richard


-
Hi Sal, I first just put the canvas on the floor and it was easier to find the dropped pieces, but I was still having to get down on the floor and my knees really complained. That's when I attached the canvas to the work table and placed the other end in my lap. Now when I drop pieces they are right in my lap on the canvas, well usually in my lap. Richard.