HOLIDAY DONATION DRIVE - SUPPORT MSW - DO YOUR PART TO KEEP THIS GREAT FORUM GOING! (Only 20 donations so far - C'mon guys!)
×


rtropp
-
Posts
936 -
Joined
-
Last visited
Content Type
Profiles
Forums
Gallery
Events
Everything posted by rtropp
-
How would you improve your Byrnes tools?
rtropp replied to Keith_W's topic in Modeling tools and Workshop Equipment
Nobotch, I could not find a picture of the zero tolerance plate with the splitter. I would be interested to see how you did that. In addition to some of the accessories mentioned, my list would include an attachment for the thickness sander, like the micrometer for the table saw. This would be helpful but not really critical. Also, variable speed control for the sander. I often want to work slowly with delicate parts and moving the piece from center to edge to control speed does not work for me. You cannot even attach a speed control due to its design. This is why I ended up with a different manufacturers sander. I would have bought the Byrnes sander, hands down, if it had this feature. There are homemade remedies for other jigs for the table saw, i.e., thin cut jigs, modified fence additions, etc., so if I were to vote for something new it would be a tool similar to the Dremel shaper/router table which I have begun to use more frequently, but with more precision and a more solid build. Most recently I used the router table to cut the stepped edges for the boarding ladder steps on my build of the Syren. I have also used it to route grooves (channels) on thin stock. A recent conversation discussed how to modify the table saw to cut dados. A shaper/router tool would help resolve some of that need. Richard -
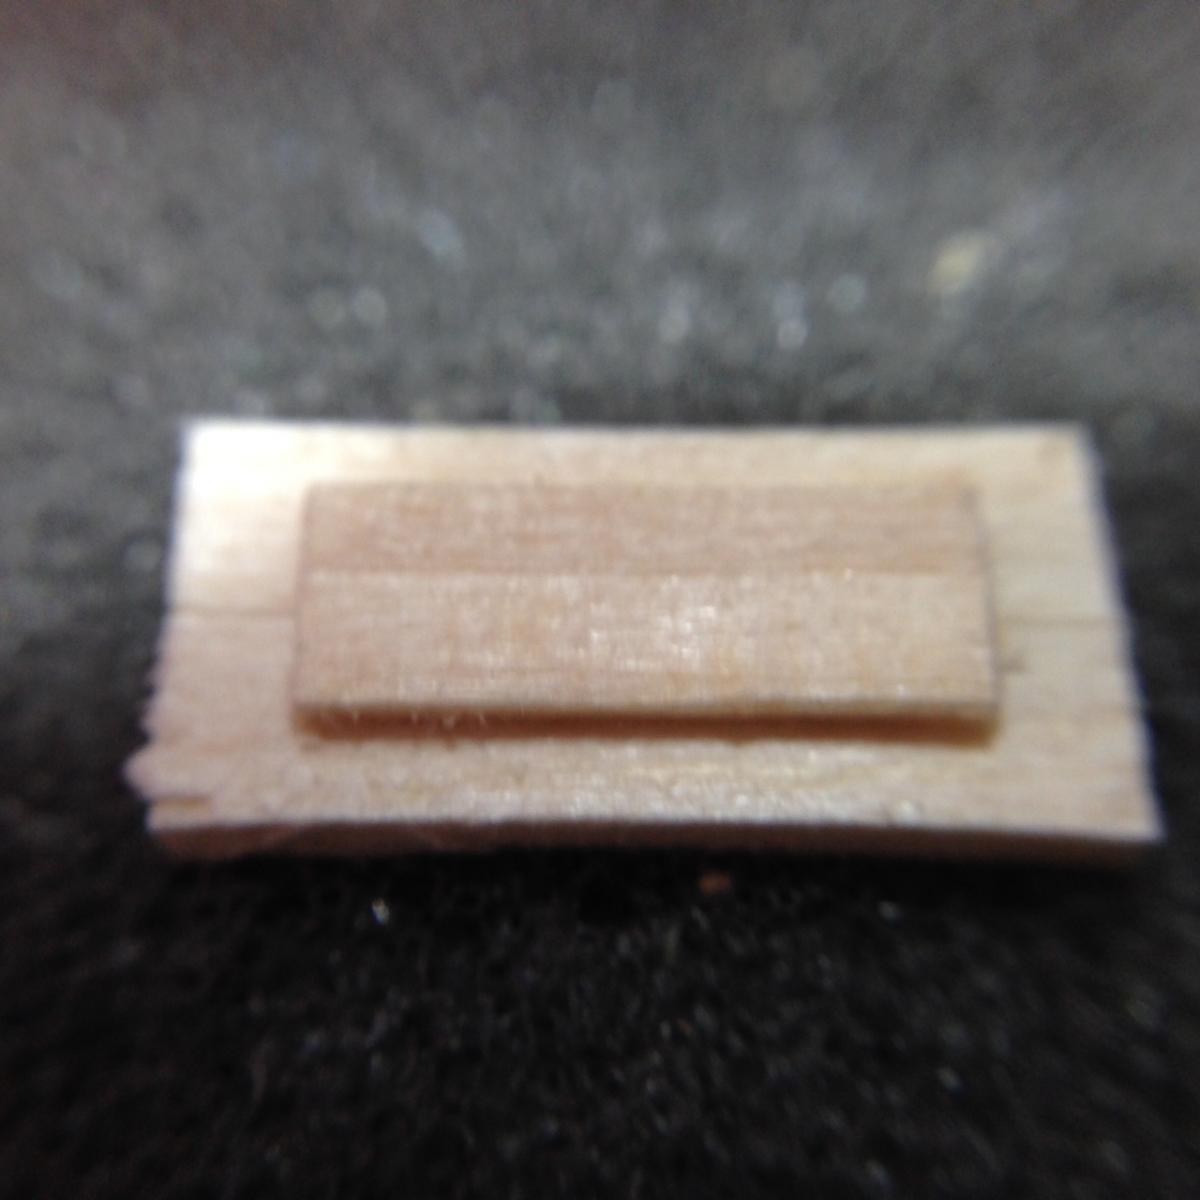
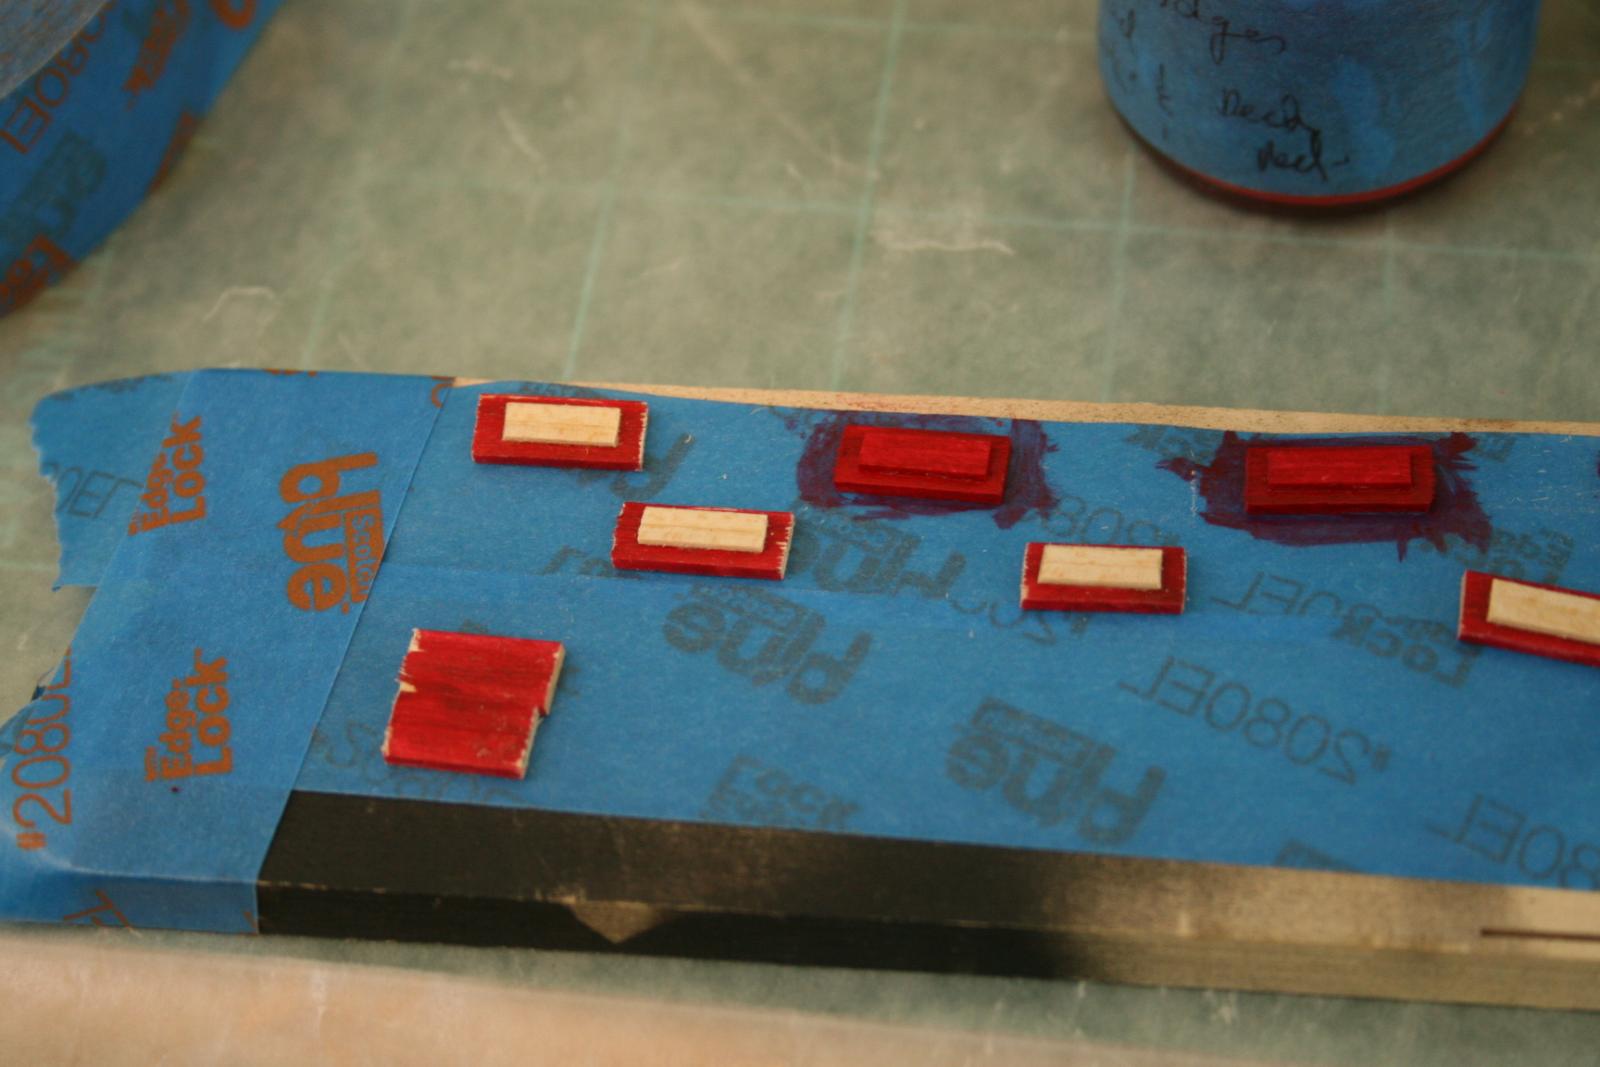
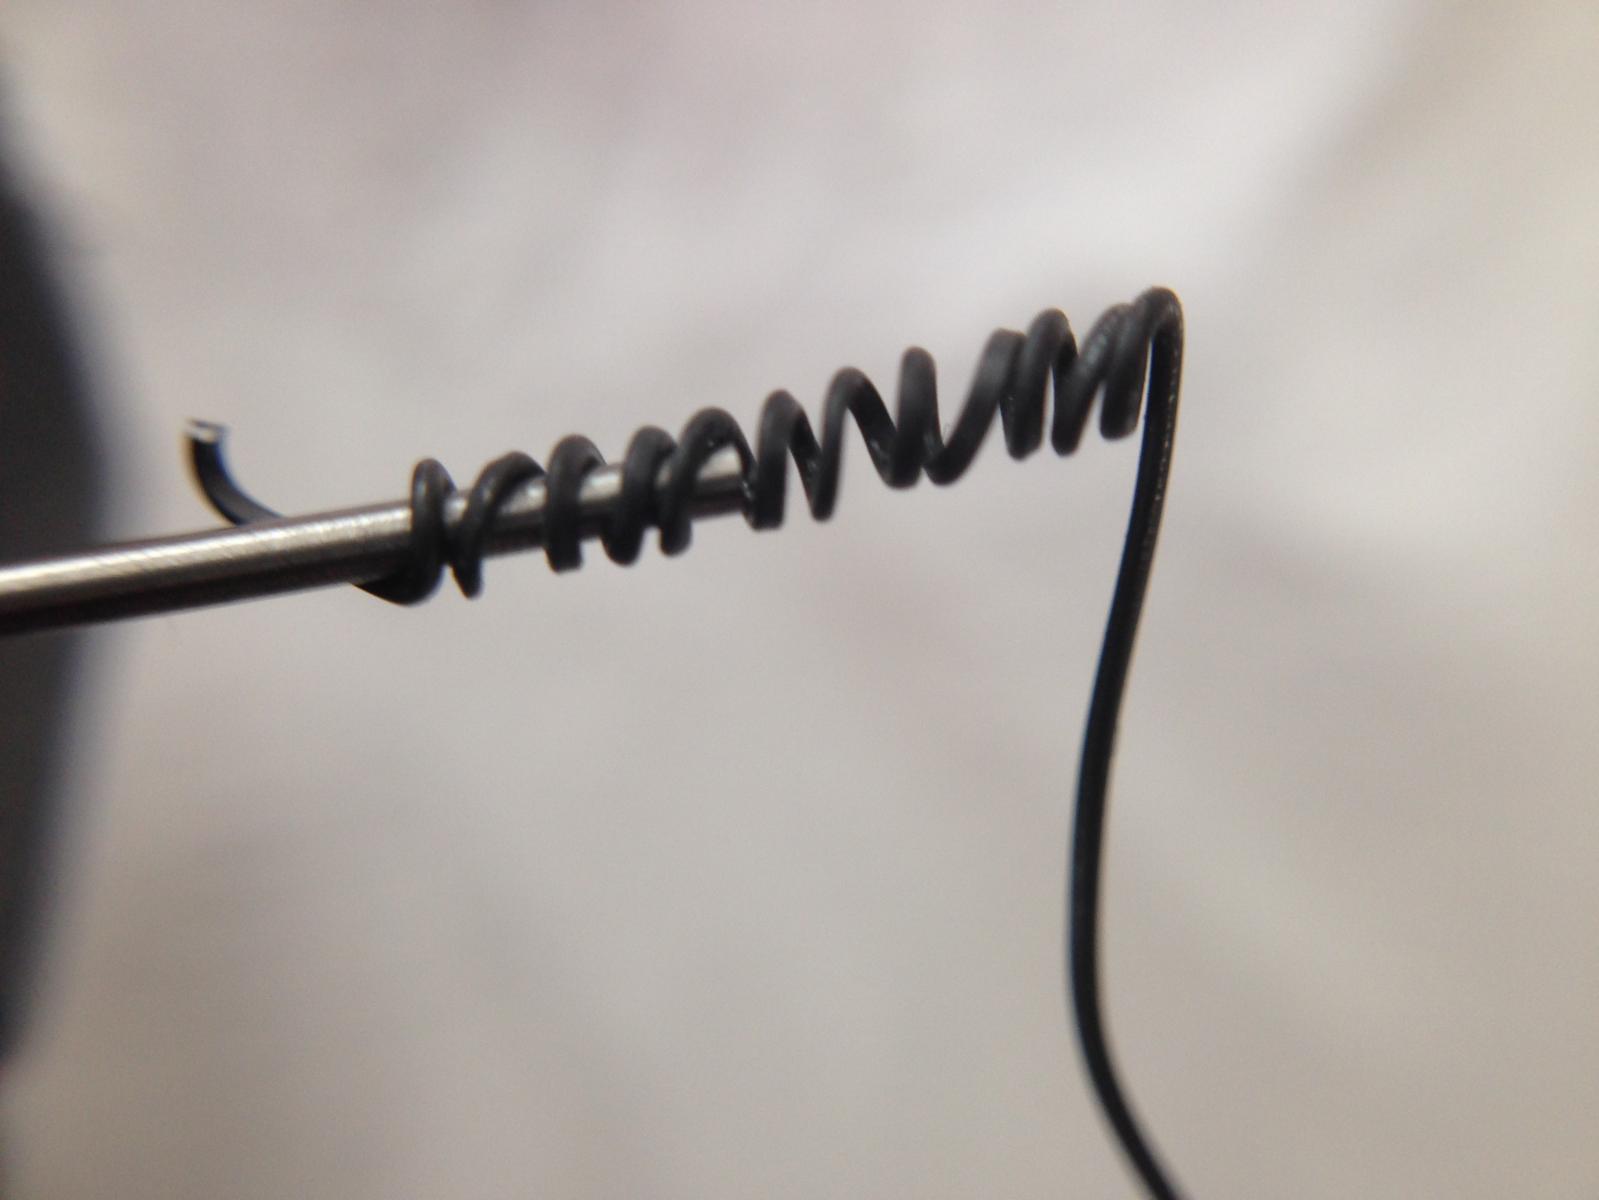
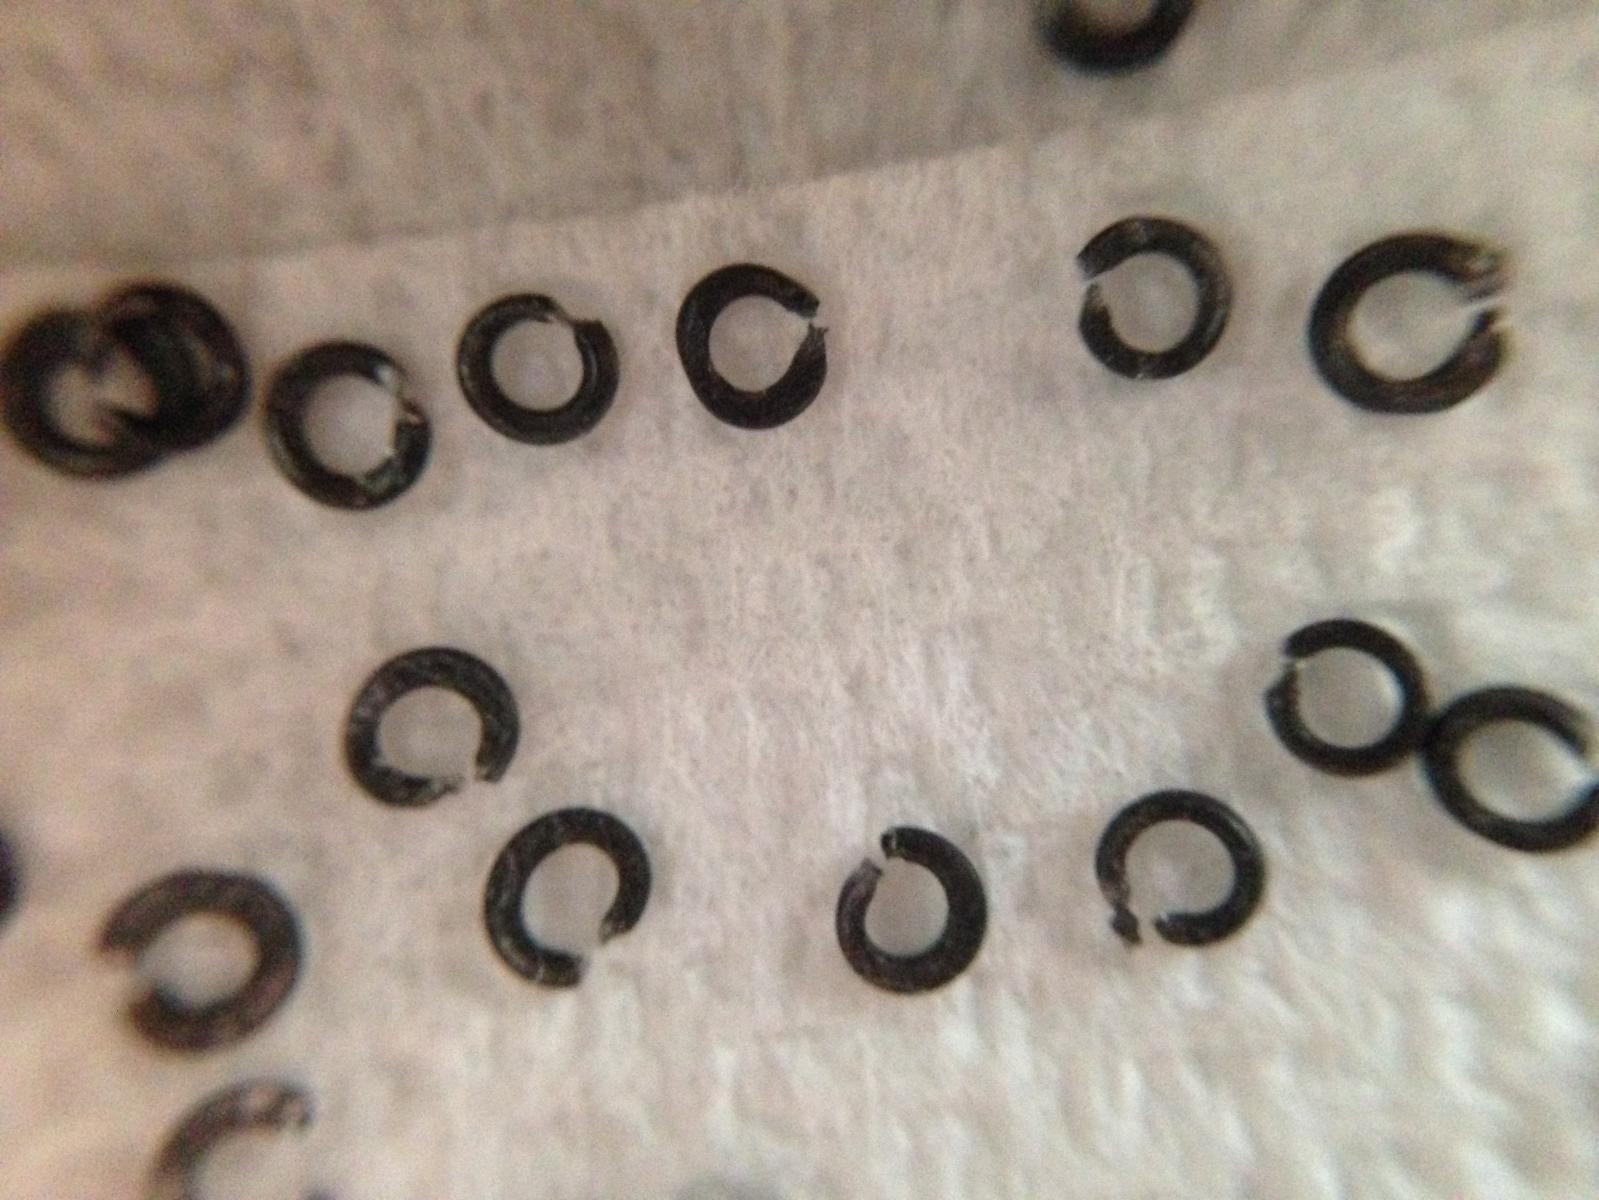
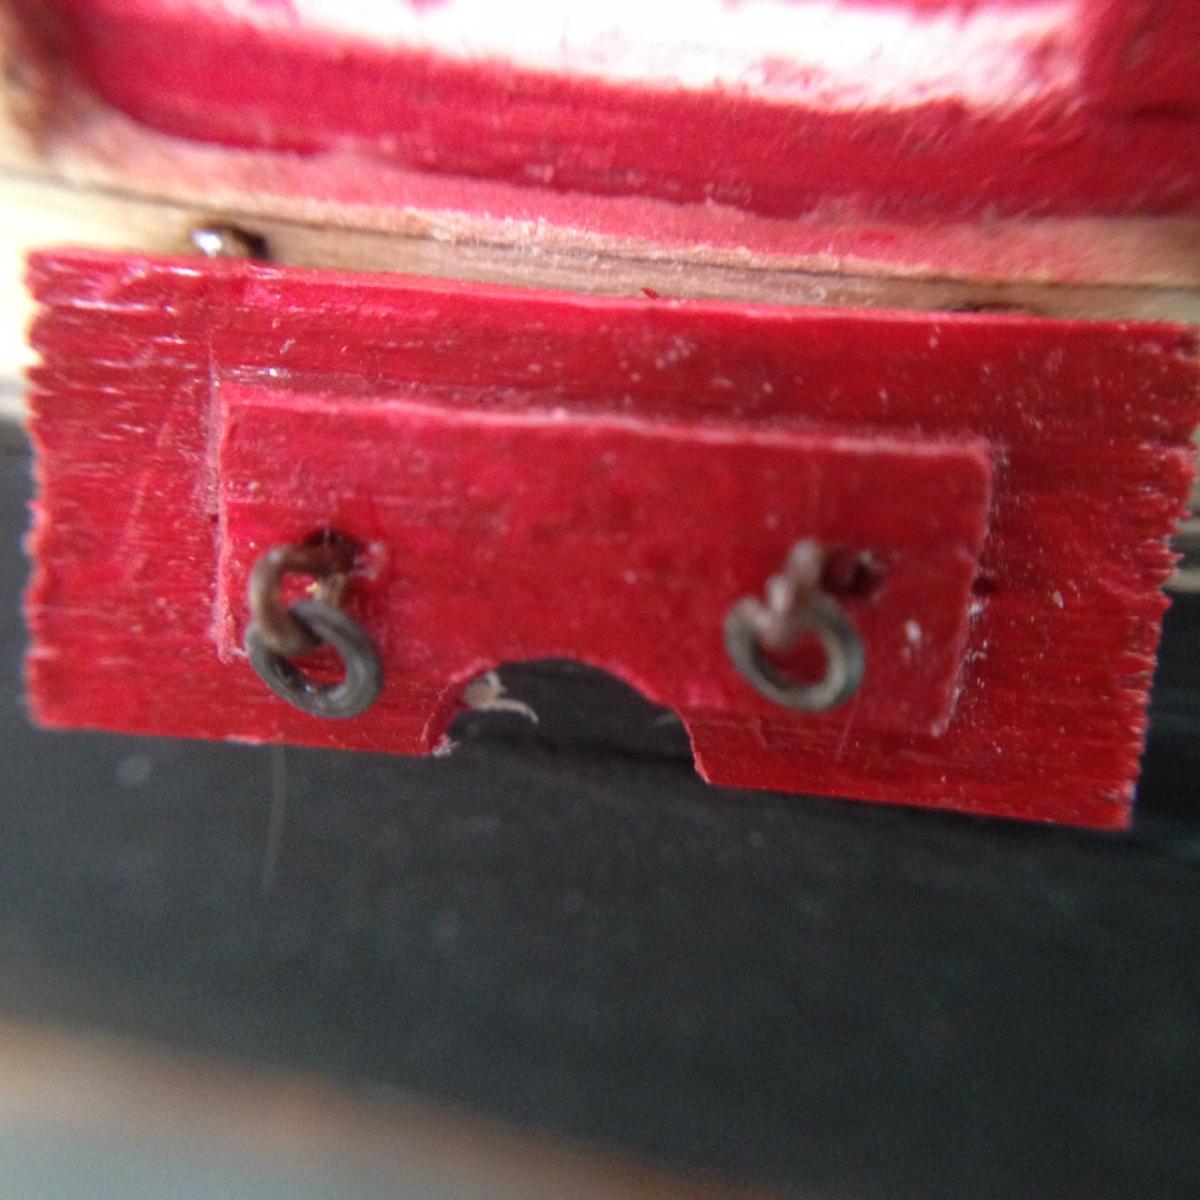
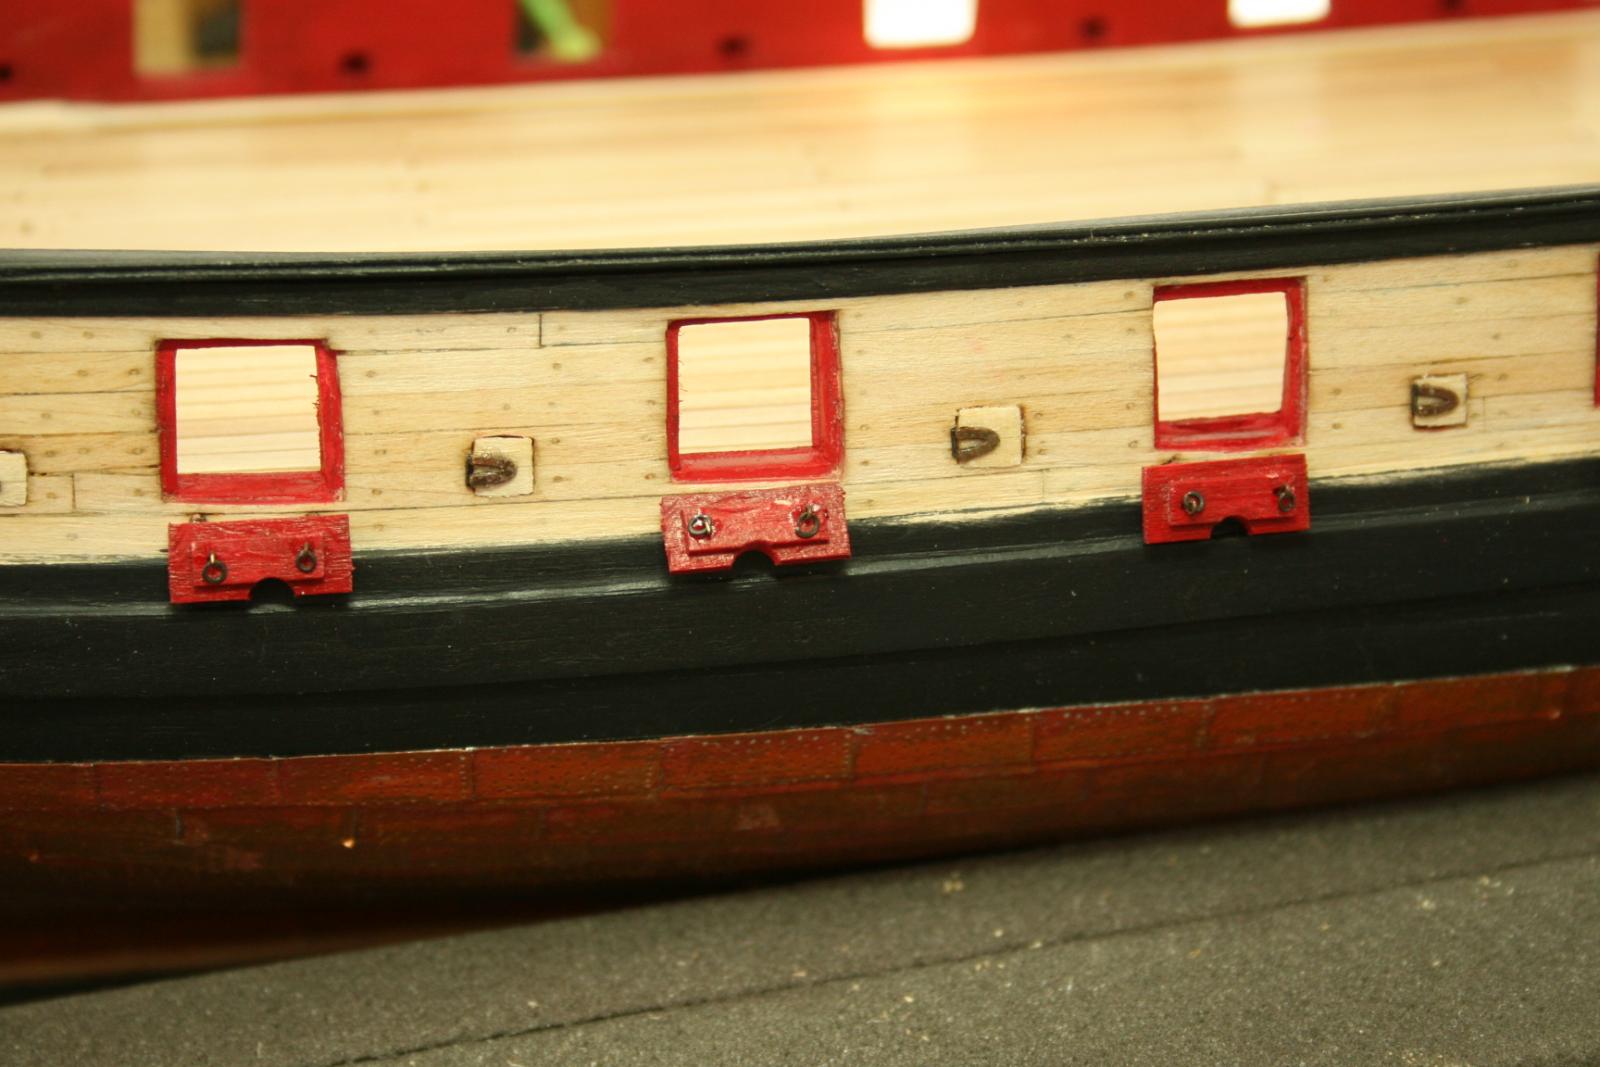
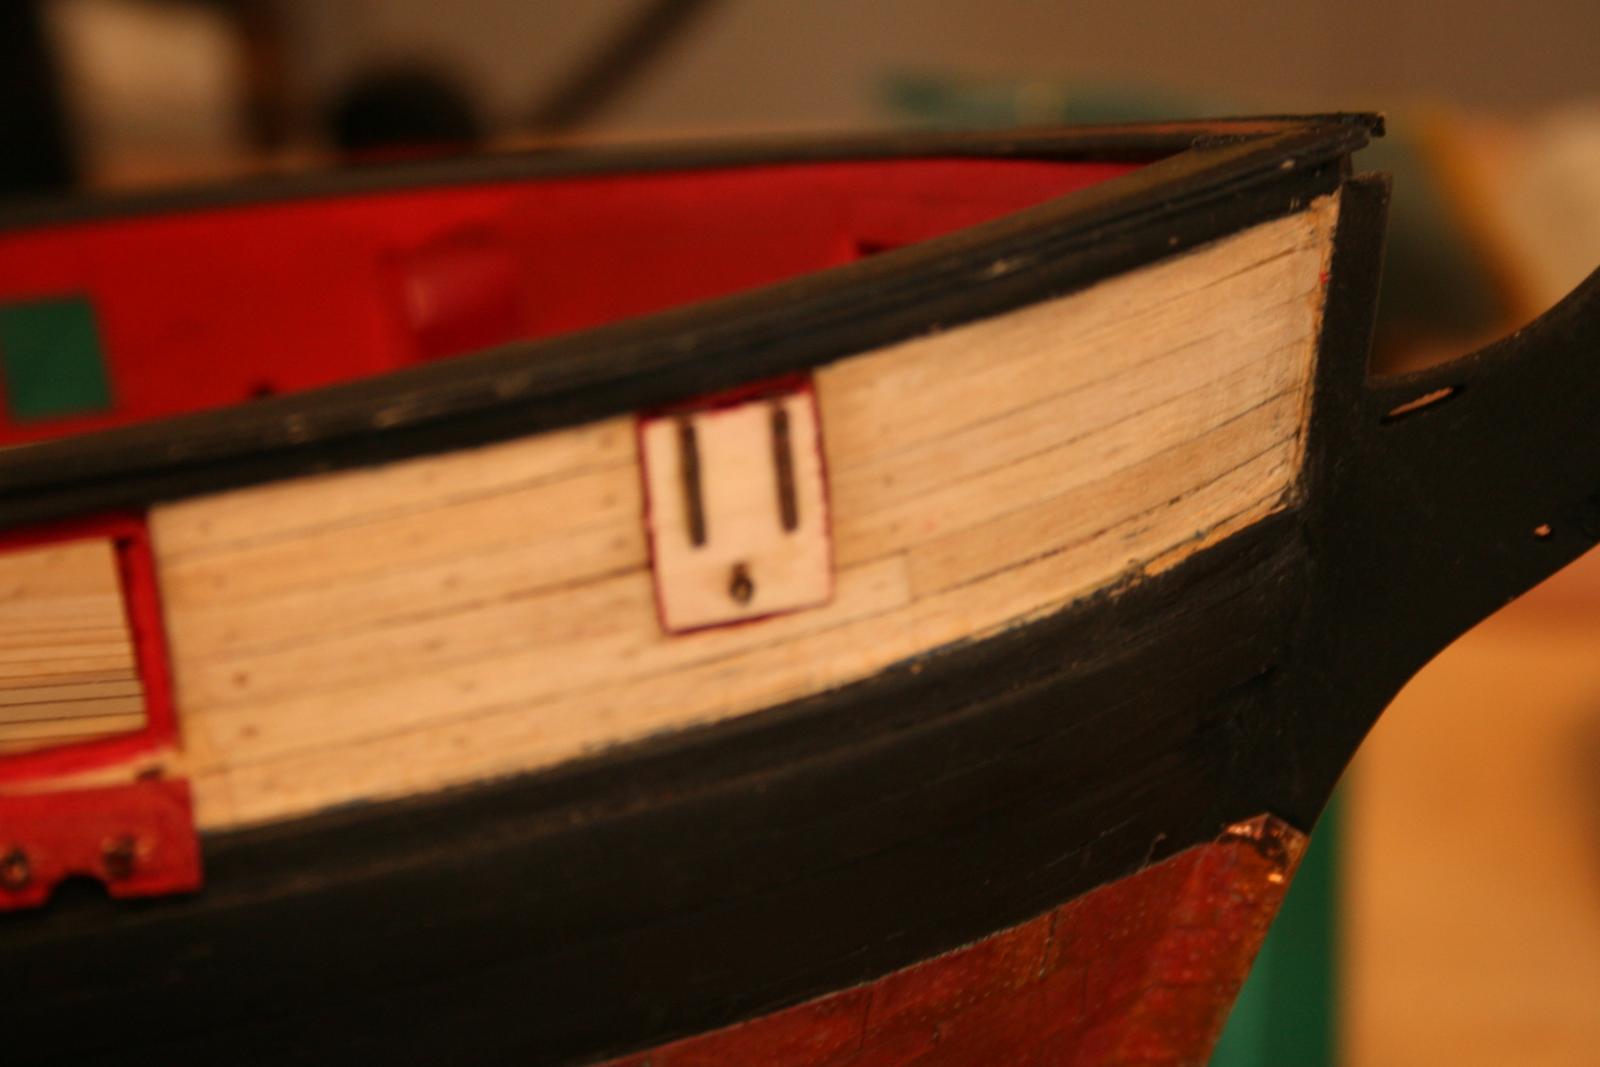
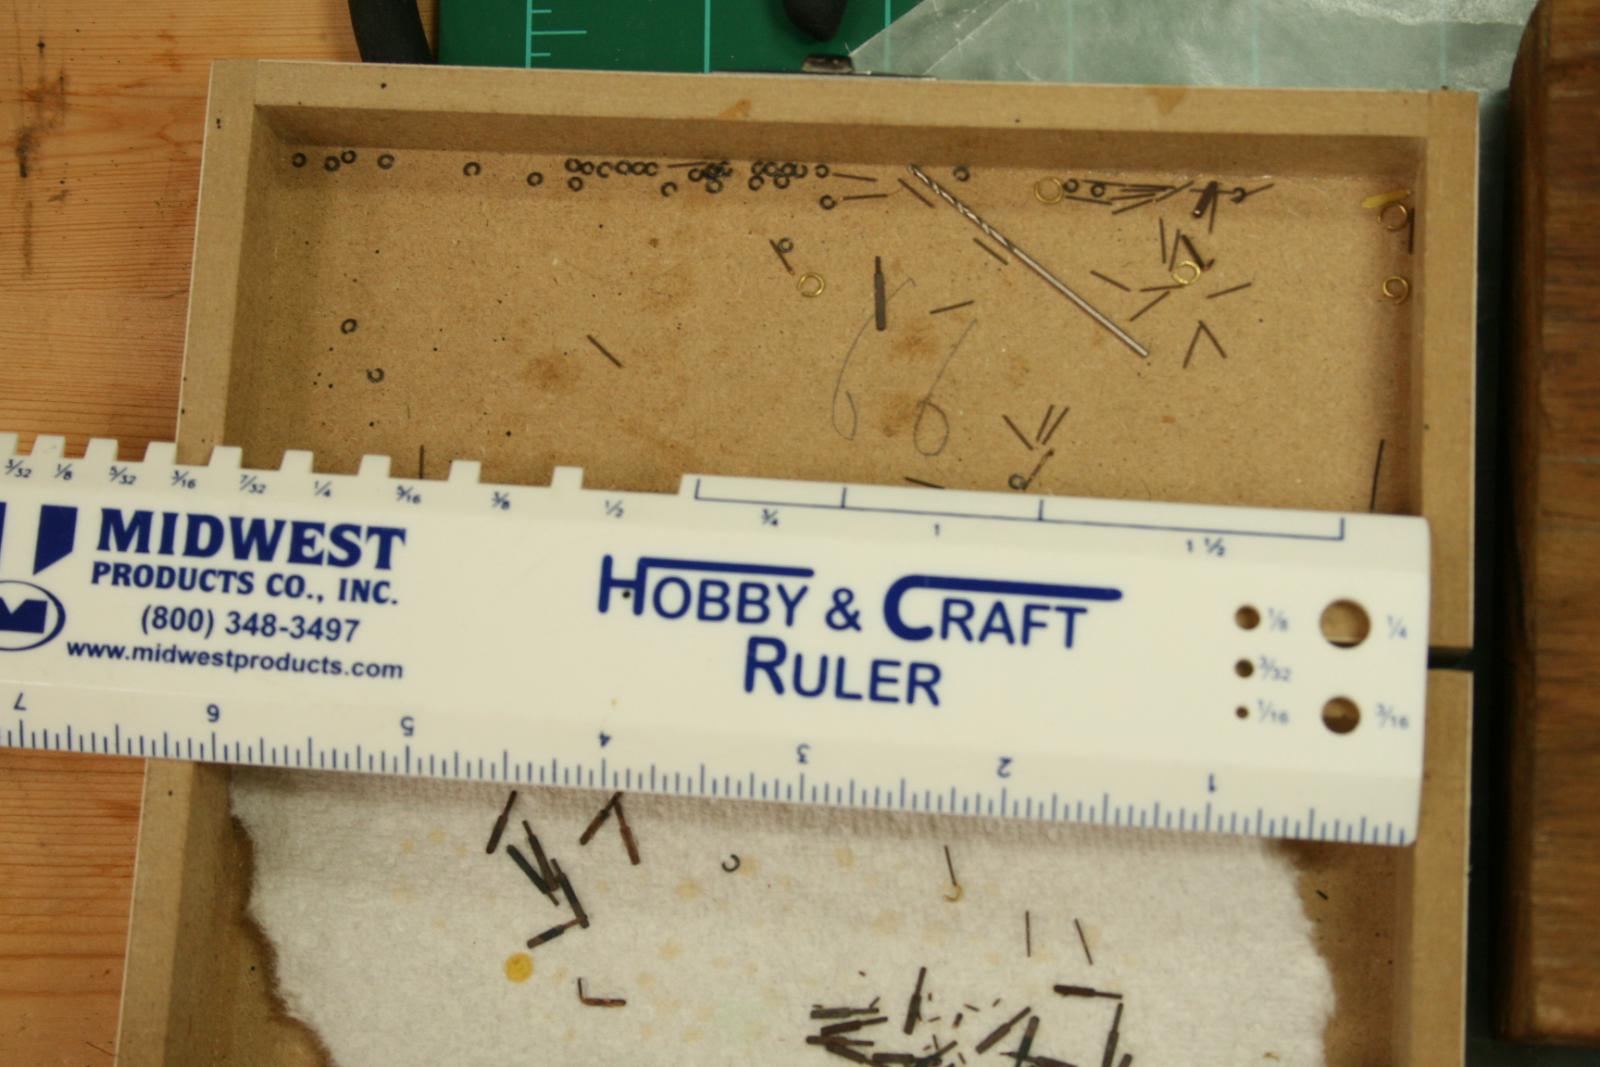
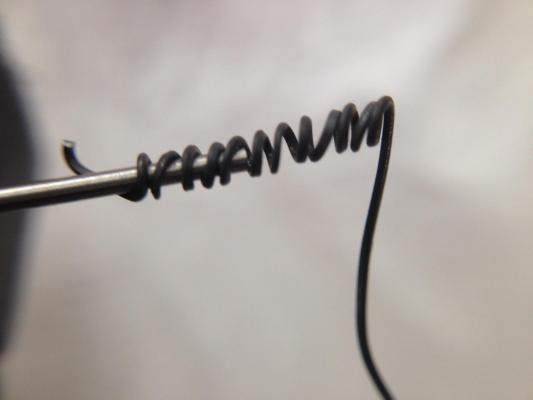
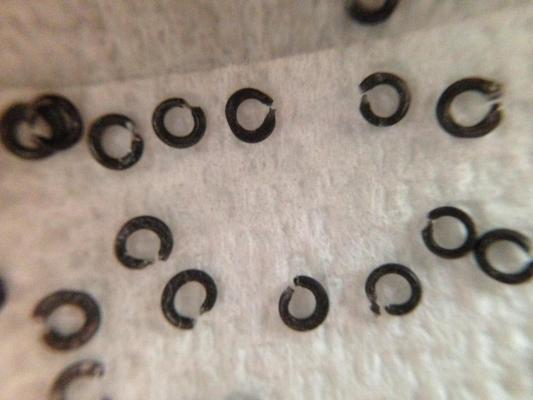
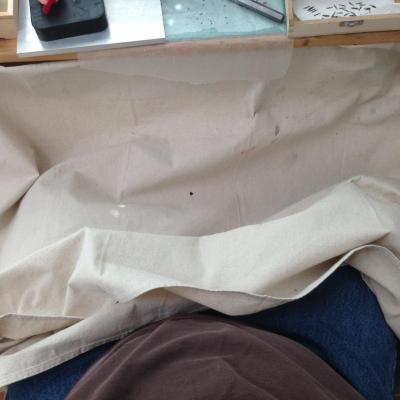
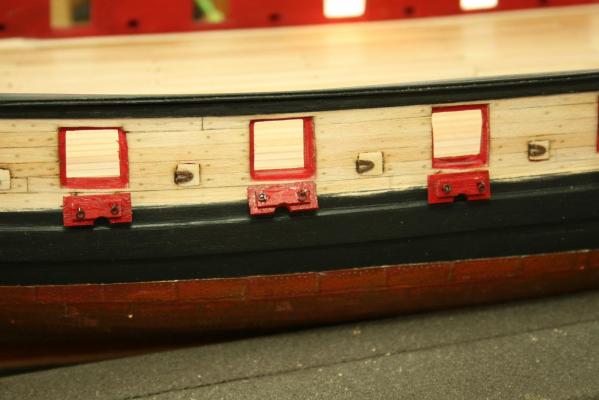
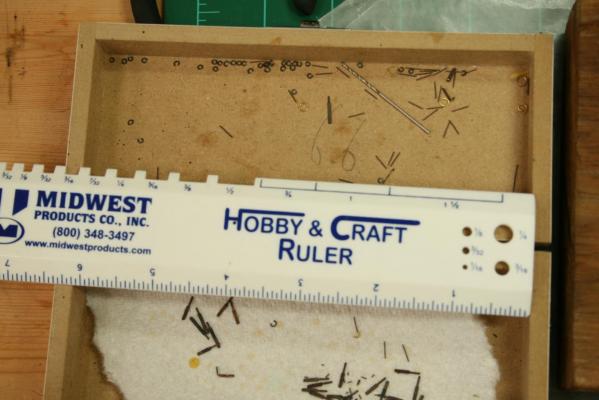
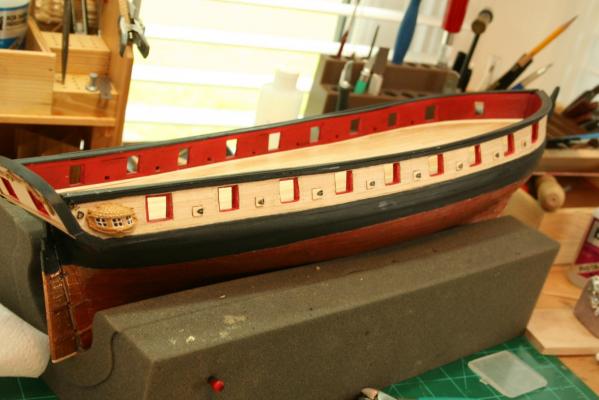
On to the gunports. I decided to build them as others from two pieces. First I thinned the planks so they would size better when glued together. I used the sticky side of tape up to hold the parts while painting. Decided to make split rings to attach to the posts. I flattened the rings using a small brass hammer on a jewelers hard rubber block Here is a collection of the parts for the ports. I keep that little box, which has a lid, near my work. Whenever I work in fiddly bits (I love that expression, learned it here) I keep them there so I know to be really careful around them. after spending more time searching the floor for dropped parts than actually building the ports, I attached a light piece of canvas to the table with clamps with the other end up against my chest. The fabric is stiff enough to stay without stapling it to my chest. All dropped parts go onto the canvas and are easily retrieved without having to get up. I leave the fabric there even when not using it as my legs still slide under the table, wouldn't be without it now. Finally, I did not get any pictures of the hinges, but that went pretty easily. I cut them off the photo etch wrong so had to order replacements. Model expo had them to me in a week. I have to say, their replacement performance has been excellent. This being my first model I have needed a lot of replacement parts and they just keep sending them. Glad my first kit came from them. Any way, the hinges were not difficult to work. The problem with the gun and sweep ports was the work on the cutouts when I first started the model. They were done before skills had been developed at all... and show it. So, I decided to keep all the gun ports open to avoid obvious mismatch. I left the single piece port closed... but actually used a separate piece for the inside of it so it would have a better fit. As I go on, and have to deal with the effects of poor work early in the build, I get the urge to start again. The problem is I do not know what mistakes I have yet to make!!. I have to remember that this is my first kit and the objective is to build skills. So I move on. Richard


-
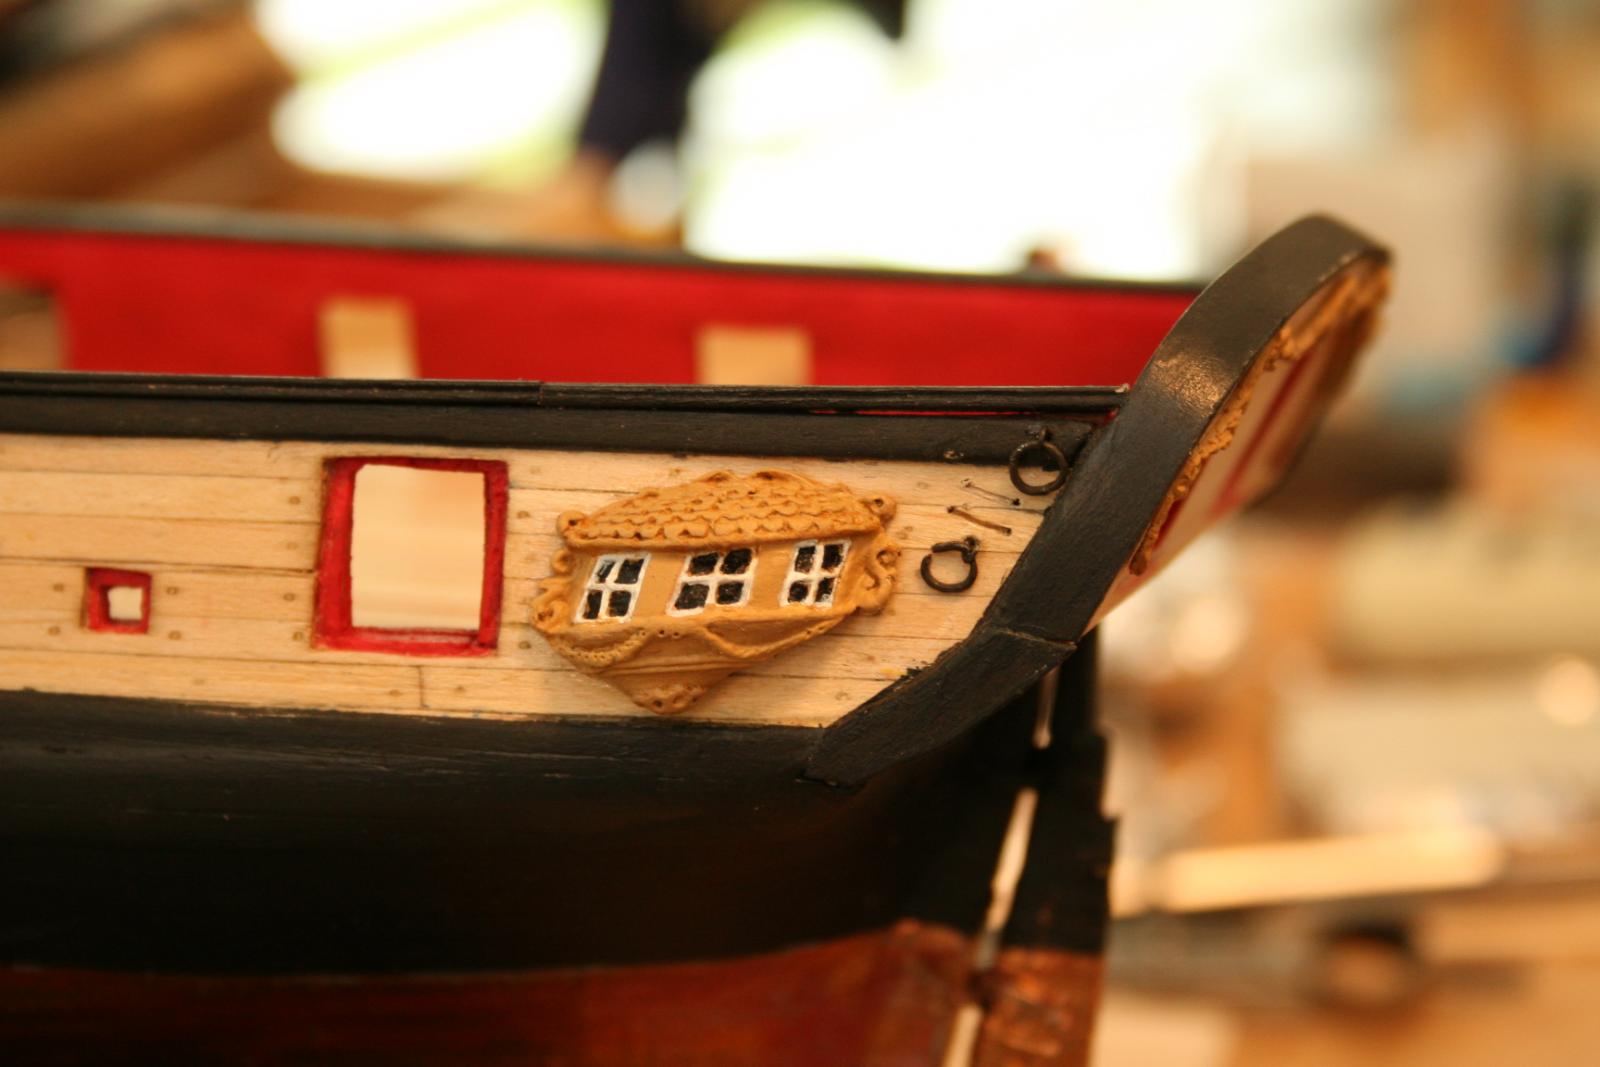
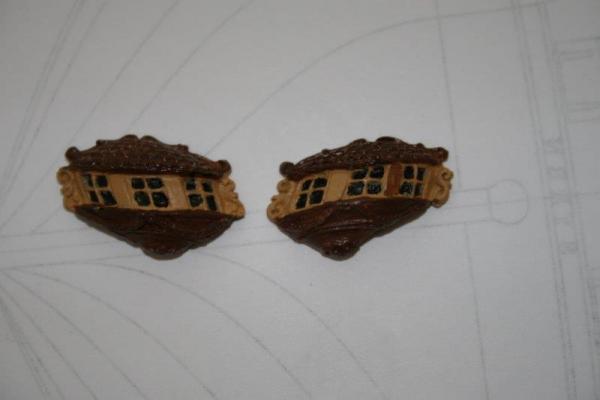
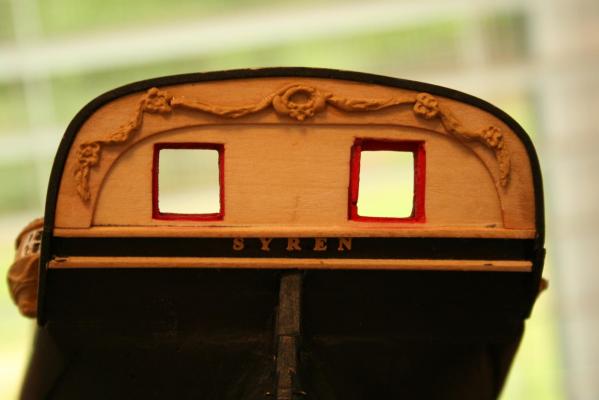
Hi all, Its been awhile since I posted. Too many distractions but I have still found time to work on the build so here is an catch up on the last few months. After the rudder, I began work on the quarter badges. I attempted to craft them myself but results were terrible. I asked Model Expo for a couple more badges and the ones they sent (very quickly) had sharper definition so I used them. I was not crazy about the colors so I went for a more subdued combination. and the stern decorations With that finished I moved on to the Gunports Richard

-
I used the crimping device when planking my Syren. I used it mostly with the more severe bends near the stern or bow. I found it to be quick, easy and effective. For more gradual bends, I used traditional water. I would practice on a couple of scrap pieces to figure out the amount of pressure to use. Also, if you saw the same YouTube that I did, the discussion about the spacing between the "crimps" is very helpful. The more severe the bend, the tighter the crimps should be to each other. I found it had no negative effects on the outside (viewed) side of the plank . As I said, I found it easy, and no waiting for planks to dry between shaping and gluing. I would think that it is worth a try if you are interested. Richard
-
Fred, If I didn't already have the beers I would not be dropping that many parts :-) Seriously, I do get up and down a lot so while it is clamped to the table, it is only resting on me, not attached. For those times I use it, I just pick up the non clamped end and put it on my lap then just let it drop off when I am done with it. Getting up and down is easy. The light weight canvas is stiff enough to stay leaning against my chest without dropping. Richard
-
I had been having a problem with dropping small parts. Seems like I was spending as much time searching the floor as I was building the Syren. I had a piece of light weight canvas left over from some painting so I clamped one end to the table and pulled the other end over my lap and up to my chest. It does very well for catching small parts that "jump" around. Some of the rascals still disappear but only a fraction of what I was losing. Richard
-
those guns look good. Can you detail the supplies you used for casting them? I would like to give it a try. Thanks, Richard
-
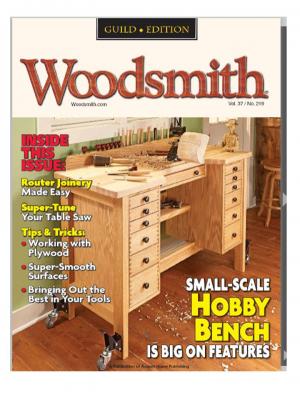
Hi, I came across this do-it-yourself hobby table in the latest issue of woodsmith magazine. I don't have the tools, or skills, but I thought you all might be interested. Richard
-
Joel I am not sure I understand the implications of French feet on the plans and on the building process. Thanks Richard.
-
Hi this has all been a great help. I would like an automatic table but suspect that would be a future item. I have too many tools that I still want. The chair I use is adjustable si it probably makes sense to go with standard desk height. The idea of a "riser" that i can use when I need close up work is a nice and simple solution for the immediate future. I am checking cabinets and there are some good buys at Home Depot. I also found some a bit more expensive on amazon. They have 5,6 or seven short drawers that would be great for tools an supplies. I appreciate all the ideas. Now, for a trip to Home Depot. If it comes out decent I'll post a picture. Richard
-
That looks like it would be great for my sculpting but I am not sure it would work as well as a an end support for my large table top. I would be interested in seeing a couple of pictures of your home made unit to gauge for sculpting. Thanks Richard
-
I am going to build a simple work tablet to provide more work space (2.5' x 6') and have a better surface than the small, unfinished table I am now using. Home Depot has large sheets of what looks like white melamine surfaced wood at 3/4". I will be sitting at this table. (I have standard wood working benches for when I work standing. ) I started to think about the height. I want it taller than than table I have now, but am not sure how tall. I have been considering 32 or 33 inches to bring it up a little closer to a more comfortable crafting height. I was hoping that others might have some info, experiences or preferences to share when considering height. As mentioned this particular work table will be used while sitting. Also, I am looking for a couple of small, multi drawer units that could serve as end supports. I considered file cabinets but would like more and smaller draws for storing tools and supplies, preferably made of wood. I don't want to build it from scratch but would rather use existing components. Thanks Richard.
-
Al, I have used an applicator called the "Glue Looper" and it works really well. They come in a pack with three sizes but I am still on the first tip after a few months of use. It only works with thin CA. They use any standard Xacto type blade holder. It allows placement of a very fine drop. I have been using it for various parts of my build and it works well. I periodically use a lighter to burn off any residue which keeps it clean and reusable. After a few months I finally took it apart after soaking in acetone, then soaked all the parts in the acetone and put it back together. Good as new. I am finally going to use another blade but that is because I need to use the smaller one for some really fine gluing. They were cheap enough that I figured it was worth a try. The glue tips are around $12 and shipping about $3 if bought directly from the manufacturer, cheaper than Amazon. It is made and sold by Creative Dynamic LLC Here's the web address. www.creativedynamicllc.com Richard
- 265 replies
-
- 1
-

-
- finished
- artesania latina
- (and 1 more)
-
I work in our sunroom. I pretty much took it over with worktables and tools. It directly access the house so I need to be careful about saw dust. The power tools I buy all have vacuum dust ports which, on the whole, work pretty well. I keep a shop vac with a car kit attachment and wireless starter at my work table. When cutting or sanding, I run the vac every few minutes. The long stem and brush attachment from the car kit make it perfect for small jobs. While it does a pretty good job of cleaning, it is not powerful enough or big enough to suck up small tools, clamps, etc. Also, it makes working the pieces easier because they are clear of debris. Richard.
-
I realized that Chuck P's build log for the longboat would be a good place to ask this question so I have posted it there. Richard
-
Hi Chuck, I purchased Model Expo's long boat kit but I am attempting a scratch build of it at twice the size of the kit. My question is about planking. Did the full size longboats only have one plank per strake or is that a convention used in the kit to ease construction because of its small size? With the longboat at 26 feet long it would seem that while they could use long planks they would use multiple planks on each strake, perhaps up to 12 or 14 feet long, with shorter ones to stagger the planks between strakes. I appreciate your help. I have been taking pictures for a build log but have not gotten to it yet. Richard
-
I am attempting a scratch build of an 18th Century Longboat using plans a Model Expo kit that I purchased for a club build. I am building it at twice the size of the original 1/4" scale plans. The kit plans and directions show using one length of plank for each strake. Is this true to the full size long boats or is this a convention to ease building the model's (1/4" scale) small size? Thanks, Richard
-
Sal, Looking great. I like the way you fabricated the pieces. Very sharp. I found that if I did not have the drill bits with high rpm they would break. At first I was working very slowly but went through too many bits until I got some good advice. High speed, slow feed. Also, use an awl or similar to not only mark the hole but also create a slight indent to guide the drill bit. keep the piece on a hard surface while marking it to make sure it does not bend. I went through copper like crazy but finally figured it out. I put the copper ring on the gudgeon on the inside of the bend. I had seen some like that but putting it on the outside looks like it makes more sense. Its a good idea to dry fit the pieces to see how much distance there is between the rudder and the sternpost. I think mine had a little too much space between them but did not look too bad. Right now my ship club has a group build going on. It is the 18th century longboat and to make it interesting I have it at double the size and working it as a scratch build. I plan to switch between it and the Syren as soon as I get the longboat planks cut. I look forward to following along with your build. Richard.
- 659 replies
-
- 3
-
-
- syren
- model shipways
- (and 1 more)
-
thanks Chuck, Richard
-
Chuck, On the pre cut sheet, above the false keel, there are five cut outs. Three look like the bow fillers (only use two.) What are the two smaller cutouts designed for? Thanks, Richard
-
Silver soldering - Copper vs Brass
rtropp replied to rtropp's topic in Metal Work, Soldering and Metal Fittings
Grant, What brand and type of silver solder are you using? Richard -
chuck, what software do you use for design? Thanks, Richard
-
Toni, Great work, I would like to see a close up of the mounted rudder if it is ready. Thanks, Richard
-
Silver soldering - Copper vs Brass
rtropp replied to rtropp's topic in Metal Work, Soldering and Metal Fittings
David, At this point I am going to work with the premise that the Blazer torch was the problem by not operating to its published specs. I will try the berzomatic and I understand their torches can be for butane or propane. Does anyone have opinions on either? A member of my ship club loaned me a torch that takes two tanks. oxygen and a fuel. That will be my next experiment. I thought that sort of torch would be unwieldy but the tanks are available at the hardware store and very large. I want to see both its impact on the solder as well as the size of the flame for the delicate work we do. If that works I may consider one of the torches such as the smith little torch. I'll let you all know what I find, thanks again for all the help. Richard. -
Silver soldering - Copper vs Brass
rtropp replied to rtropp's topic in Metal Work, Soldering and Metal Fittings
Most of these were phone calls. Their tech support spent a fair amount of time on it. I will write the company with the situation but, other than that, I can only post my experience here, on Amazon, etc. Richard