Rustyj
-
Posts
2,535 -
Joined
-
Last visited
Content Type
Profiles
Forums
Gallery
Events
Everything posted by Rustyj
-
 Well the admiral is a bit under the weather so I've stayed home from work to in case she needed anything. It did afford me some extra time to get some "work" done on the barge. I painted the bench arm rests and glued them in place. Then the upper portion aft of the arm rests was planked. Then the seat base and seat tops were added. You can see I painted a small portion testing the consistency of the thinned paint and checking the seams at the planking for a nice tight fit. I've found that if there is a bad joint it will show up when paint is applied. The paint I'm using is Winsor & Newton Galeria Acrylic Crimson.
- 120 replies
-
- 19
-

-
- queen anne barge
- Syren Ship Model Company
- (and 1 more)
-
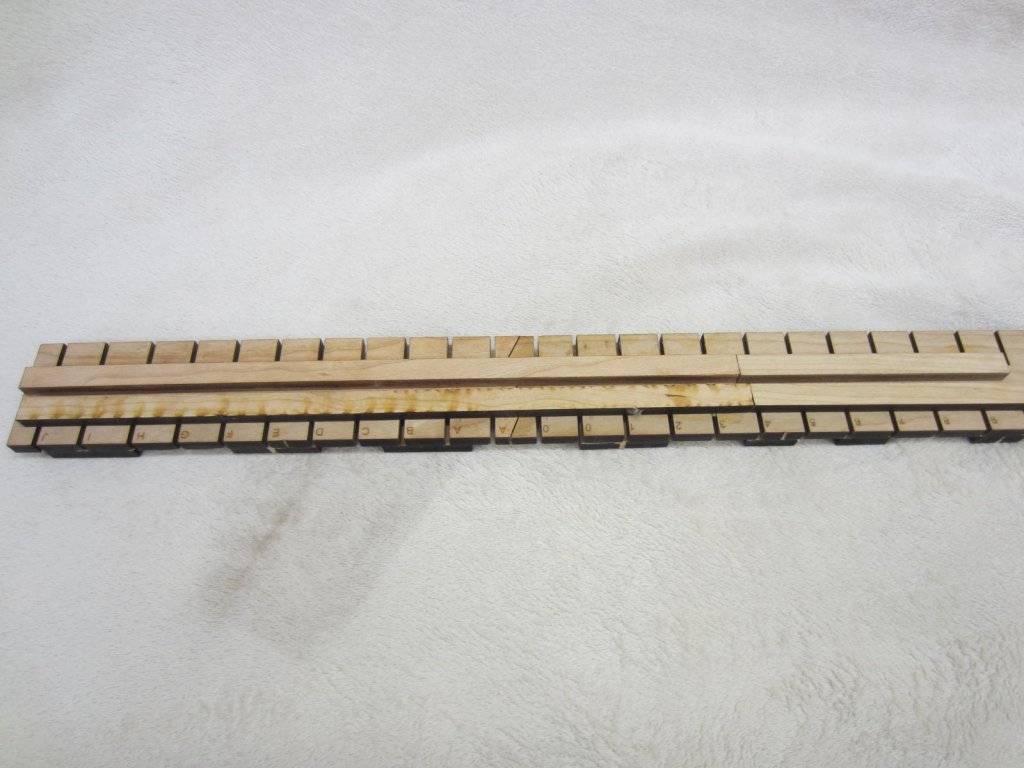
Very good B.E.The work to do all of the tick strips and marks will pay off when planking the belts.
- 574 replies
-
- 6
-
-
- cheerful
- Syren Ship Model Company
- (and 1 more)
-
Ah you went and did it. Good for you. It will be great to see her built at 1/4"
- 1,784 replies
-
- 4
-
-
- winchelsea
- Syren Ship Model Company
- (and 1 more)
-
You've got that right. Glasses and magnification was mandatory.
- 120 replies
-
- 3
-
-
- queen anne barge
- Syren Ship Model Company
- (and 1 more)
-
Thanks Tim, Mark and alde, Been a little busy so my reply is a bit tardy. Mark, trying to gauge 1/64" on a drill bit was a bit tricky. I was able to be successful drilling the holes and use the supplied black line to simulate the bolts. The line was cut off flush using a sharp razor blade. Now its on to interior work and, shudder, painting.
- 120 replies
-
- 21
-
-
- queen anne barge
- Syren Ship Model Company
- (and 1 more)
-
Hi Mike, I remember how much "fun" doing those ports, especially at the bow were. Great job.
- 607 replies
-
- 8
-
-
- winchelsea
- Syren Ship Model Company
- (and 1 more)
-
Thanks Chuck and Ben. Drilling a hole in wood that is one 1/32" thick without going all the way through sounds like a lot of fun.
- 120 replies
-
- 5
-
-
- queen anne barge
- Syren Ship Model Company
- (and 1 more)
-
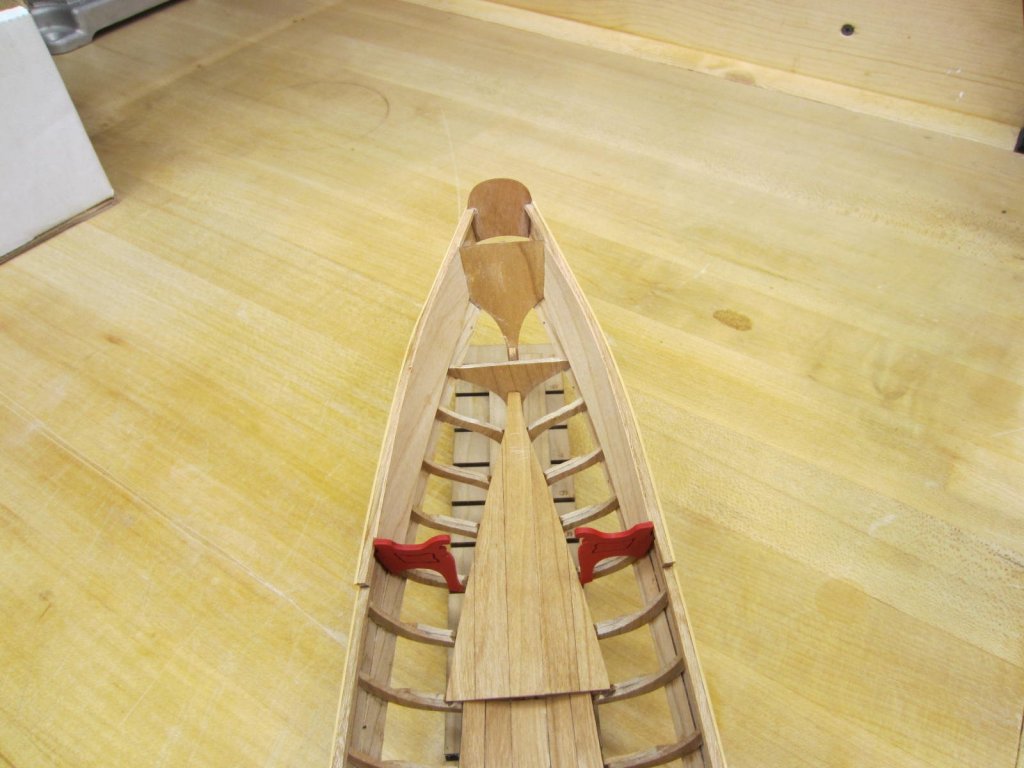
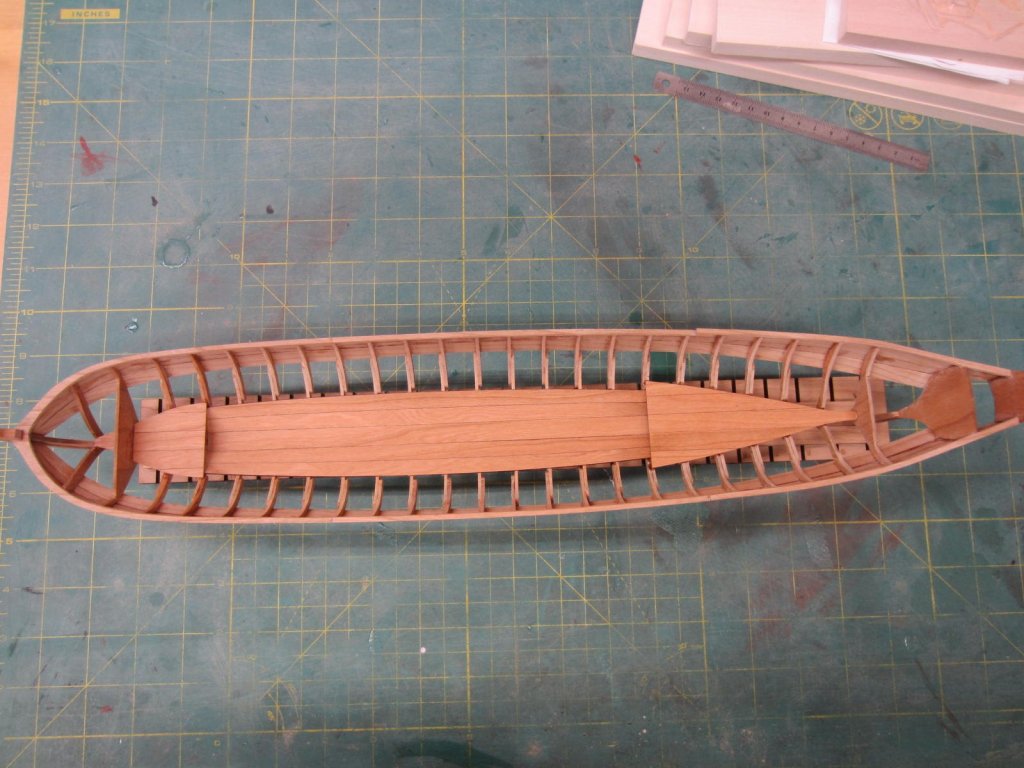
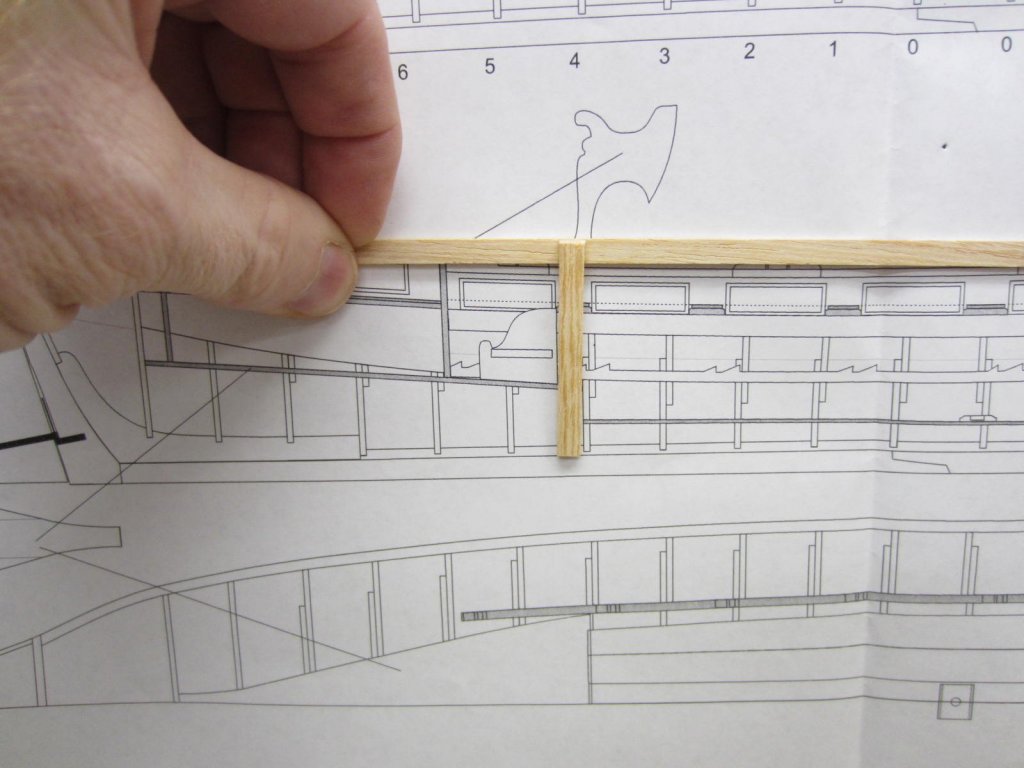
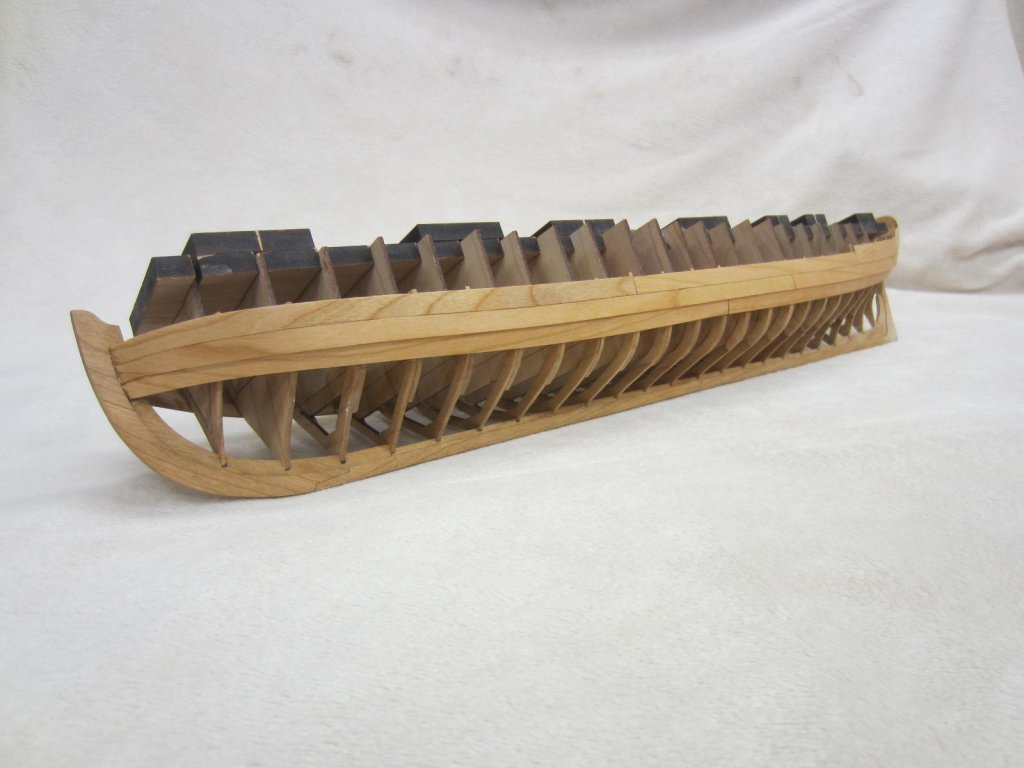
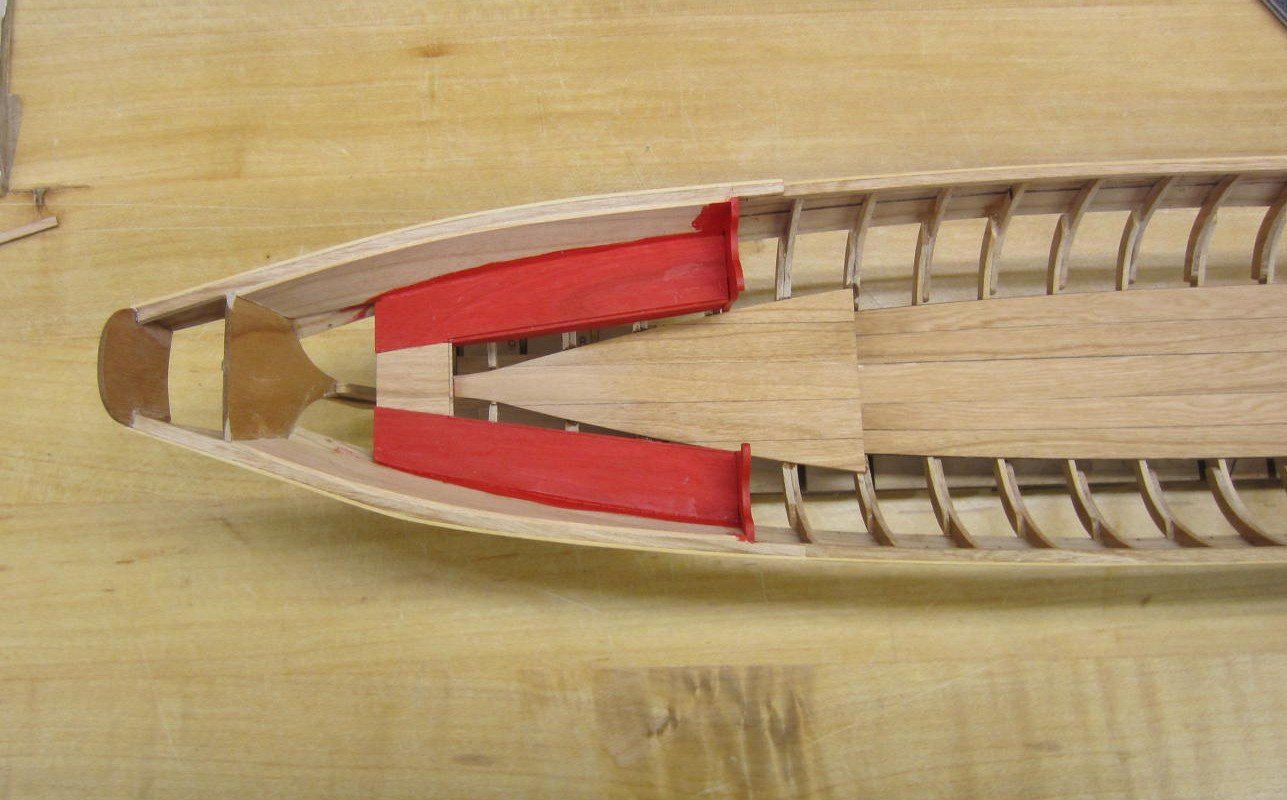
The fore and aft platforms are now installed. Chuck showed a nifty idea for using a "T" made from scrap wood to measure the correct position of the platforms on the frames. Align the top of the T with the cap rail and then make a tick mark at the depth of the platform. Transfer it to the matching frames and you have the correct depth. Some minor sanding of the frames was required to get it correct. Next is drilling a couple hundred holes for the simulated nailing of the planking.
- 120 replies
-
- 19
-
-
- queen anne barge
- Syren Ship Model Company
- (and 1 more)
-
Thanks Derek and welcome aboard to you too!
- 120 replies
-
- 3
-
-
- queen anne barge
- Syren Ship Model Company
- (and 1 more)
-
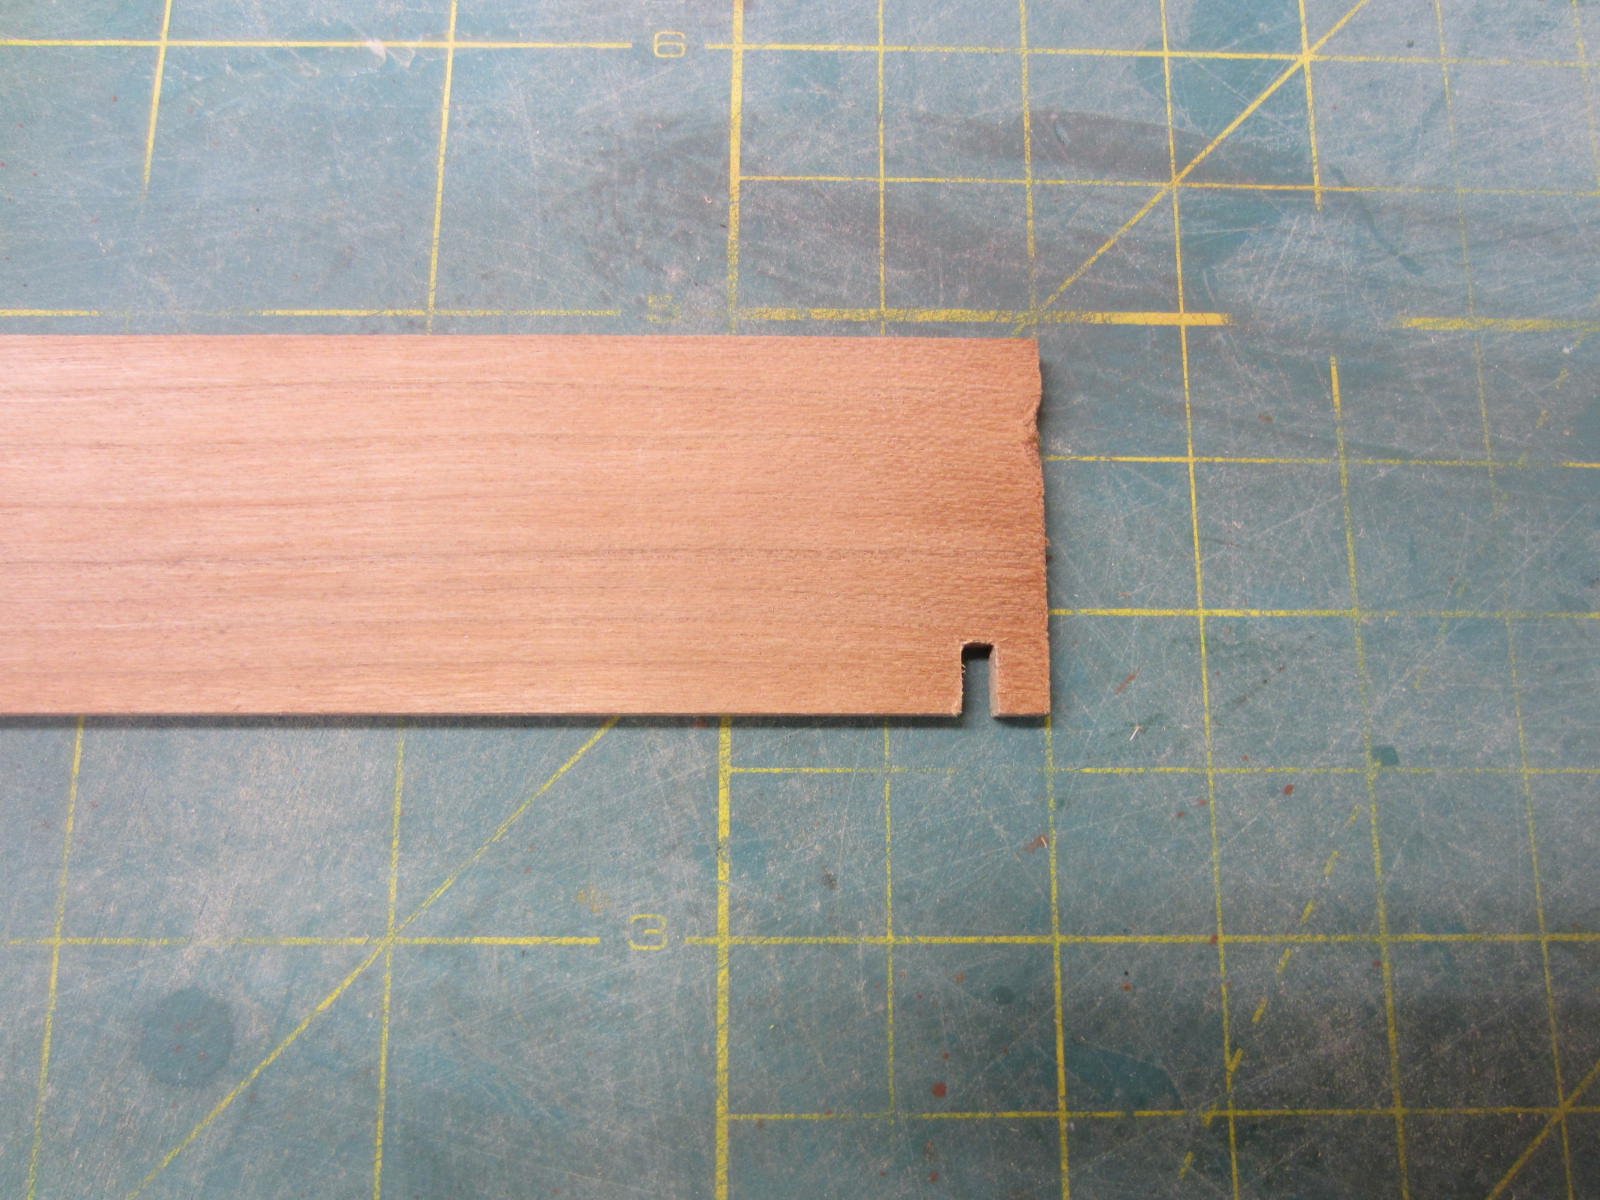
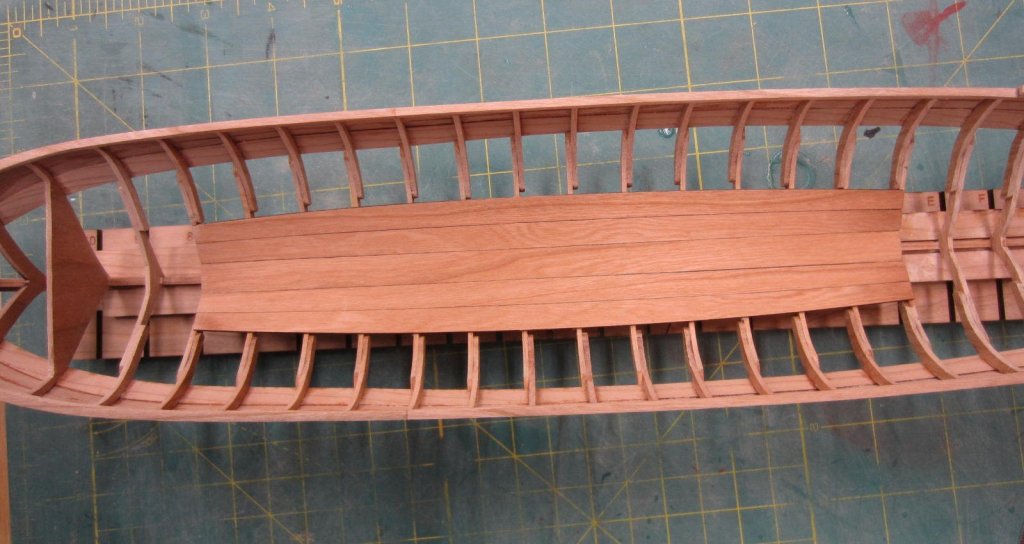
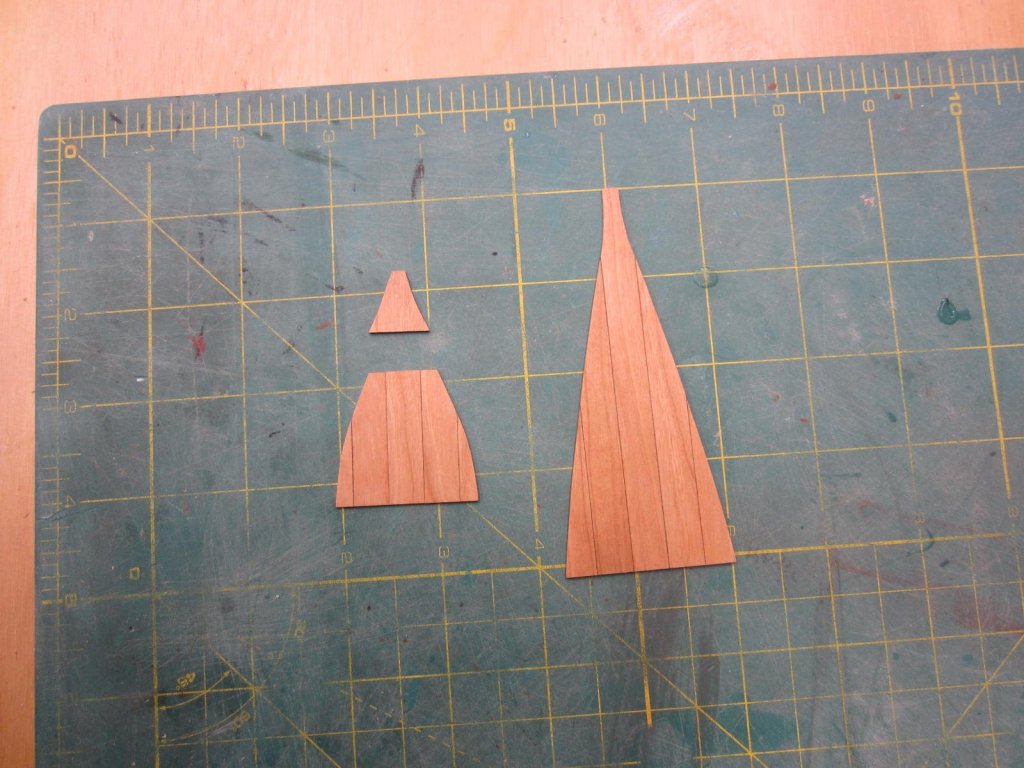
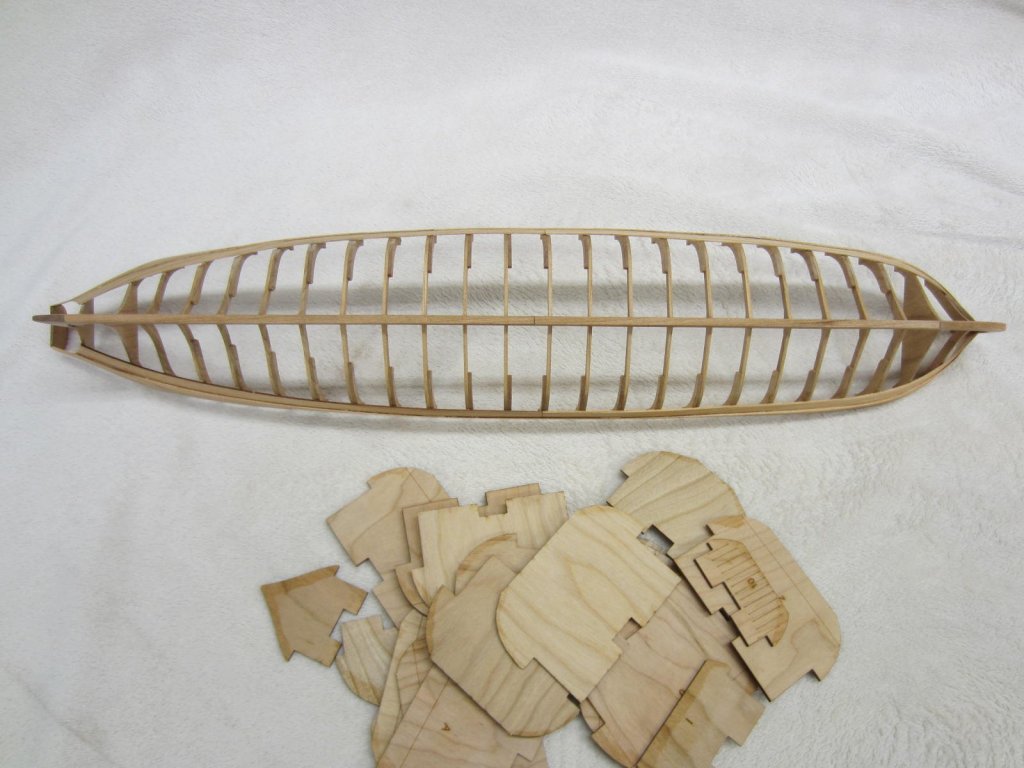
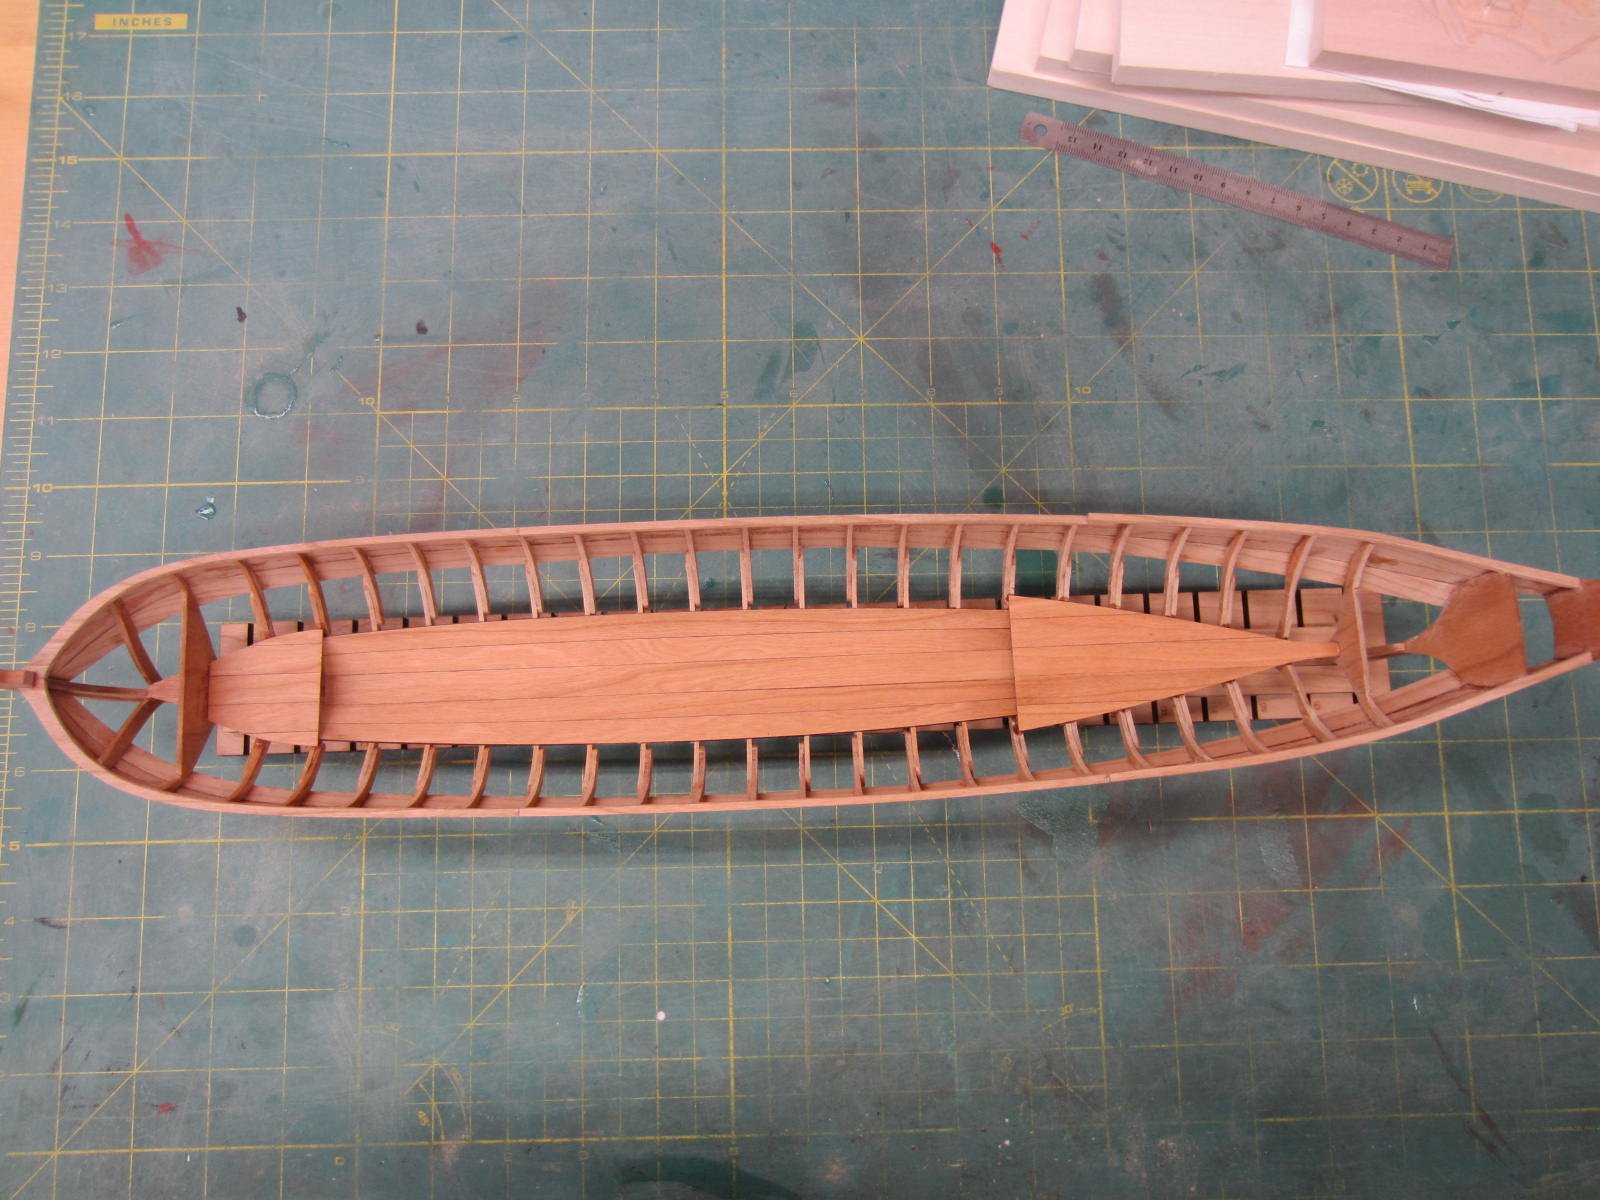
Hi all, The cap rail and frames have all been sanded to their proper dimensions. Next I sanded the floorboards and prepared them for installation. They are laser cut and required minimal heat bending to get a nice fit. Here the fore and aft platforms have been glued up and ready to install.
- 120 replies
-
- 20
-
-
- queen anne barge
- Syren Ship Model Company
- (and 1 more)
-
Thanks Ben, I too didn't know it was available. Gonna get one now.
-
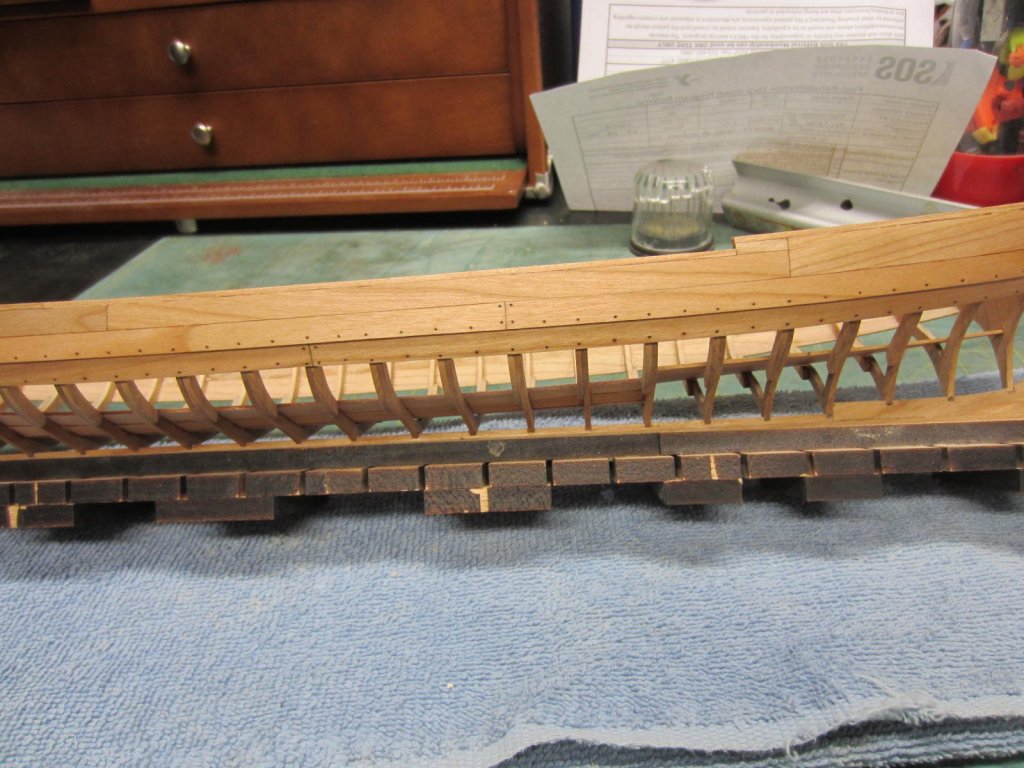
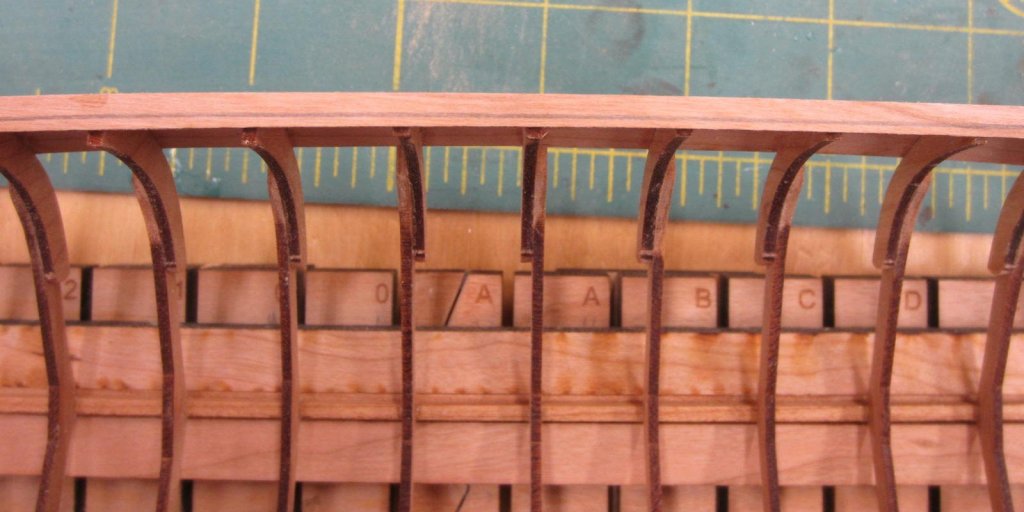
The cap rail and inner frames have all been sanded to the required thickness on the port side. Just a lot of sand, measure, sand, measure, continue as needed!

- 120 replies
-
- 20
-
-
- queen anne barge
- Syren Ship Model Company
- (and 1 more)
-
Thanks Ben. I hope you are enjoying this as much as I am. Also thanks for all the likes!
- 120 replies
-
- 3
-
-
- queen anne barge
- Syren Ship Model Company
- (and 1 more)
-
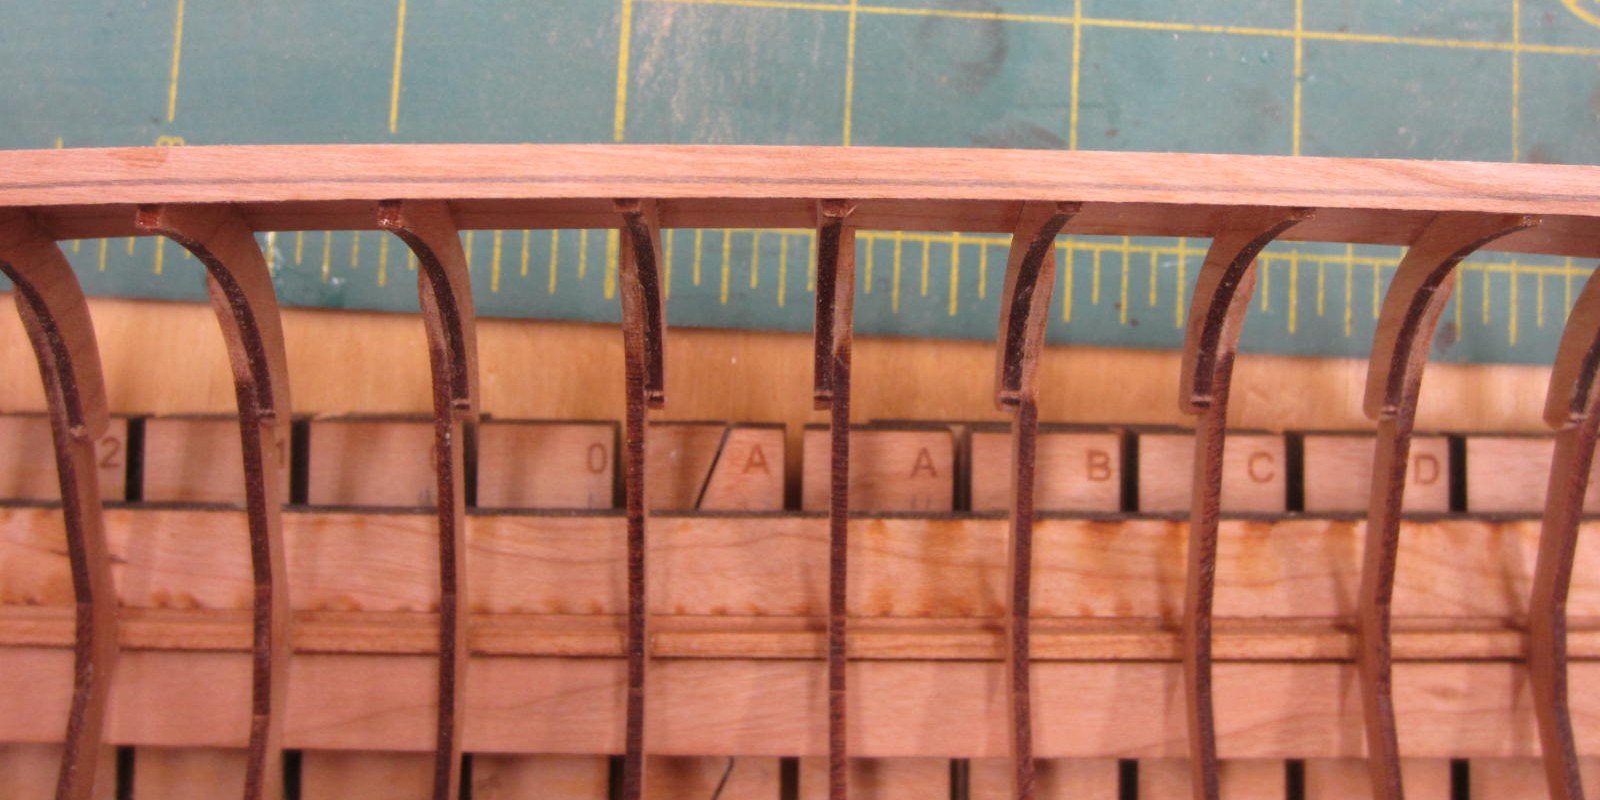
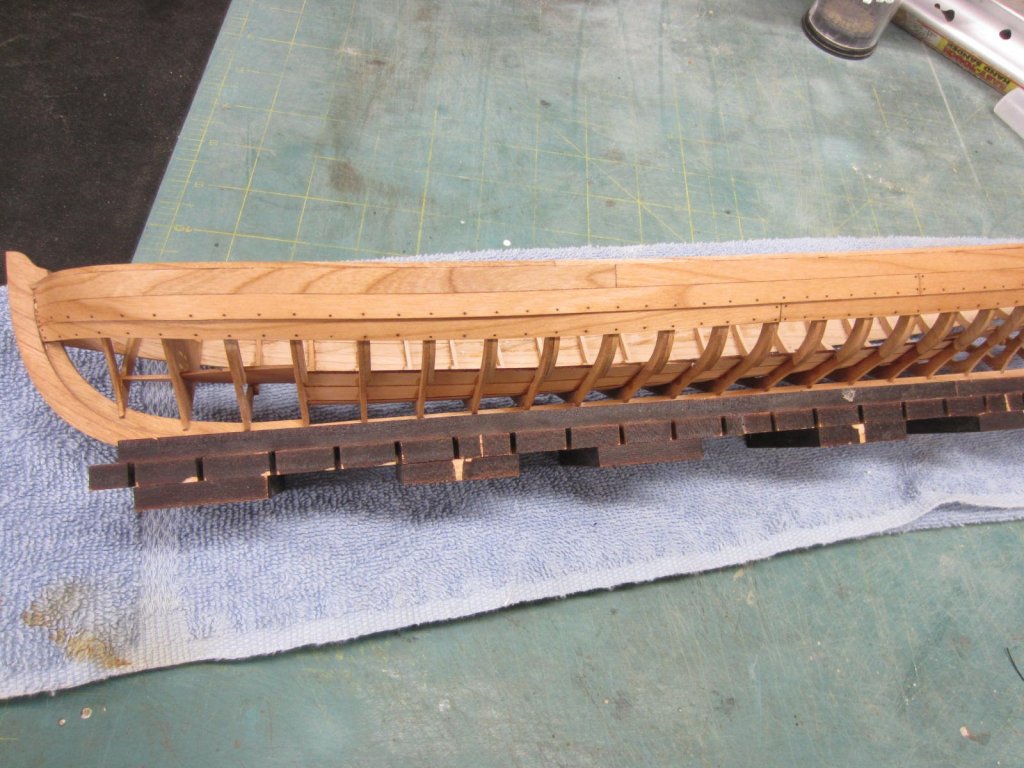
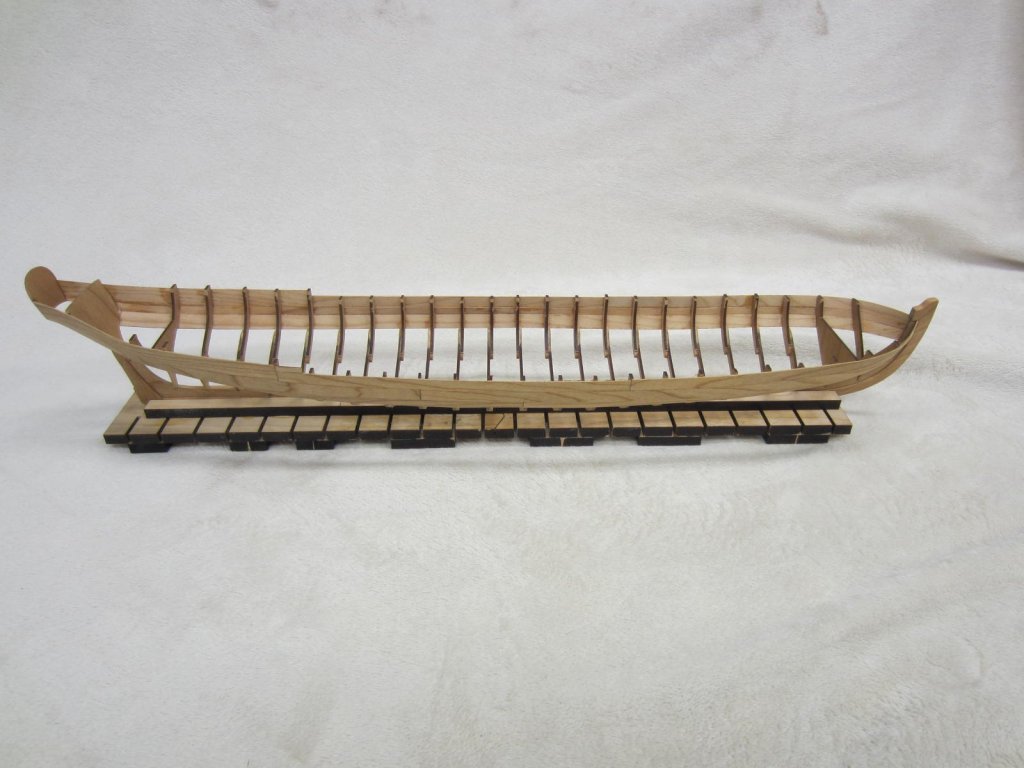
Now that the barge has been released from the building board it can be used to hold the model in the upright position. Chuck supplied the wood pieces and now it is held firmly is place. Next I sanded the tops of the frames flush with the planking in preparation of adding the cap rail. The cap rails finished width is 5/64". you can see that a piece is plenty wide enough was provided. You can see I marked how wide it would be when sanded to its proper width. The rails were added and then sanded flush to the outboard planking. I then marked a reference line to guide me while sanding the inboard frames and rail. I also used a 5/64" gauge to ensure a correct width.
.thumb.JPG.b1e6b185bf52fb6a1b688dc45430f991.JPG)


- 120 replies
-
- 18
-
-
- queen anne barge
- Syren Ship Model Company
- (and 1 more)
-
Wonderful work Chuck! Hopefully some of the "test" portions will make it to the Northeast Conference. Huh huh pretty please!
-
Looking really good Ben. Awsome workmanship.
- 74 replies
-
- 4
-
-
- queen anne barge
- Syren Ship Model Company
- (and 1 more)
-
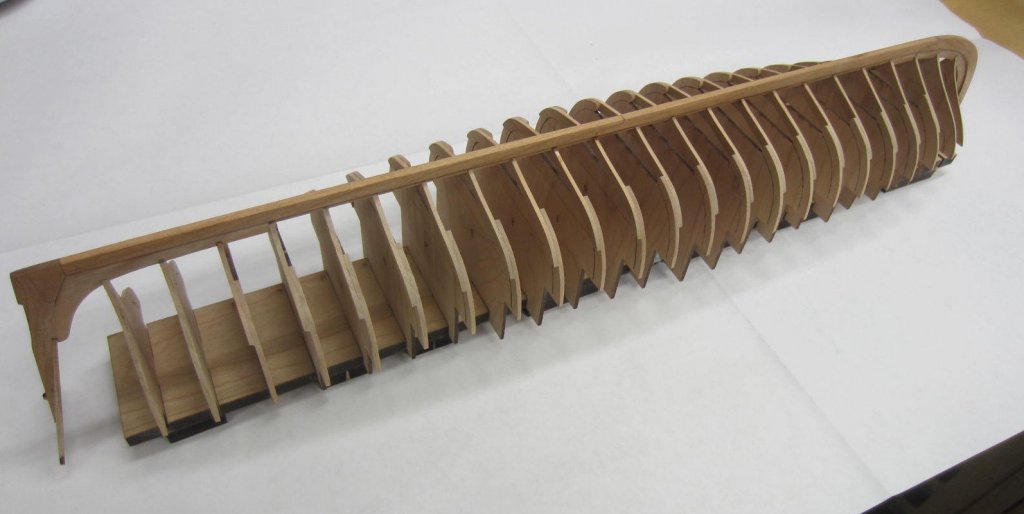
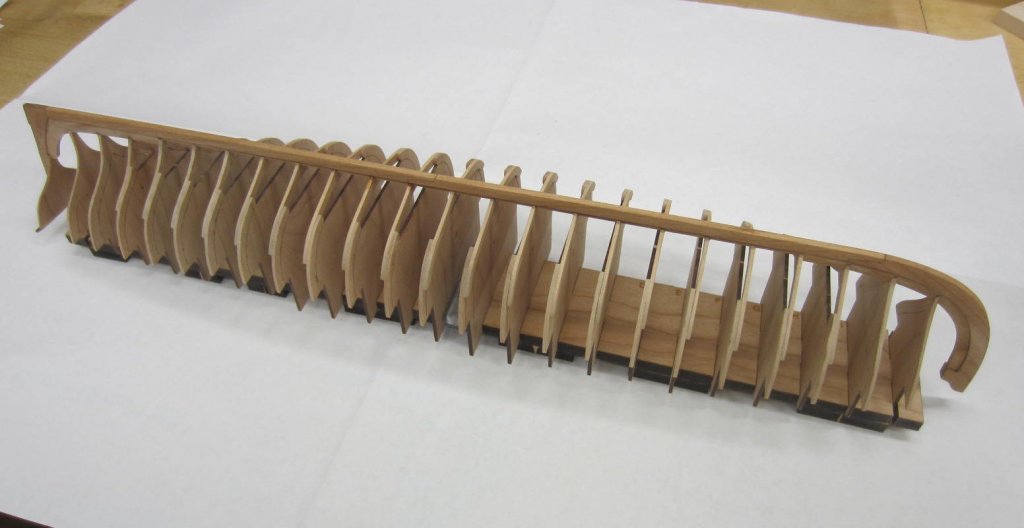
Thanks and welcome aboard Tim! Thank Bob! The centers have now been removed from the frames. Like Ben I found using a fine razor saw worked well for me. Next is adding the cap rail and fairing the inboard frames.

- 120 replies
-
- 17
-
-
- queen anne barge
- Syren Ship Model Company
- (and 1 more)
-
Thank you Jean-Paul and Ben. Also thank you all for the likes.
- 120 replies
-
- 3
-
-
- queen anne barge
- Syren Ship Model Company
- (and 1 more)
-
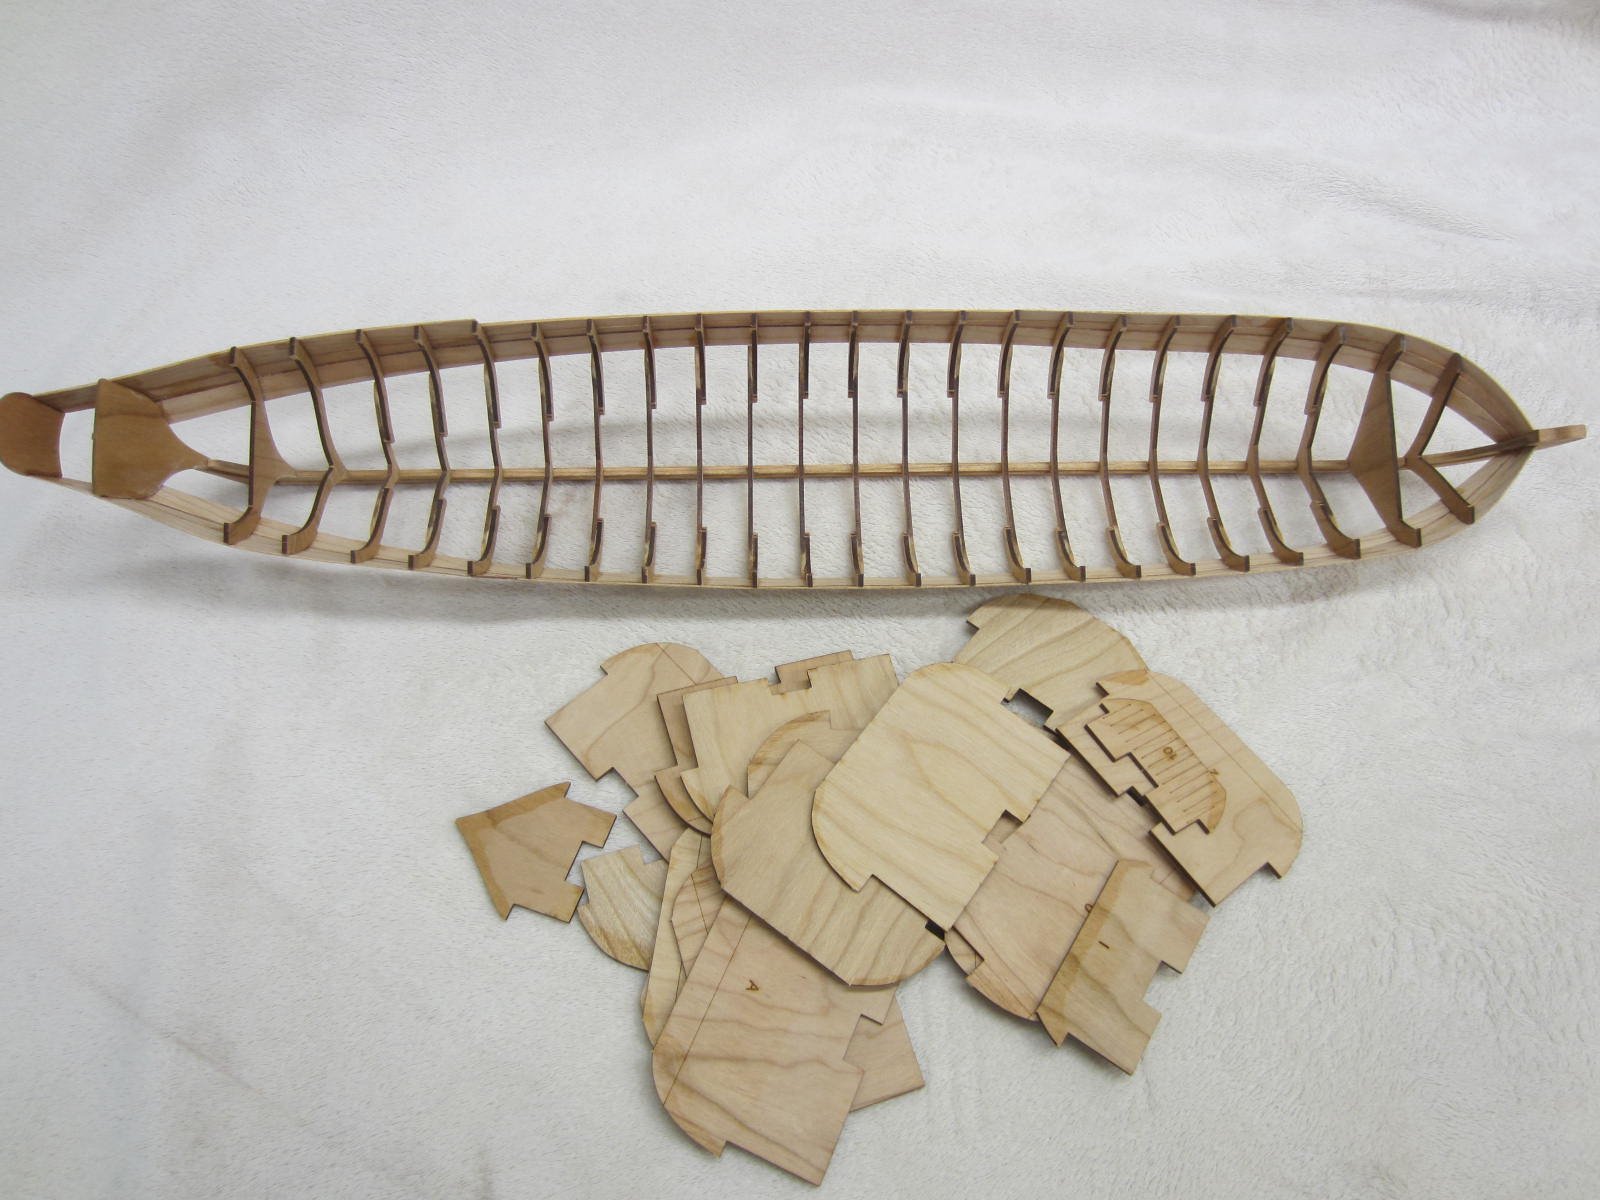
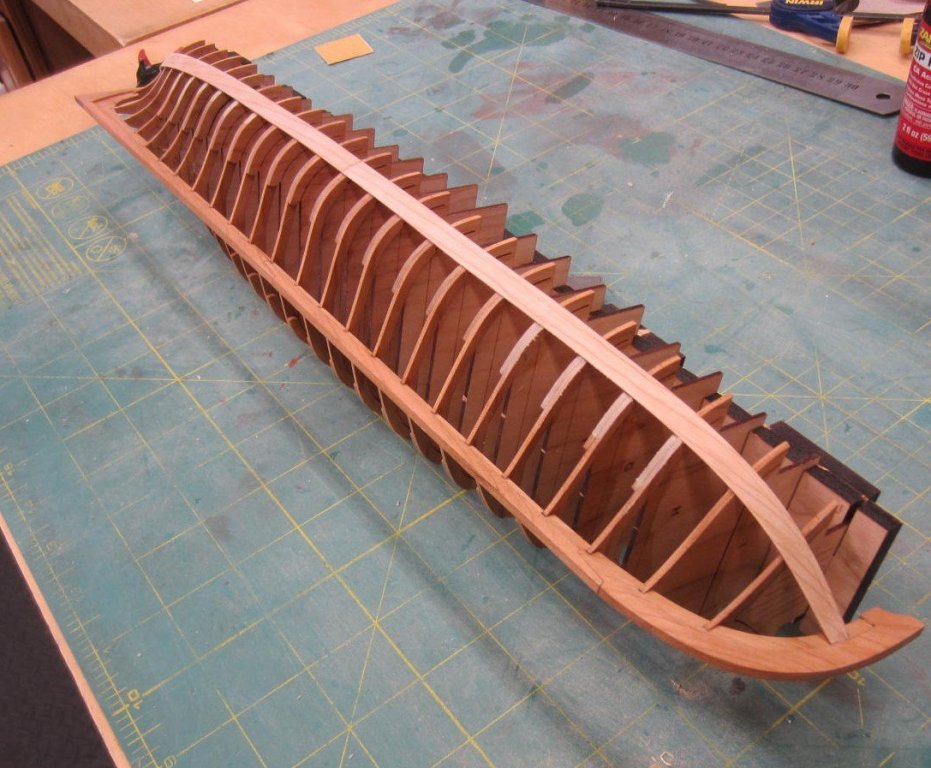
Hi All, Here is the first row of planking on the starboard side. And here is all the planking completed. And the now released from the building board!


- 120 replies
-
- 23
-
-
- queen anne barge
- Syren Ship Model Company
- (and 1 more)
-
Very nice progress Jean-Paul. She's a joy to build.
- 103 replies
-
- 1
-
-
- queen anne barge
- Syren Ship Model Company
- (and 1 more)
-
Thanks Chuck! Great design and having a ball. Also thanks everyone for all the likes! Much appreciated.
- 120 replies
-
- 3
-
-
- queen anne barge
- Syren Ship Model Company
- (and 1 more)
-
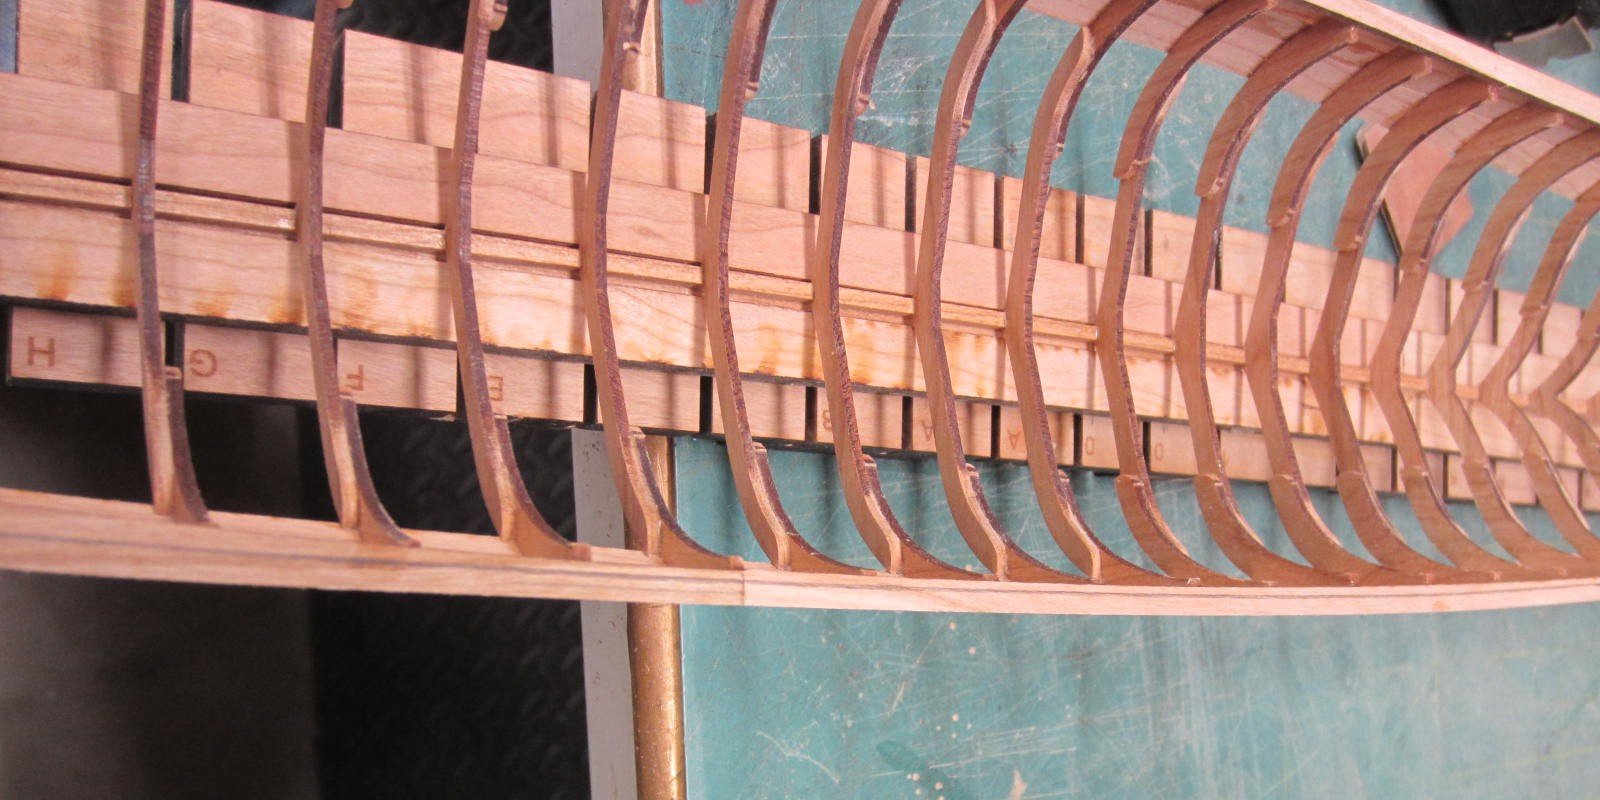
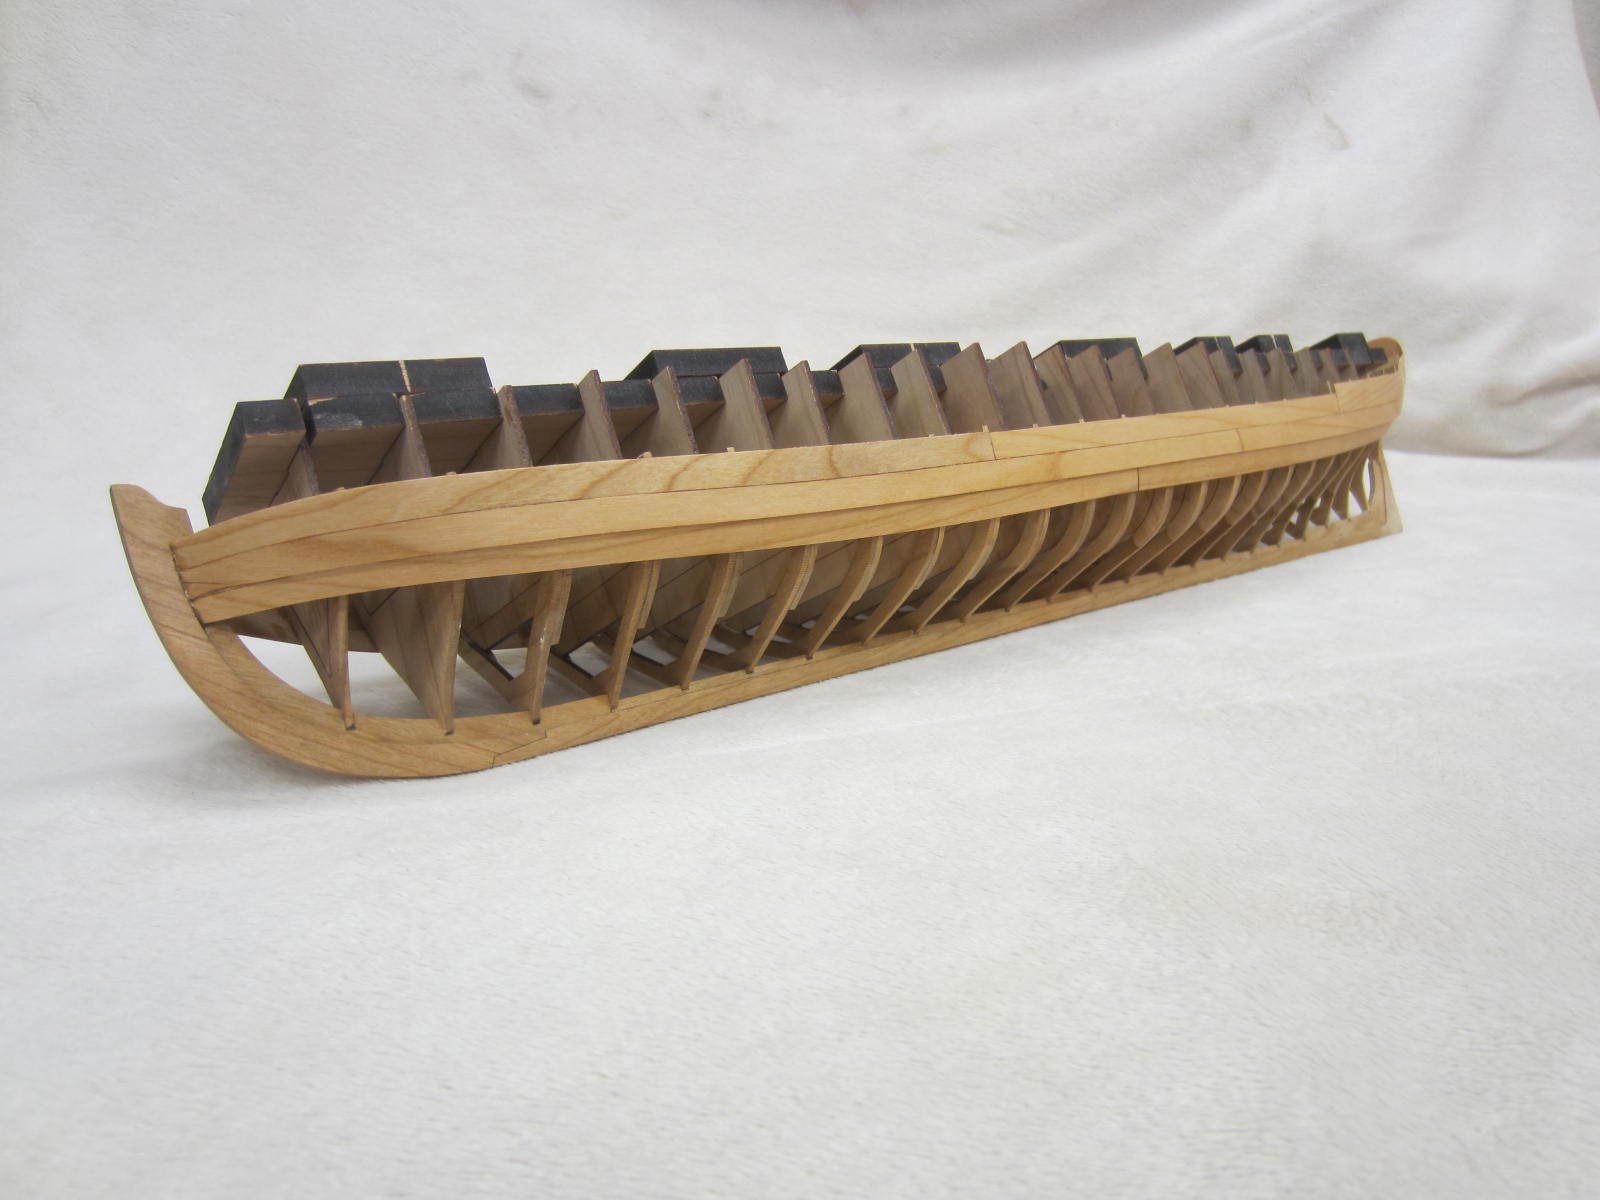
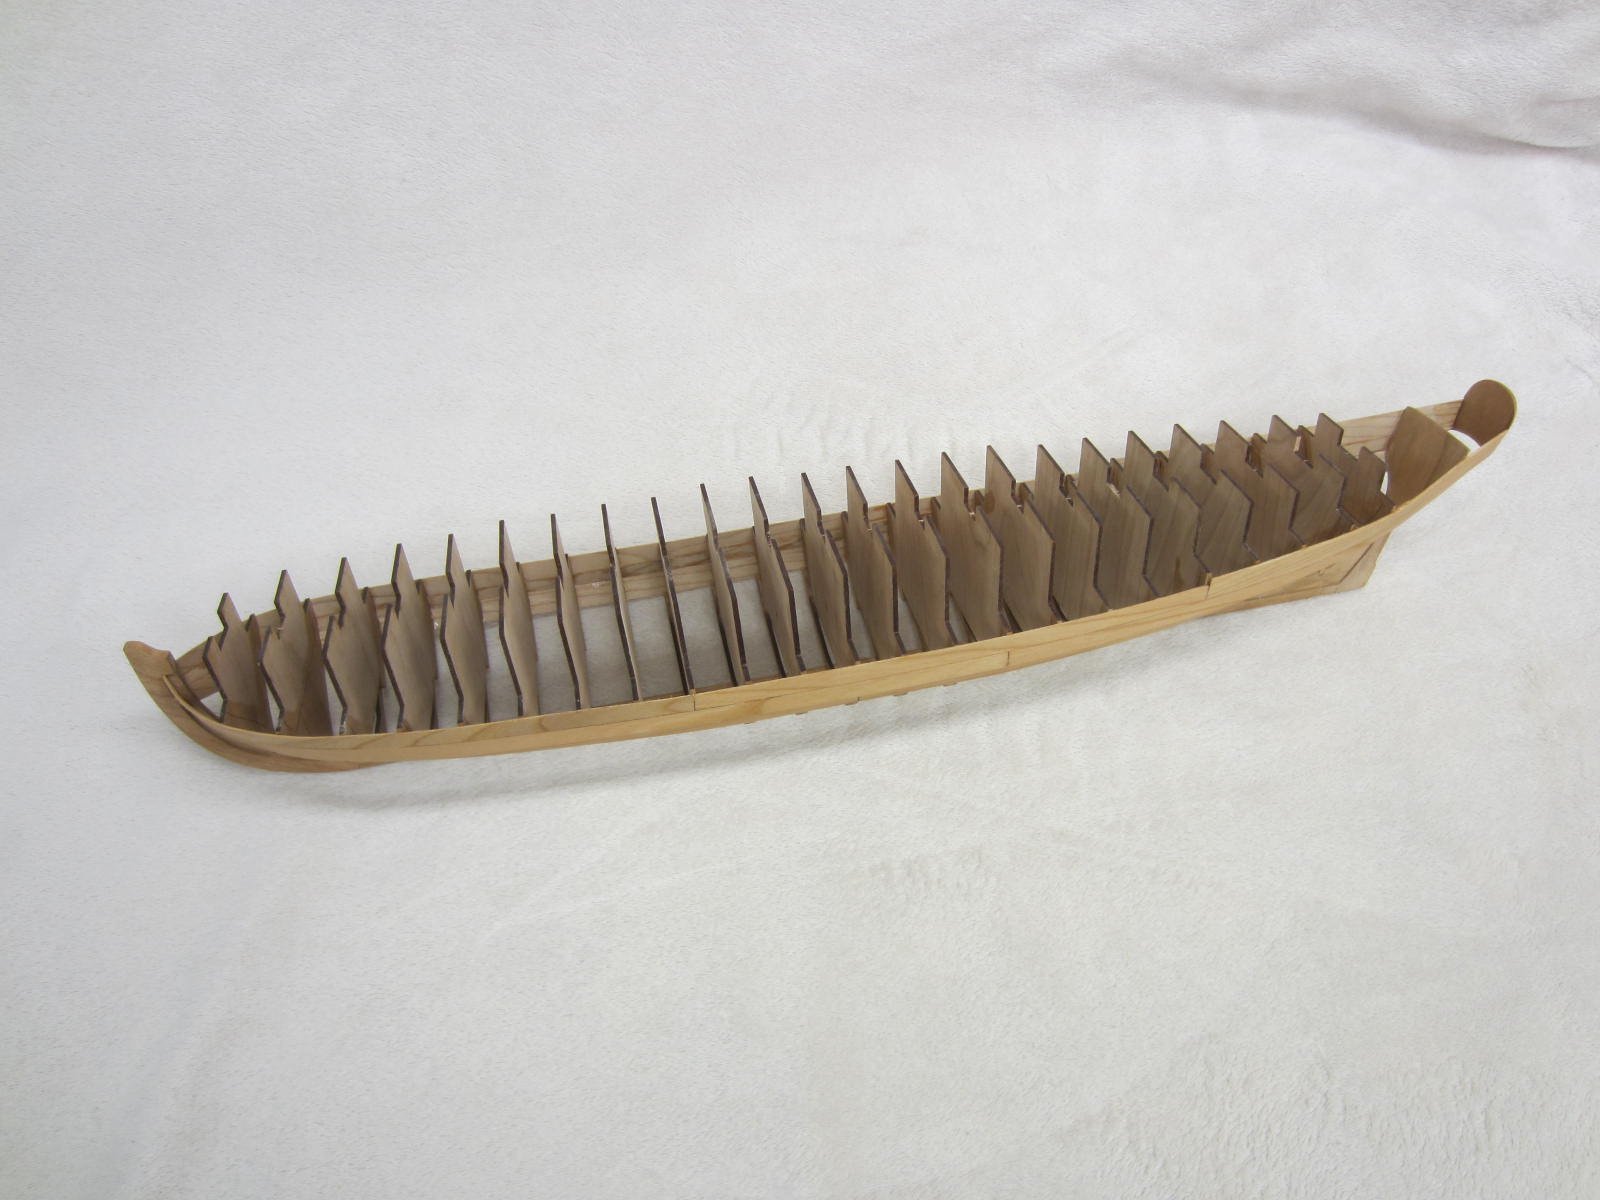
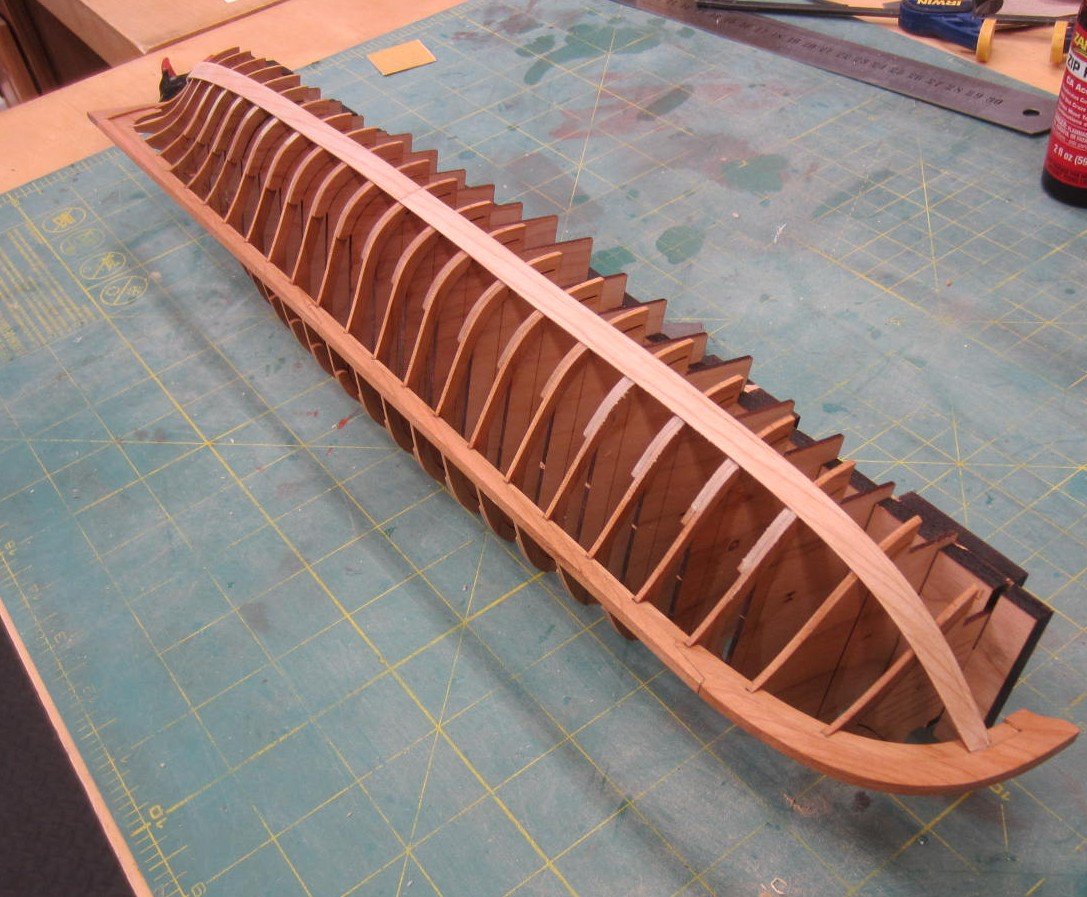
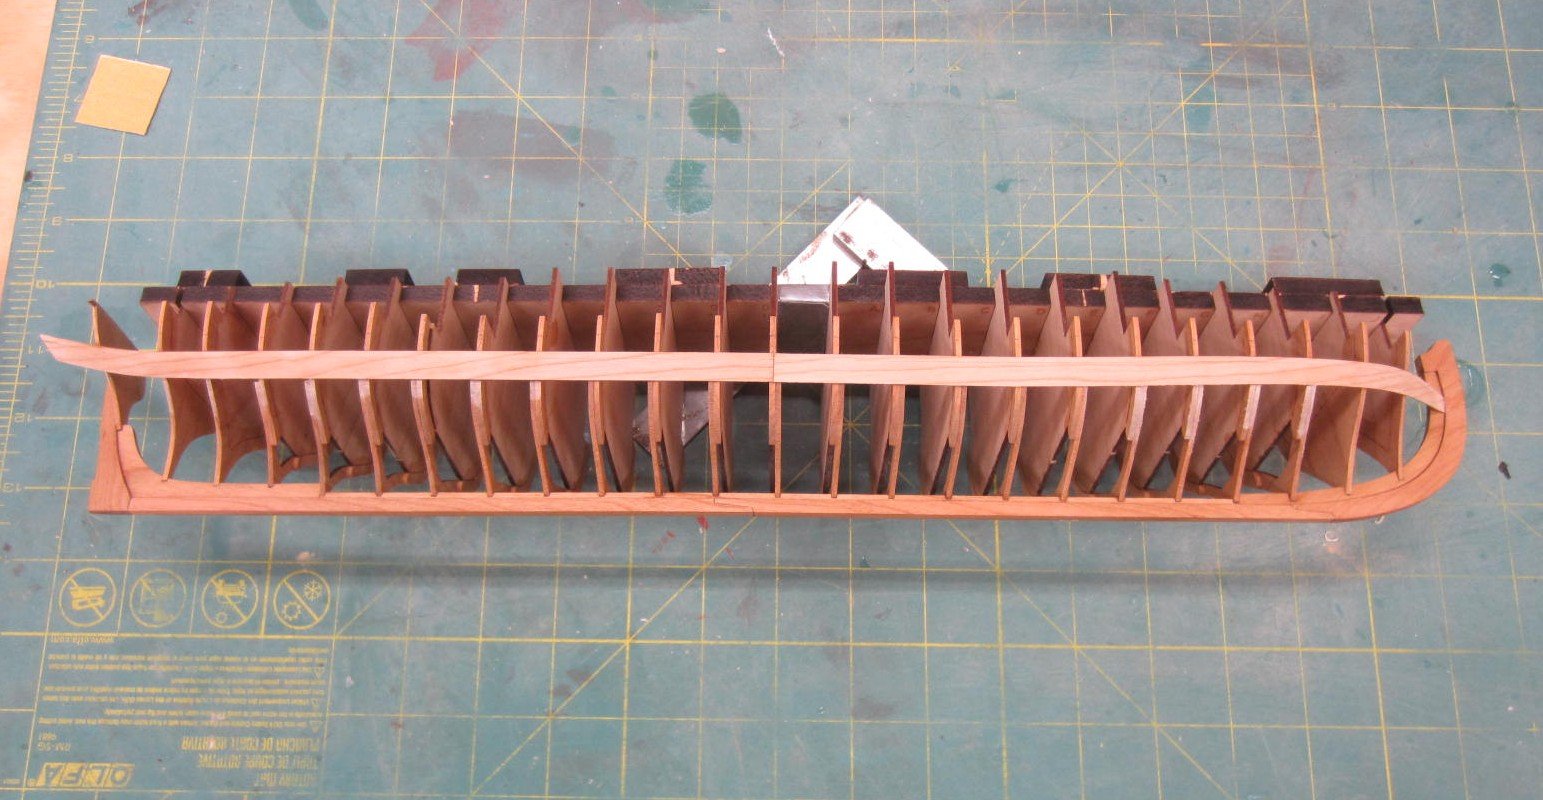
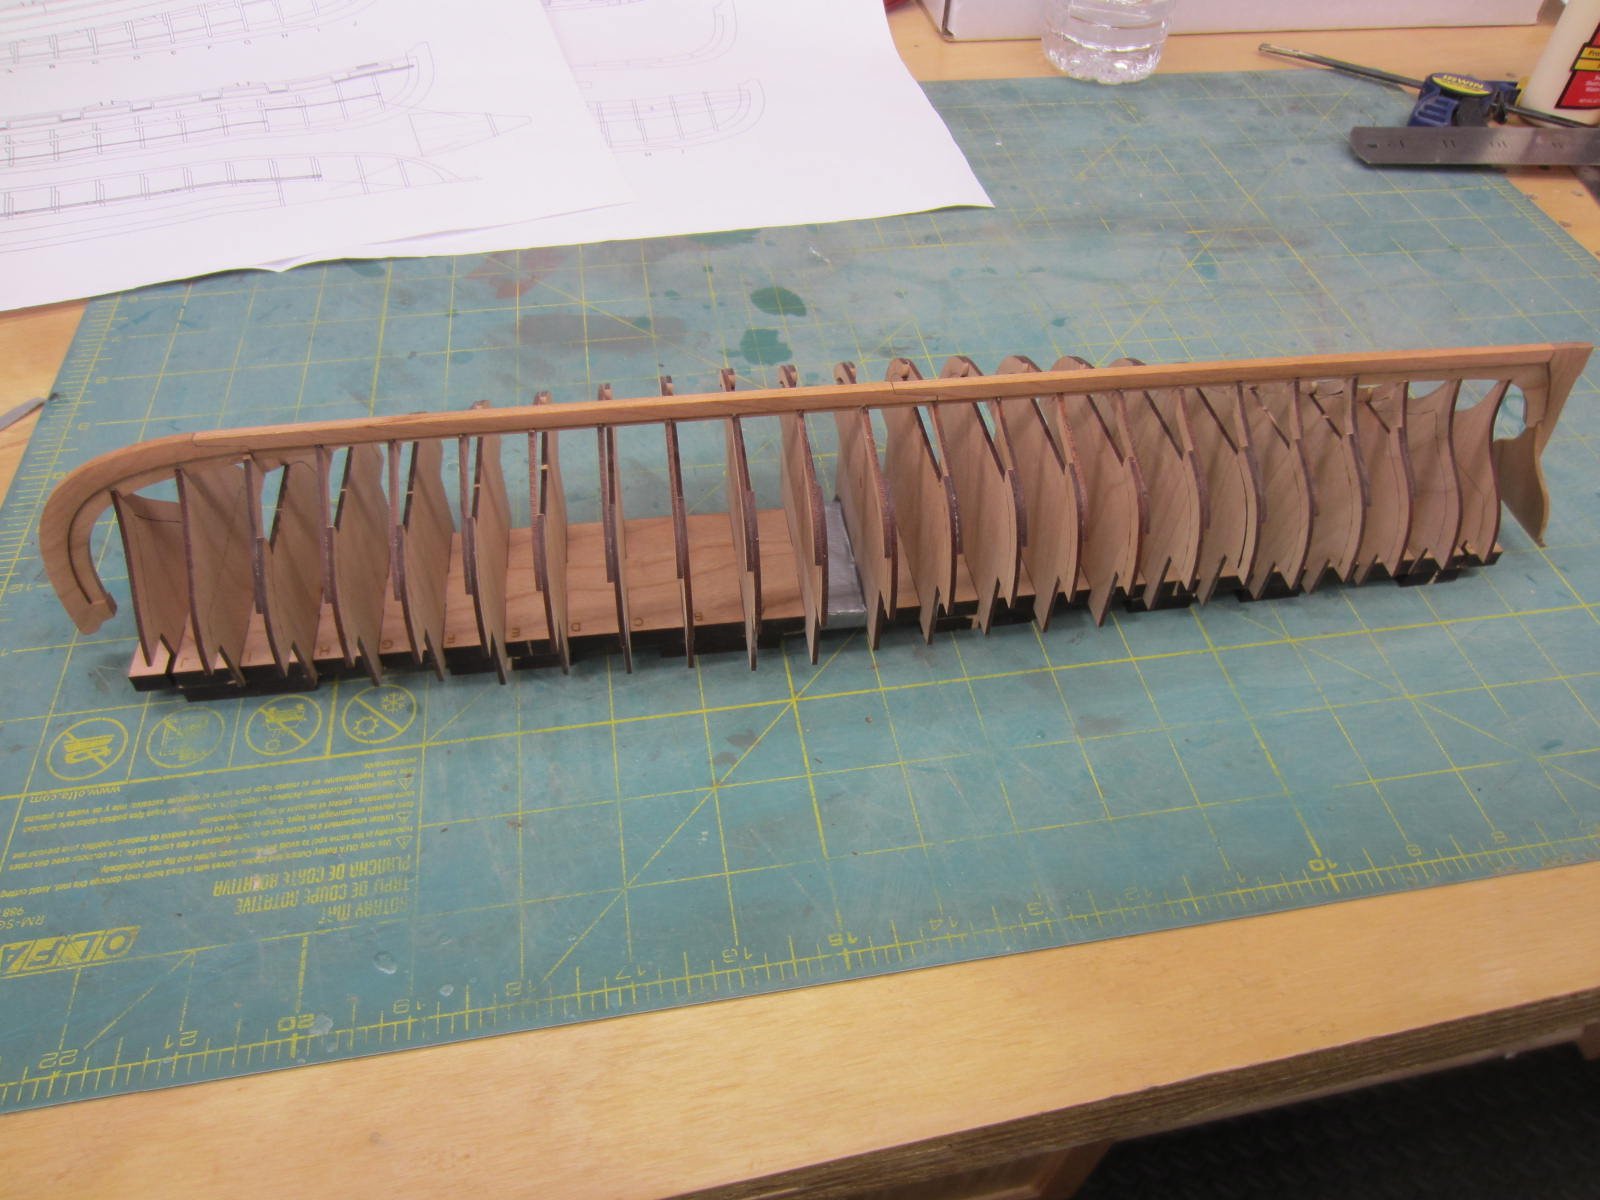
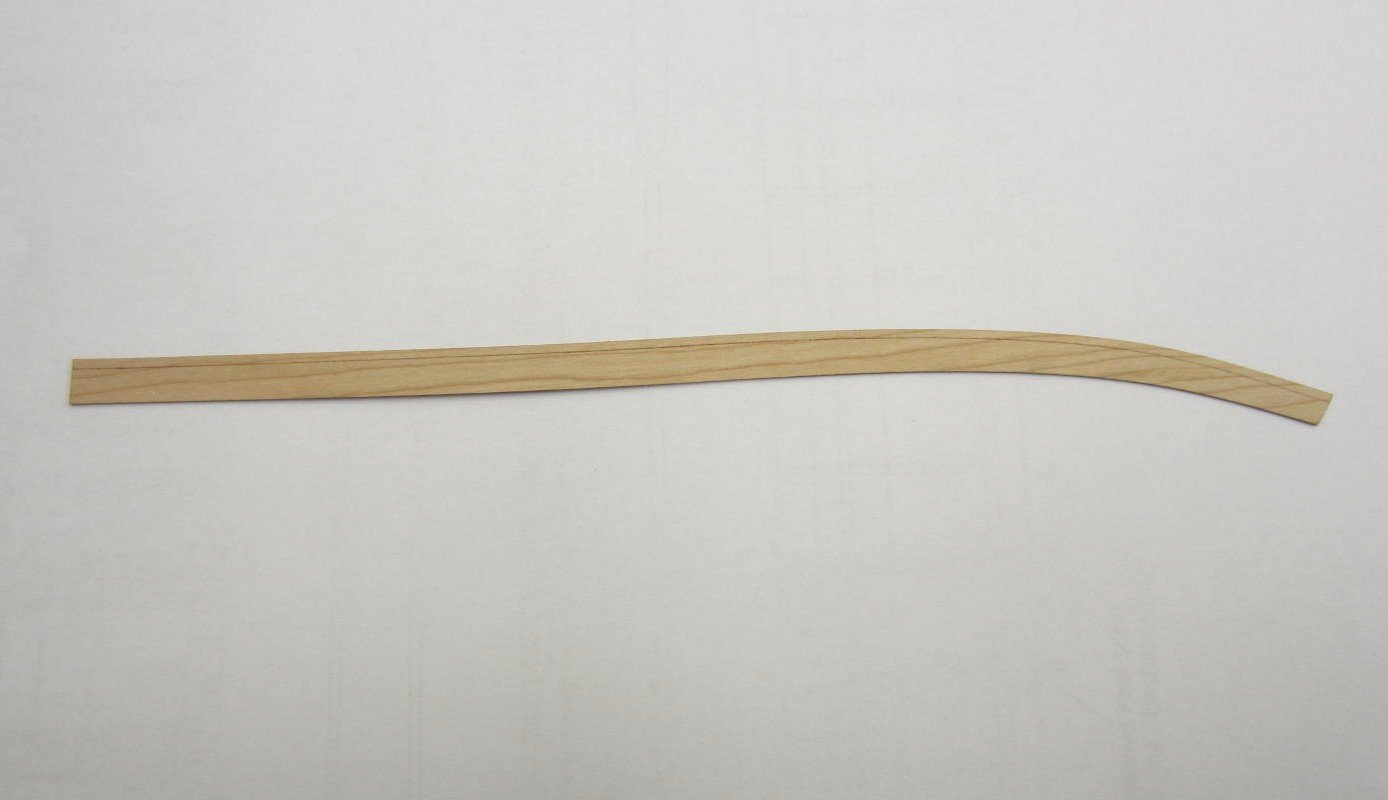
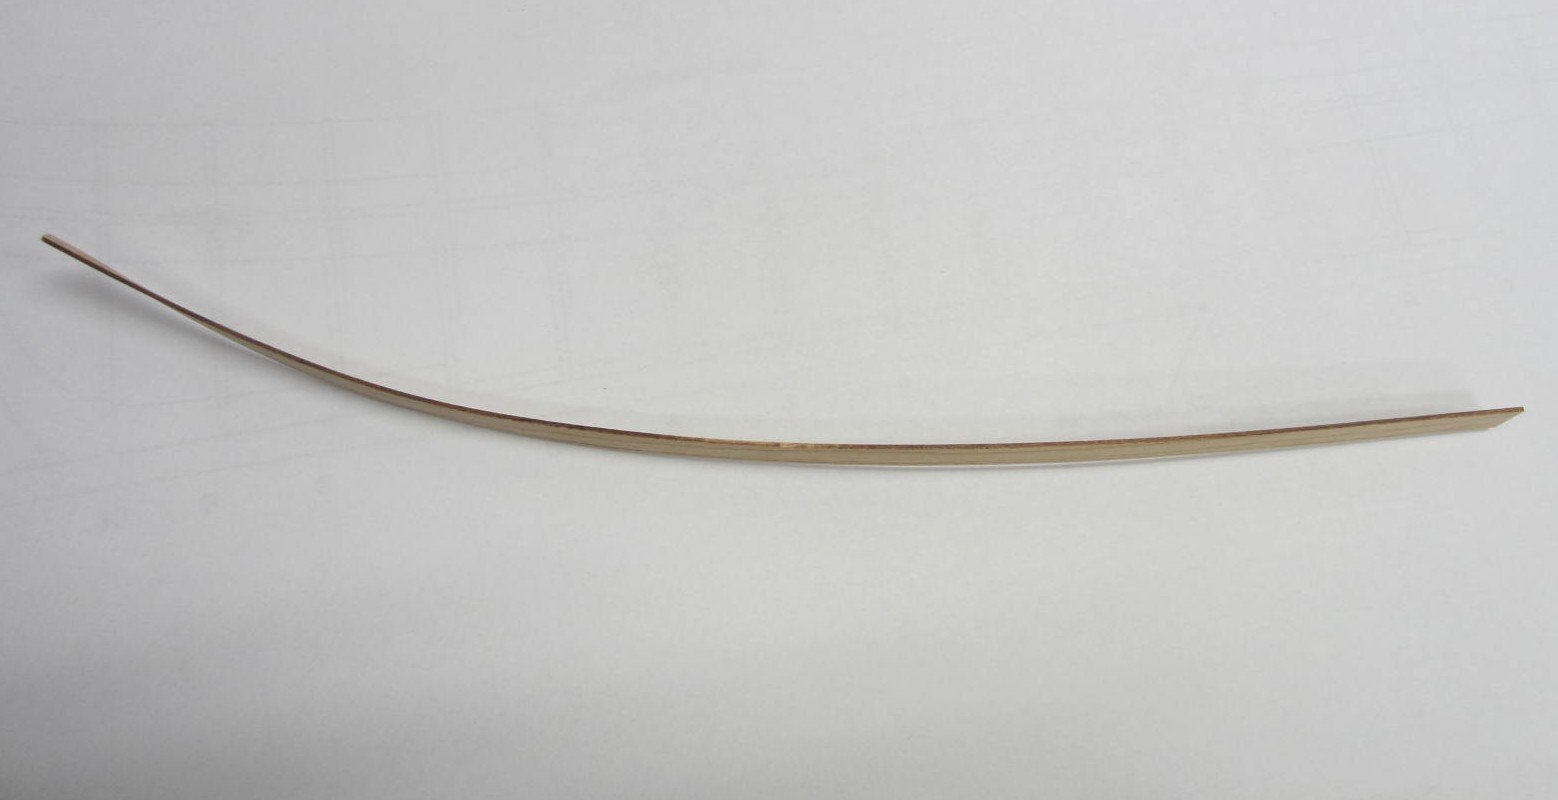
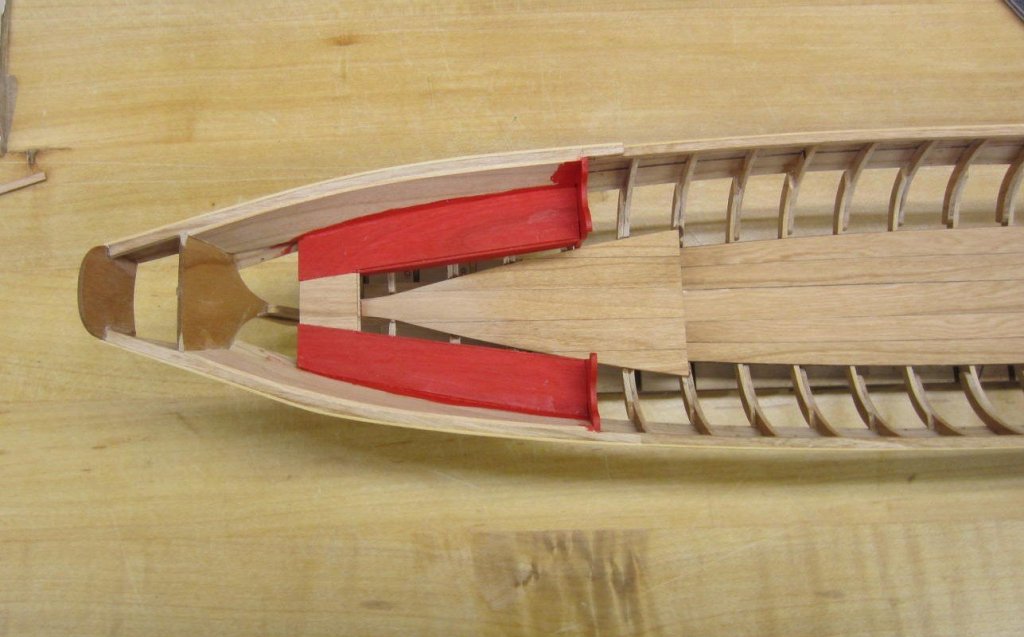
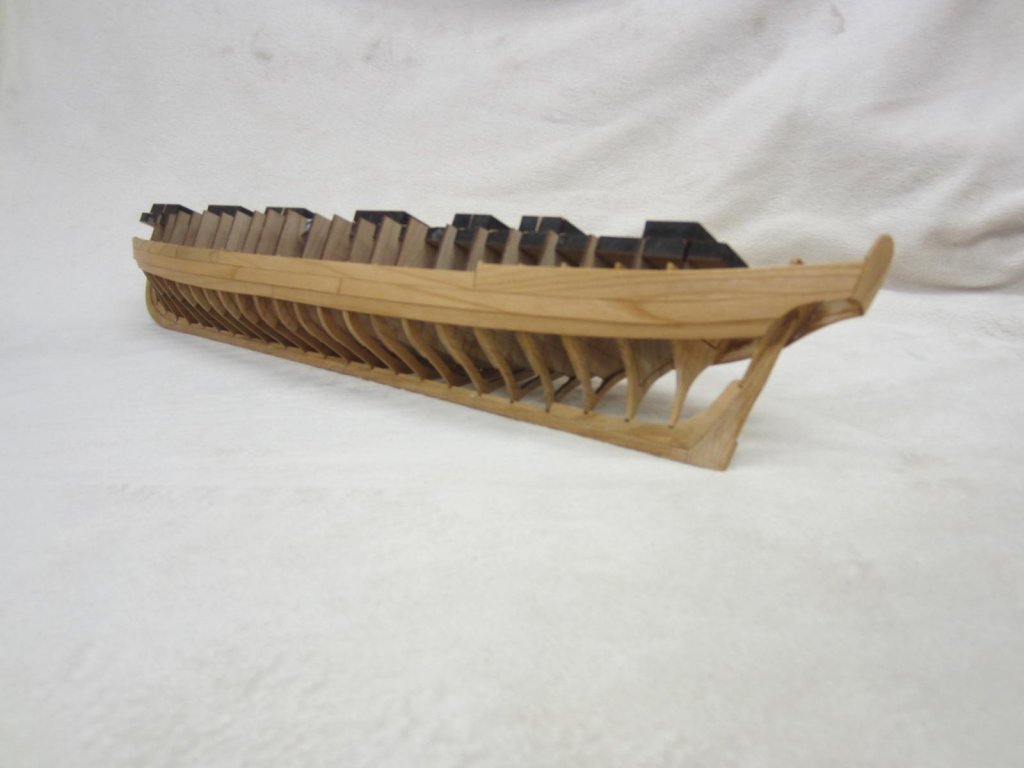
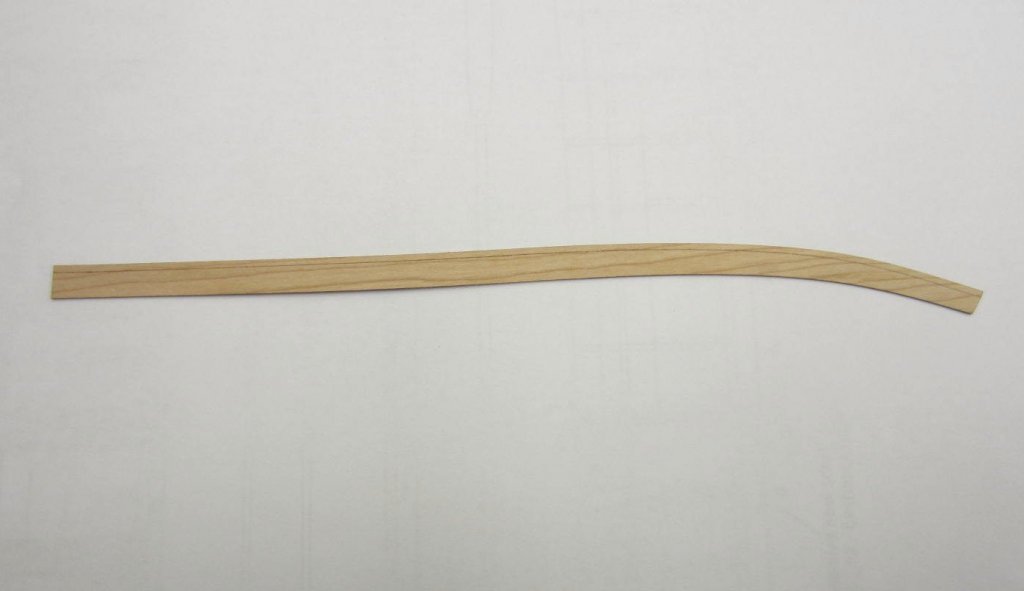
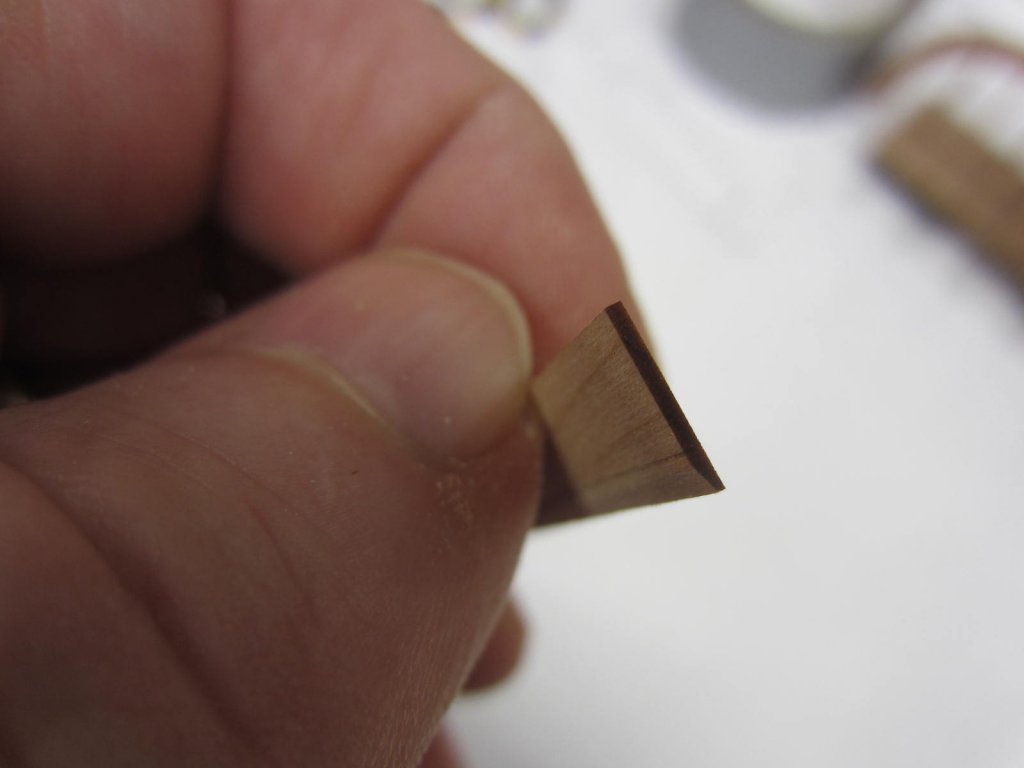
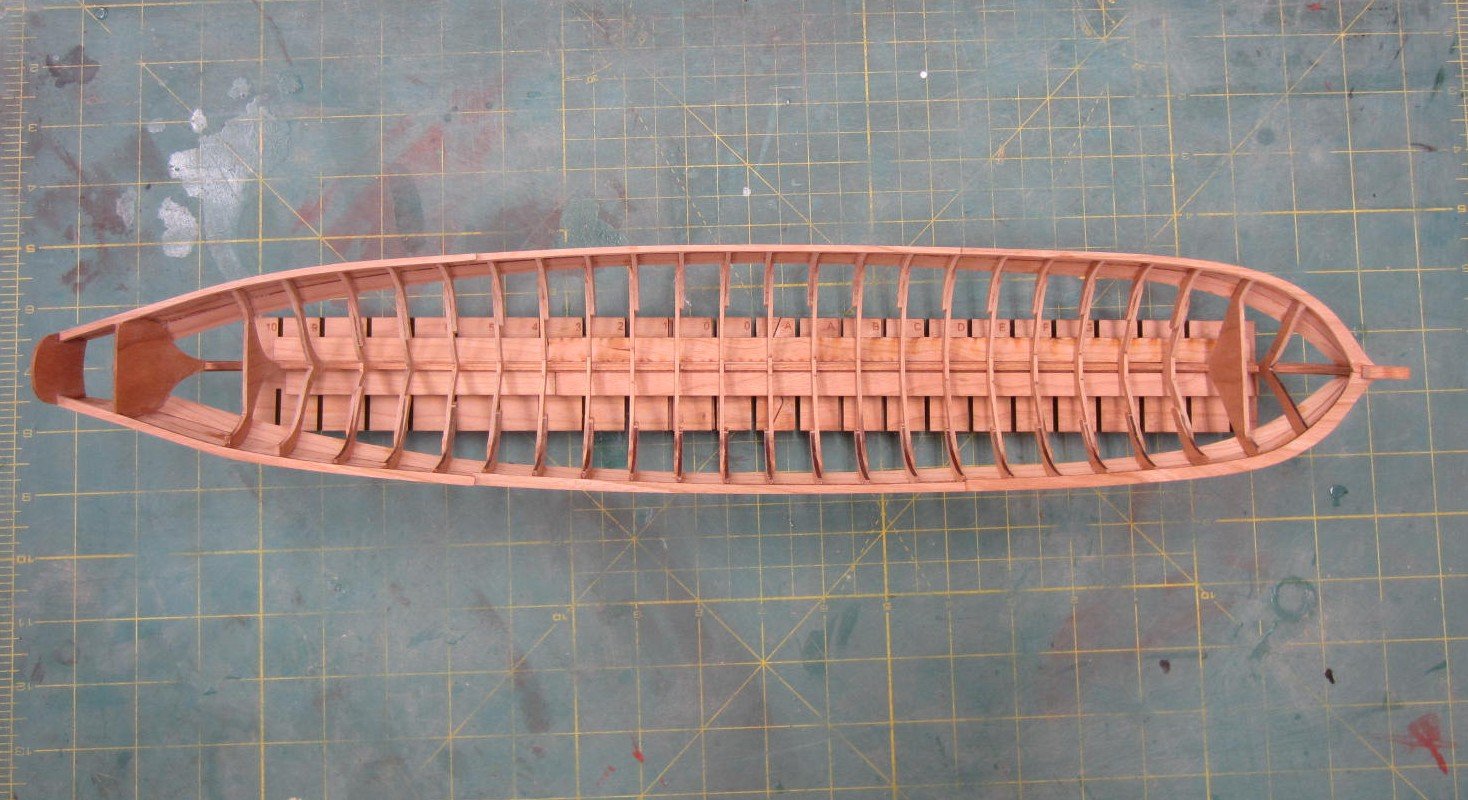
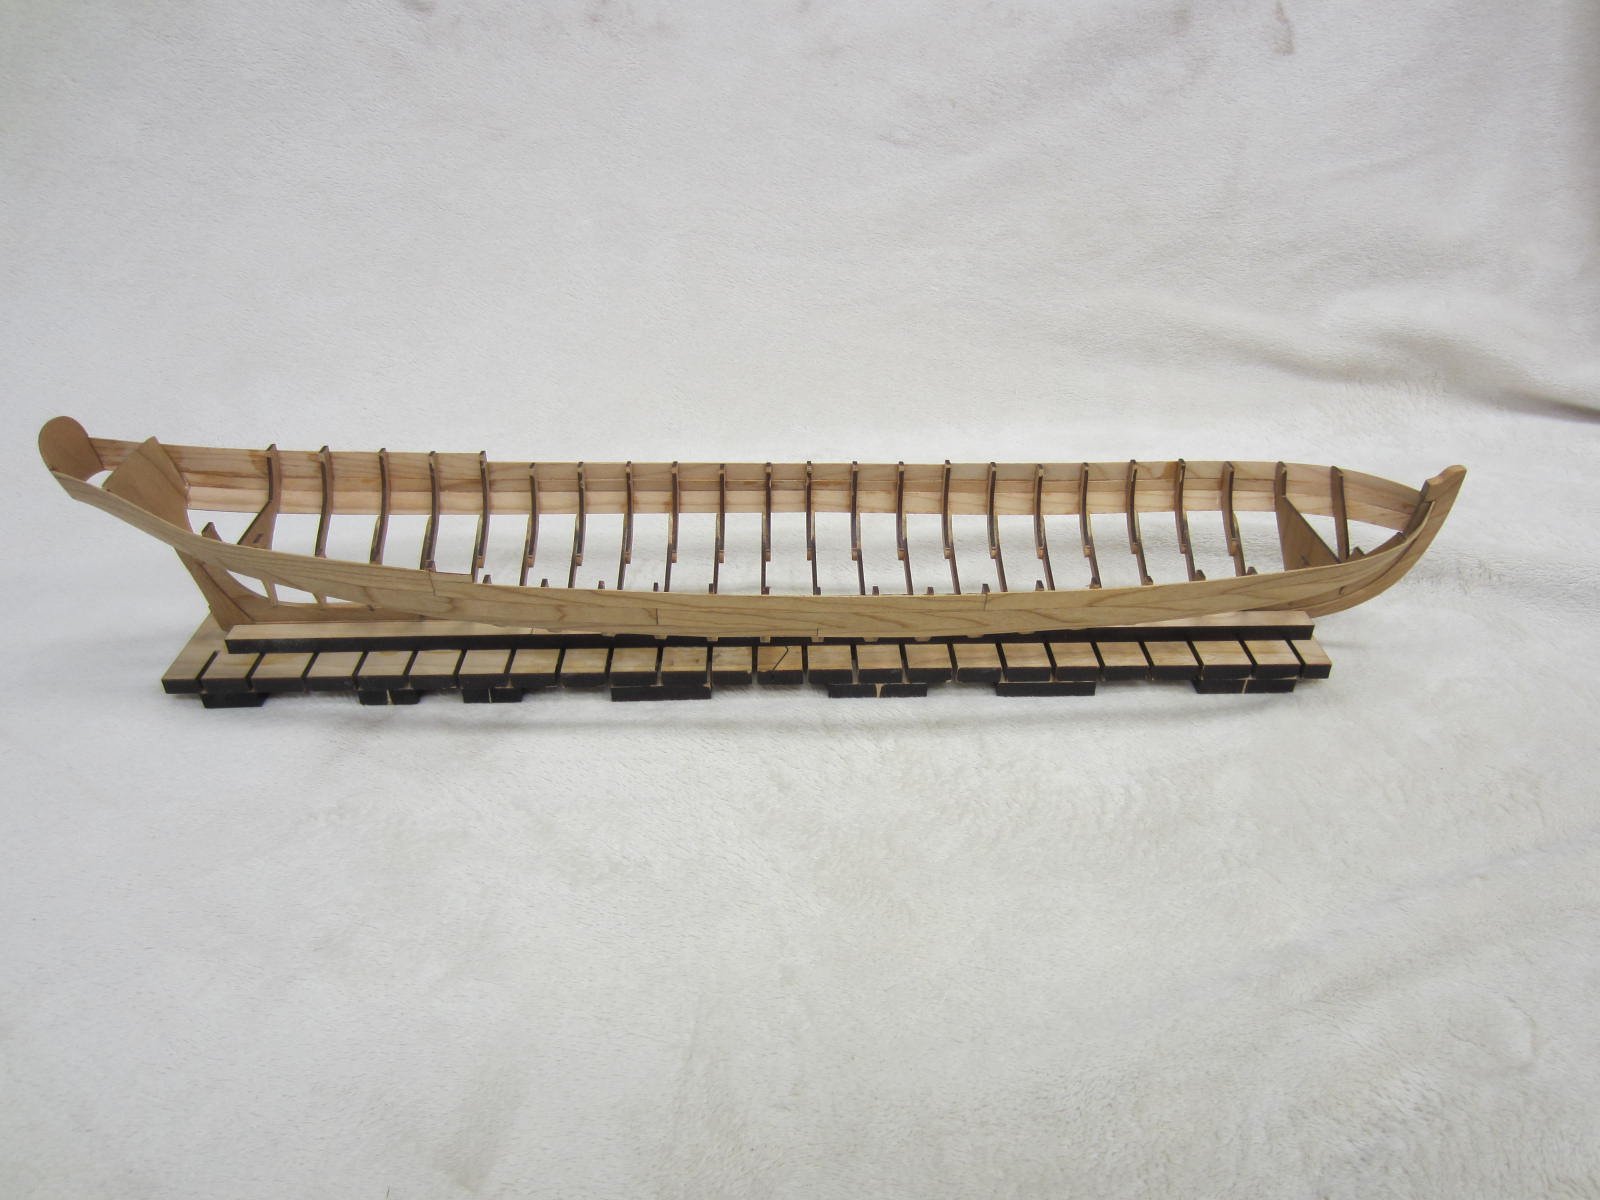
Both halves have been glued to the keel, dried and fairing is mostly completed. I've started prepping the spiled planks. They are 1/32" (.08mm) thick so they are delicate. Laser char is gently removed with a sanding stick. You will also see a faint laser etched line in the plank. A bevel from the laser line to the edge was created with the sanding stick too. Here you see a plank formed to fit by heat bending until it lays on the frames without being forced. This is a whole lot of fun!


- 120 replies
-
- 22
-
-
- queen anne barge
- Syren Ship Model Company
- (and 1 more)


.JPG.1b3241a56905ba4f1363e19ef9f774fb.JPG)