HOLIDAY DONATION DRIVE - SUPPORT MSW - DO YOUR PART TO KEEP THIS GREAT FORUM GOING! (89 donations so far out of 49,000 members - C'mon guys!)
×


chris watton
-
Posts
2,331 -
Joined
-
Last visited
Content Type
Profiles
Forums
Gallery
Events
Everything posted by chris watton
-
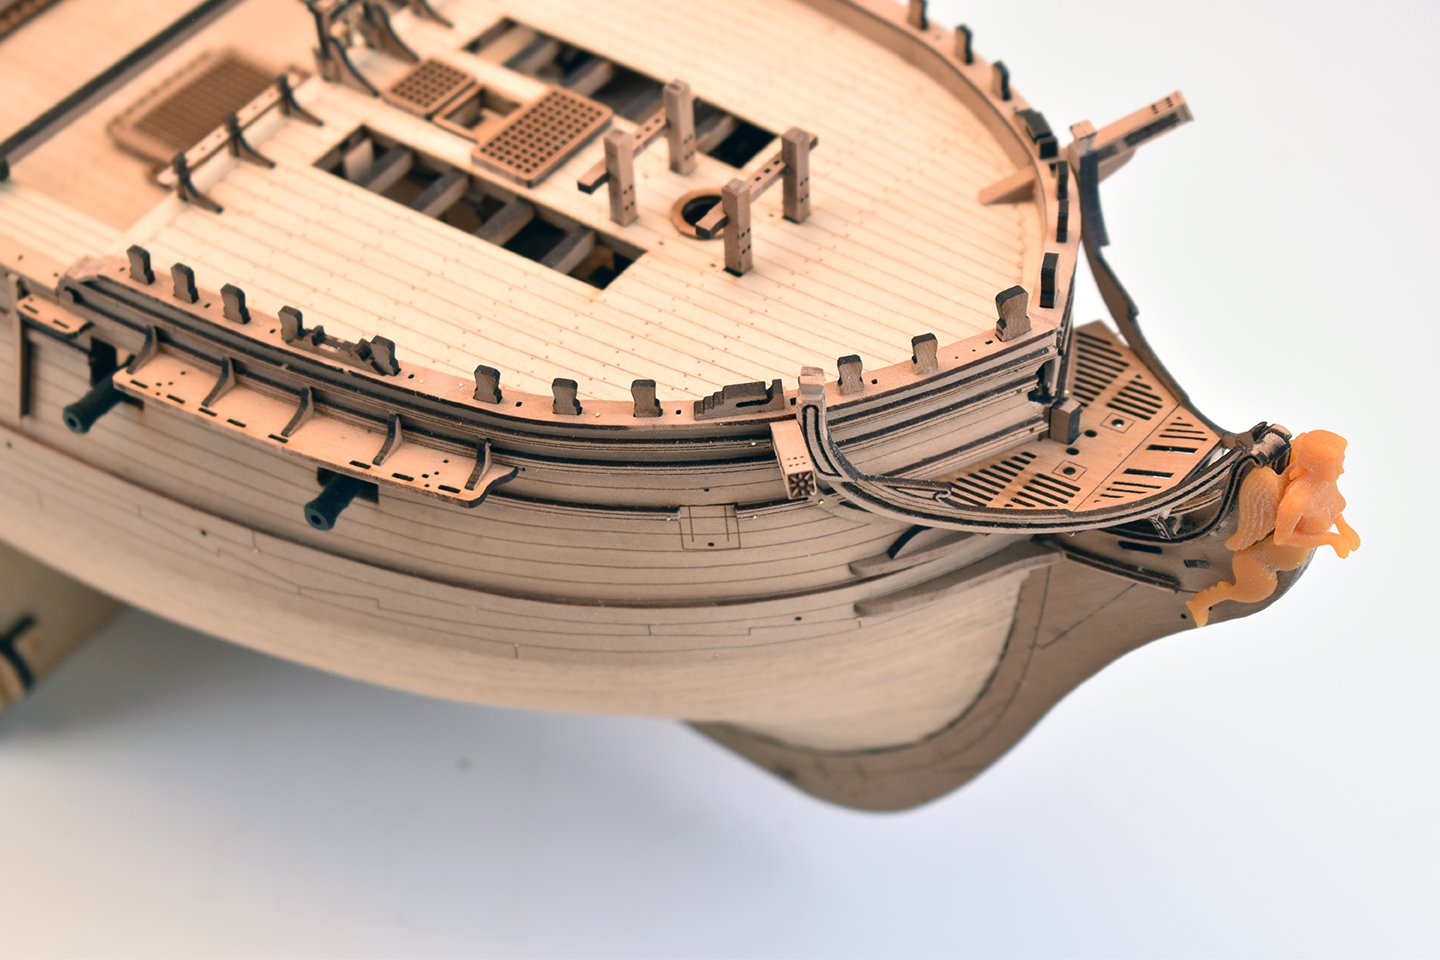
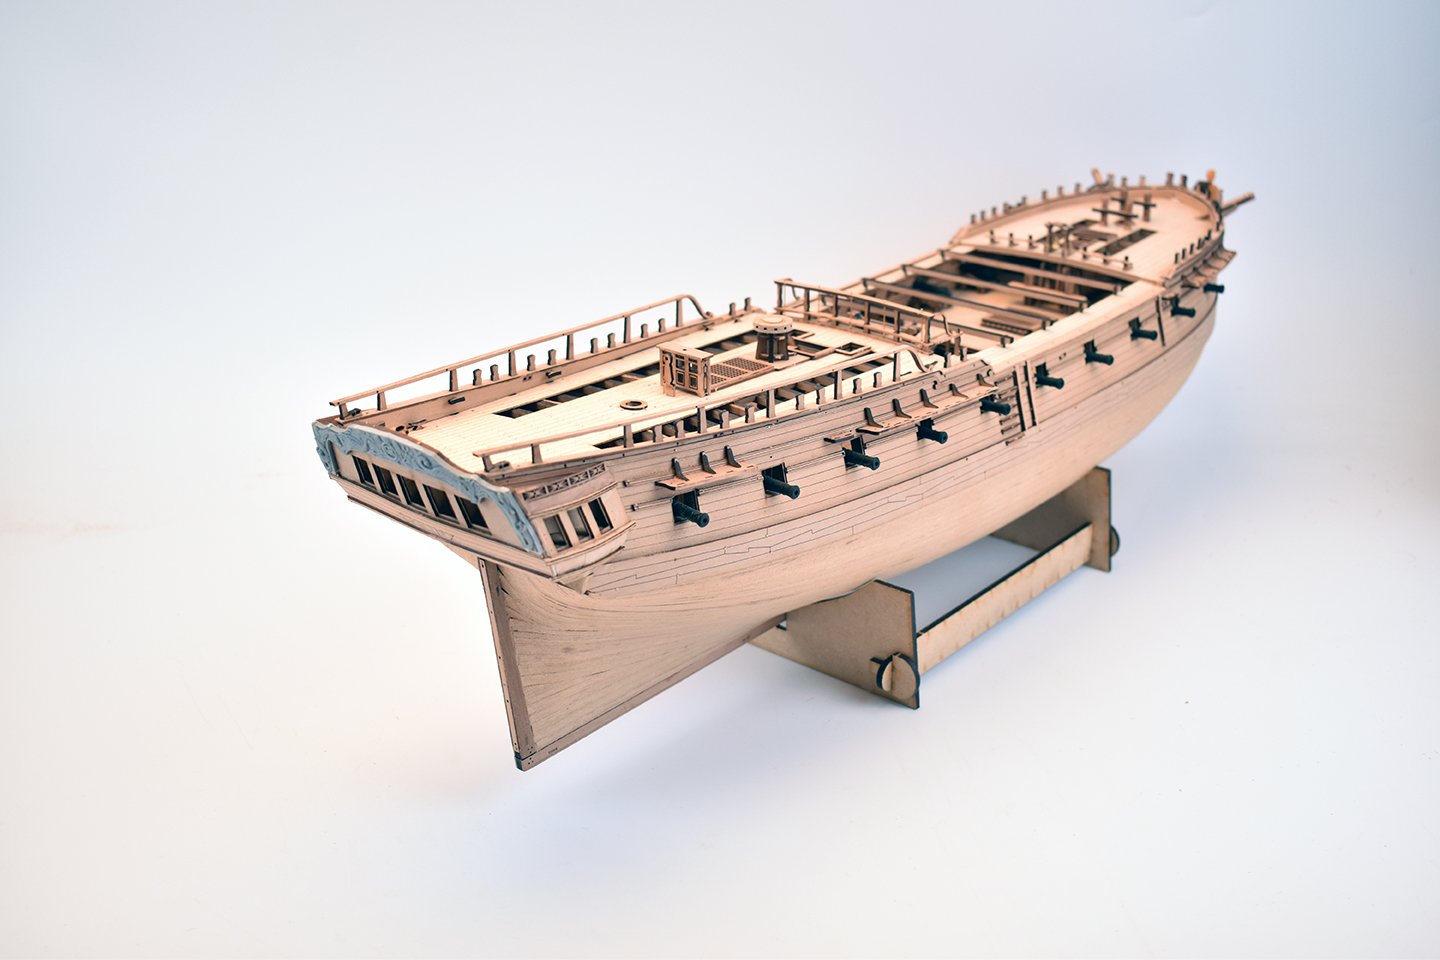
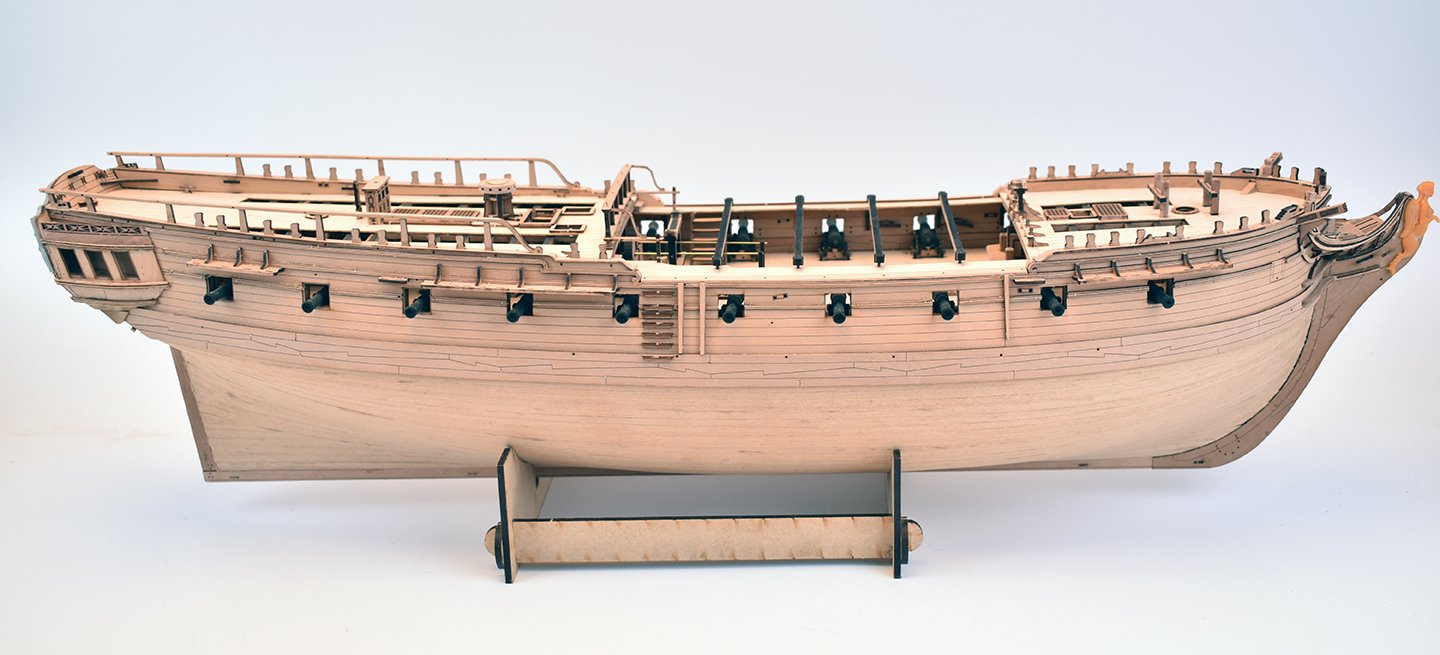
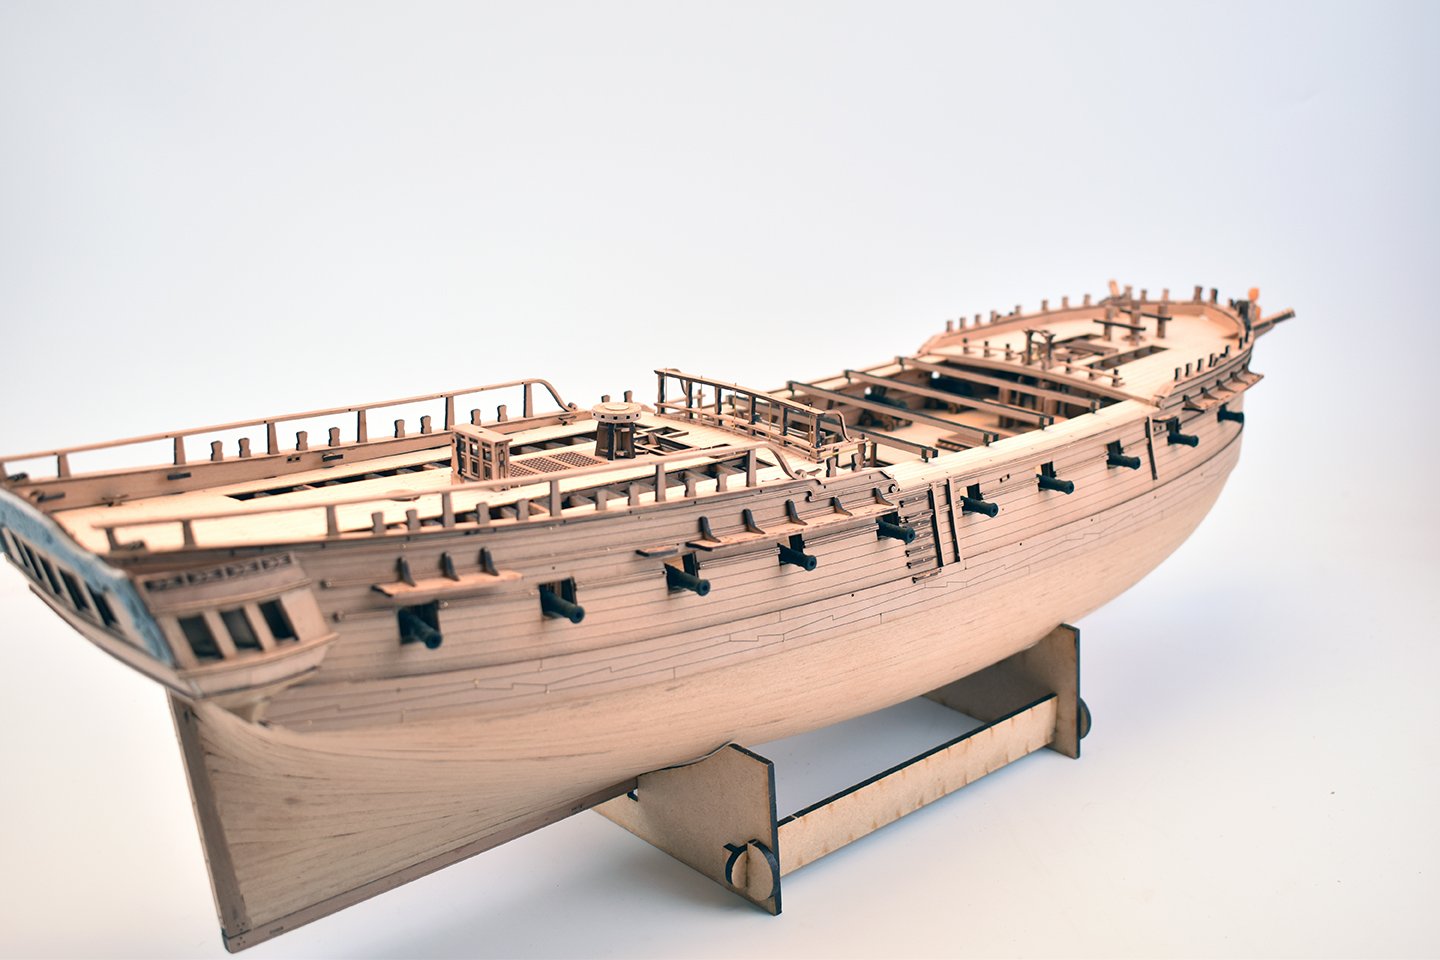
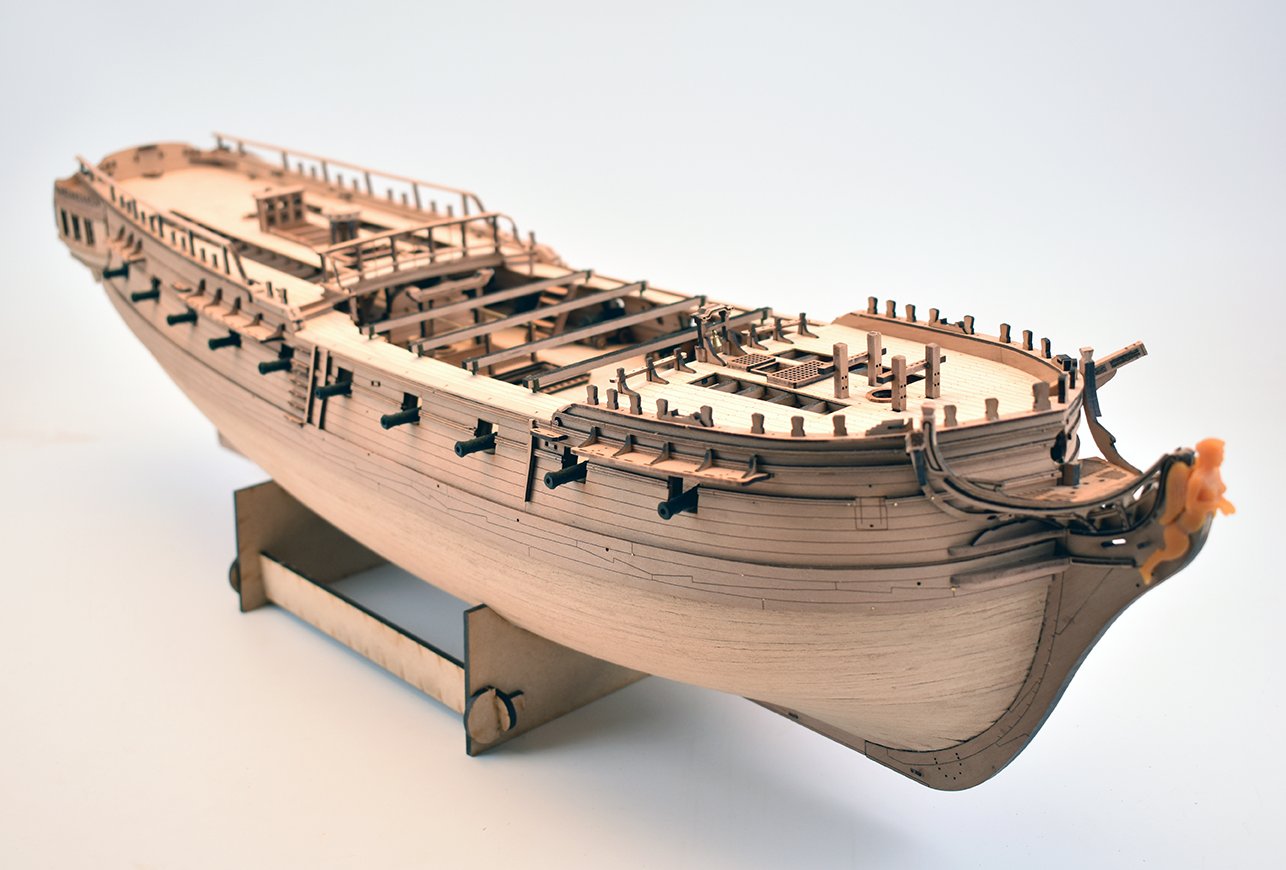
 OK, I have now finished with the 'pre-prototype' model, and have all the info I need. A lot of small changes have been made, so this model shows (many) mistakes that the prototype model will not have. What is shown is around 95% of the hull laser cut parts and the castings. For the boat beams, the U shaped brackets presented a problem. I was going to do them in PE, but wasn't happy with them, as they protrude above the gangway by around 1.5mm. So, these are now perfectly scaled 3-d printed parts, using a very tough resin, and are the kit versions. A very small detail, but happy with the result. The gangway has changed since these pics, with the widest part nearest the quarterdeck moved back a few mm, so the ladders are in between the cannon. The slots in the quarterdeck were moved back a lot further, in order to show the chequered deck pattern in the aft cabin. Ladders are cut in 0.6mm pear, and look much better, scale-wise. The catheads are made from 5 laser cut and engraved parts each, otherwise they would have looked pretty basic.. Al PE is done and sent off to Italy to be produced for the prototype model, and I now have the task of part numbering everything and doing a full parts list, followed by starting on the CAD drawings for plans...
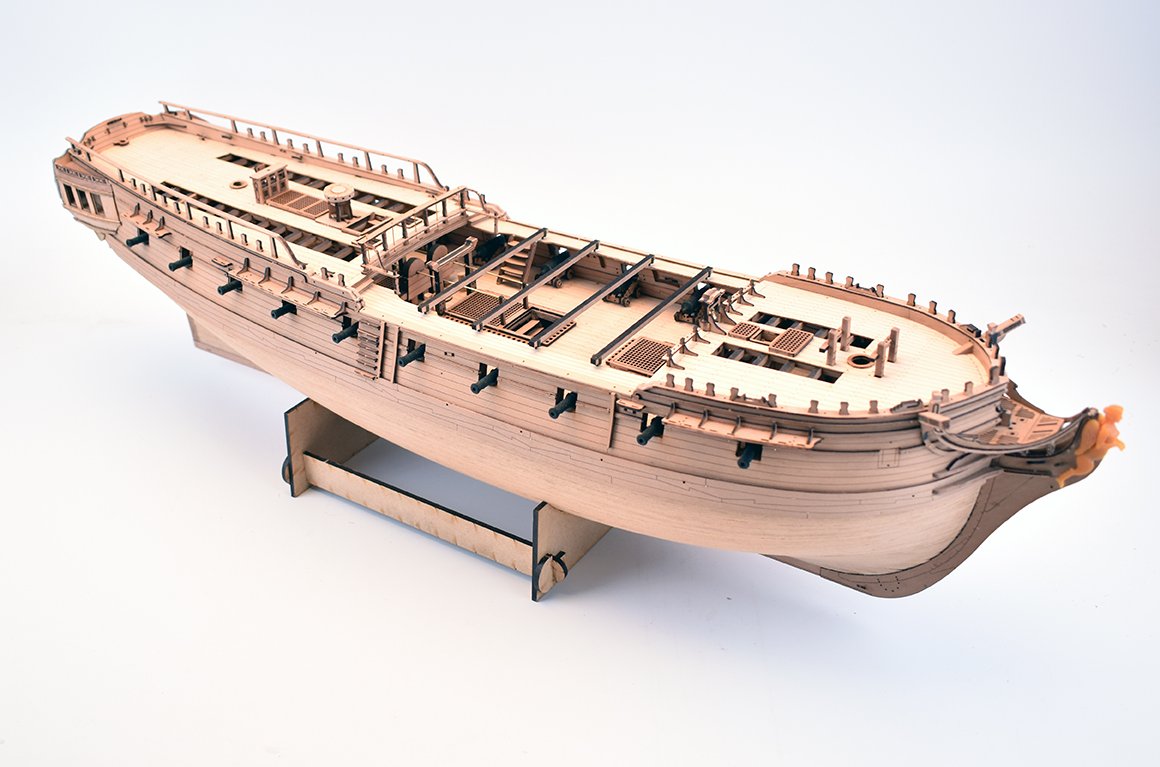


-
'The Terror' - BBC series Mar 2021
chris watton replied to Rik Thistle's topic in Nautical/Naval History
It was strange seeing reviews for this series, and giving the impression it is new. I have had this via my Amazon Prime account for almost two years! It is very good, though, if a little strange...- 8 replies
-
- 7
-

-
- John franklin
- 1845
- (and 2 more)
-
Just a quickie to say I have a 15% off sale for a couple of weeks for all kits, to help offset extra charges to some EU countries...

-
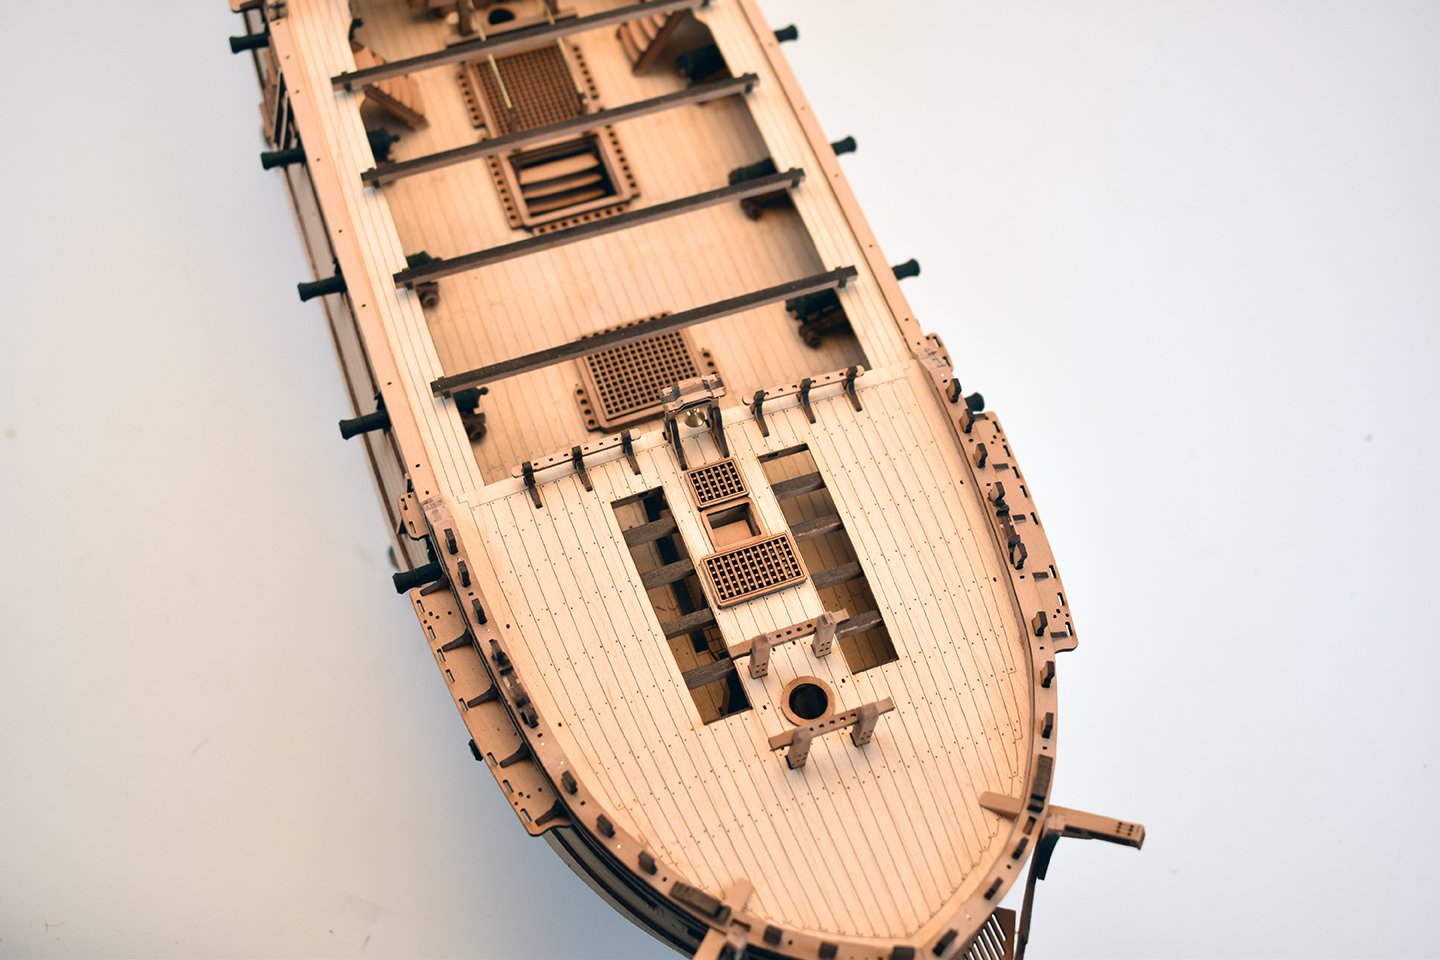
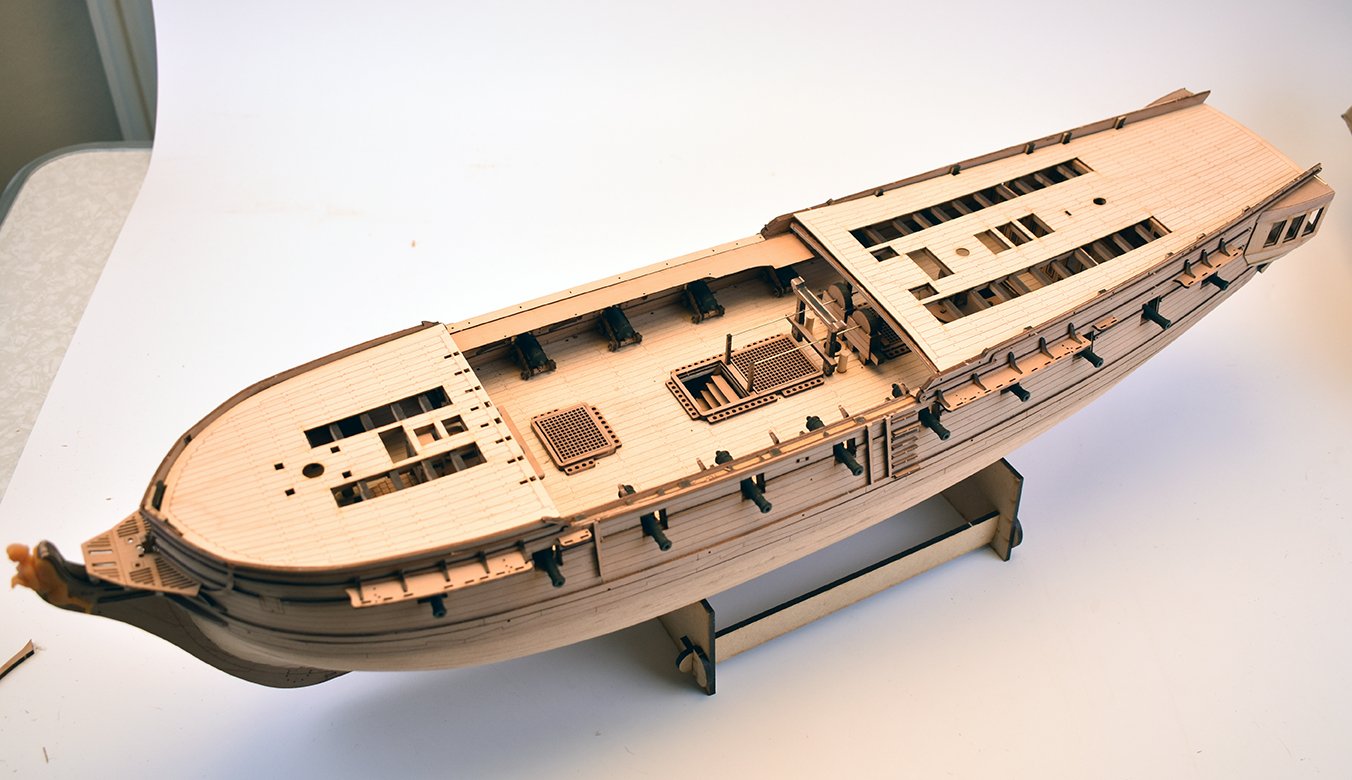
That's the idea! And yes, the upper deck beams are in their correct positions with correct spacing, according to the Sphinx Admiralty plans. These beams locate into slots on a pattern each side of the inner bulwarks, which in turn are slotted into the sides of the bulkheads, so there's zero chance of misalignment. No need to check every station with a rule... ETA - The gun deck bulkheads near the stern will have panelling detail on both sides, as they will be visible on the finished model. For the upper decks, my idea is to just use the laser engraved maple veneer, as this will give scale deck plank thickness. However, I may also include a 0.8mm ply version for those who wish to have a more substantial underlay for the maple veneer deck, or simply want to plank it with their own choice of wood.
-
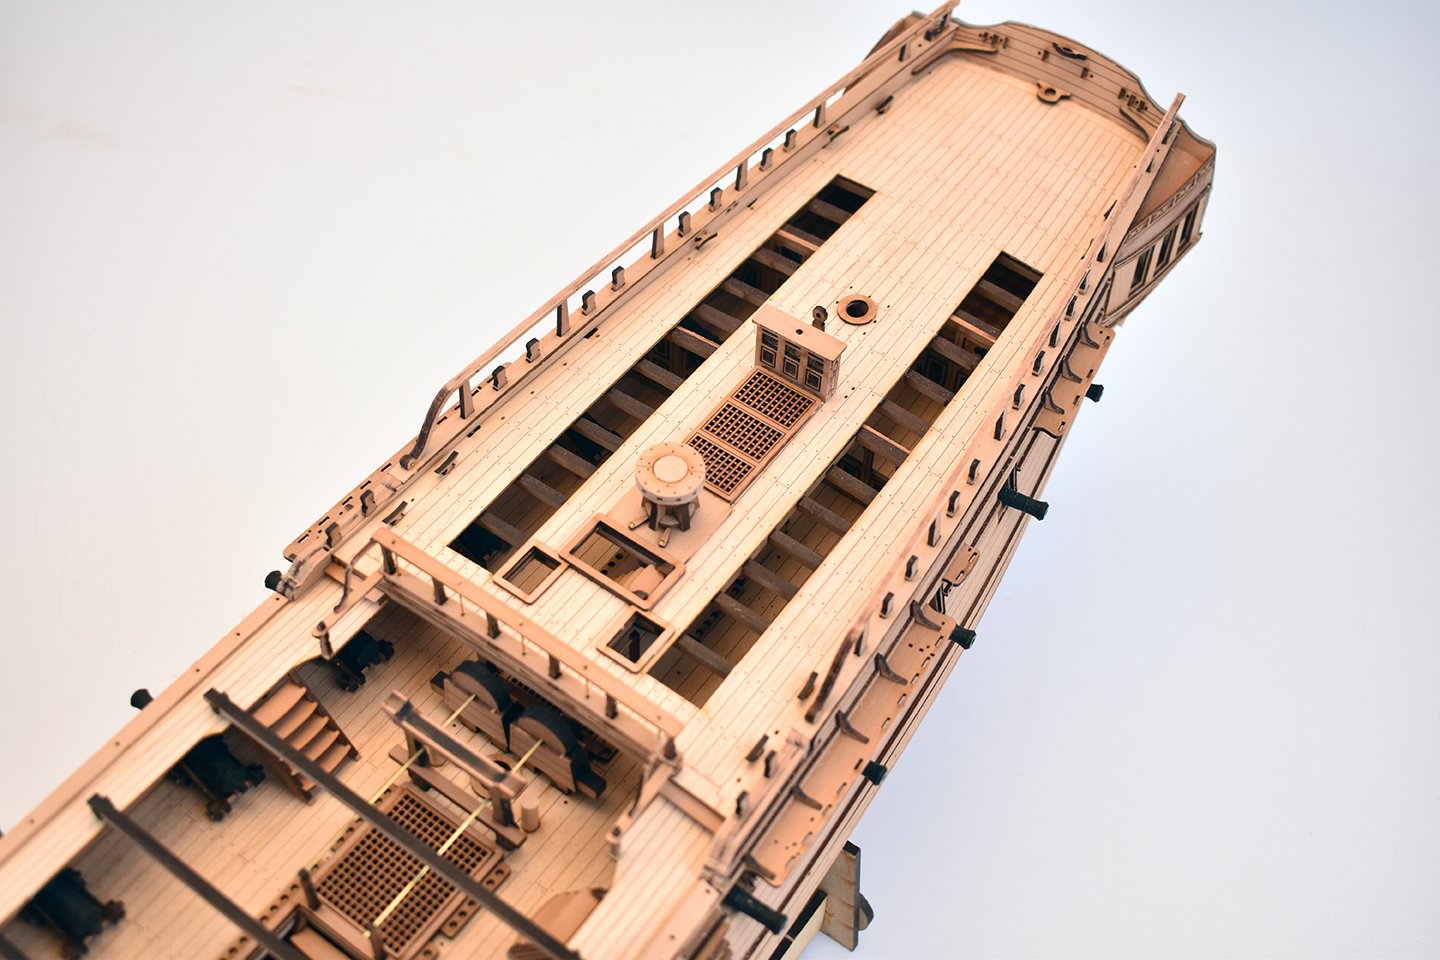
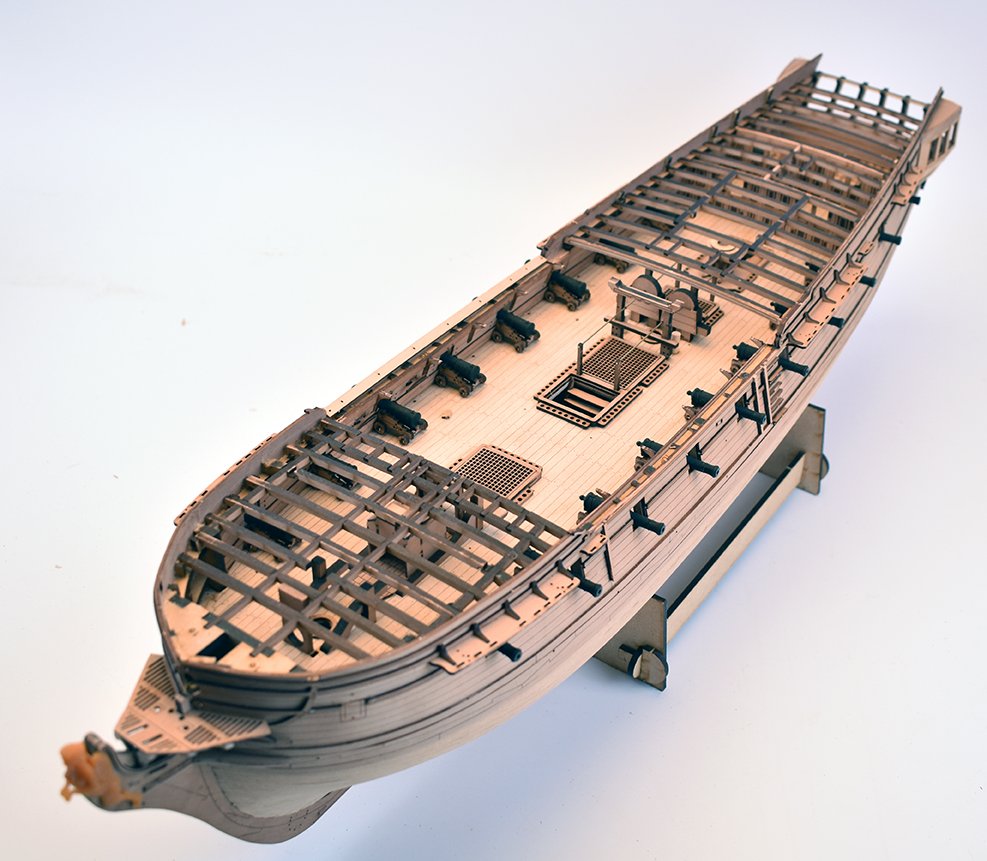
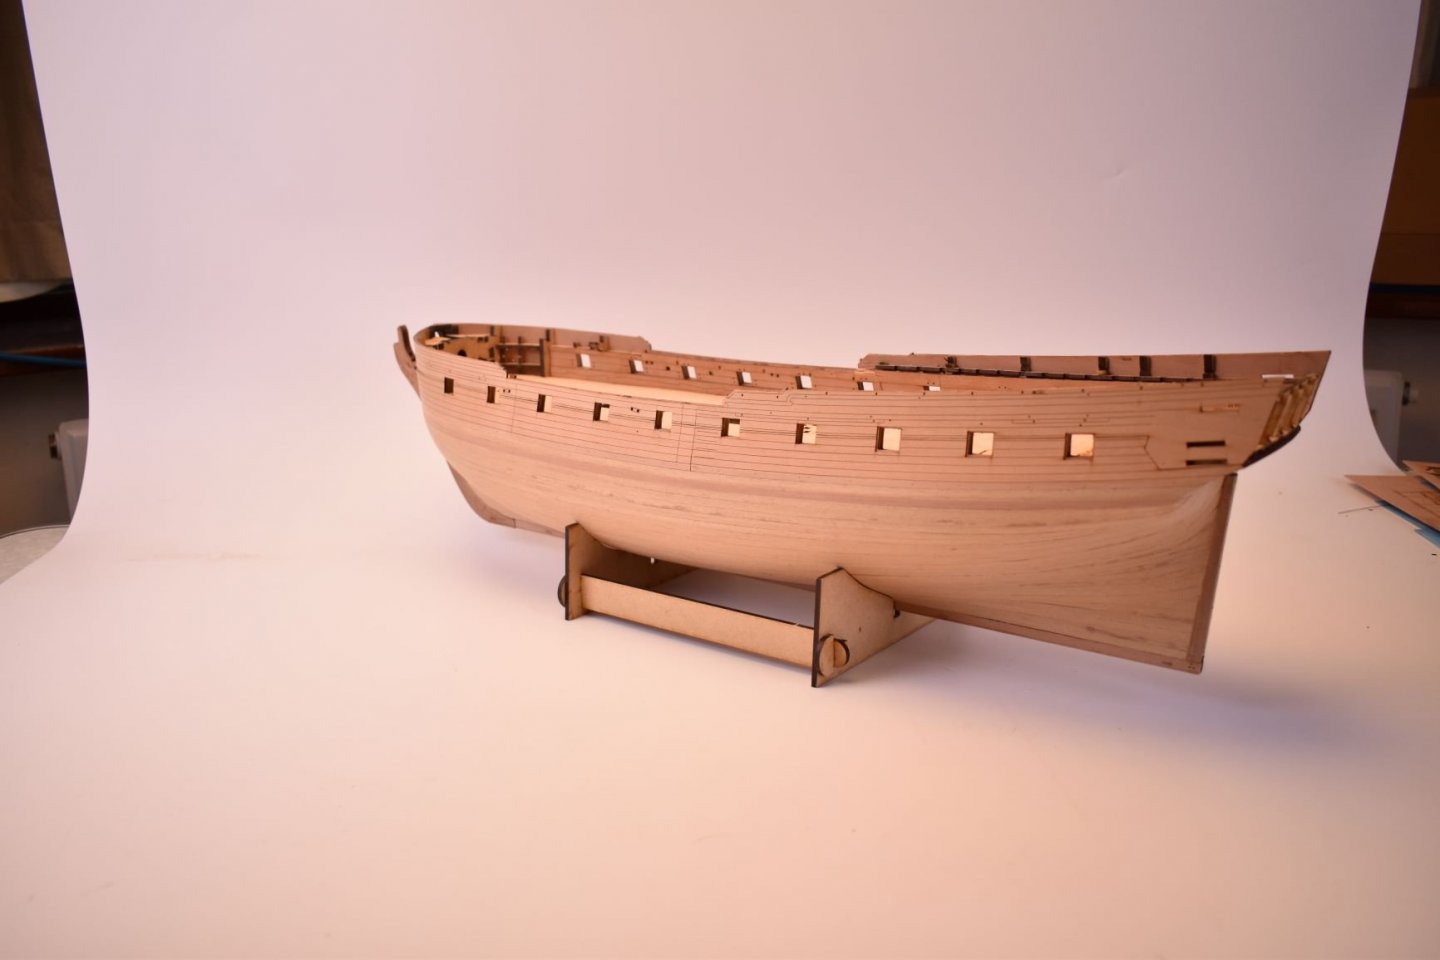
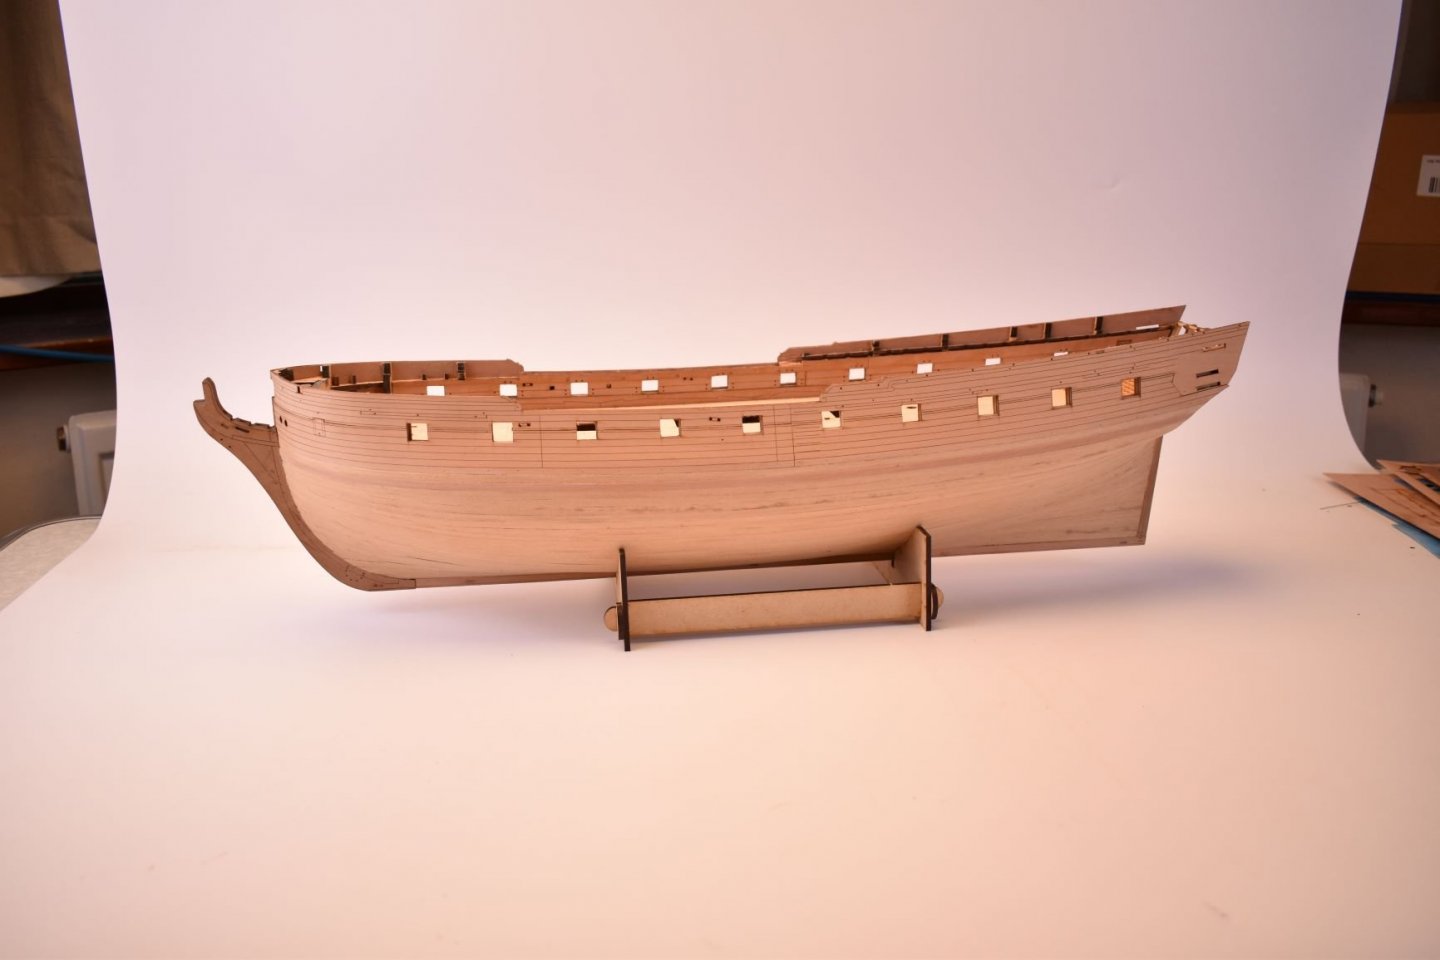
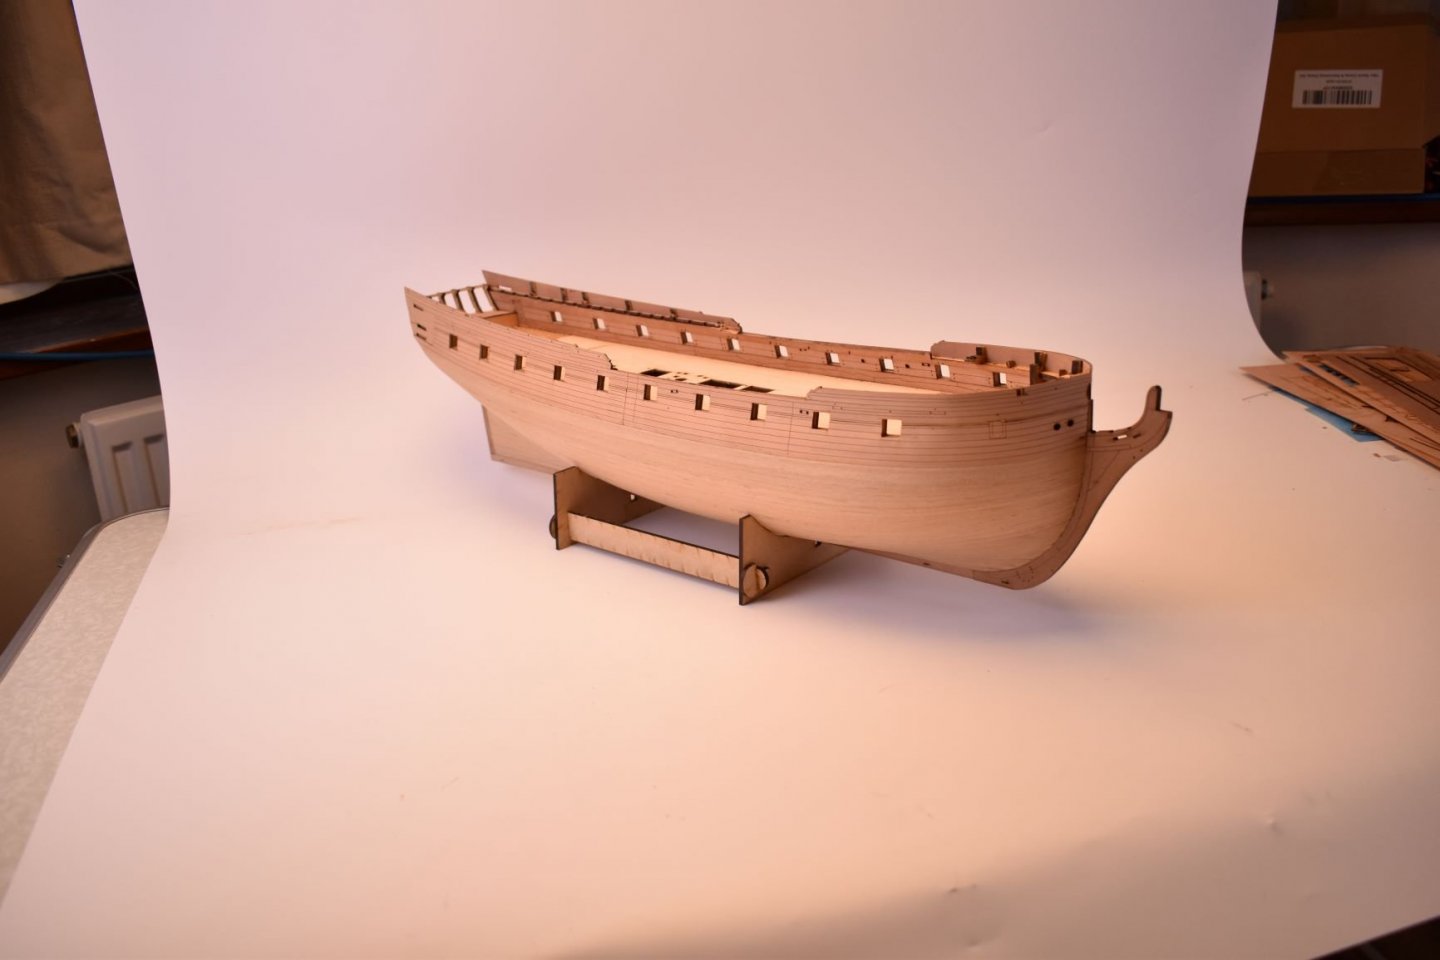
OK, just took a few pics of the pre-prototype model of Sphinx, so you can see where I am up to. Please bear in mind that this model is disposable, no paint, no varnish, it has been dropped a couple of times, as the starboard forecastle bulkhead can testify, and no PE as yet, which is why I have just use brass rod for the chain pump handles, just to make sure all holes for this align correctly. This is just to make sure designed parts fit, and if not, changed and replaced. Today I glued the forecastle and quarterdeck beams in place, and finished the final deck engraving designs for the forecastle. I think once upper decks are fixed, my only real design job is for the inner upper bulwarks.

-
Cheap and effective tools
chris watton replied to Ron B's topic in Modeling tools and Workshop Equipment
Stanley Knife, small rusty old plyers, pin vice and steel rule - set up for life! -
Cheers My broadband problems have zero effect on my work speed. What does have an effect is my full time day job. In the week, on work days, I work on the CAD designs before work, and on my days off, I work on the (pre) prototype model. A little slow, exacerbated by the sheer number and complexity of some parts compared to previous designs, but it's coming along. Oh, one more thing, I forgot to mention, I asked my wood supplier if I could have 0.8 x 4mm pear for Sphinx, plus some sheets in the same thickness, as I feel the 1mm is a little too thick, and the 0.8 would be easier to manipulate. So for Sphinx, the wood thickness for laser cut will be 0.6, 0.8, 1, 1.5, 2, 3 and 4mm. Planking will be 1x5mm limewood first planking and then 0.8x4mm pear for second planking, but the planking does not start until just below the main wale.
-
I am here, but I have no internet or phone line until at least next Tuesday. We bought a pay as you go wi-fi dongle thingy, so I could at least reply to emails and book all orders to be posted. I am still working long and hard on Sphinx. All photo etch designs will be complete within two weeks, and I am hoping the laser cut designs will be complete very soon. This is a lot more complex than the other kits, and requires a lot more development time.
-
3D drawings 18pdr at 1/64 scale
chris watton replied to Barbossa's topic in CAD and 3D Modelling/Drafting Plans with Software
In that case, this website may be of help: Frédéric LA HOCHE qui propose des éléments pour la construction de modèles réduits de bateaux en bois They do offer a full suite of Venus cannon, but I note they are in 72nd scale, unfortunately. -
3D drawings 18pdr at 1/64 scale
chris watton replied to Barbossa's topic in CAD and 3D Modelling/Drafting Plans with Software
Are they long or short 18 pounders? I ask because many 38 gun frigates had the short barrels (8 foot, 41.8mm in 64th), yet 36 gun frigates were usually equipped with the longer type (9 foot, 46.6mm). Also, what is the launch date of the model you are making? If is it around 1795 or later, you probably will need the Blomefield pattern (with the ring located on the cascabel), which is something that isn't done on commercial turned brass cannon. -
There should be a Hachette version out there somewhere, as I did this 10 years ago, with the movie blueprints. Odd looking thing...
-
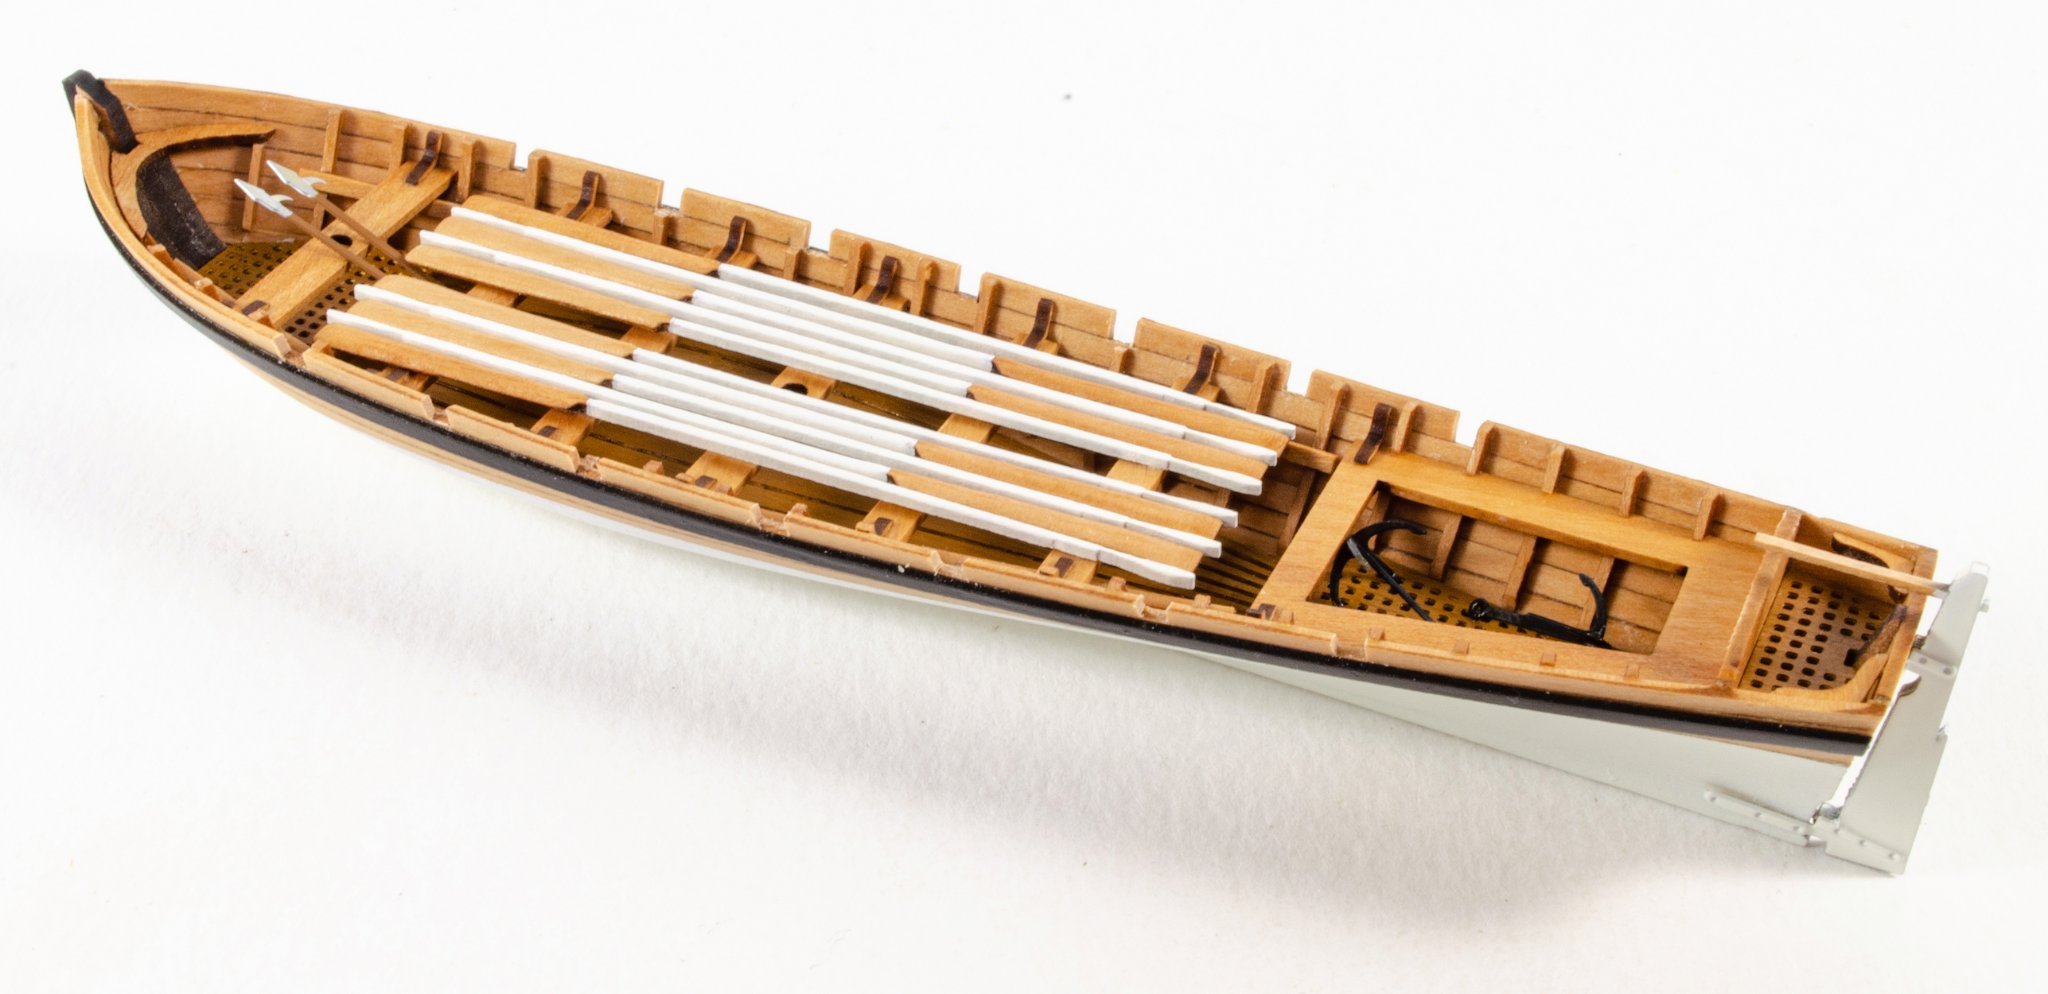
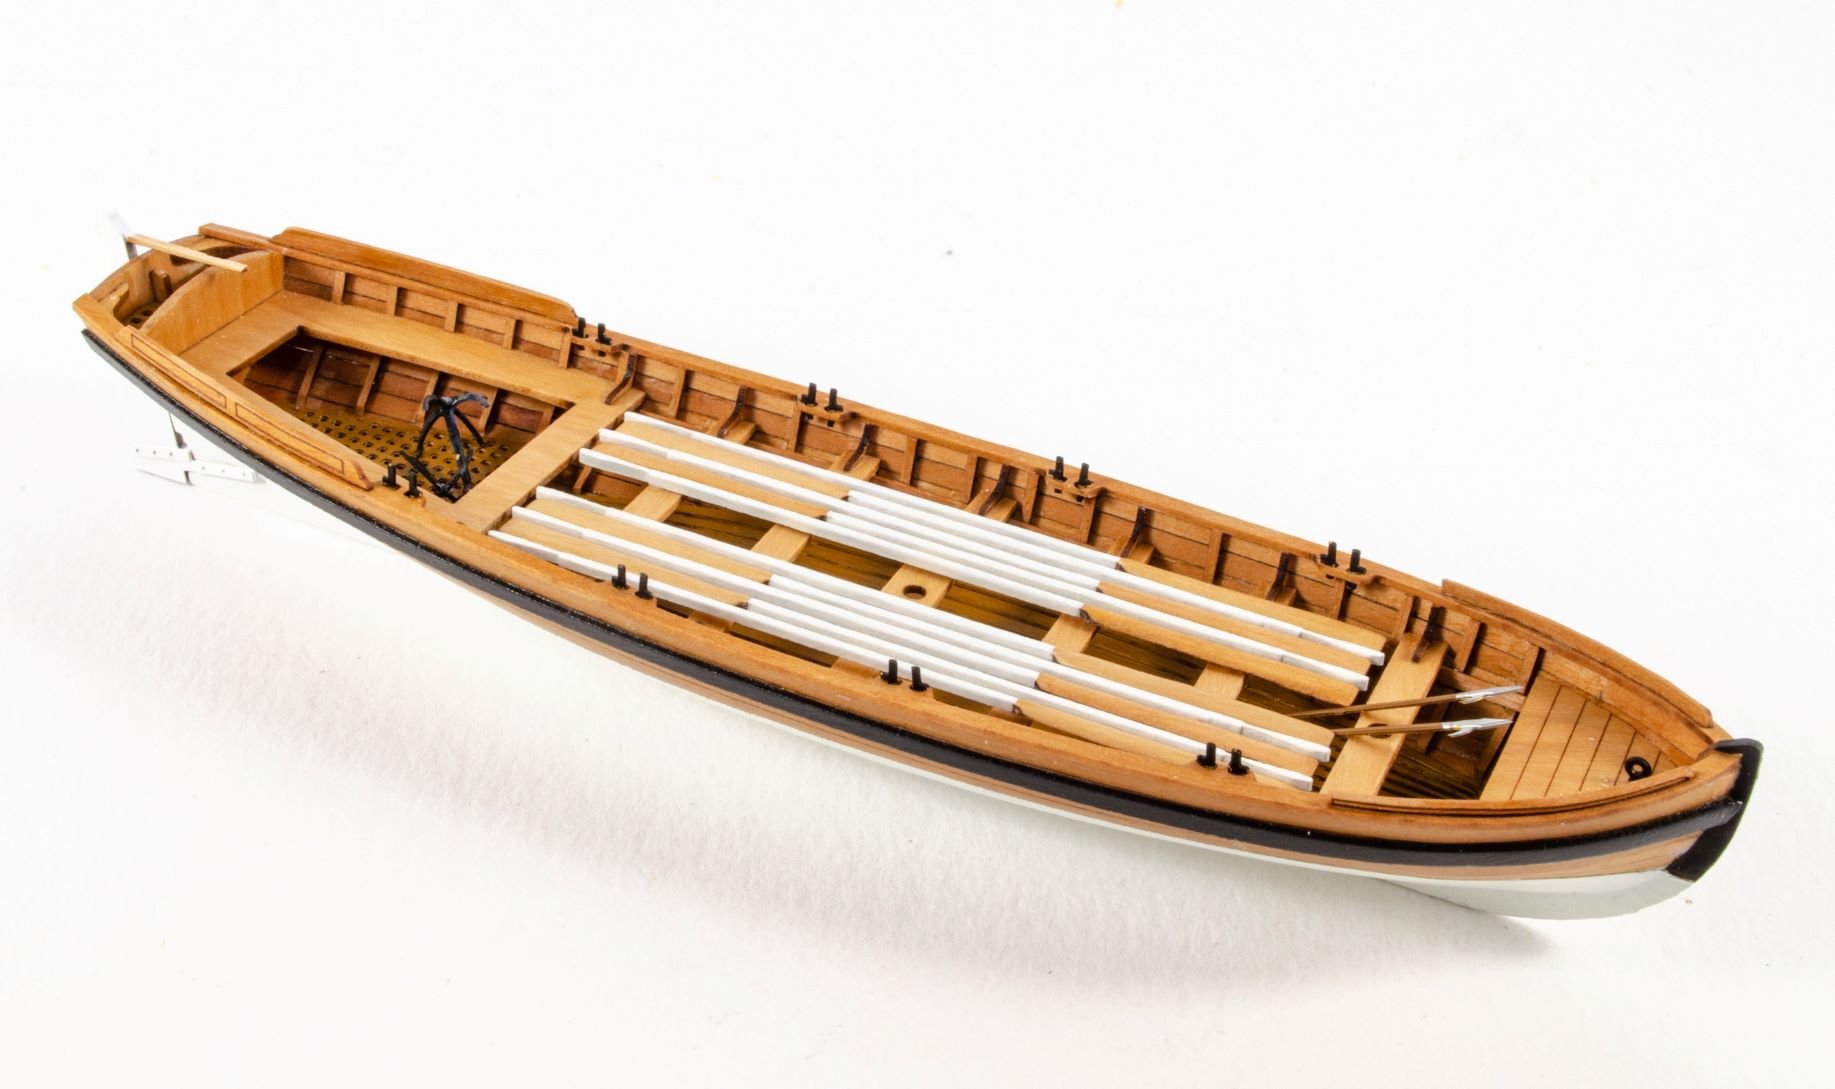
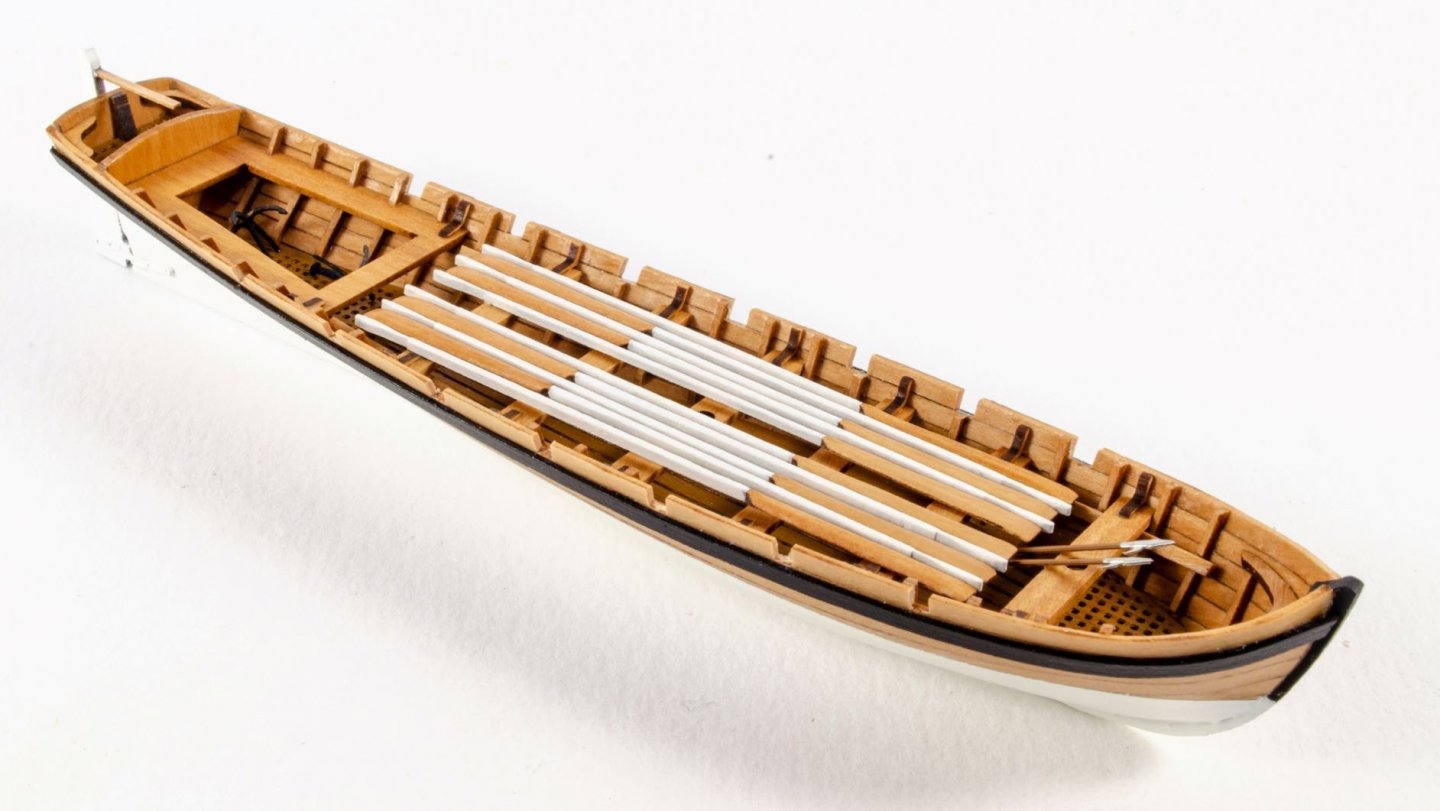
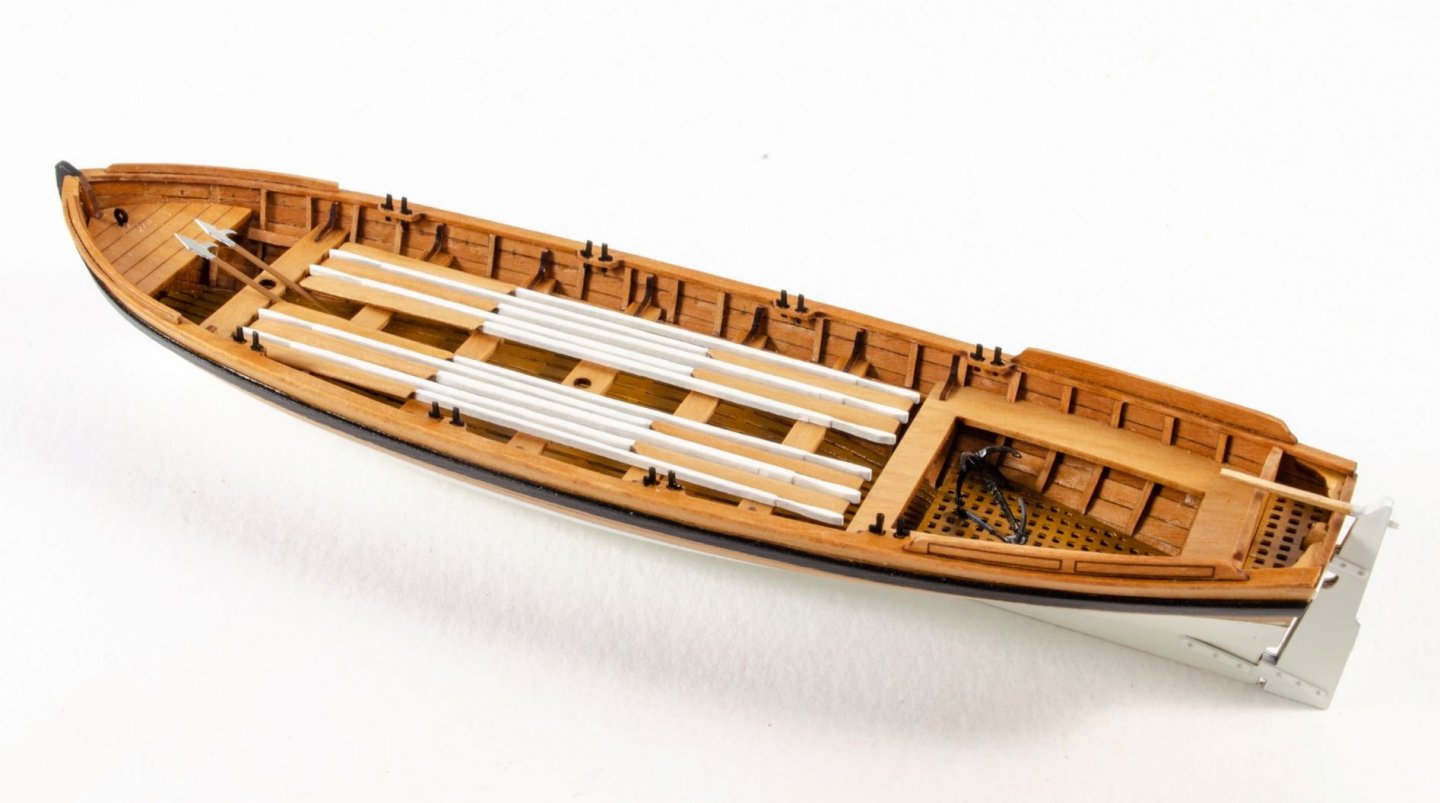
Cheers! Stock for the new boats is very low (34 foot launch sold out) until the new sets of photo etched brass arrives, hopefully in the next week or two. Two more are almost ready, both 32 footers, a barge and pinnace, around 151mm long. Again, thanks to James Hatch.


-
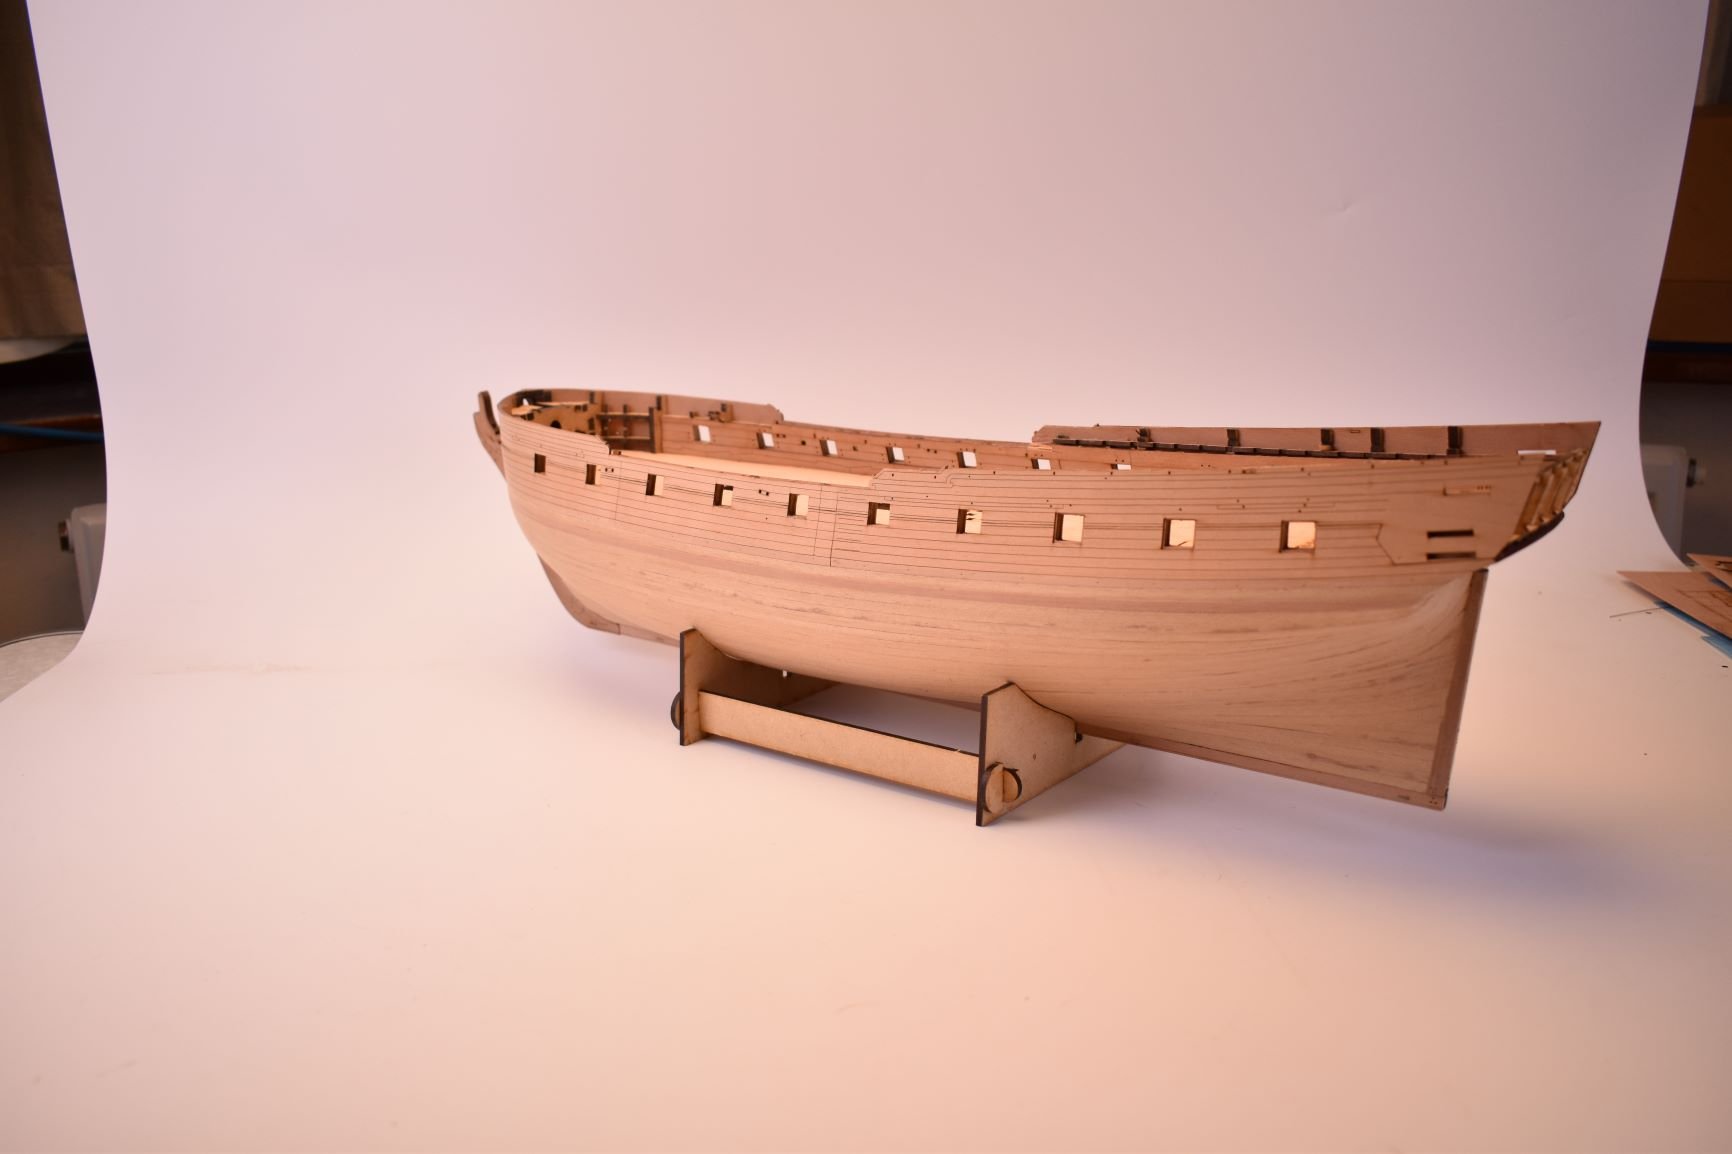
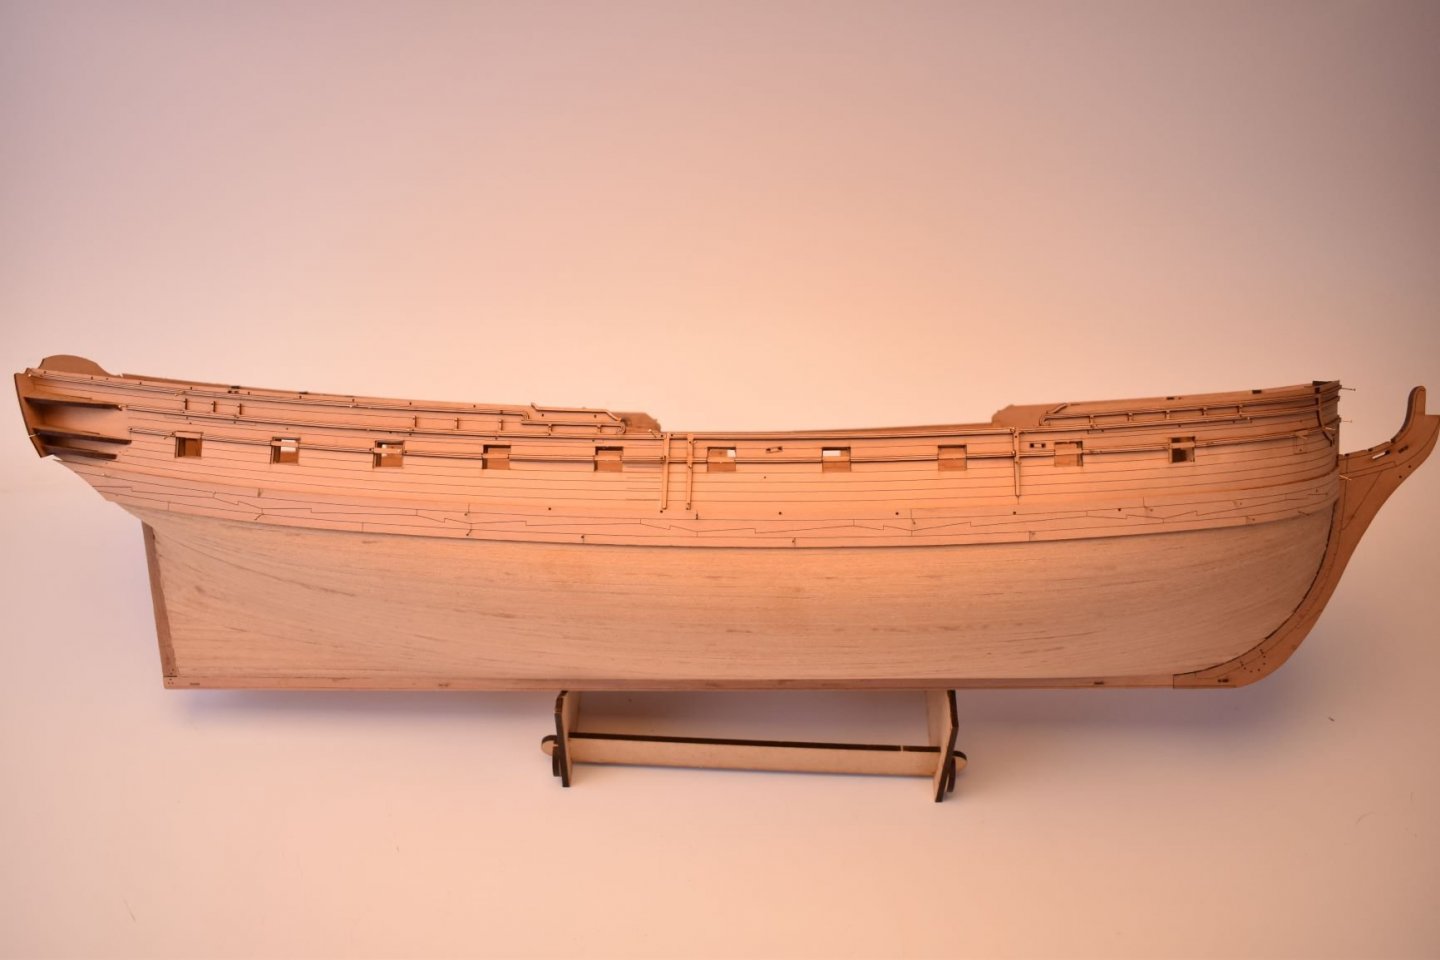
Overall length will be around 785mm (with bowsprit), hull length will be around 610mm
-
I 'think' the black is the general lines and the red is internal/fittings. Some plans also have green, which usually indicates further changes to future classes of the same vessel.
-
I have no idea what TFFM is? For the Sphinx designs, I have copies of the original Admiralty plans (lines and decks). To fill in the gaps, I have used the Marshall paintings and the Pandora book, as this book even has a picture of Sphinx in it, mentioning the classes were very much alike, albeit Pandora being a 24 gun ship. Regarding the etched plank lines, as I mentioned, a lot of the Sphinx is painted, wales are black (so the lines will be very subtle), upper sides are blue with frieze work (if you want to add it), and inner bulwarks and a lot of fittings will be red. The parts are etched on one side only, so you do have a choice to use the unetched side - or just use planking strip. This is what I like about wooden ship models, you can do almost anything you like with it.
-
The wale planking (along with a lot more info) I got from AOTS Pandora, a contemporary of Sphinx albeit slightly larger. The main wale will be painted, with only faint lines shown, so won't look as fussy.
-
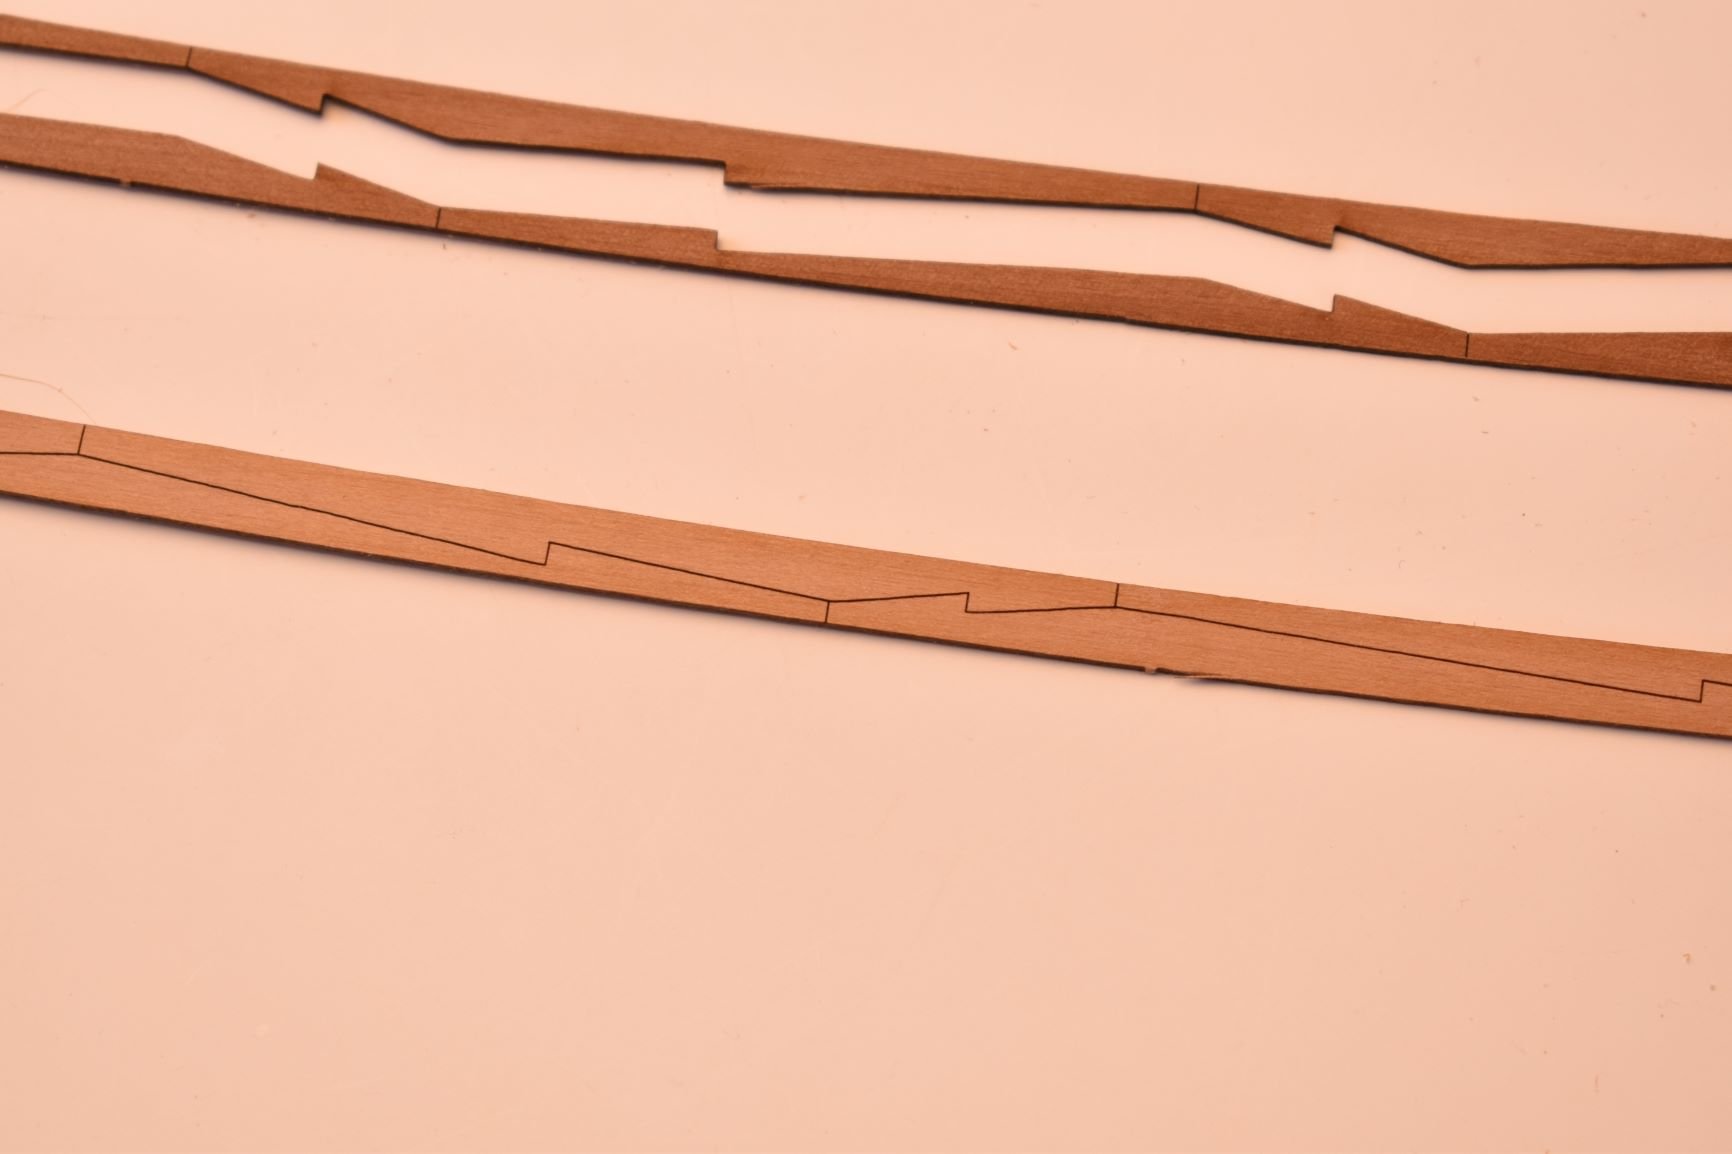
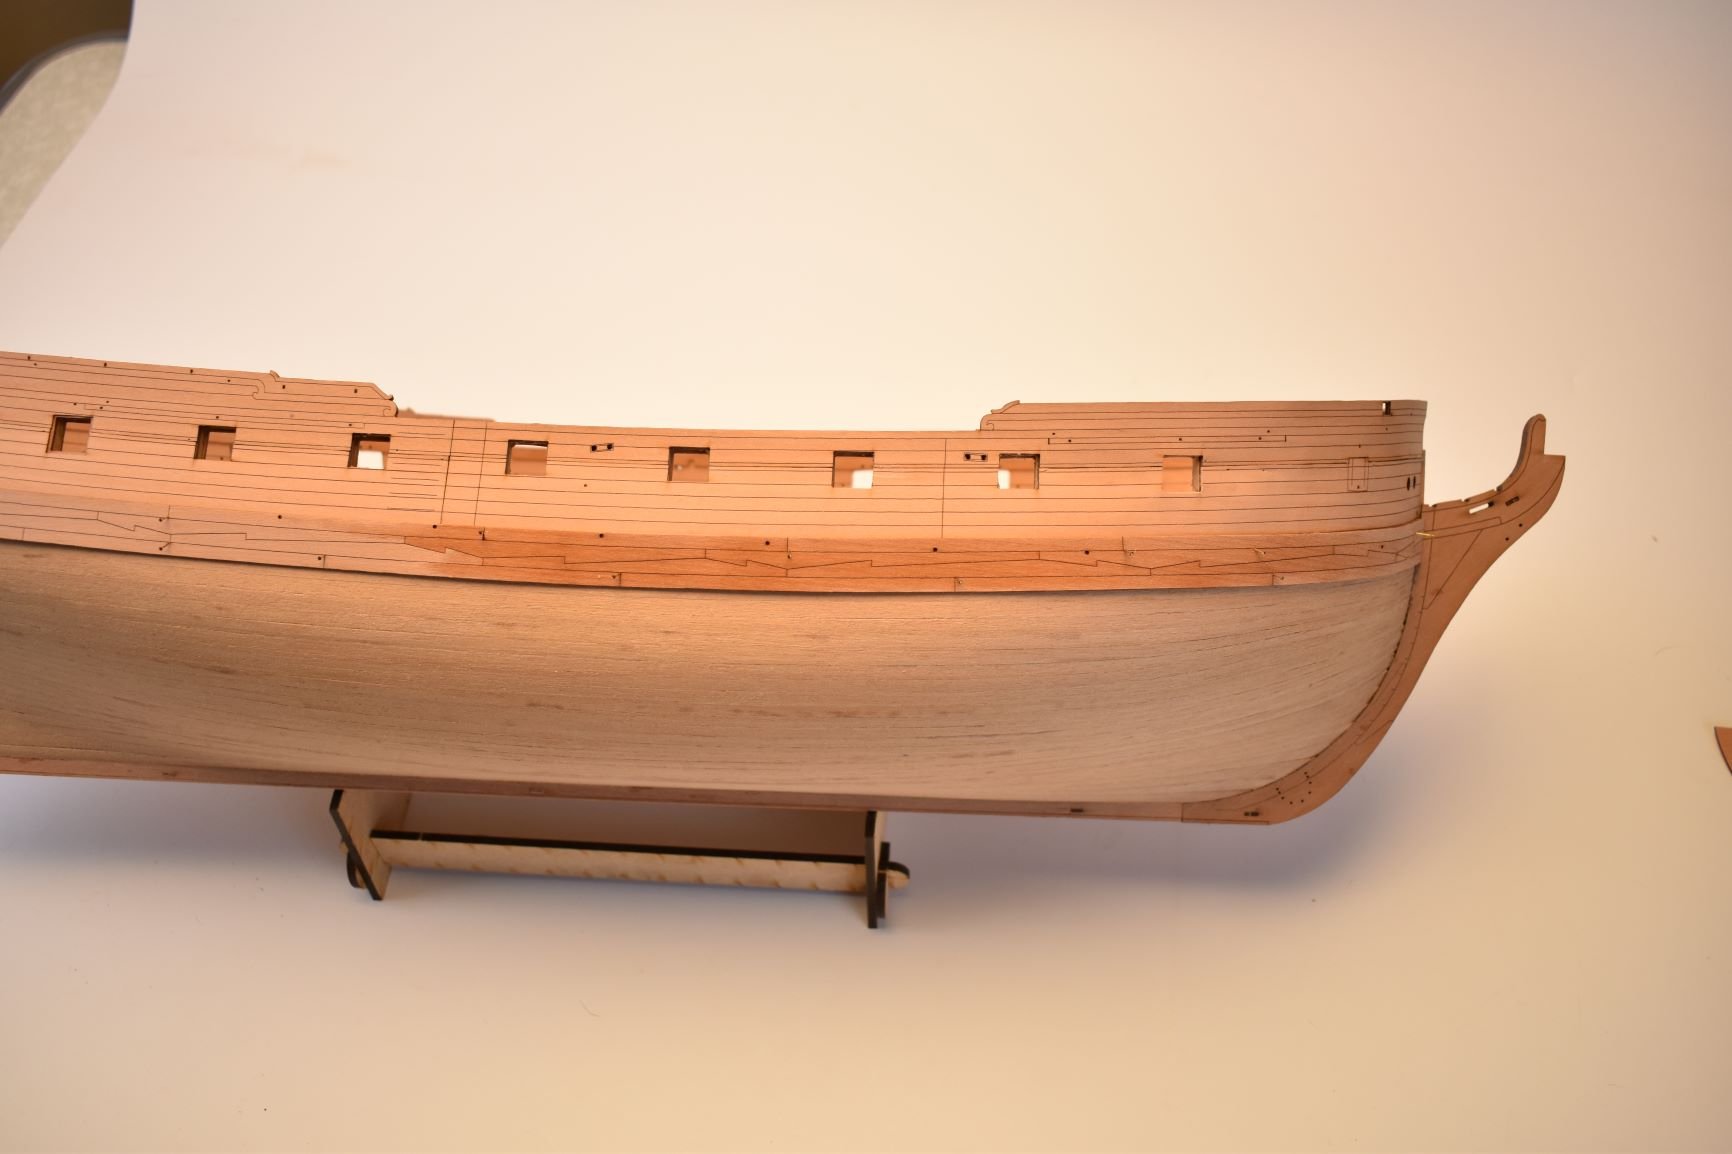
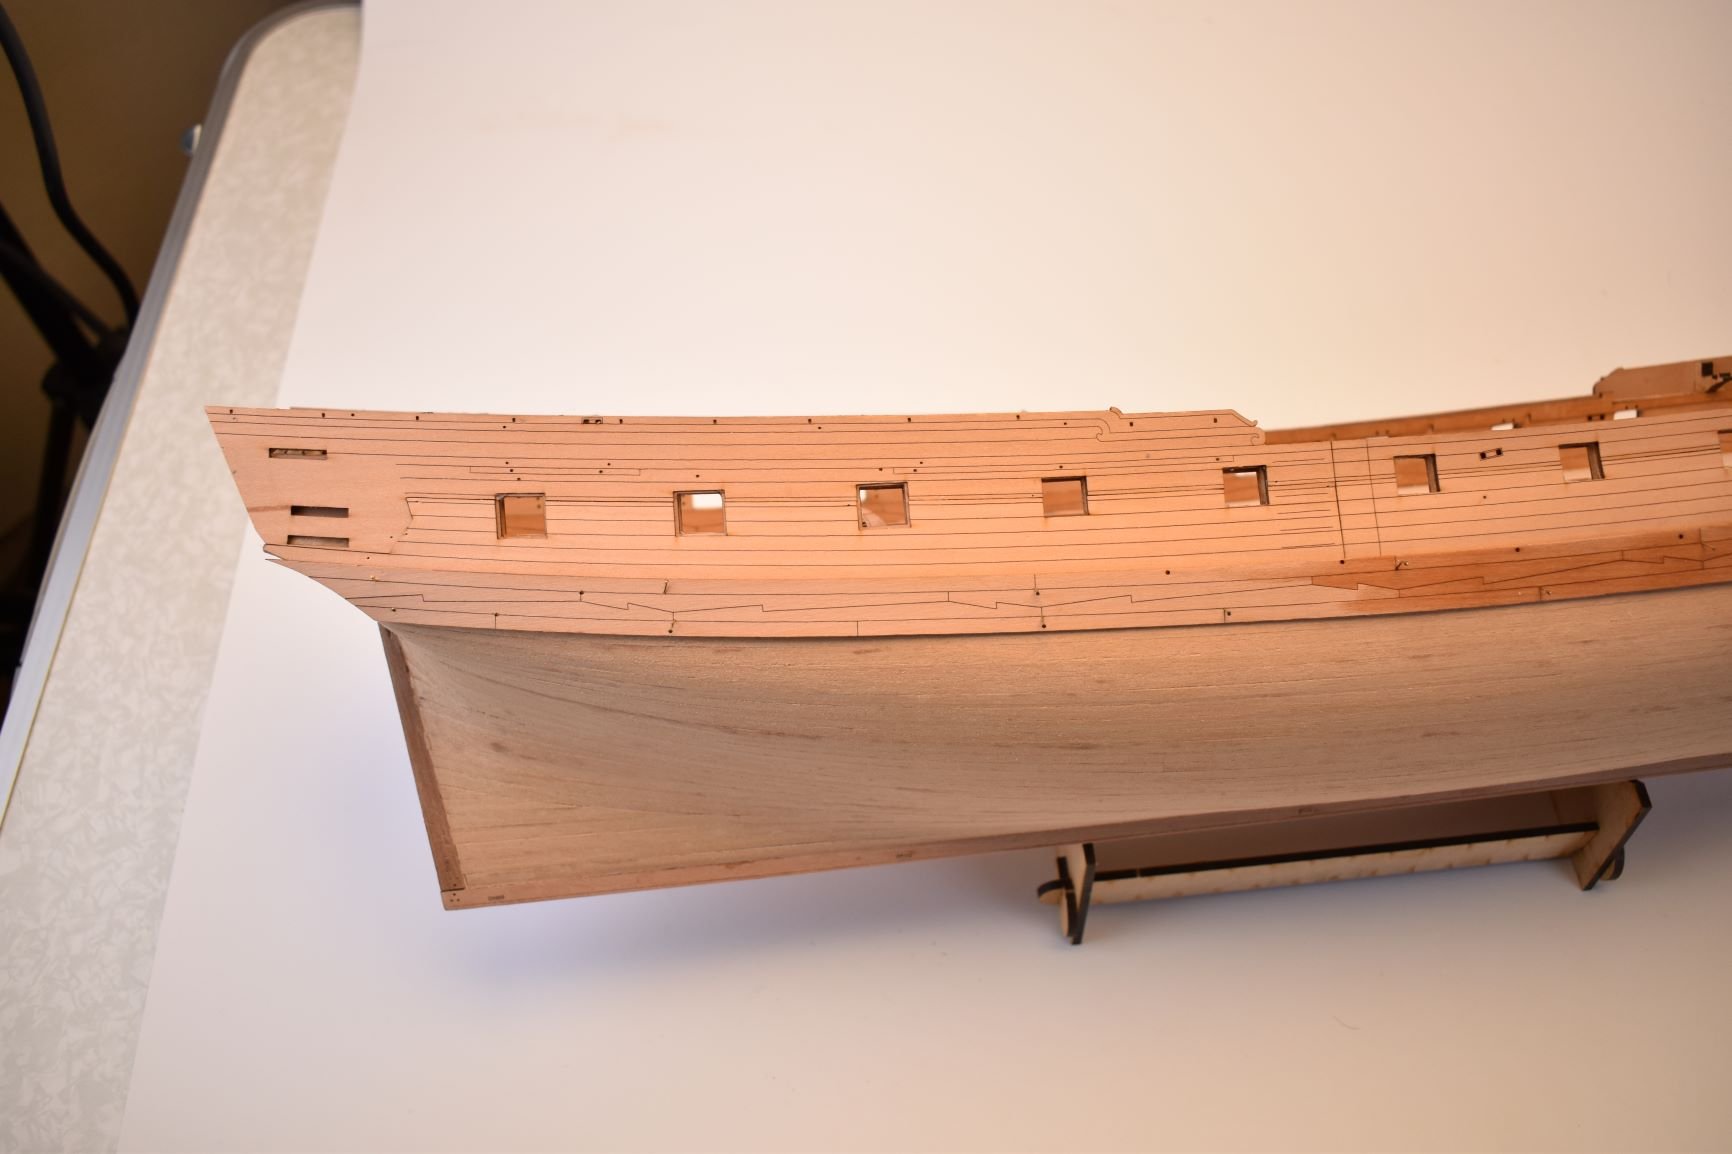
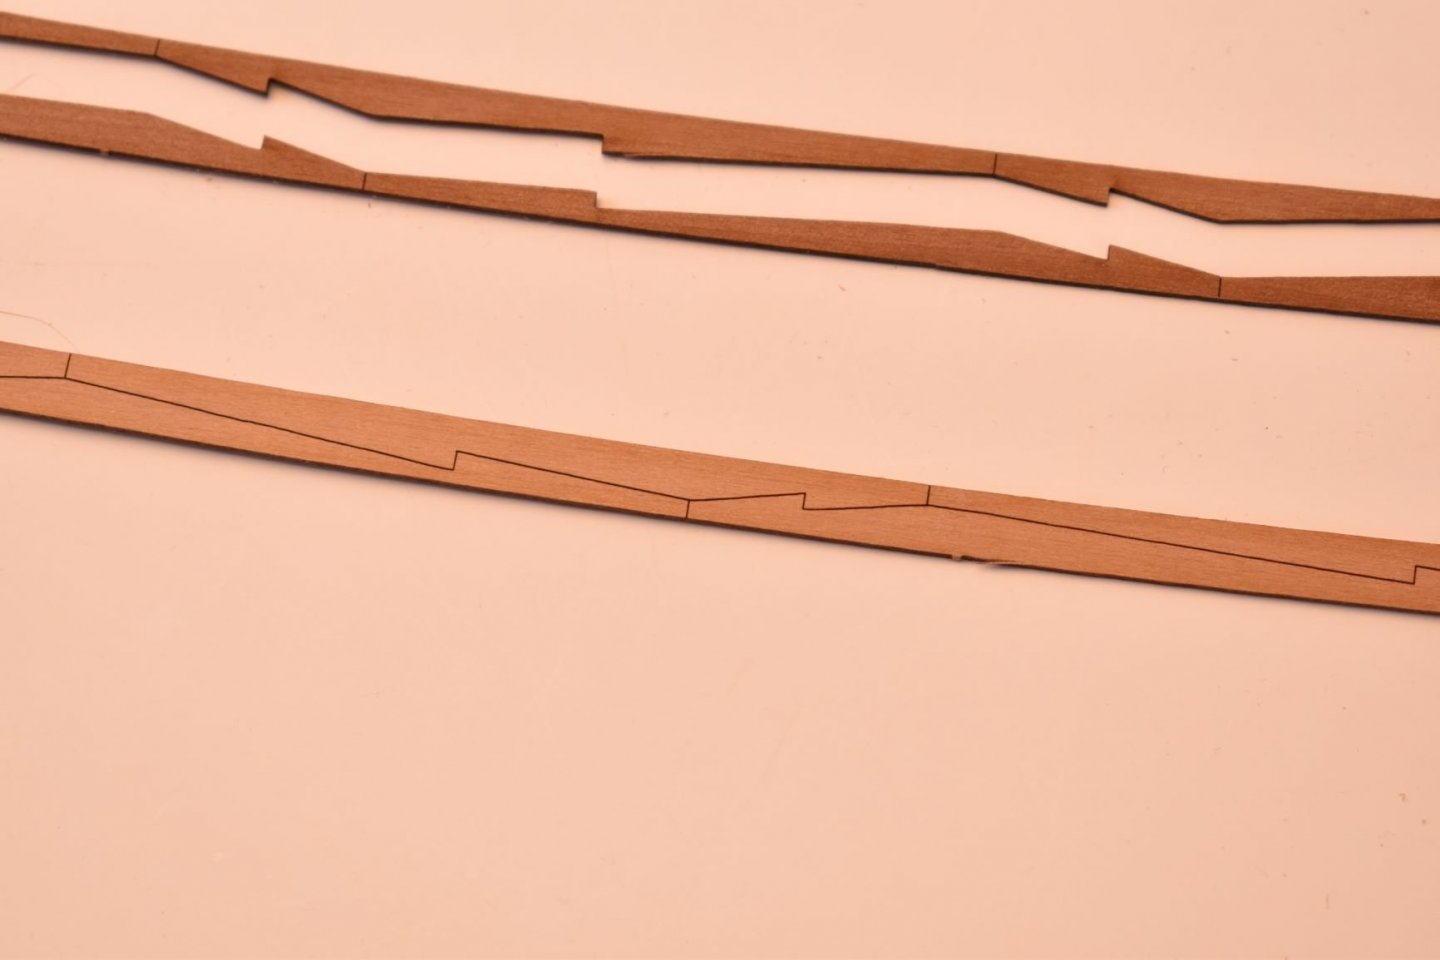
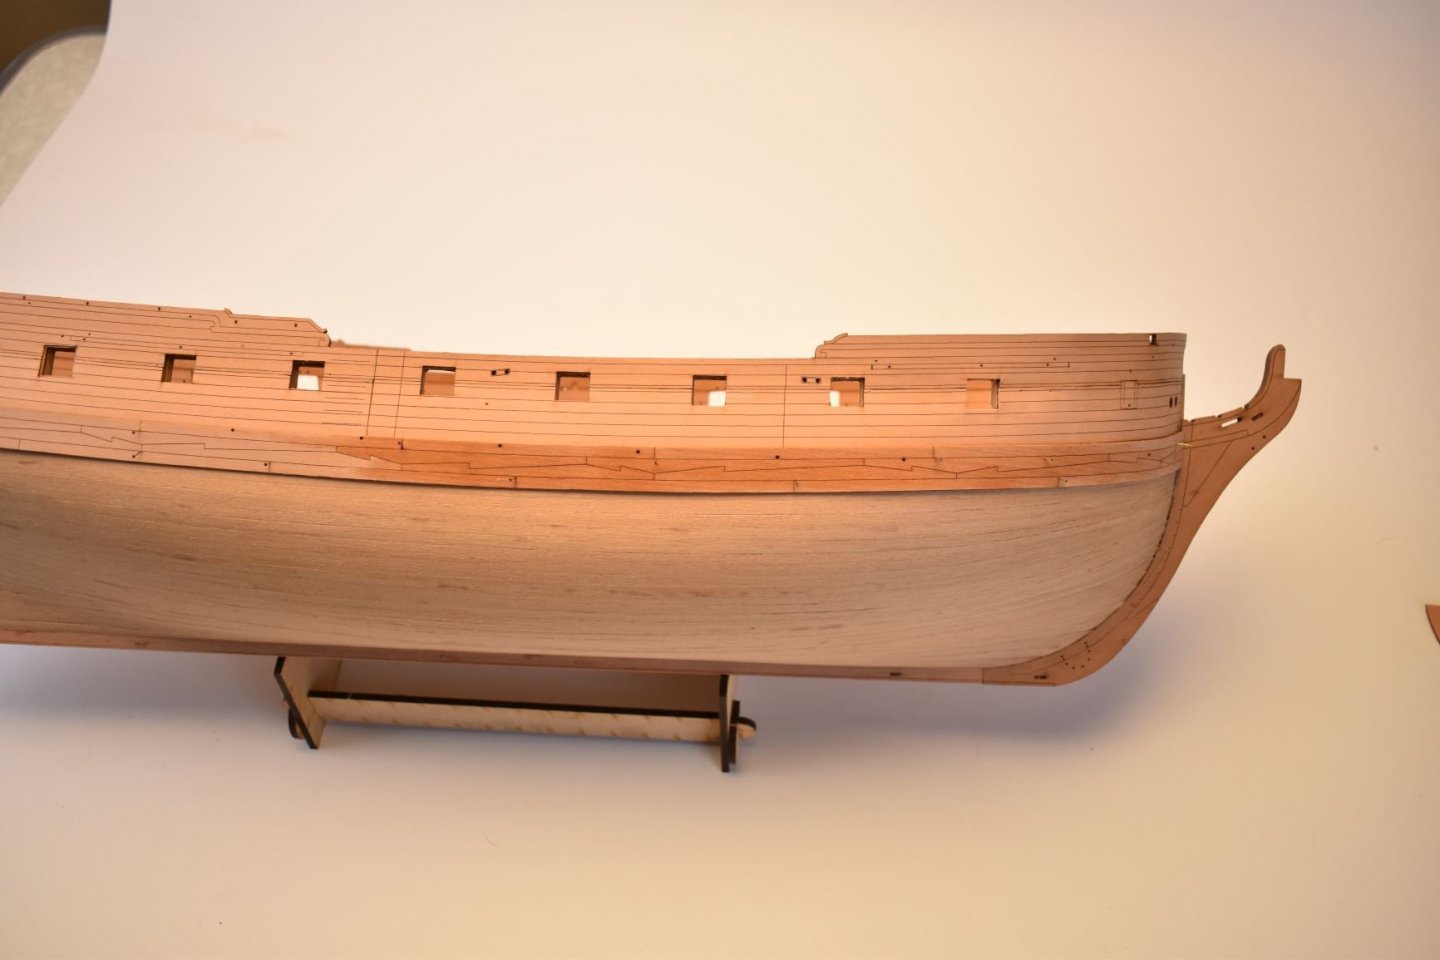
Hi Spyglass I don't know what to tell you, other than I am so used to it I hardly think about the process. I do one plank per side; that is, I lay the plank to see where it needs tapering, mark the spot, wet a little and cut, usually I taper to around half the plank width. No point trying to be too technical and it would never work planking with just a Stanley Knife, steel rule and rusty old plyers to help bending. Although using the Tanganyika, I can just manipulate the required curves with my fingers, as it's much more pliable than pear. Once those planks are glued in place (left and right sides), I start the process again until complete. Worked on wales today, and tried a few ways of offering these in the kit. In the end, my first hunch won the day, but not before I messed up the port side by (stupidly) gluing the three part wale in place. I decided to lay it as if I was a novice, with no bevelling to take into account the curves of the hull, as I know some will do this. The result wasn't pretty. A one piece wale however, is as fool proof as I can make it, and hugged the hull a lot better than I thought it would - so the single piece wale will be the kit version. Also attached is a photo of a 4 piece wale (not tried, as I know I didn't like it - get it wrong when gluing, and it would look awful). The starboard one piece wale is just pinned in place.

-
See above, that hull is the Sphinx. Still in design stage.
-
May keep it for a while, always hard to throw them away..
-
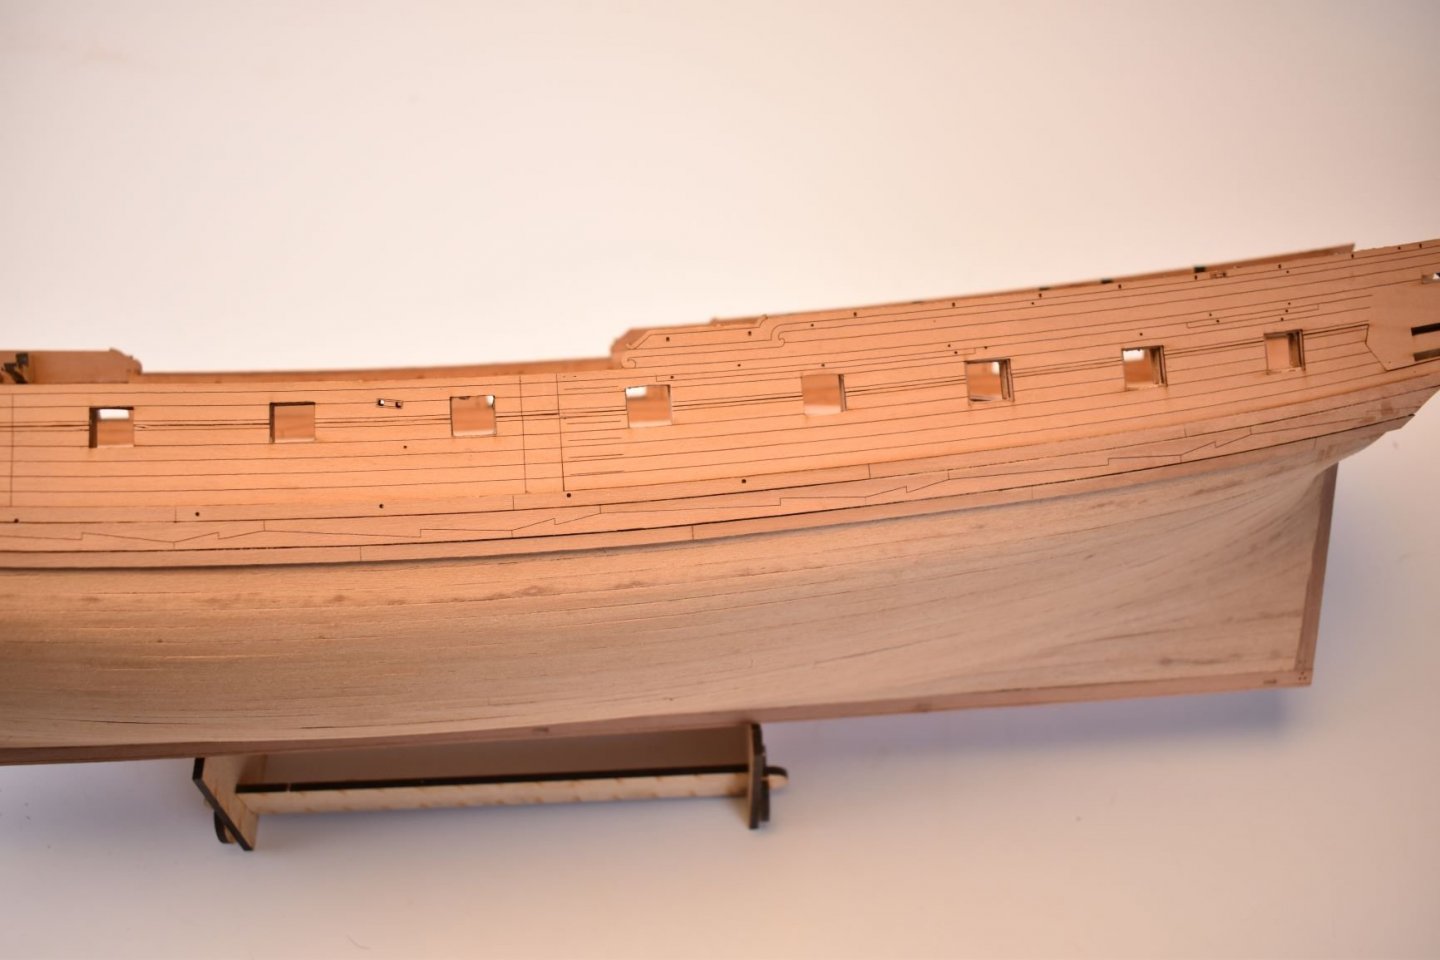
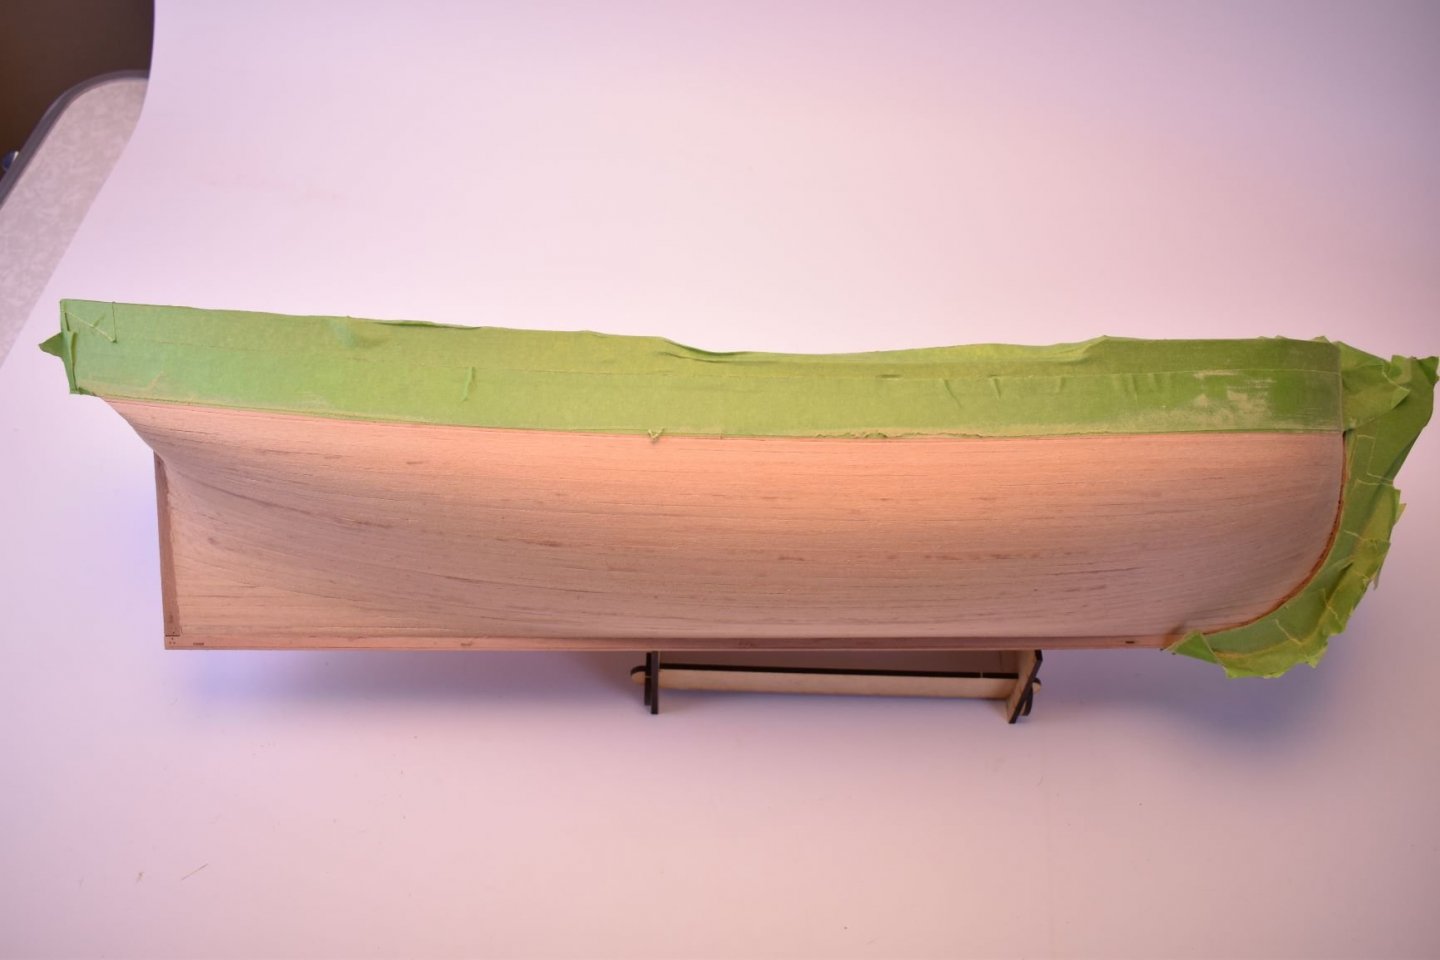
That Tanganyika was much easier to use, but a lot of the planks have this mottled effect in them, making it look like those 'mottled' paint schemes I see on WW2 German aircraft in the North African theatre... One thing I must stress, it is very important to mask off the finished engraved upper hull before sanding...
-
Have decided to wait for this instead: Pen and Sword Books: Historic Ship Models of the Seventeenth and Eighteenth Centuries - Hardback (pen-and-sword.co.uk)
-
OK, I never meant to plank the whole Sphinx hull, as this model will be thrown away once all the info I need has been taken from it. But couldn't help myself. this is a very quick planking job (a day), using scrap 1x4 Tanganyika instead of wasting the pear on a disposable hull - no filling, just a quick sand so I have a smooth (ish) surface for checking all parts that are to be fixed to it. I am happy with the hull lines, nice shape to plank, too.
-
Well, I did ask them if I could buy three of their books, and arrange a UPS pick up myself to collect the books. Frustratingly, this is the reply: 'No, sorry. I talked with Bob, and he said that the warehouse can only handle US mail. I'm very sorry, but we can't help you on the shipping charges.' Not sure why, to be absolutely honest. Oh well, I did ask, and I am not paying for postal service that's seemingly broken right now. ( I wanted the Rogers Collection of Ship Models at the US Naval Academy The Third Rates, Volume II and the 2 Speedwell volumes)
-
I would very much like 'Rogers Collection of Ship Models at the US Naval Academy' I may contact them and ask if I could use my shipping courier to pick it up and ship to me, rather than using standard post..