chris watton
-
Posts
2,334 -
Joined
-
Last visited
Content Type
Profiles
Forums
Gallery
Events
Everything posted by chris watton
-
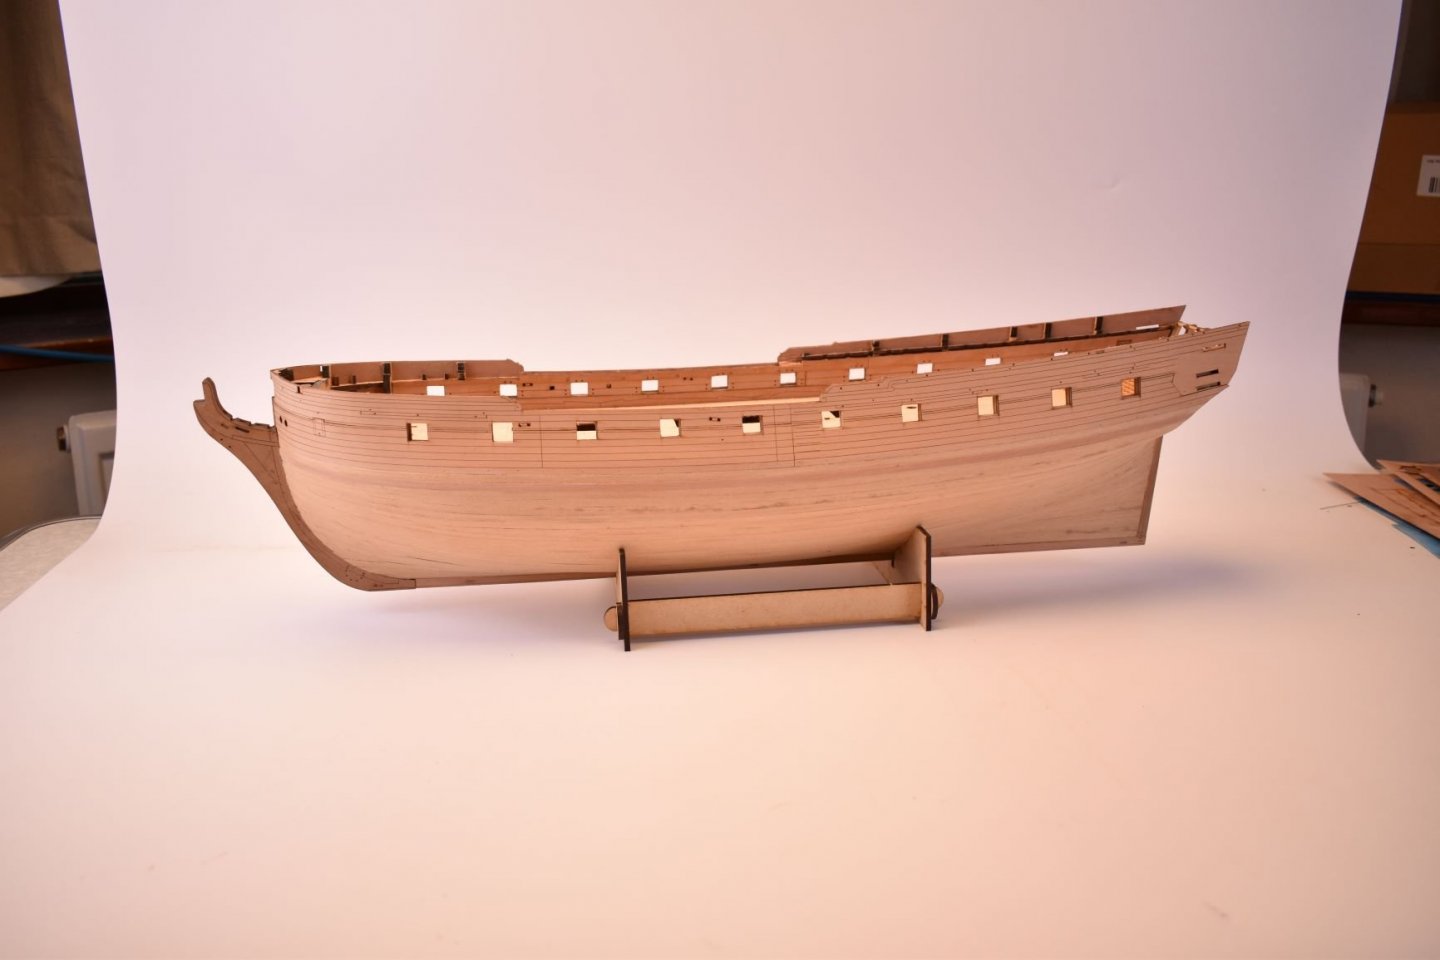
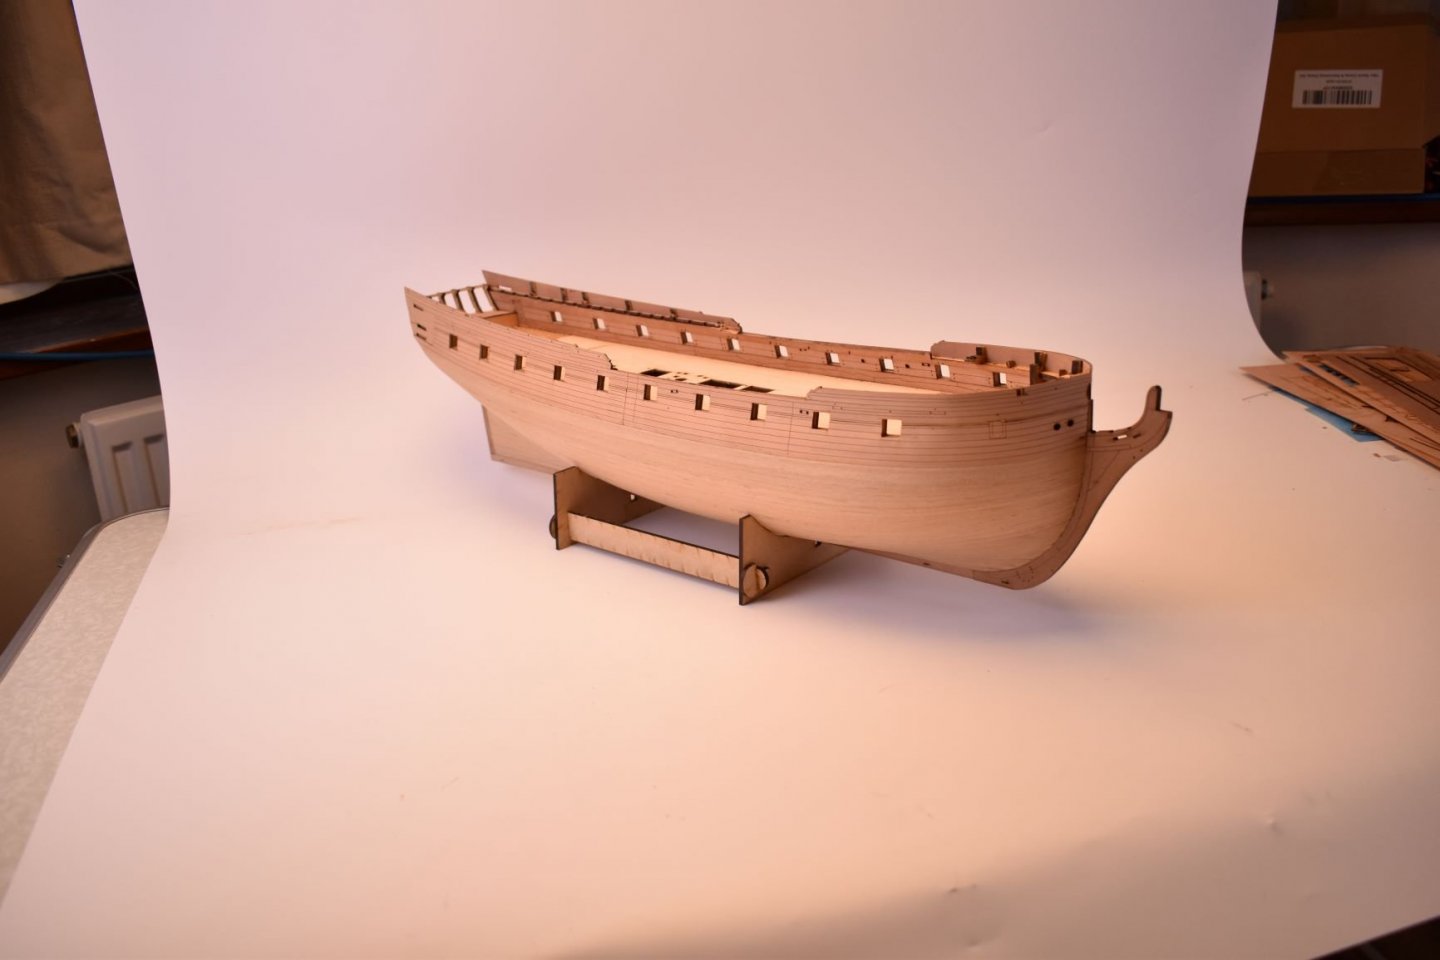
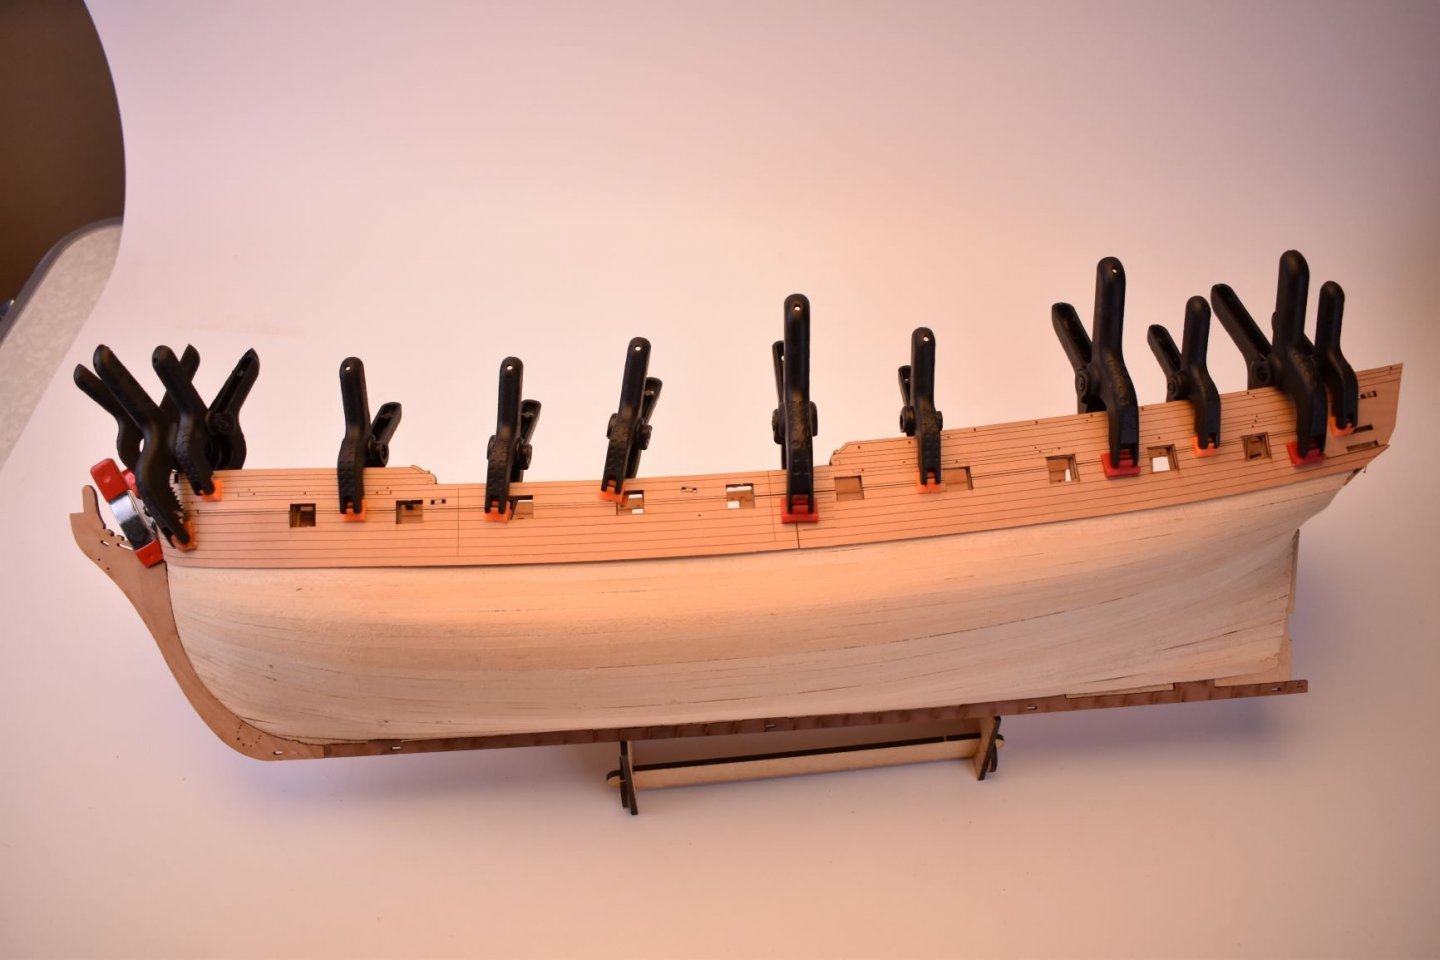
 OK, I never meant to plank the whole Sphinx hull, as this model will be thrown away once all the info I need has been taken from it. But couldn't help myself. this is a very quick planking job (a day), using scrap 1x4 Tanganyika instead of wasting the pear on a disposable hull - no filling, just a quick sand so I have a smooth (ish) surface for checking all parts that are to be fixed to it. I am happy with the hull lines, nice shape to plank, too.
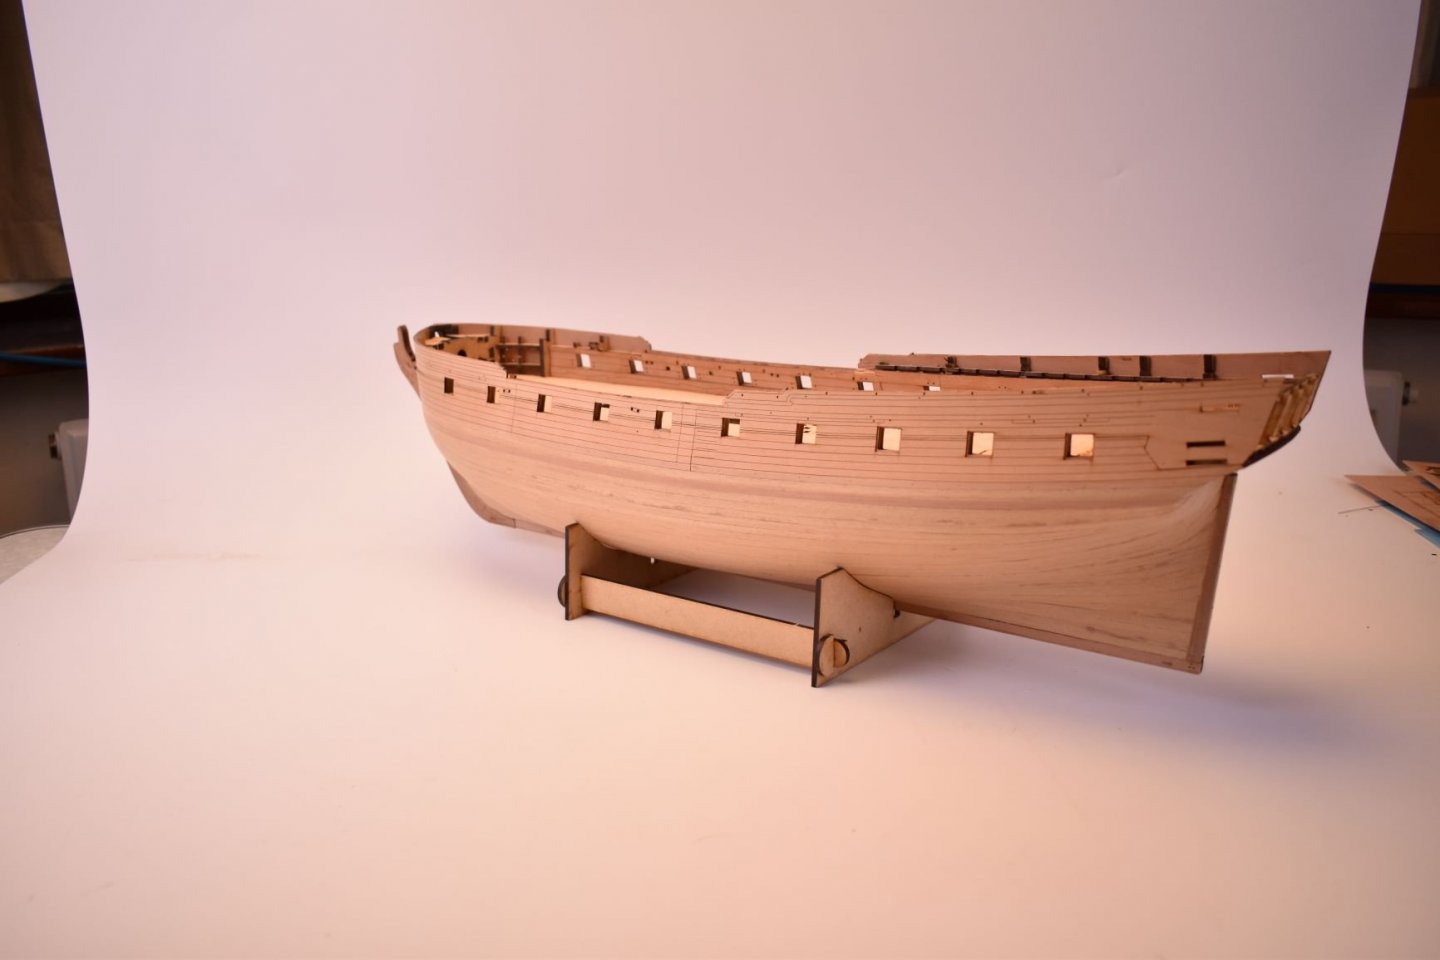
-
Well, I did ask them if I could buy three of their books, and arrange a UPS pick up myself to collect the books. Frustratingly, this is the reply: 'No, sorry. I talked with Bob, and he said that the warehouse can only handle US mail. I'm very sorry, but we can't help you on the shipping charges.' Not sure why, to be absolutely honest. Oh well, I did ask, and I am not paying for postal service that's seemingly broken right now. ( I wanted the Rogers Collection of Ship Models at the US Naval Academy The Third Rates, Volume II and the 2 Speedwell volumes)
-
I would very much like 'Rogers Collection of Ship Models at the US Naval Academy' I may contact them and ask if I could use my shipping courier to pick it up and ship to me, rather than using standard post..
-
Yeah, I have never seen that before. I bought my Le Superb in 1992 from Model Dockyard, and this was laser cut, one of the first, I think, and very nice (for the time) and excellent manual.
-
Do not worry, Clark, you said/did absolutely nothing wrong! I also hope you can rely on me, as I am always investing in new designs and products. It seems I have very healthy sales outside the EU anyway. Once I have a larger update (still in the 'Doldrums Stage' with Sphinx), I shall start a new topic. But for now, I am still plodding on with Sphinx, designs are around 90% there (I really do agonise over many parts as to the best way to design them, having the end user in mind when doing so..), and once done, the final prototype parts will be sent to Jim for the final building and manual shots. And as Jim does that, I then concentrate on drawing the plans (although mast and yard drawings are already done, needed to to get the correct dimensions for laser and PE mast and yard fittings, tops, trestle/cross-trees etc.) So, I best crack on....
-
Thank you very much! Jim has done a superb job in putting them together. And to think, a year ago he hadn't touched any wooden kit for years! They do, they are my US distributors.
-
I think I will start a fresh thread soon, as this is long and now getting a little too off topic
-
I meant the overall length of the laser cut keel, which included stem and stern
-
Superb work!
-
I bought the plans from NMM and scaled the lines to the correct size to get profiles. I certainly wasn't going to change them. Full size, the 28 foot equates to 8534.4mm Divide this by 64 and you get 133.35mm. This is more or less the keel length of my 64th scale 28 foot cutter. Not sure where you're getting the 140mm from. I am still shipping to EU countries, seems to be a lot of scare mongering right now.
-
Two more almost ready...
-
Other bits and pieces... Not sure what will stay and what will go in finished kit...

-
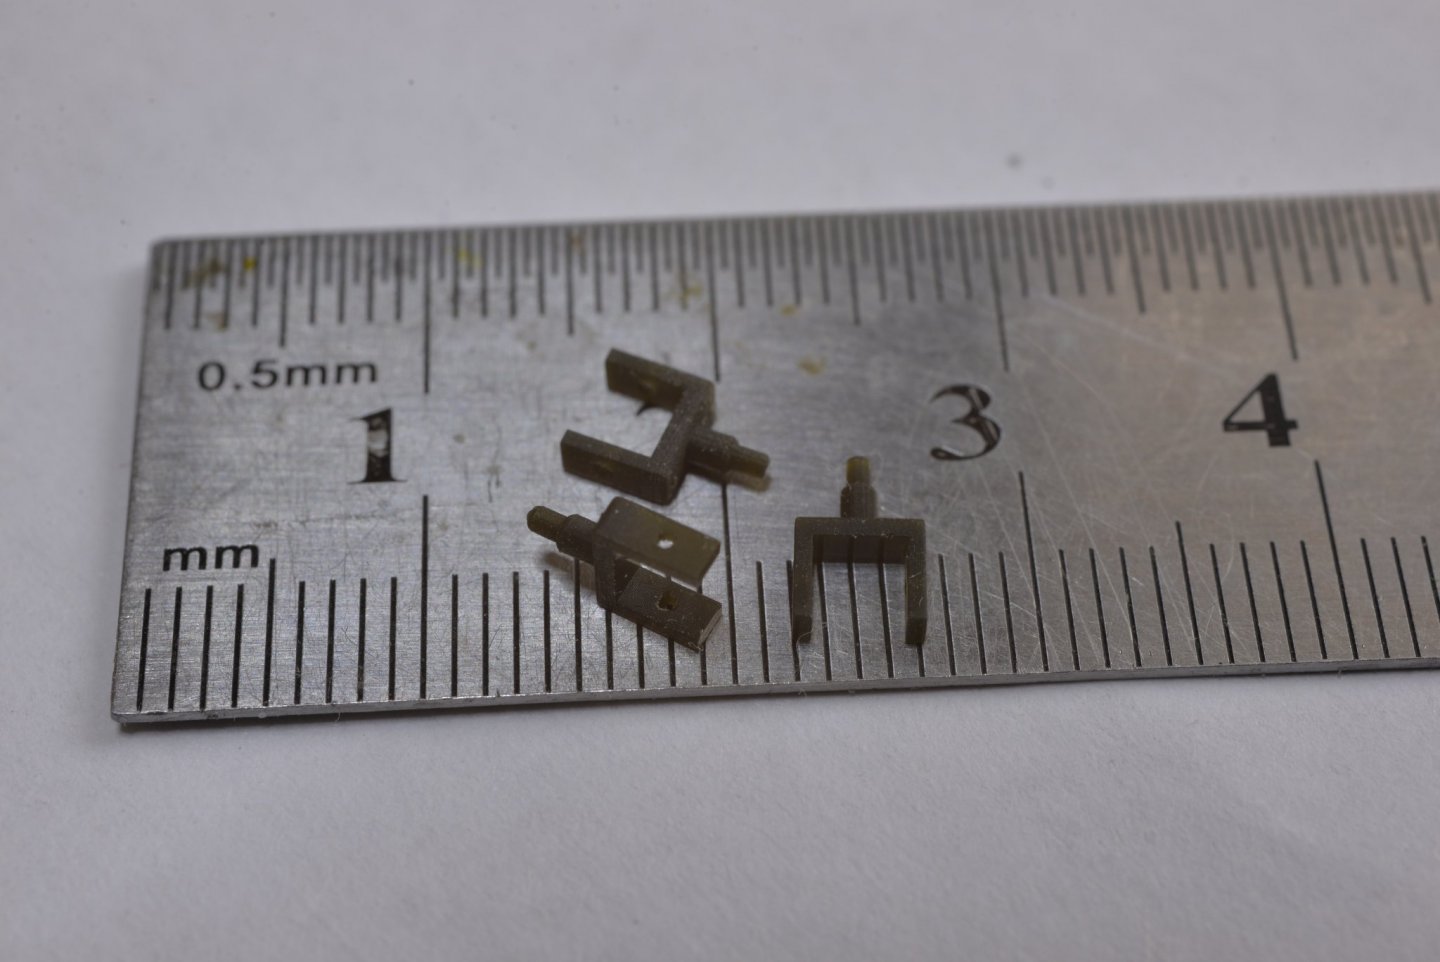
Just received a pic of the samples I asked to have made for the boat beam 'U' shaped brackets. These were initially problematic for me, as I intended to produce them in PE, but the issue was that they stand proud of the gangway by about 1.5mm. I figured the best way to do these is a one piece casting, to ensure they all maintain the correct height. Development continues...
-
Absolutely superb, and a perfect display for her. Just goes to show that a wooden vessel's hull is a beautiful thing to behold, no matter what era, or millennium! Love it!
- 158 replies
-
- 2
-

-

-
- byblos ship
- Egyptian
- (and 1 more)
-
Great work Glenn! Just do not forget to turn those cleats over before gluing them.
- 382 replies
-
- 1
-
-
- Vanguard Models
- Duchess of Kingston
- (and 1 more)
-
I designed some fine saws for PE for Amati a while back, but they decided not to go ahead. The problem with PE saw blades is that the teeth are not 'splayed' out at the sides like 'real' saw blades, which makes sawing easy and reduces clogging (they are very sharp though, as the MD of Amati almost cut his finger off when trying out one of my saw blades when it slipped...). They would have been fine for anything 3mm and thinner, I think.
- 70 replies
-
- 2
-
-
- 22ft Yawl
- Vanguard Models
- (and 2 more)
-
Revenge is almost 200 years before the intended fittings shown. I am not sure if boats were towed permanently for a vessel of Revenge's era. The lantern castings are of a typical mid to late 18th Century pattern.
-
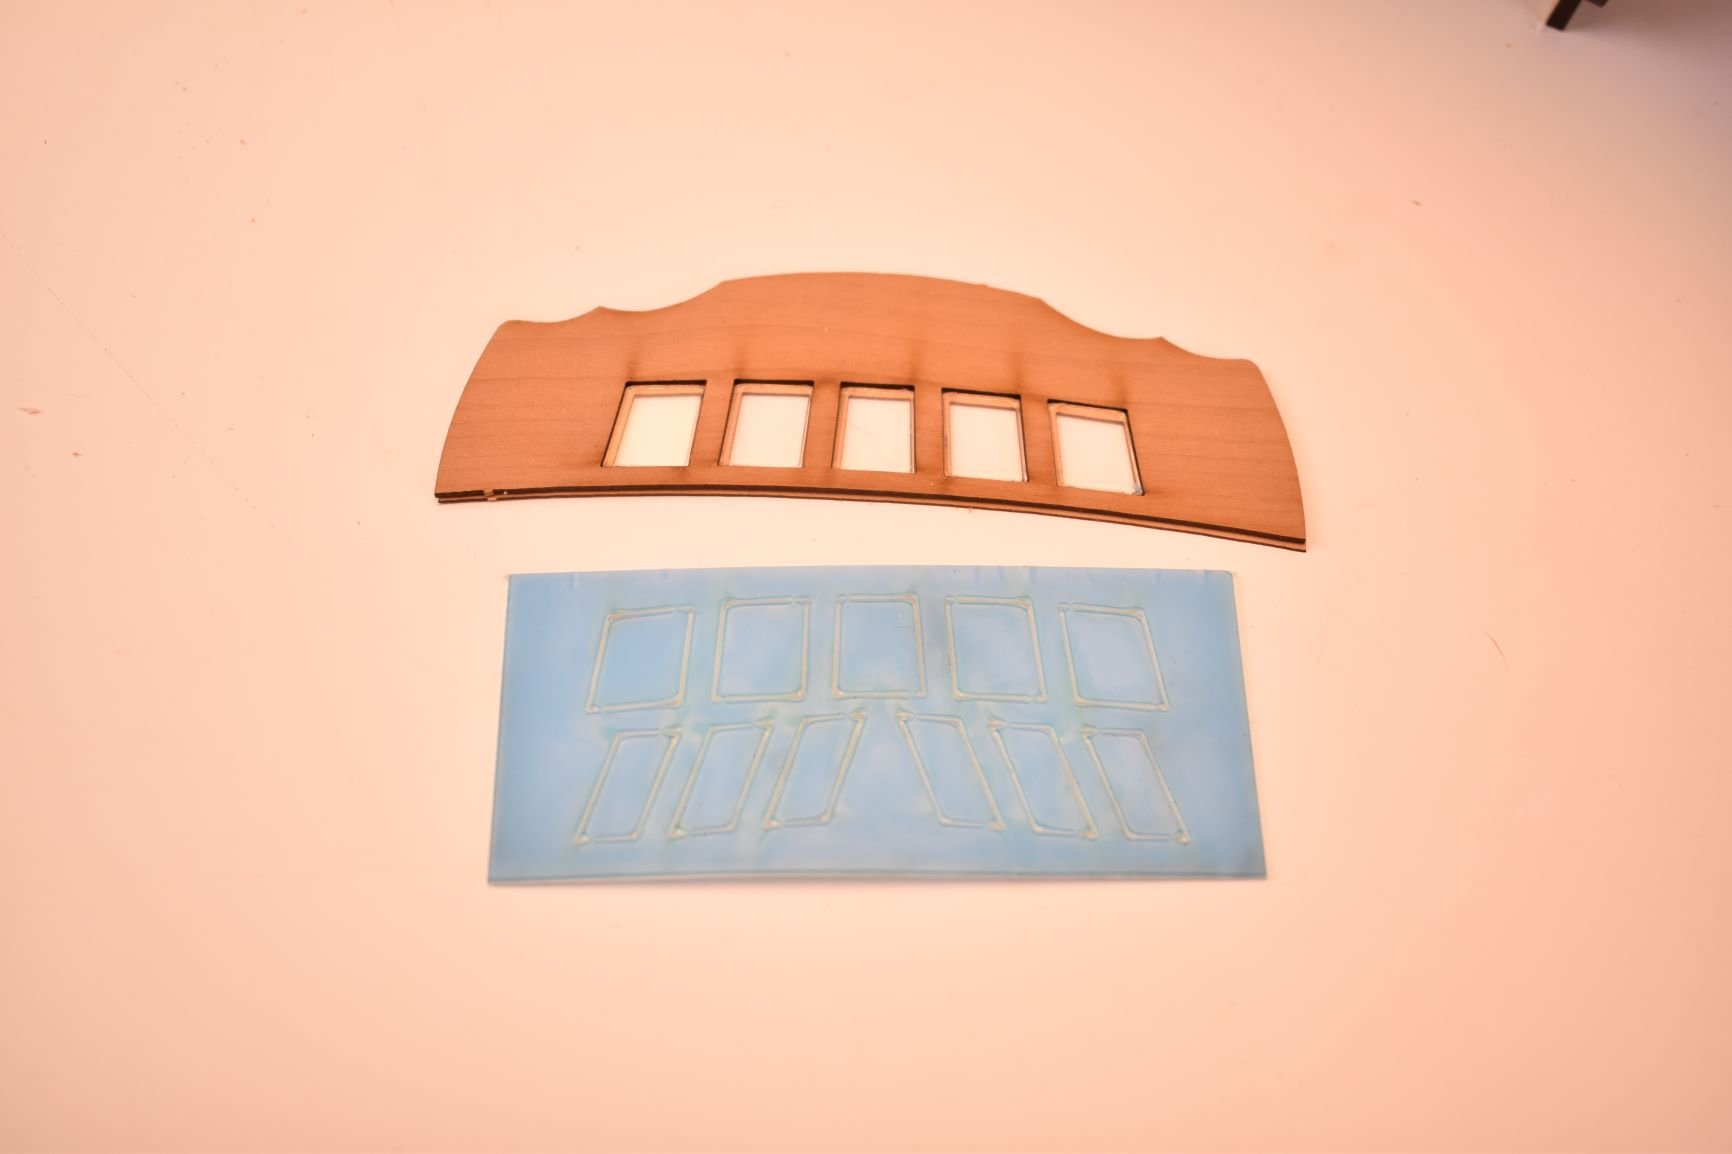
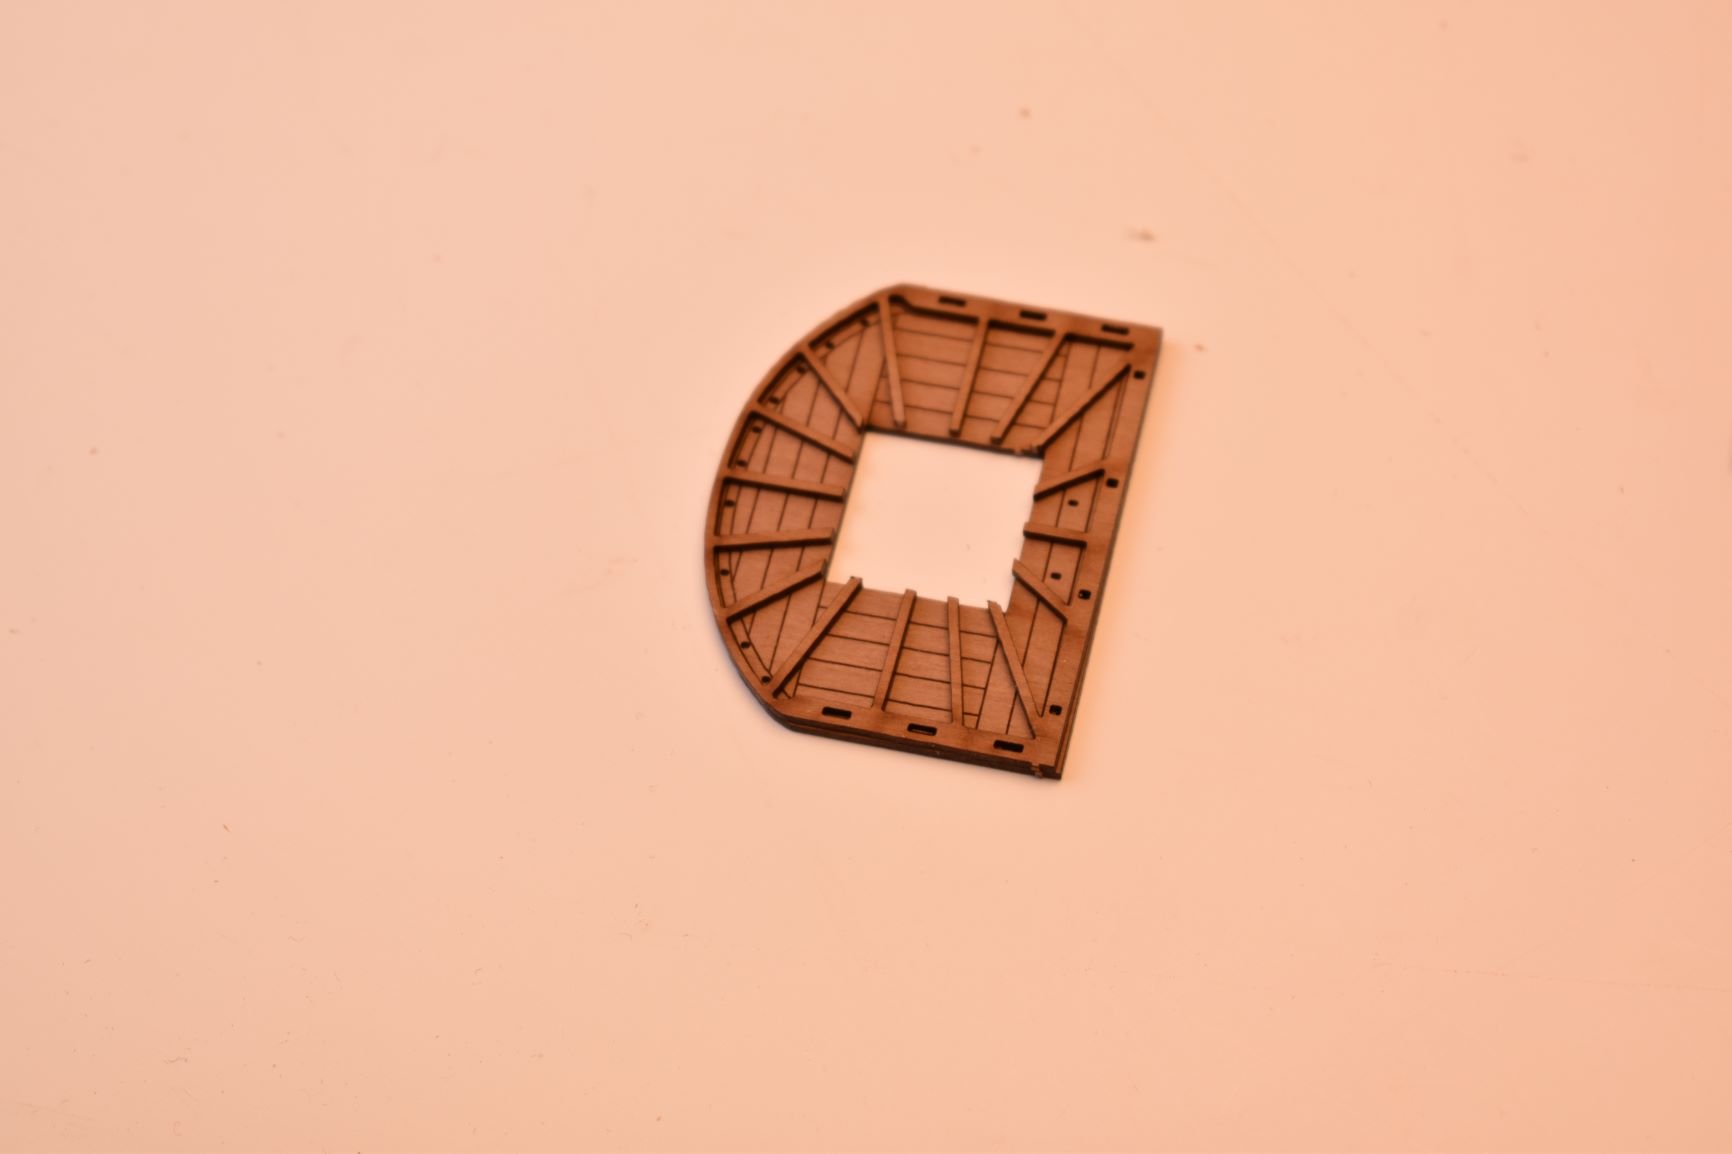
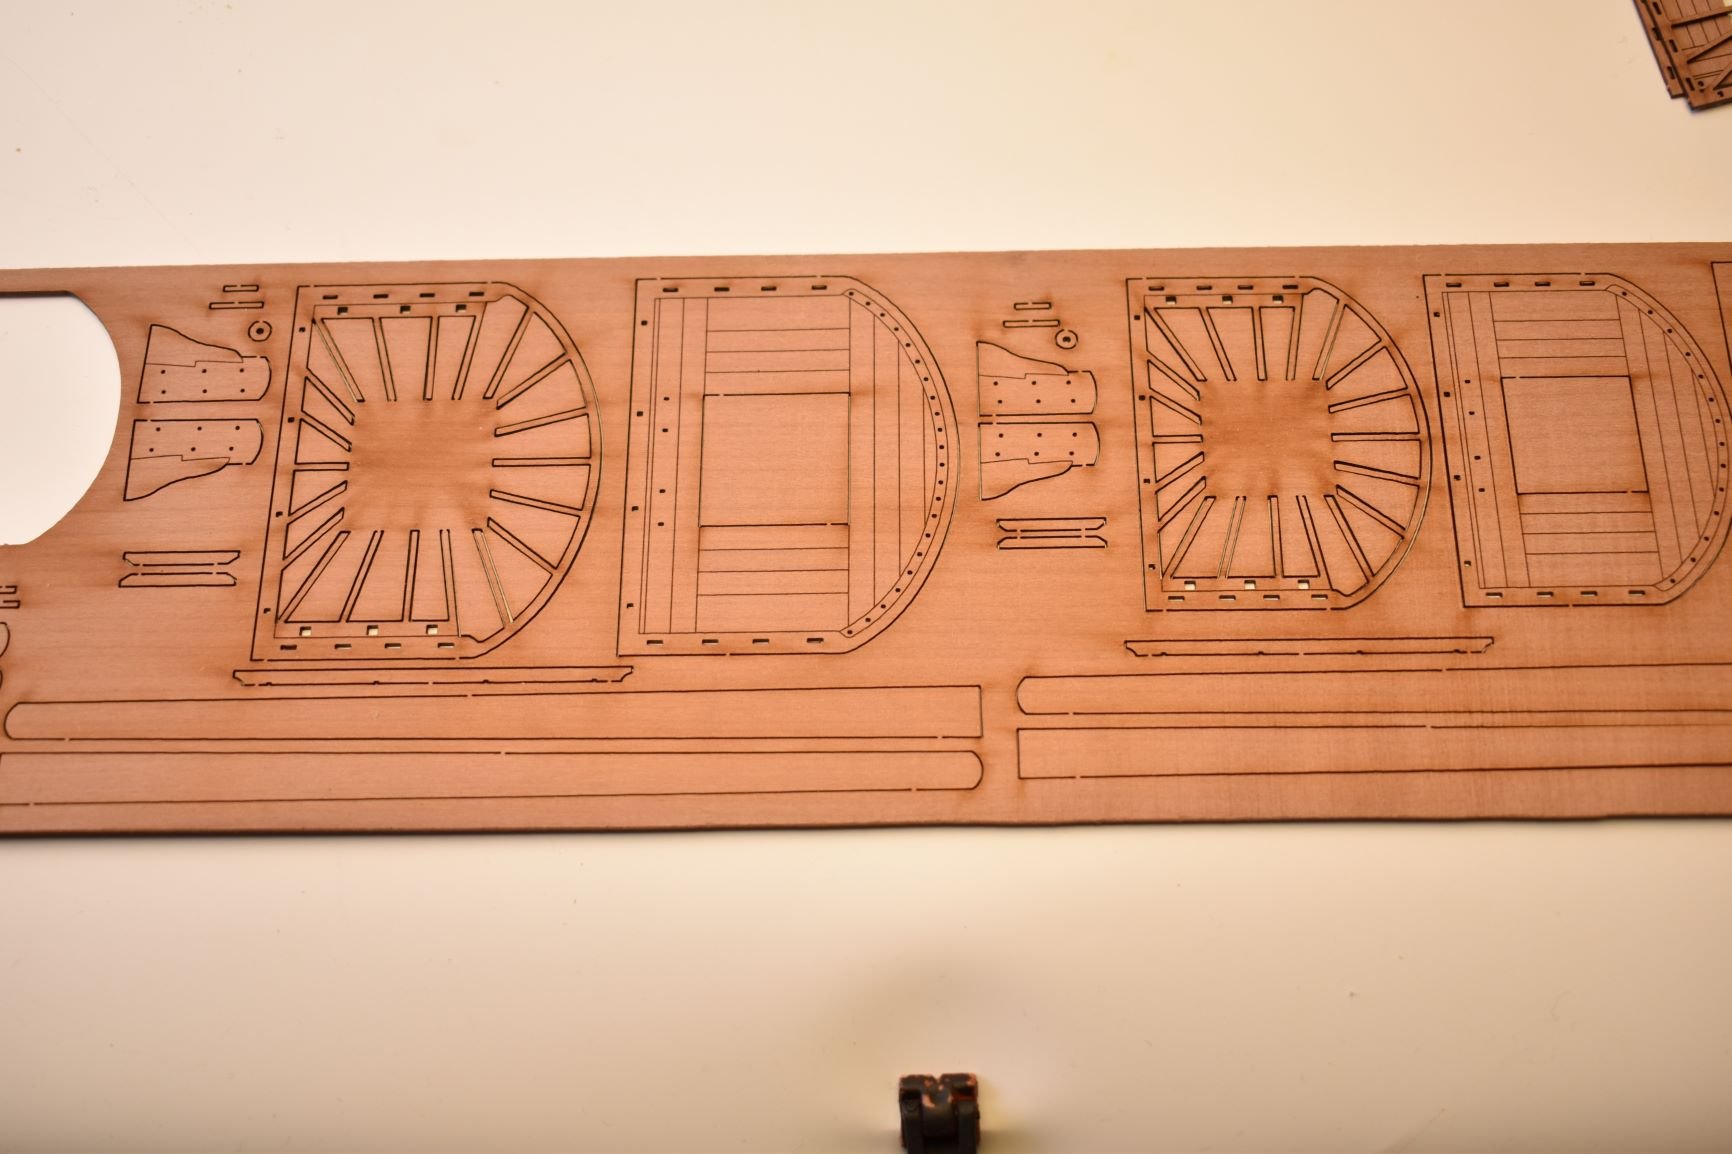
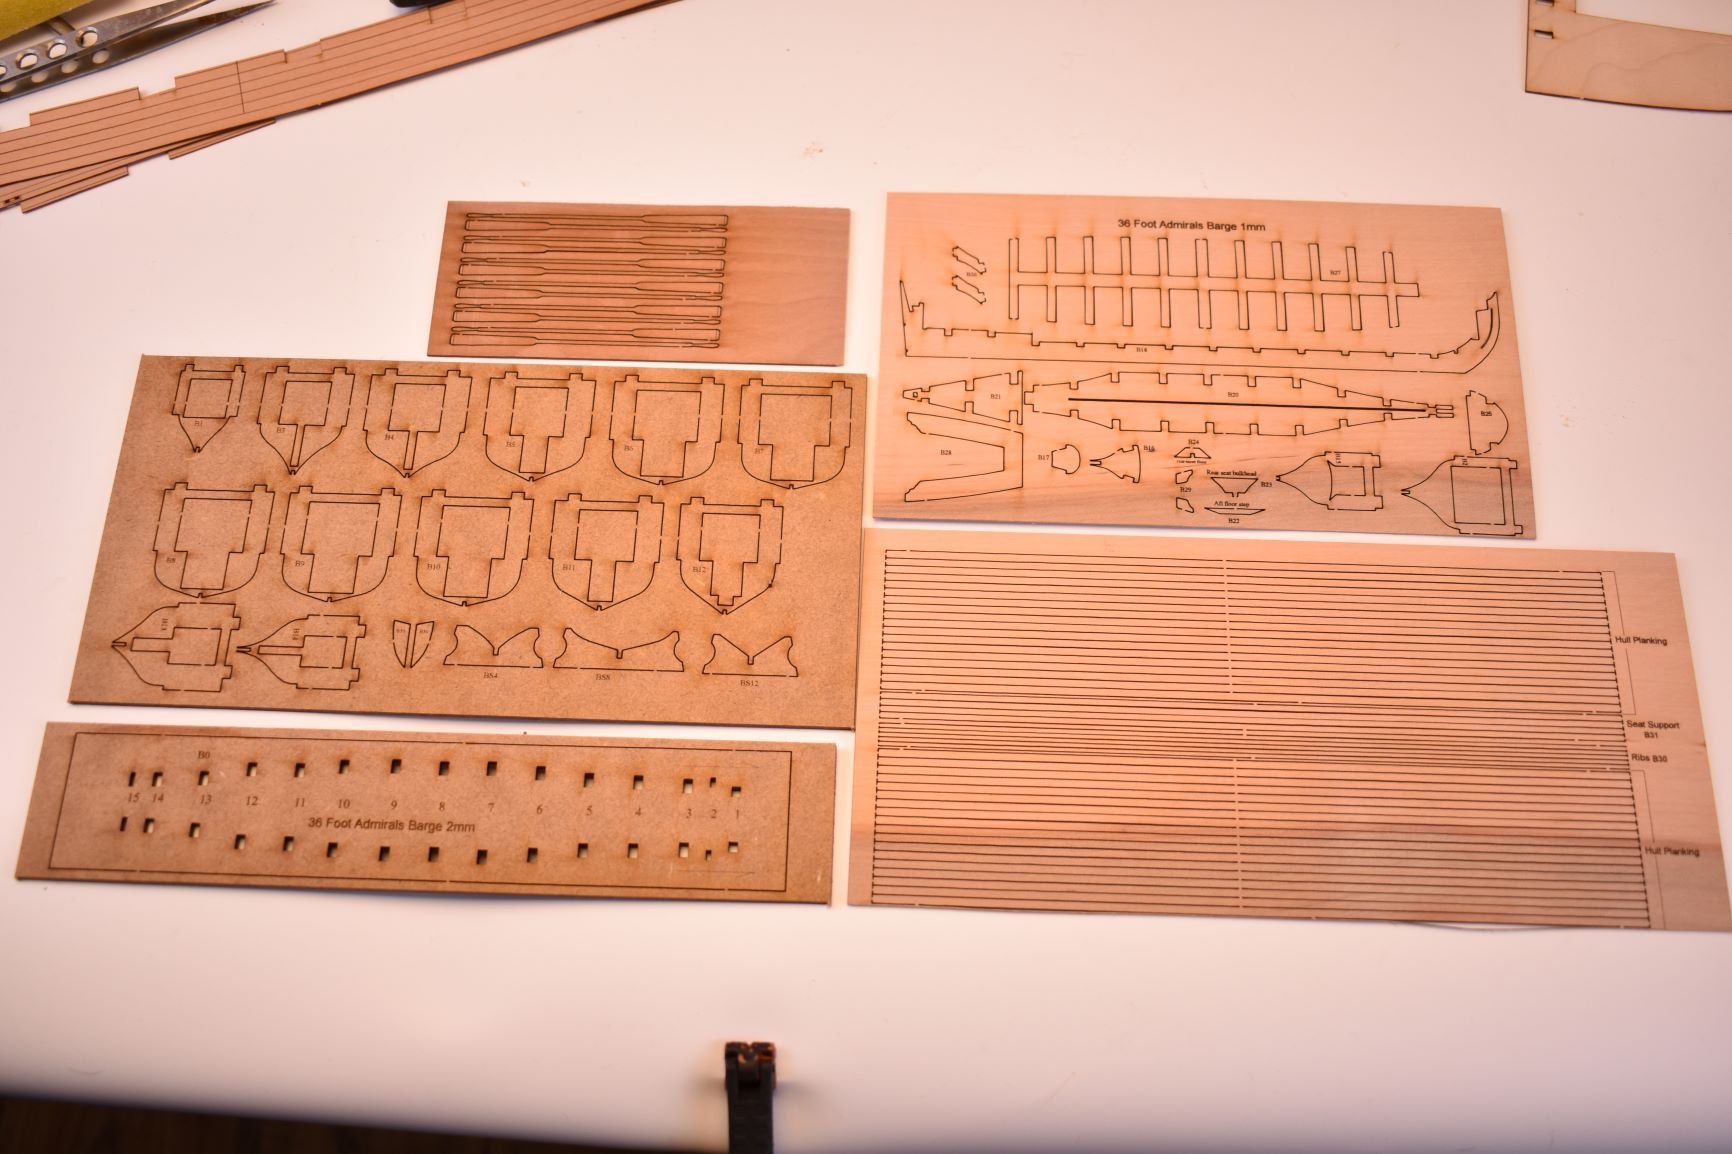
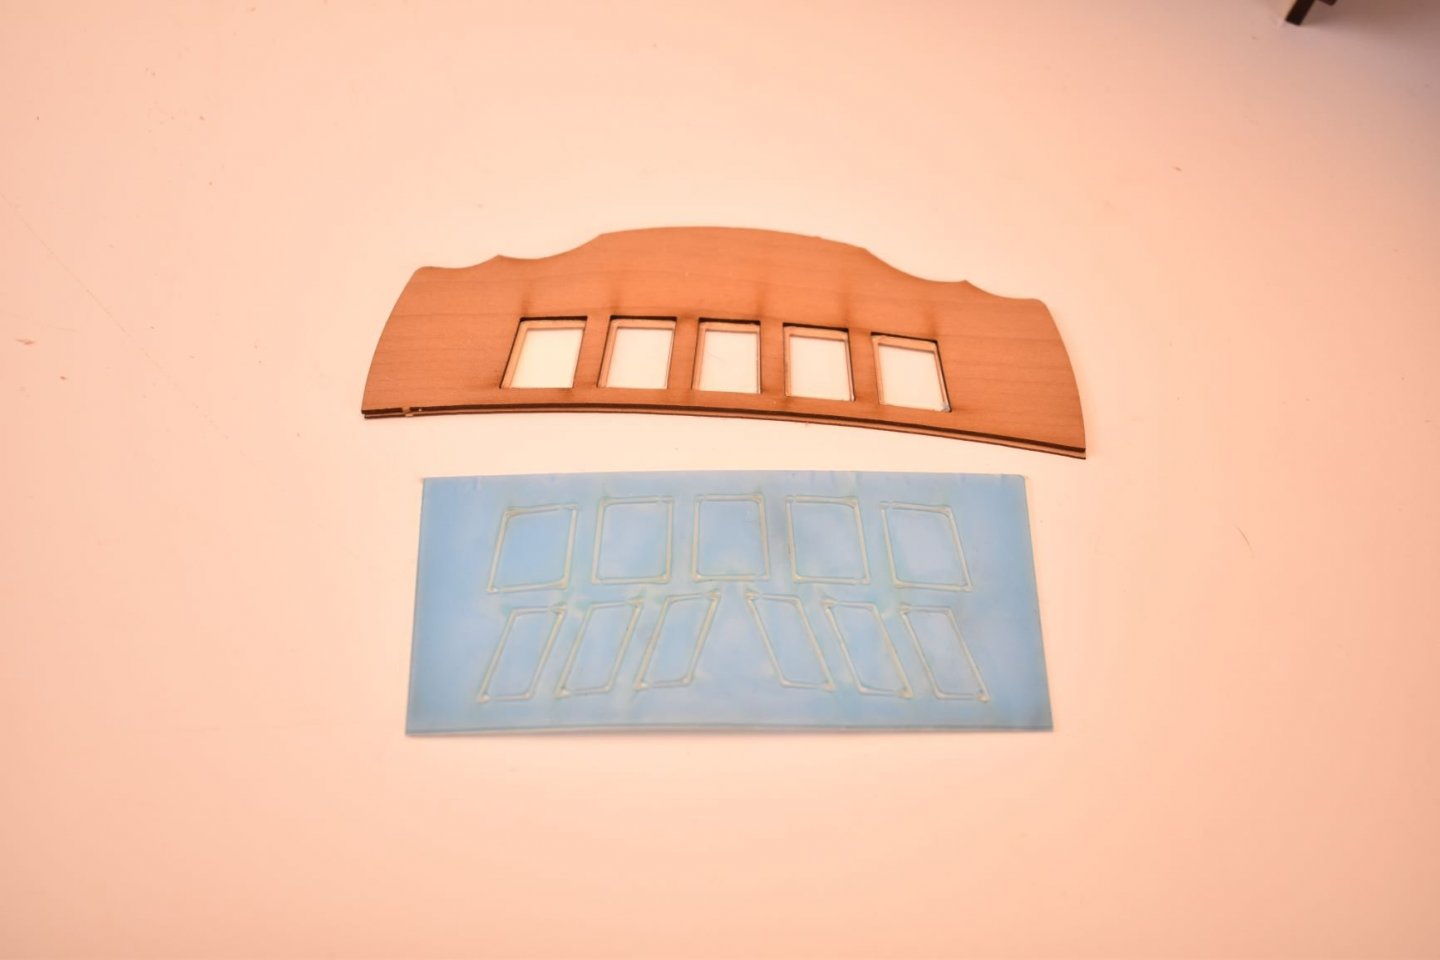
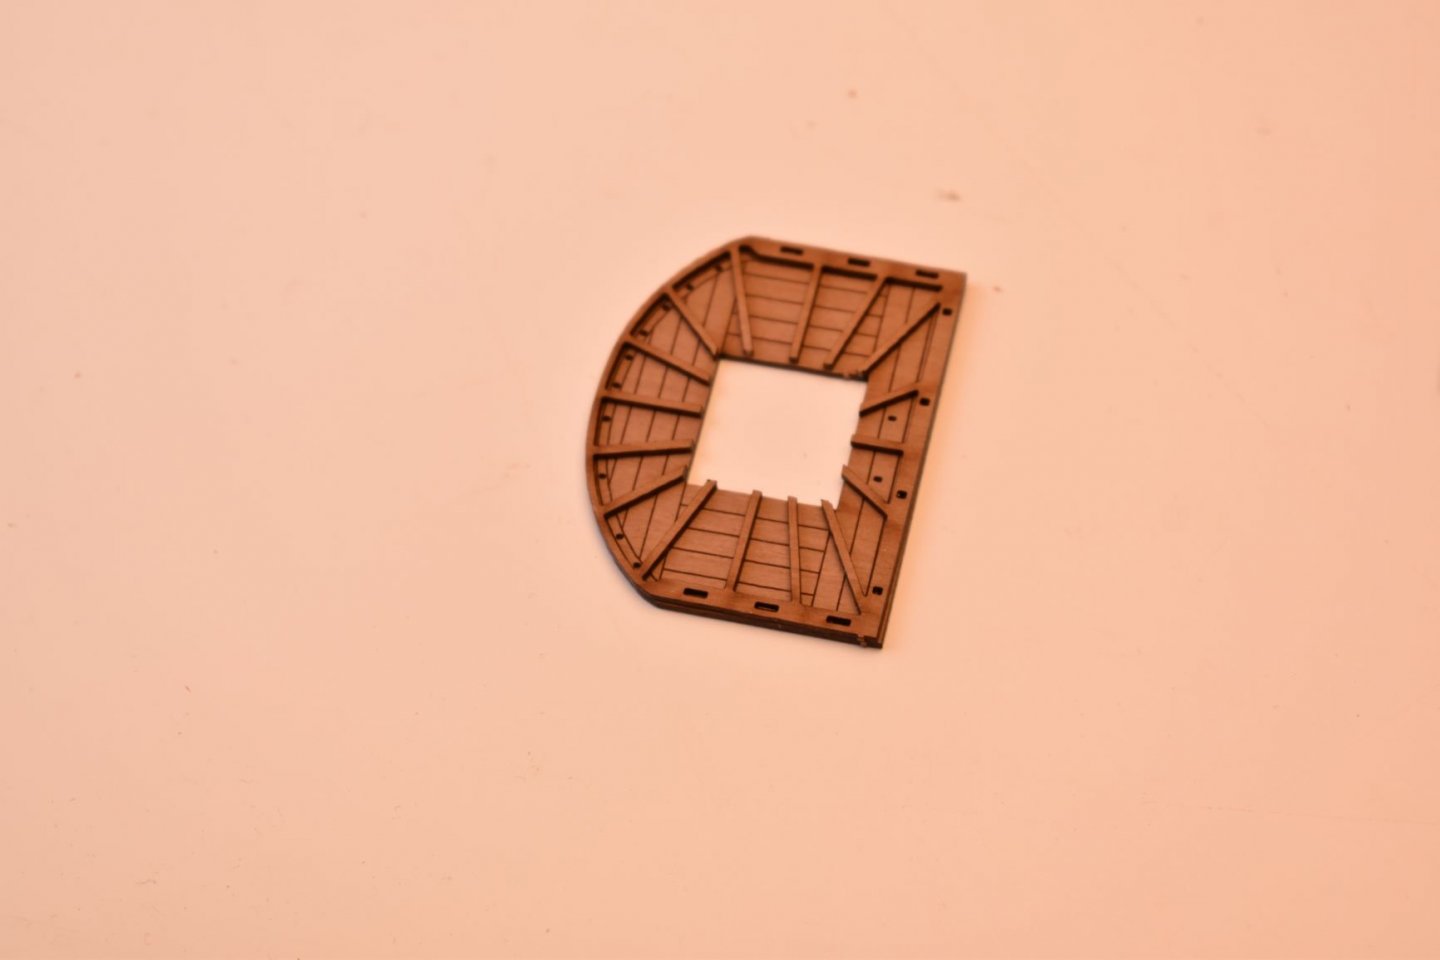
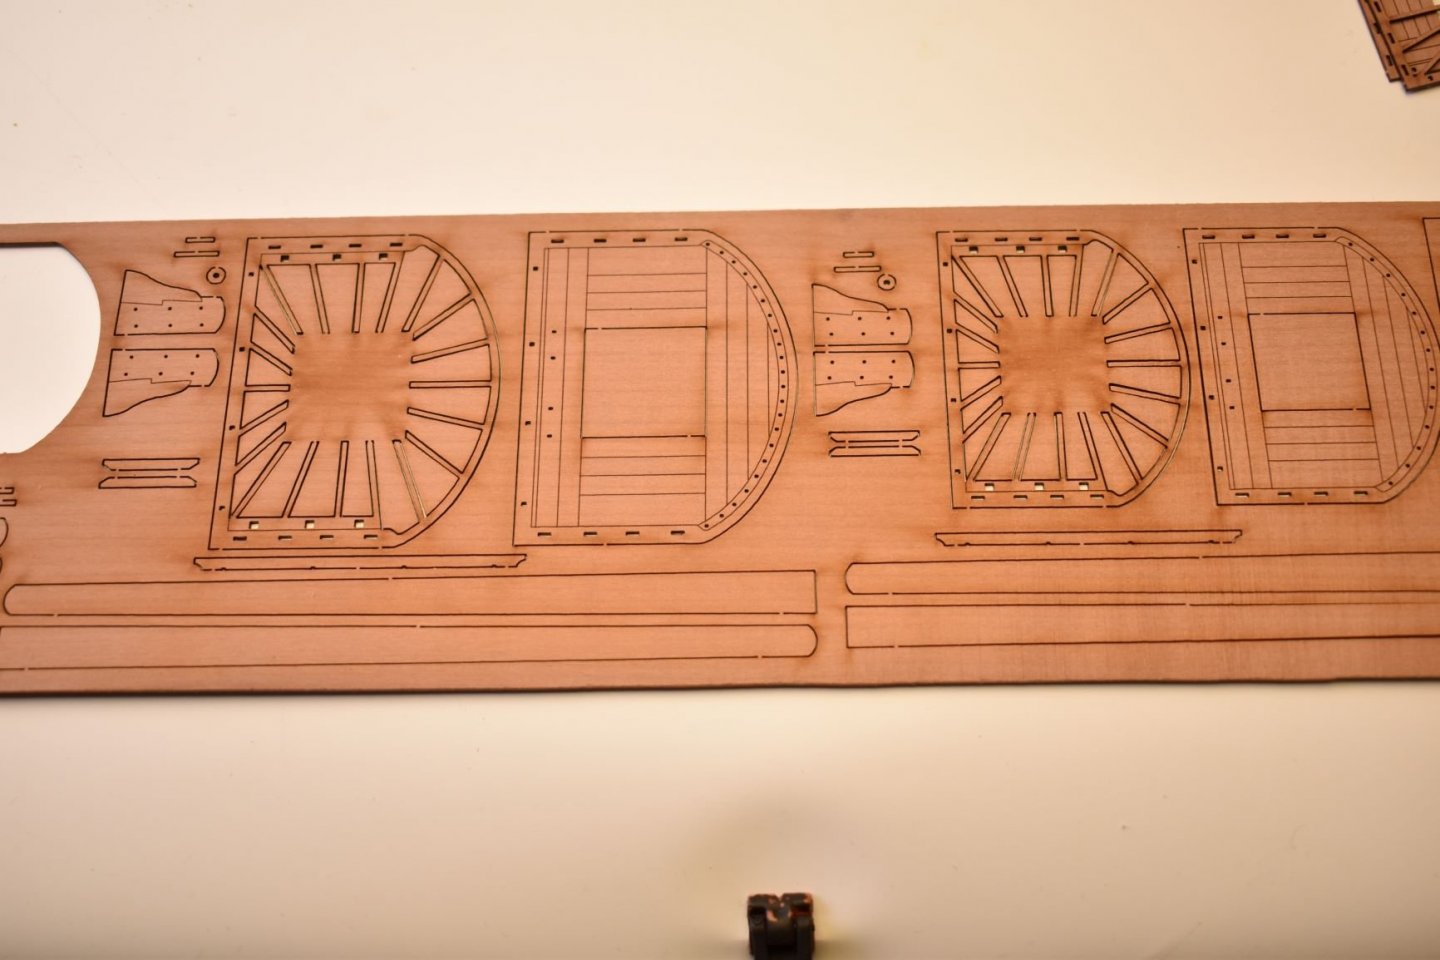
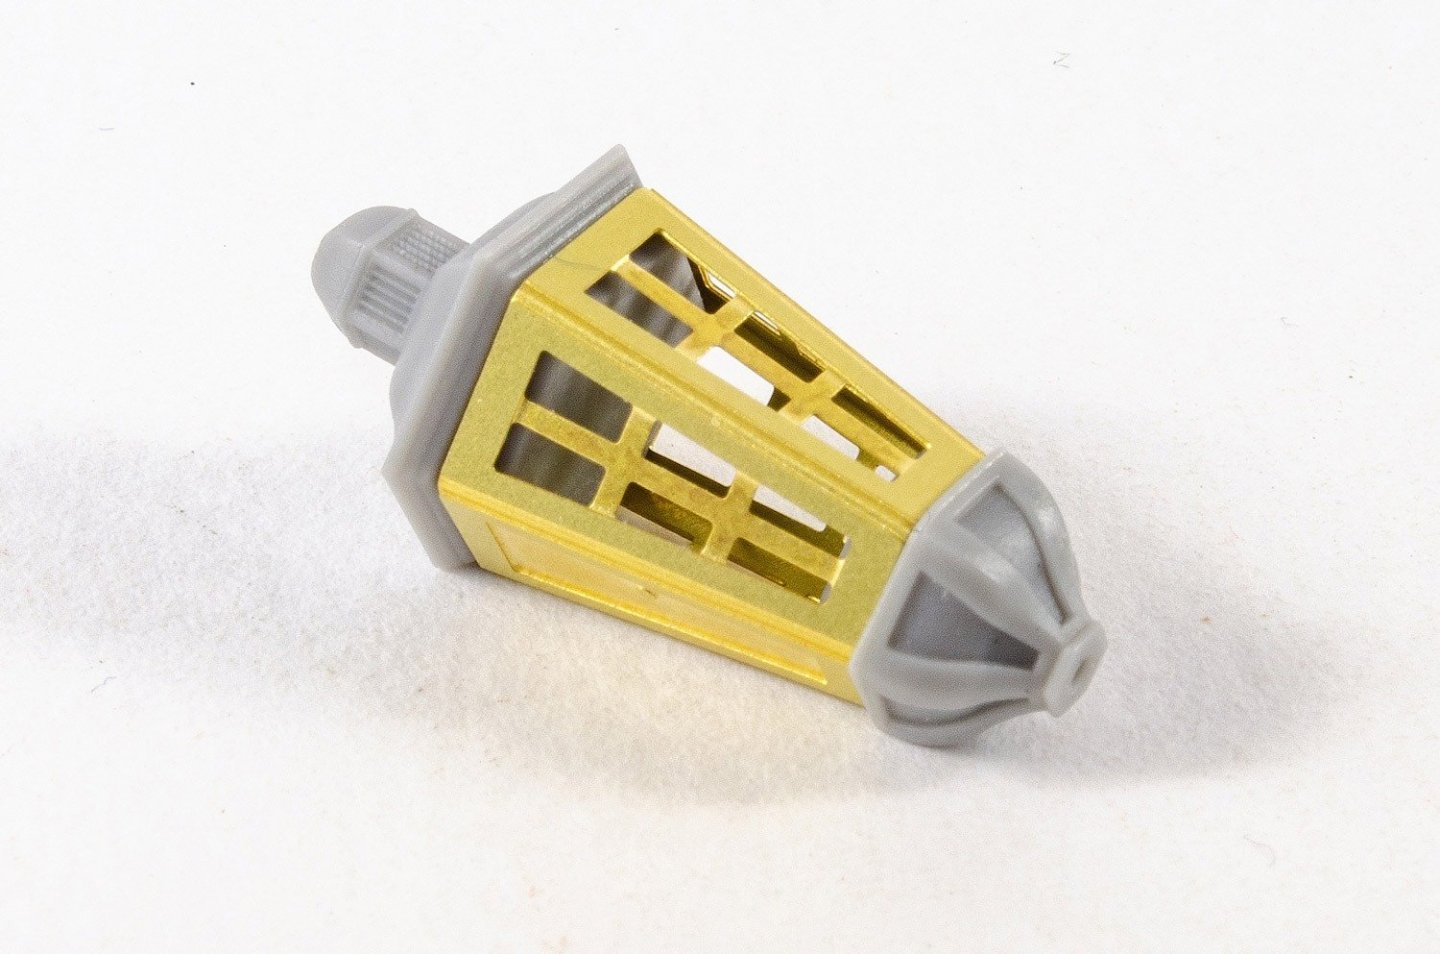
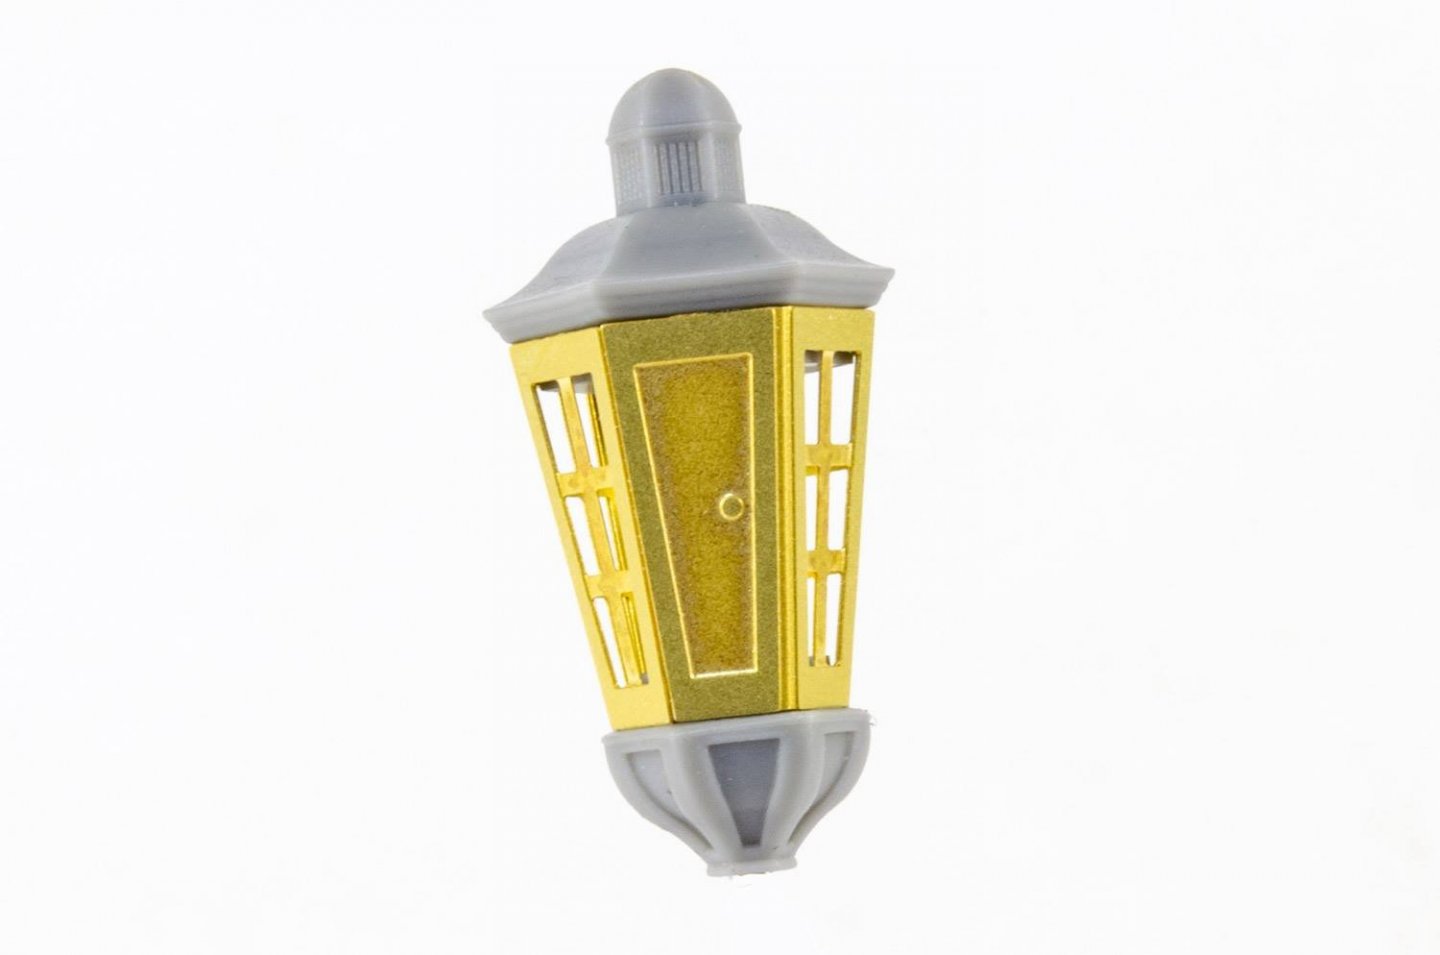
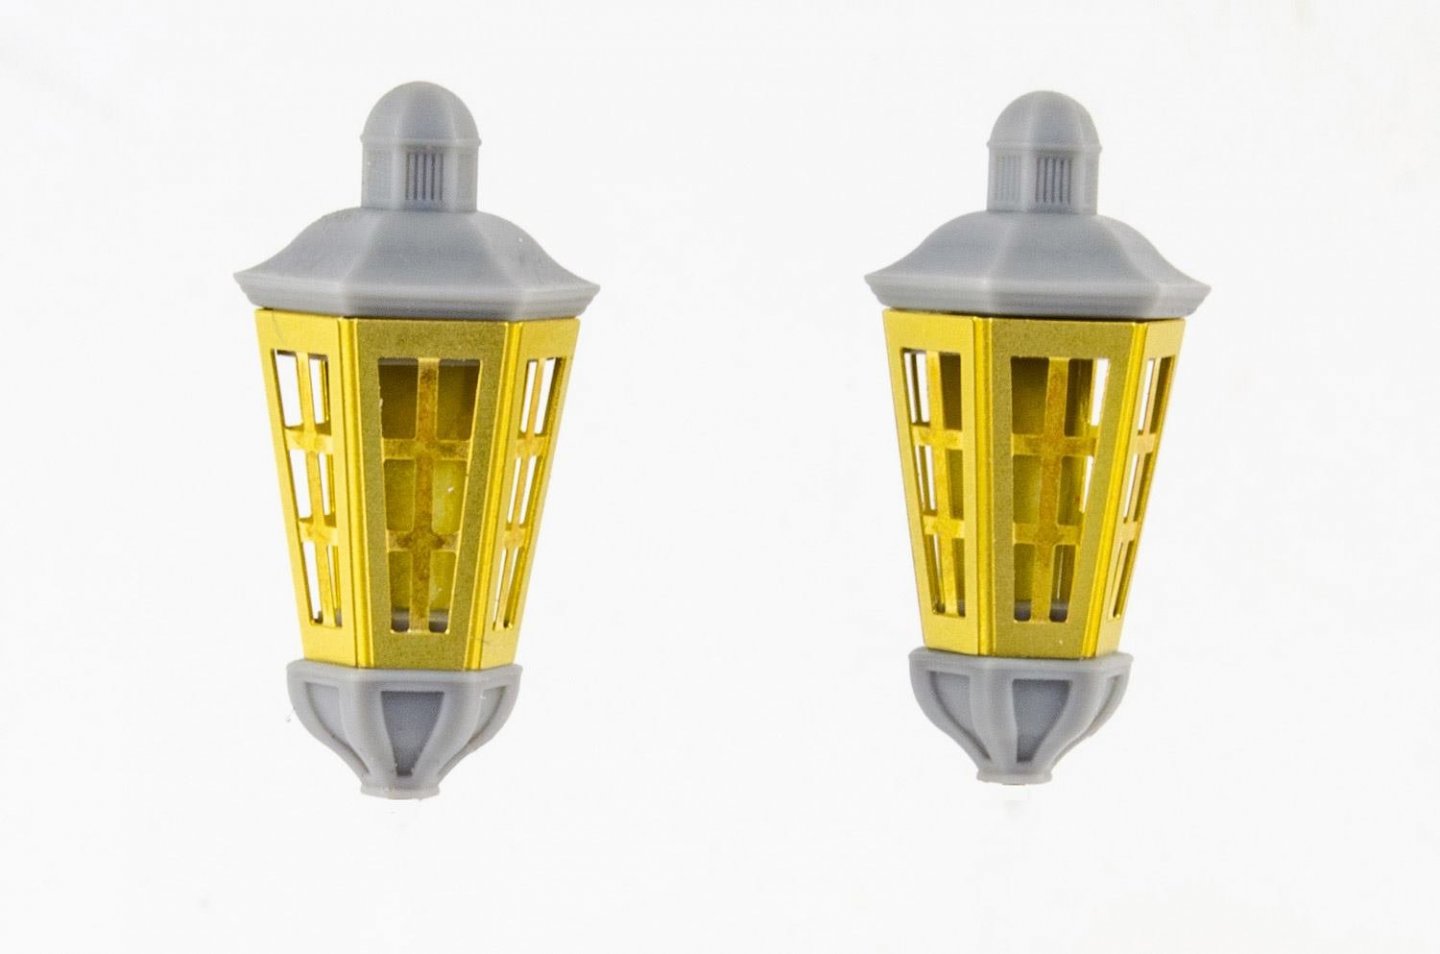
Just the smallest of updates, I now have three sizes of stern lantern available. They come in pairs and consist of a cast resin top and bottom, and fold-around photo etch frame that fits in between. Simple things, but the castings are quite detailed, especially compared to my past efforts, a turned top and bottom on the lathe and cast in white metal.. Lanterns – VANGUARD MODELS Sizes are (height): SMALL – 17.8mm MEDIUM – 21.3mm LARGE – 23.7mm Also included a pic of the laser cut parts for the 36 foot admirals barge (over 160mm long), that I cut today, but am waiting for the PE sheets to arrive.

-
Only 64th scale. These are all mini kits that will be included in my future main kits. I wanted them to be kits in themselves, and not the usual afterthought to the main kit. I have little time to re draw each one for 72nd scale, it would double my costs, especially when it comes to the photo etched parts, which are never cheap anyway (nor is the pear). I think that when I have a healthy range of kits, I will have the luxury of looking at more fittings in different scales, but for now, I am concentrating exclusively on subjects in 1:64th scale. I will have three sizes of stern lantern soon, with a fully detailed cast resin top and bottom and photo etched frames in between, sold per pair.
-
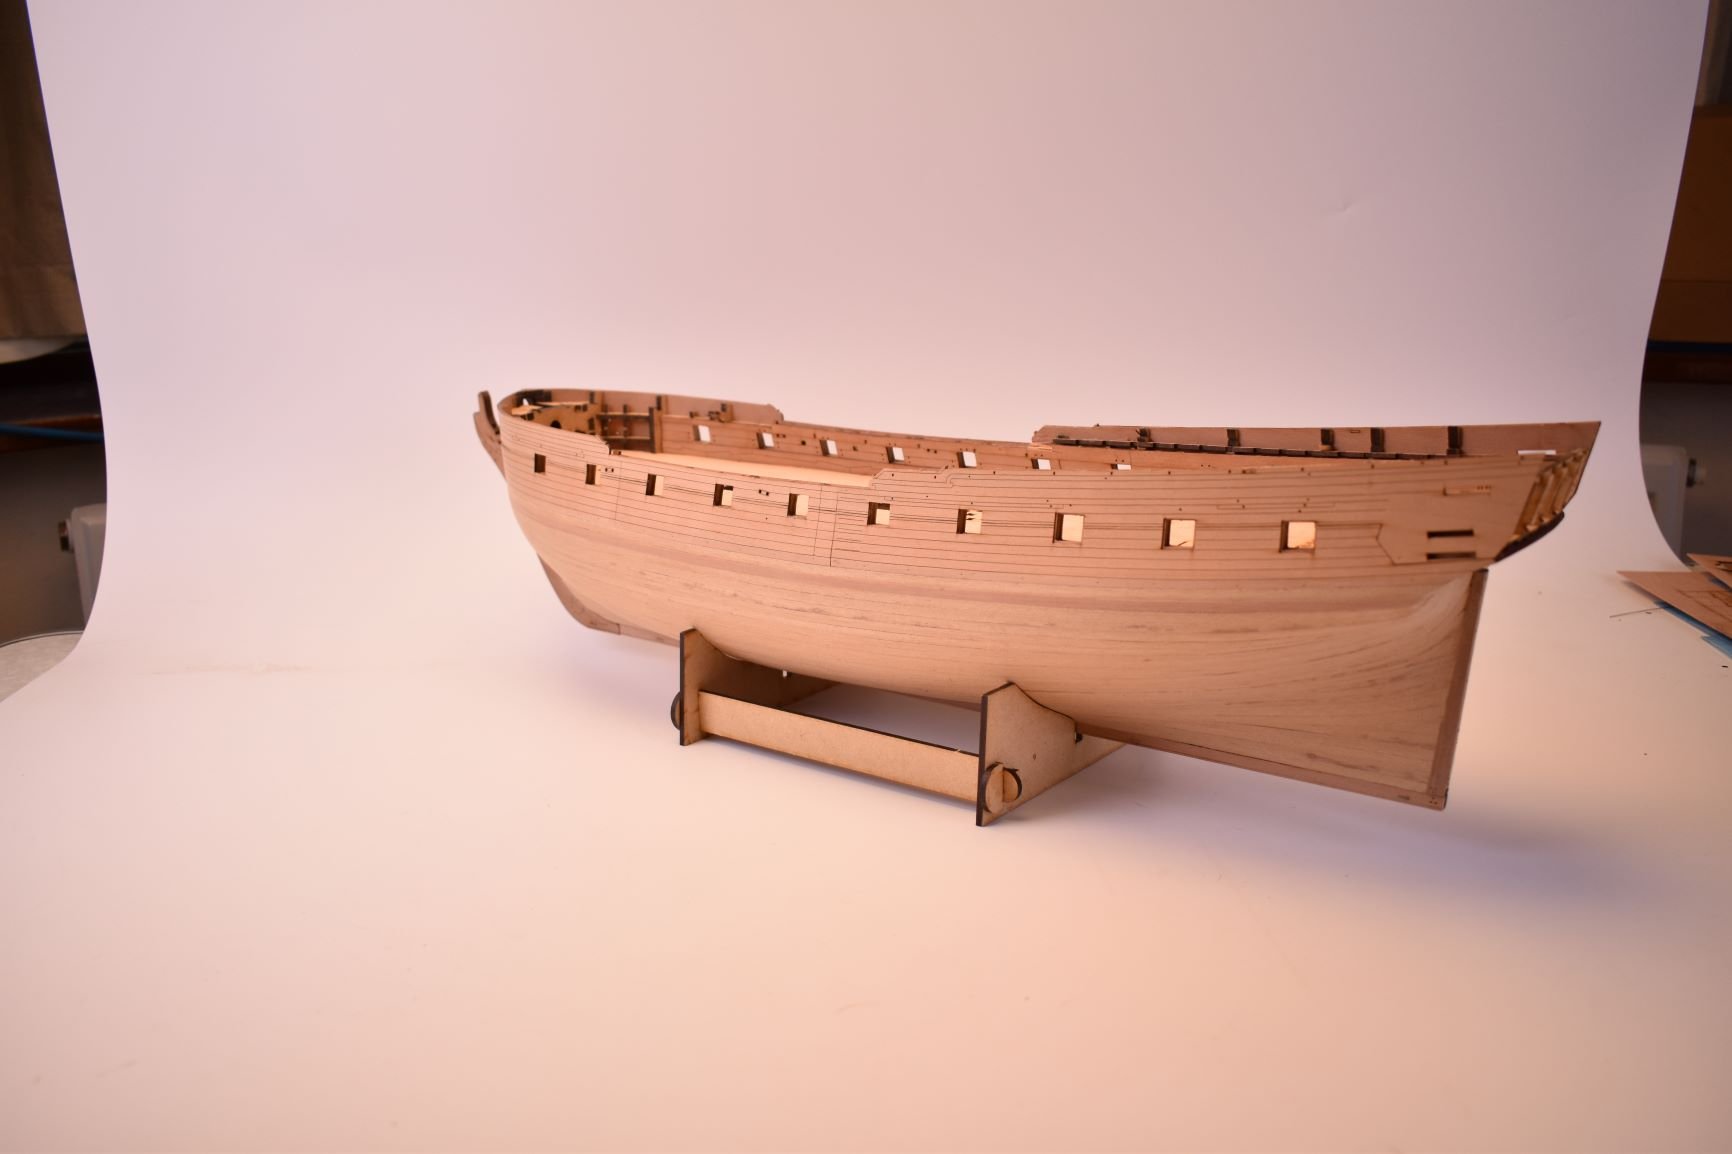
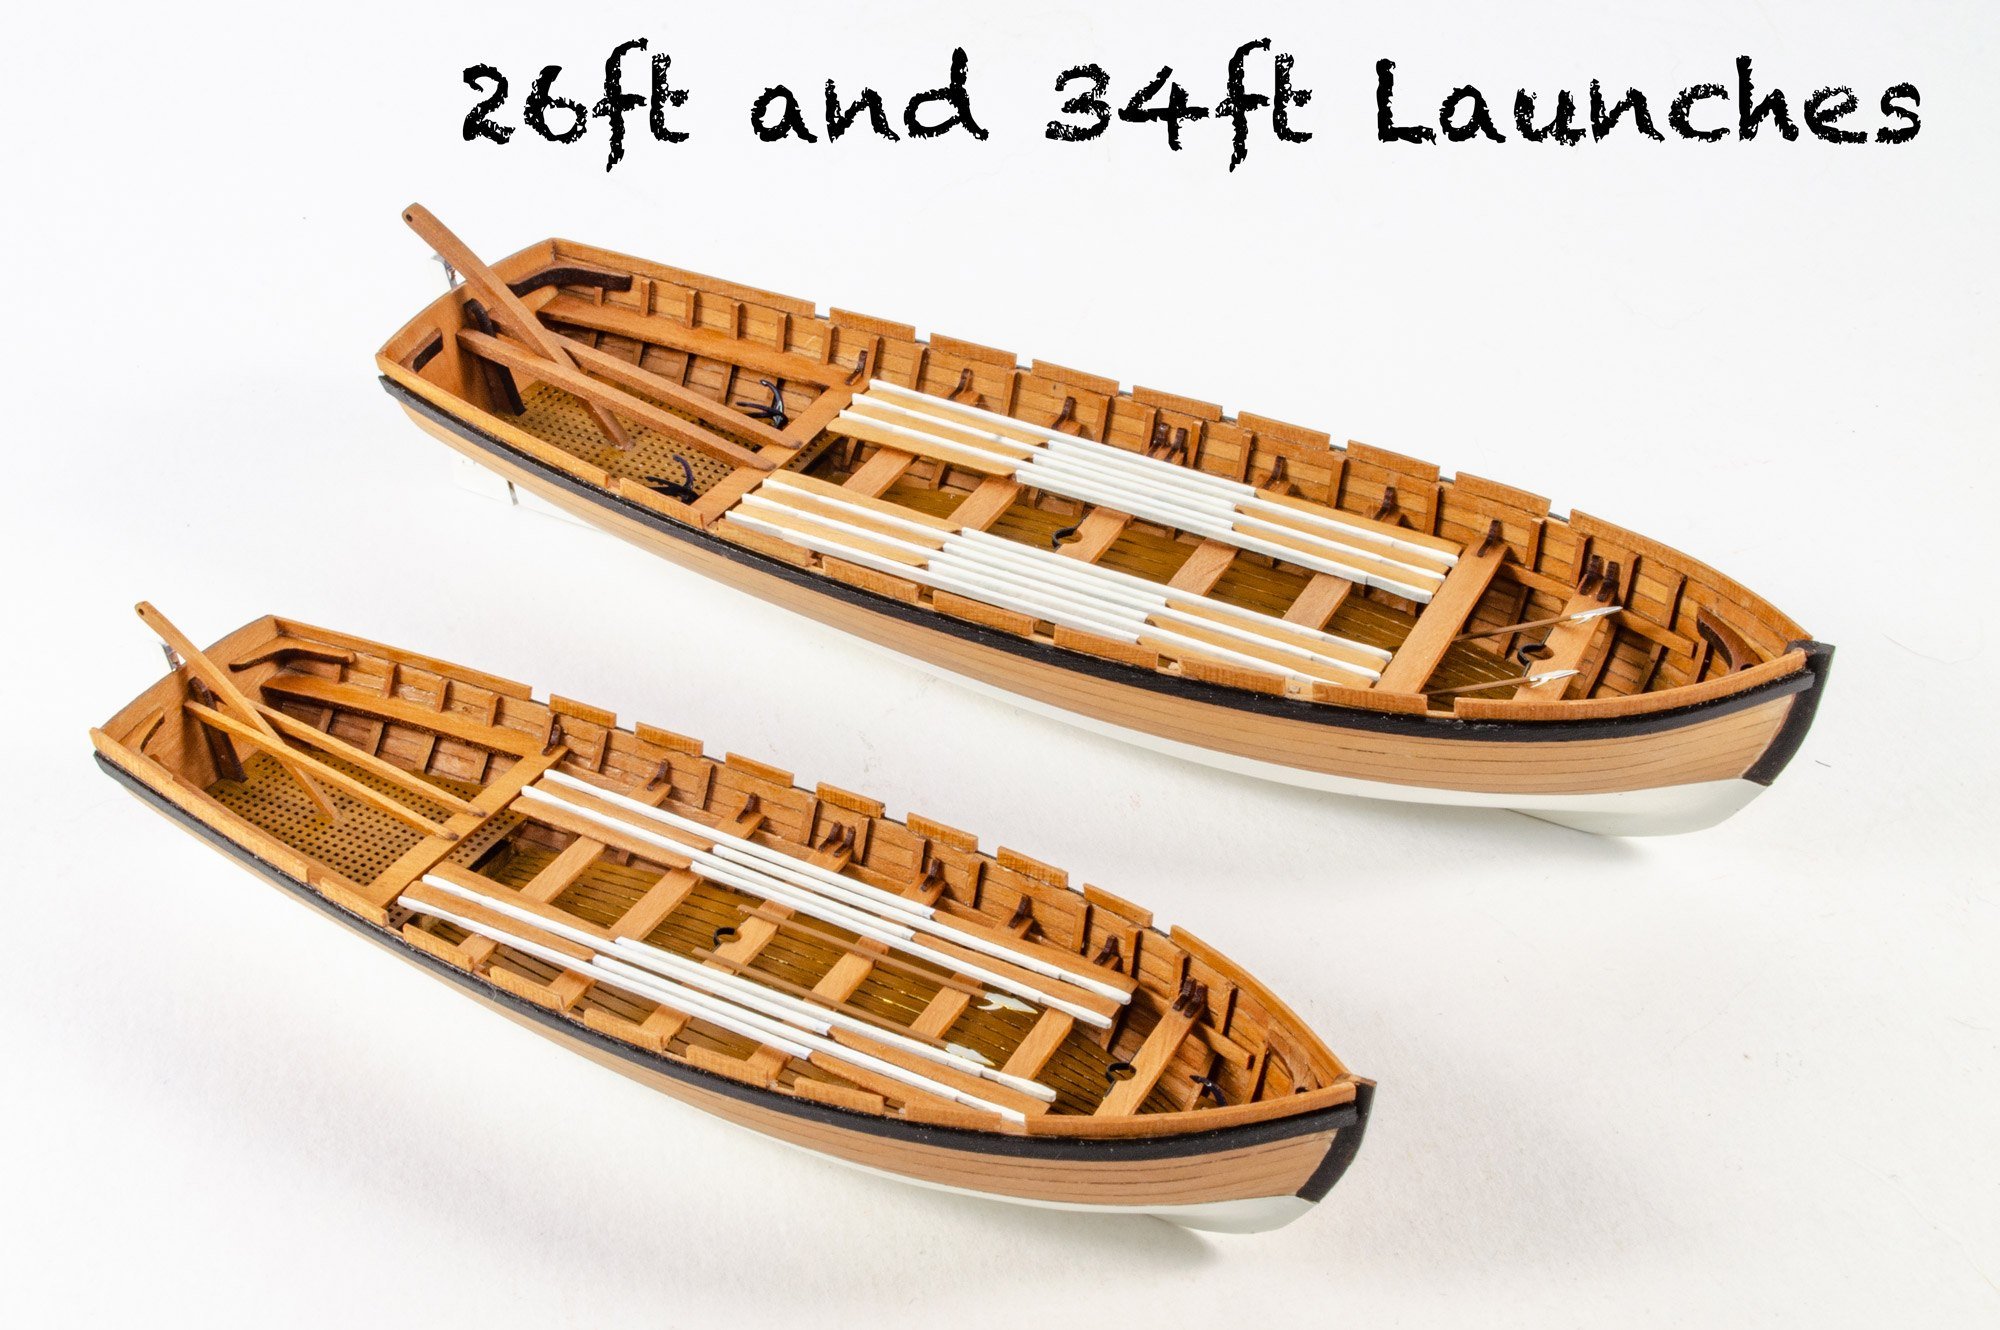
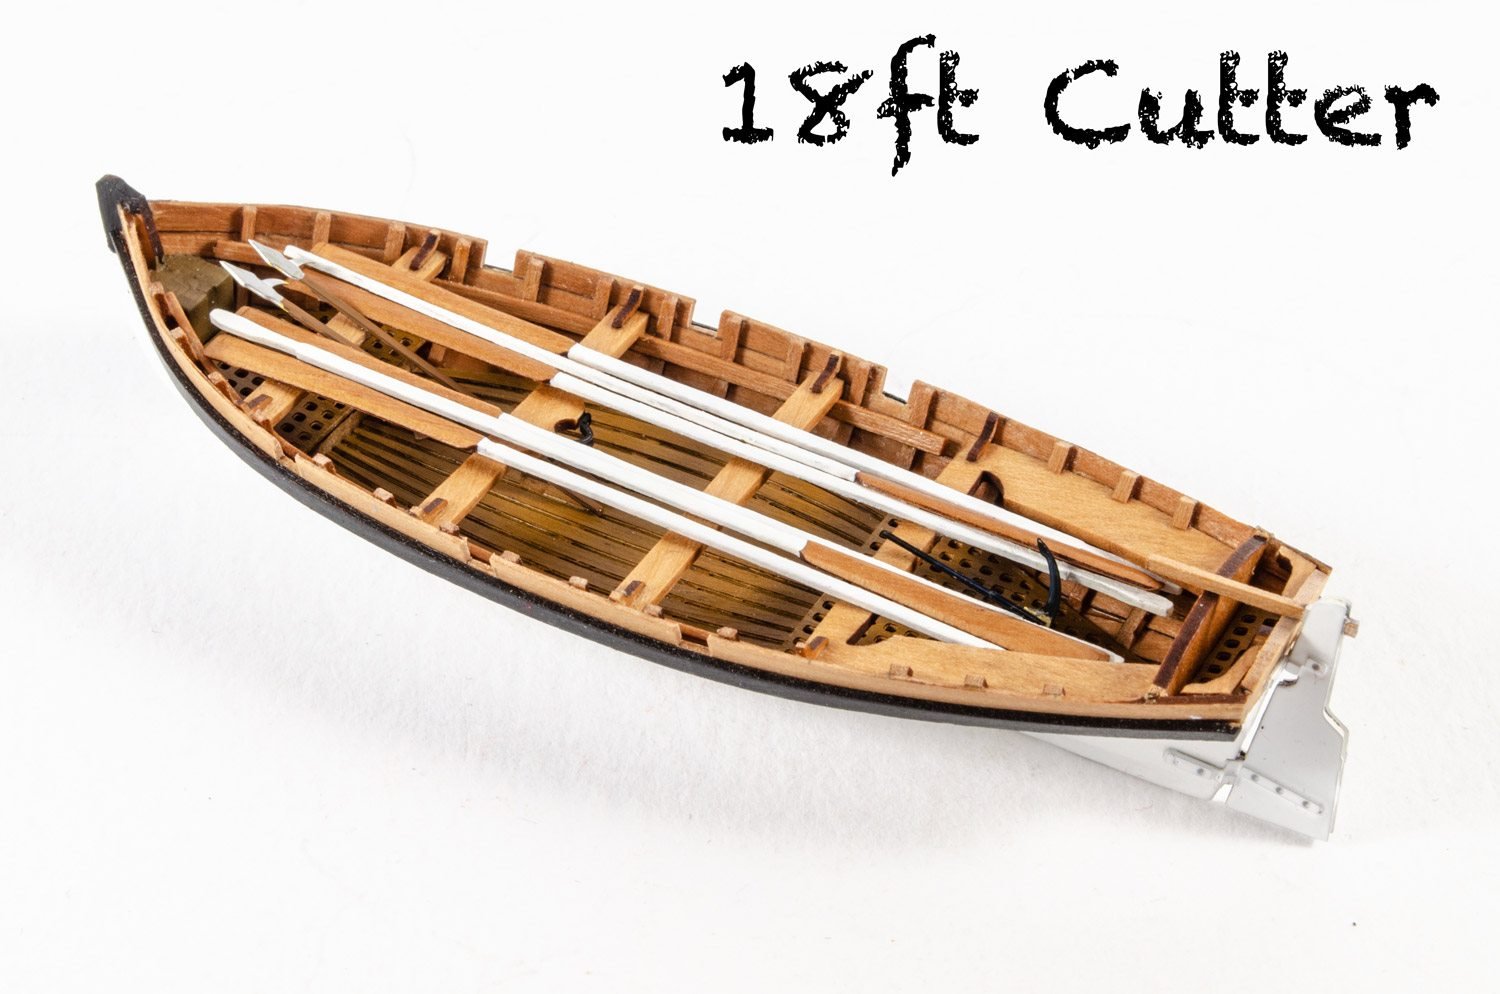
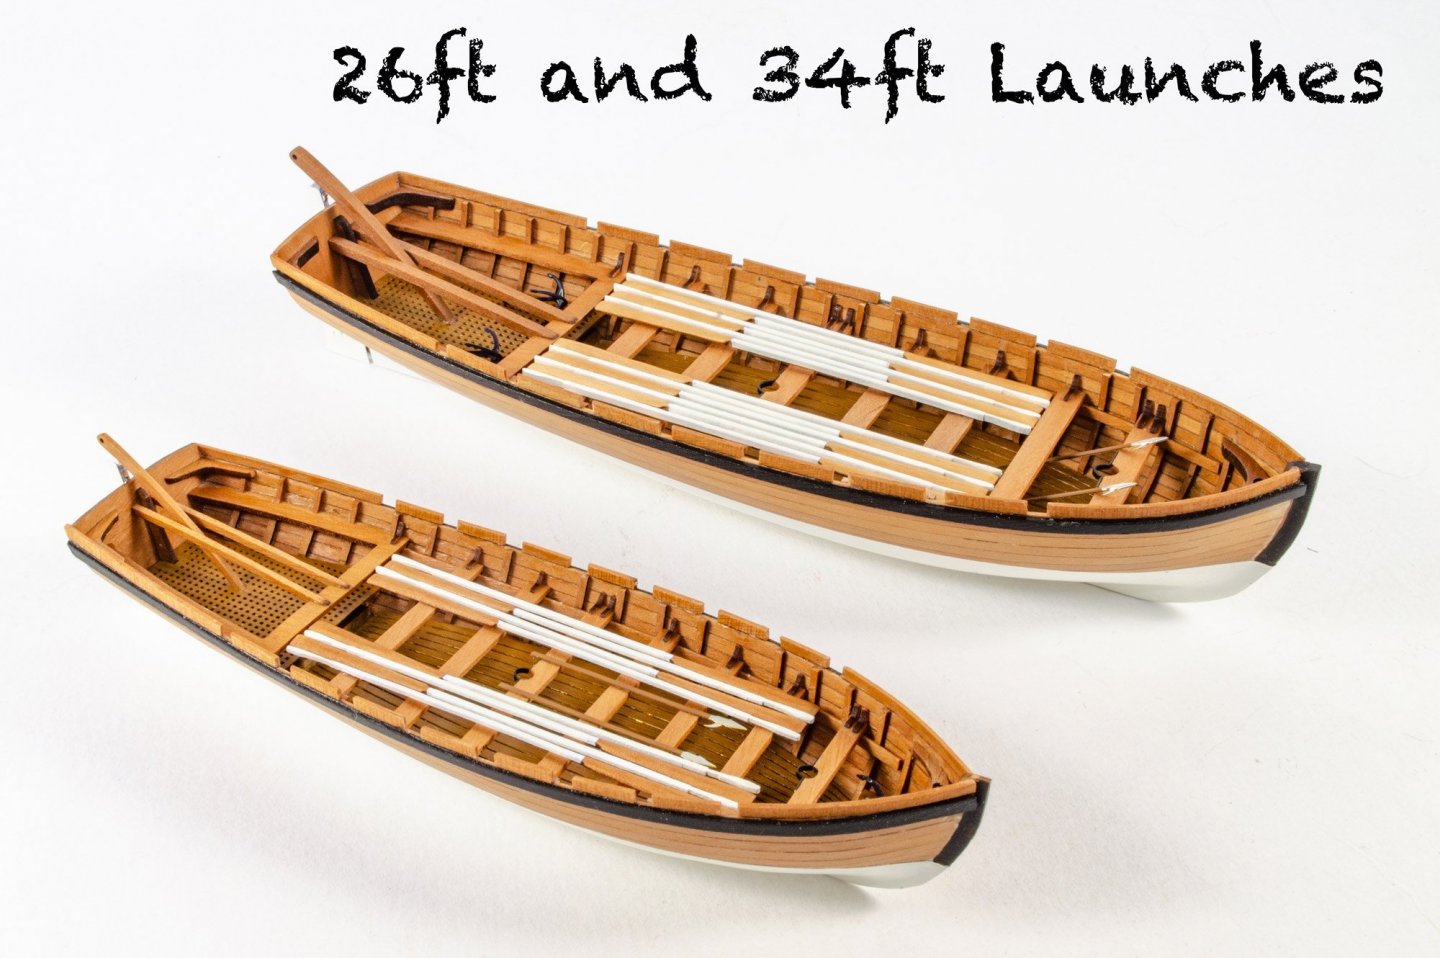
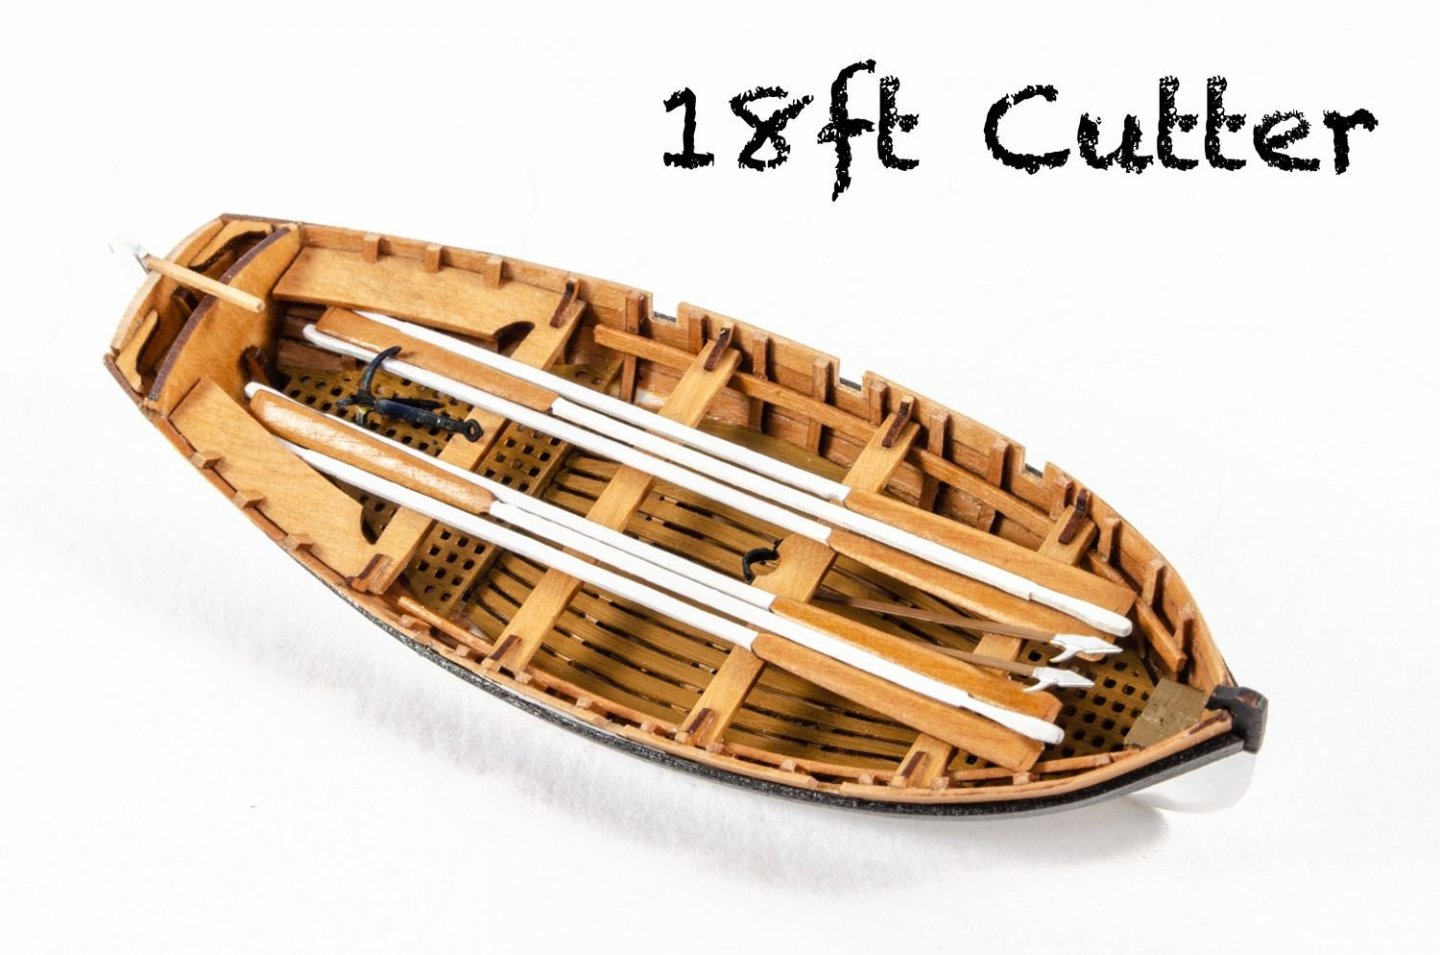
I now have the slightly reworked 18' cutter online (again, thanks to Jim Hatch), This, in line with some of the other small boats, has a 1mm pearwood keel and laser cut pearwood oars and 0.6mm pearwood planking, so it looks more in scale, despite its diminutive size. Ship’s Boats (various types) – VANGUARD MODELS There will be another 4 boats ready in the next week or so, a 26 and 34 foot launch, 32 foot pinnace and 32 foot barge. There will be the 36 foot Admirals barge in the next couple of months, and will probably finish off the range with a couple of larger cutters that are to be found on the later 18th/early 19th Century vessels. I am still working on Sphinx, it's one of those frustrating and hated stages where I spend a hell of a lot of time doing seemingly very little, but I have to go through it. Even more for this development, due to the extra details and the headaches they cause trying to make sure the building of the model is as easy as I can make it.. I am once again furloughed from my day job for the next two weeks, so hopefully I can put this bonus time to good use..

-
It is a shame. I bought one of my very first wooden kits from Nick back in 1992, Mantua's (then) brand new kit of Le Superb, and ordered from the Model Dockyard for years after. He will be missed.
-
Why do some manufacturers make single plank kits?
chris watton replied to Meriadoc Brandybuck's topic in Wood ship model kits
I guess ultimately, it comes down to what one is used to. For me, personally, my perception of single planked kits was one of cheapness, at least judging from my first wooden kits I bought and made in the early 1990's (Billings). What seemed to be the norm then (at least in the UK, and I assume Europe) was that cheap kits were single planked, with box contents that looked positively anaemic, with wood parts mainly of one type (lime/basswood/obechi), and the 'premium' kits were double planked. That, at least was my experience when first starting out. To do a really good job of a single planked kit, you do have to be very careful in preparation, planking and finishing. The wood is usually still basswood or lime (am talking mainstream kits). Thinking as a beginner/novice, if it were of a harder, closer grained type, because of the required thickness, the planks would be a nightmare to manipulate. Using double planking negates this somewhat, as the thickness can be as little as 1mm, even 0.6, which is much easier to manipulate, despite being closer grained than lime or similar mainstream materials. But this is just based on my experience. If you were brought up on a diet of single planked models, you would be more used to, and more comfortable with that, and naturally favour what you know best.- 24 replies
-
- 14
-
-
Well done, for a first model, that's not too shabby at all. Looks great so far, in fact.
-
cutter-manual.pdf (vanguardmodels.co.uk)