chris watton
-
Posts
2,339 -
Joined
-
Last visited
Content Type
Profiles
Forums
Gallery
Events
Everything posted by chris watton
-
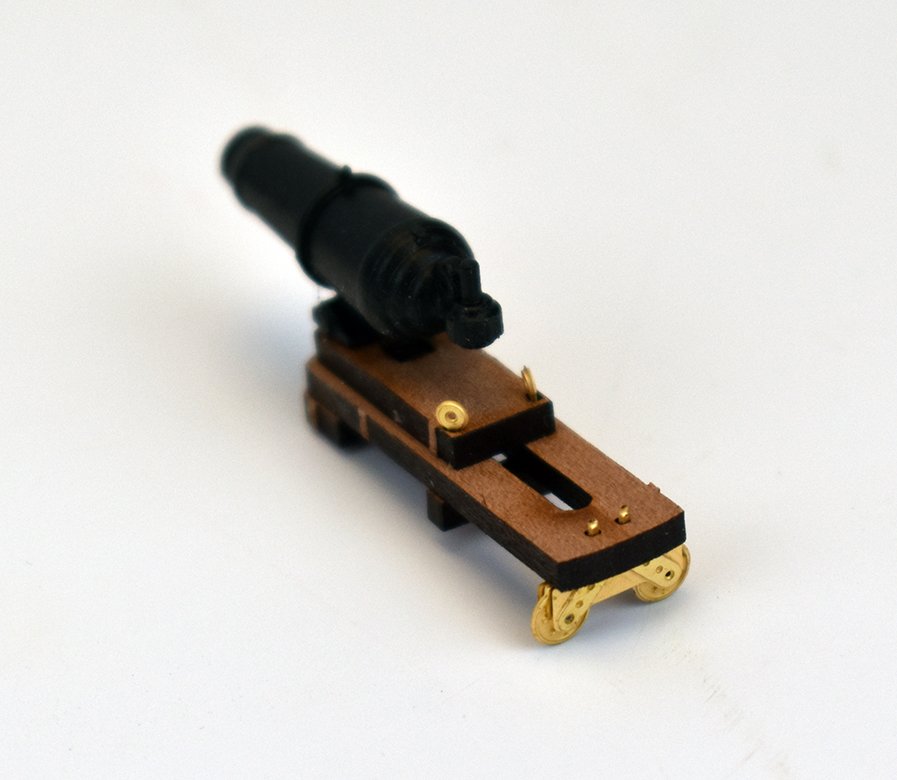
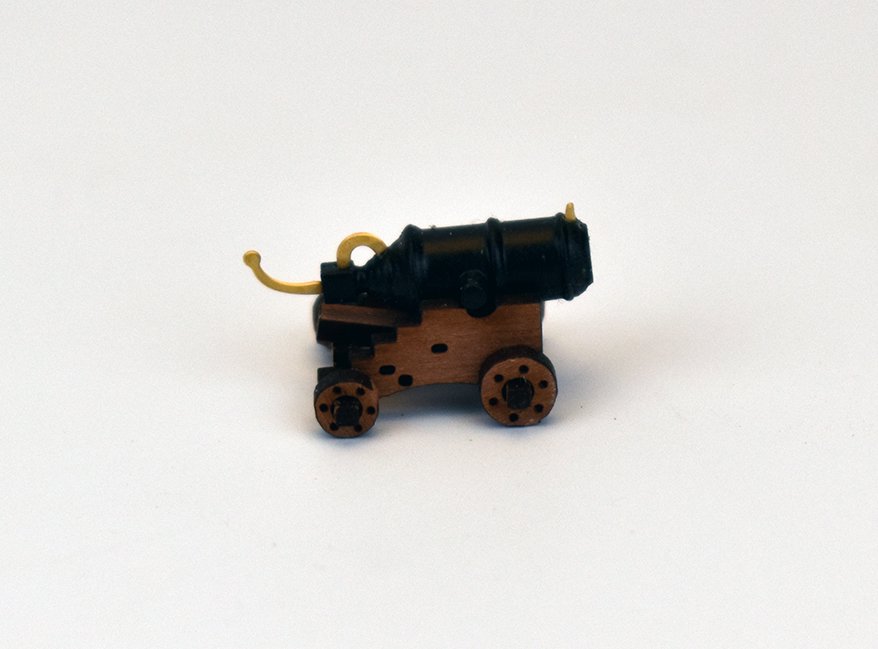
 OK, Duchess of Kingston will be available for pre order very soon, as it is almost ready. In the meantime, I had a set of cast black resin cannon barrels arrive, including a PE sheet for each. I am selling the 9, 12, 18, 24 and 32 pounder cannon barrel and carriage sets in pairs, which include the laser cut pear, photo etched parts (including flintlocks) and 2 cast black resin barrels. https://vanguardmodels.co.uk/product/cannon-carriages/ I also had sample castings for the carronade barrels, which look fine, so will order production sets to be made. Again, I have the PE sheets done for these, just need the barrels cast now. I have been working on my 7th kit, Sphynx, but because I am no back in full time employment, things are going slower than I would like. Still, get something done every day when I have the spare time. The short 9 pounder barrels (7 foot, as opposed to 8 or 9 foot versions) have been cast by MK, and the figurehead and stern decoration is being carved (digitally) right now, so everything's still moving forward...
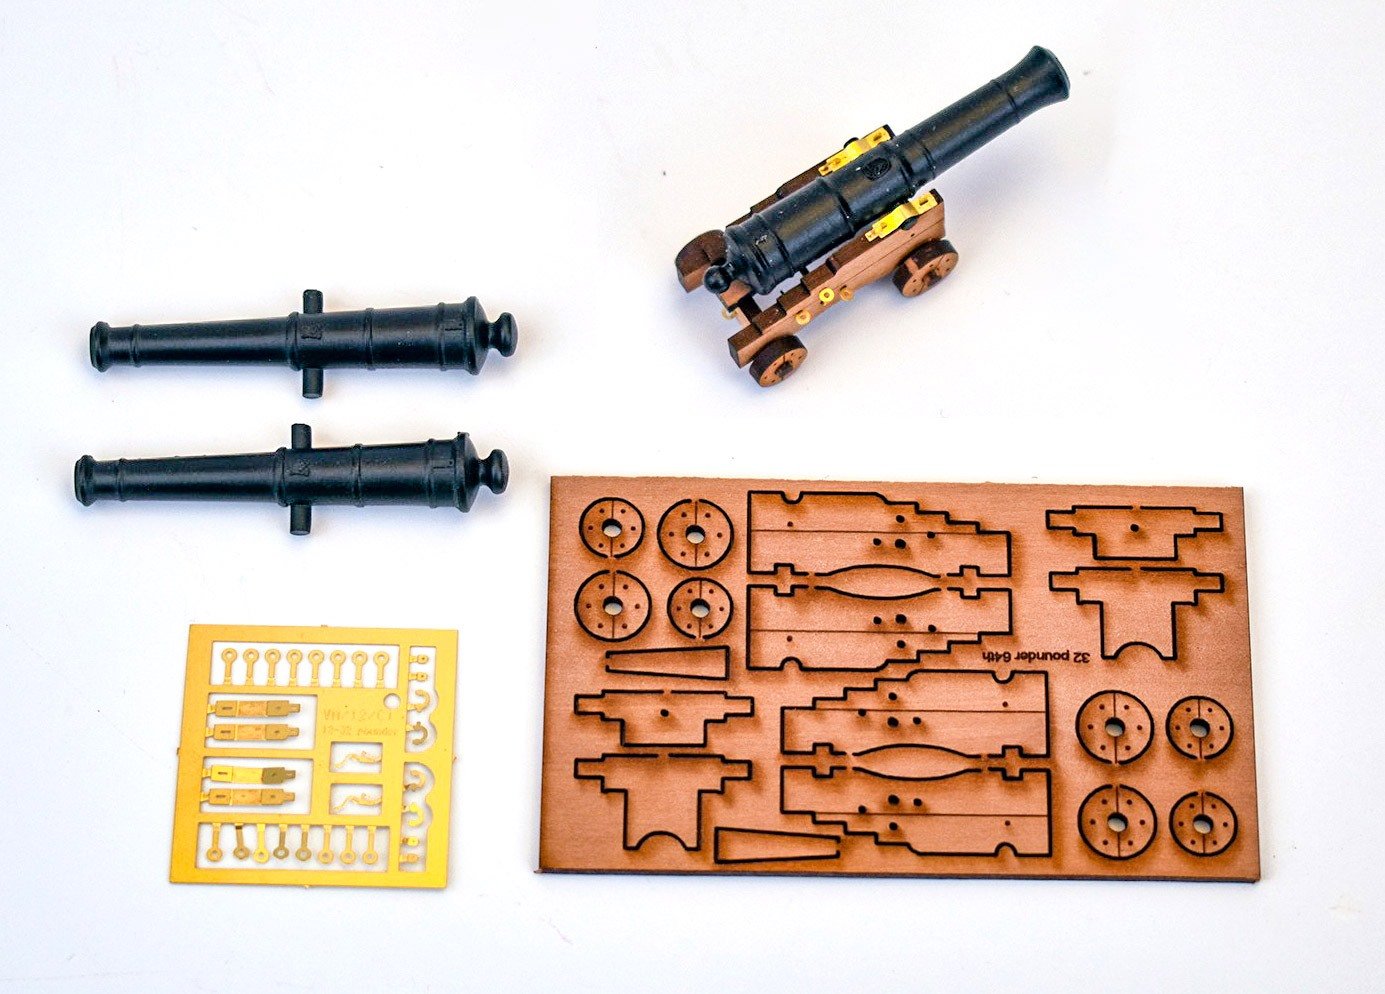
-
I always buy copies of every original plan there is of each subject. These are the basis for the hull, decks and fittings (where and when shown). For detail that isn't shown on the plans, I have plenty of books for reference - the Anatomy of the Ship Pandora is of great use for this particular development, as this is not much bigger than Sphynx and would share a lot of the details for fittings. The ships stove would be slightly smaller, though, according to the tables in The Arming and Fitting of English Men of War. There are belaying pins, but there seems to be no Mizzen bitts and rail at all for this particular class. Am assuming a pin ring or cleats near the foot of the Mizzen...
-
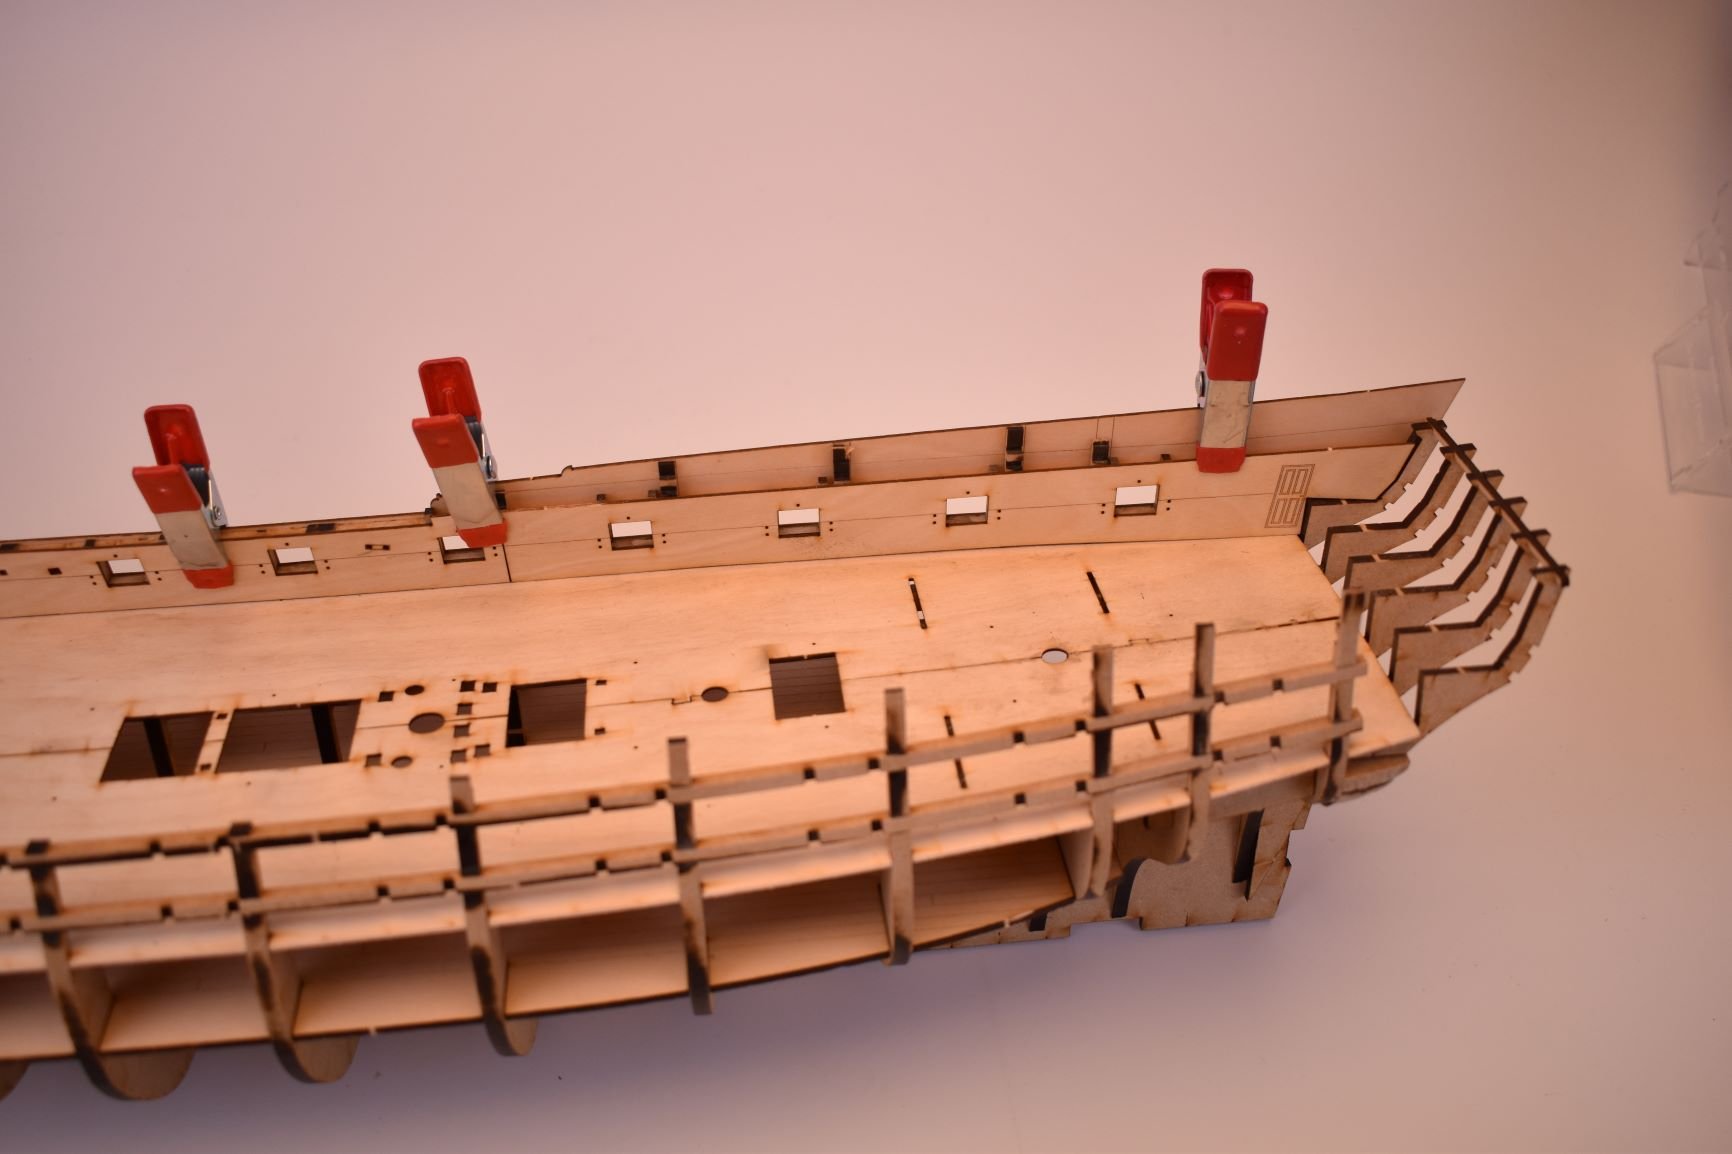
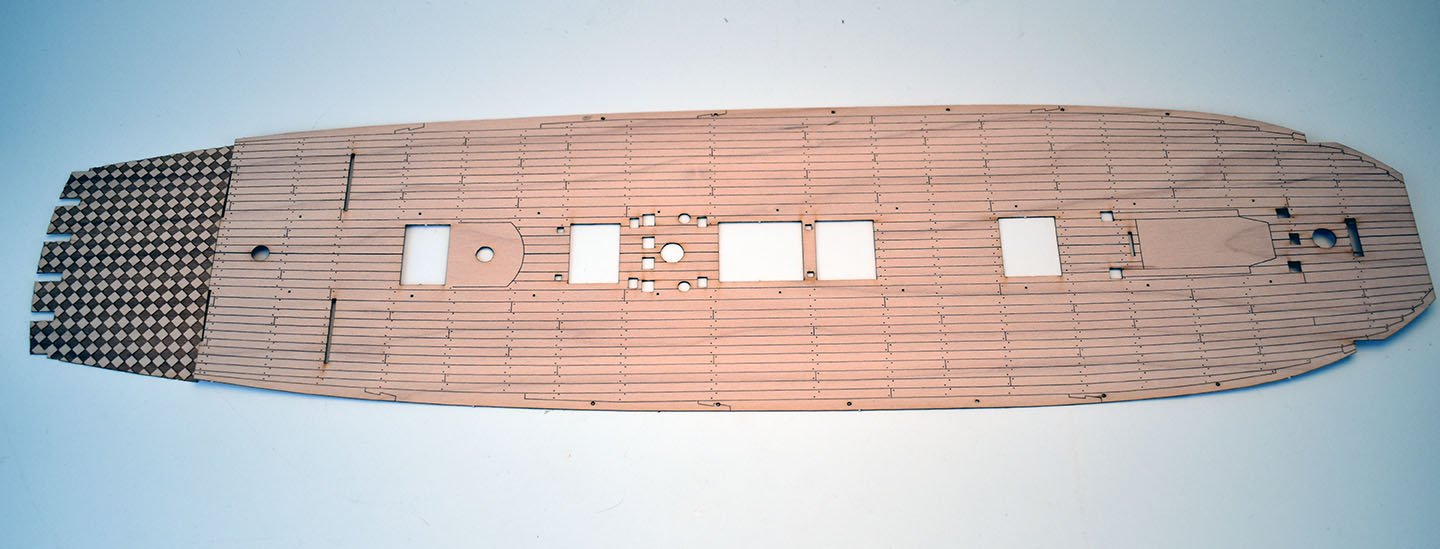
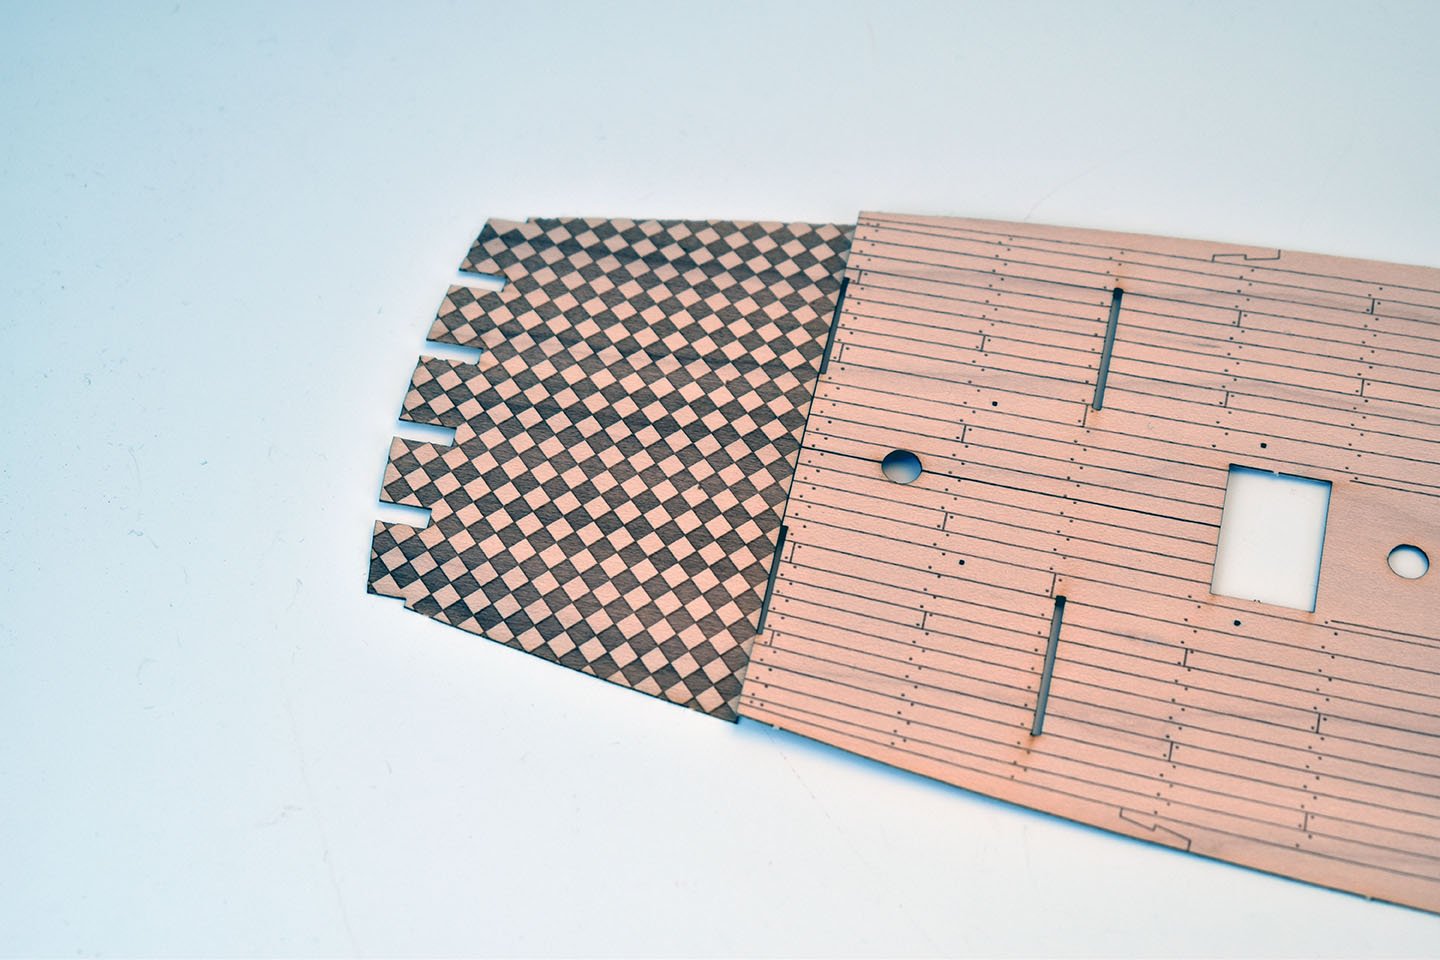
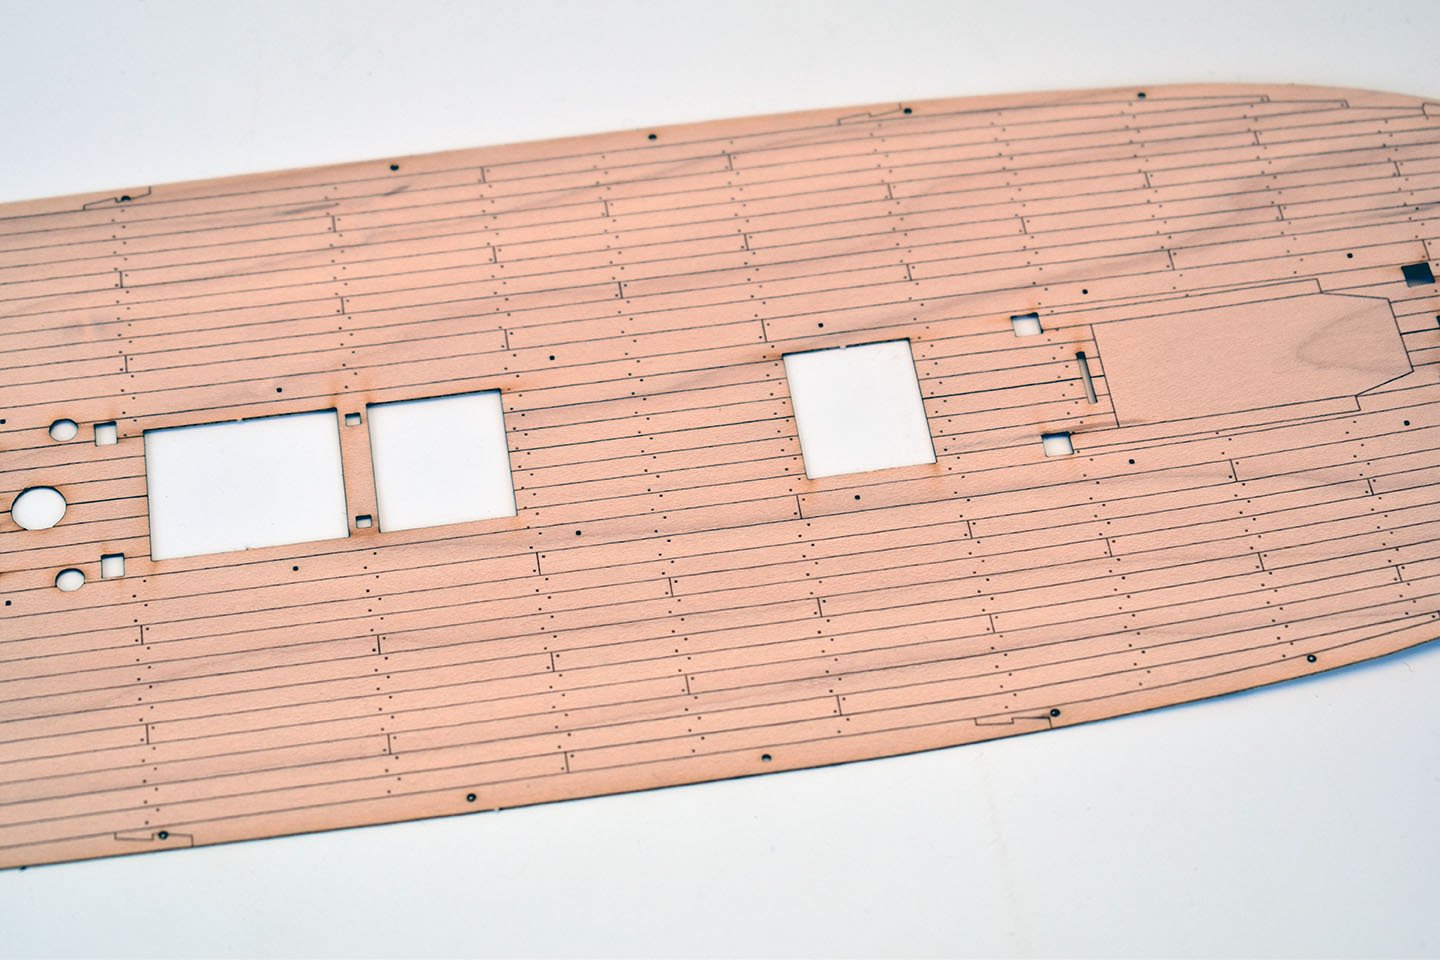
Here is the final version of the main gun deck, complete with engraved chequer plating at the stern. This will be fitted to my prototype model and is cut from a scrap piece of veneer, hence the darker than usual colour variations...
-
I just hate 'Dummy Barrels', and the gun port patterns is now old hat, as every other company seems to have adopted this method (although still required for smaller subjects with thinner bulwarks). I figured that if I were to do a 3-decker, the model needs to have at least three complete decks, otherwise it is no more detailed, internally, as a sloop or frigate, the only difference being the hull is deeper. With this Victory, you do not start the outer planking until half way though the hull build!
-
Alex is a master model maker, making unique models, but only one model, with no consideration required for manufacturing hundreds of the same. What I will do is laser etch the detail (as per Duchess of Kingston yacht), as I cannot get any strip with such mouldings at this small size. Plus they end up in scrolls - better to have the whole rail as one so they 'flow' as they should, as far as I am concerned. Most kits supply 1x2 or 1x1mm wood strip for these parts. I am already worried that I am adding too much to this kit, which increases costs....
-
I will paint the inner bulwarks red for the prototype. The modeller can paint or varnish as they wish. (Spirketting planks added once deck laid)
-
I so wanted to paint the topsides of my prototype model black, as it should be...
- 222 replies
-
- 3
-

-
- First Build
- Lady Isabella
- (and 2 more)
-
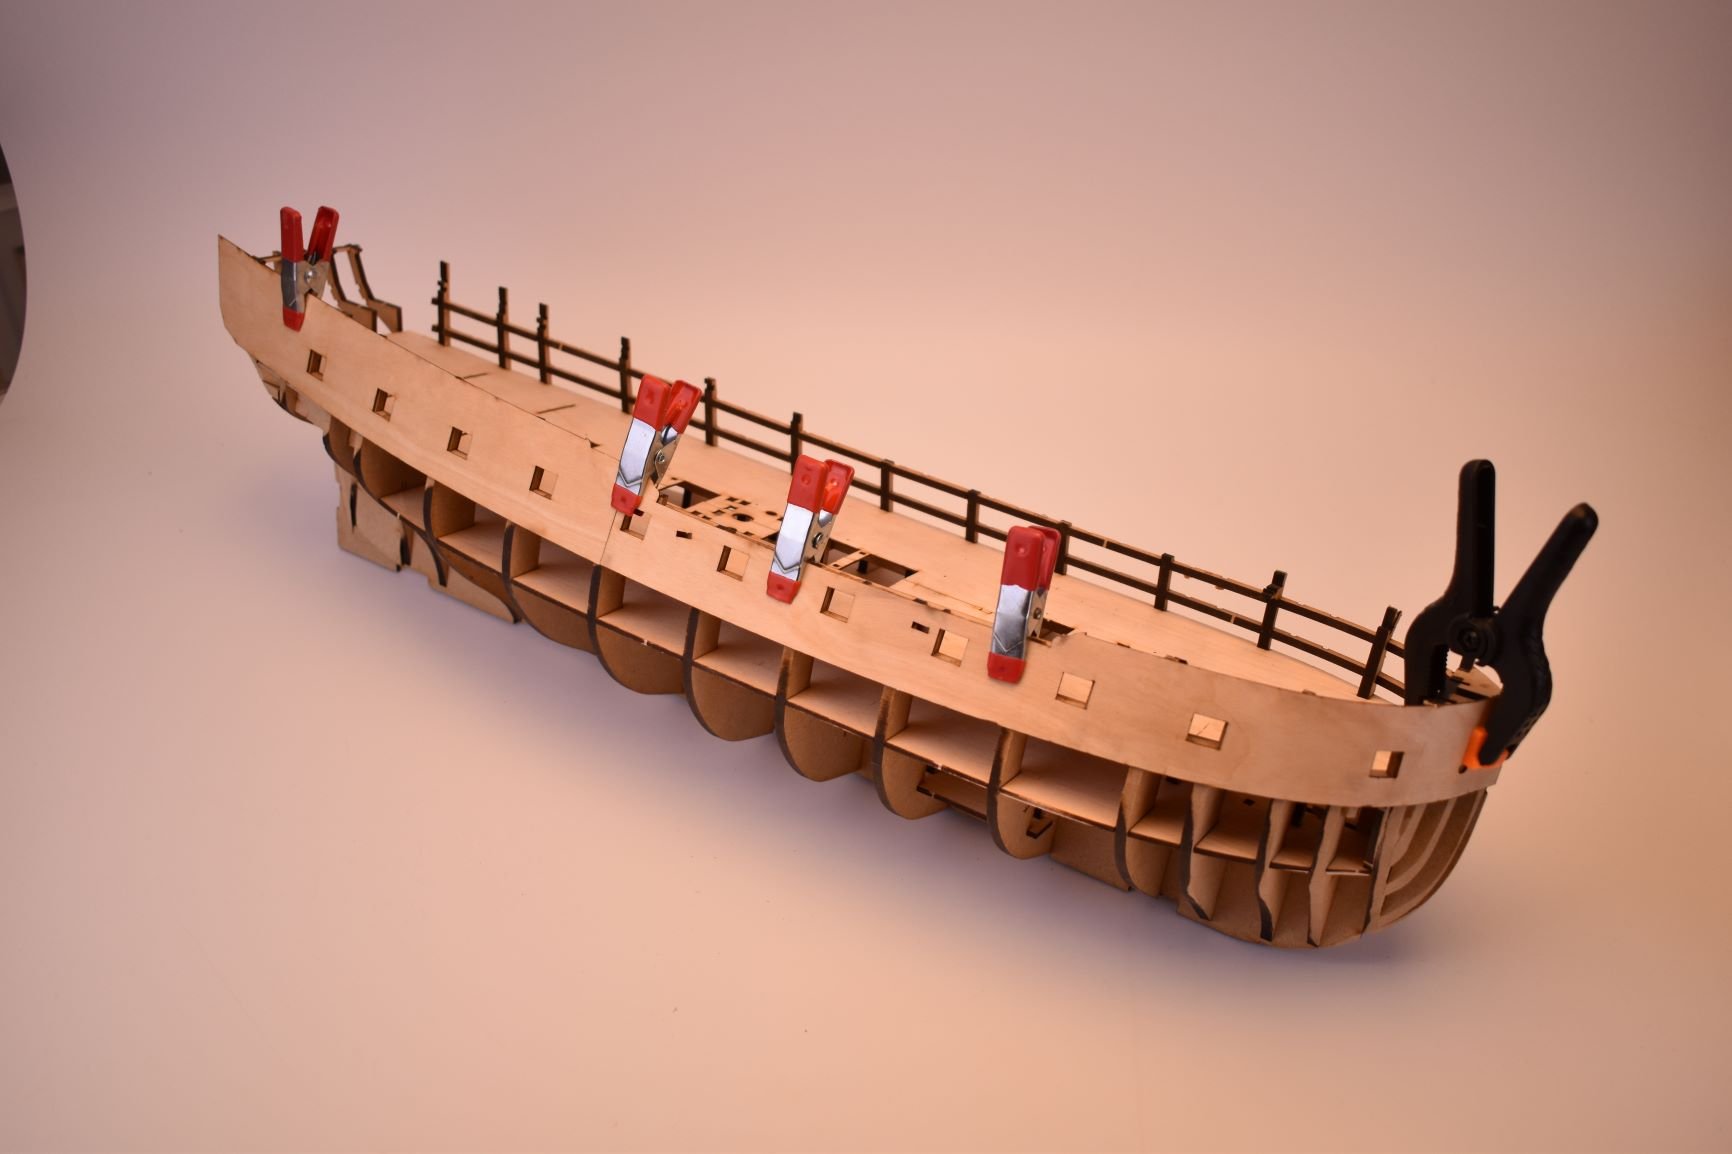
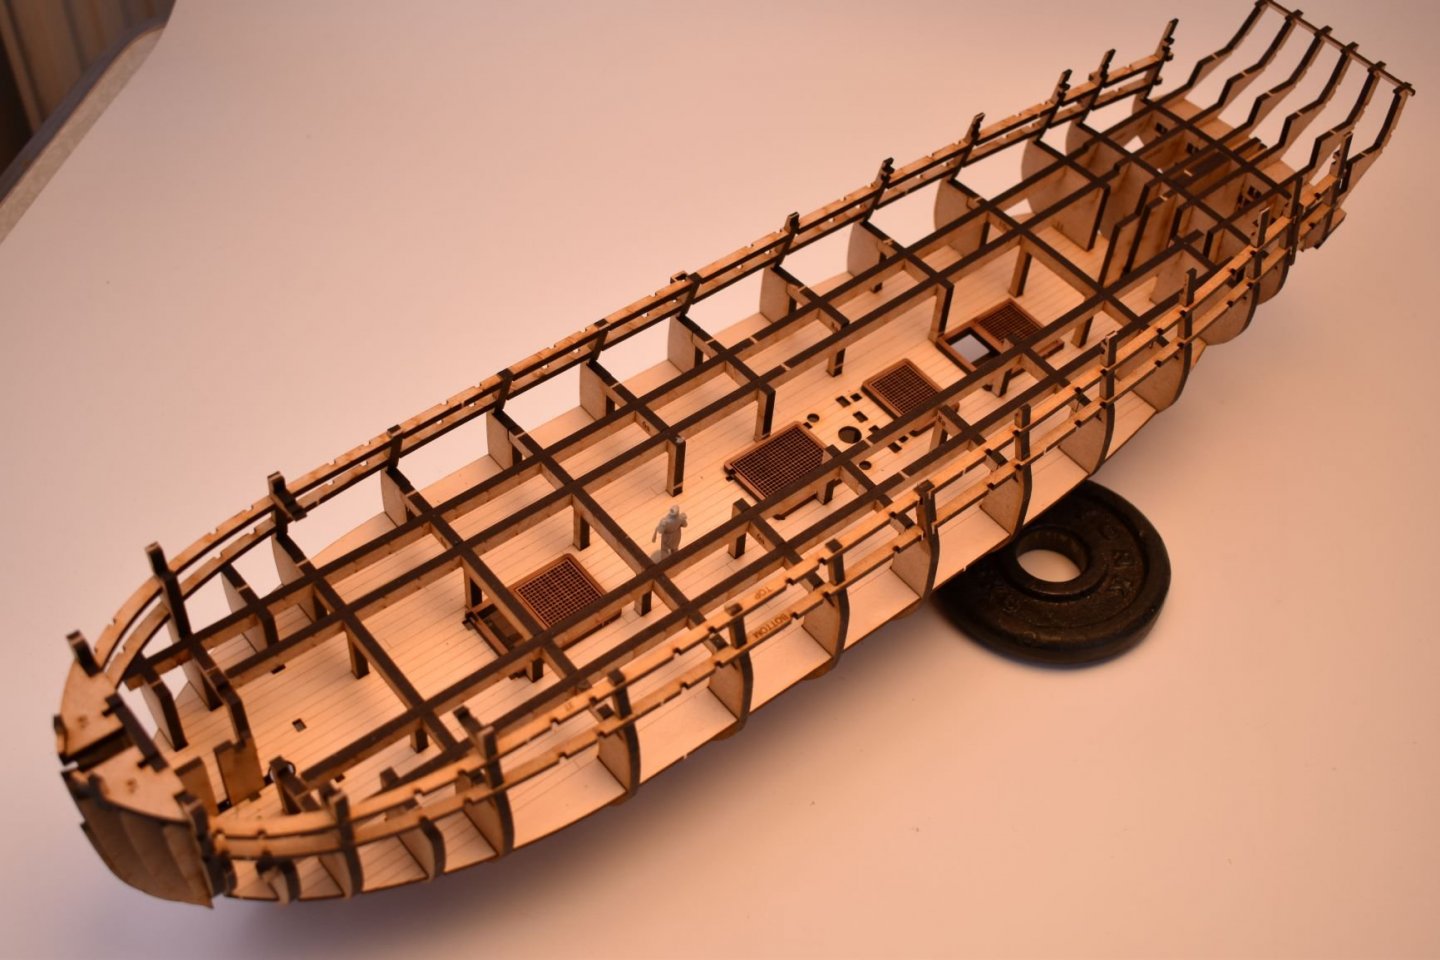
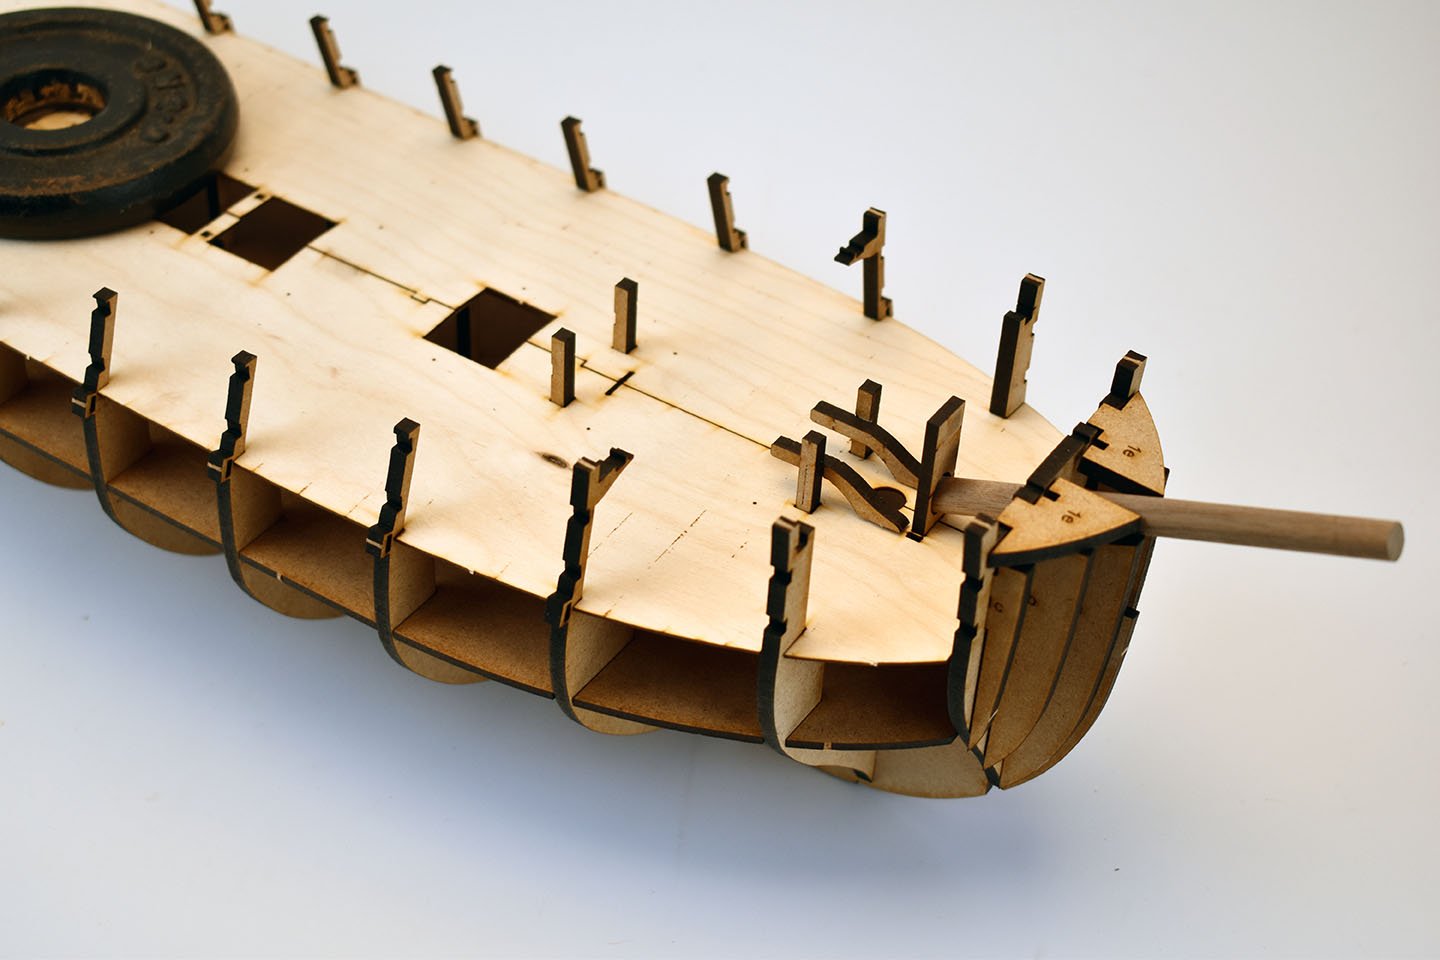
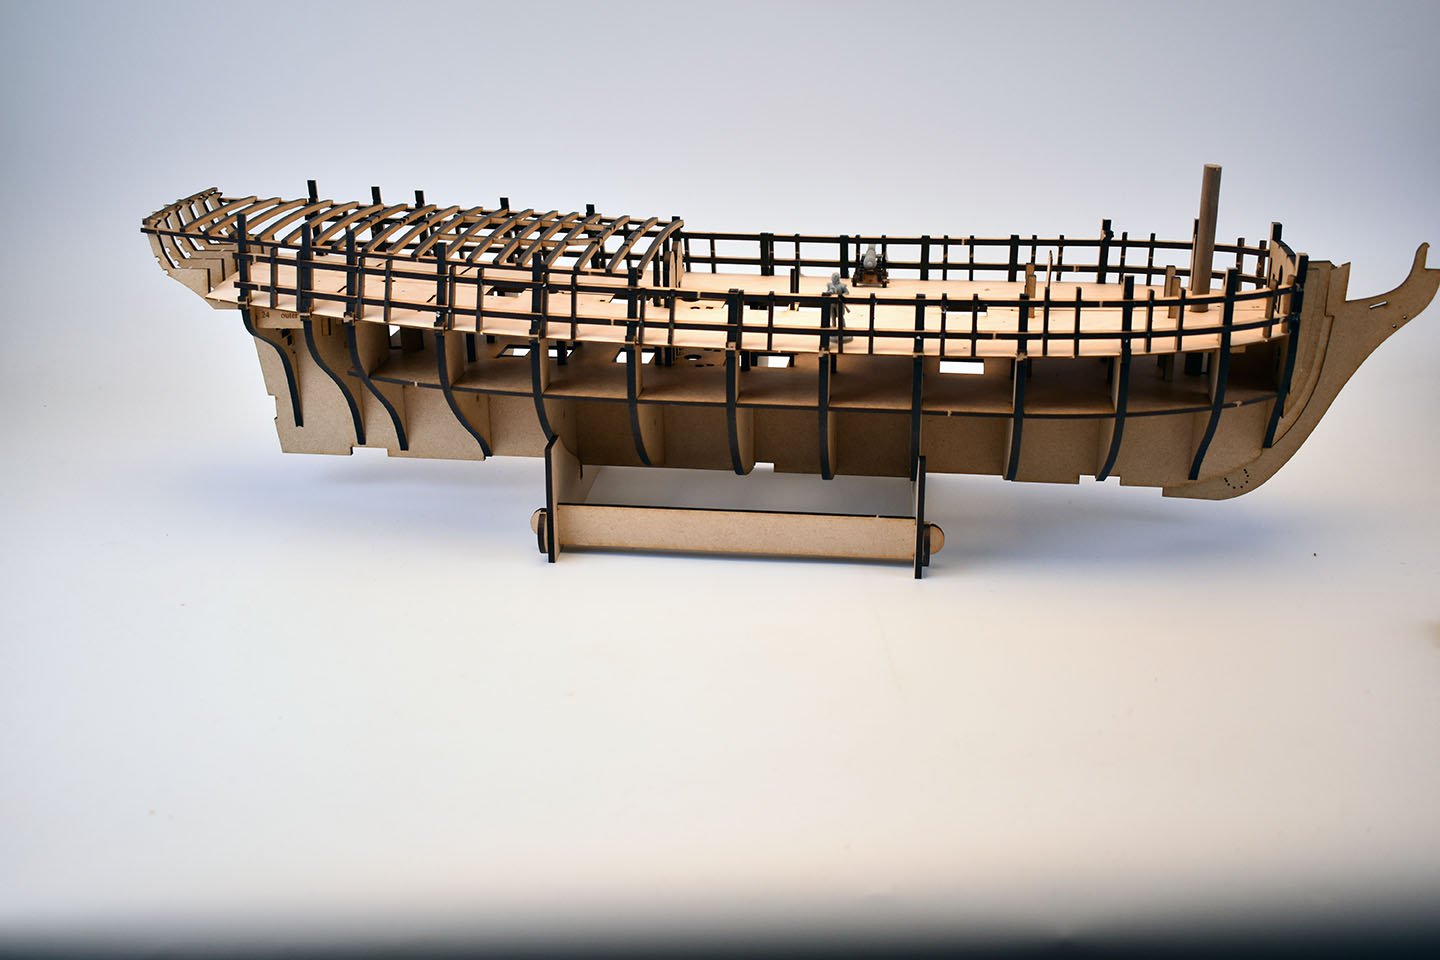
Still in pre-prototype stage, but am now ready to start laser cutting for the actual prototype model, now that I have worked out all essential patterns required. These pics will not reflect the actual model, as the inner bulwarks will be wood, plus there gave been quite a few minor changes to everything...

-
I think that Sphynx is a nice size, not too big, not too small, and noticeably larger than the 16 gun Swan Class. Designs are well beyond those of Fly/Pegasus, though, even Victory. The drawback is the sheer amount of laser cut parts and materials for it, making it more expensive, but as easy to build as it can be. For the much larger kits, I may have to hold back on the designs (making them more traditional and stay at Amati Victory levels), though, as prices would start to get too high, as I do need them to sell...
-
Caledonia immediately springs to mind, followed by Commerce de Marseilles...
-
Cheers ASAT. I don't know know, though, I love Chuck and CAF's models, they are great, and lot more technical than mine. But I try to design with the novice in mind, and hope they can build something that looks great out of the box without too much 'kit bashing', like we're used to with the older mainstream kits. ETA - Forgot to mention, bulkheads and bow/stern patterns are thicker MDF and keel is 3mm, to be clad either side, like Duchess of Kingston for etched details and rabbets.
-
Don't know finished dimensions, haven't looked at masts and yards yet, as I have only just started. I know the hull is around 605mm without any spars. Am figuring about 770/780mm overall length, as there's no mizzen gaff boom jutting out from the stern (being 1775) No Jim for this one, am on my own, as Jim has the Amati Victory to do, the two timer!
-
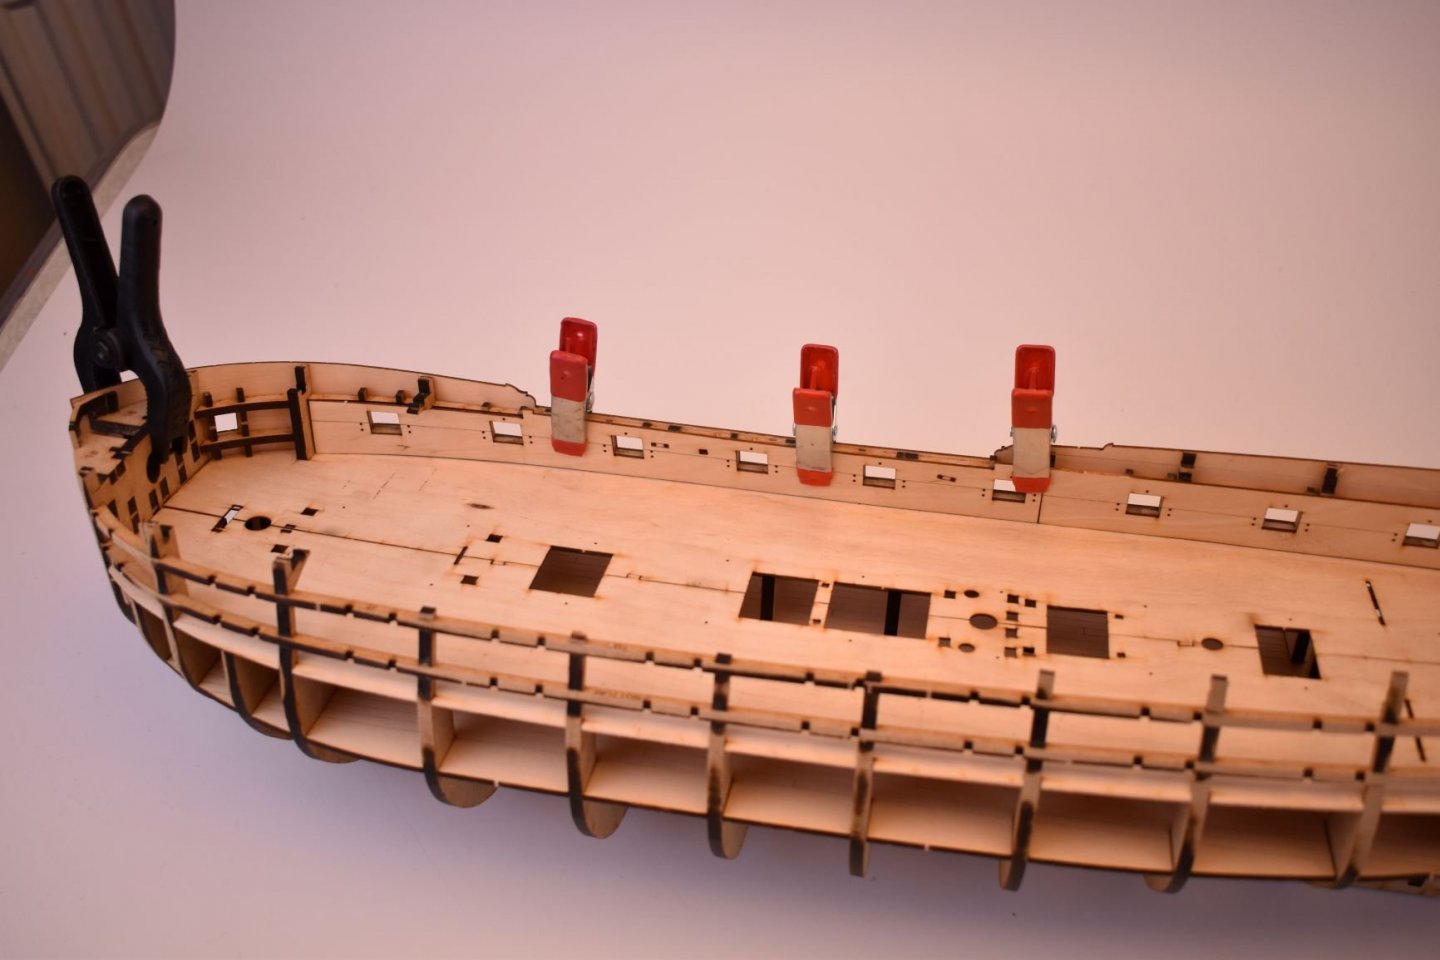
OK, am now fully up to date with the Duchess of Kingston manual, not much left to do on that. So today I cut the second 'pre-prototype' Sphinx parts, which have quite a few little changes from the first. One of which is making sure the bowsprit sits correctly when added. Still only MDF for most parts. Gun deck is split into halves. I did try bending a complete deck into position on the first prototype, but only managed to damage the bulkhead tabs. Nothing is glued at all at this stage, just checking critical alignments. In fact, I shall recommend that nothing is glued until the 2mm lower/birth deck is in place. The upper tabs look vulnerable, but the gun port 'stringers' are added (3mm MDF) once the gun deck is in place, making them a lot stronger as they connect to every single bulkhead. In fact, because the deck is in two halves, they could be added before fitting the deck...

-
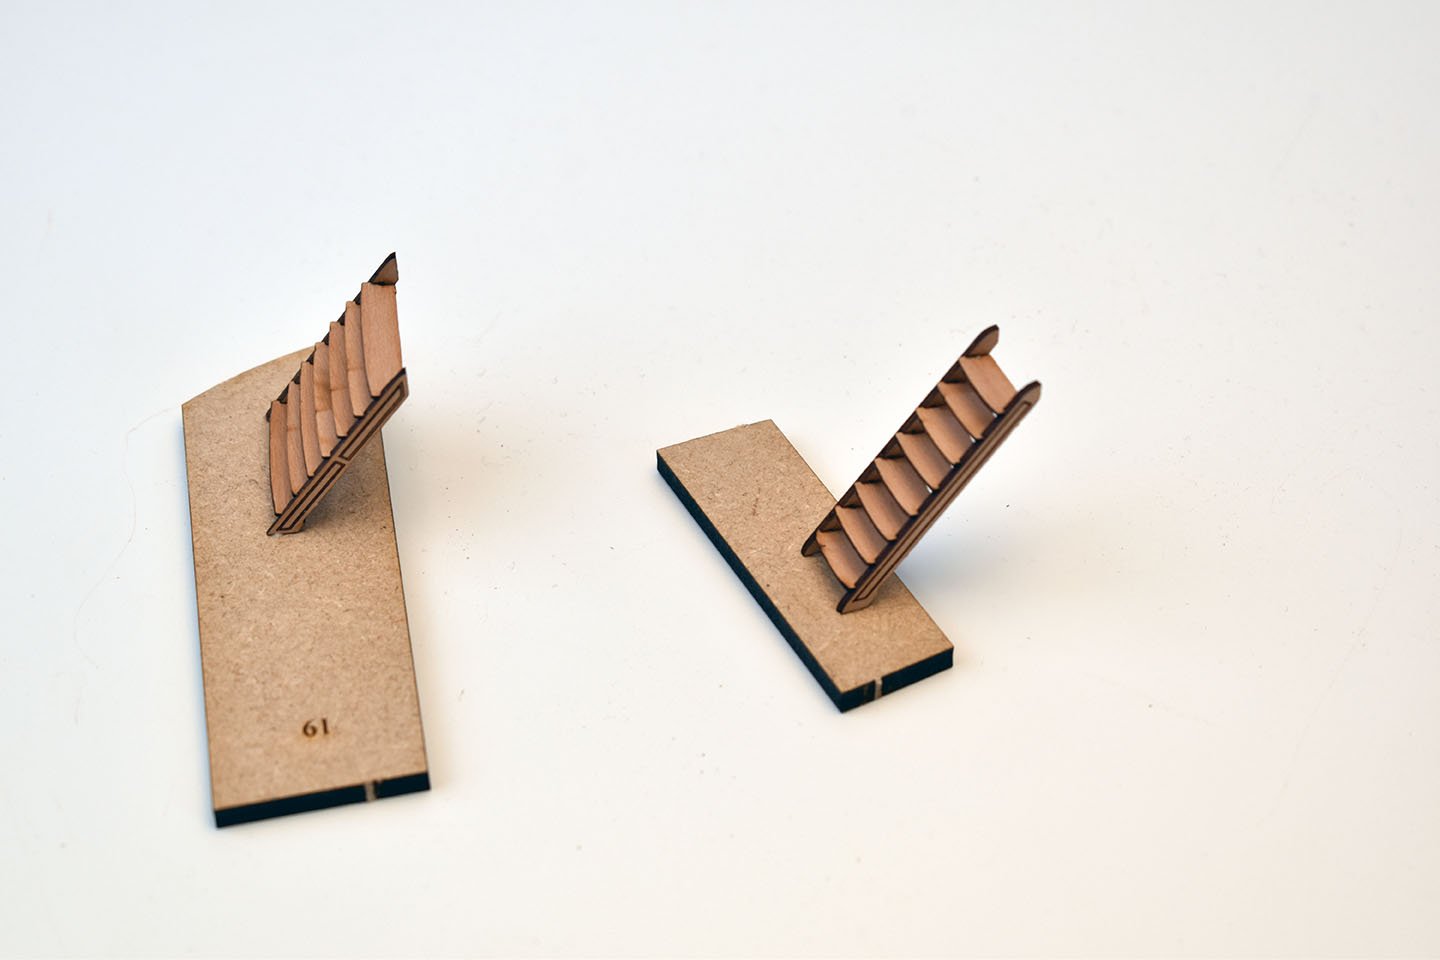
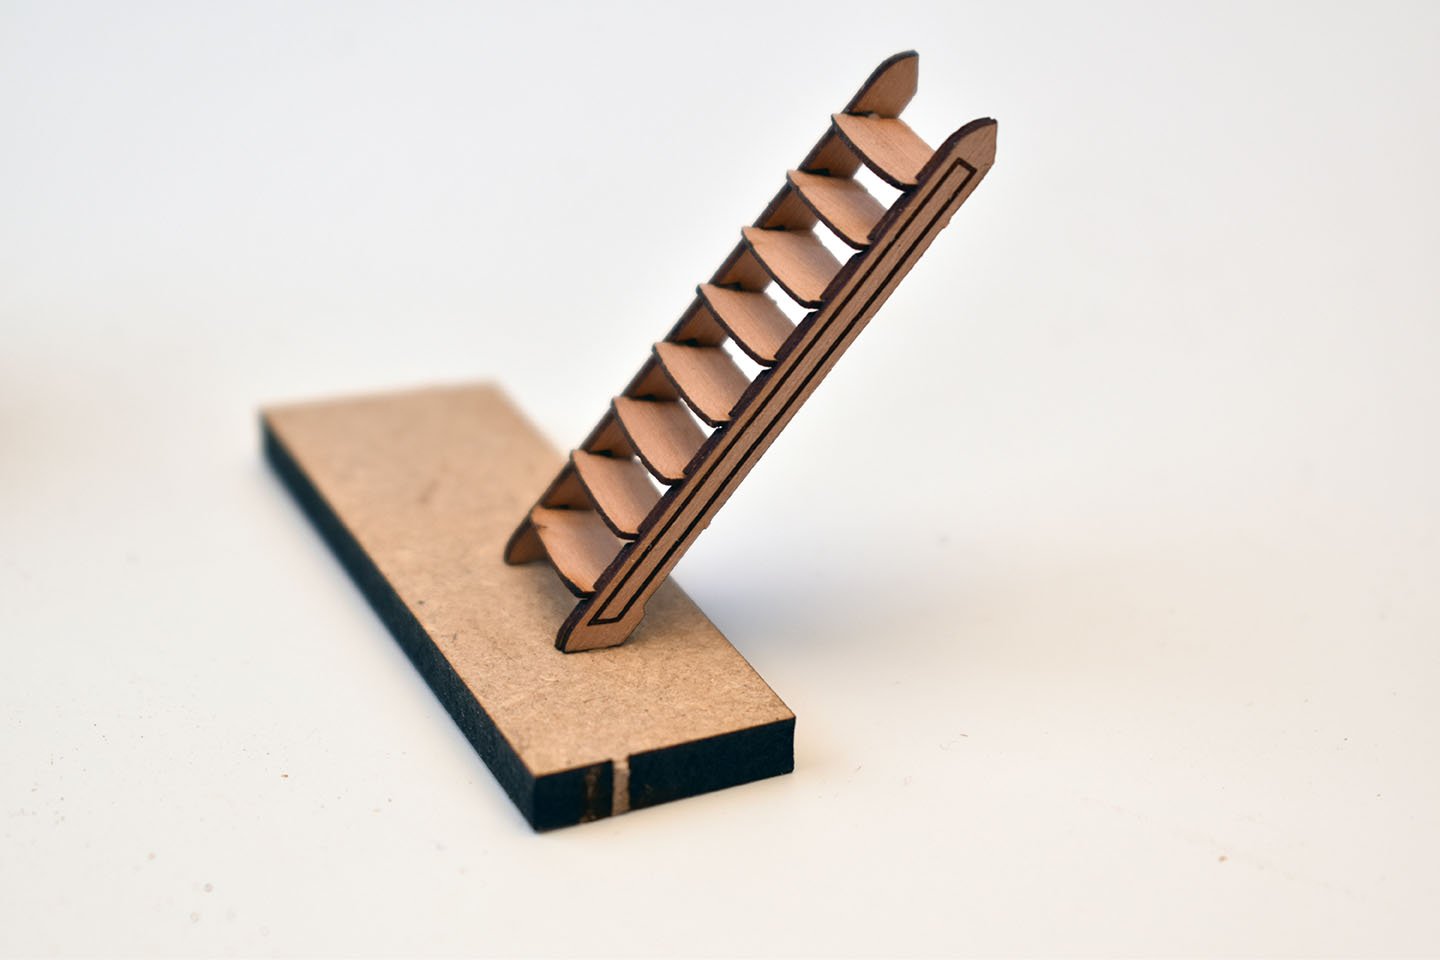
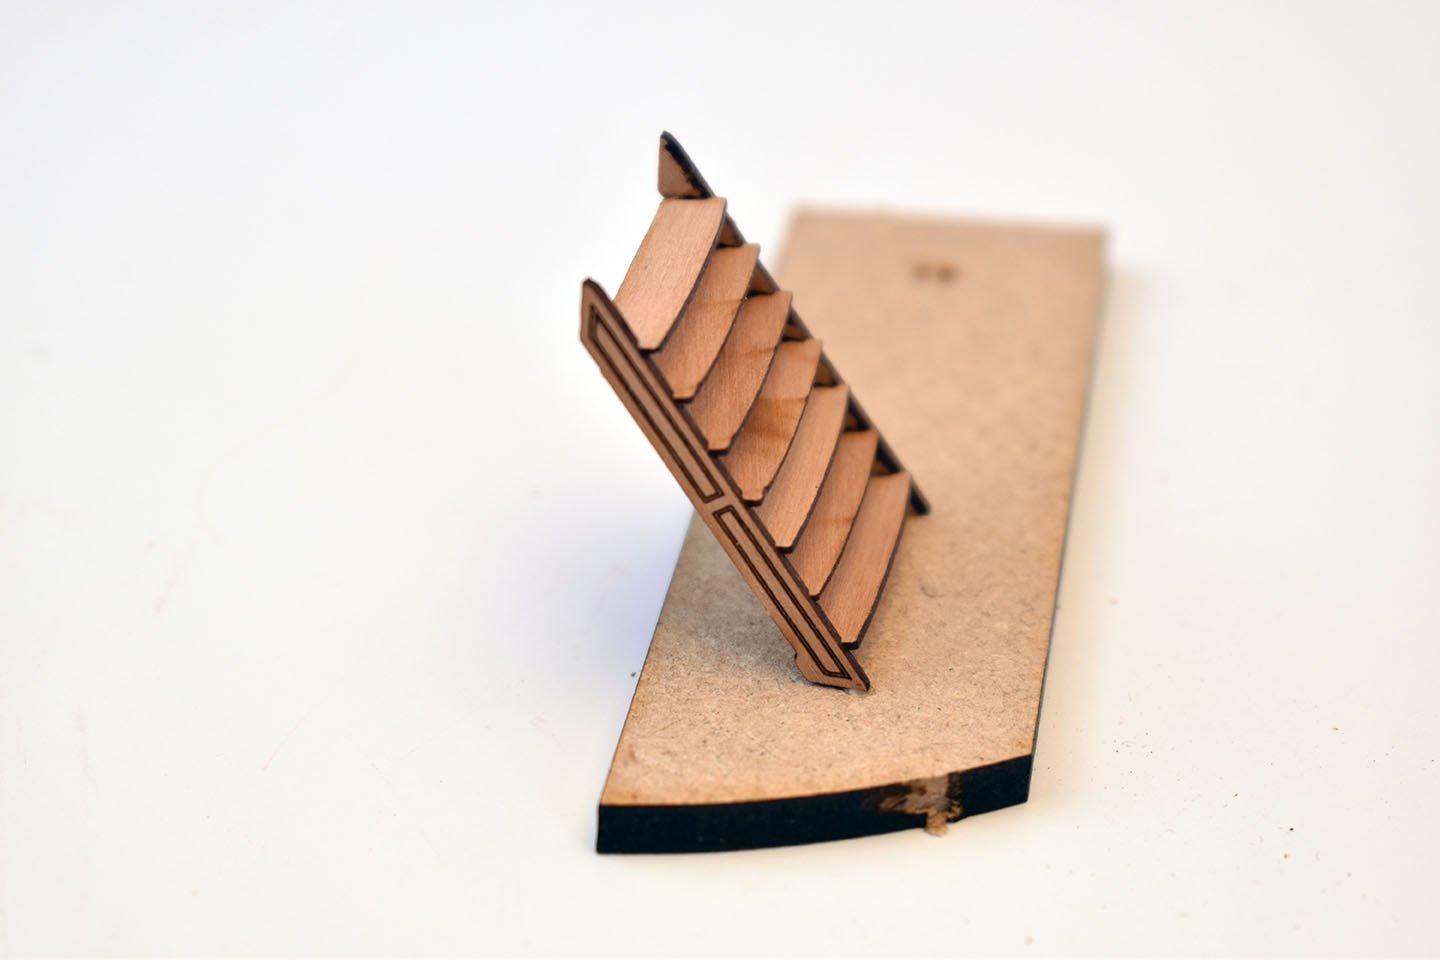
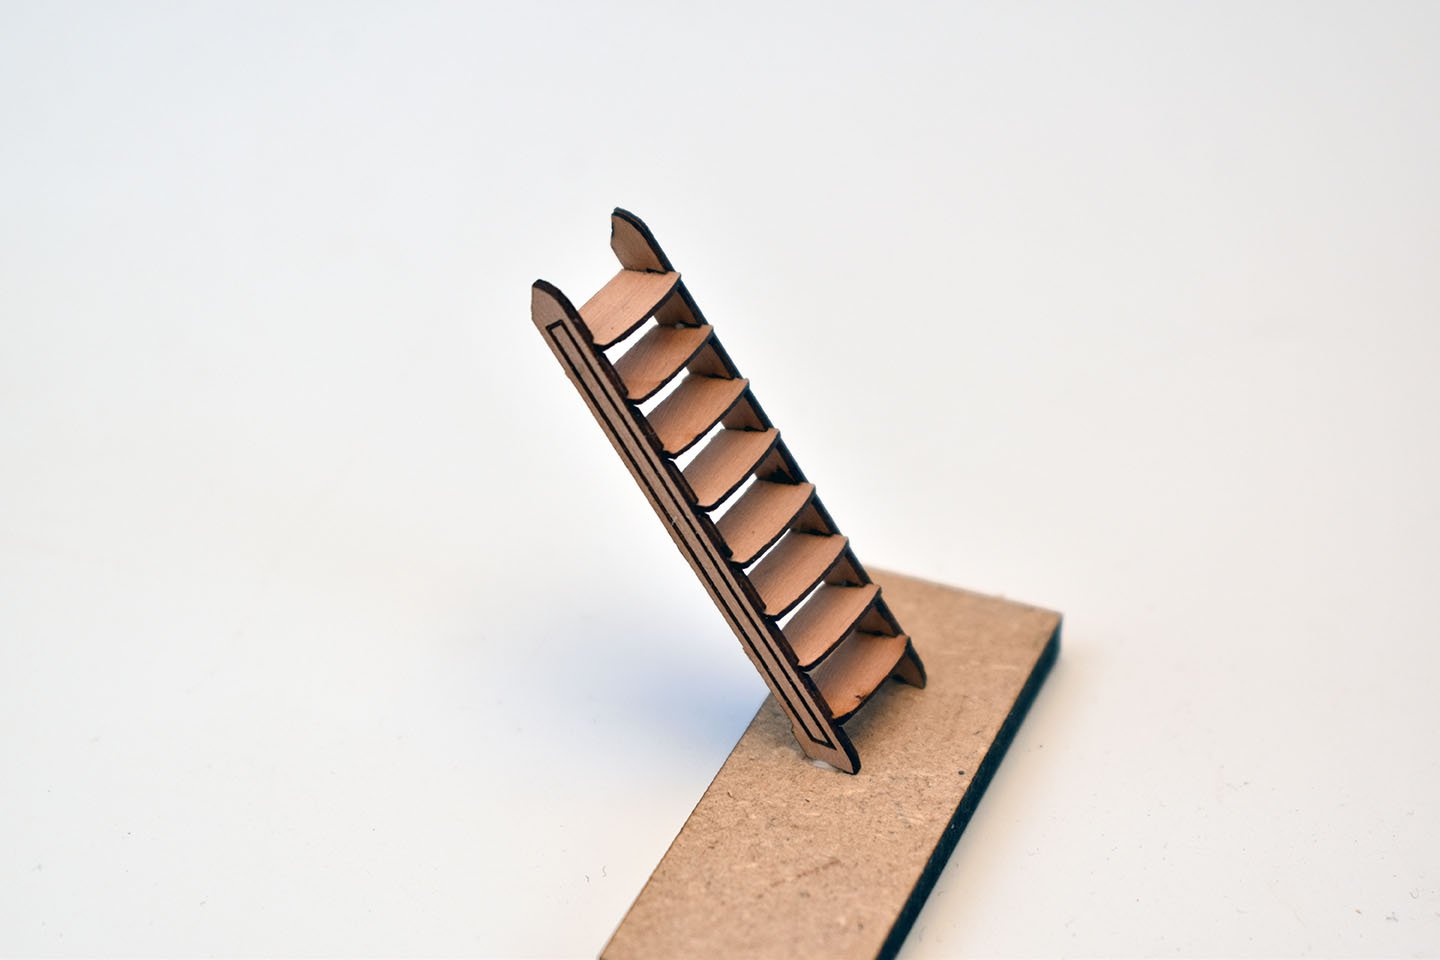
Yep, HMS Sphynx, will be my 7th kit, a real step up in size and complexity. Am laser cutting 2nd lot of 'pre-prototype parts now. I thought the 1mm pear for ladder sides, especially double layered, looked a trifle thick. I ordered a batch of 0.6mm pear sheet (more expensive, but prefer things to look more in scale), and designed and just laser cut a pair of ladders for the orlop and mid deck hatch. All ladders will be designed to suit each hatch opening. I copied the ladder profile from the original plans.
-
It is ship rigged, armed with 20 x 9-pounders, Fly (Swan Class) had 16 x 6 pounders plus swivels, as built. Am sure many have already worked out the name and class..
-
What a great job you have done, love it!
-
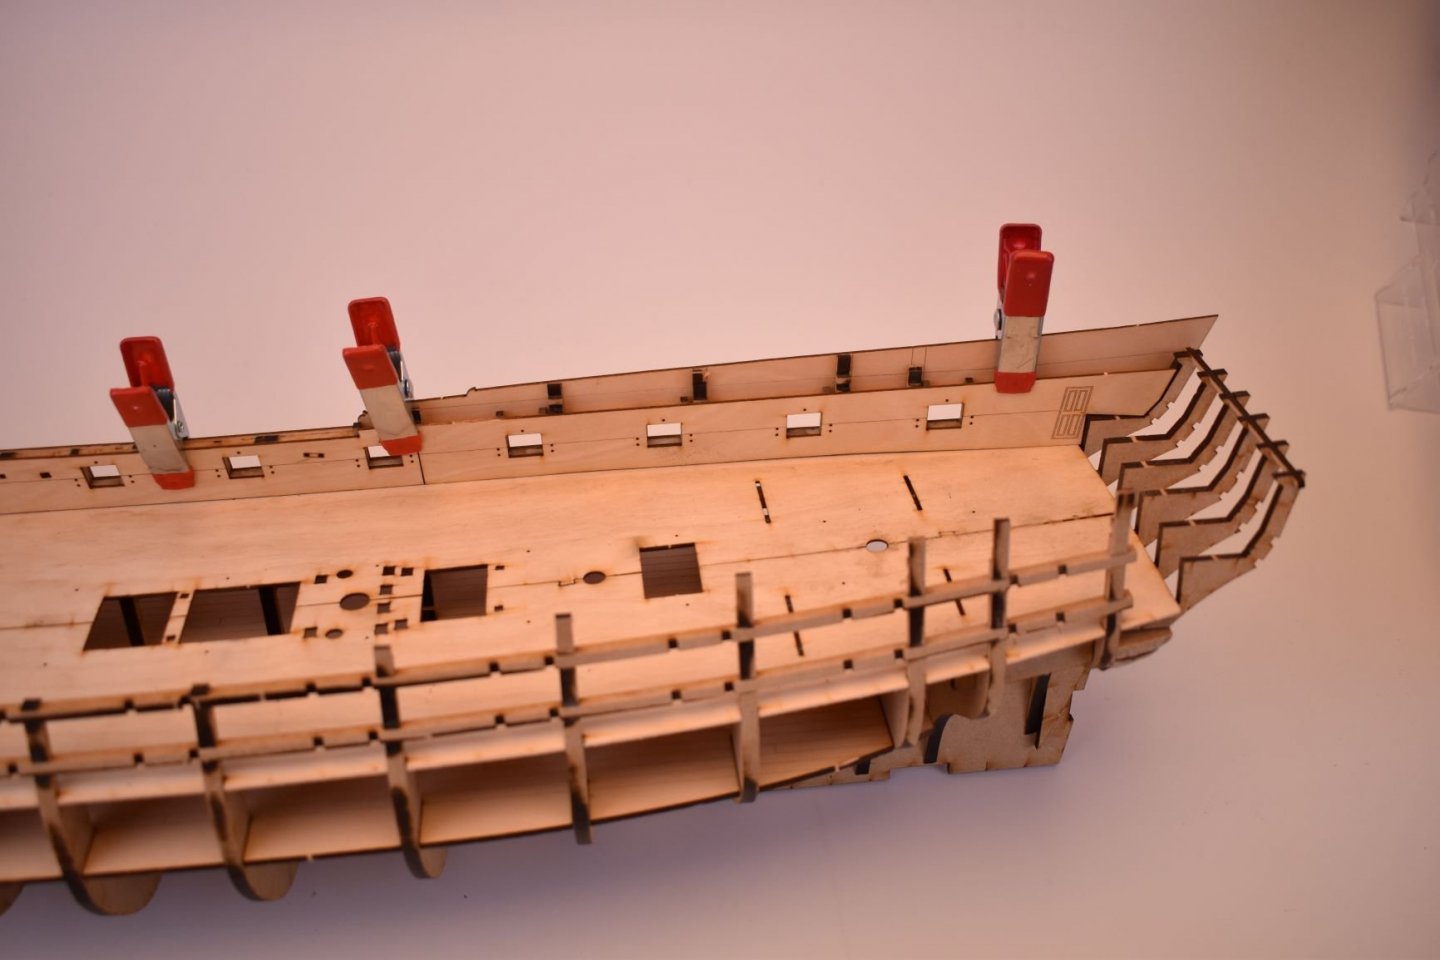
I think I will keep stern frames as is, as I would like the modeller have the option of fitting out that area if they so wished. If they are all solid (but completely fool-proof), then it's a lot of work to try and mod that area. Better to meet half way, allow the modders a fighting chance whilst also allowing the general model maker to sand the area for the stern fascia with minimum risk of breaking anything - so the frames are a lot deeper that they should be, scale-wise. Oh yes, also I shall add coamings and gratings for that lower/berth deck But, I must stop this now and concentrate on the Duchess of Kingston manual, which shouldn't take too long thanks to Jim.
-
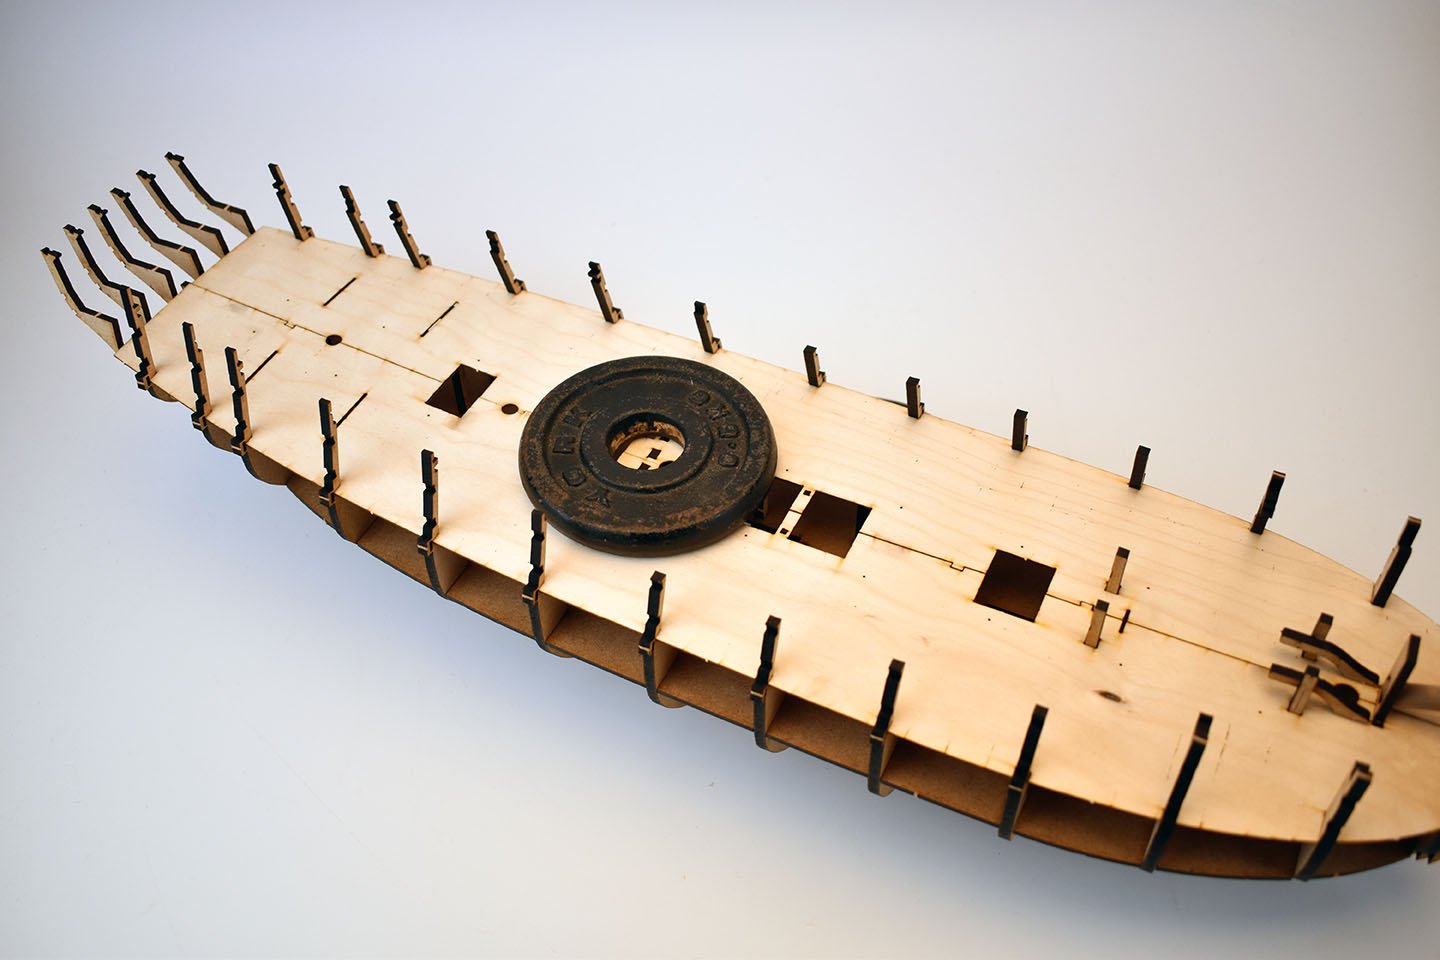
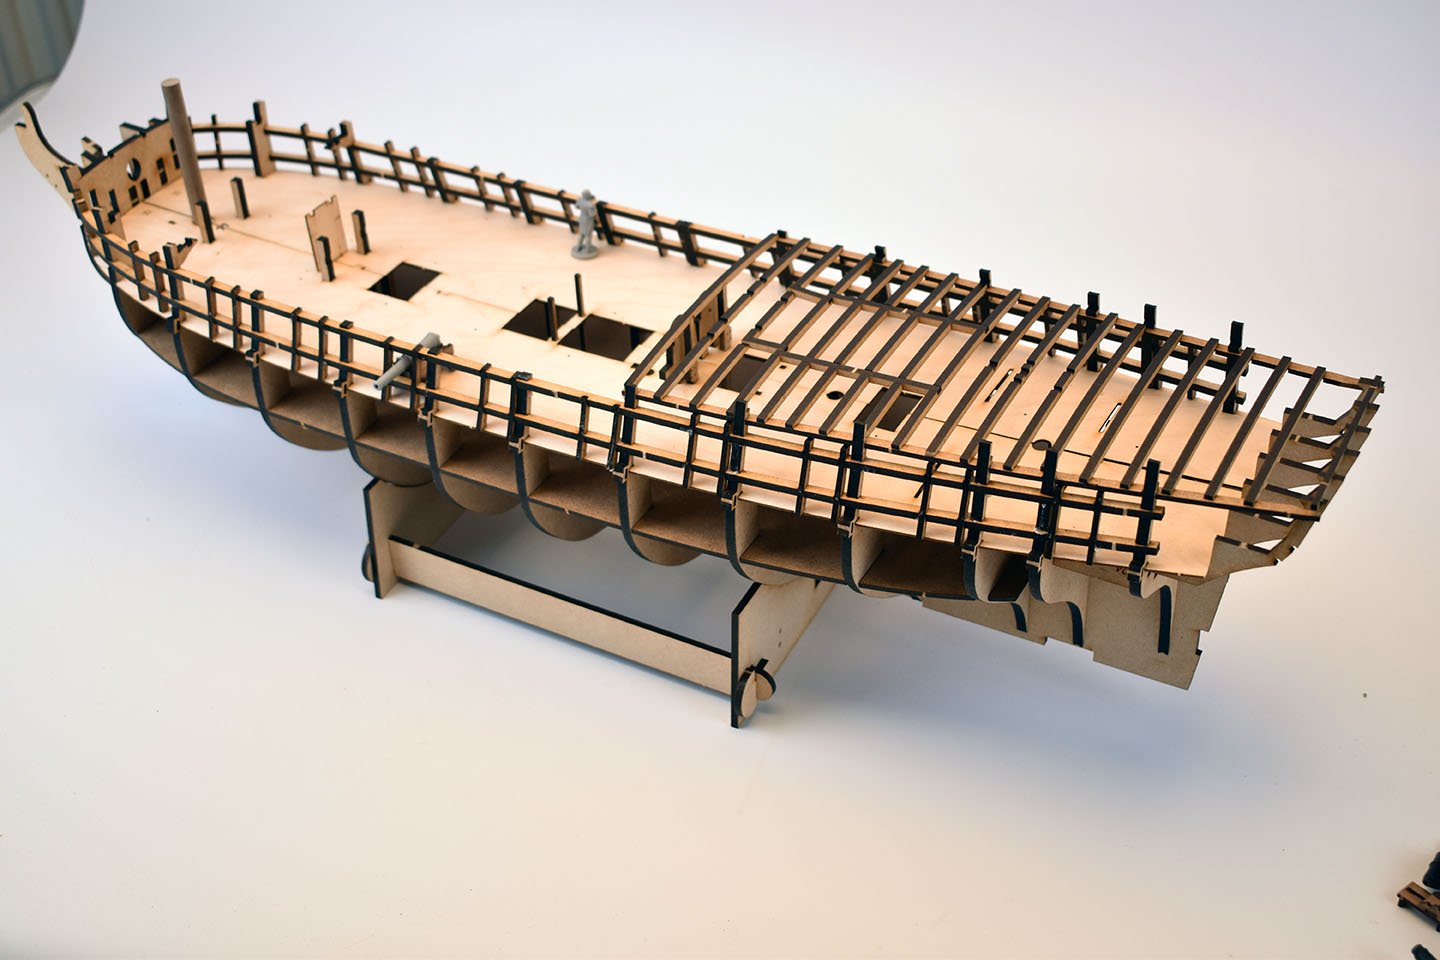
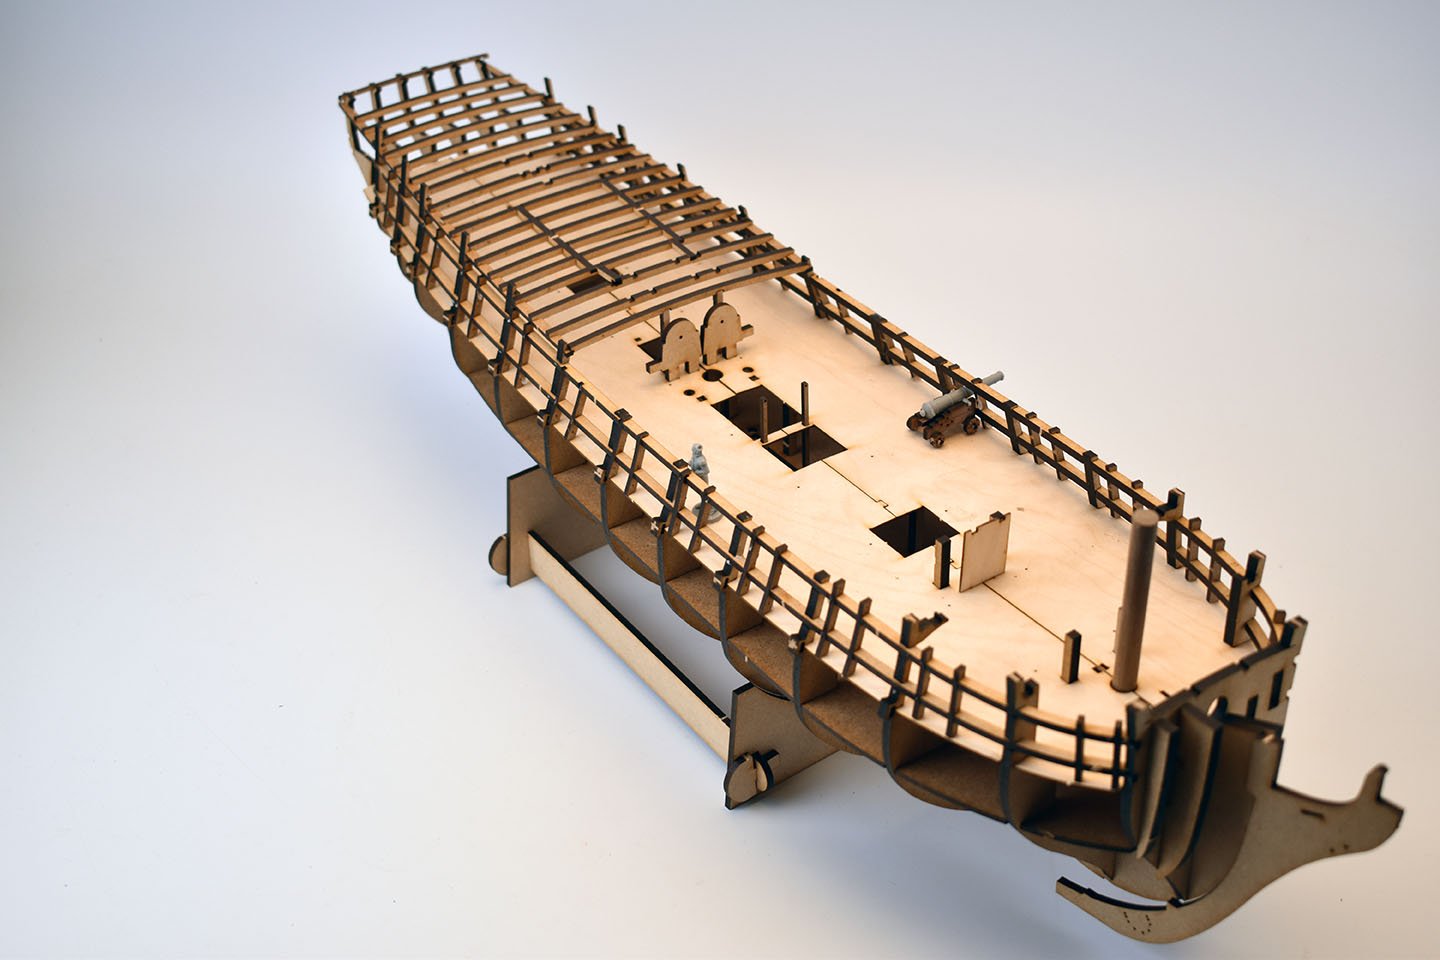
Almost 24 inches for the hull. Have to be careful, as the kits are designed for almost anyone to have a go. What I always have to think of is fragile parts, and how will the non expert modellers fare, a thin line between enjoyment of building and utter frustration. But the pics show more or less what I have in mind for my larger kits, will have to see how the stern holds up to some rough treatment, though, as I know some will moan when they break something.. I cut these parts this morning, actually, I cut two whole sets with slightly different designs for the forecastle and quarterdeck beams, and the one shown proved to be much easier to construct, so that may be what I shall go with, with those beams being spaced to scale.
-
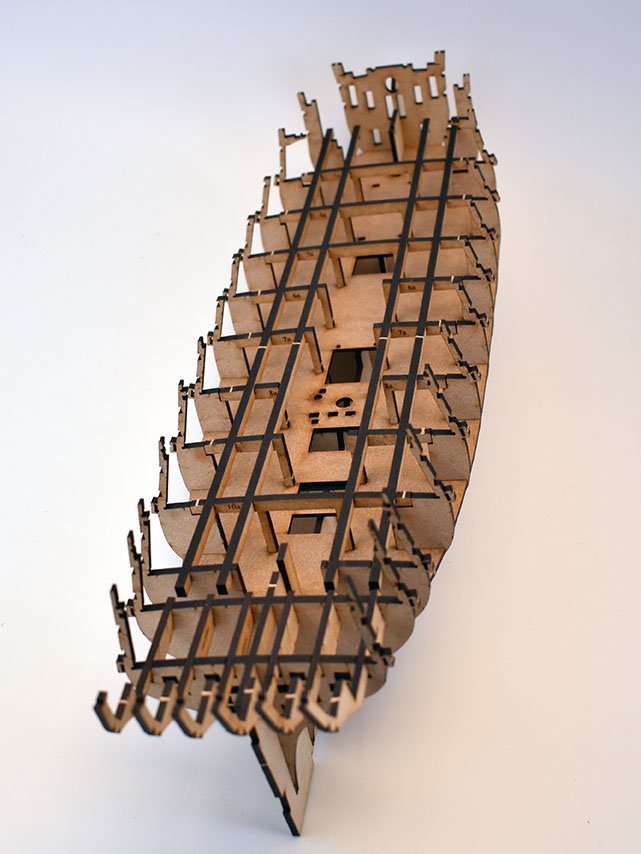
As Jim helps me with completing the Duchess of Kingston model, I started designs on my first medium/large development (a littler larger than a Fly type kit), trying different methods in certain areas to allow more gun deck detail to seen when complete. This hull is over 600mm long and incorporates the gun port frames into the hull structure. But, as I said, this is a very early stage of the design, and this is the first time I have put the parts together, so I can get a feel for what needs to be done, and what I can and cannot get away with... All cut in MDF, only the gun deck in ply. All quarterdeck beams are just placed, not glued..

-
I am sure the object is not a 'Corvus' or any other kind of boarding bridge, as the vessels depicted are merchant/cargo ships.
-
(Provisional) Price is £342.50 and £30 for the optional pear blocks (standard blocks being included in the kit) Won't know the exact end cost until I have the plans and manual quotes
- 117 replies
-
- 8
-
-
- vanguard models
- yacht
- (and 2 more)
-
No 'Master Shipwright' version with this kit. This is because the materials have been tested twice (two full hulls made and finished) with the supplied materials, and I know these work. I am not sure how the boxwood would bend when wet, plus the cost of a MS version would be too prohibitive, due to the sheer amount of boxwood required. The only option for this kit will be the machined pear blocks and deadeyes. I may be open to special enquiries for people with experience with boxwood, but would be very expensive. (This would be 9 boxwood sheets) Regarding flags, I will at some point, but not yet.
- 117 replies
-
- 5
-
-
- vanguard models
- yacht
- (and 2 more)
-
Only once I have the plans and manual in printing. Everything else is done. I weighed the laser cut and photo etched parts pack today, well over 1.3kg. A lot of parts, but that doesn't mean complicated, it just means there are less (or no) parts for the modeller to fashion from scratch from a supplied lump or strip of wood. I think Jim's managed to get this far in just 5 weeks!
- 117 replies
-
- 11
-
-
- vanguard models
- yacht
- (and 2 more)