


CTDavies
-
Posts
72 -
Joined
-
Last visited
Content Type
Profiles
Forums
Gallery
Events
Posts posted by CTDavies
-
-
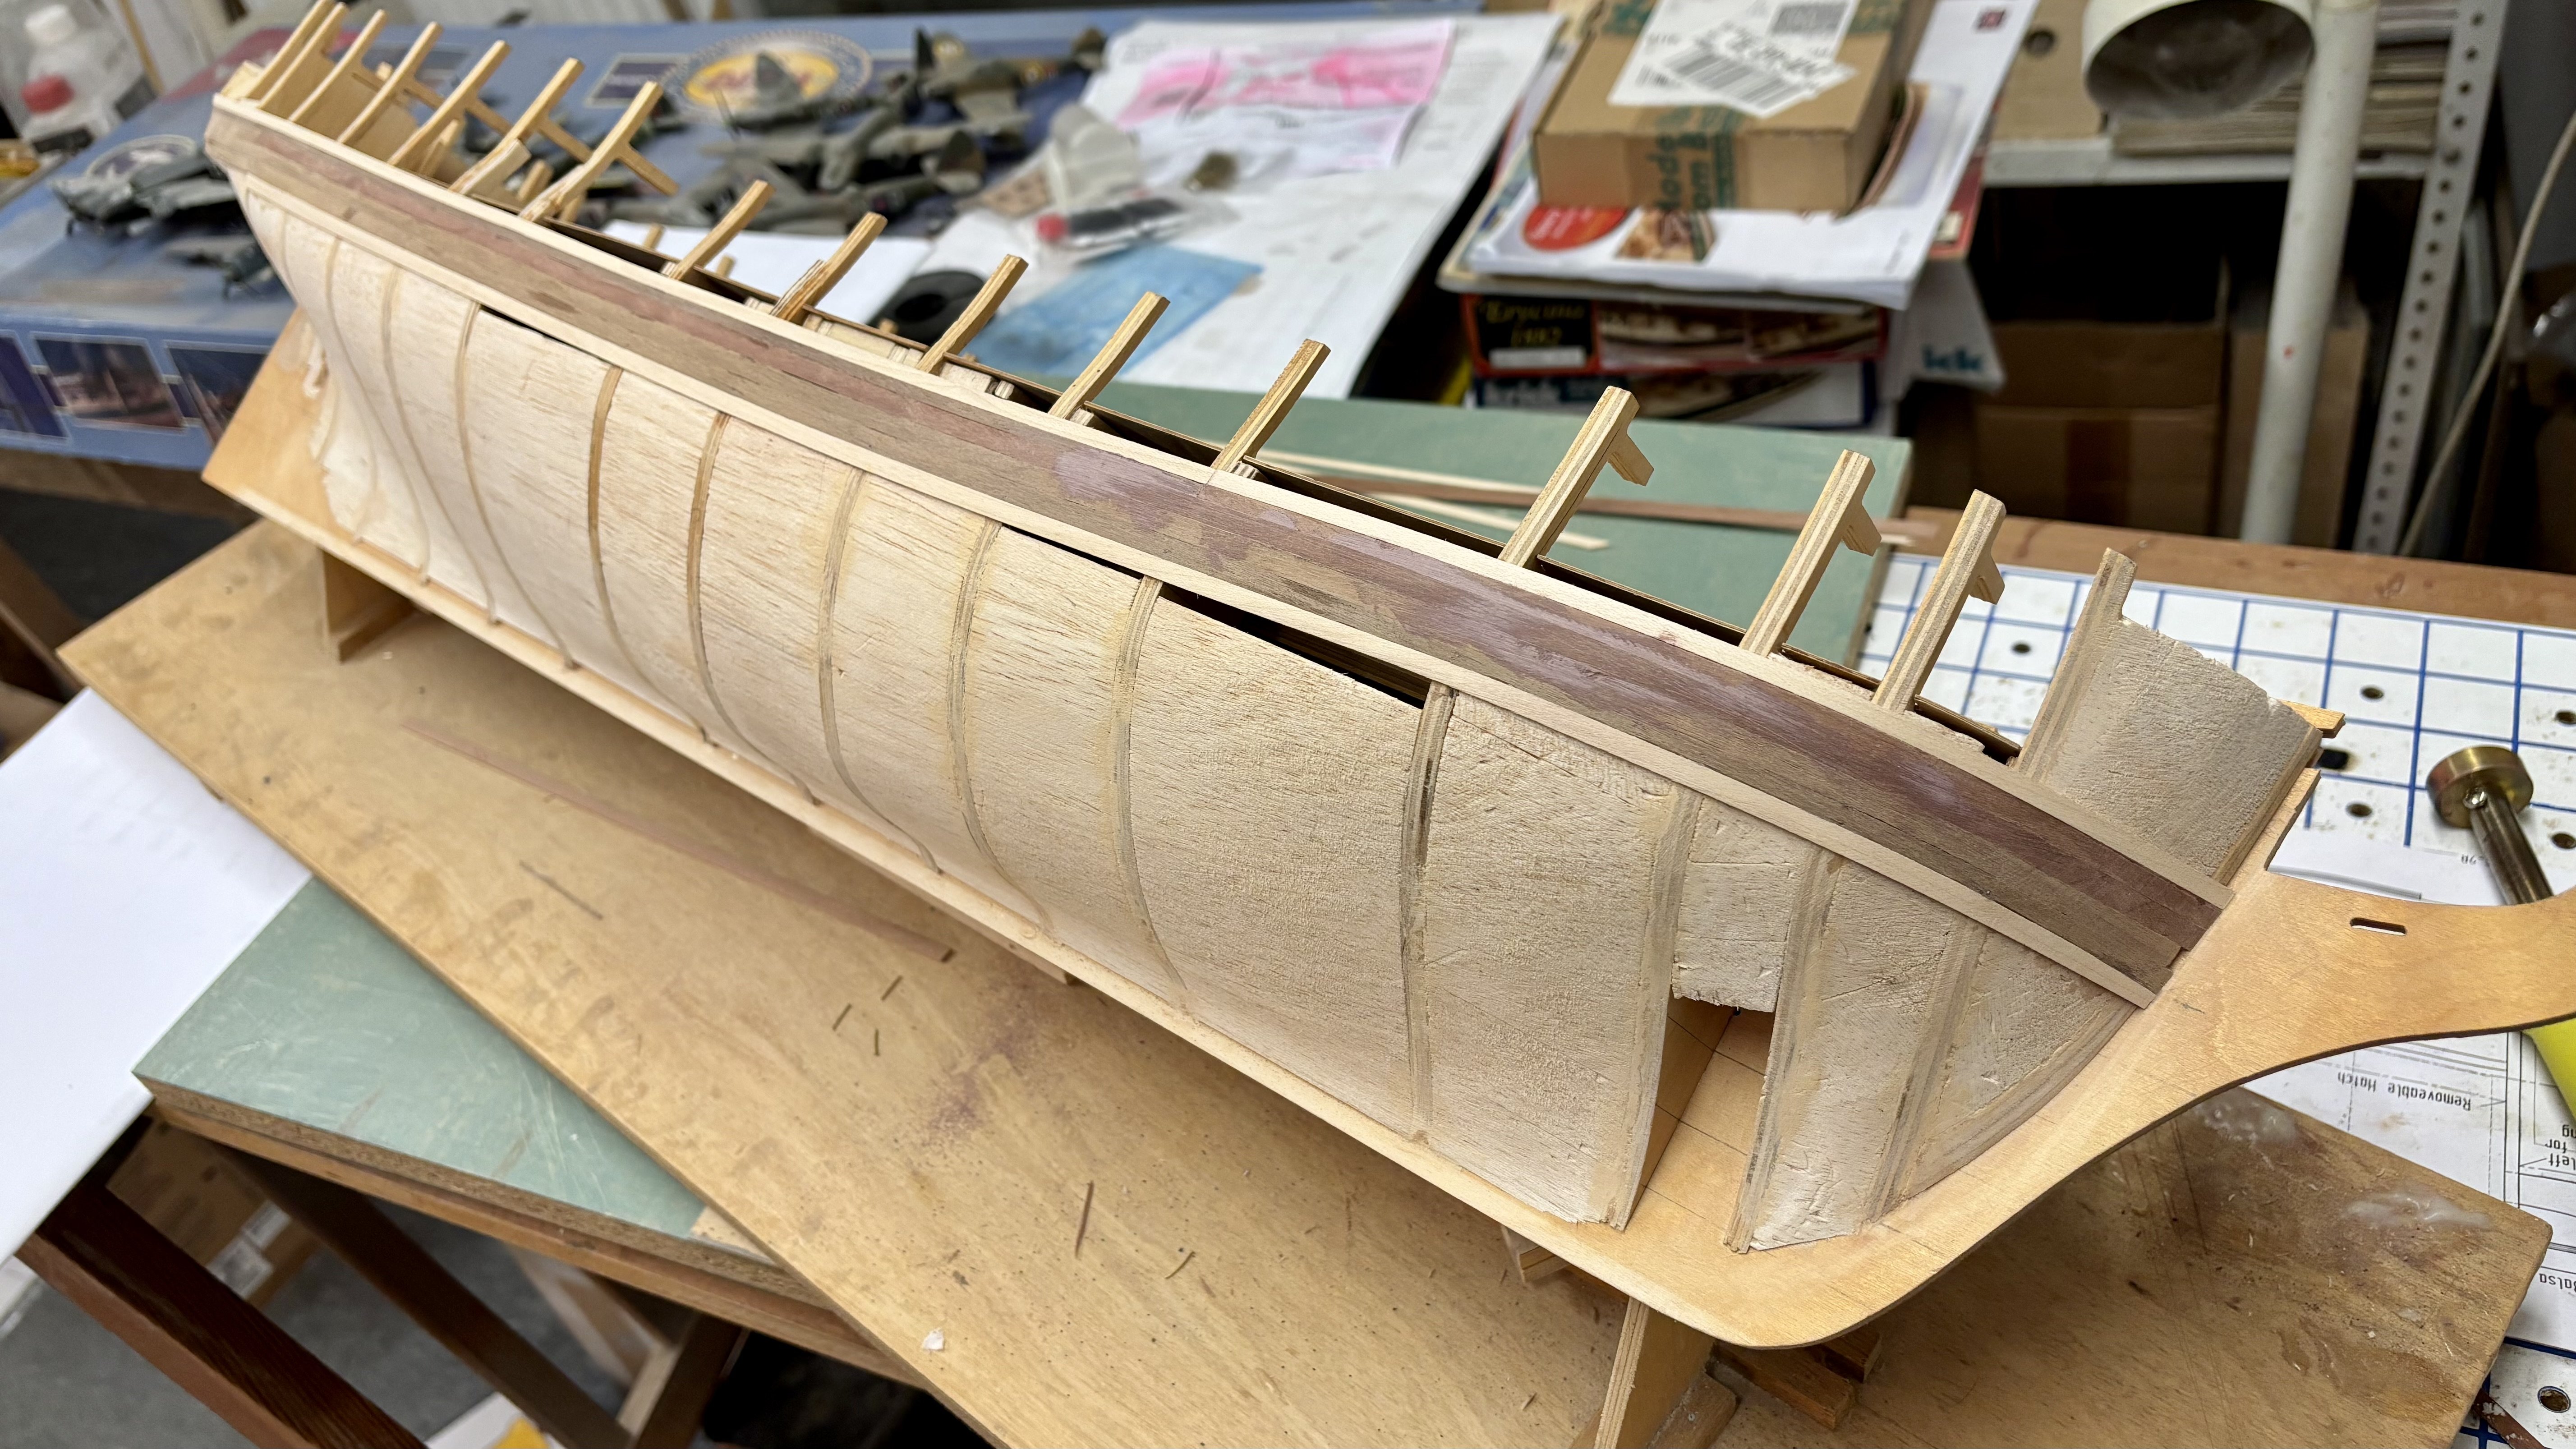
One thing I totally ignored was 'am I achieving a nice even curve with the planking when viewed from the top'? I noticed that I wasn't when I was way into the planking. The instructions does say 'The edges of the bulkheads must also be bevelled and shaped to follow the run of the planks', but who needs the instructions, eh? So instead I placed thin balsa shims where the run was uneven and caused dents and bruises. In some places I had to part the planking strip from the bulkhead with a sharp chisel.
Checking the run of the port side plank:

Shim pieces installed on the starboard side. These will be cut down after planking and the next layer will be started again from anew.

Also it turned out to be beneficial to connect the individual planks with strips from the inside. I use thin super glue for planking and hadn't glued the planks to each other. So the skin wasn't rigid which made sanding very difficult. In some places I also ran a line of thin super glue along the planking joints to add rigidity. Taking short cuts on the first planking can cause problems later on.

This is where I'm at right now.
Thanks for checking in, Chris
-
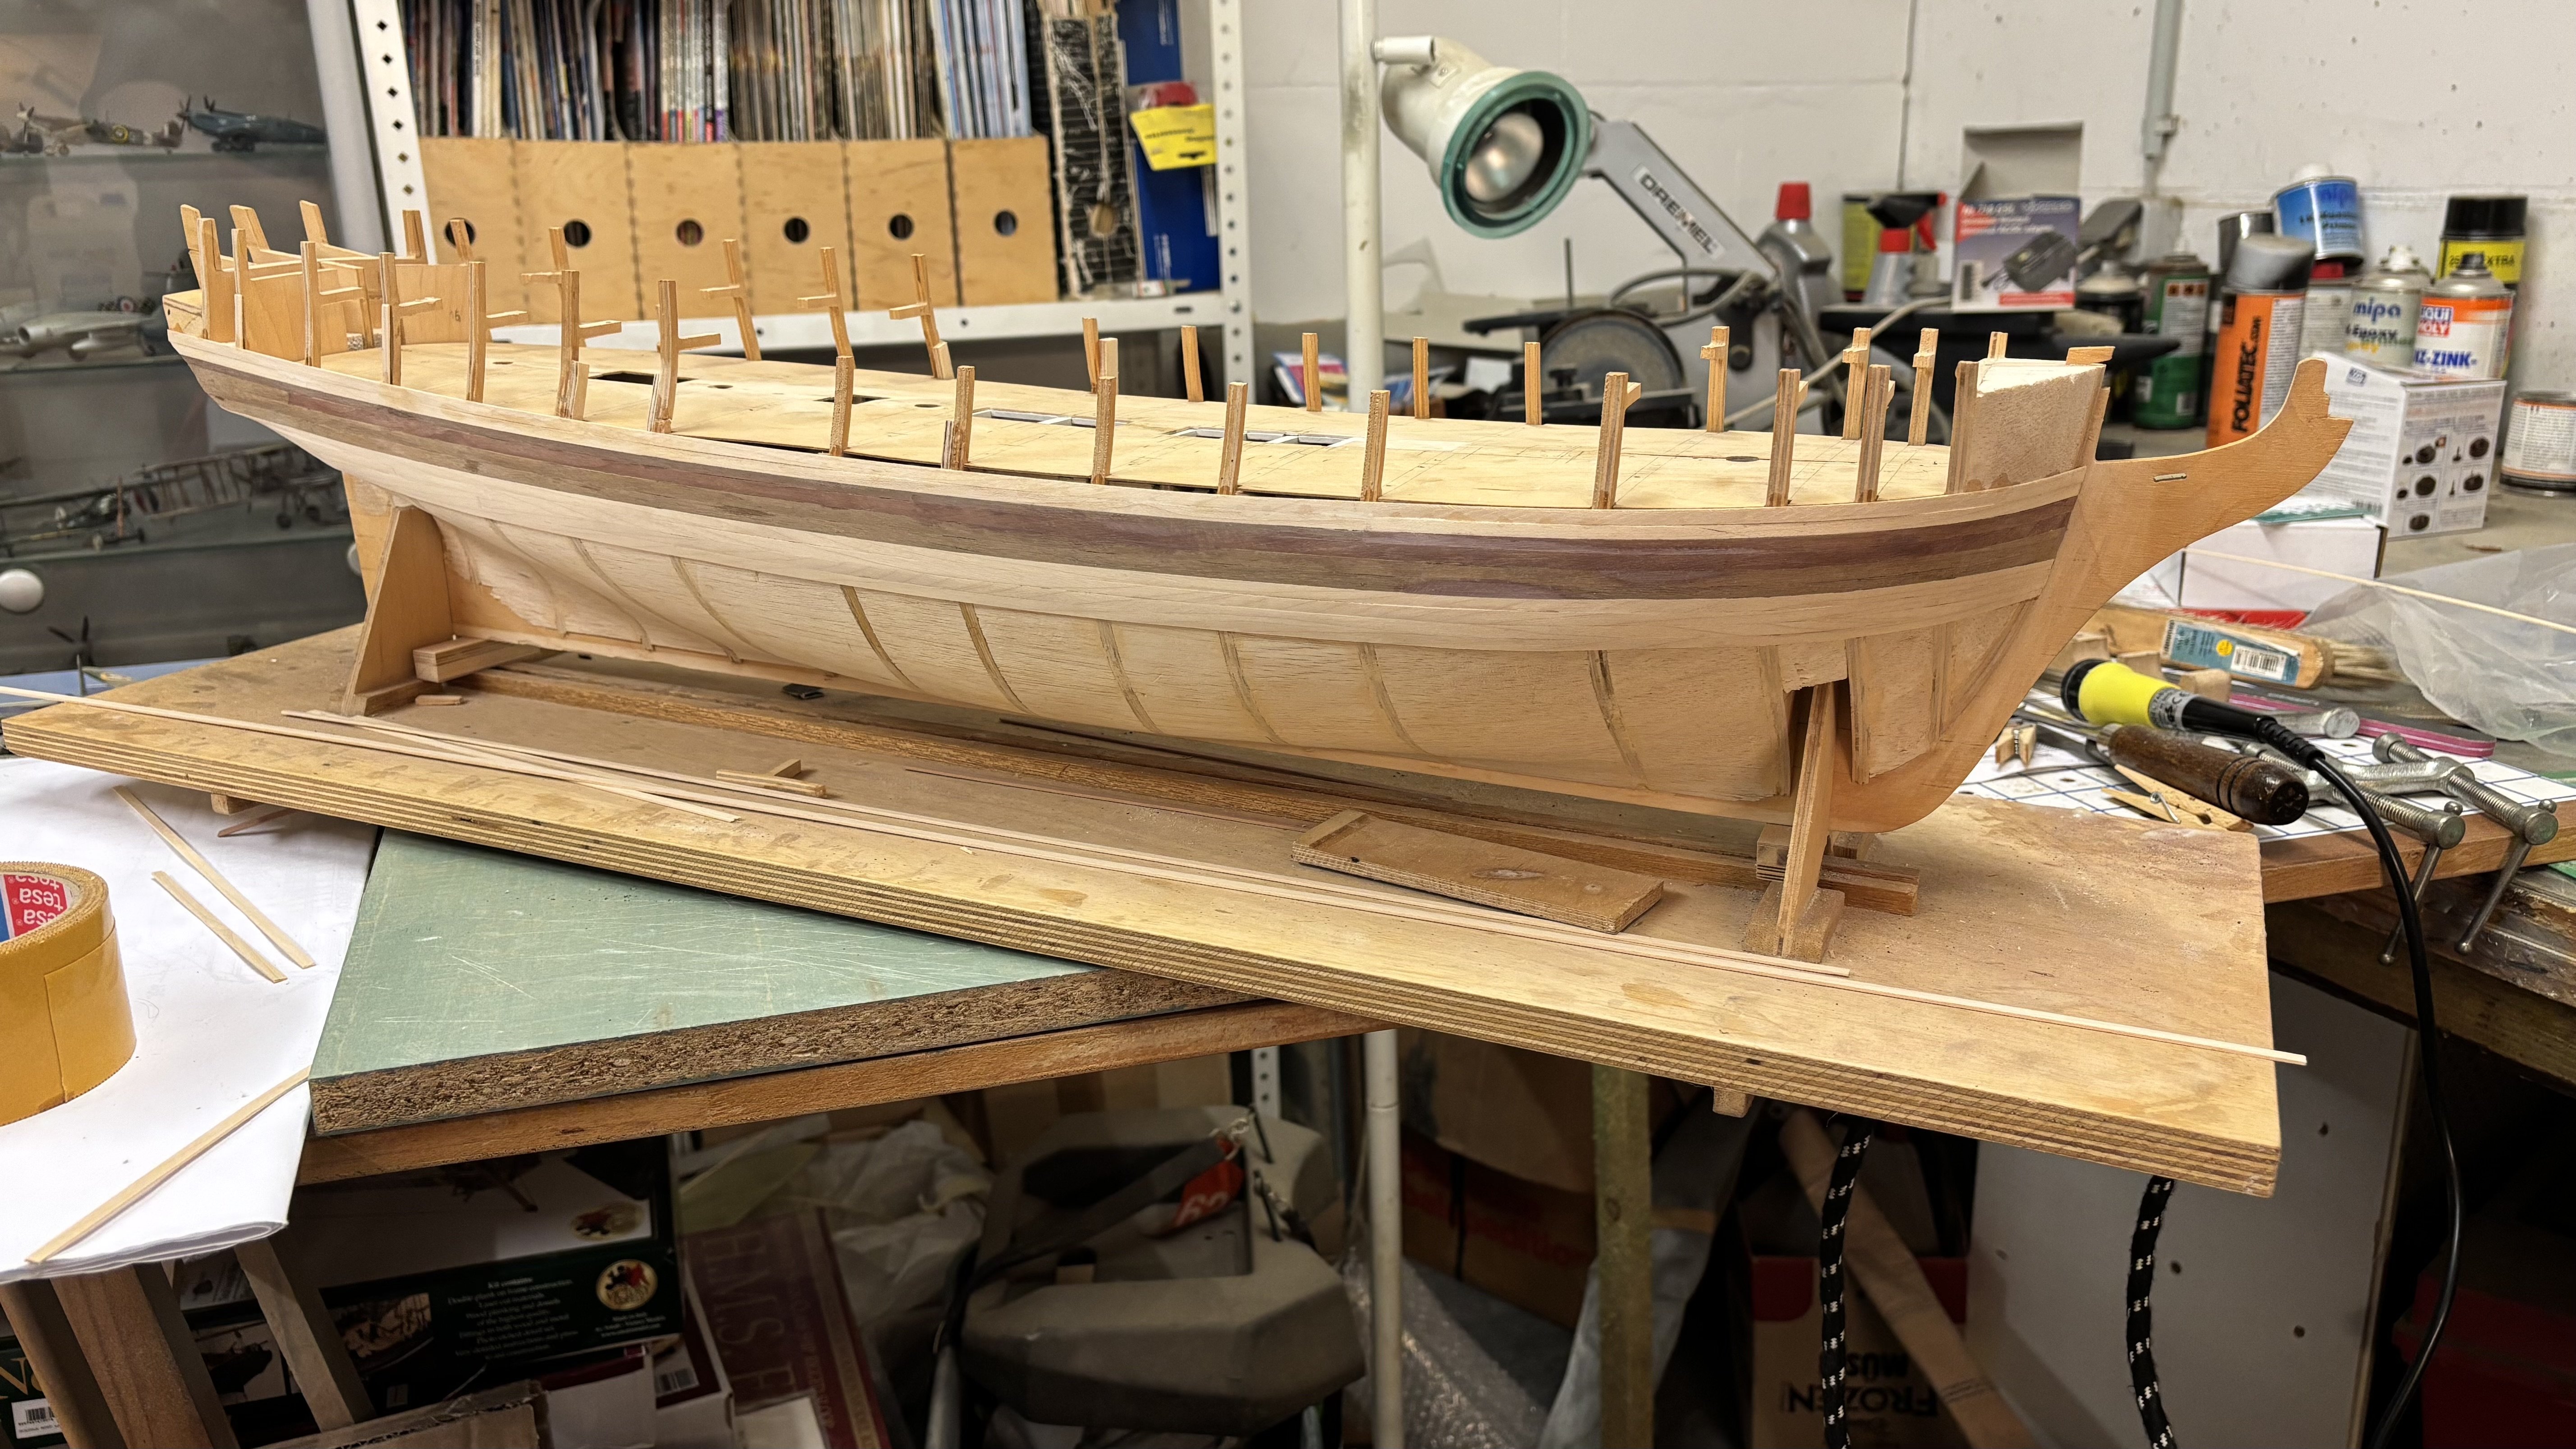
Progress ist still slow...
I'm using Walnut for the wales and Boxwood for the rest. I ran out of Boxwood just after I had started so I ordered a bunch 4 and 5mm wide strips. Not only was this new material much darker than what I had it was also much wider. So I can only assume what I had been using below the wales was 3mm material. Bummer (although it measured out to be 3,5 of 4mm). I want to stay with that width as it is a lot easier using and shaping narrower planks although it might be more work in the end. Above the wales 5mm was used as the curvature was mainly in one direction and no shaping with water was necessary.
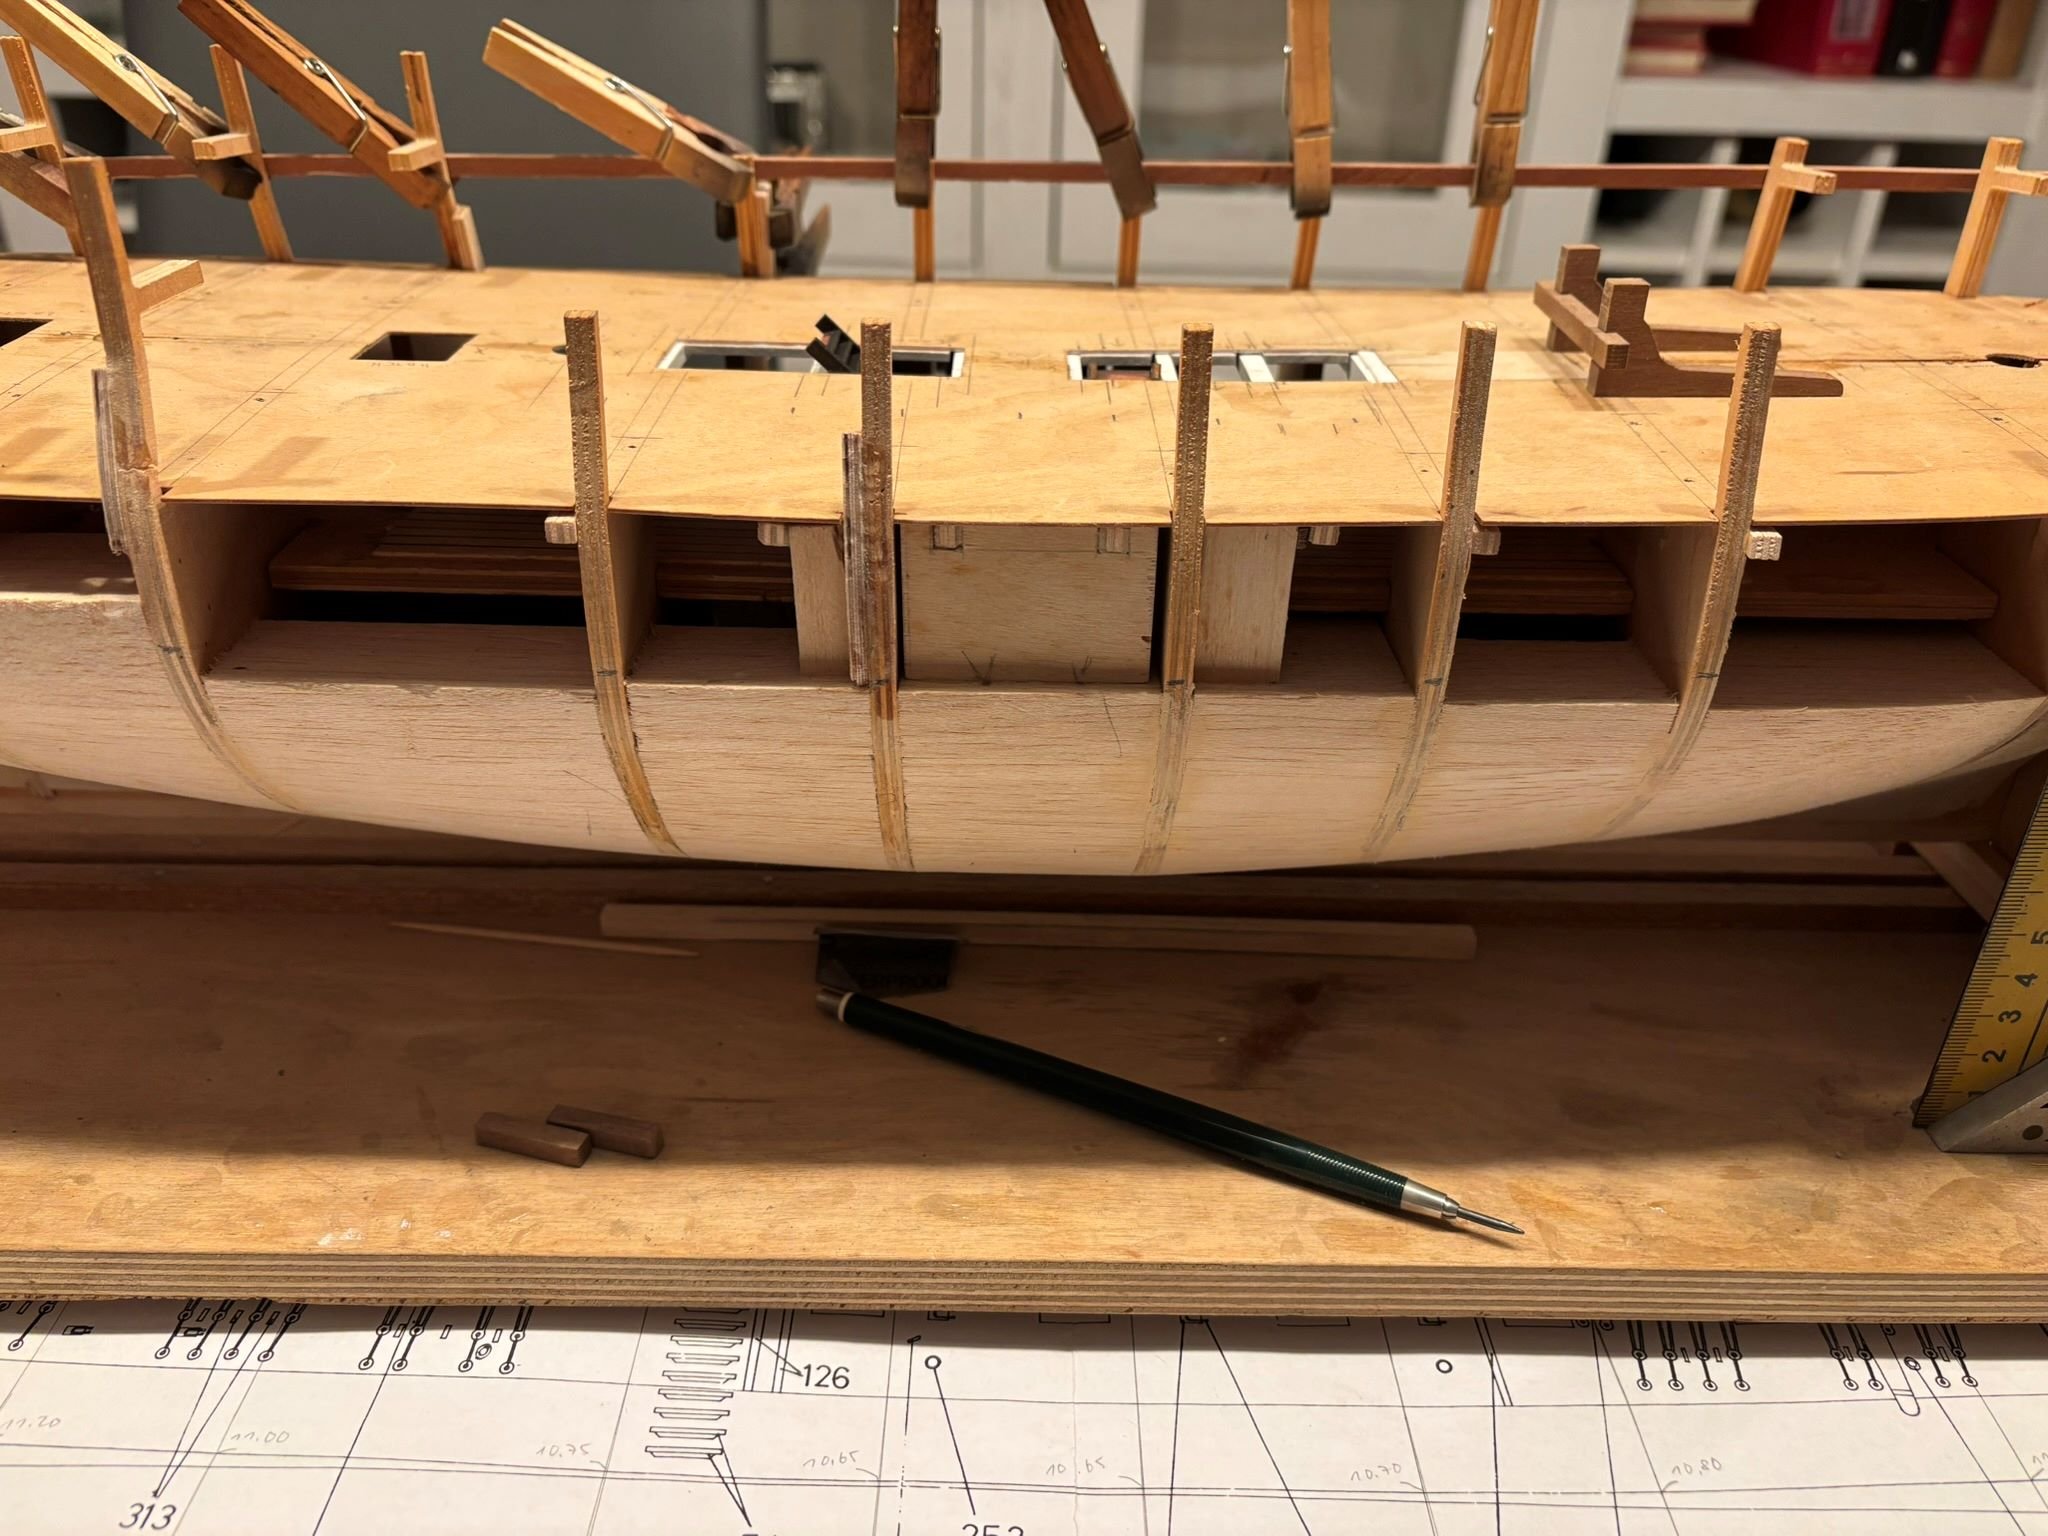
I didn't check if the formers produced a nice curved line and did end up with some deep ends and higher bits. As I was moving ahead quite swiftly and enjoying it this was only noticed after a few planks above the wale had been done. Below the wales wasn't an issue as the balsa fillers assisted in a nice and even curvature. To rectify this I used thin Balsa packing strips placed stratigically where needed between the frames and the planking.
A bit of wood filler was needed here and there. Remember this is the first planking, but I want to do this right to avoid extra work when I'm doing the second.
-
-
Got a few days off over Easter


Hope to get some more done tomorrow and on Monday perhaps
-- Chris
- chris watton, Barbossa, Mr Whippy and 3 others
-
 6
6
-
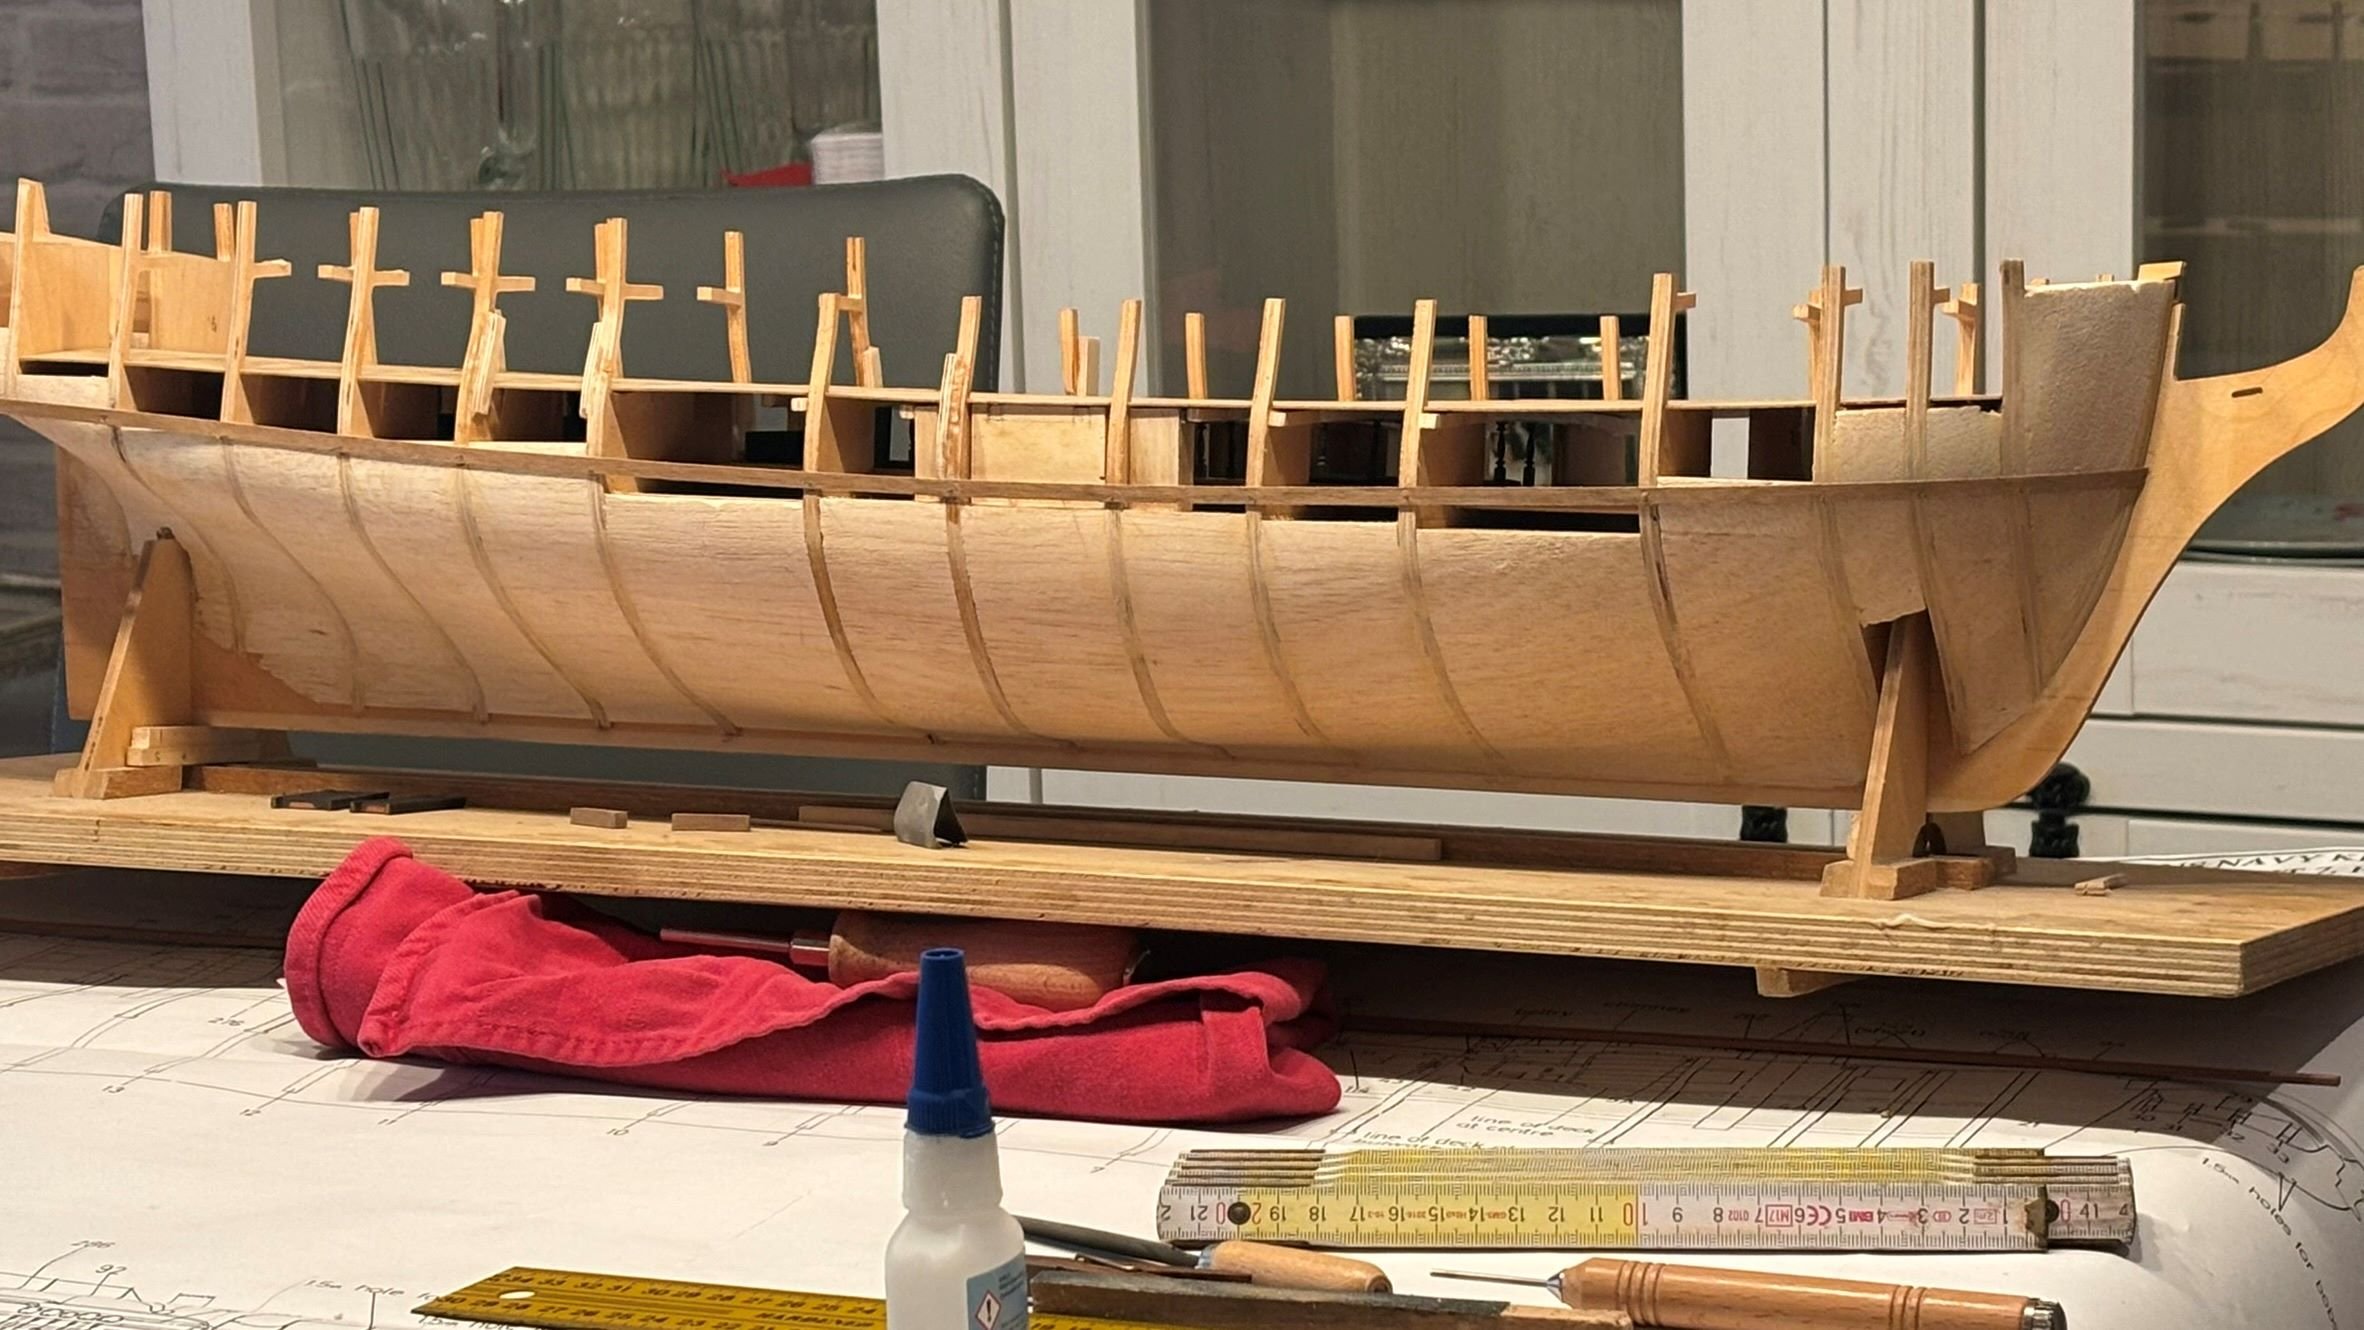
No real reason to be overly meticulous here, as this is actually still the first planking. But I think it might help in the long run to do the first planking exactly like the second to get 'a feel' for the quirks of it all. Sort of a full dress rehearsal. We'll see... For the wale I'm using walnut, for the rest I will be using a lighter wood, maybe boxwood, for a contrast

- dunnock, vossiewulf, KARAVOKIRIS and 2 others
-
5
-
Thanks, No Idea, that's very kind.
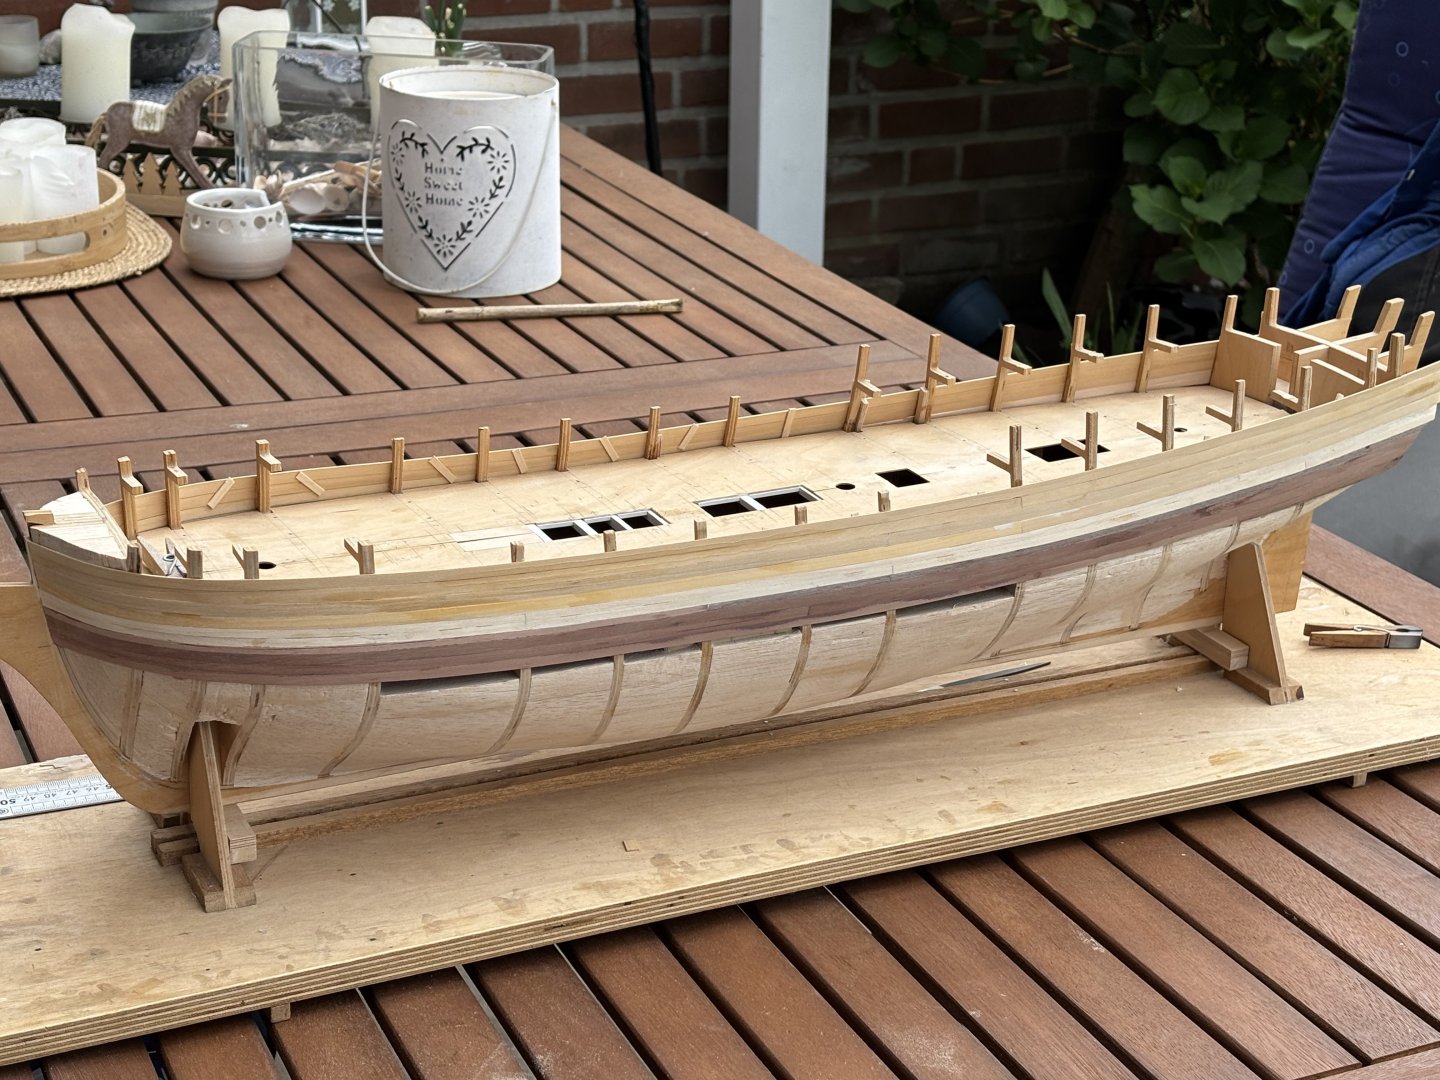
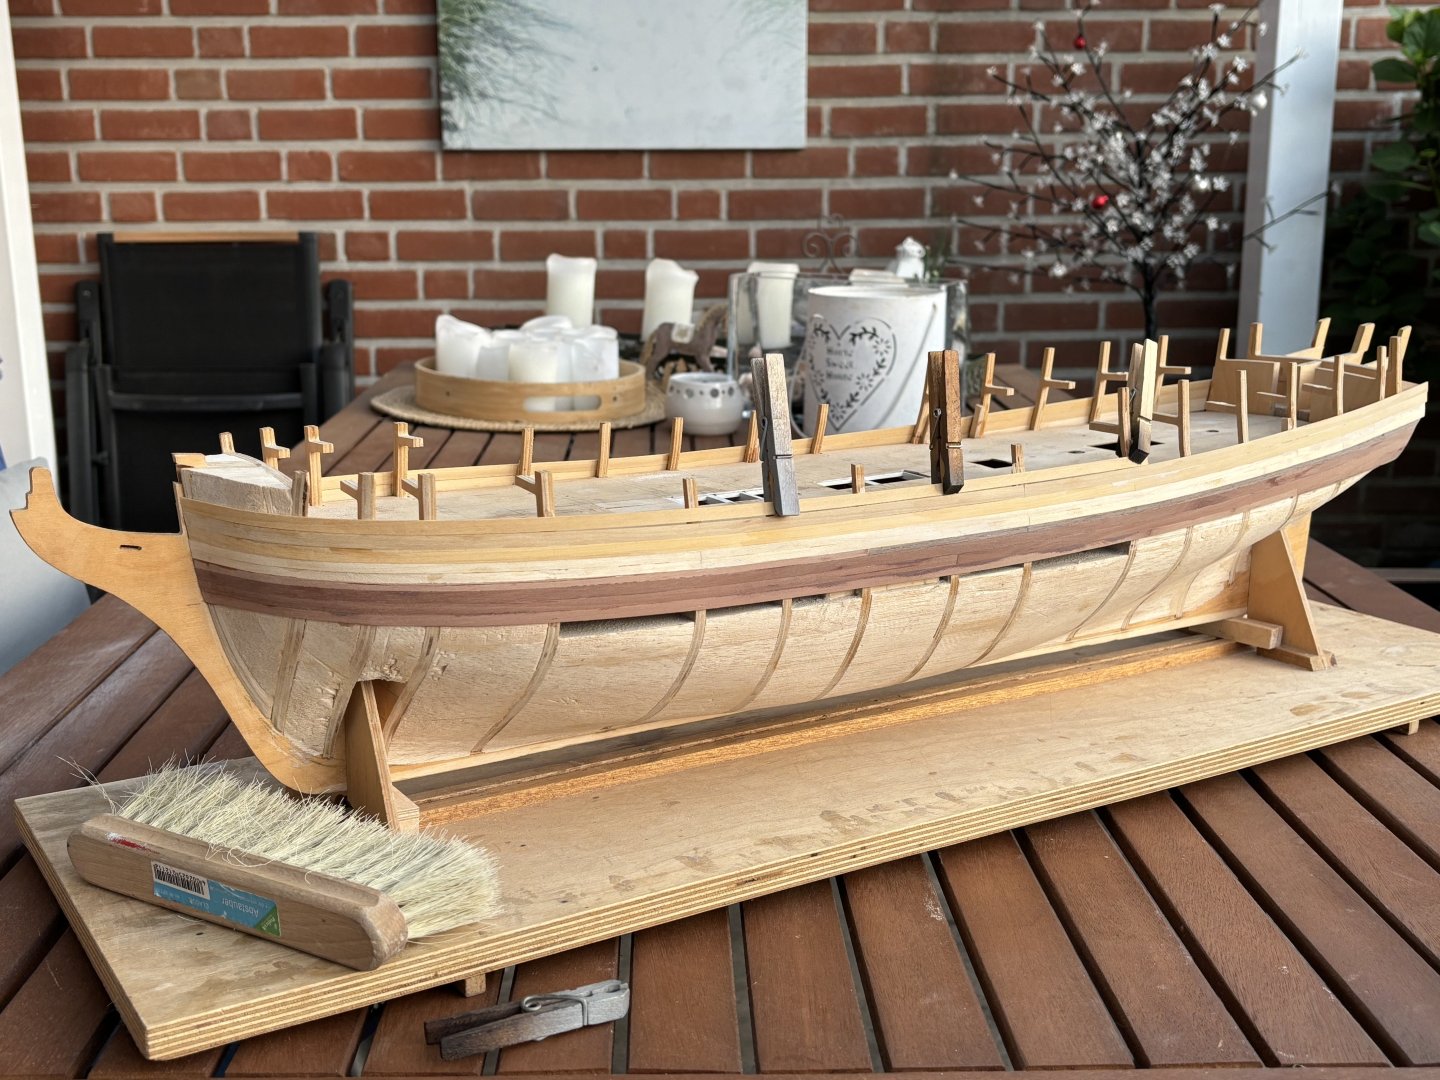
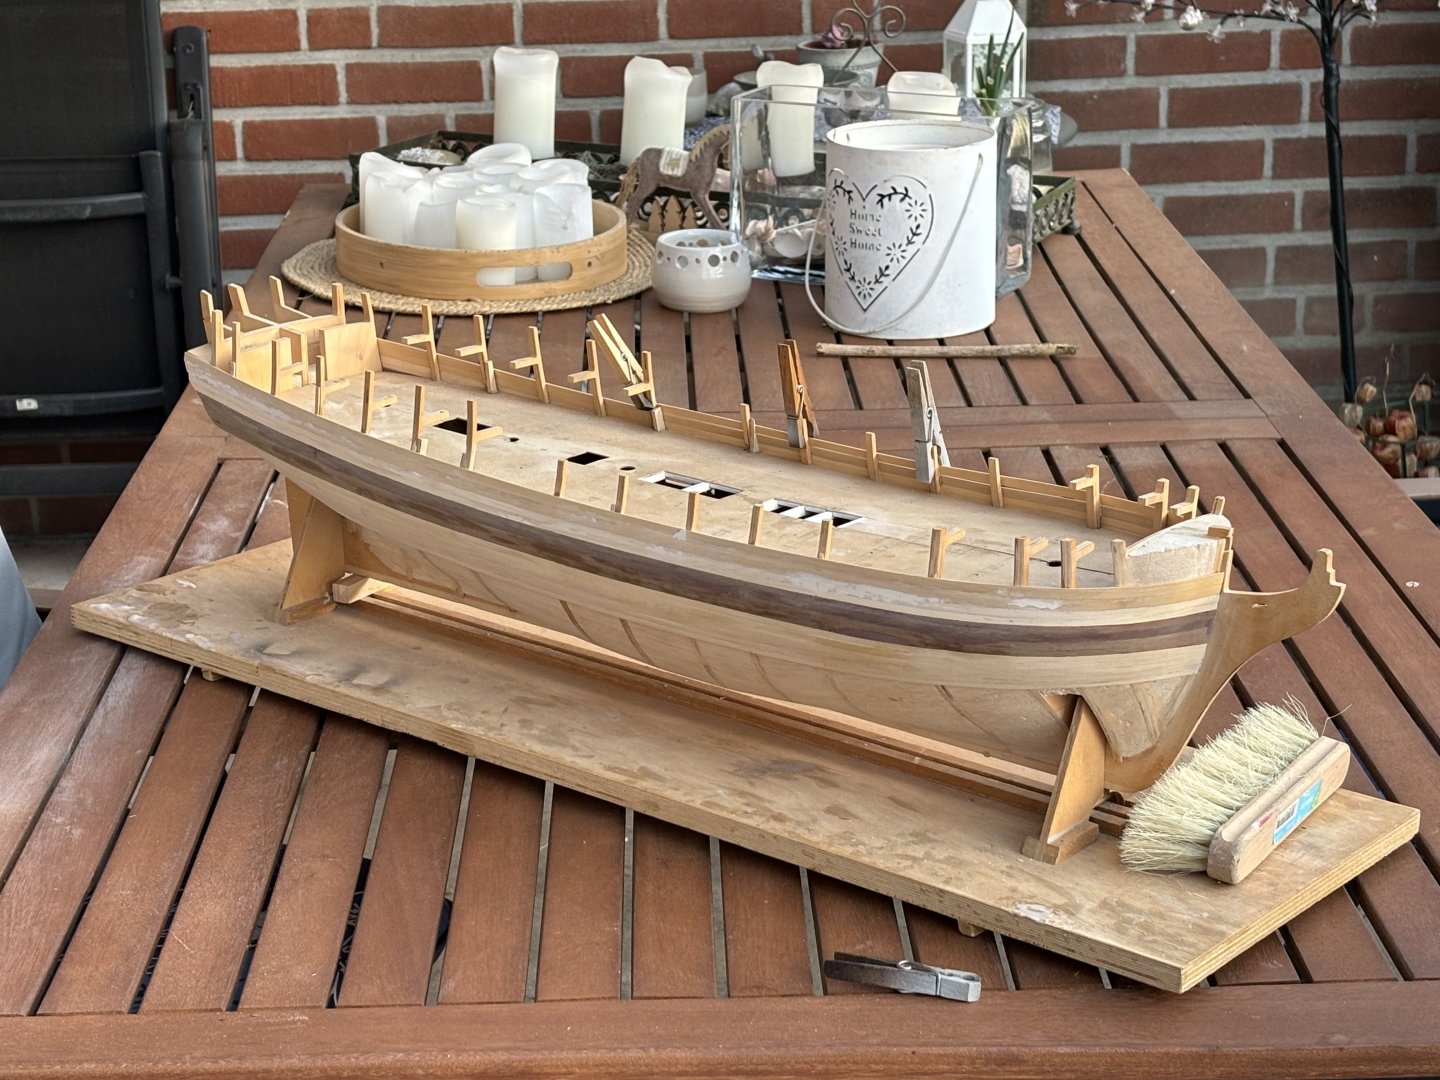
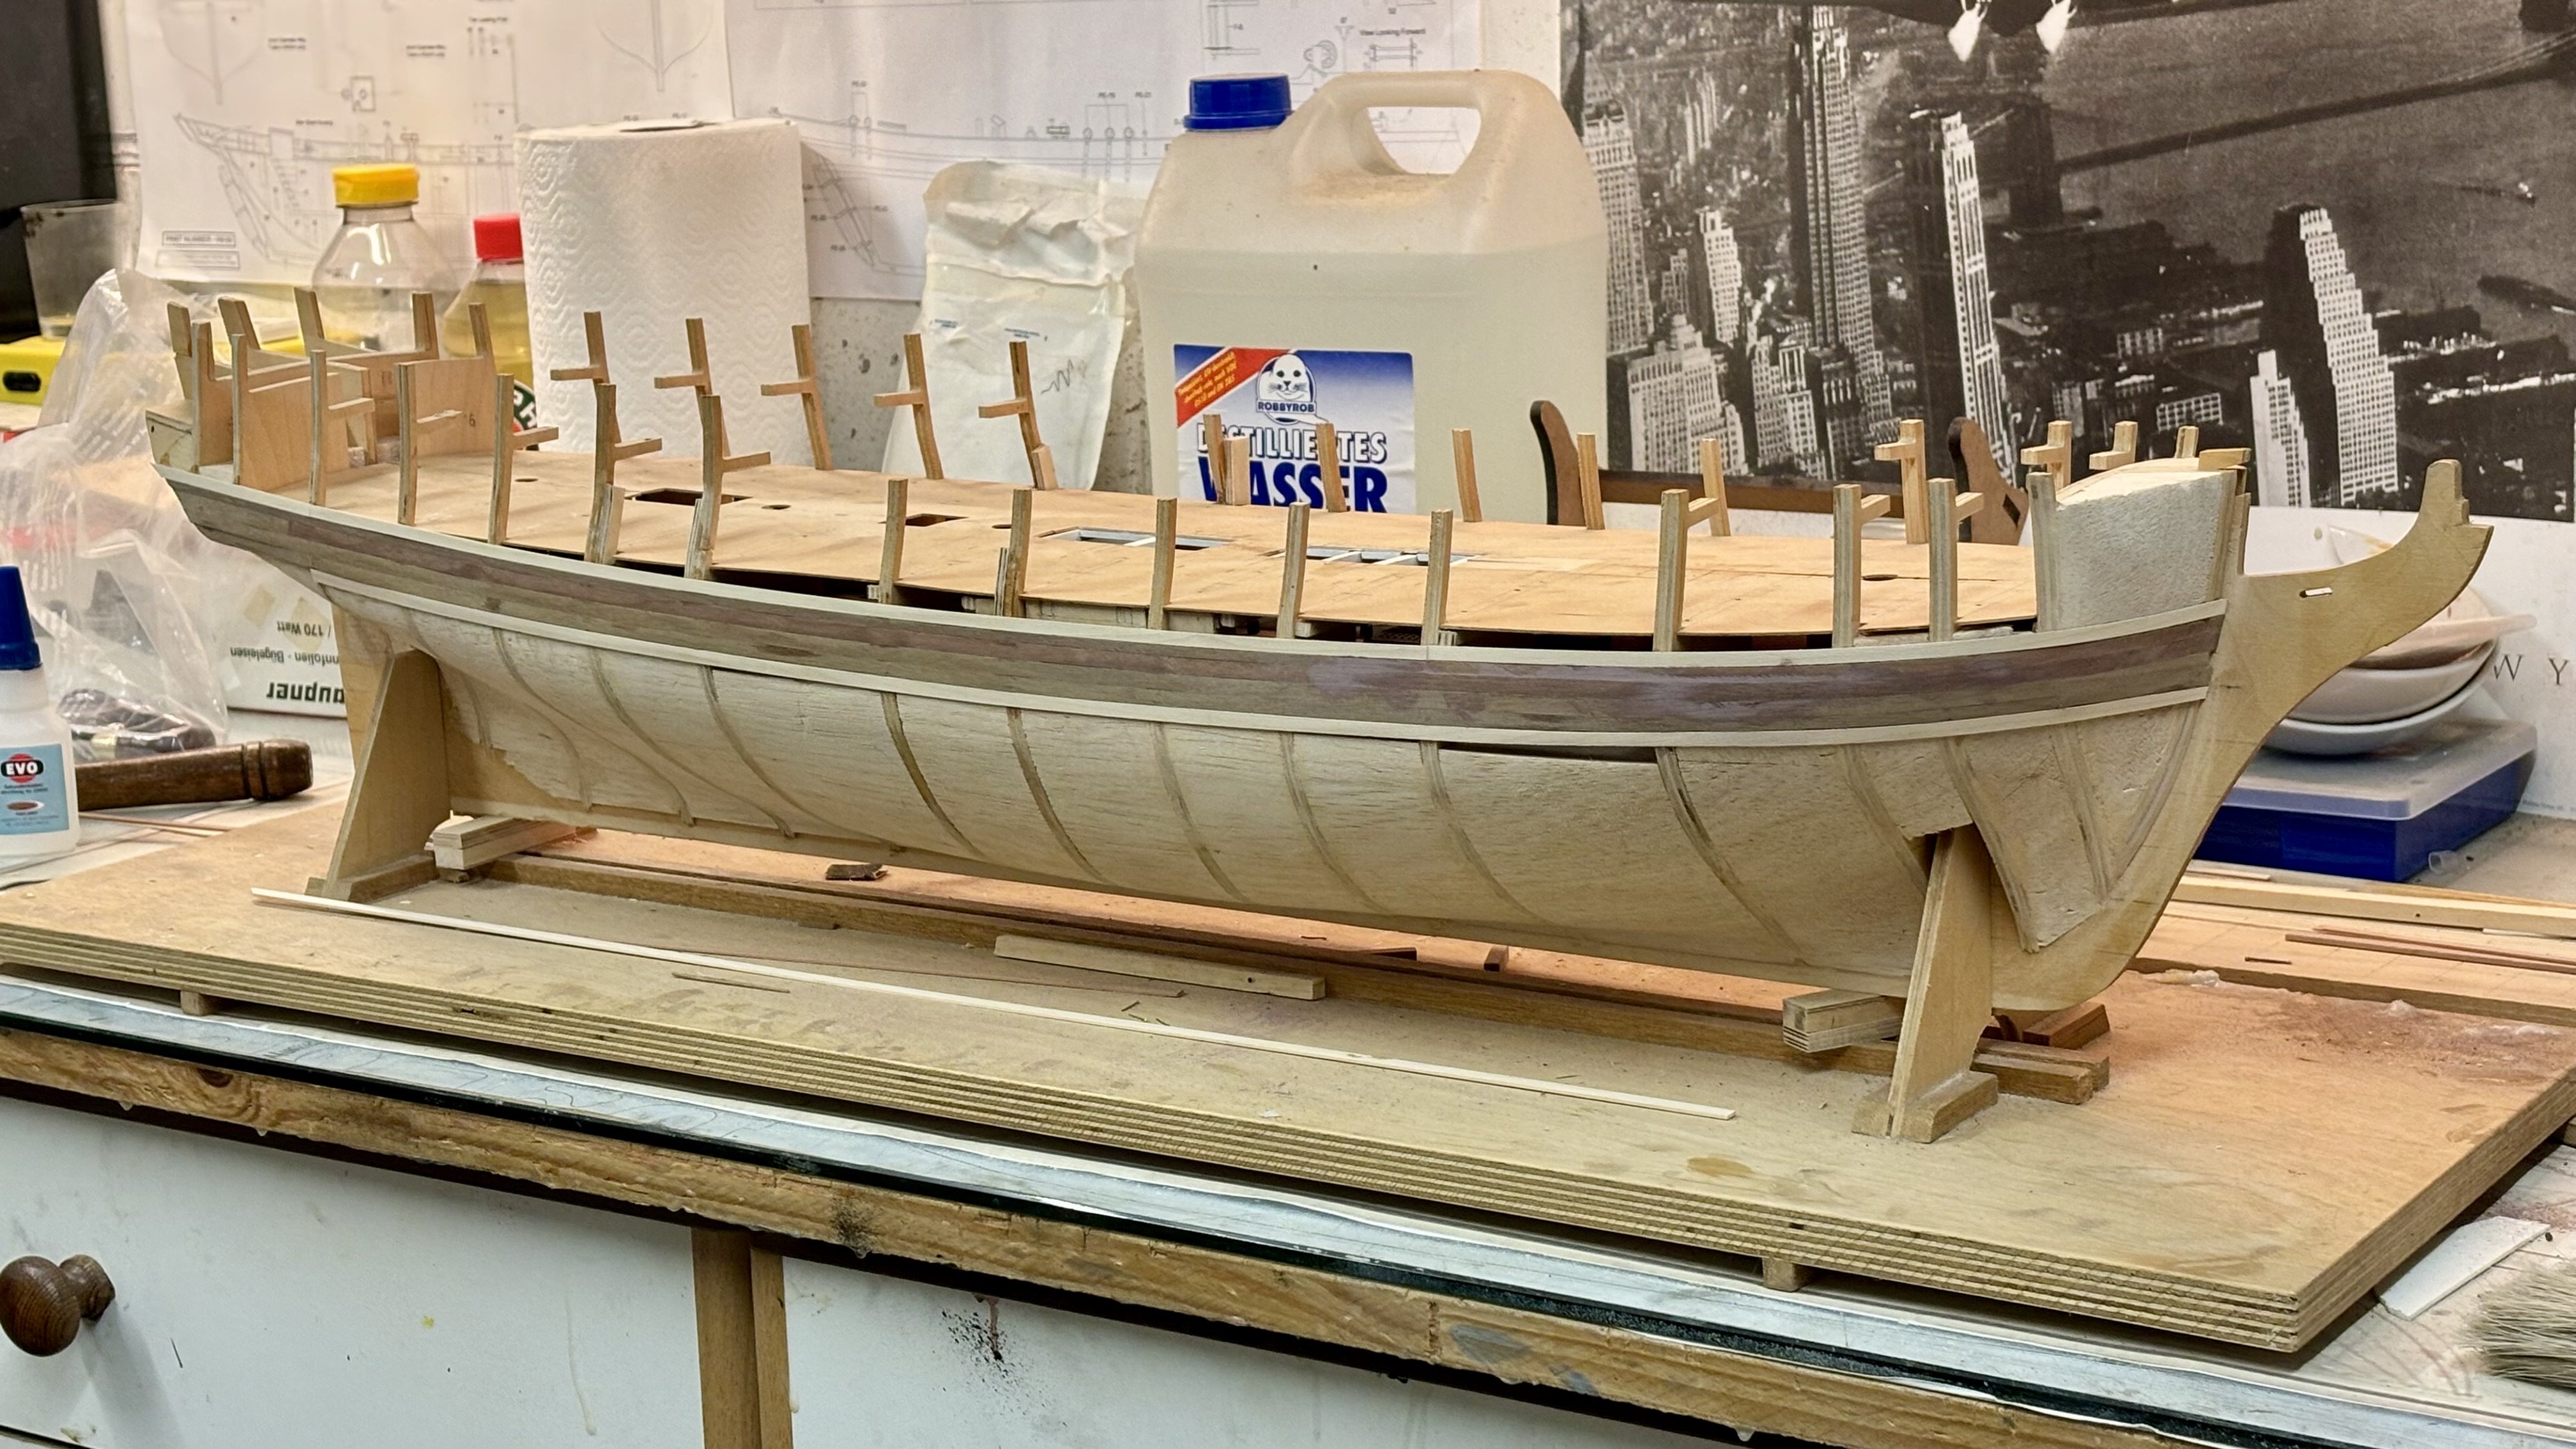
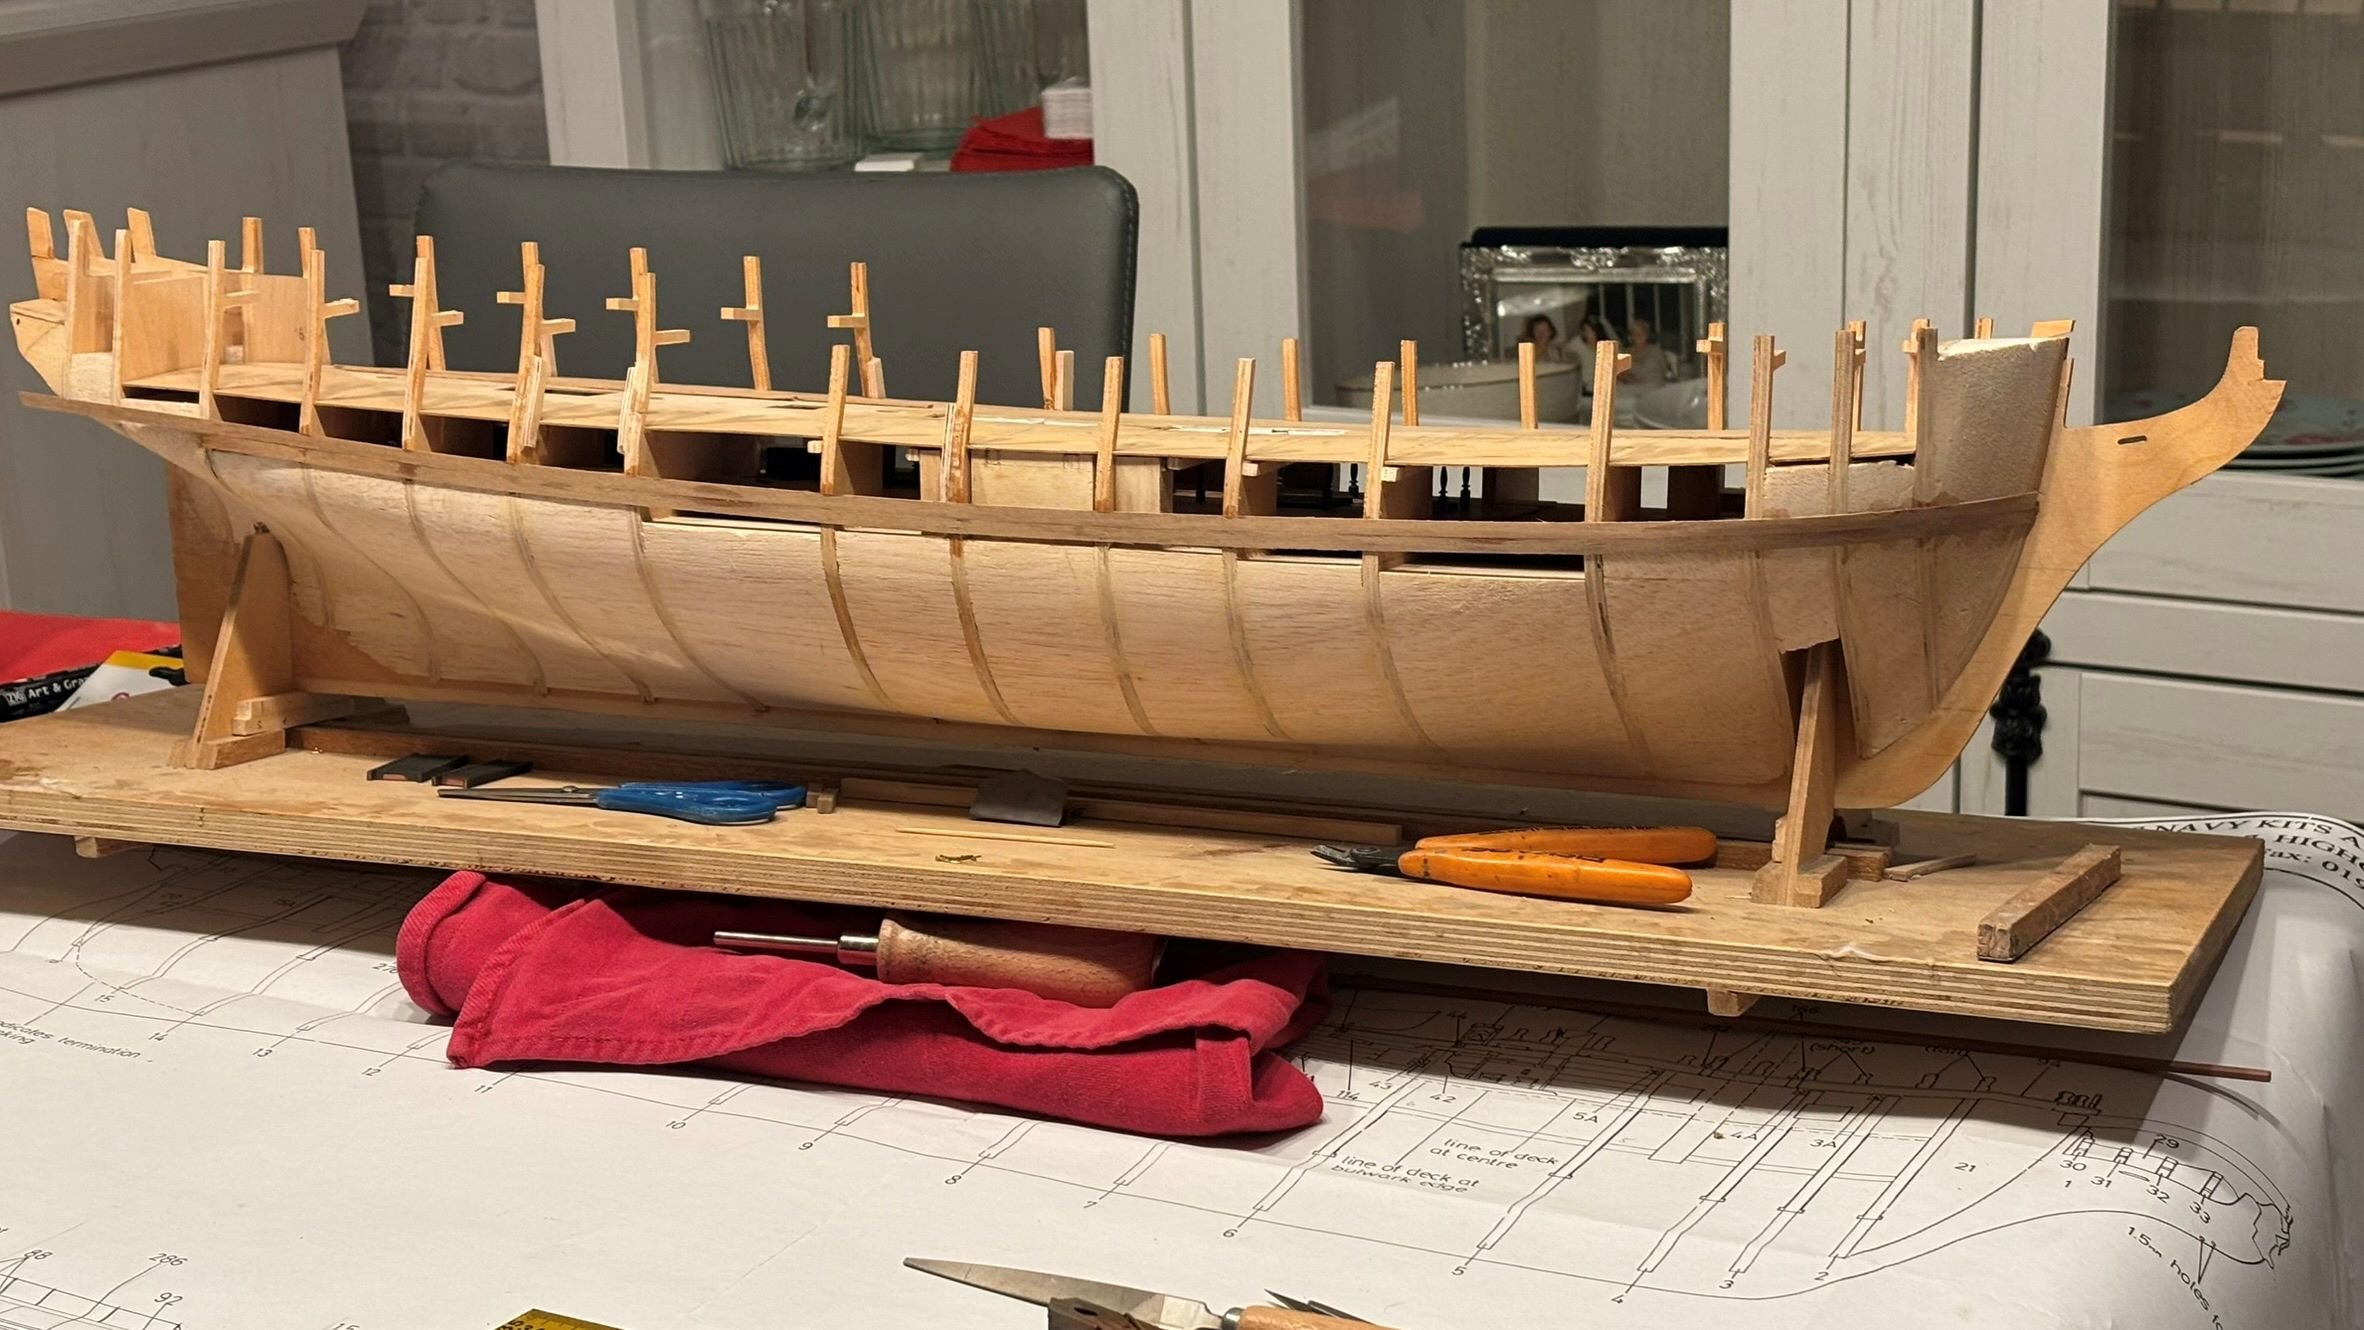
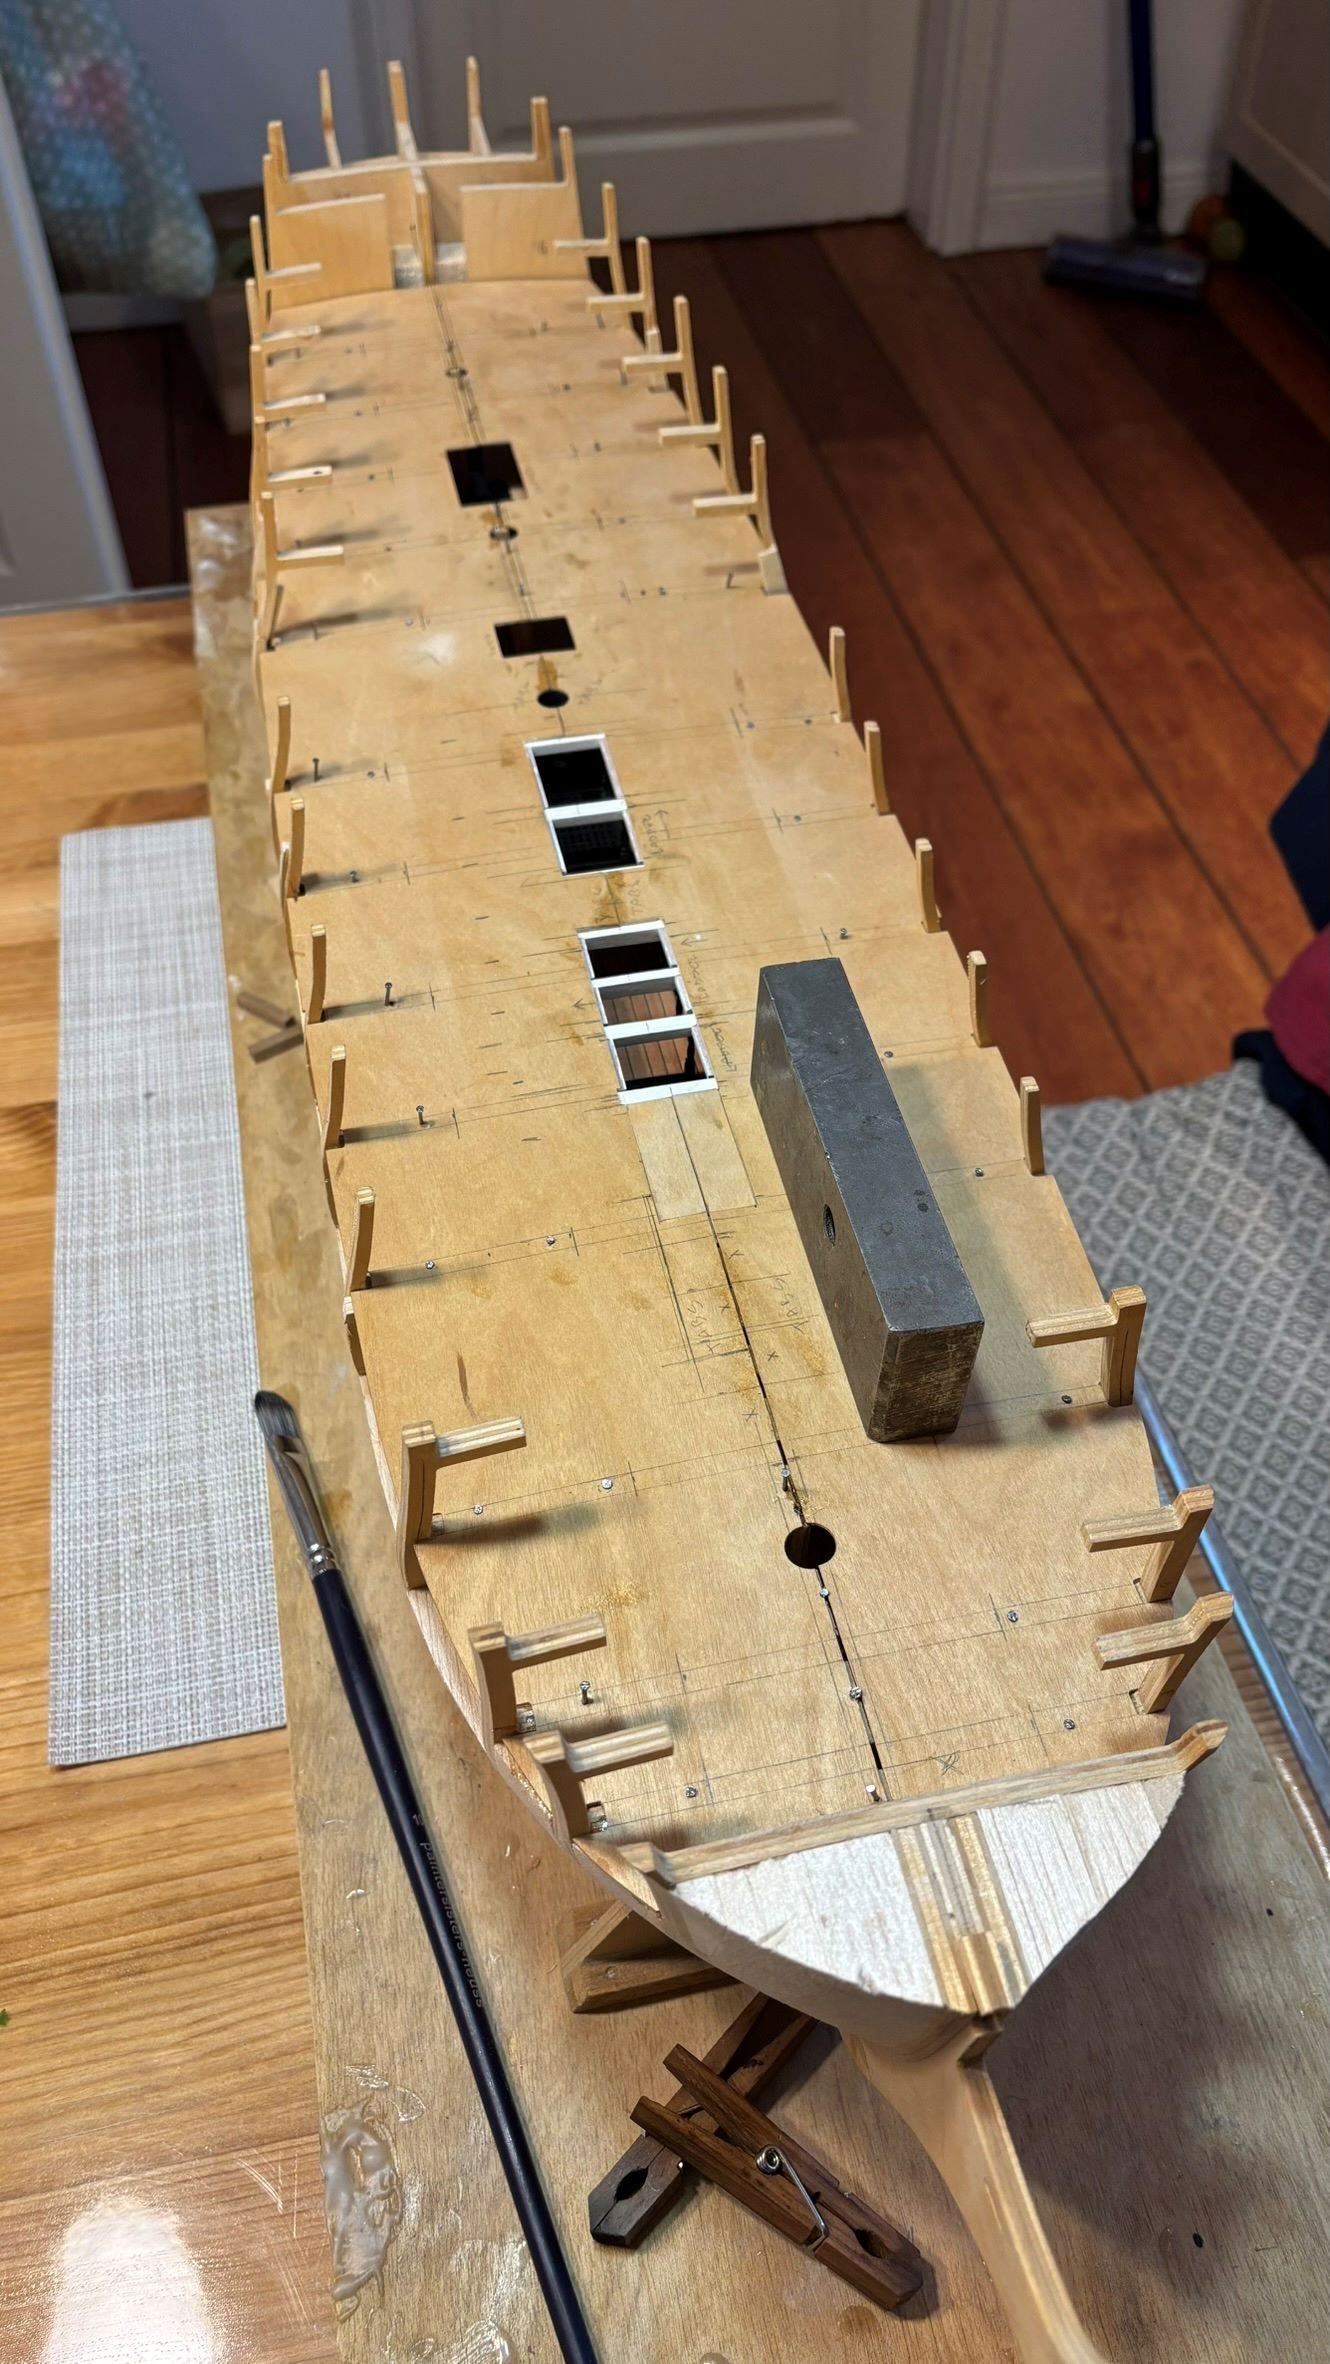
So now, after 10 years, something exciting is happening: the main wale. This is probably the most vital part of any scale model boat. Get it wrong and it will jump at you for ever like a tooth gap in a smile. So I'm taking my time with this. I used the side view of Sheet 1 and measured the distance from a reference line below the keel and made a pencil mark on the model at the precise point of the bottom line of the wale. The reference line was actually the building board where the model is mounted on.
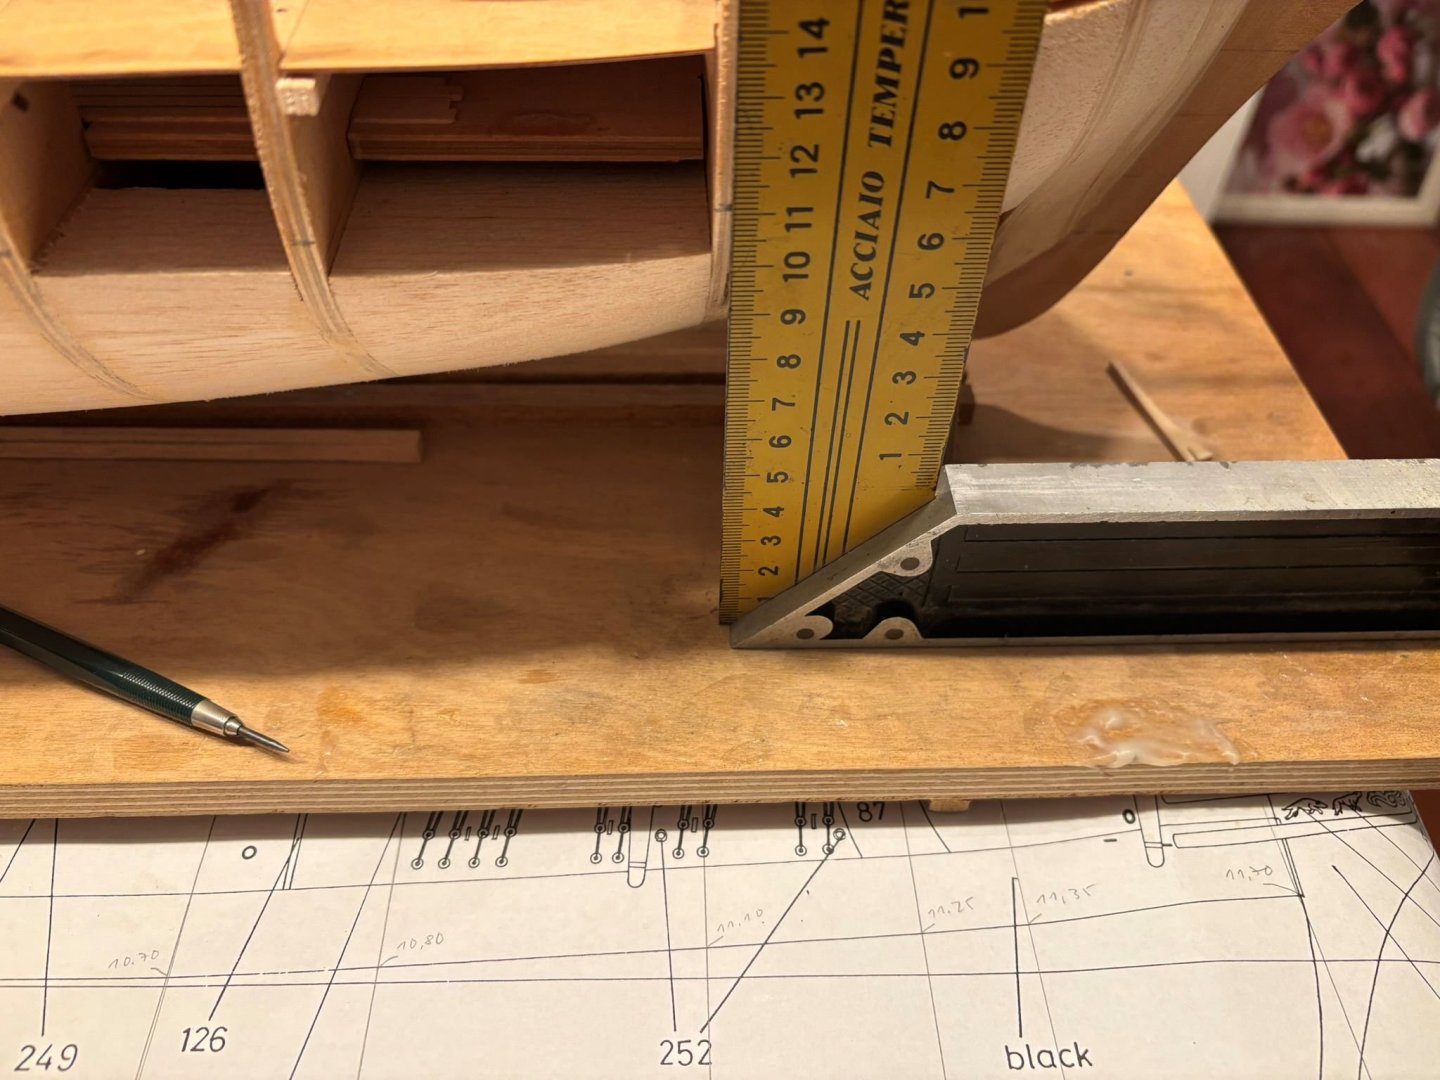
Dimensions drawn onto the Sheet 1...

...and the point of the bottom line of the wale transfered on the formers, according to the dimensions
Taking my time with this, but hopefully not another ten years

Thanks for looking in, Chris
- KARAVOKIRIS, dunnock, Ronald-V and 3 others
-
6
-
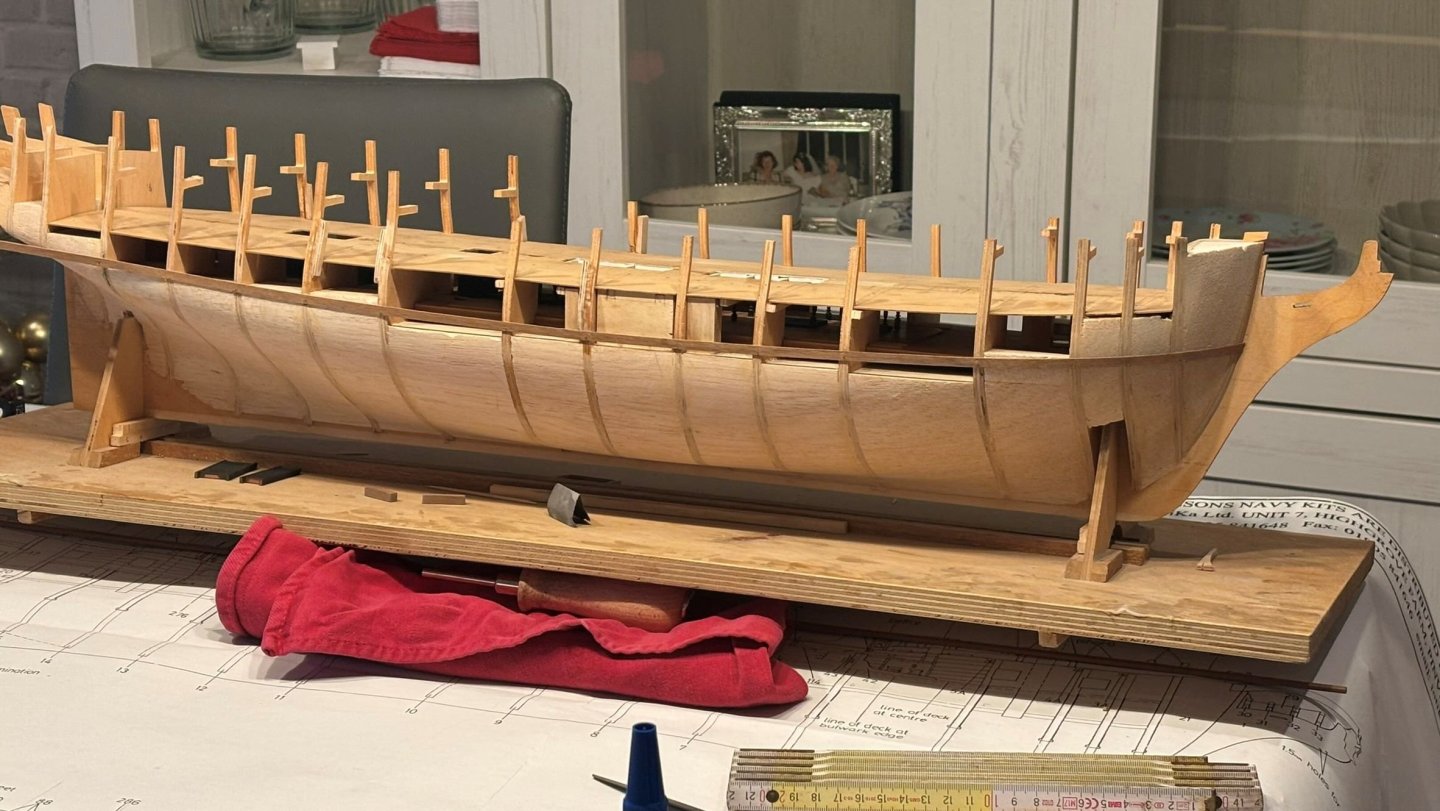
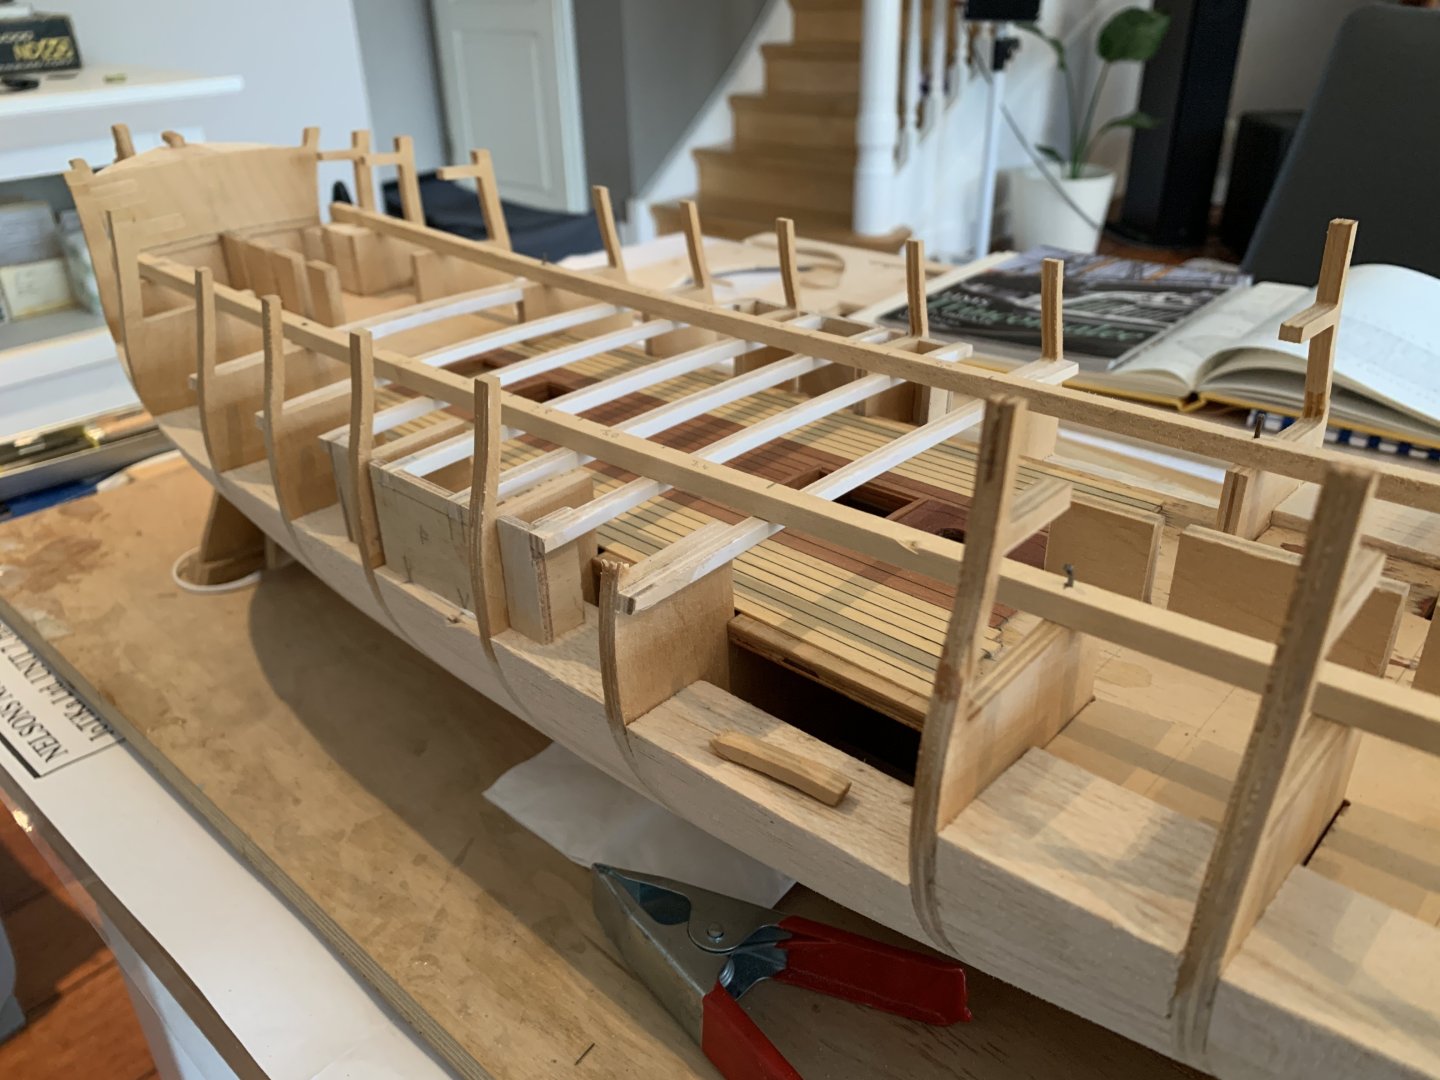
It is almost 10 years ago to the day that I bought this kit. This is far too embarrasing, as the saga with the lower deck continues. I did the columns yet once more as I found an online dealer who had ones for sale. Although they had a square profile, they were easily rounded off by fixing them in a Dremel and shaping them with a file. Although far from 100% scale accurate they were good enough for this purpose.

In the lower deck they will be hard to see once the upper deck has been added.
Finally the whole thing could be buttoned up and the false gun deck glued in place.

So what I did in the past 10 years is basically the first chapter on page three. Instead of adding the hatches and planking the instructions says here 'Stain the centre section of this deck Walnut as a small part is just visible in the completed model'. Filling the space between the bulkheads is also not required per the instructions, I did this because I am hoping for some benefits when planking the hull, which will be the next step.
I turned 64 just before Christmas, so I have at least another 36 years to go, so I'm in good shape so far.
Chris, from Germany
- Mr Whippy, KARAVOKIRIS, dunnock and 3 others
-
6
-
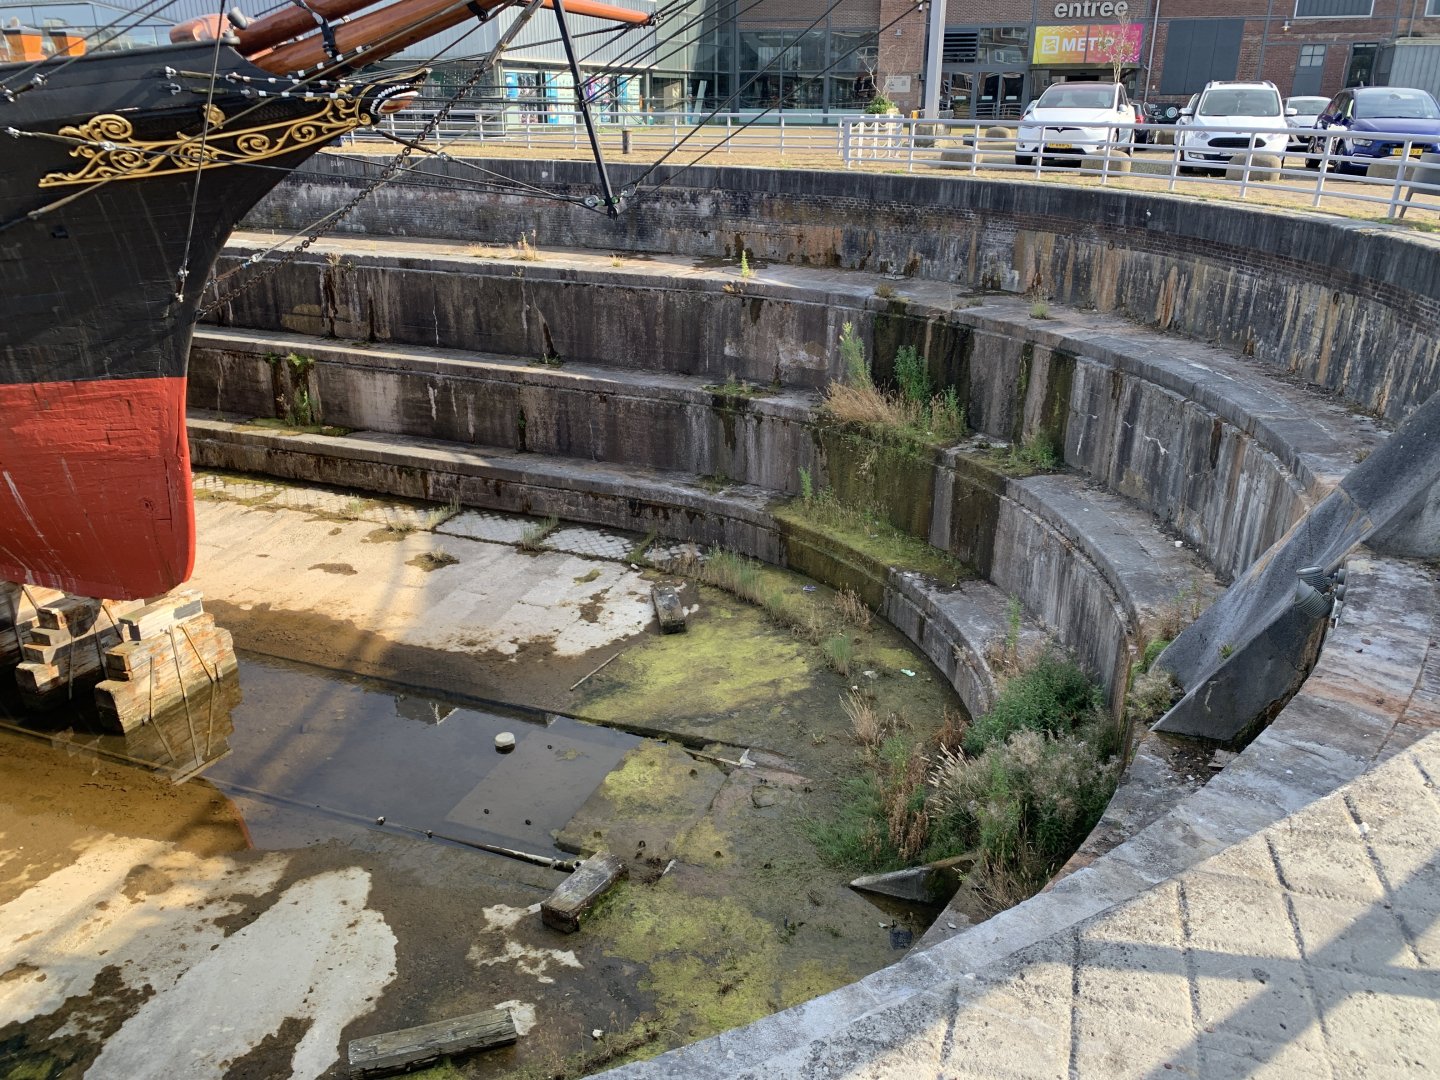
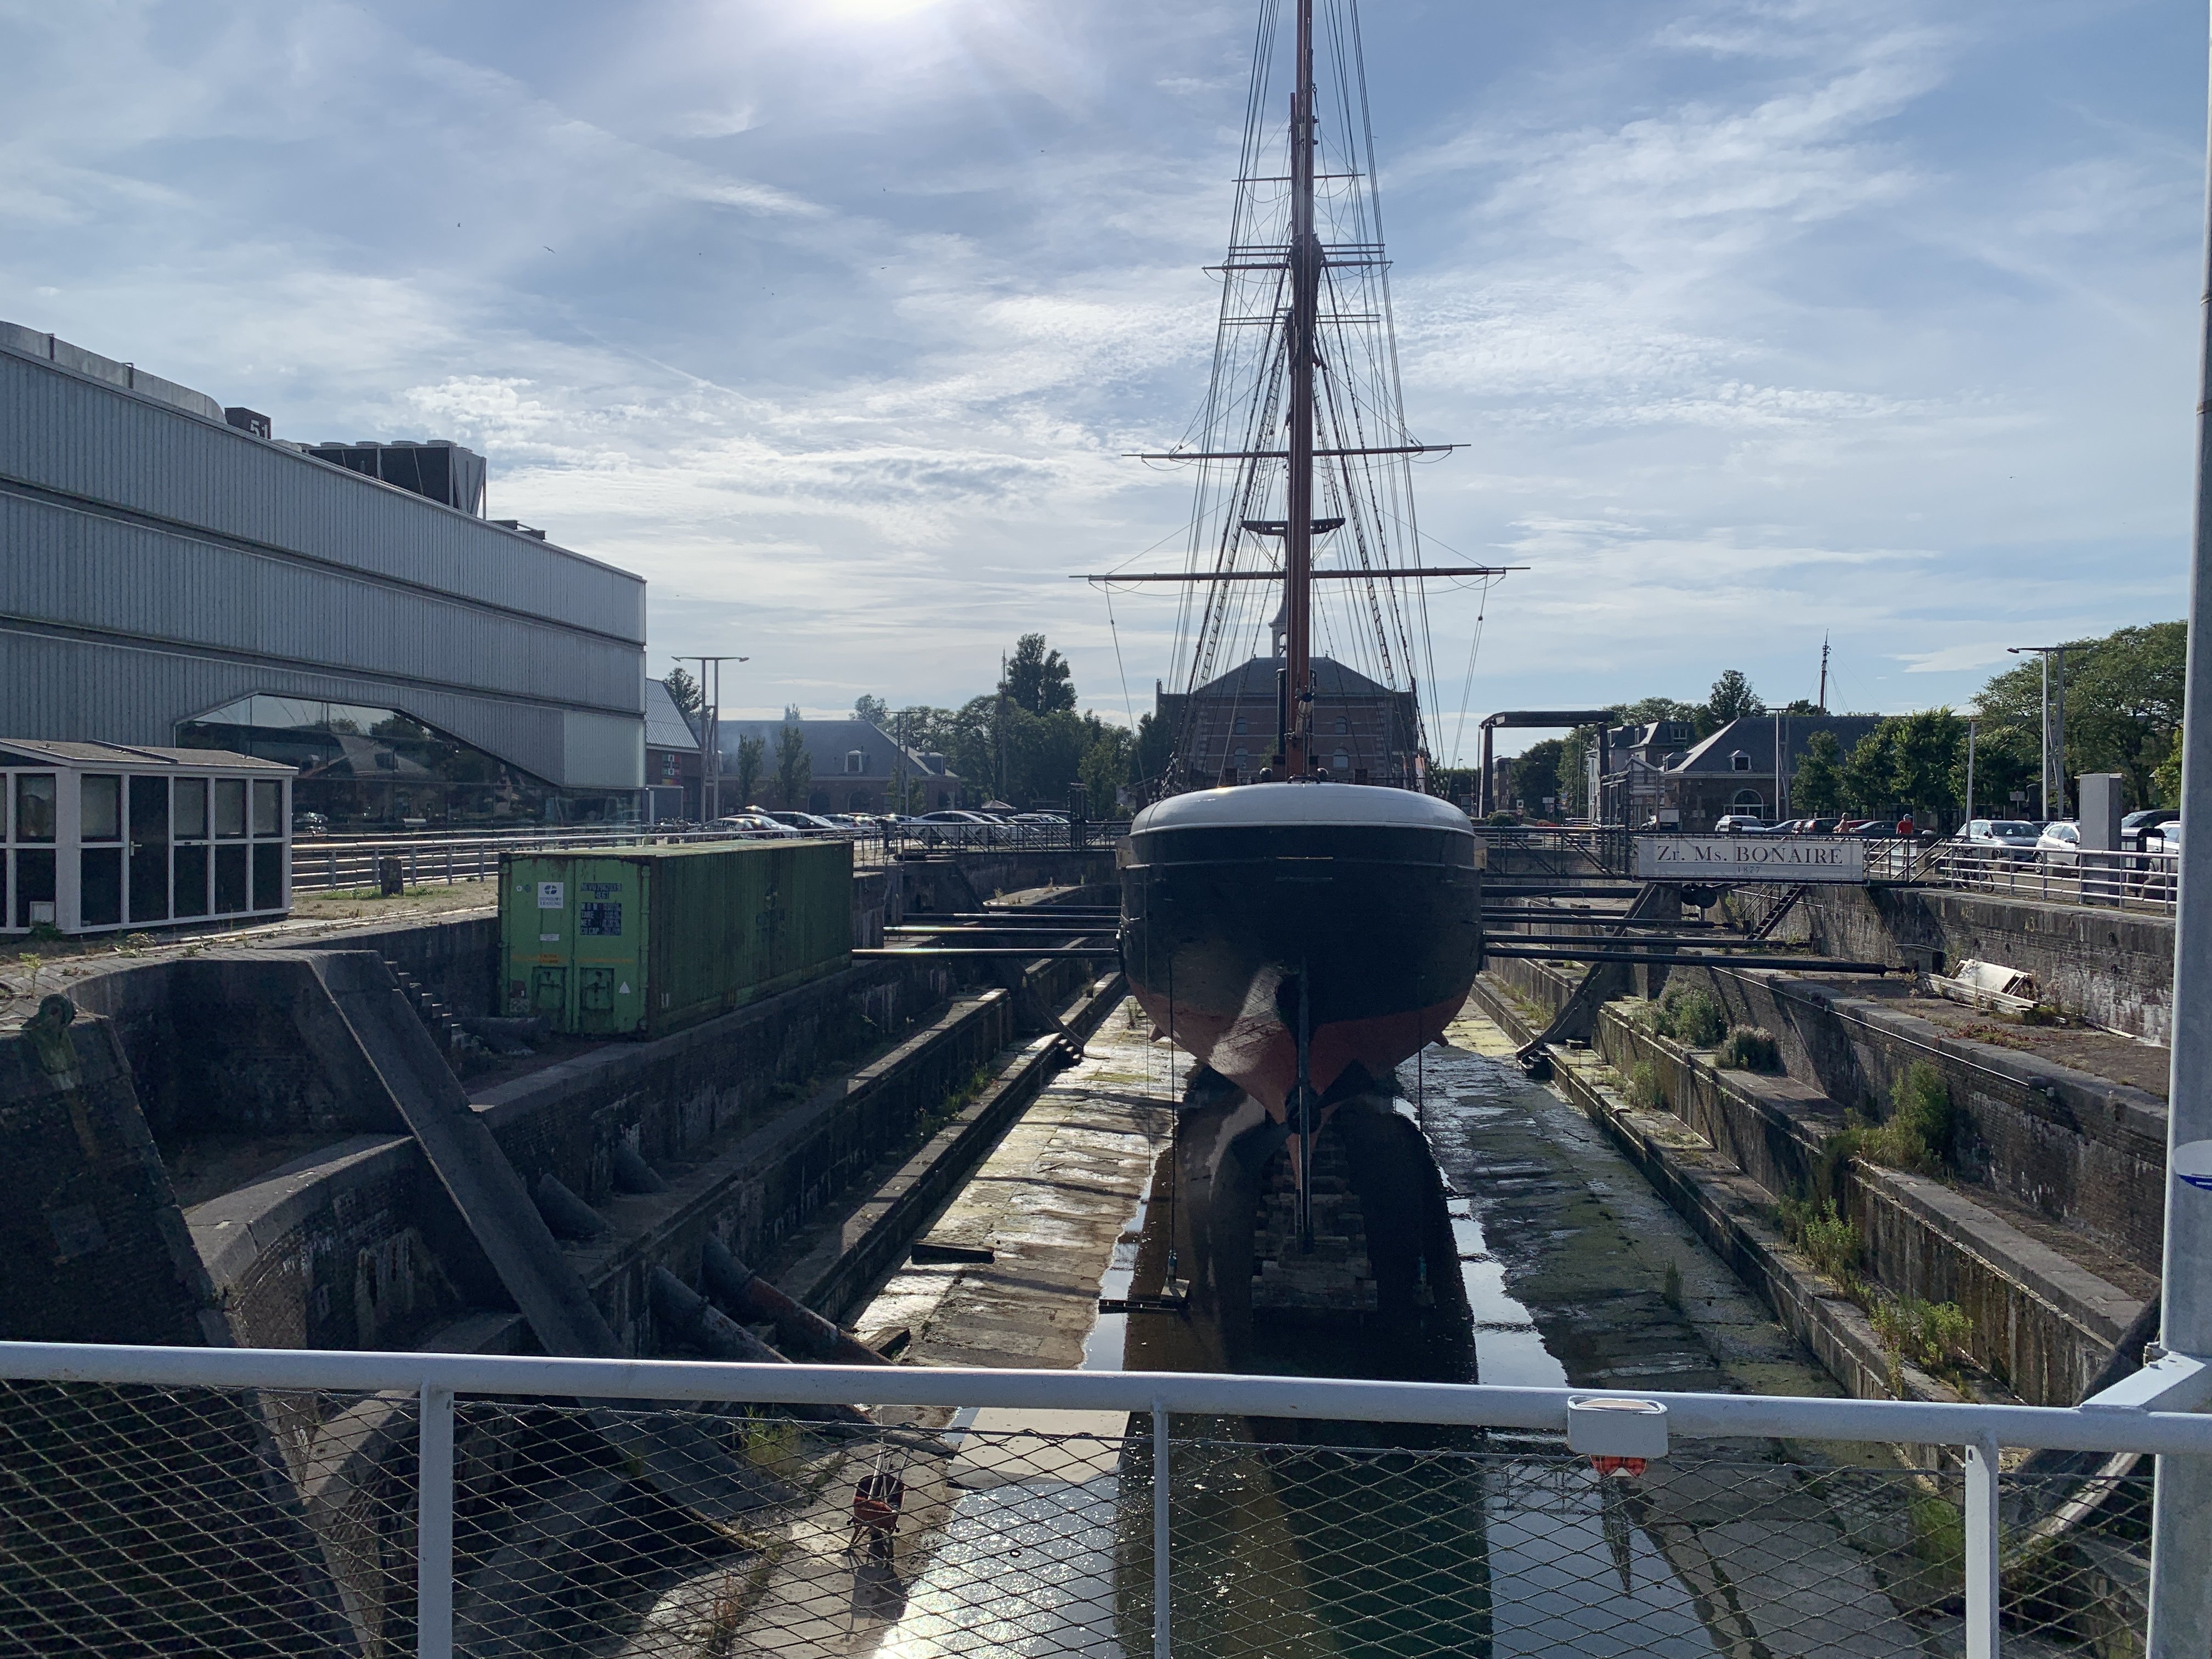
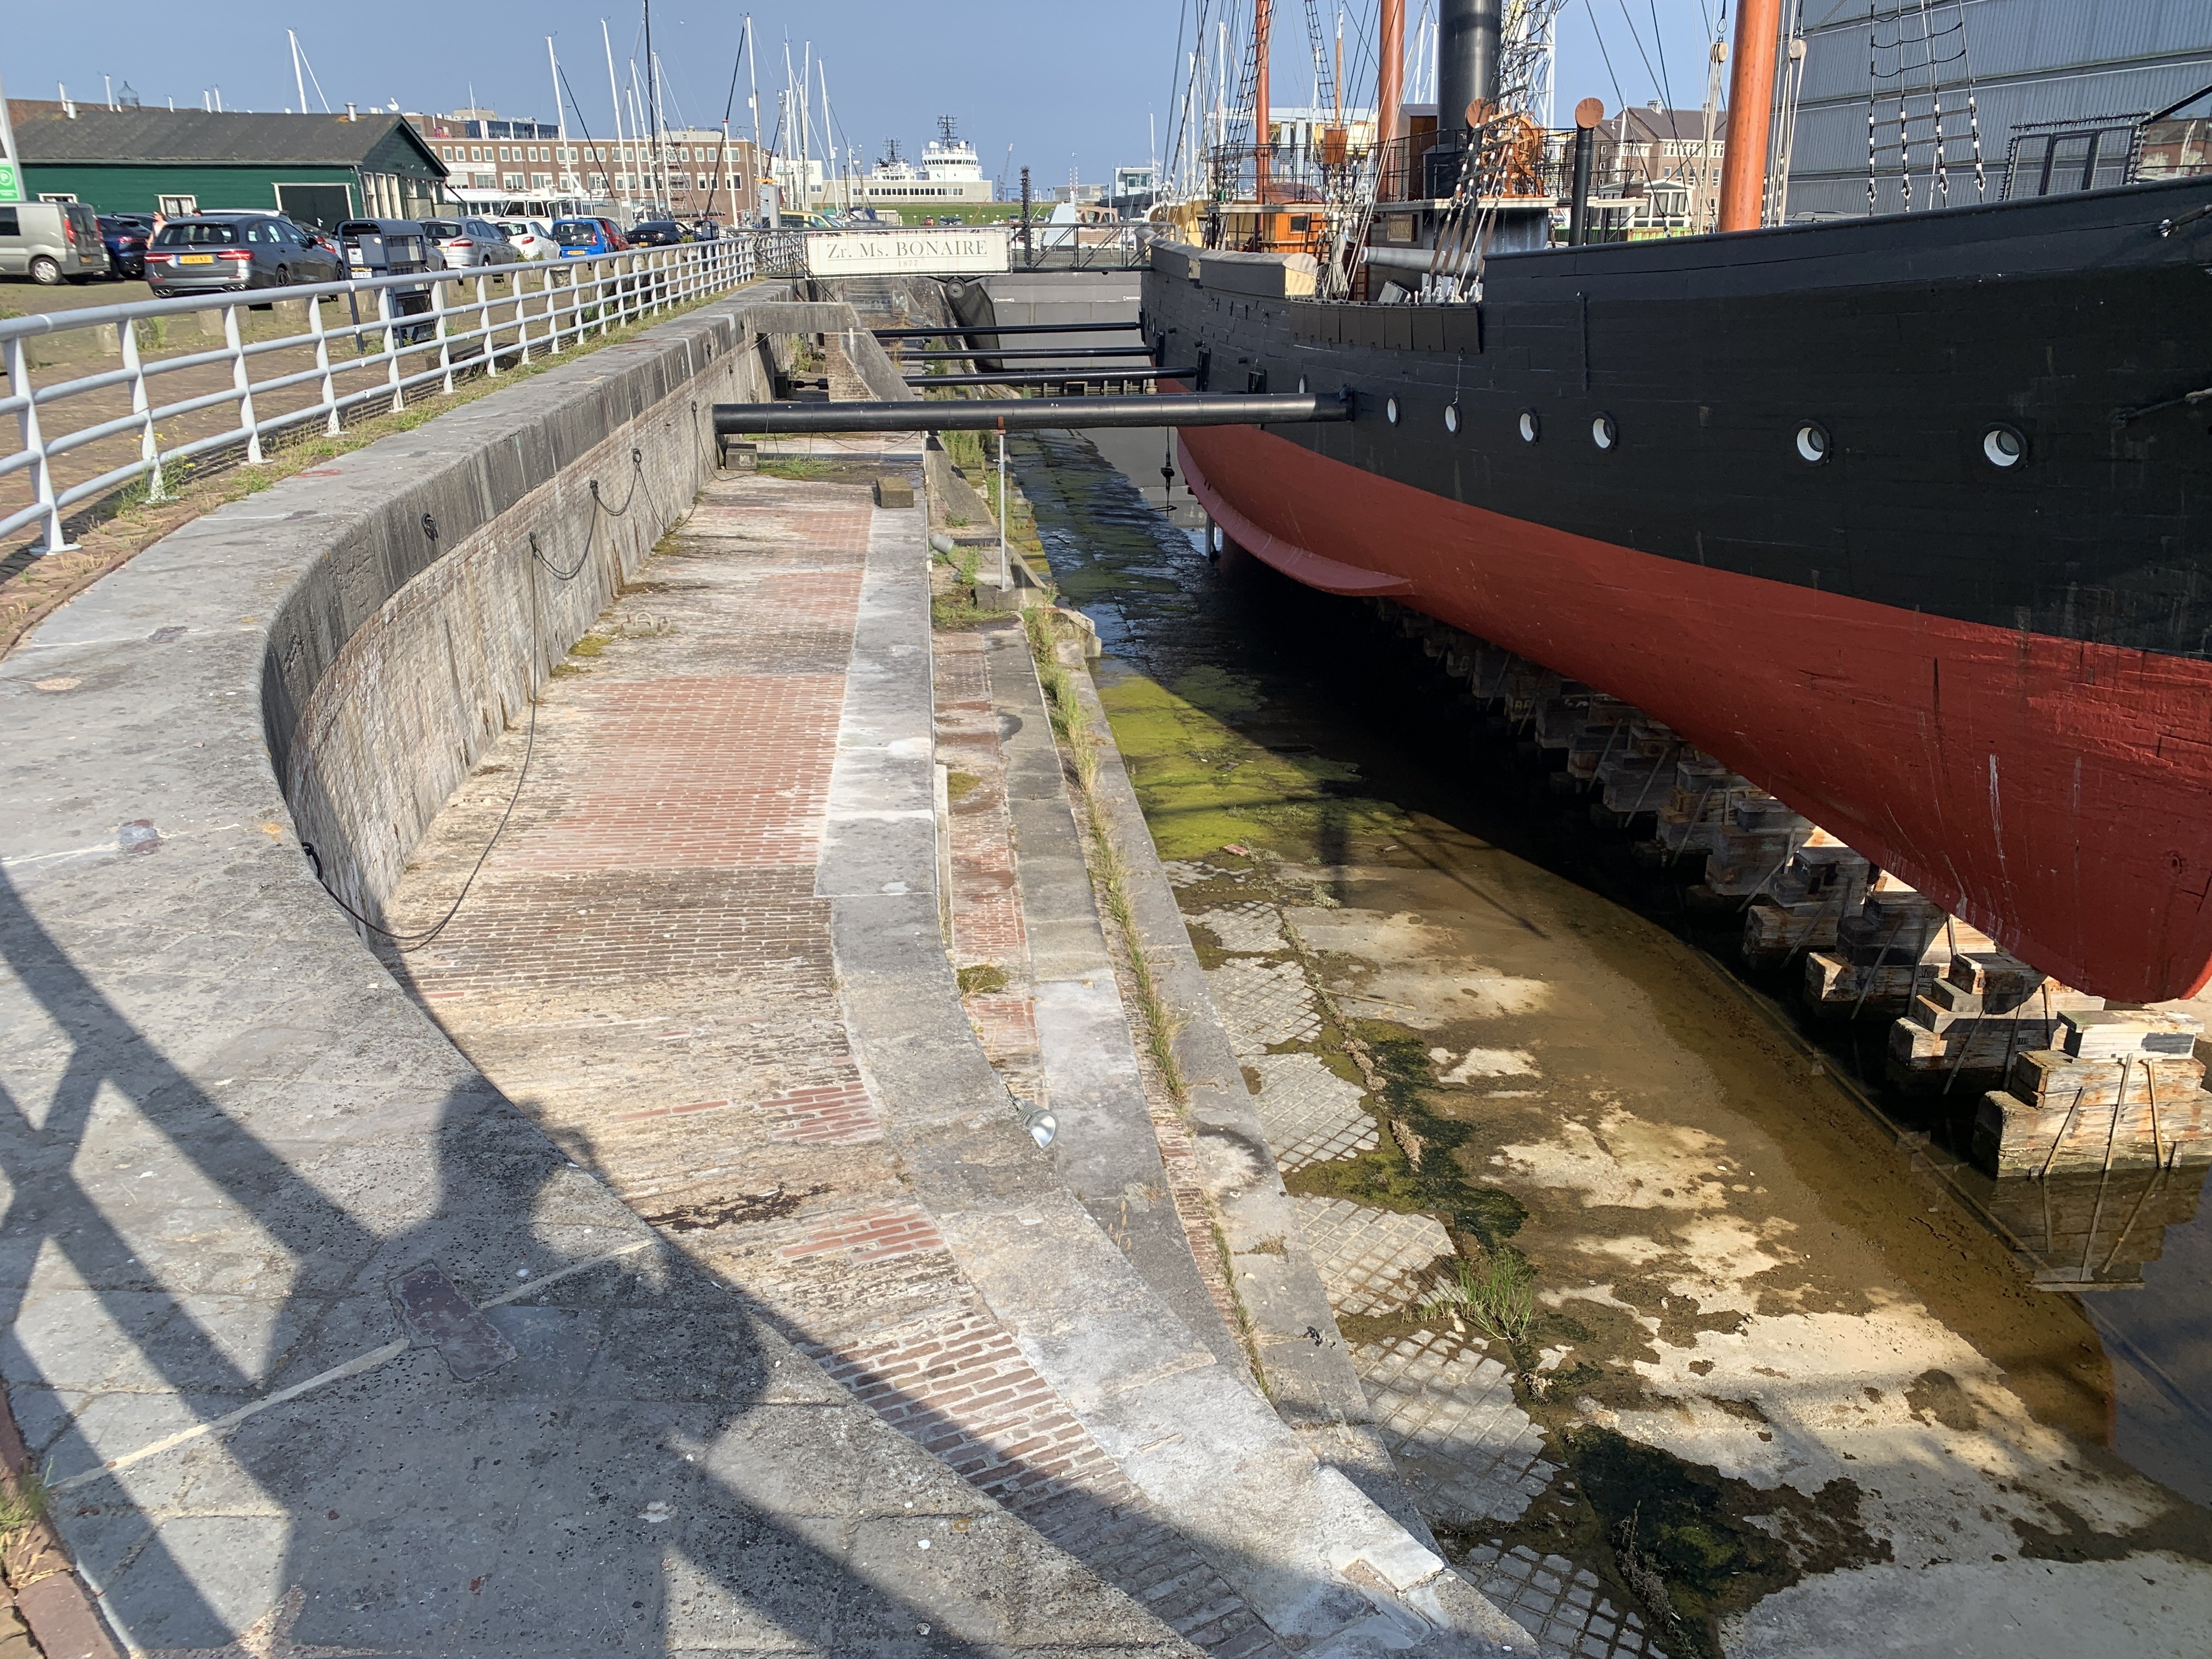
From our short holiday in Den Helder, north-west Holland. Previously know as Willemsoord, this is where the Dutch Royal Navy was stationed for the past 300 or so years. This is the No.1 dock there, where the (ex HMS) Diana was destroyed in a fire. This place is a lot like the historic docks in Plymouth and I’m going back tomorrow to check some of the historic buildings there.


- Mr Whippy, chris watton and Ronald-V
-
3
-
Thanks Dave, that was a very kind comment. I'm hoping I will post much more in future, although progress really takes time.
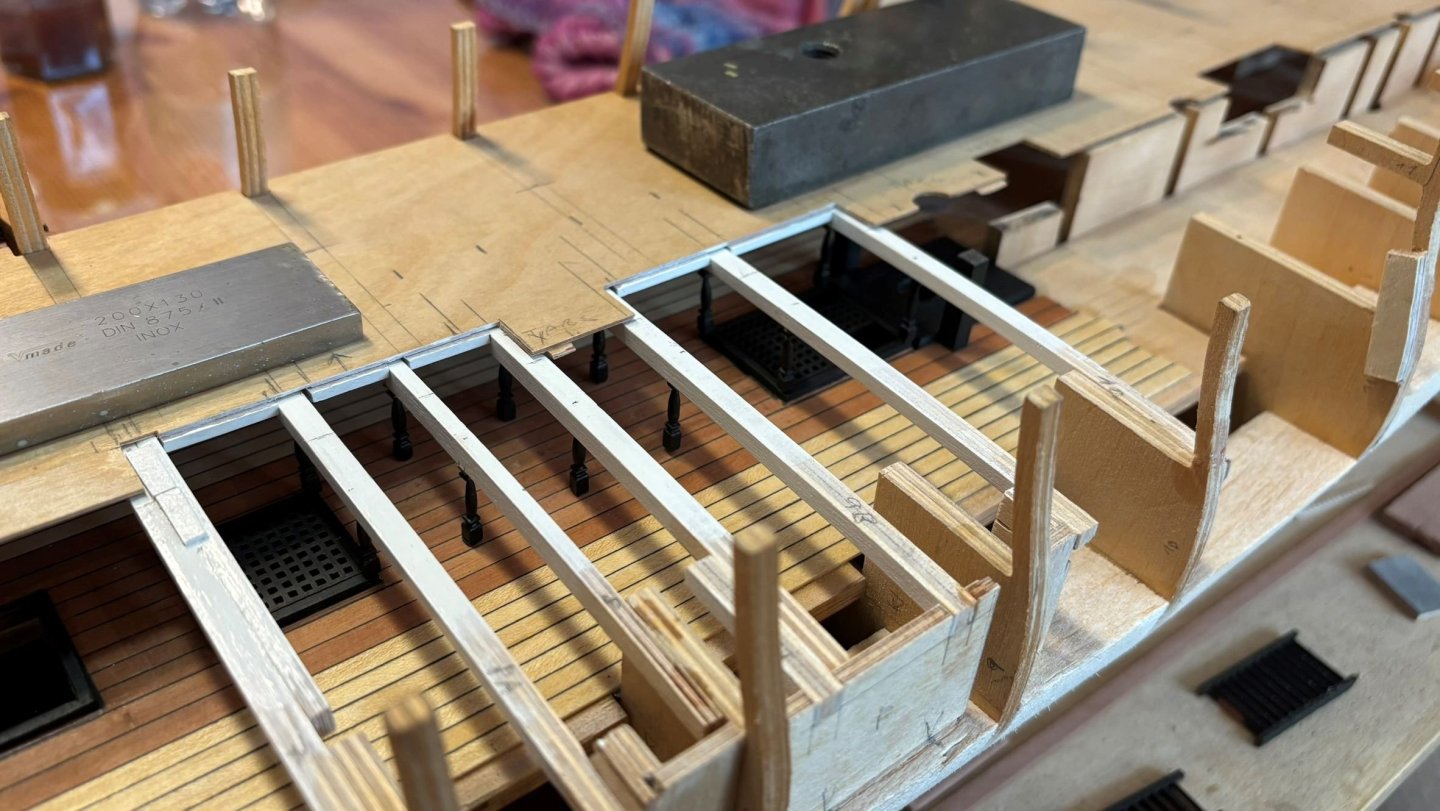
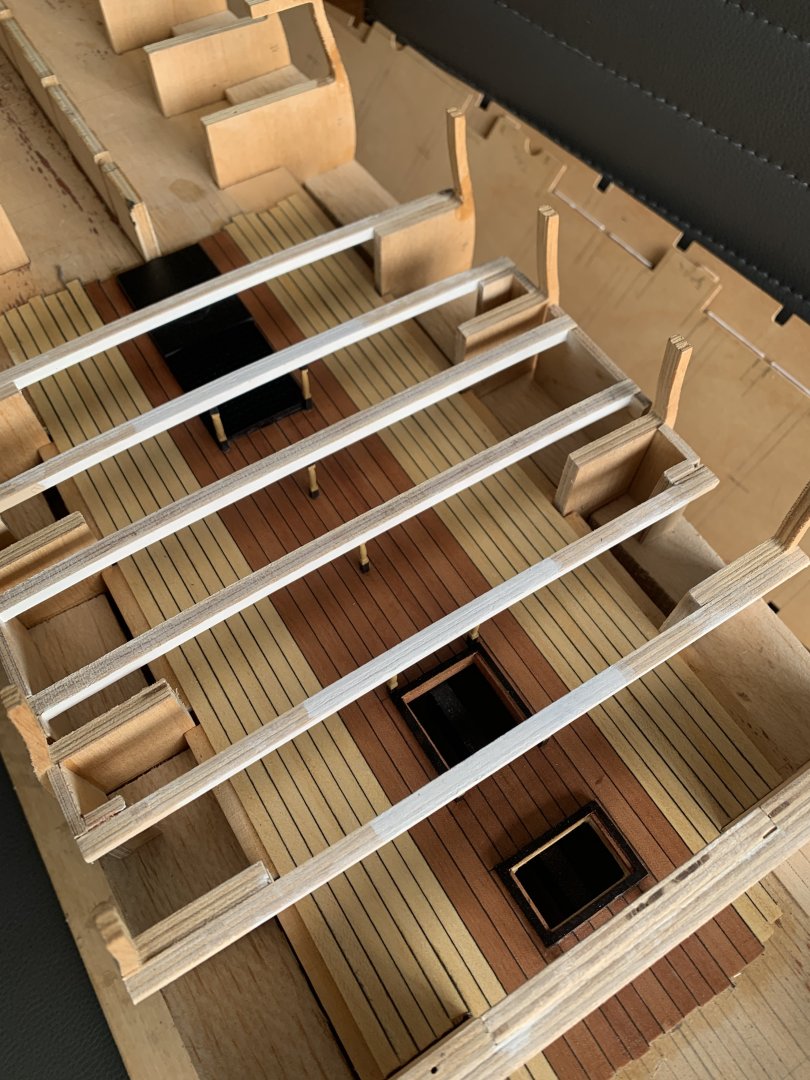
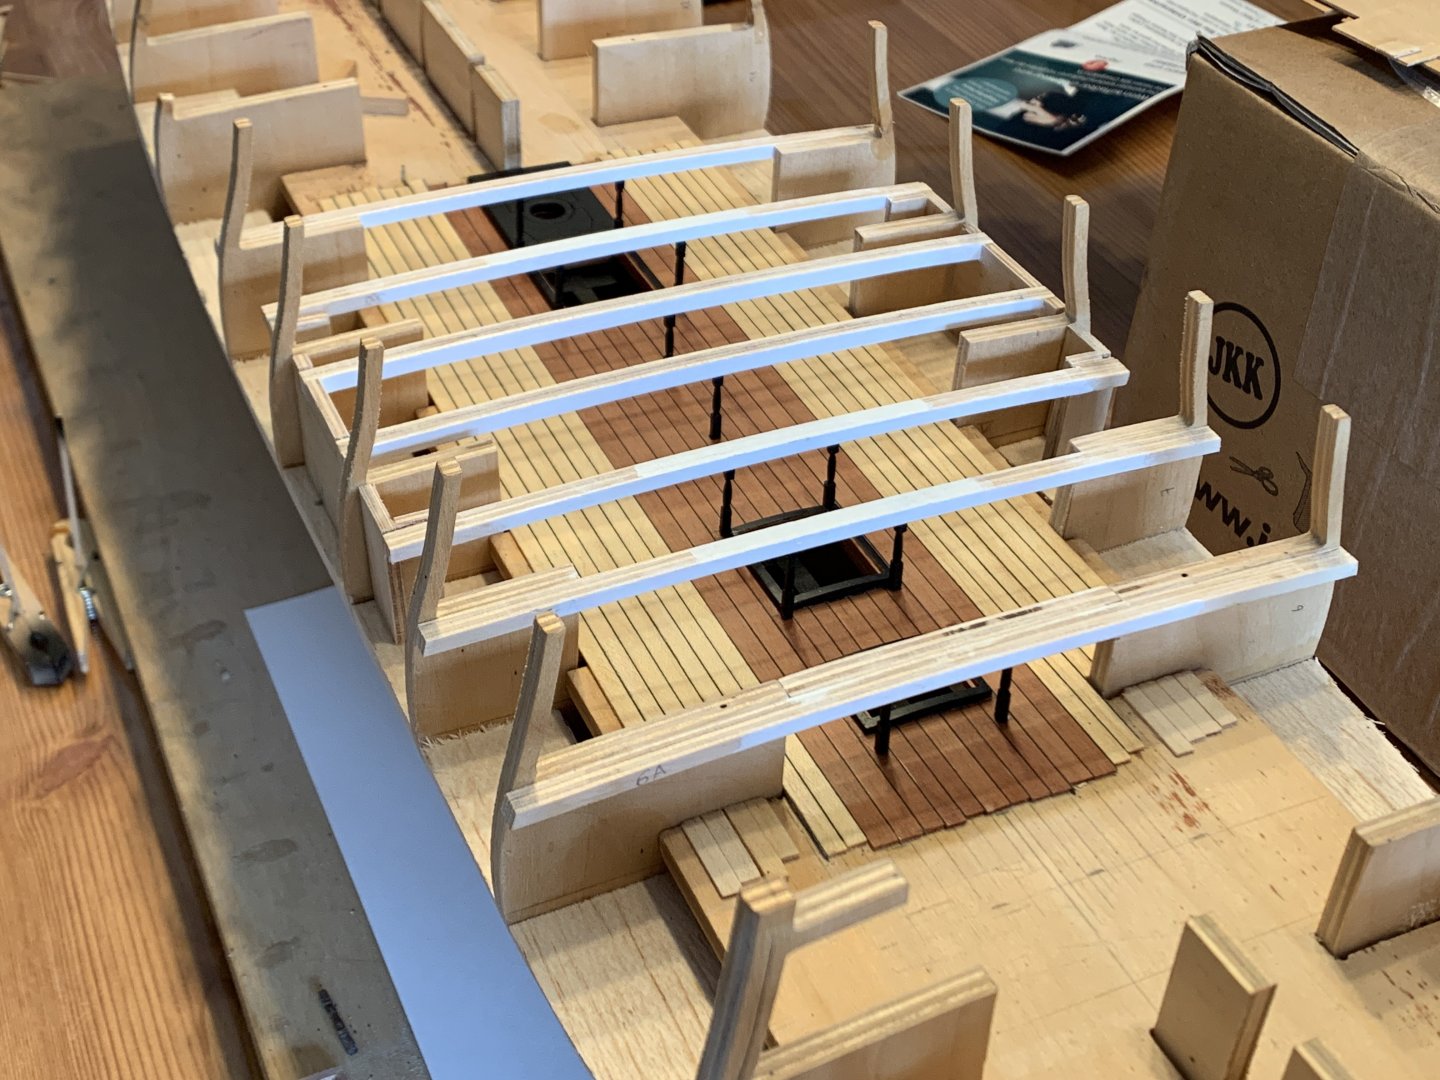
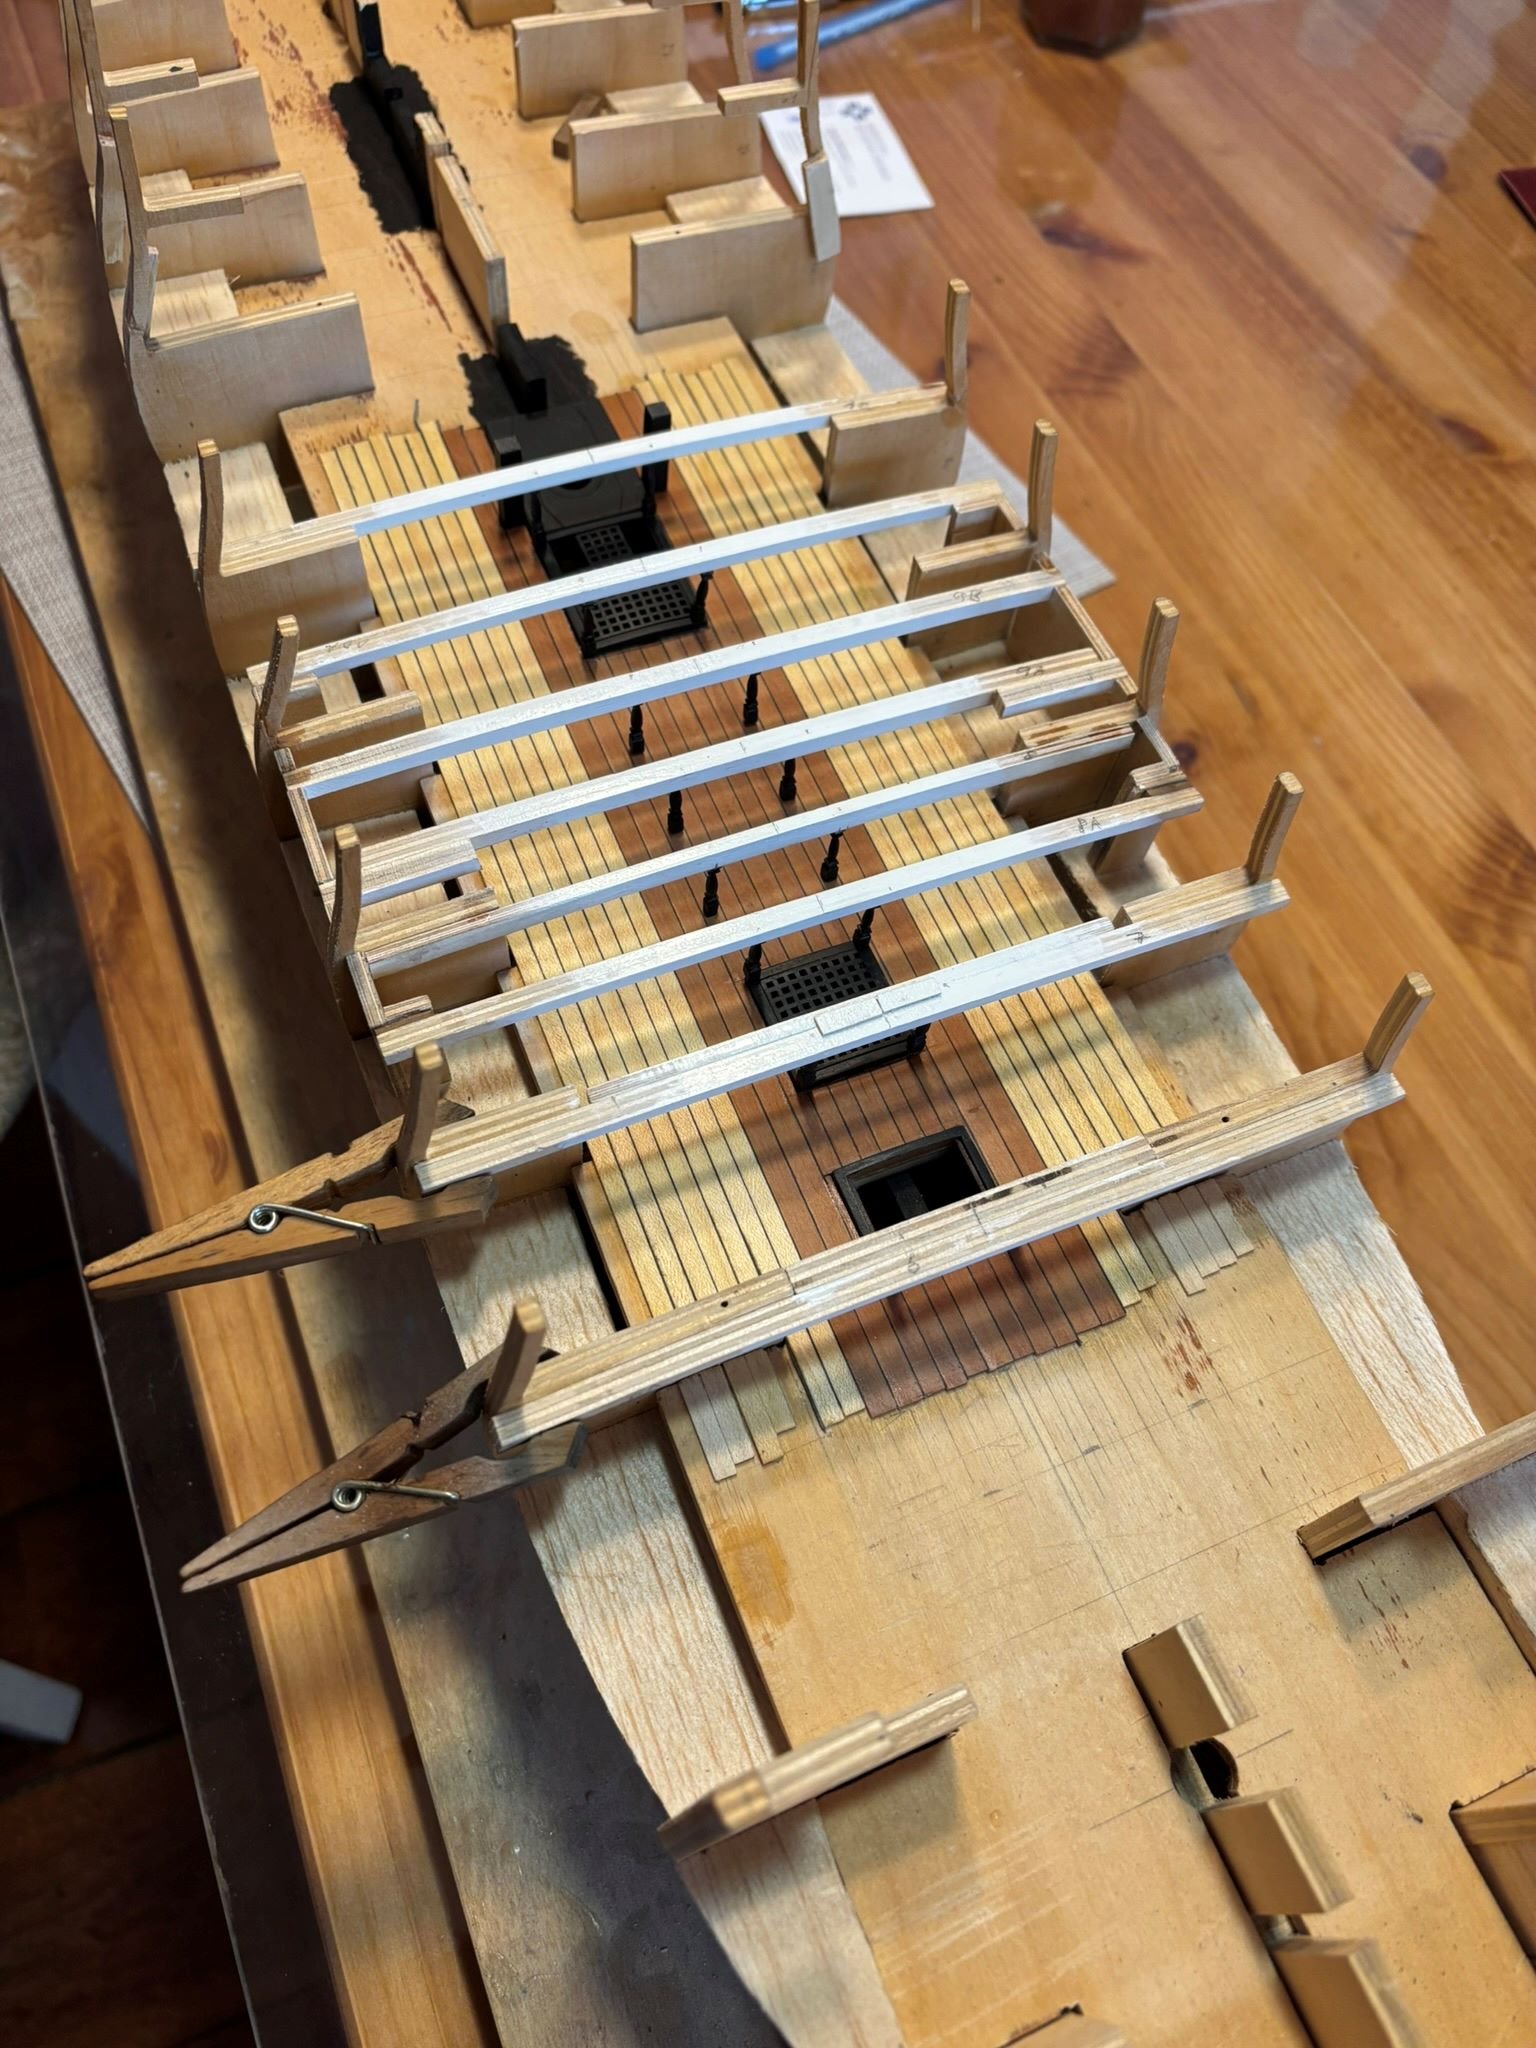
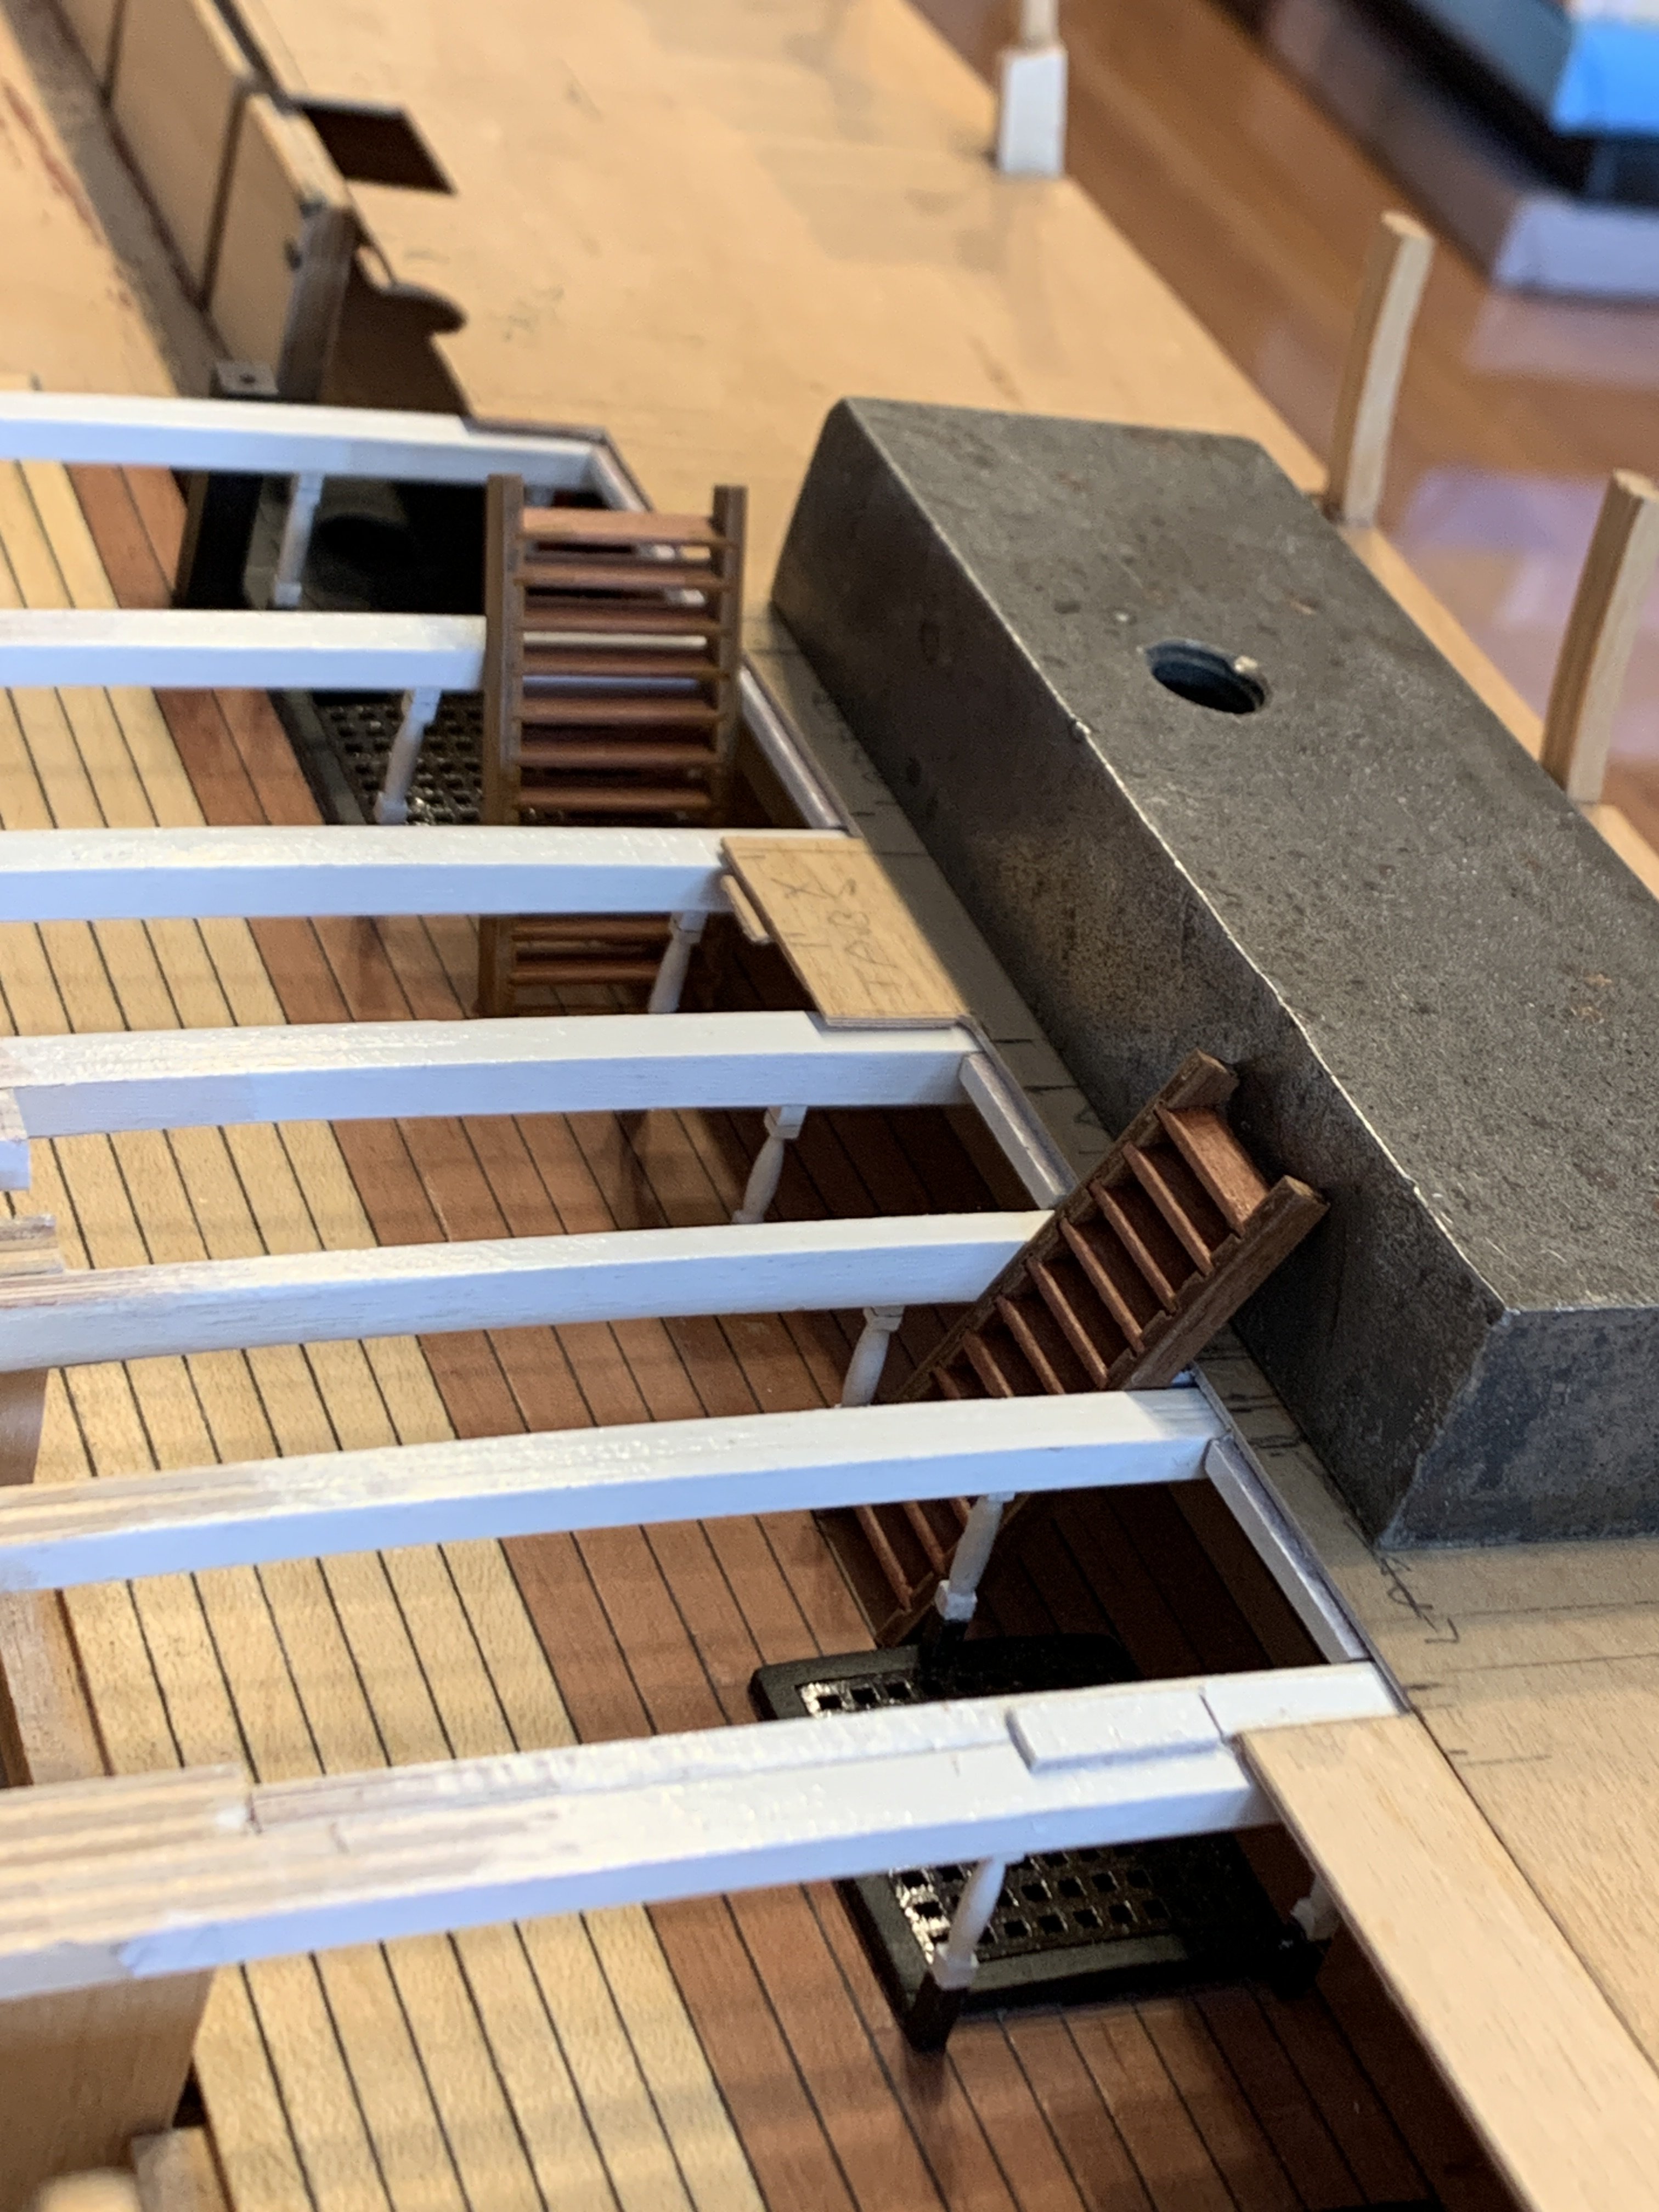
I wasn't really happy with the pillars even in yellow ochre as they also got lost in the depths of the lower deck, so I decided to go all out and paint them white, at least the upper half of them. From what I have read the ship's captain had the right to 'personalise' his ship and paint it including its interior as he felt suitable. From brousing through books I couls see that on the Victory they were dark brown or black, on the Trincomalee also but on old pictures of the Implacable I could see two colour tones, so from this I assume there wasn't a strict code to adhere to. So mine are now white, at least the upper half of them is.
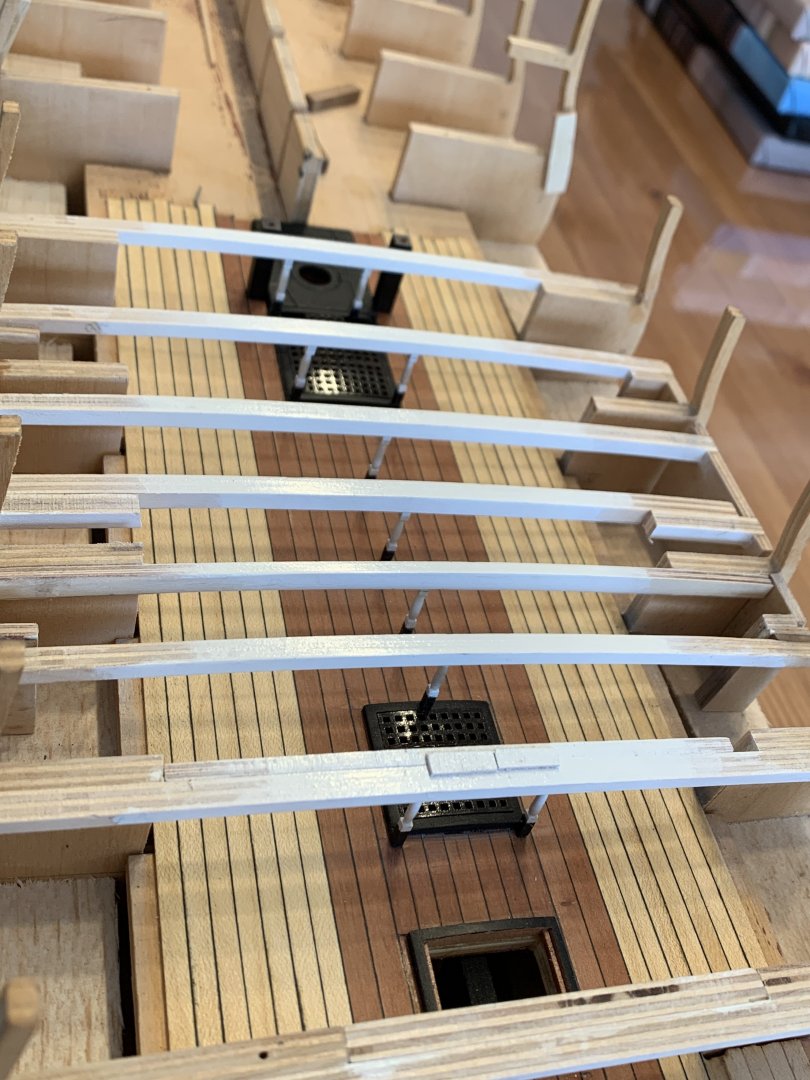
I also painted the gratings gloss dark brown so that they remain conspicuous once everything has been buttoned up. Not 100% accurate but at least they can still be seen from the top, but only just.
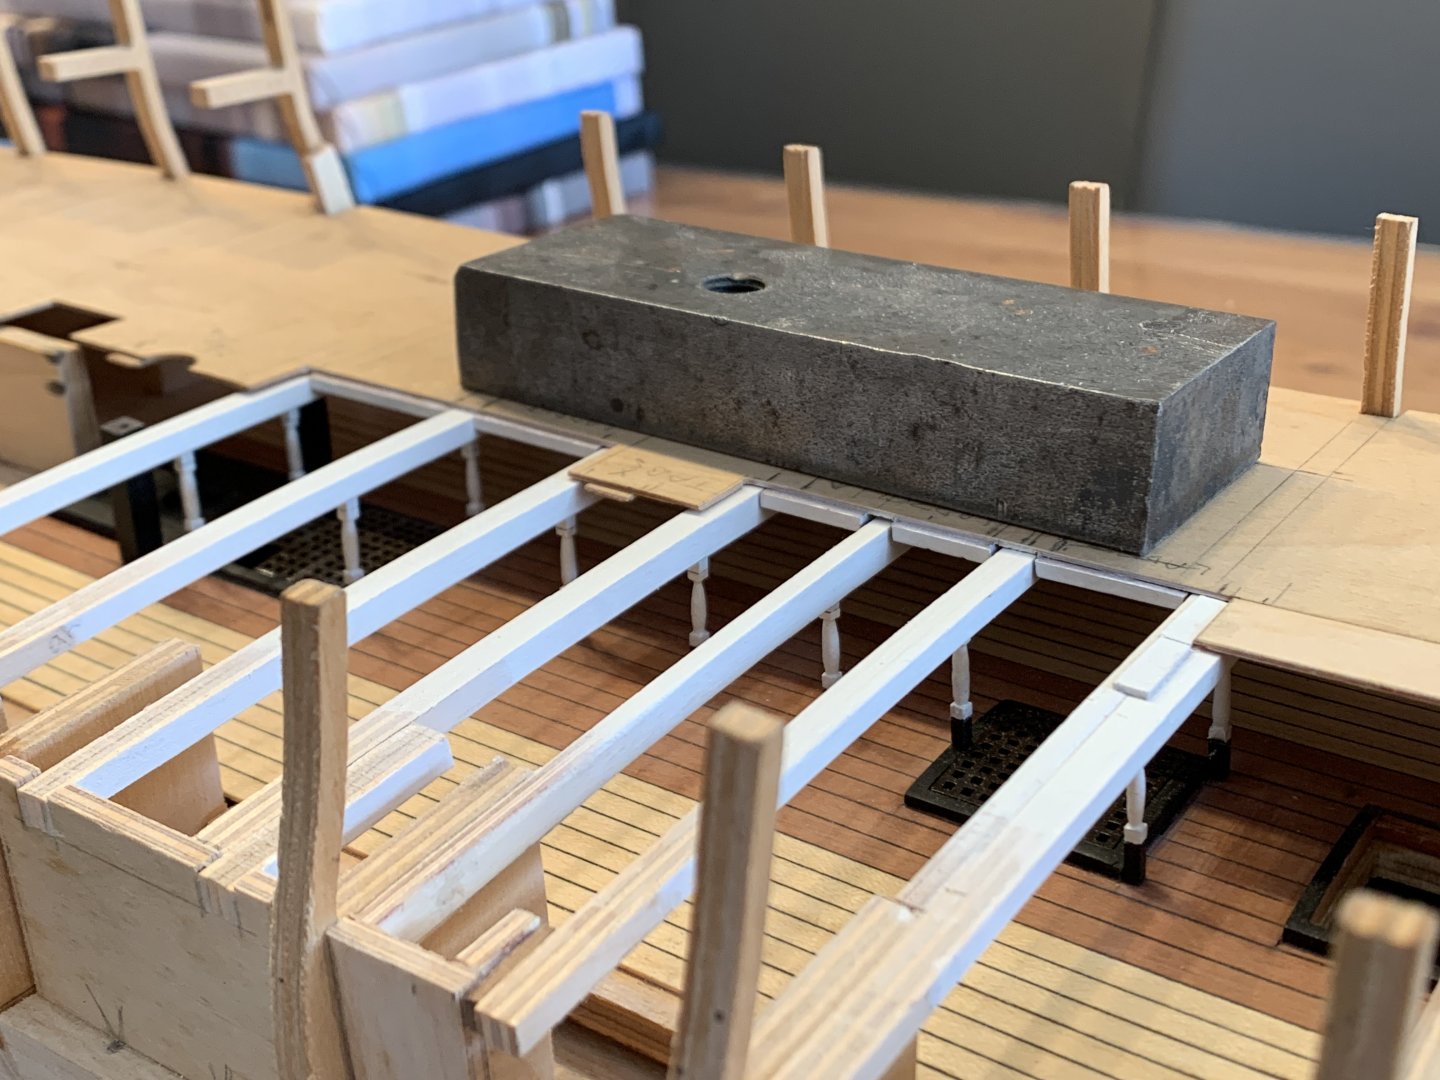
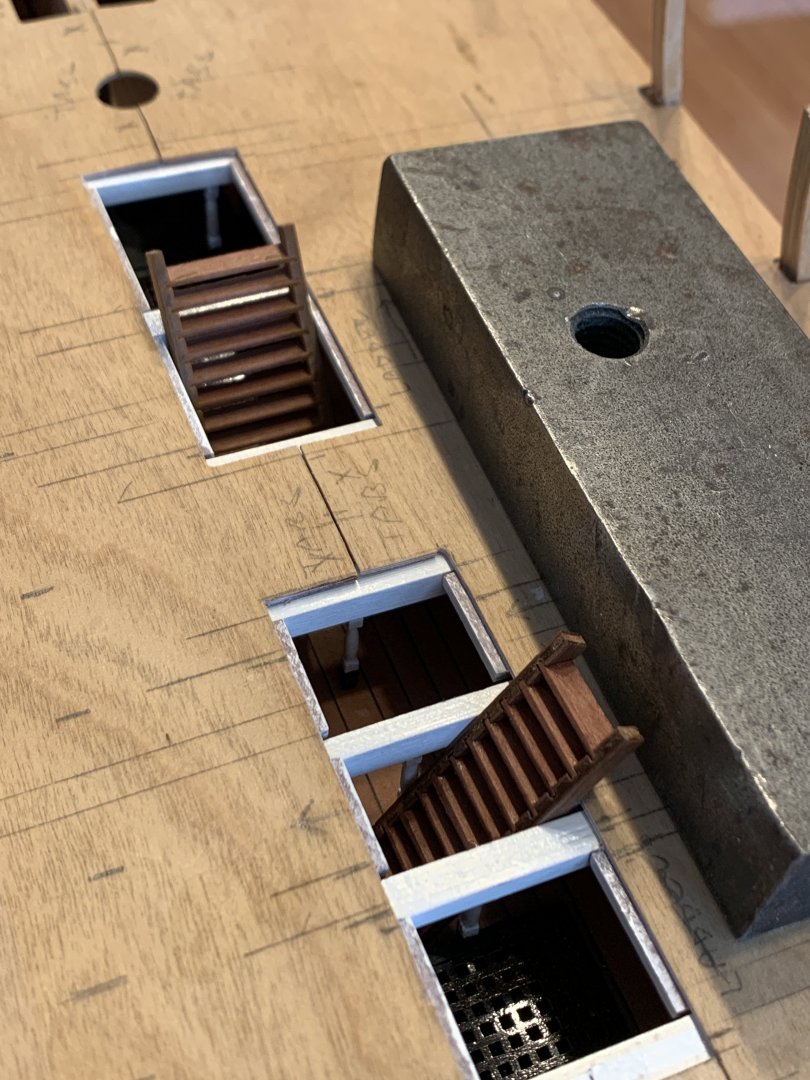
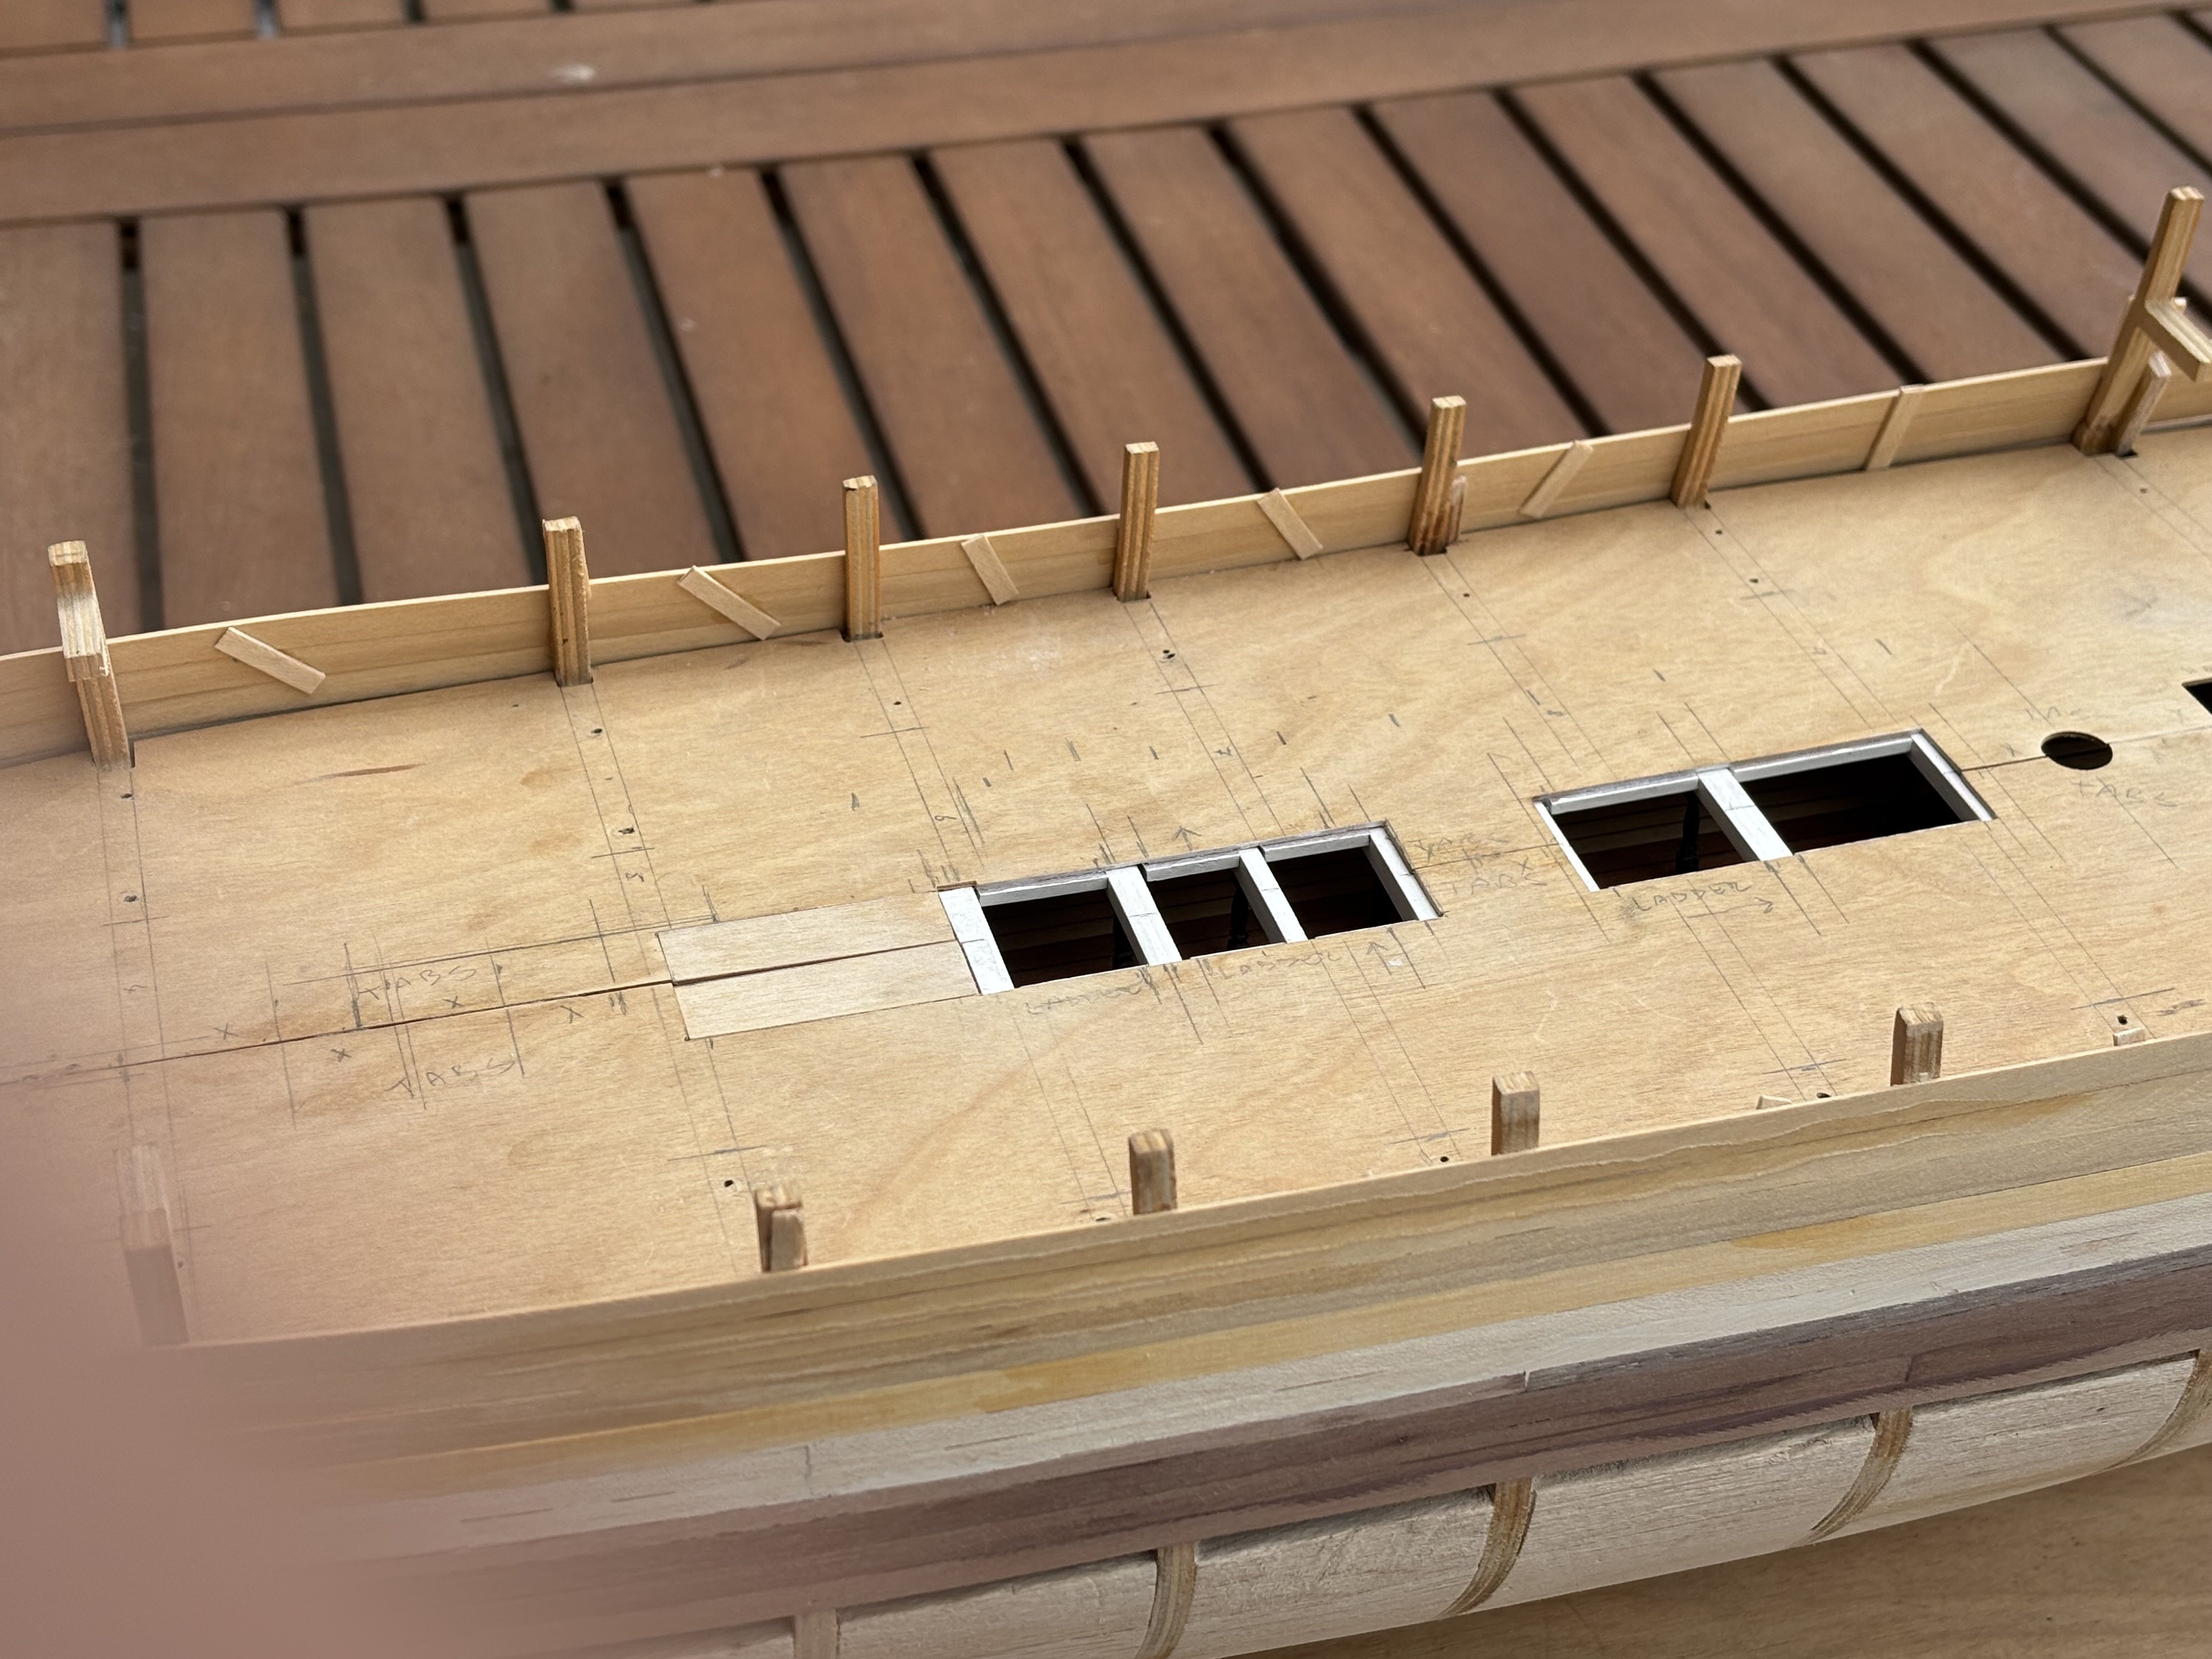
I started on the ladders just to see how they all fit into the scheme of things. Maybe a bit too chunky?

The gun deck gratings will eventually cover everything up here, but I will leave the hatches open as if the ship is being loaded right now.
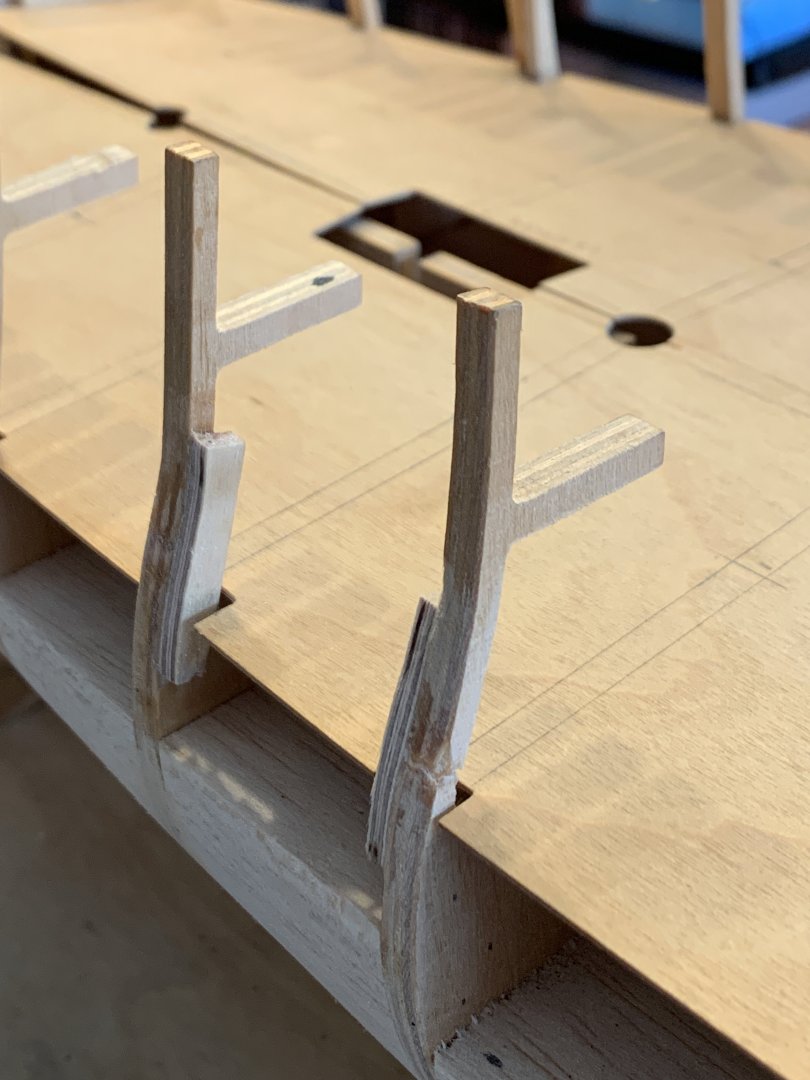
A PIA was me being ham fisted all along and breaking off the the extensions on the bulkheads for the bulwalk planking and quarter deck beams. I decided it was time for a real fix here.
Oh yes, extending the front main hatch as described in my previous post was wrong. So this was reversed.
-
-
Good evening All,
I've noticed something that seems to be unique on large frigattes concerning the handling of the anchors on large frigattes, maybe not only British ones. On HMS Diana (1794) the hawse pipes are slightly abover the upper (gun) deck. The riding bit is behind them on the same deck which means the cables enter the boat through the hawse pipes and remain on the upper (gun) deck at least as far as the riding bit. The cable tier on a large frigatte is about midship (according to Tosti) but two decks lower. My question is, where does the anchor cable pass into the lower deck and from there into the hold area with the anchor tier. I'm assuming a manger was behind the hawse pipes to scrape off the wet cables before these moved to the riding bit. But after this there is a gap in my trial of thought where the cables were connected to the messenger via several 'nippings'. The messenger must have been mounted right under a deck, via rollers. But which deck? And where did the cable drop from upper (gun) deck to the lower deck and from there to the cable tier? On the Victory this is easy. According to Nepean the hawse pipes were just above the lower gun deck. This is also where the riding bits were. Right under the lower gun decke was... (you guessed it) the cable tier. I hope I'm making sense here...
Any help here is greatly appreciated.
Chris
- Keith Black and mtaylor
-
2
-
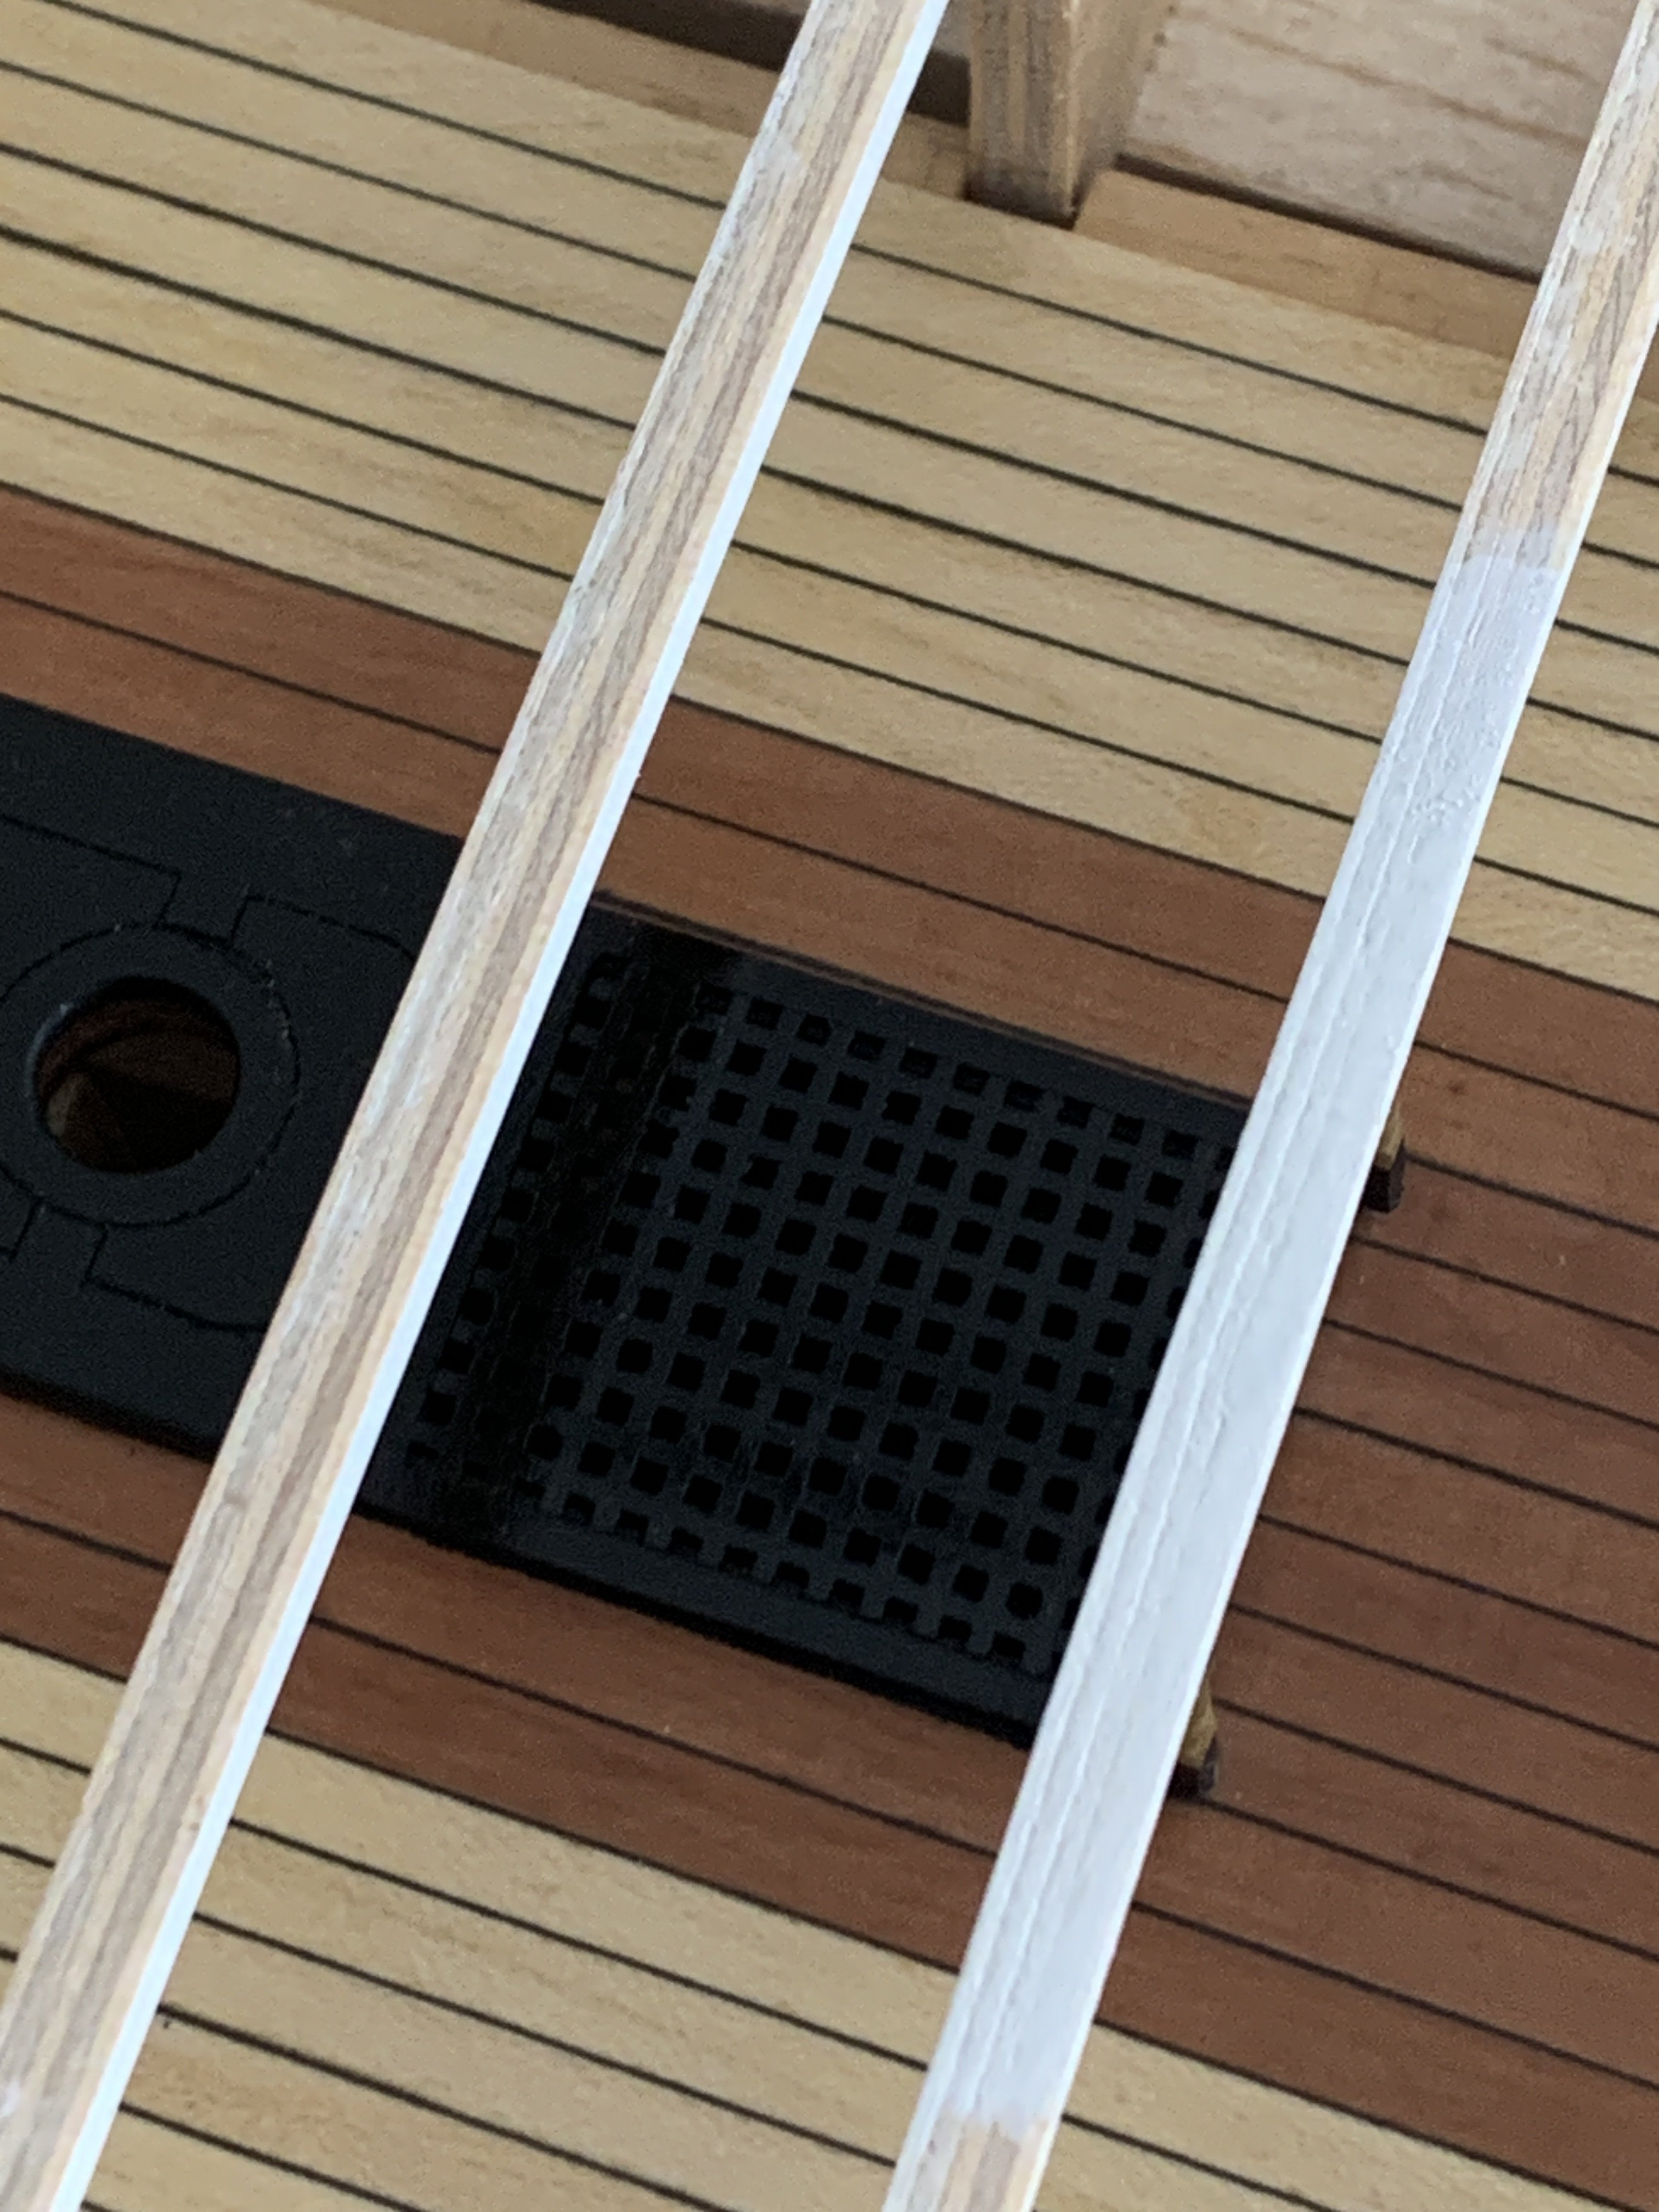
I was a bit disappointed to see that the black pillars got totally lost under the upper (gun) deck so I painted the middle section yellow ochre hoping this would improve their visibilty a bit. Also, I still needed to add some gratings to the lower hatches that needed to be scratch built as the kit doesn't provide any materials for this. For them I ordered some generic items, which compared well size wise with others I have for 1/64th scale boats.


At least the pillars are now slightly visible, heaven knows how conspicuous they will be under five or so jolly boats, though. But to get the gratings more conspicuous I painted them (or airbrushed them is more correct as most painting I do is done with an airbrush) gloss black. The reflection of the gloss paint helped them being more visible and, although they might be too glossy as they are right now, I might just leave them this way to prevent them from getting completely lost under the upper (gun) deck and boats and wotnot.
I was thinking of adding anchor cables, but after some studying I realised that they were up on the gun deck. Question here is, would the messenger be in place all the time or would it be removed while the ship is out at sea? The anchor cables probably disappear down into the orlop deck holds through the very front hatch, but what about the messengers? Please tune in...
-
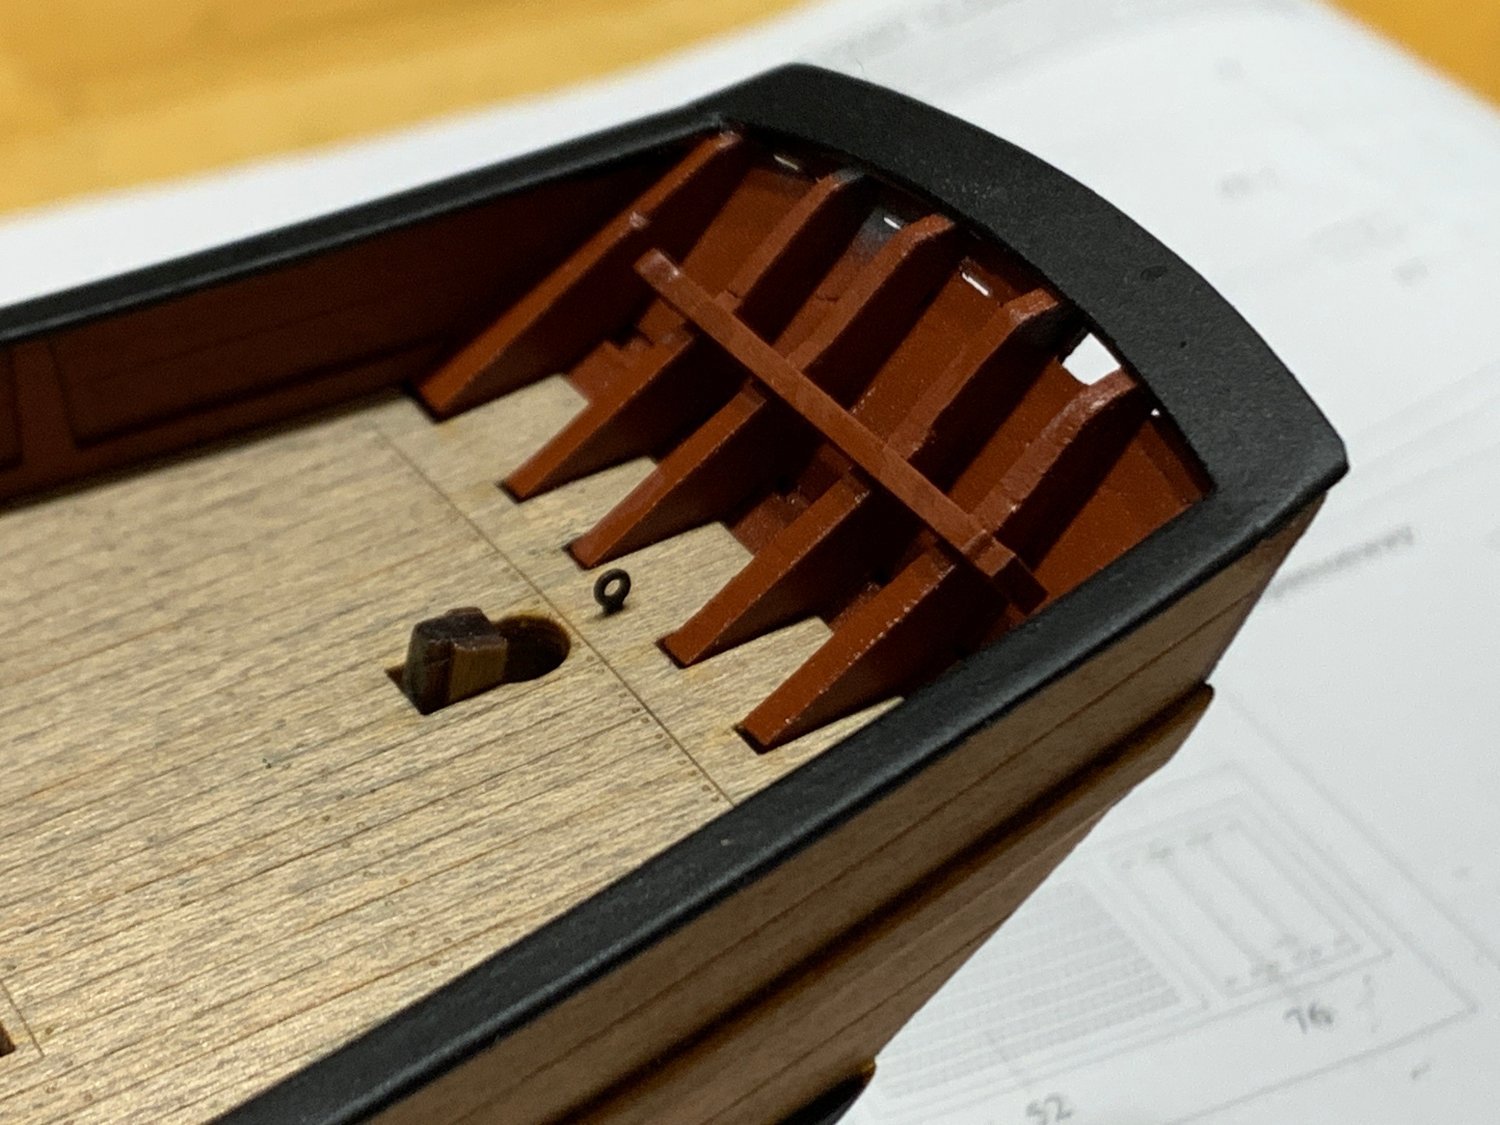
The lower deck looked a bit bare, so to add a bit of business, I put some pillars where I expexted some would be. The AotS didn't show any but there were some on the Pandora drawings from which I could make an estimated guess. I also looked around a bit to find some information on the colour the could have been, and while Victory, Tricomalee and Unicorn are all pretty much the same here, the Victory's pillars were painted black as well as the coaming carlings. Problem with the pillars being black is, you can hardly see them once the gun deck is on. Oh well, I know they're there... I'm glad I didn't add any ladders here.
- brunnels, Mr Whippy, chris watton and 3 others
-
6
-
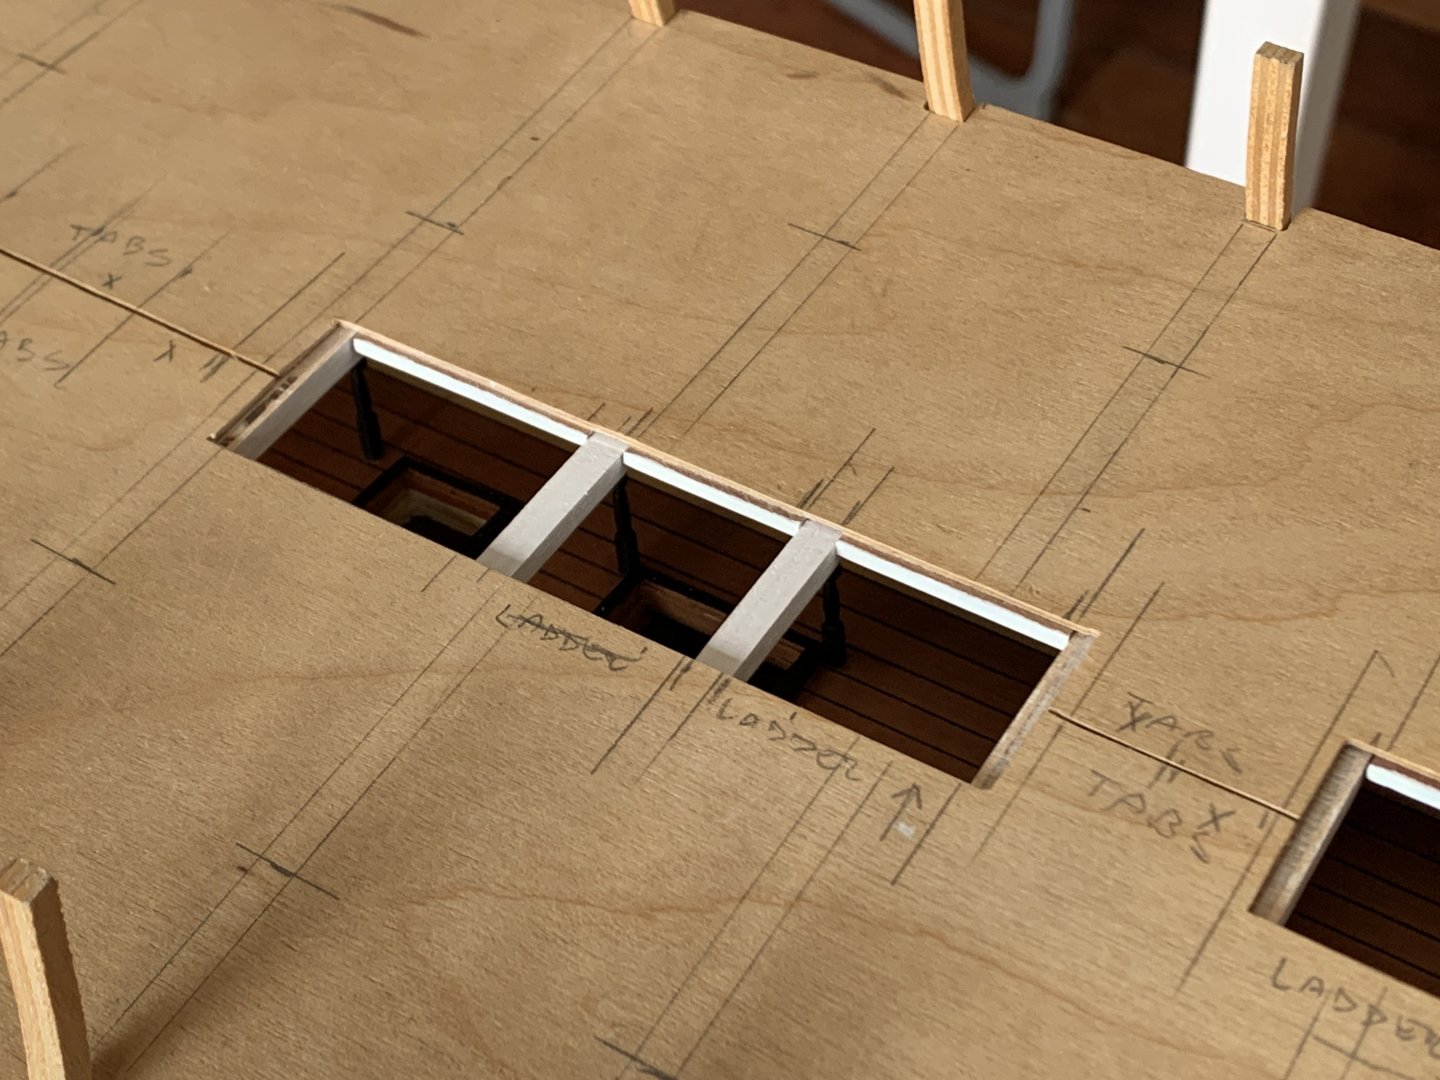
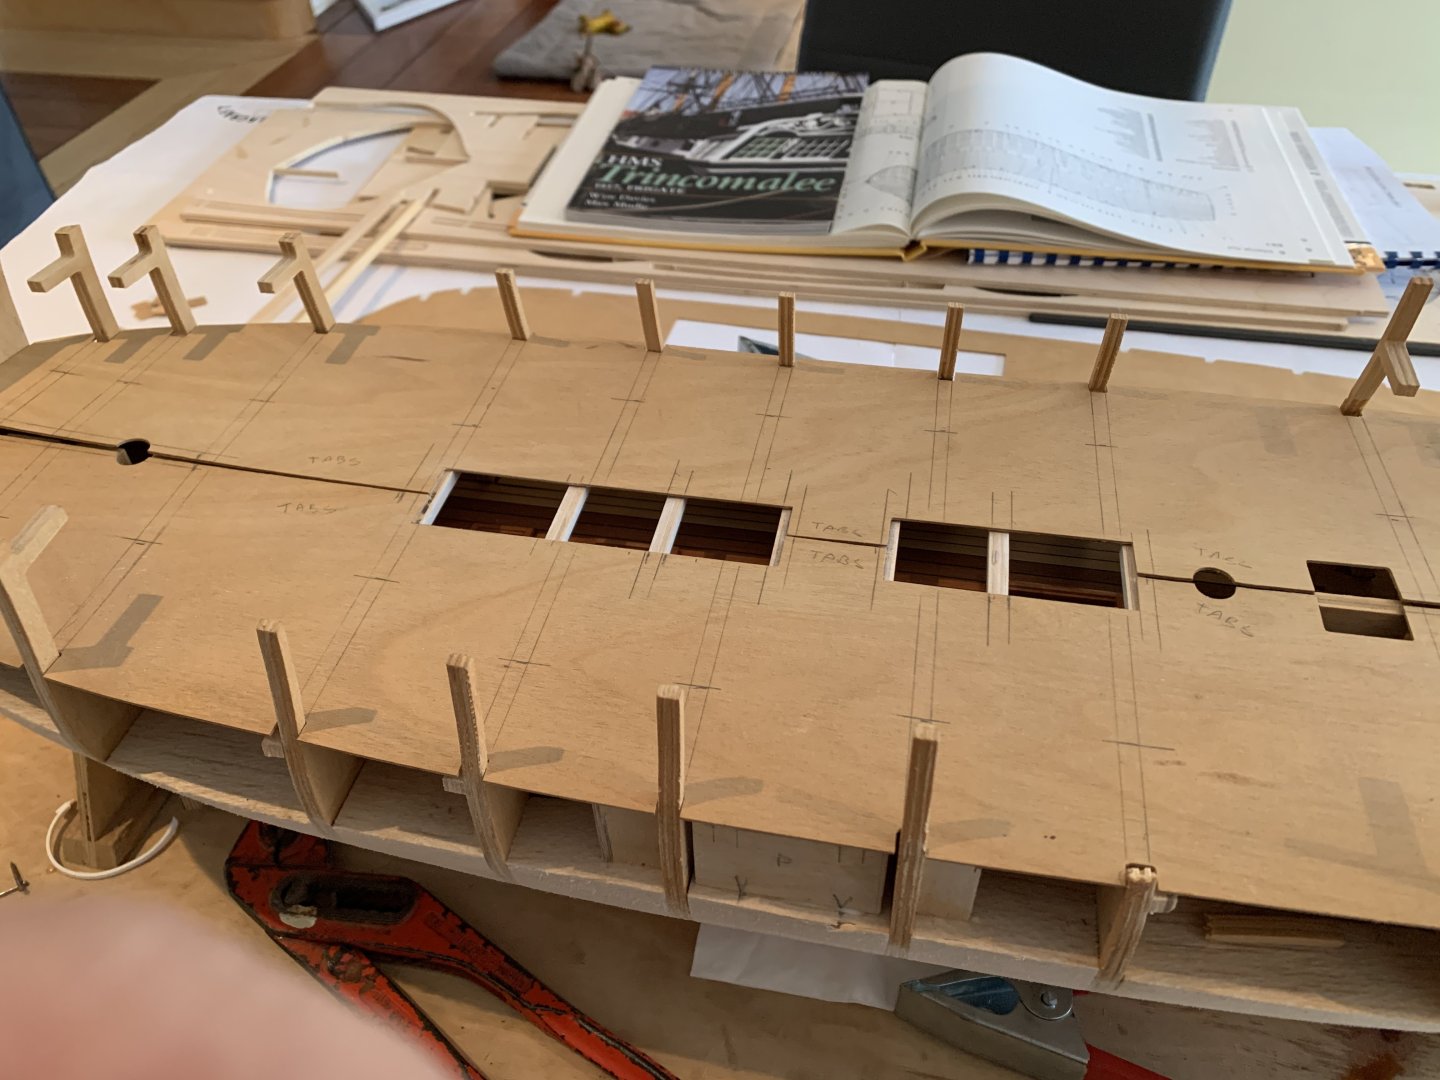
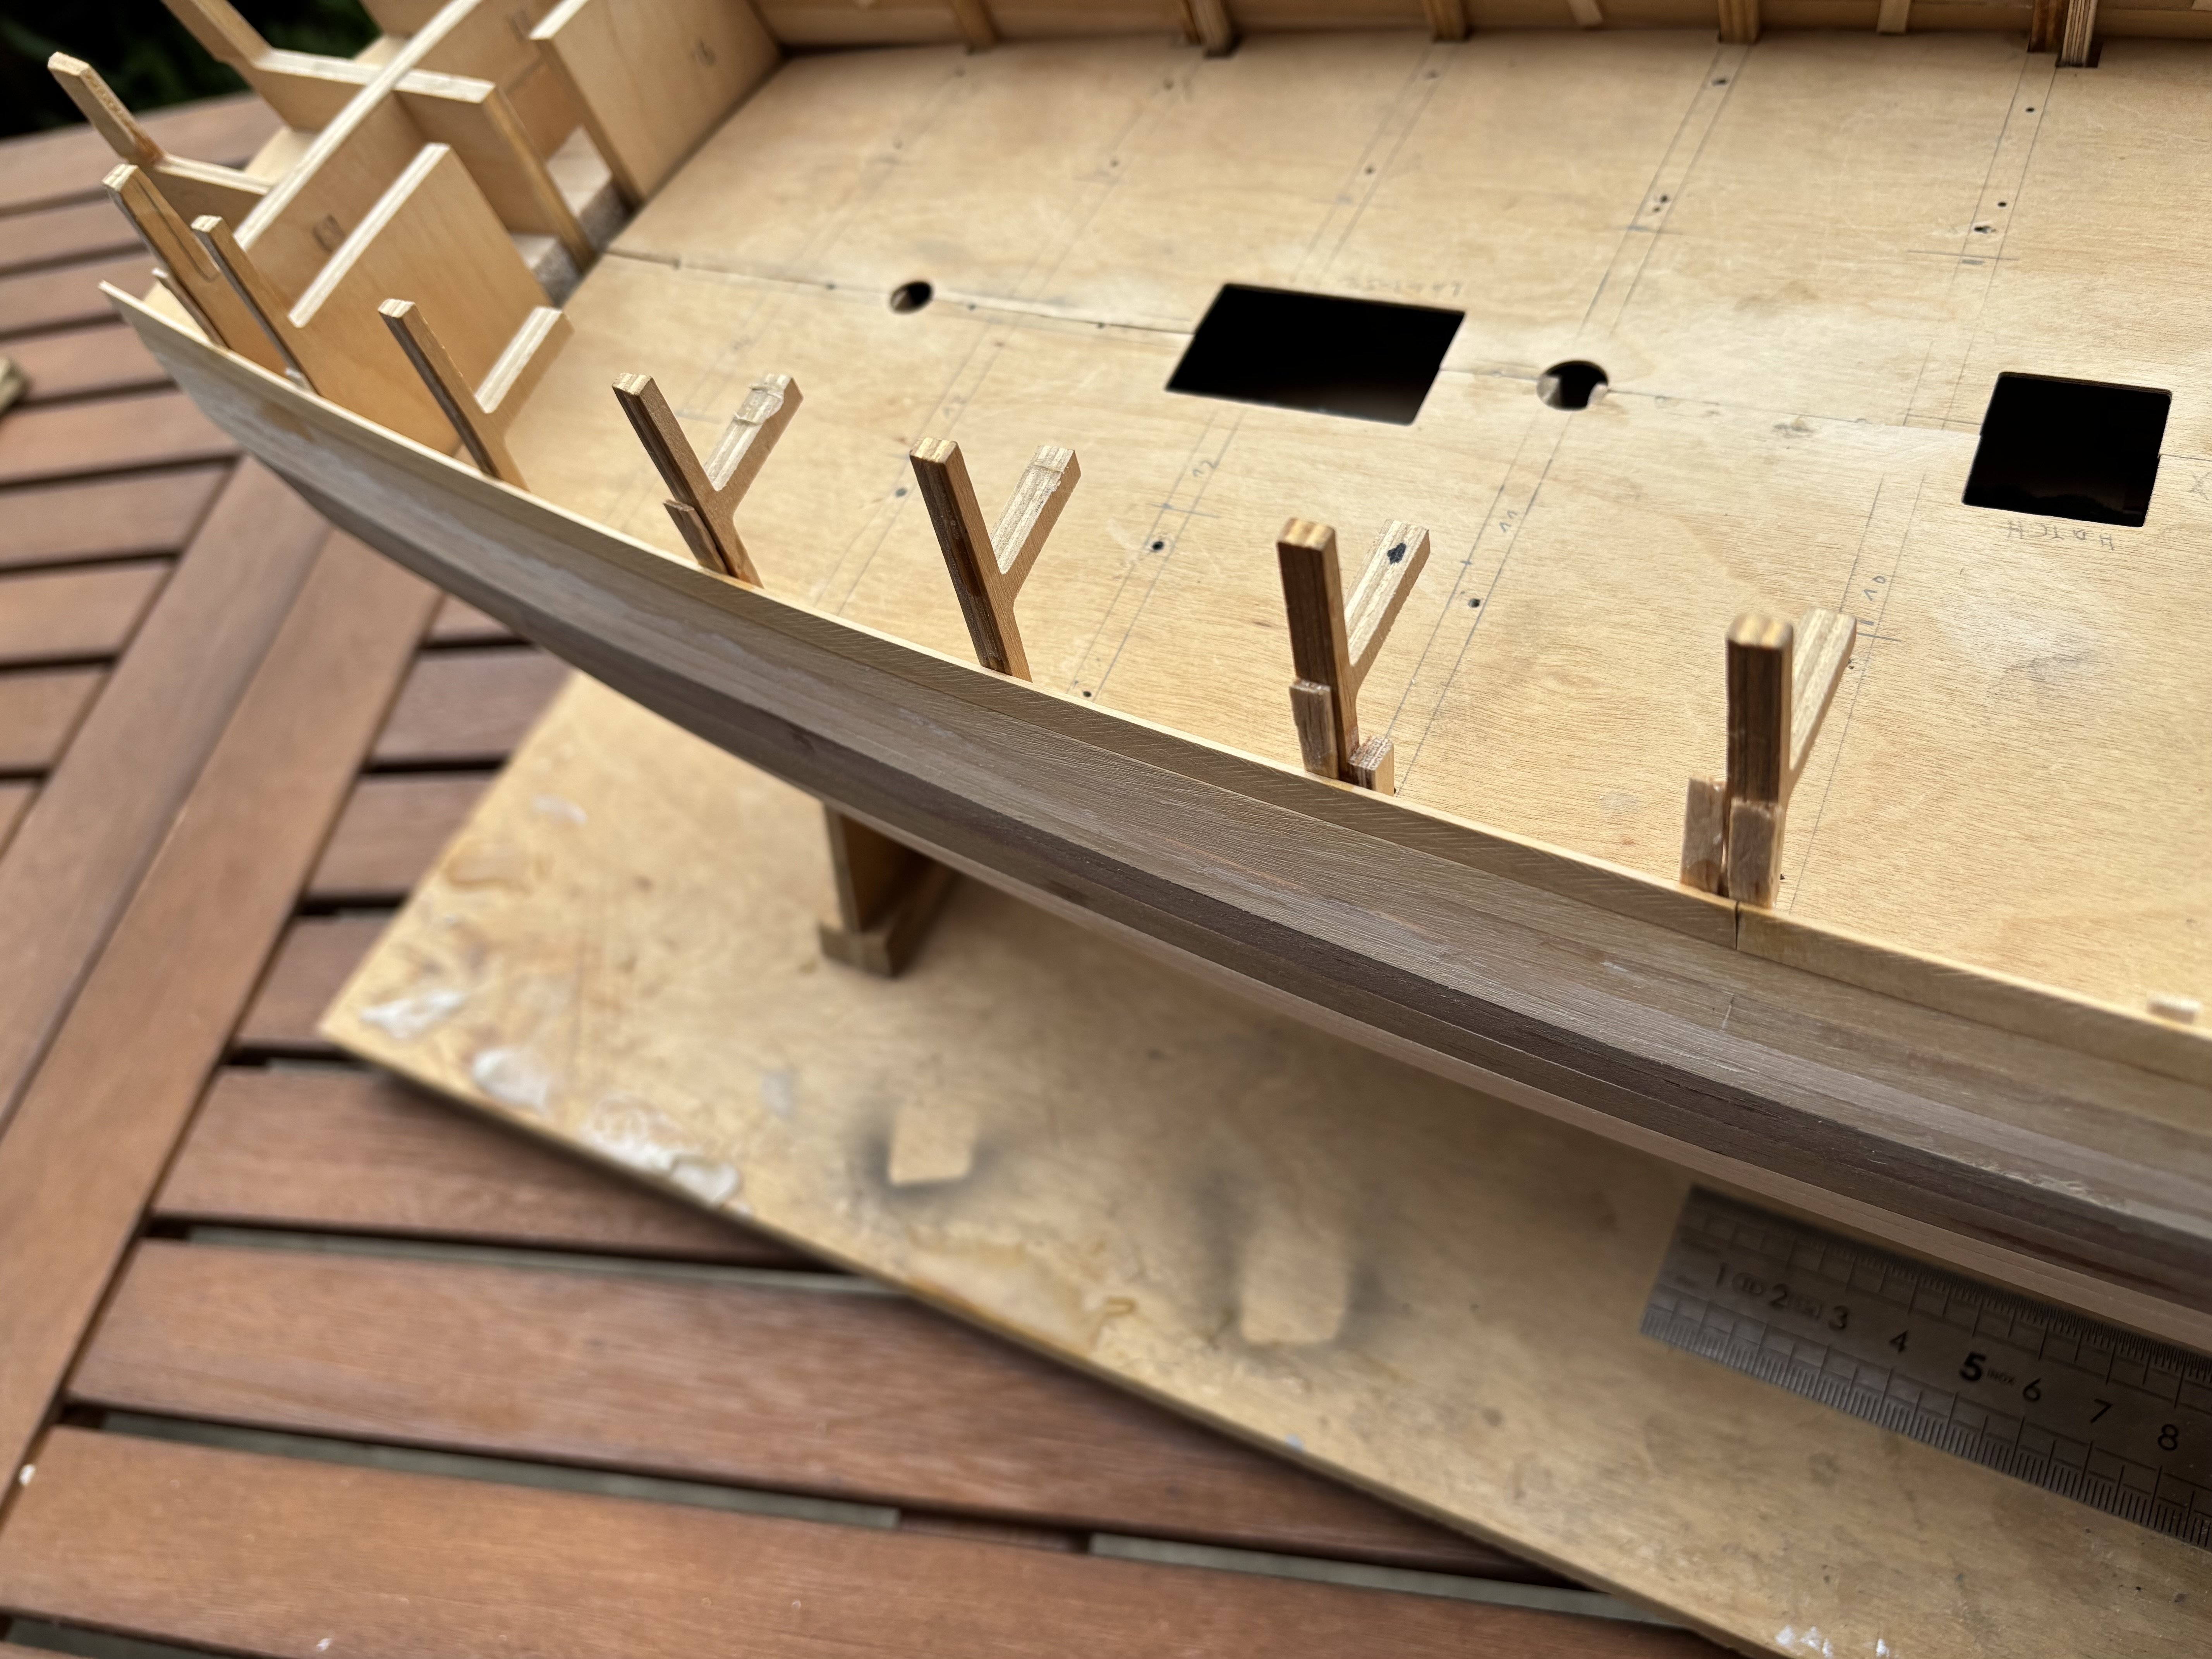
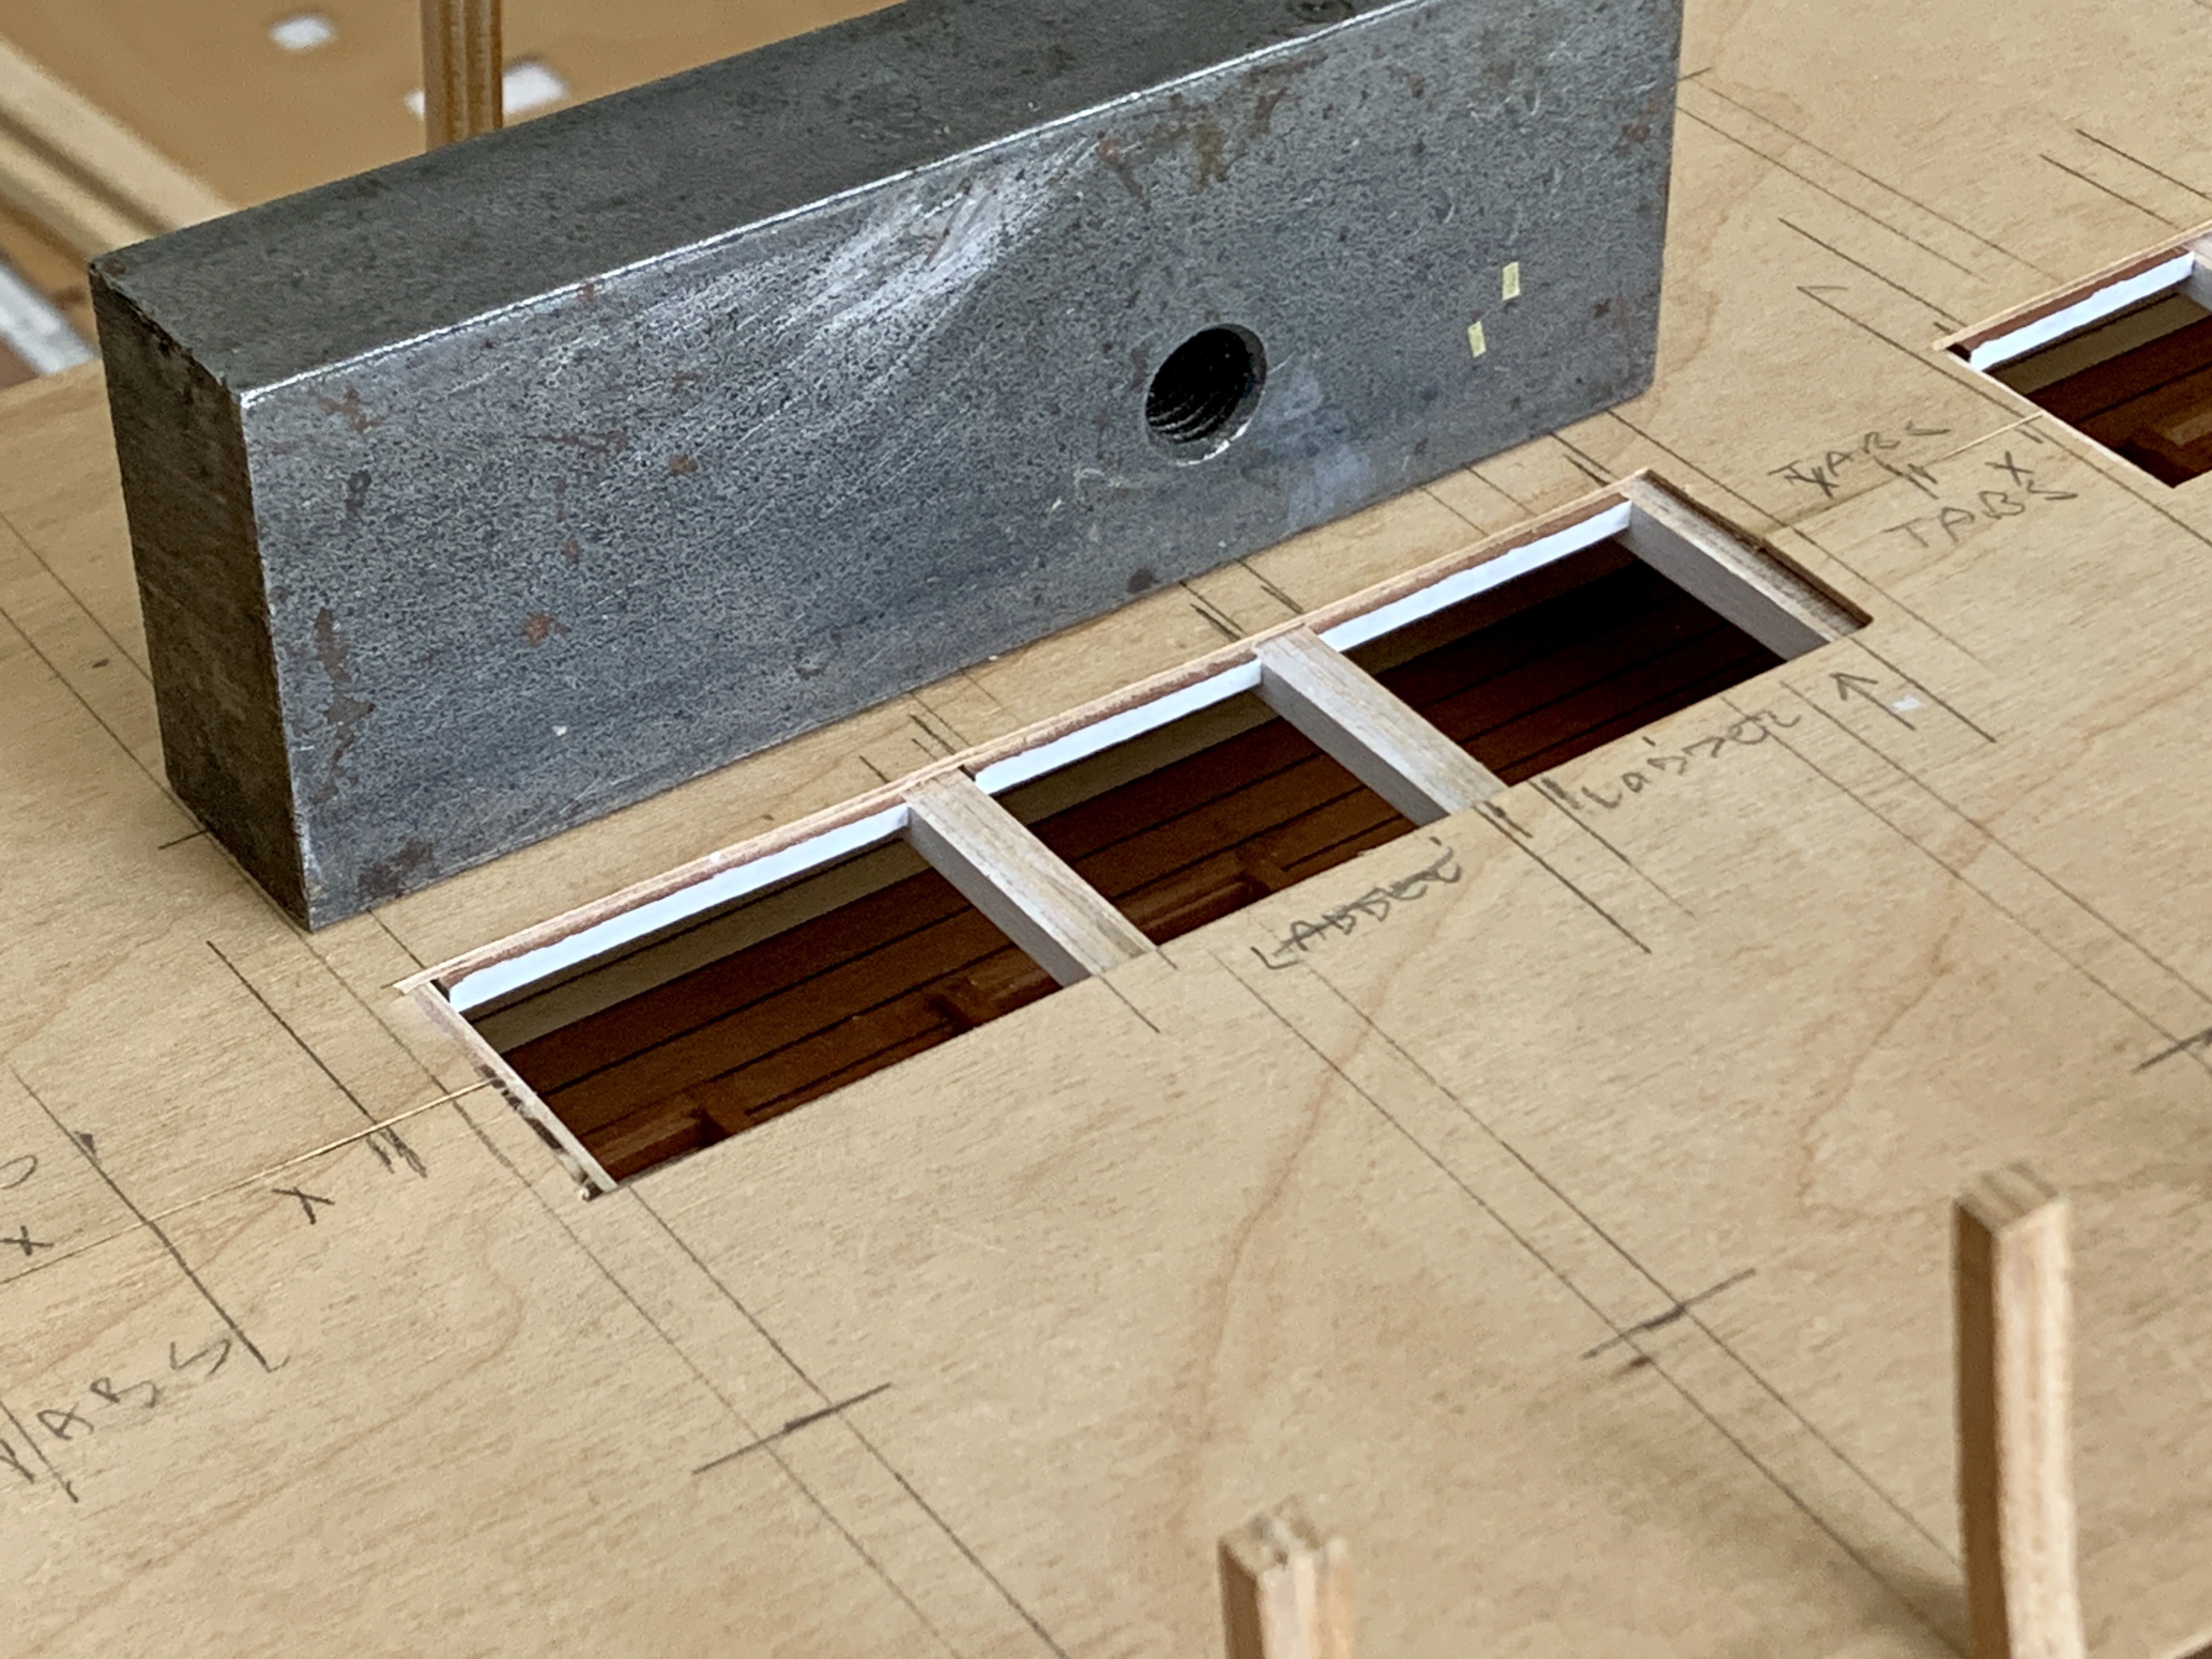
The person I had bought the kit from had cut the plywood lower deck in half, which makes sence as fitting it in one piece would be extremely difficult. There is support where the deck is glied along the centre line keel part but for the other areas I glued small tabs to both halves which interlock for more support here.
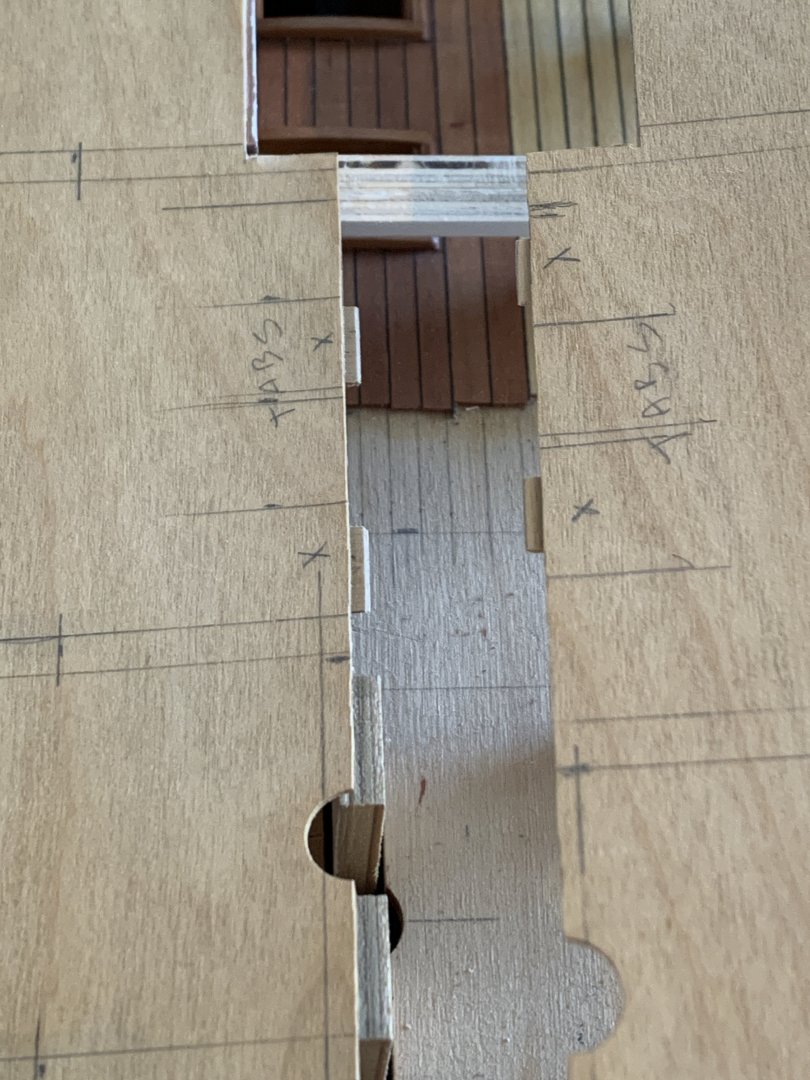
the tabs are tapered at therir tips to help final assembly
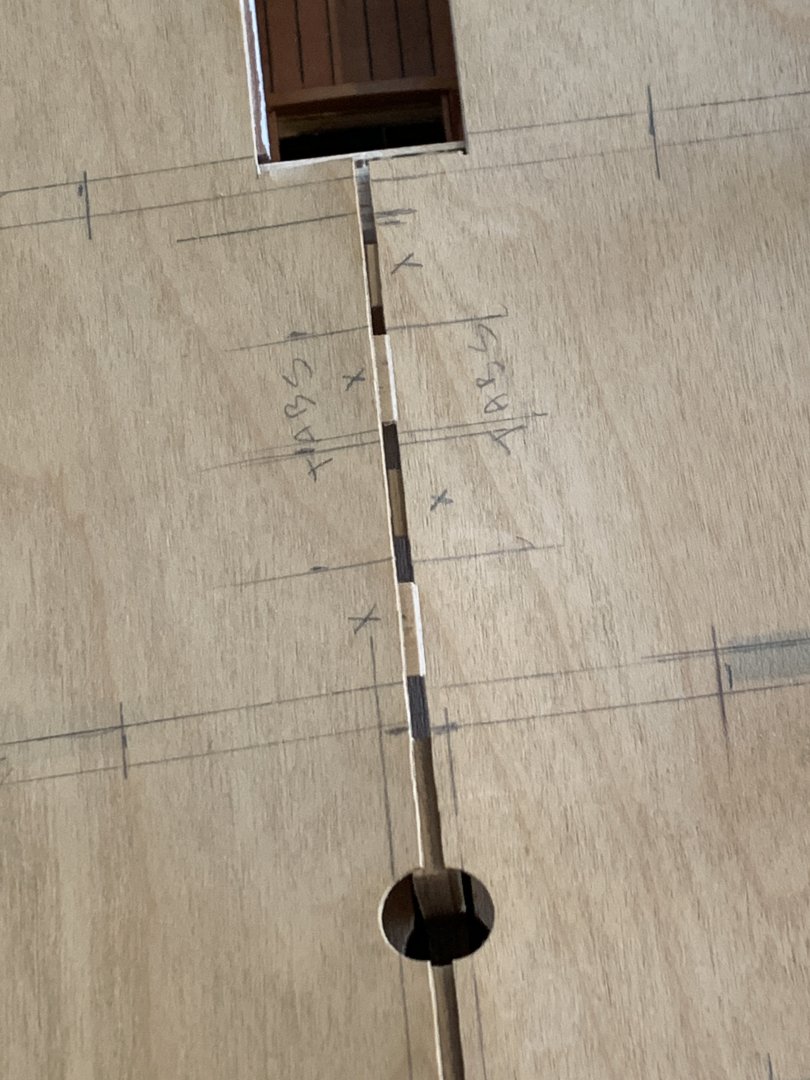
the coaming carlings were glued to the lower side of the ply deck and painted white like the deck beams. There are a few gaps at the joints but these will be fixed with white filler later when the deck has been put in place

plenty of construction notes and guide lines for glueing on the deck
- cotrecerf, chris watton, Mr Whippy and 2 others
-
5
-
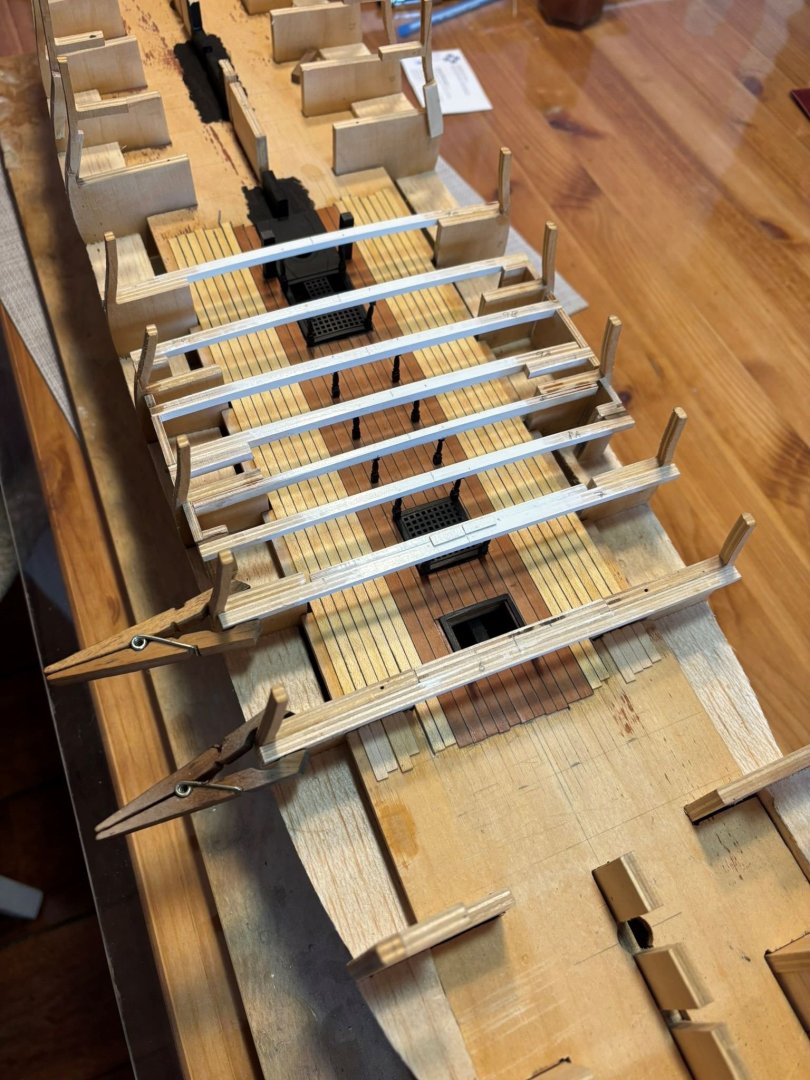
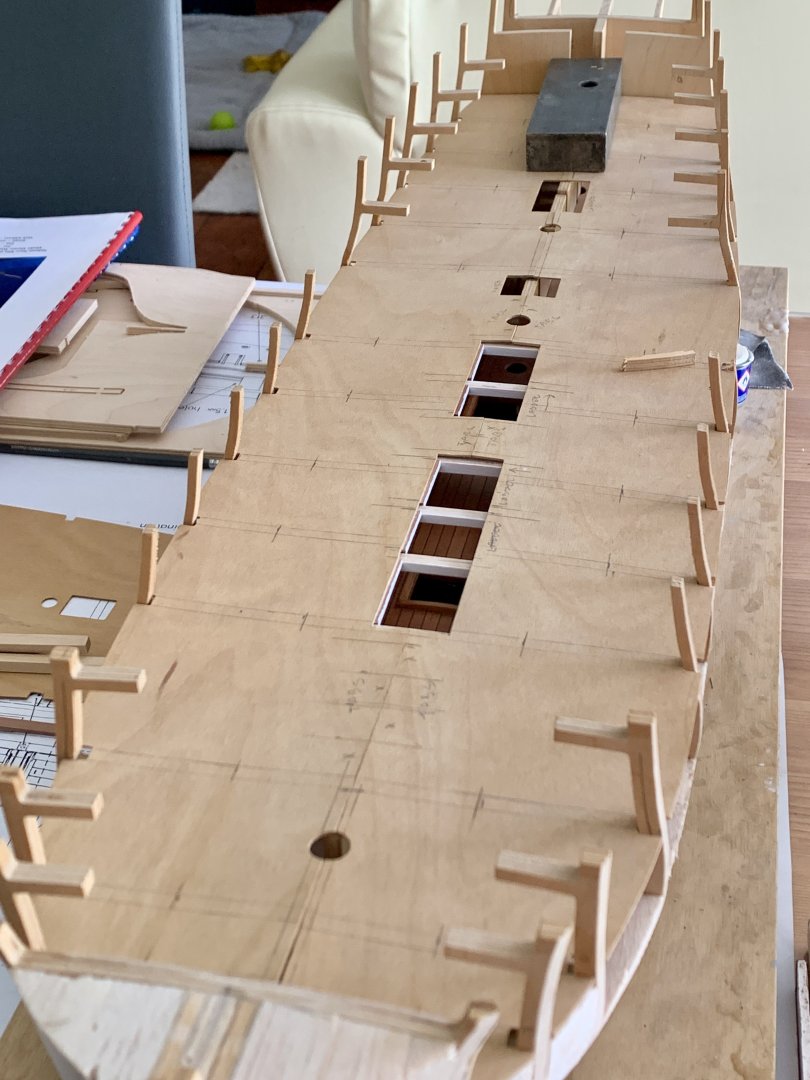
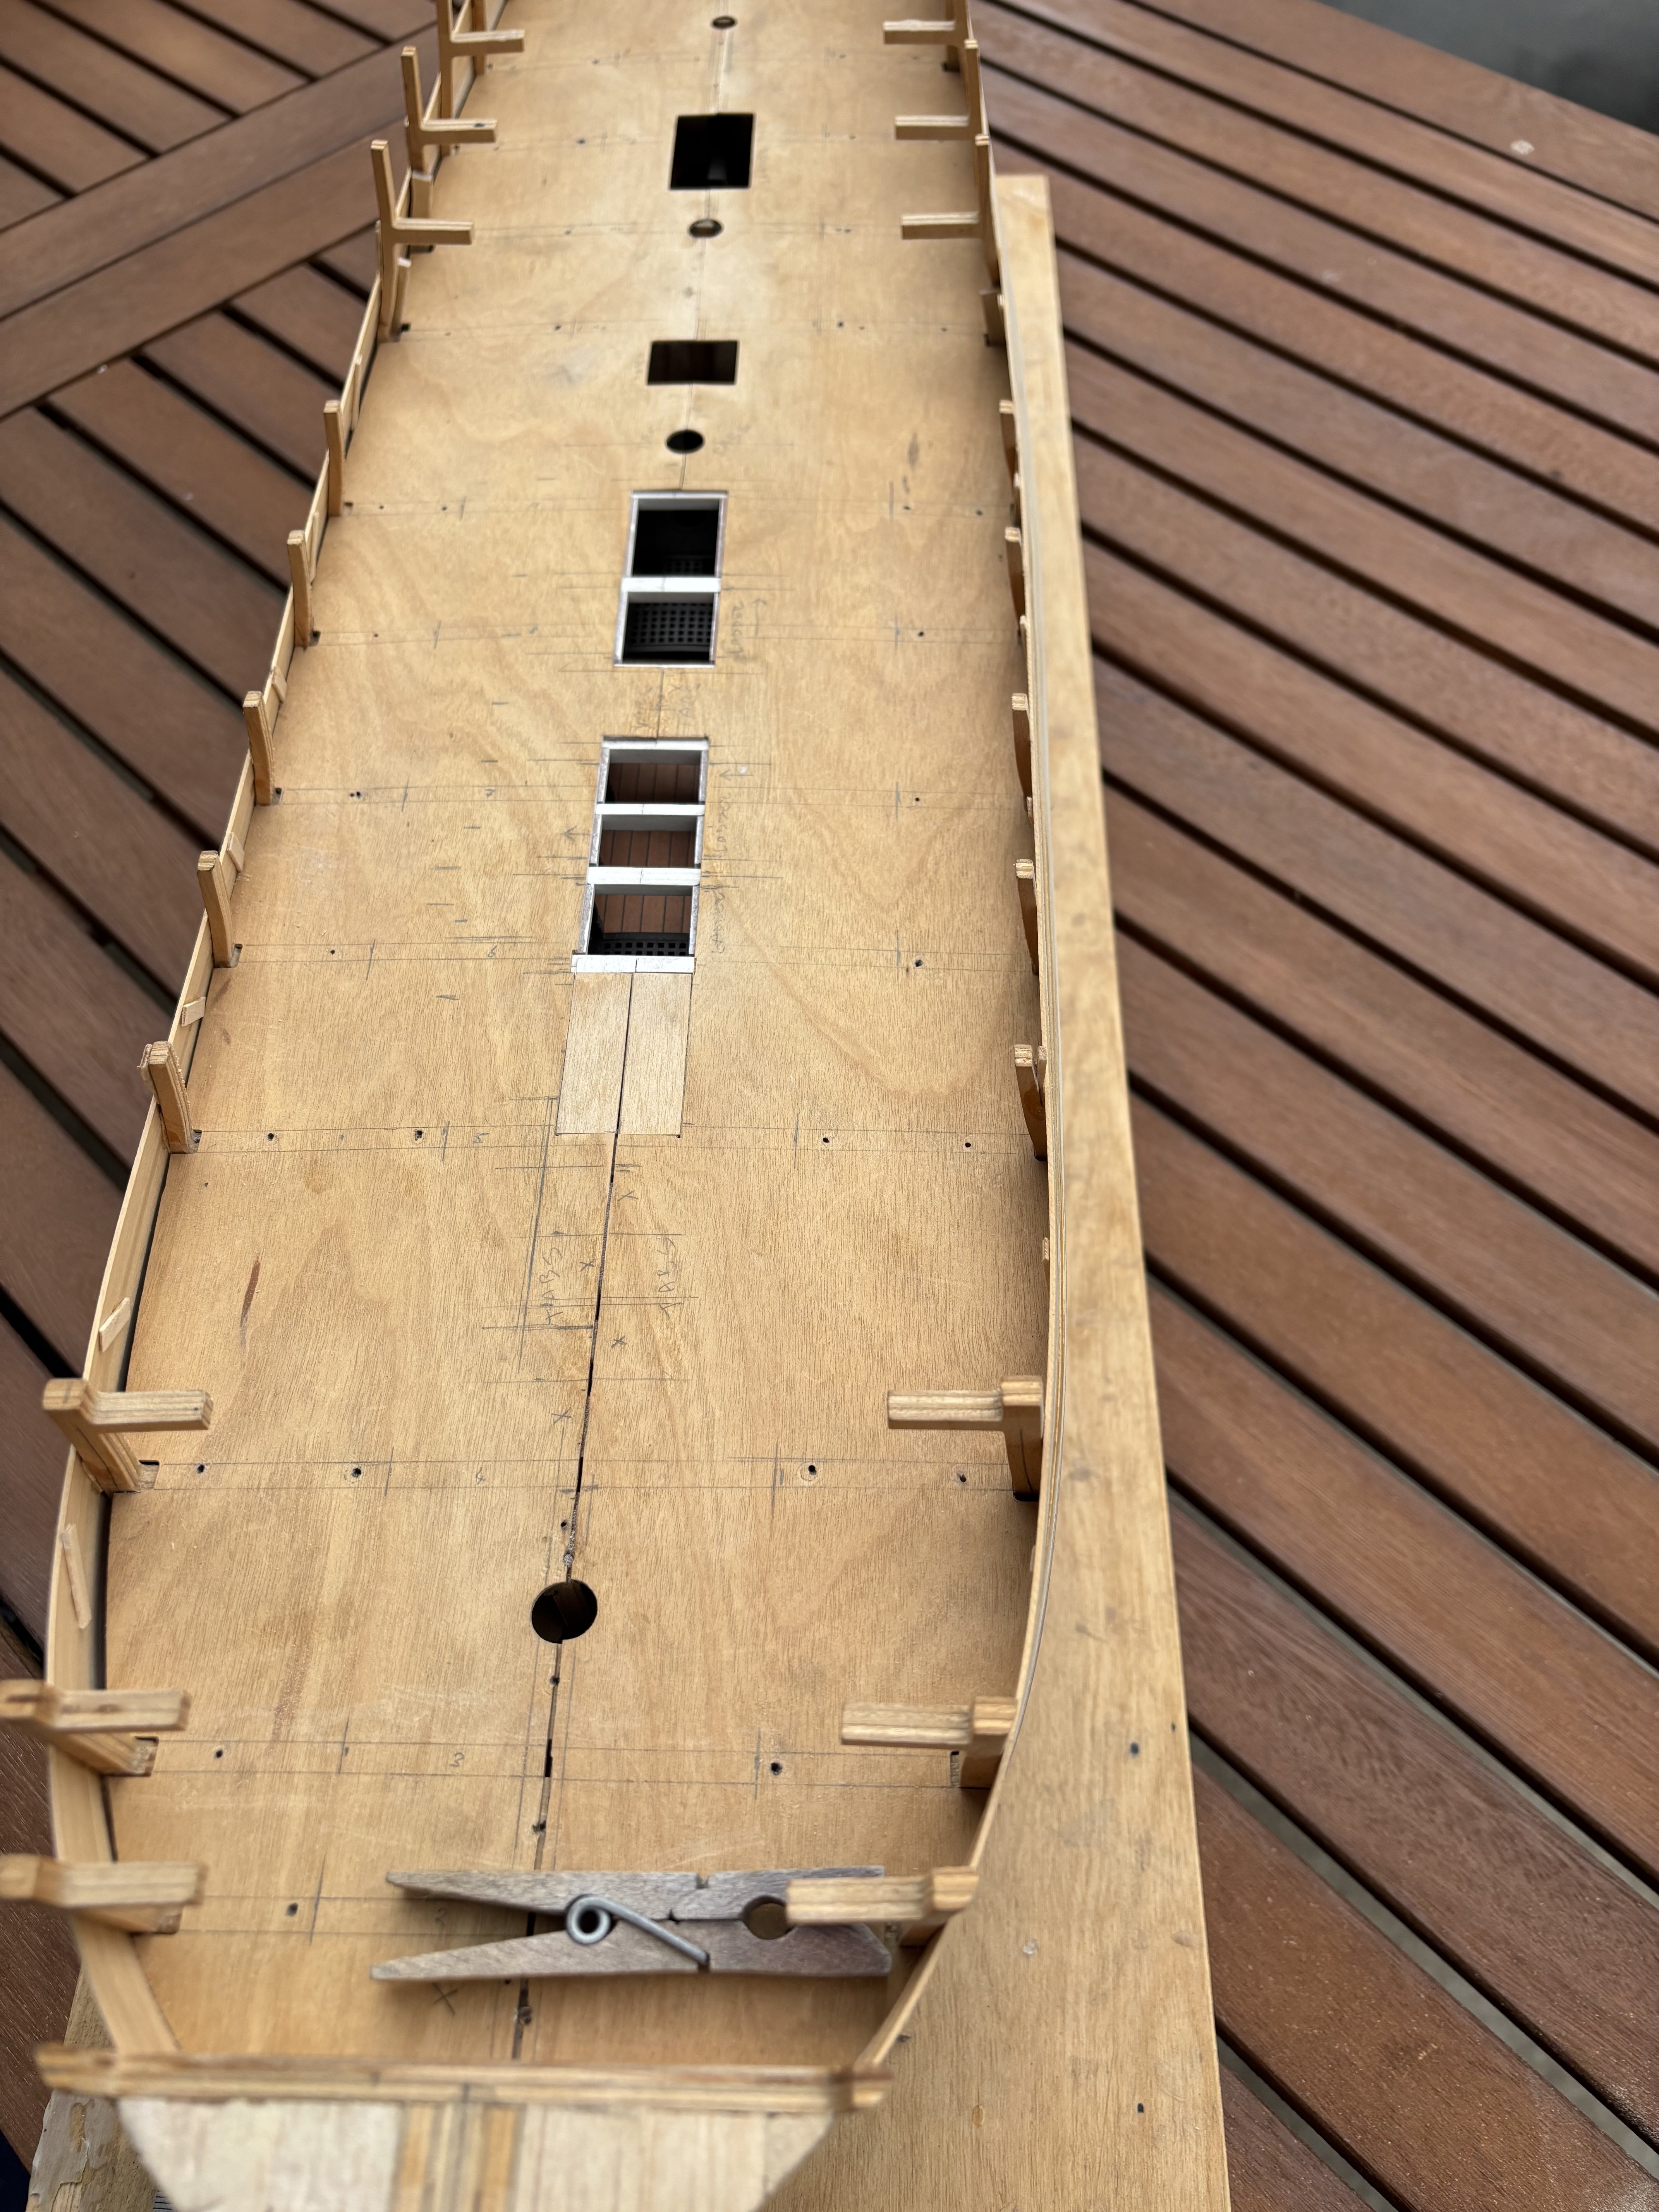
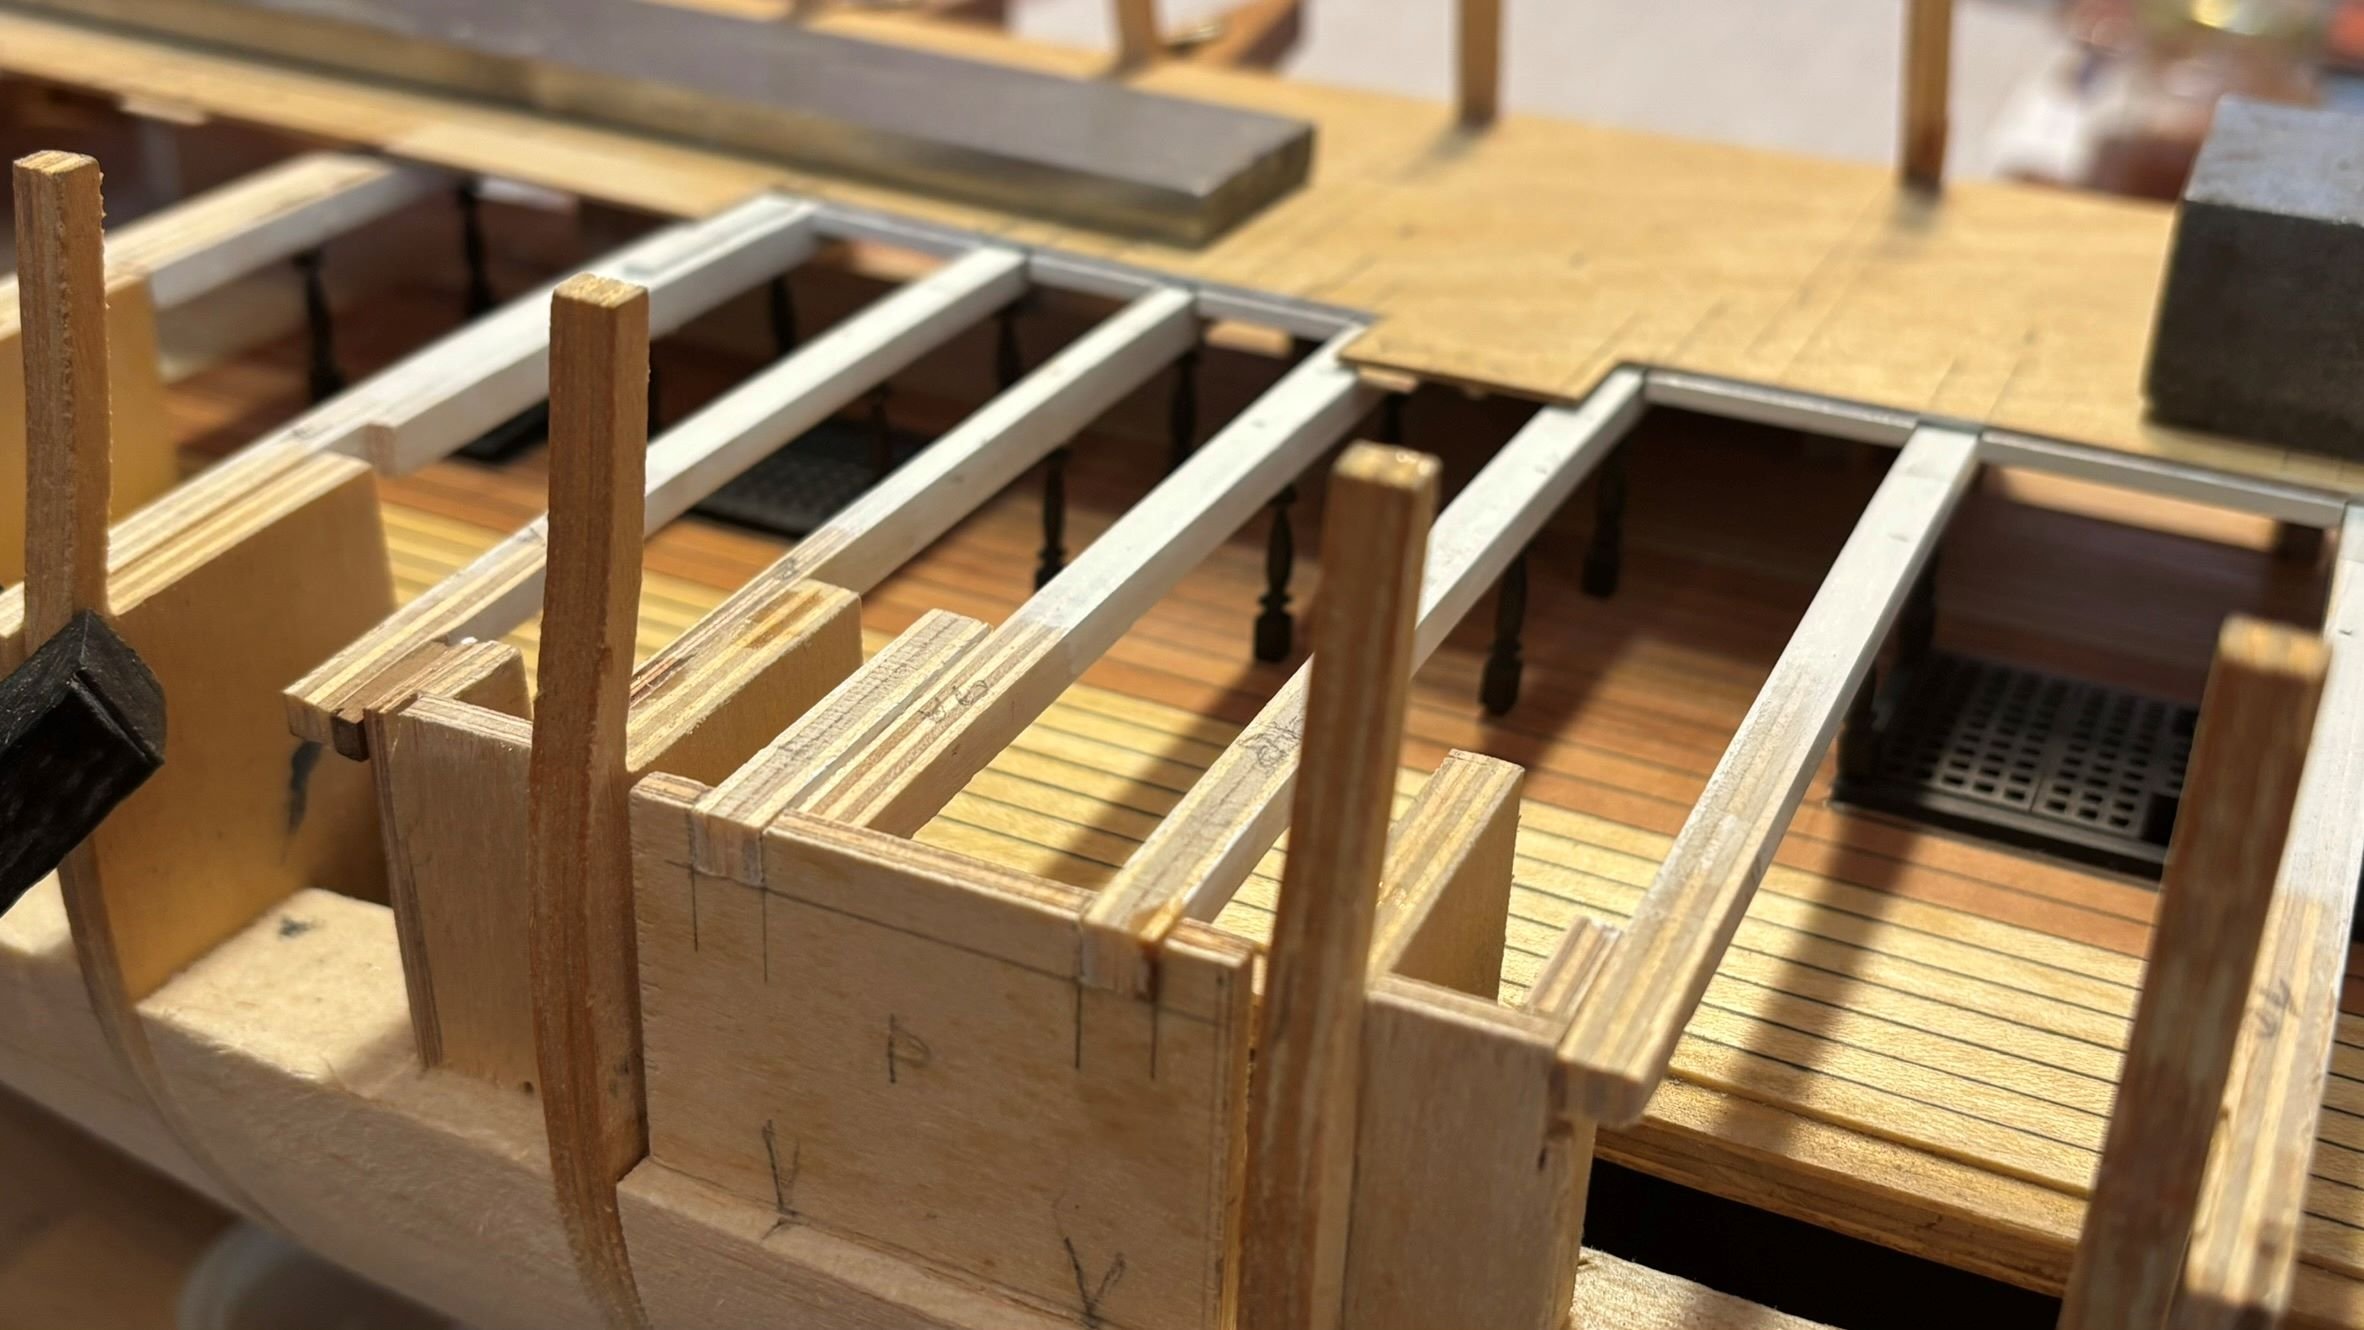
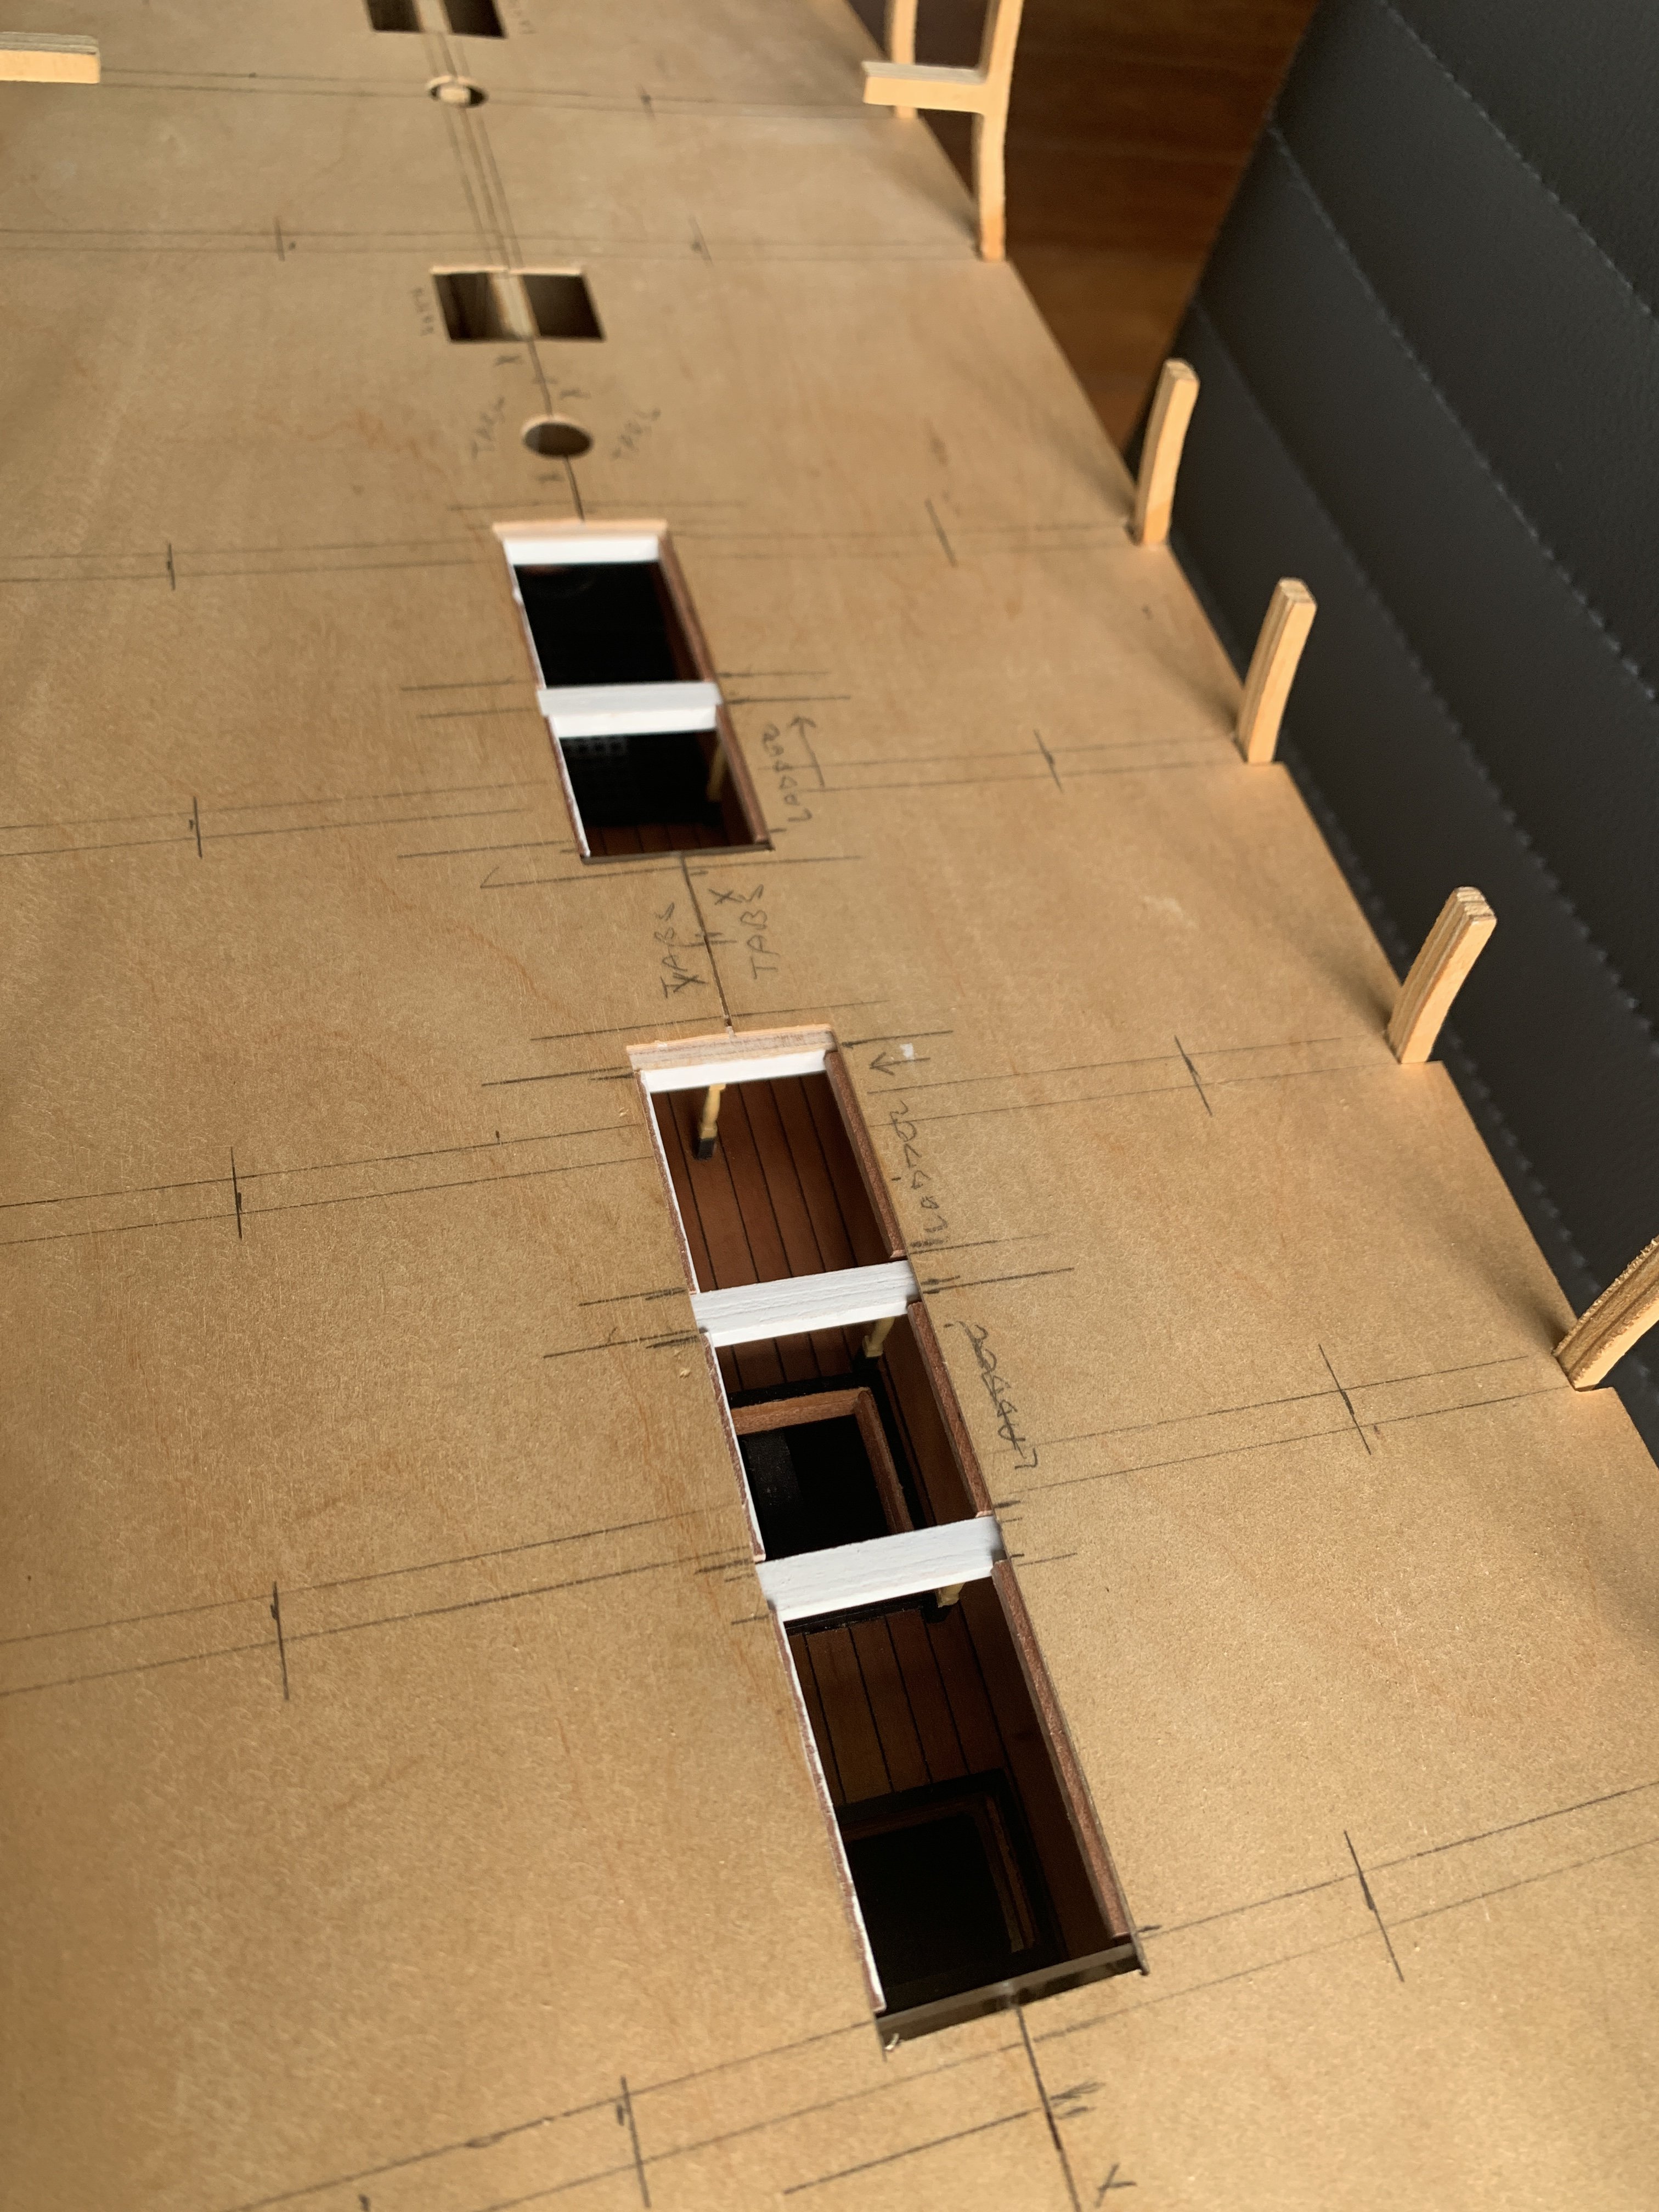
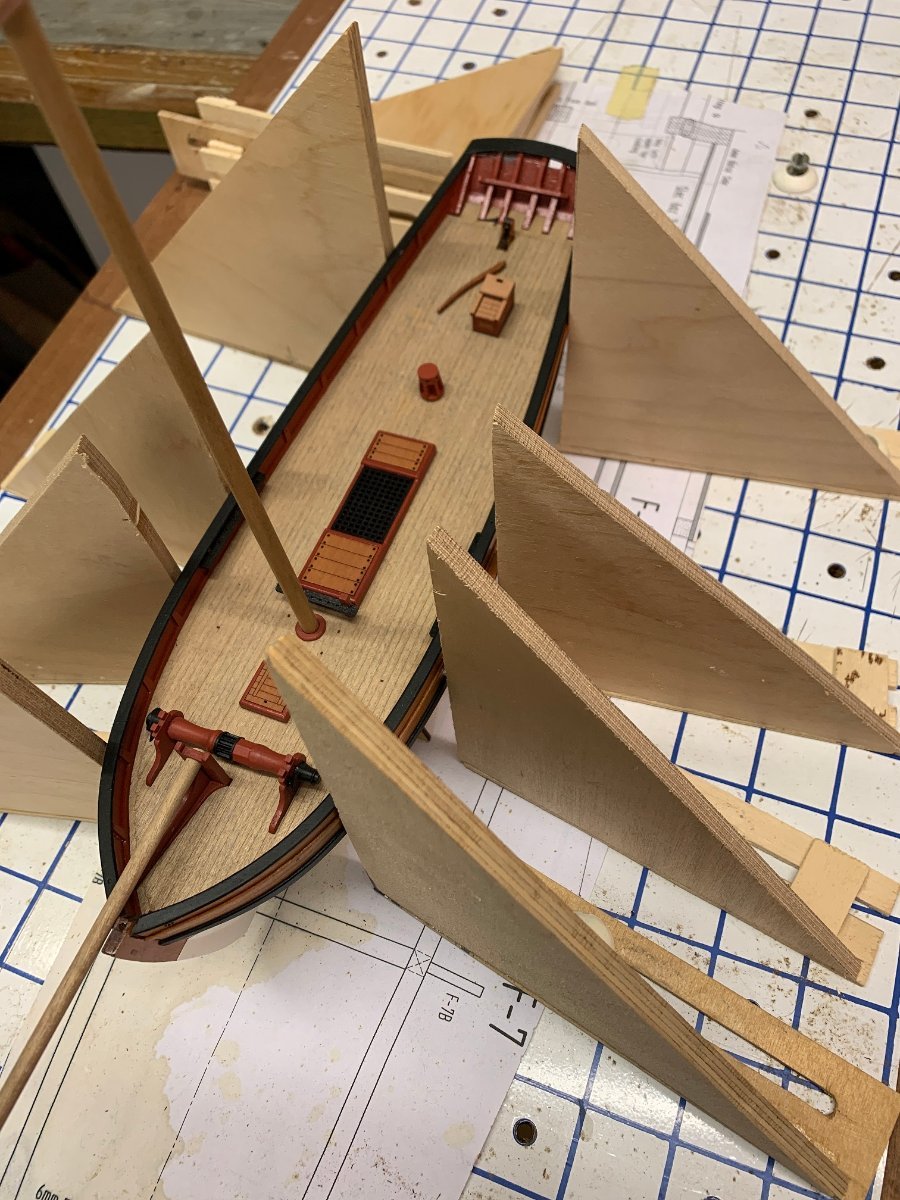
Where I had left of on the Diana I was in the process of rearranging the upper deck beams as the bulkheads with their appropriate beams didn't line up with the hatches and ladder ways. The beams on bulk heads 8 and 9 were ommited and 4 other ones placed around them
I also added a doubler to the rear side of beam 6 (on the left here)...
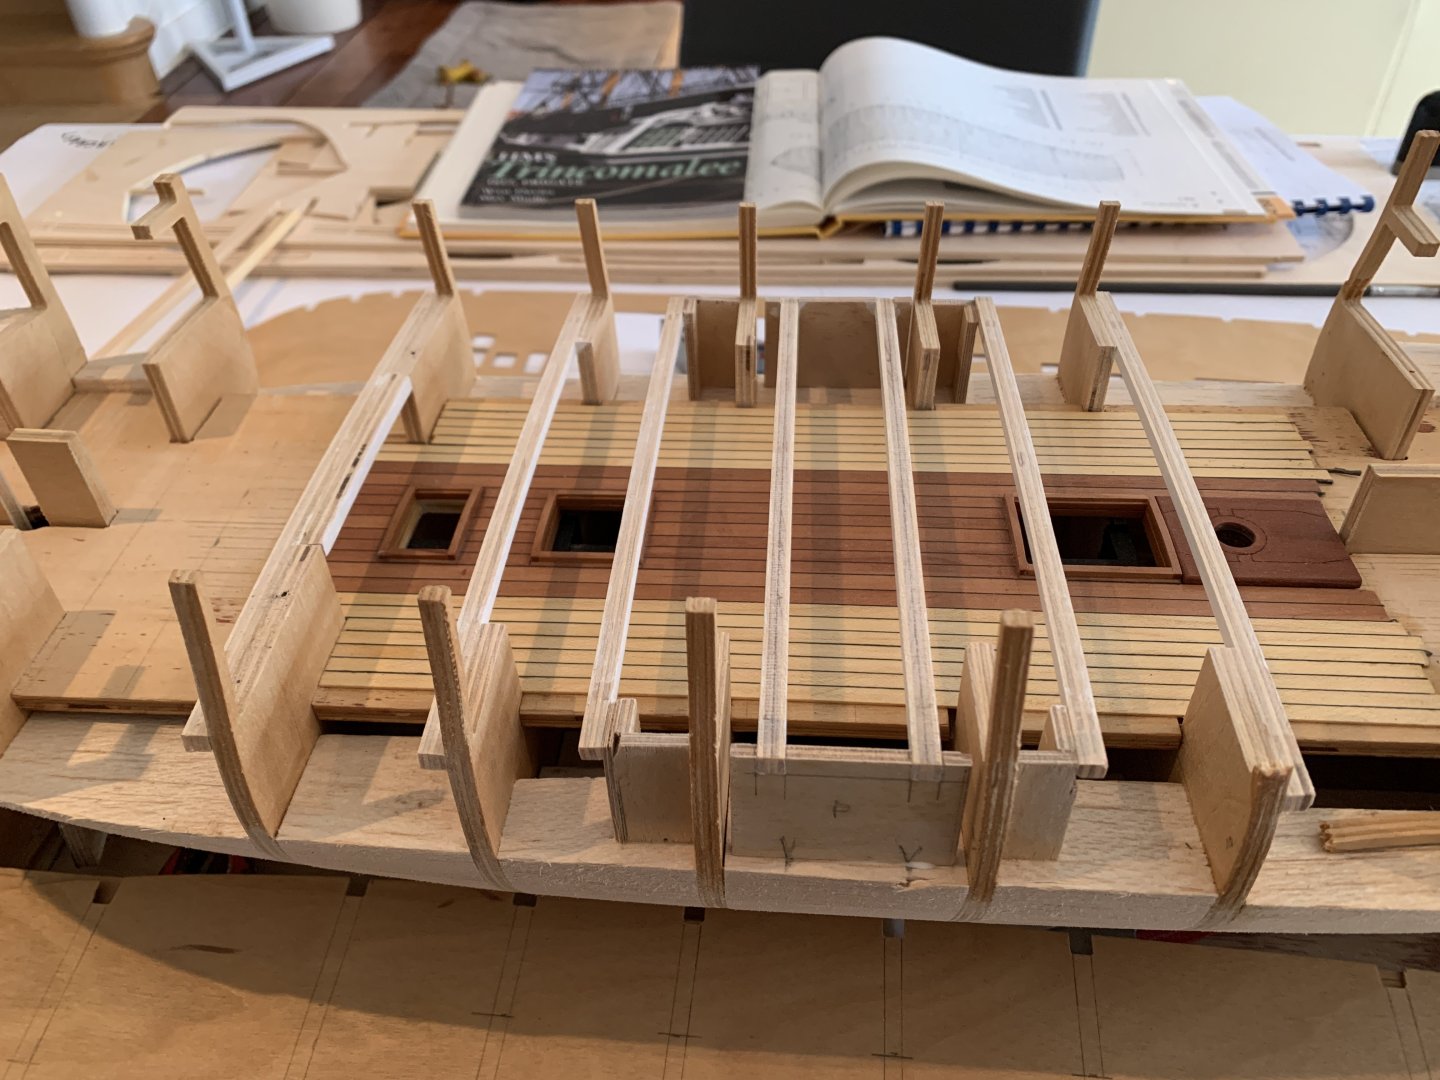
...as a large hatch for the fore hold was missing on the kit and this would be the ledge needed for the coaming carling.
This is where I'm at now, a nice evening's worth of modelling. The front hatch between bulkheads 6 and 7 has been added.
My wife wants her dining room back

- chris watton, Ronald-V, robdurant and 1 other
-
4
-
So just a little over four years ago I decided to put my Diana by the side for a while as I realised it might be a project too large for my skills. Also, the studs for planking the bulwarks (for lack of a better word) kept breaking off which was a royal PIA. To top ist all off, I was trying to pull a plastic model kit from out of the stash which was on the shelf above the Diana, which ended up in the whole stash coming down with some kits hitting her and breaking off four or five more studs in the process. I carefully retrieved her, glued the studs back on as well as I could and totally disheartened put her away again.
A simpler kit was definitely needed to gain some more experience. So I bought an Amati HMS Fly which was supposed to be built out of the box, but I struggled here on the second planking, as I was trying to invent my own procedures instead of adhering to the recommended ways here, which in the end didn't work out well. So the decision was made for another step down and I bought the wonderful Erycina kit from Vanguard Models together with their Saucy Jack. Erycina's hull is very slim as she was built for speed and I decided to work on her first. Success! The hull turned out beautifully as can be seen on a thread here.
The Saucy Jack had a more bulbous hull which, as I had expected, was a bit more of a challenge, but I got it done, and I am very satisfied with it. My second success!
The Diana and the Fly had been watching me from the distance the whole time, but I wanted to do another simpler and smaller boat before I get them back on the building board. The next project was the Amati Lady Nelson. By this time I was fairly confident with planking hulls, only this time I decided the shape the individual planks for the second planking by soaking them and bending with a bending iron and also shaping the planks laterally with a flat iron (for the required banana shape). The whole world changed! This is definitely the way to go, the Lady Nelson's hull is the best I have built so far and she turned out very well.
I have not tackled the rigging yet on any of the models, as that is the next step I need to learn.
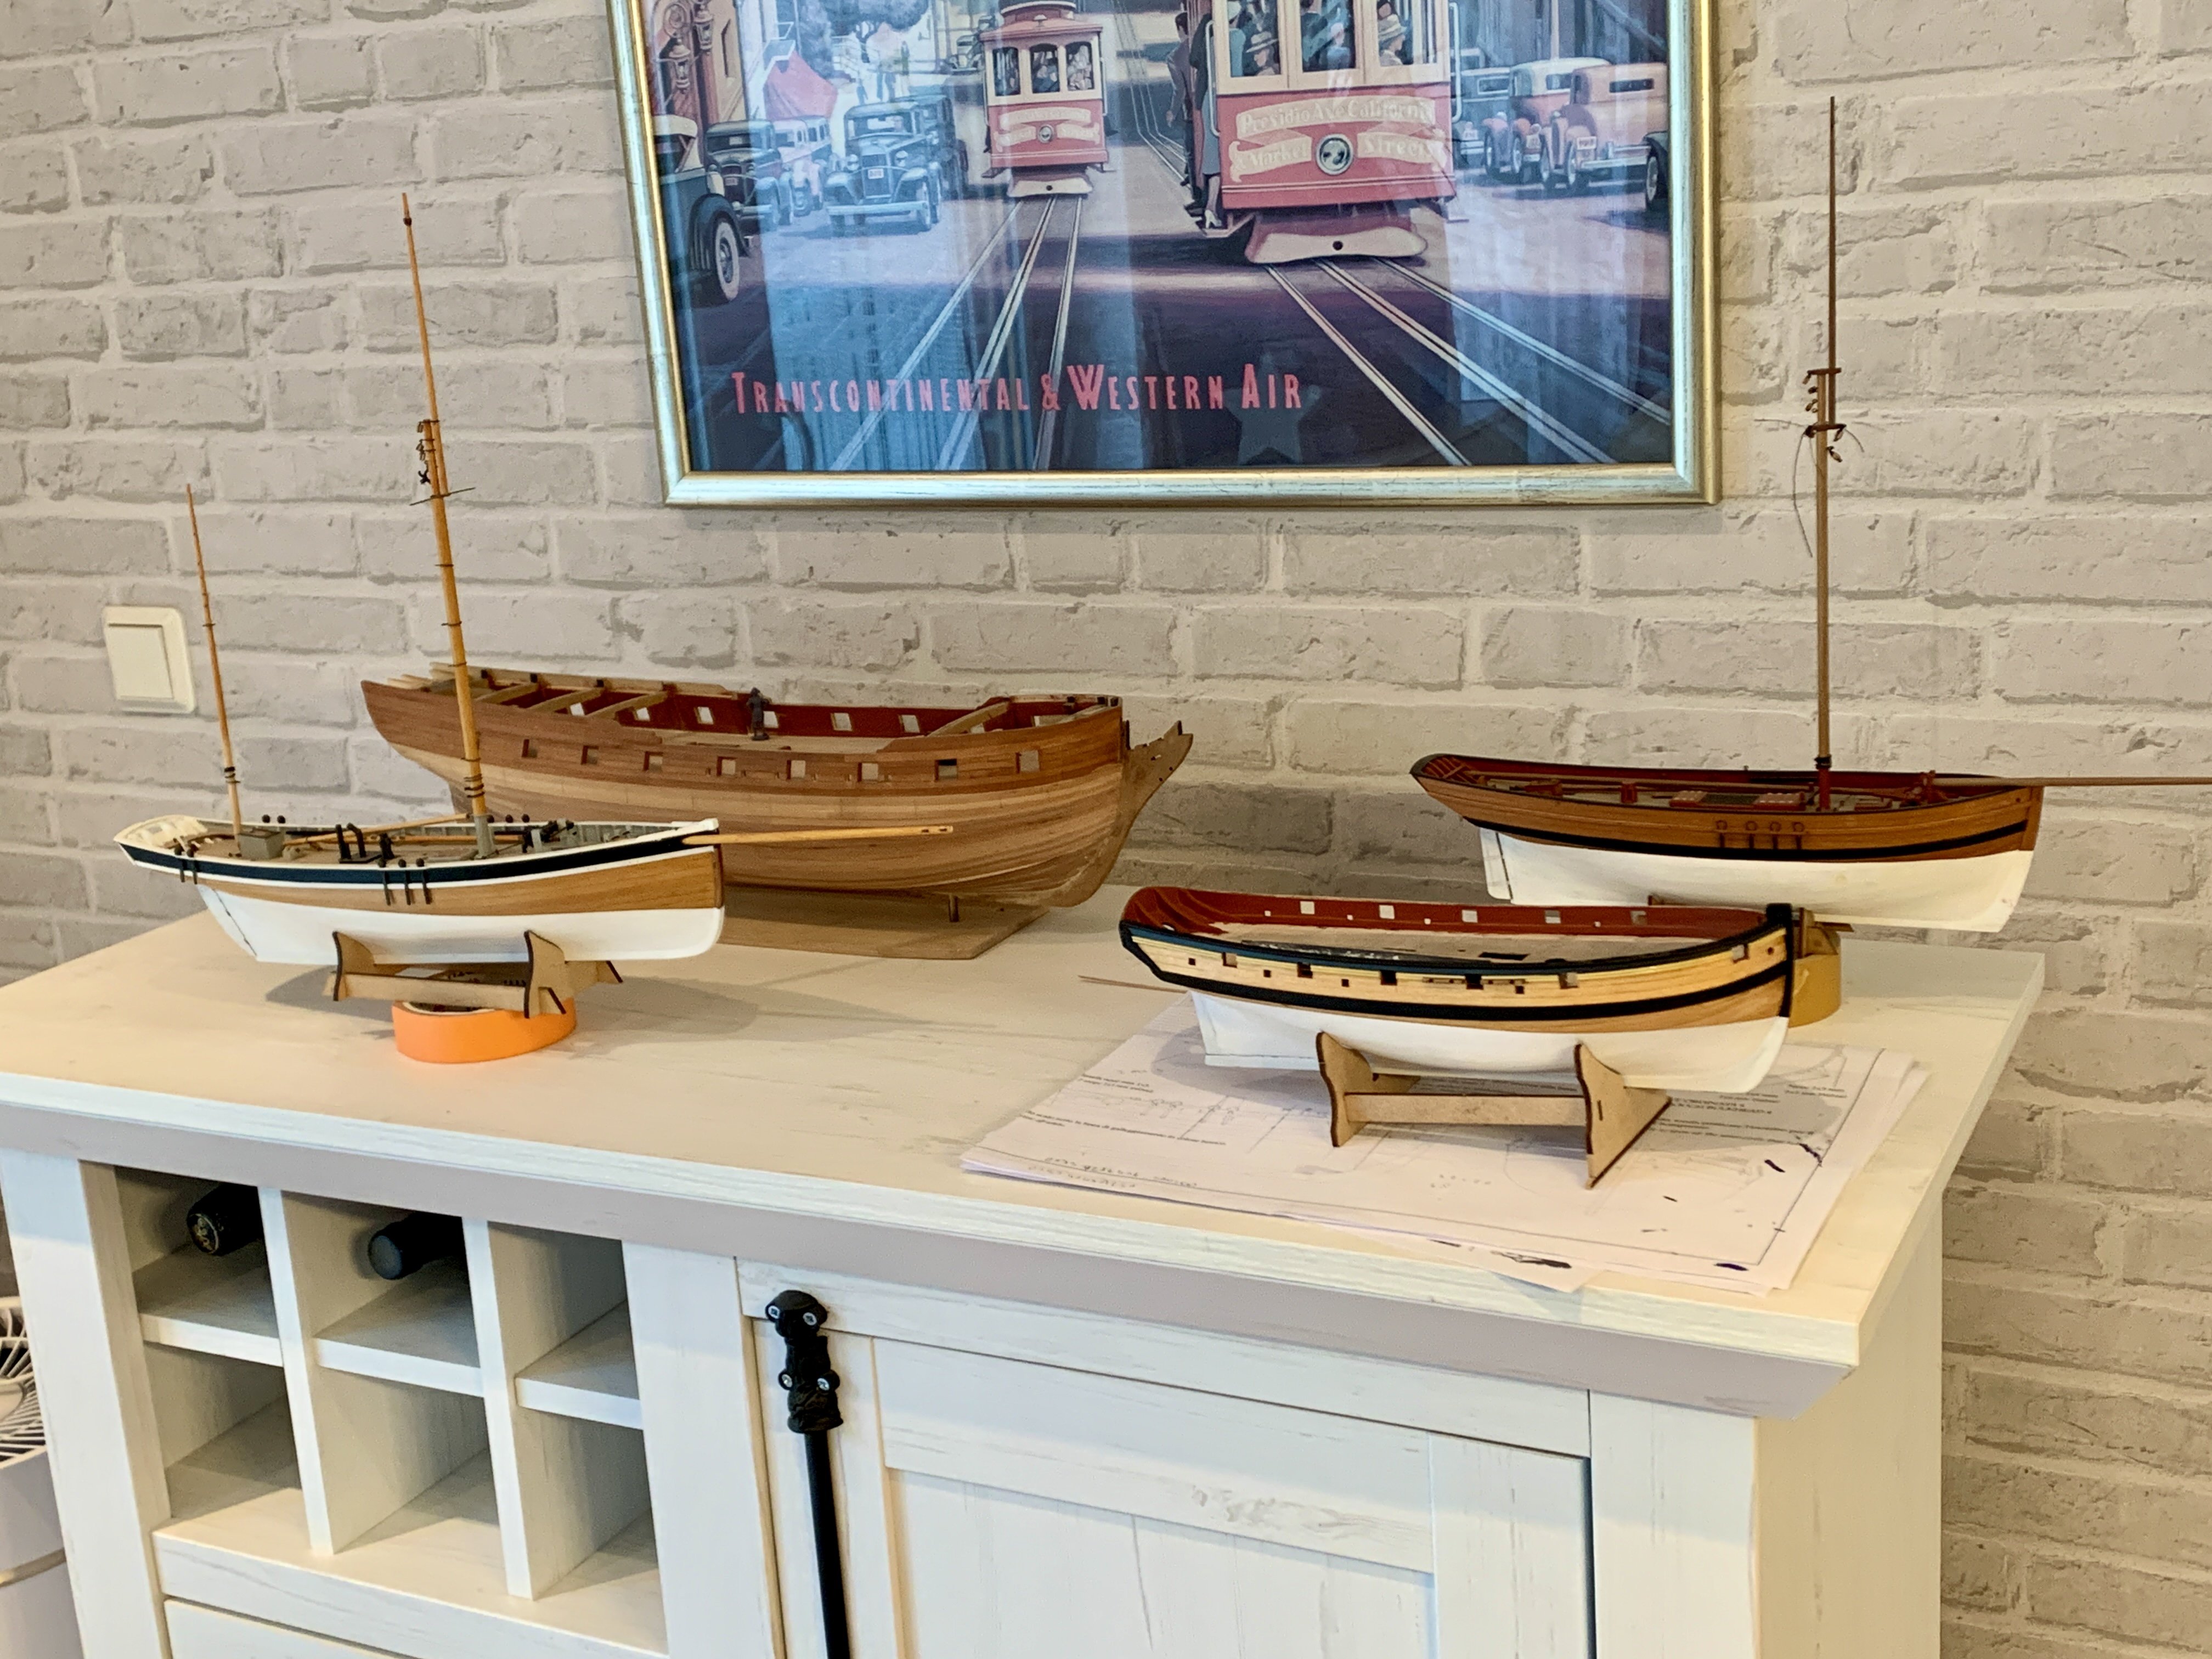
Here you have part of my little shipyard at its current stage (I've need to learn again how to upload images here so I hope this works).

The Diana urgently needed some attention as studs were coming off again and she started to look a bit sorry for herself.
-
I'm definitely going to get one. But although I have the Trial Cutter, an HMS Alert and a Lady Nelson lined up as options for my next project, I'm thinking of getting the Version 2023 Speedy as that would fit quite nicely for the next step up on the ladder. Hmmmm, tough decisions to make...
-
The nice thing about these fishing boats is you don't have to adhere to a specific colour scheme. I checked some Youtube videos on Channel Cutters, Fishing Boats etc and got some nice ideas there.
I had problems with the stern frames being to short and the transom mirror (is that the right word? - part 80) standing proud and kept breaking off along the top as it is extremely thin, so in the end I extended the frames. This wasn't an easy task with everything in places. Maybe master Chris wants to have another look at this area.

-
Hi All,
a few photos to show you all my Saucy Jack project. I never intended to start a fully fledge build log so I hardly too any photos of the building process. I hope it's ok just to show the current status. This is one of Vanguard Models' fishing boats which are intended for beginners, like me. The nice thing about them is, you can actually finish them as they are easy to build and they don't take too long, unless you're a slow builder like I am.
I am also building a Vanguard Models Ericyna right now of which I hace also posted some pictures here. With both I have now reached the stage where I have too start the rigging. I have never done this before so I need to take my time here.


-
I've had to pause on the Erycina for a short while as I managed to loose some photo-etched parts. An additional etched parts fret was ordered last week Monday and it arrived here in Germany today, which was excellent considering it went though customs and all. Great service by Mr. Watton of Vanguard Models.
However, in the mean time I painted the hull of my second Vanguard Models project, the Saucy Jack. So this update is more about her.
- Paul Le Wol, DB789, Mr Whippy and 2 others
-
5
-
I was hoping to get more done this weekend after the dowels for the masts arrived. In the end I decided to go with basswood dowels twice stained with cherry wood oils. Still just a tad too bright for my liking but they will have to work for now. As ist happened I must have lost some of the photo-etched parts needed for the rigging so I have contacted Chris at Vanguard Models to see if I can get replacements.
Vanguard Models Saucy Jack in the background waiting for some paint.
-
To me it looks like my first post here turned out pretty much ok, so on with the show...
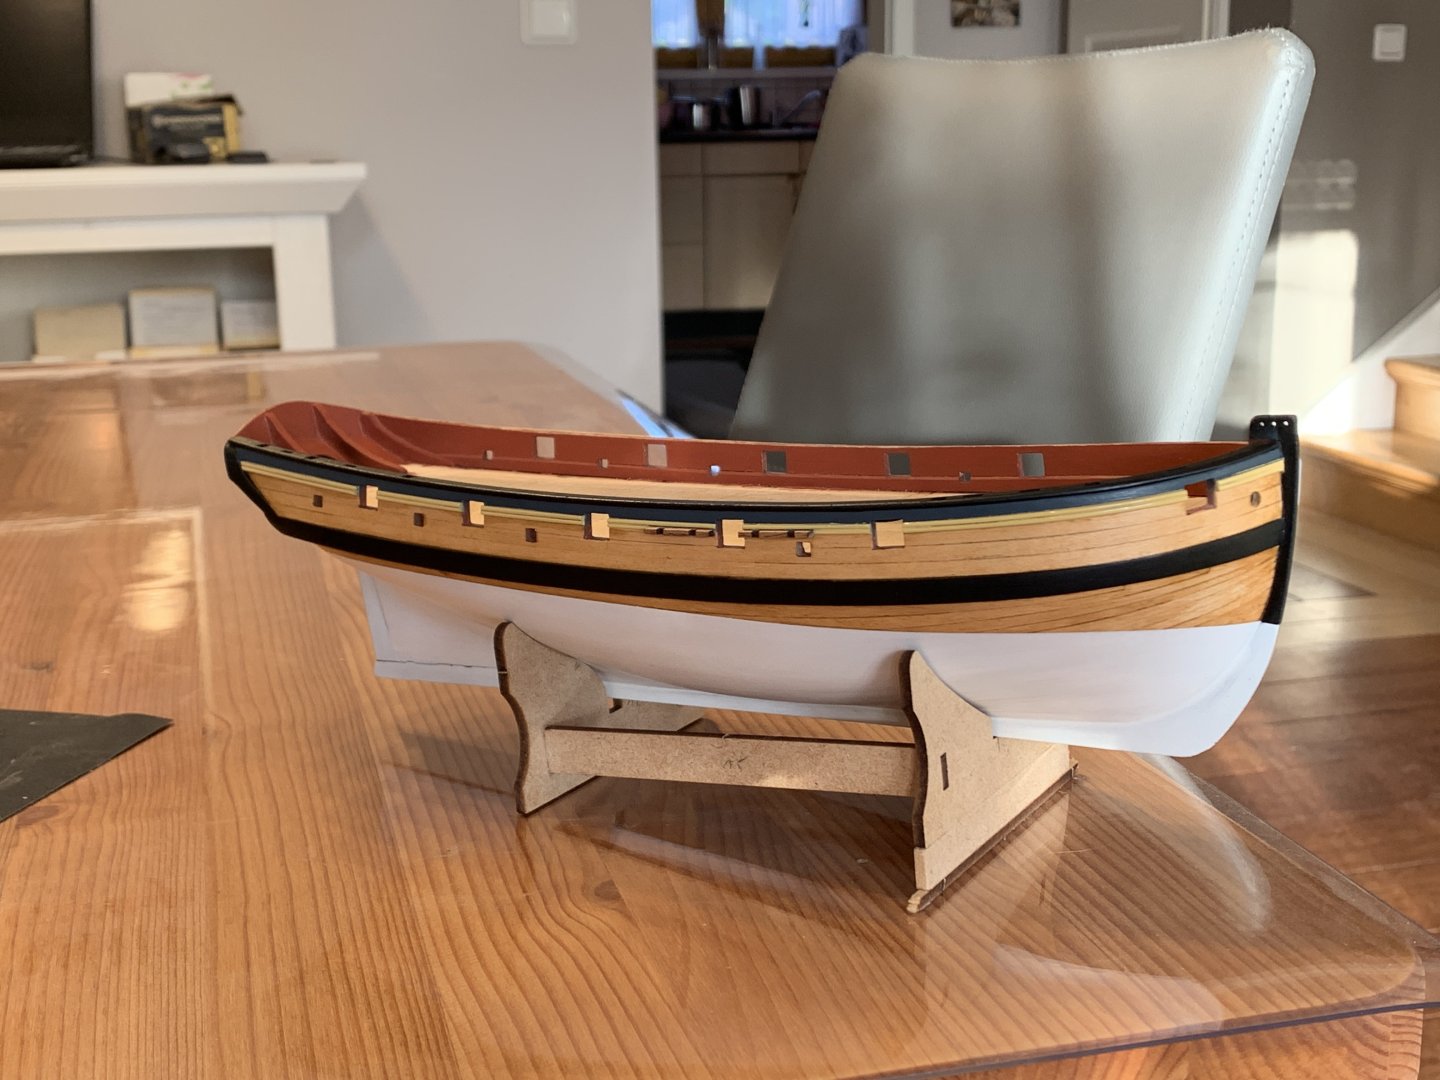
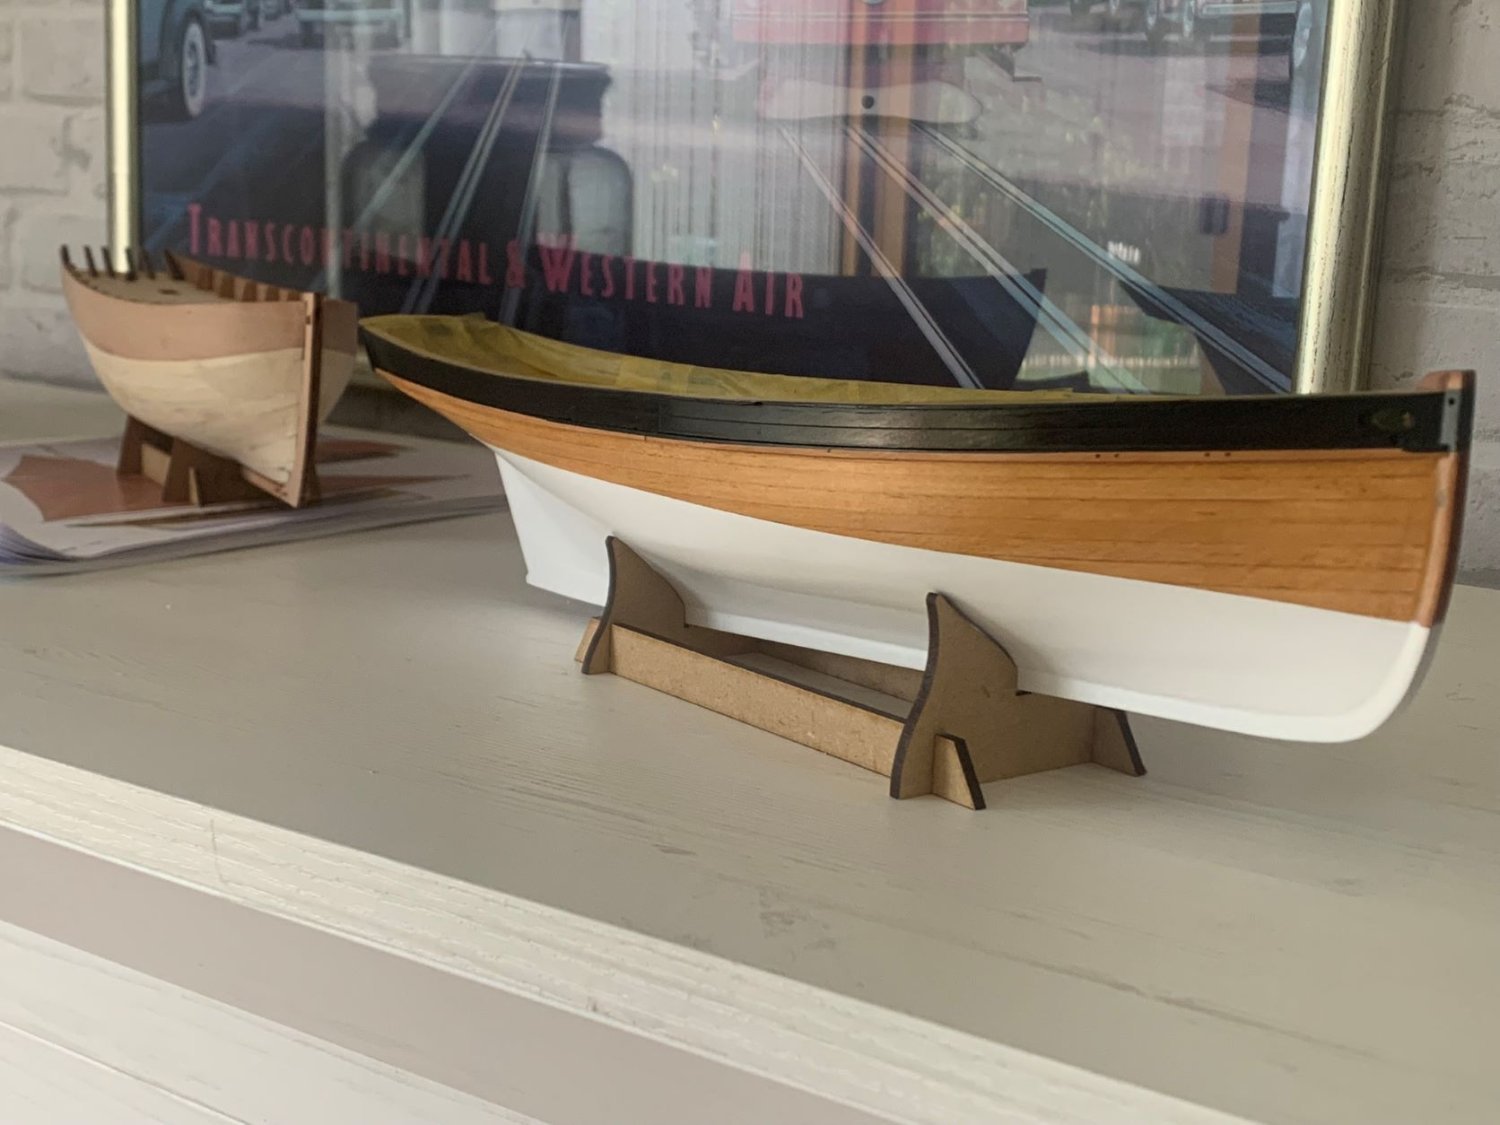
As I said I liked the idea of painting the outside bulwarks in dark blue, instead of dark green as given in the instructions. I watched several cutter videos on YouTube (search Pilot Cutter) and could see some very nice boats there, in various colour schemes. The dark blue here is just what I wanted, almost black.
 The wales (I'll call them that here, not being sure if that's the right word) were then painted white which added a nice contrast to the dark blue. As I said everything was done with an airbrush. I am useless at brush painting.
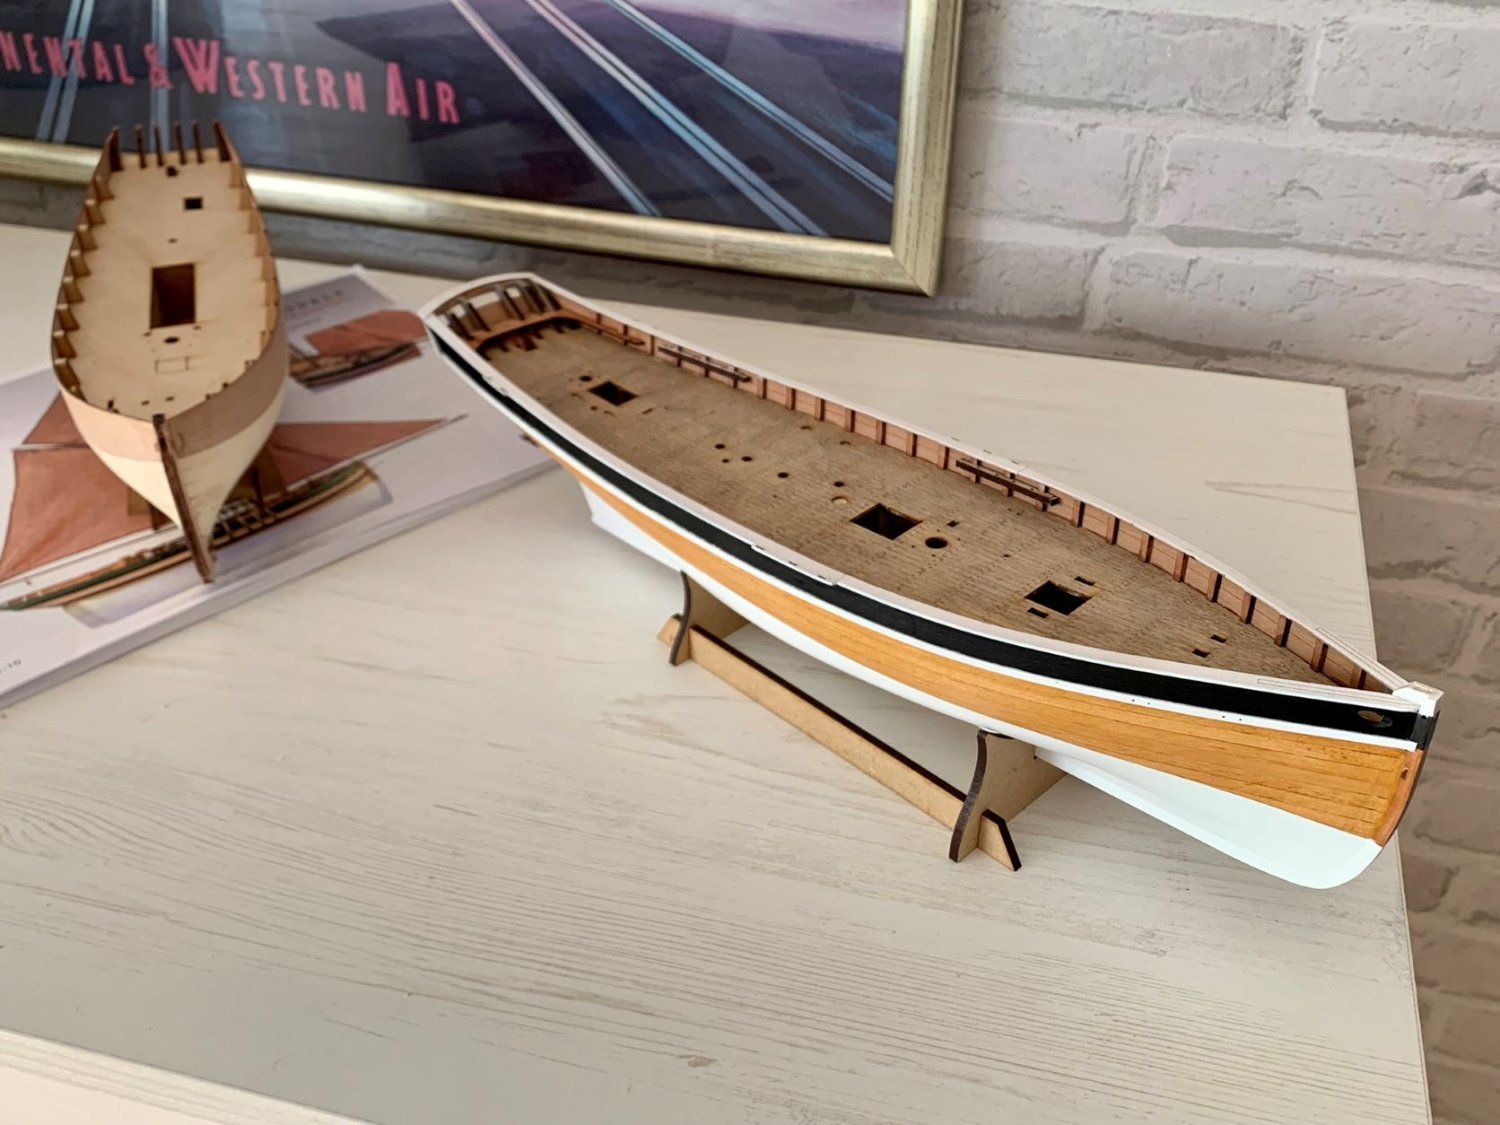
 What I also noticed on YouTube is that the decks are nearly always grey, so I applied a grey stain to the one-piece deck. It still looks a bit rough here (image above) but it settled down later. What I also saw on Youtube was that the inside of the bulwarks were frequently painted as well. I choose grey here again, as I had decided to use grey as a 'main colour' for the various deck furnishing parts (following image).
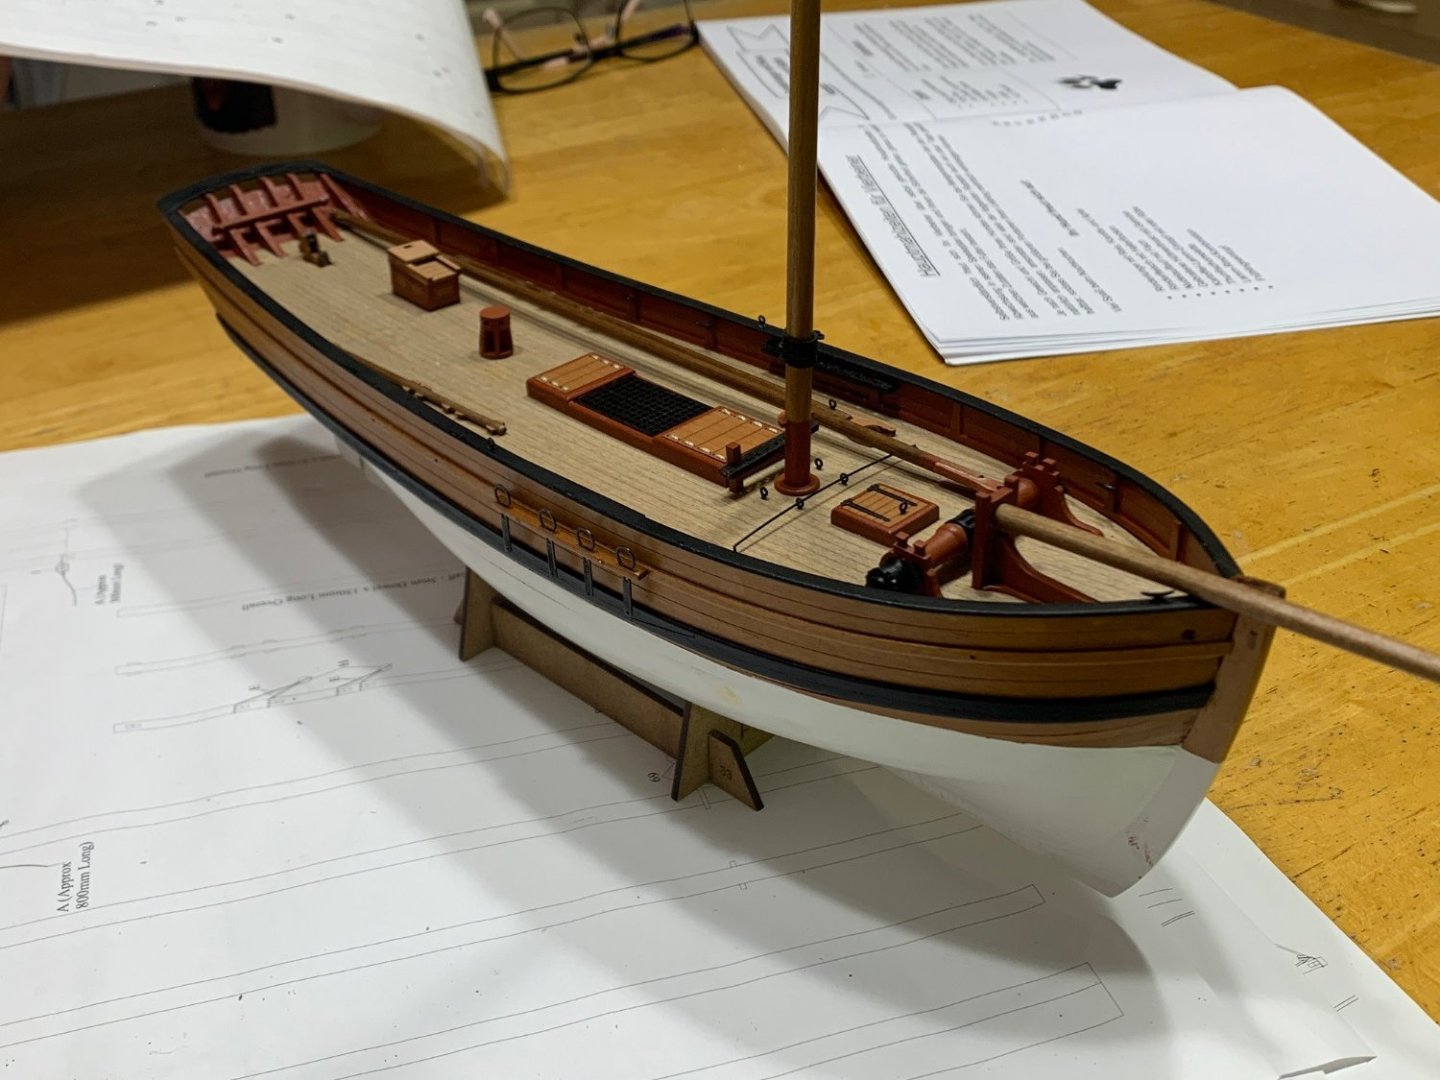
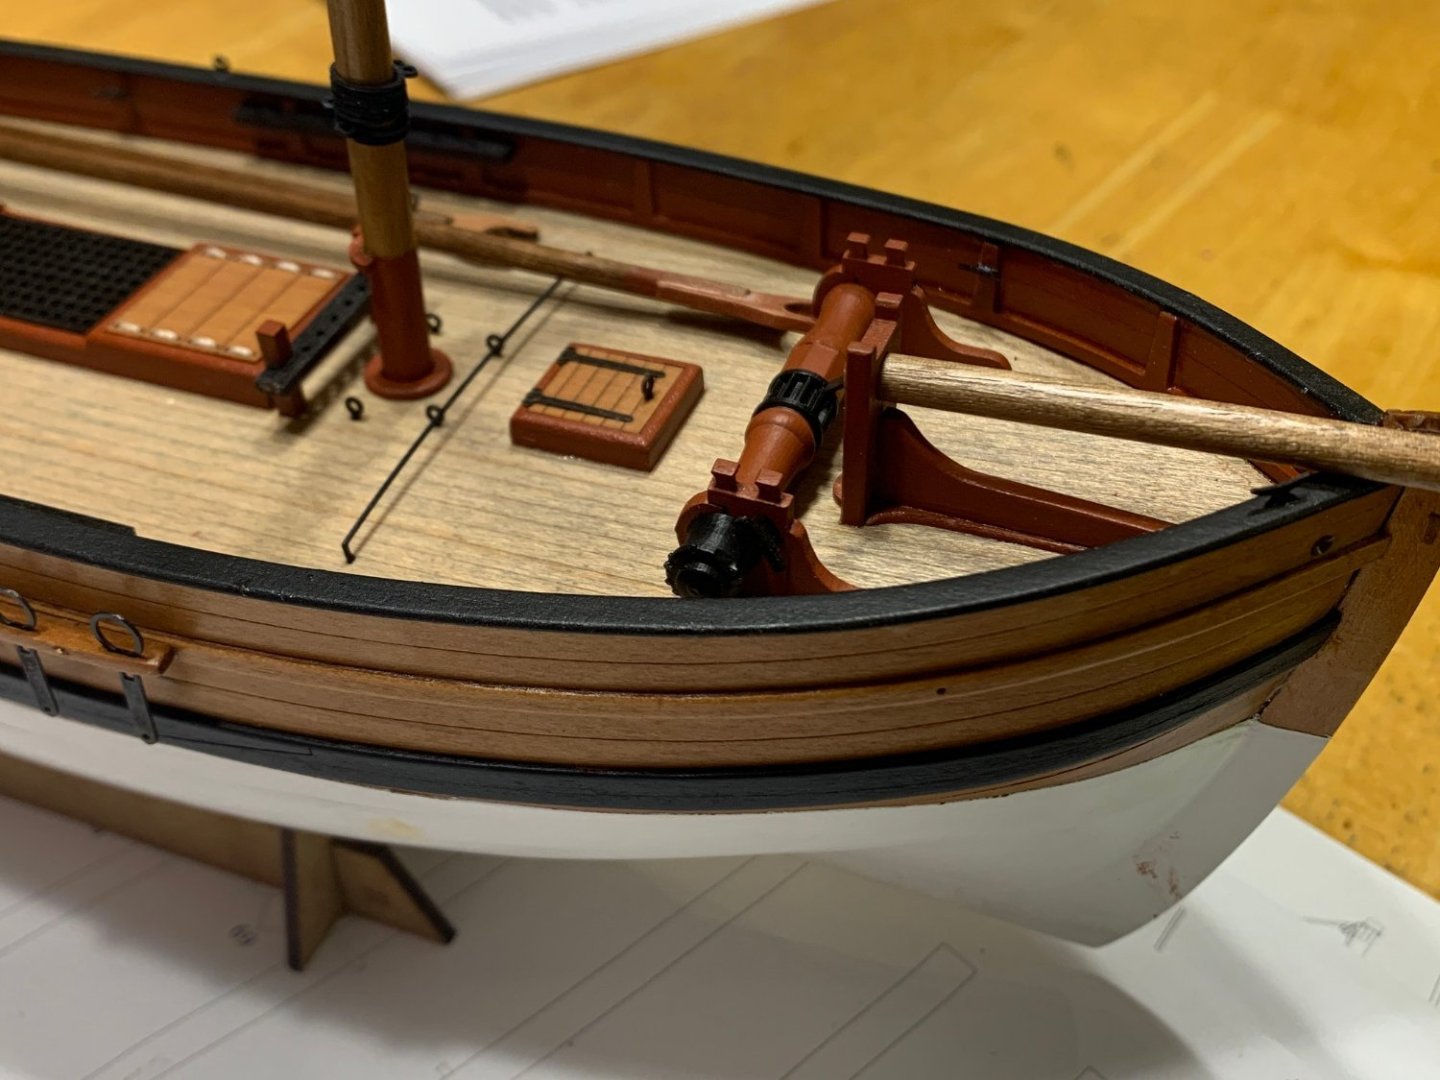
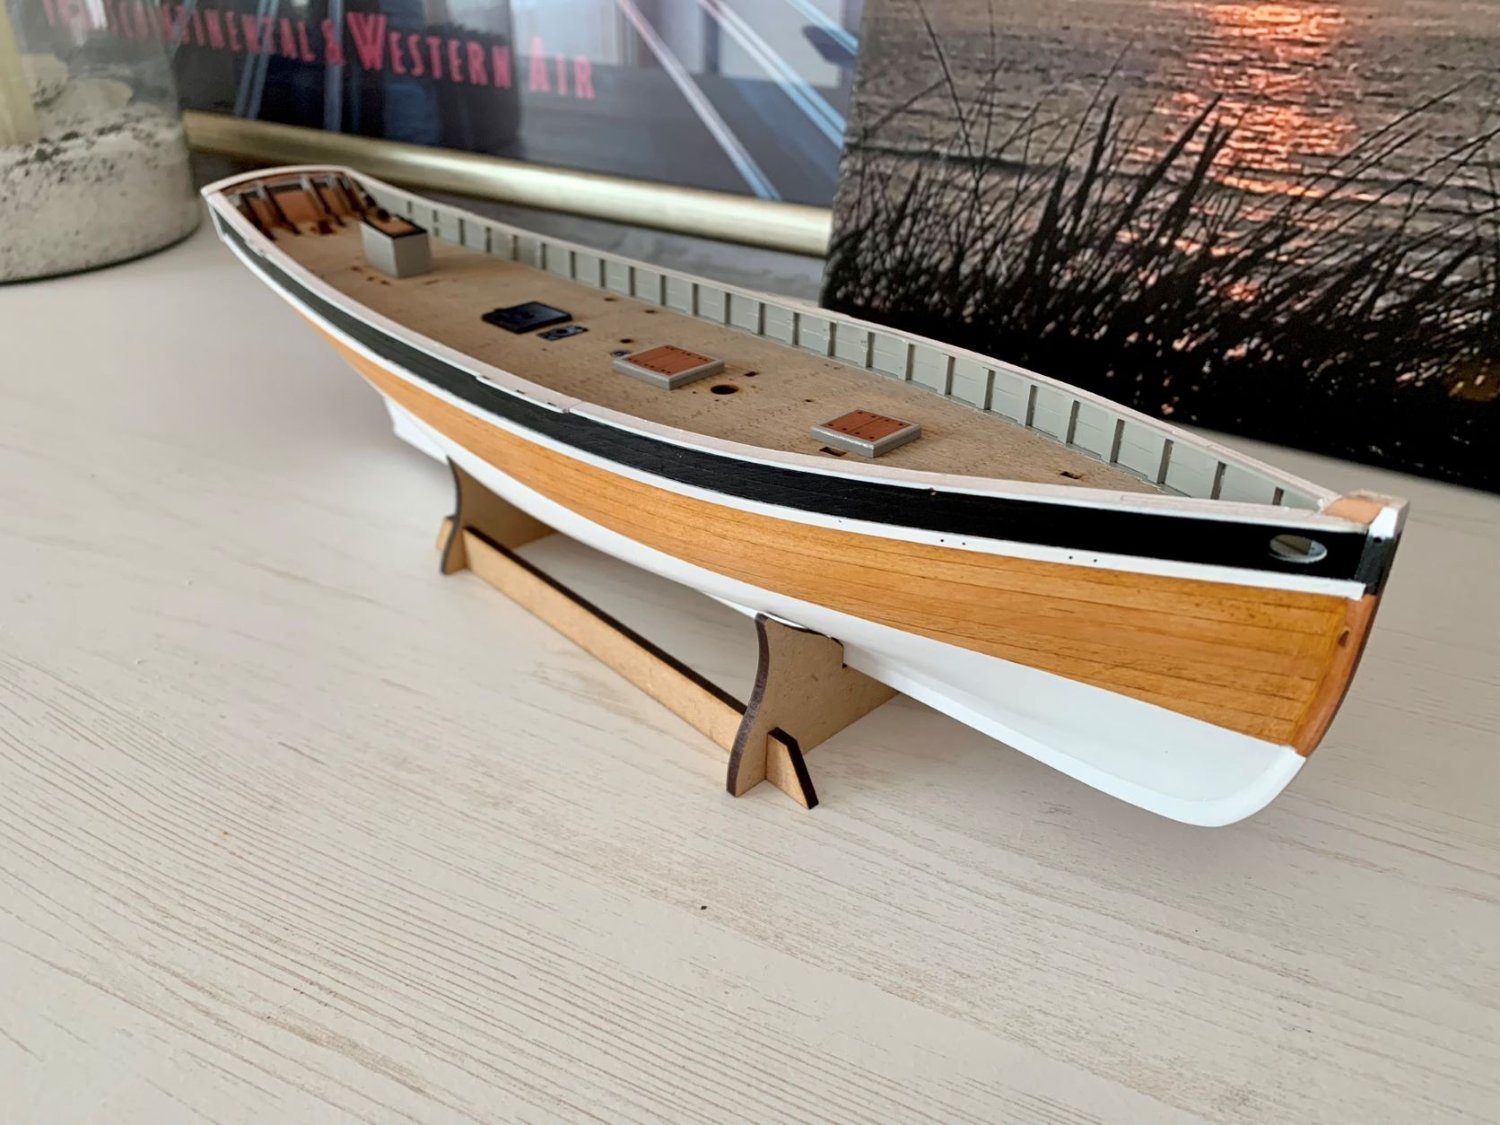
 Then most of the deck furniture was added (Saucy Jack in the background, much smaller than the Erycina)
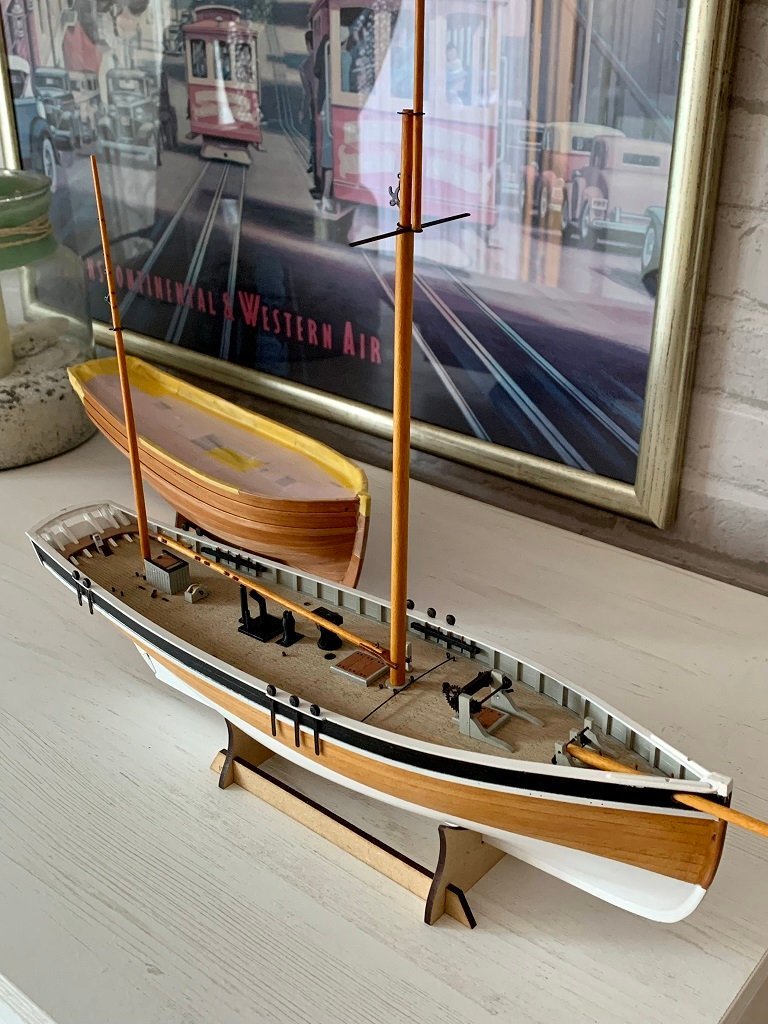
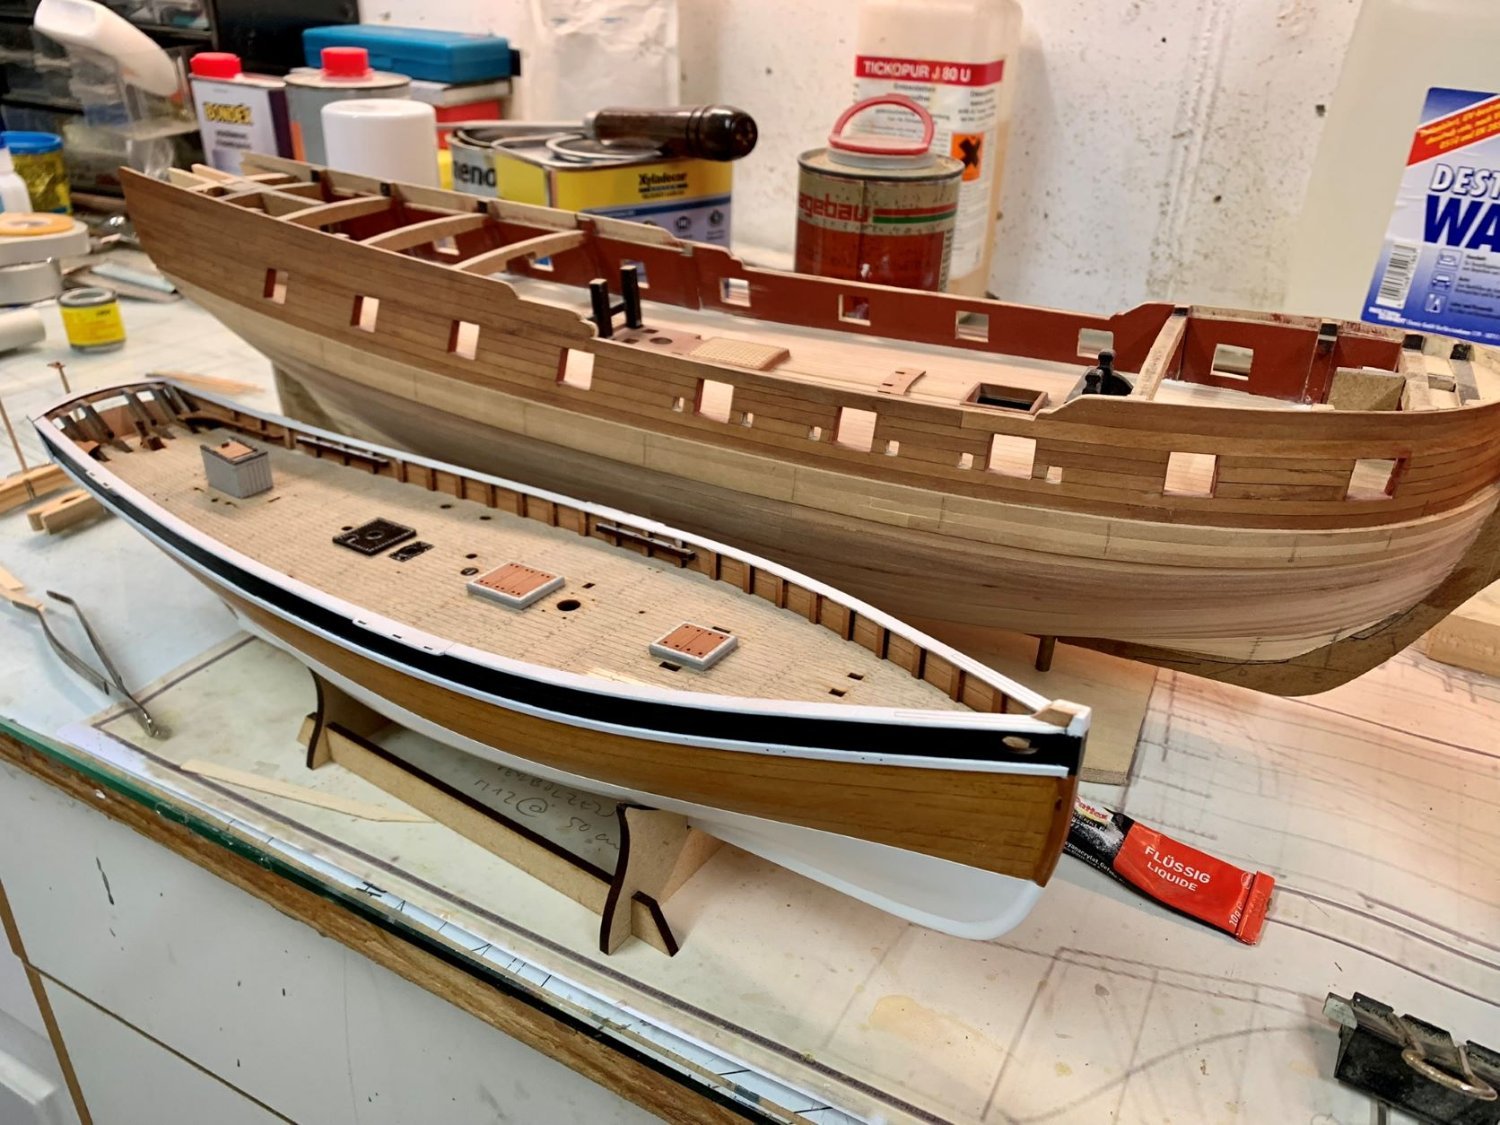
 So now I will move on to the masts and rigging. The latter is something I have never done before so we'll see how that goes. This is where I'm at right now (following picture)
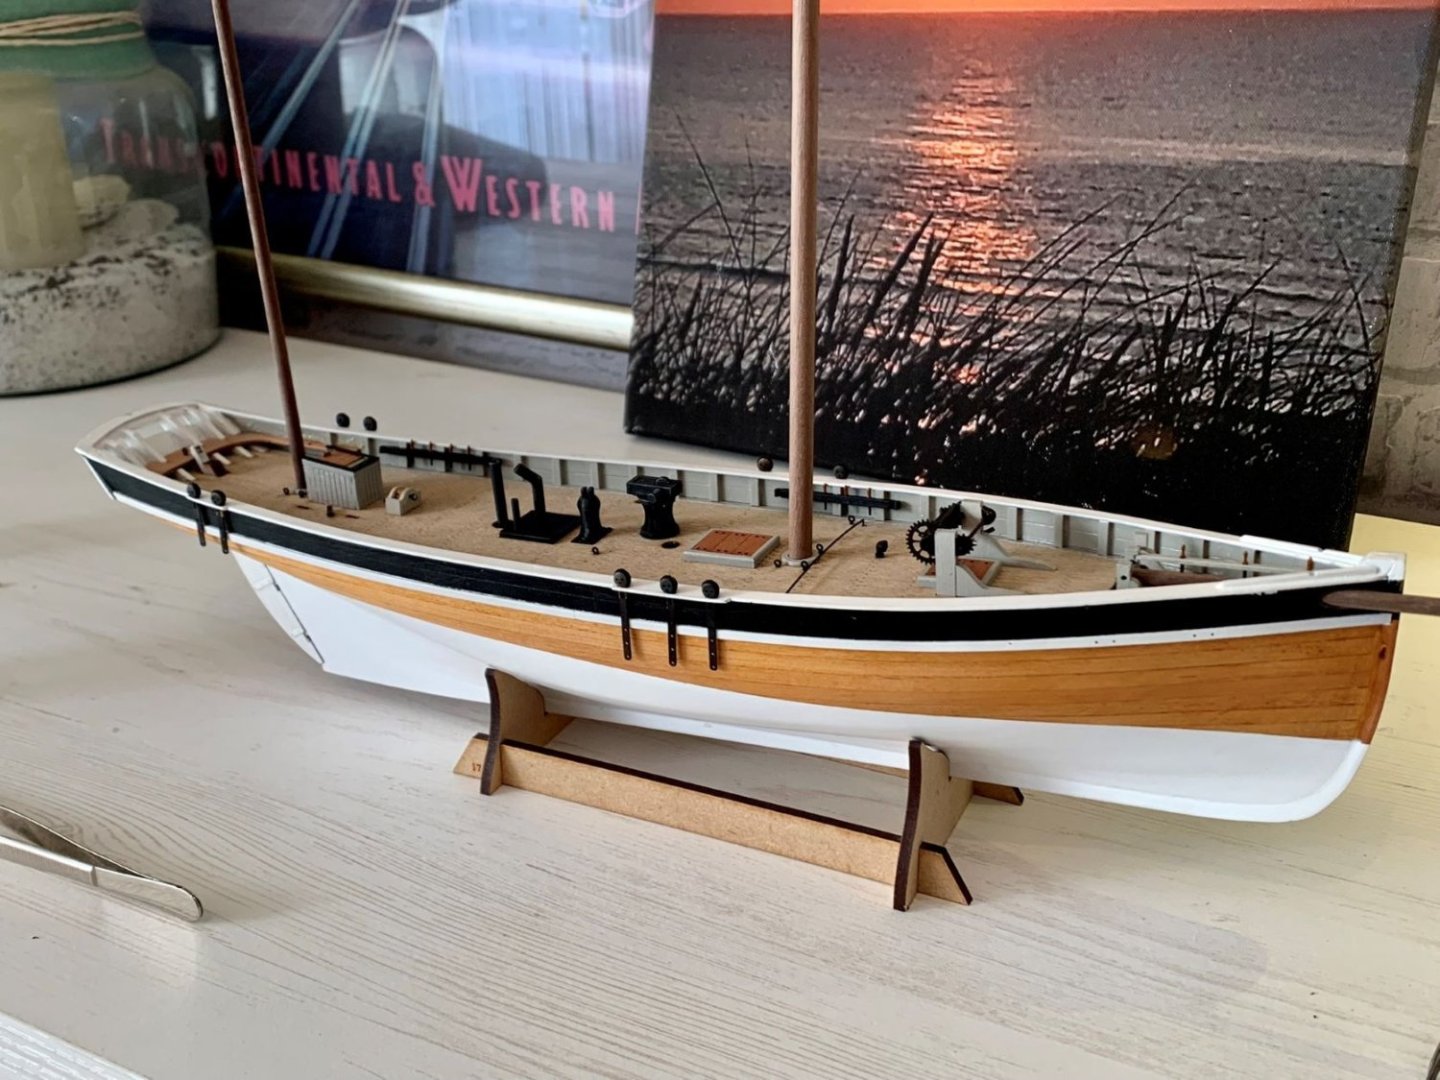 I have to admit that the masts as supplied were a bit dark for my liking, so I've ordered some other dowels as a possible alternative. I'm guessing that the wallnut dowels are supplied because they are nice and straight. Will have to see how the other material compares.
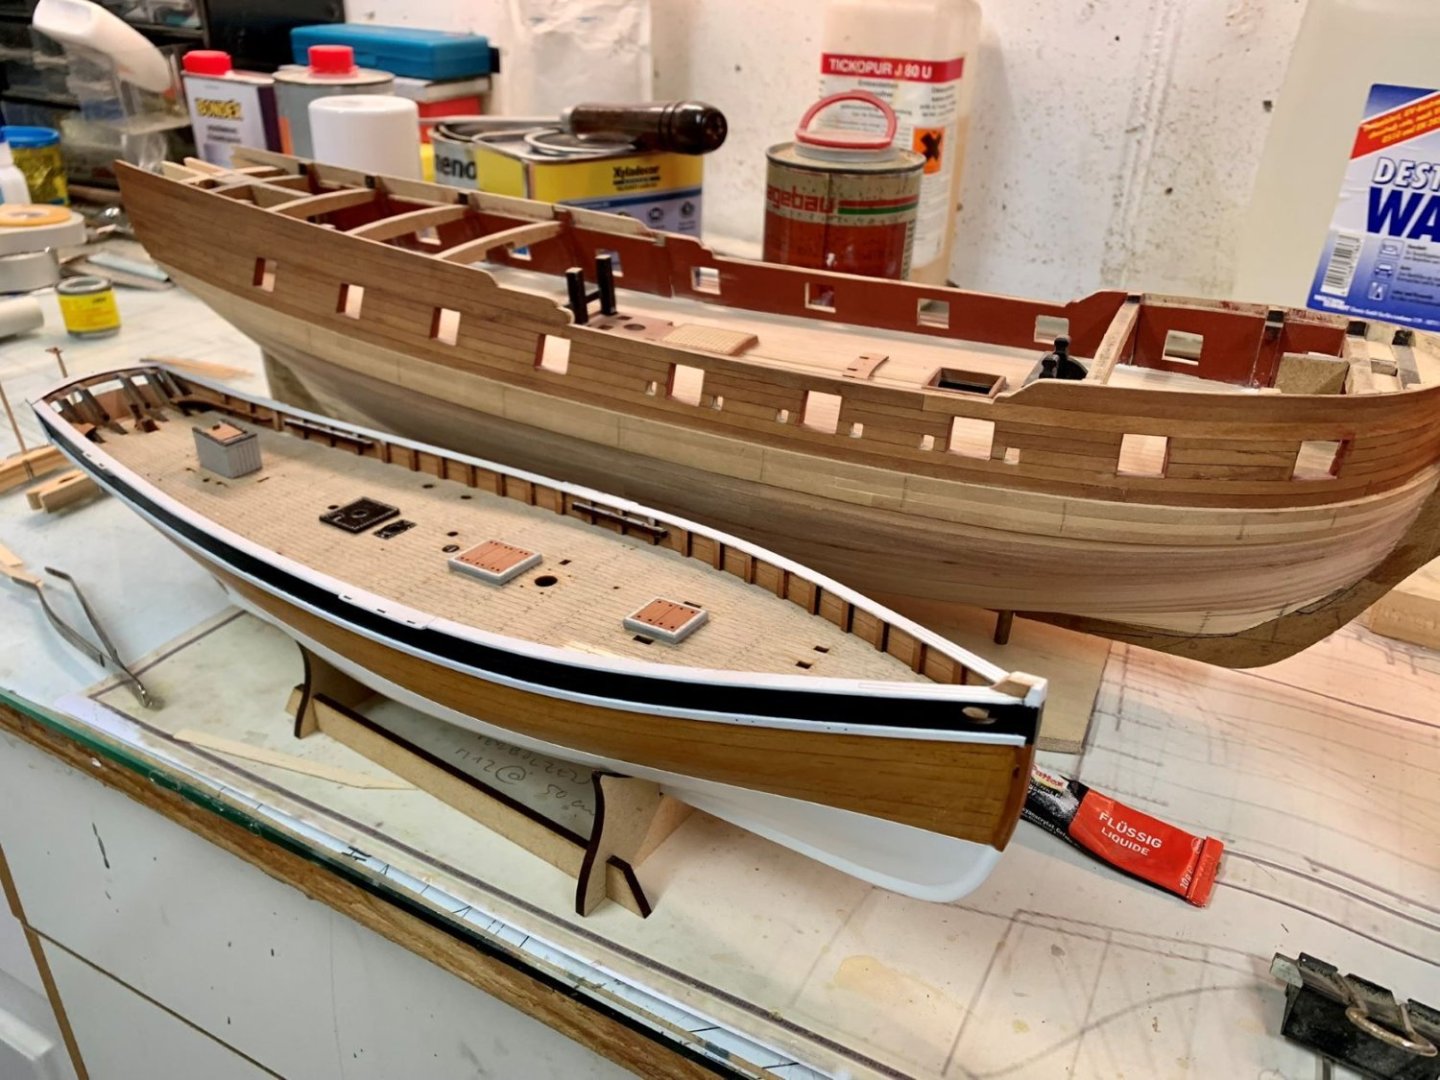
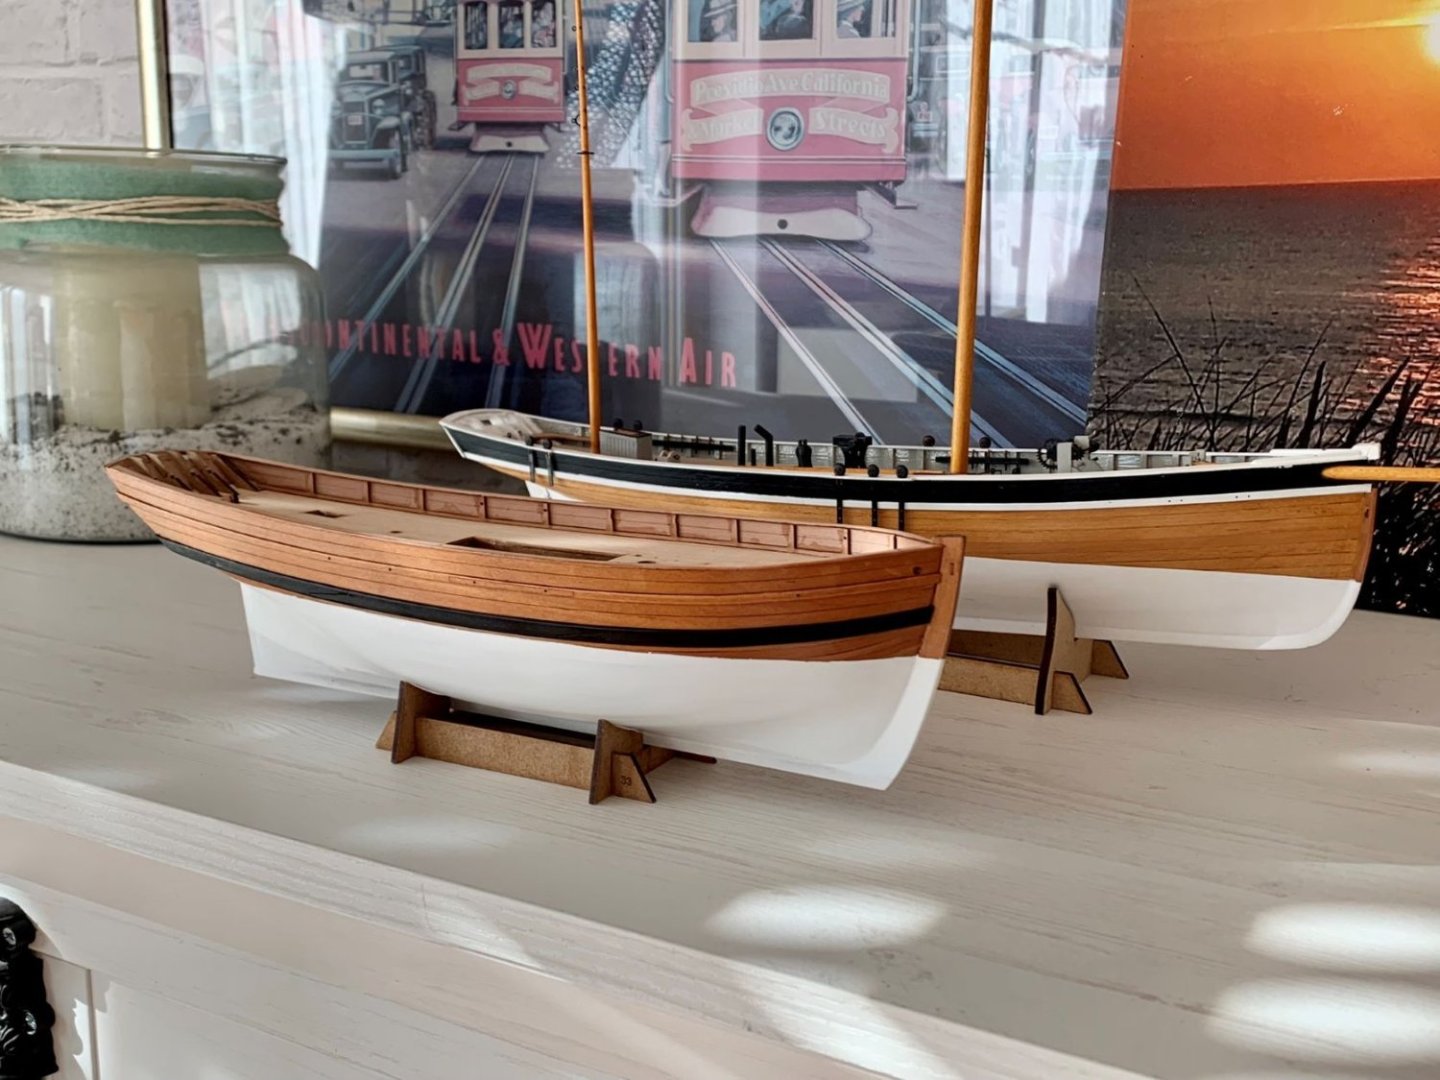
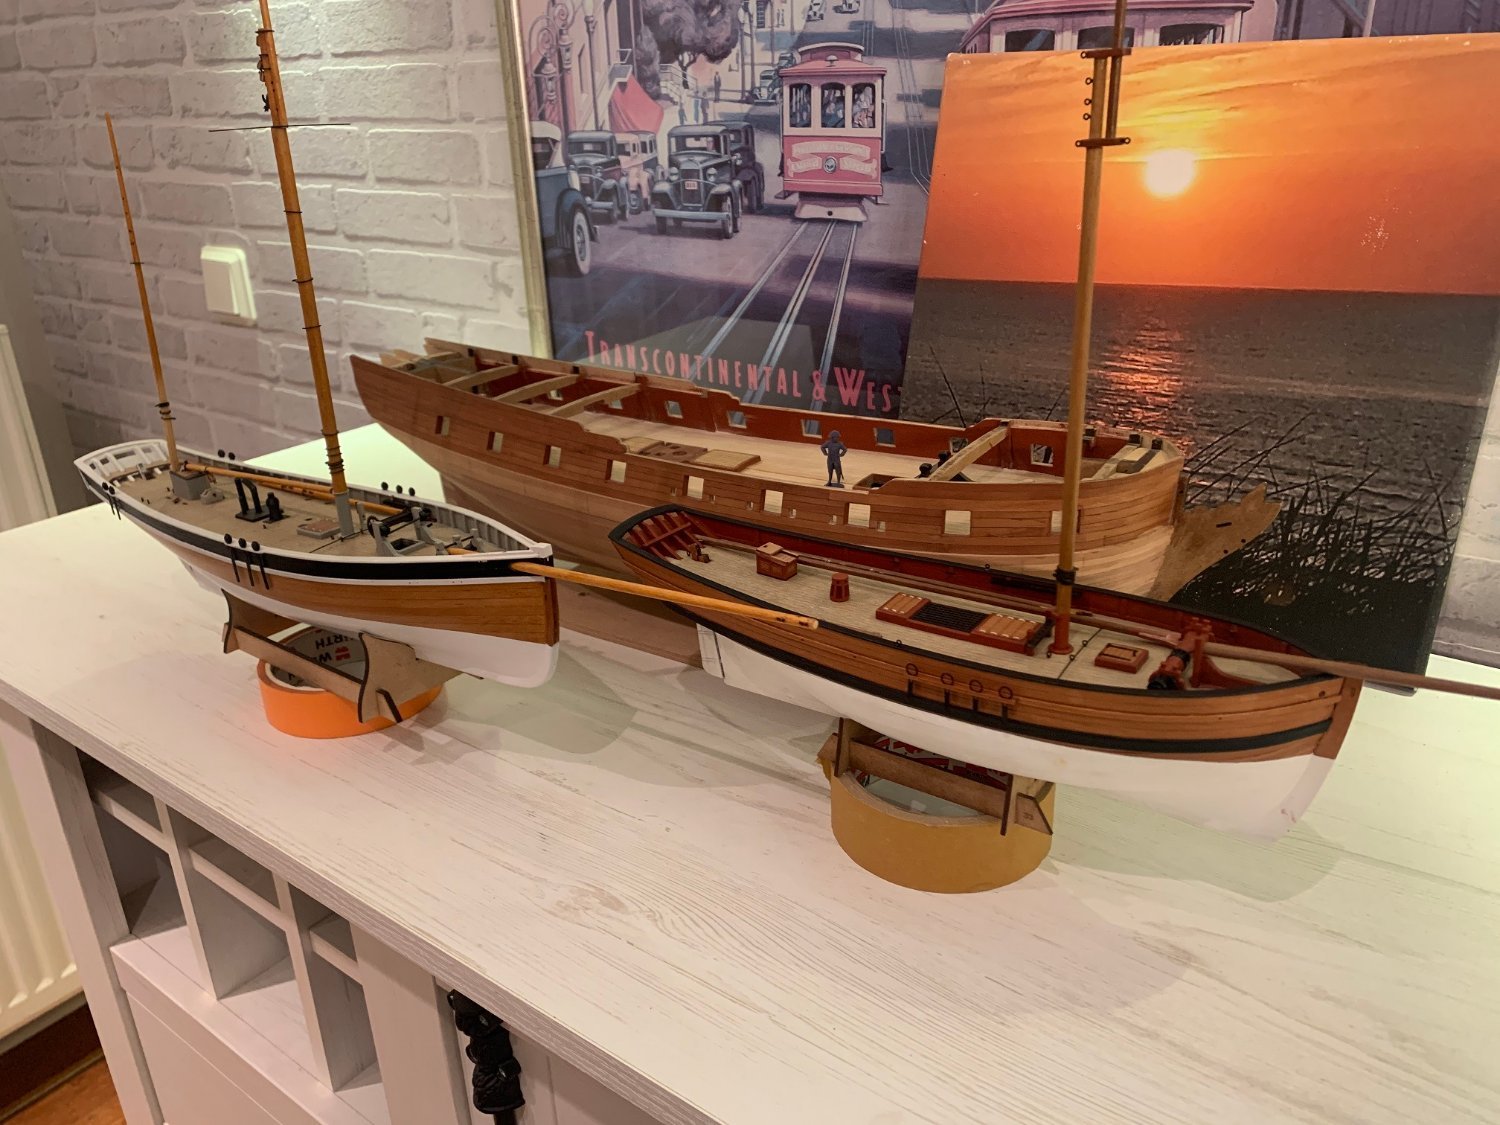
Size comparison: Erycina and HMS Fly
More in a couple of weeks, I hope... Chris
- jpalmer1970, chris watton, DB789 and 4 others
-
7
-
Hello Everyone, Chris here from Germany tuning in again after a long while.
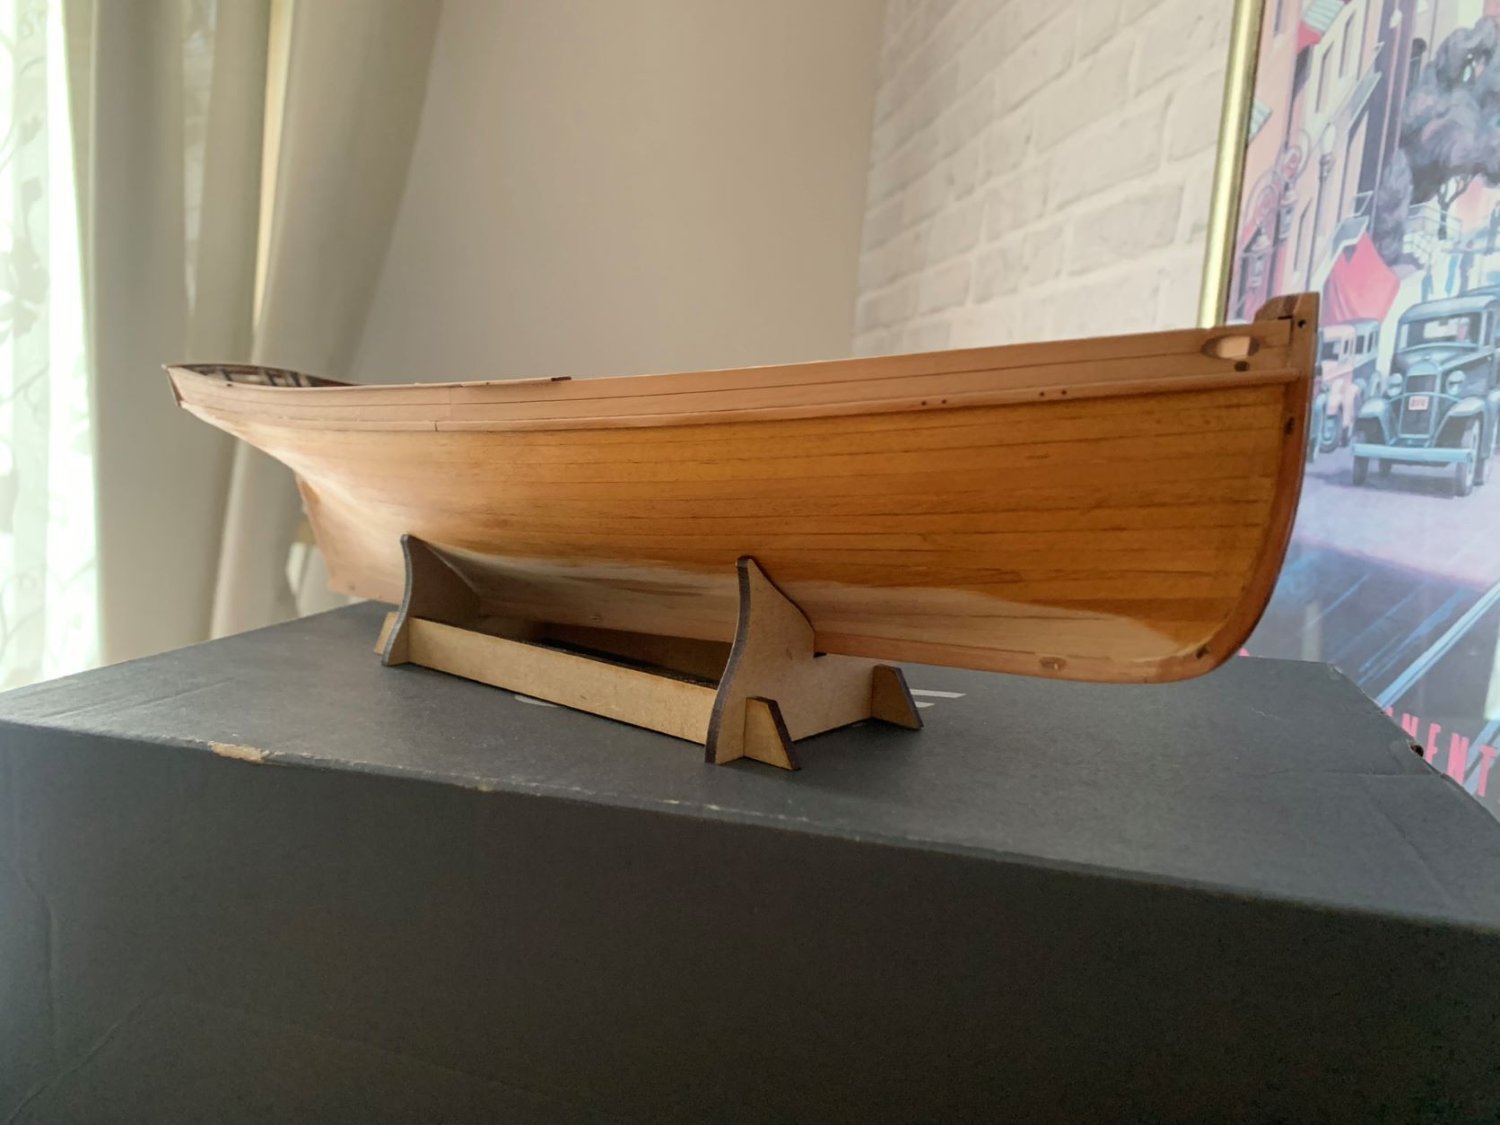
Many years ago I was fortunate enough to find an HMS Diana from Calder Craft on eBay classifieds here in Germany, which I worked on a bit before it stalled. It was probably a bit too much for a ship novice so I bought an HMS Fly from Amati/Victory models which also ended up on the shelf of shame, waiting for some more love and attention one day, hopefully. Hoping to build a model ship that I would eventually finish I looked at Vanguard Models' fishing boat line and imediately liked their Erycina and Saucy Jack. The first because of her very elegant lines, that latter because she was almost the opposite - at least in my eyes. Not much needs to be said about Vanguard Models' kits as there are plenty of build logs here of their more popular (I'm assuming) Ship of the Line and other warship kits.
So let's see how it's going:
I hope the pictures are not too big here. I use Windows photo viewer which also lets me resize them for emails and internet posts etc, so I hope this is adequate.
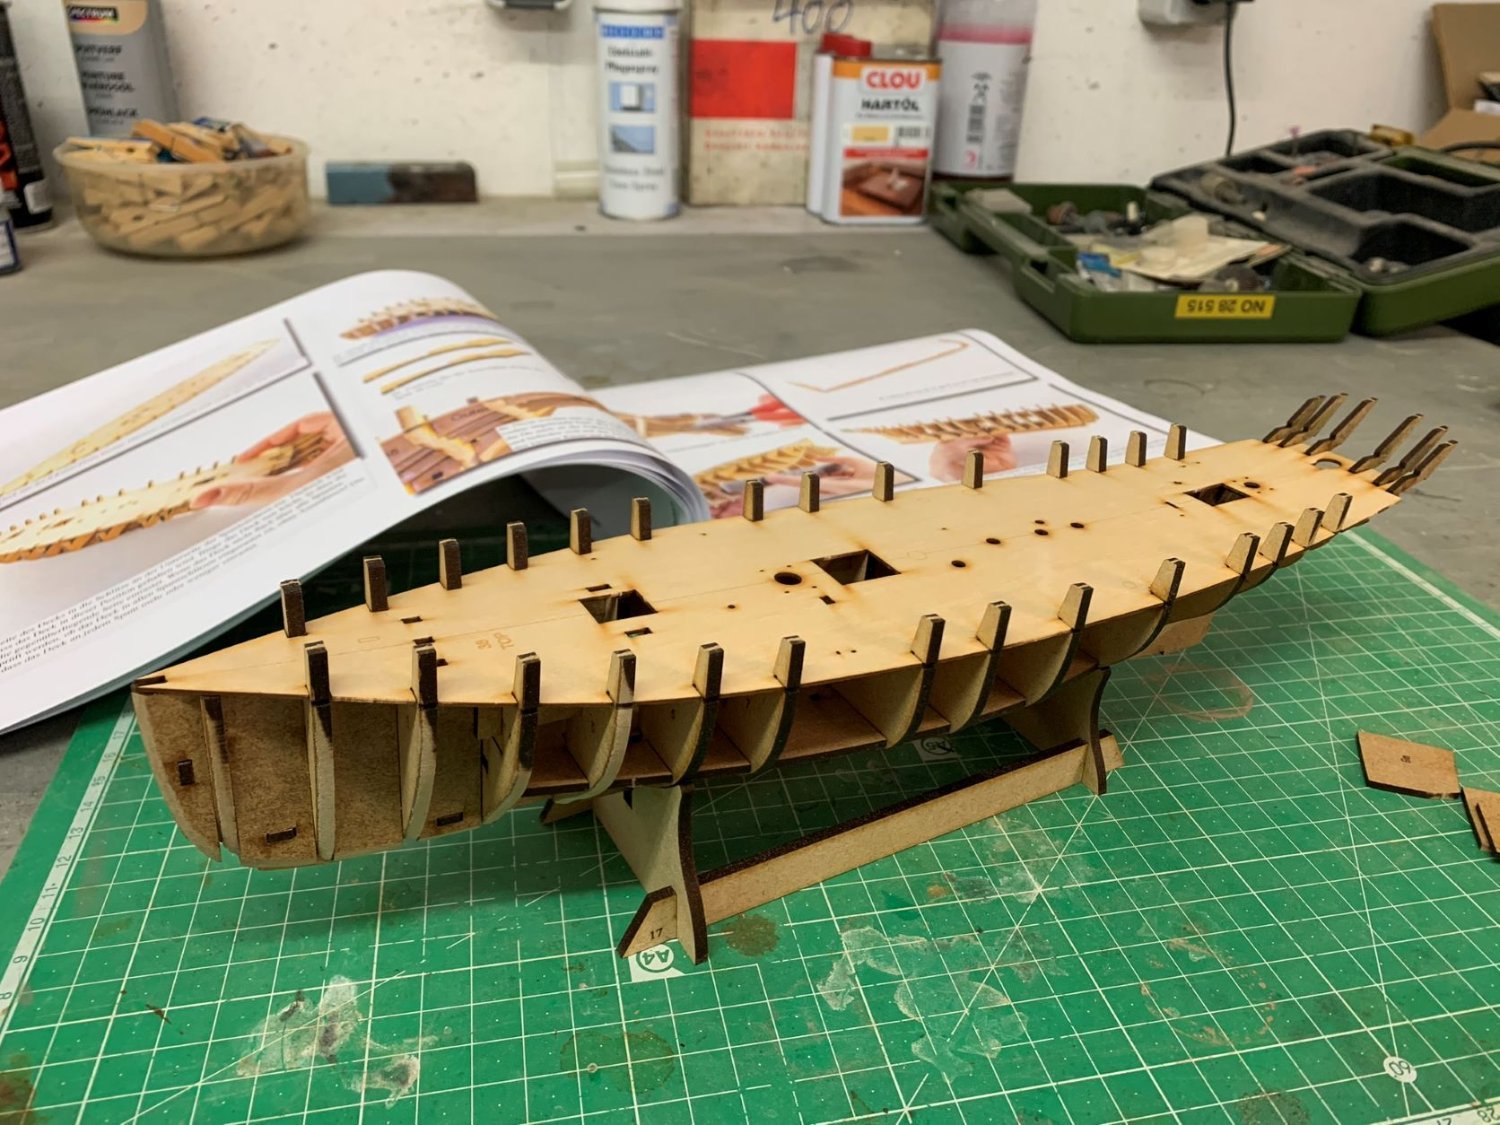
Bulkheads and keel are all done in mdf and being laser cut fit is flawless. There should be a small notch in the keel for one of the Gypsy Winch parts which isn't there, so I had to change that part much later when I realised this. Maybe Chris wants to make a note of this.
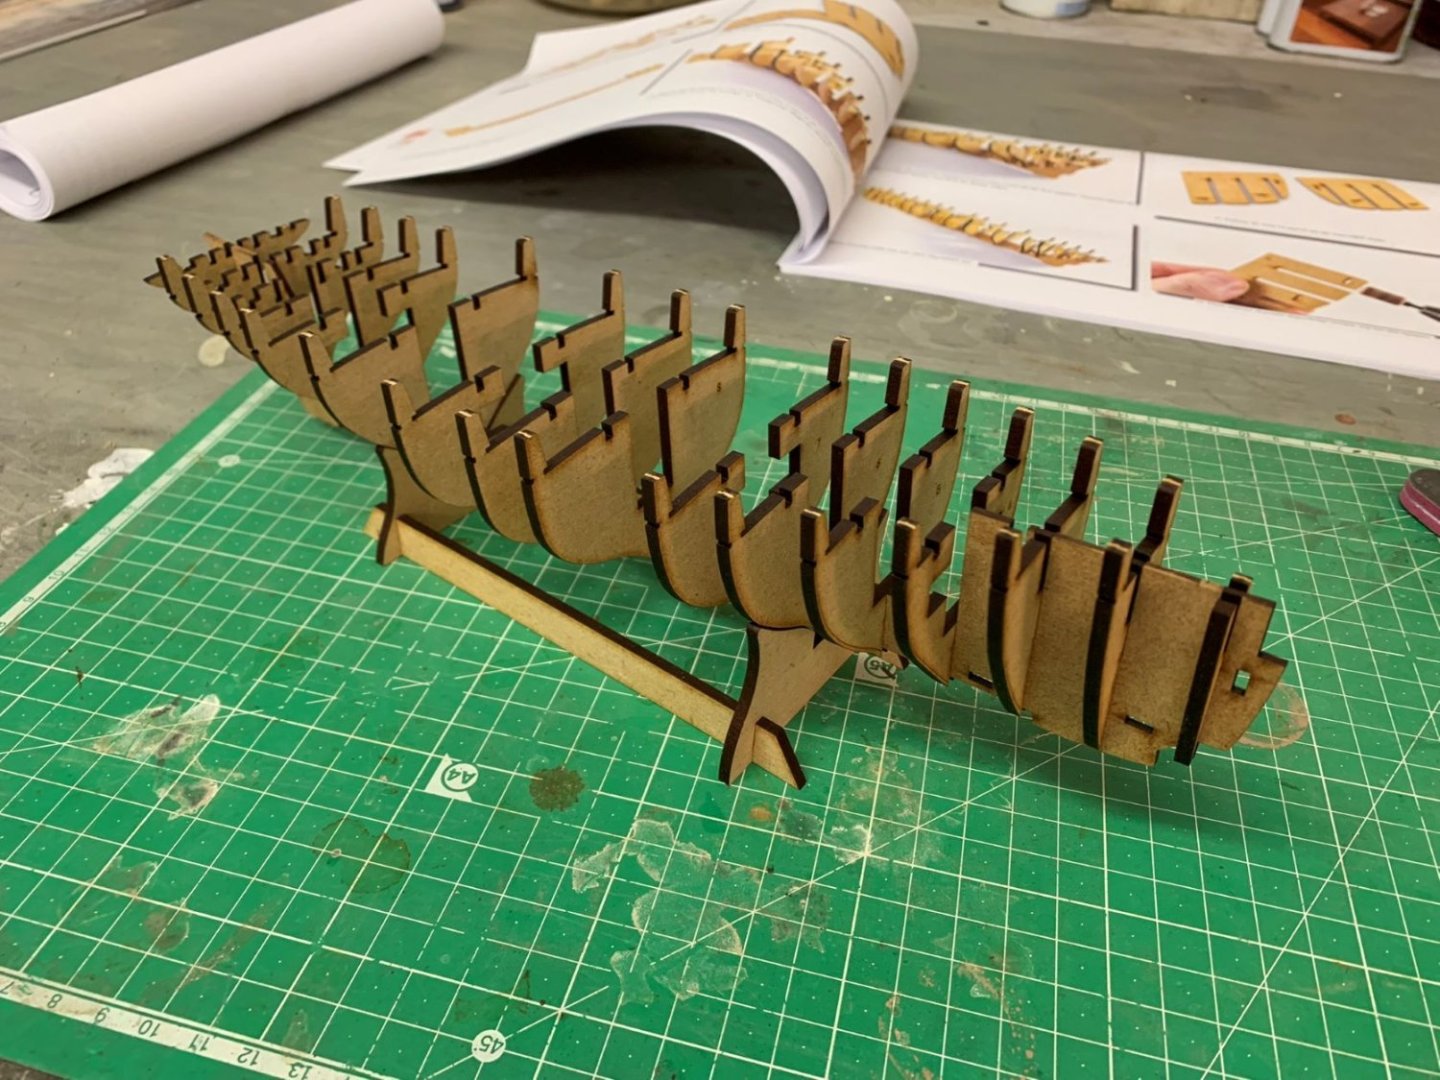
So Here all bulkheads have been attached to the keel with all doublers and fillers, plus the false deck. I noticed that the deck is not symmetrical. 'Top' is written on the deck but there was no warning in the building manual, so beware. I nearly missed that!
 Then I could start the dreaded planking. For me this is the make or break part of building ship models.
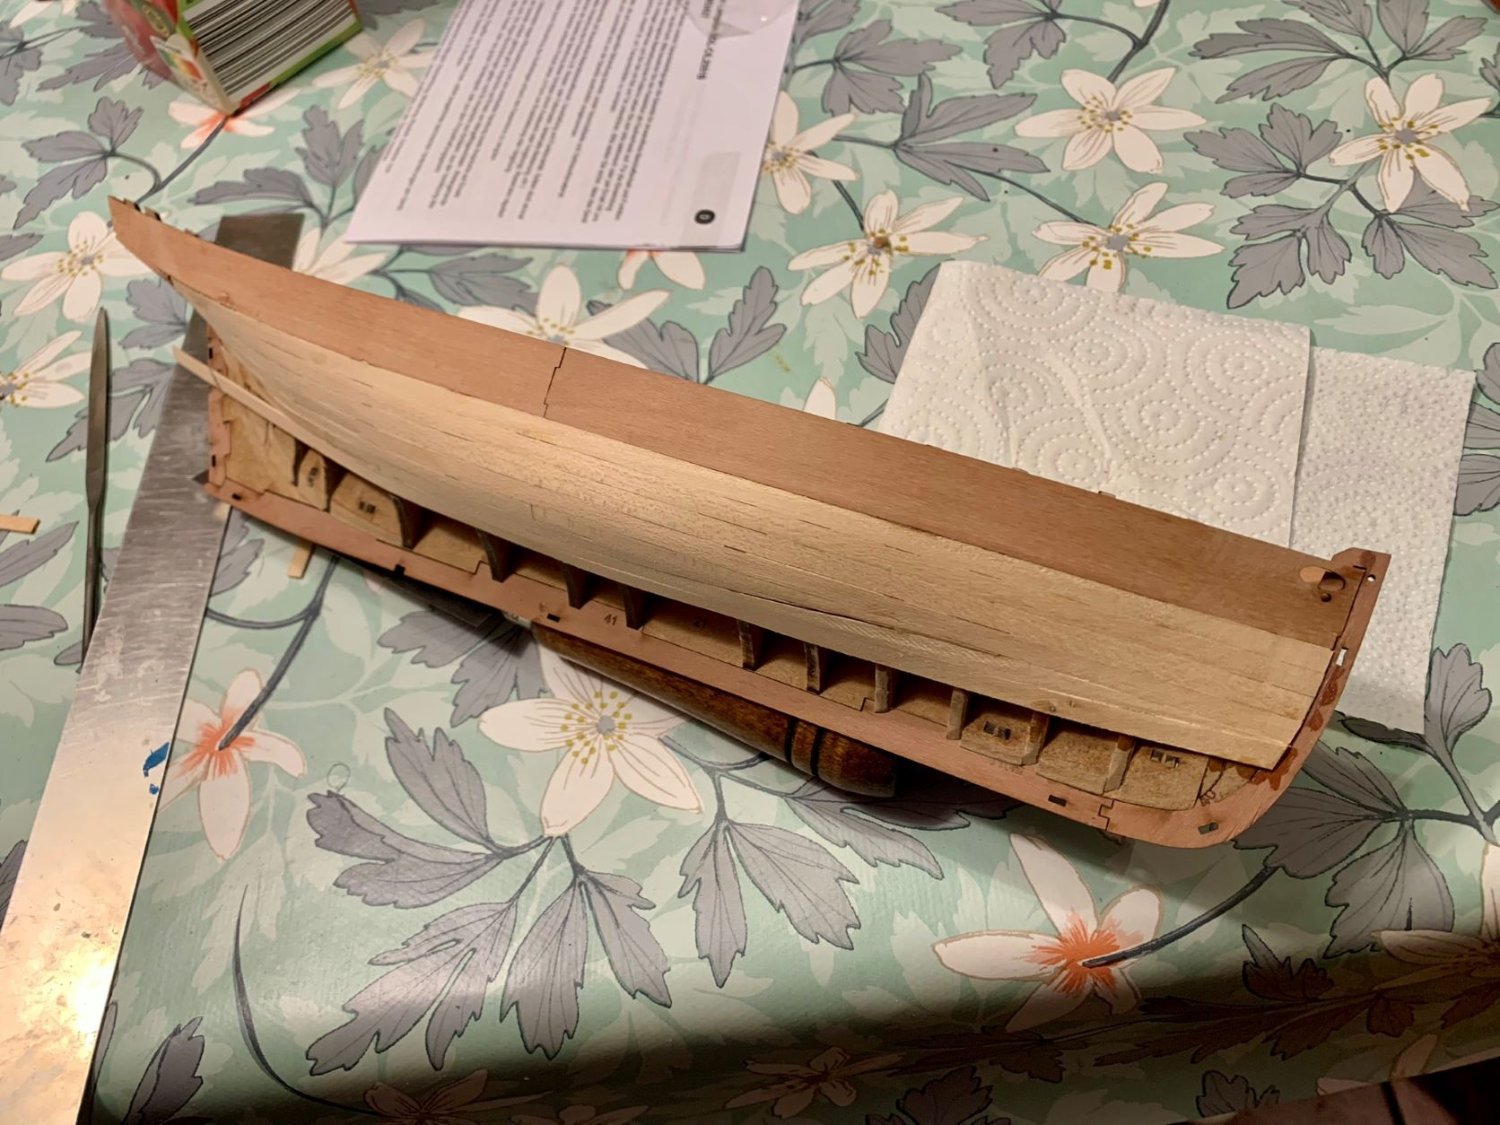
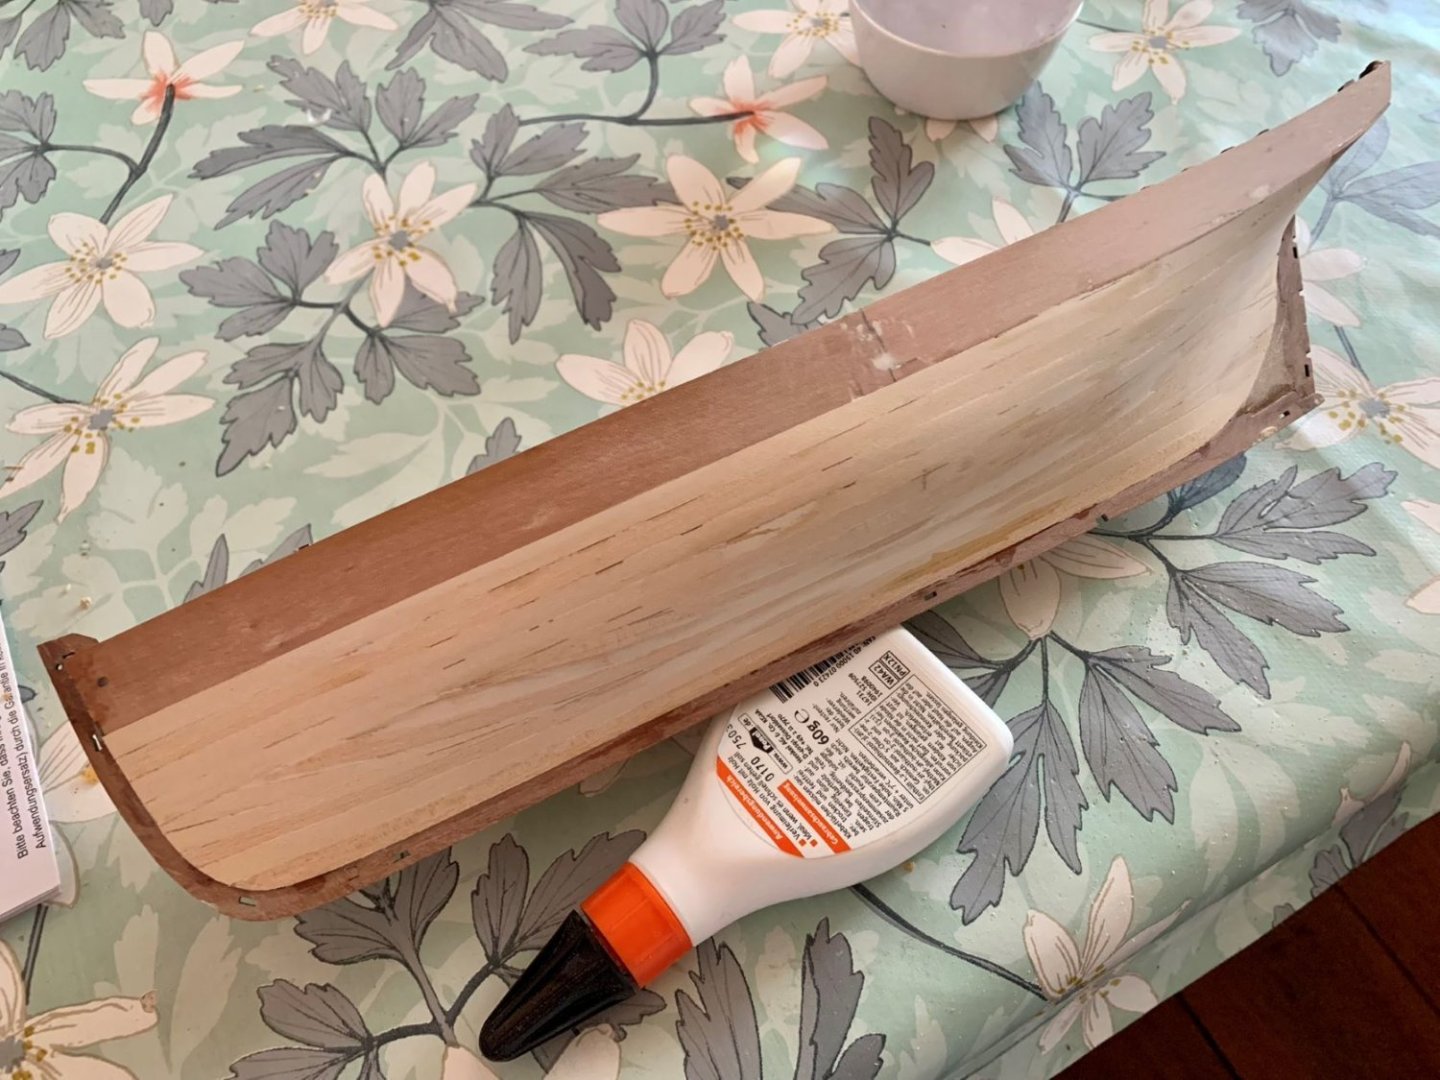 As is obvious by the planking here I started from the top and worked myself downwards until about half was done, then I continued at the keel working my way up. For me the most important rule here is: you can't force wood to do something it doesn't want to. That always needs to be kept in mind.
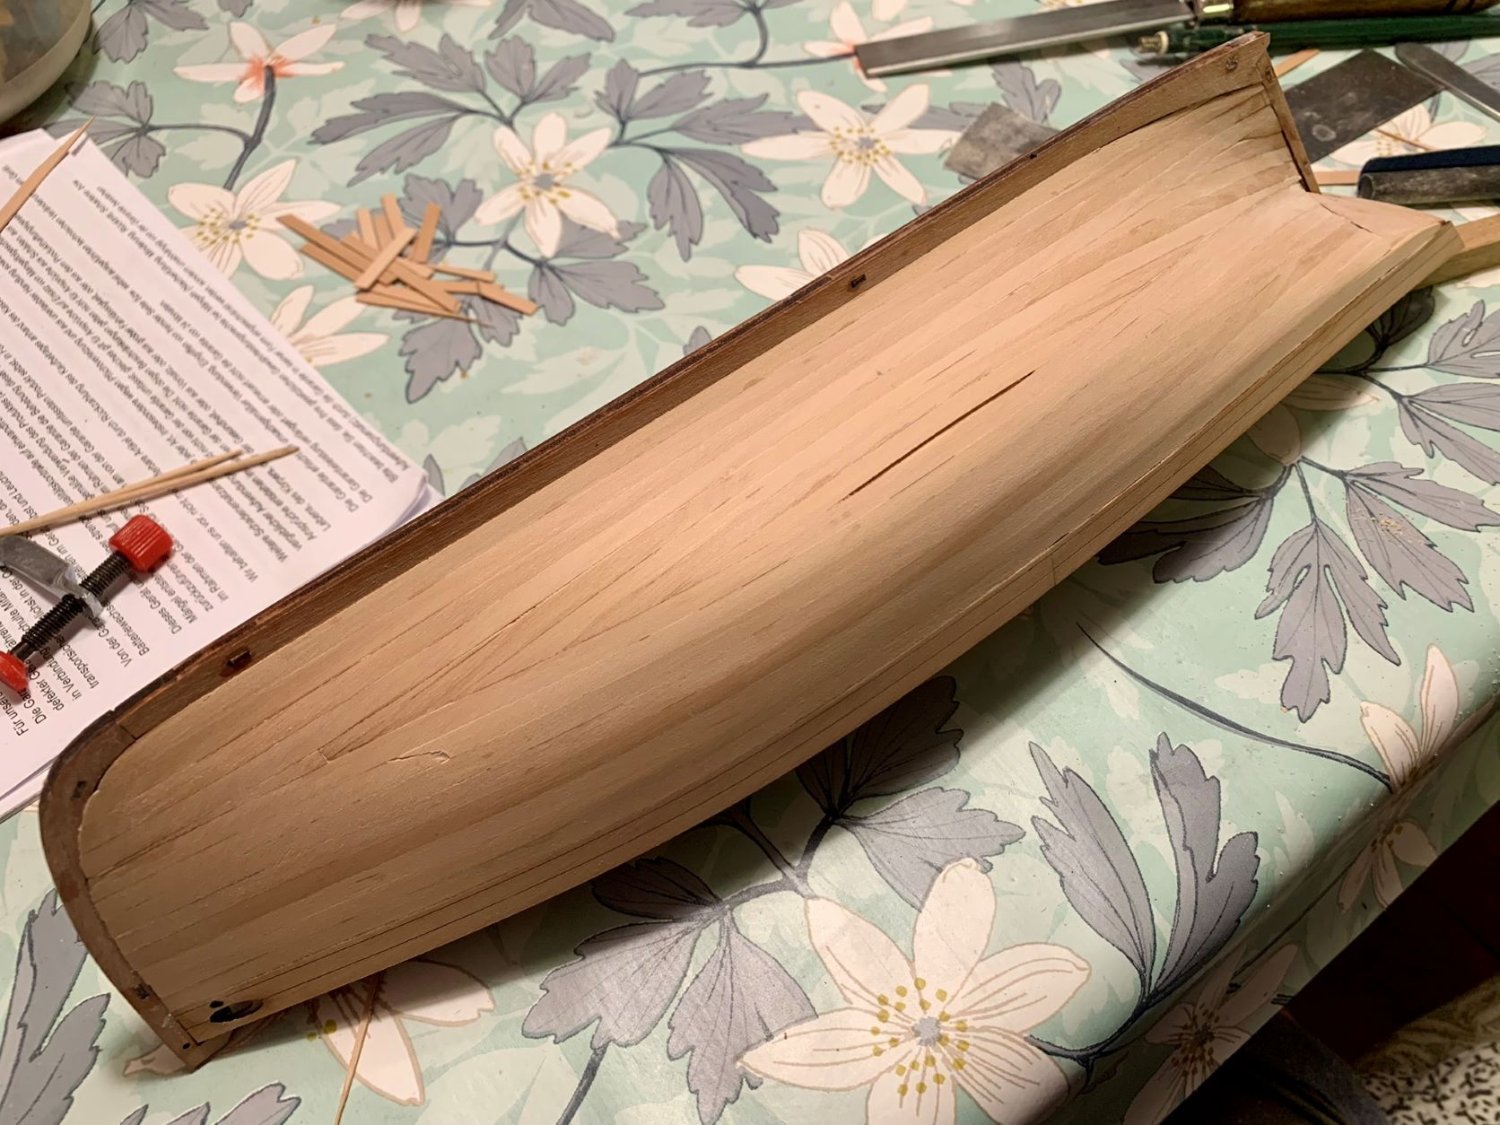
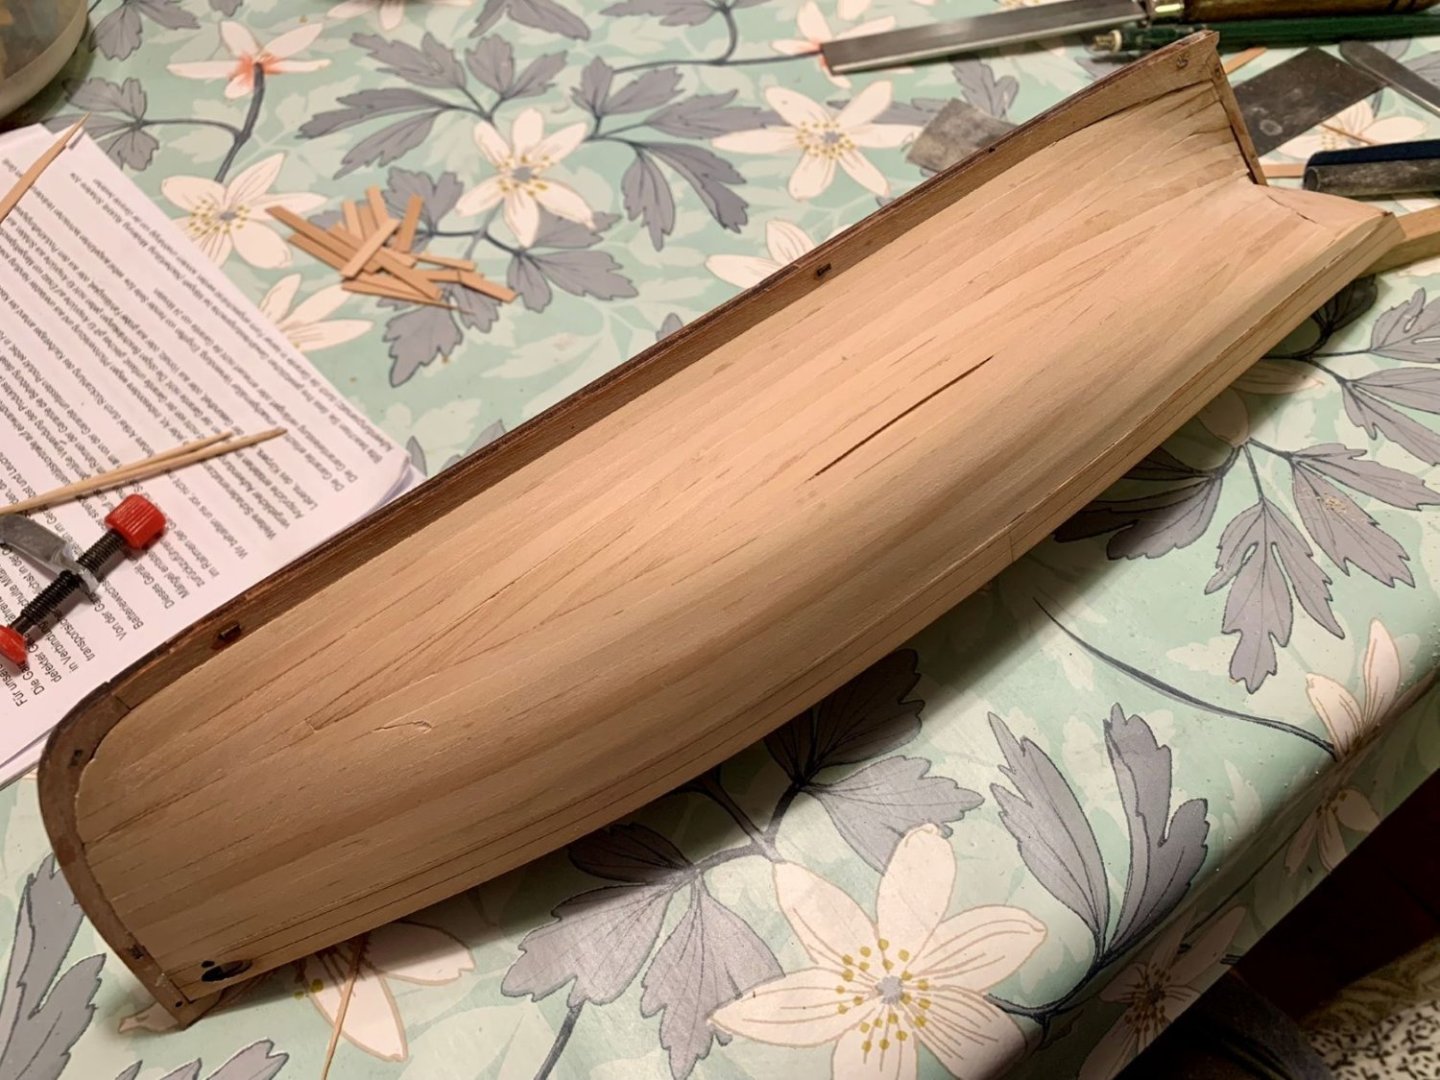 Here the second planking just about complete (image above). One strip of wood snapped as can be seen here, but I didn't worry about that too much, as the hull will be painted anyway.
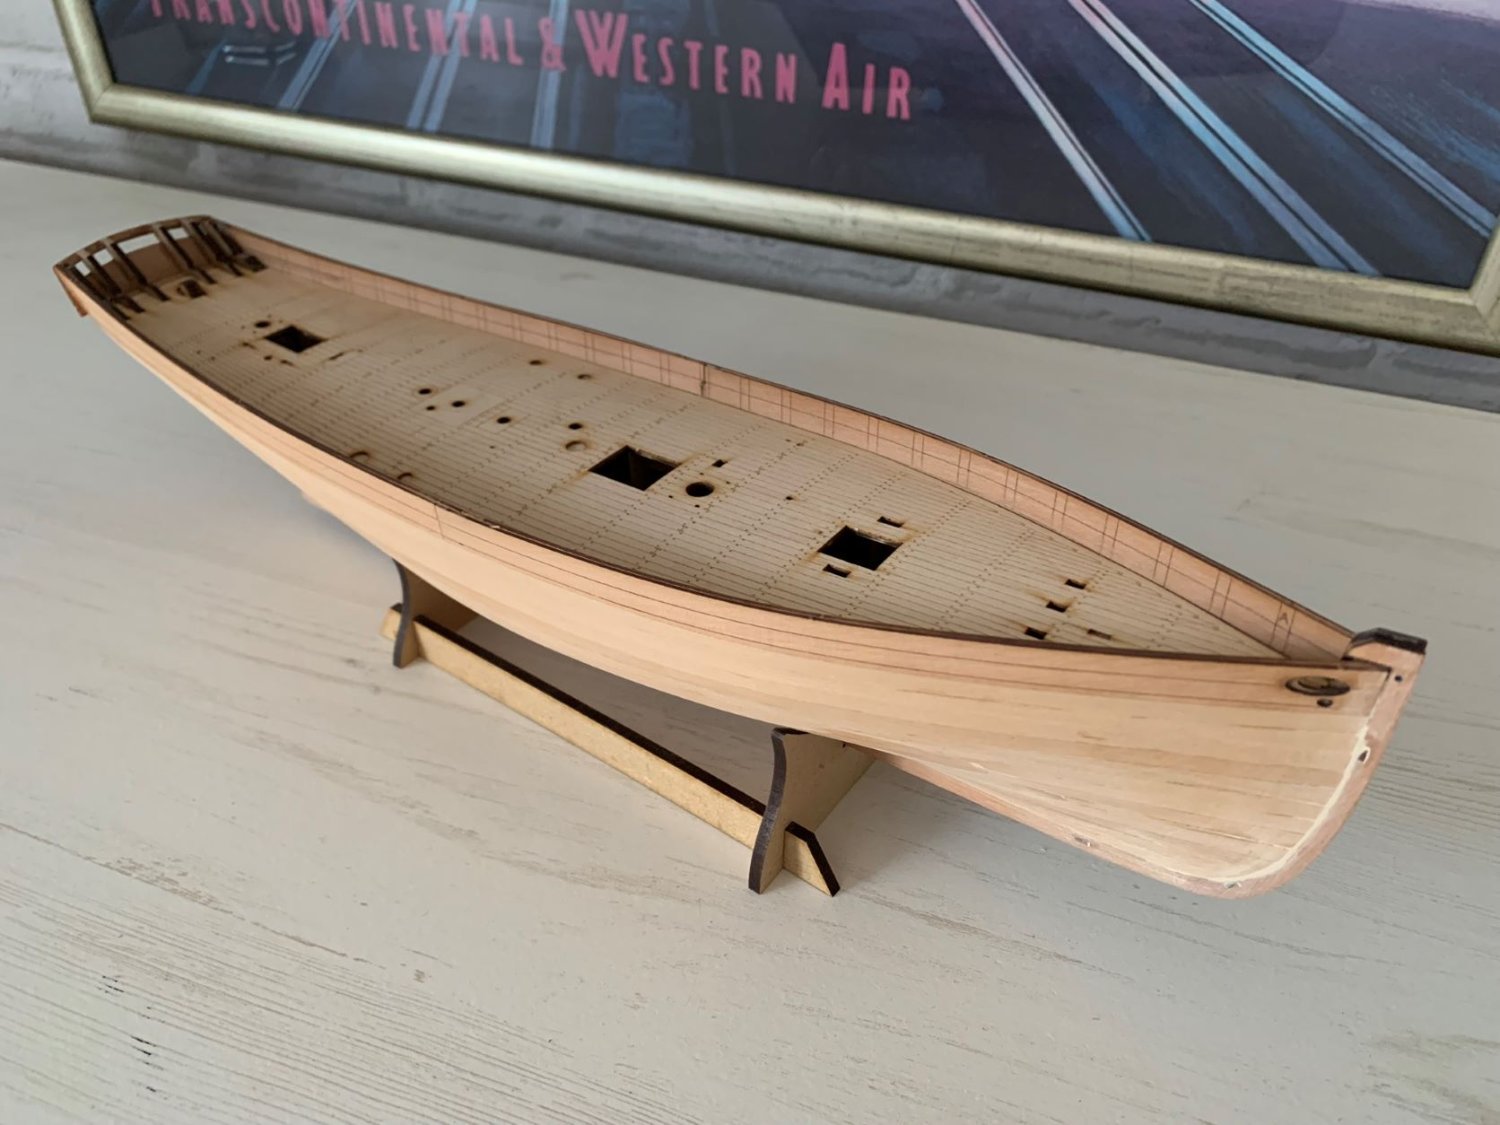
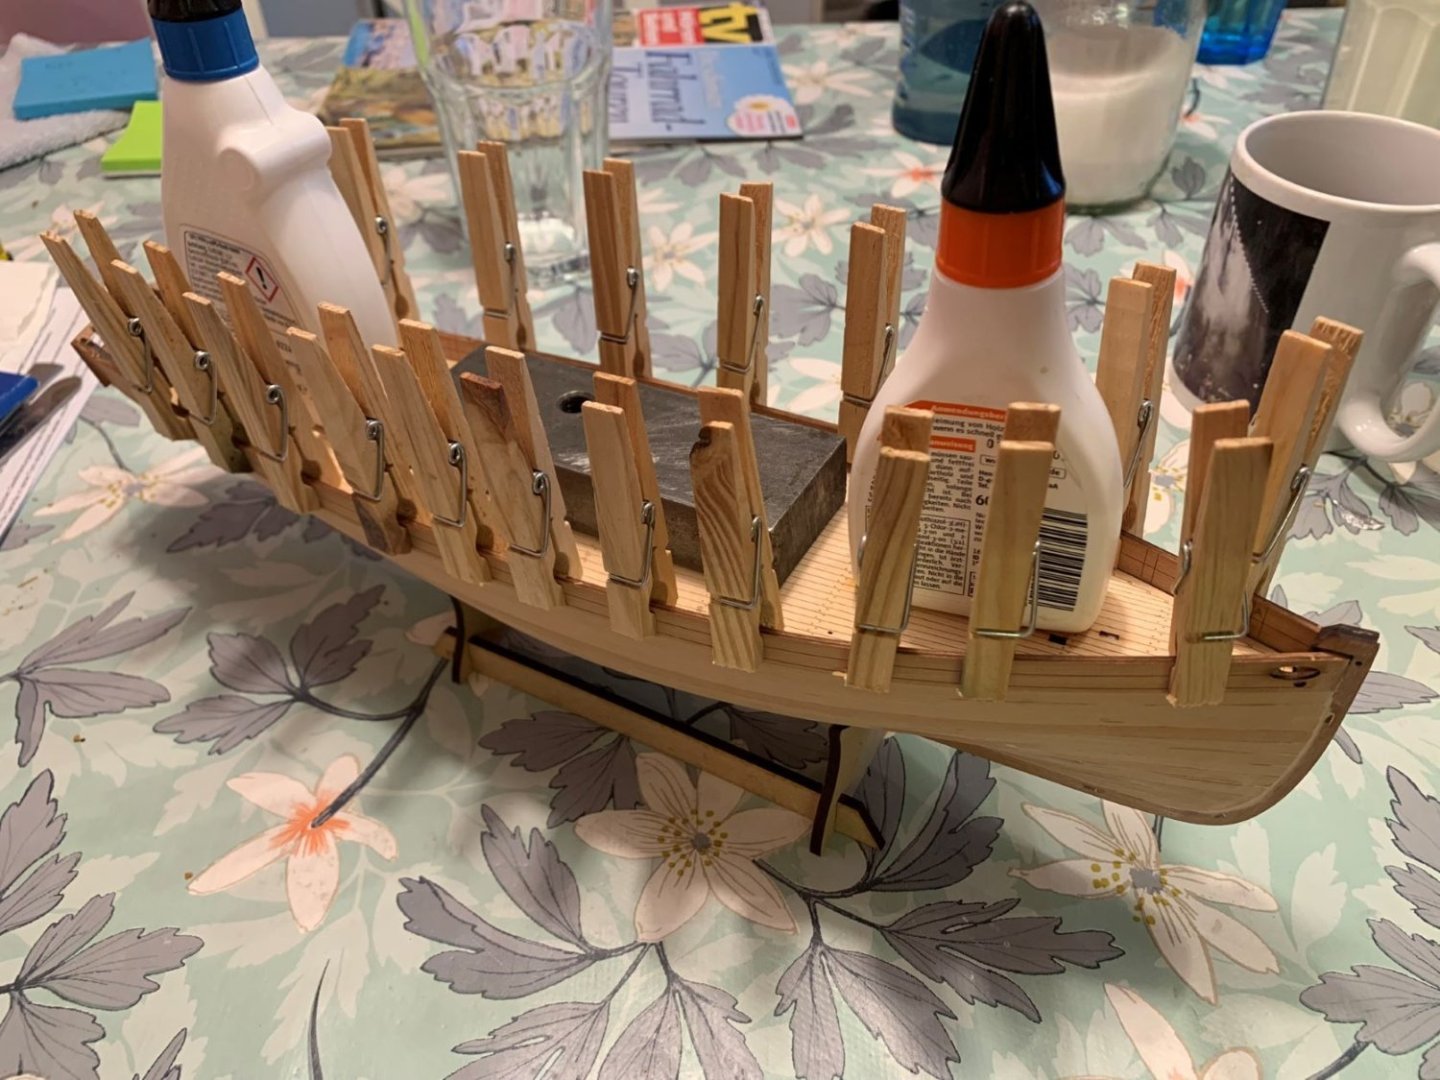 A nice feature of Vanguard model kits is the one-piece deck with laser 'engraved' planks etc. Here the deck is being glued in place and, most importantly, held down by clothes pegs on which the front end has been cut to a vee-shape to ensure that the edge of the deck is being held tightly against the false deck and the bulwarks.
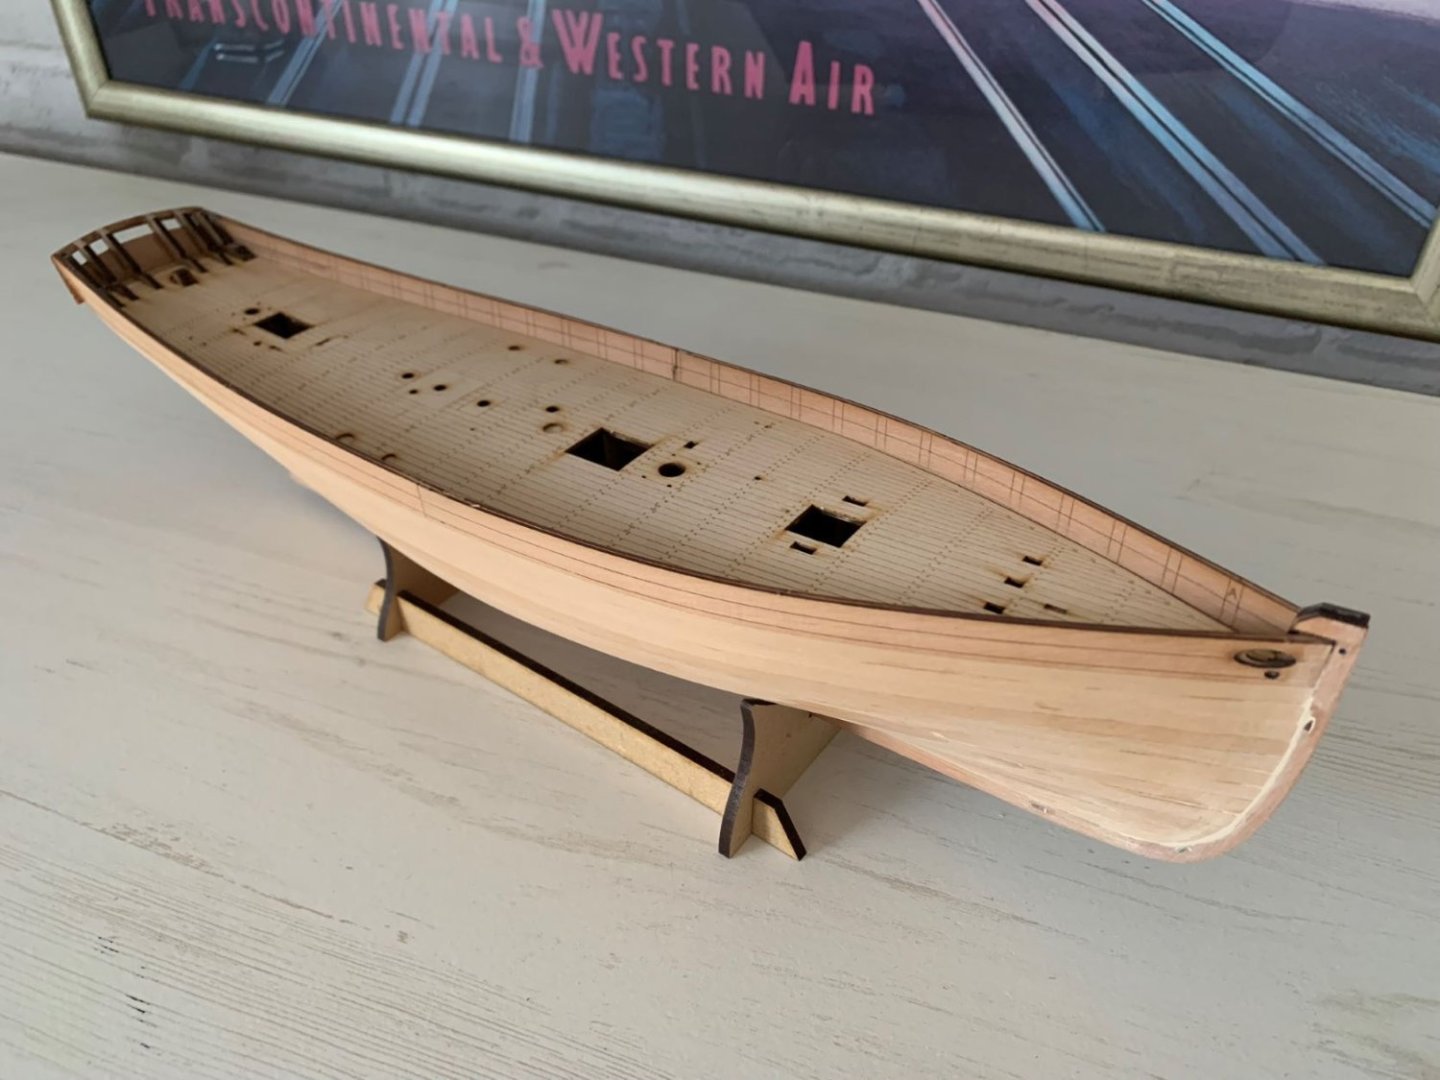 An importang milestone has been reached and I'm quite statisfied.
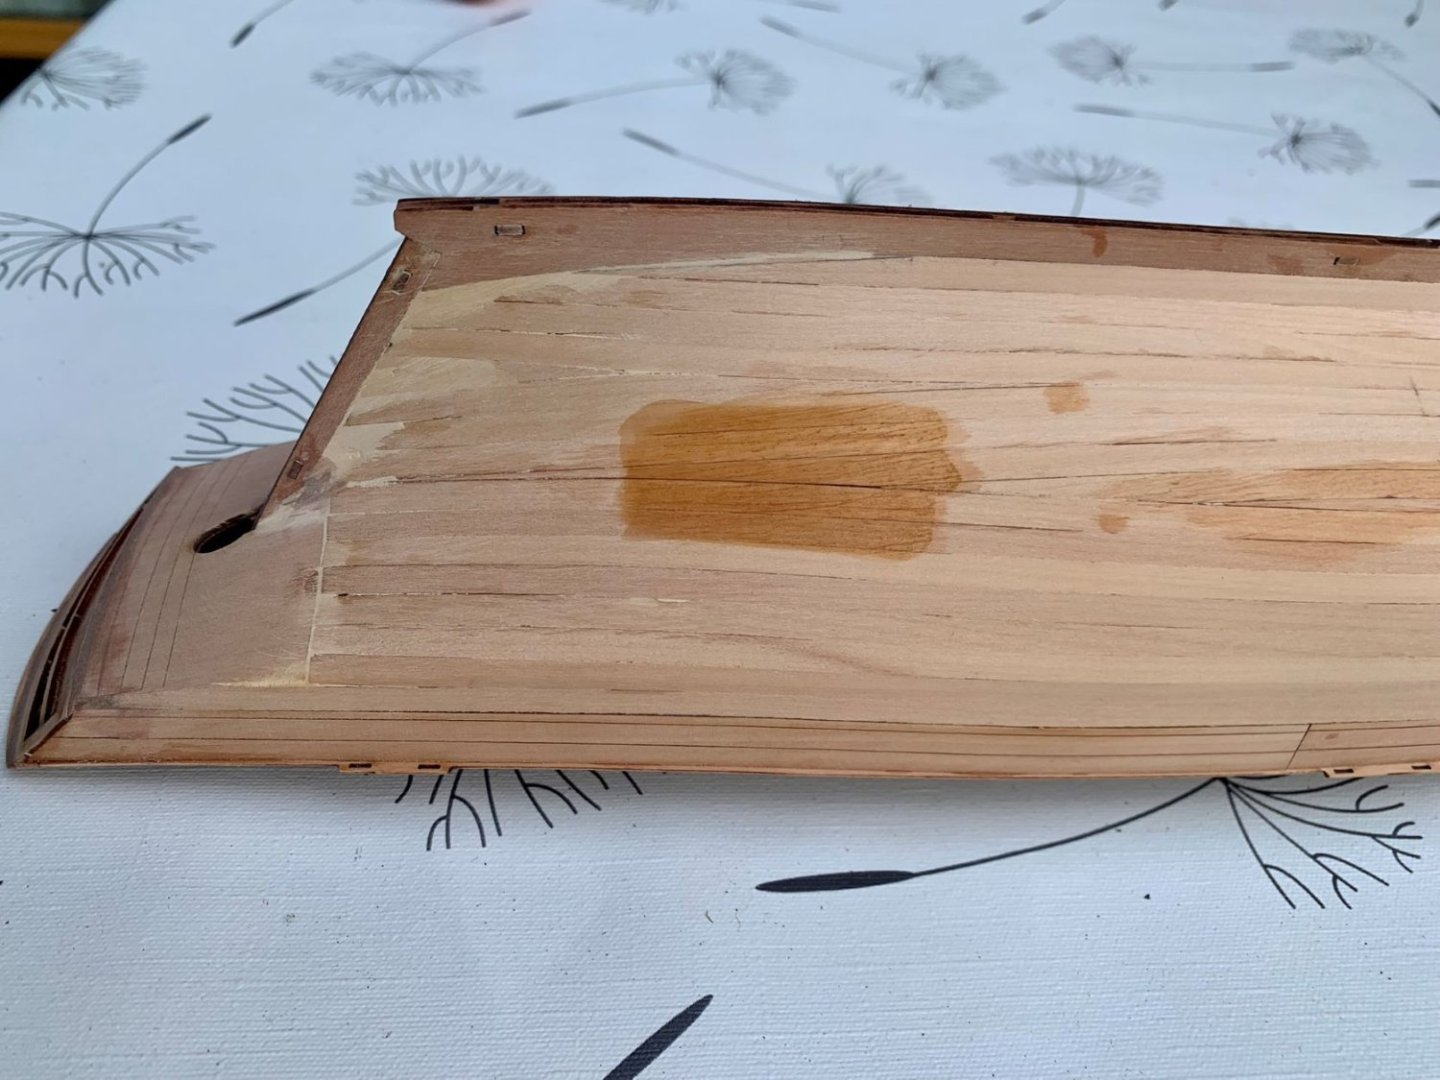 I still had a can of Pine wood stain which seemed to provide a nice golden brown colour, which was what I was looking for here.
 Looking good so far, all it needs now is a lacquer finish. I have never been good at brush painting, so this was done with an airbrush.
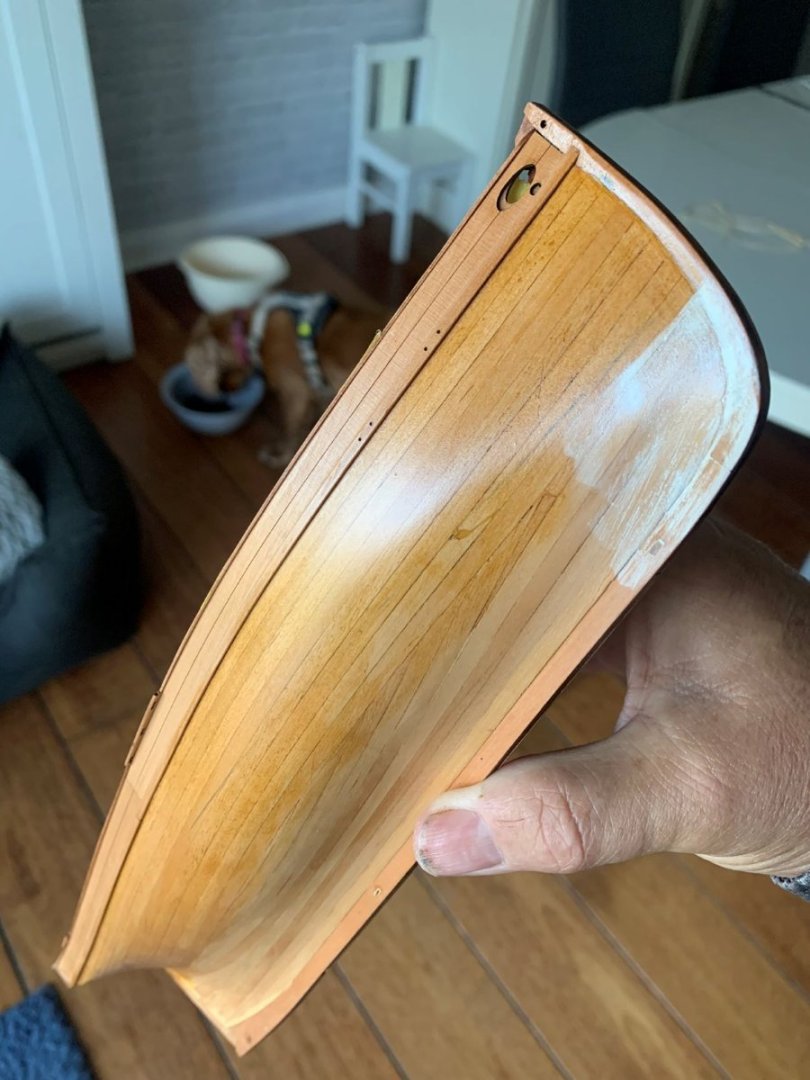
The white up front is a left over from a failed attempt at brush painting. Apart from that the sheen is pretty much what I was hoping for (image above).
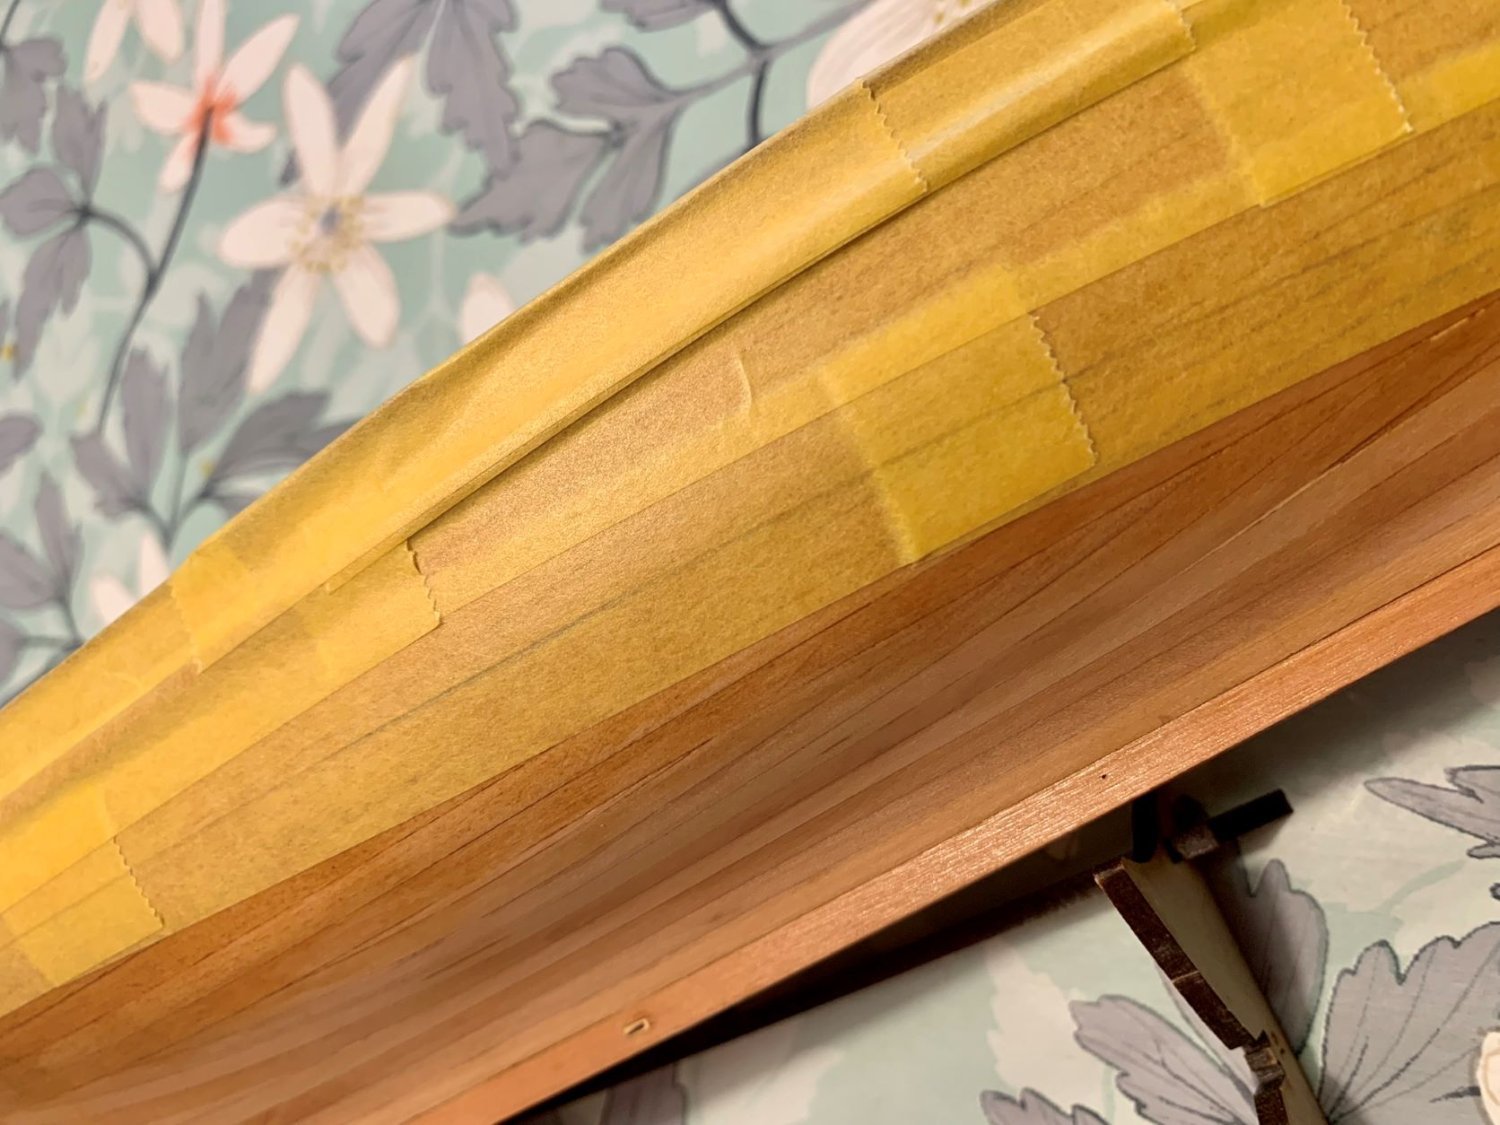
 The areas not to be painted white were masked off with Tamiya tape and the water line drawn on with a soft pencil.
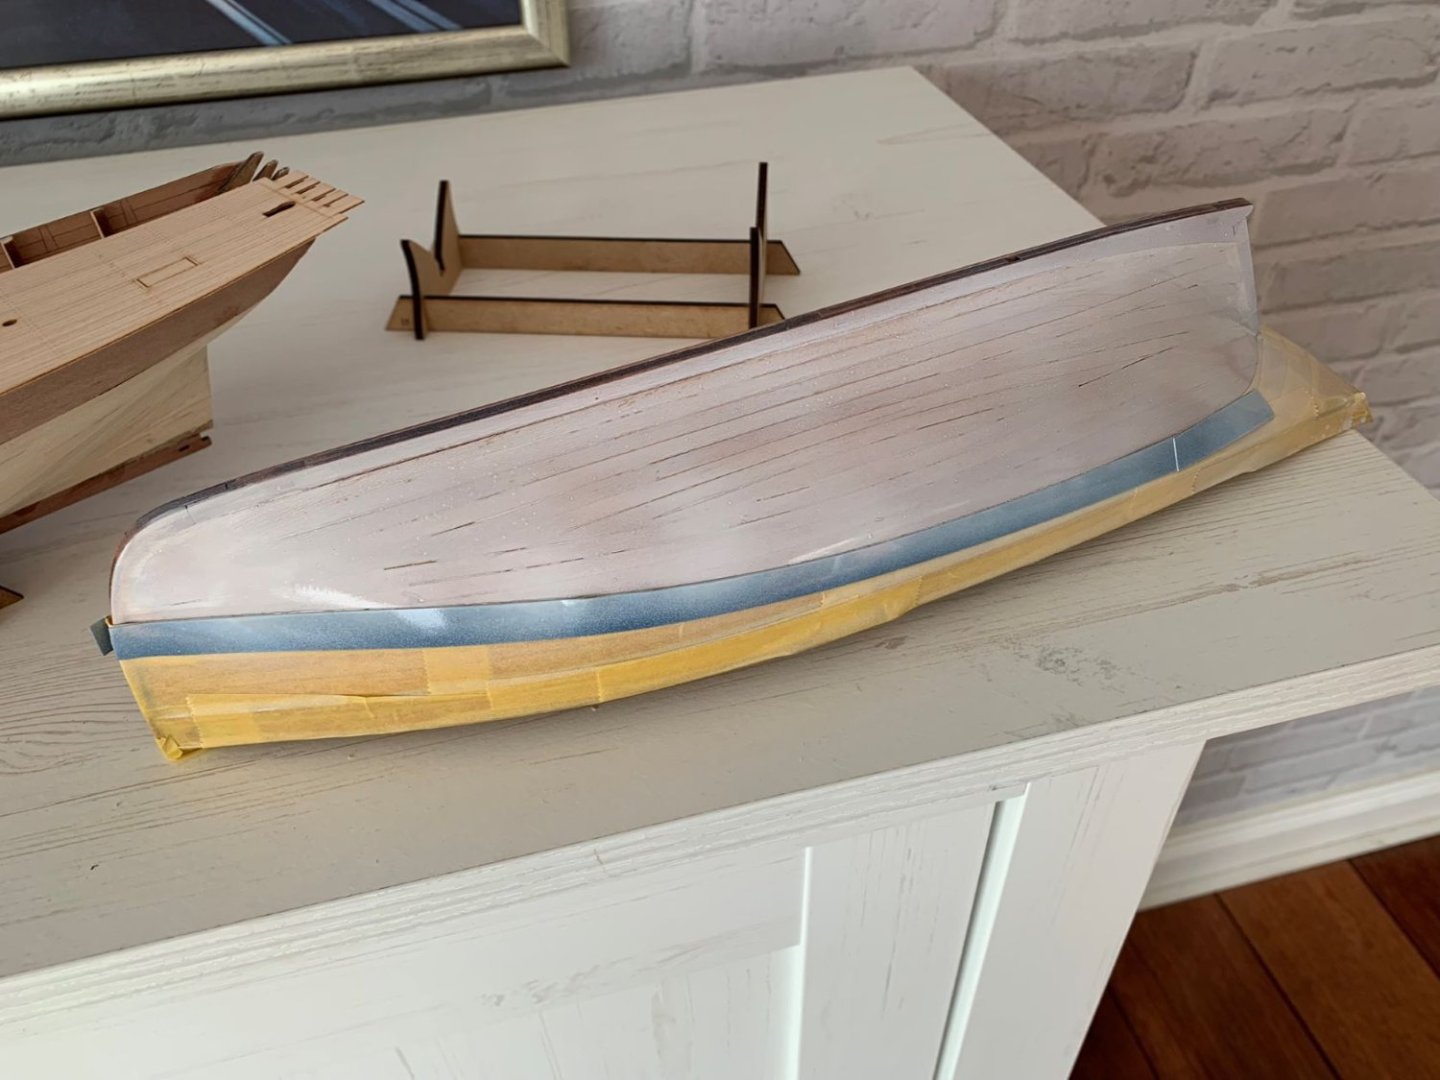 Dymo tape was used as a guide for cutting away the Tamiya tape along the water line. As you can see here a bit more work is required here, before the final layer of paint is applied. I ended up filling in all the cracks with white filler and then painted the white in Mr. Surfacer 1000 primer out of a rattle can. Perfect!
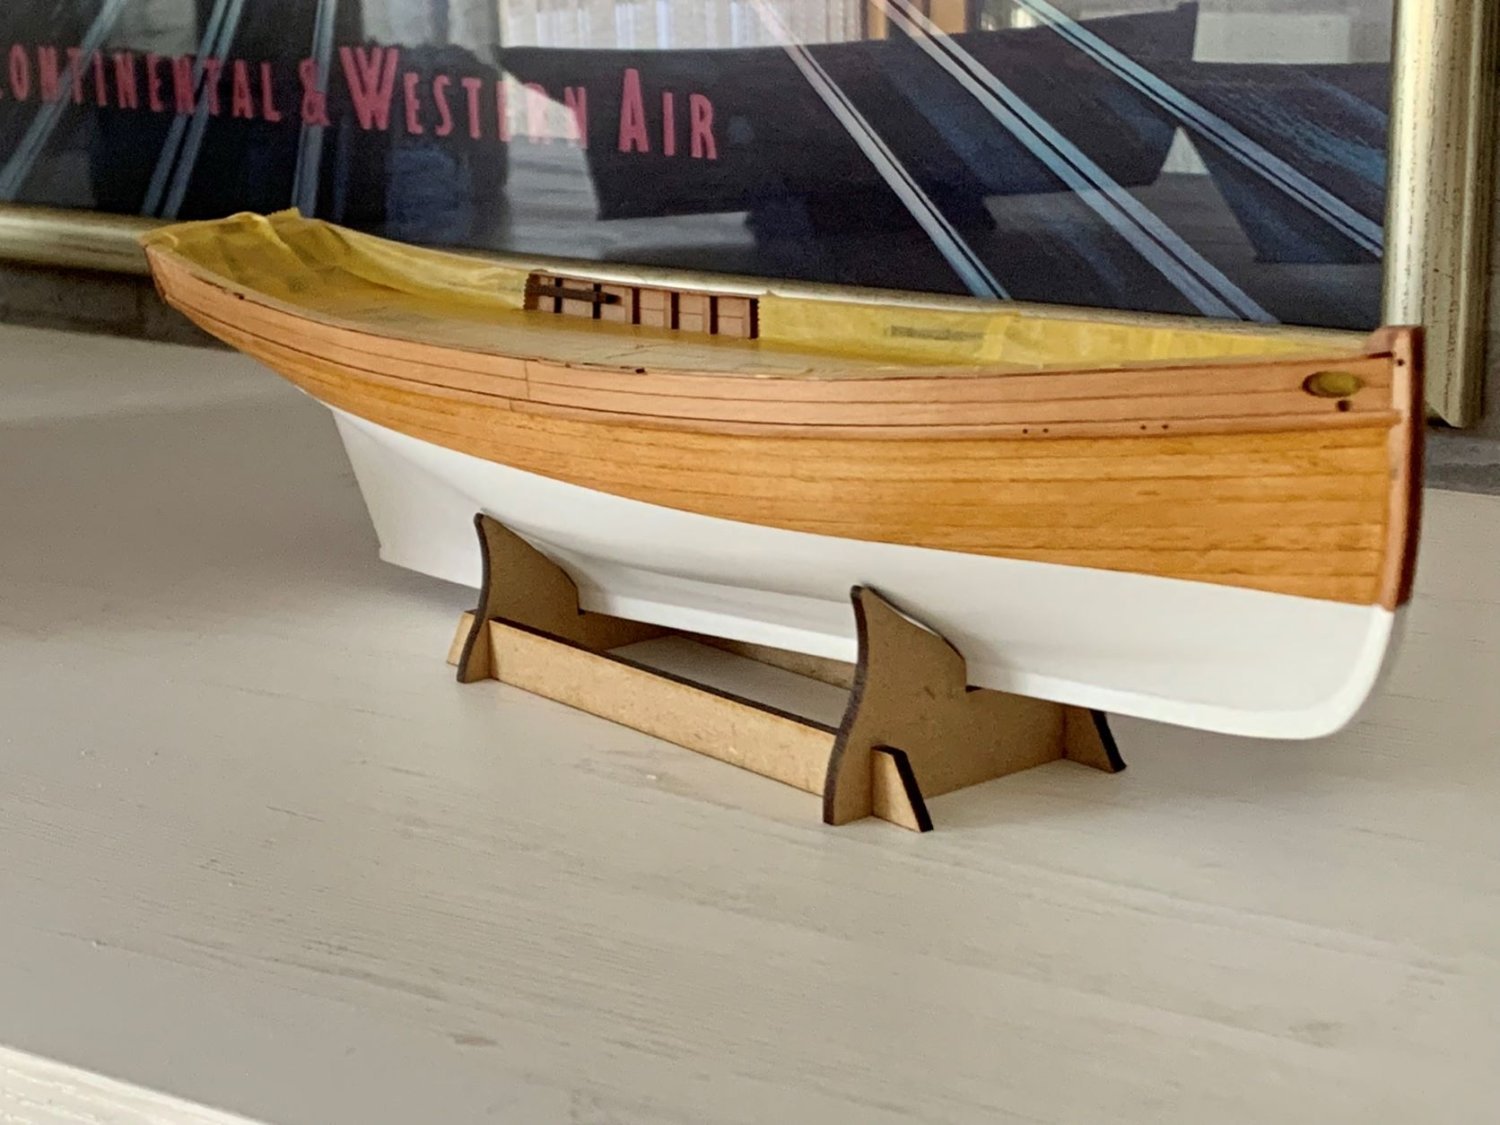
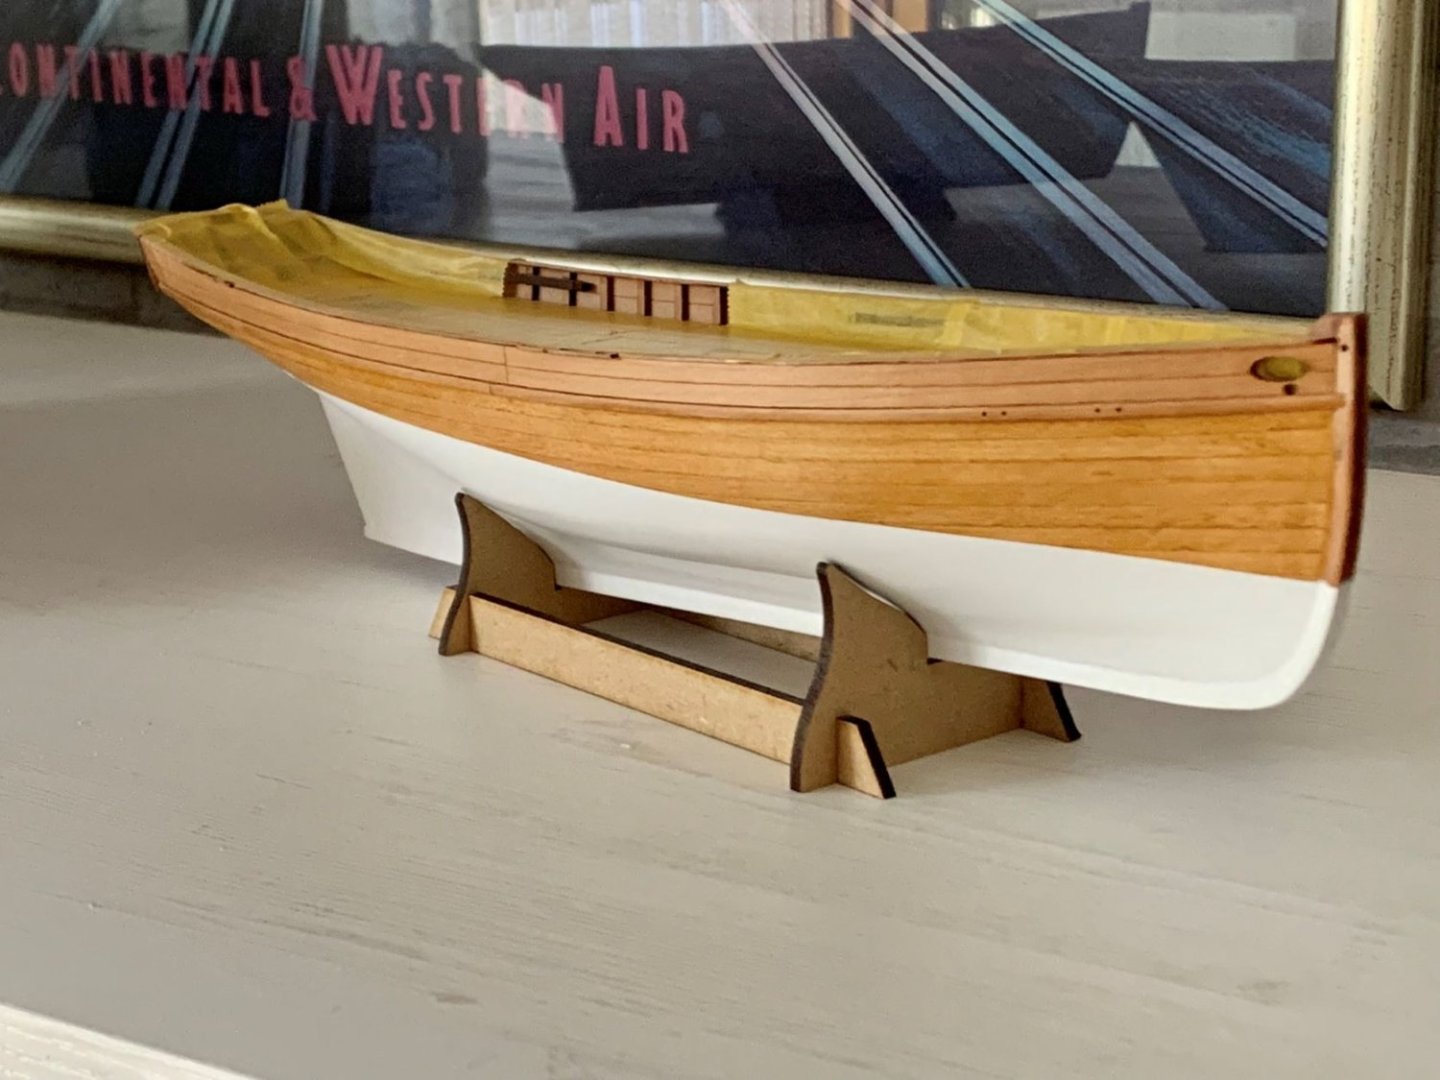 Voila! The deck was left masked off as I wanted to paint the upper part of the bulwark in another colour. I liked the idea of dark blue, more of that later...
(hmmm, there is no preview function here, so it's win or loose. If I did everything right, the images shouldn't be scattered all over the place - we shall see (as Arthur Harris said)
- jpalmer1970, DB789, JpR62 and 3 others
-
6
-
Forget Brexit, custom dues and taxes. I live in the EU and I‘m getting one of these even if it kills me.
As John Adams of Aeroclub fame once told me: if a modeller wants it, he‘ll find a way to get it. 😆
- bruce d, chris watton, Glenn-UK and 7 others
-
10


HMS Diana 1794 by CTDavies - Caldercraft - 1:64th Scale - as built
in - Kit build logs for subjects built from 1751 - 1800
Posted
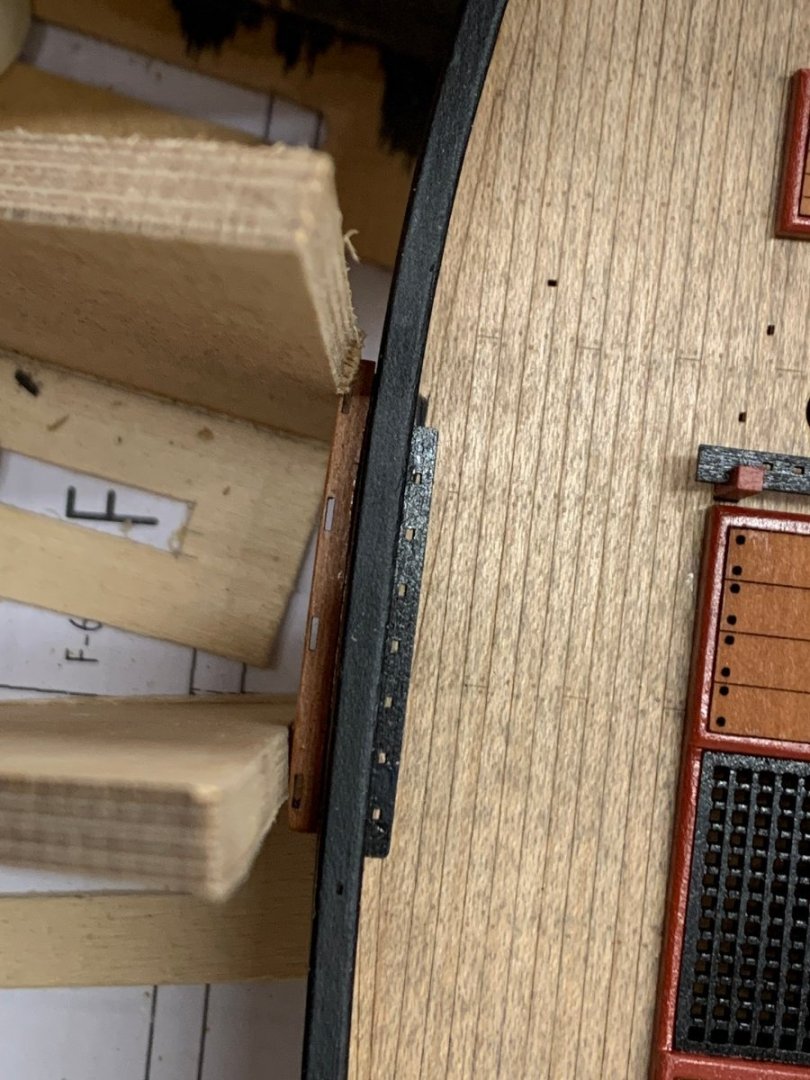
Here you can see a very slight dent along to planking...
... this was pried carefully away from the former with a sharp chisel and a hammer (you can see the gap)...
... which was filled with a superglued balsa shim...
... run of the planks saved.