


oakheart
-
Posts
515 -
Joined
-
Last visited
Content Type
Profiles
Forums
Gallery
Events
Everything posted by oakheart
-
 Fun ! I think I may need that Aspirin now.......... Just spent a good ten mins looking for a way to search for a specific name? Any clues? I was looking for more detail on the cutter Rattlesnake ( I already have the profile and lines that Craig sent me the link too ) Tim
 -
Hi Bruce Thanks for the link, the drawings will be useful for the detail. What an amazing resource, how on earth do you find specific ships? Tim
-
Hi Bruce Thanks for thinking of me. Where can I get hold of the Danish hi res version of the plans? Anything that will help my build is good. Tim
-
Oh Craig, I should have guessed as usual you are one step ahead of me.......... I will crack on and see if I can keep pace. Question. Are those bulkheads directly from the booklet plans? Tim
-
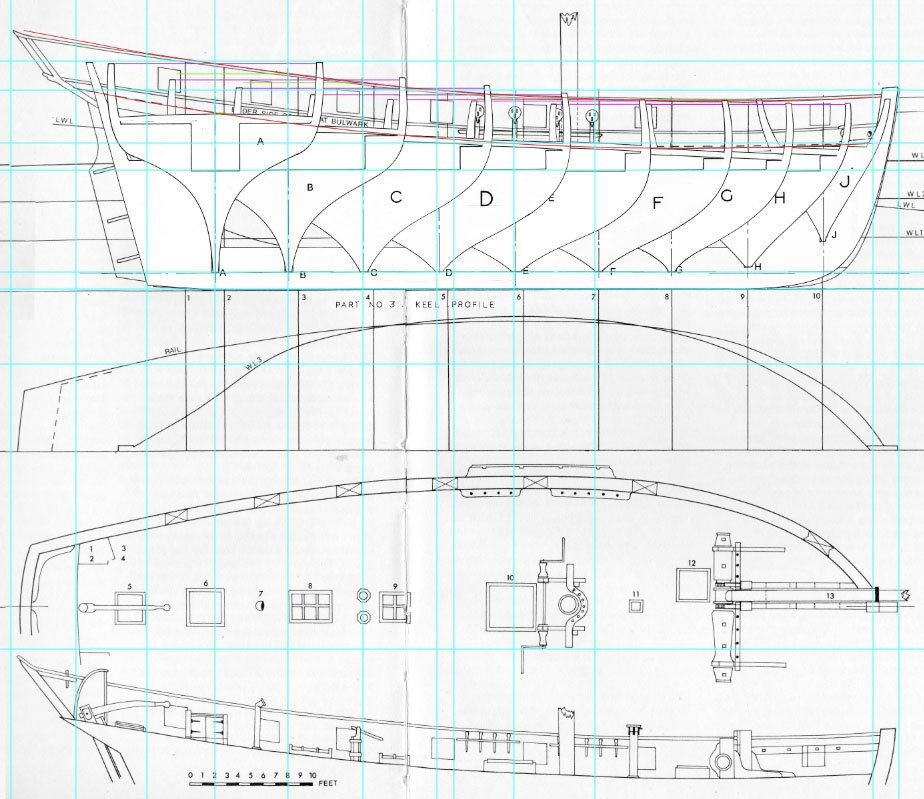
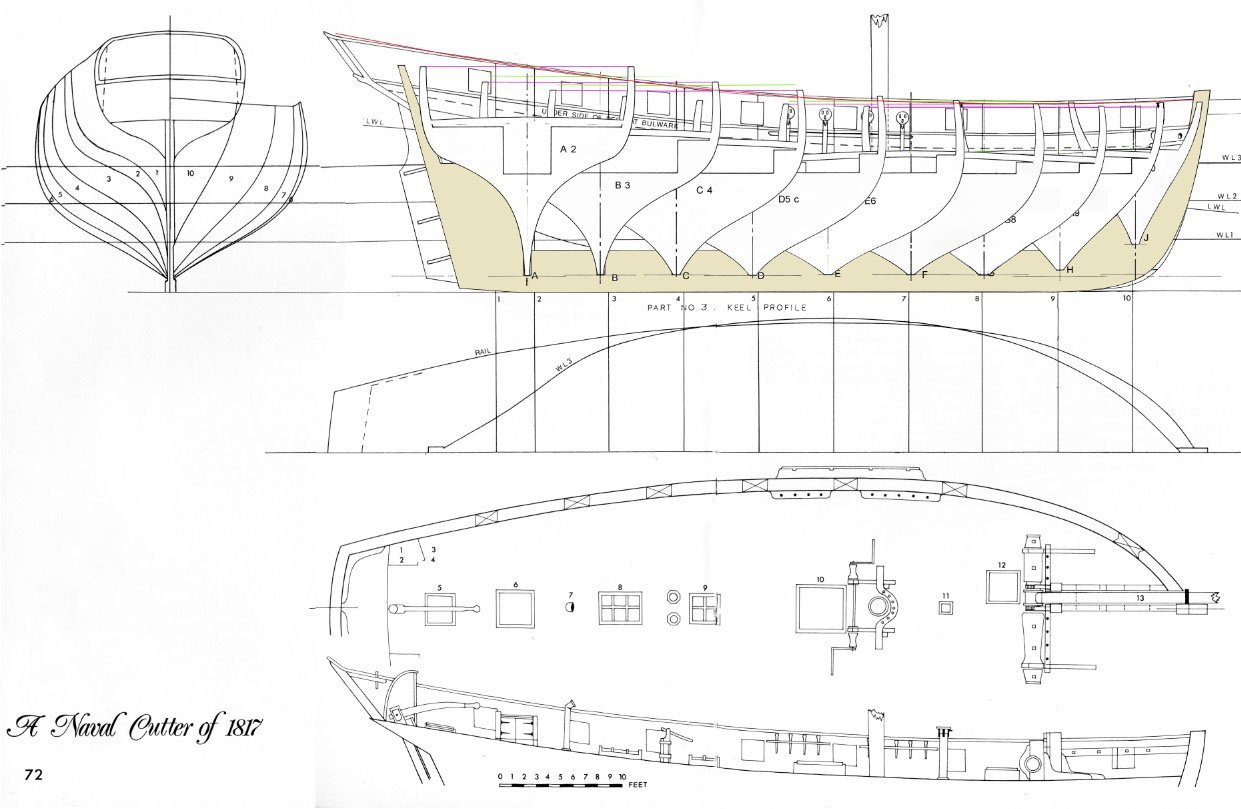
Just heading off to the workshop. Here are a couple of the drawings I have been working with, lets see what we get This shows the original bulkheads directly off the booklet plans Tim Here are my corrected bulkheads overlaid on Bill Shoulders original 1972 drawing. I also cleaned up the scan of Bills drawing. Now ( after I have cut the lawn ) to make some sawdust. Tim
-
Hi Jaager Thanks for all of that information, it will be / is really helpful. As I said before, I am really impressed with your research skills. Although the actual ship may be ambiguous, I think this could make a nice little cutter model. I have to warn you that this is going to be a simple PoB build so don't fall back to sleep 🙂 Tim
-
Thank you Craig, Jaager and Bruce. While I was asleep dreaming peacefully about the sweet little cutter I was going to start building today, you lot have been living a nightmare..... I am deeply impressed with all of your research skills, I will need all of that kind of information when I get back to my other cutter "Rattlesnake" the plans for which are still being developed. Craig is right, I the plans that I have 'corrected and scaled' are adequate to build a cutter, it will really be a generic cutter of the period. For this build I would really like to develop my planking skills and end up with a nice looking hull in wood, it will not be rigged. A note on what I meant by scaled and corrected. I imported the RMG drawing and made sure it was at 1:48 scale. Then I imported the other plans into that master drawing and scaled then to 'match' the RMG draught. The bulkheads are really badly distorted and needed a lot of work to get right. The 'lower deck' part that locks the bulkheads together was also not symmetrical. So today I will cut out some parts and see how they fit together. It should only take a couple of hours, so let's meet back here for tea. ( or grog ) Tim
-
I now have a complete set of drawings scaled and corrected. As Thunder commented in his Speedy build the bulkheads needed quite a bit of adjusting to get correct. So tomorrow I will print out the keel and bulkheads, paste them to some plywood and make some sawdust. Tim
-
Hi Craig This really is a small world, I had completely forgotten about your Lapwing, heading over there right now.... Tim
-
After being a bit sidetracked by the Corel Unicorn hull I found at a local flea market, I was still looking for a new project. I spend Tuesdays mornings at my model club, HSME ( Hereford Society of Model Engineers ) After searching in the clubs library (the clubhouse loft) I discover we have a large collection of Model Shipwright magazines and the quarterly books dating back to 1972. After much rummaging, I find some plans and articles by Bill Shoulders for the cutter "Speedy 1828". I was very impressed by Thunders build log on the old kit he found that happens to be based on these articles. So HMS Speedy 1828, looks like it will be my new project, small, simple and should make a nice model. So its over to RMG to get the original draughts that Bill used to develop his plans. Lets hope there is a high resolution version on Wiki as well Then I need to scan and scale the drawings, I think I will stick to 1:48 for this build, my Bounty's launch was very fiddly to learn on. Tim
-
Hi EvenKeel, welcome to this crazy place. Don't follow anything I did on my build, I had ( have ) no idea what I am doing except following my nose. Good luck with the build, I love your other work ,I'm sure this will be as good too. Tim
-
Thanks Mark, MSW is a wonderful and inspiring place to be a part of, I'm glad I found it. Tim
-
You missed me 🙂 Glad the outcomes over there were good. Off to take a look right now. That's life anywhere it seems. Let's all remember to enjoy this day we have. Tim
-
Thanks for your comment, it helps. Talking of research, its something I really enjoy doing, just putting it into practice on the model is what I have realised I don't want or need to do to achieve what I want out this hobby. Tim
-
Chris thanks for your thoughts, I am determined to make those future projects enjoyable. Tim
-
You may not have noticed, but there’s not been much in the way of progress here. They say things come in threes, well that's been true for me. It’s been a bad time for me lately, on a weekend some weeks ago now. Saturday : Robin a good friend of mine died after fighting cancer for a very long time. Sunday : Liz . My big sister died, suddenly from a medical condition nobody knew she had. A week later : I had a medical scare, loads of tests with prodding and every type of scanning known to mankind. Thankfully the lump turned out to be benign. Whew! After spending time in France helping Robins widow sort out his unfinished projects, he had 4 classic cars in pieces, some of the parts labelled and stored in boxes some randomly placed on shelves, I'm sure he knew what and where everything was. I got to thinking about my own projects and what I want to achieve. What is it I want? I want to produce some nice looking models, made from wood. I don’t really need them to be historically accurate in every detail. They should be: well made, well finished and if possible look at least similar to the original. So in response to my thoughts. I am declaring this model of the Bounty Launch FINISHED. It has served its purpose; I have learned the basics of making a wooden model ship. That includes planking, realising that small scale is harder, understanding that I should work with good quality materials. But the most important thing is that by doing this build log I have learned a lot from you rogues on here. So moving forwards, I will be starting a new Build log, the new project will be an English Cutter from the 18th or 19th Century Hope to see you over there. Sorry about the rant, I know this is not a self help group. Now back to the modelling, well tidy up the workshop and sort all my stuff out. Tim
-
Hi Riotvan The tug I am building, an 85 ft Harbour tug designed by Francis Smith, a quick google search will give you loads of ideas. have a look here https://www.modelboatmayhem.co.uk/forum/index.php/board,126.0.html there are loads of tugs https://www.rcgroups.com/forums/showthread.php?3015172-85-foot-Army-ST-Tugboat and this smaller scale https://www.rcgroups.com/forums/showthread.php?827506-Army-Tug-St-Type I just used some really cheap 4mm ( 1/8" ) plywood for the frames and balsa for planking, as that's what I had 'in stock' filled in dips with ronseal wood filler and I will GRP ( Resin and cloth ) over the whole hull. Tim
-
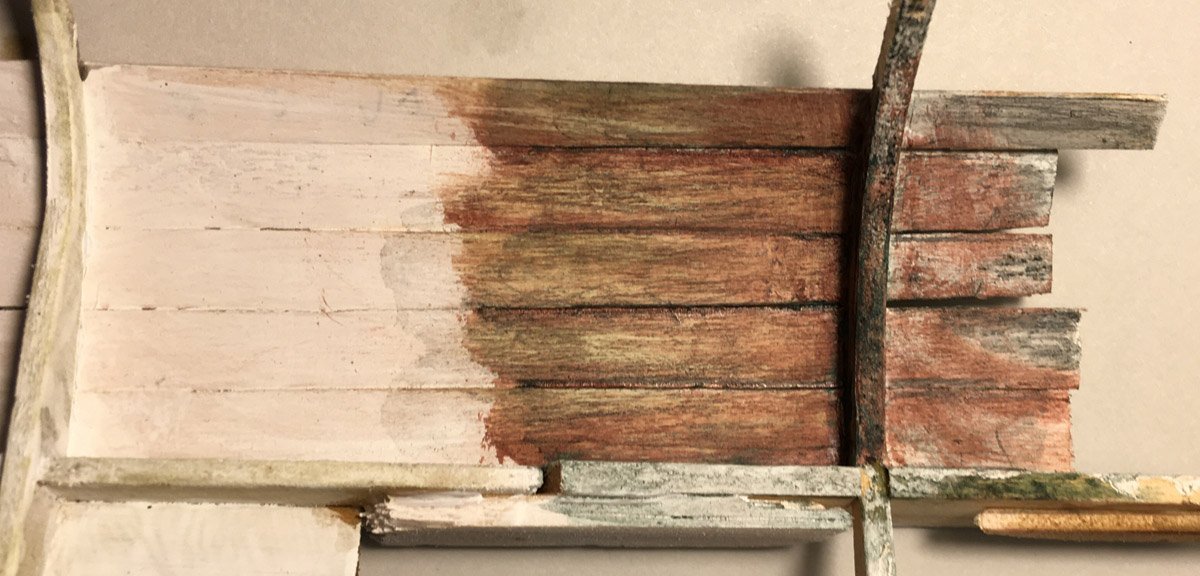
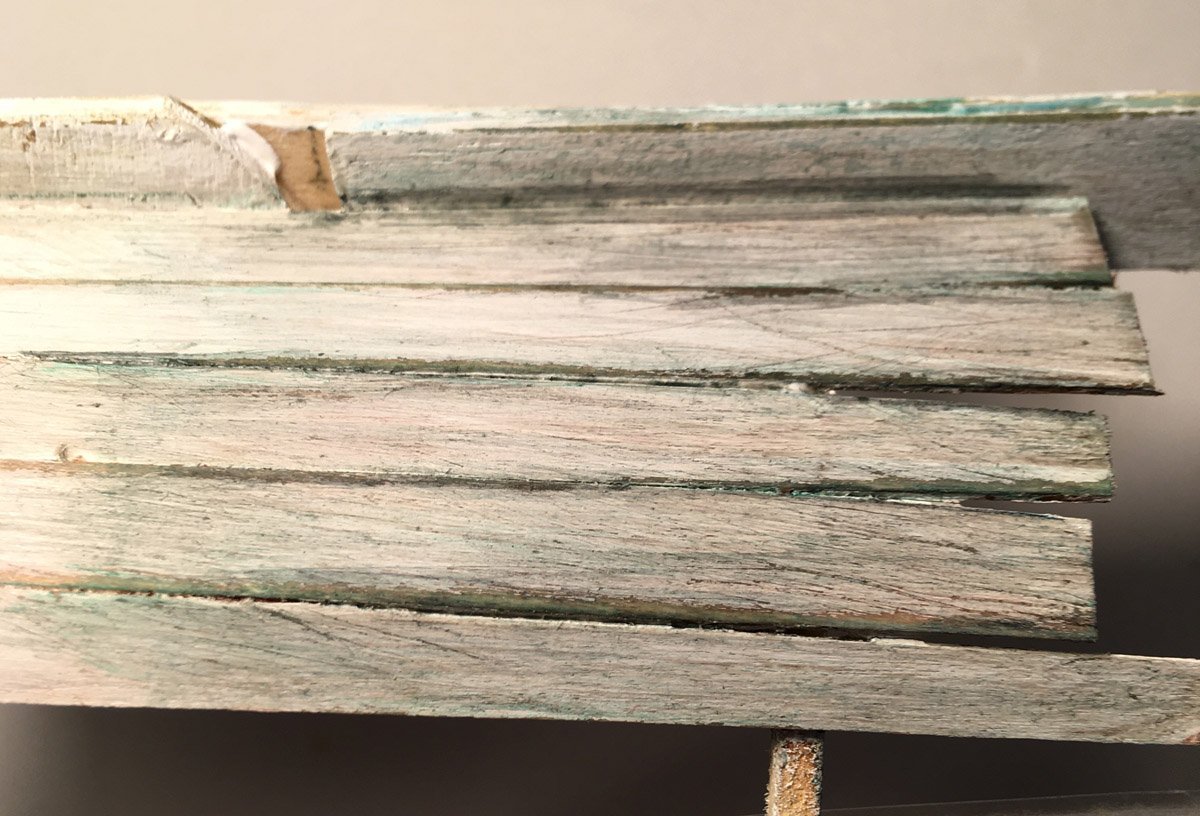
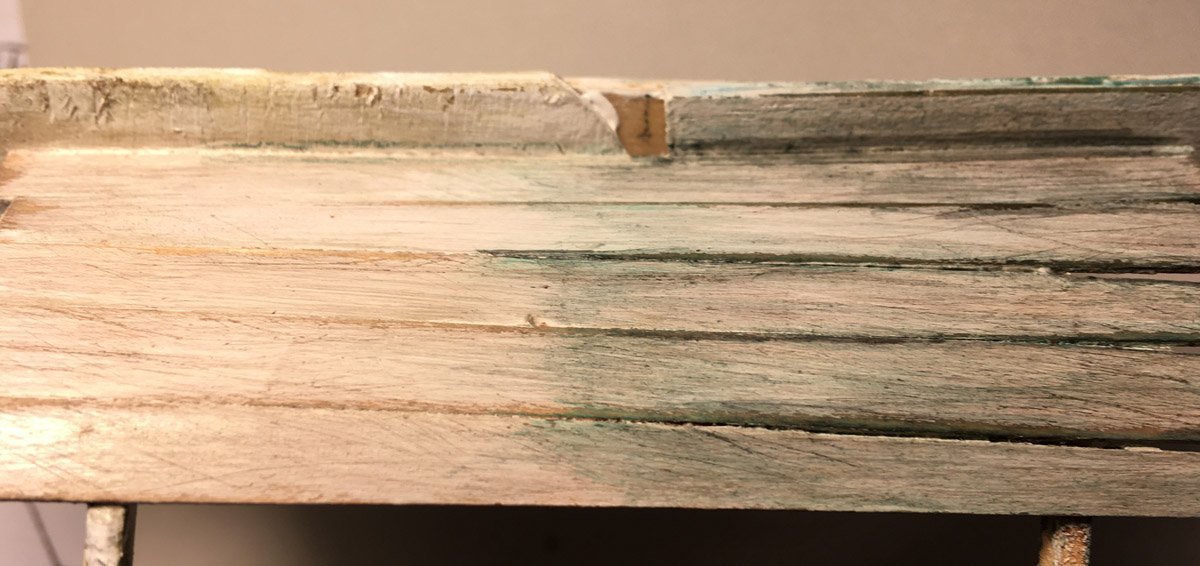
OK. back again after a turbulent couple of weeks. I have been playing with weathering paint FX for the as sailed version. First tests : with the green I was trying to get the kind of slimy look you get on old timber, not sure if this would happen on a boat at sea? a close up and here is a dirty inside The brown is a bit much, but I like the effect. Comments please. Tim
-
Some say it was because it's easier to repair a carvel ship when traveling in far off places with no ship yards. Tim
- 302 replies
-
- 2
-

-
- Diana
- Caldercraft
- (and 1 more)
-
Hi Allan I have used Jenolite "Kold Blak" make sure the steel is really clean, no oil. Tim
-
Hi toolmaker That is some really good planking, something I will aim to achieve. My 2nd build is going to be a cutter the Rattlesnake sister to the Alert so I will study your excellent planking before I attempt to do mine Nicely done, and as Allan said thanks for sharing Tim
-
Glad your back, hope the eyes are good now. That planking looks really good, what is the finish you used? Tim
-
Thanks Christian I hope to do a plank on bulkhead scratch build of a Cutter as used in the South East Kent area of the UK The Rattlesnake was built at Folkestone a town I know well. Any information I can get will help with drawing up my plans. I have chopped up the Danish drawing and imported it into Fusion 360, next I start tracing the station lines for the bulkheads. It's the same as I did for this launch model, just bigger.. Tim
-
Hi Christian You developed some drawings for the Alert http:// https://modelshipworld.com/topic/4993-naval-cutter-alert-by-anobiumpuncatum-scale-132-pof/#comment-144239 Would it be alright if I used these to help me develop my 1:64 scale version of the Rattlesnake? Tim