JacquesCousteau
-
Posts
1,383 -
Joined
-
Last visited
Content Type
Profiles
Forums
Gallery
Events
Everything posted by JacquesCousteau
-
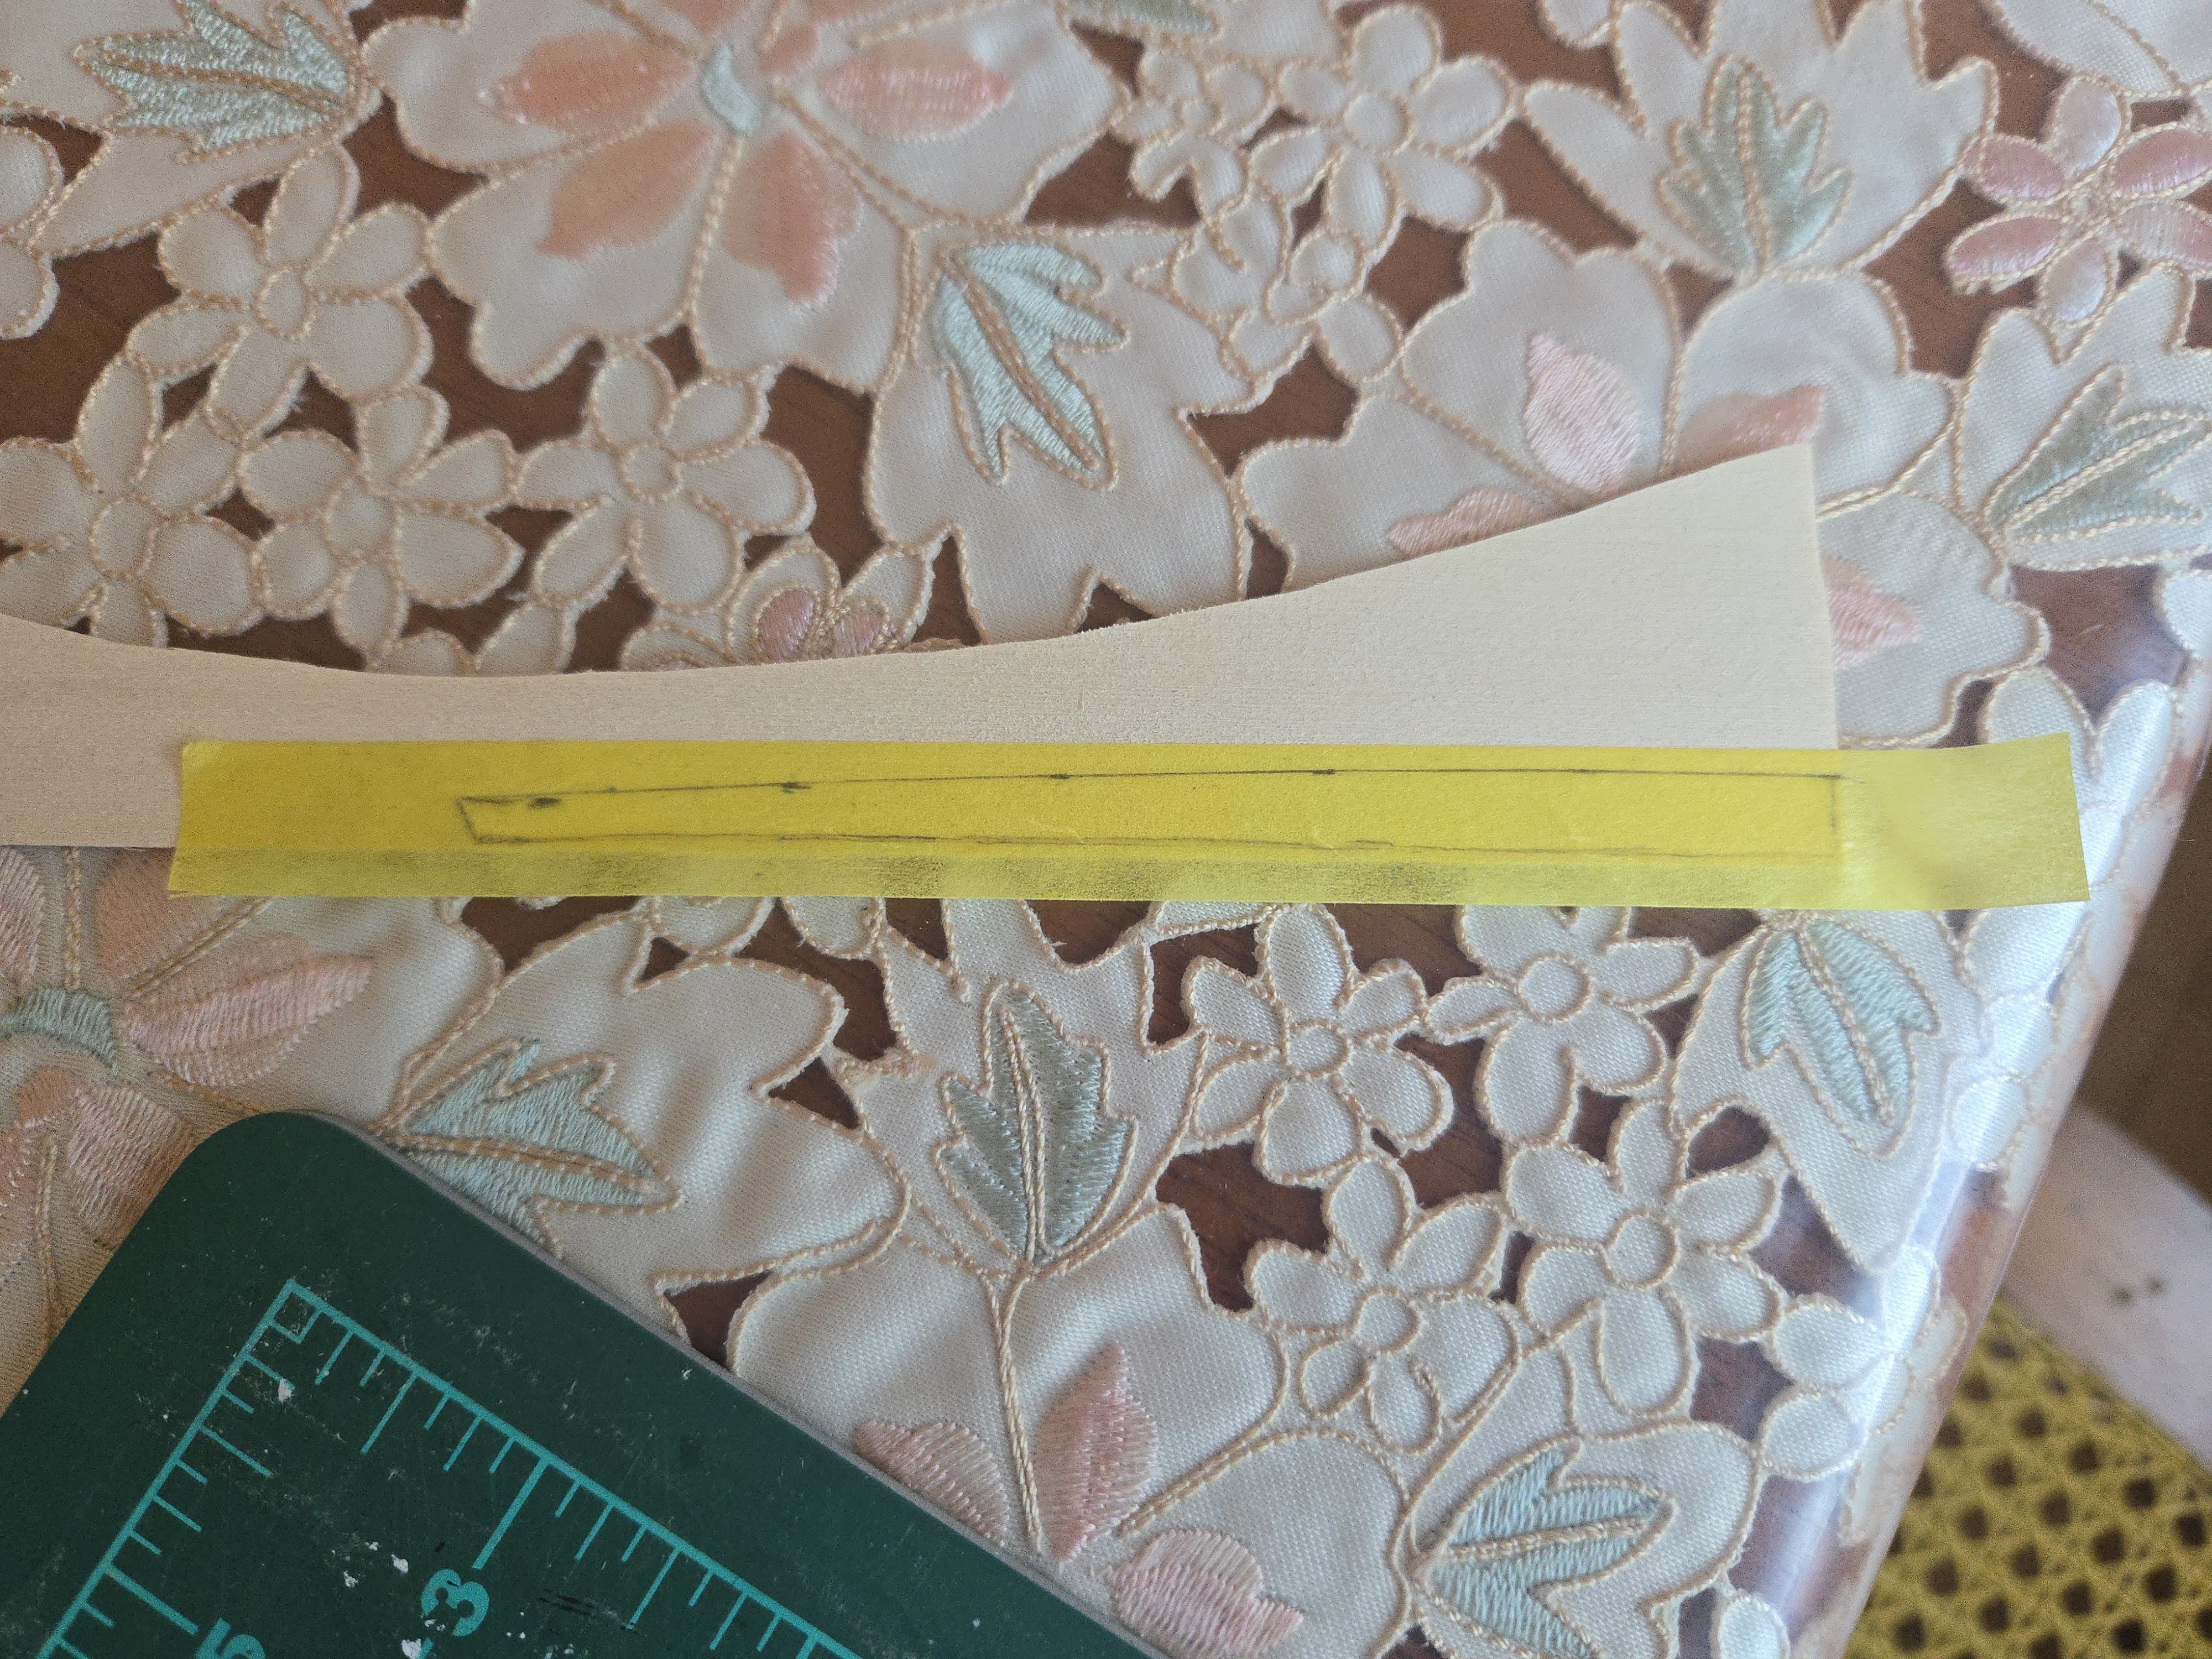
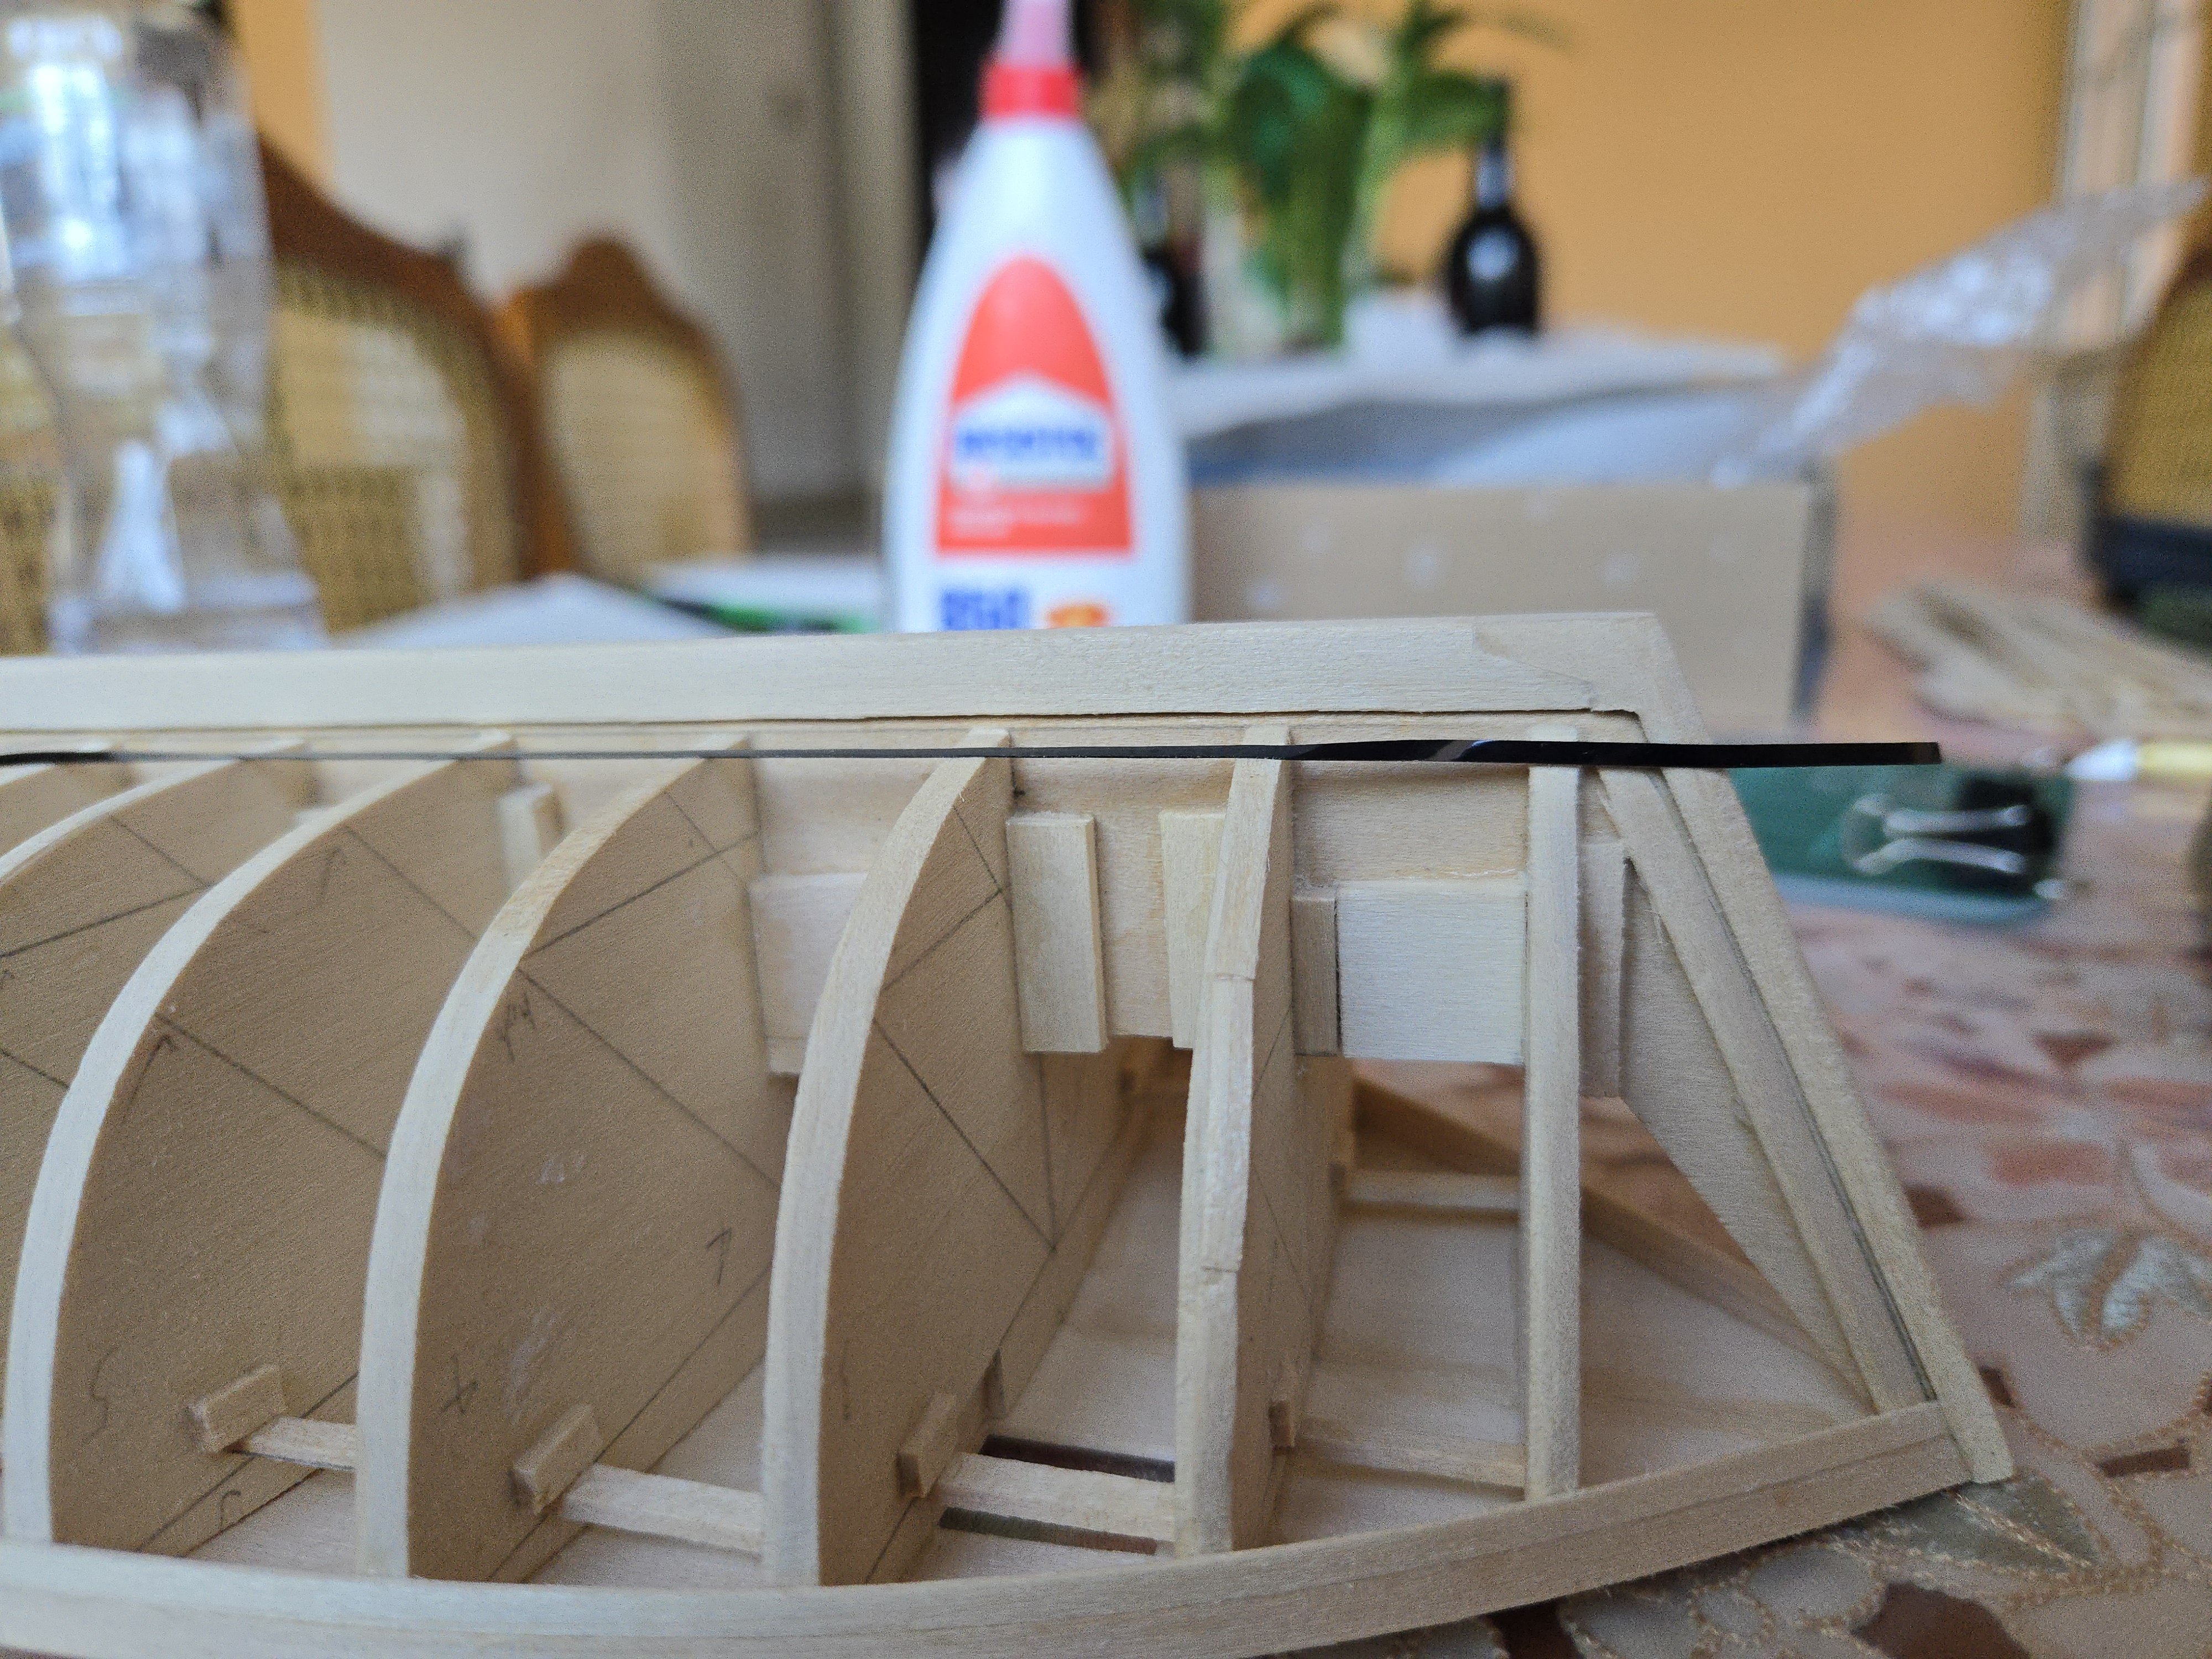
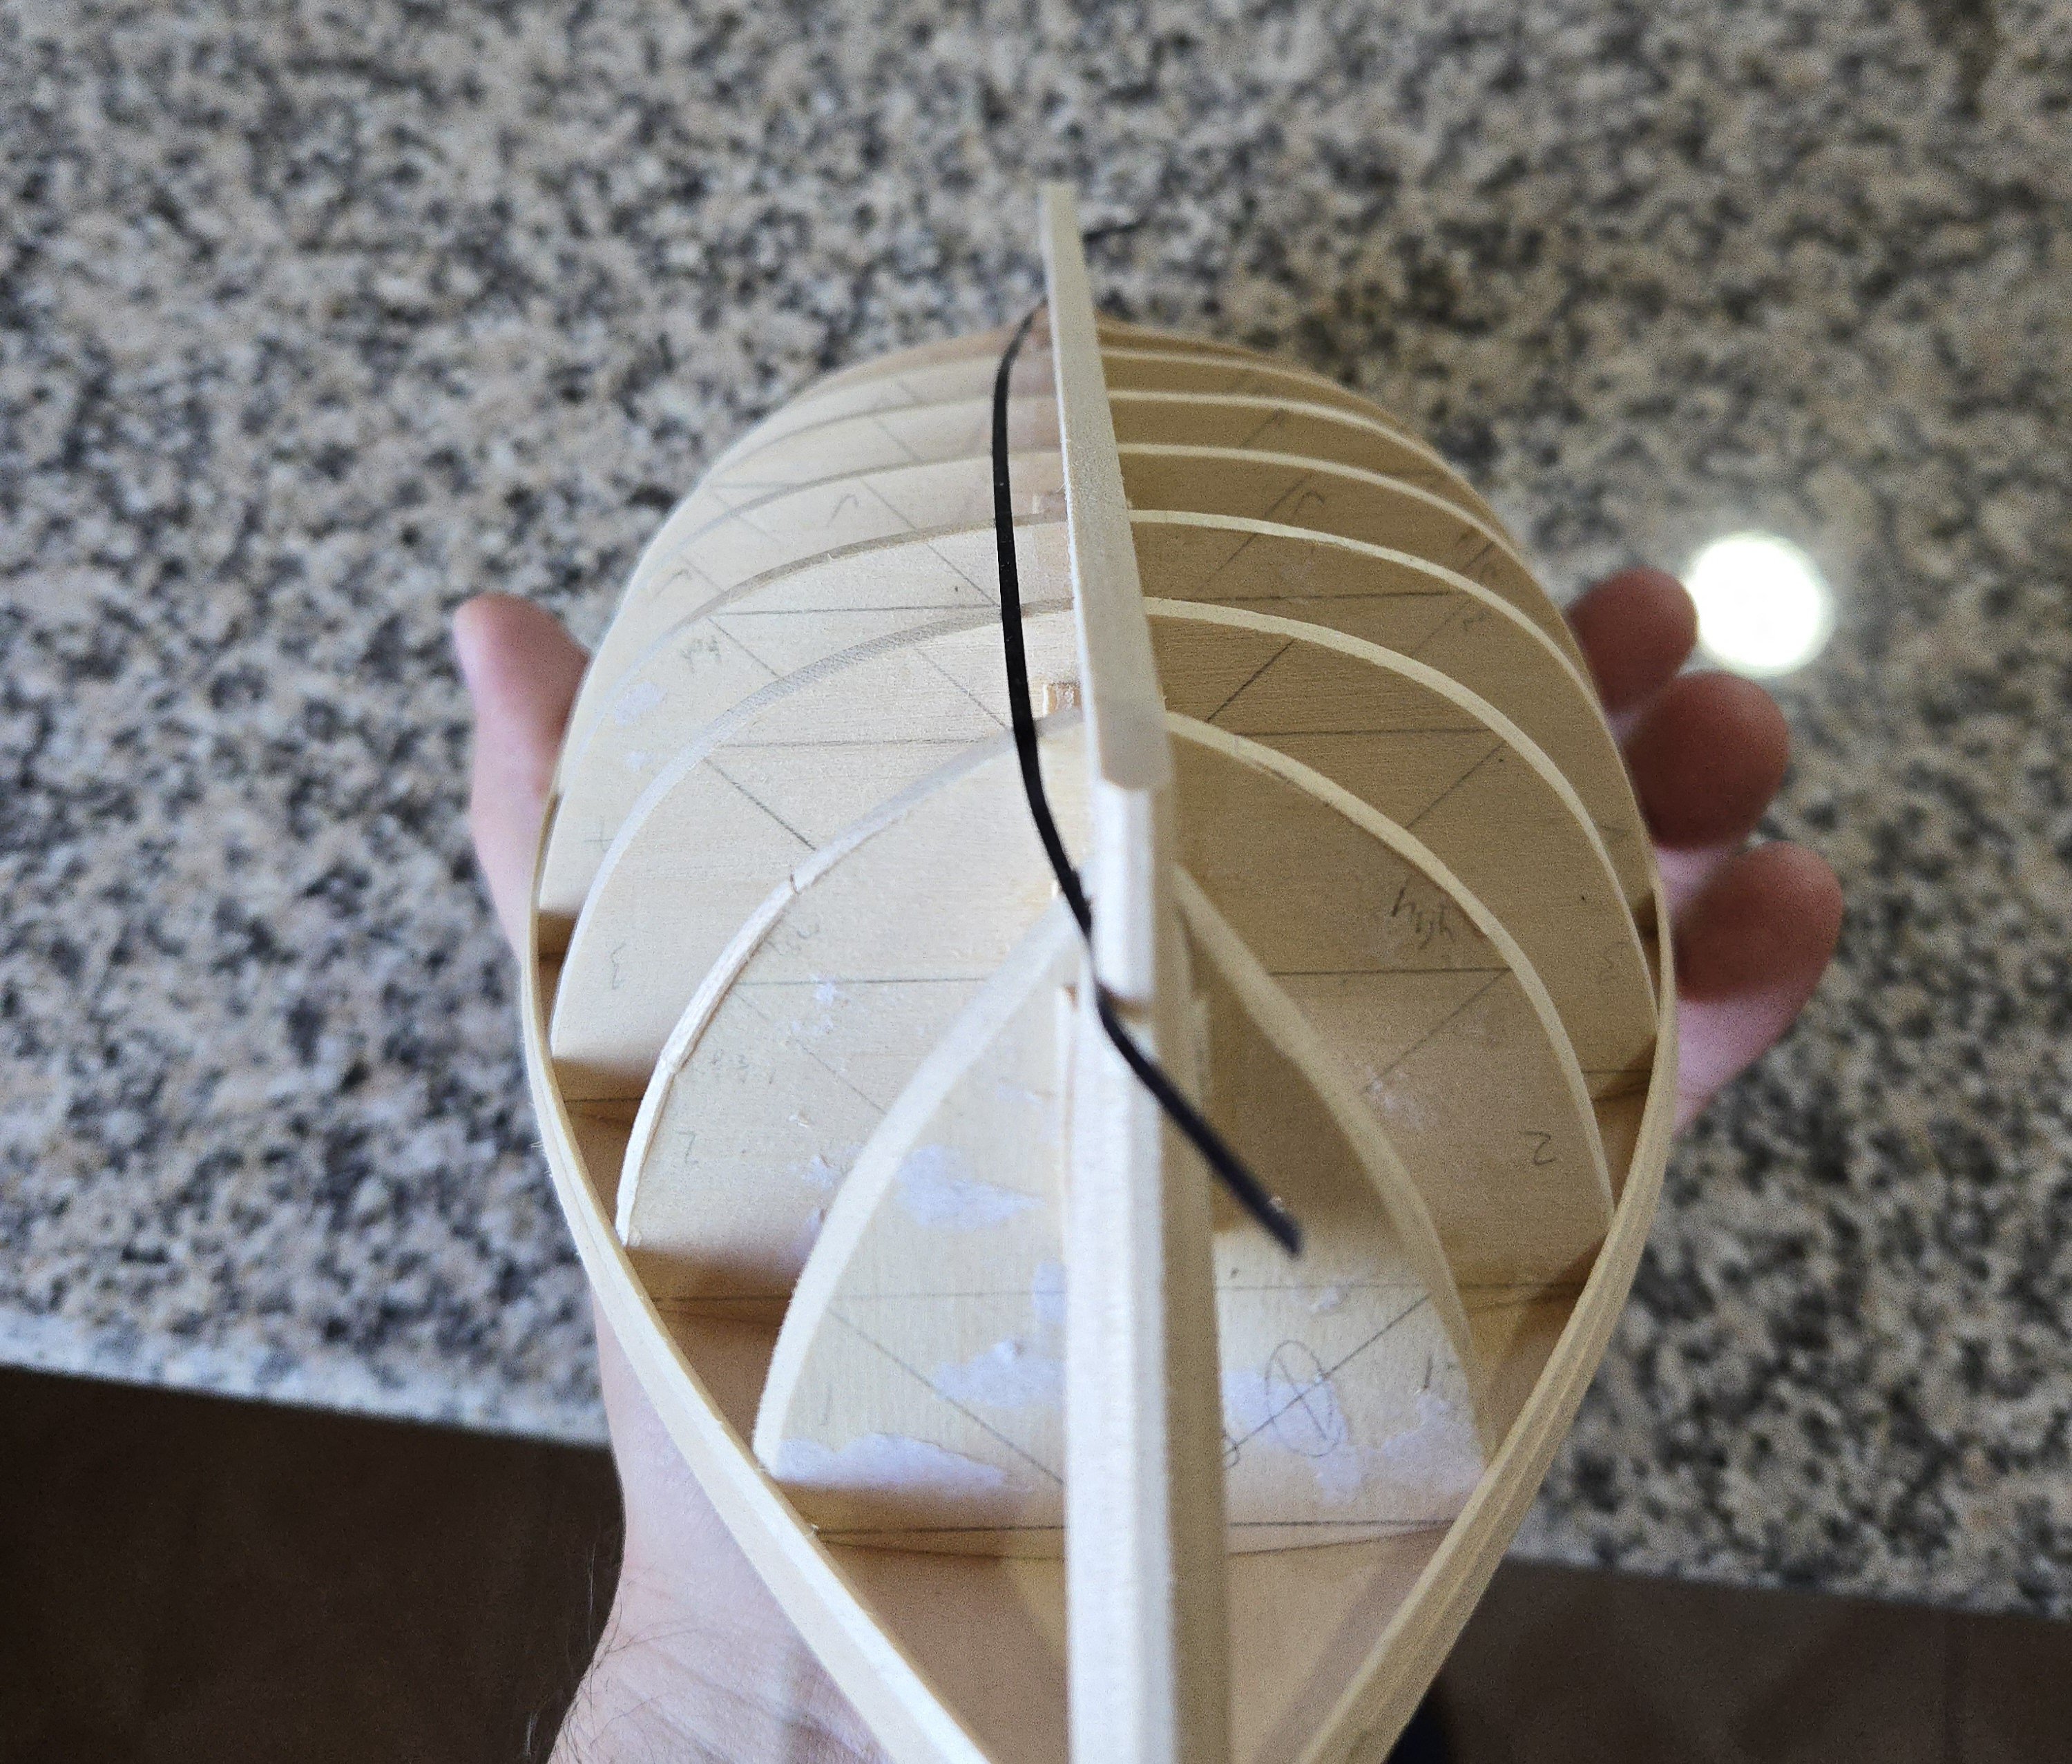
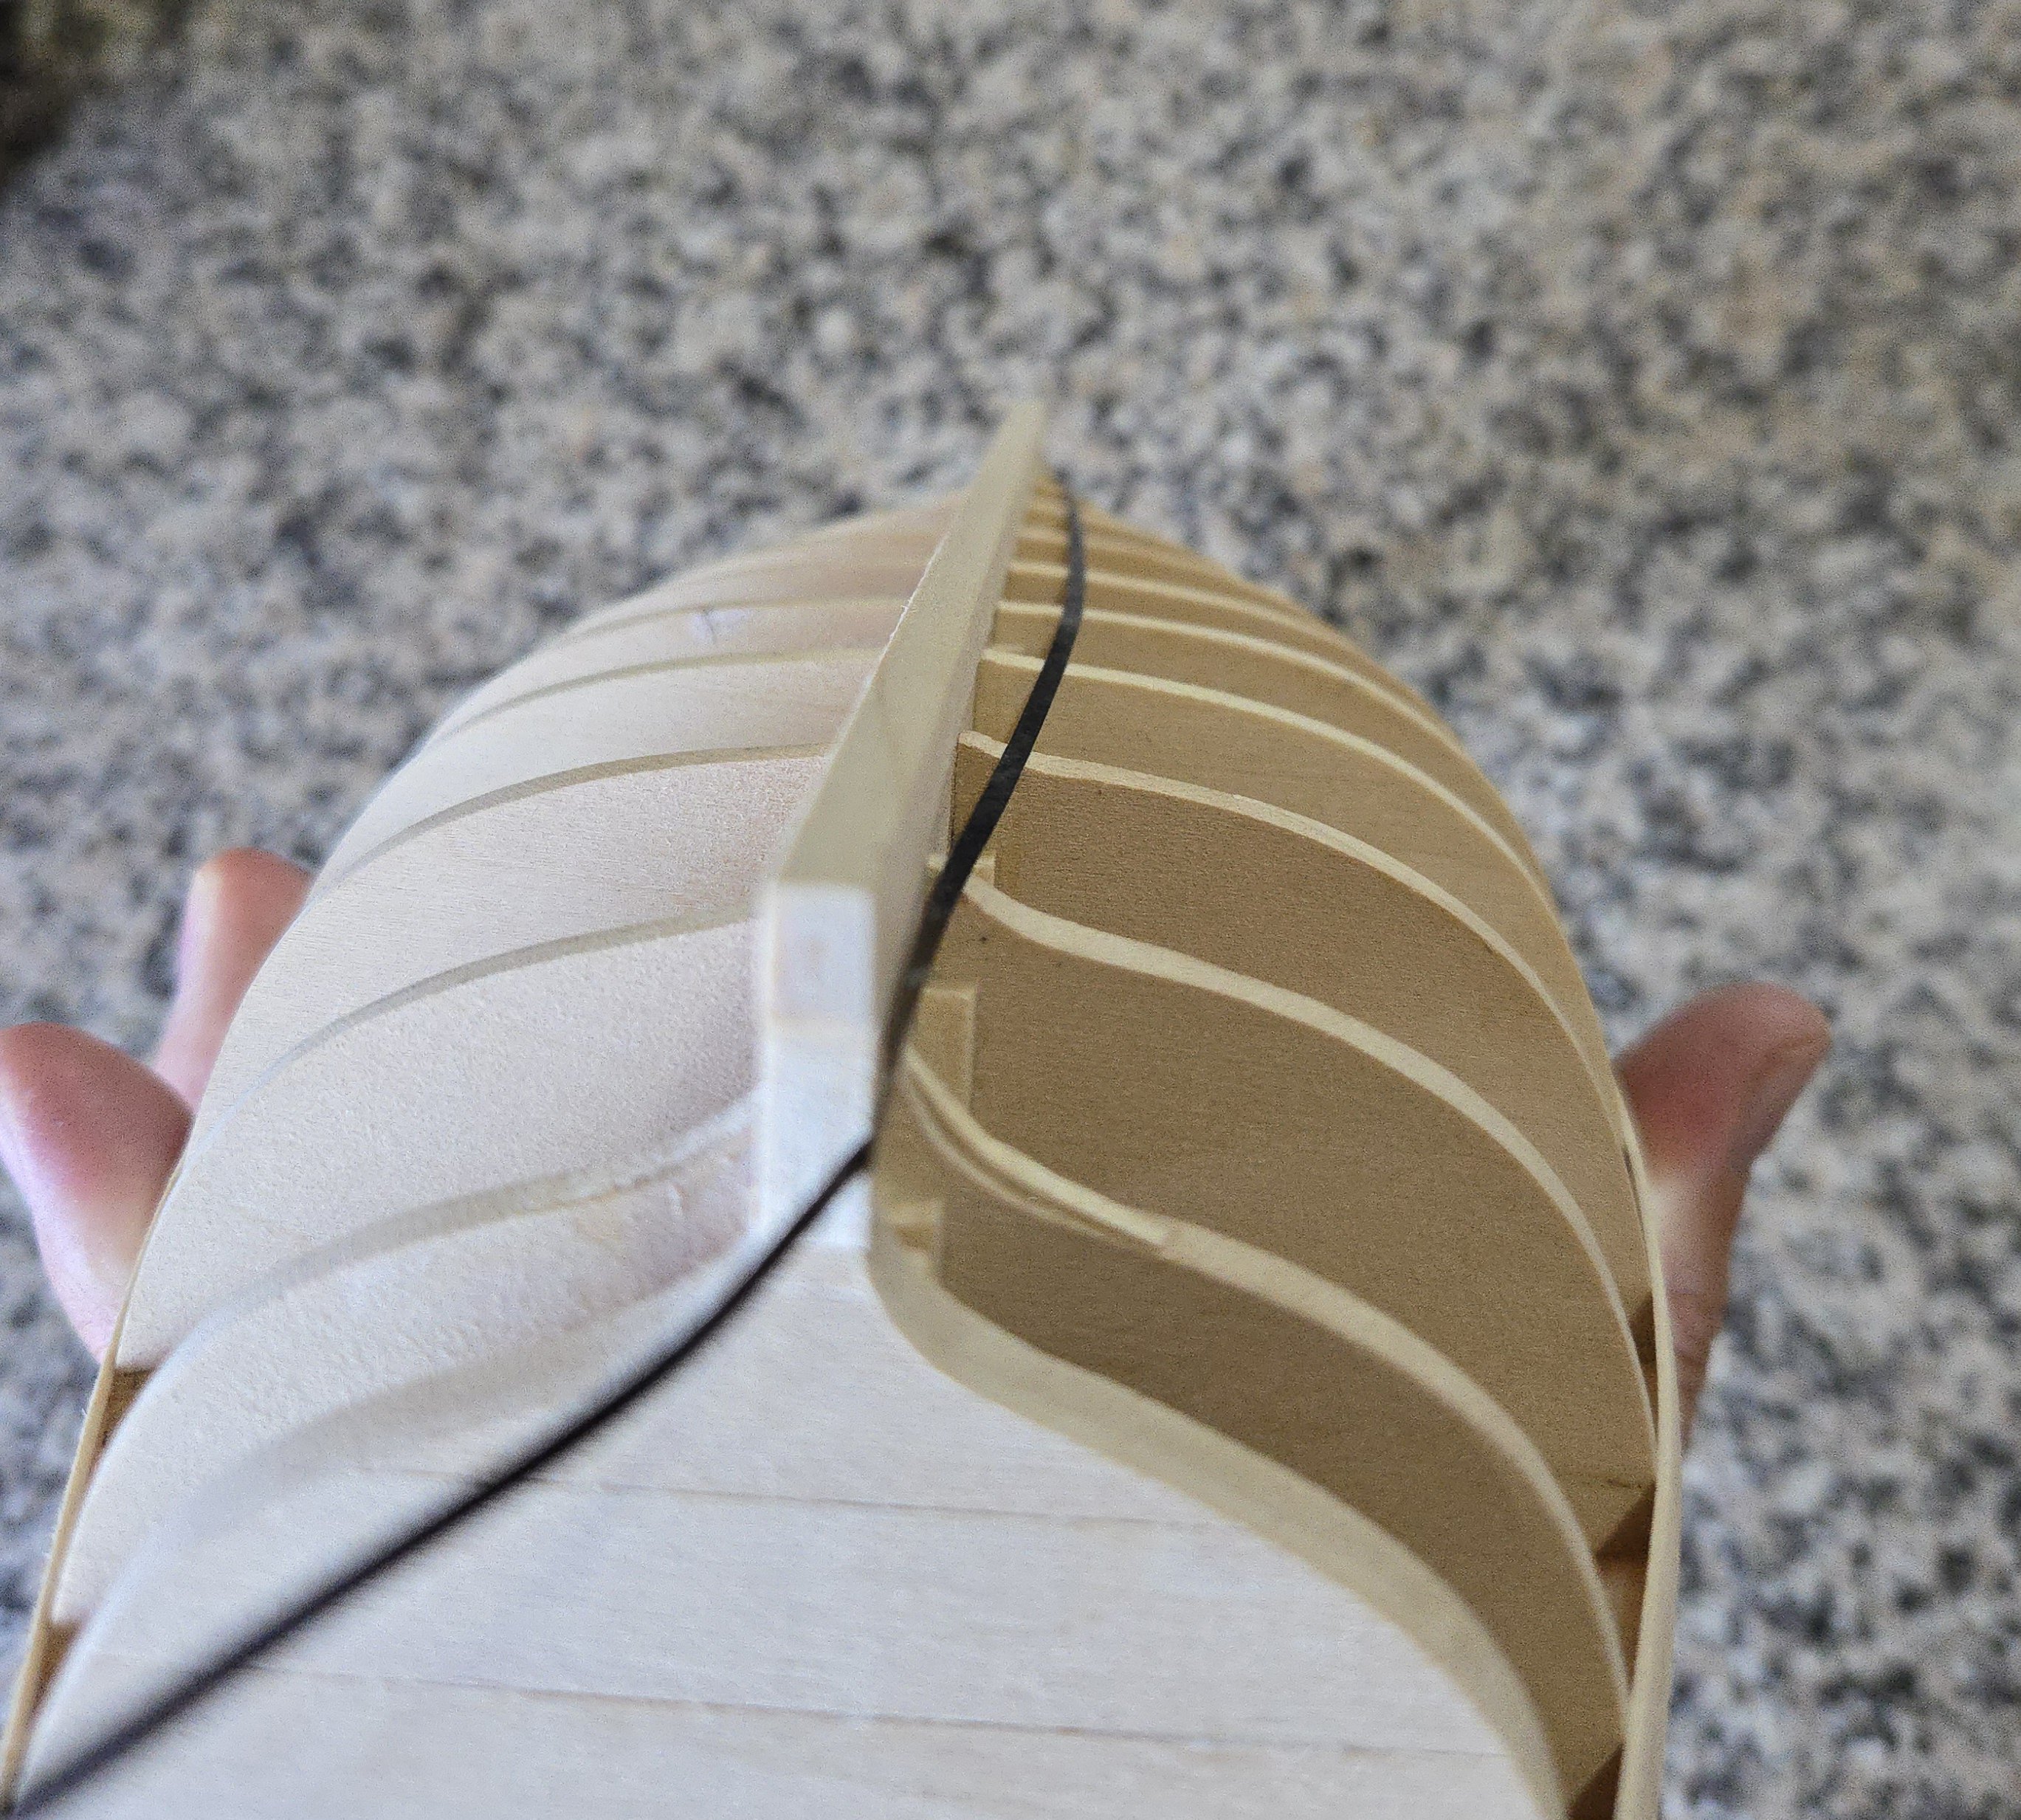
 Thanks, Paul! I was able to fair the shims on bulkhead 10 and to add the sternpost. I also realized, based on photo evidence, that the bottom of the stem should be rounded rather than sharp (as shown in the plans). This was easily done by sanding. I also started on the garboard strake, using chart tape to lay out its shape after determining that I would go with a maximum width of 1/4 inch. Determining its shape is quite challenging due to the 90-degree twist, especially aft where the deadwood complicates matters more. I ended up adjusting the aft end further from the photo above. The fore end also was a bit tricky--I didn't want to make it rise too high, but the low fore end shown below turned out to be less than half the width of the widest point, so I had to slightly raise it. The overall line seems all right now. I've begun work on the fore starboard plank following the method used for the Half-Hull build. The aft half will undoubtedly be trickier. Happy New Year's Eve!


- 312 replies
-
- 6
-

-
- Chile
- Latin America
- (and 6 more)
-
Welcome! Looking forward to following your build log!
-
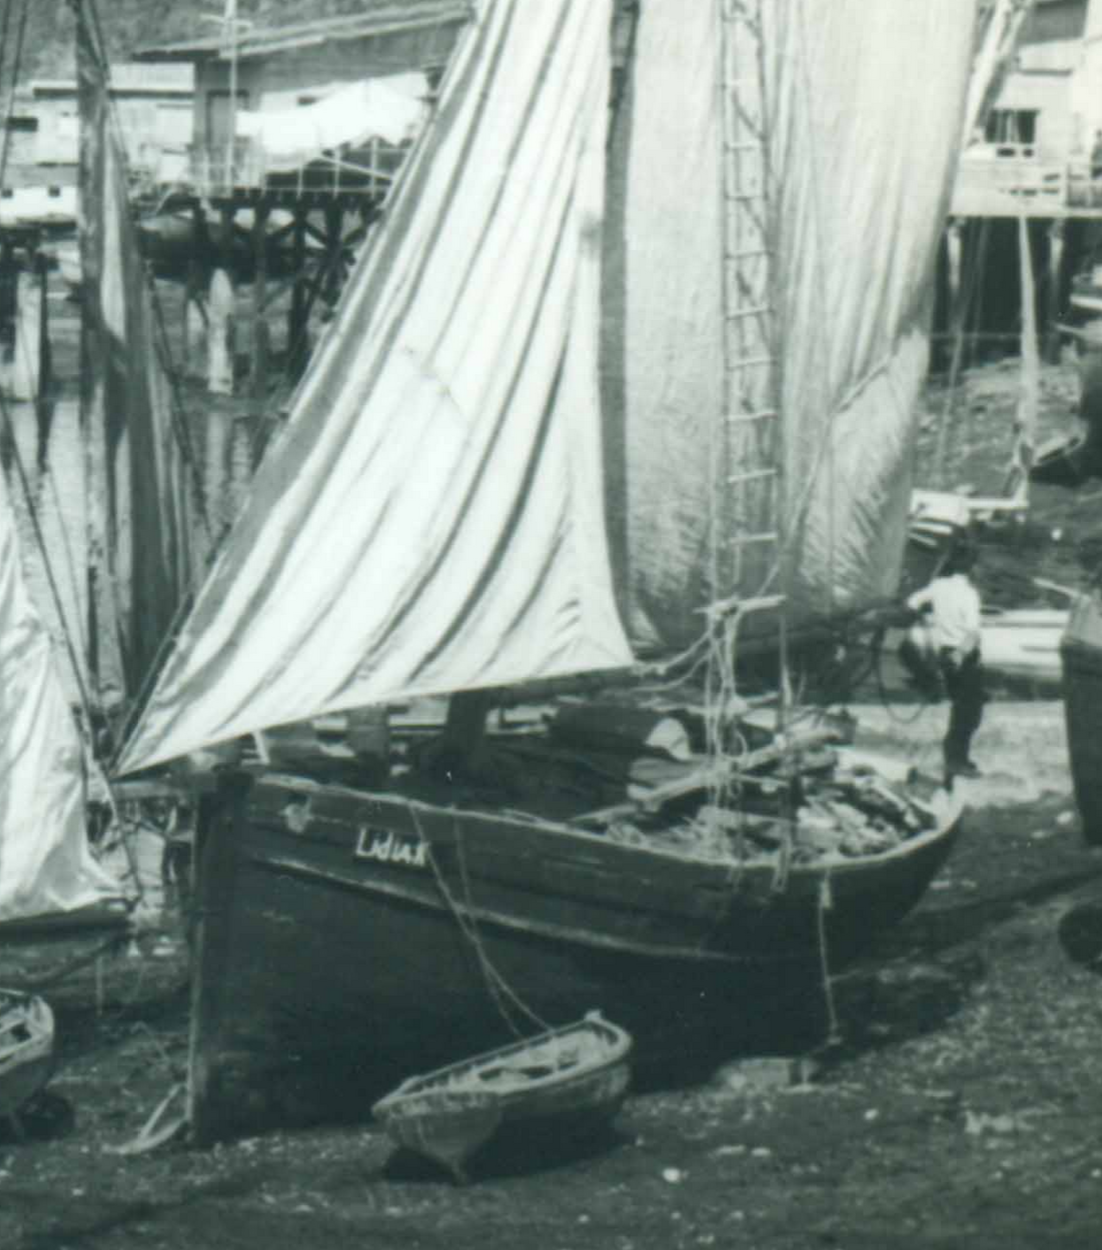
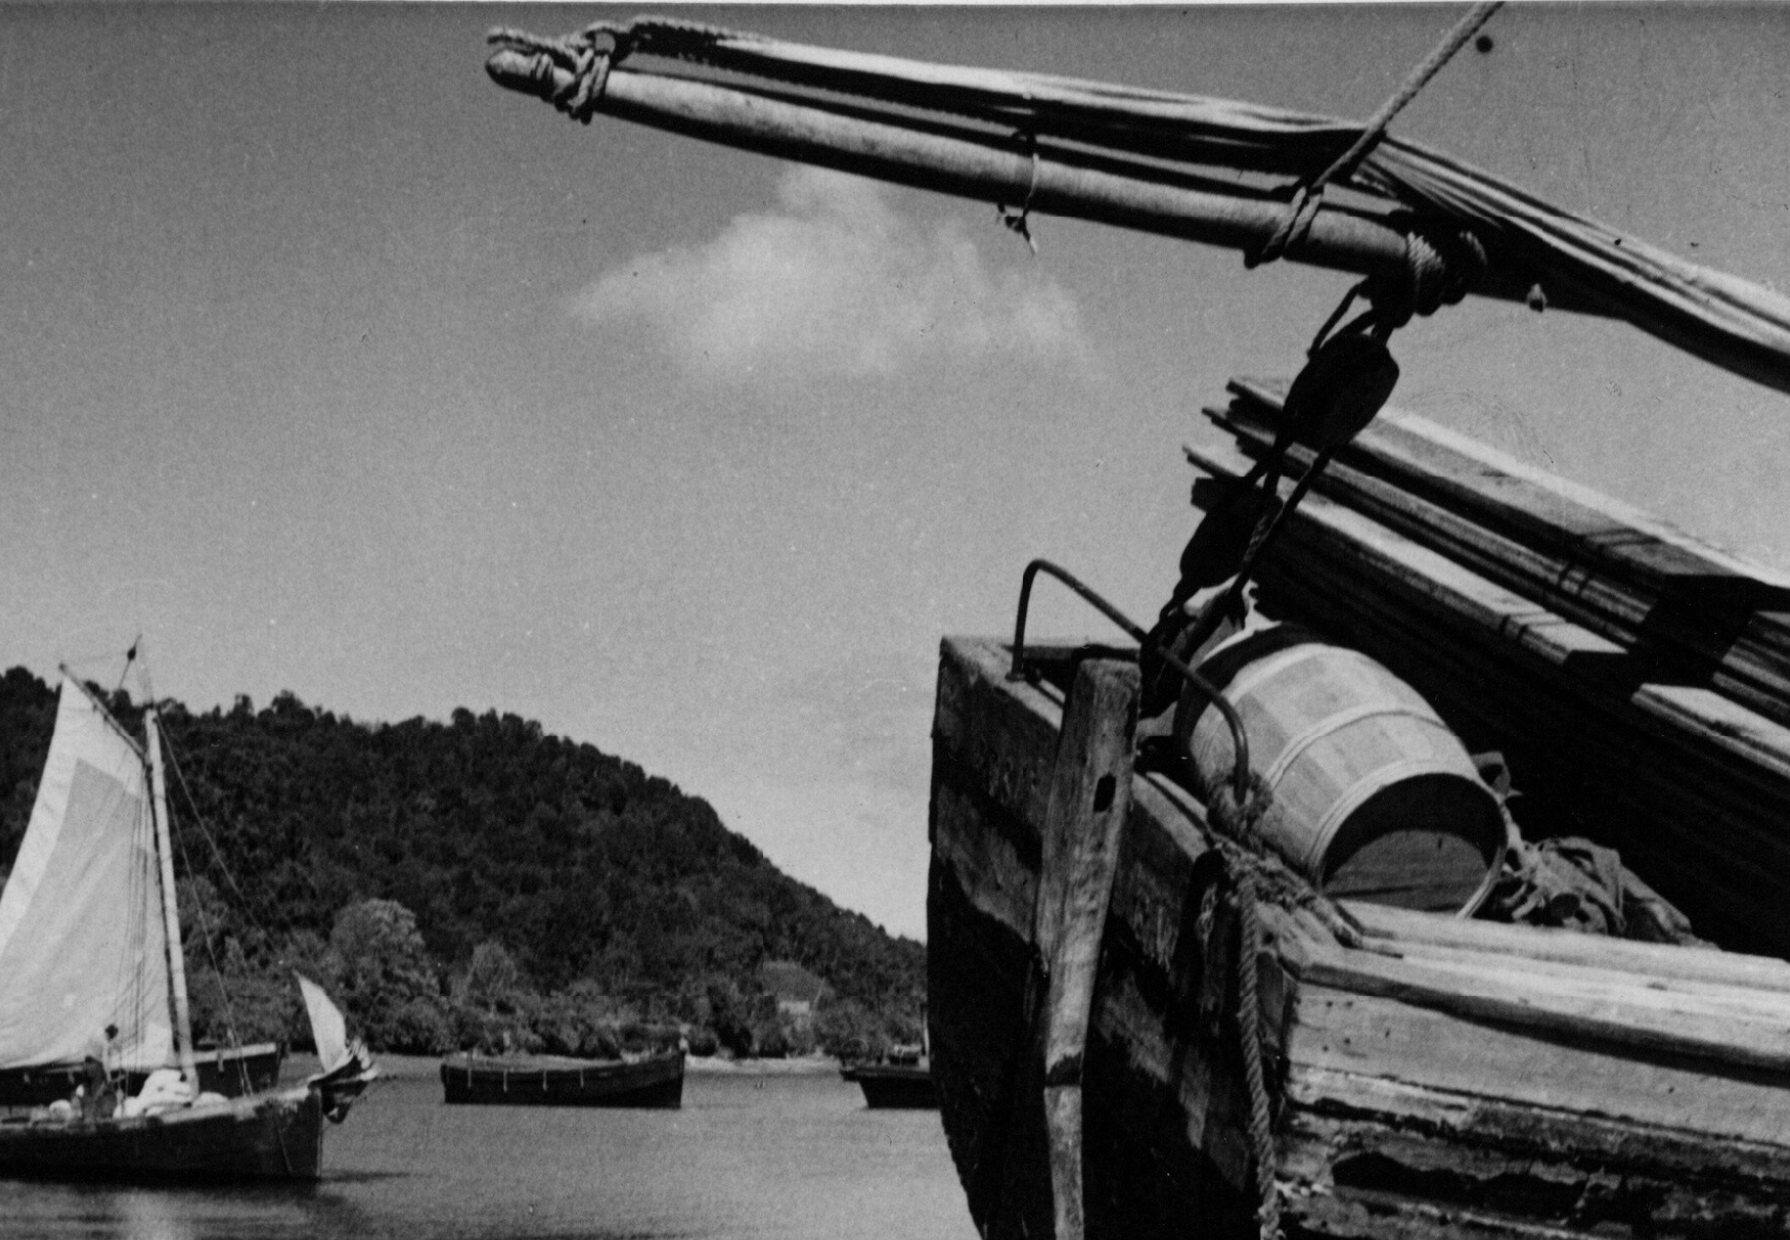
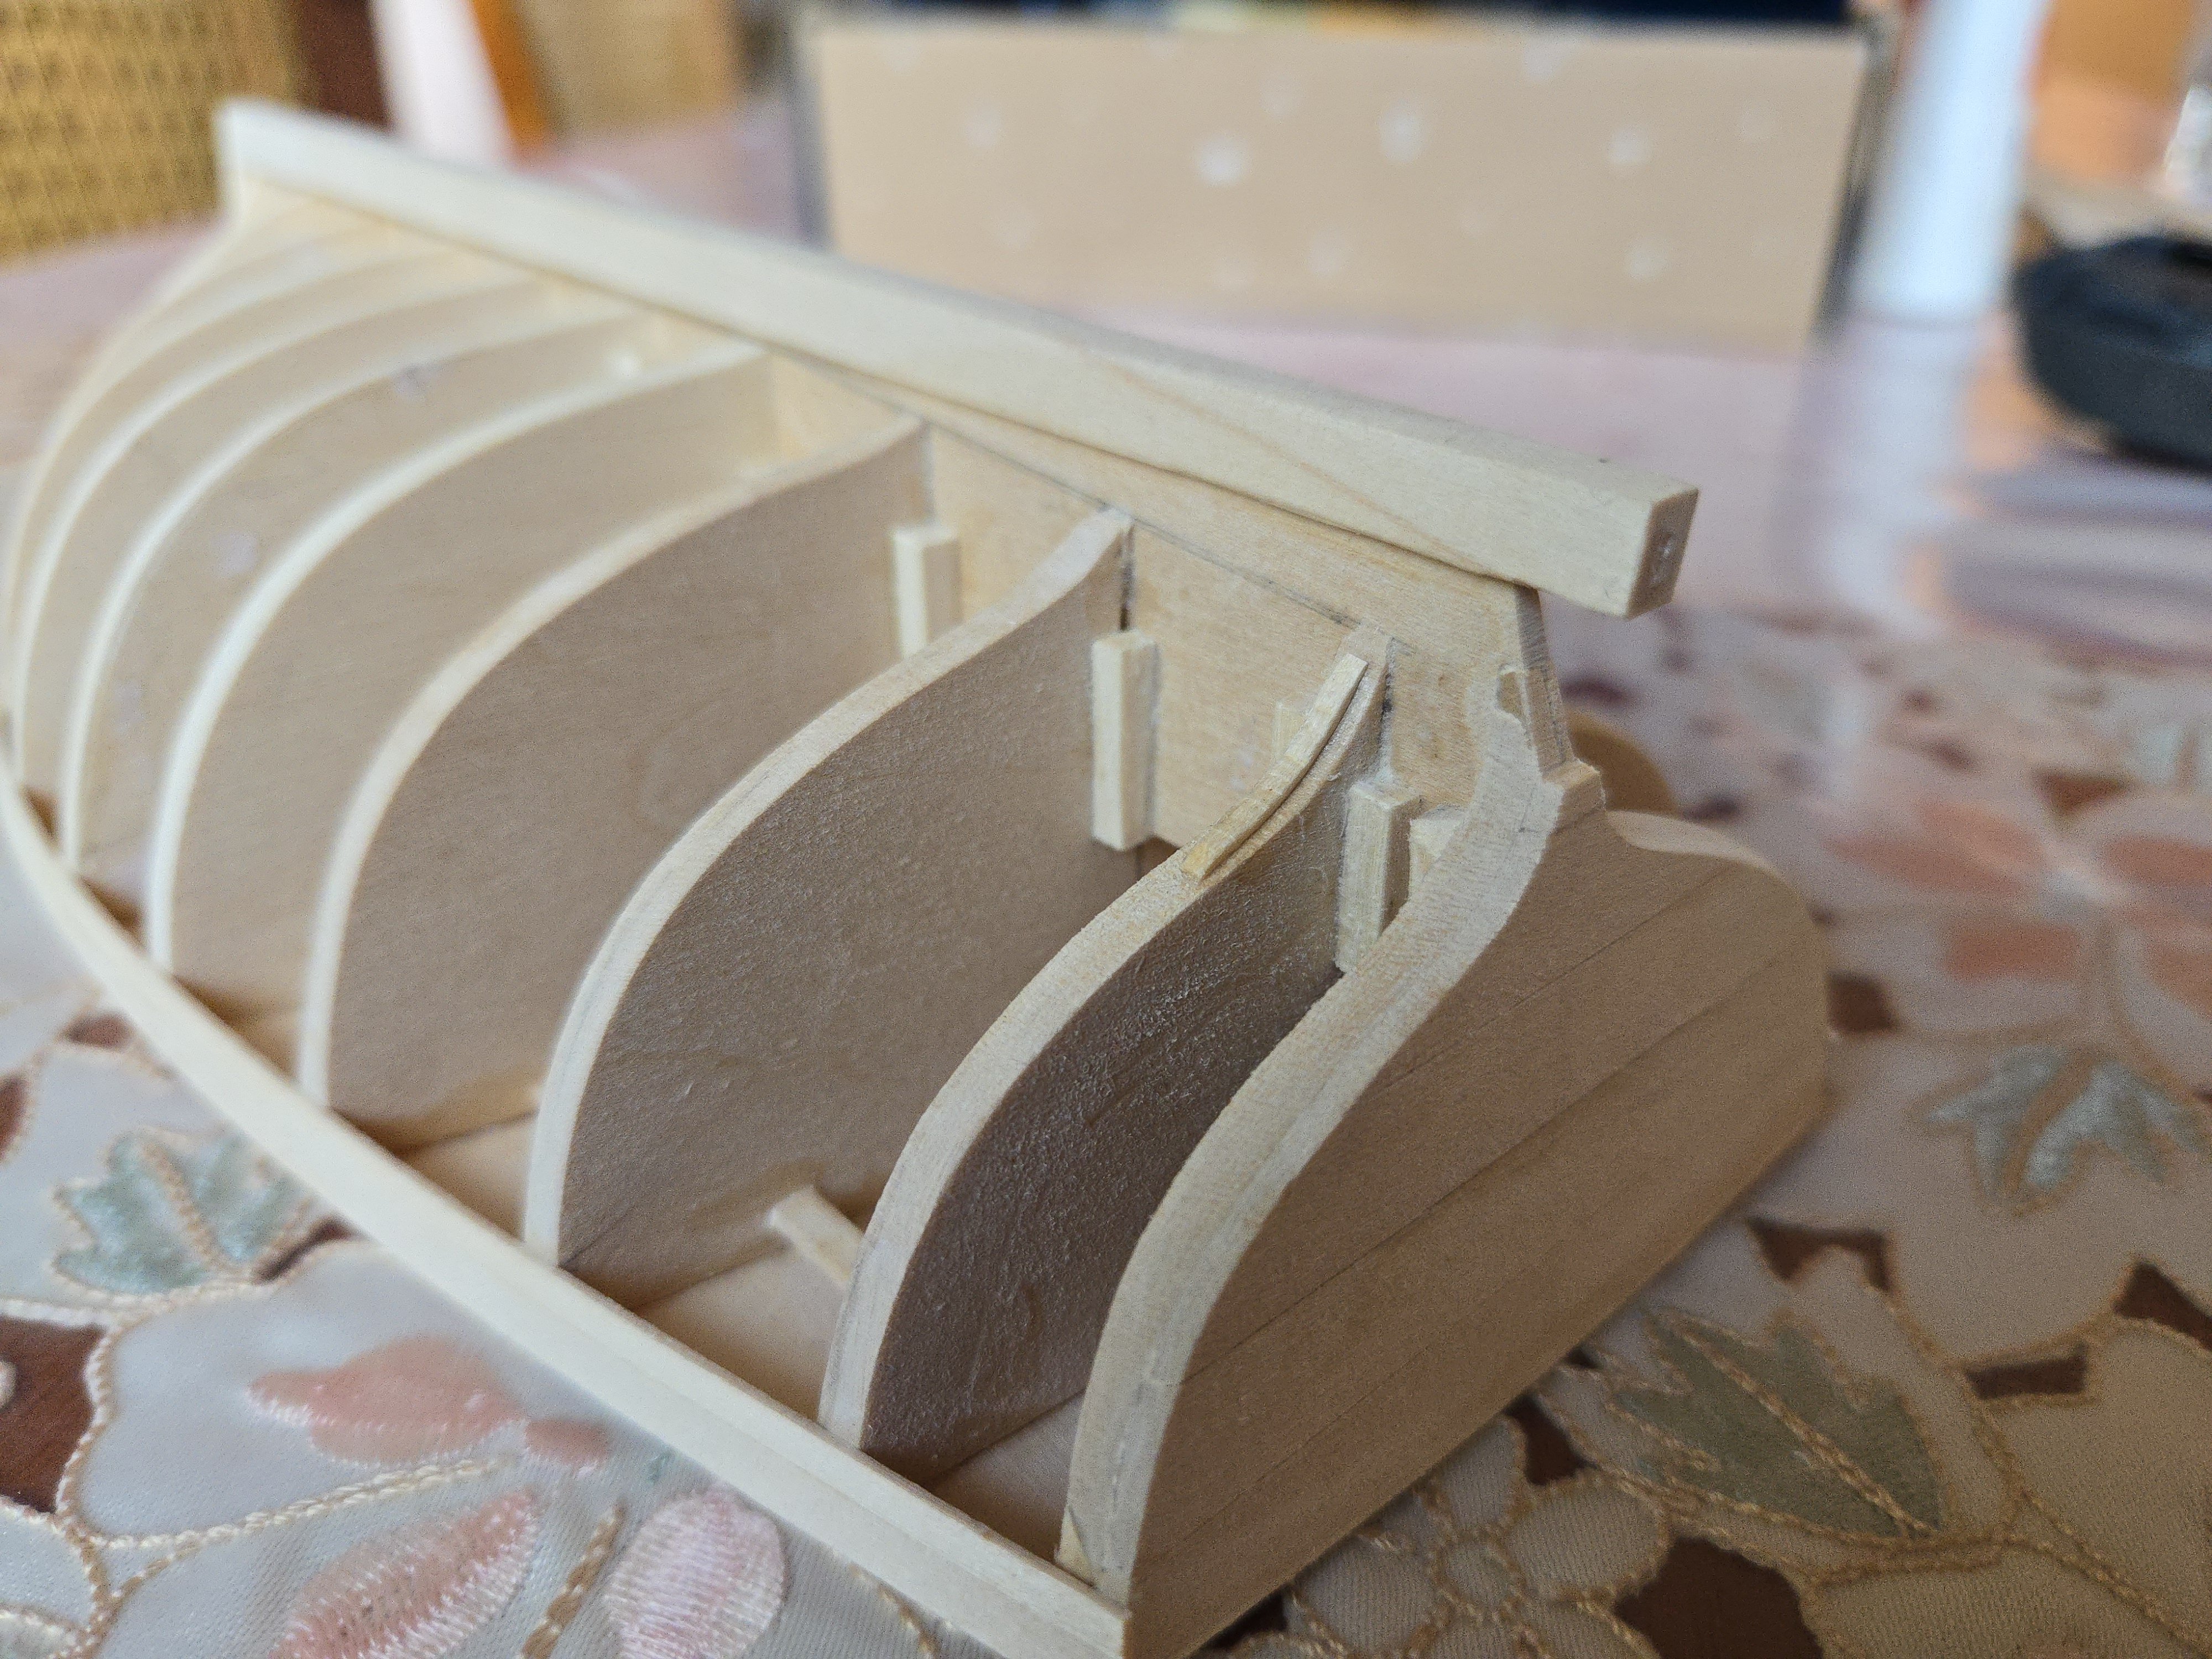
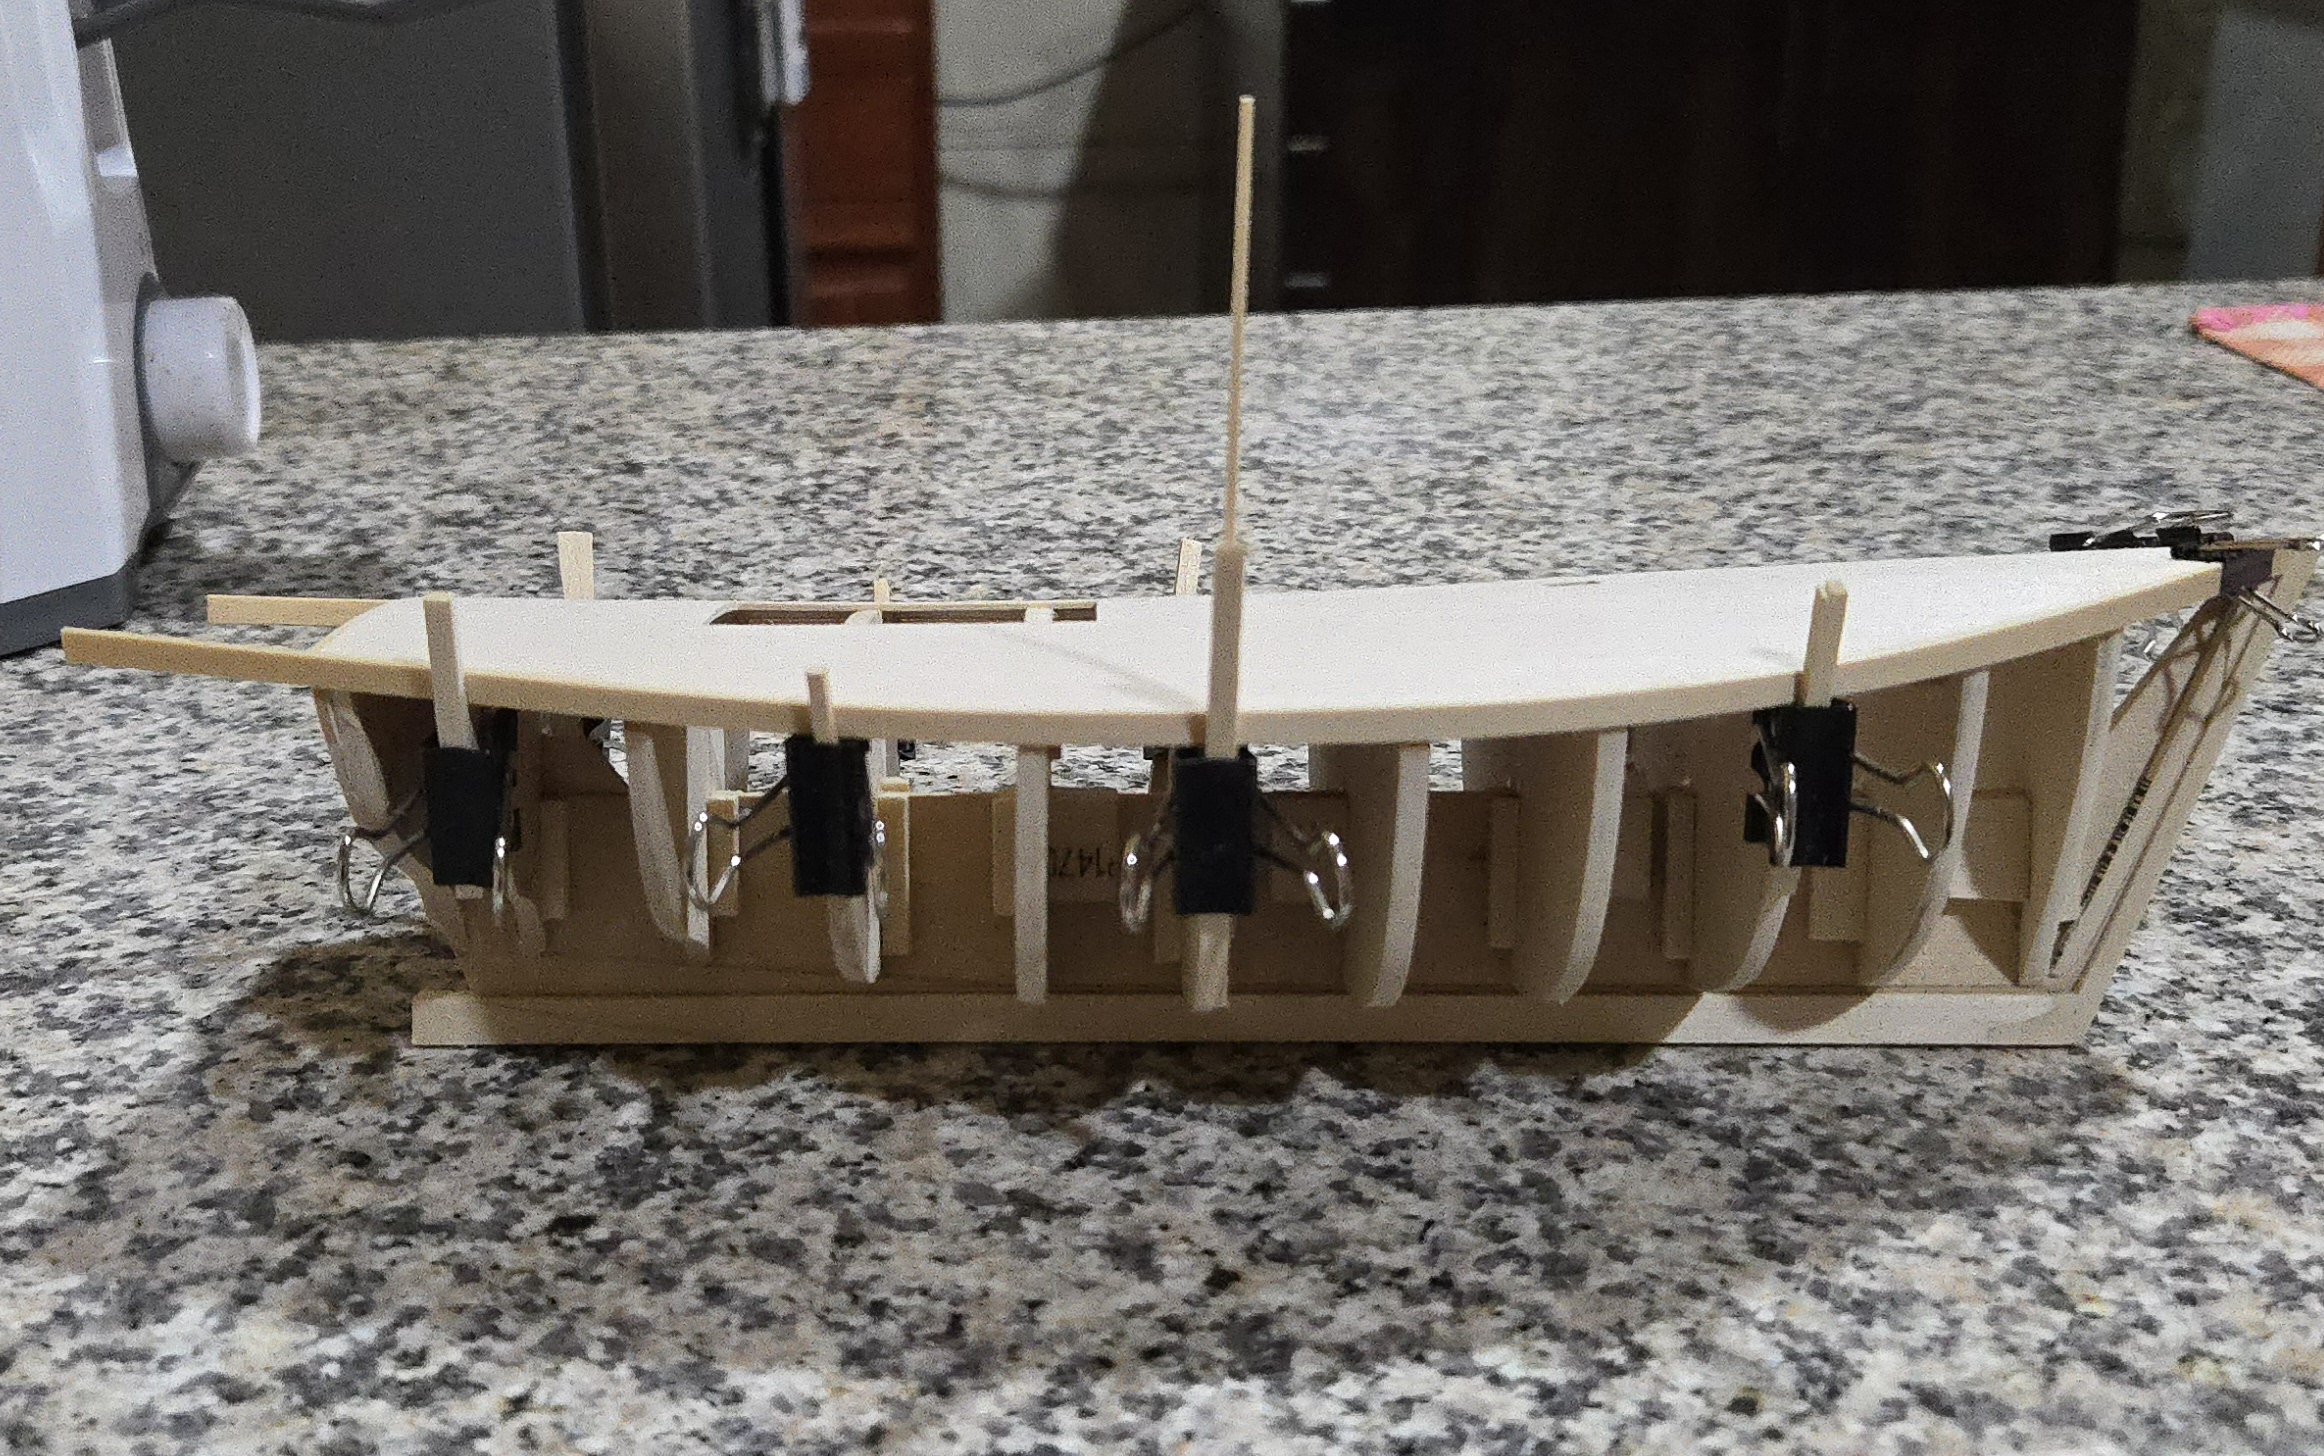
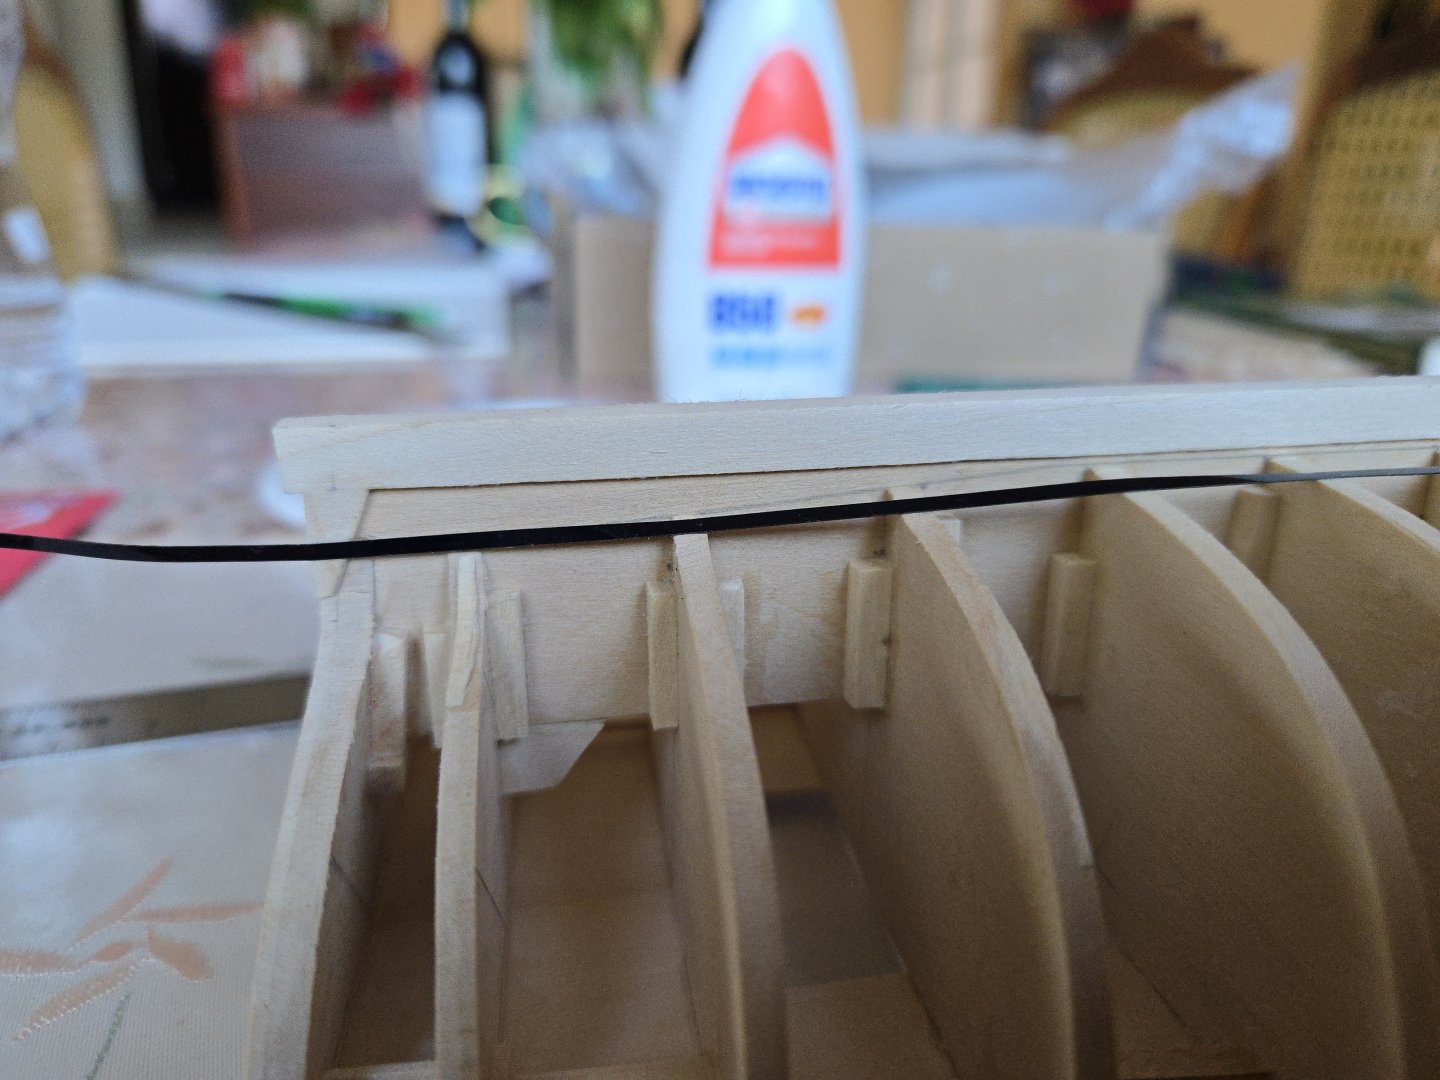
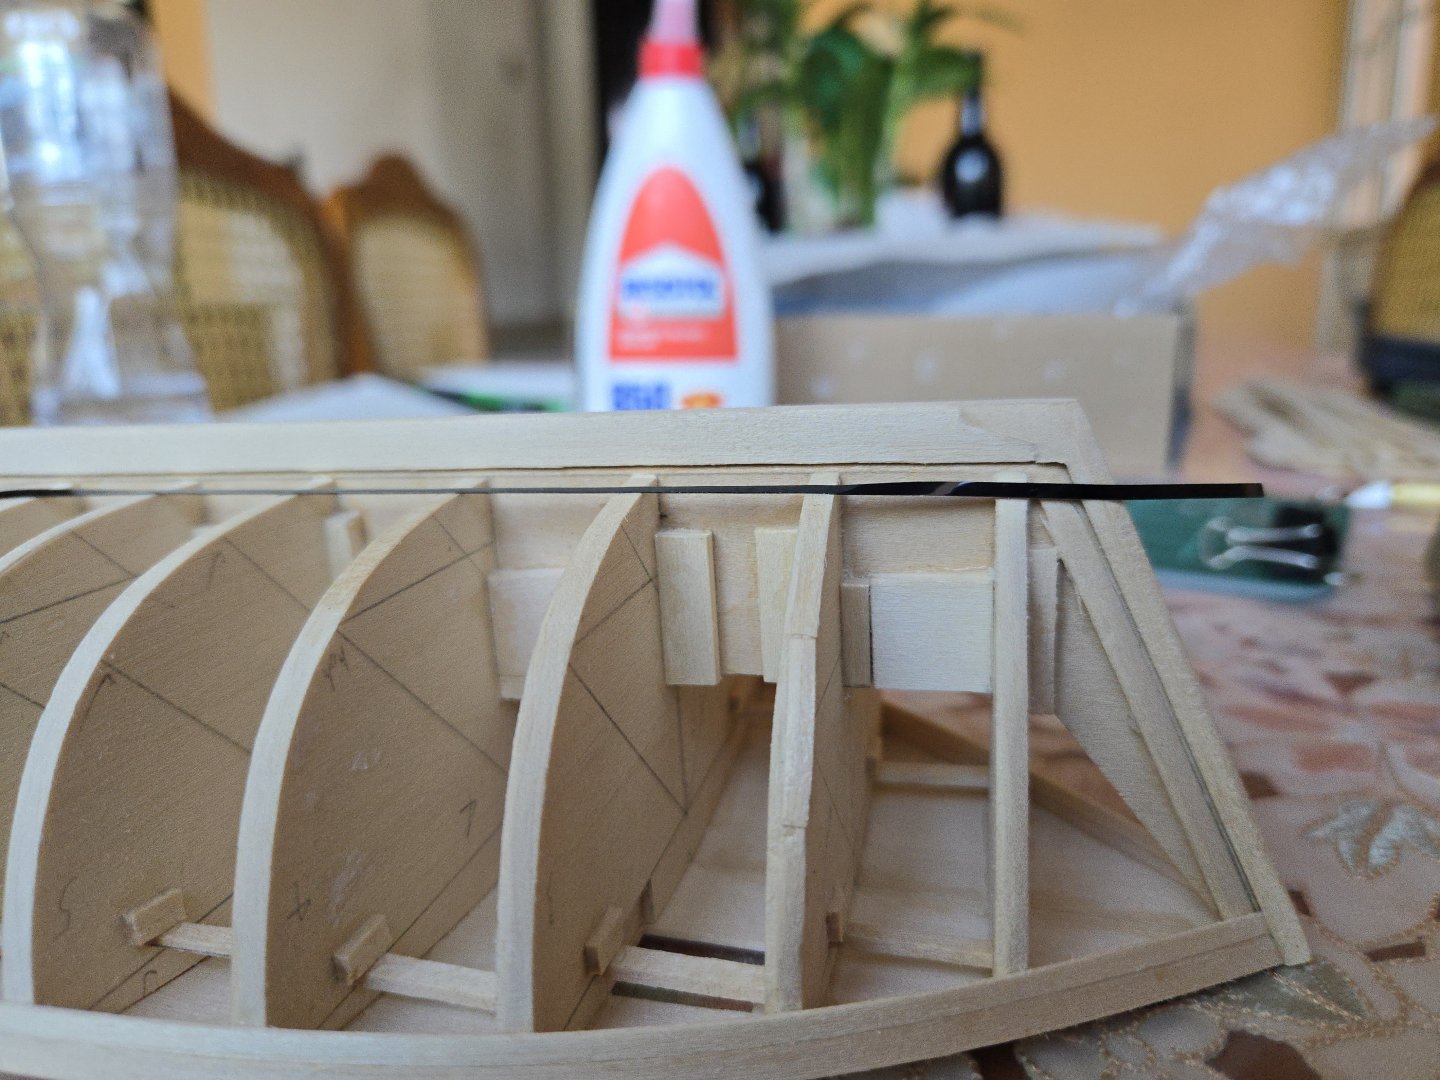
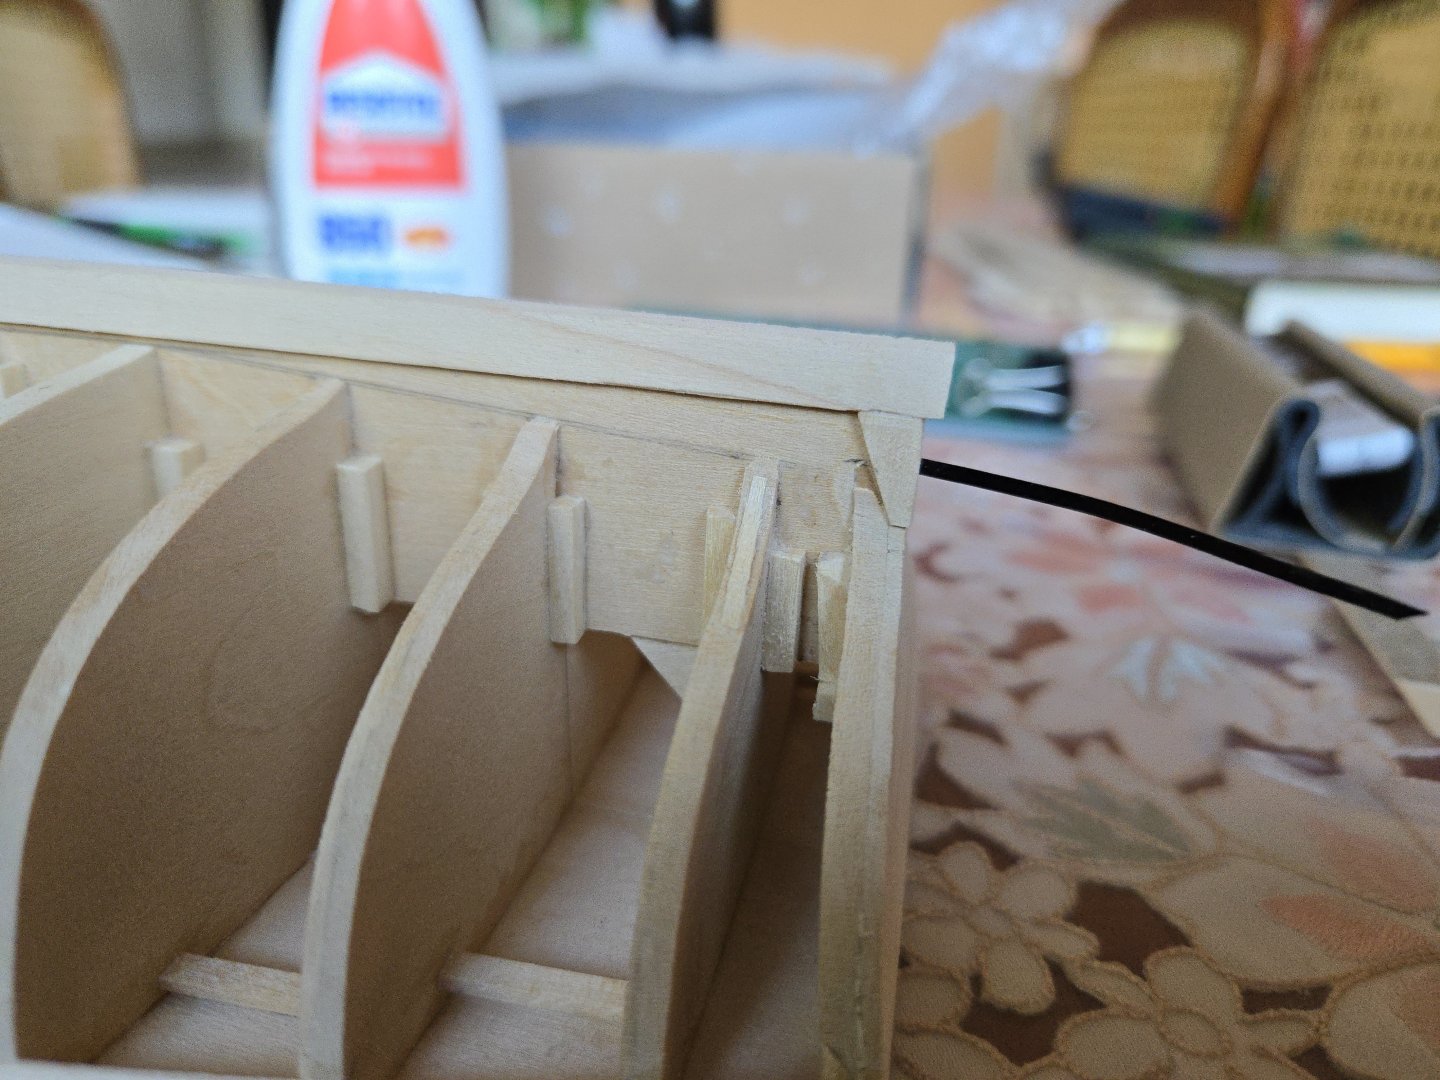
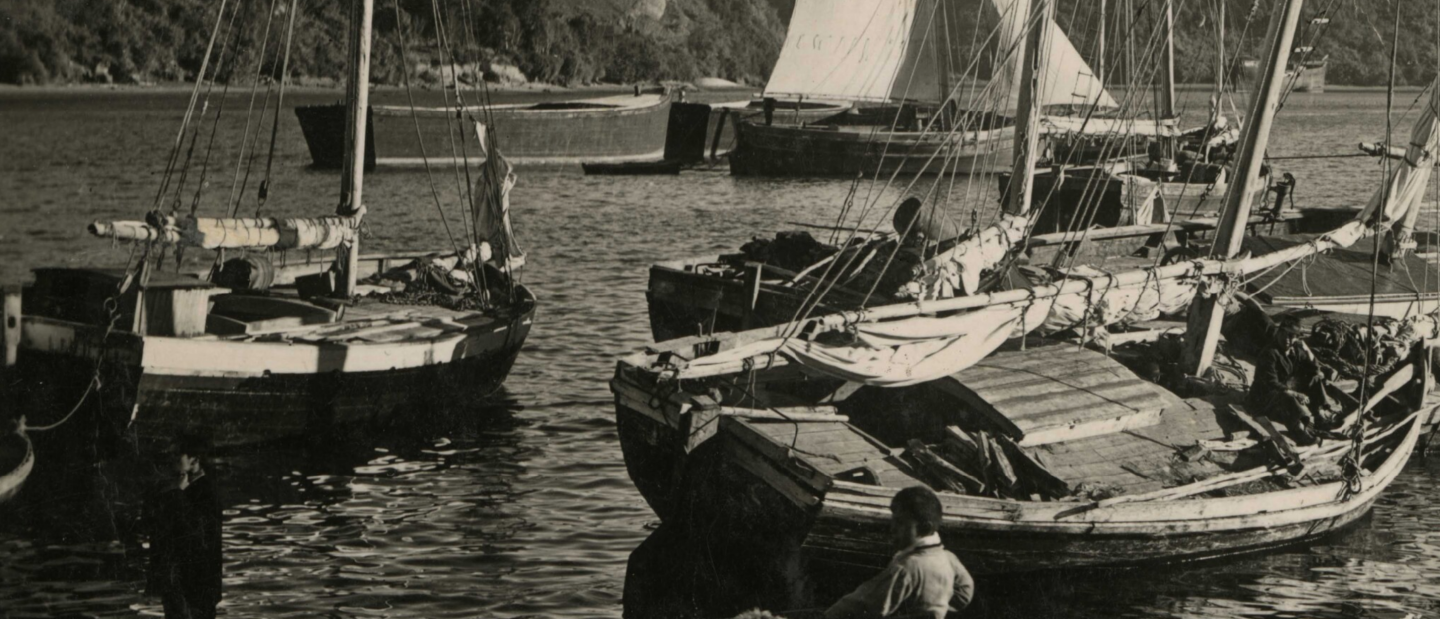
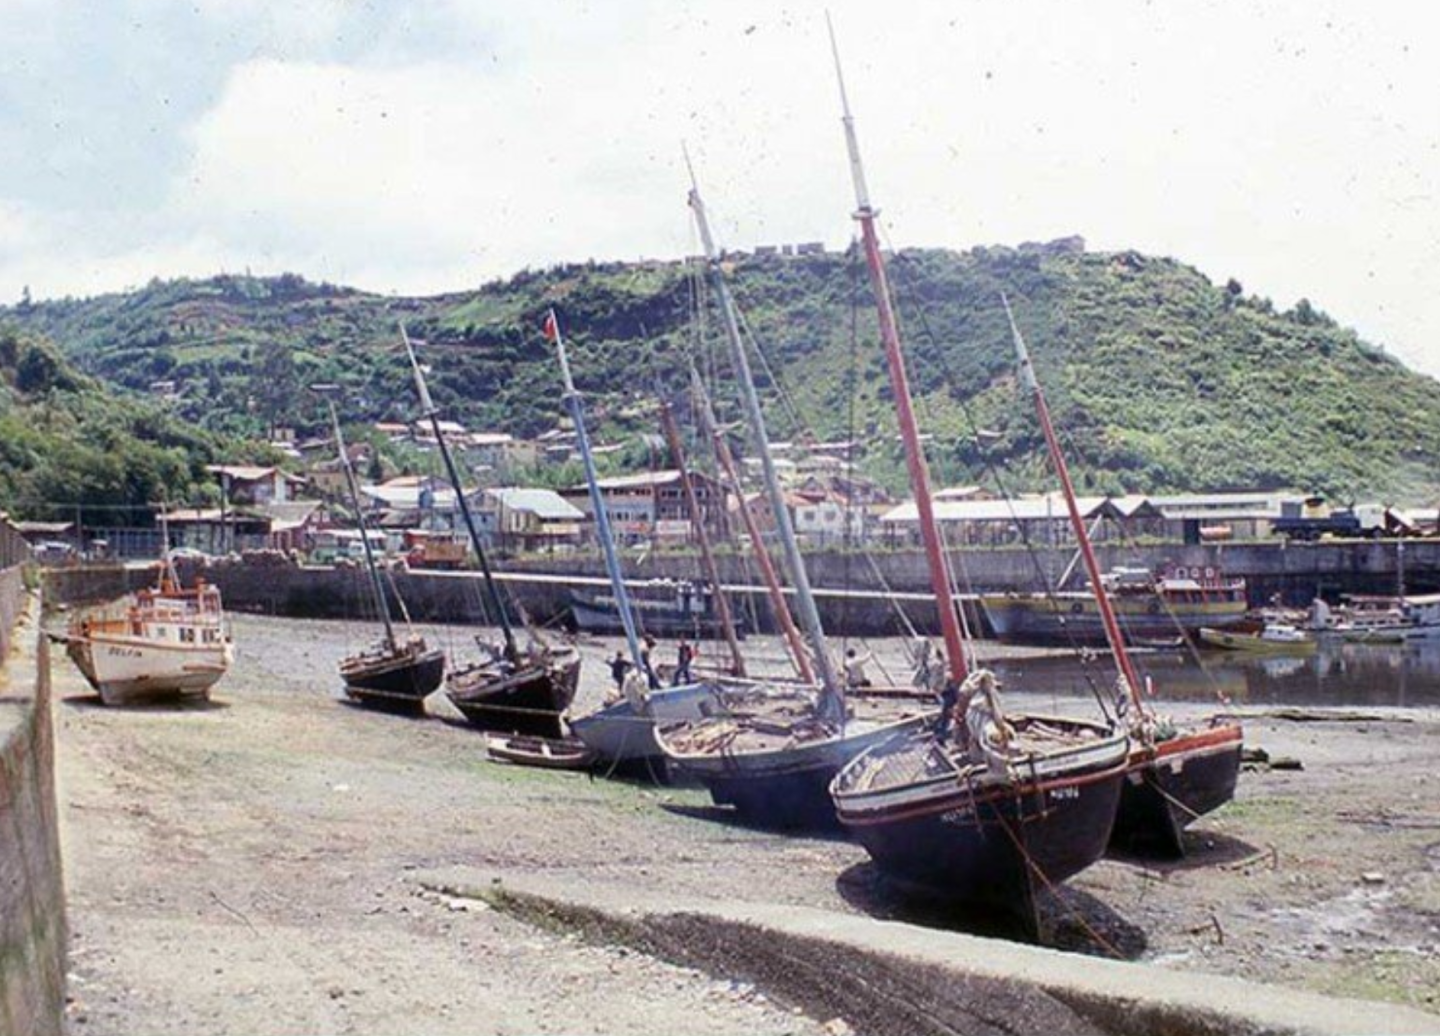
The sheer strake turned out pretty well. There are a few points where it’s not totally flush with the subdeck, but where it’s off, it’s off by a very small amount, protruding above the subdeck by at most about 1/64th of an inch. Once I am back in Mexico City and have access to my tube of wood filler, I think a light application of filling at these points and some sanding should leave a nice, smooth edge for the covering boards and decking. On the hull planking: looking at photos, there’s a very wide range of wale (or rubbing strake) positions. Some lanchas, including the Quenita (which my plan sheet is based on), have no visible wales—that is, all the planking appears to be of the same thickness. Others have a wale directly below the scuppers. In at least some of these cases, it may not actually be a wale, but a protruding covering board. Some others seem to have had a thin wale just below the scuppers (which may just be an extended covering board) and/or a thin wale somewhat lower on the hull. It’s also worth noting that some of these thinner pieces may have simply been rubbing strakes rather than real wales. The photo below shows several possibilities. The lancha at right foreground has a thin wale or rubbing strake just below the scuppers. It seems to wrap around the chainplate for the shroud, so this was likely a separate part from the covering board. The lancha at left, in contrast, seems to have no wales, although the covering board is apparently visible and seems to be a different color (at least near the stern). Interestingly, the covering board seems to protrude slightly near the stern, but by the midpoint of the hull is level with hull planking (which is why I interpret it as an oversized covering board and not a rubbing strake, which would be visible around the midpoint of the hull). The two lanchas at center-right background, in contrast (one at anchor and one under sail) seem to have a thin wale/rubbing strake or extended covering board below the scuppers and a thin wale/rubbing strake lower on the hull. Source: https://www.bibliotecanacionaldigital.gob.cl/bnd/629/w3-article-613545.html Still others had what looks to be a sort of rubbing strake just below the scuppers, but a rather thicker piece (either a wale or a thick rubbing strake) lower down, as on this vessel (in the foreground): Source: https://www.bibliotecanacionaldigital.gob.cl/bnd/629/w3-article-320752.html Some vessels like the one below had a rather thick wale or covering board just below the scuppers, and a thinner sort of rubbing strake lower down. (This lancha is particularly interesting in that it also has some sort of ratlines or a ladder in the shrouds despite being, as seen by the person in the background, a pretty small vessel—ratlines were usually only seen on the larger coasting schooners or some of the large, round-sterned sloops). Source: https://www.memoriasdelsigloxx.cl/601/w3-article-86081.html Finally, others had flush covering boards, and a thin wale or rubbing strake lower down, as on the foremost vessel in the photo below: Source: https://www.carlosvairo.com/galeria-puerto-montt-lanchas-chilotas All of which is to say, I have several options for placing the wale. I personally don’t much like the look of the totally smooth hull, so I decided to follow the example of the last photo above—that is, there will be a rubbing strake or thin wale a bit below the scuppers. I decided to add it in two parts like on my NRG Half Hull build, doubling 1/32x1/8-inch strips that I have left over from my Maine Peapod build. This way I’ll be able to sand the hull smooth first and paint the rubbing strake/wale off the model to get a clean paint job. The first layer of the wale is now on. All planks below this will be spiled/cut to shape. Finally, having faired the hull, I was having a consistent problem with a bit of a hollow at the 10th bulkhead near the center. After checking various images, I decided that the hollow was inaccurate, and so I’ve now added shims in that spot, as seen below. Once I re-fair that spot of the 10th bulkhead, I’ll be able to add the sternpost and then the garboard. I’ll then be able to mark off the hull for planking.


- 312 replies
-
- 12
-
-
- Chile
- Latin America
- (and 6 more)
-
Looks like an interesting kit!
-
There's some useful information and leads to follow in the conversation here: It touches on some useful source books for modeling British warships of the era. You may also want to check if the original plans for the Triton or other vessels of its class are available online (wikimedia has a ton of British warship plans), they would probably give you a good idea of the mast locations and angles. Nice job on the windows!
-
Beautiful job on a very interesting and unique model!
-
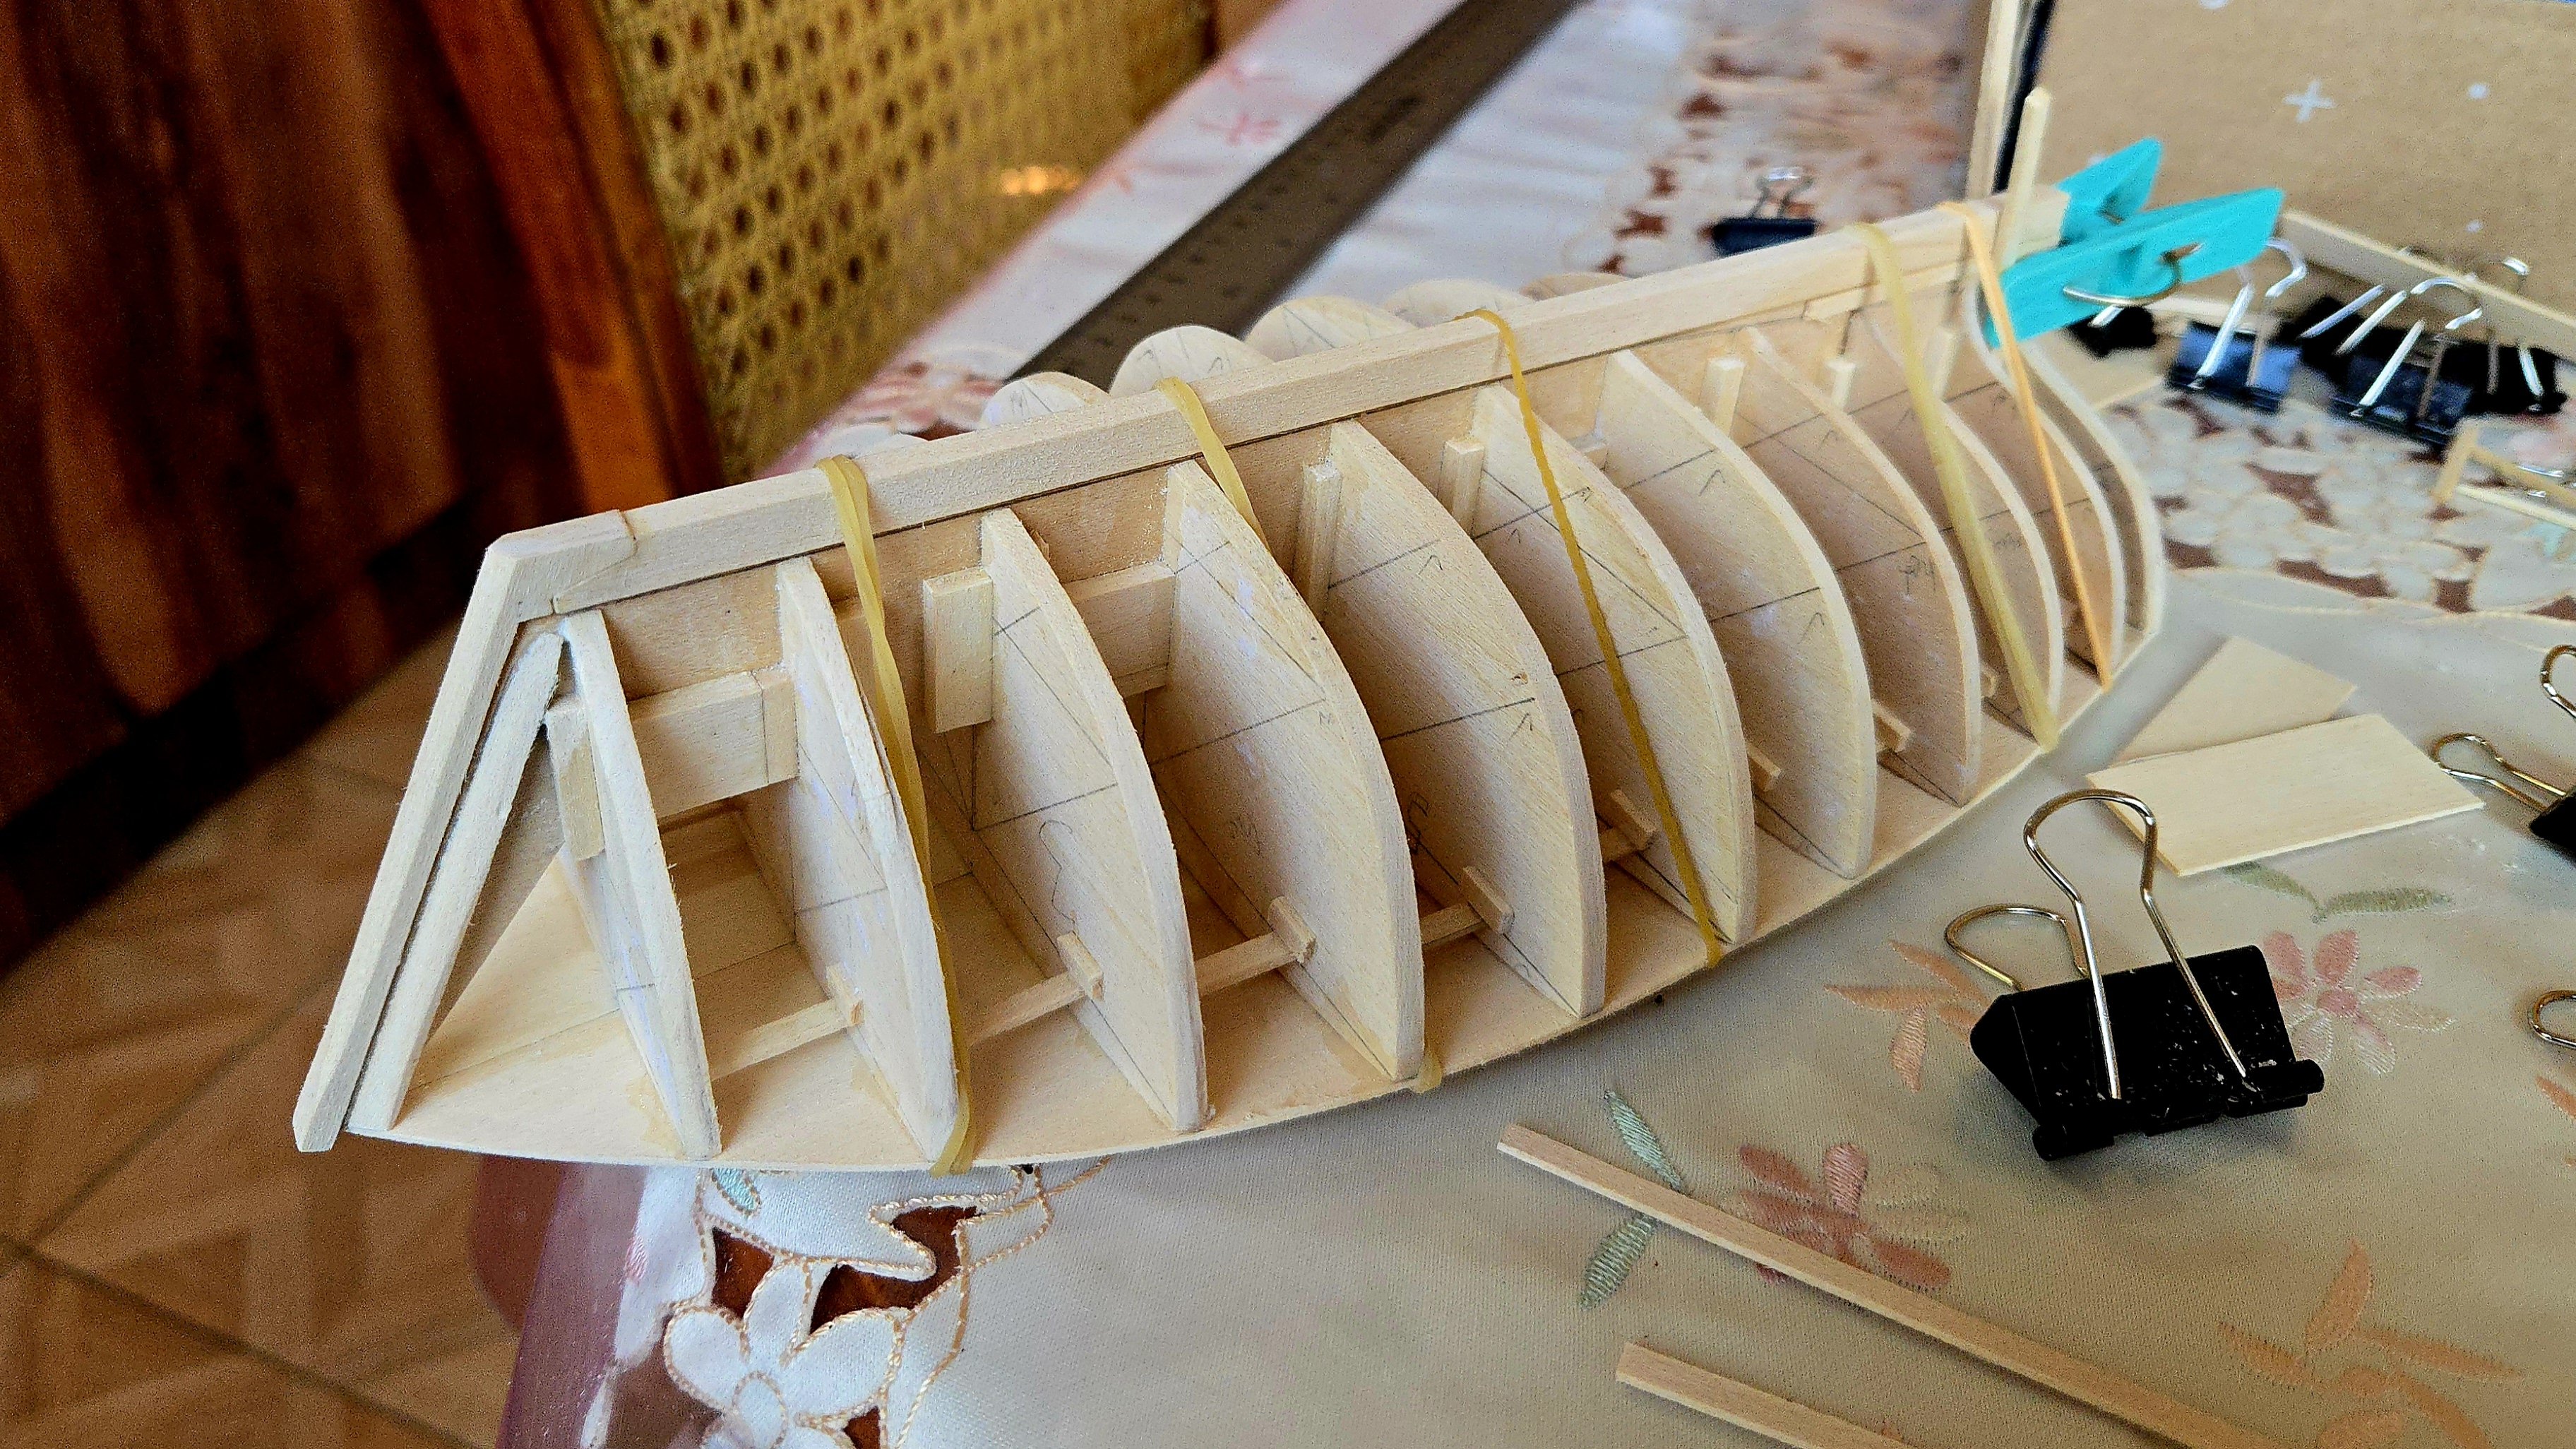
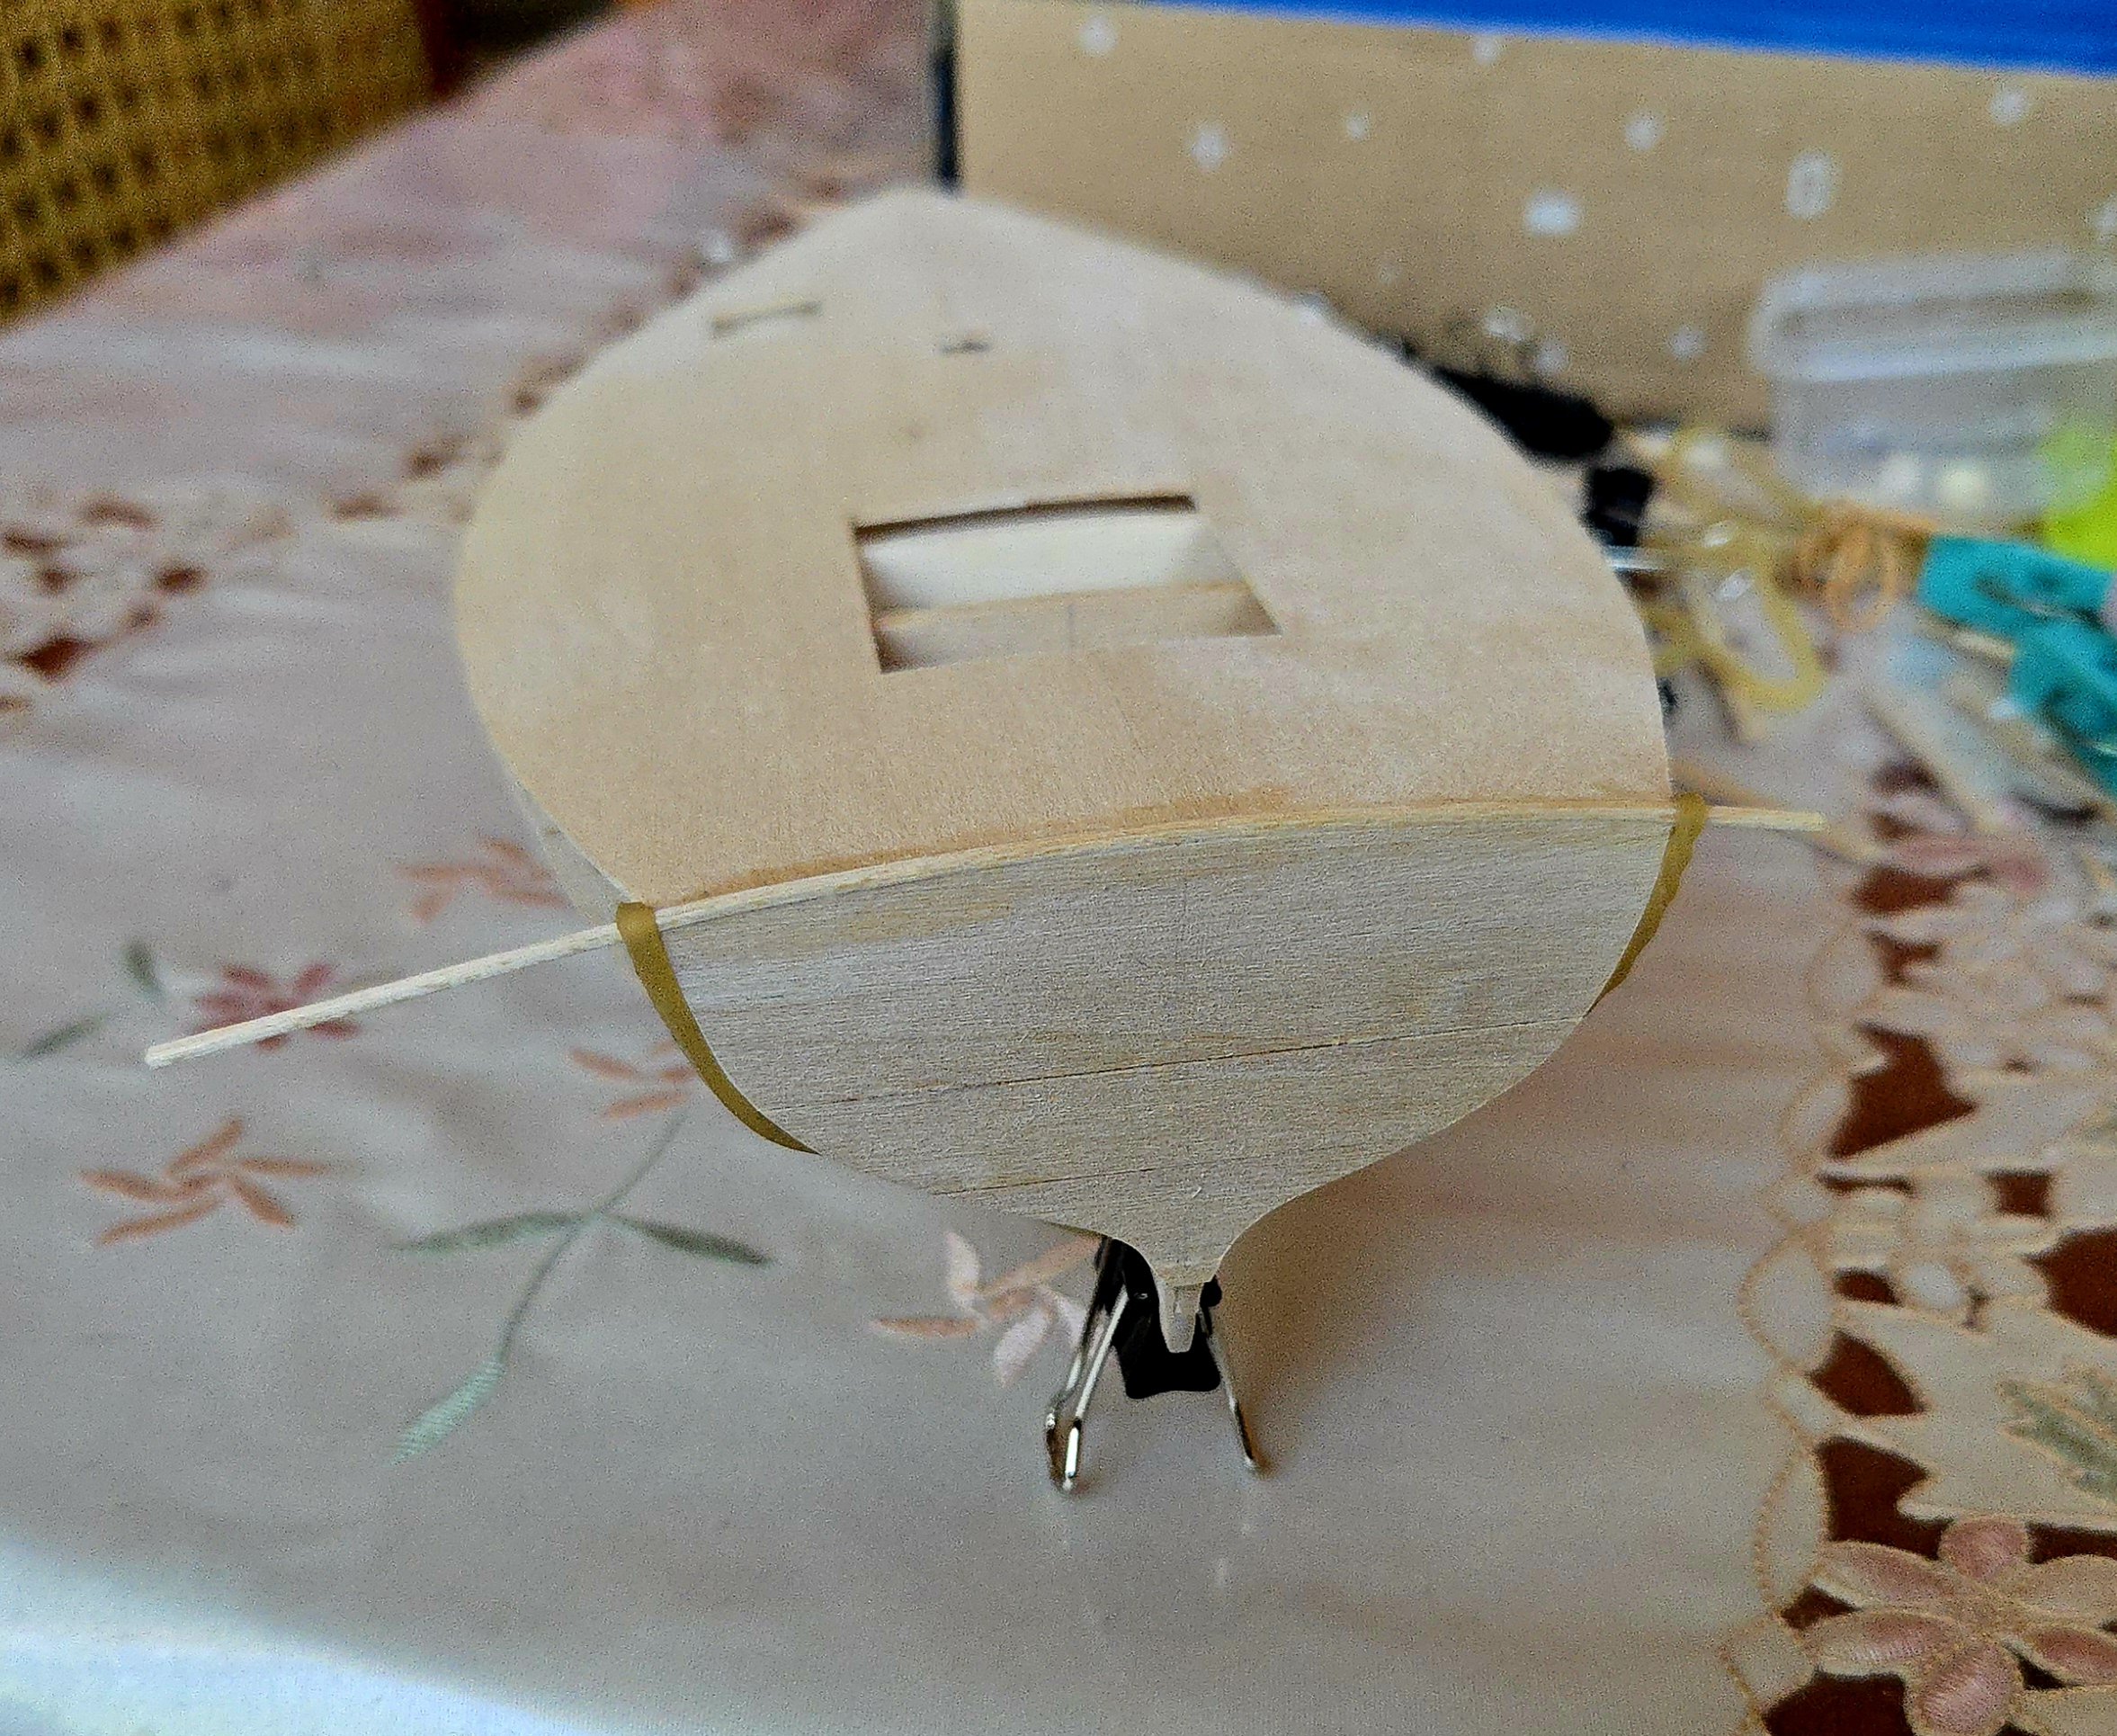
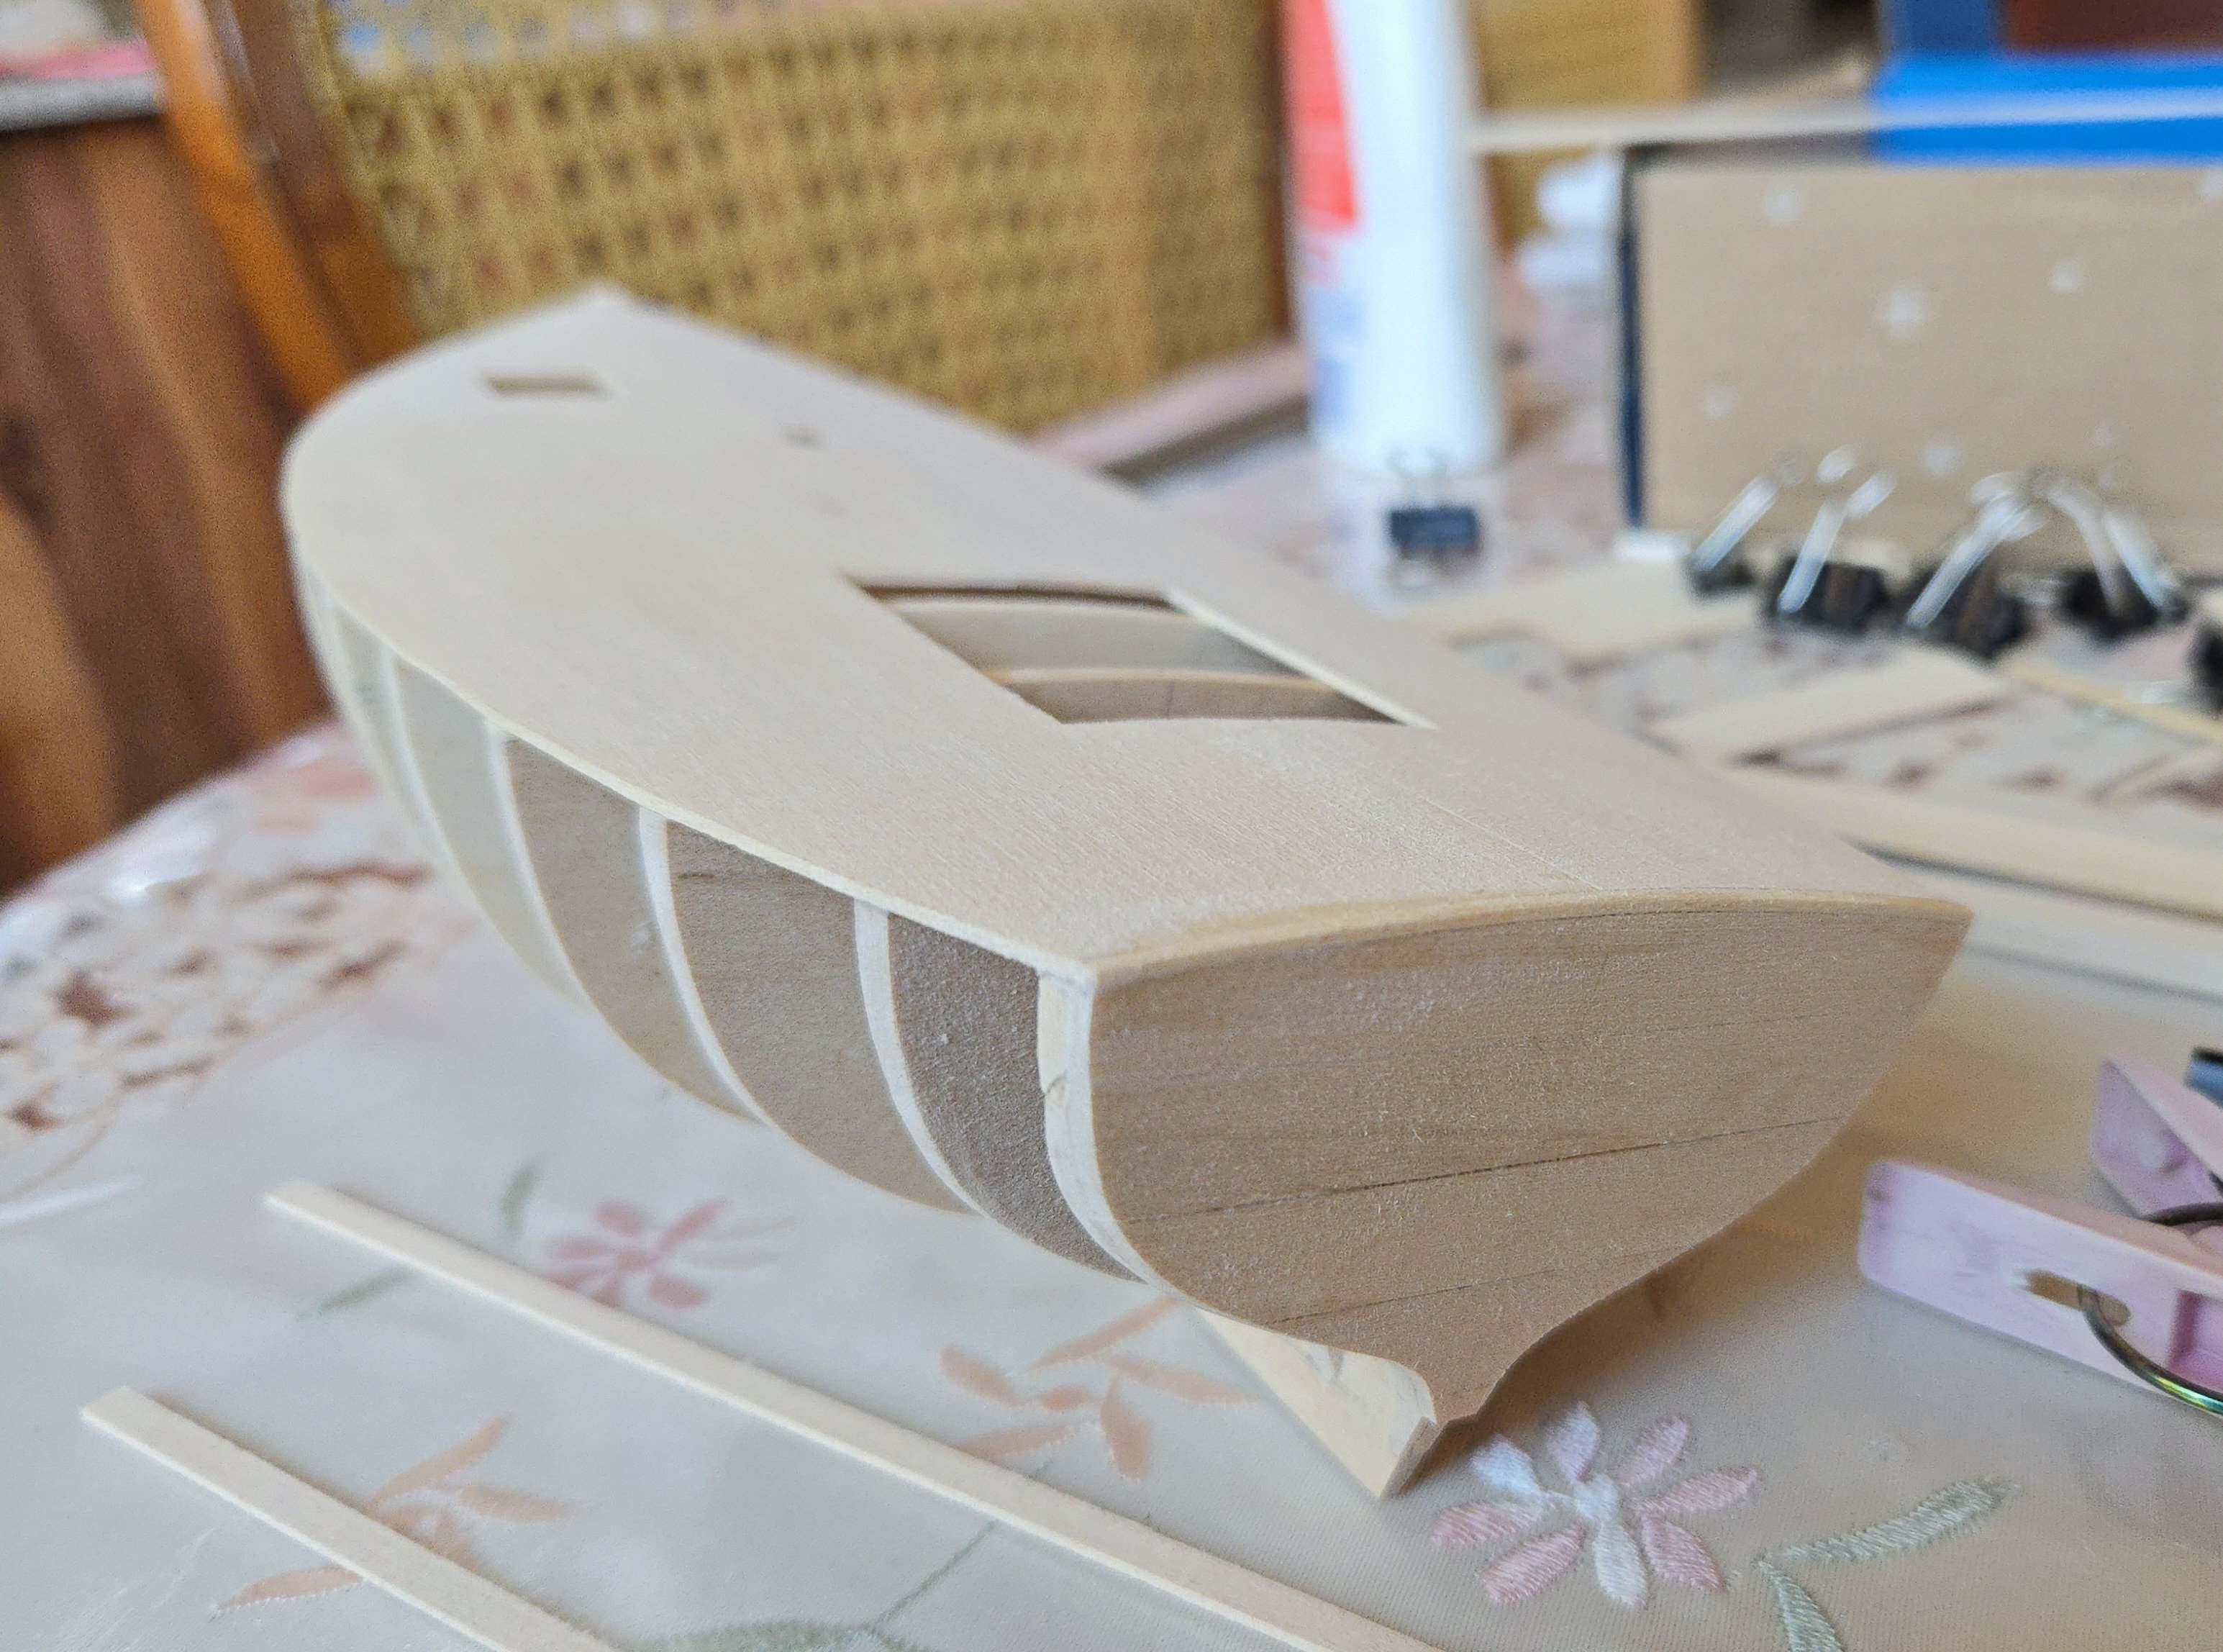
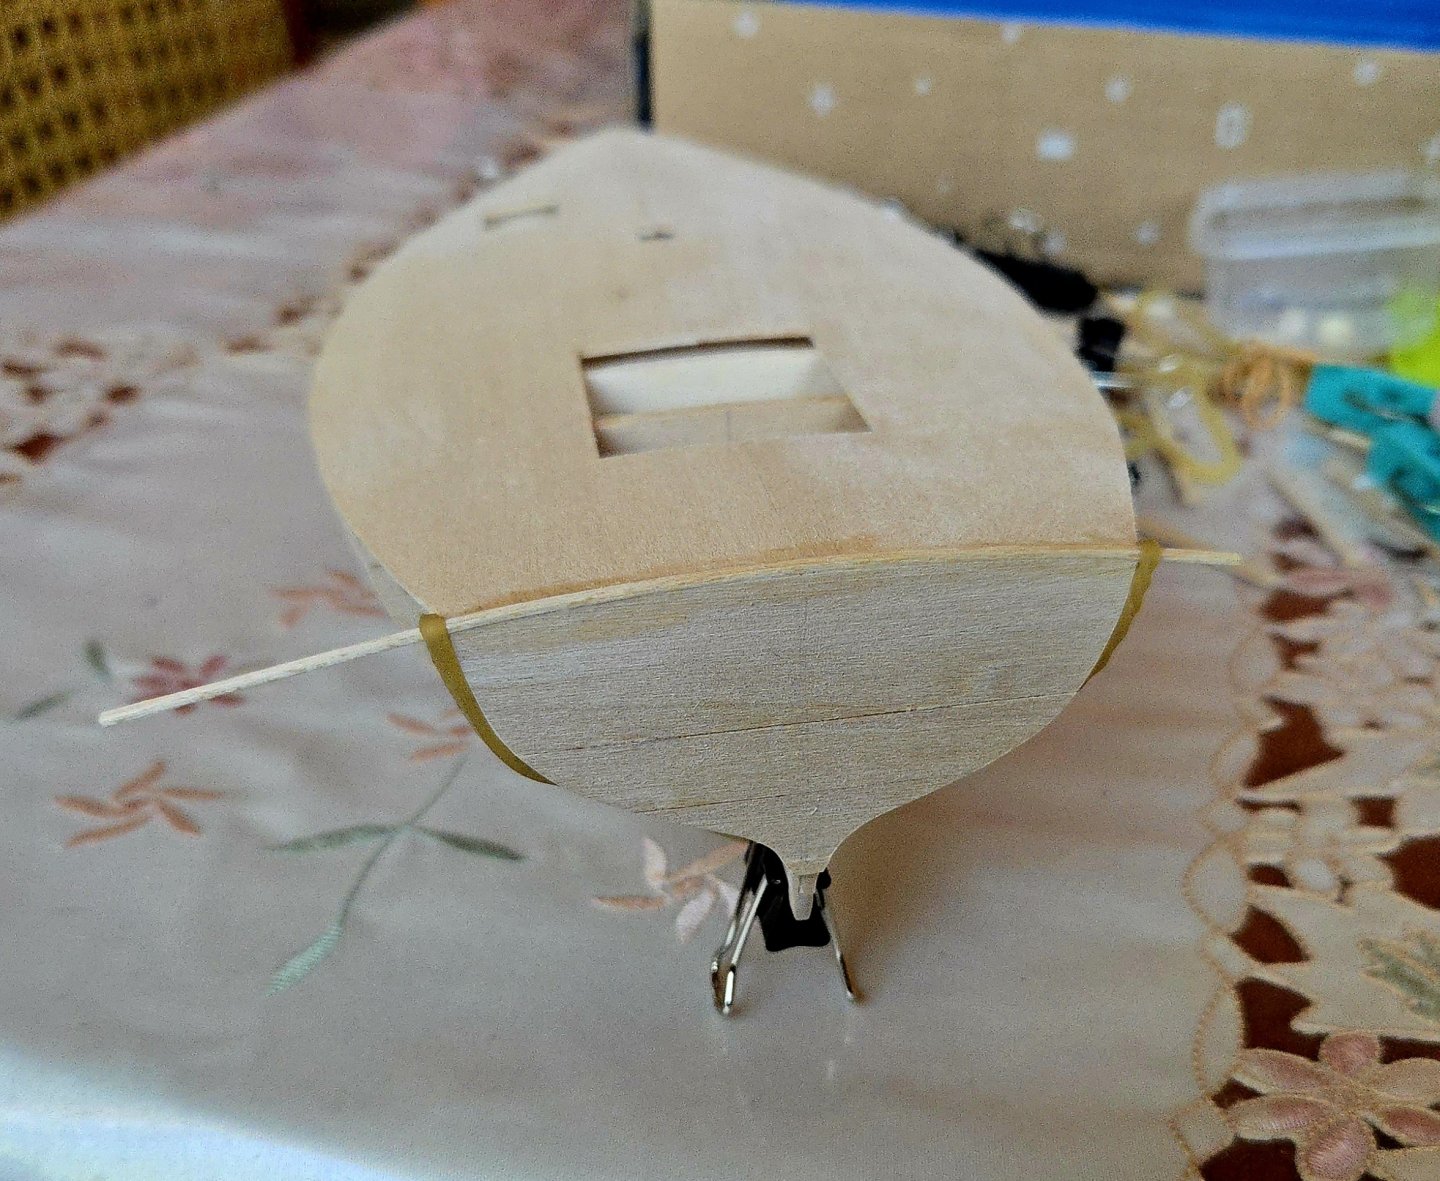
Thanks, John! Next, I added the extra strip across the top of the transom, holding it in place with a rubber band (a relatively light one, as the strip was pretty fragile). I then trimmed and sanded it smooth. The joint with the transom will still need a bit of filler and sanding. Next, I added the stem, so as to start creating the bow rabbet and to be ready for planking. Again, I used rubber bands to hold it in place. Once that had dried for a couple hours or so, I added the keel. Adding it made me realize that the stem was slightly angled off-center, but I was able to sand it into the proper shape afterward. I then sanded the keel and especially the joint between the keel and the stem. For now I'm leaving off the sternpost, and I'll trim the aft end of the keel once I add it, but I'm liking how it's coming out so far. Finally, I cut out two 1/4x1/32-inch strips to use as sheer strakes. I decided that these would be made of a single piece. I suspect that the strakes lower down will be easier to make from multiple planks due to the serious curves and twists. For now, the sheer strakes have been soaked and are drying in place. Fitting them made me realize that, despite my best efforts, the bow rabbet is a little small to really fit them, so I'll need to somewhat thin the planks where they reach the rabbet.


- 312 replies
-
- 10
-
-
- Chile
- Latin America
- (and 6 more)
-
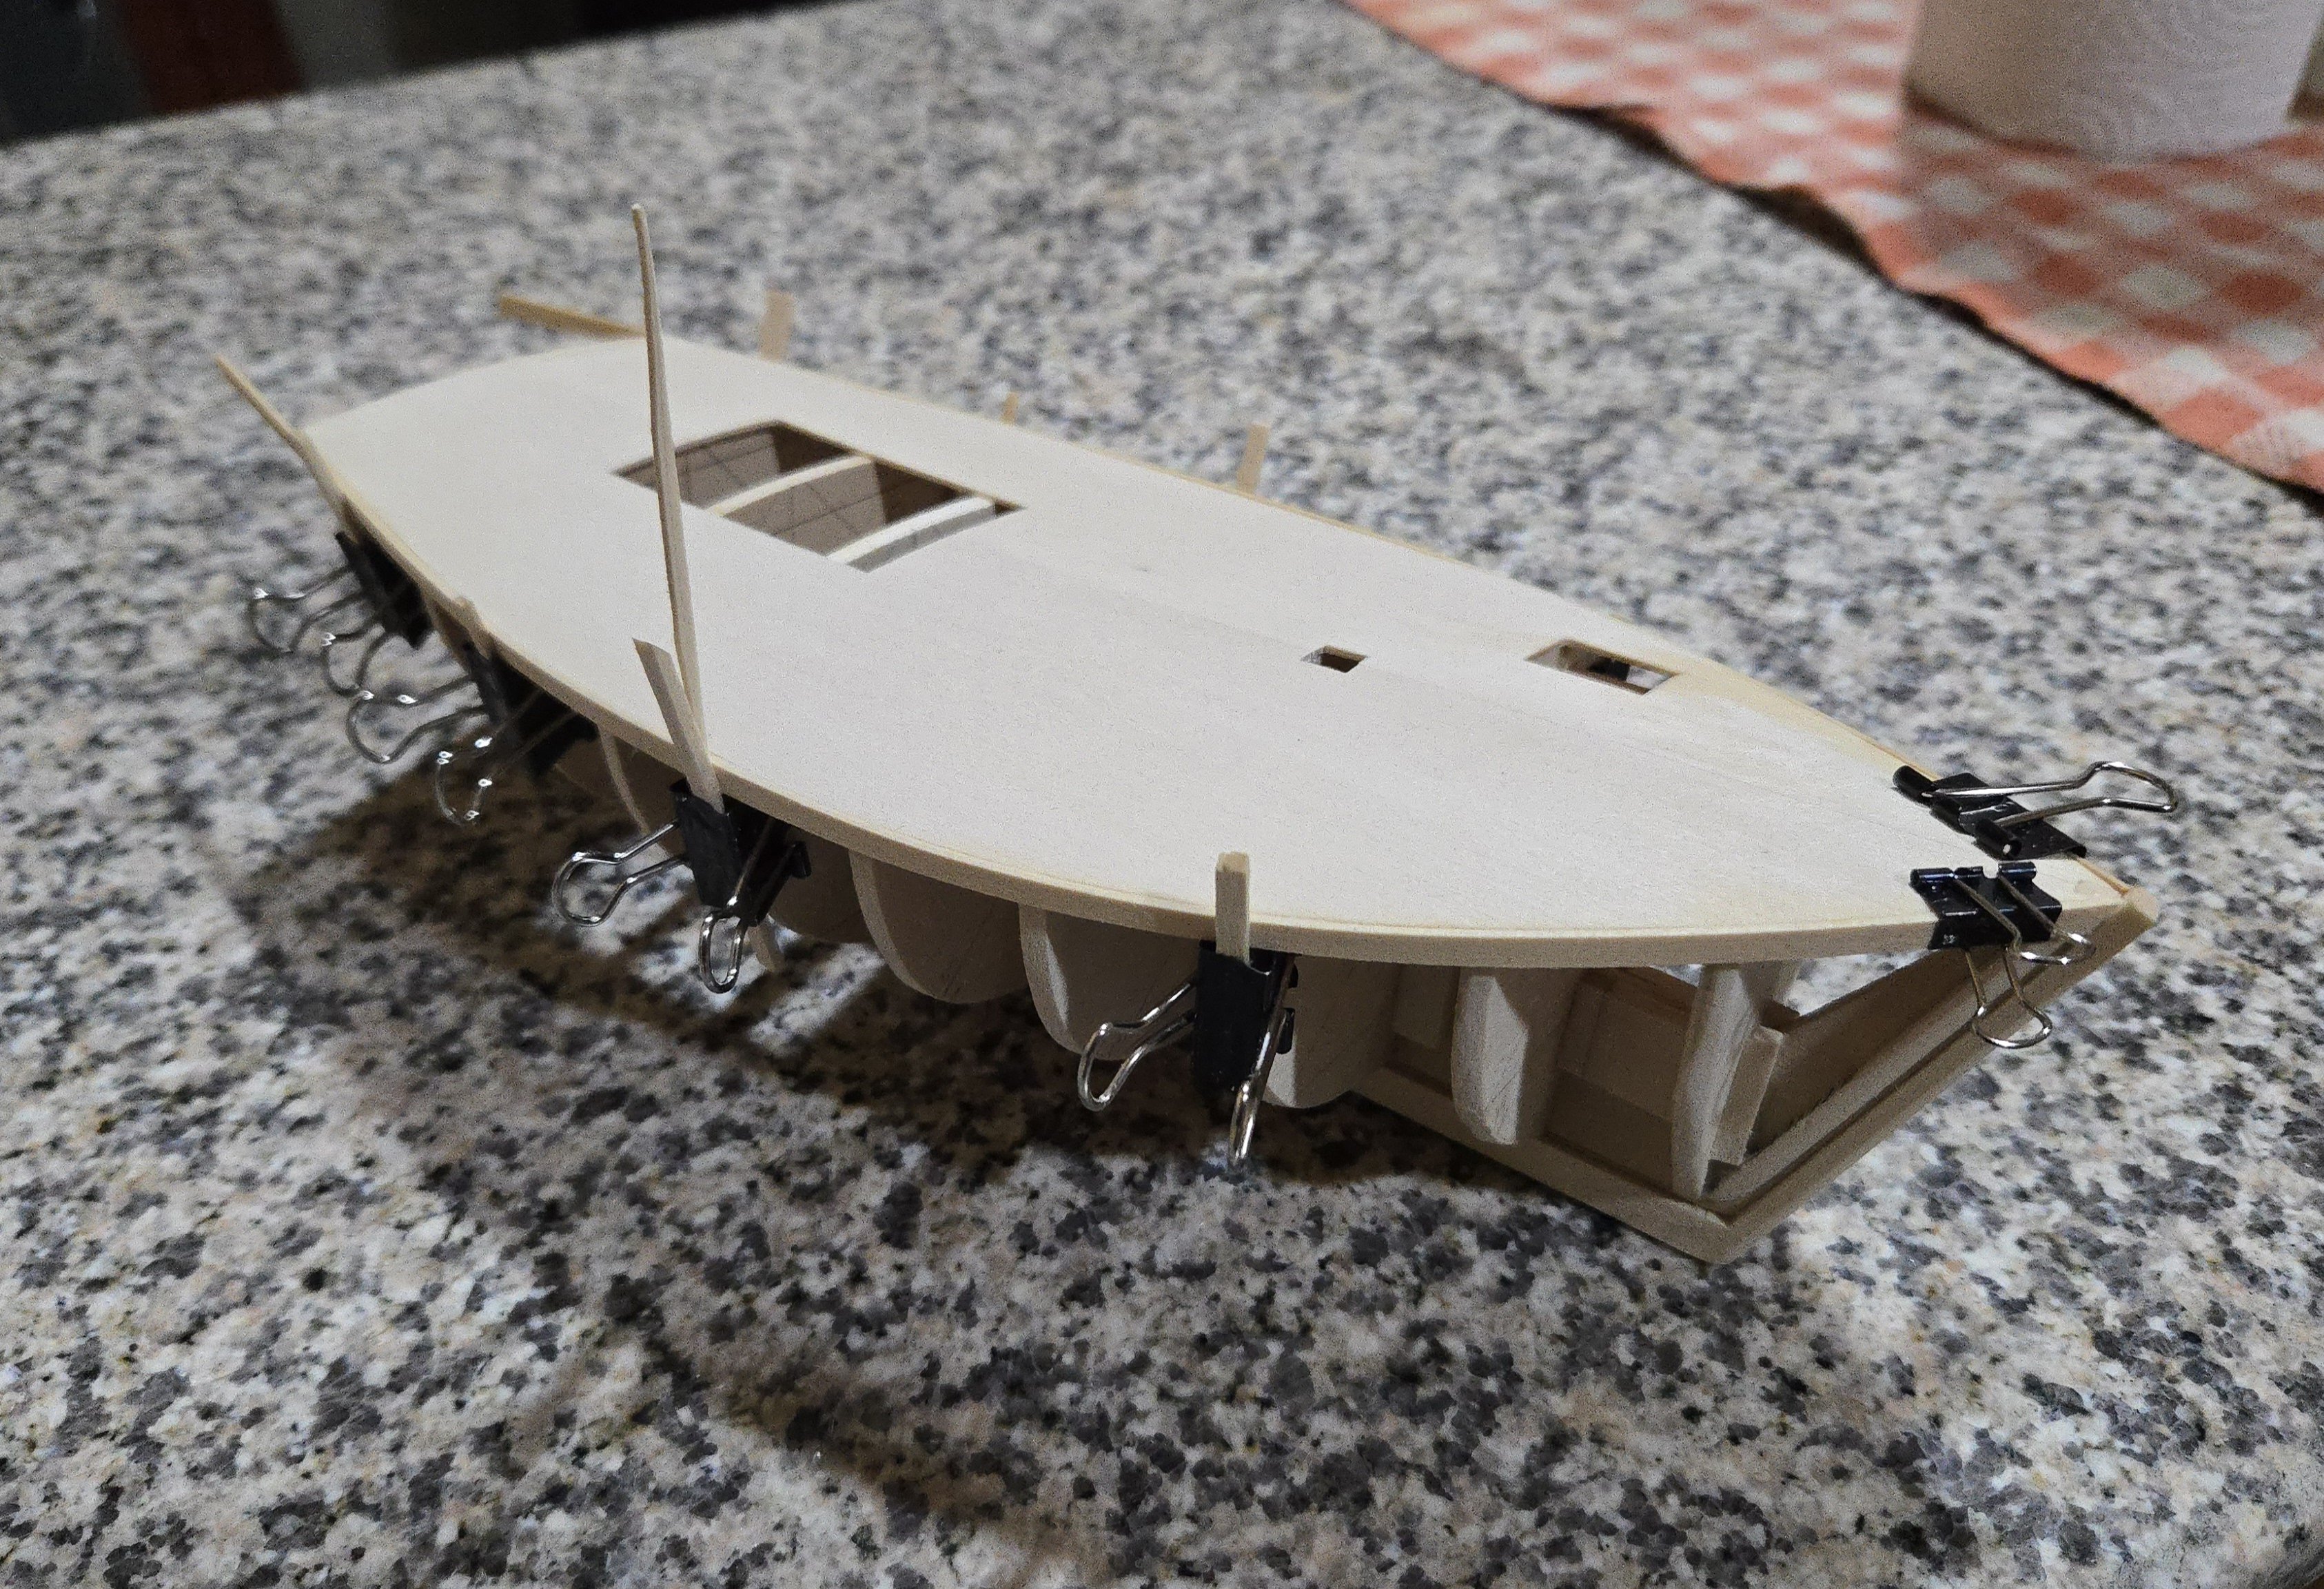
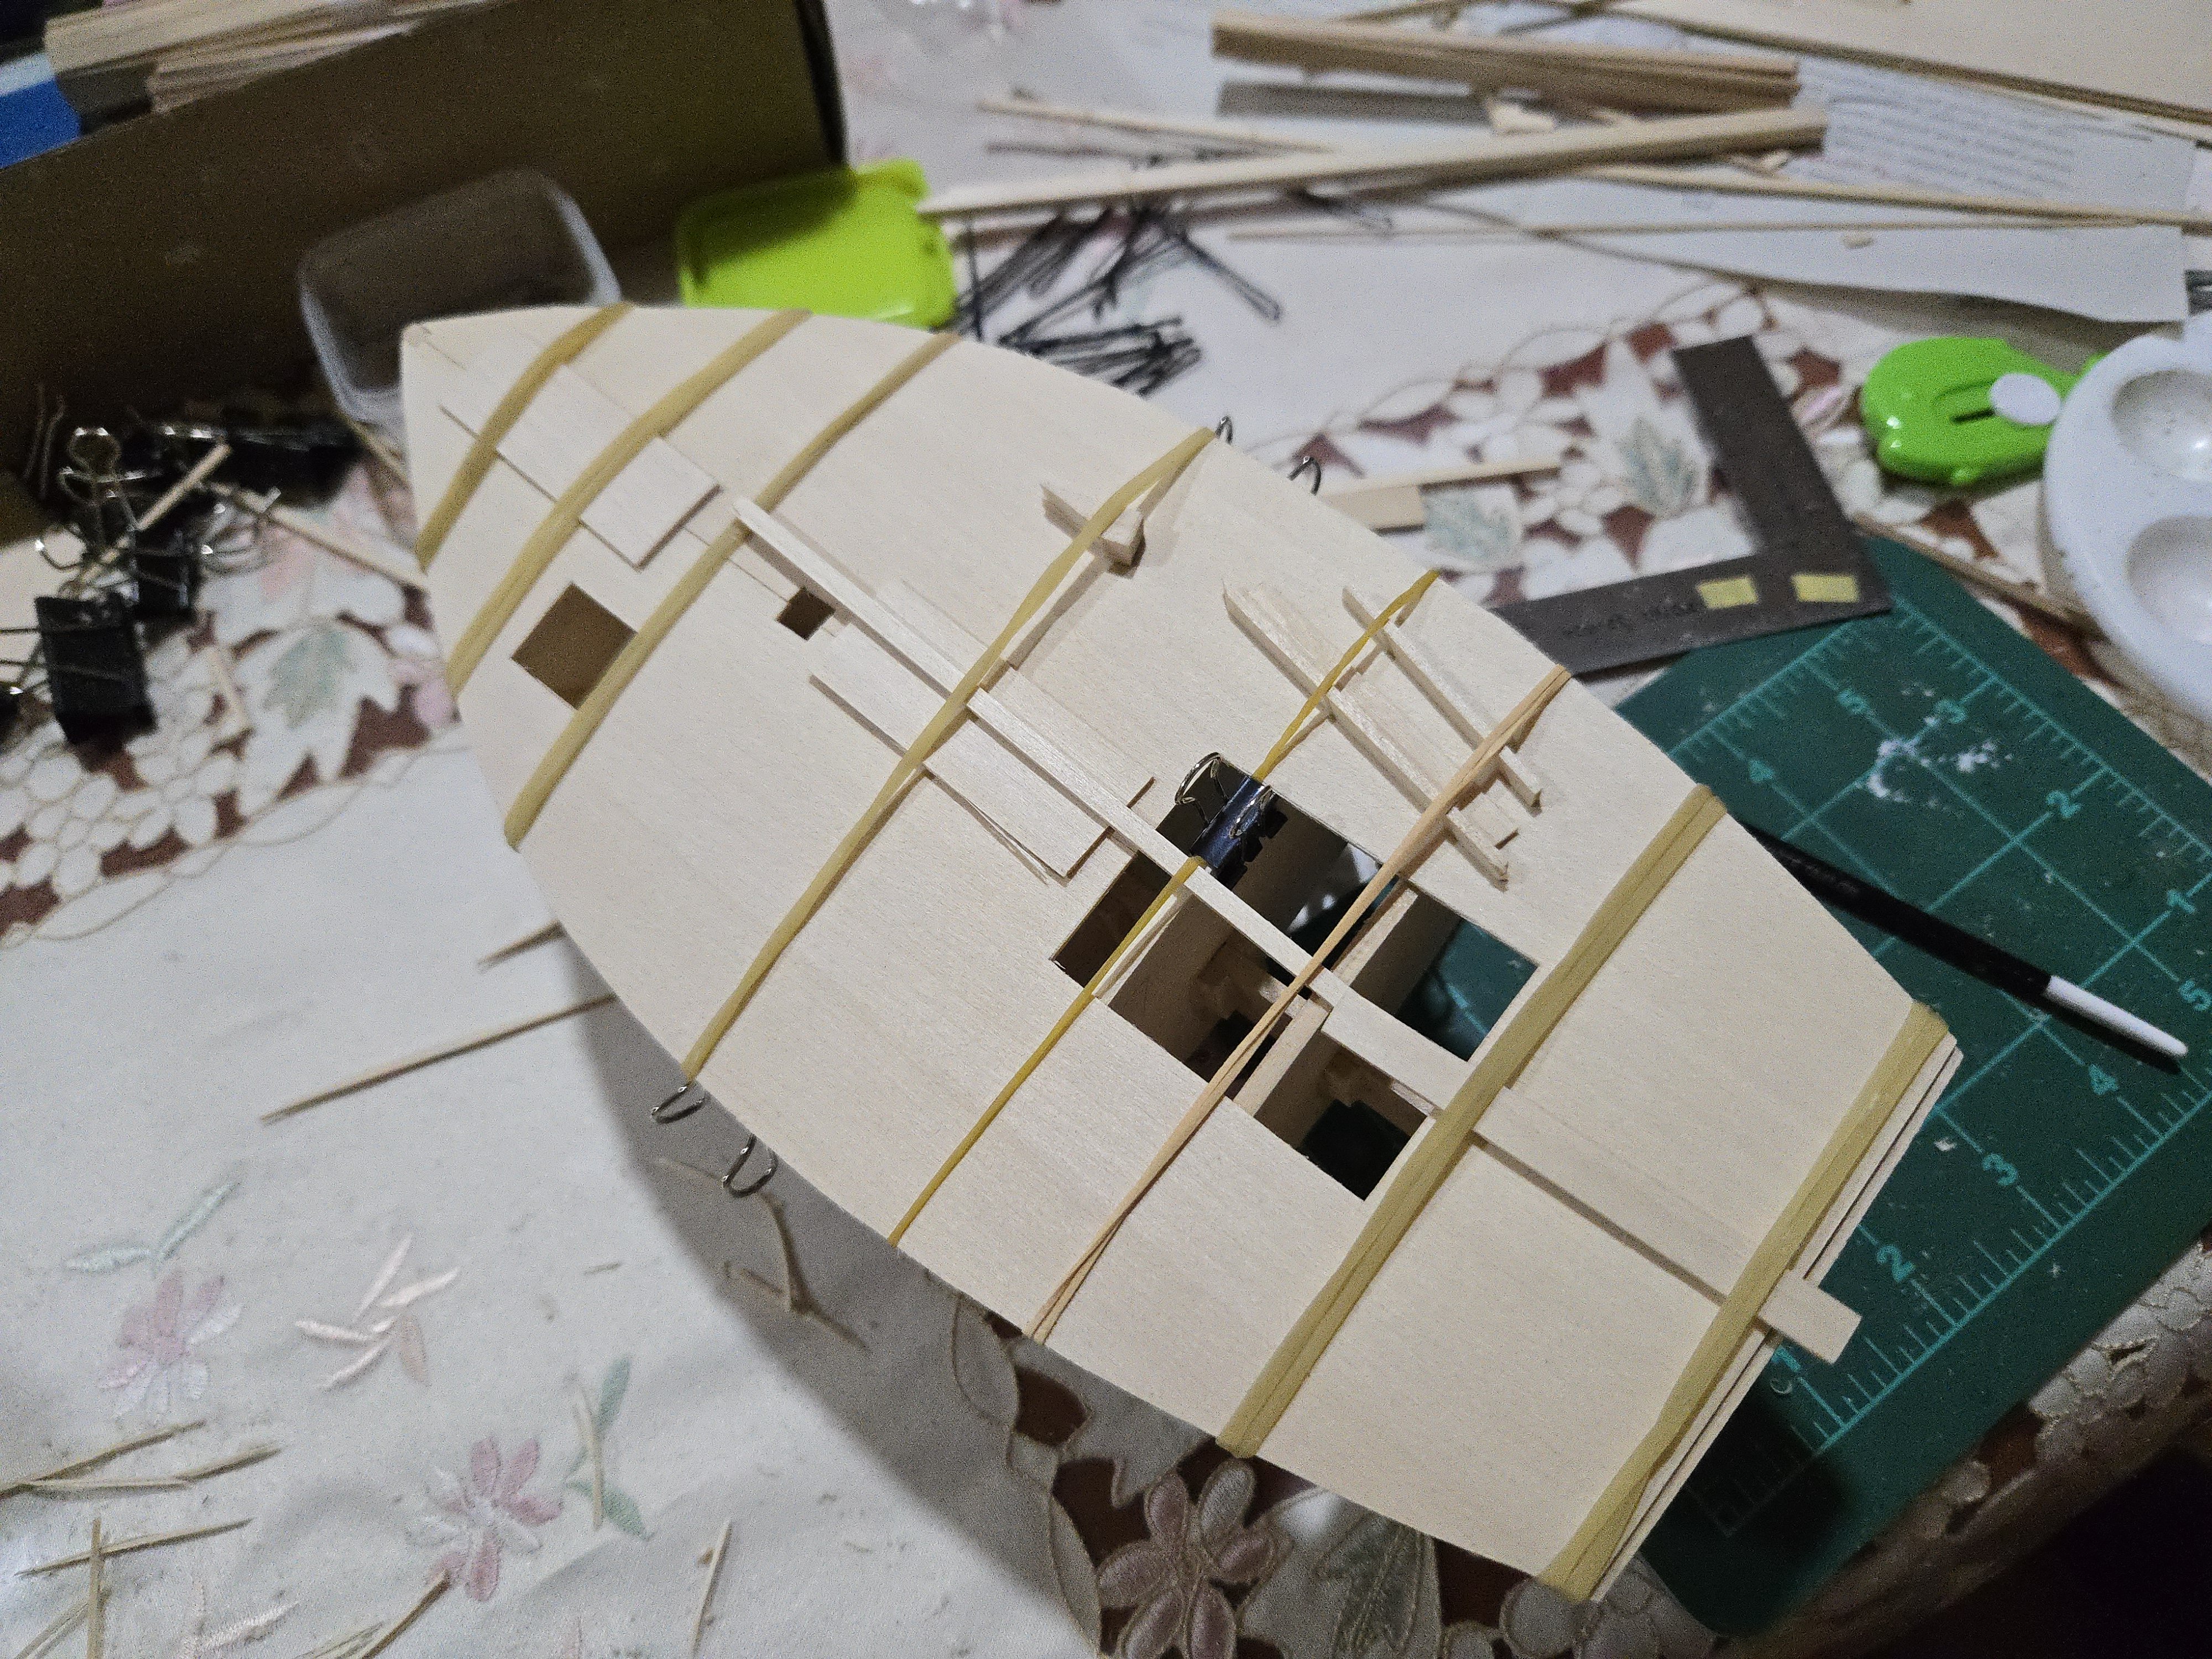
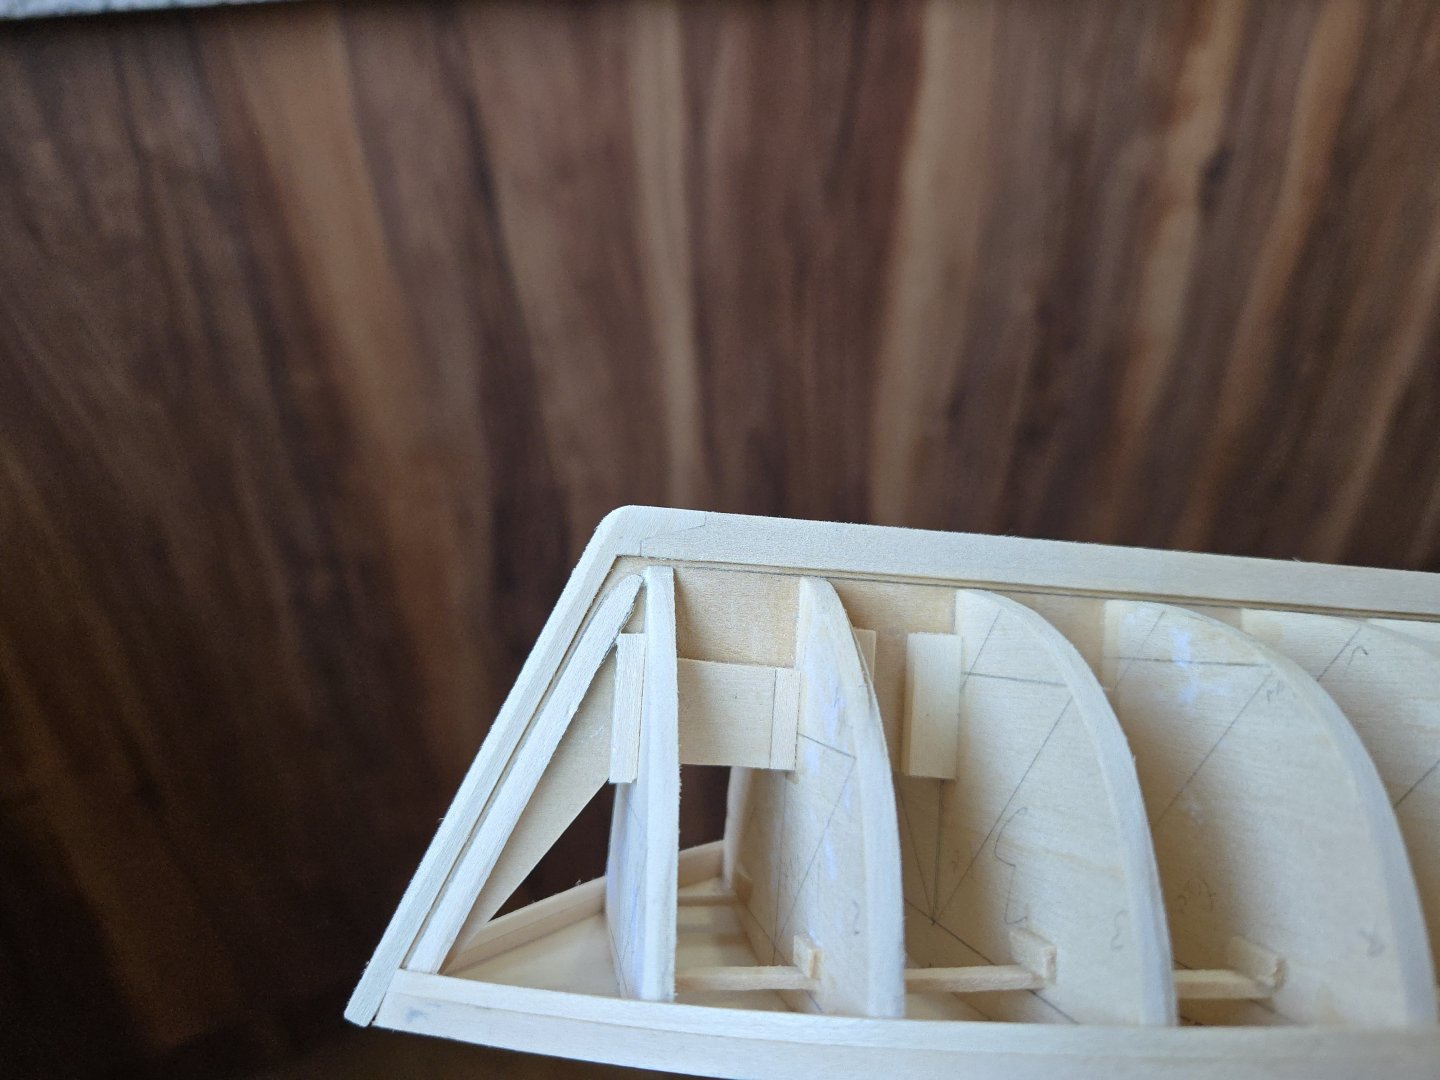
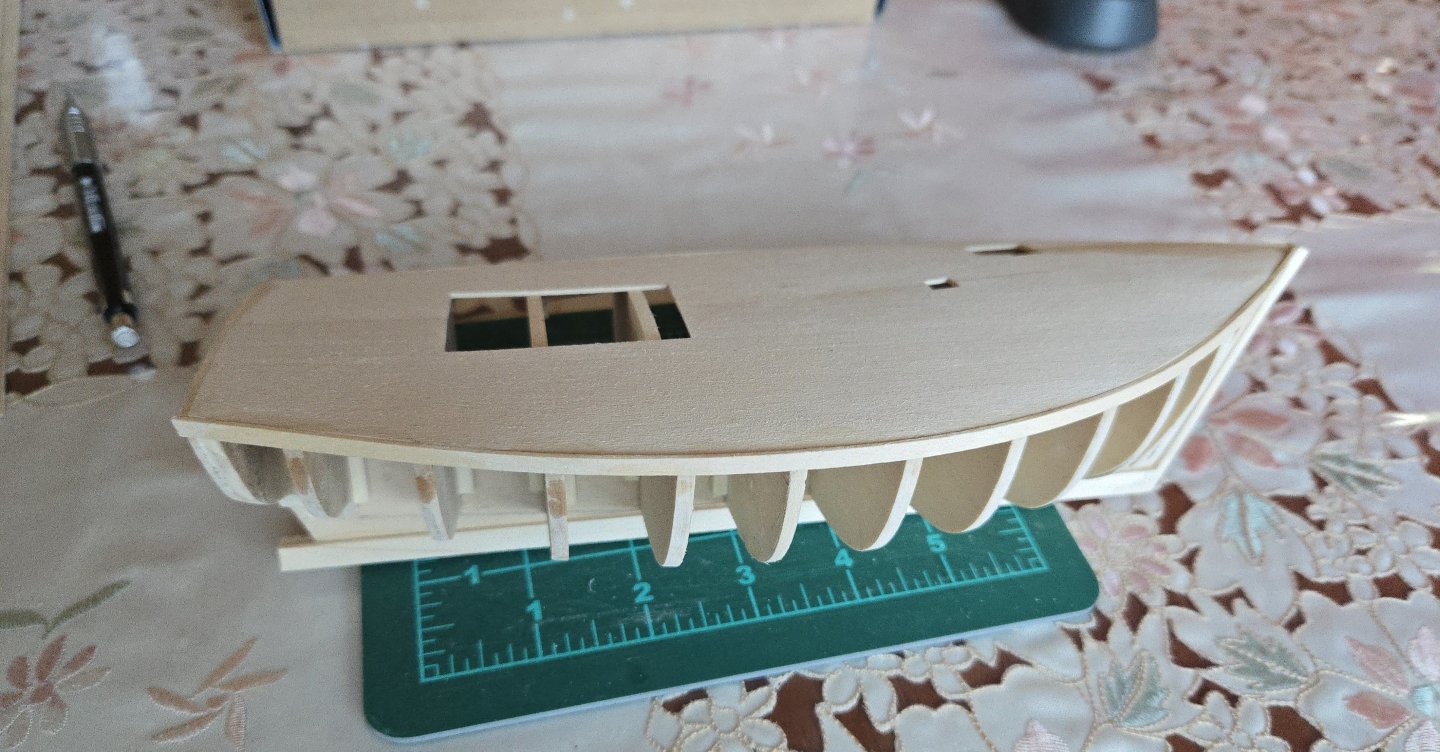
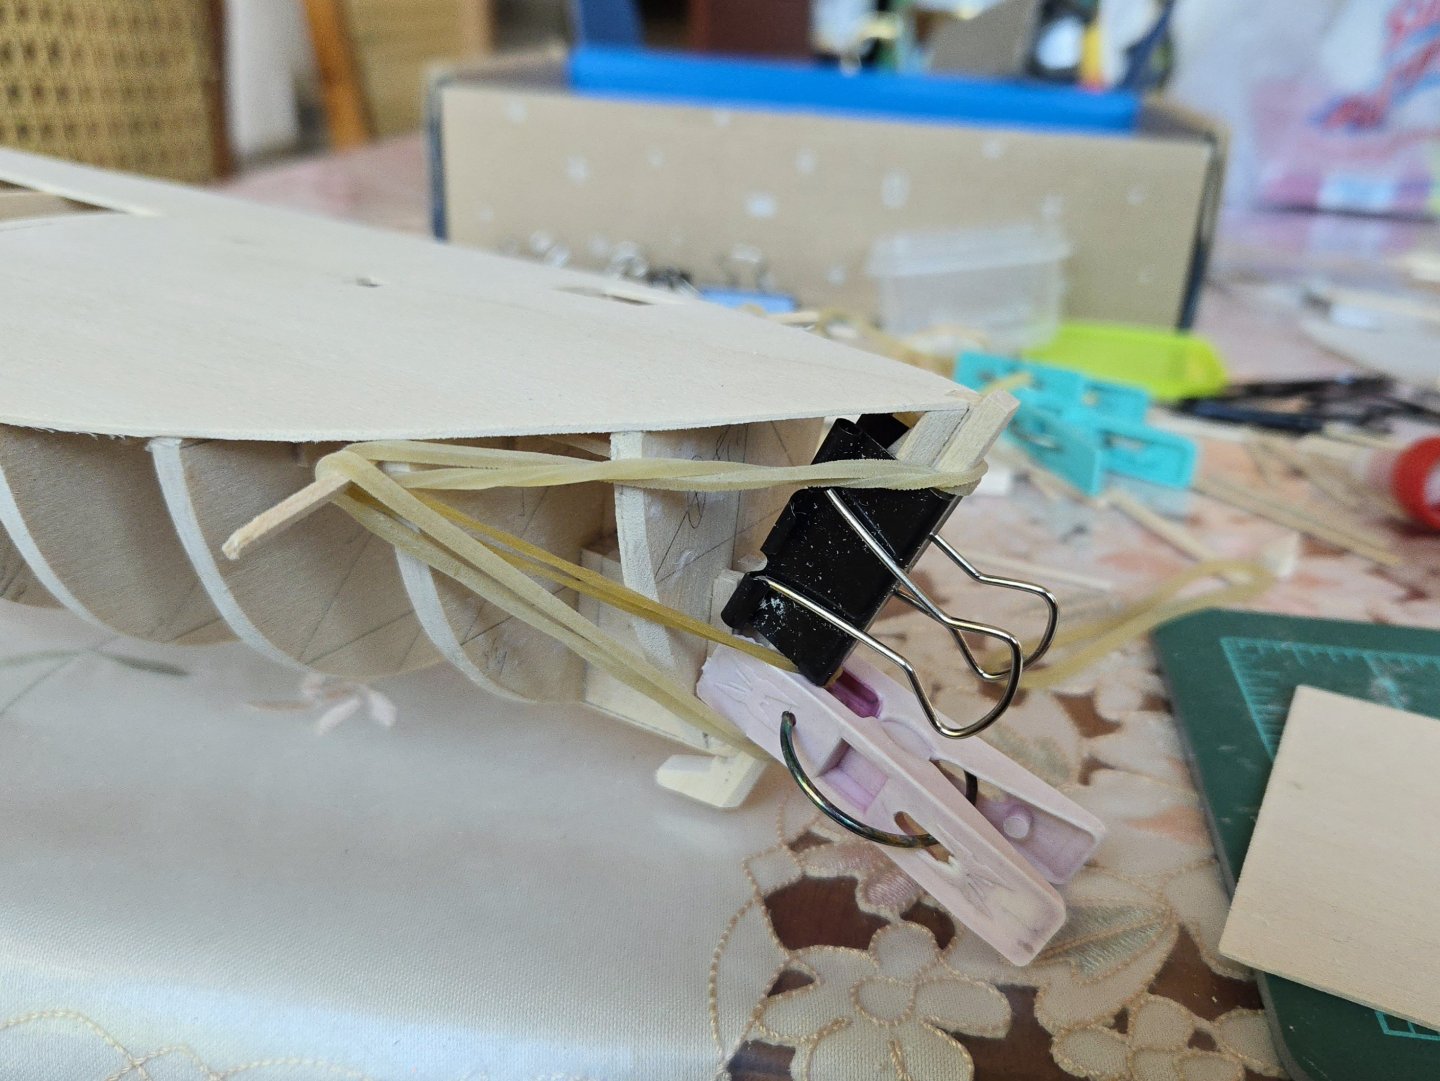
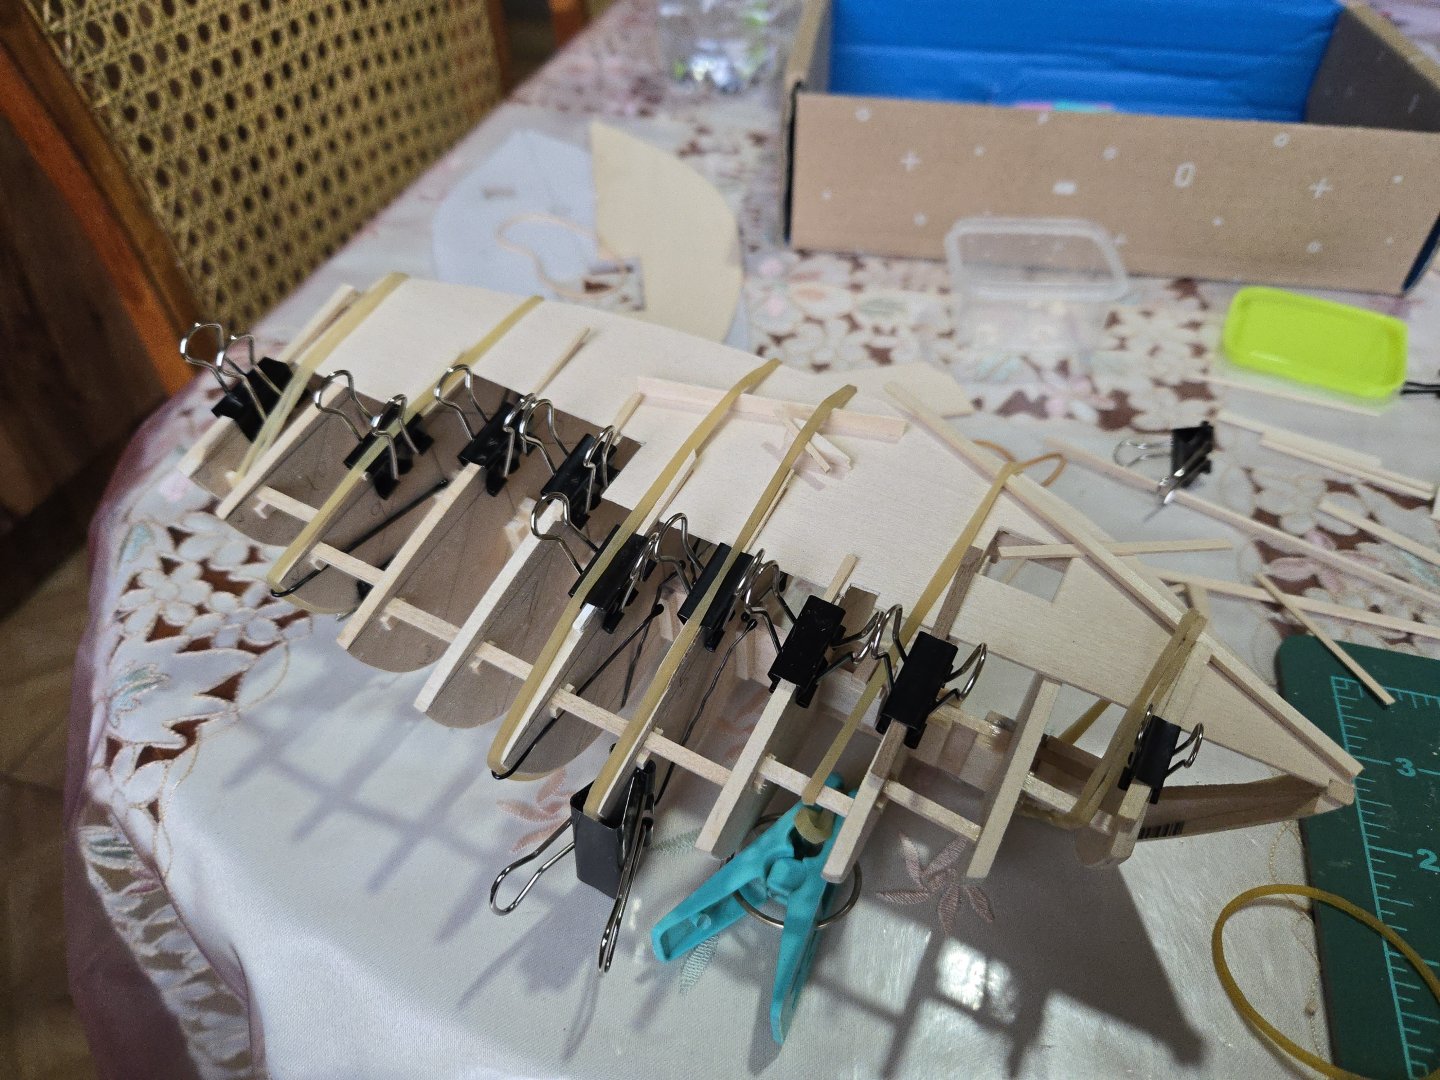
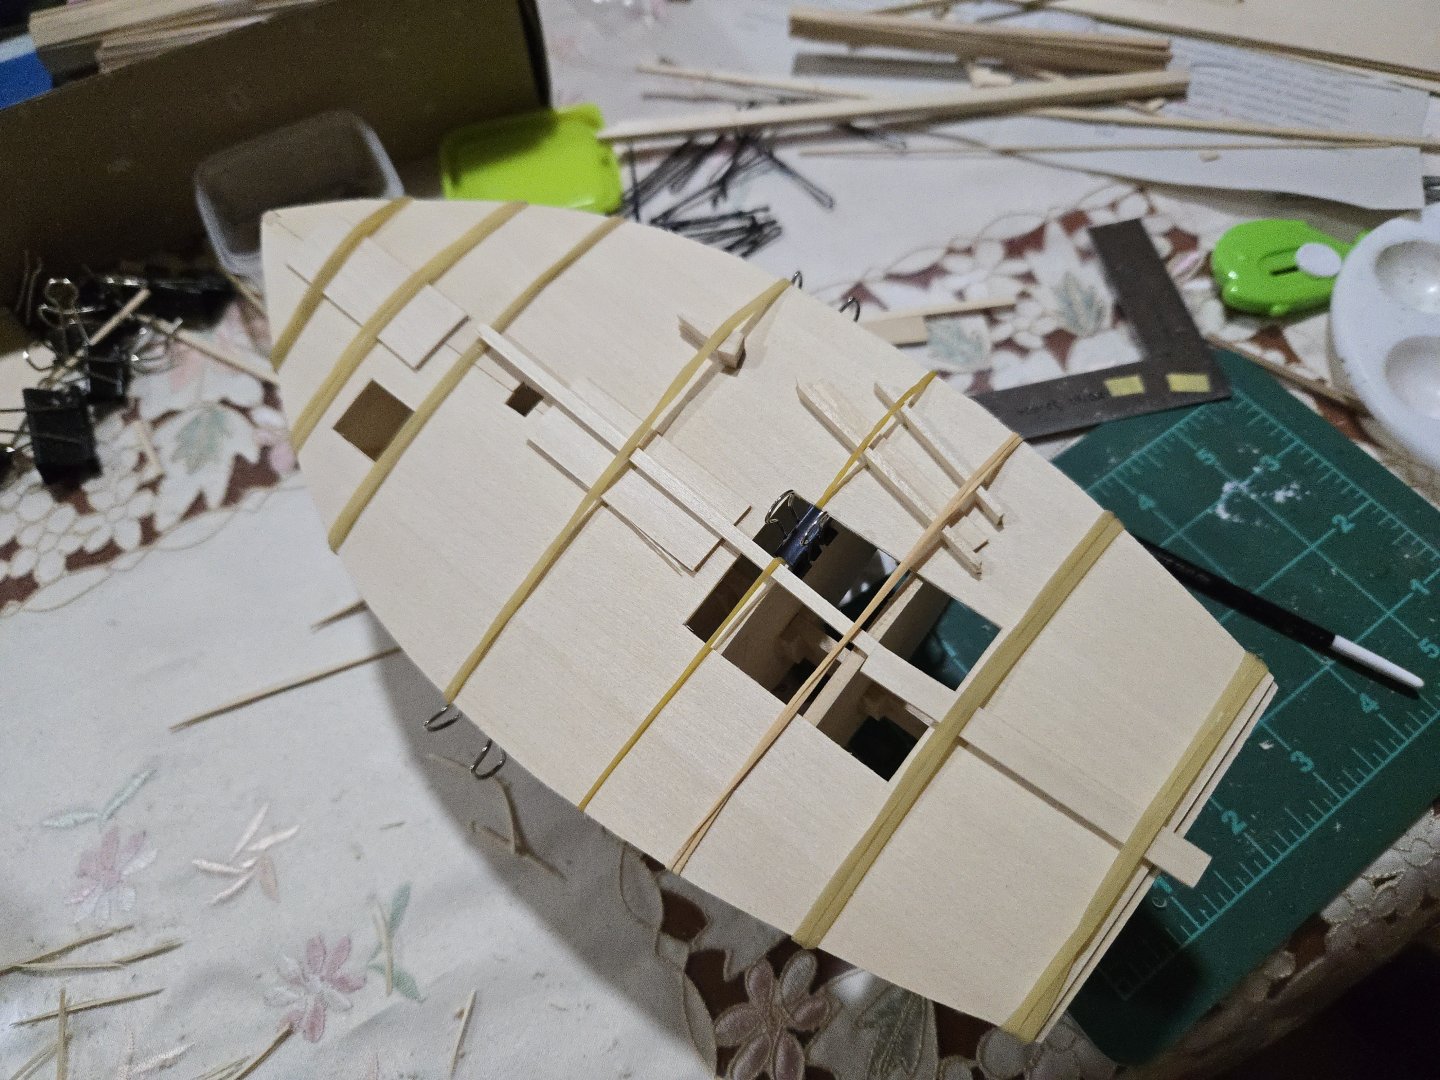
Thanks! Adding the subdecks was slightly more complex than expected, but they're on now. First, I marked and trimmed the exterior edges. I had cut them a good bit oversized and realized that I was setting myself up for a lot of sanding, so I trimmed them to just oversized. Then I glued on the first subdeck on the port side. As can be seen, it took a lot of clamps and rubber bands. I started gluing around the center and added clamps to hold it in place and get the right curve fore-and-aft, and then added glue extending out to the edges followed by rubber bands to set the camber. Gluing the second half was trickier because, with the first half in place, I couldn't really clamp it to the bulkheads. Instead, it was glued all at once and mostly held in place with rubber bands. It was trickier to hold this one in place, and there ended up being a few points where the subdeck wasn't quite in firm contact with the bulkheads, despite adding shims beneath the rubber bands. Thankfully the gap ended up being very small, enough that I was able to sand it out of the subdeck despite it being just 1/32-inch thick. Another challenge was that it was very easy to bend the subdeck with the rubber band, unless it was placed at the junction with the bulkheads. After letting it dry overnight, I was able to remove the bands and sand the edge and top. The subdeck provides a better sense of how the camber turned out, I don't think it looks excessive. As can be seen, I cut the subdeck slightly short so I could add a strip at the top of the transom. I think having the grain running side-to-side there, instead of having open grain, will make it easier to use sanding and filler to disguise that I placed the top transom plank slightly too low. Next steps will be to add the transom top strip, add the keel/stem/sternpost, and to plank down to the wale. I can then line out the hull planking, add the covering boards, and begin planking the hull and the deck.


- 312 replies
-
- 8
-
-
- Chile
- Latin America
- (and 6 more)
-
Very nicely done, especially for a first model!
-
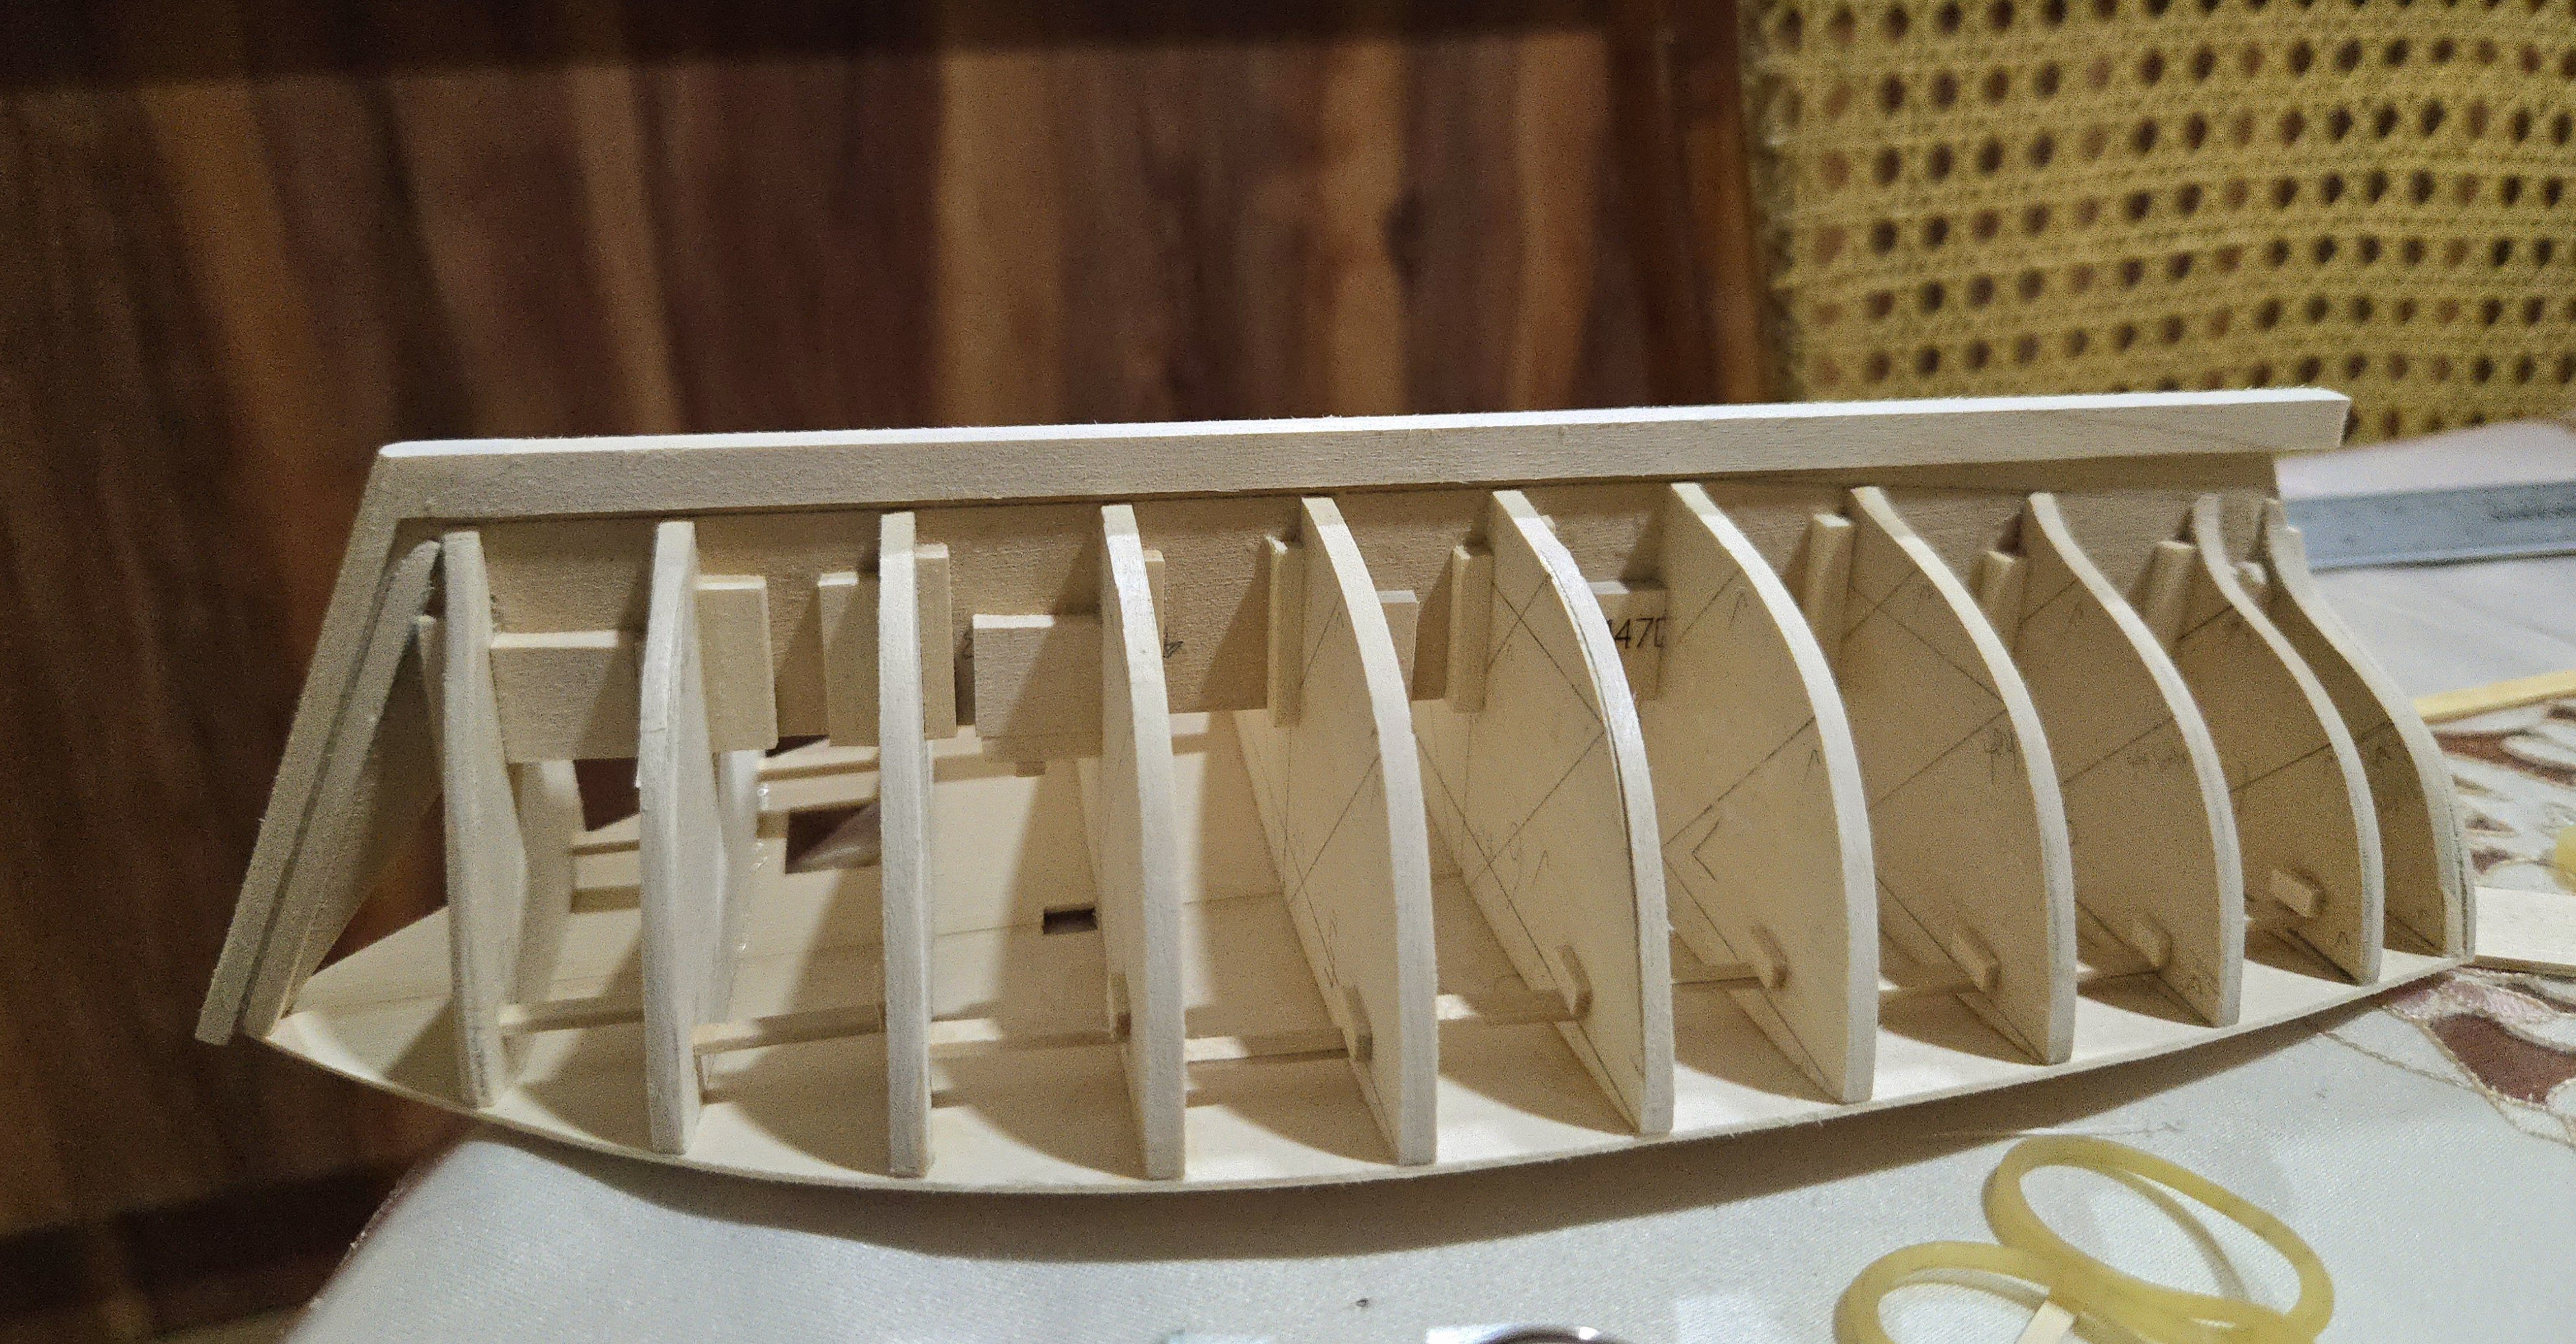
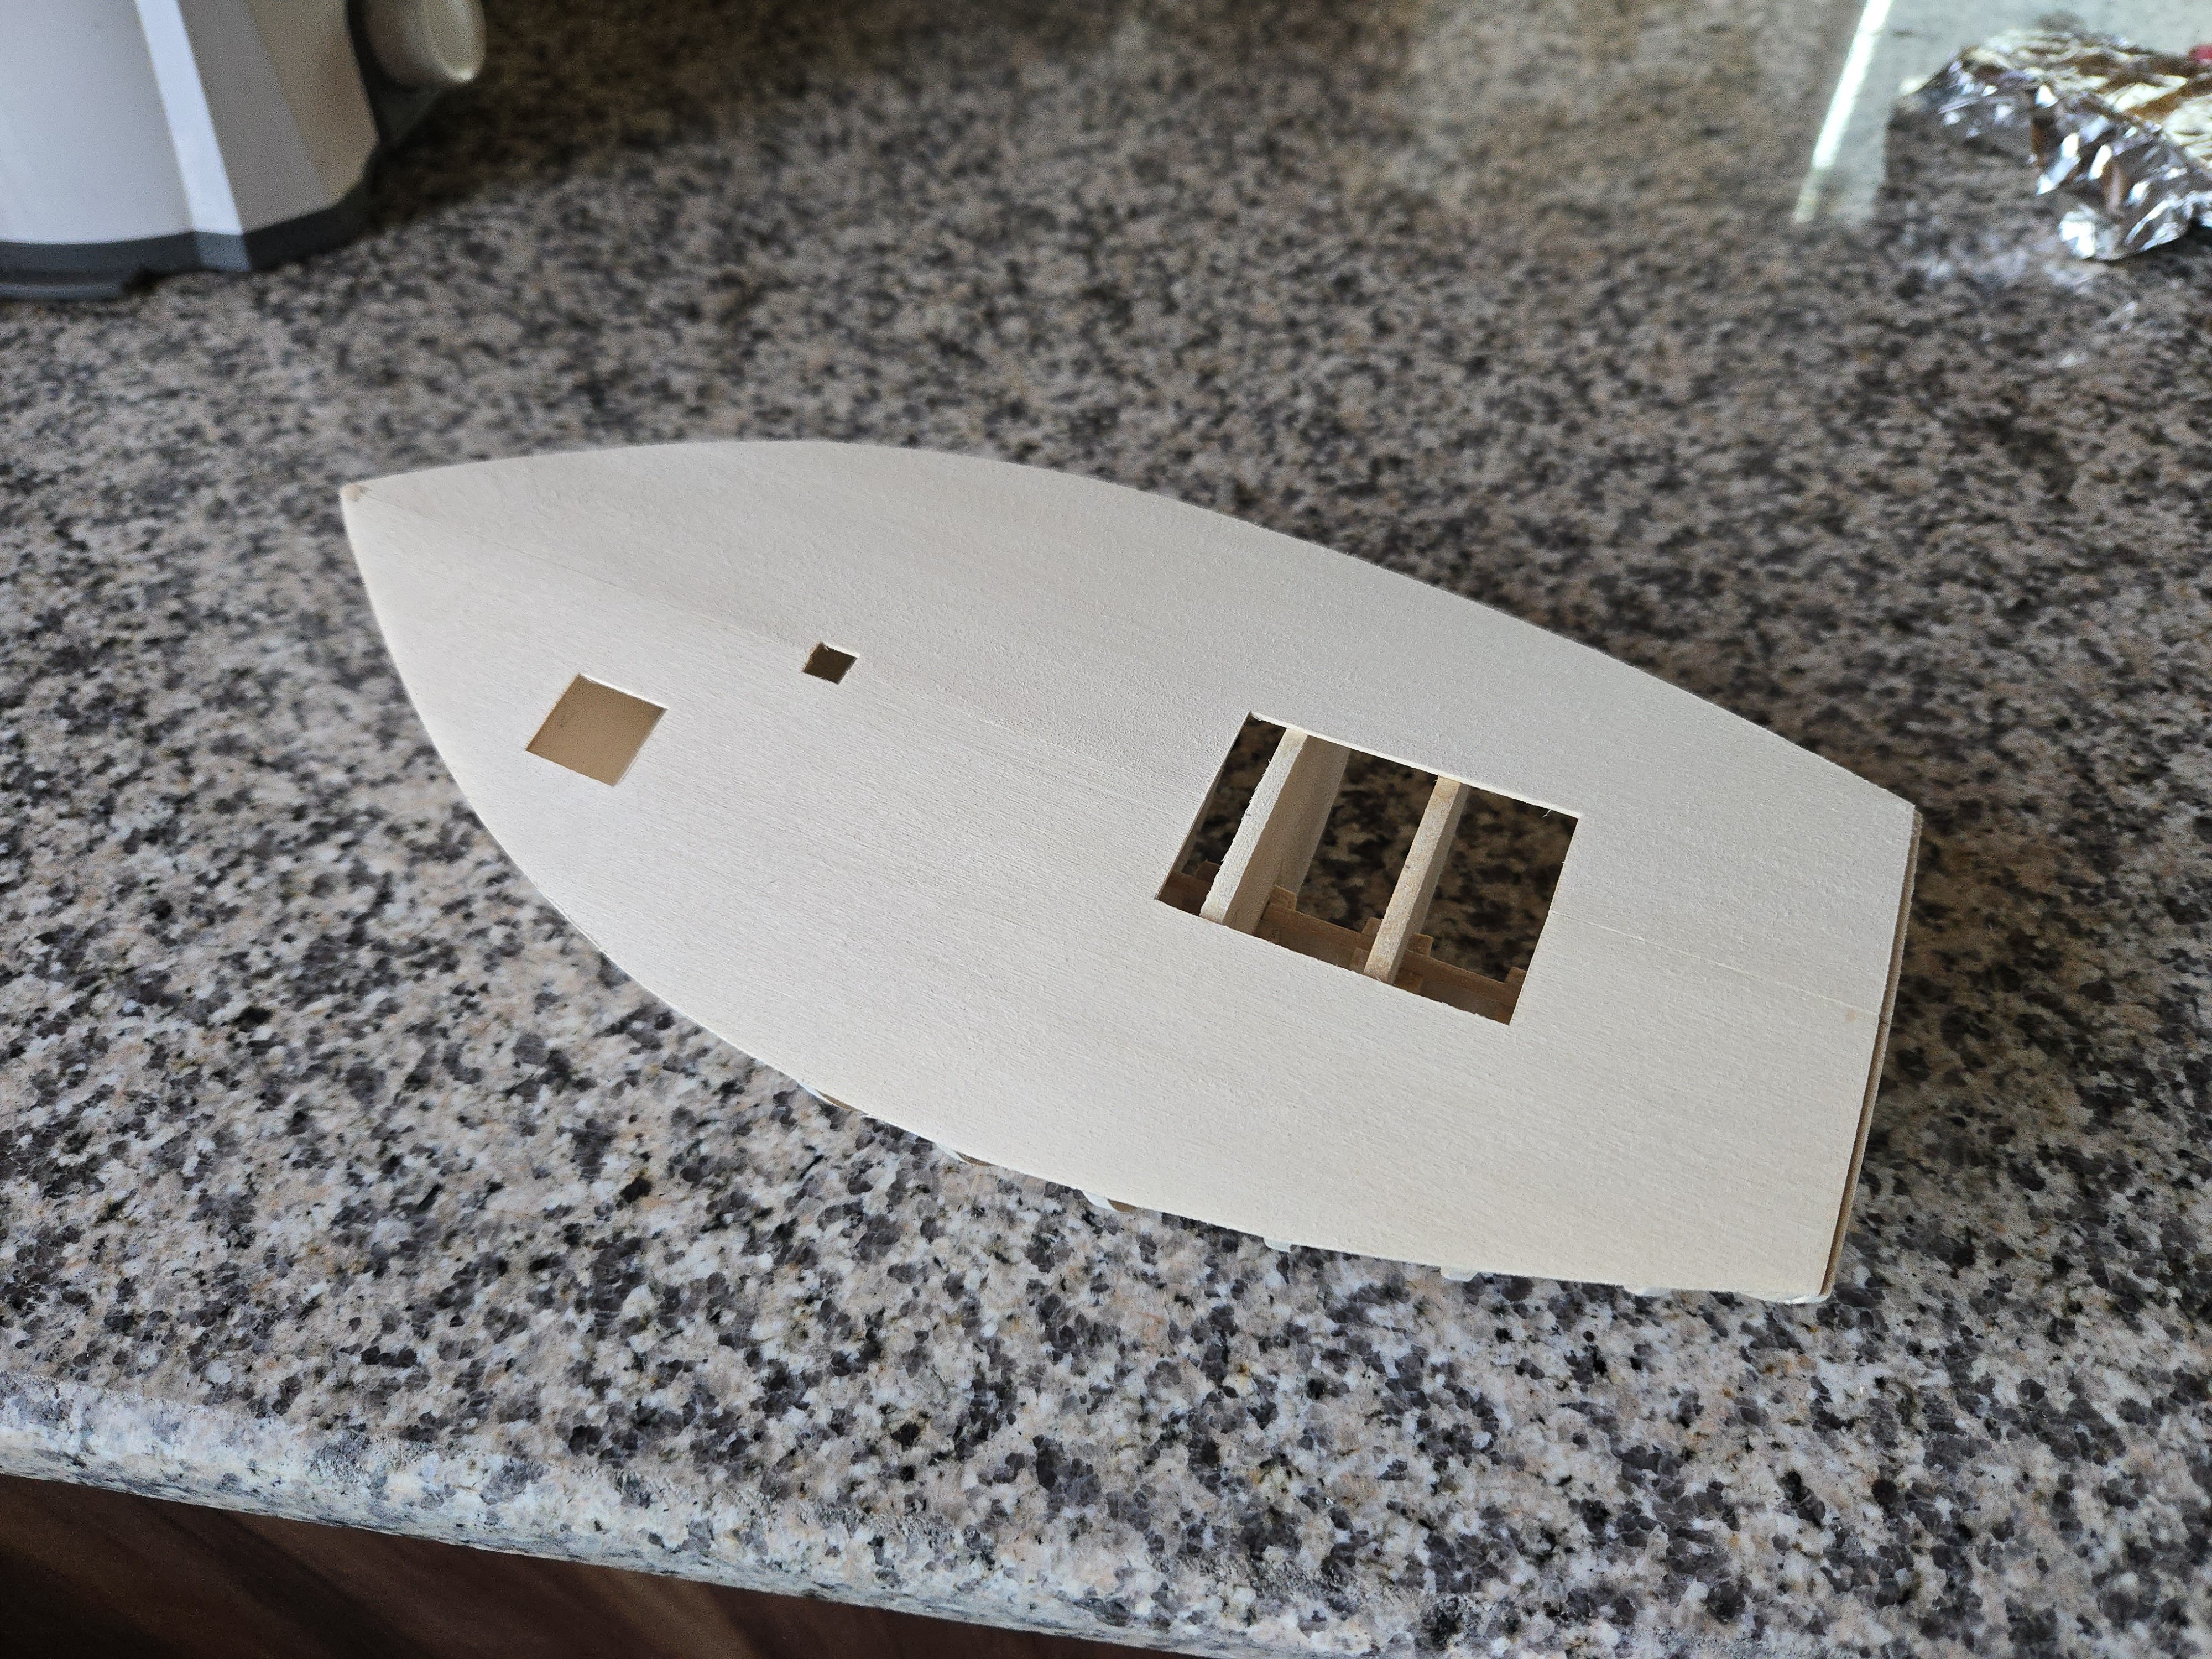
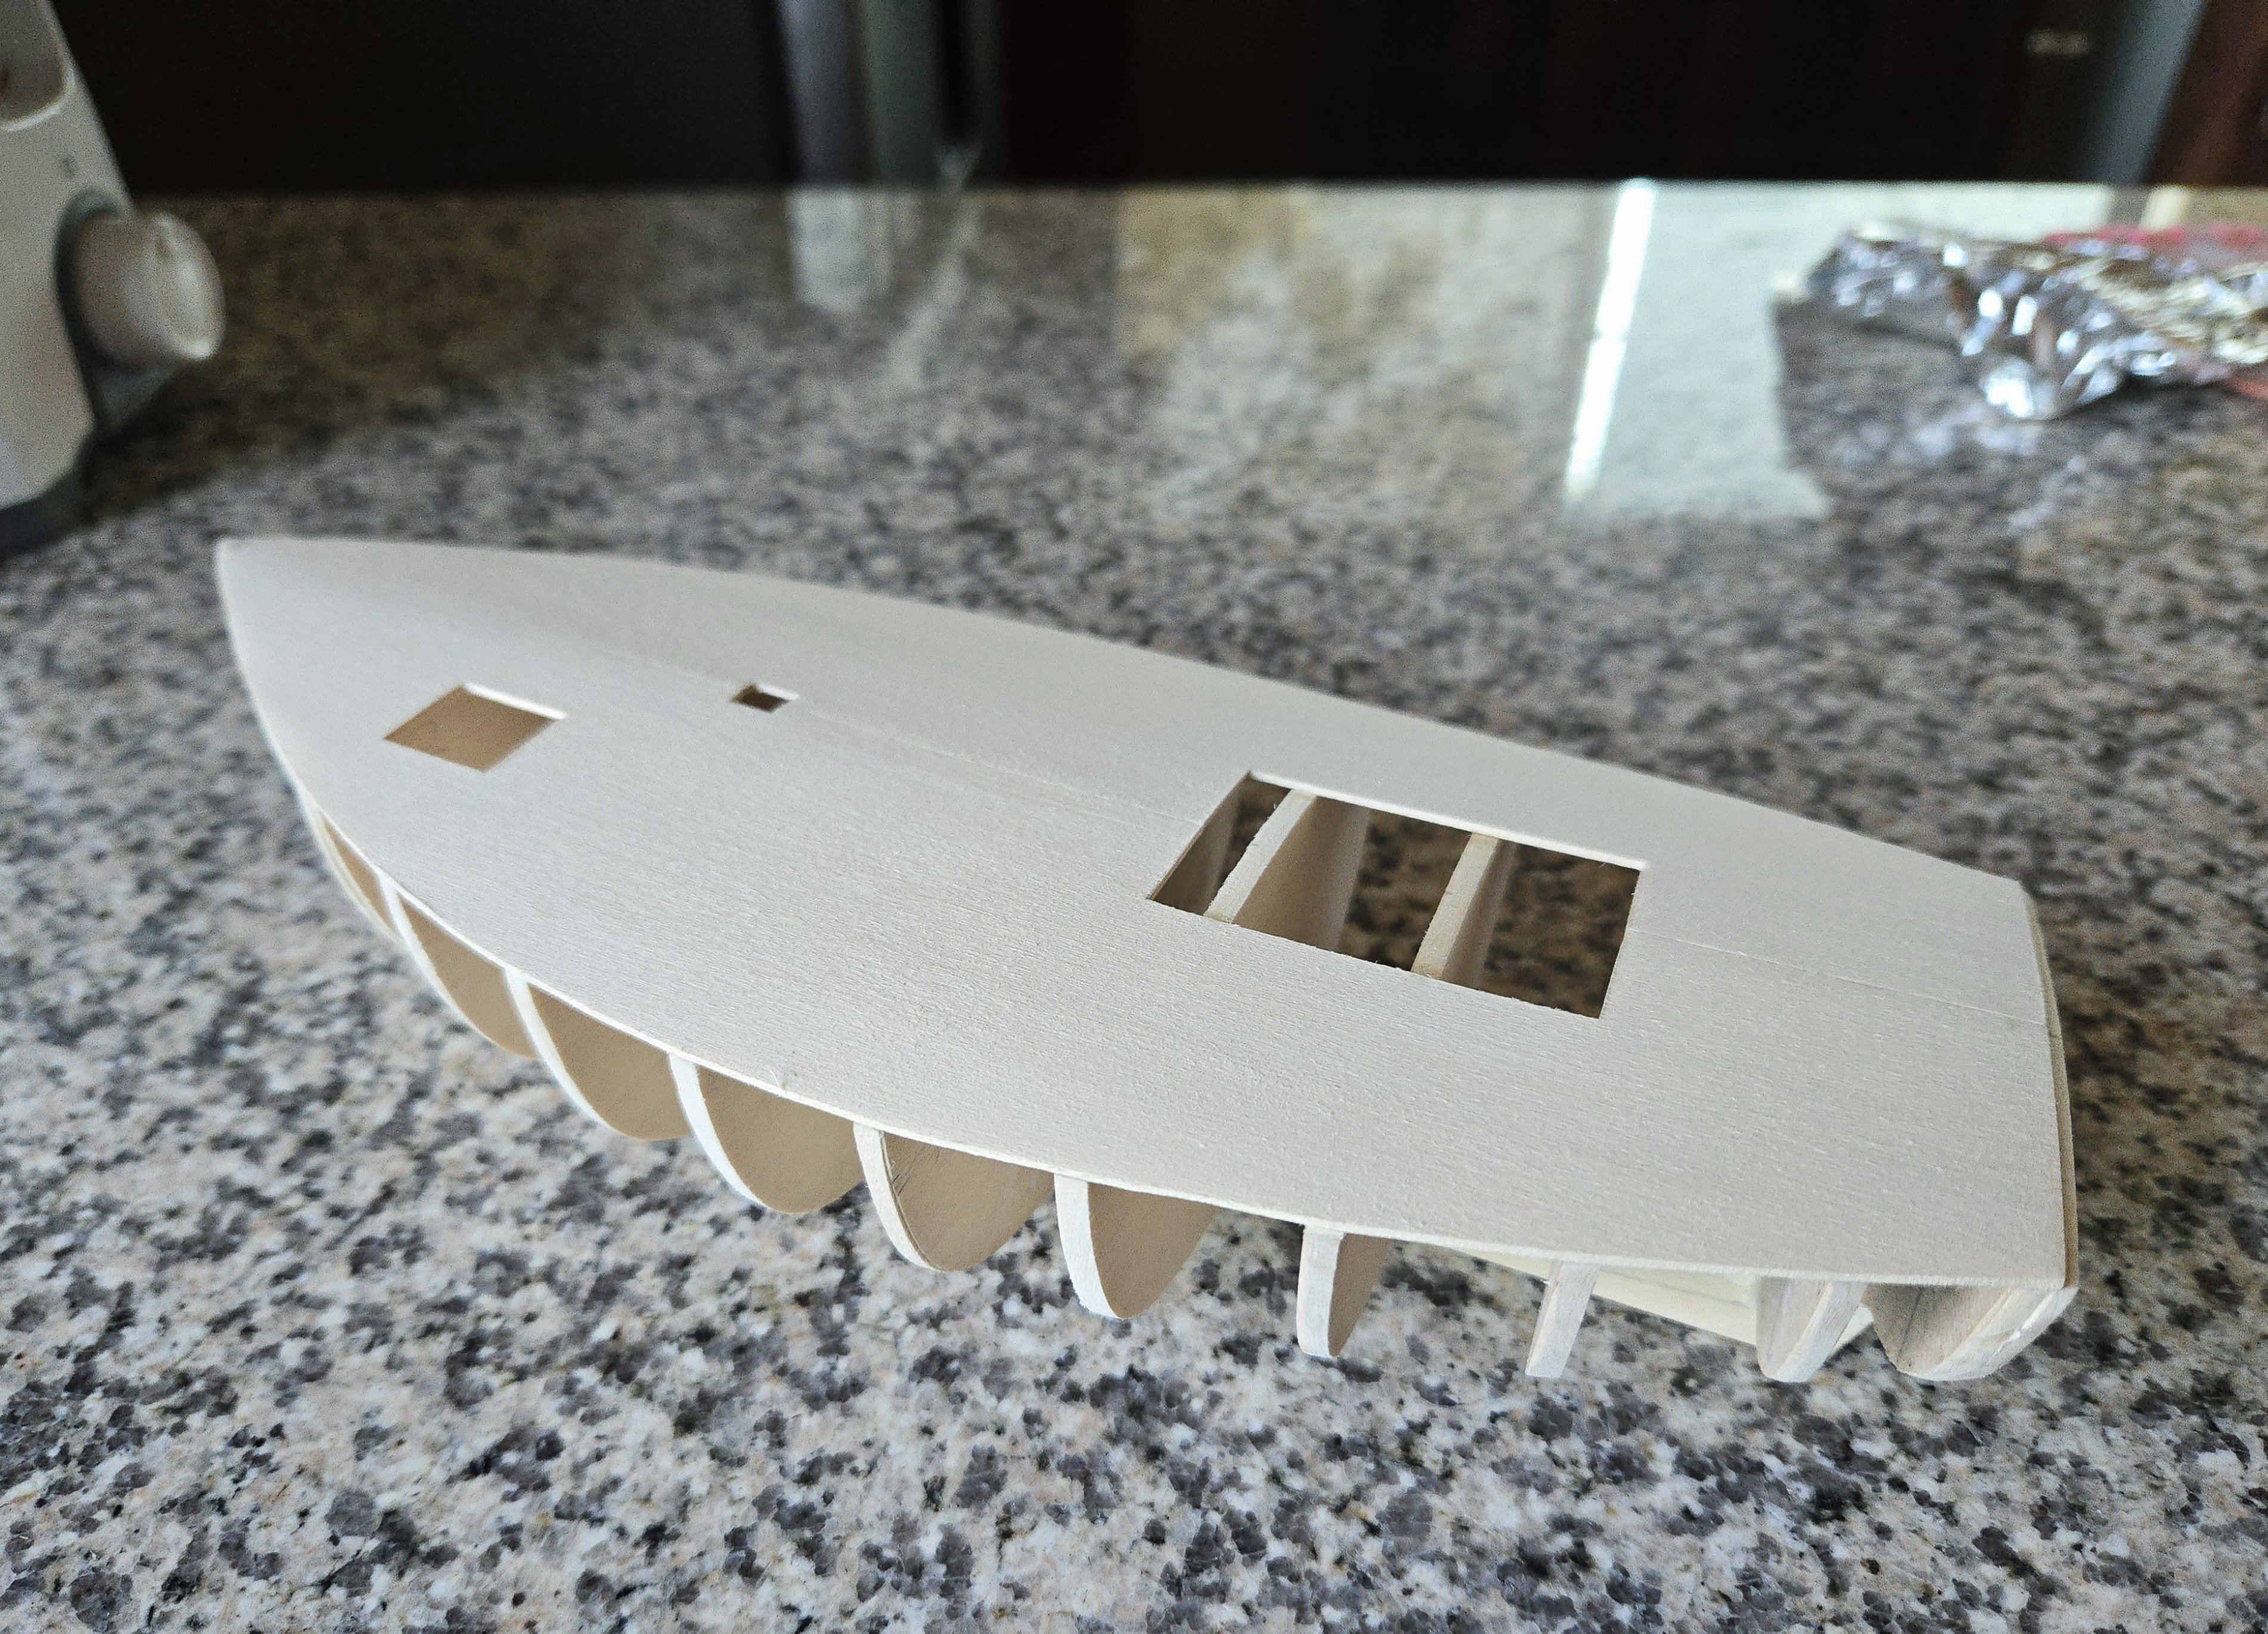
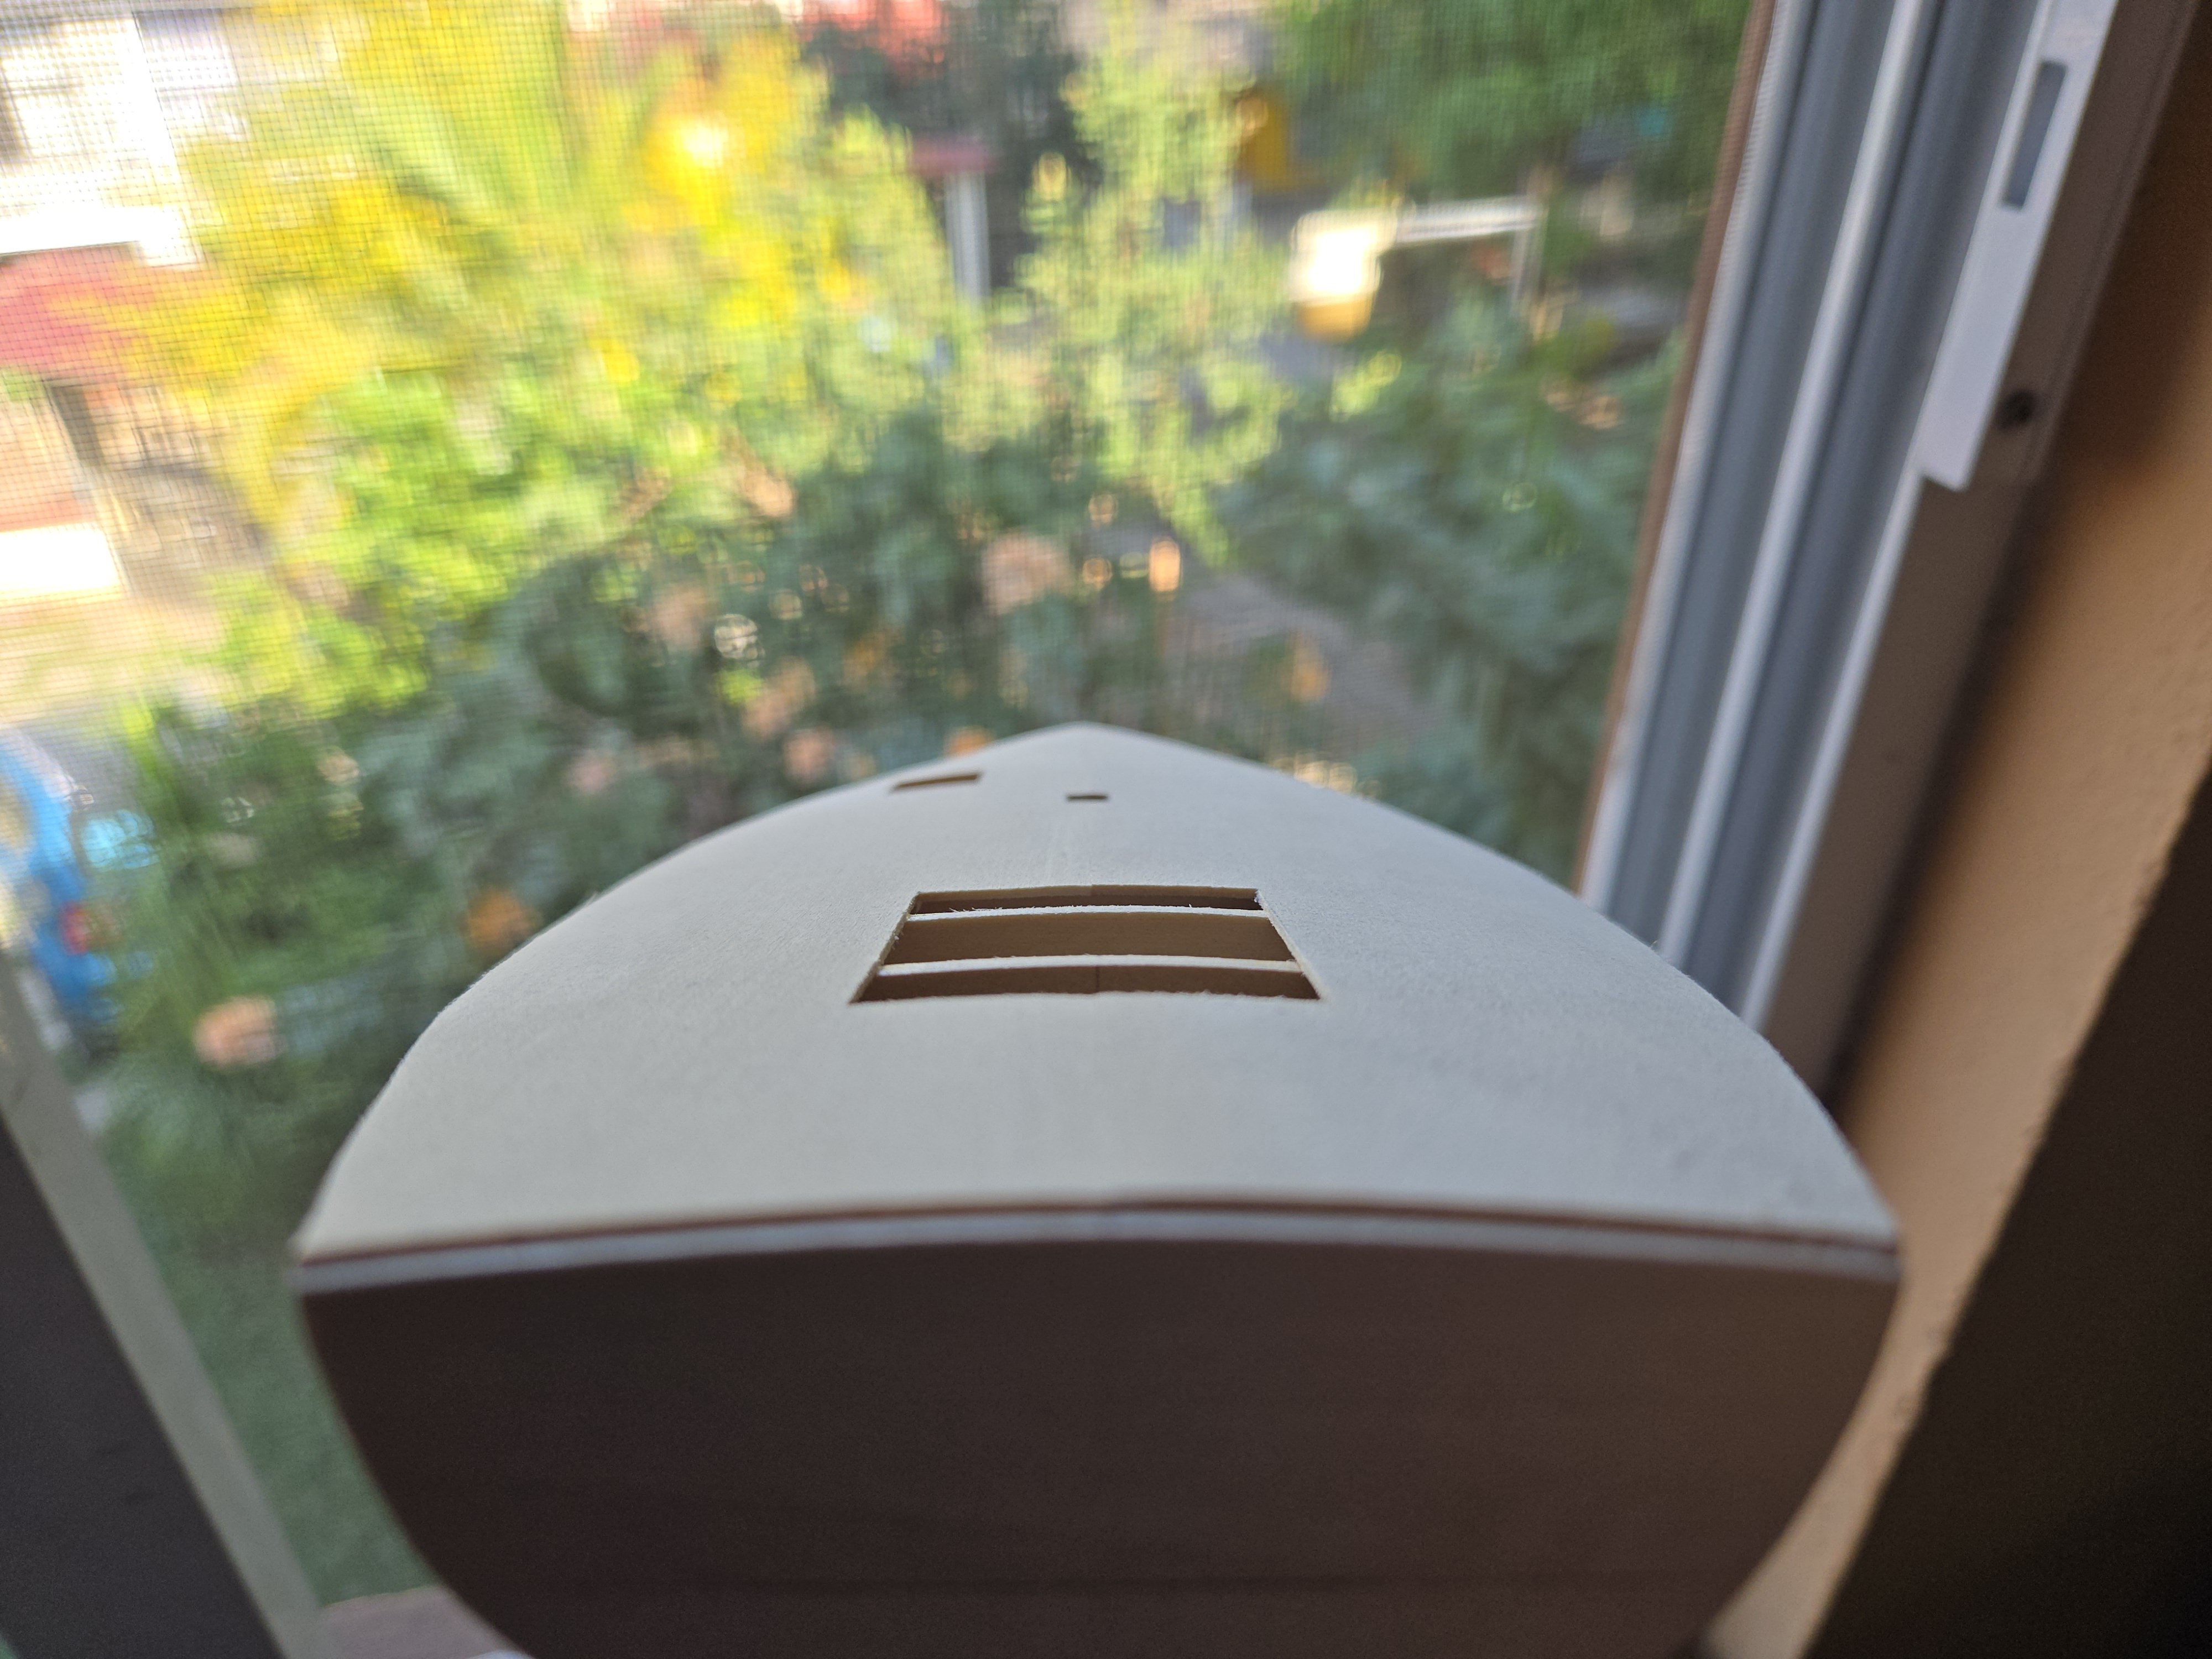
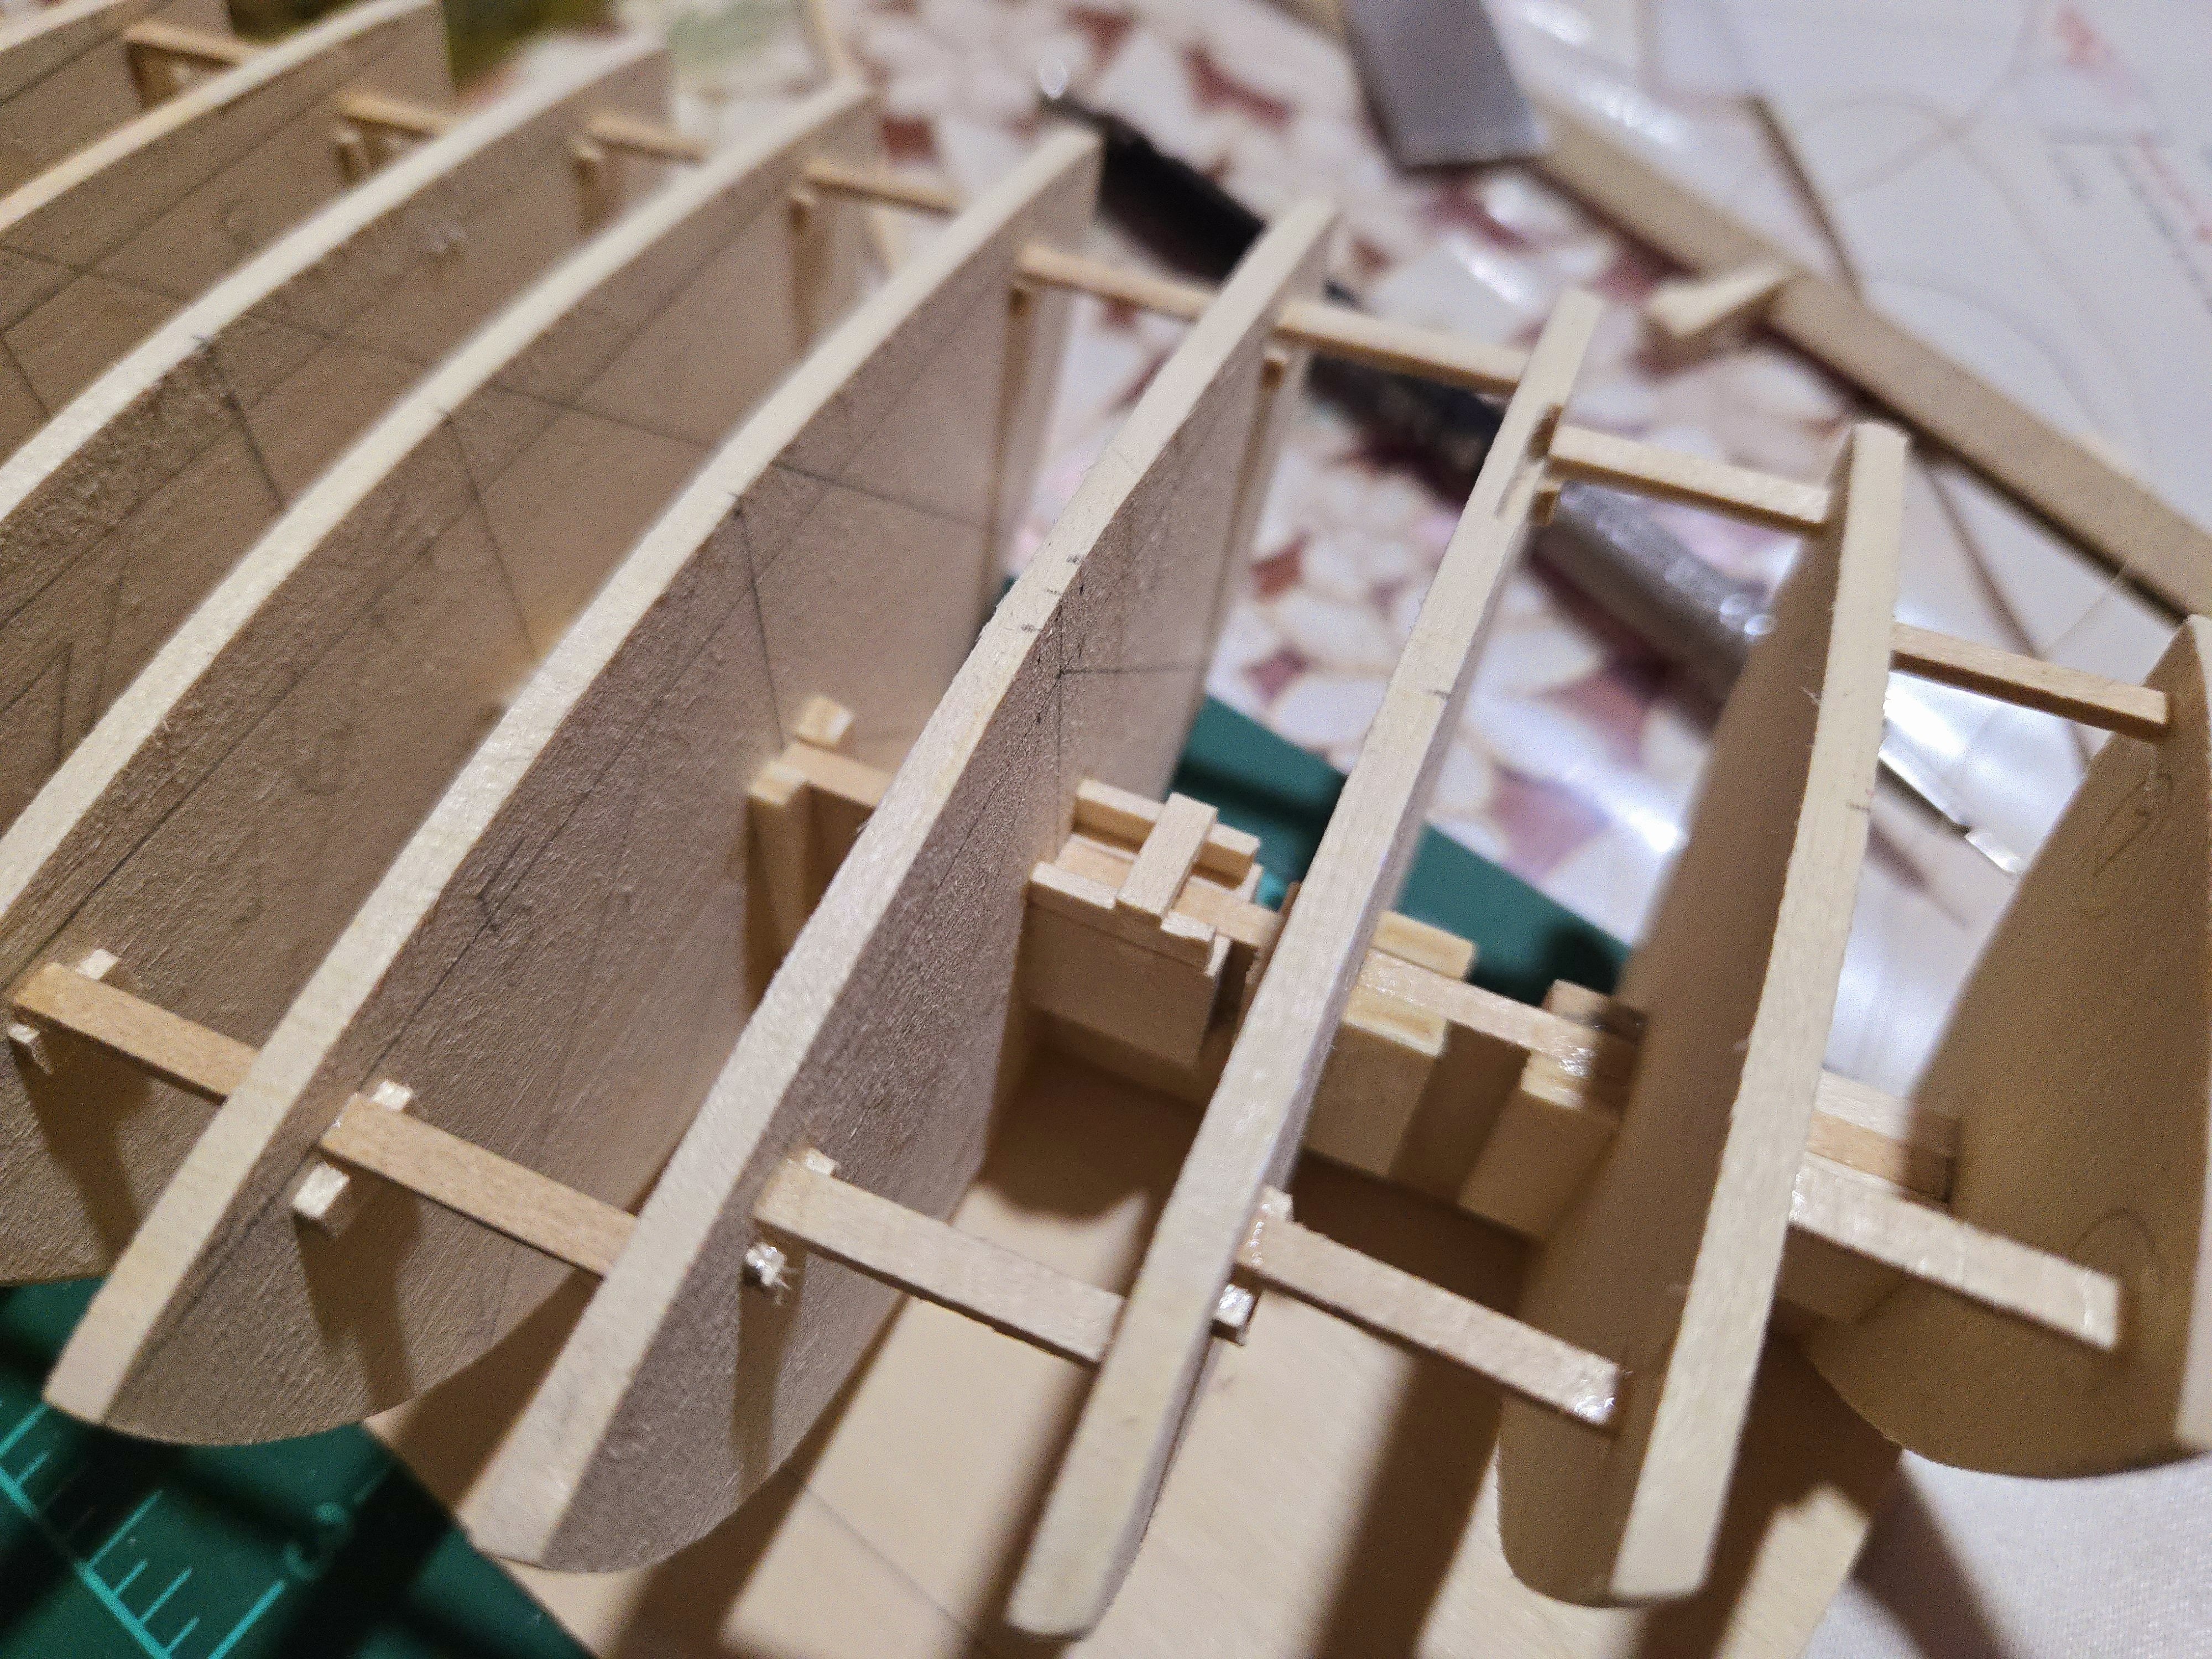
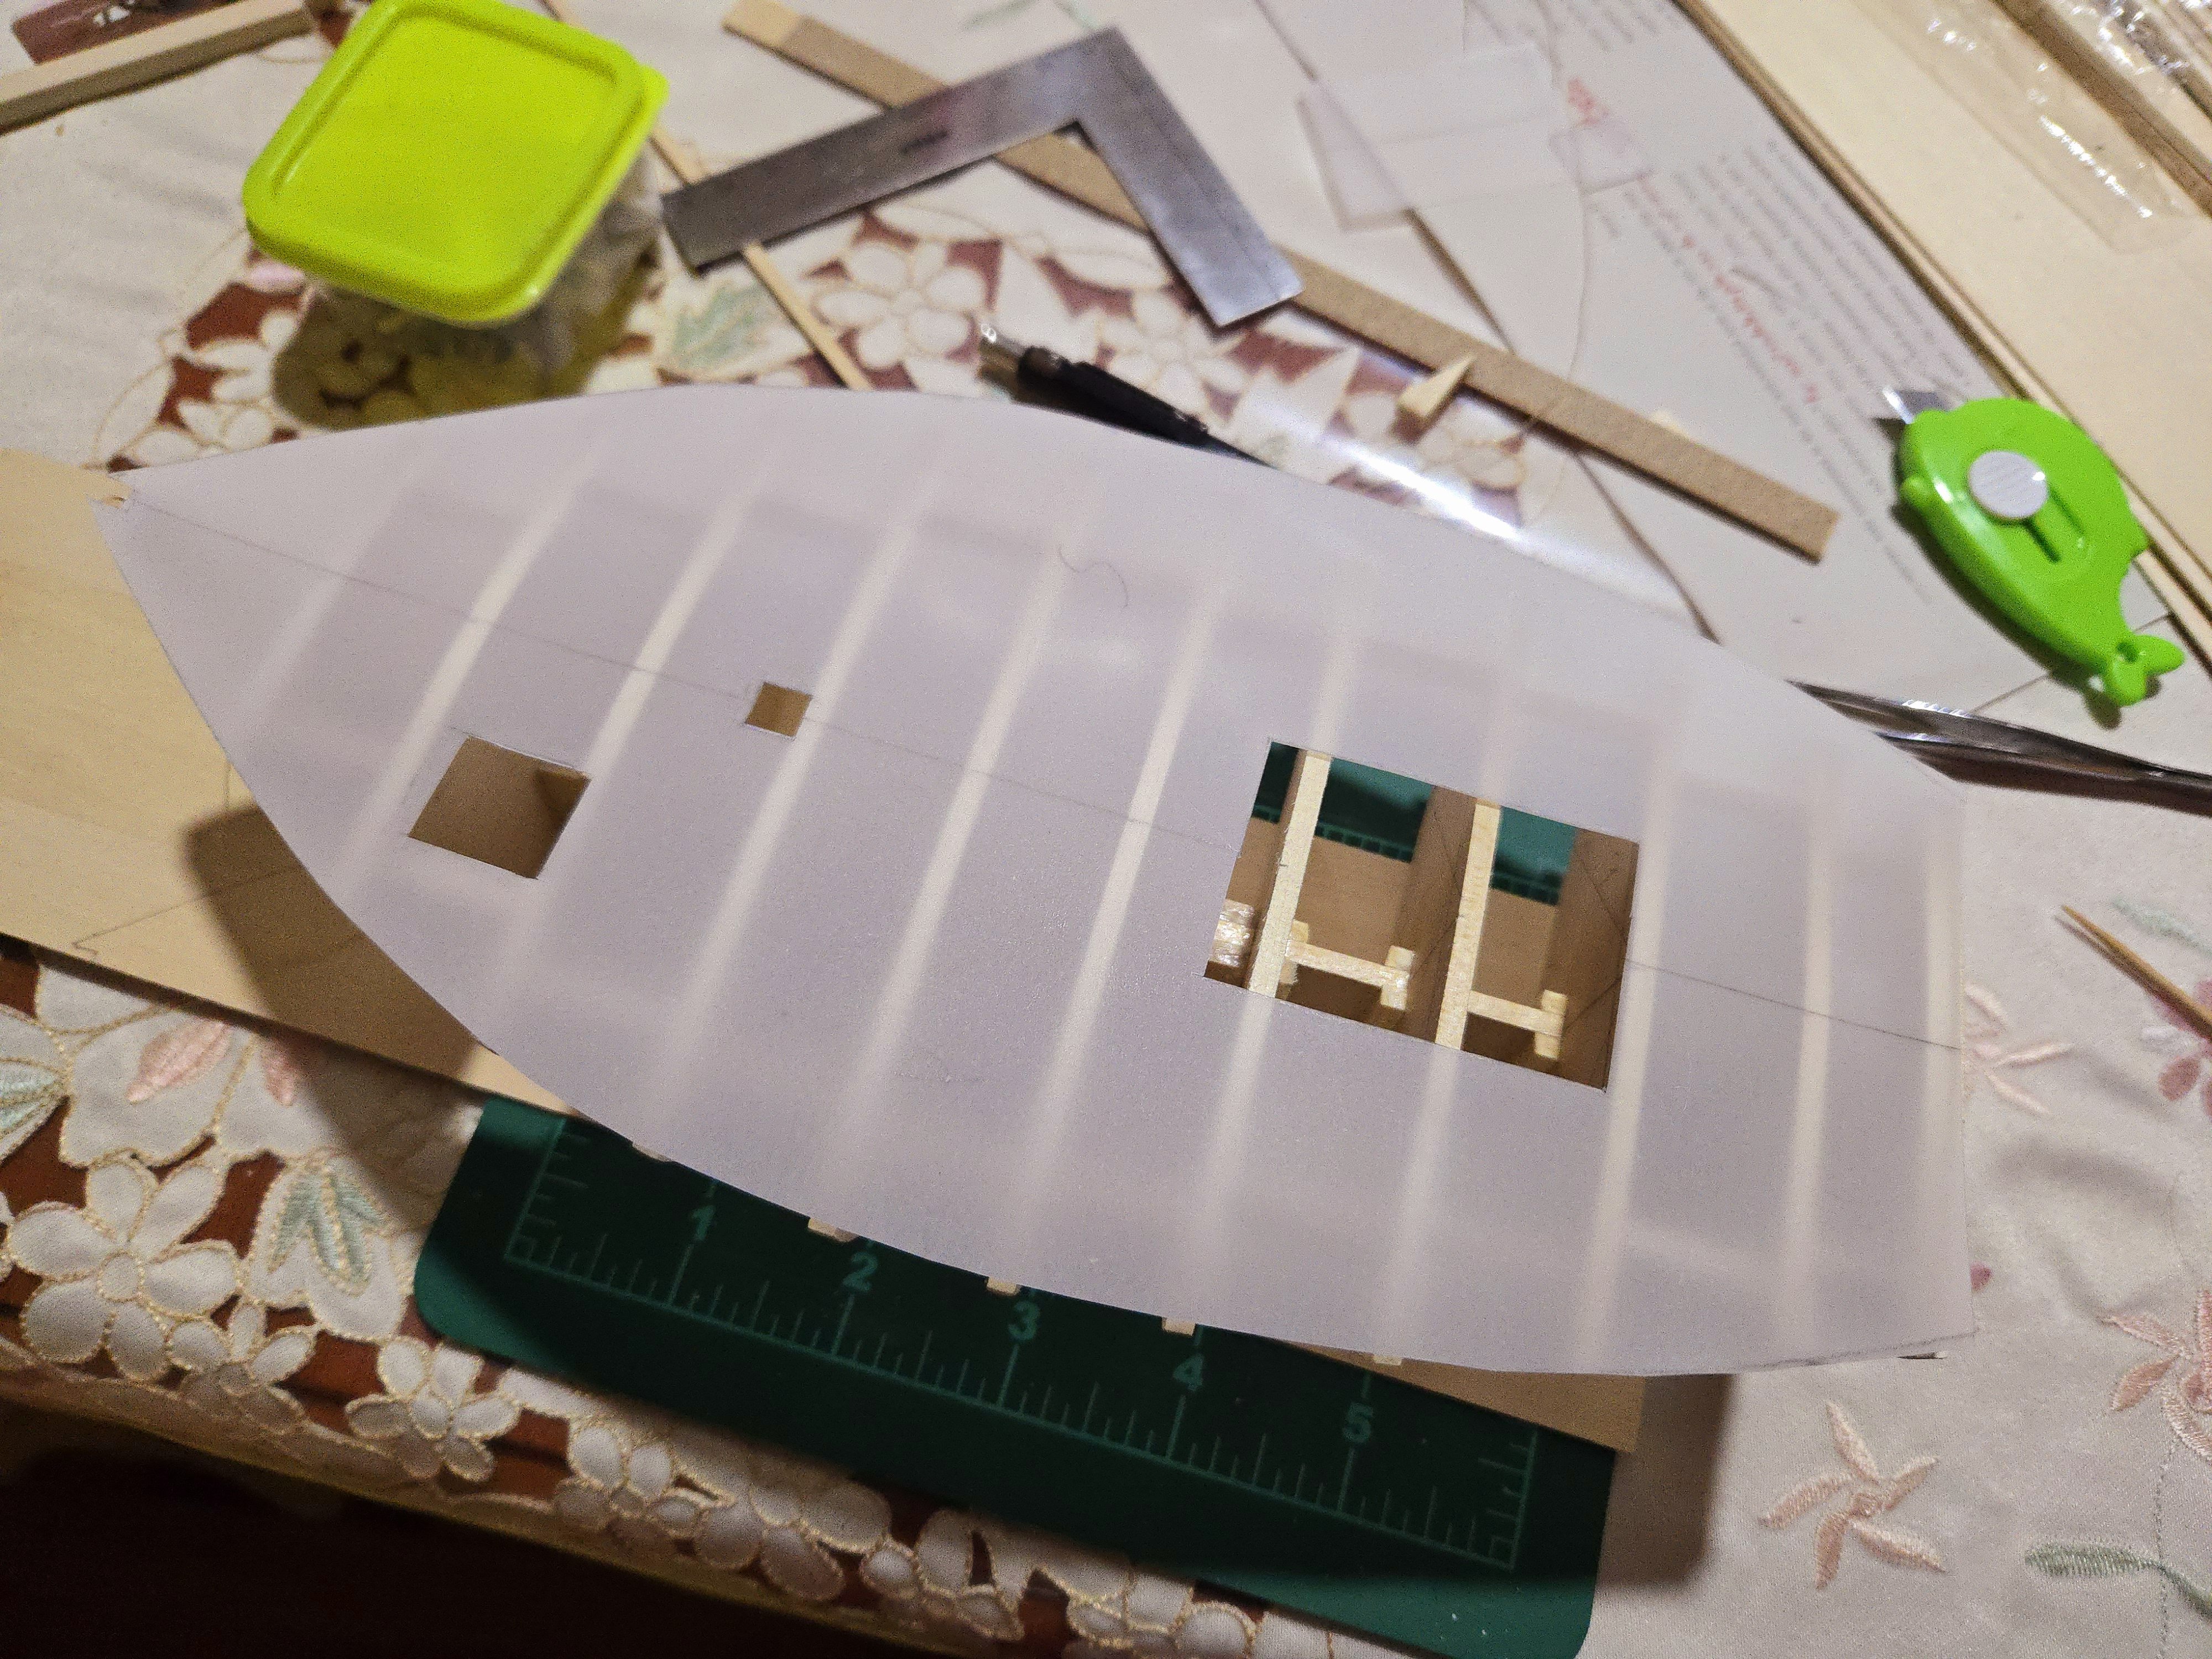
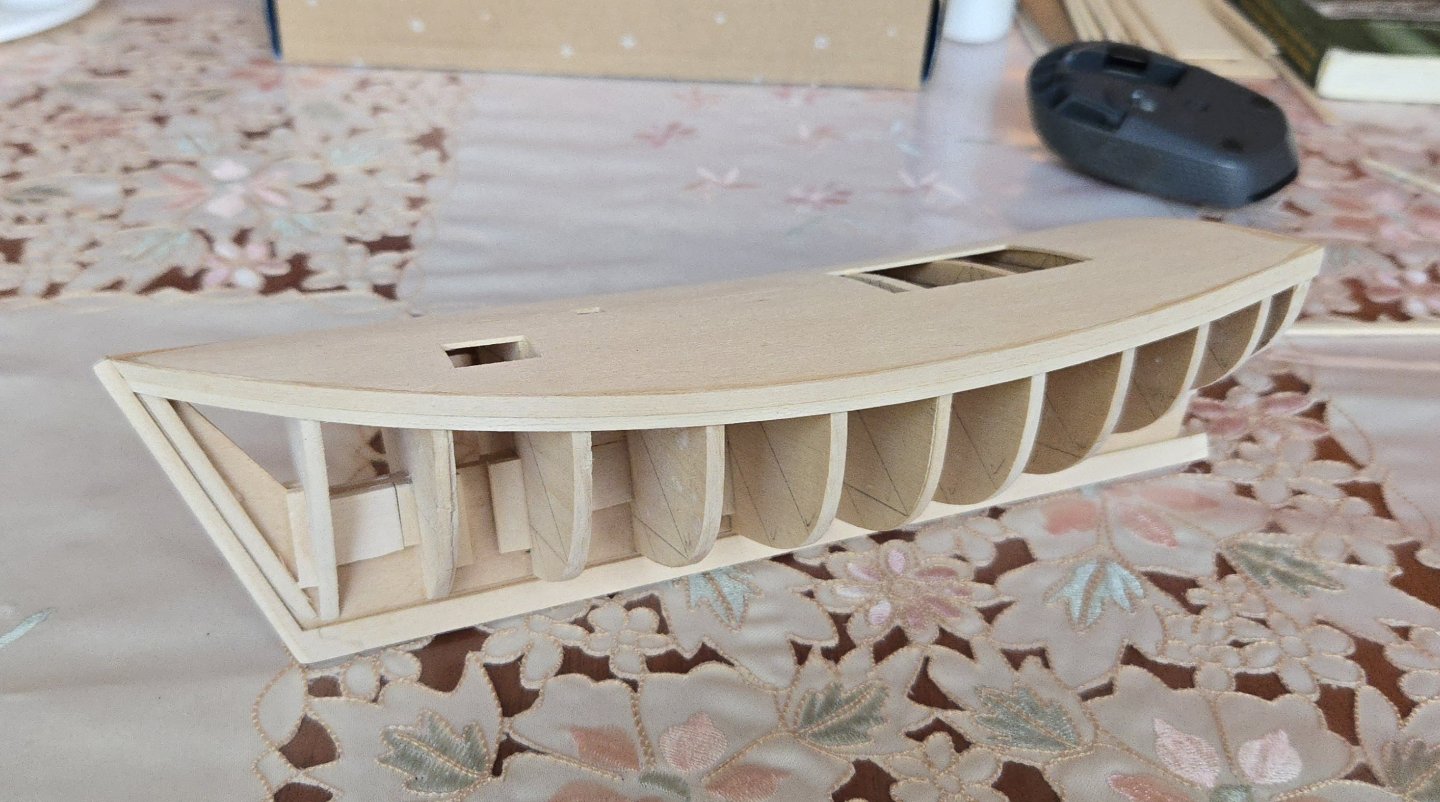
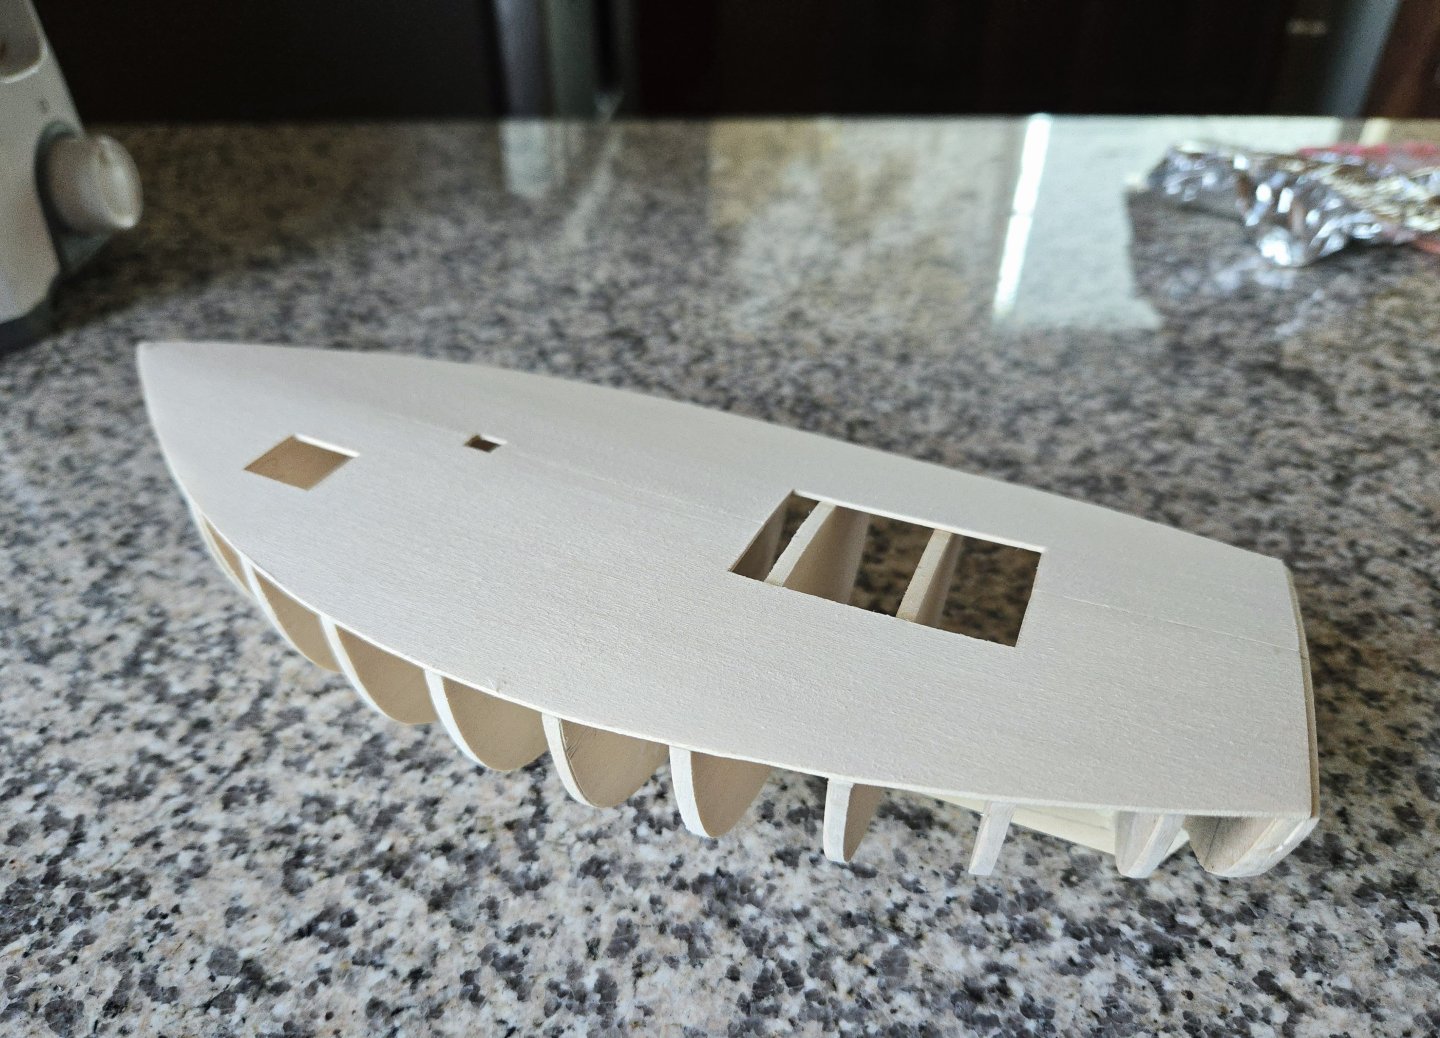
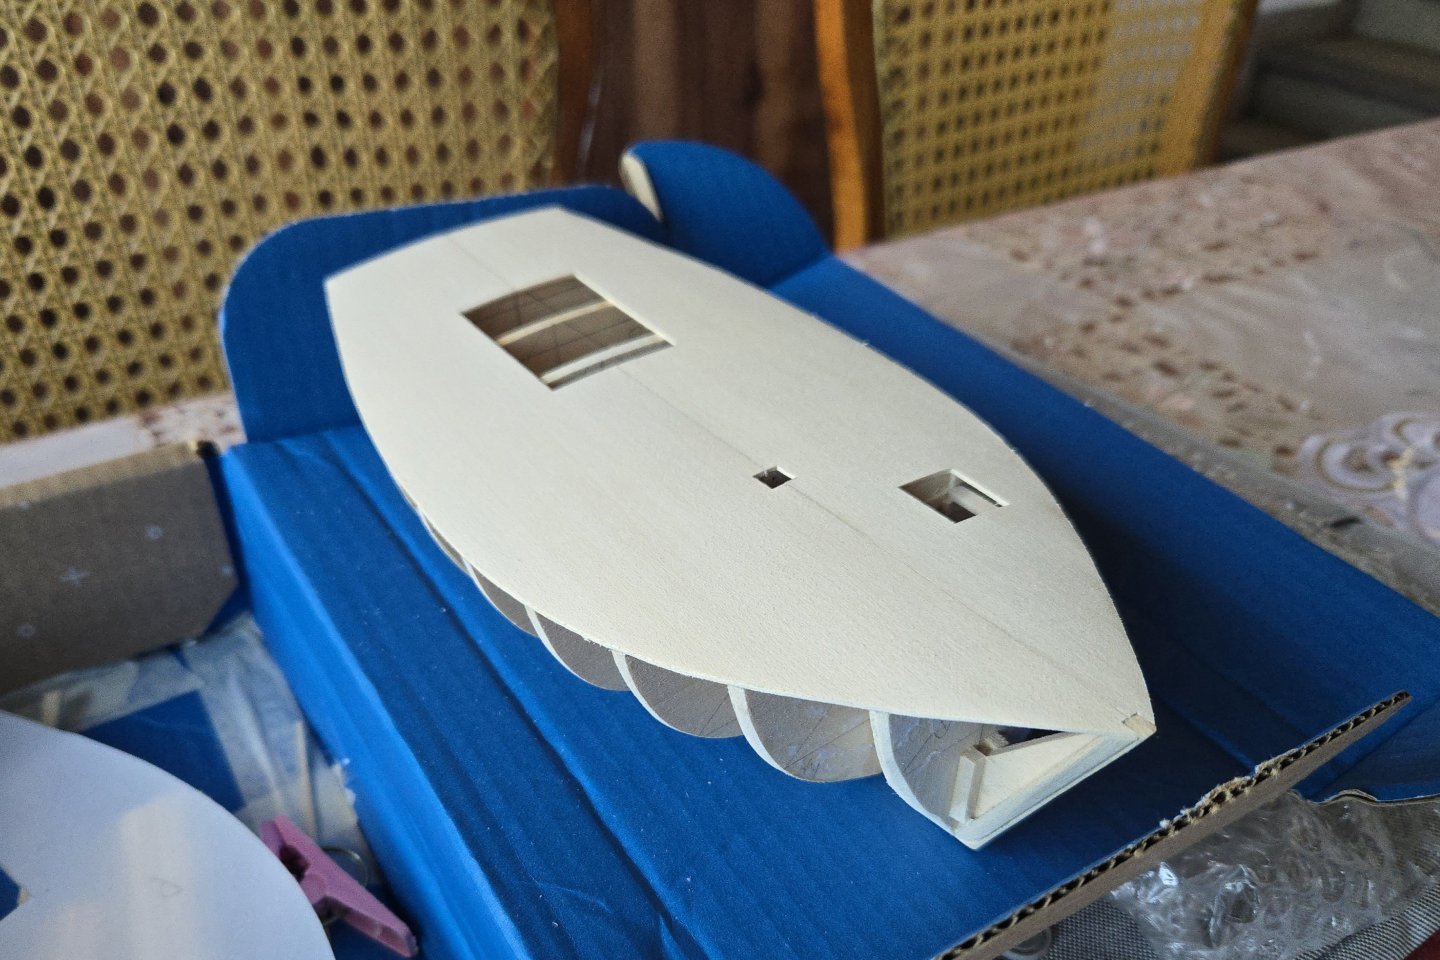
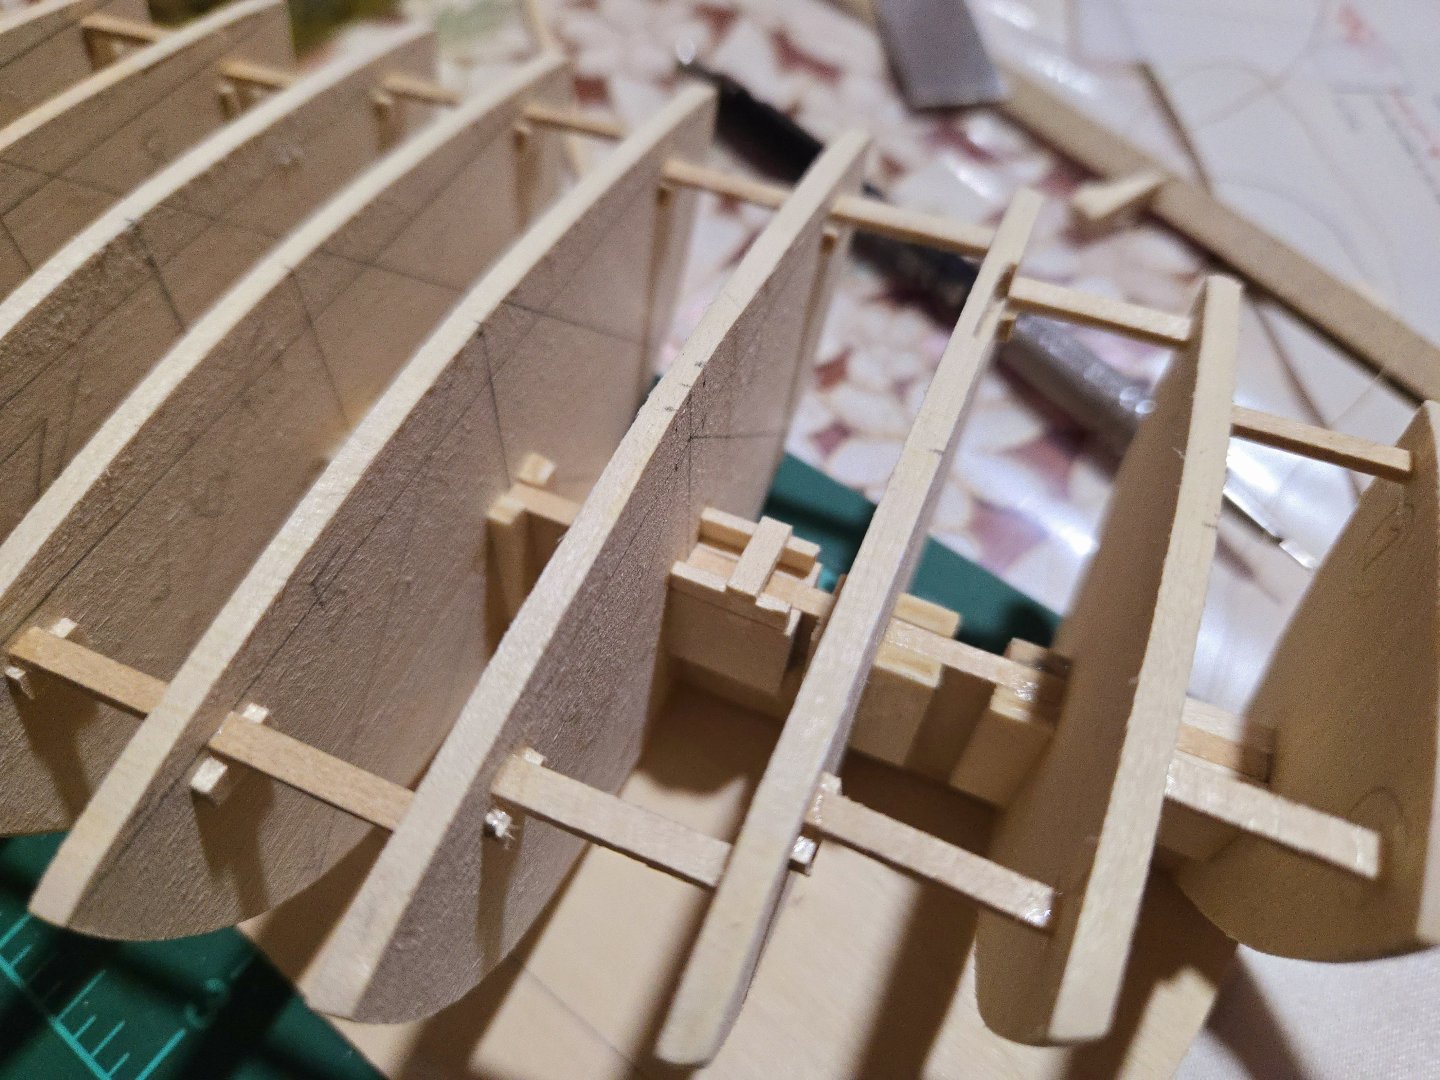
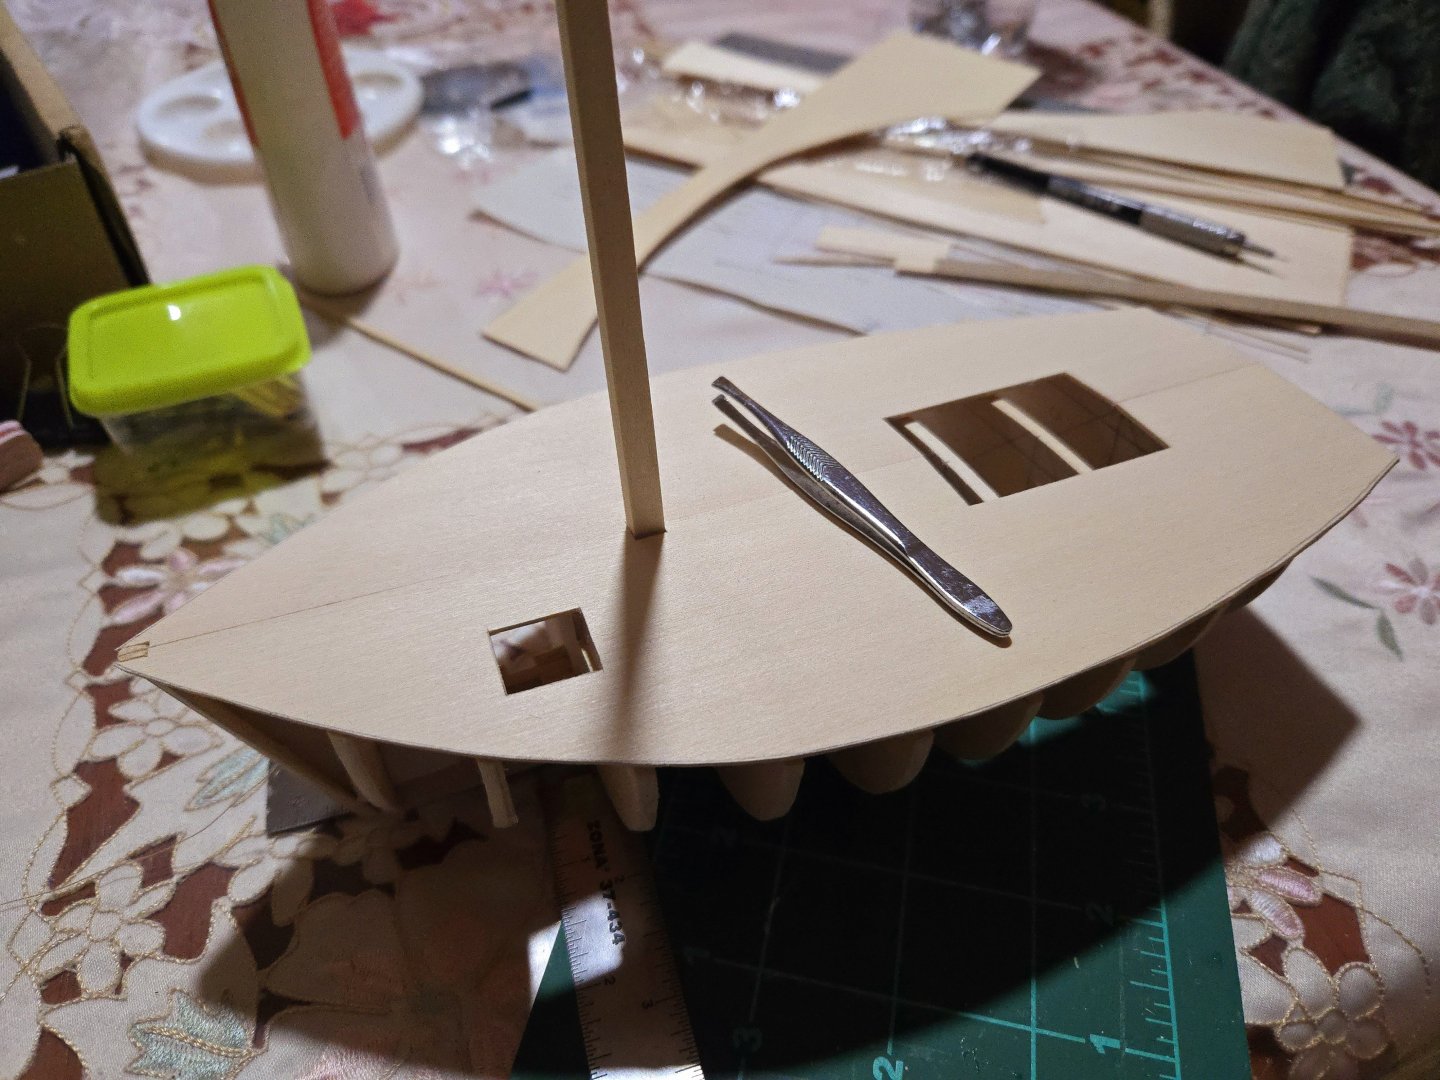
Once again I'm traveling for the holidays, and once again I was able to bring along some supplies and tools to try and make a bit of progress. First, I added the mast step. The mast will have a square cross section extending a bit above the deck, so I just built a sort of box with 1/16x1/8-inch strip wood. I also checked the template for the subdeck. And then cut out the subdeck. It's wider than any of the 1/32‐inch thick sheets that I have, so I had to make it in two halves. It's roughly placed in the photo below, with the keel being used to roughly mark the mast position. I cut the subdeck wide, so I'll have a bit of trimming and sanding to do. I still need to glue it in place. Unfortunately, my attempt at dampening it and using rubber bands didn't work very well, as the thin wood just started almost rolling up. Once the subdeck halves fully dry (which is taking a while in the Veracruz humidity) I'll work out how best to glue them. Merry Christmas to those who celebrate, and Happy Holidays!

- 312 replies
-
- 7
-

-
-
- Chile
- Latin America
- (and 6 more)
-
Congratulations, very nicely done!
-
Fairing the stern can be tricky. The only way to know if it's right is to check with a batten.
-
Thank you for following! For now, I'll be working on the Lancha Chilota. I also have a few other projects in the pipeline and, as I enjoy having multiple projects going at once, I'm weighing which to start next.
-
Excellent work, this is really looking phenomenal. You may have mentioned it earlier, but did you paint the shackles, or chemically blacken them?
- 201 replies
-
- 4
-
-
-
- Oyster Sharpie
- first scratch build
- (and 1 more)
-
I can't compare it with other dory kits, but I personally found the Model Shipways kit to be a great introduction to model building. The instructions are very detailed (and, as mentioned above, are available online so you can seewhat they're like). There are a few aspects to the build that were a little bit tricky, but it was straightforward enough to check other build logs for clarification. Off the top of my head: it's very easy to put a dent in the planking at the bow and stern, but this can be avoided by placing clamps carefully and using light clamps (I found that bobby pins worked well in many cases). Adding the gains to the planks is a little confusing, so it was useful to see how other people handled it on their buid logs--you really have to think about how the planks will fit together. The wood for the false stem isn't specified in the instructions, but you can just use an appropriate sized strip of scrap wood, which lots of build logs note. Some people have also noted an issue with frame templates, although I didn't experience that, so you can check their logs for how they handled things. I would also consider size, cost, and whether you want it with a sail or not. The model shipways kit is pretty small, which I liked because I didn't have a ton of display space, but maybe you want a much larger model to display. The model shipways kit is also cheaper than the midwest or bluejacket dories, which might matter. Finally, the model shipways kit doesn't include a mast/sail, which the other kits do. It's not hard to kitbash it to add a sail if you want, which is what I did, but it will take a bit of research and some extra materials (which can be had for pretty cheap). Best of luck!
-
Thanks for following, looking forward to watching your Perseus build come together! Thanks! More to come soon, hopefully.
-
Thanks, Glen! It was a lot of fun, and it was definitely inspiring to see how you find creative uses for materials in your SIB builds!
-
Thanks, Paul, your encouragement and responses to questions throughout the build has been incredibly helpful!
-
And a few more photos of the finished build, continuing my previous post (which is more of a reflection on the build):


- 286 replies
-
- 17
-

-
-
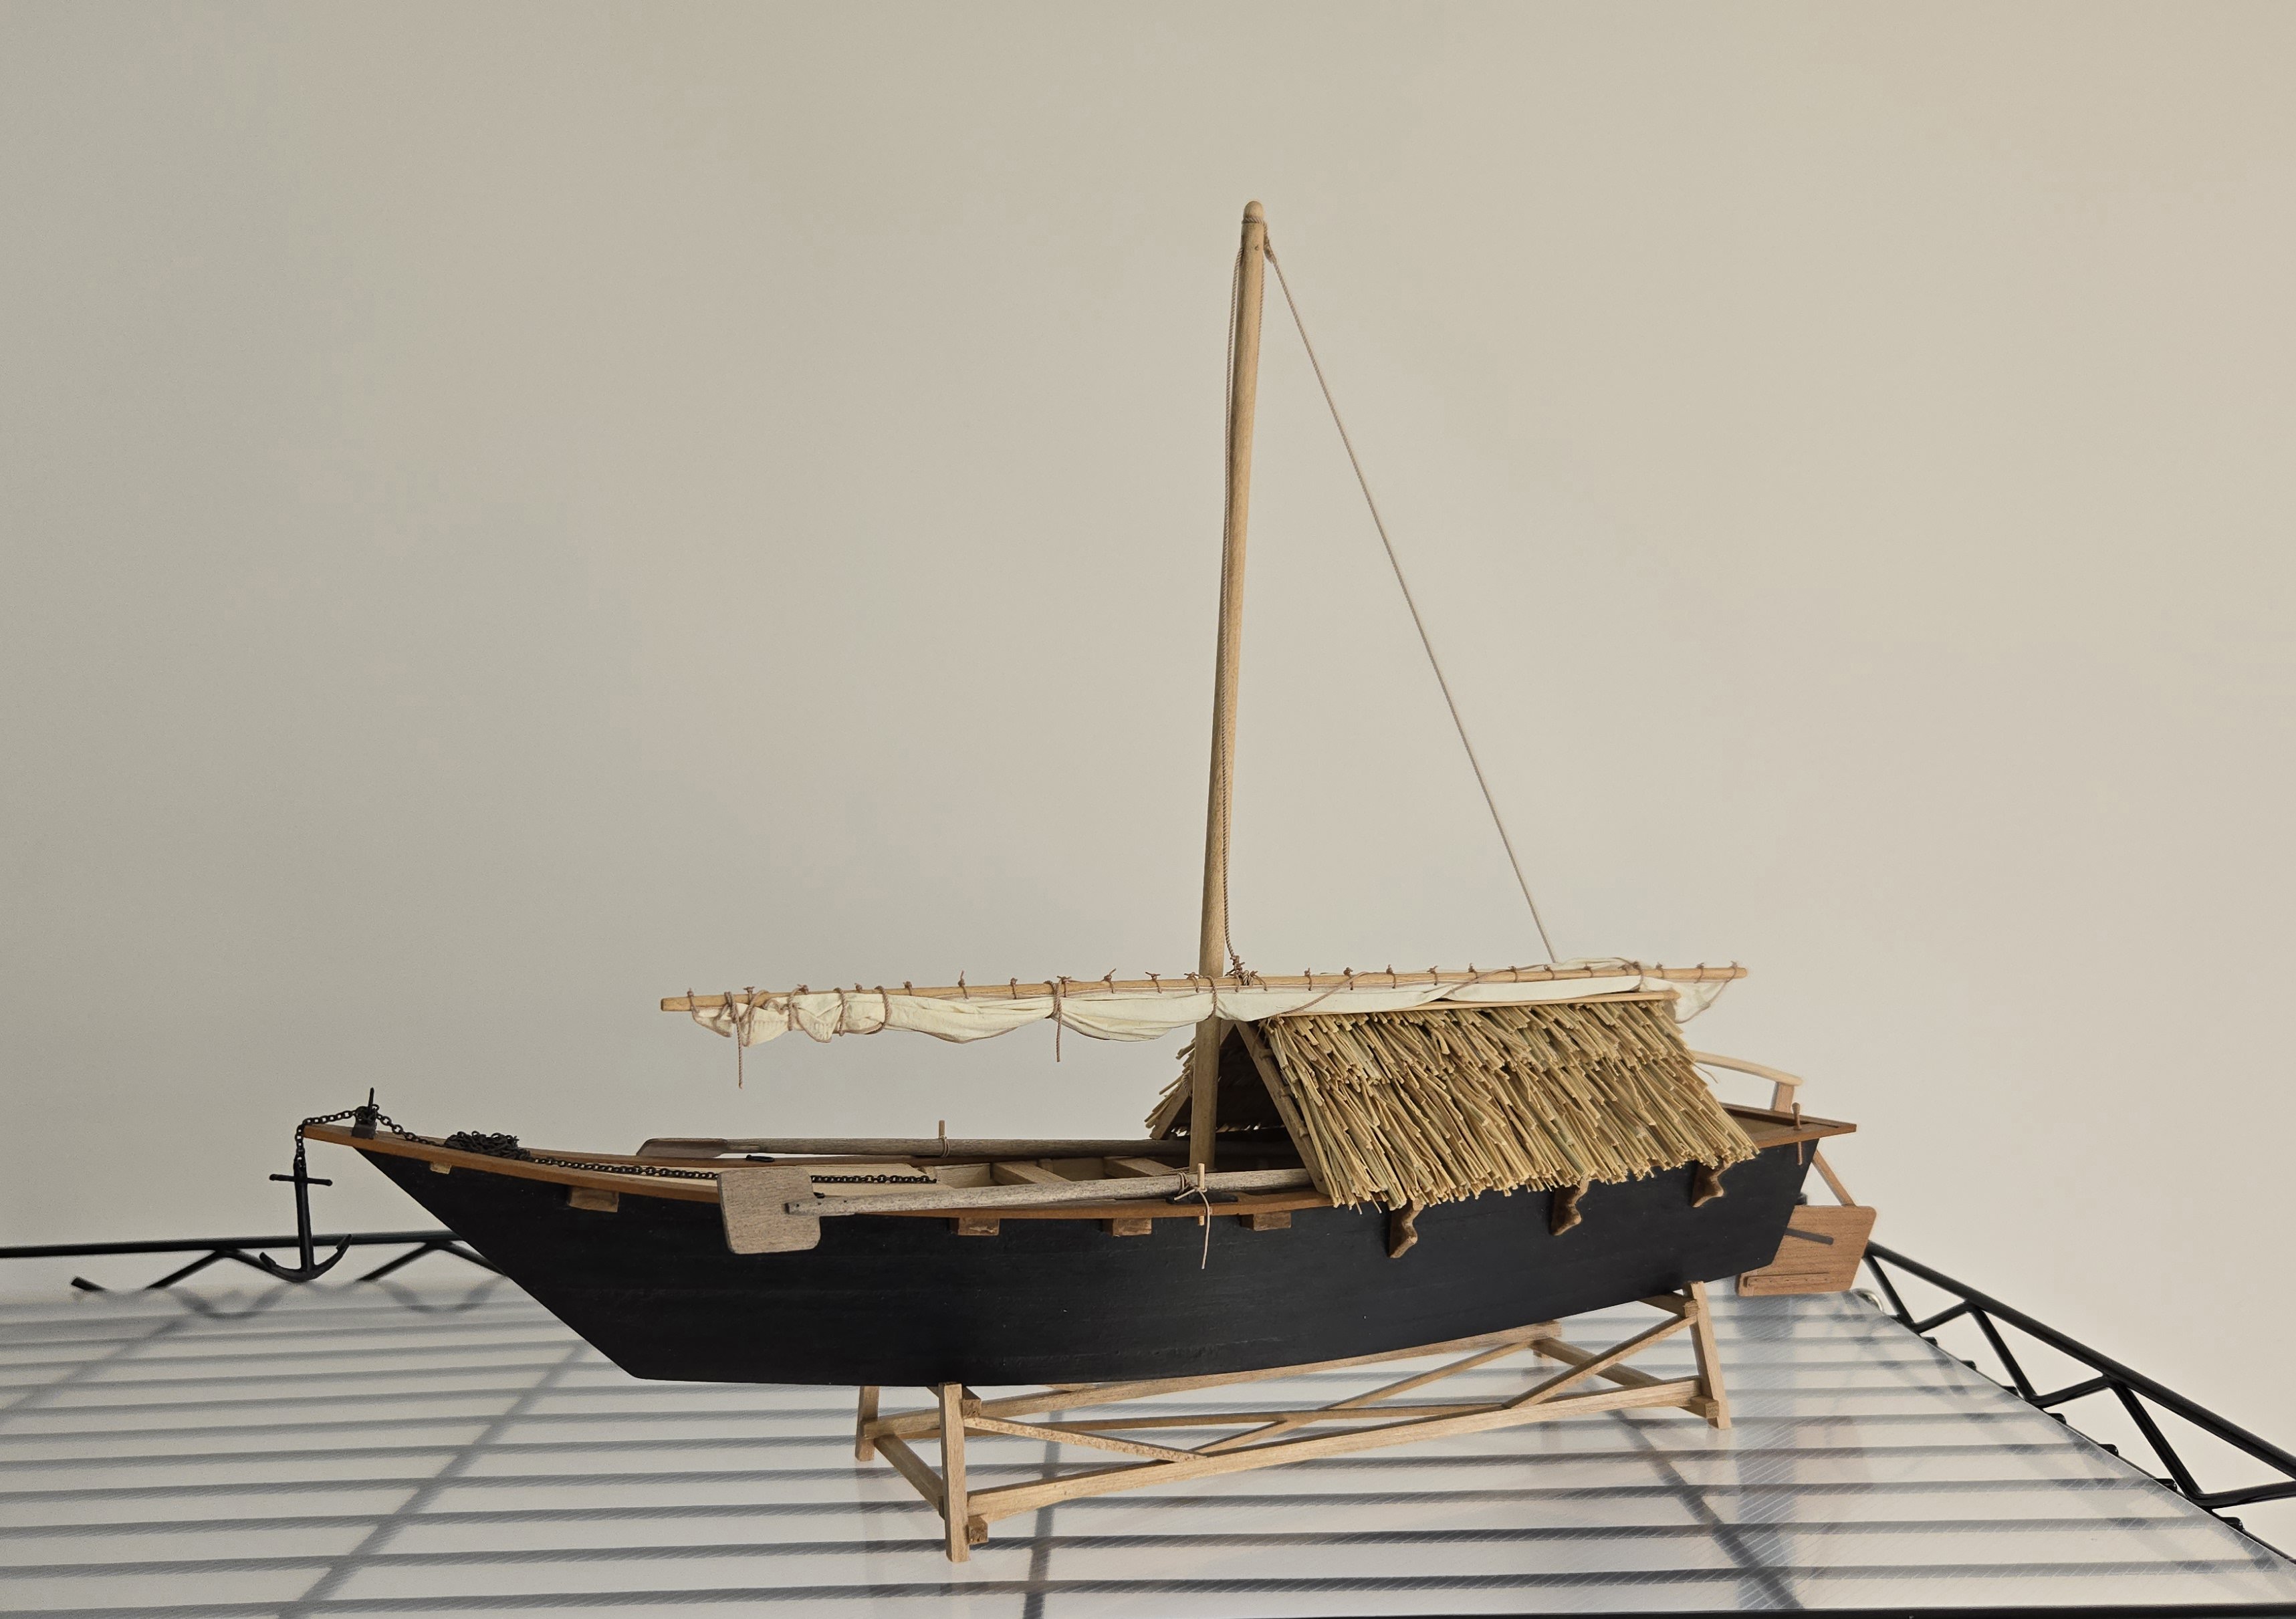
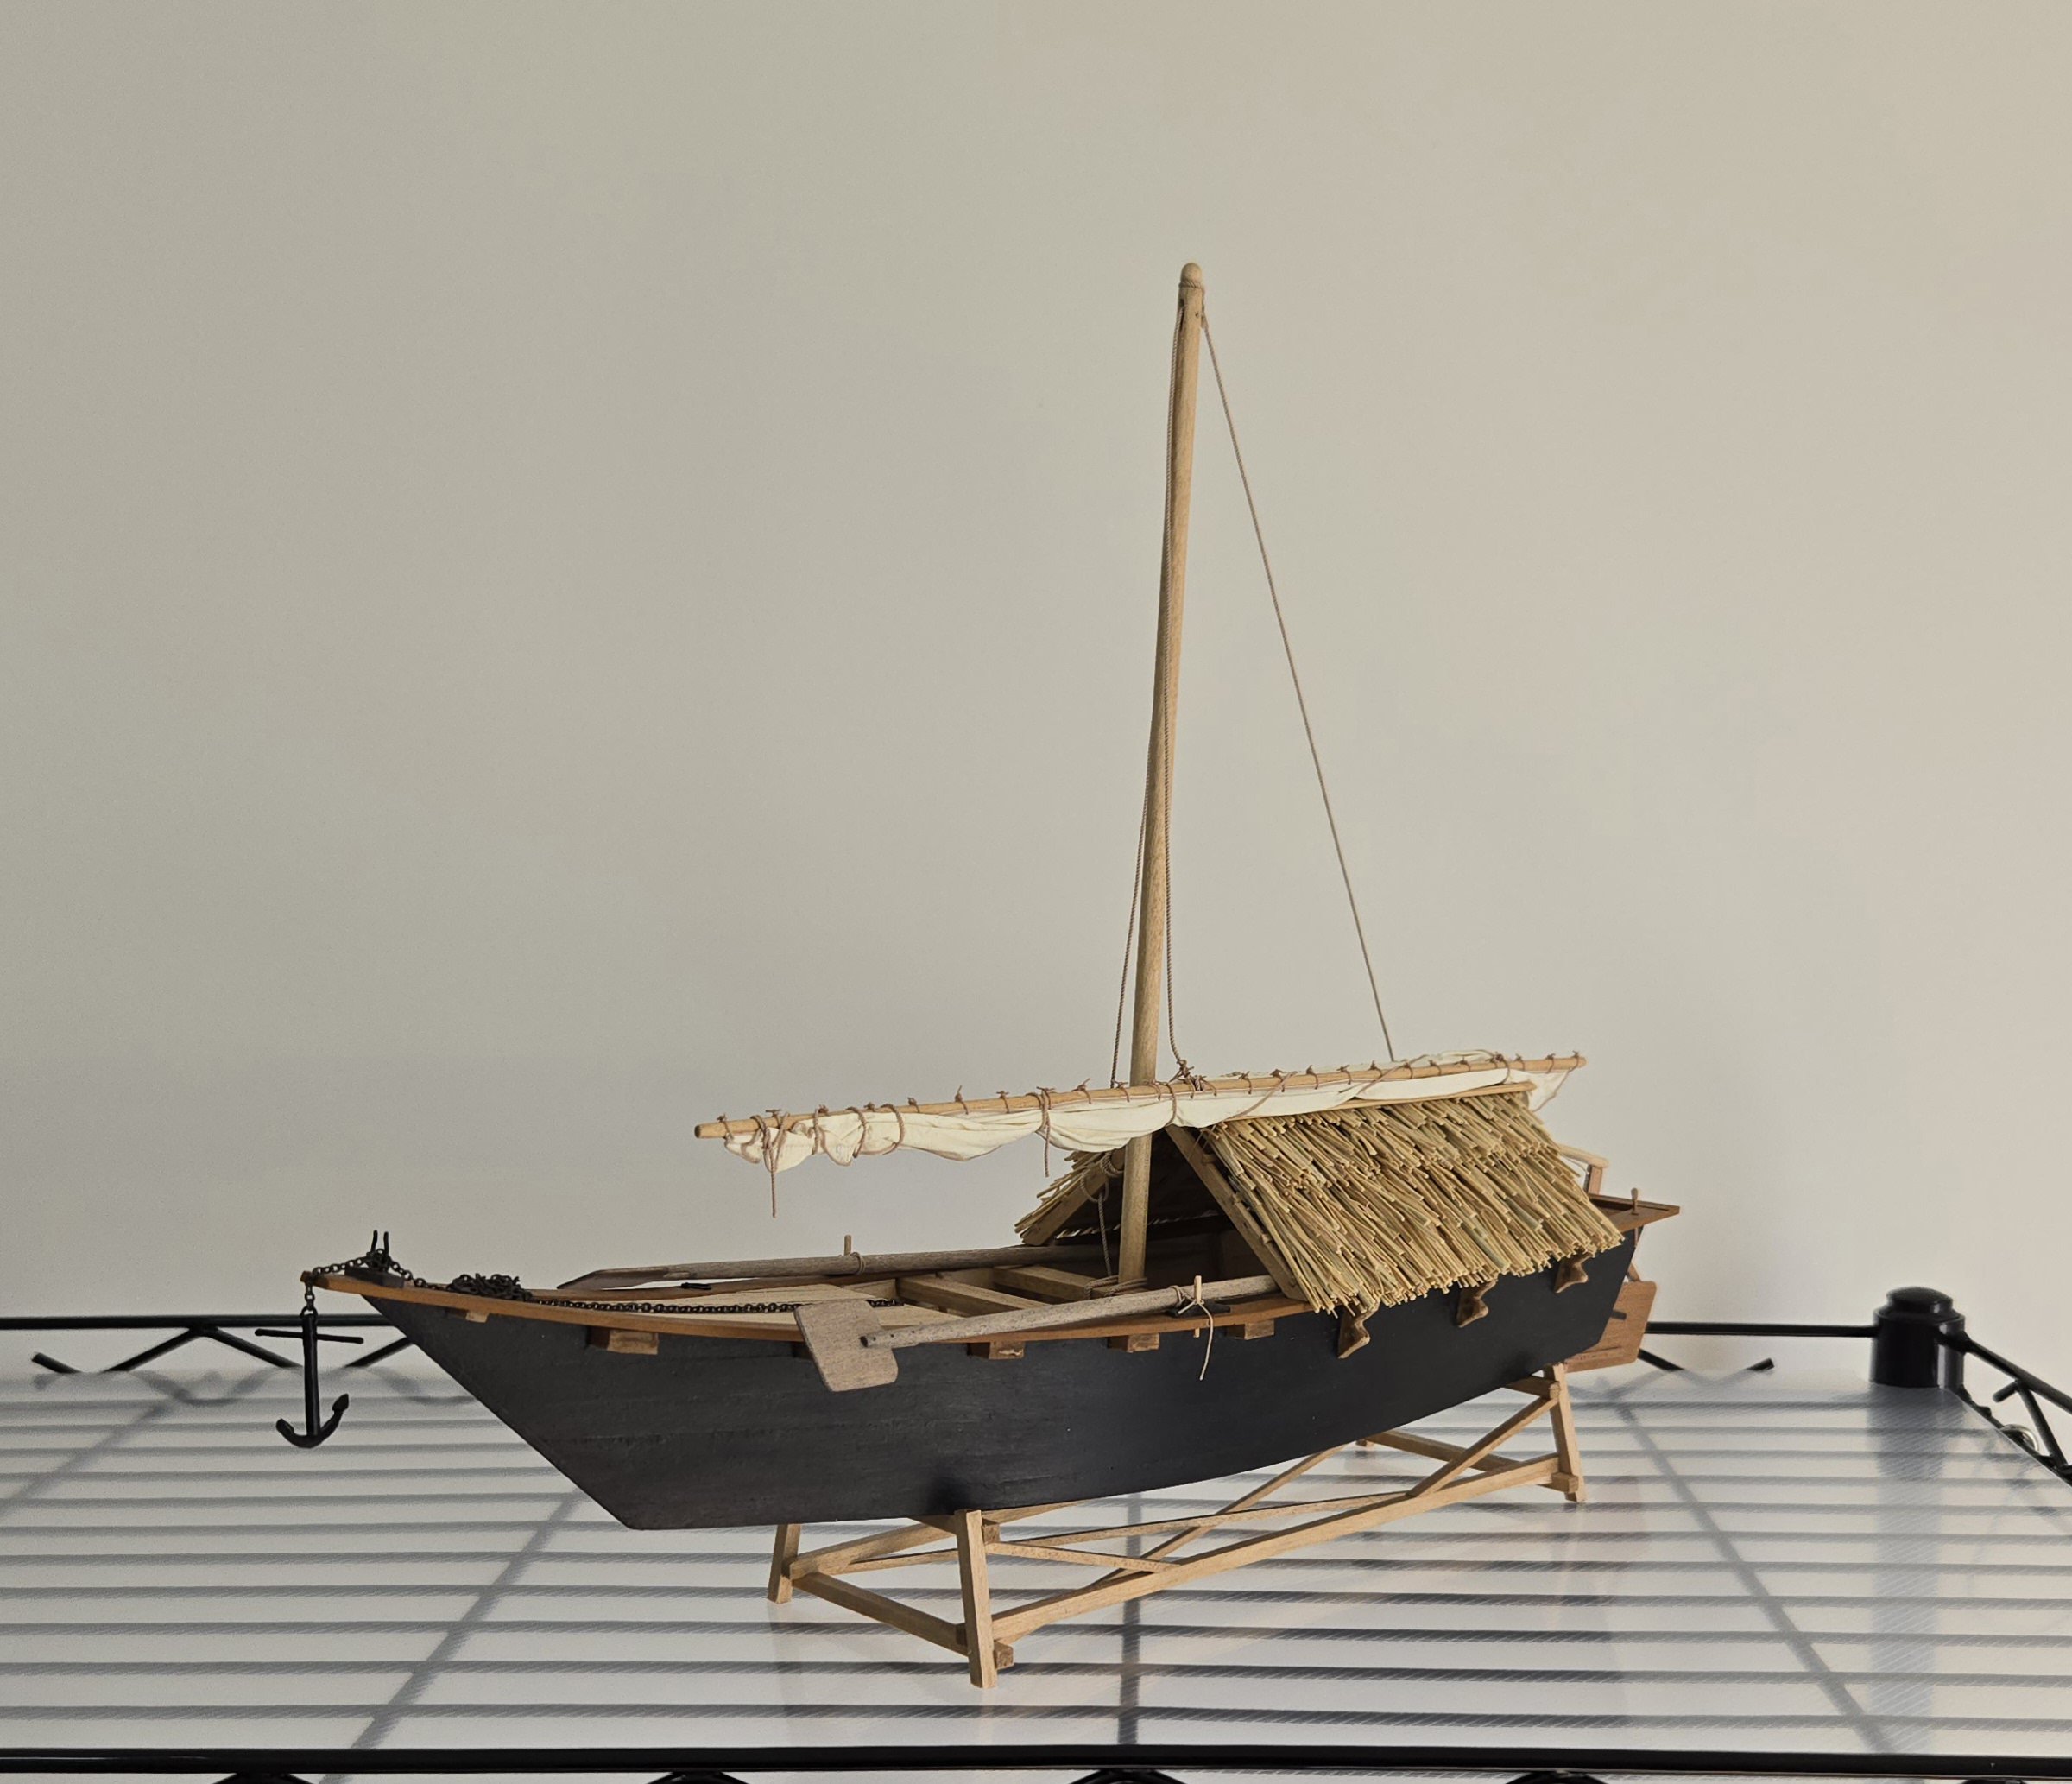
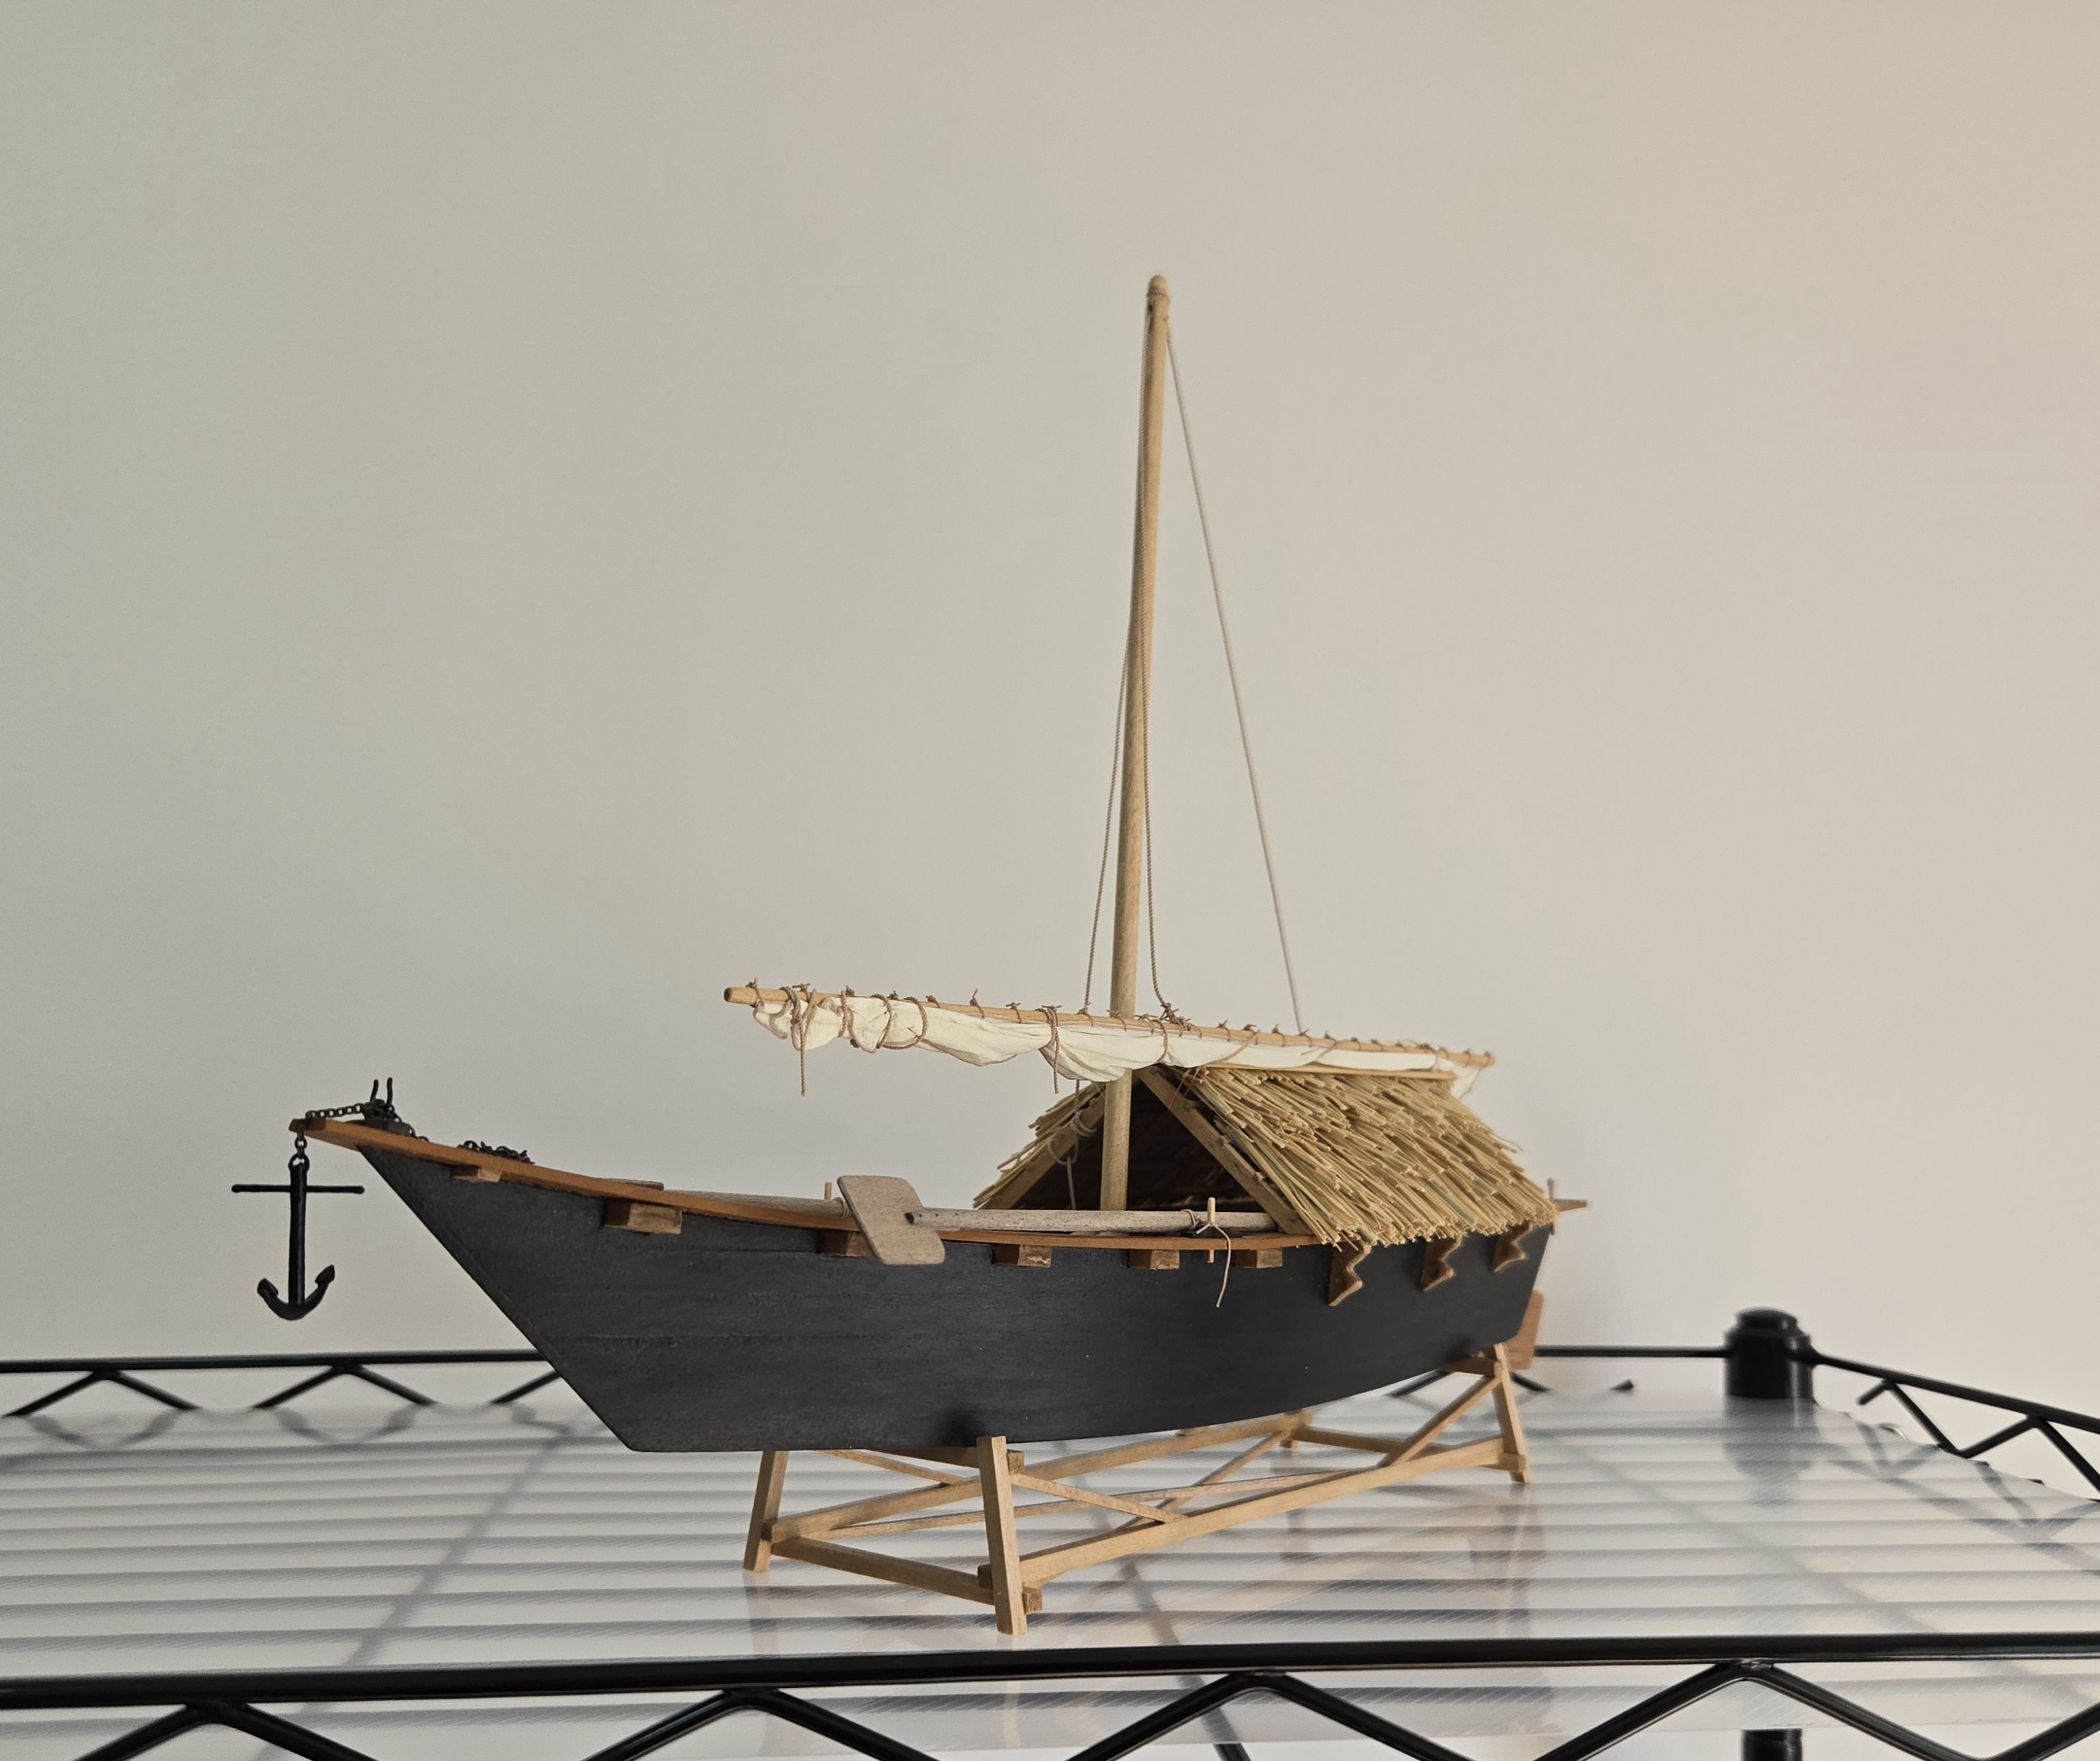
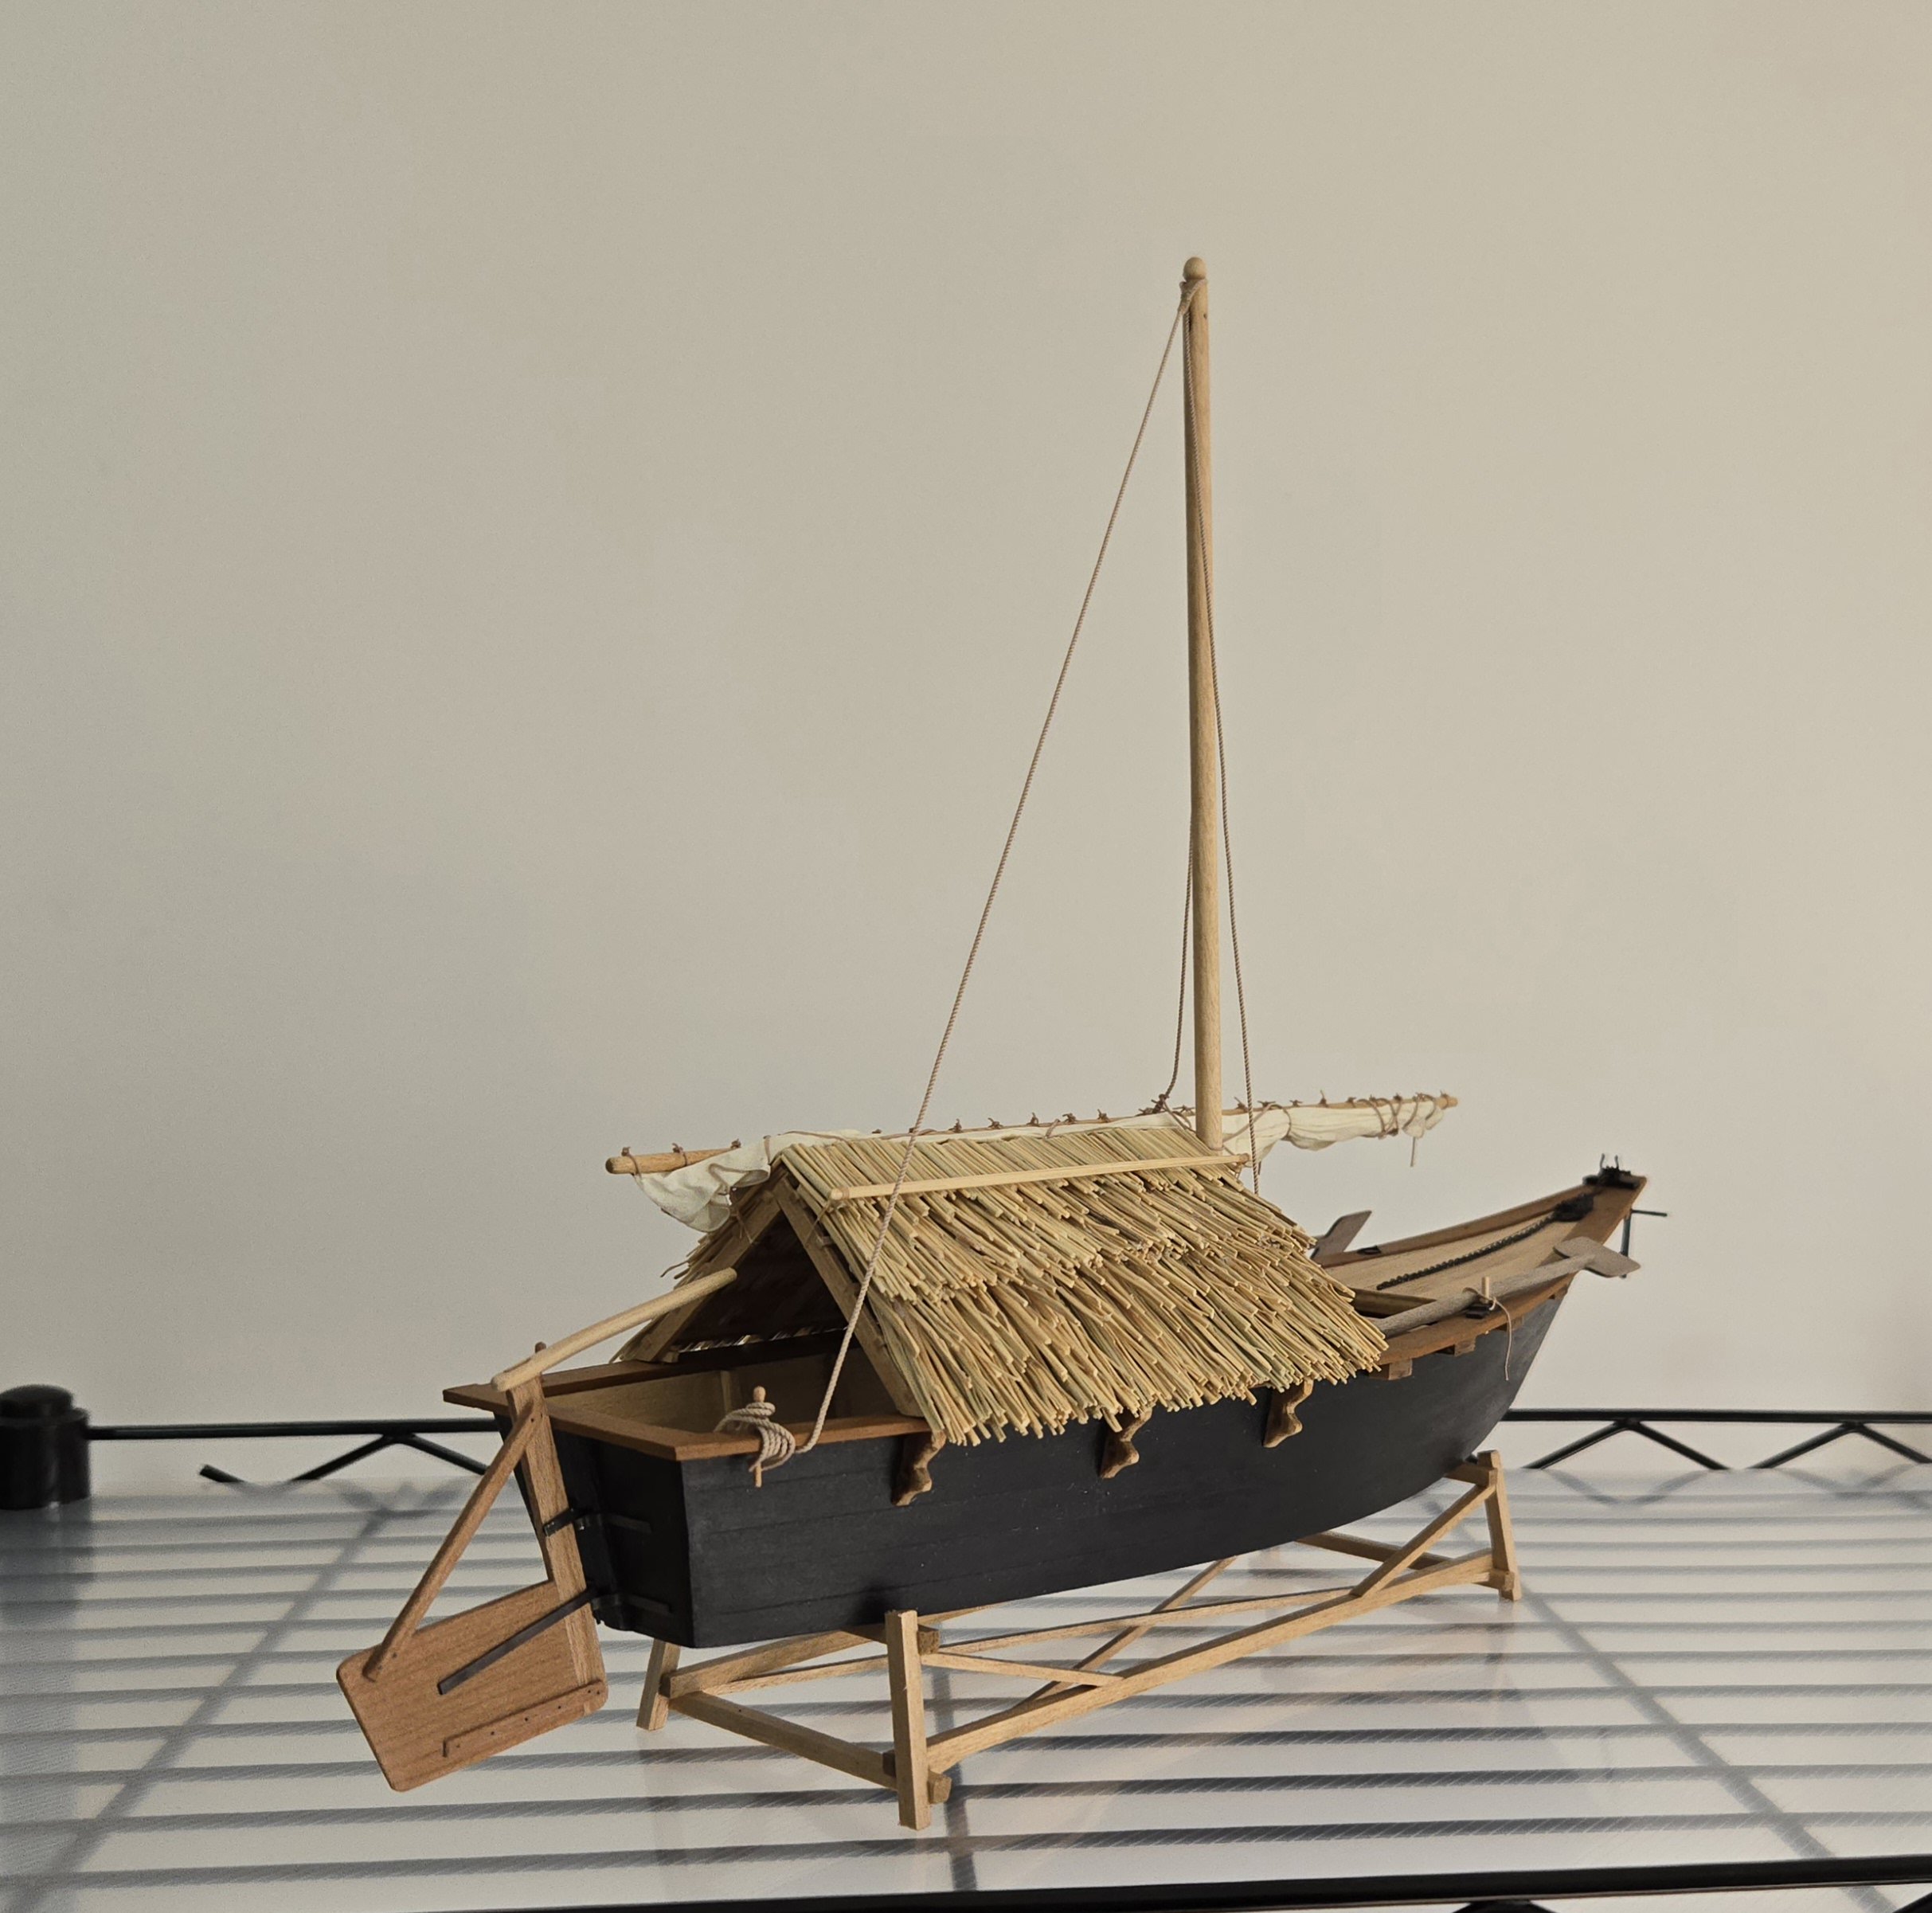
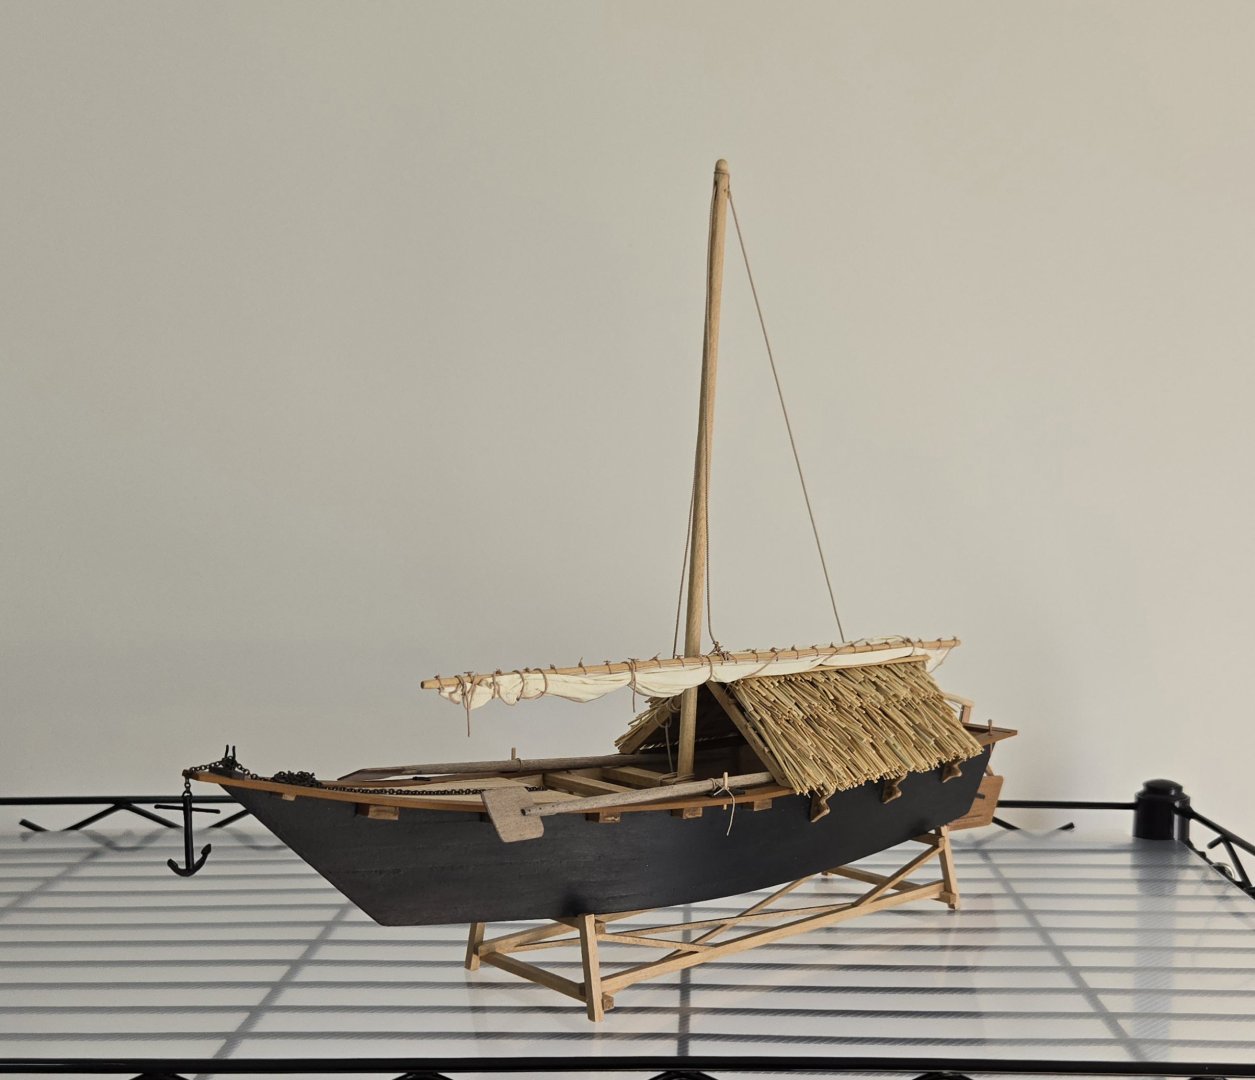
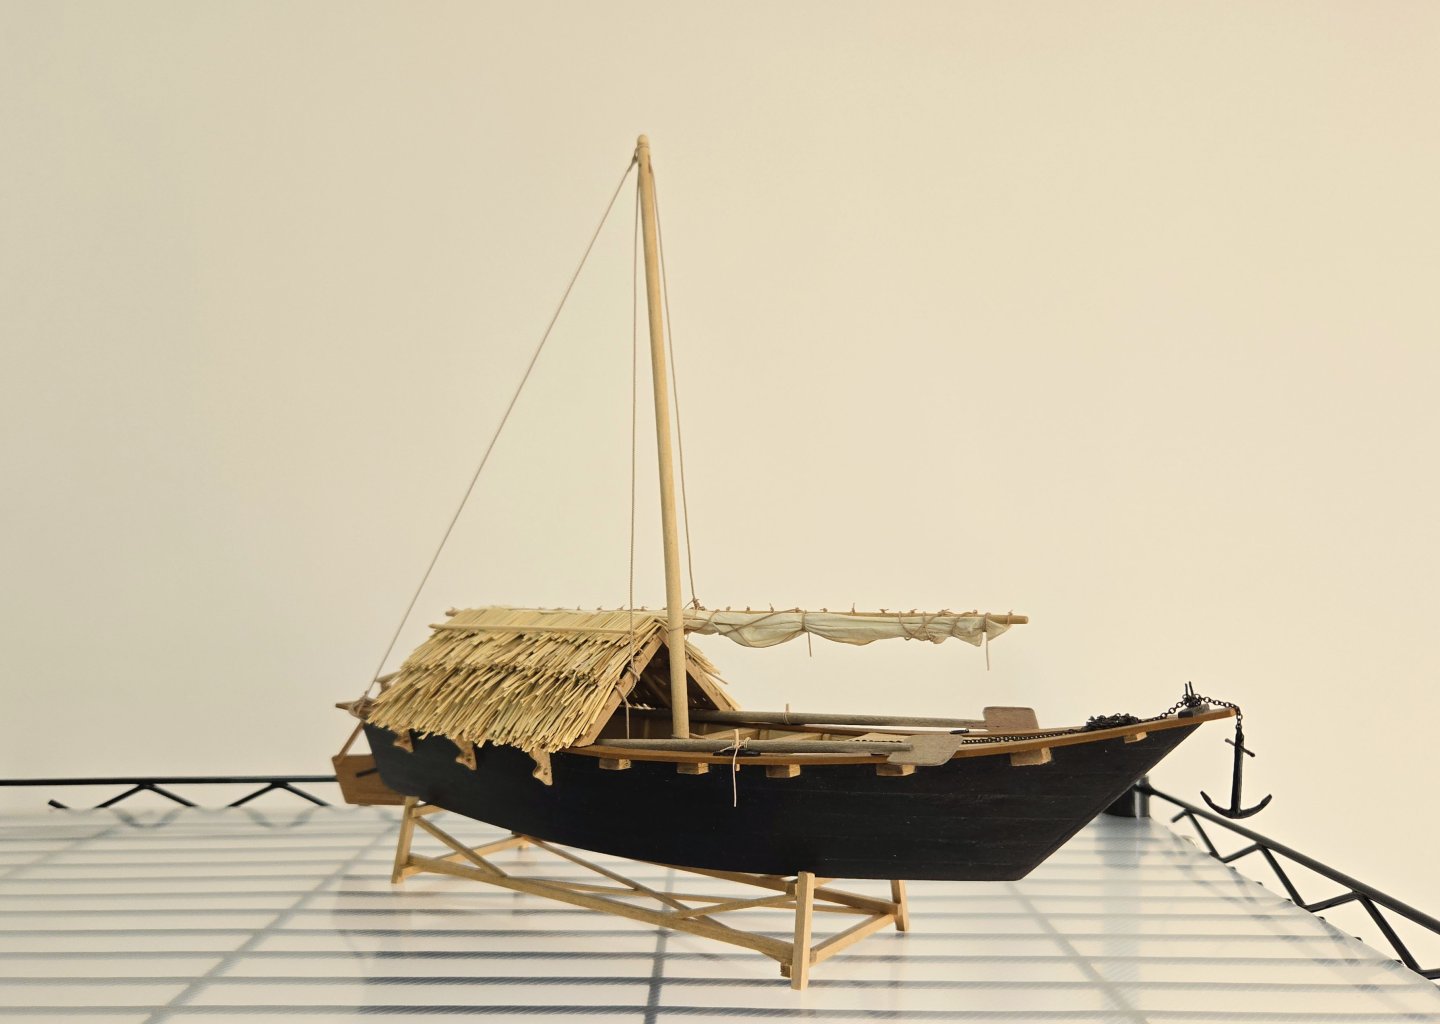
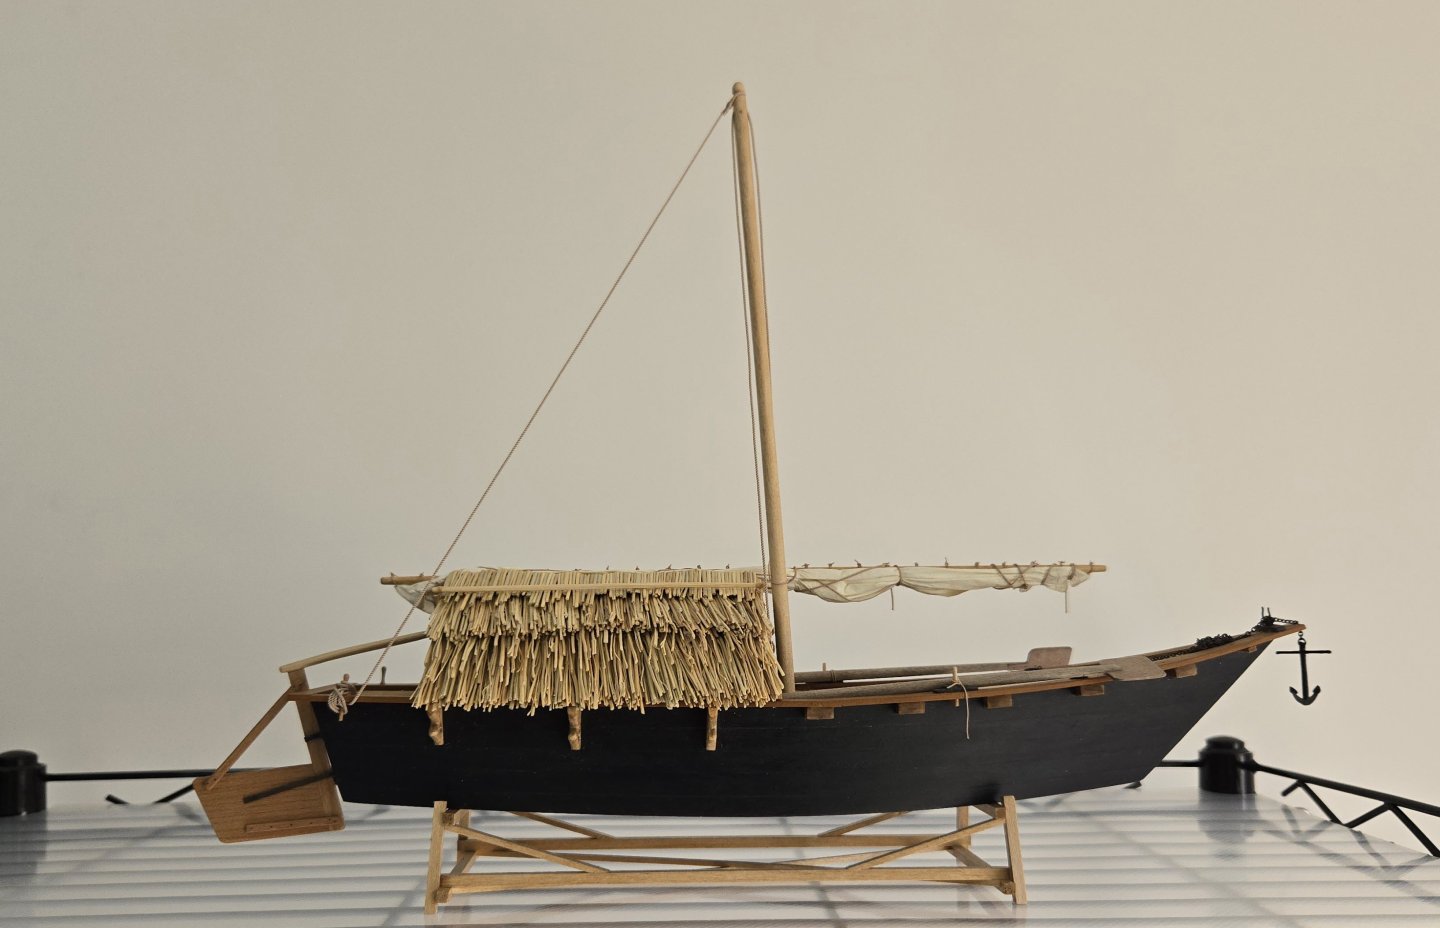
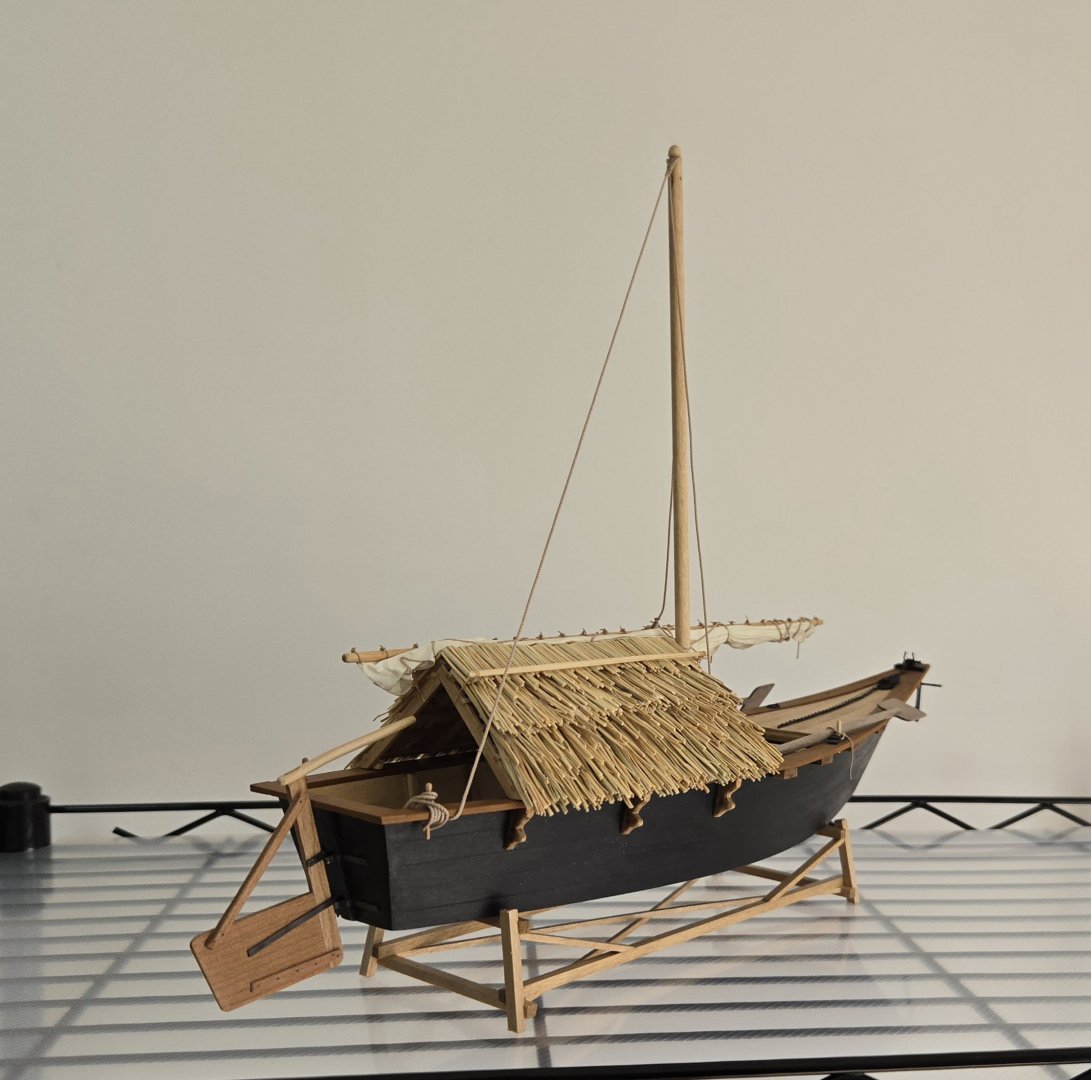
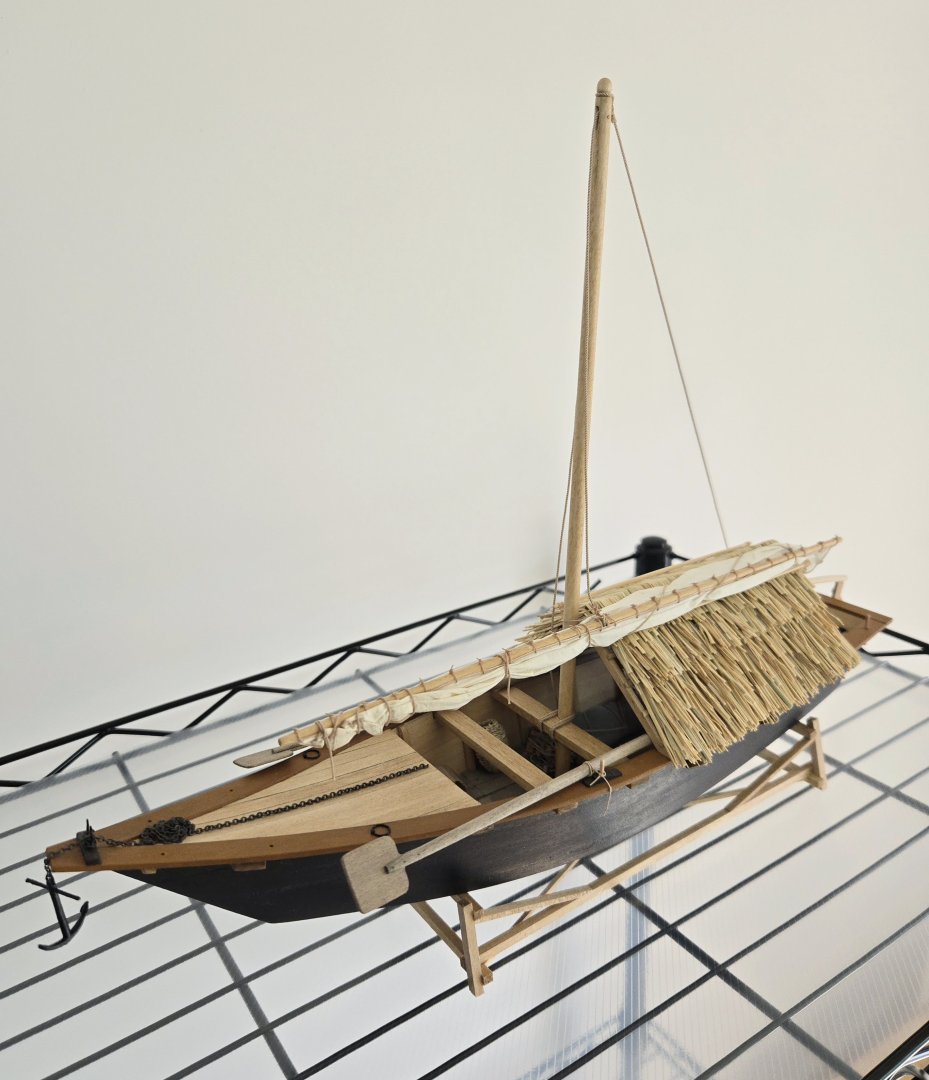
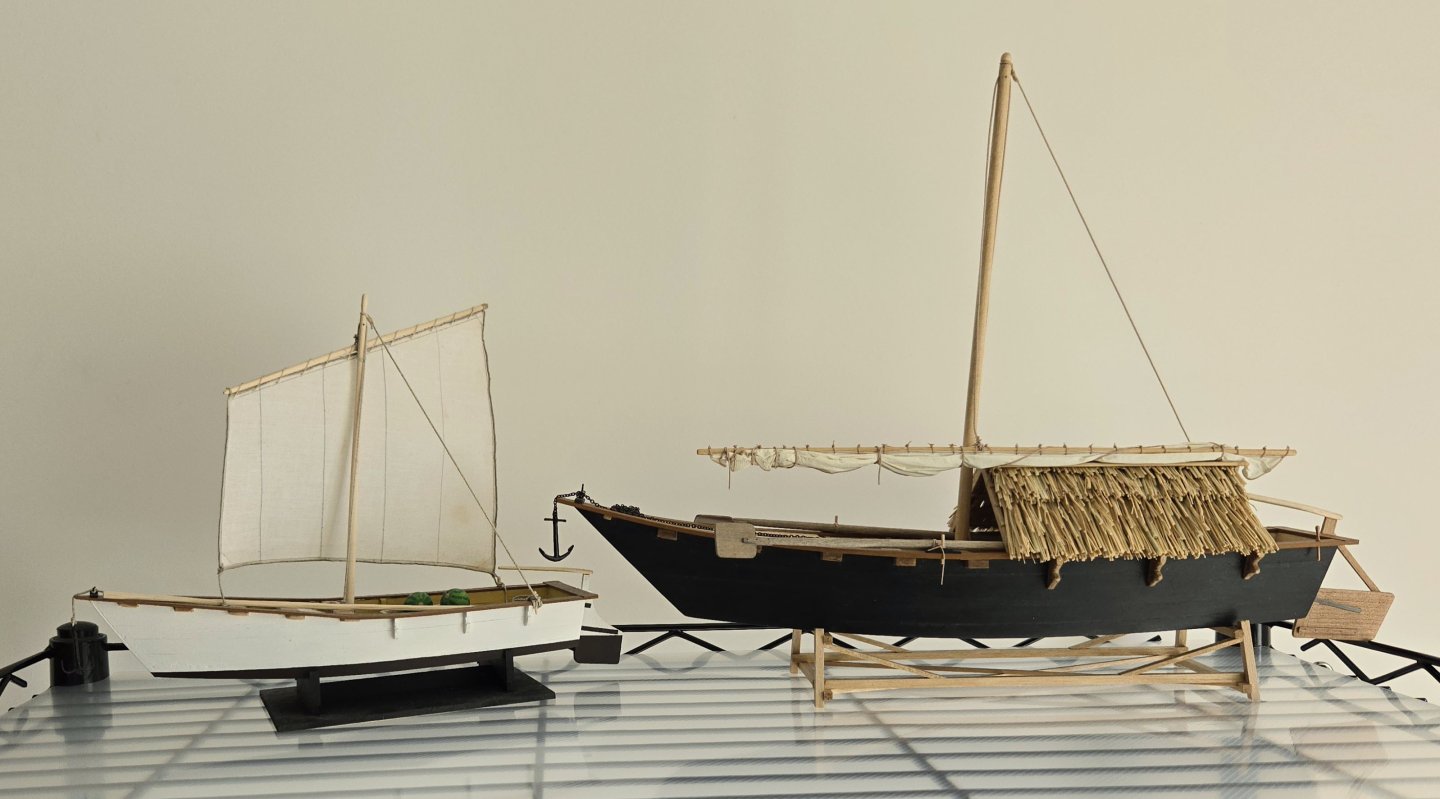
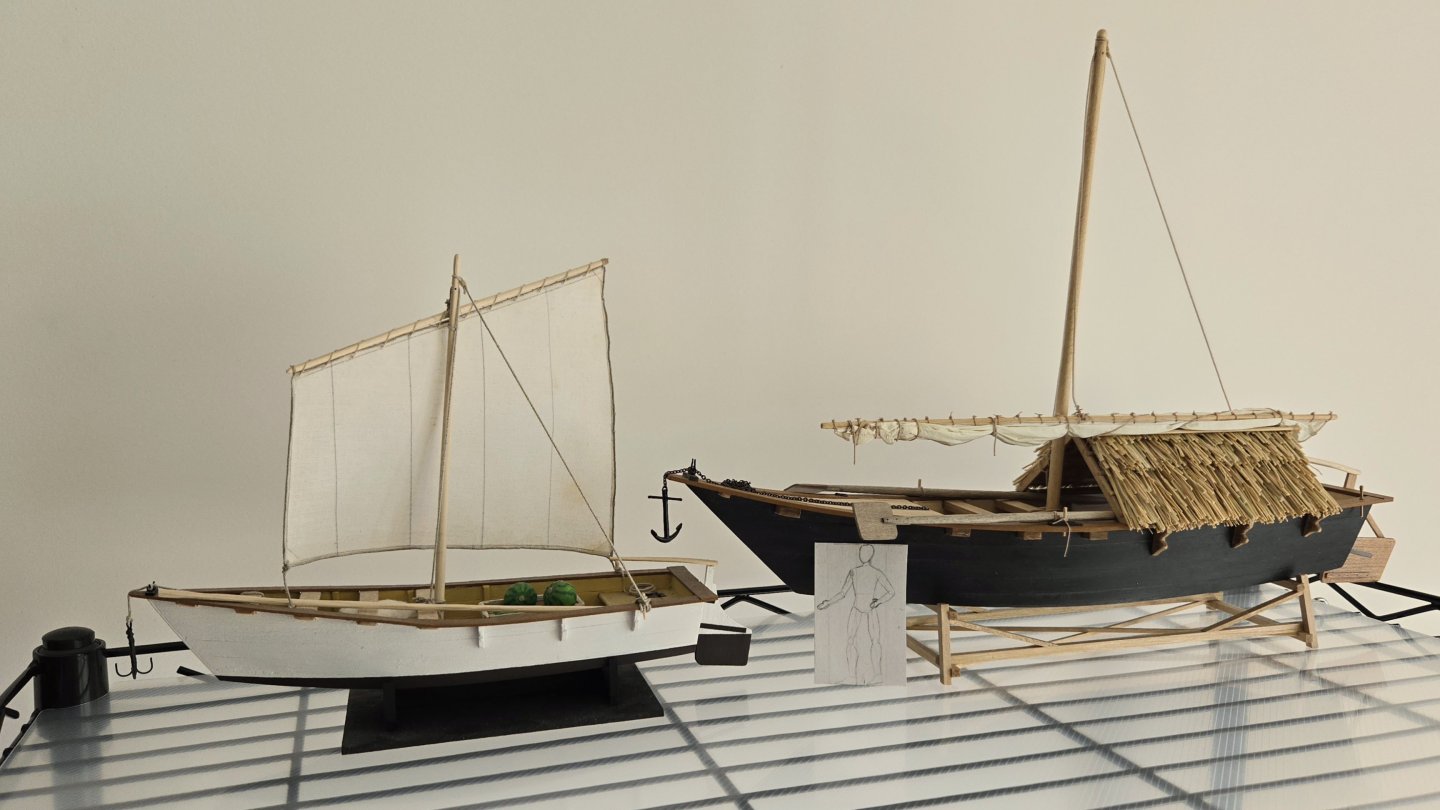
Finished! I started making this model (or at least drafting my first attempts at plans) on 22 July 2023, and began this build log a few days later. It was my third build overall and my second scratch build. At the time, I thought it would be simple and quick, not much more complicated than the dory I had recently finished, and I thought that I could knock it out in a few months or so while waiting for a kit to arrive. As it turned out, it ended up taking 515 days in total, just under a year and a half, to finish (and 270 posts!). Along the way, this simple build turned into multiple models (including a digression into making some entirely unrelated models as Christmas gifts) and a much deeper dive than I had anticipated into research, opening up a series of questions about, among other things, processes of technological change and intellectual exchange. I also developed substantially in my model-making skills, such that I can see clear differences between the Cargo Canoa (finished about a year ago) and the Canoa de Rancho. This build, and the many helpful comments from so many people, has taught me a lot. Even though it's a simple vessel overall, I tried my best to make it with care and to not shy away from difficulty, even if this meant, for example, tediously re-making the thatched roof. While there are still things that I can see could be improved, I'm happy with how it turned out. This has been an incredibly rewarding build, well worth the time and occasional frustrations, and I'm glad I did it. Below: The Canoa de Rancho, at left, and the Cargo Canoa, at right. I feel like my improvement over time is apparent, although I also wouldn't have been as happy with my results on the Canoa de Rancho without making a lot of mistakes on the Cargo Canoa. (Figure at right for scale.) There were a number of frustrating aspects of this build. To name three specific parts, the thatched rancho took a lot of time and experimentation, the sail was tricky to get right, and the metalwork for the rudder hinges was challenging. More generally, it was difficult at the outset to proceed given that I only had photos to go off and no plans--in this respect, the model is perhaps one of the "models that shouldn't be built" according to Howard Chapelle. That said, I think I was able to produce a reasonable model based as much as possible on existing evidence, especially photos. (And it certainly helps that this vessel has a flat-bottomed, wall-sided hull--a curved hull would be significantly more challenging). Moreover, I've tried to be clear about the choices I've made in interpreting that (sometimes confusing or contradictory) evidence. Some parts of this build are quite conjectural. A lot of the details of the rigging (like the parrel or the robands) were not very clear in photos, but I hope that I've at least provided a reasonable explanation for why I went with the rigging details I went with. Similarly, while I have yet to find a clear photo of the floorboards, other evidence made it clear that they existed, and I hope that I have at least proposed a coherent and plausible explanation of how they might have been. Finally, with better photo evidence coming out over time, I have gradually come to believe that the locker under the helmsman's platform is inaccurate. This is an error on my part, and all that I can say in my defense is that at the time it seemed a reasonable interpretation based on literary sources. Nonetheless, I don't think that we should let the possibility of making such a mistake hold us back. This is especially the case with branching out from modeling vessels that are well-represented in plans and in existing models, including most Latin American workboats--subject that I'm particularly interested in and that I think are well worth building. Ultimately, all that we can do is explain our reasoning and evidence as clearly and compellingly as possible and make a case for why we've made the choices we made. I think the two main takeaways I've had from this build are: 1) This is an excellent, supportive community with a ton of resources. When I had questions about how to do something, I was often able to find existing posts that answered my questions, or I was able to ask and receive a lot of helpful advice about everything from judging hull colors in black and white photos to sail-making. I would not have been able to finish without such a helpful community, and I offer a heartfelt thanks to everyone who followed along, answered or asked questions, offered comments, or just gave the occasional like. It's easy to feel isolated in this hobby, but having so much support and so many examples of excellent builds through this site was really crucial in helping me push forward and strive to improve. Thank you all. 2) Being careful rather than trying to speed through things really pays off. This model took a lot longer than expected, but the end result is worth it. When I was building my NRG Half-Hull kit, I reflected on the advice to treat each plank as a model in its own right. The same can really apply to pretty much any part of any model. For any new modelers out there (as I was when I started this), I can't emphasize enough that taking the time to get everything satisfactory, and even practicing with test pieces, is the key to getting a result that you're happy with. This has been a fun, challenging, and rewarding experience, and I can't wait to continue working on more Latin American (and other) workboats. I'm glad that I was able to capture, in model form, an often under-studied aspect of maritime history, one which was nonetheless important in shaping people's lives and can tell us something about the past. I hope that anyone reading this considers modeling an overlooked subject that speaks to them. This site has an impressive and growing collection of build logs for such vessels, and I can confirm that modeling one is a very worthwhile endeavor, challenges and all. Once again, thank you to everyone for your help and support. I'll include a few more photos in the next post.


-
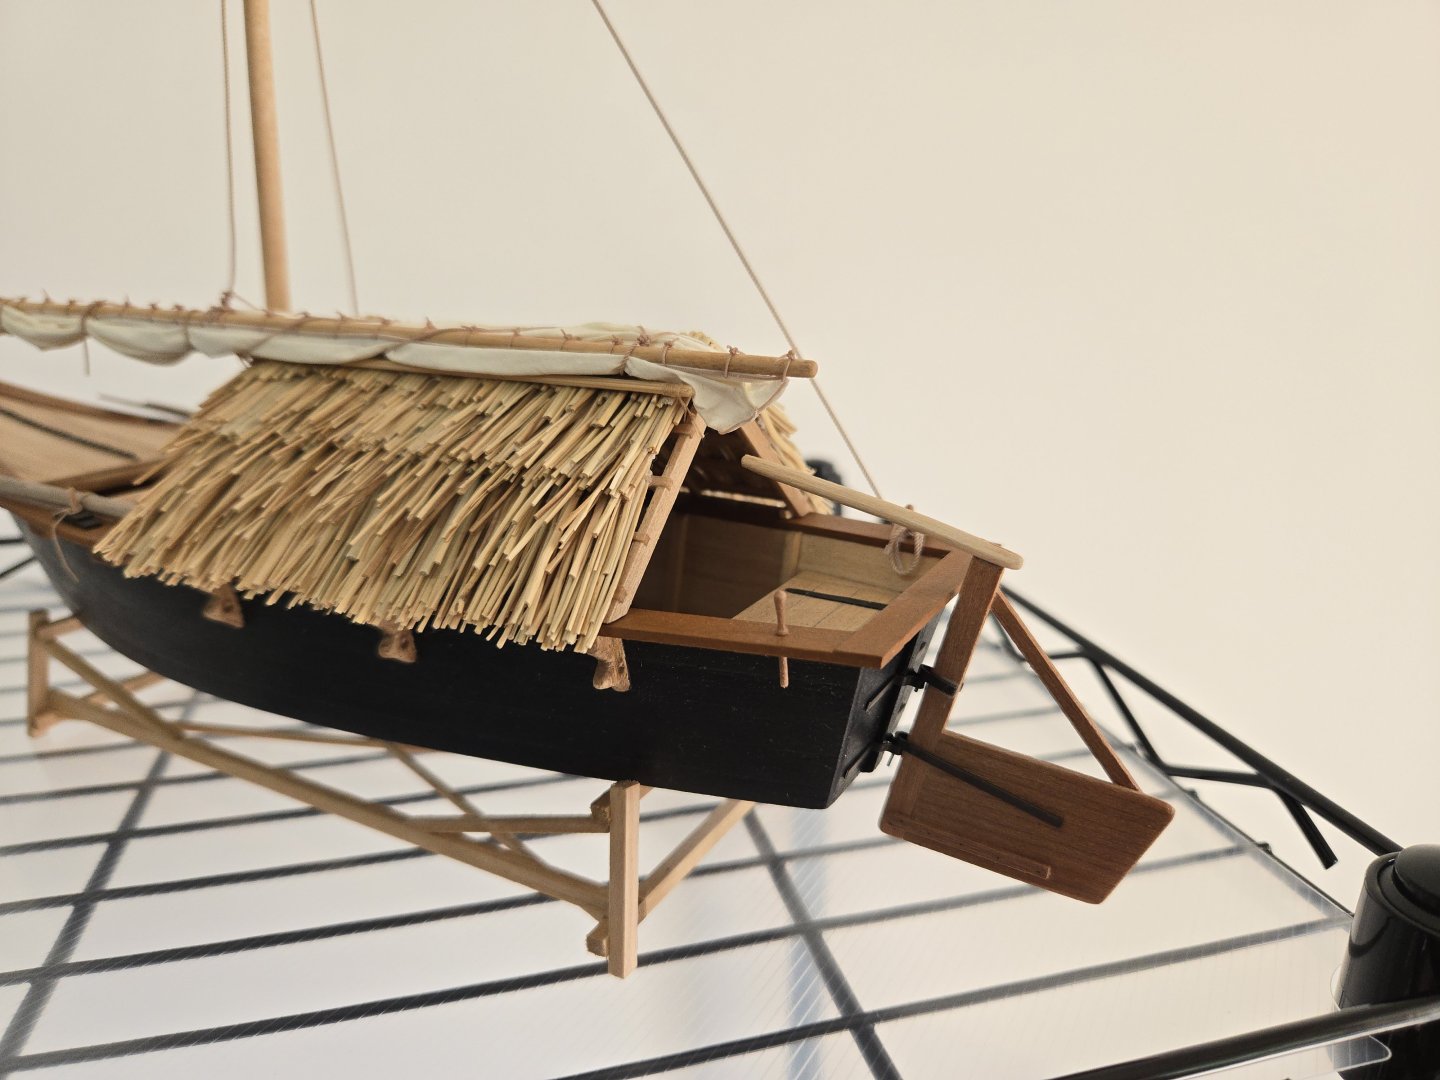
After a bit of work, I was able to re-wet, re-shape, and salvage the sail, and the model is now nearly complete. Upon reflection after my frustrating and rather chaotic first attempt, a few things stood out. First, on the positive side, I was happy with how the aft half of the sail (over the rancho) turned out, which spurred me to try to salvage things. Second, while the white glue holding the boltrope in place had stood up to some tests on the sail and seemed like it would hold, the tests didn't involve nearly as tight folds as on the final assembly, and the glue came loose in many places. Fortunately, I was able to use the Aleene's Fabric Fusion to re-glue it in place, and it held up much better (thanks for the suggestion, Glenn!). Third, a big part of the problem was that I needed to furl the sail in contact with the rancho roof to get the shape right, but none of my clamps were suitable to hold things in place, meaning that I needed to press down on the aft part of the sail while trying to shape it elsewhere. This was a recipe for disaster. After thinking a bit more, I realized that I could use thread to tie the sail/yard down over the rancho, and could cut it away later. This worked out--although I could probably have tied it tighter, and I ended up placing a clamp at the aft end solely to weigh it down a little, the thread at least held the piece roughly in place and allowed me to focus on the fore half. Finally, I was using the sheets to wrap up the sail, but I wasn't able to get them very tight, which contributed to some of the loose and awkward folds/draping in the fore half. Upon rewatching Tom Lauria's video about making furled silkspan sails, I noticed that he was able to use a lot of separate ties, using the knots to get things tight. In his case, these were part of the model, but I realized that I could do the same thing with thread, then wrap the sheets over those locations and carefully cut off the thread. This worked much, much better. So, here's the assembly while drying. In hindsight, I would not recommend using wood shims to clamp the sail material, as the wood stuck a little to the sail's glue, but it turned out ok. There were a few places that I wasn't happy with, such as the odd bolt rope shown below--after being reattached, it had come loose again after being folded in a way that made it very difficult to re-attach it precisely to the sail edge. Unless you're looking right at it, though, it's hard to notice and just looks like a fold in the sail, so I decided that I could live with it. In any case, here's the full sail assembly. Overall I'm happy with how it turned out. Next, there were a few loose ends of the rigging to deal with. First, I finished off the parrel (the end of which still needs trimming below). Then the end of the backstay. The looped excess line could be a bit tighter, but I may need to remove the mast and rigging for a possible move in about a year and a half or so, so I've only glued the end of the loop so far. I may try to glue a tighter loop with shellac if I can find any, so it can be easily dissolved in alcohol for removal. Finally, the halyard. I was originally going to run this to the port belaying pin aft, but then I realized that this would only really be done when the yard/sail was hoisted. In most photos, when the yard has been dropped, the halyard just hangs relatively loosely. I've noticed quite a few photos that seem to show the rancho itself (or presumably its framework) being used to belay lines, so I decided to run the halyard through a few loops around the rancho framework near the mast, as though the crew has loosely tied it off to keep it from interfering too much with the fishing gear. At the moment, part of the line has been soaked in a glue-water mix and is being held down with a pair of forceps in order to look like it's hanging naturally. Once this dries, I'll be able to remount the rudder, and the model will be complete!