JacquesCousteau
-
Posts
1,383 -
Joined
-
Last visited
Content Type
Profiles
Forums
Gallery
Events
Everything posted by JacquesCousteau
-
 Nice work, and very well done on the dory as well!
- 11 replies
-
- 2
-

-
- Muscongus Bay Lobster Smack
- Midwest Products
- (and 2 more)
-
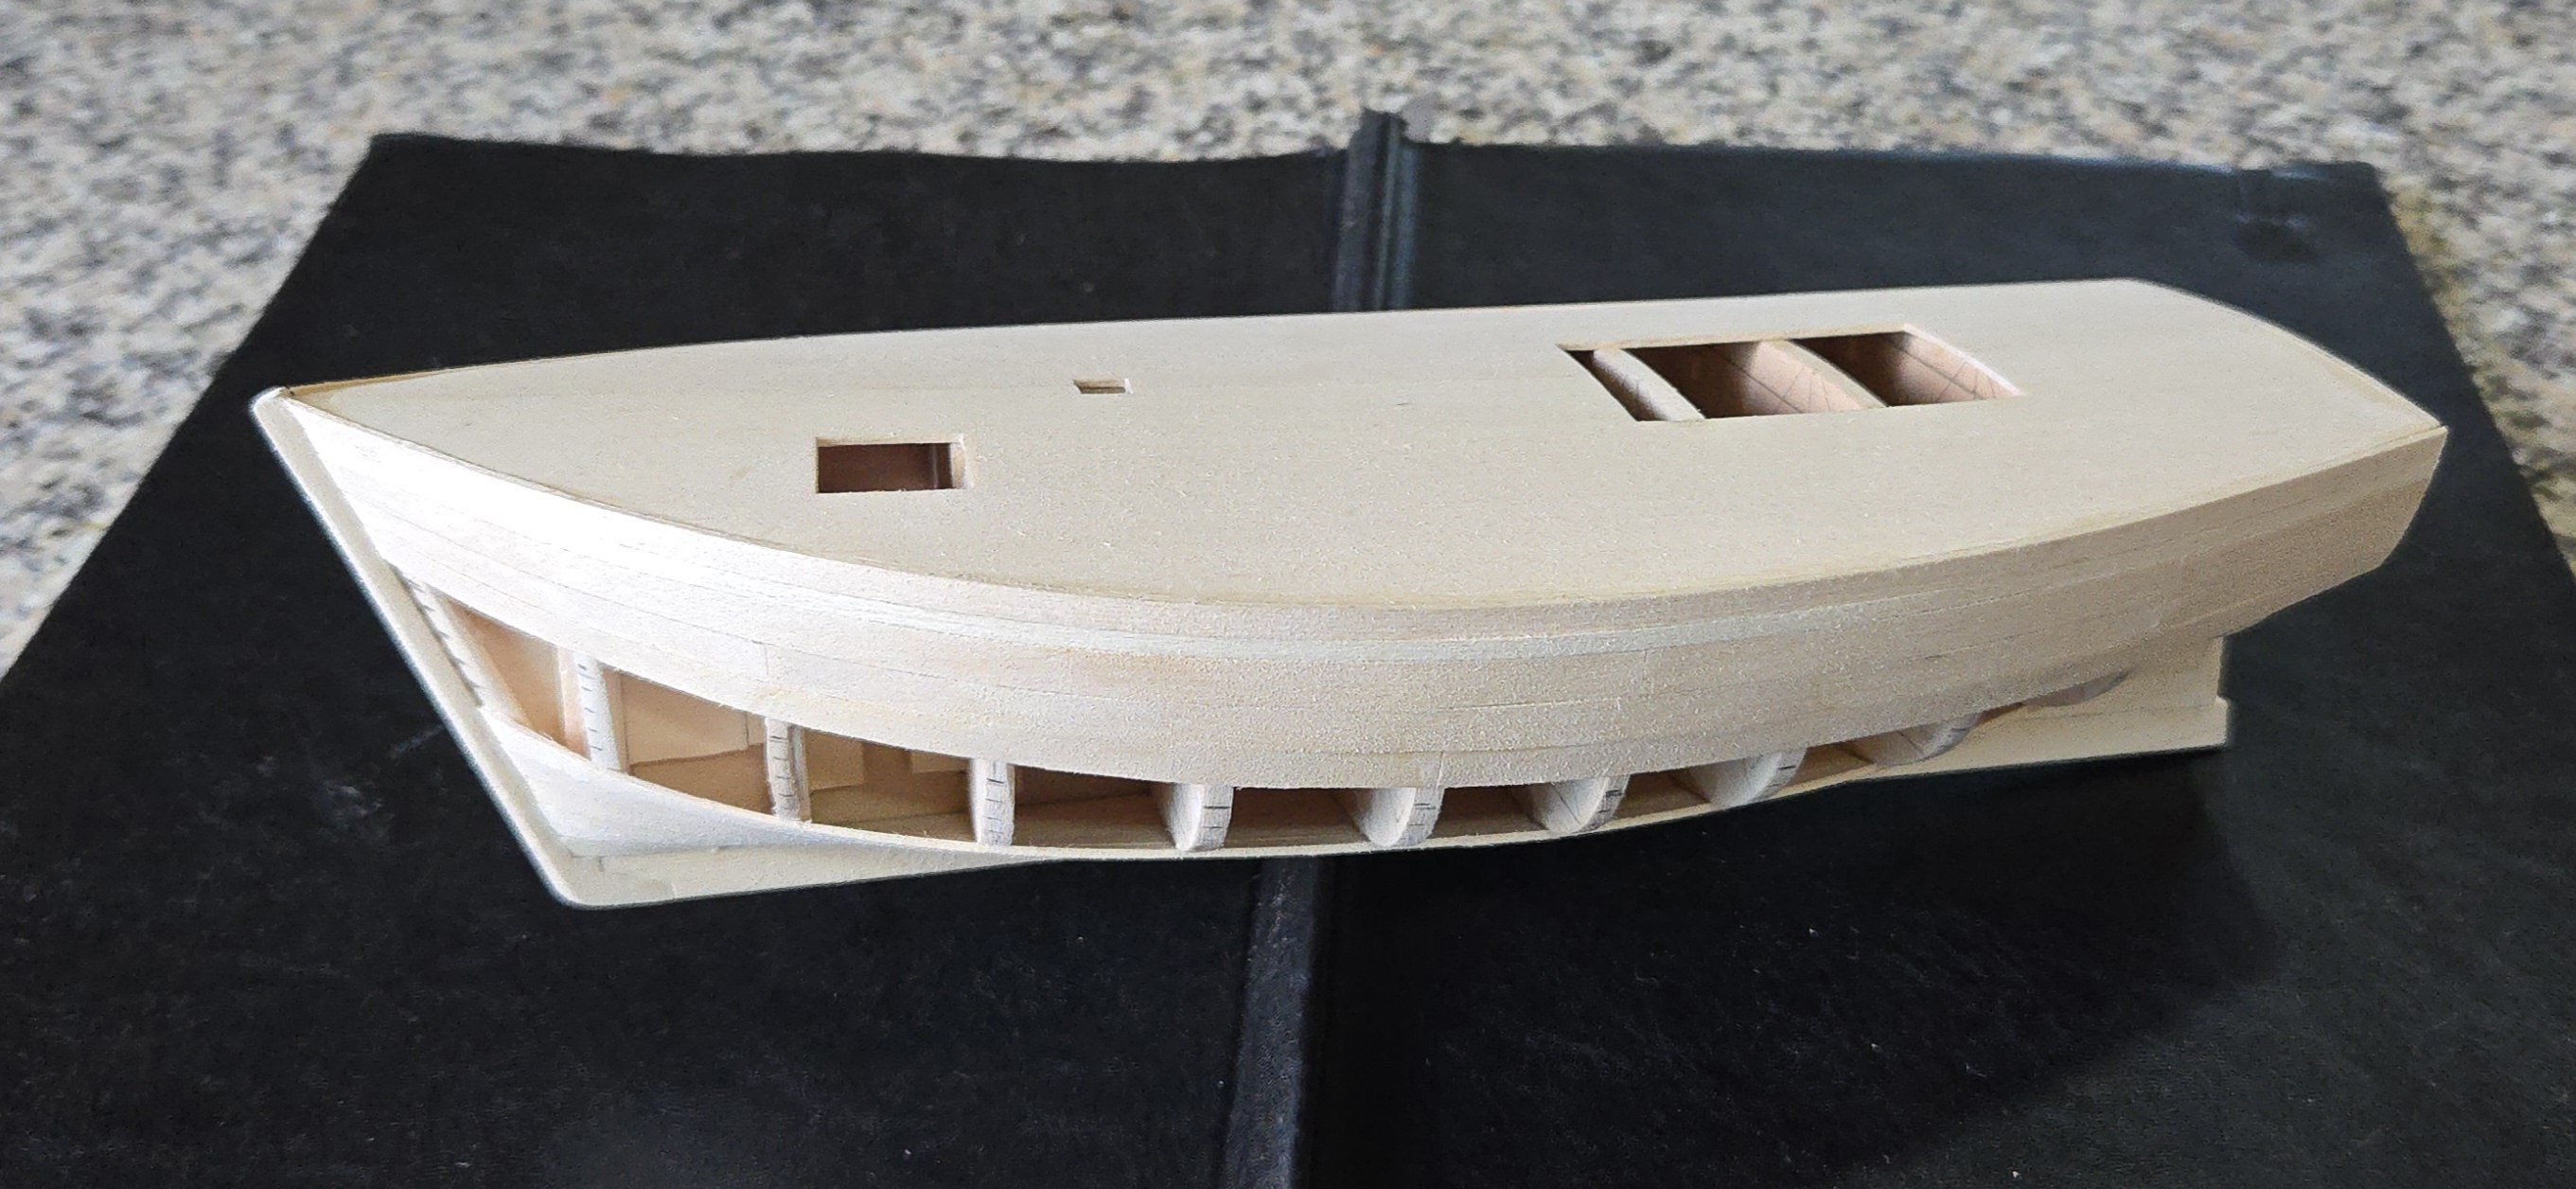
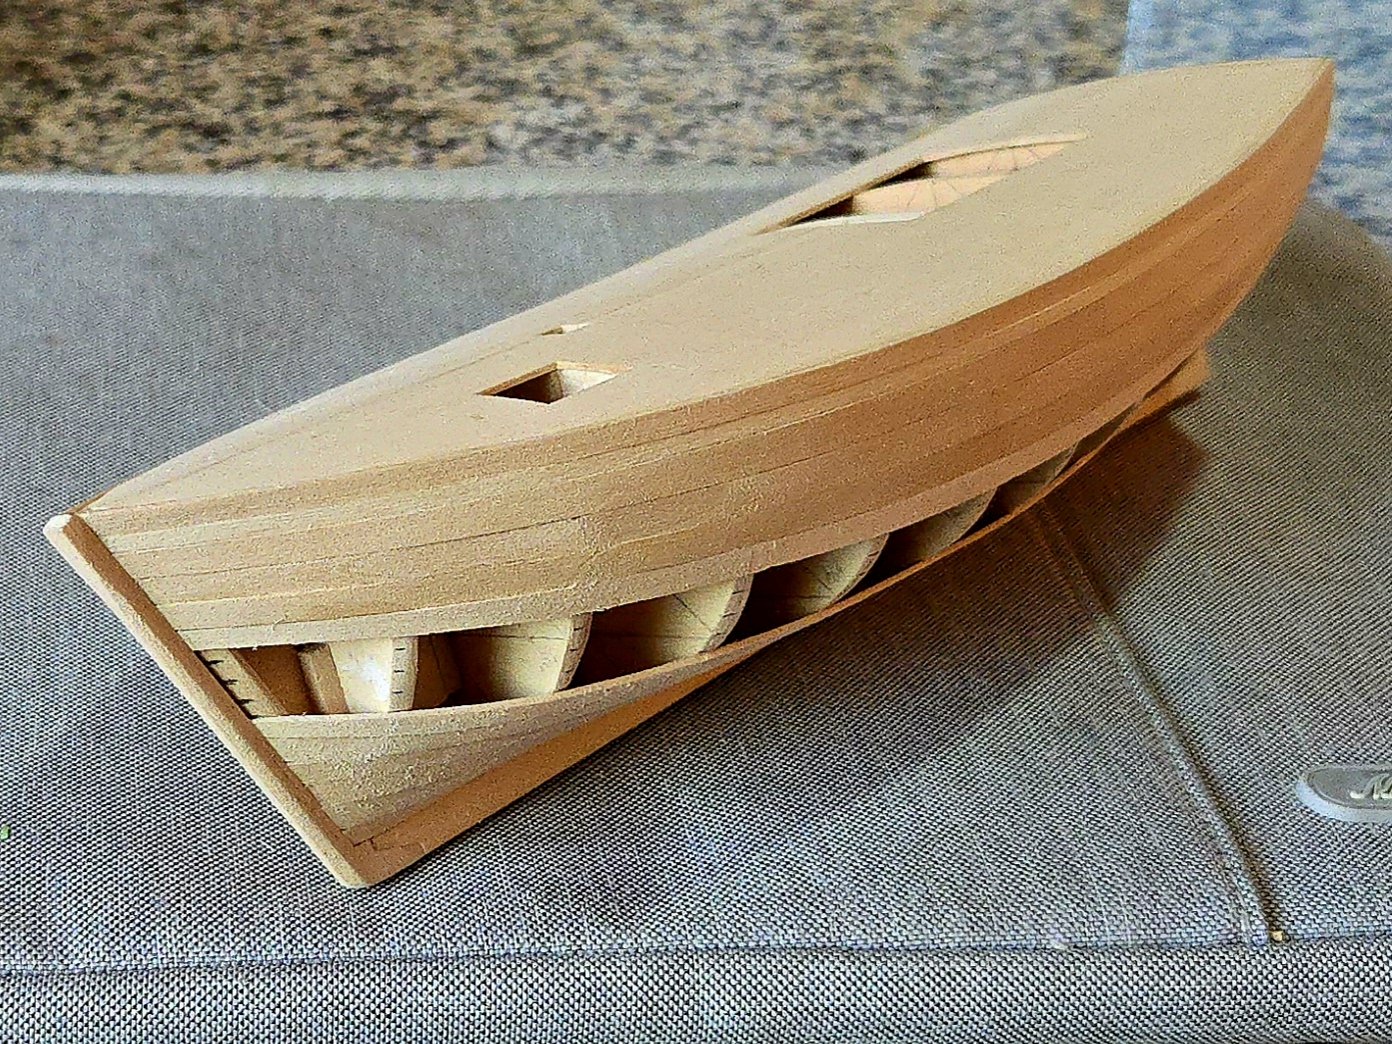
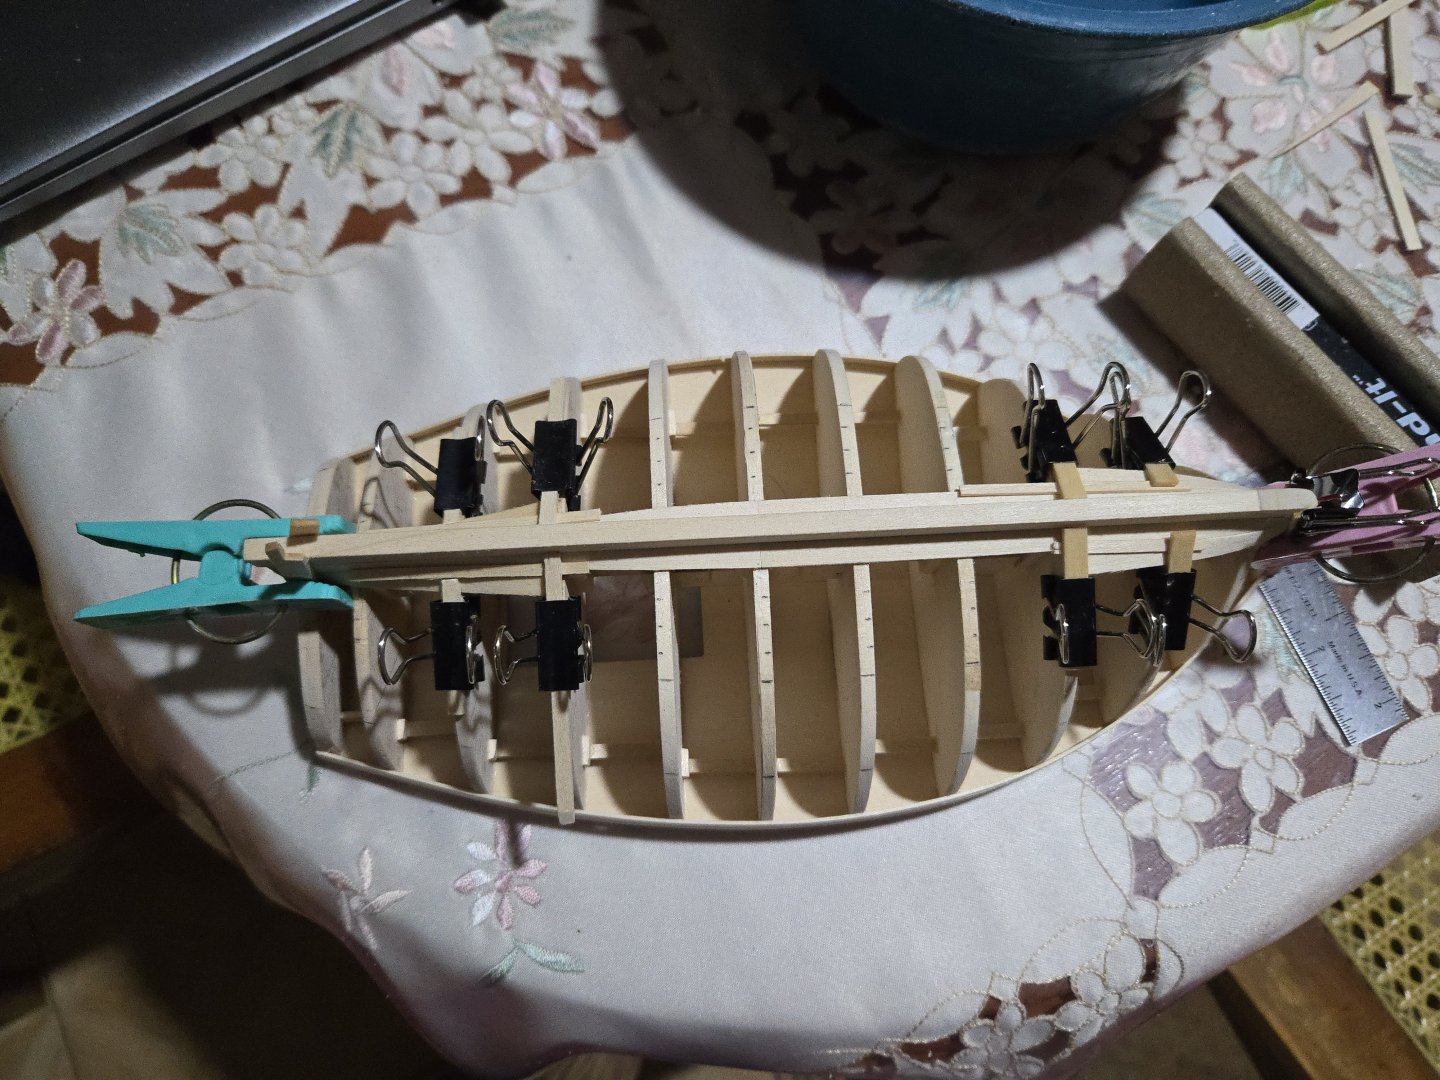
Thanks, all, for the kind comments! I suspected as much during the Half Hull build, but I think planking may be my favorite part of modeling. Glad to hear that people are enjoying the history behind this vessel type, too. We'll see if I can add more as the build progresses, I enjoy research and feel it's important to understand not just how a boat was built, but how and why it came to be. Gary, I think "charming" is a good word for it. For such a beamy, full-bodied, and rather squat vessel, the hull still has a bit of grace to it, I think. A couple more strakes have been added. Now I'll be packing up the hull for travel back home, and I'll be finishing planking there.
- 312 replies
-
- 13
-
-
- Chile
- Latin America
- (and 6 more)
-
Nice work, very well done! If you haven't already looked, you might want to check out existing build logs--I know there are some for the Bounty Launch and the Sloup, at least. They might give you an idea of particular challenges of each.
-
Looking forward to following this build! Depending on how you'd like to make it, there are a lot of options to personalize this as a fishing boat or as a yacht. Either way, I've had some luck in finding old photos of Friendship Sloops via the Penobscot Maritime Museum's digital collections, although the search function is a bit unwieldy. See here, for instance, for photos tagged as Friendship Sloops: https://penobscotmarinemuseum.historyit.com/search-interfaces/search/digital-collection/0/1/1/1?rq[0]=8639&ip=1
- 90 replies
-
- 3
-

-
-
- Friendship Sloop
- bluejacket shipcrafters
- (and 1 more)
-
Fantastic job, definitely something to be proud of!
- 47 replies
-
- 3
-
-
- Erycina
- Vanguard Models
- (and 1 more)
-
Thanks, @wefalck, @Keith Black, and @palmerit for your comments, and to many others for the likes! I've made further progress on the planking, completing the lower band and having just one strake left in the upper band. At this point, I decided that I wil try for semi-irregular plank widths in the central band, so as to better match the photos I've seen of actual lanchas. As noted earlier, many seem to have had slightly slimmer planks around the bilge. To represent this, I took the remaining space--the central band plus the last strake of the upper band--and marked it out for six planks instead of five, reducing the average width relative to the other bands. I considered trying to mark out different widths within this new, expanded central band, but realized this would be tricky as I would need to set up matching irregular proportions across all bulkheads. Instead, I marked the new strake locations evenly, but I will fiddle with the plank widths by making some strakes just under the markings and others just over them.


- 312 replies
-
- 14
-
-
- Chile
- Latin America
- (and 6 more)
-
Congratulations on a job very well done! This is a really exceptional build, fantastic craftsmanship and a great eye for detail. The photos of the whole model really showcase how well everything comes together. Sometimes I find myself favoring more of a weathered look, but this model does a great job at showing how a clean build can highlight the elegance of even a relatively simple workboat. It was a true pleasure to follow along as you built this. Any ideas of what you're building next?
- 201 replies
-
- 5
-
-
-
- Oyster Sharpie
- first scratch build
- (and 1 more)
-
Excellent work, the planking looks great!
-
Welcome! The Provencale seems to be a good starter kit, and doing a build log would be very useful for getting advice. If you haven't already seen it, HakeZou's build log does a good job of showing how it comes together, as well as signaling some challenges. https://modelshipworld.com/topic/24350-la-provençale-by-hakezou-finished-artesania-latina-120-scale/#comment-716193
-
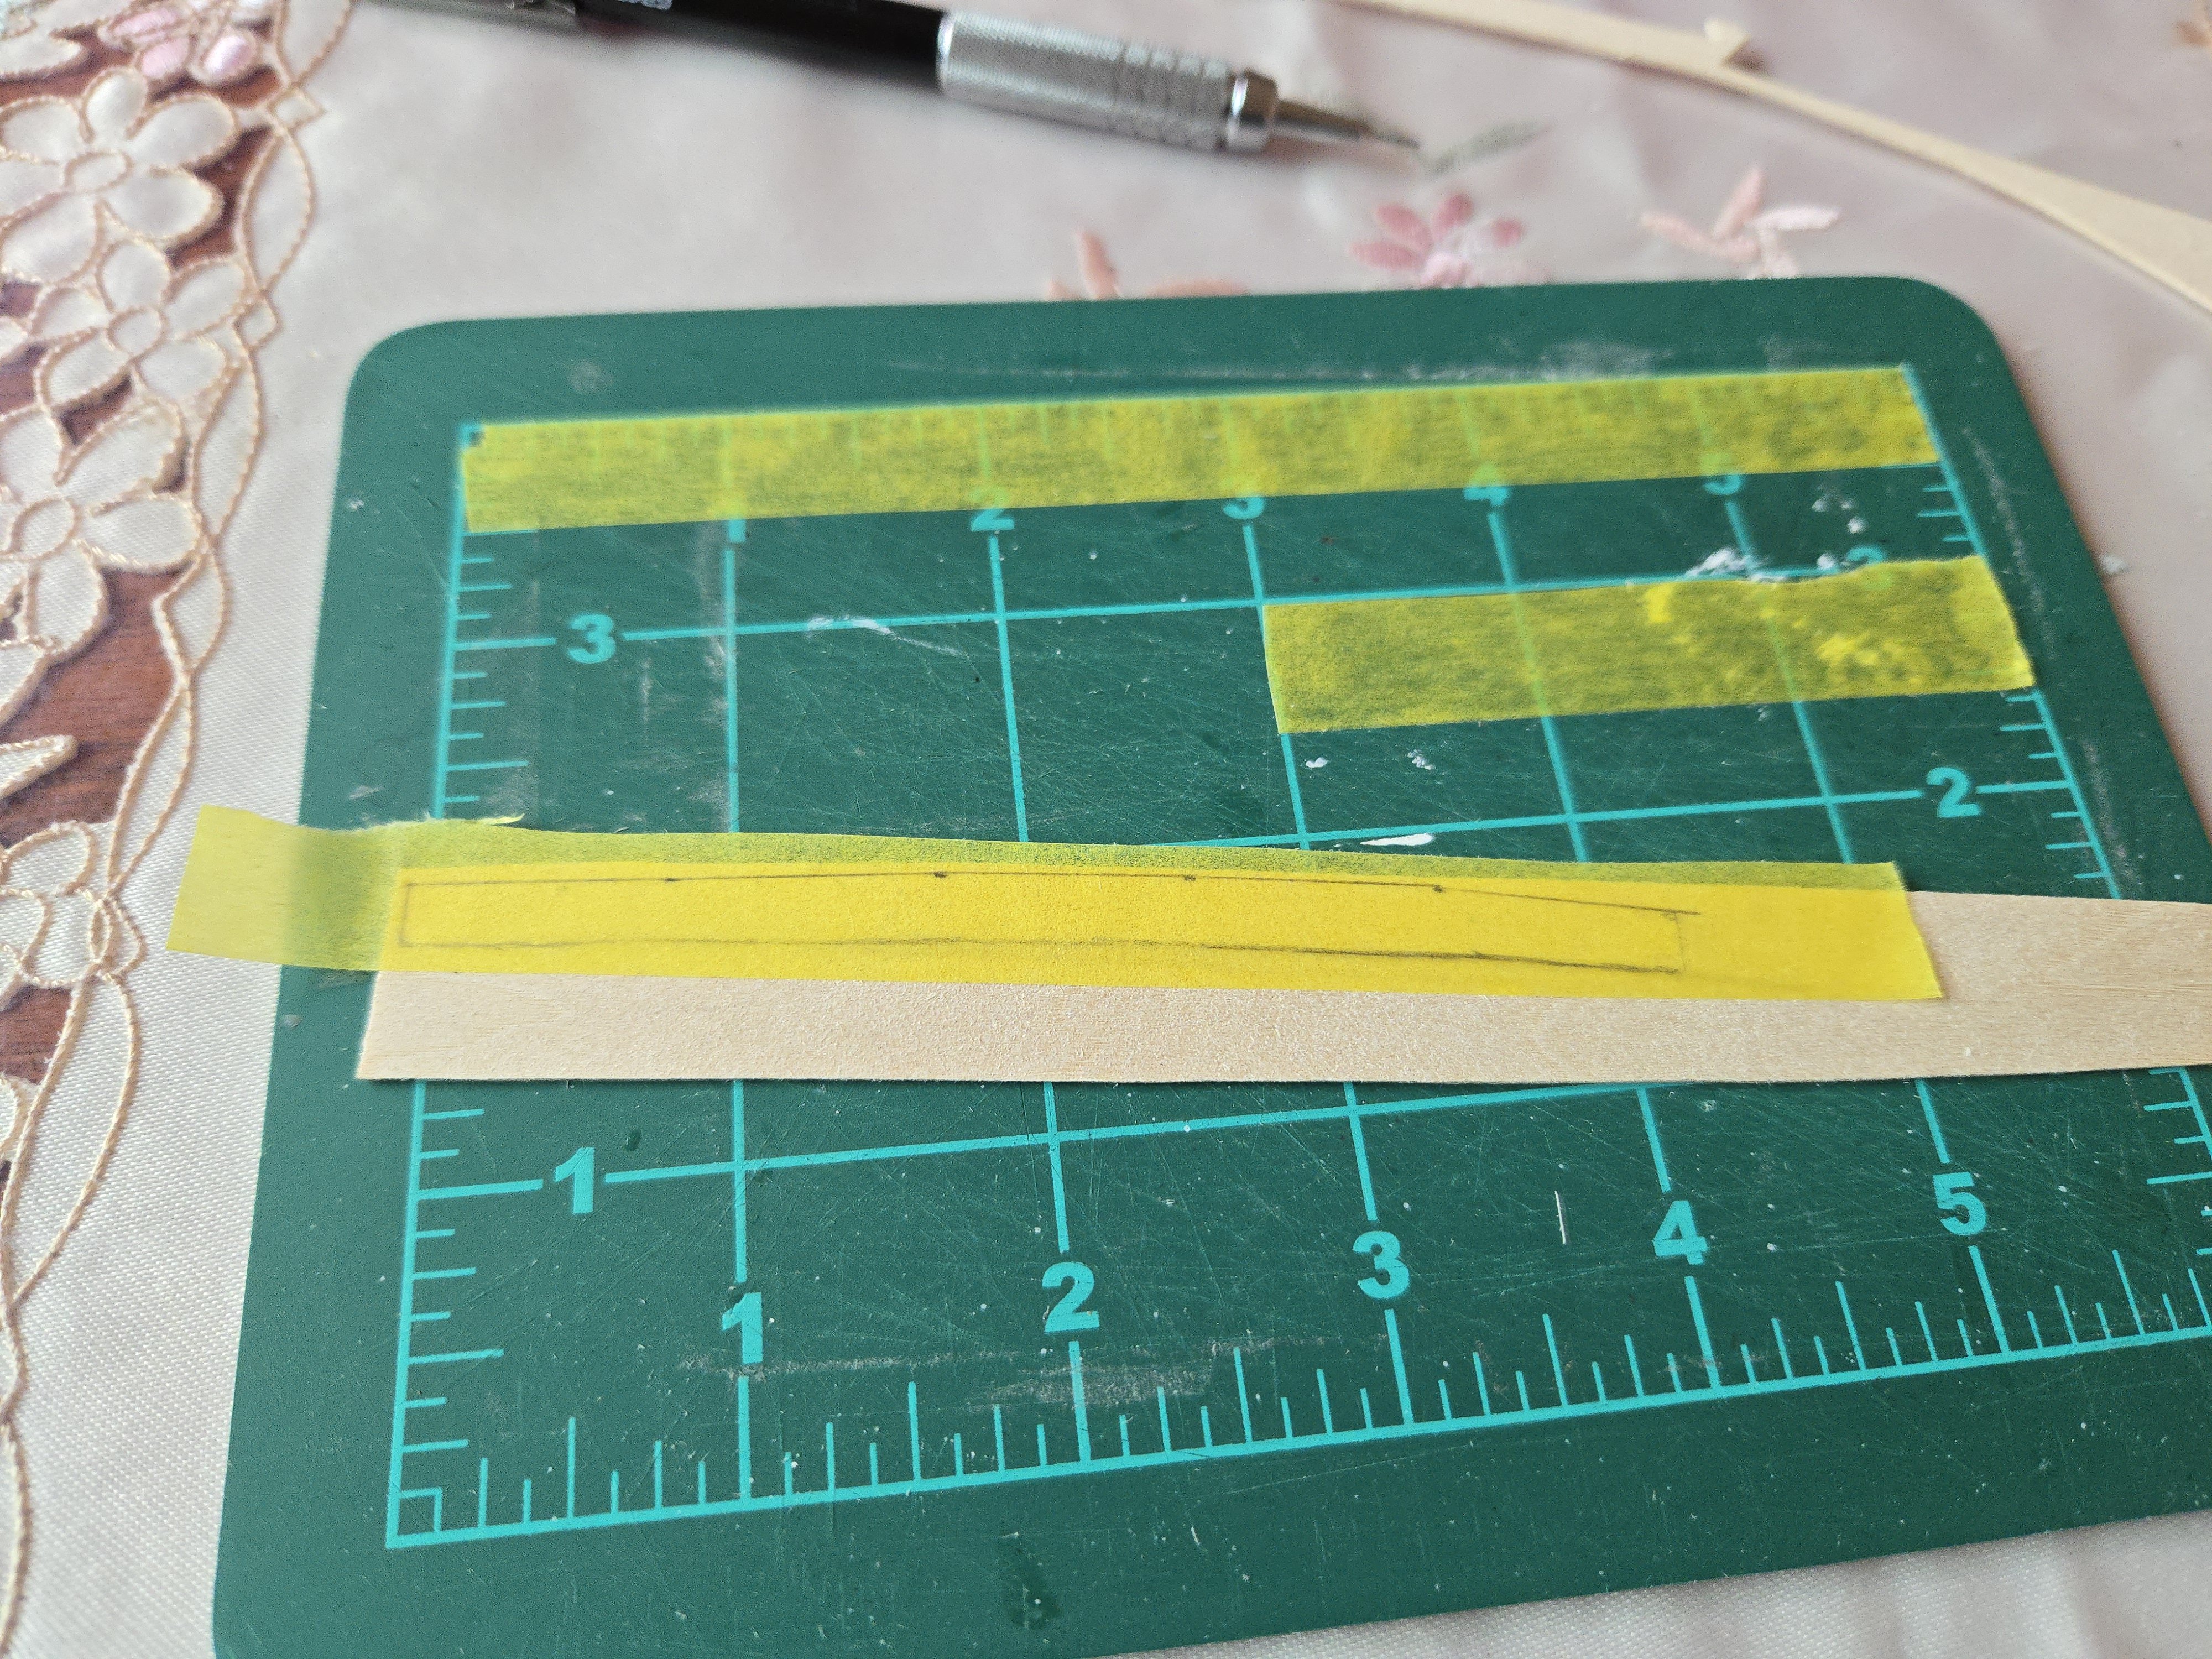
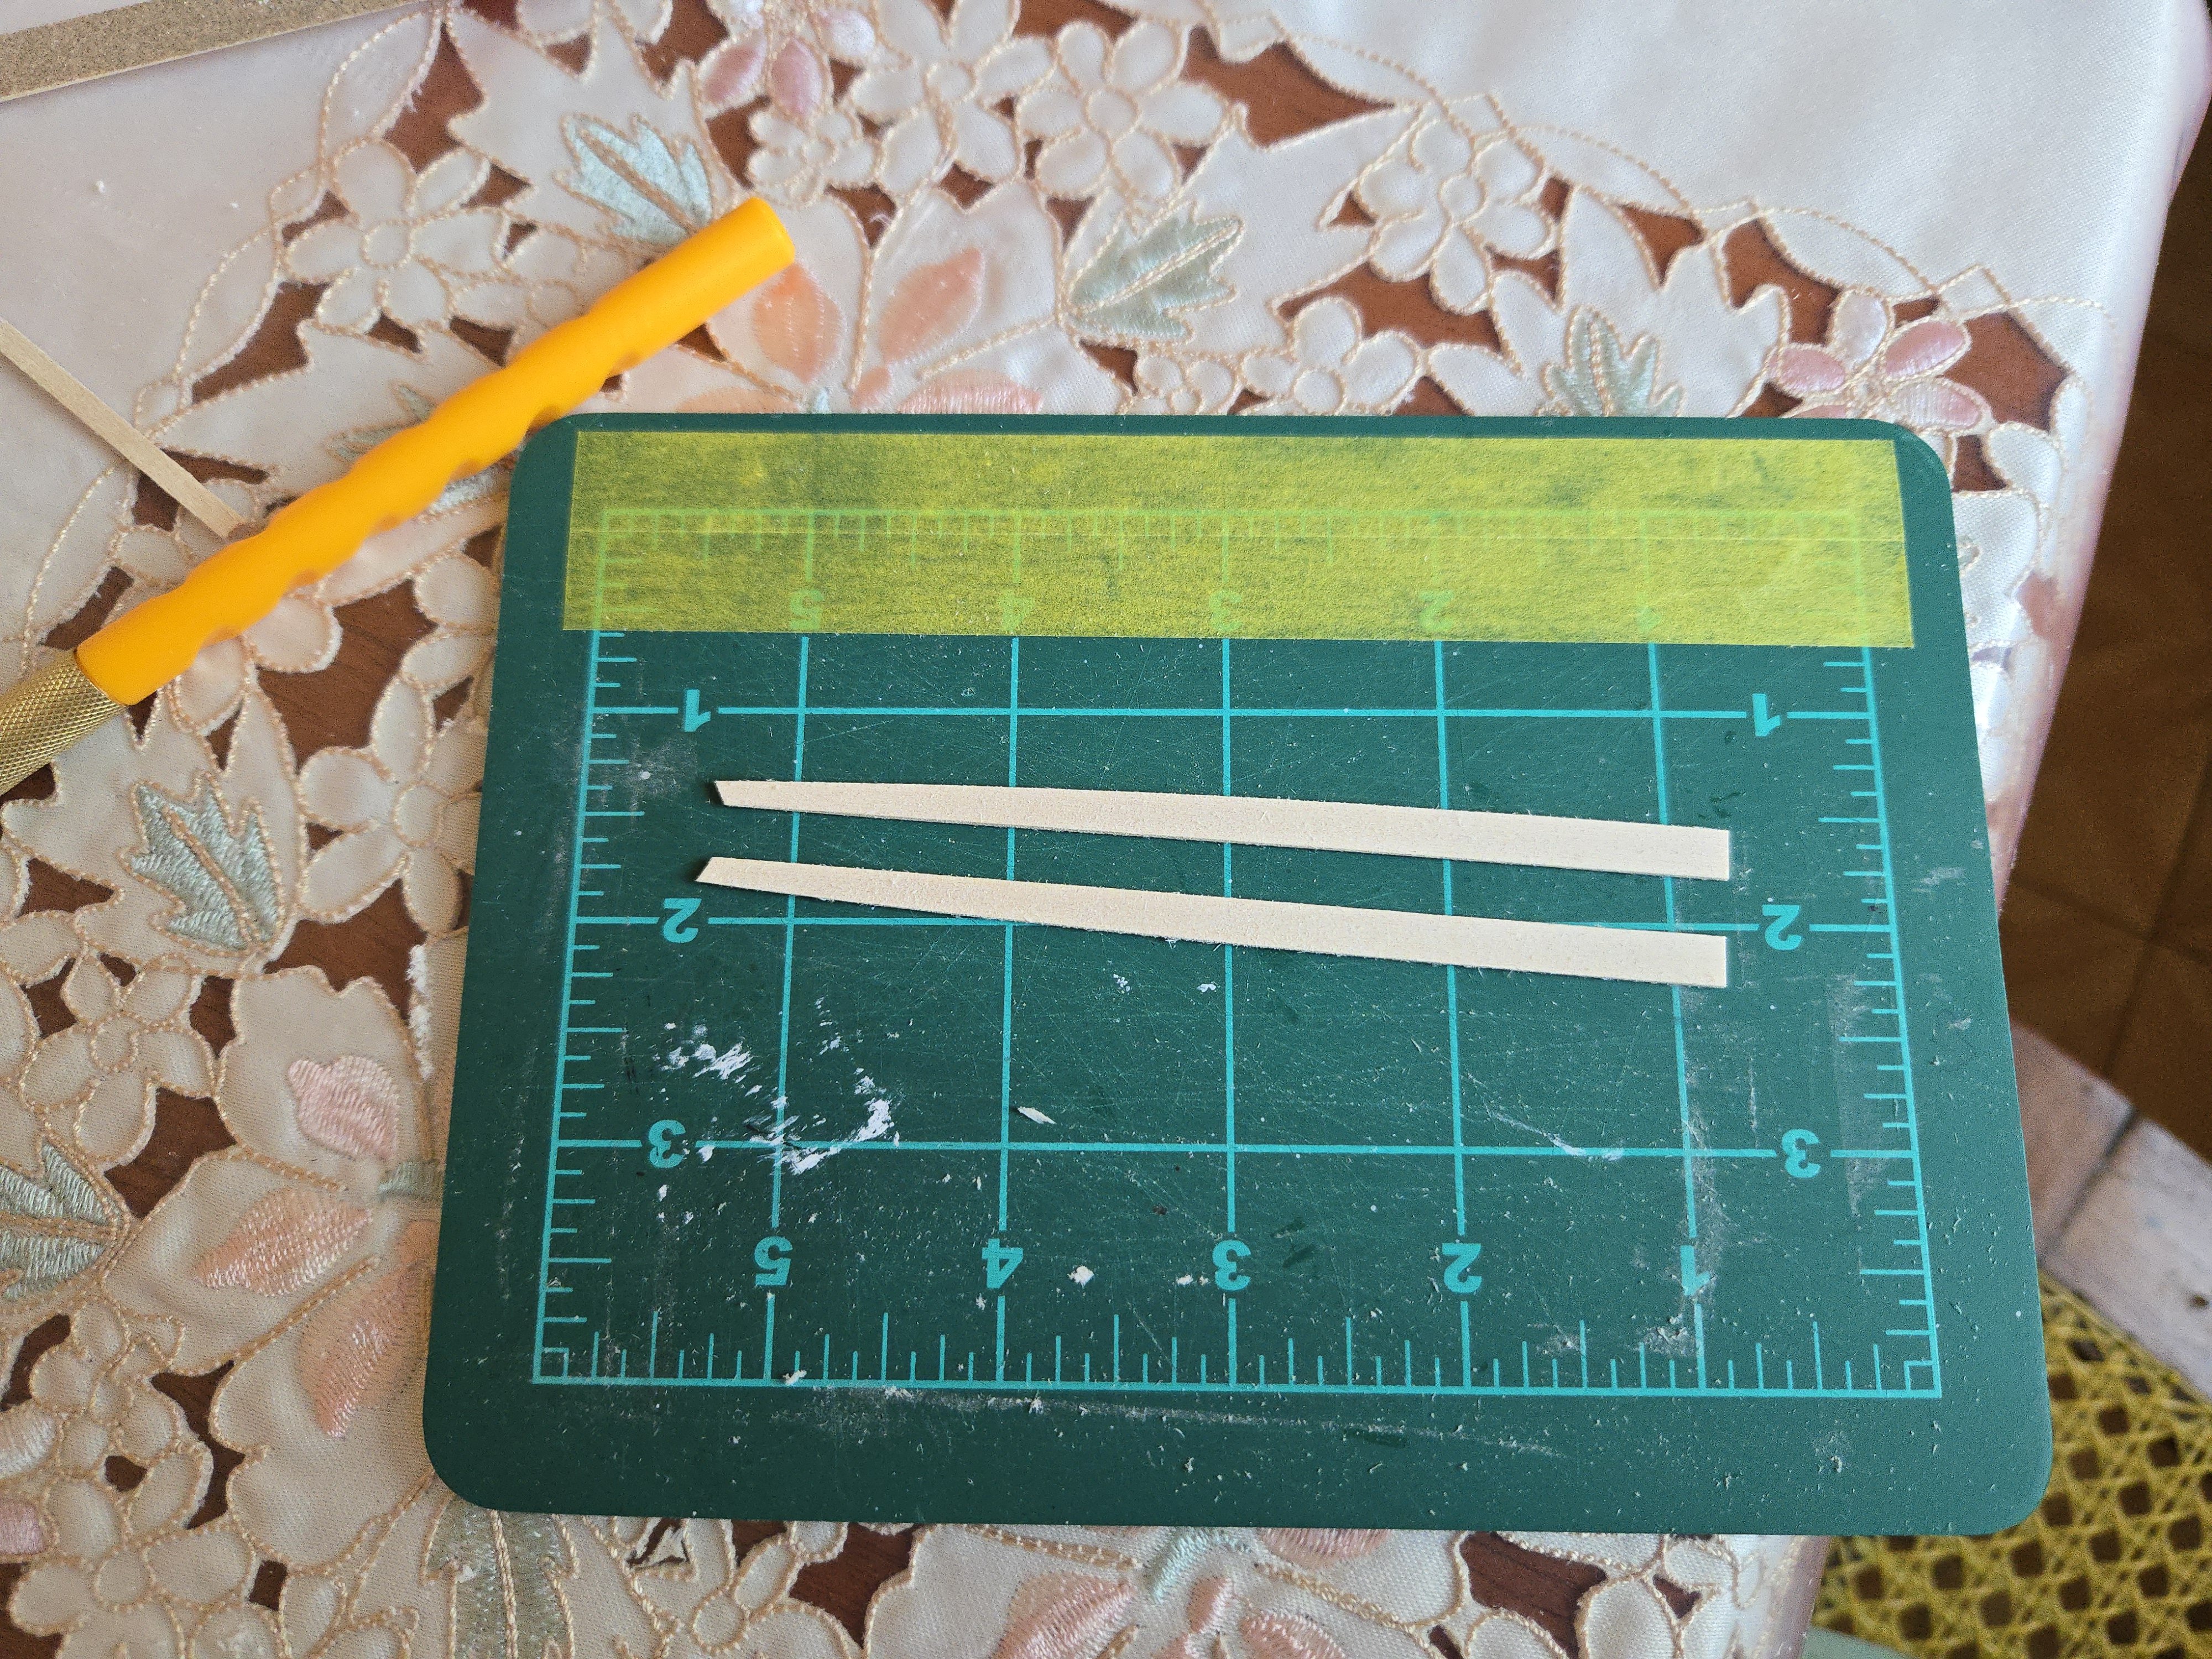
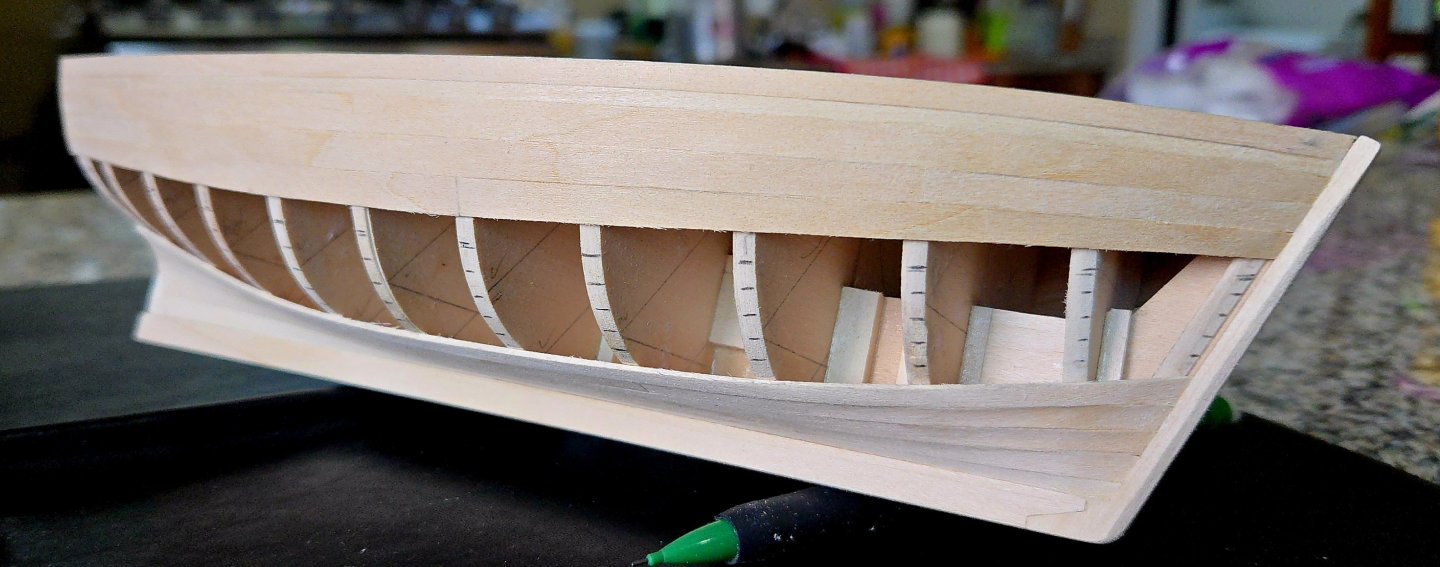
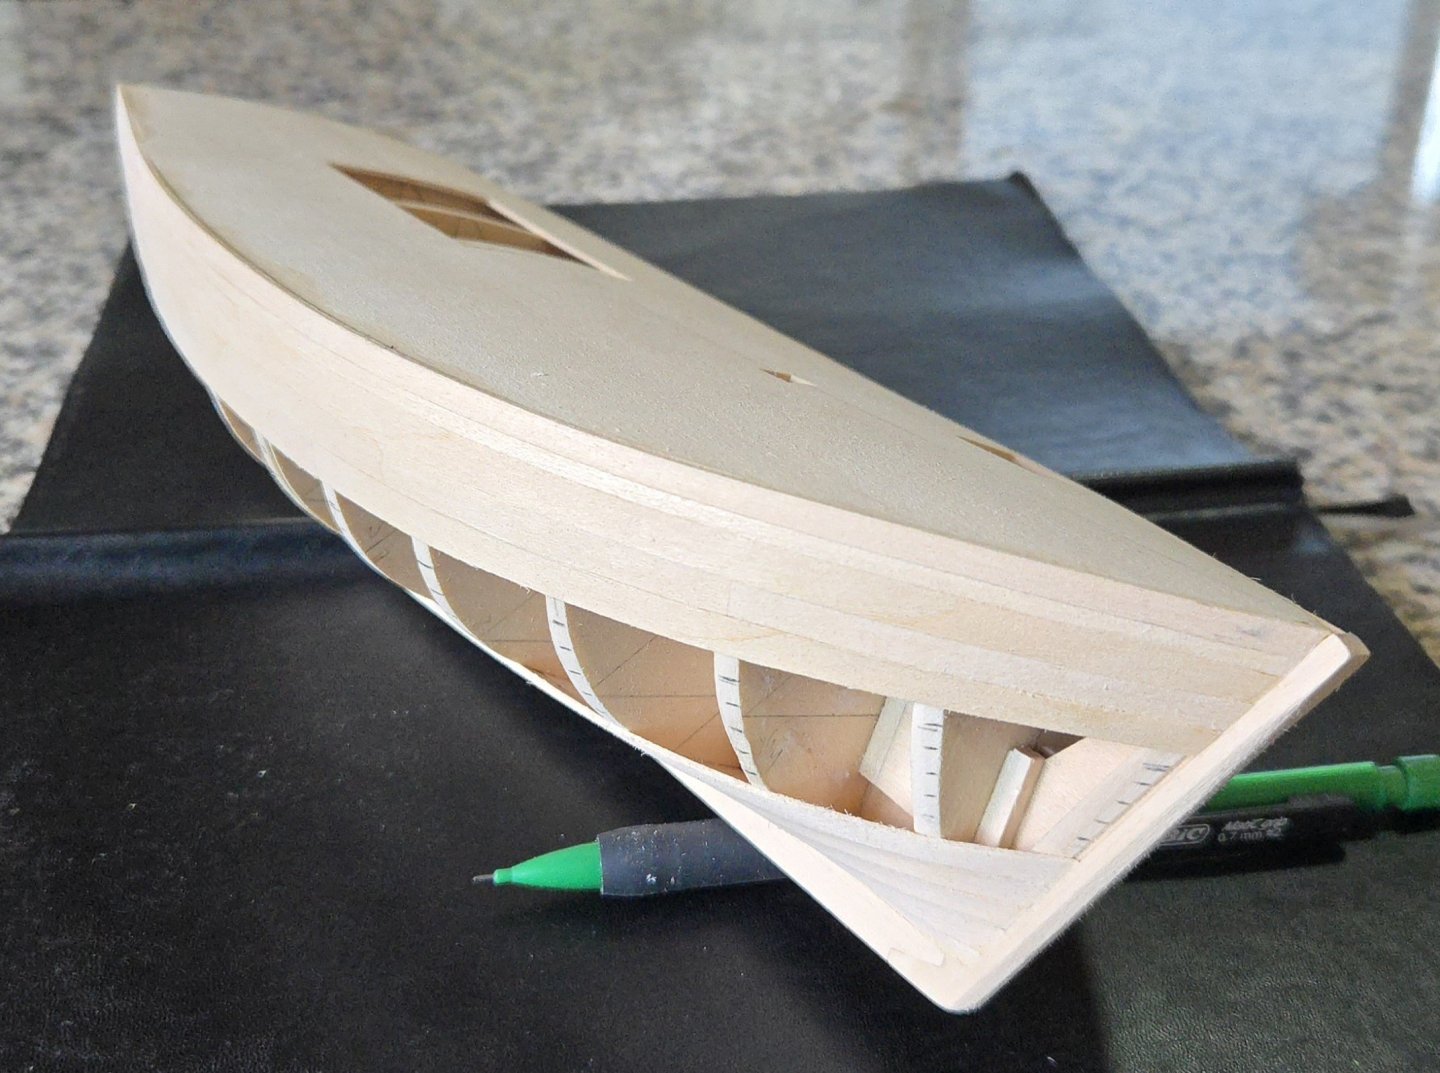
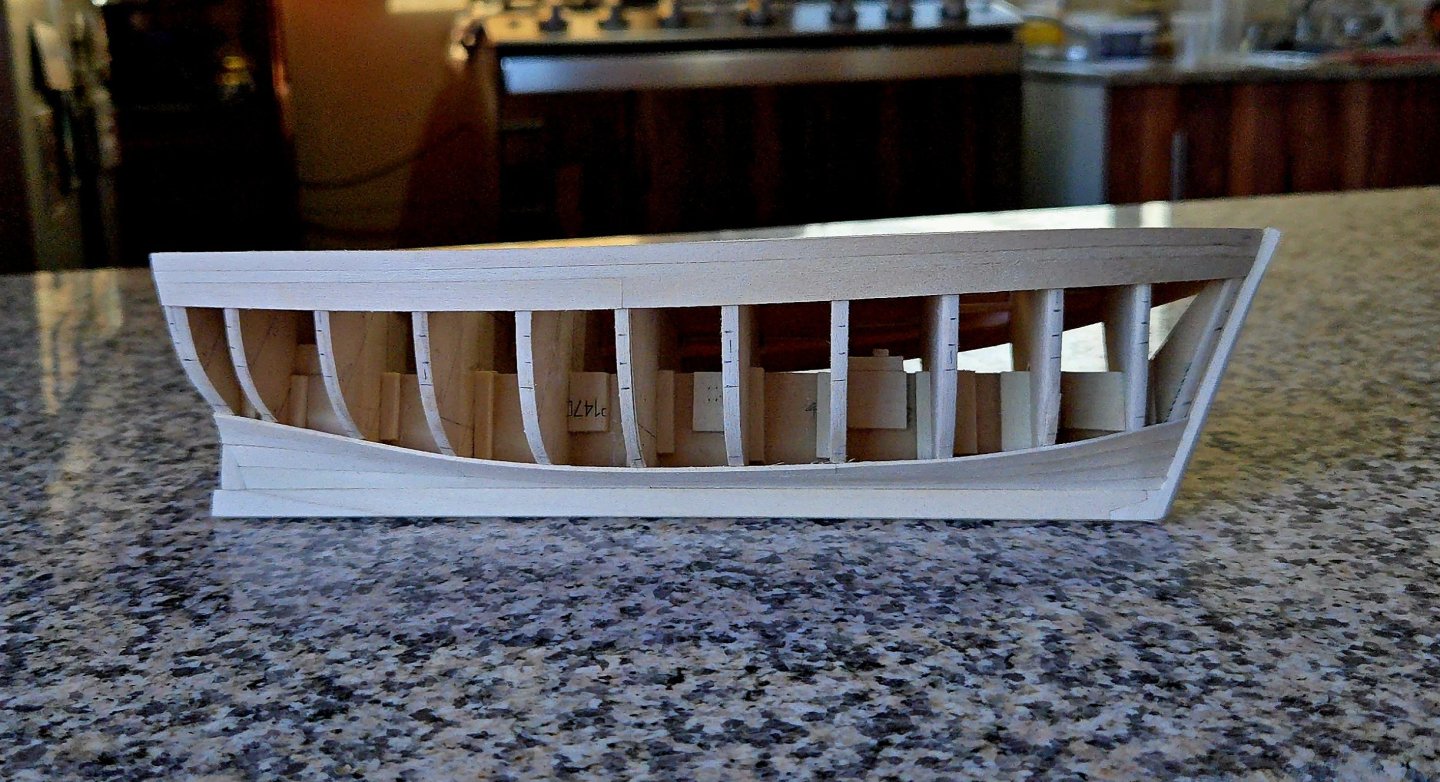
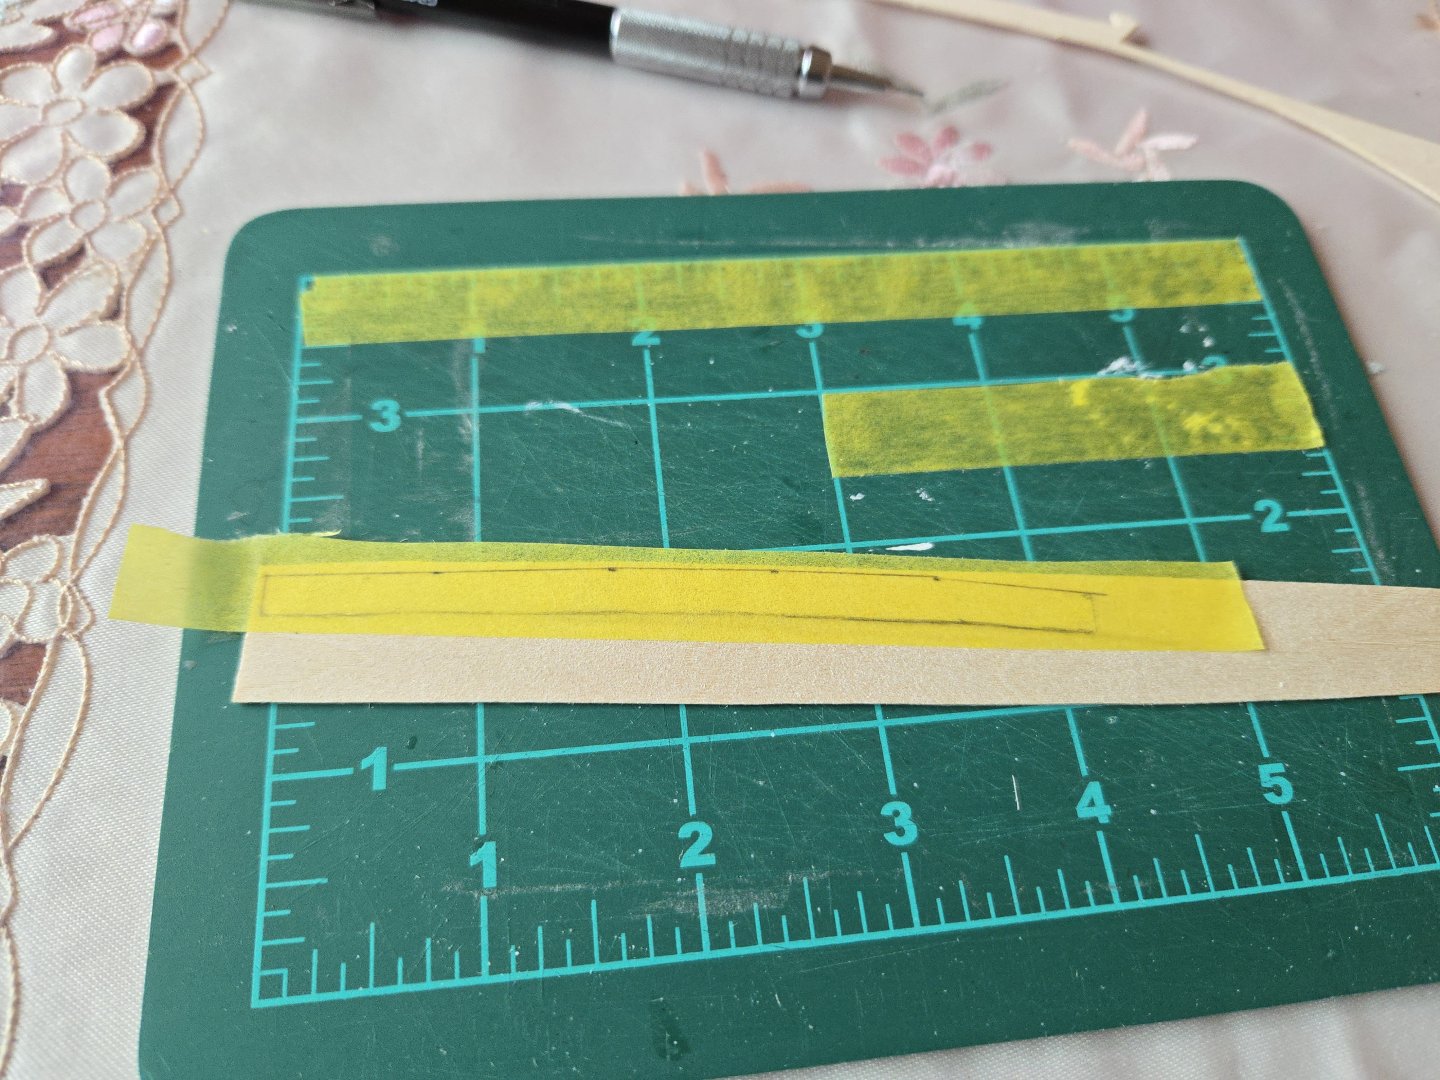
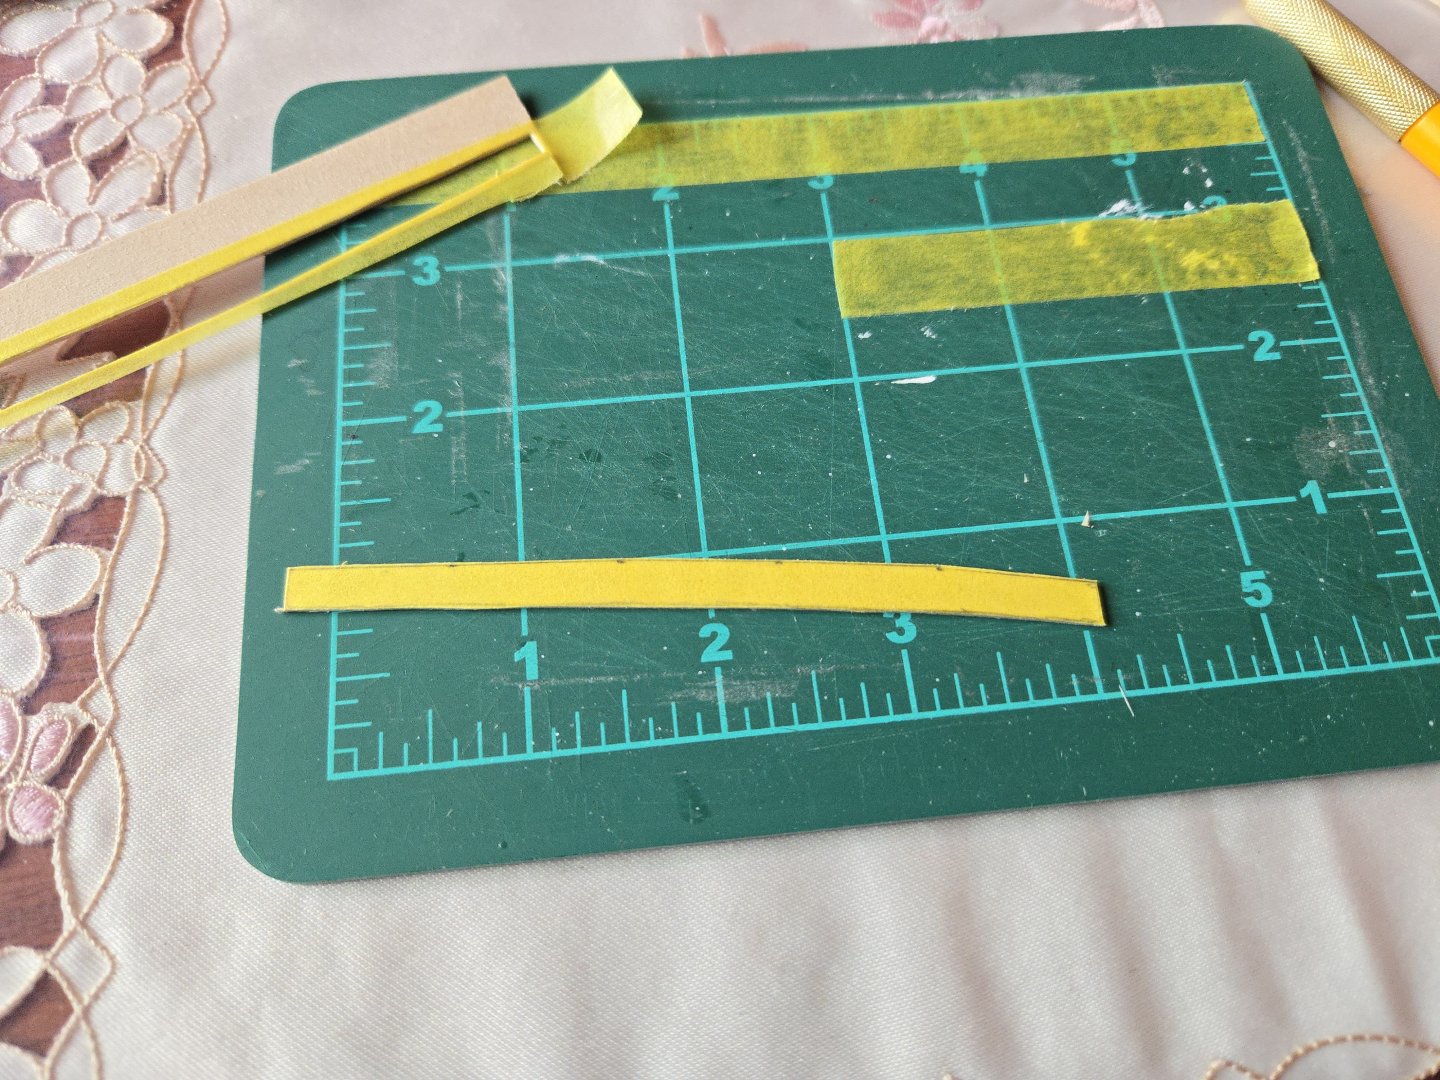
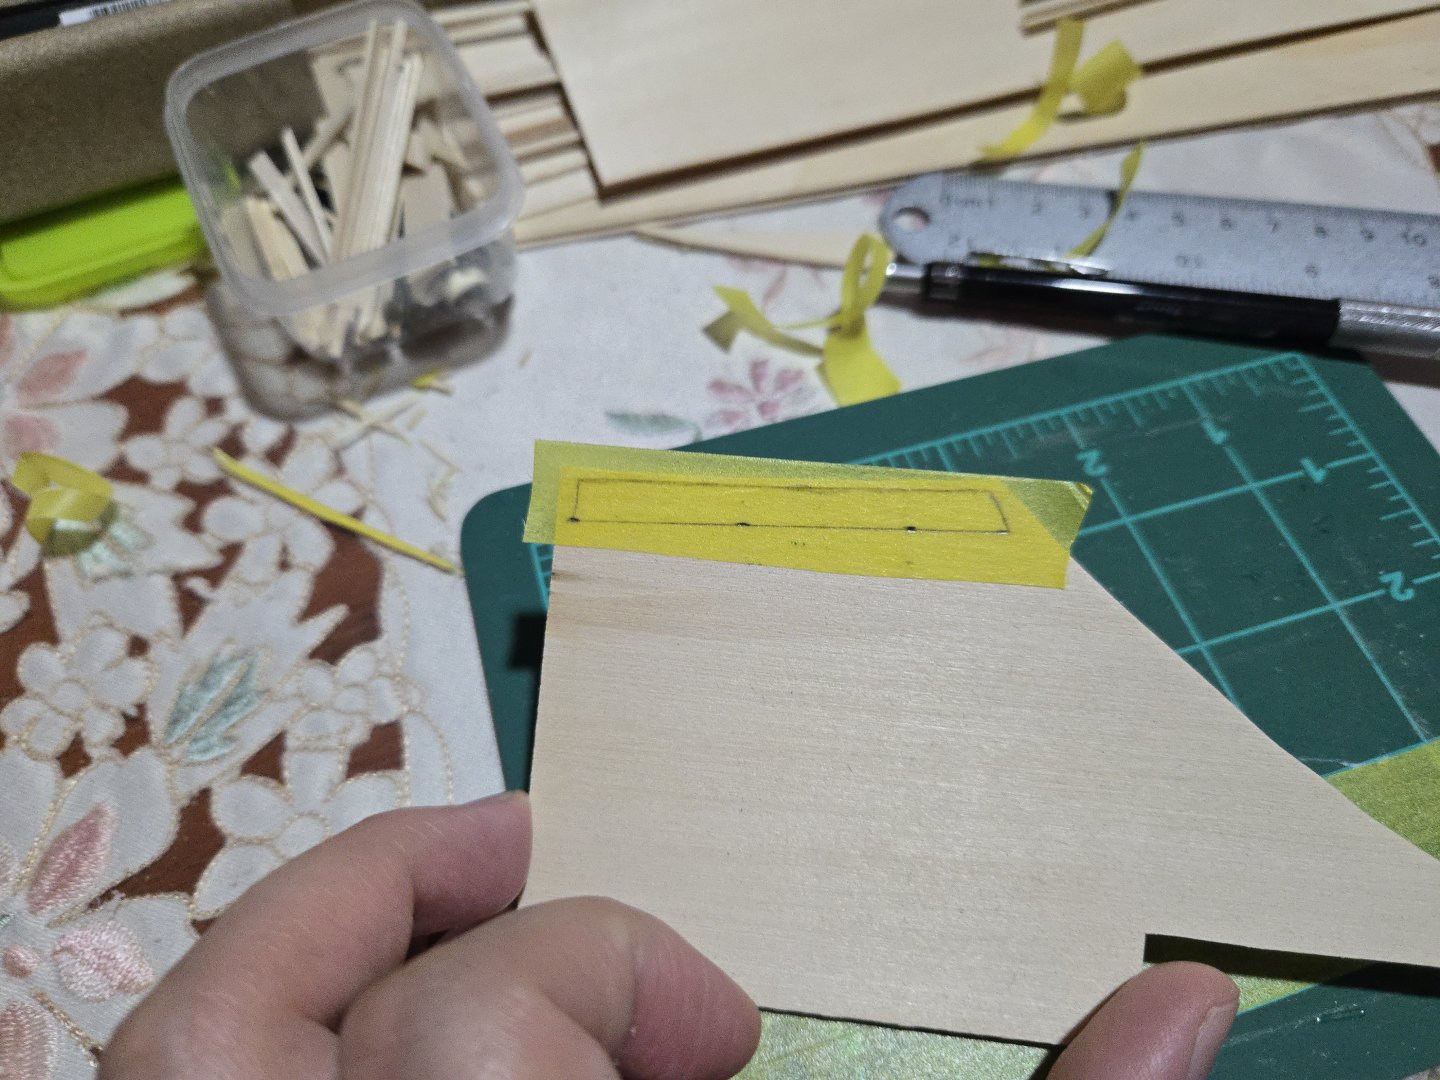
By now, the planking is about one-third of the way complete. I've added three out of four strakes in the lower band and one out of four in the upper. So far, the planking is coming along all right. With the rather beamy and full shape of the hull, the planks in the lower band have all been very curved and the foreward planks have all had a pronounced twist, which has posed a challenge to getting a good fit. That said, the hull will be painted, which--compared with the NRG Half-Hull--gives me a little more flexibility with any minor issues, as I can just use filler if there's a tiny gap. I've been following the same planking methods as on the Half-Hull. To briefly recap: First, I use a bit of semi-translucent Tamiya masking tape to mark the shape of the plank. Then, I put it on a sheet of 1/32-inch-thick basswood and cut it out slightly oversize. I then dry fit, noting high points along the joint with the previous plank and sanding them down a little at a time, checking and rechecking until it fits well. Then I adjust the outer edge to fit the marks on the bulkheads until everything fits well, at which point the plank is soaked, clamped to dry in place, and then glued once dry. It's a pretty slow but meditative process that I enjoy, although if you're not careful it can be easy to accidentally oversand and ruin the plank, as I did here. So far I have not made a final decision about whether to add irregular-width planks further along. At the moment, I'm leaning toward no, because I think it will be very hard to see on the completed model, has a high chance of looking wrong, and would add complexity to lining out the strakes. I also have to admit that I think I'm doing a better job at consistent plank width so far on this build than on the Half-Hull, and it feels like a bit of a shame to purposely throw it off. I've also decided that I'll include a slight irregularity in the plank butt shift pattern. From the image of the Marisol shown a few posts ago, it looks to me like there's not necessarily a consistent plank butt shift over the entirety of the hull. I've determined that I can change up a strake in each band--especially because the strakes are longer in the upper band, allowing more possibilities--in order to include a bit of irregularity and suggest that these vessels were planked in somewhat idiosyncratic ways without looking too "off".


- 312 replies
-
- 9
-
-
- Chile
- Latin America
- (and 6 more)
-
Excellent work! The decision to use other woods and leave them with a natural finish really worked out well, it's a striking result and definitely a very unique variation on a frequently-built kit. Looking forward to your next builds!
- 32 replies
-
- 4
-
-
- Grand Banks Dory
- Model Shipways
- (and 2 more)
-
Congratulations on an inventive and unique build! The chain base looks great and fits the mood of the piece quite well.
- 185 replies
-
- 7
-
-
-
- Flying Dutchman
- Black pearl
- (and 2 more)
-
Very precise work, the plexiglass construction method is very visually striking as well. Having never worked with any sort of glass, I'm very curious to see how you fair the hull. I may have missed it elsewhere, but will you be planking it in wood or some other material?
-
Very nicely done, especially for your first build! Definitely a result to be proud of.
- 28 replies
-
- 2
-
-
- Lowell Grand Banks Dory
- Model Shipways
- (and 1 more)
-
Great job, this really looks exceptional.
-
Very nicely done! The naval board style looks like a great way to display a model without taking up a ton of space, plus it really lets the hull construction and details shine.
- 43 replies
-
- 1
-
-
- Vanguard Models
- Sherbourne
- (and 1 more)
-
Thanks, very good eye! I actually hadn't caught that. Somehow I misinterpreted the slight horizontal line through the stealer as the continuing plank, not sure how I missed that it's actually a stealer. It's definitely an interesting stealer, given that it seems to suddenly double the width of the plank. It looks like the plank above also turns into a steaker, this one with a pointed diagonal joint with the plank running into it.

- 312 replies
-
- 3
-
-
- Chile
- Latin America
- (and 6 more)
-
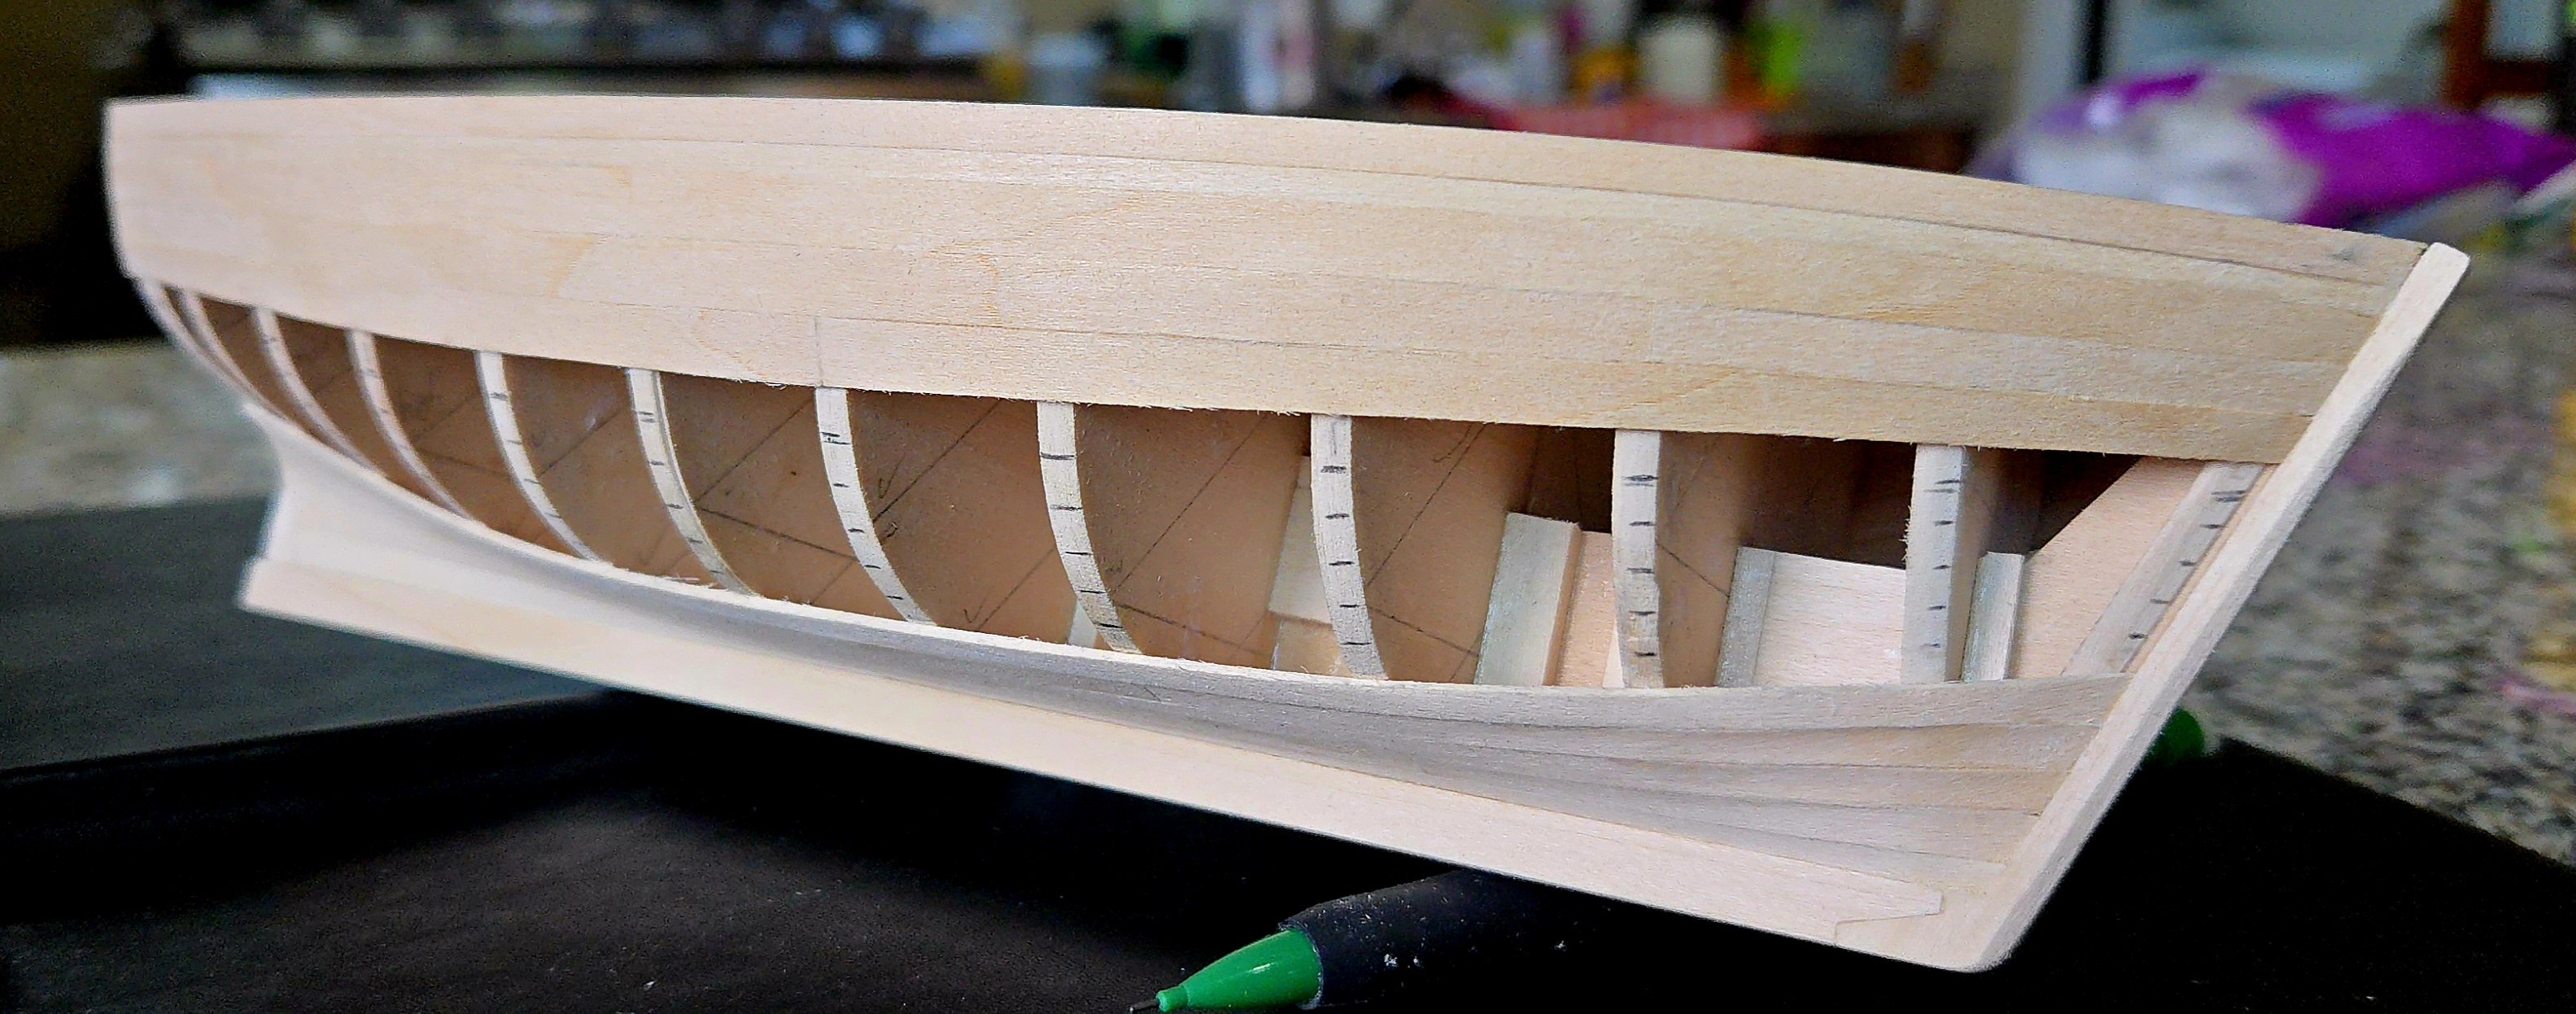
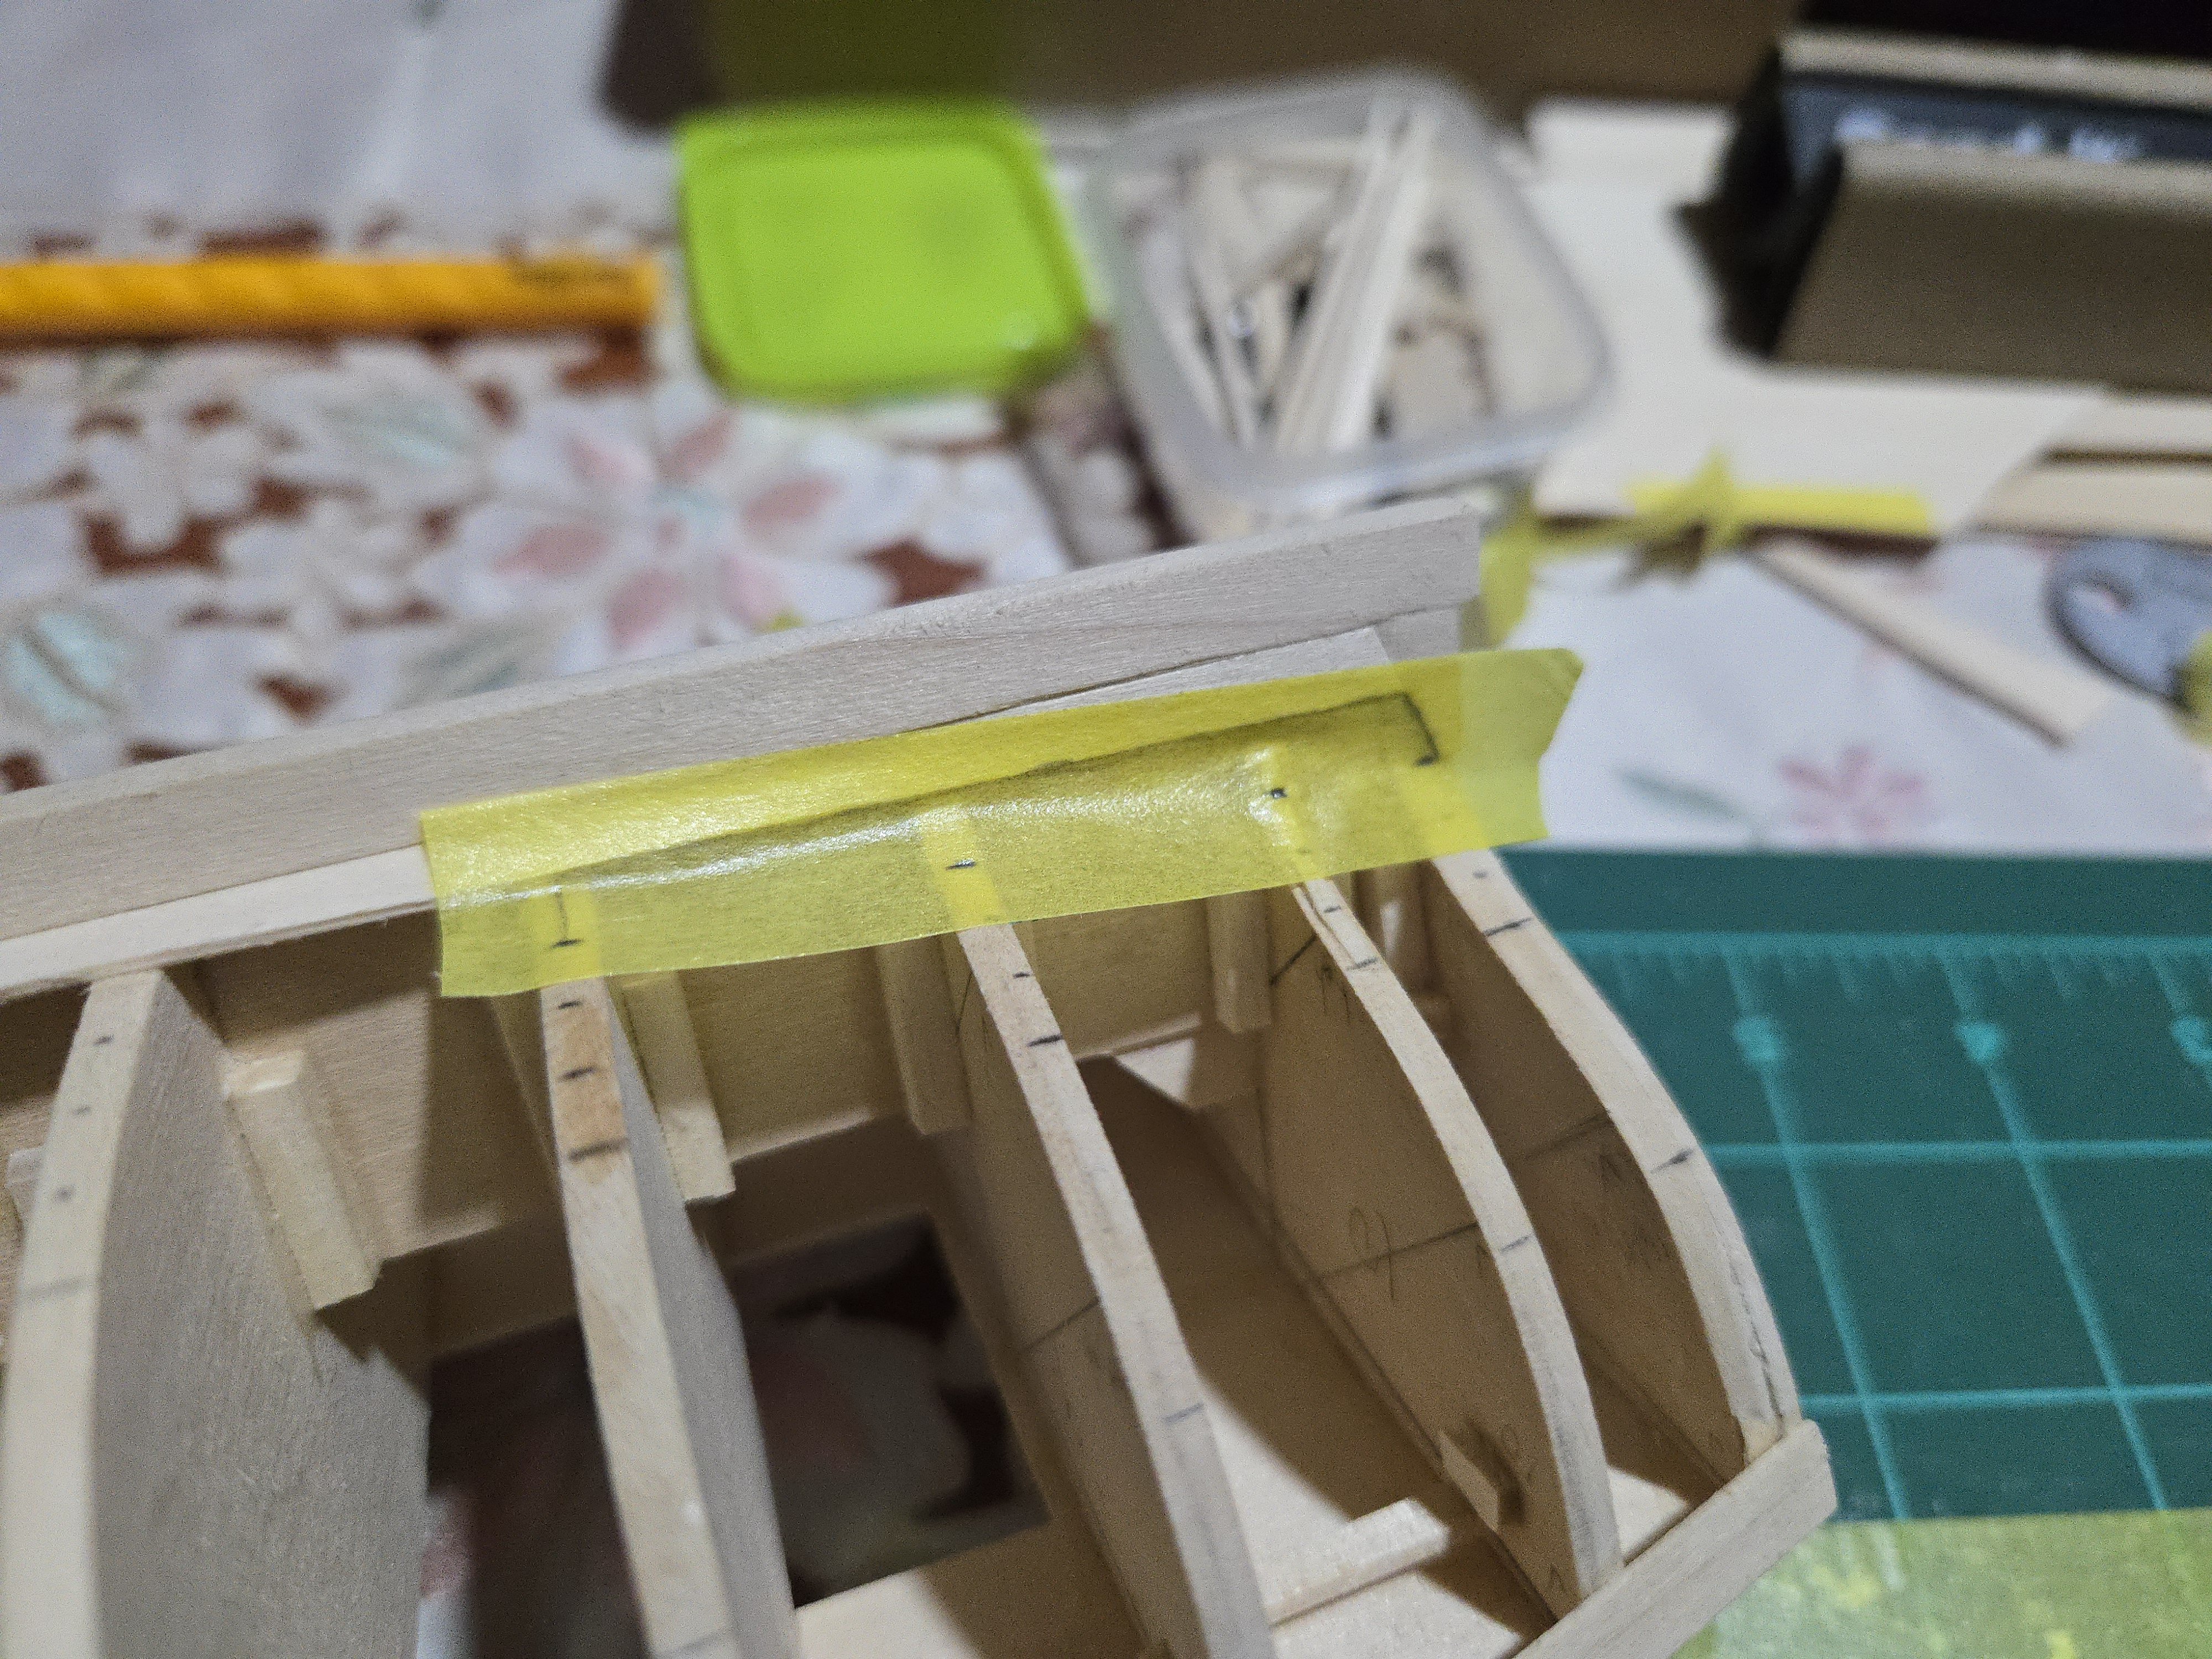
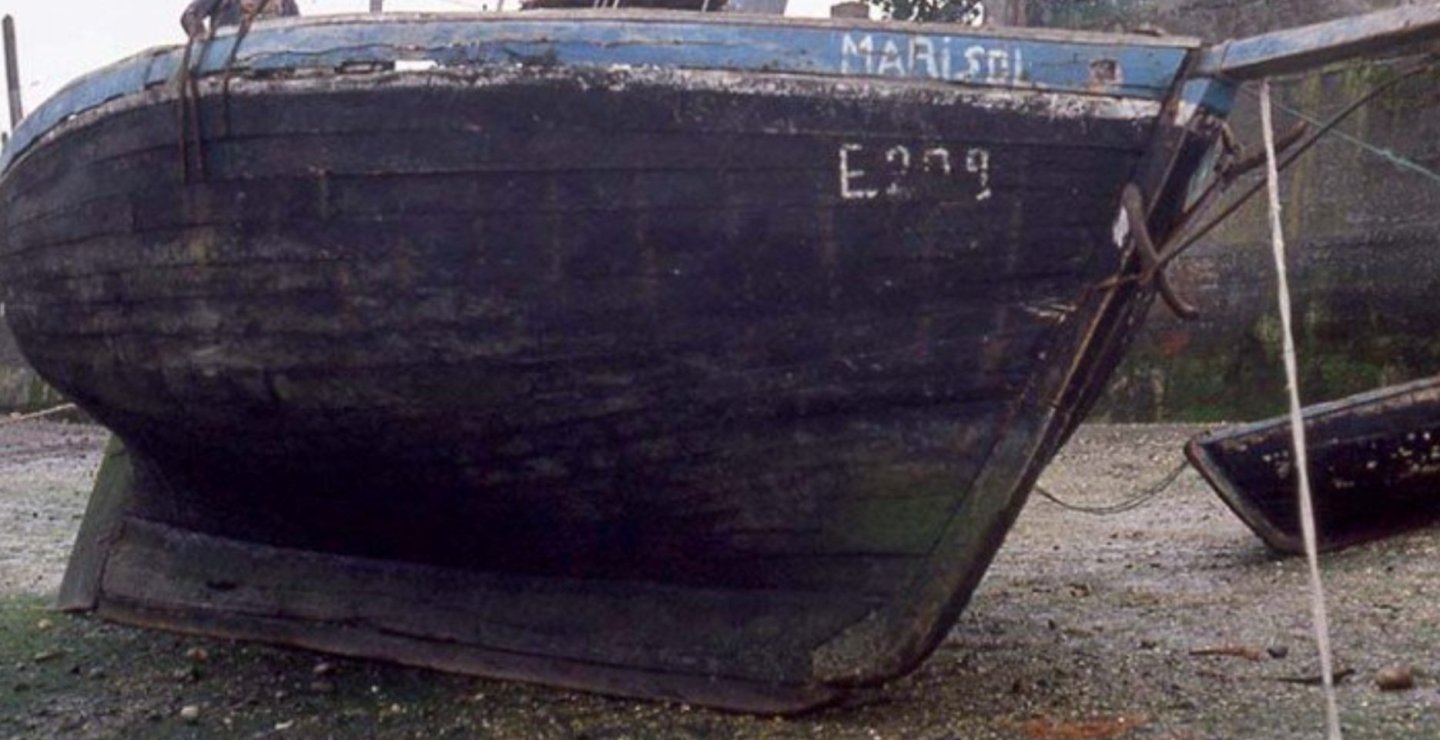
Thank you for your detailed comments on this. I'm definitely wary of having too much randomness and making it look weird/wrong rather than interesting/accurate. The idea to test it out with card first is a good one. I also agree that a more variable width between planks rather than between bands may end up looking more natural, but it will be tricky to balance this so it doesn't look off. It's also worth noting that some lanchas had relatively even planking, as on the Marisol, below. Any unevenness there is pretty subtle--and somewhat obscured by the paint, as will be the case on my build: Source: https://www.carlosvairo.com/galeria-puerto-montt-lanchas-chilotas So, for now, I've decided to start the lower band of planking with equal-width planks marked out. After I get a couple strakes down, I may revisit whether I want to switch to some variable-width planks instead. After getting the bands finally adjusted, I marked out the plank widths (which may be adjusted a bit later, as mentioned above). I also worked out a 4-plank butt shift pattern. Based on photos like that of the Marisol, above, it seems like having 2-3 planks per strake should be reasonable. I then began work on the first plank, using the same method I used on the NRG Half-Hull--that is, using tape to mark out the shape (the method is described in more detail in that build log). So far I'm finding that the planks are close enough in shape that, after shaping one, I can trace around it to make the plank for the other side, leaving it very slightly wide and carefully sanding for the final shaping. I've added the fore and aft planks of the first strake above the garboard. Despite the pronounced twist, they seem to have turned out all right. There's a slight gap at the aftmost end on the port side, which I couldn't see before due to the clamps, but it's small and a bit of filler can fix it.


- 312 replies
-
- 7
-
-
- Chile
- Latin America
- (and 6 more)
-
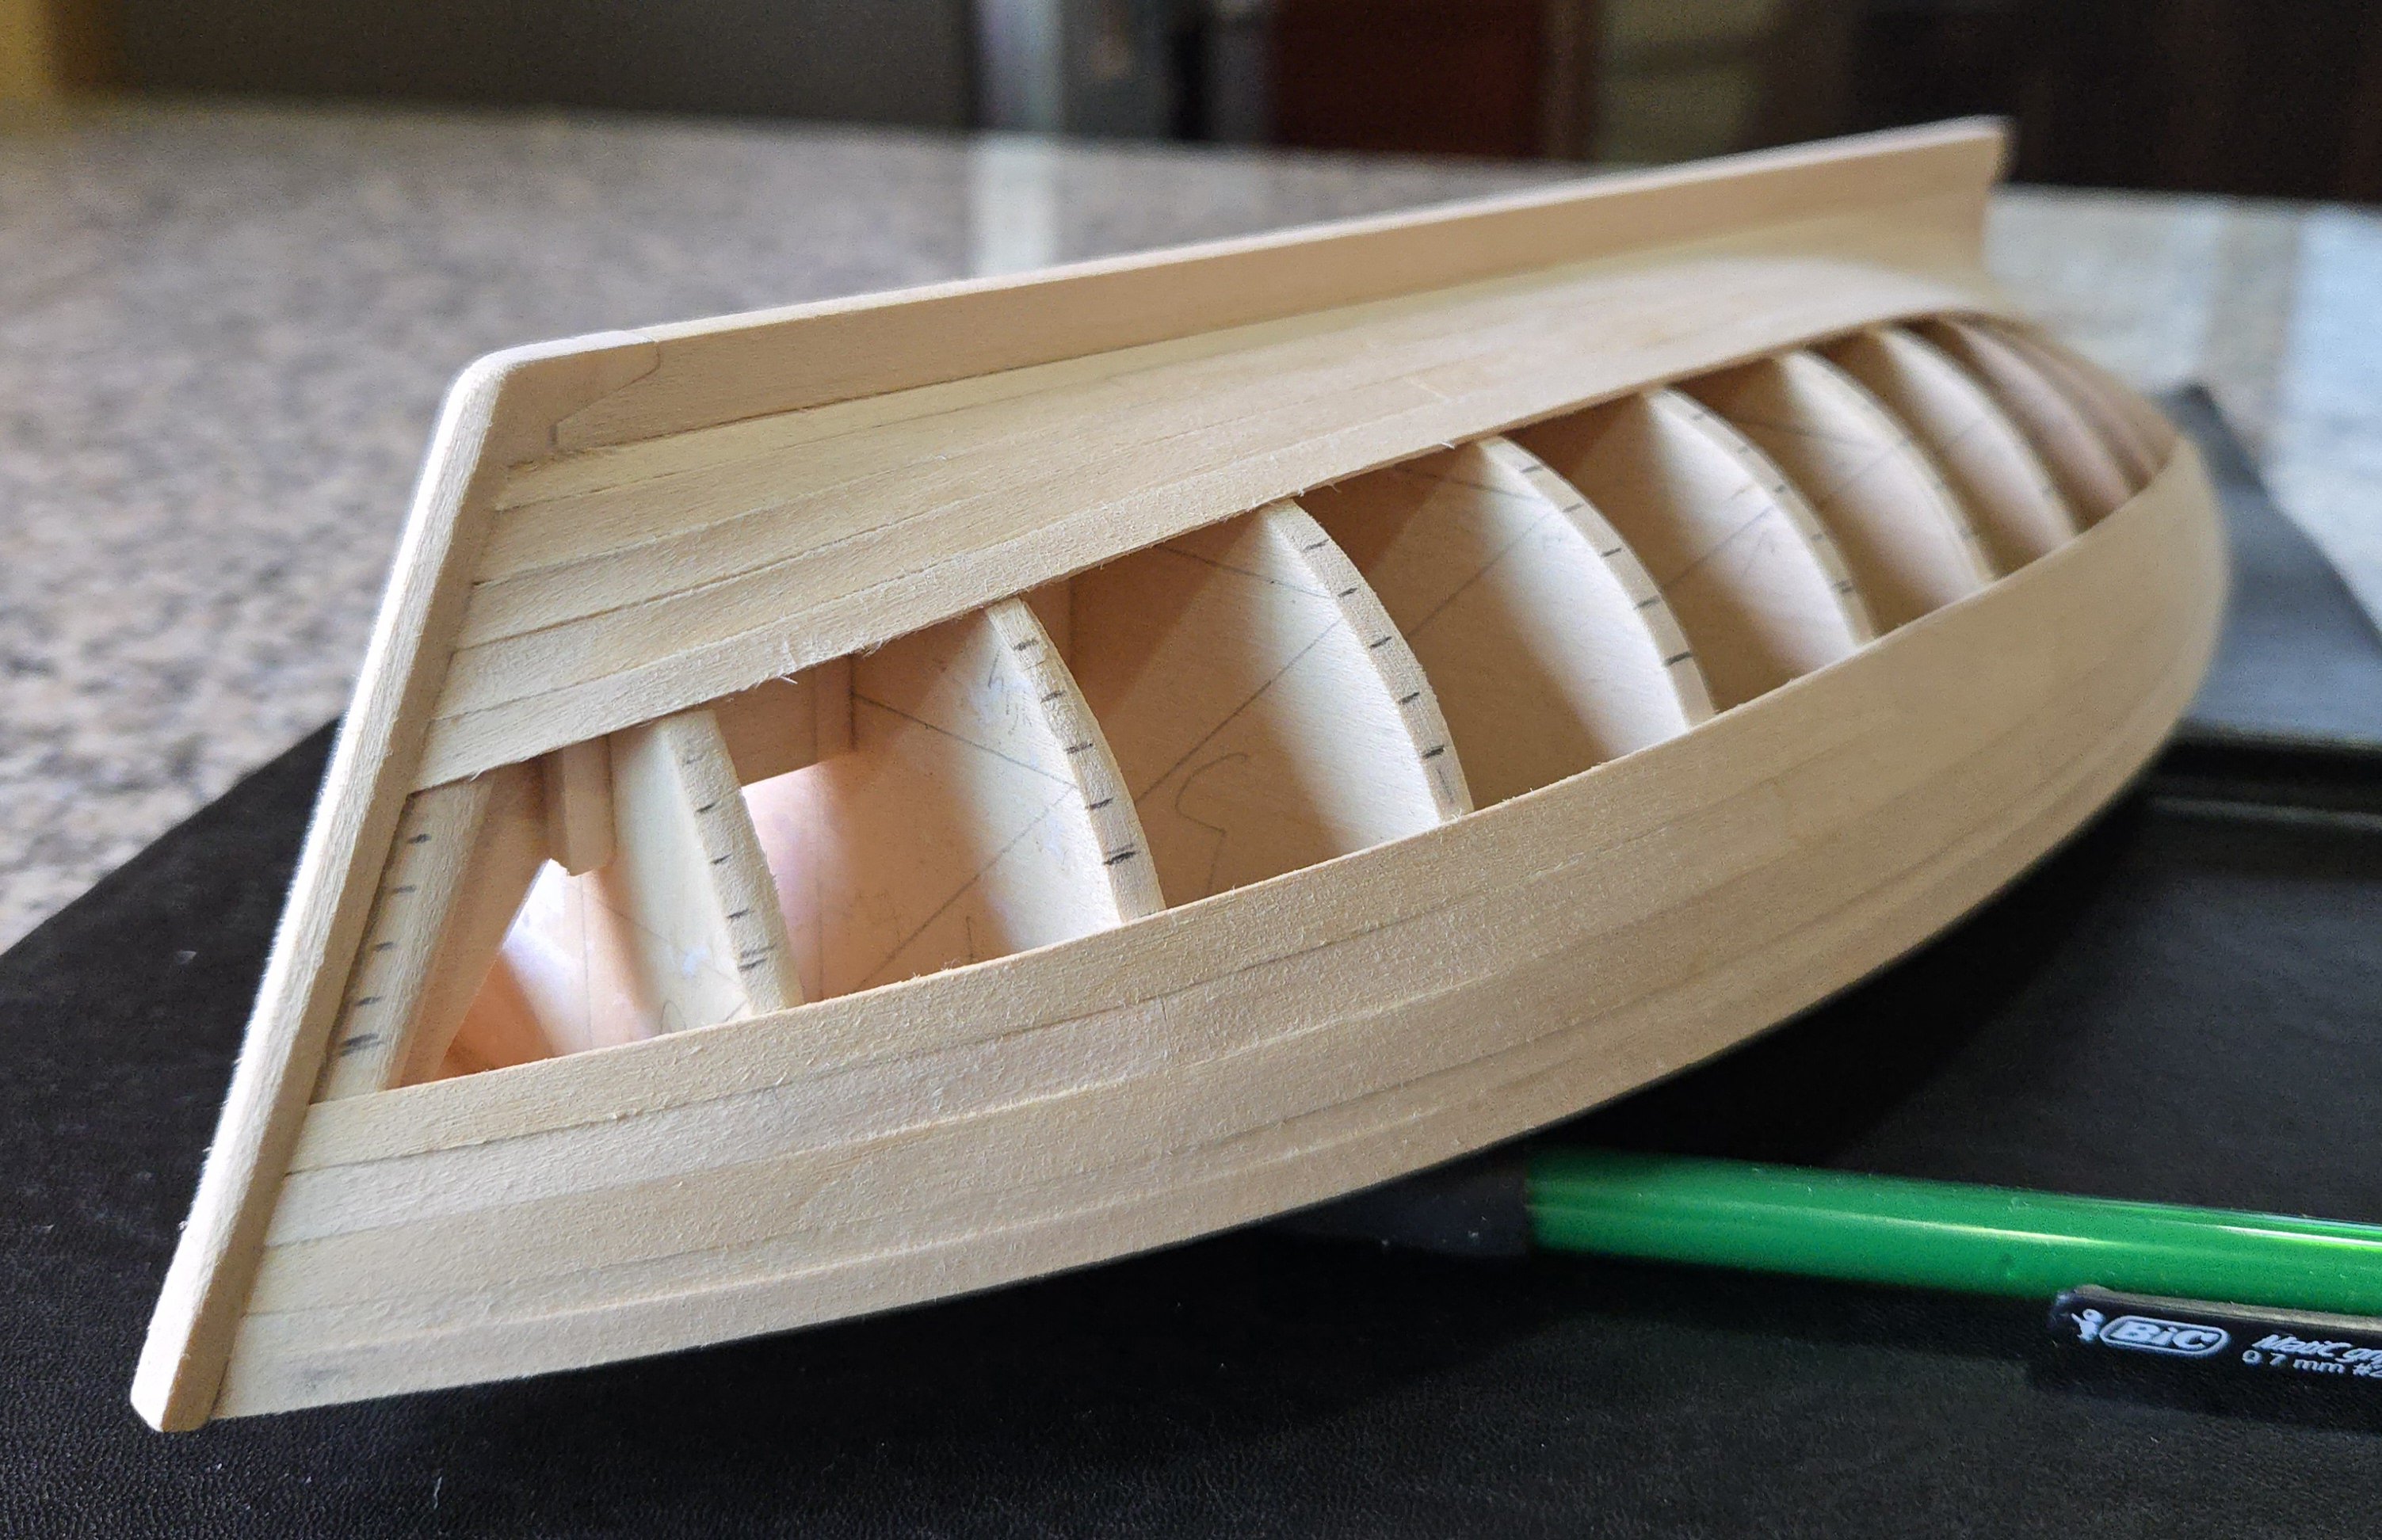
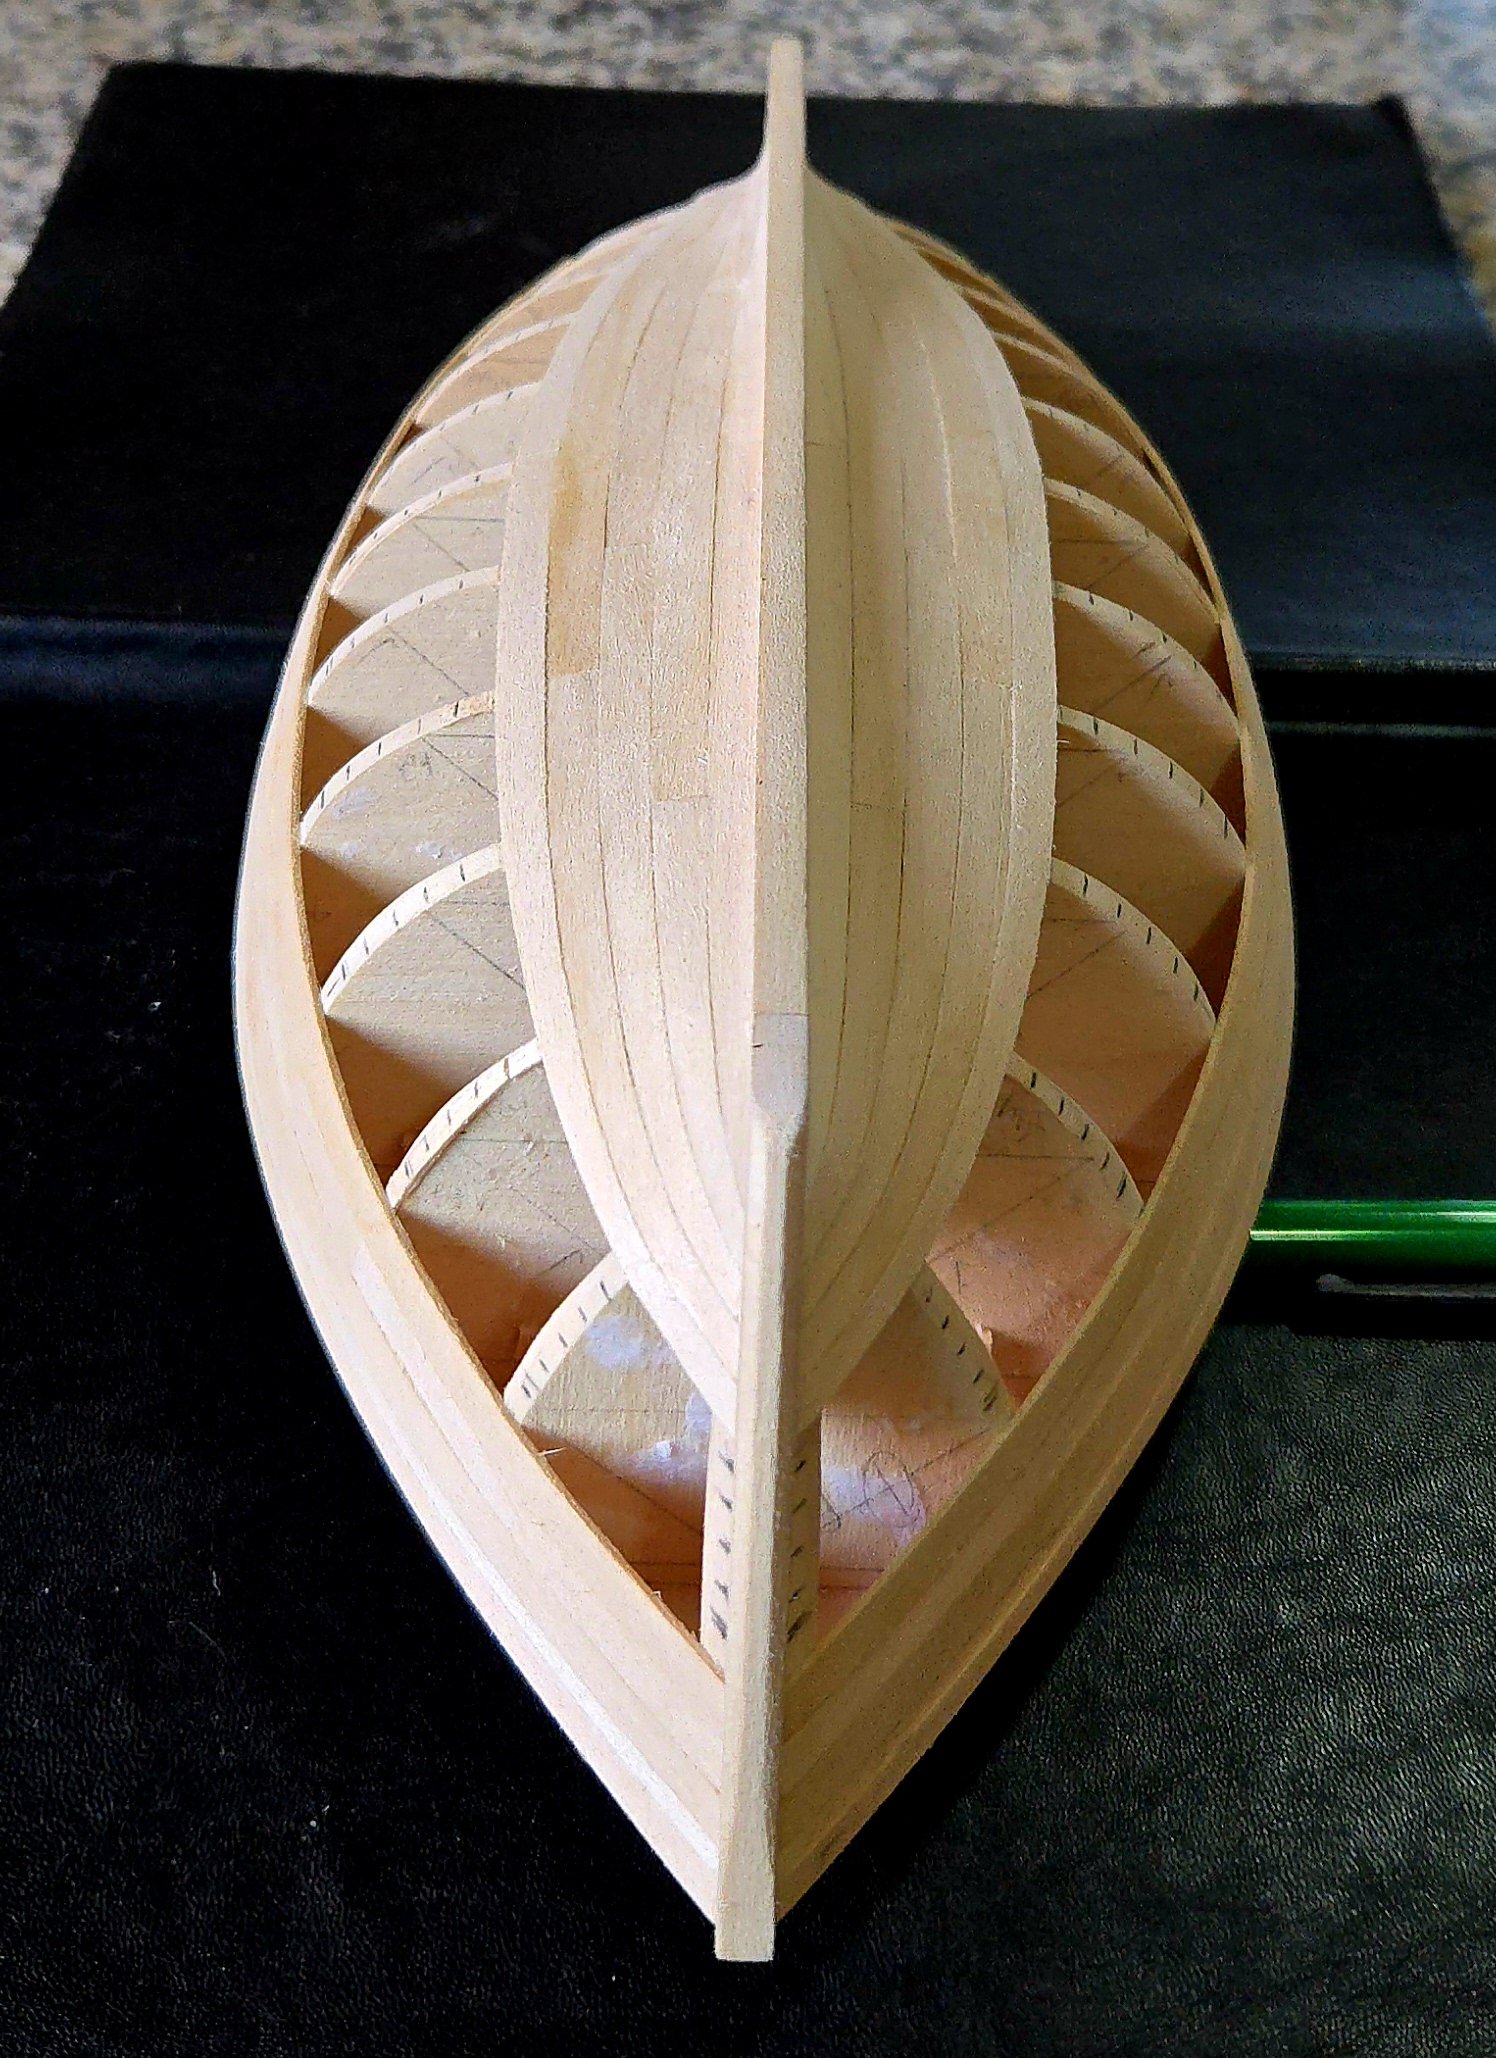
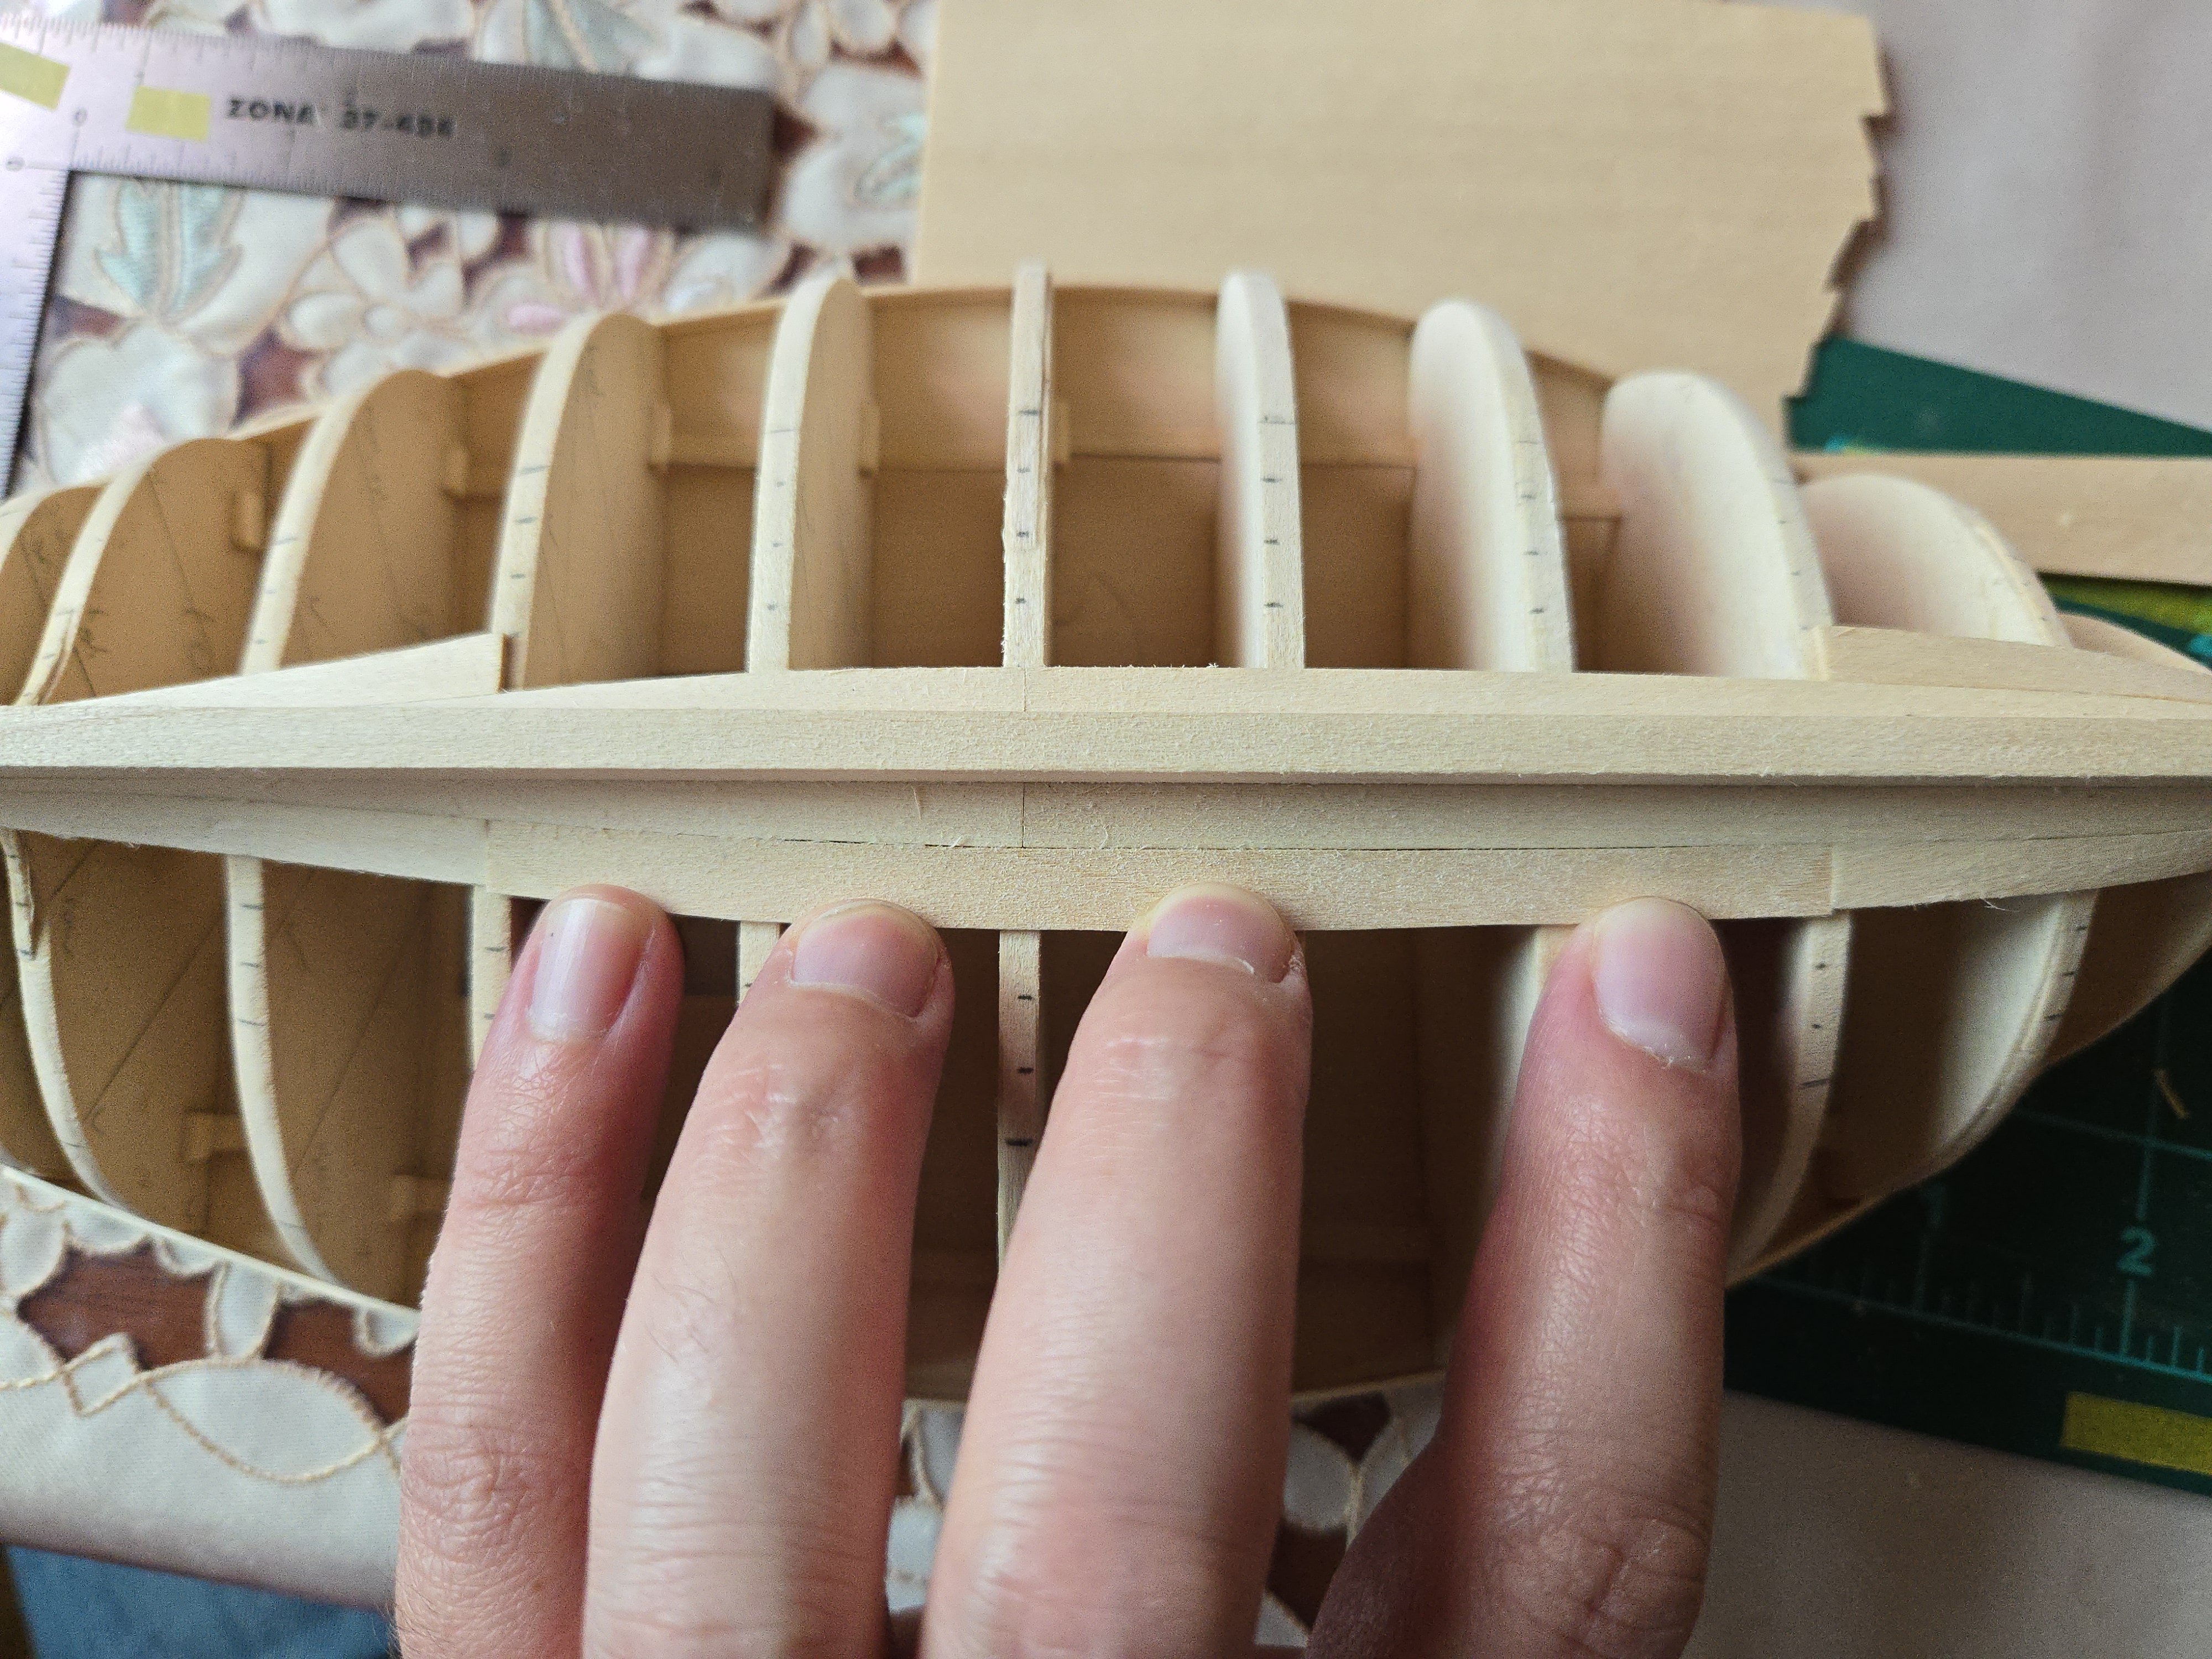
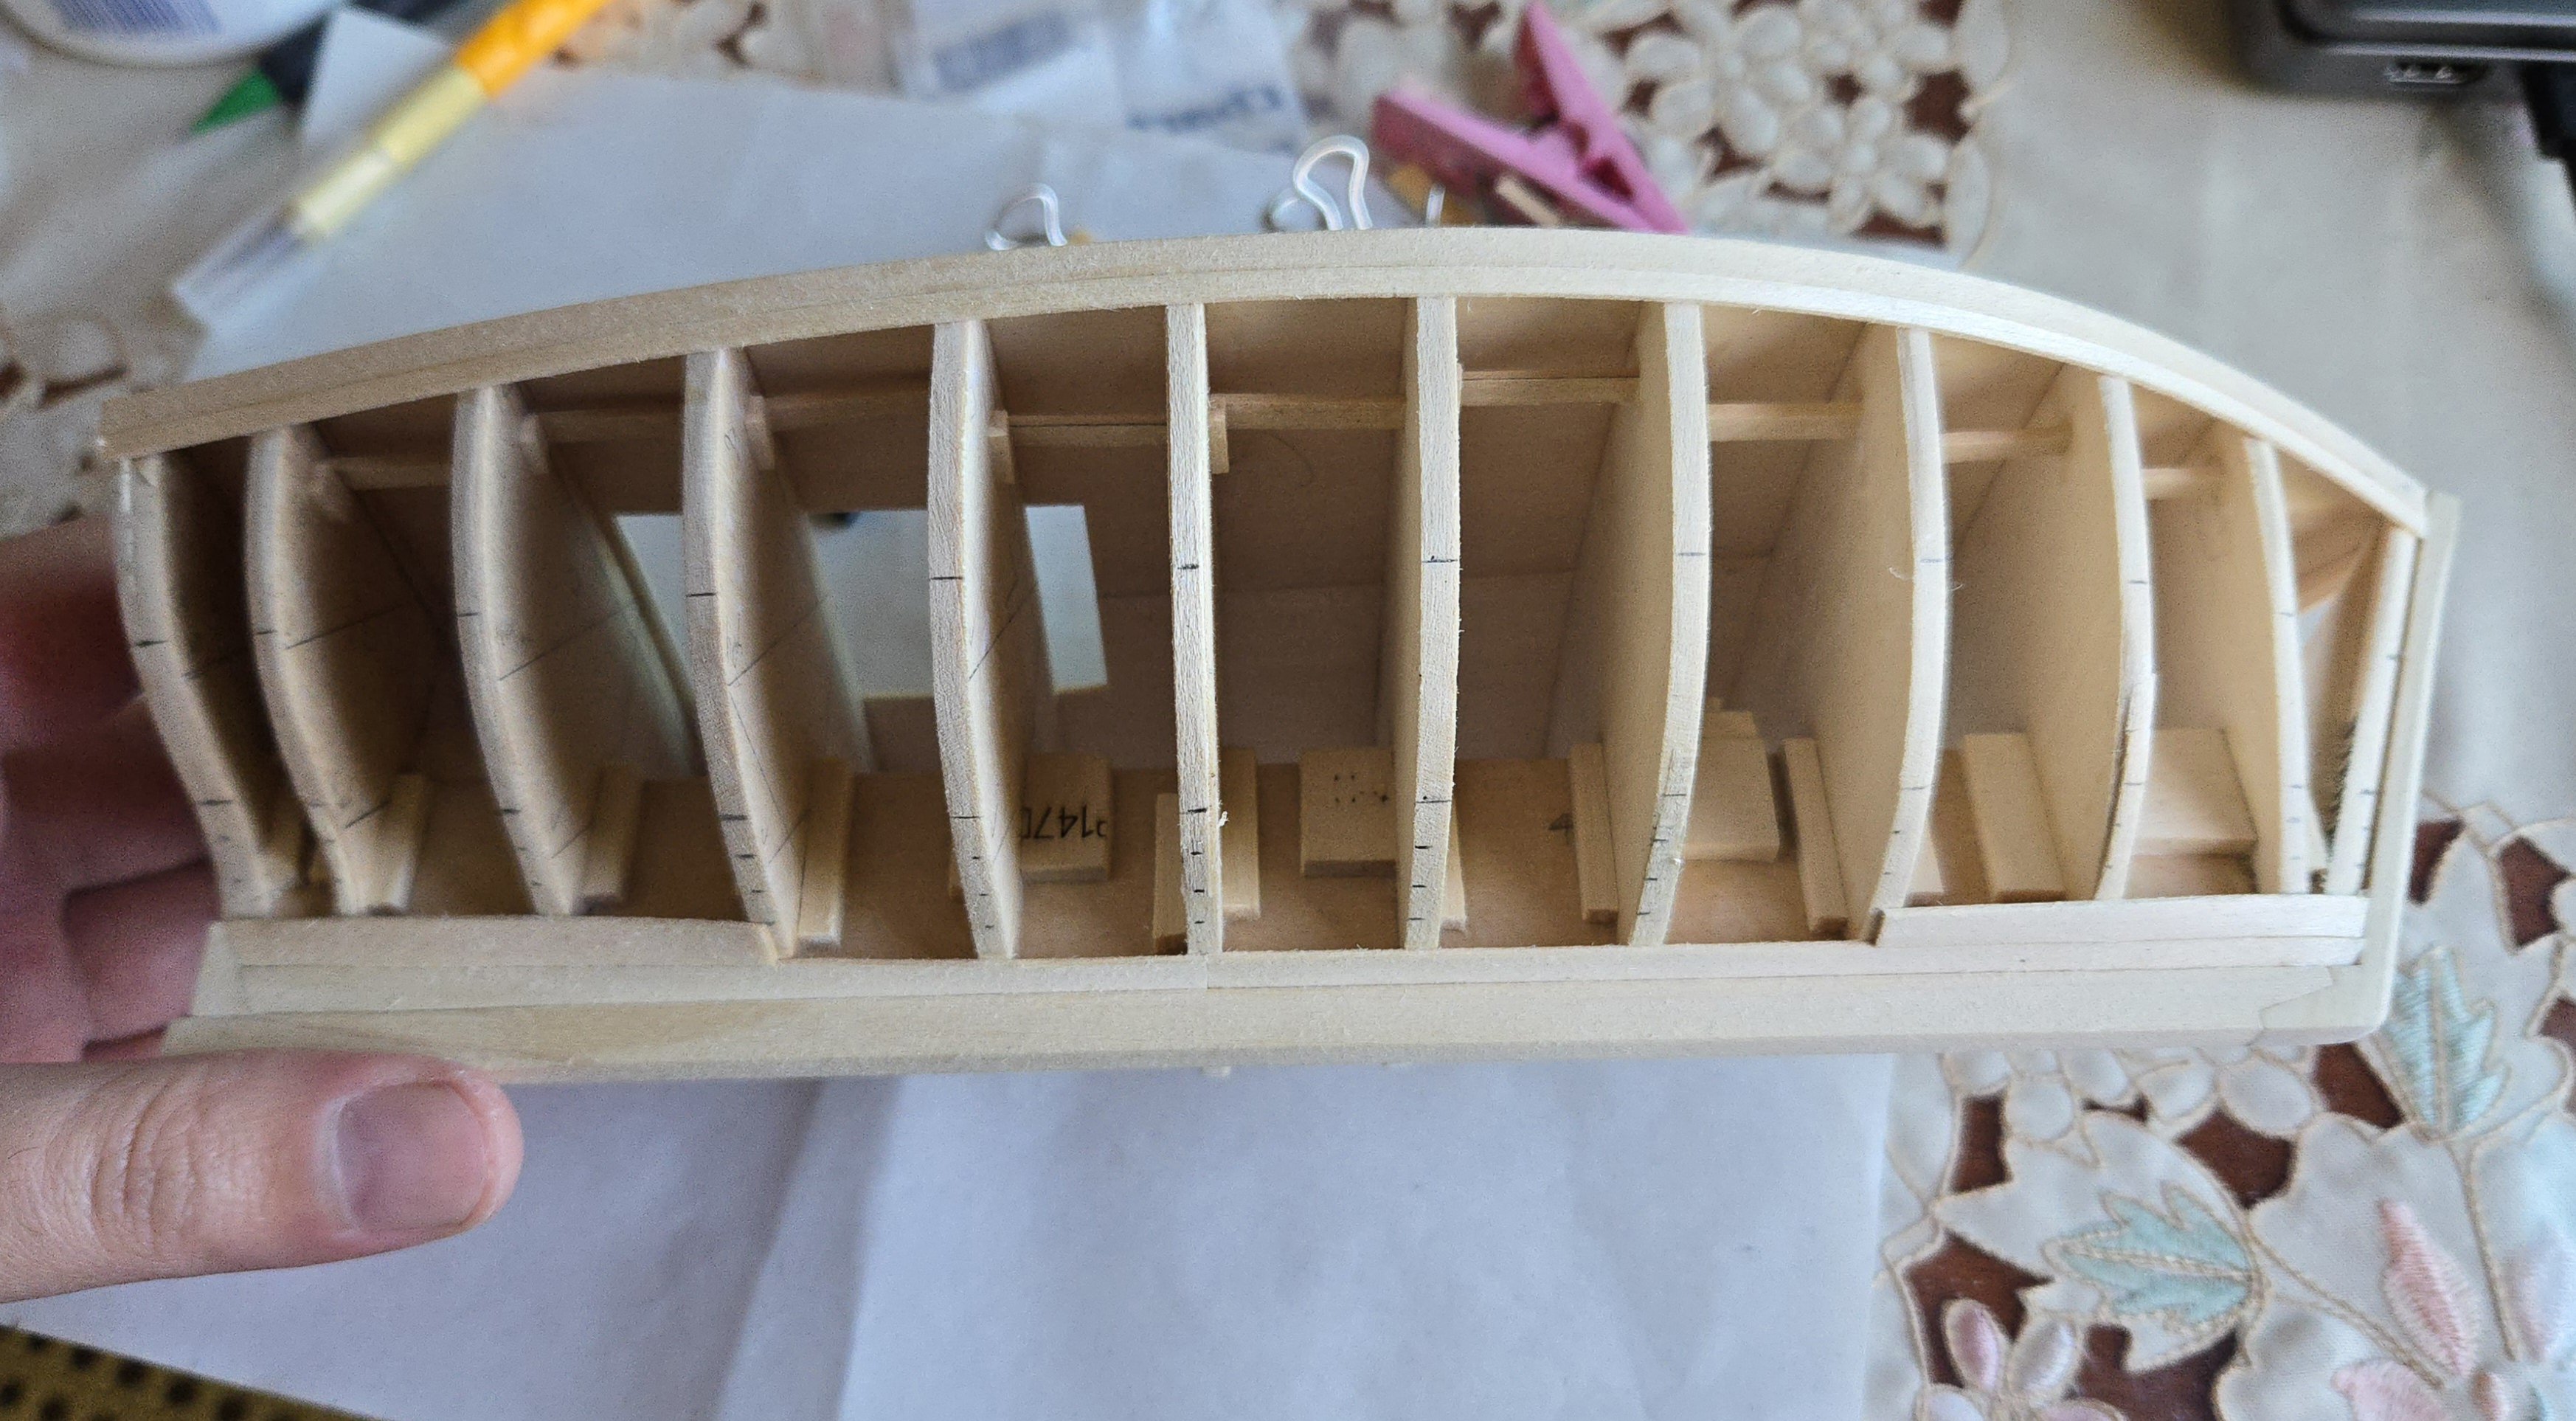
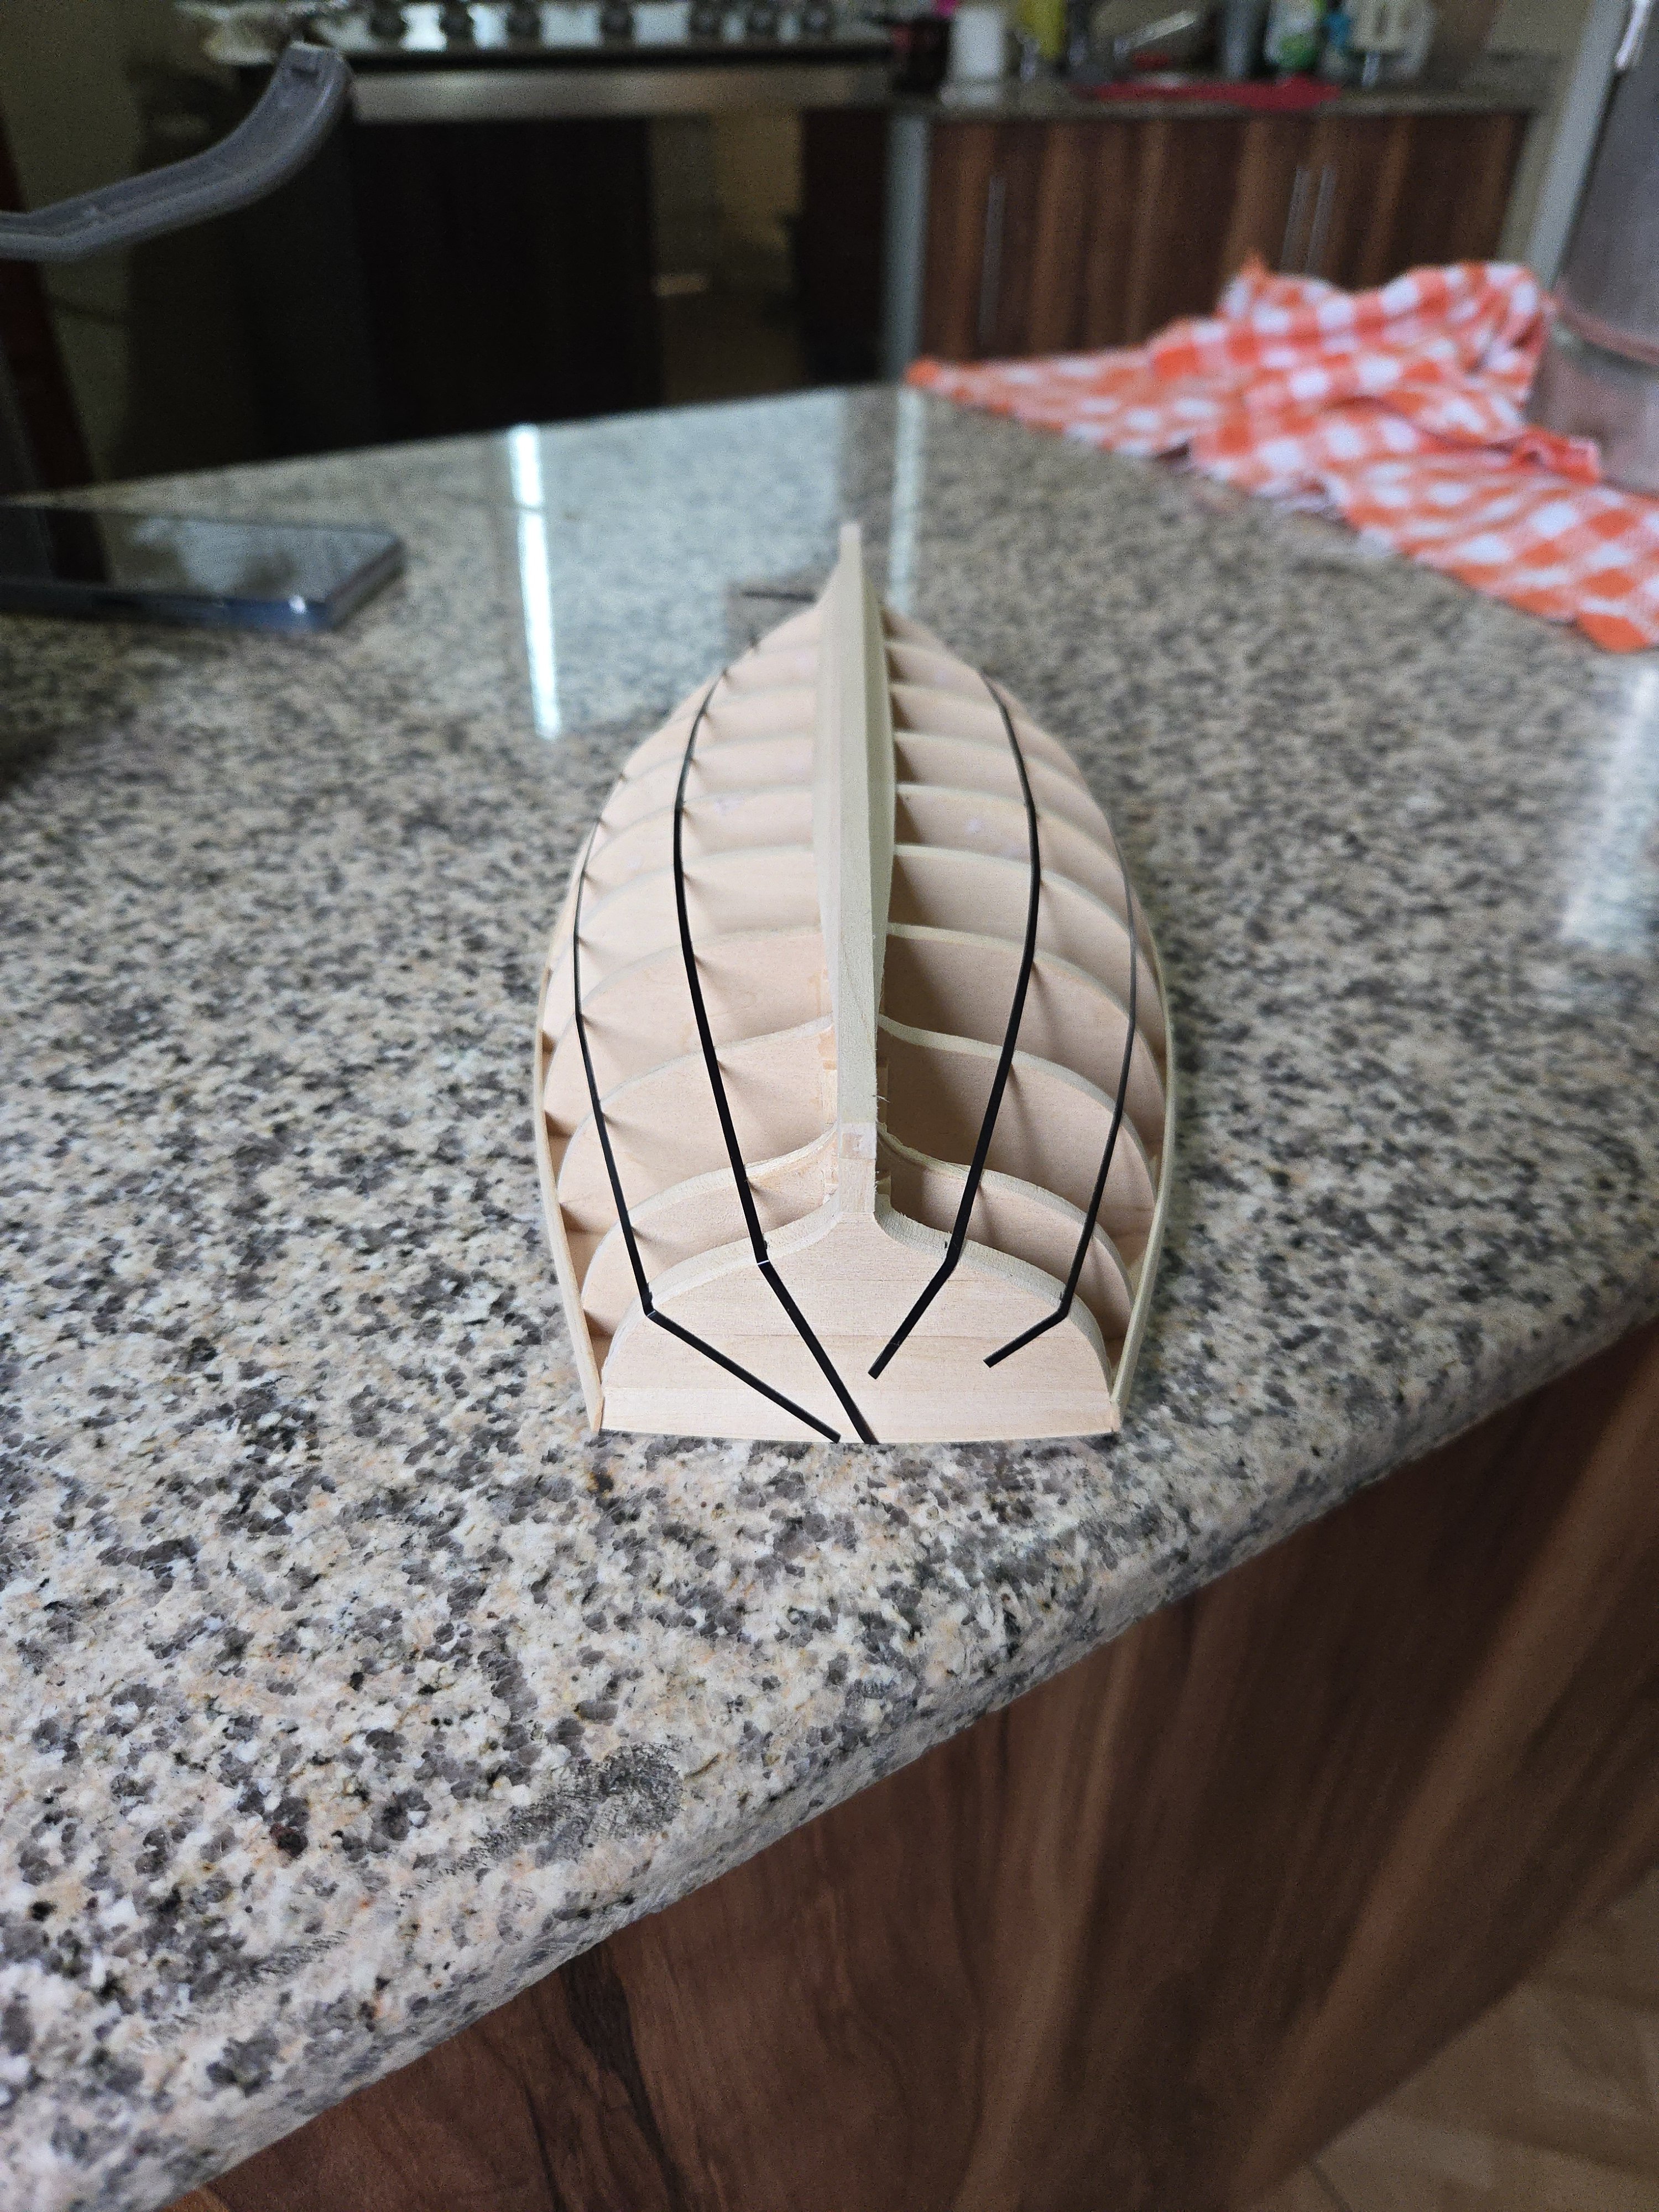
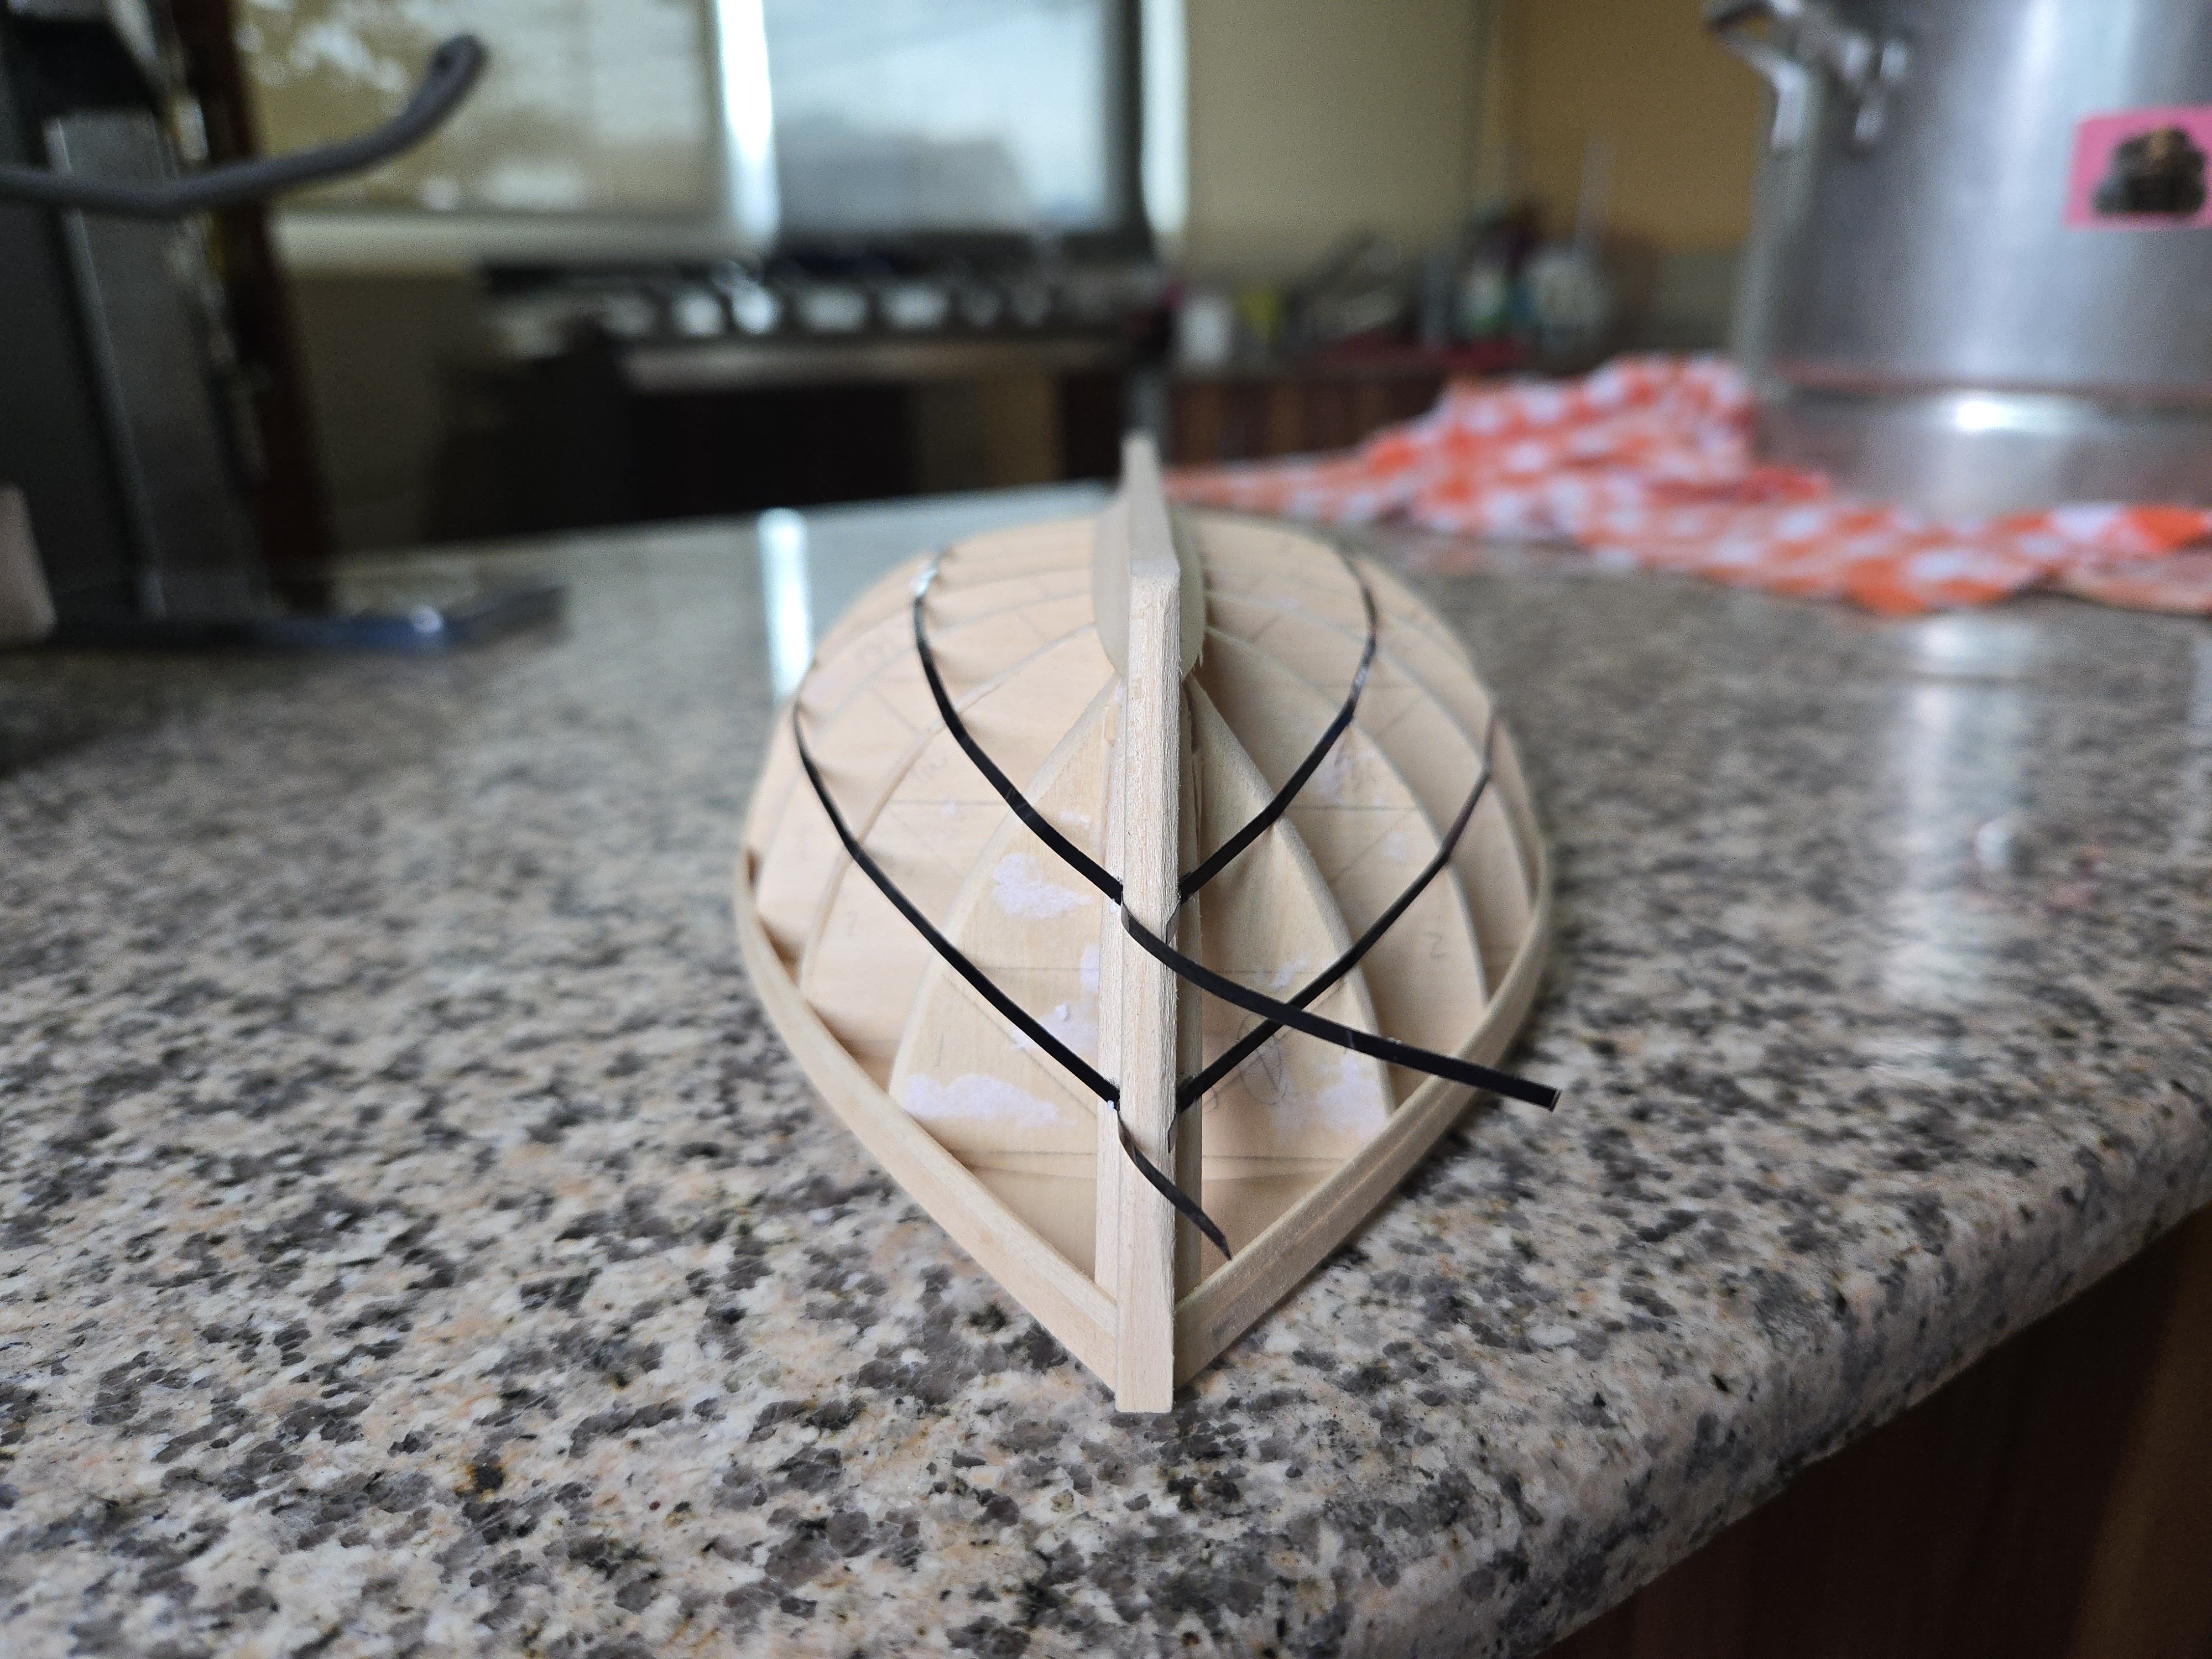
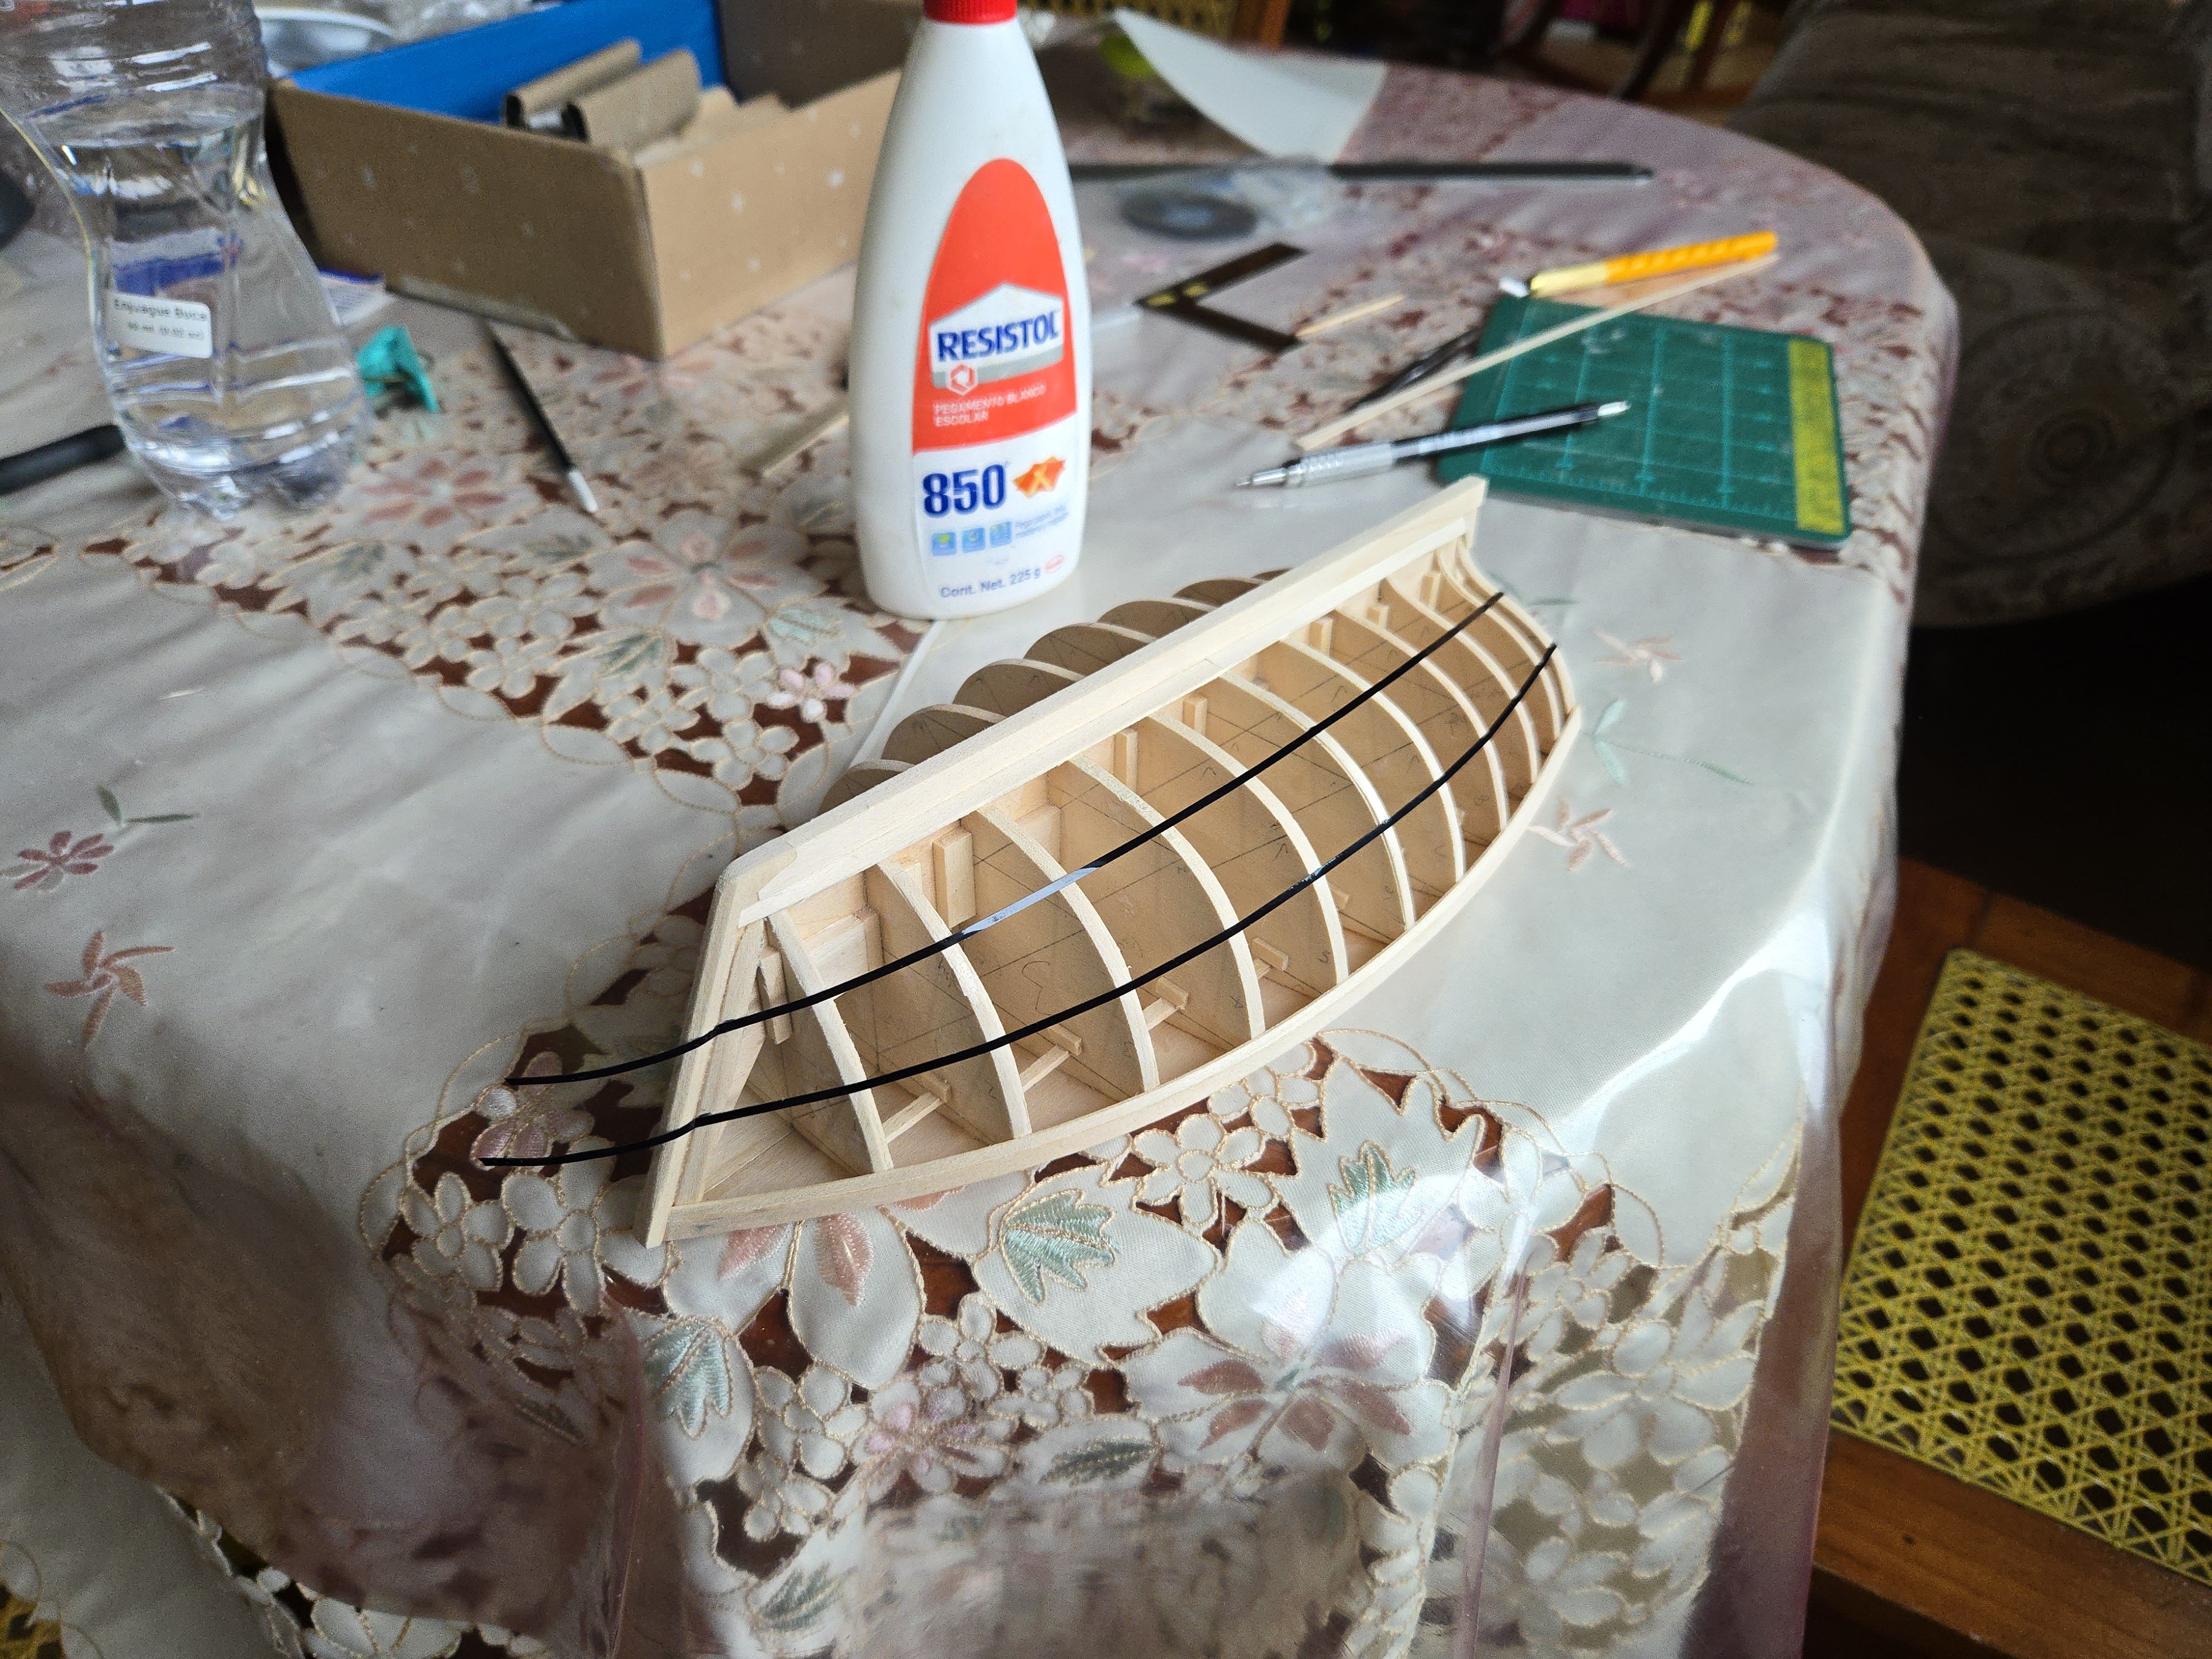
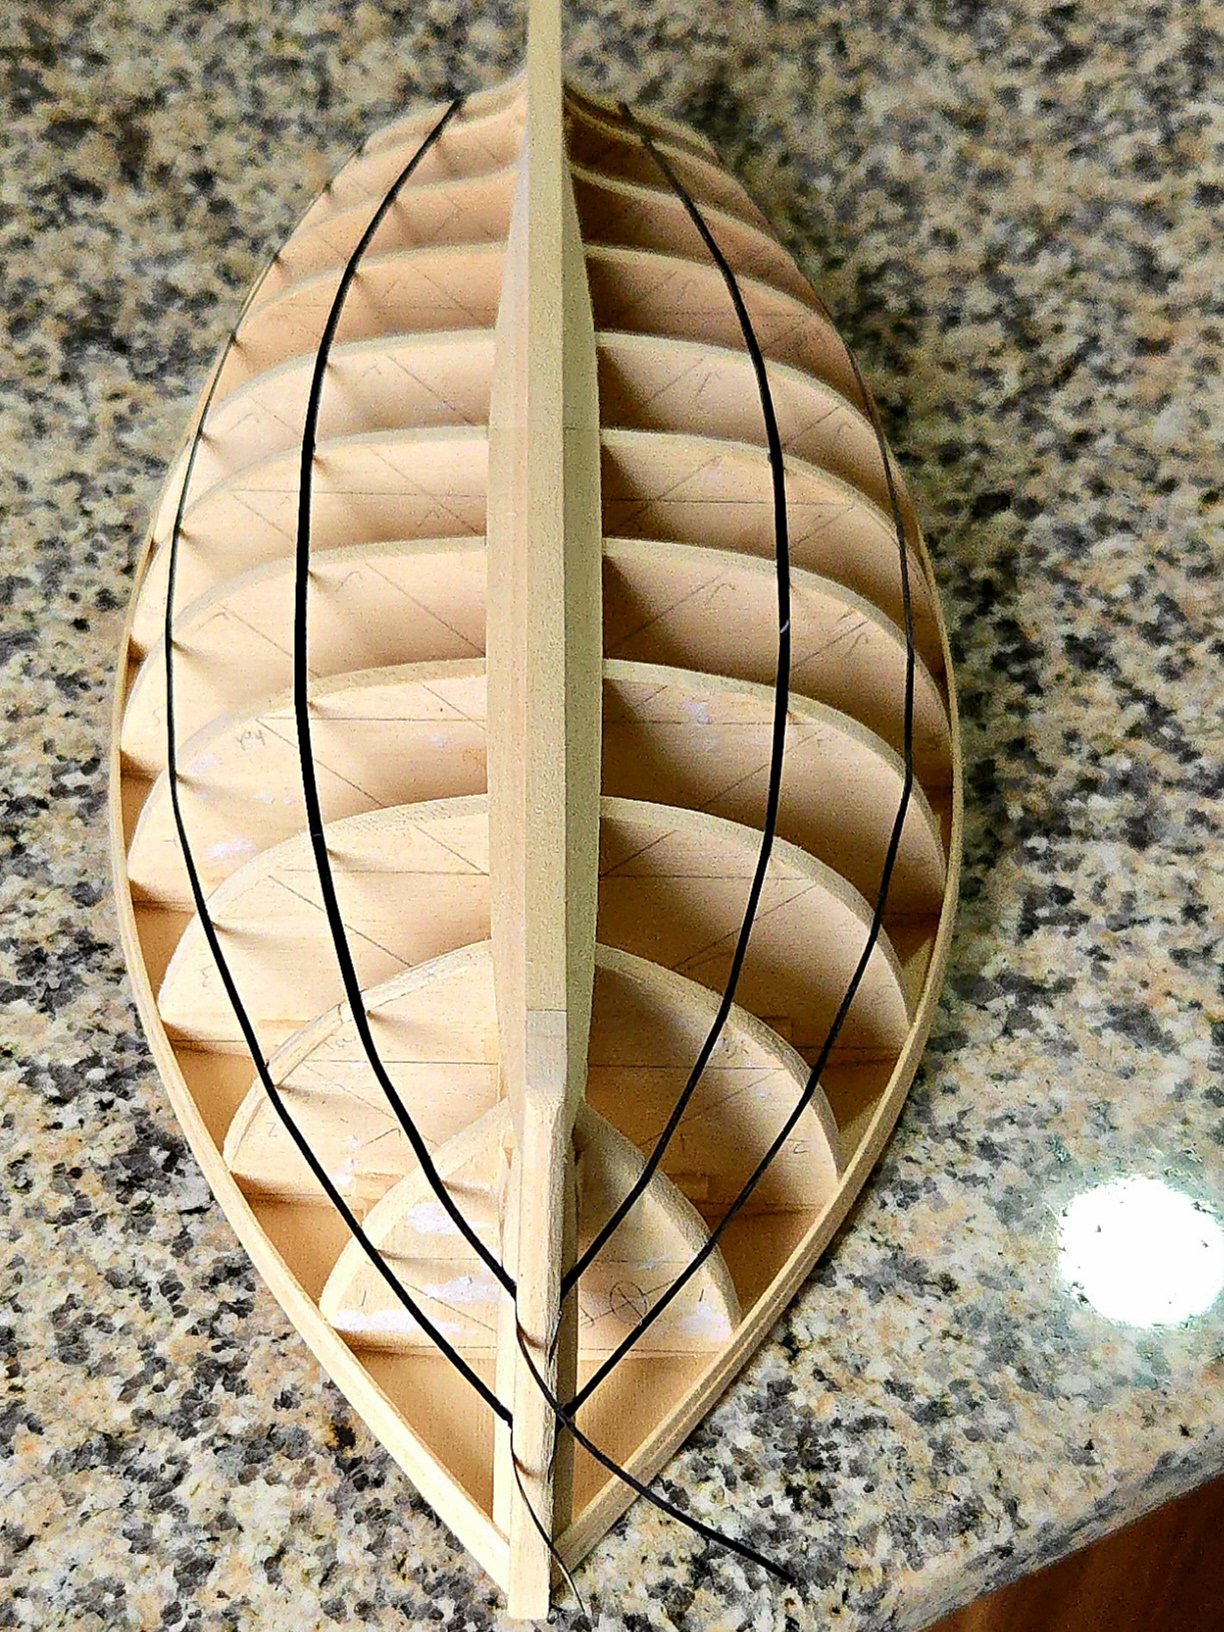
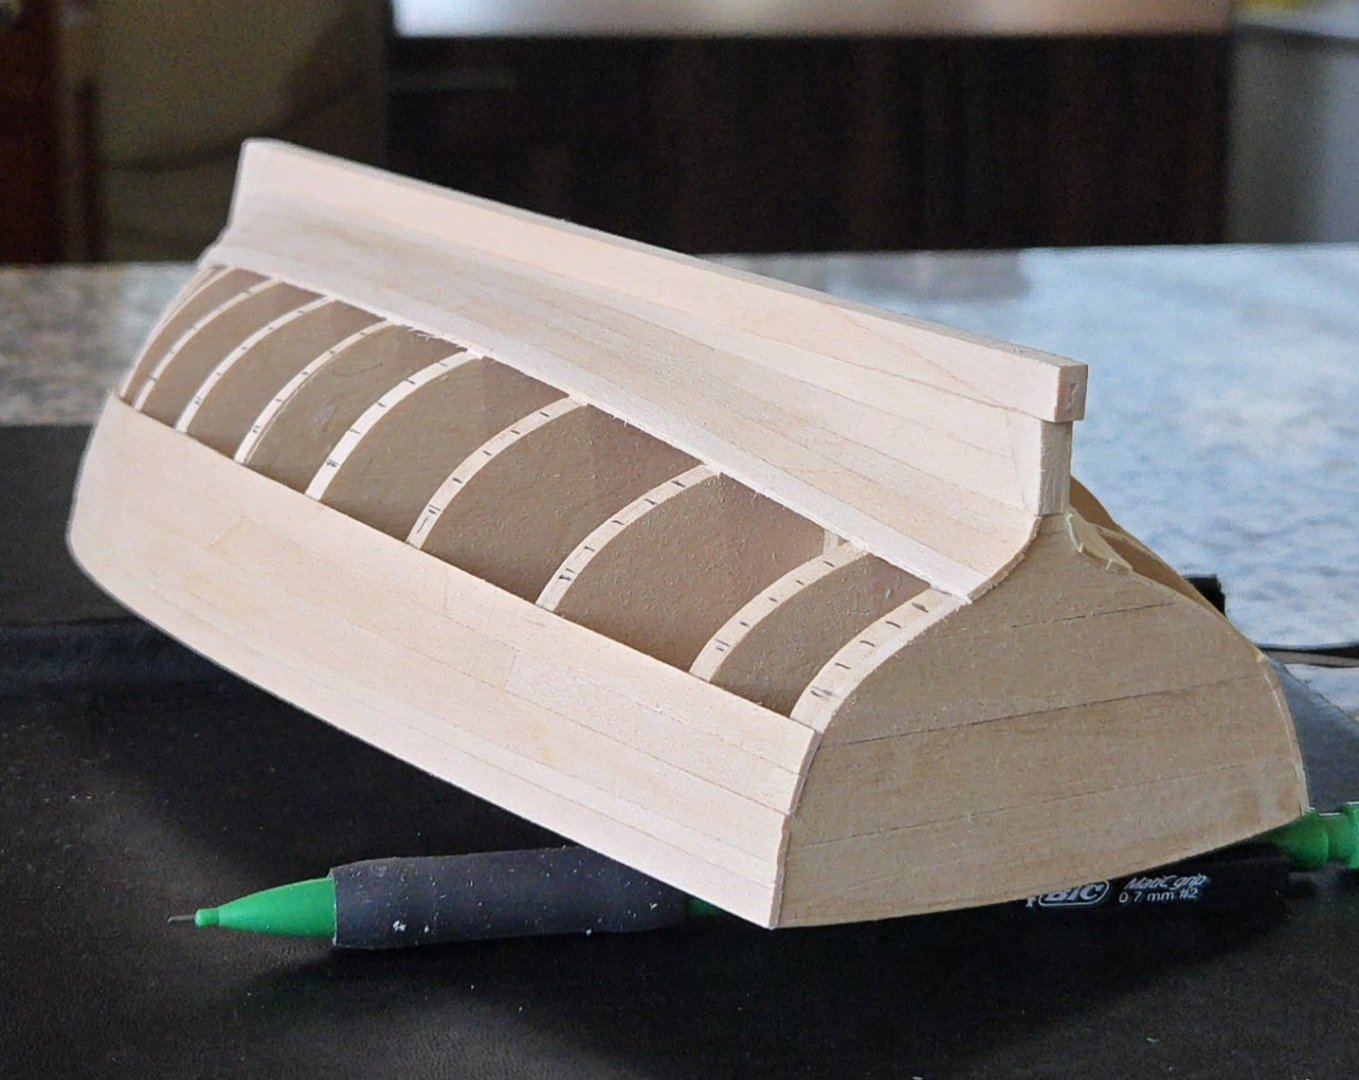
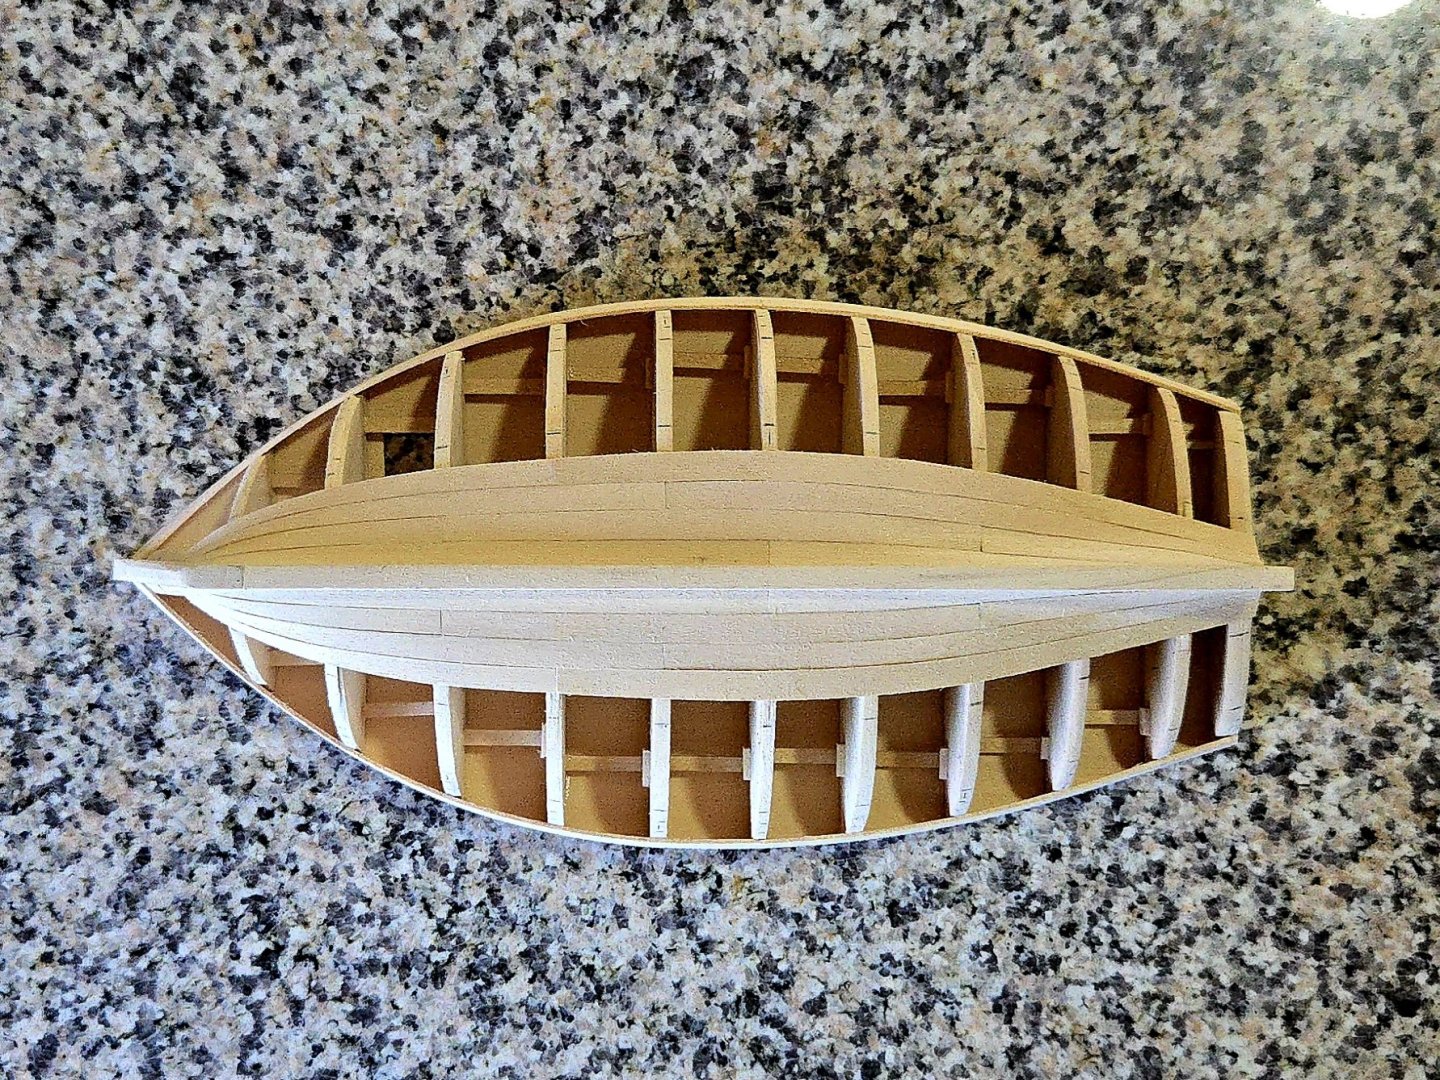
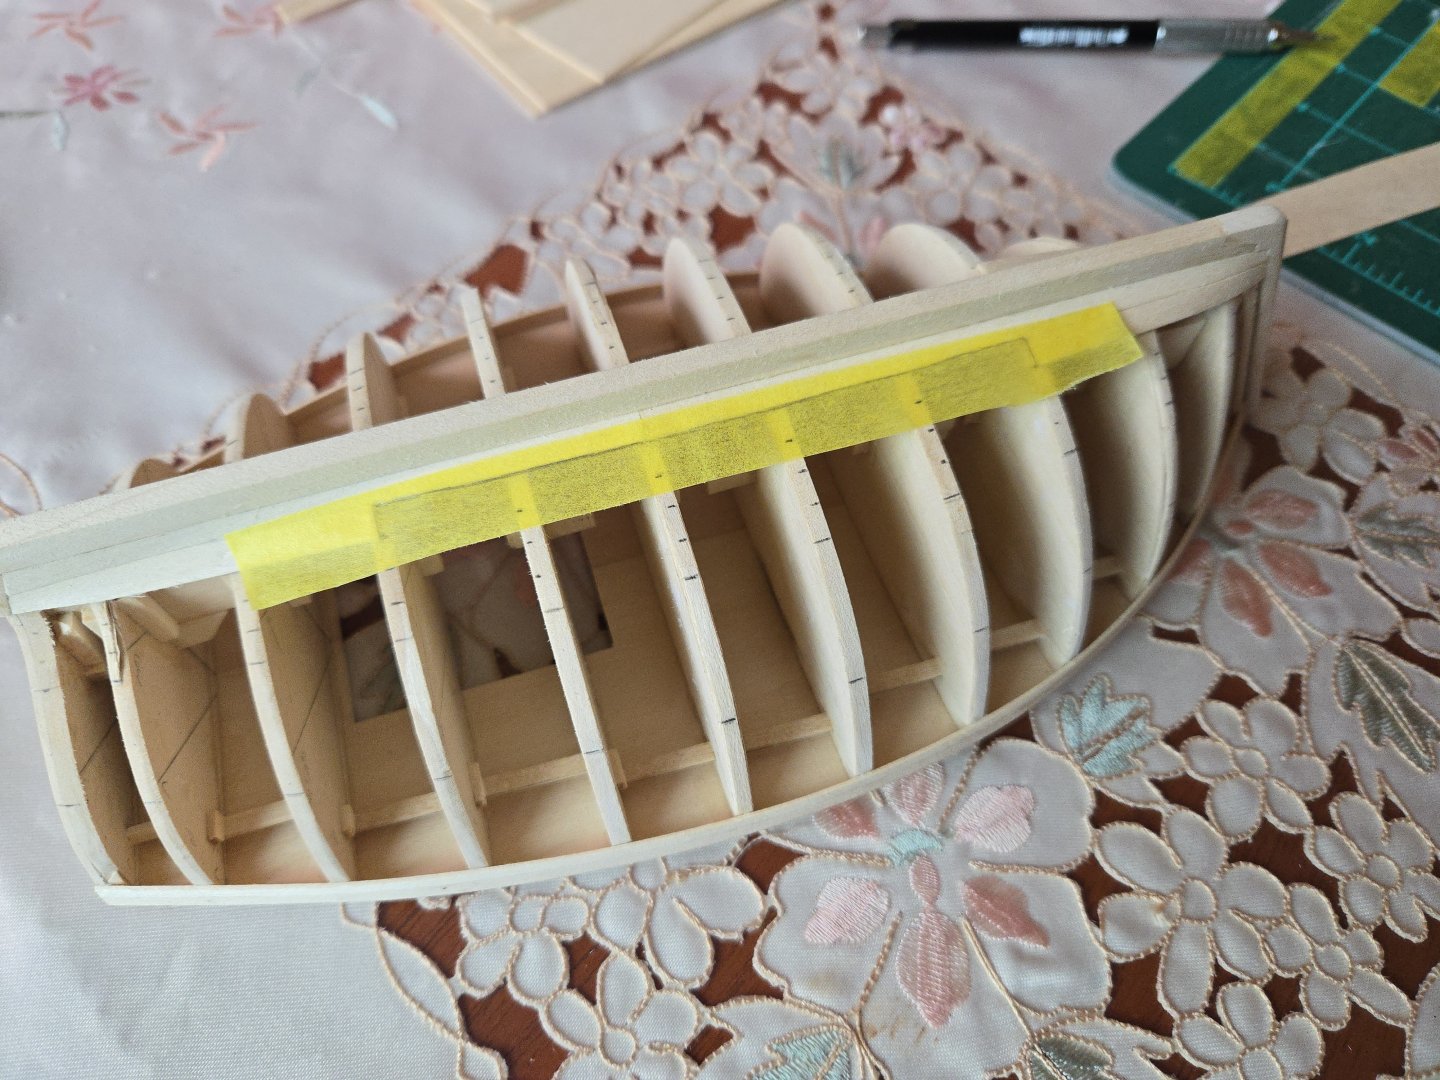
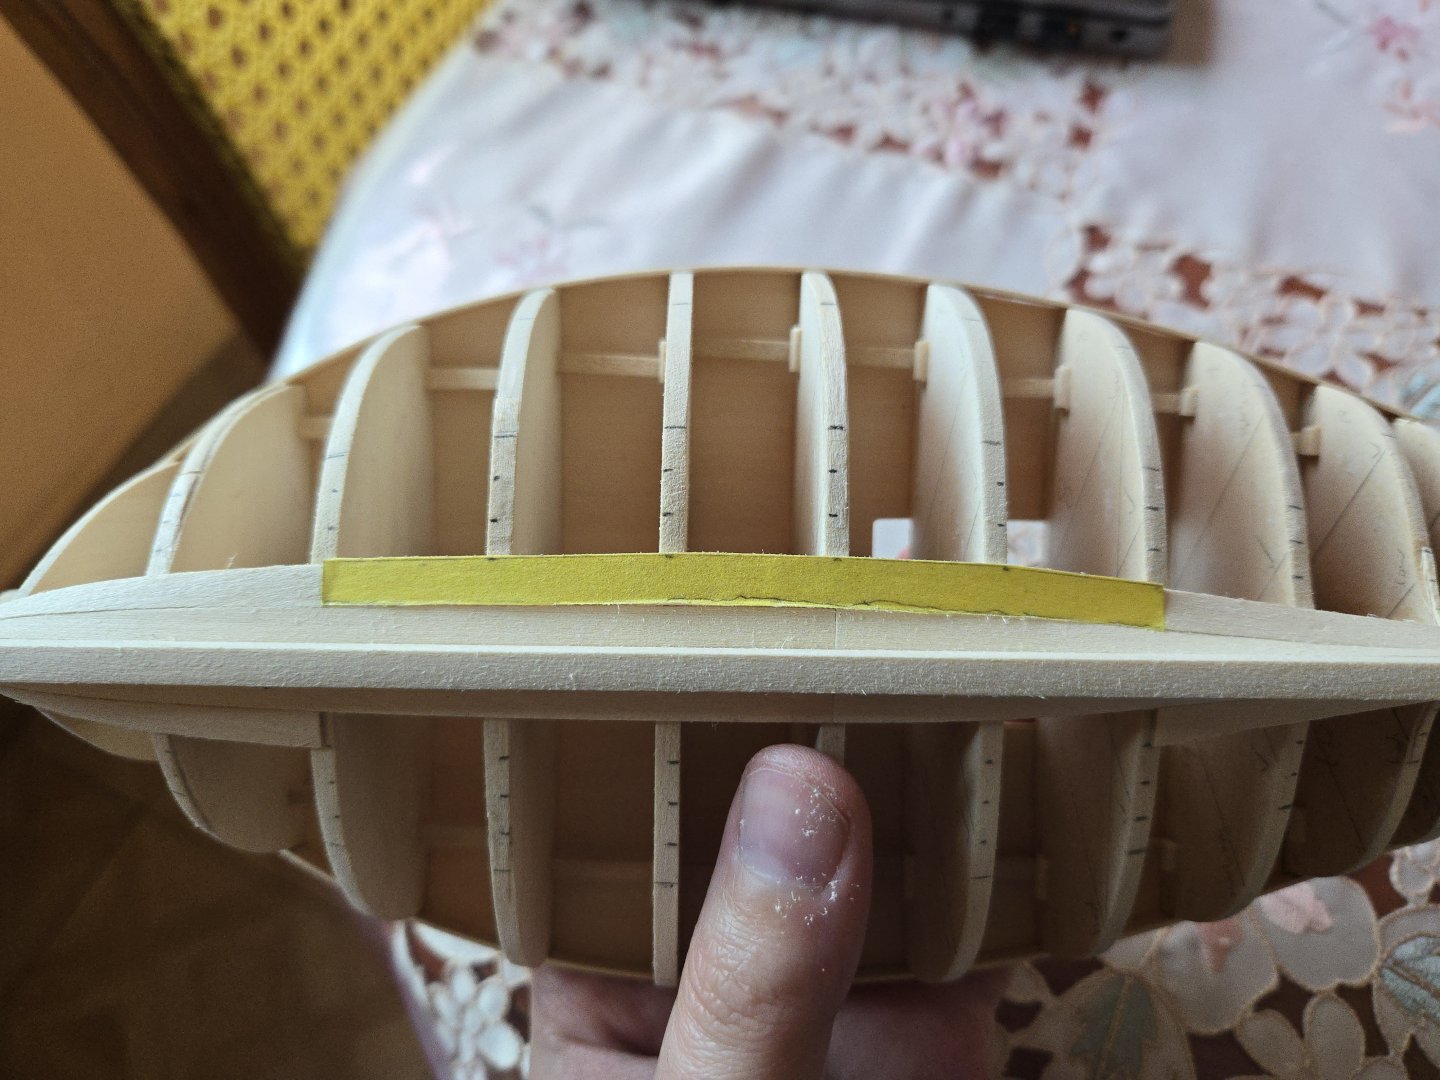
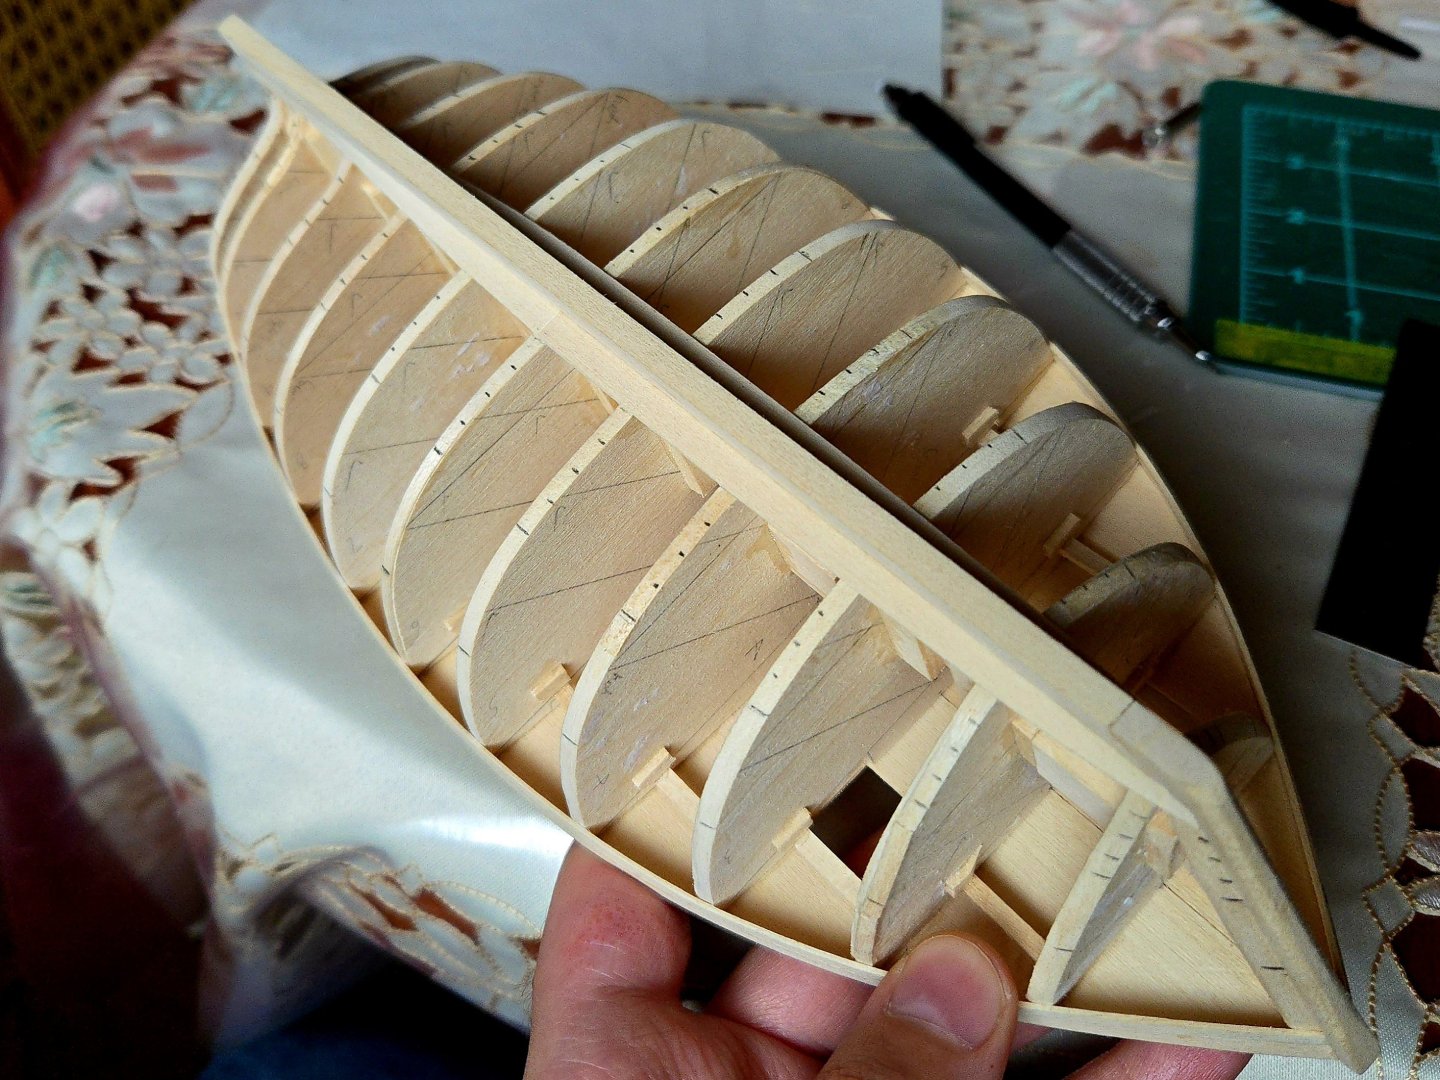
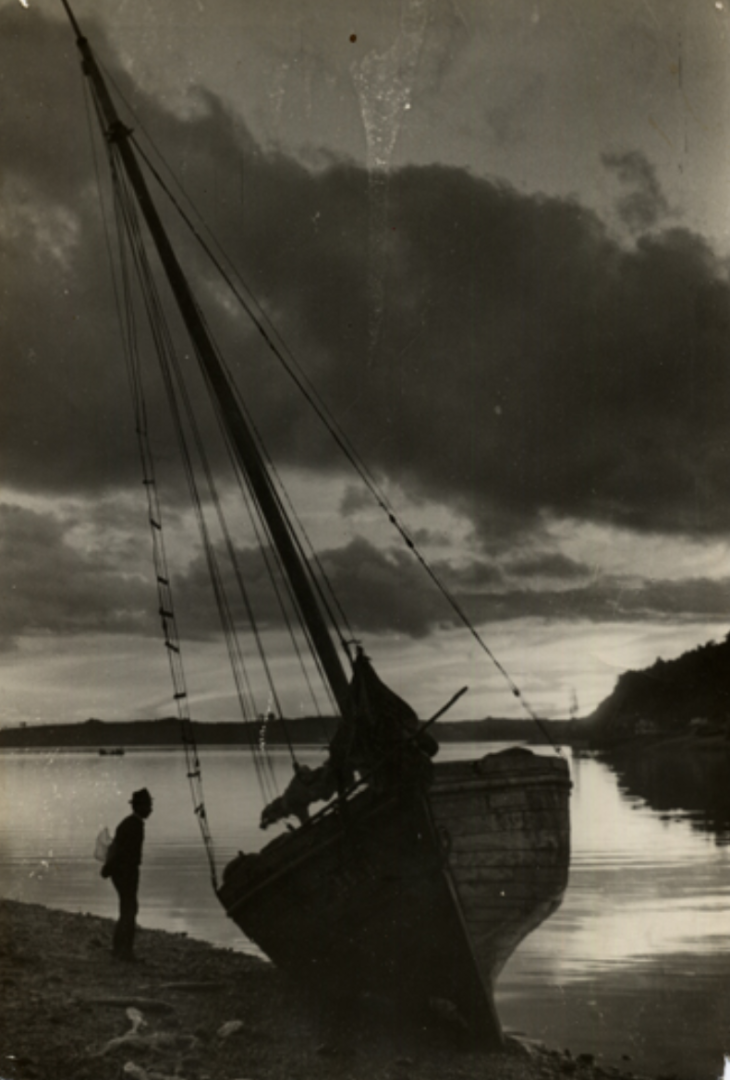
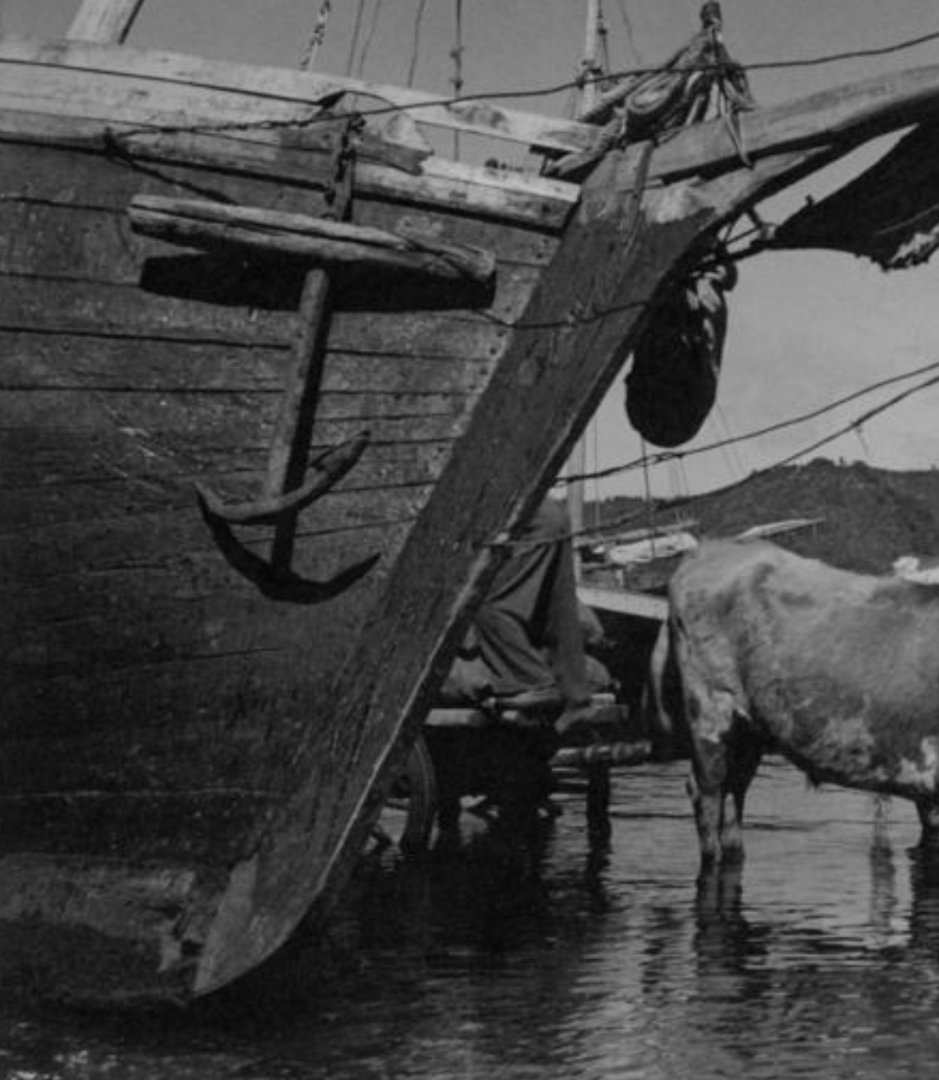
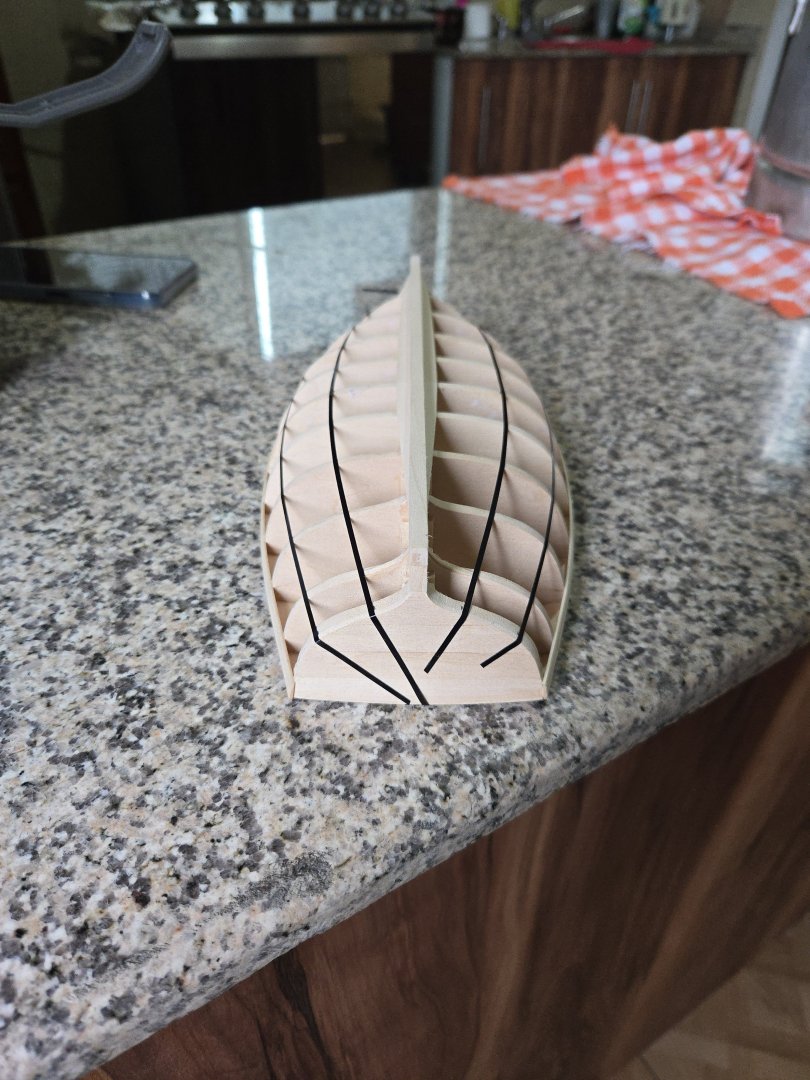
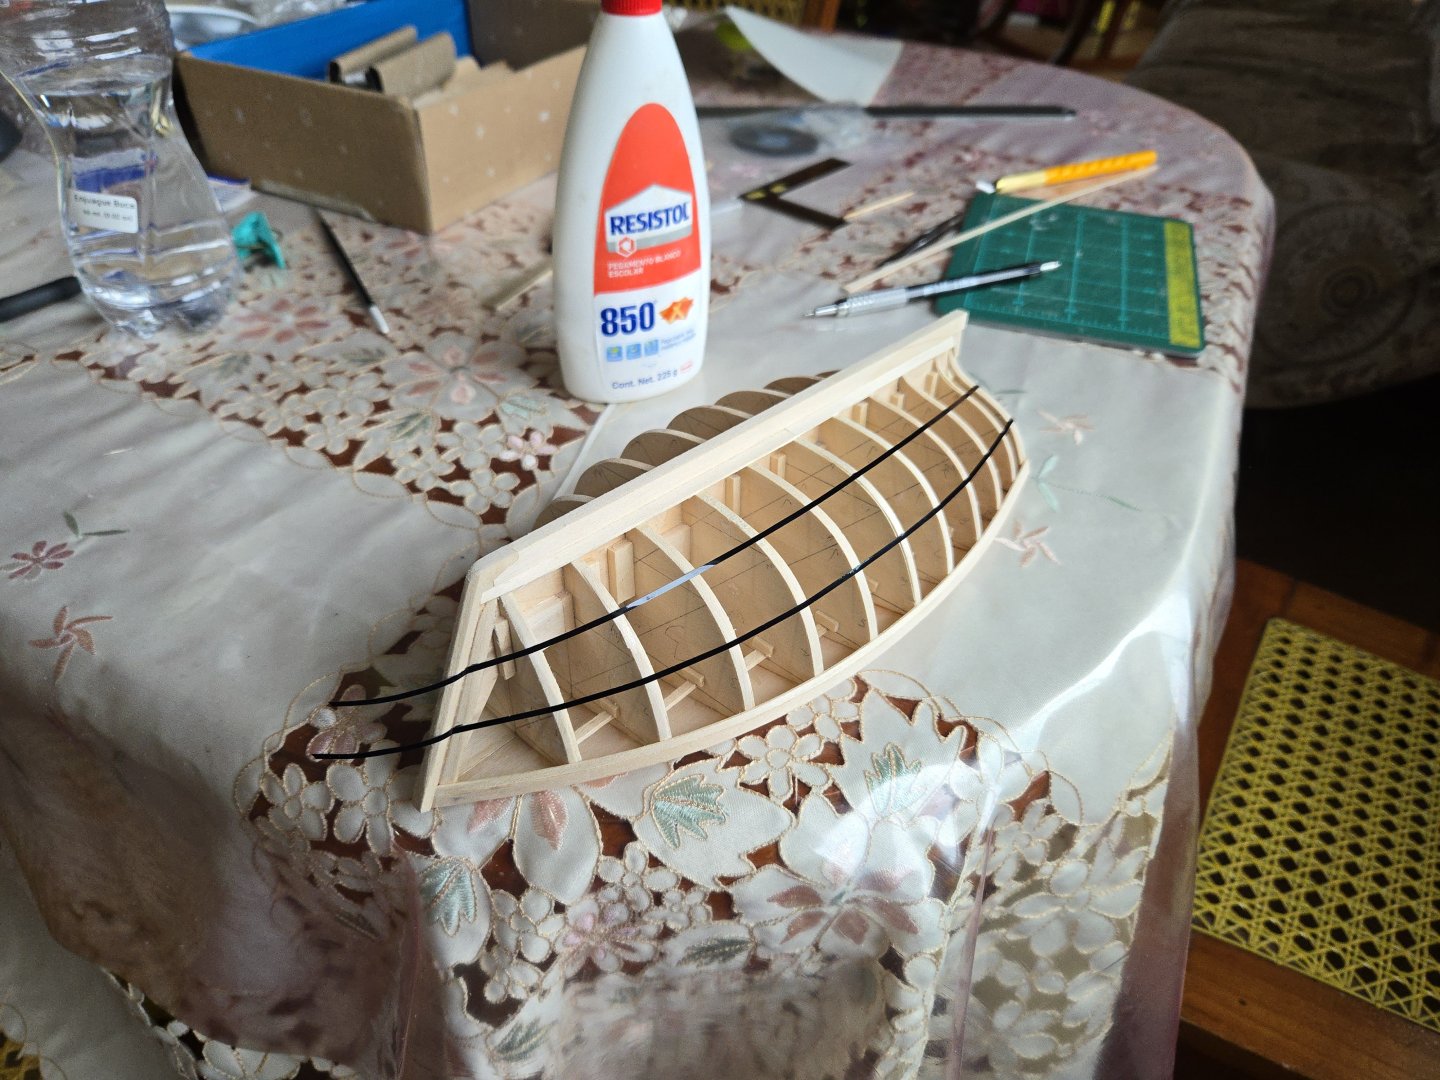
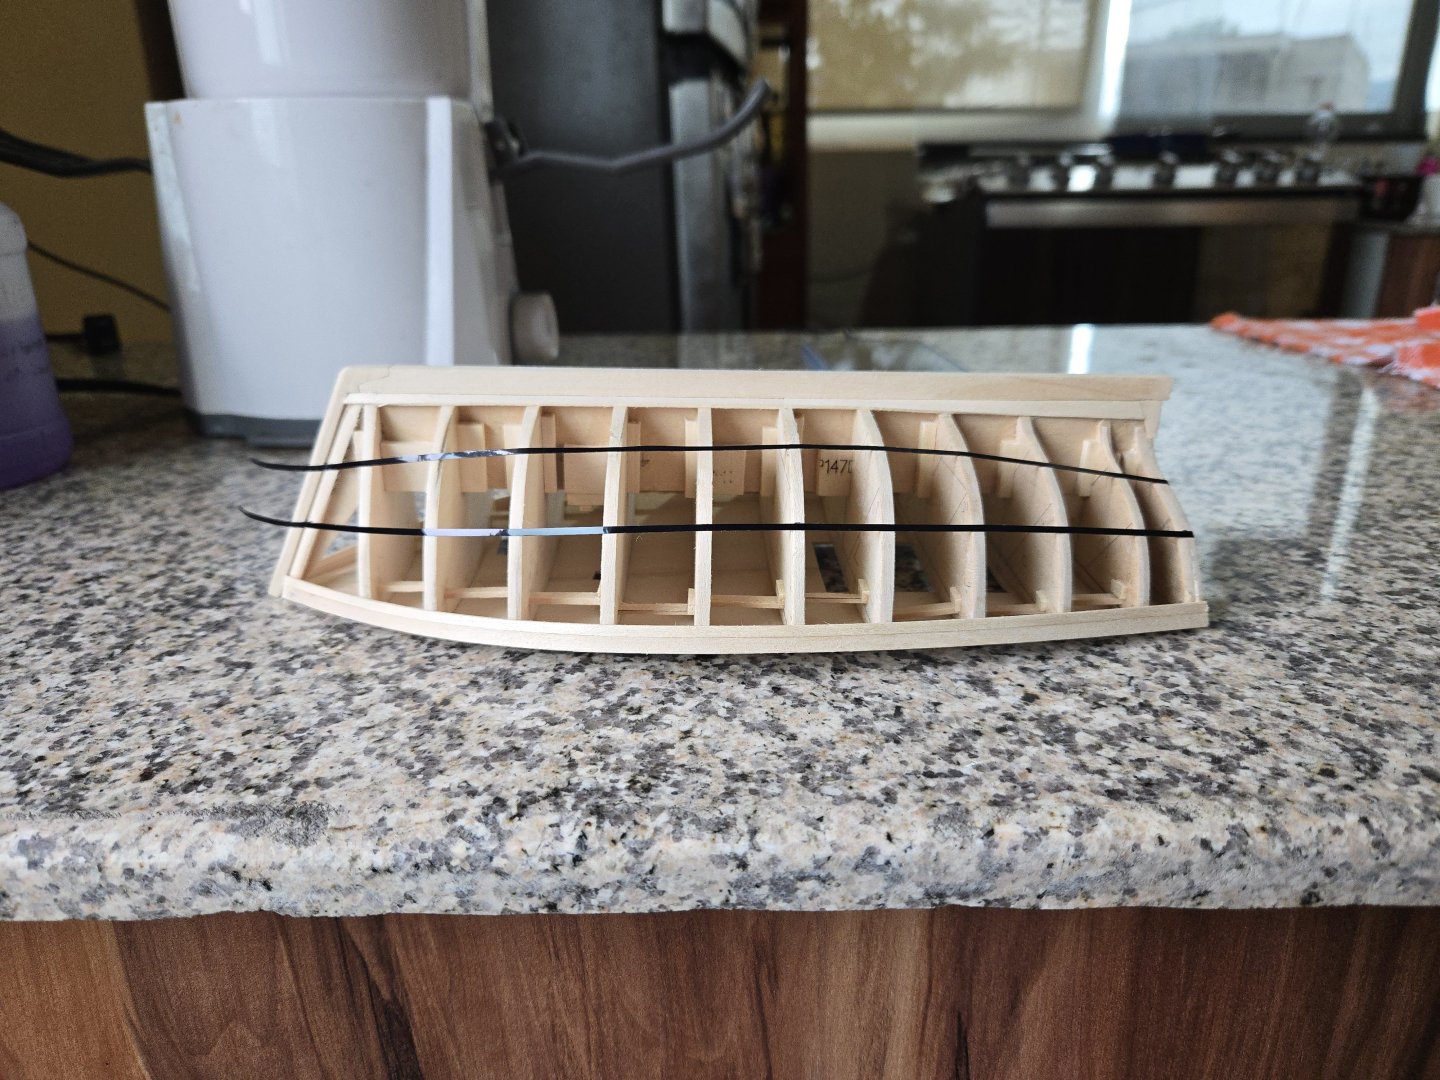
Thanks, all! With the garboard squared away, I’ve been working out the planking belts. I actually started on this a bit earlier as a way of figuring out what width I should give the garboard. I don’t really have any information about what sizes of wood were available, but what I could do, in at least a few of the photos that I have, is to count the number of planks on the hull, and from there work out how many planks I wanted to have on this model and what their maximum width would be, from which I was able to choose a slightly wider dimension for the garboard. Interestingly, many lanchas have planking of highly variable width where it intersects the stem. This is maybe clearest in this photo from 1935, which seems to have 14 planks below the sheer strake, some of them much wider than others. Source: https://www.bibliotecanacionaldigital.gob.cl/bnd/629/w3-article-320806.html Similarly, the vessel below (which seems to have 12 planks below the sheer strake) from 1963 also has planks of different widths. Source: https://www.memoriasdelsigloxx.cl/601/w3-article-1805.html I was unsure of how to best handle the uneven plank widths. I would like to make an accurate model, but this seems like something that could be easily overdone and look strange. It also would pose a challenge to lining out the hull. After some consideration, what I’m currently planning is to divide the hull into three equal bands of planking. However, while the upper and lower band will be made of 4 strakes each, the middle band will have 5 strakes. This way, the narrowest planking is around the turn of the bilge, which seems to be more or less what’s going on in the second photo above and which would make the most sense to me if there was any deliberate planning about where to use narrower planks (instead of the builders simply making do with what was available, which likely was at least a part of it). So, the middle band’s strakes will be about 20% narrower than the other strakes, which seems notable to anyone paying attention to the hull without going so far as to make the hull look weird. I’ve therefore begun marking out the bands using chart tape. As on the half-hull build, after getting a good run I’ll be letting it sit overnight to approach it with fresh eyes tomorrow. If anyone has any suggestions about the variable planking width and my plans to deal with it, I’m all ears!


- 312 replies
-
- 8
-
-
- Chile
- Latin America
- (and 6 more)
-
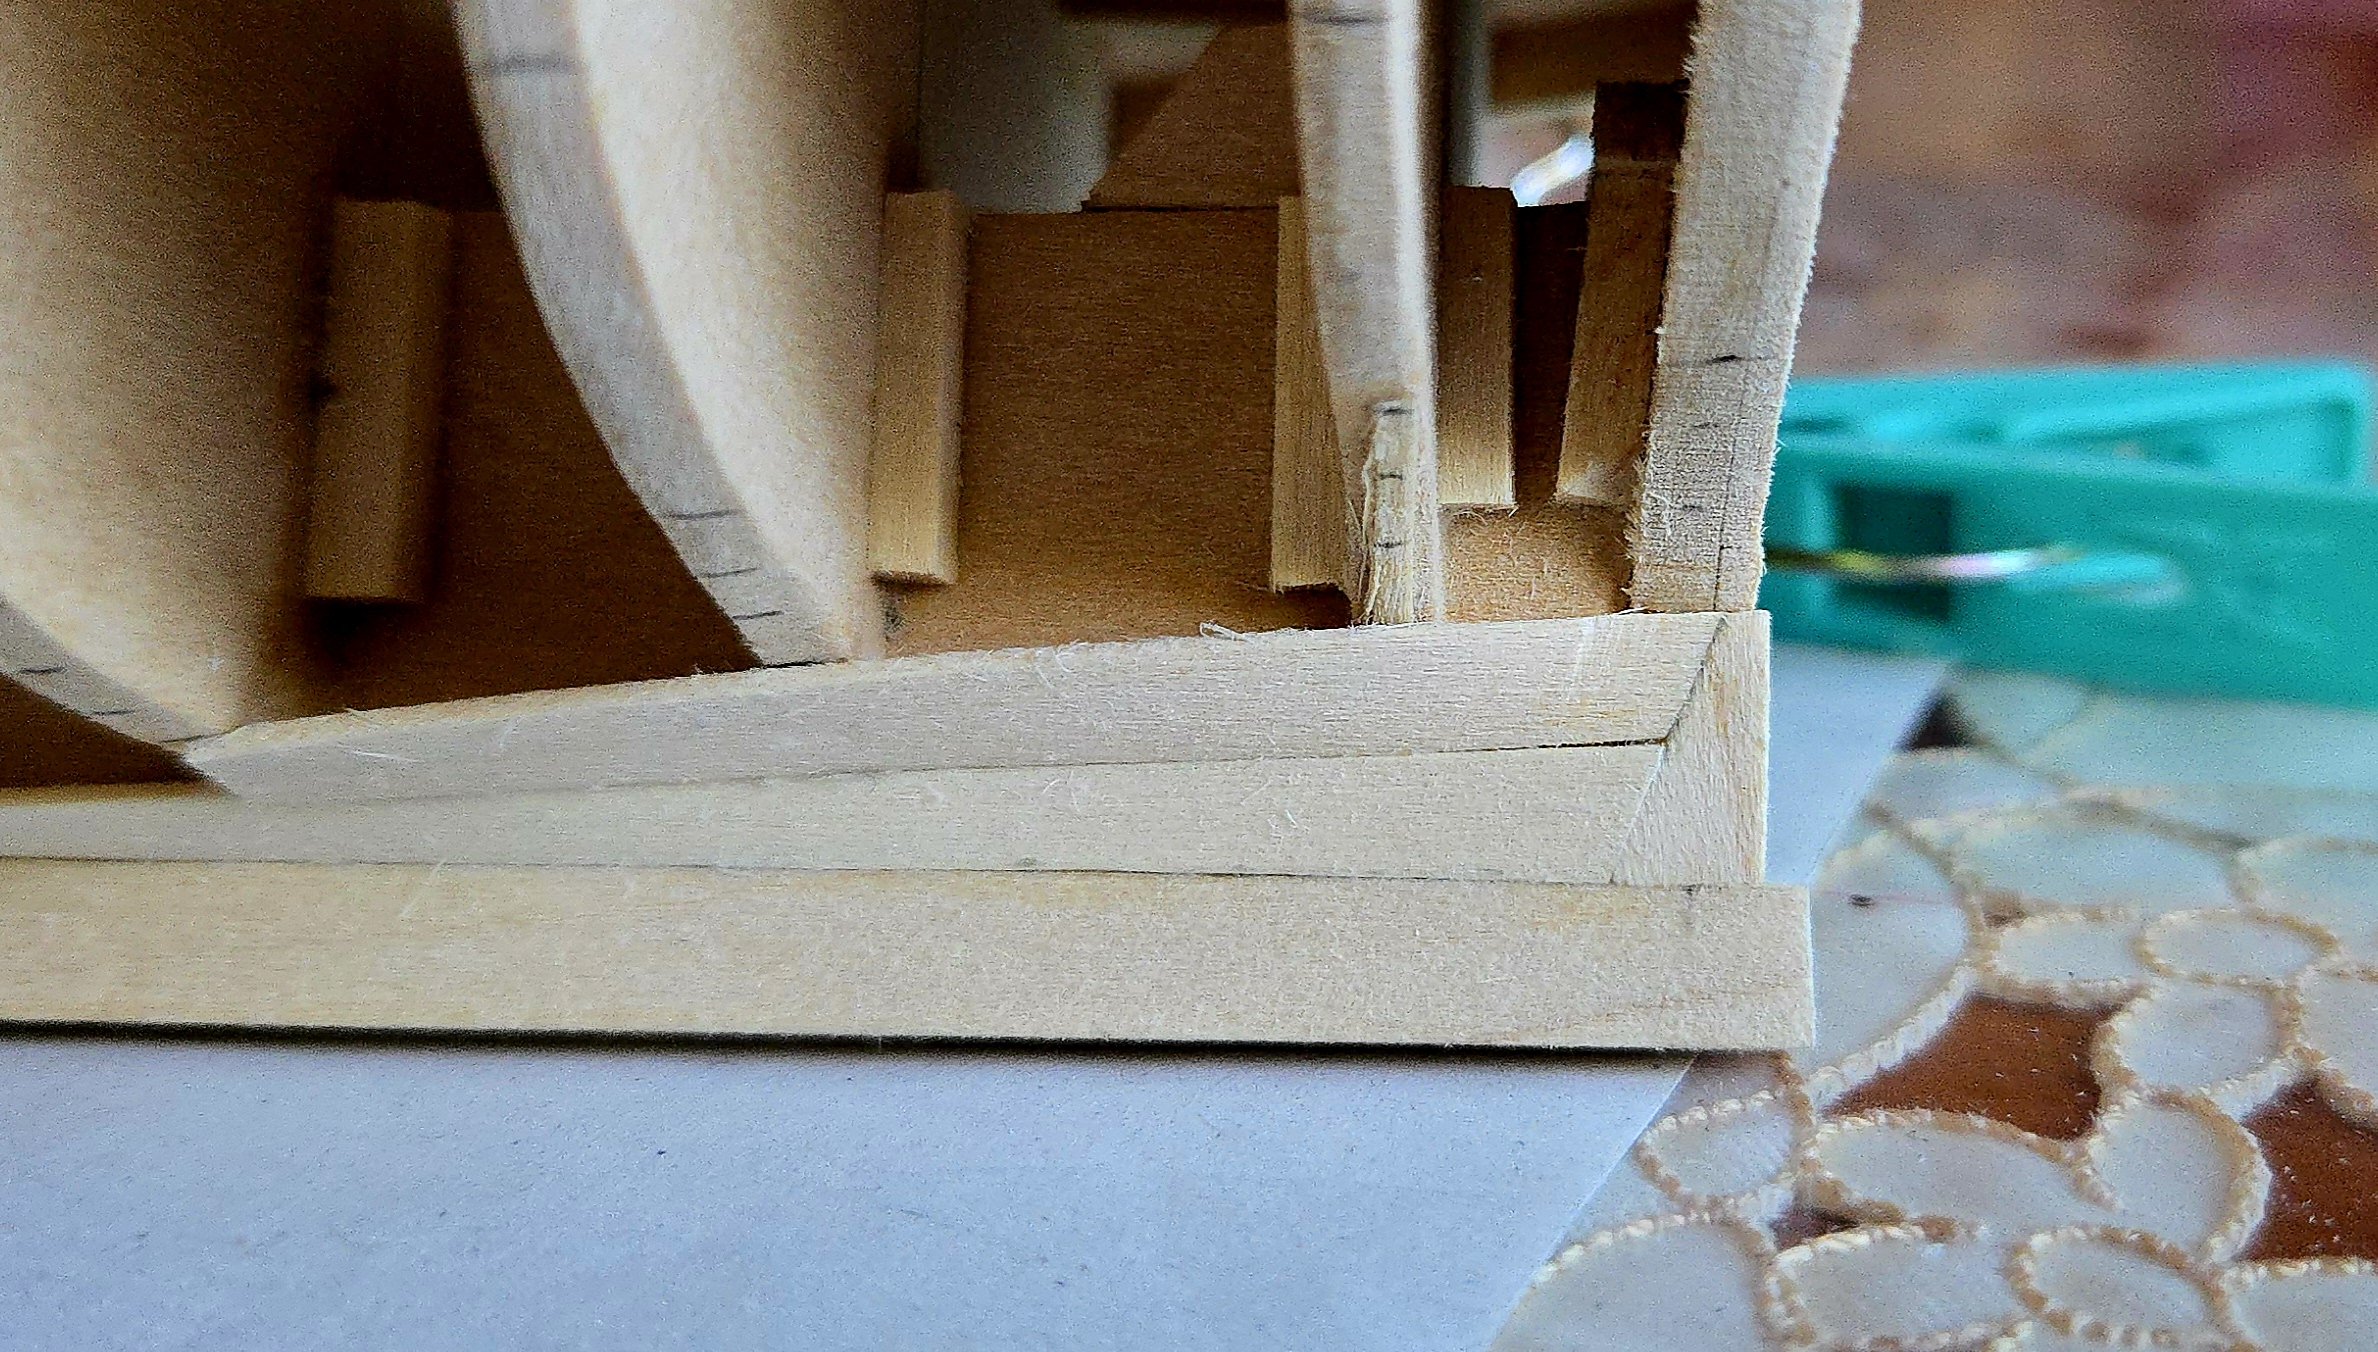
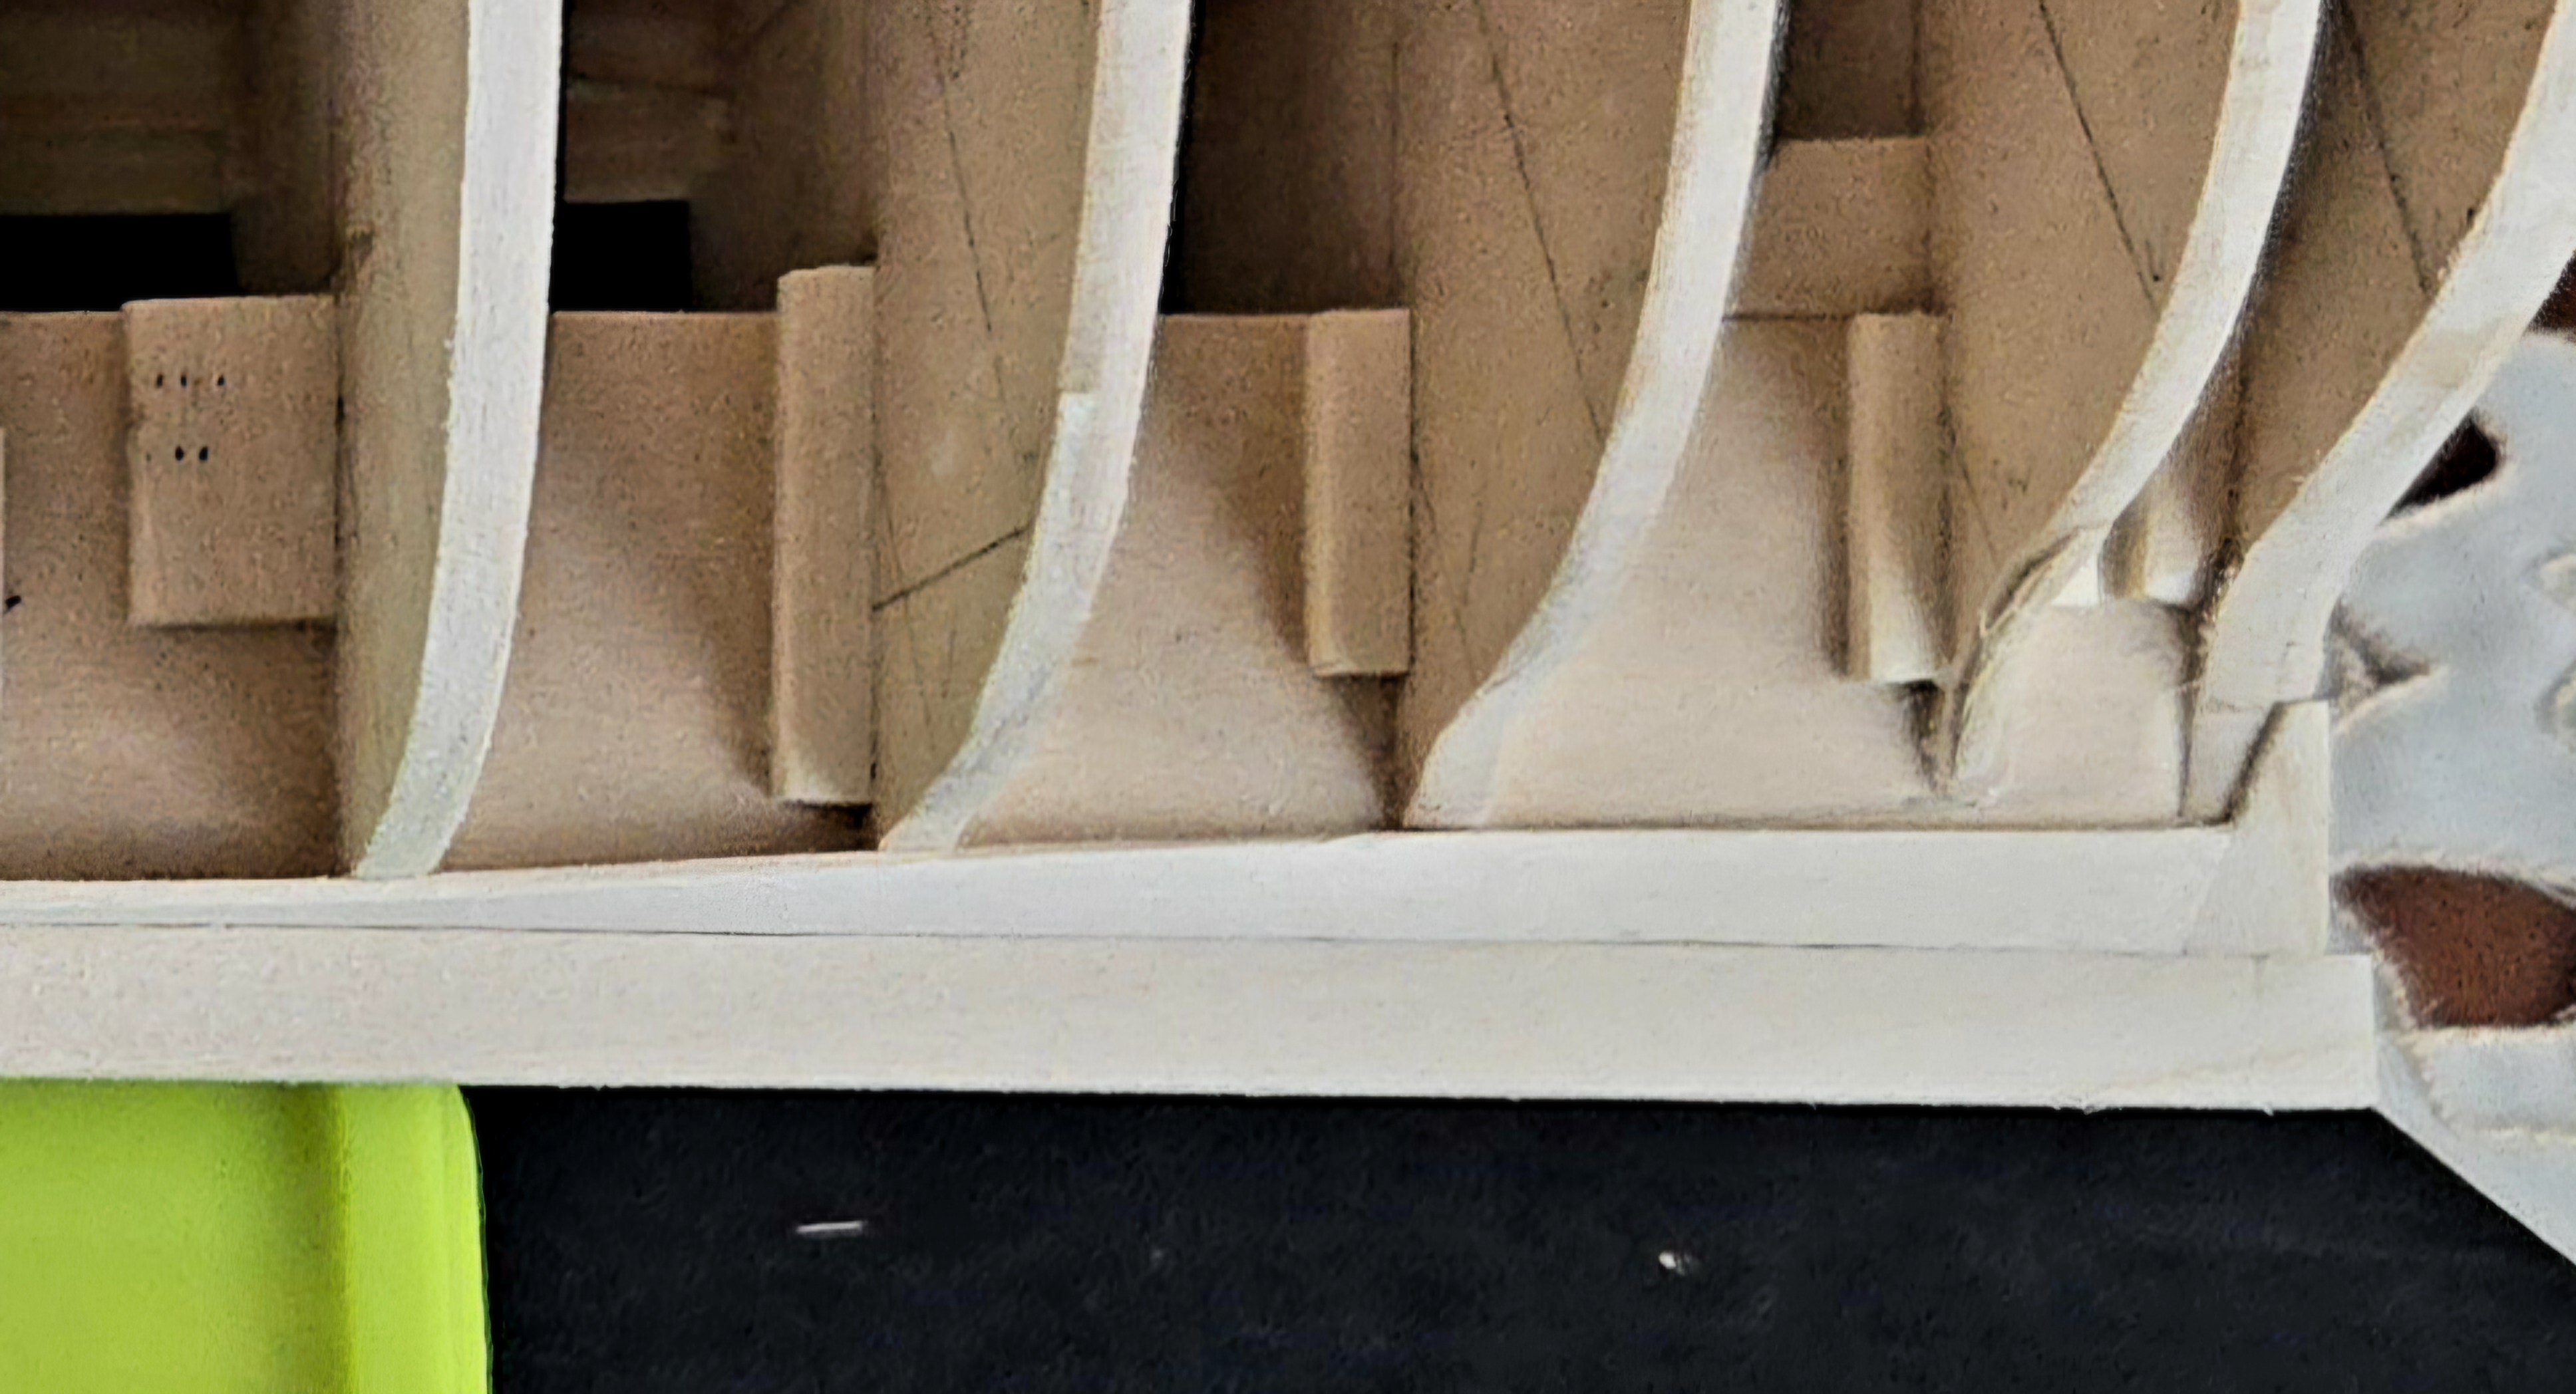
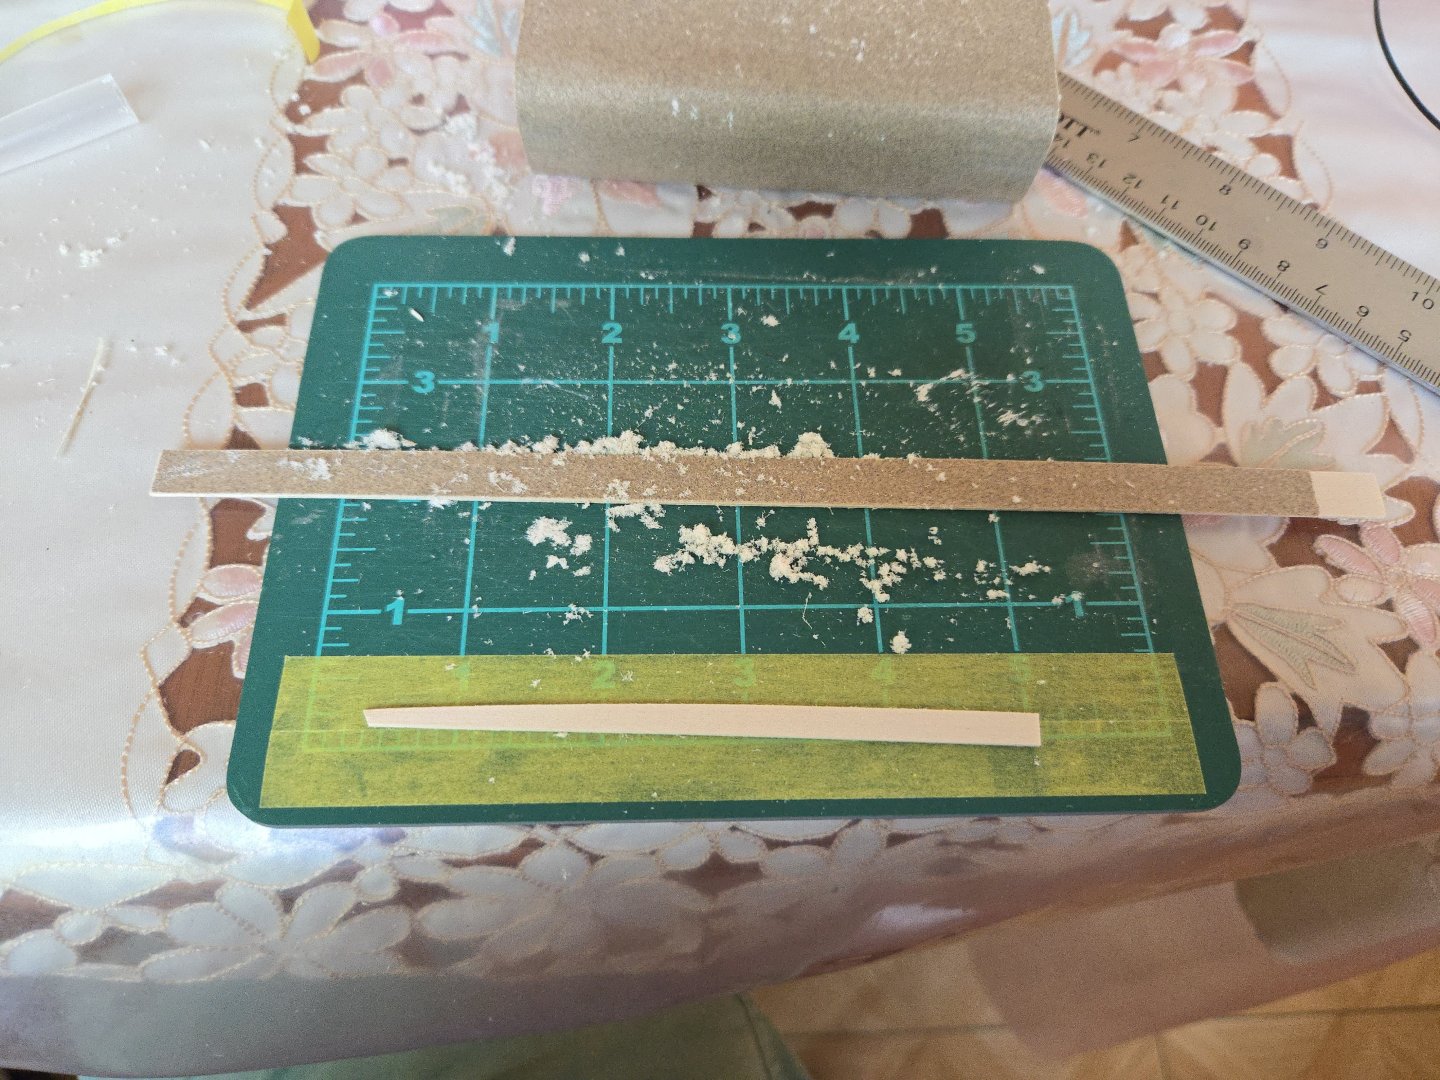
Thanks! Thanks for the suggestion! After coming back to the model this morning I had the same thought about something being a little off in that area. From photos it seems like there were usually multiple planks ending against the sternpost, so I didn't want to widen the plank at the aftmost end, but I thought I might be able to narrow the plank in some parts and get rid of the odd flatness to the run of the garboard aft. I considered trying to remove the plank with alcohol but was concerned that it would be difficult as this plank is the most solidly glued of all the hull planks (substantial surface area glued to the deadwood, sturdily set into the rabbet). Before taking it off, I decided to try reshaping the plank on the model--worst case scenario, I'd just have to redo it anyway. It was tricky as I don't have all my tools while traveling, and the files would have been really useful, but with a sanding stick and a craft knife I was able to give the plank a bit of a better run. Before: After:


- 312 replies
-
- 10
-
-
- Chile
- Latin America
- (and 6 more)
-
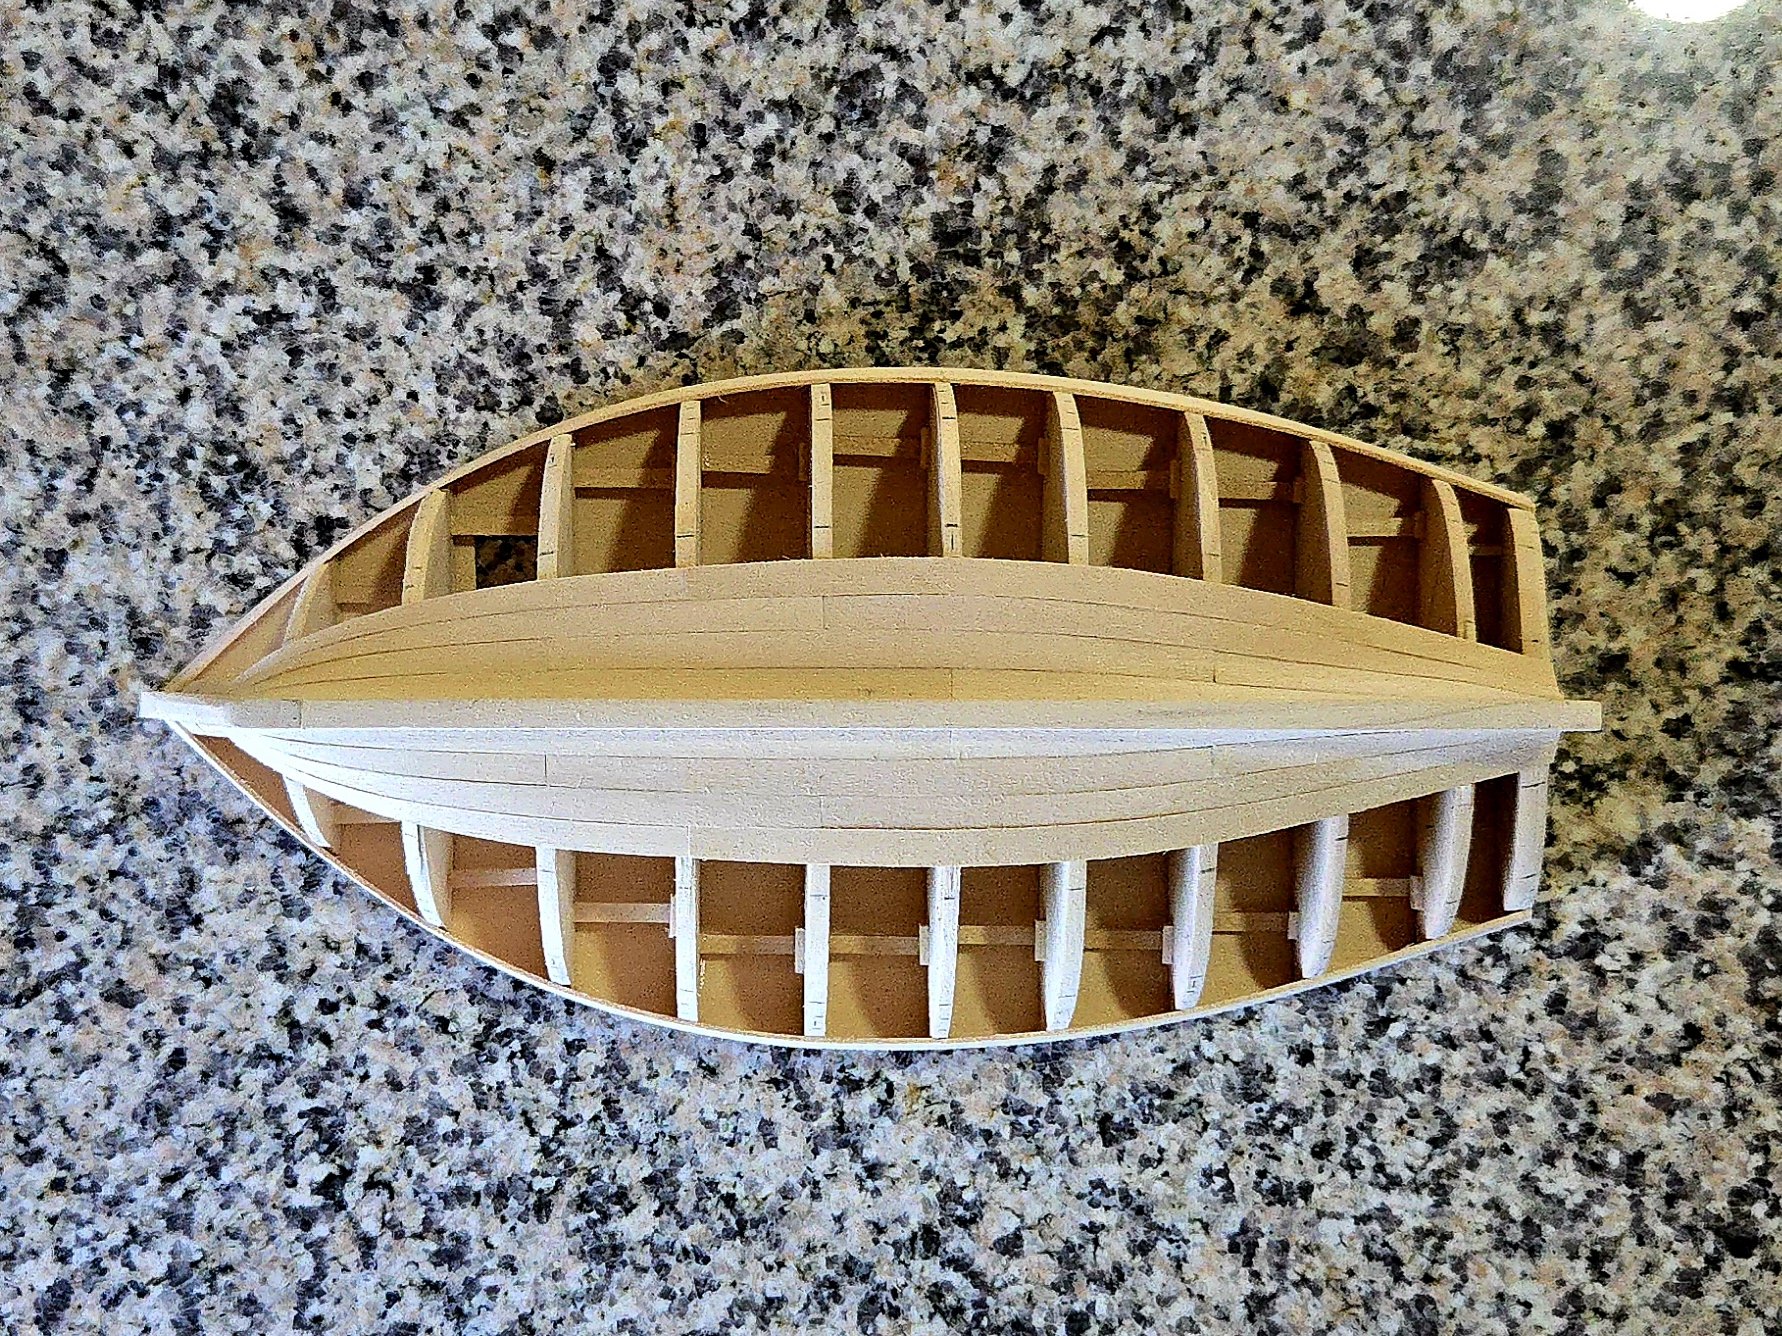
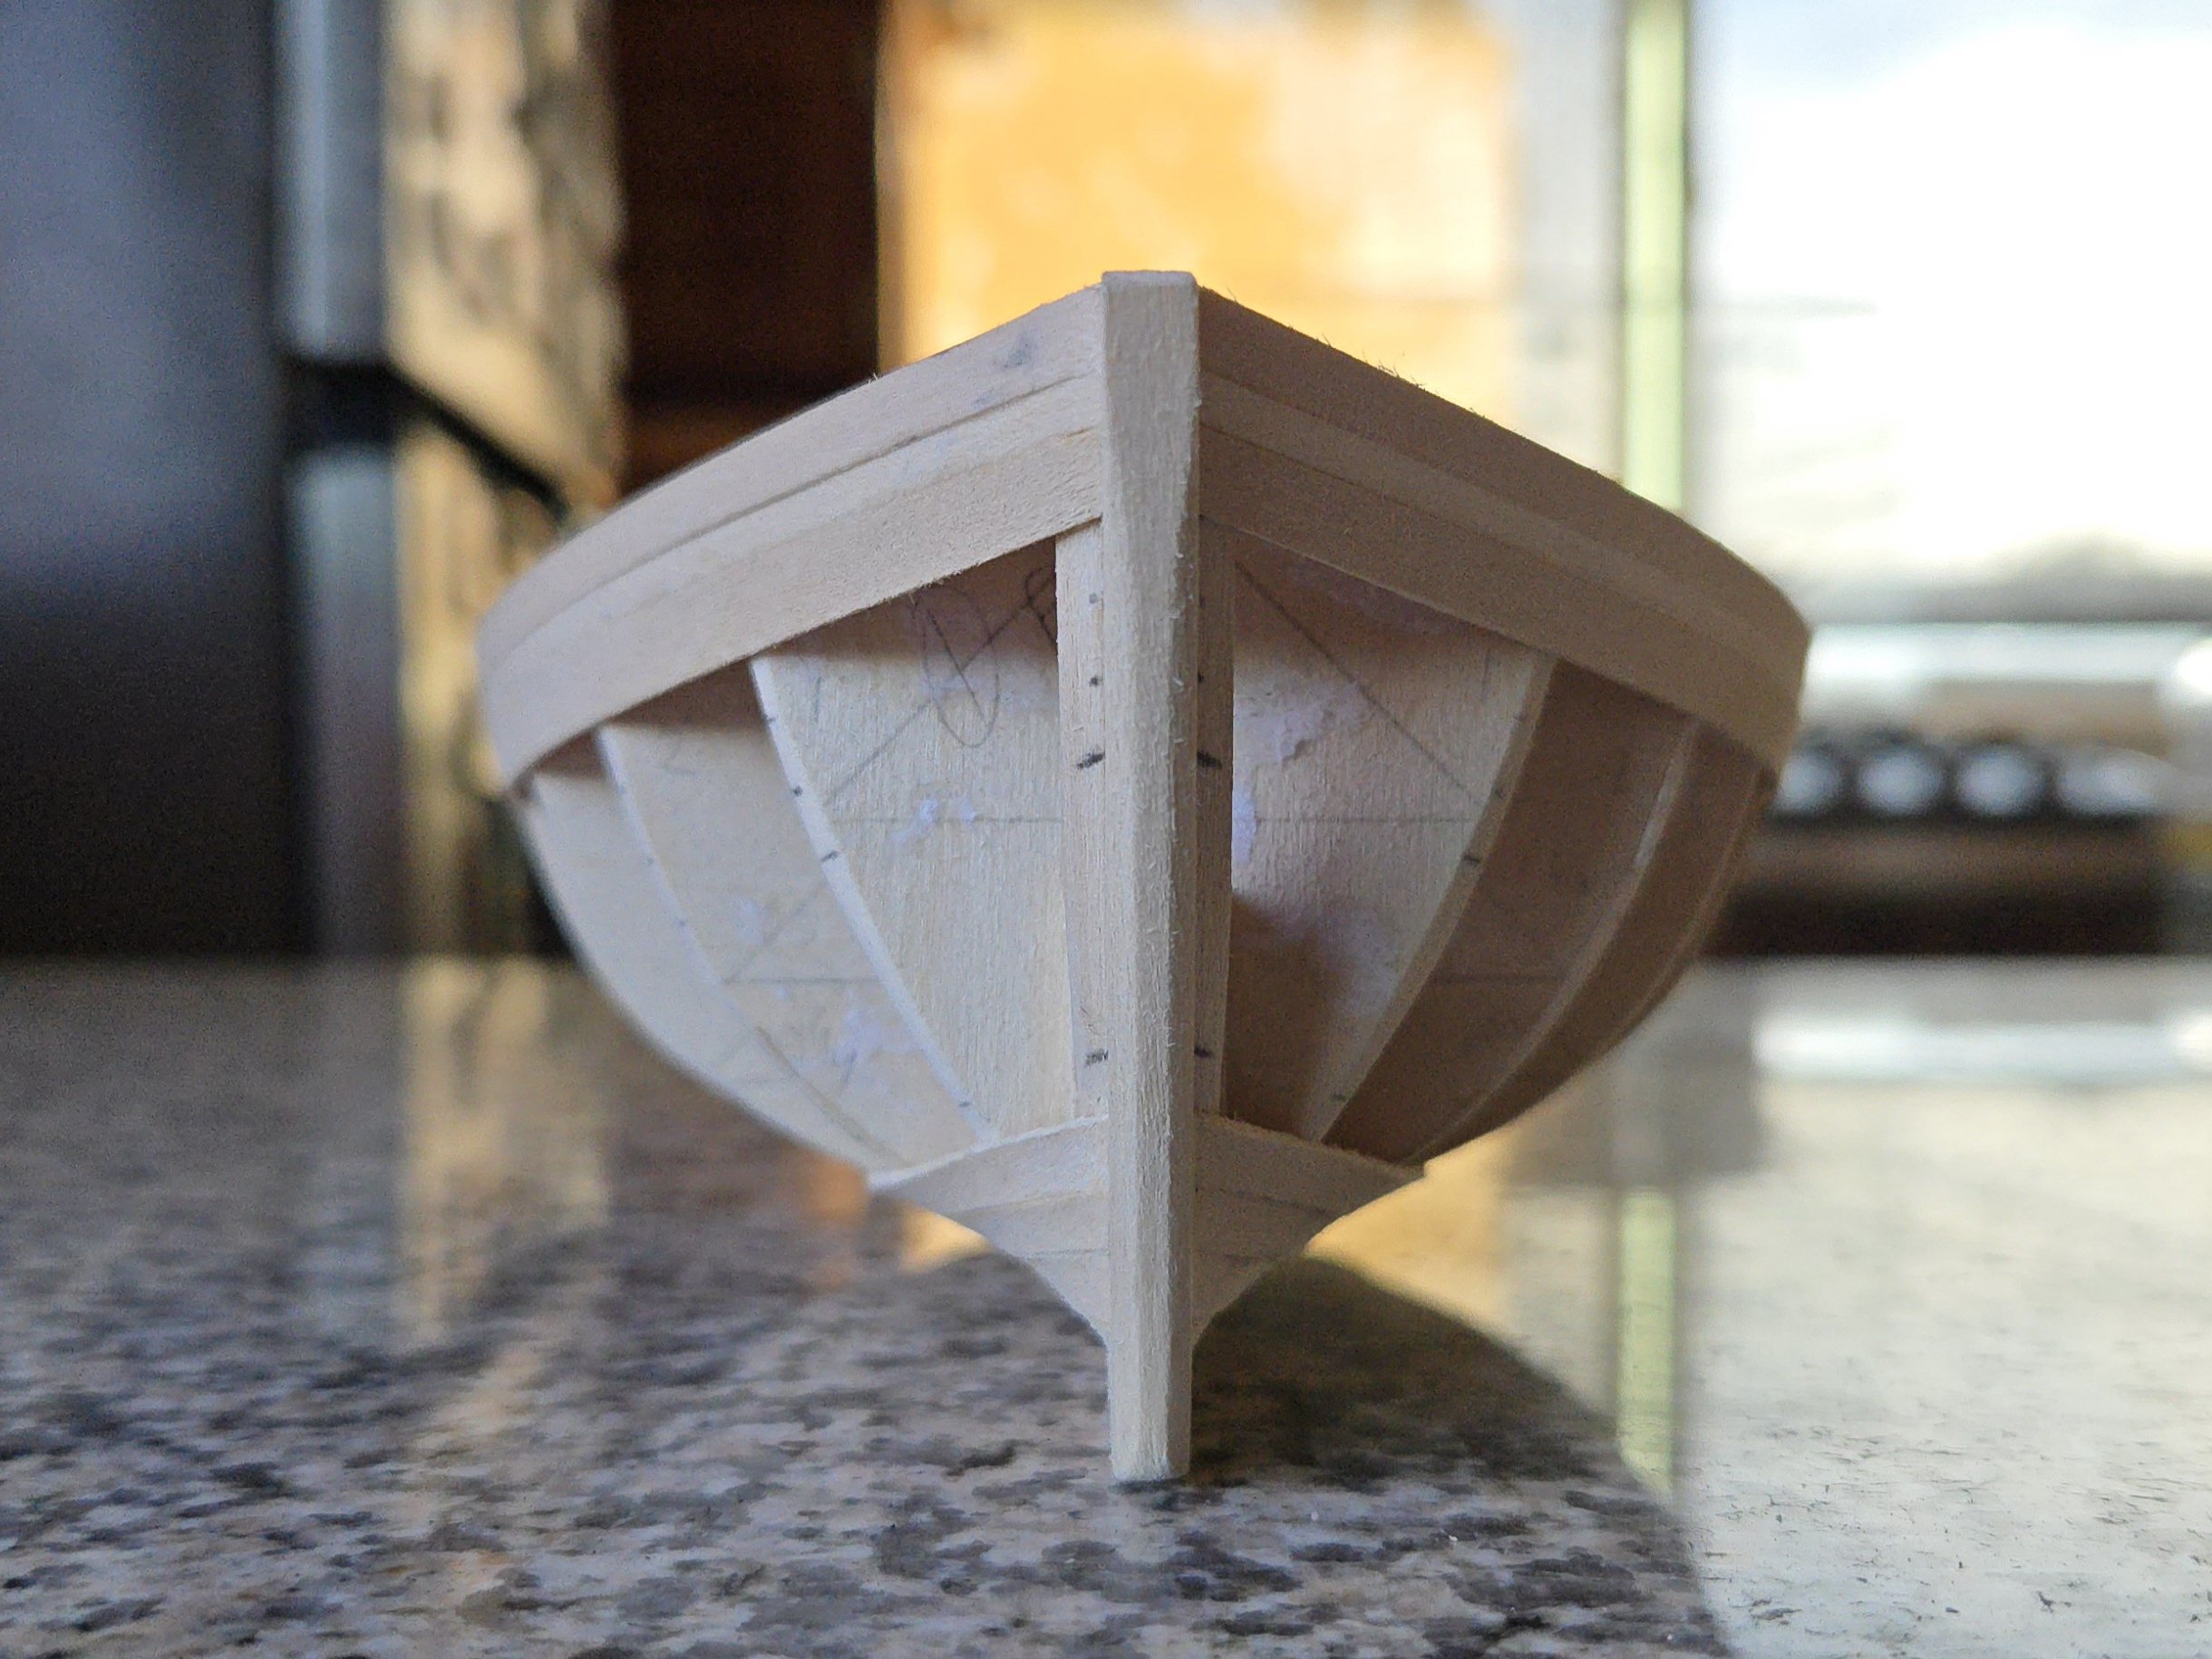
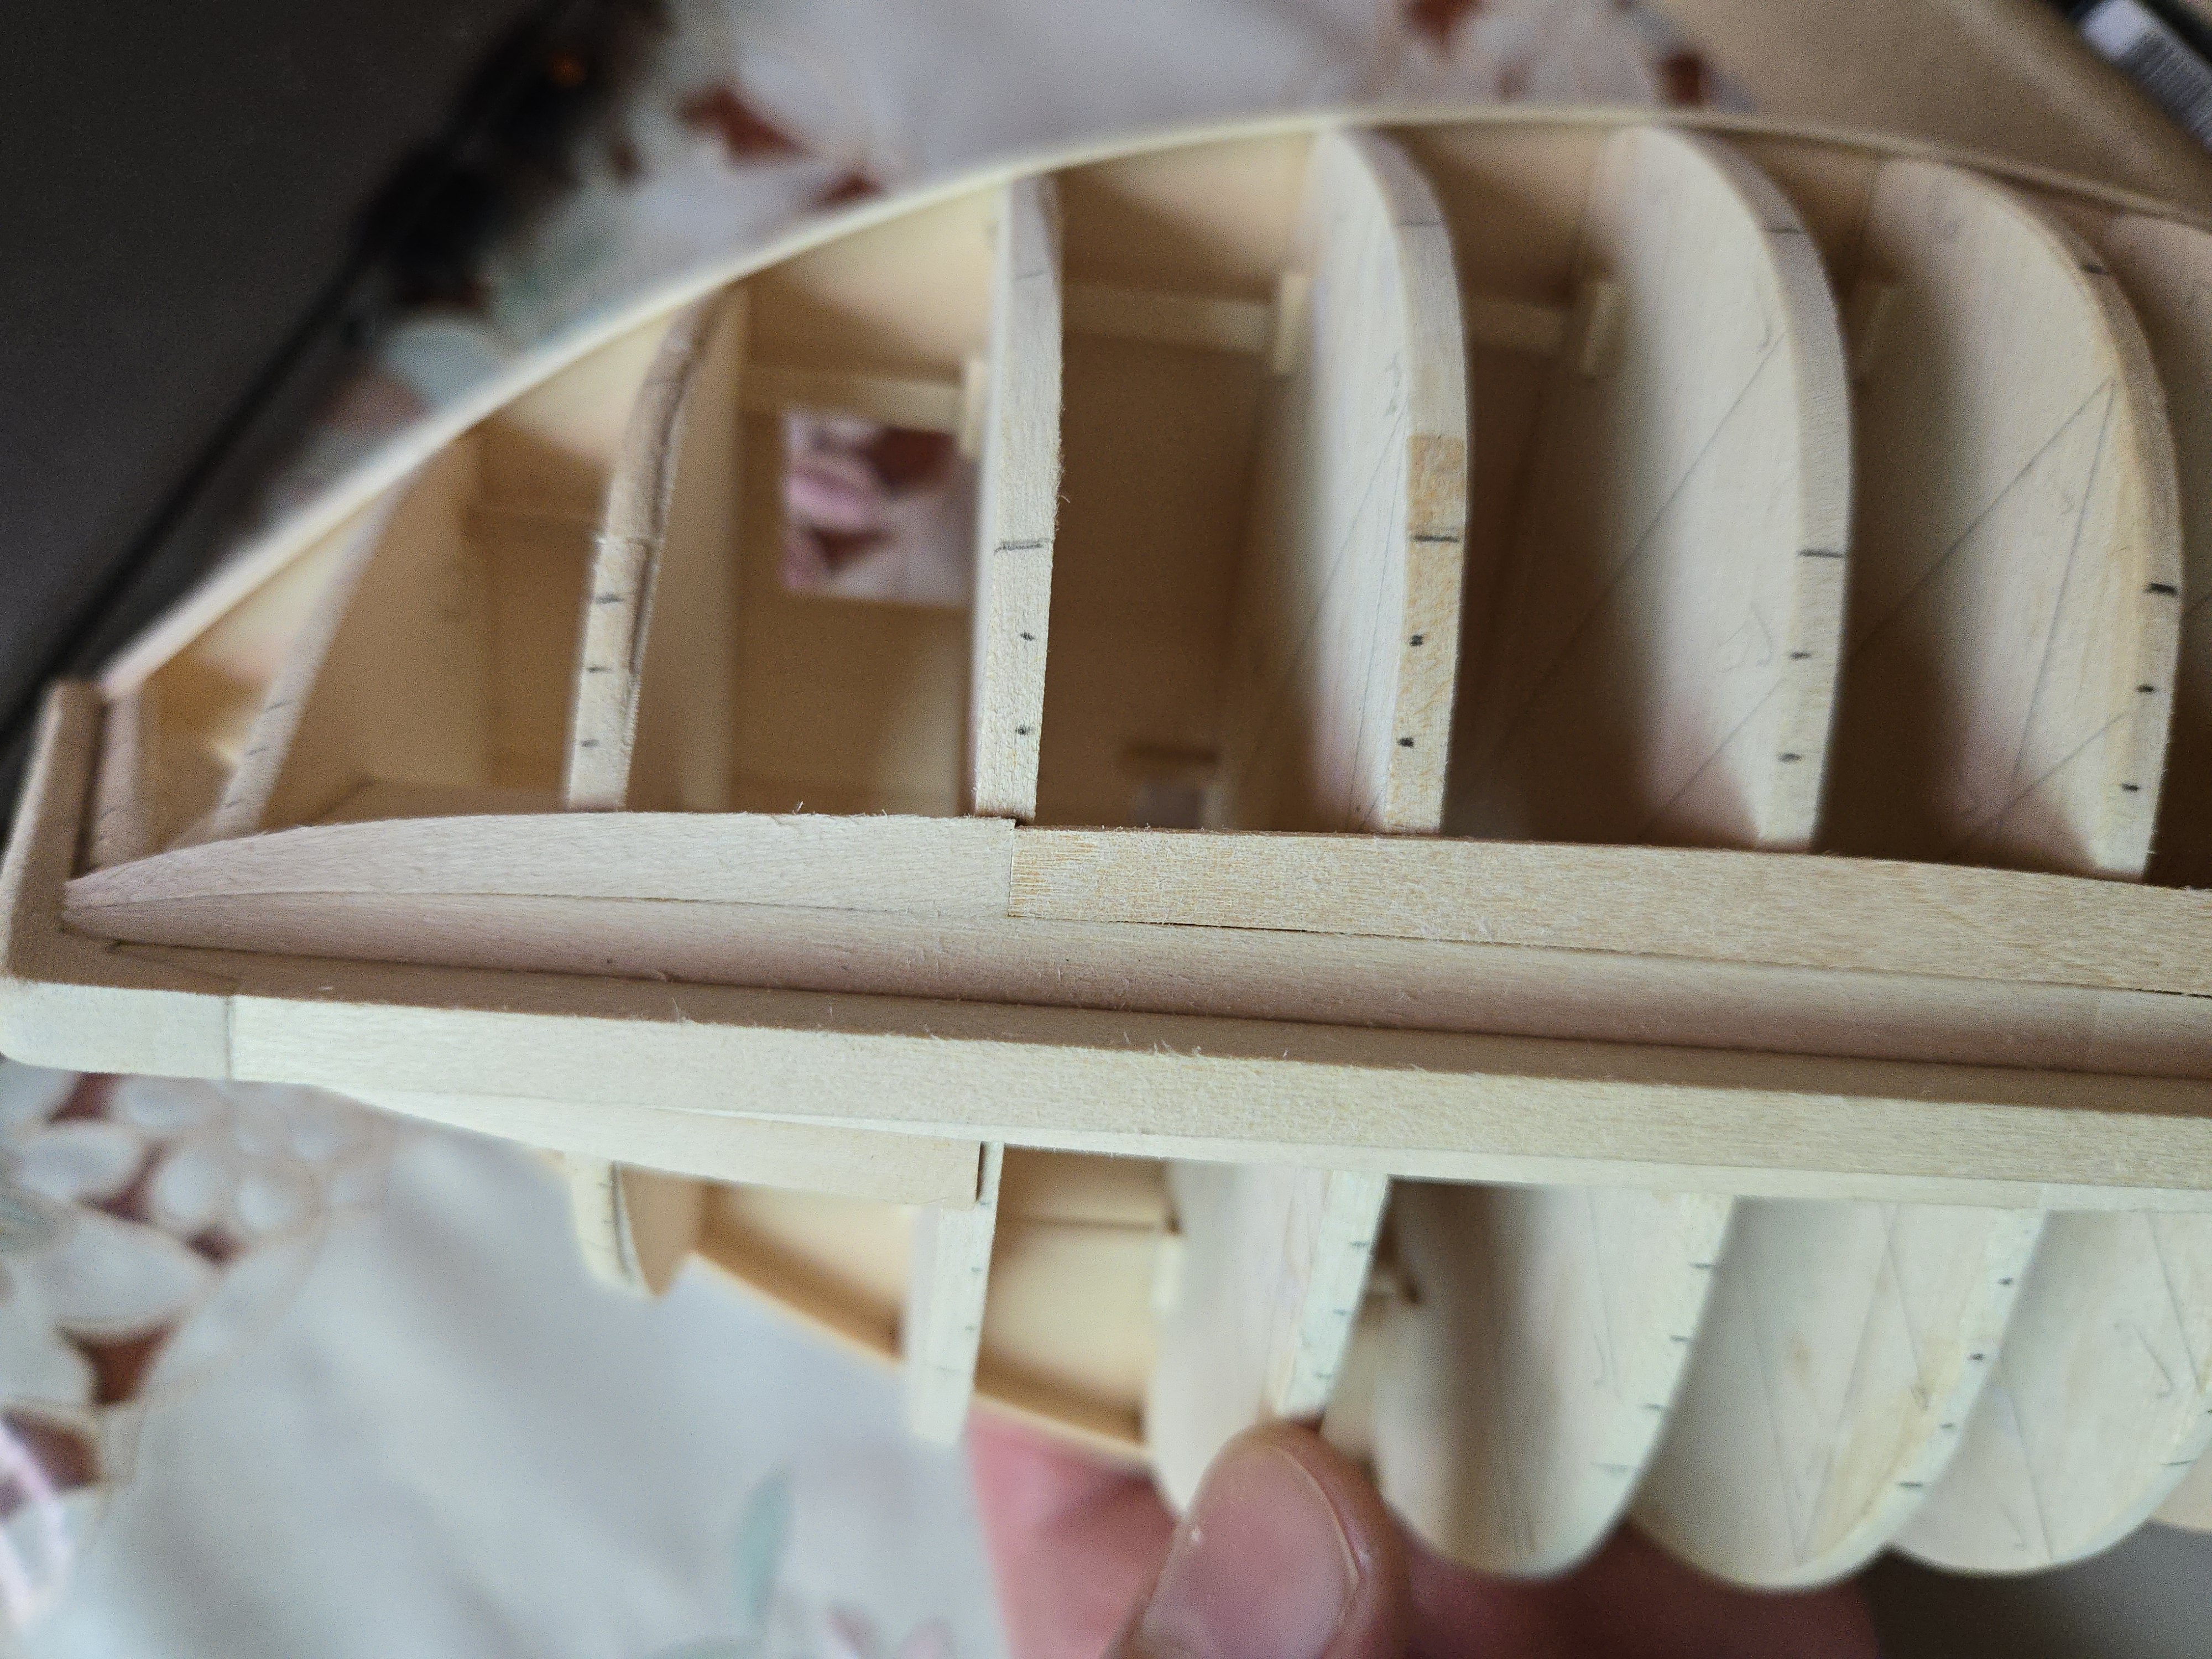
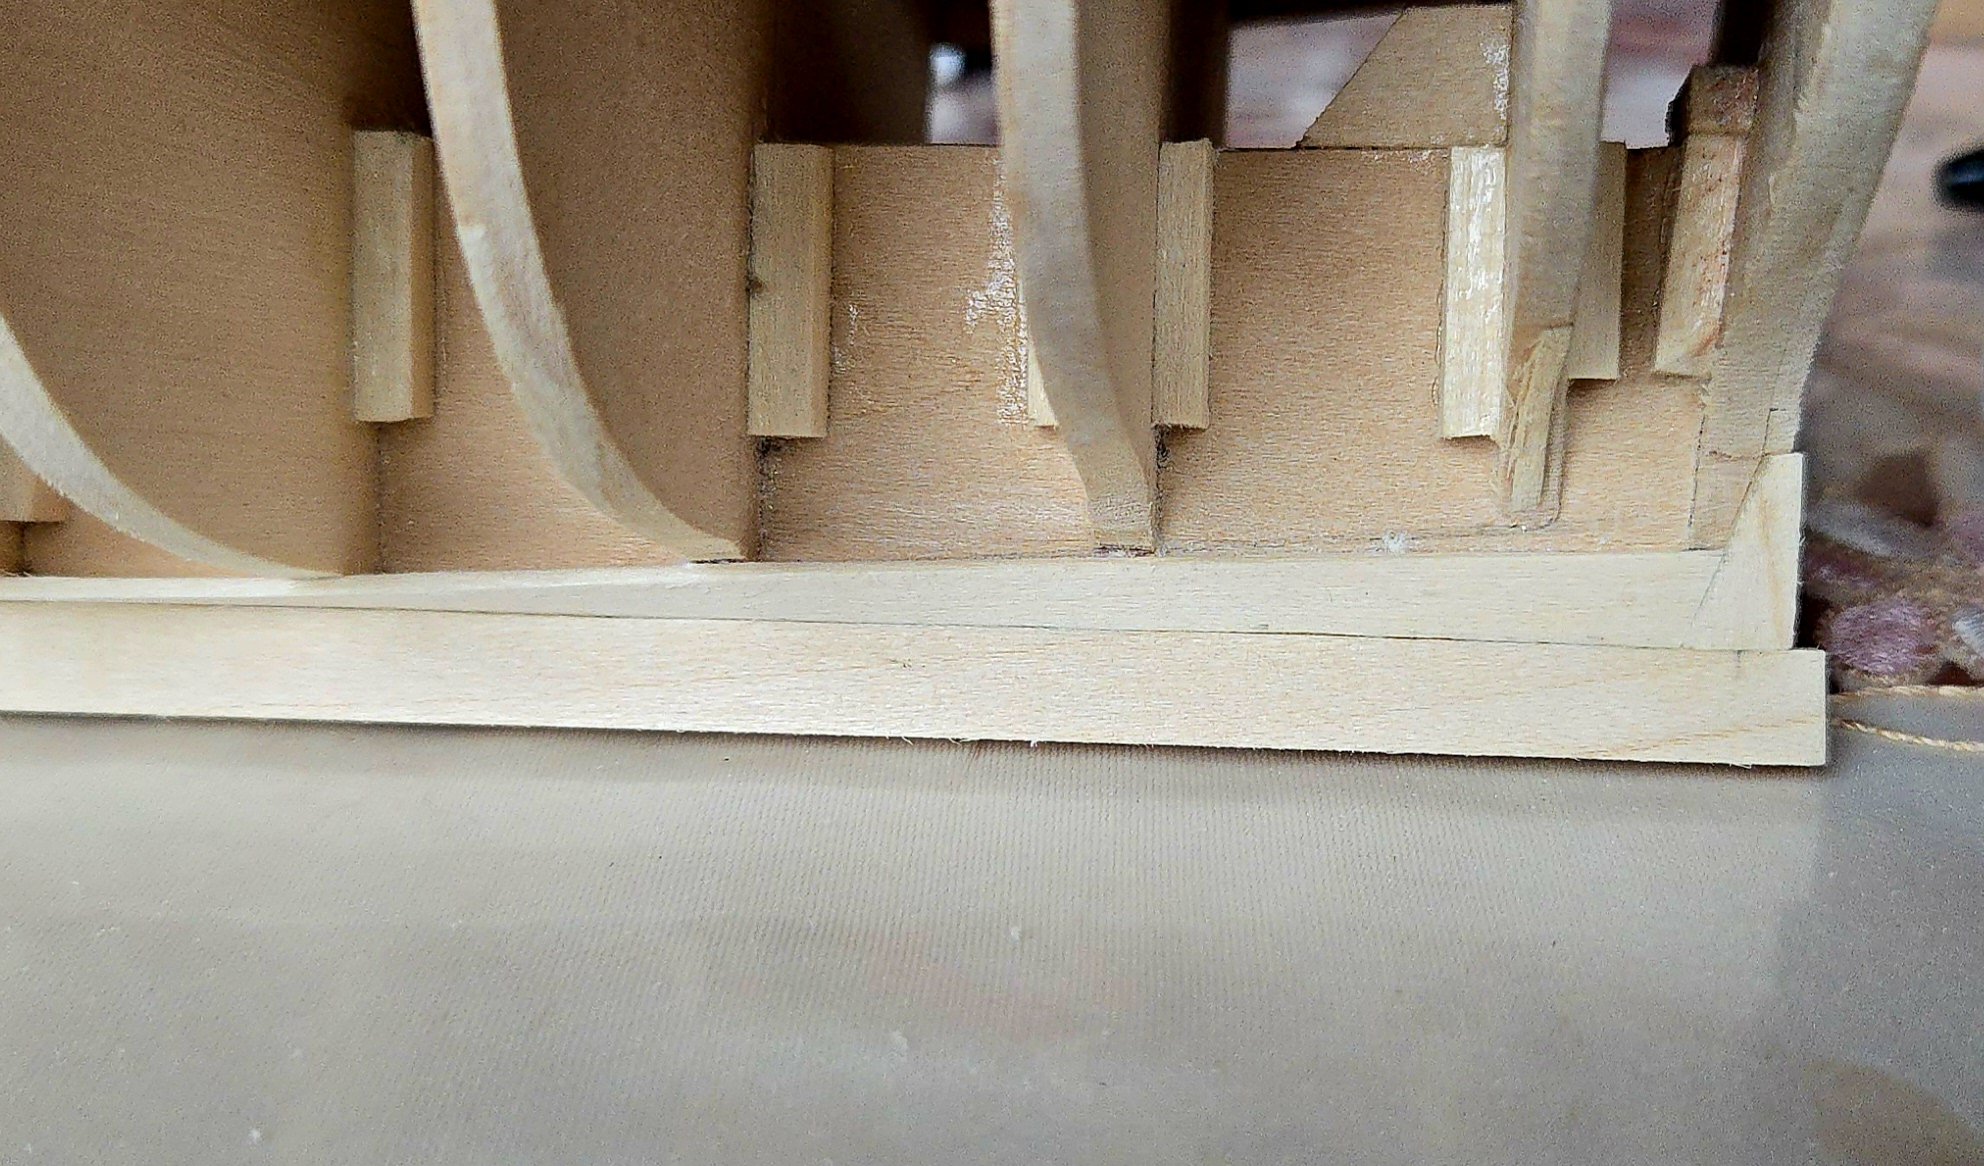
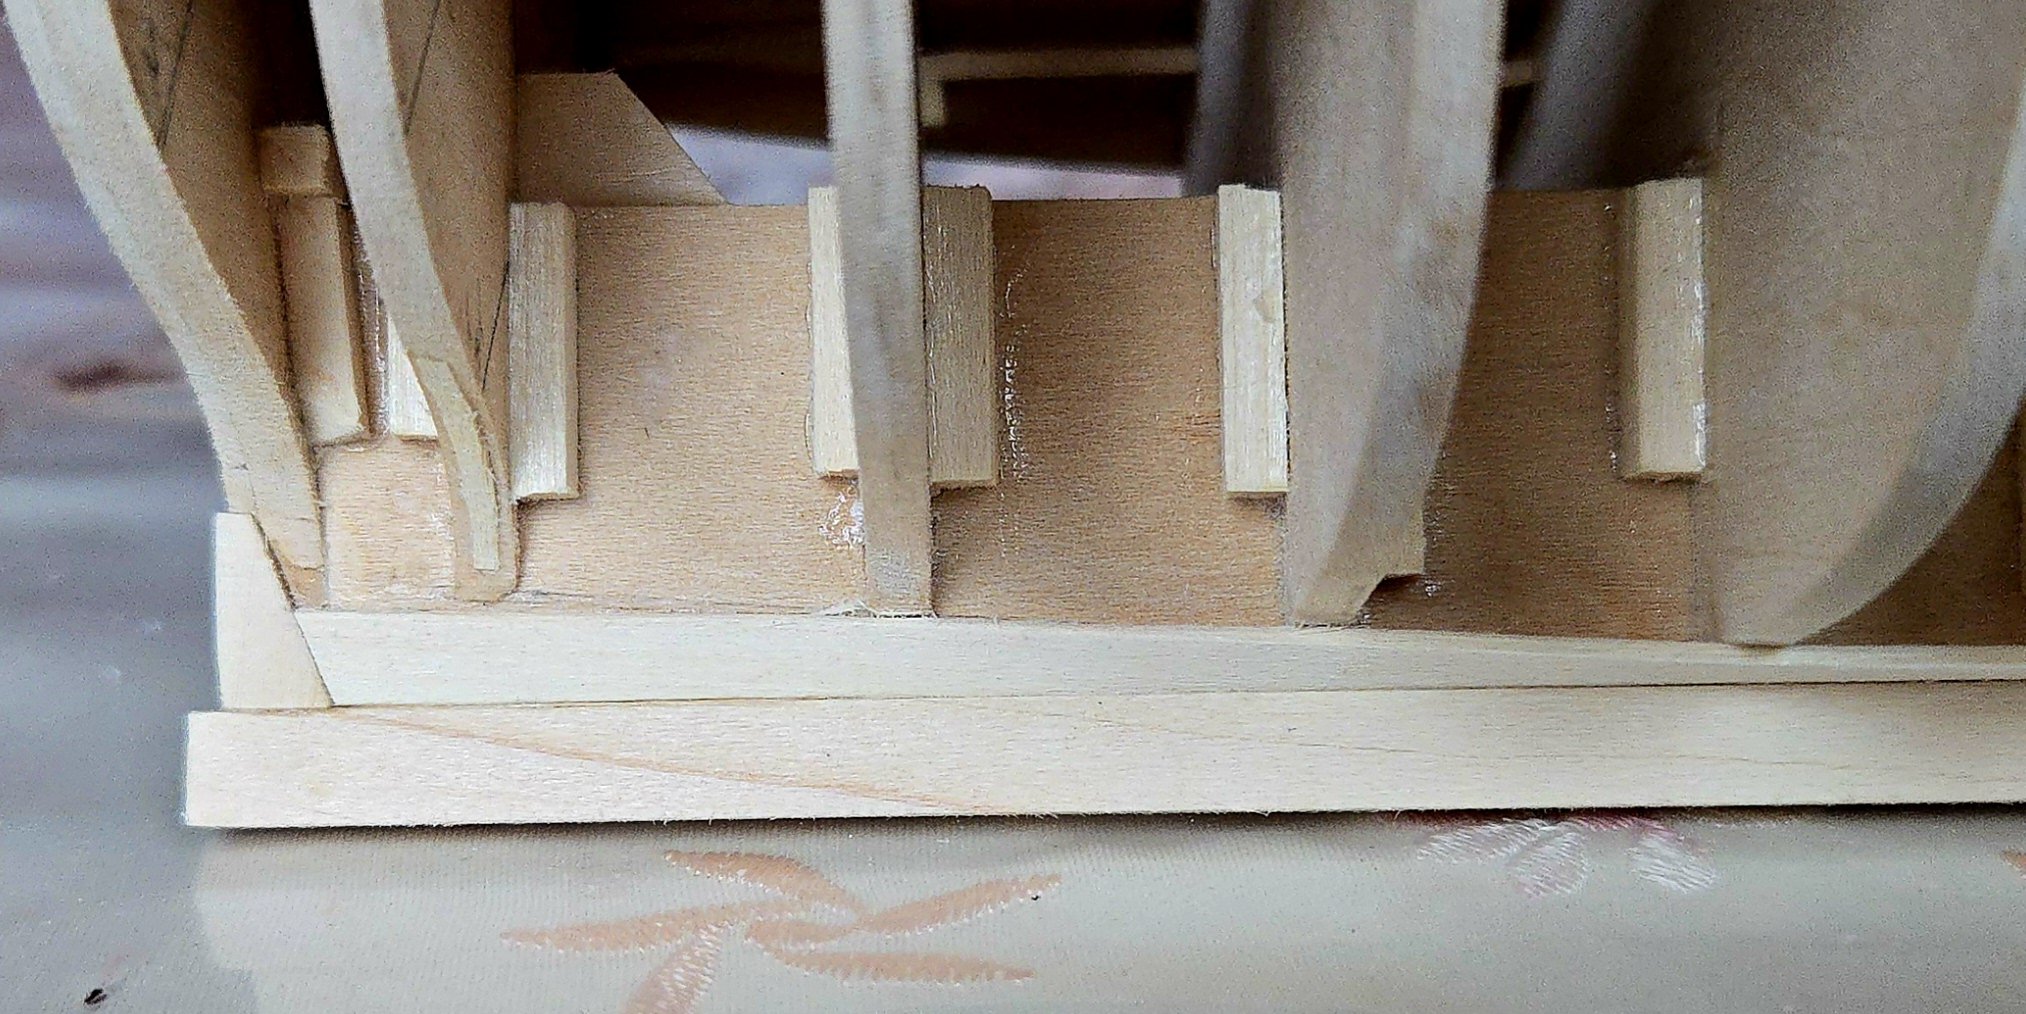
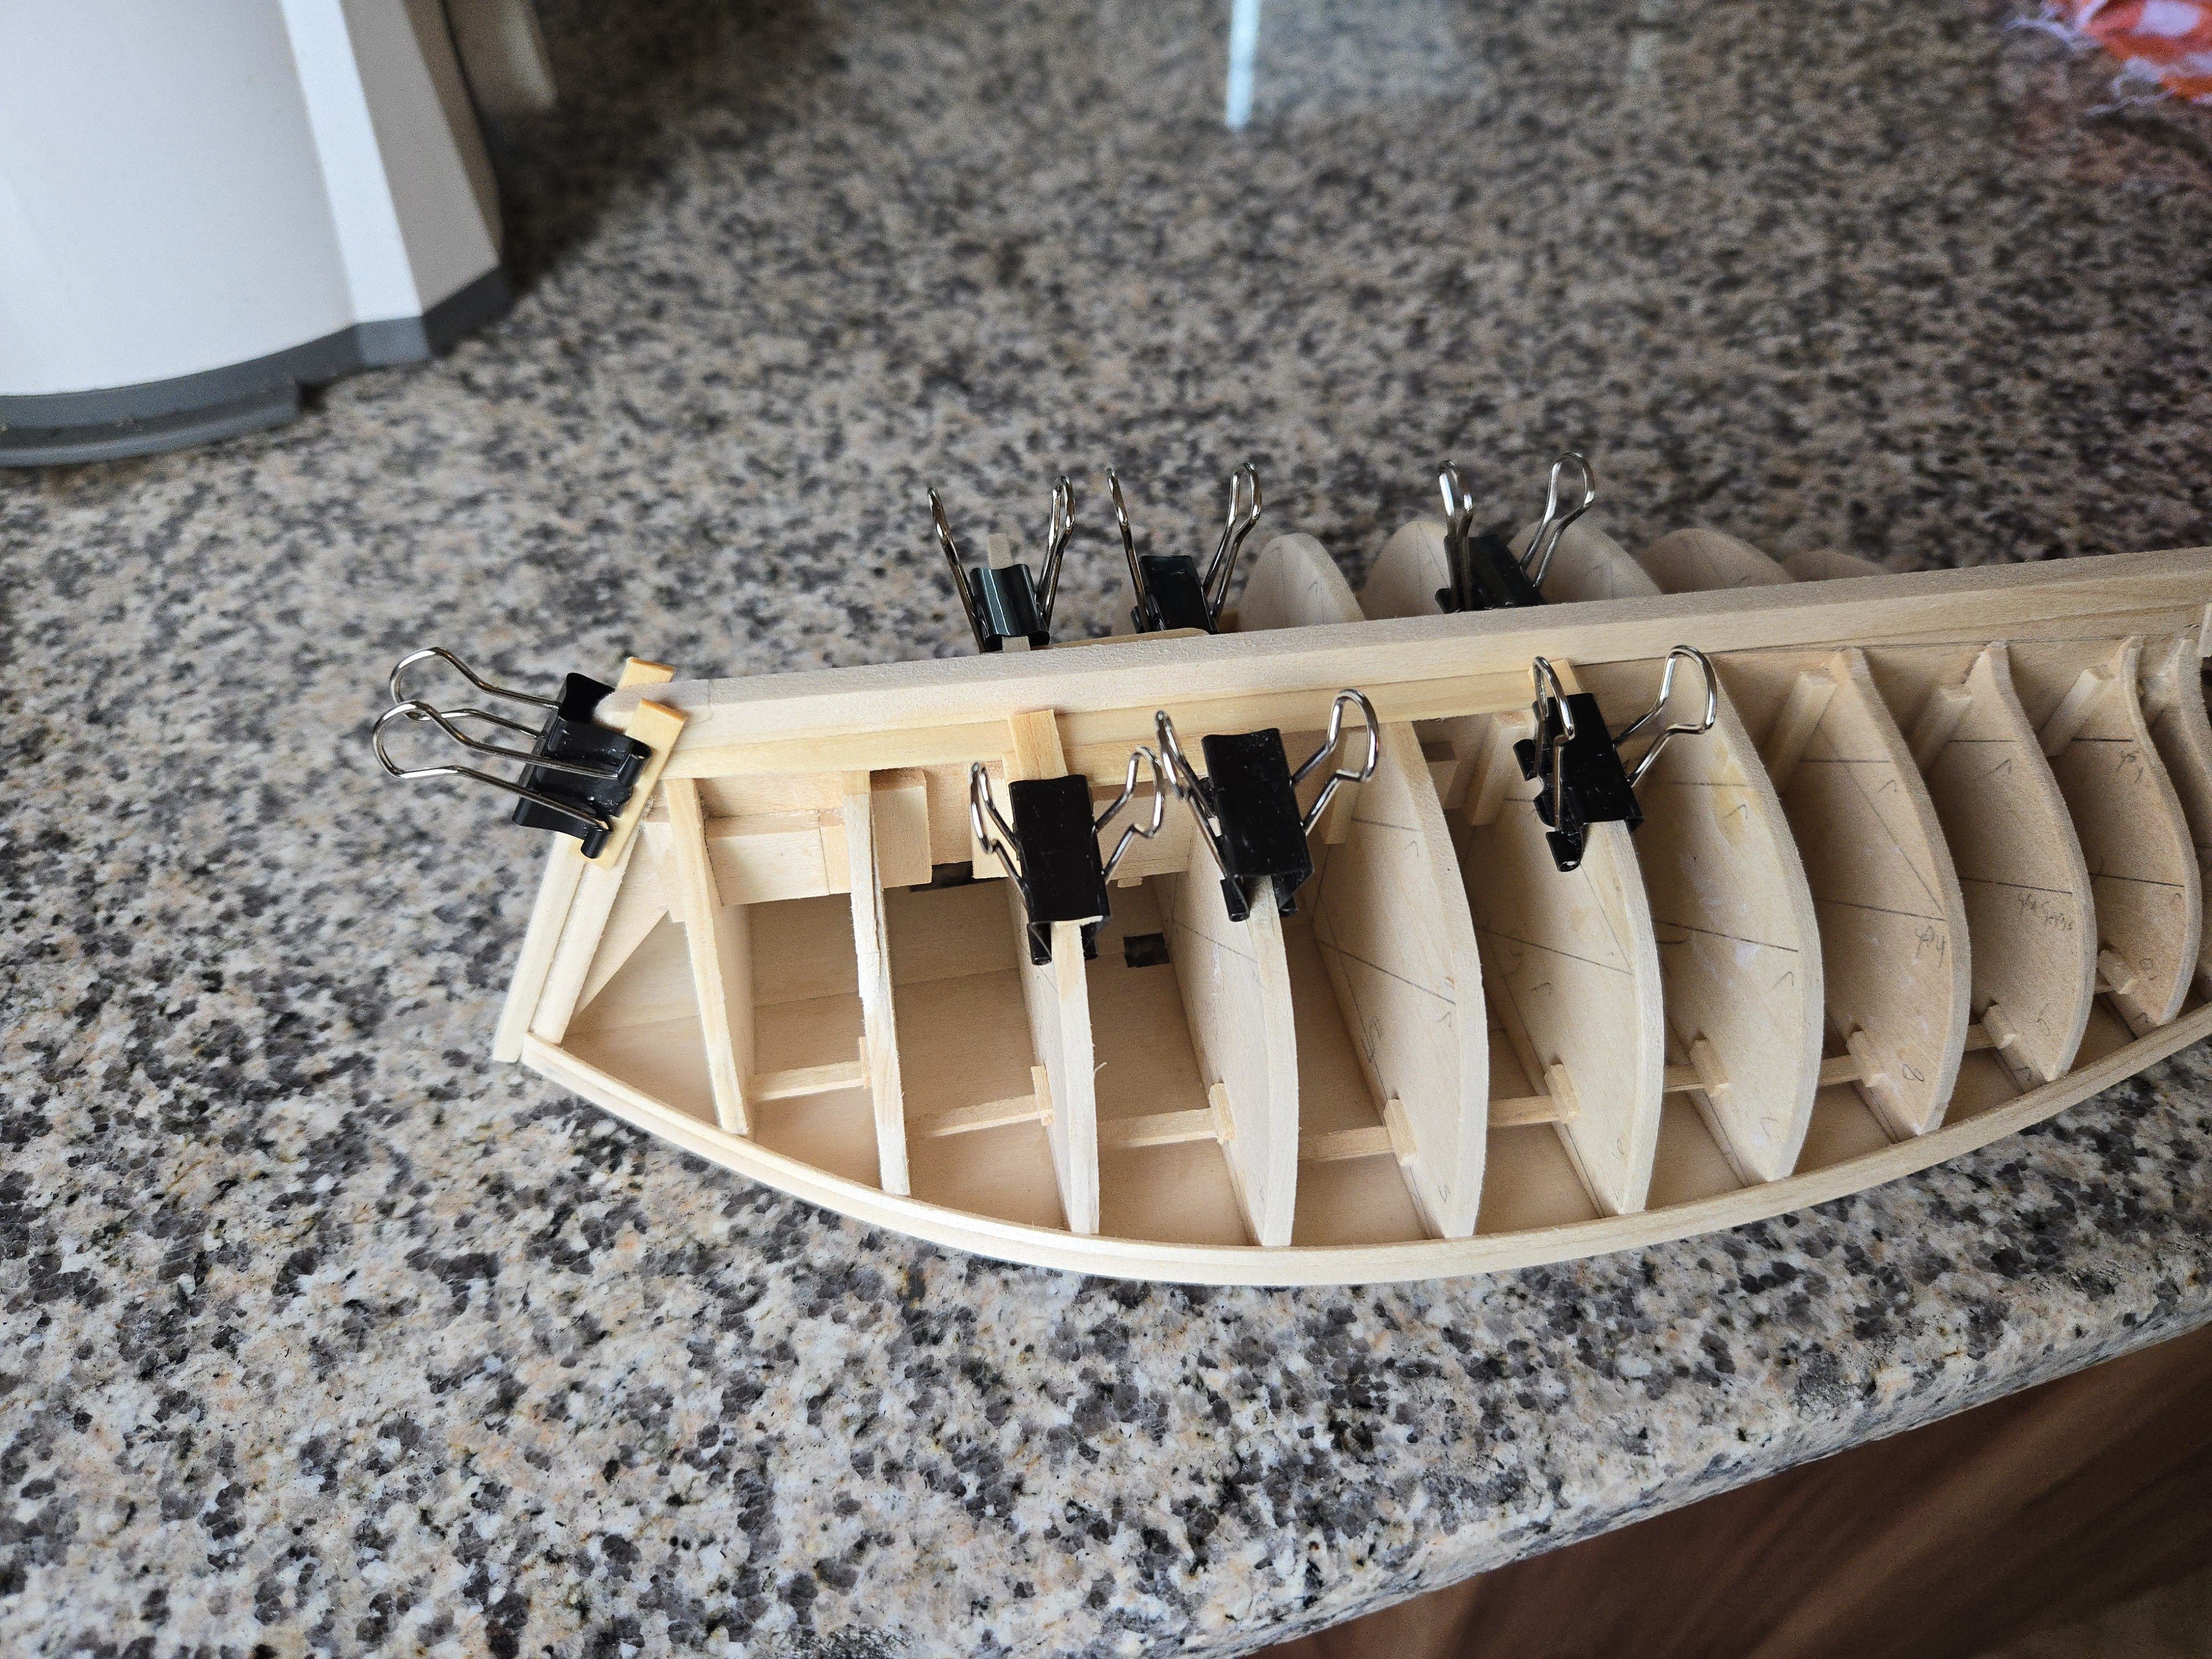
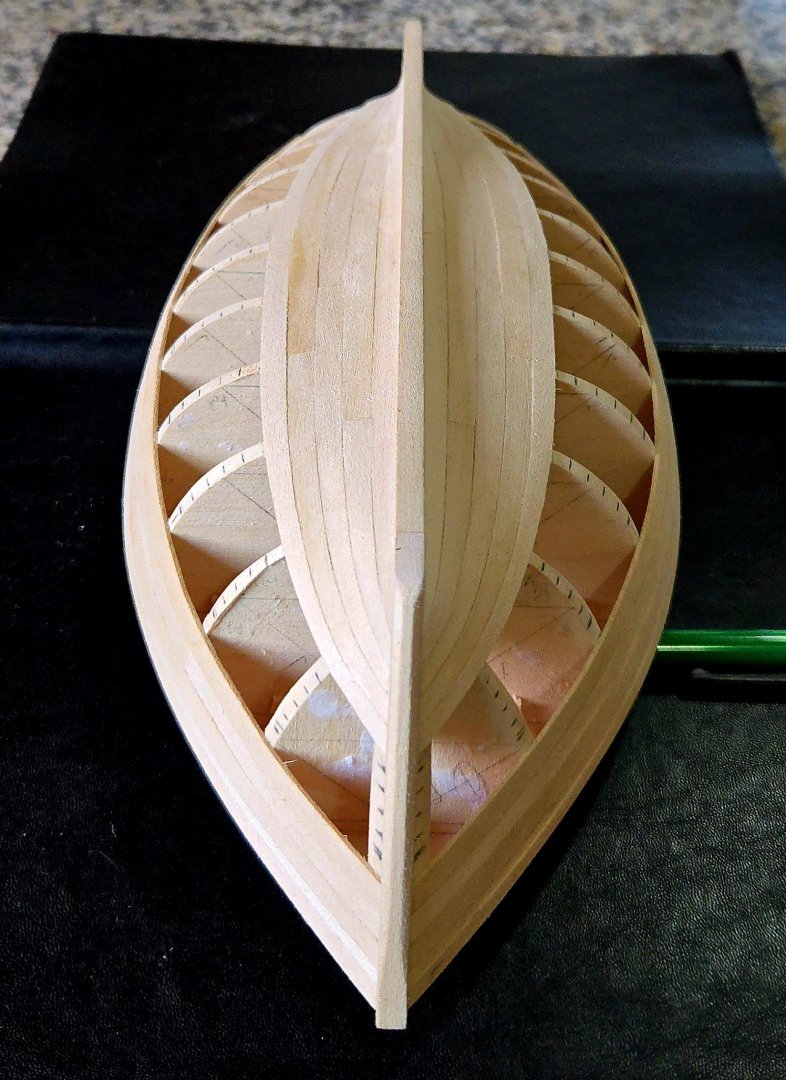
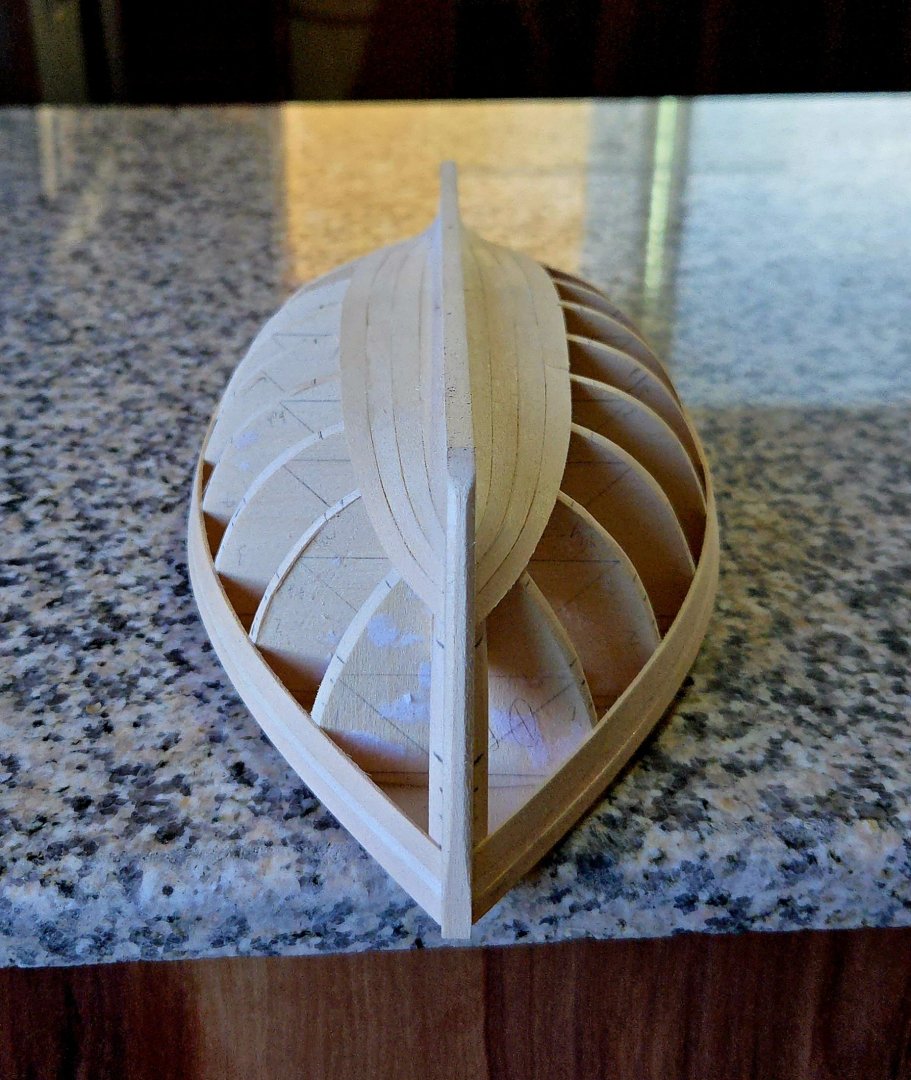
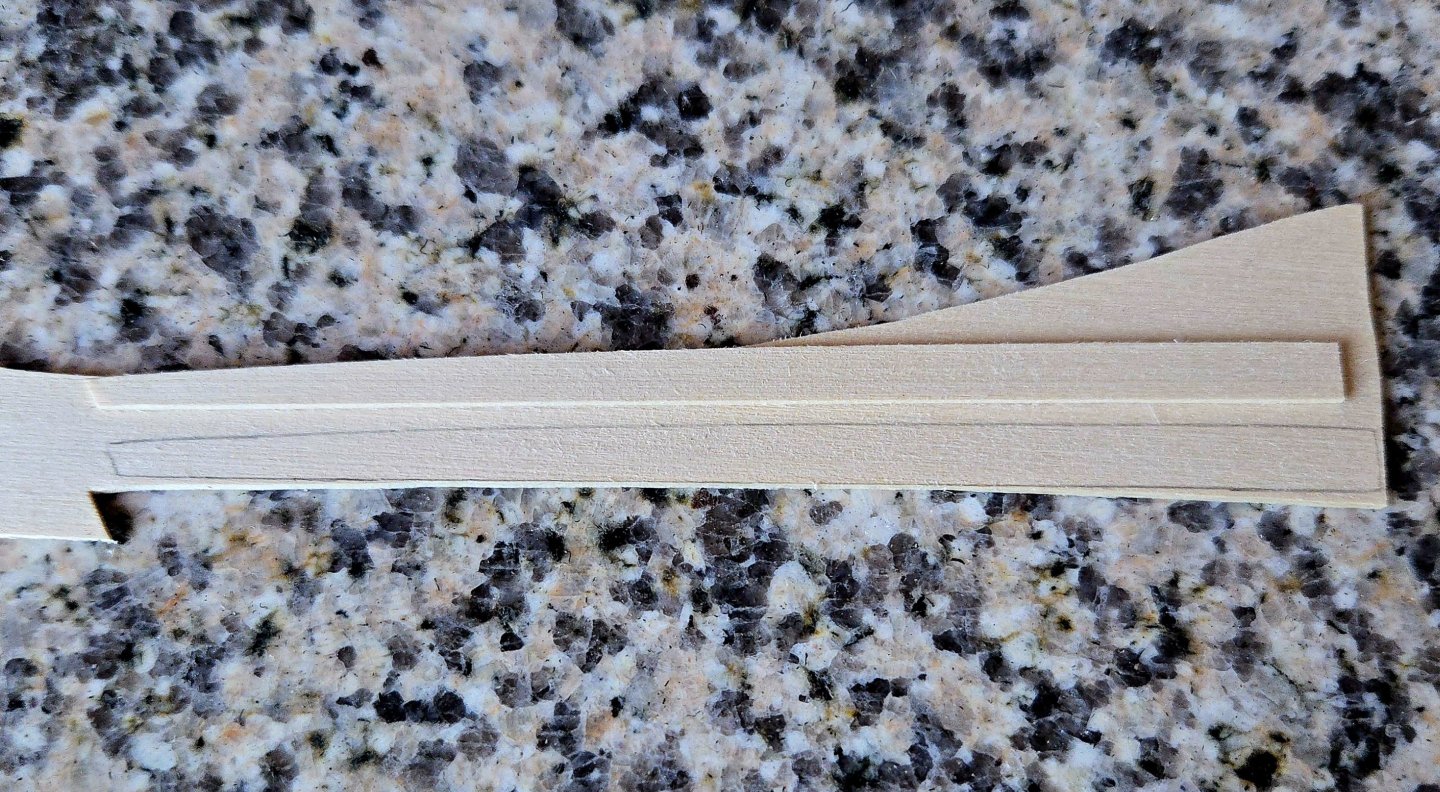
The garboard is now complete! After the fore plank, I turned to the aft plank, following the same procedure to make it. Interestingly, this time it did turn out to need a bit of a downward curve to it. After soaking it, clamping it in place, and allowing it to dry, I decided that it was a little wide between the 7th and 10th bulkheads, so I sanded it down slightly there so it would better form a nice curve. Finally I was able to glue it into place. It looks good from above (well, below relative to the boat itself), but perhaps a little odd from the side. This is because, based on photos, the garboard needs to end halfway up the sternpost. I could have more aggressively narrowed the plank around the 9th bulkhead, but I think this would have resulted in an odd shape when viewed from other angles. In any case, the hull will be painted. Next up: working out the planking bands.


- 312 replies
-
- 8
-
-

-
- Chile
- Latin America
- (and 6 more)
-
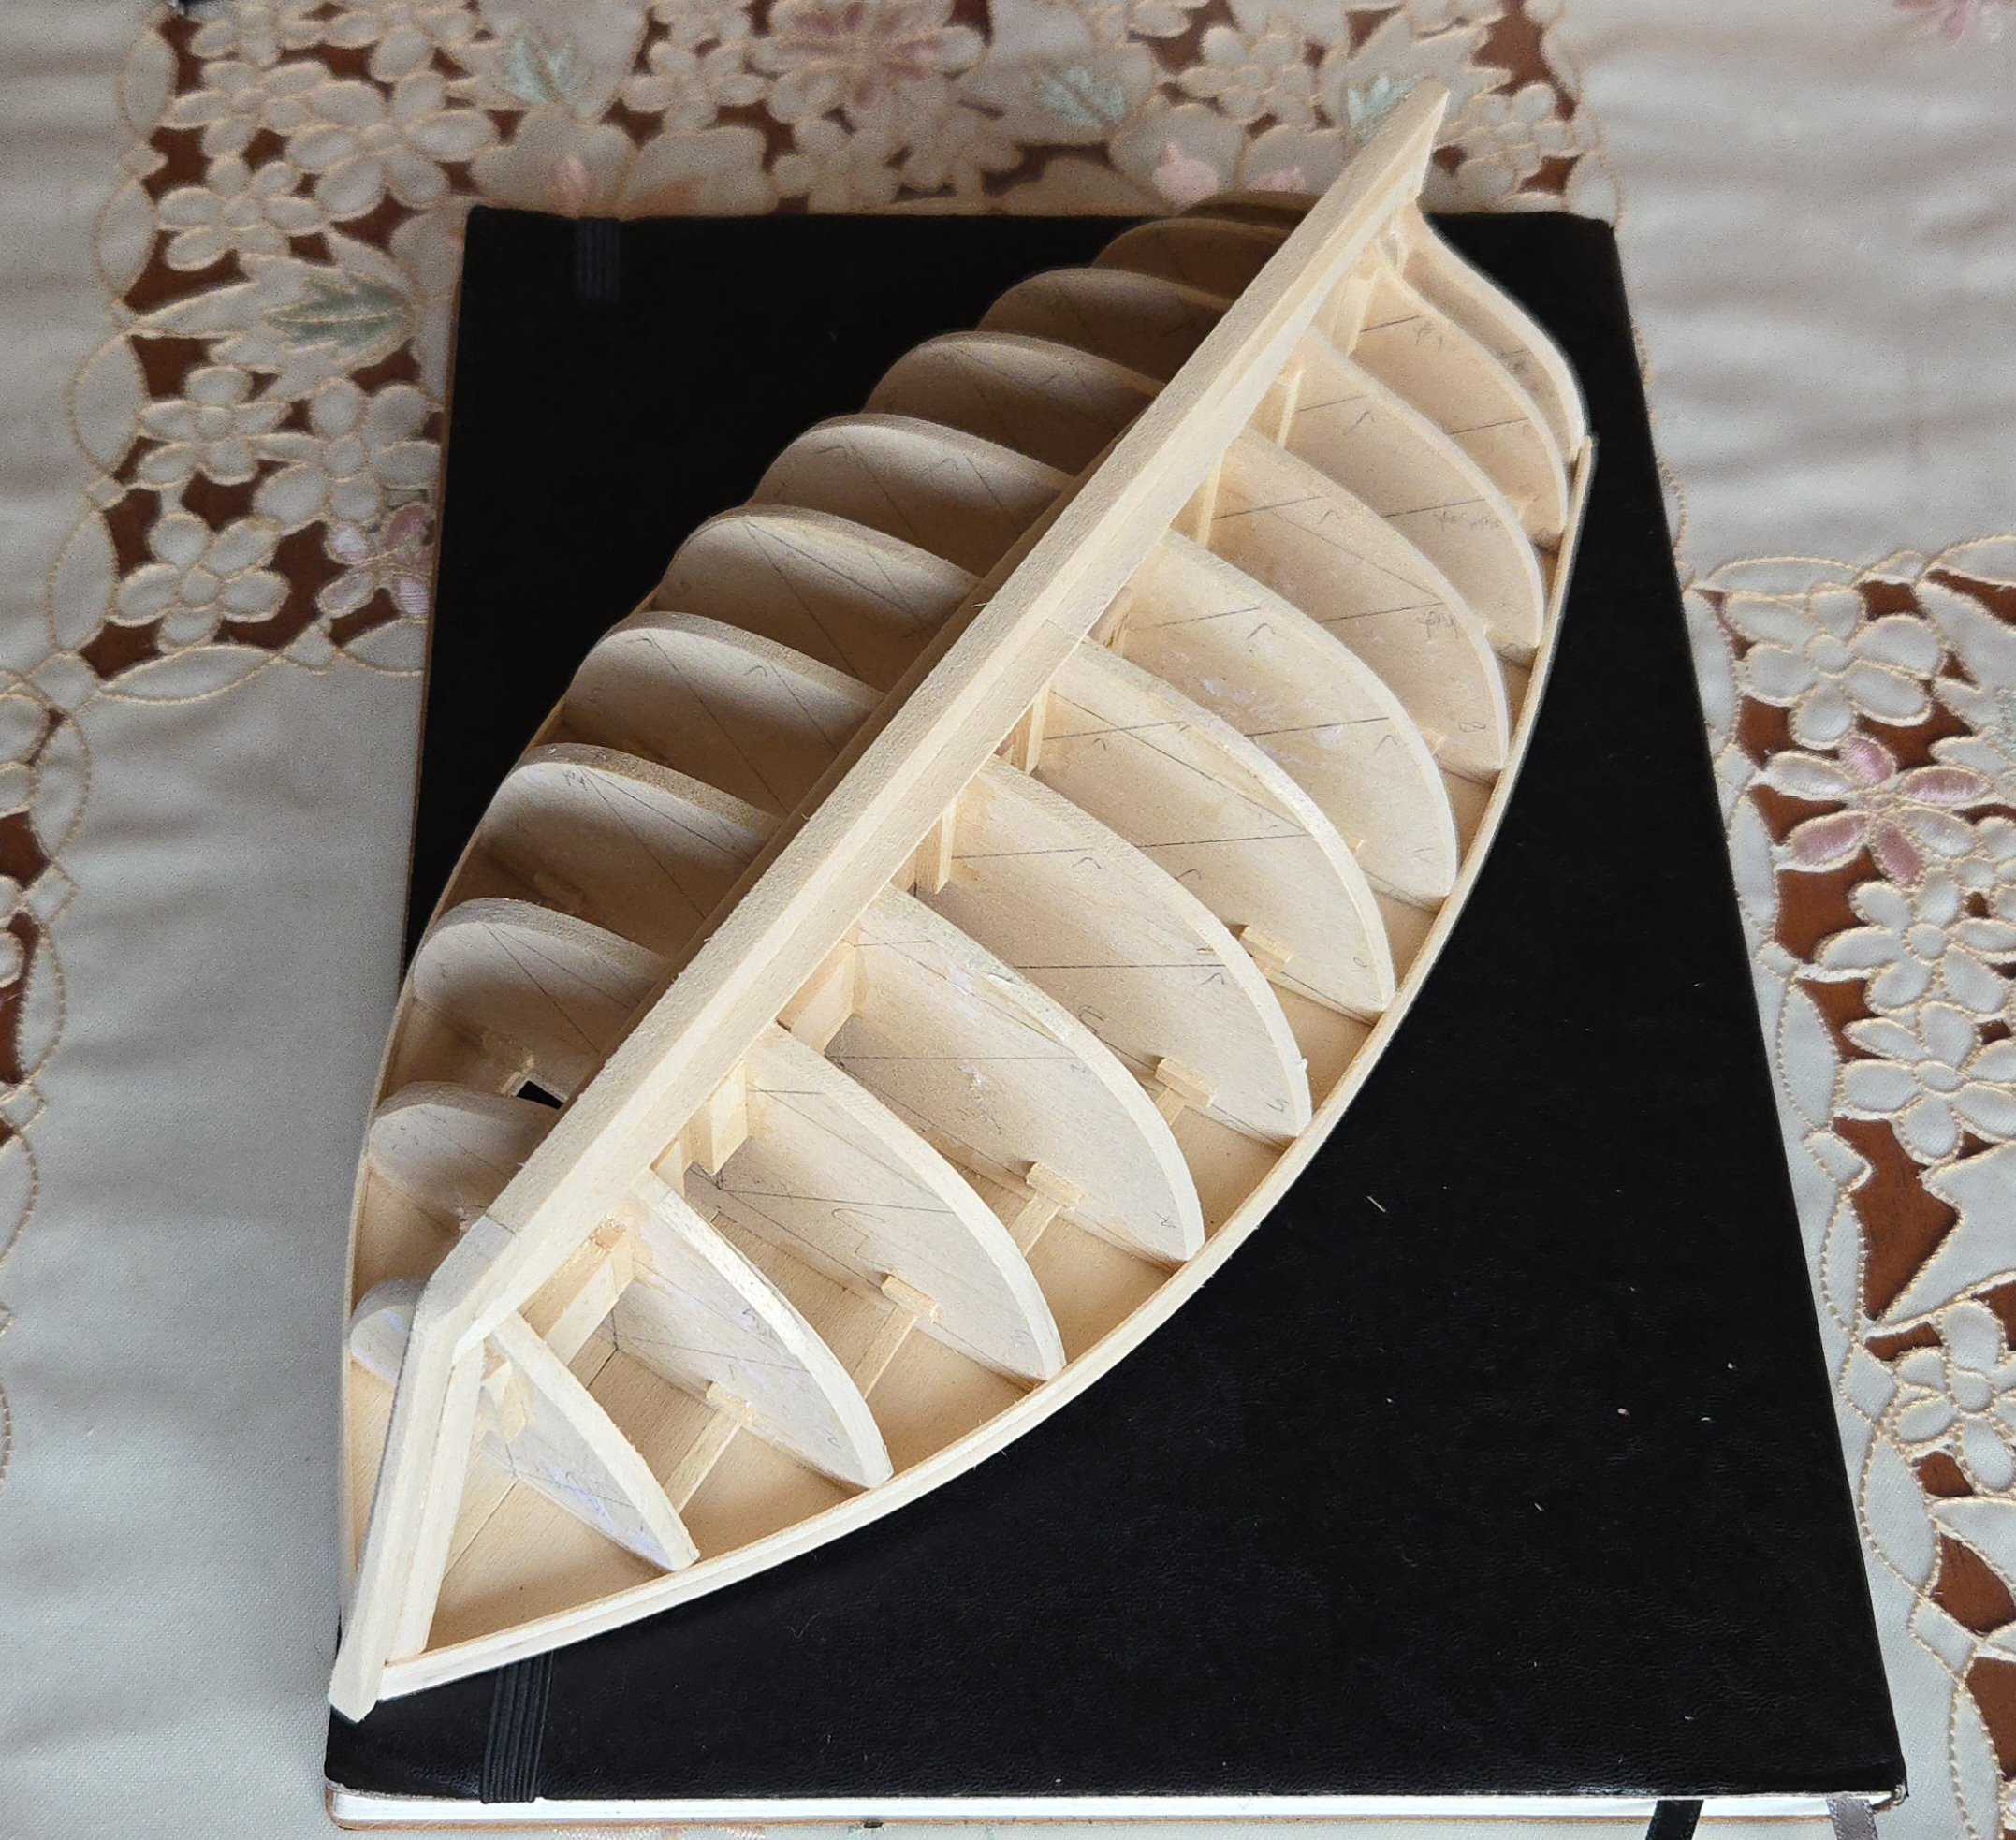
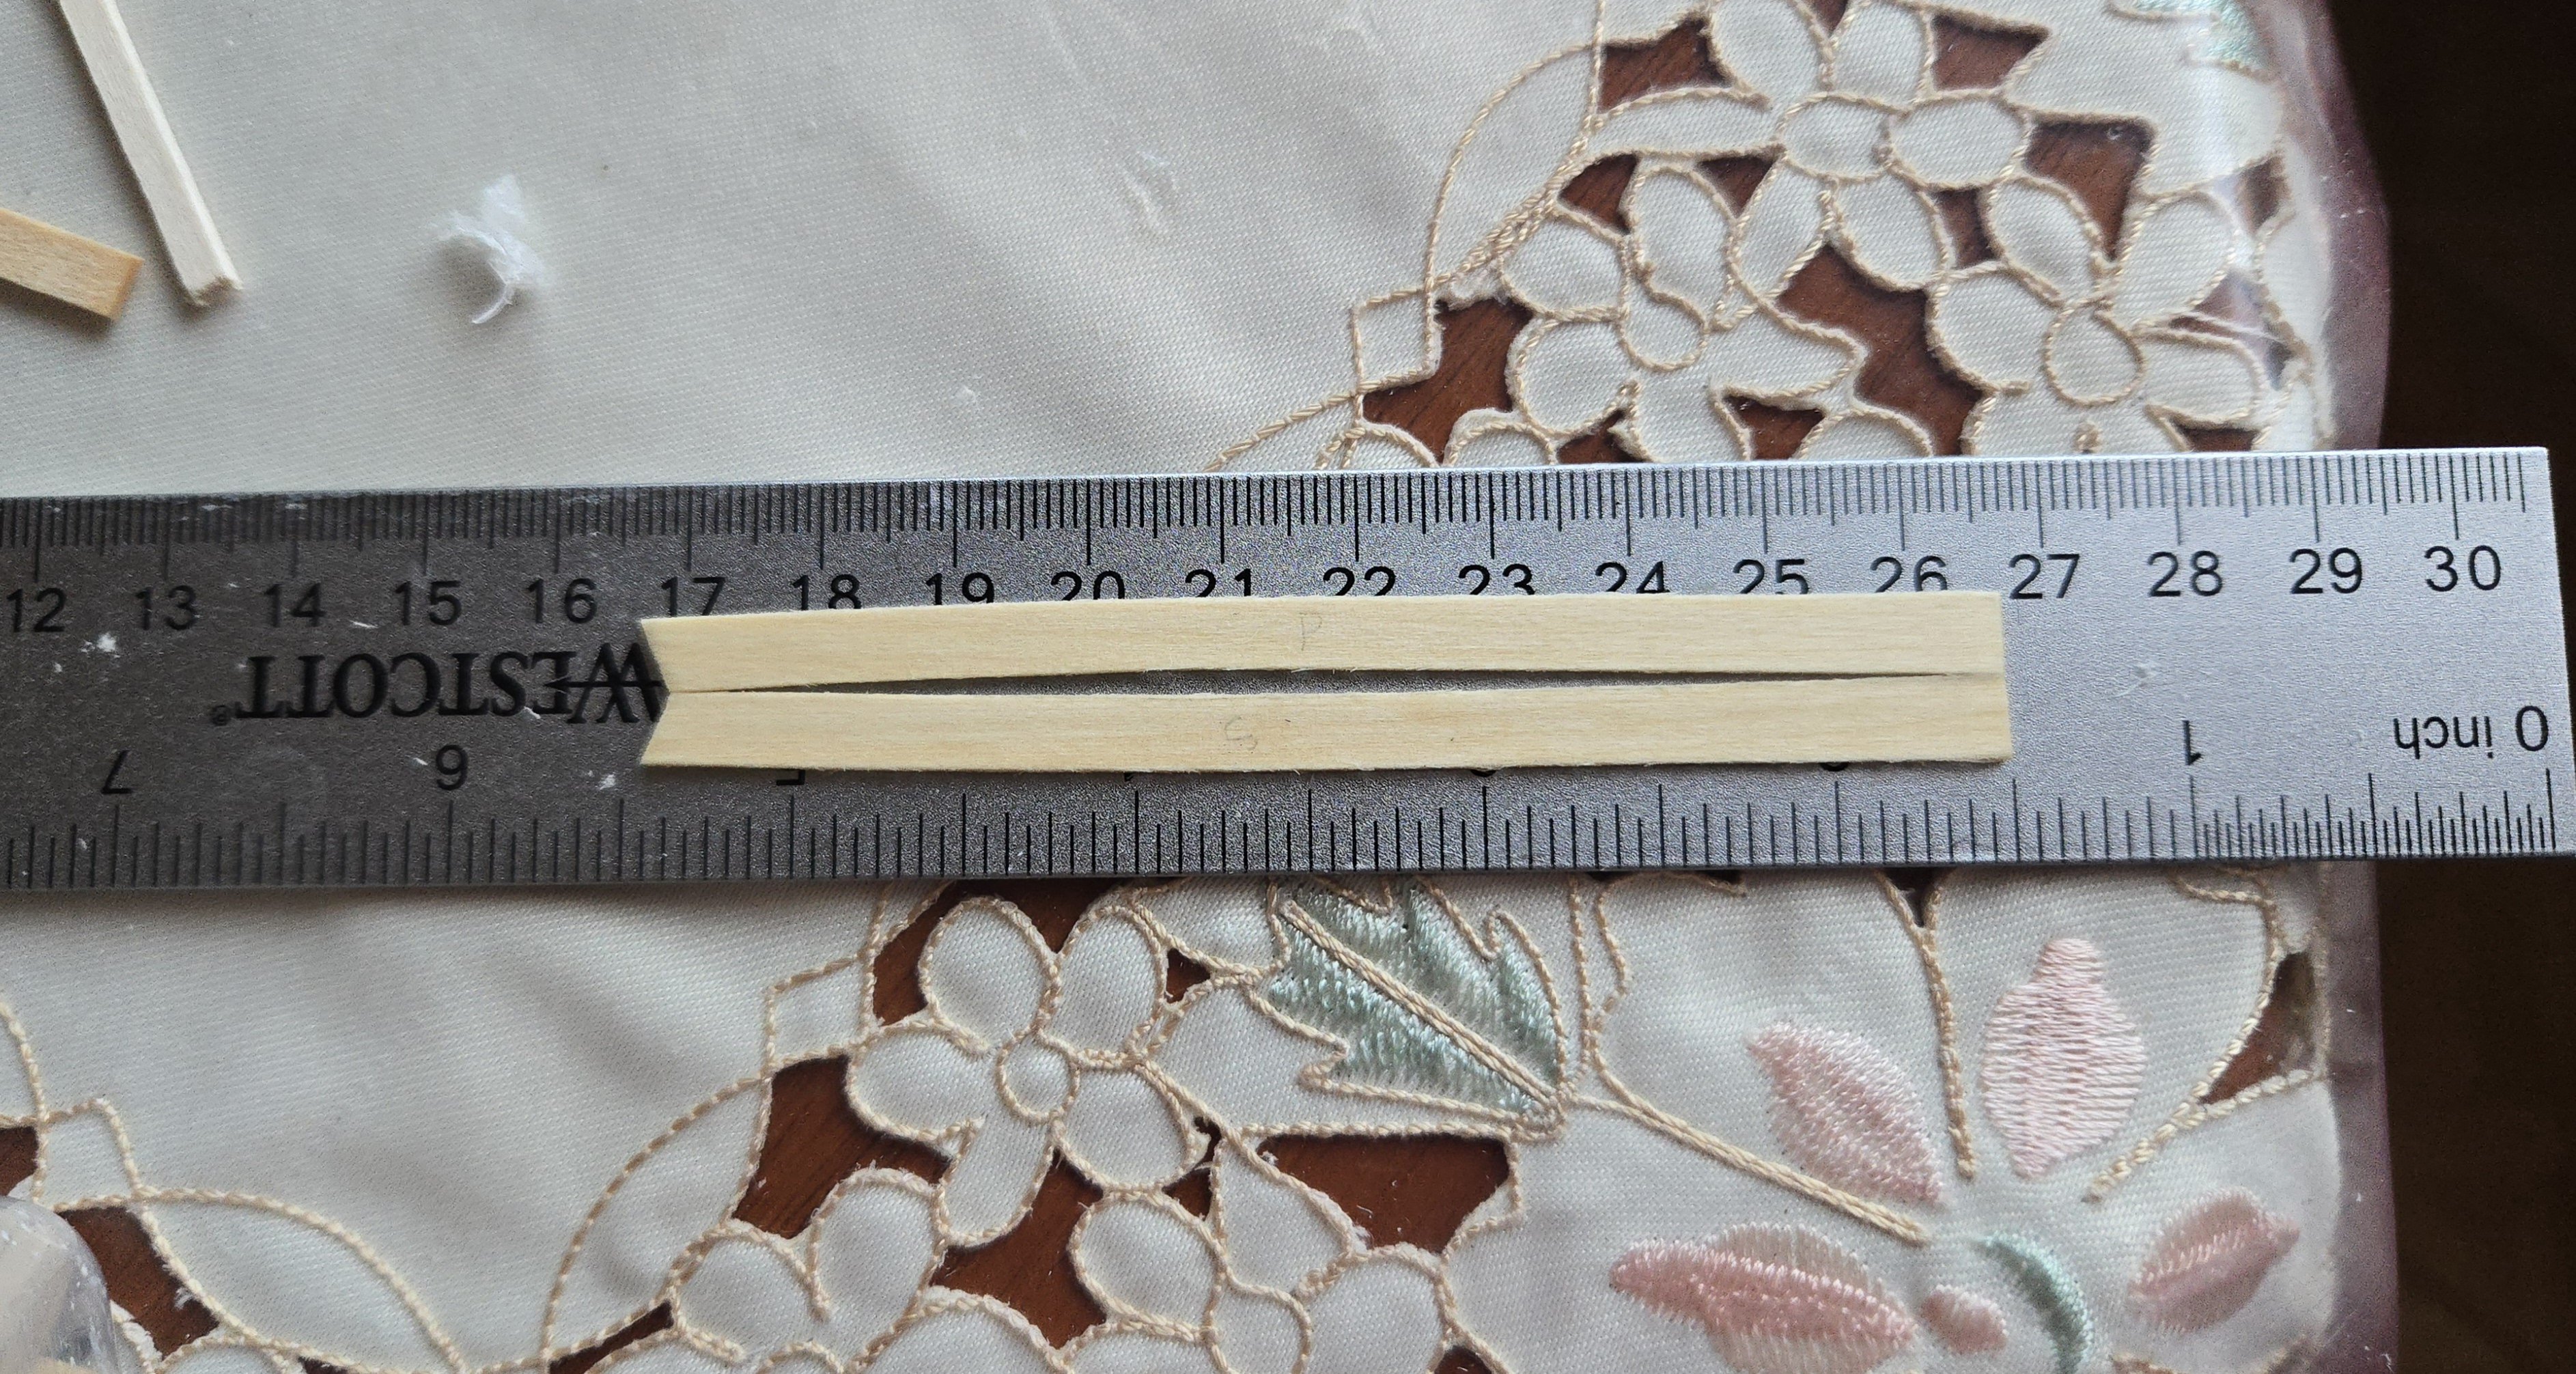
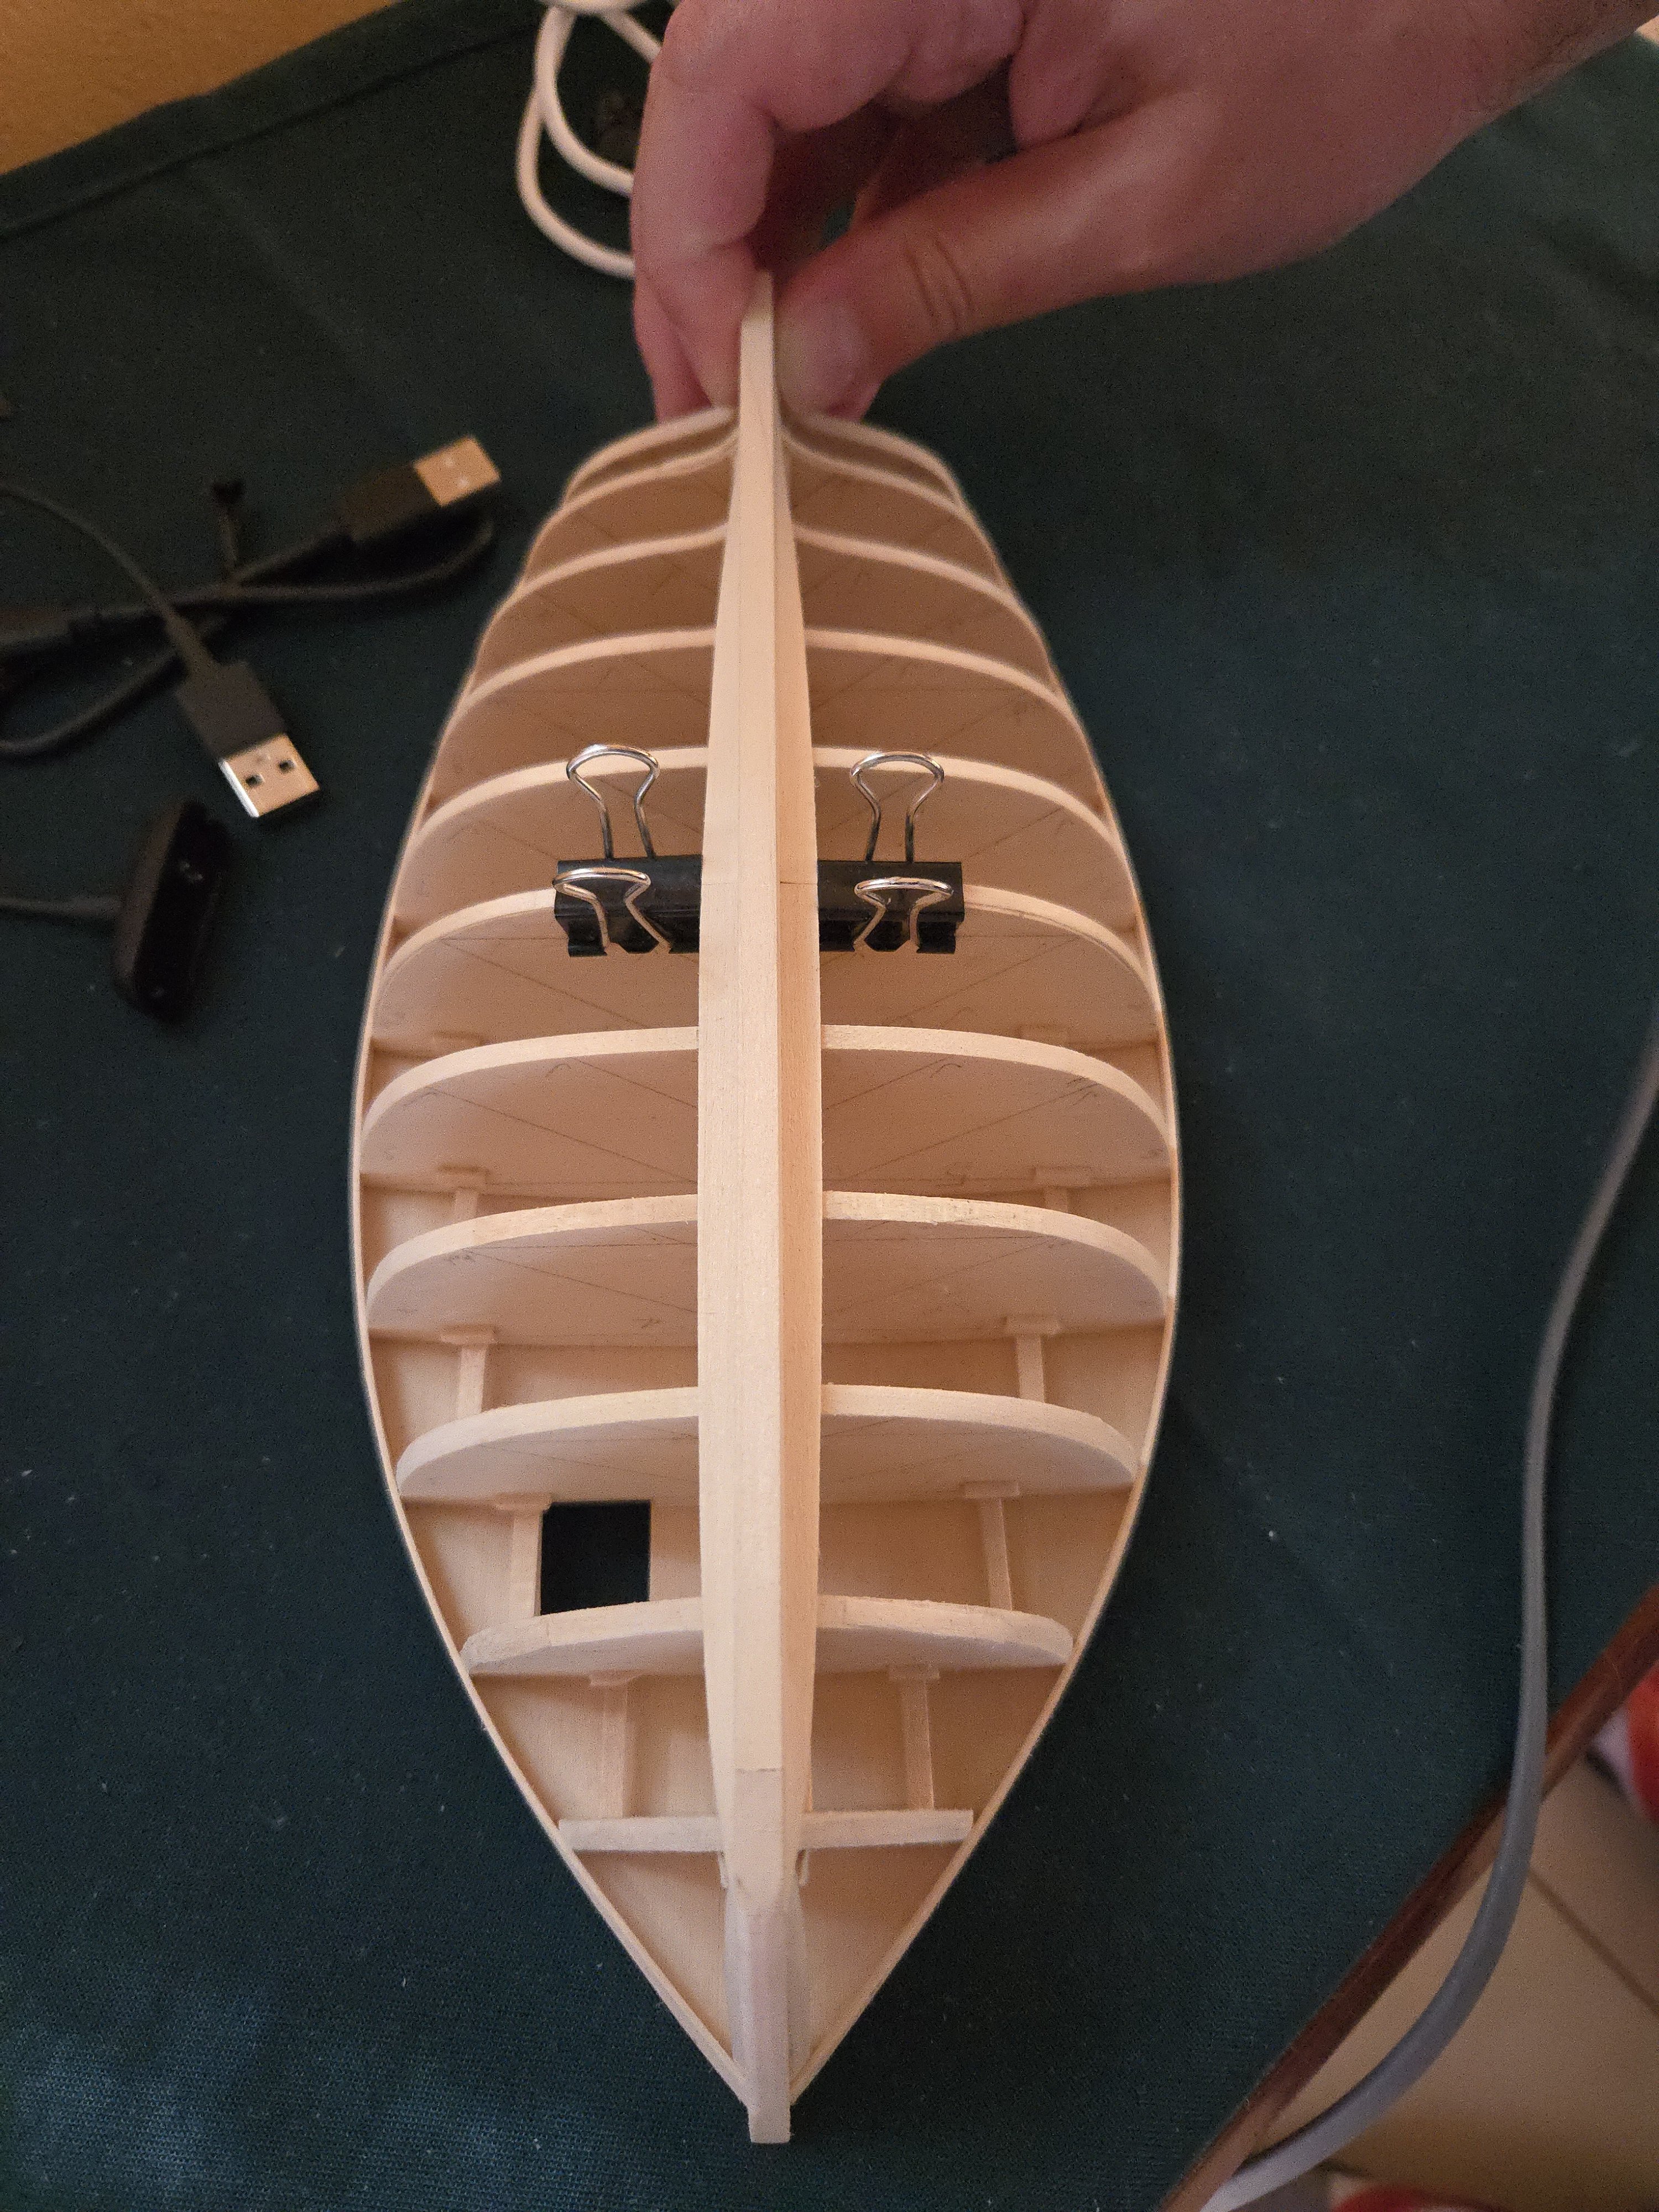
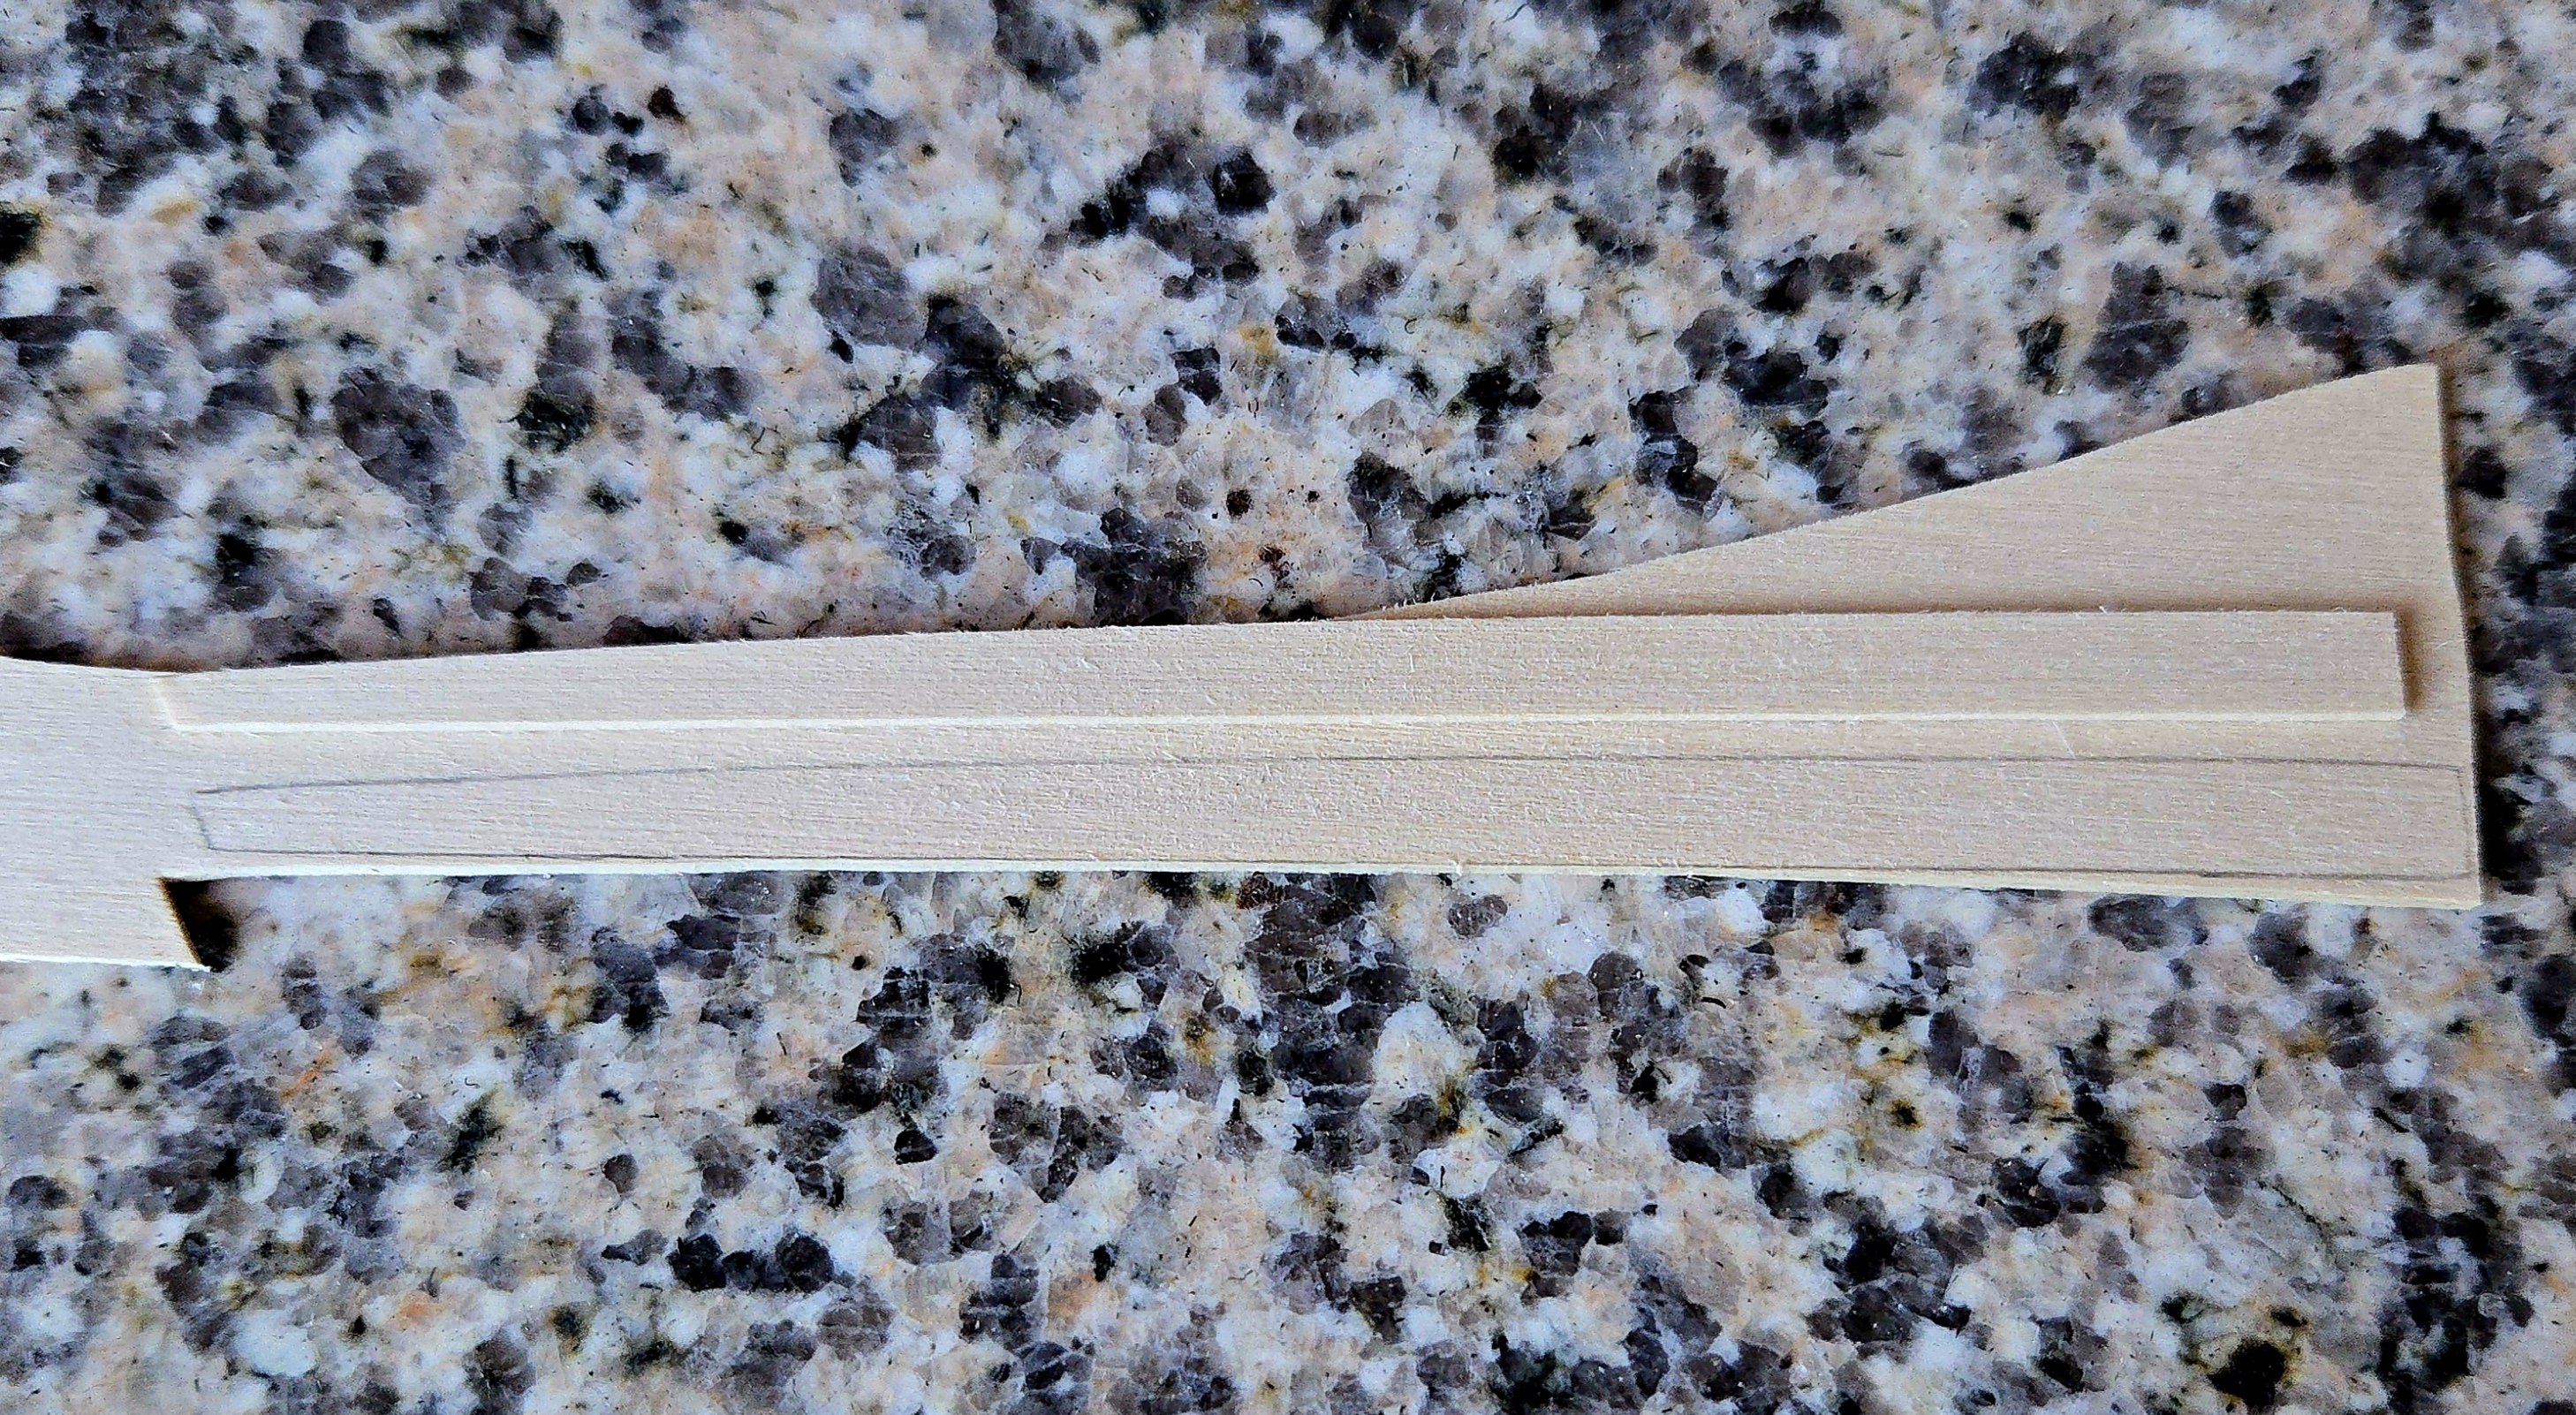
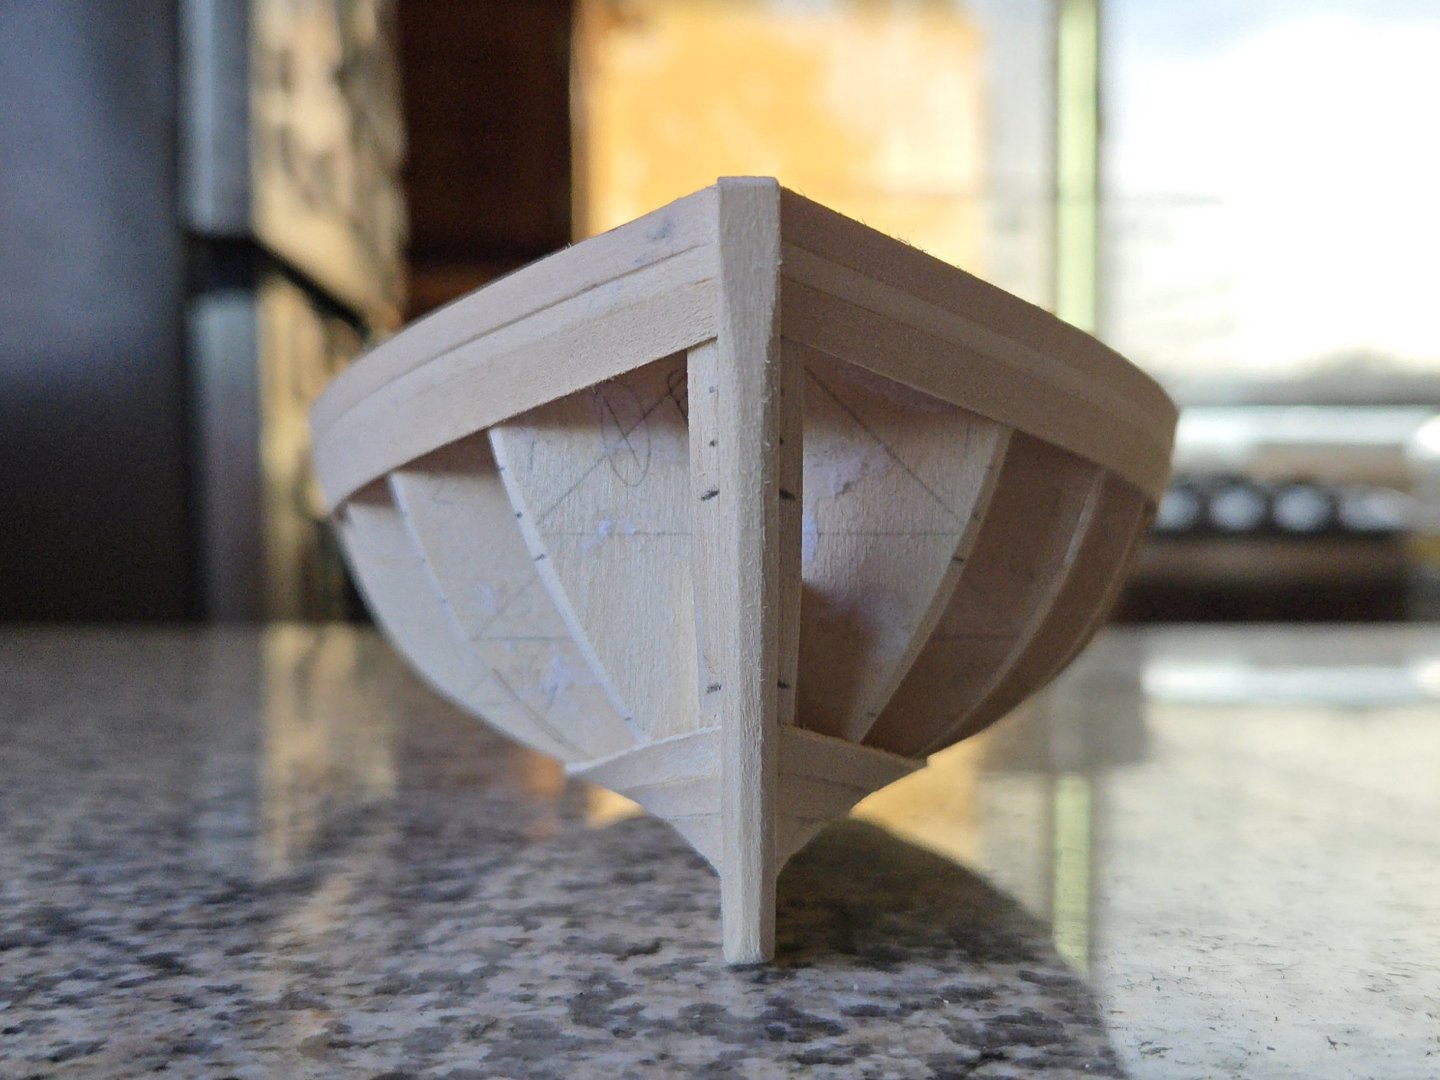
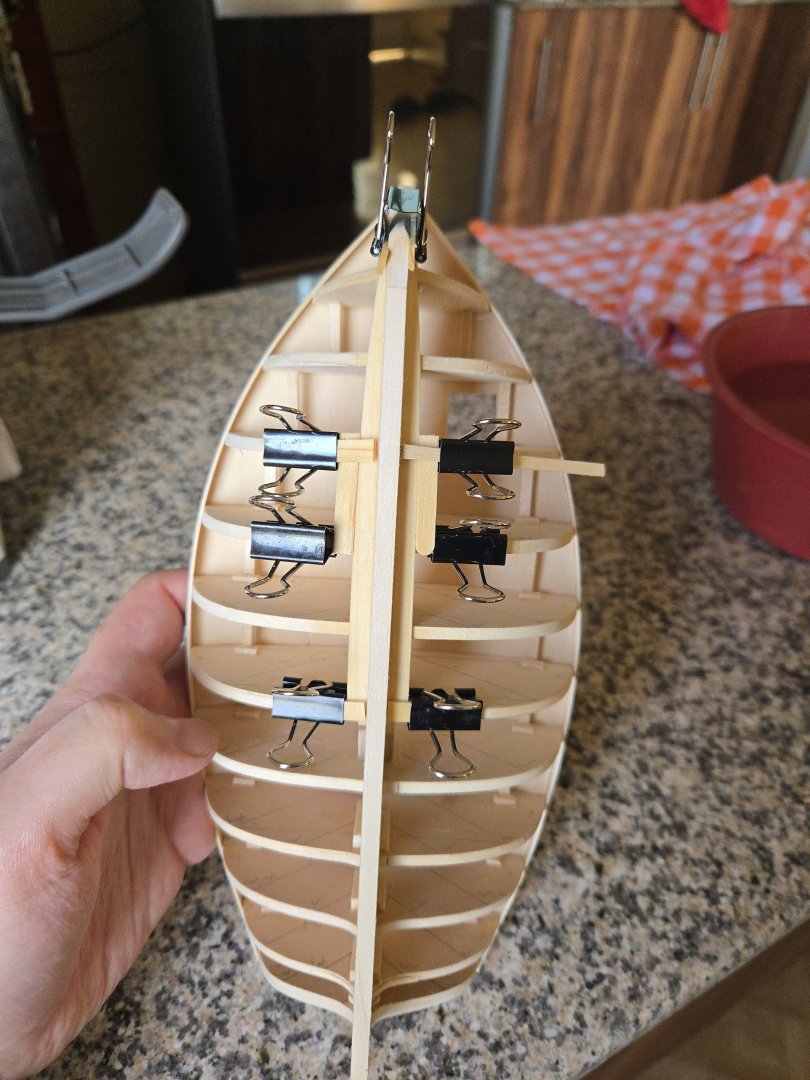
Definitely! I found that I quite enjoyed planking during the Half-Hull kit, so I'll have to see how I feel as this build goes on. Somehow the tape must have gotten a little twisted, and the bottom of my fore garboard plank had a bit of a curve to it. Testing it showed that the curve shouldn't have been there, but thankfully I had cut the plank a bit oversized so I was able to reshape it properly. I had forgotten how much dust plank forming creates! Rather than try to set up the chart tape the same on the other side of the hull, I decided to just copy the garboard plank from this side onto the other. Measuring along a few bulkheads showed pretty much the same dimensions, and any issues will be taken care of when laying out the planking belts. Given that the tape form had turned out inaccurate, I instead just traced the existing plank and then carefully shaped and sanded it to size. I then soaked the planks in hot water for a few minutes and set them to dry in place on the hull. I clamped them both at the bow first, then aft, then pressed with scrap wood and fingernails to make sure they were sitting evenly in the keel rabbet before clamping there too. Despite the extreme twist, the planks seem to be in good contact with each bulkhead. When the time comes, we'll see if the same holds true for the stern--I suspect the deadwood will complicate things a bit.


- 312 replies
-
- 5
-
-
- Chile
- Latin America
- (and 6 more)