JacquesCousteau
-
Posts
1,383 -
Joined
-
Last visited
Content Type
Profiles
Forums
Gallery
Events
Everything posted by JacquesCousteau
-
 Great start!
 -
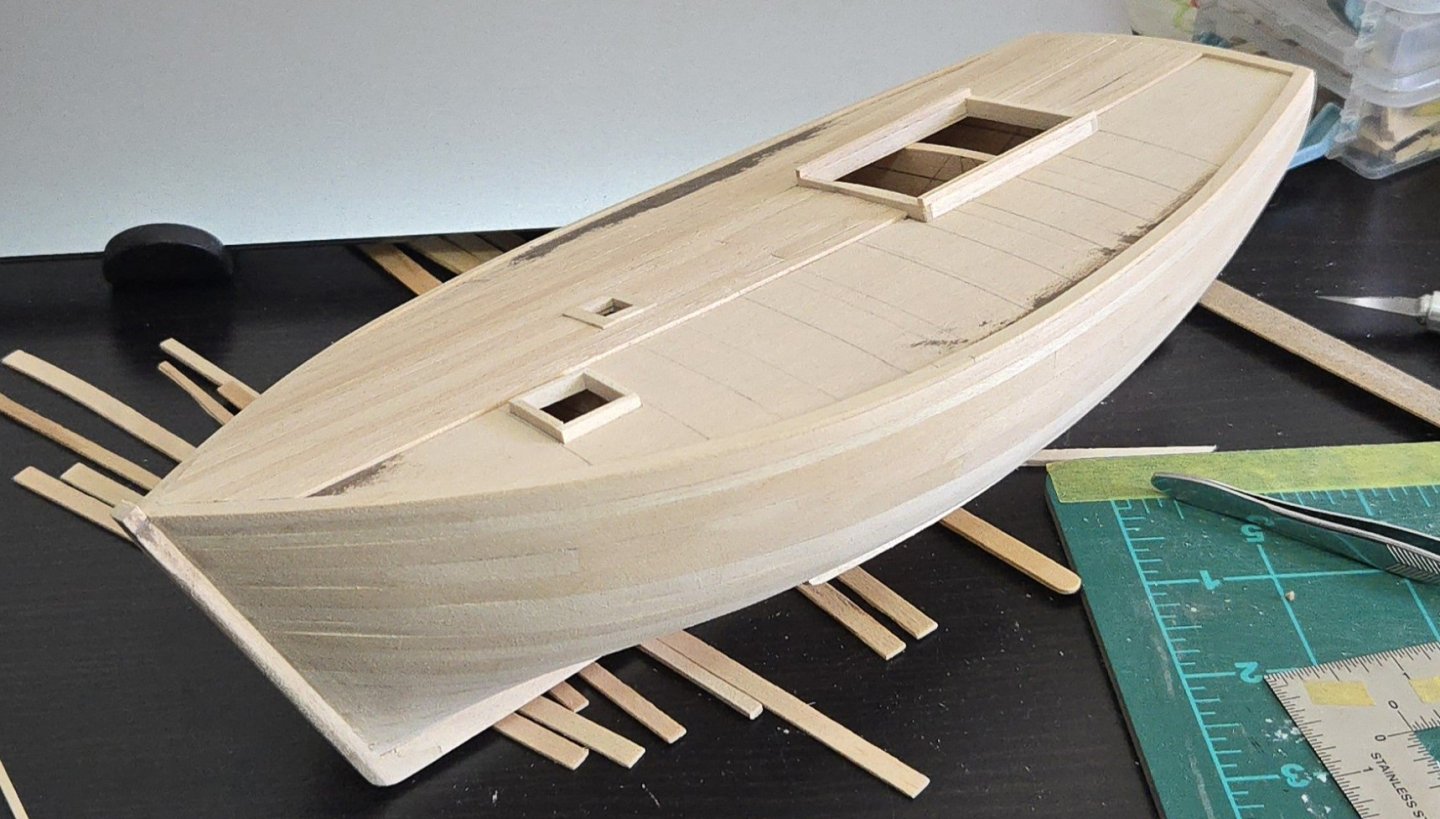
Thank you, all, for your input. I hadn't really been thinking of displaying the model resting on the guarda playa, but I may need to reconsider. Going for a full diorama could be interesting, but I think I'll stick with a simple wooden base this time around, as I've been looking forward to using the cherry board and I think the wood tones will contrast nicely with the black painted hull. Wefalck, it's interesting how starting modeling has changed how I look at materials encountered in everyday life. Suddenly, so many items seem full of possibility. Just the other day I was walking past a hat shop and noticed that they sell some kind of long, straight, narrow straw material. It would have been extremely useful for the thatching on the Canoa de Rancho build, and would likely be ideal if I ever decide to model a reed boat. Anyway, I've finished planking the starboard side. Fitting the last plank was quite the challenge. I should note that I've seen no evidence of the planks being nibbed into the covering board. I also didn't end up following a set butt shift pattern, instead just trying to avoid placing any too close together. I've also been making a little more progress on the port side. I've discovered that the model isn't perfectly symmetrical, so I'll be carefully measuring at every step to ensure a relatively even planking job. This first plank alongside the main hatch, for instance, needs to be slightly narrower on the port side than on the starboard side. I think slight differences in plank width will be less noticeable than having a different number of planks per side. I think that sanding the decking will smooth out some of the dark lines between planks.

- 312 replies
-
- 8
-

-
- Chile
- Latin America
- (and 6 more)
-
Thanks Paul! I have considered it, I think it could be a very interesting option. It would definitely be unique and also true to life. That said, I think it would also somewhat obscure the curves of the hull, and it would also preclude displaying set sails. I'm still deciding whether I want the sails set or furled.
- 312 replies
-
- 3
-
-
- Chile
- Latin America
- (and 6 more)
-
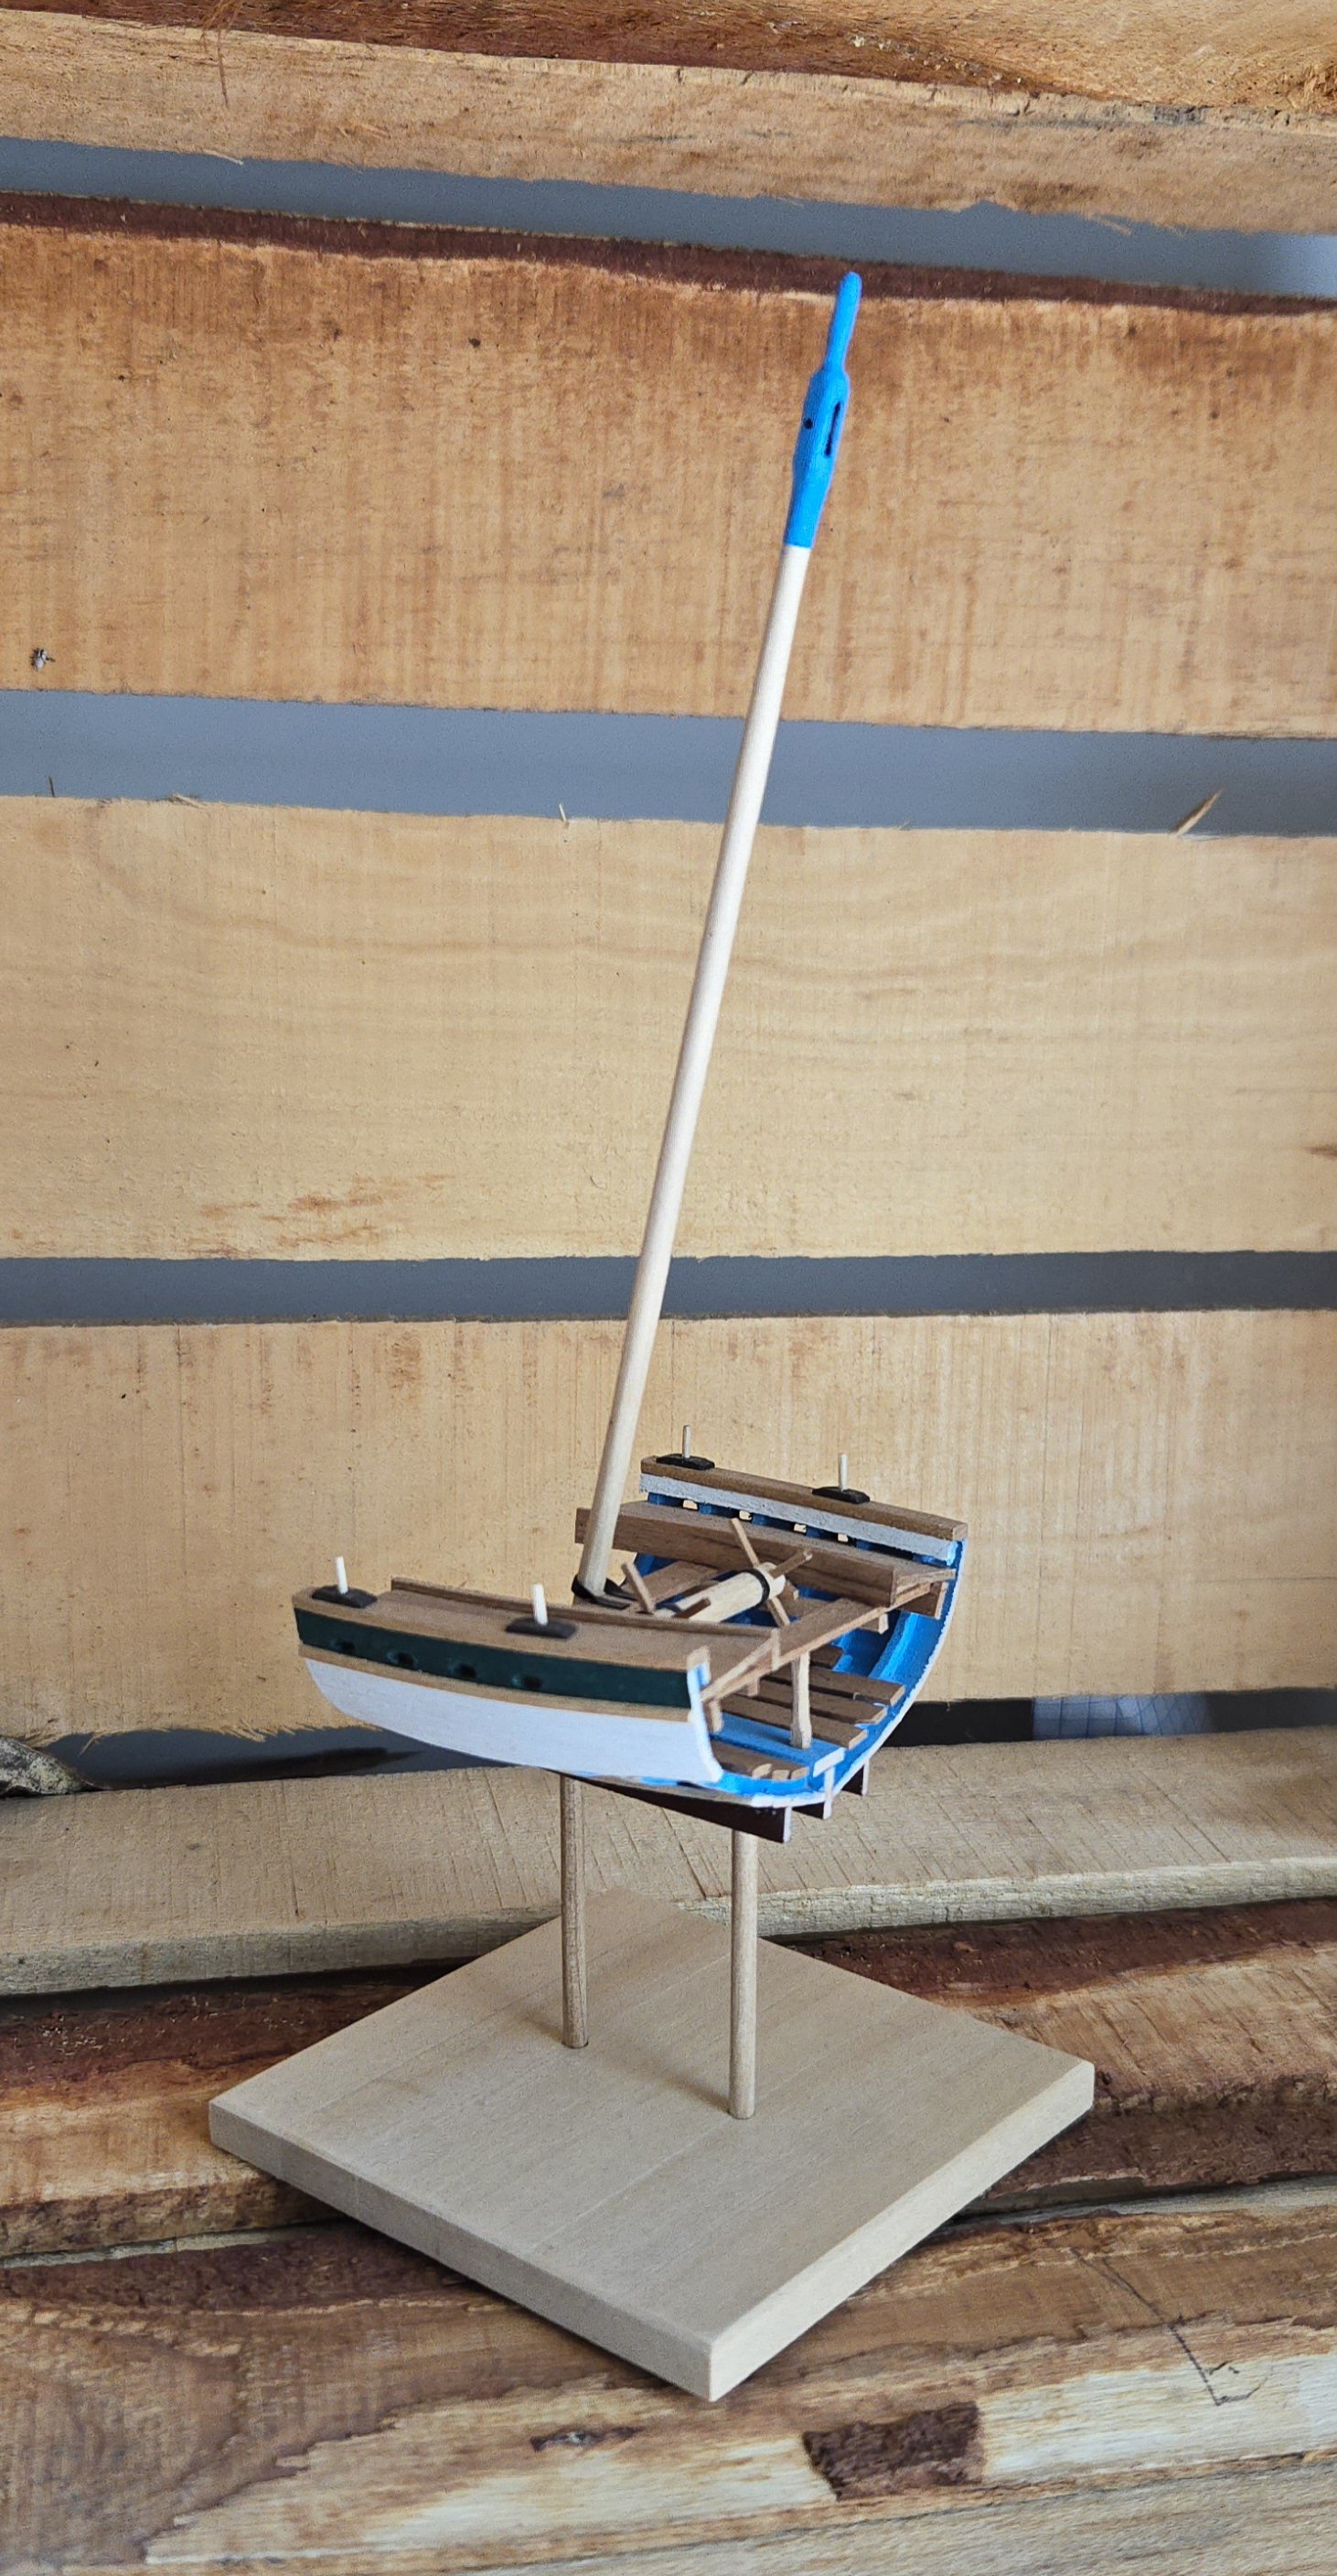
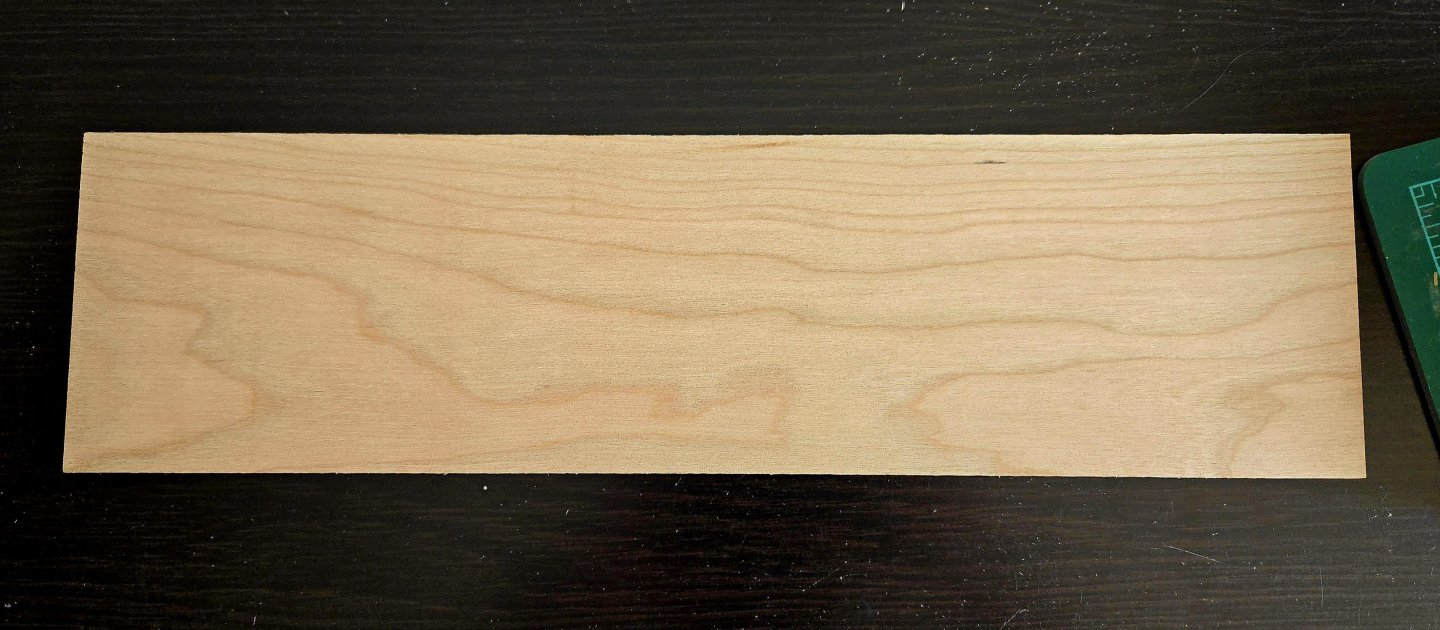
No worries! I do when I'm in the US, but I'm usually limited to what I can pack in a carry-on and I generally buy sheets rather than strips as they're more useful for my hull planking method. In the future I may try to get more strips though. Unfortunately, so far all I've found in Mexico City is 1/16‐inch basswood sheets, and a wide variety of balsa wood (which is not very useful for modeling). On another topic, I'm trying to figure out the base for this model, so that I can do any required drilling on the bottom before anything fragile has been permanently added to the topside. I liked the sort of "scaffolding" I did for the Canoa de Rancho, but I want to do something different on this build. On my last trip to the US, I placed an order with Joe at Modeler's Sawmill for, among other things, a 4x16x3/16-inch cherry sheet. (I'm quite pleased with the order, and highly recommend the shop.) The wood will make a nice base. 3/16 is a bit on the thin side for a base, but I'm planning on thickening it a little with a cheaper wood on the bottom, and then adding a thicker trim around the edges, either in cherry or in a contrasting lighter wood. I plan on finishing it with linseed oil, as I did with the basswood of the NRG Half-Hull. Aa can be seen, it's a bit oversized, so I can get some extra usable material by trimming it down to an appropriate size. I'm thinking of two options for how to mount the model. One would be to make a simple wooden cradle, based on a pair of bulkhead shapes from the plans. This option would require the least amount of work on the bottom of the hull--at most, just a small hole in the keel for a pin. That said, I'm not crazy about how cradles can interrupt the smooth lines of a hull. So, the second option would be to support the model on two lengths of brass tubing running into holes in the keel. It would have an effect kind of like what I did on the Juana y José cross-section, below (although there the posts are wood, and they actually fit around the keel, which is very thin). This option would much better show off the hull. The challenge is with drilling into the keel. The keel is 3/16-inch thick basswood, so I don't want to choose tubing that's too thick. Moreover, ideally I'd like to drill the mounting hole into the false keel, as well, which would make for a much stronger mounting, but the false keel is only 1/8-inch thick and thus would require even thinner tubing to create a reasonably secure mount--I think 1/16-inch tubing is about the thickest I can reasonably use, although I'm not sure if that's so thin that it will bend too easily. My best bet may be to position the holes where the bulkheads are located, so that there's a bit more wood to support everything. However, this brings me to the other challenge: the difficulty of drilling straight and perfectly centered, especially as the sheer makes it impossible to position the boat upside down such that the waterline is perfectly flat and even. Thankfully, at least there's no drag on this hull, and the waterline is parallel to the keel. To deal with this challenge, I think my best bet would be to make a drilling jig with scrap 3/16‐inch basswood. By measuring carefully and drilling a pilot hole from both sides, I can theoretically get centered perpendicular holes the proper distance apart, and I can place the jig on the keel to hold the pin vise properly squared and centered to drill into the keel and false keel. It would be a relatively simple matter to mark the depth on the drill bit with a bit of tape or something so that it sits evenly on the base. At least, that's the plan. If it doesn't work, I can always go with the cradle option.


- 312 replies
-
- 5
-
-
- Chile
- Latin America
- (and 6 more)
-
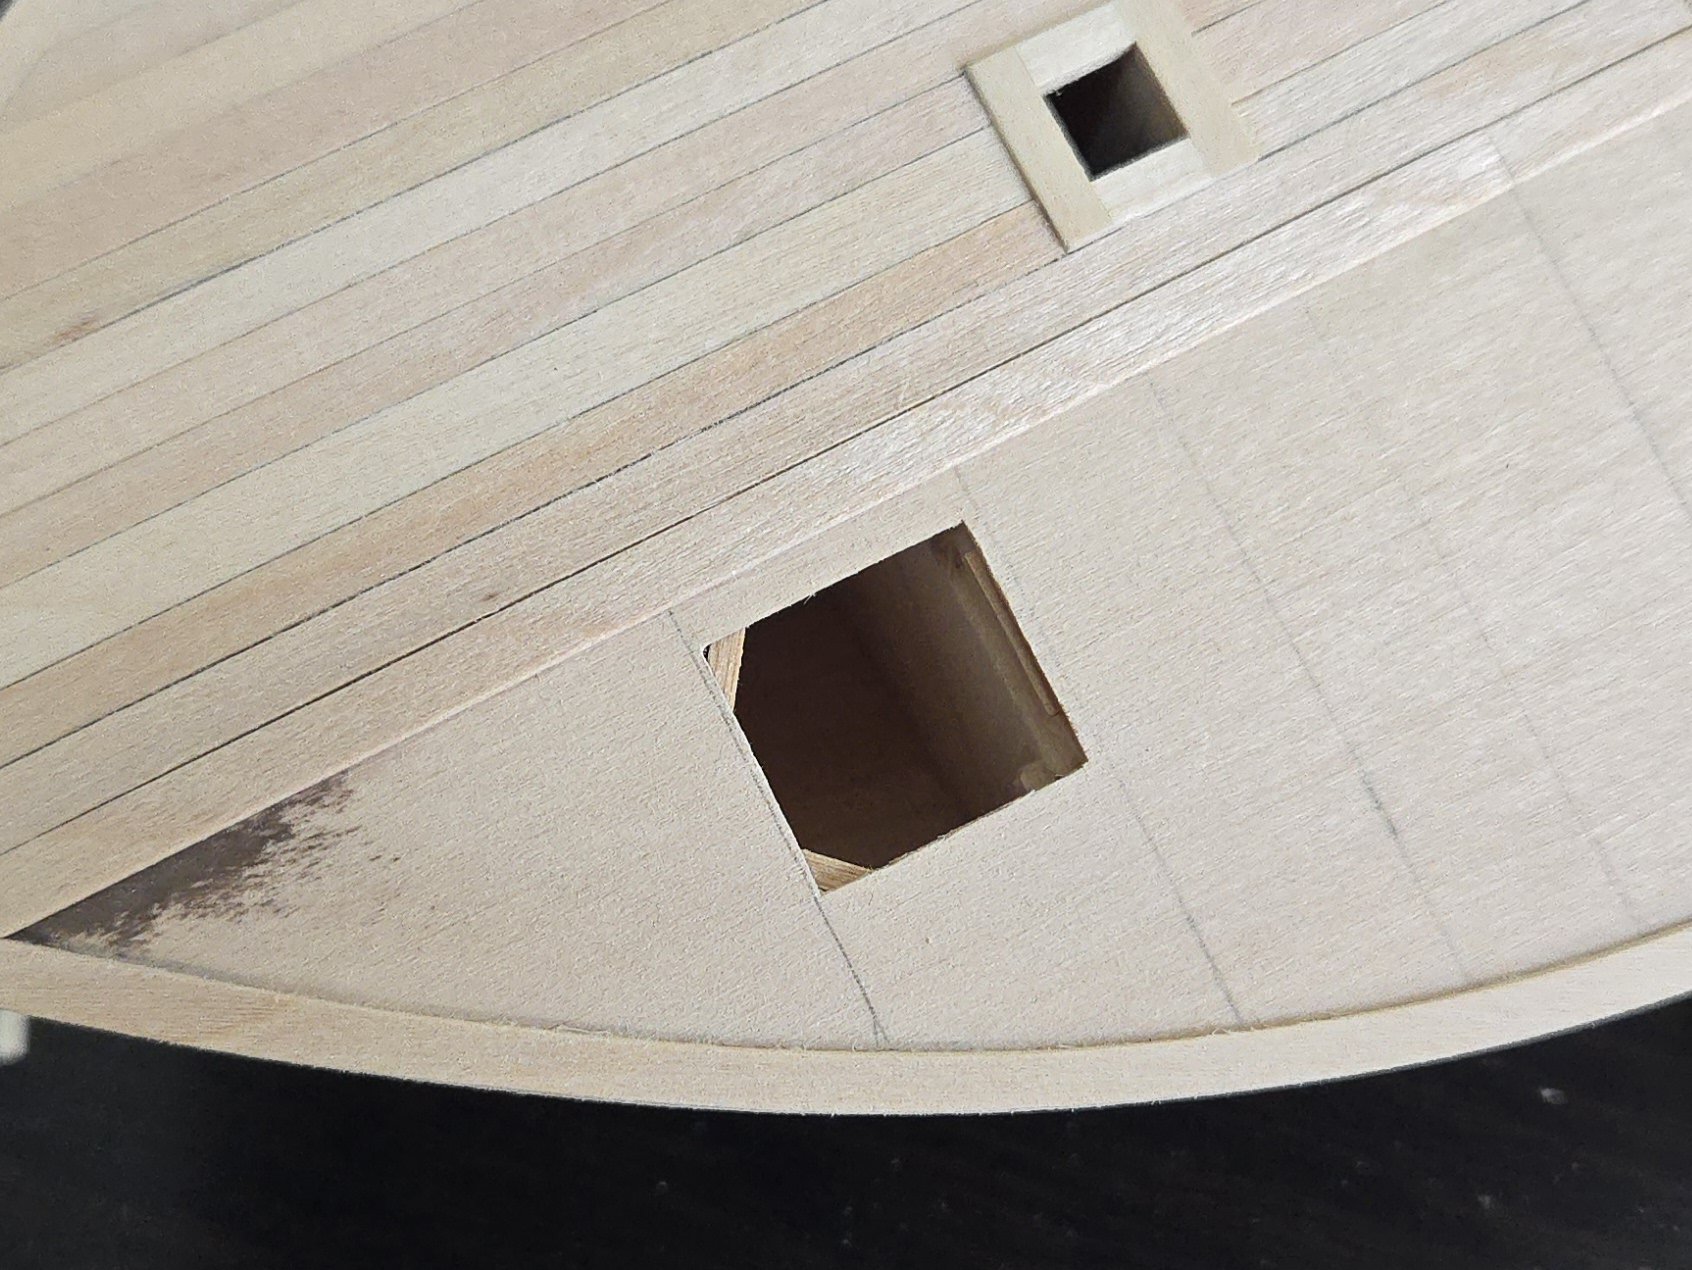
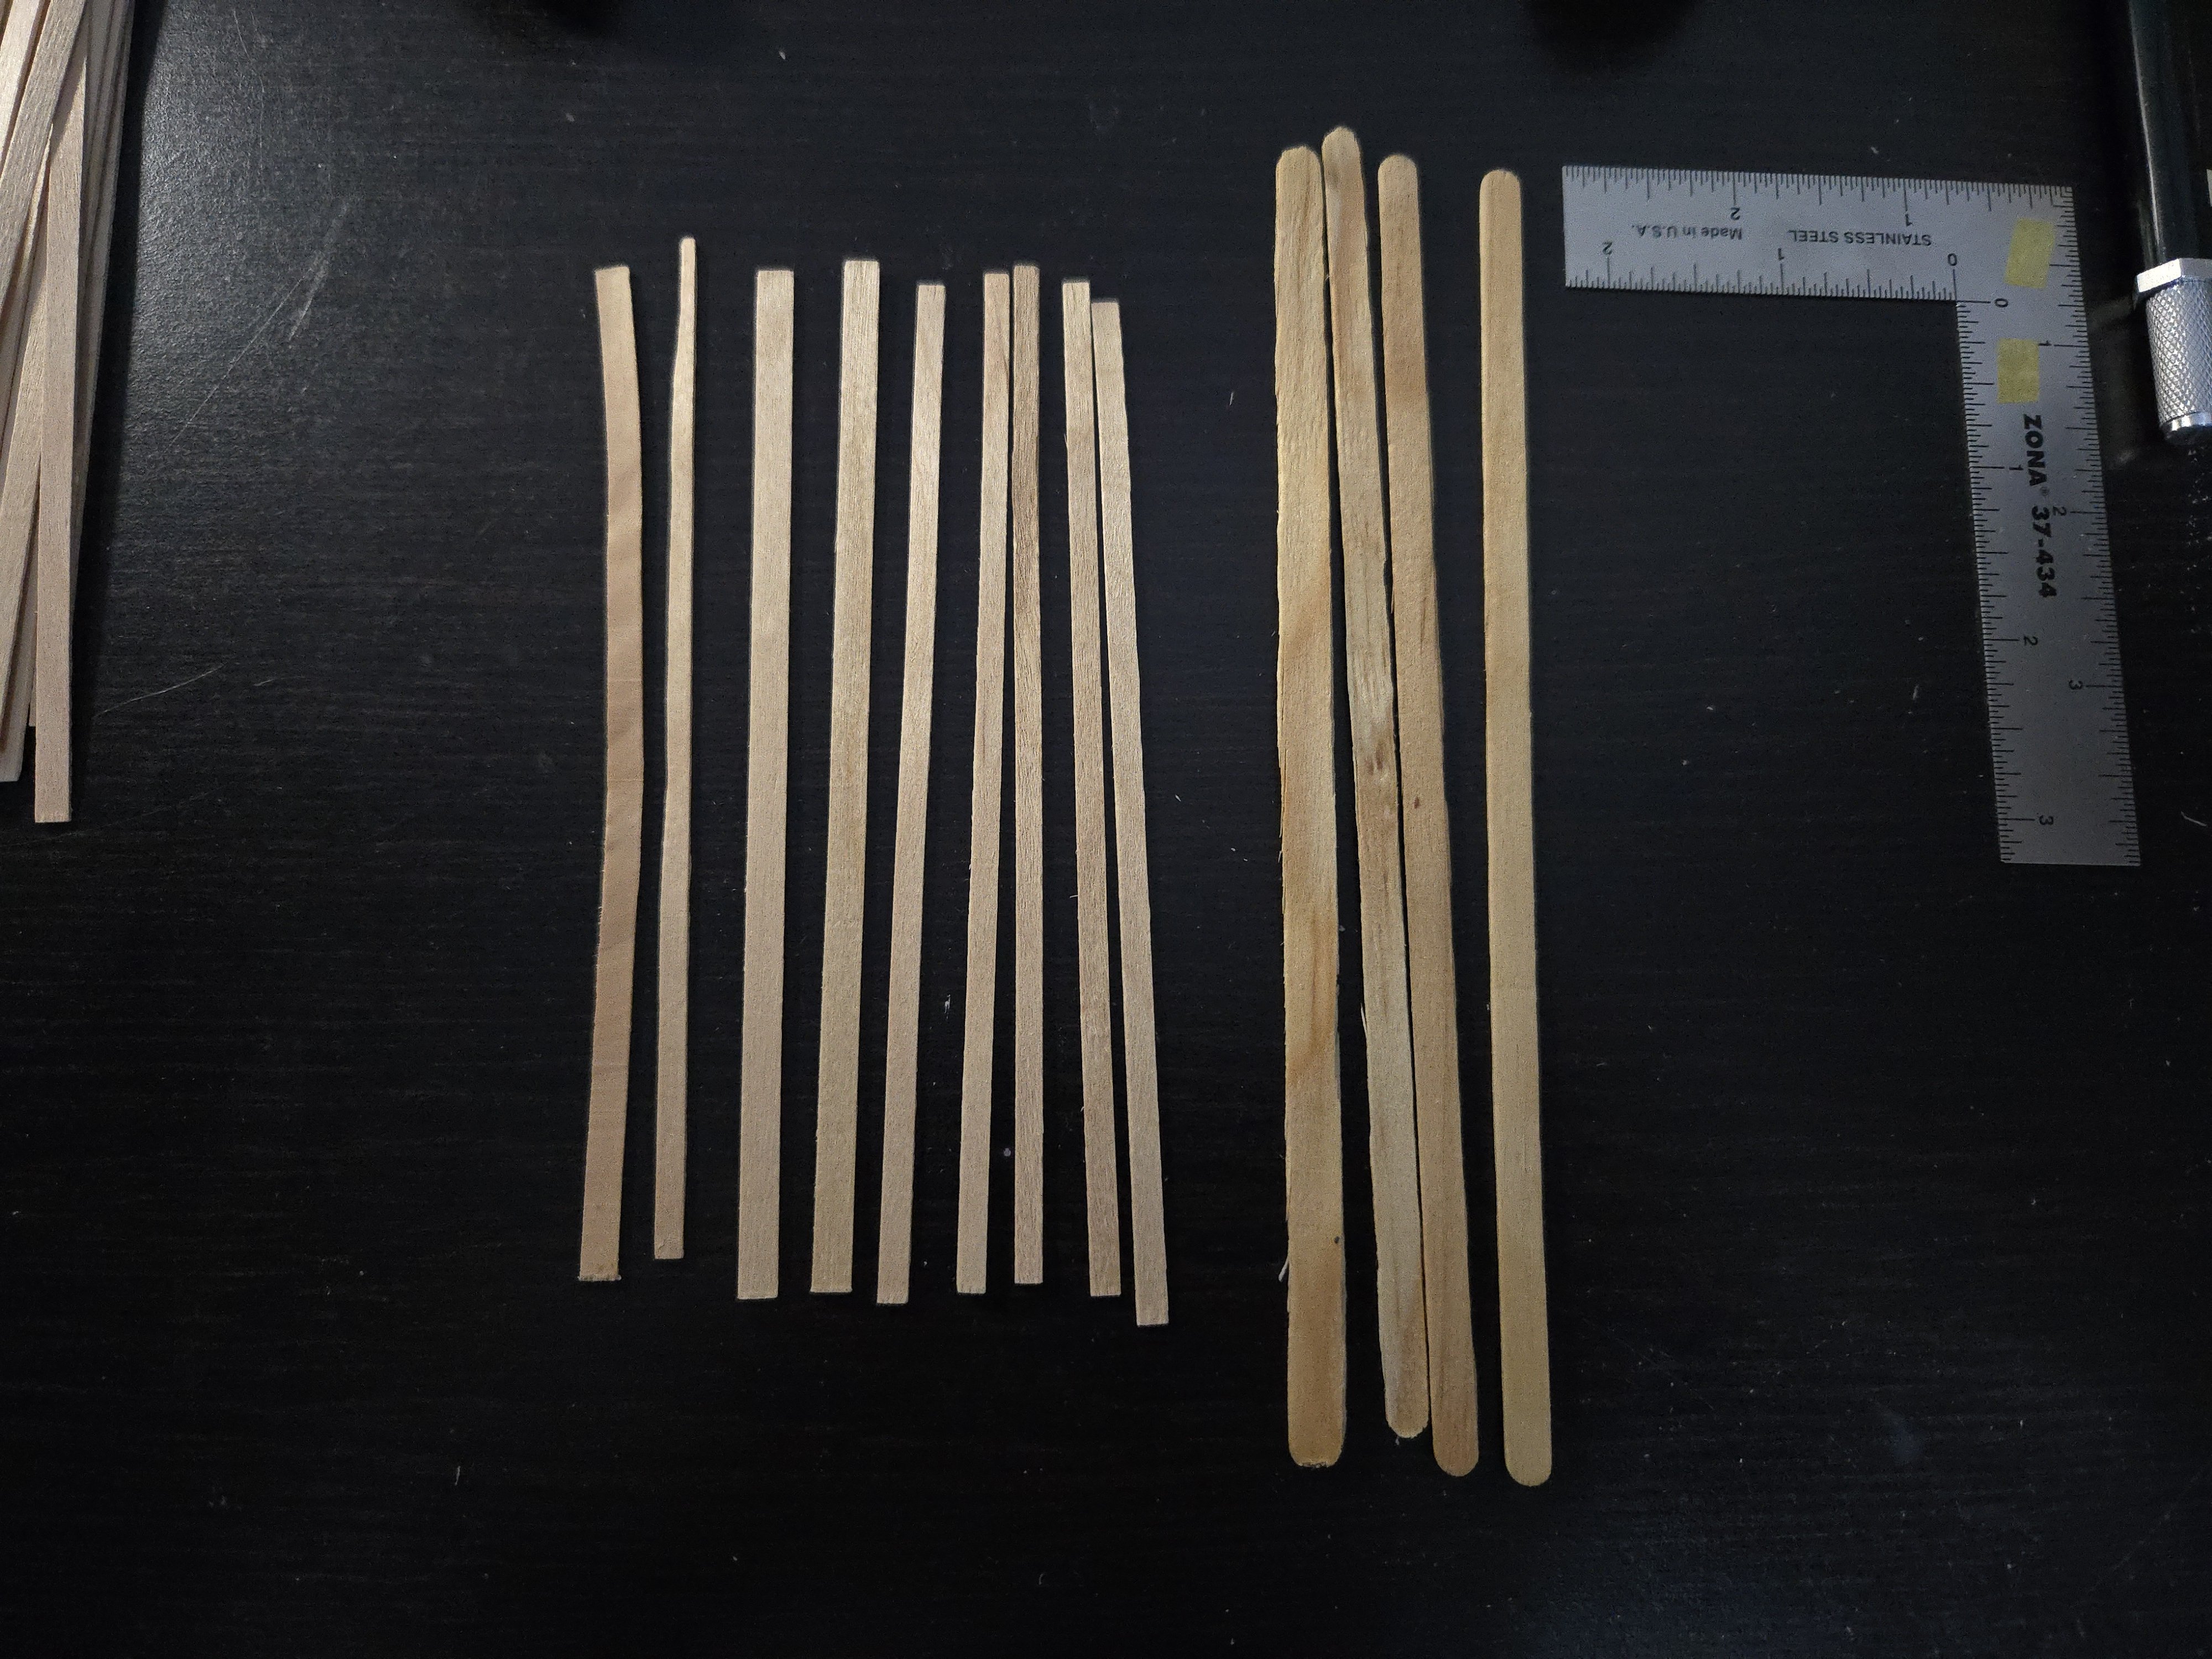
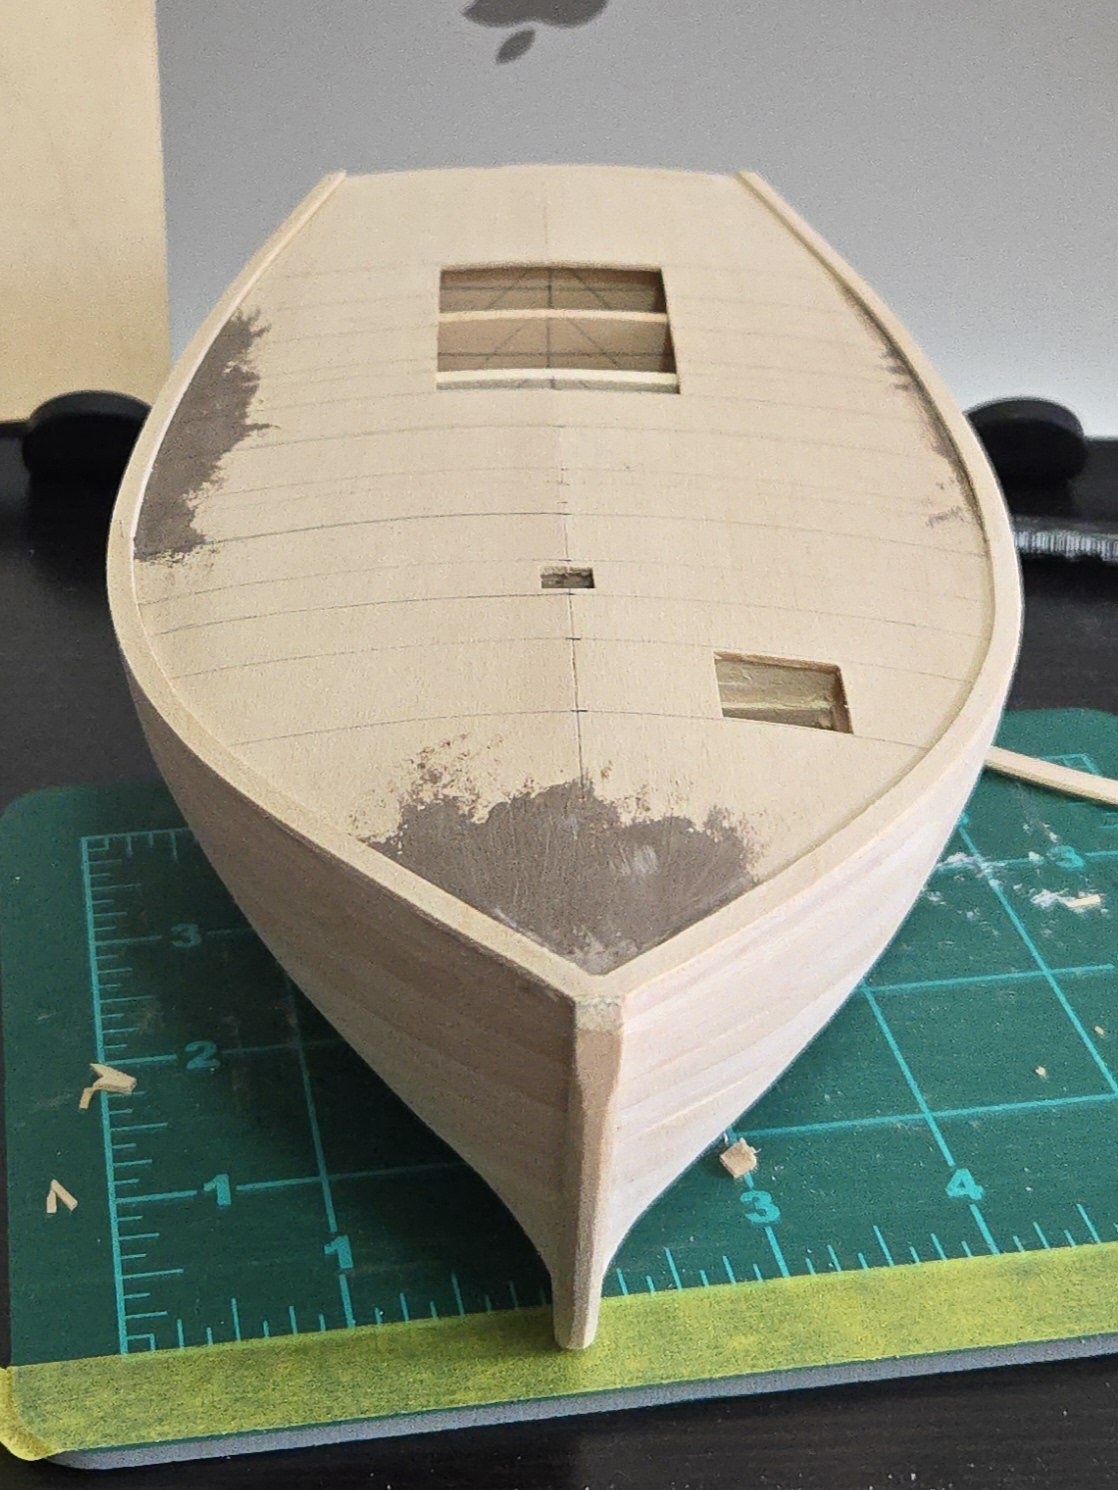
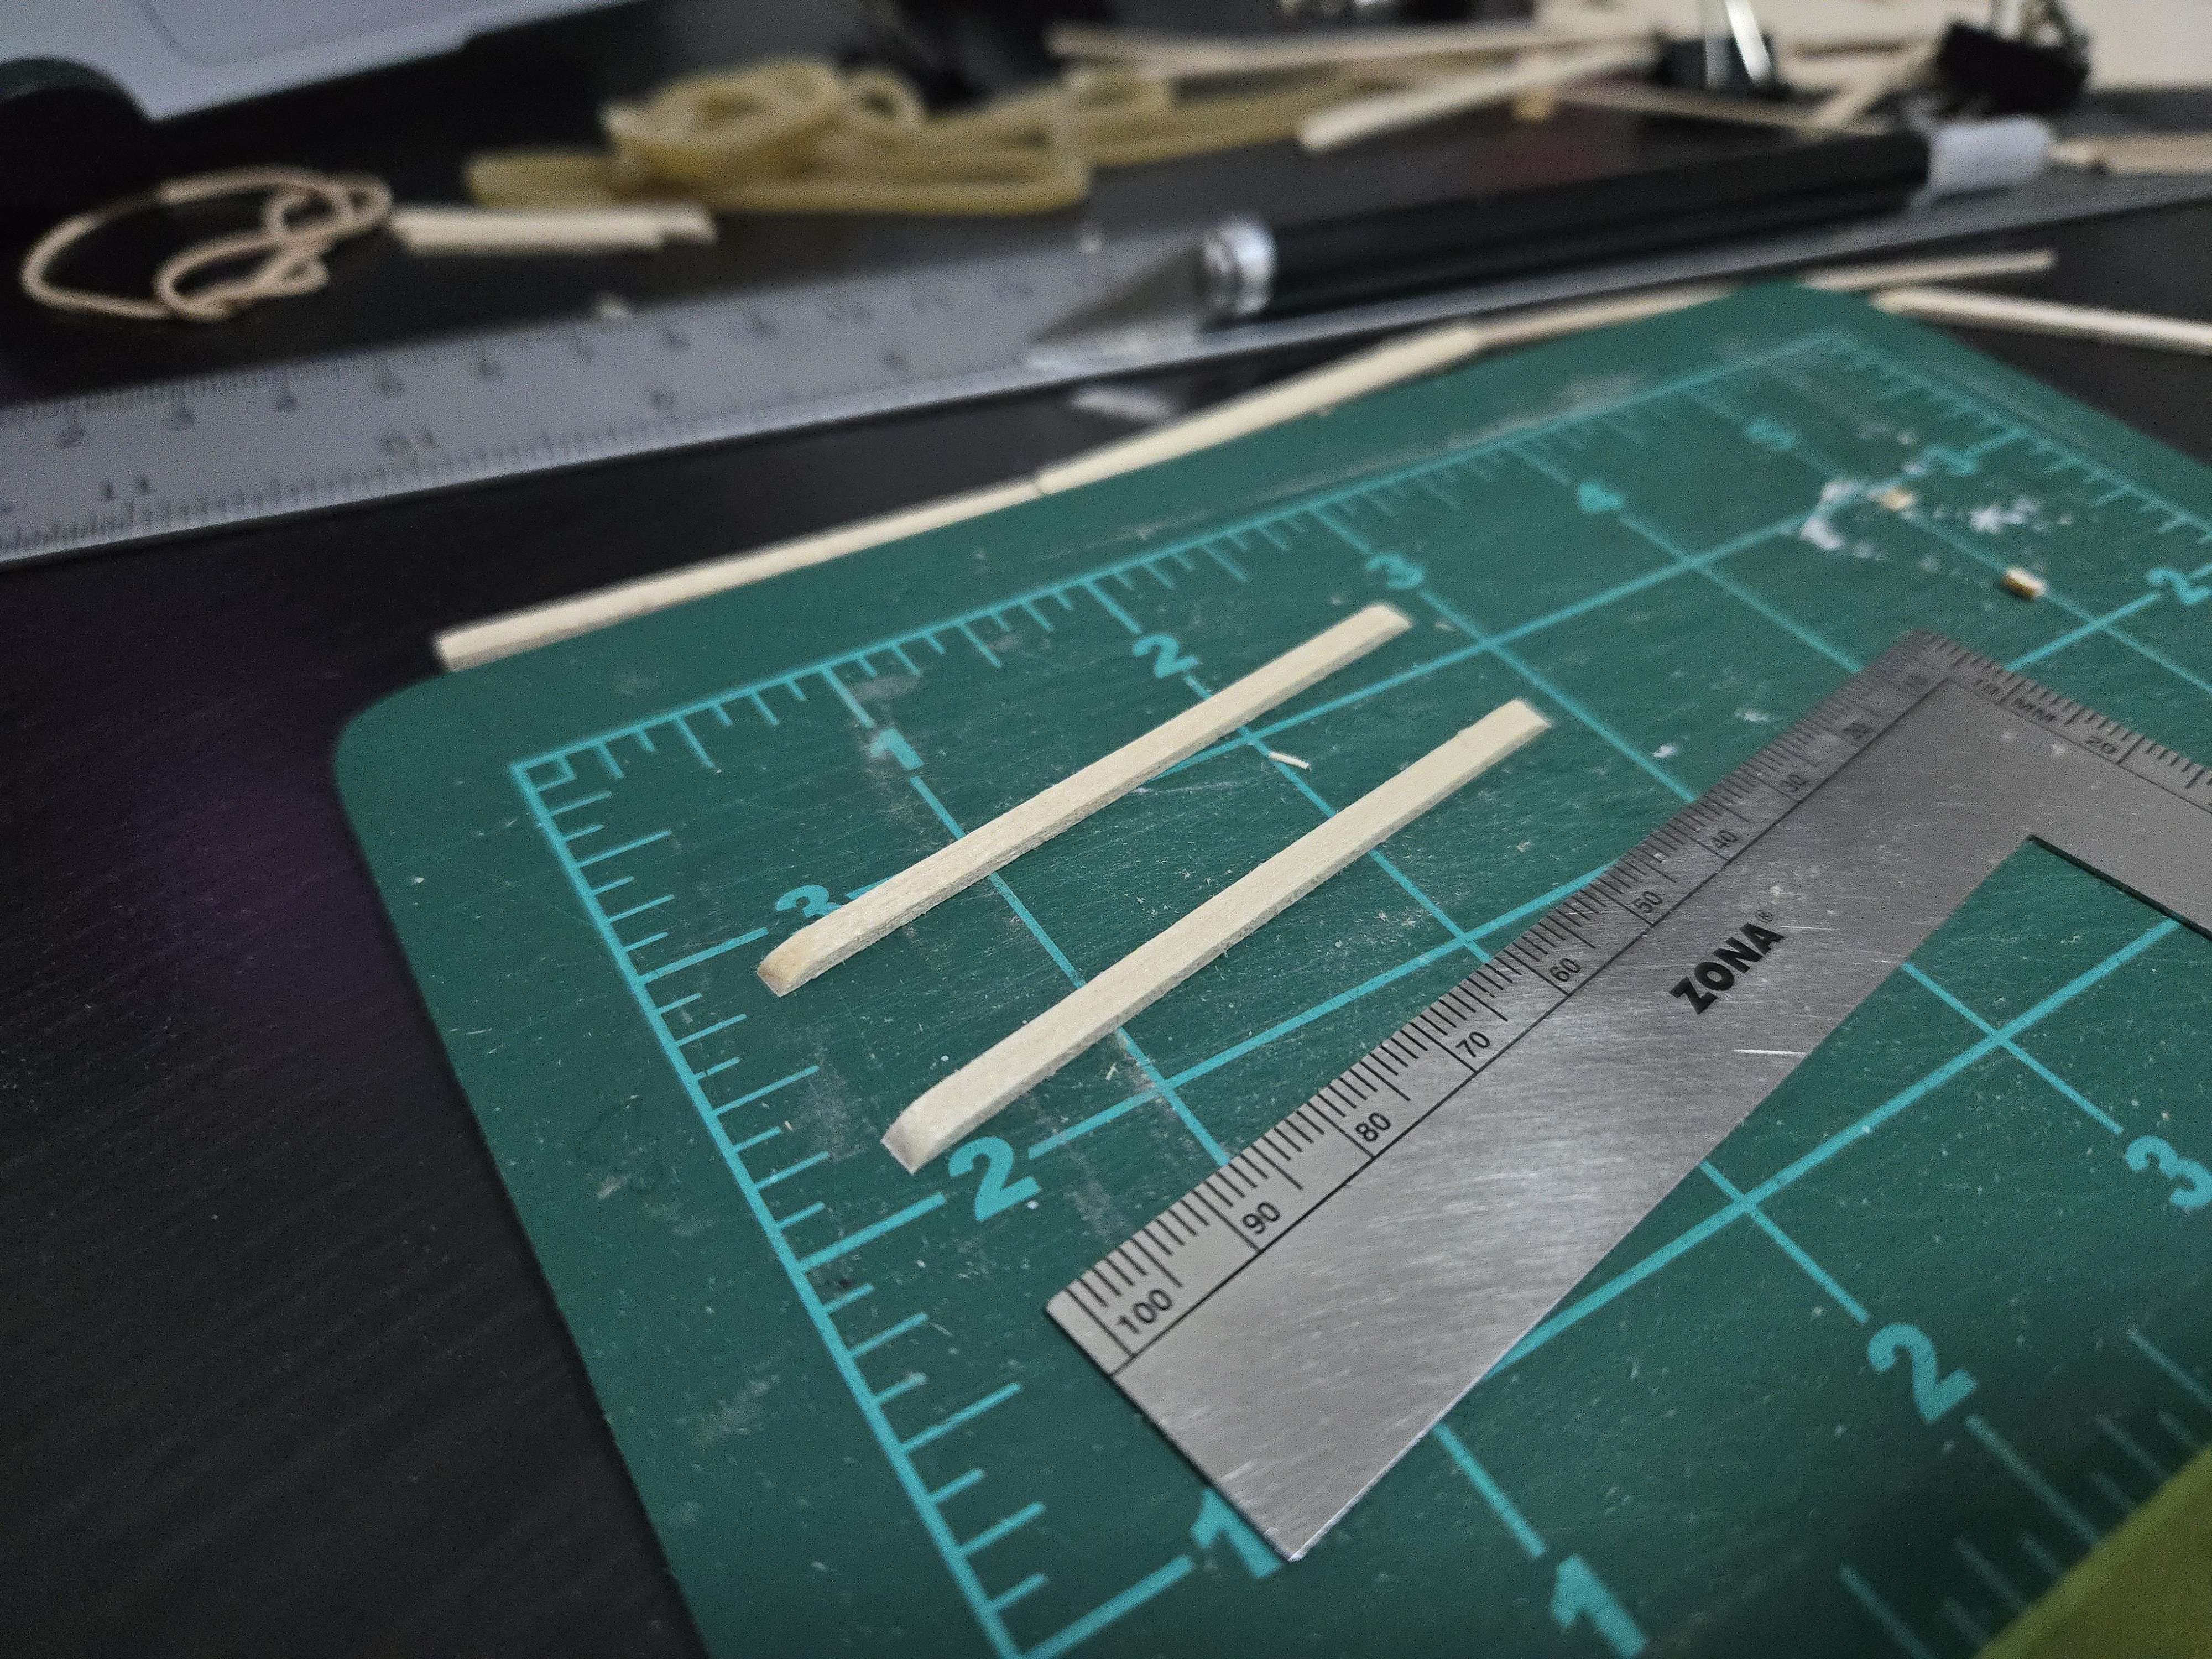
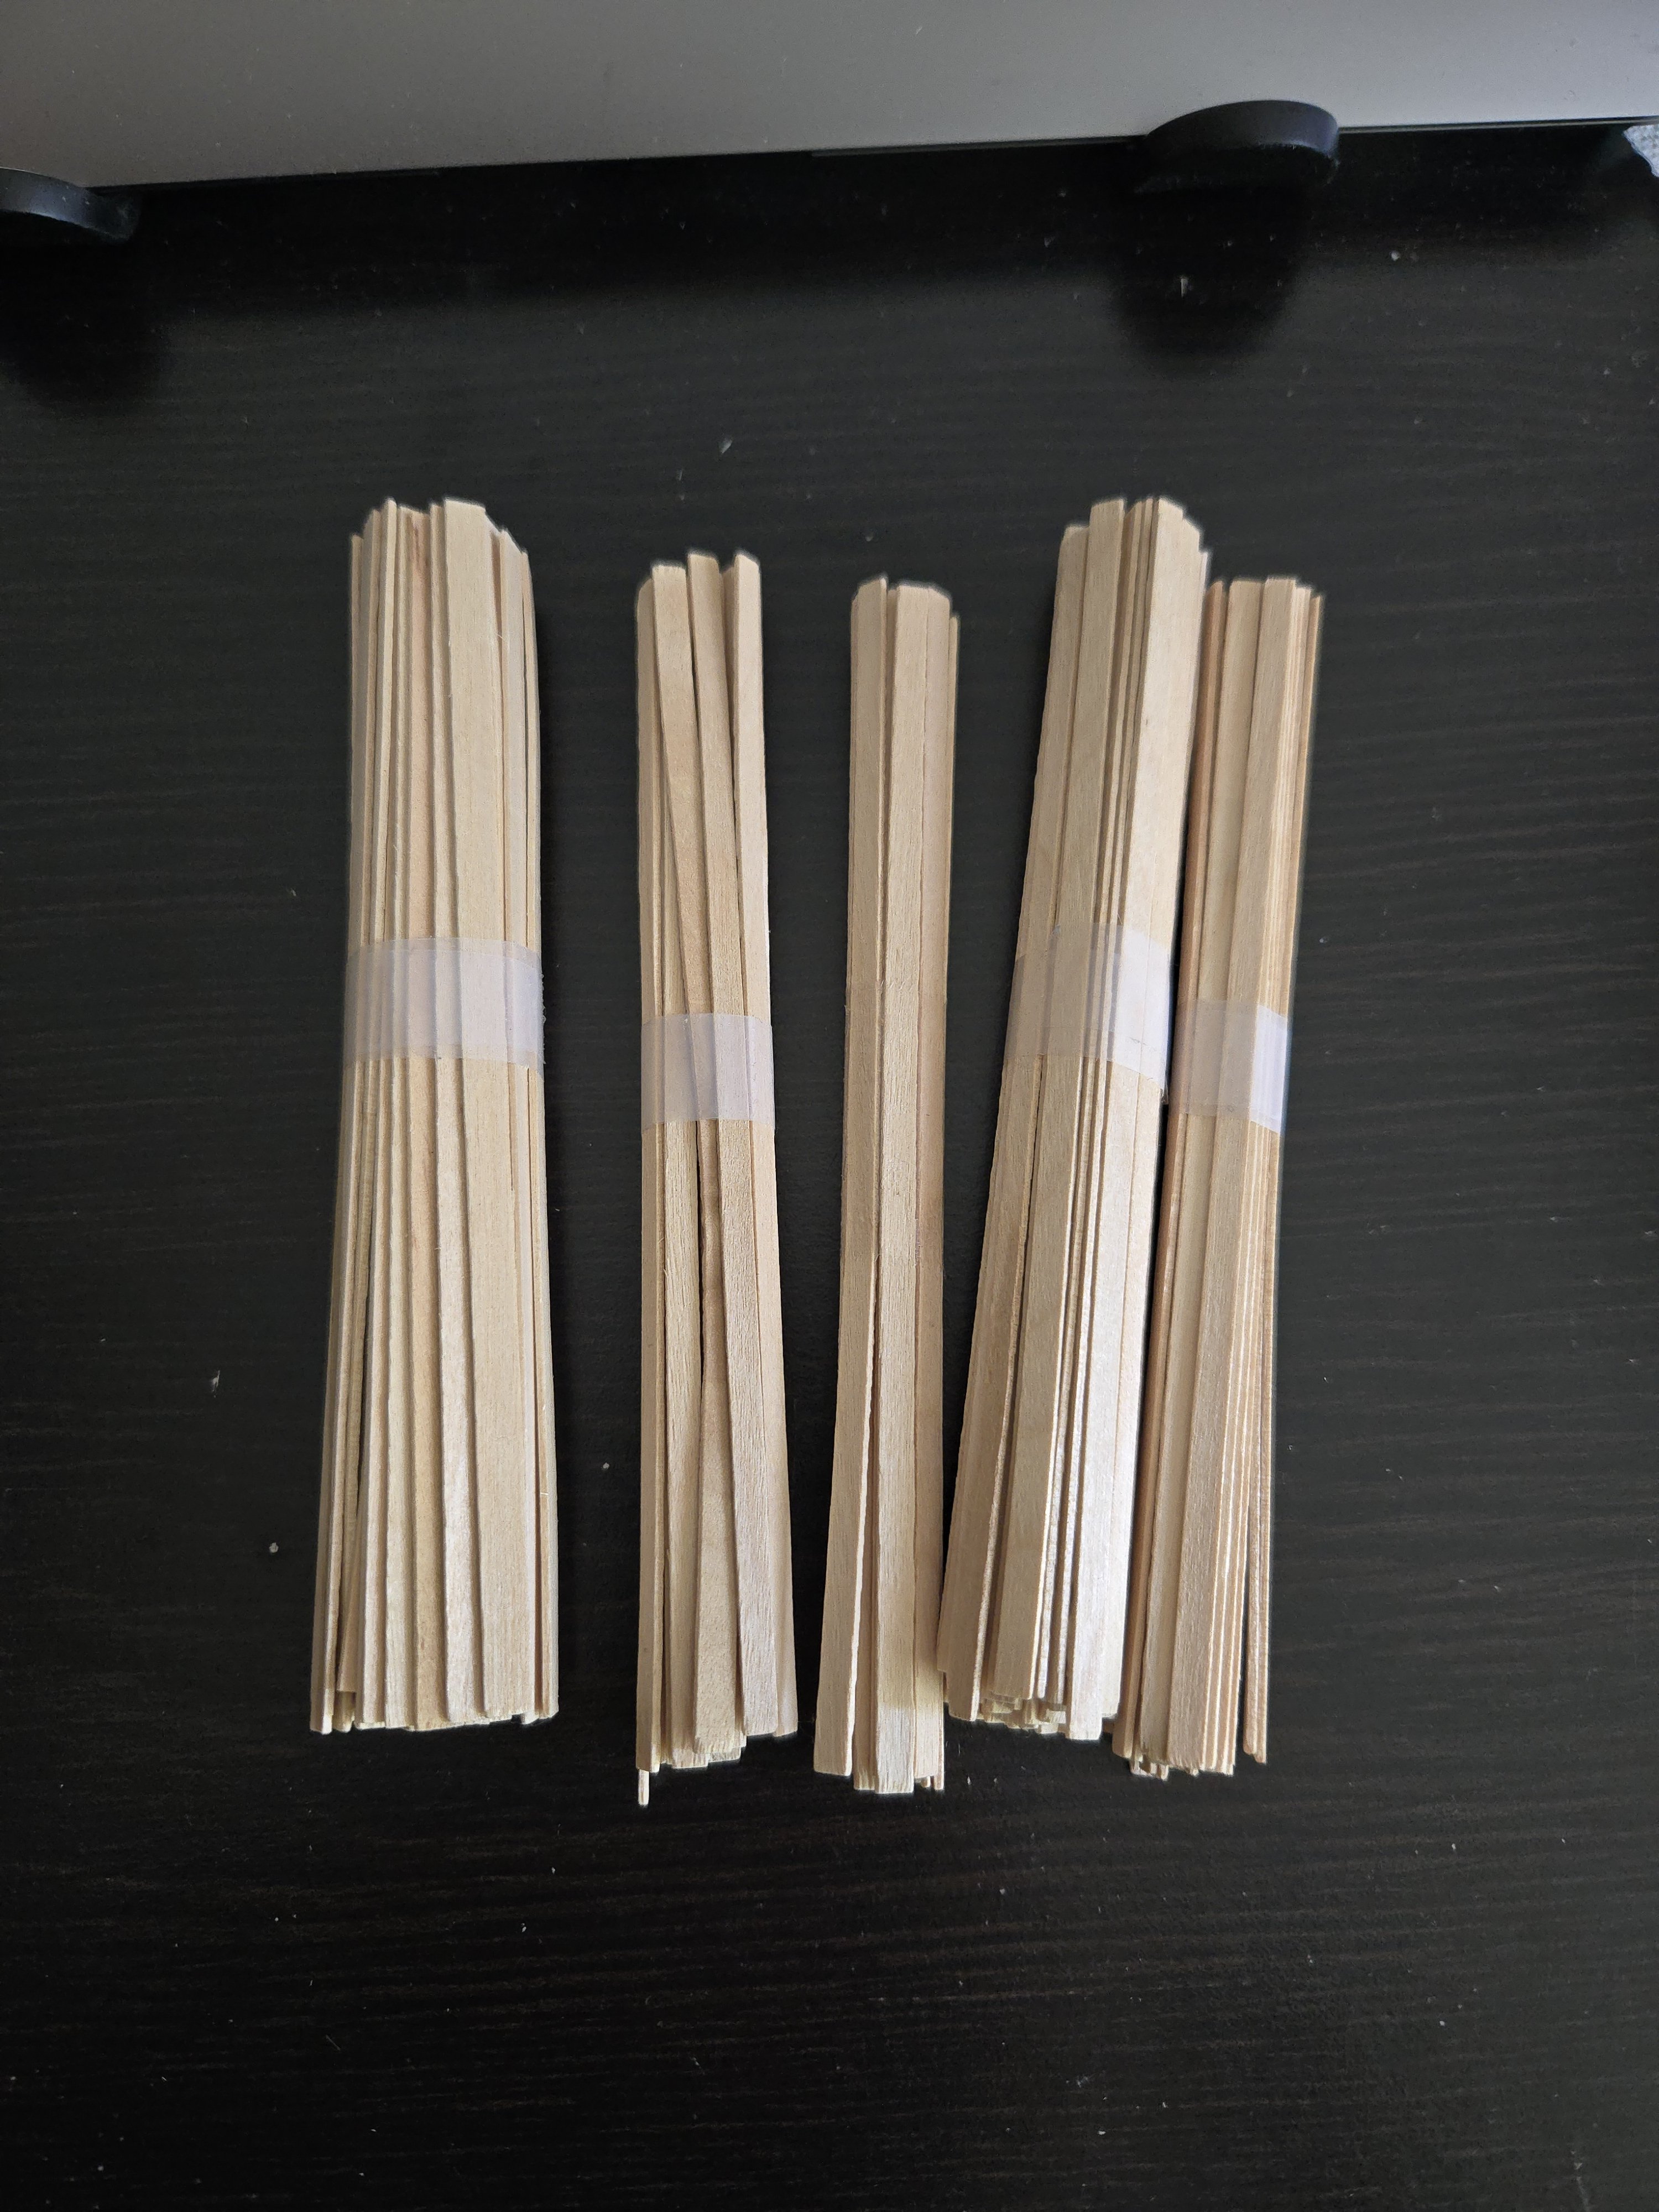
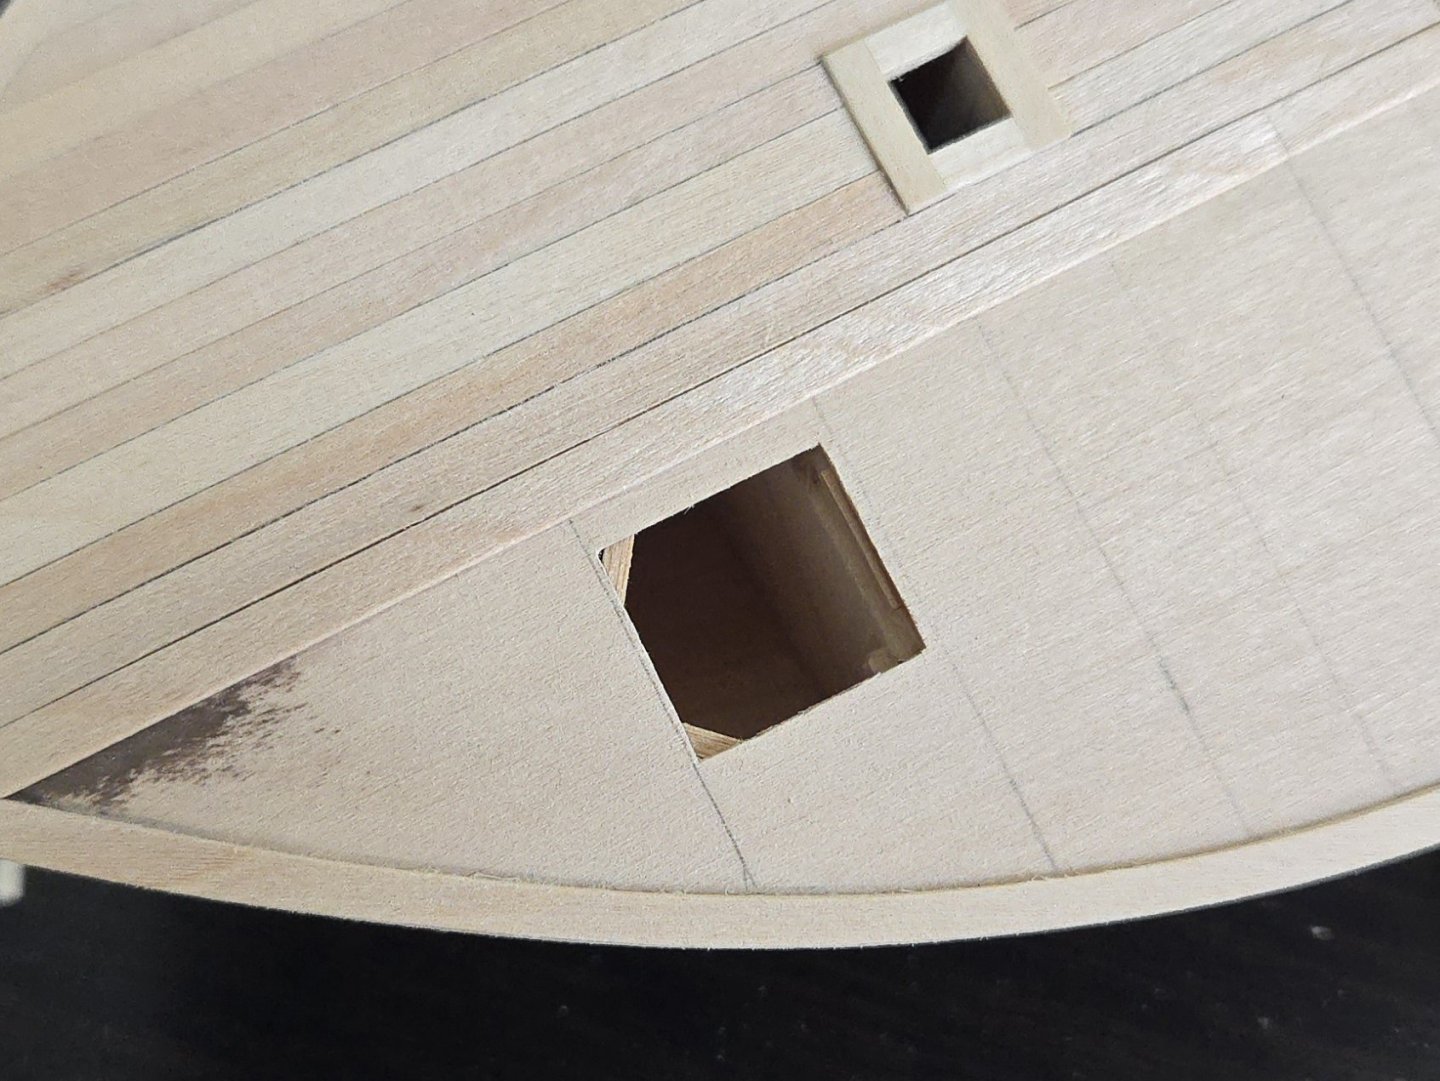
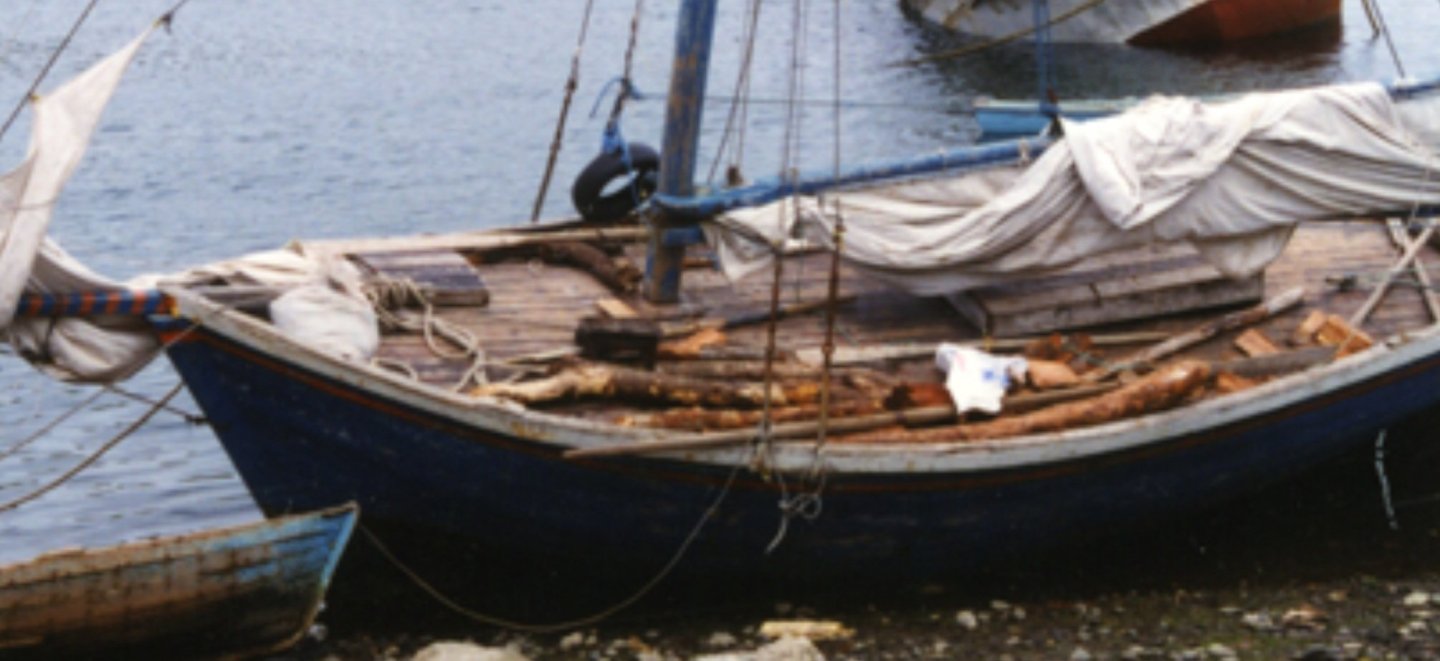
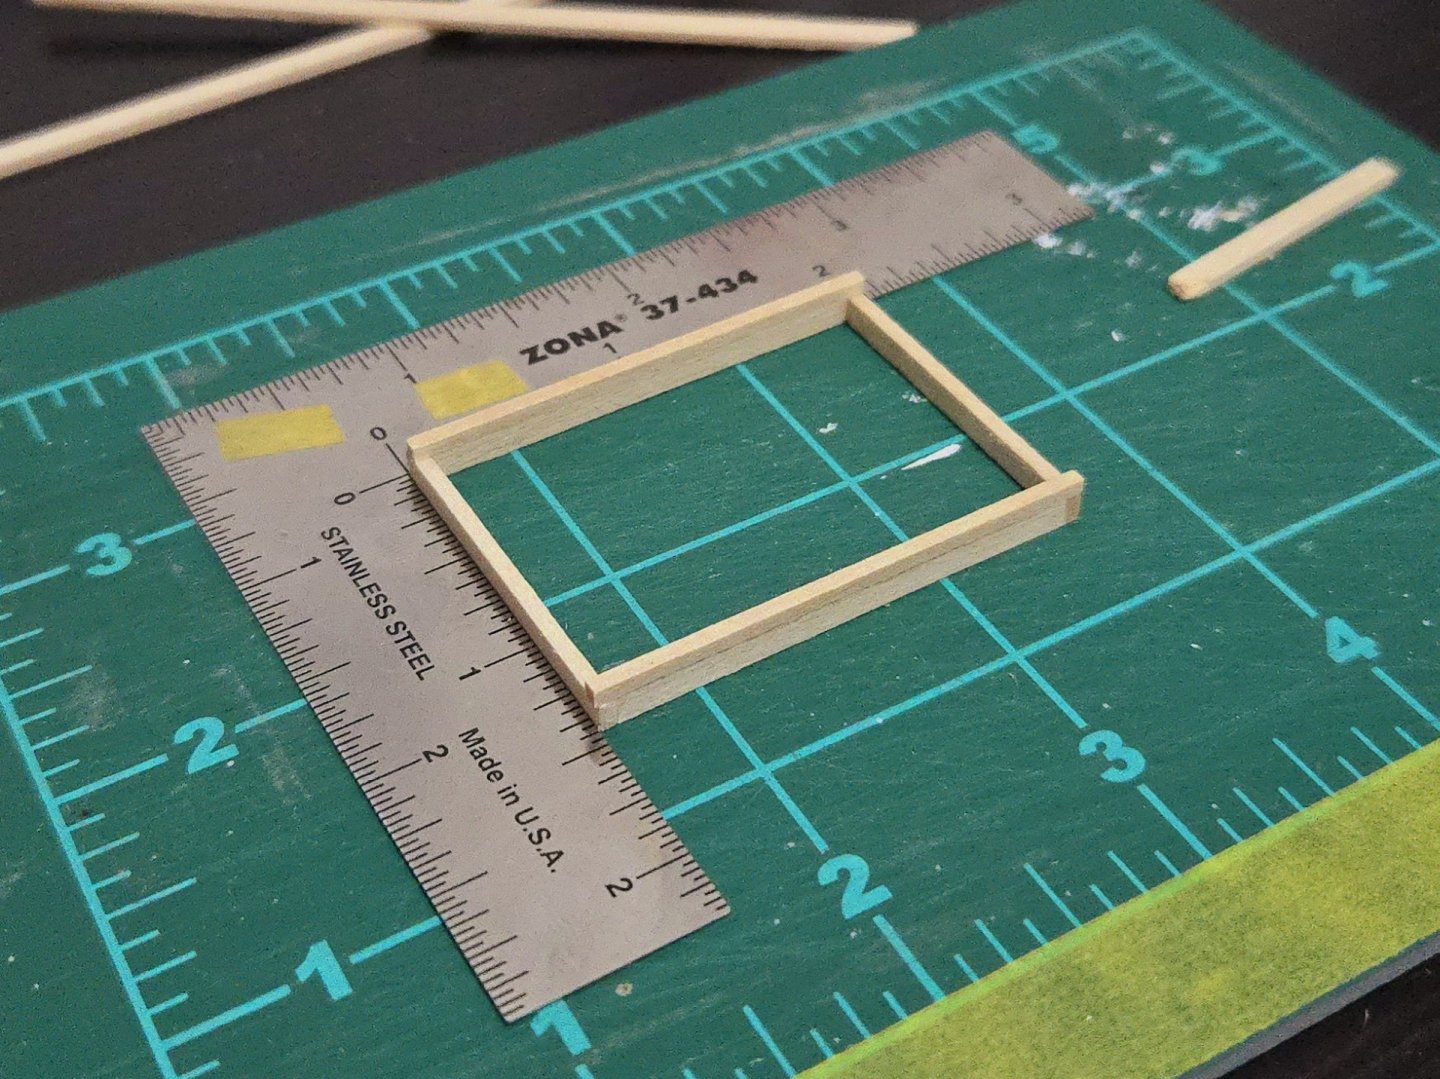
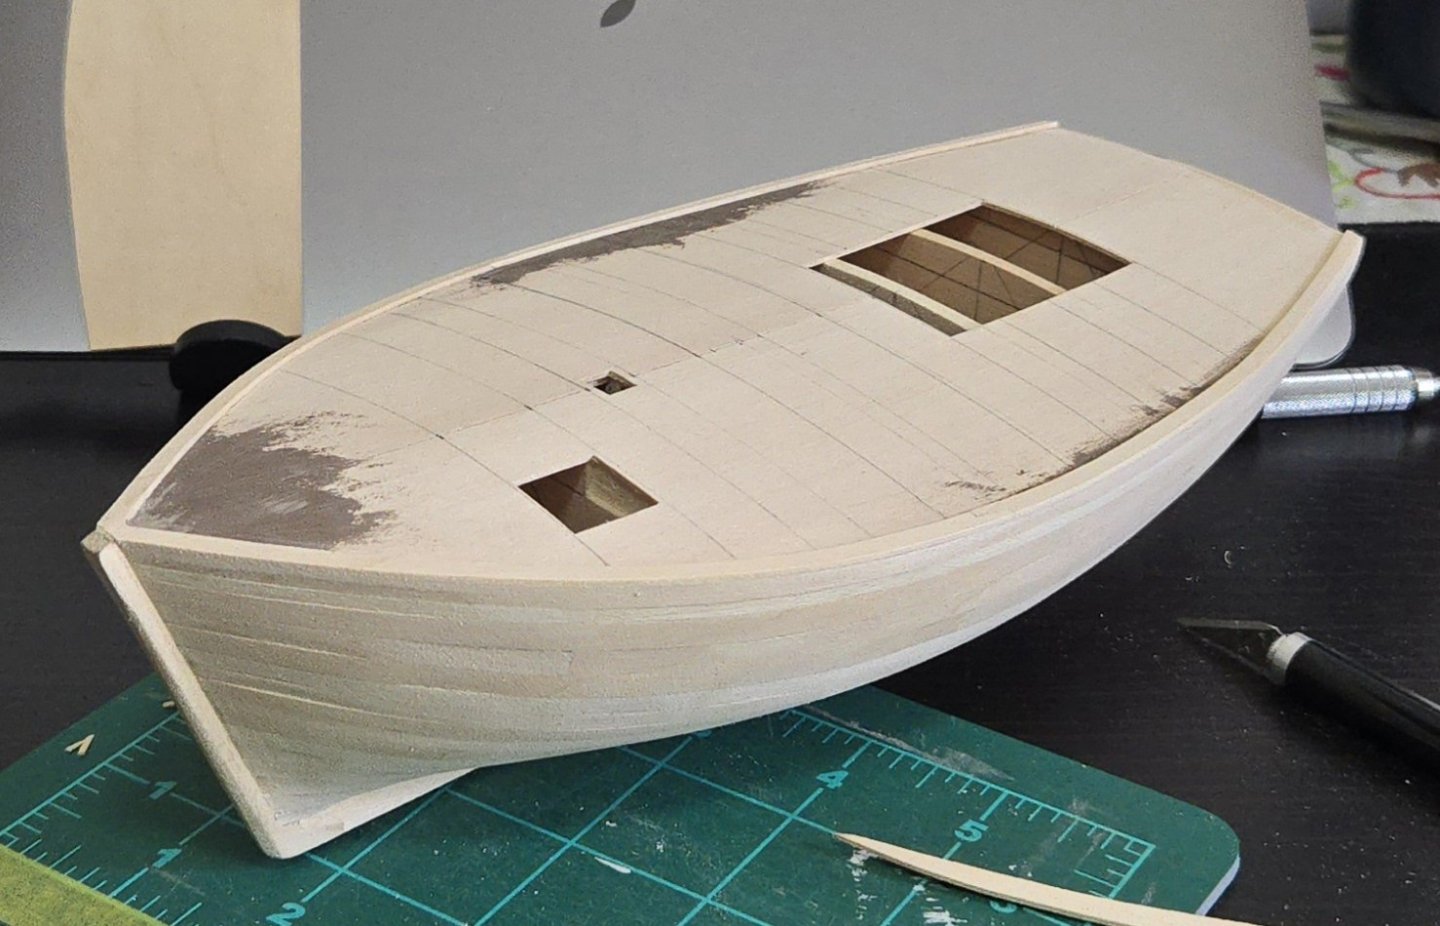
Thanks, all! @Keith Black, I agree that they're not the best quality lumber, but Midwest strips aren't available here. @Jim Lad, not all coffee stir sticks are the same, but some are surprisingly decent quality. In the photo below, the ones on the right are pretty atrocious. I only grabbed them for paint mixing, although I'm now thinking they could be cut up to represent a cargo load of rough-milled lumber. The sticks in the center/center-left are the two types that I'm using. Although some are inconsistent and unusable (see the two on the far left), in general they have a relatively even grain and can just be lightly sanded on the edges to even up the sides before use. Widths aren't perfectly consistent, which would be a problem if I were making, say, a ship of the line, but this is acceptable for a small workboat that in real life at times had deck planks of inconsistent width. @Glen McGuire, that could have worked, but then the center plank would have been off-center unless I removed all the planking and started from scratch. I ended up slightly widening the two replacement planks. Although the plank that goes to the edge of the hatch is still wider than its counterpart on the other side, it's less noticeable now. In any case, before I continued on the port side, I needed to frame the fore hatch. This was surprisingly tricky for two reasons. First, due to the deck camber, the pieces needed to be joined at an angle. This took some work to get right, and I had to redo a couple of the parts. Second, there was nothing inside the hatch hole with which to hold the coaming in place. After trying and discarding a friction fit--too much risk of the coaming falling in and being lost forever--I carefully super-glued in a few supports, two in the fore corners and a long thin one along the aft edge. With this, the fore hatch coaming is ready and I can continue planking the port side. I've also made progress on the starboard side.


- 312 replies
-
- 7
-
-
- Chile
- Latin America
- (and 6 more)
-
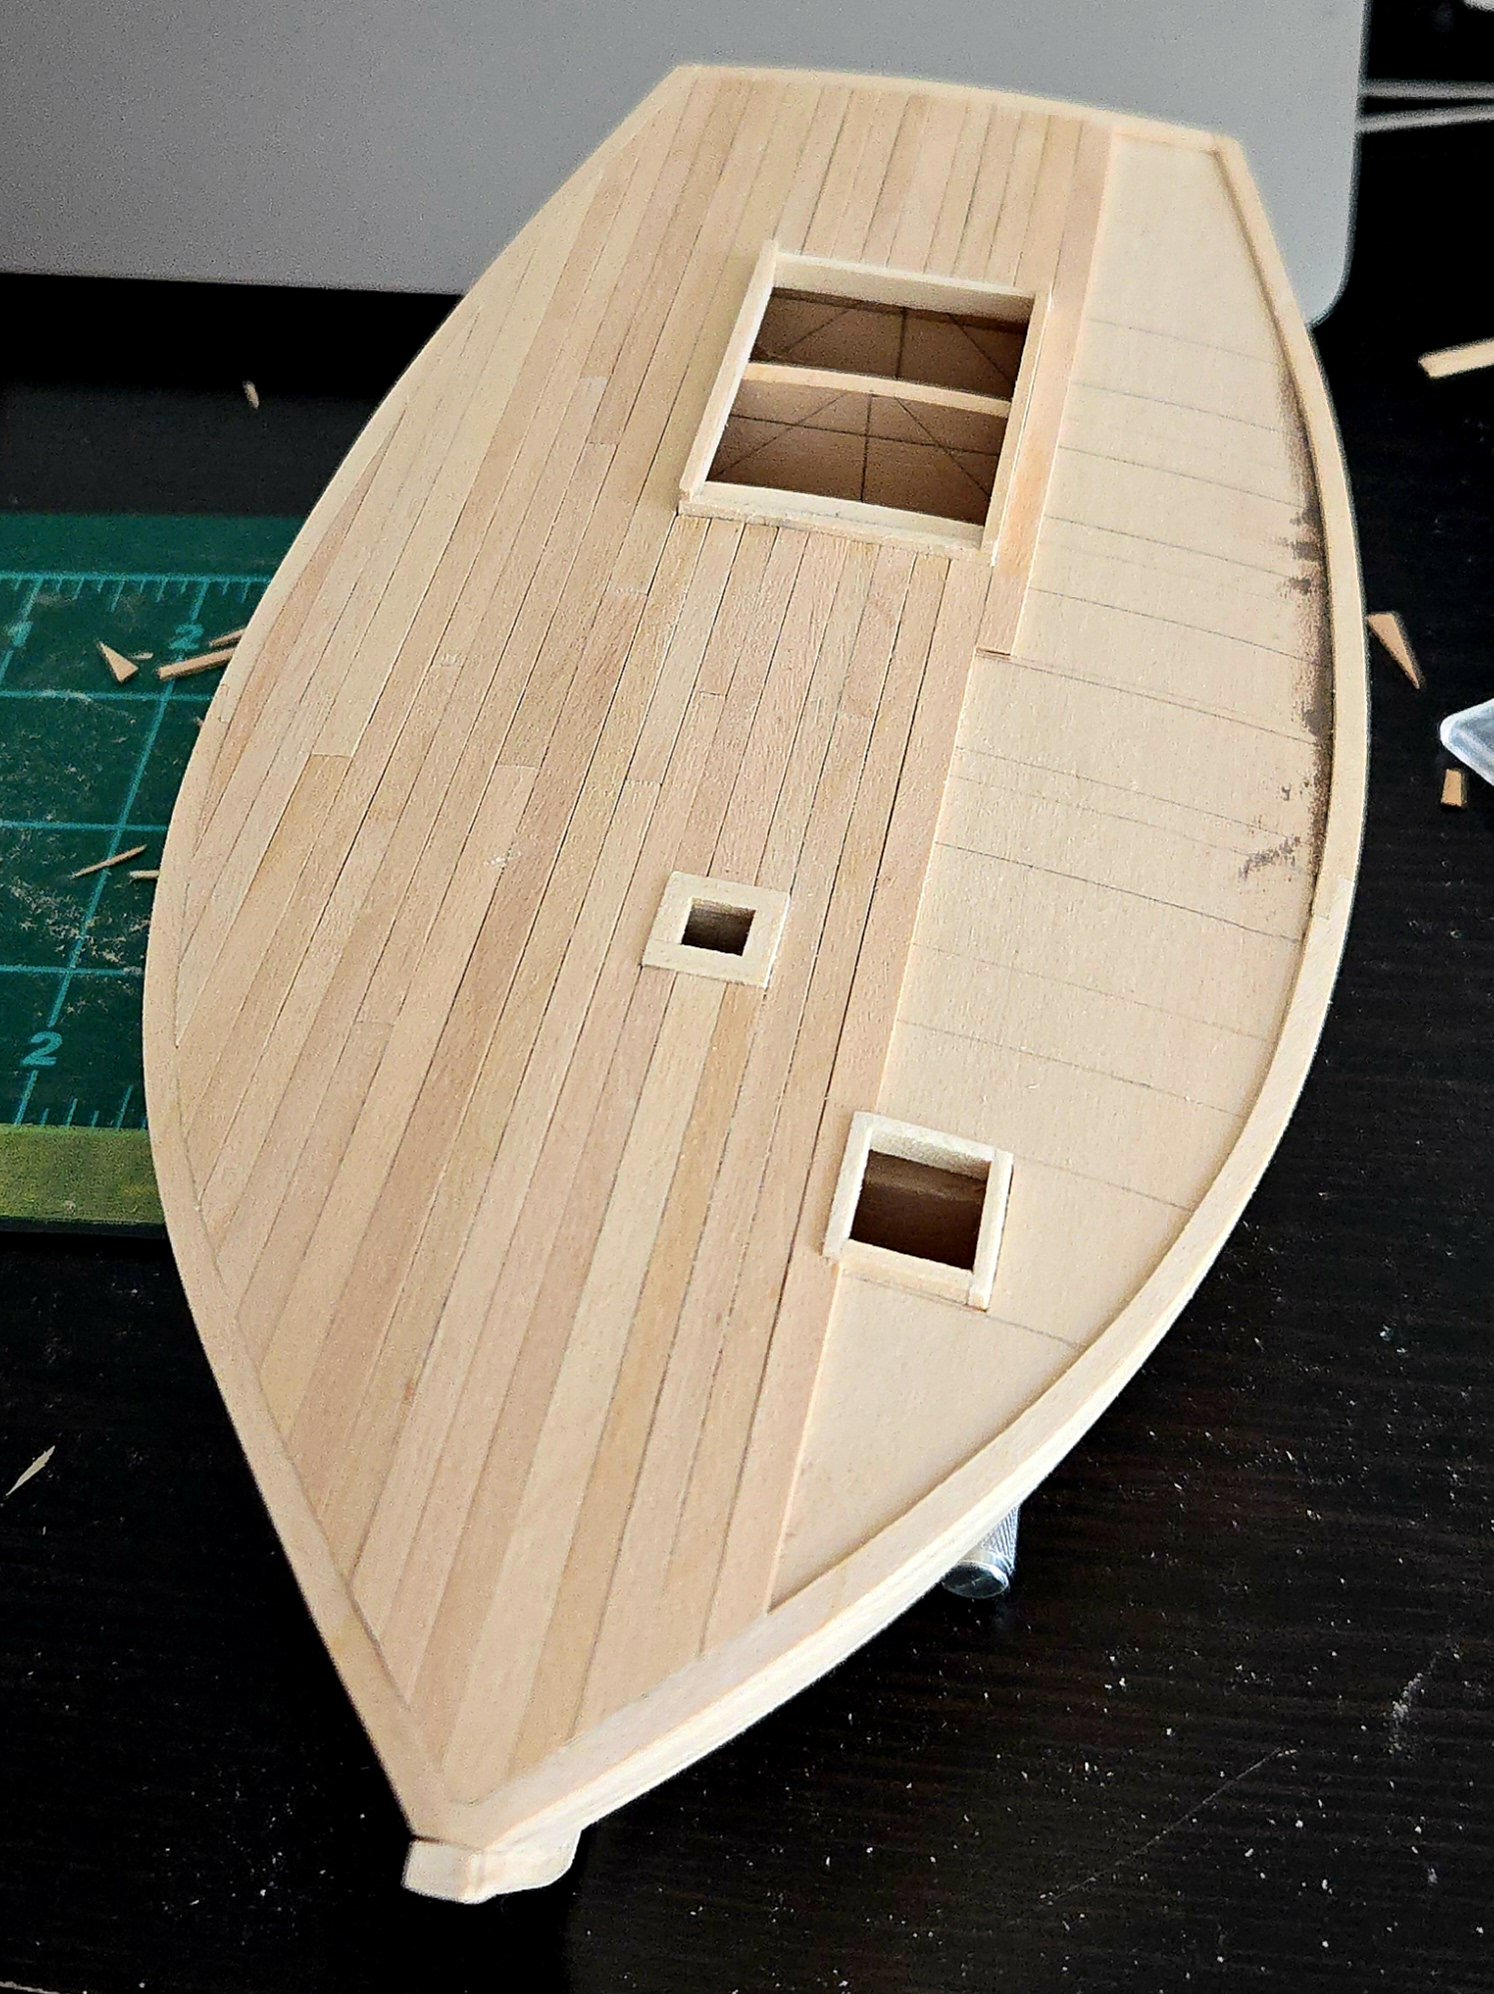
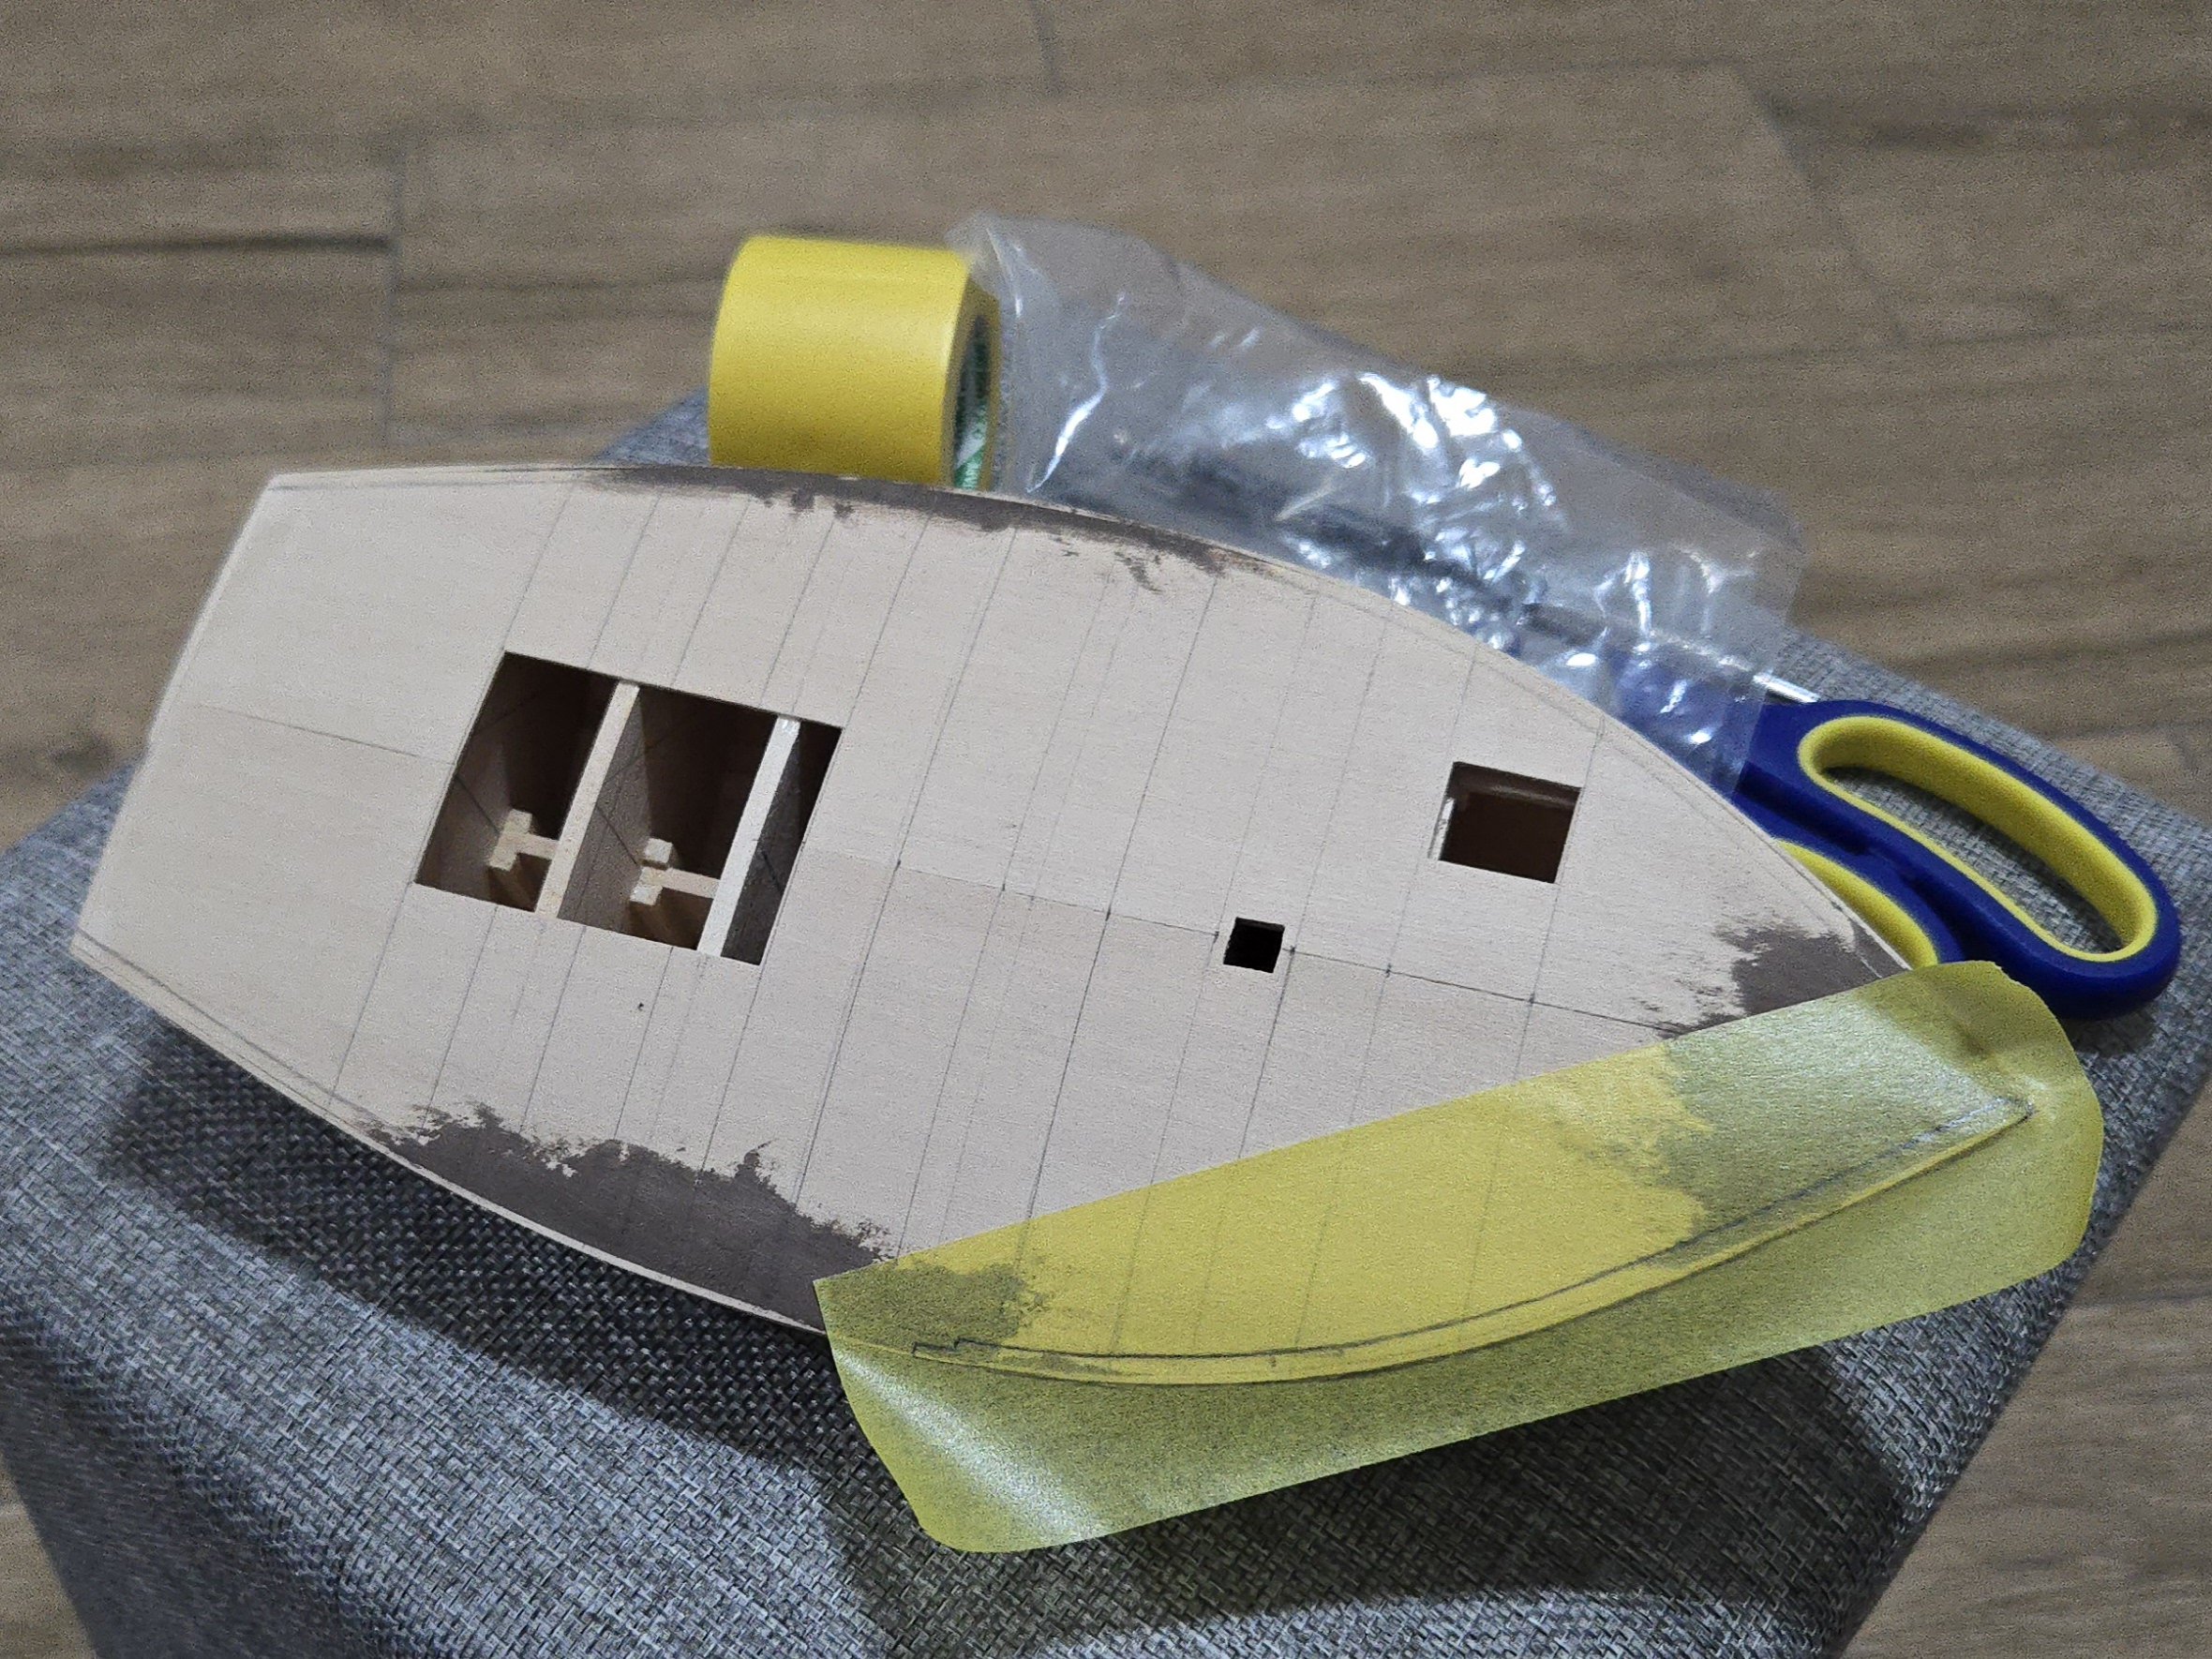
After some consideration, I decided to remove the two planks from the port side. I can replace them with slightly thicker planks and end up with a more even planking job. They came off pretty easily after being soaked in rubbing alcohol--while there's a lot of surface area glued, the glue joint isn't all that strong as I'm not able to clamp any of these planks. I'll just make sure to secure any cleats that may have a bit of pressure on them not only with glue, but also with a pin. In any case, I've continued planking the starboard side. I'll just need to take care that the port side planking matches.
- 312 replies
-
- 7
-
-
- Chile
- Latin America
- (and 6 more)
-
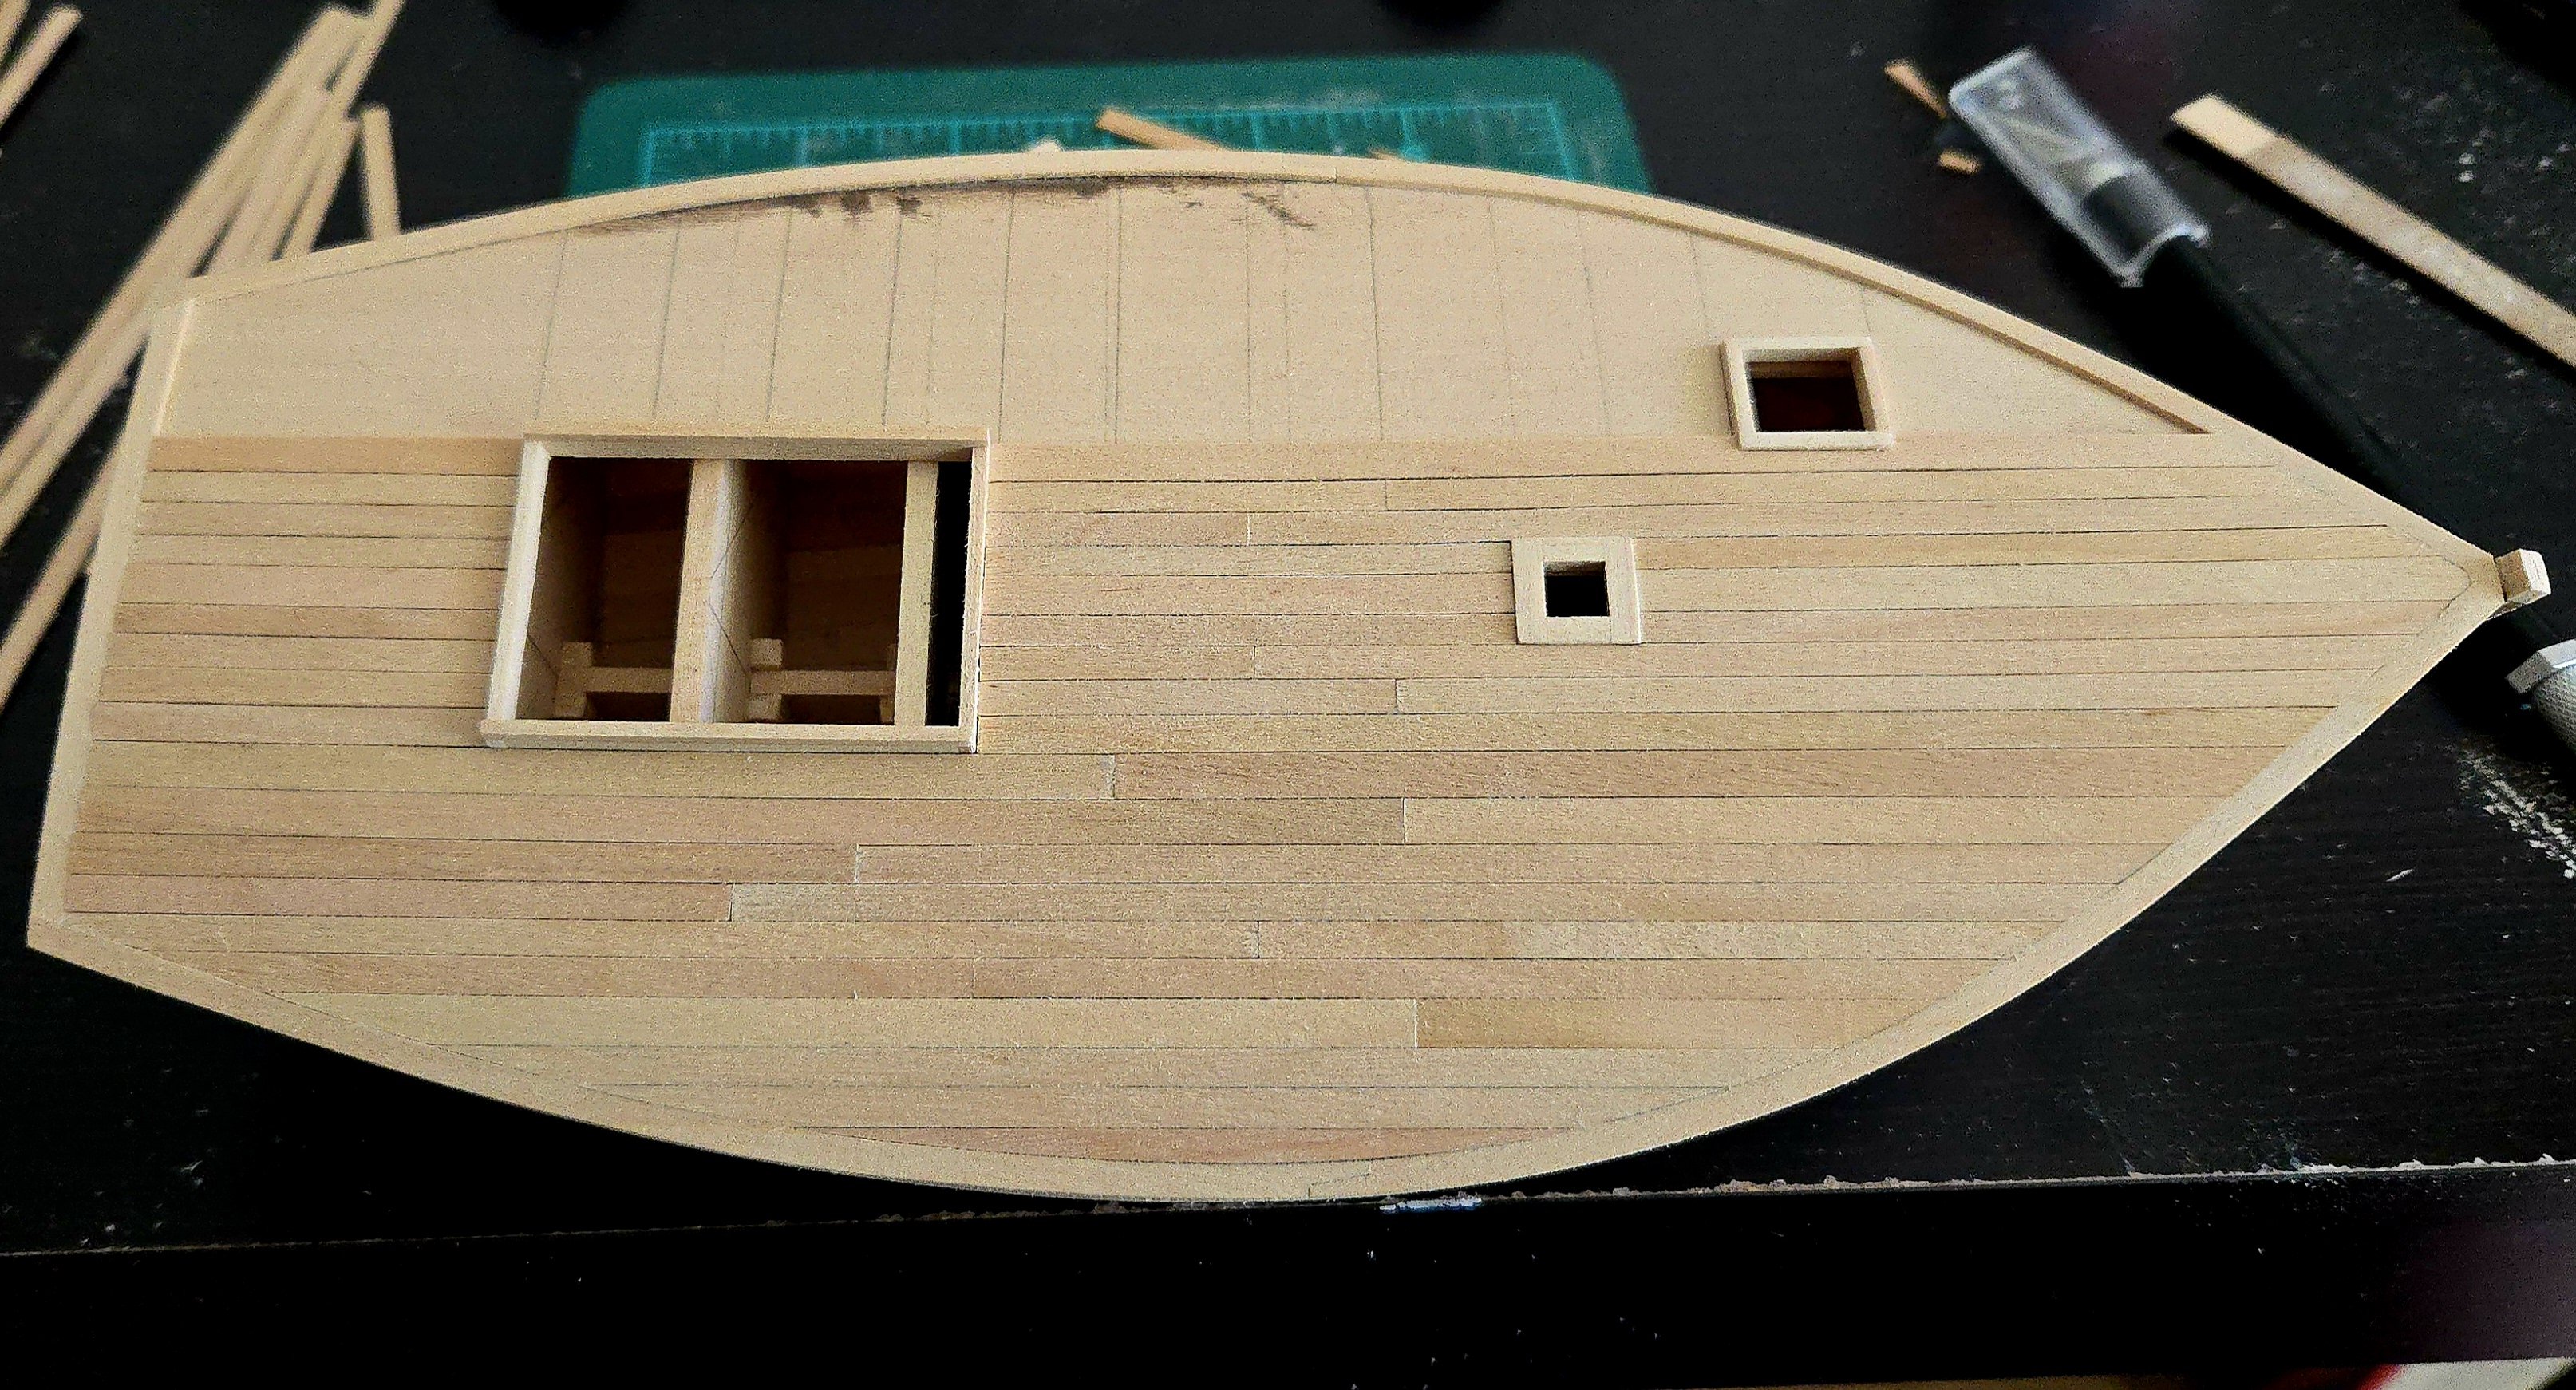
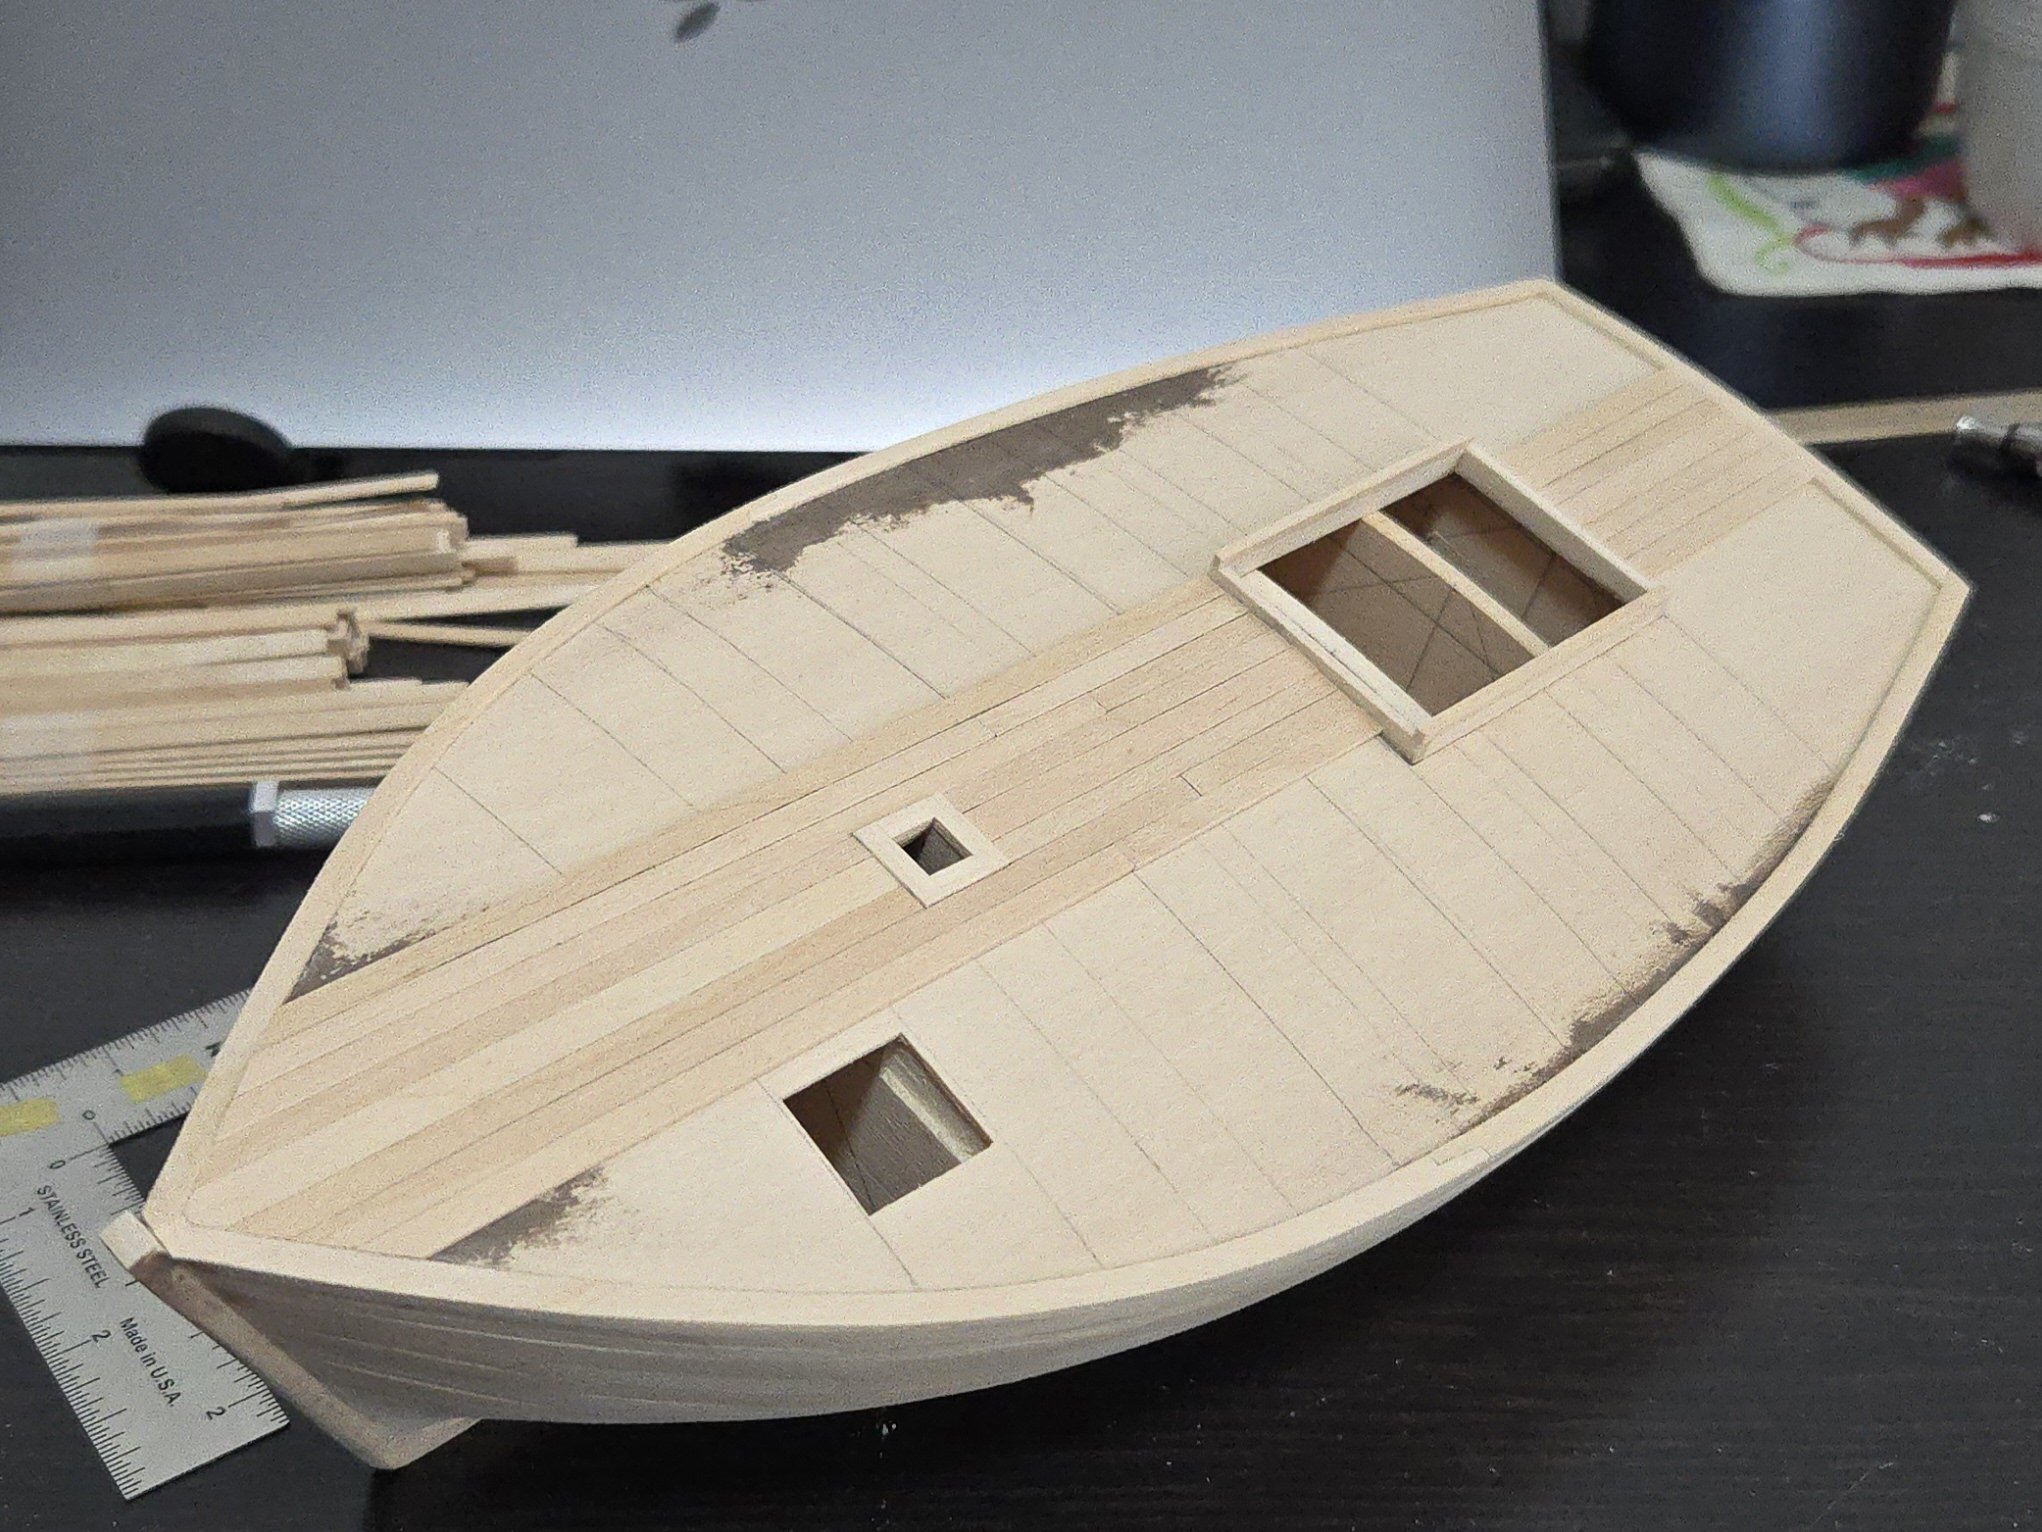
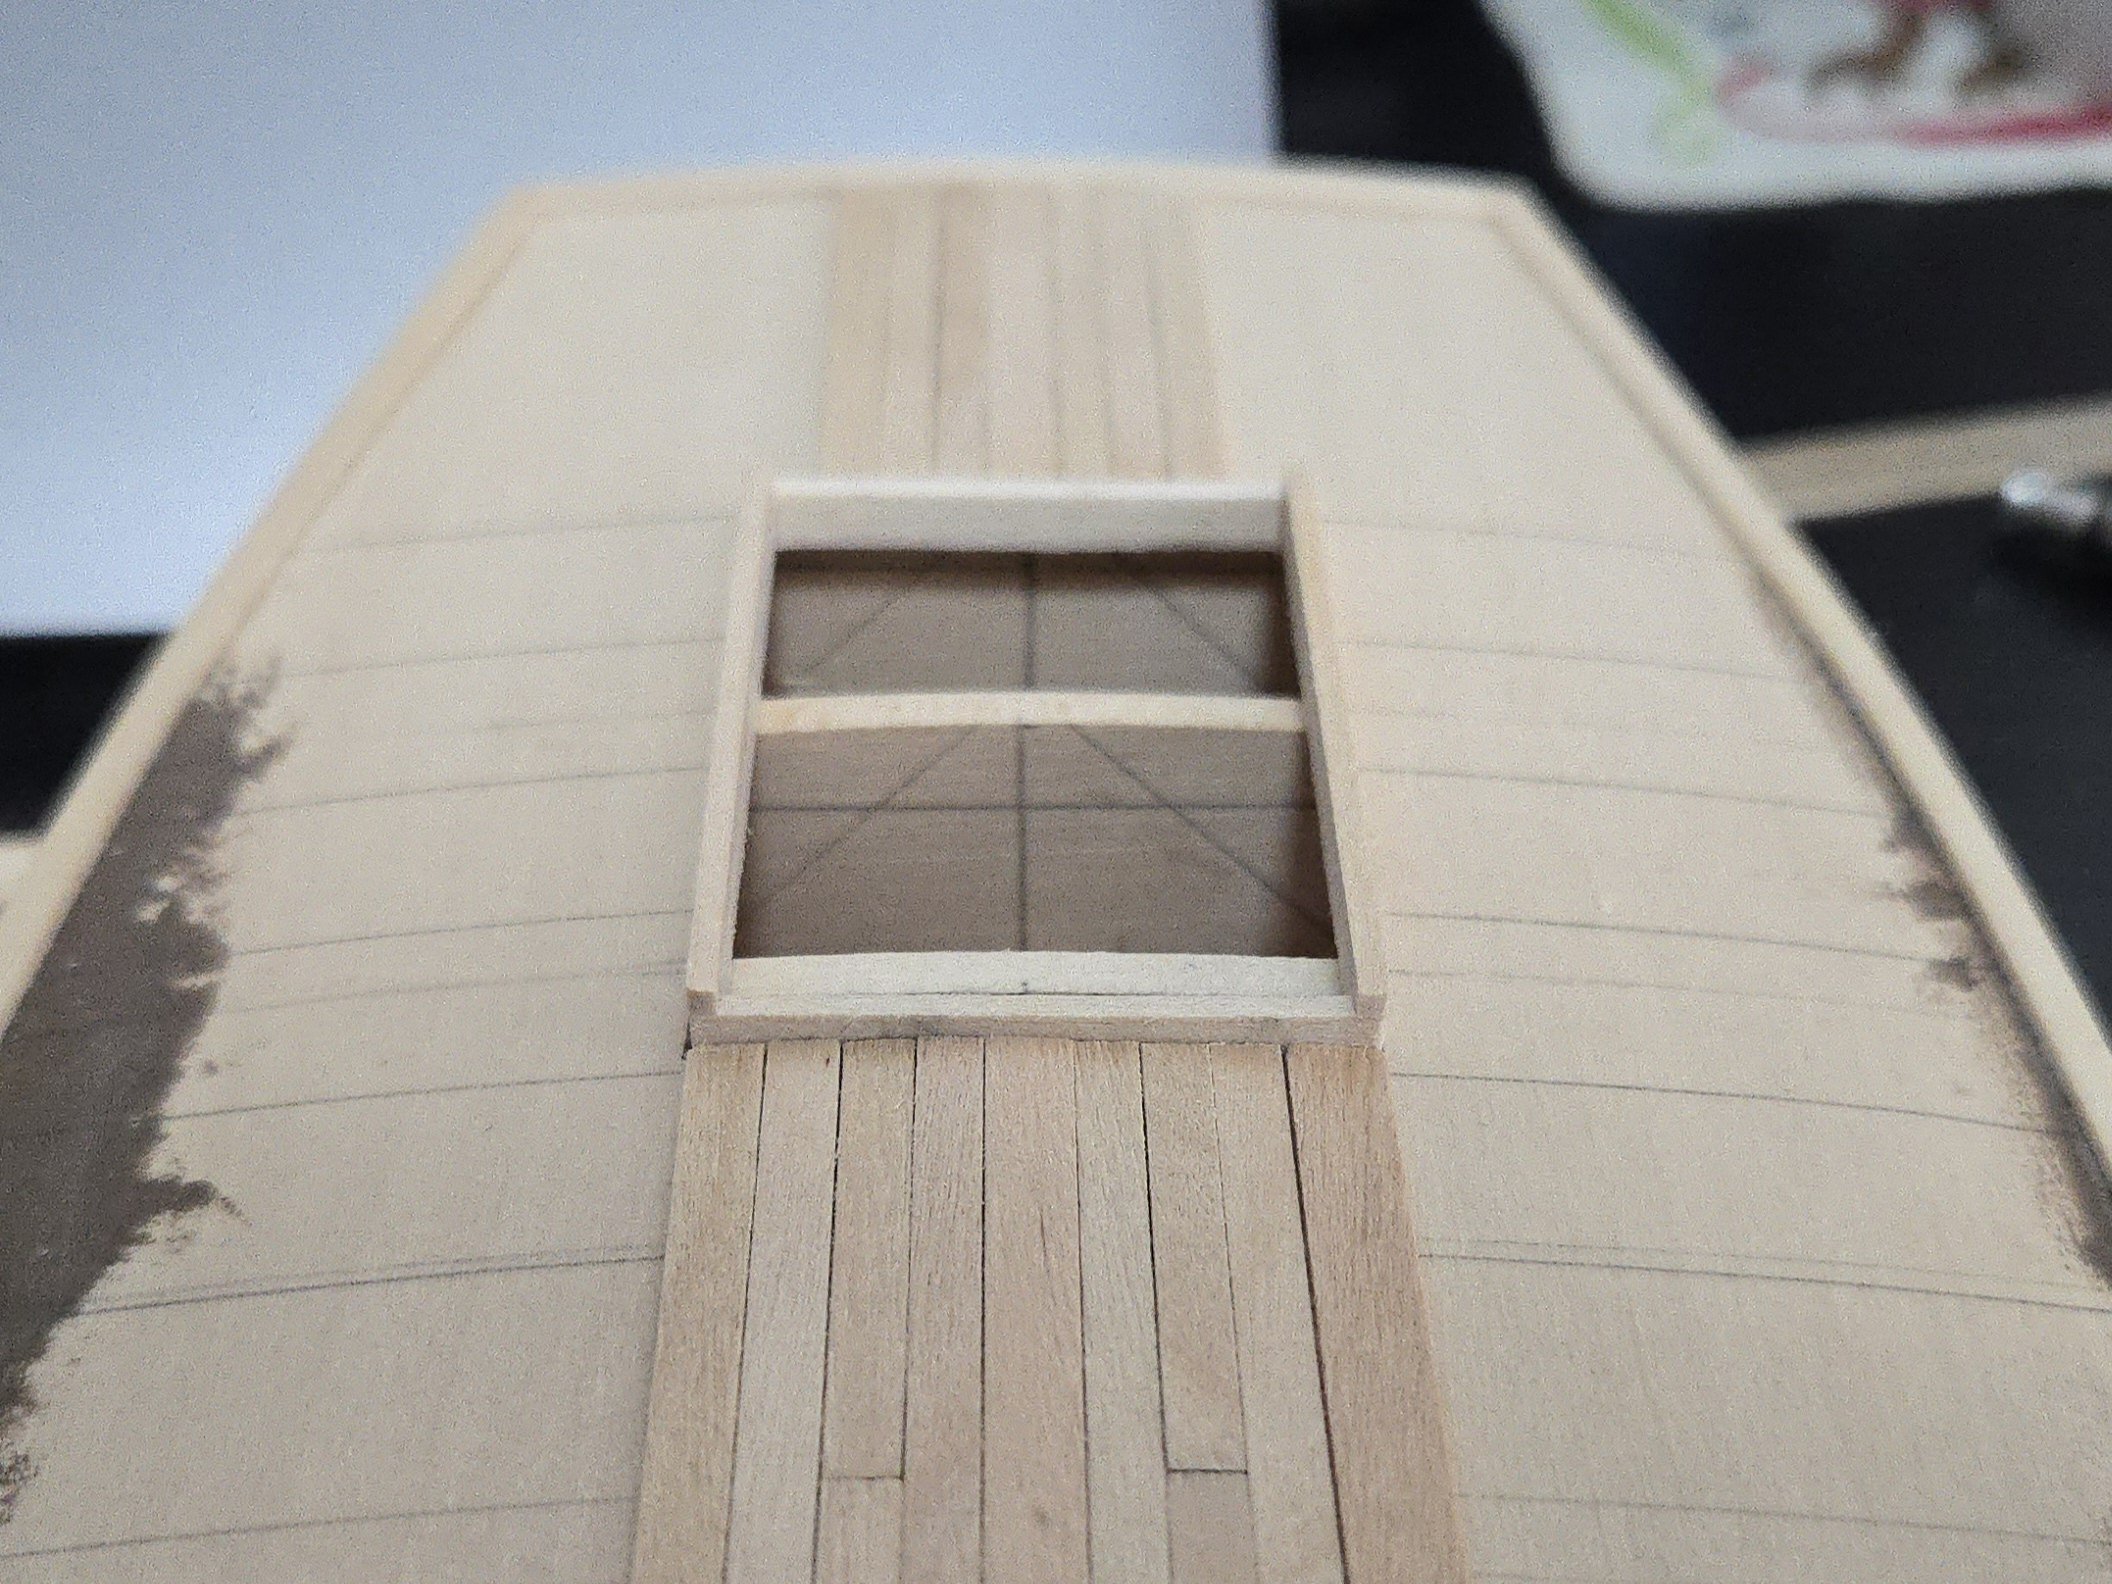
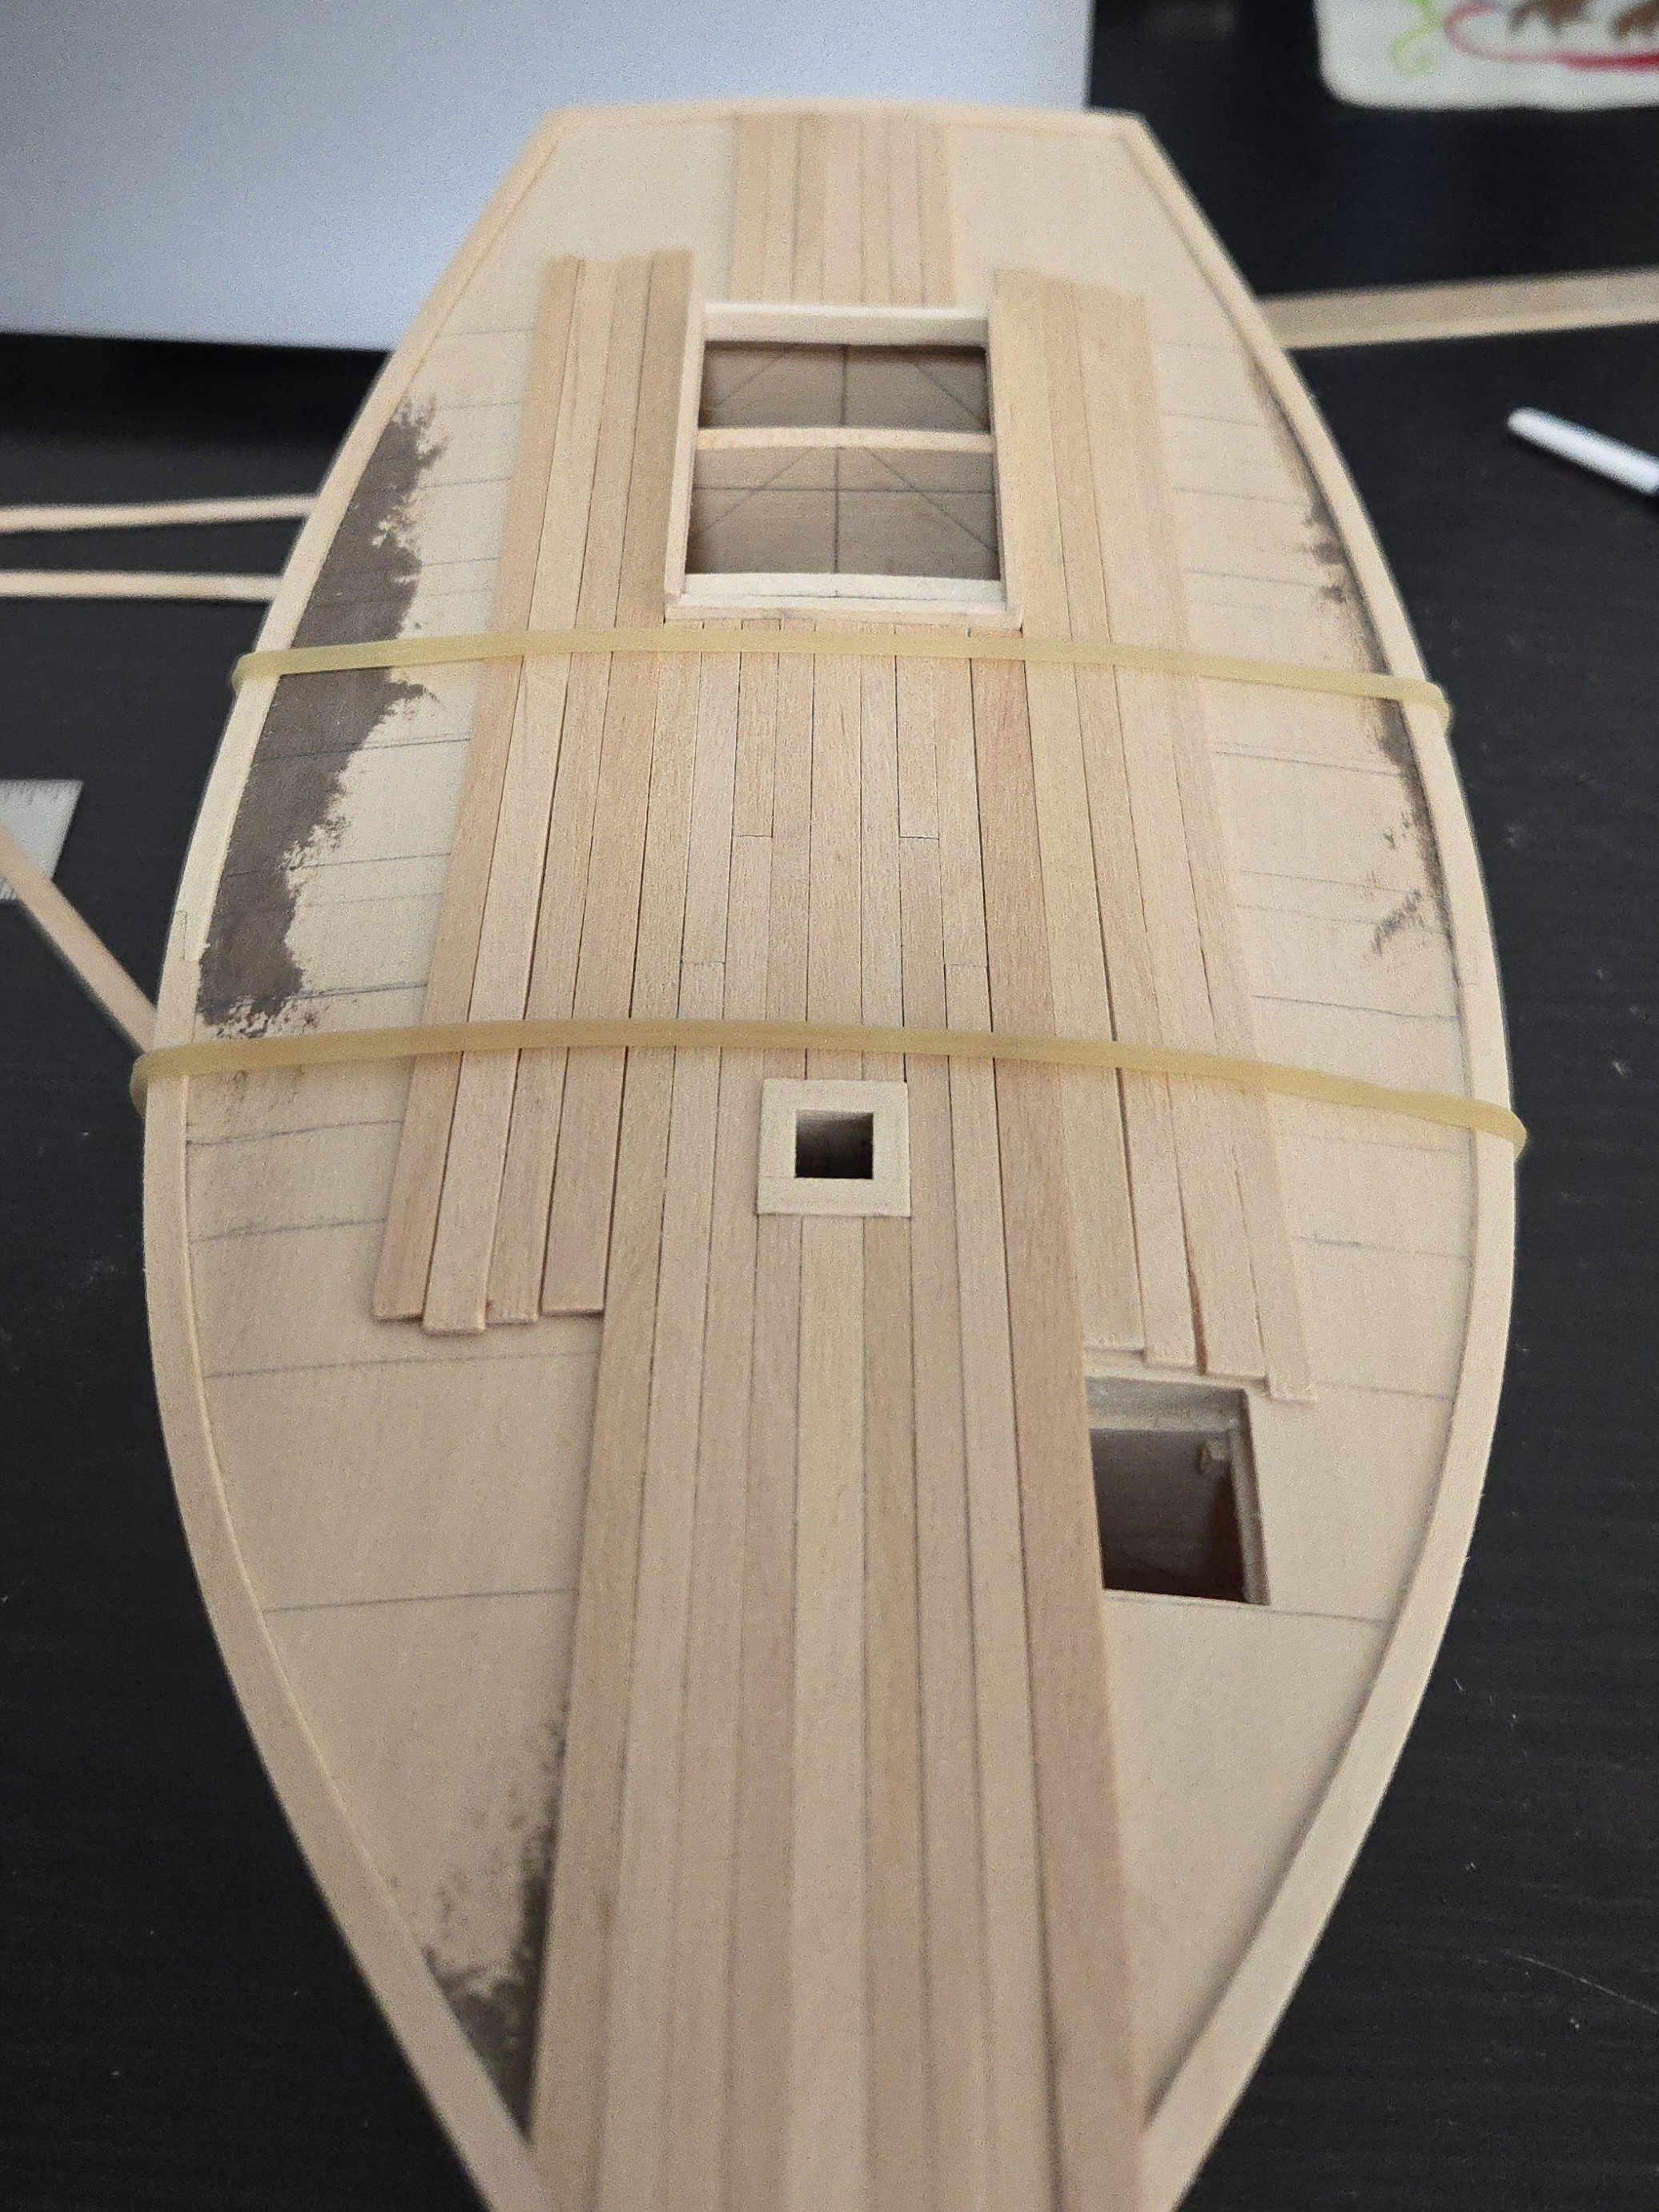
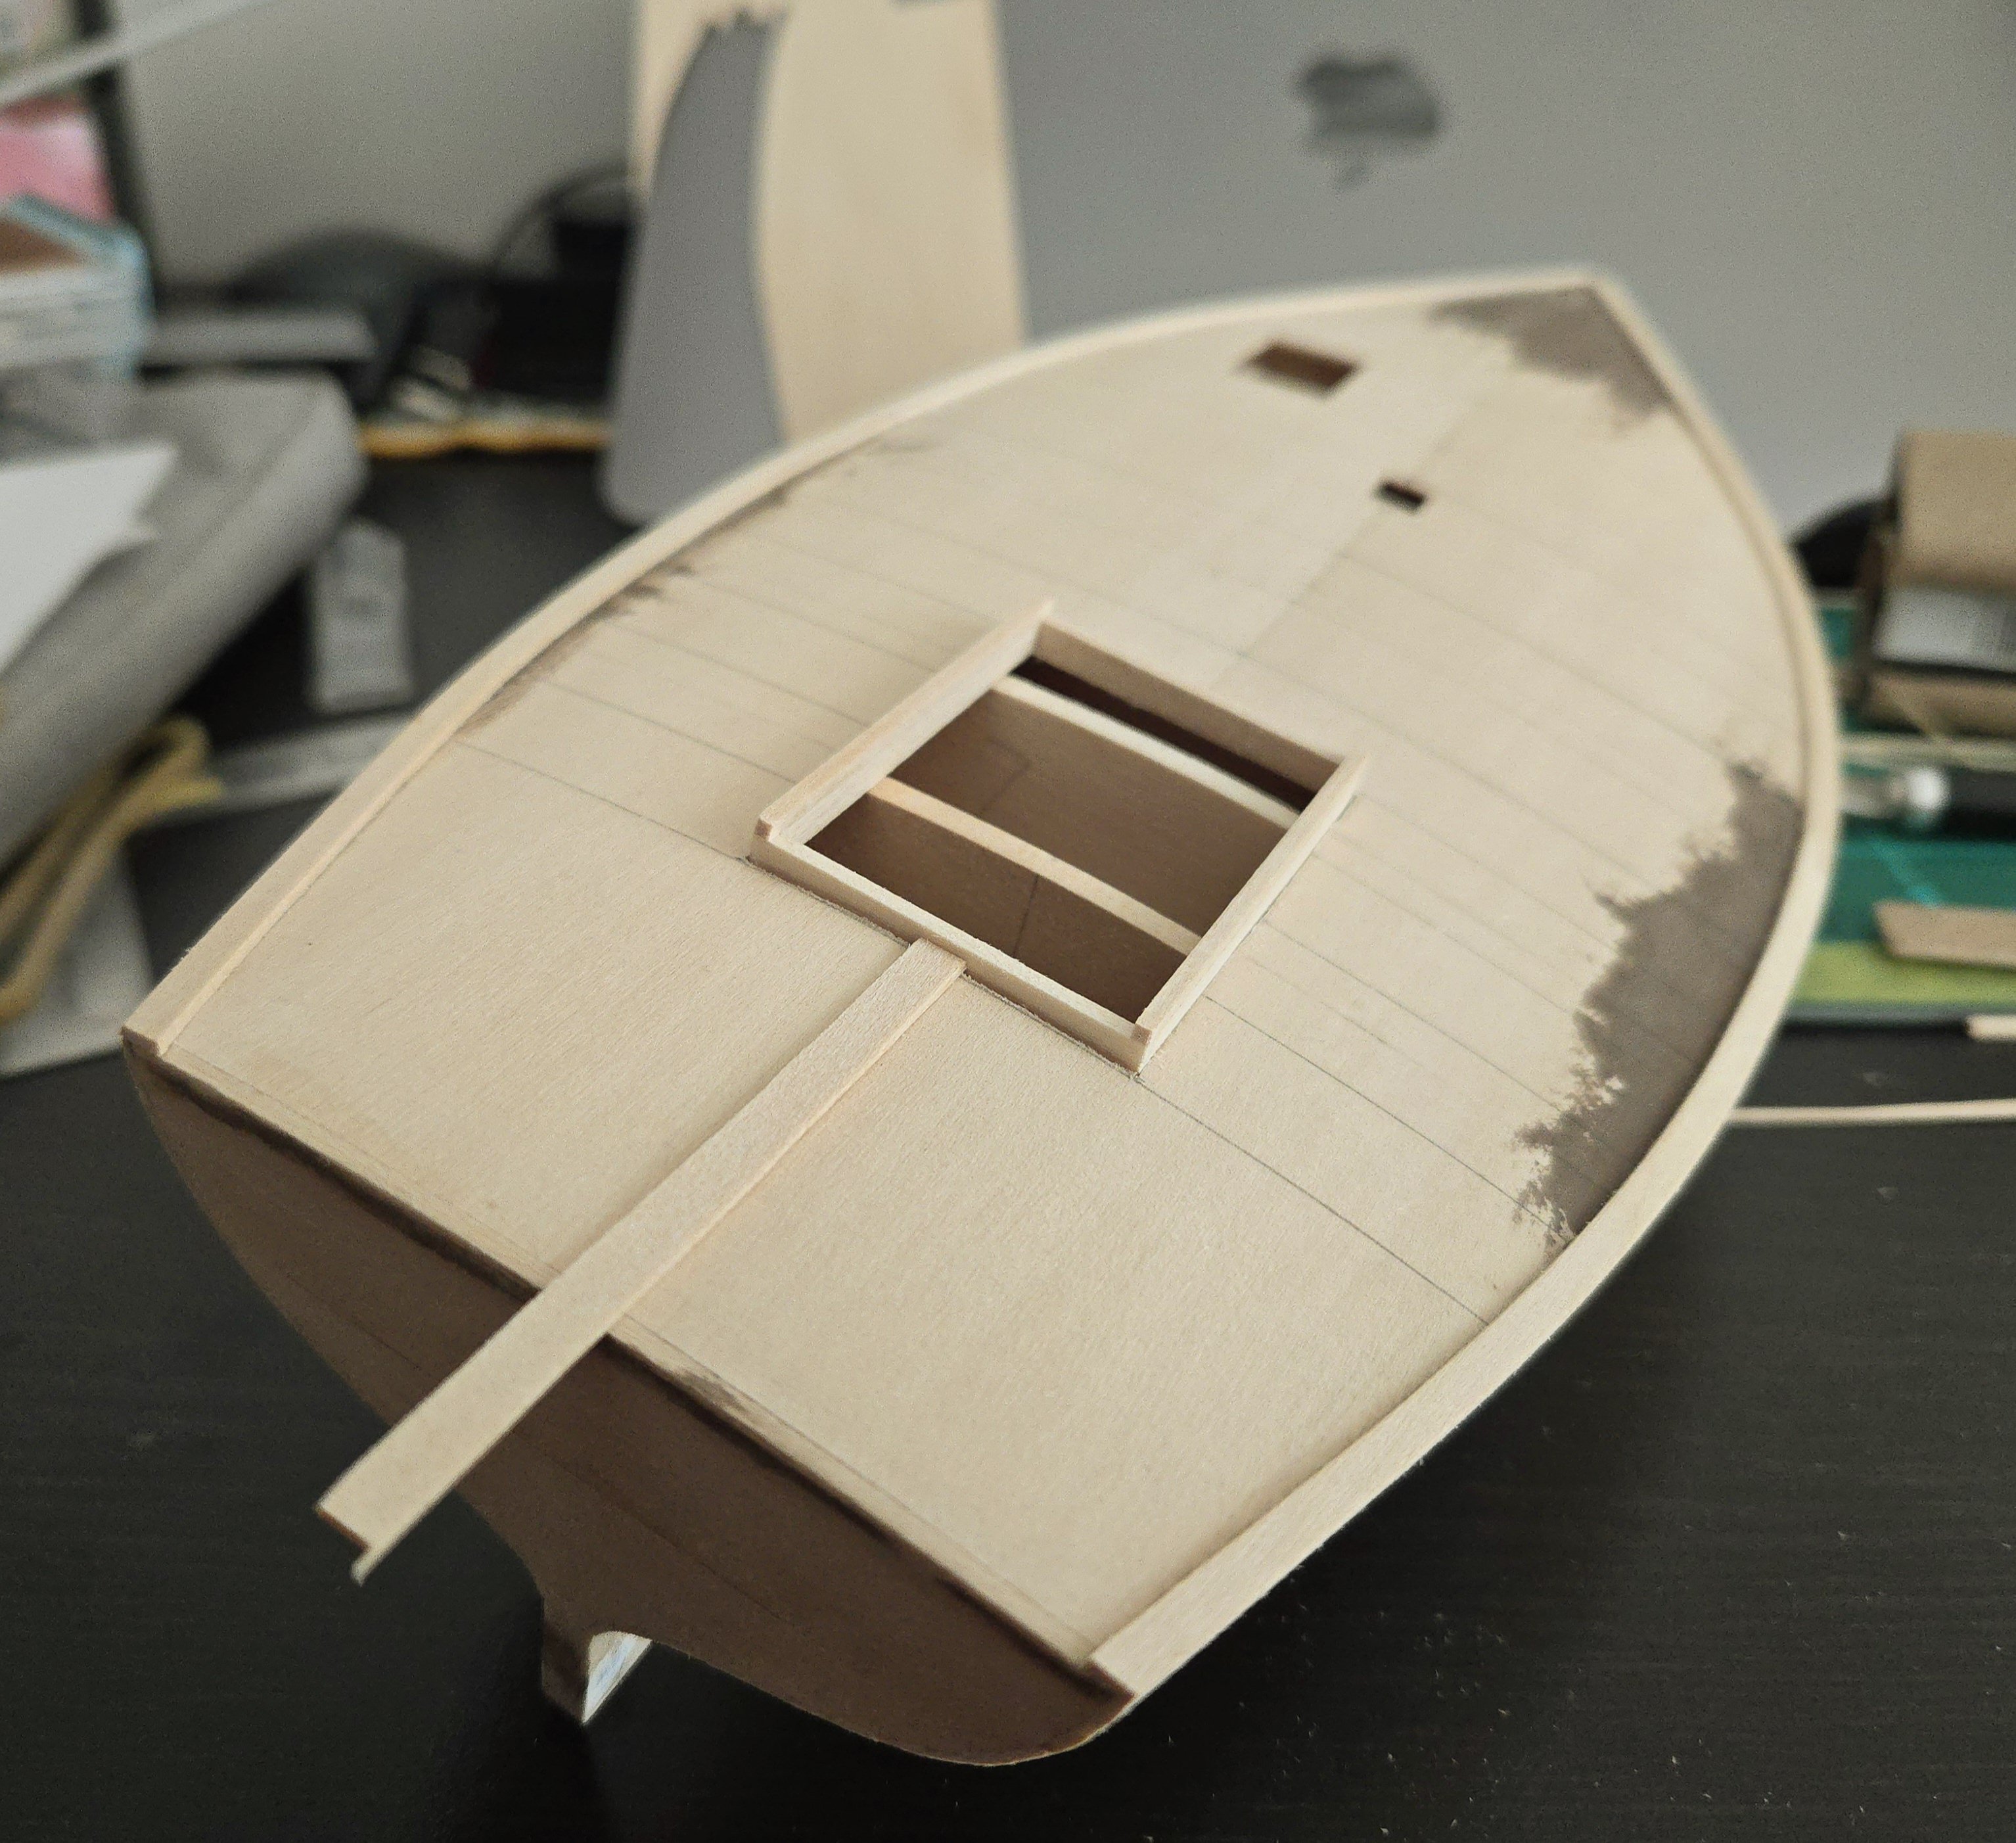
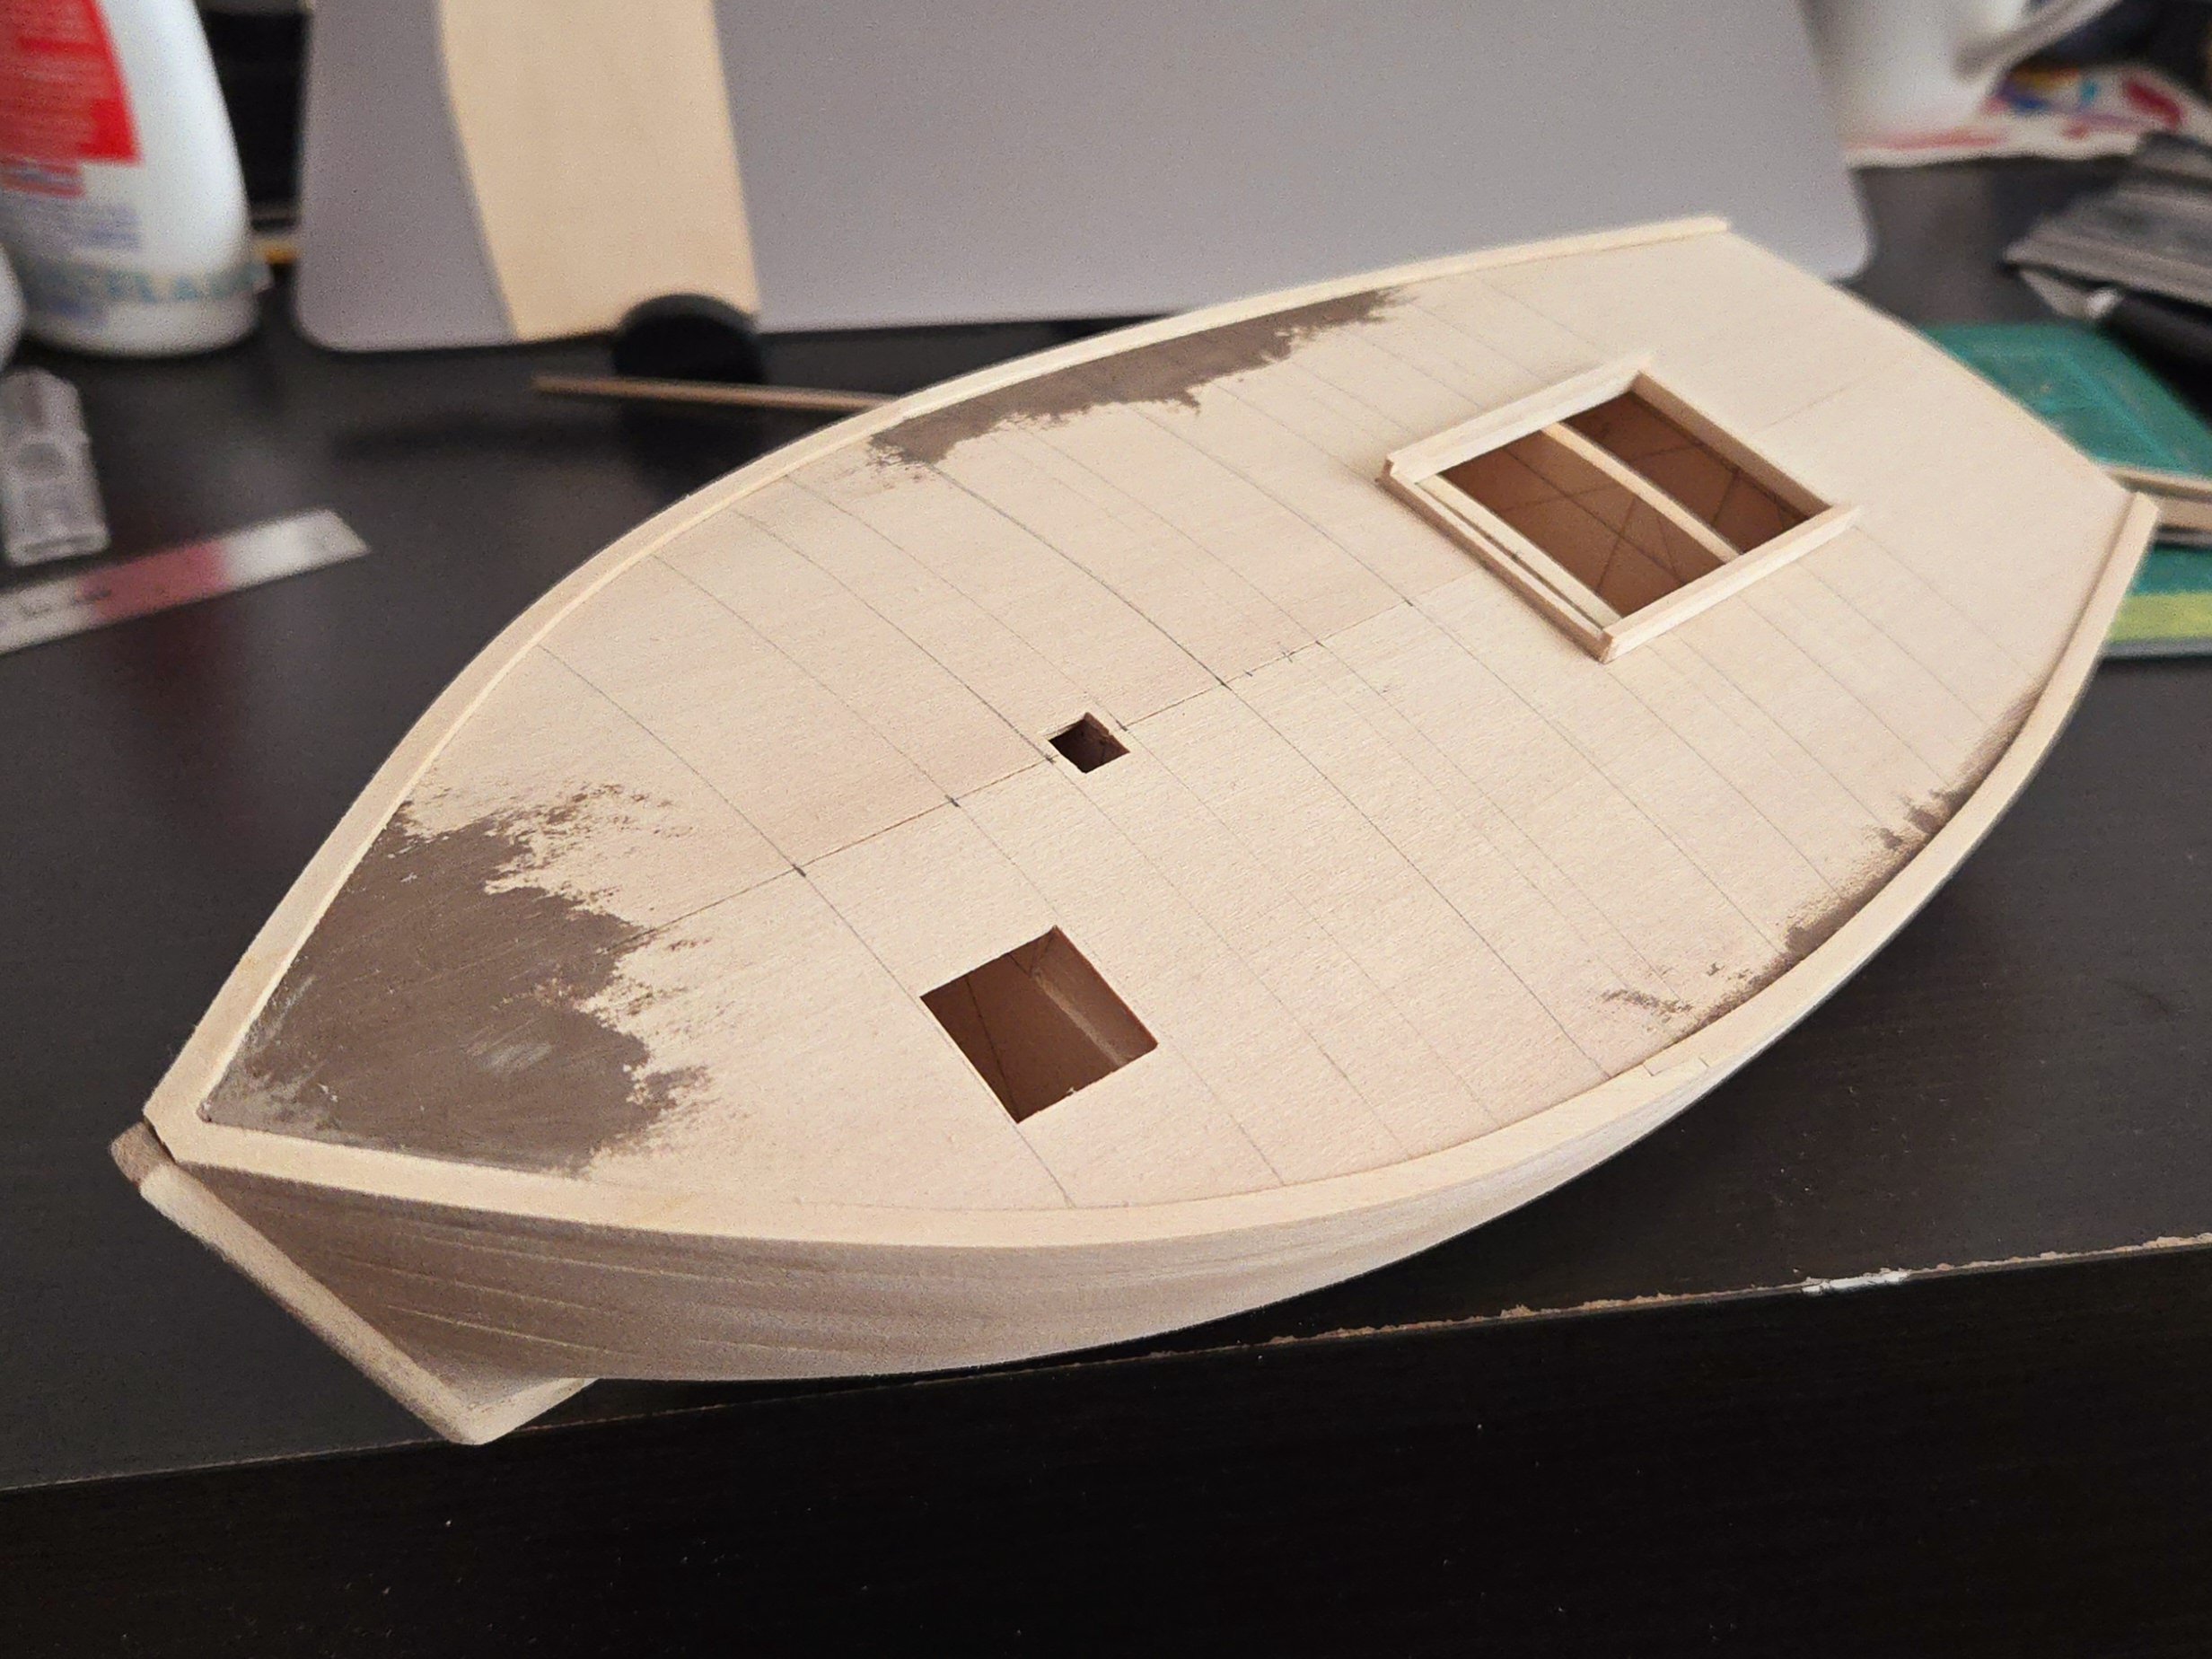
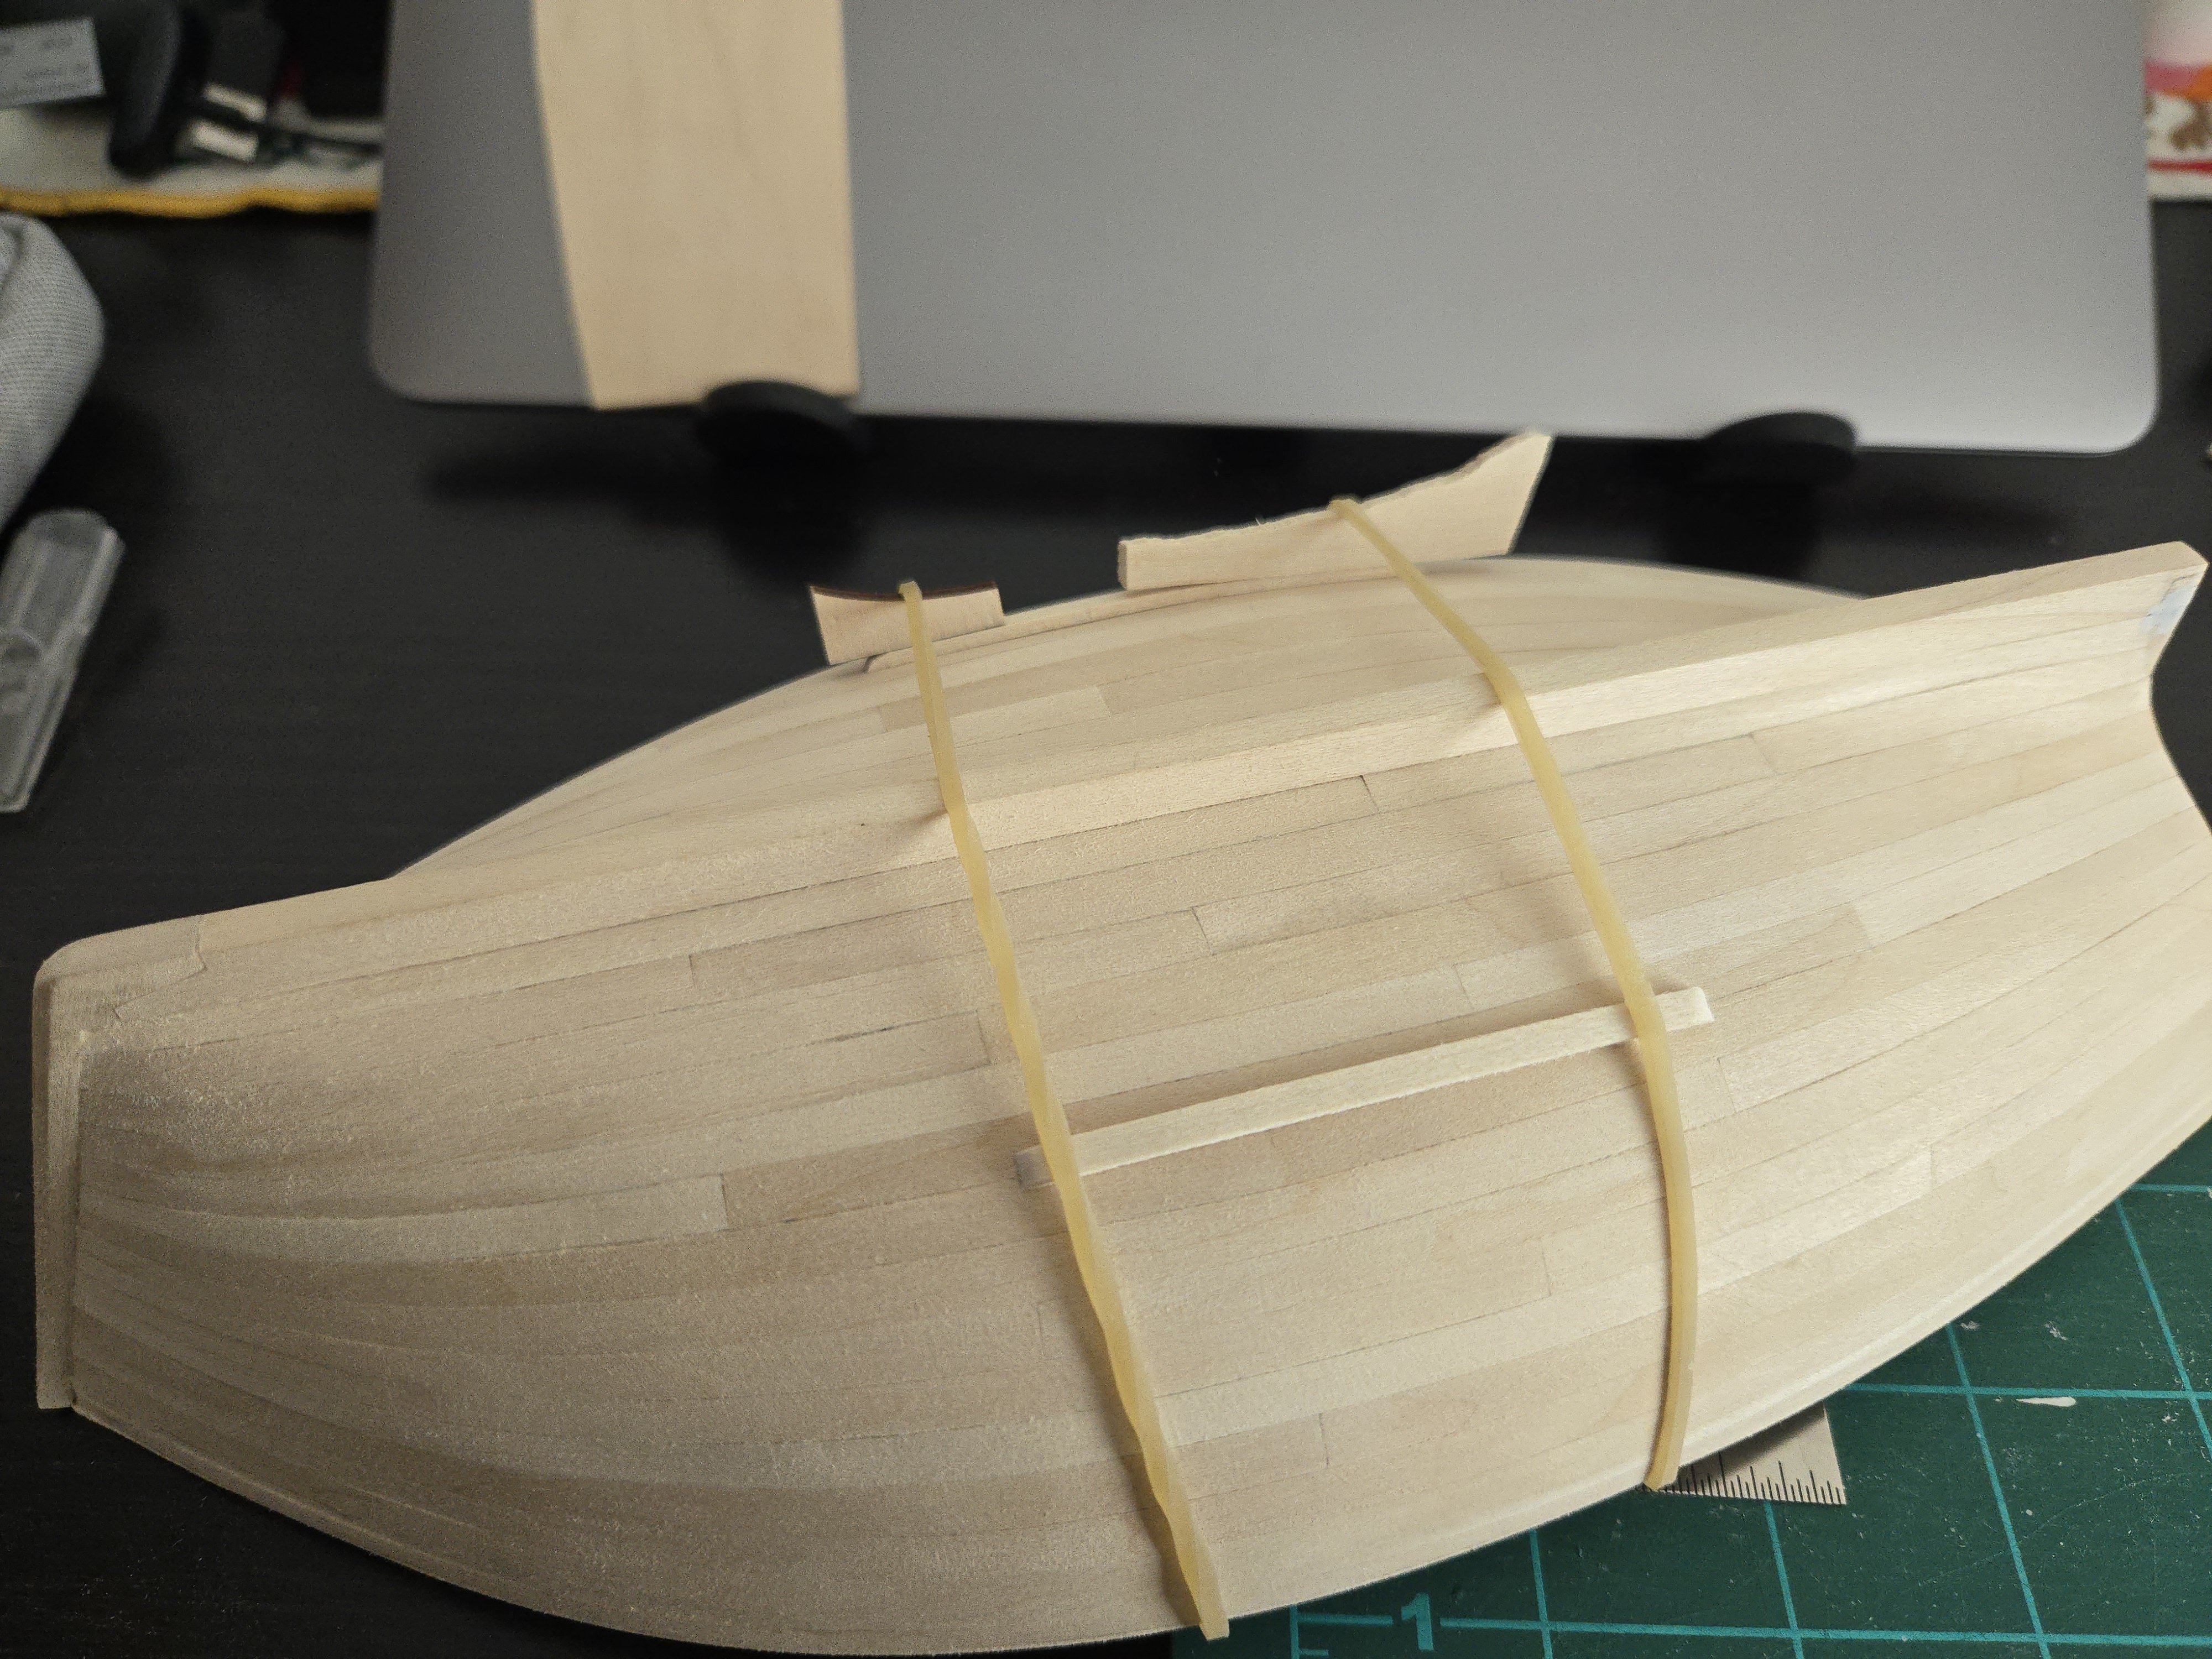
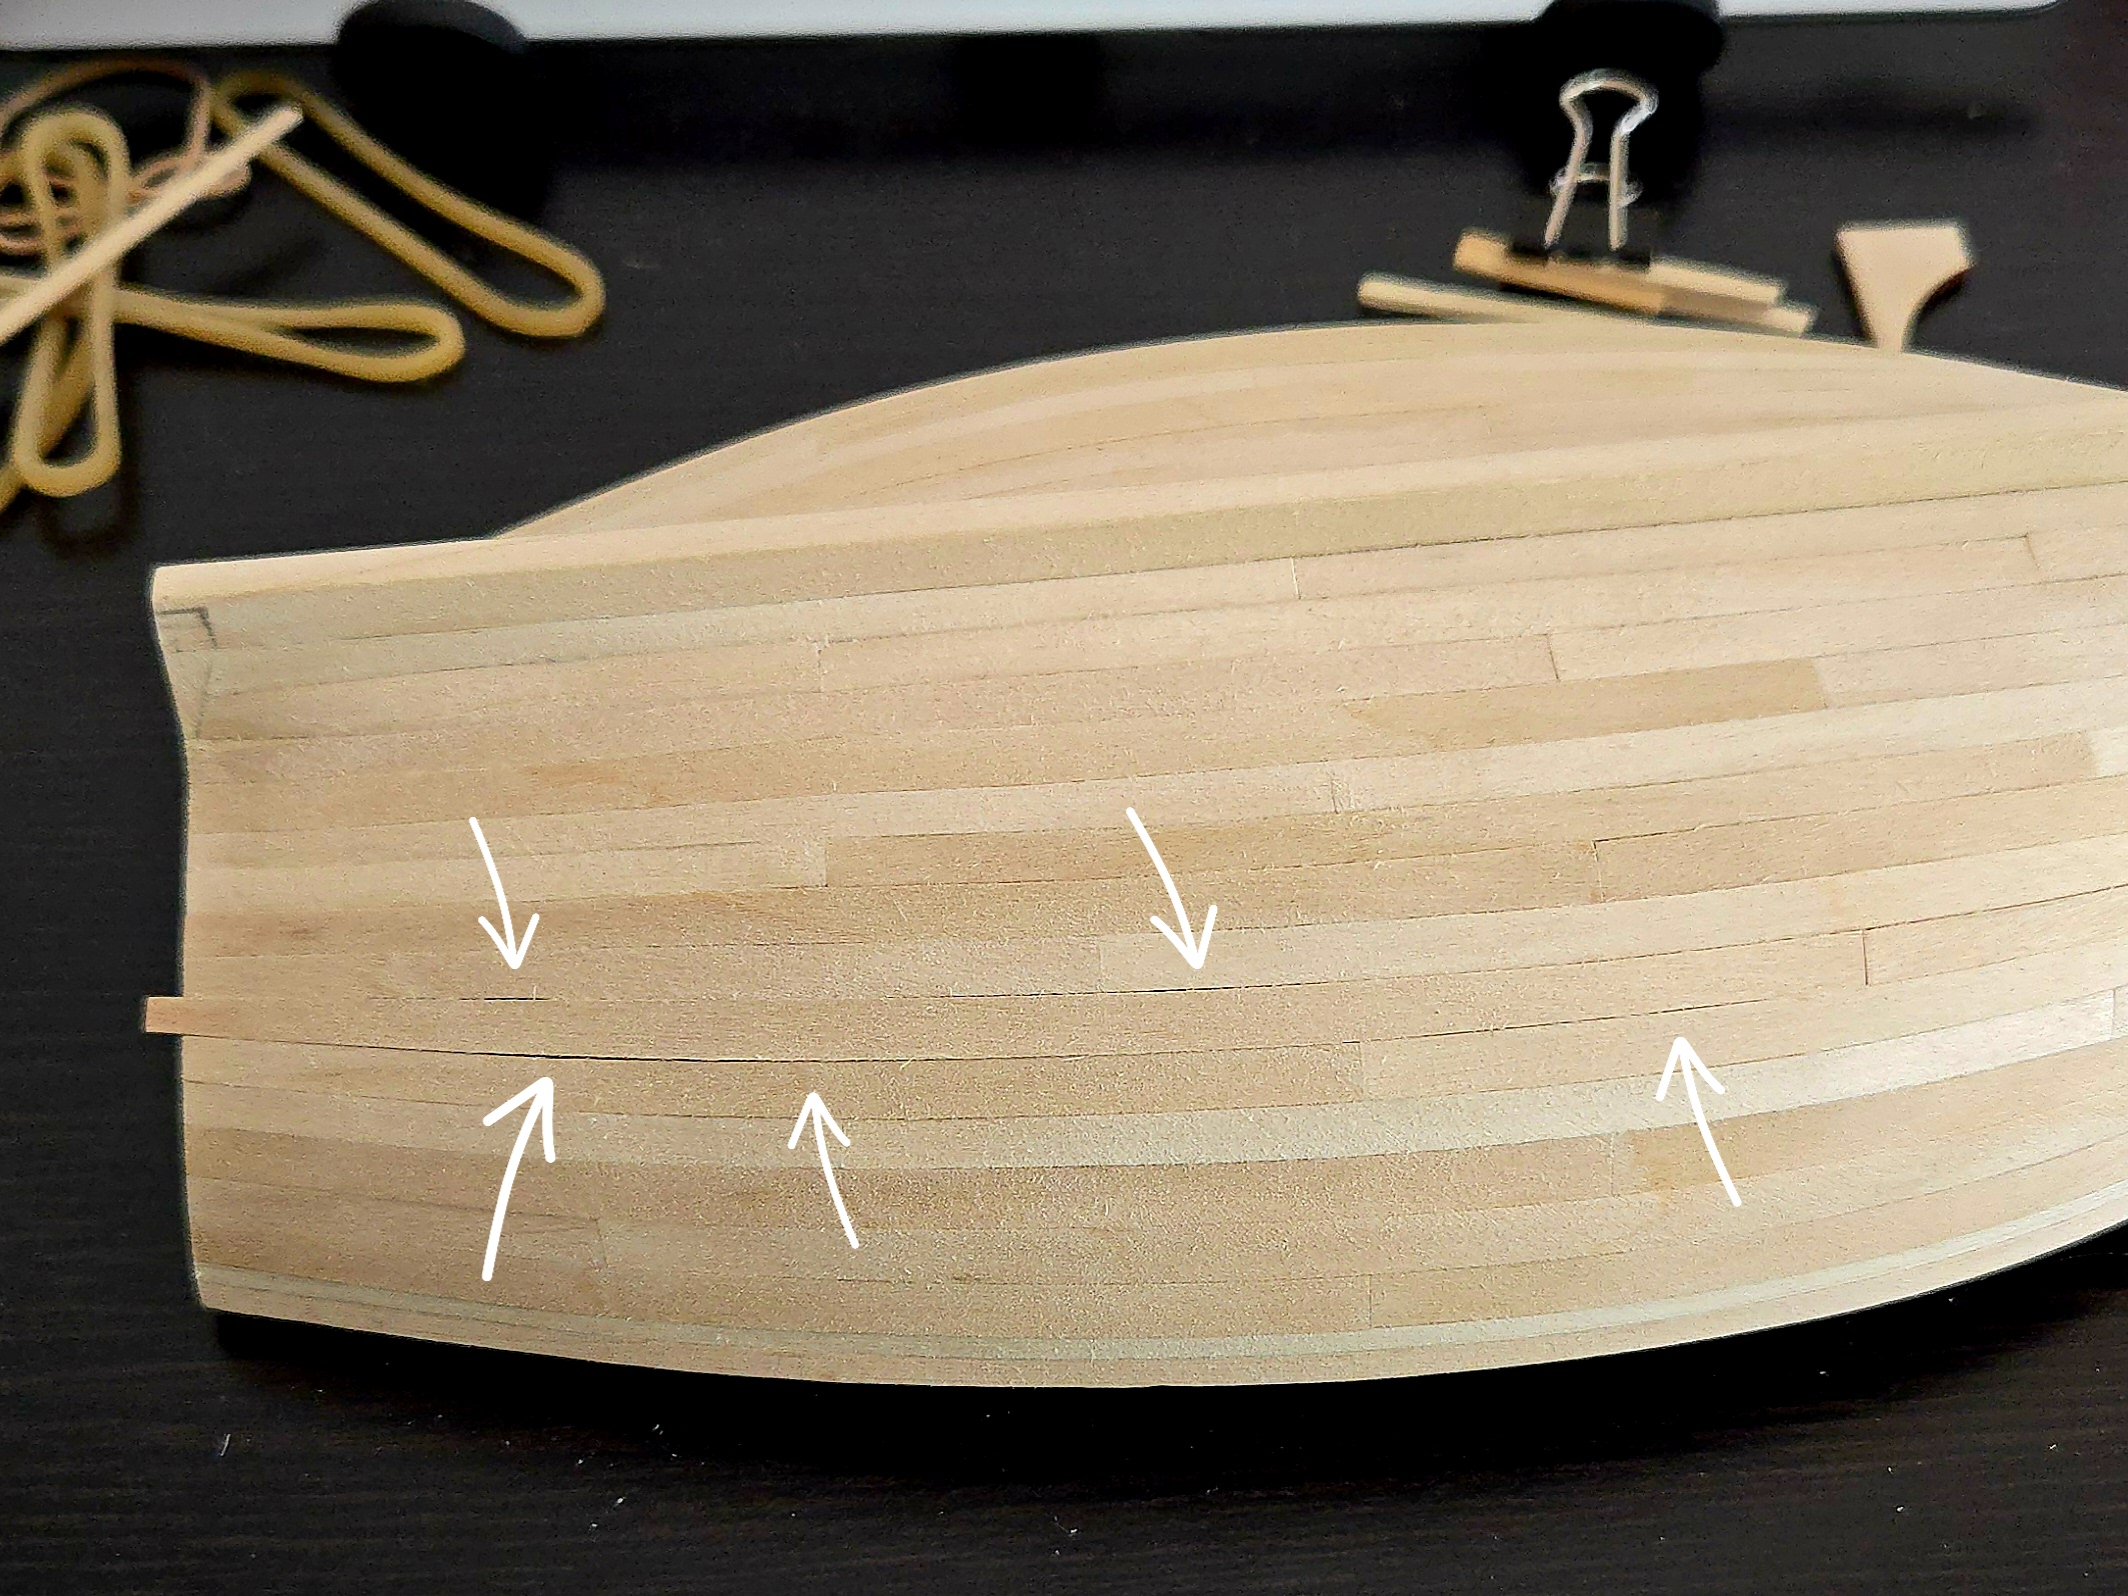
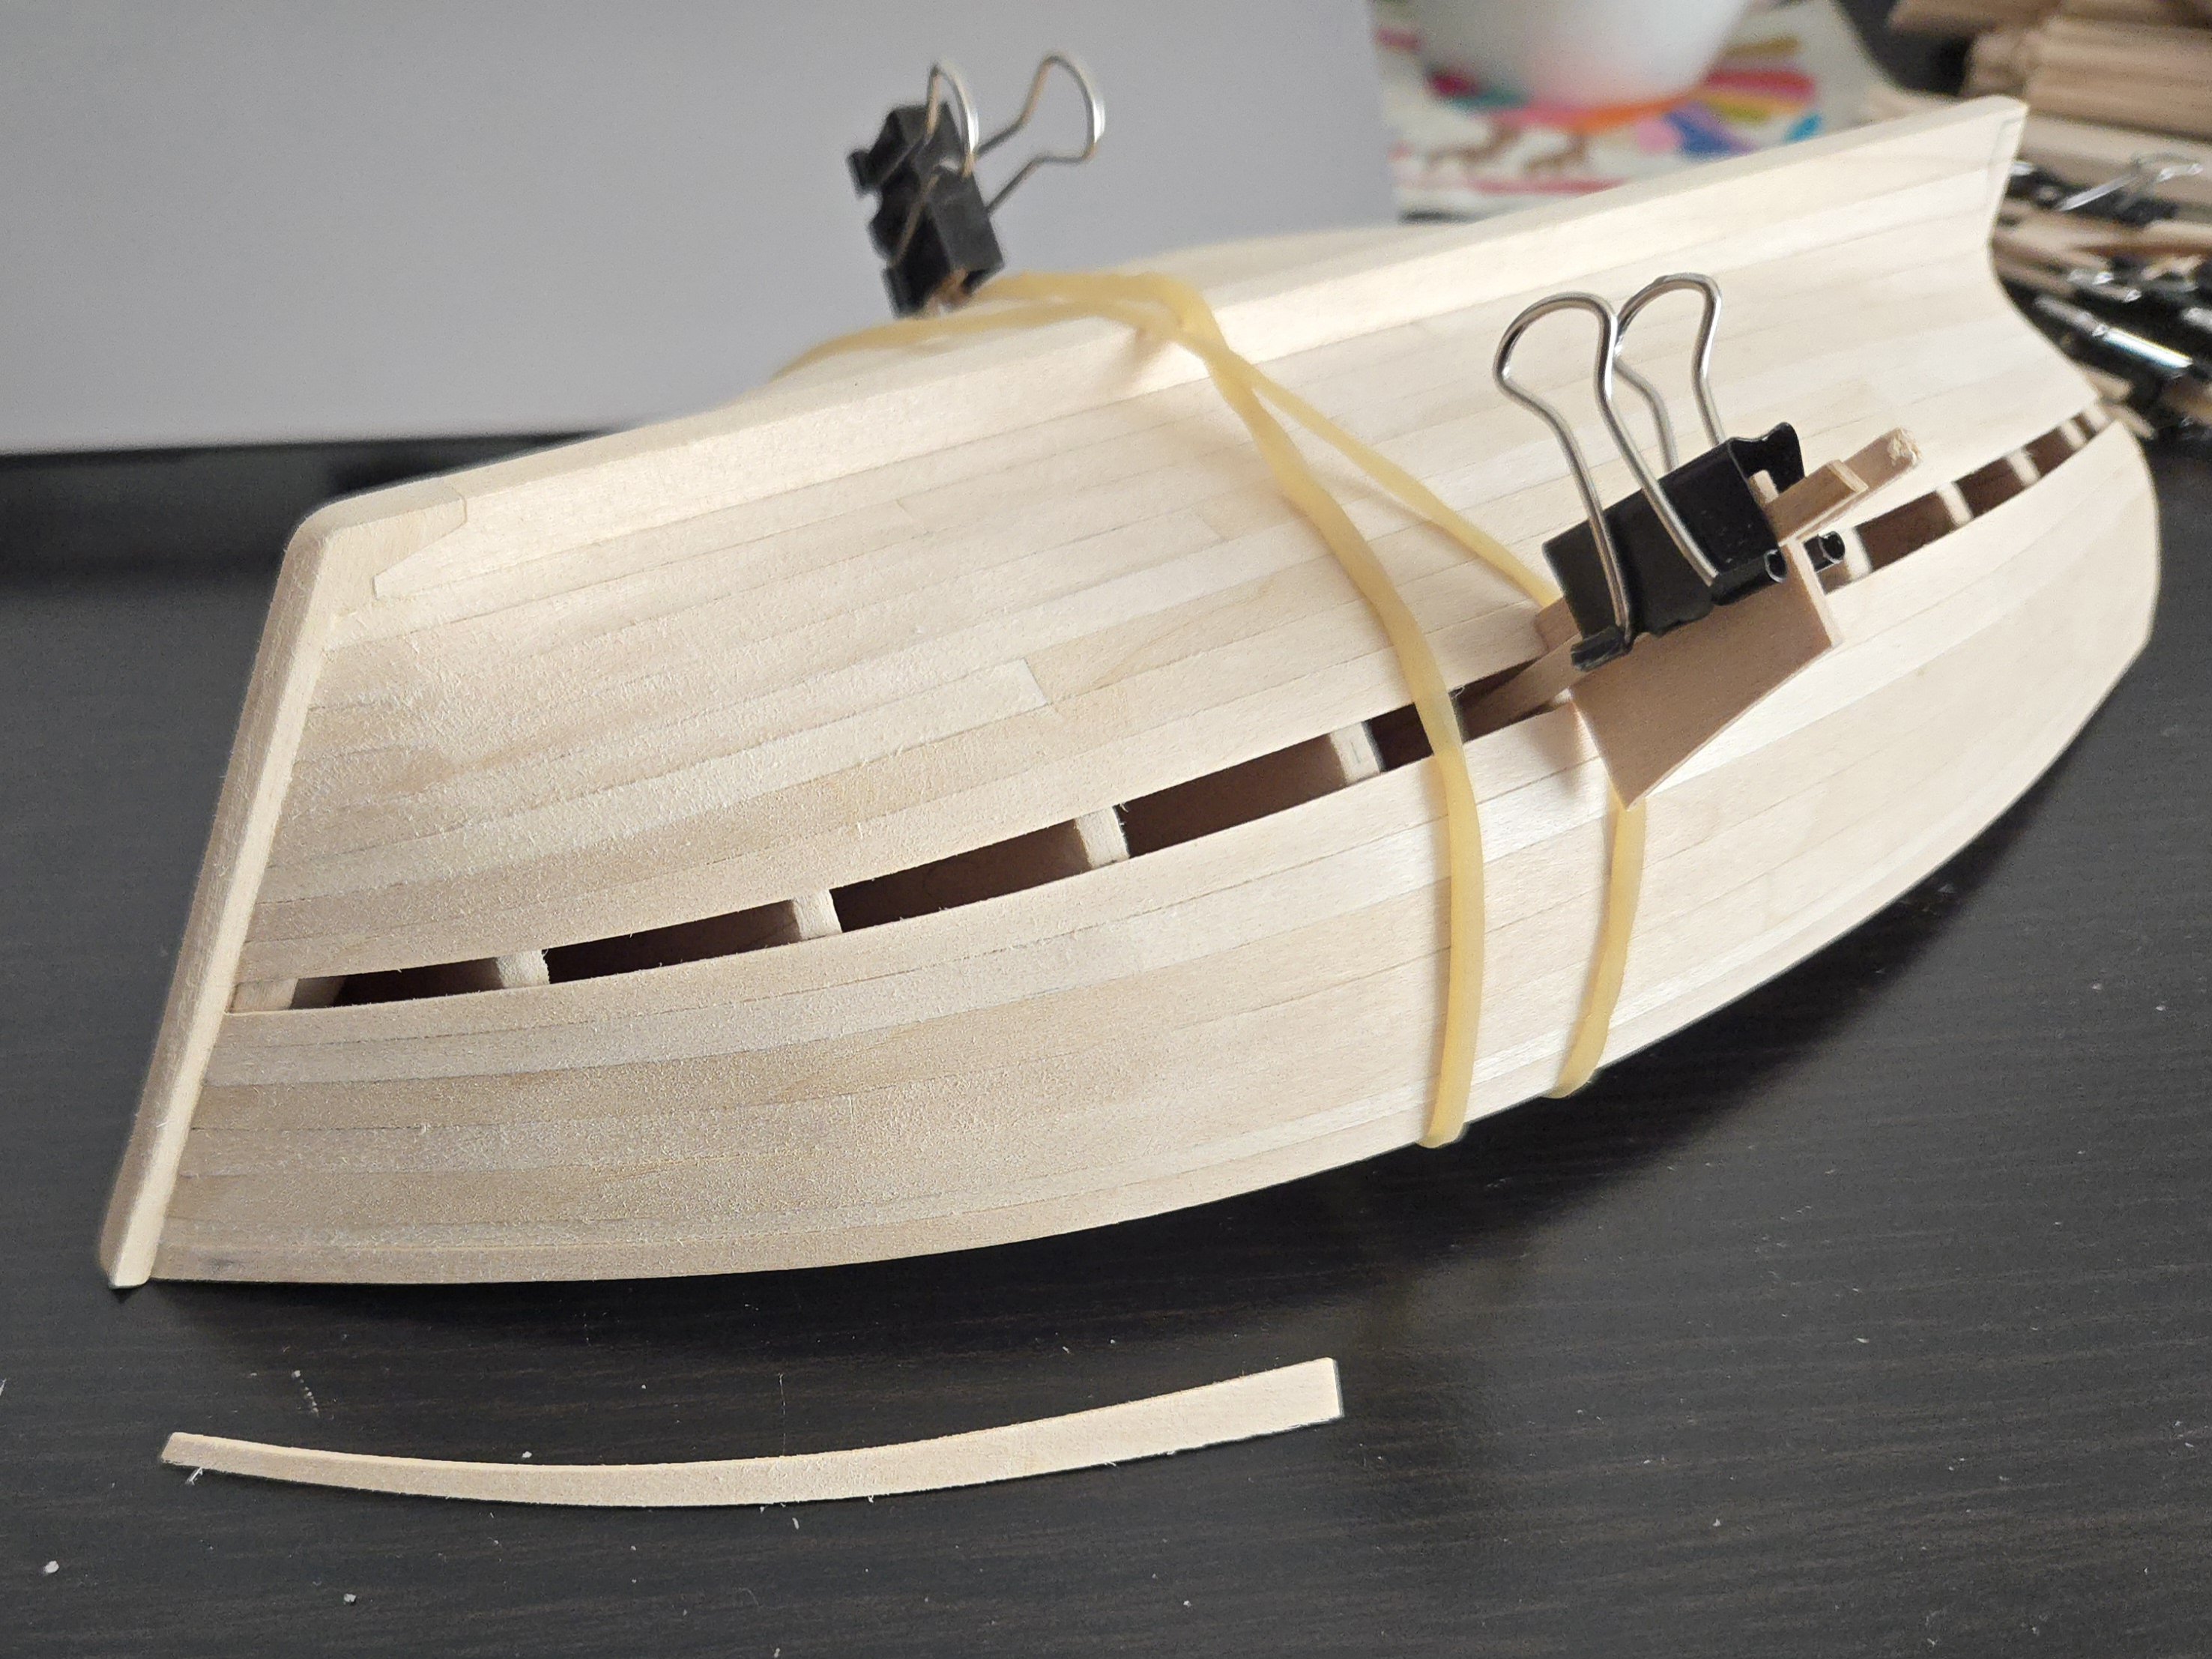
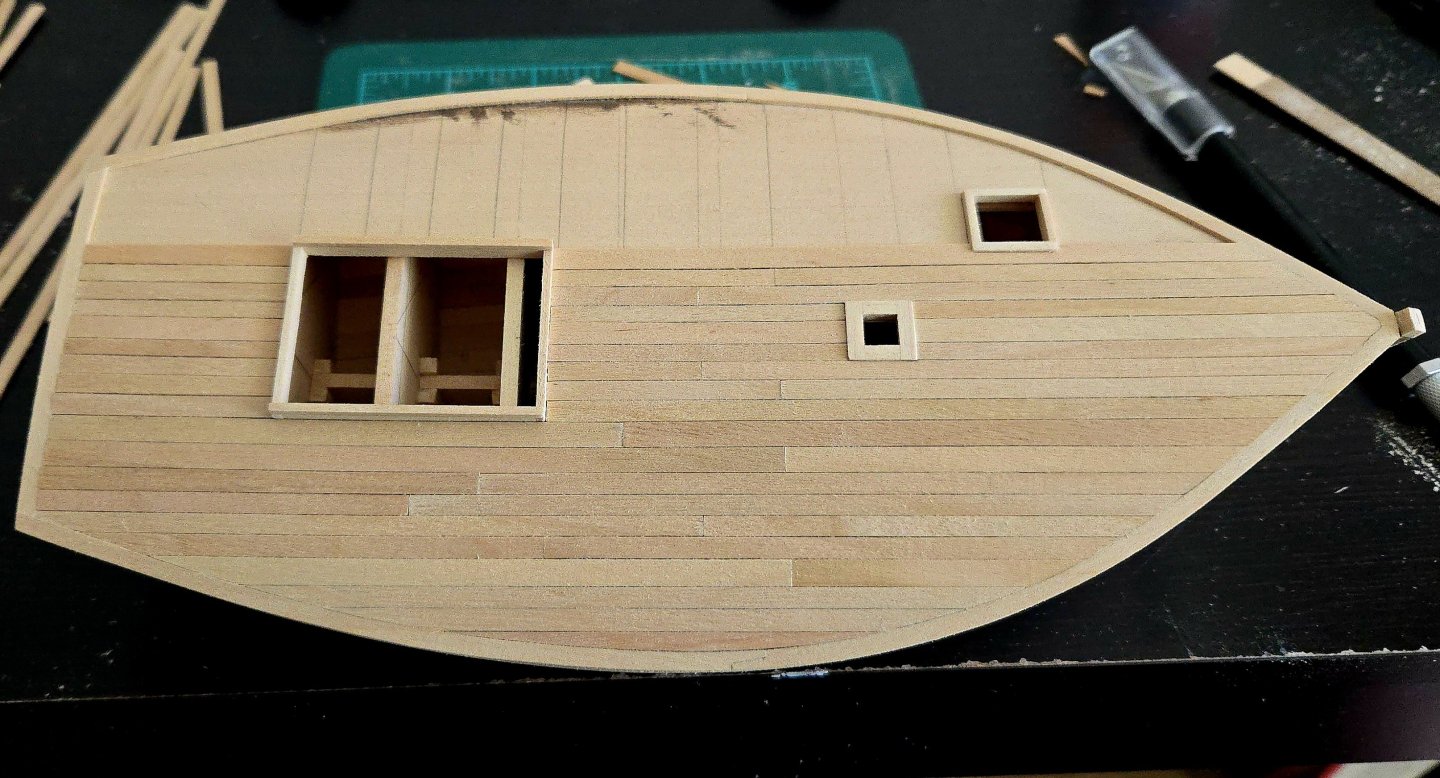
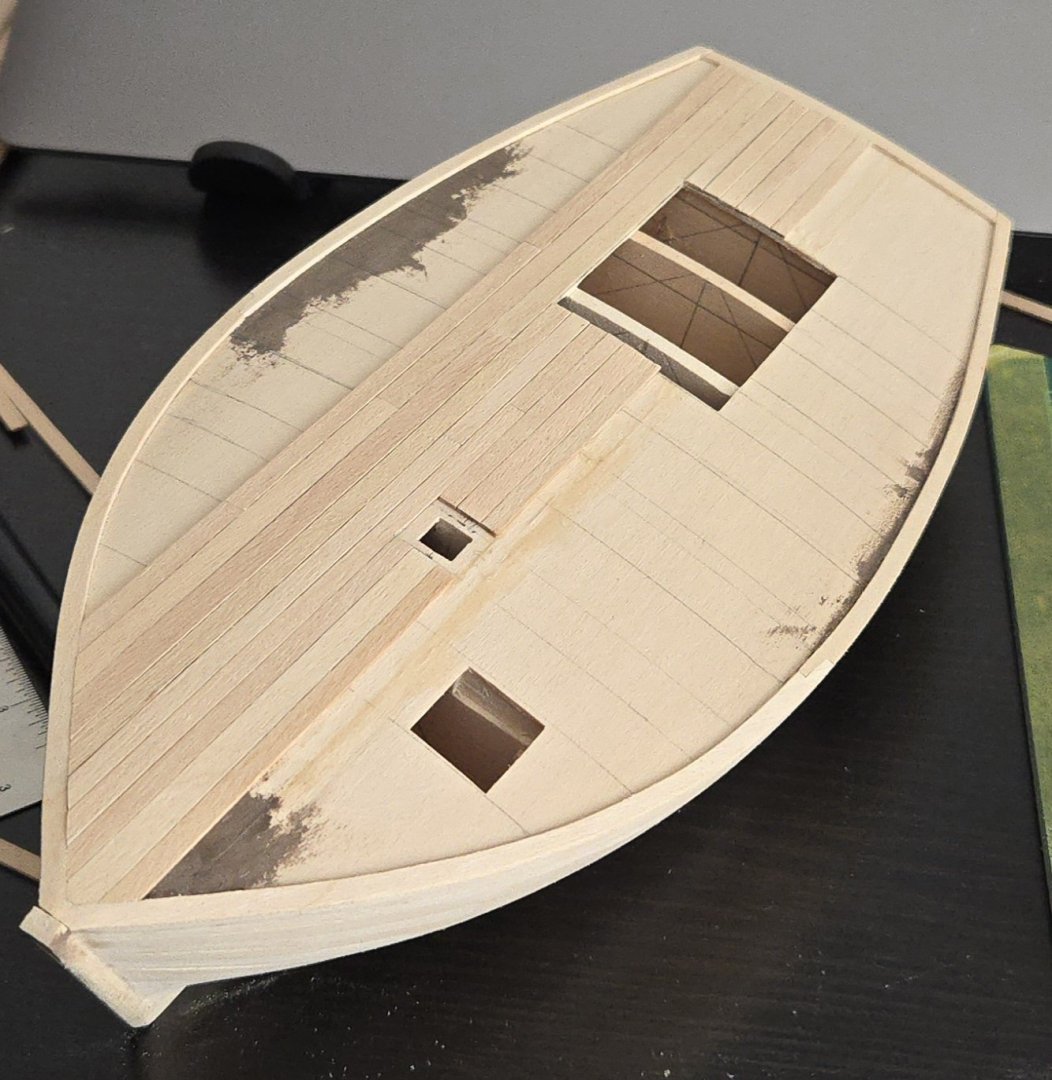
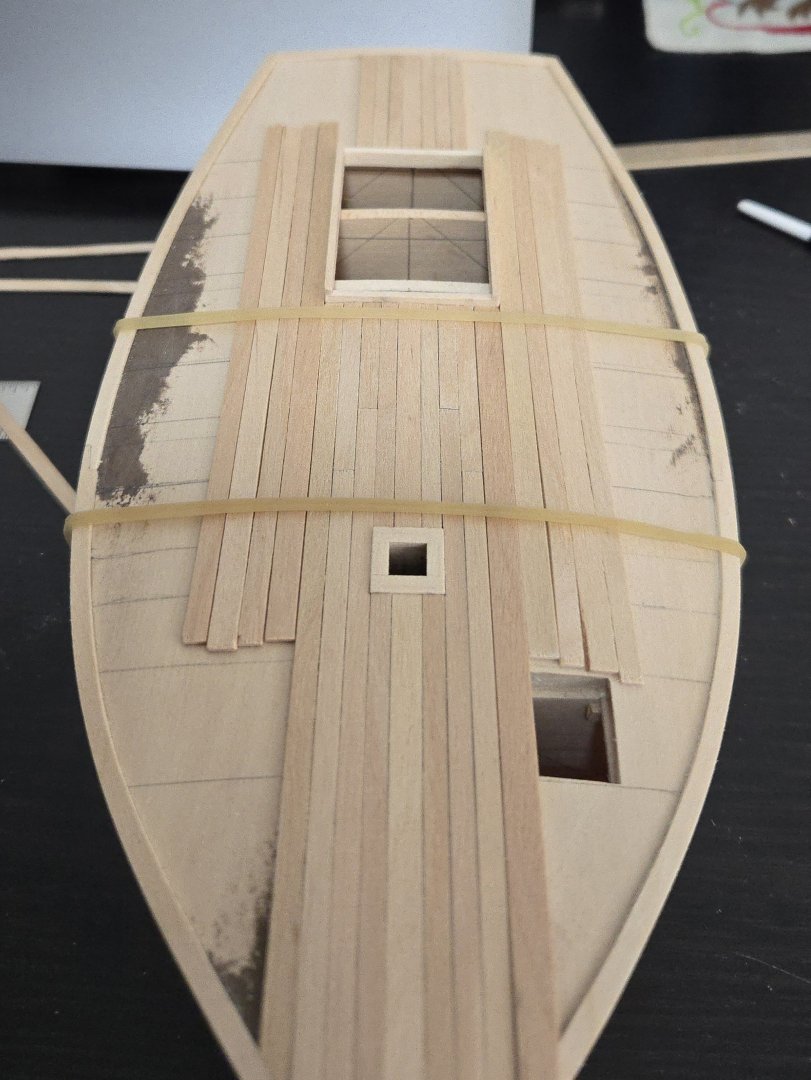
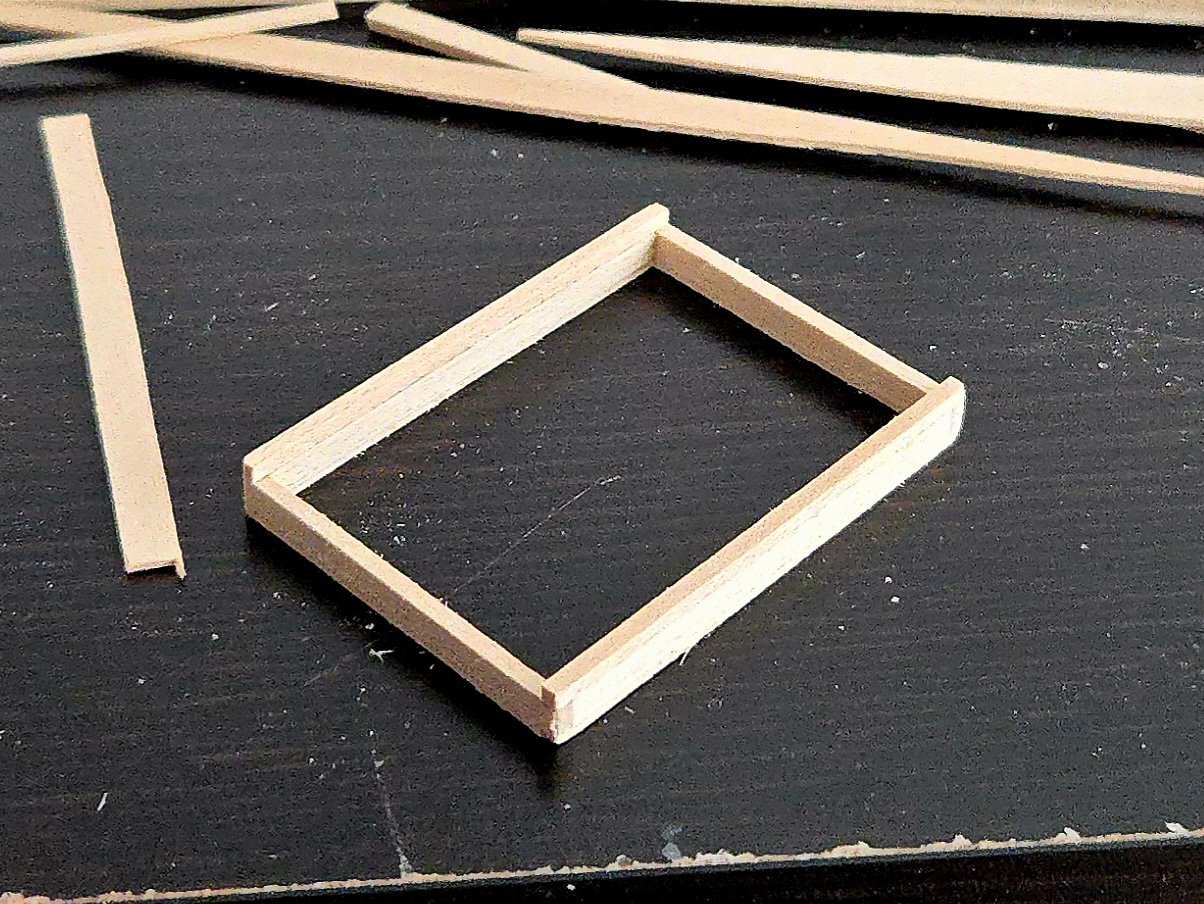
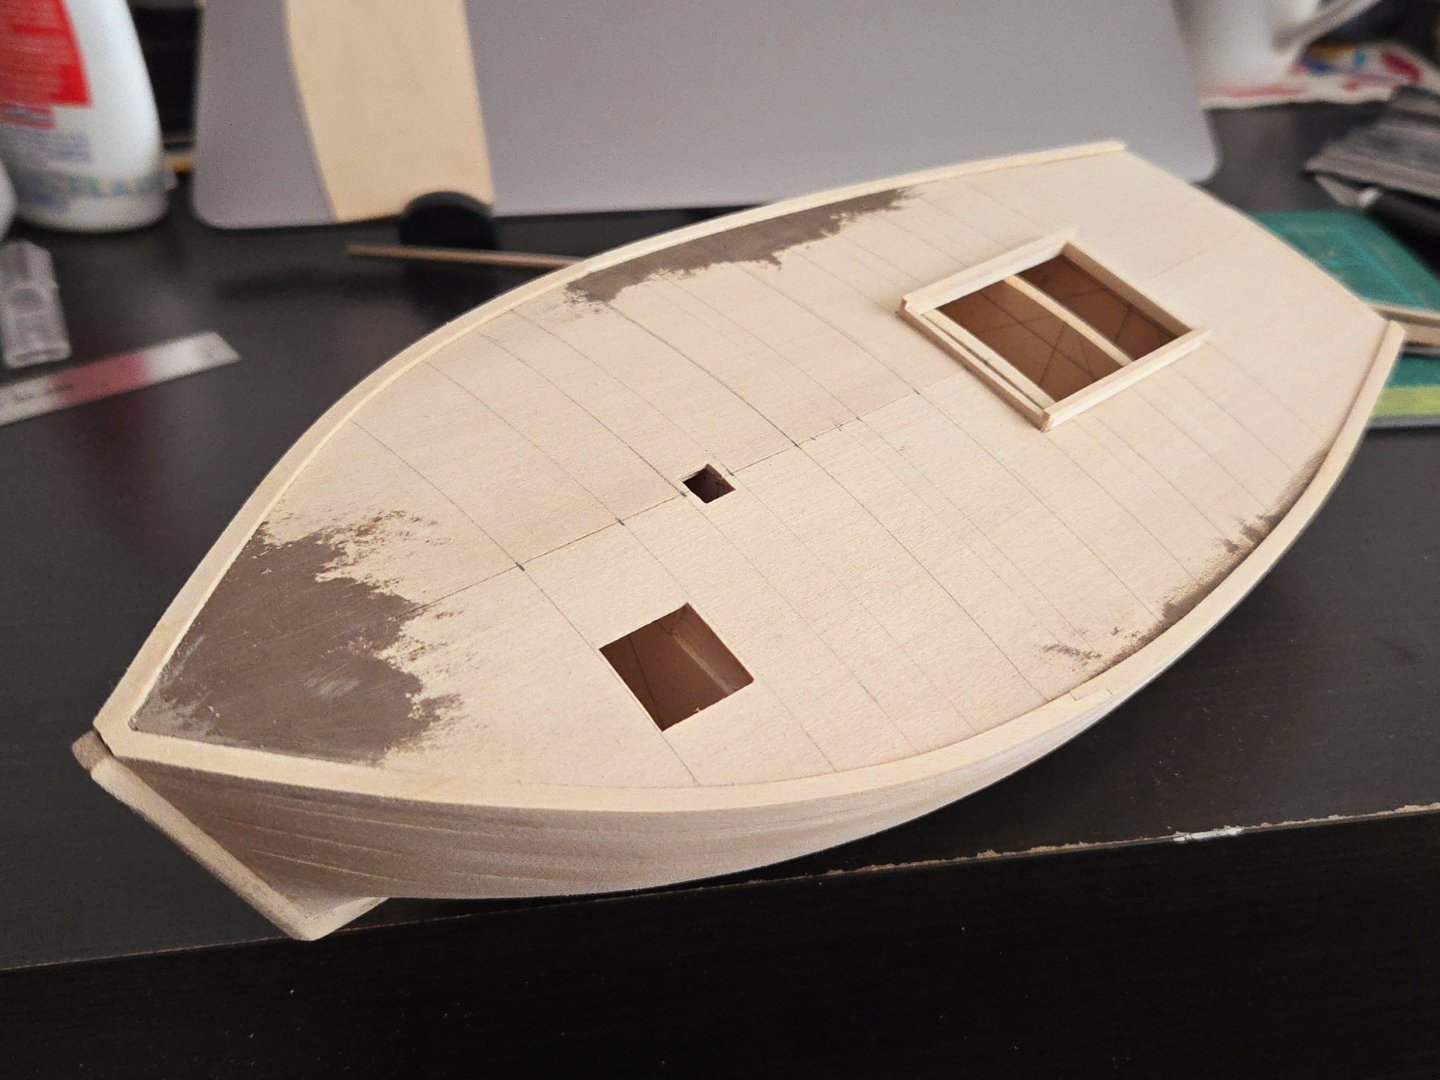
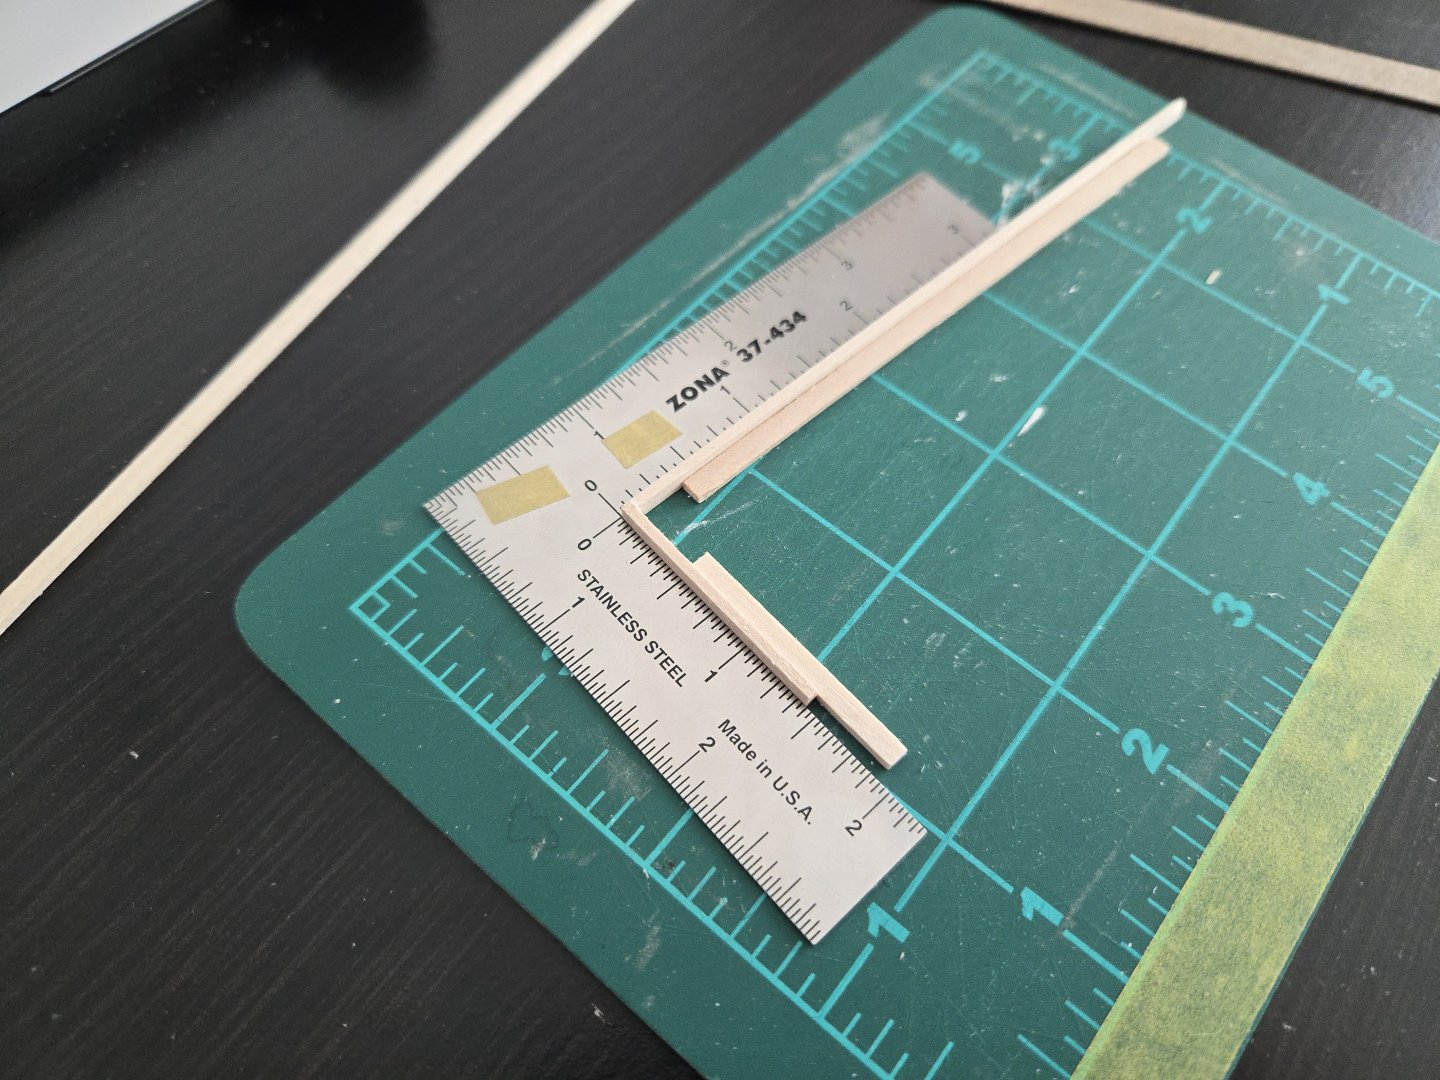
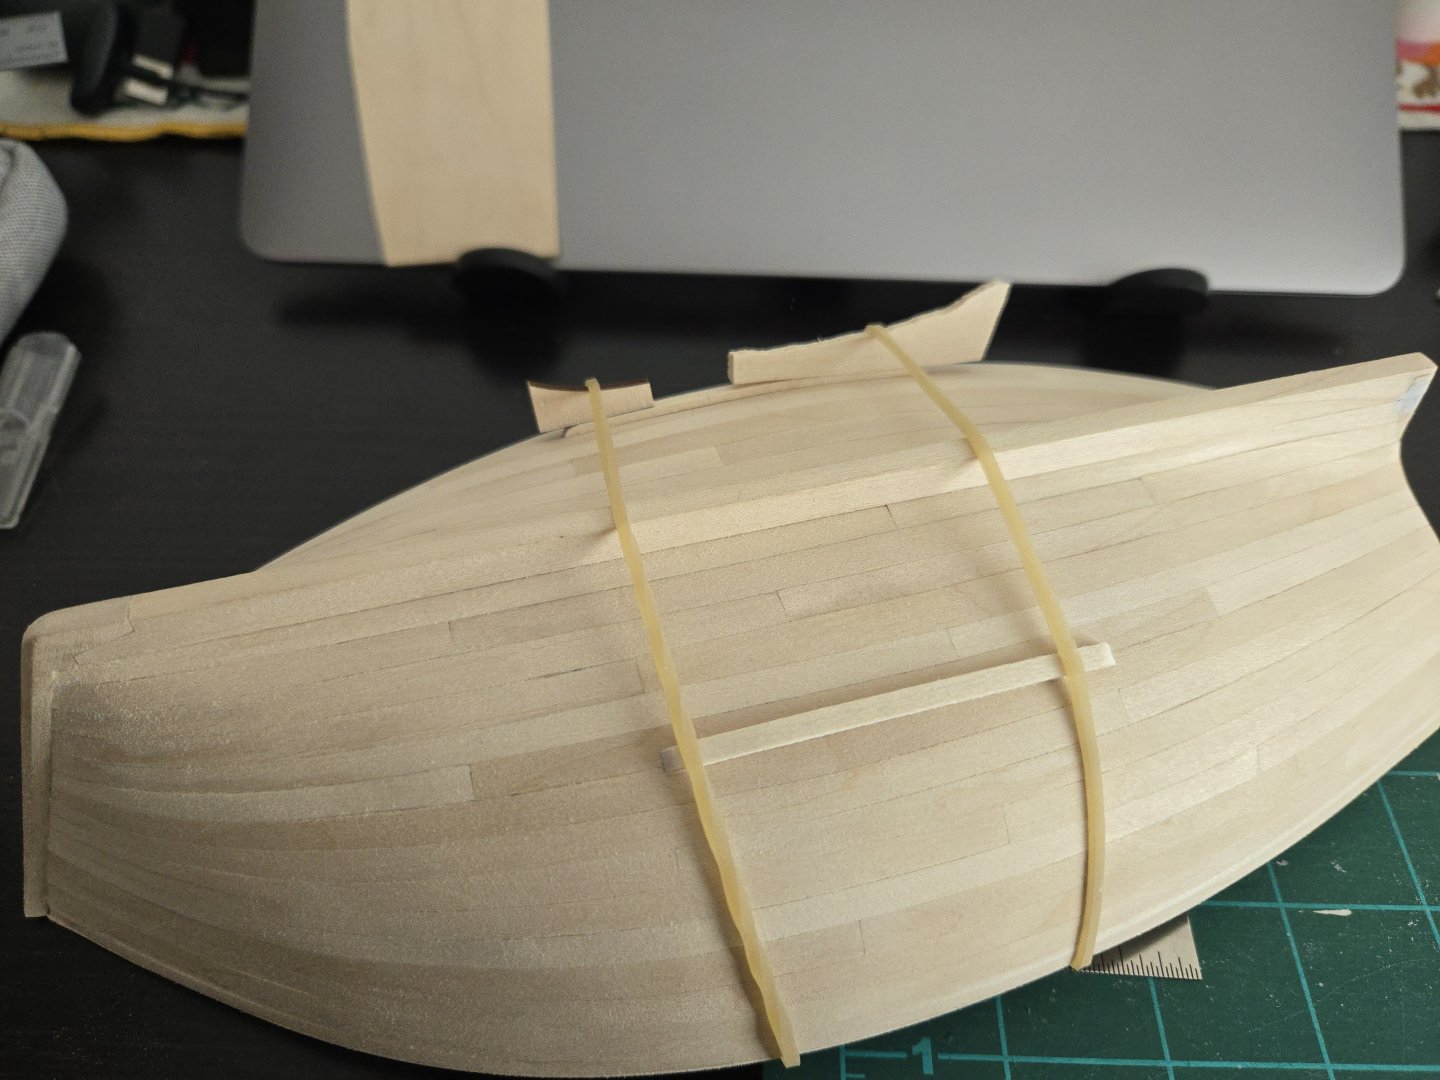
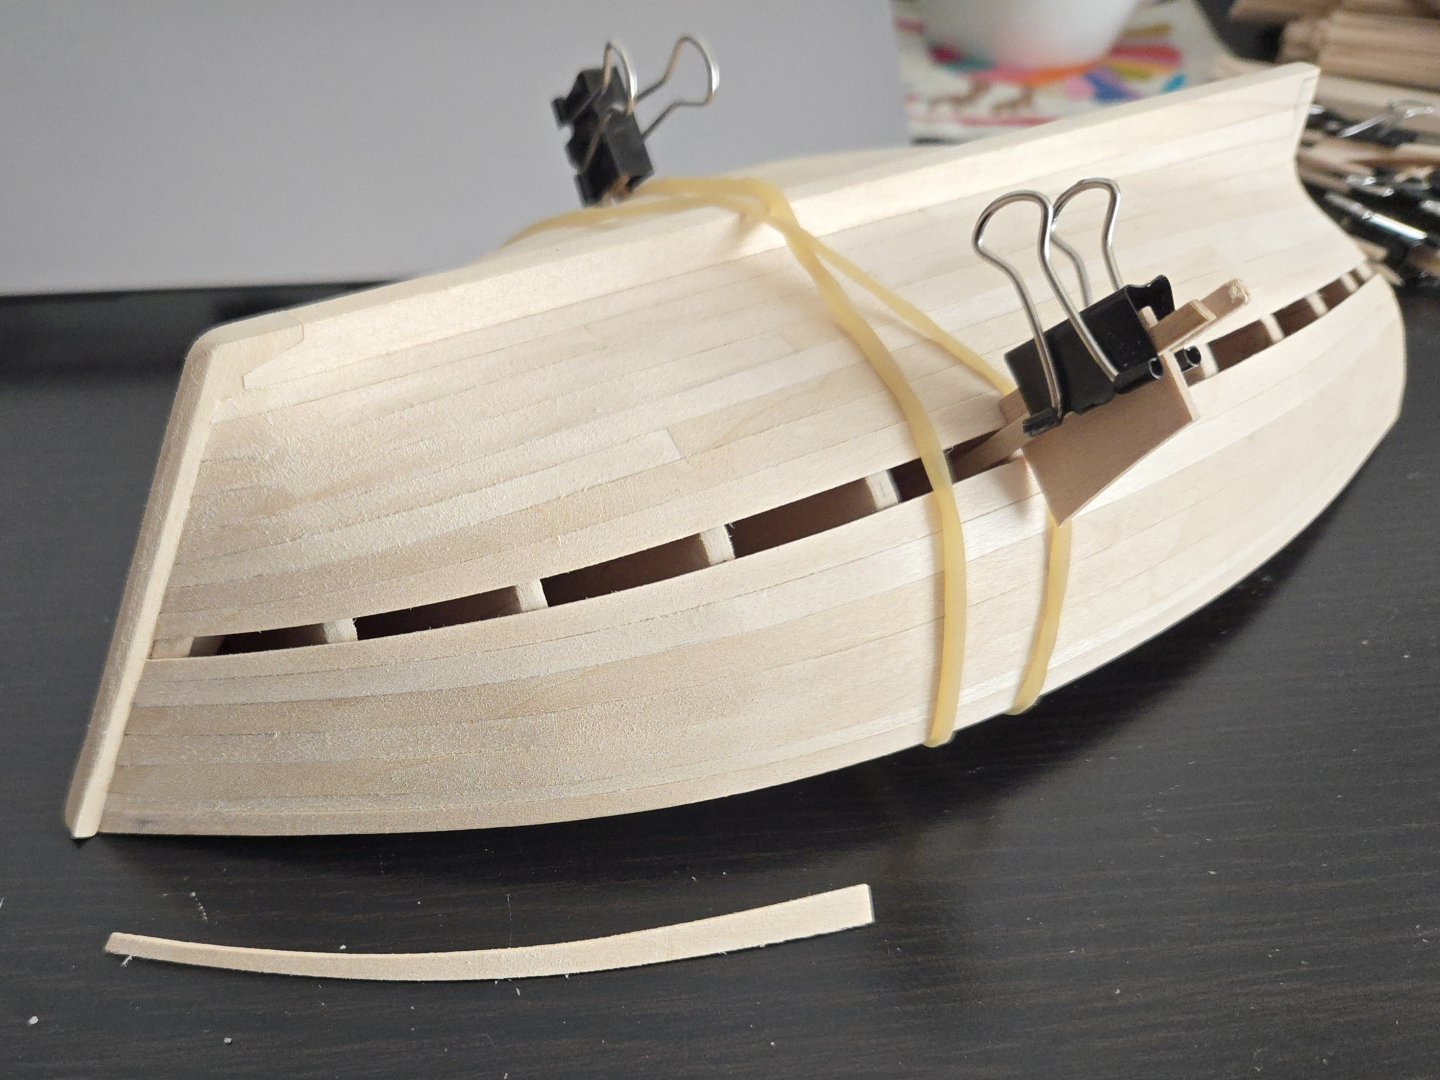
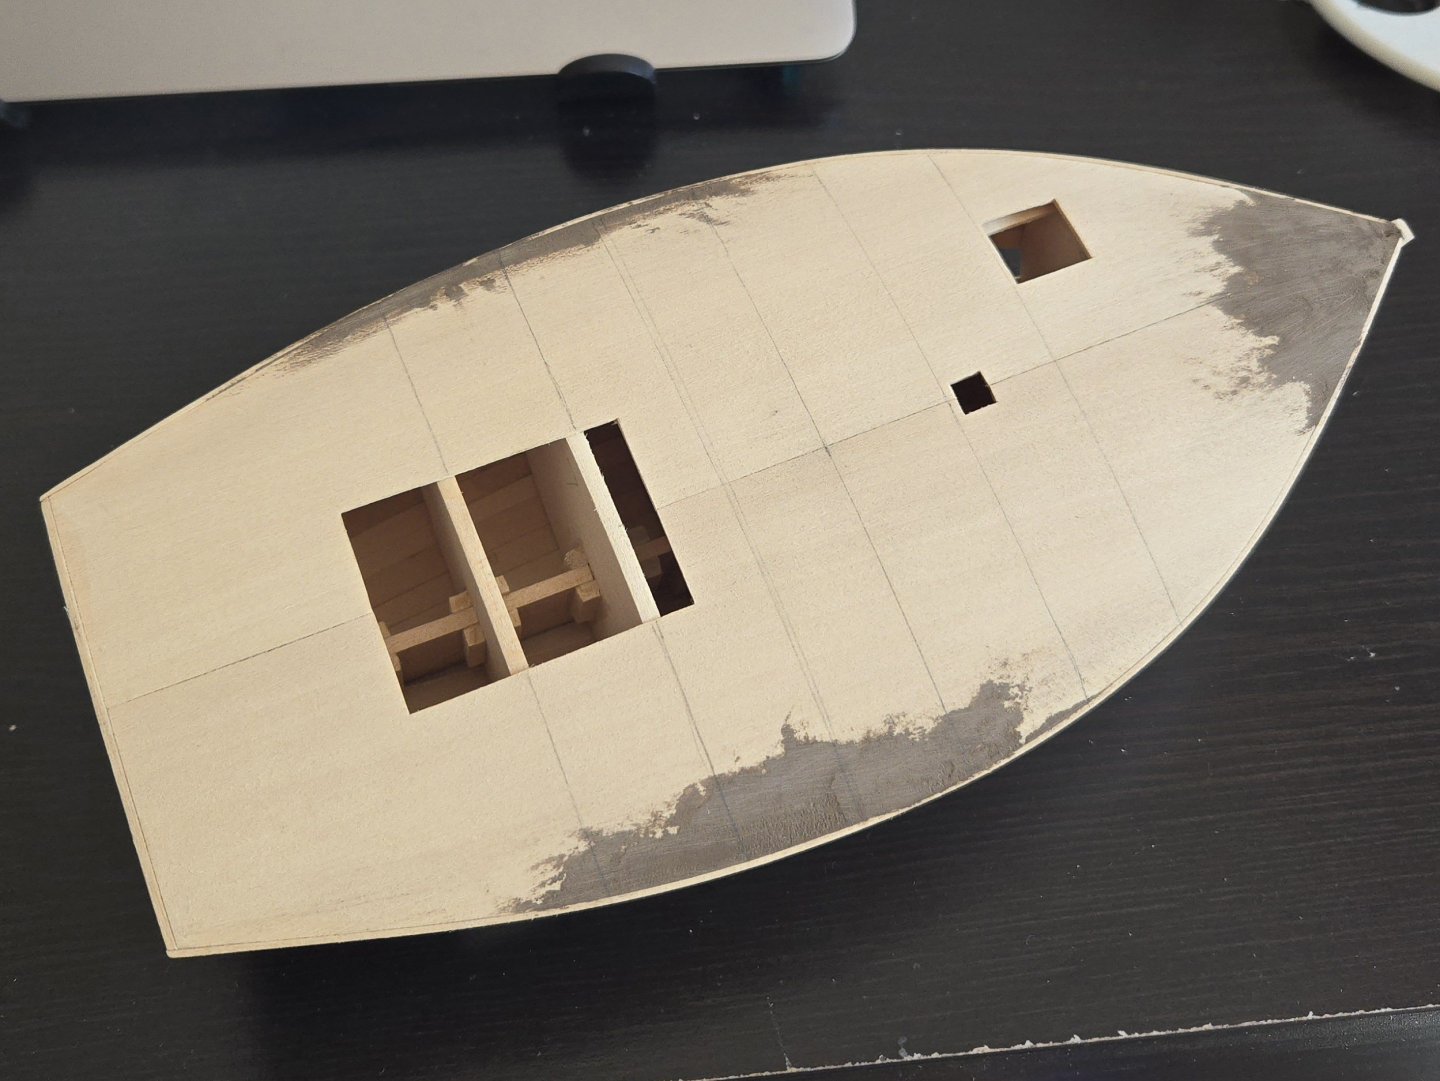
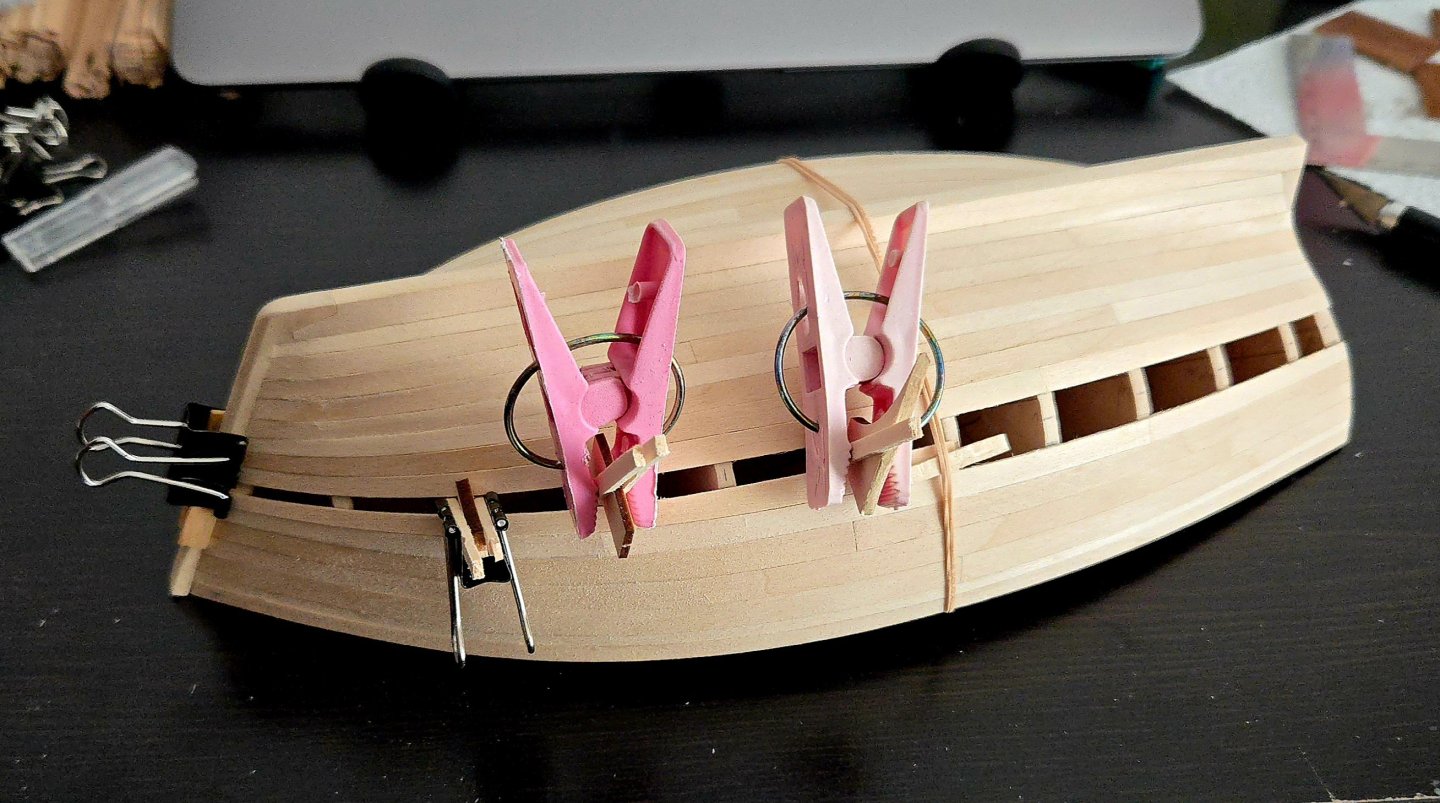
Thanks! Planking the deck seemed to be going well. However, I then ran into a problem. The coffee stir sticks I'm using for planking are not wholly even. I thought that I was doing a good job of evening them with a bit of sanding, and they seemed close enough. However, as I reached the edge of the main hatch (which is centered), I found that the port plank needs to be a full 1/16-inch wider than its starboard equivalent. The three previous port planks were all slightly narrower than their starboard equivalents. Individually it's not really noticeable, but the cumulative effect of three in a row like that really added up. Below, you can see how the rightmost plsnk is notably wider. So, I'm now trying to figure out how best to deal with this. The simplest option would be to just leave it as it is--as discussed in earlier posts, the real vessels certainly had some irregular-width planks on their decks. I'm concerned that this will look a bit off, though. Below, you can see how that would look, roughly, with further planks loosely held in place with rubber bands. My sense from this is that the wide plank running into the hatch is still quite noticeable. The other option would be to remove one or two of the port side strakes and replace them with slightly wider ones, so that the plank running into the edge of the hatch could be a bit narrower. I could remove all three to fully redo it, but I think I could disguise the irregularity just fine with just one or two new ones. In any case, this is a definite issue with using coffee stir sticks as modeling material. They seem fine overall, but I would recommend checking carefully with a gauge to make sure they're even.


- 312 replies
-
- 10
-
-
- Chile
- Latin America
- (and 6 more)
-
Welcome, sounds like you have some interesting projects lined up!
-
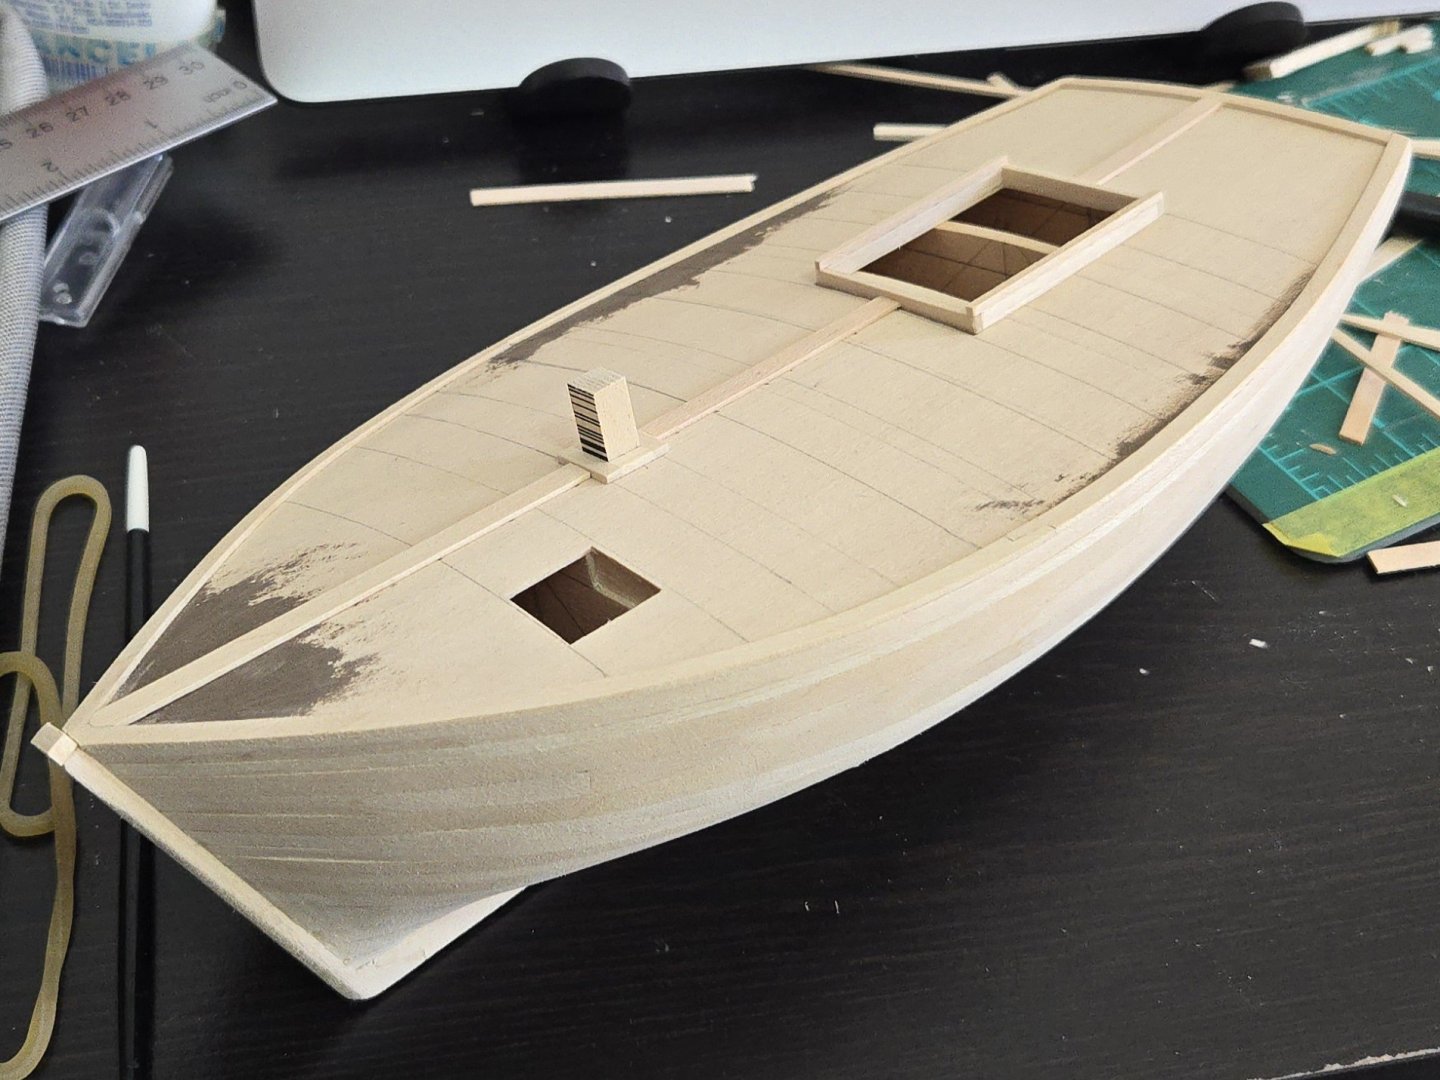
Thanks, all! Keith, I agree that workboats are fascinating subjects (and very nice job on your steamboat, by the way). I've finally gotten started on the deck planking. First, I had noticed that some photos show a thicker square or rectangular mast partner, as can be seen below: Source: https://www.memoriasdelsigloxx.cl/601/w3-article-2204.html I made one out of basswood, building it around a small length of 1/4-inch square stripwood that will serve as a stub mast during building. I then added a covering board along the stern (which will be covered by the aft rail), and also a bit of wood at the bow to extend the stem (the joint of which still needs to be filled and sanded). It was now time to begin the deck planking. The main hatch coaming and the mast partners are just friction-fit into place for now so I can get a tight joint, but can remove them to sand the deck. I started with the king plank, which had to be made of multiple stir sticks--hopefully the color differences are evened out a bit once I apply stain and washes. I then added the next two strakes, one on each side, using the thinner of the two sizes of stir sticks. I'll be using a mix of the two widths in a semi-random pattern throughout. In this case, the thinner sticks were the perfect size to match the edge of the mast partner, so that subsequent strakes don't need to be cut to shape around them. Going forward, I'll need to add the fore hatch coaming, and work out some sort of plank butt shift pattern.

- 312 replies
-
- 8
-
-
- Chile
- Latin America
- (and 6 more)
-
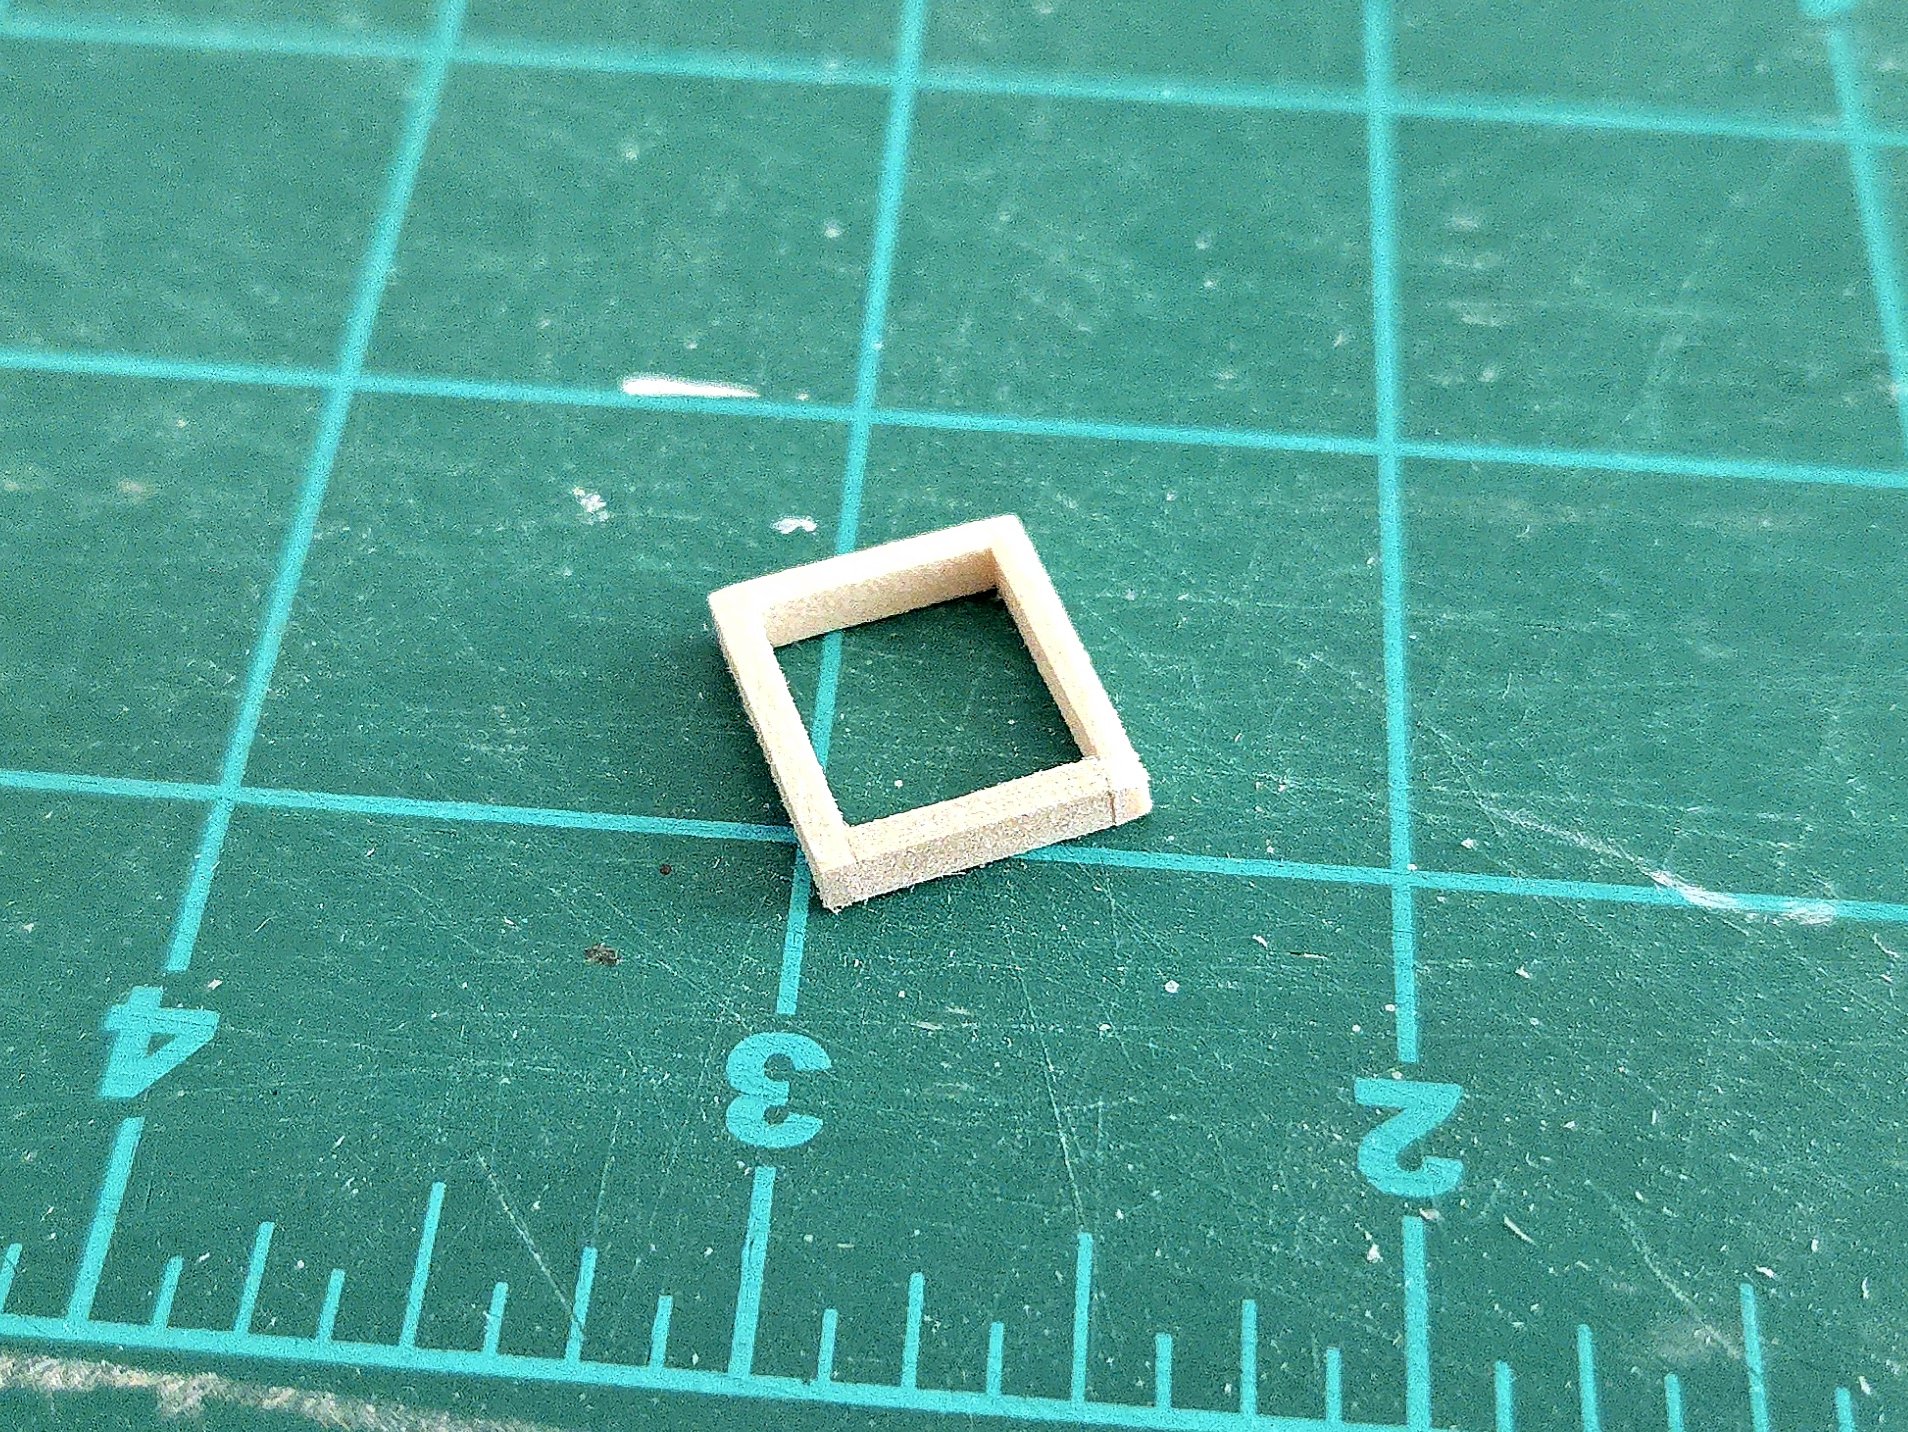
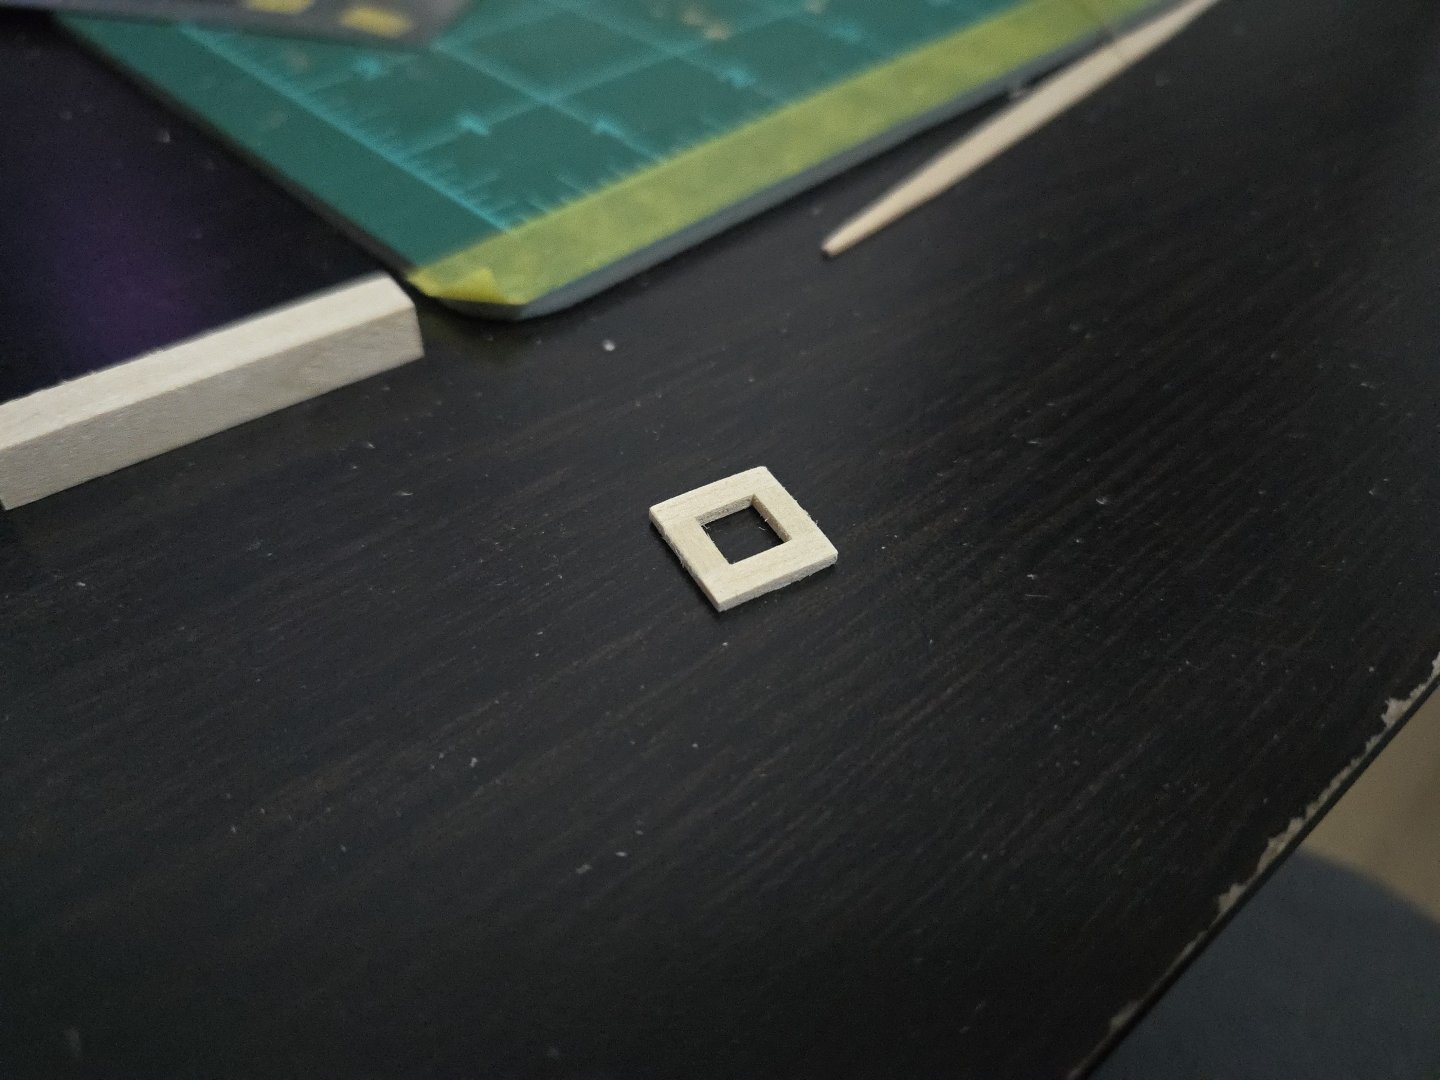
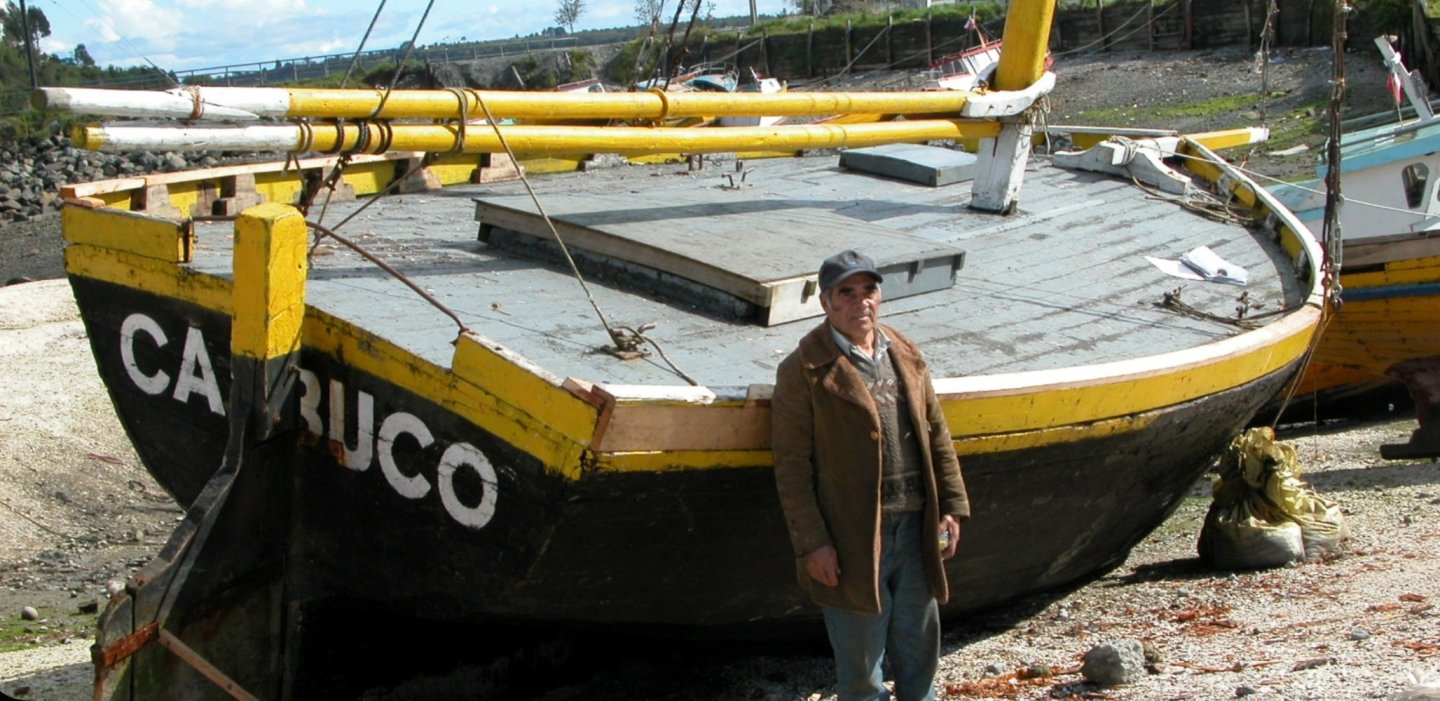
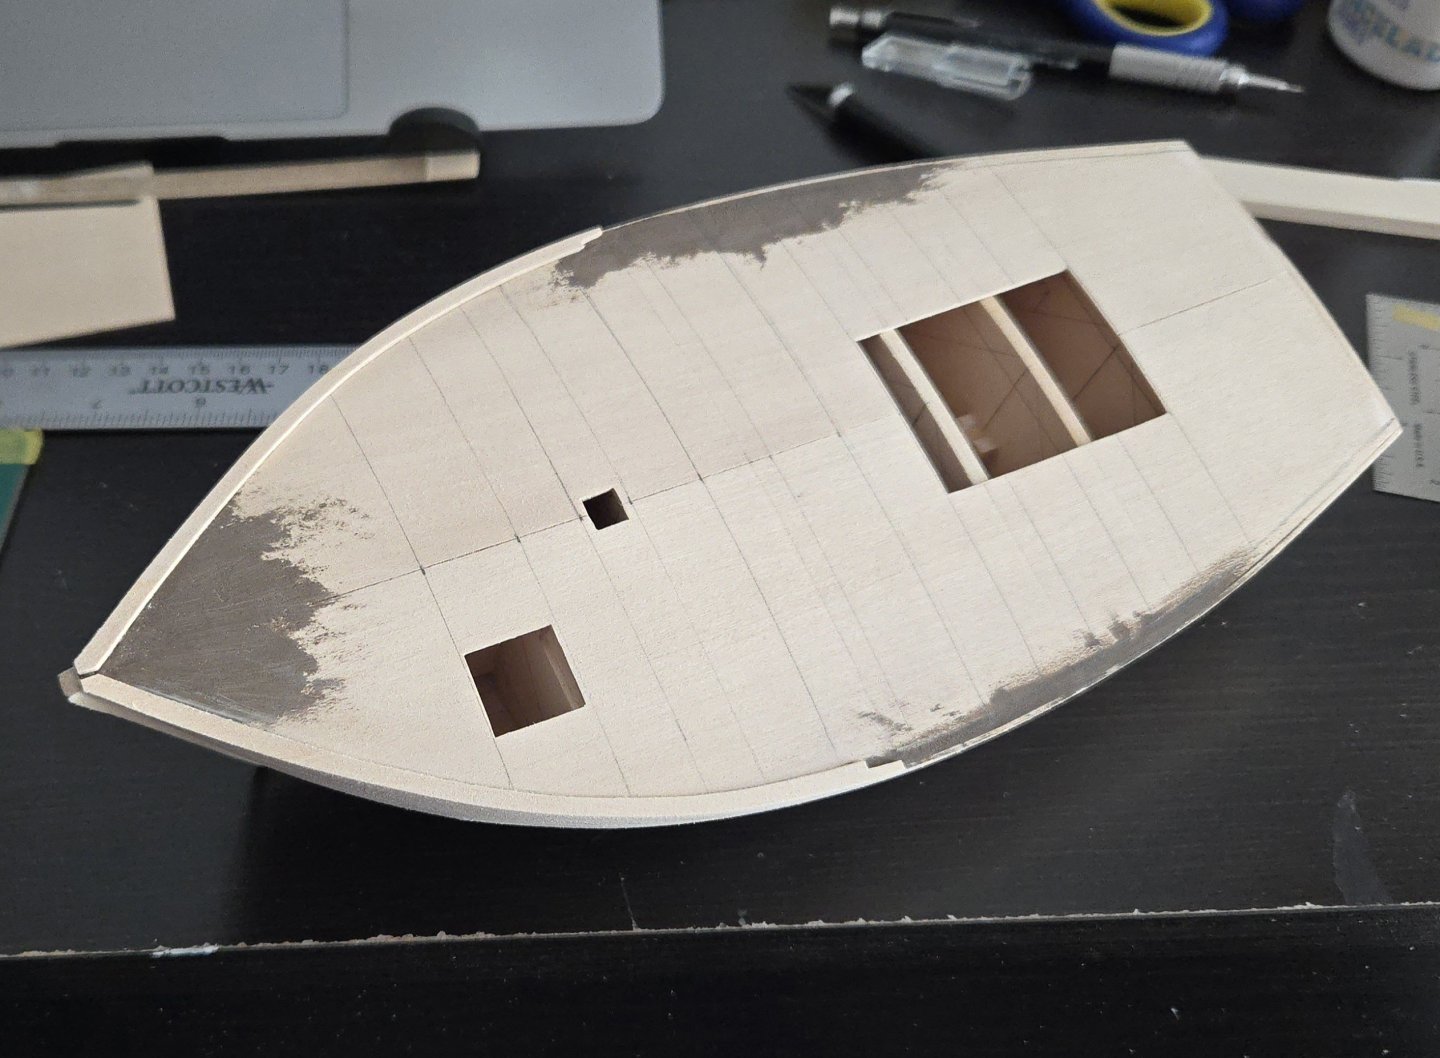
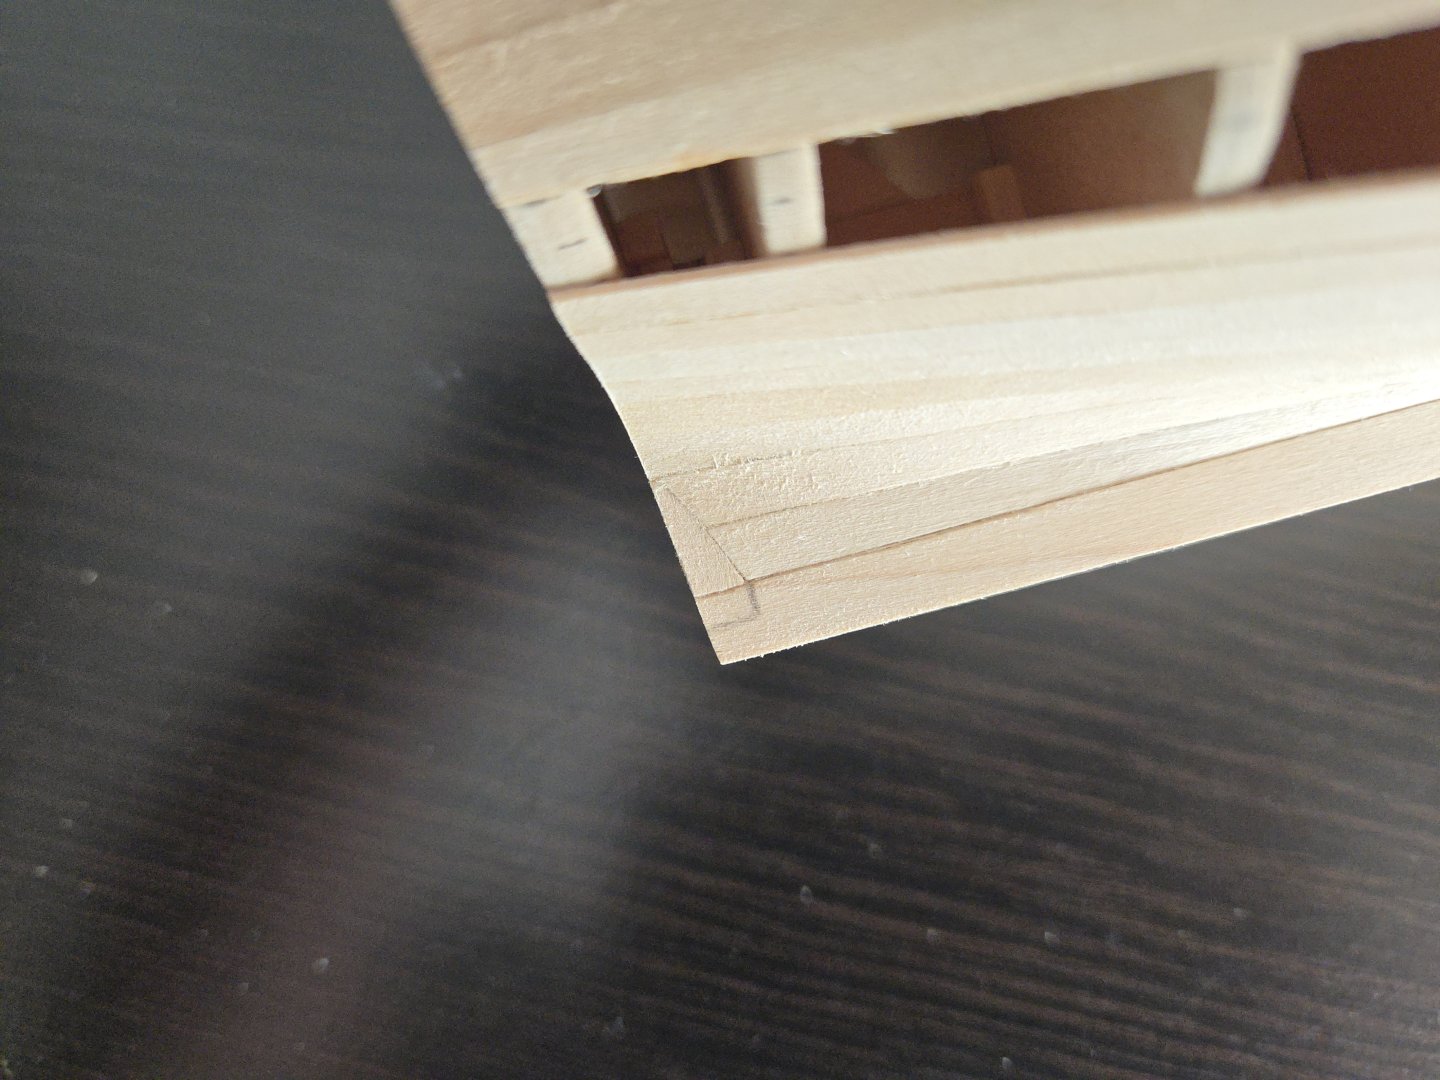
@Paul Le Wol, I'm not sure why they removed the full aft rail, but it seems to have been a general change not limited to just the Quenita. Perhaps it did make cleaning easier. A bit more progress on the build. First up, the guarda playas have been added. I still need to add a bit of filler where they didn't conform perfectly to the hull. As can be seen, the model now properly rests on the guarda playa. I also finished the main hatch coaming. I built this out of several layers, as this allowed me to use strip materials I had at hand. Given that the hatch cover will be either completely or almost completely closed, the layering shouldn't be visible. First, I simply butted together some 1/16x1/8-inch strips, taking care to get them square. After finishing that layer, I placed a 1/16‐inch square strip over the top running fore and aft. The overlap considerably strengthens the joints. It also properly represents how the aft edge of the coaming could be lower than the sides, as shown by some photos--although some lanchas also simply had an even-height coaming. (Meanwhile, the fore edge will be completely covered by the hatch cover). I tested this out by placing it in the hatch opening. I found that it was a little low considering that the deck planking needs to be added. So, I added a 1/32-inch thick strip along the bottom to raise the coaming slightly. As can be seen, the aft edge will now protrude an appropriate amount above the deck. Next up, the fore hatch coaming and the support around the mast.


- 312 replies
-
- 11
-
-
- Chile
- Latin America
- (and 6 more)
-
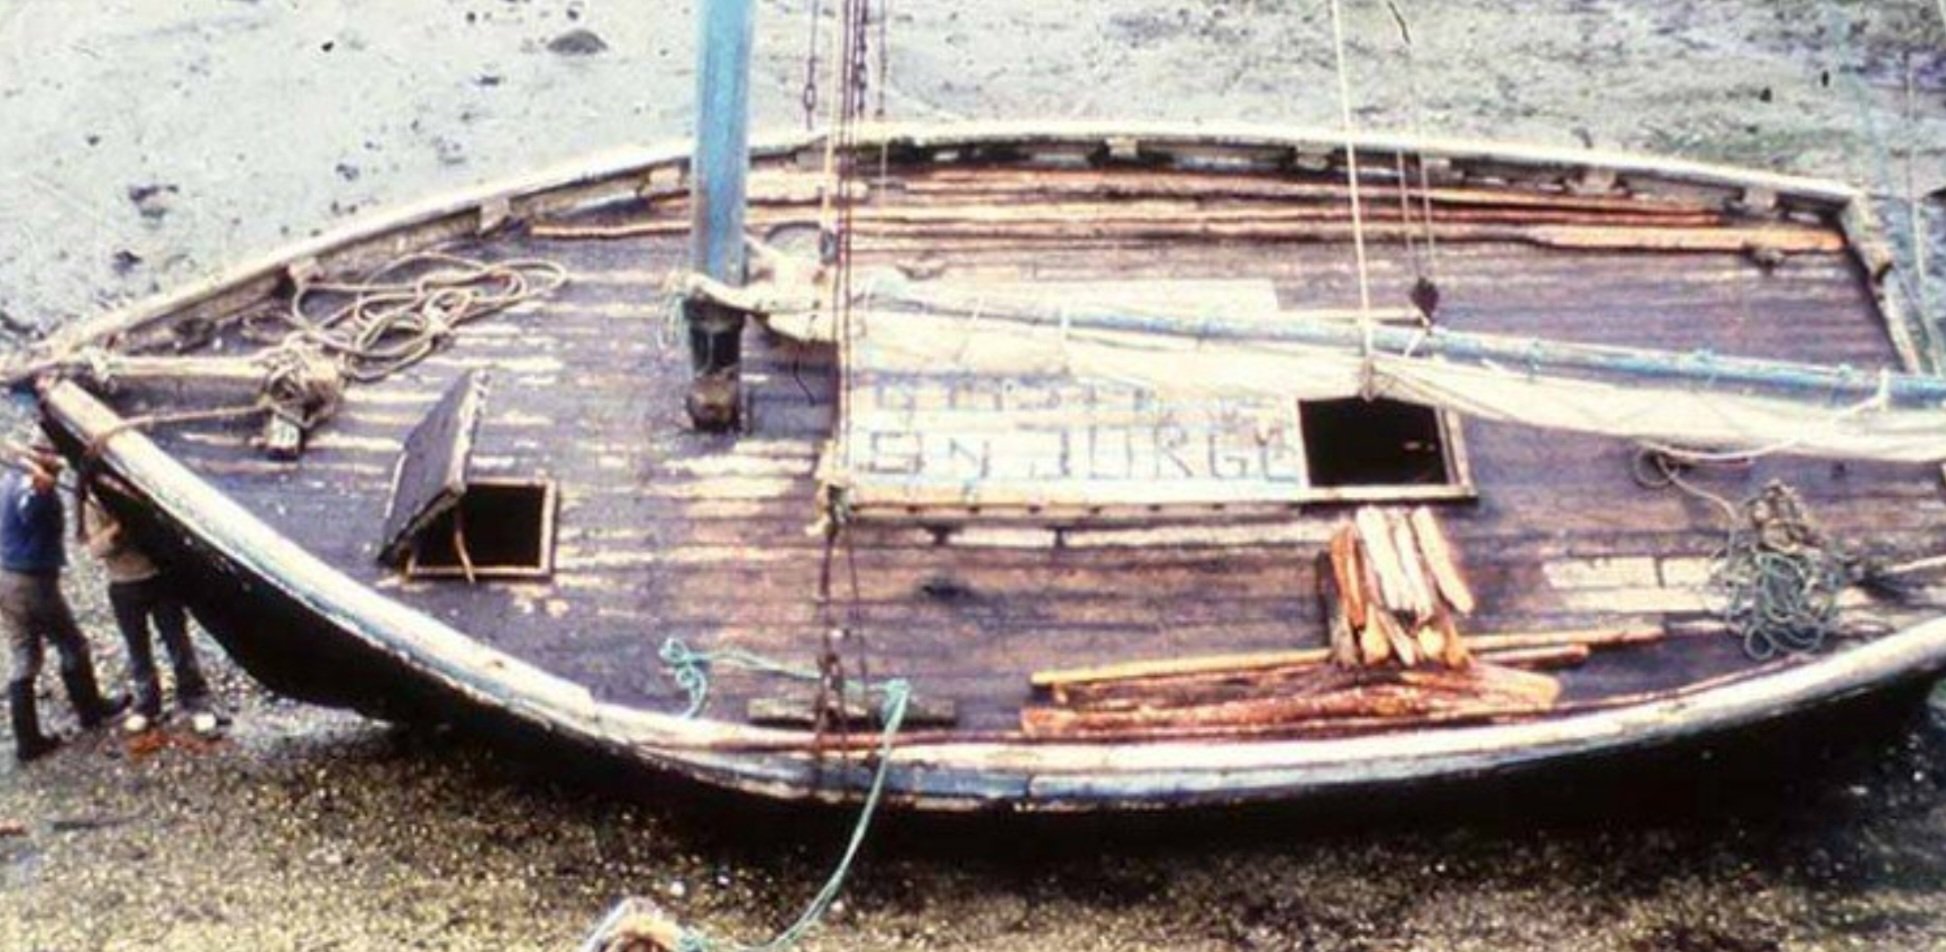
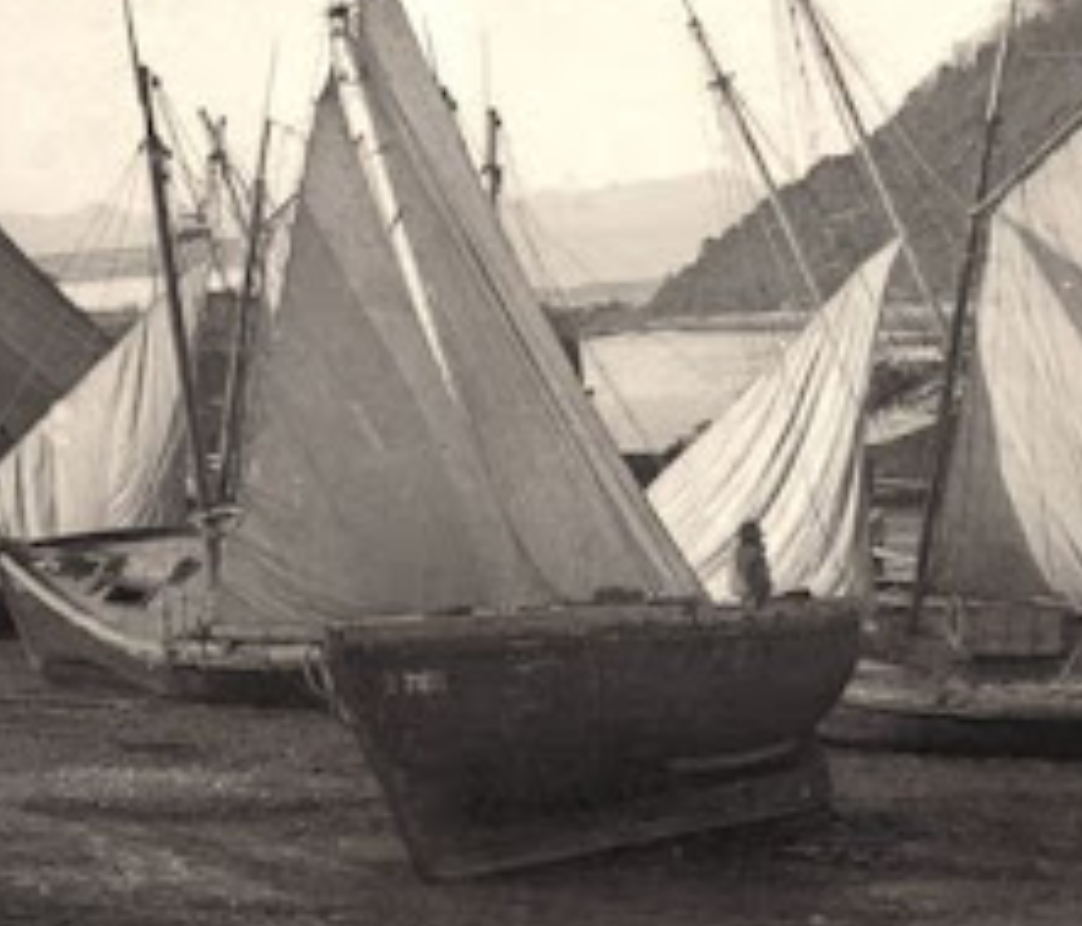
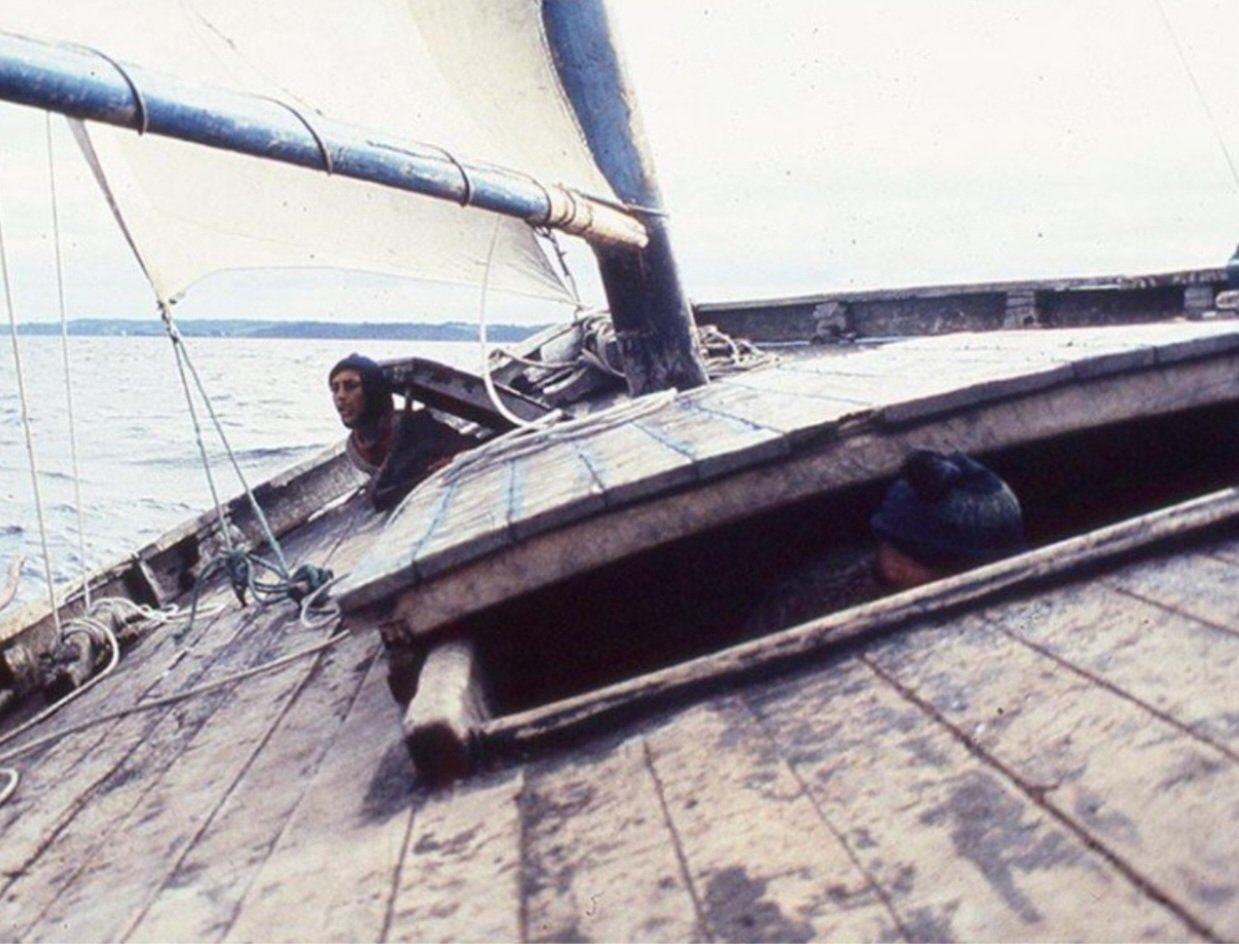
Thank you! I've now finished up the covering boards and added the filler piece at the bow. (The seeming irregularity aft at the line of the transom is actually just a blotch of dark filler.) There are a few steps before I get to planking the deck. First, I've decided that the hatch coamings will be set into the holes in the subdeck, with the decking butting up against them, rather than being placed over the decking itself. So, I need to make the coamings off the model, making sure that they're square, and then will put them in place without gluing while adding the deck (so that they can be removed while I sand and stain the deck). I won't be leaving the hatches totally open, as the interior of the vessel is nowhere near accurate, but I have been considering whether to have them cracked open so as to add visual interest without exposing the framework to sight. This may be easier with the fore hatch, which can be propped slightly open on one side, than with the main hatch which slides open. In any case, I'll need to make a decision on this so I can paint any potentially visible interior black. Second, I need to decide how I'm handling the stern. Later lanchas--such as the Quenita, below, or those photographed in the 1980s by Carlos Vairo--had no full stern bulwark or rail. In the Quenita's case, the deck planking simply ran to the end of the deck. Source: http://lanchaschilotas.com/wp-content/uploads/2011/03/DSCN71501.jpg However, pretty much all the photos that I've seen of earlier lanchas show a built-up bulwark (or is the correct term rail?) across the stern. See, for instance, the photo below: Source: https://www.bibliotecanacionaldigital.gob.cl/bnd/629/w3-article-613545.html I'm tempted to go for the earlier style, but it does pose a bit of a challenge in terms of figuring out how the stern bulwark was constructed. I need to figure this out before planking the deck, as it seems like the deck planks would end against this construction. Finally, with the addition of the covering boards, it's clear that I'll need to slightly extend the stempost and smooth the resulting joint with filler.

- 312 replies
-
- 5
-
-
- Chile
- Latin America
- (and 6 more)
-
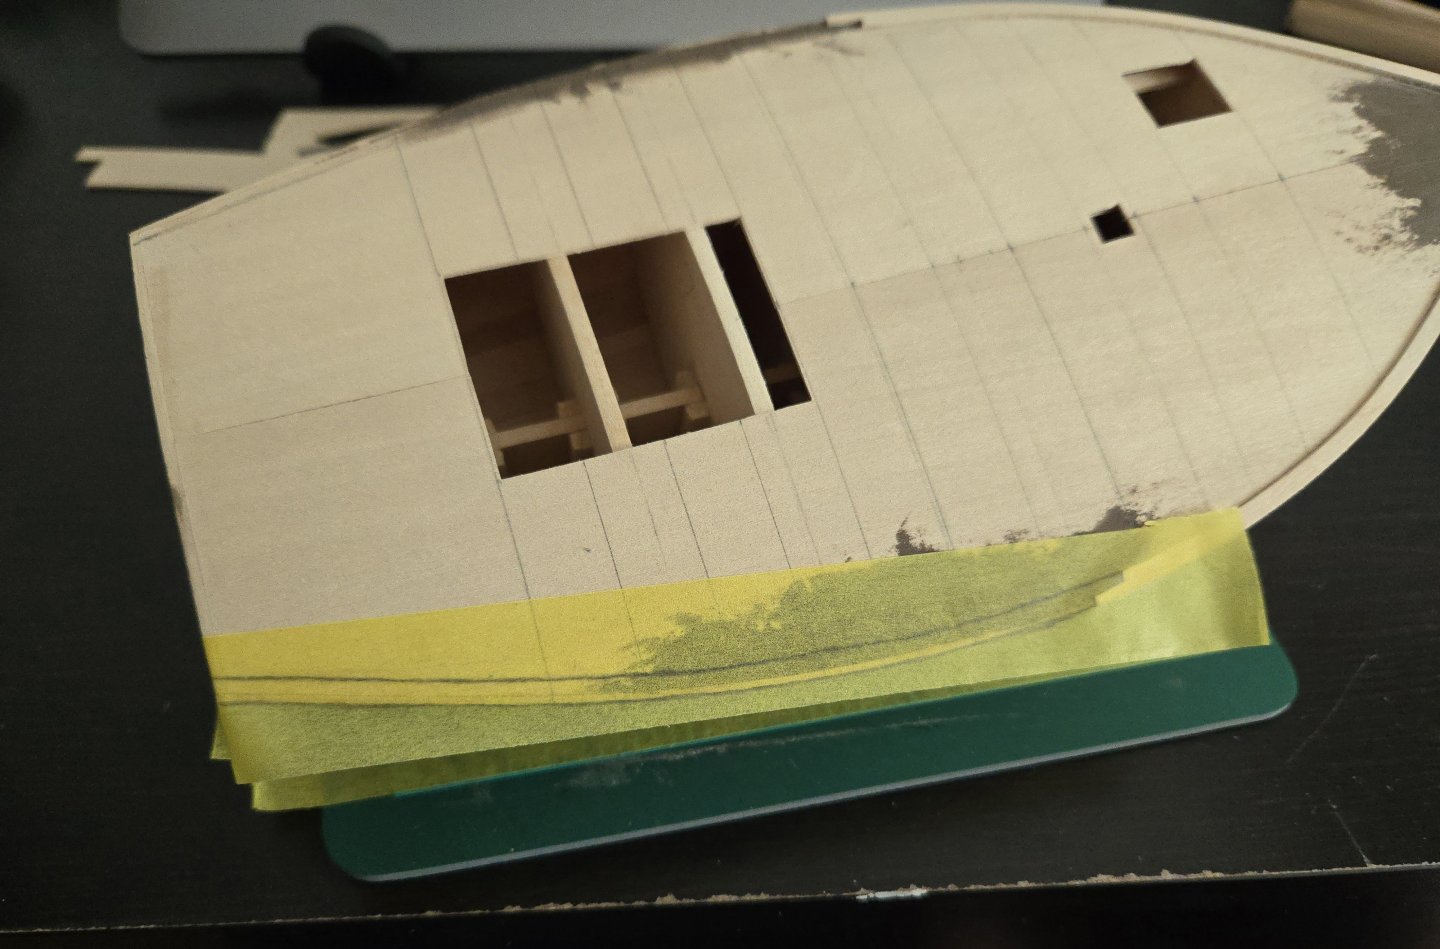
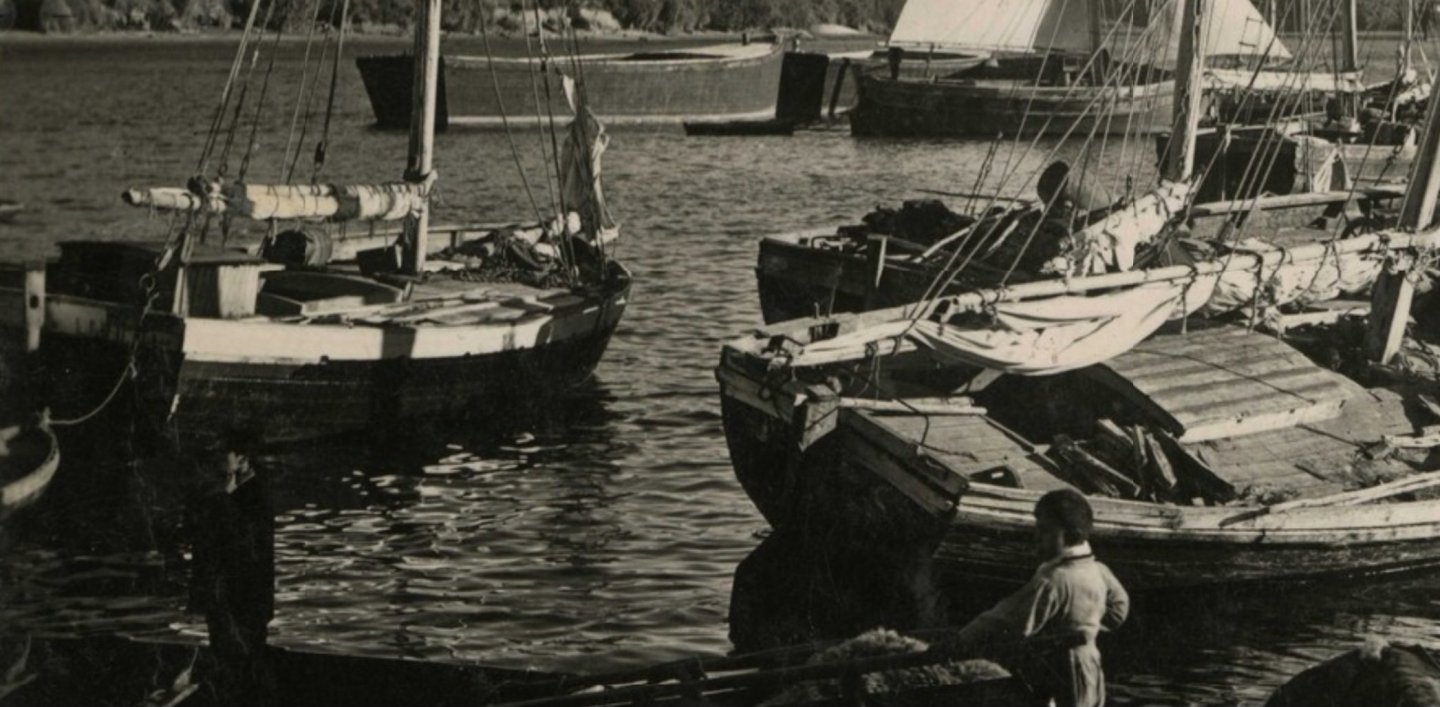
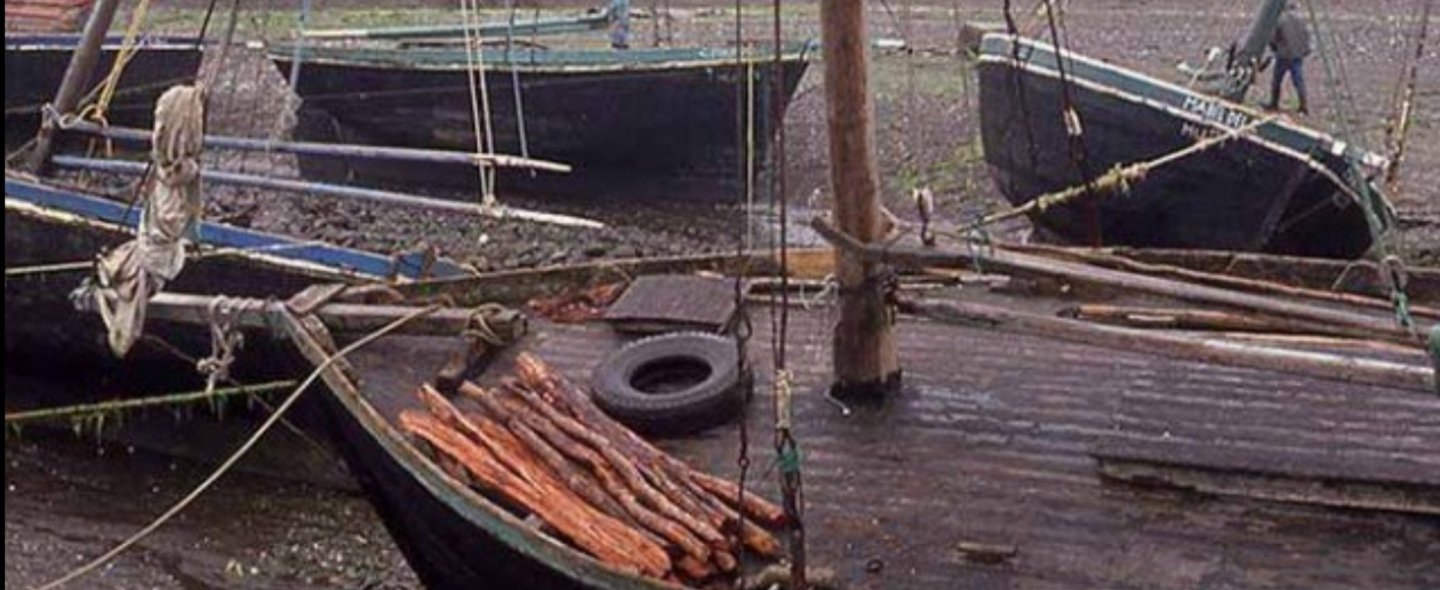
Thank you, @Paul Le Wol, @Jim Lad, @Keith Black, @Thukydides, @Knocklouder, @Glen McGuire, for the kind comments! As much as I enjoyed planking the hull, it's fun to now move on to other tasks. First up, I applied a bit of filler to cover the joints between the transom and the subdeck, and between the keel and sternpost (so as to later scribe a more accurate false joint, for the latter). I then began work on the covering boards. First, I marked a line 1/8-inch inboard from the edge of the hull. I did this by holding a short length of mechanical pencil lead against a bit of 1/8-inch wide scrap and running the scrap along the edge. I then used tape to take down templates for the covering boards, as seen below. I focused on getting the covering boards properly shaped inboard, as the edge would be sanded flush with the hull. The photo below shows the two fore covering boards in place and shaped, although I need to fine-tune the scarf joint at the aft end and add a filler piece at the bow (which will be covered by the bowsprit in any case). I also began work on the guarda playa--the "bumper" plank around the turn of the bilge. This was used to protect the hull while the lancha was beached for loading/unloading by low tide. Although not all lanchas had one (based on photos), enough did, and the guarda playa is an interesting enough detail that I wanted to include it in my build. Below: The guarda playa is visible around the turn of the bilge on the closest vessel to the camera. Source: http://ceph-puerto-montt.blogspot.com/2009/02/album-del-recuerdo-imagenes-de-nuestra_22.html José A. Garnham's drawings of lanchas suggest that the guarda playa was either made with a special extra-thick plank, or by simply adding a separate plank outside the rest of the hull planking. I chose the second option and will be using a bit of 1/16x1/8-inch strip to make them. First I used a ruler to check where on the hull the guarda playa should be located. This detail isn't included in the plans, so I just went with what looked reasonable in terms of length, making sure each end was in line with the frame lines signaled by the hull plank butts. I then cut the strip to length, curving each tip a bit. Next up: to finish the covering boards, glue on the guarda playas, and start work on the hatches before planking the deck.


- 312 replies
-
- 8
-
-
- Chile
- Latin America
- (and 6 more)
-
Very interesting choice of a build, I'm looking forward to following along! I'm sure it will make for a great (and very large!) model. It looks like you've made a good start with the former.
-
Very nice job!
-
You're off to a good start!
-
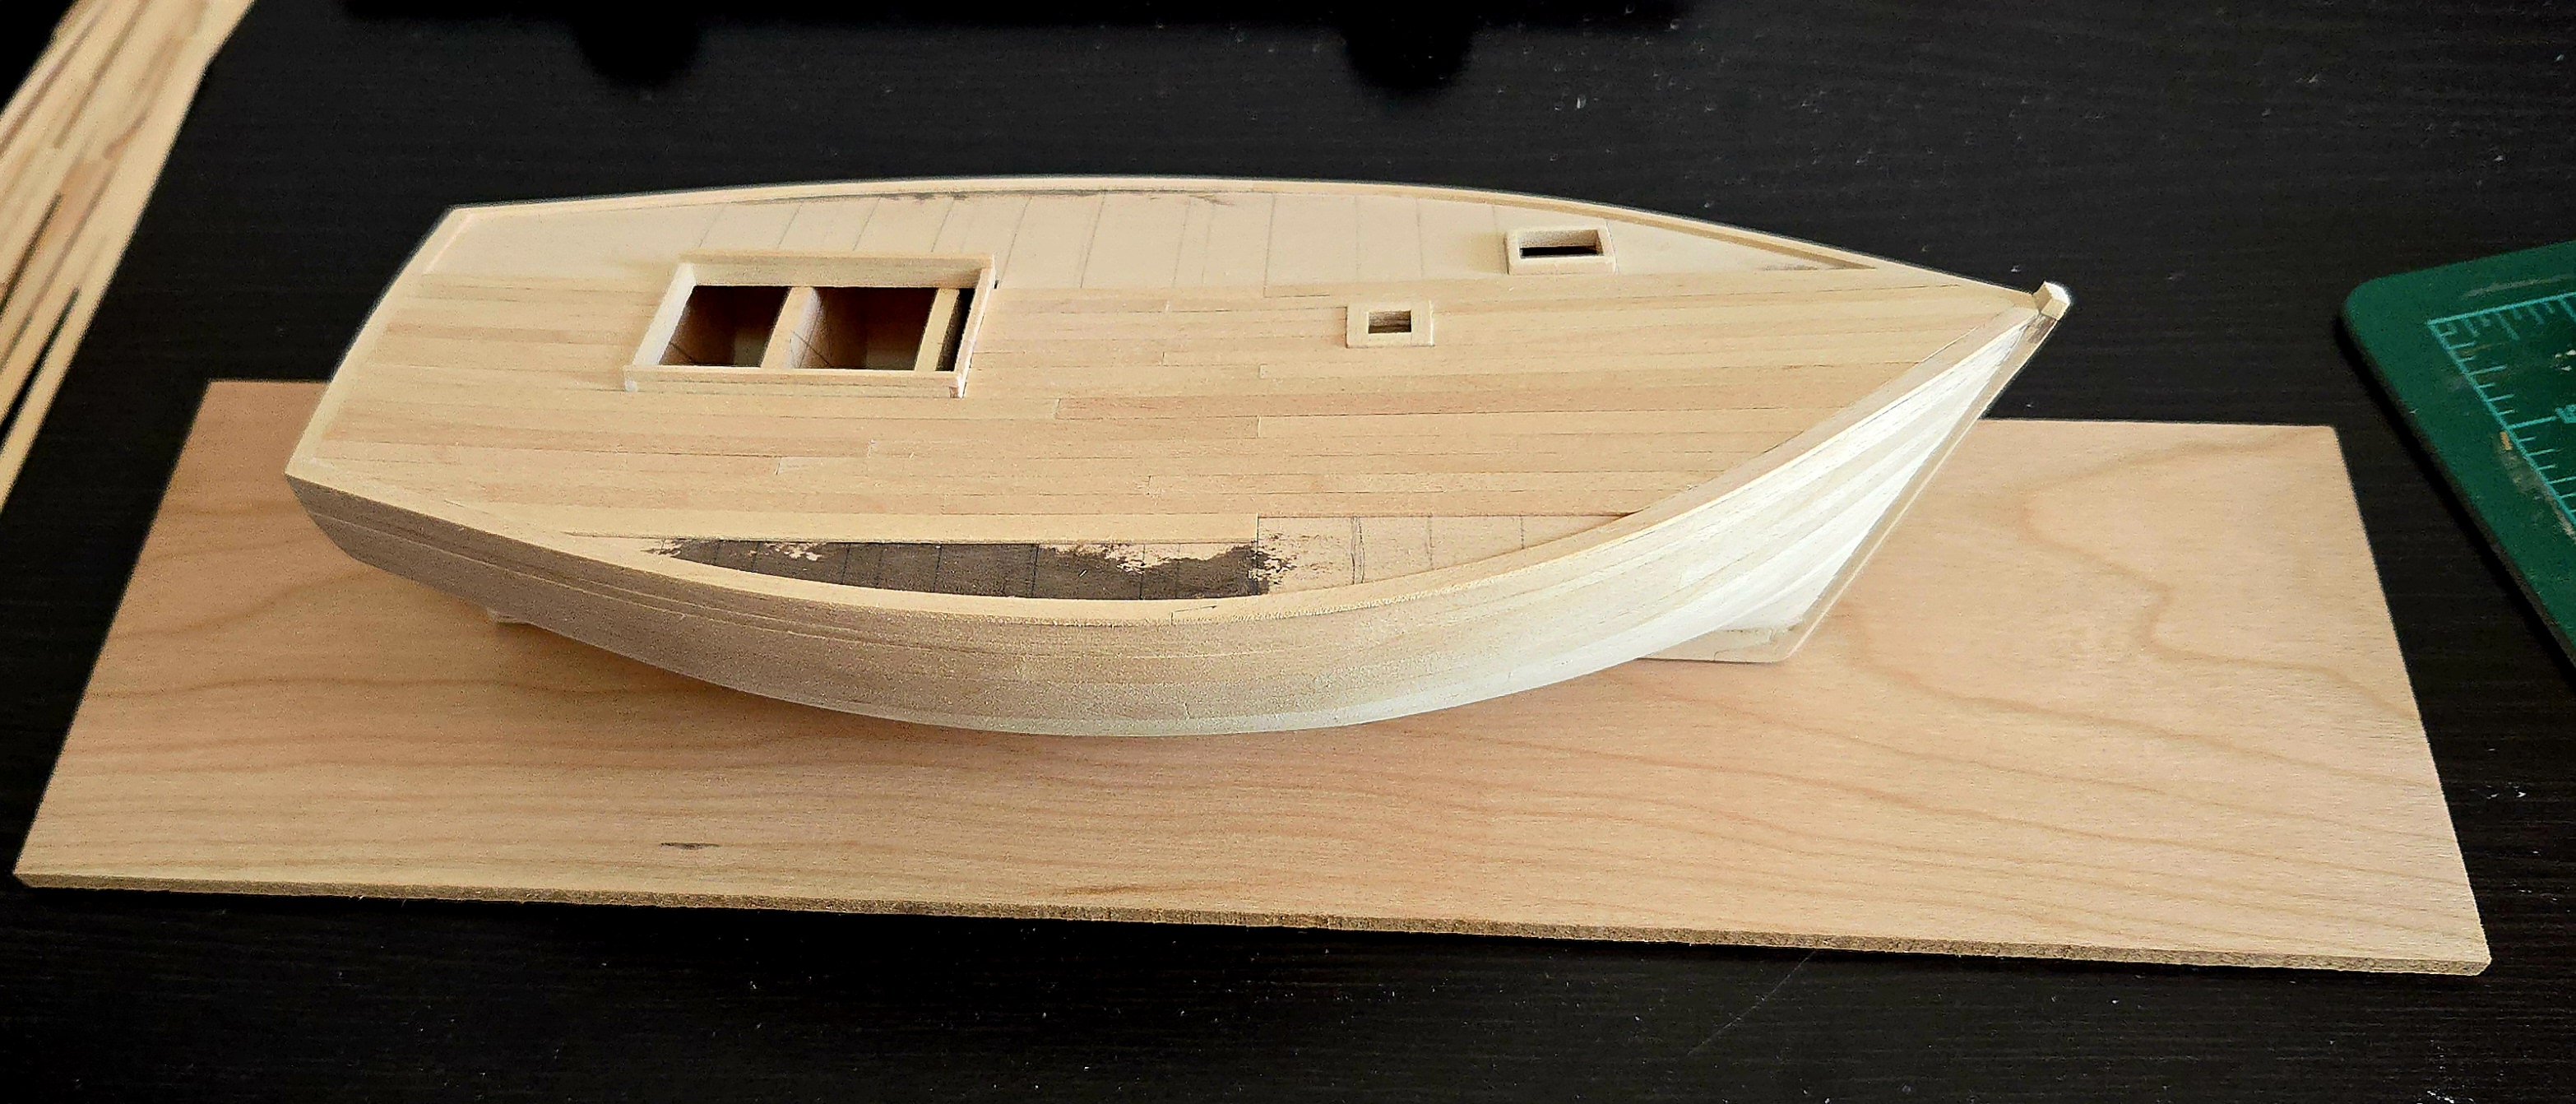
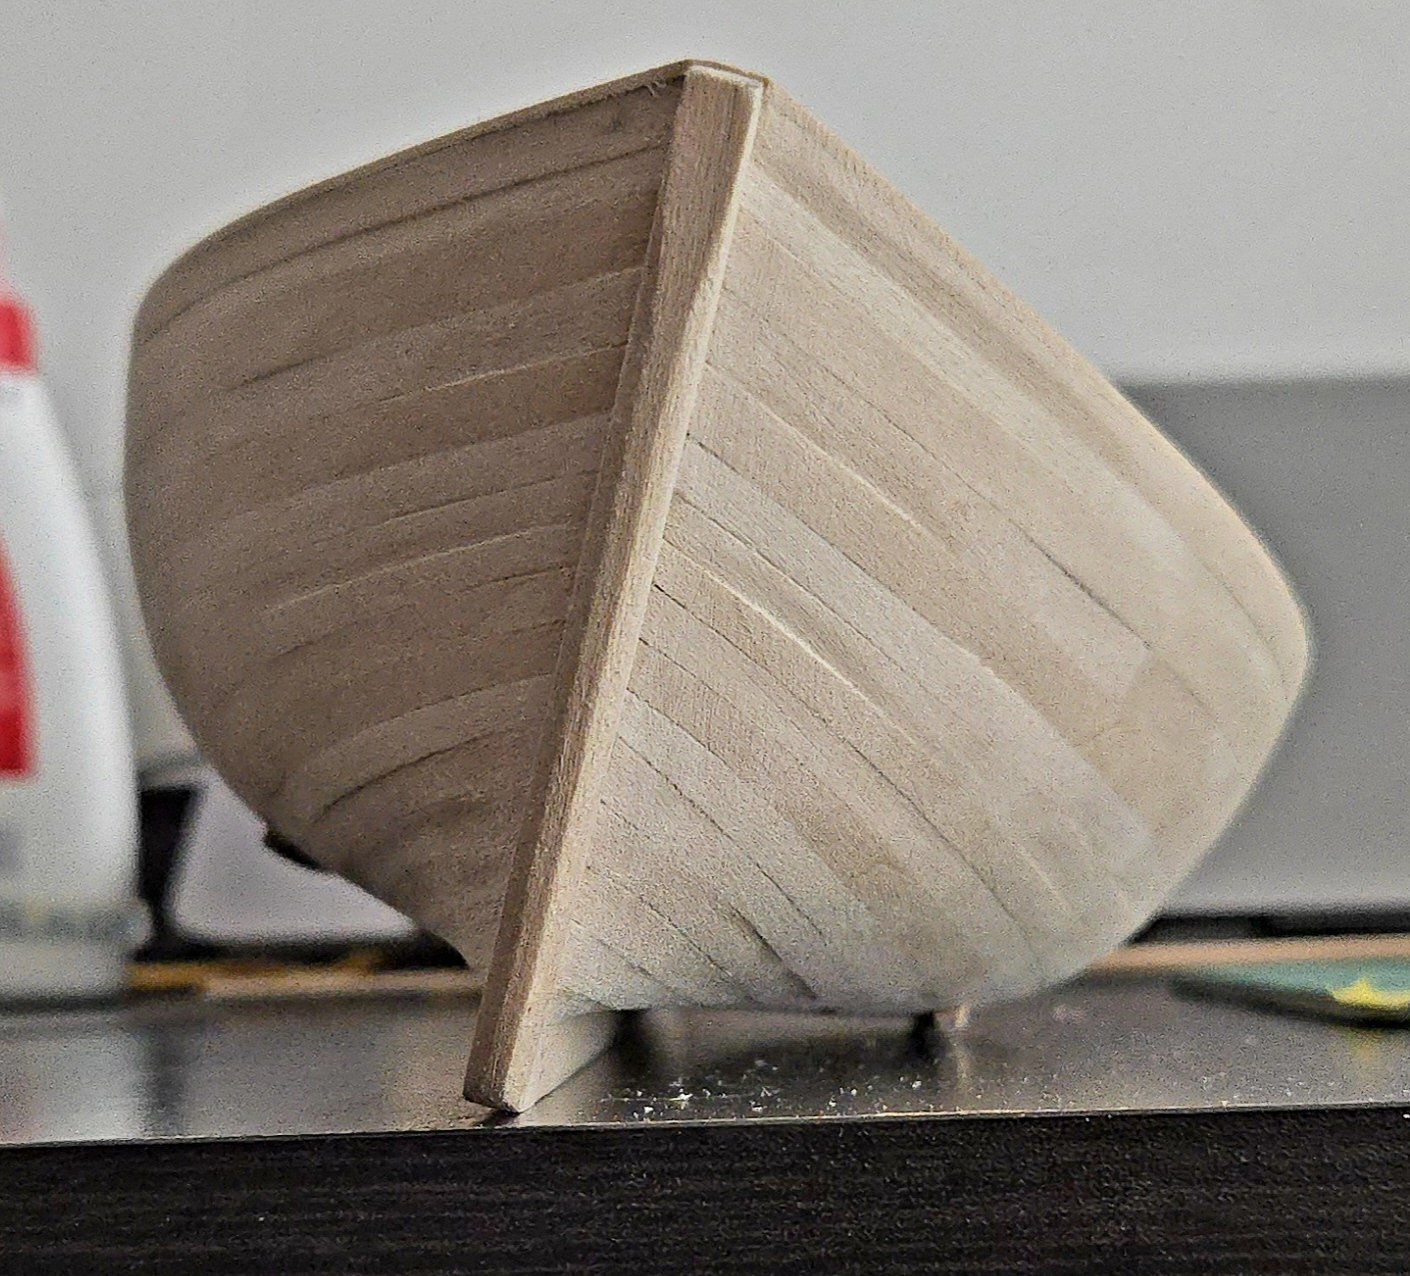
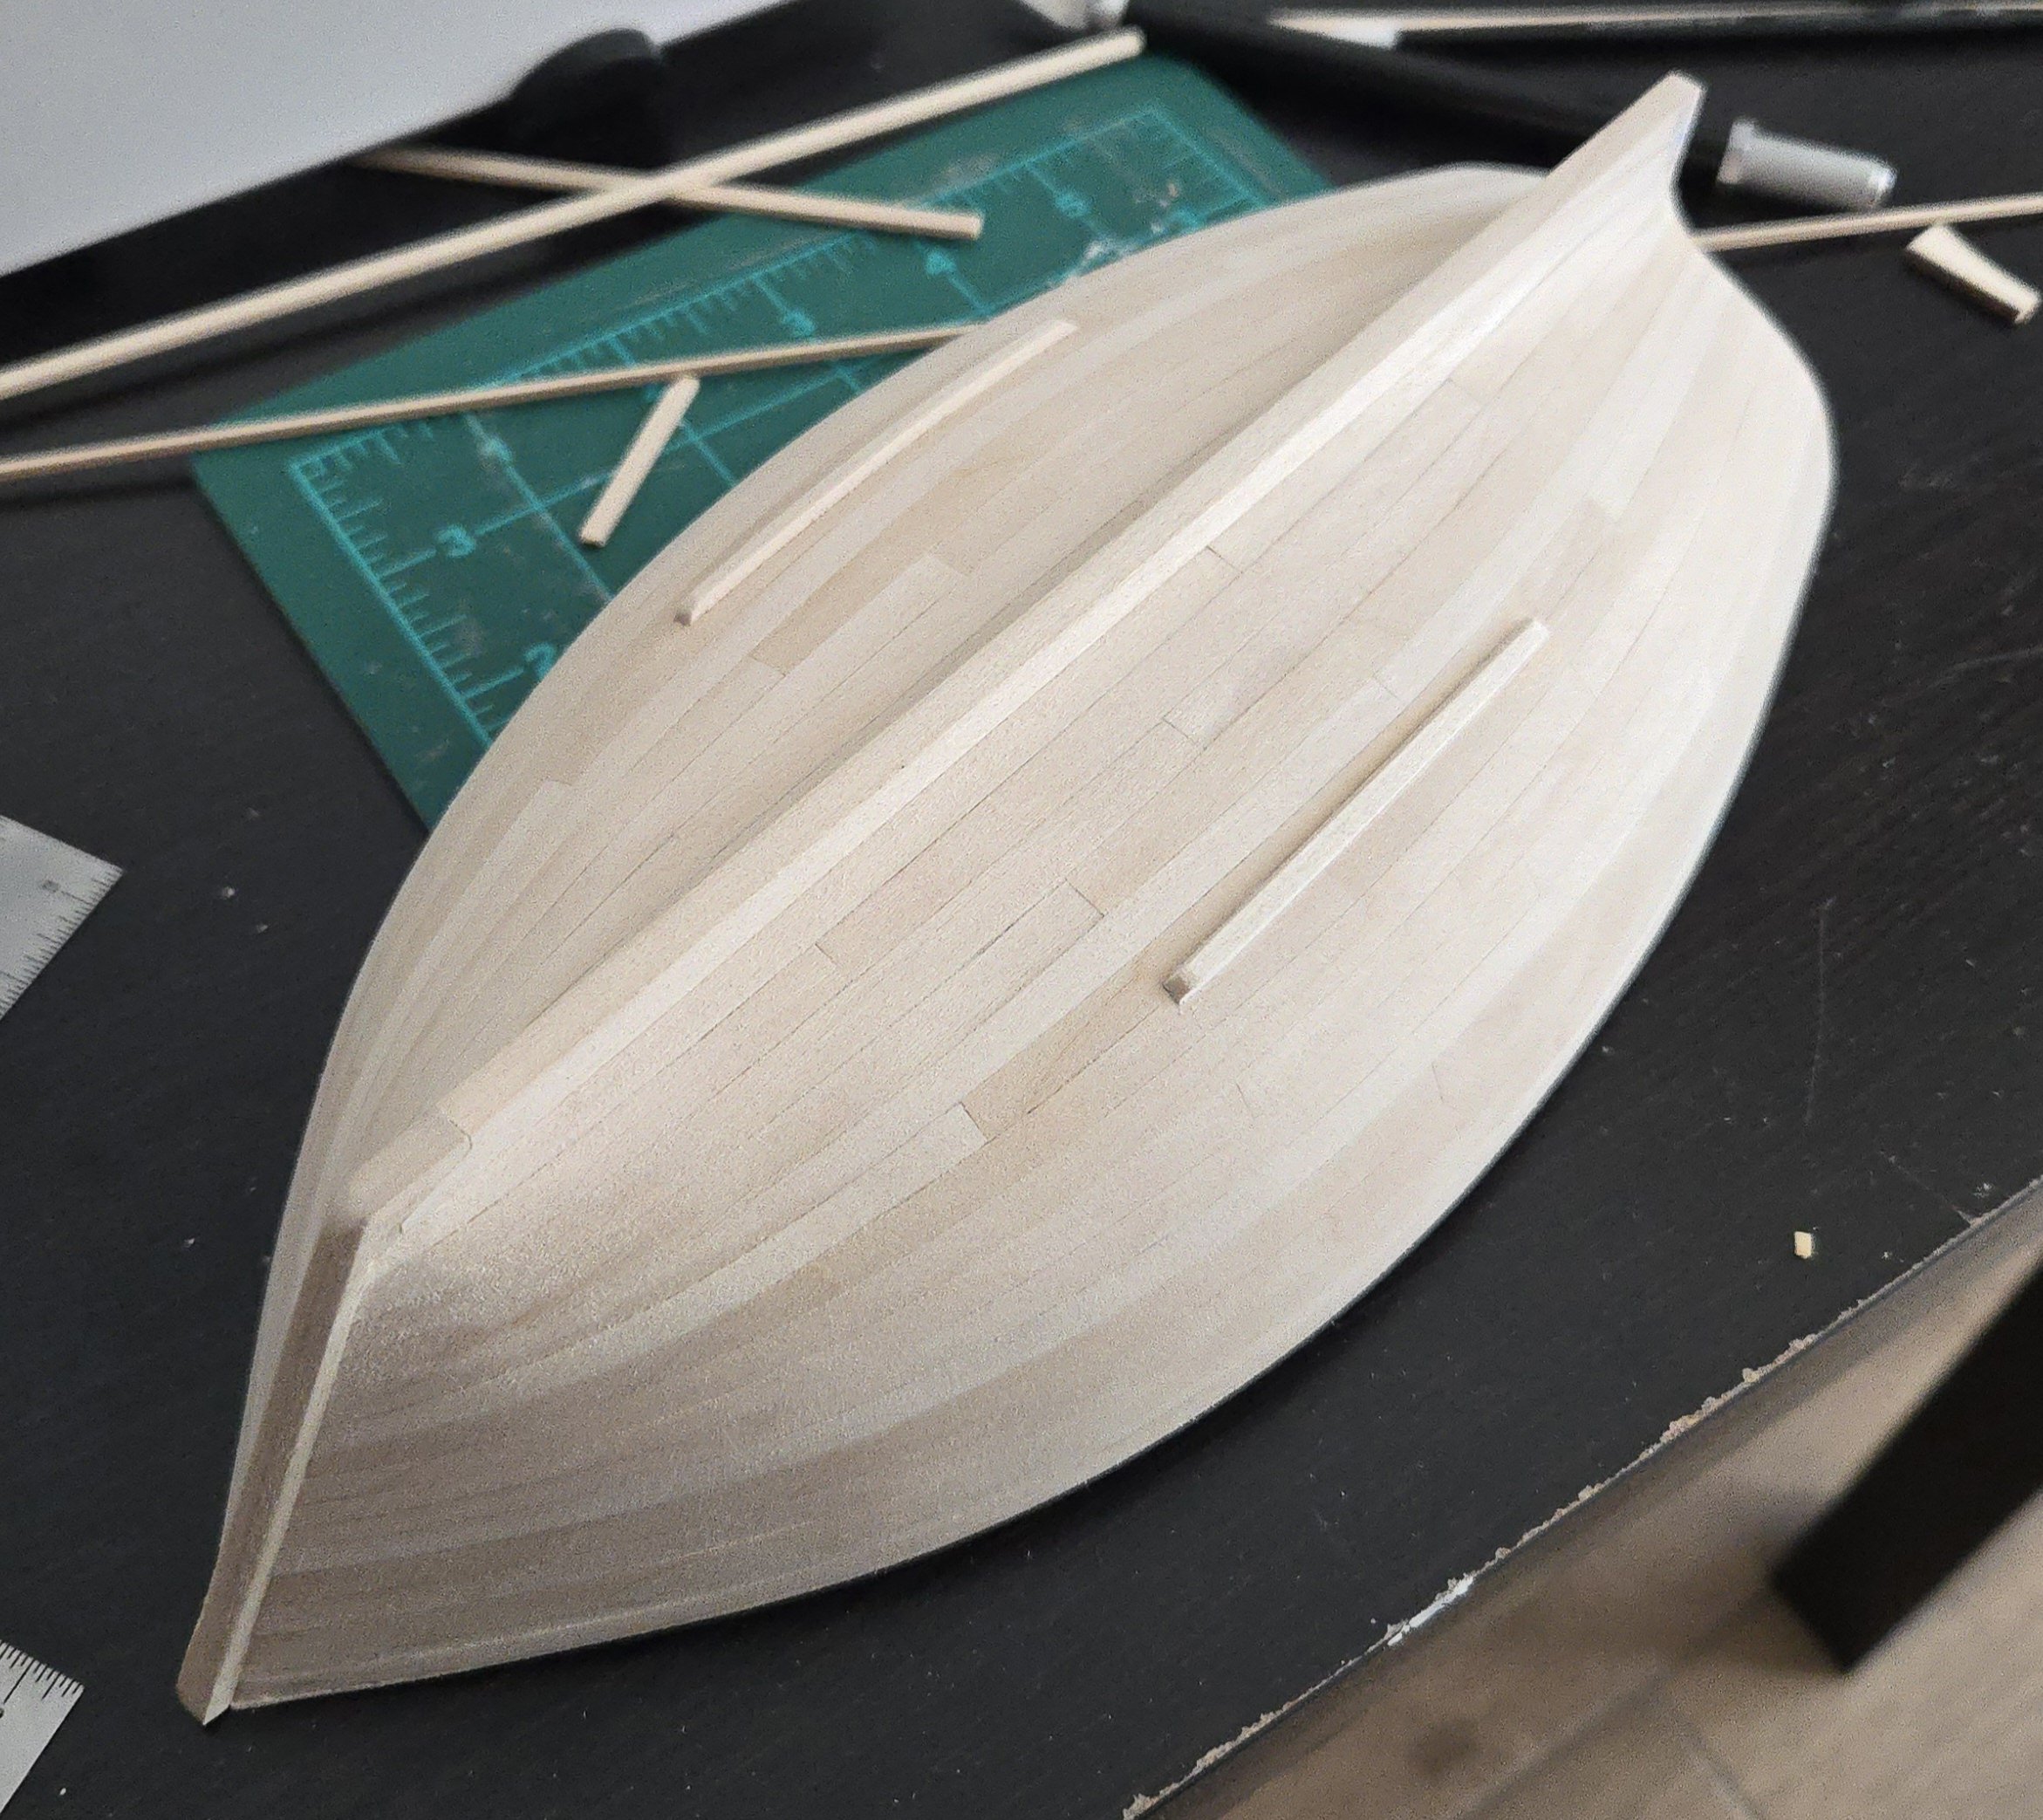
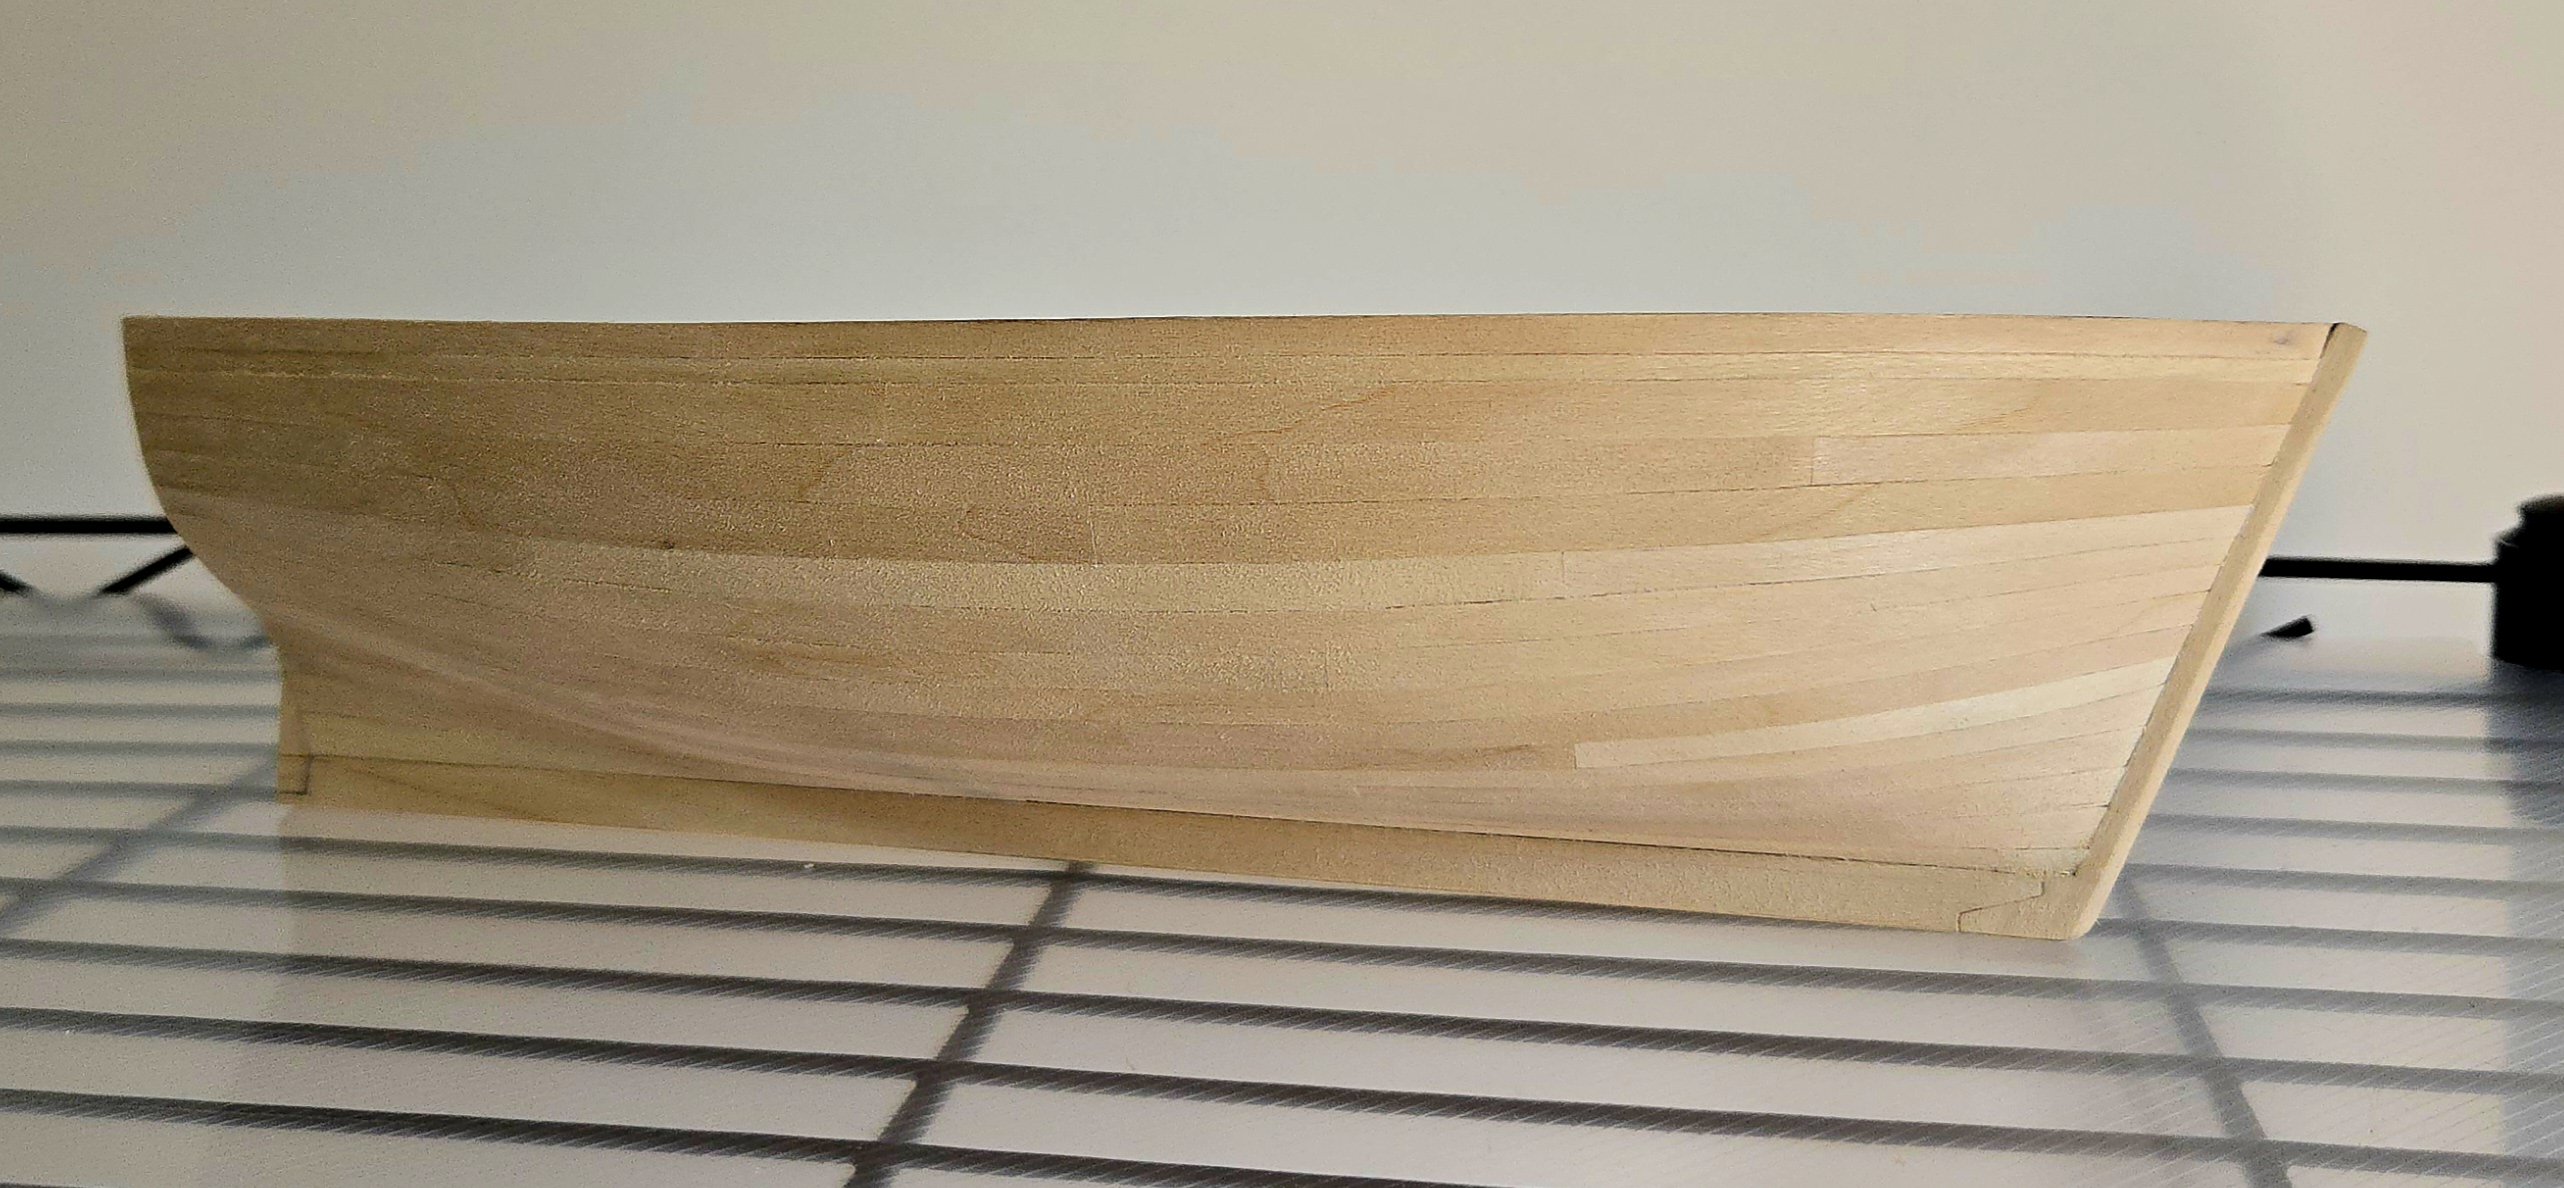
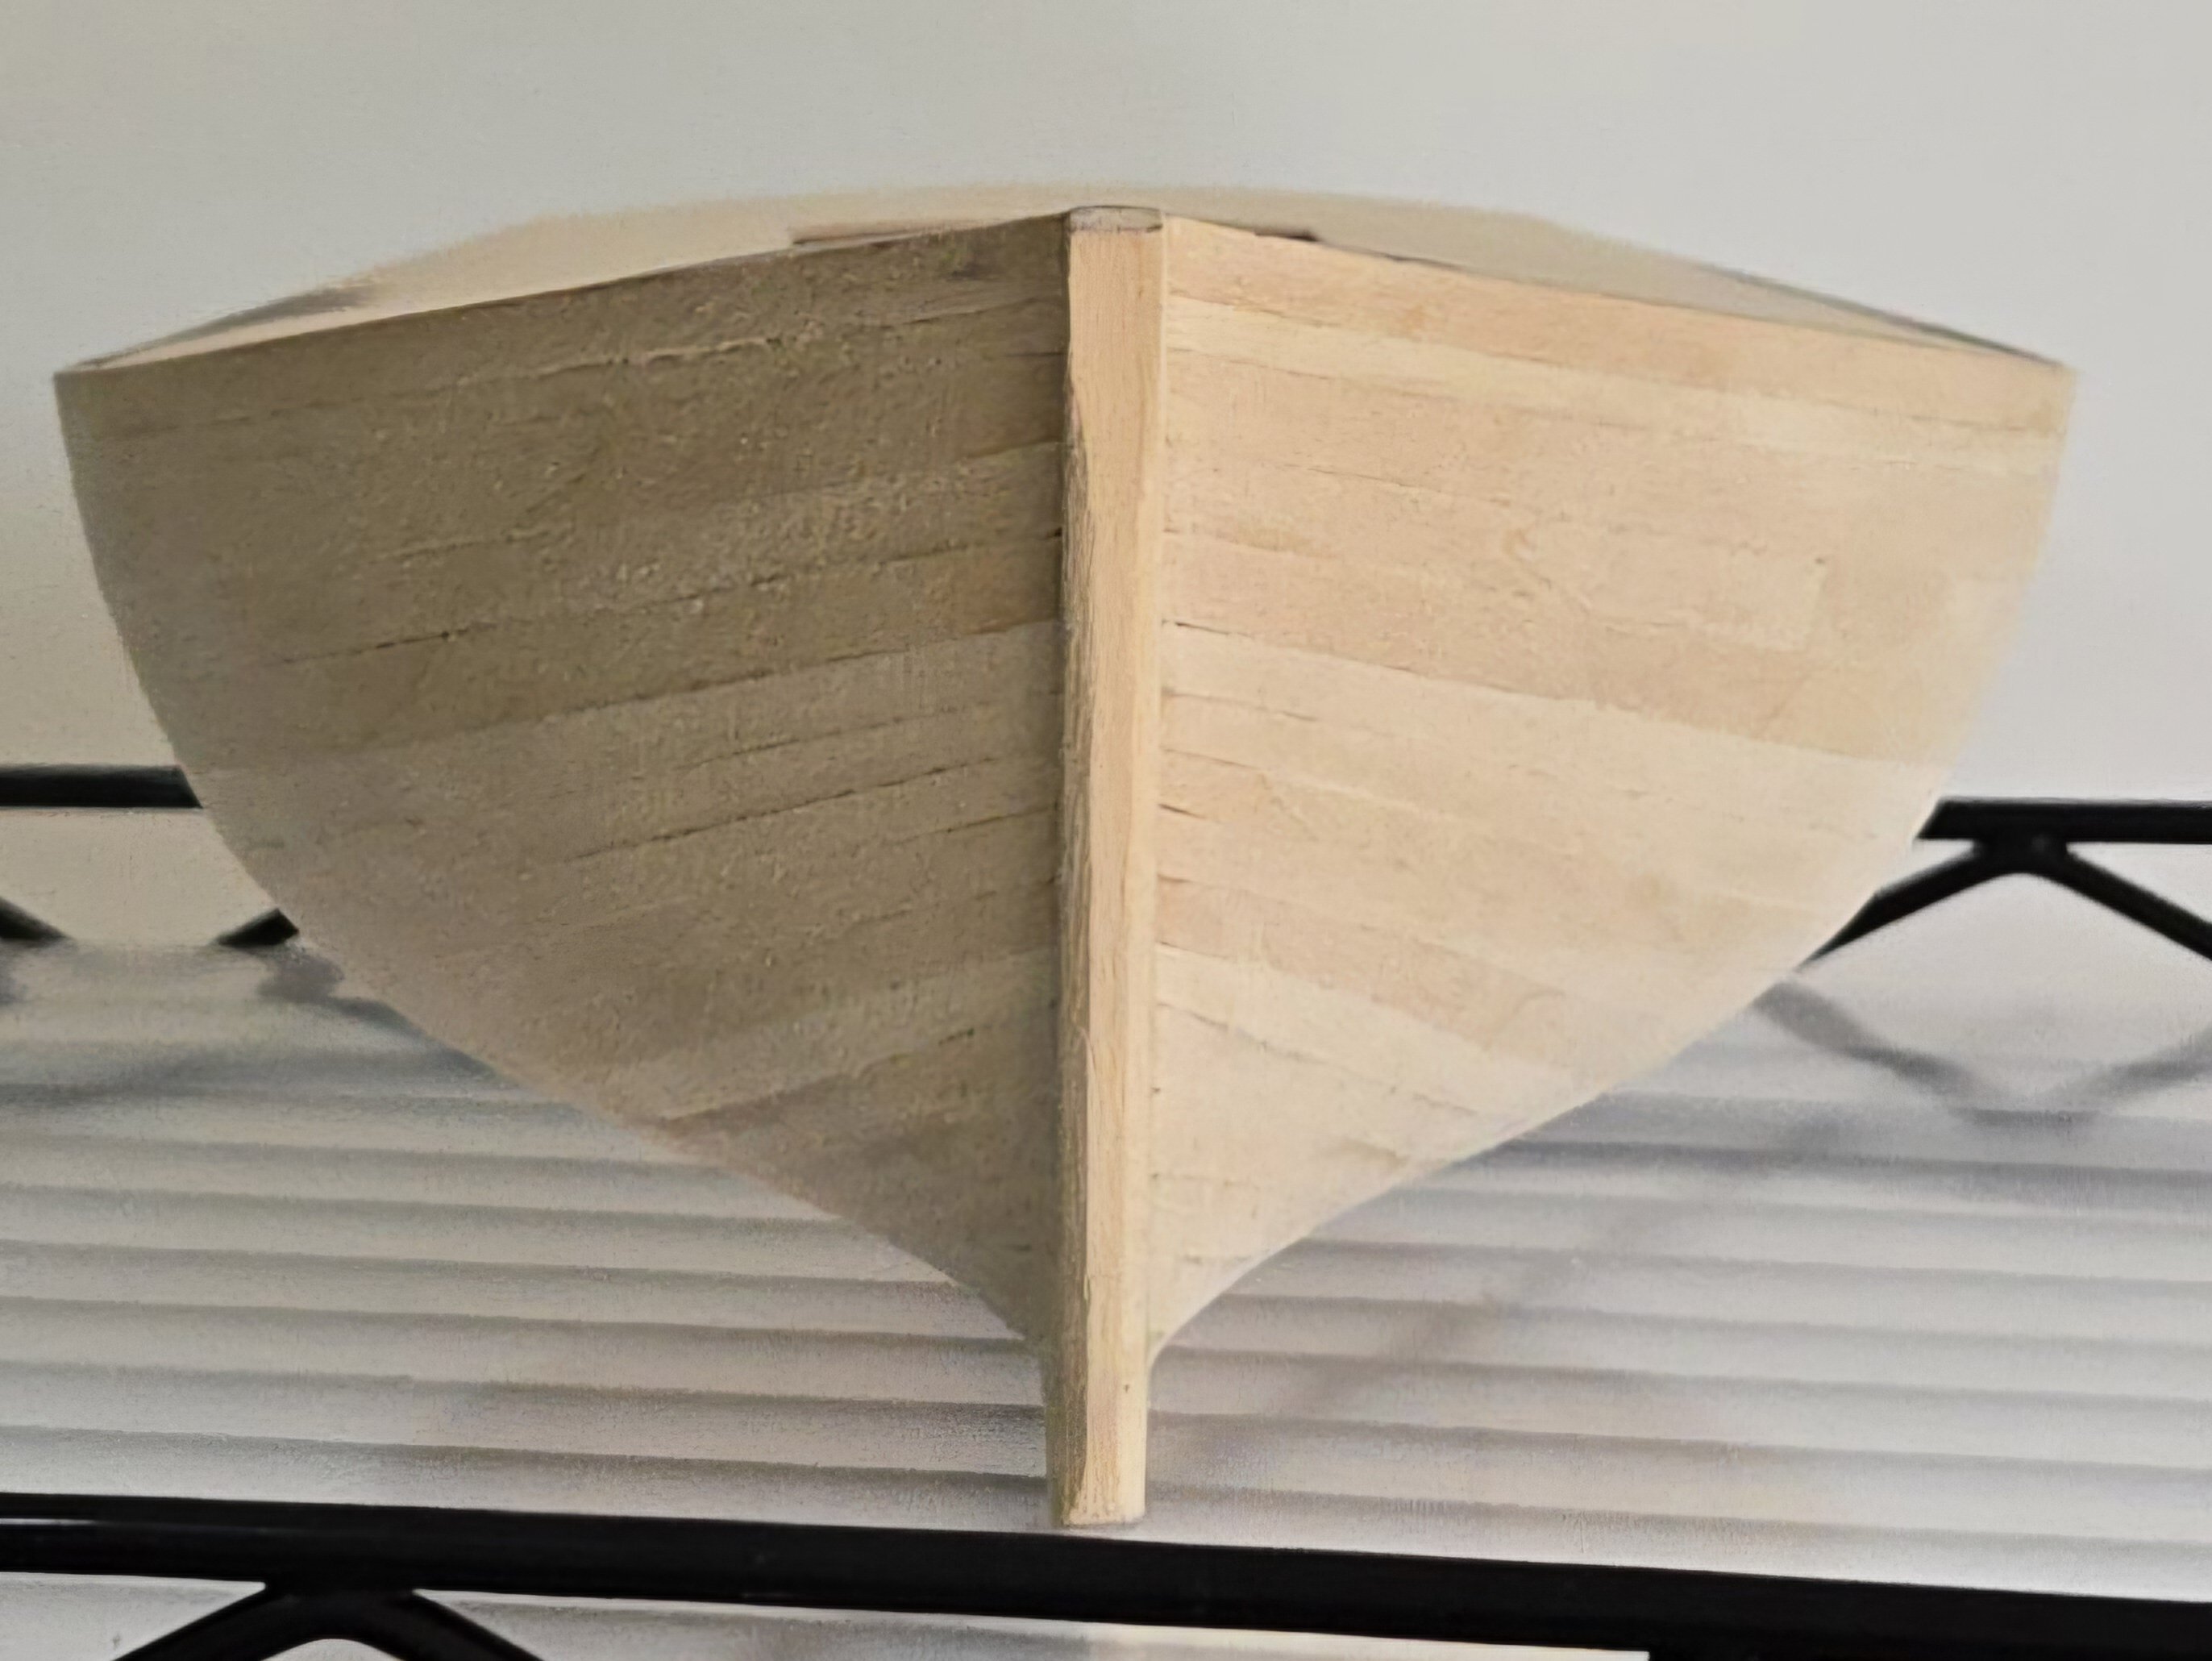
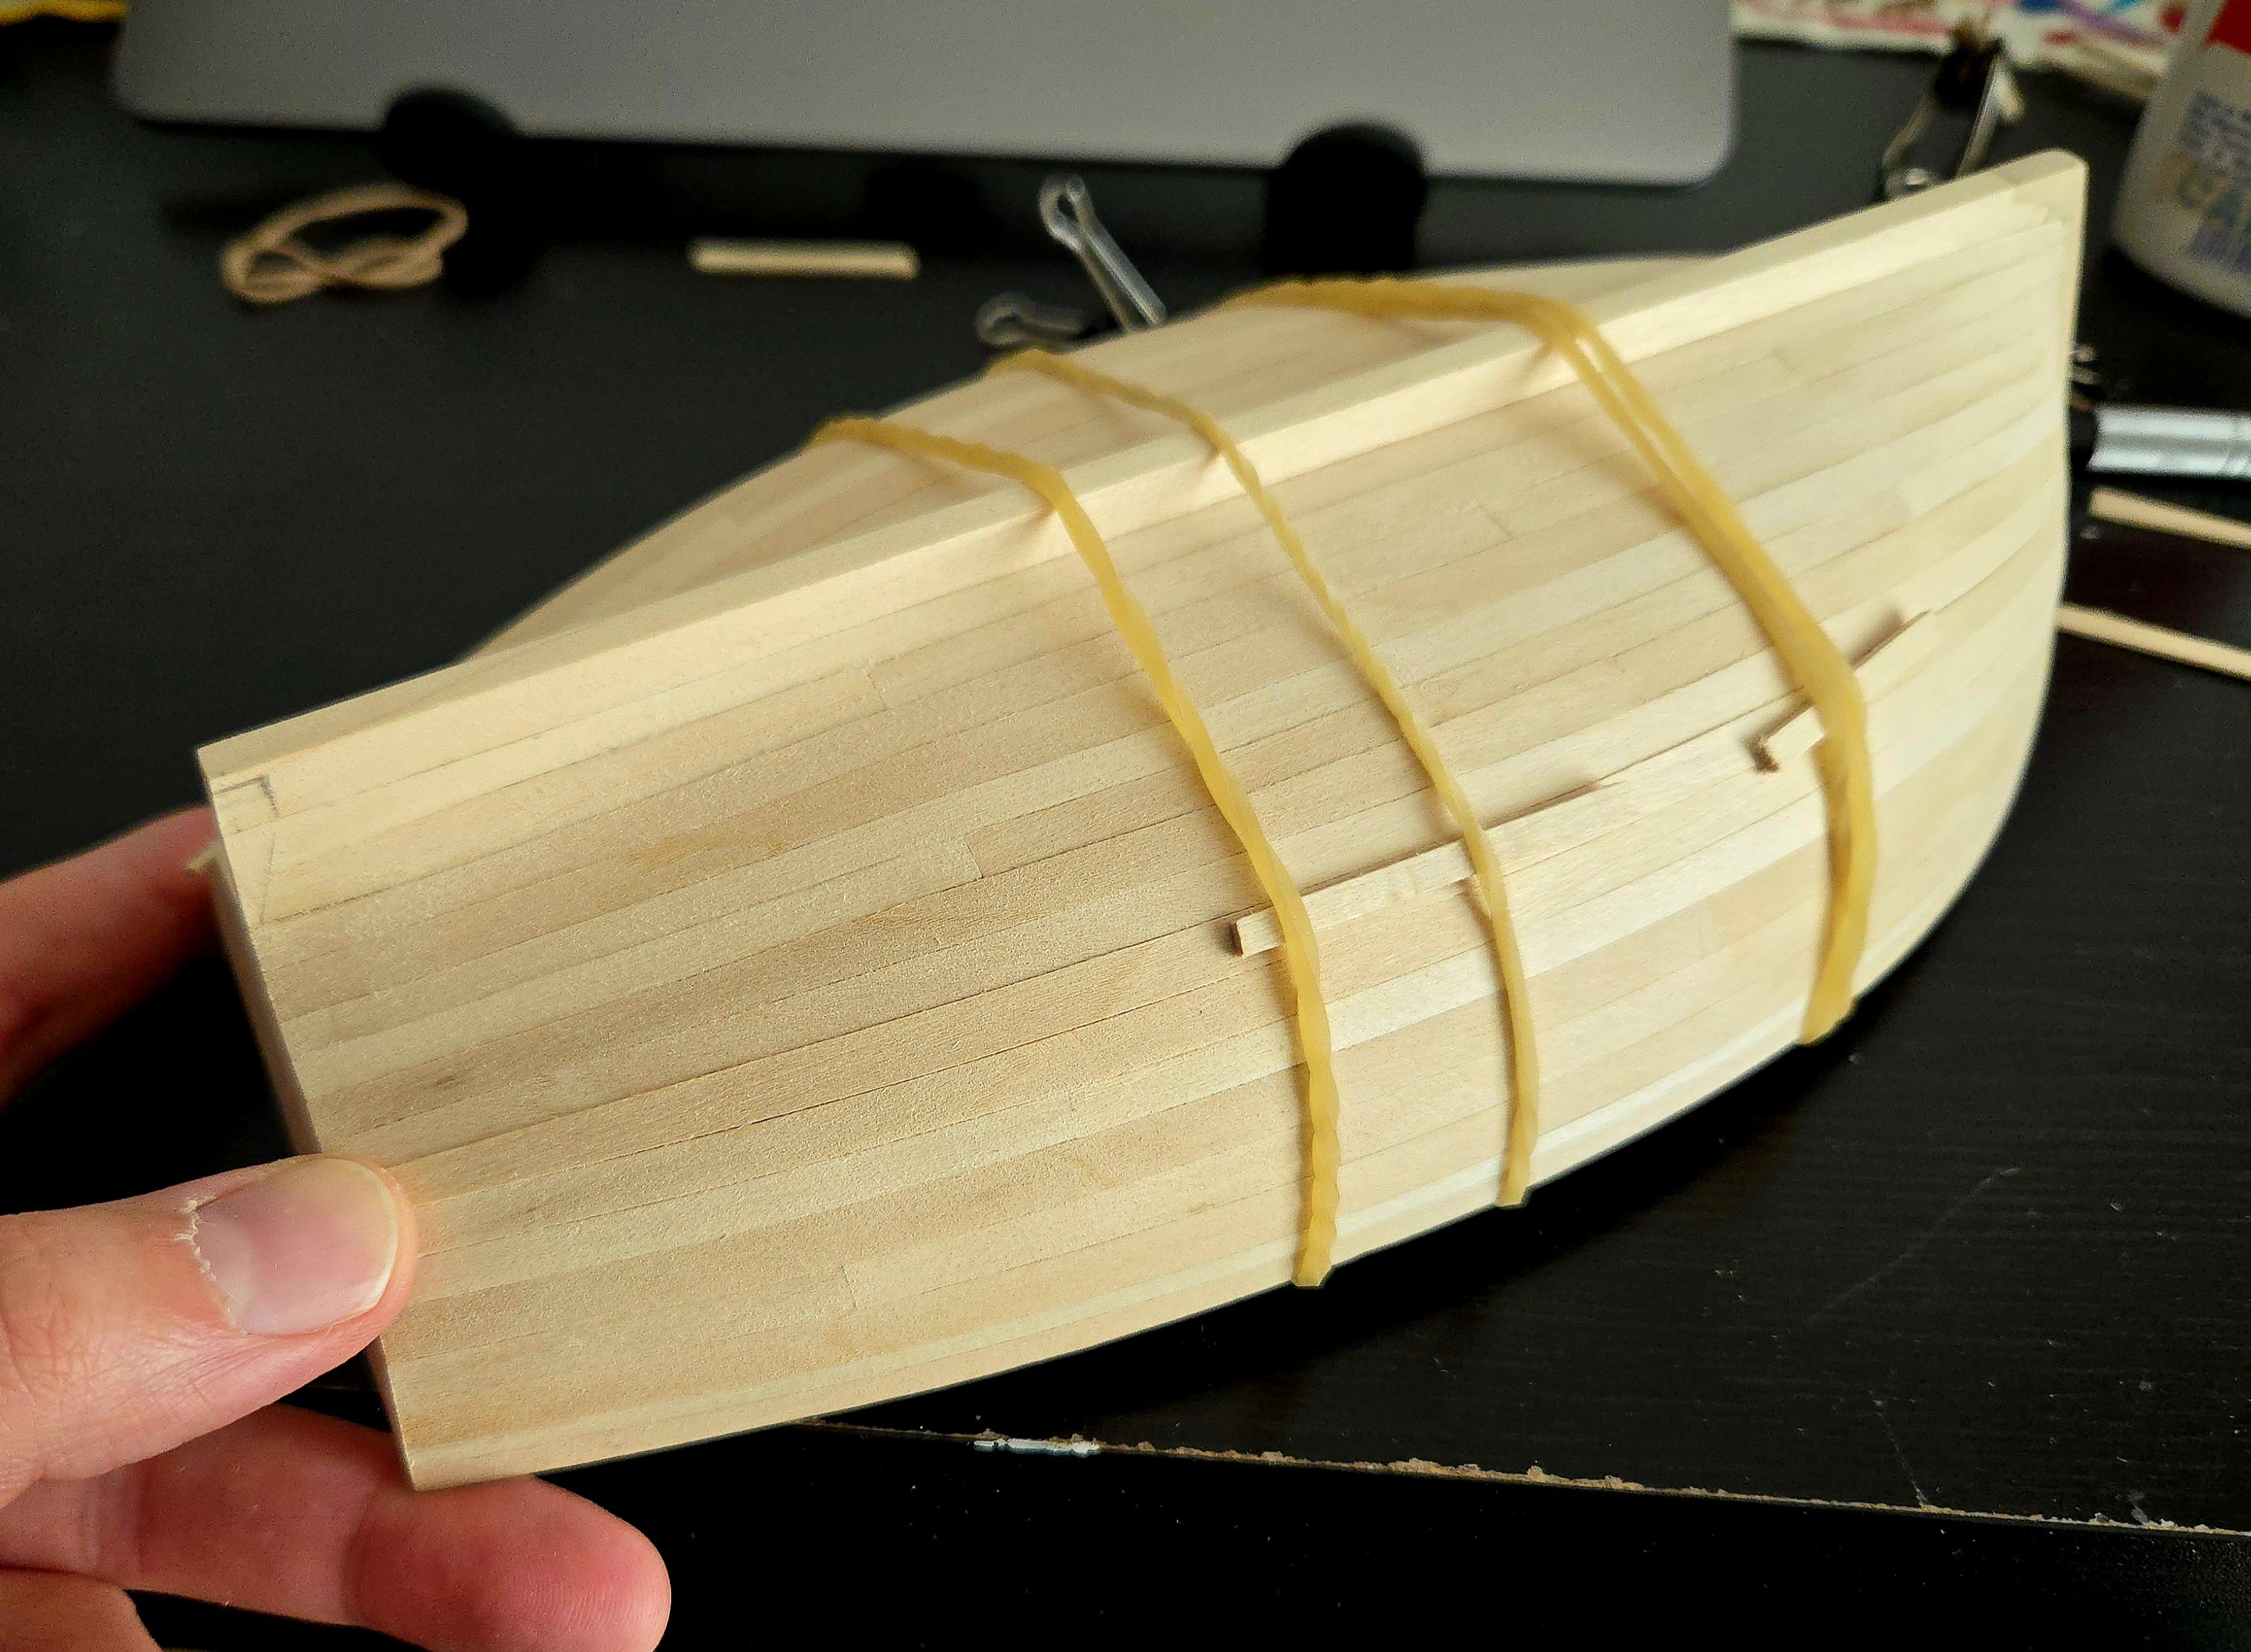
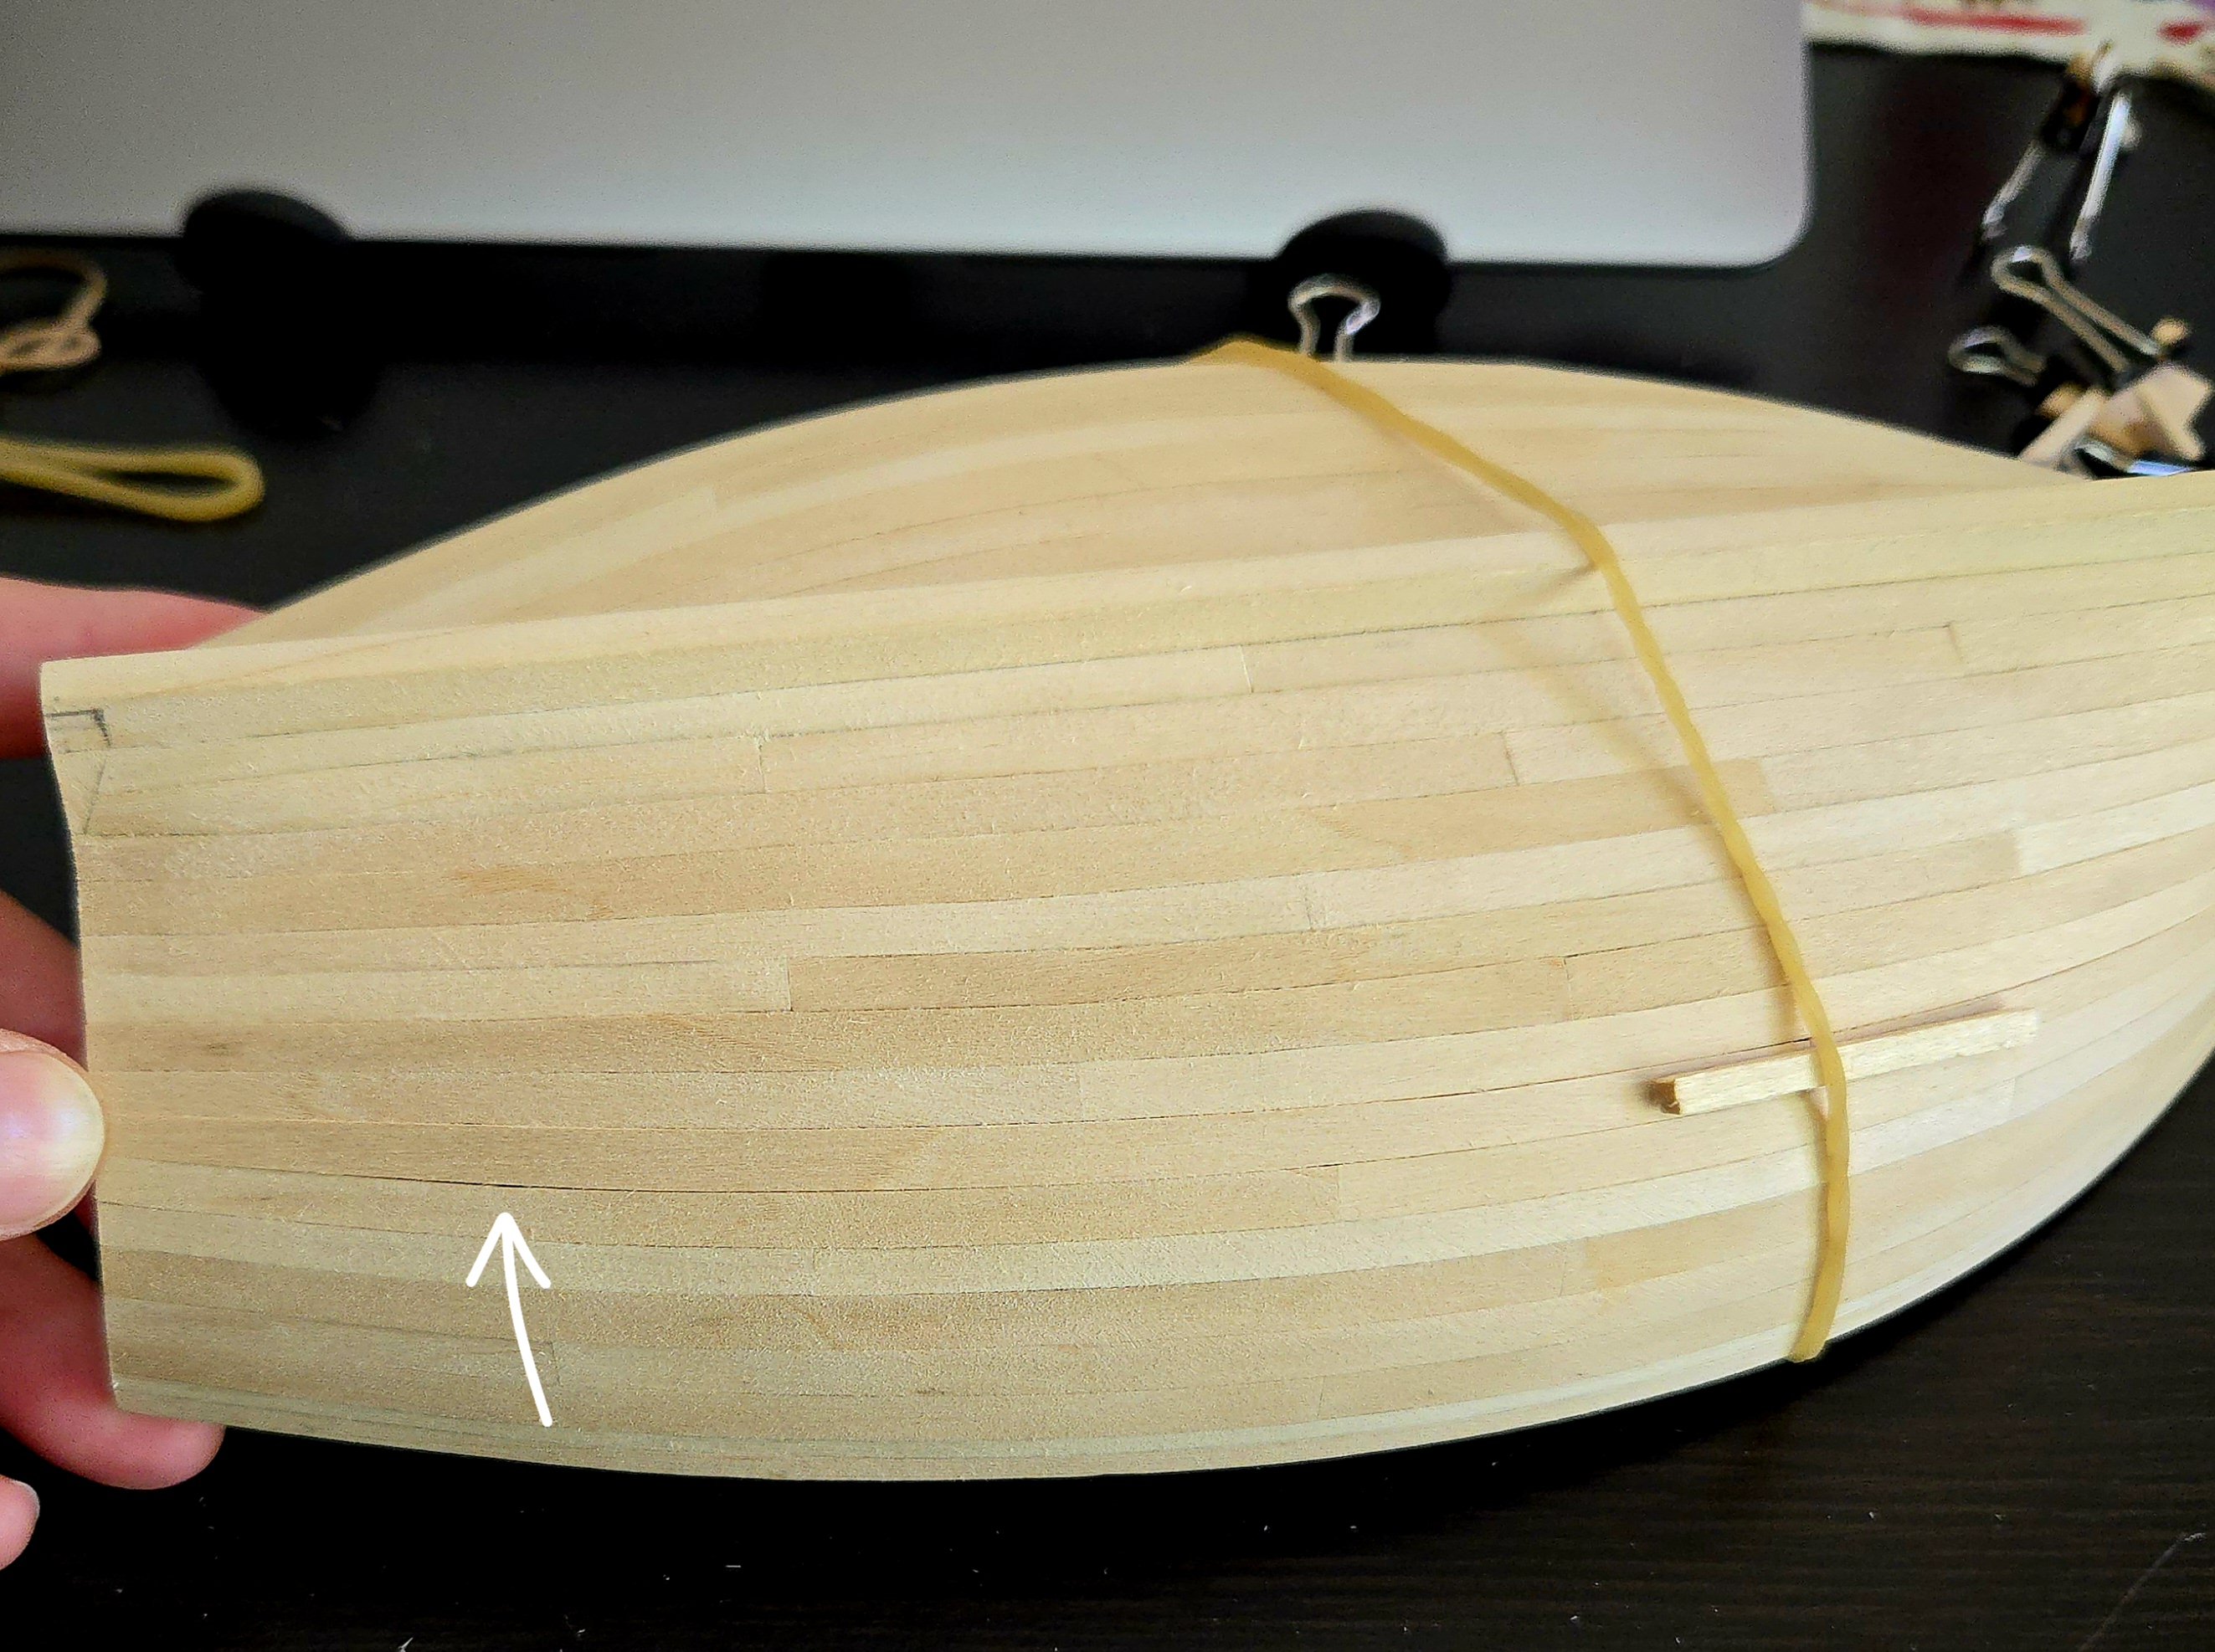
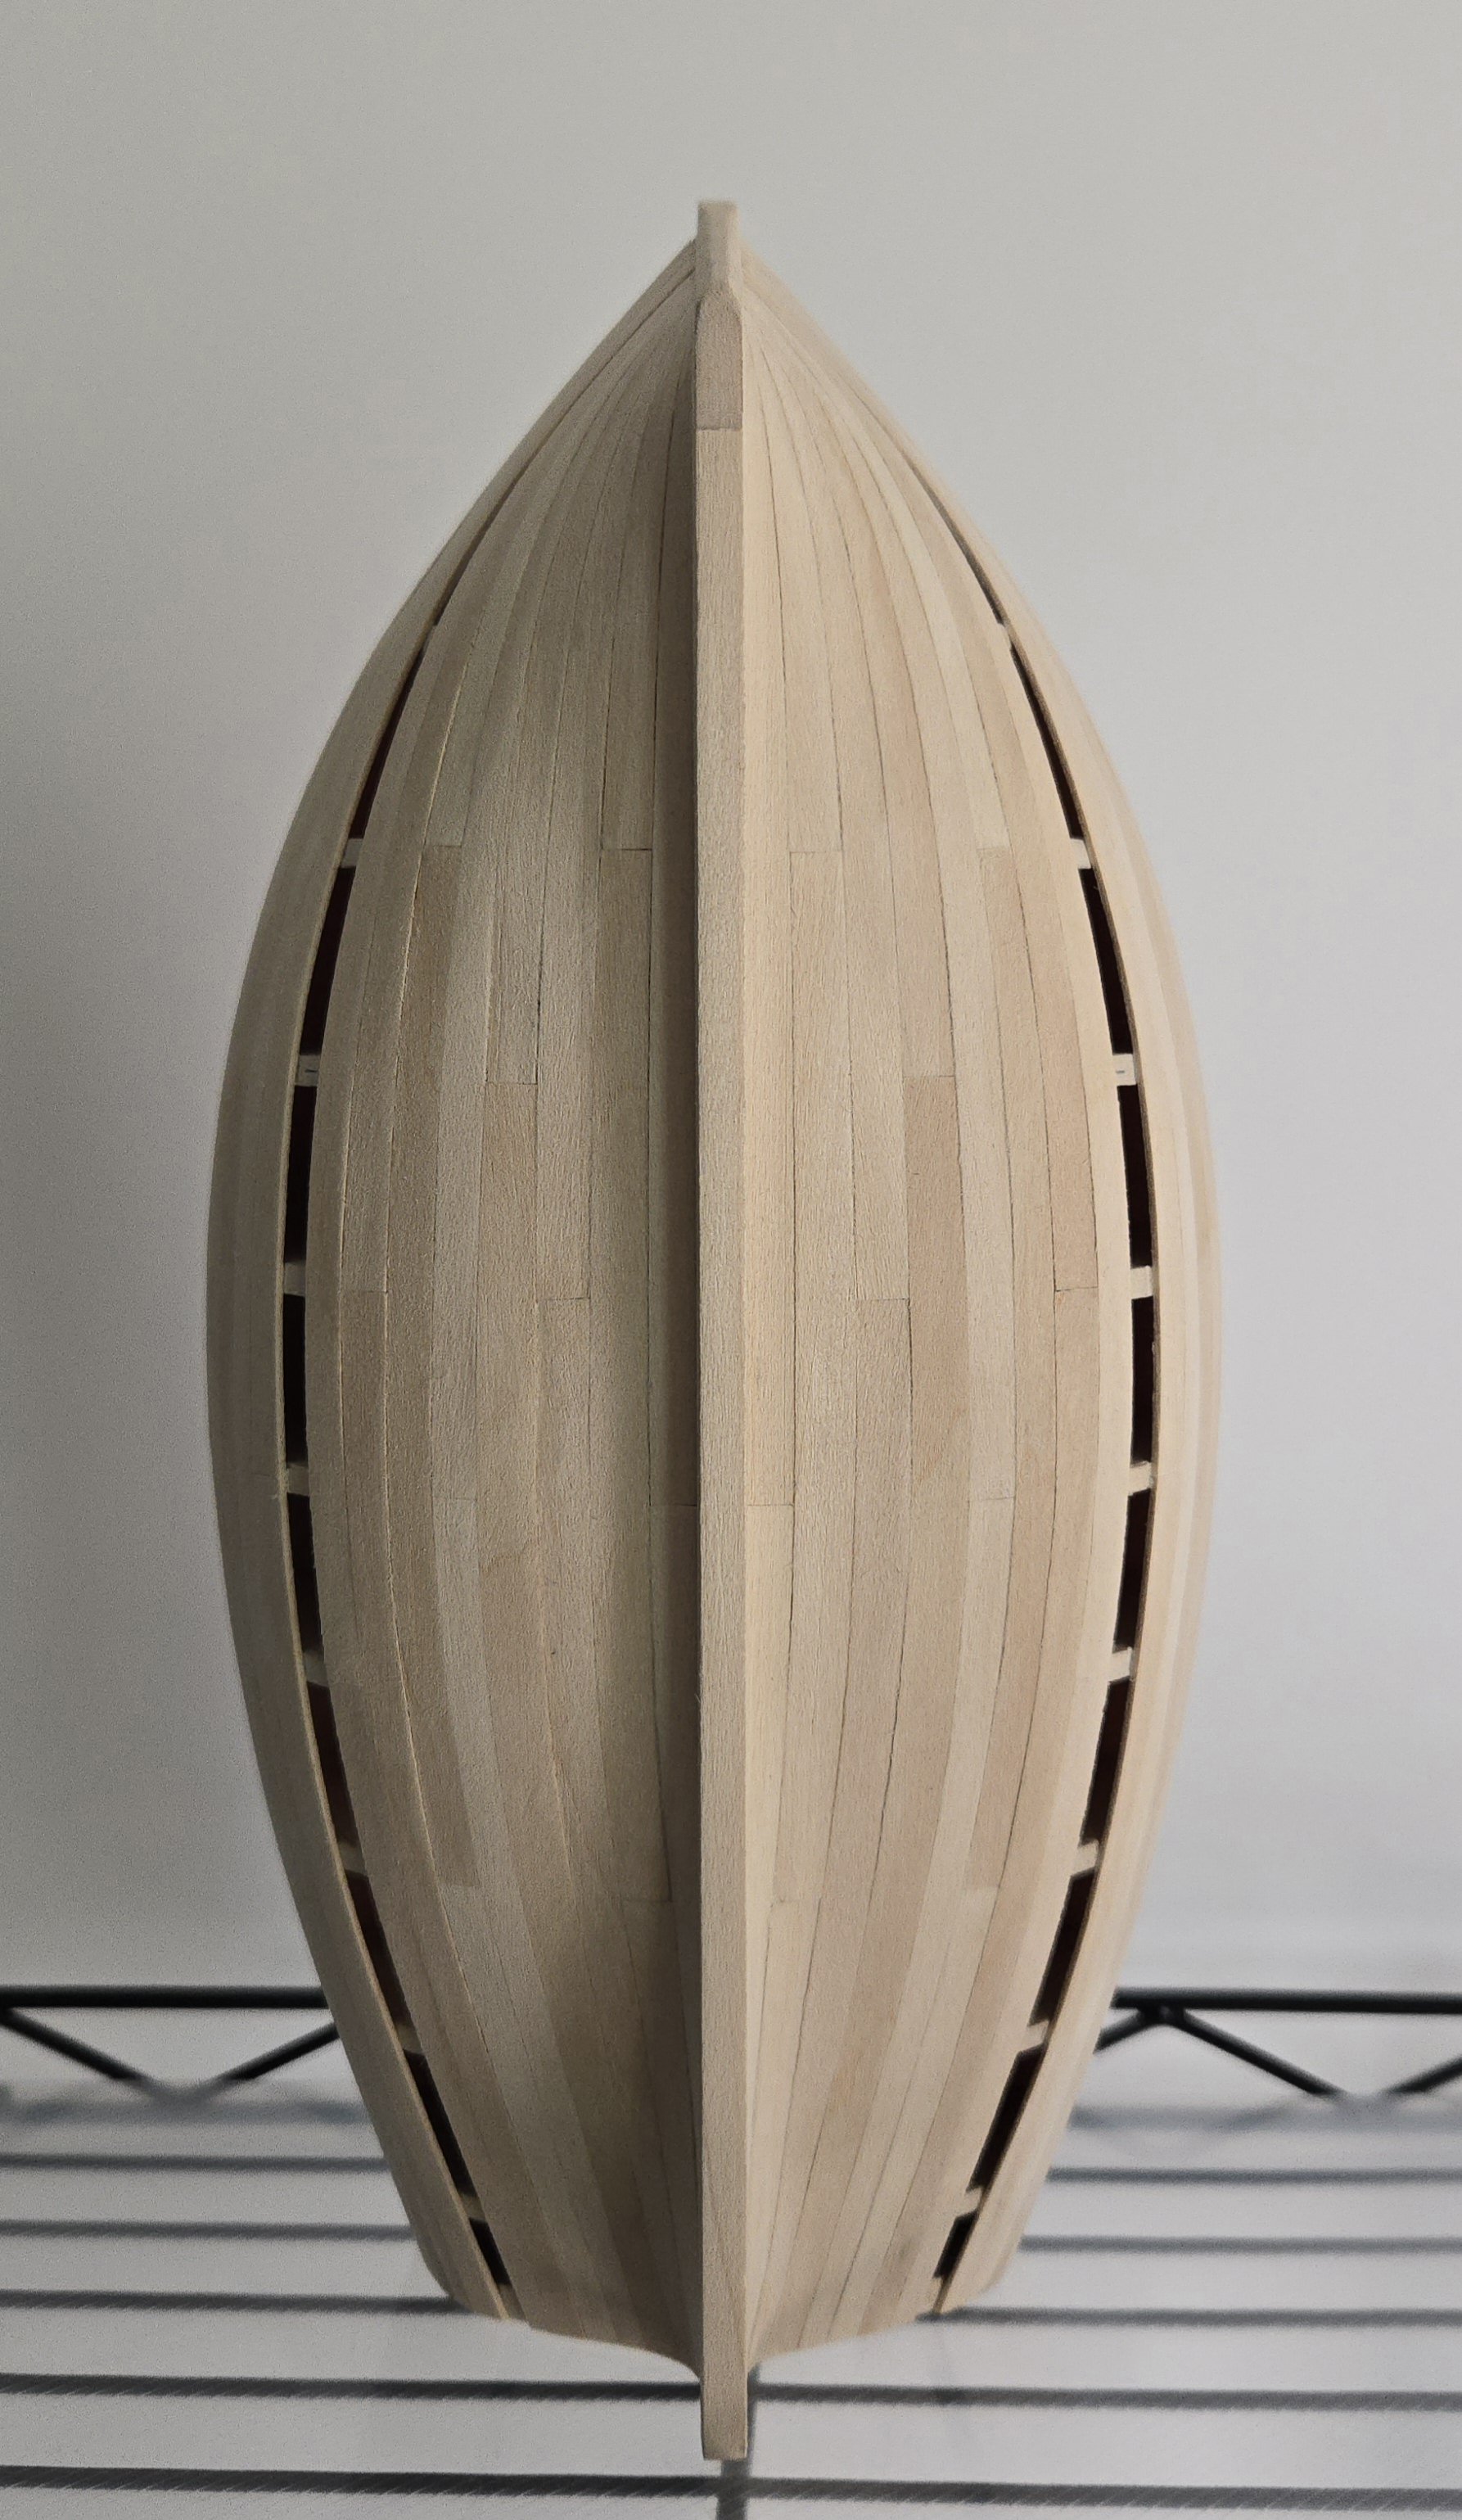
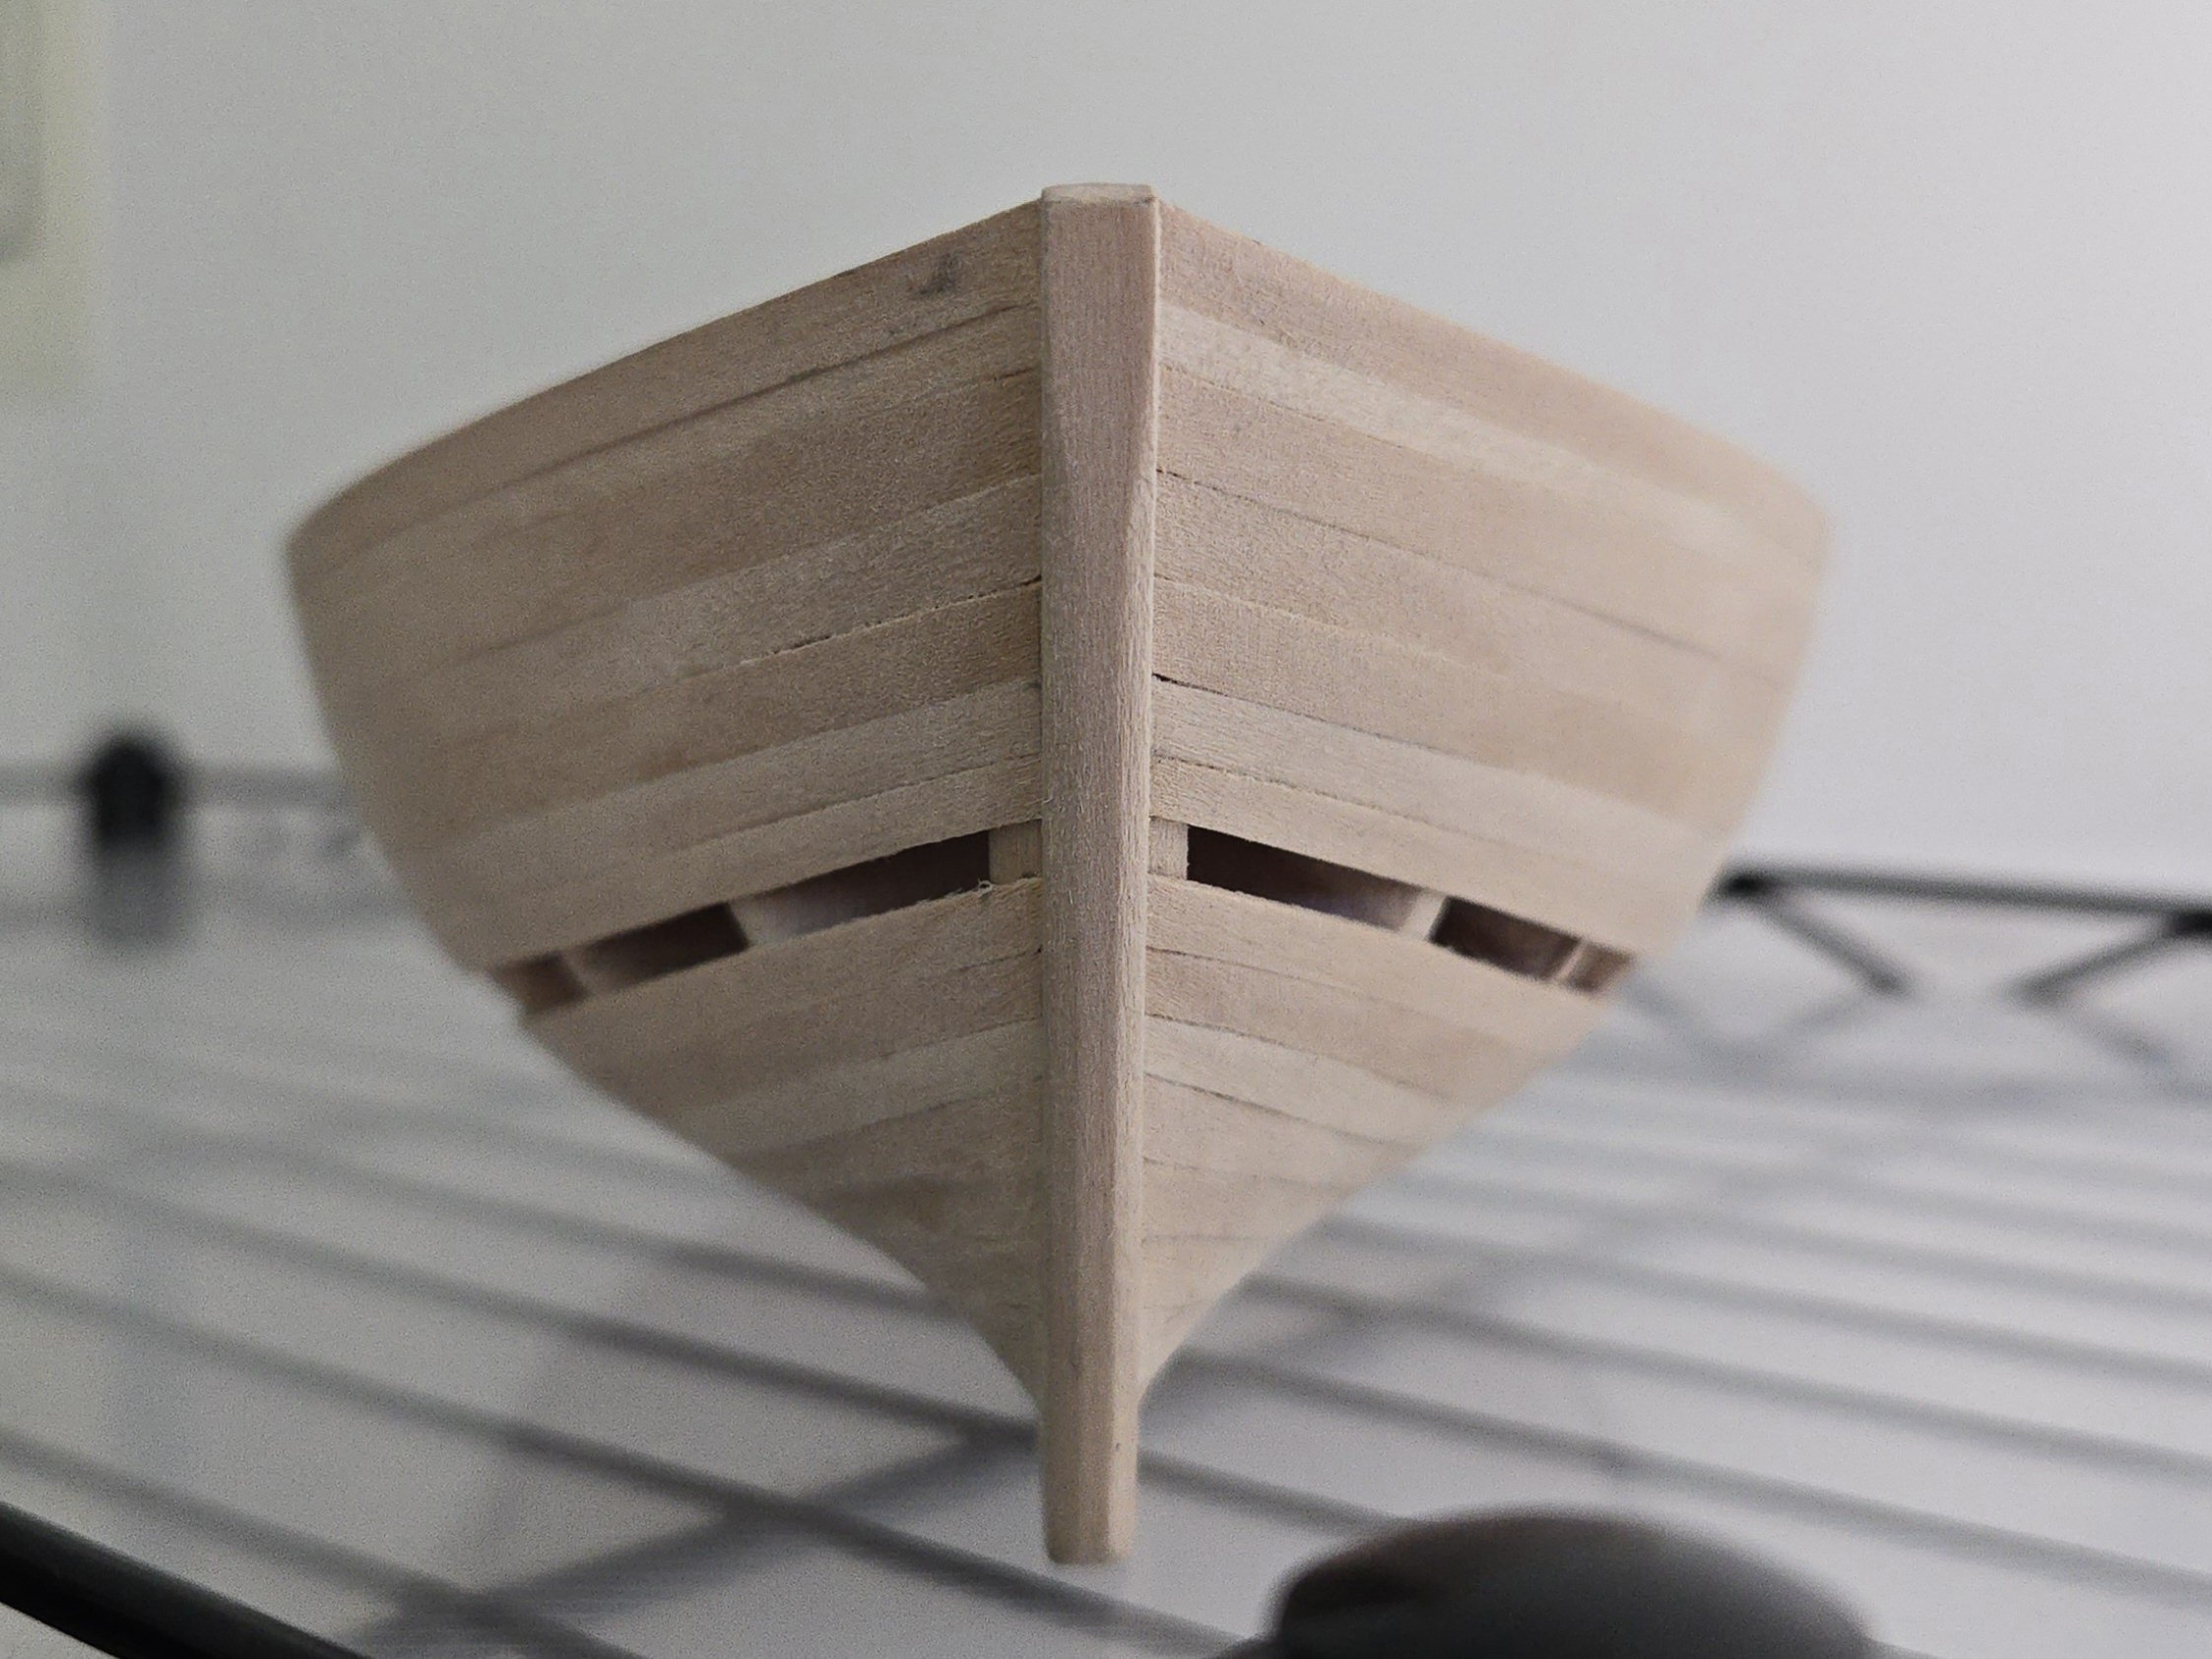
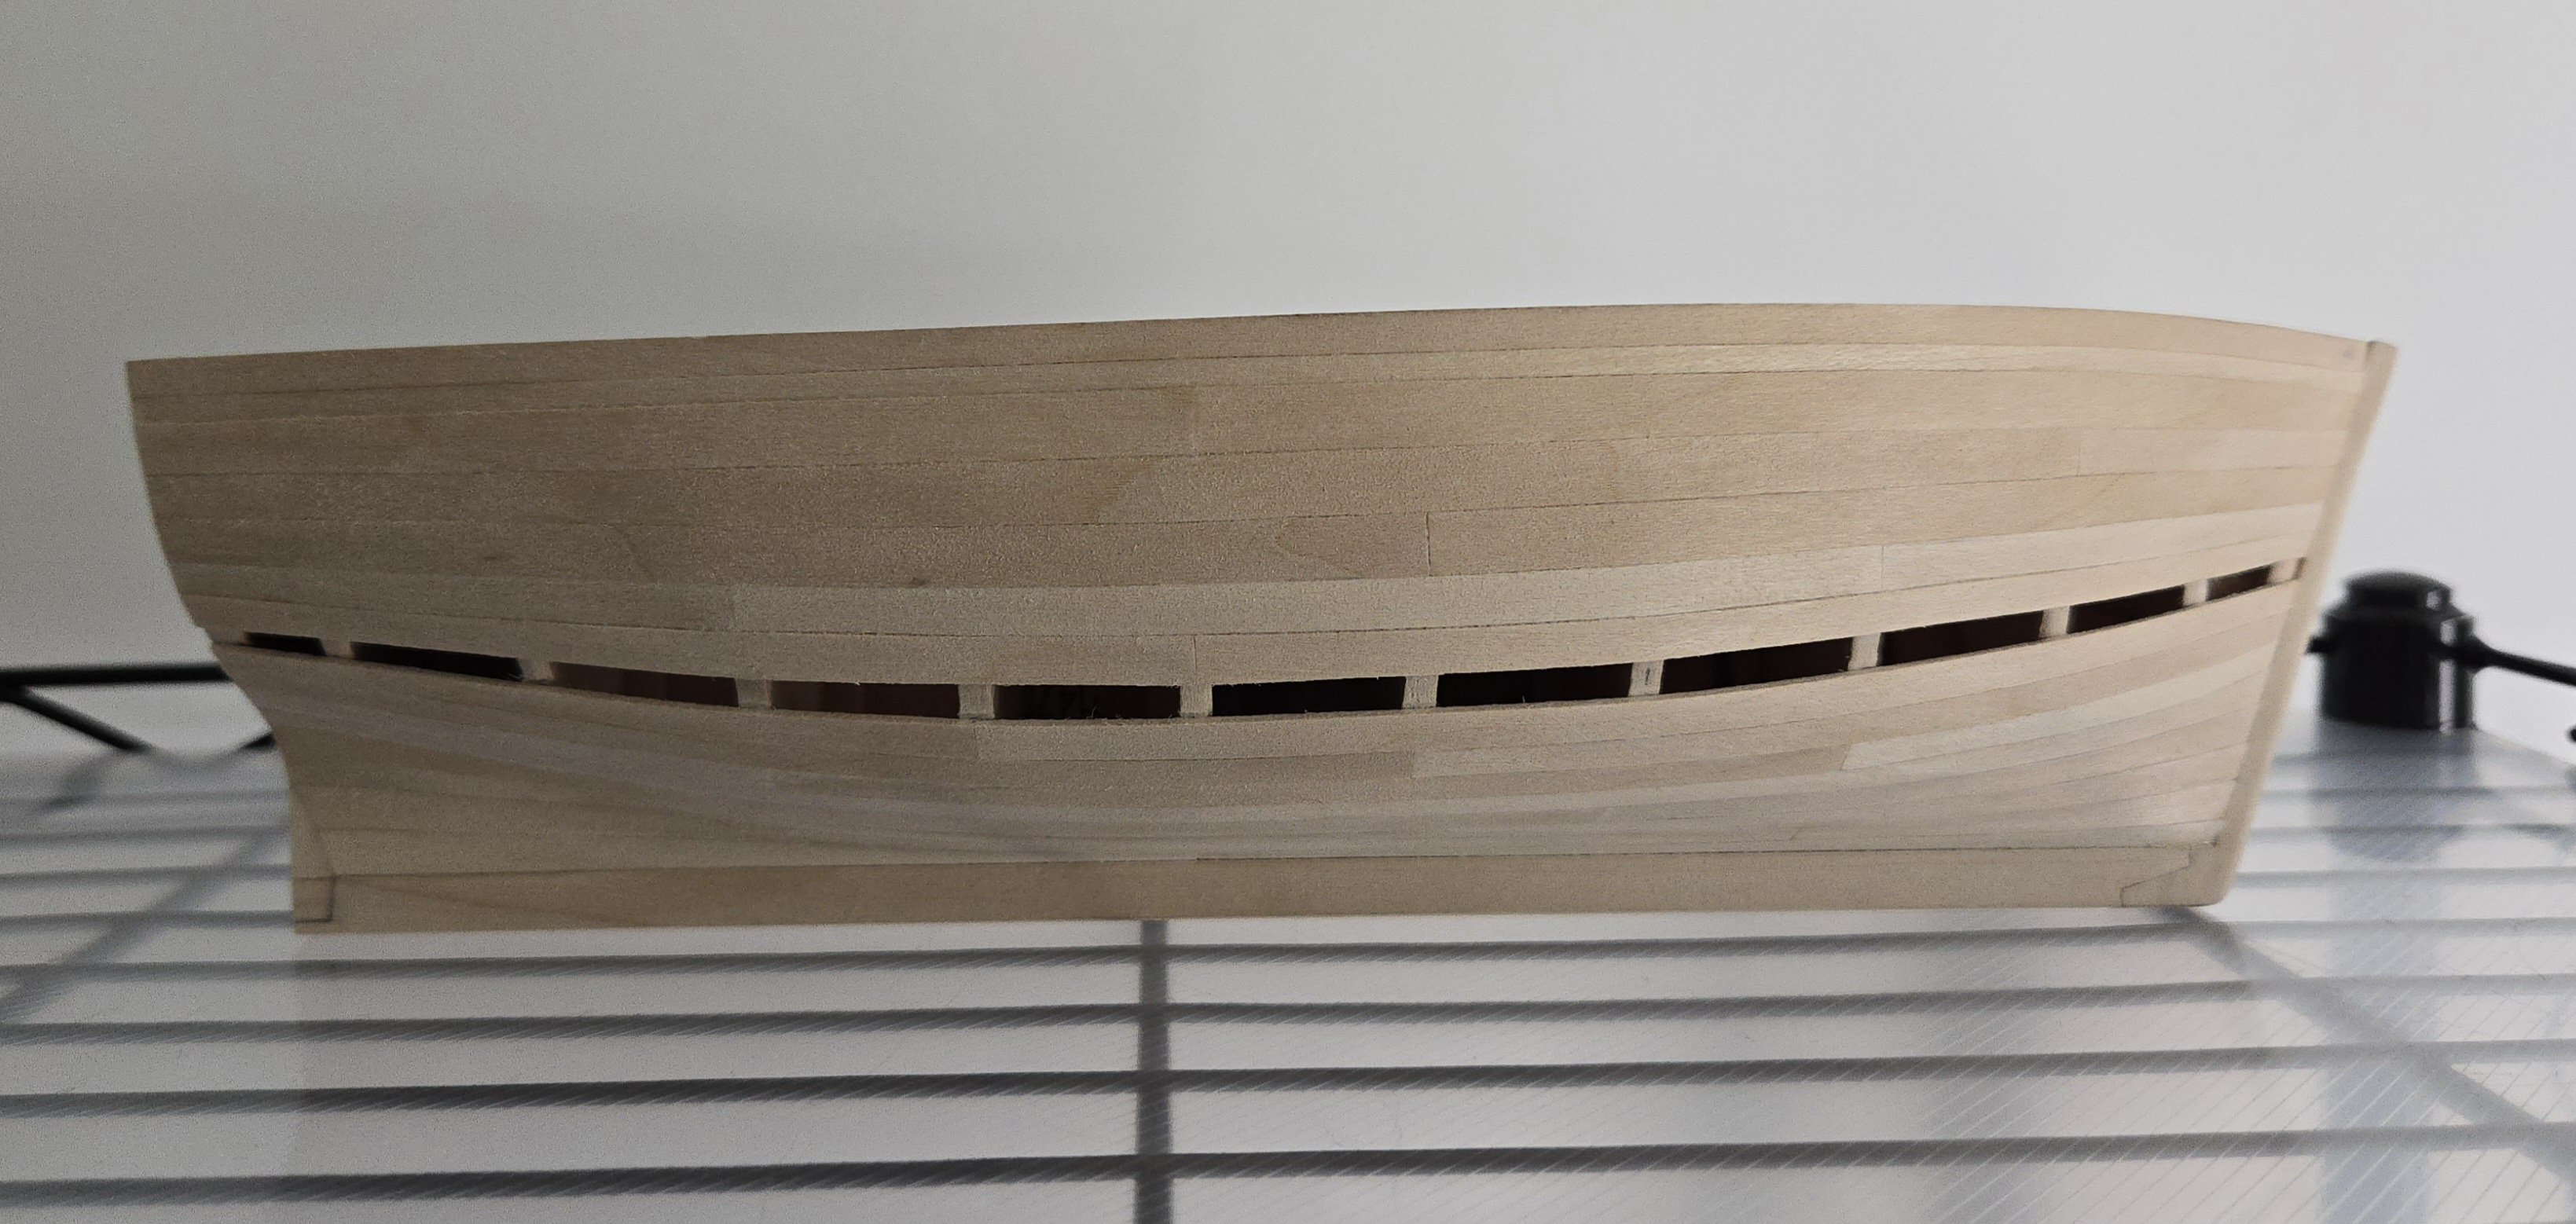
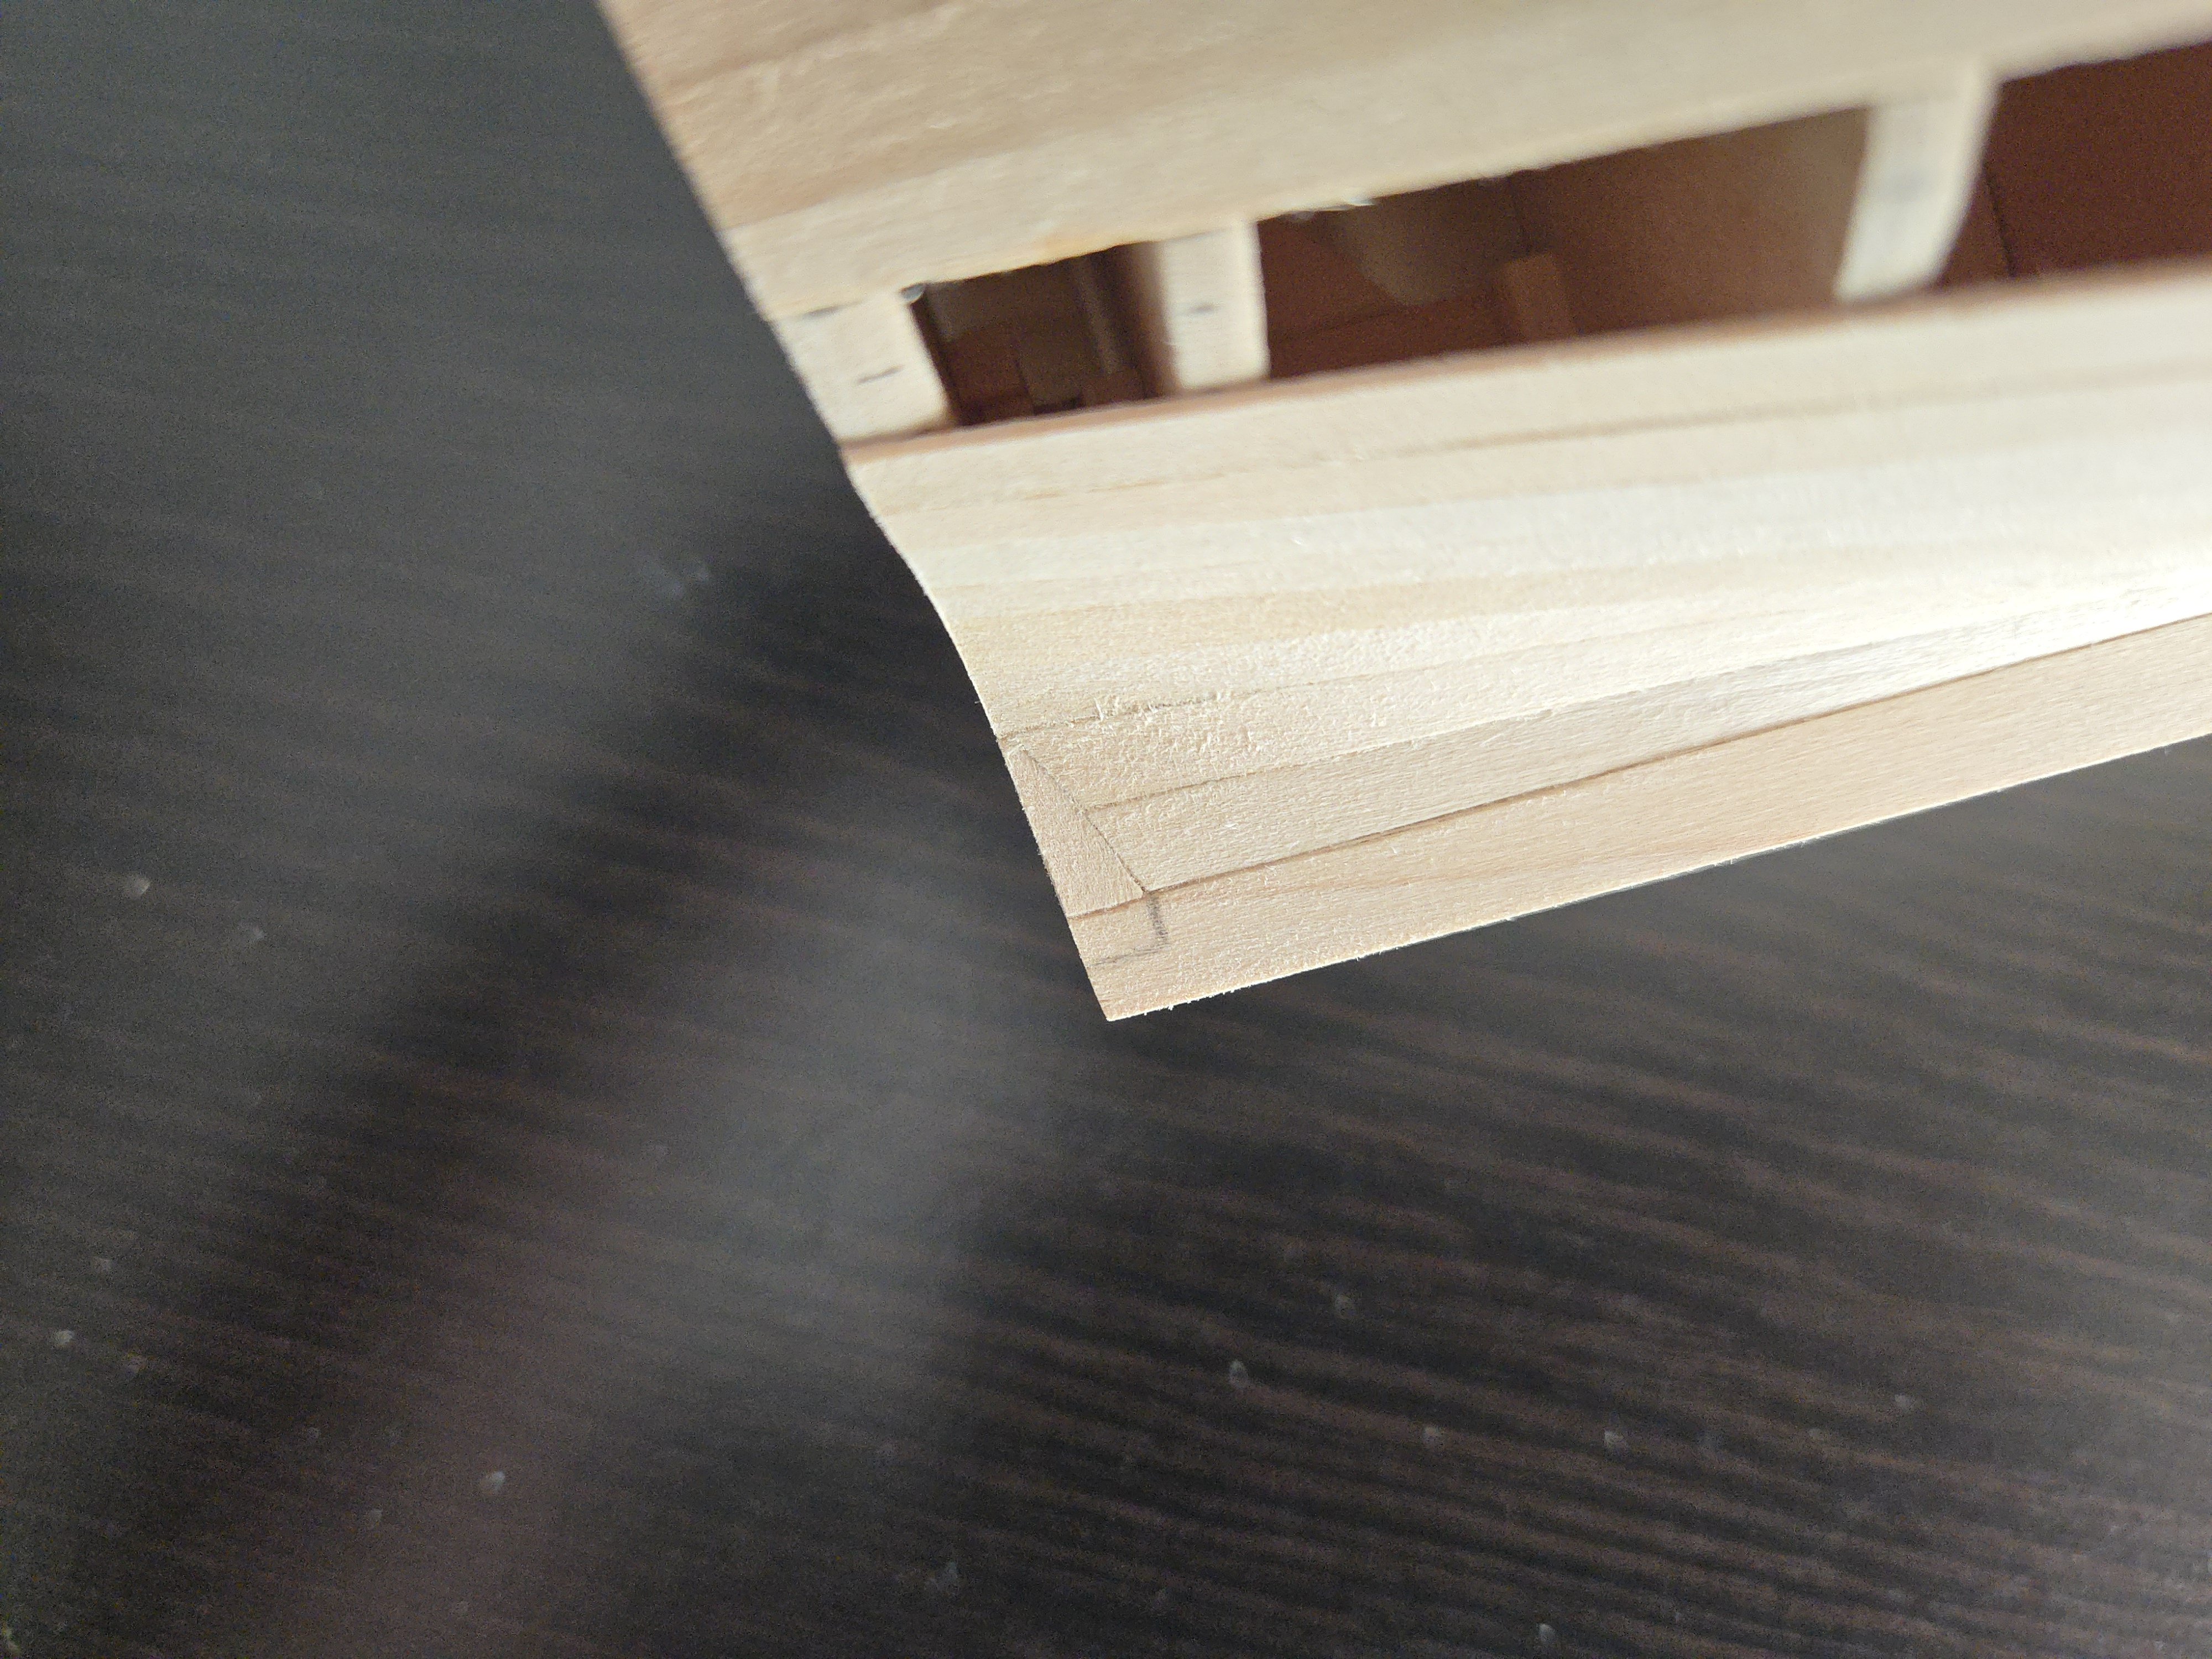
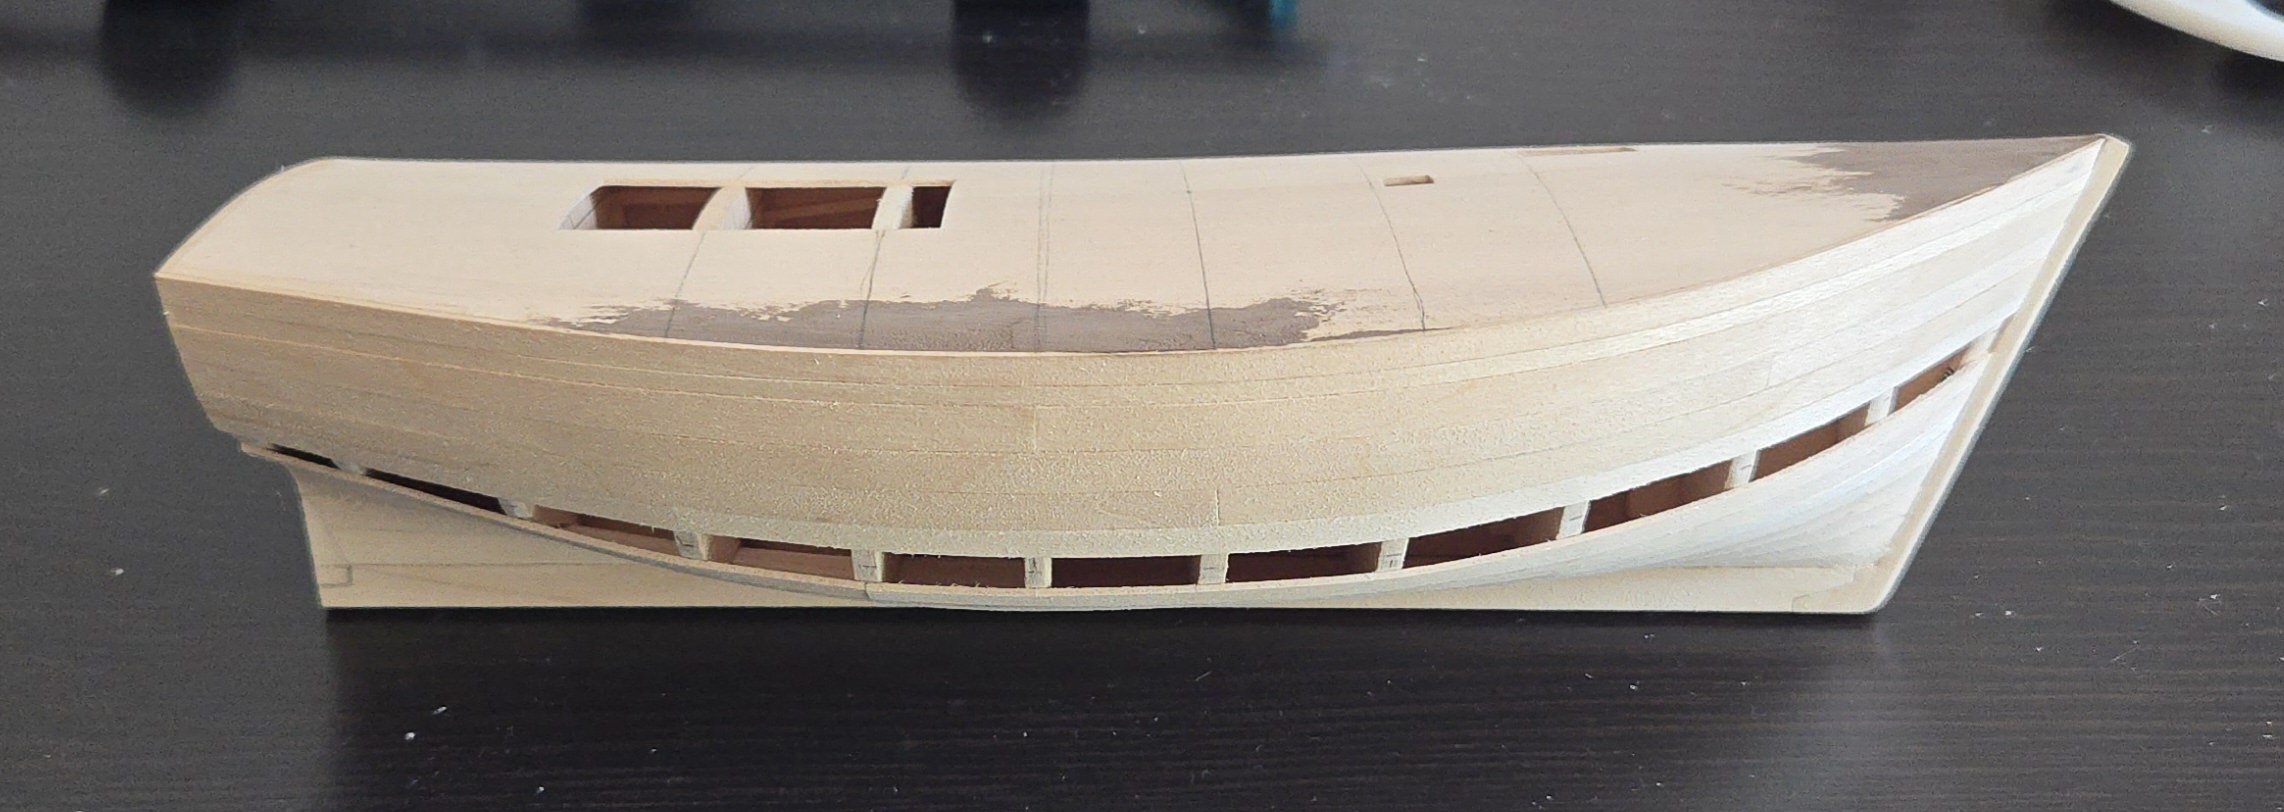
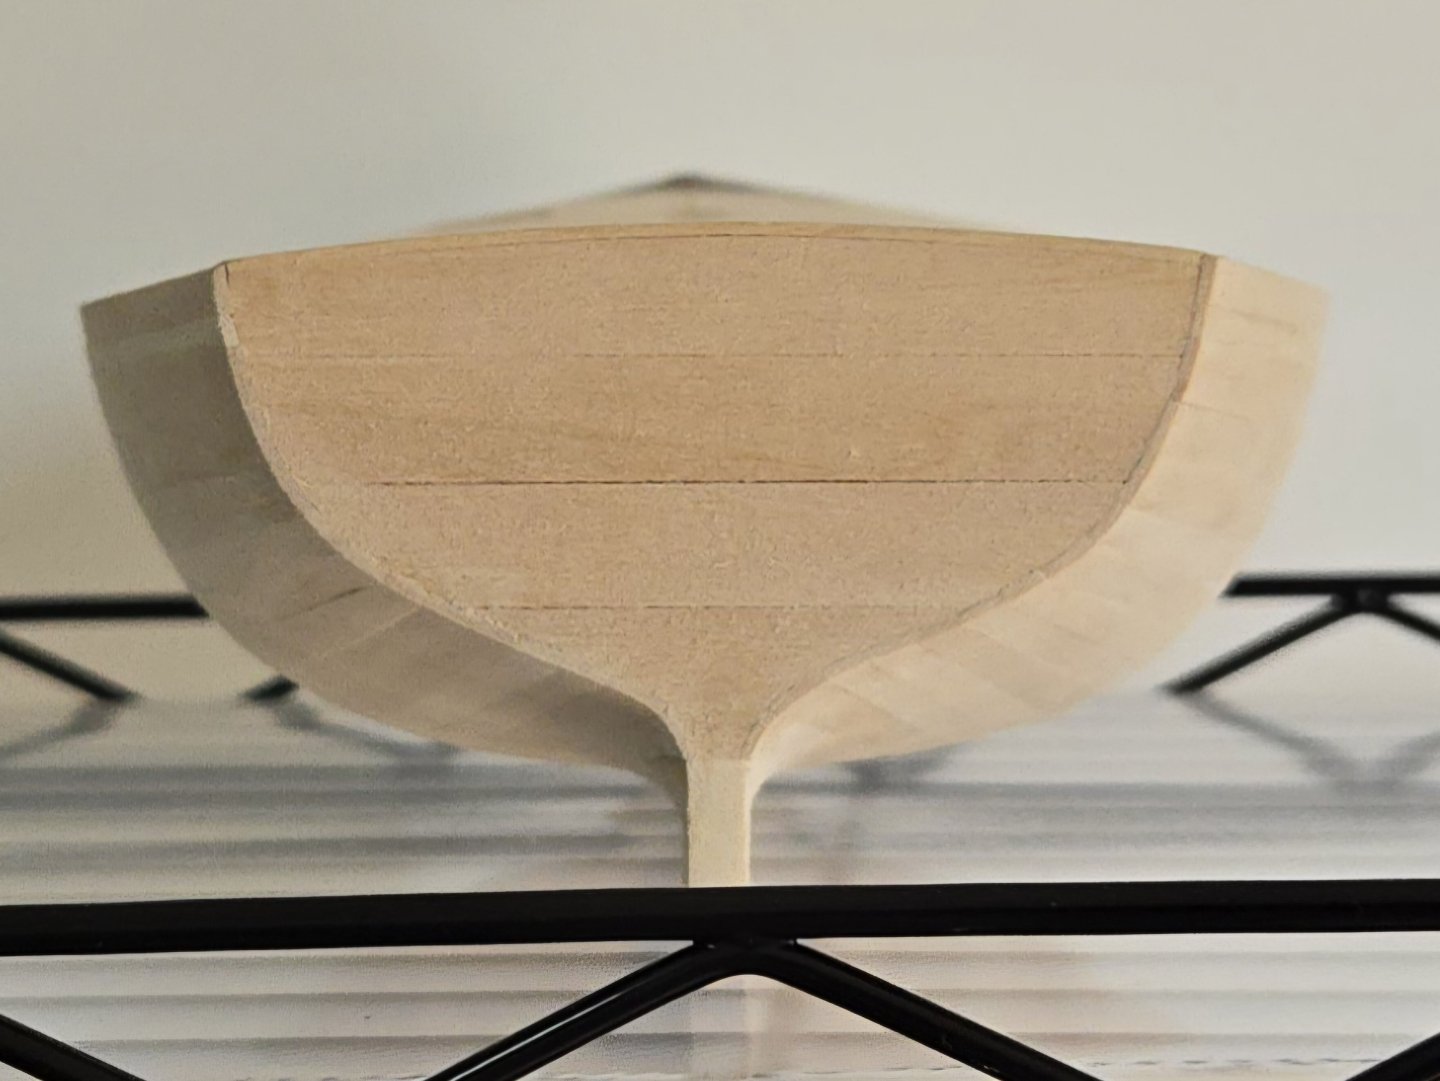
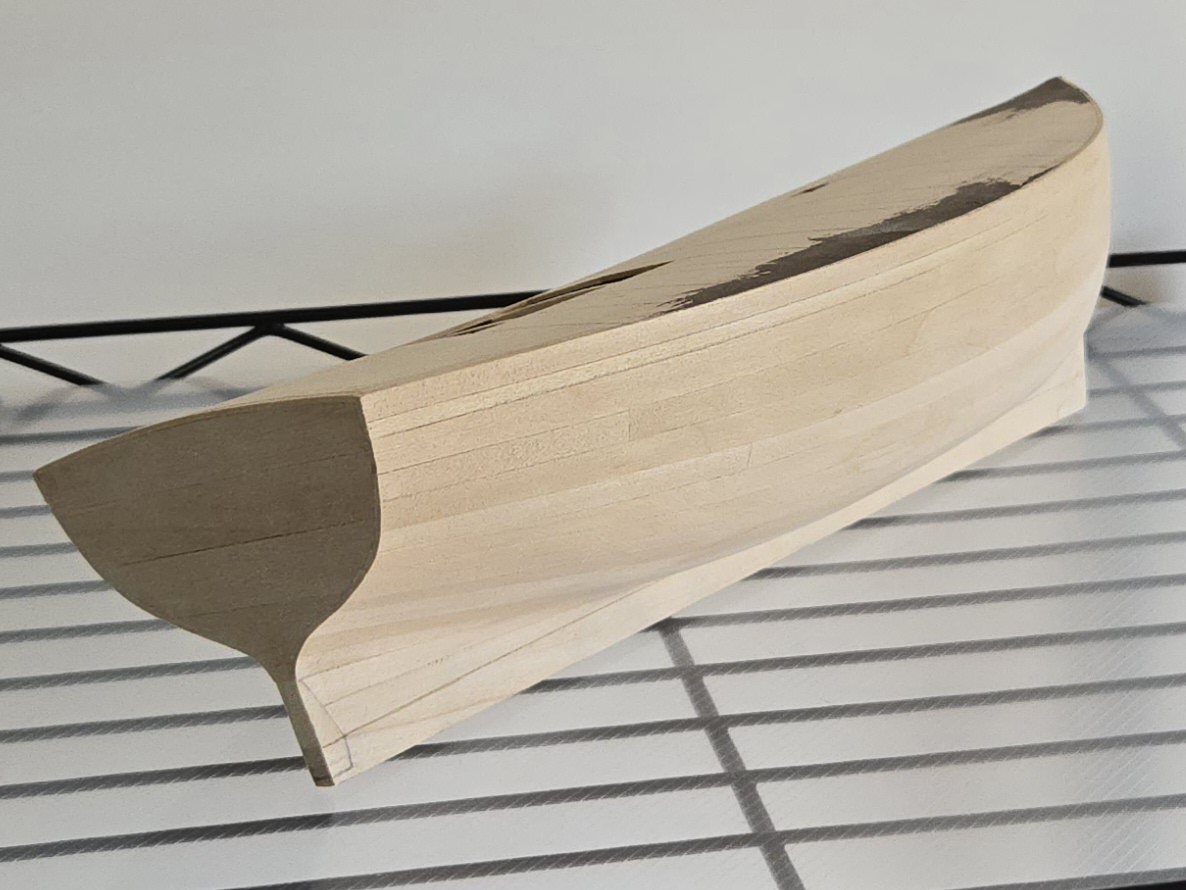
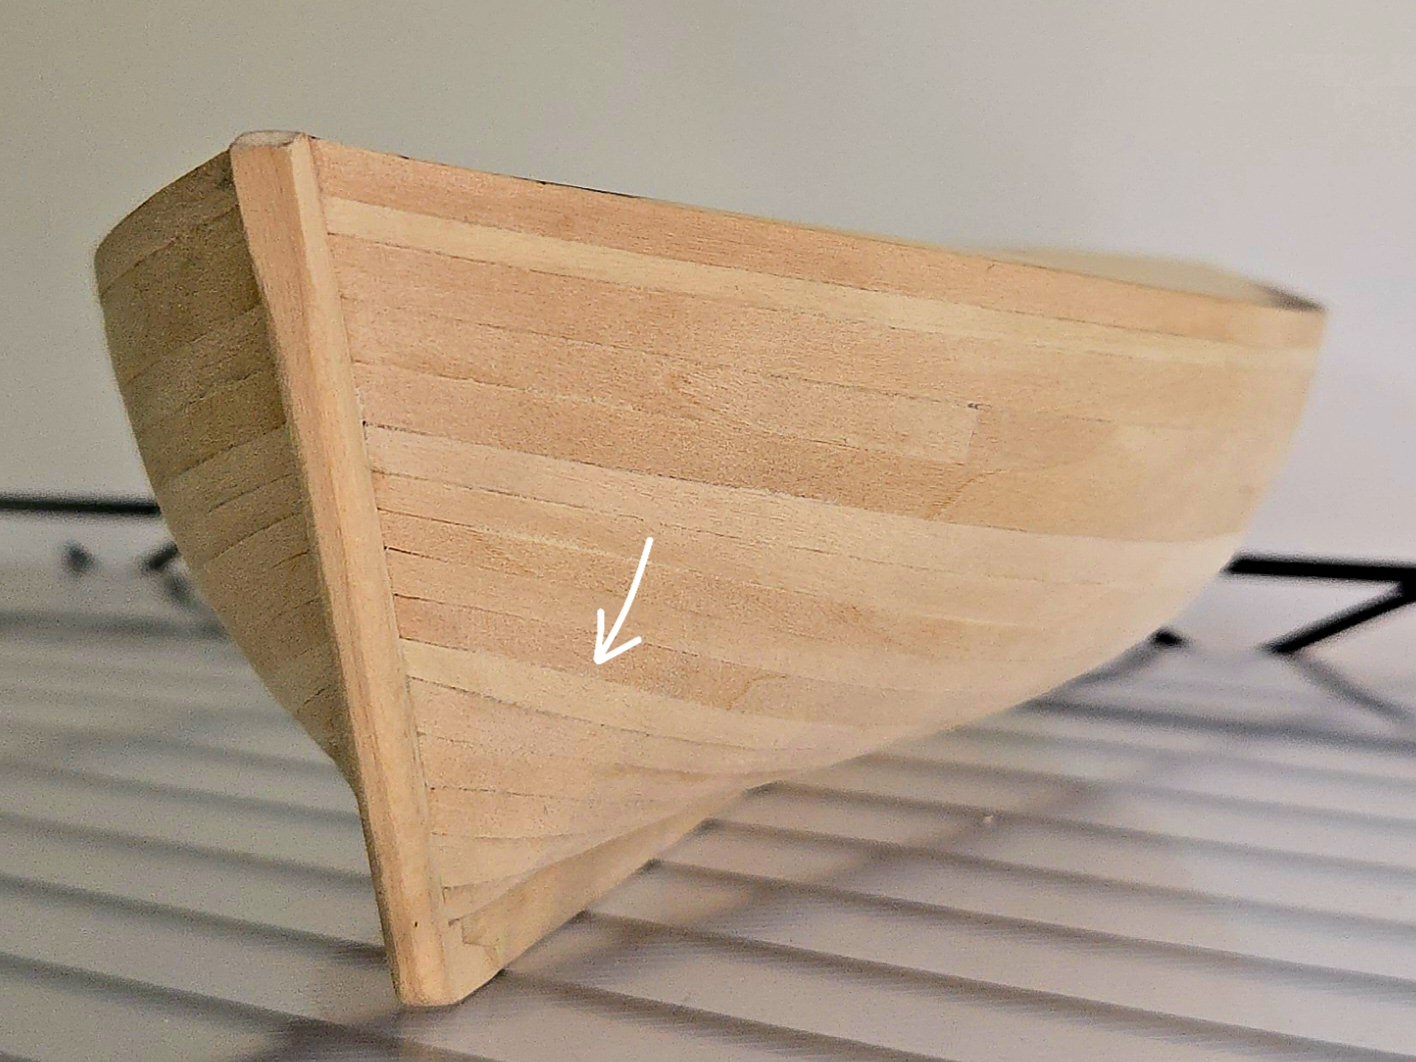
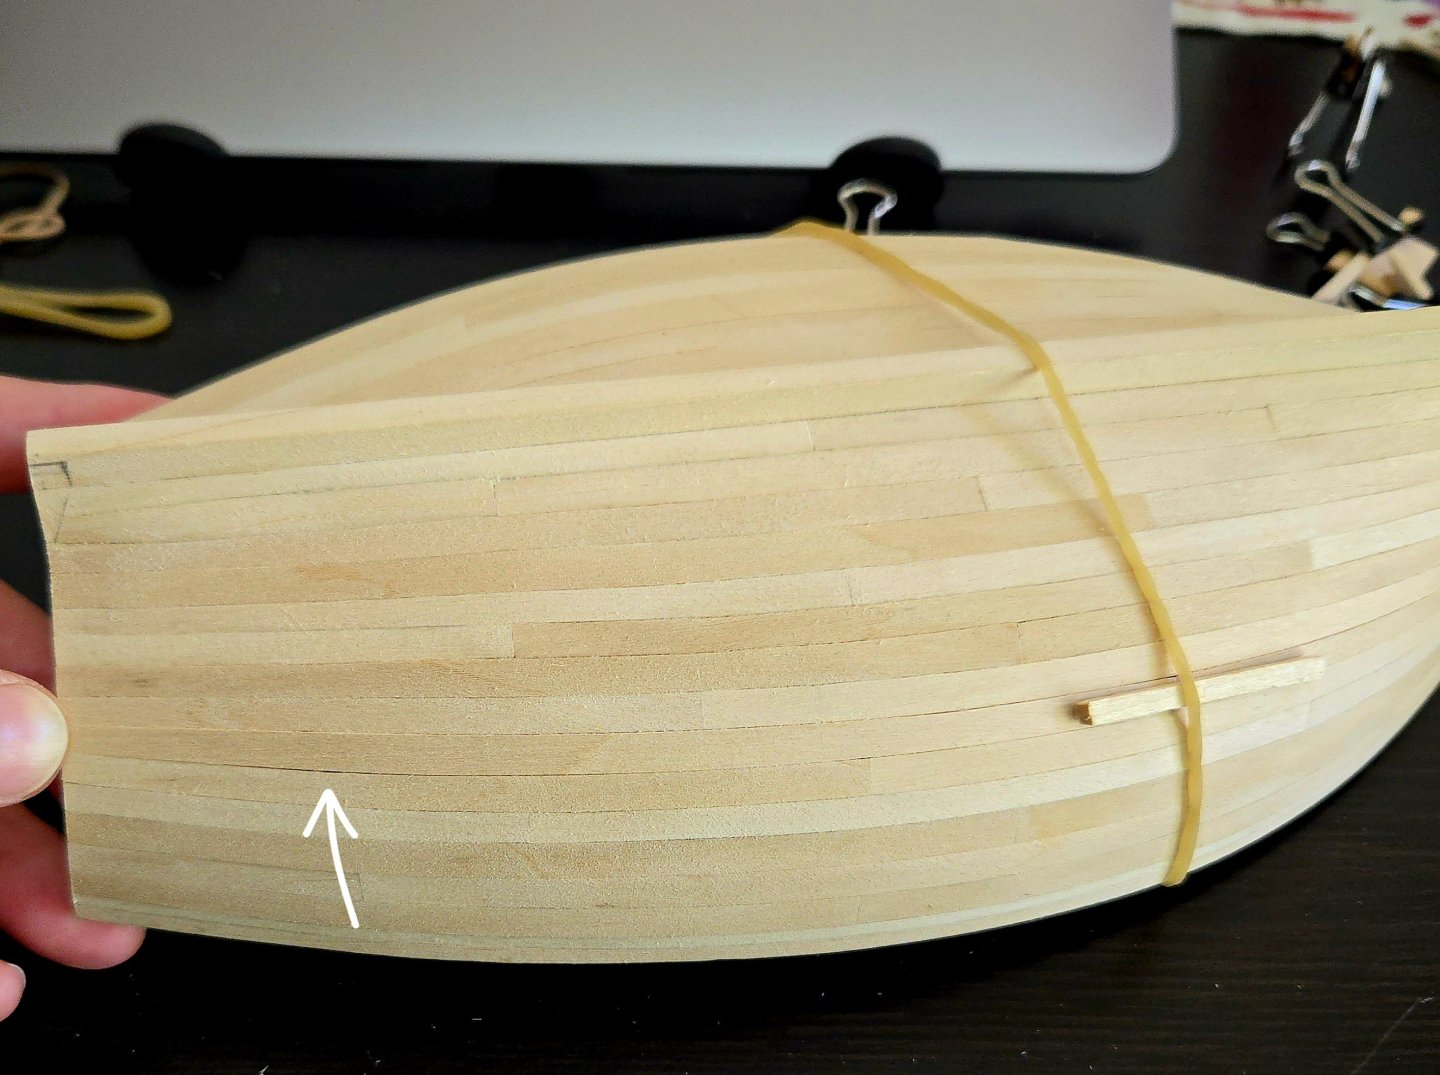
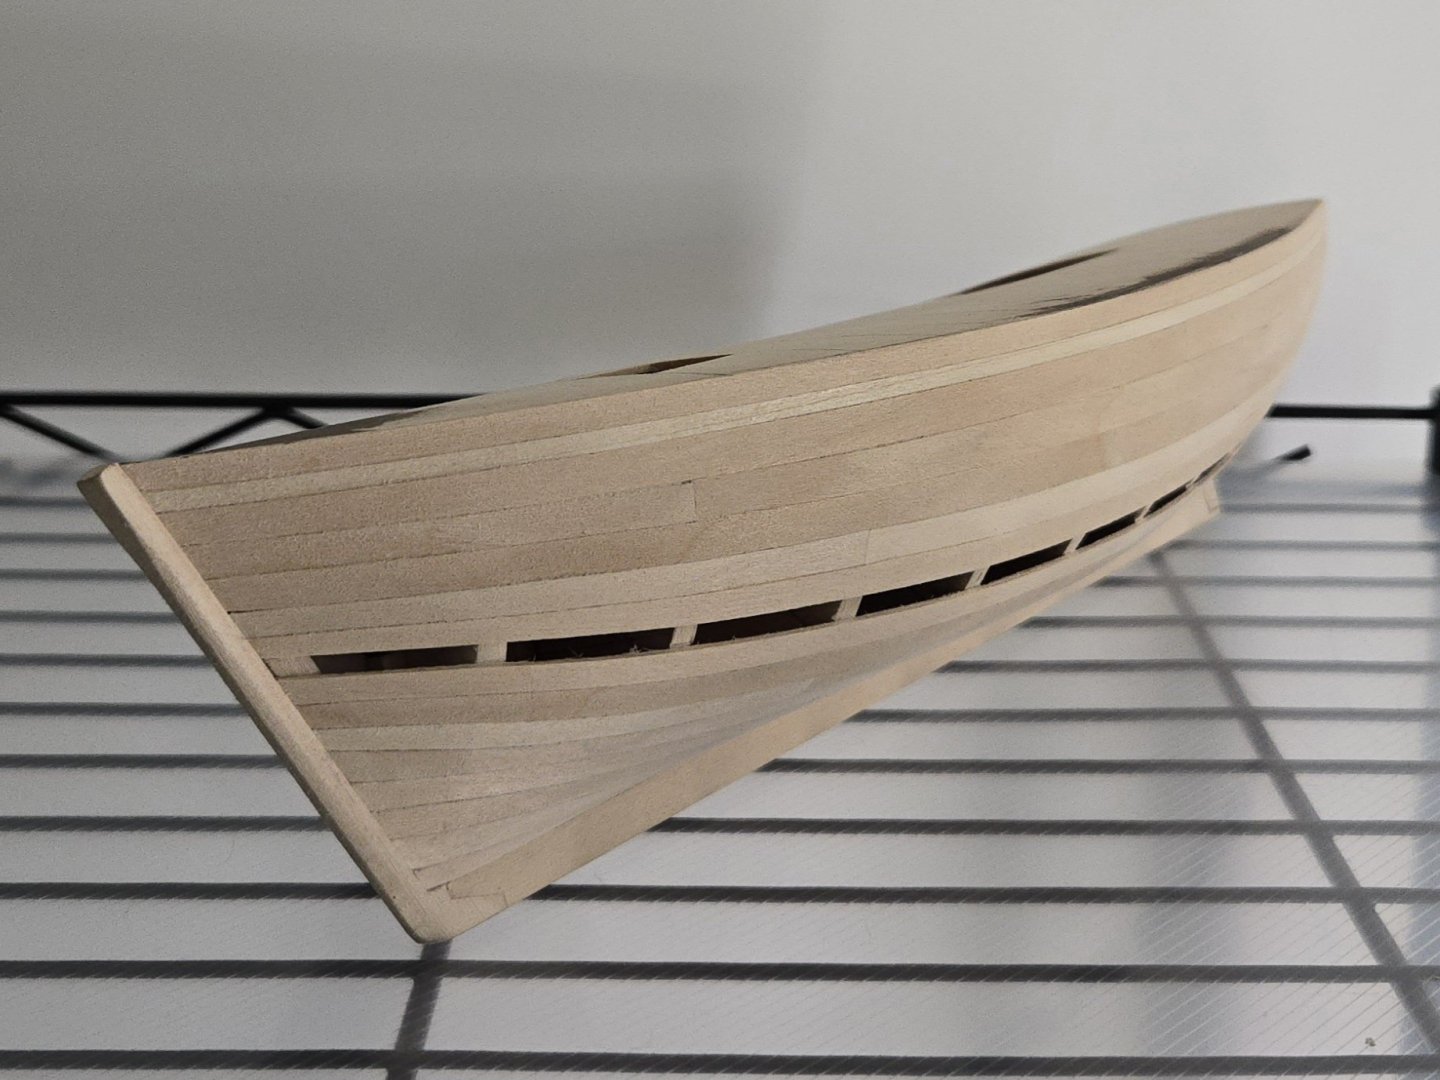
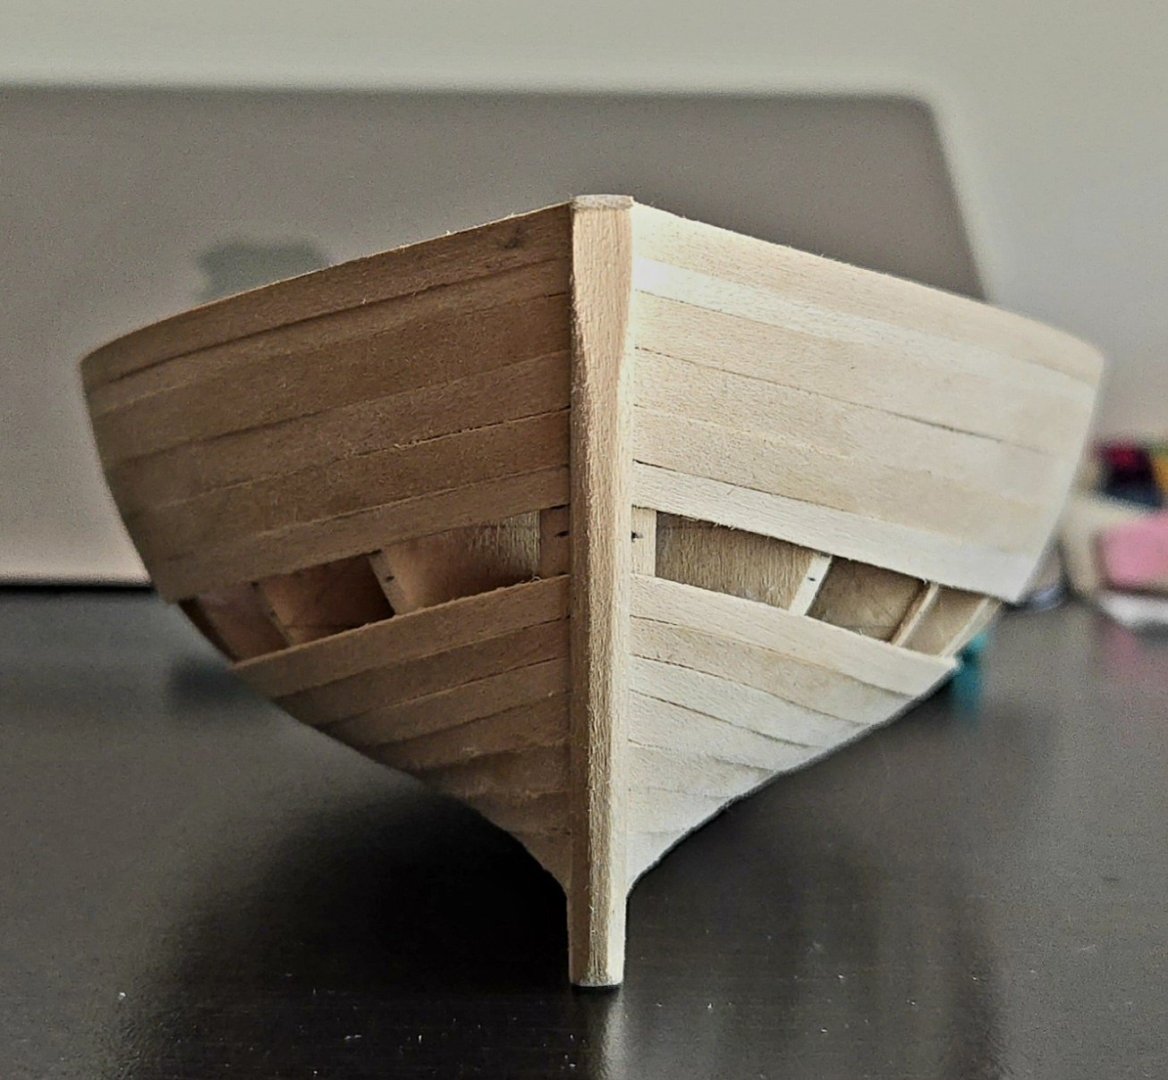
Thank you! The hull is now fully planked. The final planks were the trickiest. If any of the other planks were a hair too thin on one side, it wasn't really a problem because they only had to run alongside the previous plank. But these final planks needed to fit properly on both sides. Moreover, it's not possible to place them alongside the previous plank to get a sense of where there are high and low spots while shaping them, making it much harder to fit. As a result, I needed to redo half of them. The bow plank, ready to be glued: The very final plank needed to be redone. Below, I've indicated a number of spots where there was too much of a gap--maybe I could have just filled it, but I wanted to get it right: After redoing it, there was just one spot with a slight gap, much smaller than on the first attempt and eminently repairable with filler. This I could live with: To glue it in place, I used rubber bands and shims, except at the transom where I had to just hold it for a little while: I've seen the final plank referred to as the "whiskey plank," although maybe pisco would be more appropriate for a Chilean vessel. I'll have to celebrate tonight. In any case, after trimming the ends and giving the hull a preliminary sanding, here's where it stands: Overall, I'm pleased with my decision to use a single layer of planking in 1/32‐inch basswood, which I hadn't been sure about at the beginning. 1/16‐inch wood would have been much more difficult to bend at twist, especially at the lower bow, and if I had planned on double-planking, I would have felt like it was pointless once I reached this stage (but then I would have had to deal with the gap in the rabbet). That said, I can see a couple areas for improvement in the future. First, while I think I did a good job of keeping the planking symmetrical at the stem, I wasn't checking past that. So, one plank on the port bow ended up having a bit of a bulge just past the stem, as seen below, which (if you look at the bow-on photo above) did slightly throw off the strakes above it relative to the starboard side. It's not like I'm going to redo that plank now, but it's a reminder to keep an eye on symmetricality beyond just the stem. Second, I noticed that there are a few low points on the hull on each side of plank butt joints, especially near the bow. This seems to be because, when bending the plank into place, it tends to run straighter/flatter between the adjacent bulkhead and the butt location than it would if it continued, as the wood would take more of a curve between the bulkheads in the latter case. (If that makes any sense). I think the only way to deal with this would be to cut planks one bulkhead overlength and then cut to size after bending, but this is complicated to do. In the future, I may give it a try for planks at the bow, at least, as that's where the wood is most curved and the issue is most visible.


- 312 replies
-
- 14
-

-
-
- Chile
- Latin America
- (and 6 more)
-
Good catch on the stern! It's fascinating to see the different construction methods used here. I really shouldn't be, but I'm surprised by how well the varnished paper mimics wood.
-
Thanks for your input! That's the option I'll be going with. I realized a mistake in the deck beam locations. While I followed the bulkheads locations, the beams would actually be located in slightly different spots. In particular, based on looking at deck beam locations for other vessels, there was probably a beam at the fore and aft end of the main hatch. There would also be two beams around the mast, as seen in the photo by Carlos Vairo below: Source: https://www.carlosvairo.com/galeria-puerto-montt-lanchas-chilotas With this in mind, I marked out different beam locations. This will also give me much greater flexibility with setting up the plank butt shift pattern. One thing I've noticed from photos is that, when they're visible, the deck plank butt locations on adjacent and close-to-adjacent planks are often pretty far distant from each, which requires more beam locations than I initially had. Planking the hull continues, with a single strake left on either side.


- 312 replies
-
- 8
-
-
- Chile
- Latin America
- (and 6 more)
-
Nice work, you won't regret redoing those planks. I also had trouble at that particular bulkhead and found I had to fair it a bit more.
-
Looks like you're off to a good start!
-
Looks like you're off to a nice start, the deck looks great! Small workboats like this leave a lot of room for personalization by adding equipment and other details, if you're so inclined. I'm not certain, but I believe that at least some similar Billings kits (like the Bayard) are based on vessels included in Souvenirs de Marine by Paris, so you may be able to find a few relevant details there.
- 9 replies
-
- 2
-
-
- Esperance
- Billing Boats
- (and 1 more)
-
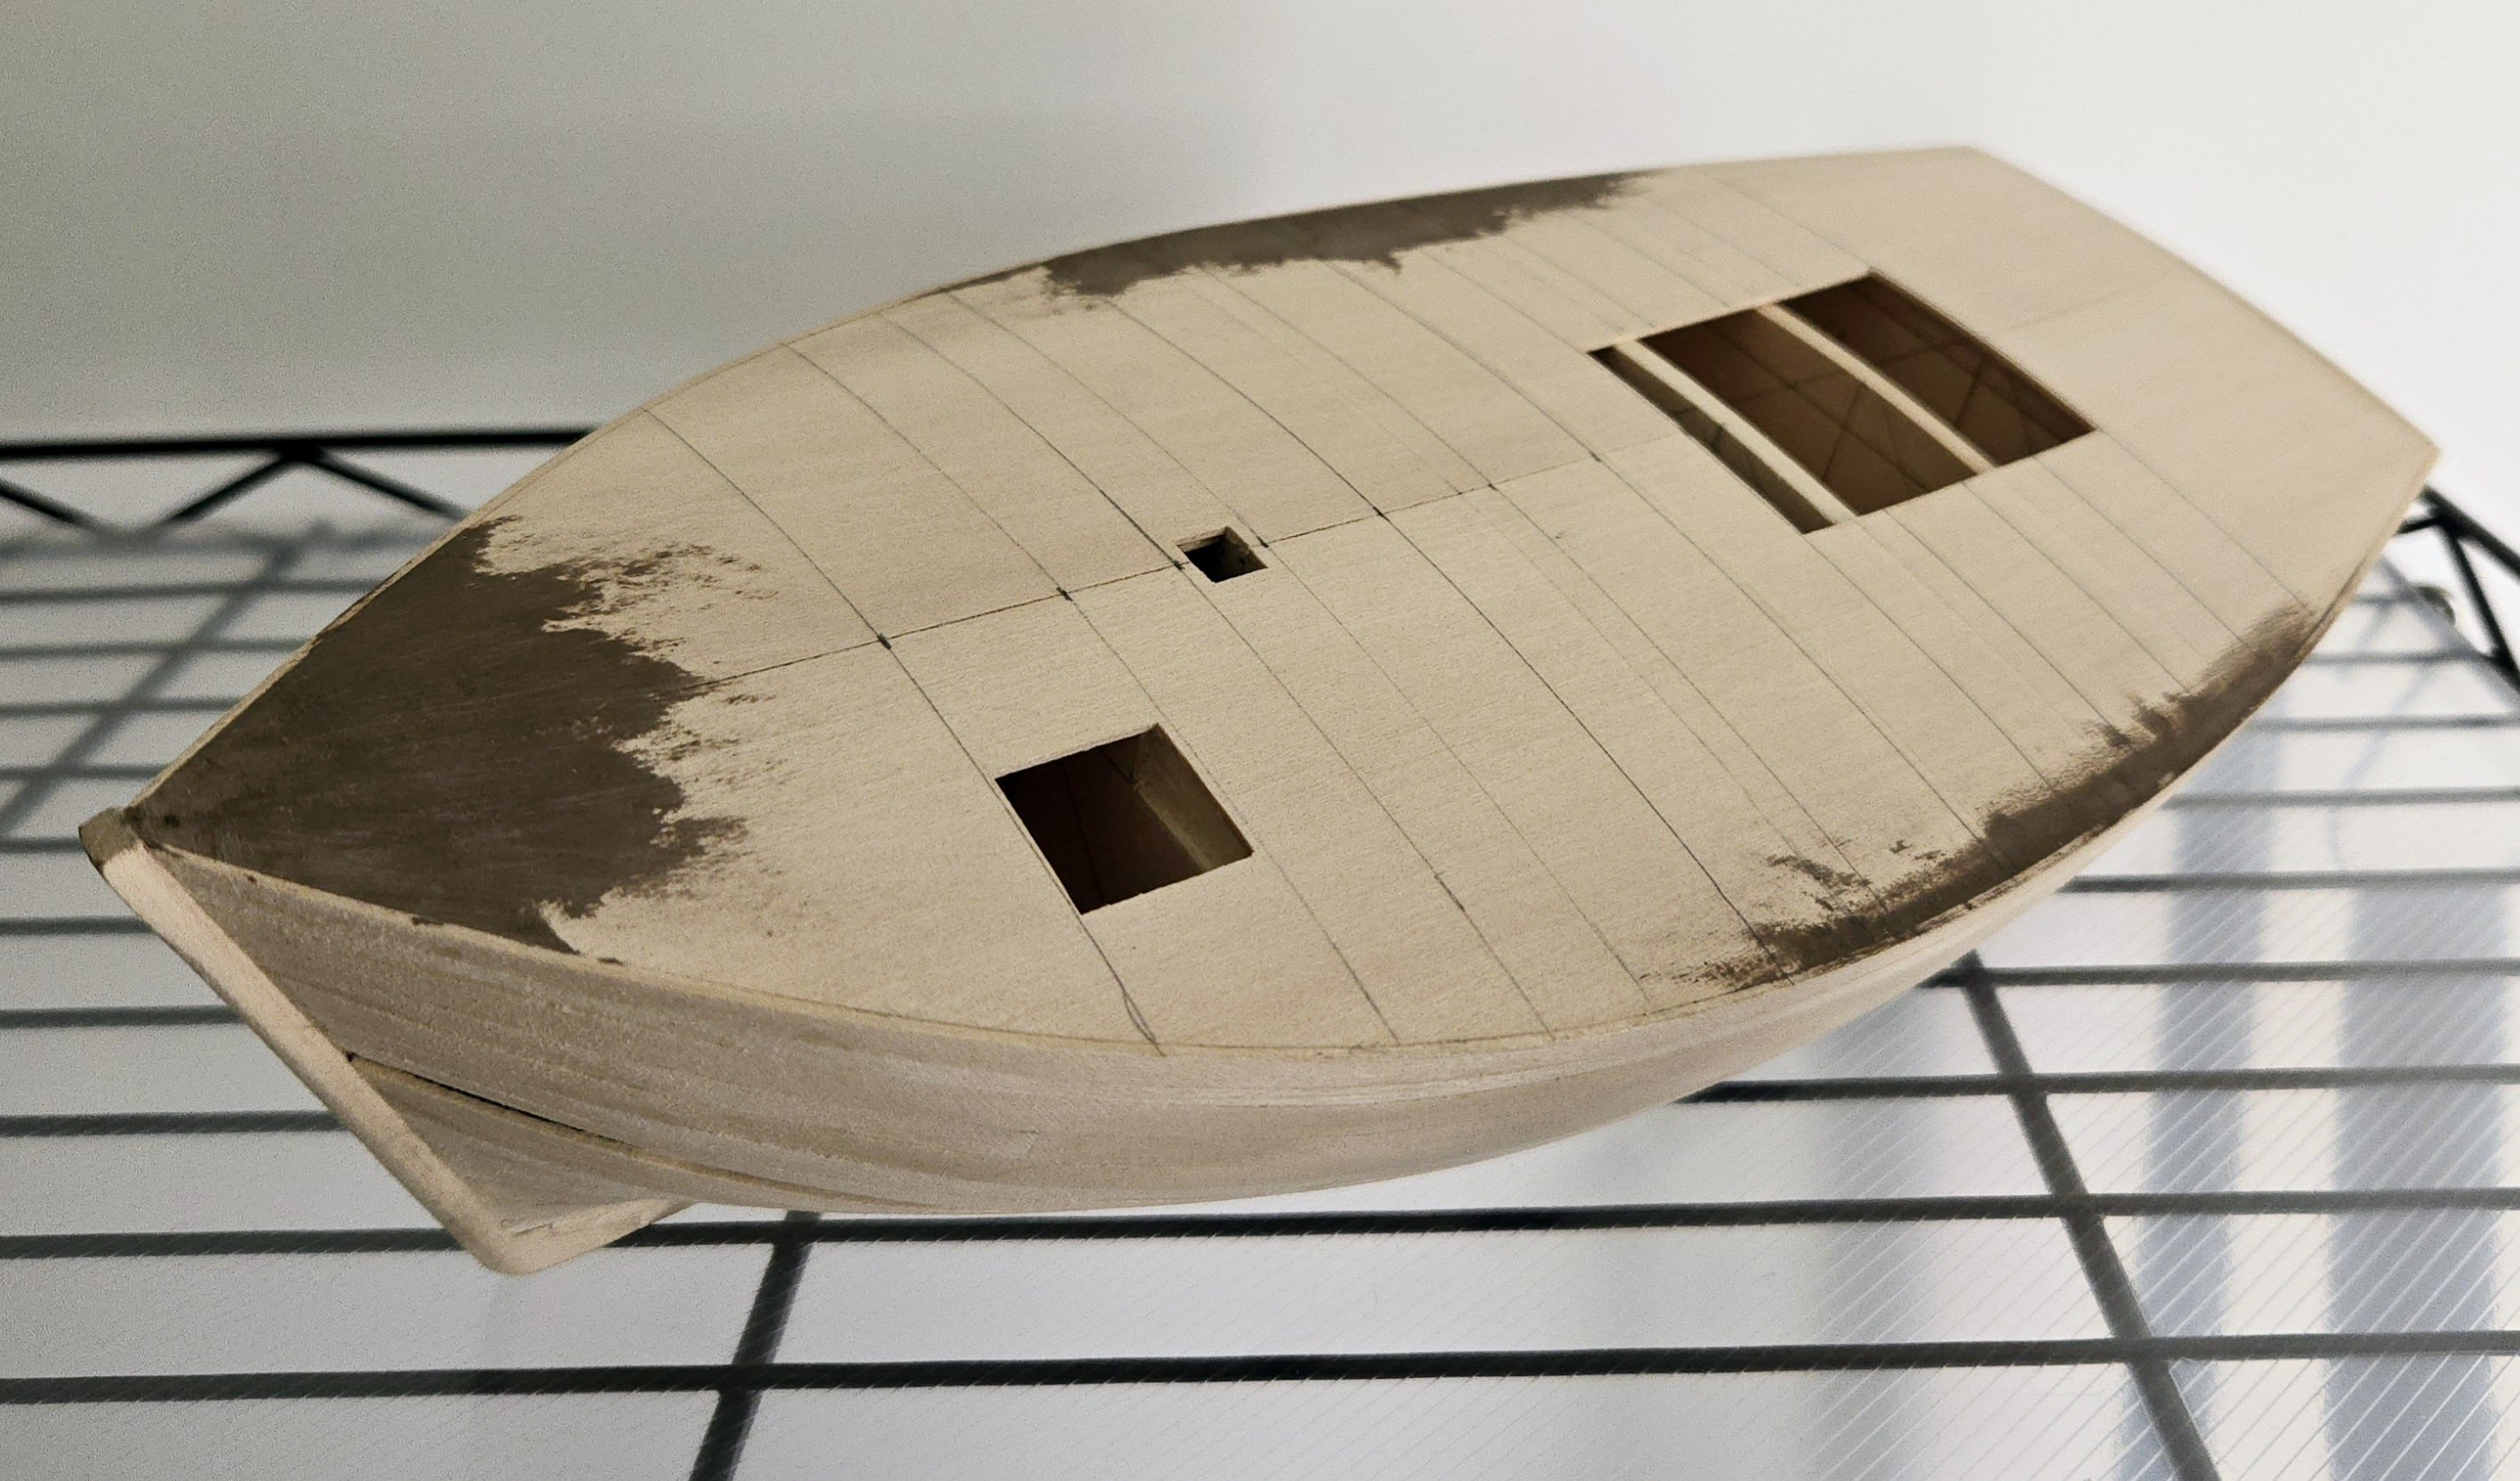
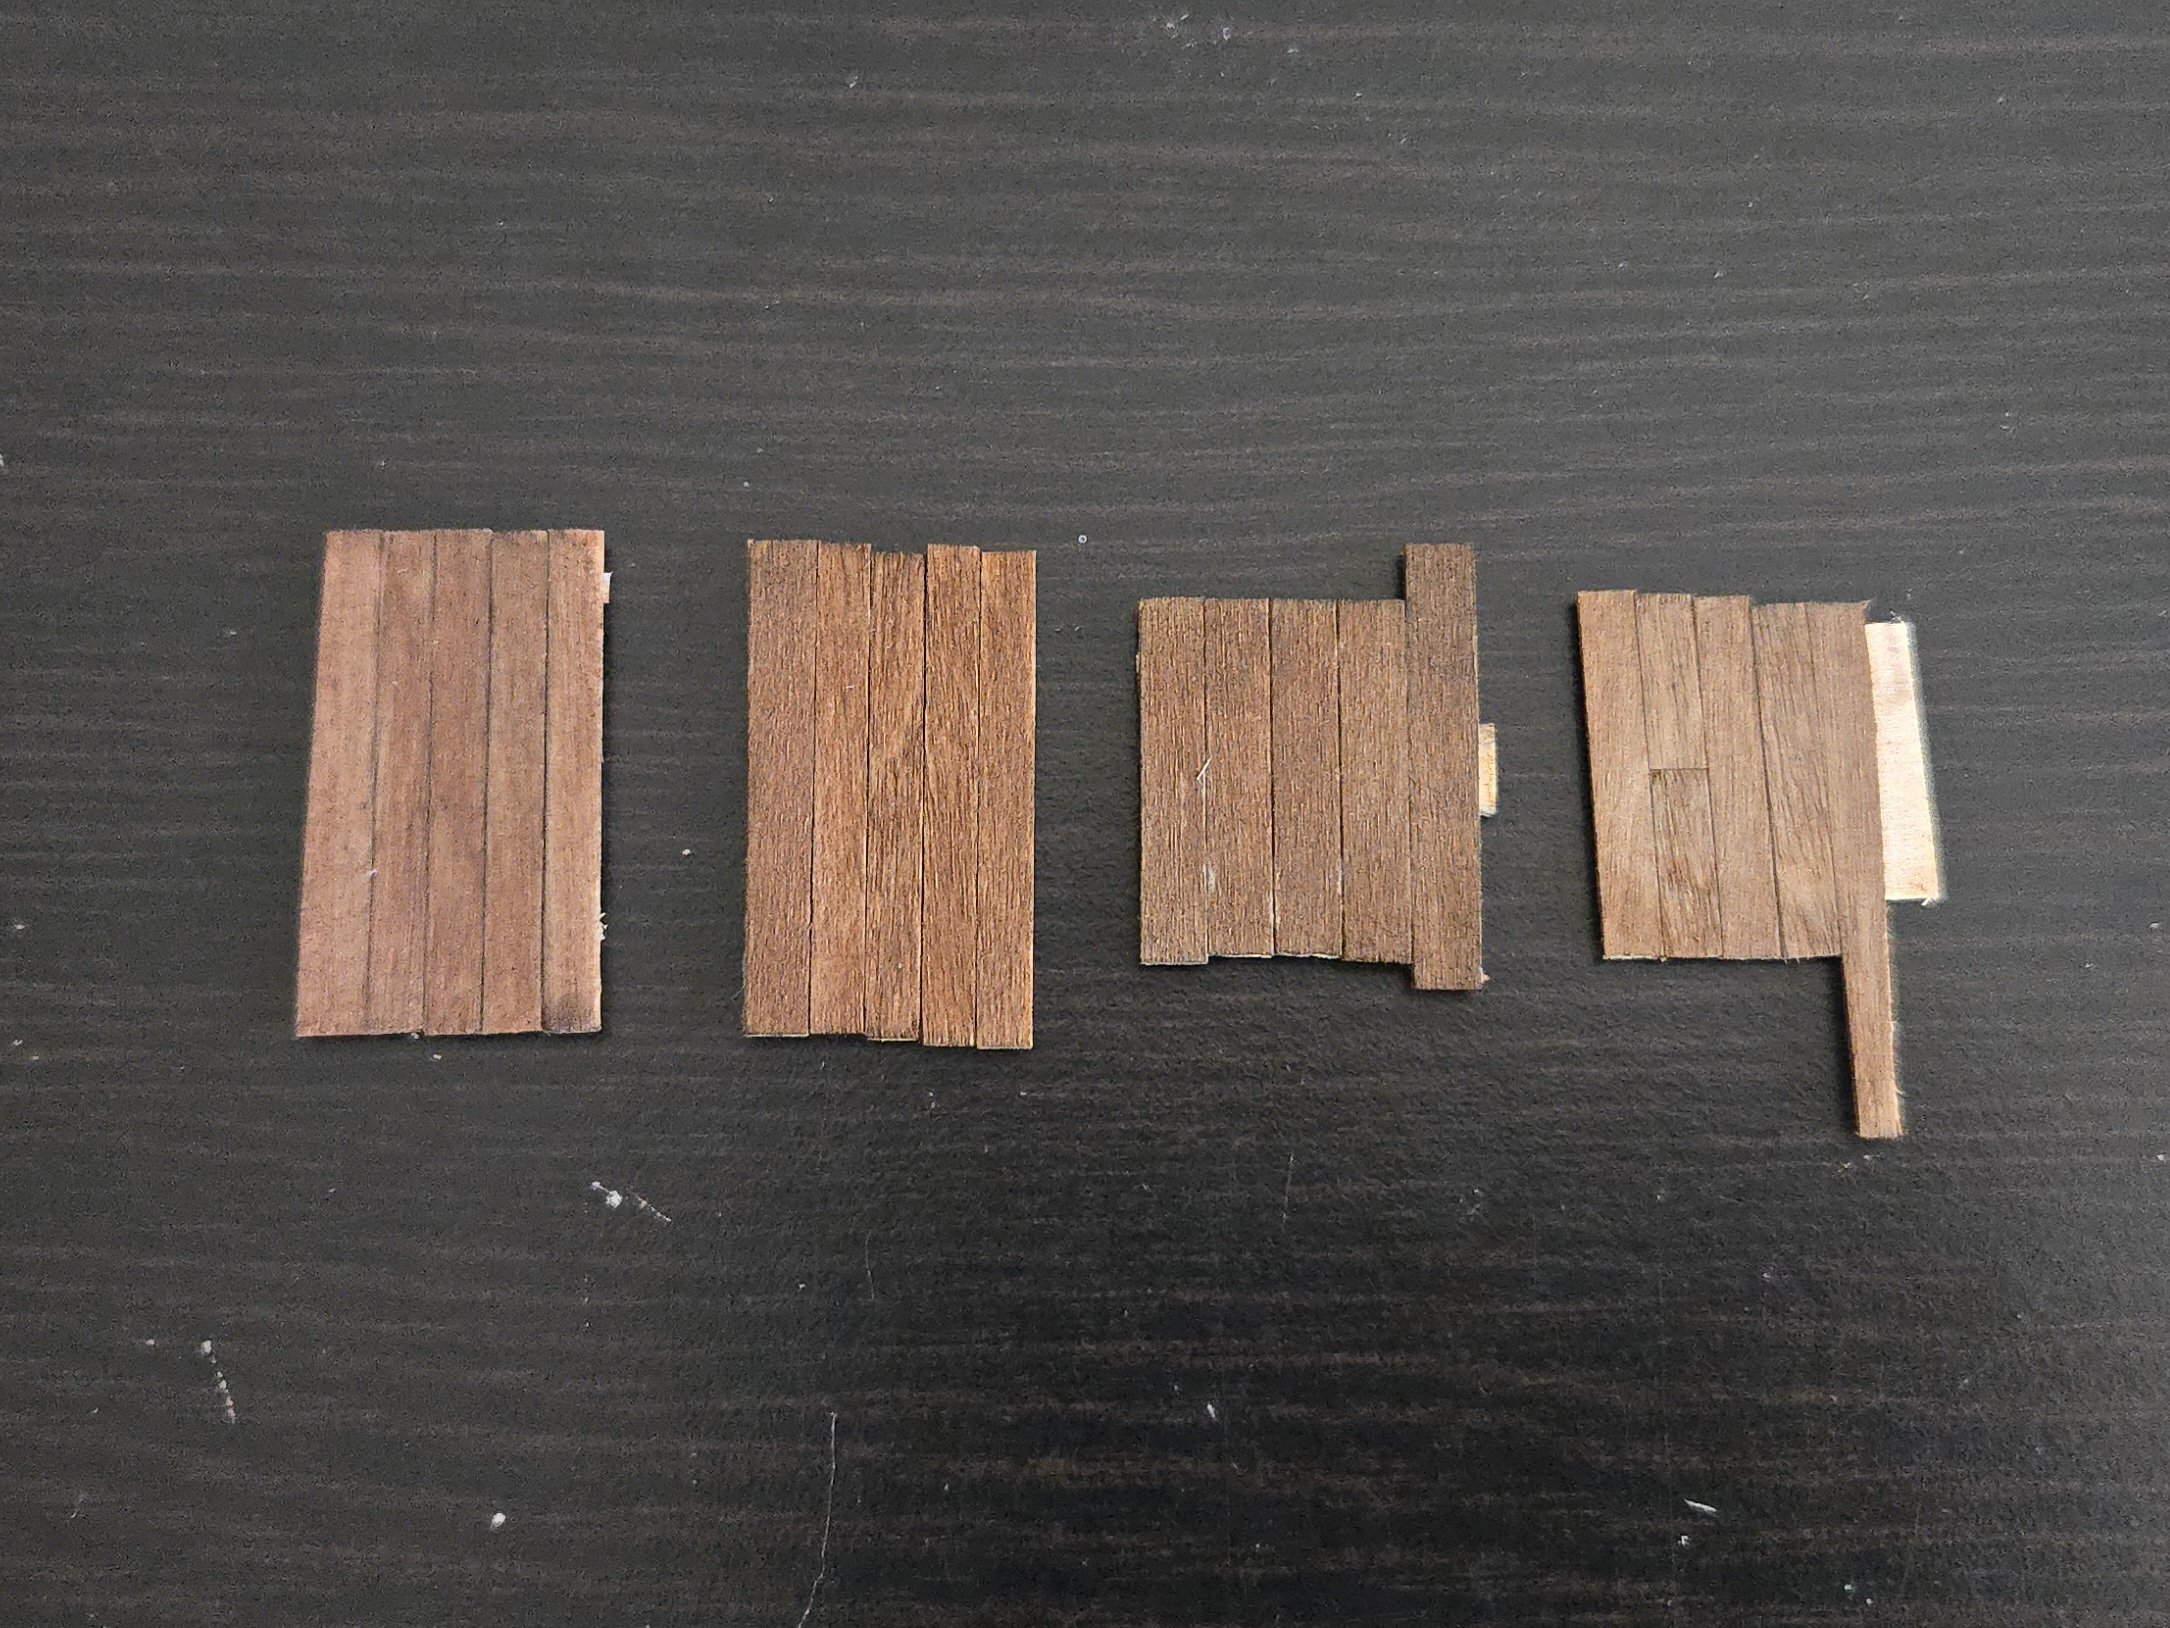
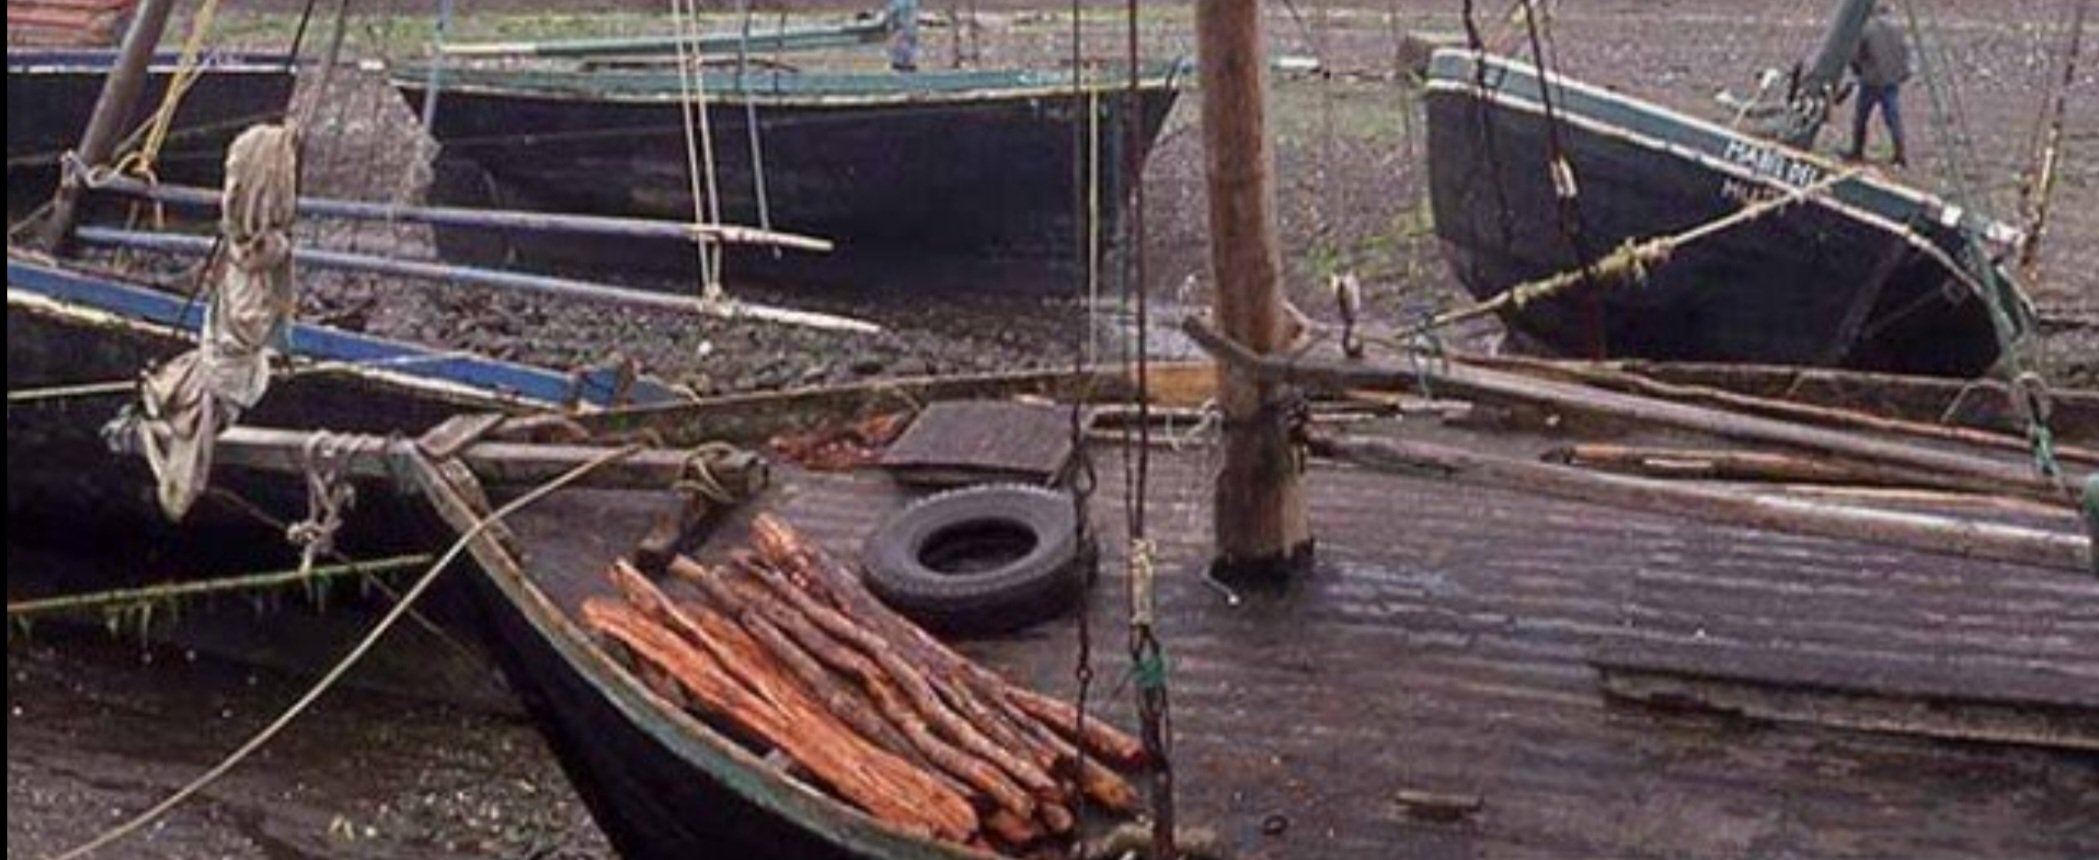
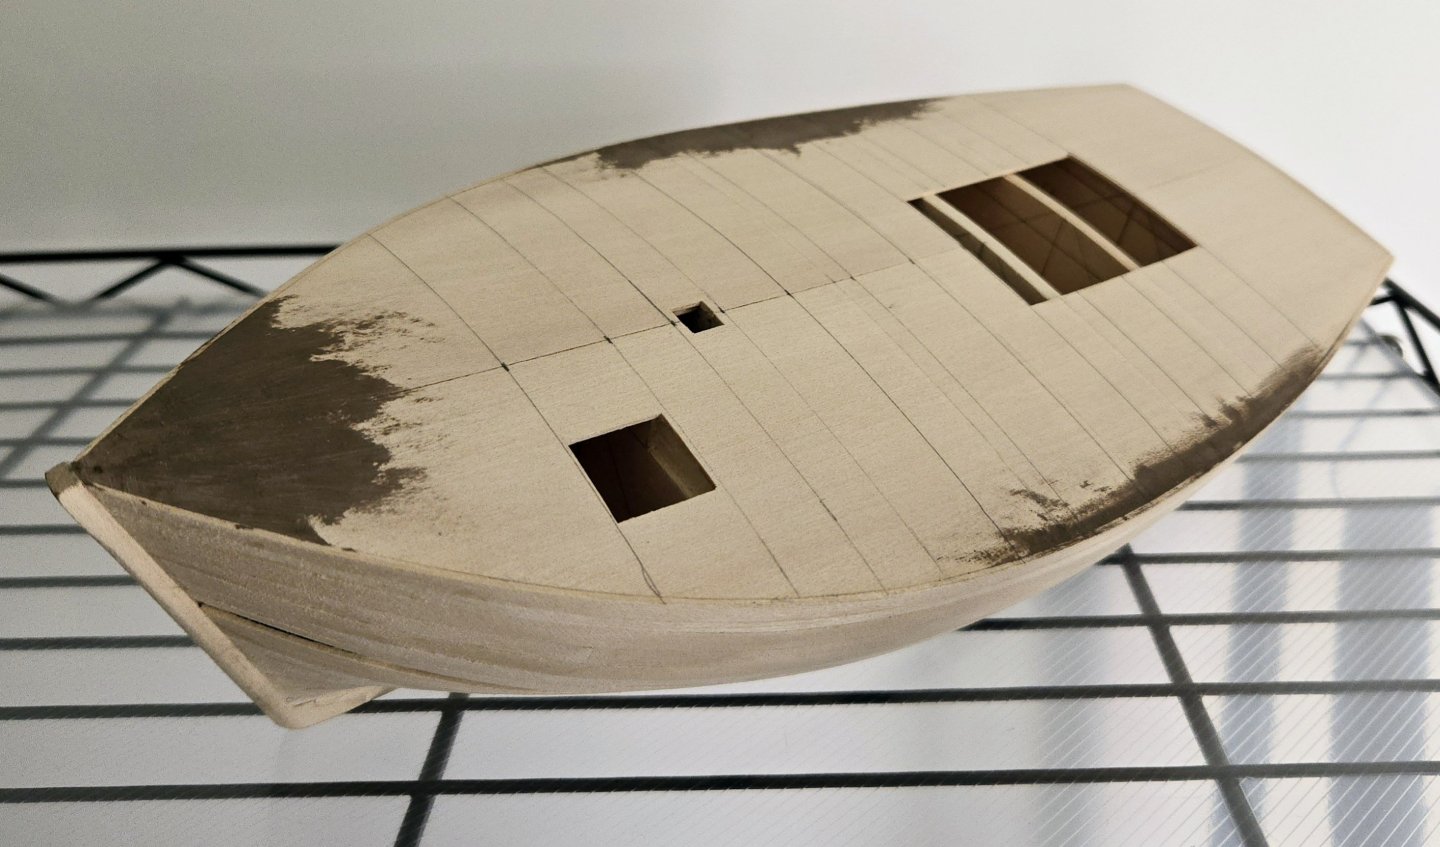
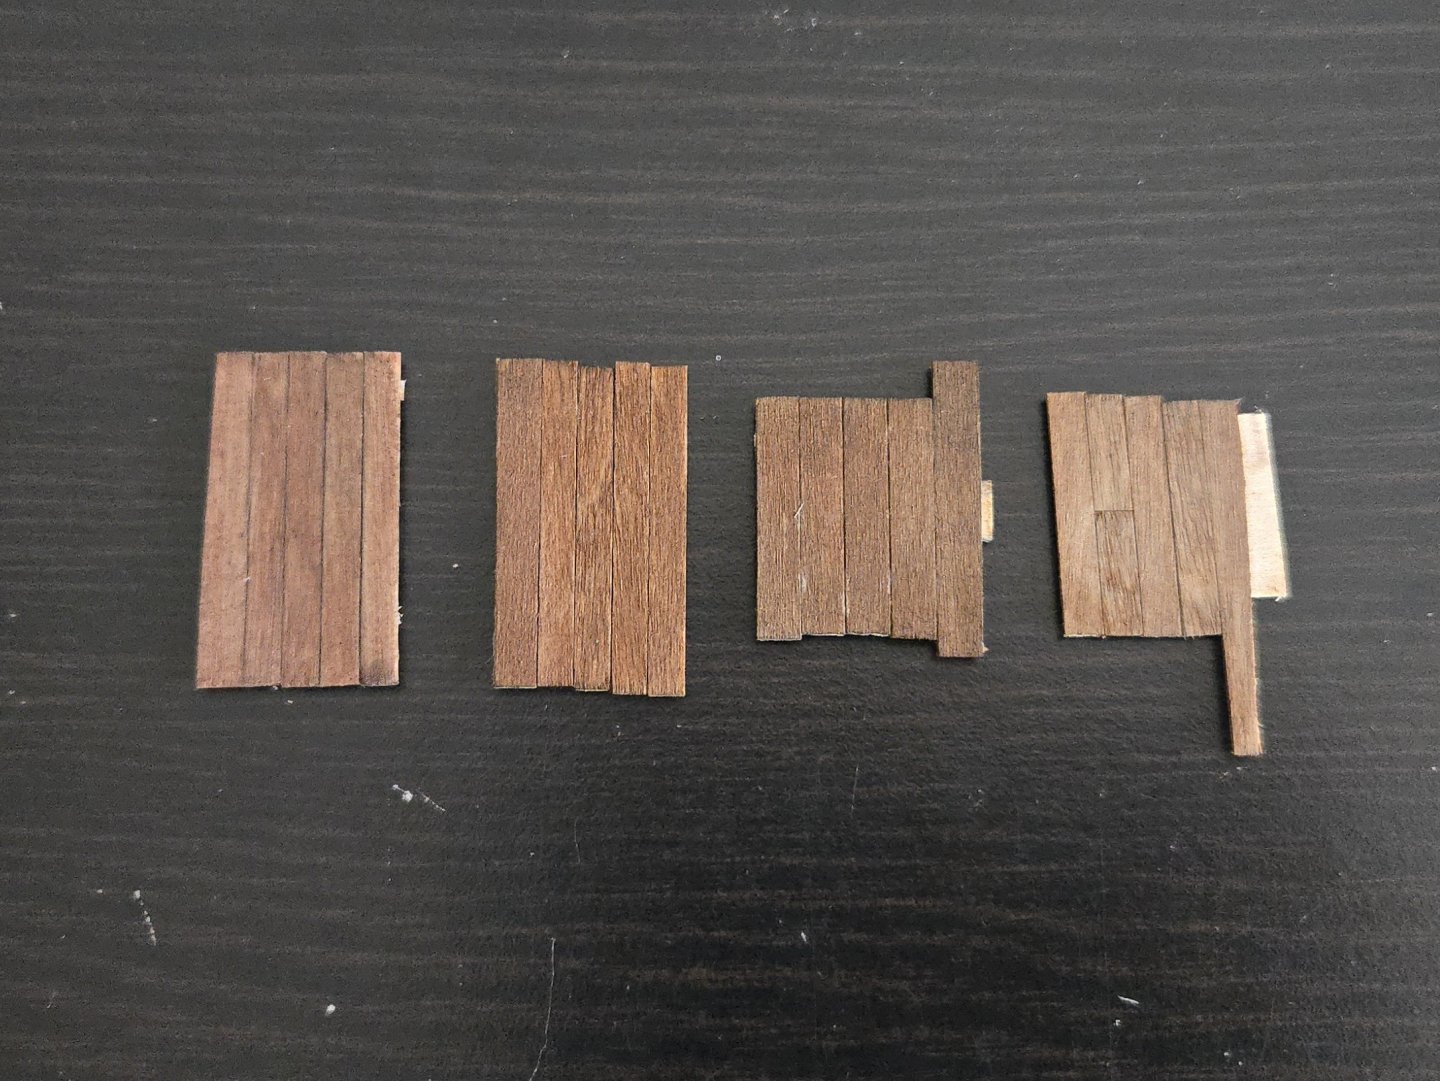
After returning to Mexico City, I've been able to make more progress. First up, I applied filler to a couple slightly low points where the sheer plank met the subdeck. I then marked out the top of the bulkheads (except toward the bow and stern) so that I can properly set the deck butt shift pattern. I recognize that the bulkheads aren't necessarily accurate to where the deck beams would actually be placed, but the spacing seemed like a good approximation at least. Speaking of the deck, I've been thinking of how to make and color it. The clearest images of the decks of working lanchas come from Carlos Vairo's photos from the early 1980s, several examples of which are below. As can be seen, there's some variation, but a dark brown or gray brown color seems appropriate. Source: https://www.carlosvairo.com/galeria-puerto-montt-lanchas-chilotas In terms of materials, I am running low on my stocks of 1/32‐inch thick basswood (which I cannot seem to find available in Mexico), so I was thinking of using coffee stir sticks, of which I've accumulated quite a few in widths of 3/16- and 1/8-inches, which seem to be roughly appropriate in scale based on Vairo's photos (and could well represent the variable deck planking widths that have been pointed out earlier). From what I can tell, these are made of birch, which is a fairly common modeling wood. That said, I had a couple concerns. First, how to best go about getting the right color? Second, I'll still need to make the covering boards out of basswood, so would there be too much of a contrast with the birch deck? I made a few test deck patches to check, seen below. The one at left has a basswood plank on the left side and was stained with a Minwax cherry stain pen, then given washes in dark brown and black acrylic. The second from the left also includes a basswood plank on the left side and was stained with Sayer Arce stain (which, unlike the Minwax, is readily available here) before also receiving brown and black washes. Third from left is just basswood and also was stained with Sayer Arce, but had a different quantity and proportion of brown and black washes applied. The rightmost one (just birch) was stained with a mix of Sayer Arce and a gray stain, before having the same washes applied. Overall, I don't think the difference between the basswood and the birch is overly noticeable if I go with basswood covering boards and a birch deck. The birch grain is a little more visible, though, which I'm not crazy about but which I don't think is bad per se. As far as the coloration, while I do like the cherry, I have my doubts as to whether a single stain pen would be enough, and I think the arce looks good as well. I am currently thinking of using the mixed gray and brown stains and then applying washes a bit unevenly in order to represent the wear patterns seen in Vairo's photos. Let me know if you have any thoughts! I also trimmed the sternpost and keel to their proper length and angle. I further marked out where the bottom of the sternpost should join the keel timber. Next I plan on filling the current joint between the two, sanding smooth, and carving a false joint (which ideally will be barely visible under the paint. Finally, I'm nearly done with planking. The gap is narrow enough now that clamping is becoming a challenge.


- 312 replies
-
- 9
-
-
- Chile
- Latin America
- (and 6 more)
-
Nice job dealing with the challenges you're facing. The Spanish Windlass idea is something I'll have to try myself. Out of curiosity, how far apart are the bulkheads? They look quite widely spaced, which seems to me like it may make planking (not to mention attaching the subdeck) more difficult.