JacquesCousteau
-
Posts
1,383 -
Joined
-
Last visited
Content Type
Profiles
Forums
Gallery
Events
Everything posted by JacquesCousteau
-
I think it might be this post: That said, it's aimed mostly at a complete beginner, and it sounds like you already have some experience. You can use your judgment as to what makes sense for your skills, display space, etc. And for your interests--no point in choosing a kit that's not actually interesting to you.
-
 Thanks Chris! That's exactly how it works, just with an opening at only one end and a row of spikes instead of a net funnel.
 -
Thanks! According to Ortiz Segura, the nasa was used to catch mojarra (a type of chichlid), catfish, pescado blanco (a larger variety of the chirostoma genus, which also included the tiny charales which were caught in fine nets), and other larger fish.
-
Sounds like you found a solution! Good luck with the grading, that's always been my least favorite part of teaching.
-
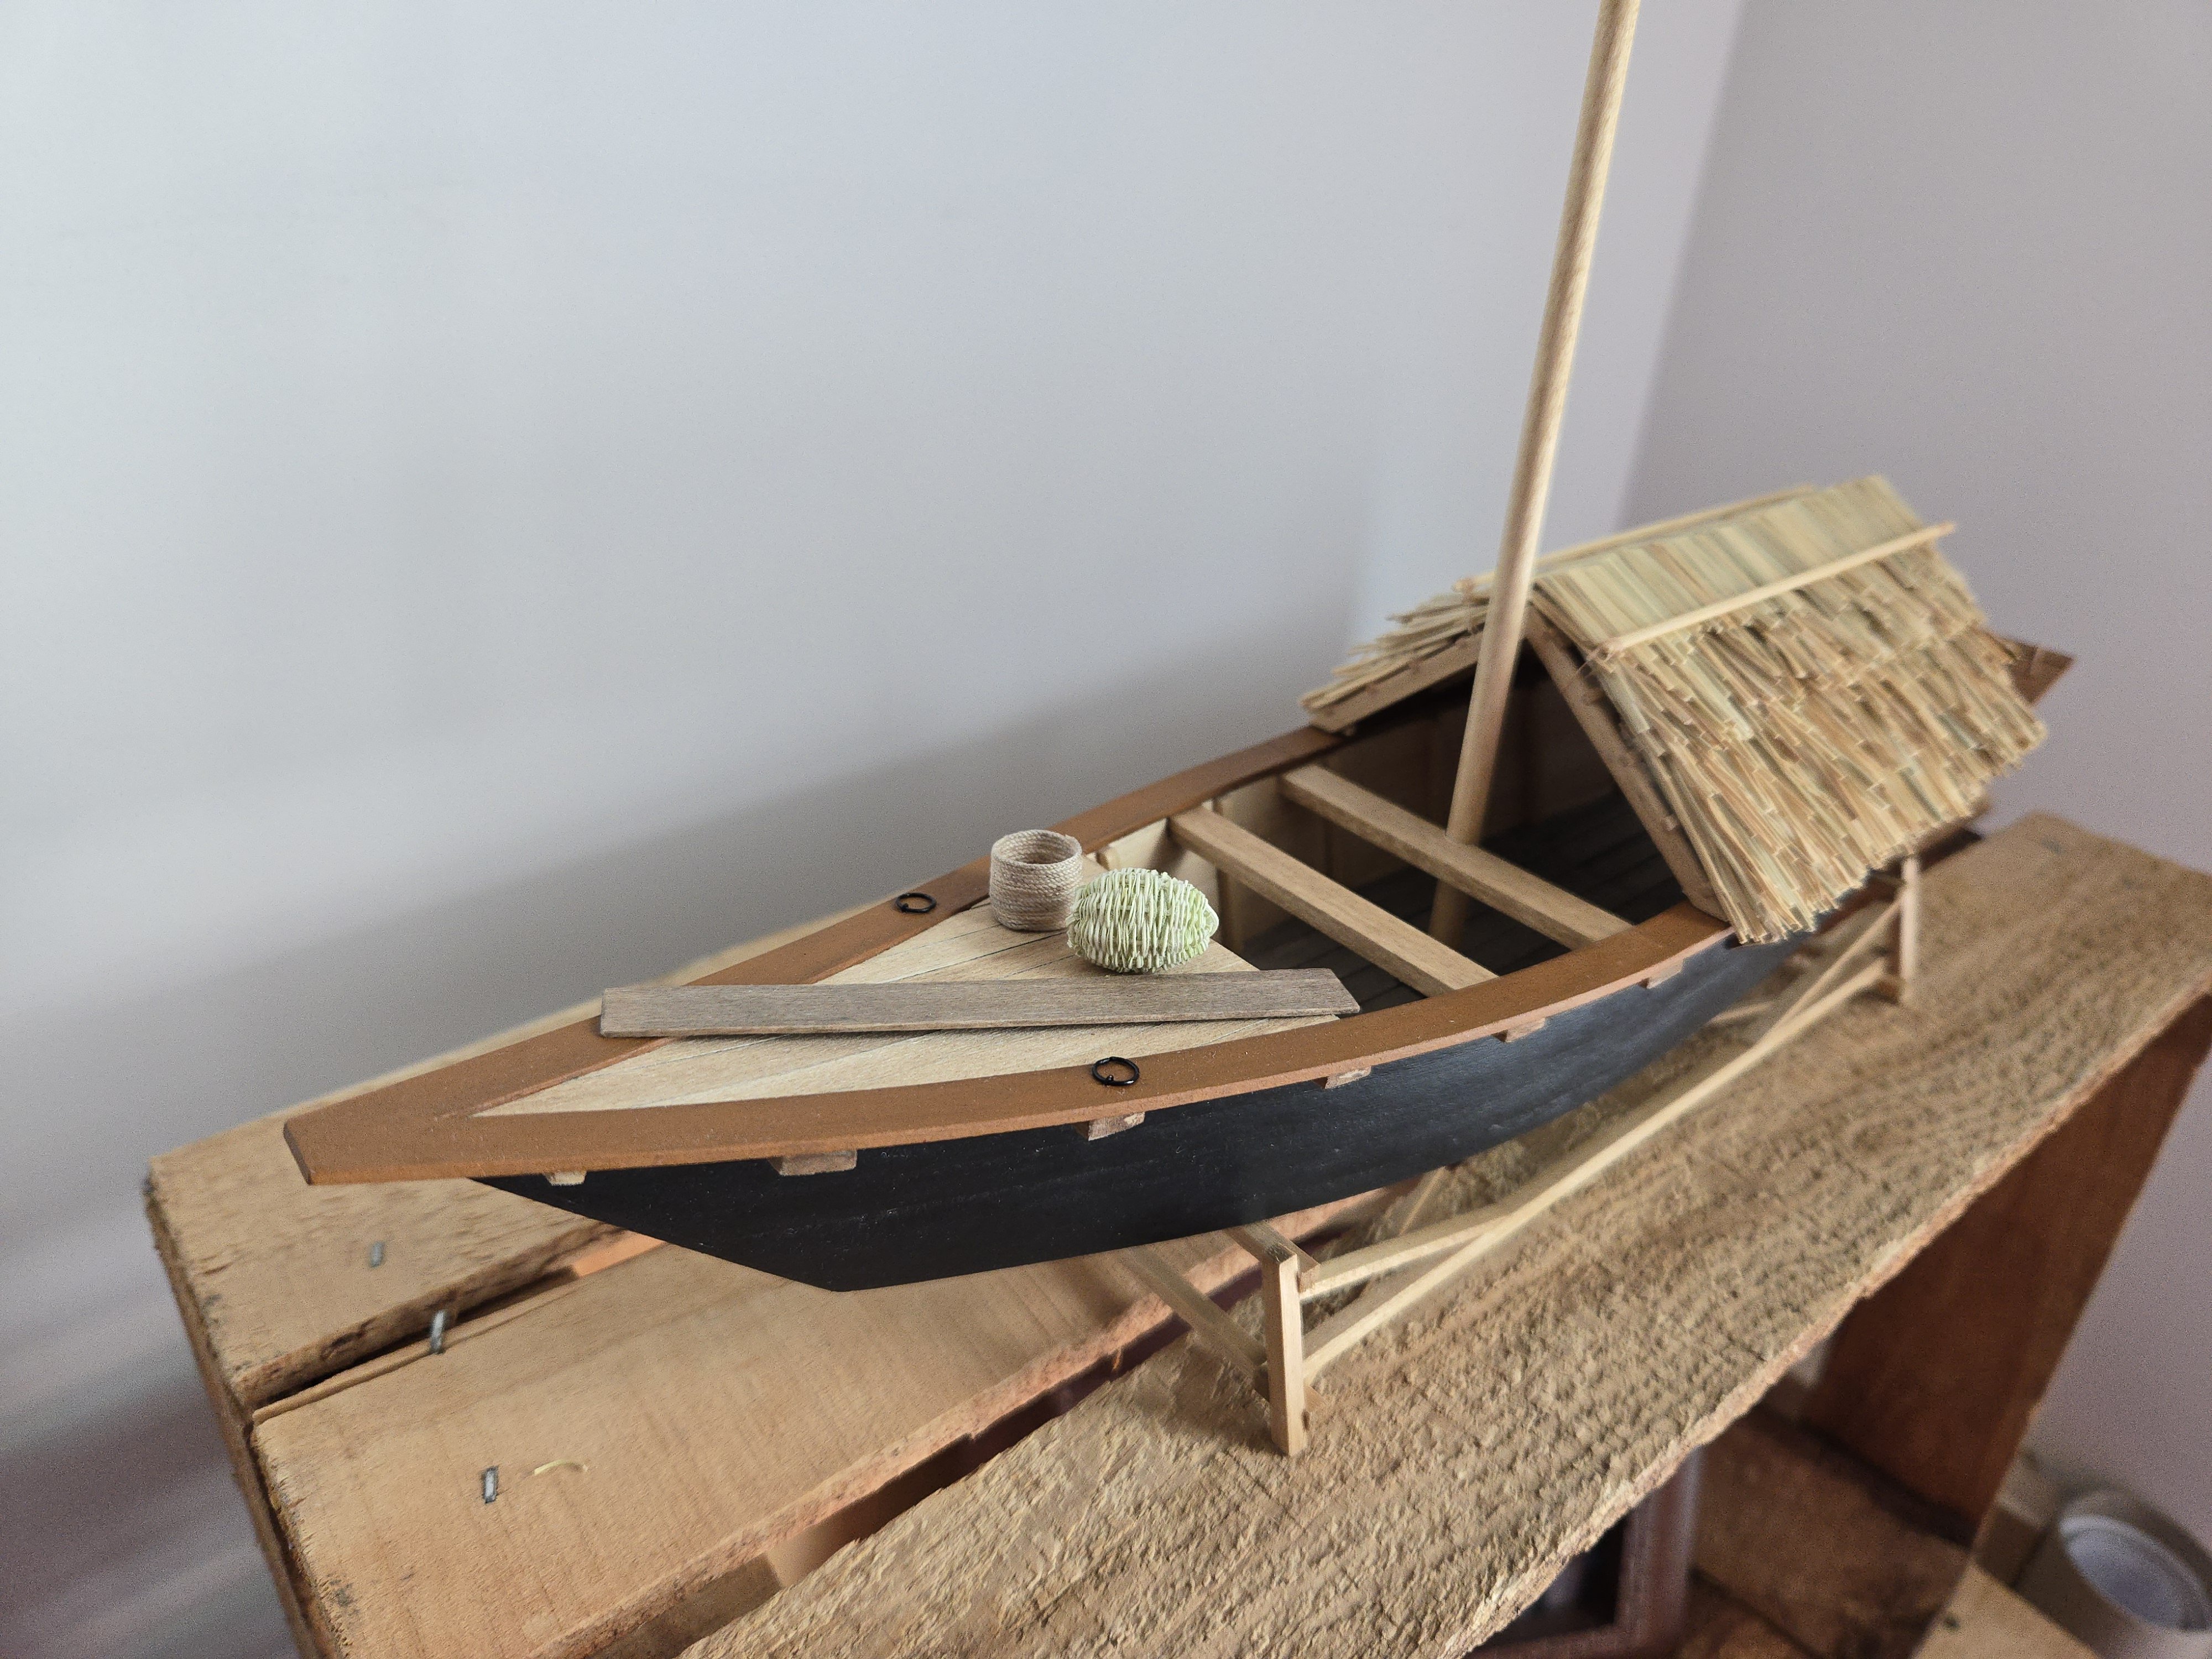
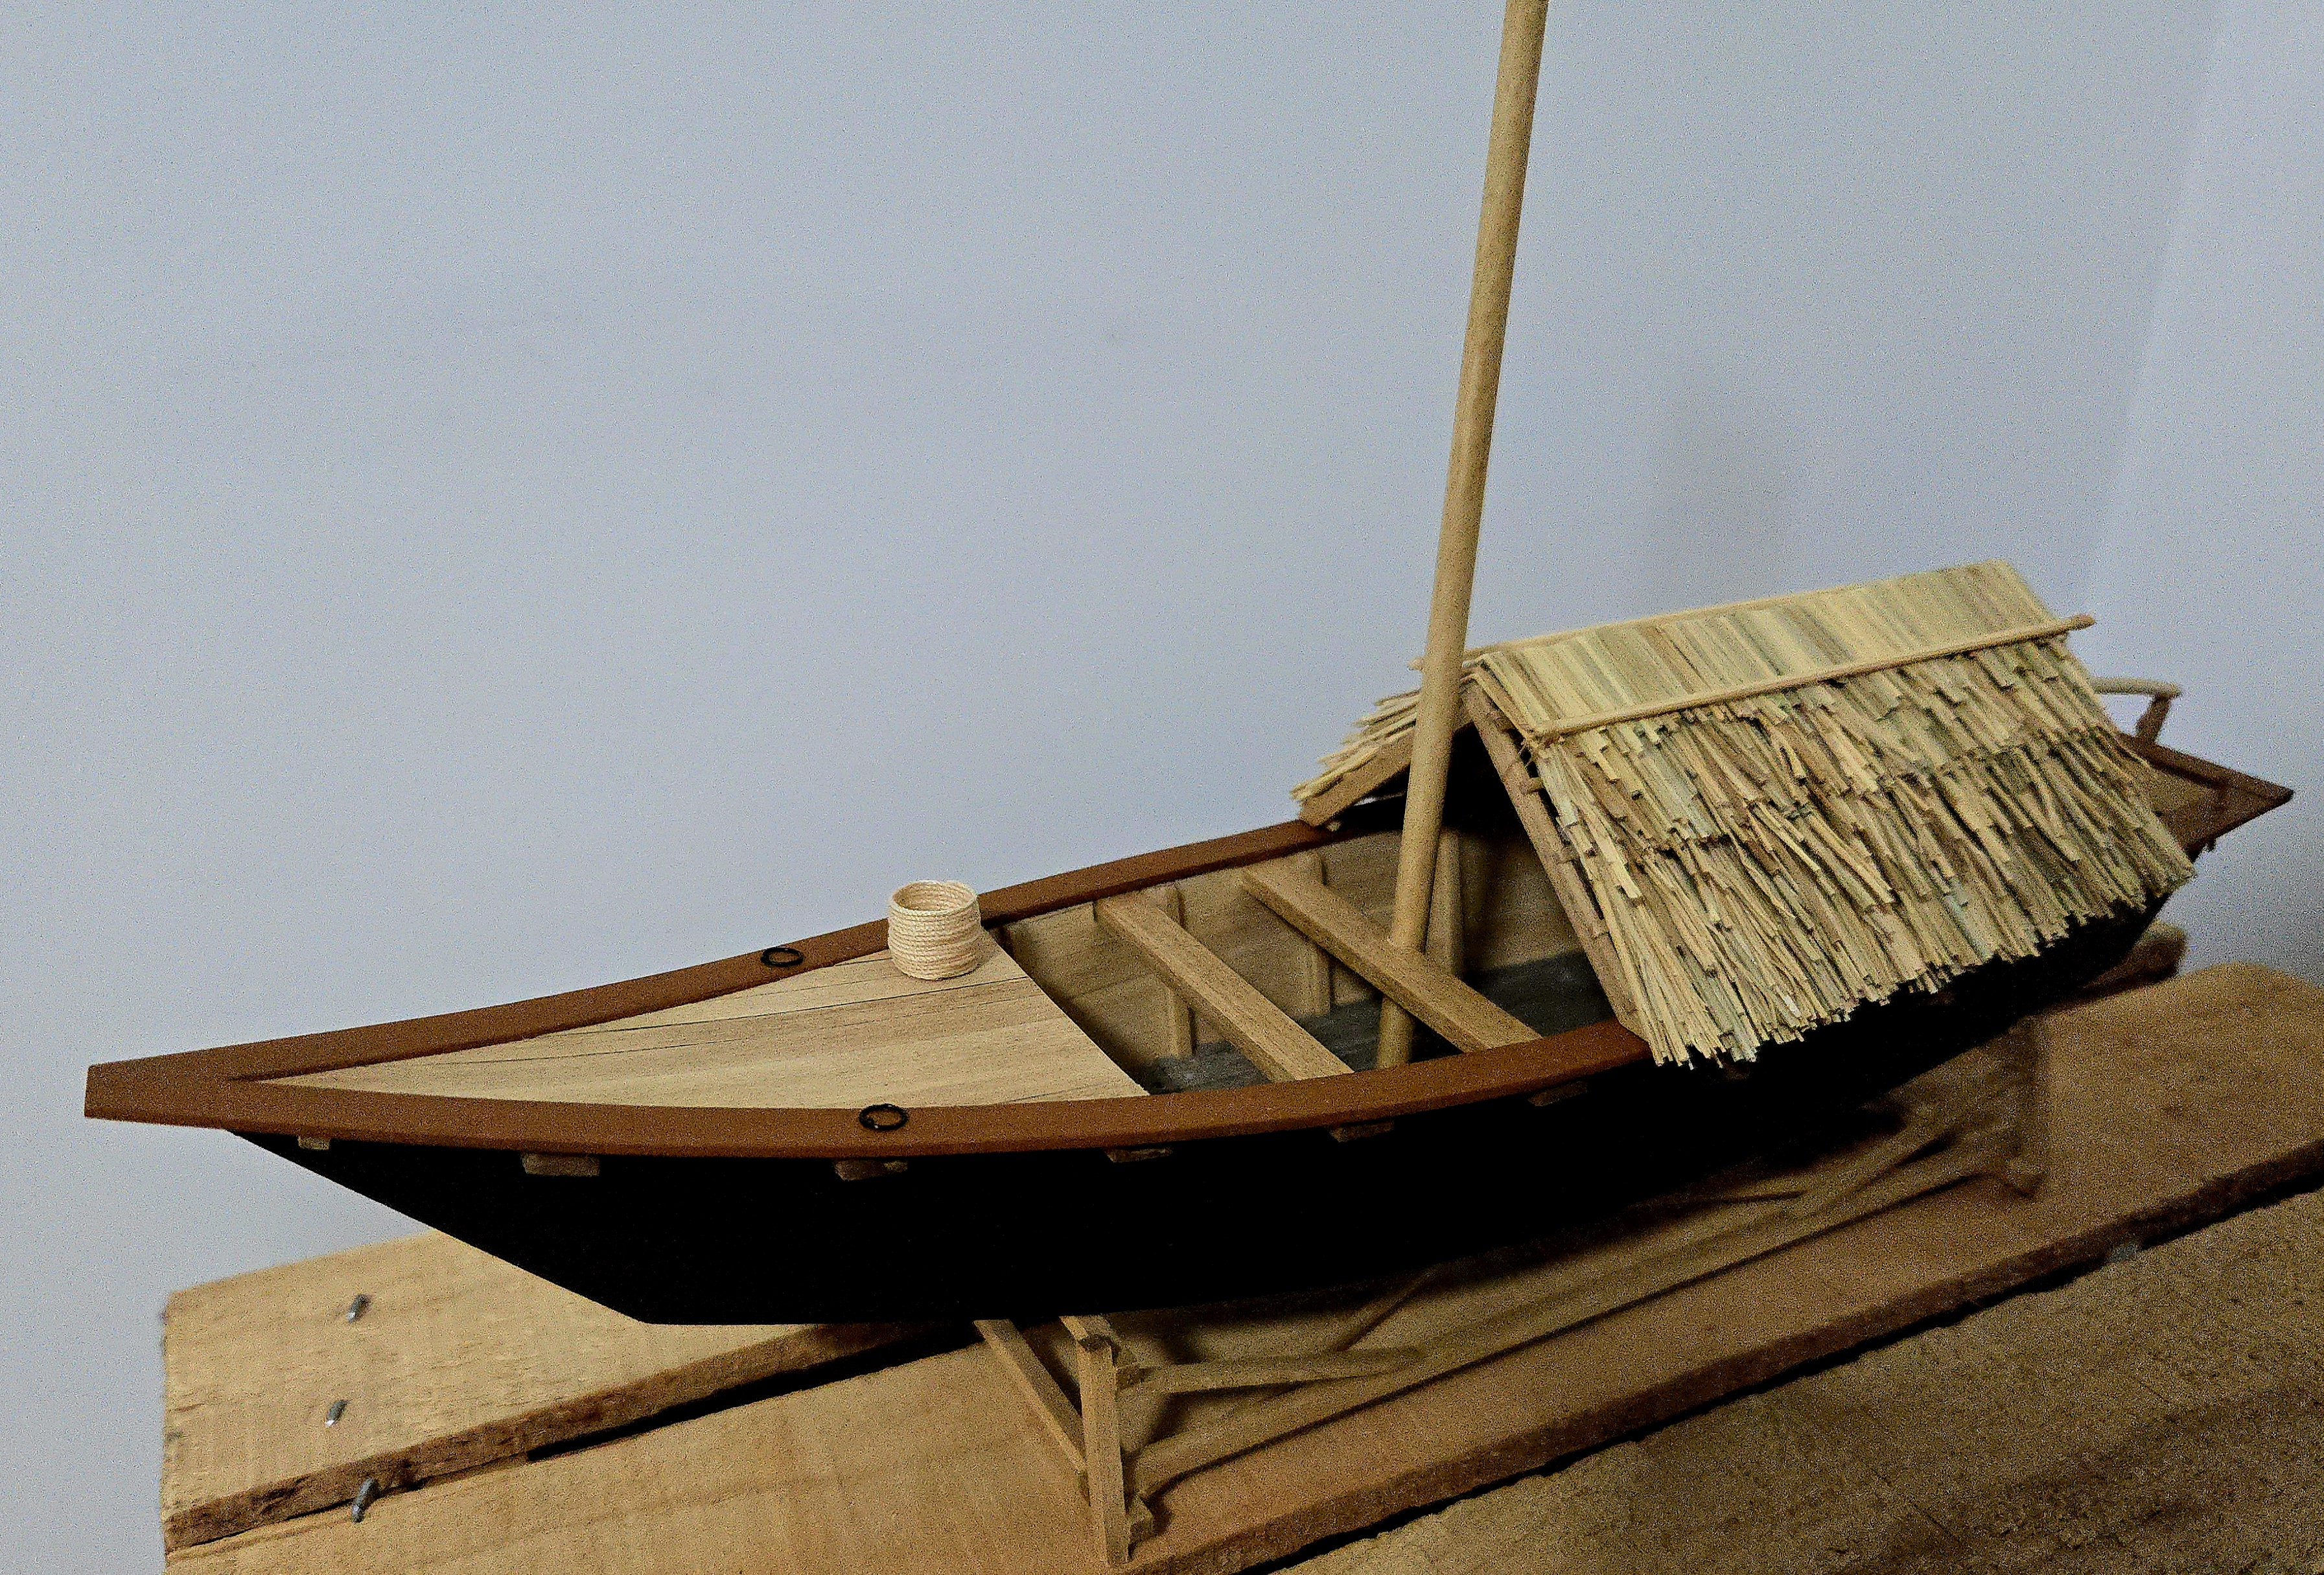
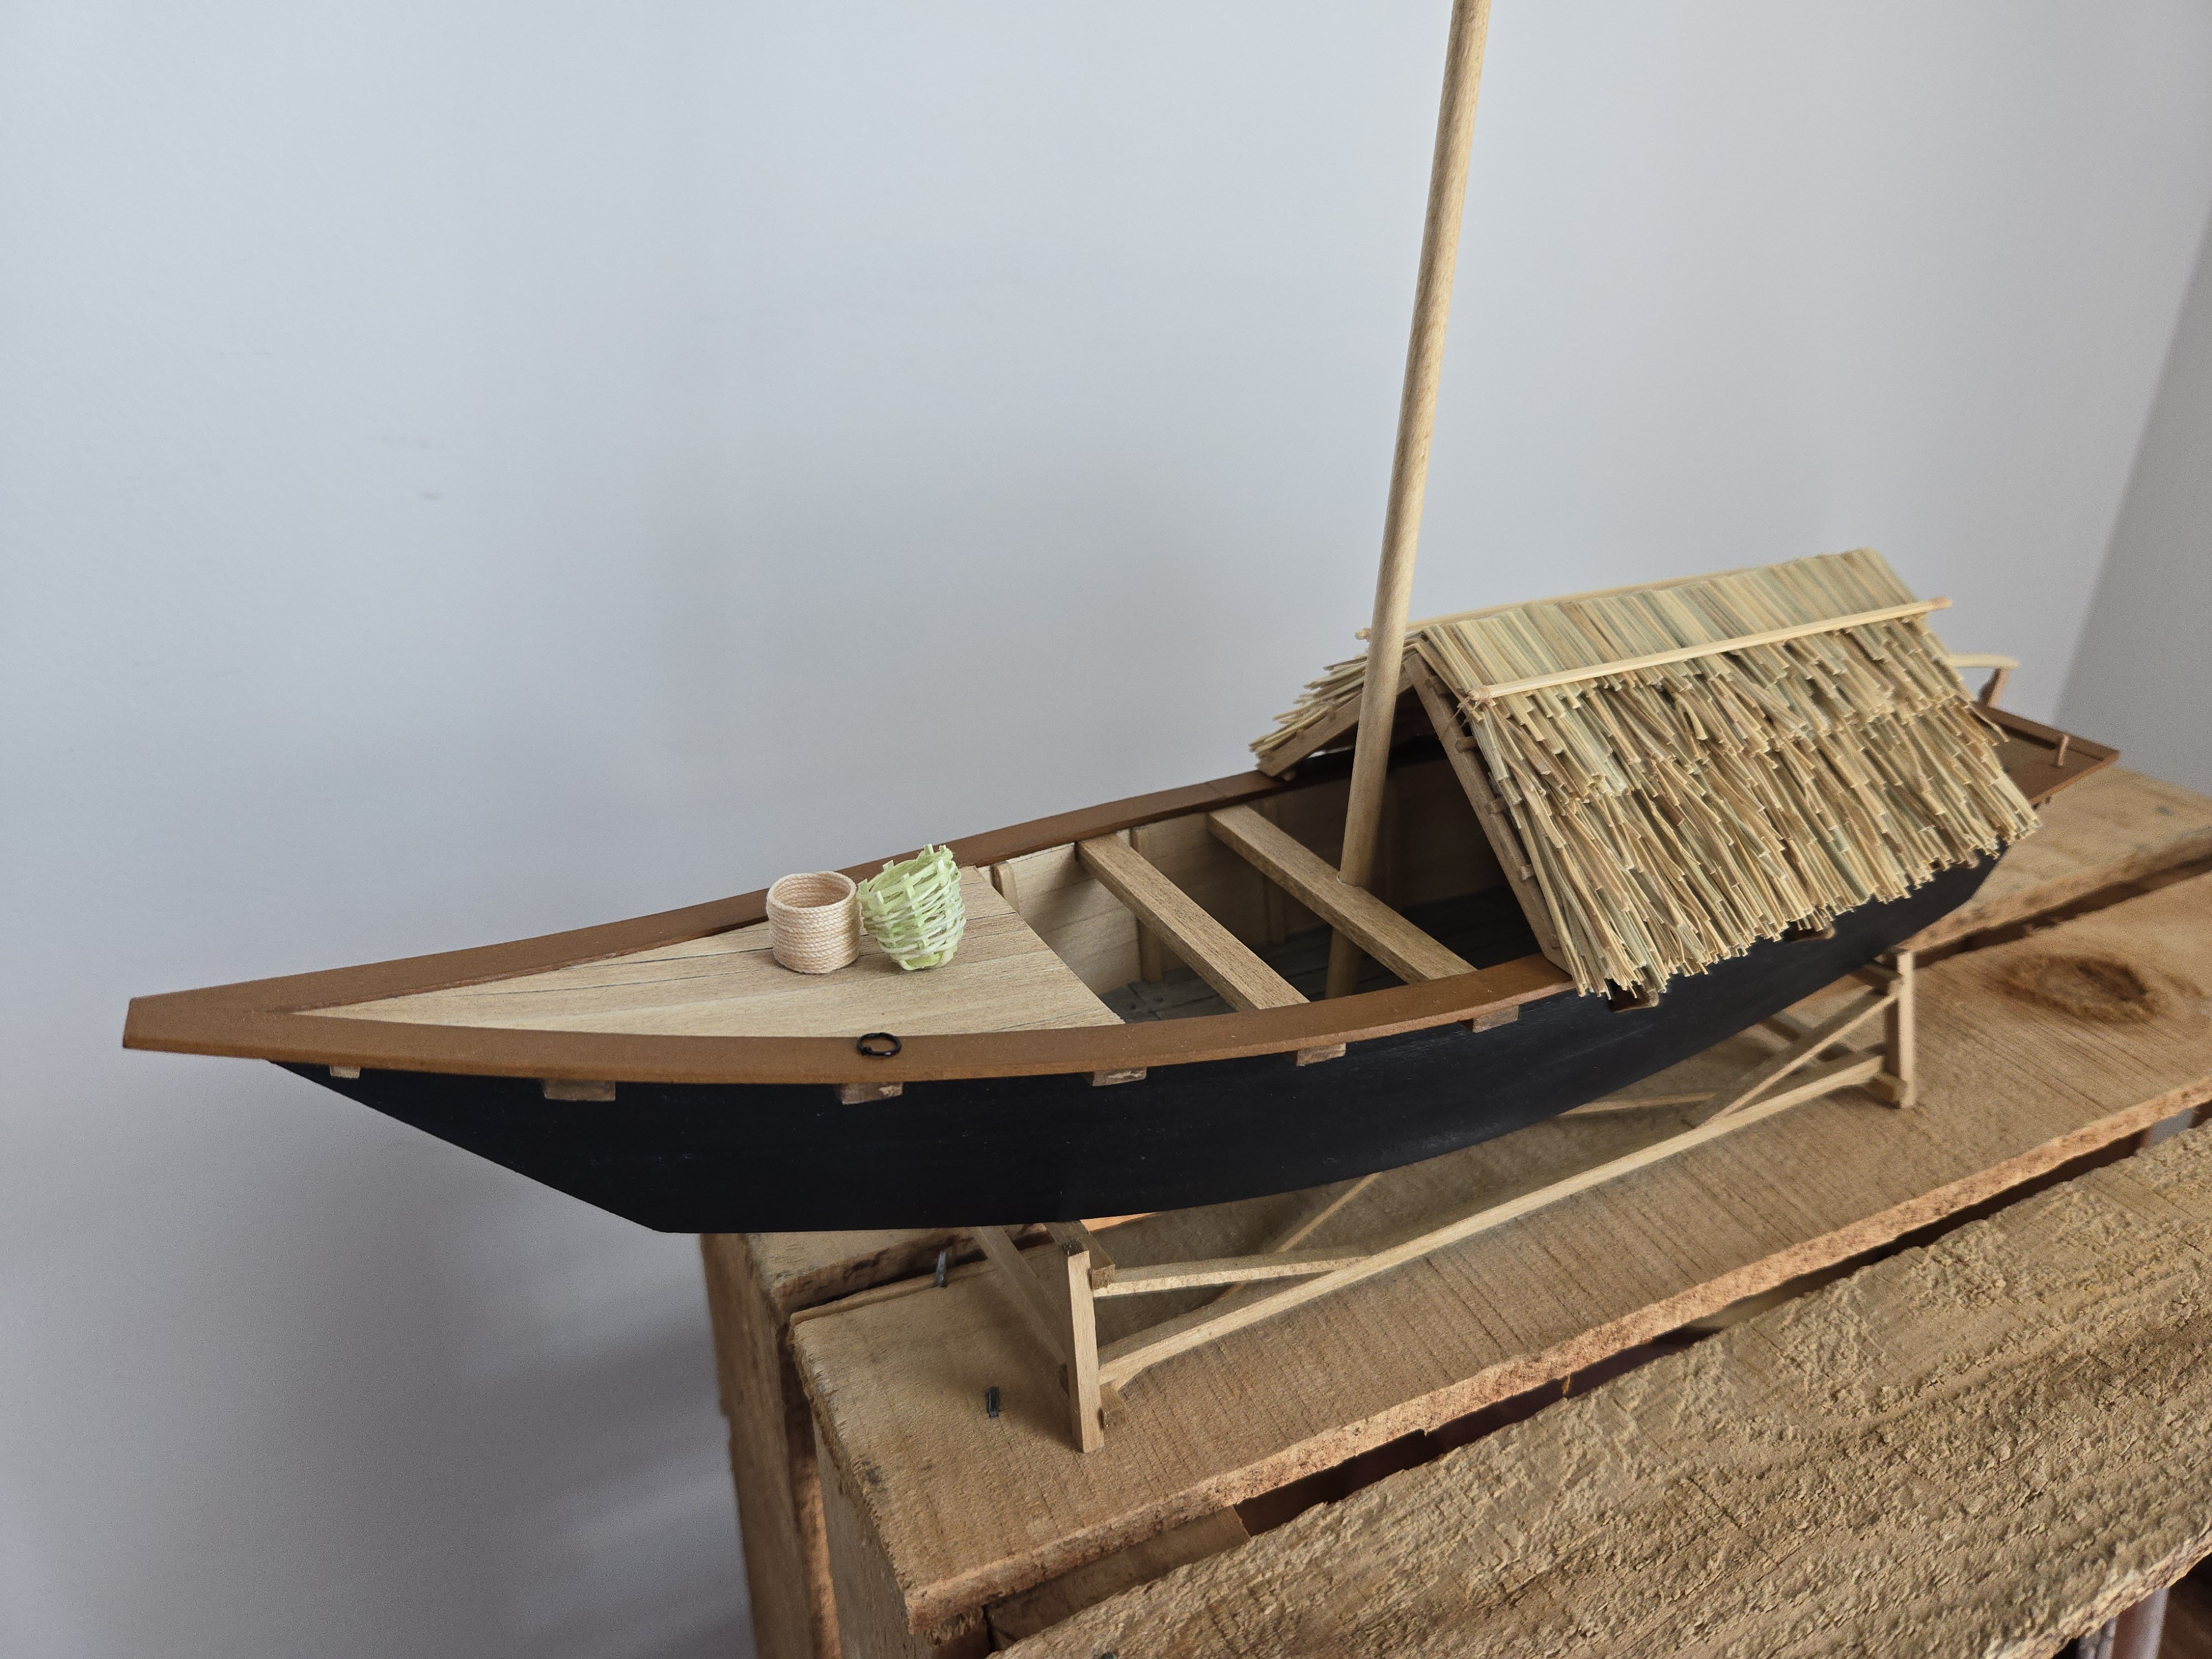
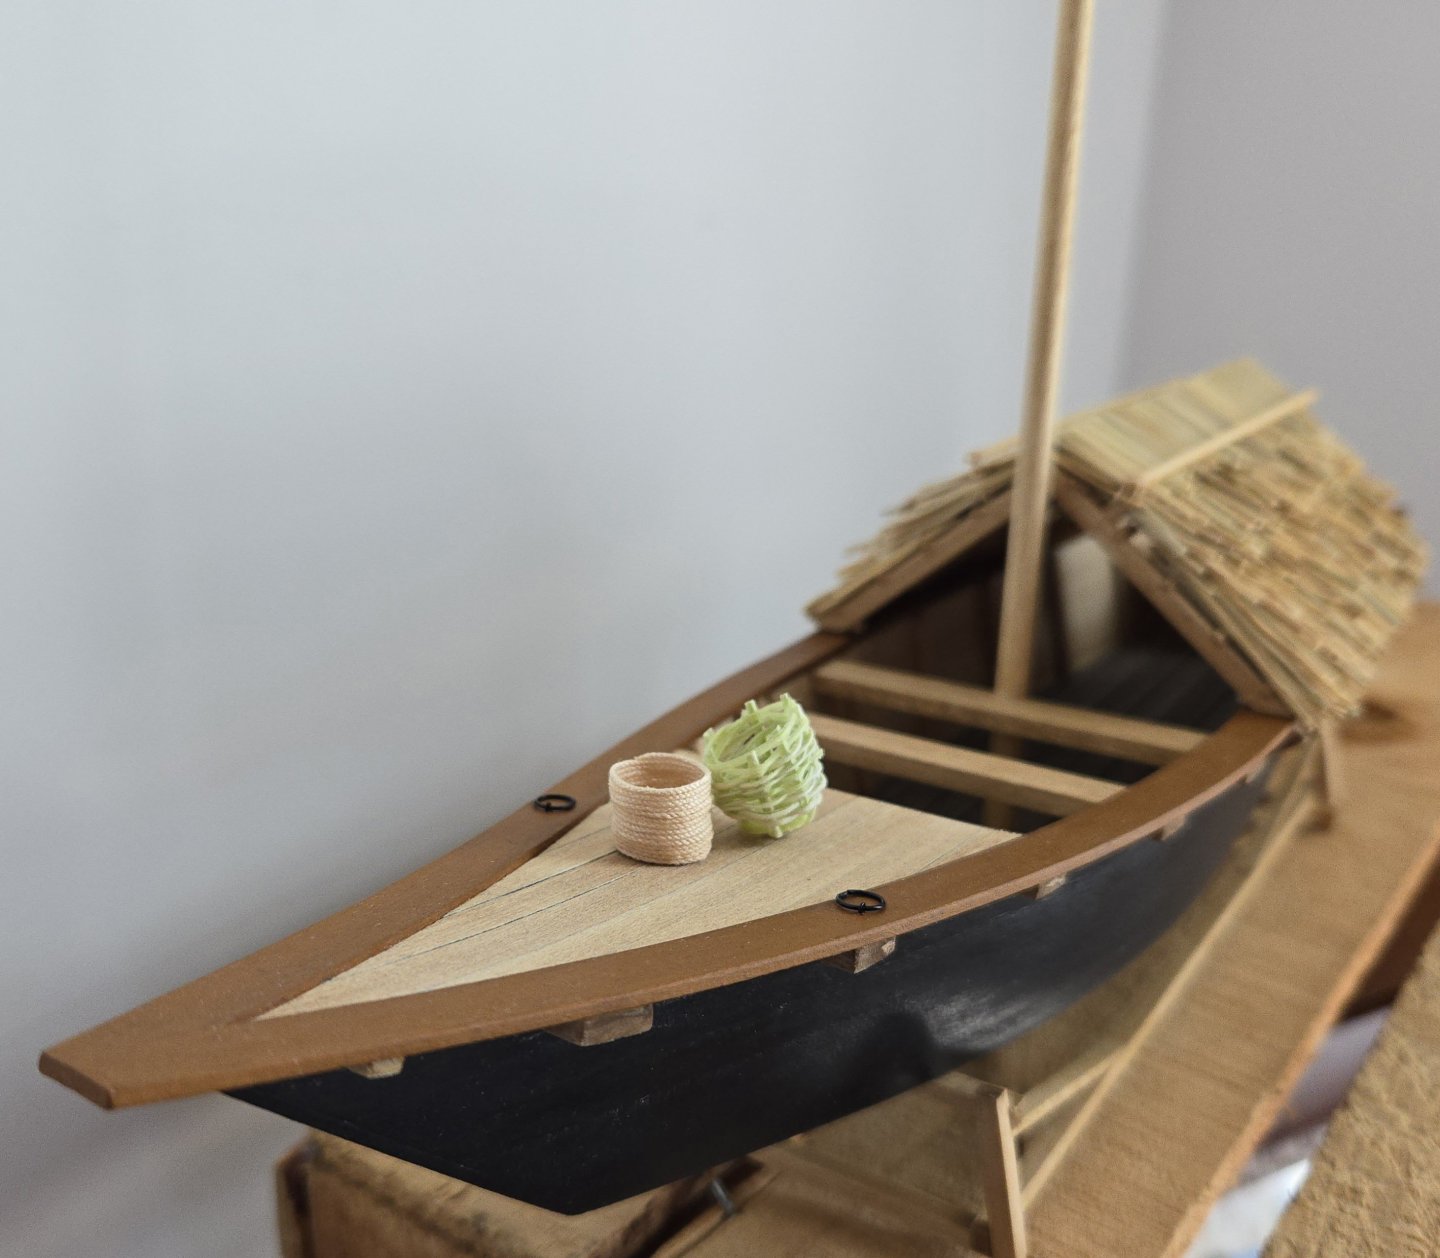
I forgot to add a shot of the nasa on deck alongside the rope bucket (now given a dark brown wash) and the gangplank (also colored with washes).

- 286 replies
-
- 10
-

-

-
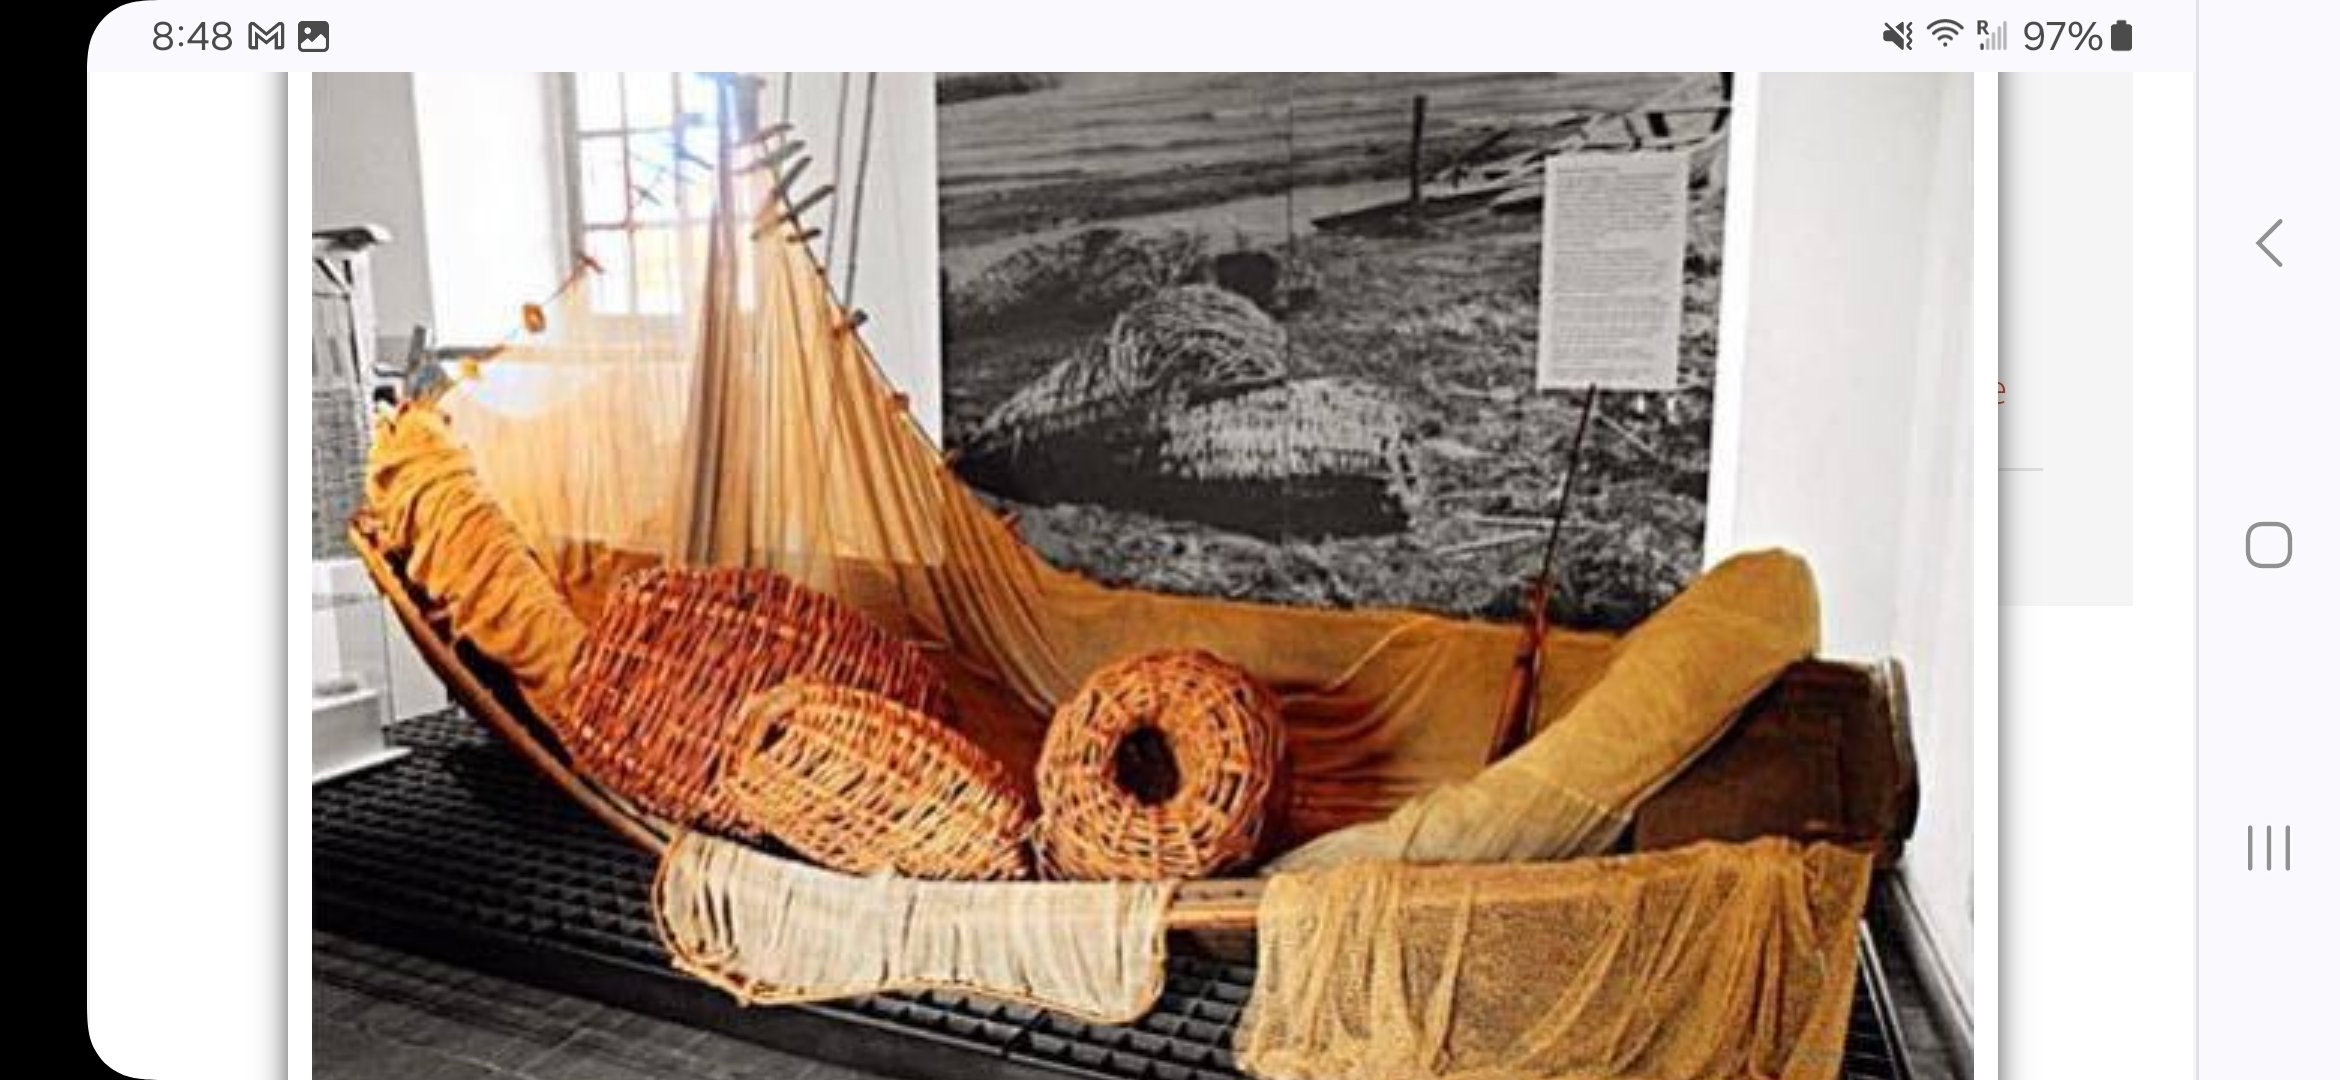
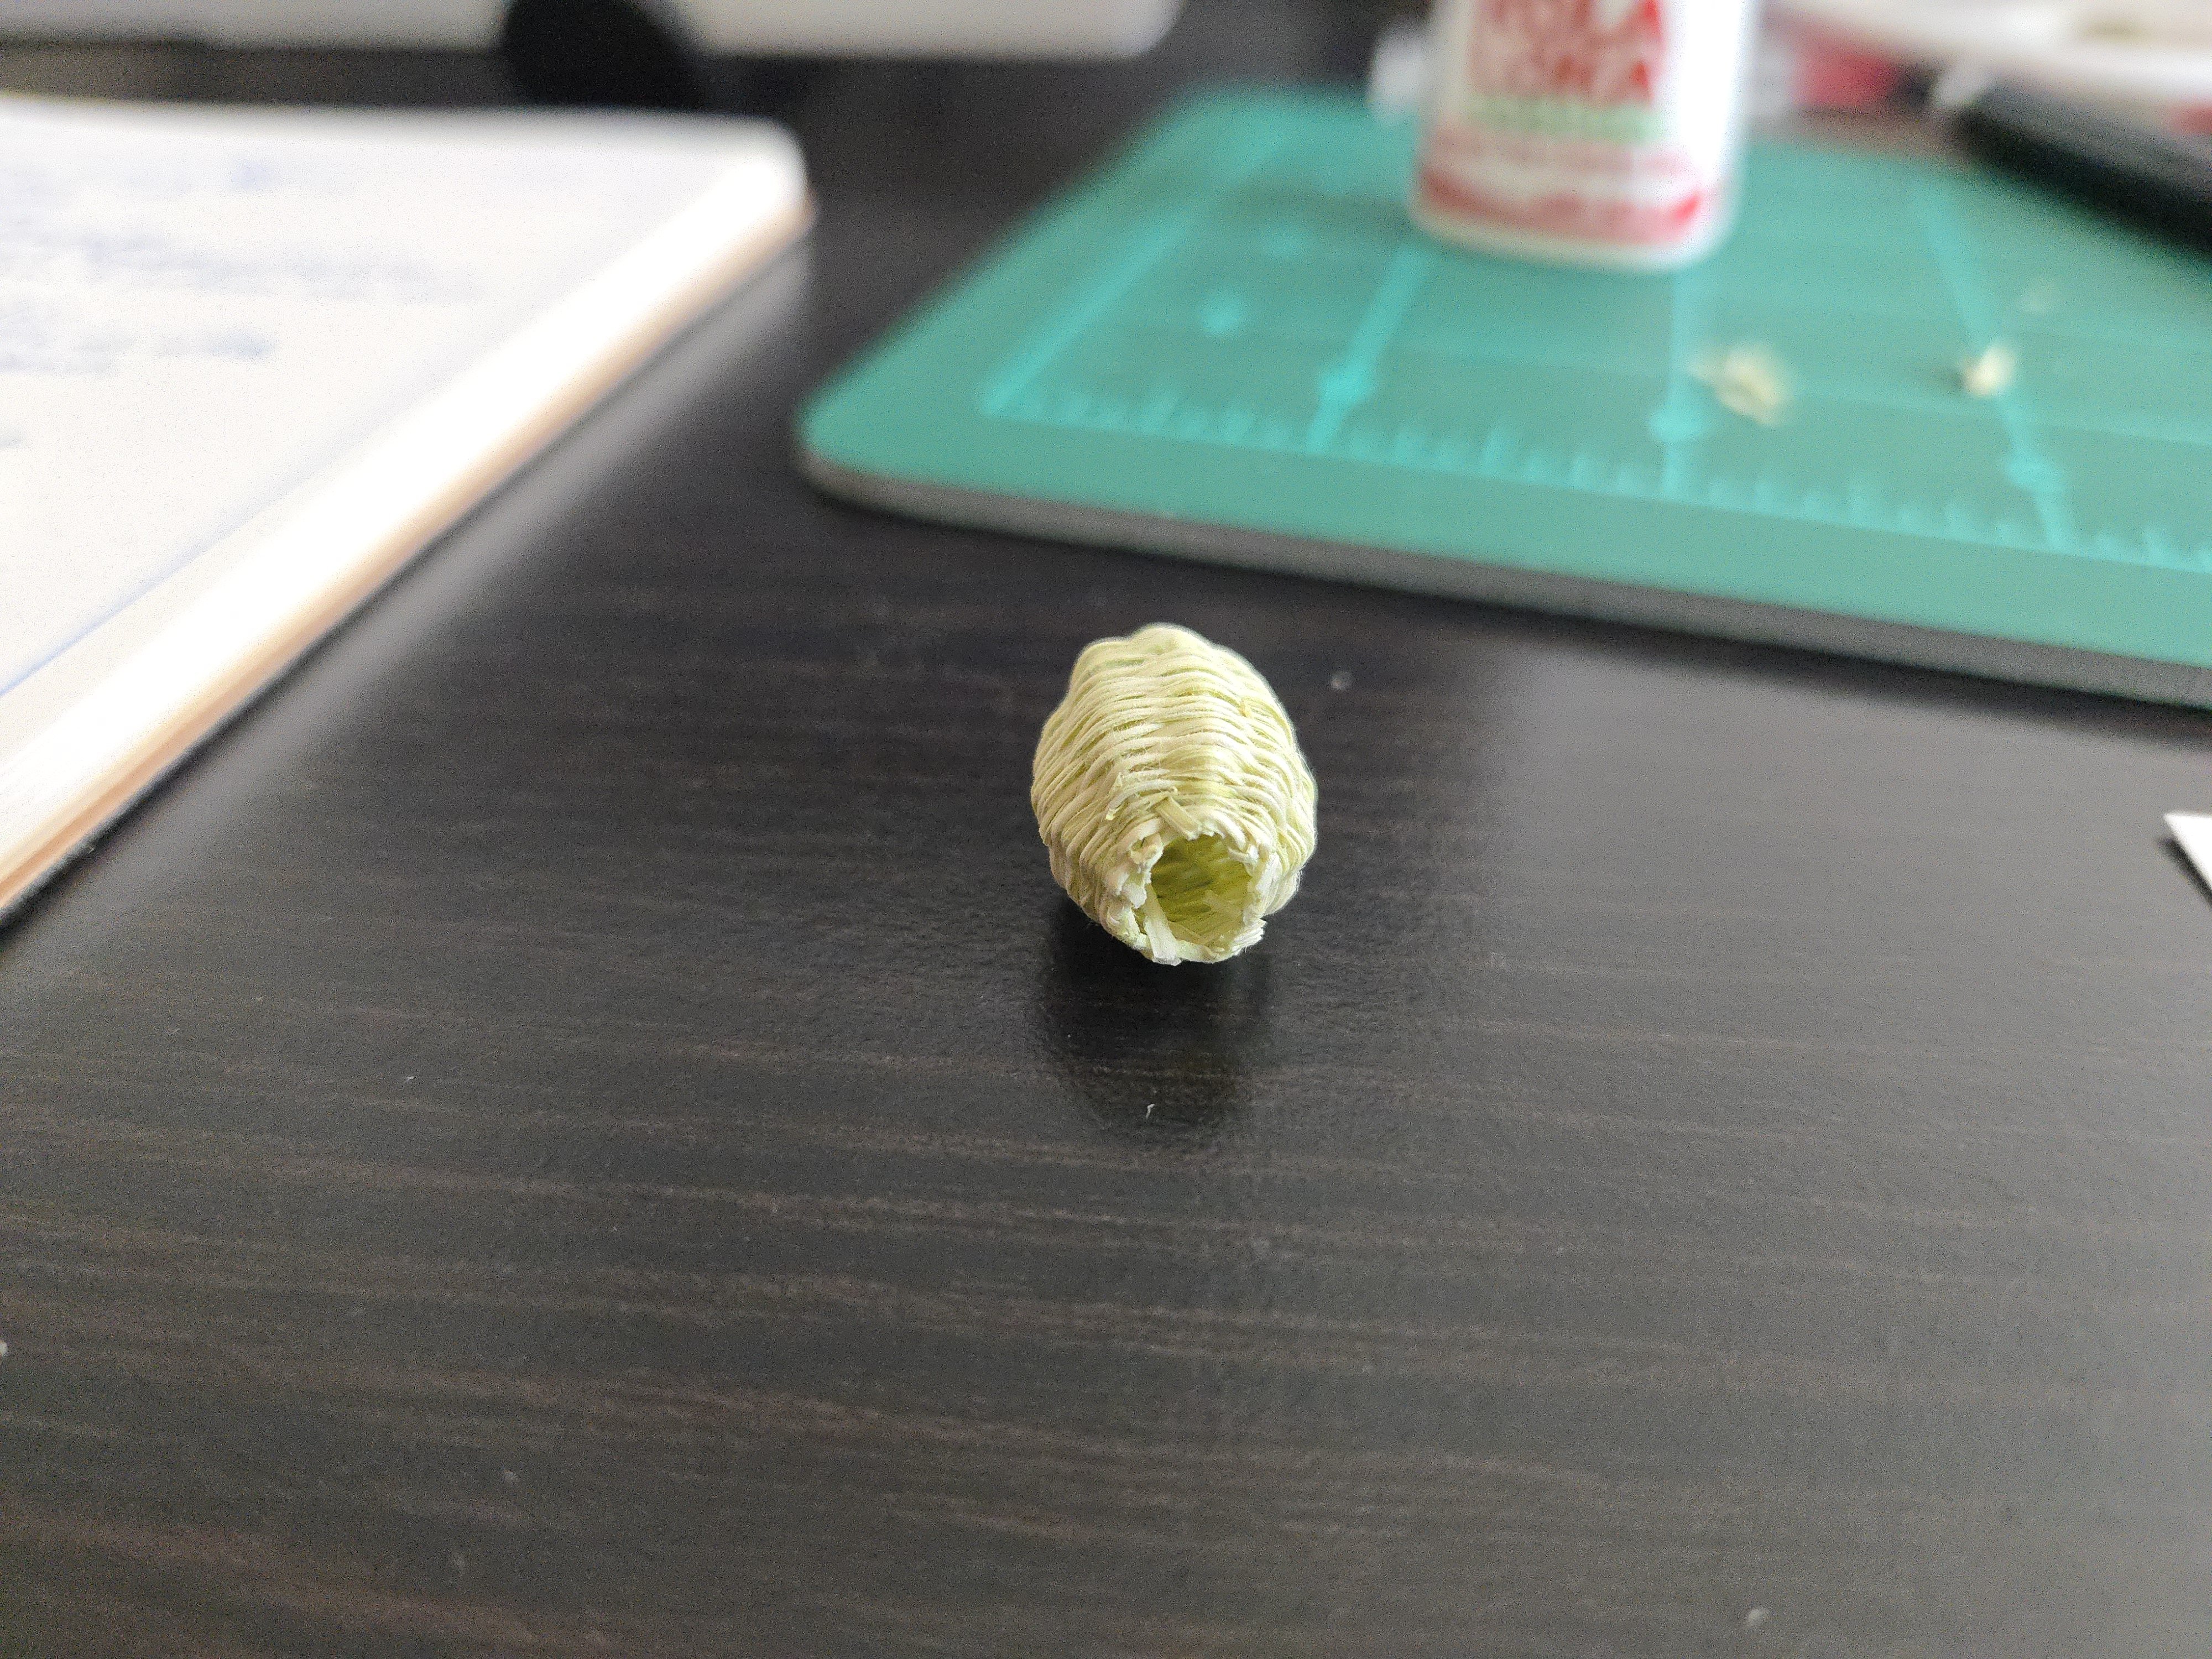
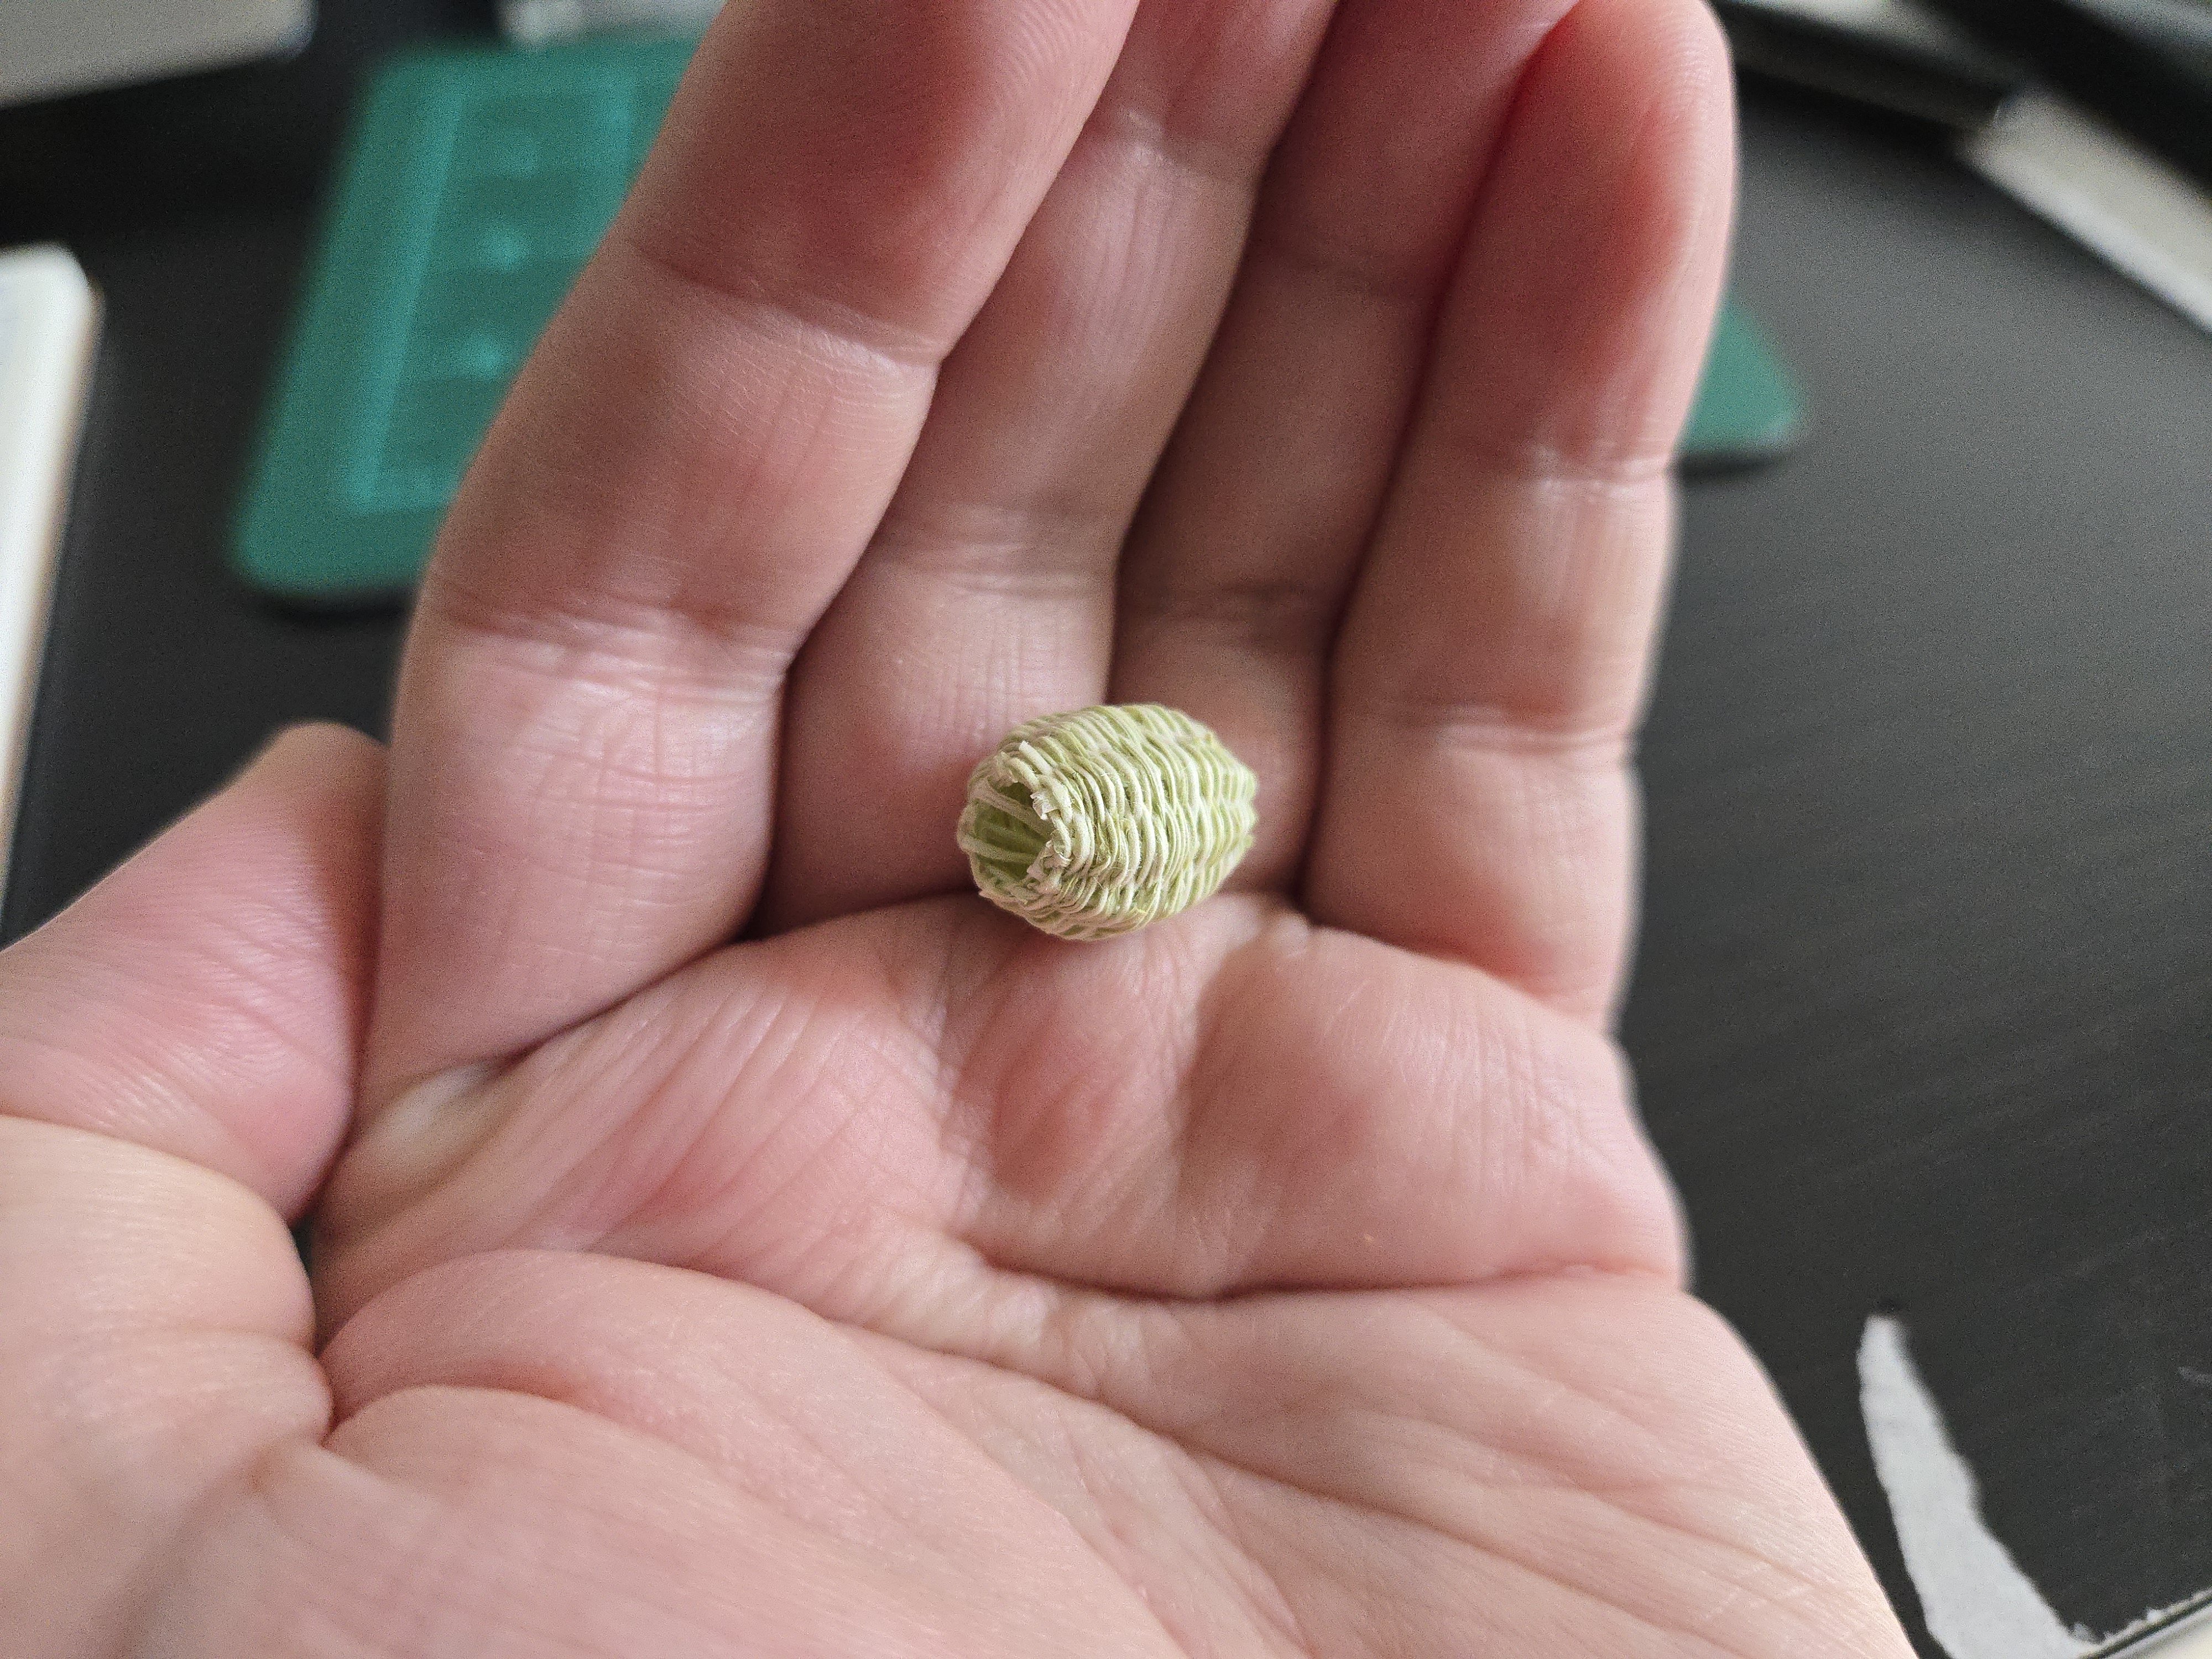
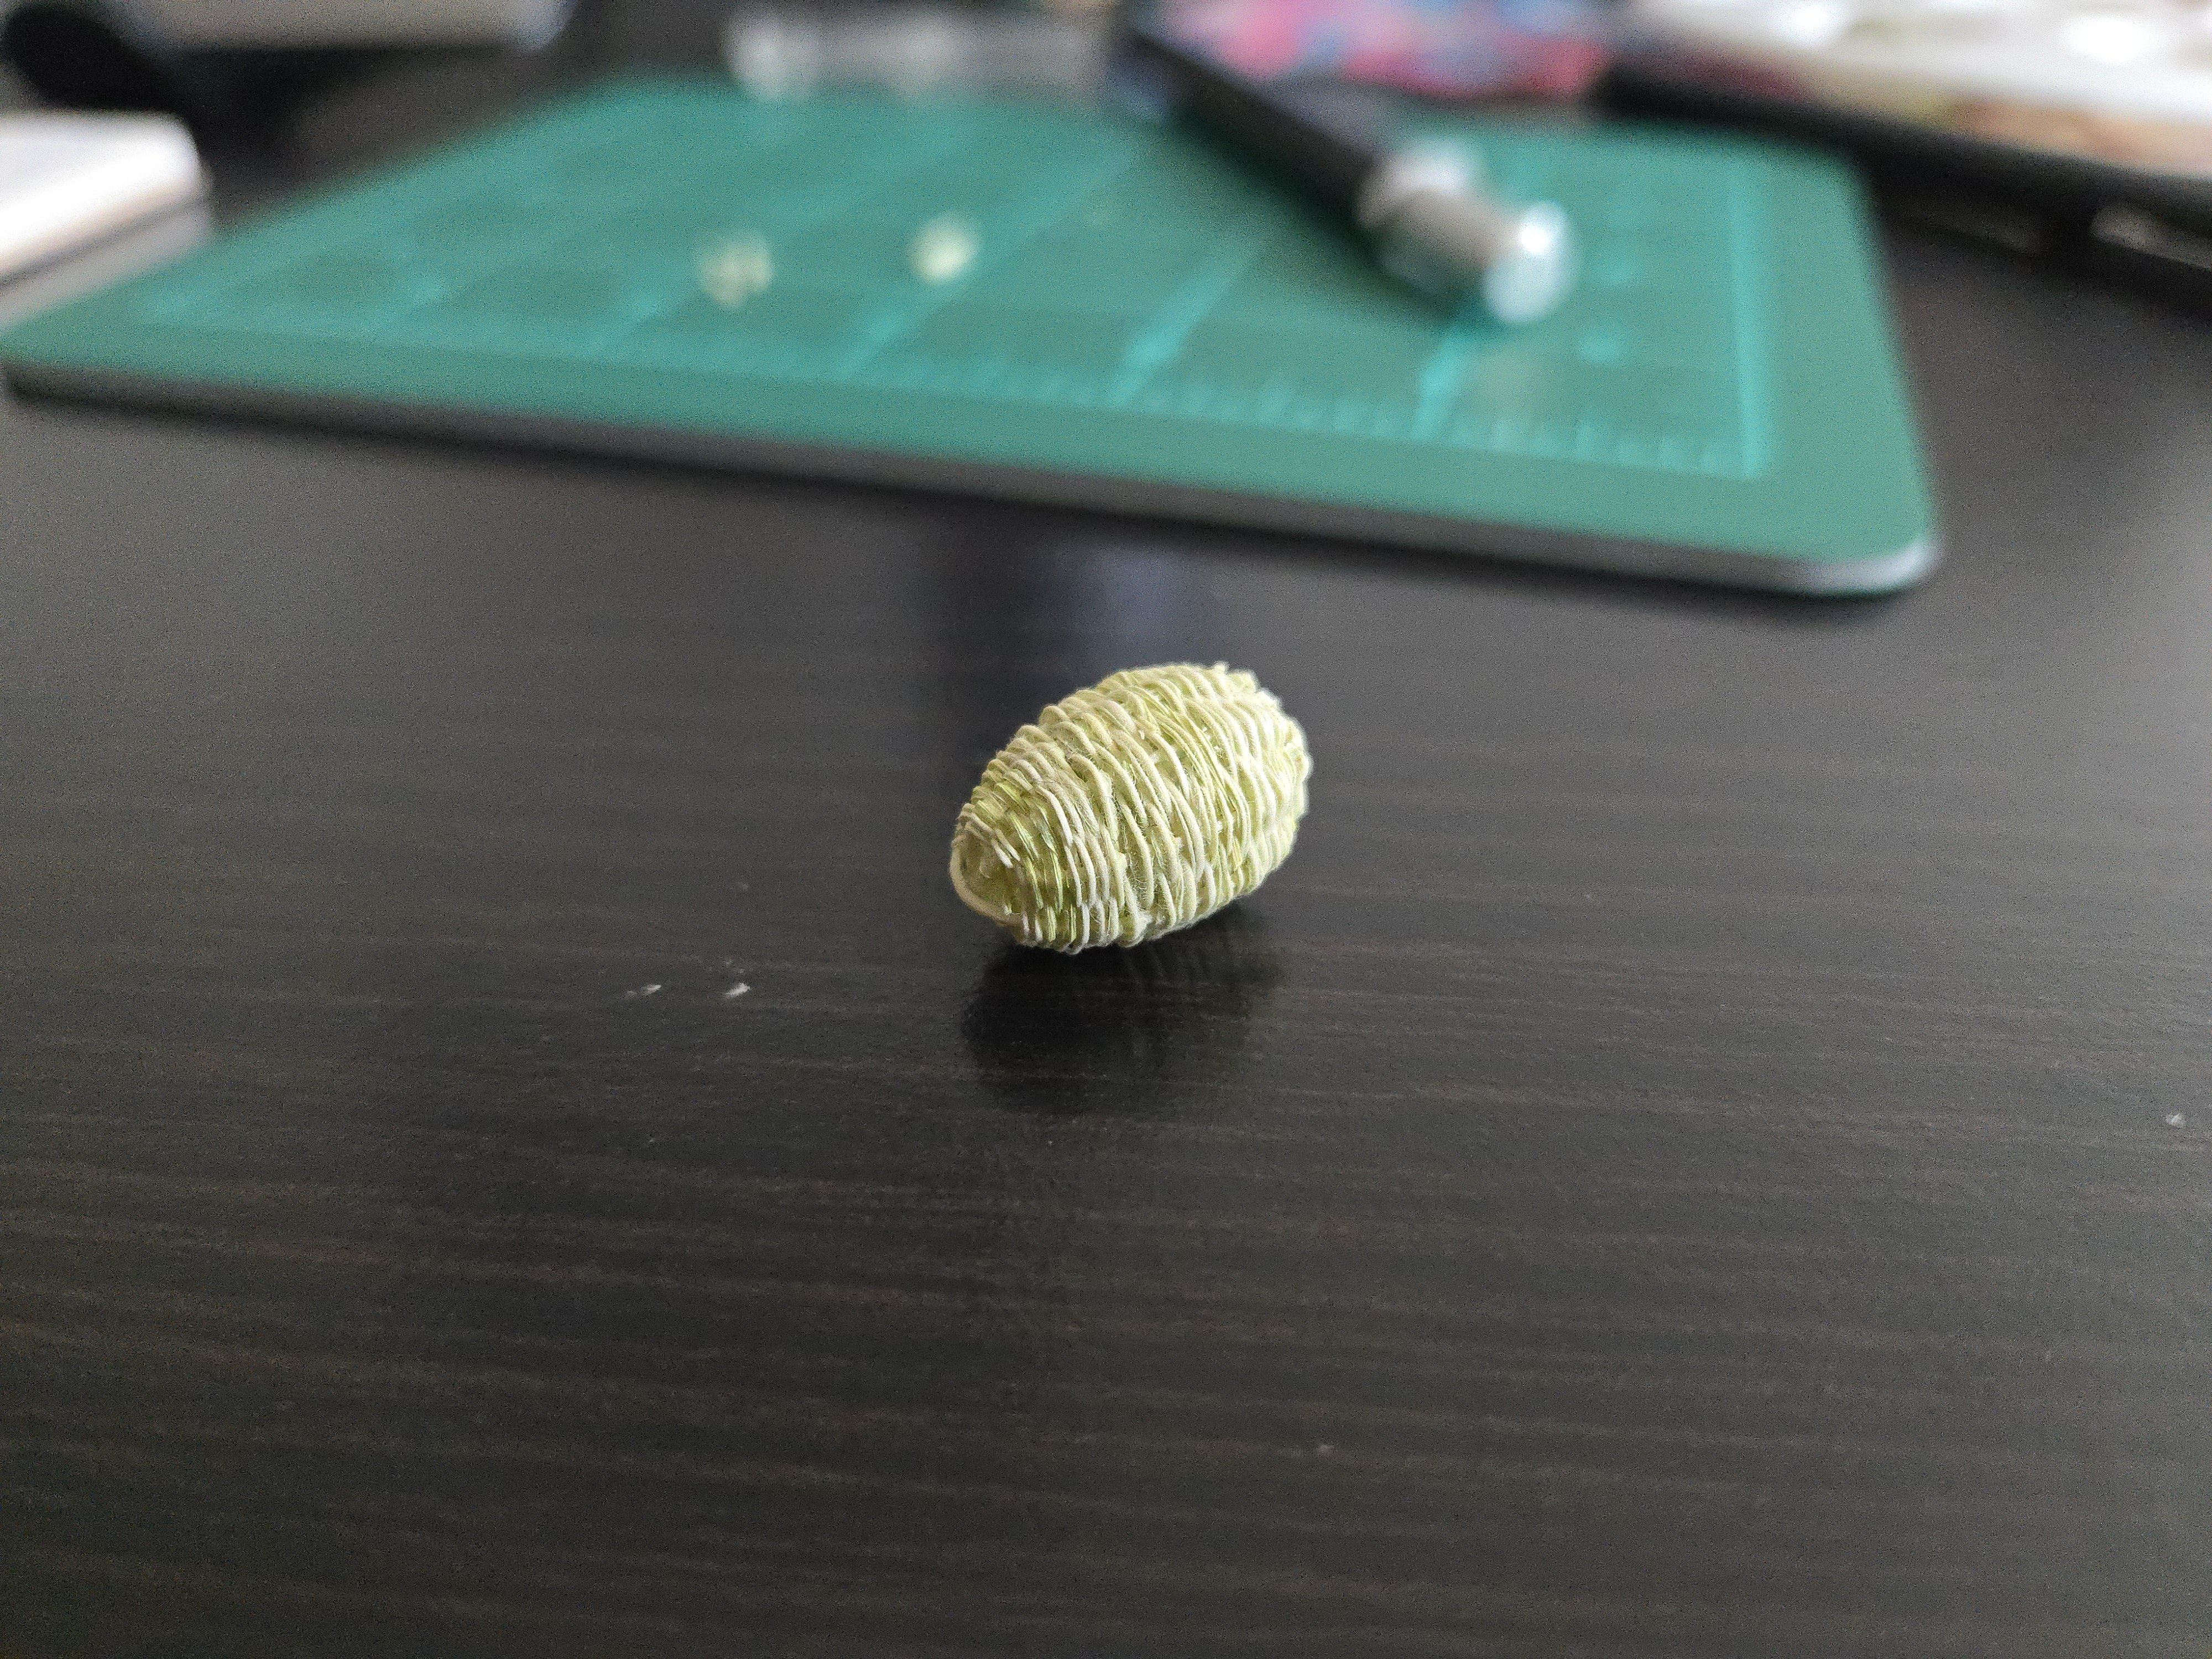
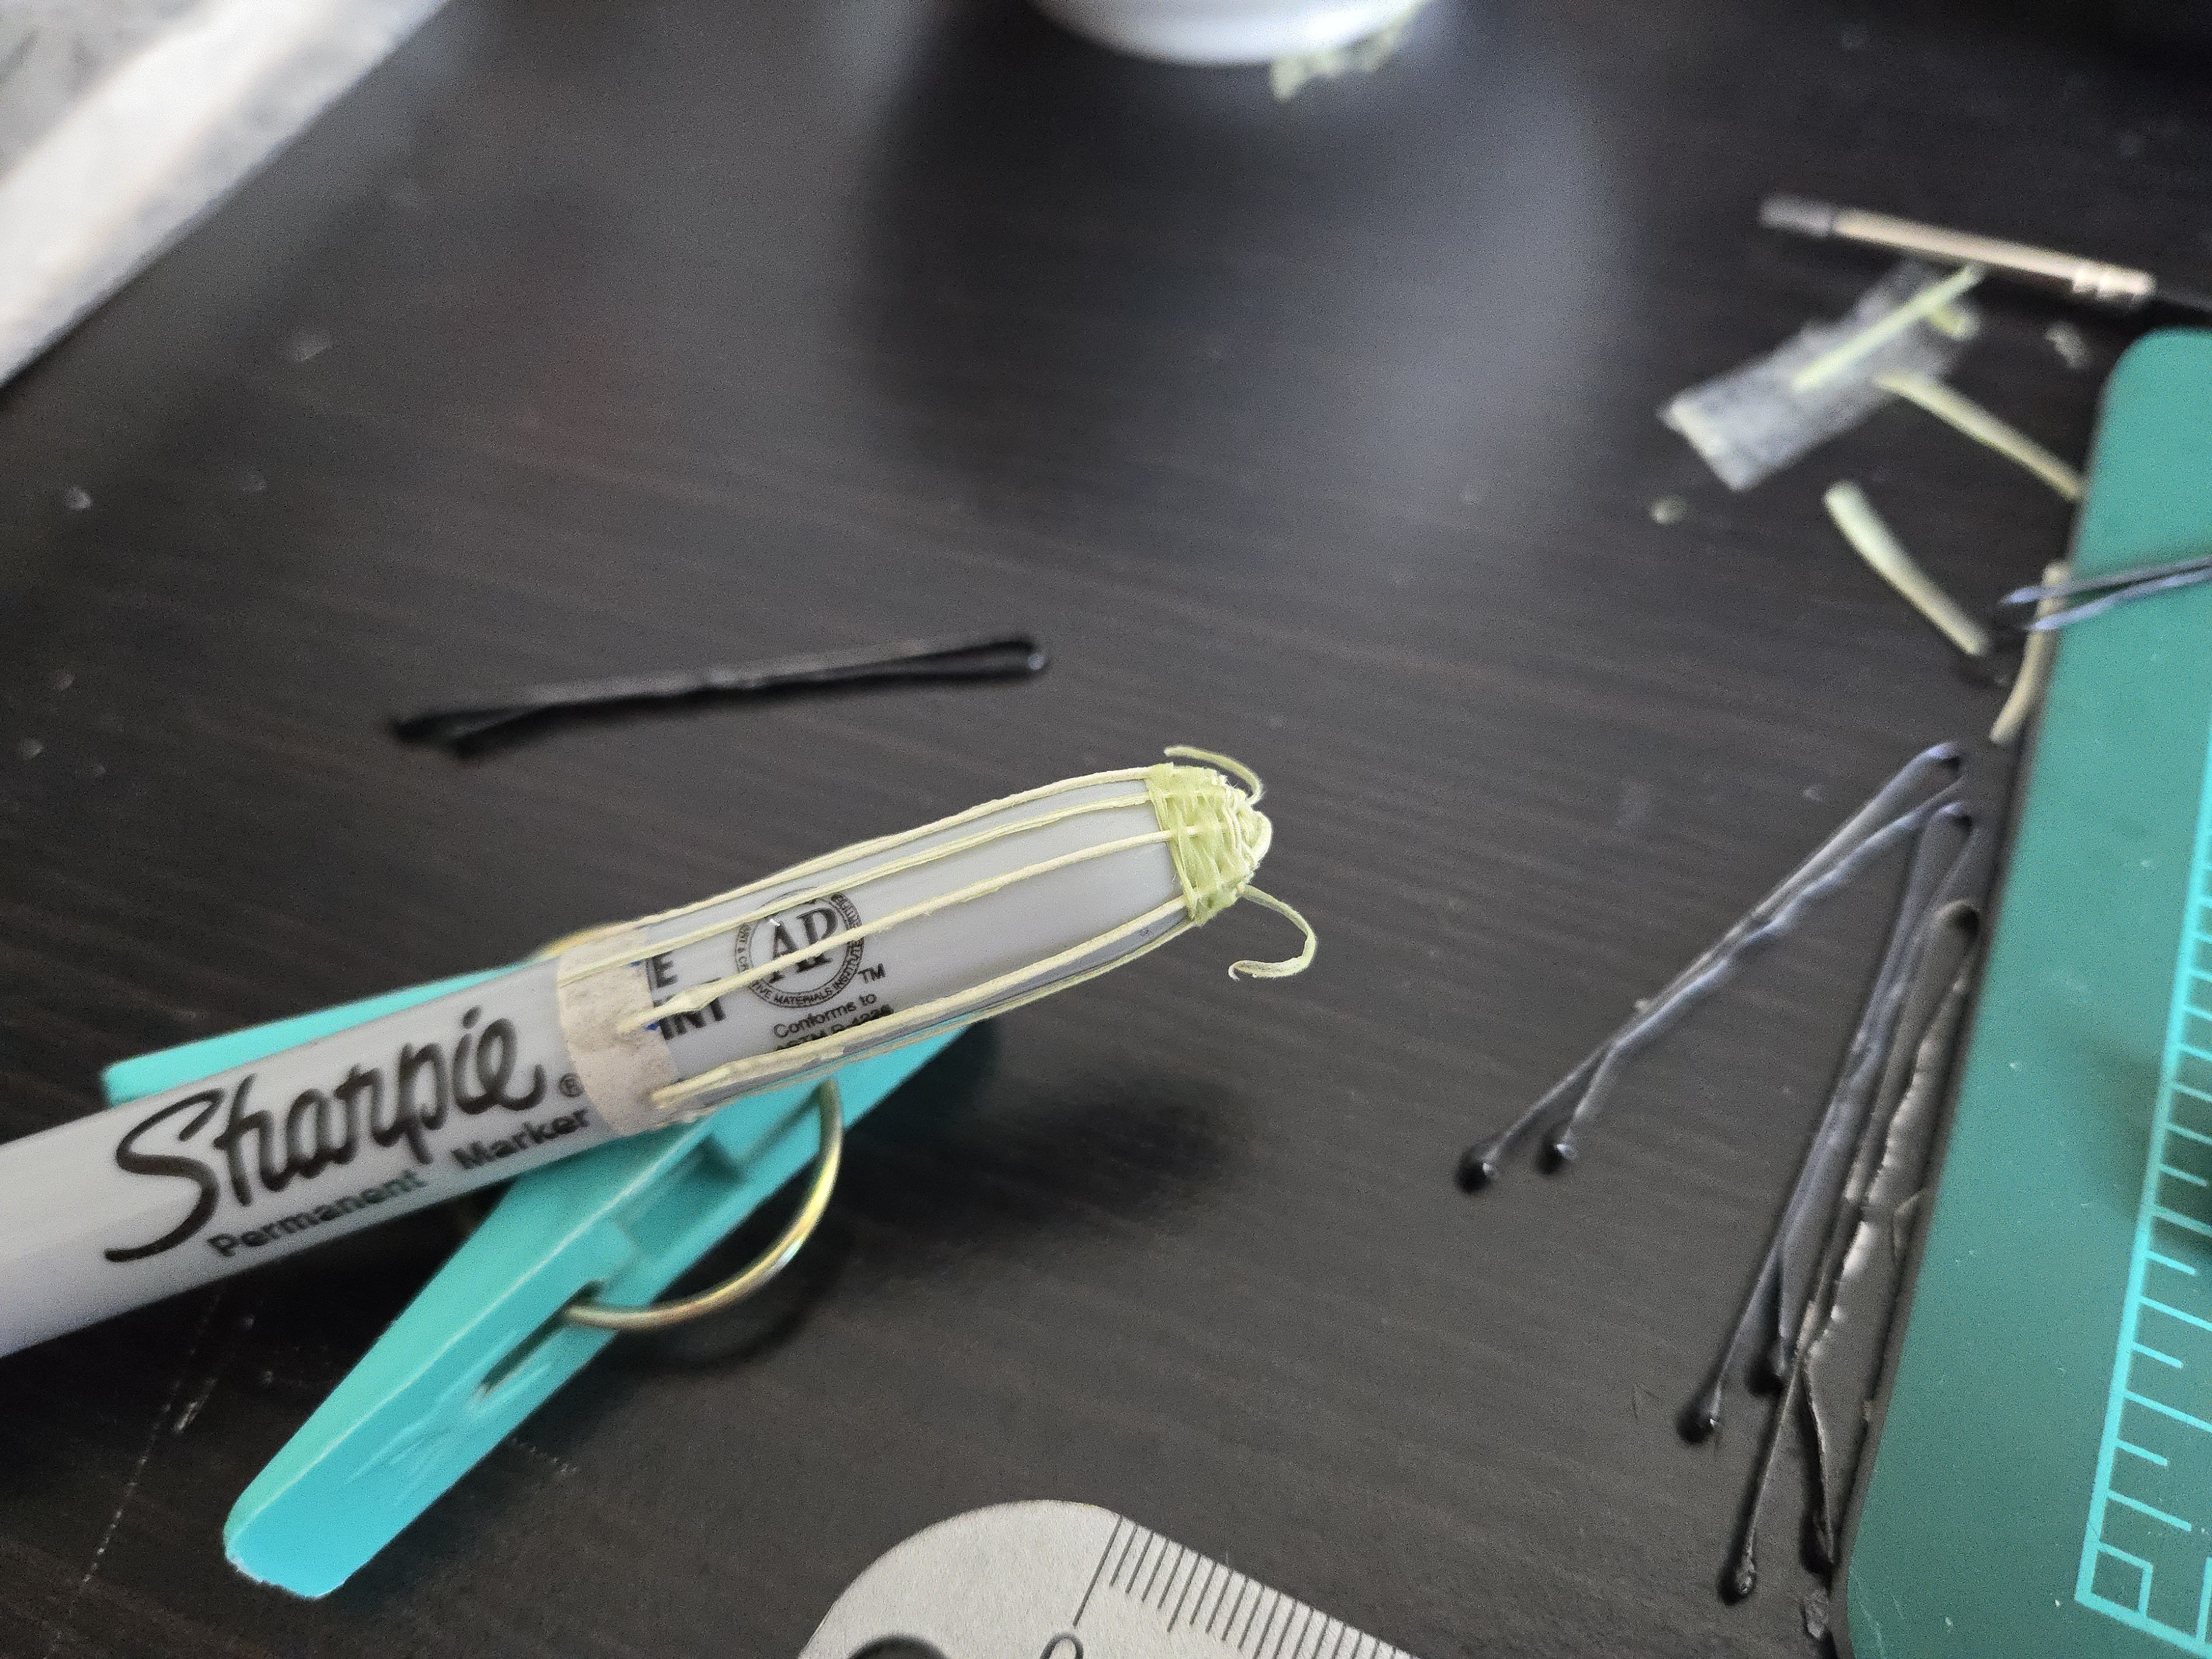
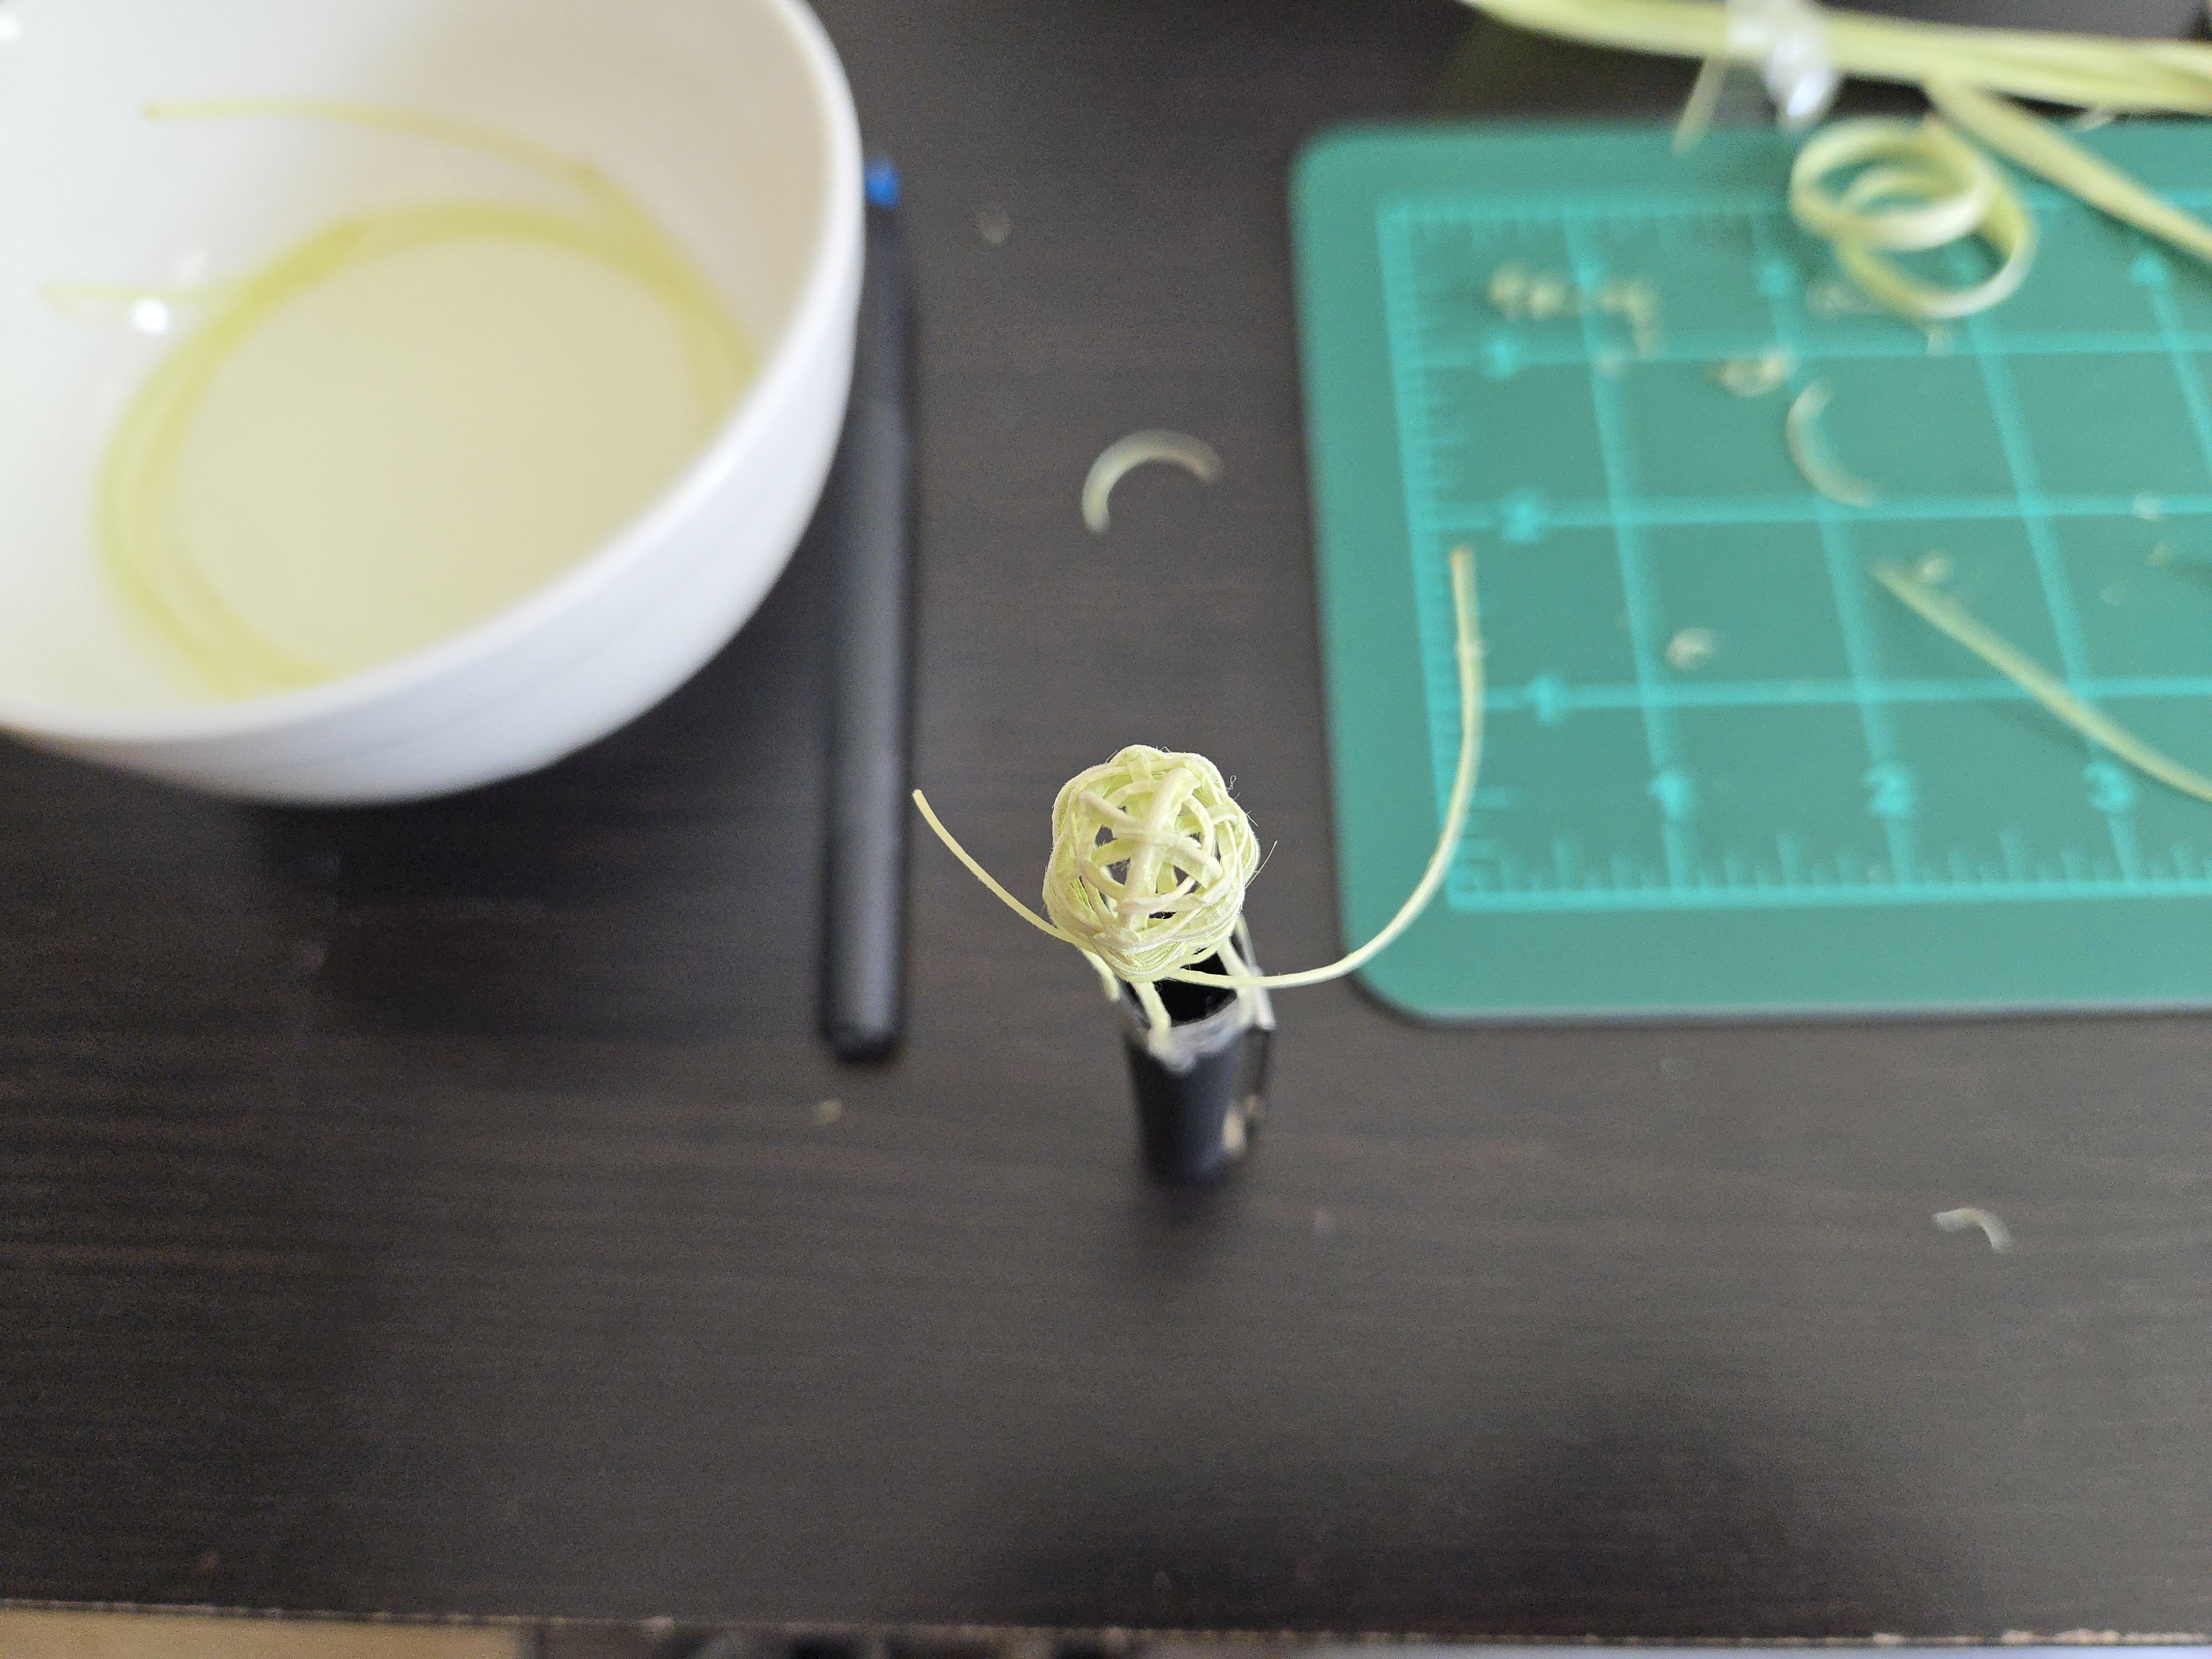
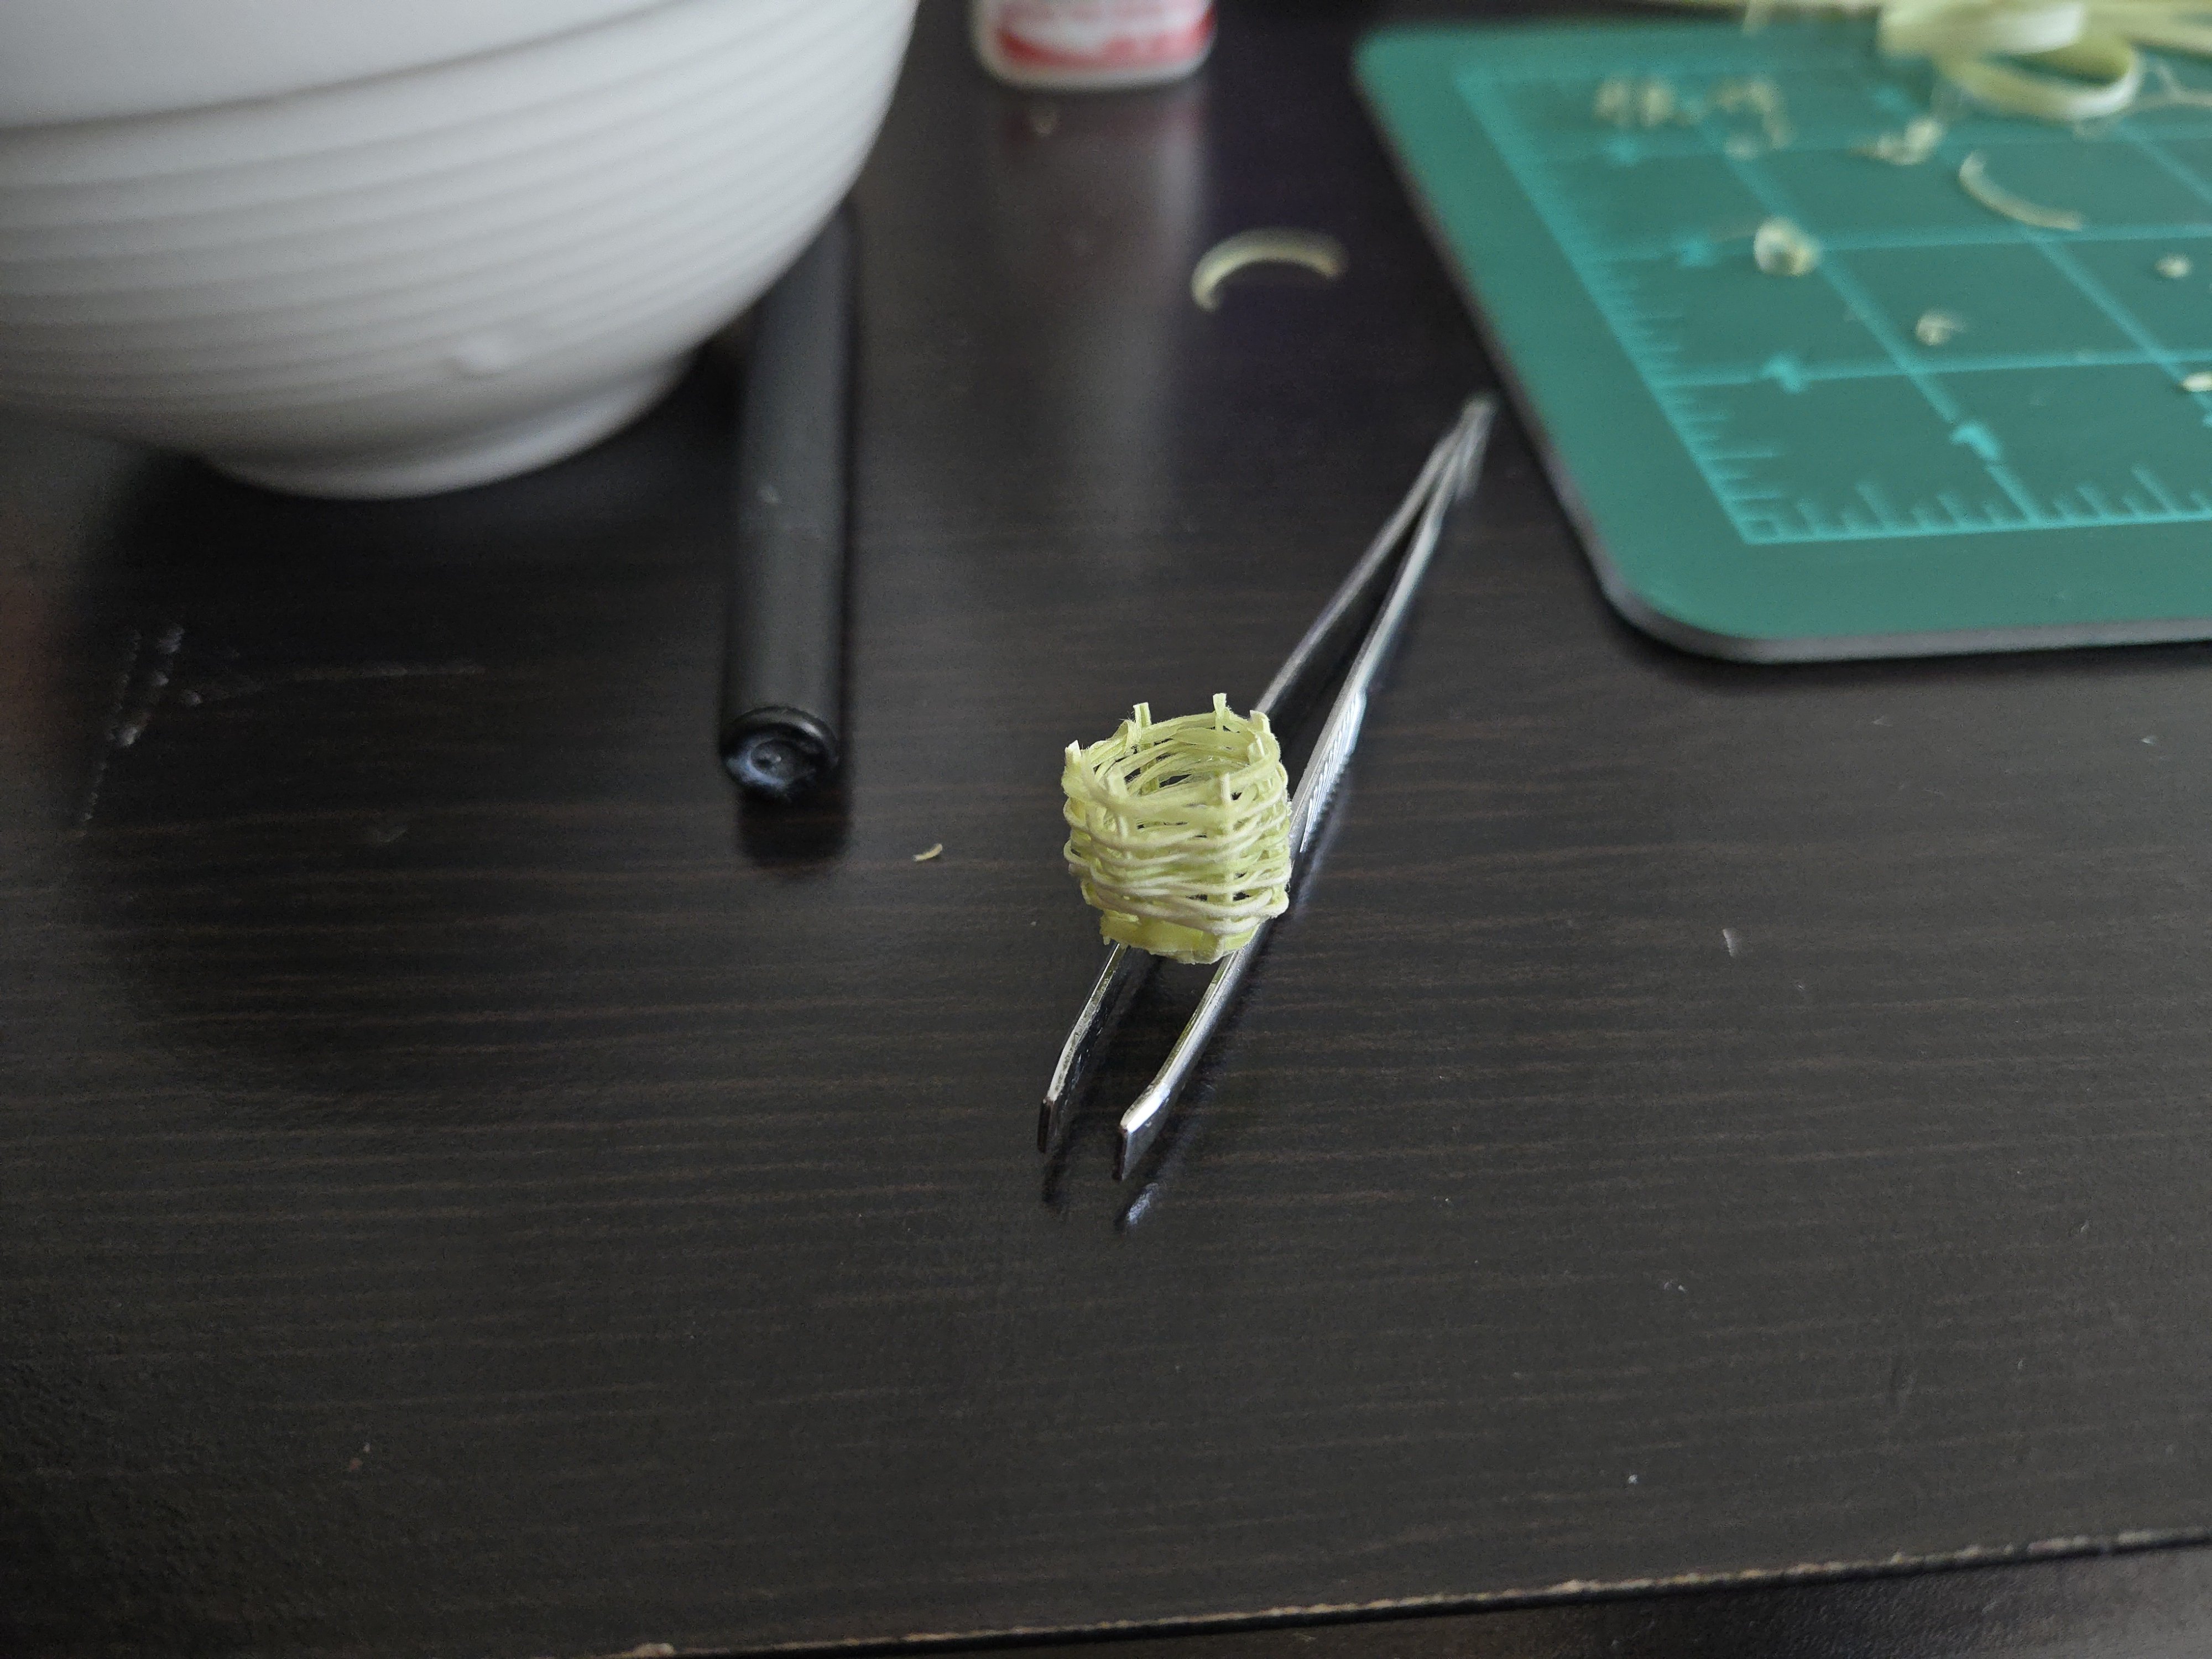
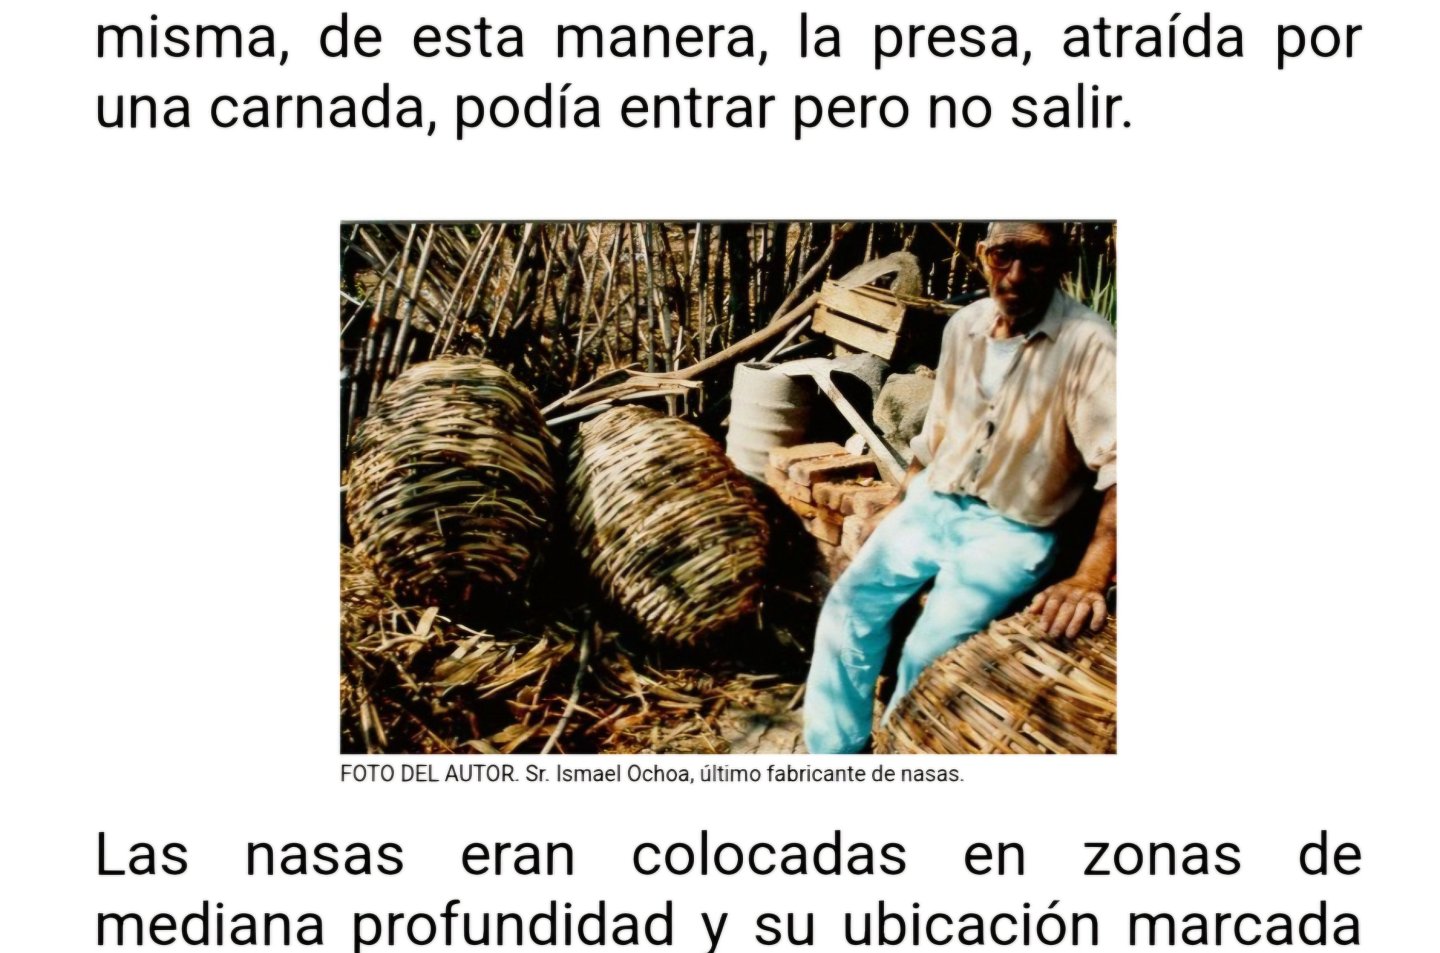
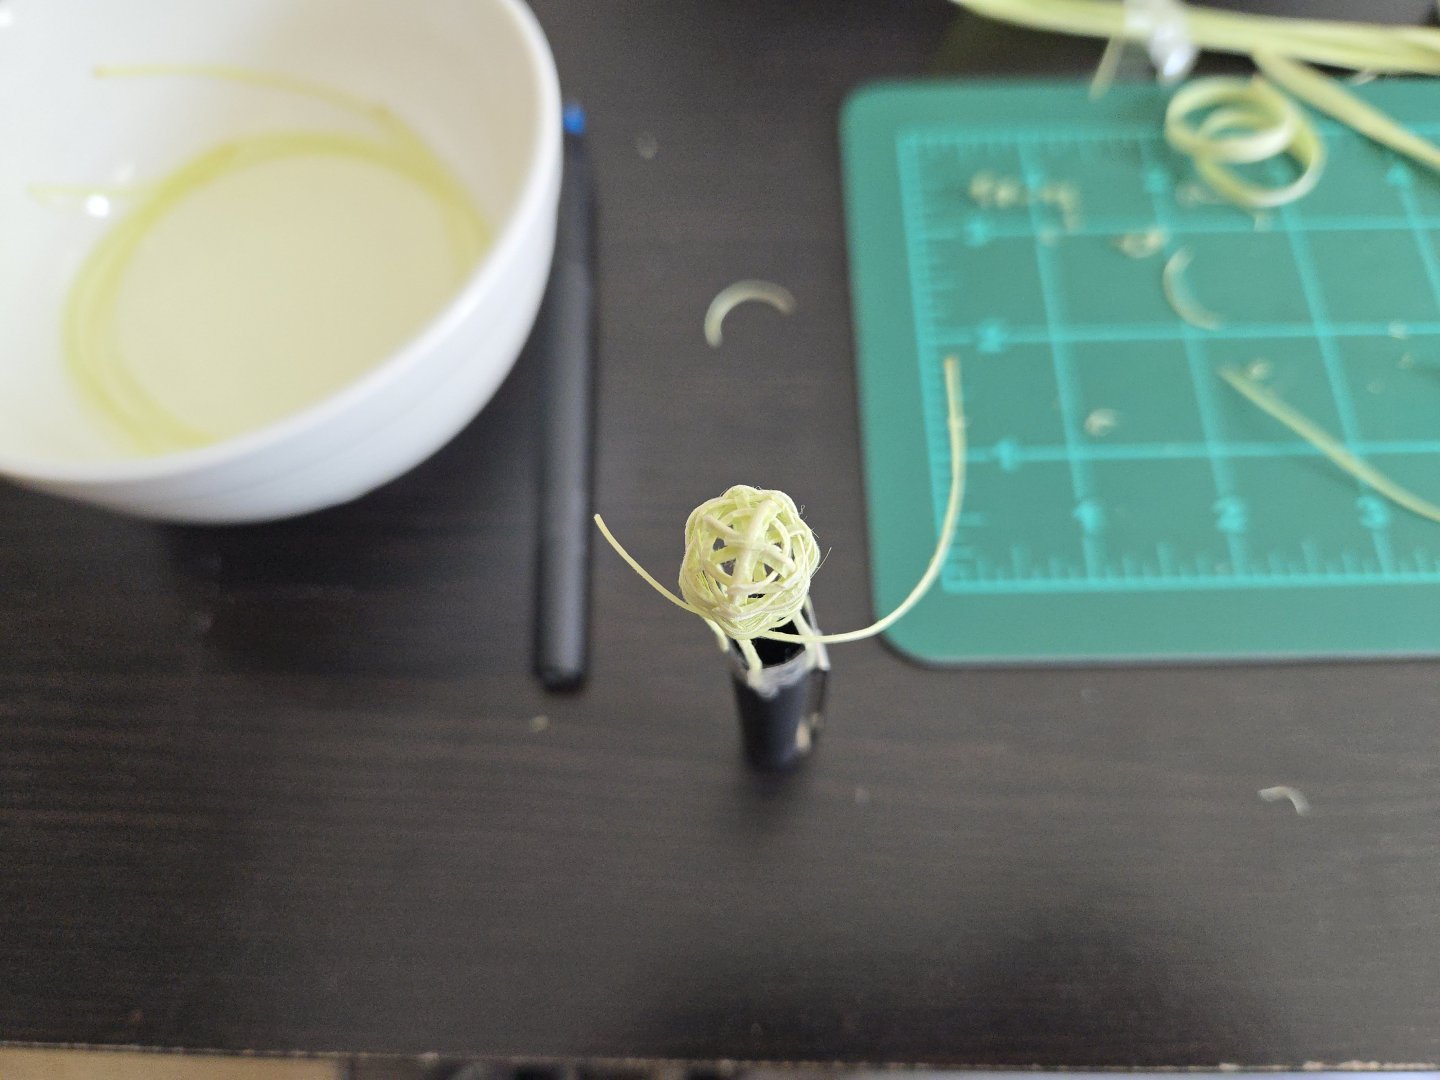
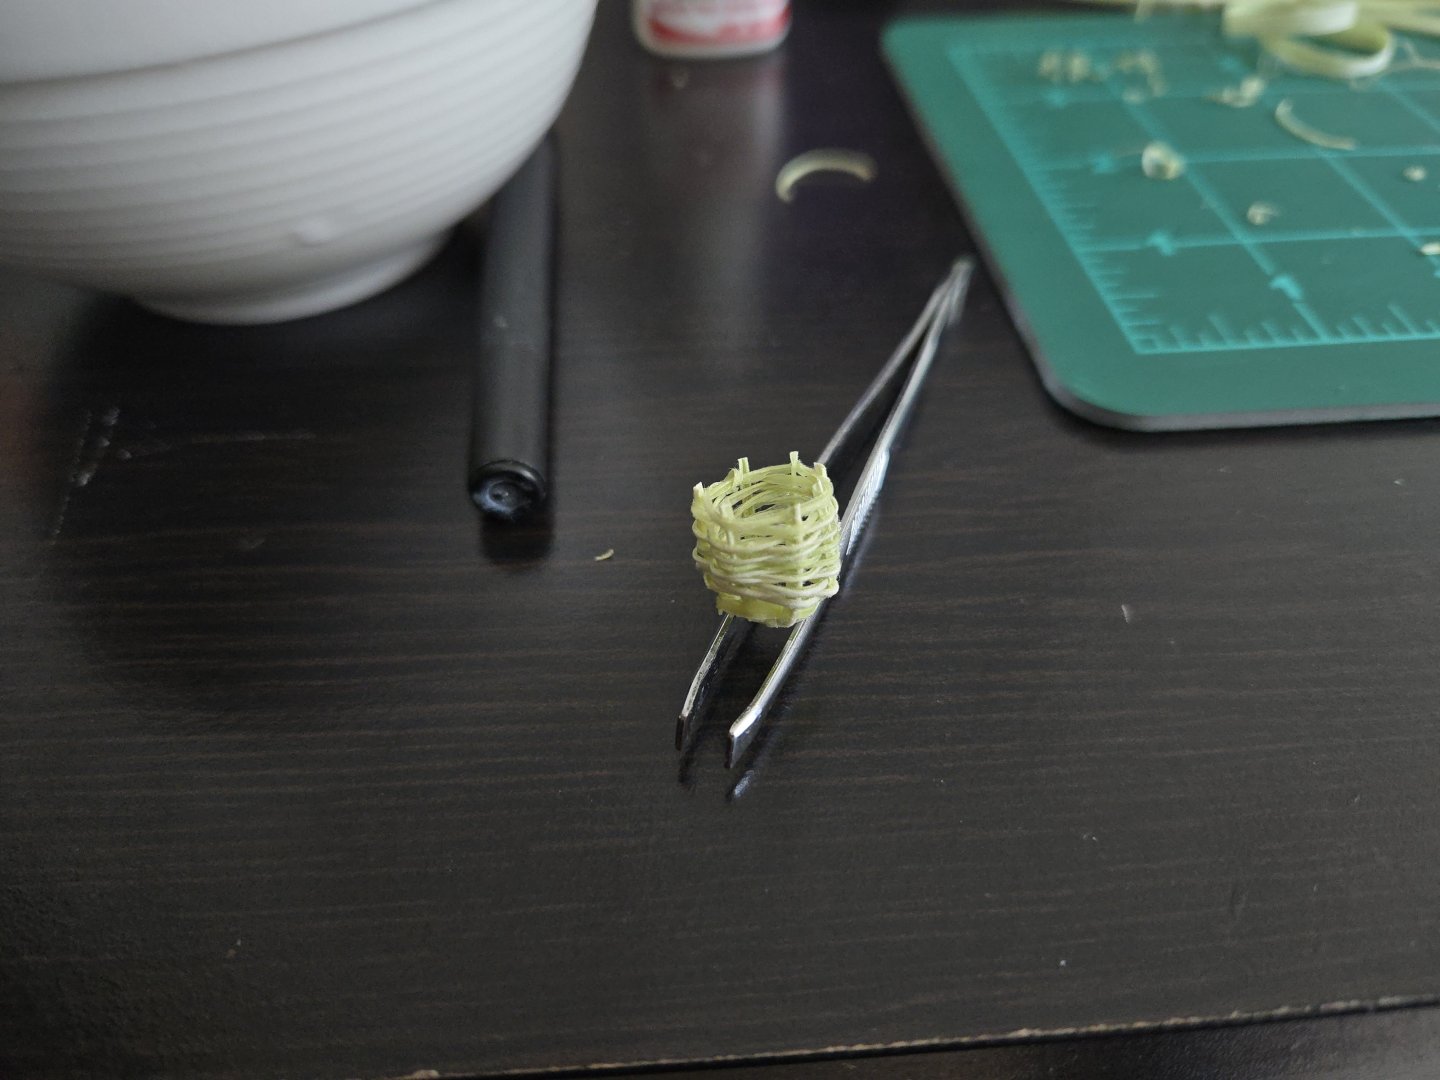
Thanks, Glen! Wefalck, I was sure I had seen someone's woven baskets on some build log but couldn't find it, I should have guessed it was your botter. The baskets look great, and I may try again with some different materials. I decided to build on my first corn husk basket experience. With the material, it was difficult to get a very tight weave. But I noticed that, while the baskets I've seen in photos seem fairly tightly woven, there was another fishing tool that wasn't so tightly woven: the nasa or fish trap. These were essentially large woven baskets in the form of an egg, with an opening at one end and various pointed stakes positioned inside to bar exit to any fish that enter. Here we see an image from the Ortiz Segura article of the last nasa-maker in Chapala: Source: https://www.ugr.es/~pwlac/G17_26Carlos_Ortiz_Segura.html And here we see a variety of sizes of nasas (and other nets) in the Chapala fishing display at the Guadalajara Regional Museum: Source: https://lugares.inah.gob.mx/es/museos-inah/exposiciones/sala-piezas/10855-10855-instrumentos-utilizados-para-la-pesca.html?lugar_id=480&expo_id=9850 The nasa was one of the most common fishing implements in use on the lake, so I knew I wanted to make one. And the rather large weave (which undoubtedly allows water to easily drain) would be easier to make out of cornhusk than a more finely-woven basket. I decided to use nine stakes instead of the seven on my practice basket, and I spaced them evenly around the end of a sharpie permanent marker. I then began weaving. Learning from my first try, I cut the cornhusk fibers thinner this time. I was able to get a much tighter weave than on the practice basket. Once I reached about the midpoint, I had to remove the nasa from the marker "jig" and glue the ends of the stakes together so that I could properly tighten the perimeter toward the opening. Without the marker to shape the nasa, this part was a little trickier to weave, but the base was pretty solid. Finally, I trimmed the loose ends of weaving material, and turned over the stakes--those that "emerged" out of the opening were properly woven around the edge and back into the interior to secure the mouth of the nasa, while the others were just folded inside. Overall I'm pretty pleased with how the nasa turned out. It would be nice of the opening was a little smaller, but it needed to be large enough for my tweezers to fit in. I'm hoping that the color will become more gray-tan as the cornhusk fibers continue to fully dry. I may give it a dip in wood stain if not. All that's left for it is to attach its line and marking buoy.


-
Welcome! Fishing boats are a great subject for modeling. There are quite a few kits to choose from. A lot of different manufacturers have kits of the Bluenose with variations in size/scale, accuracy, and level of detail. Model Shipways has a fairly large scale model of the Benjamin Latham. Bluejacket also has kits of several fishing schooners, including Smuggler and We're Here. I'd recommend looking at build logs for all of them to get a sense of each kit and any potential issues.
-
Congratulations, that looks great! I love the touch of red in the cockpit.
- 37 replies
-
- 1
-
-
- Model Shipways
- muscongus bay lobster smack
- (and 1 more)
-
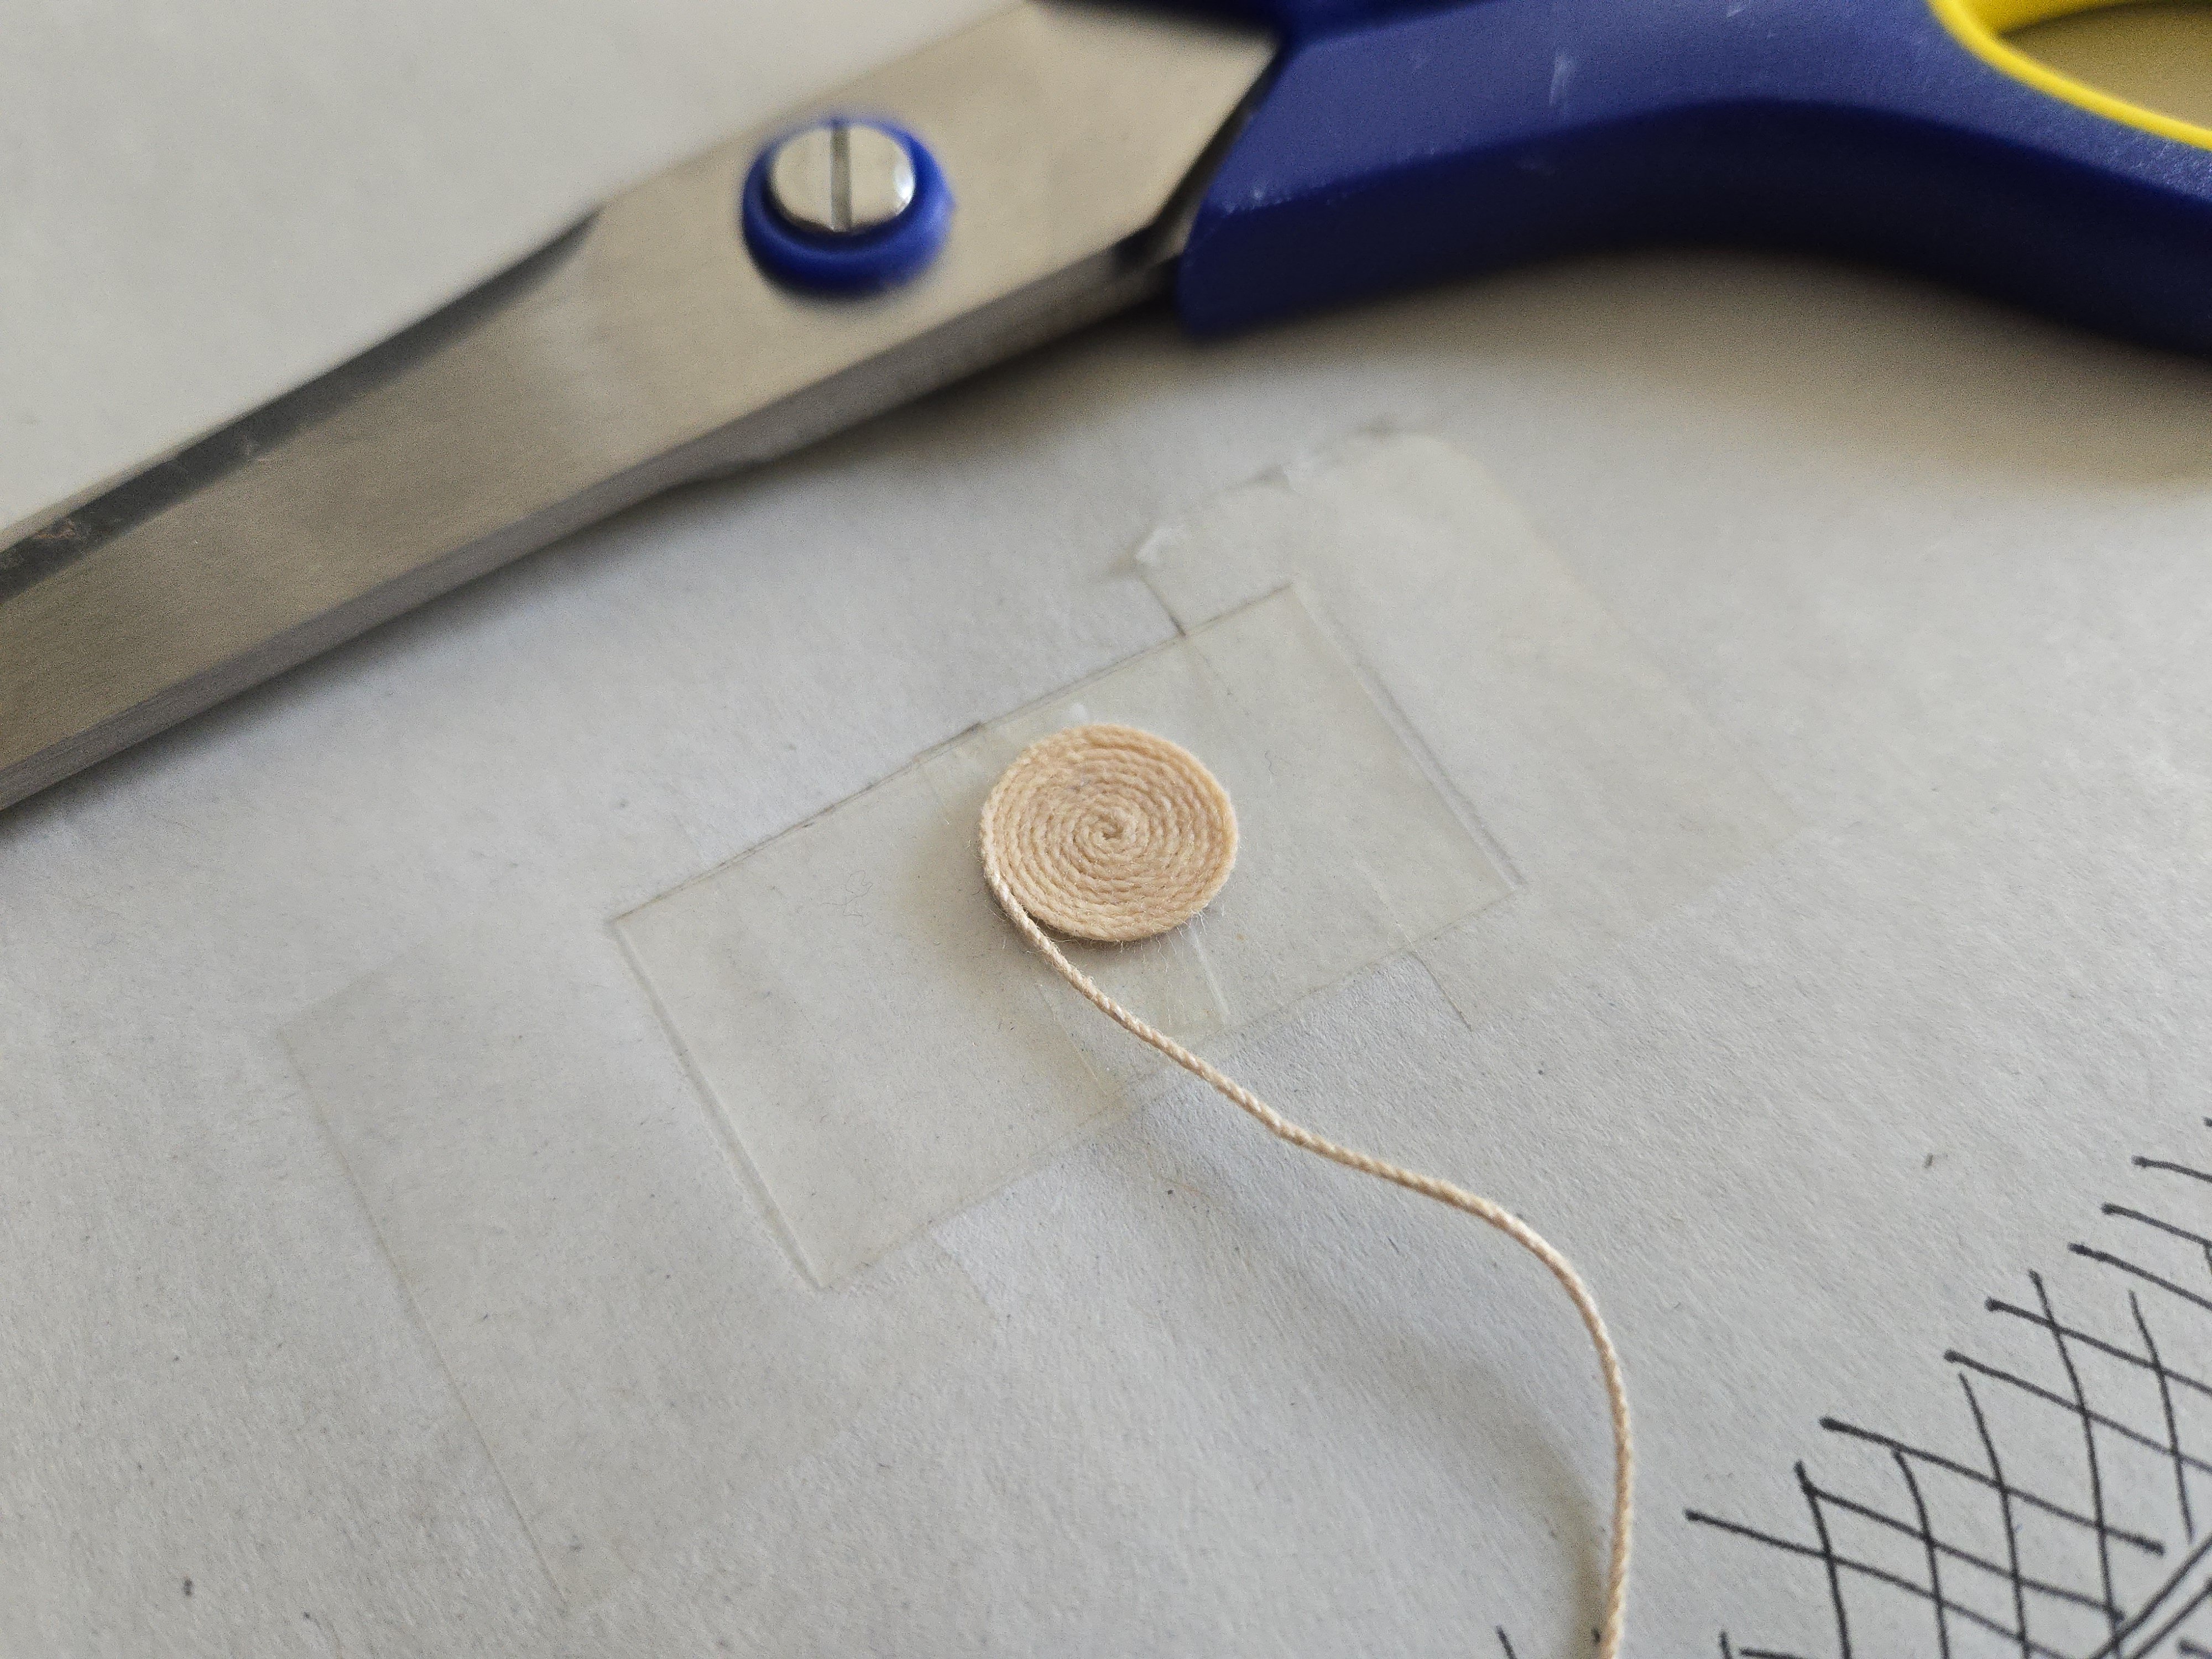
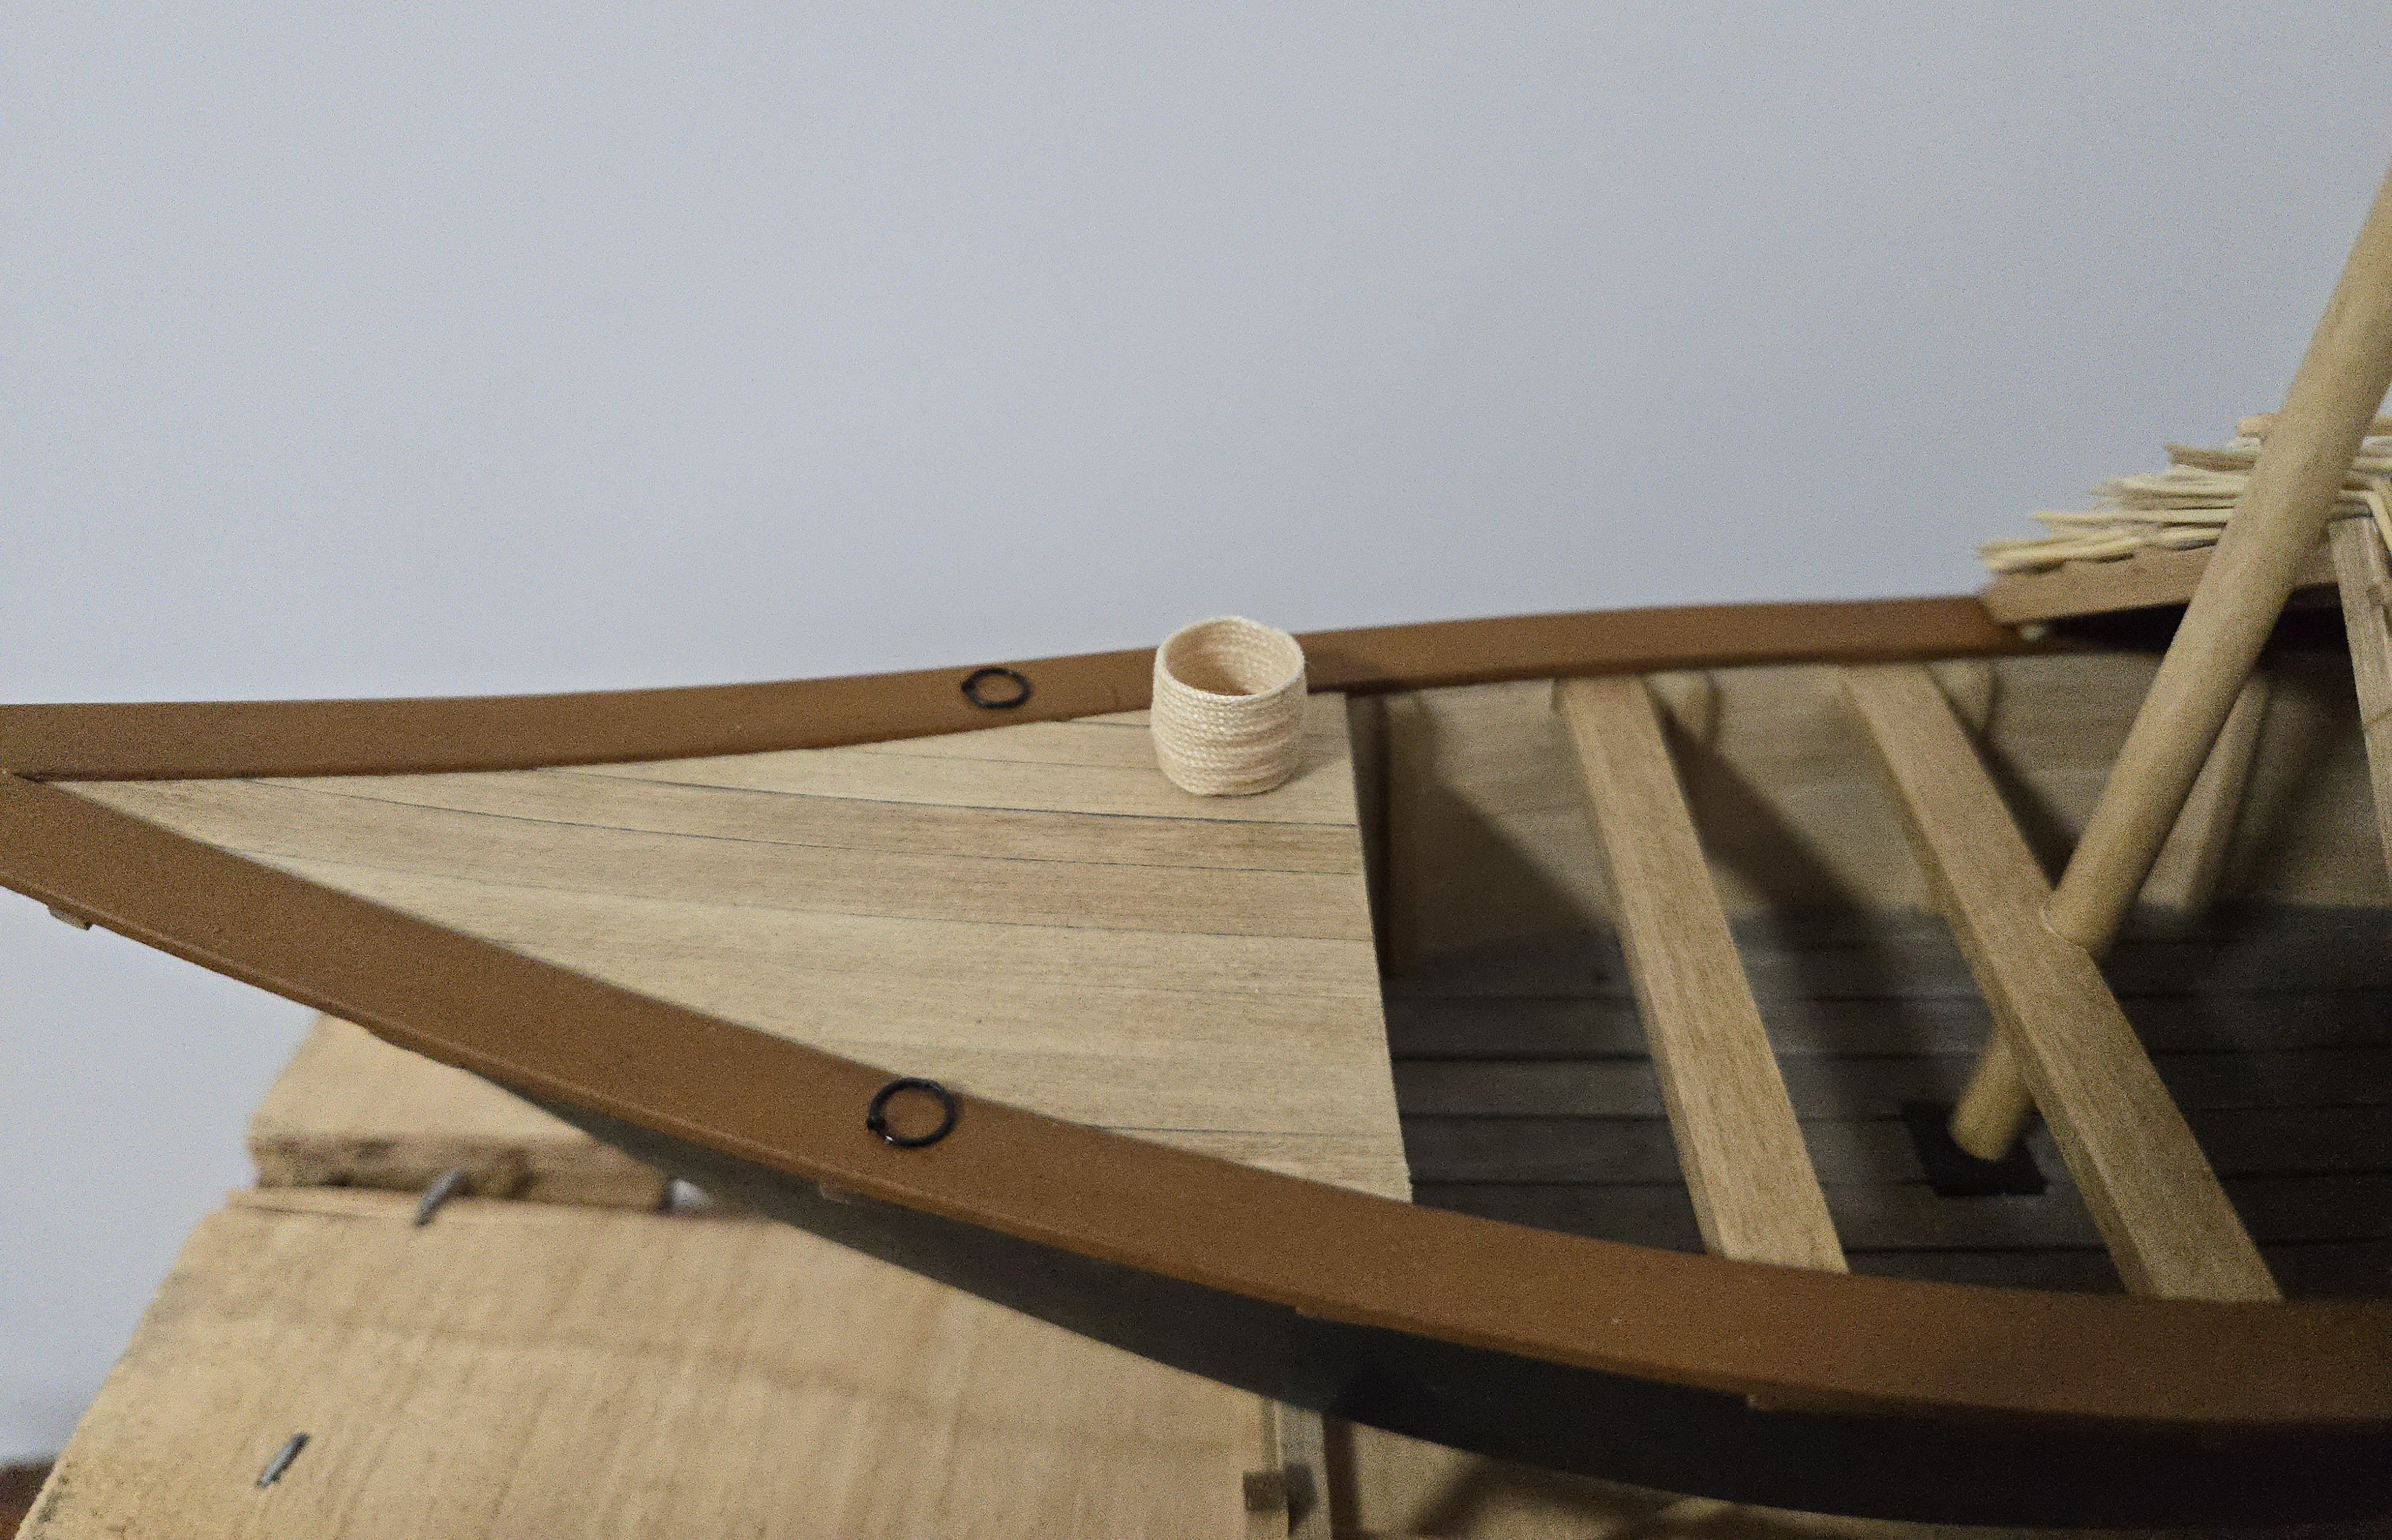
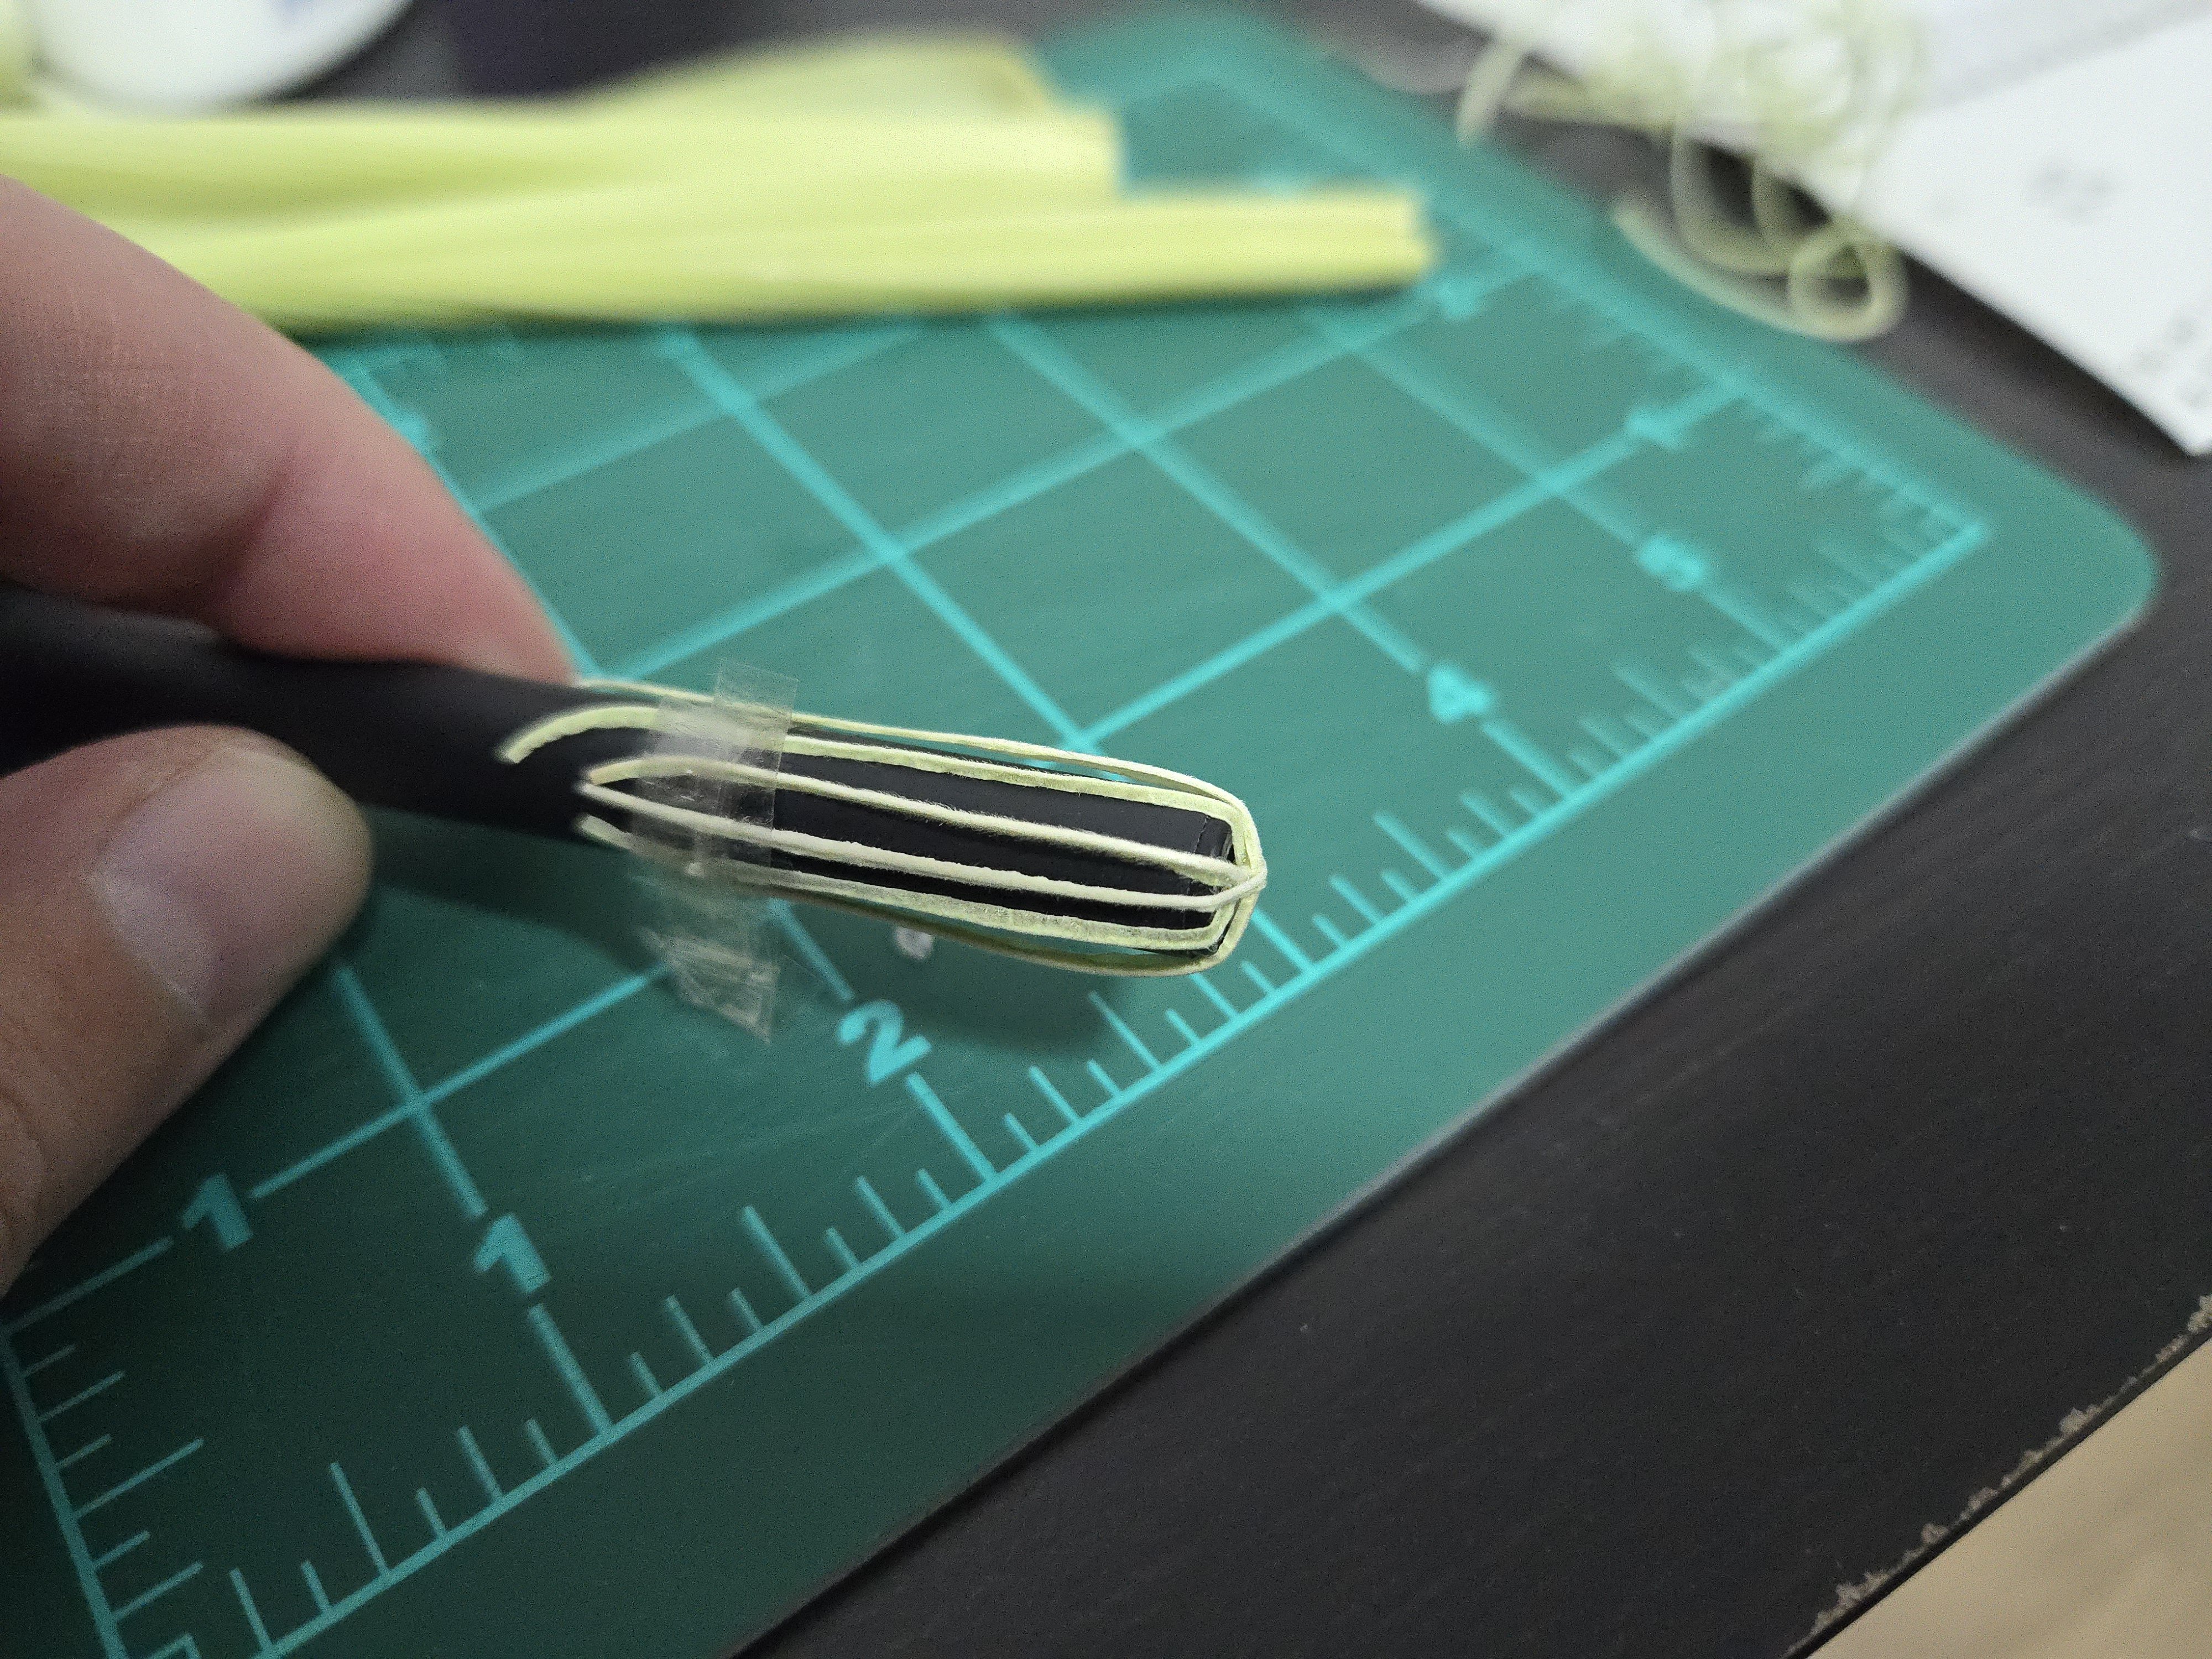
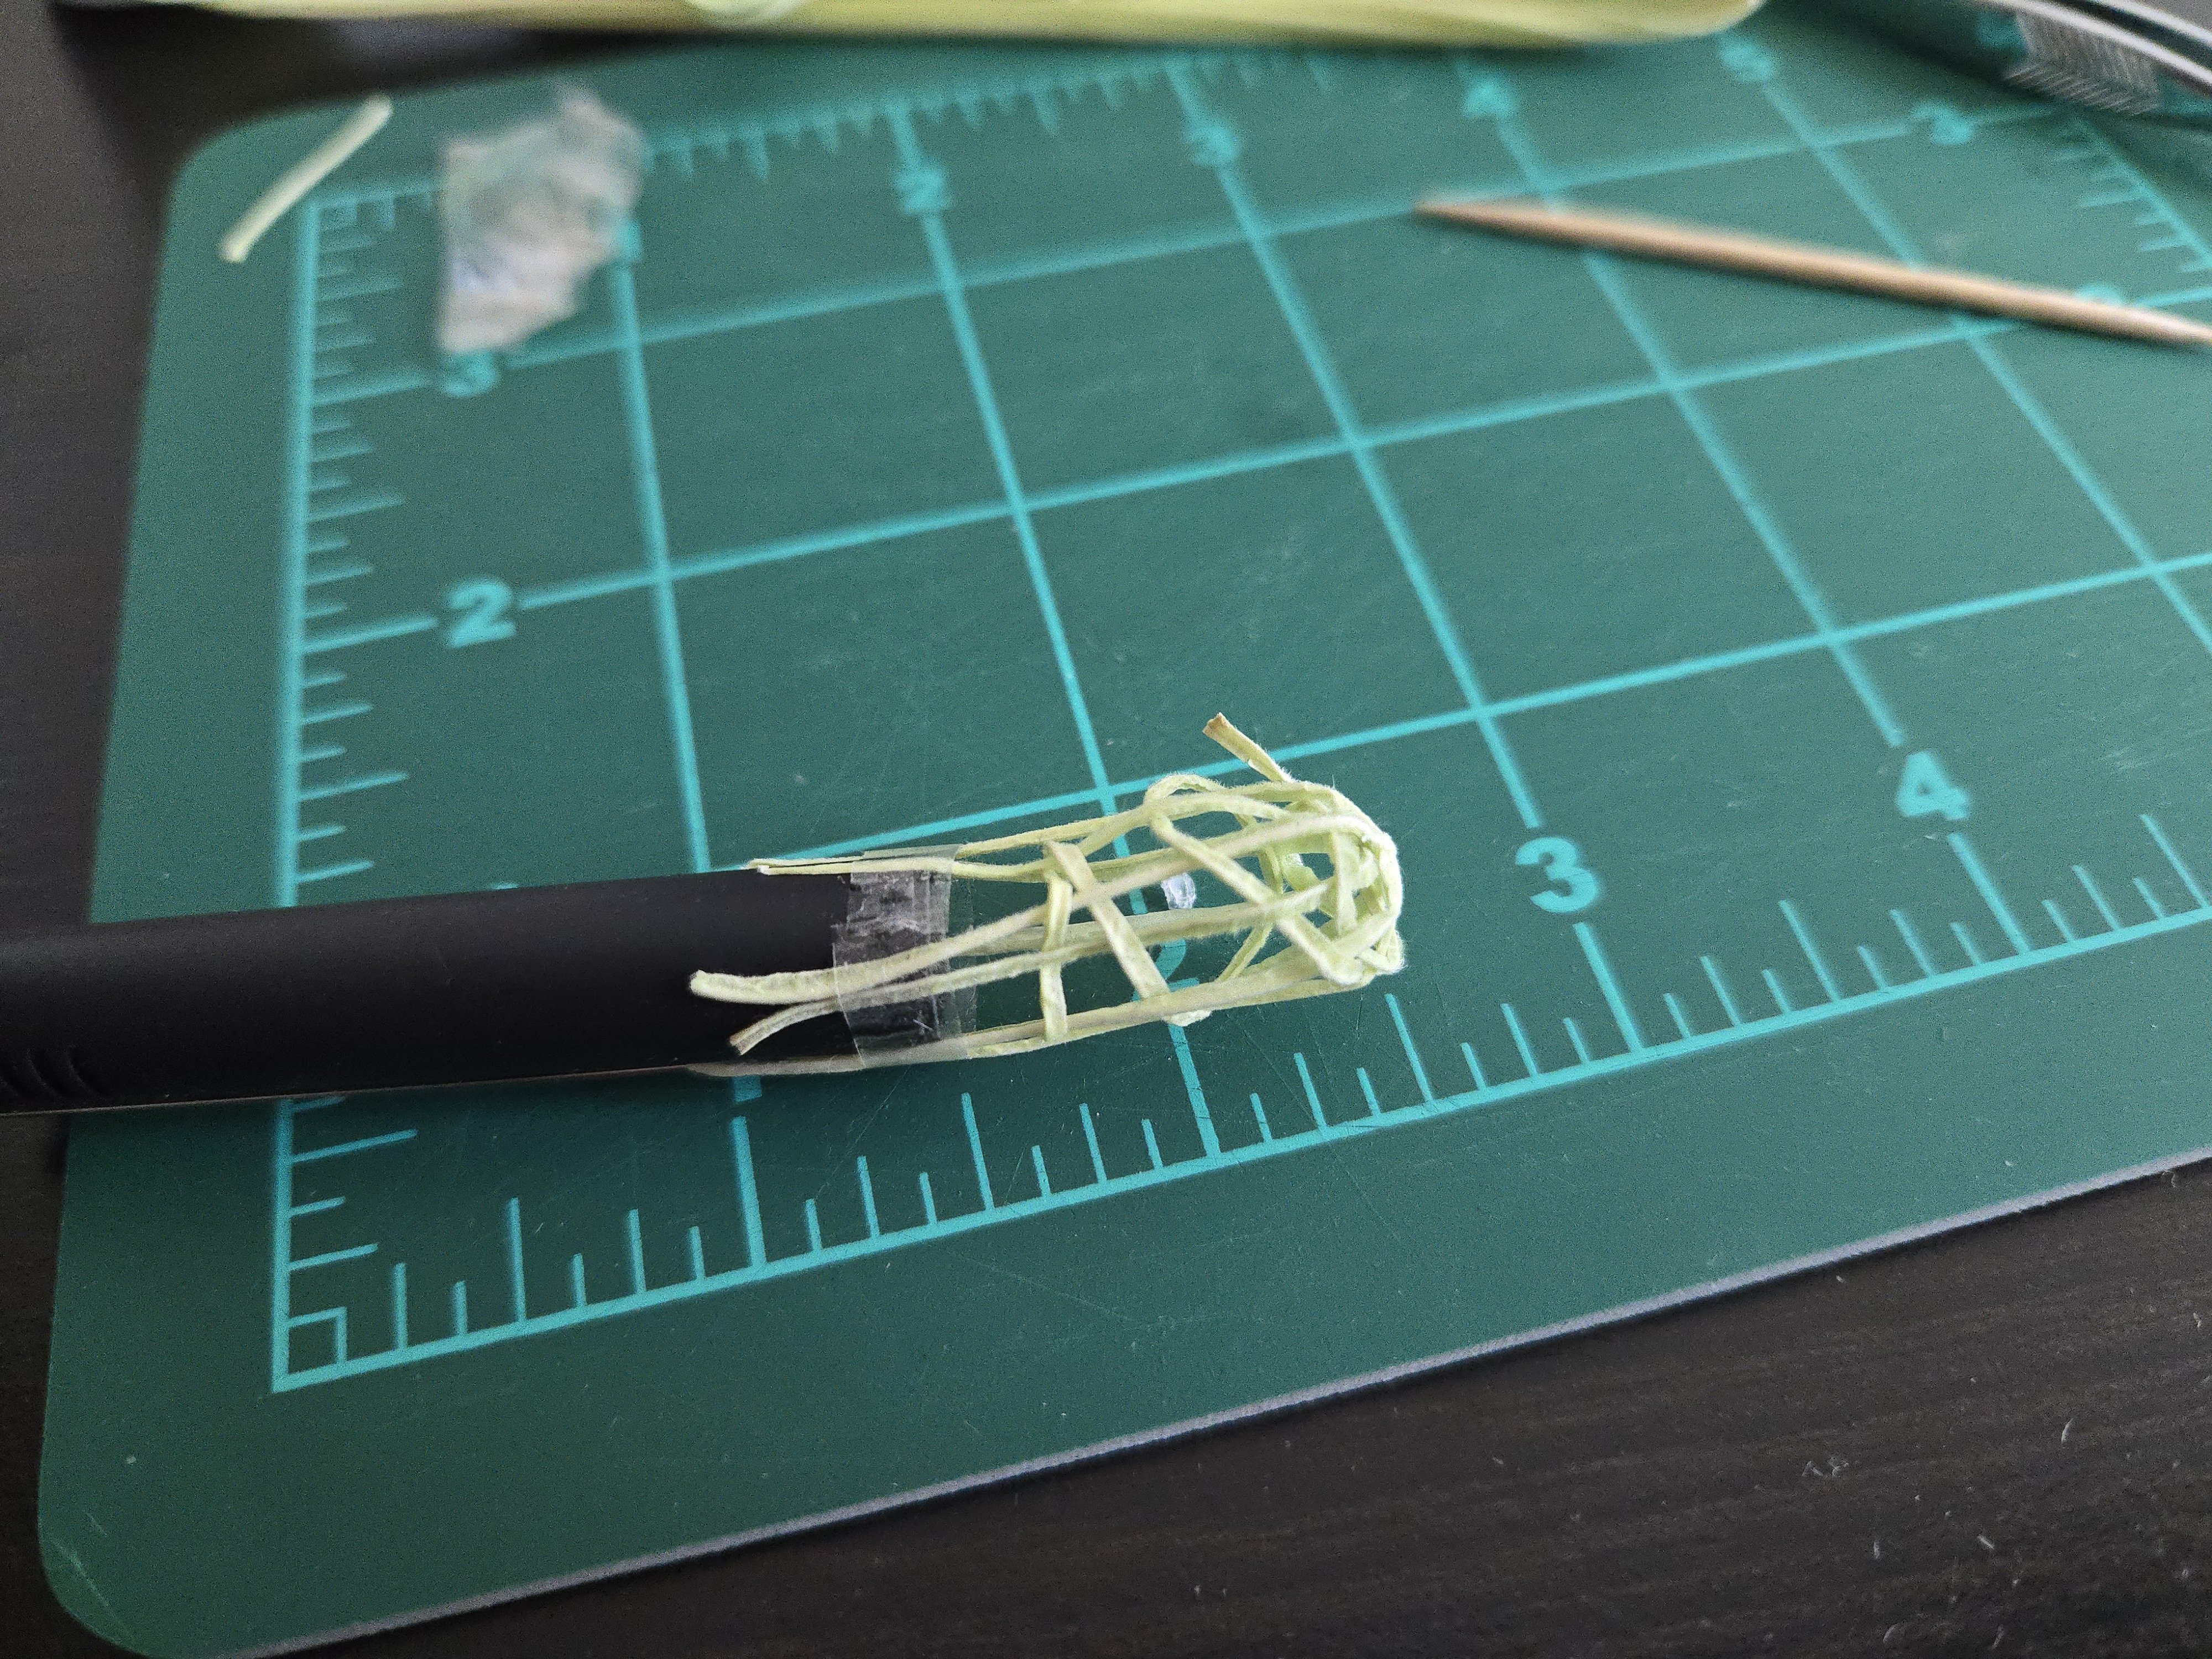
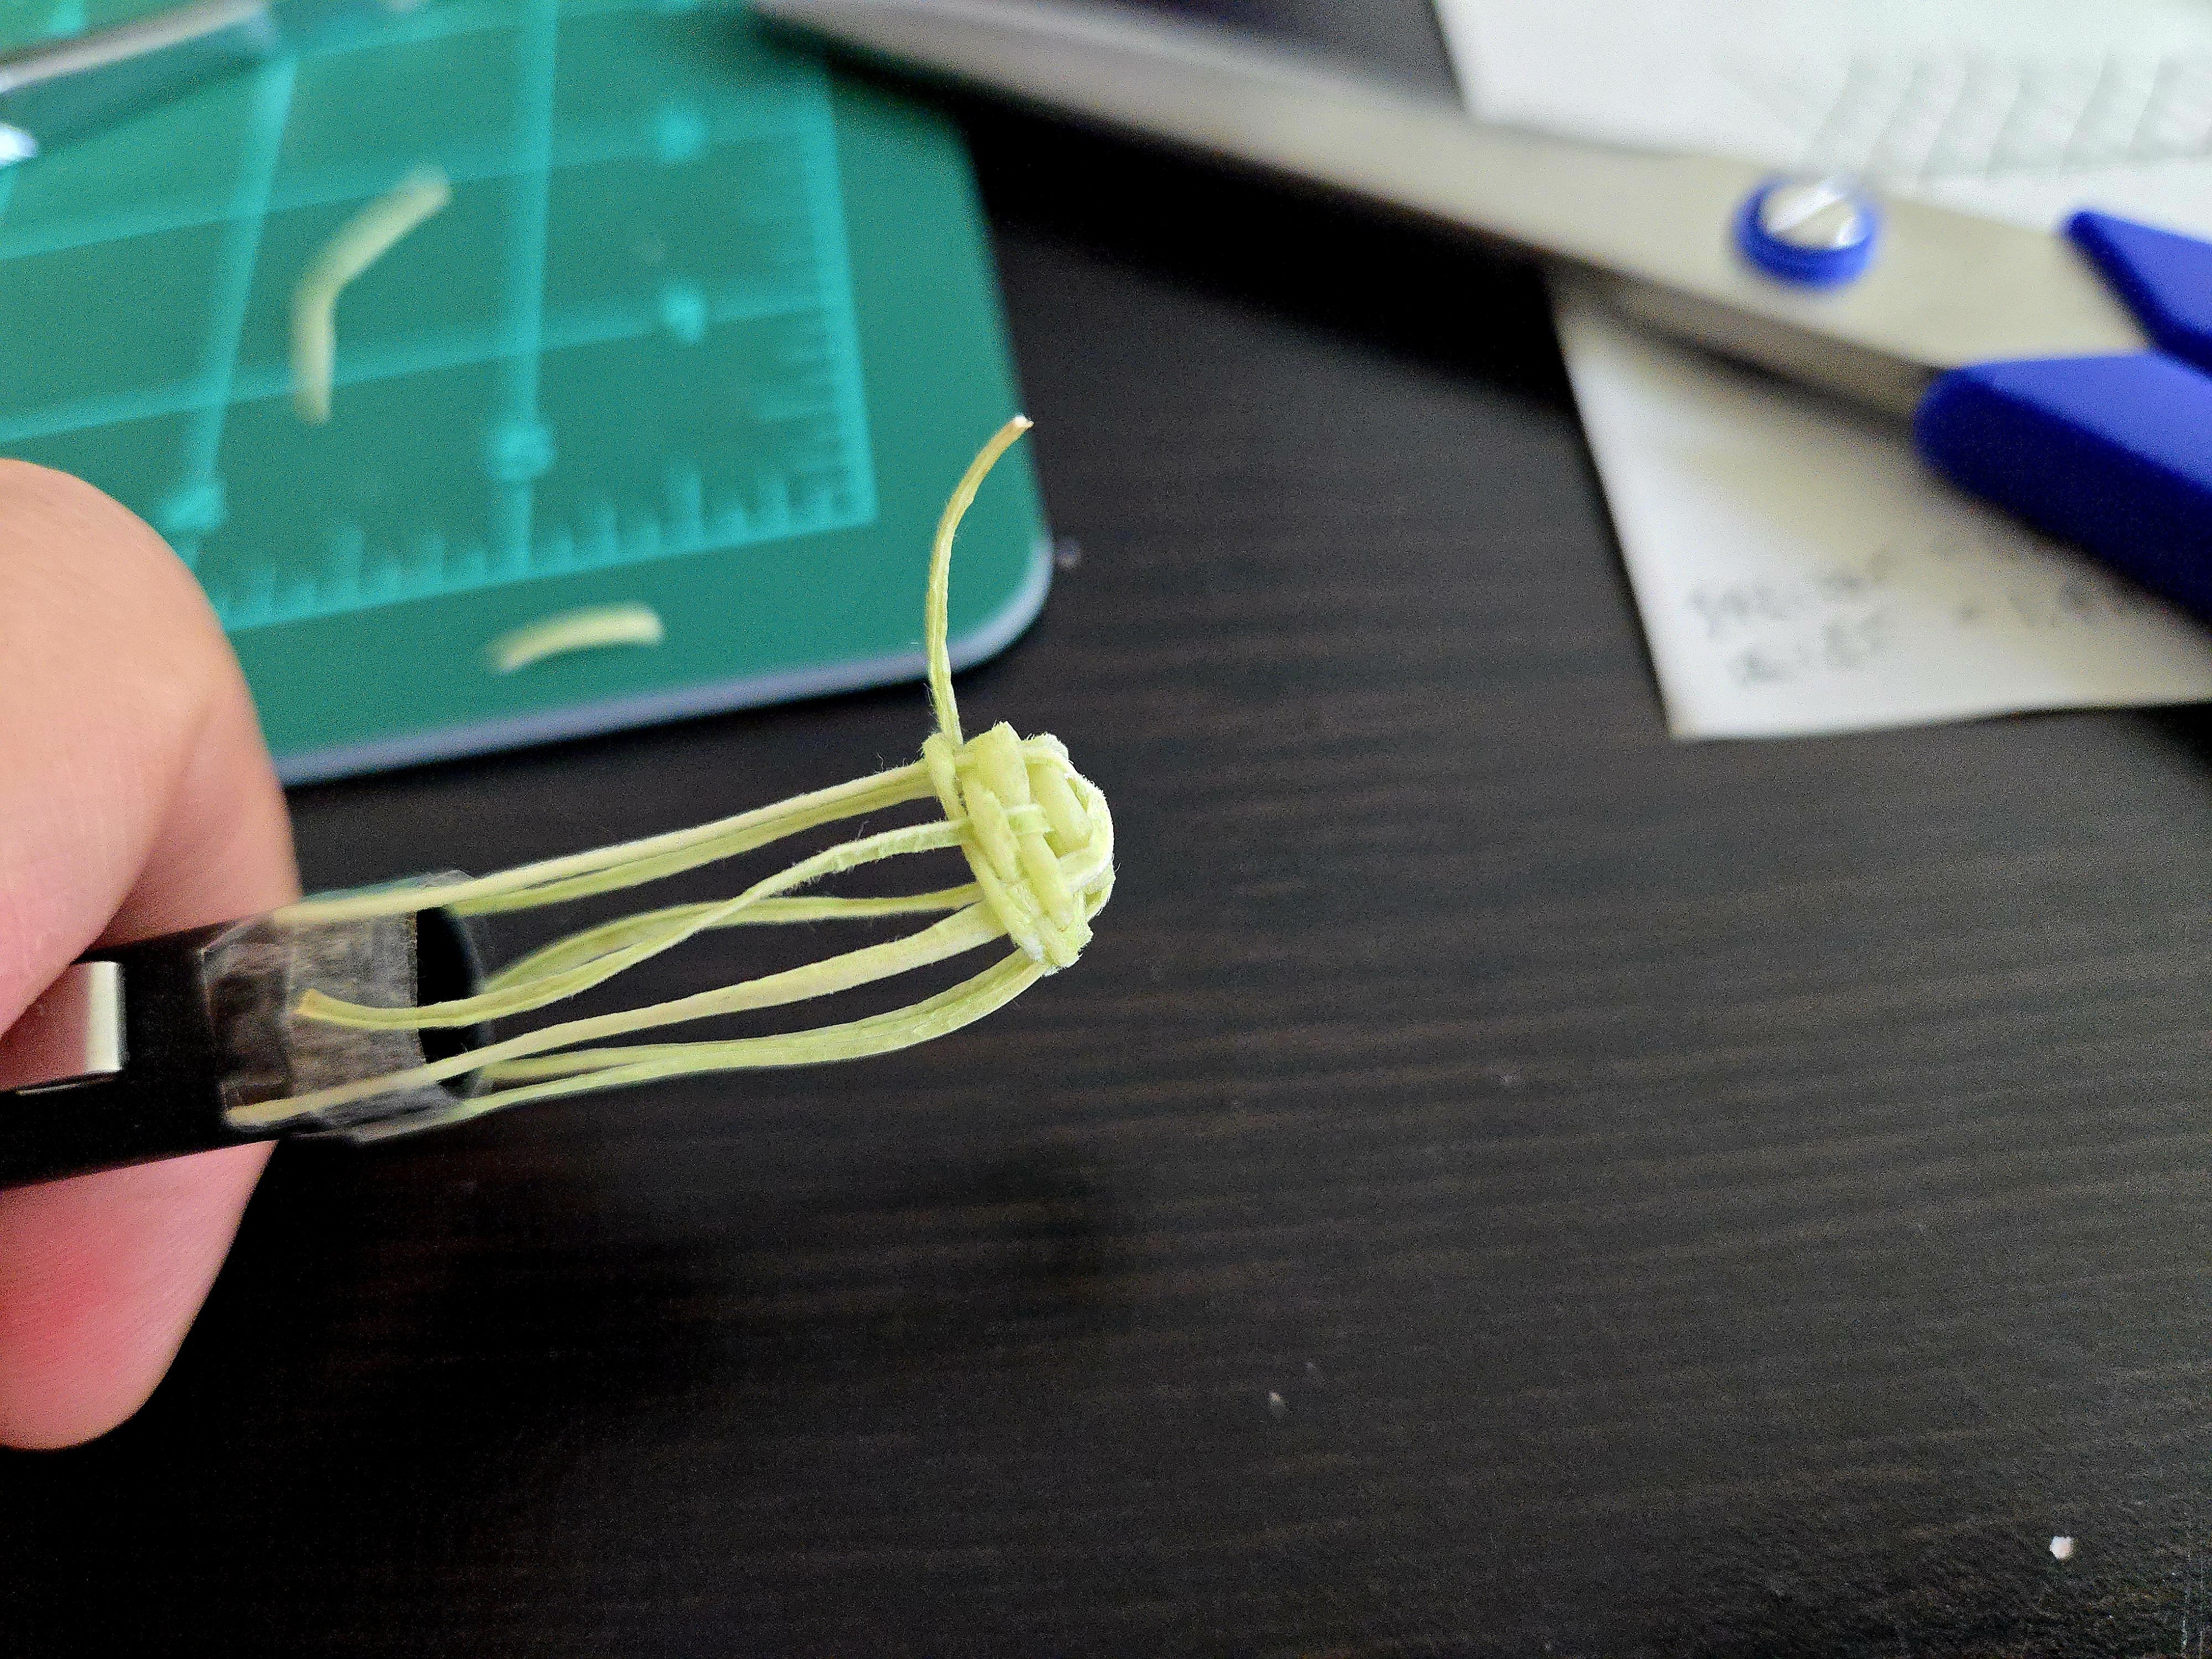
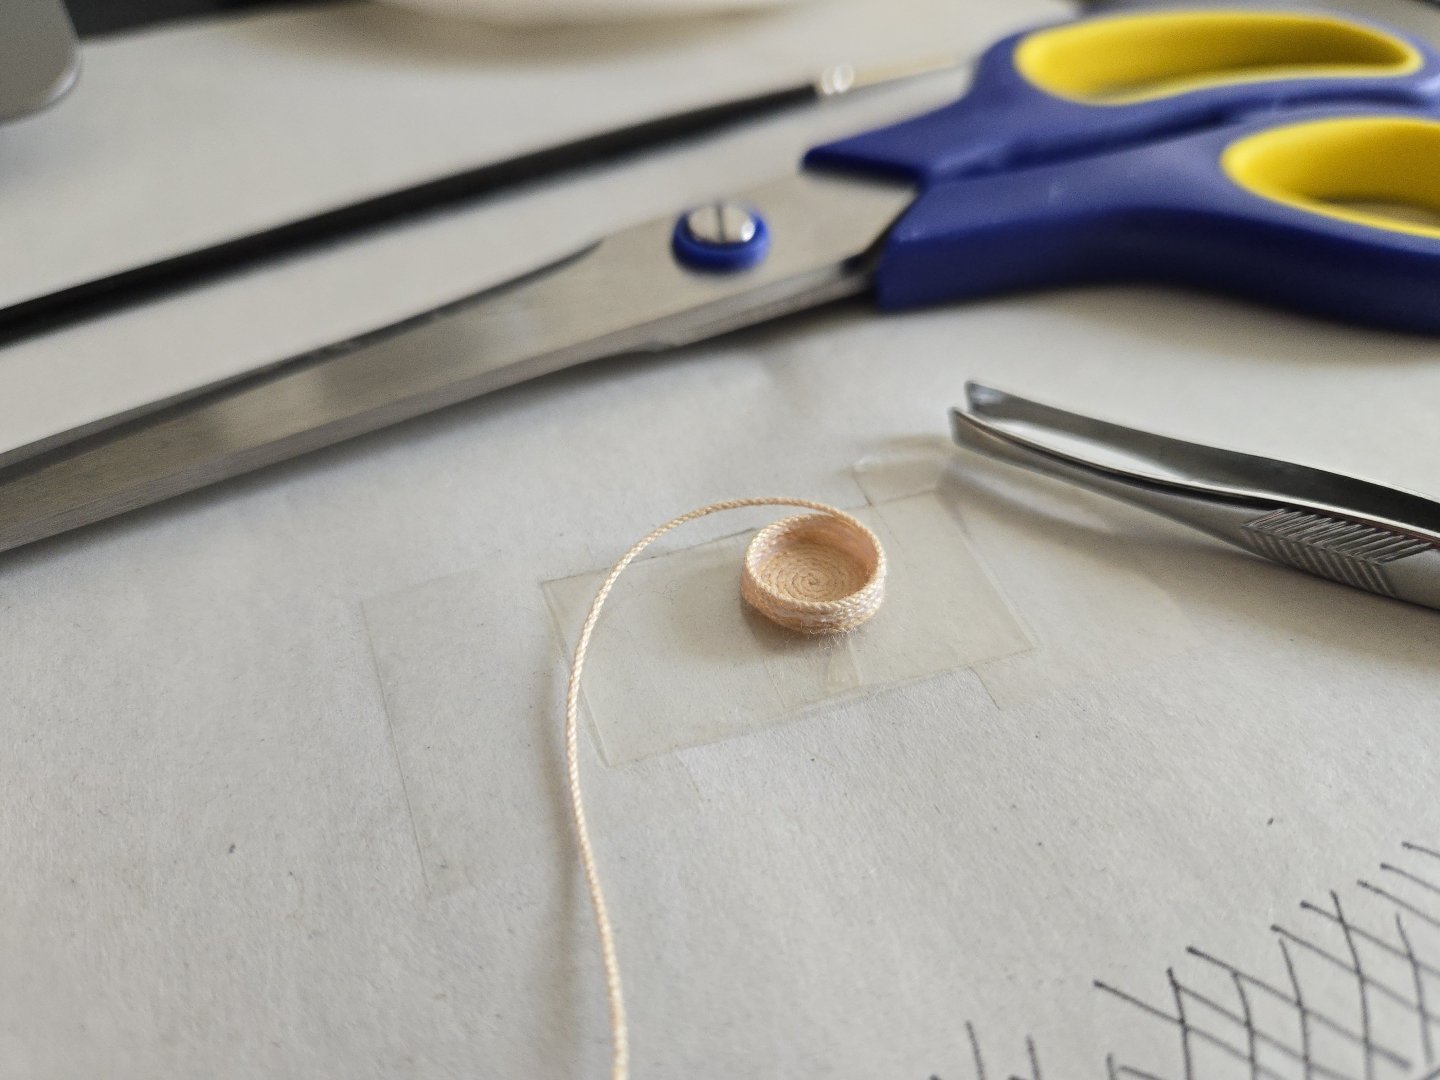
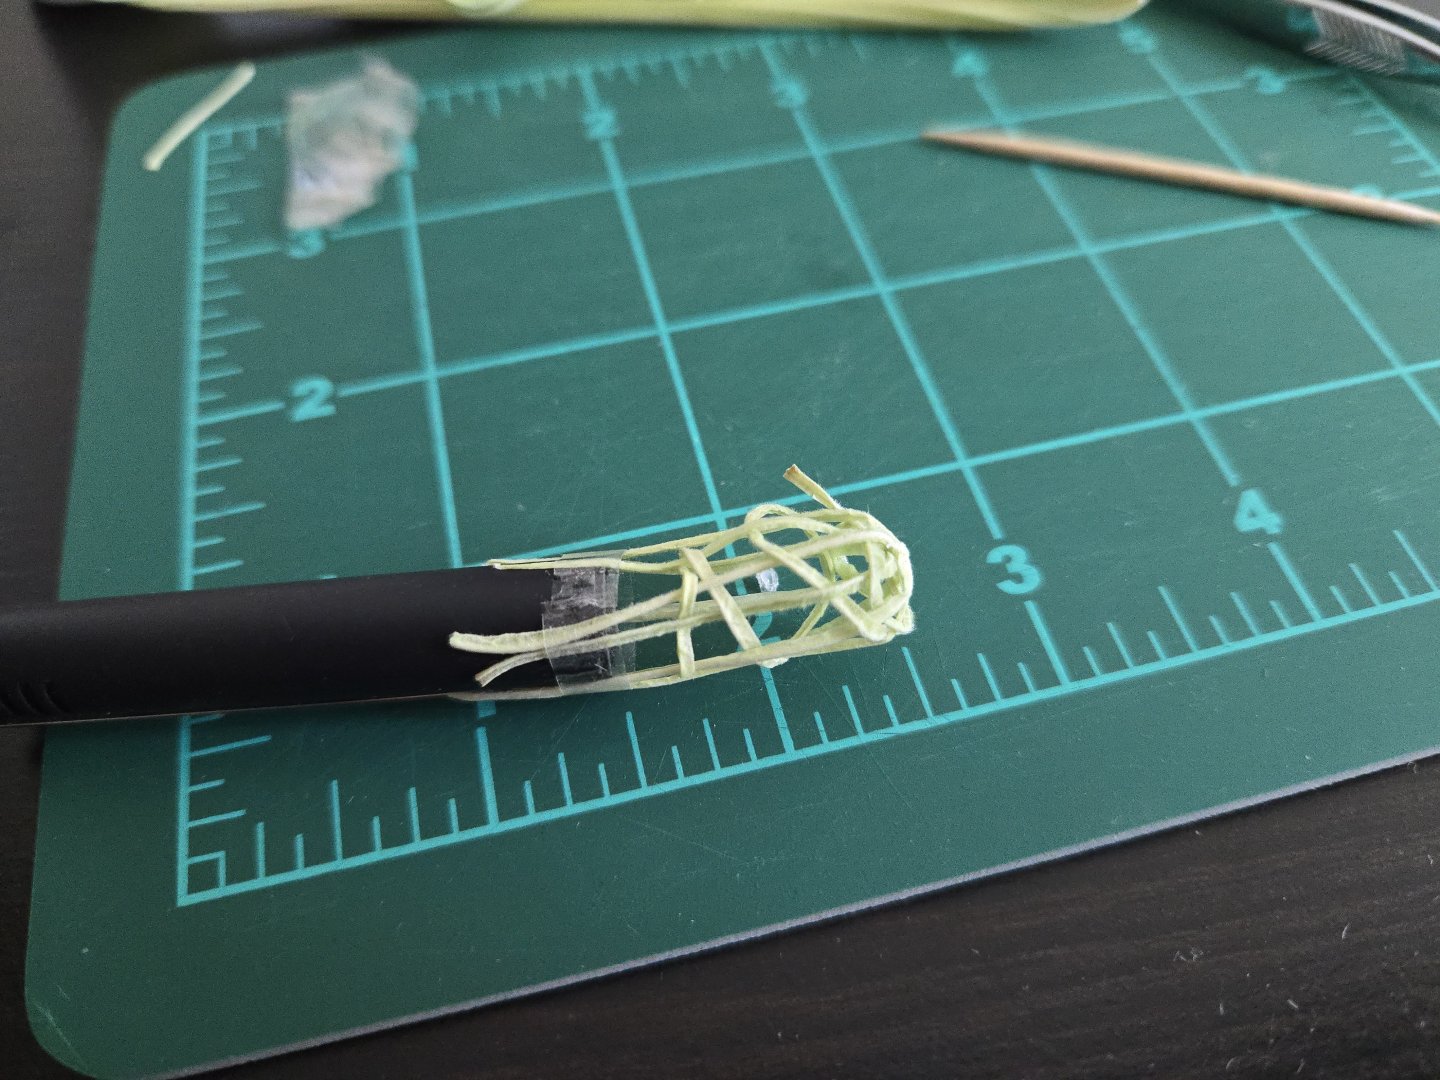
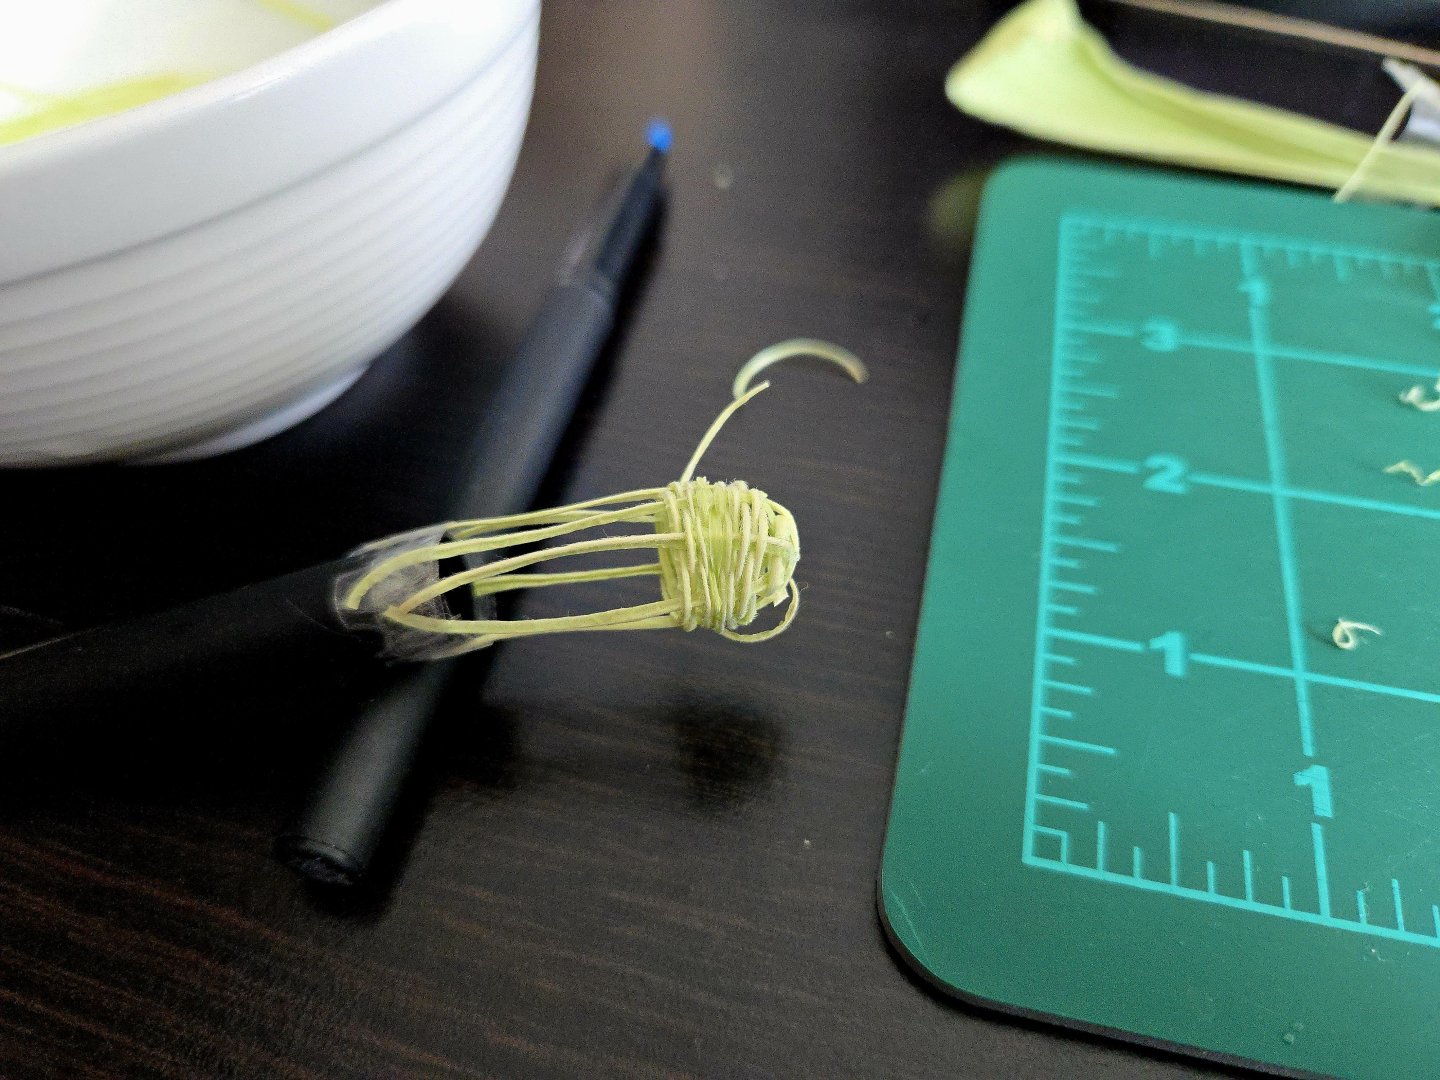
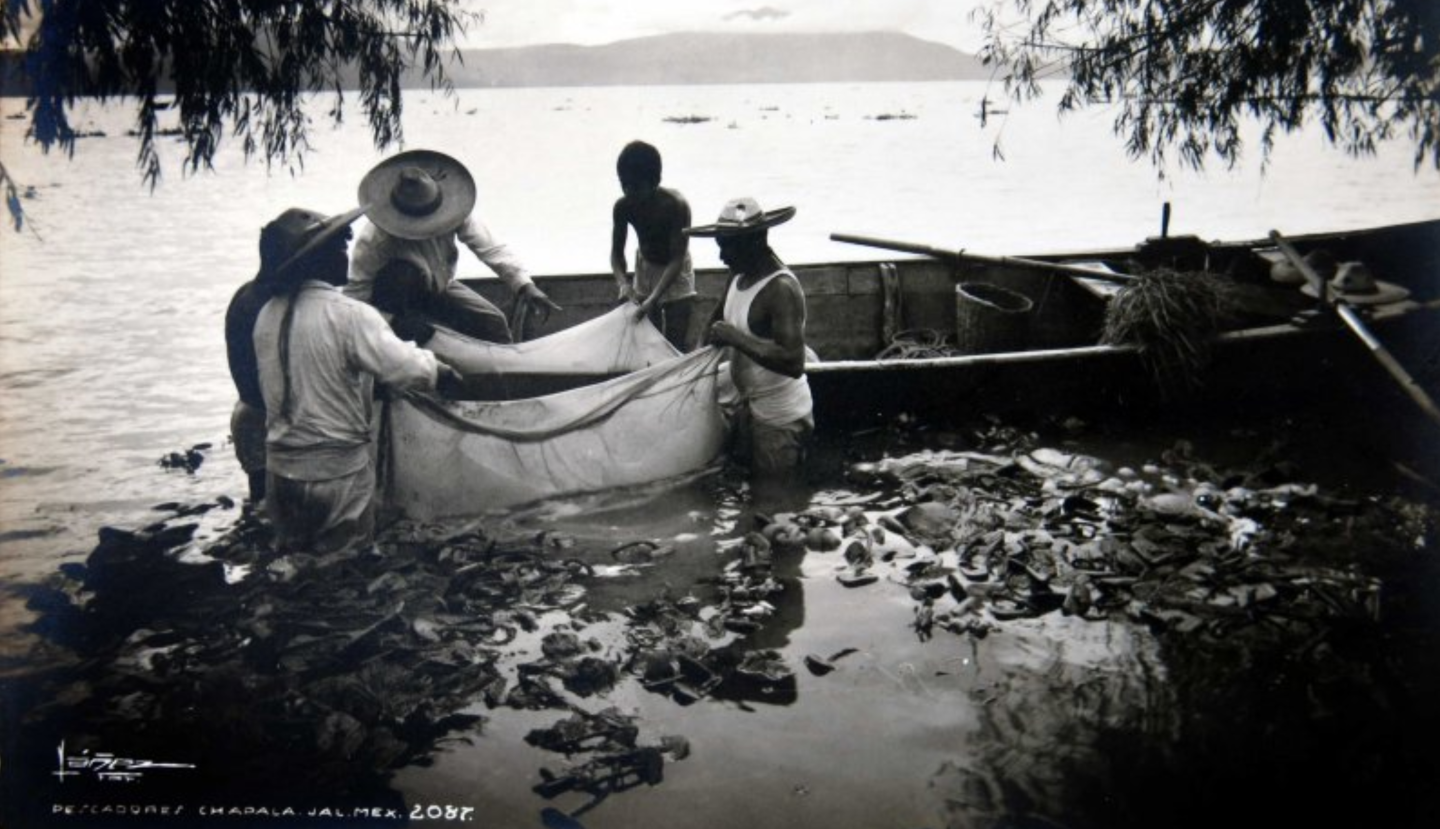
Next, I thought I'd work on some baskets. As far as I can tell, these were used to store caught fish. A woven basket appears in this image: Source: https://www.mexicoenfotos.com/MX14140215743756 I've tried two methods for making this. First, I made a simple rope coil basket out of yarn held together with glue. I began by making a tight coil for the bottom, making it flat on a strip of tape sticky-side-up and soaking it in diluted white glue. I then continued the coil upwards to make the sides, again using white glue. Nothing too challenging, although it required a bit of attention to keep the bucket sides from falling inward (and I should have done more to make them flare out a bit). I repeatedly paused to dab on diluted white glue, besides using undiluted glue to hold each layer on. Once the bucket seemed an appropriate height, I trimmed off the loose thread. The finished bucket can be seen below, temporarily placed in the bow of the Canoa. As far as bucket methods go, this was pretty easy, but it doesn't really look all that woven. I thought about trying to really weave something, but couldn't figure out what materials to use. The broom fibers I had used for the thatching maybe would have been a good option, but I had thrown out the remains of the broom during the move. While cleaning up after having corn on the cob for lunch, I was struck by the possibility of using corn husks. They have long fibers and are frequently used in Mexican craft goods, so it would be a nice gesture linking my work to this tradition. So, I saved a few husks and split them into thin fibers, and started work on a woven basket. I started with the stakes, forming them into a rough basket shape around a pen and securing them where the overlap with a drop of superglue. To weave, I removed the shaped stakes and taped them around a pen cap, leaving space to thread around them. My first attempt went poorly. First, I had let the husk fiber sit out too long and it was too stiff. Second, I found that nine stakes was too many to really deal with at this scale. So, I placed the fibers in a dish of water to soak, and removed two stakes so I had seven. With this, I started again. It was extremely difficult to get started, but after a good bit of frustration, I soon had a semi-credible weave going. I kept going, using dots of superglue to secure ends when I moved on to the next fiber. I found that it was much easier to weave after this, as the superglue stiffened the structure significantly. The bottom, where I had started, was a total mess, but I kept going, as I could either use this one just for practice or could place it in the model so as to hide the bottom. Finally I decided it was large enough and cut off the stakes. I'll properly trim them to size once it fully dries (which should also turn it from green to brown). Overall, it's quite a lumpy, misshapen basket, and the weave itself isn't really to scale. That said, I think this method shows some promise and I might try again, both for more baskets and, especially, for the fishtraps. The main takeaways learned are as follows: 1) The bottom is quite difficult to properly weave, and it may make more sense to fake it using the same coil method as in the rope basket, before properly weaving the sides. 2) The corn husk needs to be moist to be effectively threaded, but it does shrink a bit as it dries, so it loosens slightly. 3) One problem I had was with the stakes. They're too flexible, which made it hard to keep the basket in shape. This was compounded by my failing to space them properly evenly, which contributed to the basket's lumpiness. In the future, I may try applying a bit of superglue to stiffen the stakes, although this will require drying them first so they don't warp as they dry.


- 286 replies
-
- 12
-
-
-
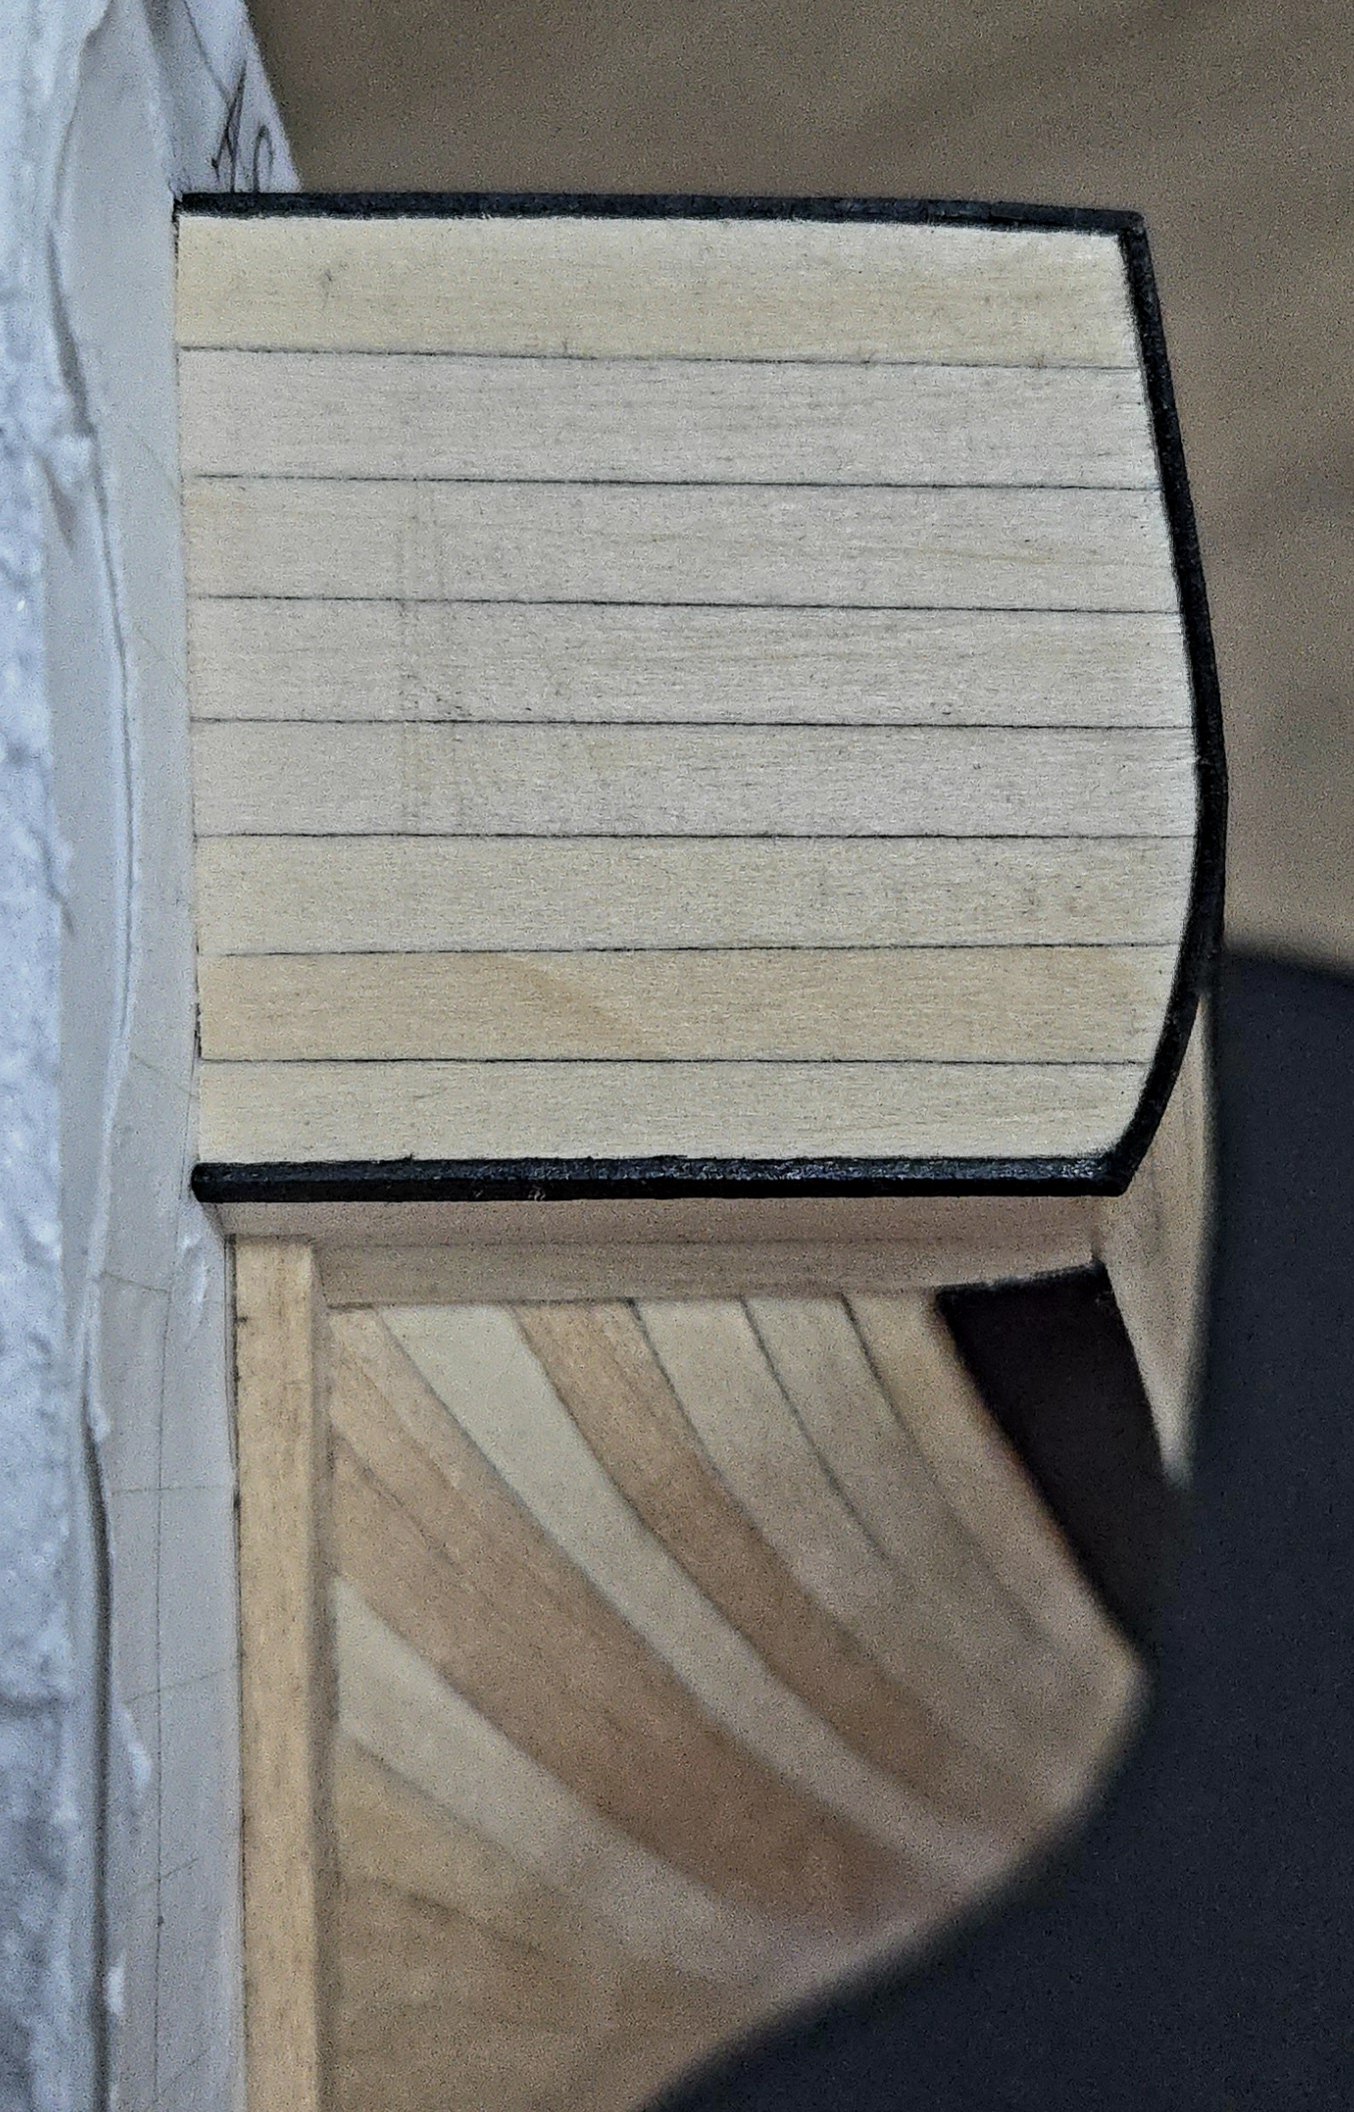
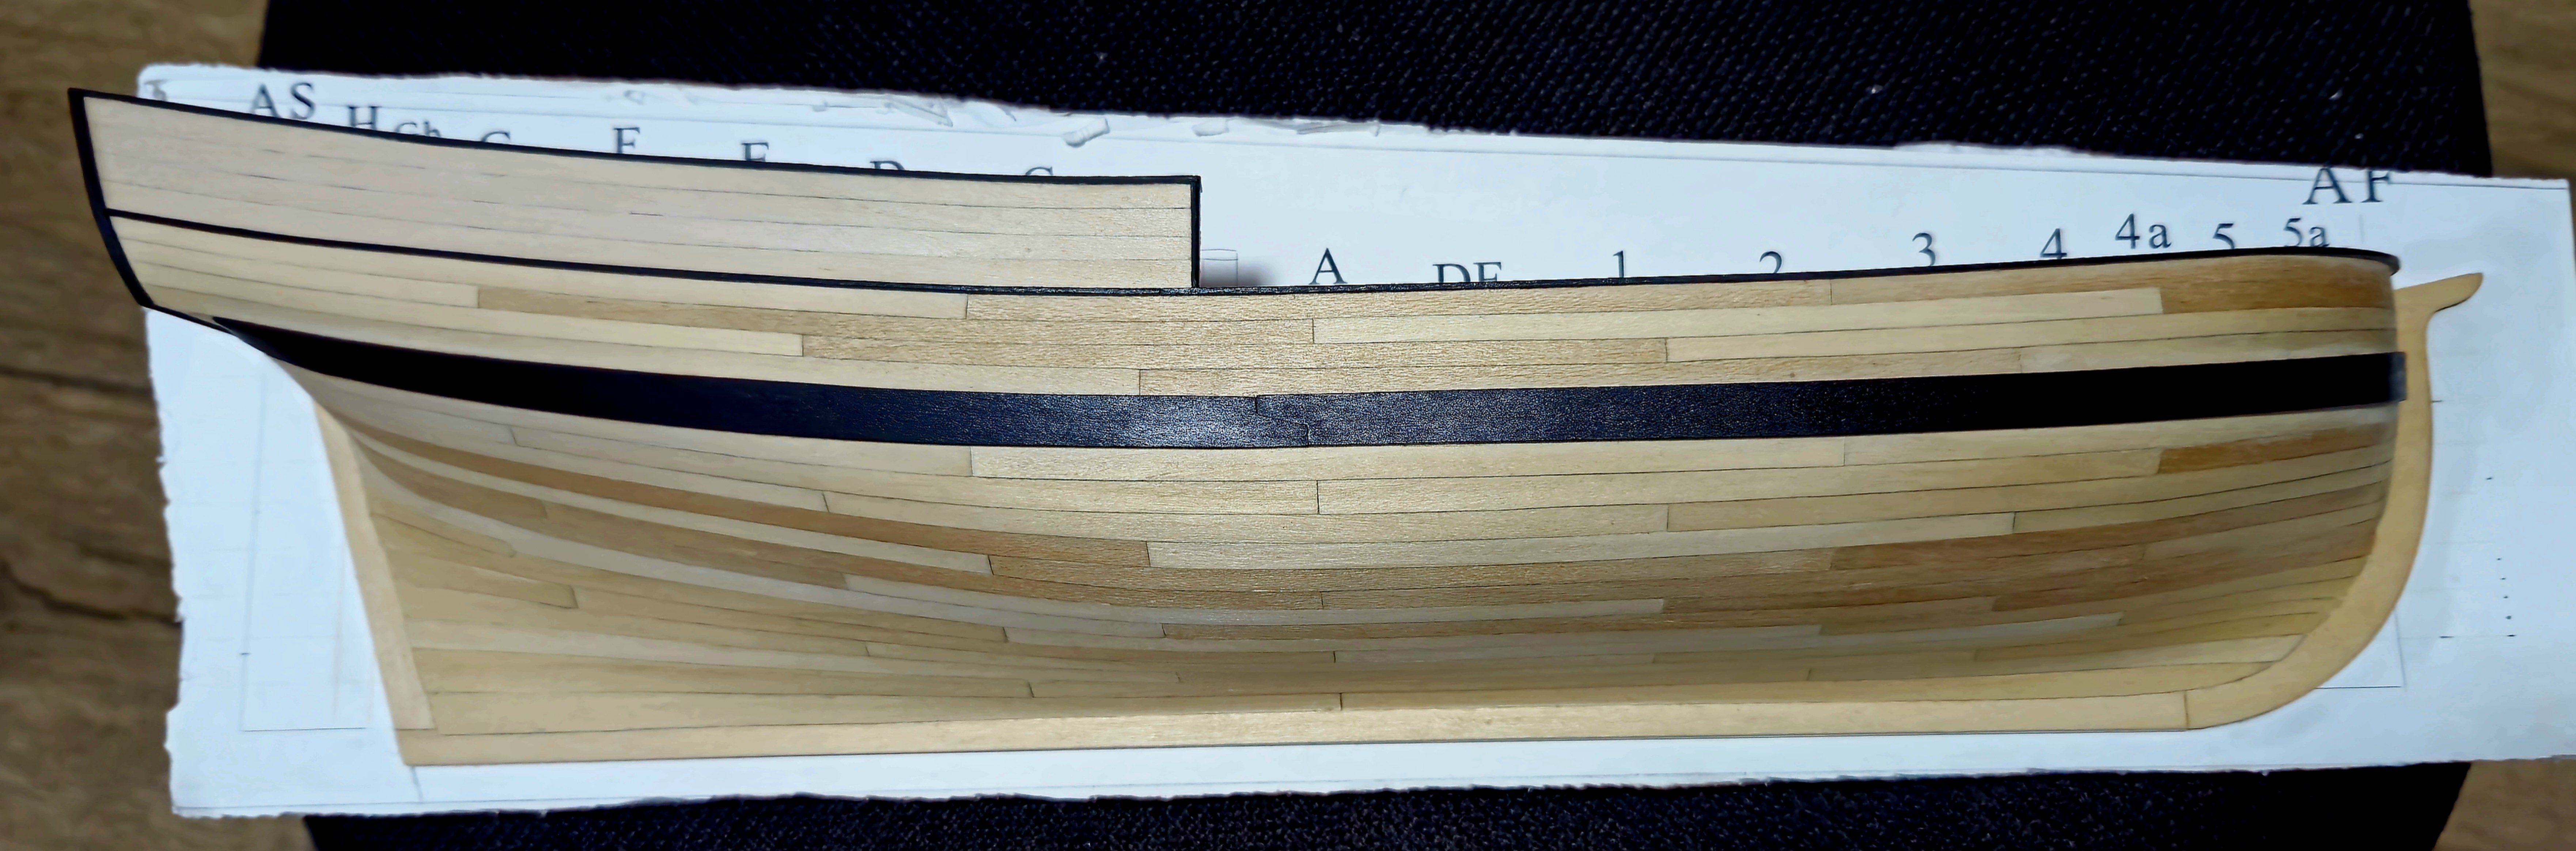
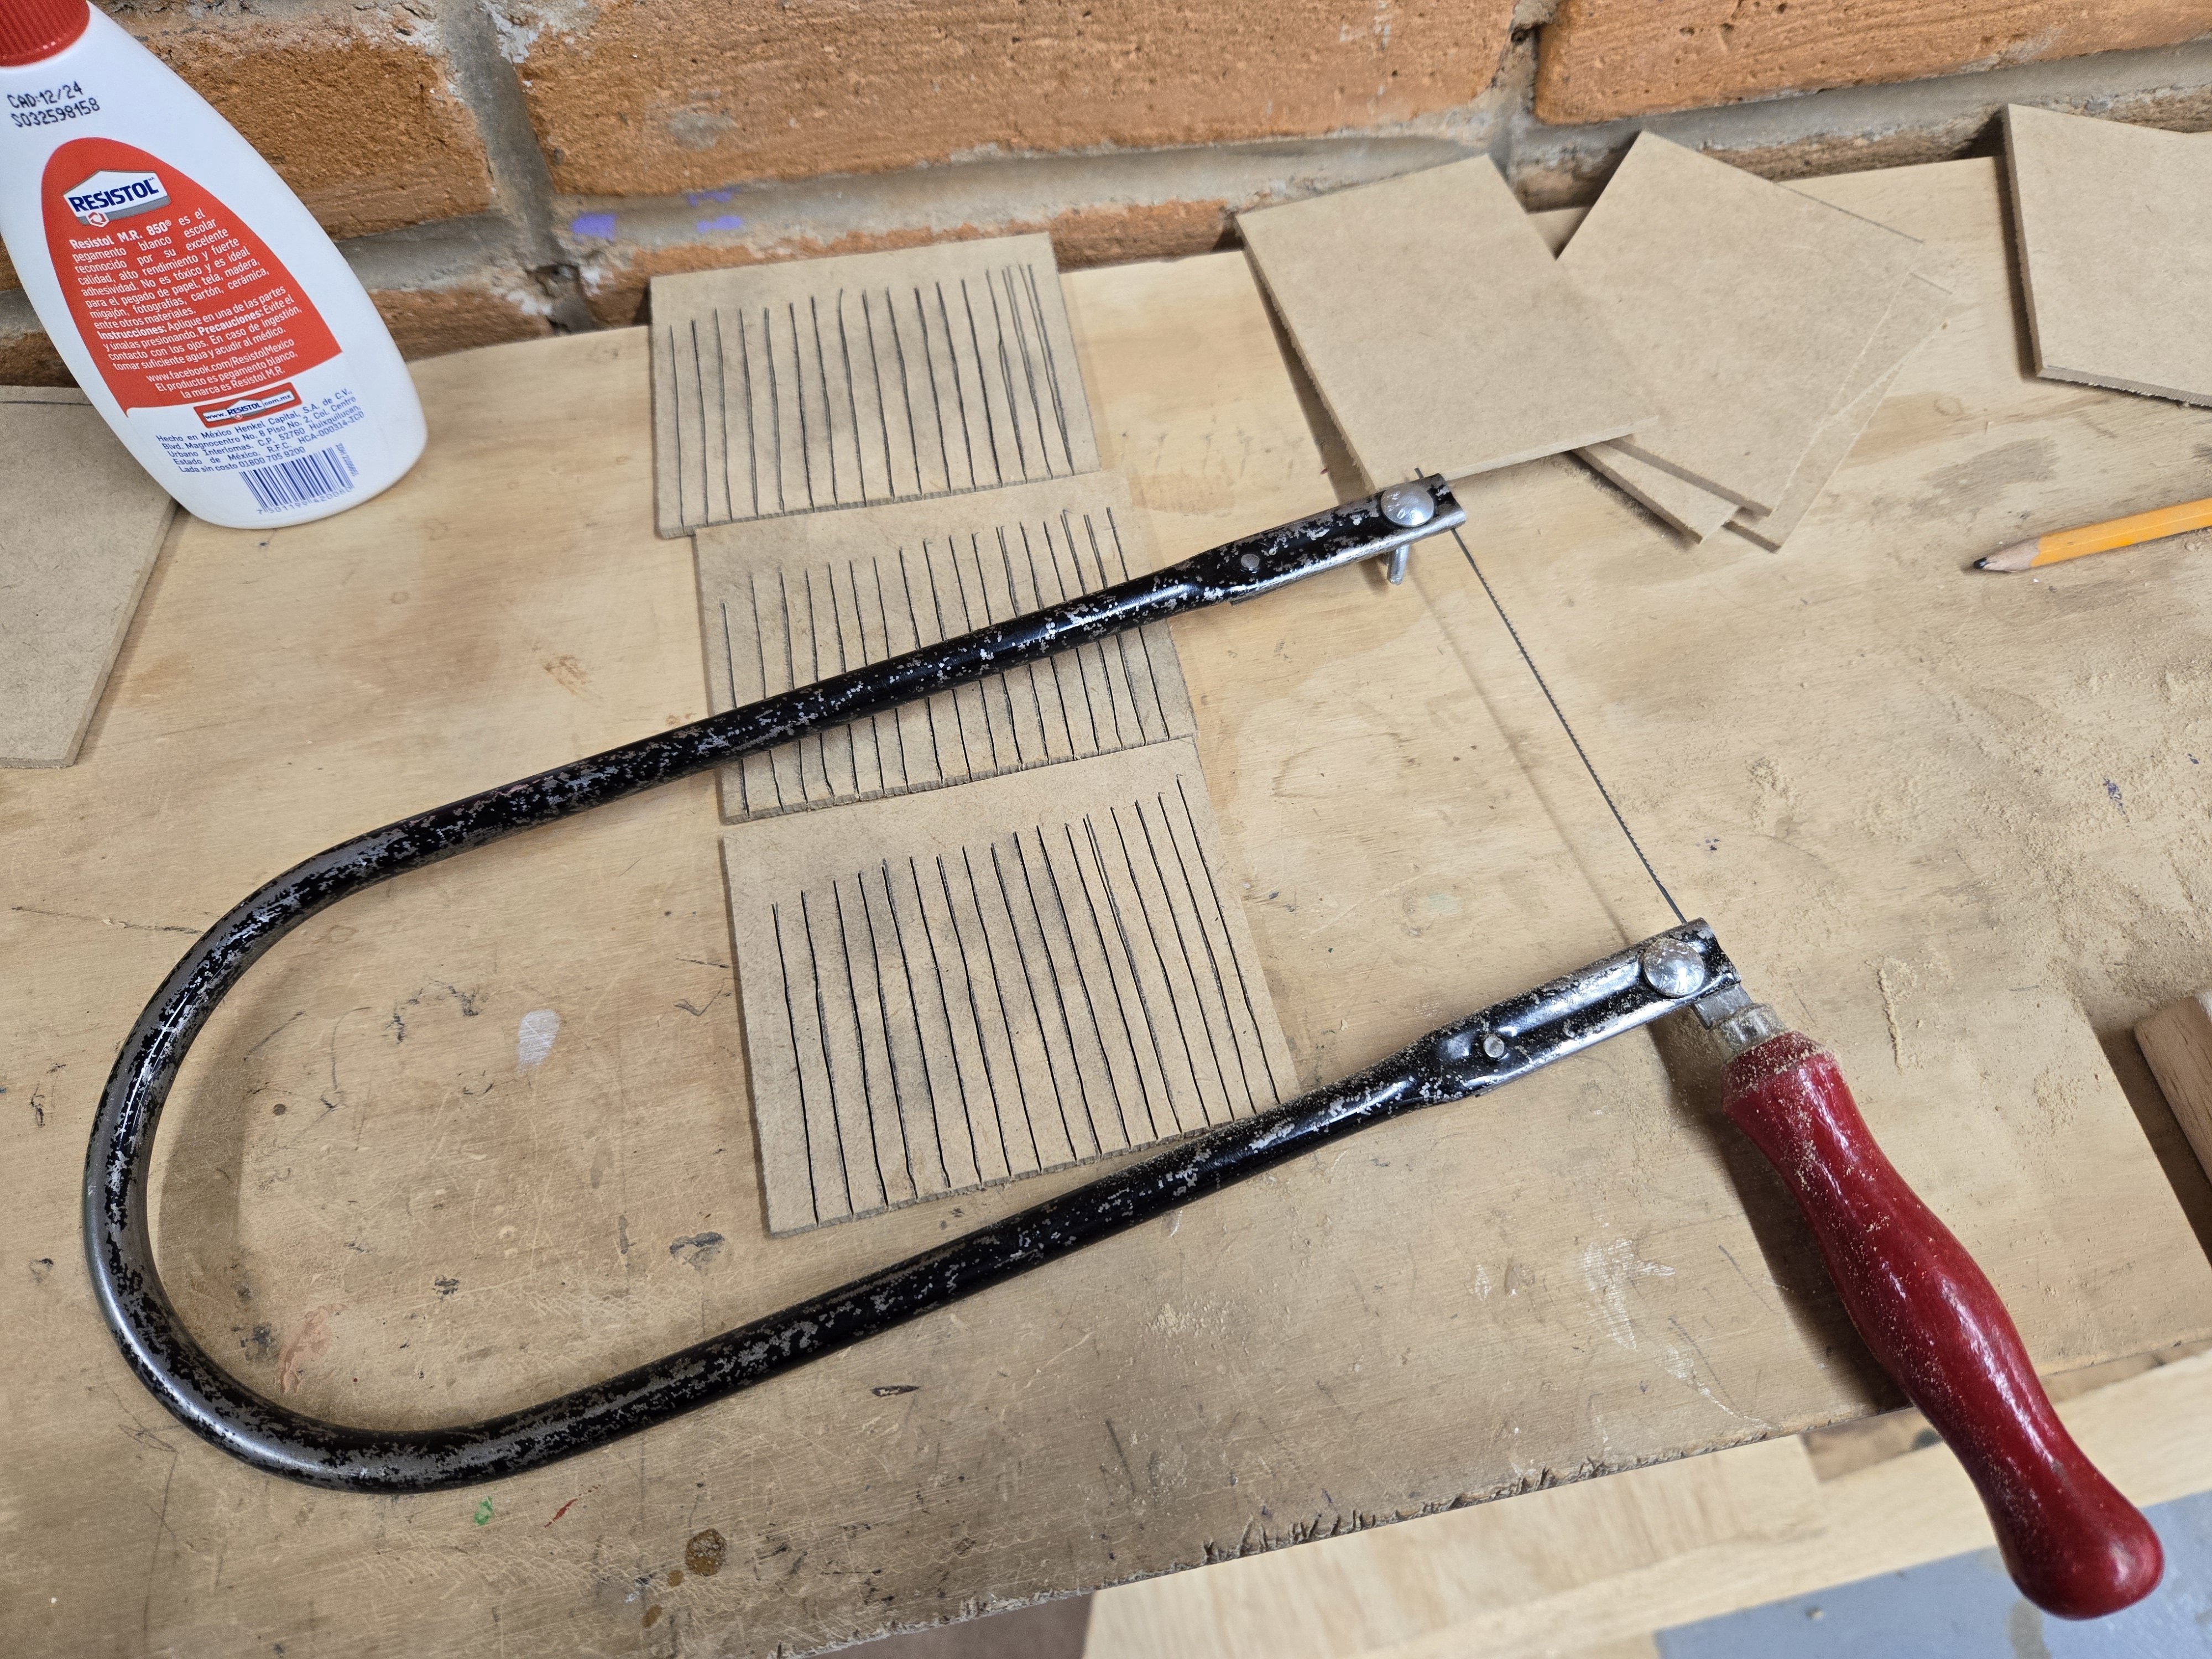
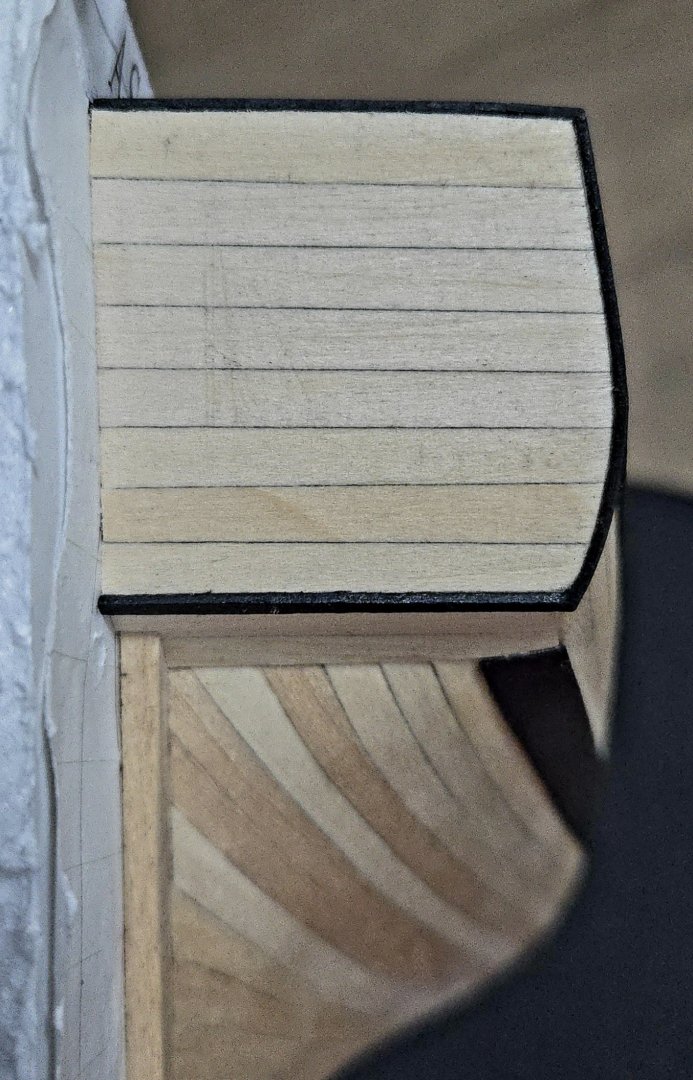
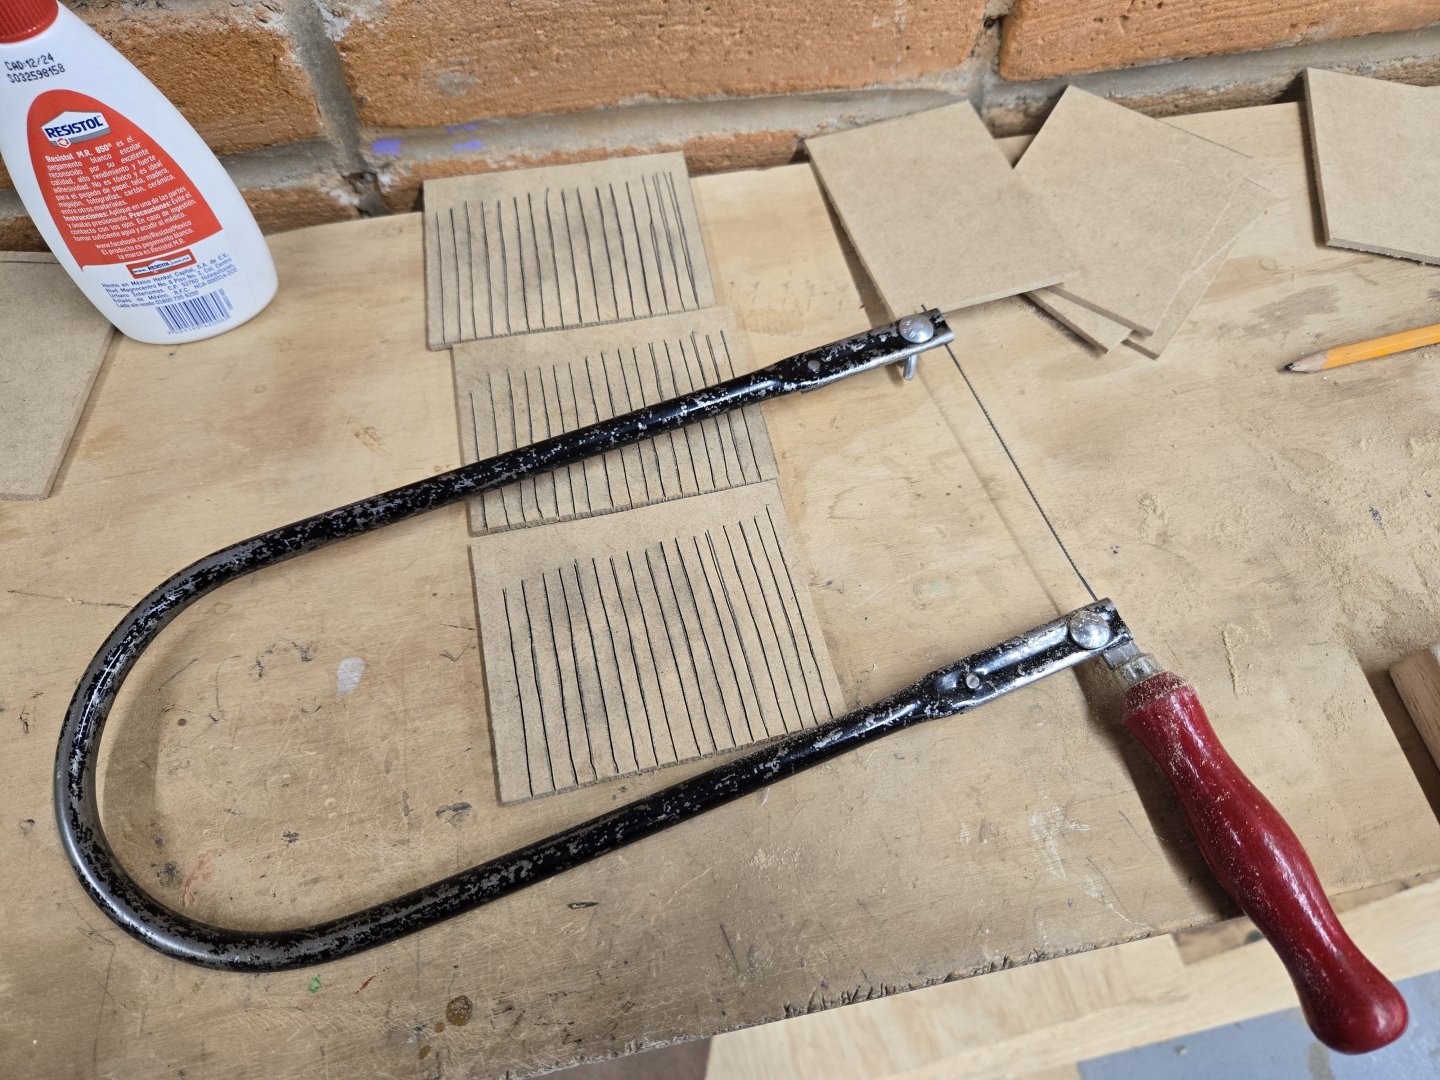
I've started applying the finish and it's mostly going all right so far. Most logs seem to go over this very briefly (e.g. "Then I applied Danish Oil/W.O.P./Shellac etc, and here's what it looks like upon completion). So as this is my first time applying anything other than a matte varnish as a finish, I thought I'd include at least some detail, as I've actually encountered some challenges. I should also note: apologies for the poor quality images! I recently upgraded to a Galaxy S24 phone and can't seem to figure out how to take halfway decent photos with it, especially as it seems to auto-adjust a lot of settings such that what I see when I click to take a photo isn't what the image ends up looking like. (So if anyone has any suggestions, I'm all ears!) I began by putting just a dab of linseed oil on my cloth--a chunk of an old t-shirt--and rubbing it into the hull, periodically adding more oil to the cloth. In the photo below, I've oiled the hull except for the quarterdeck. The oil really brings out the differences in color between planks! Personally I like the effect, at least on this model, as it draws attention to the planking (which is the whole point of this kit), but I'll definitely do a better job of color matching on any future builds that I'm leaving natural. One challenge that I faced was that the oil really didn't get into nooks and crannies very well. There were lots of dry spots all along the wale, the trim, and the keel/stem, and even some at uneven points at the edge of planks. For these areas, after I rubbed oil into the hull as best as I could with the cloth, I used a brush to dab some one, and then used the cloth to remove excess. Another challenge was that my seemingly lint-free cloth actually wasn't. It didn't leave a ton, but there were a few bits of black lint I had to get off the hull with a brush. I'll definitely be using a different cloth for future coats, but I'm not sure what would work best. Finally, probably because the oil highlights details in the wood I otherwise wouldn't notice, I discovered some odd vertical scratching on the transom, below. Is it possible to buff this out? Or will I need to sand this down (which sounds like a bad idea while the oil is still polymerizing)? Despite these challenges, I'm liking the look of the oiled hull--even if the phone's camera seems determined to make the photos look weird! Finally, I've started taking a carpentry class, and my first independent project will be the frame/plaque for this hull. First, though, I'm learning to use a fretsaw, which is turning out ti be everything I had thought a coping saw would be. It should be extremely useful for cutting out bulkheads and frames on some upcoming builds. But first, a lot of practice cuts...


- 82 replies
-
- 4
-
-
-
- half hull planking project
- half hull
- (and 2 more)
-
Thanks, all, for the comments and suggestions! I haven't found any photos with the weights, but double checking in Ortiz Segura, the weights were "tied stones." I may try Wefalck's suggestion of chopping up a cork. In any case, I still need to get paints and some other materials, so I will probably work on some other part before finishing the net.
-
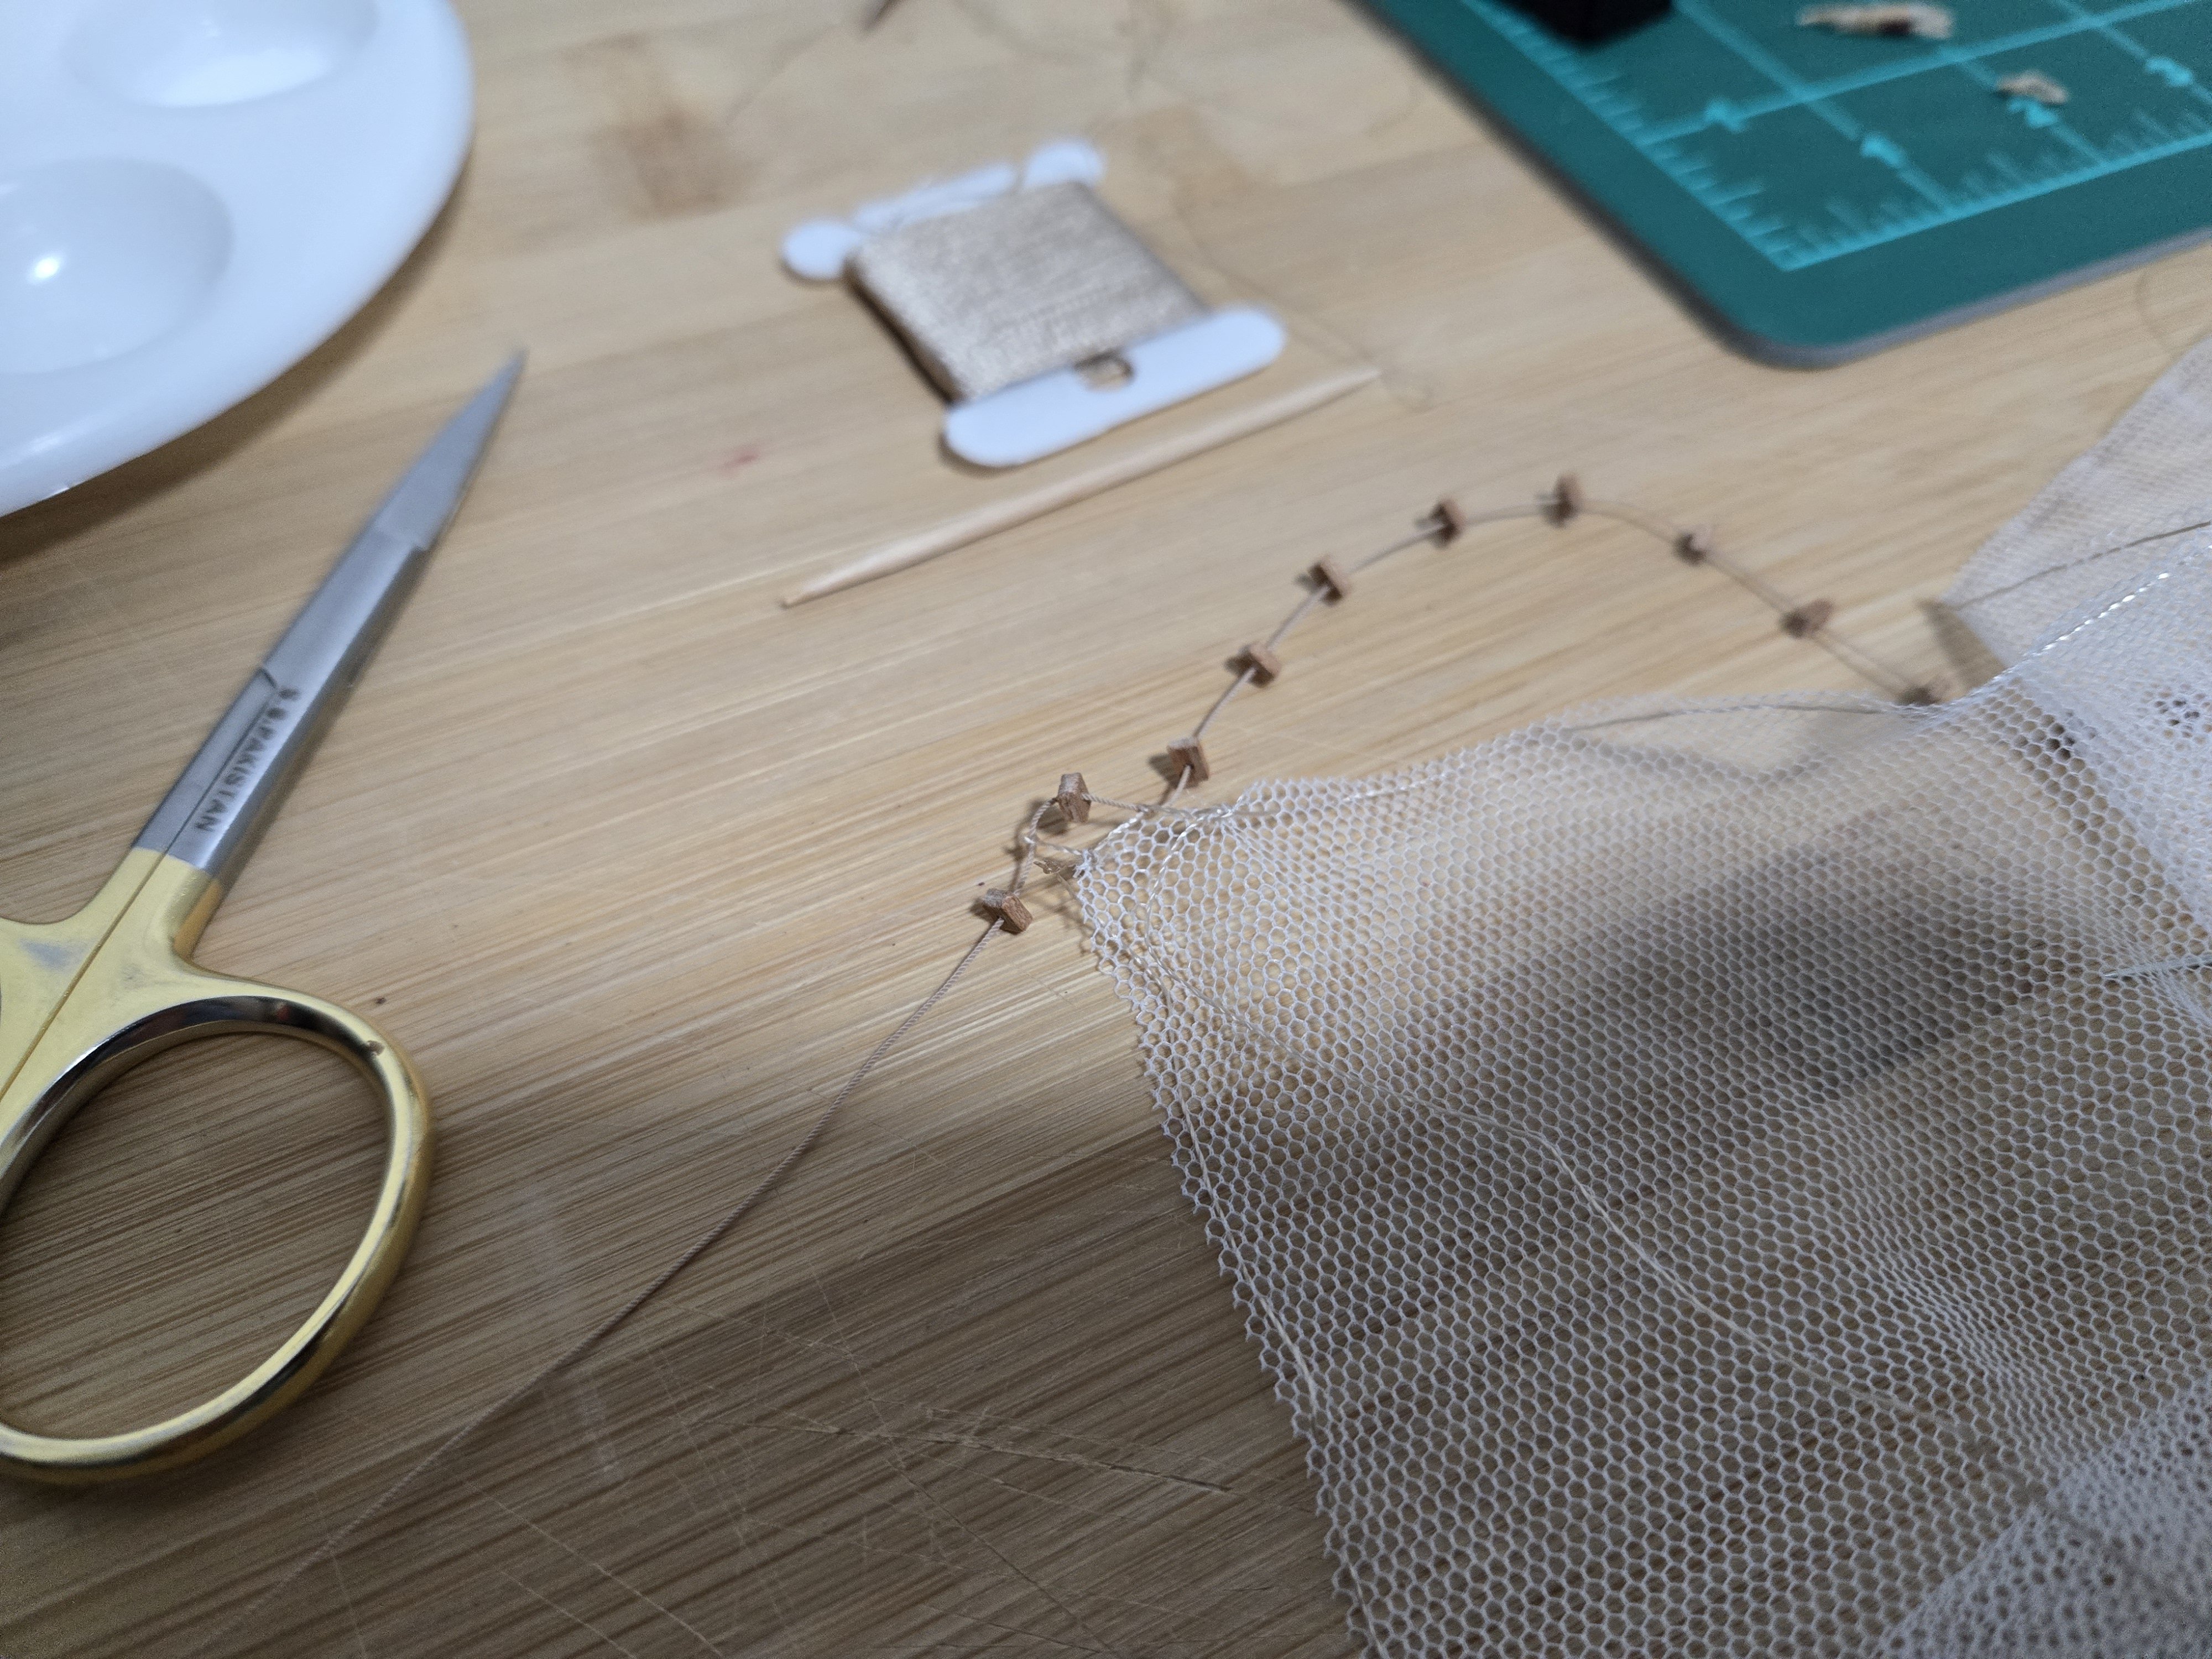
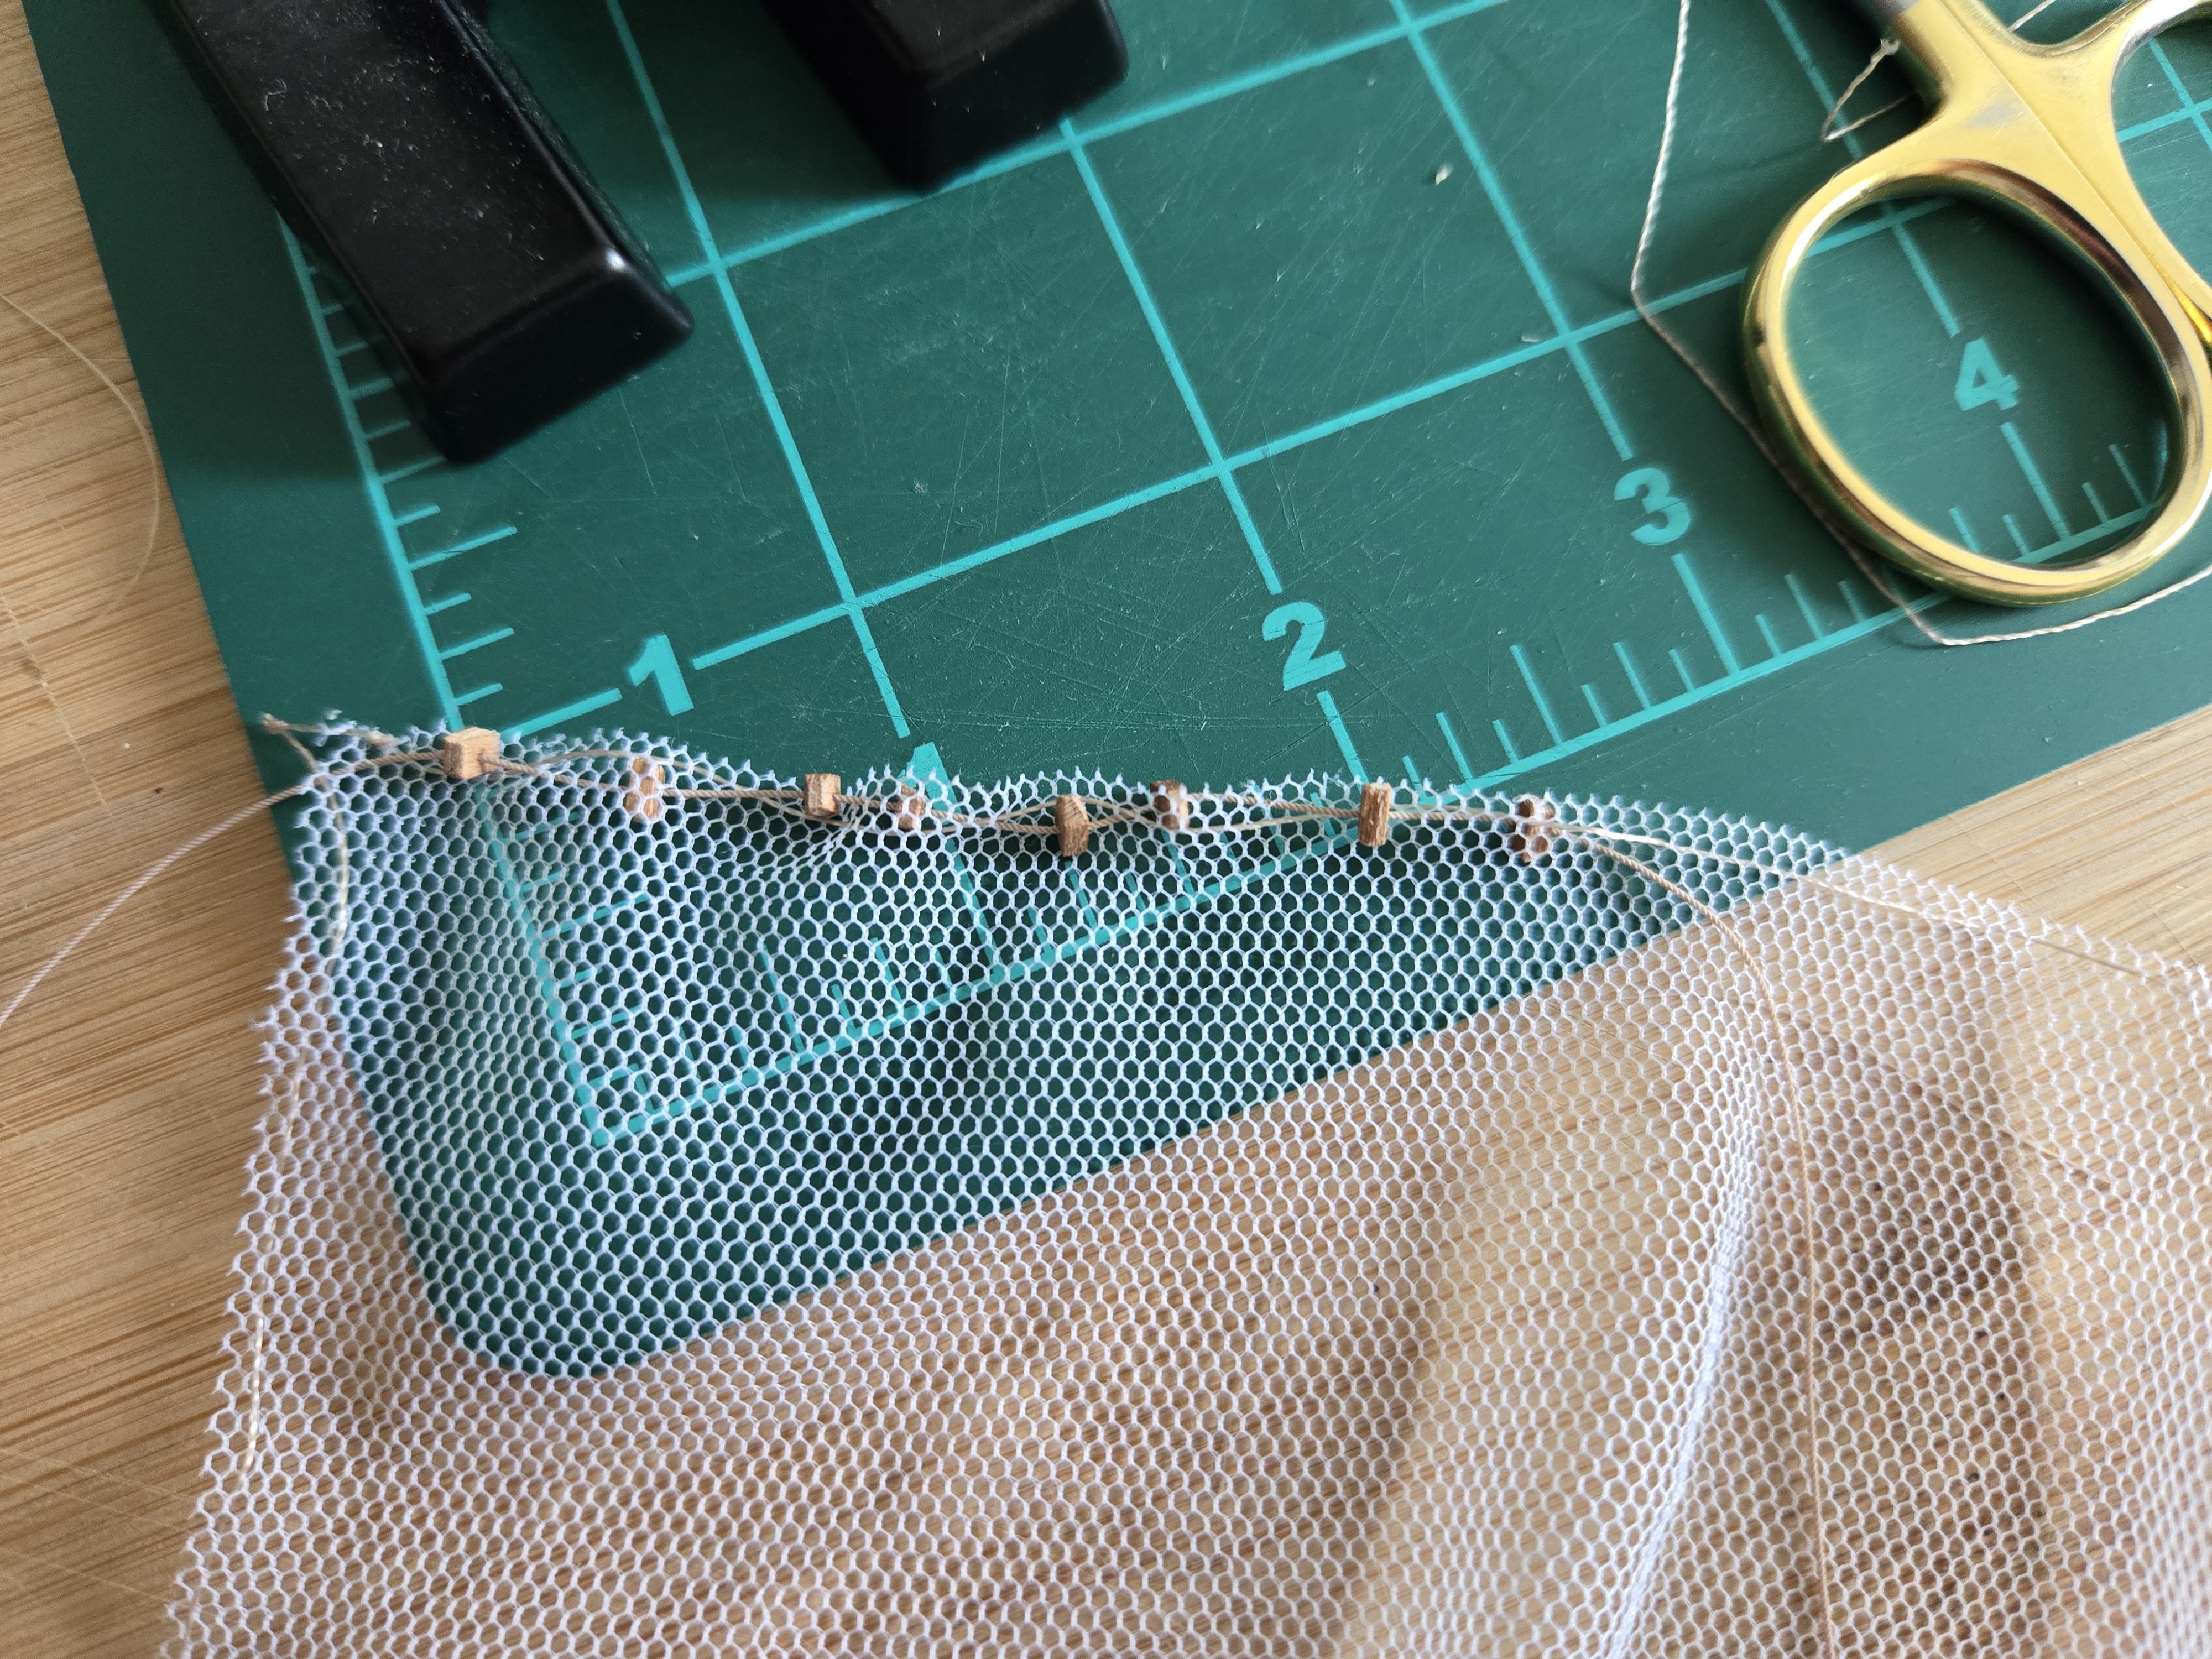
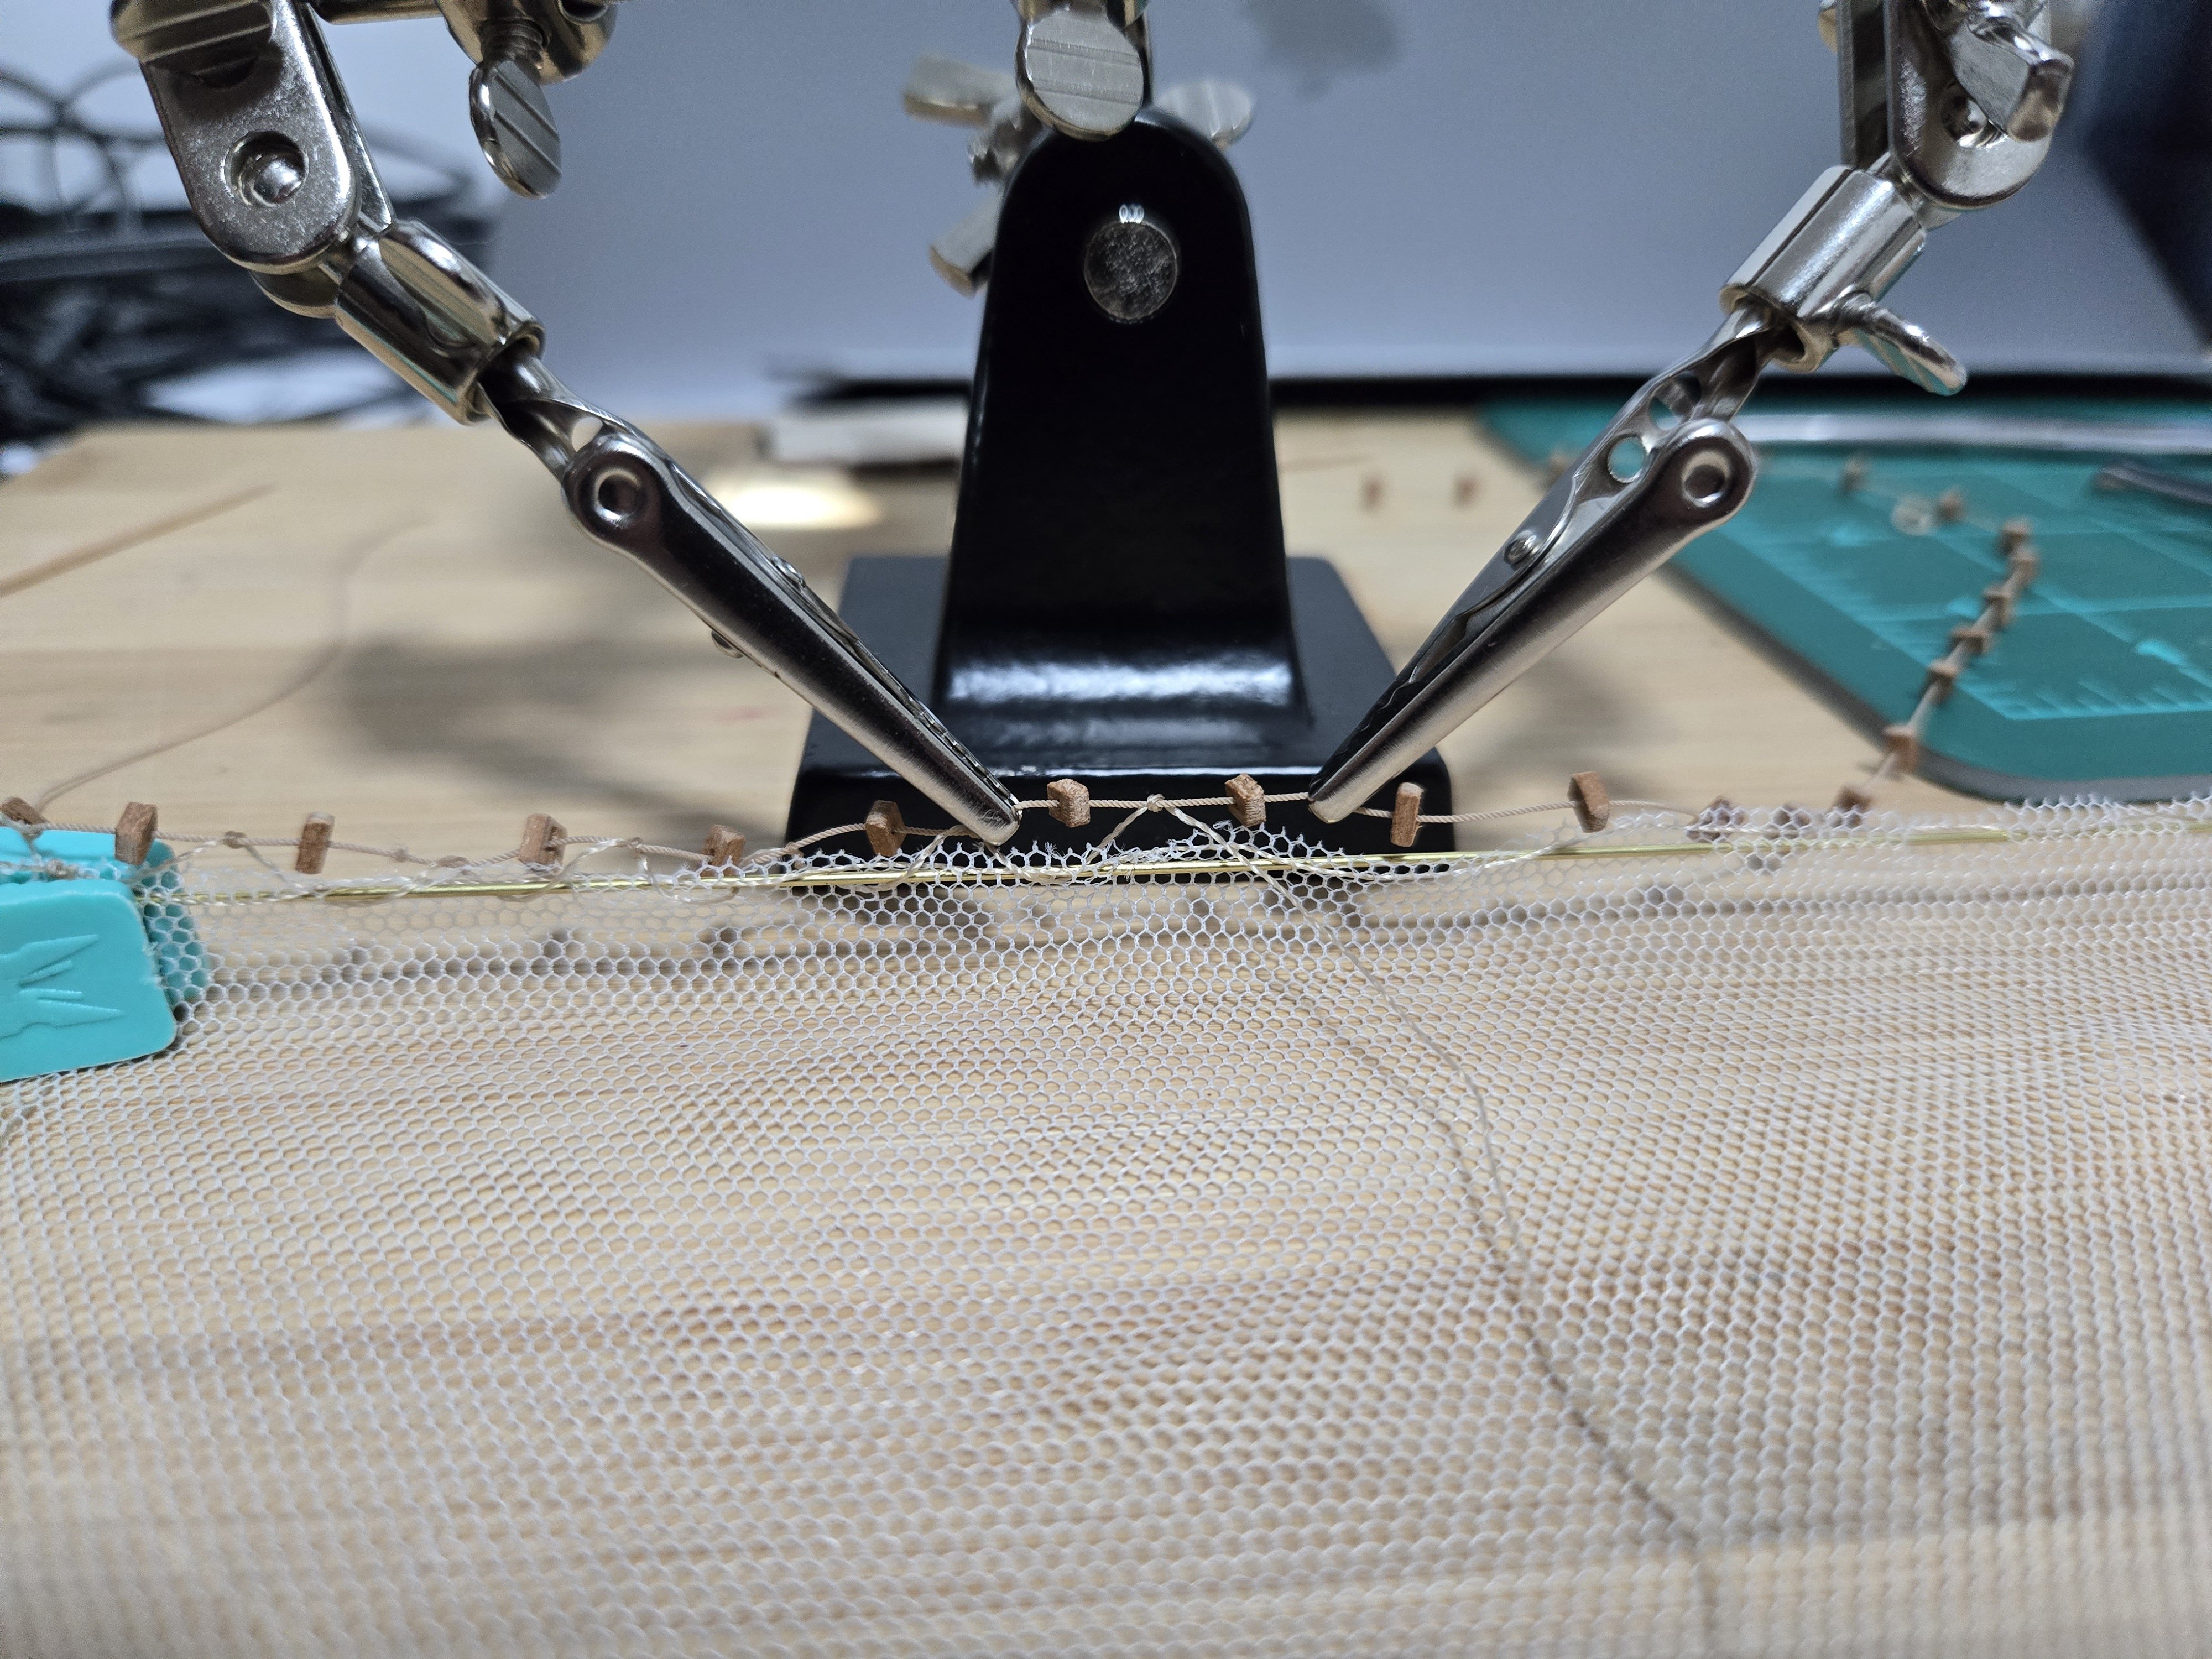
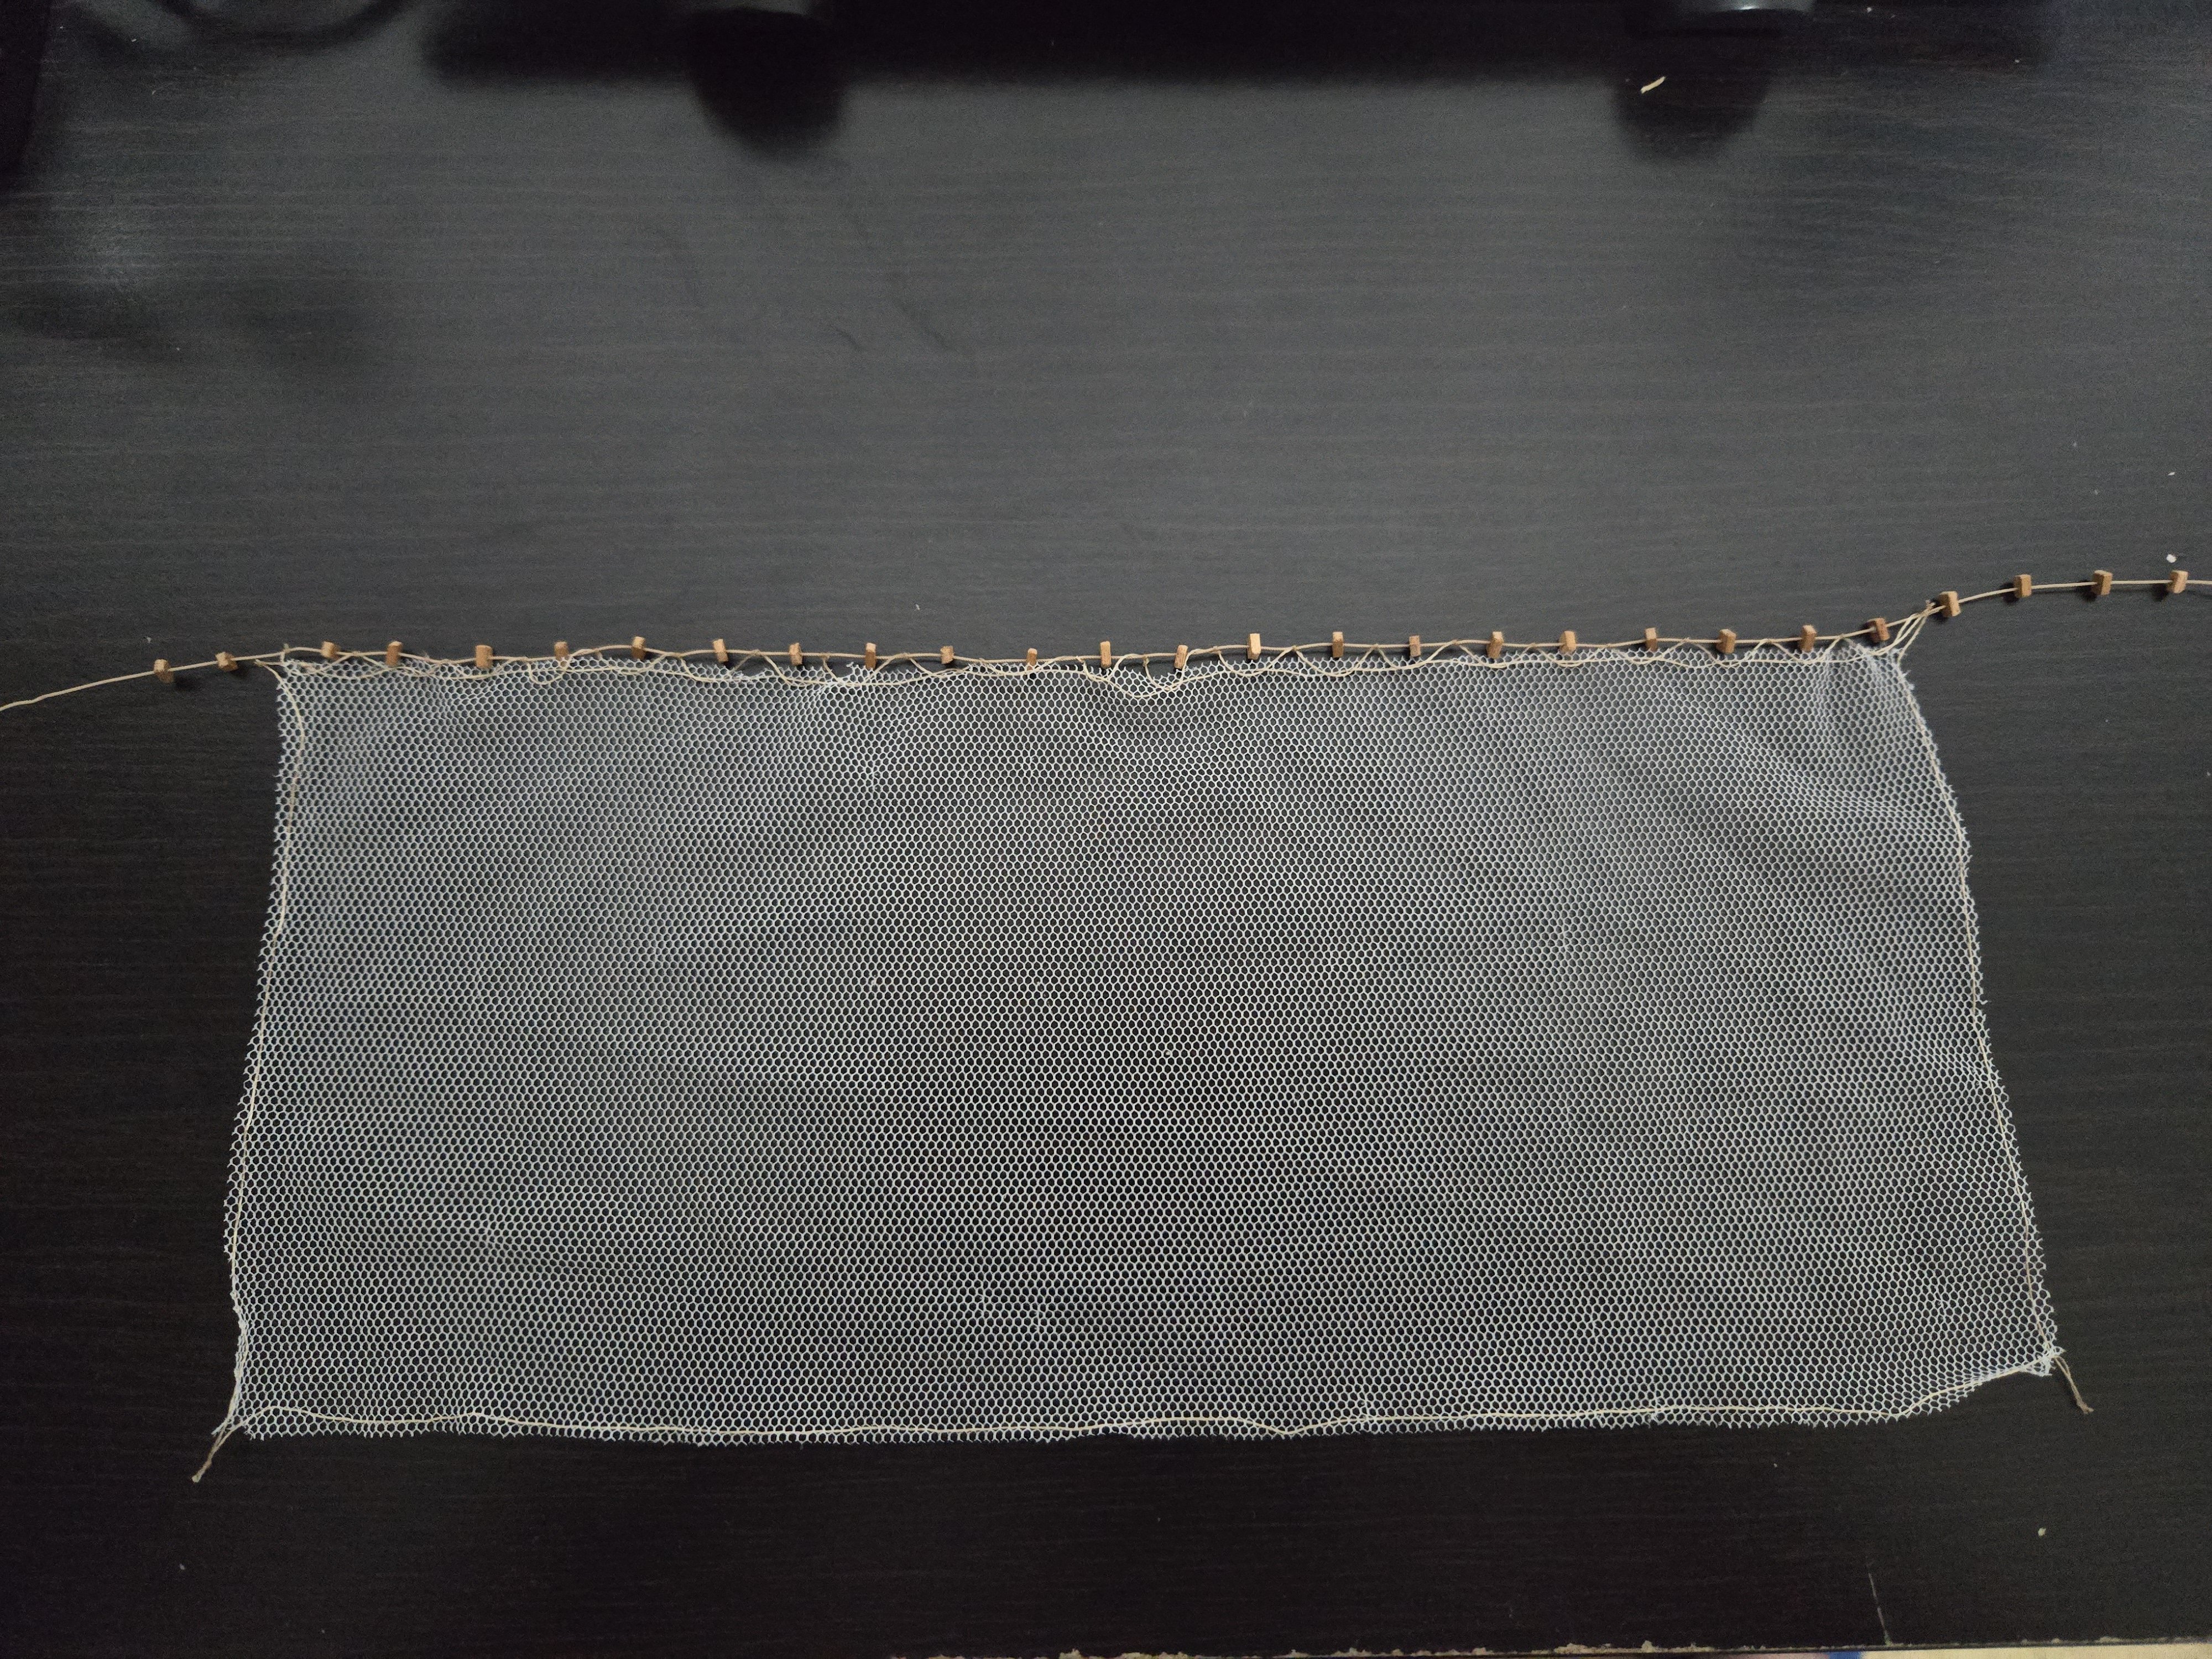
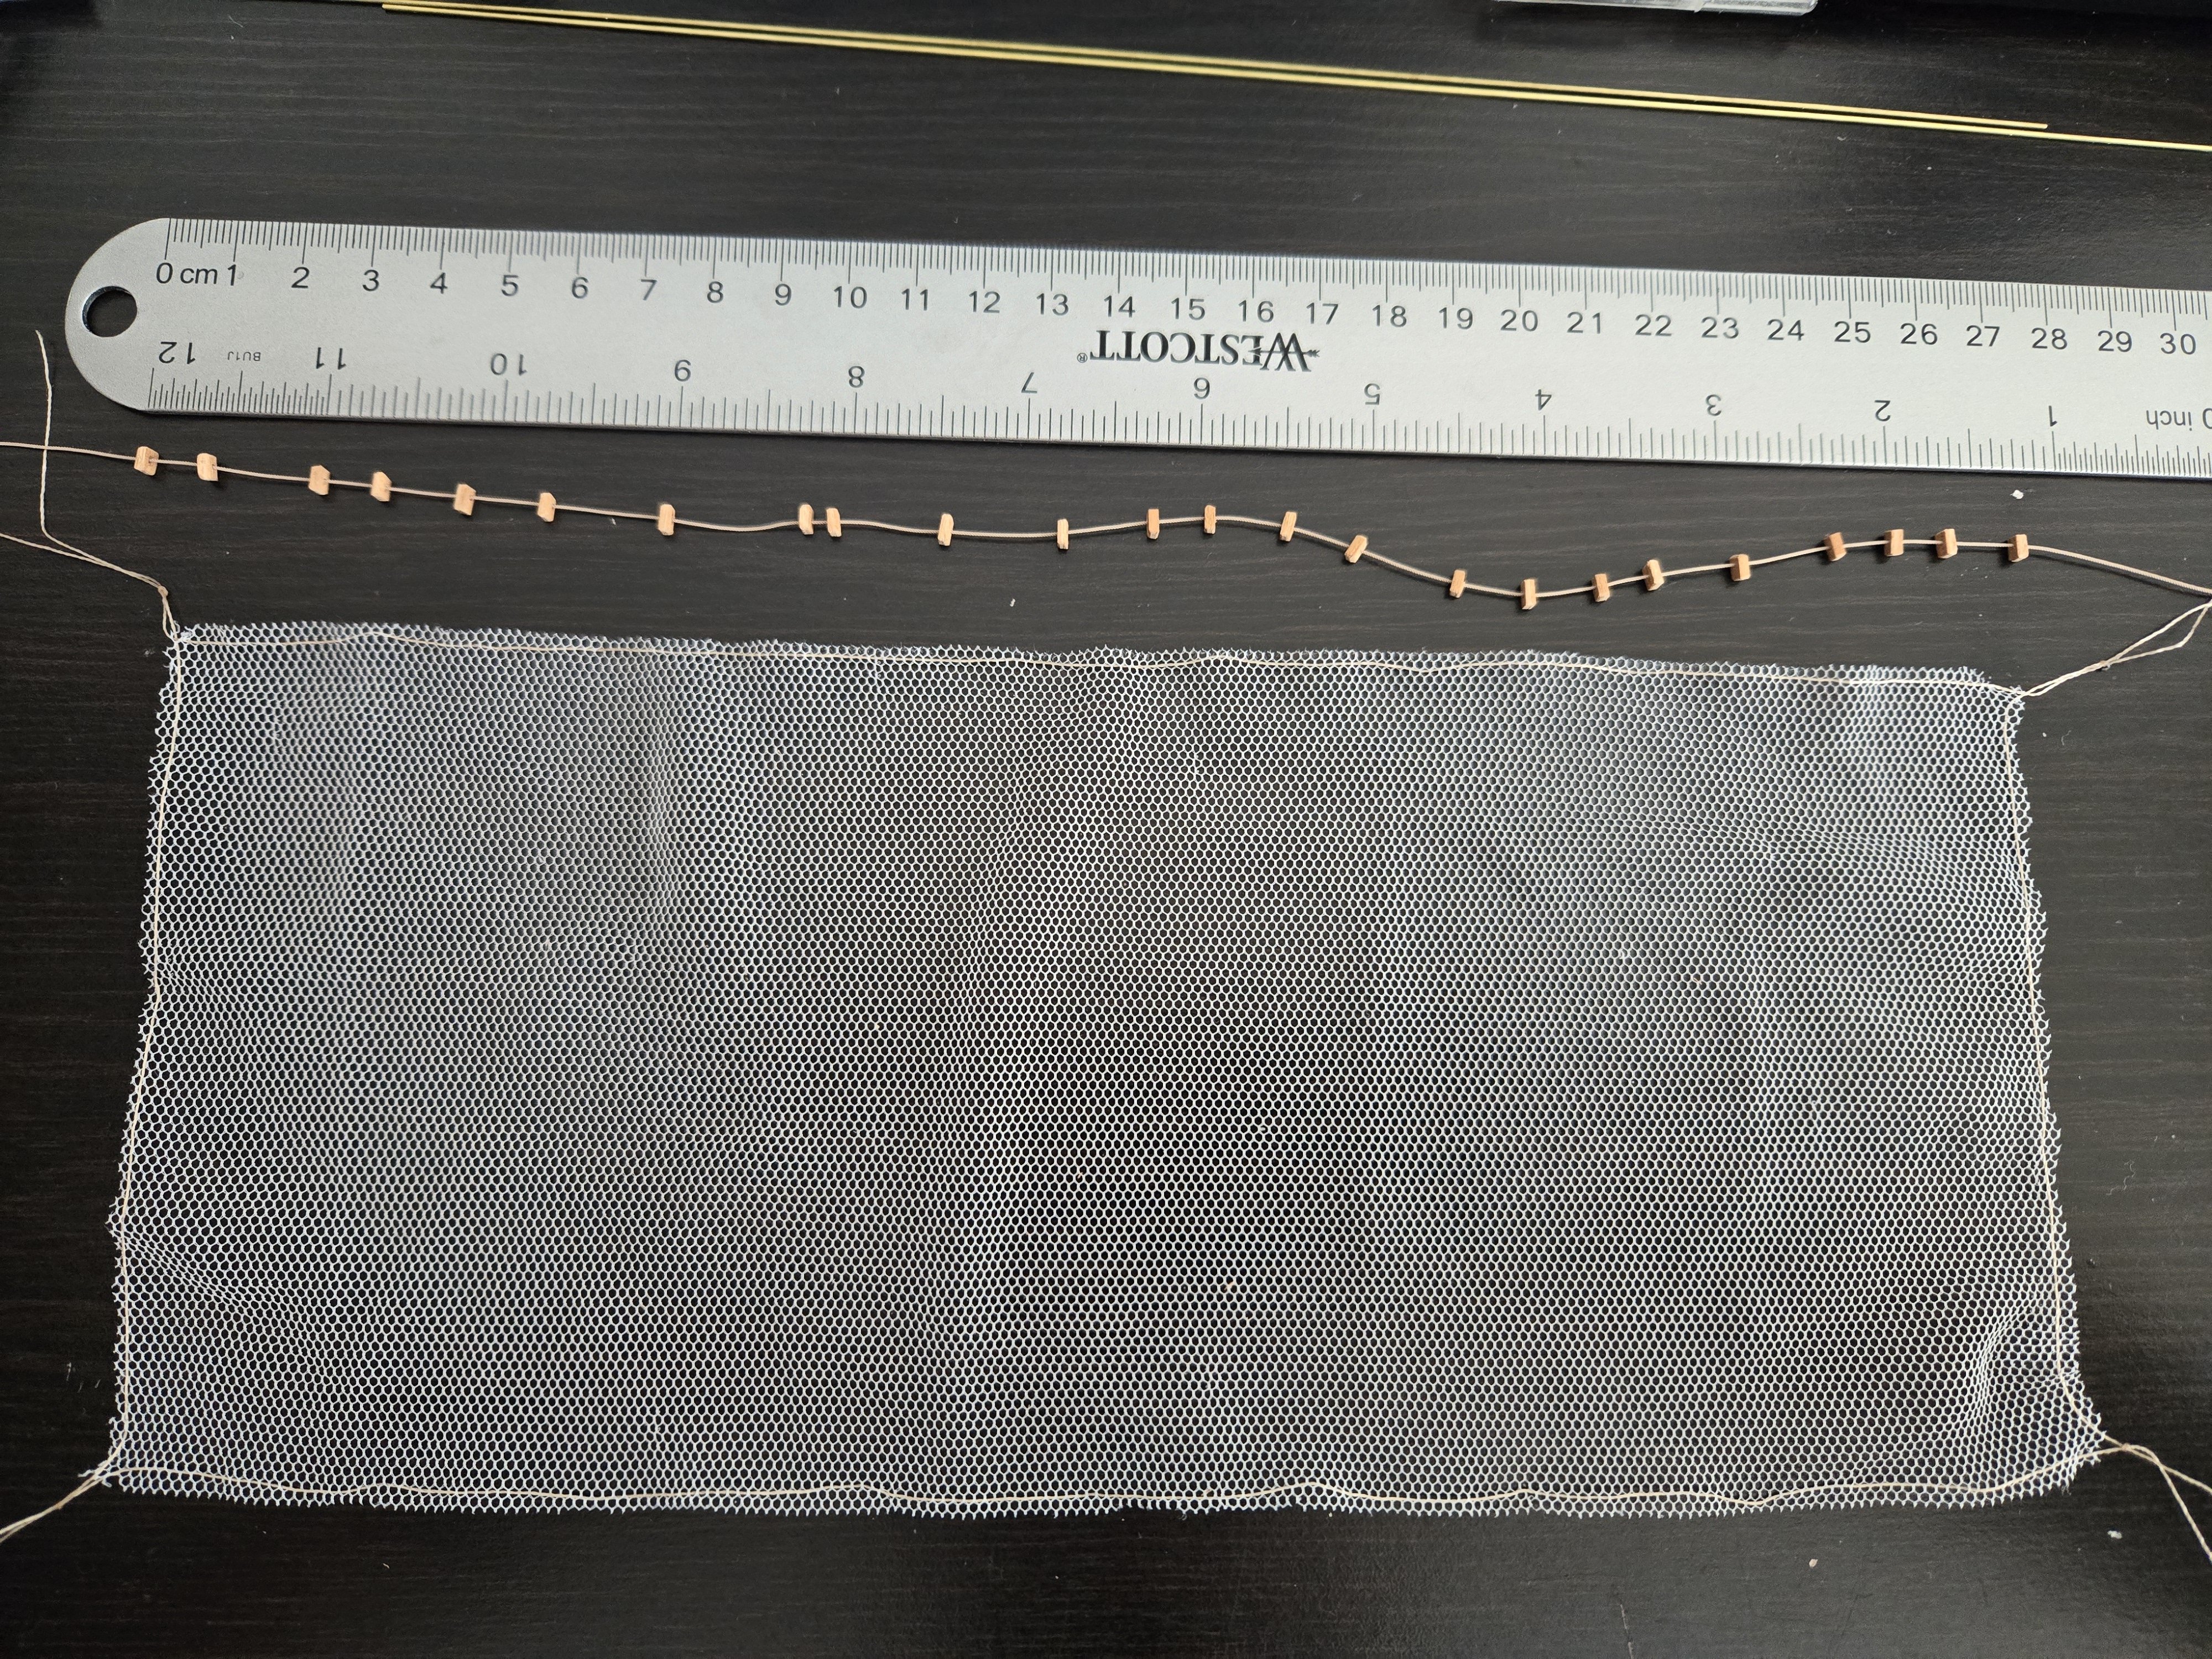
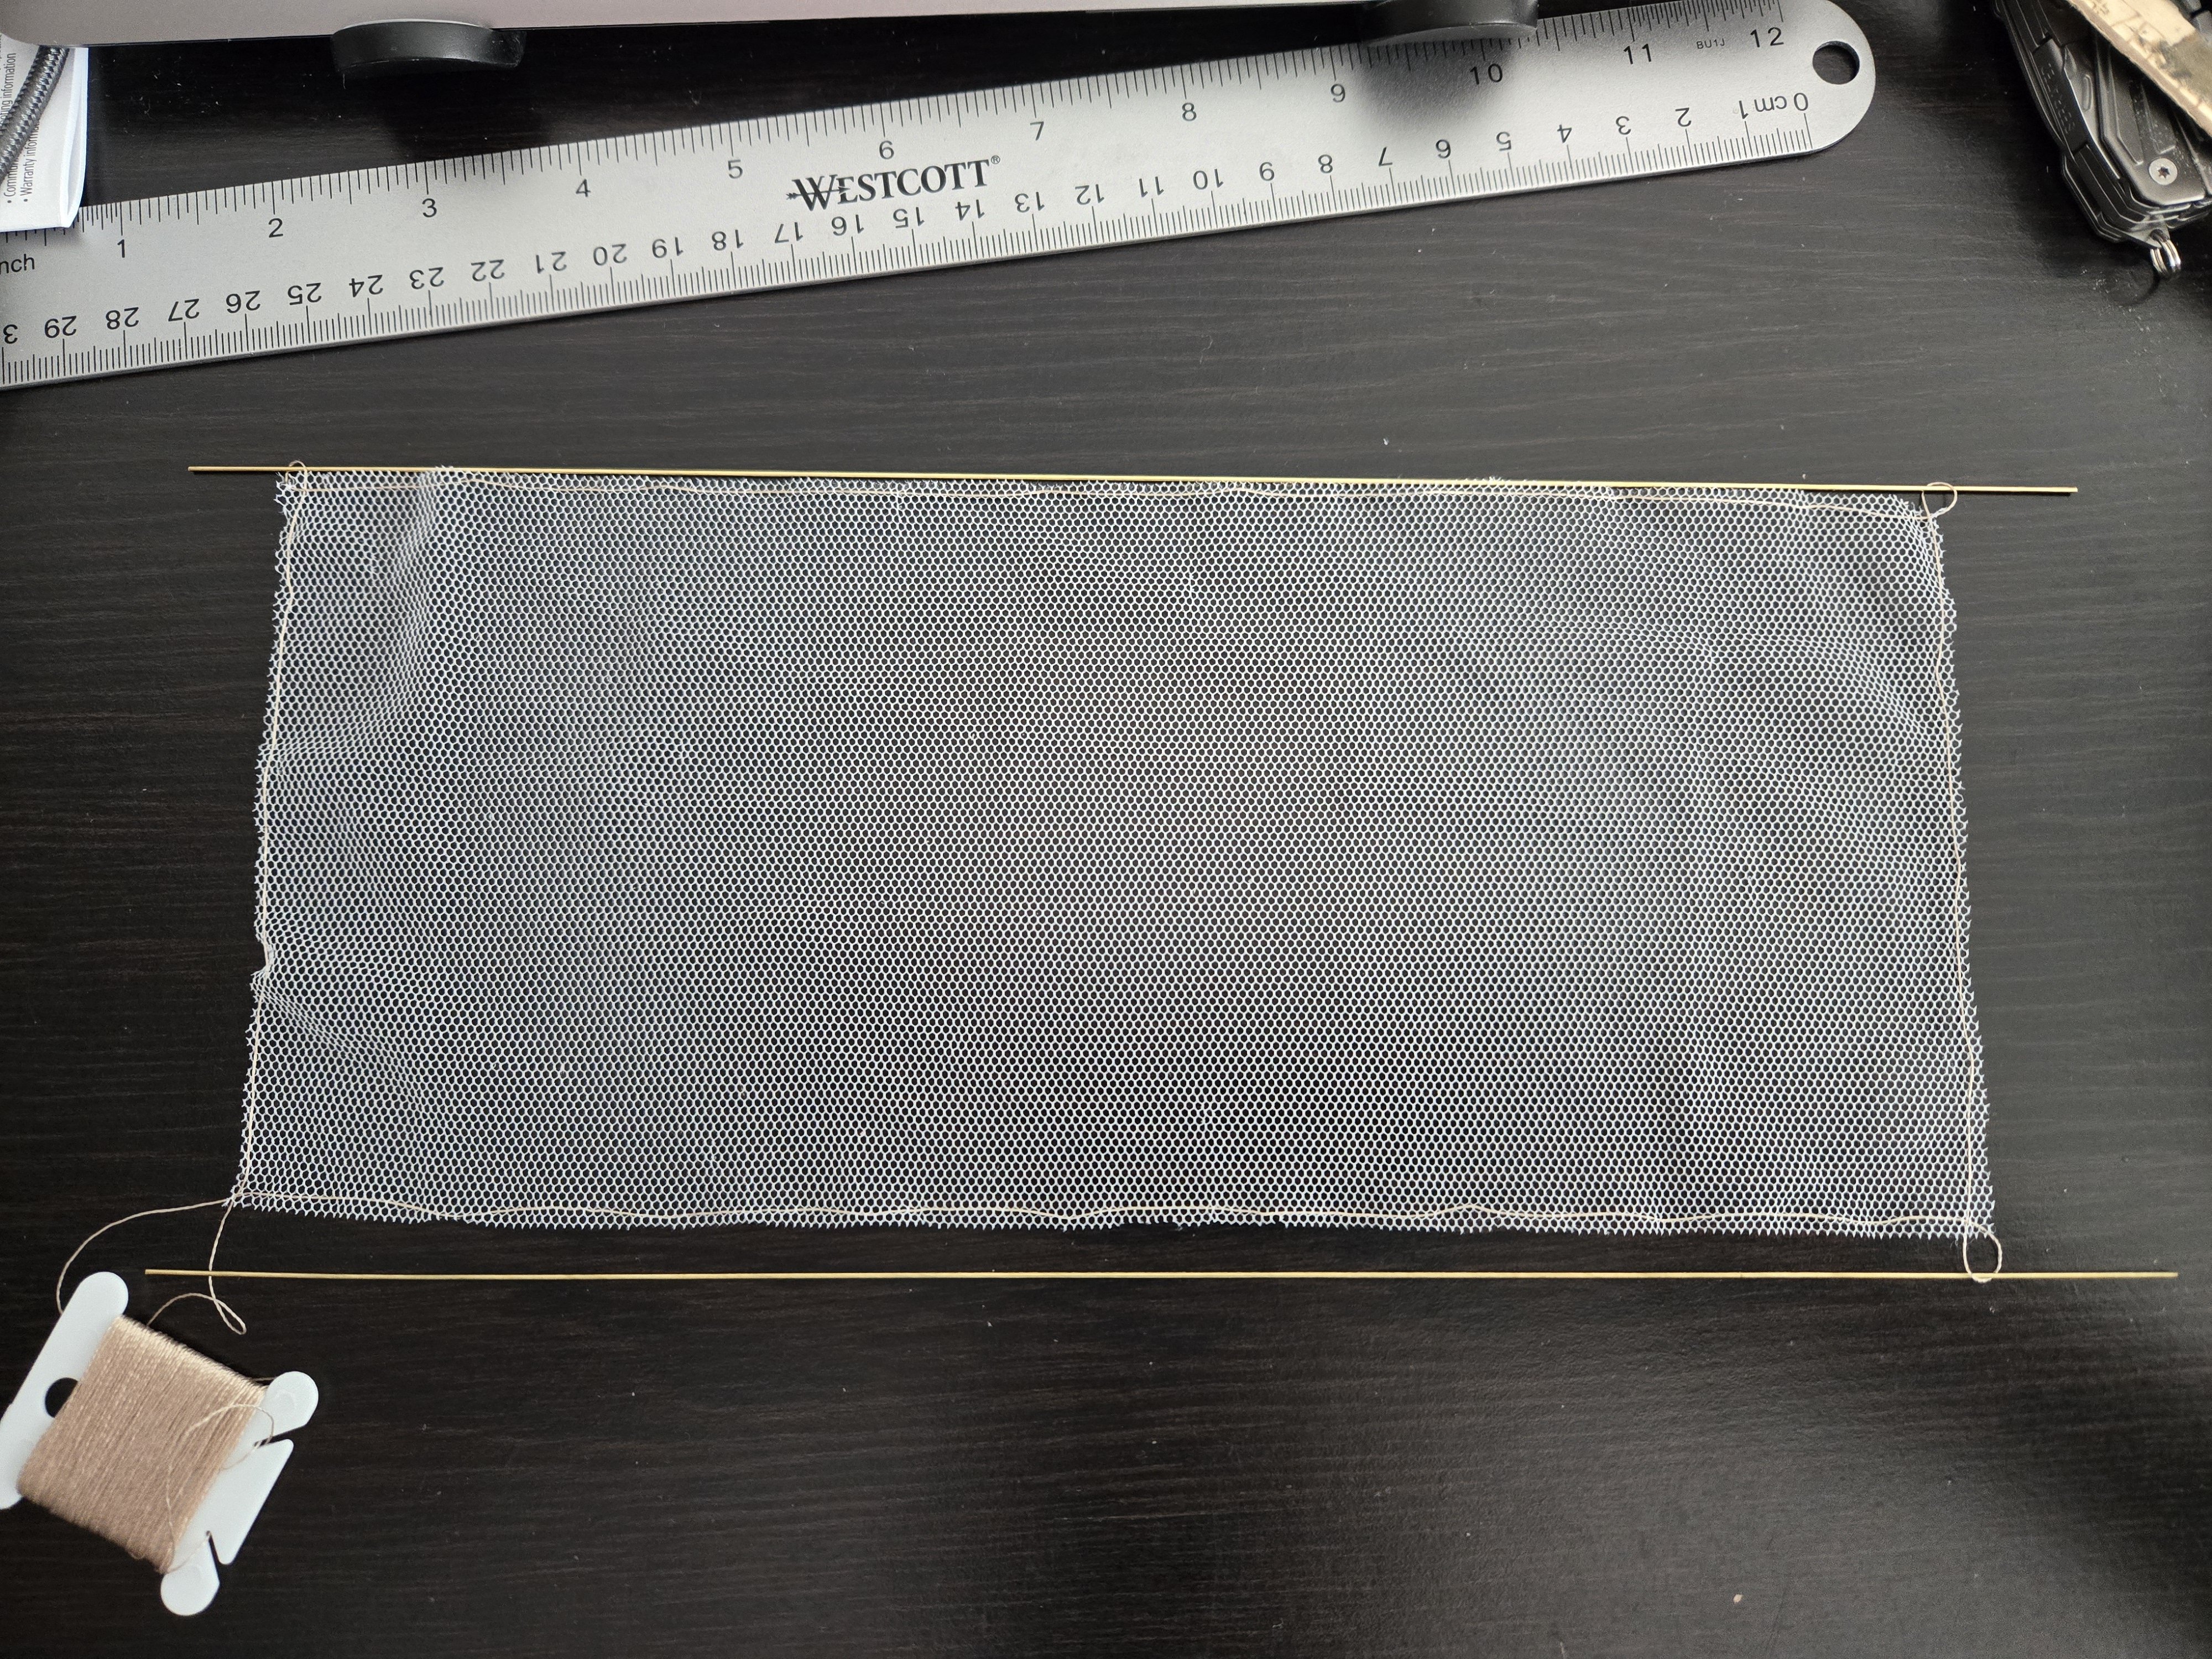
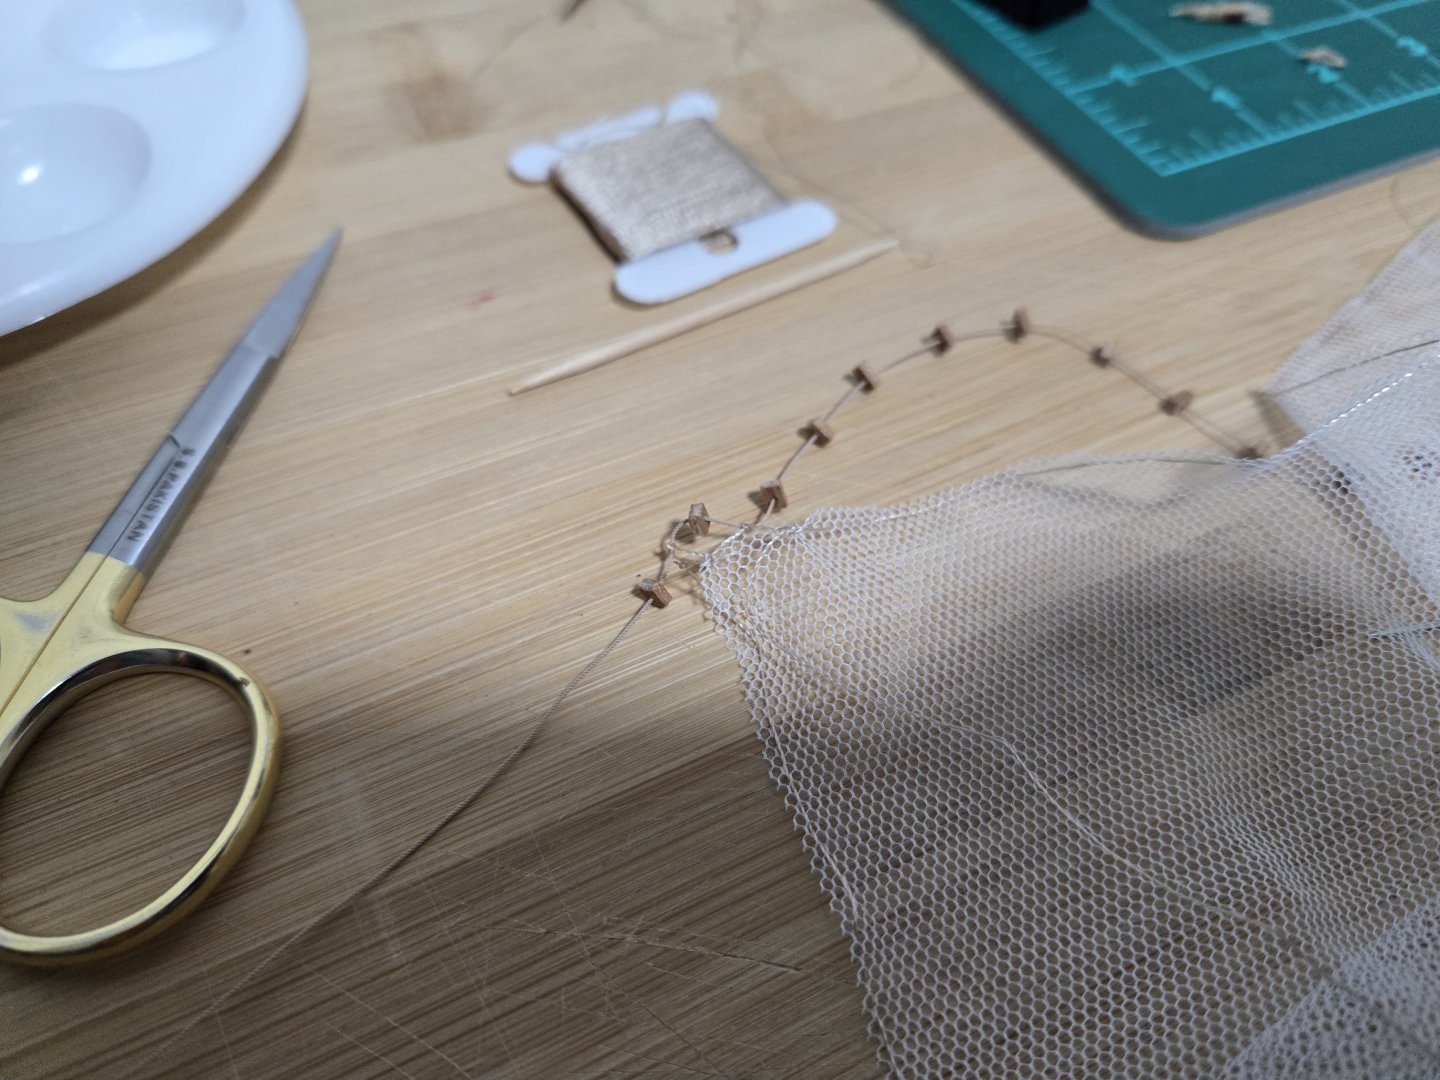
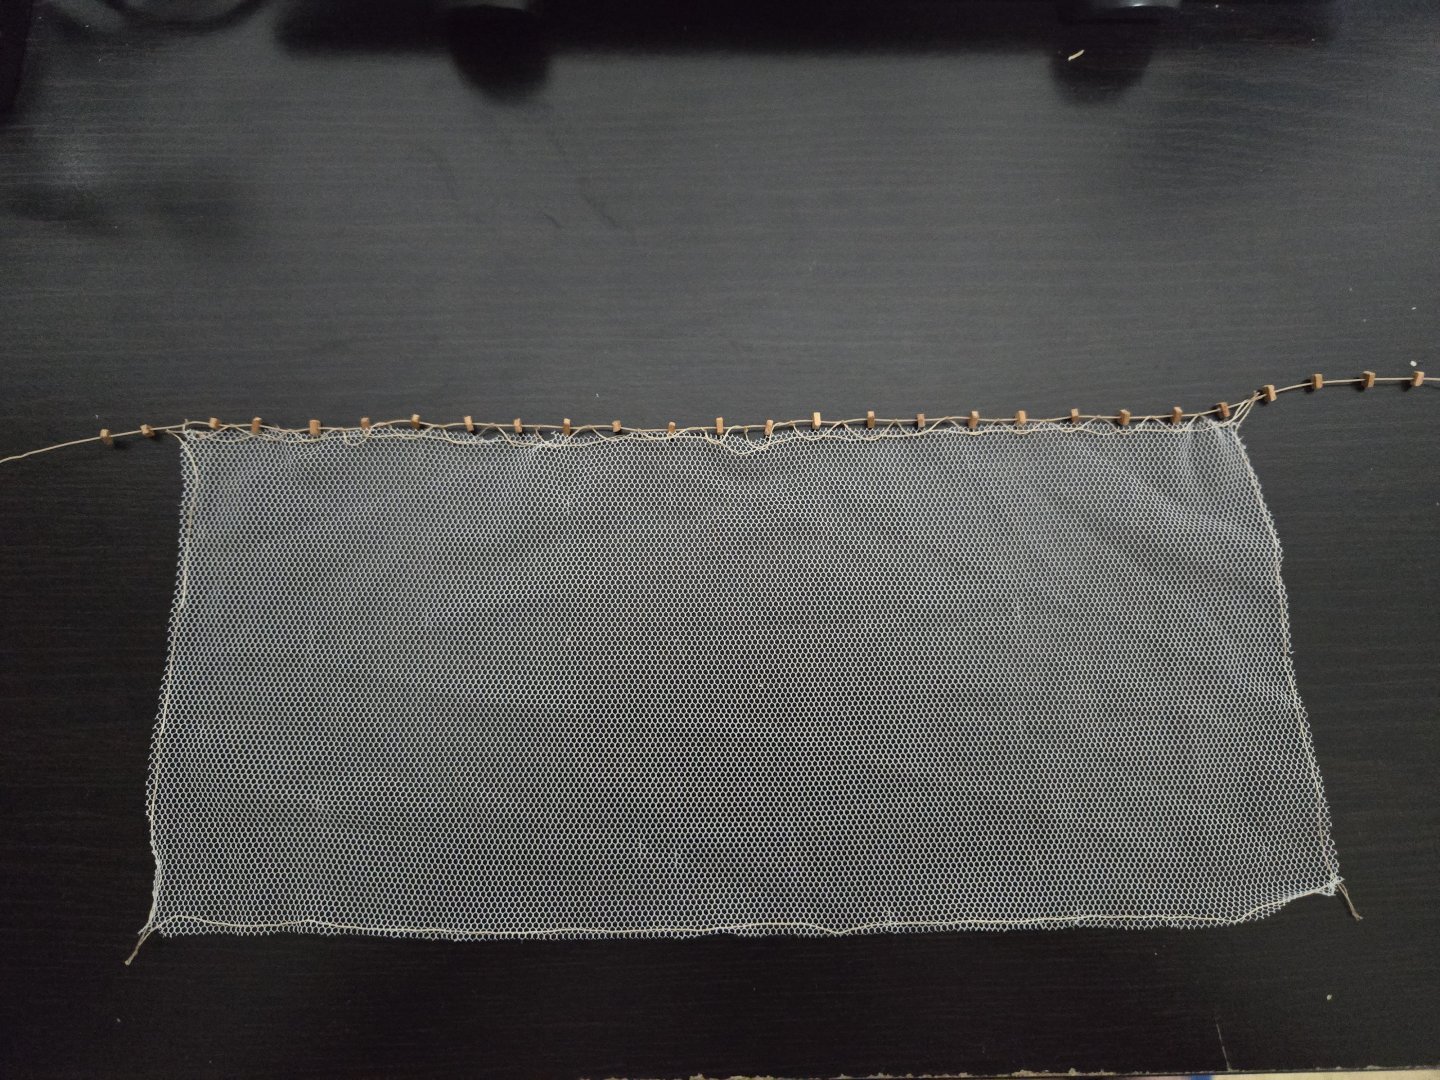
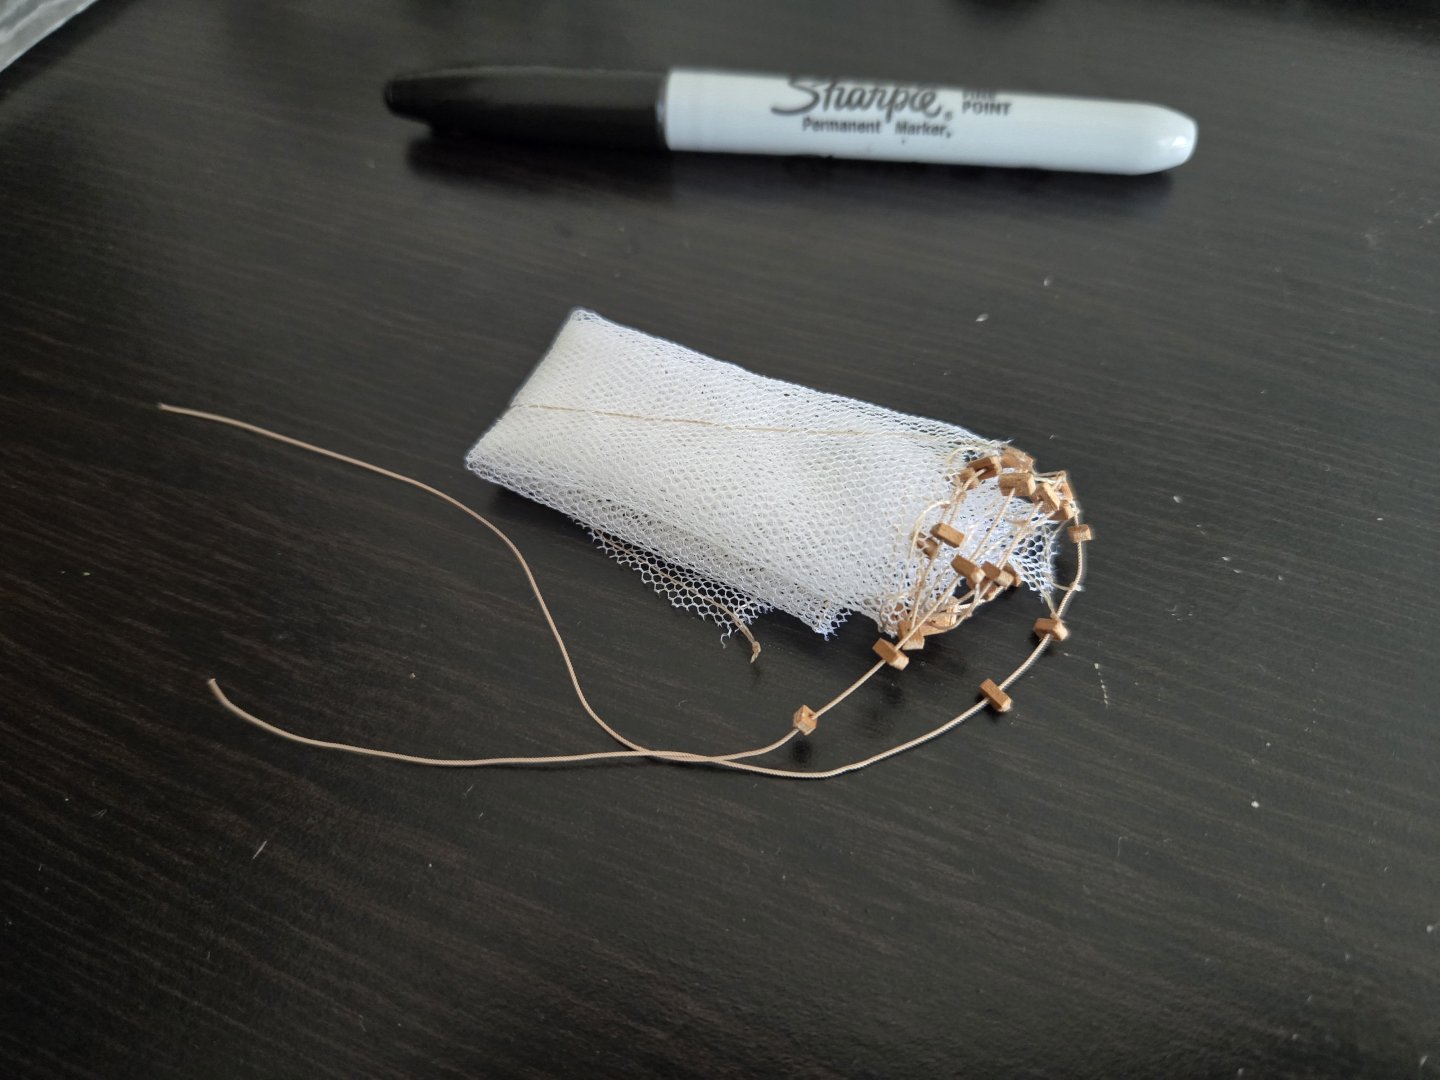
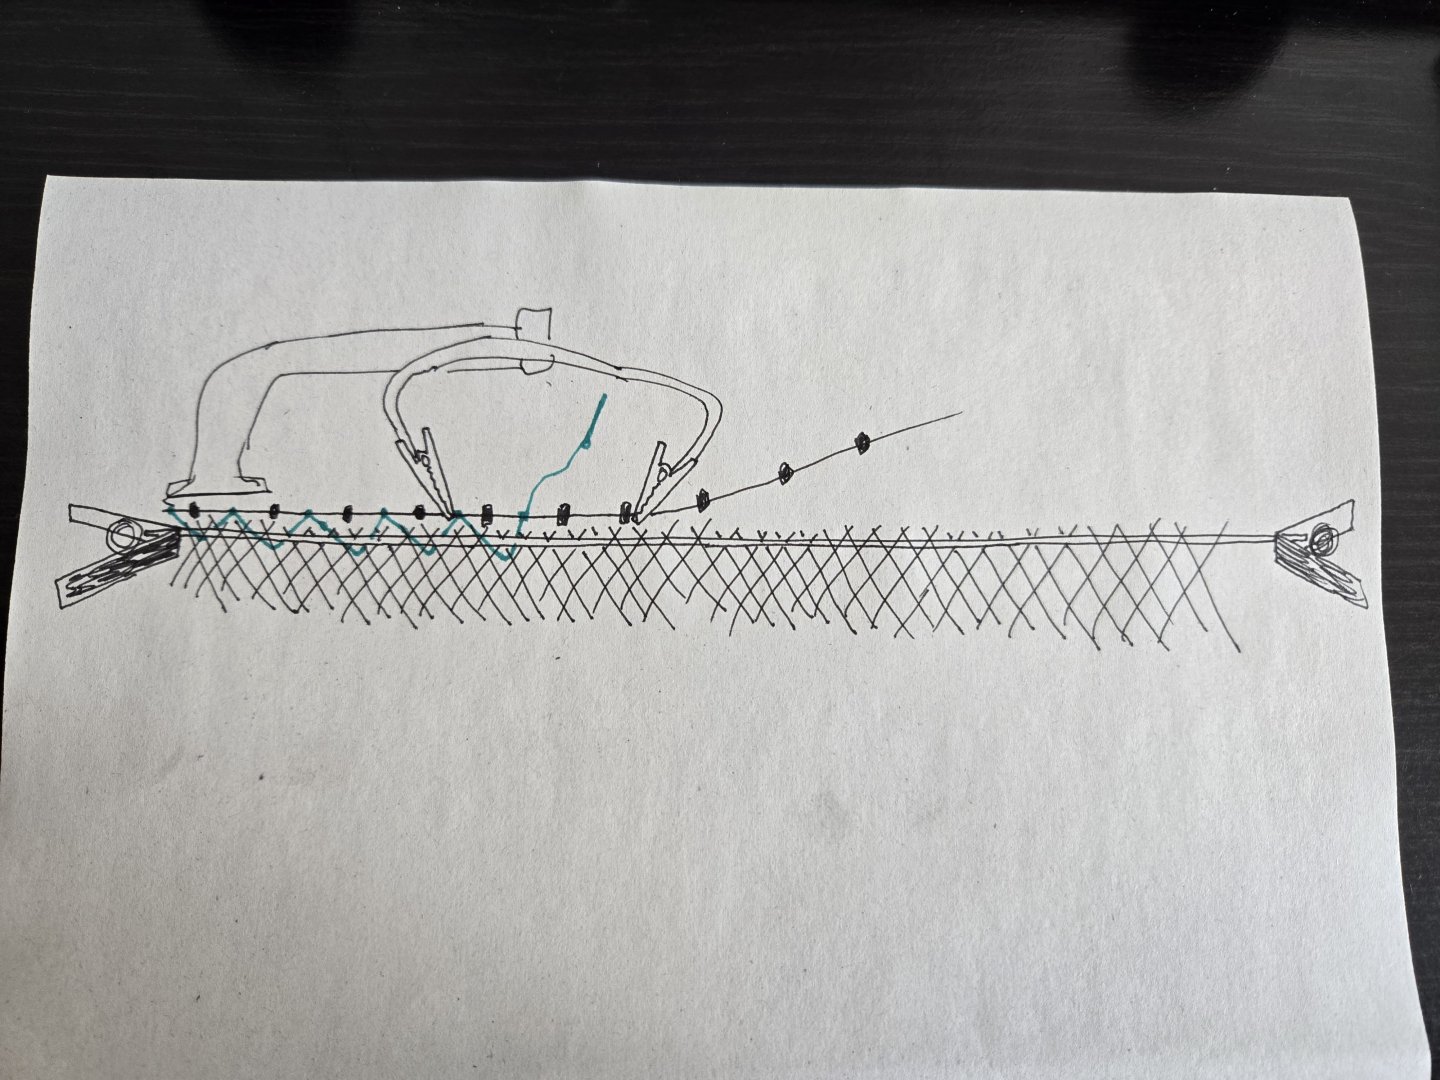
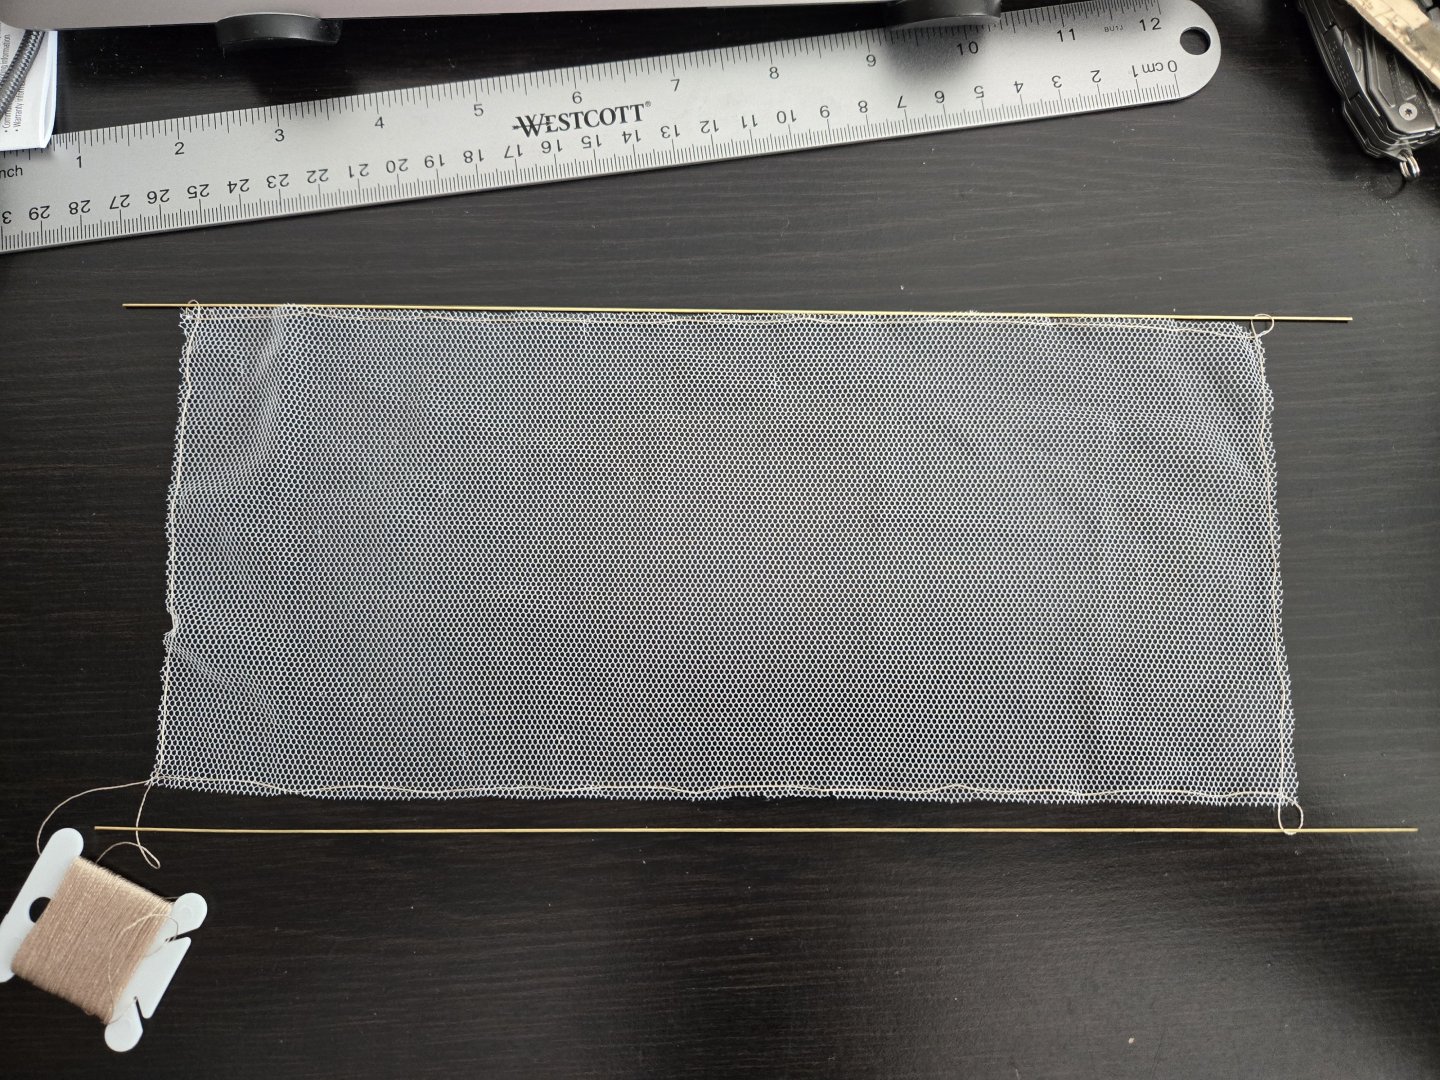
Thanks, your net looks fantastic! (As does the rest of your build). The tulle I'm using has holes about 3/64-inch across, corresponding to 1.5 inches at full scale. This is definitely a bit oversized, but I don't think it will be very noticeable with the net all rolled up. I'll definitely consider the stockings for future nets, though. It took more work than expected, but I connected the float line to the rest of the net. My first attempt was to try tying clove hitches in a zigzag, freehand, between the float line and the net line. This didn't work well, because it was very difficult to keep the lengths of the zigzag consistent. (Sorry about the terrible photo lighting!) So I undid it. For my second attempt, I thought I would just weave the float line directly through the net. So I removed the floats (which were not held in place very strongly, which just a dab of diluted white glue) and started. However, I soon realized that this method led to the floats being very covered up by the tulle--it looked terrible. Once again, I undid it. For the third try, I decided to make a sort of jig to hold the float line and net steady, straight, and at a consistent distance. I also decided to only do clove hitches along the float line and ise a simple loop along the net, reducing the number of knots I would have to tie and allowing the line to equalize itself better between zigzags (if that makes sense--so if one bit was a little too short and the next too long, the line could be adjusted slightly). To make my "jig" (if it can even be called that), I threaded a bit of brass rod through the net alongside the edge line to hold the net straight. I used clothespins at each end to hold the net in place, and to prop the net edge up off the table. I then used a set of helping hands set just above the net to hold the float line in place, and wove between the two lines. I didn't get a picture of the whole setup, but I sketched it out (with the "zigzag" line in green to make it clearer. As I worked, I just moved the helping hands down to the next section. Here's the jig in action. It's extremely simple, but it worked fairly well. The brass rod, especially, really helped keep the tulle in place. Once I finished the knots, I slid the brass rod out, and it was ready. There are a few uneven parts, but overall I'm happy with how it turned out. (The right half, which I did last, came out pretty even.) And here's how it looks rolled up, which makes the unevenness less noticeable, although I'll need to squish it down flatter once I actually roll it up at the end. Next on the net, I just need to dye it and attach some weights to the bottom end, which will have to wait until I can find some beads or something. But maybe I'll do something that doesn't involve so much thread work first.


-
Congratulations on finishing, very nicely done!
-
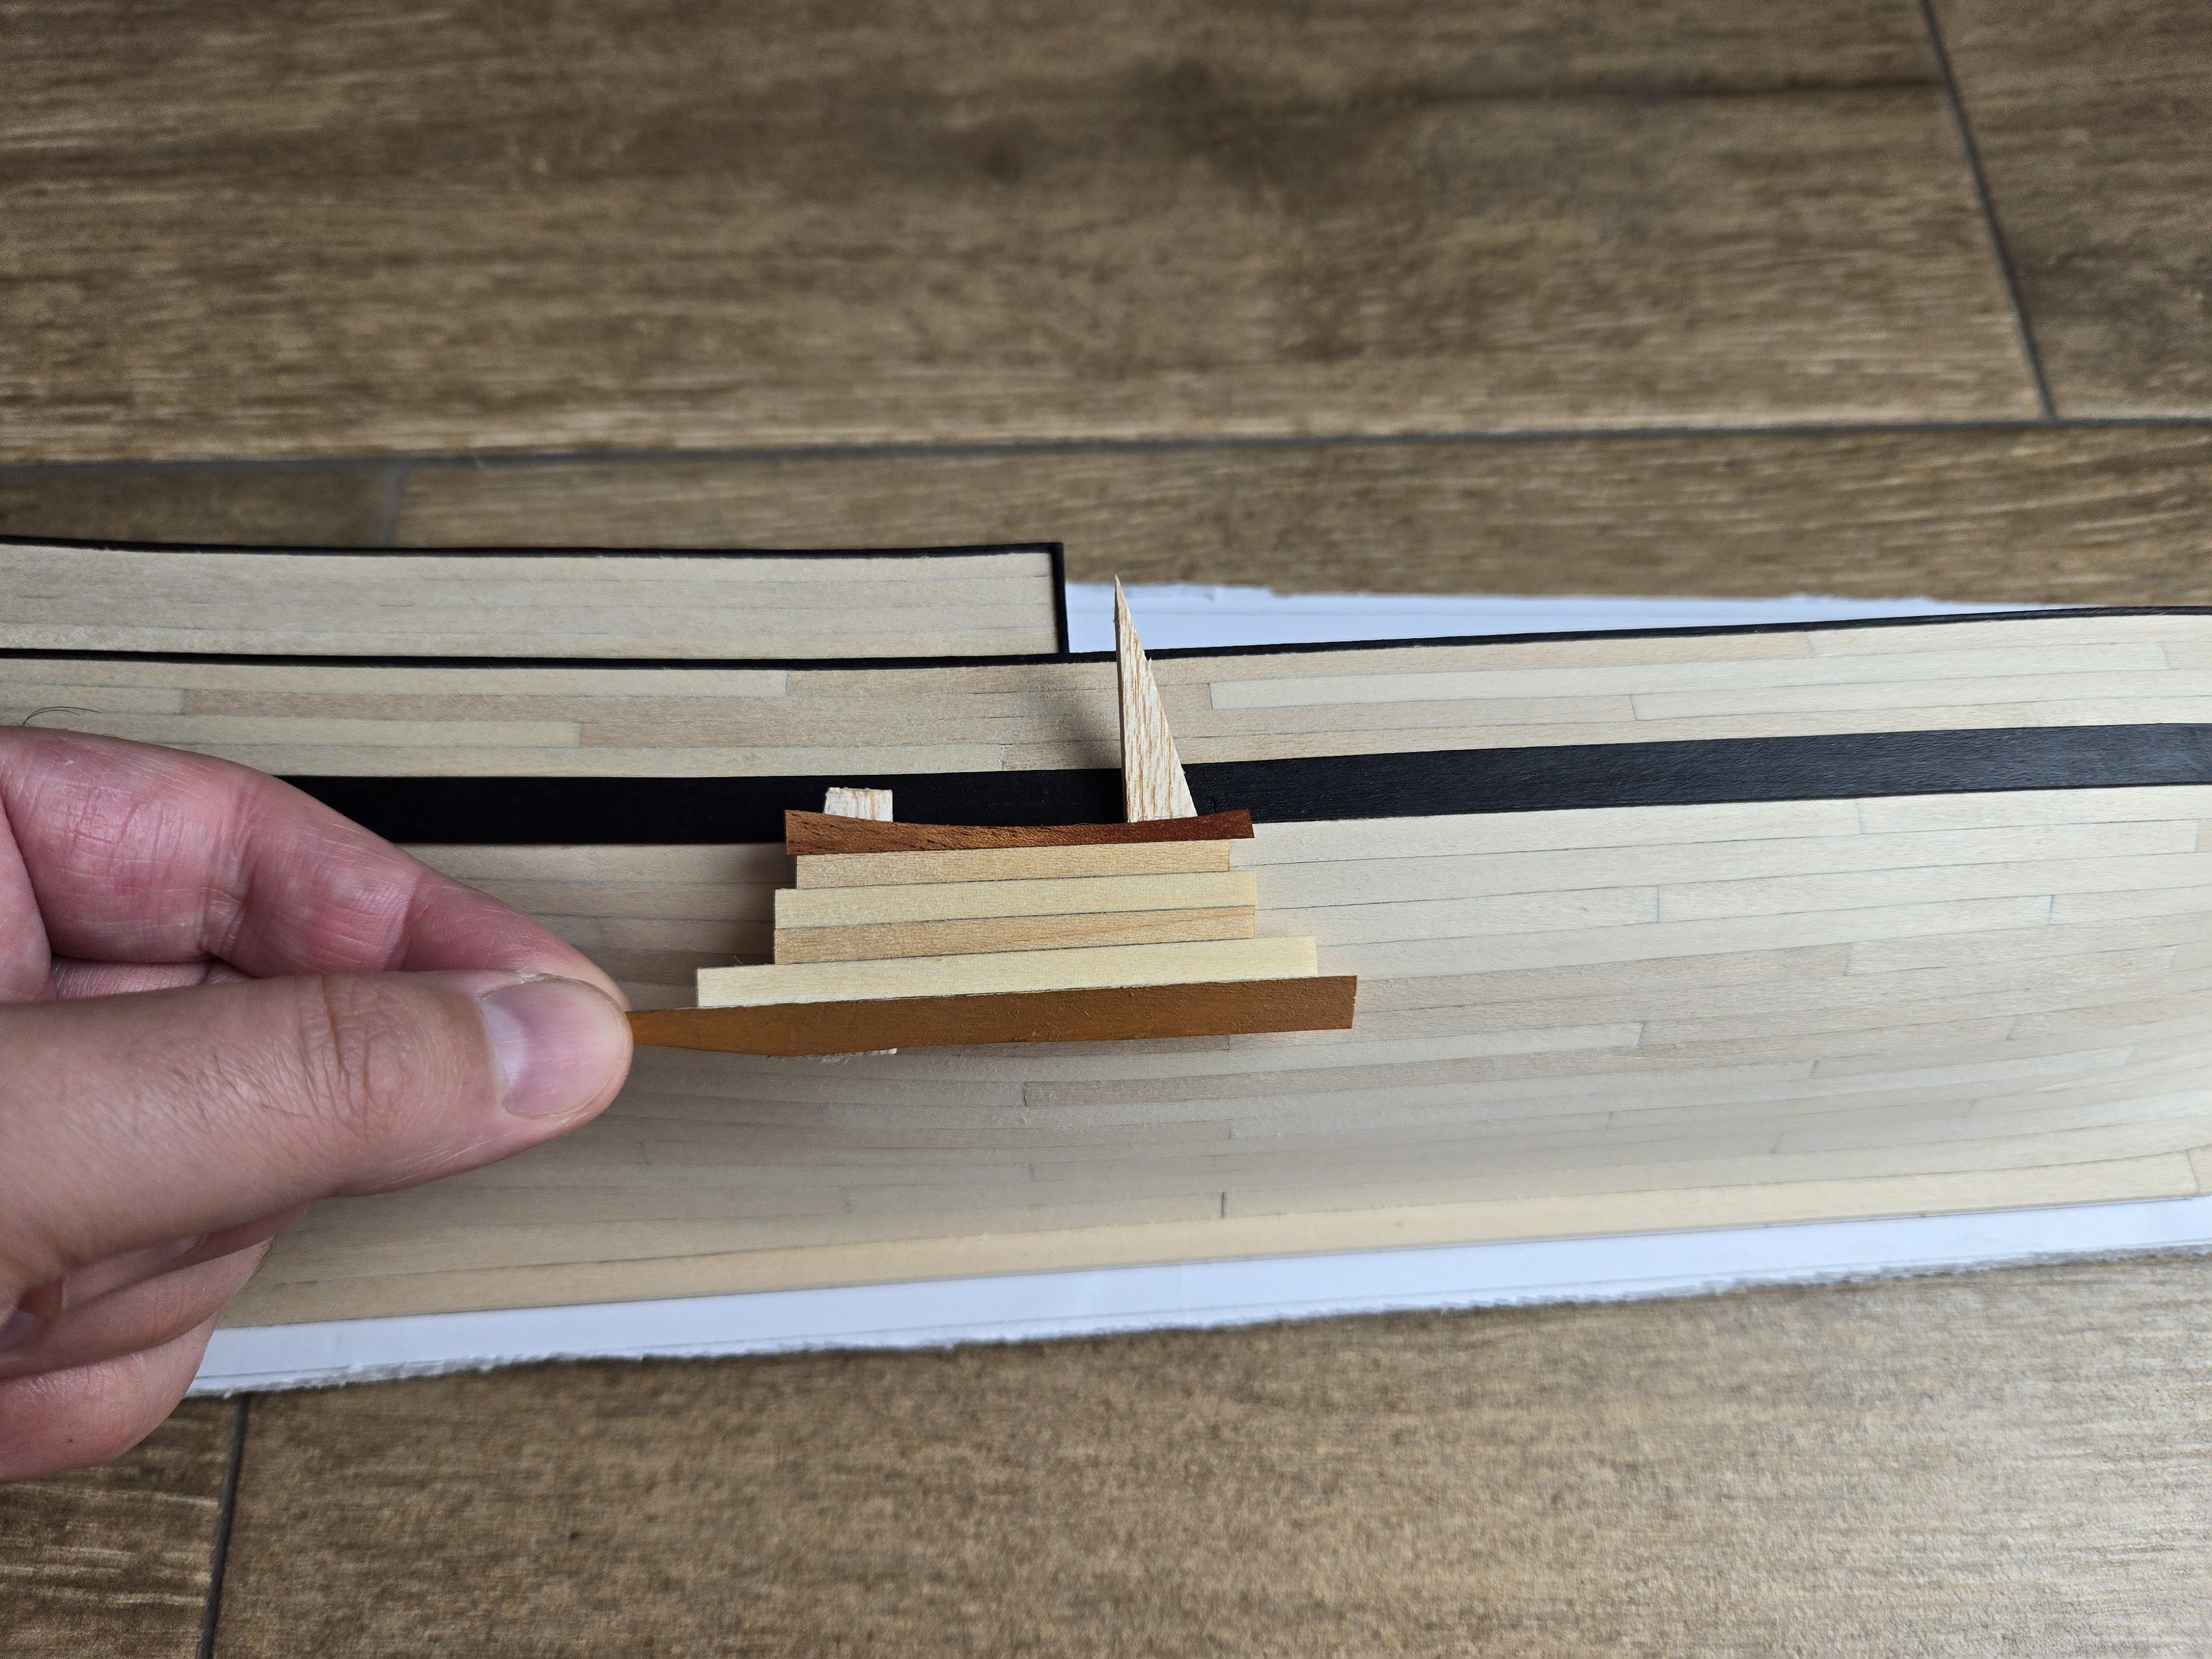
I'll be building the frame soon, but in the meantime, I started looking at finishes for the model. Although basswood is usually not considered a very nice wood to leave unpainted, other half-hull build logs show quite beautiful results from applying finishes like Danish Oil, Teak Oil, and Wipe-On Poly. Unfortunately, having just moved to Mexico City, I'm discovering that all of these finishes are substantially more expensive here than they were in the US, at least double the cost per unit, and generally only available in much larger quantities than I will need. So, casting around for options that won't break the bank, I found that plain Linseed Oil is readily available for cheap. Although the boiled variety is generally recommended due to the long drying time of the plain stuff, I am not in a rush. I made a sample bit of planking out of scraps to test it. Although I don't have any scraps painted black like the wale, I included some painted brown to check how the oil would handle an acrylic painted surface. I also threw in a scrap of mahogany out of curiosity. I was also curious about the effect of multiple layers, so the left side only has one coat, while the right side has three. The results don't look bad, with the oil--especially three coats--adding some depth to the wood color (especially on the mahogany, which is good to know if I use it again on any future model or, perhaps more likely due to the prominent grain, stand). The difference in color is much easier to see when compared with the untreated hull: So, I think I'll be going with plain Linseed Oil for the hull treatment, just being aware that it will take a long time to dry. Thin coats applied at least a day apart seems crucial here.

- 82 replies
-
- 2
-
-
- half hull planking project
- half hull
- (and 2 more)
-
I'm not sure how helpful my response is, but I don't think there's any one right answer. What sort of vessel interests you the most, and what aspects of building do you enjoy most, dislike most, and want to focus on improving? You mentioned that the Golden Hind's instructions forced you to think outside the box--did you enjoy the challenge, or would you prefer better instructions for the next model? If you're really most interested in a frigate, it would certainly be a step up in complexity, but you do have experience you can build on, you're not starting from zero (and if part of a build is too complicated or frustrating, you can always set it aside for a bit--that's part of what I've enjoyed about having multiple builds going at once). On the other hand, a smaller warship might also be useful as an intermediate step for building skills in fully rigging masts and cannon. About the only firm advice I would give is not to build a ship you're not interested in. There are many paths in modeling, and it's really just about finding what you enjoy. For example, I've found that I'm really not interested in warships, and I'm not a big fan of rigging so I don't plan on ever building a full-rigged ship. Instead, I've found smaller wooden working boats to be extremely rewarding subjects and interesting research topics in their own right, and I particularly enjoy the challenges of scratchbuilding (whether whole models or just additions to kits, which I'm still happy to build). That said, I've also chosen projects that allow me to progressively build skills, rather than jumping straight into some of the more complex scratch builds I hope to do one day. All of which is to say, there's no one right path, it's just a question of asking yourself what interests you and what is feasible.
-
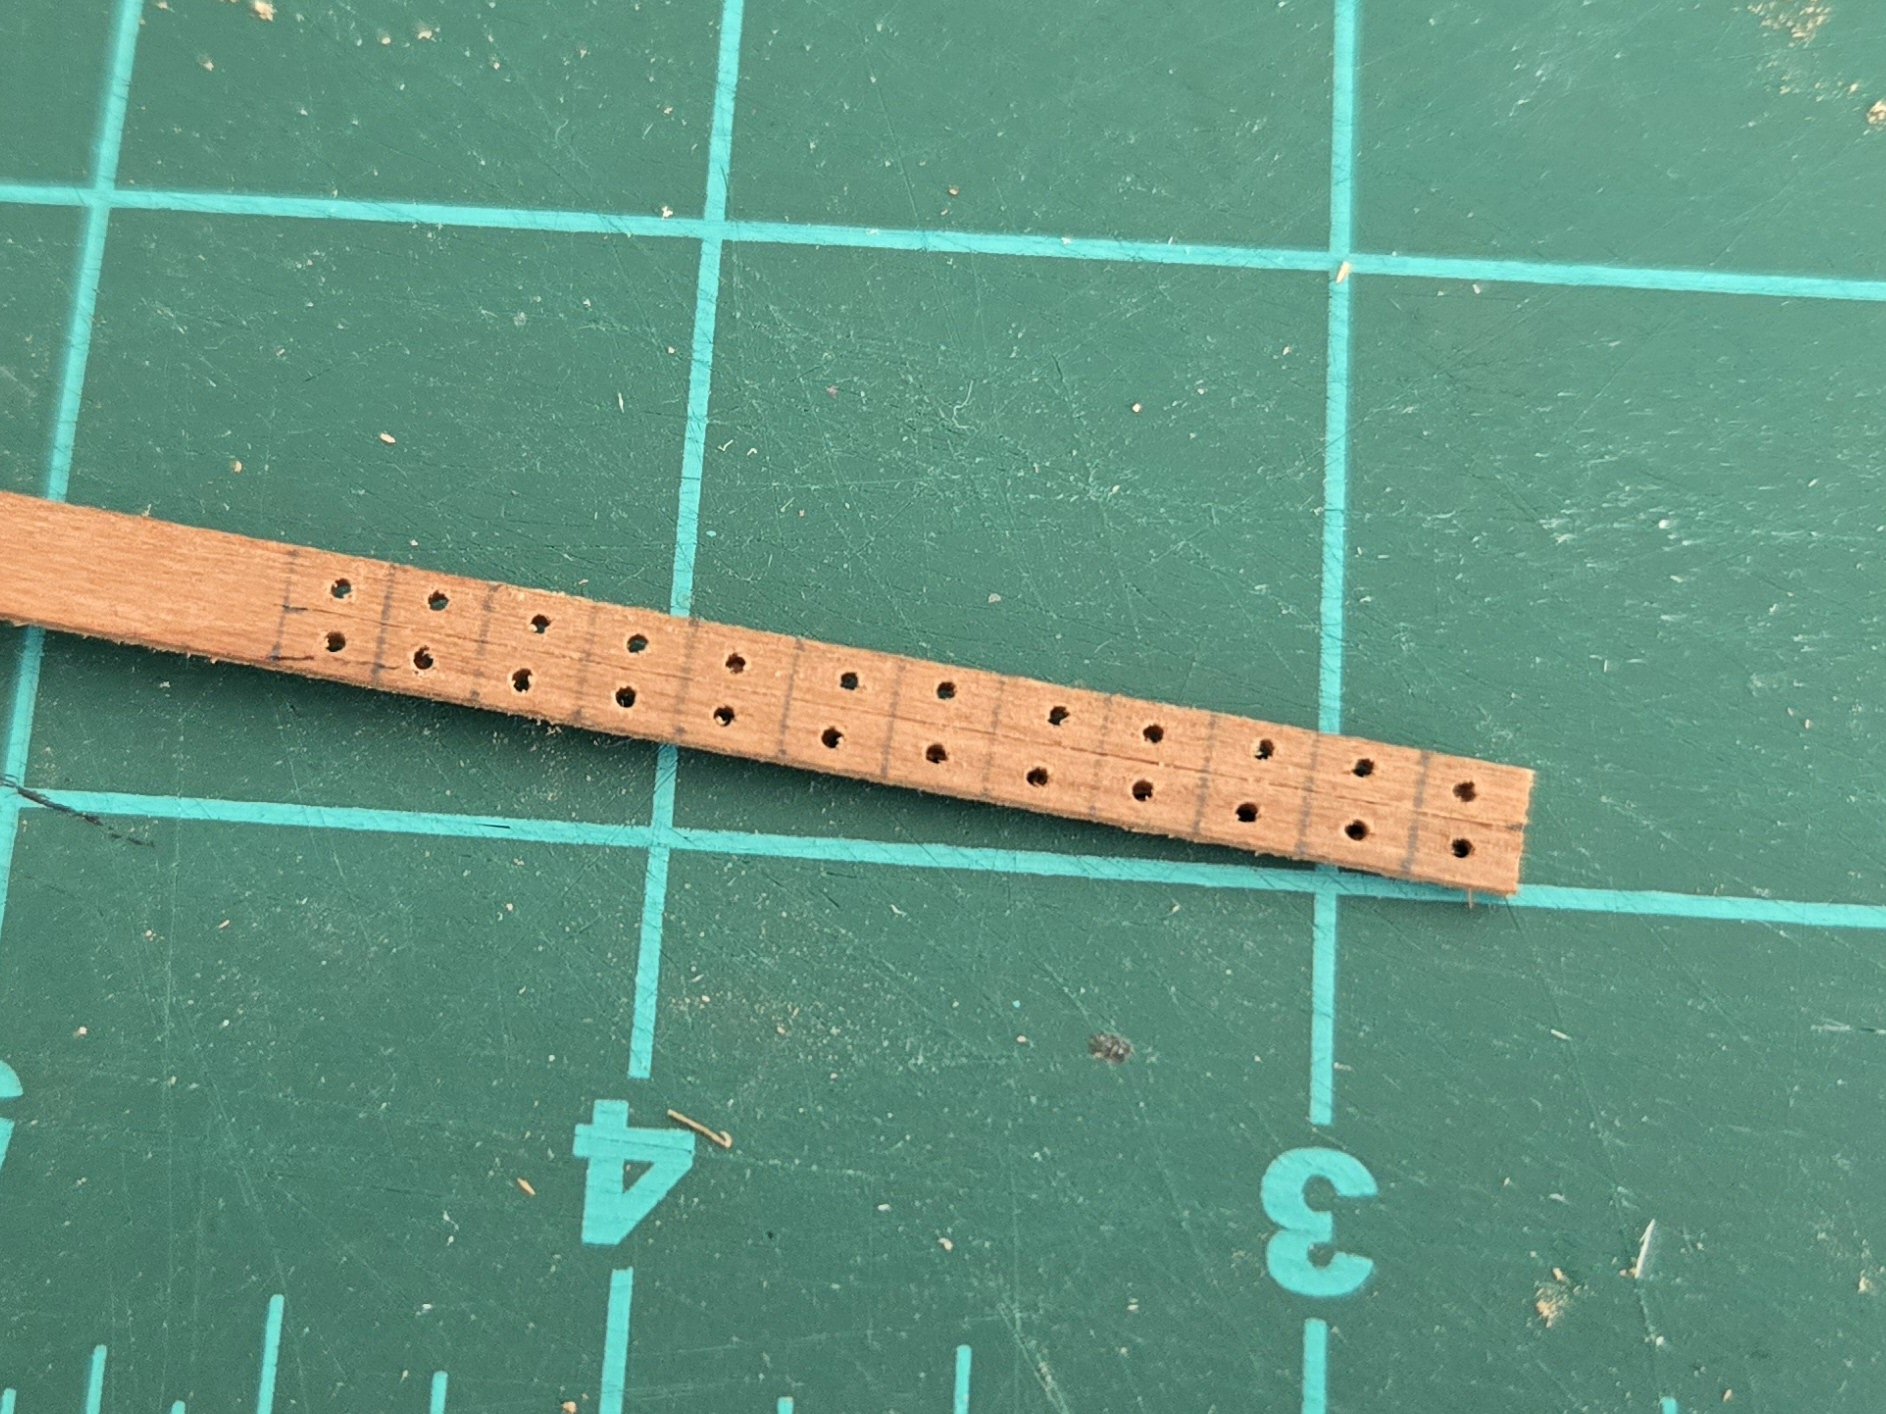
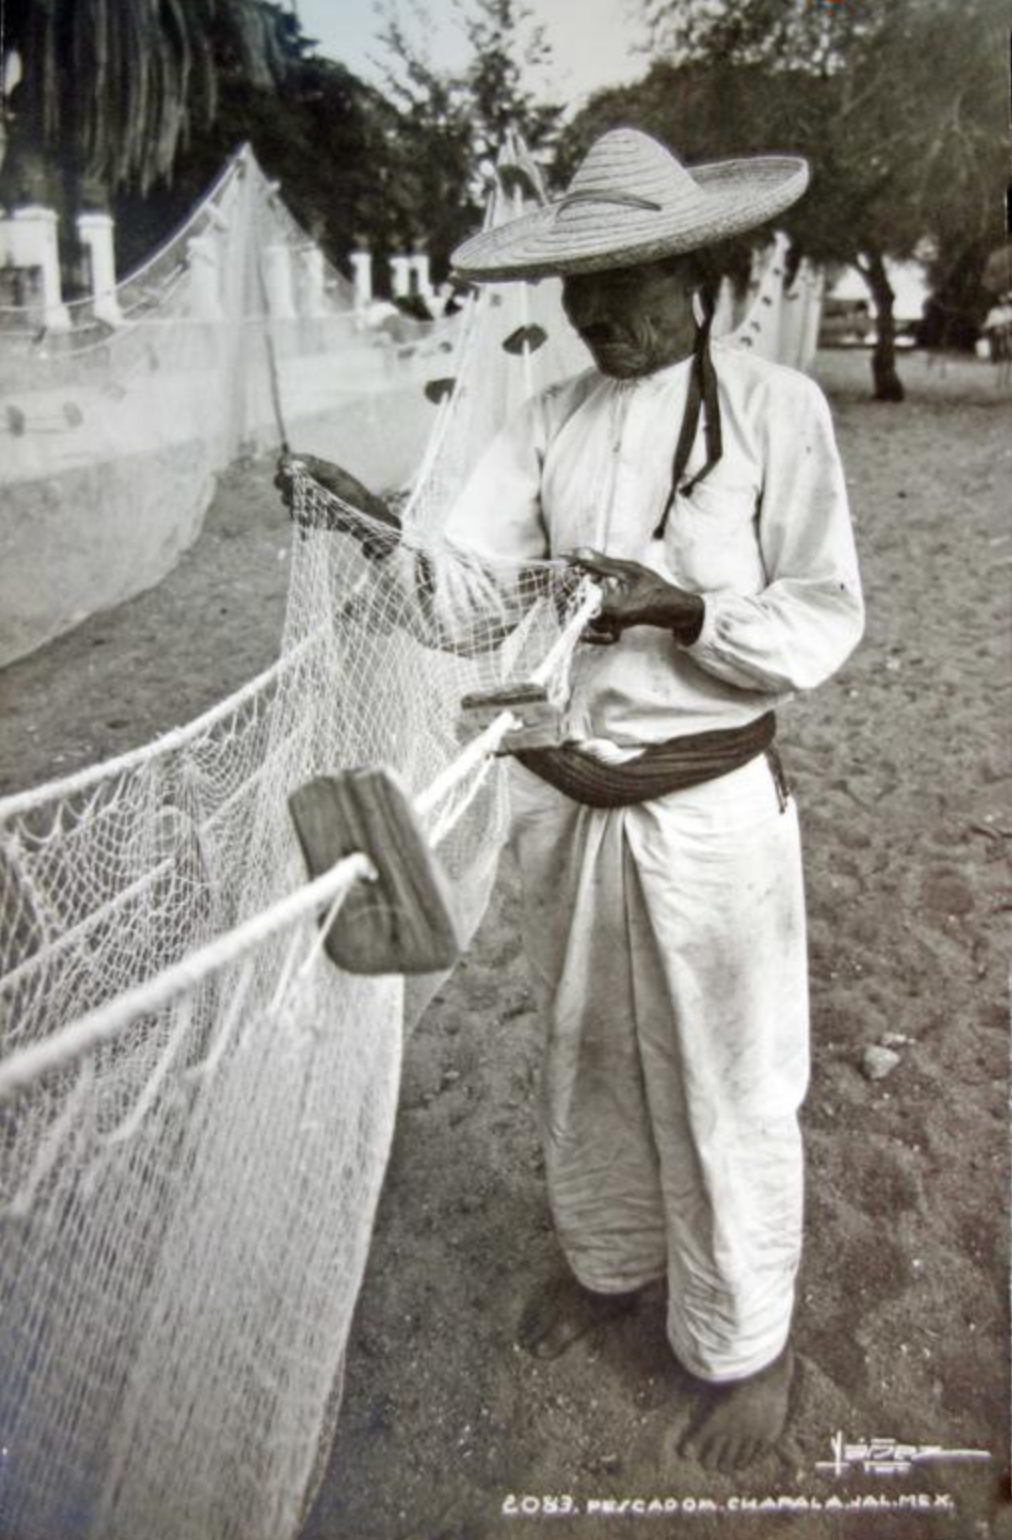
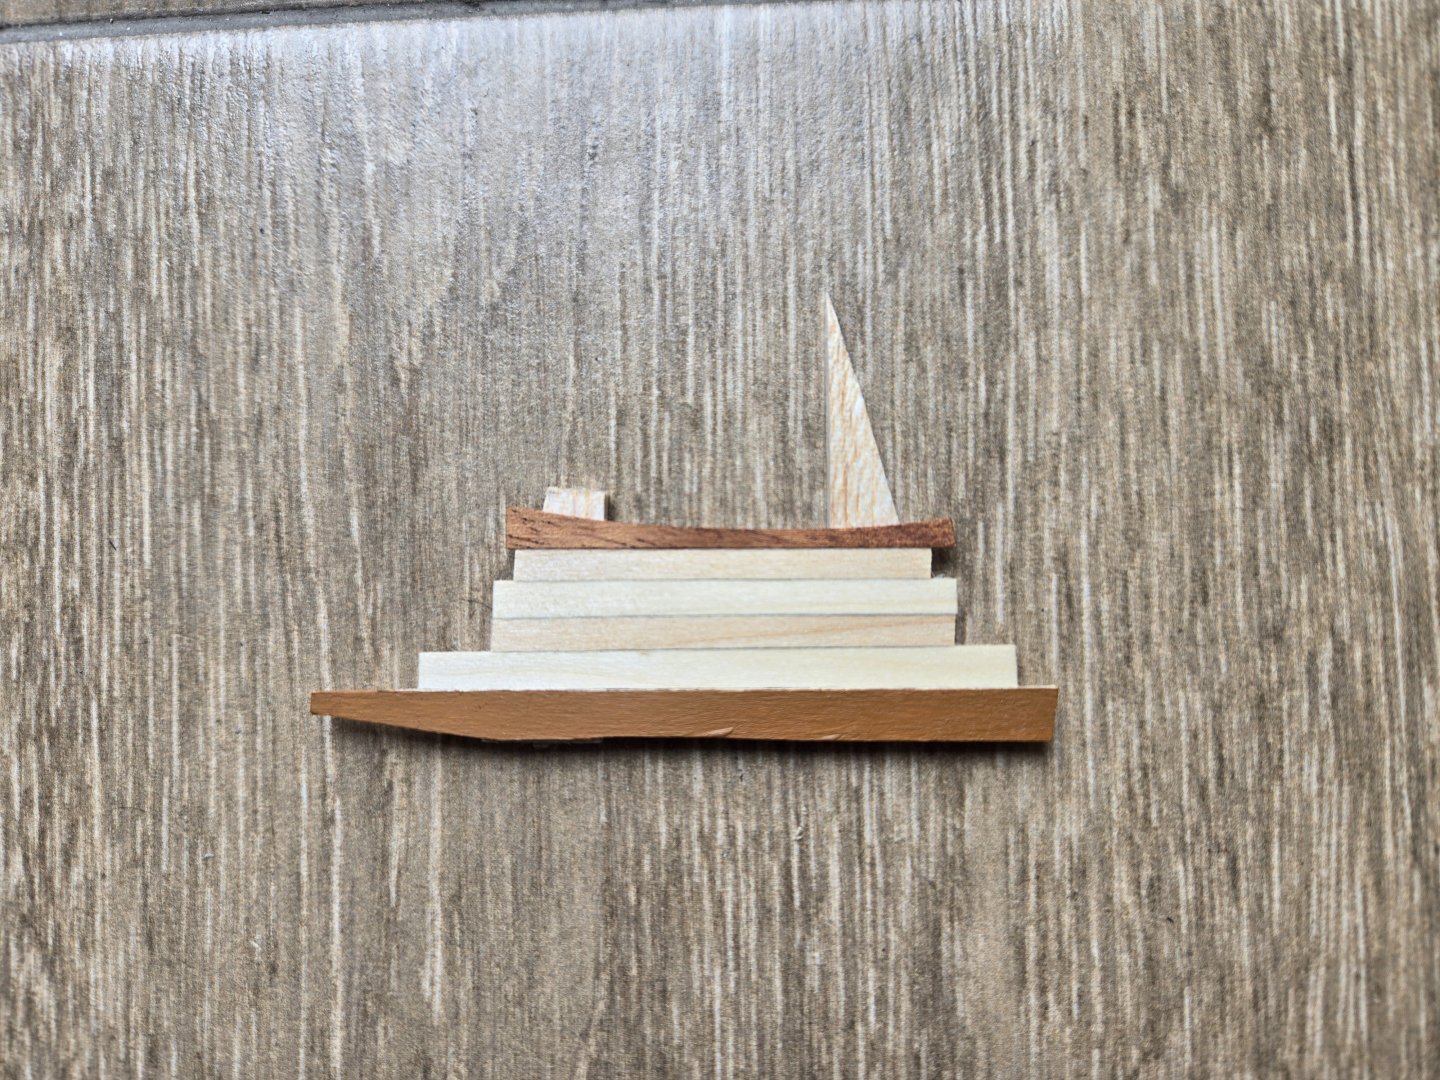
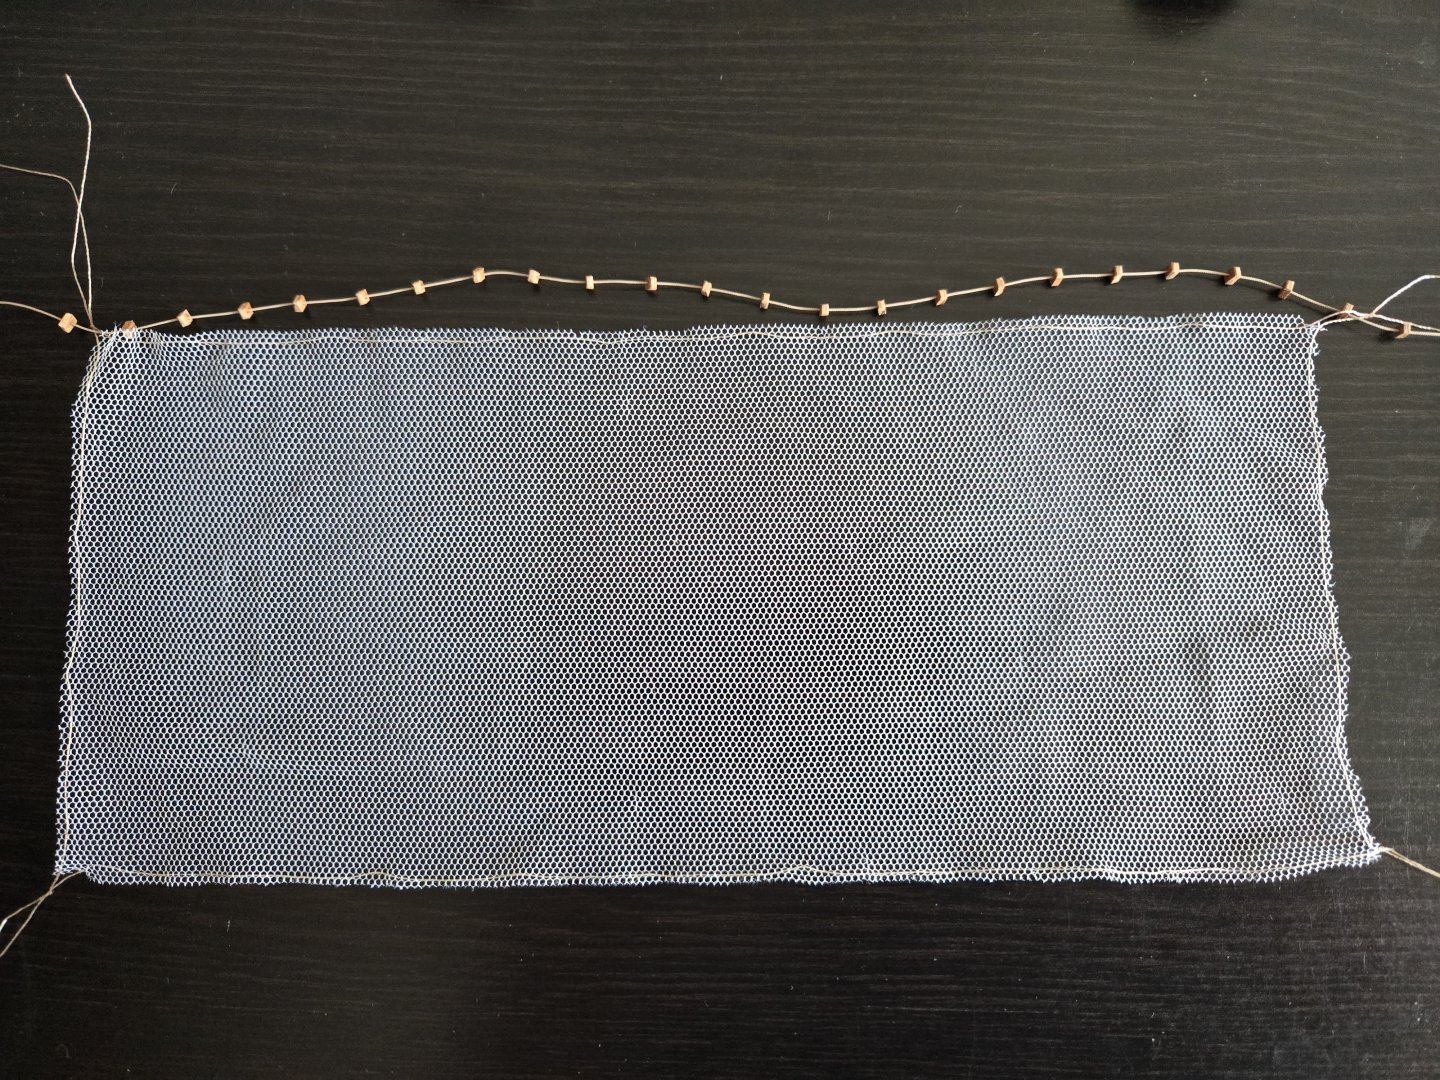
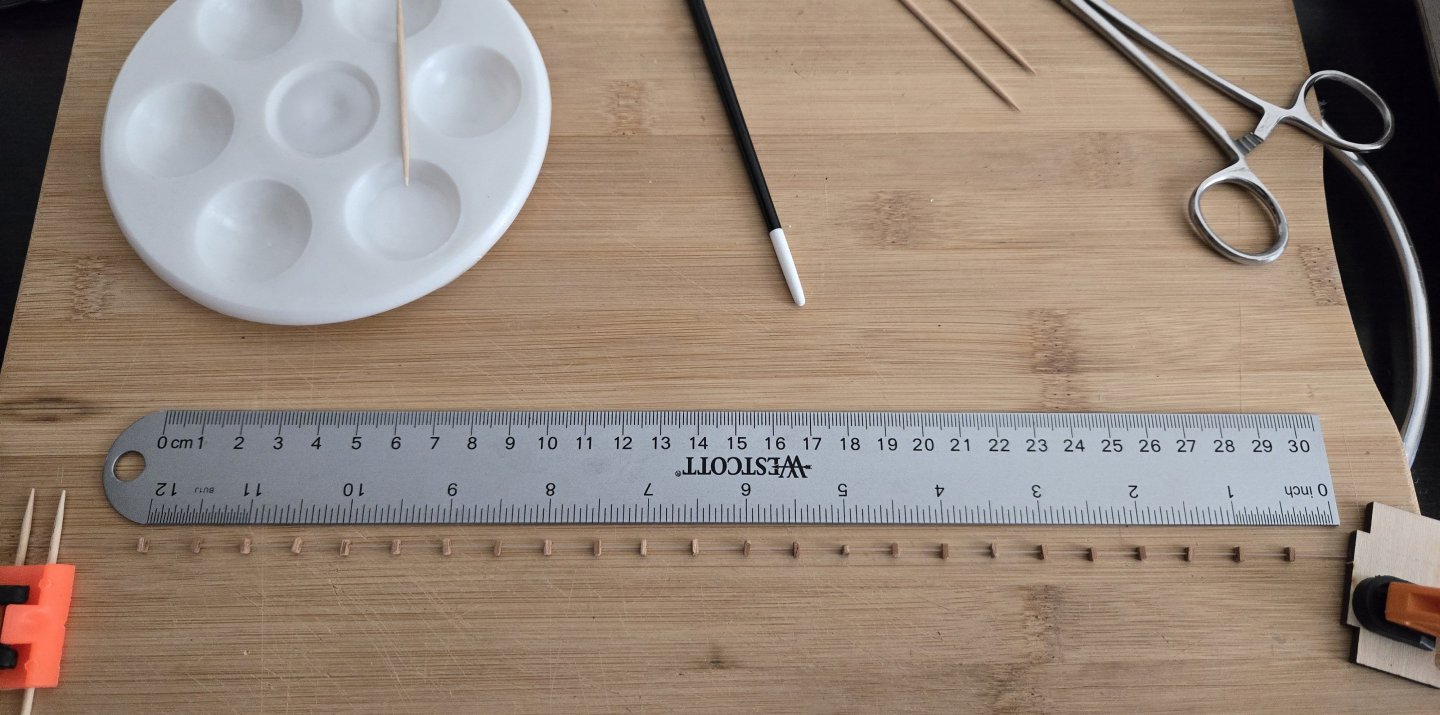
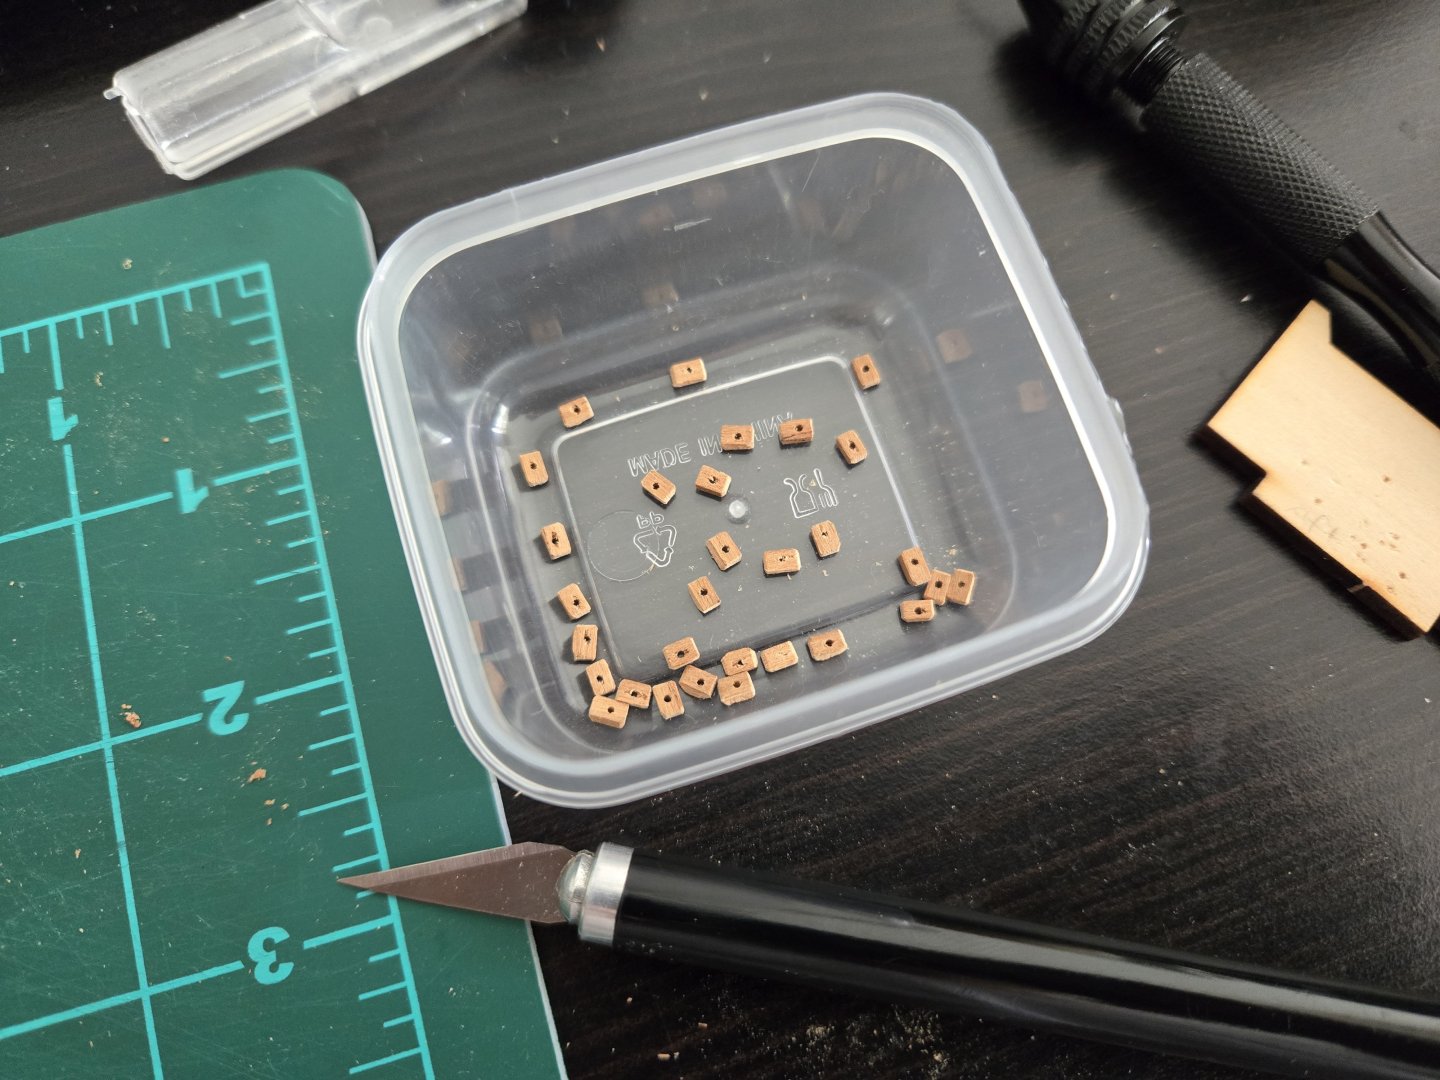
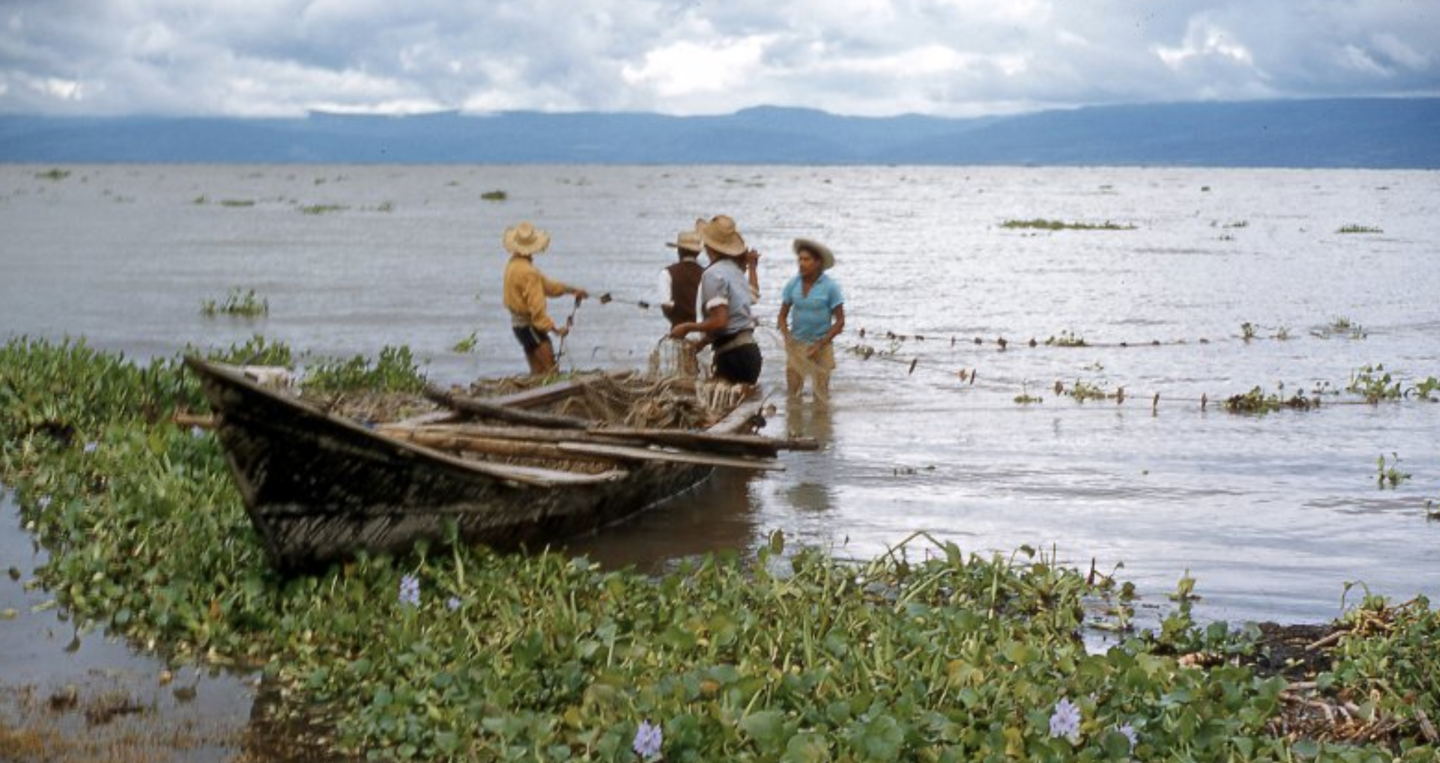
With the model close to completion, I wrote out a list of everything that's left to do. I realized that I can't attach the backstay just yet because I still need to be able to insert all the fishing gear and accoutrements that will be under the thatched rancho (which I also therefore can't glue in place yet). So, I decided to work next on some of the fishing gear, which is very clearly described in Carlos Ortiz Segura's article "'Todo tiempo pasado fue mejor', o la pesca en el lago de Chapala antes de la desecación de su ciénaga," Gaceta de Antropología No. 17 (2001) (link: http://www.gazeta-antropologia.es/?p=3291#:~:text='Todo tiempo pasado fue mejor,la desecación de su ciénaga&text=CIESAS.,México.) The first piece of fishing equipment I want to make is a net, specifically a chinchorro net. These were the largest in use on the lake, anywhere from 100 meters in length up to 300 meters, according to Ortiz Segura. The top lf the net is lined with floats, while the bottom is lined with stone weights. According to Ramón Rubin in his novel La canoa perdida, they were extremely effective nets, but so indiscriminate in what they caught that they were occasionally banned (ineffectively) in hopes of maintaining fish stocks. The chinchorro was used as follows. First, one end was tied to a stake which was driven into the relatively shallow lake bottom. A canoa was then poled or rowed out in a large semicircle, casting out the net behind it. Once the whole net was out, the canoa crew took the end back to the start of the net and the whole thing was pulled in. Here's a photo showing an example of this (although it may be with a smaller type of net used in the same way--notably, they're just wading in the shallows). Source: https://www.mexicoenfotos.com/antiguas/jalisco/chapala/pescadores-en-el-lago-de-chapala-1958-MX15186632784160/3 This use of the net, as opposed to seine netting or other net techniques, highlights why smaller, more manueverable canoas (which usually didn't have a rancho) were preferred for fishing. The larger canoas de rancho, especially the ones in the 40-60 ft range, were simply impractical for this sort of work. However, while most fishing was done from the smaller vessels, canoas de rancho were used as storeships and fish drying stations for the mobile fishing fleets that would set up camp for days or weeks at a time around the lake while pursuing the best catch. (The final chapters of La canoa perdida focus on one such camp). My canoa de rancho represents one of these storeships, and hence will be carrying a variety of fishing equipment and other supplies. (Although I will not be modeling any drying fish hung on the rigging--the charales that were prepared this way would be, at scale, barely 2mm long.) At my scale, a full chinchorro net would measure about 10-30 feet long, so I will only be making a section, especially as the net will be folded up and stored in the hull. I'm after a representation rather than a fully accurate depiction. As part of simplifying it, I also won't be including the deeper "cup" in the center of the net that Ortiz Segura mentions, which would be invisible in any case once the net is folded. This photo of a fisherman inspecting nets drying on the shore is very useful for the details. It shows off the floats, as well as how the line for the floats was connected to the net itself just below. Source: https://www.mexicoenfotos.com/antiguas/jalisco/chapala/tipos-mexicanos-pescador-arreglando-las-redes-chap-MX15040598739914/4 I started with the floats. According to Ortiz Segura, they're made of sabino (aka ahuehuete, aka Moctezuma Cypress). Cherry seems like a close enough approximation of the color. I marked off a number of floats on a strip of 1/16‐inch-thick cherry and drilled out the center holes before cutting. It took a while, but after some work and sanding the edges, I had 30 floats. Next, the net itself. I cut a rectangle out of tulle. I then threaded a length of nylon jewelry tread along the outside rim to represent the rope around the edge of the net seen in the photo mentioned earlier. The corners gave me some trouble as the thread didn't take a 90-degree corner too well. First I tried adding a loop at each corner. But this didn't work well. Instead, I found that I got a better corner with a knot. I also began threading the floats onto a length of .45mm-diameter rope from Ropes of Scale. Next, I used thinned white glue to stick the floats onto the rope every 1/2 inch, which seems close enough to the proper length as seen in photos (especially given that this will be all folded up). That's where things stand at the moment. The next step will be to tie the float rope to the net. Then, I'll need to figure out the weights hanging off the bottom--I'm thinking some small beads might work best. I also need to color the net.


-
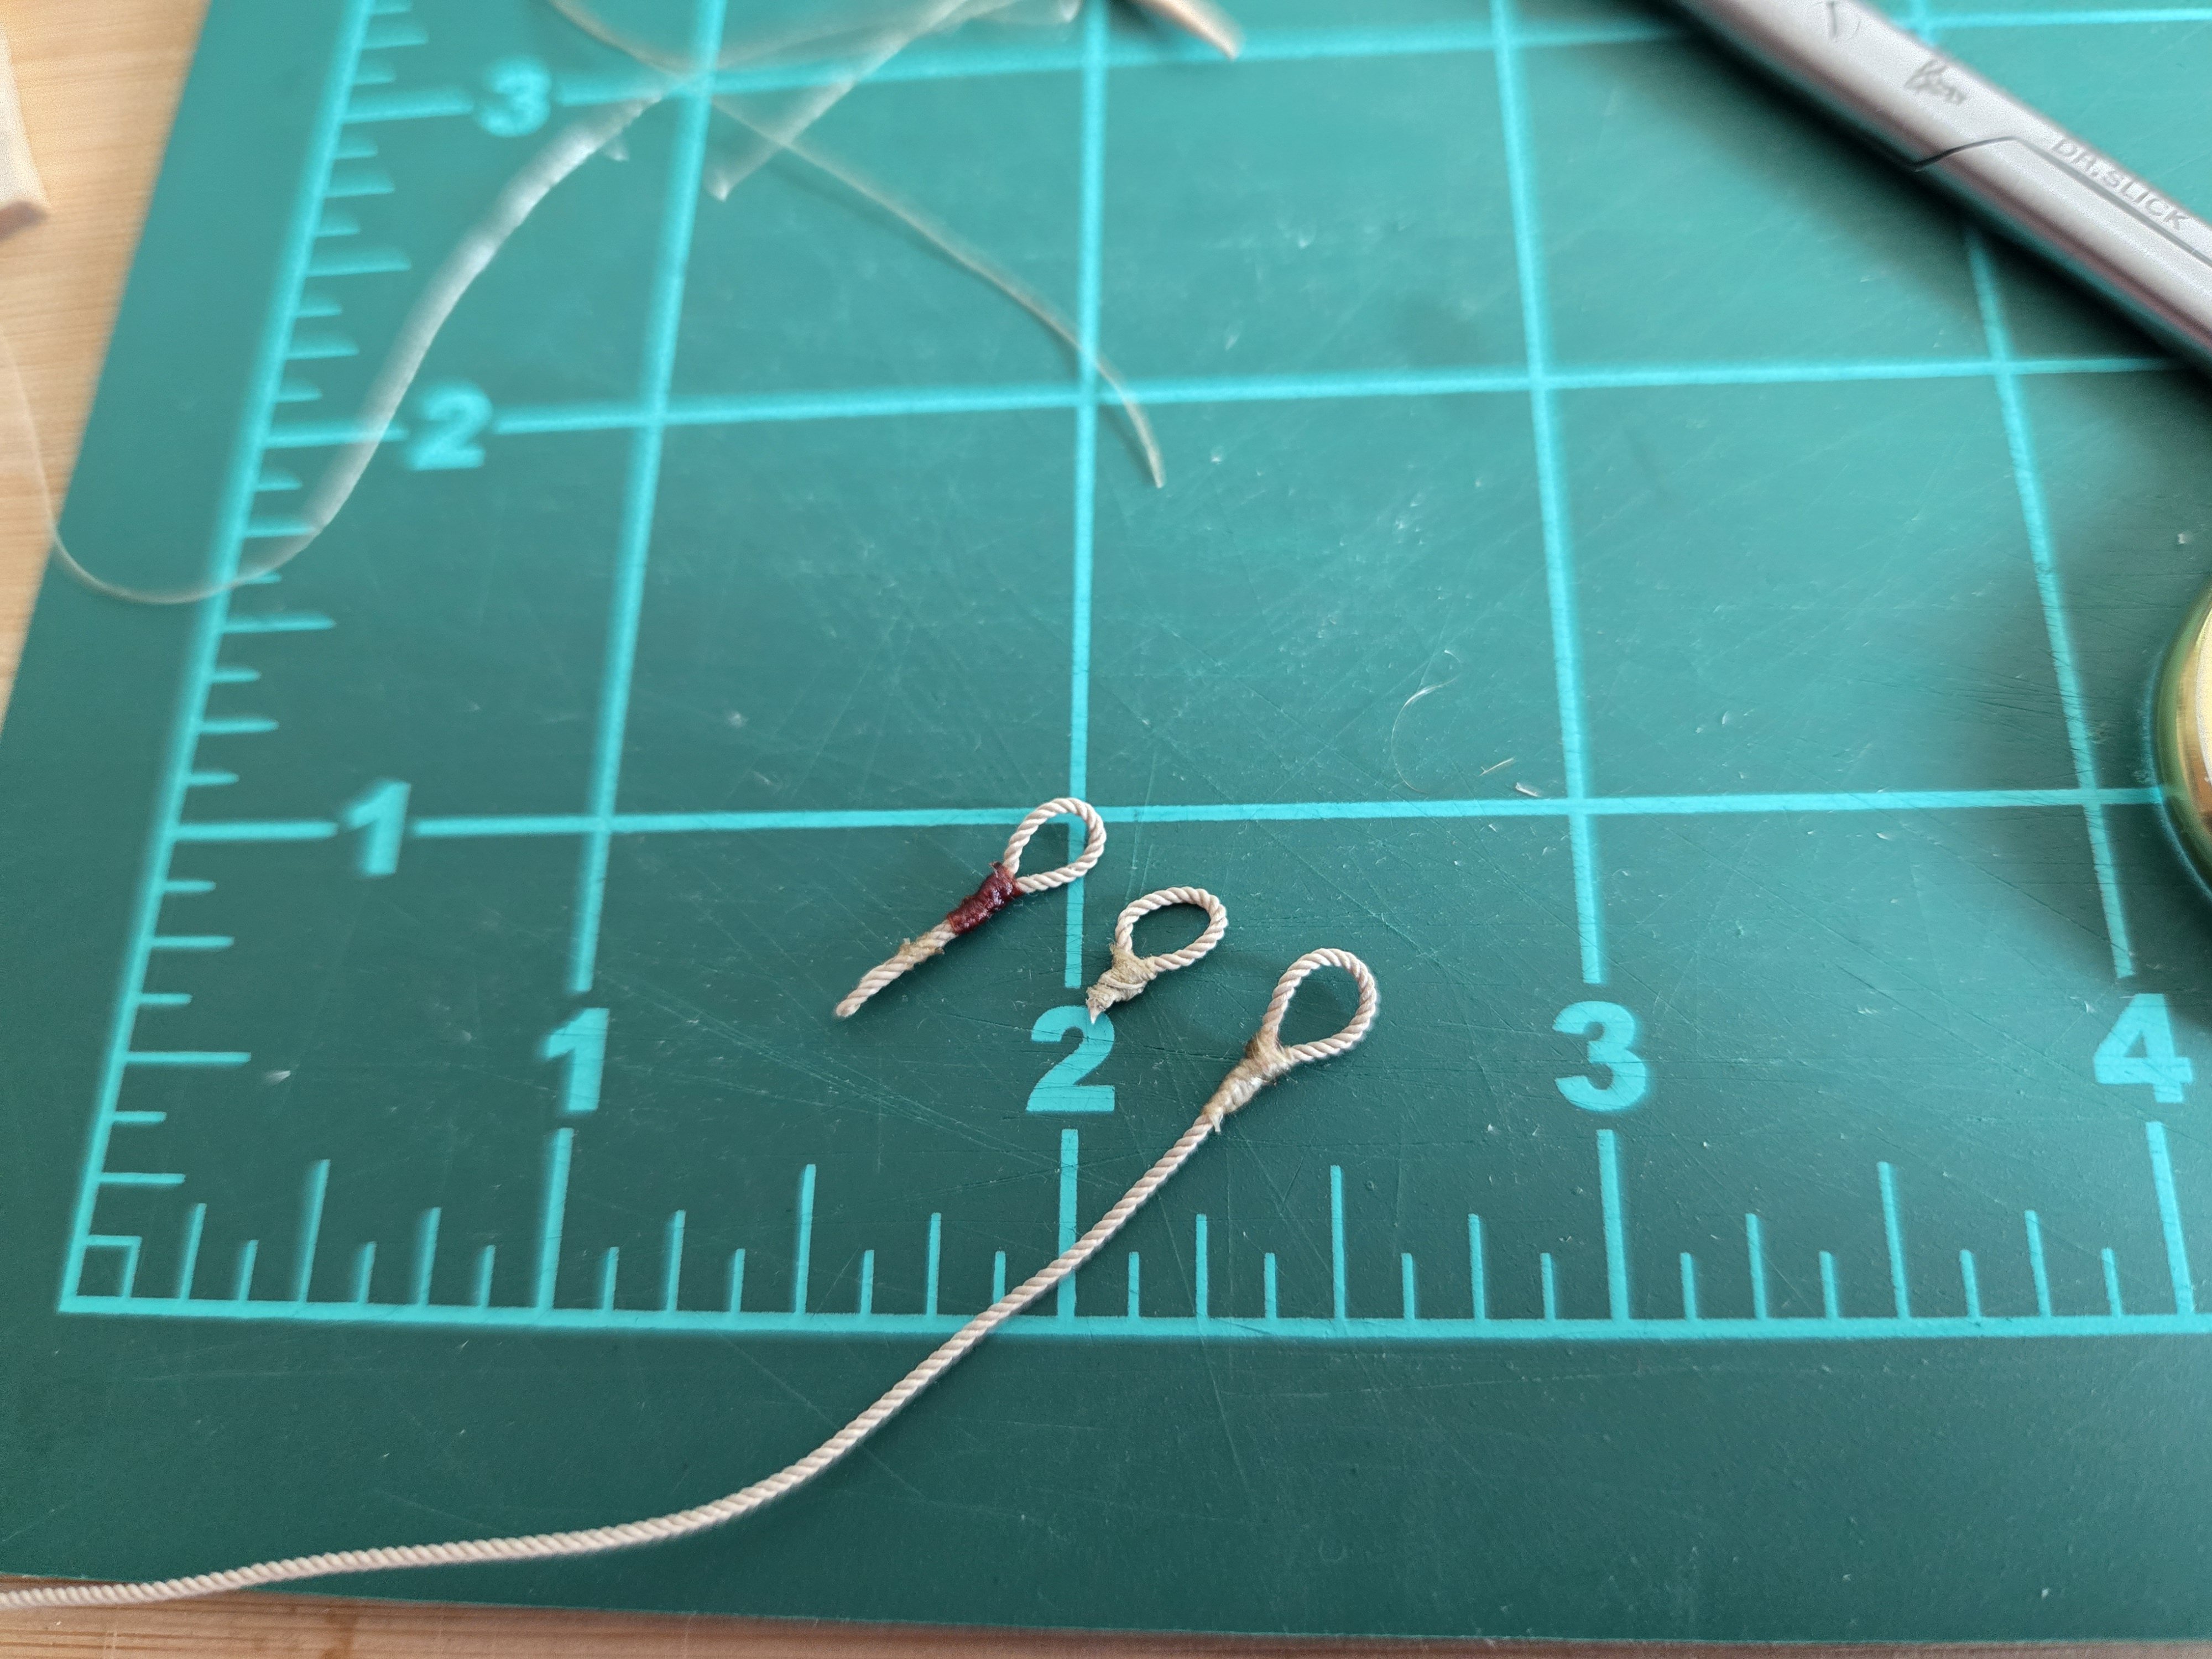
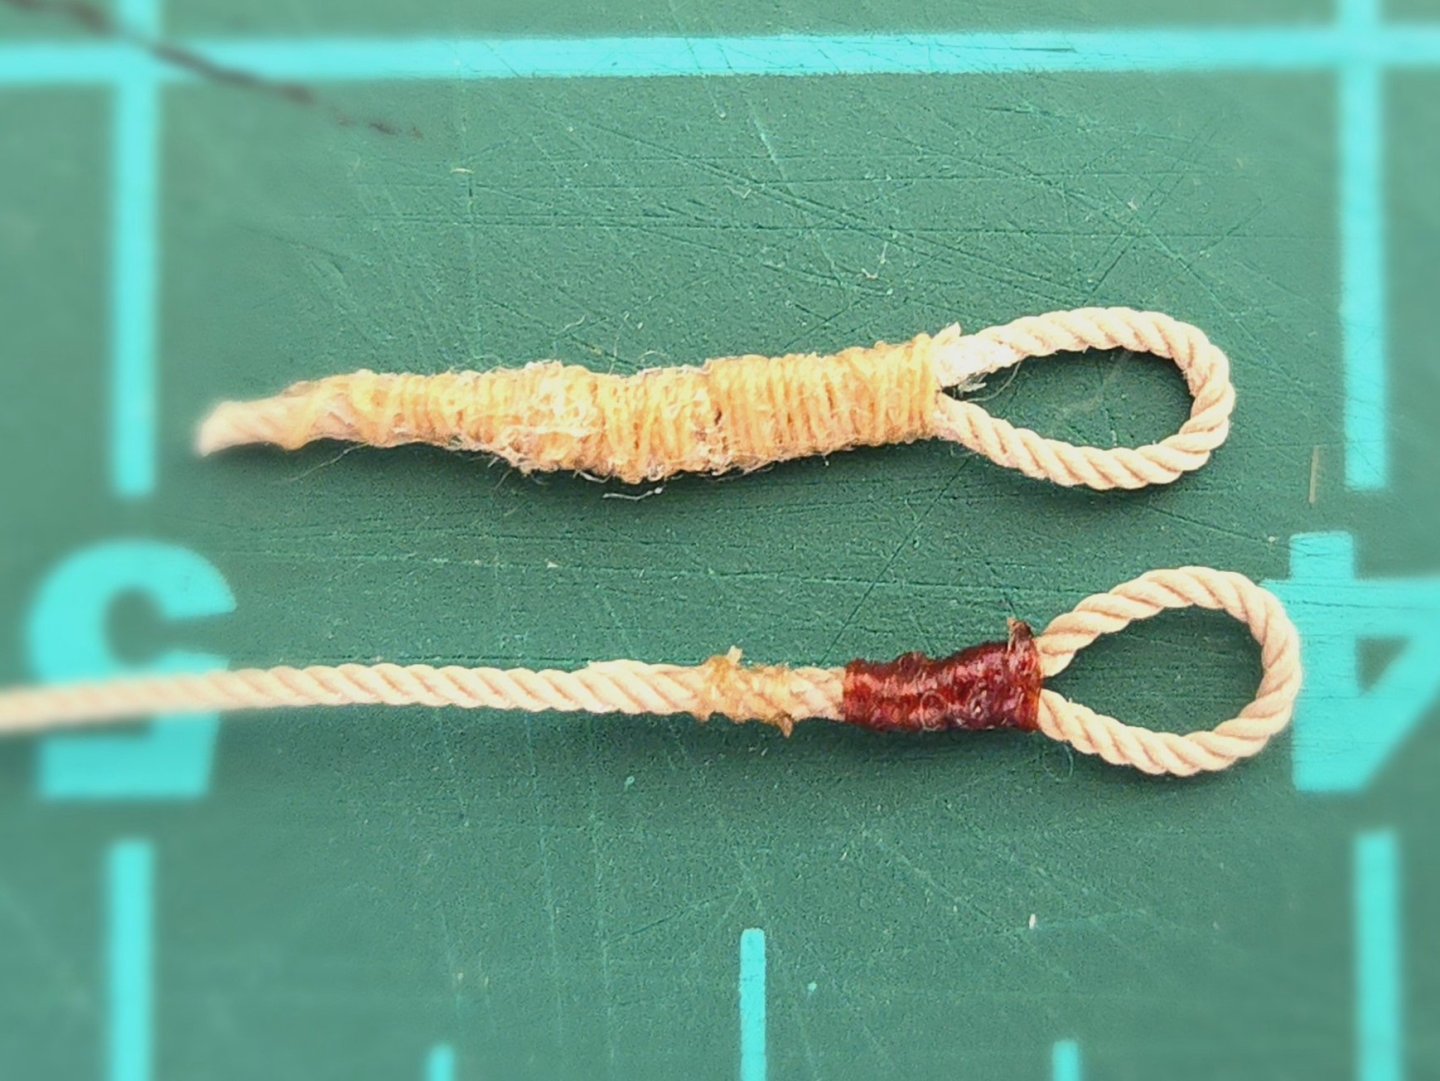
Thank you all for the helpful suggestions! Following up on my earlier posts, I finished the loop at the top of the lone backstay. This took more tries than I anticipated. On my third attempt (after the two discussed earlier) I used just thinned white glue to join the false splice. But, it wasn't a strong joint and it came apart as soon as I tried to remove the stay from the mast. So, I decided that I would use super glue after all--if it leaves the rope fragile and it breaks down the line, it's not a particularly difficult rope to replace. However, my fourth attempt was accidentally too tight and couldn't be slipped off the mast tip. My fifth attempt went better, but despite snipping off the excess line close to the splice, the serving turned out weirdly lumpy there. Finally, my sixth attempt was acceptable--less lumpy than the fifth (although still not quite as smooth as I would have liked), loop the proper size, and strongly joined at the false splice. Next up, the fishing nets (or at least one of them, I'd like to make several if all these tiny knots don't drive me insane first).

-
This build really looks fantastic! Out of curiosity, what sort of wood did you use for the deck, and how did you get it that color?
-
Welcome! Modeling can definitely be a very meditative experience. Doing a build log for the dory would definitely help with getting through the inevitable complications of any build, this is a very supportive community.
-
Very nicely done! That's a very elegant solution to the problem of where to store models after they're built.
- 33 replies
-
- 2
-

-
-
- midwest products
- kayak
- (and 1 more)
-
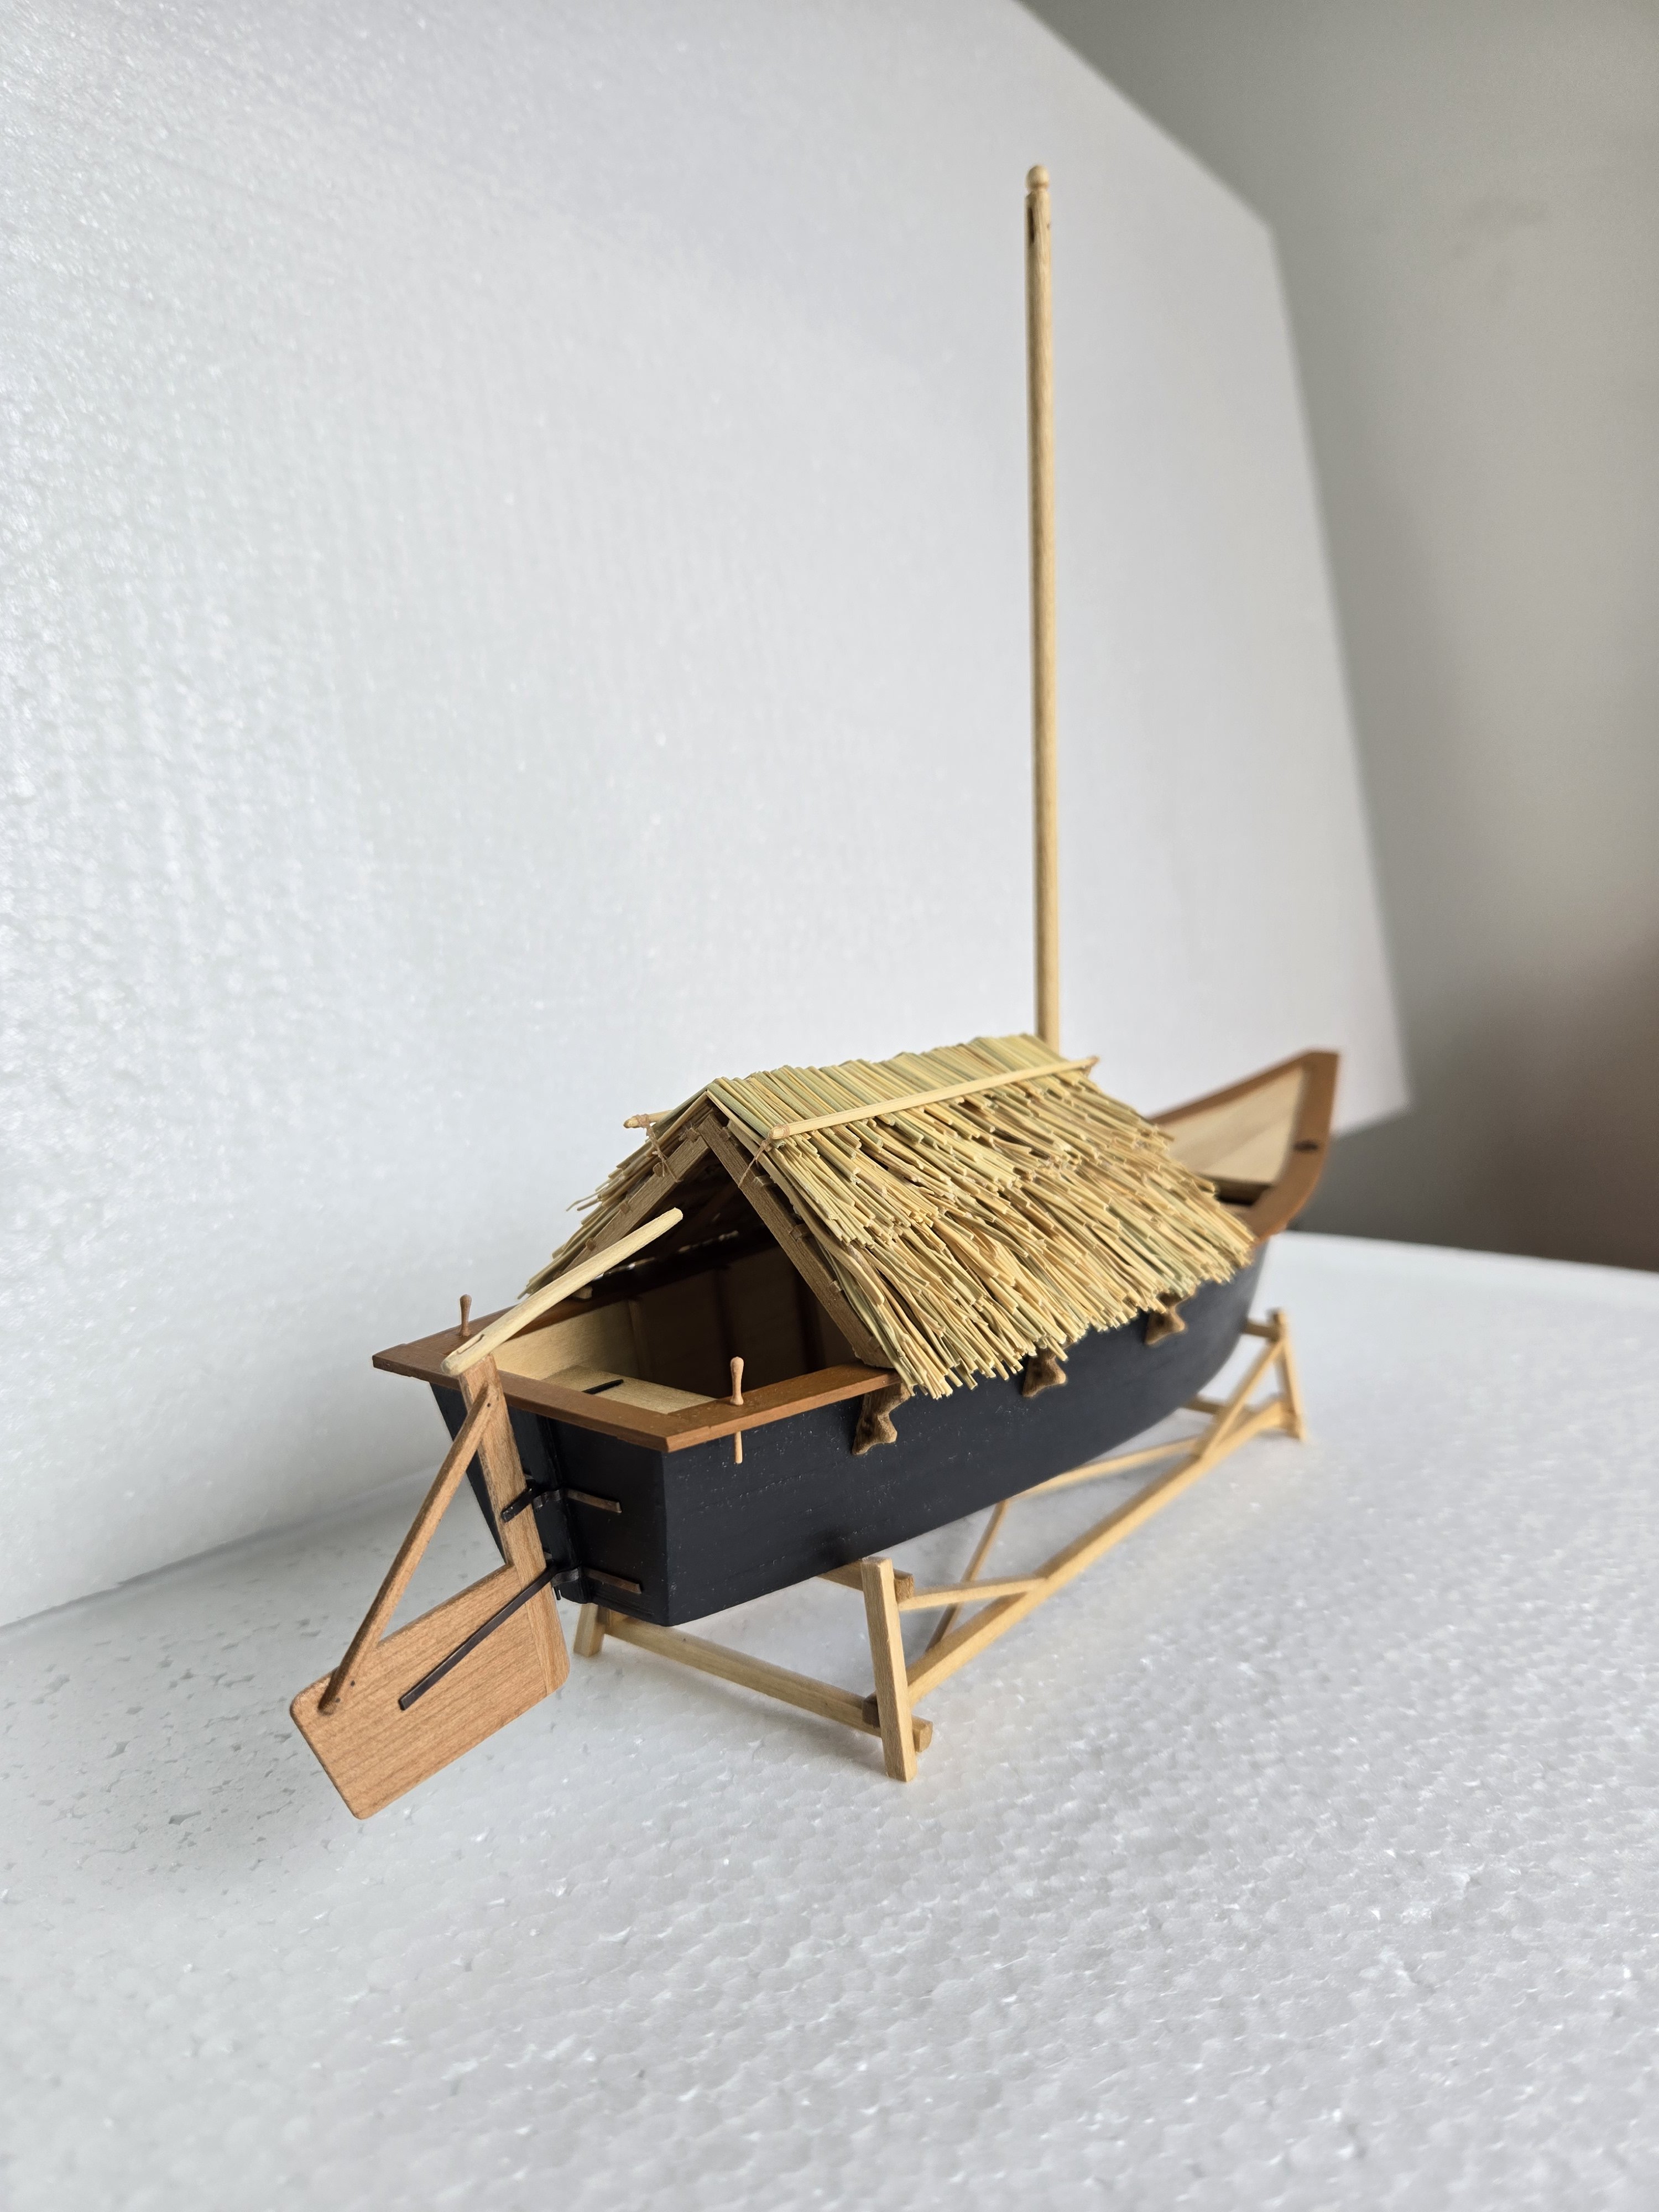
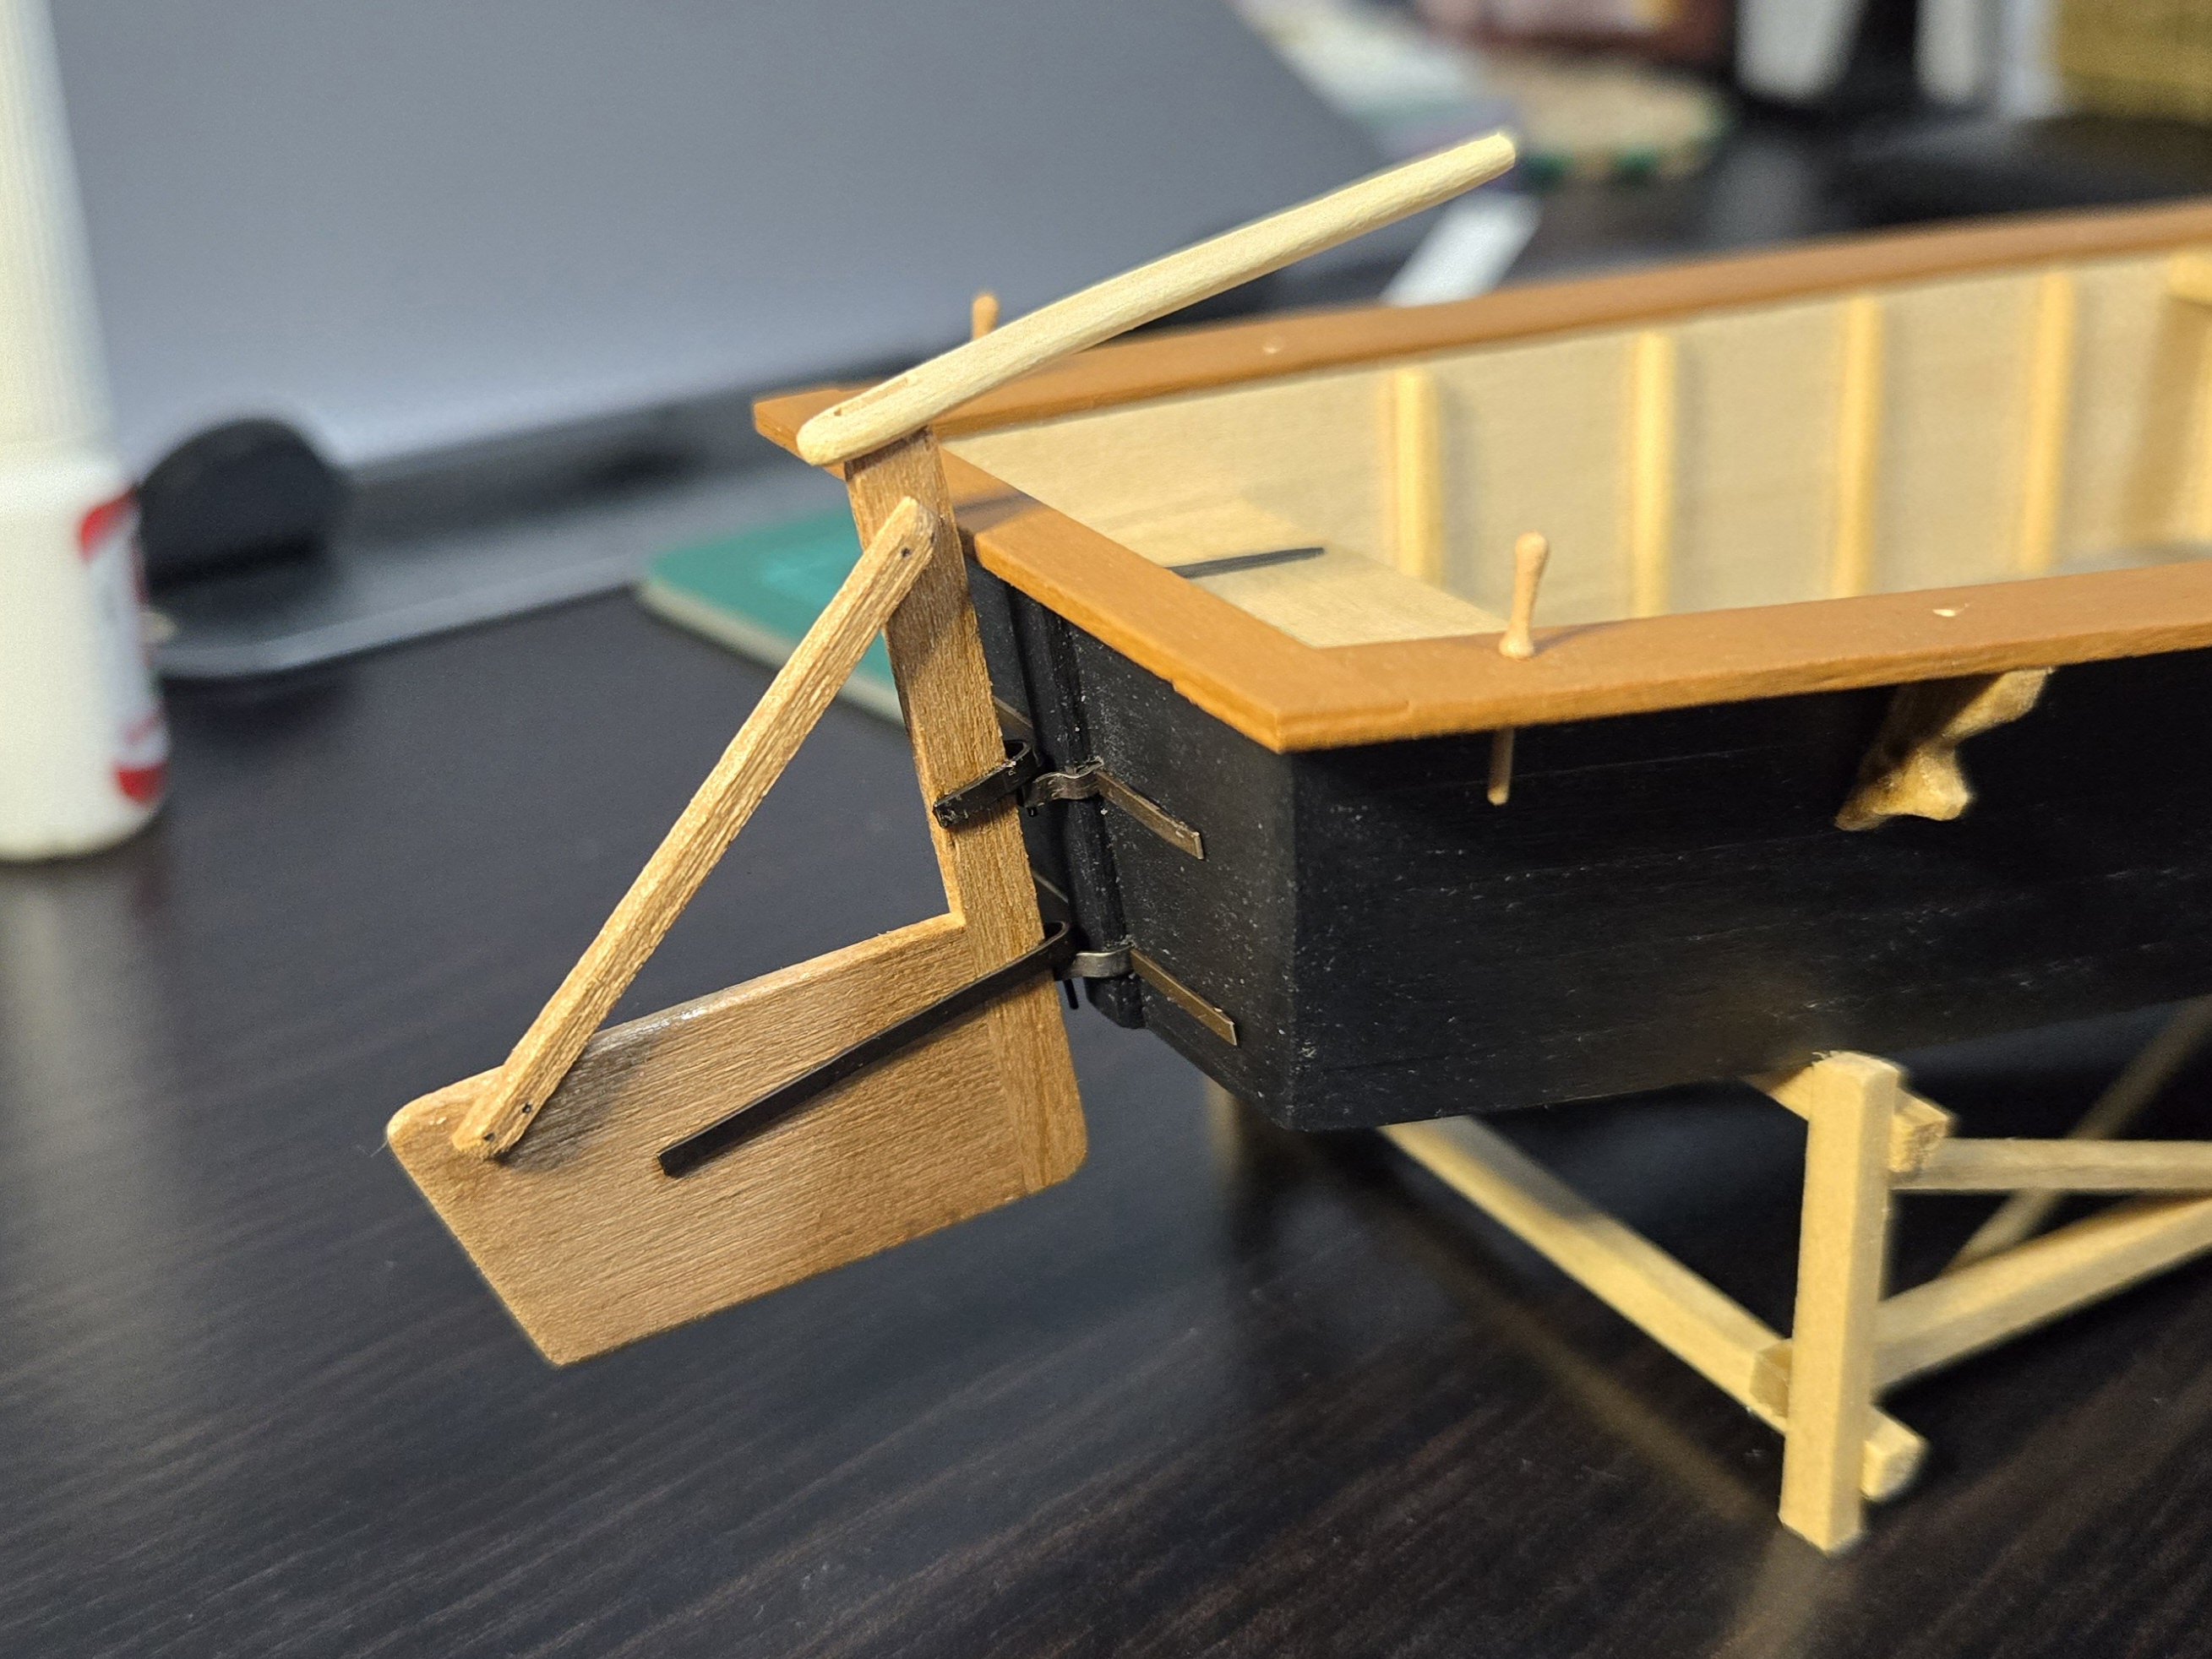
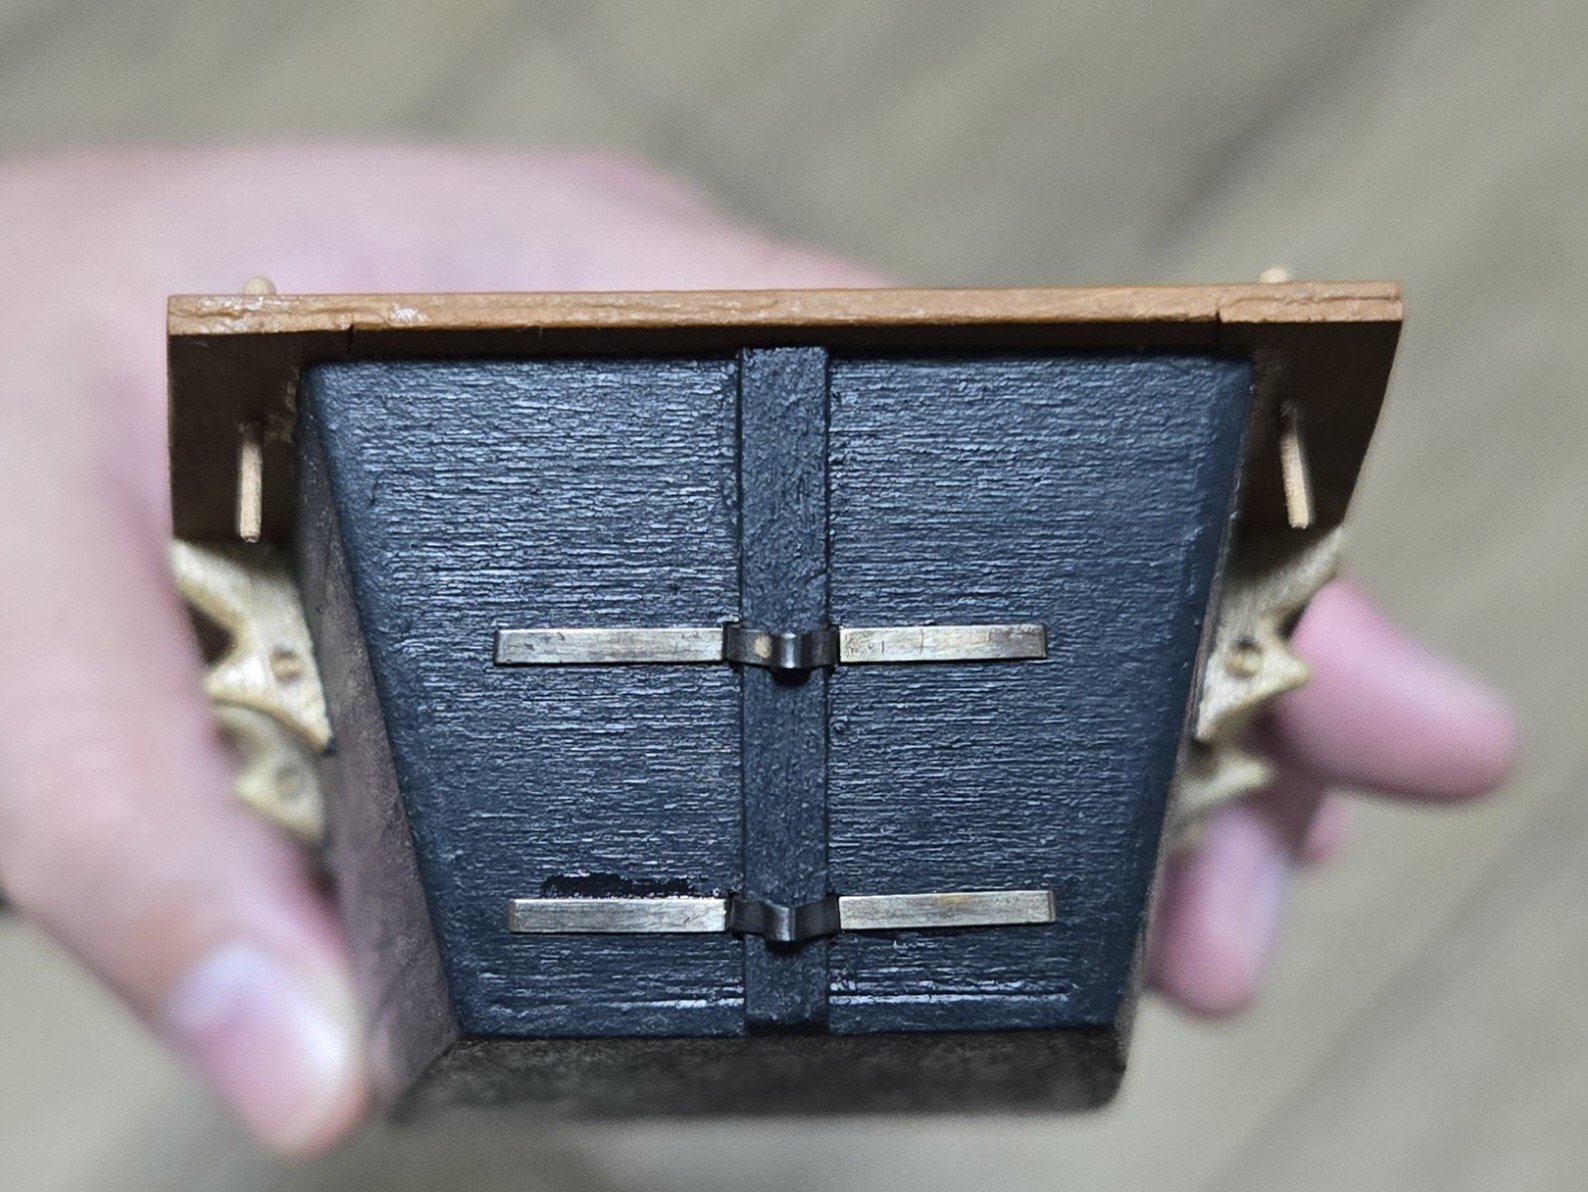
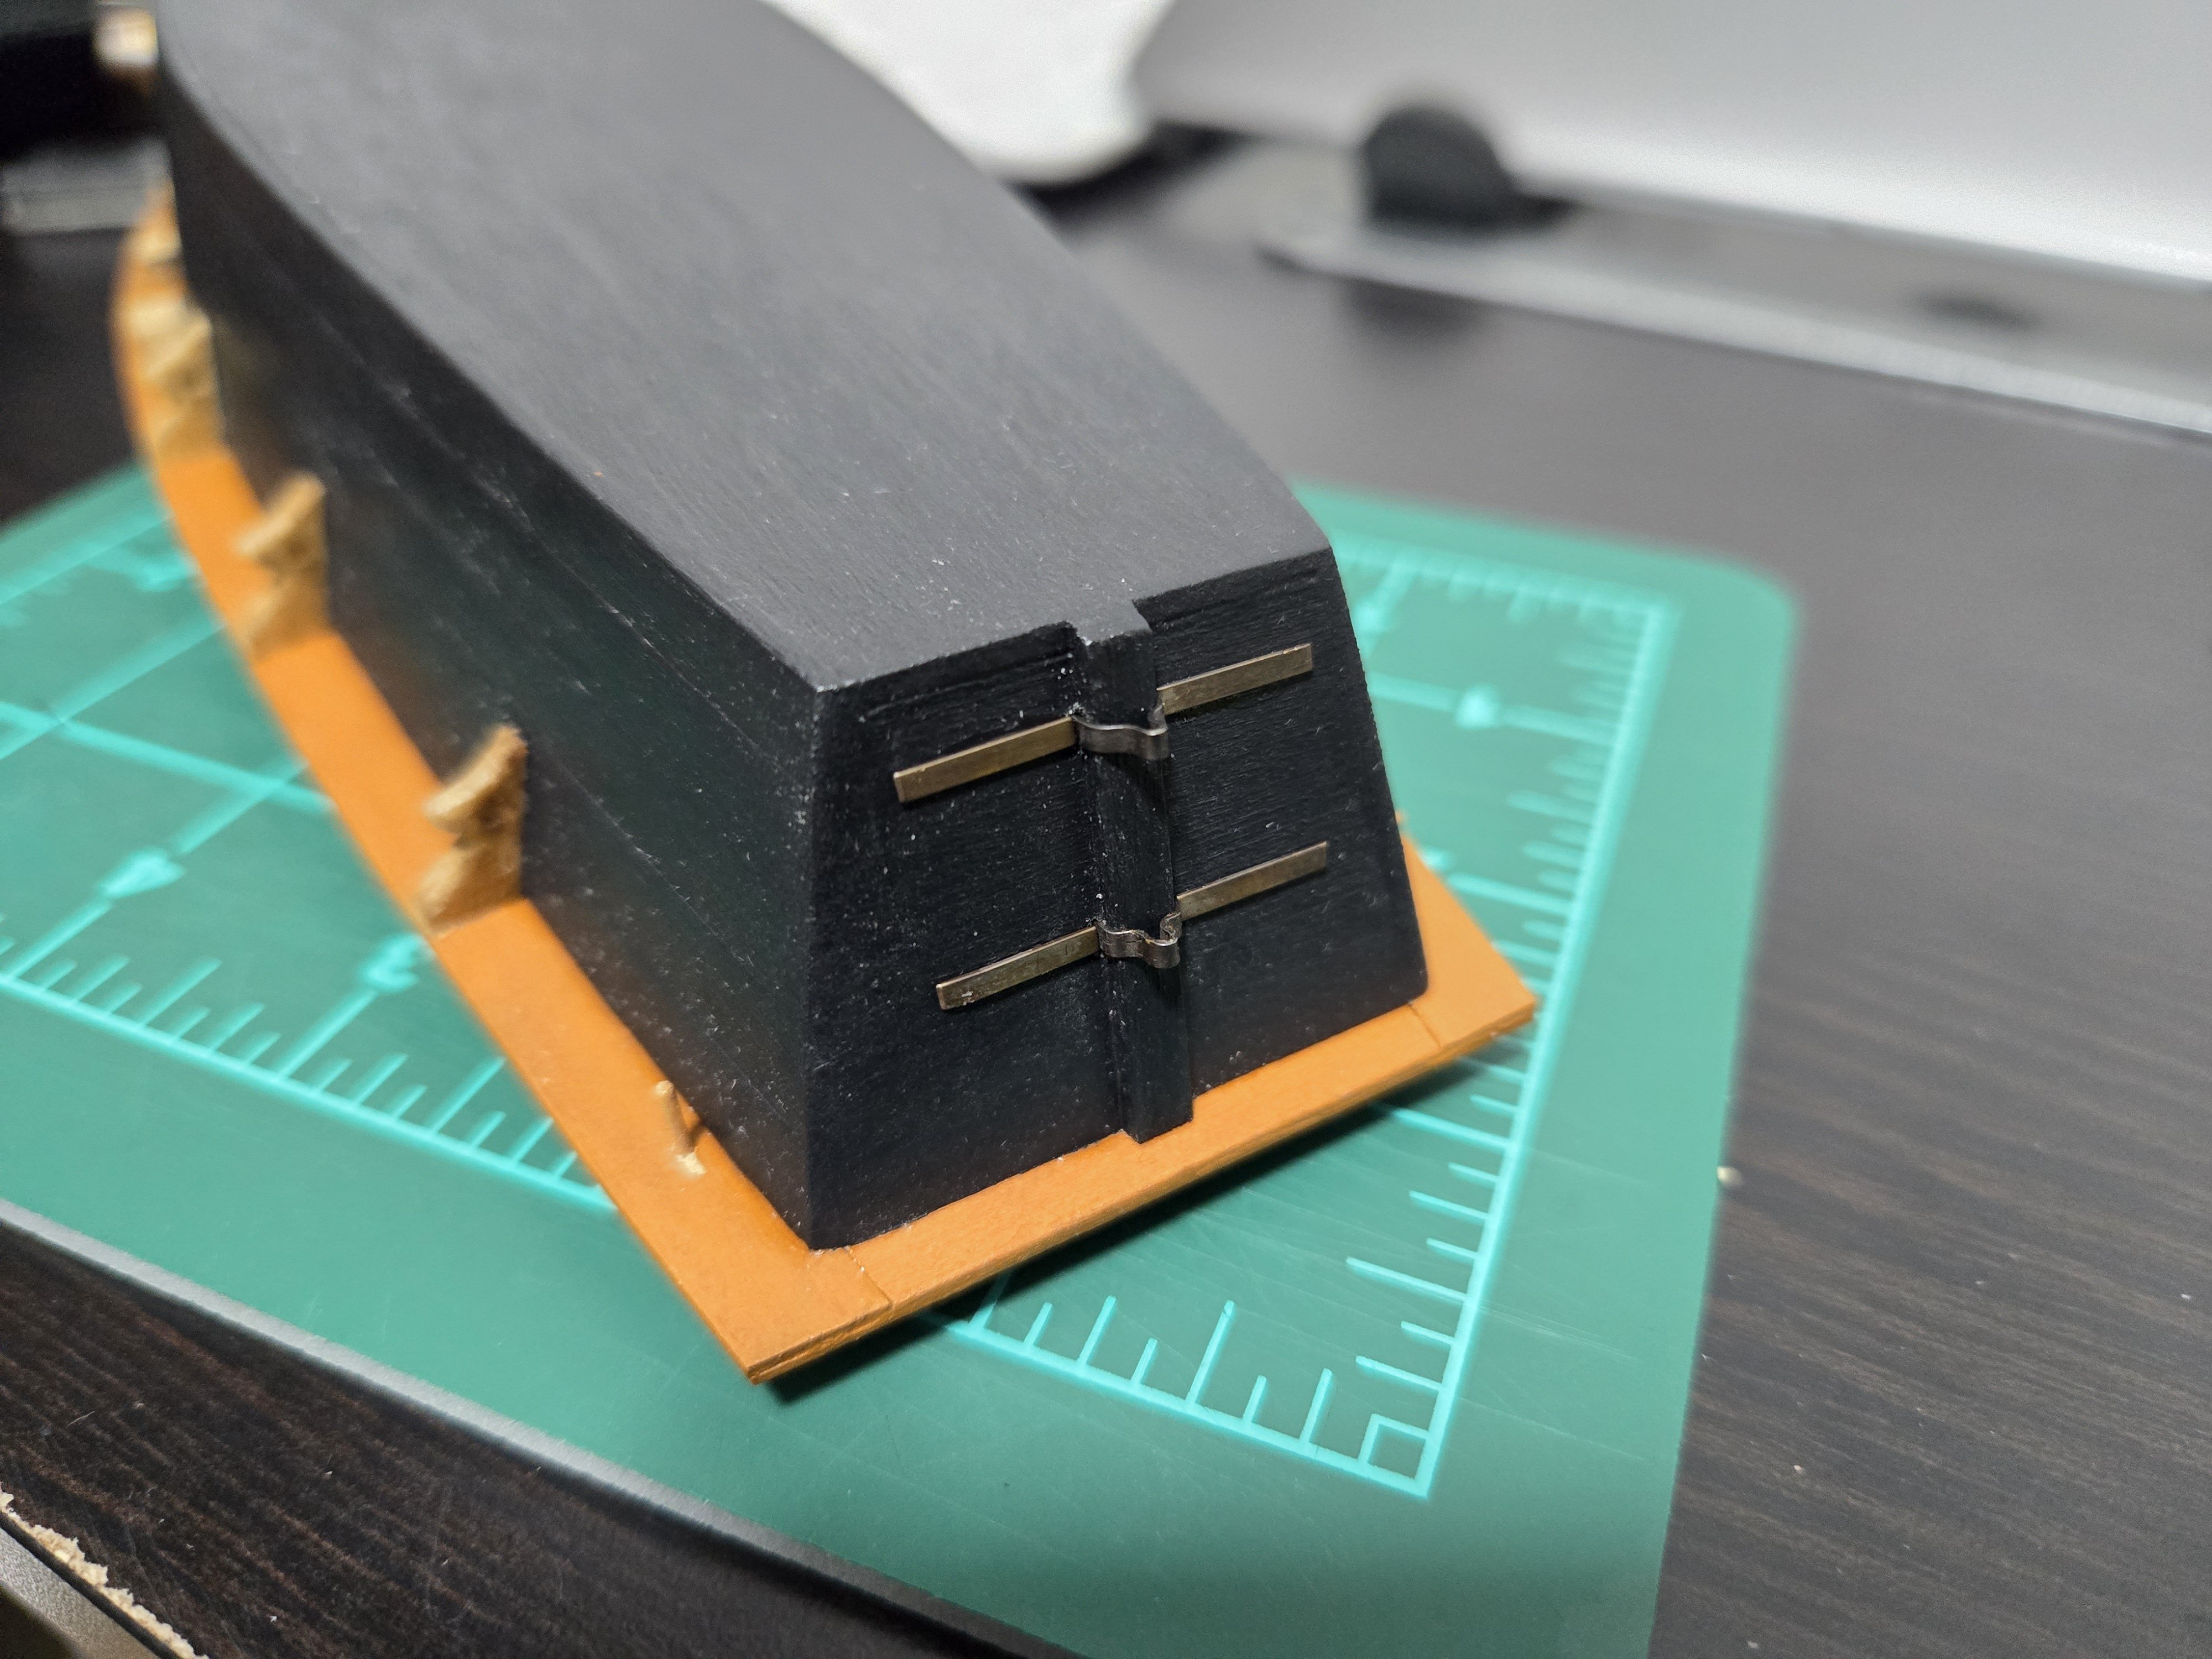
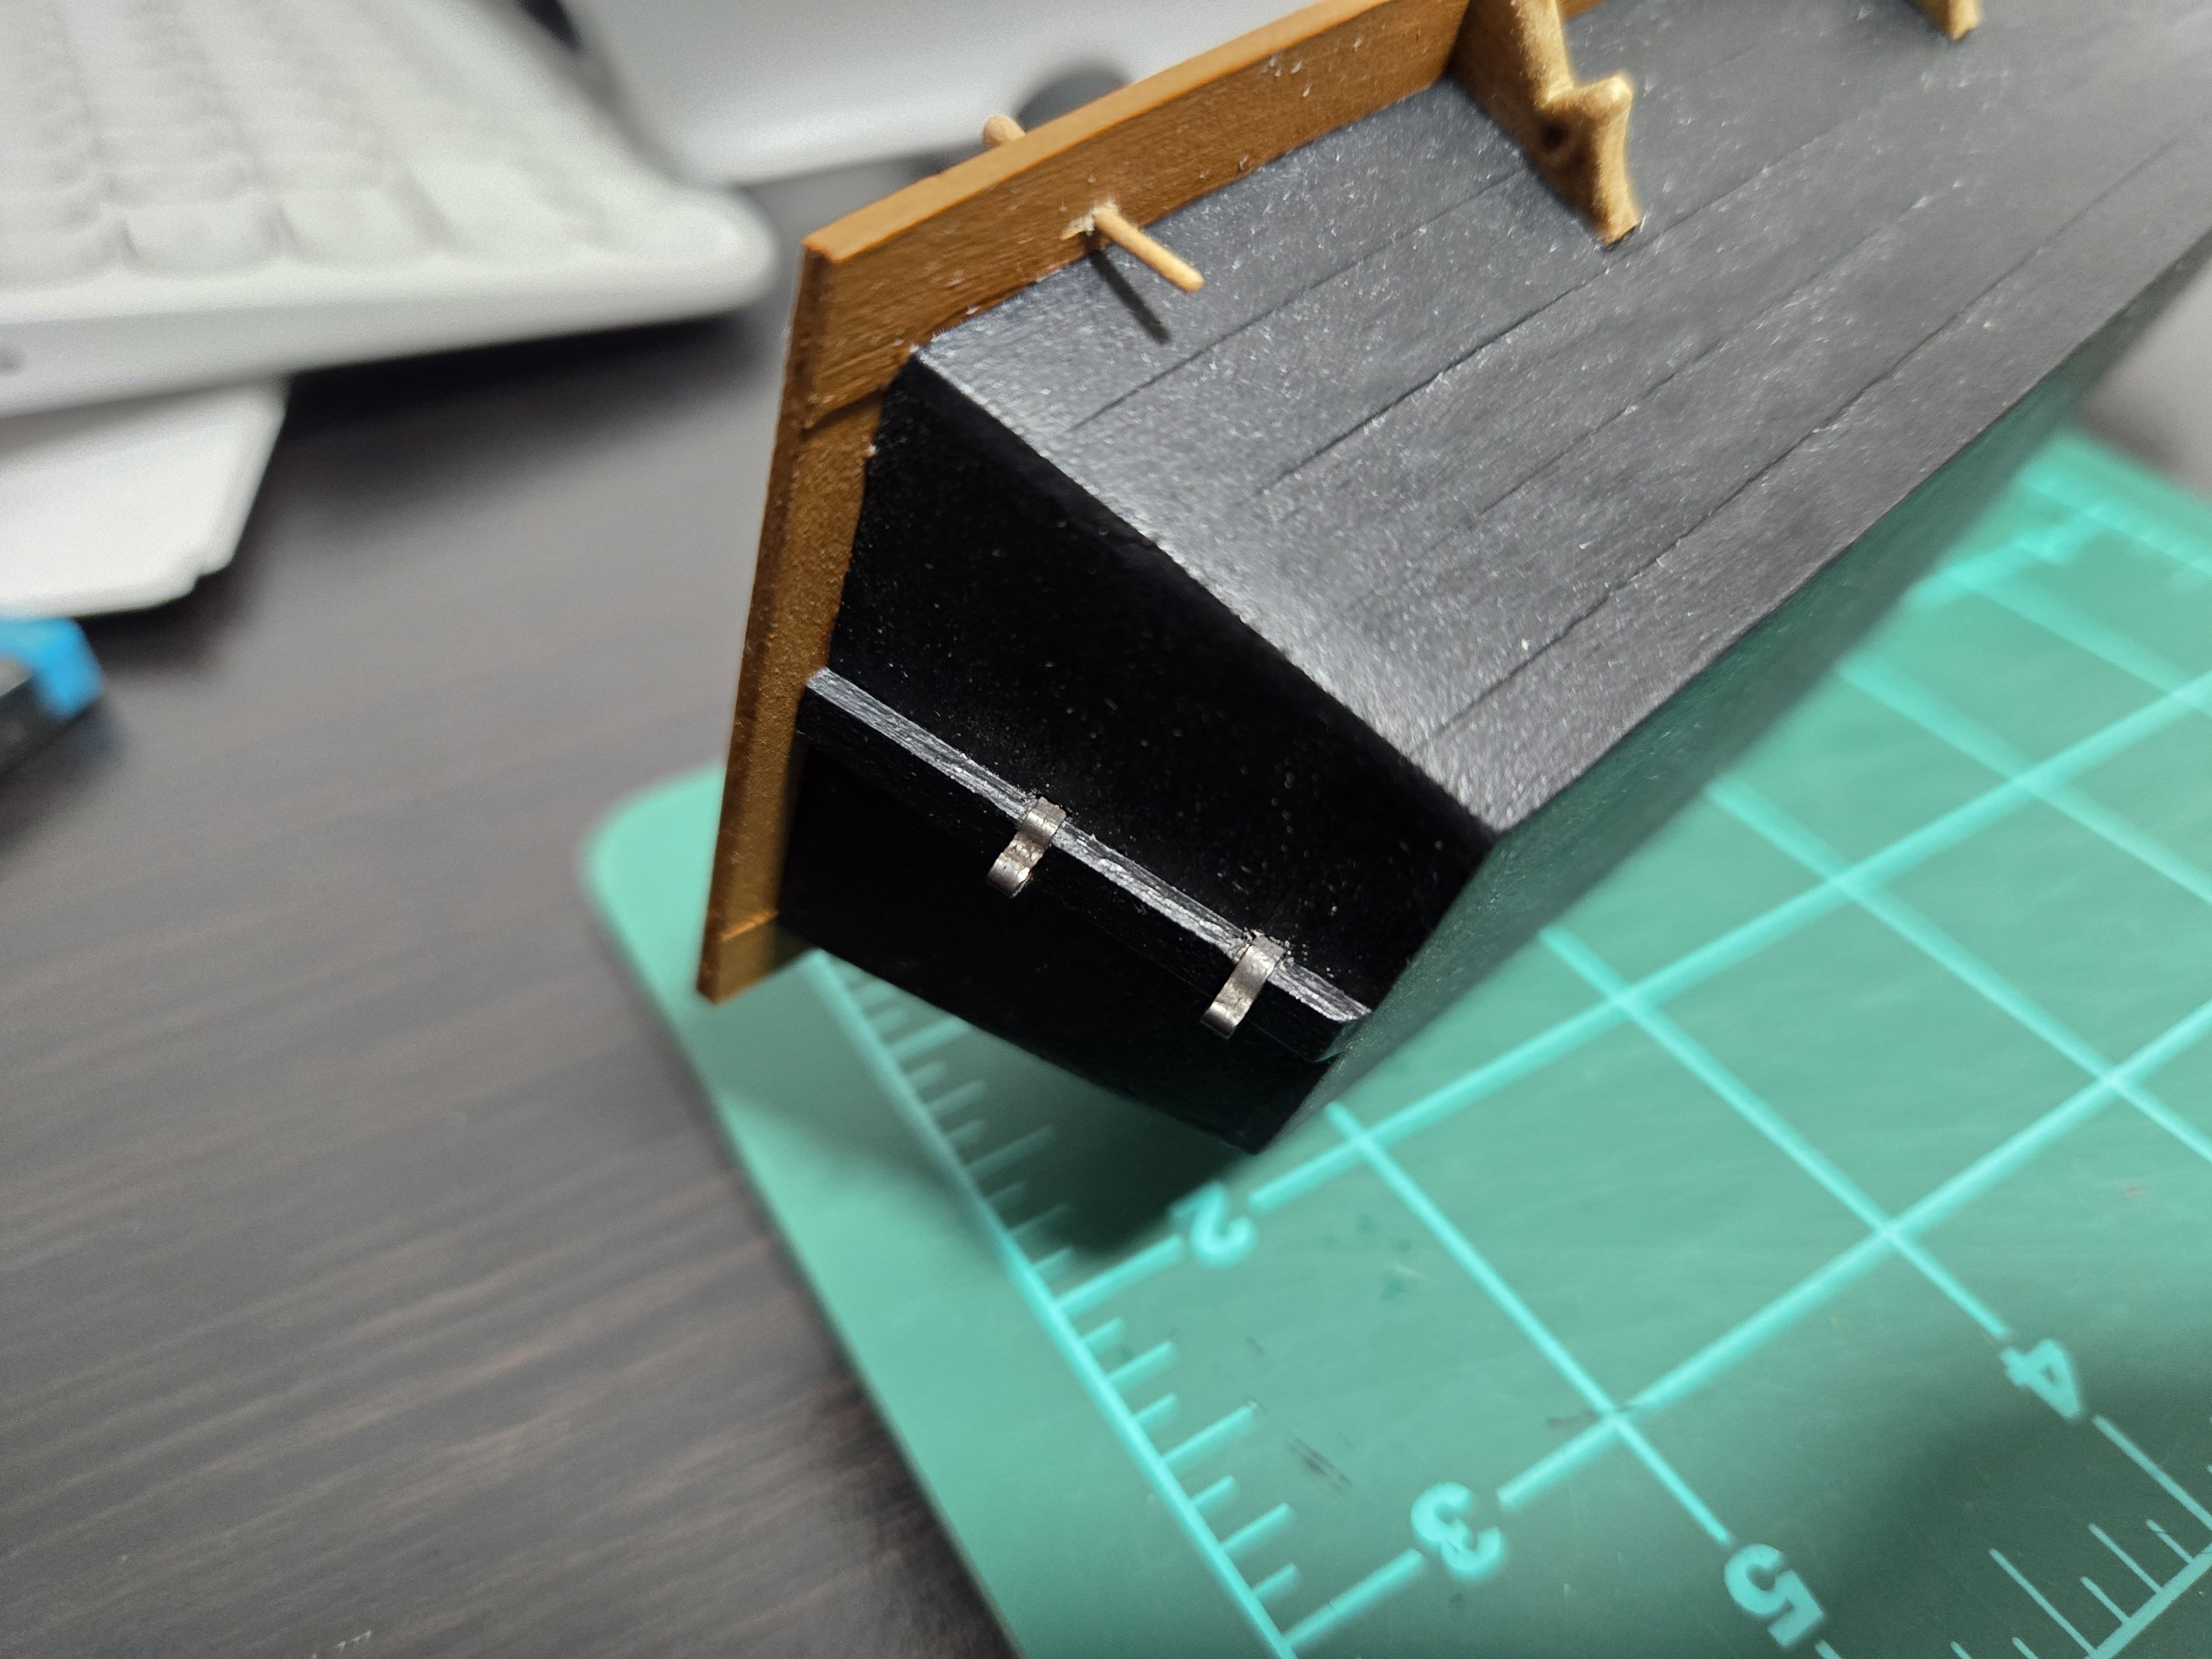
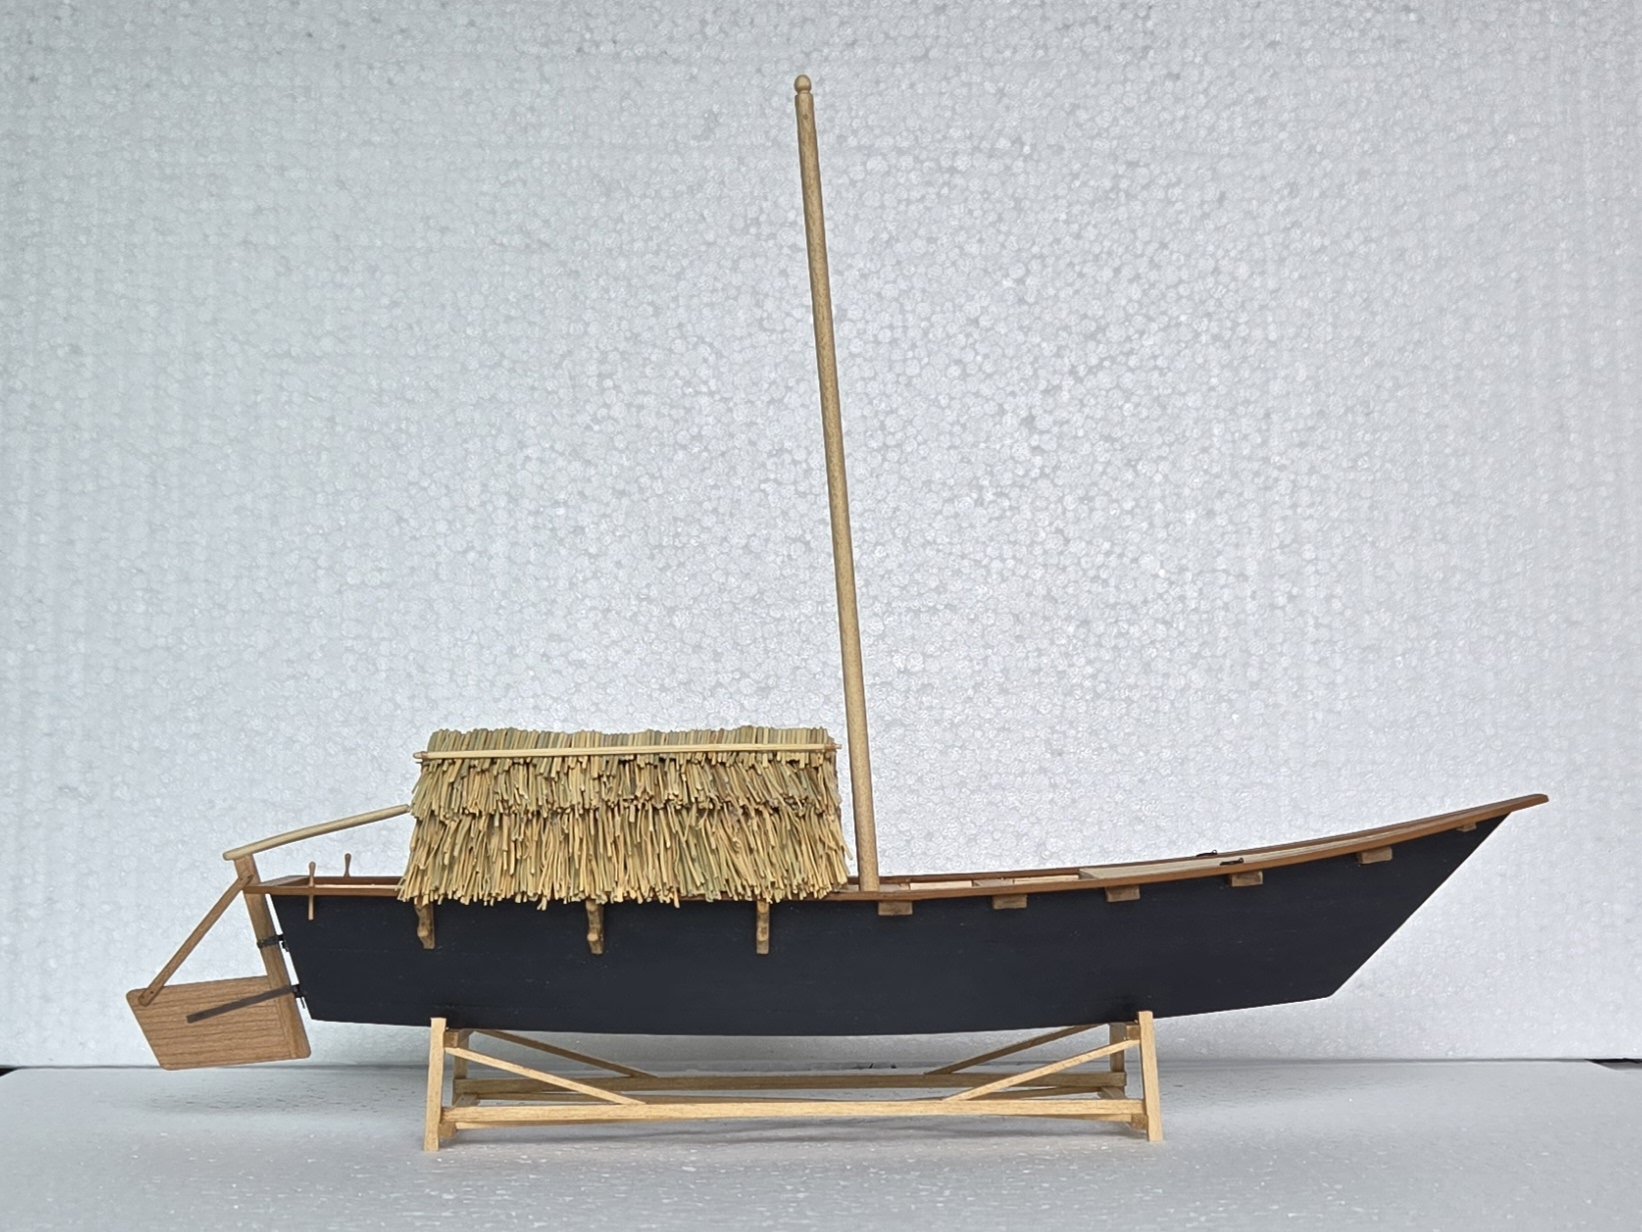
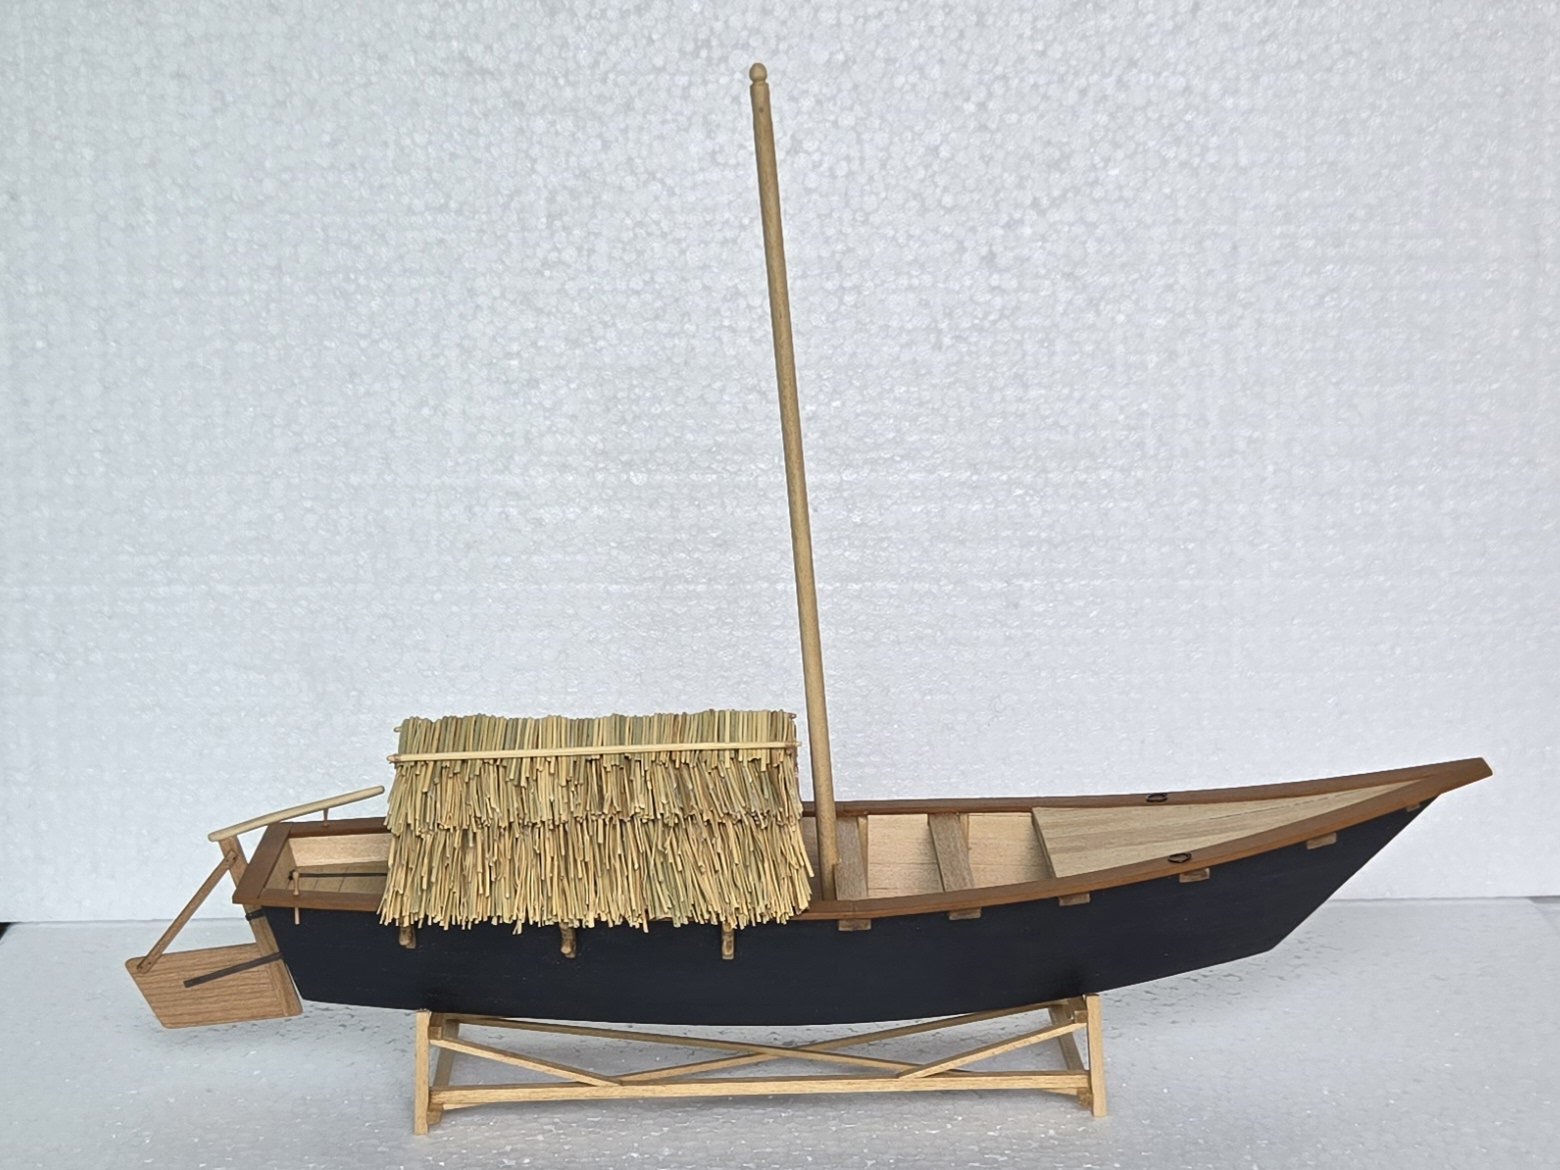
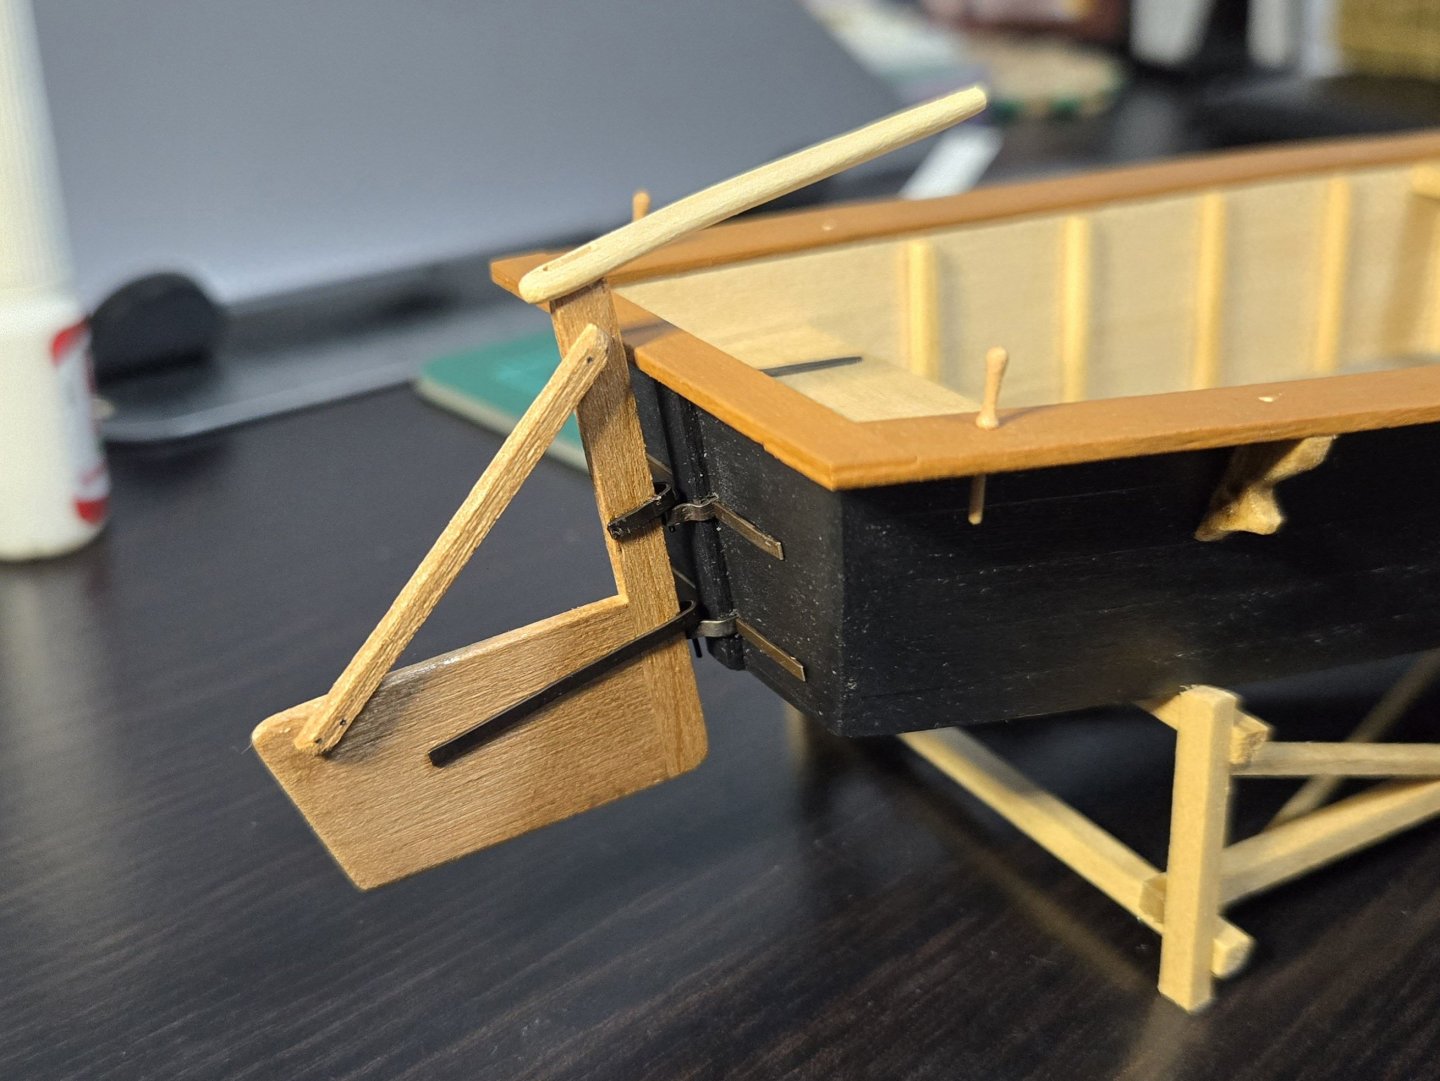
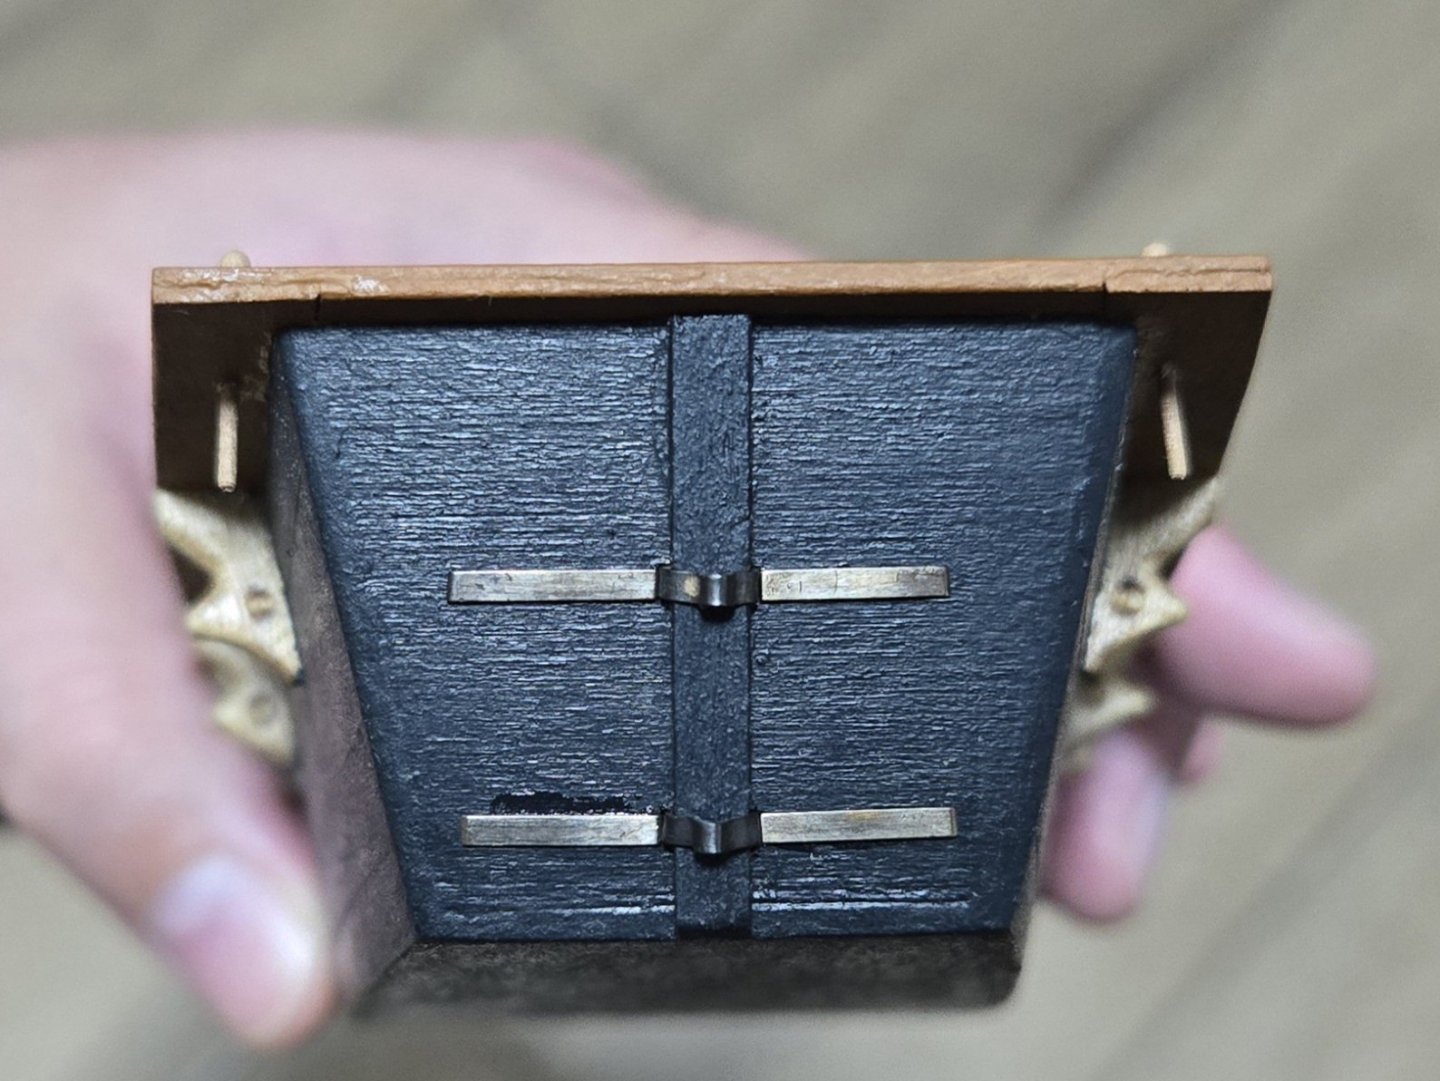
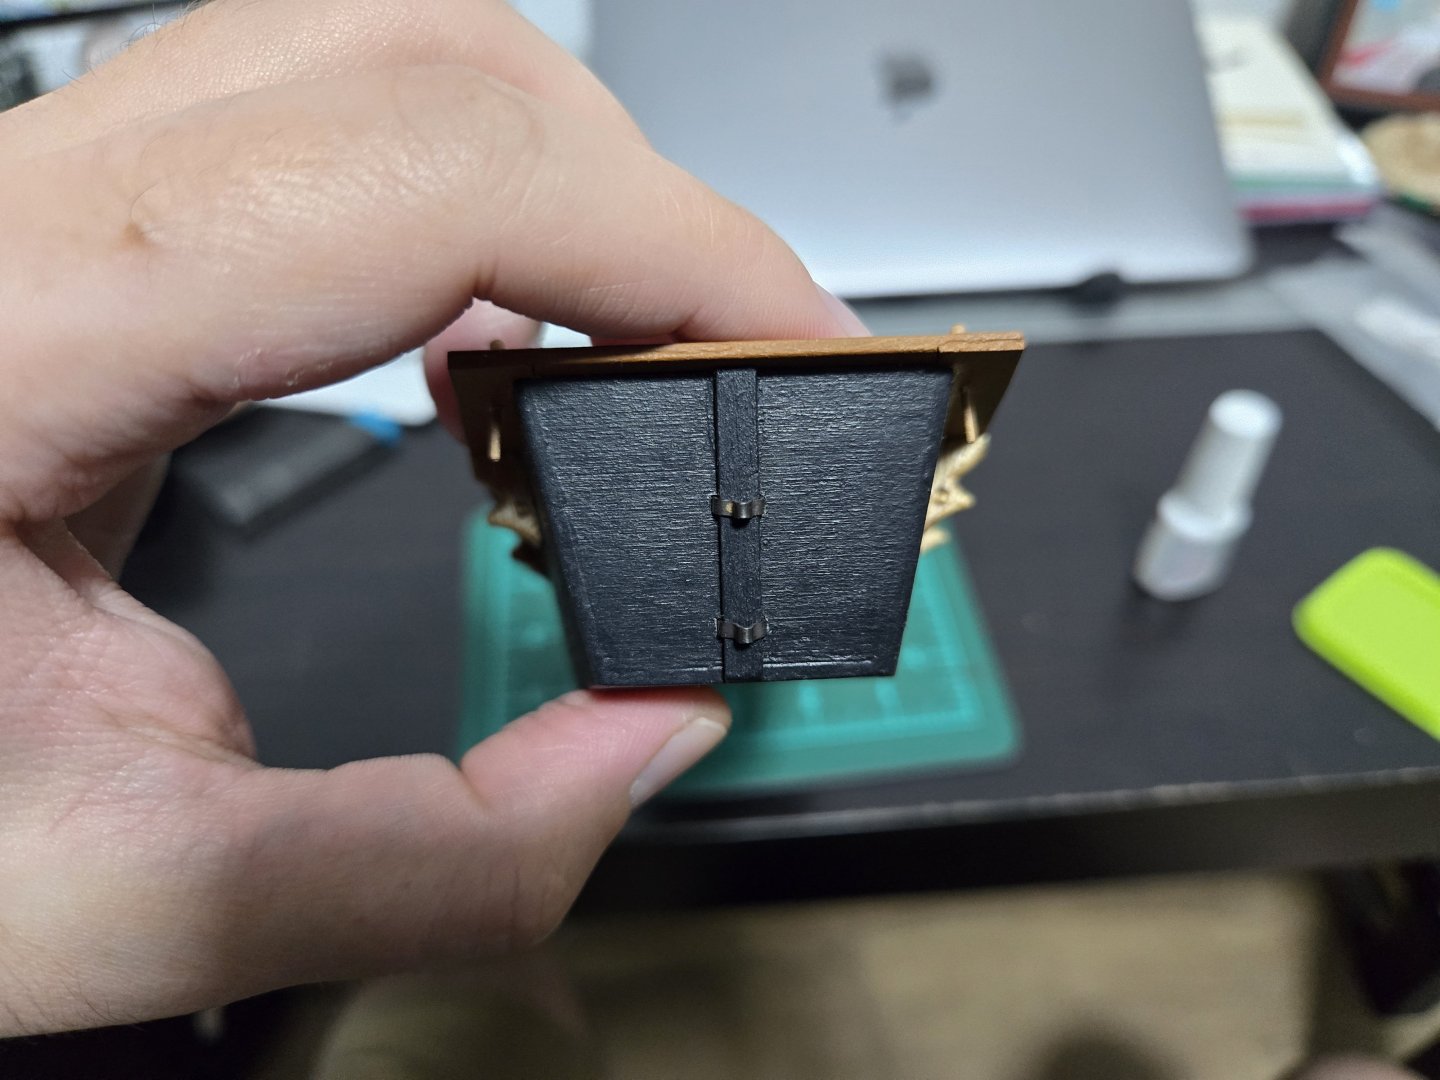
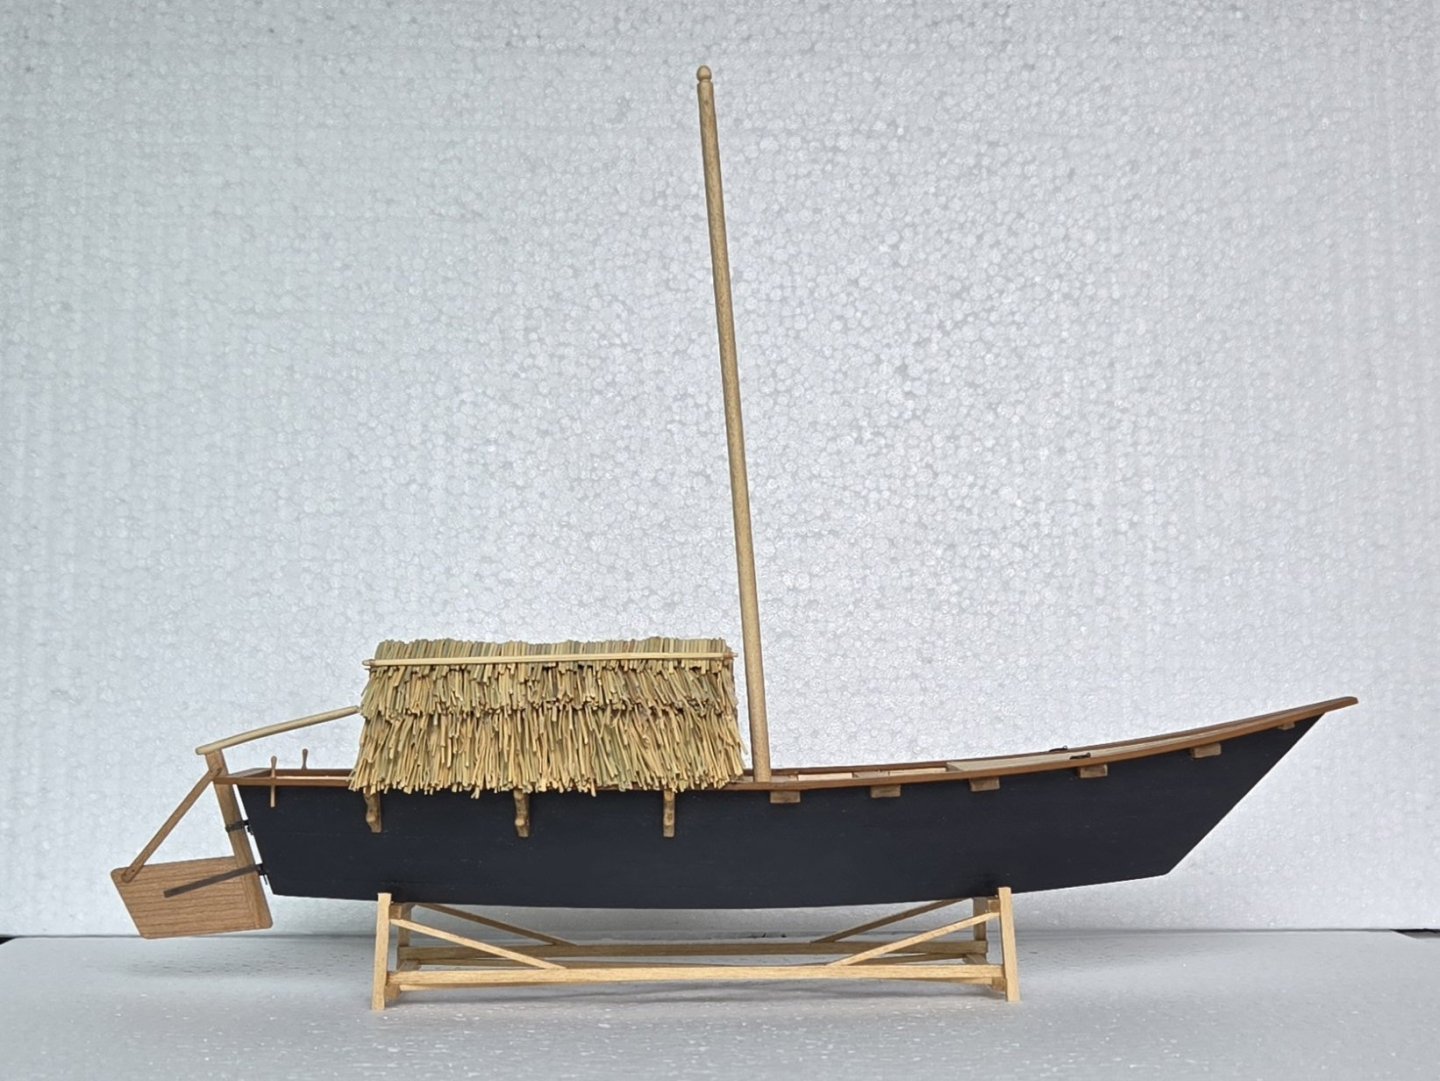
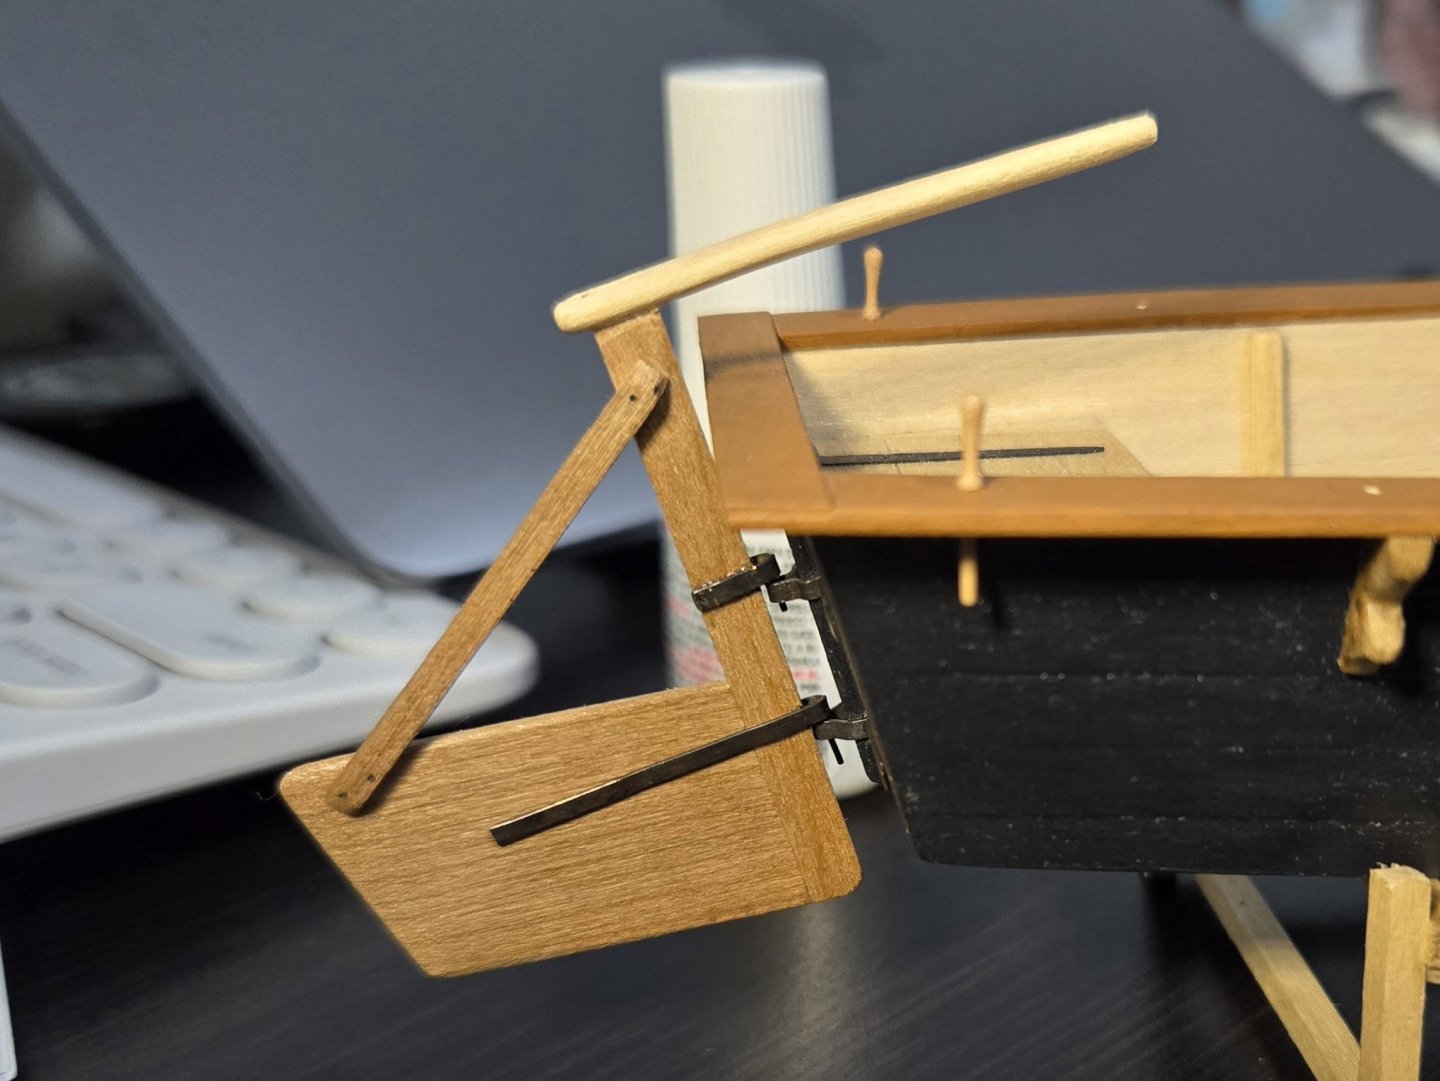
Thanks! I may have to try using overhand knots, it sounds like a useful solution to the tension problem. While I wait to pick up some pva, I turned my attention to the rudder hinges. As shown in earlier posts, I had already made them and blackened them, and had decided that making them out of several pieces would be easier than trying to bend a series of tight 90-degree angles into the brass strip. So, the first step was to drill small slots alongside the sternpost and slot in the central hinge parts (the gudgeons), as seen below: Unfortunately, the top gudgeon has a small blotch portside that didn't properly blacken, which I didn't notice earlier. I'll need to do a bit of touch-up when I get more brass black, as my bottle didn't survive the move, but for now that side can go against the wall. Next, I added the fake hinge "arms" coming off of the sides. I still haven't found my tweezers, which got packed.... somewhere, so this was a bit tricky to do. As can be seen, there was a little smearing of super glue which I'll cover once I've bought paints again (another victim of the move, I got rid of them as they were drying up anyway). Although there's a bit of a visible line between the central hinge and the false arms, I don't think it's very noticeable and I'm mostly happy with how this part turned out. Next, the rudder side of the equation. After measuring, I drilled a couple holes into the rudder's front end and added in a couple pieces of black wire bent at a 90-degree angle to form the pintle. The rudder straps were then glued around it. Getting everything just right was a challenge, and after getting everything in place, it turns out there was a small gap--the upper strap was just a hair too high. I decided that I can live with it, though. In any case, the rudder hangs and can swing freely. Overall, I'm pleased with how the rudder turned out. I think the model looks much more balanced now: There are a few things to note, though. Overall, I found metalwork for the hinges to be a serious challenge and an often frustrating experience, with some effects on the build/build experience. First, I didn't get the gudgeons as small or as close to the hull as I would have liked, so there's a bit more of a gap between hull and rudder than I would have liked. This is largely due to the difficulties I had with bending brass. If I do hinges like this again, I will try to do a simpler false gudgeon that will be tighter against the hull by just making a simple loop similar to what I did for the pintle straps. Second, while the brass blackening mostly went well, upon handling the parts, I realized that I hadn't fully cleaned them and there was a bit of black powder that got on my hands. This is a highly toxic selenium compound. While I was able to remove it with thorough hand-washing, and thoroughly cleaned my desk afterward, I really don't like the idea of risking selenium poisoning. It's one thing to have a bottle of something toxic, but it's another thing to have a toxic powder that can more easily spread to places it shouldn't be. So, while I quite like the gunmetal color that the blackening process produced, I'm considering just going with paint in the future. Given that I don't love metalworking, too, I also might give a look at Chuck Passaro's boxwood hinge kits for future hinges.


-
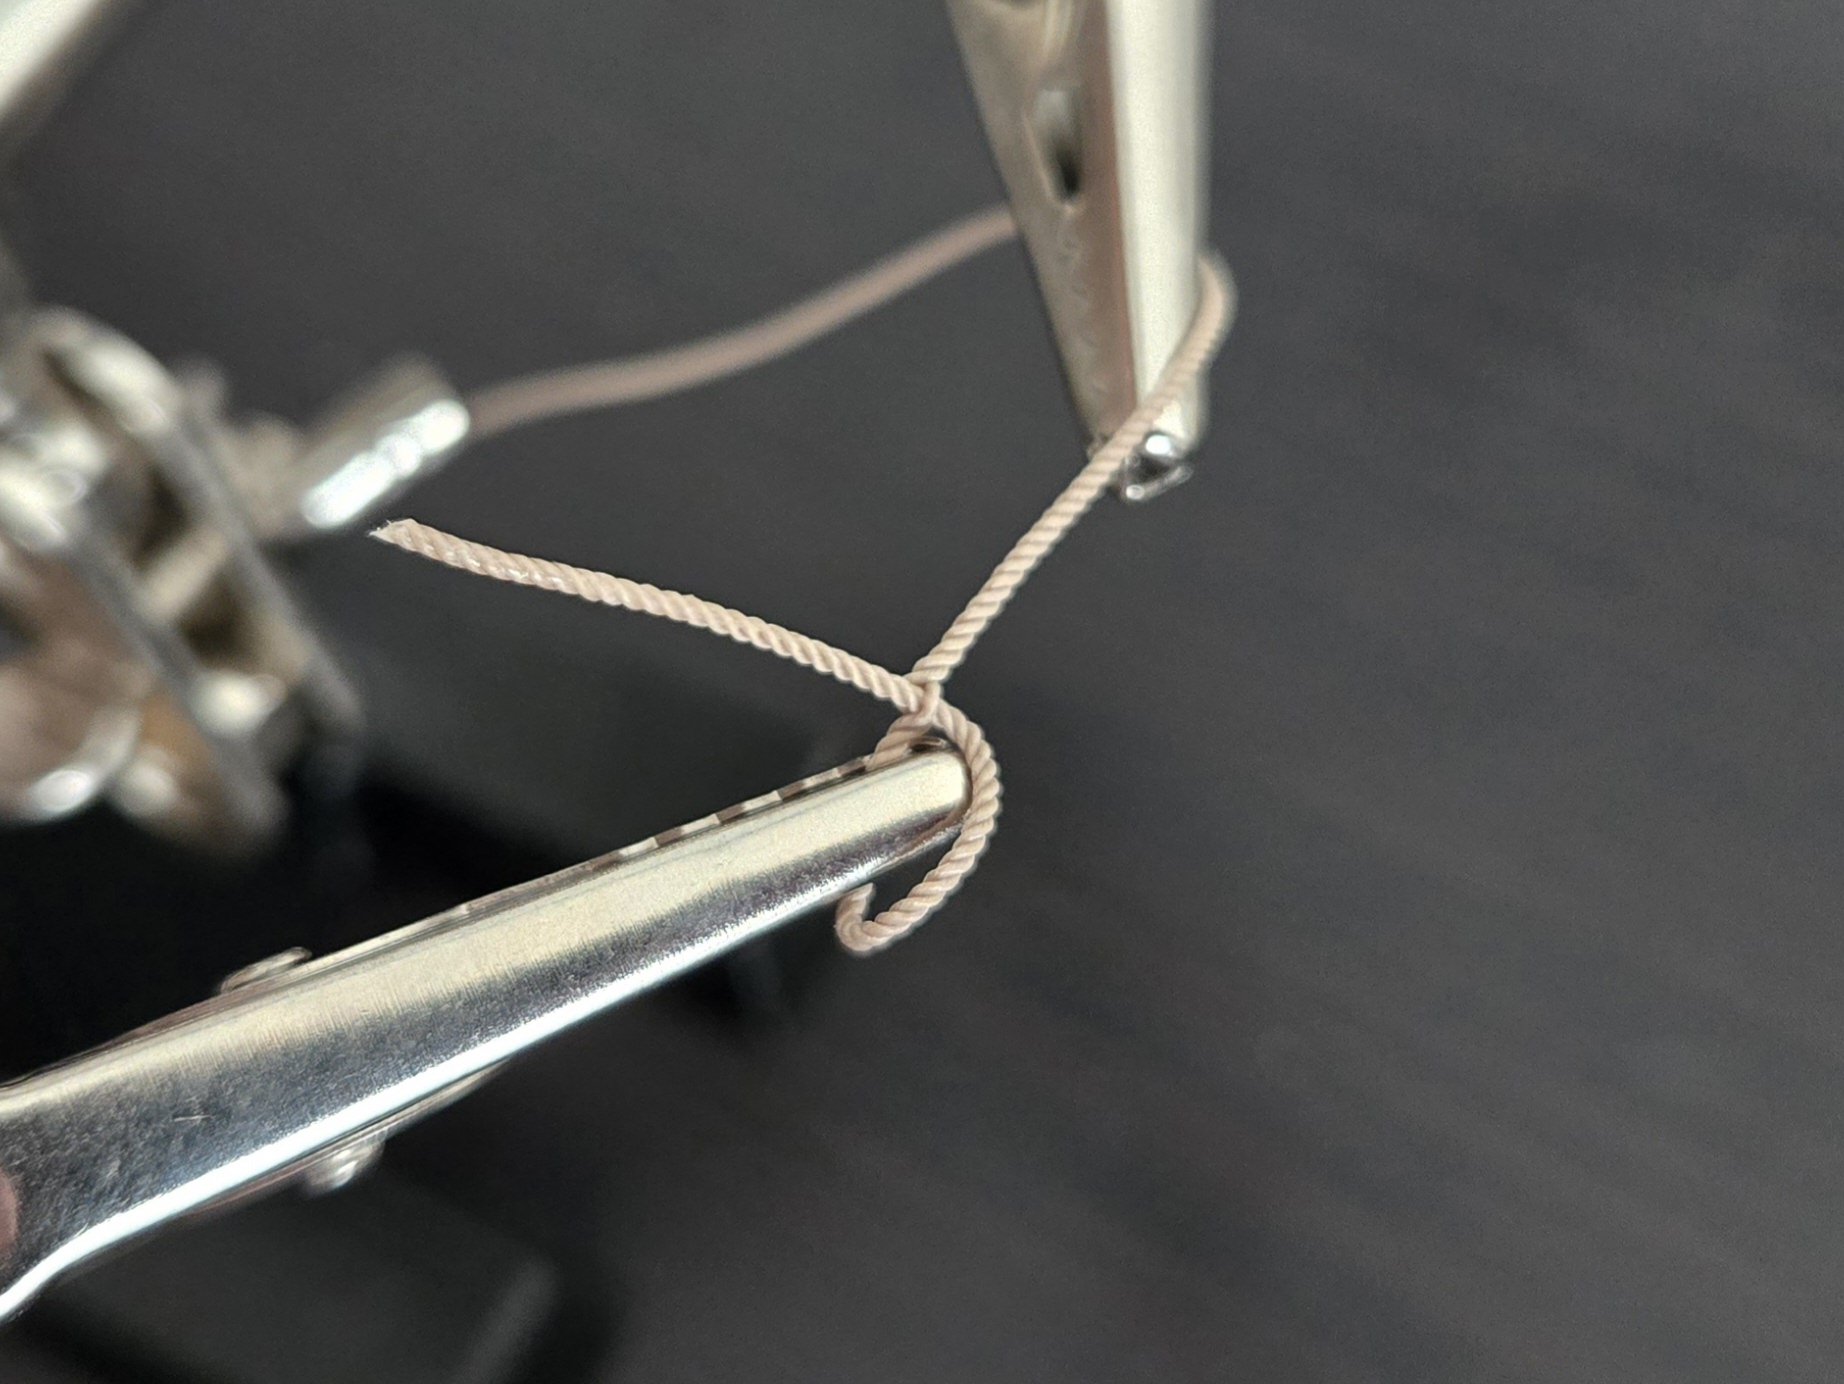
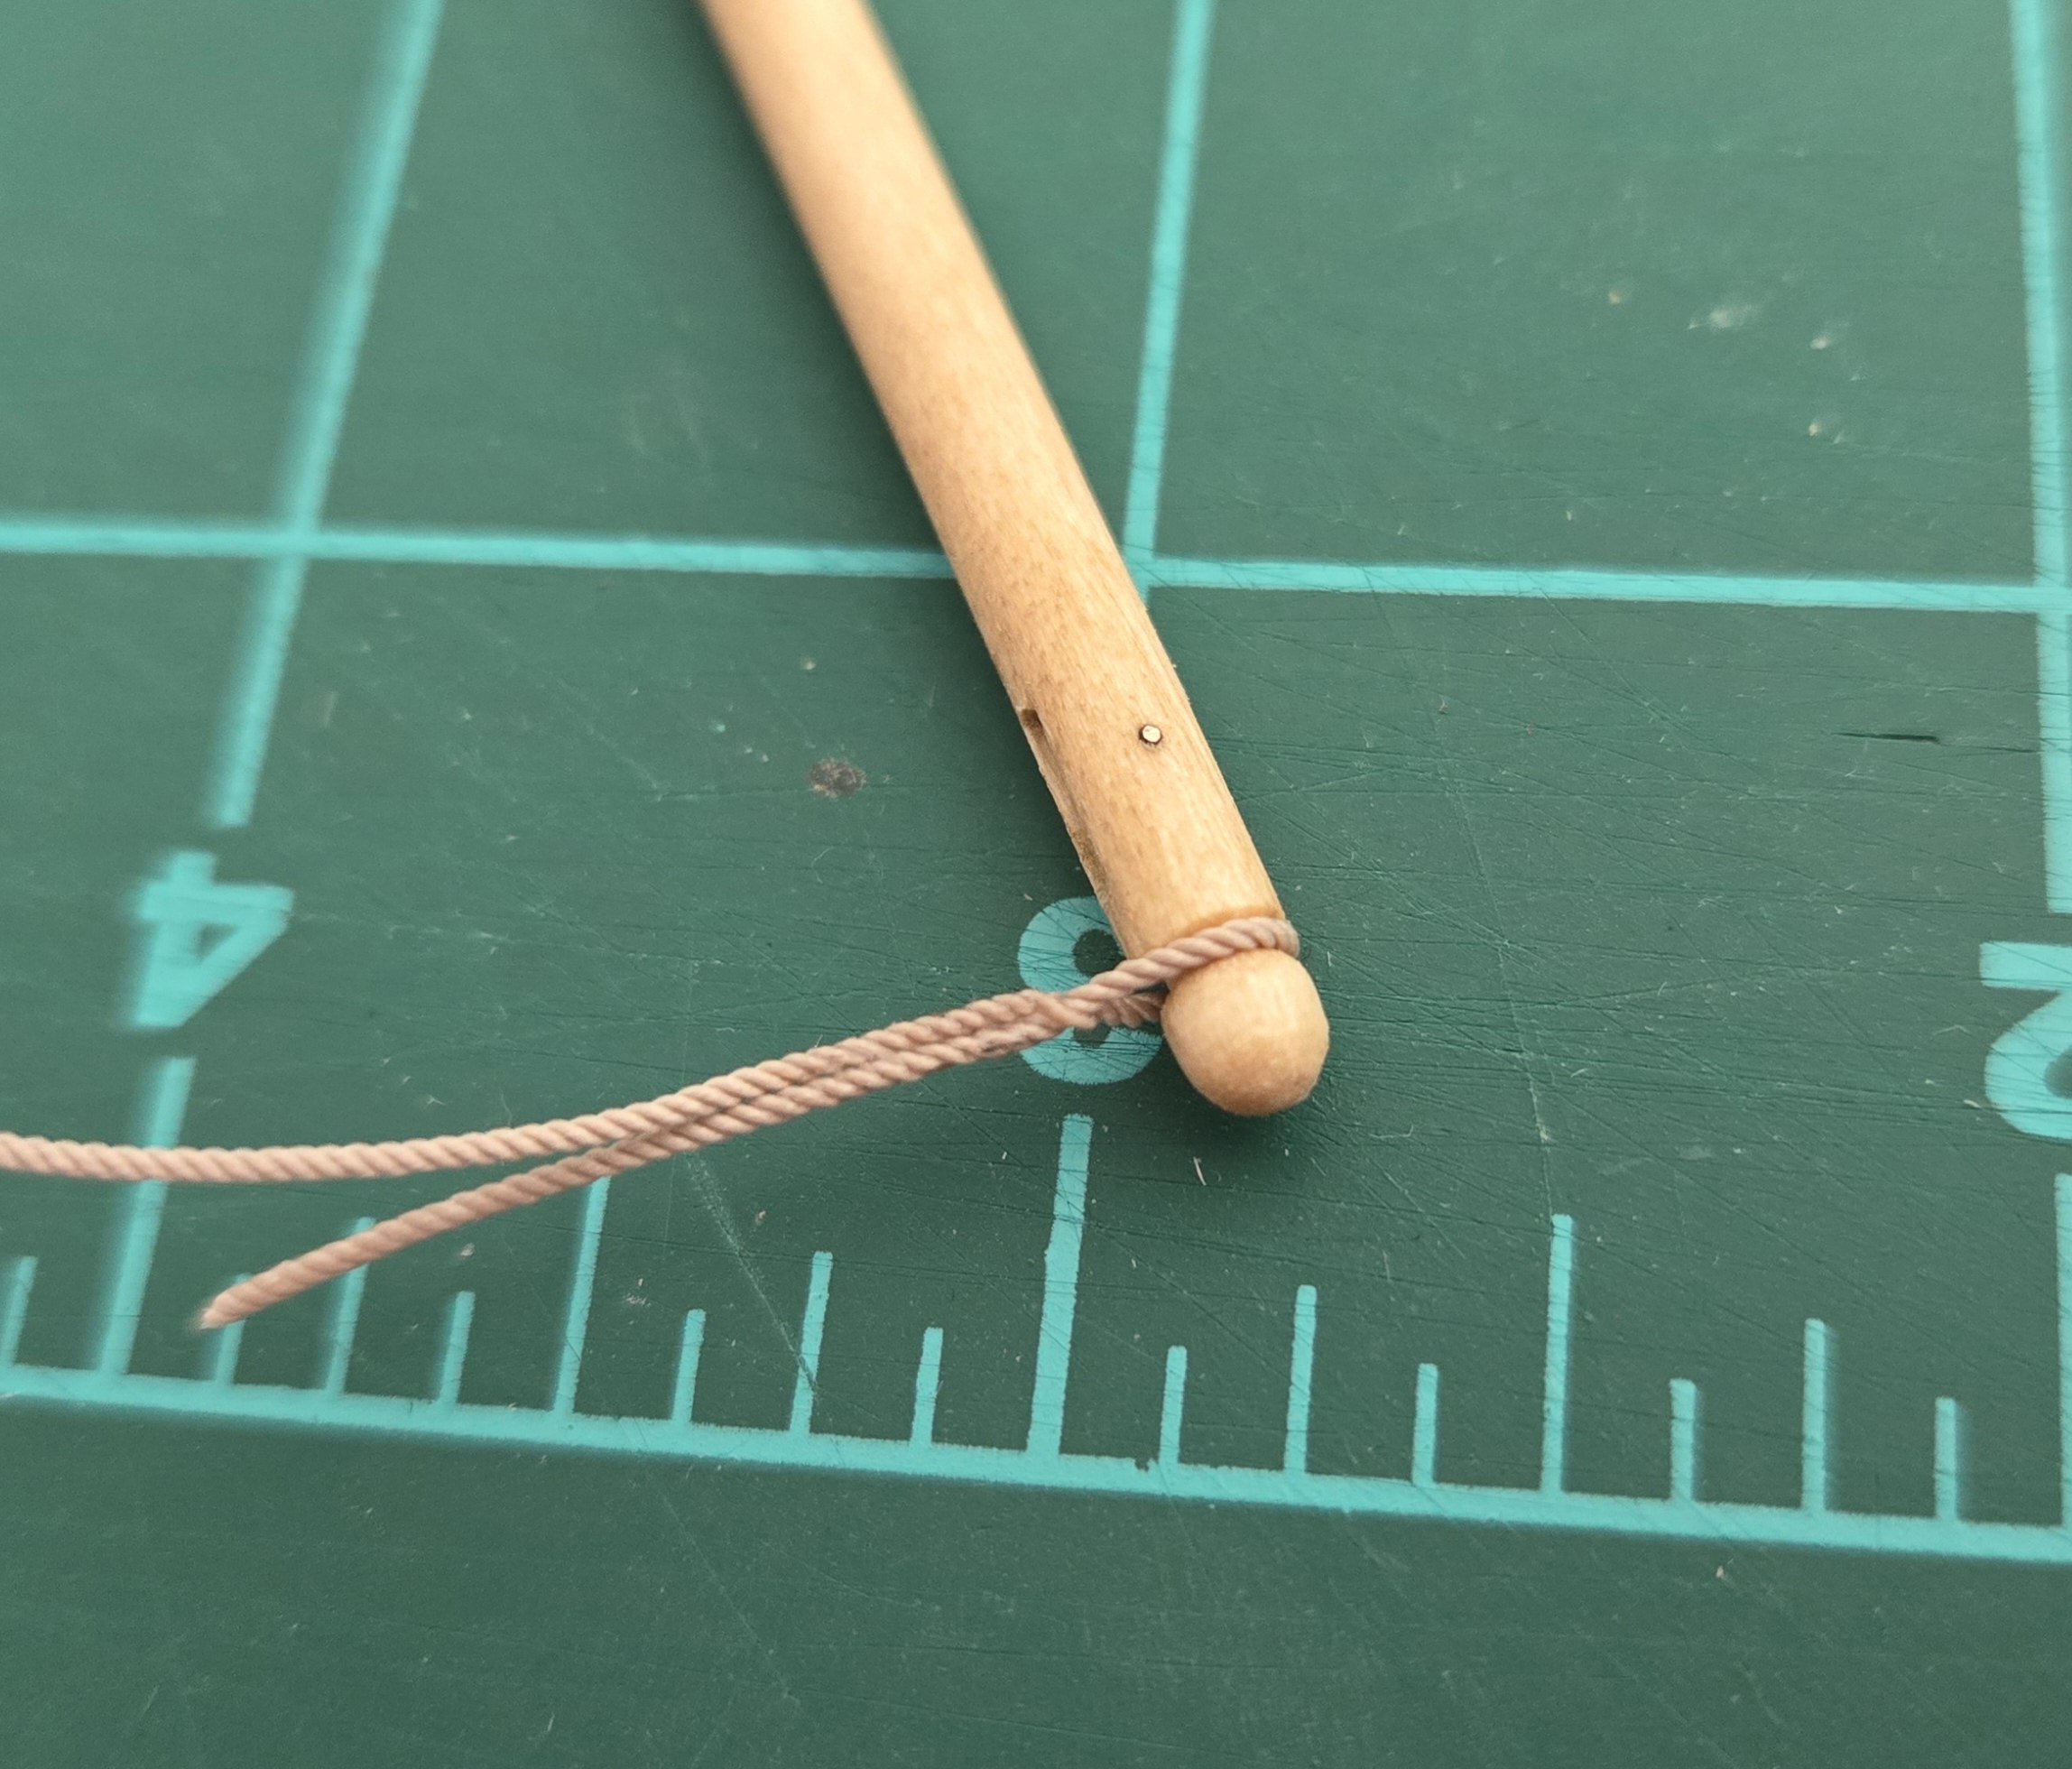
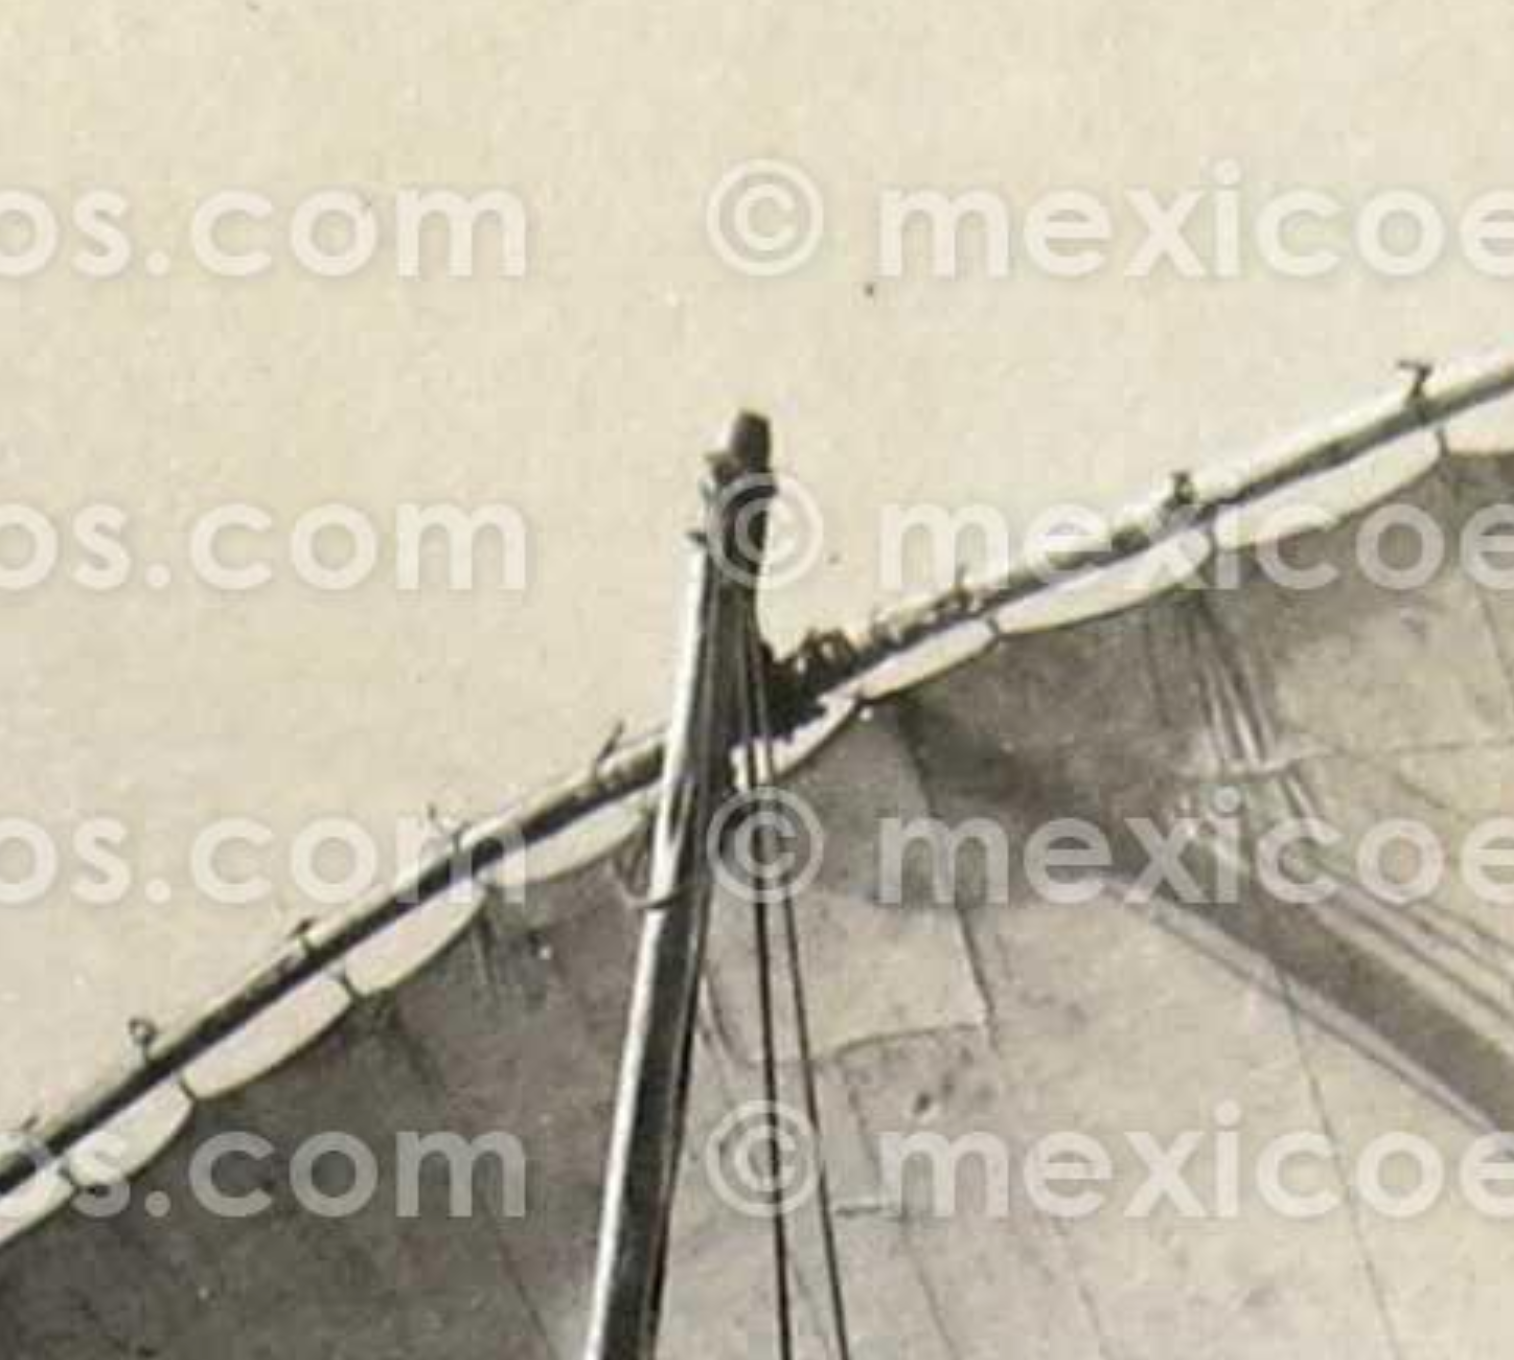
Having completed my move back to Mexico, I'm finally ready to return to work on the canoa! Back in June, in post number 183, I documented my first attempt at making and serving (or seizing? I have to admit that I'm confused by the difference between these terms) an eye splice on the top of the backstay. It didn't turn out very well for a number of reasons--I couldn't get a false splice so I just glued the rope, I used thread that was much too thick and fuzzy for the serving, and the end result was bulky and lumpy. Now that I'm more settled in, I decided to try again. This time, I was able to successfully do a false splice! I don't yet have a hypodermic needle, as Wefalck suggested, but I was able to separate the rope strands as follows. First, I placed the part of the rope that will form the loop in the clip of a helping hands. Then, holding the rope close to the clip, I rolled it to slightly unwind the strands in that spot only. Note: I'm using Ropes of Scale rope, which is treated to prevent unwinding--using an untreated rope could possibly lead to a catastrophic unwinding. I then passed the end through and re-rolled the rope. Success! I then immediately screwed things up on the next step. After placing it around the mast to ensure it was the right size, I used a bit of superglue to secure the splice. In doing so, I committed two errors. First, as I read immediately afterward, superglue is not recommended for rigging as it can maje the lines fragile and lead to breakage later--diluted white glue is better. Given that I'll probably need to unrig this model for another move in a year or two (I may have chosen the wrong hobby for my career, or vice versa), I definitely don't want to make it fragile. Second, I didn't properly trim it tight up against the splice, but (based on what I've seen in cases like the Model Shipways Norwegian Sailing Pram) left it a bit long and glued up against the stay, as seen below, to be lashed later. My error was especially clear when I double-checked photos. Although I don't have any photos that provide a very clear image of how they handled the loop at the top of the backstay on actual canoas, the splices or knots do appear to have been pretty compact, as seen in the image below--the ropes definitely aren't "doubled" as I did it. The perils of modeling before the coffee kicks in! Source: https://www.mexicoenfotos.com/antiguas/jalisco/chapala/un-velero-panorama-MX14561525002424 So, this morning was a good reminder to double-check what I'm doing before I do it! In any case, as I'm going to redo it, I decided to use this as a learning experience/testbed to try lashings and serving with different sizes and colors of fly-tying thread. For the lashings, which I used to practice clove hitches, I used 140 denier tan thread. As can be seen below, this practically disappeared against the rope. I used a darker brown 210 denier thread for the serving. I found it difficult to maintain even tension while serving. I really ought to get my old fly-tying equipment for it. In any case, as can be seen below by the contrast between the earlier attempt (above) and this try (below), the different materials and techniques made a big difference, and I think I should be able to do a better job on the final version.


-
Welcome!