Der Alte Rentner
-
Posts
1,018 -
Joined
-
Last visited
Content Type
Profiles
Forums
Gallery
Events
Everything posted by Der Alte Rentner
-
 Nothing to be sorry about. I appreciate the effort. Thanks again
 -
Thank you Gregg and Jon, Sadly, one tool I forgot to bring with me was my Vernier caliper. Measurements will have to wait. So, carronades will be a back burner issue until I return to the shipyard. In the mean time, I will likely go ahead and build the carriages. Keeping Mustafa's caveat in mind, I've convinced myself that I won't have a problem drilling holes for the eyebolts after the carriages are assembled. I tried hand drilling one today. That's not going to fly! I'm pretty sure I can setup the Proxxon mill to handle the holes later. All I need to do is construct another fixture or two. (famous last words?)🤔 I did bring one of the kit's carronades with me. Judging from the plans you two provided, I think these are too long. However, after doing some cleanup and painting it black, I might yet opt to use the MS parts. The rigging issue will thus be taken care of. Off to the pool.. Enjoy the winter up North!
-
Is it just me? Or are the eye bolts that came with my kit a lot smaller than they should be. Compare and contrast to a picture from the Hunt practicum. Also, because the diecast carronades that came with the kit are in such horrible shape, I purchased some replacements online. (Scroll back a few posts if you don't remember this..) These do not have the eye bolts attached at the cascabel that appears on the ones in the model shipways kit. Hipexec discussed this in his build somewhere on page 31. I can't say I like any of the three solutions broached in that discussion. I really don't want to have to file every single one of the model ship ways carronades, (which I didn't bring with me anyway). But I can't see me attempting to drill holes in the cascabels and inserting eye bolts to facilitate rigging. Sigh..

-
USS Constitution by mtbediz - 1:76
Der Alte Rentner replied to mtbediz's topic in - Build logs for subjects built 1751 - 1800
in the ultra close up, the workmanship is even more impressive. wow! -
USS Constitution by mtbediz - 1:76
Der Alte Rentner replied to mtbediz's topic in - Build logs for subjects built 1751 - 1800
inspiring work, as always. I'd love to see some photos of the technique you use in rigging the carronades. I assume you do the seizing (right term?) before you glue the eyebolts in. -
Thank you Jon, Here's the view from the side showing the wedges. They are there to pair with the hawse ports, that will be added later. While the ports are cut directly into the hull in the Hunt practicum, I've learned that there is some structure added to the hull between the cheek knees. I'm following several builders in adding that feature.
-
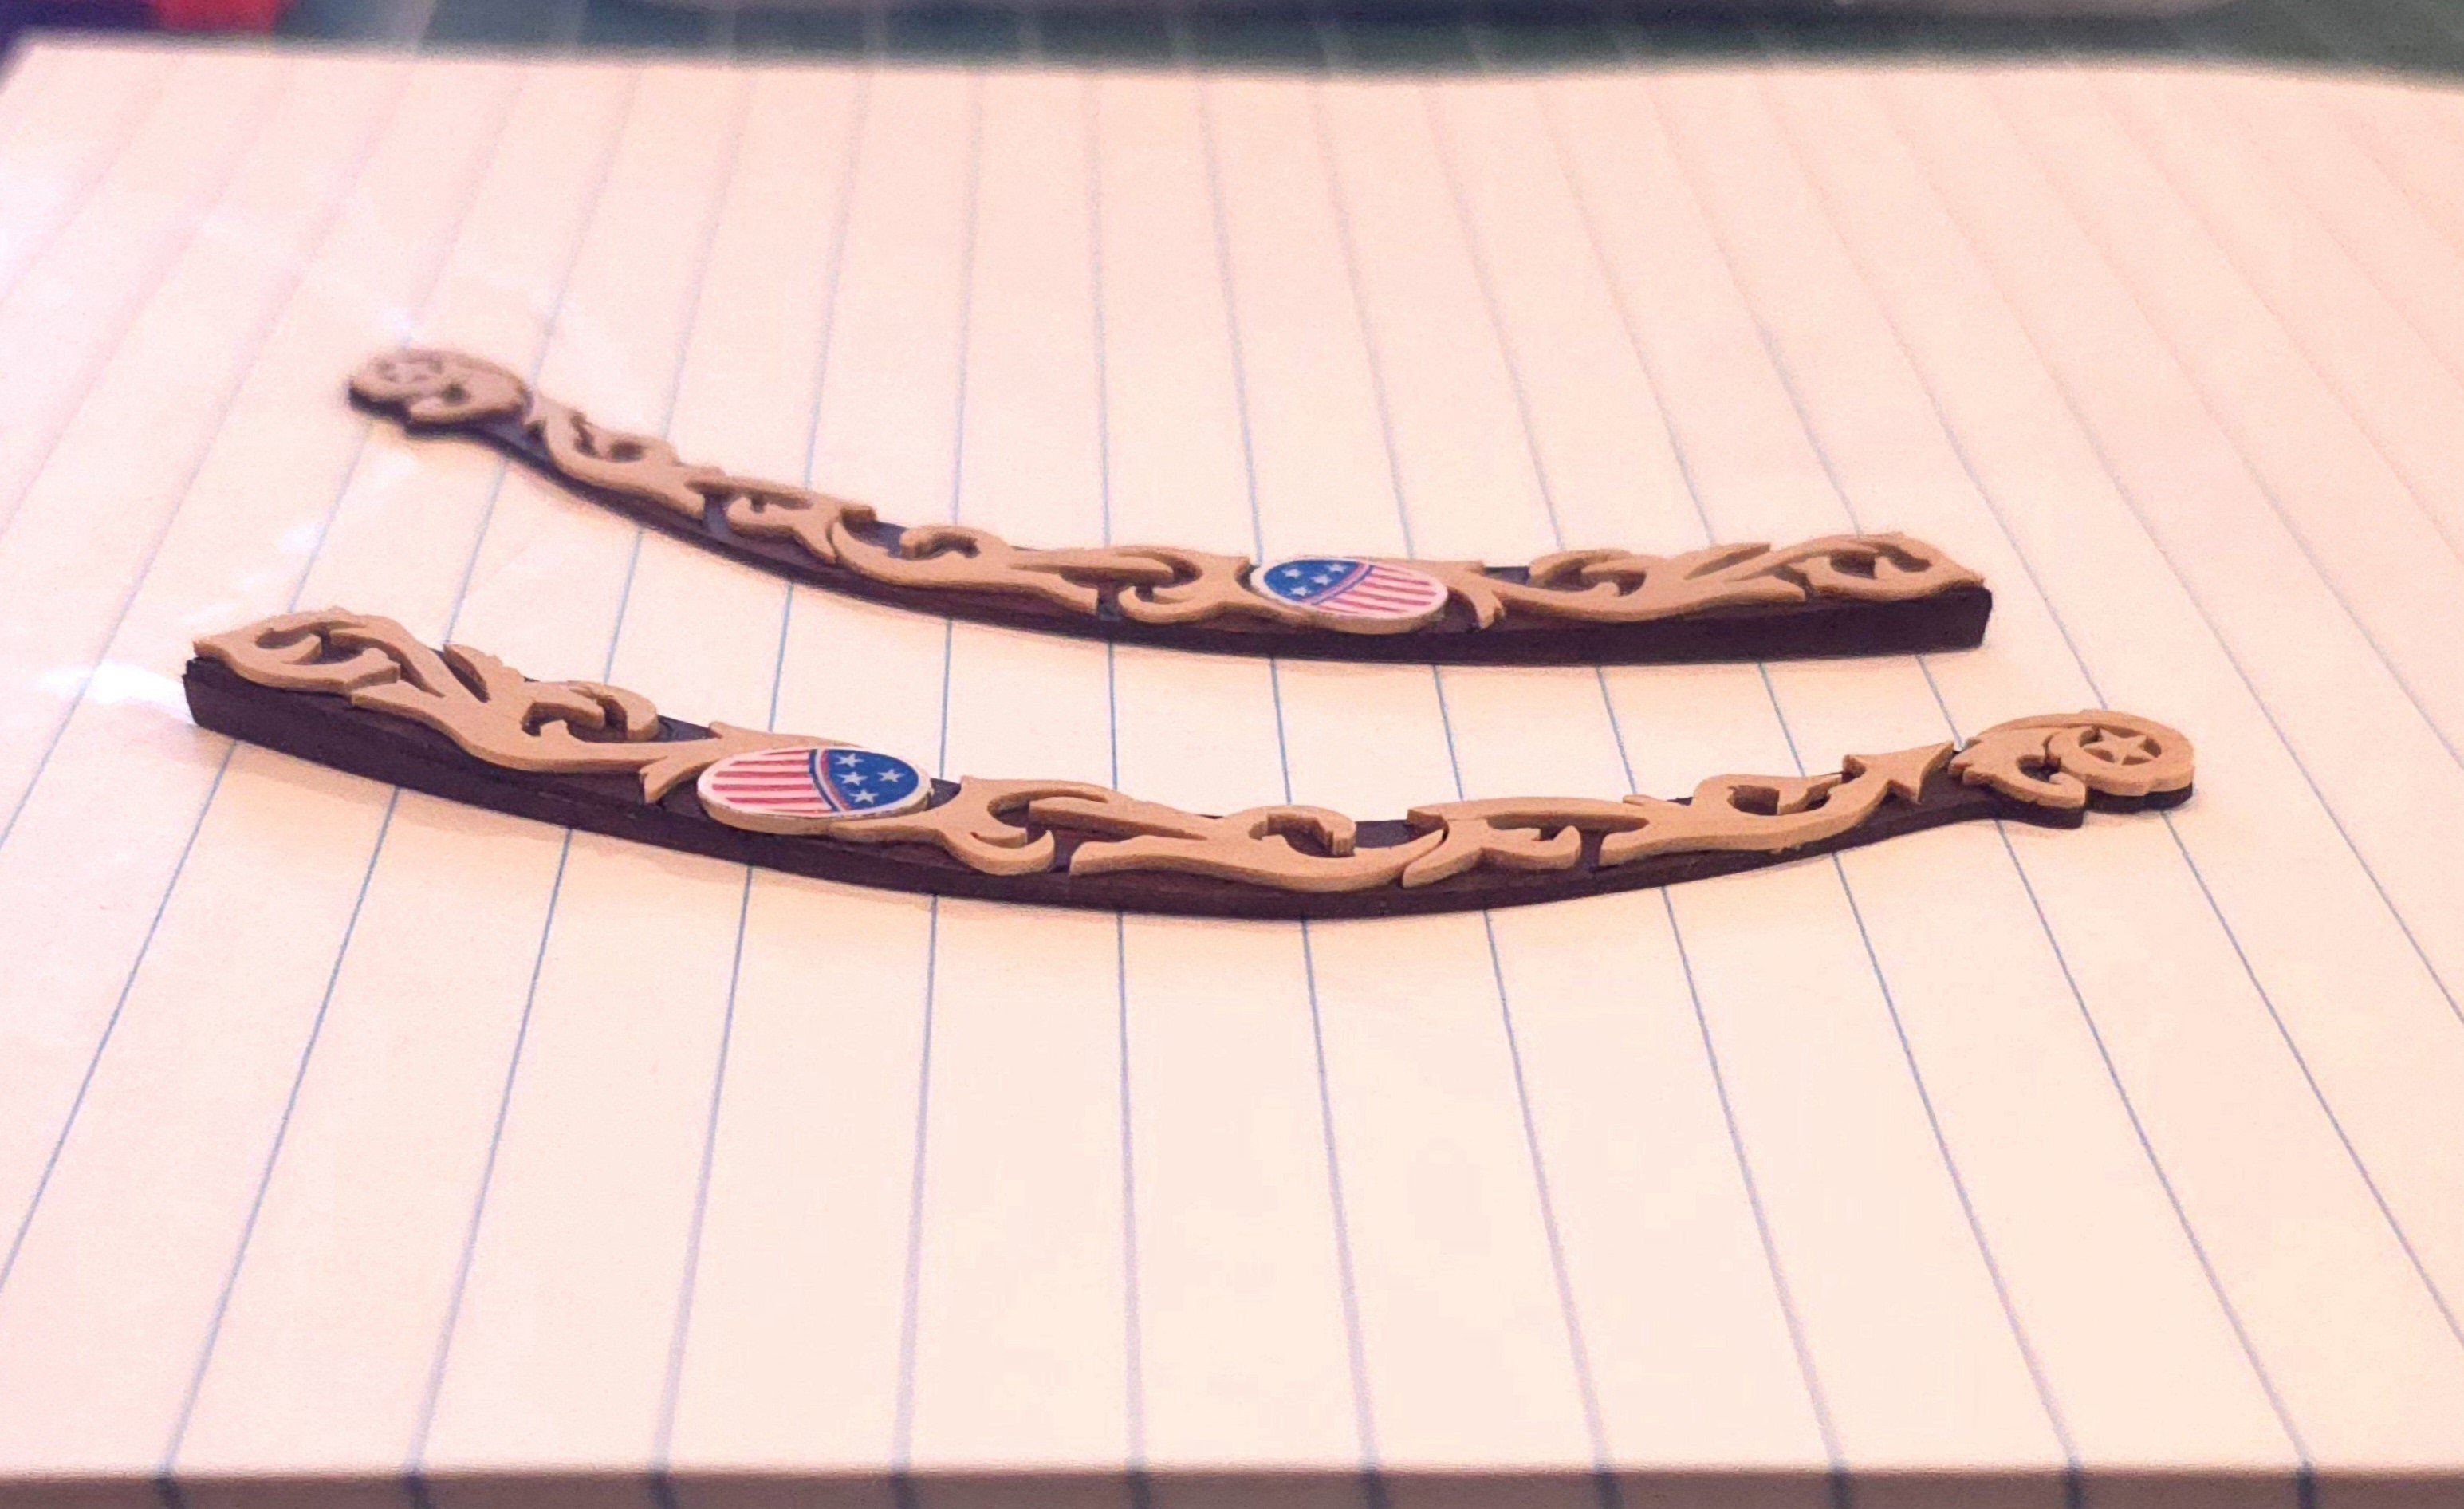
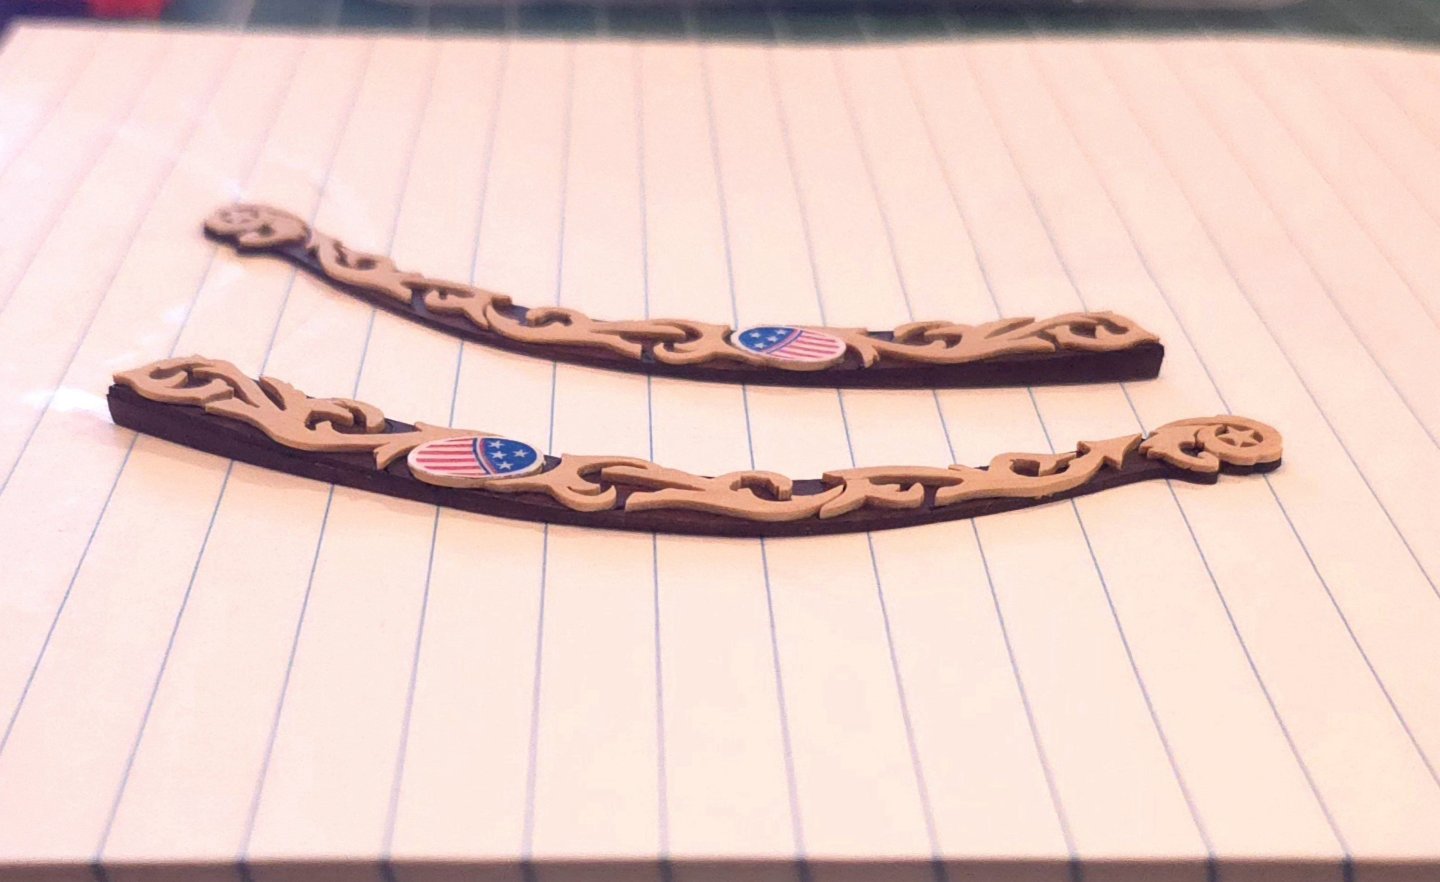
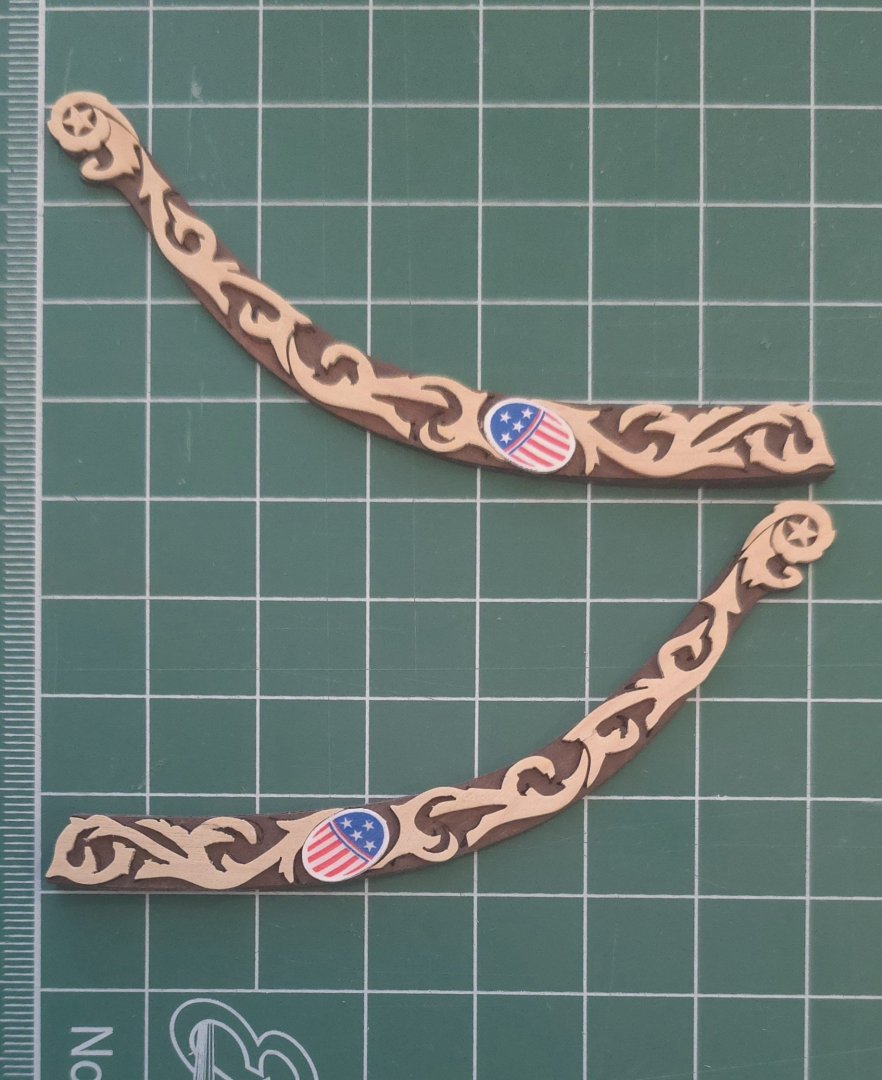
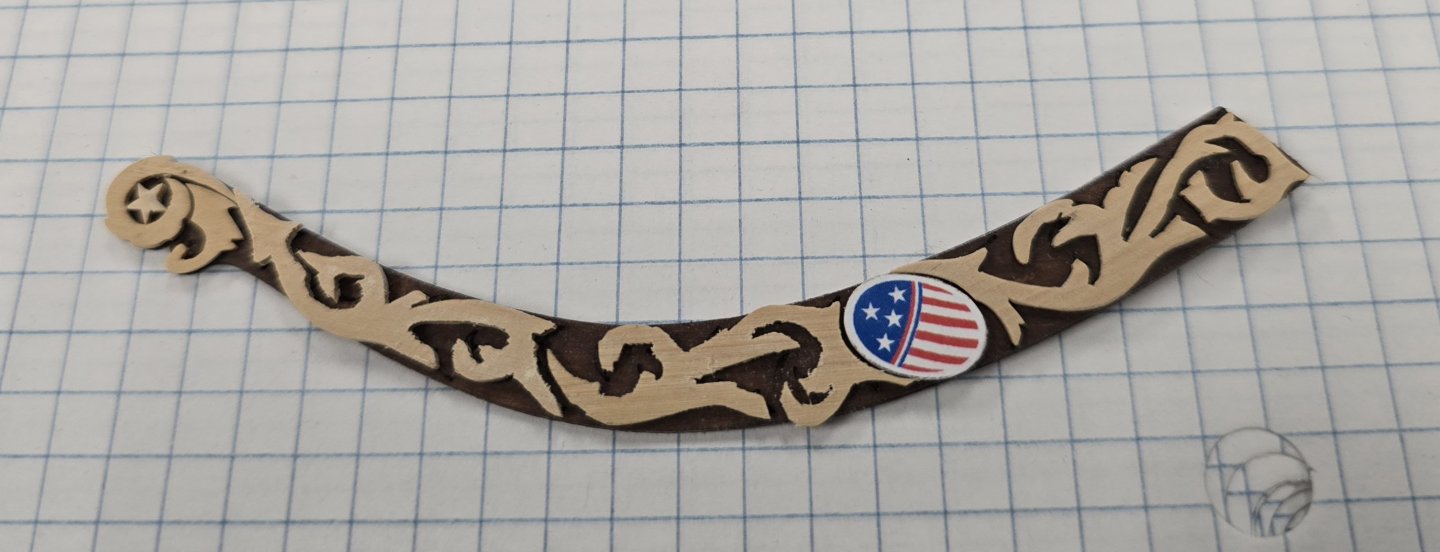
Slow going on vacation, but I finally managed to finish the scroll work. Not visible in these photos are the wedges that I added to the aft end of both of these trailboards.
-
sehr schön.
-
Jon, was it you who argued in favor of keeping lines randomly scattered around the deck to show the ship in a state of action? If so, there would be no canopies up during battle. That could be your ticket for skipping them altogether.. 😉
-
I searched the MSW site and found your initial dialog with Helmarsowick in 2023. I believe his supplier is located in Poland, which suggests the ordering process may be a bit of an issue. I wonder if anyone in the USA offers this product. But, if you do get the details on ordering the printed canopies, I'd likely follow suit and order them too. Thanks Jon
-
I may indeed go that route. I've seen that post here at MSW and will look it up. Thanks for the reminder.
-
I'm nowhere near my shipyard and won't be for a few weeks. Please ask again at the end of the month. For what it's worth, I eyeballed everything at the time. I'd have to put a ruler to the base to provide dimensions. Thanks
-
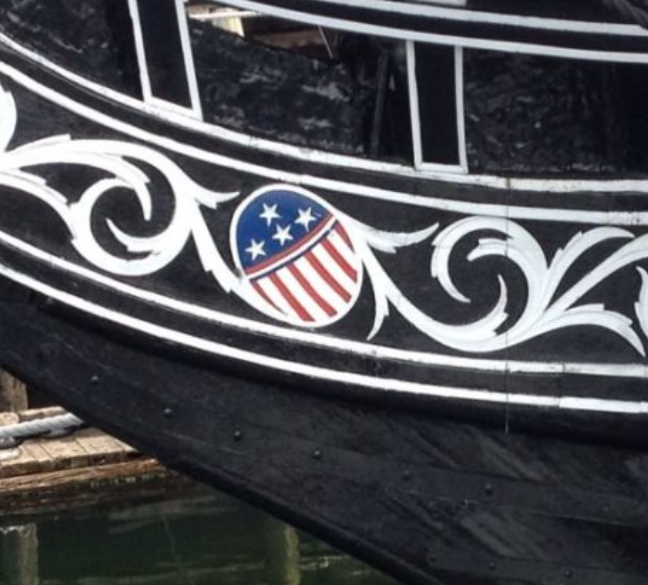
Very little in life is "straight forward". Seeing what I am here, I may well skip this detail. Could you please take a picture from a distance so I can see how things look from a typical viewer's perspective, instead of the electron microscope closeup? I admire your tenacity!
-
I was thinking the same thing this morning. Had I thought of it before I packed my bags, I would have done that using my drill press and a jig in the shipyard. Before I assemble the second carriage, I'll figure out an efficient path forward with the tools I have available here (Gulf Coast of Florida). In the meantime, I'll busy myself with shaping the scrollwork. Thanks you
-
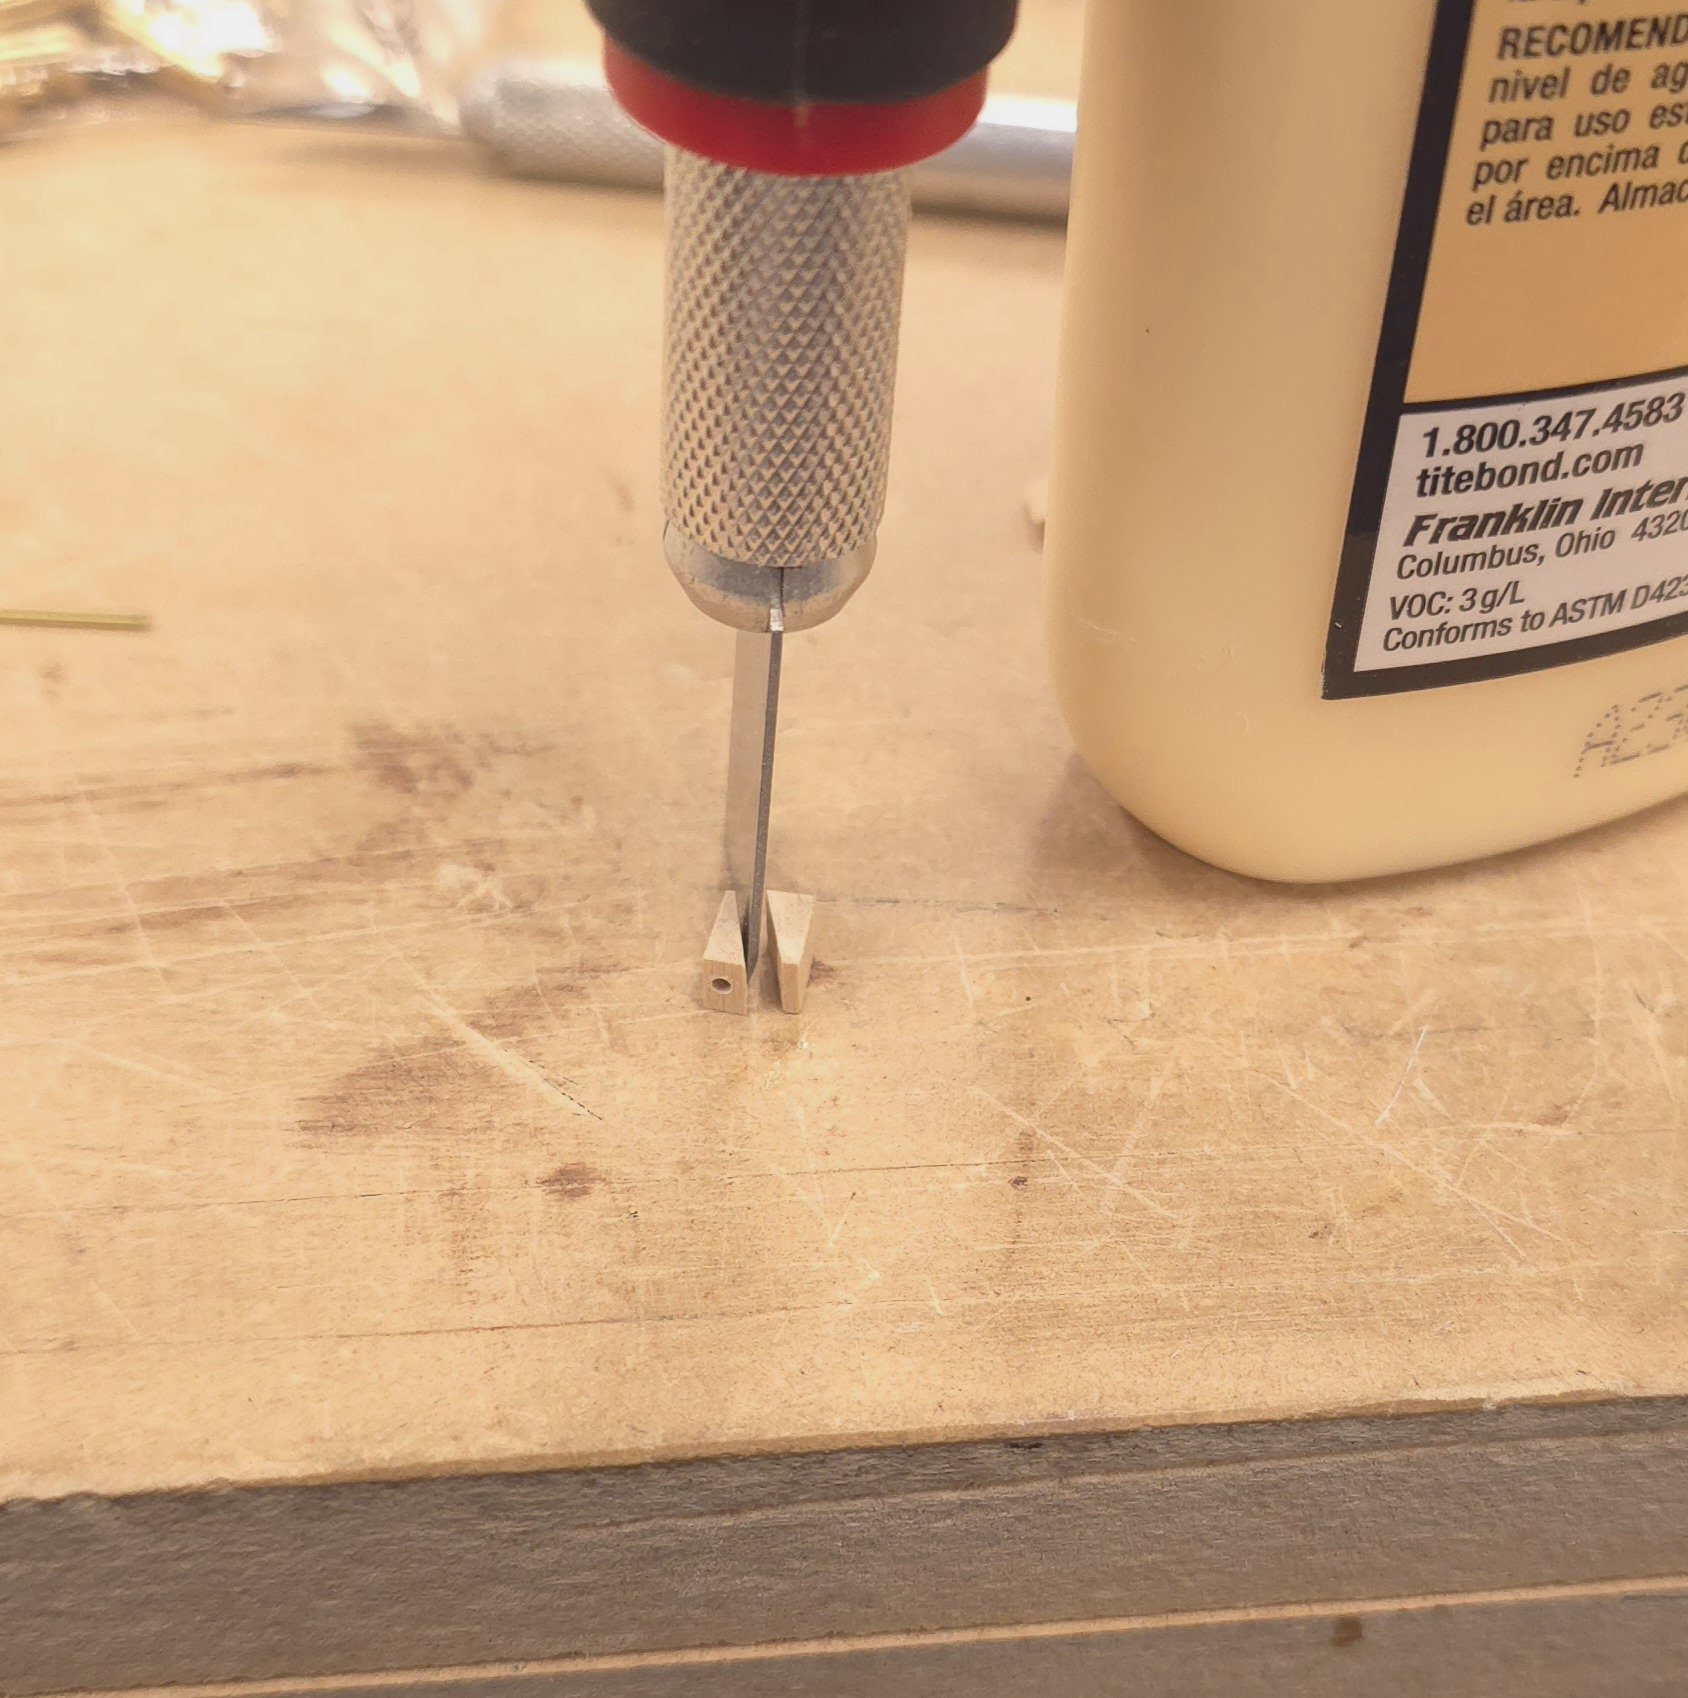
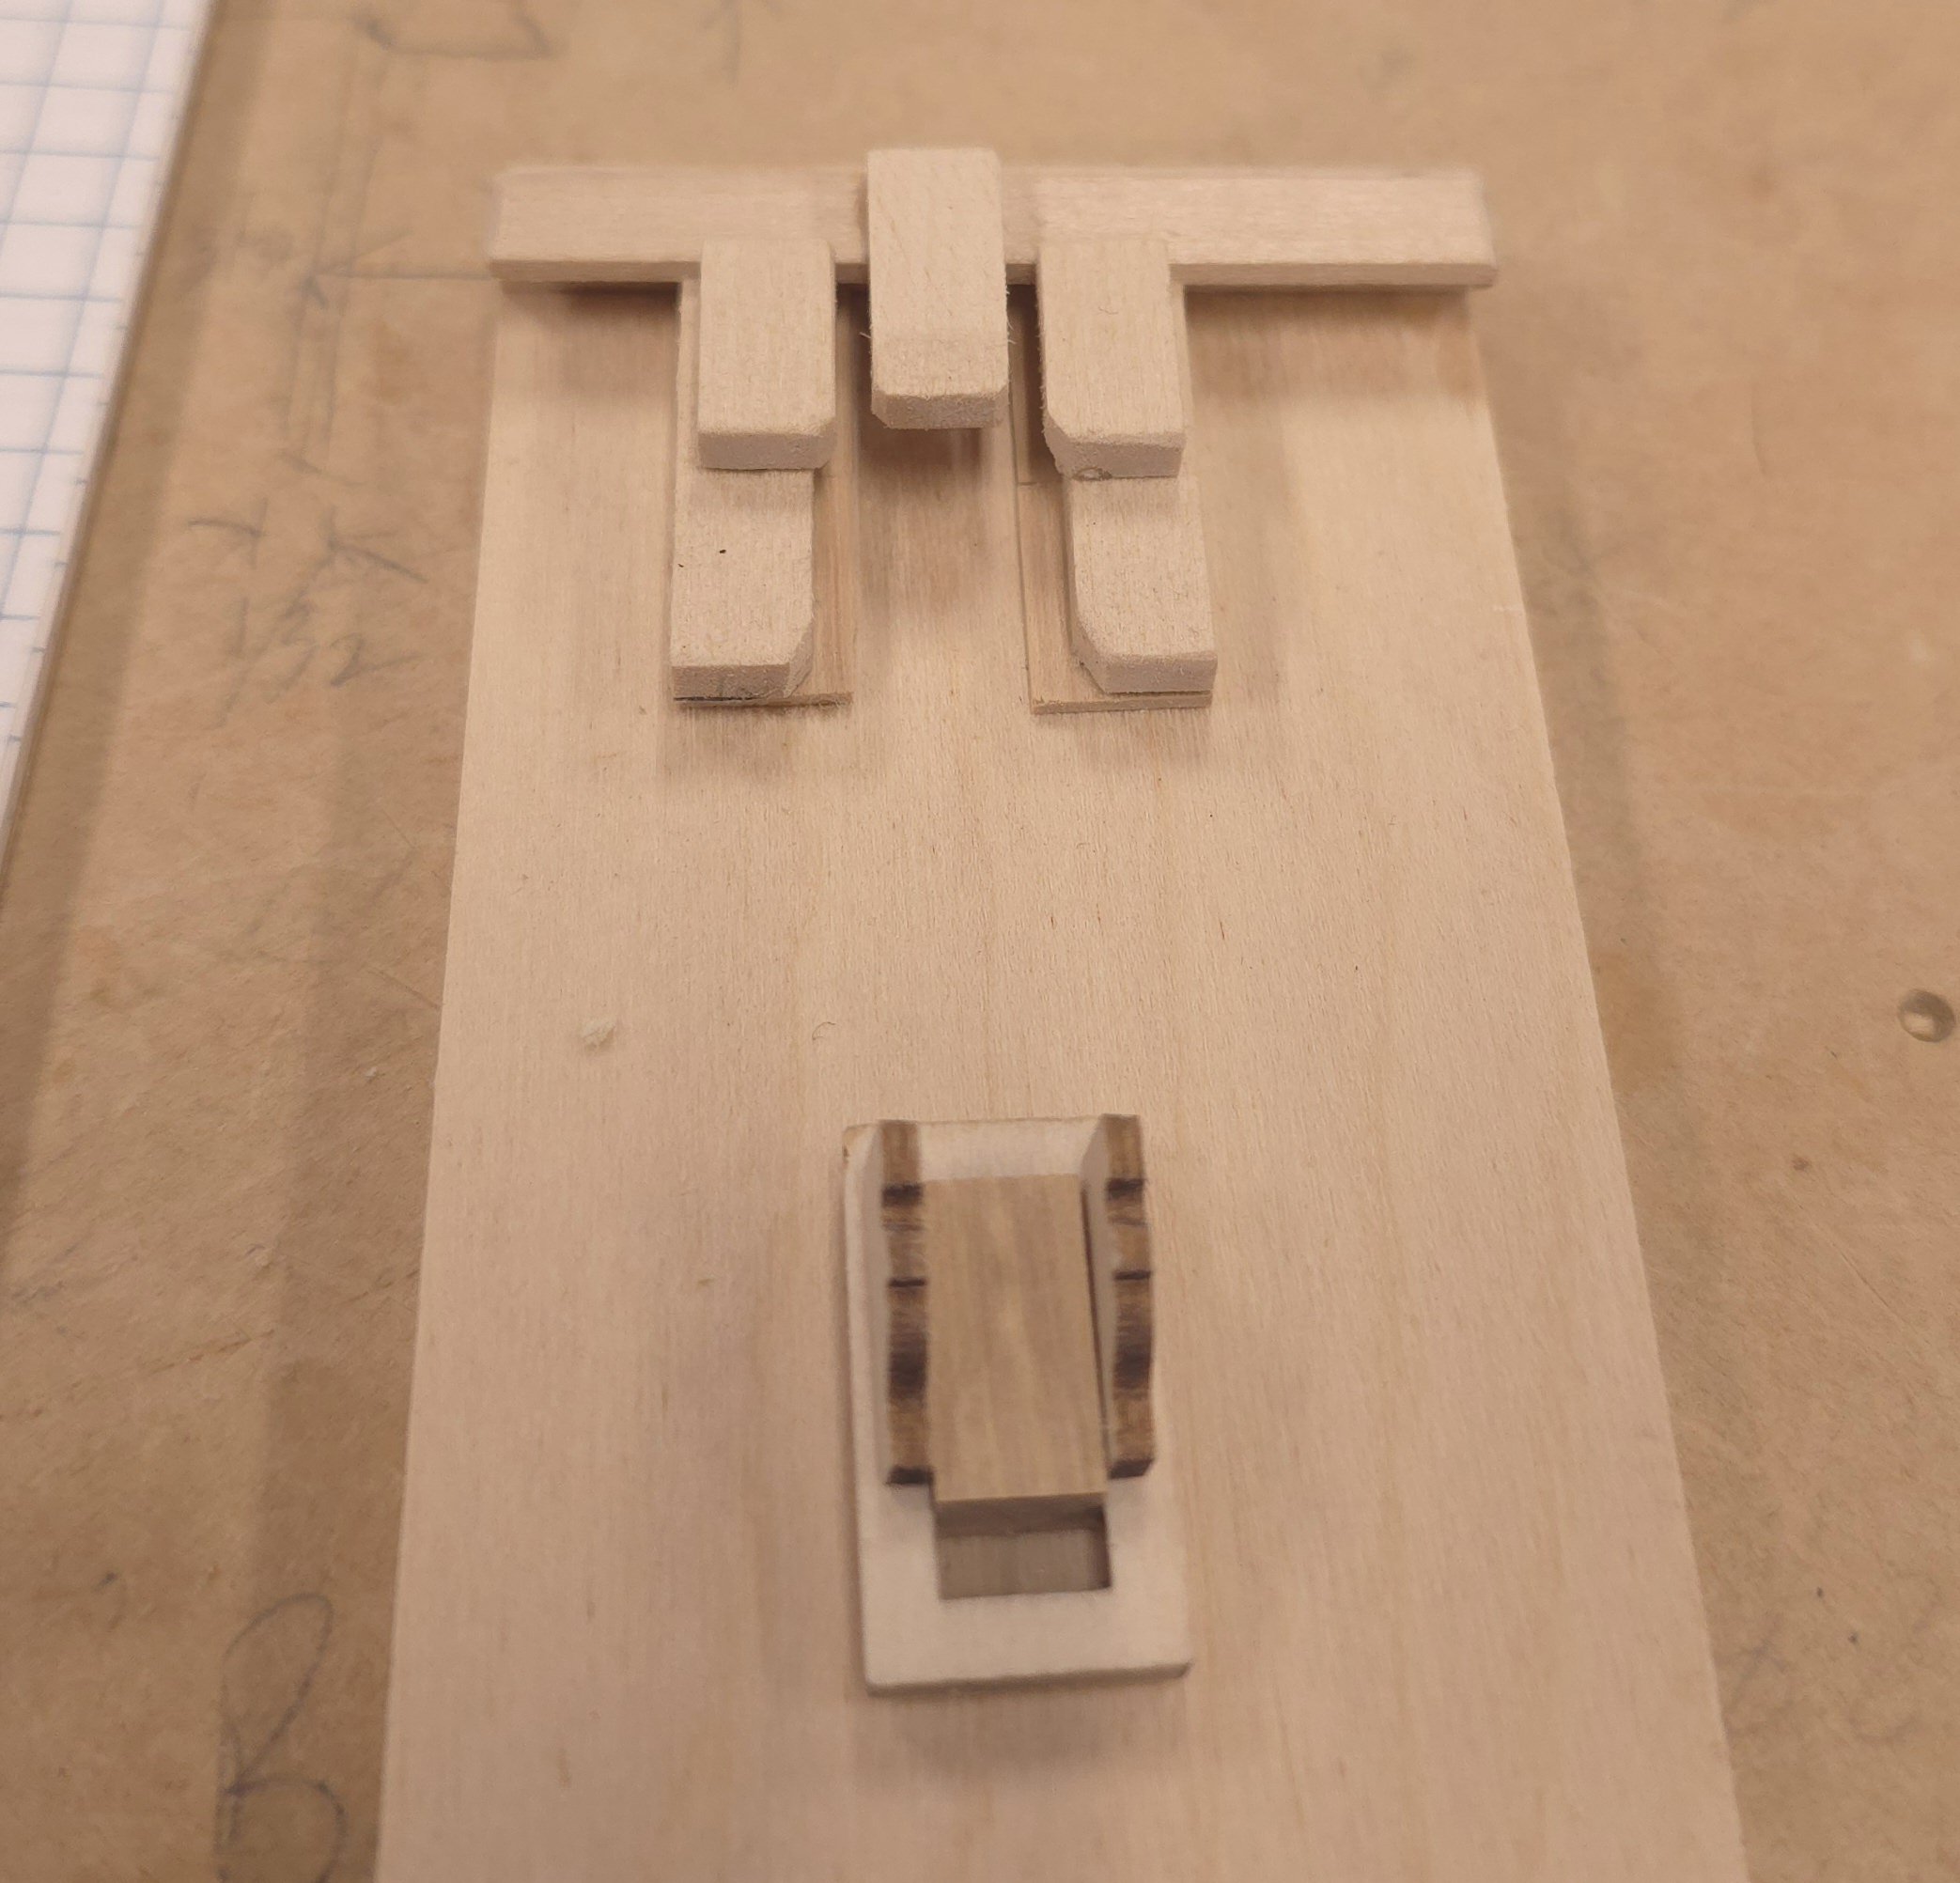
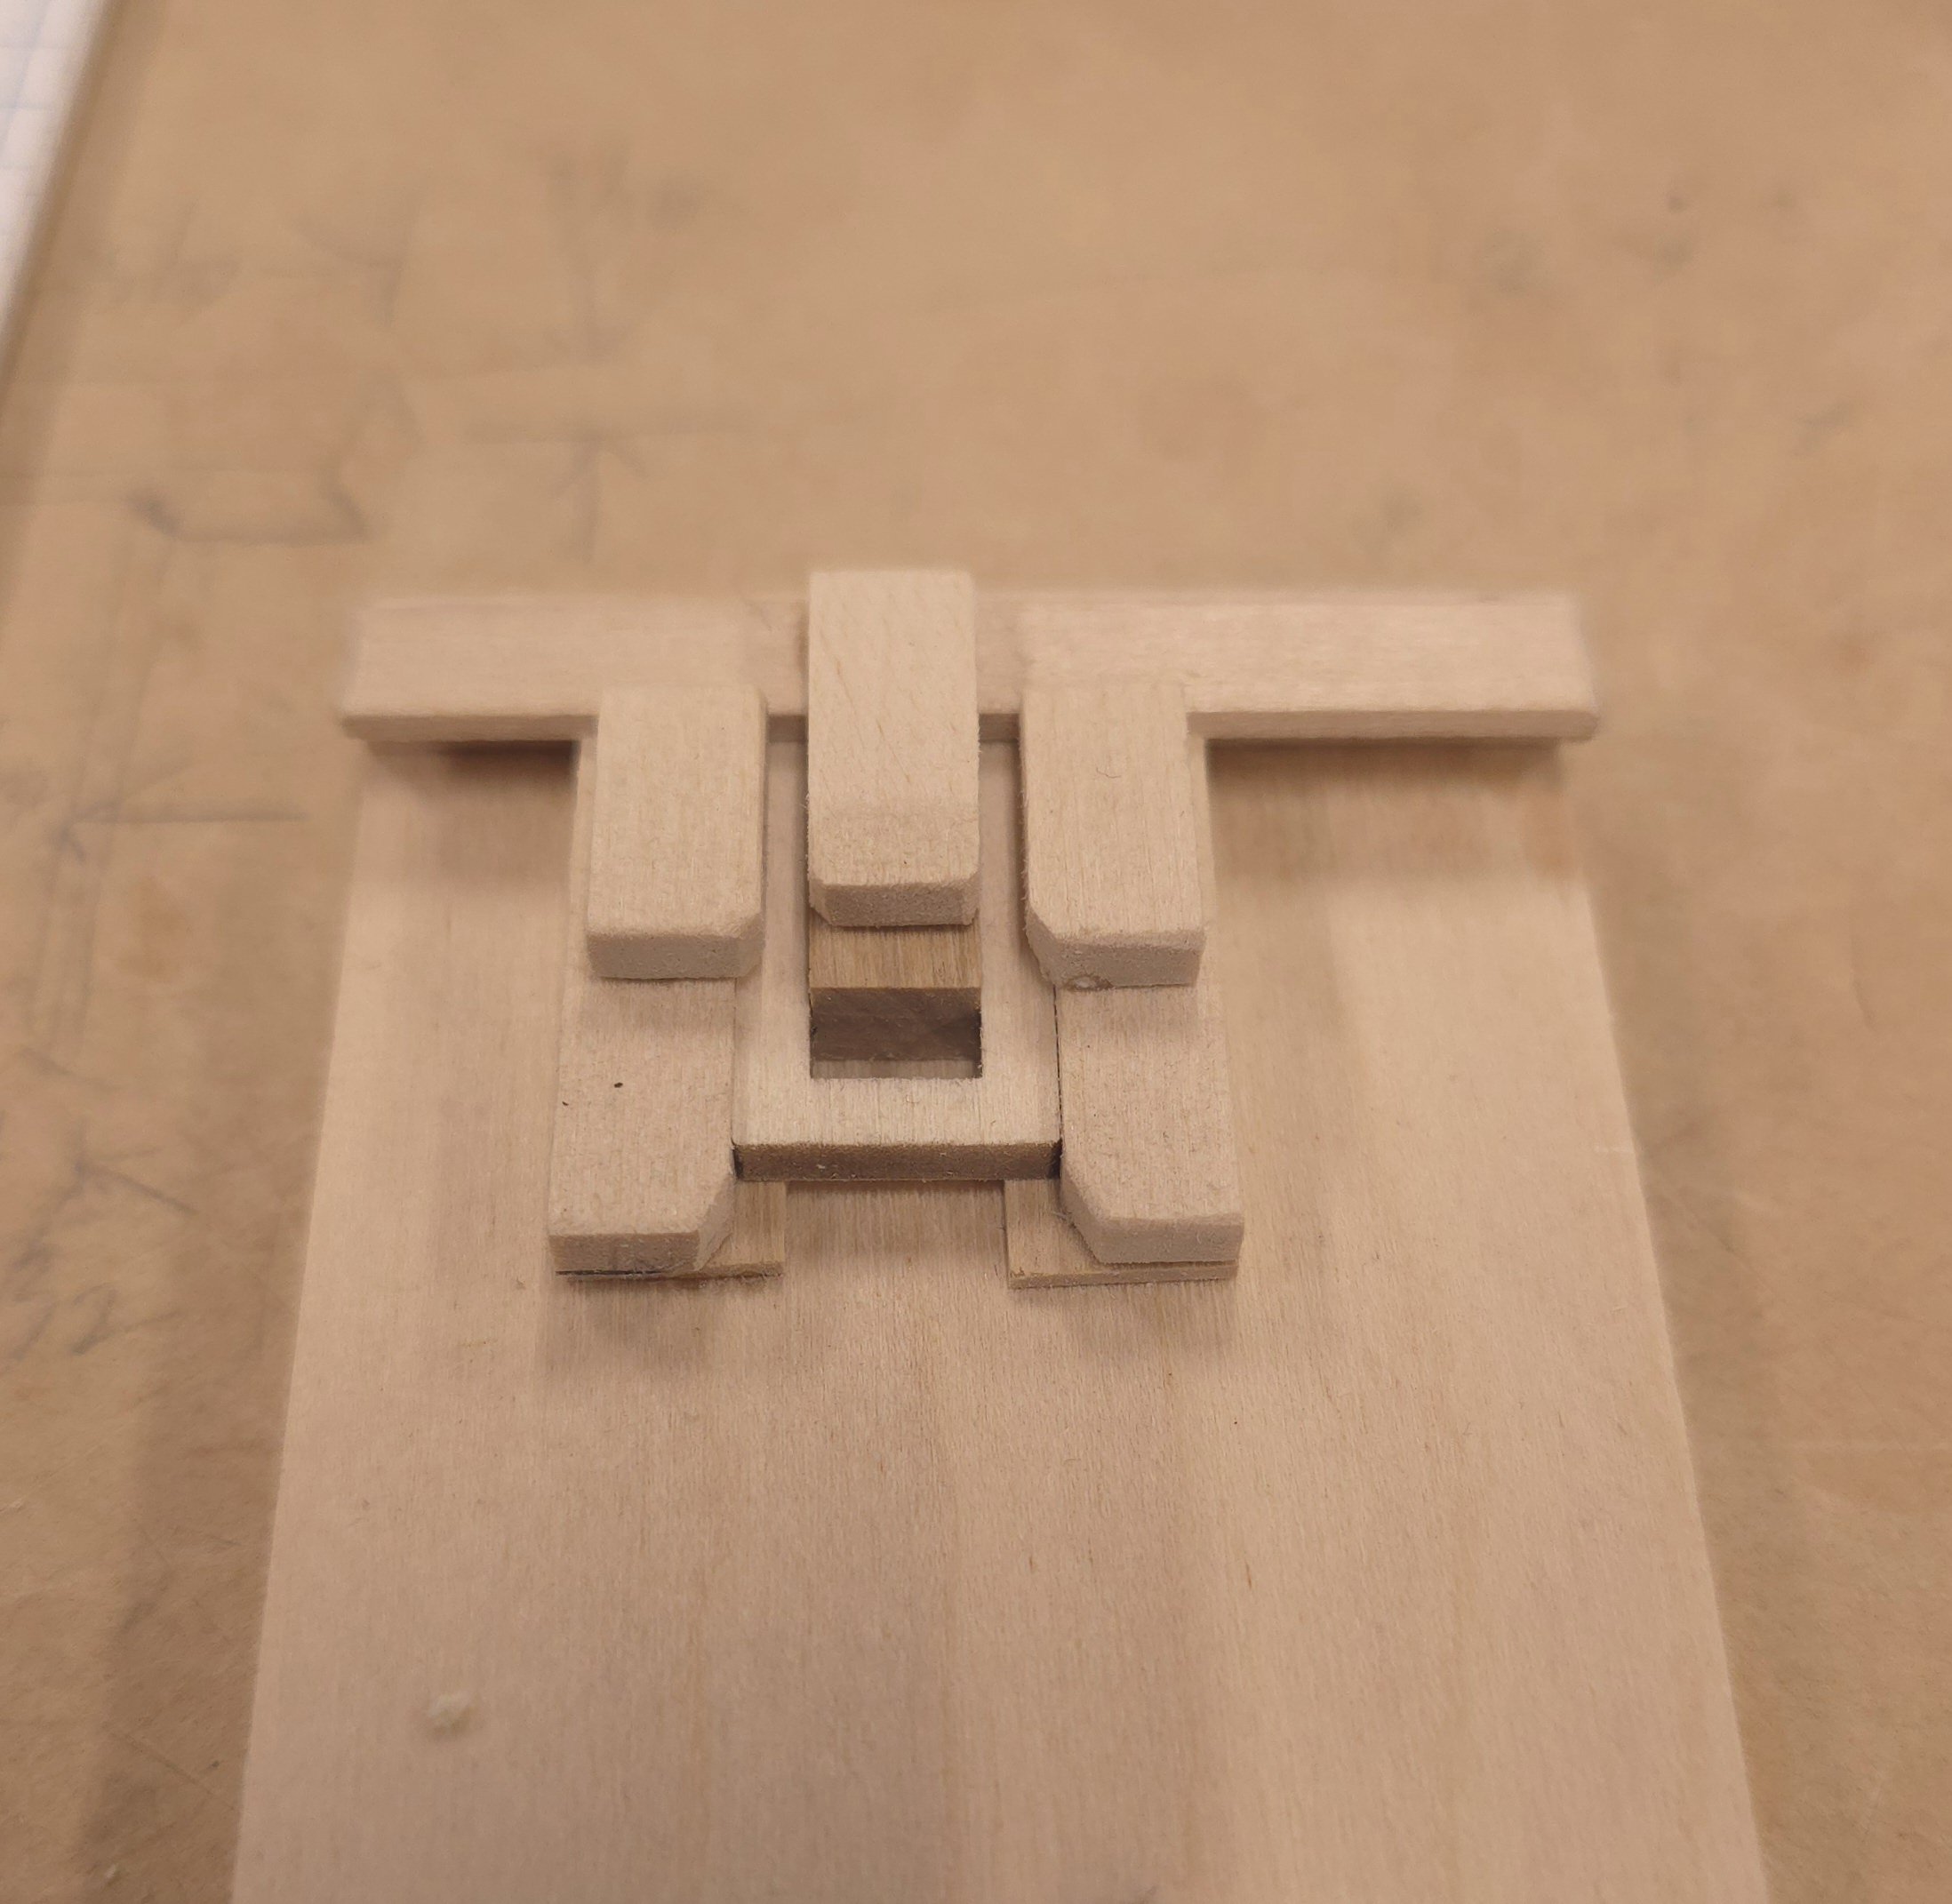
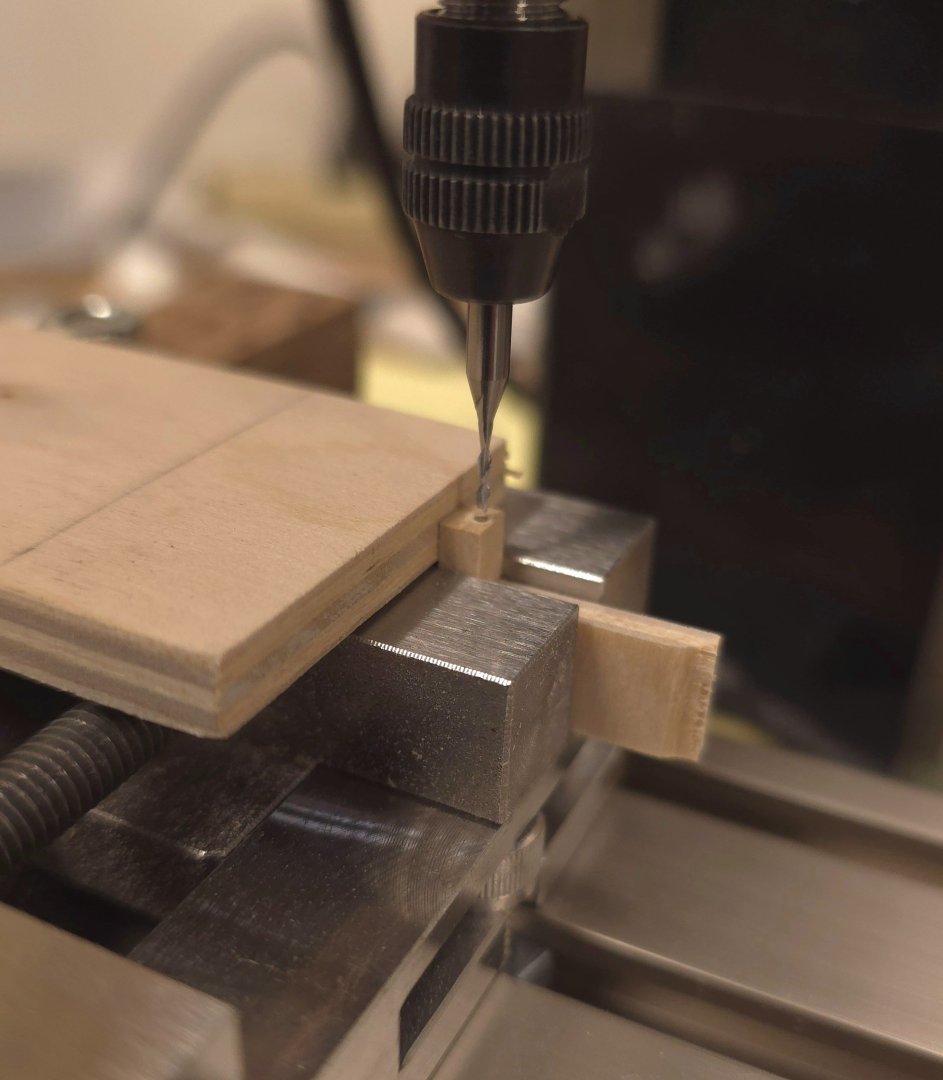
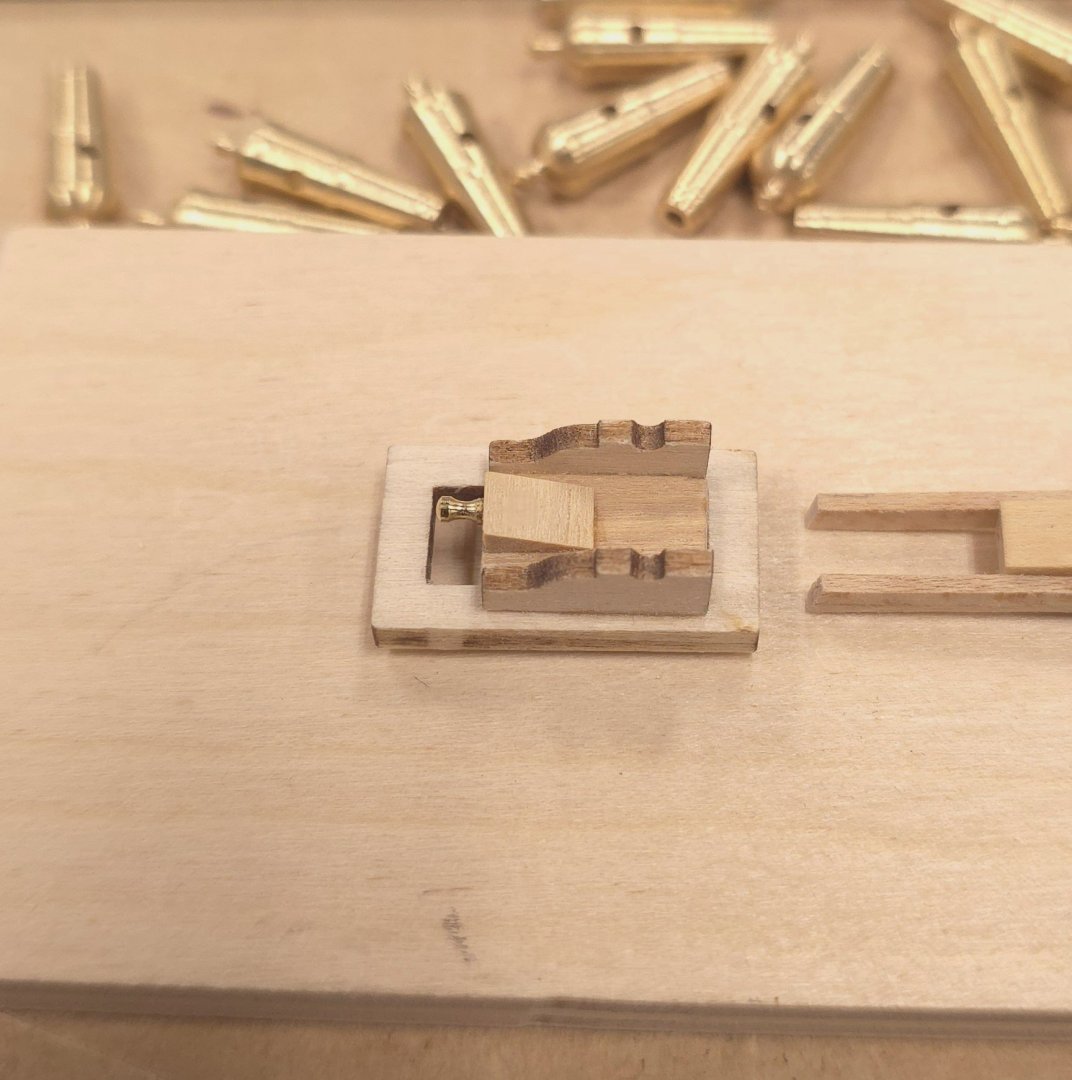
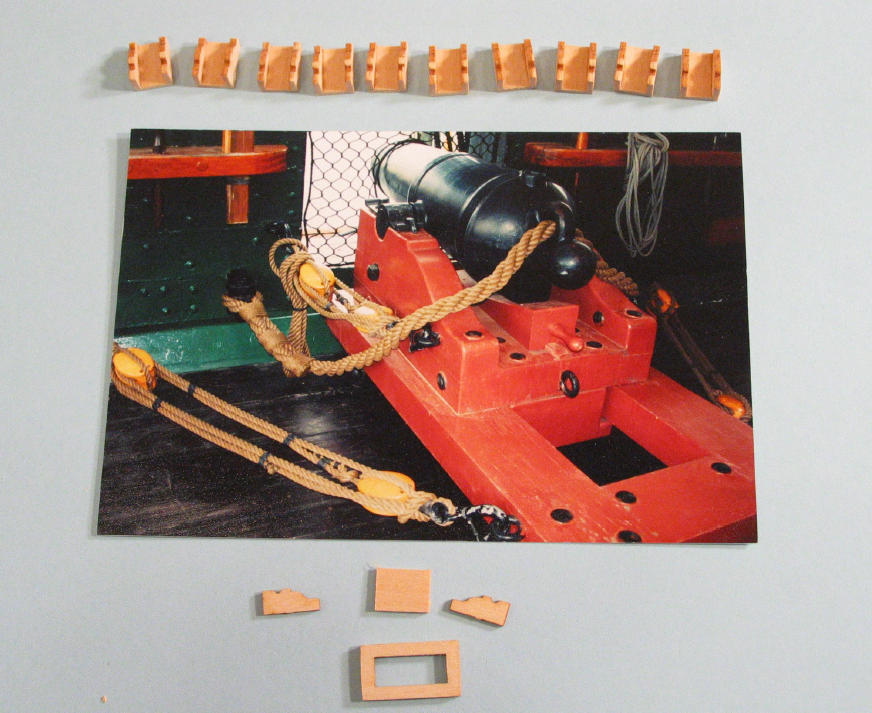
I'm packing up my stuff for my hiatus. I've fabricated the quoins, cut 20 of the kit's belaying pins, built a jig to position the quoins on the carriages and invested in a supply of diamond coated jewelers files. While gone, I will construct the carronade carriages and fine tune the scrollwork. I also invested in a small tackle box to contain everything I might need while gone, cleaned up the shop, set the alarms and turned off the lights. The proxon mill comes in handy again to perfectly position the holes for the quoins. The straight chisel exacto knife does a fantastic job of cleaving those blocks into wedges. It helps that I used boxwood. The fixture or jig to affix the quoins to the carriage is pictured to the right of the carriage, and the quoin to its left. Fixture in place, quoin positioned. Finito. The shafts that came with the carronades from Czechoslovakia are too short. By the time I get home from the shipyard, a small supply of 1/16" brass rod will have arrived, which I'll pack up to take along with the rest, and cut to fit on vacation. I'll have to enlarge the holes with a 1/16" drill. And yes, Jon, I know these are not the correct carronades (at least according to the photos in the Hunt practicum). I'll bring the cast pieces along as well, but doubt seriously I'll try to salvage them.


-
Scrollwork cut out. Some fine tuning done, but more to go.
-
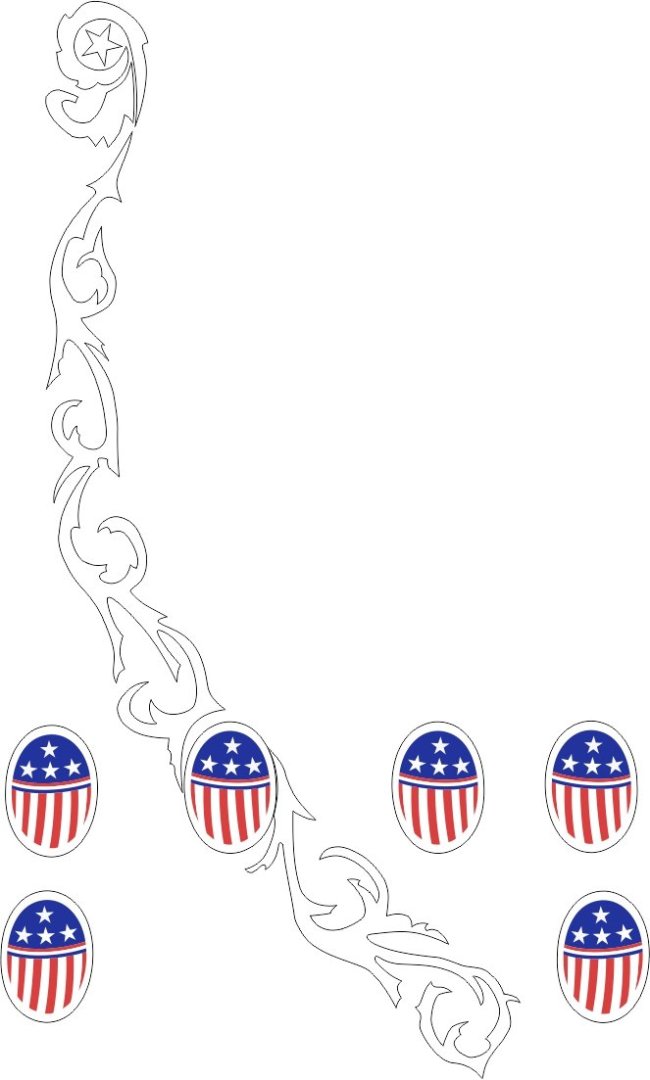
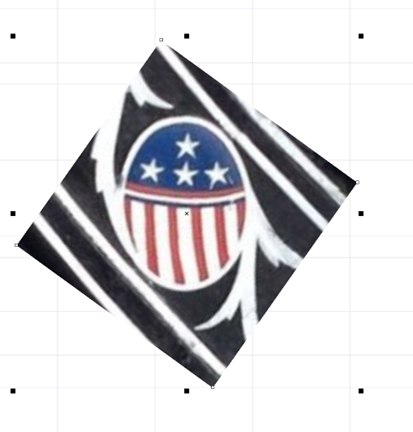
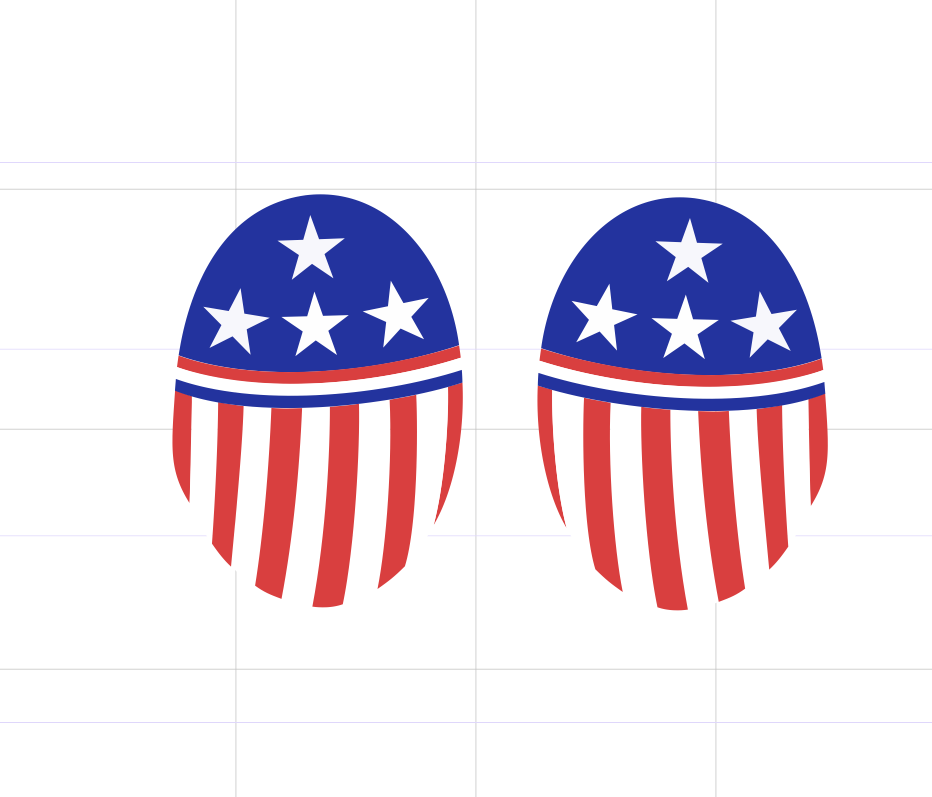
Revisiting the Shield artwork project, I shrunk the size of the shield and increased slightly the size of the hairline black border to give me some wiggle room with the scissors when cutting them out of the printed page. The black perimeter should be nothing more than a cutting guide. I won't know how well this turned out until I've cut the shields out and positioned them onto the wooden ovals. If you copy the .jpg image below, it is to the correct scale. Just paste it into image processing software like Photoshop or Paint to print it. I have no idea if the cdr or svg files will be of use to anyone, but they are included below. Bow Scrollwork - Shield plus 105.cdr Bow Scrollwork - Shield plus 105.svg
-
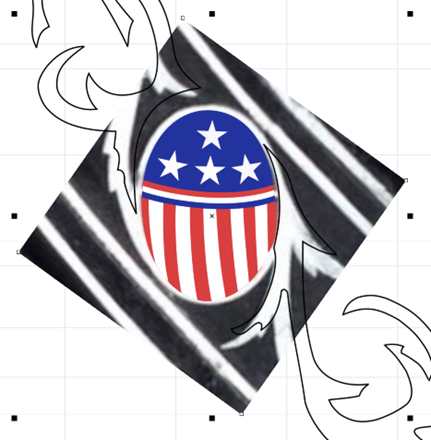
Ooops, I thought I was done until I paid closer attention to the white perimeter. Back to the drawing board.. Fortunately, all I'll have to do is scale down the components of the shield and change the color of the background oval, which is completely covered right now, from black to white. Shouldn't take more than a half hour. Not today however. Thanks Jon. P.S. Sorry, I couldn't help myself. 😁 I checked your build log to see how you did it. I think you mounted at least one shield on the wrong side. If you caught the asymmetry, then both sides are reversed. But, as has often been mentioned here at MSW, from a foot away, no one will ever notice. Still, an amazing job on the scrollwork!
-
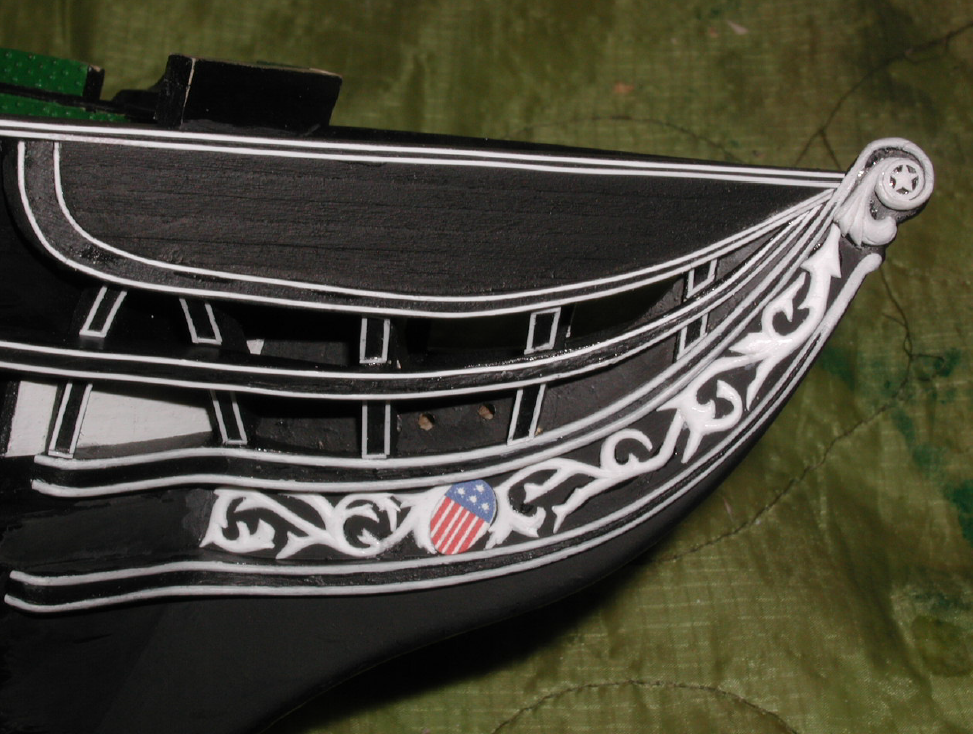
This morning was spent advancing my skills with Corel Draw. Having closely studied the photos that Jon provided a couple of posts back, and checking other sources, I came to the conclusion that the shield on the bow decor is not symmetrical. But first, the graphics that led to the results: Closeup of the shield as provided by Jon and my cdr version superimposed onto that. Isolating just the shield. Then adding the mirrored image for the opposite side of the trailboard. I removed files posted here because of a subsequent conversation with Jon. See later post for details..Good luck..

-
That was always an option, but requires spending some time with Photoshop or Corel Draw. I had hoped that someone had already gone through this exercise. But if not, that'll be my next home office art project. Now that I think of it, it would be fairly easy to do in Corel, especially since I already have the scanned ellipses. I'll just create my own Stars and Stripes to fit. It helps to be a jack of all trades.
-
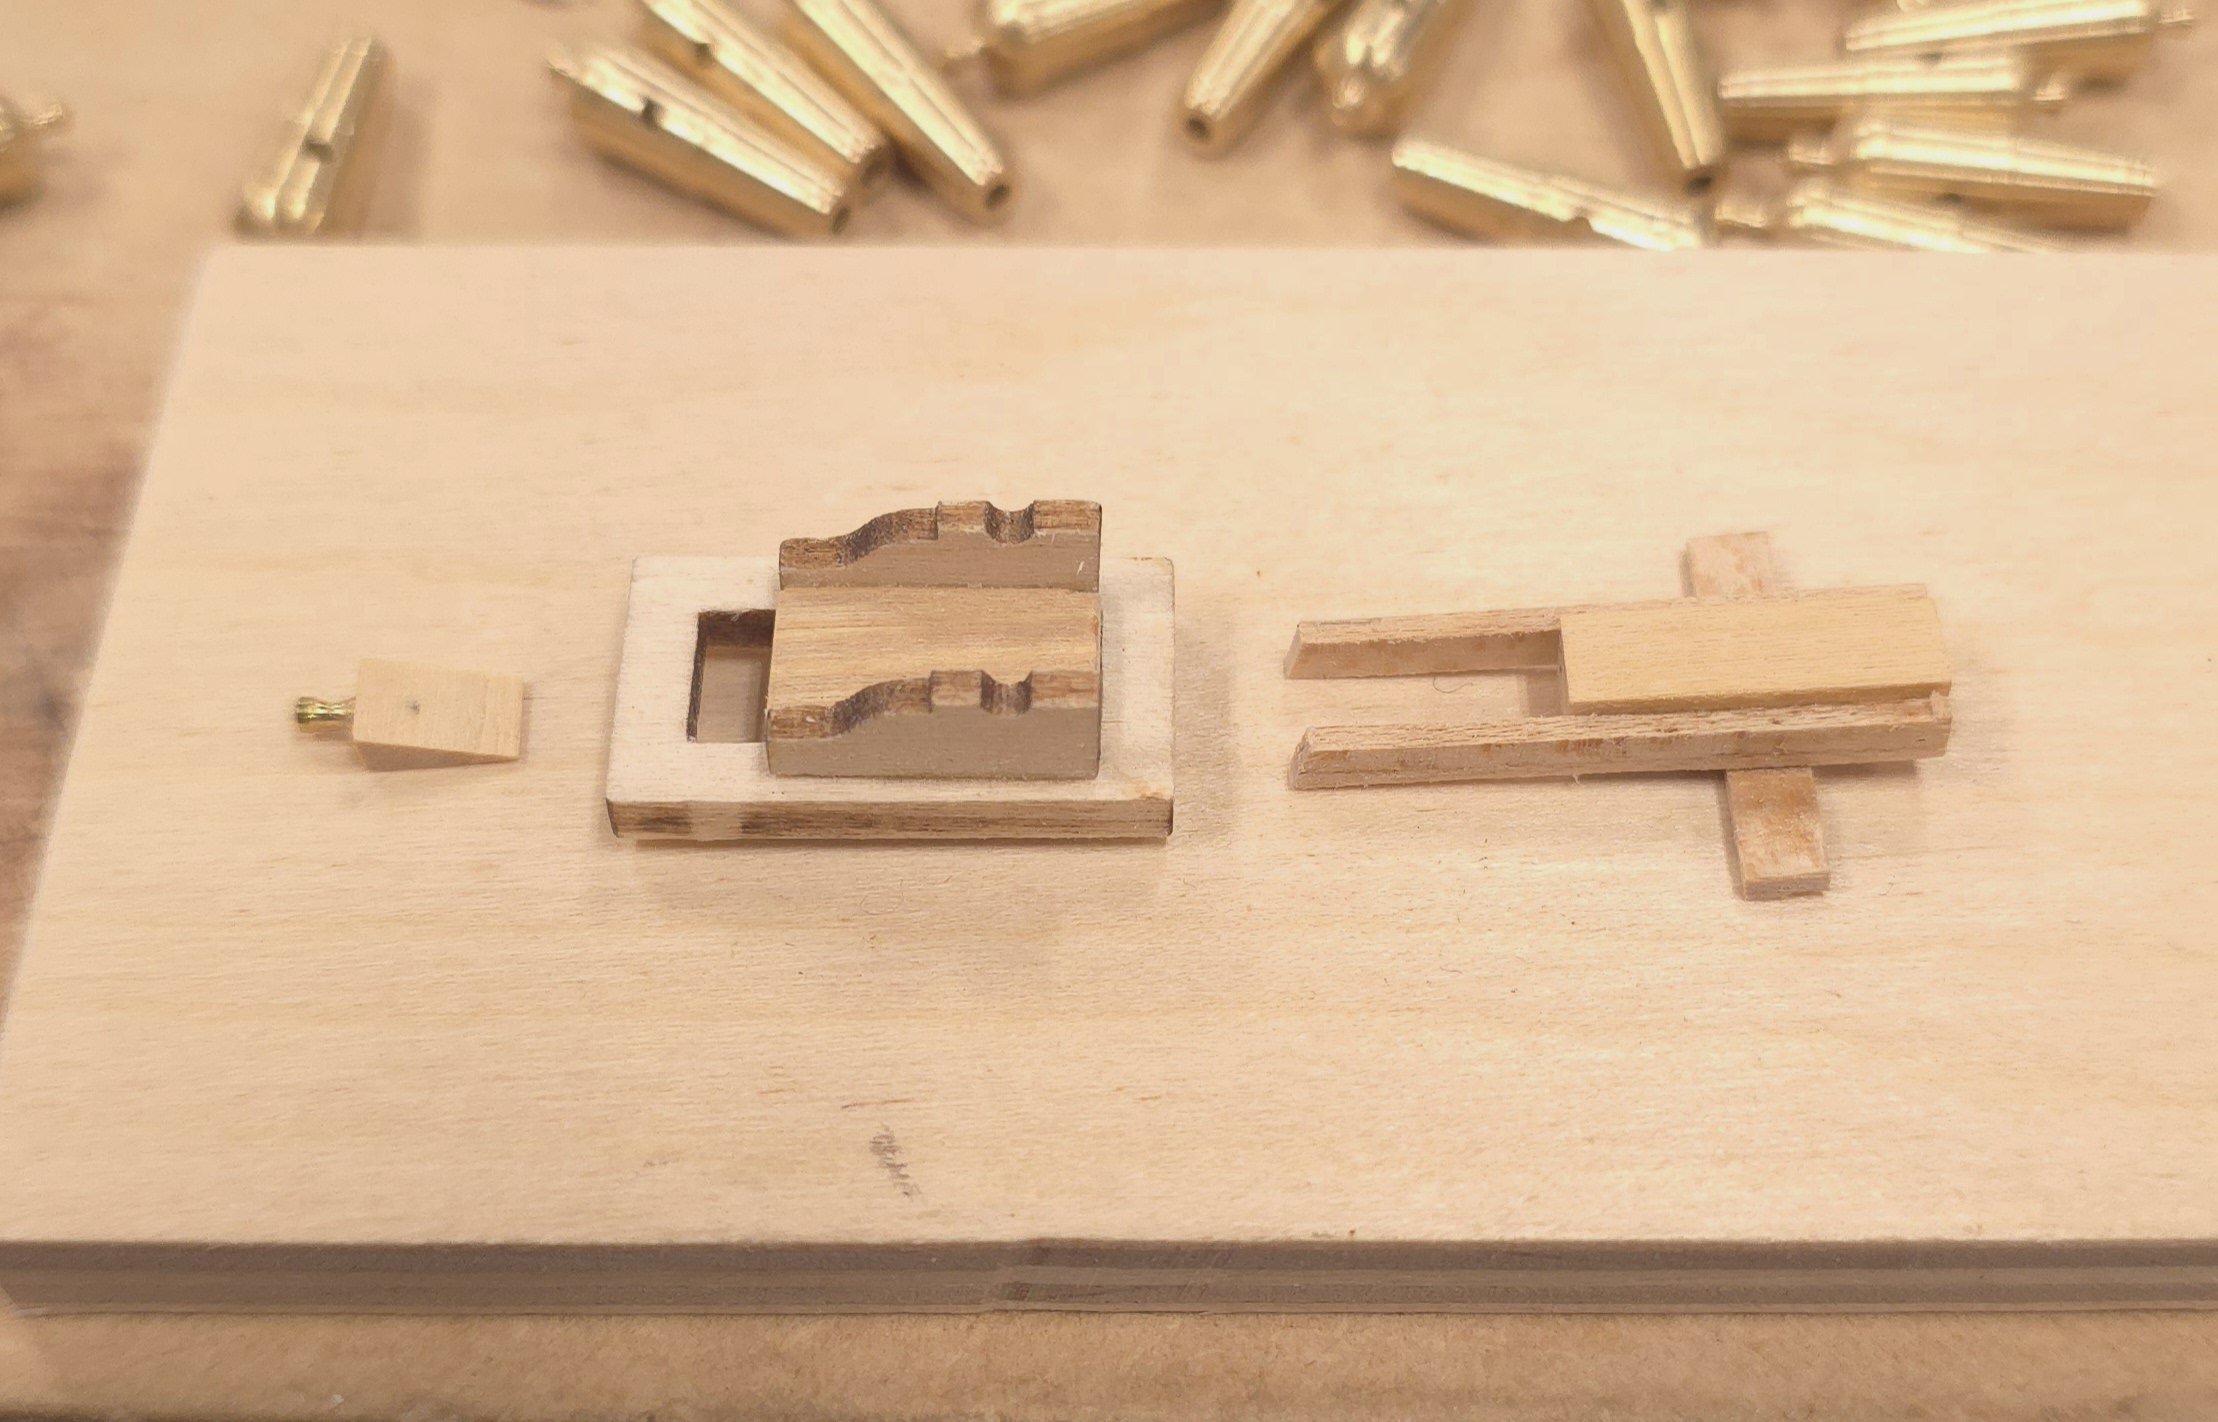
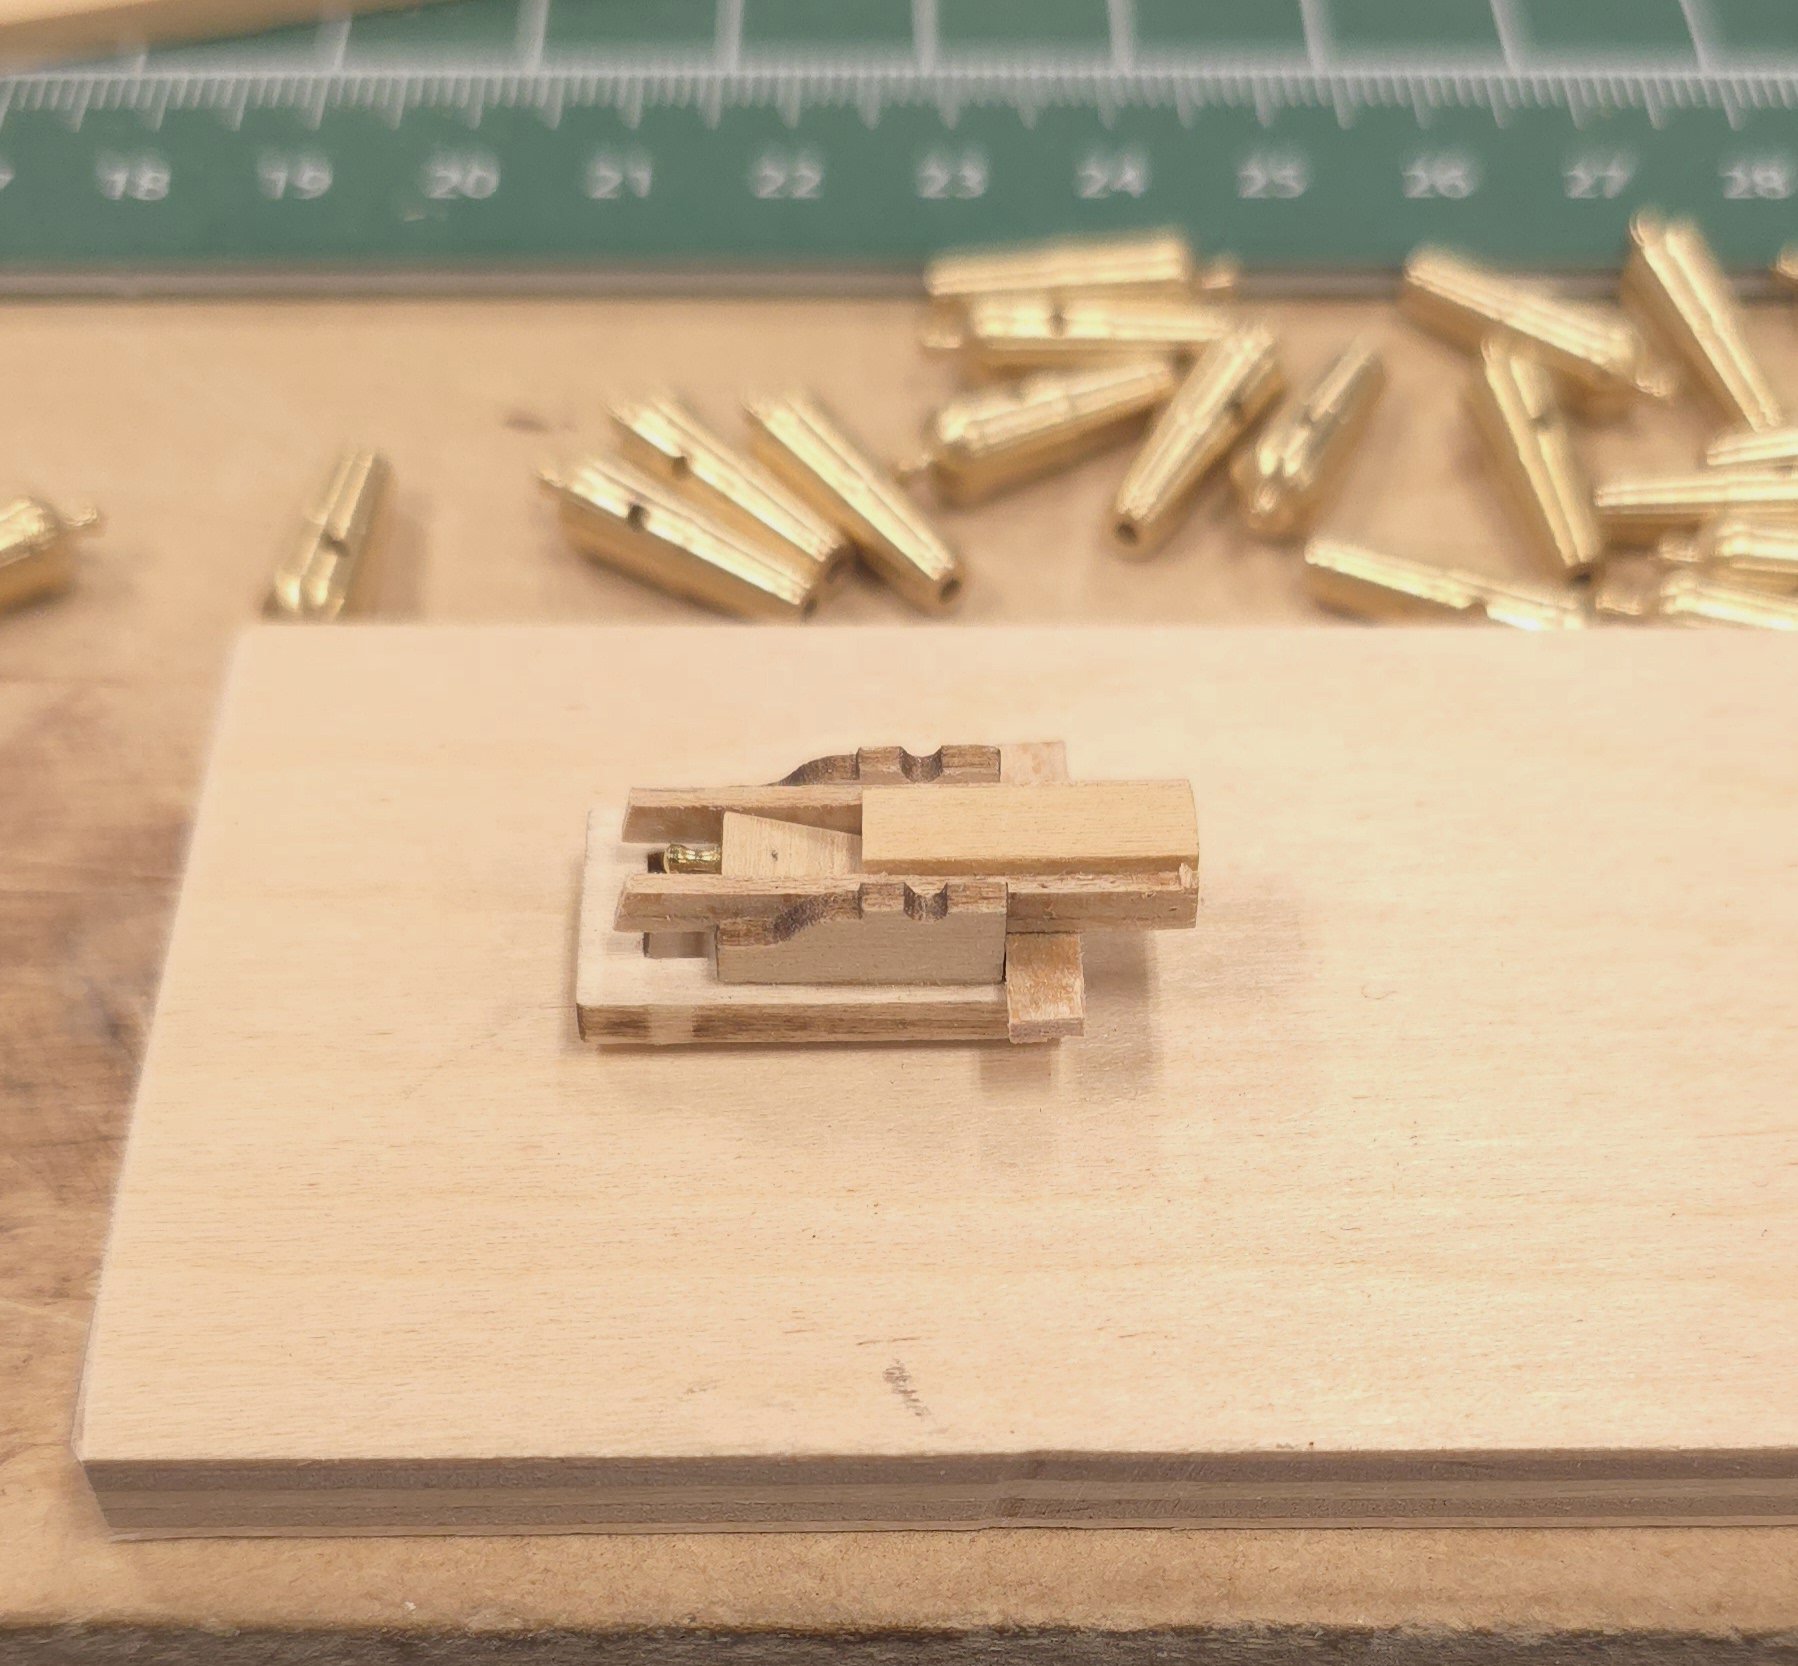
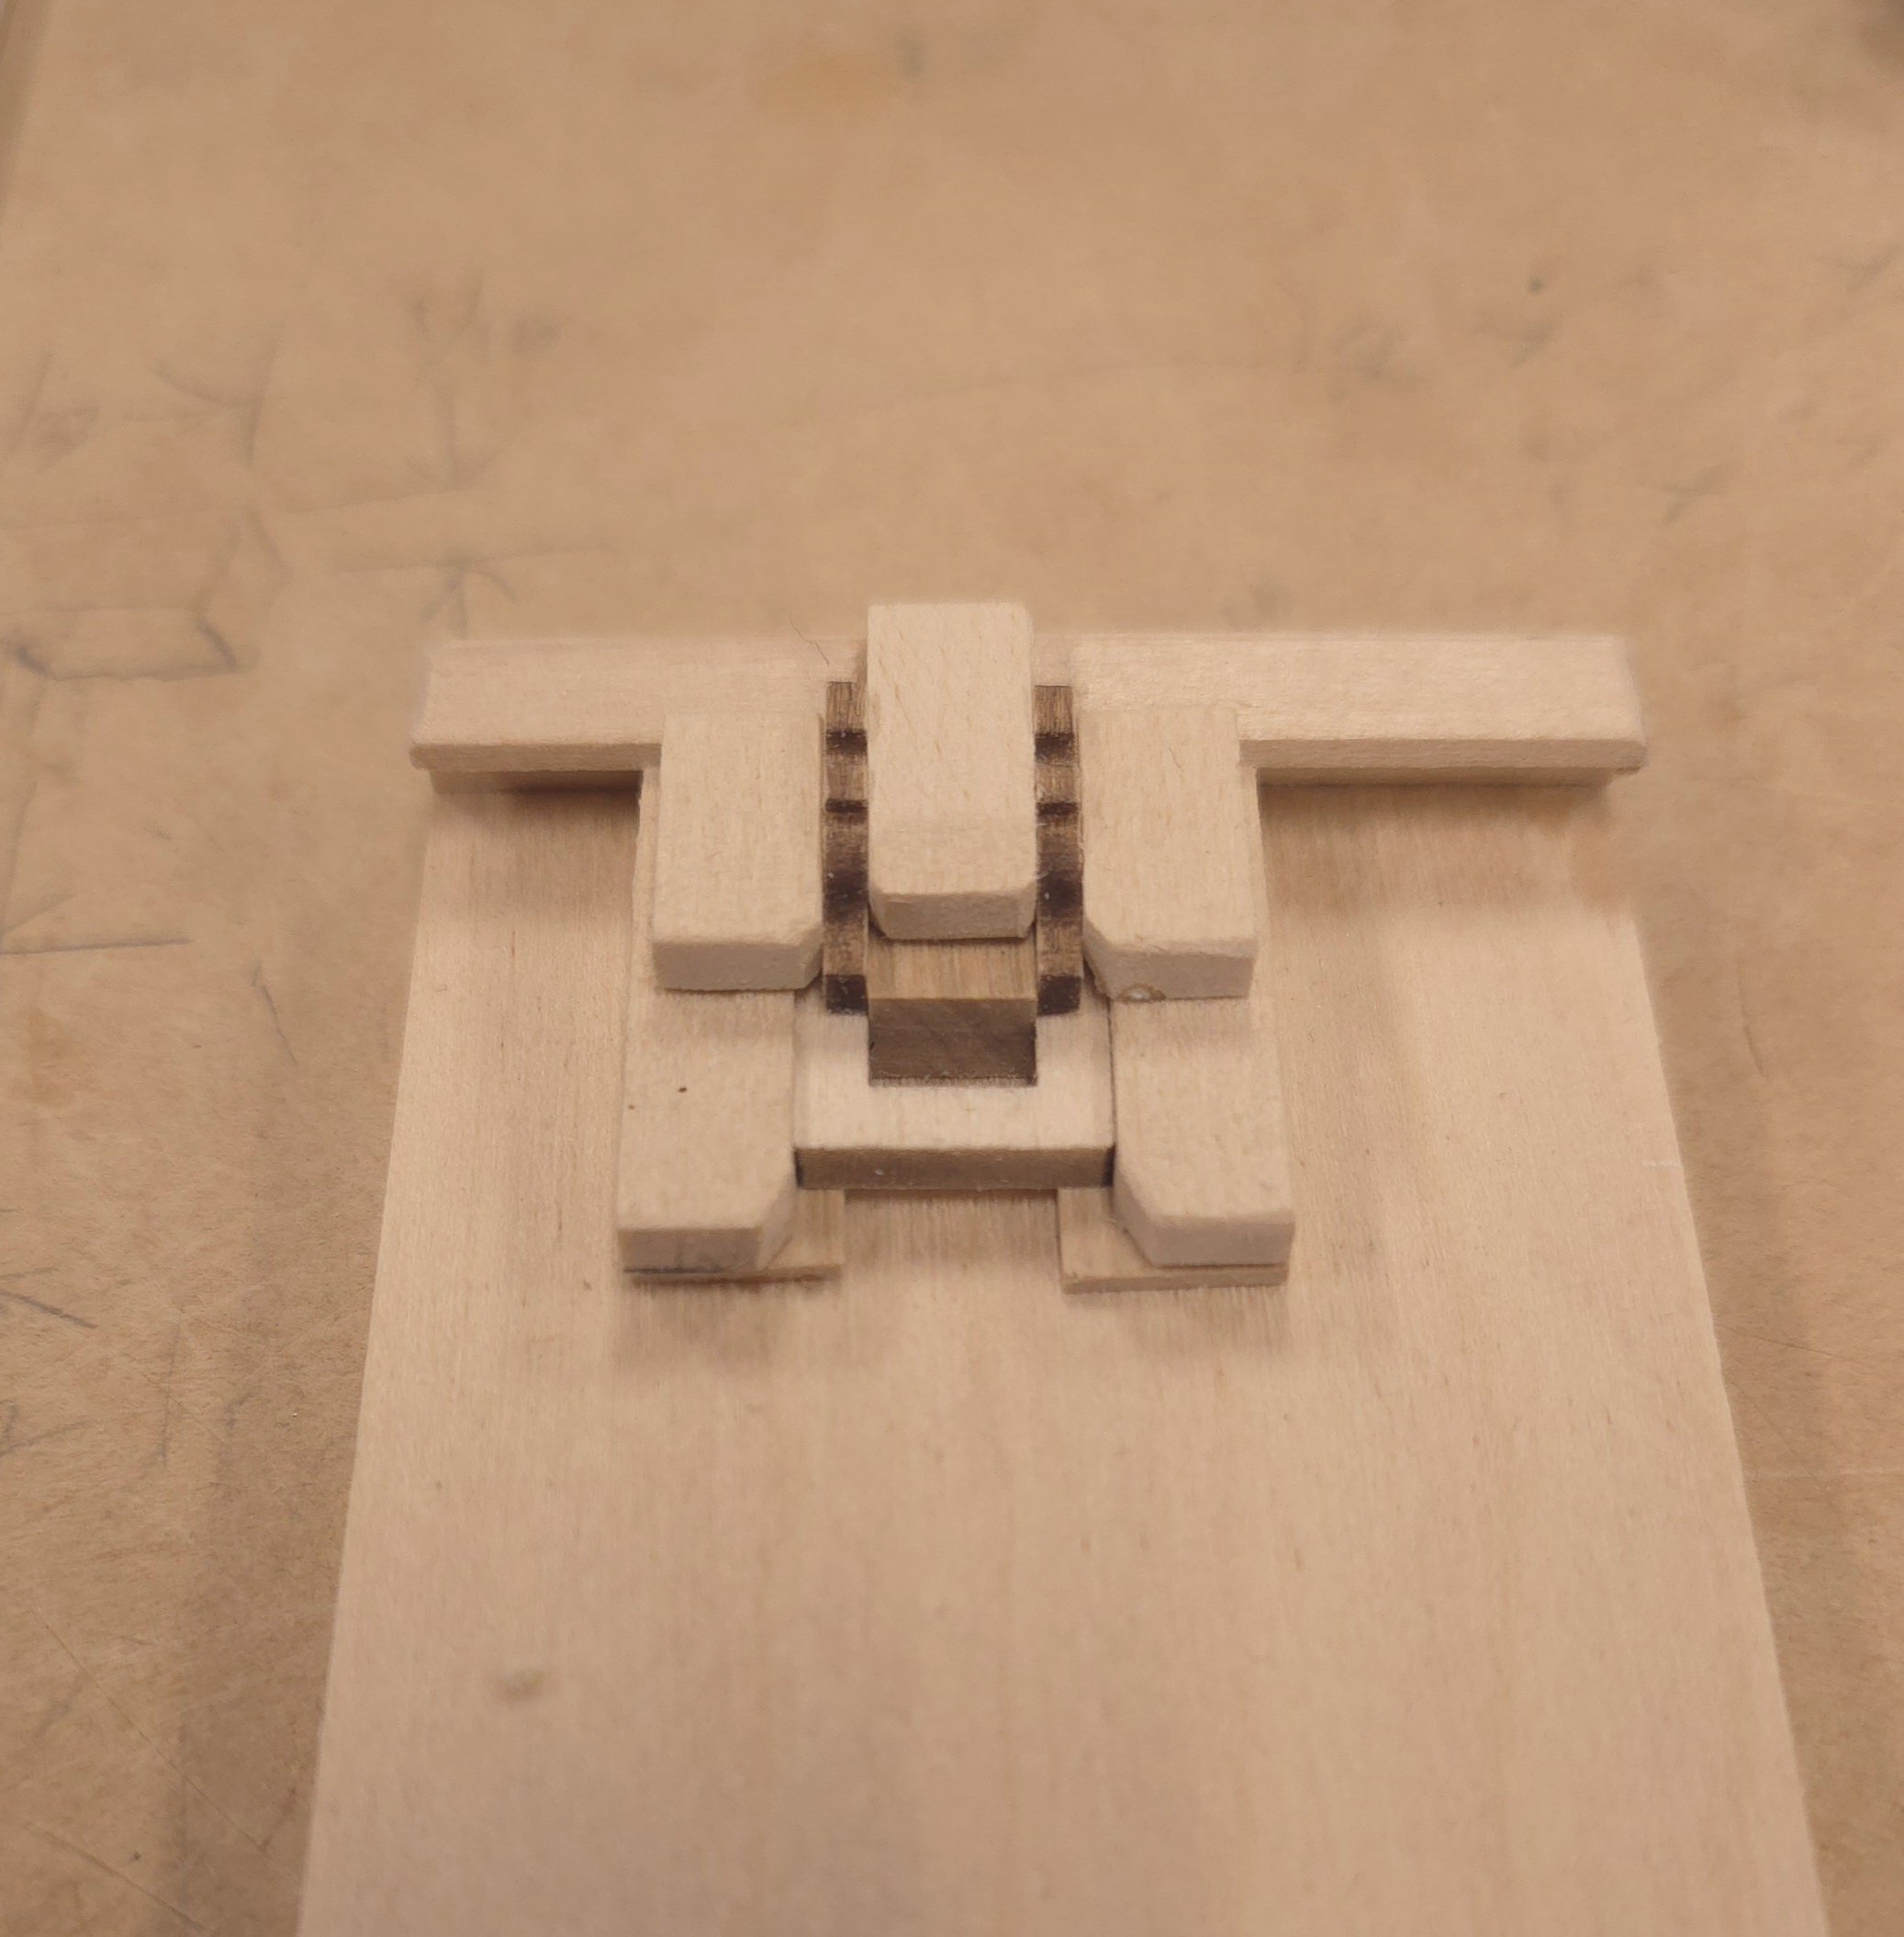
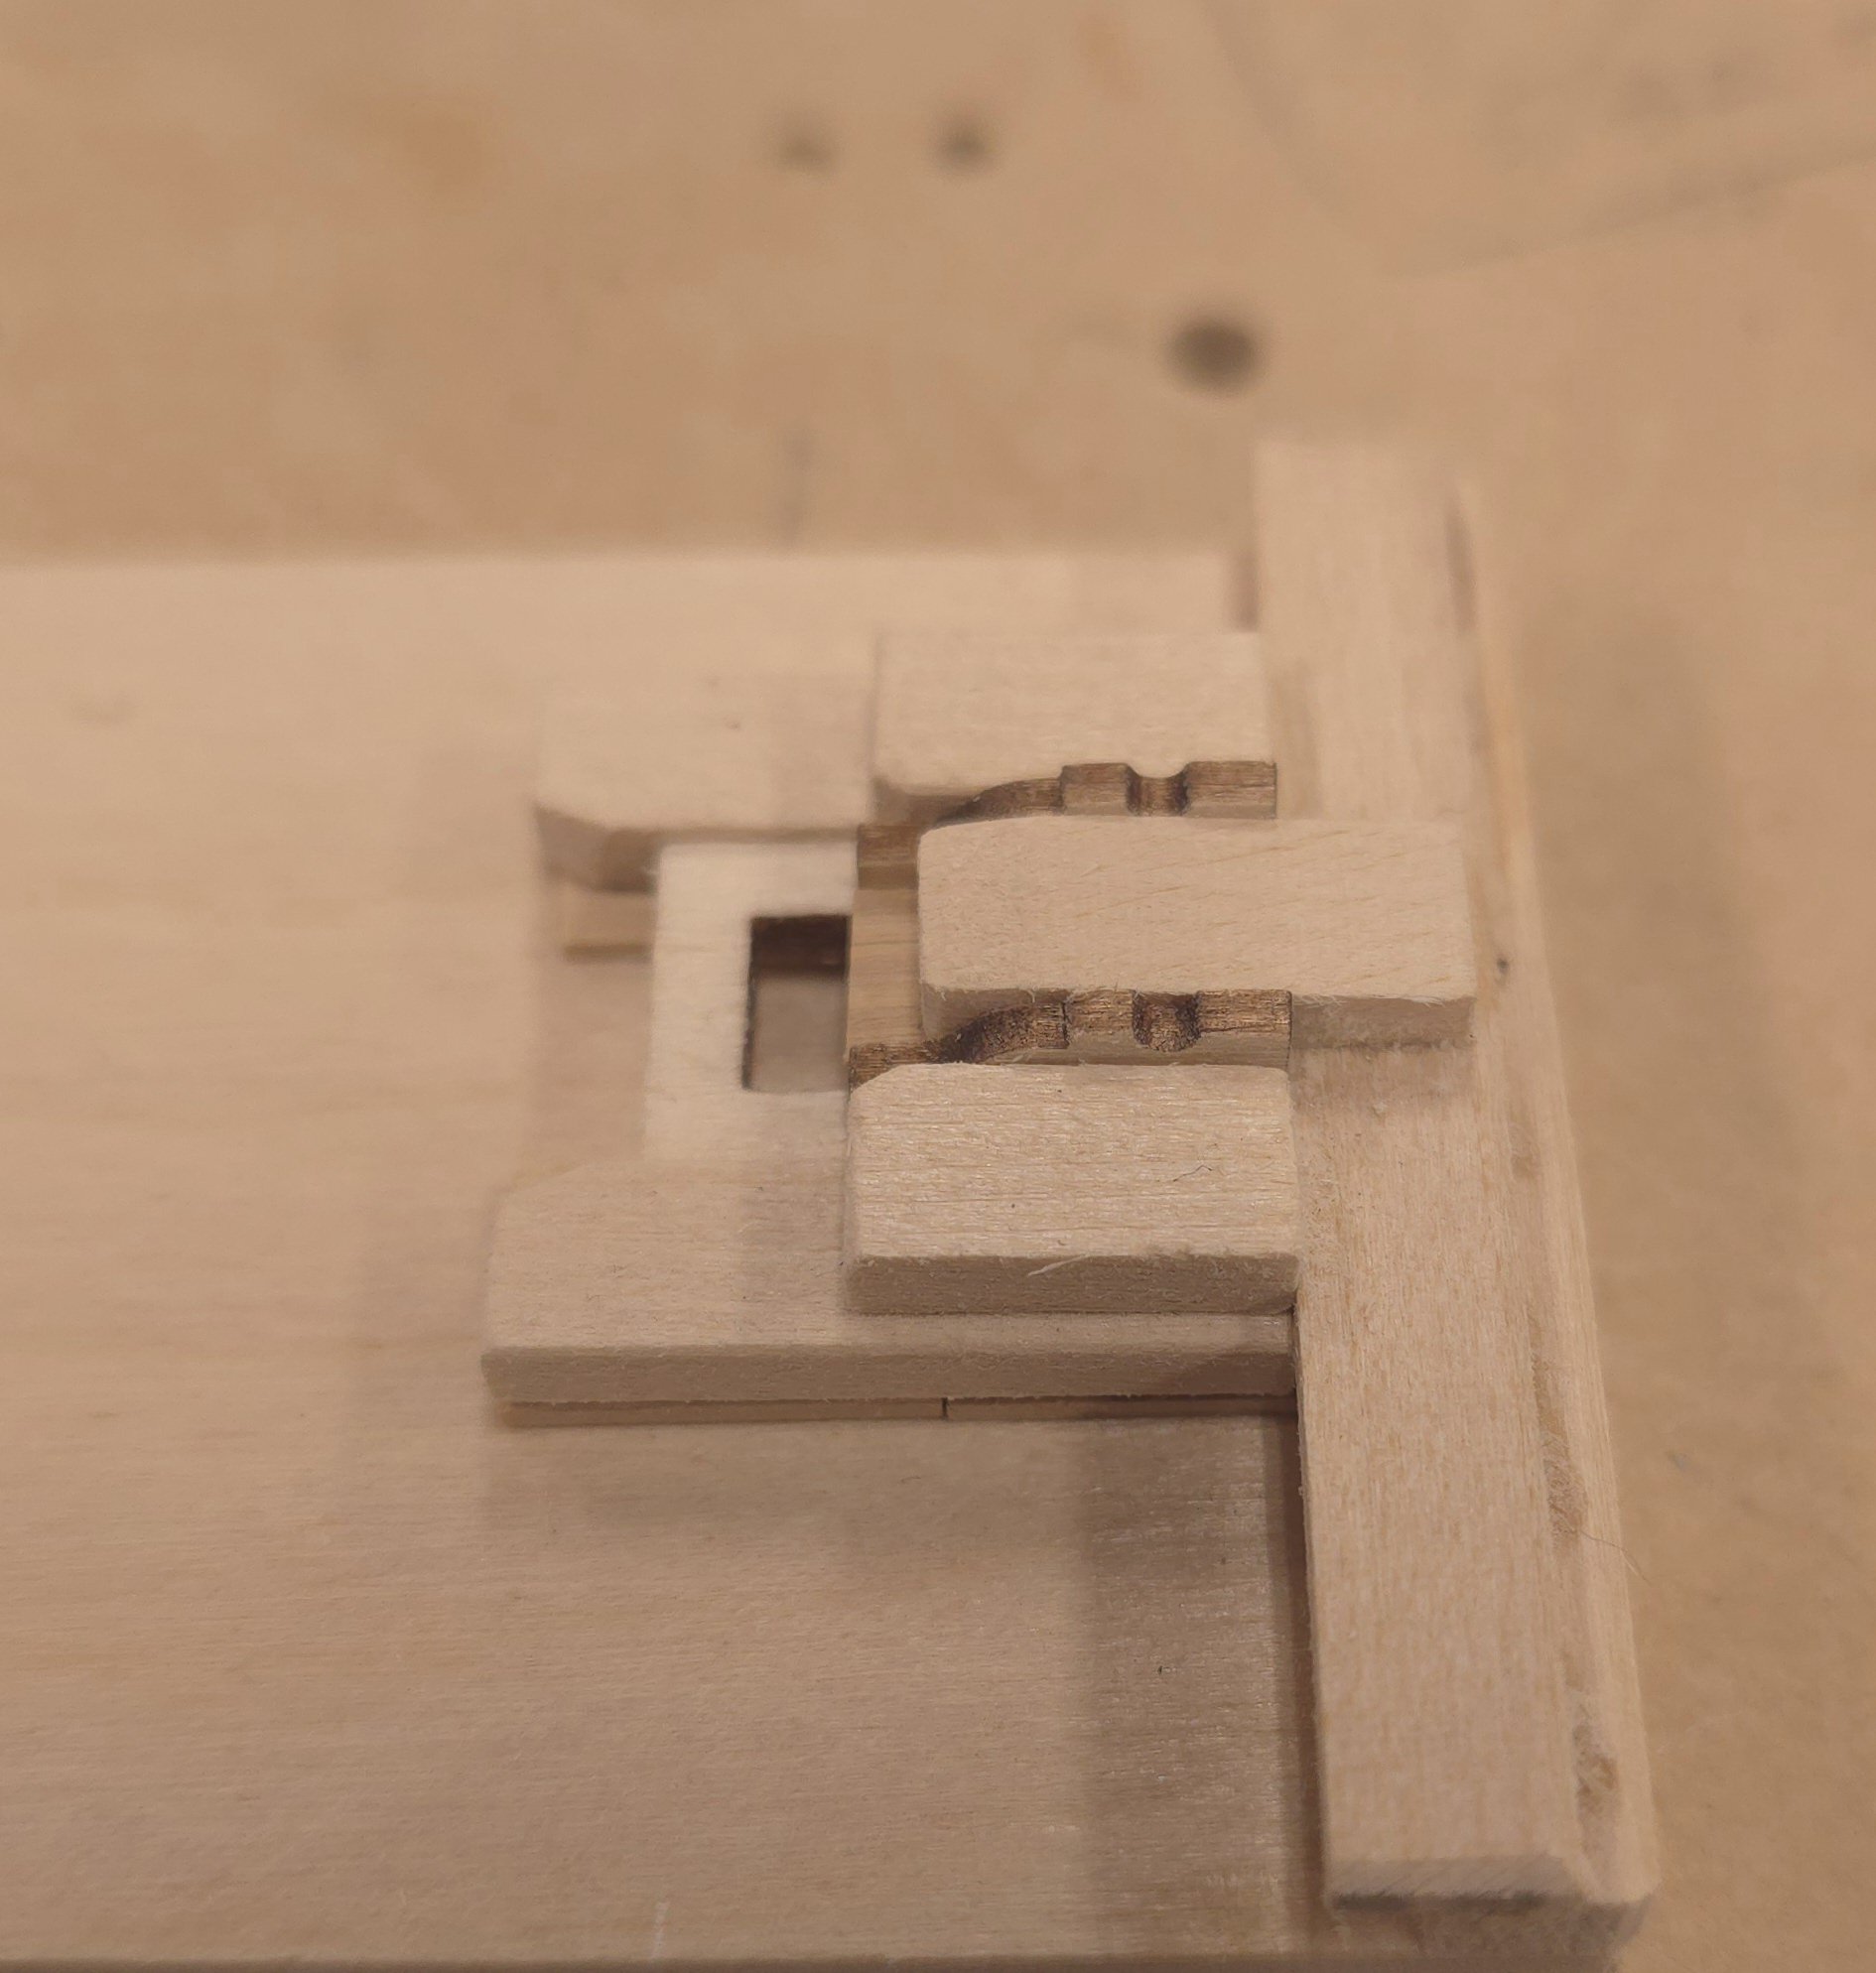
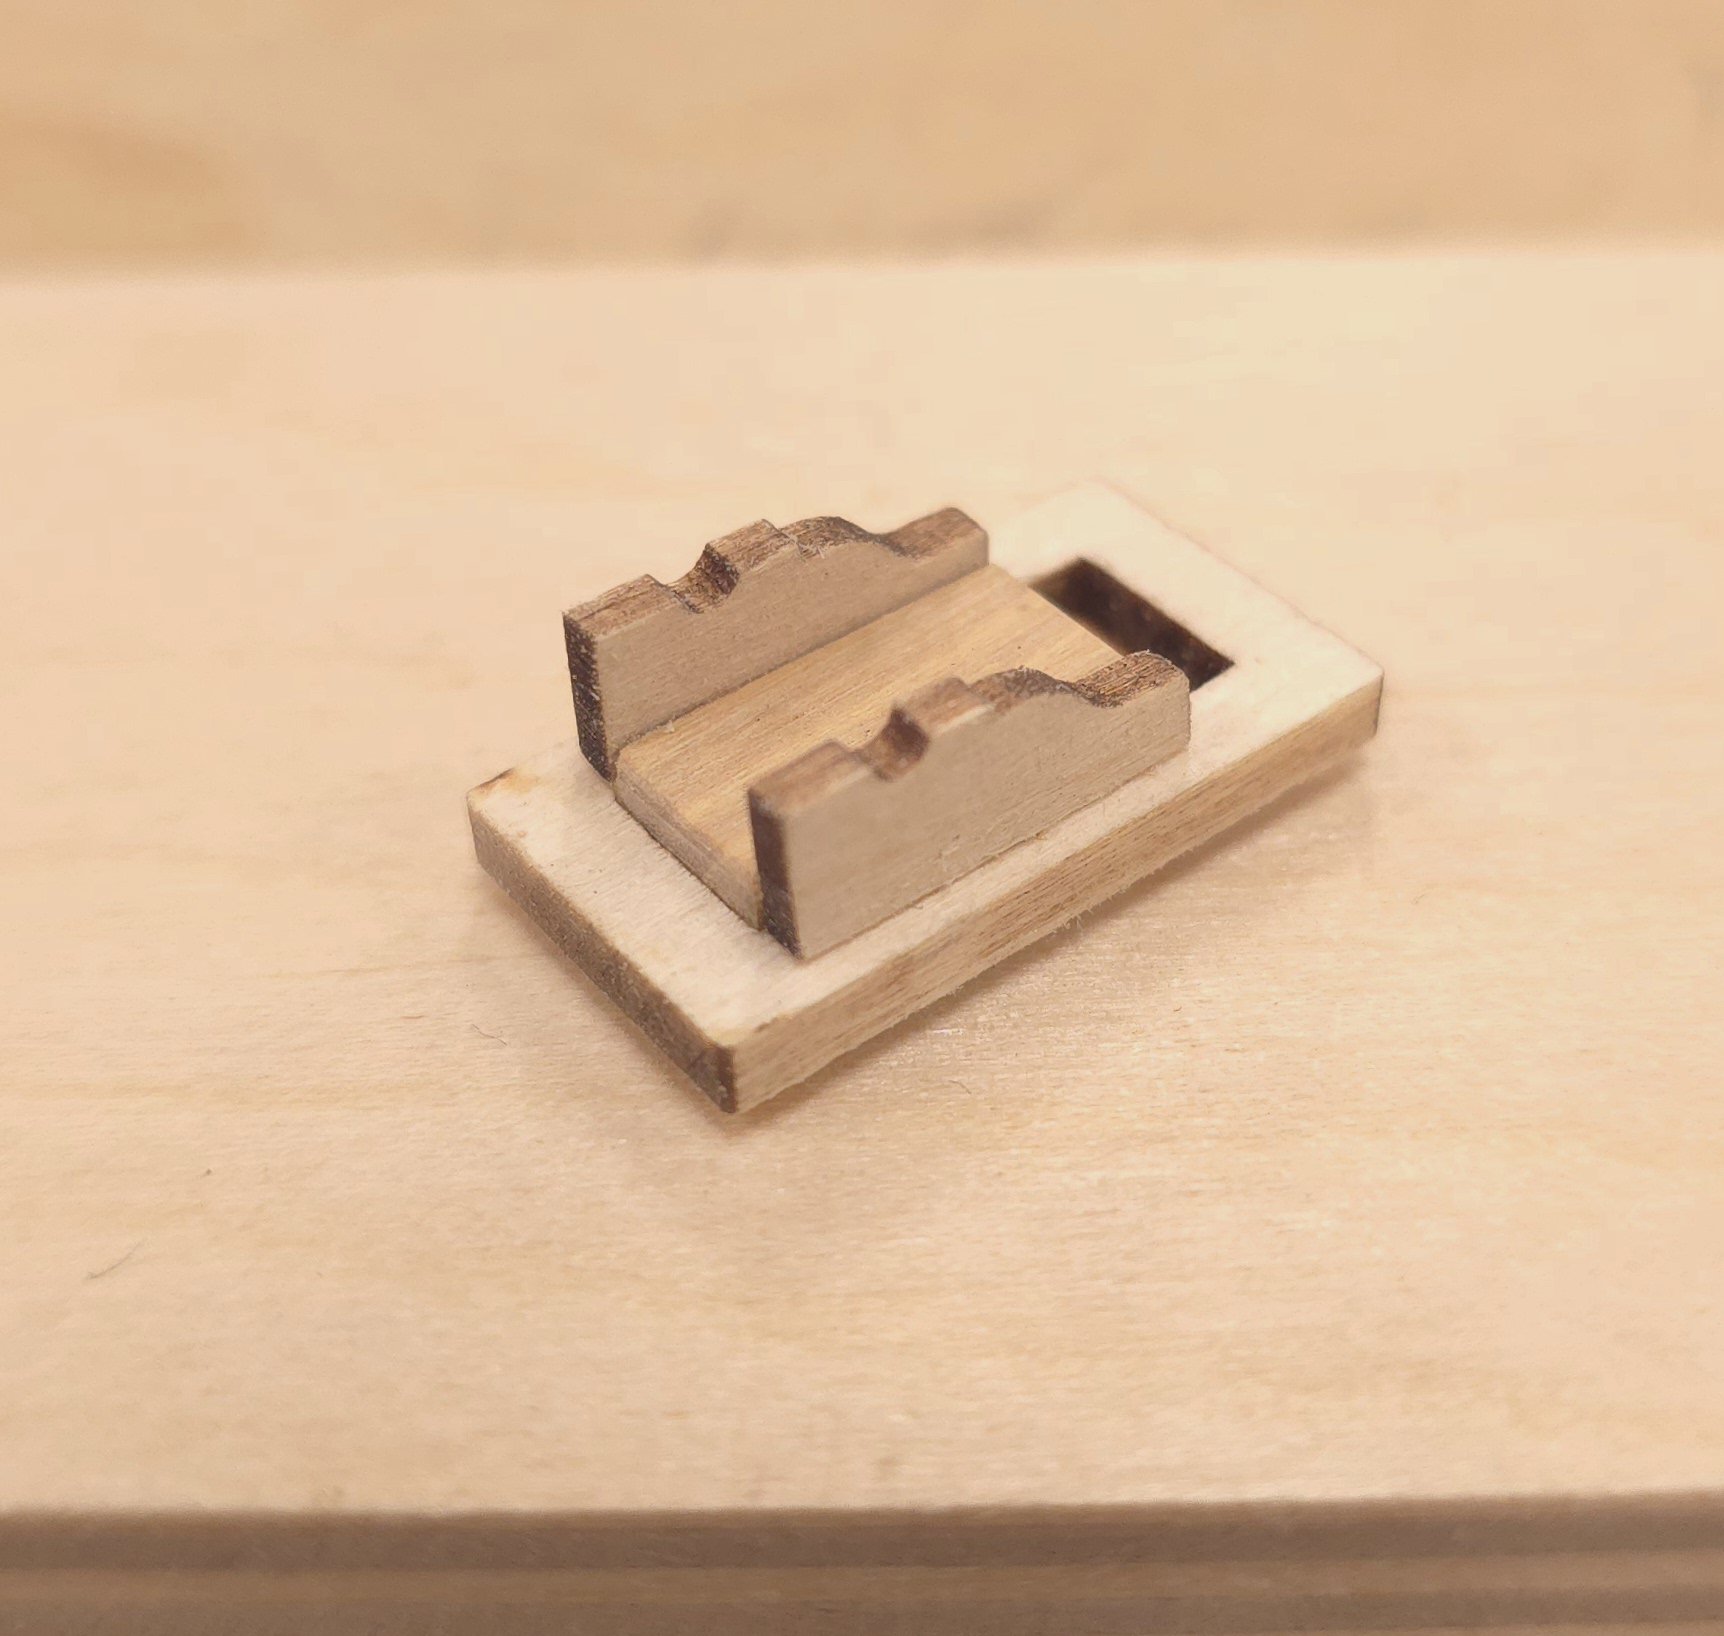
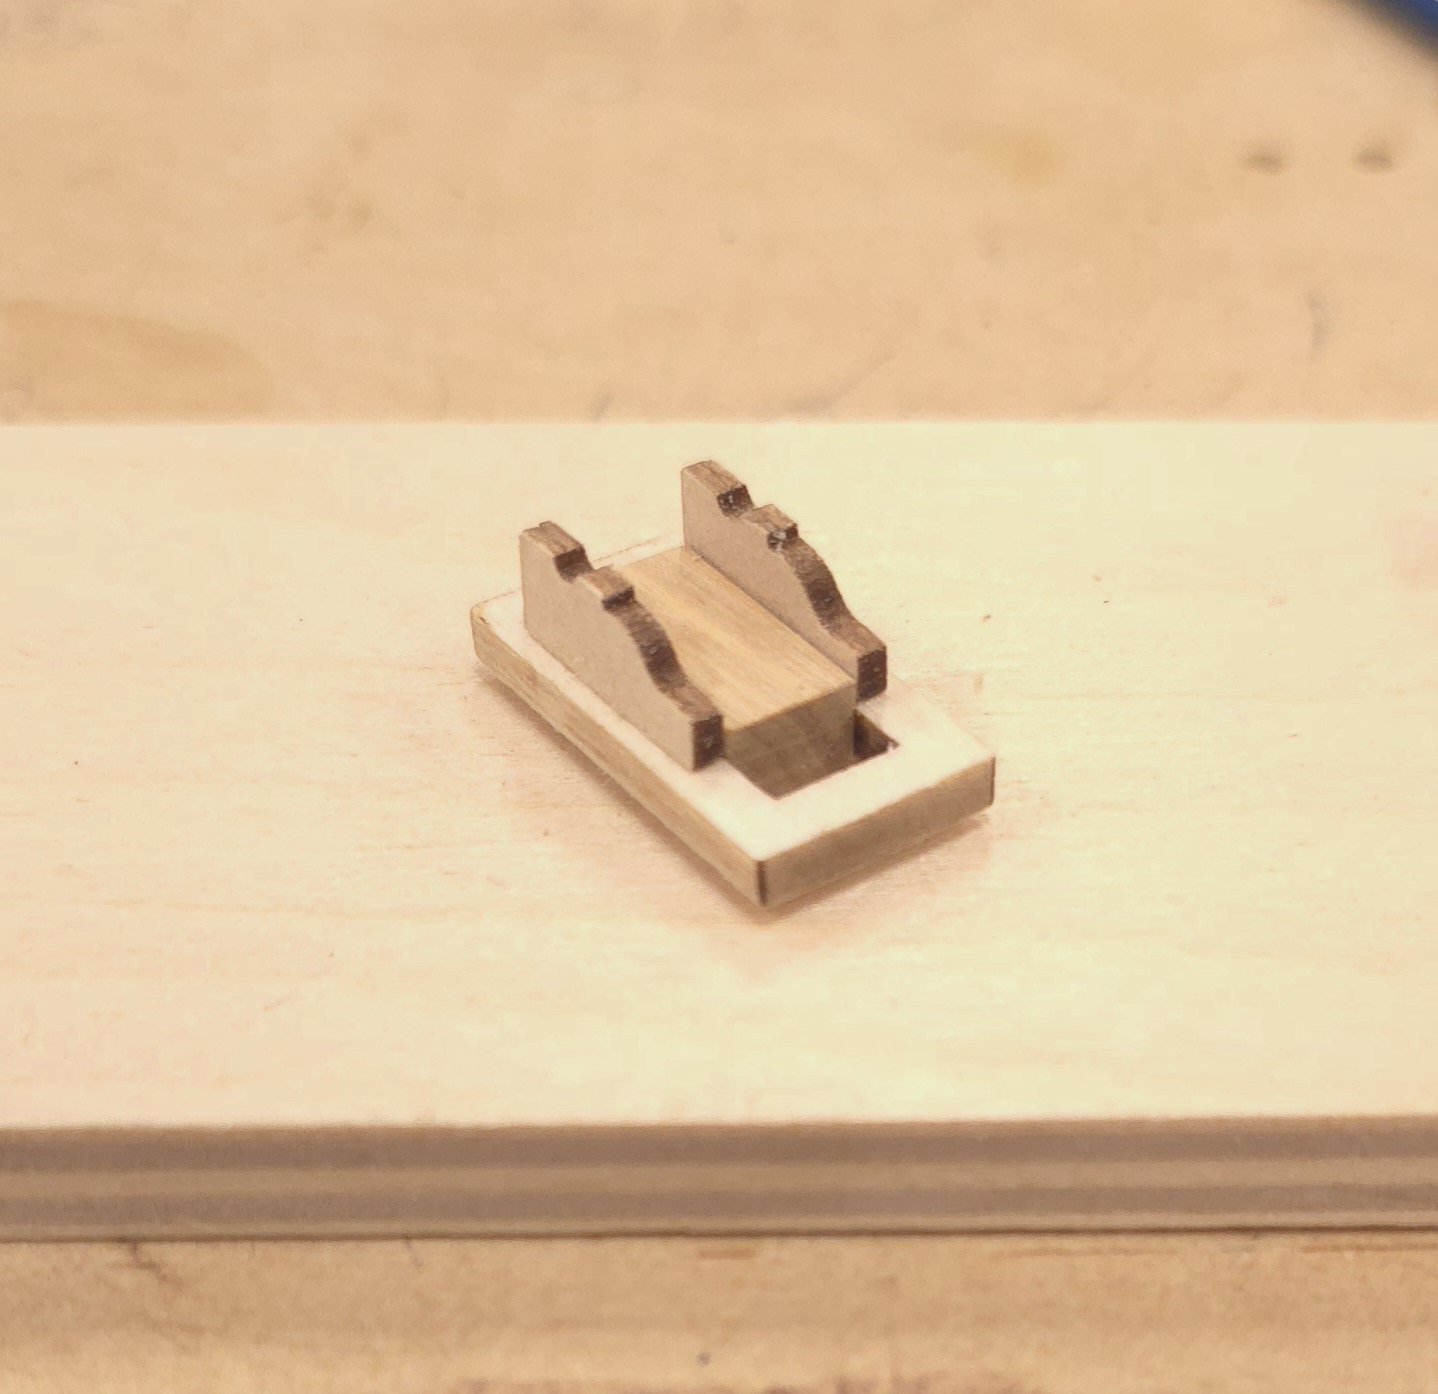
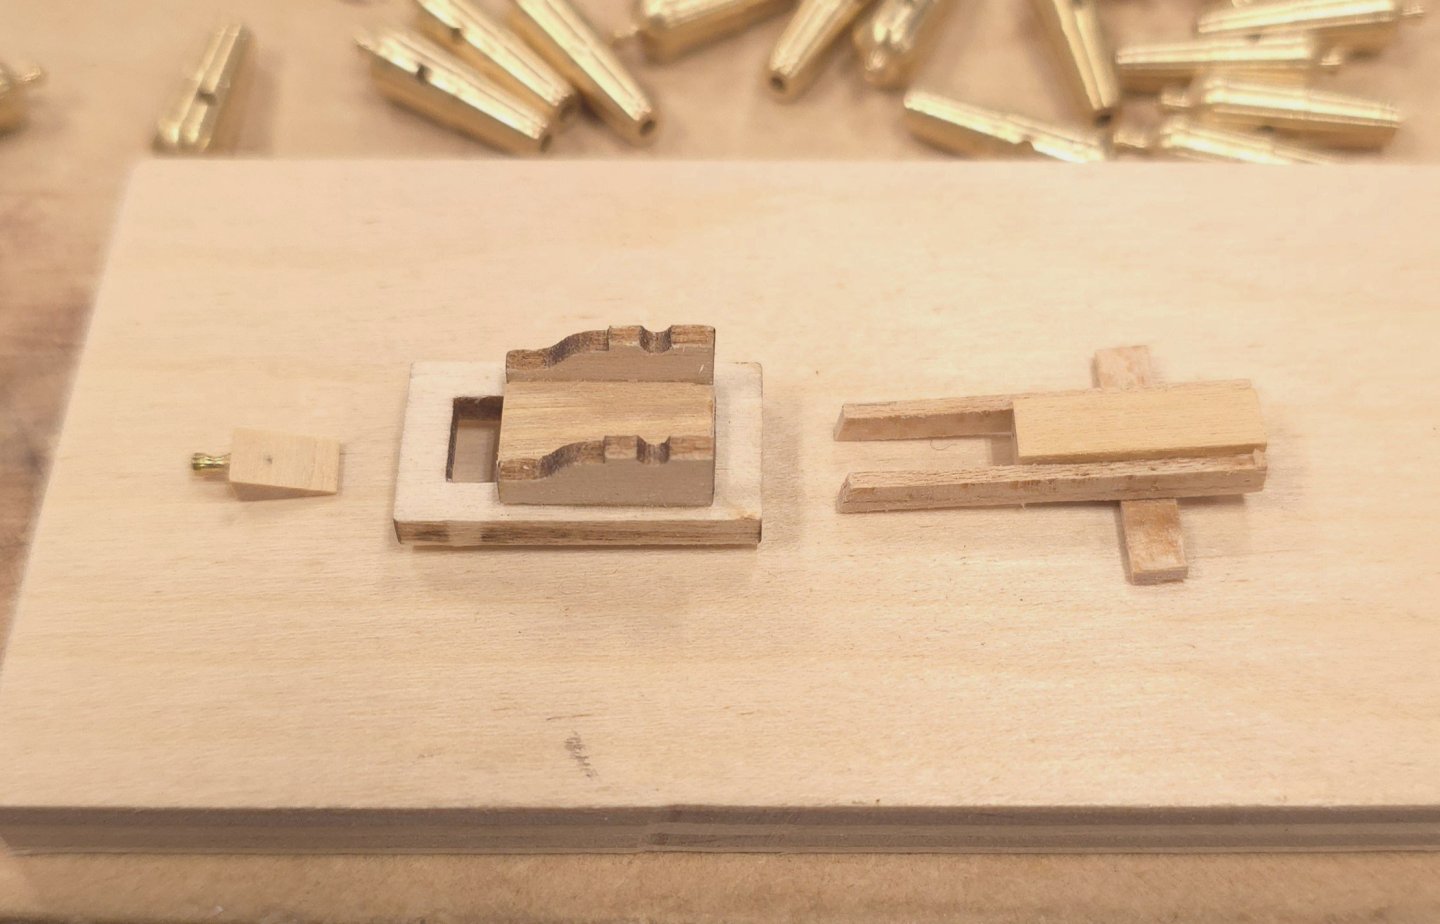
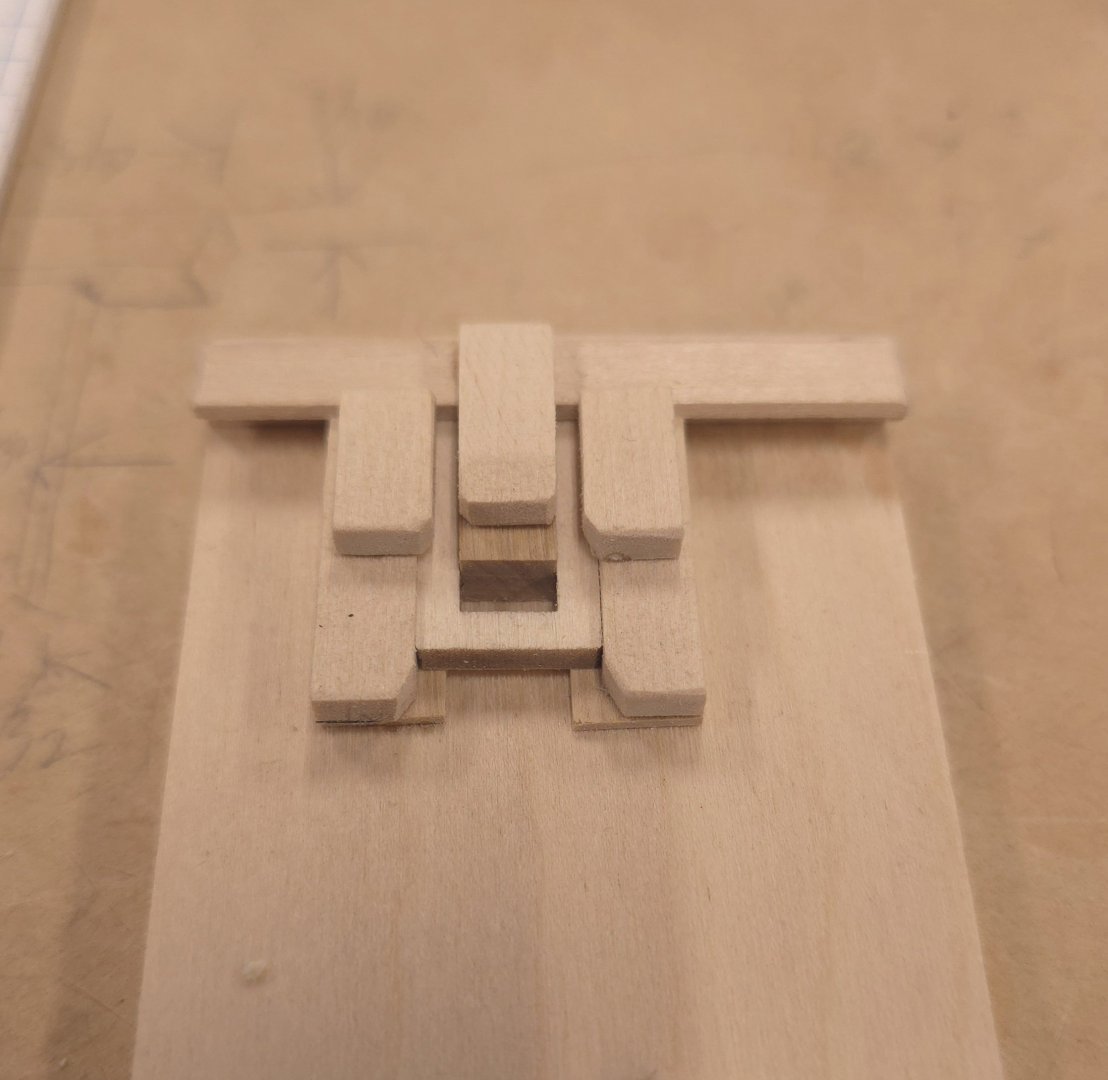
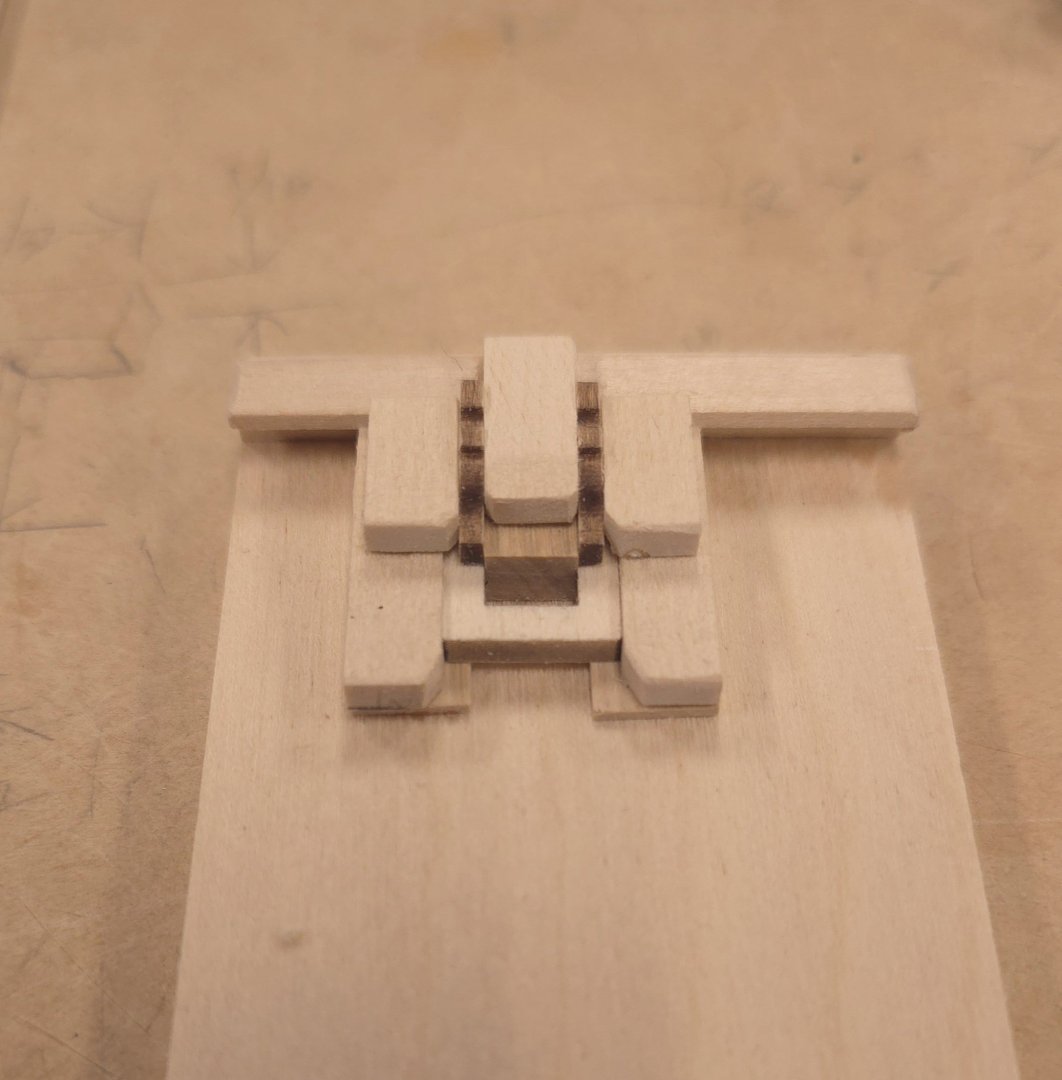
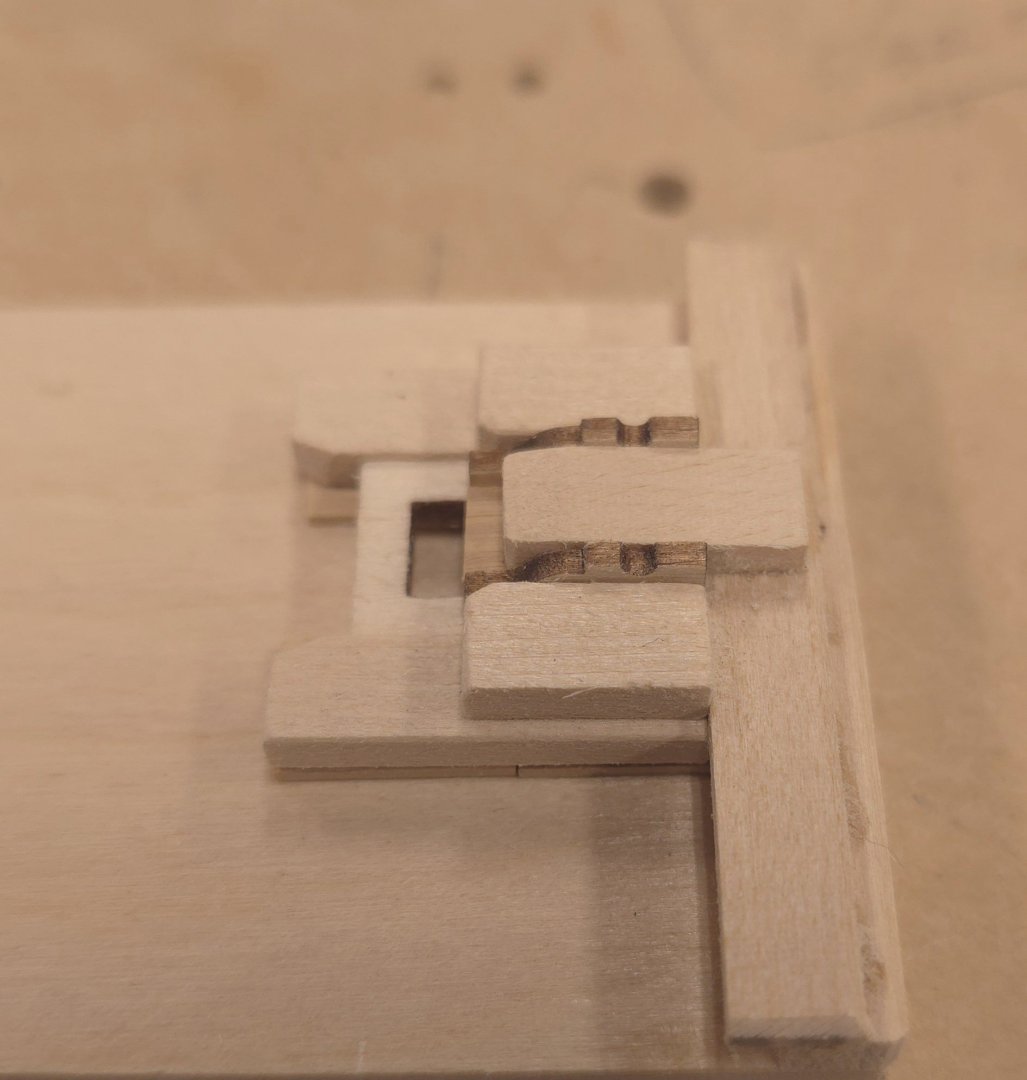
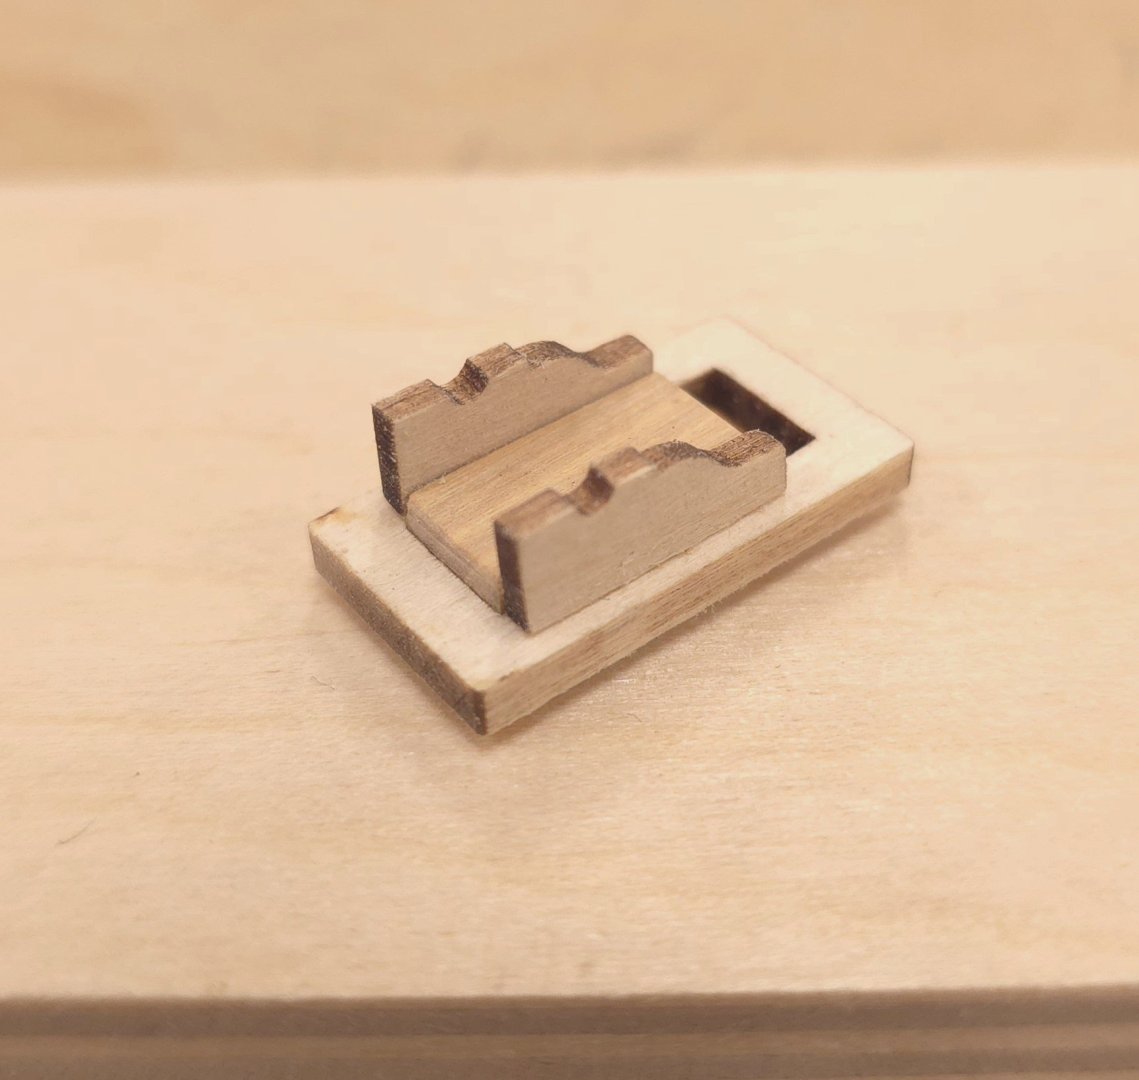
Thanks to all you historians for your contributions to the discussion. Hopefully you'll forgive me for going my own - less than perfect - way.. Which brings me to today's contribution.. I built a little jig for assembling the carronade carriages, and since the idea behind working on these at this stage of my bill is to keep myself busy while on vacation, I only assembled one unit as a proof of concept. To give myself plenty of work time before the glue set, I used Titebond II and a very fine brush to carefully and strategically apply glue to the block in the center before inserting the base Into the fixture, and then dropping the carriage sides down into those little grooves.


-
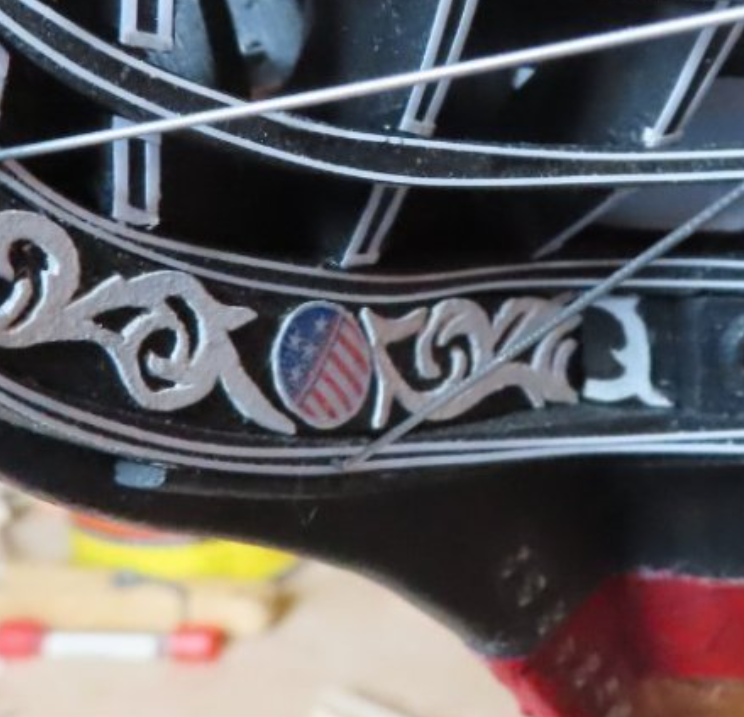
Does anyone (Jon?) have a jpg file of the US flag decoration for the Oval decoration on the trailboard that you would be willing to share? The one bmp file provided with the Hunt practicum (Conny Chapter 8 Flag.bmp) is too small, not to mention too pixilated.
-
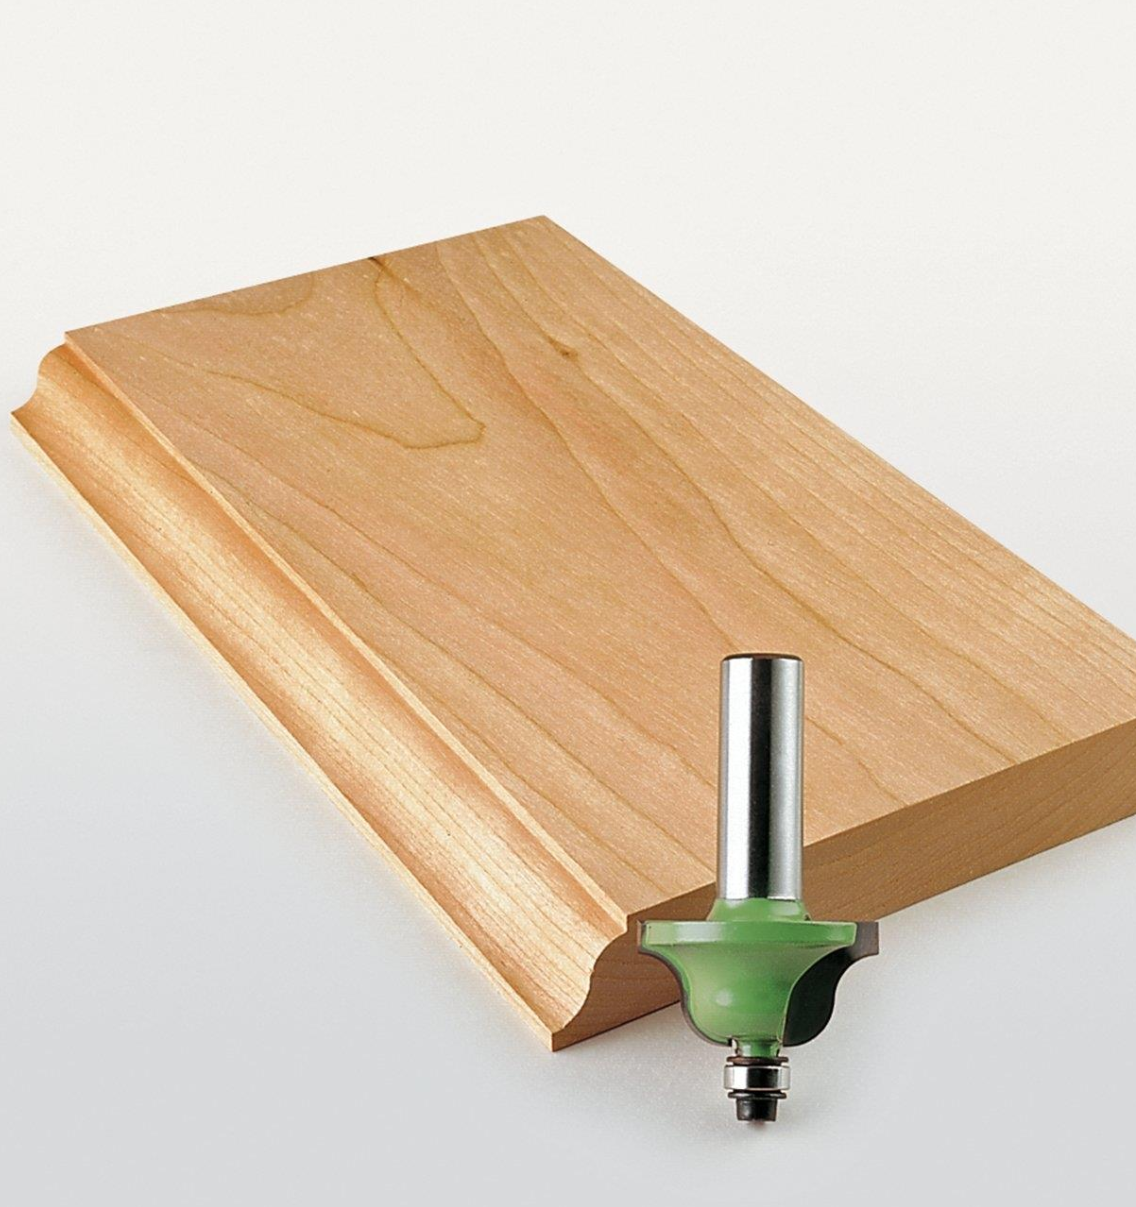
In my previous comment to you, Mustafa, there was a typo. I was trying to show you how an ogee bit could have made shaping the curve on the carriage sides easier for you by using a router table, instead of the numerous passes you must have endured on the Proxxon mill.

-
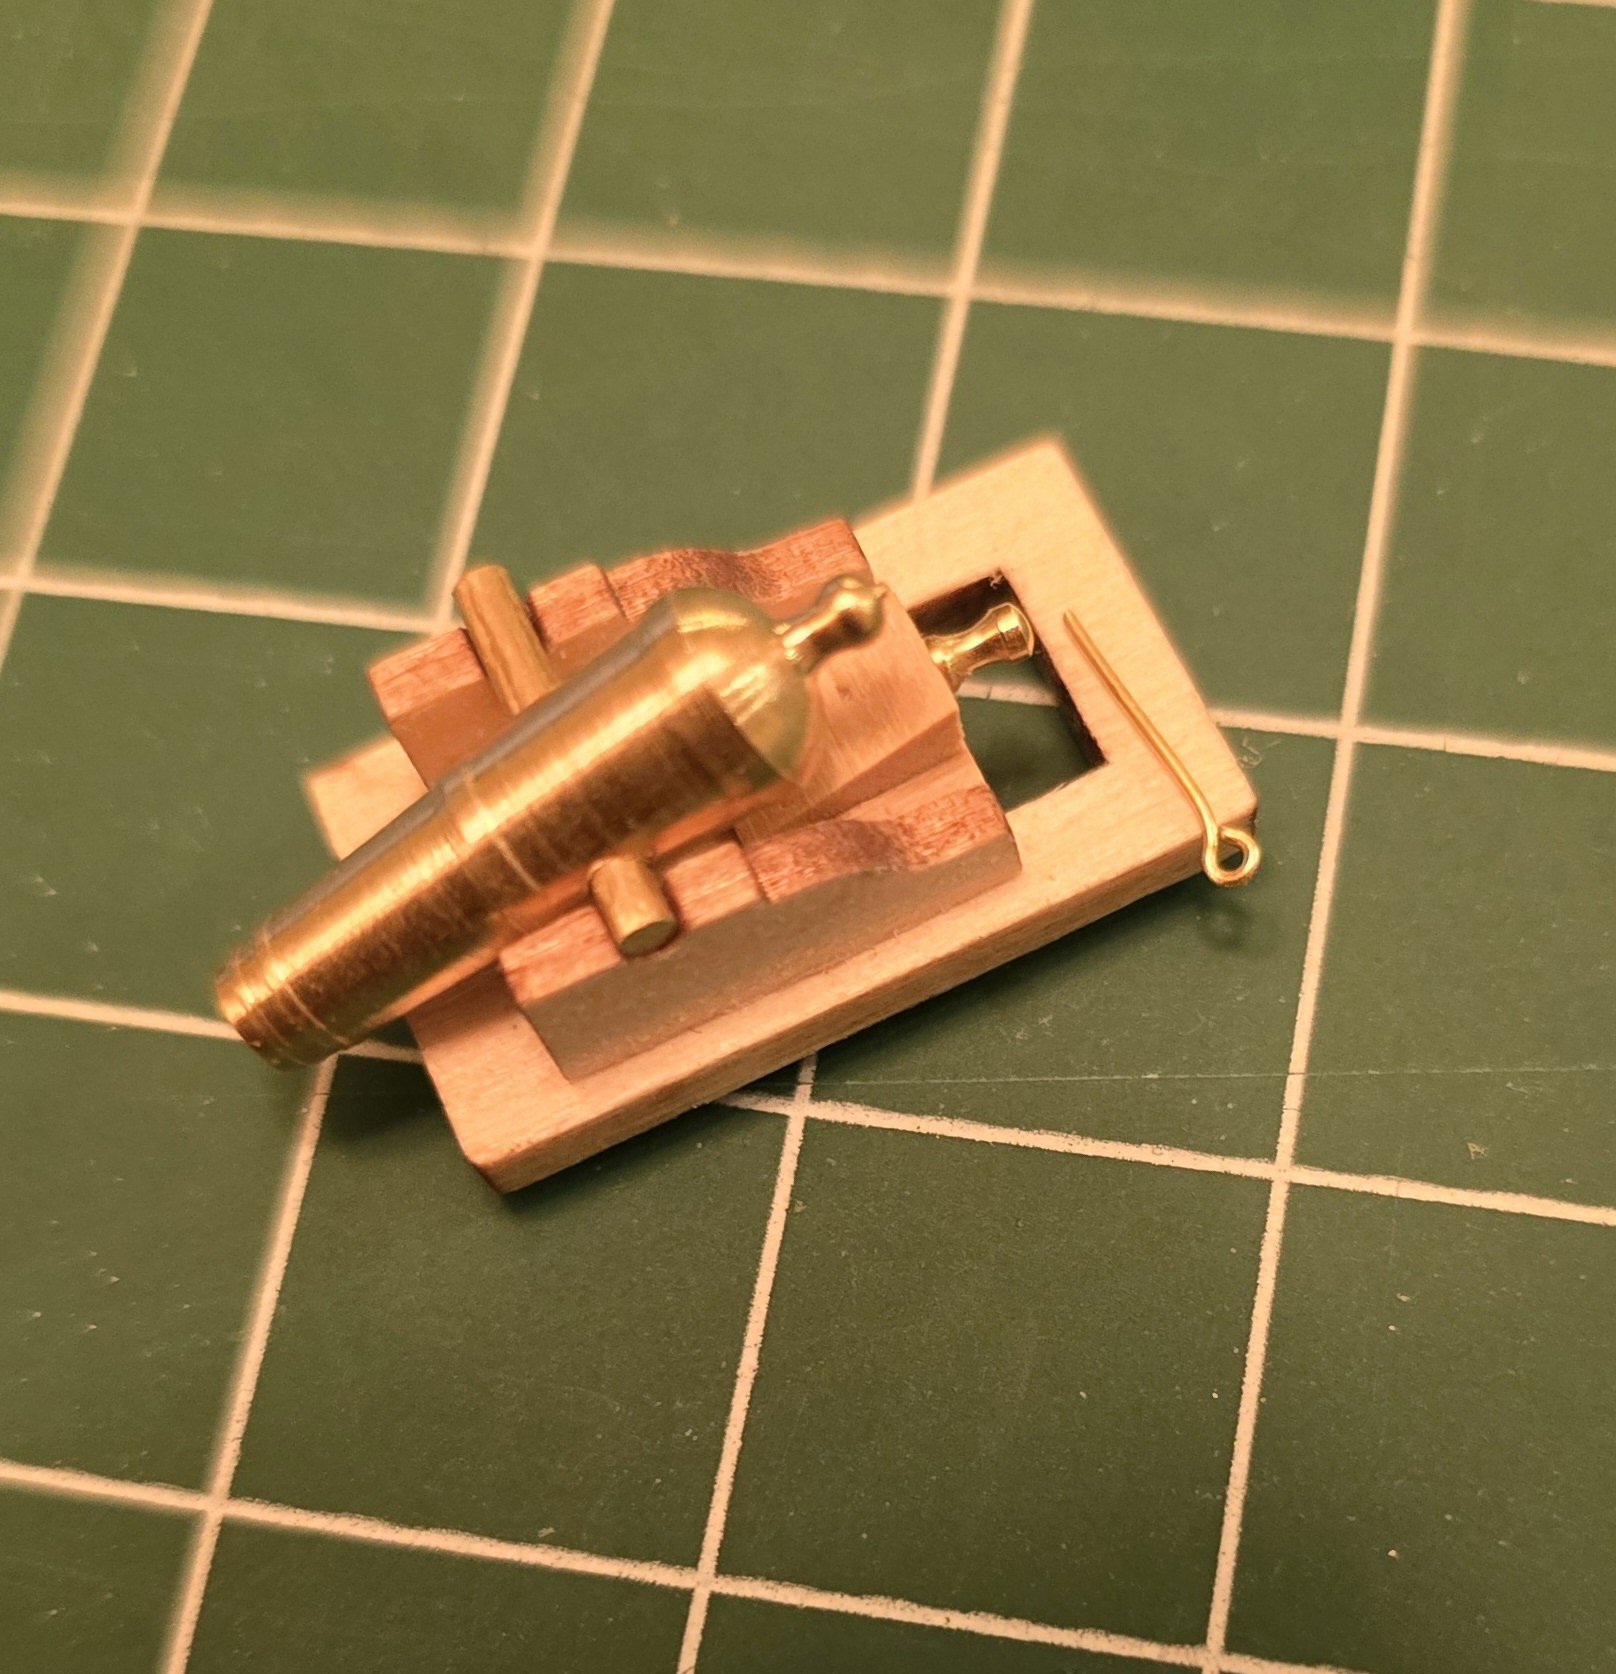
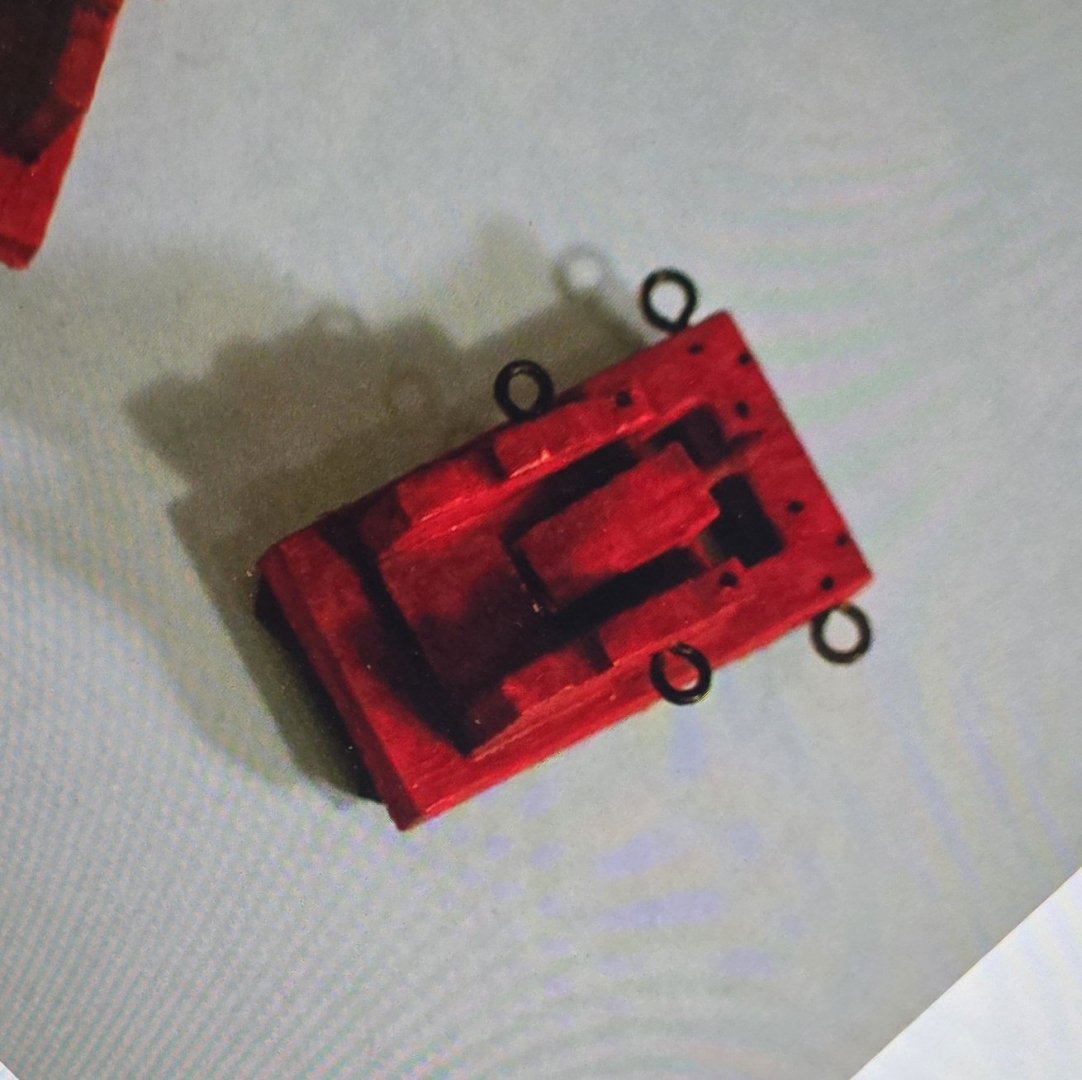
Assuming you were addressing me with the question, Unegawahya, I'm going for what Bob Hunt showed in the photo (not his build). Though I haven't decided on going with this color scheme, that of the Constructo kit (stained wood and brass), or a hybrid - red carriage with brass carronade? black carriage with brass carronade? I kind of like this color combo, but I hate to blacken the brass carronades.
-
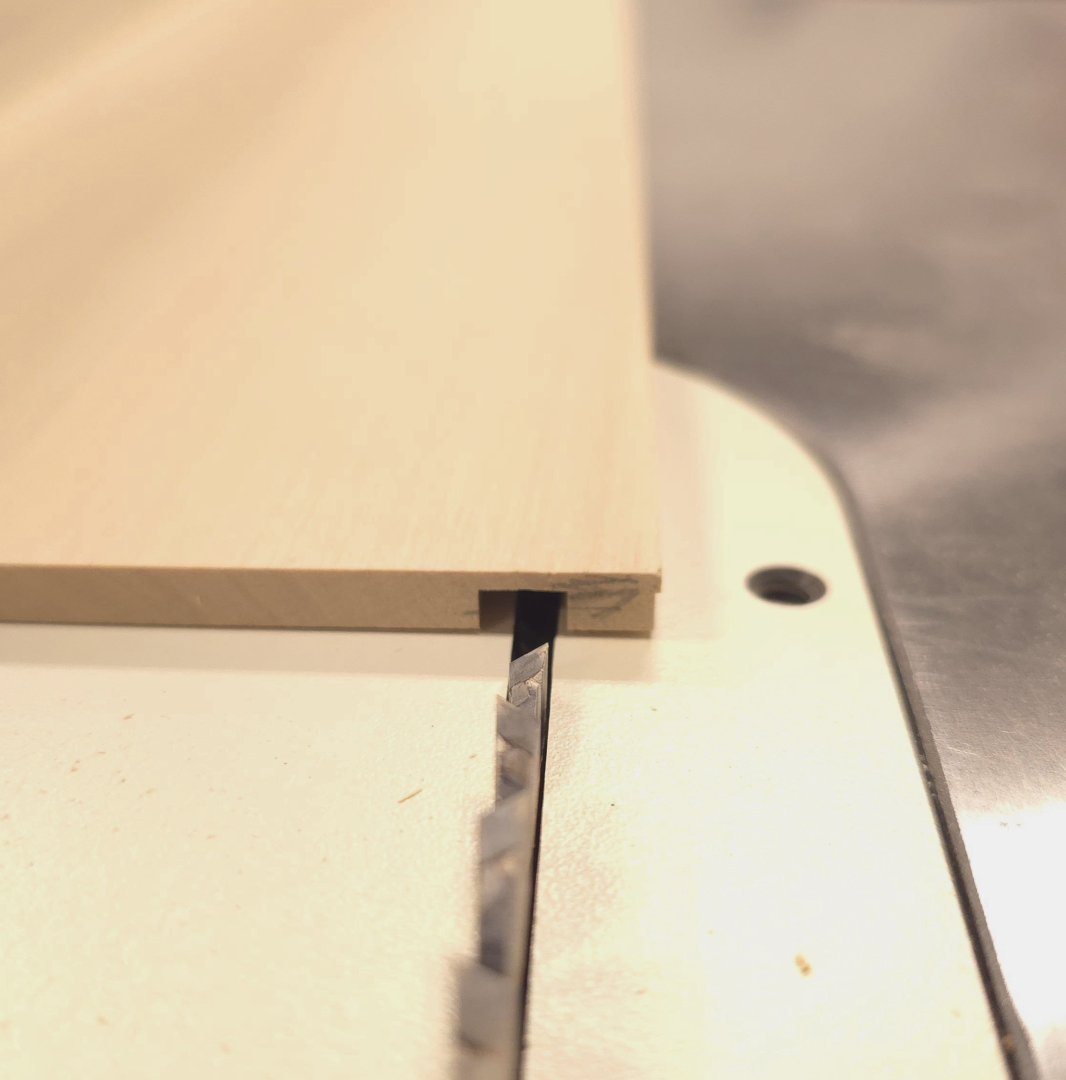
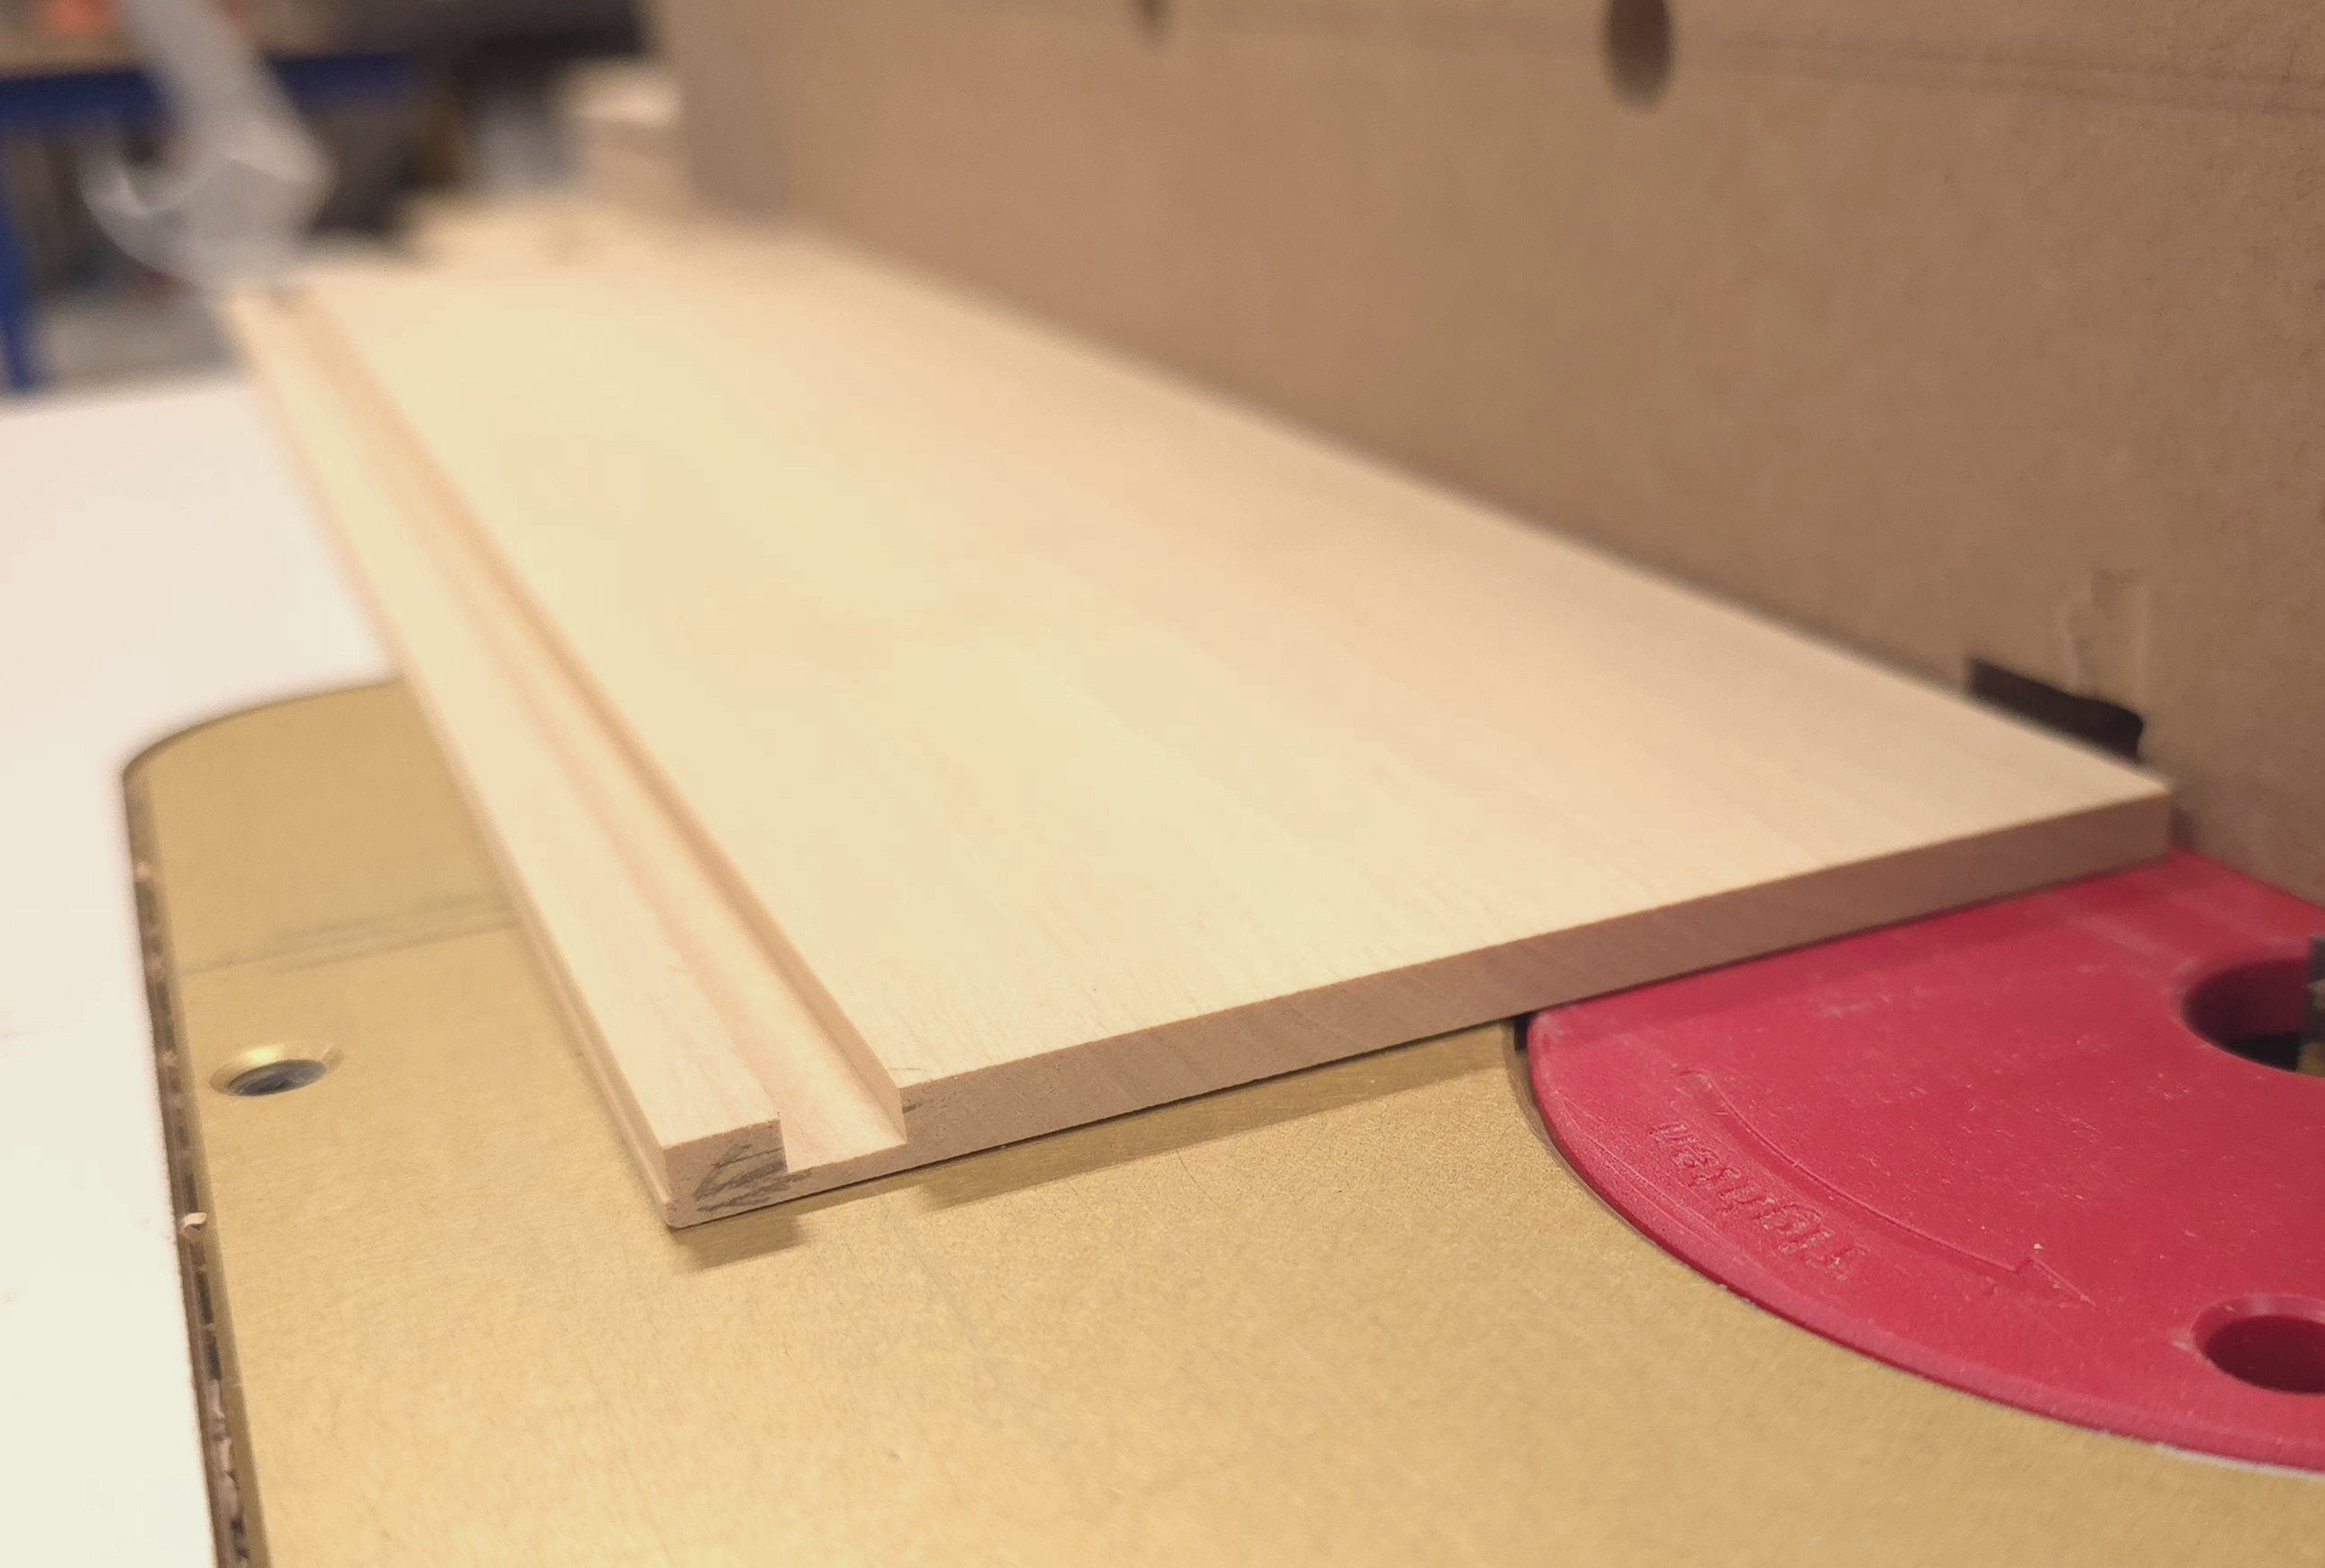
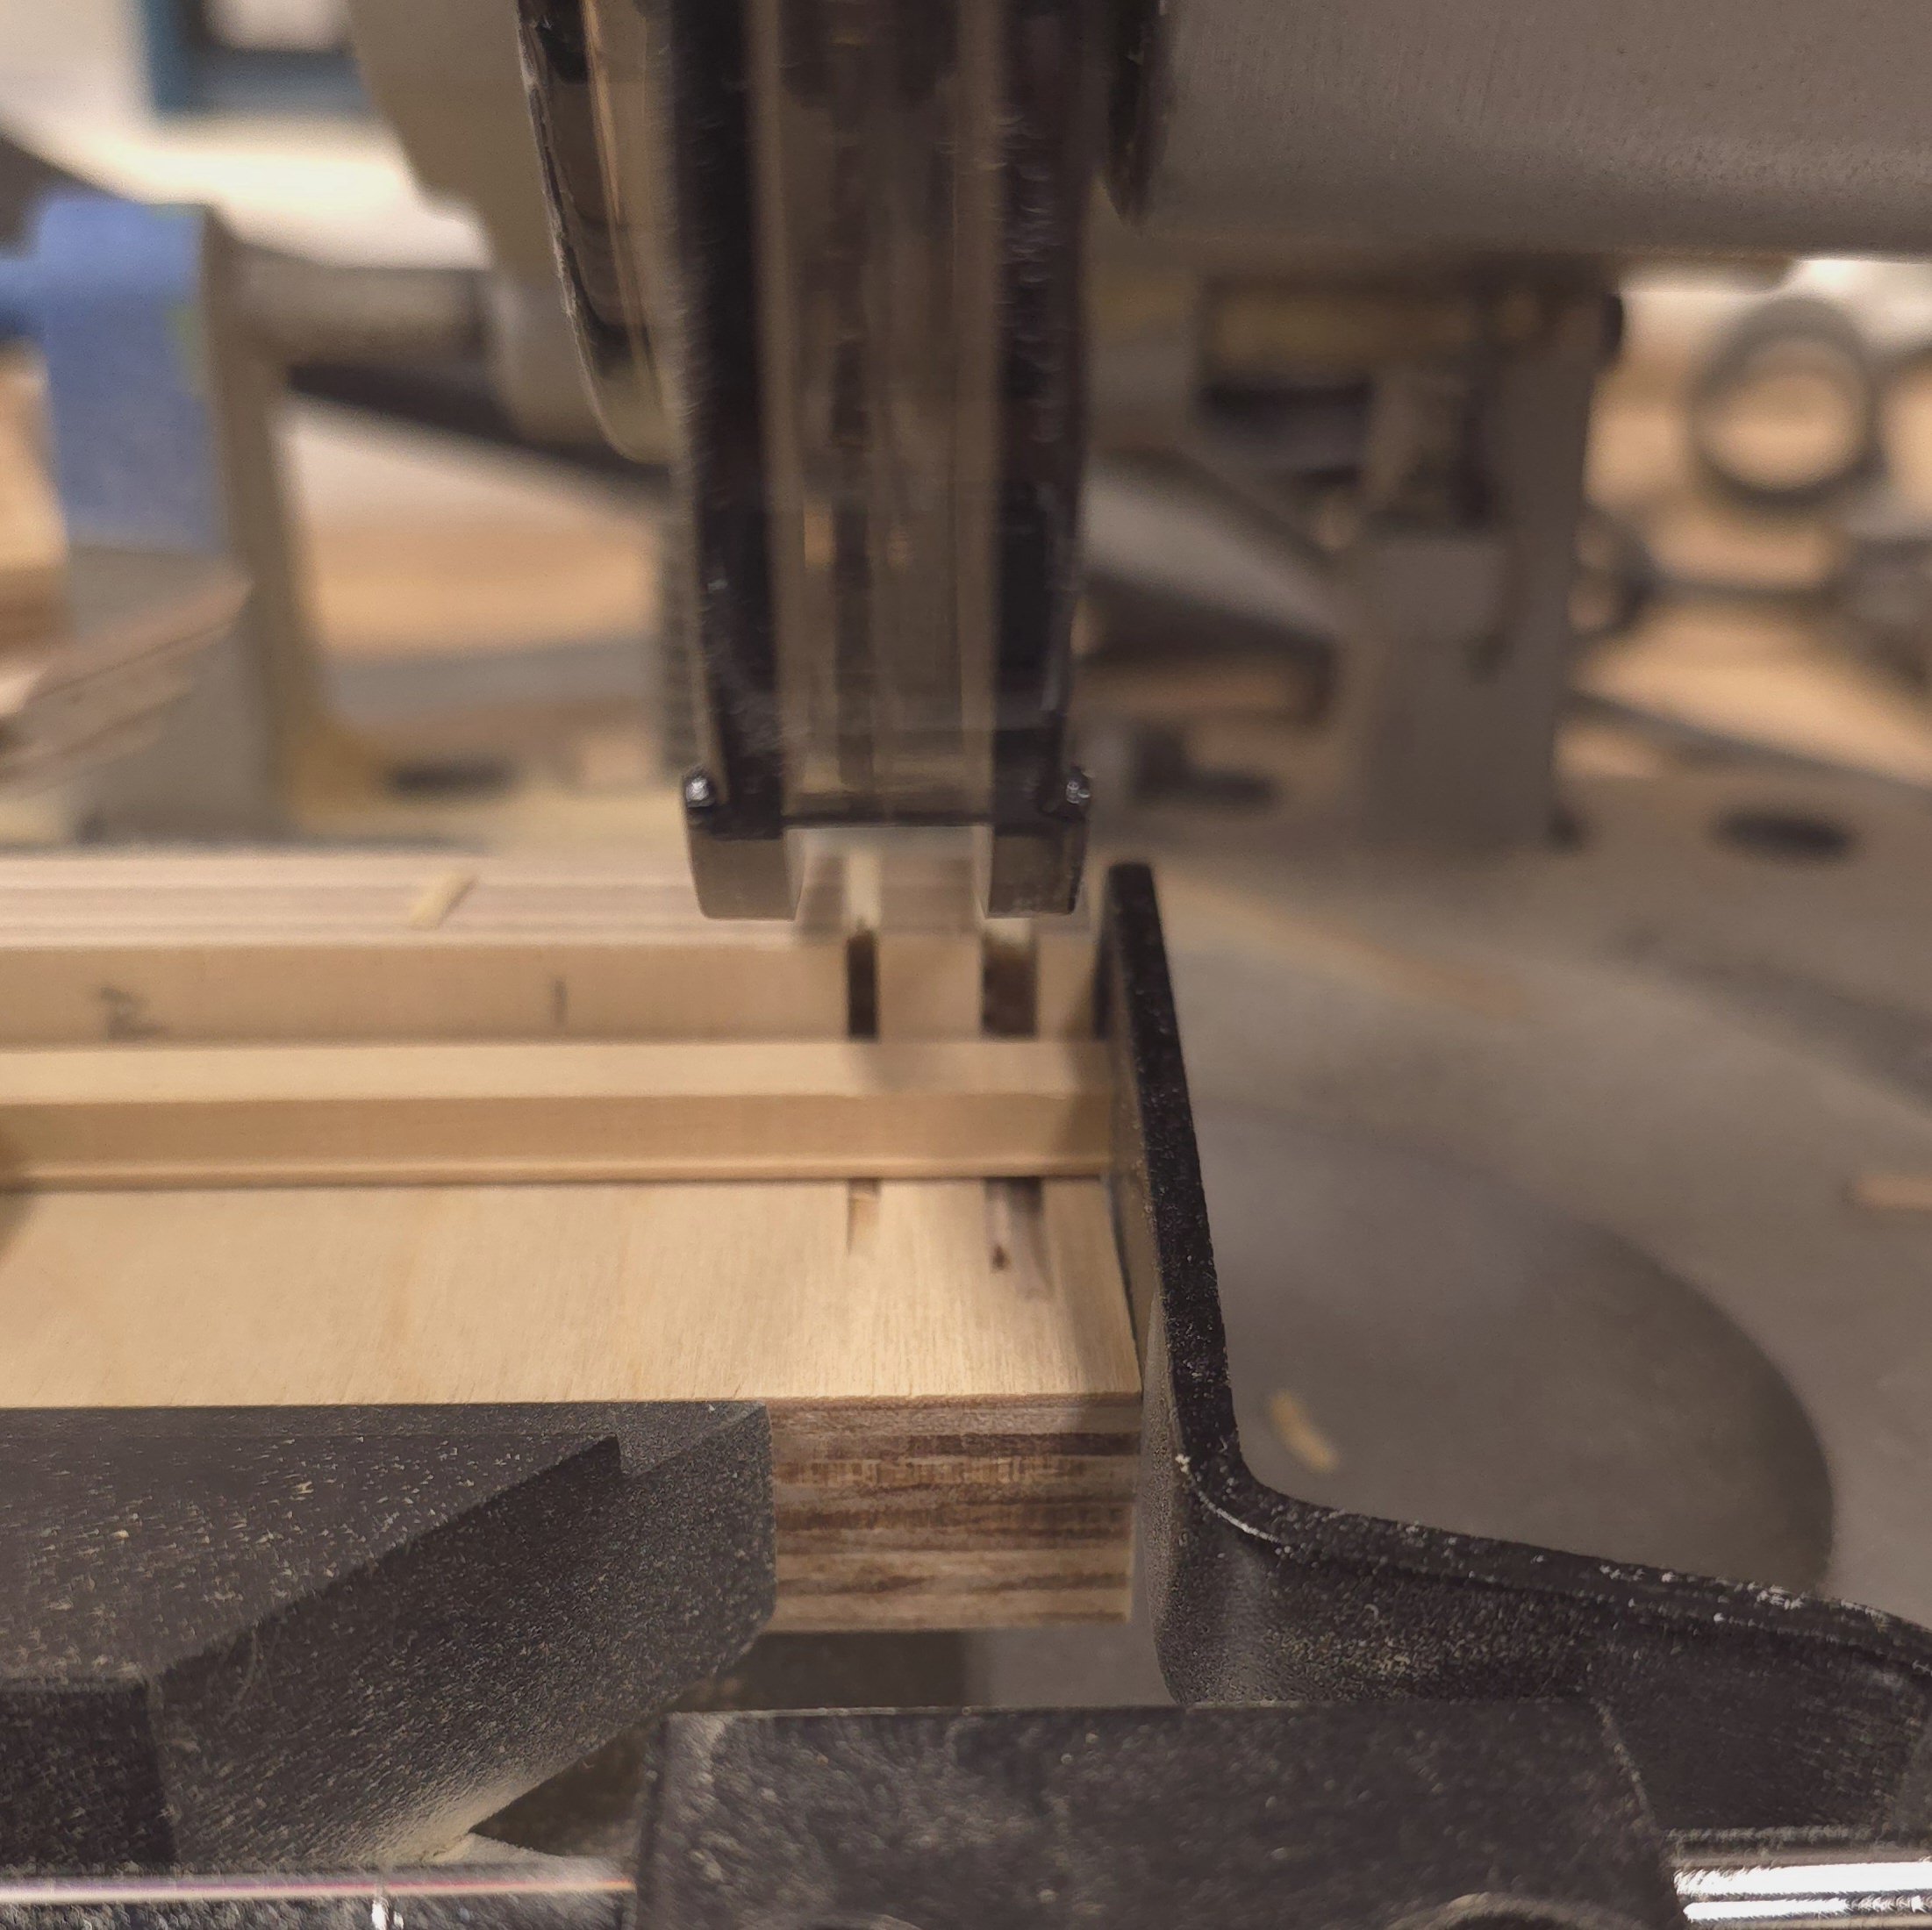
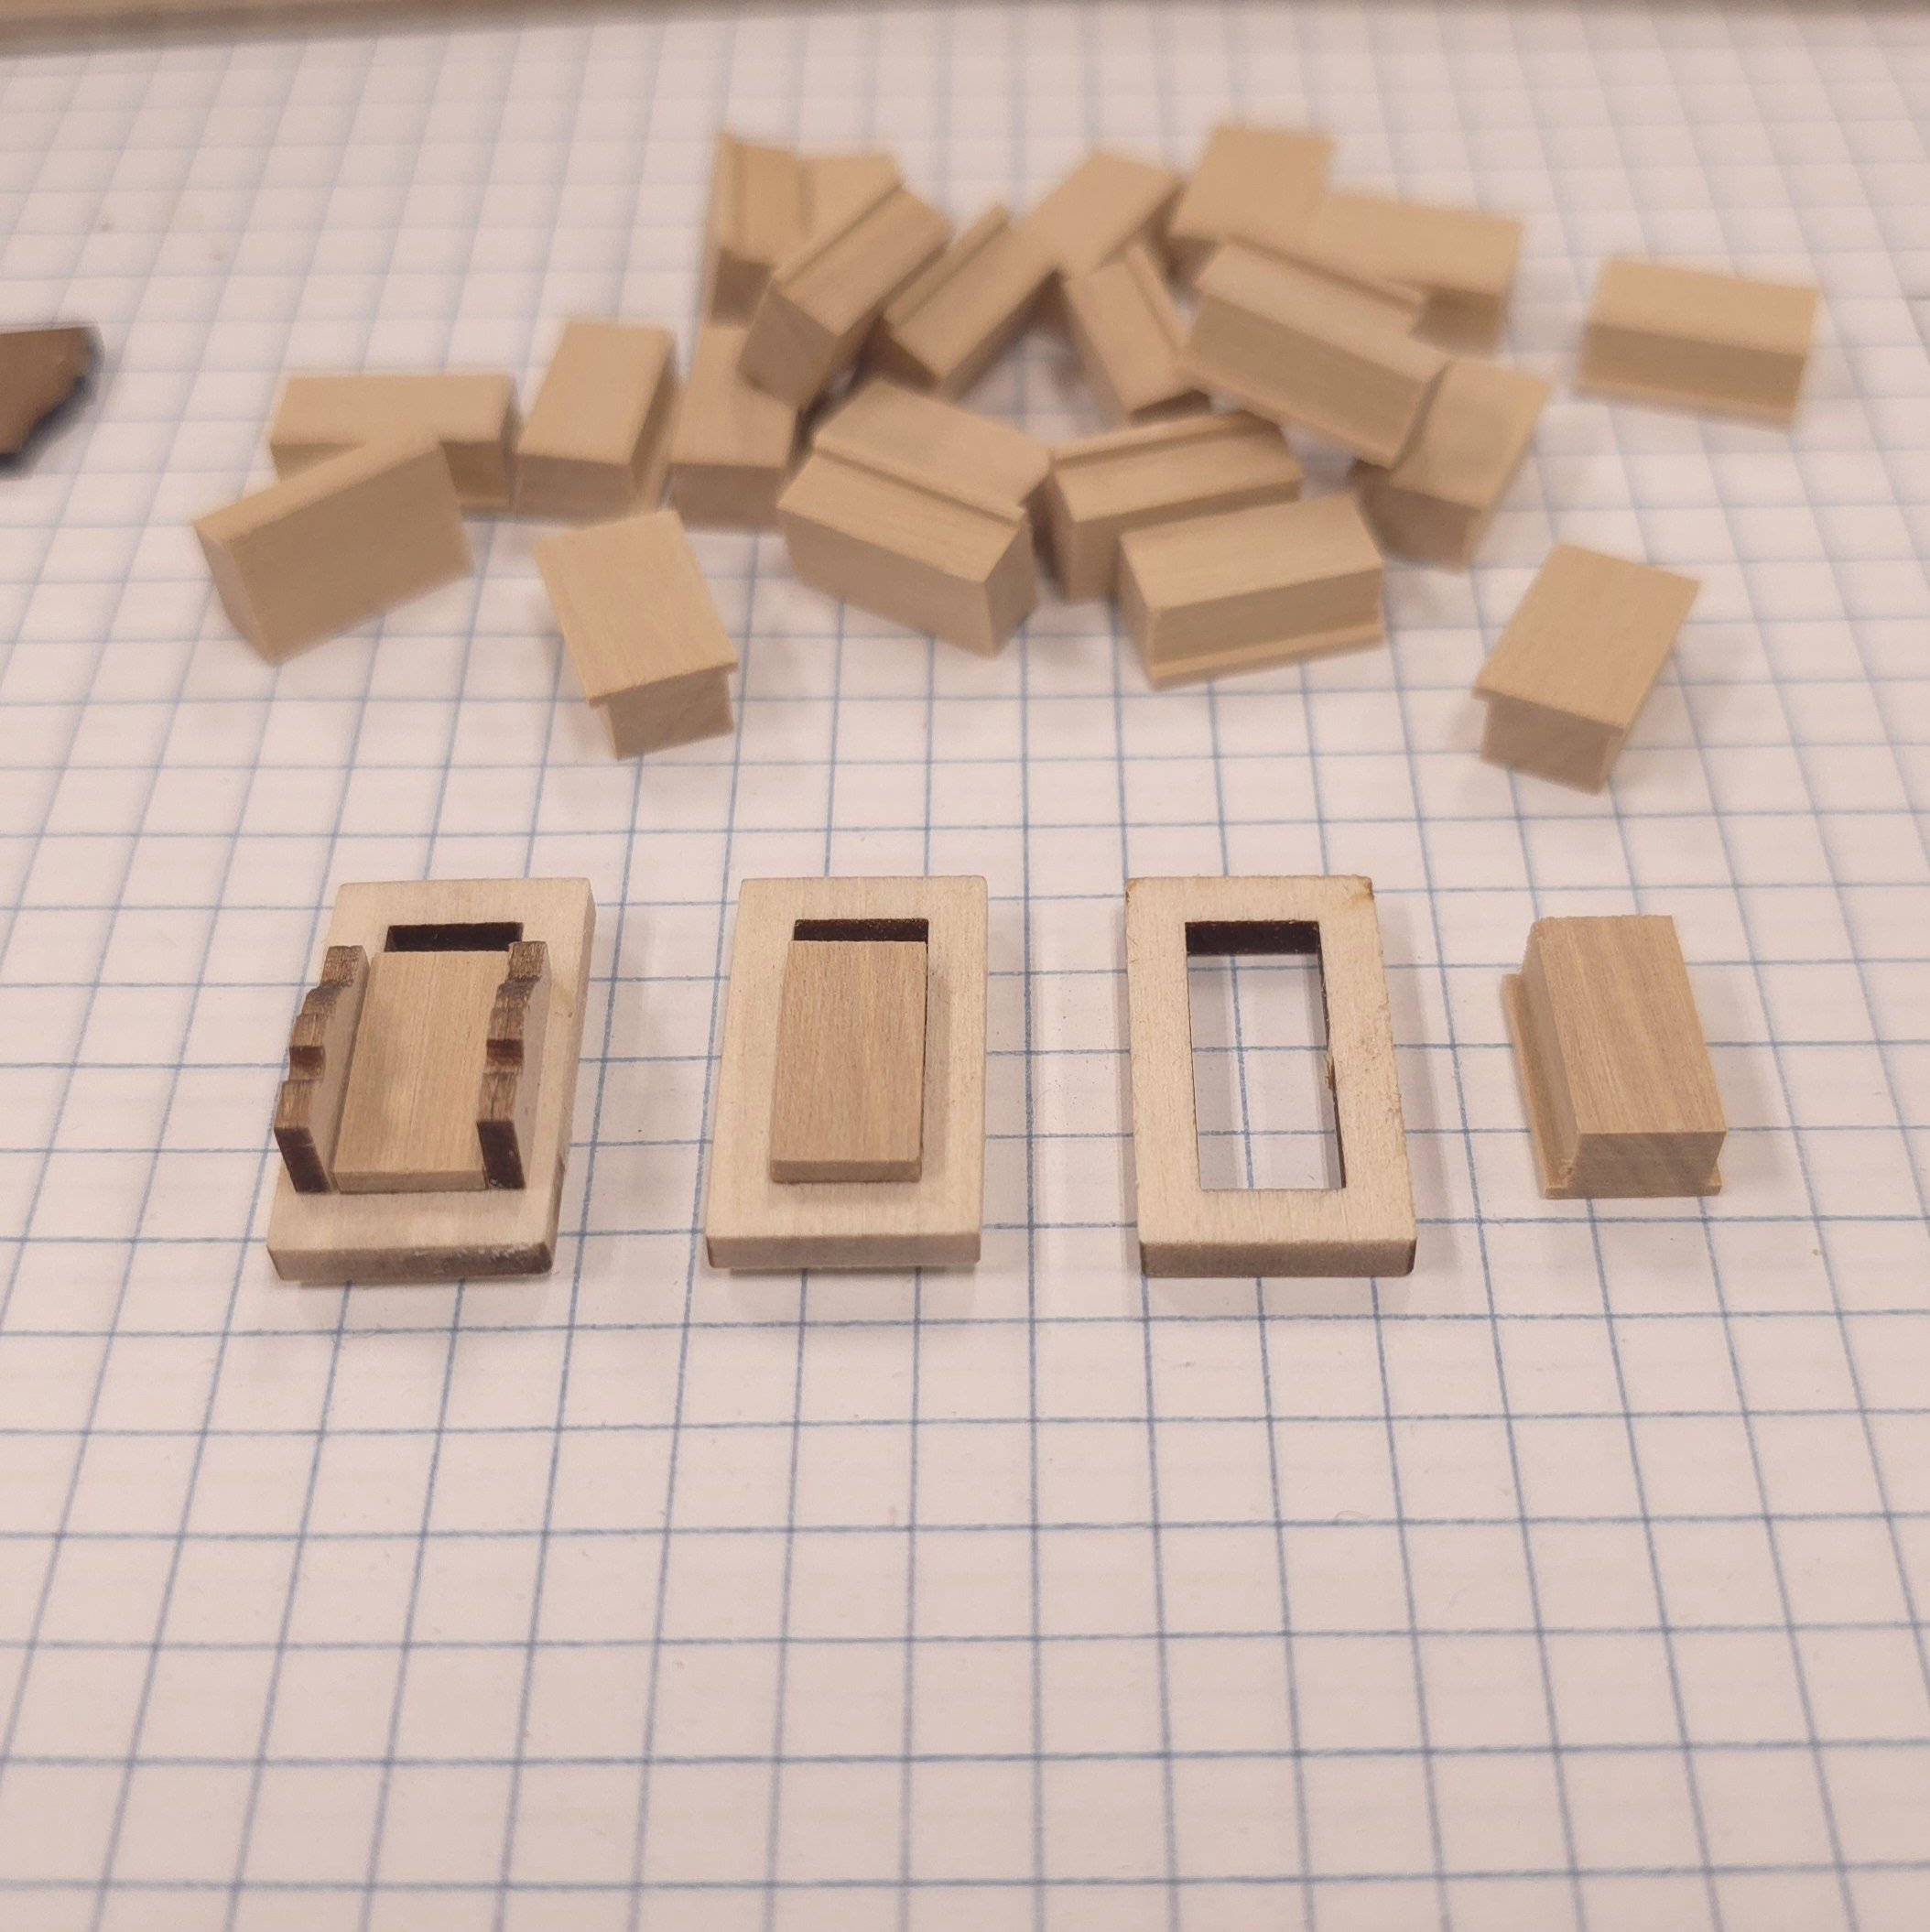
I stand corrected. There will be some pictures today. I did in fact return to the shipyard, where I started putting together the parts I needed for the Carronades. I chose a slightly different and perhaps more practical route than Mr Hunt. You will have to zoom in quite closely to see The edge on the left side of the board. (Mustafa, as long as I was setting up the router table, I was hoping I had an Ogee bit so I could demonstrate how you could have saved time on your carronade sides. Alas, I had nothing that small, but I think you can see the concept.) Carefully set up the table saw to knock off the opposite edge of the board. After making sure I had the distance set correctly, I flipped the board over for proper saw safety technique. Next step, cut one half inch lengths. Here's the concept..