DONATION DRIVE - SUPPORT MSW - DO YOUR PART TO KEEP THIS GREAT FORUM GOING! (91 donations so far out of 49,000 members - C'mon guys!)
×


wvdhee
-
Posts
174 -
Joined
-
Last visited
Content Type
Profiles
Forums
Gallery
Events
Everything posted by wvdhee
-
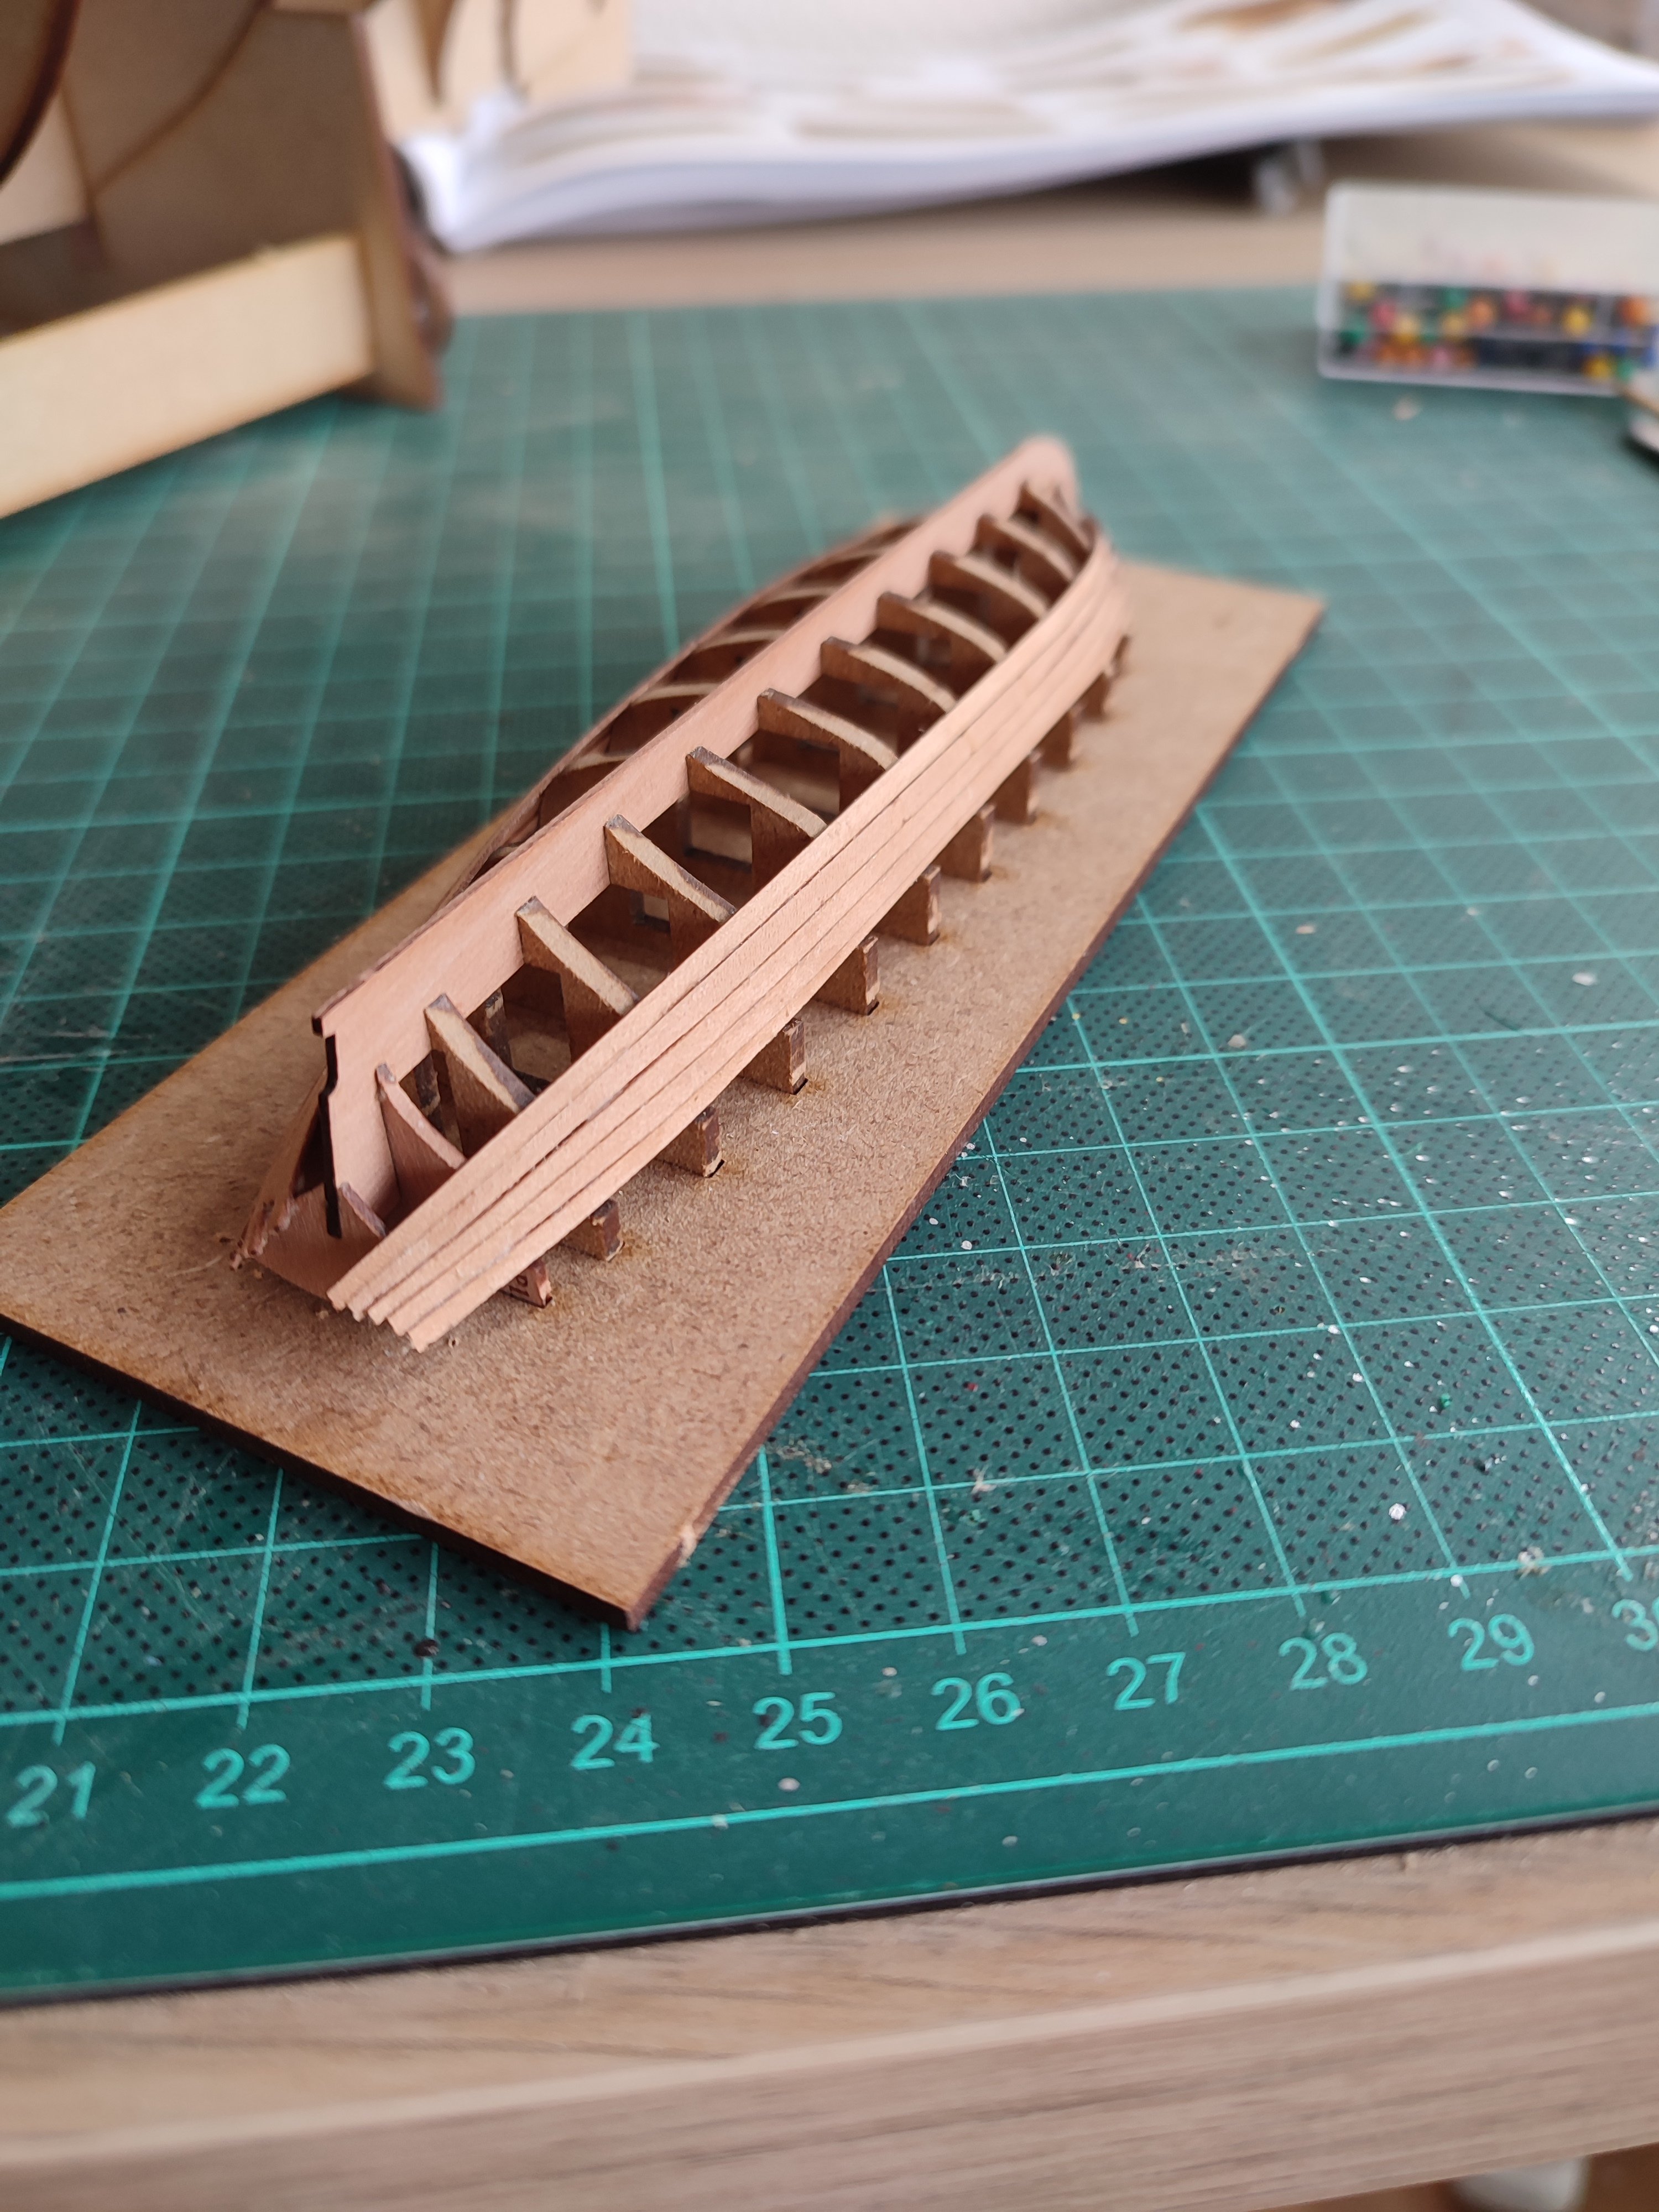
 The pinnace. Ok, not as good as James's, but I'm quite happy with my first go at small boats 😊
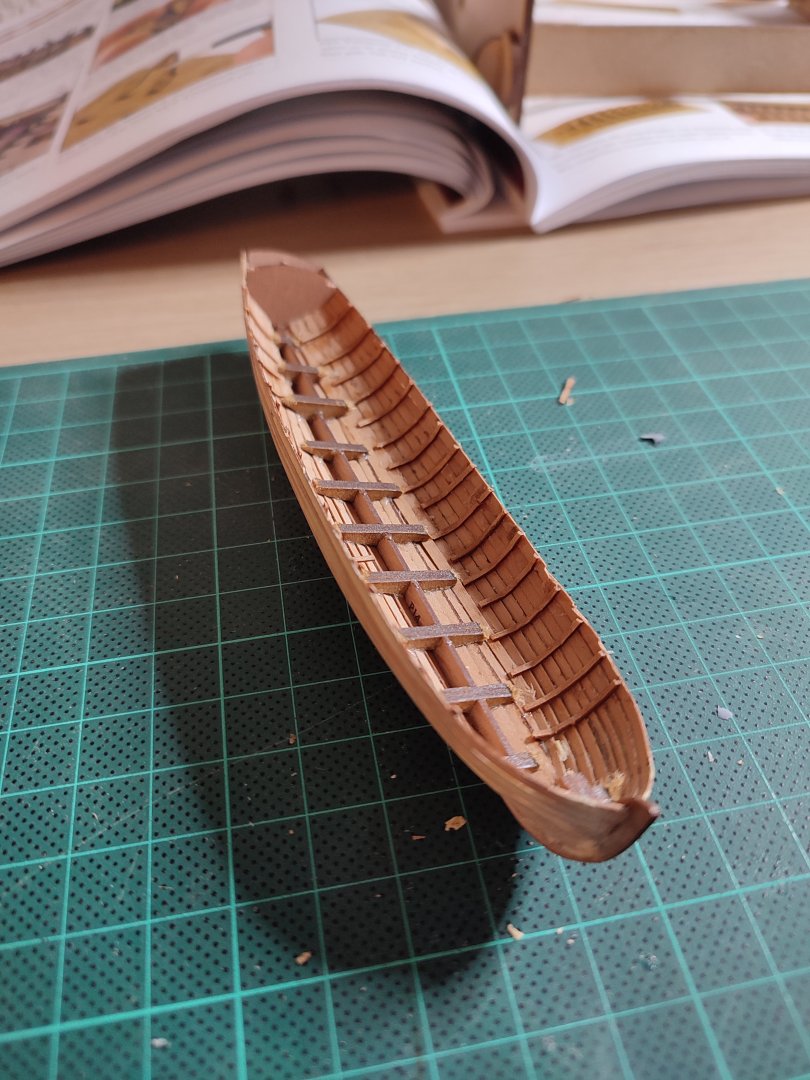
-
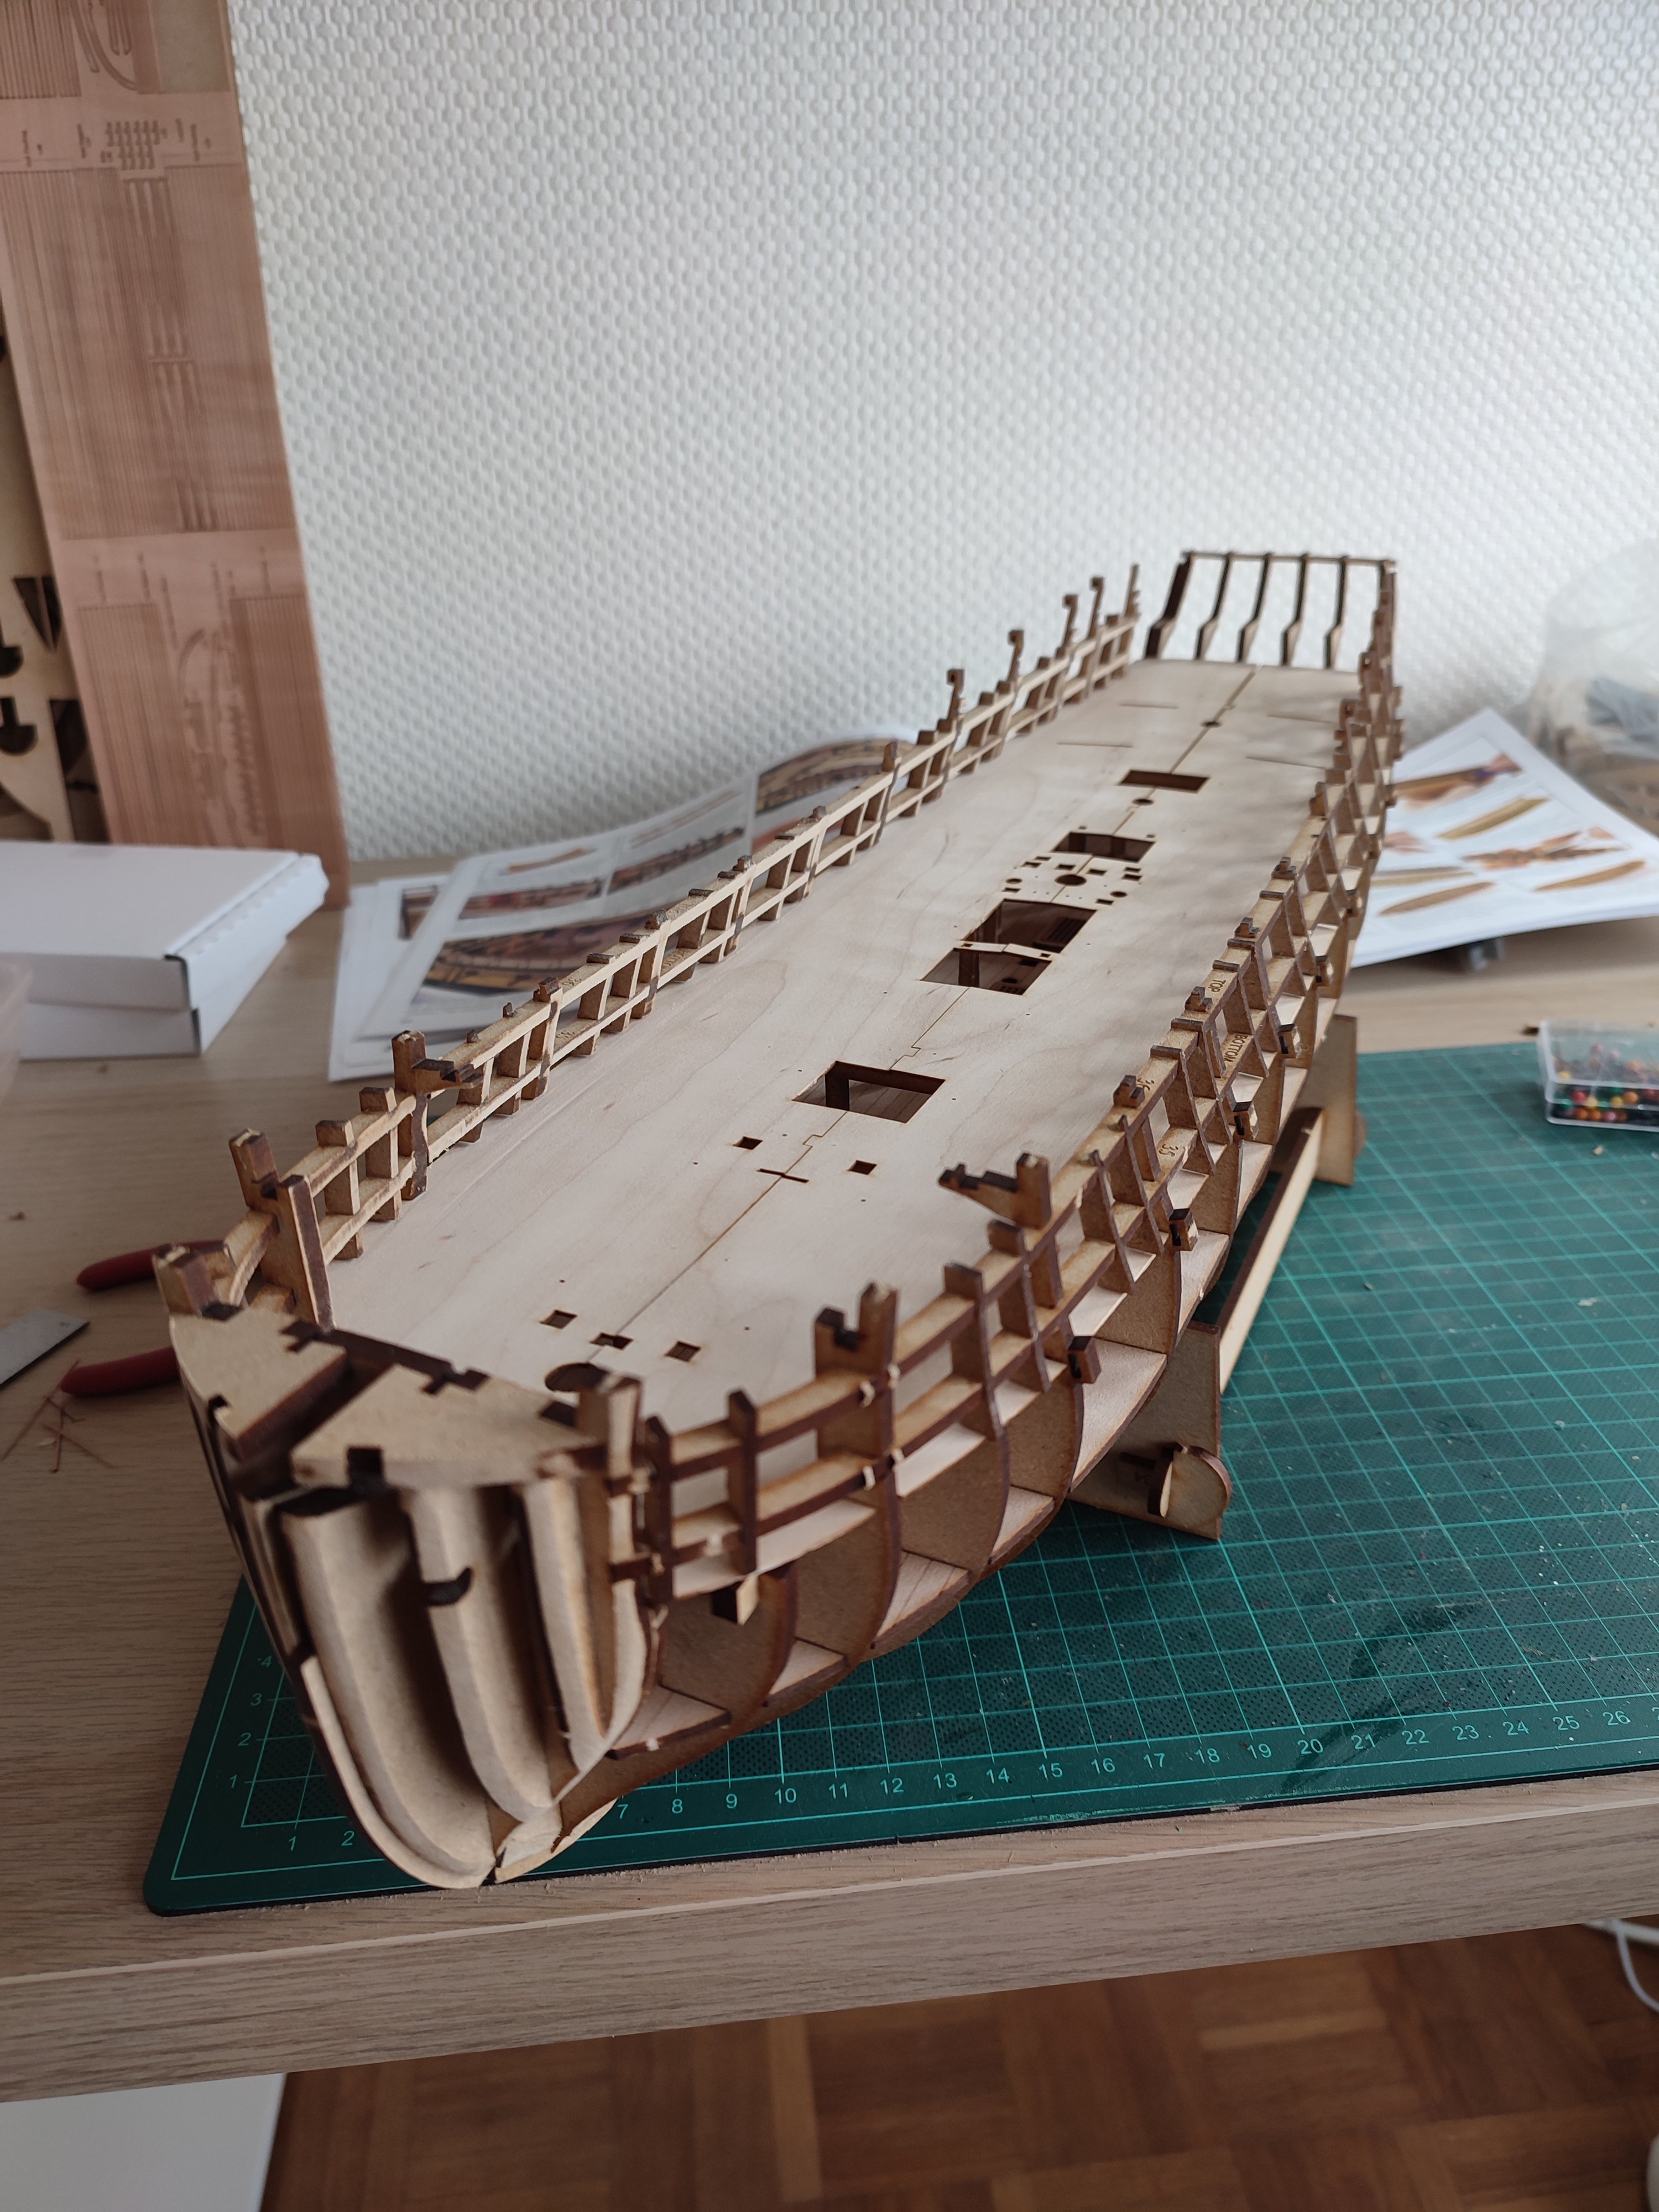
The build has started! The mdf construction of the hull goes really fast, it all fits perfectly of course, but gunport parts are a bit fragile I found out. While waiting for glue and paint to dry I started the construction of one of the 3 small boats, the 28ft pinnace. I've never done a small boat like this and really wanted to try, so I wasn't tempted to buy the 3D printed alternatives. I guess a dozen or so small boats further in my 'career' I will definitely get the printed ones 😉 But so far so good...


-
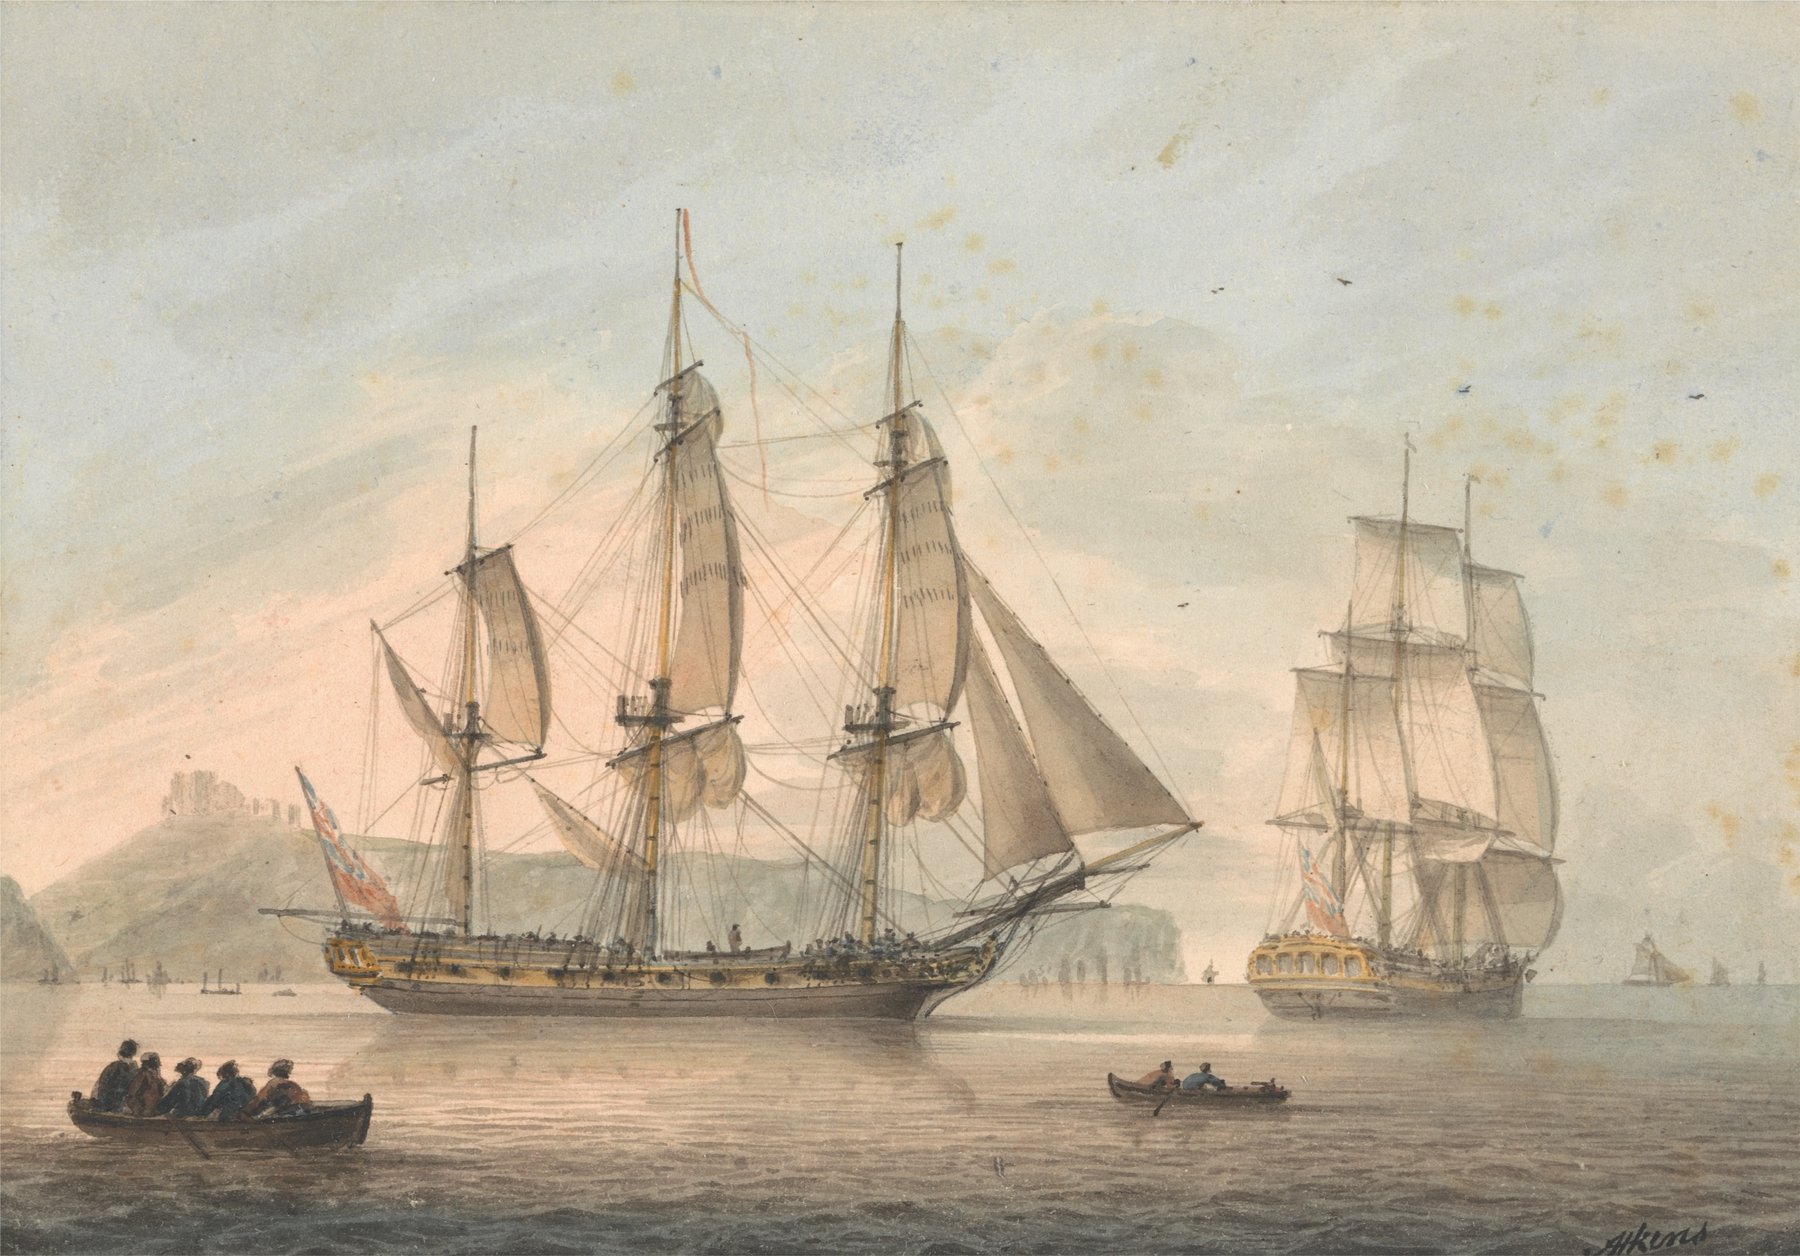
One of our great researchers; Thukydides showed me this painting (called "Ships of the line off Dover"). It's made by Samuel Atkins, somewhere between 1787 and 1808. It clearly shows one (or two) 6th rates. A quick deduction, like what 6th rate classes were active in that time frame and number of windows and gun ports, leads to the conclusion that it is, or are, most probably Sphinx class ships! If true, it's imho the best depiction out there of these ships, albeit the inaccuracies. Anyway, it shows the forecastle bulwarks still original, so I will probably don't heighten them then.

-
The tiles do look better yes. I'll opt for those then 🙂 ty
-
Nearly done already 😉 Are copper plates easier/better than copper tape? and why/why not if I may ask?
-
Great job and amazing patience 👏
-
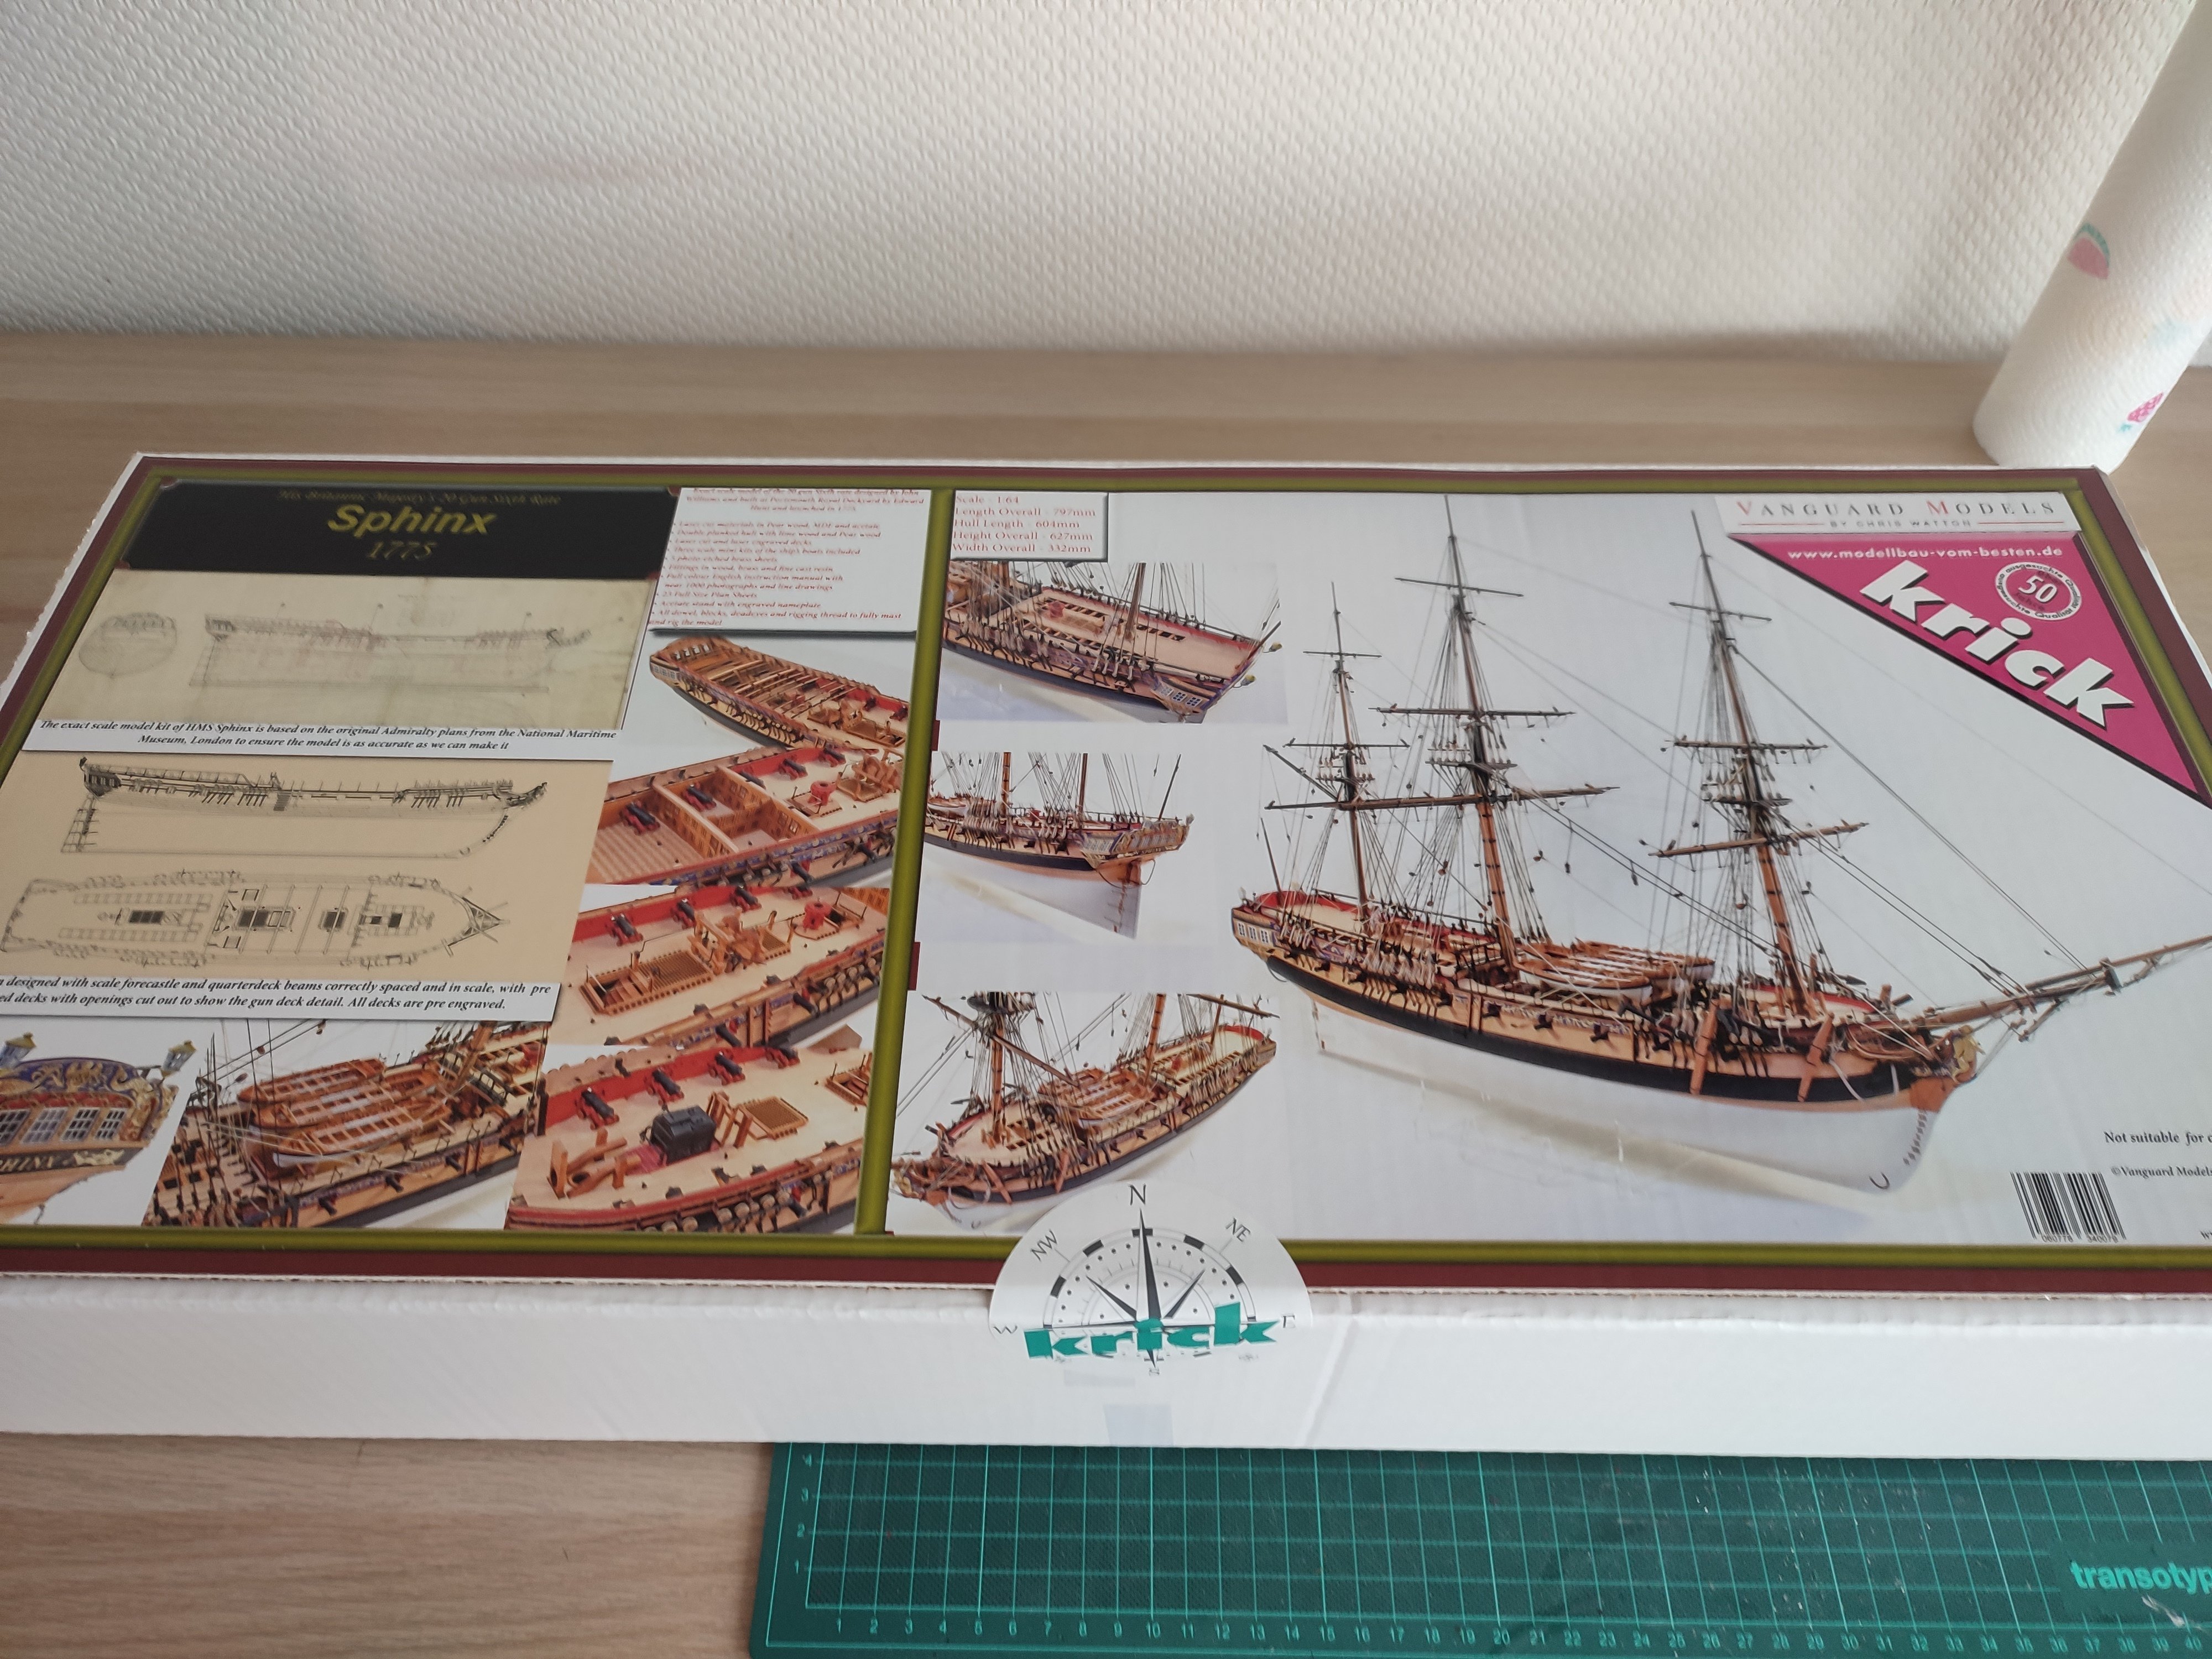
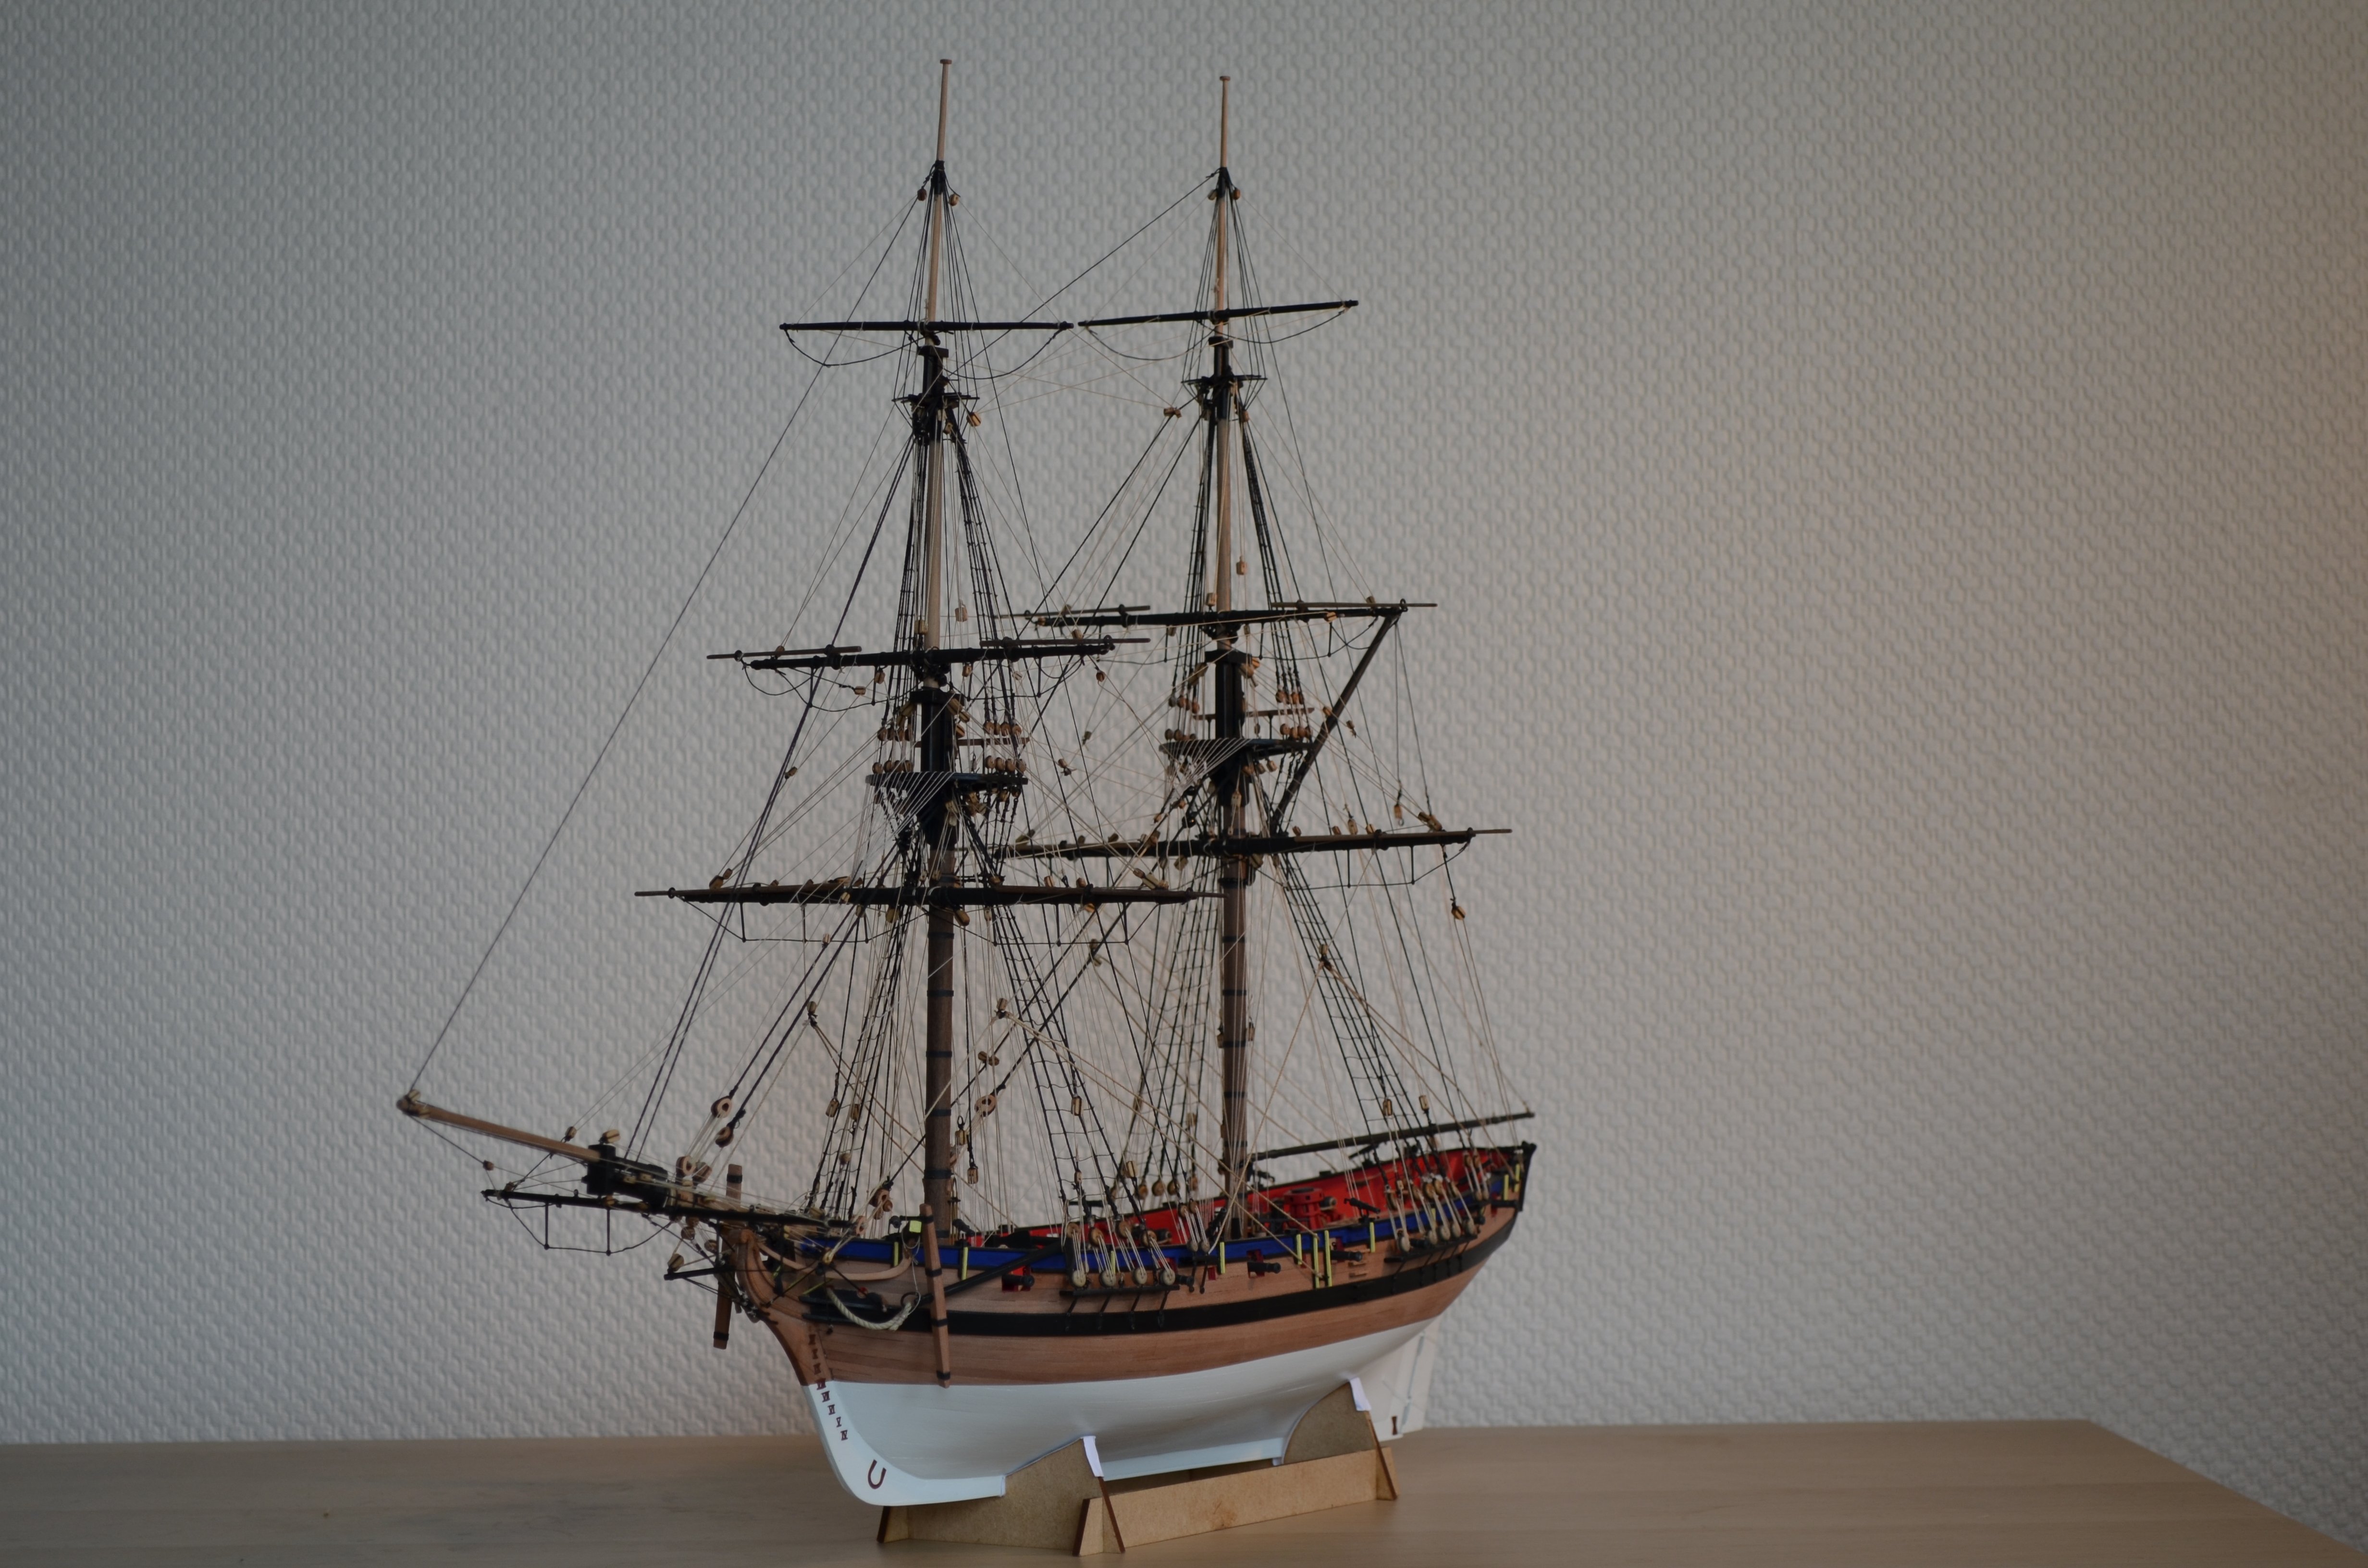
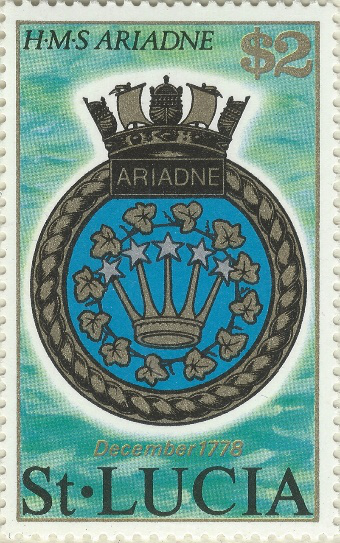
Hello y'all and a very happy, ship building filled, new year! I have been busy with life, which prevented me to be busy with ships (I hate it when I mix up my priorities), but it's a new year and time for a new ship 🙂 With HMS Flirt done, it’s time for something a little bigger, one more mast, few more guns, carronades to top it off and that awesome well-known, yellow-black paintjob. Wanting another ship from Vanguard Models (you all know why) that would leave me with just one choice, the Indefatigable. But time, space and budget are preventing me from doing that one for now. And with HMS Surprise (which may tick all the boxes 😉) on the (maybe far?) horizon, I have only one option; a slightly modified version of the ship I always wanted to do anyway, HMS Sphinx . Of all the 10 Sphinx class ships built, I think Ariadne had the most lustrous career. Launched in 1776, she sailed straight for North America to fight the revolution. She took several American ships, including the Alfred, the first flagship of the Colonial navy. She was present in a couple of sea battles against the French in the Caribbean (she even got her own St Lucia stamp). After some time in home waters, she underwent a major refit in 1792/1793 and sailed for the Mediterranean to fight the French again. Probably not in time for the destruction of the French fleet at Toulon, she ended however up in the squadron of a certain H. Nelson, who then was the captain on the Agamemnon. She was present and played an important role in the Battle of Hyères Islands (1795), cruised the Med with Nelson’s flotilla, joined now by HMS Speedy (yes, that one) before sailing back to home waters, where she remained active until her end in 1814. One fun fact is that in 1798, while participating in an action at Ostend, she came across the now also well-known HMS Harpy 😉 During the major refit HMS Ariadne underwent in 1792/1793, 4 more guns (4-pounders) were added, 2 on the forecastle and 2 on the quarterdeck. The Bulwarks were heightened and some (4 or 6 depending on source) carronades were added as well. My take is 4 and all of them on the quarterdeck. A drawing with a proposal to change HMS Sphinx in much the same way, only shows one gun opening on the forecastle and it’s probably a bit tight there as well to place more guns/carronades. (https://www.rmg.co.uk/collections/objects/rmgc-object-83709) The guns and carronades I ordered already a while back from Vanguard Models and I have enough wood and scrap pieces left from the Flirt for the higher bulwarks, I just don’t know yet how to do it 😊 Sad thing is that I won’t be using the photo etched decorations from the Sphinx kit, but they might be used in another build some day. And of course I need a new figurehead, preferably Ariadne 😉 but 3D printing makes everything possible these days. In theory, I guess the stern decorations weren’t identical to the Sphinx’s, but I am hoping history will forgive me for using them anyway 😊 Well, I ordered the Sphinx today, so in a few days, a week maybe I will start normally! 😃 There’s plenty examples of how to build a Sphinx here already, so I won’t be posting every step, but I plan to share where I deviate from the original.
-
Patience being not one of my virtues, I admit, but we're nearly tomorrow again... 😉
-
Really exciting 😃 And then the figurines that go with it and us all whining that Russel Crowe's left nostril really isn't like modelled 😅
-
Sign me up! 😀 Is the sudden switch due to a film we don't know about yet?
-
Wow, good luck with that! I'll be following you 😉
- 125 replies
-
- 3
-

-
- Christiania
- Vanguard Models
- (and 1 more)
-
It does mean that yes. I forgot about it actually and just did them.
- 152 replies
-
- 2
-
-
- Flirt
- Vanguard Models
- (and 1 more)
-
Gorgeous ship 😍
-
So sorry to hear about your wife 😥 wishing you all the best.
-
It's maybe already asked somewhere else, but why do carronades on the Harpy count as guns (18 gun brig) and on the indy, sphinx and other ships they're not taken into the gun count?
-
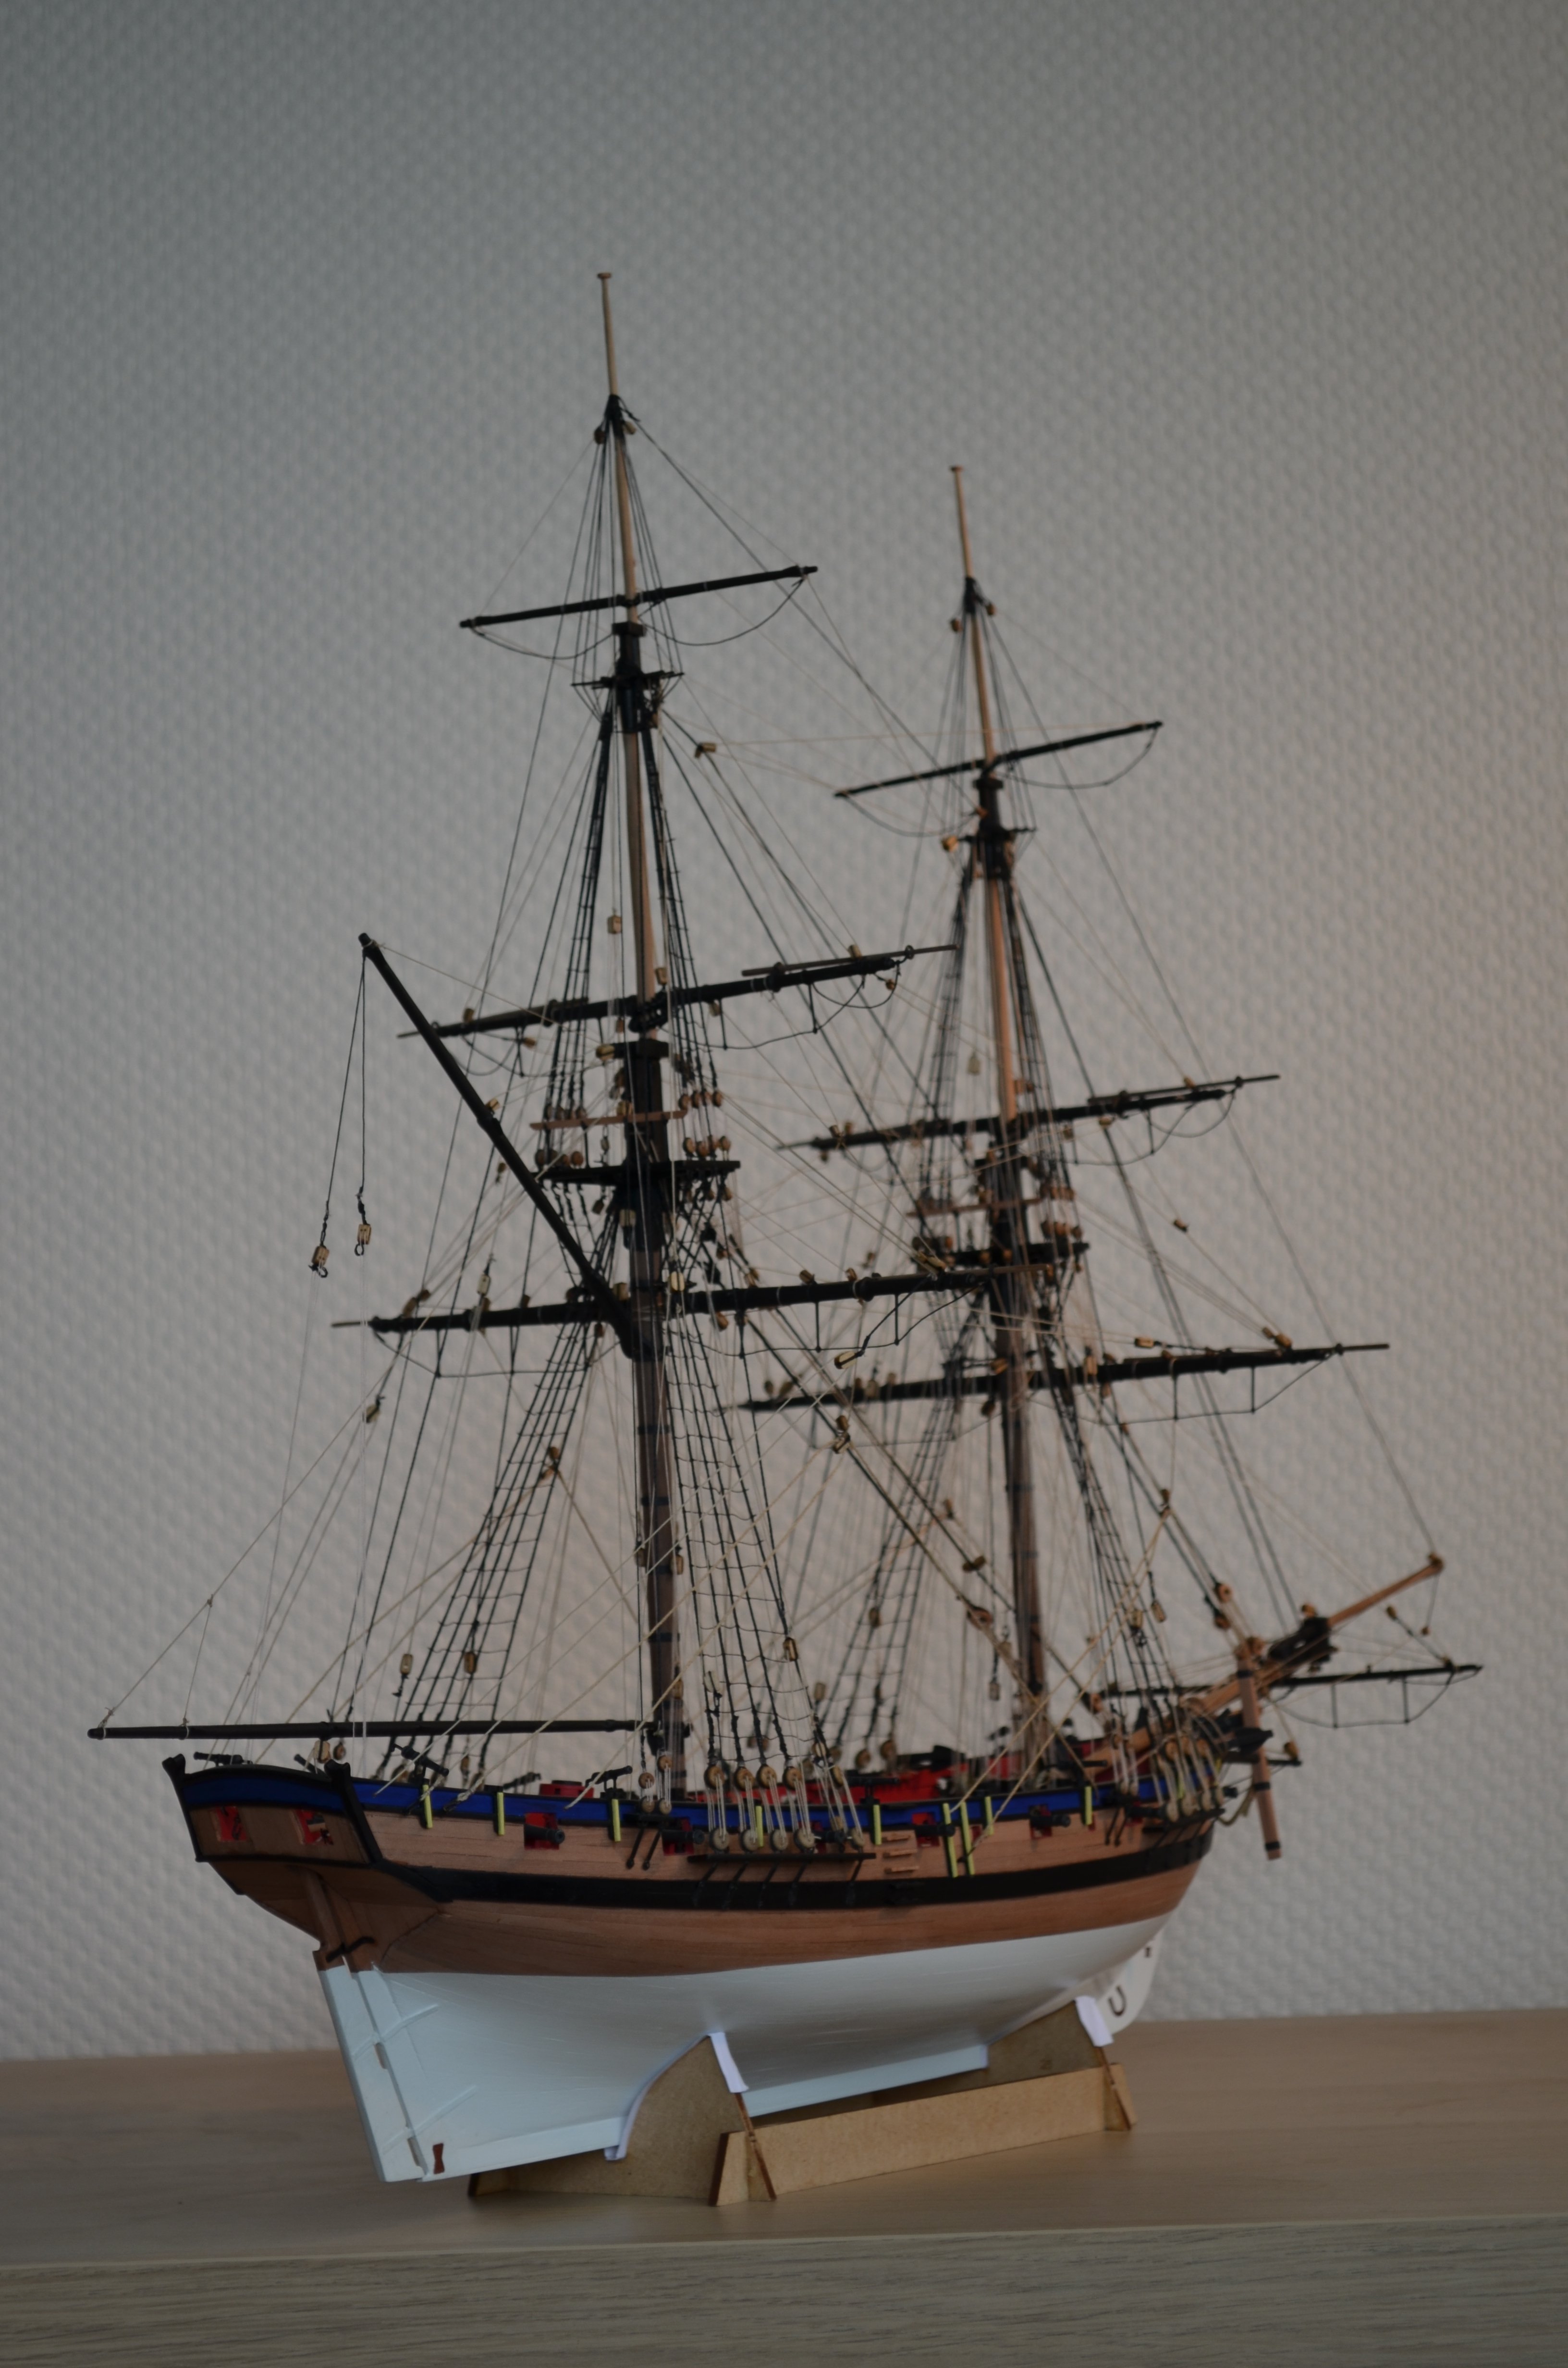
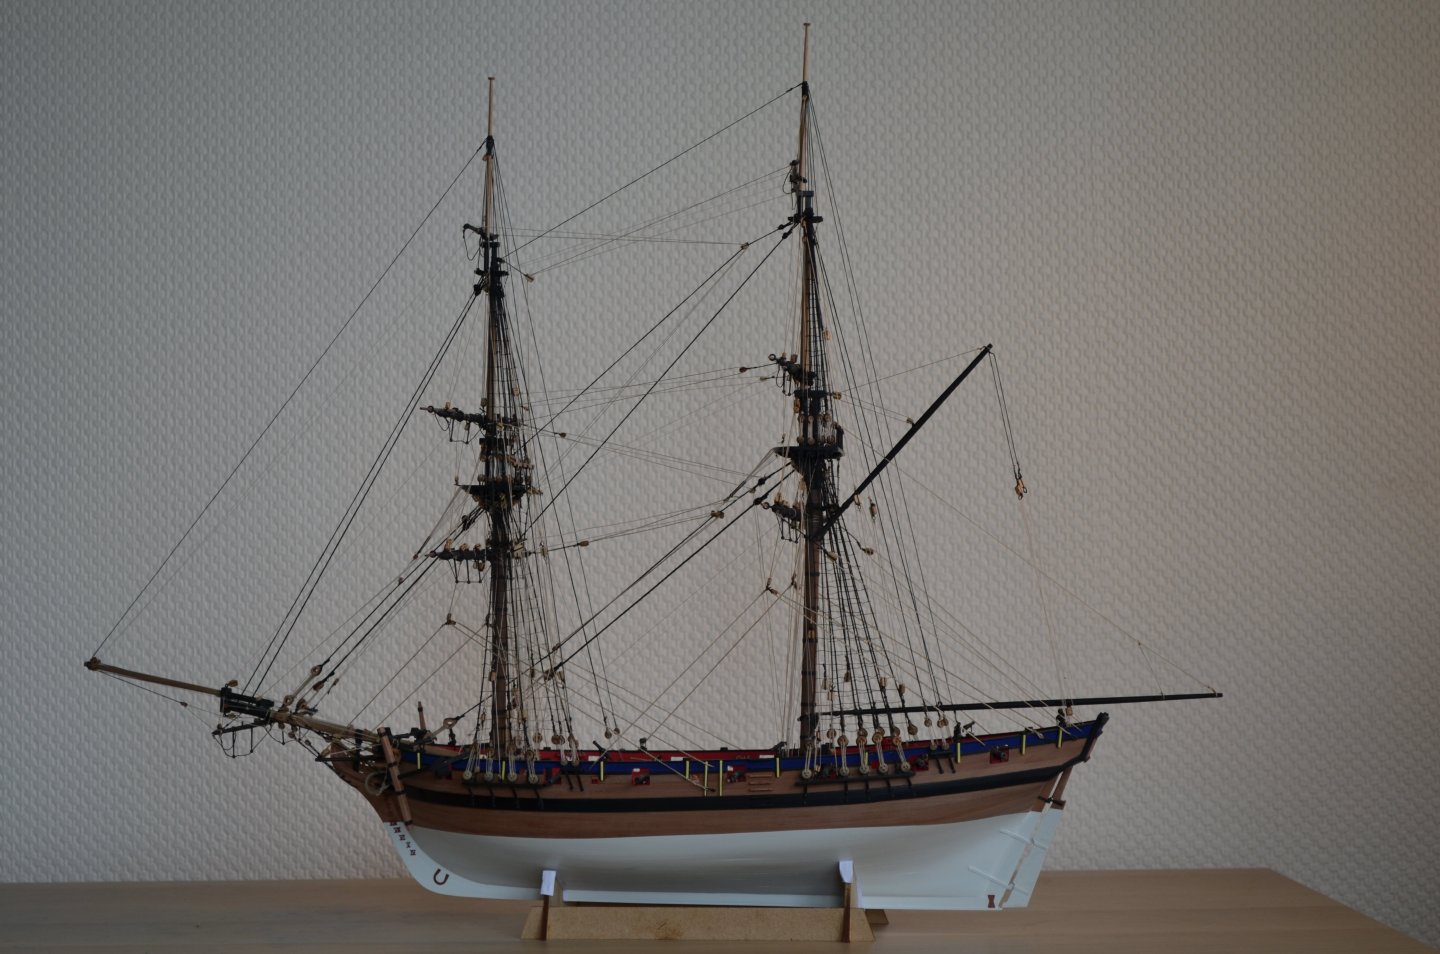
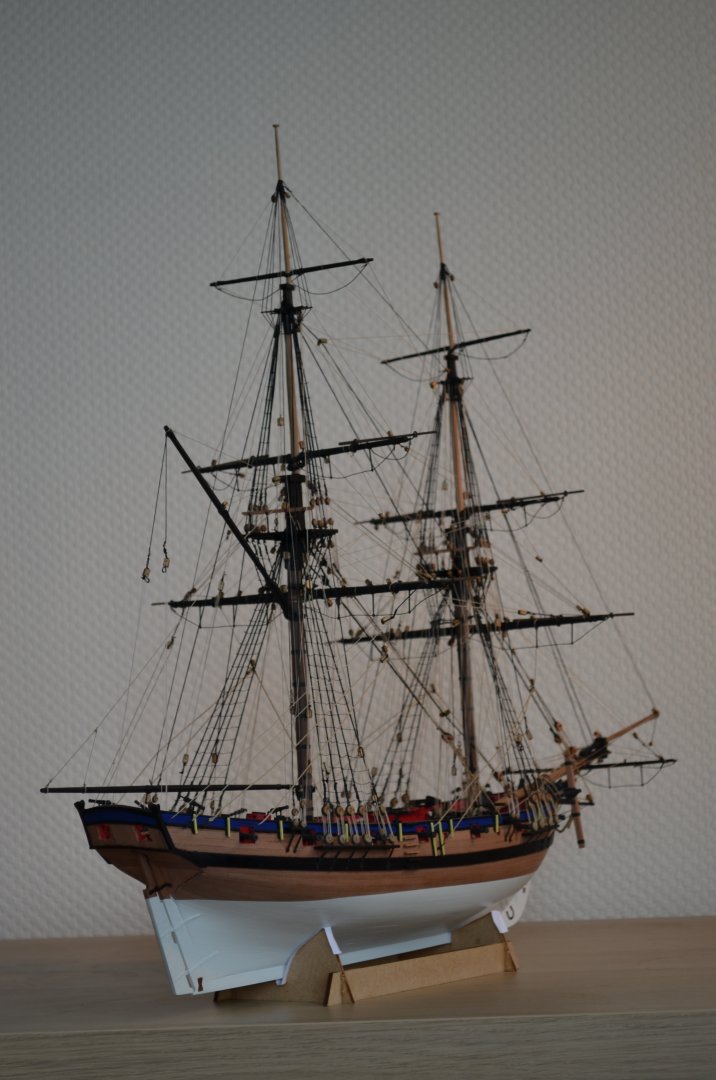
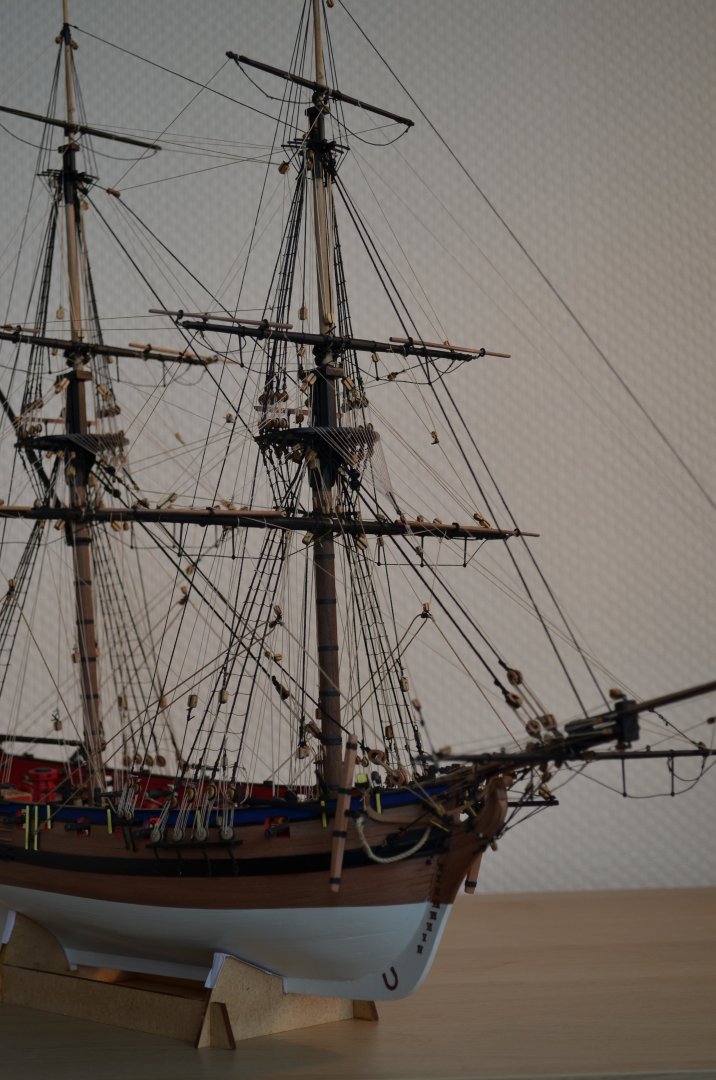
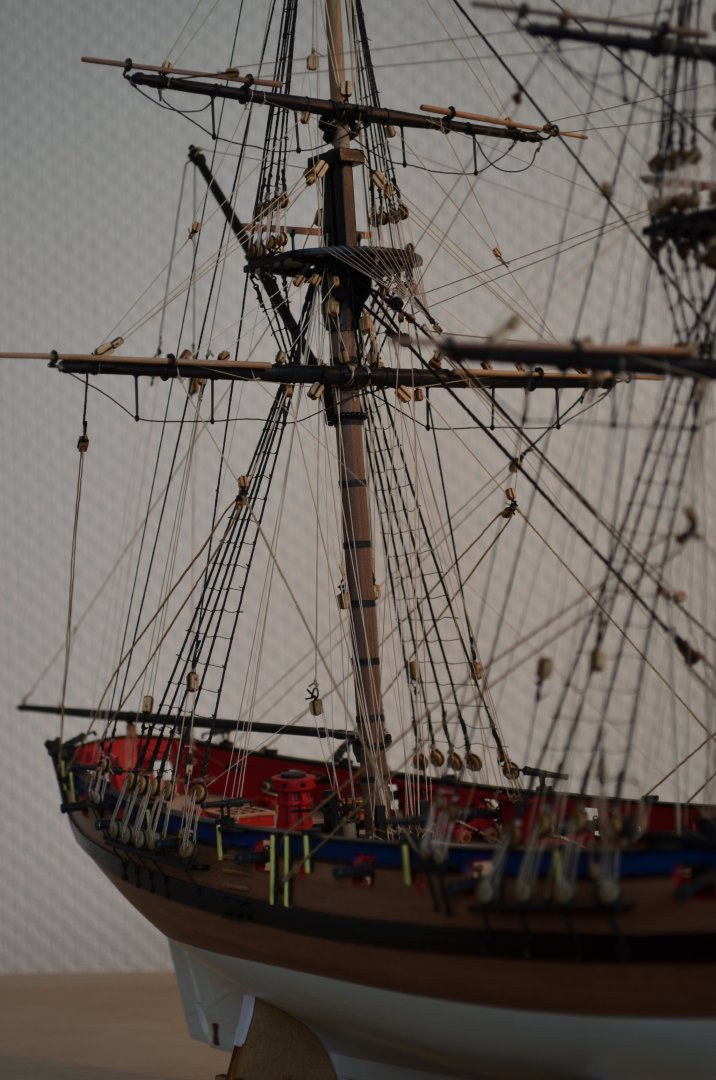
Anchors done (only 2) and all the rigging done too! That concludes this adventure 🙂 It was a great kit to make, very diverse, high quality, I enjoyed every minute of it. I am also quite pleased with the result, it's not perfect I know and I have some points to improve for the next ship. What I really need to tell myself more often is not to hurry and go slowly. It doesn't matter if the build takes 2 weeks more, but taking your time greatly improves quality and reduces frustration imo. Some pictures then...

- 95 replies
-
- 19
-
-

-
- flirt
- vanguard models
- (and 1 more)
-
Ziet er goed uit!! (looking great 😉 ) But yes, the lovely weather is a bit of an issue here as well...
-
I was wondering about blocks for my next ship indeed, I'm not going to change them on my Flirt, I've nearly finished her (pics soon ish) But the new standard blocks from Chris look already better?
-
The question is; is there a Nelson's ship coming? 😉