
MORE HANDBOOKS ARE ON THEIR WAY! We will let you know when they get here.
×


yvesvidal
-
Posts
3,556 -
Joined
-
Last visited
Reputation Activity
-

 yvesvidal reacted to chris watton in Newsworthy updates from Chris Watton
Yes, it is quite exciting to realise what can be produced on the 3d printers.
However, with the economy in the state that it is, right now I still prefer giving the work to talented individuals who can carve by hand - which I am sure will soon be a dying art due to the new technologies becoming more mainstream and affordable. (That is of course, if our governments don't bankrupt our nations first and send us all back to the Stone Age....)
-
yvesvidal reacted to jack.aubrey in Twelve Apostles by jack.aubrey - De Agostini - Scale 1:100
Tuesday, June 11, 2013 - Installation of beams
This afternoon I had a couple of hours that I immediately dedicated to the Twelve Apostles.
For consistency I painted hazelnut the internal sides of the new parts of the false decks, operation I said earlier totally useless . . but I like it.
Then I installed the beams, provided in the issues 20 and 21. Nothing special to say for their assembly. I glued a strip 3 x 3 on the first bulkhead, in a such a way position to assure a strong support for the deck that must be installed over. This basis, in the original project does not exist, but the assembly will certainly be more accurate and also stronger.
Then I started to think a possible way to implement the camber of the deck of this model, since as usually happen, this element is sistematically ignored since forever by De Agostini (or better, the kit manufacturers who design these model for her). I found it but, anyway, consistently with my role of "pioneer" (?) that was assigned to me in the DeAgostini forum I decided not to implement it but, just to make myself useful to those users, this method can be copied without difficulty by those who wish to implement this important particular.
In the following photos, especially in the more detailed, you will notice that next to each beam in the bow area (but I think to continue with all the others, I glued to a side of the original beam, another piece of "home made" reinforcement, made with poplar plywood 5 mm thick.
Well, this particular may seem like a simple reinforcement, and I have actually used in this way, but it would be enough that the top of this reinforcement was properly shaped that automatically you will have a new beam with the camber in place. At this point it remains only to paste the deck above this curve and the game is done. The bonding would be a bit more complex, because there is a minimal sheer, but definitely possible. .
01
02
03
The last image shows the placement of a half deck segment at the bow, reproducing a problem that another builder has, and probably more, in this area. More precisely it is located near the bulkhead number 3 . How I believe we can infer from this picture, the same problem, although to a lesser extent, is present also in my build, I will use for it a corrective method that I hope, if successful, to show you in the future.
04
Kind regards, Jack.Aubrey.
High Definition Images:
01 http://i81.servimg.com/u/f81/12/86/14/83/p1090526.jpg
02 http://i81.servimg.com/u/f81/12/86/14/83/p1090527.jpg
03 http://i81.servimg.com/u/f81/12/86/14/83/p1090528.jpg
04 http://i81.servimg.com/u/f81/12/86/14/83/p1090529.jpg
The following picture shows the problem as it appears to another user . .
-
 yvesvidal got a reaction from ianmajor in Twelve Apostles by jack.aubrey - De Agostini - Scale 1:100
That is probably why they call it a "cock".
Yves
-
yvesvidal reacted to cpt. Tom in HMS Victory Cross-Section by Cpt. Tom - DeAgostini - 1/72 my first Cross-Section
I lost a couple of pictures, so I made a little jump
The Platforms on hold
The Victory had 200 tons of gravel ballast and in this the gravel the barrels were stowed
-
yvesvidal reacted to Jaxboat in Confederacy by Jaxboat - Model Shipways
Here are some shots of the stern. Obviously, I have not trimmed planks down to the outside edge of the lower lower counter yet. I welcome any comments on the shape of the stern filler pieces. I am not sure I shaped them correctly . In hindsight, it would have been better to carve blocks. It would take longer but would be easier for me to visualize. I also need to adjust the transom horizontal pieces again. I seem to struggle even though I have used a pattern.
Looking forward to more posting. Thanks to Anja and Chuck for helping this computer challenged Luddite figure out how to set up the log. Also thanks to Russ and others who encouraged me too start the log
Best
Jaxboat
-
 yvesvidal got a reaction from Kenneth Powell in RATTLESNAKE 1780 by RiverRat - Mamoli - 1:64 - Massachusetts privateer
This is gorgeous. Excellent idea and great details. Another modeller on this forum even designed a checker board like planking for the cabin.
Yves
-
yvesvidal reacted to RiverRat in RATTLESNAKE 1780 by RiverRat - Mamoli - 1:64 - Massachusetts privateer
Ha! The midshipman has lost the log and reel in the stormy digital sea!
After a long hiatus due to "personal issues", I was about to get back to working on the Rattlesnake and then I find much has been lost in the software change. I thought I'd go ahead and repost some info/pictures before I actually got into it in earnest.
I had been wanting to build a replica of an 1870s Ohio River steamboat my ancestors owned and operated, found this site looking for tips, fell in love with some of the builds here, found a great deal on a Rattlesnake kit on eBay, and picked up this infernal shipmodelling disease.
I had kept my MSW Rattlesnake log photos in a separate folder on my computer so they're all set to be reproduced.
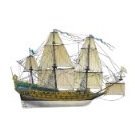
Here's the box picture of the Rattlesnake...
Handsome ain't she?
The metal parts provided for the transom, quarter lights ( I used to call these windows until I got a little nawdikal ejukashun), and other areas made me cringe, so I thought I'd replace them with wood or other appropriate medium. Here is the supplied transom decoration and window frames and the supplied transom base with the window area excised...
Here are the original pieces dry-fitted/taped.
The #12 bulkhead is located at the position of the quarter lights, and the horizontal piece, #22, cuts into the cabin space, so I will modify that area to add the quarter lights and open up the cabin to approximate its fullness, as I will be making the lights (windows) clear instead of the blue paper simulated glass.
Part of #12 cut away.
Pseudo-framing of transom....
Quarter light frames (very fragile at this point!) made and stern "bench" from #22 piece....
I think this shows the template for adding the structure/frame above the light frames (hey, forgive me, it's been a while....)
Here's the rough-shaped transom, balsa filler and the supplied beechwood pieces at the outer ends. The beech was surprisingly easy to shape; could have used it for the whole thing , as designed, without much heartache.
Most of the main deck planking done, with a scale Captain Clarke (hey! looks like John Paul Jones....)
Gunports and framing, fore- and quarterdeck supports, and fake bowsprit root in case that area is visible....
I had grandiose visions of outfitting the captains quarters, adding quite a bit of fine detail, but I've decided it would not likely be too visible anyway, so I'll keep it simple and move on. With what I have, I'll add rings, rig/secure these cabin cannons for sea, add a couple benches, and move on to finish the stern pieces, decks, and then the dreaded planking........
I may not get to this right away, but the intention is there....stay tuned.
-
yvesvidal reacted to JSGerson in Rattlesnake by JSGerson - FINISHED - Mamoli - 1:64 - Using Robert Hunt’s practicum
Then the whole floor was simply dropped in place and glued down.
-
-
-
 yvesvidal got a reaction from DARIVS ARCHITECTVS in Kit Review - Mayflower 1/65 by Constructo
Folks,
I was exploring what are the options for building a Mayflower at the scale of 1/64th. The Model Shipways with the excellent practicum by Chuck passaro would have been the perfect candidate but it is unfortunately, built at a less than standard scale of 1/76th or something around that.
I like my ships to be all of the same scale so that comparisons can be made and proportions appreciated. Finding a Mayflower at the scale of 1/65th or 1/64th was only leaving me with two choices: Artesania Latina or Constructo which may in fact be the same kit, since both are built in Spain.
The Artesania Latina kit is rather expensive in the USA and although procurement in Europe would not have been too much of a problem, I stumbled across a kit on E-Bay for less than $100 and decided to give it a try.
The top of the big box is presented above. The box is much bigger than the Model Shipways box and that could be explained by the fact that the model is slightly bigger, but much more logically by the way the parts are presented inside:
A large plastic tray with compartments, presents all the detail parts in a neat and attractive way. There are wood, metal, and plastic parts in that kit, which may be an heresy for some of us. In full honesty having blocks and belaying pins made of plastic can be a great time saver in the overall construction of the kit. Besides, one can always fabricate or procure the blocks and pins from wood and accessories suppliers.
The Mayflower does not need to be presented and a nice replica (Mayflower - II) rests in the harbor of Plymouth Massachusetts. I remember seeing this ship some 20 years ago, while living in Boston and I was sincerely impressed by the courage and desperation that must have fueled these immigrants to start such a long and dangerous trip across the oceans and to an unknown land, on such a small vessel. And small is that vessel when you see it with your own eyes, and docked next to you.
The Mayflower II was built by William Baker in England in 1955 as he tried to replicate as faithfully as possible, a vessel which plans or detailed information no longer exist. Mayflower II was later on sailed across the Atlantic Ocean and given to the Mayflower Historical Society. In that regard the interpretation of Mayflower by Constructo and Model Shipways are quite different in color, decoration, and arrangement of the transom and bulwarks among many other things.
The following picture shows an exquisite model based on the Constructo kit made by a skilled Canadian modeler:
The interpretation of Model Shipways is presented below:
One can see quite a few differences between the two models. The Model Shipways kit designed by Chuck Passaro is based on Mayflower II, and therefore is perfectly exact as it replicates the .... replica. The model designed by Constructo is probably more based on what could have been the Mayflower and brings elements of "marine romanticism" that may not be completely accurate. The most notably different parts are the transom in which the Constructo version is romanticizing the vision of a vessel of the 17th century, with a lantern, two flower emblems and large round windows on the transom. The presence of guns is also a matter for discussion as Mayflower was first and foremost a merchant vessel before the "big adventure" to the new continent. Knowing how packed that vessel was with 102 crews on board, supplies to rebuild a new community, food supplies and live stock, once can wonder where they could have found space for guns and ammunition.
Below is the Constructo vision of the transom:
......versus the more stern and probably realistic version of Model Shipways:
Let's move to the Documentation side. Constructo provides two sheets for the plans and one flimsy manual translated in 5 different languages for the European and North American markets. Besides a list of parts, the assembly instructions are almost non-existent. When you compare their manual with the fantastic Practicum provided by Model Shipways, once can understand why European kits are so difficult and the perfect recipe for discouraging new modelers. The Constructo Mayflower is not that difficult to put together but the quality of the instructions and the lack of details of the plans, make the construction a true challenge for the neophyte. As far as I am concerned, I will simply ignore the Constructo instructions and build the kit as recommended by Chuck Passaro.
My kit did not include a color pictorial describing the various phases of the construction. Newer kits may have it and these additional pictures may help the beginner modelers. However, no explanations or directions provided by Constructo comes even close to the excellent practicum published by Model Shipways.
The following pictures attempt at showing the two sheets provided in the Constructo kit:
One question jumped to my mind: How can you do a decent and realistic rigging job with the plan above? Constructo provides five different sizes and colors of lines and thread as well as these nicely detailed (although made of plastic) blocks. They also provide the fabric to make your own sails. However, the lack of instructions and directions will be a repelling factor for a lot of builders, and most likely a large number of kits will never be completed by lack of proper instructions. It is a pity. Again, the Practicum from Model Shipways comes to the rescue as it offers all the detailed information to turn that model into a very realistic and accurate model.
Let's review the parts provided in the kit:
The bulkheads and the keel are pre-cut with what looks like water jets. This technology allows some precision and prevents the burning of the wood often found in laser cut kits. The parts are for the most part made of plywood (3 plies), with some precious wood of darker colors. Unfortunately, there are no sheet to compare the cuts with the plans and one will have to spend some time fairing carefully the hull before planking it.
The decks and some other parts of the masts are die-cut, making them relatively difficult to detach. A sharp blade will finish the poor job of the factory. A base is even provided in the kit, to display the ship.
The wood provided in the kit allows for double planking of the hull. It is nice to have different varieties of wood and colors. It is a nice departure from the basswood trend used by some model manufacturers. Overall the quality is nice and special care and a lot of heat and moisture will be necessary to bend the Bokapi wood strips for the hull.
Various wooden parts are provided in the kit, including a pre-shaped boat. Most parts are already cut and (apparently) ready to be glued.
Nice brass parts and plastic blocks are provided in the kit. The presence of guns is a question as I do not believe they belong to the Mayflower during its trip to religious freedom.
Yves
-
 yvesvidal got a reaction from Aussie048 in Kit Review - Mayflower 1/65 by Constructo
Folks,
I was exploring what are the options for building a Mayflower at the scale of 1/64th. The Model Shipways with the excellent practicum by Chuck passaro would have been the perfect candidate but it is unfortunately, built at a less than standard scale of 1/76th or something around that.
I like my ships to be all of the same scale so that comparisons can be made and proportions appreciated. Finding a Mayflower at the scale of 1/65th or 1/64th was only leaving me with two choices: Artesania Latina or Constructo which may in fact be the same kit, since both are built in Spain.
The Artesania Latina kit is rather expensive in the USA and although procurement in Europe would not have been too much of a problem, I stumbled across a kit on E-Bay for less than $100 and decided to give it a try.
The top of the big box is presented above. The box is much bigger than the Model Shipways box and that could be explained by the fact that the model is slightly bigger, but much more logically by the way the parts are presented inside:
A large plastic tray with compartments, presents all the detail parts in a neat and attractive way. There are wood, metal, and plastic parts in that kit, which may be an heresy for some of us. In full honesty having blocks and belaying pins made of plastic can be a great time saver in the overall construction of the kit. Besides, one can always fabricate or procure the blocks and pins from wood and accessories suppliers.
The Mayflower does not need to be presented and a nice replica (Mayflower - II) rests in the harbor of Plymouth Massachusetts. I remember seeing this ship some 20 years ago, while living in Boston and I was sincerely impressed by the courage and desperation that must have fueled these immigrants to start such a long and dangerous trip across the oceans and to an unknown land, on such a small vessel. And small is that vessel when you see it with your own eyes, and docked next to you.
The Mayflower II was built by William Baker in England in 1955 as he tried to replicate as faithfully as possible, a vessel which plans or detailed information no longer exist. Mayflower II was later on sailed across the Atlantic Ocean and given to the Mayflower Historical Society. In that regard the interpretation of Mayflower by Constructo and Model Shipways are quite different in color, decoration, and arrangement of the transom and bulwarks among many other things.
The following picture shows an exquisite model based on the Constructo kit made by a skilled Canadian modeler:
The interpretation of Model Shipways is presented below:
One can see quite a few differences between the two models. The Model Shipways kit designed by Chuck Passaro is based on Mayflower II, and therefore is perfectly exact as it replicates the .... replica. The model designed by Constructo is probably more based on what could have been the Mayflower and brings elements of "marine romanticism" that may not be completely accurate. The most notably different parts are the transom in which the Constructo version is romanticizing the vision of a vessel of the 17th century, with a lantern, two flower emblems and large round windows on the transom. The presence of guns is also a matter for discussion as Mayflower was first and foremost a merchant vessel before the "big adventure" to the new continent. Knowing how packed that vessel was with 102 crews on board, supplies to rebuild a new community, food supplies and live stock, once can wonder where they could have found space for guns and ammunition.
Below is the Constructo vision of the transom:
......versus the more stern and probably realistic version of Model Shipways:
Let's move to the Documentation side. Constructo provides two sheets for the plans and one flimsy manual translated in 5 different languages for the European and North American markets. Besides a list of parts, the assembly instructions are almost non-existent. When you compare their manual with the fantastic Practicum provided by Model Shipways, once can understand why European kits are so difficult and the perfect recipe for discouraging new modelers. The Constructo Mayflower is not that difficult to put together but the quality of the instructions and the lack of details of the plans, make the construction a true challenge for the neophyte. As far as I am concerned, I will simply ignore the Constructo instructions and build the kit as recommended by Chuck Passaro.
My kit did not include a color pictorial describing the various phases of the construction. Newer kits may have it and these additional pictures may help the beginner modelers. However, no explanations or directions provided by Constructo comes even close to the excellent practicum published by Model Shipways.
The following pictures attempt at showing the two sheets provided in the Constructo kit:
One question jumped to my mind: How can you do a decent and realistic rigging job with the plan above? Constructo provides five different sizes and colors of lines and thread as well as these nicely detailed (although made of plastic) blocks. They also provide the fabric to make your own sails. However, the lack of instructions and directions will be a repelling factor for a lot of builders, and most likely a large number of kits will never be completed by lack of proper instructions. It is a pity. Again, the Practicum from Model Shipways comes to the rescue as it offers all the detailed information to turn that model into a very realistic and accurate model.
Let's review the parts provided in the kit:
The bulkheads and the keel are pre-cut with what looks like water jets. This technology allows some precision and prevents the burning of the wood often found in laser cut kits. The parts are for the most part made of plywood (3 plies), with some precious wood of darker colors. Unfortunately, there are no sheet to compare the cuts with the plans and one will have to spend some time fairing carefully the hull before planking it.
The decks and some other parts of the masts are die-cut, making them relatively difficult to detach. A sharp blade will finish the poor job of the factory. A base is even provided in the kit, to display the ship.
The wood provided in the kit allows for double planking of the hull. It is nice to have different varieties of wood and colors. It is a nice departure from the basswood trend used by some model manufacturers. Overall the quality is nice and special care and a lot of heat and moisture will be necessary to bend the Bokapi wood strips for the hull.
Various wooden parts are provided in the kit, including a pre-shaped boat. Most parts are already cut and (apparently) ready to be glued.
Nice brass parts and plastic blocks are provided in the kit. The presence of guns is a question as I do not believe they belong to the Mayflower during its trip to religious freedom.
Yves
-
yvesvidal reacted to patrickmil in Niagara by patrickmil - FINISHED - Model Shipways - 1/64th
More pics...
-
yvesvidal reacted to cabrapente in Le Fleuron by cabrapente - FINISHED
place the 12 bronze cannons.
I lost the photo camera.
these are with the phone, of poorer quality.
-
 yvesvidal got a reaction from ModelExpoOnline in A Visit to Model Expo in Hollywood, FL
Folks,
For those who wants to know a little bit more about the Model Shipways factory and their models, I just finished posting a review at:
http://modelshipworld.com/index.php?/topic/1523-a-visit-to-model-expo-in-hollywood-florida/
Yves
-
 yvesvidal got a reaction from CaptMorgan in USF Confederacy by Rustyj - FINISHED
Ben,
I wish that when Chuck is done with enhancing his home, he finds the time to produce a small series of add-on accessories for his kits distributed by Model Shipways. The list of parts that needs to be replaced grows with each kit produced:
- Carronades for the Syren (although, MS did an effrot by providing free replacements for the ugly appendices that came with the kit).
- Figure head for the Syren
- Figure head for Confederacy
- Stern decorations for Confederacy
- Cannons for Confederacy (turned and in brass)
- Plans for Confederacy rigging
- Kit for Confederacy rigging
...etc
A small business of retrofitting parts could actually be created without hurting Model Expo in any ways and would contribute to turn these kits into masterpieces.
Yves
-
 yvesvidal got a reaction from mtaylor in A Visit to Model Expo in Hollywood, FL
Folks,
For those who wants to know a little bit more about the Model Shipways factory and their models, I just finished posting a review at:
http://modelshipworld.com/index.php?/topic/1523-a-visit-to-model-expo-in-hollywood-florida/
Yves
-
yvesvidal reacted to carlosys in Calella by carlosys - FINISHED - OcCre - 1:15
Seguimos con la construcción...
Pintura y "ensuciado" :mrgreen:
Montaje de luces...
Y vistas finales del modelo terminado.
Eso es todo...
Os deseo a todos una buena salida de año 2012 y una mejor entrada del 2013.
Un abrazo!!!
-
 yvesvidal got a reaction from tasmanian in Newsworthy updates from Chris Watton
In MSW incarnation #1, there was a few threads about the work of Master modeler Chris Watton and some upcoming kits that he was designing for Amati.
I was wondering if there is anything new in that direction. I remember very vividly two gorgeous models in preparation for Amati:
1) The Bellona (unfortunately at the scale of 1/72 - I wish it would be available at 1/64th))
2) The HMS Victory at 1/64th, using a new technique based on MDF for the building of the hull and inner decks.
Could anybody shed some light on these two kits?
And then of course, there was also the Revenge:
Thanks in advance.
Yves
-
 yvesvidal got a reaction from dgbot in Newsworthy updates from Chris Watton
In MSW incarnation #1, there was a few threads about the work of Master modeler Chris Watton and some upcoming kits that he was designing for Amati.
I was wondering if there is anything new in that direction. I remember very vividly two gorgeous models in preparation for Amati:
1) The Bellona (unfortunately at the scale of 1/72 - I wish it would be available at 1/64th))
2) The HMS Victory at 1/64th, using a new technique based on MDF for the building of the hull and inner decks.
Could anybody shed some light on these two kits?
And then of course, there was also the Revenge:
Thanks in advance.
Yves
-
 yvesvidal got a reaction from GrandpaPhil in Emma C Berry by yvesvidal - Model Shipways - 1/32
Thank you Craig. You may actually catch up with me at some time, as I am not very fast and have no more than 15 to 20 minutes per day to dedicate to this build.
Anyway, I finished the stern and here is again a full picture of the craft showing the intricacies of the beams and carlings. Quite beautiful, I must say (Hey, it is okay to be happy and proud of what we are doing....):
A close up on the stern. The rudder axle box has been completed and sanded flush with the rest of the deck:
Although, the plan does not mention anything about it (or I could not find it), the inside of the transom is planked on the real boat. Therefore, we are going to plank it as well. I am leaving a small gap between the last deck beam and the planking to insert the little strips that will be used to plank the deck:
The transom planks have been soaked in warm water to ease their bending. The central pins are pushing upwards, whereas the side pins are giving some curvatures to the planks. We are almost finished:
A little clean up of the excess of white glue in the groove seems like a good idea, before it dries. The outside part of the transom will be planked as well, as is the real boat. This will be for a next and upcoming installment of our Emma C Berry saga in ten zillions parts.
Yves
-
 yvesvidal got a reaction from Chuck in 18th Century Longboat by Ryland Craze - Model Shipways - 1:48
Ryland,
This is a beautiful Build Log. I love how you present the kit, the parts, the plans and all your step-by-step progress.
Darn, it makes my mouth water just watching you build that gorgeous kit. Once again, I am going to have to invest in Chuck Passaro, Inc.
I'll be following closely. By the time you are done, your Build Log will become the De Facto Practicum.
Yves
-
yvesvidal got a reaction from GrandpaPhil in Emma C Berry by yvesvidal - Model Shipways - 1/32
Folks,
As you may remember, we are moving from the bow to the stern (nothing radically unusual there ). The central part of the ship is now fully kneeled and beamed (am I inventing new words?). I am still using the section of wood located between two laser-cut main beams, to build the smaller deck beams.
The section above the bunks room is now completed and ready for the deck planking.
The stern of the craft is a little bit trickier, but not by much. It is necessary to file two pieces of a main beam (laser-cut) and bevel it to create a slant corresponding to the inclination of the stern board.
The beam ahead of the tiller shaft must be filed carefully to embrace the rudder shaft box. It is easier to do than to describe. At this stage, I have 6 knees left to cut (yeah !!!!!) and one more smaller beam and all the beams and carlings will be done.
View into the bunks room:
and view of the stern skeleton:
Finally, an eagle eye view of the whole enchilada:
And now time for a nap......
Thank you for your interest and encouragements.
Yves
-
yvesvidal got a reaction from Chuck in Model Shipways Syren - The new Carronades have arrived !
Folks,
Since we do not have a repository for the Syren (Model Shipways) any more, I am posting the good news that Model expo started shipping and distributing the new castings of the Carronades for the kit Syren. I just received mine today and here is the new casting based on the original and revisited mold by Chuck Passaro:
On top is of course, the ugly "appendices" that were shipped with the kit. On the bottom, is the new and much cleaner Chuck Passaro casting.
Yves