


SJSoane
-
Posts
1,655 -
Joined
-
Last visited
Content Type
Profiles
Forums
Gallery
Events
Everything posted by SJSoane
-
 Hi Gaetan, So are you projecting the sheer drawing onto the side of the hull, for marking off things like the wales? Mark
 -
Siggi, Your figurehead looks great, so early in the project. It gives a strong indication of the quality yet to come. I imagine it also keeps you thinking, "everything needs to be as good as the figurehead"! Best wishes, Mark
-
Hi Doris, Nice to see you back, and with this exceptional project. Mark
- 1,035 replies
-
- 5
-

-
- royal katherine
- ship of the line
- (and 1 more)
-
thanks, Russ and Hubac'sHistorian, a great deal of the fun for me in this hobby is the miniature joinery. Very soothing when one is not in a rush; file and test fit, file and test fit, file and test fit.... Mark
-
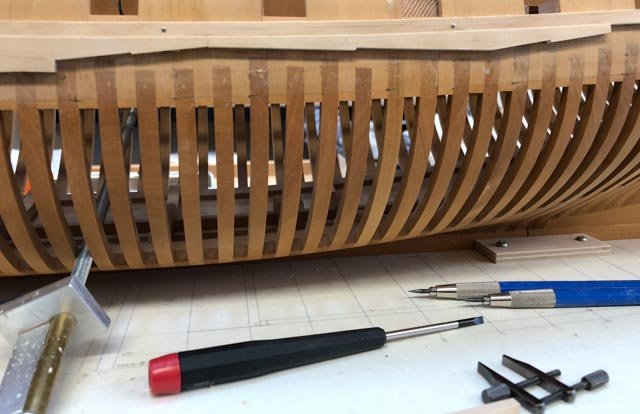
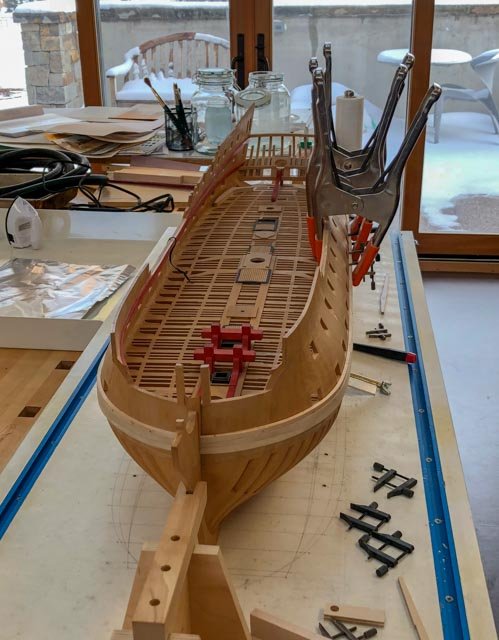
calling all clamps, calling all clamps, report to the port side... After going off in a huff and recovering my composure, I got going again. Just four more planks to install on the port side, upper two strakes (blanks are next to the screwdriver in the photo below). This is a big step, because it locks in the two sides longitudinally at about the same level of humidity. Good days for working in the shop here in Montana. We hit minus 11 degrees fahrenheit last night, the town of Butte about 180 miles away hit minus 24 degrees, the lowest in the lower 48 states, and the wind chill factor on the eastern plains hit minus 36 degrees. Not much point in going outside. I can only begin to appreciate how cold it got on a winter North Atlantic station, or rounding the horn, taking in sail. Best wishes, Mark
-
Alan, Once I walk away from mistakes and eventually regain my composure, I think of my restarts as just practice. It sounds like you got some exceptionally good advice. My own gunports benefitted greatly from striking a line along the length of the hull, so I could see how each flowed to the next. Without seeing the overall line, it would have been too easy to slightly misalign and you would never know until it was all done and too late. Having said this, I haven't quite regained my composure on my own recent Bellona mistake; I will follow your lead in this! Mark
-
I always knew we are especially wonderful, our scrap boxes confirm it! Mark
-
Håkan, That first photo shows just how complex the bevel must be to roll from clinker to carvel at the rabbet. Well done. Mark
-
Thanks, druxey and Håkan. Mistakes like this help keep one humble! Mark
-
I cut and cut, and it was still too short... There went a morning's work, with a piece pre-trimmed too short to meet the gunport edges. I tried the board stretcher, but it just could not quite manage the task.🙂 All of the pieces from this point to the stern are just a smidgeon too short, so I have to remake them all. My CAD drawing slightly underestimated the length of the wale when it was turned into a true projection, and so I cut the blanks at the stern with too little to spare. I had cut them long enough oversize on the starboard side to adjust when put to their true location, but for some reason I failed to do so on the port side. Just when you think you have got a process down, the demons jump up and grab you. Time to go do something else! Mark
-
Greg, your work sets an exceptionally high standard. Is this the same project I saw several years ago at your sail-making workshop in Baltimore? Mark
-
Beautiful work! Mark
-
Ed, you continue to amaze us with your skill, working out very clever ways of fabricating such tiny parts, and obtaining such precision. Not to mention the beauty of it all! Mark
- 3,618 replies
-
- 2
-
-
- young america
- clipper
- (and 1 more)
-
Thanks, Mark. One learns a lot about full size construction from little models. I still marvel at the idea of the shipwrights steam bending a 32 foot long, 8 inch thick by 12 inch wide plank, hoisting it into position several stories off the ground, and then clamping it before it begins to cool. Just about impossible for me to comprehend. Yes, we are living through what old-timers here call one of the worst winters in memory, true across much of North America and Europe, I understand. (It still doesn't feel as cold as when I lived in London many years ago in a student room with a single bar electrical heater. I gained a strong appreciation of British toughness in the face of weather, certainly tougher than I was...🙂) But between the dumps of snow and low wind chill factors, we occasionally get out to ski here. And of course, a big snow storm is a terrific opportunity to brew a big pot of coffee and work in the shop! Best wishes, Mark
-
Thanks, druxey. When I started working this morning, I noticed that where I left off last night shows just how much the hooked scarphs interlock. I was initially skeptical that those relatively small hooks would make a difference, but modeling the joint has shown me the exceptional strength this joint has created. Mark
-
Håkan, Nice story about your real boat. I have always marveled at how clinker built hulls can be shaped without ribs. You are demonstrating well the complexities involved in this construction method. It really does rely on the "eye" of the shipwright, doesn't it? Mark
-
Hi Siggi, I see your dilemma. I never looked very carefully at the wales with two separated black strakes, because they were before the time of my ship. I cannot see the joint in the first example you showed, which is the condition you are constructing. Are there any other examples you have in your great collection of photos that you could show here? I would assume that the three strakes are indeed separate from each other, not hooked to each other. Why call it out as wales and stuff between, and then paint the three strips separately, if the joints in the underlying construction are not three separate, continuous lines? Anchor stock or butt and hook would obviously have the joint line wavering up and down, crossing back and forth across the paint line. This does not seem logical. If this is the case, then the hooked joints called for in the establishment would only apply to a single strake's planks connected together horizontally. I would assume the joint would be like the first or third sketch, since the second does not have a hook. I assume it would be like the third sketch, only because the Bellona's wales a few decades later put the hook in the center of the scarph, not offset like your first sketch. I would assume the later joint in the Bellona evolved from the earlier one you are trying to understand. But this is all speculation on my part. I look forward to seeing how you resolve this! Best wishes, Mark
-
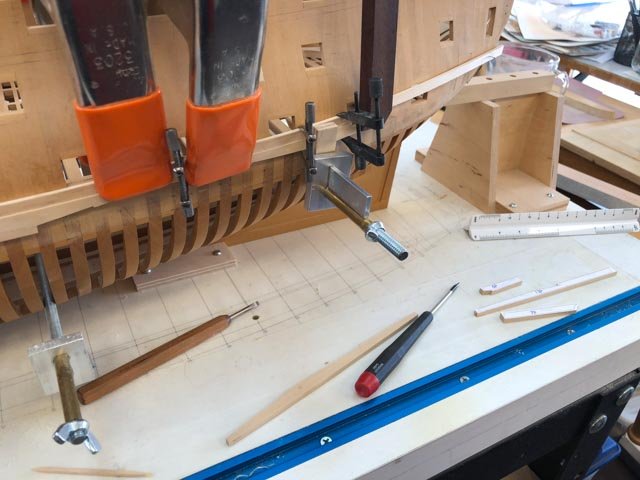
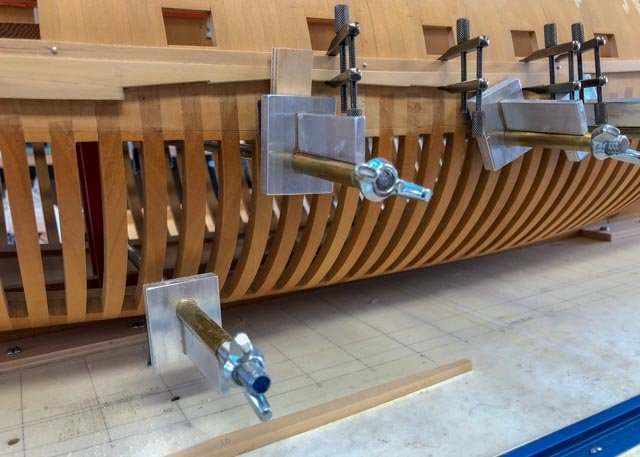
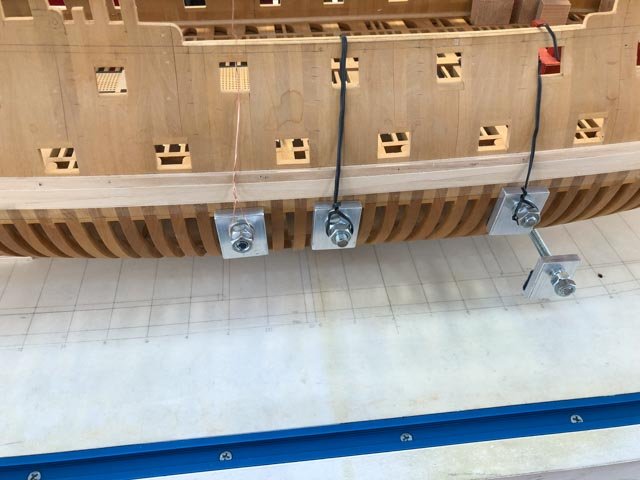
Thanks, John, your comment means a great deal to me. Work proceeds on the port wales, using the old clamps at midships to grab from below where the deck is too high relative to the wale for a clamp from above. The second photo shows hanging the clamps on the starboard side to keep them level when tightening. And a view of both wales from the bow, although the lower two strakes are not yet installed and the battens are not yet removed. Mark
-
Hi Siggi, That is a very ingenious way of framing the gun ports. You will be planking soon! Mark
-
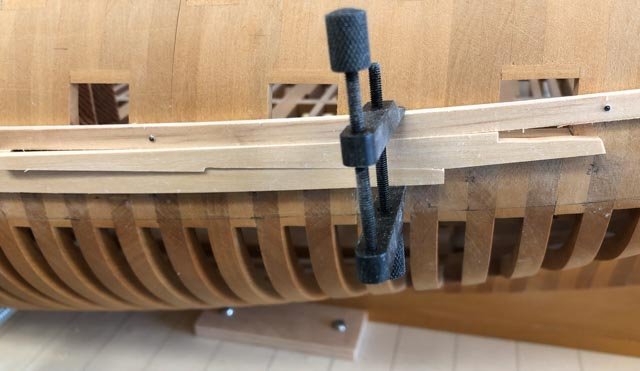
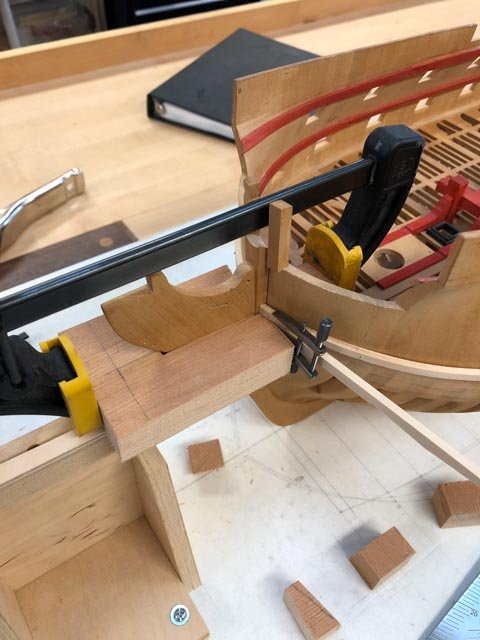
Hi druxey, I tapered the plank down to about 1 ½" oversize at the rabbet, leaving room for some leveling. The temporary batten above the wales is not tapered, and is blocking our view of the tapered plank below in these photos. Incidentally, this was also causing me some problems in seeing if the plank was truly clamped tight at this point, one of the reasons I made the custom clamping block to ensure a tight fit. Next time I should taper the batten as well. And thanks for checking. It is easy to lose track of details in these complex, multi-step phases. I forgot to trim the length of the first plank before I steamed it, and so had to pare it back while holding the curved surface steady on a cutting block. Would have been easier if I had done it when the piece was flat. It was thrilling to see all of the teams march into the Olympic stadium last night. Young people all over the world united in a common cause of attempting to achieve their very best! And there was a ship and a boat.... Best wishes, Mark
-
Thank you, Gary, druxey and Håkan for your kind comments. It helps me keep going. druxey, thank you for confirming that I should work on the port side top two strakes, before going back to the starboard lower two strakes. I want to trap the frame on both sides as close to the same time as possible, when the humidity is roughly the same. I worry about unequal pull on the two sides if one is restrained and the other is not when the humidity changes. Last time, I fiddled with a variety of clamps at the bow. This time, I fashioned a wooden block that can be clamped against the bow by way of the back of the stem. It provides a good, clean, simple way of clamping. I need to take the time to make special clamps like this in the future; worth the extra time for a clean assembly process. I also experimented with steaming and clamping the top plank on the port side directly to the hull, not to my former. The next day, the spring-back was so great that I steamed the piece again and clamped it in the former, now upside down, to make the piece symmetrical to the starboard piece. It now lays nicely against the hull. Time to watch the Olympics! Mark

-
Hi Alan, I would either use a small adjustable bevel, or a card template (old manila file folders work well), to obtain the correct angle from the hull. Then you can transfer this to the cill to give you a pretty close idea of the angle you need to cut on the end of the cill. I then use the following method for refining the first cut. Putting graphite paper between two surfaces you are trying to join or fair, squeezing tight, and pulling the paper out, gives a very clear indication of high points needing filing or sanding. Sometimes I use small files to remove the high spots. Sometimes it is easier to use sandpaper mounted on a 12" X 12" piece of plywood with 220 and 320 grit sandpaper spray mounted to it on either side. You gently slide small pieces of wood against this sandpaper to make small adjustments to sizes and angles. The advantage of moving the piece against a stationary sanding surface is that you are less likely to round the corners or edges as long as you keep "feeling" the flat of the wood. If you are having to adjust the bevel slightly, put pencil graphite on the surface and tilt the surface slightly for the first few passes, and then check to see if you are evening sanding the new adjusted bevel. I find I can creep up on a fit very precisely this way, although it can be tedious. It is check and file, check and file, numerous times. Your build is looking great! Best wishes, Mark
-
Hi Siggi, It is great to see your new project. The figurehead is spectacular! I wish you could give a class on miniature wood carving. I look forward to your progress on this very interesting and unusual ship. Best wishes, Mark
-
Hi Gary and druxey, Here is the details of the drawing of the black strake from Brian Lavery's Bellona book ( p. 42). number 10 is the wale, and 13 the black strake. It shows a distinct step between the two strakes of the black strake, but from what I see everywhere else, and from your contract, Gary, I am thinking that the two black strakes would form a single tapered surface on the outer side. Best wishes, Mark
