SJSoane
-
Posts
1,655 -
Joined
-
Last visited
Content Type
Profiles
Forums
Gallery
Events
Everything posted by SJSoane
-
 Michael, Those blocks rival the ones on the 18th century models in the National Maritime Museum. Mark
 -
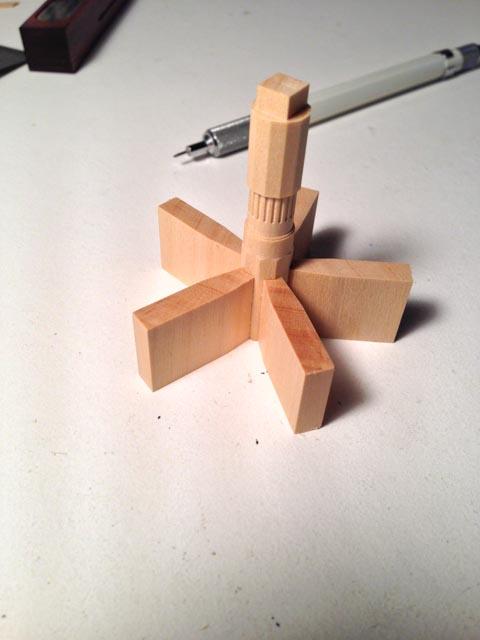
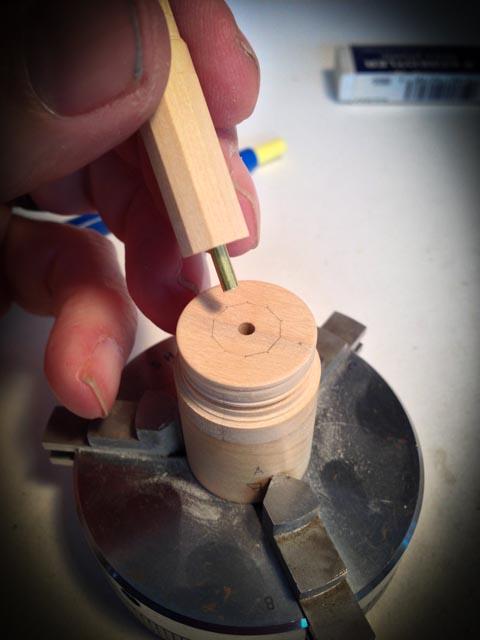
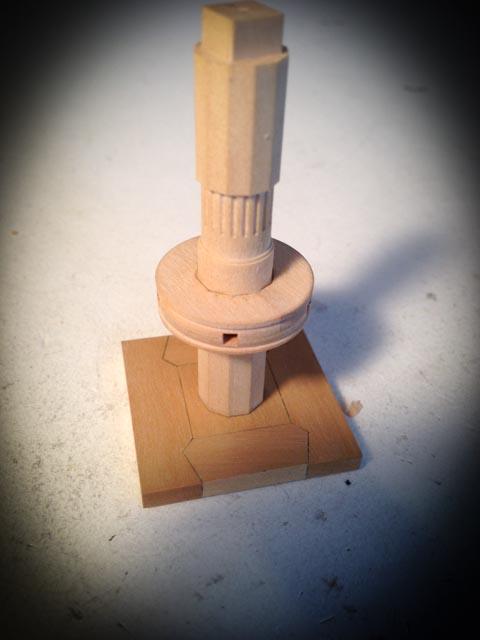
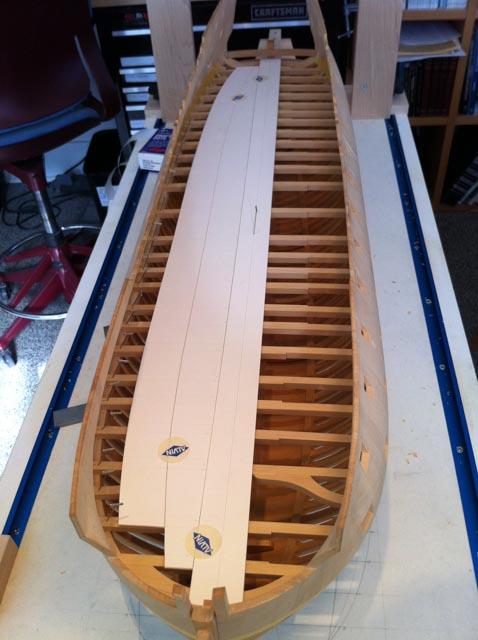
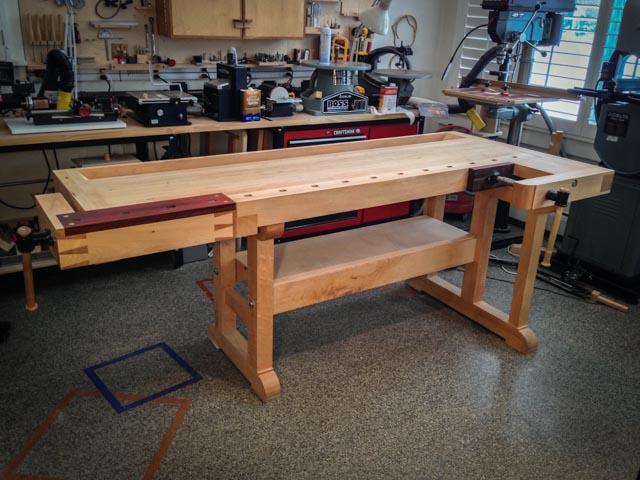
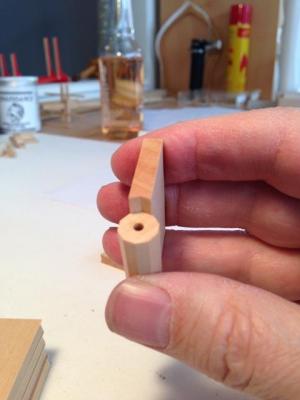
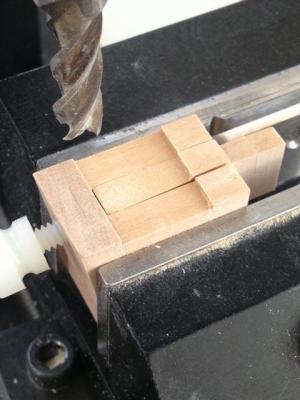
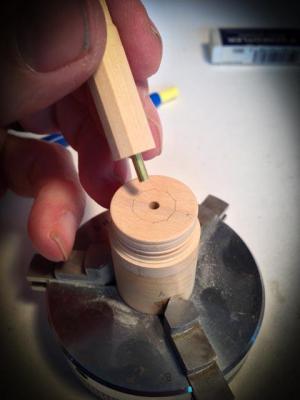
Thank you Michael, Bob and Toni. Your comments help keep me going. I was feeling less skilled this weekend, still struggling with the whelps and chocks on the capstan. After trying several ways to cut the rabbets for the chocks, without success, I had another idea that I will try this afternoon. But while I was pondering this, I took some time to clear my head by moving from little to large. I re-leveled the top of my workbench (I haven't done that since I built it 20 years ago), using a hand plane. Very satisfying physical work after so much close precision. Lefties will note that I built this bench backwards, with the shoulder vise at the right end, since I am also left-handed. Back to whelps and chocks.... Mark
-
I use a 9H lead in a mechanical pencil, sharpened every other time I use it. The finer the line the more precise the work. The best is to scribe lines with an exacto knife, or a marking knife used to mark out dovetails in full size construction. A scribed line lets you register a chisel precisely on the line for really precise work. Mark
-
Foredom or Dremel Fortiflex ?
SJSoane replied to Mcdood's topic in Modeling tools and Workshop Equipment
Martin, I don't know about the Dremel, but the Foredom is a high quality, well built tool and a pleasure to use. Mark -
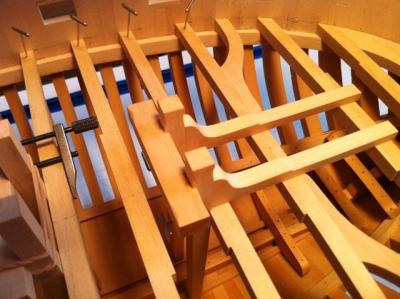
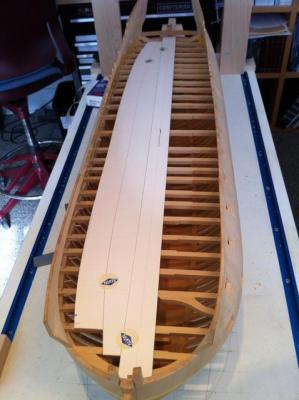
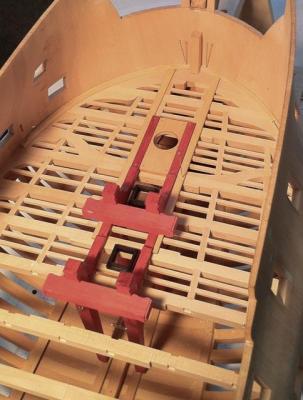
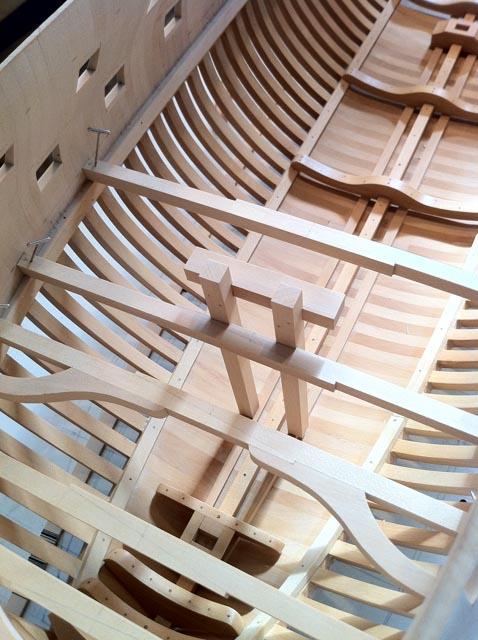
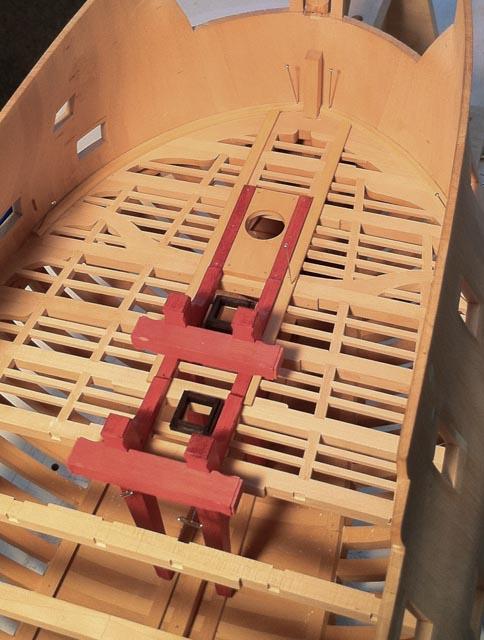
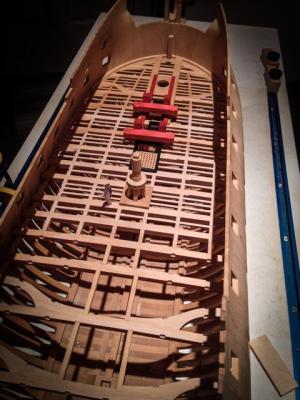
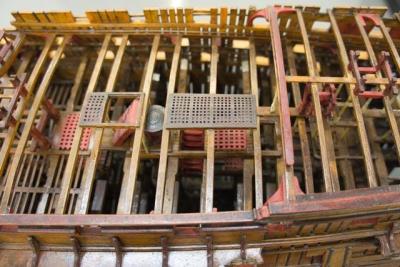
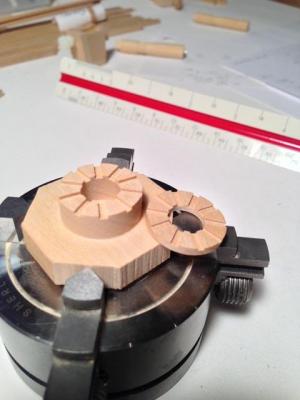
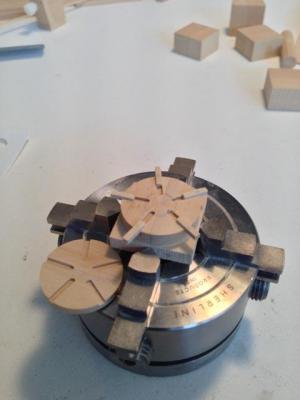
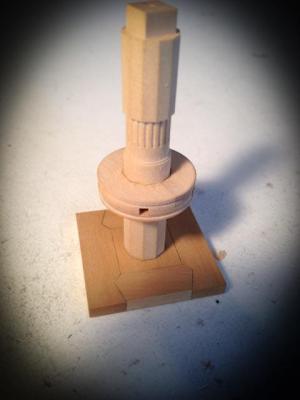
Here is an update with a few more carlings and ledges, plus the whelps loosely fitted on the capstan to see how it looks. I am looking forward to an entire weekend in the shop. Mark
-
Gaetan, I really enjoy your collage of photos. I wish you could publish a book of these photos. Spectacular! Mark
-
ancre Le Fleuron 1729 by rekon54 - 1:24
SJSoane replied to rekon54's topic in - Build logs for subjects built 1501 - 1750
Giorgio, nice to see your build in fast forward. What great craftsmanship! Did you carve your captain/shipwright? Mark -
Ed, I am assuming much of this will be included in the book volume 2? Can't wait! Mark
-
Chuck, very nice project, and instructions. I will definitely follow this when I get around to building a longboat for the Bellona (maybe in 10-12 years, at the rate I am going....) Mark
- 162 replies
-
- 1
-

-
- 18th century longboat
- model shipways
- (and 1 more)
-
Ilhan, very nice to see this build summarized. And I learned a lot from your "outside-in" building method. How did you heat the metal tube over which you are bending the planks? Mark
-
Hi Alexandru, it is great to look through the first stages of your project again! Mark
-
Thank you Colin, my skills have definitely improved as I get further into the project. Gaetan gave me great advice, which is to think of potentially boring tasks like cutting hundreds of mortises for the deck carlings and ledges as a way of honing skills. It makes the time pass more tolerably, and skills definitely increase! I still return to mechanical devices like mills and custom jigs to control cuts where precision is important and I don't trust my hand, but I am slowly learning more hand skills with chisels and planes. It is all part of the fun of the project. One of these days, I might try writing down what I have learned about craftsmanship so far through this project, from some great tutors on this site. Mark
-
Hi Paul I did not realize that you started over on the same hull. What caused you to change it out? New research? Mark
-
Can't wait for volume 2! Mark
-
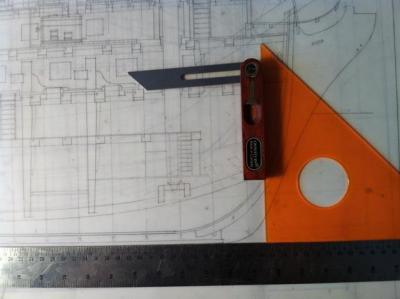
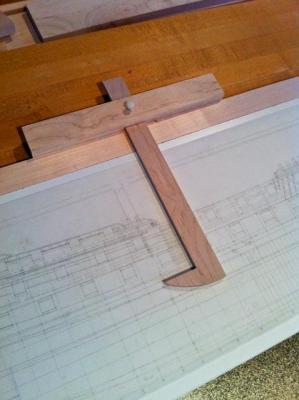
Daniel, Many apologies, I forgot to post the picture of the measuring device on the board with the drawing. Here it is: Mark
-
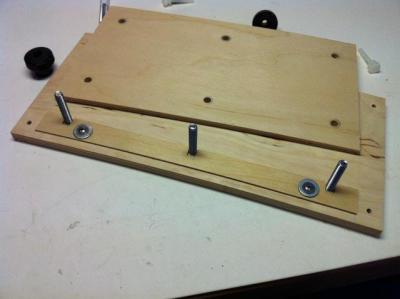
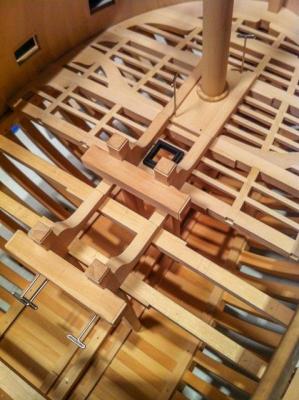
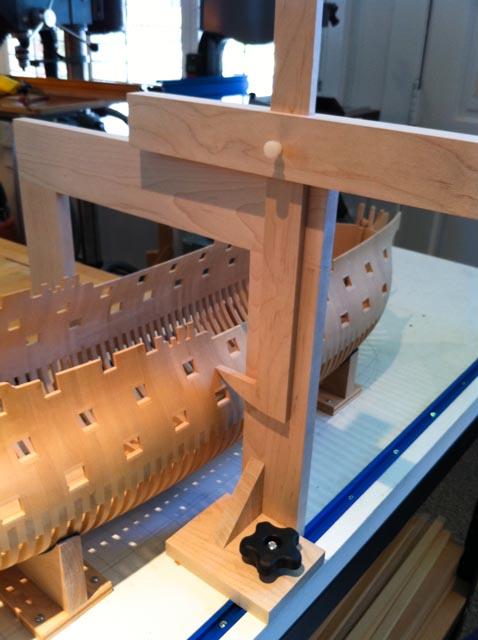
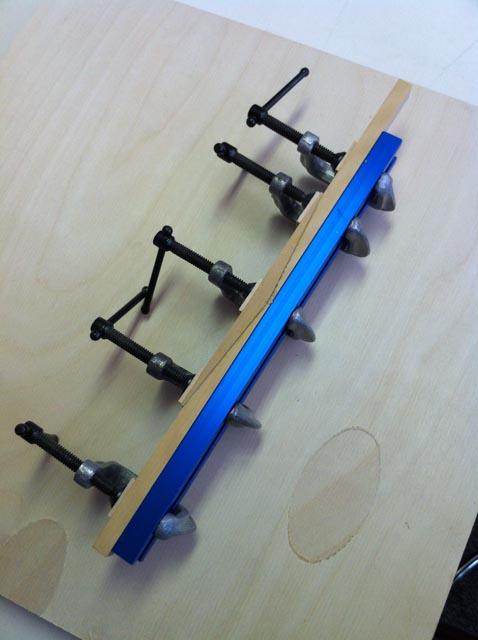
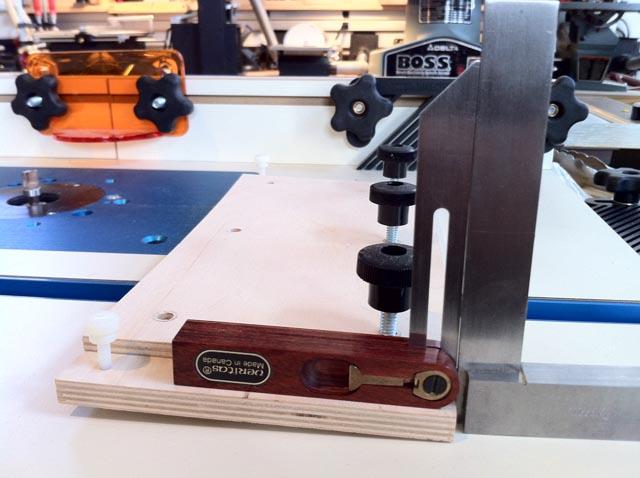
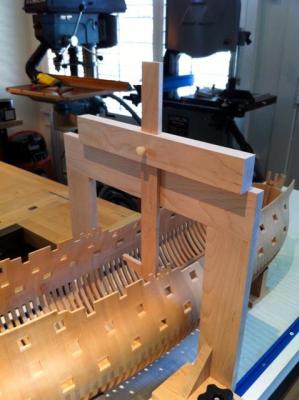
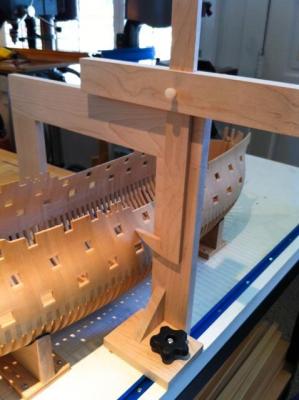
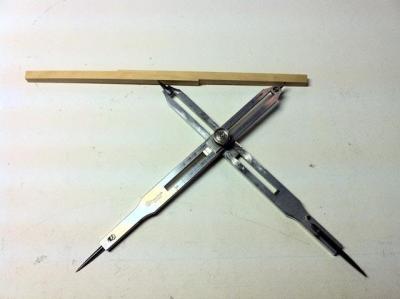
Thank you, druxey, Christian and Ed. All of this re-posting is allowing us to see all of the builds afresh! Ed, I will be particularly happy when we have your index again. I used that fairly regularly. Daniel, the blue track idea comes from Ed, and it is made from components purchased at Rockler Woodworking. All of the parts for the track and the tightening bolts and knobs are already made. The link to the site is: http://woodworking.rockler.com/c/jigs-jig-its-t-tracks I recall that I used a router with a bit exactly the width of the track, using a fence on the router to keep it parallel to the sides of the building board. Once the grooves are cut, the tracks are very easy to screw in. The bridge was a little trickier, because it wants to be exactly right angles to the building board, and have some way of lining up with the station lines of the plan on the board. Ed developed one idea, and I tried a slight variation that I showed in the previous pictures. Ed, are you able yet in your re-posting to link to your bridge design? I recall Ed has an way of fixing his camera to the bridge, which I want to try someday. The final complexity was to get the top of the bridge to the building board surface to be exactly the same distance as the top of my board with the section drawing pasted on, to the bottom of the keel. That is so measurements taken off the board with the drawing will exactly match the same height on the actual model measured from the bridge. I hope the photos explain this well. If not, I'll do a little drawing of the arrangement. Best wishes, Mark
-
Beautiful set of masts, Remco! Mark
-
Remco, That mast still stands as the ultimate of craftsmanship, and an inspiration to us all. Mark
-
Toni, Great to see your build again. Mark
-
HI Gary, Looking forward to the rebuild of your log. It is quite fun to simplify years of work into a shortened story. I have always enjoyed your project, with its close attention to detail, beautiful construction and exceptional research. Also, you have always been a number of steps ahead of me on a 74, and I see your work as an invaluable road map for what I will need to do next, with very helpful instruction. Can't wait to see the Alfred again! Best wishes, Mark
-
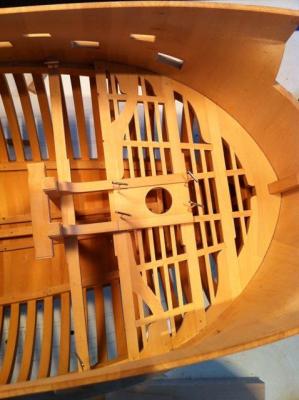
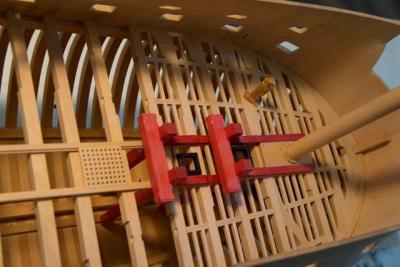
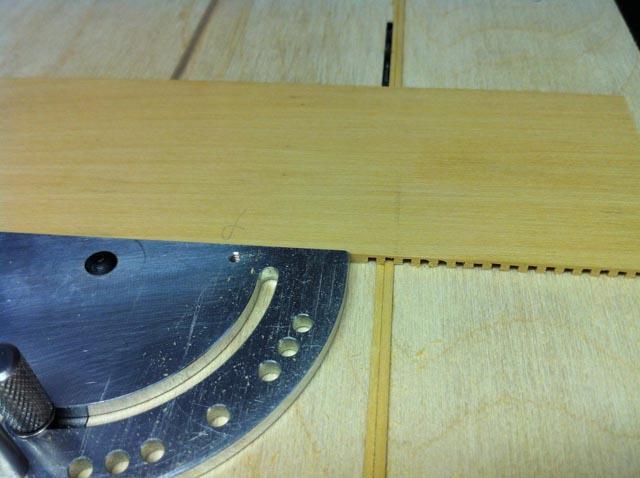
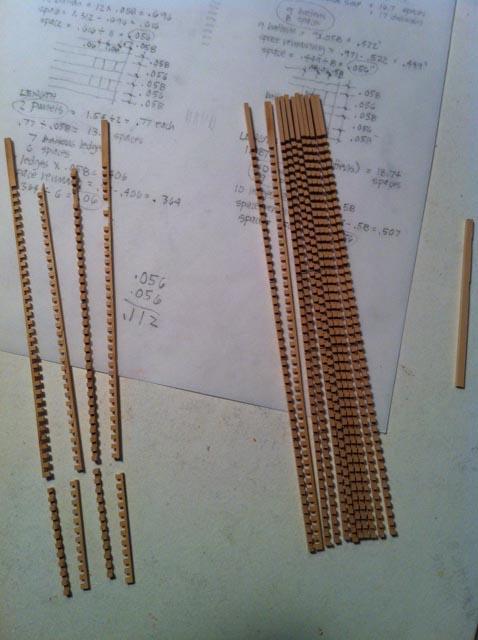
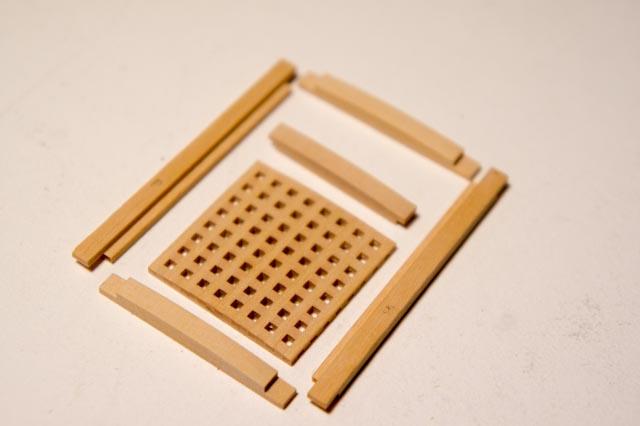
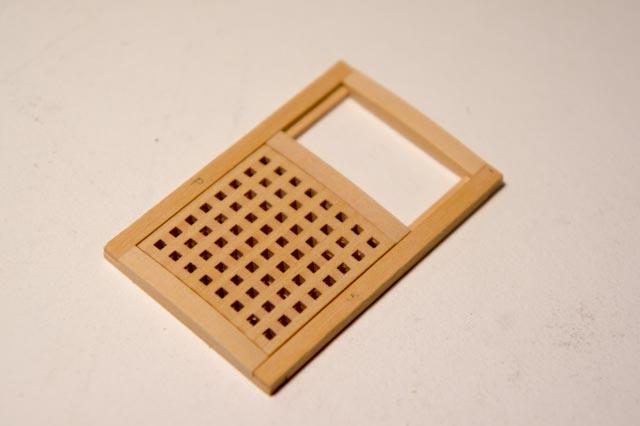
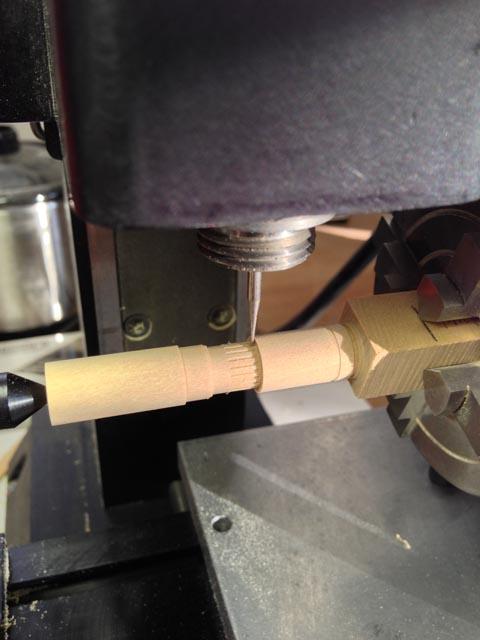
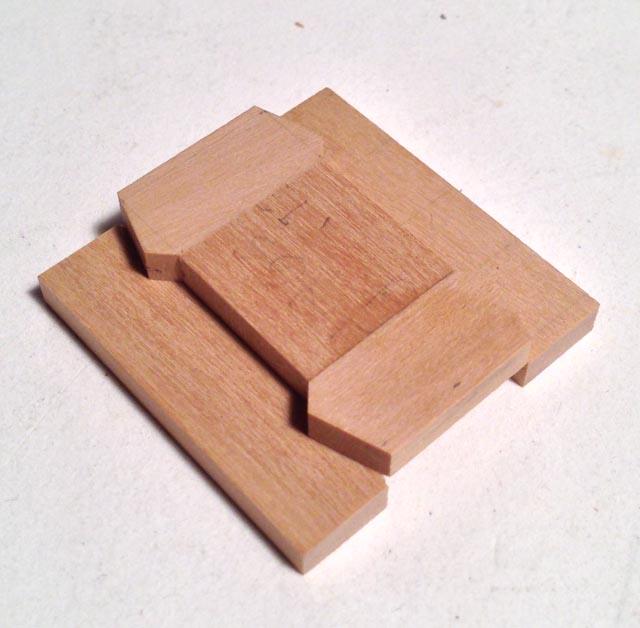
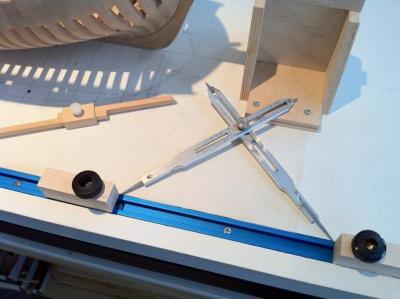
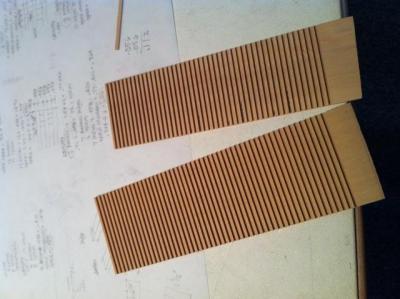
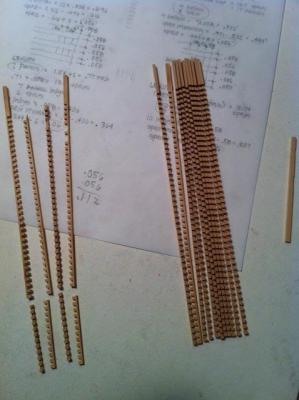
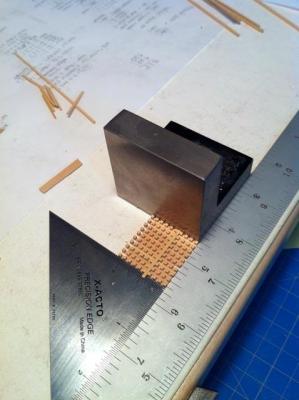
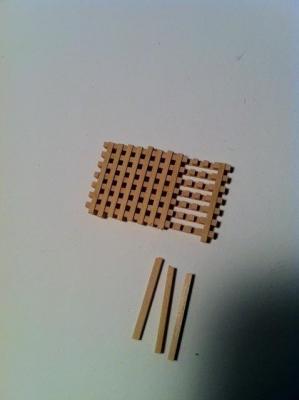
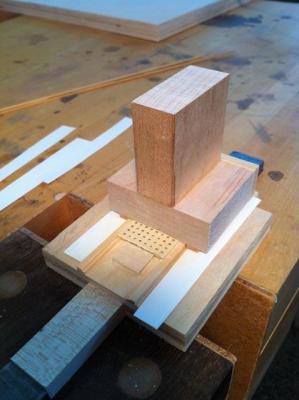
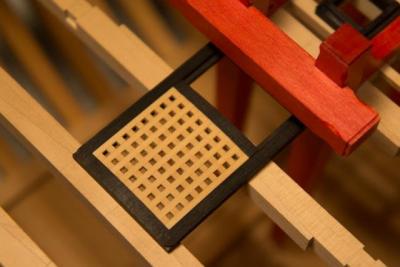
Thank you, Michael, John, and Elia for your encouragement. It really helps keep me motivated. Greg, I looked for a photo of how I made the grating sanding jig, but can't seem to find it. I'll keep looking. Yes, there is sandpaper underneath, but only exactly to the edge of the grate. There are little runners on each side that bottom out on the lower part of the jig once the right depth is reached. I made the profile of the sanding surface by gluing the profile on the end of some maple, which I then ran across the routing table with a piloting bit. It shaped the entire surface of the maple block with the right profile. In image #17 in the background you can see the calculations I made for each grating, where I attempted to calculate the exact size of the parts for each grating so it would be a perfect fit within the coaming. But I more recently put the other gratings in place on the deck, and something isn't lining up yet. I may have to do those over. It wouldn't be the first time for me that very careful calculation nonetheless got it wrong... I have attached an image of the Bellona model looking through the quarterdeck onto the upper deck, which shows a couple of gratings that were imperfectly fitted to the coamings. Maybe they took those from an earlier model and made do, or maybe that is how they really worked. Most of the rest seem to fit better. Harvey, I am not sure which jig you would like to see. I have attached some photos of the bridge for measuring, and how I used it for transferring heights inboard and outboard from my drawing. I took the idea of the track and the bridge directly from Ed. The little blocks in the blue track I used for help in cutting beams so that the center of the made-up beams always aligned with the center of the hull, using the proportional dividers. But right now, I can't remember why I needed the blocks when I could just use the dividers. I'll remind myself when I start making the beams for the upper deck. If you let me know which jig you are interested in, I would be very happy to make a sketch! Best wishes, Mark
-
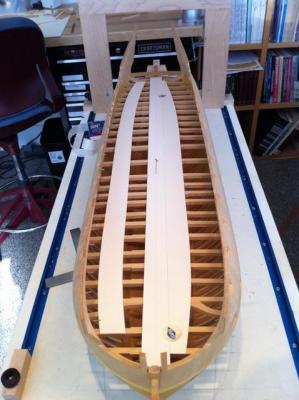
almost up to date...


-
HI Ed, What a relief you have your posts as Word pages. I was going to have serious withdrawal symptoms thinking about not having access to all of the tips in your posts that I regularly scrolled back through. I still intend to buy volume 2 when it comes out, but it was handy looking things up with your index. Best wishes, Mark
-
Thanks, Mark, Remco, Grant and Greg. It has been fun going through the photos to tell the story in sequence, without extraneous stuff. Greg, I arranged with the curator a private showing of the Bellona when I was last in England. It was in January when the exhibits were closed at Chatham, which helped. I understand the Bellona model has pride of place in one of their exhibit halls. The "breadboard" style after the old Admiralty models has caused significant movement in the hull with the season changes, because of the cross grain construction. Colorado can go from 12% to 70% or more. I used to live in house with a humidifier which kept things constant. But the new shop has no humidifier, and the hull regularly opens up a joint here or there in the winter. It used to cause me some distress, but everything stays in place when summer comes around again. I guess this worked better in England, when the humidity was uniformly high. If I had life to do over--or maybe for the next model--I would frame like your's and David Antscherl's system. The space between frames allows expansion and contraction longitudinally, without stressing the longitudinal members like the keel. Best wishes, Mark
-
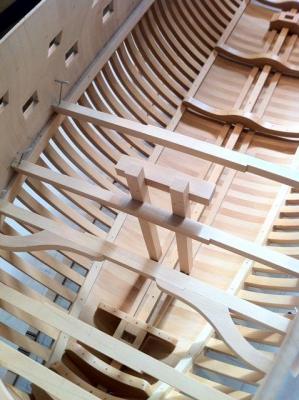
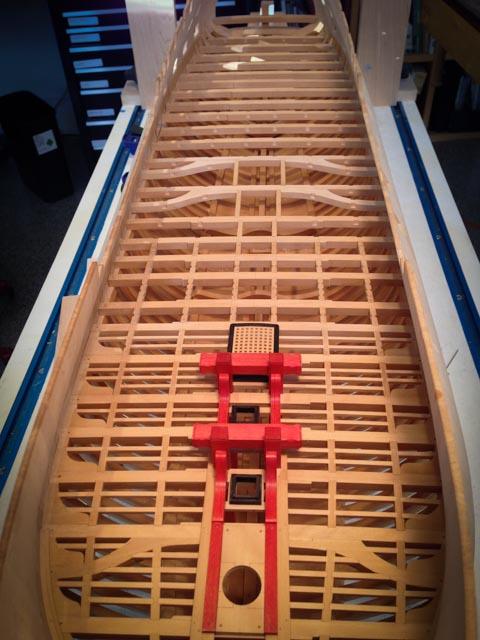
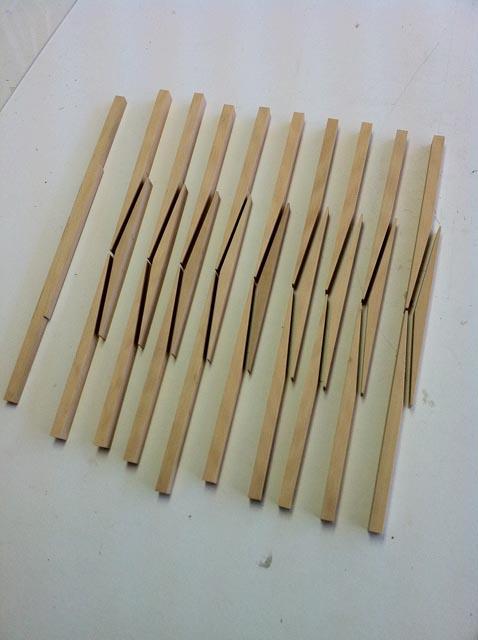
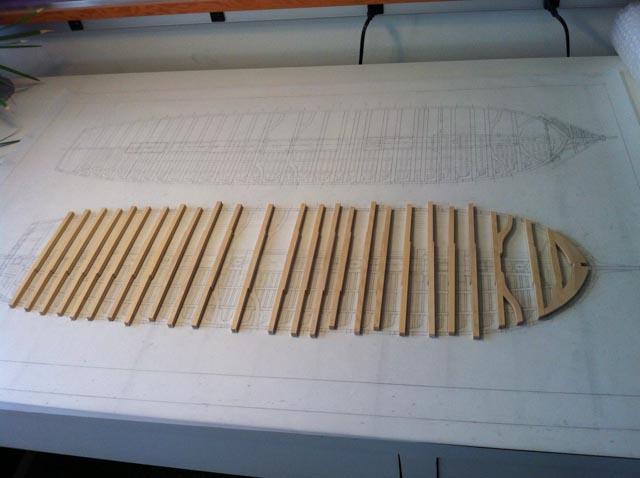
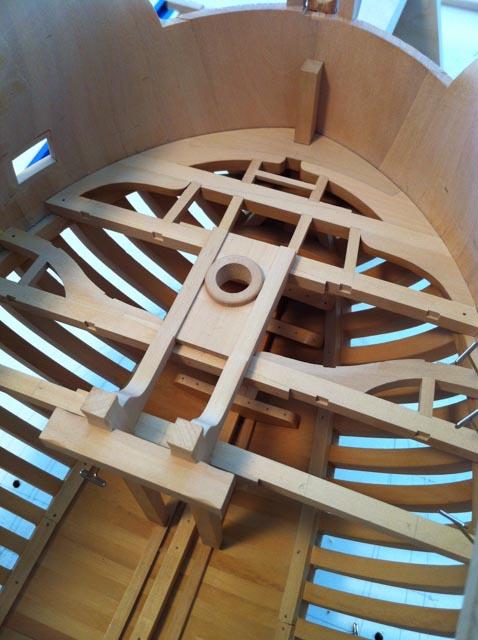
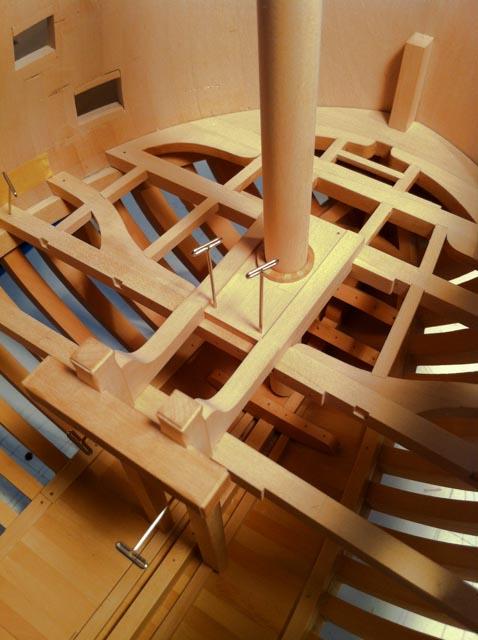
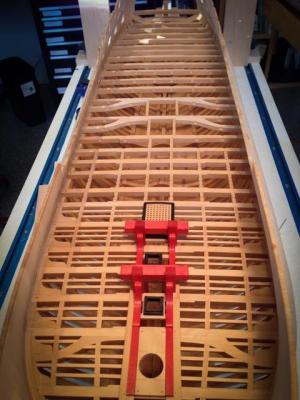
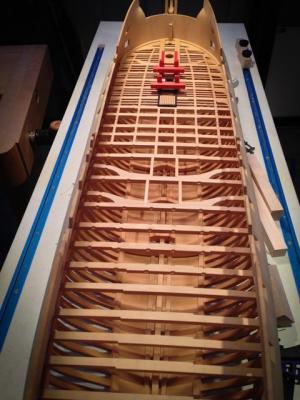
and beams and riding bitts